Install, Upgrade, and Maintenance Guide for Cisco Unity ...
106
Install, Upgrade, and Maintenance Guide for Cisco Unity Connection Release 12.x First Published: 2019-01-14 Last Modified: 2021-06-28 Americas Headquarters Cisco Systems, Inc. 170 West Tasman Drive San Jose, CA 95134-1706 USA http://www.cisco.com Tel: 408 526-4000 800 553-NETS (6387) Fax: 408 527-0883
-
Upload
khangminh22 -
Category
Documents
-
view
1 -
download
0
Transcript of Install, Upgrade, and Maintenance Guide for Cisco Unity ...

Install, Upgrade, and Maintenance Guide for Cisco Unity ConnectionRelease 12.xFirst Published: 2019-01-14
Last Modified: 2021-06-28
Americas HeadquartersCisco Systems, Inc.170 West Tasman DriveSan Jose, CA 95134-1706USAhttp://www.cisco.comTel: 408 526-4000
800 553-NETS (6387)Fax: 408 527-0883

© 2019 Cisco Systems, Inc. All rights reserved.

C O N T E N T S
Installing Cisco Unity Connection 1C H A P T E R 1
Introduction 1
Methods of Installation 1
Important Considerations for Installation 2
Install with Data Import 3
Pre-Installation Tasks 4
Creating a Virtual Machine 5
Changing the Boot Order of Virtual Machine 6
Changing Reservation on Virtual Machines Running with E7 or E5 Processors 6
Changing the Reservation Numbers 6
Verifying DNS Settings 7
Gathering Information for Installation 7
Installation Scenarios 14
Installation Tasks 14
Navigating Within the Installation Wizard 15
Installing the Publisher Server 15
Configuring Subscriber Server on the Publisher Server 18
Installing the Subscriber Server 18
Generating Answer File for Unattended Installation 19
Task List for Unattended Installation 20
Touchless Installation for Virtual Machine 21
Methods for Touchless Installation 21
Task List for Touchless Installation 22
(Optional) Enabling Dynamic-Cluster-Configuration Using CLI 22
Applying a Patch 23
Upgrading from a Remote Server 23
Install, Upgrade, and Maintenance Guide for Cisco Unity Connection Release 12.xiii

Upgrading from a Local Disk 25
Verifying the Installation 26
Cisco Unity Connection Survivable Remote Site Voicemail Installation 27
Post-Installation Tasks 27
Post-Migration Tasks 28
Troubleshooting Installation Issues 29
Backing Up and Restoring Cisco Unity Connection Components 31C H A P T E R 2
About Cobras 31
About Disaster Recovery System 31
Components Supported for DRS Backup 32
Backup Files in DRS 32
Configuring DRS Backup 33
Configuring a Backup Schedule 34
Configuring a Manual Backup 35
Viewing the Backup Status 35
Viewing the Backup History 35
Configuring DRS Restore 36
Viewing the Restore Status 37
Viewing the Restore History 37
About System Restore Tool 38
Types of System Restore Points 38
Creating a Restore Point task 38
Enabling Create Backup Restore Point 39
Restoring Data using Restore Points task 39
Upgrading Cisco Unity Connection 41C H A P T E R 3
Introduction 41
Upgrade Types 42
Status of Unity Connection Cluster During an Upgrade 46
Duration of Upgrade 46
Prerequisites for Upgrade 47
Upgrade Considerations with FIPS Mode (Applicable for Unity Connection 12.5(1) SU1 and Later) 49
Task list to Upgrade to Unity Connection Shipping Version 12.x 49
Install, Upgrade, and Maintenance Guide for Cisco Unity Connection Release 12.xiv
Contents

Upgrading the Unity Connection Server 52
Switching to the Upgraded Version of Unity Connection Software 53
Applying COP file from a Network Location 54
Rollback of Unity Connection 55
Rollback Scenarios 55
Rollback a Unity Connection Server to the Version in the Inactive Partition 56
Configuring Cisco Unity Connection Cluster 57C H A P T E R 4
Introduction 57
Task List for Configuring a Unity Connection Cluster 57
Administering a Unity Connection Cluster 58
Checking the Cluster Status 58
Steps to Check Unity Connection Cluster Status from Command Line Interface (CLI) 58
Managing Messaging Ports in a Cluster 59
Stopping All Ports from Taking New Calls 61
Restarting All Ports to Take Calls 61
Server Status and its Functions in a Unity Connection Cluster 62
Changing Server Status in a Cluster and its Effects 65
Manually Changing the Server Status from Secondary to Primary 65
Manually Changing from the Server Status from Secondary to Deactivated 65
Manually Activating a Server with Deactivated Status 66
Effect on Calls in Progress When Server Status Changes in a Unity Connection Cluster 66
Effect on Unity Connection Web Applications When the Server Status Changes 67
Effect of Stopping a Critical Service on a Unity Connection Cluster 67
Shutting Down a Server in a Cluster 67
Replacing Servers in a Cluster 68
How a Unity Connection Cluster Works 69
Effects of Split Brain Condition in a Unity Connection Cluster 70
Maintaining Cisco Unity Connection Server 71C H A P T E R 5
Migrating a Physical Server to a Virtual Machine 71
Replacing a Publisher Server 72
Replacing a Subscriber Server 73
Replacing the Non-Functional Server 74
Install, Upgrade, and Maintenance Guide for Cisco Unity Connection Release 12.xv
Contents

Changing the IP Address or Hostname of a Unity Connection Server 75
Determine Whether Unity Connection is Defined by Hostname or IP Address 75
Important Considerations before Changing the Hostname or IP Address of a Unity ConnectionServer 76
Changing the IP Address or Hostname of a Unity Connection Server or Cluster 77
Adding or Removing Unity Connection Languages 79
Task List for Adding Languages to a Standalone Unity Connection Server 79
Installing Unity Connection Language Files from Network Location or Remote Server 80
Removing Unity Connection Language Files 81
Managing Licenses 83C H A P T E R 6
Managing Licenses 83
Overview 83
Deployment Options 84
Smart Account and Virtual Account 84
Prerequisites for Configuring Cisco Smart Software Licensing 85
Configuring Cisco Smart Software Licensing in Unity Connection 85
Configuring Transport Settings (optional) 86
Token Creation 86
Registering the Unity Connection 87
Managing Cisco Smart Software Licensing 87
Smart Software Licensing Status 87
Registration Status 87
Authorization Status 88
Specific License Reservation 88
Configuring Specific License Reservation in Unity Connection 88
Specific License Reservation Status 89
Registration Status 89
Authorization Status 89
Enforcement Policy on Unity Connection 90
Licenses in Unity Connection Cluster 91
Migrating Licenses 91
Enabling Encryption in Cisco Unity Connection 12.5(1) SU1 and Later 91
License Parameters for Unity Connection Features 92
Install, Upgrade, and Maintenance Guide for Cisco Unity Connection Release 12.xvi
Contents

Managing Cisco Unity Connection using Cisco Prime Collaboration 95C H A P T E R 7
Managing Cisco Unity Connection using Cisco Prime Collaboration 95
Install, Upgrade, and Maintenance Guide for Cisco Unity Connection Release 12.xvii
Contents

Install, Upgrade, and Maintenance Guide for Cisco Unity Connection Release 12.xviii
Contents
C H A P T E R 1Installing Cisco Unity Connection
• Introduction, on page 1• Methods of Installation, on page 1• Important Considerations for Installation, on page 2• Install with Data Import, on page 3• Pre-Installation Tasks, on page 4• Installation Scenarios, on page 14• Installation Tasks, on page 14• Post-Installation Tasks, on page 27• Post-Migration Tasks, on page 28• Troubleshooting Installation Issues, on page 29
IntroductionCisco Unity Connection can be deployed in either of the following ways:
• Standalone Deployment: Involves the installation of a Unity Connection as a single server.
• Cluster Deployment: Involves the installation of same version of two Unity Connection servers in anactive-active or high availability mode. During the installation of Unity Connection as a cluster, the firstserver is referred to as publisher server and the second server as the subscriber server. For more informationon cluster configuration, see the Introduction chapter.
Unity Connection 10.0(1) and later releases can only be installed on virtual machines. For more information,see thehttp://www.cisco.com/c/dam/en/us/td/docs/voice_ip_comm/uc_system/virtualization/virtualization-cisco-unity-connection.html.
Note
Methods of InstallationYou can use either of the following methods to install standalone or cluster server:
• Standard Installation: Allows you to manually specify the installation information, such as hostname andIP address using installation wizard.
Install, Upgrade, and Maintenance Guide for Cisco Unity Connection Release 12.x1

• Unattended Installation: Allows you to install Unity Connection using an installation disk and apre-configured answer file floppy diskette. The answer file has all the information required for unattendedinstallation. Unattended installation is a seamless process of installation that allows you to start installationon both the publisher and subscriber servers simultaneously. The subscriber installation continues whenthe publisher is successfully installed. This type of unattended installation is Touchless Installation. Formore information on Touchless Installation, see the Touchless Installation for Virtual Machine.
• You can also perform fresh installation of Unity Connection12.x and later using Cisco Prime Collaboration Deployment.For more information on Cisco PCD, seehttp://www.cisco.com/c/en/us/products/cloud-systems-management/prime-collaboration/index.html
• The answer file supports only fresh installs and does not supportupgrades.
Note
• Install with Data Import: Cisco Unity Connection 12.5(1) SU5 and later releases, supports installationof Unity Connection along with the data import from the previous releases. It involves migration of databy exporting source release data to SFTP server, and installing a new machine with import of that data.Examples of data that you can export and import are component specific configurations files, voicemails,DB related files, platform provision data and platform files like certificates. For more details, see Installwith Data Import, on page 3 section.
Important Considerations for InstallationBefore you proceed with the installation, consider the following points:
• Verify the system requirements, such as licensing and phone integration requirements necessary for theUnity Connection server in the System Requirements for Cisco Unity Connection guide athttps://www.cisco.com/c/en/us/td/docs/voice_ip_comm/connection/12x/requirements/b_12xcucsysreqs.html.
• Be aware that when you install on an existing Unity Connection server, the hard drive gets formattedand all existing data on the drive gets overwritten.
• Ensure that you connect each Unity Connection server to an uninterruptible power supply (UPS) toprovide power backup and protect your system. Failure to do so may result in damage to physical mediaand require a new installation.
• (Applicable for Unity Connection 12.5(1) and later) Ensure that the virtual machine has ESXi 6.5 U2and VM version 13.
• For a Unity Connection cluster:
• Install the Unity Connection software first on the publisher server and then on the subscriber server(applicable to only standard installation scenarios). For more information on installation scenarios,see Installation Scenarios.
• Note down the Security password that you mention at the time of installing publisher server. Youneed to specify the same password when installing the subscriber server in a cluster.
• Do not run Network Address Translation (NAT) or Port Address Translation (PAT) between thepublisher and subscriber servers.
Install, Upgrade, and Maintenance Guide for Cisco Unity Connection Release 12.x2
Installing Cisco Unity ConnectionImportant Considerations for Installation

• Verify that DNS server is properly configured before installing Unity Connection. For more information,see the Verifying DNS Settings.
• Do not perform any configuration changes during the installation.
• Be aware that the directory names and filenames that you enter during the installation are case-sensitive.
Install with Data ImportWhen the migration cluster is created using Install with Data Import installation method, you must indicatewhether all destination cluster nodes will keep the same hostname or IP address, or if some of these addresseswill be changing. Depending upon this there are two types of Data Migration as explained below:
• Simple Migration: Using the source node settings for all destination cluster nodes is referred to SimpleMigration.
• Network Migration: Entering new network settings for one or more destination cluster nodes is referredto Network Migration.
If Intrasite, HTTPS and SRSV networking is configured remove the server from the Unity Connection sitebefore performing Install with Data Import. For instructions, see the Networking Guide for Cisco UnityConnection Release 12.x available athttps://www.cisco.com/c/en/us/td/docs/voice_ip_comm/connection/12x/networking/guide/b_12xcucnetx.html.
Caution
Following are the different ways to perform Install with Data Import:
1. Export data from source publisher node, Import data on destination publisher node and fresh installdestination subscriber node.
2. Export data from both source publisher and subscriber nodes and import data on both destination nodes.
Data exported from Publisher Node cannot be imported on the Subscriber Node.Note
You can perform Export and Import of data by the following steps:
1. (Applicable for Unity Connection 12.5(1) SU4 and earlier releases) Install the COP fileciscocm.cuc_DataExport_v1.0.cop on both nodes of cluster.
2. You can use below CLI command to export source release data:utils system upgrade dataexport initiate
Execute above CLI command on publisher node to export data. Export subscriber node data only aftercompletion of export on publisher node as per requirement. For more information on CLI usage, see "UtilsCommands" chapter of the Command Line Interface Reference Guide for Cisco Unified CommunicationsSolutions available at https://www.cisco.com/c/en/us/support/unified-communications/unified-communications-manager-callmanager/products-command-reference-list.html.
Please note the following information related to CLI:
Install, Upgrade, and Maintenance Guide for Cisco Unity Connection Release 12.x3
Installing Cisco Unity ConnectionInstall with Data Import
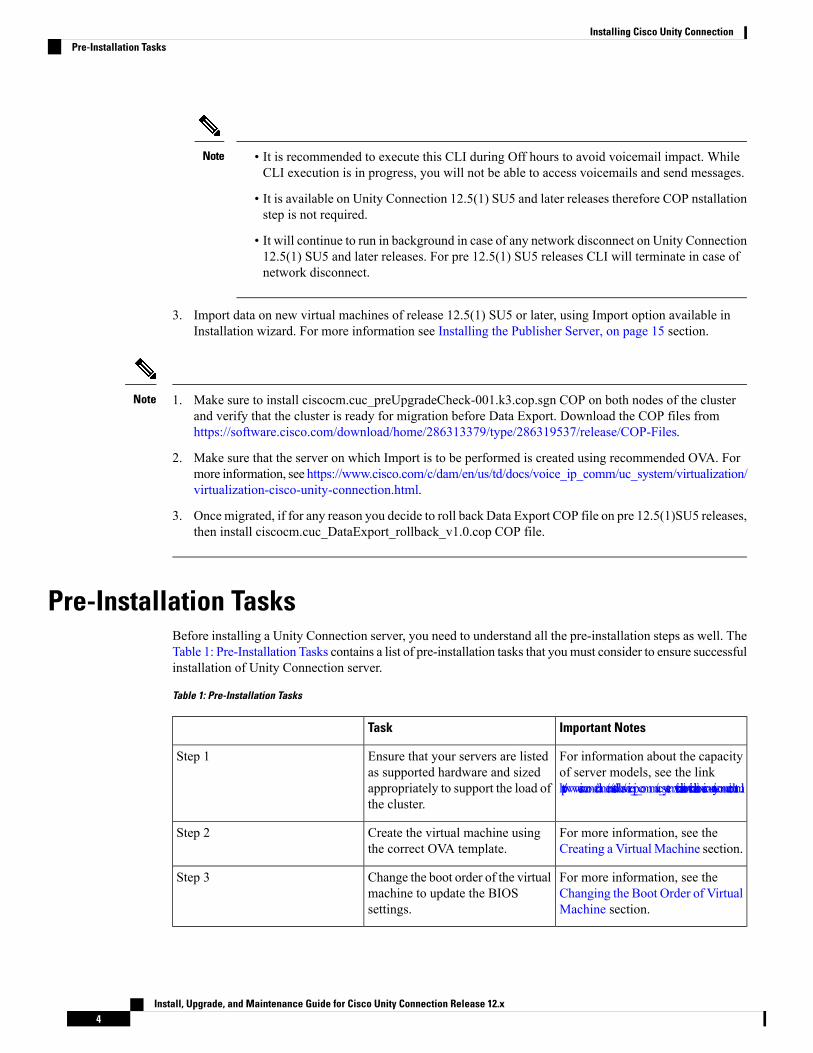
• It is recommended to execute this CLI during Off hours to avoid voicemail impact. WhileCLI execution is in progress, you will not be able to access voicemails and send messages.
• It is available on Unity Connection 12.5(1) SU5 and later releases therefore COP nstallationstep is not required.
• It will continue to run in background in case of any network disconnect on Unity Connection12.5(1) SU5 and later releases. For pre 12.5(1) SU5 releases CLI will terminate in case ofnetwork disconnect.
Note
3. Import data on new virtual machines of release 12.5(1) SU5 or later, using Import option available inInstallation wizard. For more information see Installing the Publisher Server, on page 15 section.
1. Make sure to install ciscocm.cuc_preUpgradeCheck-001.k3.cop.sgn COP on both nodes of the clusterand verify that the cluster is ready for migration before Data Export. Download the COP files fromhttps://software.cisco.com/download/home/286313379/type/286319537/release/COP-Files.
2. Make sure that the server on which Import is to be performed is created using recommended OVA. Formore information, see https://www.cisco.com/c/dam/en/us/td/docs/voice_ip_comm/uc_system/virtualization/virtualization-cisco-unity-connection.html.
3. Once migrated, if for any reason you decide to roll back Data Export COP file on pre 12.5(1)SU5 releases,then install ciscocm.cuc_DataExport_rollback_v1.0.cop COP file.
Note
Pre-Installation TasksBefore installing a Unity Connection server, you need to understand all the pre-installation steps as well. TheTable 1: Pre-Installation Tasks contains a list of pre-installation tasks that youmust consider to ensure successfulinstallation of Unity Connection server.
Table 1: Pre-Installation Tasks
Important NotesTask
For information about the capacityof server models, see the linkhttp://www.cisco.com/c/dam/en/us/td/docs/voice_ip_comm/uc_system/virtualization/virtualization-cisco-unity-connection.html.
Ensure that your servers are listedas supported hardware and sizedappropriately to support the load ofthe cluster.
Step 1
For more information, see theCreating a VirtualMachine section.
Create the virtual machine usingthe correct OVA template.
Step 2
For more information, see theChanging the Boot Order of VirtualMachine section.
Change the boot order of the virtualmachine to update the BIOSsettings.
Step 3
Install, Upgrade, and Maintenance Guide for Cisco Unity Connection Release 12.x4
Installing Cisco Unity ConnectionPre-Installation Tasks
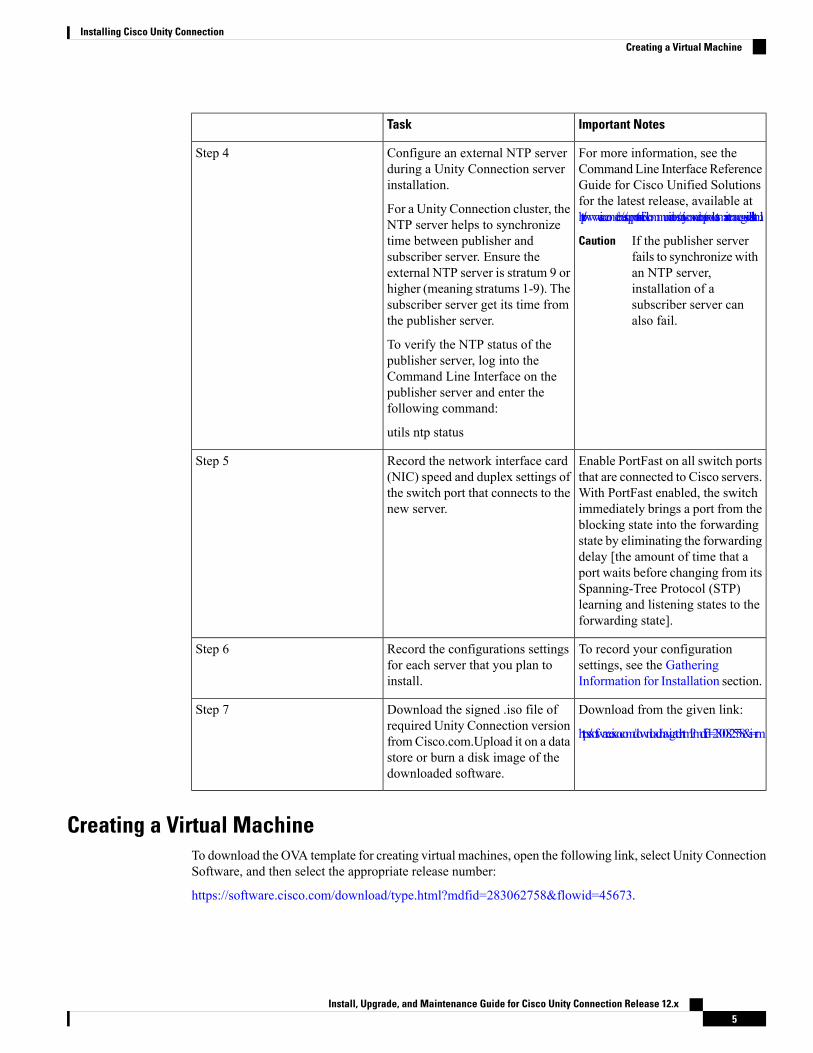
Important NotesTask
For more information, see theCommandLine Interface ReferenceGuide for Cisco Unified Solutionsfor the latest release, available athttp://www.cisco.com/c/en/us/support/unified-communications/unity-connection/products-maintenance-guides-list.html.
If the publisher serverfails to synchronize withan NTP server,installation of asubscriber server canalso fail.
Caution
Configure an external NTP serverduring a Unity Connection serverinstallation.
For a Unity Connection cluster, theNTP server helps to synchronizetime between publisher andsubscriber server. Ensure theexternal NTP server is stratum 9 orhigher (meaning stratums 1-9). Thesubscriber server get its time fromthe publisher server.
To verify the NTP status of thepublisher server, log into theCommand Line Interface on thepublisher server and enter thefollowing command:
utils ntp status
Step 4
Enable PortFast on all switch portsthat are connected to Cisco servers.With PortFast enabled, the switchimmediately brings a port from theblocking state into the forwardingstate by eliminating the forwardingdelay [the amount of time that aport waits before changing from itsSpanning-Tree Protocol (STP)learning and listening states to theforwarding state].
Record the network interface card(NIC) speed and duplex settings ofthe switch port that connects to thenew server.
Step 5
To record your configurationsettings, see the GatheringInformation for Installation section.
Record the configurations settingsfor each server that you plan toinstall.
Step 6
Download from the given link:
https://software.cisco.com/download/navigator.html?mdfid=280082558&i=rm
Download the signed .iso file ofrequired Unity Connection versionfromCisco.com.Upload it on a datastore or burn a disk image of thedownloaded software.
Step 7
Creating a Virtual MachineTo download the OVA template for creating virtual machines, open the following link, select Unity ConnectionSoftware, and then select the appropriate release number:
https://software.cisco.com/download/type.html?mdfid=283062758&flowid=45673.
Install, Upgrade, and Maintenance Guide for Cisco Unity Connection Release 12.x5
Installing Cisco Unity ConnectionCreating a Virtual Machine

Step 1 To deploy the OVA template in a supported VMware client, from the File menu, select Deploy OVA template.Step 2 Next, browse the OVA template from the URL or file location on the system.Step 3 Follow on-screen instructions to create the virtual machine.
Changing the Boot Order of Virtual MachineThe virtual machine boot into the BIOS menu.
Step 1 In VMware client, power off the virtual machine that has the deployed OVA template.Step 2 In the left pane of VMware client, right-click the name of the virtual machine, and select Edit Settings.Step 3 In the Virtual Machine Properties dialog box, select the Options tab.Step 4 In the Settings column, from the Advanced menu, select Boot Options.Step 5 In the Force BIOS Setup, check the The next time the virtual machine boots, force entry into the BIOS setup screen check
box.Step 6 Select OK to close the Virtual Machine Properties dialog box.Step 7 Power on the virtual machine.Step 8 Navigate to the Boot menu and change the boot device order so the CD-ROM device is listed first and the Hard Drive
device is listed second.Step 9 Save the change and exit BIOS setup.
Changing Reservation on Virtual Machines Running with E7 or E5 ProcessorsThe CPU reservations are now included in OVAs, which are based on the Xeon 7500 processor. For E7processors and certain E5 processors, the CPU reservations are higher than available cycles on 1 virtual CPU.In such cases, the administrator needs to change the reservation number of the virtual machine manually usingthe steps mentioned in Changing the Reservation Numbers
Additionally, based on the lab tests, we see that the 2.4 GHz reservation on E7 or E5 processor has the sameperformance as a 2.53 GHz Xeon 7500 processor.
For more information see the docwiki available athttp://docwiki.cisco.com/wiki/UC_Virtualization_Supported_Hardware.
Changing the Reservation Numbers
Step 1 In VMware vSphere Client, select the host on which virtual machine is created.Step 2 Click the Summary tab, under CPU, note the available CPU cycles for 1 virtual CPU in GHz.Step 3 Power off the virtual machine on which you deployed the OVA templateStep 4 In the left pane of vSphere Client, right-click the name of the virtual machine and select Edit Settings.Step 5 In the Virtual Machine Properties dialog box, select the Resources tab.
Install, Upgrade, and Maintenance Guide for Cisco Unity Connection Release 12.x6
Installing Cisco Unity ConnectionChanging the Boot Order of Virtual Machine

Step 6 In the Settings column, select CPU.Step 7 Under Resource Allocation, enter the new reservation value in the Reservation textbox. The new reservation value is
calculated as the number of CPUsX2.4GHz (for E5440 processor) and the number of CPUs multiplied by the 1 virtualCPU cycles in GHz (from step 2) (for E7 processor).
Step 8 Click OK to close the Virtual Machine Properties dialog box.Step 9 Power ON the virtual machine.
Verifying DNS Settings
Step 1 Login to command prompt.Step 2 To ping each server by its DNS name, enter pingDNS_name.Step 3 To look up each server by IP address, enter nslookupIP_address.
Gathering Information for InstallationUse the Table 2: Gathering Information for Installation to record the information about your server. Gatherthis information for a single Unity Connection server or for both the servers in a Unity Connection cluster.You should make copies of this table and record your entries for each server in a separate table.
Table 2: Gathering Information for Installation
Can Setting Be Changed AfterInstallation?
DescriptionConfiguration Setting
Yes, using the CLI command
CLI > set timezone
Sets the local time zone and offsetfrom Greenwich Mean Time(GMT).
Select the time zone that mostcloselymatches the location of yourserver.
In a cluster, you mustset the subscriber serverto the same time zone asthe publisher server.
Caution
Time Zone:_____________________
Install, Upgrade, and Maintenance Guide for Cisco Unity Connection Release 12.x7
Installing Cisco Unity ConnectionVerifying DNS Settings

Can Setting Be Changed AfterInstallation?
DescriptionConfiguration Setting
Yes, using the CLI command
CLI > set network mtu
Sets the largest packet, in bytes,that is transmitted by this host onthe network.
By default, MTU is set to the sizedefined in the operating system.
Selecting a different packet sizewould be more prevalent where aVPN or IPsec tunnel is used with acustom packet size. Web accessover VPN can cause web pages notto load because of an improperMTU configuration.
The MTU size that you configuremust not exceed the lowest MTUsize that is configured on any linkin your network.
In clustered server pairs,the MTU setting mustbe the same on bothservers
Note
MTU Size:______________________
Install, Upgrade, and Maintenance Guide for Cisco Unity Connection Release 12.x8
Installing Cisco Unity ConnectionGathering Information for Installation

Can Setting Be Changed AfterInstallation?
DescriptionConfiguration Setting
Yes, using the CLI command
CLI > set network dhcp
CLI > set network gateway
CLI > set network ip eth0
Sets whether to use DHCP toautomatically configure thenetwork settings on your server.
If you select No, you must enter ahostname, IP address, IP addressmask, and the gateway IP address.
The hostname can contain up to 50alphanumeric characters, hyphens,underscores, and period. The firstcharacter cannot be a hyphen.
We recommend you use staticDynamic Host Control Protocol(DHCP) host configuration toensure the DHCP server alwaysprovides the same IP addresssettings to the server
If you do not have agateway, you must stillset this field to255.255.255.255. Notspecifying a gatewaymay limit you to onlybeing able tocommunicate withdevices on your subnet.
Note
Make sure not to useciscounity in thehostname of the serverelse enterprisereplication gets broken.
Caution
Hostname and IP addresses:
DHCP (Yes/No): ______
If DHCP is No:
Hostname: _________________
IP Address: _________________
IP Mask: ___________________
Gateway (GW)Address:________
Install, Upgrade, and Maintenance Guide for Cisco Unity Connection Release 12.x9
Installing Cisco Unity ConnectionGathering Information for Installation

Can Setting Be Changed AfterInstallation?
DescriptionConfiguration Setting
Yes, using the CLI commands
CLI > set network dns
CLI > set network domain
Sets whether a DNS server resolvesa hostname and IP address.
Unity Connectionenables the use of adomain name server tolocate other Cisco Unityservers and devices.This is necessary whenconfiguring digitalnetworking andclustered server pairs.We recommend you toconfigure a secondaryDNS server to avoid anyloss of connectivity orservice.
Note
Domain Name Server:
DNS: (Yes/No): ______
If DNS is Yes:
Domain: ____________________
DNS Primary:_________________
DNS Secondary:_______________
Login: No.
Password: yes, using the CLIcommand
CLI > set password user admin
You can createadditional administratoraccounts afterinstallation.
Note
Sets the administrator credentialsfor secure shell access to the CLIand for logging into Cisco UnifiedCommunicationsOperating Systemand Disaster Recovery System.
The administrator account shouldbe shared only with installers andengineers who have a thoroughunderstanding and are responsiblefor platform administration andupgrades, and backup and restoreoperations.
Ensure the password isat least six characterslong; it can containalphanumericcharacters, hyphens, andunderscore.
Note
Administrator Account Credentials:
Login: ____________________
Password: _________________
Install, Upgrade, and Maintenance Guide for Cisco Unity Connection Release 12.x10
Installing Cisco Unity ConnectionGathering Information for Installation

Can Setting Be Changed AfterInstallation?
DescriptionConfiguration Setting
Yes, using the CLI command
CLI > set web-security
Sets information used by the serverto generate certificate signingrequests (CSRs) that are used toobtain third-party certificates.
To enter more than onebusiness unit name,separate the entries witha comma. For entriesthat already contain acomma, enter abackslash before thecomma that is includedas part of the entry.
Tip
For location, you can enter anysetting that is meaningful withinyour organization. Examplesinclude the state or the city wherethe server is located.
Certificate Information:
Organization:____________________
Unit: ______________________
Location: _________________
State: ____________________
Country: _________________
First server refers to the publisherserver. During the installation ofsecond or subscriber server, enterthe details of the first server.
Cluster:
First server in cluster (Yes/No):____
If First server is No:
Publisher hostname: ____________
Publisher IP address:____________
Publisher security password:______
Install, Upgrade, and Maintenance Guide for Cisco Unity Connection Release 12.x11
Installing Cisco Unity ConnectionGathering Information for Installation

Can Setting Be Changed AfterInstallation?
DescriptionConfiguration Setting
Yes, using Cisco Unified OperatingSystem Administration:
Settings > NTP Servers
Using the CLI command
CLI > using the CLI command
Sets the hostname or IP address ofone or more network time protocol(NTP) servers that synchronizeswith your Unity Connection server.
The NTP service ensures that thetime synchronized is accurate fordate/timestamps of messages,reports, and various tools, such aslogs and traces.
All Unity Connection serversrequire an external NTP source thatare accessible during installation.The source can be a corporatehead-end router synchronized witha public NTP time server or it canbe the public NTP time serveritself.
To avoid potentialcompatibility, accuracy,and network jitterproblems, the externalNTP servers should beNTP v4 (version 4). Ifyou are usingIPv6addressing, externalNTP servers must beNTP v6.
TheNTP server that youspecify for the publisherserver is automaticallyapplied for thesubscriber server.
Note
NTP Servers:
NTP Server 1:__________________
NTP Server 2:__________________
NTP Server 3:__________________
NTP Server 4:__________________
NTP Server 5:__________________
Install, Upgrade, and Maintenance Guide for Cisco Unity Connection Release 12.x12
Installing Cisco Unity ConnectionGathering Information for Installation
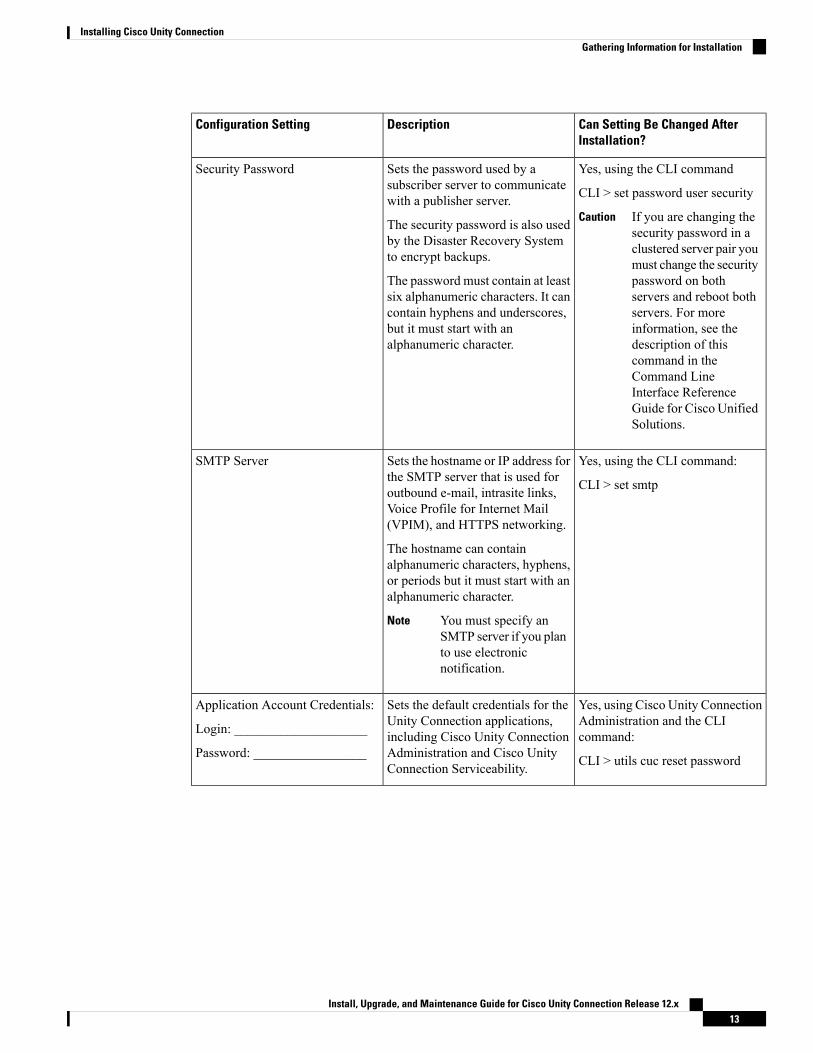
Can Setting Be Changed AfterInstallation?
DescriptionConfiguration Setting
Yes, using the CLI command
CLI > set password user security
If you are changing thesecurity password in aclustered server pair youmust change the securitypassword on bothservers and reboot bothservers. For moreinformation, see thedescription of thiscommand in theCommand LineInterface ReferenceGuide for Cisco UnifiedSolutions.
Caution
Sets the password used by asubscriber server to communicatewith a publisher server.
The security password is also usedby the Disaster Recovery Systemto encrypt backups.
The password must contain at leastsix alphanumeric characters. It cancontain hyphens and underscores,but it must start with analphanumeric character.
Security Password
Yes, using the CLI command:
CLI > set smtp
Sets the hostname or IP address forthe SMTP server that is used foroutbound e-mail, intrasite links,Voice Profile for Internet Mail(VPIM), and HTTPS networking.
The hostname can containalphanumeric characters, hyphens,or periods but it must start with analphanumeric character.
You must specify anSMTP server if you planto use electronicnotification.
Note
SMTP Server
Yes, using Cisco Unity ConnectionAdministration and the CLIcommand:
CLI > utils cuc reset password
Sets the default credentials for theUnity Connection applications,including Cisco Unity ConnectionAdministration and Cisco UnityConnection Serviceability.
Application Account Credentials:
Login: ____________________
Password: _________________
Install, Upgrade, and Maintenance Guide for Cisco Unity Connection Release 12.x13
Installing Cisco Unity ConnectionGathering Information for Installation

Installation ScenariosTable 3: Installation Scenarios
Installation MethodInstallation Scenarios
Standard
• Installing the Publisher Server
• Verifying the Installation
Unattended
• Generating Answer File for UnattendedInstallation
• Installing the Publisher Server
• Verifying the Installation
Standalone Deployment
Standard
• Installing the Publisher Server
• Configuring Subscriber Server on the PublisherServer
• Installing the Subscriber Server
• Verifying the Installation
Unattended
• Generating Answer File for UnattendedInstallation
• Installing the Publisher Server
• Configuring Subscriber Server on the PublisherServer
• Installing the Subscriber Server
• Verifying the Installation
Cluster Deployment
Installation TasksDepending on the type of installation scenario, you need to perform the following tasks to install the UnityConnection software:
Install, Upgrade, and Maintenance Guide for Cisco Unity Connection Release 12.x14
Installing Cisco Unity ConnectionInstallation Scenarios

Navigating Within the Installation WizardFor instructions on how to navigate within the installation wizard, see Table 4: InstallationWizard Navigation.
Table 4: Installation Wizard Navigation
Press ThisTo Do This
TabMove to the next field
Alt-TabMove to the previous field
Space bar or EnterSelect an option
Up or down arrowScroll up or down in a list
Space bar or Enter to select Back (when available)Go to the previous window
Space bar or Enter to select Help (when available)Get help information on a window
Installing the Publisher ServerWhile installing a Unity Connection server, you are prompted to enter different configuration information.Refer the table mentioned in the Gathering Information for Installation section wherever applicable.
Step 1 Prepare the virtual machine to install Unity Connection:a) Select Edit virtual machine settings to select the ISO image from CD/DVD drive using client device or from data
store.b) Navigate to the Console tab. A screen prompting you to check the integrity of the DVD appears.c) Select Yes to perform the media check or Skip to move to the next step.
If you select media check and it fails, either download another copy from Cisco.com or obtain anotherDVD directly from Cisco.
Note
d) After performing the hardware check, you get a prompt to restart the system. You need to select Yes to continueinstallation. After the system restarts, the Product Deployment Selection window displays.
Step 2 In the Product Deployment Selection window, select OK to install Cisco Unity Connection. Then Proceed with Installwindow appears.
Step 3 In the Proceed with Install window, select Yes to continue the installation.
If you select Yes on the Proceed with Install window, all existing data on your hard drive gets overwrittenand destroyed.
Caution
The Platform Installation Wizard window appears.
Step 4 In the Platform Installation Wizard window, select the applicable option:
• If you want to perform a standard installation, select Proceed, and continue with this procedure.
• (Applicable to Unity Connection 12.5(1) SU5 and later) If you want to Import data from SFTP server during freshinstall, select Import and continue.
Install, Upgrade, and Maintenance Guide for Cisco Unity Connection Release 12.x15
Installing Cisco Unity ConnectionNavigating Within the Installation Wizard

• If you want to perform an unattended installation, select Skip. Connect the answer file image on a virtual floppydiskette and select Continue. The installation wizard reads the configuration information during the installationprocess and then follow the steps mentioned in the Post-Installation Tasks section.
Step 5 If you select Proceed in the previous window, the Apply Patch window appears:a)
• Select Yes to upgrade to a later Service Release of the software during installation and follow the processmentioned in the Applying a Patch section.
This option is not applicable to Install with Data import installation method.Note
• Select No to skip this step and the Basic Install window appears.
b) If you select Import in the previous window, the Import Upgrade Configuration Information window appears. Itexplains the format of entering SFTP server and Export Directory. Select OK. The Timezone Configuration windowappears. Continue with Step-7.
Step 6 In the Basic Install window, select Continue to install the software version or configure the pre- installed software. TheTimezone Configuration window appears.
Step 7 In the Timezone Configuration window, select the appropriate time zone for the server and then select OK. The AutoNegotiation Configuration window appears.
In a cluster, the subscriber server must be configured to use the same time zone as the publisher server. Thereplication do not work if the timezone is not same.
Caution
Step 8 In the Auto Negotiation Configuration window, select Continue. The MTU Configuration window appears.Step 9 In the MTU Configuration window, select the applicable option:
• Select No to accept the default value (1500 bytes).
• Select Yes to change the MTU size, enter the new MTU size, and select OK.
If you configure the MTU size incorrectly, your network performance can be affected.Caution
The DHCP Configuration window appears.
Step 10 In the DHCP Configuration window, select the applicable option:
• Select Yes to use DHCP server that is configured in your network.The network restarts and the AdministratorLogin Configuration window appears.
• Select No to configure a static IP address for the server and continue with this procedure. The Static NetworkConfiguration window appears.
Step 11 In the Static Network Configuration window, enter the static network configuration information.
The DNS Client Configuration window displays.
Step 12 To enable DNS, select Yes, enter the DNS client information and select OK.
The network restarts using the new configuration information.
Step 13 If Import option is selected in Step-4 then Software Location of Data to import windowwill display. In this window,enter the following information.
a)
Install, Upgrade, and Maintenance Guide for Cisco Unity Connection Release 12.x16
Installing Cisco Unity ConnectionInstalling the Publisher Server

DescriptionField
The Secure FTP (SFTP) server that will store the sourcecluster's exported data.
Remote Server Name or IP
Directory path on the server containing export data.Export Data Directory
Allow for data retrieval of the remote SFTP server.Remote Server Login ID
Contains alphanumeric characters, hyphens, andunderscores
Remote Server Password
The Certificate Information window appears.
b) If Import option is not selected in Step-4 then enter the administrator login and password. The Certificate Informationwindow appears.
Step 14 Enter your certificate signing request information and select OK.
The First Node Configuration window displays.
Step 15 In the First Node Configuration window, select the applicable option:
• Select Yes to configure this server as the publisher server or as a standalone server and continue this procedure.The Network Time Protocol Client Configuration window appears.
• Select No to configure this server as the subscriber server.
Step 16 In the Network Time Protocol Client Configuration window, enter the hostname or IP address of the NTP server(s)and select Proceed.
Cisco recommends that you use an external NTP server to ensure accurate system time on the publisherserver. However, you can configure multiple NTP servers based on your requirements.
Note
Step 17 If Import option is not selected in Step-4 then Security Configuration window appears.In the Security Configurationwindow, enter the security password.
a)
The system uses this password to authorize communications between the publisher and subscriber servers;you must ensure this password is identical on the two servers.
Note
The SMTP Host Configuration window appears.
b) If Import option is selected in Step-4 then SMTP Host Configuration window appears after selecting Proceed onthe Network Time Protocol Client Configuration window.
Step 18 In the SMTP Host Configuration window:a) Select Yes to configure an SMTP server and enter the SMTP server name or IP address.b) Select OK. The Application User Configuration window appears.
You must configure an SMTP server to use certain platform features; however, you can also configure anSMTP server later using the platform GUI or the command line interface.
If Import option is selected in Step-4, then Platform Configuration Confirmation window appears afterselecting OK on the SMTP Host Configuration window. Continue with Step-20.
Note
Step 19 In the Application User Configuration window:
Install, Upgrade, and Maintenance Guide for Cisco Unity Connection Release 12.x17
Installing Cisco Unity ConnectionInstalling the Publisher Server

a) Enter the Application User name and password and confirm the password by entering it again.
Do not use the system application name as the Application User name. Using a system application namecauses the installation to fail with an unrecoverable error during the installation of the database. Thesystem application names are operator, replication, undeliverablemessagesmailbox, and Unity Connection.
Note
b) Select OK. The Platform Configuration Confirmation window appears.
Step 20 In the Platform Configuration Confirmation window, select OK to continue the installation. The system installs andconfigures the software.
Step 21 When the installation process completes, you are prompted to log in using the Administrator account and password.
Configuring Subscriber Server on the Publisher Server
Step 1 Sign in to Cisco Unity Connection Administration.Step 2 Expand System Settings and select Cluster.Step 3 On the Find and List Servers page, select Add New.Step 4 On the New Server Configuration page, in the Hostname or IP Address field, enter the hostname or IP address of the
second server in the cluster.Step 5 (Optional) In the MAC Address field, enter the MAC address of the second server.Step 6 In the Description field, enter a description for the second server and select Save.
Above mentioned steps are applicable to:
• Unity Connection 12.5(1) SU4 and earlier releases.
• If Import option is not selected, while installation for Unity Connection 12.5(1) SU5 and later releases.
• If Import option is selected for publisher node, while installing Unity Connection 12.5(1) SU5 and laterreleases.This is the case network migration in which data is exported and imported on publisher node onlyand subscriber node is freshly installed.
Note
Installing the Subscriber Server
In case of Install with Data Import installation method, you can fresh install the subscriber node or you canimport the subscriber node using Import option.
For importing the subscriber node, select the Import option in Platform InstallationWizard window and followthe steps of importing publisher server until the First Node Configuration window appears.Then continue thefollowing procedure.
Note
To fresh install the subscriber server, follow the steps of installing publisher server until the First NodeConfiguration window appears and then continue the following procedure.
Install, Upgrade, and Maintenance Guide for Cisco Unity Connection Release 12.x18
Installing Cisco Unity ConnectionConfiguring Subscriber Server on the Publisher Server

While installing a Unity Connection server, you are prompted to enter different configuration information.Refer the table mentioned in the Gathering Information for Installation section wherever applicable.
Step 1 In the Console tab, on the First Node Configuration window, select No to continue the installation of the subscriber serverand select OK.
The Network Connectivity Test Configuration window displays.
Step 2 During installation of a subscriber server, the system checks to ensure that the subscriber server can connect to thepublisher server.
• To pause the installation after the system successfully verifies network connectivity, select Yes.
• To continue the installation, select No.
The First Node Access Configuration window displays.
Step 3 Enter the connectivity information for the publisher server and select OK.
The system checks for network connectivity.
If you select to pause the system after the system successfully verifies network connectivity, the Successful Cisco UnityConnection to First Node window displays. Select Continue.
If the network connectivity test fails, the system stops and allows you to go back and re-enter the parameterinformation.
Note
The SMTP Host Configuration window displays.
Step 4 If you want to configure an SMTP server, select Yes and enter the SMTP server name.
The Platform Configuration Confirmation window displays.
Step 5 Select OK to start installing the software.Step 6 When the installation process completes, you are prompted to log in using the Administrator account and password.
After installing publisher and subscriber nodes, complete the post-installation tasks that are listed in thePost-Installation Tasks, on page 27. In case of Install with Data Import option, complete the post-migrationtasks listed in the Post-Migration Tasks section.
Note
Generating Answer File for Unattended InstallationYou can generate answer files using Cisco Unified Communications Answer File Generator web application.To use the answer file during installation, you need to save the answer file to the root directory of a floppydiskette, browse to the file during installation, and leave the installation to complete.
In case of Unity Connection cluster:
• You need to generate separate answer files for publisher and subscriber servers.
• You are not required to enter details of the publisher server manually on the subscriber server duringsubscriber server installation.
Install, Upgrade, and Maintenance Guide for Cisco Unity Connection Release 12.x19
Installing Cisco Unity ConnectionGenerating Answer File for Unattended Installation

The Cisco Unified Communications Answer File Generator supports Internet Explorer version 11.0 or higherand Mozilla version 28.0 or higher.
Note
Task List for Unattended InstallationYou need to perform the following tasks to generate answer file and create floppy image for unattendedinstallation.
1. Generate and download answer files that includes the platformConfig.xml files for both the publisher andthe subscriber server. For more information on how to generate answer files, see Generating andDownloading Answer File.
2. After generating the answer files, create a floppy image. For more information, seehttp://kb.vmware.com/selfservice/microsites/search.do?language=en_US&cmd=displayKC&externalId=1739.
3. Deploy and configure the servers in the cluster, publisher and subscriber. For more information, see theConfiguring the Publisher Server and Configuring the Subscriber Server section.
4. To install the publisher and subscriber server, see the Installing the Publisher Server and Installing theSubscriber Server section.
Generating and Downloading Answer File
Step 1 Log in to the Unity Connection Answer File Generator application. The answer file can be generated using the followinglink: http://www.cisco.com/web/cuc_afg/index.html.
Step 2 Enter details in the Clusterwide Configuration section.
(Applicable to Unity Connection 12.5(1) SU5 and later) You can select option Configure Software Locationof Data to Import for using Install with Data Import installation method. Enter details of Remote Server andExport Data Directory.
Note
Step 3 Enter details for the primary node in the Primary Node Configuration section.Step 4 (Optional) If you want to enable Dynamic Cluster Configuration, enter a value in the Dynamic-cluster-config-timer field.
Step 4 is mandatory when you are using Dynamic-cluster-configuration process for Touchless installation.Note
Step 5 Enter details for the secondary node in the Secondary Node Configuration section.Step 6 In the List of Secondary Nodes list box, select Add Secondary Node. The node that you add as secondary node appears
in this list box.Step 7 Click Generate Answer Files. A dialog box appears showing the details for the primary node, the secondary node, and
the clusterConfig file.Step 8 In the Communications Answer File Generator dialog box, follow the download instructions, and then click the Download
File button to download the answer files to your computer.
Install, Upgrade, and Maintenance Guide for Cisco Unity Connection Release 12.x20
Installing Cisco Unity ConnectionTask List for Unattended Installation

Configuring the Publisher Server
Step 1 Log in to the virtual machine to start the cluster installation.Step 2 From the VMmenu, select Edit settings to mount the floppy image that you have created from the Answer File Generator
tool. The Virtual Machine Properties dialog box appears.Step 3 From the available hardware list, select Floppy drive 1.Step 4 In the Device Type section, select Use the existing floppy image in the database, and then click Browse to navigate to
the floppy image.Step 5 Click OK. The floppy image is attached.Step 6 Select the CD/DVD Drive 1 > Connect to ISO image on local disk option from the toolbar and select CD/DVD Drive1
> Connect to ISO image on a datastore, navigate to the data store to select the ISO image, and click OK. The ISO imageis attached and the installation starts.
Step 7 (Optional) If you want to test the media before the installation, click OK in the Disc Found message box, or select Skipto skip testing the media before the installation. The installation proceeds without any manual intervention. The publisheris installed and the subscribers is added to the publisher.
Configuring the Subscriber Server
Step 1 You can install the subscriber only after the publisher is installed.(Applicable to only unattended installation, not validfor Touchless install).
Step 2 Perform Step 1 to Step 6 of the Configuring the Publisher Server.
Touchless Installation for Virtual MachineTouchless installation is an enhancement of the existing unattended installation, which promotes simplifiedcluster installation. In unattended installation, you first install Unity Connection on the publisher server usinganswer file, add the subscriber server to the Cluster page of the publisher server, and then start the installationof subscriber server. However, in Touchless installation, you are not required to manually enter the details ofthe subscriber server on the publisher server. The subscriber details are automatically updated throughclusterConfig.xml file or dynamic-cluster-configuration option in the AFG tool, which minimizes the needfor intervention and scheduling during the deployment of a new cluster.
Methods for Touchless InstallationYou can use either of the following two methods for Touchless installation:
• Predefined Cluster Configurations (AFG Process)
• Automatic Sequencing of Touchless server (Subscriber-Dynamic-Cluster configuration).
Predefined Cluster Configurations (AFG Process)
In this method of installation, the Answer File Generator (AFG) tool generates the clusterConfig.xml filealong with the existing platformConfig.xml file for both the publisher and subscriber servers. If you specifythe details of the subscriber server in the AFG tool, those details are included in the clusterConfig.xml file.After the publisher server is installed, it reads the clusterConfig.xml file and if the publisher server finds the
Install, Upgrade, and Maintenance Guide for Cisco Unity Connection Release 12.x21
Installing Cisco Unity ConnectionConfiguring the Publisher Server

subscriber server, it adds the subscriber server to its processnode table. Adding the subscriber server to theprocessnode table eliminates the need to wait for the publisher server to finish its installation, and thenmanuallyadd the subscriber server on the server page.Thus, the entire installation process occurs automatically.
Automatic Sequencing of Touchless Server (dynamic-cluster-configuration)
In automatic sequencing feature, subscriber gets configured dynamically along with the publisher during theinstallation. To use this functionality, enable the dynamic-cluster-configuration option in the AFG tool or usethe command line interface (CLI) command on the publisher server. To use CLI to enable dynamic-configurationfunctionality, see (Optional) EnablingDynamic-Cluster-ConfigurationUsing CLI. There is no clusterconfig.xmlfile in this process of Touchless install.You need to enable the Dynamic Cluster Config Timer (1-24 hours)and start the installation on both the servers at the same time. The number of hours is the duration for whichsubscriber waits for publisher to receive the subscriber entry in the processnode table.
Task List for Touchless InstallationYou need to perform the following tasks to generate answer files and create floppy image for Touchlessinstallation.
1. Generate and download answer files that includes the platformConfig.xml files for both the publisher andthe subscriber server and clusterconfig.xml file (only for AFG Process). For more information on how togenerate answer files, see Generating and Downloading Answer File.
In case you are using dynamic-cluster-configuration method of installation, then you just need toenable dynamic-cluster-configuration option in the AFG tool and follow the step1.
Note
2. After generating the answer files, create a floppy image. For more information, seehttp://kb.vmware.com/selfservice/microsites/search.do?language=en_US&cmd=displayKC&externalId=1739.
3. Deploy and configure the servers in the cluster, publisher and subscriber. For more information, see theConfiguring the Publisher Server and Configuring the Subscriber Server section.
4. To install the publisher server, see the Installing the Publisher Server section for cluster deployment.
5. The installation of subscriber continues if:
• You enable the dynamic-cluster-configuration timer.
• The clusterConfig.xml files are present.
(Optional)
(Optional) Enabling Dynamic-Cluster-Configuration Using CLI
Procedure
PurposeCommand or Action
You can enable Dynamic-Cluster-Configuration throughthe CLI for up to an hour using the command: set network
Step 1
cluster subscriber dynamic-cluster-config {default | no. ofhours}. For more information, see the Set command chapterof Command Line Interface Guide for Cisco Unified
Install, Upgrade, and Maintenance Guide for Cisco Unity Connection Release 12.x22
Installing Cisco Unity ConnectionTask List for Touchless Installation
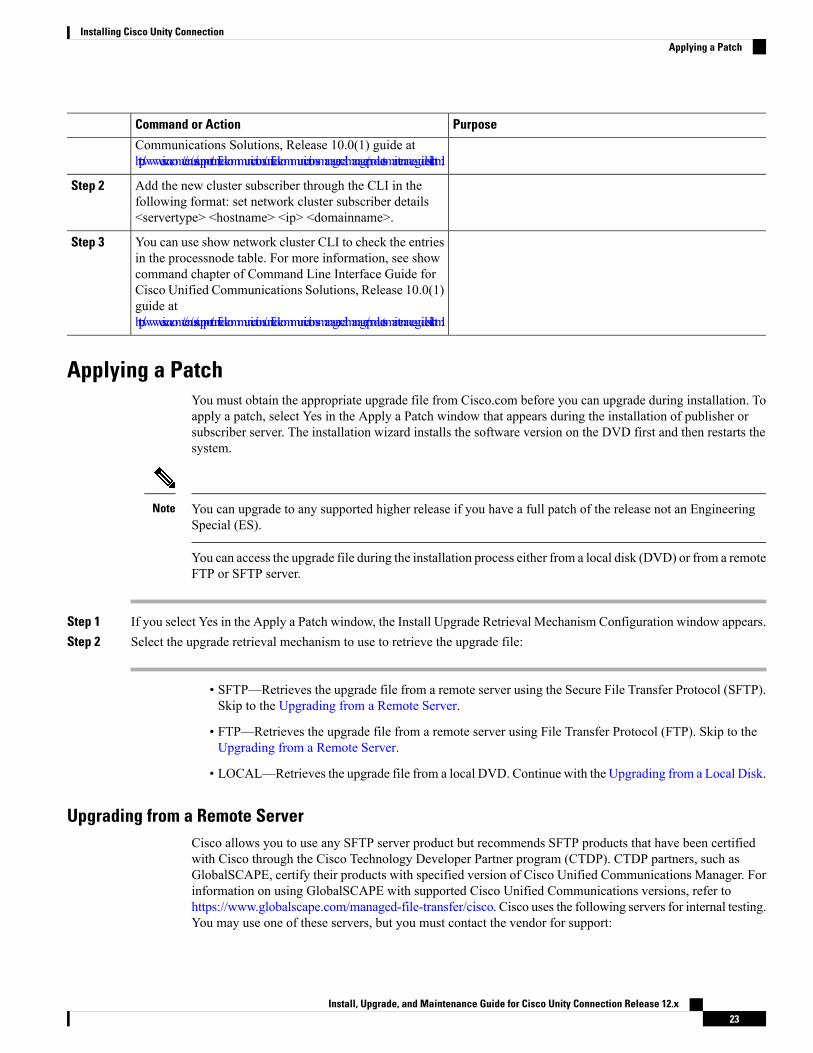
PurposeCommand or Action
Communications Solutions, Release 10.0(1) guide athttp://www.cisco.com/c/en/us/support/unified-communications/unified-communications-manager-callmanager/products-maintenance-guides-list.html.
Add the new cluster subscriber through the CLI in thefollowing format: set network cluster subscriber details<servertype> <hostname> <ip> <domainname>.
Step 2
You can use show network cluster CLI to check the entriesin the processnode table. For more information, see show
Step 3
command chapter of Command Line Interface Guide forCisco Unified Communications Solutions, Release 10.0(1)guide athttp://www.cisco.com/c/en/us/support/unified-communications/unified-communications-manager-callmanager/products-maintenance-guides-list.html.
Applying a PatchYou must obtain the appropriate upgrade file from Cisco.com before you can upgrade during installation. Toapply a patch, select Yes in the Apply a Patch window that appears during the installation of publisher orsubscriber server. The installation wizard installs the software version on the DVD first and then restarts thesystem.
You can upgrade to any supported higher release if you have a full patch of the release not an EngineeringSpecial (ES).
Note
You can access the upgrade file during the installation process either from a local disk (DVD) or from a remoteFTP or SFTP server.
Step 1 If you select Yes in the Apply a Patch window, the Install Upgrade Retrieval Mechanism Configuration window appears.Step 2 Select the upgrade retrieval mechanism to use to retrieve the upgrade file:
• SFTP—Retrieves the upgrade file from a remote server using the Secure File Transfer Protocol (SFTP).Skip to the Upgrading from a Remote Server.
• FTP—Retrieves the upgrade file from a remote server using File Transfer Protocol (FTP). Skip to theUpgrading from a Remote Server.
• LOCAL—Retrieves the upgrade file from a local DVD. Continue with the Upgrading from a Local Disk.
Upgrading from a Remote ServerCisco allows you to use any SFTP server product but recommends SFTP products that have been certifiedwith Cisco through the Cisco Technology Developer Partner program (CTDP). CTDP partners, such asGlobalSCAPE, certify their products with specified version of Cisco Unified Communications Manager. Forinformation on using GlobalSCAPE with supported Cisco Unified Communications versions, refer tohttps://www.globalscape.com/managed-file-transfer/cisco. Cisco uses the following servers for internal testing.You may use one of these servers, but you must contact the vendor for support:
Install, Upgrade, and Maintenance Guide for Cisco Unity Connection Release 12.x23
Installing Cisco Unity ConnectionApplying a Patch

• Open SSH (for Unix systems. Refer to http://sshwindows.sourceforge.net/)
• Cygwin (http://www.cygwin.com/)
• Titan (http://www.titanftp.com/)
For issues with third-party products that have not been certified through the CTDP process, contact thethird-party vendor for support.
Note
If you select to upgrade through an FTP or SFTP connection to a remote server, you must first configurenetwork settings so that the server can connect to the network.
Step 1 The Auto Negotiation Configuration window displays.Step 2 The installation process allows you to automatically set the speed and duplex settings of the Ethernet network interface
card (NIC) using automatic negotiation. You can change this setting after installation.
To use this option, your hub or Ethernet switch must support automatic negotiation.Note
• To enable automatic negotiation, select Yes.
The MTU Configuration window displays. Continue with Step 4.
• To disable automatic negotiation, select No. The NIC Speed and Duplex Configuration window displays. Continuewith Step 3.
Step 3 If you select to disable automatic negotiation, manually select the appropriate NIC speed and duplex settings now andselect OK to continue.
The MTU Configuration window displays.
Step 4 In the MTU Configuration window, you can change the MTU size from the operating system default.
The maximum transmission unit (MTU) represents the largest packet, in bytes, that is transmitted by this host on thenetwork. If you are unsure of the MTU setting for your network, use the default value.
If you configure the MTU size incorrectly, your network performance can be affected.Caution
• To accept the default value (1500 bytes), select No.
• To change the MTU size from the operating system default, select Yes, enter the new MTU size, and select OK.
The DHCP Configuration window displays.
Step 5 For network configuration, you can select to either set up static network IP addresses for the Unity Connection serverand gateway or to use Dynamic Host Configuration Protocol (DHCP). Static IP addresses are recommended.
• If you have a DHCP server that is configured in your network and want to use DHCP, select Yes. The installationprocess attempts to verify network connectivity.
• If you want to configure static IP addresses for the server, select No. The Static Network Configuration windowdisplays.
Step 6 If you select not to use DHCP, enter your static network configuration values and select OK.
Install, Upgrade, and Maintenance Guide for Cisco Unity Connection Release 12.x24
Installing Cisco Unity ConnectionUpgrading from a Remote Server
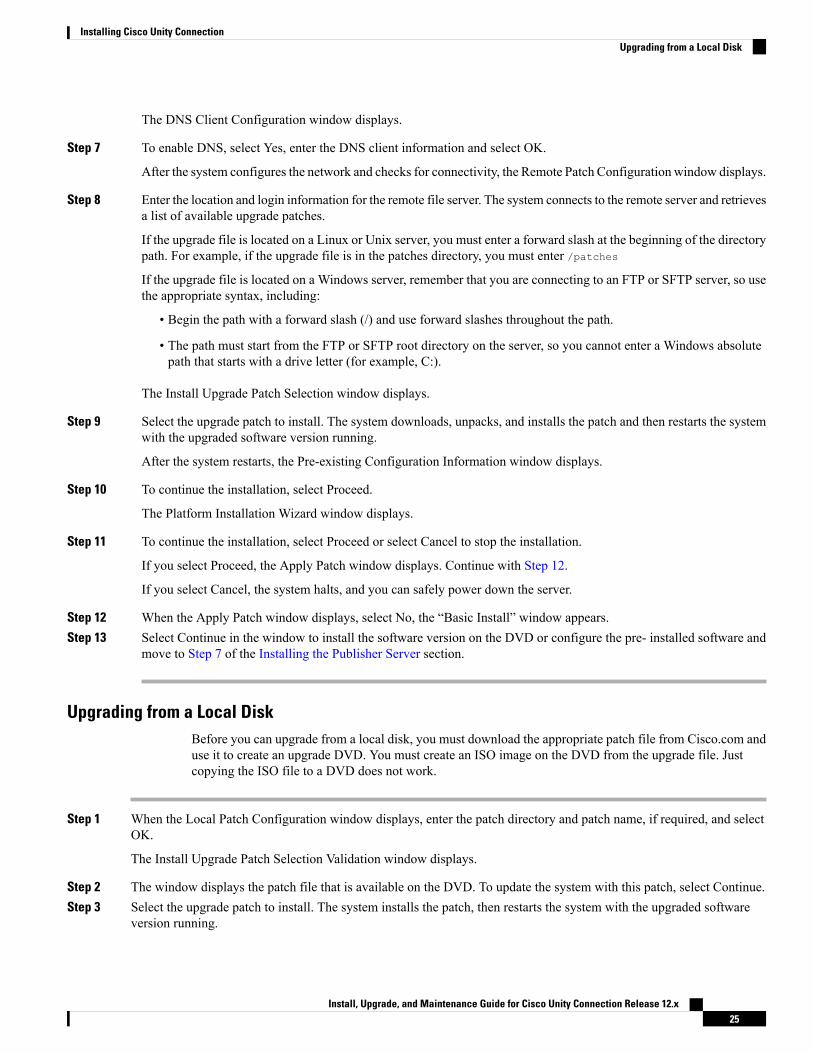
The DNS Client Configuration window displays.
Step 7 To enable DNS, select Yes, enter the DNS client information and select OK.
After the system configures the network and checks for connectivity, the Remote Patch Configuration window displays.
Step 8 Enter the location and login information for the remote file server. The system connects to the remote server and retrievesa list of available upgrade patches.
If the upgrade file is located on a Linux or Unix server, you must enter a forward slash at the beginning of the directorypath. For example, if the upgrade file is in the patches directory, you must enter /patches
If the upgrade file is located on a Windows server, remember that you are connecting to an FTP or SFTP server, so usethe appropriate syntax, including:
• Begin the path with a forward slash (/) and use forward slashes throughout the path.
• The path must start from the FTP or SFTP root directory on the server, so you cannot enter a Windows absolutepath that starts with a drive letter (for example, C:).
The Install Upgrade Patch Selection window displays.
Step 9 Select the upgrade patch to install. The system downloads, unpacks, and installs the patch and then restarts the systemwith the upgraded software version running.
After the system restarts, the Pre-existing Configuration Information window displays.
Step 10 To continue the installation, select Proceed.
The Platform Installation Wizard window displays.
Step 11 To continue the installation, select Proceed or select Cancel to stop the installation.
If you select Proceed, the Apply Patch window displays. Continue with Step 12.
If you select Cancel, the system halts, and you can safely power down the server.
Step 12 When the Apply Patch window displays, select No, the “Basic Install” window appears.Step 13 Select Continue in the window to install the software version on the DVD or configure the pre- installed software and
move to Step 7 of the Installing the Publisher Server section.
Upgrading from a Local DiskBefore you can upgrade from a local disk, you must download the appropriate patch file from Cisco.com anduse it to create an upgrade DVD. You must create an ISO image on the DVD from the upgrade file. Justcopying the ISO file to a DVD does not work.
Step 1 When the Local Patch Configuration window displays, enter the patch directory and patch name, if required, and selectOK.
The Install Upgrade Patch Selection Validation window displays.
Step 2 The window displays the patch file that is available on the DVD. To update the system with this patch, select Continue.Step 3 Select the upgrade patch to install. The system installs the patch, then restarts the system with the upgraded software
version running.
Install, Upgrade, and Maintenance Guide for Cisco Unity Connection Release 12.x25
Installing Cisco Unity ConnectionUpgrading from a Local Disk
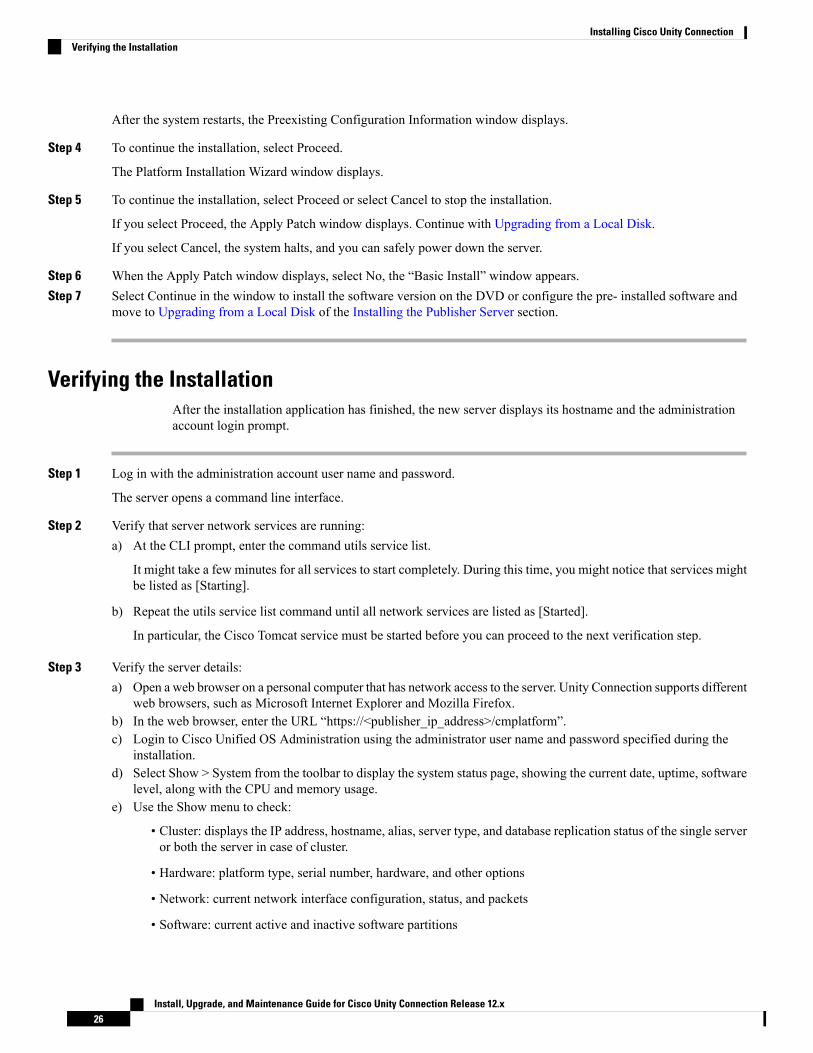
After the system restarts, the Preexisting Configuration Information window displays.
Step 4 To continue the installation, select Proceed.
The Platform Installation Wizard window displays.
Step 5 To continue the installation, select Proceed or select Cancel to stop the installation.
If you select Proceed, the Apply Patch window displays. Continue with Upgrading from a Local Disk.
If you select Cancel, the system halts, and you can safely power down the server.
Step 6 When the Apply Patch window displays, select No, the “Basic Install” window appears.Step 7 Select Continue in the window to install the software version on the DVD or configure the pre- installed software and
move to Upgrading from a Local Disk of the Installing the Publisher Server section.
Verifying the InstallationAfter the installation application has finished, the new server displays its hostname and the administrationaccount login prompt.
Step 1 Log in with the administration account user name and password.
The server opens a command line interface.
Step 2 Verify that server network services are running:a) At the CLI prompt, enter the command utils service list.
It might take a few minutes for all services to start completely. During this time, you might notice that services mightbe listed as [Starting].
b) Repeat the utils service list command until all network services are listed as [Started].
In particular, the Cisco Tomcat service must be started before you can proceed to the next verification step.
Step 3 Verify the server details:a) Open a web browser on a personal computer that has network access to the server. Unity Connection supports different
web browsers, such as Microsoft Internet Explorer and Mozilla Firefox.b) In the web browser, enter the URL “https://<publisher_ip_address>/cmplatform”.c) Login to Cisco Unified OS Administration using the administrator user name and password specified during the
installation.d) Select Show > System from the toolbar to display the system status page, showing the current date, uptime, software
level, along with the CPU and memory usage.e) Use the Show menu to check:
• Cluster: displays the IP address, hostname, alias, server type, and database replication status of the single serveror both the server in case of cluster.
• Hardware: platform type, serial number, hardware, and other options
• Network: current network interface configuration, status, and packets
• Software: current active and inactive software partitions
Install, Upgrade, and Maintenance Guide for Cisco Unity Connection Release 12.x26
Installing Cisco Unity ConnectionVerifying the Installation

Step 4 Verify the server status:a) In the web browser, enter the URL “https://<publisher_ip_address>/cuadmin”.b) The Cisco Unity Connection Administration window opens. Select Cisco Unity Connection Serviceability from the
navigation pane. Login using the application user name and password specified during the installation.c) Select Tools > Cluster Management. It lists the server status of either single server or both the servers in case of
cluster. For a standalone server deployment, the server shows Primary status whereas in case of cluster, one of theserver shows Primary status and the other shows Secondary status.
Cisco Unity Connection Survivable Remote Site Voicemail InstallationYou install a Cisco Unity Connection Survivable Remote Site Voicemail (SRSV) server by converting astandalone Unity Connection server with the CLI command
utils cuc activate CUSRSV
After installing Unity Connection SRSV, you can not revert to a standalone Unity Connection server.Warning
All the existing Unity Connection configurations are lost after running the conversion.Caution
The unrestricted version of Unity Connection SRSV works only with the unrestricted version of UnityConnection (central) server.
Note
Post-Installation TasksAfter installing Unity Connection on your server, you should perform the following additional tasks beforeconfiguring the system for your application:
• Obtain the licenses for the Unity Connection server. For this, you must register the product with CiscoSmart Software Manager (CSSM) or Cisco Smart Software Manager satellite.
For more information, see the Managing Licenses chapter.
• (Optional) Change the application passwords.
You can change the passwords using either the Cisco Unity Connection Administration web application,or you can log into the server and run the CLI command
utils cuc reset password
• If you require additional languages, install them.
For details, see the Adding or Removing Unity Connection Languages section.
• Install the Cisco Unified Real-Time Monitoring Tool.
Install, Upgrade, and Maintenance Guide for Cisco Unity Connection Release 12.x27
Installing Cisco Unity ConnectionCisco Unity Connection Survivable Remote Site Voicemail Installation

You can use Cisco Unified Real-Time Monitoring Tool to monitor system health, and view and collectlogs. For more information on RTMT, see the Cisco Unified Real-Time Monitoring Tool AdministrationGuide Release 10.x athttp://www.cisco.com/c/en/us/support/unified-communications/unified-communications-manager-callmanager/products-maintenance-guides-list.html.
(Optional): You can configure RTMT to send alert notifications through emails to the specified emailaddress. For more information on enabling email alert, see the Enable email alerts section of the CiscoUnified Real-Time Monitoring Tool Administration Guide.
• Activate Unity Connection feature services.
For service activation requirements, see the Cisco Unified Serviceability Administration Guide Release12.x athttps://www.cisco.com/c/en/us/td/docs/voice_ip_comm/connection/12x/serv_administration/b_12xcucservag.html
• Configure the backup settings. For more information, see the Backing Up and Restoring Cisco UnityConnection Components chapter.
Post-Migration TasksNetwork Migration
After successful Install with Data Import in case of Network Migration, perform some additional steps asdescribed below:
1. Obtain the Licenses for the new Unity Connection server. For configuration of licenses, see the ManagingLicenses chapter.
Make sure to de-register the node fromwhich export is performed to free the license consumptionand then proceed for registration of new imported node.
Note
2. If Unity Connection on source release has IPsec configured using a certificate-based authentication, thenyou must reconfigure the IPsec policy with a CA-signed certificate after successful installation on newUnity Connection Server. For more information, see the section Upgrade Considerations with FIPSMode(Applicable for Unity Connection 12.5(1) SU1 and Later), on page 49.
3. If there is any change in certificates on newUnity connection server then regenerate and upload certificateson appropriate paths on new Unity Connection server. Some examples are given below:
• If Unity Connection on source release has Secure SIP call configured using SIP Integration then aftersuccessful installation, generate and upload RSA based Tomcat certificates on newUnity Connectionserver. To learn how to regenerate certificates, see section Settings for RSA Key Based certificatesof Cisco Unified Communications Manager SIP Integration Guide for Cisco Unity ConnectionRelease 12.x available athttps://www.cisco.com/c/en/us/td/docs/voice_ip_comm/connection/12x/integration/guide/cucm_sip/b_12xcucintcucmsip.html.
• If Unity Connection on source release uses tomcat-ECDSA certificates (self signed and third party)for next generation security then after successful installation generate and upload tomcat-ECDSAcertificates on new Unity Connection server.To learn how to regenerate certificates, see sectionSettings for EC Key Based certificates of Cisco Unified Communications Manager SIP Integration
Install, Upgrade, and Maintenance Guide for Cisco Unity Connection Release 12.x28
Installing Cisco Unity ConnectionPost-Migration Tasks

Guide for Cisco Unity Connection Release 12.x available athttps://www.cisco.com/c/en/us/td/docs/voice_ip_comm/connection/12x/integration/guide/cucm_sip/b_12xcucintcucmsip.html.
4. For proper functioning of SAML SSO perform below steps:
• Update the Metadata files of new Unity Connection server for SAML on IdP.
• Update IdP Metadata file on new Unity Connection server.
For more information, see Quick Start Guide for SAML SSO Access available at https://www.cisco.com/c/en/us/td/docs/voice_ip_comm/connection/12x/quick_start/guide/b_12xcucqssamlsso.html.
5. Update the new Unity Connection server's FQDN and IP in required telephony configurations on CiscoUnified CommunicationsManager side. For more information, see SystemConfiguration Guide for CiscoUnified Communications Manager available at https://www.cisco.com/c/en/us/support/unified-communications/unified-communications-manager-callmanager/products-installation-and-configuration-guides-list.html
6. You must reinstall the set of required locales that are compatible with the new Unity Connection version.
7. Changes done by COP files installed on previous releases does not carry forward with migration andtherefore COP files installed on previous release needs to be installed again. After successful migrationyou must manually install that COP file on new Unity Connection server.
8. If you want to change Unity Connection SMTP Domain Name, follow steps mentioned inhttps://www.cisco.com/c/en/us/support/docs/unified-communications/unity-connection/117237-technote-uc-00.html.
Simple Migration
After successful Simple Migration perform below additional steps:
1. Obtain the Licenses for the new Unity Connection server. For configuration of licenses, see the ManagingLicenses chapter.
Make sure to de-register the node fromwhich export is performed to free the license consumptionand then proceed for registration of new imported node.
Note
2. For successful working of IPSec, restart IPSec service on both the nodes of new Unity Connection serverusing below CLI:utils ipsec restart
3. Changes done by COP files installed on previous releases does not carry forward with migration andtherefore COP files installed on previous release needs to be installed again. After successful migrationyou must manually install that COP file on new Unity Connection server.
4. You must reinstall the set of required locales that are compatible with the new Unity Connection version.
Troubleshooting Installation IssuesFollow the steps in this section to troubleshoot issues faced during installation.
Install, Upgrade, and Maintenance Guide for Cisco Unity Connection Release 12.x29
Installing Cisco Unity ConnectionTroubleshooting Installation Issues

• Examine the log files if you encounter problems during installation. Use the following commands inCommand Line Interface to view log files.
To obtain a list of install log files from the command line, enterCLI>file list install *
To view the log file from the command line, enterCLI>file view install log_file
where log_file is the log file name.
You can also view logs using the Cisco Unified Real-Time Monitoring Tool.
You can dump the install logs to the serial port of a virtual machine using the "Dumping Install Logs" procedurementioned athttp://docwiki.cisco.com/wiki/How_to_Dump_Install_Logs_to_the_Serial_Port_of_the_Virtual_Machine.
For more information on troubleshooting installation issues, see the Troubleshooting Guide for Cisco UnityConnection Release 12.x, available athttps://www.cisco.com/c/en/us/td/docs/voice_ip_comm/connection/12x/troubleshooting/guide/b_12xcuctsg.html.
Install, Upgrade, and Maintenance Guide for Cisco Unity Connection Release 12.x30
Installing Cisco Unity ConnectionTroubleshooting Installation Issues

C H A P T E R 2Backing Up and Restoring Cisco UnityConnection Components
You must take the backup of Cisco Unity Connection components to avoid loosing any data or messages. Thefollowing are the tools supported for taking the backup or restoring the Unity Connection components:
• About Cobras, on page 31• About Disaster Recovery System, on page 31• About System Restore Tool, on page 38
About CobrasCisco Unified Backup and Restore Application Suite (COBRAS) is an application used to migrate data andmessages. You can take the backup using Export tool and restore the backup data using Import tool.
For more information, download the latest version of COBRAS, and view the training videos and Help athttp://www.ciscounitytools.com/Applications/General/COBRAS/COBRAS.html.
About Disaster Recovery SystemThe Disaster Recovery System (DRS) is web application that enables you to take the full backup of UnityConnection server components to remote locations using File Transfer Protocol (FTP) or Secure File TransferProtocol (SFTP).
You can take the backup of the following Unity Connection server components:
• Unity Connection configuration database
• Mailbox messages• User greetings and recorded names• Other server and platform components
DRS also provides a restore wizard that enables you to restore the Unity Connection server components froma backup file stored on an FTP or SFTP server.
Install, Upgrade, and Maintenance Guide for Cisco Unity Connection Release 12.x31

You must configure the Unity Connection server with the settings similar to the server of which backup wastaken before you can restore the software components.
Note
All the tasks related to Cisco Unified Operating System Administration web interface remain in the lockedstate when Disaster Recovery System backup or restore is running. This is because DRS locks the operatingsystem platform API. All the Command Line Interface (CLI) commands continue to work except for the CLIbased upgrade command since the platform API is locked.
The Disaster Recovery System contains two key components:
• Master Agent (MA)• Local Agent (LA)
The Master Agent coordinates the backup and restore activities with Local Agents. The system automaticallyactivates both the Master Agent and the Local Agent on all the servers in the cluster.
Disaster Recovery System backup tasks can be configured from web interface or Command Line Interface(CLI) but configuring from web interface is more preferable. For information on configuring backup tasksusing CLI, see the applicable Command Line Interface Reference Guide for Cisco Unified CommunicationsSolutions athttp://www.cisco.com/c/en/us/support/unified-communications/unified-communications-manager-callmanager/products-maintenance-guides-list.html
Components Supported for DRS BackupYou can take the backup specific Unity Connection components. The components are listed under SelectFeatures:
• CUC: Other Unity Connection server and platform components.
• CONNECTION_GREETINGS_VOICENAMES: All user greetings and recorded names.• CONNECTION_DATABASE: Unity Connection configuration database.• CONNECTION_MESSAGES_<MAILBOXSTORENAME>:Allmessages in the namedmailbox store.
• CONNECTION_HTML_NOTIFICATION: All HTML notification messages.
Selecting the CONNECTION_GREETINGS_VOICENAMESor CONNECTION_HTML_NOTIFICATIONcomponent automatically includes the CONNECTION_DATABASE component.
Note
You should take the backup of all the server components when you are taking the backup for the first time,changing the backup device, upgrading the Unity Connection server to higher releases, migrating from physicalserver to virtual machine, or re-installing the server.
Backup Files in DRSDRS stores the backup of all the server software components in multiple .tar files based on the componentselected.
Install, Upgrade, and Maintenance Guide for Cisco Unity Connection Release 12.x32
Backing Up and Restoring Cisco Unity Connection ComponentsComponents Supported for DRS Backup

The .tar backup file includes an XML file called drfComponent.xml that contains a catalog of all the componentfiles stored during the backup operation. When DRS performs the next backup operation, it uses the contentsof this catalog to determine:
• Whether the number of.tar backup files should exceed the total number of backups you defined for thebackup device.
• The .tar backup file to erase.
DRS encrypts the .tar backup files using the security password configured during the installation of UnityConnection server. If you decide to change this password, perform a full DRS backup immediately. You mustuse the same security password on the replacement server when performing a restore
operation.
Caution
Configuring DRS Backup
In a cluster deployment, you need to take the backup of publisher server onlyNote
Step 1 Set up and configure the FTP or SFTP server(s) used for storing the backups.
A number of SFTP applications, such as Free FTP and Core FTP mini SFTP server are available that can be used to storeand retrieve the backups.
To configure the FTP or SFTP server, you must define the directory that stores the backup and create an account thatDRS can use to store and retrieve the backups.
Make sure there is enough capacity in the directory for the required number and size of backups. Keep in mindthat the size of the backups increase as the organization grows.
Note
Step 2 Configure a backup device in DRS.
Each DRS backup device consists of the backup location, the FTP or SFTP account credentials, and the total number ofbackups that can be stored at the backup location. When the total number of allowed backups is reached, DRS overwritesthe oldest backup on the server.
Follow the given steps to configure a backup device:
• Sign in to Disaster Recovery System and login using the same administrator username and password that you usefor Cisco Unified Operating System Administration.
• Select Backup> Backup Device. The Backup Device window displays. Select Add New.
• Enter the backup device name, network configuration information and the number of backups to store on networkdirectory.
• Select Save to create the backup device.
Depending on the backup policy and organization, it is advisable to create multiple backup devices forredundancy. If the organization consists of multiple locations, each location should have its own set of backupdevices
Note
Install, Upgrade, and Maintenance Guide for Cisco Unity Connection Release 12.x33
Backing Up and Restoring Cisco Unity Connection ComponentsConfiguring DRS Backup
Do not use the same network location/directory for different backup devices. Backup files for each UnityConnection server must be stored in a directory dedicated to that server.
Caution
Step 3 Configure the backup process
After creating the backup device, you can
• Configure a backup schedule using Configuring a Backup Schedule, on page 34
• Configure a manual backup using Configuring a Manual Backup, on page 35
Configuring a Backup ScheduleYou can create a different backup schedule for each backup device you created. Backup schedule can beconfigured to run the backup at different times. It is recommended to take multiple schedules, each stored ona different network location.
In most of the cases, you should set a schedule that performs a nightly backup during a defined maintenancewindow when there is the least amount of server and network traffic.
You can configure up to ten backup schedules, each has its own backup device, features, and components.
Disabling the schedule allows you to prevent the scheduled backups from running without deleting the scheduleentirely.
Note
To Configure a Backup Schedule for Each Backup Device in Disaster Recovery System
Step 1 Sign in to Disaster Recovery System and login using the same Administrator username and password that you use forCisco Unified Operating System Administration.
Step 2 Select Backup> Scheduler. The Schedule List window displays.Step 3 On the Schedule List window, select Add New to create a new backup schedule. The Scheduler window displays.Step 4 On the Scheduler window, the following information are mentioned to configure a schedule:
• Schedule Name: Specify a schedule name.• Select Backup Device: Specify the backup device for which you want to create a schedule.• Select Features: Specify the Unity Connection components you want to backup.• Starts Backup at: Specify the starting date and time of the schedule.• Frequency: Specify the daily, weekly, or monthly cycles of the schedule.
Step 5 Select Save to apply the backup schedule.
If you select the Set Default option in the toolbar enables you to configure the backup schedule to performweekly backups on Tuesday through Saturday.
Note
Install, Upgrade, and Maintenance Guide for Cisco Unity Connection Release 12.x34
Backing Up and Restoring Cisco Unity Connection ComponentsConfiguring a Backup Schedule

Configuring a Manual BackupYou can run a manual backup for all components each time you create or change the configuration of a backupdevice.
Make sure to select all the components listed for backup.Note
The amount of time required to complete the backup depends on the size of the database and the number ofcomponents selected for backup. The maximum time taken for backup to complete is 20 hours or it gets timeout.
Step 1 Sign in to Disaster Recovery System and login using the same Administrator username and password that you use forCisco Unified Operating System Administration.
Step 2 Select Backup> Manual Backup. The Manual Backup window displays.Step 3 On the Manual Backup window,
• Select Backup Device: Specify the backup device to be used for backup.• Select Features: Specify the Unity Connection components you want to backup.
Step 4 Select Start Backup to start the manual backup.
DRS generates a log file for each component after completing its backup. If an error occurred, you can open the component’slog file to identify the specific error.
Viewing the Backup StatusTo View the Backup Status in Disaster Recovery System
Step 1 Sign in to Disaster Recovery System and login using the same Administrator username and password that you use forCisco Unified Operating System Administration.
Step 2 Select Backup> Current Status. The Backup Status window displays.Step 3 The Backup Status window displays the current status of the components selected for backup.Step 4 You can select Cancel Backup to cancel the backup after the backup of the current component completes.
Viewing the Backup HistoryTo View the Backup History in Disaster Recovery System
Step 1 Sign in to Disaster Recovery System and login using the same Administrator username and password that you use forCisco Unified Operating System Administration.
Step 2 Select Backup> History. The Backup History window displays.Step 3 On the Backup History window you can view the backup history after running a manual backup, to ensure it completed
successfully.
Install, Upgrade, and Maintenance Guide for Cisco Unity Connection Release 12.x35
Backing Up and Restoring Cisco Unity Connection ComponentsConfiguring a Manual Backup

Step 4 You can select Cancel Backup to cancel the backup after the backup of the current component completes.
Configuring DRS RestoreIn case of Unity Connection cluster, you take the backup of publisher server only. Therefore, you need torestore only on the publisher server.
To Restore the Software Components on Unity Connection
Step 1 Install a new Unity Connection server.
The new server must be installed with exactly the same software and patches as the server being removed from service,and must be configured with the same hostname, IP address, and deployment type (standalone server or cluster pair). Forexample, the Disaster Recovery System does not allow a restore from version 8.5(1).1000-1 to version 8.5(2).1000-1, orfrom version 8.5(2).1000-1 to version 8.5(2).1000-2. (The last parts of the version number change when you install aservice release or an engineering special.)
Step 2 Follow the given steps after reinstalling Unity Connection:a) Confirm that the IP address and hostname of the server matches the IP address and hostname of the server as it was
before taking the backup.b) Confirm that the following settings match the values when taking the server backups:
• Time zone• NTP server• NIC speed and duplex settings• DHCP settings• Primary DNS settings• SMTP hostname• X.509 Certificate information (Organization, Unit, Location, State, and Country)
c) Confirm that the security password of the server matches the security password of the server as it was before takingthe backup.
DRS encrypts the backup data using security password as the encryption key. If you change the security passwordof the Unity Connection server after the last backup was taken, you need to enter the old security password duringthe restore process.
d) If any Unity Connection languages were previously installed, reinstall the same languages on the server.
Step 3 On the new server, log in to Disaster Recovery System (DRS) and recreate the backup device used to store the backupsfrom the server removed from service.
Step 4 Follow the given steps to run the restore operation in DRS:a) Sign in to Disaster Recovery System and login using the same administrator username and password that you use for
Cisco Unified Operating System Administration.b) Run the Restore Wizard.
From the toolbar, select Restore > Restore Wizard.
c) Select the backup device you re-created and select Next.d) Select the backup .tar file to restore the components and select Next.
Install, Upgrade, and Maintenance Guide for Cisco Unity Connection Release 12.x36
Backing Up and Restoring Cisco Unity Connection ComponentsConfiguring DRS Restore

DRS time stamps each backup file enabling you to easily select the backup file to use for a restore operation.Note
e) Select the software components to restore and select Next.f) Select the specific server to restore each component.
Additionally, Unity Connection can perform a file integrity check as part of the restore operation. This is advisableto ensure that the files are valid and have not been corrupted during the backup or restore operations.
g) Select Restore to begin the restore of the selected .tar file to the server.
As with the restore operation, you can view the restore operation log file for each restored component.
Also as with a restore operation, the time it takes to restore depends on the size of the database and the componentsrestored.
Step 5 Restart the new Unity Connection server. In case of a cluster server, reboot the publisher server.Step 6 (Cluster only) Once the publisher reboots, run the following command on Command Line Interface (CLI) on the subscriber
server to copy the data from the publisher to the subscriber server:utils cuc cluster overwritedb
Step 7 (Cluster only) Run the following CLI command on either the publisher or subscriber server to check the status of theUnity Connection cluster:show cuc cluster status
Verify that the status of publisher server is Primary and subscriber server is Secondary. Test and validate it before movingit back into production.
Viewing the Restore StatusTo Check the Restore Status in Disaster Recovery System
Step 1 Sign in to Disaster Recovery System and login using the same administrator username and password that you use forCisco Unified Operating System Administration.
Step 2 Select Restore > Current Status. The Restore Status window displays.
The Status column in the Restore Status window shows the percentage of restore process completed.
Step 3 To view the restore log file, select the log filename link.
Viewing the Restore HistoryTo View the Restore History in Disaster Recovery System
Step 1 Sign in to Disaster Recovery System and login using the same Administrator username and password that you use forCisco Unified Operating System Administration.
Step 2 Select Restore > History. The Restore History window displays.
Step 3 On the Restore History window, you can view the restores that you have performed, including filename, backup device,completion date, result, and the features that were restored.
Install, Upgrade, and Maintenance Guide for Cisco Unity Connection Release 12.x37
Backing Up and Restoring Cisco Unity Connection ComponentsViewing the Restore Status

The Restore History window displays only the last 20 restore jobs.Note
About System Restore ToolThe System Restore Tool is a new tool introduced in Unity Connection that allows the administrator to takeeither manual backup or schedule backup at specified intervals of time. The tool creates restore points thatthe administrator can use to restore data. For example, if the database is corrupted, the data can be restoredusing restore points.
Types of System Restore PointsThe administrator can create following types of restore points using System Restore Tool:
• Recent: Allows you to restore the data from the most recent backup stored on the server.
• Daybefore: Allows you to restore the data from the backup before the recent data backup stored on theserver.
• Temp: Allows you to restore data from the manual backup created at a particular instance of time. Theadministrator can create the Temp restore point through the run cuc sysrestore backup_tempCLI commandonly. For more information on the CLI command, see the “run cuc sysrestore backup_temp section” ofthe Command Line Interface Reference Guide for Cisco Unified Communications Solutions athttp://www.cisco.com/c/en/us/td/docs/voice_ip_comm/cucm/cli_ref/10_5_2/CUCM_BK_CA8D6D40_00_cucm-cli-reference-guide-1052/CUCM_BK_CA8D6D40_00_cucm-cli-reference-guide-1052_chapter_0101.html.
Whenever the data backup is initiated, the data from Recent restore point is copied to Daybefore and currentrestore point is marked as Recent. This cycle continues with each scheduled backup, which helps in maintainingthe integrity of the backup and consuming less space (less than 2GB) to store the restore points efficiently.
Note
Creating a Restore Point taskDo the following tasks to create restore points using System Restore Tool.
1. Create a user with mailbox with an alias “system-backup-and-restore-admin” and assign him a corporateemail id to receive the restore point creation alerts or failure notifications. For more information on howto create a user, see Users chapter of System Administration Guide for Cisco Unity Connection Release12.x athttps://www.cisco.com/c/en/us/td/docs/voice_ip_comm/connection/12x/os_administration/b_12xcucosagx.html
Skip this task, if such user already exists.Note
2. If you want to schedule automatic backup, enable the Create Backup Restore Point task to automatebackup. See Enabling Create Backup Restore Point
3. If you want to create manual backup, run the run cuc sysrestore backup_tem CLI command.
Install, Upgrade, and Maintenance Guide for Cisco Unity Connection Release 12.x38
Backing Up and Restoring Cisco Unity Connection ComponentsAbout System Restore Tool

In case of Unity Connection cluster, take backup of publisher and subscriber server separately.Note
Enabling Create Backup Restore PointDo the following steps to enable the Create Backup Restore Point task for automatic backup.
Step 1 Sign in to Cisco Unity Connection Administration.Step 2 Navigate to Tools > Task Management and select Create Backup Restore Point.Step 3 Go to Edit and select Task Schedules.Step 4 On the Task Schedules page, enter the required information to schedule the task.Step 5 Click Save to apply the settings.
Restoring Data using Restore Points taskThe administrator can restore data using restore points created through System Restore Tool.
During restore operation, the tool specifies the timestamp of the restore point, the count of the messagesagainst the user aliases, and also lists the users which will be lost after restore operation. The user aliases thatare reported to be lost after restore are the aliases created after the restore point creation.
Note
To restore the data using restore points, run the following CLI command:run cuc sysrestore restore_operation <restore mode> <restore point>
where,
• restore mode can be database, config, or both
• restore point can be Recent, Daybefore or Temp
Restore mode specifies the data that you want to restore. For example, if you specify database as restore mode,only database is restored.
If you specify config or both as restore mode, you need to restart the server to restore the data successfully.Note
After successfully restoring the Unity Connection server components using any of the above mentioned tool,you must register the Unity Connection with Cisco Smart SoftwareManager (CSSM) or Cisco Smart SoftwareManager satellite. If the product was already registered before taking the backup, you must reregister theproduct for updating the license information.
For more information on how to register the product with CSSM or satellite, see "Managing Licenses" chapter.
Note
Install, Upgrade, and Maintenance Guide for Cisco Unity Connection Release 12.x39
Backing Up and Restoring Cisco Unity Connection ComponentsEnabling Create Backup Restore Point

Install, Upgrade, and Maintenance Guide for Cisco Unity Connection Release 12.x40
Backing Up and Restoring Cisco Unity Connection ComponentsRestoring Data using Restore Points task

C H A P T E R 3Upgrading Cisco Unity Connection
• Introduction, on page 41• Upgrade Types, on page 42• Status of Unity Connection Cluster During an Upgrade, on page 46• Duration of Upgrade, on page 46• Prerequisites for Upgrade, on page 47• Upgrade Considerations with FIPS Mode (Applicable for Unity Connection 12.5(1) SU1 and Later), onpage 49
• Task list to Upgrade to Unity Connection Shipping Version 12.x, on page 49• Upgrading the Unity Connection Server, on page 52• Switching to the Upgraded Version of Unity Connection Software, on page 53• Applying COP file from a Network Location, on page 54• Rollback of Unity Connection, on page 55
IntroductionYou need to upgrade from the current version of Cisco Unity Connection to a higher version to use the newfeatures supported with the new version. When you upgrade a server, the new version of Unity Connectionis installed in a separate disk partition known as inactive partition. To activate the new version, you need toperform switch version. The following are the two ways to switch to the new version:
• Automatic Switching: Allows you to automatically switch to the new version of Unity Connection aspart of the upgrade process.
• Manual Switching: Allows you to manually switch to the new version of Unity Connection after thesuccessful completion of upgrade.
If you need to revert the server to the previous version, you can rollback to the previous version.
You can install or upgrade Unity Connection 10.0(1) and later releases only on virtual machines.Note
Install, Upgrade, and Maintenance Guide for Cisco Unity Connection Release 12.x41

Upgrade TypesThe Unity Connection upgrade files are available as ISO images or COP (Cisco Option Package) files. Youcan use either of the following interfaces to upgrade Unity Connection:
• Command Line Interface (CLI)
• Cisco Unified OS Administration web interface.
You must save the COP files on a Network Location FTP/SFTP server accessible during upgrade. ISO imagecan be saved on a local DVD or on a network location. The performance of the upgrades can be monitoredthrough CLI or Cisco Unified Operating System Administration interfaces.
The Table 5: Upgrade Matrix for Unity Connection explains the upgrade types and supported upgrade pathsfrom one version to another.
Table 5: Upgrade Matrix for Unity Connection
DescriptionUpgrade PathUpgrade Type
• SU is installed on the inactivepartition to which you canswitch later on.
• ISO images are non-bootableimages not meant forinstallation.
Examples of supported paths:
• 12.x.x/12.x.xSUx1 to12.x.xSUx2
Service Update (SU)
Install, Upgrade, and Maintenance Guide for Cisco Unity Connection Release 12.x42
Upgrading Cisco Unity ConnectionUpgrade Types

DescriptionUpgrade PathUpgrade Type
• You need the following COPfile before performing thisupgrade:
• ciscocm.cuc_upgrade_12_0_v1.3.cop.sgn
• ciscocm.enable-sha512sum-2021-signing-key-v1.0.cop.sgn
• The new version is installedon the active partition. DuringRU, switch version isperformed automatically.
• 10.5.2SU10 or earlier to12.5.1 SU6.
• 11.5.1SU9 or earlier to 12.5.1SU6.
For 10.5(1) to 12.5(1),you must follow anintermediate upgradepath. Example: 10.5(1)to 11.x or later and then11.x or later to 12.5(1).
Note
Refresh Upgrade (RU)
• You need the following COPfile before performing thisupgrade:
• ciscocm.cuc_upgrade_12_0_v1.3.cop.sgn
• The new version is installedon the active partition. DuringRU, switch version isperformed automatically.
• 10.x.x to 12.5.1 SU5 orearlier.
• 11.5.1SU10 to 12.5.1 SU6.
For 10.5(1) to 12.5(1),you must follow anintermediate upgradepath. Example: 10.5(1)to 11.x or later and then11.x or later to 12.5(1).
Note
• You need the following COPfile before performing thisupgrade:
• ciscocm.enable-sha512sum-2021-signing-key-v1.0.cop.sgn
• The new version is installedon the active partition. DuringRU, switch version isperformed automatically.
12.0.1SU4 or earlier to 12.5(1)SU6.
• No COP file is required forthis upgrade path.
• The new version is installedon the active partition. DuringRU, switch version isperformed automatically.
• 12.0.1SU5 or later to12.5(1)SU6.
Install, Upgrade, and Maintenance Guide for Cisco Unity Connection Release 12.x43
Upgrading Cisco Unity ConnectionUpgrade Types

DescriptionUpgrade PathUpgrade Type
• If the operating system versionof the Unity Connection donot change during an upgrade,it is referred to as an Level 2(L2) upgrade.
• You need the following COPfile before performing thisupgrade:
• ciscocm.cuc_upgrade_12_0_v1.3.cop.sgn
• The new version is installedon the inactive partition towhich you can switch later on.
10.x or later to 12.0(1).Level 2 (L2)
• If the operating system versionof the Unity Connection donot change during an upgrade,it is referred to as an Level 2(L2) upgrade.
• You need the following COPfile before performing thisupgrade:
• ciscocm.enable-sha512sum-2021-signing-key-v1.0.cop.sgn
• The new version is installedon the inactive partition towhich you can switch later on.
12.5.1SU3 or earlier to 12.5(1)SU6.
• If the operating system versionof the Unity Connection donot change during an upgrade,it is referred to as an Level 2(L2) upgrade.
• No COP file s required for thisupgrade path.
• The new version is installedon the inactive partition towhich you can switch later on.
12.5.1SU4 or later to 12.5(1)SU6.
Install, Upgrade, and Maintenance Guide for Cisco Unity Connection Release 12.x44
Upgrading Cisco Unity ConnectionUpgrade Types

DescriptionUpgrade PathUpgrade Type
Installation with Data Import is analternative to Direct Upgrades. Itinvolves migration of data byexporting source release data toSFTP, and installing a newmachinewith import of that data.
For more details, see section Installwith Data Import, on page 3
Examples of supported paths:
• 11.5(1) or later to 12.5(1) SU5or later.
Install with Data Import
• COP files are installed on theactive partition and you cannotuninstall them. Contact CiscoTAC to uninstall COP files.
Fix for the same version.COP file, for more information, seethe Applying COP file from aNetwork Location
After the upgrade, you may need to reinstall the locale depending on the source and the target version. If thetarget version is compatible with the existing locales, then you need not install any new locales. However, ifthe target version requires to install new locales, then remove the existing set of locales after the completionof upgrade process, and install the new set of available locales. To check the existing locales, use show cuclocales CLI command.
If you are upgrading Unity Connection to 12.5(1) and later, then after completion of successful upgrade, youmust reinstall the set of available locales that are compatible with the upgraded version.
Before installing locales, you must stop the Connection ConversationManager and ConnectionMixer servicesthrough Cisco Unity Connection Serviceablity page. Otherwise, you may not get the proper installation statuson GUI. It is recommended that you should install the locales on Unity Connection through Command LineInterface.
For more information on CLI commands, see the Command Line Interface Reference Guide for Cisco UnifiedCommunications Solutions available at https://www.cisco.com/c/en/us/support/unified-communications/unified-communications-manager-callmanager/products-maintenance-guides-list.html
Note
After successful upgrade to Unity Connection 12.5(1), if you need to revert the server to previous softwareversion, you can switch version the software to older version. After that, you can not upgrade the server toany pre 12.5(1) release (for example: 11.5(1) or 12.0(1)). In addition to this, If the upgrade from any previousreleases to Unity Connection 12.5(1) fails for any reason, then also you cannot upgrade the server to pre12.5(1) release. To troubleshoot the issue, contact Cisco TAC.
If administrator wants to upgrade the server to pre 12.5(1) release in above scenarios, fresh cluster rebuild isrequired by performing DRS backup and restore before upgrade.
If you are upgrading Unity Connection from 11.5(1) or 12.0(1) as base release to 12.5(1) and later, then youmust rename custom role "Read Only Administrator" to different name on base release before upgrade.
Caution
Install, Upgrade, and Maintenance Guide for Cisco Unity Connection Release 12.x45
Upgrading Cisco Unity ConnectionUpgrade Types

The procedure for upgrading Unity Connection to any Service Update (SU), is similar to RU and L2 upgrade.Note
Status of Unity Connection Cluster During an UpgradeWhen a Unity Connection cluster is upgraded, the publisher server is completely disabled for the entire durationof upgrade but the subscriber server continues to provide services to users and callers. However, the performanceof the cluster is affected in the following ways:
• If the phone system is routing calls to the subscriber server, outside callers and Unity Connection userscan leave voice messages but the messages are not immediately delivered to user mailboxes. Duringswitch version on the subscriber server in a cluster, messages that were left on the subscriber server arecopied to the publisher server and delivered to user mailboxes.
• Unity Connection users can use the telephone user interface (TUI) to play messages recorded before theupgrade starts but cannot play the messages recorded during the upgrade.
• Unity Connection may not retain the status of messages. For example, if a user plays a message duringthe upgrade, the message may be marked as new again after the upgrade. Likewise, if a user deletes amessage during the upgrade, the message may reappear after the upgrade.
• User can access Unity Connection using clients such as, ViewMail for Outlook, Web Inbox and Jabberduring upgrade. However, during switch version, user cannot access these clients. In case of RU, theseclients are not accessible during complete upgrade..
• Administrator users can make configuration changes using any of the administration applications, suchas Cisco Unity Connection Administration and Cisco Unified Operating System Administration duringupgrade. However, Unity Connection does not allow provisioning and configuration changes throughadministration applications or VMREST during the switch version. In case of RU, provisioning andconfiguration are not allowed in complete upgrade duration.
• Intrasite, intersite or HTTPS networking with other servers is disabled for the duration of the switchversion. Directory changes made on the other servers in the network are not replicated to the server orcluster until the switch version is complete.
Duration of UpgradeUnder ideal network conditions, an upgrade process takes approximately two hours to complete on each server.Therefore, a Unity Connection cluster takes four hours to upgrade to a higher version. Depending on the datasize of the server, the switch version process might take some more time.
If you are upgrading in a slow network condition, the upgrade process may take longer time than expected.It is always recommended to upgrade Unity Connection during off-peak hours or during amaintenance windowto avoid service interruptions.
You can reduce the duration of upgrade process by asking users to permanently delete items in the deleteditems folder before starting the upgrade. This saves time as deleted items are not copied.
Tip
Install, Upgrade, and Maintenance Guide for Cisco Unity Connection Release 12.x46
Upgrading Cisco Unity ConnectionStatus of Unity Connection Cluster During an Upgrade
Prerequisites for UpgradeBefore beginning the upgrade process, you must consider the following points for a successful upgrade:
• Ensure that you have a good network connection to avoid service interruptions during upgrade.
• You must have a Secure File Transfer Protocol (SFTP) or File Transfer Protocol (FTP) server in placewhen upgrading from a network location.
• Check the current version and determine the version to which you want to upgrade. See the release notesof the new version for more information. Release notes are available athttp://www.cisco.com/c/en/us/support/unified-communications/unity-connection/products-release-notes-list.html.
• Determine if you need COP files depending on the upgrade process. Download the COP and ISO imagefiles from: http://software.cisco.com/download/navigator.html?mdfid=280082558&i=rm
• Backup all the existing data. For more information on backup and restore, see the Introduction chapter.
• If you are upgrading from Unity Connection 9.1(2) or earlier versions to Unity Connection 12.x, updatethe following virtual machine settings on both publisher and subscriber server through VMware vSphereclient:
1. Change the Guest Operating System version tomatch the requirements of the Unity Connection 12.x.
If you are upgrading Unity Connection from any earlier versionto release 12.5(1), you must change the Guest Operating Systembefore upgrade.
Note
2. Modify the network adapter to use the VMXNET 3 Adapter type.
For more information on changing the Guest Operating System andnetwork adapter, see the corresponding Readme of the OVA templateat https://software.cisco.com/download/home/283062758/type/282074348/release/OVA-12.5.
Note
• Confirm that the status of both publisher and subscriber servers is active and they can answer calls.Follow the given steps to confirm the server status in a cluster:
Sign in to Cisco Unity Connection Serviceability.
Expand Tools and select Cluster Management.
Check the server status in a cluster.
In addition to this, confirm the running state of database replication using the CLI command show cuccluster status.
Install, Upgrade, and Maintenance Guide for Cisco Unity Connection Release 12.x47
Upgrading Cisco Unity ConnectionPrerequisites for Upgrade

After confirming the status of publisher server as Primary andsubscriber server as Secondary, start the upgrade process first onpublisher server and then on subscriber server.
Note
• Before upgrading to the release 12.x, rename the notification templates if created with the belowmentionednames.
Default_Missed_Call
Default_Missed_Call_With_Summary
Default_Scheduled_Summary
Default_Voice_Message_With_Summary
Default_Dynamic_Icons
Default_Actionable_Links_Only
If not renamed the mentioned notification templates gets replaced with default notification templates ofrelease 12.x.
• Before upgrading to the release 12.x, make sure the display name of default notification devices is notchanged for any of the user. If changed then update notification devices to the default name.
To check the users whose default notification device name is changed, execute below query:run cuc dbquery unitydirdb SELECT COUNT(*) AS num_sys_notdevices, USR.alias,ND.subscriberobjectid FROM tbl_notificationdevice AS ND INNER JOIN vw_user USR ONND.subscriberobjectid = USR.objectid WHERE ((ND.devicename IN ('Home Phone', 'WorkPhone', 'Mobile Phone', 'Pager', 'SMTP') AND ND.displayname = ND.devicename) OR(ND.devicename='HTML' AND ND.displayname IN ('HTML', 'HTML Missed Call', 'HTML ScheduledSummary'))) GROUP BY ND.subscriberobjectid, USR.alias HAVING COUNT(*) != 8
• Initiate a pre upgrade test before starting the upgrade process using the CLI command
run cuc preupgrade test
• With Unity Connection 12.0(1) and later, a new way of licensing "Cisco Smart Software Licensing" isintroduced to use the various licensed features. Before upgrading Unity Connection from any earlierreleases to 12.x and later, you must understand the Cisco Smart Software Licensing flow in UnityConnection at Managing Licenses chapter.
For successful upgrade of Unity Connection from 12.0(1) to anyhigher releases, make sure the system does not exist in Enforcementmode before upgrade.For more information on Enforcement mode,see Enforcement Policy on Unity Connection section.
Caution
• Unity Connection 12.5(1) requires minimum ESXi version of 6.5 U2 with minimum VM Hardwareversion of 13. For more information on the Virtual Hardware setting, see https://software.cisco.com/download/home/283062758/type
• The Exchange 2003, 2007, 2010 is end of support now. Therefore, it is recommended to delete the UnifiedMessaging Service configured with Exchange 2003 or 2007 or 2010 while upgrading to Unity Connection
Install, Upgrade, and Maintenance Guide for Cisco Unity Connection Release 12.x48
Upgrading Cisco Unity ConnectionPrerequisites for Upgrade

12.x or later. Now, create a new Unified Messaging Service with supported Exchange version to avoidany issues while using Unified Messaging Services.
Upgrade Considerations with FIPS Mode (Applicable for UnityConnection 12.5(1) SU1 and Later)
If you are performing upgrade with FIPS enabled Unity Connection releases to 12.5(1) Service Update 1 andlater, you must consider the below limitations for a successful upgrade:
• Before upgrading Unity Connection using FIPS-enabled mode, make sure that the security passwordlength is greater than or equal to 14 characters to meet FIPS compliance.
• In Unity Connection 12.5(1) SU1, the IPsec policies with DH group key values 1, 2 or 5 are disabled. Ifyou are upgrading Unity Connection to release 12.5(1) SU1 with FIPS enabled and IPse configured, thenyou must perform any one of the given procedure for successful upgrade to Unity Connection 12.5(1)SU1
• Delete the previously configured IPsec policies and perform the upgrade. After the upgrade iscomplete, reconfigure the IPsec policies with DH groups 14–18.
• Install the ciscocm_ipsec_groupenhancement_fips_<version>.copCOP file that supports DH groups14–18, reconfigure the IPsec policies and then perform an upgrade.
If you disable the FIPS mode after installing the COP file, theIPsec configuration page does not appear.
Note
• If you are upgrading Unity Connection which has IPsec configured using a certificate-based authenticationwith self-signed certificate, then you must reconfigure the IPsec policy with a CA-signed certificate foea successful upgrade.
• In FIPS mode, if you have configured Unified Messaging with NTLM web authentication mode thenyou must select a Basic authentication mode before upgrading Unity Connection to 12.5(1) SU1 andlater. NTLM web authentication mode is no longer supported with Unity Connection 12.5(1) SU1 andlater.
For more information on FIPS mode, see "FIPS Compliance in Cisco Unity Connection" chapter of SecurityGuide for Cisco Unity Connection Release 12.x available at https://www.cisco.com/c/en/us/td/docs/voice_ip_comm/connection/12x/security/b_12xcucsecx.html.
Task list to Upgrade to Unity Connection Shipping Version 12.xDo the following tasks to upgrade an Unity Connection server:
1. If you are running the current version of Unity Connection on a physical server then you must replaceit with a virtual server. See the Migrating a Physical Server to a Virtual Machine.
Install, Upgrade, and Maintenance Guide for Cisco Unity Connection Release 12.x49
Upgrading Cisco Unity ConnectionUpgrade Considerations with FIPS Mode (Applicable for Unity Connection 12.5(1) SU1 and Later)

If you are already running the current version on a virtual server, make sure it is compatible with theupgraded version. See the Cisco Unity Connection 12.x Supported Platform List athttps://www.cisco.com/c/en/us/td/docs/voice_ip_comm/connection/12x/supported_platforms/b_12xcucspl.html.
If you are performing an L2 upgrade, make sure that the Platform SOAP services are running onboth the Unity Connection servers to successfully upgrade using Prime Collaboration Deployment.SOAP services can be enabled on both the servers using Cisco Unified Serviceability page. Formore information on PCD, see the Cisco Prime Collaboration Deployment Administration Guideathttp://www.cisco.com/c/en/us/support/unified-communications/unified-communications-manager-callmanager/products-maintenance-guides-list.html.
Note
2. If you are upgrading during non business hours, run the following command on the standalone serveror the publisher server to speed up the upgrade process:
utils iothrottle disable
If you are upgrading during a maintenance window, you can speed up the upgrade by disabling thethrottling. This decreases the time required to complete the upgrade but affects Unity Connectionperformance.
You cannot disable throttling during the upgrade process. If you want to disable the throttlingprocess, you must first stop upgrade, disable throttle, and restart the Unity Connection server.Once the server is active again, begin the upgrade process.
Caution
3. Migrate all the licenses (legacy and PLM based) before you upgrade to Unity Connection 12.x server.For more information, see the Migrating Licenses section.
4. Confirm if you require COP file for the upgrade process and download file fromhttps://software.cisco.com/download/navigator.html?mdfid=280082558&i=rm
5. Apply the COP file using the steps listed in the Applying COP file from a Network Location.6. Follow the upgrade process on the standalone server:
• (RU upgrades only) Upgrade the server by performing the steps mentioned in the Upgrading theUnity Connection Server section. The server automatically switches to the new version aftercompleting the upgrade.
• ( L2 upgrades only) Upgrade the server using the steps mentioned in the Upgrading the UnityConnection Server section. Switch to the upgraded software to complete the upgrade processfollowing the steps mentioned in the Switching to the Upgraded Version of Unity ConnectionSoftware section.
7. Follow the upgrade process on the Unity Connection cluster:
• (RU upgrades only) Upgrade the publisher server following the steps mentioned in the Upgradingthe Unity Connection Server section. The server automatically switches to the new version aftercompleting the upgrade.
Upgrade the subscriber server following the steps mentioned in the Upgrading the Unity ConnectionServer section. The server automatically switches to the new version after completing the upgrade.
• ( L2 upgrades only) Upgrade the publisher server using the steps mentioned in the Upgrading theUnity Connection Server section.
Install, Upgrade, and Maintenance Guide for Cisco Unity Connection Release 12.x50
Upgrading Cisco Unity ConnectionTask list to Upgrade to Unity Connection Shipping Version 12.x
In case of L2 upgrade of a cluster, do not restart or perform switch version on the publisher serverbefore completing the upgrade on subscriber server otherwise cluster does not function properly.
Caution
Upgrade the subscriber server following the steps mentioned in the Upgrading the Unity ConnectionServer section.
Switch to the upgraded software first on the publisher server and then on the subscriber server followingthe steps mentioned in the Switching to the Upgraded Version of Unity Connection Software section.
8. Confirm that publisher server has Primary status and subscriber server has Secondary status.
9. After successful upgrade to Unity Connection 12.x, the product remains in Evaluation Mode until youregister the product with CSSM or satellite.
10. If you are performing an upgrade from a FIPS enabled Unity Connection release to Unity Connection12.x, make sure to follow the steps for regenerating certificates before using any pre-existing telephonyintegrations. To learn how to regenerate certificates, see the Regenerating Certificates for FIPS sectionof the FIPS Compliance in Cisco Unity Connection 12.x chapter of the Security Guide for Cisco UnityConnection Release 12.x athttps://www.cisco.com/c/en/us/td/docs/voice_ip_comm/connection/12x/security/b_12xcucsecx.html
11. (Applicable to Cisco Unity Connection 12.5(1) SU4 and later) If Secure SIP call is configured on thesystem using SIP Integration then after successful upgrade, generate and upload RSA based Tomcatcertificates. To learn how to regenerate certificates, see section Settings for RSA Key Based certificatesof Cisco Unified Communications Manager SIP Integration Guide for Cisco Unity Connection Release12.x available at https://www.cisco.com/c/en/us/td/docs/voice_ip_comm/connection/12x/integration/guide/cucm_sip/b_12xcucintcucmsip.html.
Verify that the value entered in X.509 Subject Name field on SIP Trunk Security ProfileConfiguration page of Cisco Unified Communication Manager is the FQDN of the UnityConnection server
Note
12. Cisco Unity Connection Release 12.5(1) SU4 and later supports HAProxy which frontends all theincoming web traffic into Unity Connection offloading Tomcat. HAProxy sends the request internallyto Tomcat via HTTP. For information on new ports which should be opened after successful upgrade,see chapter IP Communications Required by Cisco Unity Connection of Security Guide for Cisco UnityConnection Release 12.x available at https://www.cisco.com/c/en/us/td/docs/voice_ip_comm/connection/12x/security/b_12xcucsecx.html.
13. (Applicable for Cisco Unity Connection 12.5(1)) If Next Generation Security over HTTPS interface isconfigured on the system then after successful upgrade to Unity Connection 12.5(1), the configuredsettings of HTTPS ciphers get reset. You must reconfigure the HTTPS ciphers on Enterprise Parameterpage of Cisco Unity Connection Administration and restart the Tomcat service.
In case of a cluster, you must configure the HTTPS ciphers on publisher server and restart theTomacat service on each node to reflect the changes.
Note
Install, Upgrade, and Maintenance Guide for Cisco Unity Connection Release 12.x51
Upgrading Cisco Unity ConnectionTask list to Upgrade to Unity Connection Shipping Version 12.x

Upgrading the Unity Connection ServerDo the following steps to upgrade a standalone server or a cluster. In case of a cluster, follow the steps firston the publisher server and then on the subscriber server.
Step 1 Do any one of the following:
• Copy the ISO file to a folder on an FTP or SFTP server that the Unity Connection server can access.
• Insert the DVD with the ISO file of the Unity Connection server that you want install into the disk drive of theserver.
Step 2 Sign in to Cisco Unified Operating System Administration.Step 3 From the Software Upgrades menu, select Install/Upgrade.Step 4 (Applicable only for subscriber server) (Optional) On the Software Installation/Upgrade page, check the Use download
credentials from Publisher check box to use the source configuration provided for the publisher server and move toStep 13.
Step 5 In the Source field, select any one of the following:
• Remote Filesystem: Select this option to upgrade from remoter server and follow this procedure.
• DVD/CD: Select this option to upgrade from disk drive and move to Step 11.
• Local Filesystem (Applicable for Unity Connection 12.5(1) and later): Select this option to use the previouslydownloaded ISO or COP files for the upgrade.
Step 6 In the Directory field, enter the path of the folder that contains the upgrade file.
If the upgrade file is located on a Linux or Unix server, you must enter a forward slash (/) at the beginning of the folderpath. (For example, if the upgrade file is in the upgrade folder, you must enter /upgrade).
If the upgrade file is located on a Windows server, you must use the applicable syntax for an FTP or SFTP server suchas:
• The path must begin with a forward slash (/) and contain forward slashes throughout instead of backward slashes(\).
• The path must start from the FTP or SFTP root folder on the server and must not include a Windows absolute paththat starts with a drive letter (for example, C:).
Step 7 In the Server field, enter the server name or IP address.Step 8 In the User Name field, enter the alias that is used to sign in to the remote server.Step 9 In the User Password field, enter the password that is used to sign in to the remote server.Step 10 In the Transfer Protocol field, select the applicable transfer protocol.Step 11 In the SMTP Server field, enter the IP address of the SMTP server.Step 12 In the Email Destination field, enter your email address along with the SMTP server.Step 13 Select Next.Step 14 Select the upgrade version that you want to install and select Next.
Install, Upgrade, and Maintenance Guide for Cisco Unity Connection Release 12.x52
Upgrading Cisco Unity ConnectionUpgrading the Unity Connection Server

The upgrade file is copied to the hard disk of the Unity Connection server. When the file is copied, a screen displayingthe checksum value appears.
Step 15 Verify the checksum.Step 16 On the next page, monitor the progress of the upgrade.
If you loose your connection with the remote server or close your browser during this step, you may see thefollowing warning when you try to view the Software Installation/Upgrade page again:
Warning: Another session is installing software, click Assume Control to take over the installation. To continuemonitoring the upgrade, select Assume Control.
To continue monitoring the upgrade, select Assume Control.
Caution
Step 17 Select Next.
During the initial phase of upgrade, the Installation Log text box in Cisco Unified Operating System Administration isupdated with the information on the progress of the upgrade. To confirm the completion of upgrade, open the consoleof the Unity Connection server and make sure that a message indicating the completion of upgrade appears on thescreen along with the login prompt.
Step 18 Select Finish.Step 19 To verify if the upgrade is successful, run the following CLI commands:
• show cuc version: Displays the version of Unity Connection server in both active and inactive partitions. Theupgraded Unity Connection version is in the inactive partition and old version is in the active partition.
• utils system upgrade status: Displays the status of the upgrade that you performed. This command should displaythe message for successful upgrade along with the upgraded version.
Switching to the Upgraded Version of Unity ConnectionSoftware
After completing the upgrade process, you need to manually switch over to the upgraded version of UnityConnection. For a single Unity Connection server, you can select either manual switch version or automaticswitch version.
You can perform the switch version running the CLI command utils system switch-version. The systemautomatically reboots after the switch version.
If you select not to automatically switch to the upgraded partition at the end of the upgrade, do the followingprocedure when you are ready to switch partitions.
Step 1 Sign in to Cisco Unified Operating System Administration.Step 2 From the Settings menu, select Version.Step 3 On the Version Settings page, select Switch Versions, to start the following activities:
Install, Upgrade, and Maintenance Guide for Cisco Unity Connection Release 12.x53
Upgrading Cisco Unity ConnectionSwitching to the Upgraded Version of Unity Connection Software

• Unity Connection services are stopped.
• Data from the active partition is copied to the inactive partition. Note that the messages are stored in acommon partition, therefore they are not copied.
• The Unity Connection server restarts and switches to the newer version.
Applying COP file from a Network Location
Step 1 Copy the Cisco Option Package (.cop) file on an FTP or SFTP server that the server can access.Step 2 Sign in to Cisco Unified Operating System Administration.
If you are upgrading the subscriber server in a Unity Connection cluster, type the following address to access CiscoUnified Operating System Administration:
http://<Unity Connection_servername>/cmplatform
Step 3 From the Software Upgrades menu, select Install/Upgrade.Step 4 On the Software Installation/Upgrade page, in the Source field, select Remote Filesystem.Step 5 In the Directory field, enter the path to the folder that contains the .cop file.
If the .cop file is located on a Linux or Unix server, you must enter a forward slash (/) at the beginning of the folderpath. (For example, if the .cop file is in the cop folder, you must enter /cop).
If the .cop file is located on a Windows server, you must use the applicable syntax for an FTP or SFTP server such as:
• The path must begin with a forward slash (/) and contain forward slashes throughout instead of backward slashes(\).
• The path must start from the FTP or SFTP root folder on the server and must not include a Windows absolute paththat starts with a drive letter (for example, C:).
Step 6 In the Server field, enter the server name or IP address.Step 7 In the User Name field, enter the alias that is used to sign in to the remote server.Step 8 In the User Password field, enter the password that is used to sign in to the remote serverStep 9 In the Transfer Protocol field, select the applicable transfer protocol and select Next.Step 10 Select the software that you want to install, and select Next.
The .cop file is copied to the virtual hard disk on Unity Connection server. When the file is copied, a screen displaysthe checksum value.
Step 11 Verify the checksum and select Next to begin the installation.
During the upgrade, the value of the Status field is Running. When the upgrade process is complete, the value of theStatus field changes to Complete.
• All command-line interface sessions are terminated automatically.• The Cisco Tomcat Service can take several minutes to restart automatically.
Note
Step 12 Sign out from the Cisco Unified Operating System Administration application.
Install, Upgrade, and Maintenance Guide for Cisco Unity Connection Release 12.x54
Upgrading Cisco Unity ConnectionApplying COP file from a Network Location

Step 13 Run the CLI command utils service list to confirm that the Cisco Tomcat service is in the Running state.
Rollback of Unity ConnectionAfter upgrading the Unity Connection version, you can rollback to the software version that was runningbefore the upgrade by switching to the software version on inactive partition.
If you revert to the version on the inactive partition in case of RU upgrade rollback from 12.5 to 12.0 or 11.xor 10.x versions, you cannot later switch to the newest version again. Instead, you must reinstall the upgradeas documented in this guide.
Caution
Important Considerations for Rollback
1. Do not make any configuration changes during the rollback because the changes are lost after the rollback.2. In an cluster setup, do not switch versions on both the first and second servers at the same time. Perform
switch version on the second server only after you have switched versions on the first server.3. Users and mailbox stores that were added after the upgrade, no longer exist after you rollback to the
version on inactive partition. The new users and mailbox stores are deleted.4. All messages are preserved but for the users that were added after upgrade, their messages are orphaned
as the users no longer exist after rollback. These messages are moved to the undeliverable messages folder.5. If you moved mailboxes from one mailbox store to another after upgrading, those mailboxes are moved
back to the mailbox stores they were in before the upgrade.6. A future delivery folder is created for users to mark messages for future delivery. If you revert to a version
that supports future delivery but the future delivery folder has not been created for the user as yet, themessages in the future delivery folder for the new version are moved to the undeliverable messages folder.
7. (Unity Connection 8.5 and earlier only) If a user rollbacks to Unity Connection version 8.5 or earlier froma current version that is 8.6 and higher, then following limitations are faced:
• No voice messages are left after the rollback.• No administrator settings are preserved after the rollback.
8. No administrator settings are preserved after the rollback.
a. Revert to the Guest Operating System version as earlier (before upgrade).b. Modify the network adapter to the adapter type as earlier (if you changed after upgrade).
Rollback ScenariosYou can revert a single Unity Connection server or a cluster to the version on inactive partition.
To rollback a Unity Connection cluster, you should rollback both the servers, first the publisher and then thesubscriber. After the successful rollback of both the publisher and subscriber servers, reset the replicationbetween the two servers running the following CLI commands:
Stop the replication on subscriber server with the CLI command utils dbreplication stop.
Stop the replication on publisher server with the CLI command utils dbreplication stop.
Reset the replication running the CLI command utils dbreplication reset all on the publisher server.
Install, Upgrade, and Maintenance Guide for Cisco Unity Connection Release 12.x55
Upgrading Cisco Unity ConnectionRollback of Unity Connection

After the reset of replication between the two servers, check the cluster status running the CLI command showcuc cluster status utils system restart on both publisher and subscriber.
Rollback a Unity Connection Server to the Version in the Inactive Partition
Step 1 Sign in to Cisco Unified Operating System Administration.Step 2 From the Settings menu, select Version and the Version Settings window displays.Step 3 Select the Switch Versions option. After you confirm that you want to restart the system, the system restarts that might
take up to 15 minutes.Step 4 Follow the given steps to confirm that the switch version is successful:
a. Sign in to Cisco Unified Operating System Administration.b. In the Settings menu, select Version. The Version Settings window displays the product version.c. Confirm that the active partition runs the correct version of Unity Connection server and all critical services are in
the Running state.d. Sign in to Cisco Unity Connection Administration and confirm that the configuration data exists.
Install, Upgrade, and Maintenance Guide for Cisco Unity Connection Release 12.x56
Upgrading Cisco Unity ConnectionRollback a Unity Connection Server to the Version in the Inactive Partition

C H A P T E R 4Configuring Cisco Unity Connection Cluster
• Introduction, on page 57• Task List for Configuring a Unity Connection Cluster, on page 57• Administering a Unity Connection Cluster, on page 58• How a Unity Connection Cluster Works, on page 69• Effects of Split Brain Condition in a Unity Connection Cluster, on page 70
IntroductionThe Cisco Unity Connection cluster deployment provides high availability voice messaging through the twoservers that run the same versions of Unity Connection. The first server in the cluster is the publisher serverand the second server is the subscriber server.
Task List for Configuring a Unity Connection ClusterDo the following tasks to create a Unity Connection cluster:
1. Gather Unity Connection cluster requirements. For more information, see System Requirements forCisco Unity Connection Release 12.x athttps://www.cisco.com/c/en/us/td/docs/voice_ip_comm/connection/12x/requirements/b_12xcucsysreqs.html.
2. Install the publisher server. For more information, see the Installing the Publisher Server section.
3. Install the subscriber server. For more information, see the Installing the Subscriber Server section.
4. Configure the Cisco Unified Real-TimeMonitoring Tool for both publisher and subscriber servers to sendnotifications for the following Unity Connection alerts:
• AutoFailbackFailed
• AutoFailbackSucceeded
• AutoFailoverFailed
• AutoFailoverSucceeded
• NoConnectionToPeer
Install, Upgrade, and Maintenance Guide for Cisco Unity Connection Release 12.x57

• SbrFailed
For instructions on setting up alert notification for Unity Connection alerts, see the “Cisco UnifiedReal-TimeMonitoring Tool” section of the Cisco Unified Real-TimeMonitoring Tool AdministrationGuide for the required release, available athttp://www.cisco.com/c/en/us/support/unified-communications/unity-connection/products-maintenance-guides-list.html.
5. (Optional) Do the following tasks to customize the cluster settings on the publisher server:
Sign in to Cisco Unity Connection Administration.
Expand System Settings > Advanced and select Cluster Configuration.
On the Cluster Configuration page, change the server status and select Save. For more information onchanging the server status in a cluster, see Help> This Page.
Administering a Unity Connection ClusterYou must check the Unity Connection cluster status to ensure that the cluster is correctly configured andworking properly. It is also important to understand the different server status in a cluster and the effects ofchanging a server status in a cluster.
Checking the Cluster StatusYou can check the Unity Connection cluster status either using web interface or Command Line Interface(CLI).
Steps to Check the Unity Connection Cluster Status from Web Interface
Step 1 Sign in to Cisco Unity Connection Serviceability of either publisher or subscriber server.Step 2 Expand Tools and select Cluster Management.Step 3 On the Cluster Management page, check the server status. For more information about server status, see the Server Status
and its Functions in a Unity Connection Cluster section.
Steps to Check Unity Connection Cluster Status from Command Line Interface (CLI)
Step 1 You can run the show cuc cluster status CLI command on the publisher server or subscriber server to check the clusterstatus.
Step 2 For more information about server status and its related functions, see the Server Status and its Functions in a UnityConnection Cluster section.
Install, Upgrade, and Maintenance Guide for Cisco Unity Connection Release 12.x58
Configuring Cisco Unity Connection ClusterAdministering a Unity Connection Cluster

Managing Messaging Ports in a ClusterIn a Unity Connection cluster, the servers share the same phone system integrations. Each server is responsiblefor handling a share of the incoming calls for the cluster (answering phone calls and taking messages).
Depending on the phone system integration, each voice messaging port is either assigned to a specific serveror used by both servers. Managing Messaging Ports in a Cluster describes the port assignments.
Table 6: Server Assignments and Usage of Voice Messaging Ports in a Unity Connection Cluster
Server Assignments and Usage of Voice MessagingPorts
Integration Type
• The phone system is set up with twice thenumber of SCCP voicemail port devices that areneeded to handle the voice messaging traffic.(For example, if 16 voicemail port devices areneeded to handle all voice messaging traffic, 32voicemail port devices must be set up on thephone system.)
• In Cisco Unity Connection Administration, thevoice messaging ports are configured so that halfthe number of the ports set up on the phonesystem are assigned to each server in the cluster.(For example, each server in the cluster has 16voice messaging ports.)
• On the phone system, a line group, hunt list, andhunt group are configured to enable thesubscriber server answer most of the incomingcalls for the cluster.
• If one of the servers stops functioning (forexample, when it is shut down for maintenance),the remaining server assumes responsibility ofhandling all incoming calls for the cluster.
• When the server that stopped functioning is ableto resume its normal functions and is activated,it resumes the responsibility of handling its shareof incoming calls for the cluster.
Integration by Skinny Client Control Protocol (SCCP)with Cisco Unified Communications Manager orCisco Unified Communications Manager Express
Install, Upgrade, and Maintenance Guide for Cisco Unity Connection Release 12.x59
Configuring Cisco Unity Connection ClusterManaging Messaging Ports in a Cluster

Server Assignments and Usage of Voice MessagingPorts
Integration Type
• In Cisco Unity Connection Administration, halfthe number of voice messaging ports that areneeded to handle voice messaging traffic areassigned to each server in the cluster. (Forexample, if 16 voice messaging ports are neededto handle all voice messaging traffic for thecluster, each server in the cluster is assigned 8voice messaging ports.)
• On the phone system, a route group, route list,and route pattern are configured to distributecalls equally between both servers in the cluster.
• If one of the servers stops functioning (forexample, when it is shut down for maintenance),the remaining server assumes responsibility ofhandling all incoming calls for the cluster.
• When the server that stopped functioning is ableto resume its normal functions and is activated,it resumes responsibility of handling its share ofincoming calls for the cluster.
Integration through a SIP Trunk with Cisco UnifiedCommunications Manager or Cisco UnifiedCommunications Manager Express
• The number of ports set up on the phone systemis the same as the number of voice messagingports on each server in the cluster so that theservers share all the voice messaging ports. (Forexample, if the phone system is set up with 16voice messaging ports, each server in the clustermust have the same 16 voice messaging ports.)
• On the phone system, a hunt group is configuredto distribute calls equally to both servers in thecluster.
• The PIMG/TIMGunits are configured to balancethe voice messaging traffic between the servers.
• If one of the servers stops functioning (forexample, when it is shut down for maintenance),the remaining server assumes responsibility ofhandling all the incoming calls for the cluster.
• When the server that stopped functioning is ableto resume its normal functions and is activated,it resumes responsibility of handling its share ofincoming calls for the cluster.
Integration through PIMG/TIMG units
Install, Upgrade, and Maintenance Guide for Cisco Unity Connection Release 12.x60
Configuring Cisco Unity Connection ClusterManaging Messaging Ports in a Cluster
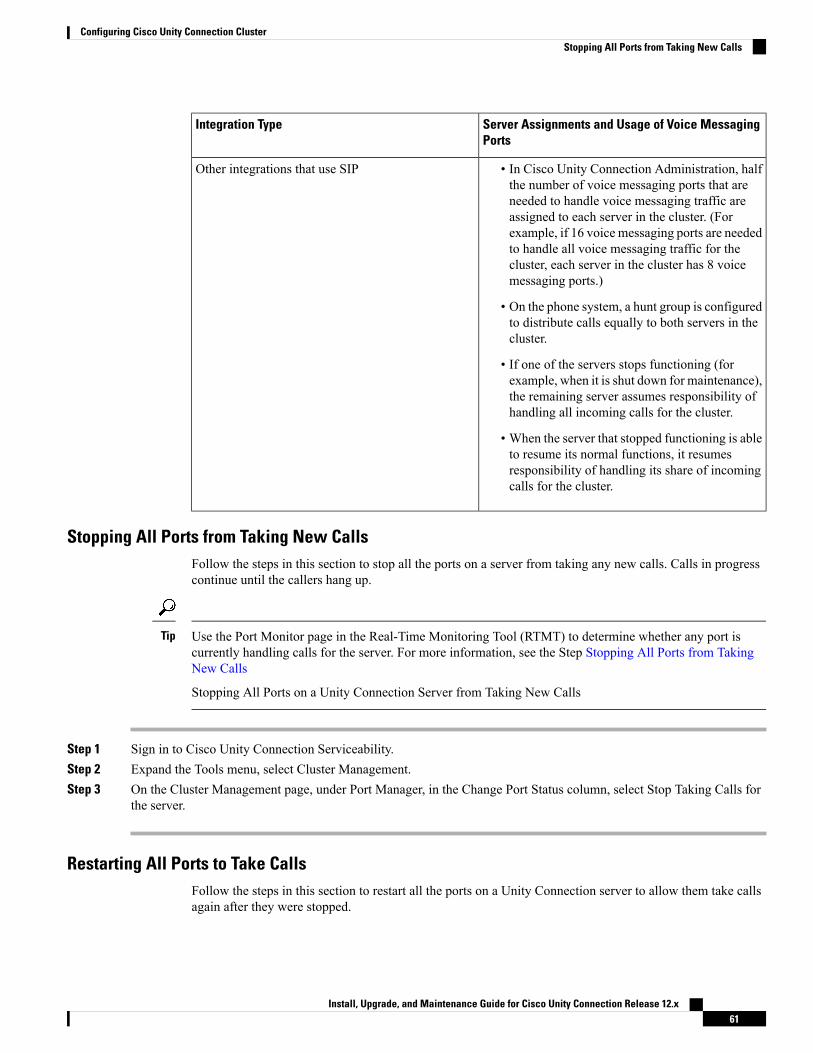
Server Assignments and Usage of Voice MessagingPorts
Integration Type
• In Cisco Unity Connection Administration, halfthe number of voice messaging ports that areneeded to handle voice messaging traffic areassigned to each server in the cluster. (Forexample, if 16 voice messaging ports are neededto handle all voice messaging traffic for thecluster, each server in the cluster has 8 voicemessaging ports.)
• On the phone system, a hunt group is configuredto distribute calls equally to both servers in thecluster.
• If one of the servers stops functioning (forexample, when it is shut down for maintenance),the remaining server assumes responsibility ofhandling all incoming calls for the cluster.
• When the server that stopped functioning is ableto resume its normal functions, it resumesresponsibility of handling its share of incomingcalls for the cluster.
Other integrations that use SIP
Stopping All Ports from Taking New CallsFollow the steps in this section to stop all the ports on a server from taking any new calls. Calls in progresscontinue until the callers hang up.
Use the Port Monitor page in the Real-Time Monitoring Tool (RTMT) to determine whether any port iscurrently handling calls for the server. For more information, see the Step Stopping All Ports from TakingNew Calls
Stopping All Ports on a Unity Connection Server from Taking New Calls
Tip
Step 1 Sign in to Cisco Unity Connection Serviceability.Step 2 Expand the Tools menu, select Cluster Management.Step 3 On the Cluster Management page, under Port Manager, in the Change Port Status column, select Stop Taking Calls for
the server.
Restarting All Ports to Take CallsFollow the steps in this section to restart all the ports on a Unity Connection server to allow them take callsagain after they were stopped.
Install, Upgrade, and Maintenance Guide for Cisco Unity Connection Release 12.x61
Configuring Cisco Unity Connection ClusterStopping All Ports from Taking New Calls

Step 1 Sign in to Cisco Unity Connection Serviceability.Step 2 Expand the Tools menu, select Cluster Management.Step 3 On the Cluster Management page, under Port Manager, in the Change Port Status column, select Take Calls for the server.
Server Status and its Functions in a Unity Connection ClusterEach server in the cluster has a status that appears on the ClusterManagement page of Cisco Unity ConnectionServiceability. The status indicates the functions that the server is currently performing in the cluster, asdescribed in Table 7: Server Status in a Unity Connection Cluster.
Table 7: Server Status in a Unity Connection Cluster
Responsibilities of the Sever in a Unity ConnectionCluster
Server Status
• Publishes the database and message store bothof which are replicated to the other server in thecluster.
• Receives replicated data from the other server.
• Displays and accepts changes to theadministrative interfaces, such as UnityConnection Administration and Cisco UnifiedOperating System Administration. This data isreplicated to the other server in the cluster.
• Answers phone calls and takes messages.
• Sends message notifications and MWI requests.
• Sends SMTP notifications and VPIMmessages.
• Synchronizes voice messages in UnityConnection and Exchange mailboxes if theunified messaging feature is configured.
• Connects with the clients, such as emailapplications and the web tools available throughCisco PCA.
A server with Primary status cannot bedeactivated.
Note
Primary
Install, Upgrade, and Maintenance Guide for Cisco Unity Connection Release 12.x62
Configuring Cisco Unity Connection ClusterServer Status and its Functions in a Unity Connection Cluster

Responsibilities of the Sever in a Unity ConnectionCluster
Server Status
• Receives replicated data from the server withPrimary status. Data includes the database andmessage store.
• Replicates data to the server with Primary status.
• Displays and accepts changes to theadministrative interfaces, such as UnityConnection Administration and Cisco UnifiedOperating System Administration. The data isreplicated to the server with Primary status.
• Answers phone calls and takes messages.
• Connects with the clients, such as emailapplications and the web tools available throughCisco PCA.
Only a server with Secondary status canbe deactivated.
Note
Secondary
• Receives replicated data from the server withPrimary status. Data includes the database andmessage store.
• Does not display the administrative interfaces,such as Unity Connection Administration andCisco Unified Operating SystemAdministration.The data is replicated to the server with Primarystatus.
• Does not answer phone calls or take messages.
• Does not connect with the clients, such as emailapplications and the web tools available throughCisco PCA.
Deactivated
• Does not receive replicated data from the serverwith Primary status.
• Does not replicate data to the server with Primarystatus.
• Does not display the administrative interfaces,such as Unity Connection Administration andCisco Unified Operating SystemAdministration.
• Does not answer phone calls or take messages.
A server with Not Functioning status isusually shut down.
Note
Not Functioning
Install, Upgrade, and Maintenance Guide for Cisco Unity Connection Release 12.x63
Configuring Cisco Unity Connection ClusterServer Status and its Functions in a Unity Connection Cluster

Responsibilities of the Sever in a Unity ConnectionCluster
Server Status
• Receives replicated database and message storefrom the server with Primary status.
• Replicates data to the server with Primary status.
• Does not answer phone calls or take messages.
• Does not synchronize voice messages betweenUnity Connection and Exchange mailboxes(single inbox).
This status lasts only a few minutes, afterwhich the server takes the applicable status.
Note
Starting
• Sends and receives data from the cluster.
• Does not answer phone calls or take messagesfor sometime.
• Does not connect with clients, such as emailapplications and the web tools available throughthe Cisco PCA for sometime.
This status lasts only a few minutes, afterwhich the previous status resumes for theserver.
Note
Replicating Data
• Updates the database and message store on theserver that is determined to have Primary status.
• Replicates data to the other server.
• Does not answer phone calls or take messagesfor sometime.
• Does not synchronize voice messages betweenUnity Connection and Exchange mailboxes ifsingle inbox is turned on for sometime.
• Does not connect with clients, such as emailapplications and the web tools available throughthe Cisco PCA for sometime.
This status lasts only a few minutes, afterwhich the previous status resumes for theserver.
Note
Split Brain Recovery (After detecting two serverswith Primary status)
Install, Upgrade, and Maintenance Guide for Cisco Unity Connection Release 12.x64
Configuring Cisco Unity Connection ClusterServer Status and its Functions in a Unity Connection Cluster

Changing Server Status in a Cluster and its EffectsThe Unity Connection cluster status can be changed either automatically or manually.
You can manually change the status of servers in a cluster in the following ways:
1. A server with Secondary status can be manually changed to Primary status. See the Manually Changingthe Server Status from Secondary to Primary section.
2. A server with Secondary status can bemanually changed to Deactivated status. See theManually Activatinga Server with Deactivated Status.
3. A server with Deactivated status can be manually activated so that its status changes to Primary orSecondary, depending on the status of the other server. See the Manually Activating a Server withDeactivated Status section.
Manually Changing the Server Status from Secondary to Primary
Step 1 Sign in to Cisco Unity Connection Serviceability.Step 2 From the Tools menu, select Cluster Management.Step 3 On the Cluster Management page, from the Server Manager menu, in the Change Server Status column of the server with
Secondary status, select Make Primary.Step 4 When prompted to confirm the change in server status, select OK.
The Server Status column displays the changed status when the change is complete.
The server that originally had Primary status automatically changes to Secondary status.Note
Manually Changing from the Server Status from Secondary to Deactivated
Step 1 Sign in to the Real-Time Monitoring Tool (RTMT).Step 2 From the Cisco Unity Connection menu, select Port Monitor. The Port Monitor tool appears in the right pane.Step 3 In the Node field, select the server with Secondary status.Step 4 In the right pane, select Start Polling. Note whether any voice messaging ports are currently handling calls for the server.Step 5 Sign in to Cisco Unity Connection Serviceability.Step 6 From the Tools menu, select Cluster Management.Step 7 If no voice messaging ports are currently handling calls for the server, skip to Manually Changing from the Server Status
from Secondary to Deactivated.
If there are voice messaging ports that are currently handling calls for the server, on the Cluster Management page, inthe Change Port Status column, select Stop Taking Calls for the server and then wait until RTMT shows that all ports forthe server are idle.
Step 8 On the Cluster Management page, from the Server Manager menu, in the Change Server Status column for the serverwith Secondary status, select Deactivate.
Deactivating a server terminates all the calls that the ports for the server are handling.
Install, Upgrade, and Maintenance Guide for Cisco Unity Connection Release 12.x65
Configuring Cisco Unity Connection ClusterChanging Server Status in a Cluster and its Effects
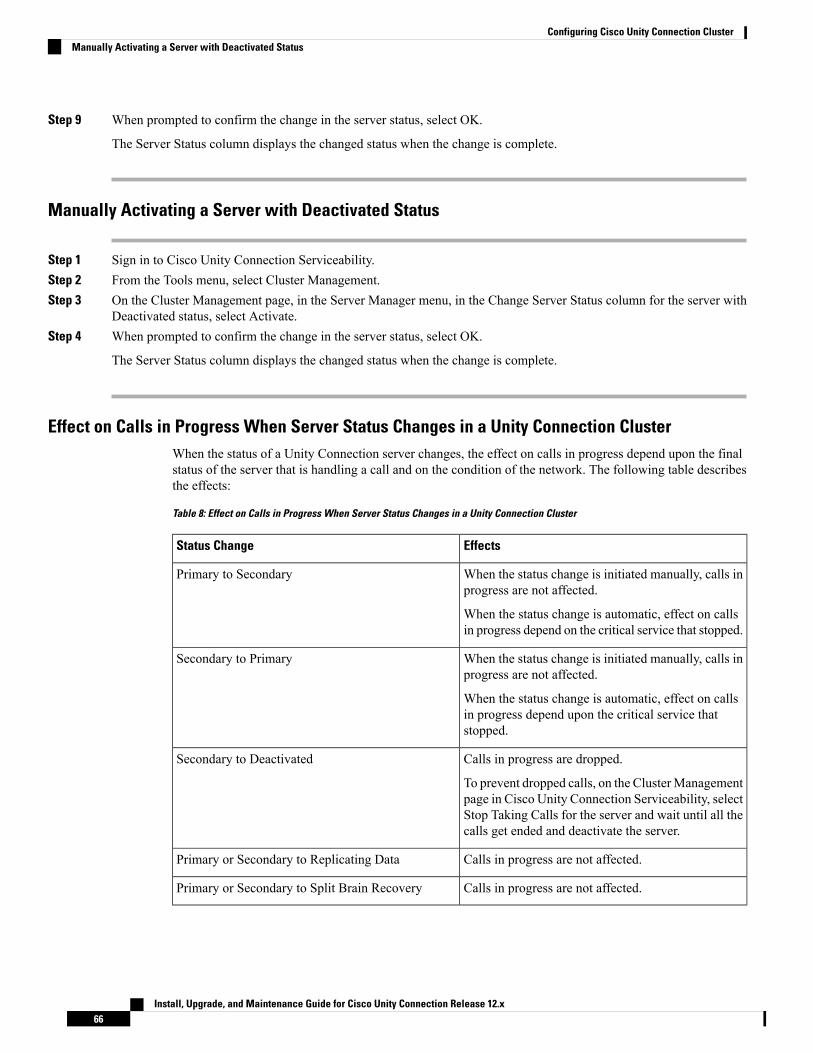
Step 9 When prompted to confirm the change in the server status, select OK.
The Server Status column displays the changed status when the change is complete.
Manually Activating a Server with Deactivated Status
Step 1 Sign in to Cisco Unity Connection Serviceability.Step 2 From the Tools menu, select Cluster Management.Step 3 On the Cluster Management page, in the Server Manager menu, in the Change Server Status column for the server with
Deactivated status, select Activate.Step 4 When prompted to confirm the change in the server status, select OK.
The Server Status column displays the changed status when the change is complete.
Effect on Calls in Progress When Server Status Changes in a Unity Connection ClusterWhen the status of a Unity Connection server changes, the effect on calls in progress depend upon the finalstatus of the server that is handling a call and on the condition of the network. The following table describesthe effects:
Table 8: Effect on Calls in Progress When Server Status Changes in a Unity Connection Cluster
EffectsStatus Change
When the status change is initiated manually, calls inprogress are not affected.
When the status change is automatic, effect on callsin progress depend on the critical service that stopped.
Primary to Secondary
When the status change is initiated manually, calls inprogress are not affected.
When the status change is automatic, effect on callsin progress depend upon the critical service thatstopped.
Secondary to Primary
Calls in progress are dropped.
To prevent dropped calls, on the ClusterManagementpage in Cisco Unity Connection Serviceability, selectStop Taking Calls for the server and wait until all thecalls get ended and deactivate the server.
Secondary to Deactivated
Calls in progress are not affected.Primary or Secondary to Replicating Data
Calls in progress are not affected.Primary or Secondary to Split Brain Recovery
Install, Upgrade, and Maintenance Guide for Cisco Unity Connection Release 12.x66
Configuring Cisco Unity Connection ClusterManually Activating a Server with Deactivated Status
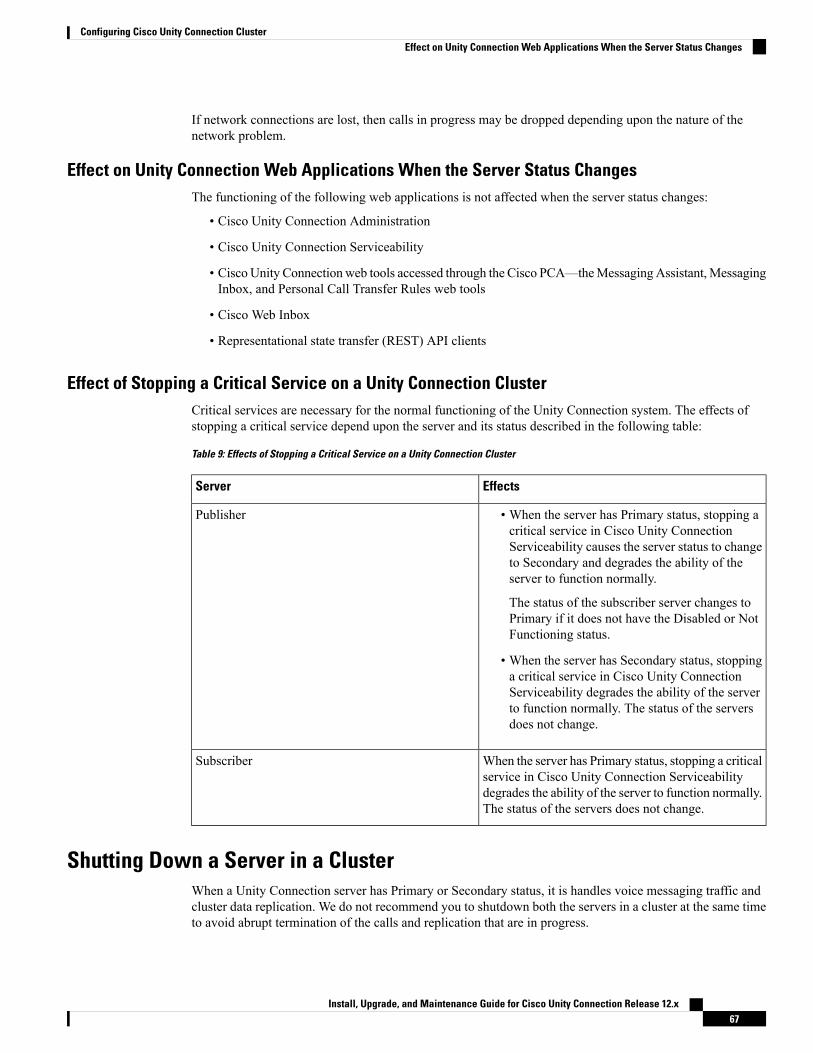
If network connections are lost, then calls in progress may be dropped depending upon the nature of thenetwork problem.
Effect on Unity Connection Web Applications When the Server Status ChangesThe functioning of the following web applications is not affected when the server status changes:
• Cisco Unity Connection Administration
• Cisco Unity Connection Serviceability
• Cisco Unity Connection web tools accessed through the Cisco PCA—theMessagingAssistant,MessagingInbox, and Personal Call Transfer Rules web tools
• Cisco Web Inbox
• Representational state transfer (REST) API clients
Effect of Stopping a Critical Service on a Unity Connection ClusterCritical services are necessary for the normal functioning of the Unity Connection system. The effects ofstopping a critical service depend upon the server and its status described in the following table:
Table 9: Effects of Stopping a Critical Service on a Unity Connection Cluster
EffectsServer
• When the server has Primary status, stopping acritical service in Cisco Unity ConnectionServiceability causes the server status to changeto Secondary and degrades the ability of theserver to function normally.
The status of the subscriber server changes toPrimary if it does not have the Disabled or NotFunctioning status.
• When the server has Secondary status, stoppinga critical service in Cisco Unity ConnectionServiceability degrades the ability of the serverto function normally. The status of the serversdoes not change.
Publisher
When the server has Primary status, stopping a criticalservice in Cisco Unity Connection Serviceabilitydegrades the ability of the server to function normally.The status of the servers does not change.
Subscriber
Shutting Down a Server in a ClusterWhen a Unity Connection server has Primary or Secondary status, it is handles voice messaging traffic andcluster data replication. We do not recommend you to shutdown both the servers in a cluster at the same timeto avoid abrupt termination of the calls and replication that are in progress.
Install, Upgrade, and Maintenance Guide for Cisco Unity Connection Release 12.x67
Configuring Cisco Unity Connection ClusterEffect on Unity Connection Web Applications When the Server Status Changes

Consider the following points when you want to shutdown a server in a Unity Connection cluster:
• Shutdown the server during non business hours when voice messaging traffic is low.
• Change the server status from Primary or Secondary to Deactivated before shutting down.
Step 1 On the server that does not shut down, sign in to Cisco Unity Connection Serviceability.Step 2 From the Tools menu, select Cluster Management.Step 3 On the Cluster Management page, locate the server that you want to shut down.Step 4 If the server that you want to shut down has Secondary status, skip to Step 5.
If the server that you want to shut down has Primary status, change the status:
a) In the Change Server Status column for the server with Secondary status, select Make Primary.b) When prompted to confirm the change in the server status, select OK.c) Confirm that the Server Status column indicates that the server has Primary status now and that the server you want
to shut down has Secondary status.
Step 5 On the server with Secondary status (the one you want to shut down), change the status:a) Sign in to the Real-Time Monitoring Tool (RTMT).b) From the Cisco Unity Connection menu, select Port Monitor. The Port Monitor tool appears in the right pane.c) In the Node field, select the server with Secondary status.d) In the right pane, select Start Polling.e) Note whether any voice messaging ports are currently handling calls for the server.f) If no voice messaging ports are currently handling calls for the server, skip to Step5g..
If there are voice messaging ports that are currently handling calls for the server, on the Cluster Management page,in the Change Port Status column, select Stop Taking Calls for the server and then wait until RTMT shows that allports for the server are idle.
g) On the Cluster Management page, from the Server Manager menu, in the Change Server Status column for the serverwith Secondary status, select Deactivate.
Deactivating a server terminates all calls that the ports for the server are handling.Caution
h) When prompted to confirm the change in the server status, select OK.i) Confirm that the Server Status column indicates that the server now has Deactivated status.
Step 6 Shut down the server that you deactivated:a) Sign in to Cisco Unity Connection Serviceability.b) Expand Tools and select Cluster Management.c) Make sure that the Server Status column shows Not Functioning status for the server that you shutdown.
Replacing Servers in a ClusterFollow the steps in the given sections to replace publisher or subscriber server in a cluster:
• To replace the publisher server, see the Replacing a Publisher Server section.
• To replace the subscriber server, see the Replacing a Subscriber Server section.
Install, Upgrade, and Maintenance Guide for Cisco Unity Connection Release 12.x68
Configuring Cisco Unity Connection ClusterReplacing Servers in a Cluster

How a Unity Connection Cluster WorksTheUnity Connection cluster feature provides high availability voice messaging through twoUnity Connectionservers that are configured in a cluster.
The Unity Connection cluster behavior when both the servers are active:
• The cluster can be assigned a DNS name that is shared by the Unity Connection servers.
• Clients, such as email applications and the web tools available through the Cisco Personal CommunicationsAssistant (PCA) can connect to either of the Unity Connection server.
• Phone systems can send calls to either of the Unity Connection server.
• Incoming phone traffic load is balanced between the Unity Connection servers by the phone system,PIMG/TIMG units, or other gateways that are required for the phone system integration.
Each server in a cluster is responsible for handling a share of the incoming calls for the cluster (answeringphone calls and taking messages). The server with Primary status is responsible for the following functions:
• Homing and publishing the database and message store that are replicated to the other server.
• Sending message notifications and MWI requests (the Connection Notifier service is activated).
• Sending SMTP notifications and VPIM messages (the Connection Message Transfer Agent service isactivated).
• Synchronizing voice messages between Unity Connection and Exchange mailboxes, if the unifiedmessaging feature is configured (the Unity Connection Mailbox Sync service is activated).
When one of the servers stops functioning (for example, when it is shutdown for maintenance), the remainingserver resumes the responsibility of handling all the incoming calls for the cluster. The database and messagestore are replicated to the other server when its functionality is restored.
When the server that stopped functioning is able to resume its normal functions and is activated, it resumesresponsibility of handling its share of incoming calls for the cluster.
It is recommended to perform provisioning only on the Publisher server in Active-Active mode and onSubscriber (Acting Primary) in case of cluster failover. The password change and password settingmodificationfor User PIN/Web application should be provisioned on Publisher server in Active-Active mode.
Note
To monitor the server status, the Connection Server Role Manager service runs in Cisco Unity ConnectionServiceability on both the servers. This service performs the following functions:
• Starts the applicable services on each server, depending on server status.
• Determines whether critical processes (such as voice message processing, database replication, voicemessage synchronization with Exchange, and message store replication) are functioning normally.
• Initiates changes to server status when the server with Primary status is not functioning or when criticalservices are not running.
Note the following limitations when the publisher server is not functioning:
Install, Upgrade, and Maintenance Guide for Cisco Unity Connection Release 12.x69
Configuring Cisco Unity Connection ClusterHow a Unity Connection Cluster Works
• If the Unity Connection cluster is integrated with an LDAP directory, directory synchronization doesnot occur, although authentication continues to work when only the subscriber server is functioning.When the publisher server is resumes functioning, directory synchronization also resumes.
• If a digital or HTTPS network includes the Unity Connection cluster, directory updates do not occur,although messages continue to be sent to and from the cluster when only the subscriber server isfunctioning. When the publisher server is functioning again, directory updates resume.
The Connection Server Role Manager service sends a keep-alive events between the publisher and subscriberservers to confirm that the servers are functioning and connected. If one of the servers stops functioning orthe connection between the servers is lost, the Connection Server RoleManager service waits for the keep-aliveevents and may require 30 to 60 seconds to detect that the other server is not available. While the ConnectionServer RoleManager service is waiting for the keep-alive events, users signing in to the server with Secondarystatus are not able to access their mailbox or send messages, because the Connection Server Role Managerservice has not yet detected that the server with Primary status (which has the active message store) isunavailable. In this situation, callers who attempt to leave a message may hear dead air or may not hear therecording beep.
It is recommended to import and delete the LDAP users from the publisher node only.Note
Effects of Split Brain Condition in a Unity Connection ClusterWhen both the servers in a Unity Connection cluster have Primary status at the same time (for example, whenthe servers have lost their connection with each other), both servers handle the incoming calls (answer phonecalls and take messages), send message notifications, sendMWI requests, accept changes to the administrativeinterfaces (such as Unity Connection Administration), and synchronize voice messages in Unity Connectionand Exchange mailboxes if single inbox is turned on. However, the servers do not replicate the database andmessage store to each other and do not receive replicated data from each other.
When the connection between the servers is restored, the status of the servers temporarily changes to SplitBrain Recovery while the data is replicated between the servers and MWI settings are coordinated. Duringthe time when the server status is Split Brain Recovery, the Connection Message Transfer Agent service andthe Connection Notifier service (in Cisco Unity Connection Serviceability) are stopped on both servers, soUnity Connection does not deliver any messages and does not send any message notifications. The ConnectionMailbox Sync service is also stopped, so Unity Connection does not synchronize voicemessages with Exchange(single inbox). The message stores are also briefly dismounted, so that Unity Connection tells users who aretrying to retrieve their messages at this point that their mailboxes are temporarily unavailable.
When the recovery process is complete, the Connection Message Transfer Agent service and the ConnectionNotifier service are started on the publisher server. Delivery of the messages that arrived while during therecovery process may take additional time, depending on the number of messages to be delivered. TheConnection Message Transfer Agent service and the Connection Notifier service are started on the subscriberserver. Finally, the publisher server has Primary status and the subscriber server has Secondary status. At thispoint, the Connection Mailbox Sync service is started on the server with Primary status, so that UnityConnection can resume synchronizing voice messages with Exchange if single inbox is turned on.
Install, Upgrade, and Maintenance Guide for Cisco Unity Connection Release 12.x70
Configuring Cisco Unity Connection ClusterEffects of Split Brain Condition in a Unity Connection Cluster

C H A P T E R 5Maintaining Cisco Unity Connection Server
• Migrating a Physical Server to a Virtual Machine, on page 71• Replacing the Non-Functional Server, on page 74• Changing the IP Address or Hostname of a Unity Connection Server, on page 75• Adding or Removing Unity Connection Languages, on page 79• Removing Unity Connection Language Files, on page 81
Migrating a Physical Server to a Virtual MachineFollow the given tasks to migrate from physical server to a virtual machine:
• Backup the software component on the physical server. For more information, see the About Cobraschapter.
• Download and deploy the OVA template to create a new virtual machine. For more information, see theCreating a Virtual Machine section.
• Migrating the Unity Connection server on the virtual machine.
• To replace the publisher server, see the Replacing a Publisher Server section.
• To replace the subscriber server, see the Replacing a Subscriber Server section.
• If Unity Connection is installed as a standalone server, restore the software component from the physicalserver to the virtual machine for which you have taken the back up. For more information, see theConfiguring DRS Backup section.
• (Optional) Install new languages on the replaced server if required or remove the existing languagesalready installed on the server. For more information, see the Adding or Removing Unity ConnectionLanguages section.
If you are deploying Unity Connection networking (Intersite, Intrasite, or HTTPS), see the Networking Guidefor Cisco Unity Connection, Release 12.x, before replacing the Unity Connection server, available athttps://www.cisco.com/c/en/us/td/docs/voice_ip_comm/connection/12x/networking/guide/b_12xcucnetx.html.
Note
Install, Upgrade, and Maintenance Guide for Cisco Unity Connection Release 12.x71
Replacing a Publisher ServerWhile you are upgrading the publisher server in a Unity Connection cluster, the subscriber server continuesto provide services to the users and callers.
In case of a standalone server, replace the server during off-peak hours to avoid call-processing interruptionsand impact to services.
Note
Step 1 Manually change the status of subscriber server to Primary:a) Sign in to Cisco Unity Connection Serviceability.b) Expand Tools and select Cluster Management.c) On the ClusterManagement page, from the ServerManager menu, locate the subscriber server and check the following:
• If the subscriber server status is Primary, skip the remaining steps in this procedure.
• If the subscriber server status is Secondary, select Make Primary.
• If the subscriber has Deactivated status, change the status to Secondary and then select Activate.When promptedto confirm changing the server status, select OK. After successful activation of the subscriber server, changethe status to Primary selecting Make Primary option.
Step 2 Manually change the status of publisher server to Deactivated:a) Sign in to the Real-Time Monitoring Tool and select Port Monitor.b) In the Node field, select the publisher server and then select Start Polling. Note whether any voice messaging ports
are currently handling calls for the server.c) Return to the Cluster Management page of Cisco Unity Connection Serviceability and do any one of th following:
• If no voice messaging ports are currently handling calls for the publisher server, move to the next Step 1.
• If there are voice messaging ports that are currently handling calls for the publisher server, on the ClusterManagement page, in the Port Manager column, select Stop Taking Calls for the publisher server and then waituntil RTMT shows that all the ports for the publisher server are idle.
d) From the Server Manager menu, in the Change Server Status column for the publisher server, select Deactivate andthen select OK.
Step 3 Install the replacement publisher server, see Installing the Publisher Server section.a) Shut down the publisher server using the CLI command utils system shutdown. On the Cluster Management page of
the subscriber server, the publisher has Not Functioning status.b) Install the virtual machine. The following settings on the virtual machine must be same as that on the physical server,
otherwise the transfer of data from the physical server to the virtual machine get failed:
• Hostname of the server
• IP address of the server
• Time zone
• NTP server
Install, Upgrade, and Maintenance Guide for Cisco Unity Connection Release 12.x72
Maintaining Cisco Unity Connection ServerReplacing a Publisher Server

• DHCP settings
• Primary DNS settings
• SMTP hostname
• X.509 Certificate information (Organization, Unit, Location, State, and Country).
Step 4 You must run the utils disaster_recovery prepare restore pub_from_sub CLI command on the publisher server. Thiscommand handles the tasks to prepare for restore of a publisher node from a subscriber node.
Step 5 Configure the cluster on the replaced publisher server:a) Sign in to Cisco Unity Connection Administration on the publisher server.b) Expand System Settings and select Cluster.c) On the Find and List Servers page, select Add New.d) On the New Server Configuration page, in the Hostname/IP Address field, enter the hostname or IP address of the
subscriber server. Enter the description and select Save.
Step 6 If Unity Connection is installed as a cluster, you can restore the publisher using the subscriber data.a) Run the utils cuc cluster renegotiate CLI command on the subscriber server. The publisher automatically restarts
after running this command.b) Run the show cuc cluster status CLI command on the subscriber server to confirm that the new Unity Connection
cluster is configured correctly.
If third-party certificates are deployed in Unity Connection then after successfully replacing the publisherserver, you must reconfigure third party certificates for the newly build publisher server. For information onhow to configure the certificates, see Security chapter of Cisco Unified Communications Operating SystemAdministration Guide for Cisco Unity Connection Release 12.x available at https://www.cisco.com/c/en/us/td/docs/voice_ip_comm/connection/12x/os_administration/b_12xcucosagx.html
Note
Replacing a Subscriber ServerWhile you are upgrading the subscriber server in a Unity Connection cluster, the publisher server continuesto provide services to users and callers.
Step 1 Manually change the status of publisher server to Primary:a) Sign in to Cisco Unity Connection Serviceability.b) Expand Tools and select Cluster Management.c) On the ClusterManagement page, from the ServerManager menu, locate the publisher server and check the following:
• If the publisher server status is Primary, skip the remaining steps in this procedure.
• If the publisher server status is Secondary, change the status by selecting Make Primary.
• If the publisher has Deactivated status, change the status to Secondary and select Activate. A prompt appearsto confirm the changing of the server status, select OK. After successful activation of the publisher server, changethe status to Primary by selecting Make Primary option.
Step 2 Manually change the status of subscriber server to Deactivated:
Install, Upgrade, and Maintenance Guide for Cisco Unity Connection Release 12.x73
Maintaining Cisco Unity Connection ServerReplacing a Subscriber Server
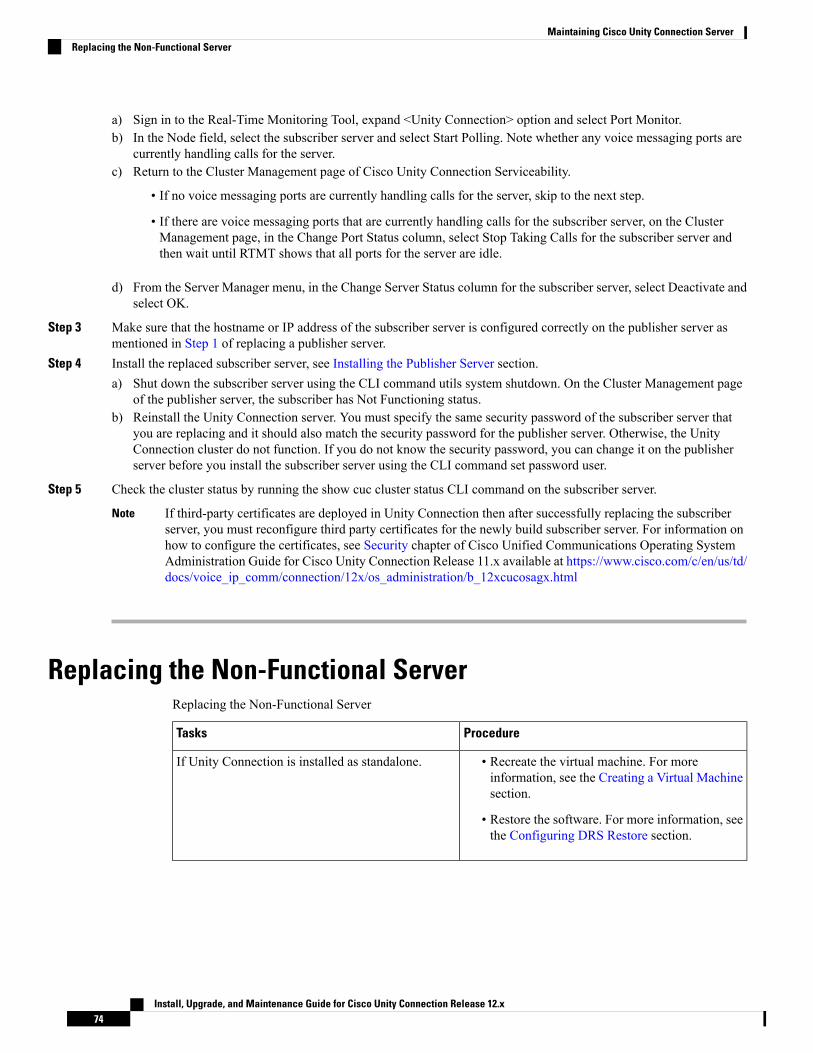
a) Sign in to the Real-Time Monitoring Tool, expand <Unity Connection> option and select Port Monitor.b) In the Node field, select the subscriber server and select Start Polling. Note whether any voice messaging ports are
currently handling calls for the server.c) Return to the Cluster Management page of Cisco Unity Connection Serviceability.
• If no voice messaging ports are currently handling calls for the server, skip to the next step.
• If there are voice messaging ports that are currently handling calls for the subscriber server, on the ClusterManagement page, in the Change Port Status column, select Stop Taking Calls for the subscriber server andthen wait until RTMT shows that all ports for the server are idle.
d) From the Server Manager menu, in the Change Server Status column for the subscriber server, select Deactivate andselect OK.
Step 3 Make sure that the hostname or IP address of the subscriber server is configured correctly on the publisher server asmentioned in Step 1 of replacing a publisher server.
Step 4 Install the replaced subscriber server, see Installing the Publisher Server section.a) Shut down the subscriber server using the CLI command utils system shutdown. On the Cluster Management page
of the publisher server, the subscriber has Not Functioning status.b) Reinstall the Unity Connection server. You must specify the same security password of the subscriber server that
you are replacing and it should also match the security password for the publisher server. Otherwise, the UnityConnection cluster do not function. If you do not know the security password, you can change it on the publisherserver before you install the subscriber server using the CLI command set password user.
Step 5 Check the cluster status by running the show cuc cluster status CLI command on the subscriber server.
If third-party certificates are deployed in Unity Connection then after successfully replacing the subscriberserver, you must reconfigure third party certificates for the newly build subscriber server. For information onhow to configure the certificates, see Security chapter of Cisco Unified Communications Operating SystemAdministration Guide for Cisco Unity Connection Release 11.x available at https://www.cisco.com/c/en/us/td/docs/voice_ip_comm/connection/12x/os_administration/b_12xcucosagx.html
Note
Replacing the Non-Functional ServerReplacing the Non-Functional Server
ProcedureTasks
• Recreate the virtual machine. For moreinformation, see the Creating a Virtual Machinesection.
• Restore the software. For more information, seethe Configuring DRS Restore section.
If Unity Connection is installed as standalone.
Install, Upgrade, and Maintenance Guide for Cisco Unity Connection Release 12.x74
Maintaining Cisco Unity Connection ServerReplacing the Non-Functional Server

ProcedureTasks
• Recreate the virtual machine. For moreinformation, see the Creating a Virtual Machinesection.
• Replace the Publisher server, see the Replacinga Publisher Server section.
If Unity Connection is installed as a cluster andpublisher is not functioning.
Install the subscriber server, see the Installing theSubscriber Server section.
If Unity Connection is installed as a cluster andsubscriber is not functioning.
• Replace the publisher server, see Installing thePublisher Server section.
• Restore the software components on the physicalmachine. For more information, see theConfiguring DRS Restore section.
• Configure cluster on the publisher sever:
• Replace the subscriber server, see theInstalling the Subscriber Server section.
• Check the cluster status using CLIcommand show cuc cluster status.
• Synchronize MWIs on each phone system.
If both the servers are not functioning in a cluster.
Changing the IP Address or Hostname of a Unity ConnectionServer
Before changing the IP address of a standalone Unity Connection server or a cluster, you need to determinewhether the server is defined by hostname or IP address.
You can also use Cisco Prime Collaboration Deployment for readdressing. For more information on CiscoPCD, see http://www.cisco.com/c/en/us/products/cloud-systems-management/prime-collaboration/index.html.
Note
Determine Whether Unity Connection is Defined by Hostname or IP Address
Step 1 Sign in to Cisco Unity Connection Administration of the server of which the IP address needs to be changed.Step 2 Expand System Settings and select Cluster.
You need to select Cluster even if you want to change the IP address or hostname of a standalone server.Note
Install, Upgrade, and Maintenance Guide for Cisco Unity Connection Release 12.x75
Maintaining Cisco Unity Connection ServerChanging the IP Address or Hostname of a Unity Connection Server

Step 3 Select Find to locate the server of which you need to change the IP address or hostname:
• If the value of the Hostname/IP Address column is a hostname, the server is defined by a hostname.
• If the value of the Hostname/IP Address column is an IP address, the server is defined by an IP address.
Important Considerations before Changing the Hostname or IP Address of aUnity Connection Server
1. When you change the IP address or hostname of the Unity Connection server, make sure to apply thesame changes on all the associated components that refer the Unity Connection server by IP address orhostname:
2. Bookmarks on client computers to the following web applications:
• Web applications, such as Cisco Personal Communications Assistant and Cisco Unity ConnectionAdministration.
• Cisco Fax Server
• Cisco Unified Application Environment
• Cisco Unified Mobile Advantage
• Cisco Unified Presence
• Cisco Unified Personal Communicator
• Cisco Unity Connection ViewMail for Microsoft Outlook
• IMAP email clients that access Unity Connection
• Phone systems and related components, including Cisco EGW2200, Cisco ISR voice gateway, CiscoSIP Proxy Server, Cisco Unified CommunicationsManager, Cisco Unified CommunicationsManagerExpress, and PIMG/TIMG units.
• RSS readers
• SMTP smart host
• Voice messaging systems with which Unity Connection is integrated via VPIM, such as Cisco Unityand Cisco Unity Express.
If associated components reference the Unity Connection serverby IP address and if you do not change the IP address asapplicable, the components are no longer be able to access UnityConnection.
Caution
3. You can change the IP address and hostname of a Unity Connection server or cluster following the stepsmentioned in the Changing the IP Address or Hostname of a Unity Connection Server or Cluster section.
Install, Upgrade, and Maintenance Guide for Cisco Unity Connection Release 12.x76
Maintaining Cisco Unity Connection ServerImportant Considerations before Changing the Hostname or IP Address of a Unity Connection Server

Do not change the IP address or hostname of a Unity Connection server during business hours.Caution
4. (Only in case of changing IP address of a Unity Connection server) If the Unity Connection server isconfigured to get an IP address from a DHCP server, you cannot manually change the IP address of theserver. Instead, you must do one of the following:
• Change DHCP/DNS settings from Cisco Unified Operating System Administration> Settings andselect the applicable option from IP, and restart Unity Connection by running the CLI command utilssystem restart.
• Disable DHCP onUnity Connection by running the CLI command set network dhcp and thenmanuallychange the IP address by doing the procedure given below.
To change the IP address or hostname of a Unity Connection cluster, follow the steps mentioned in theChanging the IP Address or Hostname of a Unity Connection Server section first on the publisher server andthen on the subscriber server.
Note
Changing the IP Address or Hostname of a Unity Connection Server or Cluster
We can also change IP Address or Hostname of Cisco Unity Connection standalone node or cluster using CLI. For more information on CLI usage refer link https://www.cisco.com/c/en/us/td/docs/voice_ip_comm/cucm/cli_ref/12_5_1/cucm_b_cli-reference-guide-1251/cucm_b_cli-reference-guide-1251_chapter_0110.html#CUCM_CL_SEB8A06A_00
Note
Do the following steps to change the IP address or Hostname of a standalone server or a cluster defined byhostname or IP address using GUI. In case of a cluster, follow the steps first on the publisher server and thenon the subscriber server.
Step 1 Sign in to the standalone server or the publisher server using Real-Time Monitoring Tool. Expand Tools> Alert andselect Alert Central. In the Systems tab, make sure the ServerDown is black. If ServerDown is red, then resolve all theproblems and change it to black.
Step 2 Check the server status:a) Sign in to Cisco Unity Connection Serviceability.b) Expand Tools and select Cluster Management.c) On the Cluster Management page, check whether server status is Primary or Secondary. If there is any other status
value then resolve the problem.
Step 3 Check the network connectivity and DNS server configuration by running the utils diagnose module validate_networkCLI command.
Step 4 Backup the database using Disaster Recovery System. See the About Cobras chapter.
Install, Upgrade, and Maintenance Guide for Cisco Unity Connection Release 12.x77
Maintaining Cisco Unity Connection ServerChanging the IP Address or Hostname of a Unity Connection Server or Cluster

Step 5 If intrasite, HTTPS, and SRSV networking is configured, remove the server from the Unity Connection site. Forinstructions, see the Networking Guide for Cisco Unity Connection, Release 12.x, available athttps://www.cisco.com/c/en/us/td/docs/voice_ip_comm/connection/12x/networking/guide/b_12xcucnetx.html .
Re-adding a server to a Unity Connection site can be a time consuming process.Caution
Step 6 On aDNS server, change the DNS record of the Unity Connection server to the new IP address. Update both the forward(A) and reverse (PTR) records.
Step 7 (Applicable only when you change the IP address or Hostname of a standalone server or a cluster defined by an IPaddress or Hostname) Changing the IP addresses or Hostname of a standalone server or the publisher server in ConnectionAdministration:a) Sign in to Cisco Unity Connection Administration.
In case of a cluster, you must sign in to the publisher sever and select subscriber server to change the IPaddress or Hostname of a subscriber server.
Caution
b) Expand System Settings, and select Cluster.c) Select Find to display a list of servers in the cluster.d) Select the name of the standalone server or publisher server.e) Change the value of the Hostname/IP Address field to the new Hostname/IP address.f) Select Save.
Step 8 On the standalone or publisher server, change the IP address, Hostname, and default gateway (if applicable):a) Sign in to Cisco Unified Operating System Administration.b) From the Settings menu, select IP > Ethernet.c) In the Host Information, enter the value of Hostname.d) If you want an alternate hostname for the server, run the set web-security CLI command. In the Hostname, change
the hostname of the server.
For more information on the CLI commands, see the applicable version of the Command Line Interface ReferenceGuide for Cisco Unified Communications Solutions athttp://www.cisco.com/en/US/products/ps6509/prod_maintenance_guides_list.html .
Enter a certificate signing request. Then download the certificate signing request to the server on whichyou installed Microsoft Certificate Services or another application that issues certificates, or downloadthe request to a server that you can use to send the certificate signing request to an external certificationauthority (CA).
(In case of SSL certificates created and installed on renamed server) Upload the root certificate and theserver certificate to the standalone or publisher server. Follow the steps as mentioned in Security Guidefor Cisco Unity Connection Release 12.x, available athttps://www.cisco.com/c/en/us/td/docs/voice_ip_comm/connection/12x/security/b_12xcucsecx.html.
Note
e) In the Port Information, change the value of the IP Address and Subnet Mask field (if applicable).f) If you are moving the server to a different subnet that requires a new default gateway address, change the value of
the Default Gateway field in the Gateway Information.g) Select Save.
After saving the page, node services will restart automatically. Restarting services ensures the proper updatefor the changes to take effect. Do not perform any action on the server until the services are up and running.To check the status of the services, run utils service list CLI command.
Caution
Install, Upgrade, and Maintenance Guide for Cisco Unity Connection Release 12.x78
Maintaining Cisco Unity Connection ServerChanging the IP Address or Hostname of a Unity Connection Server or Cluster
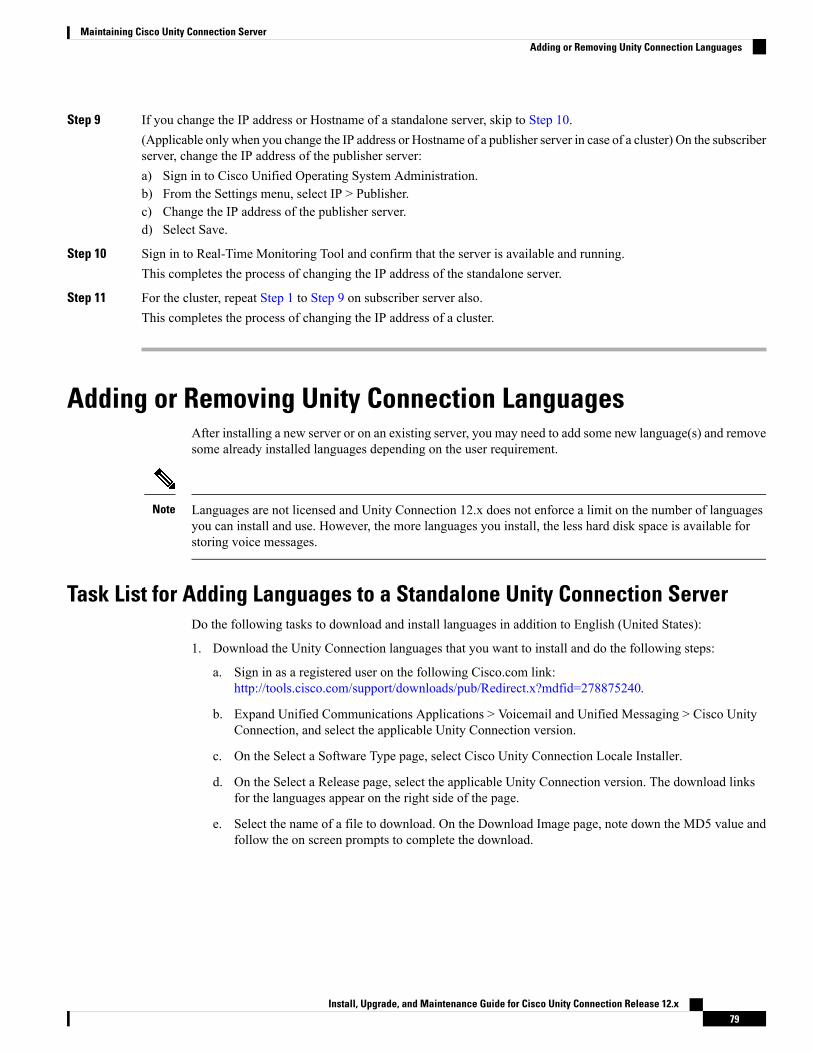
Step 9 If you change the IP address or Hostname of a standalone server, skip to Step 10.(Applicable only when you change the IP address or Hostname of a publisher server in case of a cluster) On the subscriberserver, change the IP address of the publisher server:a) Sign in to Cisco Unified Operating System Administration.b) From the Settings menu, select IP > Publisher.c) Change the IP address of the publisher server.d) Select Save.
Step 10 Sign in to Real-Time Monitoring Tool and confirm that the server is available and running.This completes the process of changing the IP address of the standalone server.
Step 11 For the cluster, repeat Step 1 to Step 9 on subscriber server also.This completes the process of changing the IP address of a cluster.
Adding or Removing Unity Connection LanguagesAfter installing a new server or on an existing server, you may need to add some new language(s) and removesome already installed languages depending on the user requirement.
Languages are not licensed and Unity Connection 12.x does not enforce a limit on the number of languagesyou can install and use. However, the more languages you install, the less hard disk space is available forstoring voice messages.
Note
Task List for Adding Languages to a Standalone Unity Connection ServerDo the following tasks to download and install languages in addition to English (United States):
1. Download the Unity Connection languages that you want to install and do the following steps:
a. Sign in as a registered user on the following Cisco.com link:http://tools.cisco.com/support/downloads/pub/Redirect.x?mdfid=278875240.
b. Expand Unified Communications Applications > Voicemail and Unified Messaging > Cisco UnityConnection, and select the applicable Unity Connection version.
c. On the Select a Software Type page, select Cisco Unity Connection Locale Installer.
d. On the Select a Release page, select the applicable Unity Connection version. The download linksfor the languages appear on the right side of the page.
e. Select the name of a file to download. On the Download Image page, note down the MD5 value andfollow the on screen prompts to complete the download.
Install, Upgrade, and Maintenance Guide for Cisco Unity Connection Release 12.x79
Maintaining Cisco Unity Connection ServerAdding or Removing Unity Connection Languages
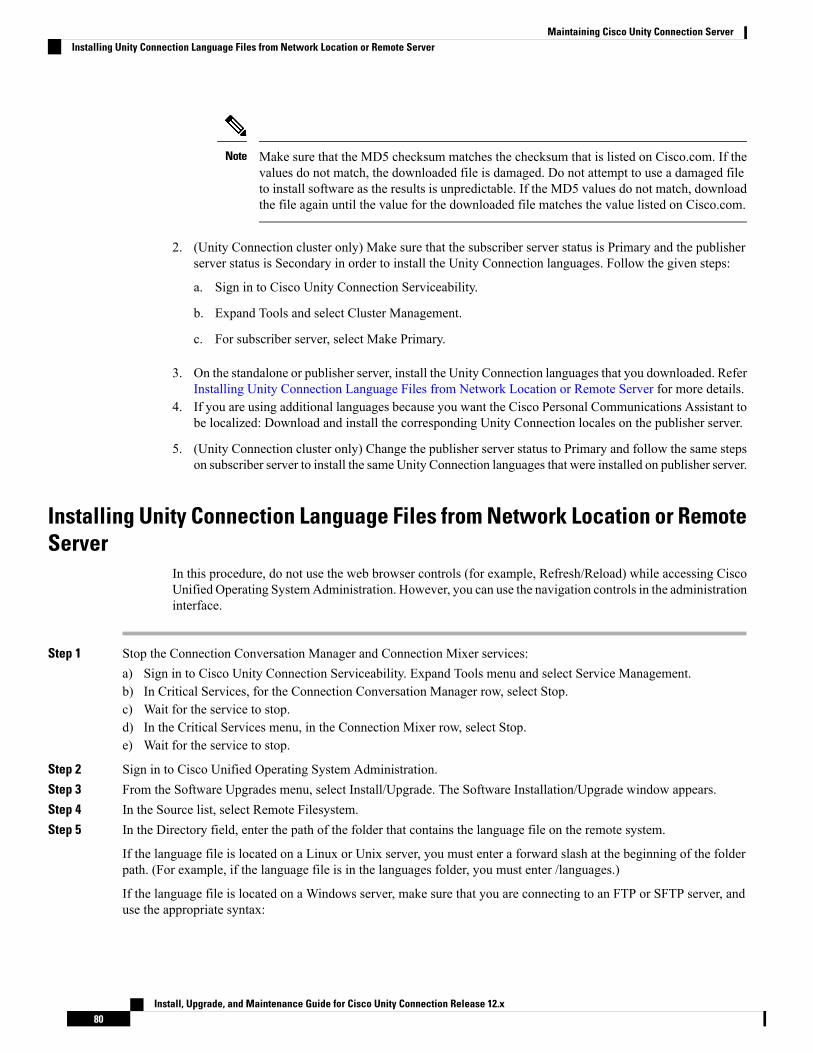
Make sure that the MD5 checksum matches the checksum that is listed on Cisco.com. If thevalues do not match, the downloaded file is damaged. Do not attempt to use a damaged fileto install software as the results is unpredictable. If the MD5 values do not match, downloadthe file again until the value for the downloaded file matches the value listed on Cisco.com.
Note
2. (Unity Connection cluster only) Make sure that the subscriber server status is Primary and the publisherserver status is Secondary in order to install the Unity Connection languages. Follow the given steps:
a. Sign in to Cisco Unity Connection Serviceability.
b. Expand Tools and select Cluster Management.
c. For subscriber server, select Make Primary.
3. On the standalone or publisher server, install the Unity Connection languages that you downloaded. ReferInstalling Unity Connection Language Files from Network Location or Remote Server for more details.
4. If you are using additional languages because you want the Cisco Personal Communications Assistant tobe localized: Download and install the corresponding Unity Connection locales on the publisher server.
5. (Unity Connection cluster only) Change the publisher server status to Primary and follow the same stepson subscriber server to install the same Unity Connection languages that were installed on publisher server.
Installing Unity Connection Language Files from Network Location or RemoteServer
In this procedure, do not use the web browser controls (for example, Refresh/Reload) while accessing CiscoUnified Operating SystemAdministration. However, you can use the navigation controls in the administrationinterface.
Step 1 Stop the Connection Conversation Manager and Connection Mixer services:a) Sign in to Cisco Unity Connection Serviceability. Expand Tools menu and select Service Management.b) In Critical Services, for the Connection Conversation Manager row, select Stop.c) Wait for the service to stop.d) In the Critical Services menu, in the Connection Mixer row, select Stop.e) Wait for the service to stop.
Step 2 Sign in to Cisco Unified Operating System Administration.Step 3 From the Software Upgrades menu, select Install/Upgrade. The Software Installation/Upgrade window appears.Step 4 In the Source list, select Remote Filesystem.Step 5 In the Directory field, enter the path of the folder that contains the language file on the remote system.
If the language file is located on a Linux or Unix server, you must enter a forward slash at the beginning of the folderpath. (For example, if the language file is in the languages folder, you must enter /languages.)
If the language file is located on a Windows server, make sure that you are connecting to an FTP or SFTP server, anduse the appropriate syntax:
Install, Upgrade, and Maintenance Guide for Cisco Unity Connection Release 12.x80
Maintaining Cisco Unity Connection ServerInstalling Unity Connection Language Files from Network Location or Remote Server

• Begin the path with a forward slash (/) and use forward slashes throughout the path.
• The path must start from the FTP or SFTP root folder on the server, so you cannot enter a Windows absolute path,which starts with a drive letter (for example, C:).
Step 6 In the Server field, enter the server name or IP address.Step 7 In the User Name field, enter your user name on the remote server.Step 8 In the User Password field, enter your password on the remote server.Step 9 In the Transfer Protocol list, select the applicable option.Step 10 Select Next.Step 11 Select the language that you want to install, and select Next.Step 12 Monitor the progress of the download.
If you loose your connection with the server or close your browser during the installation process, you may see thefollowing message when you try to access the Software Upgrades menu again:
Warning: Another session is installing software, click Assume Control to take over the installation.
If you are sure you want to take over the session, select Assume Control.
Step 13 If you want to install another language,ct Install Another, and repeat all the above stepsStep 14 If you are finished with installing languages: Restart the services:
• Sign in to Cisco Unity Connection Serviceability.
• Expand Tools menu and select Service Management.
• In the Critical Services menu, in the Connection Conversation Manager row, select Start. Wait for the service tostart.
• In the Critical Services menu, in the Connection Mixer row, select Start. Wait for the service to start.
Removing Unity Connection Language Files
Step 1 Sign in to the command line interface as a platform administrator.
Make sure to stop Connection Conversation Manager and Connection Mixer services before uninstalling thelanguages.
Note
Step 2 Run the show cuc locales CLI command to display a list of installed language files.Step 3 In the command results, find the language that you want to remove, and note the value of the Locale column for the
language.Step 4 Run the delete cuc locale <code > CLI command to remove the language, where <code> is the value of the Locale column
that you get in Removing Unity Connection Language Files.
When the command completes, the following information appears:
Install, Upgrade, and Maintenance Guide for Cisco Unity Connection Release 12.x81
Maintaining Cisco Unity Connection ServerRemoving Unity Connection Language Files

<code> uninstalled
Install, Upgrade, and Maintenance Guide for Cisco Unity Connection Release 12.x82
Maintaining Cisco Unity Connection ServerRemoving Unity Connection Language Files

C H A P T E R 6Managing Licenses
• Managing Licenses, on page 83
Managing Licenses
OverviewWith Unity Connection 12.0(1) and later, a new simple and enhanced way of licensing, Cisco Smart SoftwareLicensing is introduced to use various licensed feature of Unity Connection. Using Cisco Smart SoftwareLicensing, you can manage all the licenses associated with an organization through Cisco Smart SoftwareManager (CSSM) or Cisco Smart Software Manager satellite. Cisco Smart Software Licensing establishes apool of licenses or entitlements that can be used across your organization in a flexible and automated manner.This model of licensing provides the visibility of your licenses ownership and consumption. Unity Connectionmust be registered with the CSSM to use various licensed feature.
Cisco Smart Software Manager enables you to manage all of your Cisco Smart Software Licenses from onecentralized website. You can use Cisco Smart Software Manager to:
• Manage and track licenses• Move licenses across virtual account• Remove registered product instance
For more information about Cisco Smart Software Manager, see https://software.cisco.com/
Cisco Smart Software Manager satellite is a component of Cisco Smart Software Licensing that managesproduct registrations and monitoring of smart license usage for Cisco products. If you do not want to manageCisco products directly using Cisco Smart SoftwareManager, either for policy or network availability reasons,you can choose to install the Cisco Smart SoftwareManager satellite on-premises. Products register and reportlicense consumption to the Cisco Smart Software Manager satellite as it does on Cisco Smart SoftwareManager.
For more information about the Cisco Smart Software Manager satellite, see http://www.cisco.com/web/ordering/smart-software-manager/smart-software-manager-satellite.html.
With release 12.0(1) and later, Cisco Smart Software Licensing is only the way to manage the licenses inUnity Connection.
Note
Install, Upgrade, and Maintenance Guide for Cisco Unity Connection Release 12.x83
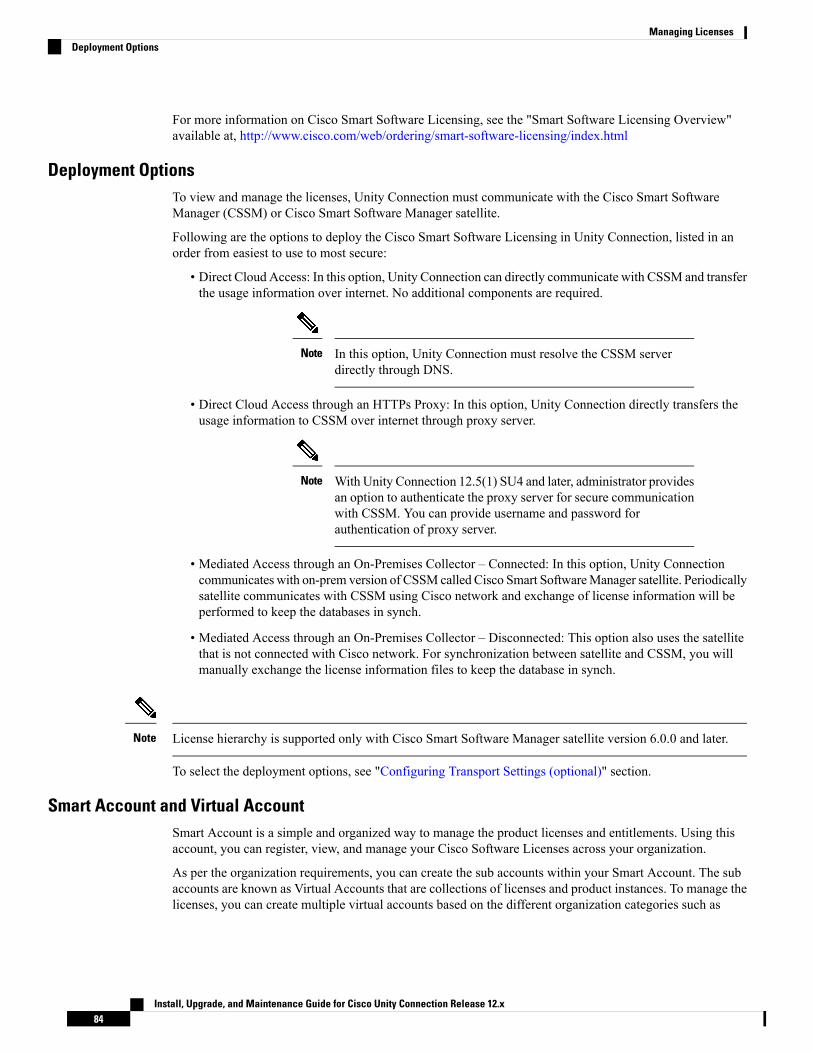
For more information on Cisco Smart Software Licensing, see the "Smart Software Licensing Overview"available at, http://www.cisco.com/web/ordering/smart-software-licensing/index.html
Deployment OptionsTo view and manage the licenses, Unity Connection must communicate with the Cisco Smart SoftwareManager (CSSM) or Cisco Smart Software Manager satellite.
Following are the options to deploy the Cisco Smart Software Licensing in Unity Connection, listed in anorder from easiest to use to most secure:
• Direct Cloud Access: In this option, Unity Connection can directly communicate with CSSM and transferthe usage information over internet. No additional components are required.
In this option, Unity Connection must resolve the CSSM serverdirectly through DNS.
Note
• Direct Cloud Access through an HTTPs Proxy: In this option, Unity Connection directly transfers theusage information to CSSM over internet through proxy server.
With Unity Connection 12.5(1) SU4 and later, administrator providesan option to authenticate the proxy server for secure communicationwith CSSM. You can provide username and password forauthentication of proxy server.
Note
• Mediated Access through an On-Premises Collector – Connected: In this option, Unity Connectioncommunicates with on-prem version of CSSM called Cisco Smart SoftwareManager satellite. Periodicallysatellite communicates with CSSM using Cisco network and exchange of license information will beperformed to keep the databases in synch.
• Mediated Access through an On-Premises Collector – Disconnected: This option also uses the satellitethat is not connected with Cisco network. For synchronization between satellite and CSSM, you willmanually exchange the license information files to keep the database in synch.
License hierarchy is supported only with Cisco Smart Software Manager satellite version 6.0.0 and later.Note
To select the deployment options, see "Configuring Transport Settings (optional)" section.
Smart Account and Virtual AccountSmart Account is a simple and organized way to manage the product licenses and entitlements. Using thisaccount, you can register, view, and manage your Cisco Software Licenses across your organization.
As per the organization requirements, you can create the sub accounts within your Smart Account. The subaccounts are known as Virtual Accounts that are collections of licenses and product instances. To manage thelicenses, you can create multiple virtual accounts based on the different organization categories such as
Install, Upgrade, and Maintenance Guide for Cisco Unity Connection Release 12.x84
Managing LicensesDeployment Options

departments or locations. Virtual Accounts are maintained by Smart Account administrators. Licenses can betransferred within virtual accounts as per the requirement.
While moving product instance from one virtual account to another, the licenses assosiated with the previousvirtual account are not transferred.
For more information on how to create and manage the Smart Account and Virtual Account, see "Cisco SmartAccounts" at http://www.cisco.com/web/ordering/smart-software-manager/smart-accounts.html
Prerequisites for Configuring Cisco Smart Software LicensingTo configure the Cisco Smart Software Licensing in Unity Connection, ensure the following requirements:
• Understand the Unified Communications (UC) licensing structure. For details, see http://www.cisco.com/c/en/us/products/unified-communications/unified-communications-licensing/index.html.
• A Smart Account and Virtual Account must be created for Unity Connection. For more information, see"Smart Account and Virtual Account" section.
If you upgrade the Unity Connection from any earlier releases to 12.0(1), all the licenses (legacy and PLMbased) used in Unity Connection must be migrated to the CSSM for using Cisco Smart Software Licensing.For more information, see "Migrating Licenses" section.
Note
Configuring Cisco Smart Software Licensing in Unity ConnectionBy default, the Cisco Smart Software Licensing is enabled for Cisco Unity Connection. To use Cisco SmartSoftware Licensing, Unity Connection must register with CSSM or satellite. After fresh install, UnityConnection remains in Evaluation Mode until it is registered with CSSM or satellite. The Evaluation Periodof 90 days are provided once in the entire life cycle of the product. As soon as Unity Connection consumeslicenses, the Evaluation Period starts.
In Evaluation Mode, you cannot enable the encryption on Unity Connection. It means you are not allowed touse the security modules in Unity Connection. To enable the encryption in Unity Connection, you must registerthe product with CSSM or satellite using token that allows Export-Controlled Functionality. To enable theExport Controlled Functionality for the product, see "Token Creation" section.
After successfully registering the product with CSSM or satellite, run "utils cuc encryption enable" CLIcommand to enable the encryption on Unity Connection.
For more information on the CLI command, see the Command Line Interface Reference Guide for CiscoUnified Solutions for the latest release, available athttp://www.cisco.com/c/en/us/support/unified-communications/unified-communications-manager-callmanager/products-maintenance-guides-list.html
For more information on the encryption in Cisco Unity Connection, see "Cisco Unity Connection- Restrictedand Unrestricted Version" chapter of the Security Guide for Cisco Unity Connection Release 12.x availableat https://www.cisco.com/c/en/us/td/docs/voice_ip_comm/connection/12x/security/b_12xcucsecx.html.
Install, Upgrade, and Maintenance Guide for Cisco Unity Connection Release 12.x85
Managing LicensesPrerequisites for Configuring Cisco Smart Software Licensing

If data plane encryption (e.g. SRTP) has been turned on after registration to CSSM or satellite and the productis subsequently deregistered from CSSM or satellite, data plane encryption will continue to be enabled. Analarm will be sent warning the administer to disable data plane encryption when unregistered from CSSM orsatellite. Data plane encryption will be disabled after a reboot of the product. Note that this encryption behavior,immediately after deregistration, may change in future versions of the product.
Note
Configuring Transport Settings (optional)To deploy the Cisco Smart Licensing in Unity Connection, you can configure the applicable transport settings.To configure the transport settings in Unity Connection, do the following procedure:
Step 1 In Cisco Unity Connection Administration, expand System Settings and select Licenses.Step 2 On the Licenses page, select View/Edit link under Transport Settings field. A dialog box appears, on which select the
applicable deployment option for the Smart Licensing. ( For more information, see Help > This Page)Step 3 Select Save.
By default, the Direct option is selected.Note
Token CreationYou must create a token to register the product with CSSM or satellite.
To create the token, do the following procedure:
Step 1 Log in to your Smart Account in Cisco Smart SoftwareManager at software.cisco.com or Cisco Smart SoftwareManagersatellite.
Step 2 Select the virtual account that contains the licenses for the product.Step 3 In the General tab of virtual account, select New Token.Step 4 In the Create Registration Token dialog box, enter the Description and Expire After information and select Create Token.Step 5 To allow the Export Controlled Functionality for Unity Connection, check the Allow export-controlled functionality on
the products registered with this token check box. By checking the check box, you can enable the encryption for theproduct registered with this Registration Token.
The Smart Account that are entitled to use Export Controlled Functionality can only check the Allowexport-controlled functionality on the products registered with this token check box.
Note
Step 6 Once the token is created, copy the token to register the product.
For more information, see software.cisco.com
Install, Upgrade, and Maintenance Guide for Cisco Unity Connection Release 12.x86
Managing LicensesConfiguring Transport Settings (optional)

Registering the Unity ConnectionTo register the Unity Connection with CSSM or satellite, do the following procedure:
Step 1 Log in to the Cisco Unity Connection Administration.Step 2 Expand System Settings and select Licenses.Step 3 On the Licenses page, select Register button. A dialog box appears, enter the registration token copied from the CSSM
or satellite.Step 4 Select Register.
Managing Cisco Smart Software LicensingAfter successful registration of the Unity connection with CSSM or satellite , you can see the usage detailson the Licenses page of the Cisco Unity Connection Administration. You can also manage the licenses byperforming the various actions on Cisco Unity Connection Administration.
To perform the actions, go to Cisco Unity Connection Administration > System Settings > Licenses. On theLicenses page, select any one of the following from the Action menu:
• Renew Authorization Now: Using this option, you can manually renew the license authorization for allthe licenses. However, the licenses are automatically authorized in every 6 hours.
• Renew Registration Now: After registering with CSSM or satellite, it provides a registration certificateto identify the product. This certificate is valid for one year. Using this option, you can manually renewthe registration of the product. However, the registration of the product is automatically renewed in everysix month.
• Deregister: Using this option, you can deregister the product from CSSM or satellite. All licenseentitlements used for the product are released back to its virtual account.
• Reregister: Using this option, you can reregister the product with CSSM or satellite.
Smart Software Licensing StatusWhenever Unity Connection communicates with the Cisco Smart Software Manager, there is a transition inthe Unity Connection licensing status. The Smart Software Licensing Status provides an overview of licenseusage on the product.
The licensing status of the Unity Connection can be categorized as follows:
• Registration Status• Authorization Status
Registration StatusThe different registration status in a Unity Connection server are:
• Unregistered: The registration status of Unity Connection remains Unregistered until it successfullyregisters with CSSM or satellite.
• Registered: Unity Connection is successfully registered with CSSM or satellite.
Install, Upgrade, and Maintenance Guide for Cisco Unity Connection Release 12.x87
Managing LicensesRegistering the Unity Connection

• Registration Expired: The registration status of Unity Connection changes to the Registration Expiredif registration of the product is not renewed within one year. After registration expired, the product goesback to the Evaluation Mode and you can use licenses for the remaining days of the Evaluation Period.When Evaluation Period of the product is expired and the product is still not registered with CSSM orsatellite, you can not create or modify the users in Unity Connection.
Authorization StatusThe different authorization status in a Unity Connection server are:
• Evaluation Mode: The authorization status of fresh installed Unity Connection is Evaluation Mode untilit registers with CSSM or satellite. In this mode, Unity Connection can use licensed feature exceptSpeechView and SpeechViewPro. The Evaluation Period of 90 days are provided once in the entire lifecycle of the product. The Evaluation Period of Unity Connection begins as soon as it starts consuminglicenses. After successful registration with CSSM, the Evaluation timer stops. You can further use theremaining Evaluation Period when Unity Connection will go in Unregister or Registration Expired state.
• Evaluation Period Expired: if Unity Connection uses licenses for 90 days without registering with CSSMor satellite, the status of Unity Connection changes to Evaluation Period Expired. In this mode, usercreation or modification are not allowed.
• No Licenses in Use: If Unity Connection does not use any licenses, the status changes to No License inUse.
• Authorized: In this state, all the licenses used by Unity Connection are authorized.
• Out of Compliance: Unity Connection authorization status changes to Out of Compliance either licenseusage exceeds the licenses available in the virtual account of the product or it uses the feature licensesthat are not available in the virtual account.
• Authorization Expired: Unity Connection Authorization status changes to Authorization Expired if UnityConnection does not communicate with CSSM or satellite within the authorization time period of 90days.
Specific License ReservationUnity Connection 12.5(1) and later provides Specific License Reservation feature that allows you to reservethe licenses or entitlements from your virtual account and associate them with the product instance. Theproduct instance can use the reserved licenses without communicating usage information to CSSM.
In Specific License Reservation, reserved licenses of a virtual account are moved with the product instance.Note
Configuring Specific License Reservation in Unity ConnectionIn Specific License Reservation, Unity Connection requires a manual exchange of information with CSSMfor product configuration and authorization. To configure Specific License Reservation and perform its variousfunctions, execute the CLI commands in the given below sequence:
• license smart reservation enable: This command is used to enable the license reservation feature.
• license smart reservation request specific: This command is used to generate reservation request codefor Unity Connection.
Install, Upgrade, and Maintenance Guide for Cisco Unity Connection Release 12.x88
Managing LicensesAuthorization Status

• license smart reservation install "<authorization code>" or license smart reservation install-file: Thiscommand is used to install the license reservation authorization-code generated on the CSSM.
You can also perform additional operations by executing the given below CLI commands:
• license smart reservation return: This command is used to generate a return code. The return code mustbe entered into the CSSM to return the licenses to the virtual account.
• license smart reservation cancel: This command is used to cancel the reservation process before theauthorization code obtained from CSSM against the product request code is installed.
• license smart reservation return - authorization "<authorization code>": This command is used to generatea return code using the authorization code specified on the command line. The return code must be enteredinto the CSSM to return the licenses to the virtual account.
In case of a cluster, you can execute the CLI commands only on publisher server.Note
For more information on above CLI commands, see Command Line Interface Reference Guide for CiscoUnified Communications Solutions Release 12.x available at http://www.cisco.com/c/en/us/support/unified-communications/unity-connection/products-maintenance-guides-list.html.
Specific License Reservation StatusWhen Unity Connection manually exchanges information once with the CSSM, there is a transition in theUnity Connection license reservation status.
The licensing status for Specific License Reservation of the Unity Connection can be categorized as follows:
• Registration Status
• Authorization Status
Registration StatusThe different registration status under Specific License Reservation in a Unity Connection server are:
• Unregistered: The registration status of Unity Connection remains Unregistered until the productreservation request code has been generated.
• Reservation In Progress: When Unity Connection generates the reservation request code, the licensingstatus changes to Reservation in Progress.
• Registered - License Reservation: When Unity Connection provides reservation request code to CSSM,CSSM generates an authorization code for the product. After successfully installing the authorizationcode on the product, the licensing status changes to Registered - License Reservation.
Authorization StatusThe different authorization status under Specific License Reservation in a Unity Connection server are:
• Evaluation Mode: Unity Connection remains in Evaluation Mode until the product is not registered withCSSM. In this mode, Unity Connection can use licenses for 90 days.
Install, Upgrade, and Maintenance Guide for Cisco Unity Connection Release 12.x89
Managing LicensesSpecific License Reservation Status

• Evaluation Period Expired: When Unity Connection uses licenses for 90 days without registering withCSSM, the status of Unity Connection changes to Evaluation Period Expired.
• No License in Use: When Unity Connection does not use any licenses, the status changes to No Licensein Use.
• Authorized - Reserved: When all the reserved licenses used by Unity Connection are authorized, thestatus changes to Authorized - Reserved.
• Not Authorized - Reserved: When Unity Connection license usage exceeds the licenses reserved in thevirtual account of the product or it uses the feature licenses that are not reserved in the virtual account,the status changes to Not Authorized - Reserved.
Enforcement Policy on Unity ConnectionWhen Unity Connection goes in either of the below state, it will go in enforcement mode. In this mode, usercreation or modification in the user account, Speech Connect Port creation or modification and other licensingrelated updates are not allowed in Unity Connection in enforcement mode. However, existing users can sendor receive the voice mails.
• Evaluation Period Expired
• Registration Expired
• Authorization Expired
• Out of Compliance with 90 days of overage period expired.
For more information on the above states, see "Smart Software Licensing Status" section .
In case of Specific License Reservation, when Unity Connection goes in either of the below state, it will goin enforcement mode.
• Evaluation Period Expired
• Not Authorized - Reserved state with 90 days of overage period expired
For more information on the above states, see" Specific License Reservation Status, on page 89
Note
In Evaluation Period Expired and Registration Expired states, Unity Connection generates an alarm to disablethe encryption on the product. It is recommended that either you execute the "utils cuc encryption disable"CLI command to disable the encryption or register the product with CSSM or satellite to further use thesecurity modules of the Unity Connection.
For more information on the CLI command, see the Command Line Interface Reference Guide for CiscoUnified Solutions for the latest release, available athttp://www.cisco.com/c/en/us/support/unified-communications/unity-connection/products-maintenance-guides-list.html
For more information on the generated alarm, see Alarm Message Definitions for Cisco Unity Connectionavailable at, https://www.cisco.com/c/en/us/support/unified-communications/unity-connection/products-system-message-guides-list.html.
Install, Upgrade, and Maintenance Guide for Cisco Unity Connection Release 12.x90
Managing LicensesEnforcement Policy on Unity Connection

Licenses in Unity Connection ClusterIn a Unity Connection cluster, both publisher and subscriber server use licenses but only publisher server isallowed to communicate with CSSM or satellite. Whenever the publisher server communicates with CSSMor satellite, the licensing status and usage information are updated on both publisher as well as subscriberserver. In case, when publisher server stops functioning (for example, when it is shut down for maintenance),the subscriber server can use licenses but the licensing status remains unchanged. If the publisher server failsto resume its functioning within 90 days, the user account provisioning is not allowed on subscriber server.
In case of a cluster, only publisher server is allowed to perform the following operations:
• Registration• Renew Authorization• Renew Registration• Deregister• Reregister
After successful registration of the publisher server with CSSM or satellite, subscriber server only shows thelicensing status and usage details of the product.
Migrating LicensesWhenever you upgrade Cisco Unity Connection from any earlier releases to 12.0(1) and later, all licenses(legacy and PLM-based) must be migrated to Cisco Smart Software Licensing. Customers with an activeCisco Software Support Service contract, can convert PLM-based (pre-12.0 versions) licenses to Cisco SmartSoftware Licenses through the Cisco Smart Software Manager portal athttps://software.cisco.com/#SmartLicensing-LicenseConversion via License Registration Portal (LRP) athttps://slexui.cloudapps.cisco.com/SWIFT/LicensingUI/Home. Customers can migrate fulfilled, partiallyfulfilled, and unfulfilled PAK's or device-based licenses to Cisco Smart Software licenses. For legacy (pre-9.0versions) licenses, customers must send a license migration request to Cisco Licensing Support available athttps://slexui.cloudapps.cisco.com/SWIFT/LicensingUI/html/contact.html. For customers with no servicecontract in place, upgrade SKU's must be ordered which will fulfill the new Cisco Smart Software licensesto their organization's Cisco Smart Account and respective virtual account. Refer the Cisco CollaborationOrdering Guide at http://www.cisco.com/c/en/us/partners/tools/collaboration-ordering-guides.html .
For more information on Cisco Smart Software Licensing, please visithttp://www.cisco.com/c/en/us/buy/smart-accounts/software-licensing.html.
If HTTPS or Legacy networking is deployed in the system, you canmigrate the licenses of each node gradually.It will not affect the system functionality.
After upgrading the Unity Connection from any earlier releases to 12.0(1), you must register the product withCisco Smart Software Manager or Cisco Smart Software Manager satellite.
Note
Enabling Encryption in Cisco Unity Connection 12.5(1) SU1 and LaterWith Unity Connection 12.5(1) SU1, the Category C customers can enable the encryption on the restrictedversion of Cisco Unity Connection with both type of licensing – Cisco Smart Software Licensing and SpecificLicense Reservation. To enable the encryption for export restricted virtual account, you must have CUC
Install, Upgrade, and Maintenance Guide for Cisco Unity Connection Release 12.x91
Managing LicensesLicenses in Unity Connection Cluster

Export Restricted Authorization Key (PID: CUC-SL-EXRTKY-K9=) license in the virtual account. In addition,you must perform below configuration to enable the encryption for Category C customers.
Enabling Encryption with Cisco Smart Software Licensing
Do the following procedure to enable the encryption with Cisco Smart Licensing
• Register the Unity Connection with CSSM using token created from Category C customer's virtualaccount.
Unity Connection does not support Cisco Smart Software satellite asdeployment option for export restricted virtual account.
Note
• Execute Export request CLI license smart export request local CUC_Export_Restricted_Authorization_Keyon the registered Unity Connection server to install Export Restricted Authorization Key.
• Execute utils cuc encryption enable CLI to enable the encryption on the product and restart the requiredservices mentioned in the CLI output.
You can also perform additional operations by executing the given below CLI commands:
• license smart export return local CUC_Export_Restricted_Authorization_Key to return an export restrictedfeature licenses.
• license smart export cancel to cancel the automatic retry of previously failed export request or returnfrom CSSM
For more information on CLI commands, see the applicable version of Command Line Interface ReferenceGuide for Cisco Unified Communications Solutions available athttps://www.cisco.com/c/en/us/support/unified-communications/unified-communications-manager-callmanager/products-maintenance-guides-list.html
Enabling Encryption with Specific License Reservation
To enable the encryption with Specific License Reservation, you must reserve the CUC Export RestrictedAuthorization Key license in virtual account of Category C customer on CSSM.
For more information on Export Control Functionality, see "Cisco Unity Connection- Restricted andUnrestricted Version" chapter of Security Guide for Cisco Unity Connection Release 12.x availablehttps://www.cisco.com/c/en/us/td/docs/voice_ip_comm/connection/12x/security/b_12xcucsecx.html.
License Parameters for Unity Connection FeaturesBelow table describes the Licence Parameters of Unity Connection feature applicable for Cisco Smart SoftwareLicensing and Specific License Reservation.
Table 10: License Parameters for Unity Connection Features
DescriptionFeatureLicense Parameter
Specifies the maximum number ofvoice mail users configured inUnity Connection.
Total number of voicemail users.CUC_BasicMessaging
Install, Upgrade, and Maintenance Guide for Cisco Unity Connection Release 12.x92
Managing LicensesLicense Parameters for Unity Connection Features

DescriptionFeatureLicense Parameter
Specifies the maximum number ofUnity Connection SRSV usersconfigured on Unity Connection.The Unity Connection SRSV usersare reflected under this tag onlywhen the branch is active. This tagalso provides the licenses of BasicMessaging.
Total number of enhancedmessaging users.
CUC_EnhancedMessaging
Specifies the maximum number ofSpeech view Standard usersconfigured in Unity Connection.
Total number of speech viewstandard users.
CUC_SpeechView
(Not applicable for SpecificLicense Reservation)
Specifies the maximum number ofSpeech view Professional usersconfigured in Unity Connection.
Total number of speech viewprofessional users.
CUC_SpeechViewPro
(Not applicable for SpecificLicense Reservation)
Specifies the maximum number ofsimultaneous voice recognitionsessions and Text to Speech (TTS)sessions allowed in UnityConnection.
Total number of speech connectports.
CUC_SpeechConnectPort
Specifes the maximum number oflocal contacts, along with VPIMcontacts created from Non UnityConnection Server.
Total number of Contacts.CUC_SpeechConnectGuestUser1
1 To avail this functionality, customers are currently not required to acquire the Speech Connect GuestUser licenses.
Cisco Smart Software Licensing supports license hierarchy, in which higher level licenses are utilized to fulfillthe request for lower level licenses to avoid a shortage of the licenses.
Reserving entitlement tags of higher release on 12.x is not allowed. You can only borrow higher level licenseson 12.x at CSSM as per license hierarchy.
Note
Following are the licenses included in license hierarchy in an order from higher level to lower level
• Unity Connection Enhanced Messaging User Licenses (12.x)• Unity Connection Basic Messaging User Licenses (12.x)
Install, Upgrade, and Maintenance Guide for Cisco Unity Connection Release 12.x93
Managing LicensesLicense Parameters for Unity Connection Features

Install, Upgrade, and Maintenance Guide for Cisco Unity Connection Release 12.x94
Managing LicensesLicense Parameters for Unity Connection Features

C H A P T E R 7Managing Cisco Unity Connection using CiscoPrime Collaboration
Cisco Unity Connection release 11.0(1) supports Cisco Prime Collaboration Deployment for installation, L2upgrade and maintenance of Unity Connection.
For detailed information on Cisco Prime Collaboration Deployment, seehttp://www.cisco.com/c/en/us/support/unified-communications/unified-communications-manager-callmanager/products-maintenance-guides-list.html.
• Managing Cisco Unity Connection using Cisco Prime Collaboration, on page 95
Managing Cisco Unity Connection using Cisco PrimeCollaboration
Cisco Unity Connection release 11.0(1) supports Cisco Prime Collaboration Deployment for installation, L2upgrade and maintenance of Unity Connection.
For detailed information on Cisco Prime Collaboration Deployment, seehttp://www.cisco.com/c/en/us/support/unified-communications/unified-communications-manager-callmanager/products-maintenance-guides-list.html.
Install, Upgrade, and Maintenance Guide for Cisco Unity Connection Release 12.x95

Install, Upgrade, and Maintenance Guide for Cisco Unity Connection Release 12.x96
Managing Cisco Unity Connection using Cisco Prime CollaborationManaging Cisco Unity Connection using Cisco Prime Collaboration

I N D E X
A
alerts, setting up notification of server status changes 57
C
calls in progress, effects of changing server status 66changing 58
cluster settings 58cluster 69
how one works 69Cluster Configuration page, changing settings 58Connection Server Role Manager service, about 69critical service, effects of stopping 67customizing cluster settings 58
D
database replication 69
E
effects 66–67, 70of a split-brain condition 70of stopping a critical service 67on calls in progress when server status changes 66
L
languages 79adding to a Connection server (no cluster) (task list) 79
M
message store replication 69monitoring server status 69
N
notification of server status change alerts, setting up 57
P
ports 59assignments of voice messaging to each server 59
R
replication 69of database and message store 69of voice messages 69
S
server status changes, setting up notification of 57servers 59, 62, 66–67, 69
assignments of voice messaging ports 59effects on calls in progress when status changes 66shutting down 67status functions in cluster 62status monitoring 69
setting up notification of server status change alerts 57settings, customizing cluster 58shutting down servers 67split-brain condition, effects of 70status 62, 69
of servers 69server, functions in cluster 62
stopping a critical service, effects of 67
T
task lists 79for adding languages to a Connection server (no cluster) 79
V
voice message replication 69voice messaging ports, assignments to each server 59
Install, Upgrade, and Maintenance Guide for Cisco Unity Connection Release 12.xIN-1

Install, Upgrade, and Maintenance Guide for Cisco Unity Connection Release 12.xIN-2
INDEX