Unity and Kinect tutorial
10
2/25/2014 Unity and Kinect tutorial « Nightmare Kitty https://web.archive.org/web/20130605171506/http://www.nightmarekitty.com/2011/10/28/unity-and-kinect-tutorial/ 1/10 Oct 28 Unity and Kinect tutorial By admin // Tutorials // No Comments 3d games and User Interfaces with Unity and Kinect What follows is an except from a book I coauthored you can buy on Amazon called Meet the Kinect . (NEW 3/30/2012) If you are going to use the Windows SDK and are on Windows 7, I’m creating an update just for you! Scroll all the way to the bottom for the update and then come back up here and skip over the installation section. For this chapter, we are going to be using a very popular game engine called Unity. By integrating OpenNI, Nite and Sensor Kinect into Unity we will control a 3d character and multiple user interfaces. After we cover the main Components, we will build an example of each from the bottom up. A game engine is a system designed for creating and developing video games, installation spaces and interfaces. What you can do with a game engine goes far beyond just the creation of games. Unity is used commonly to create architectural installations and 3D user interfaces. Game engines are designed to work with mobile devices, computers and game consoles. Most offer a rendering engine for 2d and 3d graphics, a physics engine (for collision detection and adding physics), sound, scripting, animation and more. It is a real time 3D environment easily repurposes in many ways. It can create brilliant responsive environments, 3D projection maps and interactive displays just as easily as it can create games. Getting your system ready for Kinect To get your system ready for Kinect to work with it, you will need to install 3 things first, Macports, libusb and libtool. Macports is a command line tool for allowing you to download, compile and install X11 and Aqua based open source software on your Mac. Go here to download it, then run the installer: http://www.macports.org/ Macports is now installed and we can use it from the Terminal window. Terminal is a Unix command line tool for your Mac that is part of your OS. We are going to use the Terminal to download and install the two other elements that we really need to get the Kinect USB to work with a Mac USB port, since they were designed to work with an Xbox originally, libtool and libusb. ABOUT THE GAME Nightmare Kitty is a kinect game currently under development using Beckon Gesture Technology. As you walk by, your head transforms into a ballon and you need to keep from being popped by the evil cats falling from the sky. Duck, shield, dodge and find power ups and it rains laser beam claw evil from above. Can you stay alive long enough to battle the most evil kitty to ever live? Can you beat Nightmare Kitty and free the balloons from this reign of tyranny or will your nightmares consume you? Play alone or with up to 4 other friends. Nightmare Kitty won 2 editor's choice awards at Maker Faire NYC 2011. Nightmare Kitty was exhibited at Art and Code 3D, 2011 RECENT MEOWS Twitter feed loading HOME CONTACT US http://www.nightmarekitty.com/2011/10/28/unity‑and‑kinect‑tutorial/ Go APR JUN AUG 5 2012 2013 2014 30 captures 3 Mar 12 ‑ 21 Aug 13 Close Help
Transcript of Unity and Kinect tutorial

2/25/2014 Unity and Kinect tutorial « Nightmare Kitty
https://web.archive.org/web/20130605171506/http://www.nightmarekitty.com/2011/10/28/unity-and-kinect-tutorial/ 1/10
Oct28
Unity and Kinect tutorialBy admin // Tutorials // No Comments
3d games and User Interfaces with Unity and Kinect
What follows is an except from a book I coauthored you can buy on Amazon called Meet theKinect.
(NEW 3/30/2012) If you are going to use the Windows SDK and are on Windows 7, I’mcreating an update just for you! Scroll all the way to the bottom for the update and thencome back up here and skip over the installation section.
For this chapter, we are going to be using a very popular game engine called Unity. By integratingOpenNI, Nite and Sensor Kinect into Unity we will control a 3d character and multiple userinterfaces. After we cover the main Components, we will build an example of each from the bottomup.
A game engine is a system designed for creating and developing video games, installation spacesand interfaces. What you can do with a game engine goes far beyond just the creation of games.Unity is used commonly to create architectural installations and 3D user interfaces. Game enginesare designed to work with mobile devices, computers and game consoles. Most offer a renderingengine for 2d and 3d graphics, a physics engine (for collision detection and adding physics), sound,scripting, animation and more. It is a real time 3D environment easily repurposes in many ways. Itcan create brilliant responsive environments, 3D projection maps and interactive displays just aseasily as it can create games.
Getting your system ready for Kinect
To get your system ready for Kinect to work with it, you will need to install 3 things first, Macports,libusb and libtool. Macports is a command line tool for allowing you to download, compile and installX11 and Aqua based open source software on your Mac. Go here to download it, then run theinstaller:
http://www.macports.org/
Macports is now installed and we can use it from the Terminal window. Terminal is a Unix commandline tool for your Mac that is part of your OS. We are going to use the Terminal to download andinstall the two other elements that we really need to get the Kinect USB to work with a Mac USBport, since they were designed to work with an Xbox originally, libtool and libusb.
ABOUT THE GAME
Nightmare Kitty is a kinect game currentlyunder development using Beckon GestureTechnology.
As you walk by, your head transforms into aballon and you need to keep from beingpopped by the evil cats falling from the sky.Duck, shield, dodge and find power ups andit rains laser beam claw evil from above.Can you stay alive long enough to battle themost evil kitty to ever live? Can you beatNightmare Kitty and free the balloons fromthis reign of tyranny or will your nightmaresconsume you?
Play alone or with up to 4 other friends.
Nightmare Kitty won 2 editor's choiceawards at Maker Faire NYC 2011.
Nightmare Kitty was exhibited at Art andCode 3D, 2011
RECENT MEOWS
Twitter feed loading
HOME CONTACT US
http://www.nightmarekitty.com/2011/10/28/unity‑and‑kinect‑tutorial/ Go APR JUN AUG
52012 2013 2014
30 captures3 Mar 12 ‑ 21 Aug 13
Close
Help

2/25/2014 Unity and Kinect tutorial « Nightmare Kitty
https://web.archive.org/web/20130605171506/http://www.nightmarekitty.com/2011/10/28/unity-and-kinect-tutorial/ 2/10
1. Launch a terminal window. Do that on the Mac by going to Mac > Application > Utilities > Terminal.
A terminal window should open, and you should see something like that in Figure 71.
Type the following code in at the command line prompt to download and install libtool:sudo port install libtool and hit Enter.Now type another line at the command line to get and install libusb:
sudo port install libusbdevel +universal
Figure 71. The Mac OS X terminal window
Installing Unity and Supporting Software
Let’s get started. First, let’s download Unity from http://unity3d.com/. Install Unity as you wouldinstall any other application on your platform. I will be using Mac OSX 10.6.8 for the examples here,but Unity is platform agnostic as are the Zigfu scripts we will be running.
Note: This chapter is created with Unity Basic version 3.5. Older versions are not compliantwith the software covered here.
Next, we are going to use an extremely easy install script from Zigfu. Zigfu has created a packagewith one install script that includes Open NI, Sensor Kinect and NITE. Zigfu has the unique positionof being written by two ExPrimesense employee and two other developers. Primesense was thethe company that created NITE. As a result, these Unity Scripts for OpenNI are the most stableavailable and also have the advantage of being open source. Zigfu is Amir Hirsch, Ted Blackman,Roee Shenberg, Shlomo Zippel. When asked where they got their name from, the cited the 90′smeme, All Your Base Are Belong to Us. Also, they think of moving in front of a Kinect possibly as“zigging.”
Download the Installer script from Zigfu.com. Also download the Unity Package on Zigfu.com. Thisis the package we will import to run Kinect in Unity. Unzip these files and move them into yourDocuments folder.Caution: Zigfu recommends a complete deinstall of Open Kinect, NITE and Open NI before runningtheir install.sh script. I found deinstalling unnecessary, but you may want to follow Zigfu’srecommendation.Following are the steps for executing Zigfu’s installer script on a Mac. If you are on a PC, see theuser forums if you run into any problems:
Launch a terminal window if it is not still open from earlier.Do that on the Mac by going to Mac → Application →Utilities → Terminal.Navigate to the folder containing the installer script that you downloaded. For example, I issued the
following command on my system:cd Documents/ZigFuOpenNIMacIssue the following command to execute the installer script as the root user:
sudo sh install.shThe sudo command might be new to you. There’s a user in your Mac OS that’s a superuser, or root user,used for system administration. This user account has privileges that your regular account does not have.The sudo command allows you to execute a single command as if you were logged on as this special userknown as root.You will be prompted for your user password. Enter it and then the installation will run and the following
lines of will appear in the Terminal window.You Know What You Doing (Installing OpenNI)Installing OpenNI
****************************
copying shared libraries…OK
copying executables…OK
copying include files…OK
…
*** DONE ***
For Great Justice… (Type “sh test.sh” to run the UserTracker demo)
Now we are going to test to make sure everything installed correctly by running the test script. Type thefollowing command and press ENTER:sh test.sh
This window should pop open and you should see yourself moving around, as shown in Figure 72. What yousee in the figure is a Depth Map. A Depth Map is an image channel that contains information relating to thedistance to the surfaces of scene objects from a viewpoint, in this case from the Kinect.

2/25/2014 Unity and Kinect tutorial « Nightmare Kitty
https://web.archive.org/web/20130605171506/http://www.nightmarekitty.com/2011/10/28/unity-and-kinect-tutorial/ 3/10
The install is complete! You are ready to move on and explore what Unity has to offer. Make sure toclose the Prime Sense User Tracker Viewer before moving on so as to avoid conflicts withsubsequent examples.
Figure 72. A Kinect depth map as generated by Unity
Exploring The Unity InterfaceLaunch Unity. Let’s create a project and explore the interface together.ProjectsHere’s how to create a project:1. Select File > New Project from the menu.2. It’s a good idea to always import Unity’s Standard Assets. In the popup, you will see a whole list ofpossiblies to include in your project. Select Standard Assets and press Create Project.3. Import the Zigfu Unity Package for all of the examples. Start by selecting Assets > Import Package >Custom Package from the menu.4. Navigate to your Documents folder and import the following file – UnityOpenNIBindingsv1.1.unitypackage5. From the ensuing popup, just let Unity import all the appropriate libraries for the project it needs.Unity should now have a few tabs open. The first thing you are going to want to do is note that in the upperleft you will see two tabs, Scene and Game. Click on Game to switch to the Game Tab.The Workspace
To make working in Unity easier, grab the Game Tab and drag it to the left. It will pop in as it’s ownseparate tab area. The gray bar between the two windows can be adjusted by dragging. You shouldsee results similar to Figure 73 after moving the tab.
Figure 73. The Unity workspace
The left tab is now Game viewer. In this tab, you can see everything that is in the current scene in3d space from the perspective of the camera. A camera in 3d space and works just like a regularcamera and should be positioned to frame all the appropriate visual elements in the scene.The tab on the right of the Game viewer is the Scene viewer tab. This tab shows the 3D world of theselected Scene. You can think of Scenes exactly like you’d think of levels. For each level in yourgame, you’ll create a Scene. In the upper right corner of the Scene viewer, there is an exoticcreature found in many 3D packages known as a Gizmo, and yes, that’s the official name. Fear not,it will not reproduce if you feed it after midnight or get it wet. It shows you the X, Y, Z andperspective views. It’s easy to remember X, Y and Z as R, G, B in this color scene. Click and rotateon the X, Y, Z or the center cube (perspective view) axis to see the game from these angles.
Note: Viewing from different angles doesn’t move the camera, only what the user is looking at in thecurrent Scene.The final tab to the far right is the Inspector. If you know Flash, you can think of this tab like theproperties inspector. The inspector allows you to set the properties for a selected object’scomponents. It also allows you to attach scripts to game objects to introduce functionality in Unity.This is exactly what Zigfu has already done to make their examples work. They designed a basicscene with game objects and then attached scripts to them to bind with Open NI.
You’ll see two tabs on the bottom of the workspace. The bottom left tab is your Hierarchy viewer.Everything in this tab is actually an object in your game. The bottom right tab is the Project folder forthe current project. Everything in this folder is hiding in User > New Unity Project 1 > Assets.Anything added to the assets file will automatically update in this tab viewer, how it will not be in thegame until it is added to a Scene by dragging it into the Scene or Inspector.
Basic Navigation and Transform ToolsNow let’s run down the buttons surrounding the tabs. The buttons to your top left (Figure 74) are your basicnavigation and transform tools with key commands that match most 3D applications.
Figure 74. Basic navigation and transform tools
The buttons in Figure 74 operate as follows, working from left to right. The letters in parenthesesare the keyboard shortcuts.
The hand tool (q) allows you to move around the 3d world.The Move tool (w) allows you to move around a selected game object in the scene tabThe Rotate tool (w) allows you to rotate around your selected game object in the scene tabThe Scale tool (r) allows you to scale a selected game object in the scene tab
Another handy key command to know is f. Pressing f on your keyboard will focus the scene tab on any gameobject selected in the Hierarchy.Play ControlsThe next buttons to the right are the play controls (Figure 75).
Figure 75. Unity’s play controls
The play button runs the current Scene and if it is pressed while playing stops a Scene. Unity has aspecific interface particularity to be aware of. If in Play mode, these buttons will glow blue. Anychanges made in the Inspector during this time to game object properties will be lost when thescene is stopped. There is no way to save changes made during Play mode unless you add anadditional plugin to Unity. If you hit on a property change that you like while in Play mode, write that
2/25/2014 Unity and Kinect tutorial « Nightmare Kitty
https://web.archive.org/web/20130605171506/http://www.nightmarekitty.com/2011/10/28/unity-and-kinect-tutorial/ 4/10
change down and reenter it once you are out of Play mode.
Tip: A 3 button mouse is critical to working in Unity’s 3D space. All 3 buttons are used tosmoothly move around the scene in 3d space. Holding down option and left clicking allowsyou to pan the perspective. The middle mouse scroll zooms in and out of a scene. Pressingthe scroll middle button down will toggle into the hand tool. Right clicking rotatesperspective. Option right click provides an additional zoom tool.
Understanding Zigfu’s Relation to Unity
Zigfu is a set of C# scripts that bind with OpenNI and Primesense’s NITE to allow Unity to accessNITE’s functionality. OpenNI is a open source standard for creating compatibility across the newlyemerging field of Natural Interaction devices, applications and middleware. It is an abstraction layerthat integrates middleware with hardware and applications.
OpenNI and NITE
OpenNI has been geared mainly toward 3D sensors but nothing in OpenNI is specific toPrimeSense’s NITE or the Kinect. It’s an interface that allows developers of Middleware such asNITE to get a depth stream, skeleton data, audio, IR, hand points, an RGB image, and GestureDetection. OpenNI doesn’t specifically care how these points were generated or from where.
OpenNI relies upon modules to retrieve device data and pass that data into OpenNI and anymiddleware. Anyone can write a module for any camera or senor and register it with OpenNI.Sensor Kinect is one such module. Sensor Kinect allows OpenNI to get all of the data coming infrom your Kinect and then OpenNI makes that data useful for NITE. NITE is middleware that givesdigital devices the power to translate and respond to user interaction without wearable equipment orcontrols.
Note: The important point to understand about OpenNI is that is it not specific to hardware ormiddleware. OpenNI can be used with any OpenNIcompliant hardware. For example, you canuse OpenNI with the Primesense reference design, the Microsoft Kinect, the Asus Xtion, andwith any OpenNI compliant middleware such as Nite, and soon Beckon.
NITE then, is the intermediary standing between OpenNI and your application, in this case Unity. Inthe case of the Kinect, Primesense not only made the middleware but the motion sensor chip insidethe Kinect. This really changes nothing practically, but it’s a fun fact to know and part of what makesNITE so robust.
Unity and Zigfu
Unity allows users to create Scripts and attach those Scripts to Game Objects as Components.Components are how game functionality is added to any game and they drive the Game Objects.Zigfu has created scripts for Unity to bind, or talk with, OpenNI.
Zigfu has created sample scripts to familiarize users with OpenNI’s functionality. Before Zigfu,developers in Unity were writing their own bindings. There’s still nothing stopping developers fromdoing this now should they be so inclined and skilled. With the way Unity works you can very easilyattach the Zigfu Scripts onto one object and any custom scripts that you might create onto thatsame object or any other object.Unity is so tolerant to this kind of development as to be surprising. In fact, Unity supports not one,but three scripting languages: JavaScript, C# and Boo. Developers can use all three simultaneouslyand there’s no need to choose one language over the other. One of your Game Object’sComponent’s can be in C# and the other in Boo.
Running the The Zigfu Game Examples
Go to your Project folder and open the folder called “_Scenes” These are the Zigfu created Scenes,which are the examples demonstrating OpenNI functionality. Some of these you need two people toactually use, so be prepared to get a friend to help at some point to run the multiplayer examples.Zigfu divides examples into two categories: game and interface. We’ll go over the game examplesfirst, in this section, and then the interface examples.Avatar2Players
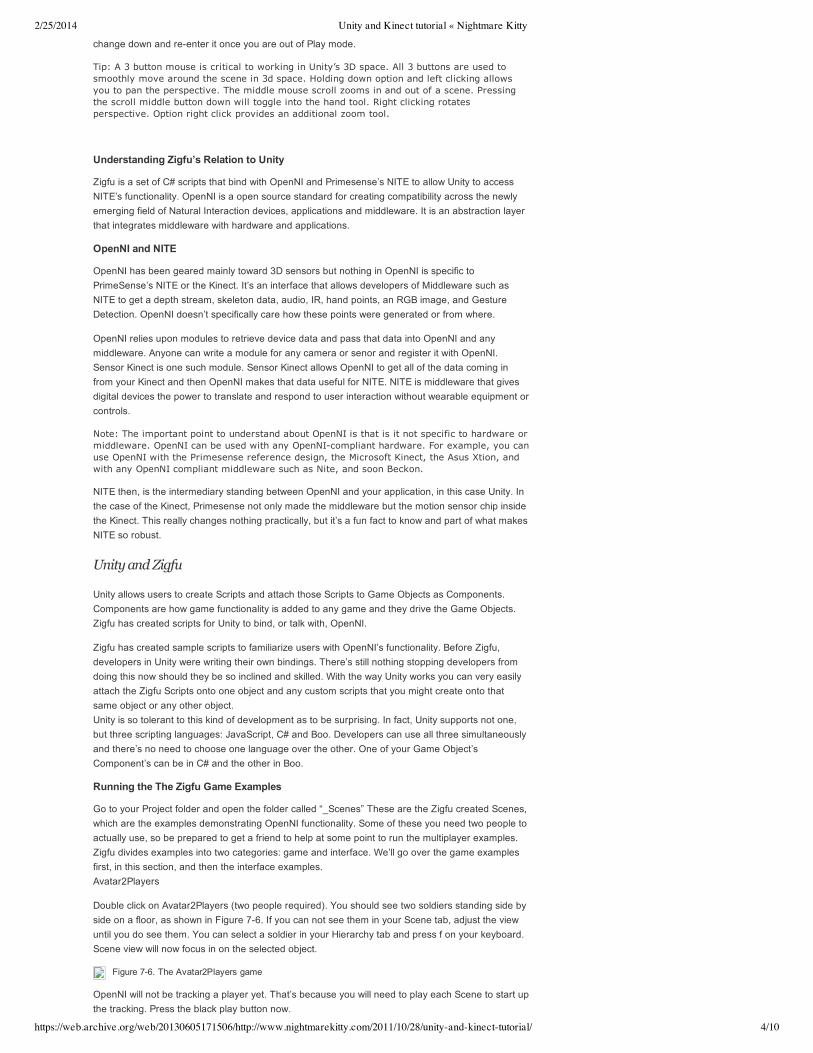
Double click on Avatar2Players (two people required). You should see two soldiers standing side byside on a floor, as shown in Figure 76. If you can not see them in your Scene tab, adjust the viewuntil you do see them. You can select a soldier in your Hierarchy tab and press f on your keyboard.Scene view will now focus in on the selected object.
Figure 76. The Avatar2Players game
OpenNI will not be tracking a player yet. That’s because you will need to play each Scene to start upthe tracking. Press the black play button now.

2/25/2014 Unity and Kinect tutorial « Nightmare Kitty
https://web.archive.org/web/20130605171506/http://www.nightmarekitty.com/2011/10/28/unity-and-kinect-tutorial/ 5/10
You will now see a little yellow view port in the bottom of your Game tab. Make sure that you andyour fellow player are both both visible in the camera view. You both will need to stand in thecalibration pose to calibrate OpenNI. This pose is exactly like the stick ‘em up pose in a bankrobbery. Both hands up now please!Make sure your elbows are parallel to your shoulders and your hands are at the same height. Afterthe Kinect catches you and your partner as the players, you will see the 3d model jump into yourbody positions.Note: OpenNI is removing the calibration pose by the end of 2011. If reading this chapter after then,you might not need to do a calibration pose. Dance around and see if you are tracked. If you are,then good. If not, then try the calibration pose.
Let’s now look a little bit deeper into this Scene from Figure 76 and how to navigate around it. Dothe following;
1. Click on Solider in the Hierarchy tab.2. Direct your attention to the right Inspector Tab.3. Turn down the arrow next to Open NISkeleton (Script).
Now visible is a list of all the joints you can get access to with OpenNI and what game objects theyare attached to in Unity. Note how all the corresponding joints are mapped onto the Game Objects.The Script joints coming from OpenNI are on the left and the Game Objects in the scene are listedon the right. They have simply been named to match the names of the joint they correspond to.Single click on any Game Object joint on the right of the list and you will see it jump to its associatedObject listed in the Hierarchy tab. Double clicking will open that object up in the Inspector. To goback to the Solider, simply single click on it in the Hierarchy again.In the Hierarchy tab, you will see all objects in the game. In this example, there is a DirectionalLight, which is lighting the scene. Next down in the list is the Floor. Click on it to see theComponents attached to this Game Object. The Transform Component is on every game object.Next you will see the Box Collider, Mesh Renderer with the shaders for the Solider and the floor andtheir respective Normalmap. A Mesh Renderer takes the geometry from the Mesh Filter andrenders it at the location defined by an object’s Transform component in the Inspector. A normalmap, or normal mapping, is a way to make an object look like it has a higher polygonal count that itactually does by faking lighting and dents via a 2d file that’s applied to the mesh of an object. Thecreation of normals, meshs and textures is beyond the scope of this tutorial, but is part of every 3dworkflow. See the manual of your 3d package to learn more.
The next object in the Hierarchy is the Main Camera. Open this object and note that there is a ZigfuScript applied to it called ExitOnEscape that allows you to exit a game when escape is pressed. Youcan add it to any scene where you want this behavior. The Script is specific just to this Zigfuexample and not part of OpenNI.
Note: To add a Script Component to a Game Object, select the Game Object in the Hierarchyto open up its list of compoents it in the Inspector.Note: This is a very straightforward process, but it feels strange the first time you do it. Allyou are doing is attaching a new compoent, a sciprt component, to your Game Object viadragging it into the Inspector Window with that Game Object’s compoents reveiled. Youexpose an Object’s compoents whenever you select it in the Hierarchy. If you are still lost,there’s are amazing tutorials showing this in video onall over youtubeYoutube. A good thingabout Unity is the amount of support you will find in the user community. The user forumsare also full of programmers who are kind enough to help newbie’s out. If you ever get stuckin a jam, the forums should be the first place you turn for help. You get to the viawww.unity3d.com
ChangeColor is for changing the color of the boxes in the ItemSelector scene.
Exitonescape exits the game when escape is pressed.
ObjectPeruser simply instantiates a prefab for every detected user and is used in theTopDownUserMap scene.
StartSessesionMessage displays the “perform focus gesture to start session” when you are not in asession.
The next object is the Sensor Object. Select this Object and notice that in the Inspector tab thereare several OpenNI scripts attached. The Sensor object itself is an Empty Game Object. Unityallows for the creation of Empty Game Objects. This empty Object was created for the purpose ofattaching scripts to it it that run in the Scene. These scripts are all related to OpenNI functionality,and are as follows:Open NIUser Tracker: Allows for Unity to track users up to the maximum number of users OpenNIregisters. There is no default maximum number.
Open NIDepthMapViewer: Simply displays the Kinect depth map in your game when it is running.Remember it will not be visible until the game is running.

2/25/2014 Unity and Kinect tutorial « Nightmare Kitty
https://web.archive.org/web/20130605171506/http://www.nightmarekitty.com/2011/10/28/unity-and-kinect-tutorial/ 6/10
OpenNIUsers Radar: Pops a dark gray user tracker box up on screen in the game with a numberattached to each specific user the game registers. If you want to use this in a newly created sceneyou must link this script to the Open NIUser Tracker in the Inspector.
Open NISplit Screen Skeleton Control: Allows users to have two players on screen at once. Thismight be helpful for a first person shooter with a split screen.The final Object in the Hierarchy is the Solider. Solider is a Prefab, that’s why it is blue. A Prefab is acollection of Game Objects and Components that can be used again and again in a game. They aresaved in the Project tab View. Prefabs are basic functionality in Unity.
Soldier is actually a Zigfu created Prefab you can add to any scene. Look in the Project Tab andopen the OpenNI Folder and then the Prefabs. The Prefab Soldier is located within. To add aPrefab to a Scene, simply drag it from the Project Folder in the Scene viewer.
AvatarFrontFacing
AvatarFrontFacing is almost exactly like Avatar2Players, but it has just one Skeleton, and itimplements some additional functionality. Double click on AvatarFrontFacing and play the Scene.Do the Calibration pose and watch yourself dance around as a Solider.
Select your Sensor Game Object in the Hierarchy tab. Notice the last script component added,Open NI Context. Open NIContext script allows loading .oni files instead of using the live sensor. Torecord .oni files use NIViewer, which comes with OpenNI. (There’s more documentation onrecording .oni files in the OpenNI manual). Any .oni file you recorded can easily be linked into Unityusing the OpenNIContext Component. Oni files are files that contain prerecorded skeleton data.This is a really easy way to do very cheap and effective motion capture without a motion capturesuit. You can take the skeleton data in an ONI file and map it to a character’s joints in unity, just likeyou would for live sensor input. The process involves some command line usage and some Unix. Ifyou are a more skilled developer or feeling adventurous, crack open the Open NI manual and give ita try.
TopDownUserMap
TopDownUserMap shows a top down game map in which the Kinect is driving the location of theplayer on the floor. The UsersContainer Object in the Hierarchy tab has the Object Per Use s PerUser (Script) on it and the Open NIUser Tracker scripts attached to it. Object Per Script attached aspecific object to a user. The scale
Blockman3rdPerson
Blockman3rdPerson adds a few new bits of functionailty. Run it and watch what happens. Theskeleton is made from Unity Game Objects and the camera follows the Blockman in space.Let’s look at the Hierarchy to see what is in this example. First there’s a Blockman Container. Openit to find the Blockman Prefab. This is another ZigFu Prefab you can use in any of your projects.Click on the Blockman to open it in the Inspector. Note something new: After the list of joints, noticethere are three checkboxes again. This time, unlike with the Soldiers Prefab, Update Joint Positionsis checked. Uncheck that option and run the example again. See the difference? The Game Objectsno longer change rotation as you move. In fact the whole skeleton is now wrong. Recheck theoption to put things right again and move forward.The other big difference in this Scene from the last is the Camera. Select the Camera in theHierarchy and in the Inspector notice the new script Smooth Follow. Smooth Follow is a defaultUnity script and it can be found in the Standard Assets folder we imported in the beginning of ourproject. In the Project tab open the Standard Assets folder and then the Scripts subfolder. Smoothfollow is here and it can be dropped onto any camera and told what Game Object to follow. Here’sit’s following the Blockman’s Head.
Sensor sits at at the bottom of our Hierarchy again and looks very similar to previous examples. It’san Empty Game Object with the OpenNI Scripts attached. Here we are using the Open NISingleSkeleton Controller just as we were in the AvatarFrontFacing example.
Running the Interface Examples
Moving forward we are now going look and the next examples used to create User Experiences.Open and play FollowHandPoint in the _Scenes folder in our Project Tab. Try it out. Sparkly right?You’ll see Unity’s default Ellipsoid Particle Emitter Component playing in the background while theOpenNI Script tracks a sphere.All that’s happening here is that the Follow Hand Point (Script) is attached Hand Follower Object inthe Hierarchy. The script exists inside of the Project tab in the Scripts subfolder HandpointControls .Open and take note of it. We will use it later to build an example from scratch.
Inside Hand Follower in the Hierarchy is parent Game Object holding two other Game Objects we

2/25/2014 Unity and Kinect tutorial « Nightmare Kitty
https://web.archive.org/web/20130605171506/http://www.nightmarekitty.com/2011/10/28/unity-and-kinect-tutorial/ 7/10
haven’t covered yet, Particle Systems. A particle system is a system of fuzzy particles. They arefrequently used to generate stars, fire and other natural phenomena. These systems can be usedand abused in interesting ways. While Particle Systems are outside the scope of this chapter, theyare worth a future look. Create them just like any other
Game Object, by choosing the following menu option:
Main Menu → Game Object → Create Other → Particle System
Note: The following Scenes are more complex and perhaps not ideal for beginners, howeveranyone and run them and play them. Also beginners are welcome to modify examples totheir own ends until they have a better understanding of Unity. They are here for moreadvanced users interested in creating Interfaces.Item Selector
The subsequent example in the _Scenes folder is Item Selector. Open and play this scene now.This example features new functionality for interface design. In the Hierarchy tab there are 6Objects: one camera, 4 Planes and and Empty Game Object called Static Menu. All of the Open NIscripts are attached here. Select on it and notice the scripts in the Inspector.
Item Selector Scripts
The Static Menu Game Object (Script) has all of the scripts for this scene attached to itis on first.Select it to expose its components in the Hierarchy tab Expand the Items arrow of the Static MenuScript. This script can take as many items Game Objects as needed and you add in Size and themyou sSimply drag Game Objects onto the Elements you want them attached to. Element 0 hasPlane 1 and so forth.
Note: The Static Menu script is a “complex” composite hand point control that reacts to thelower level events from the building blocks ZigFu provides. To open a Script and look at whatis made of, right click while over it in the Inspector and choose Edit Script or click on thegear icon to the far right corner of the Script name.
The checkbox Select on Push is our first gesture. Push simply is a quick push forward with yourhand in space. There’s not much to it really. Try performing it a few times while the Scene is playingto get the feel for it. When you perform it successfully over one the planes, the box will turn fromgreen (highlighted) to blue (selected).
The next script component attached to this Game Object is The Hand Point Control Script doesexactly what it did in the previous example, follow the User’s hand.Push Detector. Push Detector is another one of Zigfu’s custom scripts that is not part of Open NI.For those out there with more programming experience, you can write your own detector using theZigfu primitives such as:
Hand_Create(Vector3 position)Hand_Update(Vector3 position)
Hand_Destroy()
PushDetector_Push()
PushDetector_Release()
PushDetector_Click()
ItemSelector_Select(int index)
ItemSelector_Next()
ItemSelector_Prev()
Fader, another custom Zigfu script, maps a physical region in space to a normalized 01 range. The itemselector can then take the 01 range and split it into logical regions with hysteresis between them, includingspecial scroll regions.
When the Item Selector Scene is running there are 2 faders because the push detector implicitlyadds one in runtime. The push detector fader is on the Z axis, and the other fader is X axis. Thesize represents physical size (in millimeters), so 300 is 30cm, or about 1ft.
Item Selector Parameters
Some of the Item Selector parameters are as follows:
Number of items: How many logical items the Script detects
Hysteresis: A value between 0 and 1. It defines overlap between logical items, prevents the selectedindex from “bouncing” between 2 logical areas. Different applications will need different settings andthey can be tweaked in Development.

2/25/2014 Unity and Kinect tutorial « Nightmare Kitty
https://web.archive.org/web/20130605171506/http://www.nightmarekitty.com/2011/10/28/unity-and-kinect-tutorial/ 8/10
Scroll Region: how much of the range is dedicated to a scroll region. 0.2 would be 20% from eachside dedicated to scrolling (sending the Next ” Prev messages).
Item Selector Operation
To fully understand what the item selector does, create a blank game object and drag a fader ” itemselector into it. In addition, add a new script that listens to the Item Selector messages and printsthem out. Let’s create a scipt to output which items is selected to the console. To create a script goMain Menu → Assets → Create → C#script. Name your script in your project. Select it in theHierarchy and choose Open. This will open Unity’s scripting environment. Type in the followingcode:
Now add it the script to the Game Object you created. Also you are going to need to manually linkup the Fader to the Item Selector in the Inspector. This will print the the Element you are focused onin the Console. To view the console, press shift + command + c or in go Main Menu → Window →Console.
The various wait times control the repeat logic of the scrolling (similar to holding down on akeyboard key – you get the first keypress, slight pause, and then repeated keypressing slowlyaccelerating). The session manager waits for the focus gesture and starts a hand point session. ItThe Session Manger heads up display on the left of the screen that is only seen in play mode isaddedis added implicitly, like OpenNIContext, but can also be added explicitly if you want to changethe default settings (which gestures to listen to, for example, here it’s obviously listening for PUSH).
The OpenNISessionManager provides a wrapper for the HandTracking and GestureDetectionopenNI streams. The main advantage of this model is that the gesture detector is based on a rawdepth stream – no skeleton detector needed. This means that Zigfu’s hand tracker will work evenwhen you are on the couch covered with a blanket and do not resemble any humanoid form. Justdo the gesture and you’re in control! This is the main advantage NITE has over any other SDK outthere (Beckon, Softkinetic, MSR).
Creating a Skeleton From Scratch
Unity and OpenNI are a powerful combination. With them, you can create a skeleton from scratch.The following steps walk you through the process. A skeleton is a term associated with avisualization of all possible joints an API can detect. In this case, we will make a “stick man skelton.”The reason you’d be interested in doing this is to see that your tracking is working and to later toreplace your default Game Objects with real graphics created in a program like Maya. Bones,rigging and characer animation is beyond the scope of this tutorial but all 3d packages will haveplenty of documenation about how to do this. Also see the Unity manual for instructions specific toUnity.
Task 1. Add the OpenNI functionality
Your first step is to create a new Scene and add some OpenNI functionality. Here is the process tofollow:
1. Go to the Main Menu. Choose File–> New Scene.2. Save your scene as MySkeleton3. In that new Scene, create an Empty Game Object and add the OpenNI scripts onto it. Choose Main Menu→ Game Object → Create Empty to create a new game object.4. Reename the game objec to OpenNI Functionality. Do that by pressing control + rightclick, and choosingthe Rename option. Note: You can actually specify any name that you like. For example, the game object iscalled Sensor in the Zigfu Scenes. All it does is hold the Component Scripts to talk with OpenNI.5. Now go to the Project tab and open the OpenNI folder. Make sure the OpenNI Functionality Game Objectis selected in the Hierarchy and open in the Inspector. Now click and drag Open NIDepthmap Viewer into theInspector. Do the same for Open NIUser Tracker and Open NIUsers Radar and Open NISingle SkeletonController.6. We now need to connect our Open NI Tracker to our Open NIUsers Radar to make our Radar work. Simplyselect and drag the Open NIUser Tracker onto the Open NIUsers Radar script. Figure 77 shows the correctconfiguration.
Figure 77. OpenNI User Tracker Configuration
Now that you’ve tied in the necessary OpenNI functionality, you can move on to the making of thebasic skeleton.
Task 2. Making the Basic Skeleton
Let’s get started creating our first Skeleton. Here are the steps to follow:
1. Create an Empty Game Object from the Main Menu. Select the folloing option to do that: Main Menu →Game Object → Create Empty.

2/25/2014 Unity and Kinect tutorial « Nightmare Kitty
https://web.archive.org/web/20130605171506/http://www.nightmarekitty.com/2011/10/28/unity-and-kinect-tutorial/ 9/10
2. Your new Empty Object will now be in the Hierarchy tab. Select it, and control + right click. ChooseRename. Rename the object to Custom Skeleton.3. Now create a new object, a Sphere, as follows: Main menu → Game Object –> Create Other → Sphere4. Now add the Sphere to the Custom Skeleton in the Hierarchy. Simply select it and drag it onto the wordCustom Skeleton. A black arrow will appear while you drag. When you see the back arrow, drop the object.5. The Custom Skeleton should have a drop down arrow next to it and the Sphere should be located within it.This Sphere will be our head. Let’s rename it Head to match. Rename by pressing ctrl+rightclick, and thenselecting the Rename option.6. Select the Sphere and move it upward using the move tool. The move tool is automatically activated whenan object is selected. Click on the Green arrow and move the Sphere upward in Y space.7. Repeat steps 36 for each of the two hands. Create two new spheres, add them to the Custom Skeletonand rename them. Finally position them. Since the location of these objects is going to actually be generatedby the user, these positions are only for the game developers benefit when not in play mode.8. Create two Cubes for the left and right shoulders. Do exactly the same as you did for the spheres, butchoose to create cubes instead: Main Menu → Game Object –>Create Other –> Cube.The Hierarchy tab now should look like that shown in Figure 78.Note: This process of creating objects that are part of a larger object is called parenting. Weare adding the sphere objects as children of the Custom Skeleton, their parent.
Figure 78. Custom skeleton hierarchy after adding the five spheres.
End this task by lighting the Scene. Do that by adding a directional light from the following menuoption: Main Menu → Create Other → Directional Light.
Task 3. Connecting the Pieces together
Now it’s time to make the skeleton work by linking in the Game Objects and Components. Here’swhat to do:
1. First, you’ll connect the Custom Skeleton Game Object to the OpenNI Skeleton. (Zigfu makes thisprocess nearly effortless). Go to the Project tab open the OpenNI folder and then open the Scripts subfolder.Scroll until Open NISkeleton is visible. Select it and drag it onto the Custom Skeleton Game Object just aswas done for the Spheres and Cube.2. Next you must connect the Objects (the shapes we created earlier) in the Custom Skeleton to theappropriate joints in Open NISkeleton. Select Custom Skeleton in the hierarchy. In the Inspector tab thereshould be the Script for Open NISkeleton. Click the arrow next to this script to expose all of the joints. Selectand drag the Head created in Unity in Custom Skeleton in the Hierarchy tab onto the Head in the OpenNISkeleton script. Your result should look like Figure 79. Especially not ethe second item, the Head item, inthe bottom section of the figure.
Figure 79. The Head item linked to the Open NISkeleton script
1. Repeat Step 2 for the Right Hand, Left Hand, Right Shoulder, and Left Shoulder. If the Inspector changesto the selected object in the Hierarchy such as the Cube or Sphere, simply click and drag a little bit faster.2. After the list of joints there are 3 check boxes that tell Unity how to move these Object’s Transform inrelation to the Skeleton. Set these check boxes as follows:Update Joint Positions: Check this box. This boxallows the Object’s Transform to change to match the Rotation of the joints on the Skeleton. If a model wascreated in a 3D package, there is no need to check this because most likely there will no need to move jointposition, just rotation the joints.
Update Root Position: This will update the Game Object (Custom Skeleton) in relation to the user in3D space. If this is checked the Objects will move in 3D space with the user, otherwise the GameObject will stay in a fixed position, even though the joints will move.
Update Orientation: Check this box. This updates the rotation of the joints in 3D space.
3. The remaining option is for Scale. Expand this menu. The default unit of measurement in Open NI ismillimeters and in Unity is in meters. This option scales the Game Object approximately. For the purpose ofthis exercise, change the scale of X, Y and Z to 0.008.4. Now select OpenNI Functionality in your Hierarchy Tab so that your can access its Component’s in theInspector. In the Inspector, find the OpenNISingle Skeleton Controller script. Open the arrow to expose all ofthis Component’s properties. Drag the Custom Skeleton from the Hierarchy tab onto the Skeletons propertyof the Open NISingle Skeleton Controller.1. Lastly, drag the OpenNI Functionality onto the Open NISingle Skeleton Controller User Tracker
That was the magic sauce! Now run the scene and perform the calibration pose. After the trackerlatches onto your skeleton, you should see results like those in Figure 710.
Figure 710. The custom skeleton in operation
Updated 3/30/2012 specifically for people using the Windows and theKinect SDK.1. Go to Microsoft and download the Windows Kinect SDK.Follow the instructions in a way that makes paint peel with your laser focus. I found this part took consultinggoogle and a few more steps of additional errors before I got it installed on my particular setup. (Windows 7with VS Professional installed).2. Go to the start menu and type kinect in the run bar. Launch the Kinect SDK Sample Browser. If everythingruns, all of these examples should work. Try running the Shape Game. If you did it right, you can play it.3. Go to Zigfu and get the ZDK.4. At this point you need to either install Unity or have it installed already.5. Install the ZDK.6. Unity should launch. If not open it up.
2/25/2014 Unity and Kinect tutorial « Nightmare Kitty
https://web.archive.org/web/20130605171506/http://www.nightmarekitty.com/2011/10/28/unity-and-kinect-tutorial/ 10/10
7. You should now have a Zigfu folder in your Project tab. Open Zigfu > SampleScenes >Blockman3rdPerson8. Run it. Everything should launch. Dance in your underpants around your room. You’re done!
Figure 711. Windows SDK with ZDK integration in Unity
Tags: Kinect, Unity, Zigfu
Author:
has written 4 articles for us.
Share this article:
Leave a commentYou must be logged in to post a comment.
Topicsfeatured Kinect Kiosk Tips Play Testing Unity Zigfu
Community
Art And Code
Volumetric Society
Creators
Nick FoxGieg
Phoenix Perry
Technology
Make Magazine
Omek Interactive
Open Kinect
Open NI
Zigfu
Recent Meows
@mariuswatzAre you following Shiftman's Nature of Codebook on Kickstarter? Good stuff there forteaching materials. :)1 year ago
@n1ckFGWe got work to do! MEOW!1 year ago
Thank you#MakerFairefor all of the support and encouragement. Welearned so much play testing on some manypeople this weekend.1 year ago
© 2011 Nightmare Kitty. All Right Reserved.