iLogic Best Practices and Fundamentals for Success
30
Page 1 MFG467190 Let’s Take It from the Top: iLogic Best Practices and Fundamentals for Success Thomas Fitzgerald Autodesk Description As iLogic turns 12 years old, and as more companies embrace Inventor Automation, there are many perspectives as to the best way to write iLogic code. Take it from someone who has worked with large enterprise engineering departments and small specialty fabrication houses: Everyone wants some level of automation. In this class, you’ll learn how to write your iLogic code using industry best practices. You’ll also walk away with knowledge of the fundame ntals for success when developing your iLogic rules. Do you want to become better at using the Inventor API in your code? Do you want to know how to avoid the same mistakes as others who use iLogic? If you love iLogic the way we do and want to join the automation revolution, this is definitely the class for you. Speaker Thomas Fitzgerald is a Principal Implementation Consultant specializing in Inventor Automation and Data Management. Thomas has consulted with a large number of companies with a very diverse exposure to both large and small engineering departments. His work experience includes mechanical design within the Automotive, Shipbuilding, Mining and Material Handling industries as well as custom configuration applications utilizing the Inventor API, iLogic, Microsoft SQL Server, and Microsoft Visual Studio. Thomas has over 20 years of experience within the mechanical design and manufacturing industries using numerous Autodesk products. He is an Autodesk Certified Instructor as well as having his Microsoft Certified Systems Administrator credentials. Learning Objectives • Learn iLogic Best Practices • Discover Automation success measures • Learn about Product Design • Improve Design quality and consistency
-
Upload
khangminh22 -
Category
Documents
-
view
3 -
download
0
Transcript of iLogic Best Practices and Fundamentals for Success

Page 1
MFG467190
Let’s Take It from the Top: iLogic Best Practices and Fundamentals for Success Thomas Fitzgerald Autodesk
Description
As iLogic turns 12 years old, and as more companies embrace Inventor Automation, there are many perspectives as to the best way to write iLogic code. Take it from someone who has worked with large enterprise engineering departments and small specialty fabrication houses: Everyone wants some level of automation. In this class, you’ll learn how to write your iLogic code using industry best practices. You’ll also walk away with knowledge of the fundamentals for success when developing your iLogic rules. Do you want to become better at using the Inventor API in your code? Do you want to know how to avoid the same mistakes as others who use iLogic? If you love iLogic the way we do and want to join the automation revolution, this is definitely the class for you.
Speaker
Thomas Fitzgerald is a Principal Implementation Consultant specializing in Inventor Automation and Data Management. Thomas has consulted with a large number of companies with a very diverse exposure to both large and small engineering departments. His work experience includes mechanical design within the Automotive, Shipbuilding, Mining and Material Handling industries as well as custom configuration applications utilizing the Inventor API, iLogic, Microsoft SQL Server, and Microsoft Visual Studio. Thomas has over 20 years of experience within the mechanical design and manufacturing industries using numerous Autodesk products. He is an Autodesk Certified Instructor as well as having his Microsoft Certified Systems Administrator credentials.
Learning Objectives
• Learn iLogic Best Practices
• Discover Automation success measures
• Learn about Product Design
• Improve Design quality and consistency

Page 2
Table of Contents Let’s Take It from the Top: iLogic Best Practices and Fundamentals for Success .......................1
WHAT is iLogic? .........................................................................................................................3
WHY should I embrace iLogic? ...................................................................................................3
In This Class…............................................................................................................................4
Configuring Inventor to use iLogic ...............................................................................................5
What do I need to do to Inventor to configure iLogic? ......................................................................... 5
Internal and External Rules .........................................................................................................7
How and When should I use them? ..................................................................................................... 7
Event Triggers.............................................................................................................................9
How can I fire rules? ............................................................................................................................ 9
Parameters and Properties .......................................................................................................12
Whats up with Parameters?............................................................................................................... 12
What are iProperties? ........................................................................................................................ 13
Declaring Variables, Typecasting, and Shared Variables ..........................................................14
How important is it to use this coding mumbo jumbo? ...................................................................... 14
Conditional Expressions and Loops ..........................................................................................17
Does a human always have to make a decision? ................................................................................ 17
Procedures and Functions ........................................................................................................19
How can I reduce the amount of coding I need to do? ....................................................................... 19
Rule Structure ...........................................................................................................................21
Do you mean this is important? ......................................................................................................... 21
Error Handling and Commenting ...............................................................................................22
How do I know when something is wrong? ........................................................................................ 22
How do I understand what the code is supposed to do? .................................................................... 25
Forms and User Interfaces ........................................................................................................26
How can I interact with the iLogic code? ............................................................................................ 26
Links .........................................................................................................................................29
My Favorites ...................................................................................................................................... 29

Page 3
WHAT is iLogic? For the most part, people who use any type of desktop application understands what automation is. If you’ve used Microsoft Excel you may have heard of Macros, tools developed and designed within Excel to accomplish a specific task. Inventor Automation is very much the same in the sense that while the automation can take the form of many different things, in essence, it is a tool or a series of tools to automatically accomplish a specific task, process, or function. iLogic is one form of Inventor Automation. iLogic is a core functionality of Inventor that allows users and administrators to create logic in the form of VB.Net to accomplish tasks. Rules are developed and organized using snippets and other code writing statements to run at given times to consistently do some of the work engineers and designers need to do. You could develop a series of iLogic rules to do such things like updating iProperties based upon different model criteria or Replacing Components in an assembly based upon selections made in an iLogic Form, or even update text blocks within an associated Drawing. The list is long as to what iLogic can do. The question is, what do you want it to do for you?
WHY should I embrace iLogic? Now that we understand WHAT iLogic is, let’s take a look at the reasons WHY you might want to incorporate iLogic into your engineering processes. First, in my experiences, working with manufacturing companies big and small, all over this world, fabricating and manufacturing many different types of products, one thing always rings true, there are patterns and repeatable plays in every environment. The key is to find the ones where iLogic can be of assistance. This simple task requires an intimate knowledge of all the stages that Inventor plays a part in your process. Say for instance, you have a specific format for the iProperty Description of your 3D models or any of the iProperties for that matter. If the formatting is predictable, if it is Standardized, then this is a situation where iLogic can come to the rescue. You could develop logic to collect information from the model, transform that information, and then overwrite the iProperties with the correct, newly formatted information. It is always correct, it is always consistent, and it never asks for a coffee break. Another example, one that I find an extreme amount of value in, is Drawing Automation. The act of taking properly developed and designed 3D models, generating drawing views, adding dimensions and balloons, updating Parts Lists, adding and manipulating Sketched Symbols, this is the arena where iLogic can do a lot of work and be ultimately beneficial. But this little gem is hard to come by. It takes a very large amount of time to plan, prepare, and process all the requirements to implement a project of that nature. But fear not, it can be done.
Page 4
In This Class… Knowing what we know about iLogic and how vast the horizon is with its scope, let’s get an understanding as to what we will be discussing in this AU class. I know that these are by no means the only topics to understand about iLogic. This is the second of many AU classes talking about iLogic Best Practices for Success. Some topics may be a repeat of previous classes, only to demonstrate the importance of understanding those particular topics. But I assure you, there is new information that can be very valuable. 1. Configuring Inventor for iLogic 2. Internal and External Rules 3. Event Trigers 4. Parameters and Properties 5. Declaring Variables, Typecasting, and Shared Variables 6. Conditional Expressions and Loops 7. Procedures and Functions 8. Rule Structure 9. Error Handling and Commenting 10. Forms and User Interfaces

Page 5
Configuring Inventor for iLogic
What do I need to do to Inventor to configure iLogic?
Although iLogic is included in Inventor and you can start creating and using iLogic right away, it’s helpful to understand that there are some settings that should be addressed in order to use iLogic to its fullest extent. The iLogic Configuration button allows users to configure different settings to define where Inventor will find supporting information.
.

Page 6
Users and Administrators will want to modify these settings to control where Inventor will find External Rule directories, as well as the order priority for those directories. Users can also define the directory location Inventor will find any DLLs, or Dynamic Link Libraries. DLLs are the output from Microsoft Visual Studio for the development of custom User Interfaces to drive and trigger iLogic rules and other logic. The settings dialog box gives users the opportunity to set what file extension External Rules will be saved as and the default Logging level in which debugging information can be produced. There are also some Security Options settings to protect computer and network systems from potentially hazardous code running within the Inventor environment.
Best Practice Tip: When configuring the External Rule directories, you should organize your rules based upon the dependencies the rules have with one another. As an example, if you create a series of rules that provide a level of functionality, and those rules are dependent upone one another, then those rules should reside in a singe, independent folder beneath an upper level folder containing all External Rules.
This allows for better control of the automation environment, when rules are triggerd, and to better predict automation behavior.
The following image is an example of delineated External Rules folders:

Page 7
Internal and External Rules
How and When should I use them?
iLogic Rules come in 2 flavors, Internal Rules and External Rules. Either type of rule is created similarly within the context of Inventor in the iLogic Browser.
Internal Rules are rules that are created and stored within the context of a file. Part, Assembly, and Drawing files all have the capability to store, compile, and run rules to affect each file differently. Internal Rules will only run and affect the active files in which the rules are stored. Because Internal Rules are stored within the files, they are exposed and accessible to the users that have permissions to those files. This can sometimes present a security risk with the code being exposed and editable. External Rules are pretty much exactly the same, however, they are not stored within Inventor files. External Rules are stored in a directory either locally on a user system or central on a server, geographically agnostic. Because External Rules are stored in a folder outside of the files, there can be a higher level of security to those rules. Yes, users can open and see the rule code, however, system administrators can control access and editability by defining Folder Permissions to the External Rules folder. For this reason, External Rules are preferred in an Enterprise environment where numerous users might want to run code throughout the design process. If conditions do not require permission control or if multiple users do not need to utilize the rule logic simultaneously, then perhaps Internal Rules are sufficient.

Page 8
Right clicking on either type of rule can control features like Suppressing or Unsuppressing rules to control when they are triggered, deleting rules, or removing them from the list.
Best Practice Tip: Having rules run when “recognized” Parameter values change is an extremely desirable feature that does not exist when using External Rules. iLogic has the capability to programmatically create rules and populate those rules with any logic needed. A developer can create logic to see if an “Internal Helper Rule” exists, if it doesn’t, then create it programmatically. This Helper Rule can monitor Parameter values to facilitate effective logic workflows.
Page 9
Event Triggers
How can I fire rules?
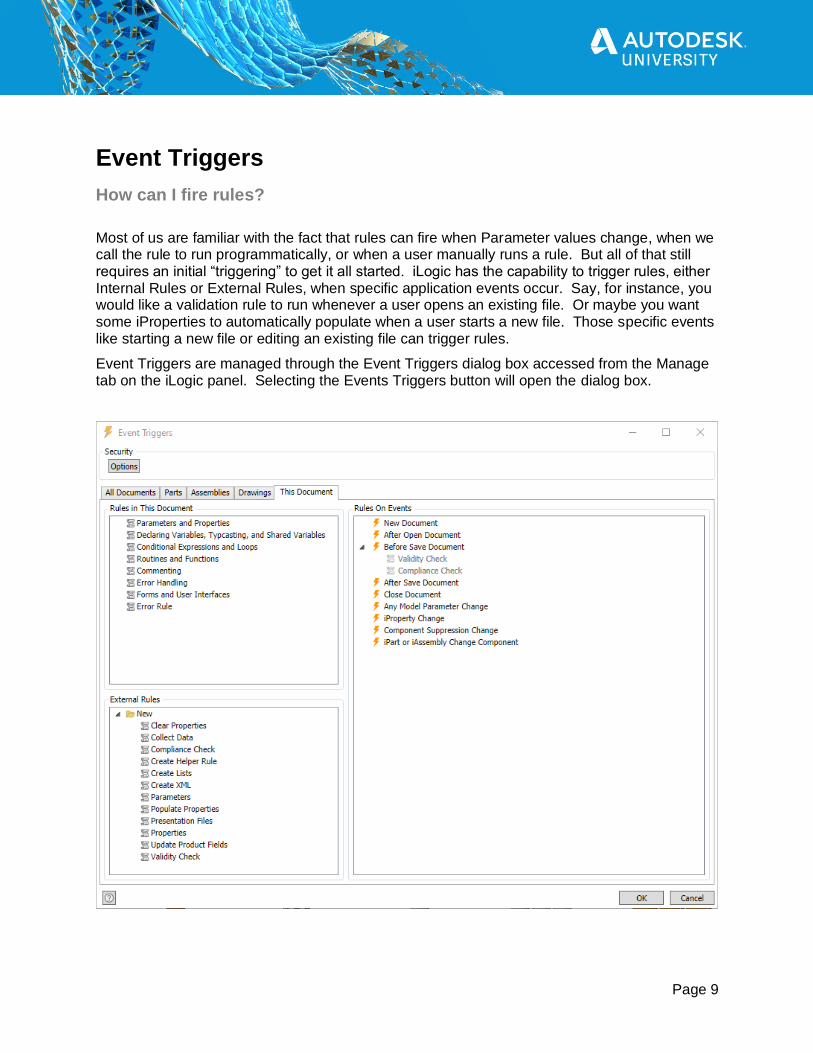
Most of us are familiar with the fact that rules can fire when Parameter values change, when we call the rule to run programmatically, or when a user manually runs a rule. But all of that still requires an initial “triggering” to get it all started. iLogic has the capability to trigger rules, either Internal Rules or External Rules, when specific application events occur. Say, for instance, you would like a validation rule to run whenever a user opens an existing file. Or maybe you want some iProperties to automatically populate when a user starts a new file. Those specific events like starting a new file or editing an existing file can trigger rules.
Event Triggers are managed through the Event Triggers dialog box accessed from the Manage tab on the iLogic panel. Selecting the Events Triggers button will open the dialog box.

Page 10
Administrators can organize which Internal Rules and which External Rules should be fired on specific events. Expanding the Rules on Events nodes will display which rules are associated to which events. The tabs on the upper left panel allow Administrators more flexibility as to which types of files should be associated to specific events for rules.
Best Practice Tip: Internal Rules can only be configured on the This Document tab. External Rules should be associated to specific file types and inherited to the This Document tab. This is denoted by the bold or subdued nature of the rule name under the event nodes. If the name is subdued, it is inherited by a different tab. Hovering over the rule name will dispay where the rule is inherited.
To set the Security Options, select the Options button in the upper left hand corner. This will open up the iLogic Security dialog box. Here you can select the option to Inspect Rules for Malicious Code where a security alert will be displayed when you run a rule Inventor detects to be potentially unsafe. You can also define which file locations are excluded from inspection.
Best Practice Tip: Depending on your iLogic functionality and how it works with Event Triggers, make sure you select the appropriate radio button for the Event Trigger behavior. If you’re expecting rules to fire upon “After Open” and “Close”, the wrong radio button may be selected.

Page 11
If Inventor finds a rule to be suspect for malicious code, you will be prompted and can then choose to run the rule as safe or not run the rule.

Page 12
Parameters and Properties
Whats up with Parameters?
Autodesk Inventor is a “3D Parametric Design Application”, well, what does that mean? Parameters are named value placeholders of a specific type. Most parameters in Inventor are numeric in type and are associated to dimensions that control geometry. As parameter values change, the dimensions associated to those parameters change as well, graphically updating the models. There are essentially 4 types of Parameters in Inventor. 1. Model Parameters 2. User Parameters 3. Reference Parameters 4. Linked Parameters Model Parameters are those parameters created by normal Inventor behavior. In the Parameters dialog box, these are automatically named as d0, d1, d2, etc. Model Parameters are controlled by Inventor, meaning they are created and deleted as necessary by the system. User Parameters are those parameters created by users. They can be Numeric, Text (String), or True/False (Boolean). User Parameters are especially important because these are created by users, consumed by many different features as well as iLogic code, and are not created or deleted by normal Inventor behavior.
Best Practice Tip: Creating User Parameters by applying a naming convention and type is the preferred method of using parameter information in iLogic rules. Although you can rename Model Parameters, it is not the preferred method to use as User Parameters provide more functionality.
Reference Parameters are created when Inventor defines a Driven Dimension. If you’ve ever seen this dialog box when working in the Sketch environment: Selecting Accept in this situation would create a Reference Parameter. In the Parameters dialog box, you will see the parameter name and value, but you cannot change the value. You can change the name, which is helpful in using the value in iLogic code.

Page 13
Linked Parameters are those parameters linked to Inventor from, typically, an Excel Spreadsheet. When a user updates the names and values in the Excel Spreadsheet, those changes will reflect in Inventor, ultimately driving dimension values, controlling features, managing assemblies, etc.
What are iProperties? Properties, or iProperties in Inventor lingo, are additional descriptors or other valuable information about your files. This is sometimes referred to as Metadata. Properties are nothing new and can be extremely useful when trying to collect a lot of data about files. Filename, File Size, Author, Modified Date; all of them are Properties. Most of the time, when working with iLogic and Inventor file data, Filename and File Path are the 2 most common Properties to handle. Other popular Properties are, Part Number, Stock Number, Description, Mass, Cost, and Custom Properties. All properties are Read, most properties are Write Enabled. Remember, iLogic doesn’t just populate iProperty values, it can also create them. Custom iProperties can be evaluated, created, populated, modified, and deleted programmatically.
Best Practice Tip: Creating Custom iProperties specific to your company needs, engineering requirements, or simply additional information needed from files, is an extremely powerful feature of Inventor. Having the ability to search for information like files without having to rely soley on filename allows companies an opportunity for better naming conventions and design standardization improving quality, consistency, and availability.

Page 14
Declaring Variables, Typecasting, and Shared Variables
How important is it to use this coding mumbo jumbo?
iLogic is code, plain and simple. Although one does not need to be a programmer or even know how to write code to use iLogic, embracing some of the basics of code writing best practices will get you a long way. This is because there are some standards that all programmers understand. Declaring variables and Typecasting is one of those standards. Why is this important? Well, it’s like speaking any language. Having a standard relieves some of the confusion when writing logic.
Declaring Variables and Typecasting Declaring variables is actually extremely simple. In iLogic, it’s simply writing a name and giving it a value: Length = 20
Once I have a variable created, then I can do things with it. I can read the value and process it in a calculation, or I can write to it to update something else. Even though typing a name and value pair is acceptable in iLogic, a better way, leveraging a code writing best practice, is to type the name, give it a “type”, and then providing a value: Dim Length As Double = 20
What this does is tells iLogic to create a variable that will only hold a “Double” value, and then provide the value. This is called Typecasting. It ensures that only a specific value can be provided to the variable. If I would try to provide a String or Text value to the Length variable, my code would fail. I have found that by providing a type allows me to use much more complicated code in my rules as well as understanding and visualizing the flow of information. As an example, if I write a statement in a rule that conducts a mathematical calculation, and I receive and error, then I know that any of my variables that are of the “String” type are not at fault. The following are examples of different kinds of Declaring Variables and Typecasting: Dim cylinderHeight As Double = Parameter("CylinderHeight")
Dim fileName As String = "This is a string value!"
Dim holeCount As Integer = 2
Dim occurrenceName As String = String.Empty
Dim plateWidth As Double = Nothing
You’ll notice that in the last 2 examples, I did not provide a value, or rather, an empty value or Nothing. There will be occasions that you may need to declare a variable, but you may not know the value as of yet. In this case, you can maintain consistency by declaring the variable,

Page 15
typecasting, and providing something on the other side of the equals symbol. This is also helpful for debugging code to see if a value is or is not being provided programmatically. If you were paying attention, you’ll also notice the first example where I declared a variable, typecast, and set the value to be equal to the value of a User Parameter. This method will be useful when constructing the logic needed for calculations, passing values to other constructs, and manipulating other parameters. It is also useful when you need to either get or set the value of the User Parameter immediately, at the time the code needs it. This is why new users to iLogic experience problems when running rules, expecting a specific behavior, but Inventor seems to “lag” behind a step. Take a look at the following examples: cylinderHeight = CylinderHeight
Dim cylinderHeight As Double = Parameter("CylinderHeight")
Both these statements do similar things but not quite exactly. The first example declares a variable that could be of any type, with a value equal to the User Parameter. Because the text color is blue, Inventor recognizes the User Parameter. Because Inventor recognizes the User Parameter, any rule that is unsuppressed using this format, will automatically run. You many or may not want rules to run that way. It also means that the variable will be set to the value of the User Parameter at the time from the last Update. If logic had changed the User Parameter value between the time the variable needs the value and the last update, then the User Parameter value is out of date. This is why an Update is required, and sometimes it seems numerous Updates are required to get the desired result.
Best Practice Tip: User Parameter names that appear to be blue in the Rule Editor are called “Recognized Parameters”. They can be Model Parameters, Reference Parameters, or User Parameters. Remember to leverage User Parameters as much as possible. Recognized Parameters are not available when using External Rules.

Page 16
To get past this, you can do 2 things. 1. Use the second statement. By declaring the variable, typecast, and use the “Parameter” function, you set the variable to be the value of the User Parameter directly, ensuring the value is up to date. It also gives you more control over when rules run. 2. Use the “RuleParametersOutput()” iLogic snippet. This will keep all the User Parameters up to date. Then conduct an Update to ensure the models associated are up to date as well.
Shared Variables Previously, we were discussing code practices about variables, but Shared Variables are a feature of iLogic. When declaring variables in an iLogic rule, that variable is only accessible within the context of that rule. If you need to create a variable and set its value to use within numerous rules, then Shared Variables are the answer. In the iLogic Snippets Panel in the iLogic Rule Editor, you can find the Shared Variable functions under the Variables index. To use Shared Variables, we will follow a similar process as when declaring other variables. First declare the Shared Variable, provide a name for the Shared Variable, then provide a value. The value can be a static value, or it can be the value of some other variable, parameter, or property. SharedVariable("VariableName") = "This is the value"
SharedVariable("cylinderHeight") = Parameter("CylinderHeight")
Once a Shared Variable has been declared and a value provided, then it can be consumed and updated as necessary. Dim cylinderHieght As Double = SharedVariable("cylinderHeight")
Use the other Shared Variable functions to see if a Shared Variable exists, or to remove any and all Shared Variables from memory.
Best Practice Tip: Shared Variables can store any type of object. Most of the time it’s numerical, String, or Boolean values, but did you know it can also store Arrays? Sharing list information across many rules can be an effective way to reuse data instead of recreating it each time it is needed.

Page 17
Conditional Expressions and Loops
Does a human always have to make a decision?
In normal interaction with Inventor, we have the luxury to look at the graphics window and select geometry to decide what to do with it. In an assembly, we can understand how components relate to one another. When we start looking at iLogic rules, we sometimes need to define the decision-making path by understanding the different conditions that might exist within a design. Using expressions that define the different conditions is a means for users of iLogic to accomplish those tasks.
The most common Conditional Expression is the If Then expression. It looks something like this:
If someValue = True Then
'Do Something
Else
'Do Something Else
End If
In code, we look to see if a condition exists and if it does, then the code will do something. If the condition does not exist or if a different condition exists, then the code will do something else. We can extend this functionality to look for numerous conditions, like the following:
If someValue = True Then
'Do Something
ElseIf someValue = False Then
'Do Something Else
ElseIf someValue = Nothing Then
'Yet Do Something Else
End If
This all looks easy and it makes perfect sense, however, there is a limit. One could easily expect the conditions to continue indefinitely, but after a certain point, it becomes confusing as to what is really happening, especially when you start adding in additional Operators. In my opinion, once you get past 3 or 4 conditions, there are better ways to handle the situation.
Another common Conditional Expression is the Select Case method. It works similarly, but to me, it’s much easier to read and understand, not to mention, less code to write. Select Case looks like this:
Select Case someValue
Case True
'Do Something
Case False
'Do Something Else
Case Nothing
'Yet Do Something Else
End Select
Page 18
As you can see, it’s a little easier to understand and it’s very easy to scale for the number of conditions you might have to accommodate.
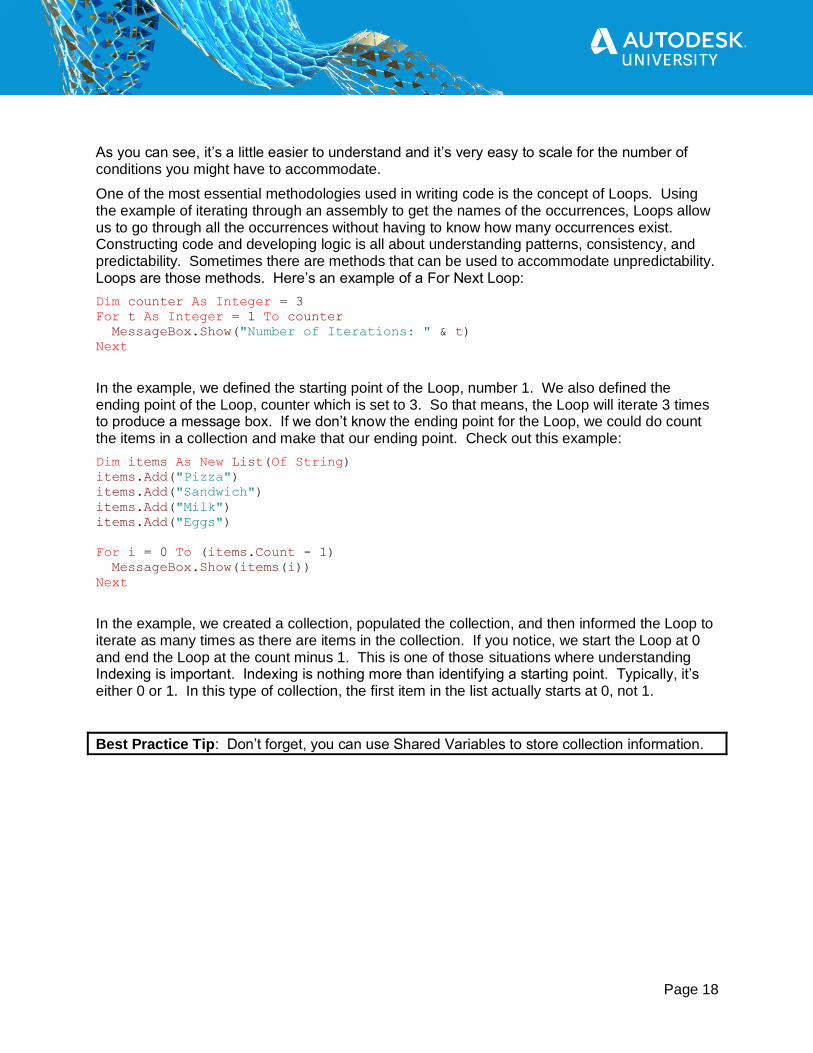
One of the most essential methodologies used in writing code is the concept of Loops. Using the example of iterating through an assembly to get the names of the occurrences, Loops allow us to go through all the occurrences without having to know how many occurrences exist. Constructing code and developing logic is all about understanding patterns, consistency, and predictability. Sometimes there are methods that can be used to accommodate unpredictability. Loops are those methods. Here’s an example of a For Next Loop:
Dim counter As Integer = 3
For t As Integer = 1 To counter
MessageBox.Show("Number of Iterations: " & t)
Next
In the example, we defined the starting point of the Loop, number 1. We also defined the ending point of the Loop, counter which is set to 3. So that means, the Loop will iterate 3 times to produce a message box. If we don’t know the ending point for the Loop, we could do count the items in a collection and make that our ending point. Check out this example:
Dim items As New List(Of String)
items.Add("Pizza")
items.Add("Sandwich")
items.Add("Milk")
items.Add("Eggs")
For i = 0 To (items.Count - 1)
MessageBox.Show(items(i))
Next
In the example, we created a collection, populated the collection, and then informed the Loop to iterate as many times as there are items in the collection. If you notice, we start the Loop at 0 and end the Loop at the count minus 1. This is one of those situations where understanding Indexing is important. Indexing is nothing more than identifying a starting point. Typically, it’s either 0 or 1. In this type of collection, the first item in the list actually starts at 0, not 1.
Best Practice Tip: Don’t forget, you can use Shared Variables to store collection information.

Page 19
Procedures and Functions
How can I reduce the amount of coding I need to do?
Have you written any iLogic rules? If so, have you written a rule and as you progressed through the logic, you got to a point where it seemed you were repeating code? Doing some of the same calculations, or need to acquire the same information? Procedures and Functions are a means to reduce the redundancy in your rules.
A Procedure is a block of code that does a specific task. Procedures can be called at any time, and typically require some sort of input. Here’s an example. Suppose you wanted to iterate through an assembly and get the name of all the unique files that make up the assembly. The individual files could be in subassemblies and at many different levels. By iterating through the assembly, you could pass the first level component to a Procedure, and the Procedure would be constructed to identify if the file is a Part file or Assembly file. If the file is a Part, get the name. If the file is an Assembly, then iterate through that assembly to get its parts to get their names. Sounds complicated, but without Procedures, it would be impossible. Procedures are contained within the Sub/End Sub code blocks. Here’s what it looks like:
Sub Main
For Each oOcc As ComponentOccurrence In oOccs
If oOcc.DefinitionDocumentType = 12291 Then
Call TraverseSubAssy(oOcc.SubOccurrences)
Else
MessageBox.Show(oOcc.Name)
End If
Next
End Sub
Private Sub TraverseSubAssy(oOccs As ComponentOccurrences)
For Each oOcc As ComponentOccurrence In oOccs
If oOcc.DefinitionDocumentType = 12291 Then
Call TraverseSubAssy(oOcc.SubOccurrences)
Else
MessageBox.Show(oOcc.Name)
End If
Next
End Sub
The first code block is a Procedure that iterates through the first level of an assembly. The second code block is a Procedure that runs to iterate through the subsequent levels of the assembly, no matter how many levels there are.
Best Practice Tip: Indenting code is a way to understand dependencies and formatting of rule code. The iLogic Rule Editor can assist you in indenting your code rows to facilitate accurate code writing formats.

Page 20
Functions are very much like Procedures, actually, they are exactly the same. The only difference is a Procedure does a task and a Function does a task and provides a return value. Perhaps you’ll need to do a task and get a response. Perhaps it’s a calculation or a decision that might need to be made. An example of a Function is as follows: Function FindPoints(oView As DrawingView, dimPoint As String, count As
Integer)
Dim oAssyDoc As AssemblyDocument = oView.ReferencedDocument
Dim occ As Object = Nothing
Dim oDef As Document = Nothing
Dim occParent As ComponentOccurrence = Nothing
Dim occParentName As String = String.Empty
For Each oOcc As ComponentOccurrence In oAssyDoc.Occurrences
oDef = oOcc.Definition.Document
For Each oWorkPoint As WorkPoint In oDef.ComponentDefinition.WorkPoints
If oWorkPoint.Name = dimPoint Then
If dimPoint.Contains("Width") Then
If count = 1 And Right(oOcc.Name, 1) = count Then
occ = oOcc
ElseIf count = 2 And Right(oOcc.Name, 1) = count Then
occ = oOcc
End If
Else
occ = oOcc
End If
End If
Next
Next
Return occ
End Function

Page 21
Rule Structure
Do you mean this is important?
As you may know, you can create as many or as few iLogic Rules as you might need. When you right click in the iLogic Browser to create a new Rule and provide a name, the Rule is placed in the iLogic Browser under the previous Rule. If you have numerous Rules, you can drag and drop them, reordering and rearranging them. Did you ever wonder why that is?
A user can run an iLogic Rule by means of right clicking on the Rule and selecting Run, or by triggering it from a Parameter change, or by an Event. When a rule is unsuppressed and it has a recognized Parameter included in the code, by default, the rule will run when that recognized Parameter is changed. If numerous Rules have a recognized Parameter included in the code, then all the Rules that include the Parameter will run in descending order. Depending on what the Rules are constructed to do, will determine in which order they should be in. If the Rules are suppressed, then you have far more control as to when they run.
Best Practice Tip: To have better control over your Rules and when they run, suppress your Rules and use the iLogicVb.RunRule command to programmatically fire your rules appropriately.

Page 22
Error Handling and Commenting
How do I know when something is wrong?
If you’ve written iLogic Rules before, you will know that the chances of writing perfect, error free logic is nearly impossible. Inevitably, logic won’t compile correctly, statements will be written wrong, or something simple like putting a comma in the wrong place will occur. When this does happen, there are a few ways Inventor will inform you. Depending on what the error is, you can determine where to look to help isolate the problem and then take the corrective action to make everything work.
If something is wrong with the structure of you iLogic Rule, you will typically see errors like the following:
A dialog box will appear with information as to what line has an error.
Here’s another example:

Page 23
If the information on the Error Message tab does not clarify where the issue is at, notice the More Info tab.
I know that this may seem confusing to understand, but if you look, the first line repeats the error. The second line is what we need to focus on. This is where the error really originates from. All the subsequent lines are supporting information to the second line. Here, the second line indicates that one of the Shared Variables required for my iLogic Rule is not created. Knowing this, I can isolate the issue by reviewing the code and seeing where there may be inconsistencies.
Ever seen this error?

Page 24
The second line of the error after the Exception Text, you will see the “System.RuntimeType.ForwardCallToInvokeMember” statement. In my experiences, I’ve seen this error a lot! Anytime you see this issue it usually means a variable or parameter value is needed but is not provided. If you look at the next line, you will see it references “Inventor.Property.set_Value”. This means the problem has something to do with setting a Property value. Now all you need to do is look at the code that sets Property values and make sure they are all being provided. It’s a little tricky to get the hang of, but this is to let you know that the information is there to help you figure out the issue.
Another method I use to help resolve issues is using the MessageBox.Show() method. This allows you to interrupt the code to make sure different chunks of code is working properly. Maybe you get an error and you know which Rule is at fault, but you’re not sure where in the Rule the issues are. Well, you can insert the MessageBox.Show() method and if the Rule compiles and hits the MessageBox, then you know up to that point the code is good to go. I know it seems a little rudimentary, but we have to use what is available sometimes.
A better method to troubleshoot or debug code and to provide Error Handling is to use Try/Next Loops. We discussed Loops in earlier sections, but a Try/Next Loop is specific to ensuring we as code writers are accommodating the possibility of an error. A Try/Next Loop looks like this:
Sub Main
Dim oDoc As Inventor.DrawingDocument = ThisApplication.ActiveDocument
Try
MessageBox.Show(oDoc.FullDocumentName)
Catch ex As Exception
MessageBox.Show(ex.Message)
End Try
End Sub
Inside the Procedure code block I am declaring a variable, typecasting, and providing a value. But after that, I have a Try/Next Loop that has a Catch statement in it. How this works, is the code block will Try to do whatever task you define. If it’s successful, then the code continues. If it’s unsuccessful, then the code will do whatever is defined in the Catch. In this case, I’m telling

Page 25
the code to produce a MessageBox and use the specific error text as the body of the MessageBox, but you can do anything in the Catch to prompt or inform the user that an error occurred. If you write an iLogic Rule and you have a concern if it works or not, put it in a Try/Next Loop, it will make your debugging process so much easier.
How do I understand what the code is supposed to do?
Depending on the complexity of the iLogic code written, you may struggle understanding exactly what is going on. The code written in iLogic rules is typically Visual Basic .Net code and it is architected and structured a specific way, one that is not very human readable. To let yourself and other know what the code is supposed to do, we rely on Commenting the code, or basically adding notes to the code.
Commenting is nothing more that adding human readable notes to the code, prefaced with an apostrophe. Take a look at the code example below of a Commented Conditional Expression:
'*** Commenting is a way to use plain verbiage to explain how code is
'*** supposed to work. Information in comments do not get compiled and
'*** processed, so it is also a means to debug code, essentially turning it
'*** off to find out where coding errors might exist.
Dim bool As Boolean = True
If bool Then
MessageBox.Show("A True Statement")
Else
MessageBox.Show("A False Statement")
End If
If you look closely, you’ll see that I added stars after my apostrophe. This is not required, it is simply something that I do to visually recognize where a comment is with relative ease.
Best Practice Tip: It is better to have too much commenting then not enough. Commenting helps you as a developer to understand which code blocks do what and it helps the next person that might have to debug or troubleshoot existing code.
To expand or collapse blocks of code, use the open and close brackets after the apostrophe before and after the code block.
Page 26
Forms and User Interfaces
How can I interact with the iLogic code?
In some instances when you are writing iLogic Rules, the intent is to do a task. Usually, it’s the process of running a rule and something gets done. But on occasion, especially if you have complex logic with many iLogic Rules, you’ll need a human to make a decision about the process. It could be to provide a value, select some geometry in the graphics window, or browse out to the network to select a file. In any case, the method of providing this functionality falls on Forms or User Interfaces.
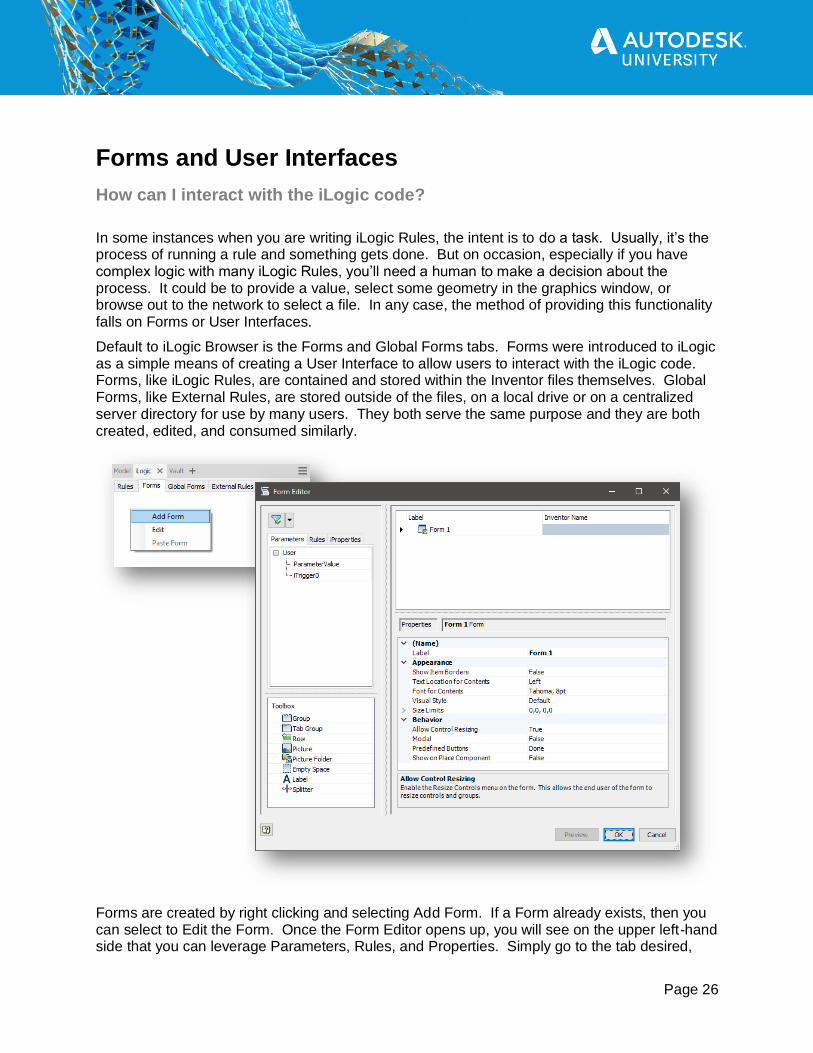
Default to iLogic Browser is the Forms and Global Forms tabs. Forms were introduced to iLogic as a simple means of creating a User Interface to allow users to interact with the iLogic code. Forms, like iLogic Rules, are contained and stored within the Inventor files themselves. Global Forms, like External Rules, are stored outside of the files, on a local drive or on a centralized server directory for use by many users. They both serve the same purpose and they are both created, edited, and consumed similarly.
Forms are created by right clicking and selecting Add Form. If a Form already exists, then you can select to Edit the Form. Once the Form Editor opens up, you will see on the upper left-hand side that you can leverage Parameters, Rules, and Properties. Simply go to the tab desired,

Page 27
find the object needed, and drag it to the right-hand side of the Form Editor. From there, you can select the object and configure it using the lower right-hand panel. Depending on which object you select, you will have different options to configure your Form. The Toolbox in the lower left-hand corner allows you to group objects together, add tabs, add pictures, create splitters, etc. The options are few and extremely easy to use and understand.
Once created, you can activate a Form by selecting the button associated to the Form in the iLogic Browser.
Or by calling the Form from an iLogic Rule using the Snippets under the Forms branch.
iLogicForm.Show("iLogic Form Demo")
Because Forms are easy to use, they are inherently limited in their functionality. Don’t get me wrong, Forms are powerful and extremely useful, but there may be instances where you just need more features and functionality then what iLogic Forms can provide. In this case, you will need to leverage Microsoft Visual Studio.
I am not going to give a tutorial or discuss much about Microsoft Visual Studio, but there are a ton of videos and online references about creating VS Forms. What I will talk about though is the ability to link VS Forms to iLogic Rules.
When creating iLogic Rules, there is an opportunity to use a Wizard to link a VS Form DLL to a Rule, allowing the user to pass information from the Rules to the Form and visa versa. The advantage of this is the limitless means of creating, formatting, and scaling VS Forms for use with your iLogic Rules.
The first step to this process is to get your hands on Microsoft Visual Studio. There are some free versions available, otherwise you can easily purchase and download the software from the Microsoft e-store.

Page 28
After you have installed Microsoft Visual Studio, you can create your Form. Once you have it created, you will then build it and output it as a DLL. From there, you will need to create an iLogic Rule, and using the Wizard, browse out to the DLL.
Best Practice Tip: Make sure you place your Form DLL in the location defined in the iLogic Options dialog box. This was covered in the first section of the handout.
After you select the DLL, the rule will automatically be populated with the required code to launch the Form when the rule is run. Be advised, usually there is additional configuration needed to ensure the correct values are being passed from the Rules to the Form. Simply creating the DLL and using the Wizard to generate the code to link the Rule and Form does not guarantee everything will work as expected.
HACK: When using creating buttons in Global Forms that are associated to External Rules, you will notice you cannot apply an “On Click Behavior”. To get around this you can modify the Global Forms XML to grant specific behavior to buttons. A forum post about it can be found here.

Page 29
Links
My Favorites
https://stackoverflow.com http://modthemachine.typepad.com/my_weblog/2013/02/inventor-api-training-lesson-1.html https://knowledge.autodesk.com/support/inventor/learn-explore/caas/CloudHelp/cloudhelp/2020/ENU/Inventor-iLogic/files/GUID-FA2587E0-8106-466C-AEDC-93CF9F6497C7-htm.html http://help.autodesk.com/view/INVNTOR/2020/ENU/?guid=GUID-DE98632B-3DC0-422B-A1C6-8A5A15C99E11 Contact Me at: [email protected]

Page 30