H3C Access Points Cloud Mode
185
H3C Access Points Cloud Mode Fundamentals Command Reference New H3C Technologies Co., Ltd. http://www.h3c.com Software version: WX6600-CMW710-E2442(WX6600 series) WA6300-CMW710-R2442(WA6300 series) WA6300-CMW710-R2442(WAP922 series) WA6300-CMW710-R2442(WAP923 series) Document version: 6W100-20210630
-
Upload
khangminh22 -
Category
Documents
-
view
1 -
download
0
Transcript of H3C Access Points Cloud Mode

H3C Access Points Cloud Mode Fundamentals Command Reference
New H3C Technologies Co., Ltd. http://www.h3c.com Software version: WX6600-CMW710-E2442(WX6600 series)
WA6300-CMW710-R2442(WA6300 series) WA6300-CMW710-R2442(WAP922 series) WA6300-CMW710-R2442(WAP923 series)
Document version: 6W100-20210630

Copyright © 2021, New H3C Technologies Co., Ltd. and its licensors
All rights reserved
No part of this manual may be reproduced or transmitted in any form or by any means without prior written consent of New H3C Technologies Co., Ltd.
Trademarks
Except for the trademarks of New H3C Technologies Co., Ltd., any trademarks that may be mentioned in this document are the property of their respective owners.
Notice
The information in this document is subject to change without notice. All contents in this document, including statements, information, and recommendations, are believed to be accurate, but they are presented without warranty of any kind, express or implied. H3C shall not be liable for technical or editorial errors or omissions contained herein.

Preface This command reference describes the fundamentals feature configuration commands. It includes the following feature modules: • CLI. • RBAC. • Login management. • FTP and TFTP. • File system management. • Configuration file management. • Software upgrade. • Tcl.
This preface includes the following topics about the documentation: • Audience. • Conventions. • Documentation feedback.
Audience This documentation is intended for: • Network planners. • Field technical support and servicing engineers. • Network administrators working with the H3C access points (Cloud mode).
Conventions The following information describes the conventions used in the documentation.
Command conventions
Convention Description Boldface Bold text represents commands and keywords that you enter literally as shown.
Italic Italic text represents arguments that you replace with actual values.
[ ] Square brackets enclose syntax choices (keywords or arguments) that are optional.
{ x | y | ... } Braces enclose a set of required syntax choices separated by vertical bars, from which you select one.
[ x | y | ... ] Square brackets enclose a set of optional syntax choices separated by vertical bars, from which you select one or none.
{ x | y | ... } * Asterisk marked braces enclose a set of required syntax choices separated by vertical bars, from which you select a minimum of one.
[ x | y | ... ] * Asterisk marked square brackets enclose optional syntax choices separated by vertical bars, from which you select one choice, multiple choices, or none.
&<1-n> The argument or keyword and argument combination before the ampersand (&) sign can be entered 1 to n times.

Convention Description # A line that starts with a pound (#) sign is comments.
GUI conventions
Convention Description
Boldface Window names, button names, field names, and menu items are in Boldface. For example, the New User window opens; click OK.
> Multi-level menus are separated by angle brackets. For example, File > Create > Folder.
Symbols
Convention Description
WARNING! An alert that calls attention to important information that if not understood or followed can result in personal injury.
CAUTION: An alert that calls attention to important information that if not understood or followed can result in data loss, data corruption, or damage to hardware or software.
IMPORTANT: An alert that calls attention to essential information.
NOTE: An alert that contains additional or supplementary information.
TIP: An alert that provides helpful information.
Network topology icons
Convention Description
Represents a generic network device, such as a router, switch, or firewall.
Represents a routing-capable device, such as a router or Layer 3 switch.
Represents a generic switch, such as a Layer 2 or Layer 3 switch, or a router that supports Layer 2 forwarding and other Layer 2 features.
Represents an access controller, a unified wired-WLAN module, or the access controller engine on a unified wired-WLAN switch.
Represents an access point.
Represents a wireless terminator unit.
Represents a wireless terminator.
Represents a mesh access point.
Represents omnidirectional signals.
TT
TT

Convention Description
Represents directional signals.
Represents a security product, such as a firewall, UTM, multiservice security gateway, or load balancing device.
Represents a security module, such as a firewall, load balancing, NetStream, SSL VPN, IPS, or ACG module.
Examples provided in this document Examples in this document might use devices that differ from your device in hardware model, configuration, or software version. It is normal that the port numbers, sample output, screenshots, and other information in the examples differ from what you have on your device.
Documentation feedback You can e-mail your comments about product documentation to [email protected].
We appreciate your comments.

i
Contents
Basic CLI commands ····················································································· 1
alias ···························································································································································· 1 display | { begin | exclude | include } ·········································································································· 2 display | by-linenum ··································································································································· 3 display > ····················································································································································· 4 display >> ··················································································································································· 5 display alias ················································································································································ 6 display history-command ··························································································································· 7 display history-command all ······················································································································· 7 display hotkey ············································································································································ 8 hotkey ························································································································································· 9 quit ··························································································································································· 10 repeat ······················································································································································· 11 return ························································································································································ 12 screen-length disable ······························································································································· 12 system-view ············································································································································· 13

1
Basic CLI commands alias
Use alias to configure a command alias.
Use undo alias to delete a command alias.
Syntax alias alias command
undo alias alias
Default The device has a set of system-defined command aliases, as listed in Table 1.
Table 1 System-defined command aliases
Command alias Command or command keyword access-list acl
end return
erase delete
exit quit
hostname sysname
logging info-center
no undo
show display
write save
Views System view
Predefined user roles network-admin
Parameters alias: Specifies an alias, a case-sensitive string of 1 to 20 characters. An alias cannot be alias or contain spaces.
command: Specifies a command string. Make sure the command string meets the syntax requirements.
Usage guidelines System-defined command aliases cannot be deleted.
You can configure one or more aliases for a command or the starting keywords of commands. Then, you can use the aliases to execute the command or commands. If the command or commands have undo forms, you can also use the aliases to execute the undo command or commands.

2
For example, if you configure the alias shiprt for display ip routing-table, you can enter shiprt to execute the display ip routing-table command. If you configure the alias ship for display ip, you can use ship to execute all commands that start with display ip:
• Enter ship routing-table to execute the display ip routing-table command.
• Enter ship interface to execute the display ip interface command.
The command string can include up to nine parameters. Each parameter starts with the dollar sign ($) and a sequence number in the range of 1 to 9. For example, you can configure the alias shinc for the display ip $1 | include $2 command. Then, to execute the display ip routing-table | include Static command, you only need to enter shinc routing-table Static. To execute the display ip interface | include GigabitEthernet1/0/1 command, you only need to enter shinc interface GigabitEthernet1/0/1.
Examples # Configure shiprt as the alias for the display ip routing-table command and verify the configuration. <Sysname> system-view
[Sysname] alias shiprt display ip routing-table
[Sysname] shiprt
Destinations : 12 Routes : 12
Destination/Mask Proto Pre Cost NextHop Interface
0.0.0.0/32 Direct 0 0 127.0.0.1 InLoop0
127.0.0.0/8 Direct 0 0 127.0.0.1 InLoop0
127.0.0.0/32 Direct 0 0 127.0.0.1 InLoop0
127.0.0.1/32 Direct 0 0 127.0.0.1 InLoop0
127.255.255.255/32 Direct 0 0 127.0.0.1 InLoop0
192.168.100.0/24 Direct 0 0 192.168.100.150 Vlan1
192.168.100.0/32 Direct 0 0 192.168.100.150 Vlan1
192.168.100.150/32 Direct 0 0 127.0.0.1 InLoop0
192.168.100.255/32 Direct 0 0 192.168.100.150 Vlan1
224.0.0.0/4 Direct 0 0 0.0.0.0 NULL0
224.0.0.0/24 Direct 0 0 0.0.0.0 NULL0
255.255.255.255/32 Direct 0 0 127.0.0.1 InLoop0
# Configure shinc as the alias for display ip $1 | include $2. [Sysname] alias shinc display ip $1 | include $2
# Use alias shinc to display all static routes. [Sysname] shinc routing-table Static
3.3.3.3/32 Static 60 0 192.168.1.62 vlan1
Related commands display alias
display | { begin | exclude | include } Use display | { begin | exclude | include } to filter the output from a display command with a regular expression.

3
Syntax display command | { begin | exclude | include } regular-expression
Views Any view
Predefined user roles network-admin
network-operator
Parameters command: Specifies the keywords and arguments of a display command. To display available keywords and arguments, enter display ?.
begin: Displays the first line matching the specified regular expression and all subsequent lines.
exclude: Displays all lines not matching the specified regular expression.
include: Displays all lines matching the specified regular expression.
regular-expression: Specifies a regular expression, a case-sensitive string of 1 to 256 characters.
Usage guidelines Use the | { begin | exclude | include } regular-expression option with a display command to filter the command output. For more information about regular expressions, see Fundamentals Configuration Guide.
Examples # Display the lines that contain vlan in the running configuration. <Sysname> display current-configuration | include vlan
vlan 1
vlan 100
port access vlan 100
display | by-linenum Use display | by-linenum to number each output line for a display command.
Syntax display command | by-linenum
Views Any view
Predefined user roles network-admin
network-operator
Parameters command: Specifies the keywords and arguments of a display command. To display available keywords and arguments, enter display ?.
Usage guidelines By numbering each output line from a display command, you can easily identify the lines of interest.

4
Each line number is displayed as a 5-character string and might be followed by a colon (:) or hyphen (-). If you specify both | by-linenum and | begin regular-expression for a display command, a hyphen is displayed for all lines that do not match the regular expression.
Examples # Display VLAN 100 settings, with each output line identified by a number. <Sysname> display vlan 100 | by-linenum
1: VLAN ID: 100
2: VLAN type: Static
3: Route interface: Configured
4: IPv4 address: 192.168.2.1
5: IPv4 subnet mask: 255.255.255.0
6: Description: For LAN Access
7: Name: VLAN 0100
8: Tagged ports: None
9: Untagged ports: None
10:
# Display the first line that begins with user-group in the running configuration and all of the following lines. <Sysname> display current-configuration | by-linenum begin user-group
114: user-group system
115- #
116- return
display > Use display > to save the output from a display command to a separate file.
Syntax display command > filename
Views Any view
Predefined user roles network-admin
network-operator
Parameters command: Specifies the keywords and arguments of a display command. To display available keywords and arguments, enter display ?.
filename: Specifies the name of the file that is used to save the output, a string of 1 to 63 characters.
Usage guidelines The display commands show the configuration, statistics, and states of the device. You can use the display > command to save the output to a file.
If the specified file does not exist, the system creates the file and saves the output to the file. If the file already exists, the system overwrites the file.

5
Examples # Save VLAN 1 settings to a separate file named vlan.txt. <Sysname> display vlan 1 > vlan.txt
# Check the content of the vlan.txt file. <Sysname> more vlan.txt
VLAN ID: 1
VLAN type: Static
Route interface: Not configured
Description: VLAN 0001
Name: VLAN 0001
Tagged ports: None
Untagged ports: None
display >> Use display >> to append the output from a display command to the end of a file.
Syntax display command >> filename
Views Any view
Predefined user roles network-admin
network-operator
Parameters command: Specifies the keywords and arguments of a display command. To display available keywords and arguments, enter display ?.
filename: Specifies the name of the file that is used to save the output, a string of 1 to 63 characters.
Usage guidelines The display commands show the configuration, statistics, and states of the device. You can use display >> to save the output to a file.
If the specified file does not exist, the system creates the file and saves the output to the file. If the file already exists, the system appends the output to the end of the file.
Examples # Append the VLAN 100 settings to the end of the vlan.txt file. <Sysname> display vlan 100 >> vlan.txt
<Sysname>
# Check the content of the vlan.txt file. <Sysname> more vlan.txt
VLAN ID: 1
VLAN type: Static
Route interface: Not configured
Description: VLAN 0001
Name: VLAN 0001

6
Tagged ports: None
Untagged ports: None
VLAN ID: 100
VLAN type: Static
Route interface: Configured
IPv4 address: 192.168.2.1
IPv4 subnet mask: 255.255.255.0
Description: For LAN Access
Name: VLAN 0100
Tagged ports: None
Untagged ports: None
display alias Use display alias to display command aliases.
Syntax display alias [ alias ]
Views Any view
Predefined user roles network-admin
network-operator
Parameters alias: Specifies a command alias. If you do not specify this argument, the command displays all command aliases.
Examples # Display all command aliases. <Sysname> display alias
Index Alias Command key
1 access-list acl
2 end return
3 erase delete
4 exit quit
5 hostname sysname
6 logging info-center
7 no undo
8 shinc display $1 | include $2
9 show display
10 shiprt display ip routing-table
11 write save
# Display the command alias shinc. <Sysname> display alias shinc
Alias Command key
shinc display ip $1 | include $2

7
Related commands alias
display history-command Use display history-command to display all commands that are saved in the command history buffer for the current CLI session.
Syntax display history-command
Views Any view
Predefined user roles network-admin
network-operator
Usage guidelines The system automatically saves commands you have successfully executed to the command history buffer for the current CLI session. You can view them and execute them again.
By default, the system can save up to 10 commands in the buffer. You can use the history-command max-size command to change the buffer size. To buffer a new command when the buffer is full, the system deletes the oldest command entry in the buffer.
All commands in the command history buffer for the current CLI session will be cleared when you log out.
Examples # Display all commands saved in the command history buffer for the current CLI session. <Sysname> display history-command
system-view
vlan 2
quit
Related commands history-command max-size
display history-command all Use display history-command all to display all commands that are saved in the command history buffer for all CLI sessions.
Syntax display history-command all
Views Any view
Predefined user roles network-admin

8
Usage guidelines The system automatically saves commands successfully executed by users to the command history buffer for all CLI sessions. Users can view them but cannot recall them from the buffer.
Up to 1024 commands can be saved in the command history buffer. To buffer a new command when the buffer is full, the system deletes the oldest command entry in the buffer.
A user logout does not cause the system to delete commands from the history buffer for all CLI sessions.
Examples # Display all commands saved in the command history buffer for all CLI sessions. <Sysname> display history-command all
Date Time Terminal Ip User
03/16/2018 20:03:33 vty0 192.168.1.26 **
Cmd:dis his all
03/16/2018 20:03:29 vty0 192.168.1.26 **
Cmd:sys
Table 2 Command output
Field Description Date Date when the command was executed.
Time Time when the command was executed.
Terminal User line used by the user.
Ip IP address of the terminal used by the user.
User Username used by the user if the user login authentication mode is scheme. If the login authentication mode is none or password, this field displays **.
Cmd Command string entered by the user.
Related commands display history-command
display hotkey Use display hotkey to display hotkey information.
Syntax display hotkey
Views Any view
Predefined user roles network-admin
network-operator
Examples # Display hotkey information. <Sysname> display hotkey

9
----------------- Hotkeys -----------------
-Defined command hotkeys-
CTRL_G display current-configuration
CTRL_L display ip routing-table
CTRL_O undo debugging all
-Undefined command hotkeys-
CTRL_T NULL
CTRL_U NULL
-System-reserved hotkeys-
CTRL_A Move the cursor to the beginning of the line.
CTRL_B Move the cursor one character to the left.
CTRL_C Stop the current command.
CTRL_D Erase the character at the cursor.
CTRL_E Move the cursor to the end of the line.
CTRL_F Move the cursor one character to the right.
CTRL_H Erase the character to the left of the cursor.
CTRL_K Abort the connection request.
CTRL_N Display the next command in the history buffer.
CTRL_P Display the previous command in the history buffer.
CTRL_R Redisplay the current line.
CTRL_V Paste text from the clipboard.
CTRL_W Delete the word to the left of the cursor.
CTRL_X Delete all characters from the beginning of the line to the cursor.
CTRL_Y Delete all characters from the cursor to the end of the line.
CTRL_Z Return to the User View.
CTRL_] Kill incoming connection or redirect connection.
ESC_B Move the cursor back one word.
ESC_D Delete all characters from the cursor to the end of the word.
ESC_F Move the cursor forward one word.
ESC_N Move the cursor down a line.
ESC_P Move the cursor up a line.
ESC_< Move the cursor to the beginning of the clipboard.
ESC_> Move the cursor to the end of the clipboard.
Related commands hotkey
hotkey Use hotkey to assign a command to a configurable command hotkey.
Use undo hotkey to restore the default.
Syntax hotkey { ctrl_g | ctrl_l | ctrl_o | ctrl_t | ctrl_u } command
undo hotkey { ctrl_g | ctrl_l | ctrl_o | ctrl_t | ctrl_u }
Default • Ctrl+G: display current-configuration (display the running configuration).
• Ctrl+L: display ip routing-table (display the IPv4 routing table information).

10
• Ctrl+O: undo debugging all (disable all debugging functions).
• Ctrl+T: No command is assigned to this hotkey. • Ctrl+U: No command is assigned to this hotkey.
Views System view
Predefined user roles network-admin
Parameters ctrl_g: Assigns a command to Ctrl+G.
ctrl_l: Assigns a command to Ctrl+L.
ctrl_o: Assigns a command to Ctrl+O.
ctrl_t: Assigns a command to Ctrl+T.
ctrl_u: Assigns a command to Ctrl+U.
command: Specifies the command to be assigned to the hotkey.
Usage guidelines The system defines some hotkeys and provides five configurable command hotkeys. Pressing a command hotkey executes the command assigned to the hotkey.
To display system-defined and configurable hotkeys, use the display hotkey command.
Examples # Assign the display tcp statistics command to hotkey Ctrl+T. <Sysname> system-view
[Sysname] hotkey ctrl_t display tcp statistics
Related commands display hotkey
quit Use quit to return to the upper-level view.
Syntax quit
Views Any view
Predefined user roles network-admin
network-operator
Usage guidelines Executing this command in user view disconnects you from the device.
Examples # Return from GigabitEthernet 1/0/1 interface view to system view and then to user view. [Sysname-GigabitEthernet1/0/1] quit

11
[Sysname] quit
<Sysname>
repeat Use repeat to repeat commands in the command history buffer for the current CLI session.
Syntax repeat [ number ] [ count times ] [ delay seconds ]
Views Any view
Predefined user roles network-admin
Parameters number: Specifies the number of the most recently executed commands in the command history buffer for the current CLI session that you want to execute. The value range is 1 to 10. The default is 1.
count times: Specifies the number of times that you want to execute the commands. The value range is 0 to 4294967295. The default is 0. If you do not specify this option, the system keeps executing the commands until you press the escape key to terminate the execution.
delay seconds: Specifies the time (in seconds) for the system to wait before executing the commands again. The value range is 0 to 4294967295. The default is 1.
Usage guidelines To repeat a command, first enter the view for the command. To repeat multiple commands, first enter the view for the first command.
The repeat command executes commands in the order they were executed.
The system waits for your interaction when it repeats an interactive command.
Examples # Configure the system to execute the two most recently executed commands (display cpu-usage and display clock) three times at an interval of 10 seconds. <Sysname> repeat 2 count 3 delay 10
<Sysname> display cpu
Unit CPU usage:
33% in last 5 seconds
32% in last 1 minute
33% in last 5 minutes
<Sysname> display clock
07:02:18 UTC Thu 06/19/2018
<Sysname> display cpu-usage
Unit CPU usage:
33% in last 5 seconds
32% in last 1 minute
33% in last 5 minutes
<Sysname> display clock

12
07:02:28 UTC Thu 06/19/2018
<Sysname> display cpu-usage
Unit CPU usage:
33% in last 5 seconds
32% in last 1 minute
33% in last 5 minutes
<Sysname> display clock
07:02:38 UTC Thu 06/19/2018
Related commands display history-command
escape-key
history-command max-size
return Use return to return to user view from any other view.
Syntax return
Views Any view except user view
Predefined user roles network-admin
network-operator
Usage guidelines Pressing Ctrl+Z has the same effect as the return command.
Examples # Return to user view from GigabitEthernet 1/0/1 interface view. [Sysname-GigabitEthernet1/0/1] return
<Sysname>
screen-length disable Use screen-length disable to disable pausing between screens of output for the current CLI session.
Use undo screen-length disable to enable pausing between screens of output for the current CLI session.
Syntax screen-length disable
undo screen-length disable
Default The default depends on the configuration of the screen-length command in user line view.

13
The following are the default settings for the screen-length command:
• Pausing between screens of output. • Displaying up to 24 lines on a screen.
Views User view
Predefined user roles network-admin
Usage guidelines If you disable pausing between screens of output, all output is displayed. The screen is refreshed continuously until the final screen is displayed.
This command takes effect only for the current CLI session. When you are logged out, the default is restored.
Examples # Disable pausing between screens of output for the current CLI session. <Sysname> screen-length disable
Related commands screen-length
system-view Use system-view to enter system view from user view.
Syntax system-view
Views User view
Predefined user roles network-admin
network-operator
Examples # Enter system view from user view. <Sysname> system-view
System View: return to User View with Ctrl+Z.
[Sysname]

i
Contents
RBAC commands ·························································································· 1
description ·················································································································································· 1 display role ················································································································································· 1 display role feature ····································································································································· 8 display role feature-group ························································································································ 10 feature ······················································································································································ 11 interface policy deny ································································································································ 12 permit interface ········································································································································ 13 permit vlan ················································································································································ 14 role ··························································································································································· 16 role default-role enable ···························································································································· 16 role feature-group ····································································································································· 17 rule ··························································································································································· 18 super ························································································································································ 22 super authentication-mode ······················································································································· 23 super default role ····································································································································· 24 super password ········································································································································ 24 super use-login-username ······················································································································· 25 vlan policy deny ········································································································································ 26

1
RBAC commands description
Use description to configure a description for a user role for easy identification.
Use undo description to restore the default.
Syntax description text
undo description
Default A user role does not have a description.
Views User role view
Predefined user roles network-admin
Parameters text: Specifies a description, a case-sensitive string of 1 to 128 characters.
Examples # Configure the description as labVIP for user role role1. <Sysname> system-view
[Sysname] role name role1
[Sysname-role-role1] description labVIP
Related commands display role
role
display role Use display role to display user role information.
Syntax display role [ name role-name ]
Views Any view
Predefined user roles network-admin
network-operator
Parameters name role-name: Specifies a user role name, a case-sensitive string of 1 to 63 characters. If you do not specify a user role name, the command displays information about all user roles, including the predefined user roles.
2
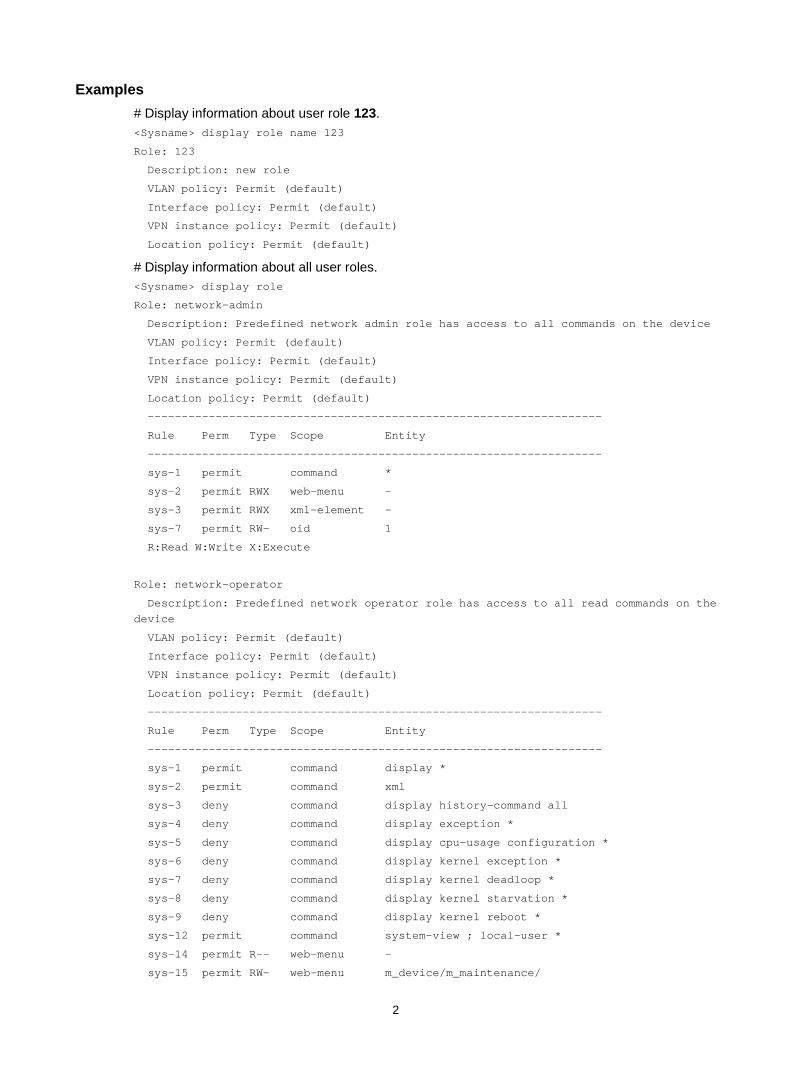
Examples # Display information about user role 123. <Sysname> display role name 123
Role: 123
Description: new role
VLAN policy: Permit (default)
Interface policy: Permit (default)
VPN instance policy: Permit (default)
Location policy: Permit (default)
# Display information about all user roles. <Sysname> display role
Role: network-admin
Description: Predefined network admin role has access to all commands on the device
VLAN policy: Permit (default)
Interface policy: Permit (default)
VPN instance policy: Permit (default)
Location policy: Permit (default)
-------------------------------------------------------------------
Rule Perm Type Scope Entity
-------------------------------------------------------------------
sys-1 permit command *
sys-2 permit RWX web-menu -
sys-3 permit RWX xml-element -
sys-7 permit RW- oid 1
R:Read W:Write X:Execute
Role: network-operator
Description: Predefined network operator role has access to all read commands on the device
VLAN policy: Permit (default)
Interface policy: Permit (default)
VPN instance policy: Permit (default)
Location policy: Permit (default)
-------------------------------------------------------------------
Rule Perm Type Scope Entity
-------------------------------------------------------------------
sys-1 permit command display *
sys-2 permit command xml
sys-3 deny command display history-command all
sys-4 deny command display exception *
sys-5 deny command display cpu-usage configuration *
sys-6 deny command display kernel exception *
sys-7 deny command display kernel deadloop *
sys-8 deny command display kernel starvation *
sys-9 deny command display kernel reboot *
sys-12 permit command system-view ; local-user *
sys-14 permit R-- web-menu -
sys-15 permit RW- web-menu m_device/m_maintenance/

3
m_changepassword
sys-16 permit R-- xml-element -
sys-20 deny command system-view ; local-user-import *
sys-21 deny command system-view ; local-user-export *
sys-22 permit R-- oid 1
R:Read W:Write X:Execute
Role: level-0
Description: Predefined level-0 role
VLAN policy: Permit (default)
Interface policy: Permit (default)
VPN instance policy: Permit (default)
Location policy: Permit (default)
-------------------------------------------------------------------
Rule Perm Type Scope Entity
-------------------------------------------------------------------
sys-1 permit command tracert *
sys-2 permit command telnet *
sys-3 permit command ping *
sys-4 permit command ssh2 *
sys-5 permit command super *
R:Read W:Write X:Execute
Role: level-1
Description: Predefined level-1 role
VLAN policy: Permit (default)
Interface policy: Permit (default)
VPN instance policy: Permit (default)
Location policy: Permit (default)
-------------------------------------------------------------------
Rule Perm Type Scope Entity
-------------------------------------------------------------------
sys-1 permit command tracert *
sys-2 permit command telnet *
sys-3 permit command ping *
sys-4 permit command ssh2 *
sys-5 permit command display *
sys-6 permit command super *
sys-7 deny command display history-command all
R:Read W:Write X:Execute
Role: level-2
Description: Predefined level-2 role
VLAN policy: Permit (default)
Interface policy: Permit (default)
VPN instance policy: Permit (default)
Location policy: Permit (default)

4
Role: level-3
Description: Predefined level-3 role
VLAN policy: Permit (default)
Interface policy: Permit (default)
VPN instance policy: Permit (default)
Location policy: Permit (default)
Role: level-4
Description: Predefined level-4 role
VLAN policy: Permit (default)
Interface policy: Permit (default)
VPN instance policy: Permit (default)
Location policy: Permit (default)
Role: level-5
Description: Predefined level-5 role
VLAN policy: Permit (default)
Interface policy: Permit (default)
VPN instance policy: Permit (default)
Location policy: Permit (default)
Role: level-6
Description: Predefined level-6 role
VLAN policy: Permit (default)
Interface policy: Permit (default)
VPN instance policy: Permit (default)
Location policy: Permit (default)
Role: level-7
Description: Predefined level-7 role
VLAN policy: Permit (default)
Interface policy: Permit (default)
VPN instance policy: Permit (default)
Location policy: Permit (default)
Role: level-8
Description: Predefined level-8 role
VLAN policy: Permit (default)
Interface policy: Permit (default)
VPN instance policy: Permit (default)
Location policy: Permit (default)
Role: level-9
Description: Predefined level-9 role
VLAN policy: Permit (default)
Interface policy: Permit (default)
VPN instance policy: Permit (default)
Location policy: Permit (default)

5
-------------------------------------------------------------------
Rule Perm Type Scope Entity
-------------------------------------------------------------------
sys-1 permit RWX feature -
sys-2 deny RWX feature device
sys-3 deny RWX feature filesystem
sys-4 permit command display *
sys-5 deny command display history-command all
R:Read W:Write X:Execute
Role: level-10
Description: Predefined level-10 role
VLAN policy: Permit (default)
Interface policy: Permit (default)
VPN instance policy: Permit (default)
Location policy: Permit (default)
Role: level-11
Description: Predefined level-11 role
VLAN policy: Permit (default)
Interface policy: Permit (default)
VPN instance policy: Permit (default)
Location policy: Permit (default)
Role: level-12
Description: Predefined level-12 role
VLAN policy: Permit (default)
Interface policy: Permit (default)
VPN instance policy: Permit (default)
Location policy: Permit (default)
Role: level-13
Description: Predefined level-13 role
VLAN policy: Permit (default)
Interface policy: Permit (default)
VPN instance policy: Permit (default)
Location policy: Permit (default)
Role: level-14
Description: Predefined level-14 role
VLAN policy: Permit (default)
Interface policy: Permit (default)
VPN instance policy: Permit (default)
Location policy: Permit (default)
Role: level-15
Description: Predefined level-15 role
VLAN policy: Permit (default)

6
Interface policy: Permit (default)
VPN instance policy: Permit (default)
Location policy: Permit (default)
-------------------------------------------------------------------
Rule Perm Type Scope Entity
-------------------------------------------------------------------
sys-1 permit command *
sys-2 permit RWX web-menu -
sys-3 permit RWX xml-element -
sys-7 permit RW- oid 1
R:Read W:Write X:Execute
Role: security-audit
Description: Predefined security audit role only has access to commands for the security log administrator
VLAN policy: Permit (default)
Interface policy: Permit (default)
VPN instance policy: Permit (default)
Location policy: Permit (default)
-------------------------------------------------------------------
Rule Perm Type Scope Entity
-------------------------------------------------------------------
sys-1 deny command *
sys-5 permit command cd *
sys-6 permit command copy *
sys-7 permit command delete *
sys-8 permit command dir *
sys-9 permit command mkdir *
sys-10 permit command more *
sys-11 permit command move *
sys-12 permit command rmdir *
sys-13 permit command pwd
sys-14 permit command rename *
sys-15 permit command undelete *
sys-16 permit command ftp *
sys-17 permit command sftp *
R:Read W:Write X:Execute
Role: guest-manager
Description: Predefined guest manager role can't access to commands
VLAN policy: Permit (default)
Interface policy: Permit (default)
VPN instance policy: Permit (default)
Location policy: Permit (default)
-------------------------------------------------------------------
Rule Perm Type Scope Entity
-------------------------------------------------------------------
sys-1 permit RWX xml-element useraccounts/approveguest/
sys-2 permit RWX xml-element useraccounts/exportguestaccount/

7
sys-3 permit RWX xml-element useraccounts/generateguestaccount/
sys-4 permit RWX xml-element useraccounts/guest/
sys-5 permit RWX xml-element useraccounts/guestconfigure/
sys-6 permit RWX xml-element useraccounts/importguestaccount/
sys-7 permit RWX xml-element useraccounts/exportguesttemplet/
sys-8 permit RWX xml-element rpc/
sys-9 permit RWX web-menu m_global/m_networksecurity/
m_guestmanage/m_guestlist/
sys-10 permit RWX web-menu m_global/m_networksecurity/
m_guestmanage/m_importguest/
sys-11 permit RWX web-menu m_global/m_networksecurity/
m_guestmanage/m_generateguest/
sys-12 permit RWX web-menu m_global/m_networksecurity/
m_guestmanage/m_approveguest/
sys-13 deny command *
R:Read W:Write X:Execute
Table 1 Command output
Field Description
Role
User role name. Predefined user role names: • network-admin. • network-operator. • level-n (where n represents an integer in the range of 0 to 15). • security-audit. • guest-manager.
Description User role description.
VLAN policy
VLAN policy of the user role: • Deny—Denies access to any VLANs except for permitted
VLANs. • Permit (default)—Default VLAN policy, which enables the user
role to access all VLANs.
Permitted VLANs VLANs accessible to the user role.
Interface policy
Interface policy of the user role: • Deny—Denies access to any interfaces except for permitted
interfaces. • Permit (default)—Default interface policy, which enables the
user role to access all interfaces.
Permitted interfaces Interfaces accessible to the user role.
VPN instance policy
This field is not supported in the current software version. VPN instance policy of the user role: • Deny—Denies access to any VPN instances except for
permitted VPN instances. • Permit (default)—Default VPN instance policy, which enables
the user role to access all VPN instances.
Permitted VPN instances This field is not supported in the current software version. VPN instances accessible to the user role.

8
Field Description
Location policy
This field is not supported in the current software version. Location identifier policy of the user role: • Deny—Denies access to any location identifiers except for
permitted location identifiers. • Permit (default)—Default location identifier policy, which
enables the user role to access all location identifiers.
Permitted locations This field is not supported in the current software version. Location identifiers accessible to the user role.
Rule User role rule number. Predefined user role rules are identified by sys-n, where n represents an integer.
Perm
Access control type: • Permit—User role has access to the items in the Entity field. • Deny—User role does not have access to the items in the
Entity field.
Type
Controlled type: • R—Read-only. • W—Write. • X—Execute.
Scope
Rule control scope: • command—Controls access to the command or commands,
as specified in the Entity field. • feature—Controls access to the commands for the feature, as
specified in the Entity field. • feature-group—Controls access to the commands for the
features in the feature group, as specified in the Entity field. • web-menu—Controls access to Web menus. • xml-element—Controls access to XML elements. • oid—Controls access to MIB nodes.
Entity
Command string, feature name, feature group, Web menu, XML element, or OID specified in the user role rule: • An en dash (–) represents any feature. • An asterisk (*) represents zero or more characters.
Related commands role
display role feature Use display role feature to display features available in the system.
Syntax display role feature [ name feature-name | verbose ]
Views Any view
Predefined user roles network-admin

9
network-operator
Parameters name feature-name: Specifies a feature by feature name. The feature-name argument represents the feature name, and all letters must be in lower case.
verbose: Displays the commands for each feature.
Usage guidelines If you do not specify any parameters, the command displays only the list of features available in the system.
Examples # Display the list of feature names. <Sysname> display role feature
Feature: stress (Stress related commands)
# Display the commands for each feature. <Sysname> display role feature verbose
Feature: stress (Stress related commands)
process * (W)
memory memset * (W)
memory policy * (W)
memory trace * (W)
display memory trace * (R)
kernel memory trace * (W)
display kernel memory trace * (R)
system-view ; probe ; system handshake * (W)
system-view ; probe ; lipc * (W)
system-view ; probe ; monitor thread-switch * (W)
system-view ; probe ; display system internal monitor thread-switch * (R)
system-view ; probe ; hook * (W)
system-view ; probe ; display system internal hook * (R)
# Display the commands for feature stress. <Sysname> display role feature name stress
Feature: stress (Stress related commands)
process * (W)
memory memset * (W)
memory policy * (W)
memory trace * (W)
display memory trace * (R)
kernel memory trace * (W)
display kernel memory trace * (R)
system-view ; probe ; system handshake * (W)
system-view ; probe ; lipc * (W)
system-view ; probe ; monitor thread-switch * (W)
system-view ; probe ; display system internal monitor thread-switch * (R)
system-view ; probe ; hook * (W)
system-view ; probe ; display system internal hook * (R)

10
Table 2 Command output (display role feature name stress)
Field Description
Feature Displays the name and brief function description of the feature.
display memory trace * All commands that start with the display memory trace keywords in user view.
system-view ; probe All commands in probe view.
(W) Command type is Write. A write command configures the system.
(R) Command type is Read. A read command displays configuration or maintenance information.
(X) Command type is Execute. An execute command executes a specific function.
Related commands feature
display role feature-group Use display role feature-group to display feature group information.
Syntax display role feature-group [ name feature-group-name ] [ verbose ]
Views Any view
Predefined user roles network-admin
network-operator
Parameters name feature-group-name: Specifies a feature group. The feature-group-name argument represents the feature group name, a case-sensitive string of 1 to 31 characters. If you do not specify a feature group, the command displays information about all feature groups.
verbose: Displays the commands for each feature in feature groups. If you do not specify this keyword, the command displays only the feature lists of feature groups.
Usage guidelines Feature groups L2 and L3 are predefined feature groups.
Examples # Display the feature lists of feature groups. <Sysname> display role feature-group
Feature group: aaa
Feature: stress (Stress related commands)
# Display the commands in each feature group. For more information about the wildcards and marks used in the command list, see Table 3. <Sysname> display role feature-group verbose
Feature: stress (Stress related commands)
process * (W)

11
memory memset * (W)
memory policy * (W)
memory trace * (W)
display memory trace * (R)
kernel memory trace * (W)
display kernel memory trace * (R)
system-view ; probe ; system handshake * (W)
system-view ; probe ; lipc * (W)
system-view ; probe ; monitor thread-switch * (W)
system-view ; probe ; display system internal monitor thread-switch * (R)
system-view ; probe ; hook * (W)
system-view ; probe ; display system internal hook * (R)
Related commands feature
role feature-group
feature Use feature to add a feature to a feature group.
Use undo feature to remove a feature from a feature group.
Syntax feature feature-name
undo feature feature-name
Default A user-defined feature group does not have any features.
Views Feature group view
Predefined user roles network-admin
Parameters feature-name: Specifies a feature name. You must enter the feature name in lower case.
Usage guidelines Repeat the feature command to add multiple features to a feature group.
Examples # Add the stress feature to feature group security-features. <Sysname> system-view
[Sysname] role feature-group name security-features
[Sysname-featuregrp-security-features] feature stress
Related commands display role feature
display role feature-group
role feature-group

12
interface policy deny Use interface policy deny to enter user role interface policy view.
Use undo interface policy deny to restore the default.
Syntax interface policy deny
undo interface policy deny
Default A user role has access to all interfaces.
Views User role view
Predefined user roles network-admin
Usage guidelines To restrict the interface access of a user role to a set of interfaces, perform the following tasks: 1. Use interface policy deny to enter user role interface policy view. 2. Use permit interface to specify accessible interfaces.
NOTE: The interface policy deny command denies the access of the user role to any interfaces if no interfaces are specified by using the permit interface command.
To configure an interface, make sure the interface is permitted by the user role interface policy in use. You can perform the following tasks on an accessible interface: • Create, remove, or configure the interface. • Enter interface view. • Specify the interface in feature commands.
The create and remove operations are available only for logical interfaces.
Any change to a user role interface policy takes effect only on users who log in with the user role after the change.
Examples # Enter user role interface policy view of role1, and deny role1 to access any interfaces. <Sysname> system-view
[Sysname] role name role1
[Sysname-role-role1] interface policy deny
[Sysname-role-role1-ifpolicy] quit
# Enter user role interface policy view of role1, and deny role1 to access any interfaces except for GigabitEthernet 1/0/1. <Sysname> system-view
[Sysname] role name role1
[Sysname-role-role1] interface policy deny
[Sysname-role-role1-ifpolicy] permit interface gigabitethernet 1/0/1

13
Related commands display role
permit interface
role
permit interface Use permit interface to configure a list of interfaces accessible to a user role.
Use undo permit interface to disable the access of a user role to specific interfaces.
Syntax permit interface interface-list
undo permit interface [ interface-list ]
Default No permitted interfaces are configured in user role interface policy view.
Views User role interface policy view
Predefined user roles network-admin
Parameters interface-list: Specifies a space-separated list of up to 10 interface items. Each interface item specifies one interface in the interface-type interface-number form or a range of interfaces in the interface-type interface-number to interface-type interface-number form. If you specify an interface range, the end interface must meet the following requirements: • Be the same type as the start interface. • Have a higher interface number than the start interface.
Usage guidelines To permit a user role to access an interface after you use the interface policy deny command, you must add the interface to the permitted interface list of the policy. With the user role, you can perform the following tasks to the interfaces in the permitted interface list: • Create, remove, or configure the interfaces. • Enter the interface views. • Specify the interfaces in feature commands.
The create and remove operations are available only for logical interfaces.
You can repeat the permit interface command to add multiple permitted interfaces to a user role interface policy.
The undo permit interface command removes the entire list of permitted interfaces if you do not specify an interface.
Any change to a user role interface policy takes effect only on users who log in with the user role after the change.
Examples 1. Configure user role role1:

14
# Permit user role role1 to execute all commands available in interface view and VLAN view. <Sysname> system-view
[Sysname] role name role1
[Sysname-role-role1] rule 1 permit command system-view ; interface *
[Sysname-role-role1] rule 2 permit command system-view ; vlan *
# Permit the user role to access only GigabitEthernet 1/0/1. [Sysname-role-role1] interface policy deny
[Sysname-role-role1-ifpolicy] permit interface gigabitethernet 1/0/1
[Sysname-role-role1-ifpolicy] quit
[Sysname-role-role1] quit
2. Verify that you cannot use user role role1 to work on any interfaces except for GigabitEthernet 1/0/1: # Verify that you can enter GigabitEthernet 1/0/1 interface view. [Sysname] interface gigabitethernet 1/0/1
[Sysname-GigabitEthernet1/0/1] quit
# Verify that you can assign GigabitEthernet 1/0/1 to VLAN 10. In this example, the user role can access all VLANs because the default VLAN policy of the user role is used. [Sysname] vlan 10
[Sysname-vlan10] port gigabitethernet 1/0/1
[Sysname-vlan10] quit
# Verify that you cannot enter interface view of GigabitEthernet 1/0/2. [Sysname] interface gigabitethernet 1/0/2
Permission denied.
Related commands display role
interface policy deny
role
permit vlan Use permit vlan to configure a list of VLANs accessible to a user role.
Use undo permit vlan to remove the permission for a user role to access specific VLANs.
Syntax permit vlan vlan-id-list
undo permit vlan [ vlan-id-list ]
Default No permitted VLANs are configured in user role VLAN policy view.
Views User role VLAN policy view
Predefined user roles network-admin
Parameters vlan-id-list: Specifies a space-separated list of up to 10 VLAN items. Each VLAN item specifies a VLAN by VLAN ID or specifies a range of VLANs in the form of vlan-id1 to

15
vlan-id2. The value range for the VLAN IDs is 1 to 4094. If you specify a VLAN range, the value for the vlan-id2 argument must be greater than the value for the vlan-id1 argument.
Usage guidelines To permit a user role to access a VLAN after you use the vlan policy deny command, you must add the VLAN to the permitted VLAN list of the policy. With the user role, you can perform the following tasks on the VLANs in the permitted VLAN list: • Create, remove, or configure the VLANs. • Enter the VLAN views. • Specify the VLANs in feature commands.
You can repeat the permit vlan command to add multiple permitted VLANs to a user role VLAN policy.
The undo permit vlan command removes the entire list of permitted VLANs if you do not specify a VLAN.
Any change to a user role VLAN policy takes effect only on users who log in with the user role after the change.
By default, all access ports belong to VLAN 1. To assign an access port to any other VLAN by using the port access vlan command, make sure you have a user role that can access both VLAN 1 and the new VLAN.
Examples 1. Configure user role role1:
# Permit user role role1 to execute all commands available in interface view and VLAN view. <Sysname> system-view
[Sysname] role name role1
[Sysname-role-role1] rule 1 permit command system-view ; interface *
[Sysname-role-role1] rule 2 permit command system-view ; vlan *
# Permit user role role1 to access VLANs 1, 2, 4, and 50 to 100. [Sysname-role-role1] vlan policy deny
[Sysname-role-role1-vlanpolicy] permit vlan 1 2 4 50 to 100
[Sysname-role-role1-vlanpolicy] quit
[Sysname-role-role1] quit
2. Verify that you cannot use user role role1 to work on any VLANs except for VLANs 1, 2, 4, and 50 to 100: # Verify that you can create VLAN 100 and enter VLAN view. [Sysname] vlan 100
[Sysname-vlan100] quit
# Verify that you can add GigabitEthernet 1/0/1 to VLAN 100 as an access port. [Sysname] interface gigabitethernet 1/0/1
[Sysname-GigabitEthernet1/0/1] port access vlan 100
[Sysname-GigabitEthernet1/0/1] quit
# Verify that you cannot create VLAN 101 or enter VLAN view. [Sysname] vlan 101
Permission denied.
Related commands display role
role

16
vlan policy deny
role Use role to create a user role and enter its view, or enter the view of an existing user role.
Use undo role to delete a user role.
Syntax role name role-name
undo role name role-name
Default The system has the following predefined user roles: network-admin, network-operator, level-n (where n represents an integer in the range of 0 to 15), guest-manager, and security-audit.
Views System view
Predefined user roles network-admin
Parameters name role-name: Specifies a username. The role-name argument is a case-sensitive string of 1 to 63 characters.
Usage guidelines You can create a maximum of 64 user roles in addition to the predefined user roles.
You cannot delete the predefined user roles or change the permissions assigned to network-admin, network-operator, level-15, guest-manager, or security-audit.
The access permissions of the level-0 to level-14 user roles can be modified through user role rules and resource access policies. However, you cannot make changes on the predefined access permissions of these user roles. For example, you cannot change the access permission of these user roles to the display history-command all command.
The device cannot assign the security-audit user role to non-AAA authentication users.
Examples # Create user role role1 and enter its view. <Sysname> system-view
[Sysname] role name role1
[Sysname-role-role1]
Related commands display role
interface policy deny
rule
vlan policy deny
role default-role enable Use role default-role enable to enable the default user role feature for remote AAA users.

17
Use undo role default-role enable to restore the default.
Syntax role default-role enable [ role-name ]
undo role default-role enable
Default The default user role feature is disabled. AAA users who do not have a user role cannot log in to the device.
Views System view
Predefined user roles network-admin
Parameters role-name: Specifies a user role by its name for the default user role. The user role must already exist. The argument is a case-sensitive string of 1 to 63 characters.
Usage guidelines The default user role feature assigns the default user role to AAA-authenticated users if the authentication server (local or remote) does not assign any user roles to the users. These users are allowed to access the system with the default user role.
For local authorization, this command is required if you do not use the authorization-attribute user role command to assign user roles to local users.
If AAA users have been assigned user roles, they log in with the user roles.
If you do not specify the role-name argument, the default user role is network-operator.
Examples # Enable the default user role feature. <Sysname> system-view
[Sysname] role default-role enable
Related commands role
role feature-group Use role feature-group to create a user role feature group and enter its view, or enter the view of an existing user role feature group.
Use undo role feature-group to delete a user role feature group.
Syntax role feature-group name feature-group-name
undo role feature-group name feature-group-name
Default Two user role feature groups L2 and L3 exist.
Views System view

18
Predefined user roles network-admin
Parameters name feature-group-name: Specifies a feature group name. The feature-group-name argument is a case-sensitive string of 1 to 31 characters.
Usage guidelines The L2 feature group includes all Layer 2 feature commands, and the L3 feature group includes all Layer 3 feature commands. These predefined feature groups are not user configurable.
In addition to the predefined feature groups L2 and L3, you can create a maximum of 64 user role feature groups.
Examples # Create feature group security-features and enter its view. <Sysname> system-view
[Sysname] role feature-group name security-features
[Sysname-featuregrp-security-features]
Related commands display role feature
display role feature-group
feature
rule Use rule to create or change a user role rule.
Use undo rule to delete user role rules.
Syntax rule number { deny | permit } { command command-string | { execute | read | write } * { feature [ feature-name ] | feature-group feature-group-name | oid oid-string | web-menu [ web-string ] | xml-element [ xml-string ] } }
undo rule { number | all }
Default A user-defined user role does not have any rules and cannot access any resources.
Views User role view
Predefined user roles network-admin
Parameters number: Specifies a rule number in the range of 1 to 256.
deny: Denies access to the specified commands, Web menus, XML elements, or MIB nodes.
permit: Permits access to the specified commands, Web menus, XML elements, or MIB nodes.
command command-string: Specifies a command string. The command string can represent a command or a group of commands. The command-string argument is a case-sensitive string of 1 to 128 characters, including the following characters:

19
• The wildcard asterisk (*). • The delimiters space and tab. • All printable characters.
execute: Specifies the execute commands, Web menus, XML elements, or MIB nodes to execute a specific function or program. The ping command is an example of execute commands.
read: Specifies the read commands, Web menus, XML elements, or MIB nodes to display configuration or maintenance information. The display, dir, more, and pwd commands are examples of read commands.
write: Specifies the write commands, Web menus, XML elements, or MIB nodes to configure the system. The ssh server enable command is an example of write commands.
feature [ feature-name ]: Specifies one or all features. The feature-name argument is a case-sensitive character string. If you do not specify a feature name, you specify all the features in the system.
feature-group feature-group-name: Specifies a user-defined or predefined feature group. The feature-group-name argument represents the feature group name, a case-sensitive string of 1 to 31 characters. If the feature group has not been created, the rule takes effect after the group is created. To display the feature groups that have been created, use the display role feature-group command.
oid oid-string: Specifies an OID of a MIB node. The oid-string argument represents the OID, a case-insensitive string of 1 to 255 characters. The OID is a dotted numeric string that uniquely identifies the path from the root node to this node. For example, 1.3.6.1.4.1.25506.8.35.14.19.1.1.
web-menu [ web-string ]: Specifies a Web menu. The web-string argument represents the ID path of the Web menu, a case-insensitive string of 1 to 255 characters. Use the forward slash (/) to separate ID items, for example, m_global/m_dashboard. If you do not specify a Web menu, the rule applies to all Web items. To verify the ID path of a Web menu, use the display web menu command.
xml-element [ xml-string ]: Specifies an XML element. The xml-string argument represents the XPath of the XML element, a case-insensitive string of 1 to 255 characters. Use the forward slash (/) to separate Xpath items, for example, arp/arpattackprotect/source. If you do not specify an XML element, the rule applies to all XML elements.
all: Specifies all the user role rules.
Usage guidelines You can define the following types of rules for different access control granularities: • Command rule—Controls access to a command or a set of commands that match a regular
expression. • Feature rule—Controls access to the commands for a feature by command type. • Feature group rule—Controls access to the commands for a group of features by command
type. • Web menu rule—Controls access to Web menus by menu type. • XML element rule—Controls access to XML elements by element type. • OID rule—Controls access to the specified MIB node and its child nodes by node type.
A user role can access the set of permitted resources specified in the user role rules. User role rules include predefined (identified by sys-n) and user-defined user role rules.
You can configure a maximum of 256 user-defined rules for a user role. The total number of user-defined user role rules cannot exceed 1024.
Any rule modification, addition, or removal for a user role takes effect only on the users who log in with the user role after the change.

20
Access to the file system commands is controlled by both the file system command rules and the file system feature rule.
A command with output redirection to the file system is permitted only when the command type write is assigned to the file system feature.
The following guidelines apply to non-OID rules: • If two user-defined rules of the same type conflict, the rule with the higher ID takes effect. For
example, a user role can use the tracert command but not the ping command if the user role contains rules configured by using the following commands: rule 1 permit command ping
rule 2 permit command tracert
rule 3 deny command ping
• If a predefined user role rule and a user-defined user role rule conflict, the user-defined user role rule takes effect.
The following guidelines apply to OID rules: • The system compares an OID with the OIDs specified in rules, and it uses the longest match
principle to select a rule for the OID. For example, a user role cannot access the MIB node with OID 1.3.6.1.4.1.25506.141.3.0.1 if the user role contains rules configured by using the following commands: rule 1 permit read write oid 1.3.6
rule 2 deny read write oid 1.3.6.1.4.1
rule 3 permit read write oid 1.3.6.1.4
• If the same OID is specified in multiple rules, the rule with the higher ID takes effect. For example, a user role can access the MIB node with OID 1.3.6.1.4.1.25506.141.3.0.1 if the user role contains rules configured by using the following commands: rule 1 permit read write oid 1.3.6
rule 2 deny read write oid 1.3.6.1.4.1
rule 3 permit read write oid 1.3.6.1.4.1
When you specify a command string, follow the guidelines in Table 3.
Table 3 Command string configuration rules
Rule Guidelines
Semicolon (;) is the delimiter.
Use a semicolon to separate the command of each view that you must enter before you access a command or a set of commands. However, do not use a semicolon to separate commands available in user view or any view, for example, display and dir.
Each semicolon-separated segment must have a minimum of one printable character. To specify the commands in a view but not the commands in the view's subviews, use a semicolon as the last printable character in the last segment. To specify the commands in a view and the view's subviews, the last printable character in the last segment must not be a semicolon. For example, you must enter system view before you enter interface view. To specify all commands starting with the ip keyword in any interface view, you must use the "system ; interface * ; ip * ;" command string. For another example, the "system ; radius scheme * ;" command string represents all commands that start with the radius scheme keywords in system view. The "system ; radius scheme *" command string represents all commands that start with the radius scheme keywords in system view and all commands in RADIUS scheme view.

21
Rule Guidelines
Asterisk (*) is the wildcard.
An asterisk represents zero or multiple characters. In a non-last segment, you can use an asterisk only at the end of the segment. In the last segment, you can use an asterisk in any position of the segment. If the asterisk appears at the beginning, you cannot specify a printable character behind the asterisk. For example, the "system ; *" command string represents all commands available in system view and all subviews of the system view. The "debugging * event" command string represents all event debugging commands available in user view.
Keyword abbreviation is allowed.
You can specify a keyword by entering the first few characters of the keyword. Any command that starts with this character string matches the rule. For example, "rule 1 deny command dis arp source *" denies access to the display arp source-mac interface and display arp source-suppression commands.
To control the access to a command, you must specify the command immediately after the view that has the command.
To control access to a command, you must specify the command immediately behind the view to which the command is assigned. The rules that control command access for any subview do not apply to the command. For example, the "rule 1 deny command system ; interface * ; *" command string disables access to any command that is assigned to interface view. However, you can still execute the acl advanced command in interface view, because this command is assigned to system view rather than interface view. To disable access to this command, use "rule 1 deny command system ; acl *;".
Do not include the vertical bar (|), greater-than sign (>), or double greater-than sign (>>) when you specify display commands in a user role command rule.
The system does not treat the redirect signs and the parameters that follow the signs as part of command lines. However, in user role command rules, these redirect signs and parameters are handled as part of command lines. As a result, no rule that includes any of these signs can find a match. For example, "rule 1 permit command display debugging > log" can never find a match. This is because the system has a display debugging command but not a display debugging > log command.
Examples # Permit user role role1 to execute the display acl command. <Sysname> system-view
[Sysname] role name role1
[Sysname-role-role1] rule 1 permit command display acl
# Permit user role role1 to execute all commands that start with the display keyword. [Sysname-role-role1] rule 2 permit command display *
# Permit user role role1 to execute the radius scheme aaa command in system view and use all commands assigned to RADIUS scheme view. [Sysname-role-role1] rule 3 permit command system ; radius scheme aaa
# Deny the access of role1 to the read or write commands for any features. [Sysname-role-role1] rule 4 deny read write feature
# Deny the access of role1 to the read commands for the stress feature. [Sysname-role-role1] rule 5 deny read feature stress

22
# Permit role1 to access all read, write, and execute commands for feature group security-features. [Sysname-role-role1] rule 6 permit read write execute feature-group security-features
# Permit role1 to access all read and write MIB nodes under the node with OID 1.1.2. [Sysname-role-role1] rule 7 permit read write oid 1.1.2
Related commands display role
display role feature
display role feature-group
display web menu
role
super Use super to obtain another user role without reconnecting to the device.
Syntax super [ role-name ]
Views User view
Predefined user roles network-admin
Parameters role-name: Specifies a user role, a case-sensitive string of 1 to 63 characters. The user role must exist in the system and cannot be security-audit or guest-manager. If you do not specify a user role, you obtain the default target user role which is set by using the super default role command.
Usage guidelines The obtained user role is a temporary user role, because this command is effective only on the current login. The next time you are logged in with the user account, the original user role settings take effect.
To enable a user to obtain another user role without reconnecting to the device, you must configure user role authentication.
Enter the username (if required) and password within 60 seconds after you enter the super command. If you fail to do so, the command will time out. To obtain the role, you will need to re-execute the command. • If no local password is configured in the local password authentication (local), a console user
can obtain the user role by either entering a string or not entering anything. • If no local password is configured in the local-then-remote authentication (local scheme), a
console or VTY user performs remote authentication.
Examples # Obtain the user role network-operator. <Sysname> super network-operator
Password:
User privilege role is network-operator, and only those commands that authorized to the role can be used.

23
Related commands authentication super (User Access and Authentication Command Reference)
super authentication-mode
super password
super authentication-mode Use super authentication-mode to set an authentication mode for temporary user role authorization.
Use undo super authentication-mode to restore the default.
Syntax super authentication-mode { local | scheme } *
undo super authentication-mode
Default Local password authentication applies.
Views System view
Predefined user roles network-admin
Parameters local: Enables local password authentication.
scheme: Enables remote AAA authentication.
Usage guidelines For local password authentication, use the super password command to set a password.
For remote AAA authentication, set the username and password on the RADIUS server.
If you specify both local and scheme keywords, the keyword first entered in the command takes precedence. • scheme local—Enables remote-then-local authentication mode. The device first performs AAA
authentication to obtain a temporary user role. Local password authentication is performed if the remote RADIUS server does not respond, or if the AAA configuration on the device is invalid.
• local scheme—Enables local-then-remote authentication mode. The device first performs local password authentication. If no password is configured for the user role, the device performs remote authentication for console and VTY users.
For more information about AAA, see User Access and Authentication Configuration Guide.
Examples # Enable local-only authentication for temporary user role authorization. <Sysname> system-view
[Sysname] super authentication-mode local
# Enable remote-then-local authentication for temporary user role authorization. <Sysname> system-view
[Sysname] super authentication-mode scheme local

24
Related commands authentication super (User Access and Authentication Command Reference)
super password
super default role Use super default role to specify the default target user role for temporary user role authorization.
Use undo super default role to restore the default.
Syntax super default role role-name
undo super default role
Default The default target user role is network-admin.
Views System view
Predefined user roles network-admin
Parameters role-name: Specifies the name of the default target user role, a case-sensitive string of 1 to 63 characters. The user role must exist in the system and cannot be security-audit or guest-manager.
Usage guidelines The default target user role is applied to the super or super password command when you do not specify a user role for the command.
Examples # Specify network-operator as the default target user role for temporary user role authorization. <Sysname> system-view
[Sysname] super default role network-operator
Related commands super
super password
super password Use super password to set a password for a user role.
Use undo super password to delete the password for a user role.
Syntax super password [ role role-name ] [ { hash | simple } string ]
undo super password [ role role-name ]
Default No password is set for a user role.

25
Views System view
Predefined user roles network-admin
Parameters role role-name: Specifies a user role, a case-sensitive string of 1 to 63 characters. The user role must exist in the system and cannot be security-audit or guest-manager. If you do not specify a user role, the command sets a password for the default target user role which is set by using the super default role command.
hash: Specifies a password in hashed form.
simple: Specifies a password in plaintext form. For security purposes, the password specified in plaintext form will be stored in hashed form.
string: Specifies the password. Its plaintext form is a case-sensitive string of 1 to 63 characters and its hashed form is a case-sensitive string of 1 to 110 characters.
Usage guidelines If you do not specify any parameters, you specify a plaintext password in the interactive mode.
Set a password if you configure local password authentication for temporary user role authorization.
It is a good practice to specify different passwords for different user roles.
Examples # Set the password to 123456TESTplat&! in plaintext form for user role network-operator. <Sysname> system-view
[Sysname] super password role network-operator simple 123456TESTplat&!
# Set the password to 123456TESTplat&! in the interactive mode for user role network-operator. <Sysname> system-view
[Sysname] super password role network-operator
Password:
Confirm :
Updating user information. Please wait......
Related commands super authentication-mode
super default role
super use-login-username Use super use-login-username to enable the device to automatically obtain the login username when a login user requests temporary user role authorization from a remote authentication server.
Use undo super use-login-username to restore the default.
Syntax super use-login-username
undo super use-login-username

26
Default The device prompts for a username when a login user requests temporary user role authorization from a remote authentication server.
Views System view
Predefined user roles network-admin
Usage guidelines This command is applicable only to the login from a user line that uses scheme authentication, which requires a username for login.
If the user was logged in from a user line that uses password authentication or no authentication, the device cannot obtain the login username. The request for temporary user role authorization from a remote authentication server will fail.
This command does not take effect on local password authentication for temporary user role authorization.
Examples # Enable the device to automatically obtain the login username when a login user requests temporary user role authorization from a remote authentication server. <Sysname> system-view
[Sysname] super use-login-username
Related commands authentication super (User Access and Authentication Command Reference)
super authentication-mode
super password
vlan policy deny Use vlan policy deny to enter user role VLAN policy view.
Use undo vlan policy deny to restore the default.
Syntax vlan policy deny
undo vlan policy deny
Default A user role has access to all VLANs.
Views User role view
Predefined user roles network-admin
Usage guidelines To restrict the VLAN access of a user role to a set of VLANs, perform the following tasks: 1. Use vlan policy deny to enter user role VLAN policy view. 2. Use permit vlan to specify accessible VLANs.
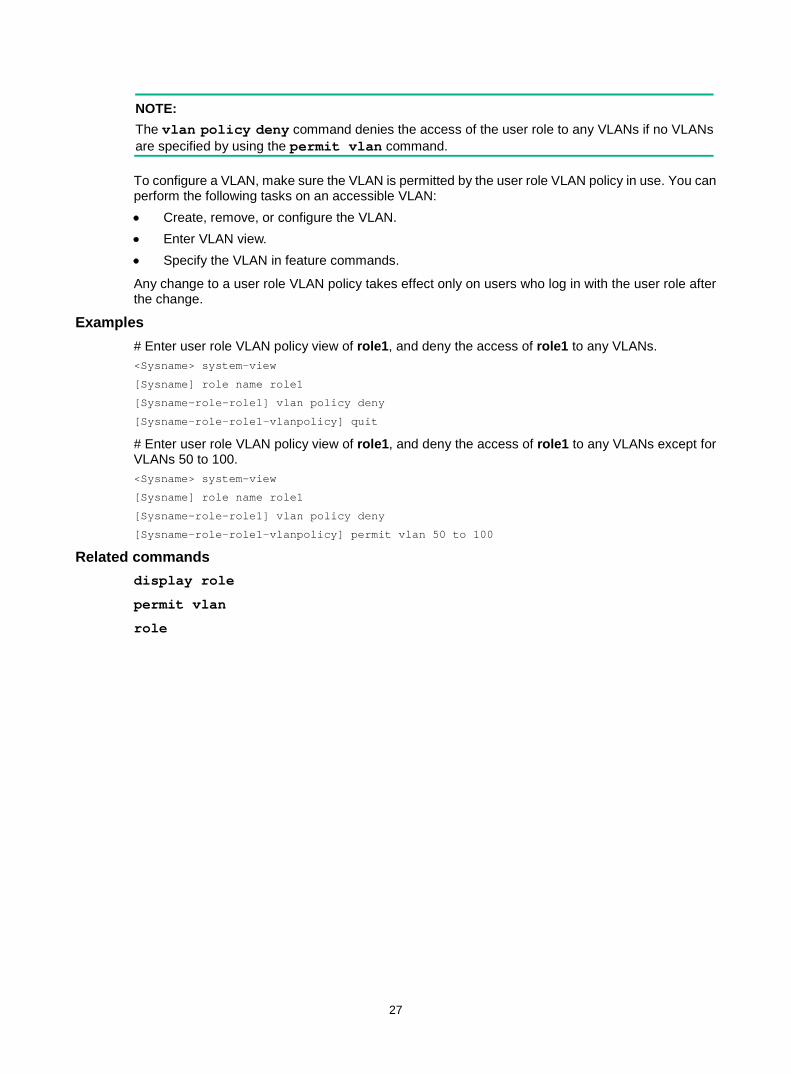
27
NOTE: The vlan policy deny command denies the access of the user role to any VLANs if no VLANs are specified by using the permit vlan command.
To configure a VLAN, make sure the VLAN is permitted by the user role VLAN policy in use. You can perform the following tasks on an accessible VLAN: • Create, remove, or configure the VLAN. • Enter VLAN view. • Specify the VLAN in feature commands.
Any change to a user role VLAN policy takes effect only on users who log in with the user role after the change.
Examples # Enter user role VLAN policy view of role1, and deny the access of role1 to any VLANs. <Sysname> system-view
[Sysname] role name role1
[Sysname-role-role1] vlan policy deny
[Sysname-role-role1-vlanpolicy] quit
# Enter user role VLAN policy view of role1, and deny the access of role1 to any VLANs except for VLANs 50 to 100. <Sysname> system-view
[Sysname] role name role1
[Sysname-role-role1] vlan policy deny
[Sysname-role-role1-vlanpolicy] permit vlan 50 to 100
Related commands display role
permit vlan
role

i
Contents
Login management commands ······································································ 1
activation-key ············································································································································· 1 authentication-mode ··································································································································· 3 auto-execute command ······························································································································ 4 command accounting ································································································································· 5 command authorization ······························································································································ 6 display ip http ············································································································································· 7 display ip https ··········································································································································· 8 display line ················································································································································· 9 display telnet client ··································································································································· 10 display user-interface ······························································································································· 11 display users ············································································································································ 12 display web menu ···································································································································· 13 display web users ····································································································································· 14 escape-key ··············································································································································· 15 free line ···················································································································································· 16 free user-interface ···································································································································· 17 free web users ·········································································································································· 18 history-command max-size ······················································································································ 18 http method ·············································································································································· 19 idle-timeout ··············································································································································· 20 ip http acl ·················································································································································· 20 ip http enable ············································································································································ 22 ip http port ················································································································································ 22 ip https acl ················································································································································ 23 ip https certificate access-control-policy ··································································································· 24 ip https enable ·········································································································································· 25 ip https port ·············································································································································· 25 ip https ssl-server-policy ··························································································································· 26 line ···························································································································································· 27 line class ·················································································································································· 27 lock ··························································································································································· 29 lock reauthentication ································································································································ 30 lock-key ···················································································································································· 30 protocol inbound ······································································································································· 31 screen-length ··········································································································································· 33 send ························································································································································· 34 set authentication password ····················································································································· 35 shell ·························································································································································· 36 telnet ························································································································································ 37 telnet client source ··································································································································· 38 telnet ipv6 ················································································································································· 38 telnet server acl ········································································································································ 40 telnet server acl-deny-log enable ············································································································· 40 telnet server dscp ····································································································································· 41 telnet server enable ·································································································································· 42 telnet server ipv6 acl ································································································································ 42 telnet server ipv6 dscp ····························································································································· 43 telnet server ipv6 port ······························································································································· 44 telnet server port ······································································································································ 44 terminal type ············································································································································· 45 user-interface ··········································································································································· 46 user-interface class ·································································································································· 46 user-role ··················································································································································· 48 web captcha ············································································································································· 49 web https-authorization mode ·················································································································· 50 web idle-timeout ······································································································································· 50

ii
webui log enable ······································································································································ 51

1
Login management commands Some login management commands are available in both user line view and user line class view. For these commands, the device uses the following rules to determine the settings to be activated: • A setting in user line view applies only to the user line. A setting in user line class view applies to
all user lines of the class. • A non-default setting in either view takes precedence over a default setting in the other view. A
non-default setting in user line view takes precedence over a non-default setting in user line class view.
• A setting in user line class view takes effect on login sessions that are established after the setting is configured.
activation-key Use activation-key to set the terminal session activation key. Pressing this shortcut key starts a terminal session.
Use undo activation-key to restore the default.
Syntax activation-key key-string
undo activation-key
Default The terminal session activation key is Enter.
Views User line view
User line class view
Predefined user roles network-admin
Parameters key-string: Specifies a shortcut key. It can be a character (case sensitive), or an ASCII code value in the range of 0 to 127. For example, if you configure activation-key 1, the shortcut key is Ctrl+A. If you configure activation-key a, the shortcut key is a. For information about ASCII code values of individual characters, see the standard ASCII code chart. For information about ASCII code values of combined keys that use the Ctrl key, see Table 1.
Usage guidelines This command is not supported in VTY line view or VTY line class view.
This command takes effect immediately.
This command is available in both user line view and user line class view. A non-default setting in either view takes precedence over a default setting in the other view. A non-default setting in user line view takes precedence over a non-default setting in user line class view.
You can use only the specified terminal session activation key to start a terminal session. To display the current terminal session activation key, use the display current-configuration | include activation-key command.

2
Table 1 ASCII code values for combined keys that use the Ctrl key
Combined key ASCII code value
Ctrl+A 1
Ctrl+B 2
Ctrl+C 3
Ctrl+D 4
Ctrl+E 5
Ctrl+F 6
Ctrl+G 7
Ctrl+H 8
Ctrl+I 9
Ctrl+J 10
Ctrl+K 11
Ctrl+L 12
Ctrl+M 13
Ctrl+N 14
Ctrl+O 15
Ctrl+P 16
Ctrl+Q 17
Ctrl+R 18
Ctrl+S 19
Ctrl+T 20
Ctrl+U 21
Ctrl+V 22
Ctrl+W 23
Ctrl+X 24
Ctrl+Y 25
Ctrl+Z 26
Examples # Configure character s as the terminal session activation key for console line 0. <Sysname> system-view
[Sysname] line console 0
[Sysname-line-console0] activation-key s
To verify the configuration: 1. Exit the console session.
[Sysname-line-console0] return
<Sysname> quit
2. Log in again through the console line.

3
The following message appears: Press ENTER to get started.
3. Press Enter. Pressing Enter does not start a session.
4. Press s. A terminal session is started. <Sysname>
authentication-mode Use authentication-mode to set the authentication mode for a user line.
Use undo authentication-mode to restore the default.
Syntax authentication-mode { none | password | scheme }
undo authentication-mode
Default The authentication mode is none for console login.
The authentication mode is password for the VTY line.
Views User line view
User line class view
Predefined user roles network-admin
Parameters none: Disables authentication.
password: Performs local password authentication.
scheme: Performs AAA authentication. For more information about AAA, see User Access and Authentication Configuration Guide.
Usage guidelines Only users assigned the network-admin, or level-15 user role can execute this command. Other users cannot execute this command, even if they are granted the right to execute this command.
When the authentication mode is none, a user can log in without authentication. To improve device security, use the password or scheme authentication mode.
In VTY line view, this command is associated with the protocol inbound command.
• If the settings of the two commands in VTY line view are both the default settings, the settings for the commands in VTY line class view take effect.
• If the settings of the two commands in VTY line view are both non-default settings, the non-default settings in VTY line view take effect.
• If only one command has a non-default setting in VTY line view, the other command uses the default setting, regardless of the setting in VTY line class view.
An authentication mode change does not take effect on the current session. It takes effect on subsequent login sessions.

4
Examples # Enable the none authentication mode for VTY line 0. <Sysname> system-view
[Sysname] line vty 0
[Sysname-line-vty0] authentication-mode none
# Enable password authentication for VTY line 0 and set the password to hello12345. <Sysname> system-view
[Sysname] line vty 0
[Sysname-line-vty0] authentication-mode password
[Sysname-line-vty0] set authentication password simple hello12345
# Enable scheme authentication for VTY line 0. Configure local user 123 and set the password to hello12345. Assign the Telnet service and the user role network-admin to the user. <Sysname> system-view
[Sysname] line vty 0
[Sysname-line-vty0] authentication-mode scheme
[Sysname-line-vty0] quit
[Sysname] local-user 123
[Sysname-luser-manage-123] password simple hello12345
[Sysname-luser-manage-123] service-type telnet
[Sysname-luser-manage-123] authorization-attribute user-role network-admin
Related commands set authentication password
auto-execute command Use auto-execute command to specify the command to be automatically executed for a login user.
Use undo auto-execute command to restore the default.
Syntax auto-execute command command
undo auto-execute command
Default No command is specified to be automatically executed for a login user.
Views User line view
User line class view
Predefined user roles network-admin
Parameters command: Specifies the command to be automatically executed.
Usage guidelines
CAUTION: After configuring this command for a user line, you might be unable to access the CLI through the

5
user line. Make sure you can access the CLI through a different user line before you configure this command and save the configuration.
The device will automatically execute the specified command when a user logs in through the user line, and close the user connection after the command is executed.
This command is not supported in console line view or console line class view.
This command is available in both user line view and user line class view. A non-default setting in either view takes precedence over a default setting in the other view. A non-default setting in user line view takes precedence over a non-default setting in user line class view.
A configuration change made by this command does not take effect on the current session. It takes effect on subsequent login sessions.
Examples # Configure the device to automatically execute the telnet 192.168.1.41 command when a user logs in through VTY line 0. <Sysname> system-view
[Sysname] line vty 0
[Sysname-line-vty0] auto-execute command telnet 192.168.1.41
This action will lead to configuration failure through line-vty0. Are you sure?
[Y/N]:y
[Sysname-line-vty0]
# To verify the configuration, Telnet to the device (192.168.1.40).
The device automatically Telnets to 192.168.1.41. The following output is displayed on the configuration terminal: C:\> telnet 192.168.1.40
******************************************************************************
* Copyright (c) 2004-2020 New H3C Technologies Co., Ltd. All rights reserved.*
* Without the owner's prior written consent, *
* no decompiling or reverse-engineering shall be allowed. *
******************************************************************************
<Sysname>
Trying 192.168.1.41 ...
Press CTRL+K to abort
Connected to 192.168.1.41 ...
******************************************************************************
* Copyright (c) 2004-2020 New H3C Technologies Co., Ltd. All rights reserved.*
* Without the owner's prior written consent, *
* no decompiling or reverse-engineering shall be allowed. *
******************************************************************************
<Sysname.41>
This operation is the same as directly logging in to the device at 192.168.1.41 through Telnet. When you close the Telnet connection to 192.168.1.41, the Telnet connection to 192.168.1.40 is closed at the same time.
command accounting Use command accounting to enable command accounting.
Use undo command accounting to disable command accounting.

6
Syntax command accounting
undo command accounting
Default Command accounting is disabled. The accounting server does not record executed commands.
Views User line view
User line class view
Predefined user roles network-admin
Usage guidelines When command accounting is enabled but command authorization is not, every executed command is recorded on the accounting server. When both command accounting and command authorization are enabled, only authorized commands that are executed are recorded on the accounting server.
Invalid commands are not recorded.
A configuration change made by this command does not take effect on the current session. It takes effect on subsequent login sessions.
After you use the command accounting command in user line class view, you cannot use the undo command accounting command in any user line views in the class.
Examples # Enable command accounting for VTY line 0. <Sysname> system-view
[Sysname] line vty 0
[Sysname-line-vty0] command accounting
Related commands accounting command (User Access and Authentication Command Reference)
command authorization
command authorization Use command authorization to enable command authorization.
Use undo command authorization to disable command authorization.
Syntax command authorization
undo command authorization
Default Command authorization is disabled. Logged-in users can execute commands without authorization.
Views User line view
User line class view

7
Predefined user roles network-admin
Usage guidelines When command authorization is enabled, a user can only use commands that are permitted by both the AAA scheme and user role.
A configuration change made by this command does not take effect on the current session. It takes effect on subsequent login sessions.
If you configure the command authorization command in user line class view, command authorization is enabled for all user lines in the class. You cannot configure the undo command authorization command in the view of a user line in the class.
Examples # Enable command authorization for VTY line 0. <Sysname> system-view
[Sysname] line vty 0
[Sysname-line-vty0] command authorization
Related commands authorization command (User Access and Authentication Command Reference)
command accounting
display ip http Use display ip http to display HTTP service configuration and status information.
Syntax display ip http
Views Any view
Predefined user roles network-admin
network-operator
Examples # Display HTTP service configuration and status information. <Sysname> display ip http
HTTP port: 80
ACL: 2222(basic)
Operation status: Enabled
Table 2 Command output
Field Description
HTTP port HTTP service port number.
ACL
ACL used to control HTTP access. If no ACL is used, this field displays 0. • basic—Basic ACL. • advanced—Advanced ACL. • layer 2—Layer 2 ACL.

8
Field Description
Operation status Whether the HTTP service is enabled.
Related commands ip http acl
ip http enable
ip http port
display ip https Use display ip https to display HTTPS service configuration and status information.
Syntax display ip https
Views Any view
Predefined user roles network-admin
network-operator
Examples # Display HTTPS service configuration and status information. <Sysname> display ip https
HTTPS port: 443
SSL server policy: test
Certificate access-control-policy: Not configured
ACL: 3333(advanced)
Operation status: Enabled
Table 3 Command output
Field Description
HTTPS port HTTPS service port number.
SSL server policy SSL server policy applied to the HTTPS service. If no SSL server policy is applied, this field displays Not configured.
Certificate access-control-policy Certificate-based access control policy used to control client access rights. If no certificate-based access control policy is used, this field displays Not configured.
ACL
ACL used to control HTTPS access. If no ACL is used, this field displays 0. • basic—Basic ACL. • advanced—Advanced ACL. • layer 2—Layer 2 ACL.
Operation status Whether the HTTPS service is enabled.
Related commands ip https acl

9
ip https enable
ip https port
ip https certificate access-control-policy
ip https ssl-server-policy
display line Use display line to display user line information.
Syntax display line [ number1 | { console | vty } number2 ] [ summary ]
Views Any view
Predefined user roles network-admin
network-operator
Parameters number1: Specifies the absolute number of a user line, in the range of 0 to 64.
console: Specifies the console line.
vty: Specifies the VTY line.
number2: Specifies the relative number of a user line. The value range is 0 for the console line and 0 to 63 for VTY lines.
summary: Displays summary information about user lines. If you do not specify this keyword, the command displays detailed information.
Examples # Display information about line 0. <Sysname> display line 0
Idx Type Tx/Rx Modem Auth Int Location
+ 0 CON 0 9600 - N - 1/0
+ : Line is active.
F : Line is active and in async mode.
Idx : Absolute index of line.
Type : Type and relative index of line.
Auth : Login authentication mode.
Int : Physical port of the line.
A : Authentication use AAA.
N : No authentication is required.
P : Password authentication.

10
Table 4 Command output
Field Description
Modem Whether the modem allows calling in or out. By default, this attribute is not configured and this field displays a hyphen (-). This field is not supported in the current software version.
Int Physical port for the line. If there is no physical port for the line or the port is a console port, this field displays a hyphen (-).
Location Physical position of the line.
A The authentication mode is scheme.
N The authentication mode is none.
P The authentication mode is password.
# Display summary information about all user lines. <Sysname> display line summary
Line type : [CON]
0:X
Line type : [VTY]
1:UXUU UUUU UUXX XXXX
17:XXXX XXXX XXXX XXXX
33:XXXX XXXX XXXX XXXX
49:XXXX XXXX XXXX XXXX
9 lines used. (U)
56 lines not used. (X)
Table 5 Command output
Fields Description
Line type Type of the user line: • CON—Console line. • VTY—VTY line.
number:status number: Absolute number of the first user line in the user line class. status: User line status. X is for unused and U is for used.
display telnet client Use display telnet client to display the packet source setting for the Telnet client.
Syntax display telnet client
Views Any view
Predefined user roles network-admin
network-operator

11
Usage guidelines This command displays the source IPv4 address or source interface specified for the Telnet client to use in outgoing Telnet packets, depending on the telnet client source command.
Examples # Display the packet source setting for the Telnet client. <Sysname> display telnet client
The source IP address is 1.1.1.1.
Related commands telnet client source
display user-interface Use display user-interface to display user line information.
Syntax display user-interface [ number1 | { console | vty } number2 ] [ summary ]
Views Any view
Predefined user roles network-admin
network-operator
Parameters number1: Specifies the absolute number of a user line, in the range of 0 to 64.
console: Specifies the console line.
vty: Specifies the VTY line.
number2: Specifies the relative number of a user line. The value range is 0 for the console line and 0 to 63 for VTY lines.
summary: Displays summary information about user lines. If you do not specify this keyword, the detailed information is displayed.
Usage guidelines This command is an older version reserved for backward compatibility purposes. It has the same functionality and output as the display line command. As a best practice, use the display line command.
Examples # Display information about line 0. <Sysname> display user-interface 0
Idx Type Tx/Rx Modem Auth Int Location
+ 0 CON 0 9600 - N - 1/0
+ : Line is active.
F : Line is active and in async mode.
Idx : Absolute index of line.
Type : Type and relative index of line.
Auth : Login authentication mode.

12
Int : Physical port of the line.
A : Authentication use AAA.
N : No authentication is required.
P : Password authentication.
Table 6 Command output
Field Description
Modem Whether the modem allows calling in or out. By default, this attribute is not configured and this field displays a hyphen (-). This field is not supported in the current software version.
Int Physical port for the line. If there is no physical port for the line or the port is a console port, this field displays a hyphen (-).
Location Physical position of the line.
A The authentication mode is scheme.
N The authentication mode is none.
P The authentication mode is password.
# Display summary information about all user lines. <Sysname> display user-interface summary
Line type : [CON]
0:X
Line type : [VTY]
1:UXUU UUUU UUXX XXXX
17:XXXX XXXX XXXX XXXX
33:XXXX XXXX XXXX XXXX
49:XXXX XXXX XXXX XXXX
9 lines used. (U)
56 lines not used. (X)
Table 7 Command output
Fields Description
Line type Type of the user line: • CON—Console line. • VTY—VTY line.
number:status number: Absolute number of the first user line in the user line class. status: User line status. X is for unused and U is for used.
display users Use display users to display online CLI users.
Syntax display users [ all ]
Views Any view

13
Predefined user roles network-admin
network-operator
Parameters all: Displays all user lines supported by the device.
Examples # Display online user information. <Sysname> display users
Idx Line Idle Time Pid Type
+ 10 VTY 0 00:00:00 Jan 01 00:33:10 484 TEL
12 VTY 2 00:06:22 Jan 01 00:33:22 495 TEL
Following are more details.
VTY 0 :
Location: 192.168.1.107
VTY 2 :
Location: 192.168.1.134
+ : Current operation user.
F : Current operation user works in async mode.
Table 8 Command output
Field Description
Idx Absolute number of the user line.
Line Type and relative number of the user line.
Idle Time elapsed after the user's most recent input, in the hh:mm:ss format.
Time Login time of the user.
Pid Process ID of the user session.
Type
User type: • TEL—Telnet user. • SSH—SSH user. For a user who logged in through the console port, this field does not display anything.
+ User line you are using.
Location IP address of the user.
display web menu Use display web menu to display Web interface navigation tree information.
Syntax display web menu [ chinese ]
Views Any view

14
Predefined user roles network-admin
network-operator
Parameters chinese: Displays information about the Chinese Web interface navigation tree. If you do not specify this keyword, the command displays information about the English Web interface navigation tree.
Usage guidelines This command displays all options on the Web interface navigation tree.
Examples # Display Web interface navigation tree information. <Sysname> display web menu
.
|--m_system: ID = m_system
| |--m_dashboard: ID = m_dashboard
| |--m_clientinfor: ID = m_clientinfor
| |--m_rateanalyse: ID = m_rateanalyse
| |--m_deviceinfor: ID = m_deviceinfor
| `--m_networkinfor: ID = m_networkinfor
|--m_quicknav: ID = m_quicknav
| `--i_quicknav: ID = i_quicknav
|--m_networkcfg: ID = m_networkcfg
| `--i_networkcfg: ID = i_networkcfg
|--m_wirelesscfg: ID = m_wirelesscfg
| `--i_wirelesscfg: ID = i_wirelesscfg
|--m_usermanager: ID = m_usermanager
| `--i_usermanager: ID = i_usermanager
|--m_securitypolicy: ID = m_securitypolicy
| `--i_securitypolicy: ID = i_securitypolicy
|--m_appmanager: ID = m_appmanager
| `--i_appmanager: ID = i_appmanager
`--m_systemcfg: ID = m_systemcfg
`--i_systemcfg: ID = i_systemcfg
display web users Use display web users to display online Web users.
Syntax display web users
Views Any view
Predefined user roles network-admin
network-operator
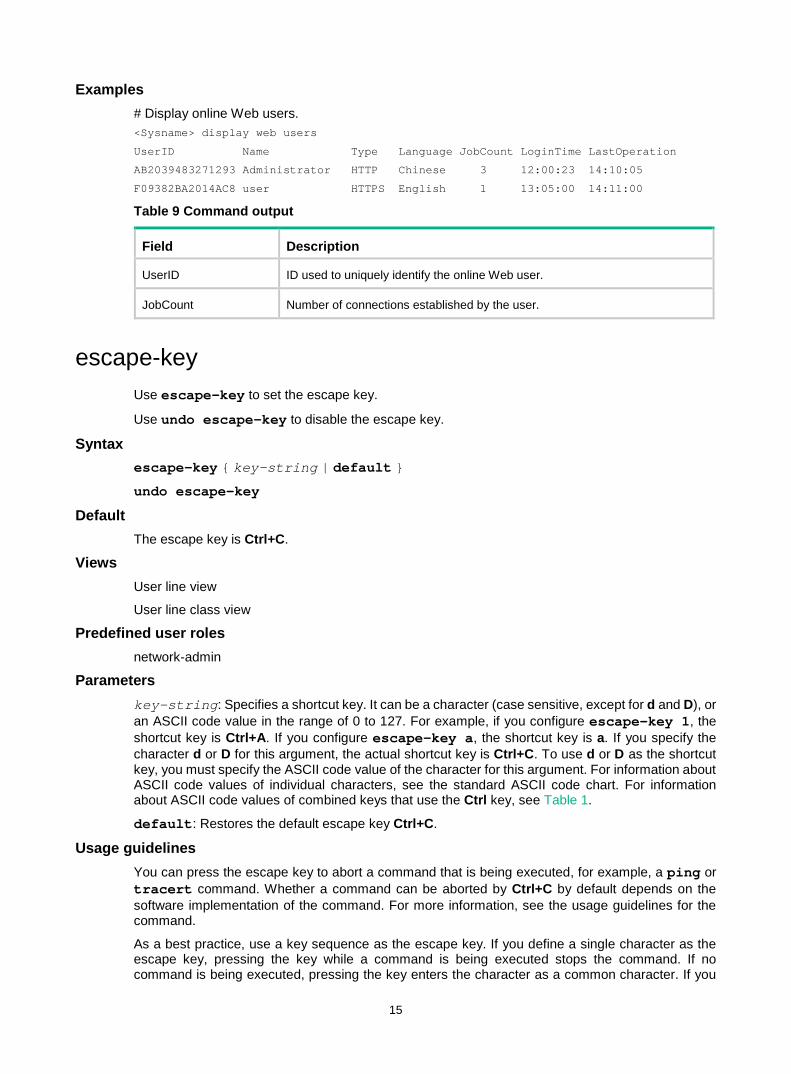
15
Examples # Display online Web users. <Sysname> display web users
UserID Name Type Language JobCount LoginTime LastOperation
AB2039483271293 Administrator HTTP Chinese 3 12:00:23 14:10:05
F09382BA2014AC8 user HTTPS English 1 13:05:00 14:11:00
Table 9 Command output
Field Description
UserID ID used to uniquely identify the online Web user.
JobCount Number of connections established by the user.
escape-key Use escape-key to set the escape key.
Use undo escape-key to disable the escape key.
Syntax escape-key { key-string | default }
undo escape-key
Default The escape key is Ctrl+C.
Views User line view
User line class view
Predefined user roles network-admin
Parameters key-string: Specifies a shortcut key. It can be a character (case sensitive, except for d and D), or an ASCII code value in the range of 0 to 127. For example, if you configure escape-key 1, the shortcut key is Ctrl+A. If you configure escape-key a, the shortcut key is a. If you specify the character d or D for this argument, the actual shortcut key is Ctrl+C. To use d or D as the shortcut key, you must specify the ASCII code value of the character for this argument. For information about ASCII code values of individual characters, see the standard ASCII code chart. For information about ASCII code values of combined keys that use the Ctrl key, see Table 1.
default: Restores the default escape key Ctrl+C.
Usage guidelines You can press the escape key to abort a command that is being executed, for example, a ping or tracert command. Whether a command can be aborted by Ctrl+C by default depends on the software implementation of the command. For more information, see the usage guidelines for the command.
As a best practice, use a key sequence as the escape key. If you define a single character as the escape key, pressing the key while a command is being executed stops the command. If no command is being executed, pressing the key enters the character as a common character. If you

16
Telnet from the device to a remote device, pressing the key enters the character as a common character on the remote device. The key acts as the escape key on the remote device only when the following conditions are met: • You define the same character as the escape key on the remote device. • You press the key while a command is being executed on the remote device.
The undo escape-key command disables the current escape key. After you execute this undo command, no escape key is available.
This command is available in both user line view and user line class view. A non-default setting in either view takes precedence over a default setting in the other view. A non-default setting in user line view takes precedence over a non-default setting in user line class view.
The setting in user line view takes effect immediately on the current session. The setting in user line class view takes effect on login sessions that are established after the setting is configured.
To display the current escape key, use the display current-configuration | include escape-key command.
Examples # Configure character a as the escape key for VTY line 0. <Sysname> system-view
[Sysname] line vty 0
[Sysname-line-vty0] escape-key a
To verify the configuration: 1. Ping IP address 192.168.1.49, specifying the -c keyword to set the number of ICMP echo
request packets to 20. <Sysname> ping -c 20 192.168.1.49
PING 192.168.1.49: 56 data bytes, press a to break
Reply from 192.168.1.49: bytes=56 Sequence=1 ttl=255 time=3 ms
Reply from 192.168.1.49: bytes=56 Sequence=2 ttl=255 time=3 ms
2. Press a. The system aborts the command and returns to user view. --- 192.168.1.49 ping statistics ---
2 packet(s) transmitted
2 packet(s) received
0.00% packet loss
round-trip min/avg/max = 3/3/3 ms
<Sysname>
free line Use free line to release a user line.
Syntax free line { number1 | { console | vty } number2 }
Views User view
Predefined user roles network-admin
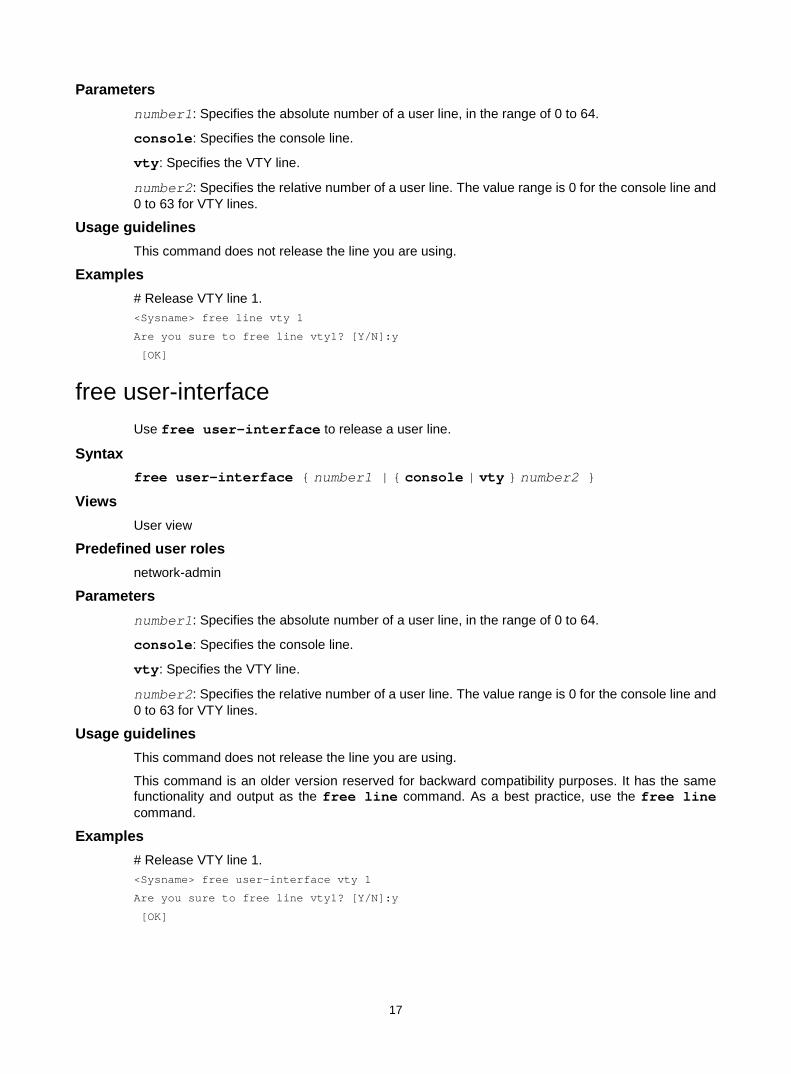
17
Parameters number1: Specifies the absolute number of a user line, in the range of 0 to 64.
console: Specifies the console line.
vty: Specifies the VTY line.
number2: Specifies the relative number of a user line. The value range is 0 for the console line and 0 to 63 for VTY lines.
Usage guidelines This command does not release the line you are using.
Examples # Release VTY line 1. <Sysname> free line vty 1
Are you sure to free line vty1? [Y/N]:y
[OK]
free user-interface Use free user-interface to release a user line.
Syntax free user-interface { number1 | { console | vty } number2 }
Views User view
Predefined user roles network-admin
Parameters number1: Specifies the absolute number of a user line, in the range of 0 to 64.
console: Specifies the console line.
vty: Specifies the VTY line.
number2: Specifies the relative number of a user line. The value range is 0 for the console line and 0 to 63 for VTY lines.
Usage guidelines This command does not release the line you are using.
This command is an older version reserved for backward compatibility purposes. It has the same functionality and output as the free line command. As a best practice, use the free line command.
Examples # Release VTY line 1. <Sysname> free user-interface vty 1
Are you sure to free line vty1? [Y/N]:y
[OK]

18
free web users Use free web users to log off online Web users.
Syntax free web users { all | user-id user-id | user-name user-name }
Views User view
Predefined user roles network-admin
Parameters all: Specifies all Web users.
user-id user-id: Specifies a Web user by the ID, a hexadecimal number of 15 digits. The system assigns each Web user a unique ID at login to identify the user.
user-name: Specifies a Web user by the username, a case-sensitive string of 1 to 255 characters.
Examples # Log off all online Web users. <Sysname> free web users all
Related commands display web users
history-command max-size Use history-command max-size to set the size of the command history buffer for a user line.
Use undo history-command max-size to restore the default.
Syntax history-command max-size size-value
undo history-command max-size
Default The command history buffer for a user line stores up to 10 history commands.
Views User line view
User line class view
Predefined user roles network-admin
Parameters size-value: Specifies the maximum number of history commands the buffer can store, in the range of 0 to 256.
Usage guidelines Each user line uses a separate command history buffer to store commands successfully executed by its user. The buffer size determines how many history commands the buffer can store.

19
To display history commands in the buffer for your session, press the up or down arrow key, or execute the display history-command command. For more information about the command history buffer, see Fundamentals Configuration Guide.
Terminating a CLI session clears the commands in the command history buffer.
The setting in user line view takes effect immediately on the current session. The setting in user line class view takes effect on login sessions that are established after the setting is configured.
Examples # Set the command history buffer size to 20 for VTY line 0. <Sysname> system-view
[Sysname] line vty 0
[Sysname-line-vty0] history-command max-size 20
http method Use http method to specify the HTTP methods to be added to the reply to an OPTIONS request.
Use undo http method to remove the HTTP methods to be added to the reply to an OPTIONS request.
Syntax http method { delete | get | head | options | post | put } *
undo http method { delete | get | head | options | post | put } *
Default No HTTP methods are specified.
Views System view
Predefined user roles network-admin
Parameters delete: Specifies the DELETE method.
get: Specifies the GET method.
head: Specifies the HEAD method.
options: Specifies the OPTIONS method.
post: Specifies the POST method.
put: Specifies the PUT method.
Usage guidelines An HTTP client sends an OPTIONS request to the device to obtain the HTTP methods supported by the device. The device identifies whether the requested URL resources have a service that has registered for the OPTIONS method. • If yes, the service responds to the OPTIONS request. • If not, the device identifies whether the options keyword is specified for this command.
If yes, the device uses the settings for this command to generate and return a reply to the OPTIONS request.
If not, the device returns the 405 Method Not Allowed message.

20
This command does not affect HTTP requests except for OPTIONS requests.
Examples # Specify GET, HEAD, POST, and OPTIONS methods as the HTTP methods to be added to the reply to an OPTIONS request. <Sysname> system-view
[Sysname] http method get head post options
idle-timeout Use idle-timeout to set the CLI connection idle-timeout timer.
Use undo idle-timeout to restore the default.
Syntax idle-timeout minutes [ seconds ]
undo idle-timeout
Default The CLI connection idle-timeout timer is 10 minutes.
Views User line view
User line class view
Predefined user roles network-admin
Parameters minutes: Specifies the number of minutes, in the range of 0 to 35791.
seconds: Specifies the number of seconds, in the range of 0 to 59. The default is 0 seconds.
Usage guidelines The system automatically terminates a user connection if no information interaction occurs on the connection within the idle-timeout interval.
To disable the idle-timeout feature, execute the idle-timeout 0 command.
This command is available in both user line view and user line class view. A non-default setting in either view takes precedence over a default setting in the other view. A non-default setting in user line view takes precedence over a non-default setting in user line class view.
The setting in user line view takes effect immediately on the current session. The setting in user line class view takes effect on login sessions that are established after the setting is configured.
Examples # Set the CLI connection idle-timeout timer to 1 minute and 30 seconds for VTY line 0. <Sysname> system-view
[Sysname] line vty 0
[Sysname-line-vty0] idle-timeout 1 30
ip http acl Use ip http acl to apply an ACL to the HTTP service.
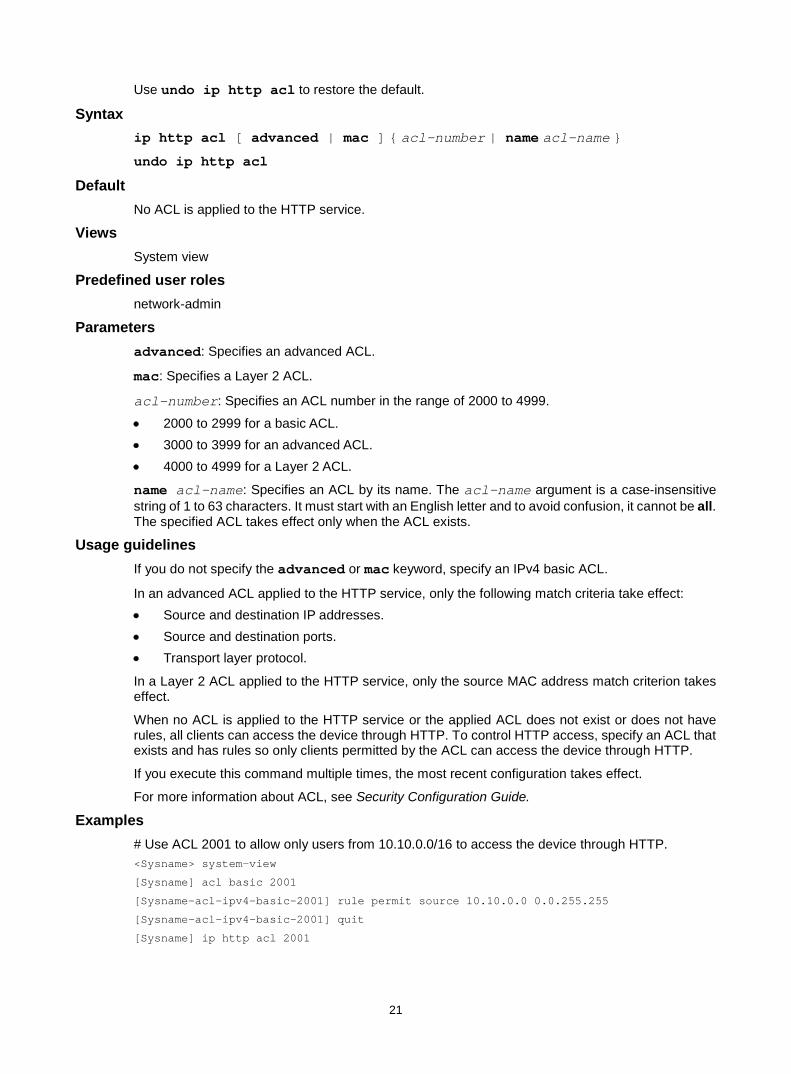
21
Use undo ip http acl to restore the default.
Syntax ip http acl [ advanced | mac ] { acl-number | name acl-name }
undo ip http acl
Default No ACL is applied to the HTTP service.
Views System view
Predefined user roles network-admin
Parameters advanced: Specifies an advanced ACL.
mac: Specifies a Layer 2 ACL.
acl-number: Specifies an ACL number in the range of 2000 to 4999.
• 2000 to 2999 for a basic ACL. • 3000 to 3999 for an advanced ACL. • 4000 to 4999 for a Layer 2 ACL.
name acl-name: Specifies an ACL by its name. The acl-name argument is a case-insensitive string of 1 to 63 characters. It must start with an English letter and to avoid confusion, it cannot be all. The specified ACL takes effect only when the ACL exists.
Usage guidelines If you do not specify the advanced or mac keyword, specify an IPv4 basic ACL.
In an advanced ACL applied to the HTTP service, only the following match criteria take effect: • Source and destination IP addresses. • Source and destination ports. • Transport layer protocol.
In a Layer 2 ACL applied to the HTTP service, only the source MAC address match criterion takes effect.
When no ACL is applied to the HTTP service or the applied ACL does not exist or does not have rules, all clients can access the device through HTTP. To control HTTP access, specify an ACL that exists and has rules so only clients permitted by the ACL can access the device through HTTP.
If you execute this command multiple times, the most recent configuration takes effect.
For more information about ACL, see Security Configuration Guide.
Examples # Use ACL 2001 to allow only users from 10.10.0.0/16 to access the device through HTTP. <Sysname> system-view
[Sysname] acl basic 2001
[Sysname-acl-ipv4-basic-2001] rule permit source 10.10.0.0 0.0.255.255
[Sysname-acl-ipv4-basic-2001] quit
[Sysname] ip http acl 2001

22
Related commands acl (Security Command Reference)
ip http enable Use ip http enable to enable the HTTP service.
Use undo ip http enable to disable the HTTP service.
Syntax ip http enable
undo ip http enable
Default The HTTP service is disabled.
Views System view
Predefined user roles network-admin
Usage guidelines To allow users to access the device through HTTP, you must enable the HTTP service.
To improve device security, the system automatically enables the HTTPS service when you enable the HTTP service. When the HTTP service is enabled, you cannot disable the HTTPS service.
Examples # Enable the HTTP service. <Sysname> system-view
[Sysname] ip http enable
Related commands ip https enable
ip http port Use ip http port to specify the HTTP service port number.
Use undo ip http port to restore the default.
Syntax ip http port port-number
undo ip http port
Default The HTTP service port number is 80.
Views System view
Predefined user roles network-admin

23
Parameters port-number: Specifies a port number in the range of 1 to 65535.
Usage guidelines When the HTTP service is enabled, changing the HTTP service port number re-enables the HTTP service and closes all HTTP connections. To log in again, users must enter the new URL in the Web browser's address bar.
Examples # Set the HTTP service port number to 80. <Sysname> system-view
[Sysname] ip http port 80
ip https acl Use ip https acl to apply an ACL to the HTTPS service.
Use undo ip https acl to restore the default.
Syntax ip https acl [ advanced | mac ] {acl-number | name acl-name }
undo ip https acl
Default No ACL is applied to the HTTPS service.
Views System view
Predefined user roles network-admin
Parameters advanced: Specifies an advanced ACL.
mac: Specifies a Layer 2 ACL.
acl-number: Specifies an ACL number in the range of 2000 to 4999.
• 2000 to 2999 for a basic ACL. • 3000 to 3999 for an advanced ACL. • 4000 to 4999 for a Layer 2 ACL.
name acl-name: Specifies an ACL by its name. The acl-name argument is a case-insensitive string of 1 to 63 characters. It must start with an English letter and to avoid confusion, it cannot be all. The specified ACL takes effect only when the ACL exists.
Usage guidelines If you do not specify the advanced or mac keyword, specify an IPv4 basic ACL.
In an advanced ACL applied to the HTTPS service, only the following match criteria take effect: • Source and destination IP addresses. • Source and destination ports. • Transport layer protocol.

24
In a Layer 2 ACL applied to the HTTPS service, only the source MAC address match criterion takes effect.
When no ACL is applied to the HTTPS service or the applied ACL does not exist or does not have rules, all clients can access the device through HTTPS. To control HTTPS access, specify an ACL that exists and has rules so only clients permitted by the ACL can access the device through HTTPS.
Because the device always uses HTTPS to transfer Web login requests, the ACL applied to the HTTPS service controls both HTTPS and HTTP logins. To access the device, HTTP clients must be permitted by the following ACLs: • ACL applied to the HTTP service. • ACL applied to the HTTPS service.
If you execute this command multiple times, the most recent configuration takes effect.
For more information about ACL, see Security Configuration Guide.
Examples # Use ACL 2001 to allow only users from 10.10.0.0/16 to access the device through HTTPS or HTTP. <Sysname> system-view
[Sysname] acl basic 2001
[Sysname-acl-ipv4-basic-2001] rule permit source 10.10.0.0 0.0.255.255
[Sysname-acl-ipv4-basic-2001] quit
[Sysname] ip https acl 2001
Related commands acl (Security Command Reference)
ip https certificate access-control-policy Use ip https certificate access-control-policy to apply a certificate-based access control policy to control HTTPS access.
Use undo ip https certificate access-control-policy to restore the default.
Syntax ip https certificate access-control-policy policy-name
undo ip https certificate access-control-policy
Default No certificate-based access control policy is applied for HTTPS access control.
Views System view
Predefined user roles network-admin
Parameters policy-name: Specifies a certificate-based access control policy by its name, a case-sensitive string of 1 to 31 characters.
Usage guidelines For more information about the certificate-based access control policy, see PKI configuration in Security Configuration Guide.

25
Examples # Use certificate-based access control policy myacl to control HTTPS access. <Sysname> system-view
[Sysname] ip https certificate access-control-policy myacl
Related commands pki certificate access-control-policy (Security Command Reference)
ip https enable Use ip https enable to enable the HTTPS service.
Use undo ip https enable to disable the HTTPS service.
Syntax ip https enable
undo ip https enable
Default The HTTPS service is disabled.
Views System view
Predefined user roles network-admin
Usage guidelines To allow users to access the device through HTTPS, you must enable the HTTPS service.
Enabling the HTTPS service triggers the SSL handshake negotiation process. • If the device has a local certificate, the SSL handshake negotiation succeeds and the HTTPS
service starts up. • If the device does not have a local certificate, the certificate application process starts. Because
the certificate application process takes a long time, the SSL handshake negotiation might fail and the HTTPS service might not be started. To solve the problem, execute this command again until the HTTPS service is enabled.
Examples # Enable the HTTPS service. <Sysname> system-view
[Sysname] ip https enable
Related commands ip https certificate access-control-policy
ip https ssl-server-policy
ip https port Use ip https port to specify the HTTPS service port number.
Use undo ip https port to restore the default.

26
Syntax ip https port port-number
undo ip https port
Default The HTTPS service port number is 443.
Views System view
Predefined user roles network-admin
Parameters port-number: Specifies a port number in the range of 1 to 65535.
Usage guidelines When the HTTPS service is enabled, changing the HTTPS service port number re-enables the HTTPS service and closes all HTTPS and HTTP connections. To log in again, users must enter the new URL in the Web browser's address bar.
Examples # Set the HTTPS service port number to 8080. <Sysname> system-view
[Sysname] ip https port 8080
ip https ssl-server-policy Use ip https ssl-server-policy to apply an SSL server policy to control HTTPS access.
Use undo ip https ssl-server-policy to restore the default.
Syntax ip https ssl-server-policy policy-name
undo ip https ssl-server-policy
Default No SSL server policy is applied. The HTTPS service uses a self-signed certificate.
Views System view
Predefined user roles network-admin
Parameters policy-name: Specifies an SSL server policy name, a string of 1 to 31 characters.
Usage guidelines If the HTTP service and HTTPS service are enabled, changes to the applied SSL server policy do not take effect. For the changes to take effect, you must disable HTTP and HTTPS, and then apply the policy and enable HTTP and HTTPS again.
To restore the default, you must disable HTTP and HTTPS, execute the undo ip https ssl-server-policy command, and then enable HTTP and HTTPS again.

27
Examples # Apply SSL server policy myssl to the HTTPS service. <Sysname> system-view
[Sysname] ip https ssl-server-policy myssl
Related commands ssl server-policy (Security Command Reference)
line Use line to enter one or multiple user line views.
Syntax line { first-number1 [ last-number1 ] | { console | vty } first-number2 [ last-number2 ] }
Views System view
Predefined user roles network-admin
Parameters first-number1: Specifies the absolute number of the first user line, in the range of 0 to 64.
last-number1: Specifies the absolute number of the last user line, in the range of 1 to 64. This number must be greater than first-number1.
console: Specifies the console line.
vty: Specifies the VTY line.
first-number2: Specifies the relative number of the first user line. The value range is 0 for the console line and 0 to 63 for VTY lines.
last-number2: Specifies the relative number of the last user line. This argument is not supported for the console line. The value range is 1 to 63 for VTY lines.This number must be greater than first-number2.
Examples # Enter the view of VTY line 0. <Sysname> system-view
[Sysname] line vty 0
[Sysname-line-vty0]
# Enter the views of VTY lines 0 to 31. <Sysname> system-view
[Sysname] line vty 0 31
[Sysname-line-vty0-31]
Related commands line class
line class Use line class to enter user line class view.

28
Syntax line class { console | vty }
Views System view
Predefined user roles network-admin
Parameters console: Specifies the console line class view.
vty: Specifies the VTY line class view.
Usage guidelines To configure the same settings for all user lines of a line class, use this command to enter the user line class view.
In user line class view, you can execute the following commands: • activation-key
• authentication-mode
• auto-execute command
• command accounting
• command authorization
• escape-key
• history-command max-size
• idle-timeout
• protocol inbound
• screen-length
• set authentication password
• shell
• terminal type
• user-role
For commands that are available in both user line view and user line class view, the device uses the following rules to determine the settings to use: • A setting in user line view applies only to the user line. A setting in user line class view applies to
all user lines of the class. • A non-default setting in either view takes precedence over a default setting in the other view. A
non-default setting in user line view takes precedence over a non-default setting in user line class view.
• A setting in user line class view does not take effect on current online users. It takes effect only for new login users.
Examples # Set the CLI connection idle-timeout timer to 15 minutes in VTY line class view. <Sysname> system-view
[Sysname] line class vty
[Sysname-line-class-vty] idle-timeout 15
# In console line class view, configure the character s as the terminal session activation key.

29
<Sysname> system-view
[Sysname] line class console
[Sysname-line-class-console] activation-key s
[Sysname-line-class-console] quit
# In the view of console line 0, restore the default terminal session activation key. [Sysname] line console 0
[Sysname-line-console0] undo activation-key
Alternatively, you can use the following command: [Sysname-line-console0] activation-key 13
To verify the configuration: 1. Exit the session on console line 0.
[Sysname-line-console0] return
<Sysname> quit
2. Log in again through the user line. The following message appears: Press ENTER to get started.
3. Press Enter. Pressing Enter does not start a session.
4. Enter s. A terminal session is started. <Sysname>
Related commands line
lock Use lock to lock the current user line and set the password for unlocking the line.
Syntax lock
Default The system does not lock any user lines.
Views User view
Predefined user roles network-admin
Usage guidelines This command locks the current user line to prevent unauthorized users from using the line. You must set the password for unlocking the line as prompted. The user line is locked after you enter the password and confirm the password.
To unlock the user line, press Enter and enter the password you set.
Examples # Lock the current user line and set the password for unlocking the line. <Sysname> lock

30
Please input password<1 to 16> to lock current line:
Password:
Again:
locked !
// The user line is locked. To unlock it, press Enter and enter the password: Password:
<Sysname>
lock reauthentication Use lock reauthentication to lock the current user line and enable unlocking authentication.
Syntax lock reauthentication
Default The system does not lock any user lines or initiate reauthentication.
Views Any view
Predefined user roles network-admin
Usage guidelines This command locks the current user line. To unlock the user line, you must press Enter and provide the login password to pass reauthentication. If you have changed the login password after login, you must provide the new password. If no login password is set, the system unlocks the user line after you press Enter.
Examples # Lock the current user line and enable unlocking authentication. <Sysname> lock reauthentication
Please press Enter to unlock the screen.
// The user line is locked. To unlock it, press Enter and enter the login password: Password:
<Sysname>
Related commands lock-key
lock-key Use lock-key to set the user line locking key. Pressing this shortcut key locks the current user line and enables unlocking authentication.
Use undo lock-key to restore the default.
Syntax lock-key key-string

31
undo lock-key
Default No user line locking key is set.
Views User line view
User line class view
Predefined user roles network-admin
Parameters key-string: Specifies a shortcut key. It can be a character (case sensitive), or an ASCII code value in the range of 0 to 127. For example, if you configure lock-key 1, the shortcut key is Ctrl+A. If you configure lock-key a, the shortcut key is a. For information about ASCII code values of individual characters, see the standard ASCII code chart. For information about ASCII code values of combined keys that use the Ctrl key, see Table 1.
Usage guidelines As a best practice, specify a combined key as the user line locking key. If you specify a single character as the key, the character acts only as the user line locking key. You cannot type the character for any commands, keywords, or arguments.
Pressing the user line locking key is equivalent to executing the lock reauthentication command.
This command takes effect immediately.
To display the current user line locking key, use the display current-configuration | include lock-key command.
Examples # Set the user line locking key to Ctrl+A for VTY line 0. <Sysname> system-view
[Sysname] line vty 0
[Sysname-line-vty0] lock-key 1
[Sysname-line-vty0] quit
To verify the configuration: 1. Press Ctrl+A.
[Sysname]
Please press Enter to unlock the screen.
2. Press Enter and enter the login password. Password:
[Sysname]
Related commands lock reauthentication
protocol inbound Use protocol inbound to specify the supported protocols.

32
Use undo protocol inbound to restore the default.
Syntax protocol inbound { all| ssh | telnet }
undo protocol inbound
Default All of the protocols are supported.
Views VTY line view
VTY line class view
Predefined user roles network-admin
Parameters all: Supports both Telnet and SSH.
ssh: Supports SSH only.
telnet: Supports Telnet only.
Usage guidelines Only users assigned the network-admin, or level-15 user role can execute this command. Other users cannot execute this command, even if they are granted the right to execute this command.
A configuration change in user line view does not take effect on the current session. It takes effect on subsequent login sessions.
Before configuring a user line to support SSH, set the authentication mode to scheme for the user line.
In VTY line view, this command is associated with the authentication-mode command. If you specify a non-default value for one of the two commands, the other command uses the default setting, regardless of the setting in VTY line class view. • If the settings of the two commands in VTY line view are both the default settings, the settings
for the commands in VTY line class view take effect. • If the settings of the two commands in VTY line view are both non-default settings, the
non-default settings in VTY line view take effect. • If only one command has a non-default setting in VTY line view, the other command uses the
default setting, regardless of the setting in VTY line class view.
Examples # Enable user lines VTY 0 through VTY 4 to support only SSH. <Sysname> system-view
[Sysname] line vty 0 4
[Sysname-line-vty0-4] authentication-mode scheme
[Sysname-line-vty0-4] protocol inbound ssh
# Enable SSH support and set the authentication mode to scheme in VTY line class view. Enable user lines VTY 0 through VTY 4 to support all protocols and disable authentication for the user lines. <Sysname> system-view
[Sysname] line class vty
[Sysname-line-class-vty] authentication-mode scheme
[Sysname-line-class-vty] protocol inbound ssh

33
[Sysname-line-class-vty] line vty 0 4
[Sysname-line-vty0-4] authentication-mode none
To verify the configuration: 1. Telnet to the device.
<Client> telnet 192.168.1.241
Trying 192.168.1.241 ...
Press CTRL+K to abort
Connected to 192.168.1.241 ...
******************************************************************************
* Copyright (c) 2004-2020 New H3C Technologies Co., Ltd. All rights reserved.*
* Without the owner's prior written consent, *
* no decompiling or reverse-engineering shall be allowed. *
******************************************************************************
<Server>
You are logged in without authentication. 2. Display online CLI user information.
<Server> display users
Idx Line Idle Time Pid Type
+ 50 VTY 0 00:00:00 Jan 17 15:29:27 189 TEL
Following are more details.
VTY 0 :
Location: 192.168.1.186
+ : Current operation user.
F : Current operation user works in async mode.
The output shows that you are using VTY 0. The configuration in user line view is effective.
Related commands authentication-mode
screen-length Use screen-length to set the maximum number of lines of command output to send to the terminal at a time when the screen pausing feature is enabled.
Use undo screen-length to restore the default.
Syntax screen-length screen-length
undo screen-length
Default A maximum of 24 lines are sent.
Views User line view
User line class view
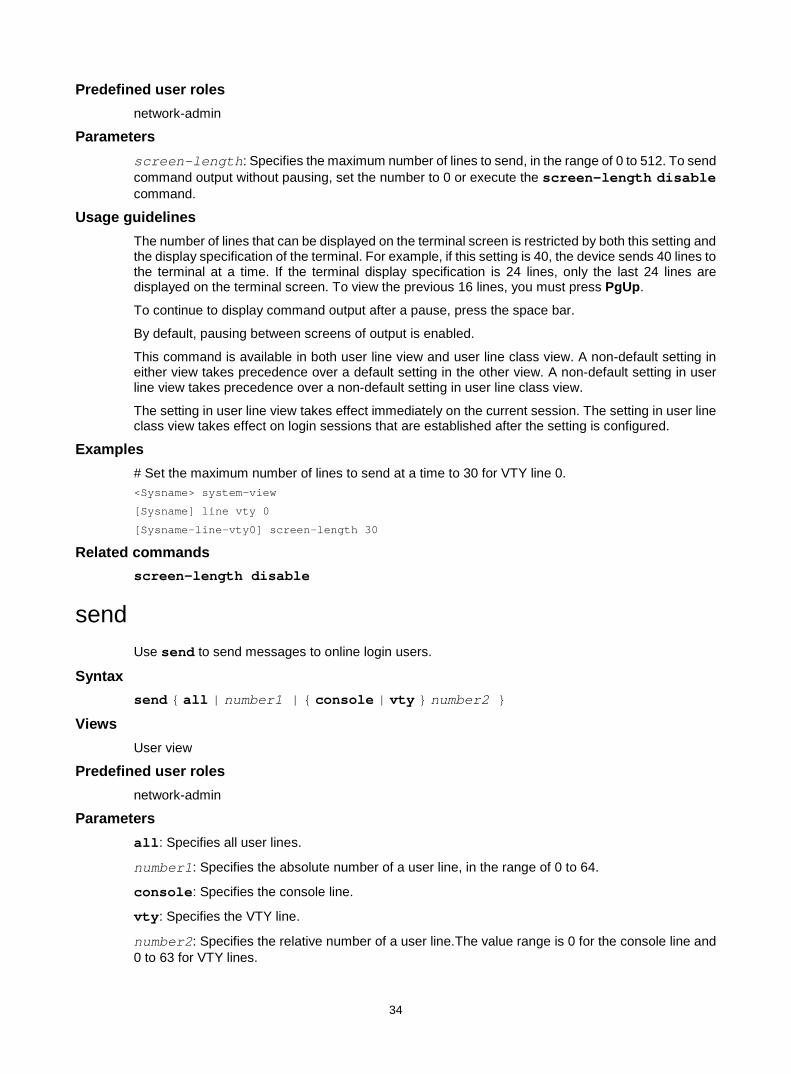
34
Predefined user roles network-admin
Parameters screen-length: Specifies the maximum number of lines to send, in the range of 0 to 512. To send command output without pausing, set the number to 0 or execute the screen-length disable command.
Usage guidelines The number of lines that can be displayed on the terminal screen is restricted by both this setting and the display specification of the terminal. For example, if this setting is 40, the device sends 40 lines to the terminal at a time. If the terminal display specification is 24 lines, only the last 24 lines are displayed on the terminal screen. To view the previous 16 lines, you must press PgUp.
To continue to display command output after a pause, press the space bar.
By default, pausing between screens of output is enabled.
This command is available in both user line view and user line class view. A non-default setting in either view takes precedence over a default setting in the other view. A non-default setting in user line view takes precedence over a non-default setting in user line class view.
The setting in user line view takes effect immediately on the current session. The setting in user line class view takes effect on login sessions that are established after the setting is configured.
Examples # Set the maximum number of lines to send at a time to 30 for VTY line 0. <Sysname> system-view
[Sysname] line vty 0
[Sysname-line-vty0] screen-length 30
Related commands screen-length disable
send Use send to send messages to online login users.
Syntax send { all | number1 | { console | vty } number2 }
Views User view
Predefined user roles network-admin
Parameters all: Specifies all user lines.
number1: Specifies the absolute number of a user line, in the range of 0 to 64.
console: Specifies the console line.
vty: Specifies the VTY line.
number2: Specifies the relative number of a user line.The value range is 0 for the console line and 0 to 63 for VTY lines.

35
Usage guidelines You can use this command to send notifications to online users before performing an operation that might affect other online users, for example, before rebooting the device.
To end a message, press Enter. To abort the send operation, press Ctrl+C.
Examples # Send a notification to the user on VTY 1. <Sysname> send vty 1
Input message, end with Enter; abort with CTRL+C:
Your attention, please. I will reboot the system in 3 minutes.
Send message? [Y/N]:y
The message should appear on the user's terminal screen as follows: [Sysname]
***
***
***Message from vty0 to vty1
***
Your attention, please. I will reboot the system in 3 minutes.
set authentication password Use set authentication password to set the password for local password authentication.
Use undo set authentication password to restore the default.
Syntax set authentication password { hash | simple } string
undo set authentication password
Default No password is set for local password authentication.
Views User line view
User line class view
Predefined user roles network-admin
Parameters hash: Specifies a password in hashed form.
simple: Sets a password in plaintext form. For security purposes, the password specified in plaintext form will be stored in hashed form.
string: Specifies the password. Its plaintext form is a case-sensitive string of 4 to 16 characters and must contain a minimum of two character types. Its hashed form is a case-sensitive string of 1 to 110 characters.
Usage guidelines Only users assigned the network-admin, or level-15 user role can execute this command. Other users cannot execute this command, even if they are granted the right to execute this command.

36
This command is available in both user line view and user line class view. A non-default setting in either view takes precedence over a default setting in the other view. A non-default setting in user line view takes precedence over a non-default setting in user line class view.
A password change does not take effect on the current session. It takes effect on subsequent login sessions.
When a user logs in to the device, the device performs login password complexity check for the user. • If a user logs in to the device with the default password, the system forcibly requests the user to
change its password to a password that meets the system requirements. • If a user logs in to the device with a less complicated password (not the default password), the
system prompts the user to change its password. As a best practice to ensure device security, change the password to a password that meets the system requirements.
Examples # Set the password to hello12345 for local password authentication on VTY line 0. <Sysname> system-view
[Sysname] line vty 0
[Sysname-line-vty0] authentication-mode password
[Sysname-line-vty0] set authentication password simple hello12345
Related commands authentication-mode
shell Use shell to enable the terminal service for user lines.
Use undo shell to disable the terminal service for user lines.
Syntax shell
undo shell
Default The terminal service is enabled on all user lines.
Views User line view
User line class view
Predefined user roles network-admin
Usage guidelines The undo shell command is not supported in console line view or console line class view.
You cannot disable the terminal service on the user line you are using.
When the device acts as a Telnet or SSH server, you cannot configure the undo shell command.
If the undo shell command is configured in user line class view, you cannot configure the shell command in the view of a user line in the class.
Examples # Disable the terminal service for VTY lines VTY 0 through 4 so no user can log in to the device through the user lines.

37
<Sysname> system-view
[Sysname] line vty 0 4
[Sysname-line-vty0-4] undo shell
Disable ui-vty0-4 , are you sure? [Y/N]:y
[Sysname-line-vty0-4]
telnet Use telnet to Telnet to a host in an IPv4 network.
Syntax telnet remote-host [ service-port ] [ source { interface interface-type interface-number | ip ip-address } ] [ dscp dscp-value ] [ escape character ]
Views User view
Predefined user roles network-admin
Parameters remote-host: Specifies the IPv4 address or host name of a remote host. A host name can be a case-insensitive string of 1 to 253 characters. Valid characters include letters, digits, hyphens (-), underscores (_), and dots (.).
service-port: Specifies the TCP port number for the Telnet service on the remote host. The value range is 0 to 65535 and the default is 23.
source: Specifies a source IPv4 address or source interface for outgoing Telnet packets. If you do not specify this option, the device uses the primary IPv4 address of the output interface for the route to the server as the source address.
interface interface-type interface-number: Specifies the source interface. The primary IPv4 address of the interface will be used as the source IPv4 address for outgoing Telnet packets.
ip ip-address: Specifies the source IPv4 address for outgoing Telnet packets.
dscp dscp-value: Specifies a DSCP value for outgoing Telnet packets. The value range is 0 to 63. The default is 48.
escape character: Specifies an escape character. You can use the escape character together with a dot (.) as the escape key to terminate the current Telnet connection and return to the upper level connection. The value for the character argument is case sensitive and must be different from the login username. As a best practice, specify a tilde (~) for the character argument.
Usage guidelines Methods for terminating Telnet connections include: • Pressing Ctrl+K—Terminates all Telnet connections. You can use this method in any scenarios
unless you configure an escape character. After you configure an escape character, pressing Ctrl+K does not terminate Telnet connections.
• Executing the quit command—Terminates the current Telnet connection and returns to the upper level connection. This method is not available when the Telnet server reboots or fails.
• Using the escape key—Terminates the current Telnet connection and returns to the upper level connection. You can use this method in any scenarios.
To use the escape key to terminate the current Telnet connection, enter the escape character and a dot in a new line. If you enter any other characters or perform any other operations (for example,

38
pressing the backspace key) before entering the escape character, the escape character does not take effect.
The source address or interface specified by this command is applied only to the Telnet connection that is being established.
Examples # Telnet to host 1.1.1.2, using 1.1.1.1 as the source IP address for outgoing Telnet packets. <Sysname> telnet 1.1.1.2 source ip 1.1.1.1
Related commands telnet client source
telnet client source Use telnet client source to specify a source IPv4 address or source interface for the Telnet client to use for outgoing Telnet packets.
Use undo telnet client source to restore the default.
Syntax telnet client source { interface interface-type interface-number | ip ip-address }
undo telnet client source
Default No source IPv4 address or source interface is specified. The Telnet client uses the primary IPv4 address of the output interface for the route to the server as the source IPv4 address.
Views System view
Predefined user roles network-admin
Parameters interface interface-type interface-number: Specifies a source interface. The primary IPv4 address of the interface will be used as the source IPv4 address for outgoing Telnet packets.
ip ip-address: Specifies a source IPv4 address.
Usage guidelines The setting configured by this command applies to all Telnet connections but has a lower precedence than the source setting specified for the telnet command.
Examples # Set the source IPv4 address to 1.1.1.1 for outgoing Telnet packets. <Sysname> system-view
[Sysname] telnet client source ip 1.1.1.1
Related commands display telnet client
telnet ipv6 Use telnet ipv6 to Telnet to a host in an IPv6 network.

39
Syntax telnet ipv6 remote-host [ -i interface-type interface-number ] [ port-number ] [ source { interface interface-type interface-number | ipv6 ipv6-address } ] [ dscp dscp-value ] [ escape character ]
Views User view
Predefined user roles network-admin
Parameters remote-host: Specifies the IPv6 address or host name of a remote host. A host name can be a case-insensitive string of 1 to 253 characters. Valid characters include letters, digits, hyphens (-), underscores (_), and dots (.).
-i interface-type interface-number: Specifies the interface for sending Telnet packets. This option is required when the remote host address is a link-local address. When the server address is a global unicast address, you cannot specify this option.
port-number: Specifies the TCP port number for the Telnet service on the remote host. The value range is 0 to 65535 and the default is 23.
source: Specifies a source IPv6 address or source interface for outgoing Telnet packets. If you do not specify this option, the device uses the primary IPv6 address of the output interface for the route to the server as the source address.
interface interface-type interface-number: Specifies the source interface. The primary IPv6 address of the interface will be used as the source IPv6 address for outgoing Telnet packets.
ipv6 ipv6-address: Specifies the source IPv6 address for outgoing Telnet packets.
dscp dscp-value: Specifies a DSCP value for outgoing Telnet packets. The value range is 0 to 63. The default is 48.
escape character: Specifies an escape character. You can use the escape character together with a dot (.) as the escape key to terminate the current Telnet connection and return to the upper level connection. The value for the character argument is case sensitive and must be different from the login username. As a best practice, specify a tilde (~) for the character argument.
Usage guidelines Methods for terminating Telnet connections include: • Pressing Ctrl+K—Terminates all Telnet connections. You can use this method in any scenarios
unless you configure an escape character. After you configure an escape character, pressing Ctrl+K does not terminate Telnet connections.
• Executing the quit command—Terminates the current Telnet connection and returns to the upper level connection. This method is not available when the Telnet server reboots or fails.
• Using the escape key—Terminates the current Telnet connection and returns to the upper level connection. You can use this method in any scenarios.
To use the escape key to terminate the current Telnet connection, enter the escape character and a dot in a new line. If you enter any other characters or perform any other operations (for example, pressing the backspace key) before entering the escape character, the escape character does not take effect.
Examples # Telnet to the host at 5000::1. <Sysname> telnet ipv6 5000::1

40
# Telnet to the host at 2000::1. Use 1000::1 as the source address for outgoing Telnet packets. <Sysname> telnet ipv6 2000::1 source ipv6 1000::1
telnet server acl Use telnet server acl to apply an ACL to filter Telnet logins.
Use undo telnet server acl to restore the default.
Syntax telnet server acl [ mac ] acl-number
undo telnet server acl
Default No ACL is used to filter Telnet logins.
Views System view
Predefined user roles network-admin
Parameters mac: Specifies a Layer 2 ACL. To specify an ACL of a different type, do not specify this keyword.
acl-number: Specifies an ACL by its number. If you specify the mac keyword, the value range of this argument is 4000 to 4999. If you do not specify the mac keyword, the value range of this argument is 2000 to 3999.
Usage guidelines When no ACL is applied to the Telnet service, all users can Telnet to the device. To control Telnet logins, specify an ACL that exists and has rules so only users permitted by the ACL can Telnet to the device. If you specify an ACL that does not exist or does not have rules, no users can Telnet to the device.
For more information about ACL, see Security Configuration Guide.
If you execute this command multiple times, the most recent configuration takes effect.
This command does not take effect on existing Telnet connections.
Examples # Permit only the user at 1.1.1.1 to Telnet to the device. <Sysname> system-view
[Sysname] acl basic 2001
[Sysname-acl-ipv4-basic-2001] rule permit source 1.1.1.1 0
[Sysname-acl-ipv4-basic-2001] quit
[Sysname] telnet server acl 2001
telnet server acl-deny-log enable Use telnet server acl-deny-log enable to enable logging for Telnet login attempts that are denied by the Telnet login control ACL.
Use undo telnet server acl-deny-log enable to disable logging for Telnet login attempts that are denied by the Telnet login control ACL.

41
Syntax telnet server acl-deny-log enable
undo telnet server acl-deny-log enable
Default Logging is disabled for Telnet login attempts that are denied by the Telnet login control ACL.
Views System view
Predefined user roles network-admin
Usage guidelines Only clients permitted by the Telnet login control ACL can Telnet to the device. This logging feature generates log messages for Telnet login attempts that are denied by the Telnet login control ACL.
For information about log message output, see the information center in Network Management and Monitoring Configuration Guide. For information about configuring a Telnet login control ACL, see the telnet server acl or telnet server ipv6 acl command.
Examples # Enable logging for Telnet login attempts that are denied by the Telnet login control ACL. <Sysname> system-view
[Sysname] telnet server acl-deny-log enable
Related commands telnet server acl
telnet server ipv6 acl
telnet server dscp Use telnet server dscp to specify the DSCP value for IPv4 to use for Telnet packets sent to a Telnet client.
Use undo telnet server dscp to restore the default.
Syntax telnet server dscp dscp-value
undo telnet server dscp
Default IPv4 uses the DSCP value 48 for Telnet packets sent to a Telnet client.
Views System view
Predefined user roles network-admin
Parameters dscp-value: Specifies a DSCP value in the range of 0 to 63.

42
Usage guidelines The DSCP value is carried in the ToS field of an IPv4 packet to indicate the packet transmission priority.
Examples # Set the DSCP value for IPv4 to use for outgoing Telnet packets to 30 on a Telnet server. <Sysname> system-view
[Sysname] telnet server dscp 30
telnet server enable Use telnet server enable to enable the Telnet server.
Use undo telnet server enable to disable the Telnet server.
Syntax telnet server enable
undo telnet server enable
Default The Telnet server is disabled.
Views System view
Predefined user roles network-admin
Usage guidelines Users can Telnet to the device only when the Telnet server is enabled.
Examples # Enable the Telnet server. <Sysname> system-view
[Sysname] telnet server enable
telnet server ipv6 acl Use telnet server ipv6 acl to apply an IPv6 ACL to filter IPv6 Telnet logins.
Use undo telnet server ipv6 acl to restore the default.
Syntax telnet server ipv6 acl { ipv6 | mac } acl-number
undo telnet server ipv6 acl
Default No IPv6 ACL is used to filter IPv6 Telnet logins.
Views System view
Predefined user roles network-admin

43
Parameters ipv6: Specifies an IPv6 ACL.
mac: Specifies a Layer 2 ACL. To specify an ACL of a different type, do not specify this keyword.
acl-number: Specifies an ACL by its number. If you specify the ipv6 keyword, the value range of this argument is 2000 to 3999. If you specify the mac keyword, the value range of this argument is 4000 to 4999.
Usage guidelines When no ACL is applied to the Telnet service, all users can Telnet to the device. To control Telnet logins, specify an ACL that exists and has rules so only users permitted by the ACL can Telnet to the device. If you specify an ACL that does not exist or does not have rules, no users can Telnet to the device.
For more information about ACL, see Security Configuration Guide.
If you execute this command multiple times, the most recent configuration takes effect.
This command does not take effect on existing Telnet connections.
Examples # Permit only the user at 2000::1 to Telnet to the device. <Sysname> system-view
[Sysname] acl ipv6 basic 2001
[Sysname-acl6-ipv6-basic-2001] rule permit source 2000::1 128
[Sysname-acl6-ipv6-basic-2001] quit
[Sysname] telnet server ipv6 acl ipv6 2001
telnet server ipv6 dscp Use telnet server ipv6 dscp to specify the DSCP value for IPv6 to use for Telnet packets sent to a Telnet client.
Use undo telnet server ipv6 dscp to restore the default.
Syntax telnet server ipv6 dscp dscp-value
undo telnet server ipv6 dscp
Default IPv6 uses the DSCP value 48 for Telnet packets sent to a Telnet client.
Views System view
Predefined user roles network-admin
Parameters dscp-value: Specifies a DSCP value in the range of 0 to 63.
Usage guidelines The DSCP value is carried in the Traffic class field of an IPv6 packet to indicate the packet transmission priority.

44
Examples # Set the DSCP value for IPv6 to use for outgoing Telnet packets to 30 on a Telnet server. <Sysname> system-view
[Sysname] telnet server ipv6 dscp 30
telnet server ipv6 port Use telnet server ipv6 port to specify the IPv6 Telnet service port number.
Use undo telnet server ipv6 port to restore the default.
Syntax telnet server ipv6 port port-number
undo telnet server ipv6 port
Default The IPv6 Telnet service port number is 23.
Views System view
Predefined user roles network-admin
Parameters port-number: Specifies a port number. The value can be 23 or in the range of 1025 to 65535.
Usage guidelines This command terminates all existing Telnet connections to the IPv6 Telnet server. To use the Telnet service, users must reestablish Telnet connections.
Examples # Set the IPv6 Telnet service port number to 1026. <Sysname> system-view
[Sysname] telnet server ipv6 port 1026
telnet server port Use telnet server port to specify the IPv4 Telnet service port number.
Use undo telnet server port to restore the default.
Syntax telnet server port port-number
undo telnet server port
Default The IPv4 Telnet service port number is 23.
Views System view
Predefined user roles network-admin

45
Parameters port-number: Specifies a port number. The value can be 23 or in the range of 1025 to 65535.
Usage guidelines This command terminates all existing Telnet connections to the IPv4 Telnet server. To use the Telnet service, users must reestablish Telnet connections.
Examples # Set the IPv4 Telnet service port number to 1025. <Sysname> system-view
[Sysname] telnet server port 1025
terminal type Use terminal type to specify the terminal display type.
Use undo terminal type to restore the default.
Syntax terminal type { ansi | vt100 }
undo terminal type
Default The terminal display type is ANSI.
Views User line view
User line class view
Predefined user roles network-admin
Parameters ansi: Specifies the ANSI type.
vt100: Specifies the VT100 type.
Usage guidelines The device supports two terminal display types: ANSI and VT100. As a best practice, specify the VT100 type on both the device and the configuration terminal. If either side uses the ANSI type, a display problem might occur when a command line has more than 80 characters. For example, a cursor positioning error might occur.
This command is available in both user line view and user line class view. A non-default setting in either view takes precedence over a default setting in the other view. A non-default setting in user line view takes precedence over a non-default setting in user line class view.
A terminal display type change does not take effect on the current session. It takes effect on subsequent login sessions.
Examples # Set the terminal display type to VT100. <Sysname> system-view
[Sysname] line vty 0
[Sysname-line-vty0] terminal type vt100

46
user-interface Use user-interface to enter one or multiple user line views.
Syntax user-interface { first-number1 [ last-number1 ] | { console | vty } first-number2 [ last-number2 ] }
Views System view
Predefined user roles network-admin
Parameters first-number1: Specifies the absolute number of the first user line, in the range of 0 to 64.
last-number1: Specifies the absolute number of the last user line, in the range of 1 to 64. This number must be greater than first-number1.
console: Specifies the console line.
vty: Specifies the VTY line.
first-number2: Specifies the relative number of the first user line. The value range is 0 for the console line and 0 to 63 for VTY lines.
last-number2: Specifies the relative number of the last user line. This argument is not supported for the console line. The value range is 1 to 63 for VTY lines. This number must be greater than first-number2.
Usage guidelines This command is an older version reserved for backward compatibility purposes. It has the same functionality and output as the line command. As a best practice, use the line command.
To configure settings for a single user line, use this command to enter the user line view.
To configure the same settings for multiple user lines, use this command to enter multiple user line views.
Examples # Enter the view of console line 0. <Sysname> system-view
[Sysname] user-interface console 0
[Sysname-line-console0]
# Enter the views of VTY lines 0 to 4. <Sysname> system-view
[Sysname] user-interface vty 0 4
[Sysname-line-vty0-4]
Related commands user-interface class
user-interface class Use user-interface class to enter user line class view.

47
Syntax user-interface class { console | vty }
Views System view
Predefined user roles network-admin
Parameters console: Specifies the console line class view.
vty: Specifies the VTY line class view.
Usage guidelines This command is an older version reserved for backward compatibility purposes. It has the same functionality and output as the line class command. As a best practice, use the line class command.
To configure the same settings for all user lines of a line class, you can use this command to enter the user line class view.
The following commands are available in user line class view: • activation-key
• authentication-mode
• auto-execute command
• command accounting
• command authorization
• escape-key
• history-command max-size
• idle-timeout
• protocol inbound
• screen-length
• set authentication password
• shell
• terminal type
• user-role
For commands that are available in both user line view and user line class view, the device uses the following rules to determine the settings to use: • A setting in user line view applies only to the user line. A setting in user line class view applies to
all user lines of the class. • A non-default setting in either view takes precedence over a default setting in the other view. A
non-default setting in user line view takes precedence over a non-default setting in user line class view.
• A setting in user line class view does not take effect on current online users. It takes effect only for new login users.
Examples # Set the CLI connection idle-timeout timer to 15 minutes in VTY line class view. <Sysname> system-view

48
[Sysname] user-interface class vty
[Sysname-line-class-vty] idle-timeout 15
# In console line class view, configure character s as the terminal session activation key. <Sysname> system-view
[Sysname] user-interface class console
[Sysname-line-class-console] activation-key s
[Sysname-line-class-console] quit
# In the view of console line 0, restore the default terminal session activation key. [Sysname] user-interface console 0
[Sysname-line-console0] undo activation-key
Alternatively, you can use the following command: [Sysname-line-console0] activation-key 13
To verify the configuration: 1. Exit the session on console line 0.
[Sysname-line-console0] return
<Sysname> quit
2. Log in again through the console line. The following message appears: Press ENTER to get started.
3. Press Enter. Pressing Enter does not start a session.
4. Enter s. A terminal session is started. <Sysname>
Related commands user-interface
user-role Use user-role to assign a user role to a user line. The device assigns the user role to a user of the line when the user logs in.
Use undo user-role to remove a user role or restore the default.
Syntax user-role role-name
undo user-role [ role-name ]
Default A console user is assigned the network-admin user role. Other users are assigned the network-operator user role.
Views User line view
User line class view
Predefined user roles network-admin

49
Parameters role-name: Specifies a user role name, a case-sensitive string of 1 to 63 characters. The user role can be user-defined or predefined. Available predefined user roles include network-admin, network-operator, and level-0 to level-15. The predefined security-audit and guest-manager user roles are not supported in user line view or user line class view. If you do not specify this argument, the undo user-role command restores the default user roles.
Usage guidelines Only users assigned the network-admin, or level-15 user role can execute this command. Other users cannot execute this command, even if they are granted the right to execute this command.
This command is available in both user line view and user line class view. A non-default setting in either view takes precedence over a default setting in the other view. A non-default setting in user line view takes precedence over a non-default setting in user line class view.
A user role change does not take effect on the current session. It takes effect on subsequent login sessions.
You can assign up to 64 user roles to a user line.
For more information about user roles, see RBAC configuration in Fundamentals Configuration Guide.
Examples # Assign user role network-admin to VTY line 0 to 31. <Sysname> system-view
[Sysname] line vty 0 31
[Sysname-line-vty0-31] user-role network-admin
web captcha Use web captcha to specify a fixed verification code for Web login.
Use undo web captcha to restore the default.
Syntax web captcha verification-code
undo web captcha
Default No fixed verification code is specified for Web login. A Web user must enter the verification code displayed on the login page.
Views User view
Predefined user roles network-admin
Parameters verification-code: Specifies the fixed verification code, a case-sensitive 4-character string.
Usage guidelines In test environments where a script is used for Web function tests, you can configure a fixed verification code to improve test efficiency.
For Web access security purposes, do not use this feature in production environments.

50
If you execute the web captcha command multiple times, the most recent configuration takes effect.
This command is not saved to the configuration file and will not take effect after a reboot.
Examples # Set the fixed verification code to test for Web login. <Sysname> web captcha test
web https-authorization mode Use web https-authorization mode to set the authentication mode for HTTPS login.
Use undo web https-authorization mode to restore the default.
Syntax web https-authorization mode { auto | manual }
undo web https-authorization mode
Default Manual authentication mode is used for HTTPS login.
Views System view
Predefined user roles network-admin
Parameters auto: Uses the PKI certificate of an HTTPS client to authenticate the client automatically.
manual: Sends the login page to the HTTPS client, and uses the username and password entered on the page to authenticate the client.
Usage guidelines In auto authentication mode, the device uses the PKI certificate of an HTTPS client to authenticate the client automatically. • If the certificate is valid, the value of the CN field is used as the username for AAA
authentication. If the authentication succeeds, the Web interface appears on the client. If the authentication fails, the login page appears on the client. The user can log in to the
Web interface after entering the correct username and password. • If the certificate is invalid (for example, expired), the device closes the HTTPS connection.
Examples # Set the HTTPS login authentication mode to auto. <Sysname> system-view
[Sysname] web https-authorization mode auto
web idle-timeout Use web idle-timeout to set the Web connection idle-timeout timer.
Use undo web idle-timeout to restore the default.

51
Syntax web idle-timeout idle-time
undo web idle-timeout
Default The Web connection idle-timeout timer is 10 minutes.
Views System view
Predefined user roles network-admin
Parameters idle-time: Specifies the Web connection idle-timeout timer in minutes. The value range is 1 to 999.
Usage guidelines The system automatically terminates a Web user connection if no mouse or keyboard operation occurs within the idle-timeout interval.
This command takes effect immediately on current Web connections.
Examples # Set the Web connection idle-timeout timer to 100 minutes. <Sysname> system-view
[Sysname] web idle-timeout 100
webui log enable Use webui log enable to enable Web operation logging.
Use undo webui log enable to disable Web operation logging.
Syntax webui log enable
undo webui log enable
Default Web operation logging is disabled.
Views System view
Predefined user roles network-admin
Usage guidelines When Web operation logging is enabled, the device generates log messages for important Web operations, for example, system time change. The device outputs log messages as indicated by information center settings.
A Web operation log message includes the following information: • Module name WEB. • Mnemonic prefix WEBOPT_.

52
• Web client IP address. • Web user's username.
The following is a sample log message: %Mar 25 14:32:38:802 2013 H3C WEB/6/WEBOPT_SET_TIME: -HostIP=192.168.100.235-User=Admin; Set the system date and time to 2013-05-27T10:00:00.
Examples # Enable Web operation logging. <Sysname> system-view
[Sysname] webui log enable

i
Contents
FTP commands ····························································································· 1
FTP client commands ········································································································································ 1 ? ································································································································································· 1 append ······················································································································································· 2 ascii ···························································································································································· 2 binary ························································································································································· 3 bye ····························································································································································· 3 cd ······························································································································································· 4 cdup ··························································································································································· 5 close ··························································································································································· 5 debug ························································································································································· 6 delete ························································································································································· 6 dir ······························································································································································· 7 disconnect ·················································································································································· 8 display ftp client source ······························································································································ 8 ftp ······························································································································································· 9 ftp client ipv6 source ································································································································ 10 ftp client source ········································································································································ 11 ftp ipv6 ······················································································································································ 11 get ···························································································································································· 13 help ·························································································································································· 13 lcd ····························································································································································· 14 ls ······························································································································································· 15 mkdir ························································································································································ 16 newer ······················································································································································· 16 open ························································································································································· 17 passive ····················································································································································· 18 put ···························································································································································· 18 pwd ··························································································································································· 19 quit ··························································································································································· 20 reget ························································································································································· 20 rename ····················································································································································· 21 reset ························································································································································· 21 restart ······················································································································································· 22 rhelp ························································································································································· 22 rmdir ························································································································································· 24 rstatus ······················································································································································ 25 status ························································································································································ 26 system ······················································································································································ 27 user ·························································································································································· 28 verbose ···················································································································································· 28
TFTP commands ························································································· 30
tftp ···························································································································································· 30 tftp client ipv6 source ······························································································································· 31 tftp client source ······································································································································· 32 tftp ipv6 ····················································································································································· 33 tftp-server acl ··········································································································································· 34 tftp-server ipv6 acl ···································································································································· 35

1
FTP commands FTP client commands
For FTP users to execute FTP client configuration commands, you must configure authorization settings for users on the FTP server. Authorized operations include viewing the files in the working directory, reading/downloading/uploading/renaming/removing files, and creating directories.
The FTP client commands in this section are supported by the device, but whether they can be executed successfully depends on the FTP server.
The output in the examples of this section varies by FTP server type.
? Use ? to display all commands supported by an FTP client.
Use ? command-name to display the help information for a command.
Syntax ? [ command-name ]
Views FTP client view
Predefined user roles network-admin
Parameters command-name: Specifies a command supported by the FTP client.
Usage guidelines In FTP client view, entering ? is the same as executing the help command.
Examples # Display all commands supported by the FTP client. ftp> ?
Commands may be abbreviated. Commands are:
append delete ls quit rmdir
ascii debug mkdir reget status
binary dir newer rstatus system
bye disconnect open rhelp user
cd get passive rename verbose
cdup help put reset ?
close lcd pwd restart
# Display the help information for the dir command. ftp> ? dir
dir list contents of remote directory
Related commands help

2
append Use append to add the content of a file on the FTP client to a file on the FTP server.
Syntax append localfile [ remotefile ]
Views FTP client view
Predefined user roles network-admin
Parameters localfile: Specifies a file on the FTP client.
remotefile: Specifies a file on the FTP server.
Usage guidelines You can perform this operation only after you log in to the FTP server.
Examples # Append the content of the local a.txt file to the b.txt file on the FTP server. ftp> append a.txt b.txt
local: a.txt remote: b.txt
150 Connecting to port 50190
226 File successfully transferred
1657 bytes sent in 0.000736 seconds (2.15 Mbyte/s)
ascii Use ascii to set the file transfer mode to ASCII.
Syntax ascii
Default The file transfer mode is binary.
Views FTP client view
Predefined user roles network-admin
Usage guidelines You can perform this operation only after you log in to the FTP server.
FTP transfers files in either of the following modes: • Binary mode—Transfers non-text files. • ASCII mode—Transfers text files.
When the device acts as the FTP server, the transfer mode is determined by the FTP client. When the device acts as the FTP client, you can set the transfer mode. The transfer mode is binary by default.

3
Examples # Set the file transfer mode to ASCII. ftp> ascii
200 TYPE is now ASCII
Related commands binary
binary Use binary to set the file transfer mode to binary, which is also called the flow mode.
Syntax binary
Default The file transfer mode is binary.
Views FTP client view
Predefined user roles network-admin
Usage guidelines You can perform this operation only after you log in to the FTP server.
FTP transfers files in either of the following modes: • Binary mode—Transfers program file or pictures. • ASCII mode—Transfers text files.
When the device acts as the FTP server, the transfer mode is determined by the FTP client. When the device acts as the FTP client, you can set the transfer mode. The default transfer mode is binary.
Examples # Set the file transfer mode to binary. ftp> binary
200 TYPE is now 8-bit binary
Related commands ascii
bye Use bye to terminate the connection to the FTP server and return to user view. If no connection is established between the device and the FTP server, use this command to return to user view.
Syntax bye
Views FTP client view
Predefined user roles network-admin

4
Examples # Terminate the connection to the FTP server and return to user view. ftp> bye
221-Goodbye. You uploaded 2 and downloaded 2 kbytes.
221 Logout.
<Sysname>
Related commands quit
cd Use cd to change the current working directory to another directory on the FTP server.
Syntax cd { directory | .. | / }
Views FTP client view
Predefined user roles network-admin
Parameters directory: Specifies the target directory. If the target directory does not exist, the cd command does not change the current working directory.
..: Specifies the upper directory. Executing the cd .. command is the same as executing the cdup command. If the current working directory is the FTP root directory, the cd .. command does not change the current working directory.
/: Specifies the FTP root directory.
Usage guidelines You can perform this operation only after you log in to the FTP server.
The directory that can be accessed must be authorized by the FTP server.
Examples # Change the working directory to the logfile subdirectory of the current directory. ftp> cd logfile
250 OK. Current directory is /logfile
# Change the working directory to the folder subdirectory of the FTP root directory. ftp> cd /folder
250 OK. Current directory is /folder
# Change the working directory to the upper directory of the current directory. ftp> cd ..
250 OK. Current directory is /
# Change the working directory to the FTP root directory. ftp> cd /
250 OK. Current directory is /

5
Related commands cdup
pwd
cdup Use cdup to enter the upper directory of the FTP server.
Syntax cdup
Views FTP client view
Predefined user roles network-admin
Usage guidelines You can perform this operation only after you log in to the FTP server.
This command does not change the working directory if the current directory is the FTP root directory.
Examples # Change the working directory to the upper directory. ftp> pwd
257 "/ftp/subdir" is your current location
ftp> cdup
250 OK. Current directory is /ftp
ftp> pwd
257 "/ftp" is your current location
Related commands cd
pwd
close Use close to terminate the connection to the FTP server without exiting FTP client view.
Syntax close
Views FTP client view
Predefined user roles network-admin
Usage guidelines You can perform this operation only after you log in to the FTP server.

6
Examples # Terminate the connection to the FTP server without exiting the FTP client view. ftp> close
221-Goodbye. You uploaded 0 and downloaded 0 kbytes.
221 Logout.
ftp>
Related commands disconnect
debug Use debug to enable or disable FTP client debugging.
Syntax debug
Default FTP client debugging is disabled.
Views FTP client view
Predefined user roles network-admin
Usage guidelines When FTP client debugging is enabled, executing this command disables FTP client debugging.
When FTP client debugging is disabled, executing this command enables FTP client debugging.
Examples # Enable and then disable FTP client debugging. ftp> debug
Debugging on (debug=1).
ftp> debug
Debugging off (debug=0).
delete Use delete to permanently delete a file from the FTP server.
Syntax delete remotefile
Views FTP client view
Predefined user roles network-admin
Parameters remotefile: Specifies a file on the FTP server.

7
Usage guidelines You can perform this operation only after you log in to the FTP server.
To perform this operation, you must have delete permission on the FTP server.
Examples # Delete the b.txt file. ftp> delete b.txt
250 Deleted b.txt
dir Use dir to display or save detailed information about files and directories on the FTP server.
Syntax dir [ remotefile [ localfile ] ]
Views FTP client view
Predefined user roles network-admin
Parameters remotefile: Specifies a file or directory on the FTP server.
localfile: Specifies the name of the local file used to save the displayed information.
Usage guidelines You can perform this operation only after you log in to the FTP server.
To display detailed information about the files and subdirectories in the working directory on the FTP server, use the dir command.
To display detailed information about a file or directory on the FTP server, use the dir remotefile command.
To save detailed information about a file or directory on the FTP server to a local file, use the dir remotefile localfile command.
In FTP client view, executing the dir command is the same as executing the ls command.
Examples # Display detailed information about the files and subdirectories in the working directory on the FTP server. ftp> dir
150 Connecting to port 50201
-rwxr-xr-x 1 0 0 1481 Jul 7 15:36 a.txt
drwxr-xr-x 2 0 0 8192 Jul 2 14:33 diagfile
drwxr-xr-x 3 0 0 8192 Jul 7 15:21 ftp
drwxr-xr-x 2 0 0 8192 Jul 5 09:15 logfile
drwxr-xr-x 2 0 0 8192 Jul 2 14:33 seclog
-rwxr-xr-x 1 0 0 40808448 Jul 2 14:33 system-a1801.bin
-rwxr-xr-x 1 0 0 3050 Jul 7 12:26 startup.cfg
-rwxr-xr-x 1 0 0 54674 Jul 4 09:24 startup.mdb
-rwxr-xr-x 1 0 0 1481 Jul 7 12:34 x.cfg

8
226 9 matches total
# Save detailed information about file a.txt to s.txt. ftp> dir a.txt s.txt
output to local-file: s.txt ? [Y/N]y
150 Connecting to port 50203
226-Glob: a.txt
# Display the content of the file s.txt. ftp> bye
221-Goodbye. You uploaded 0 and downloaded 2 kbytes.
221 Logout.
<Sysname> more s.txt
-rwxr-xr-x 1 0 0 1481 Jul 7 12:34 a.txt
Related commands ls
disconnect Use disconnect to terminate the connection to the FTP server without exiting FTP client view.
Syntax disconnect
Views FTP client view
Predefined user roles network-admin
Usage guidelines You can perform this operation only after you log in to the FTP server.
Examples # Terminate the connection to the FTP server without exiting the FTP client view. ftp> disconnect
221-Goodbye. You uploaded 0 and downloaded 0 kbytes.
221 Logout.
ftp>
Related commands close
display ftp client source Use display ftp client source to display the source address settings on the FTP client.
Syntax display ftp client source
Views Any view

9
Predefined user roles network-admin
network-operator
Examples # Display the source address settings on the FTP client. <Sysname> display ftp client source
The source IP address of the FTP client is 1.1.1.1.
ftp Use ftp to log in to an IPv4 FTP server and enter FTP client view.
Syntax ftp [ ftp-server [ service-port ] [ dscp dscp-value | source { interface interface-type interface-number | ip source-ip-address } ] ] *
Views User view
Predefined user roles network-admin
Parameters ftp-server: Specifies the IPv4 address or host name of an FTP server. A host name can be a case-insensitive string of 1 to 253 characters. Valid characters for a host name include letters, digits, hyphens (-), underscores (_), and dots (.).
service-port: Specifies the TCP port number of the FTP server, in the range of 0 to 65535. The default is 21.
dscp dscp-value: Specifies the DSCP value for IPv4 to use in outgoing FTP packets to indicate the packet transmission priority. The value range is 0 to 63. The default is 0.
source { interface interface-type interface-number | ip source-ip-address }: Specifies the source address used to establish the FTP connection.
• interface interface-type interface-number: Specifies an interface by its type and number. The device will use the interface's primary IPv4 address as the source address. To establish the FTP connection successfully, make sure the interface is up and has the primary IPv4 address configured.
• ip source-ip-address: Specifies an IPv4 address. To establish the FTP connection successfully, make sure this address is the IPv4 address of an interface in up state on the device.
Usage guidelines This command is only applicable to IPv4 networks.
If no parameters are specified, this command enters the FTP client view without logging in to an FTP server.
If the server parameters are specified, you are prompted to enter the username and password for logging in to the FTP server.
Examples # Log in to FTP server 192.168.0.211. Use 192.168.0.212 as the source IPv4 address for outgoing FTP packets. <Sysname> ftp 192.168.0.211 source ip 192.168.0.212

10
Press CTRL+C to abort.
Connected to 192.168.0.211 (192.168.0.211).
220 WFTPD 2.0 service (by Texas Imperial Software) ready for new user
User (192.168.0.211:(none)): abc
331 Give me your password, please
Password:
230 Logged in successfully
Remote system type is MSDOS.
ftp>
ftp client ipv6 source Use ftp client ipv6 source to specify the source IPv6 address for FTP packets sent to an IPv6 FTP server.
Use undo ftp client ipv6 source to restore the default.
Syntax ftp client ipv6 source { interface interface-type interface-number | ipv6 source-ipv6-address }
undo ftp client ipv6 source
Default No source address is specified for FTP packets sent to an IPv6 FTP server. The device selects a source IPv6 address as defined in RFC 3484.
Views System view
Predefined user roles network-admin
Parameters interface interface-type interface-number: Specifies an interface by its type and number. The device will use the interface's IPv6 address as the source address. For successful FTP packet transmission, make sure the interface is up and is configured with an IPv6 address.
ipv6 source-ipv6-address: Specifies an IPv6 address. For successful FTP packet transmission, make sure this address is the IPv6 address of an interface in up state on the device.
Usage guidelines If you execute this command multiple times, the most recent configuration takes effect.
The source address specified with the ftp ipv6 command takes precedence over the source address specified with the ftp client ipv6 source command.
The source address specified with the ftp client ipv6 source command applies to all FTP connections. The source address specified with the ftp ipv6 command applies only to the FTP connection that is being established.
Examples # Specify the source IPv6 address of 2000::1 for FTP packets sent to an IPv6 FTP server. <Sysname> system–view
[Sysname] ftp client ipv6 source ipv6 2000::1

11
Related commands ftp ipv6
ftp client source Use ftp client source to specify the source IPv4 address for FTP packets sent to an IPv4 FTP server.
Use undo ftp client source to restore the default.
Syntax ftp client source { interface interface-type interface-number | ip source-ip-address }
undo ftp client source
Default No source IPv4 address is specified for FTP packets sent to an IPv4 FTP server. The device uses the primary IPv4 address of the output interface for the route to the server as the source address.
Views System view
Predefined user roles network-admin
Parameters interface interface-type interface-number: Specifies an interface by its type and number. The device will use the interface's primary IPv4 address as the source address. For successful FTP packet transmission, make sure the interface is up and has the primary IPv4 address configured.
ip source-ip-address: Specifies an IPv4 address. For successful FTP packet transmission, make sure this address is the IPv4 address of an interface in up state on the device.
Usage guidelines If you execute this command multiple times, the most recent configuration takes effect.
The source address specified with the ftp command takes precedence over the source address specified with the ftp client source command.
The source address specified with the ftp client source command applies to all FTP connections. The source address specified with the ftp command applies only to the FTP connection that is being established.
Examples # Specify the source IPv4 address of 192.168.20.222 for FTP packets sent to an IPv4 FTP server. <Sysname> system-view
[Sysname] ftp client source ip 192.168.20.222
Related commands ftp
ftp ipv6 Use ftp ipv6 to log in to an IPv6 FTP server and enter FTP client view.

12
Syntax ftp ipv6 [ ftp-server [ service-port ] [ dscp dscp-value | source { ipv6 source-ipv6-address | interface interface-type interface-number } ] * [ -i interface-type interface-number ] ]
Views User view
Predefined user roles network-admin
Parameters ftp-server: Specifies the IPv6 address or host name of an FTP server. A host name can be a case-insensitive string of 1 to 253 characters. Valid characters for a host name include letters, digits, hyphens (-), underscores (_), and dots (.).
service-port: Specifies the TCP port number of the FTP server, in the range of 0 to 65535. The default is 21.
dscp dscp-value: Specifies the DSCP value for IPv6 to use in outgoing FTP packets to indicate the packet transmission priority. The value range is 0 to 63. The default is 0.
source { ipv6 source-ipv6-address | interface interface-type interface-number }: Specifies the source address used to establish the FTP connection.
• interface interface-type interface-number: Specifies an interface by its type and number. This option can be used only when the FTP server address is a link local address and the specified output interface has a link local address. For information about link local addresses, see IPv6 basics in Network Connectivity Configuration Guide.
• ipv6 source-ipv6-address: Specifies an IPv6 address. To establish the FTP connection successfully, make sure this address is the IPv6 address of an interface in up state on the device.
-i interface-type interface-number: Specifies an output interface by its type and number. This option can be used only when the FTP server address is a link local address and the specified output interface has a link local address.
Usage guidelines This command is only applicable to IPv6 networks.
If no parameters are specified, this command enters the FTP client view.
If the FTP server parameters are specified, you are prompted to enter the username and password for logging in to the FTP server.
Examples # Log in to FTP server 2000::154. <Sysname> ftp ipv6 2000::154
Press CTRL+C to abort.
Connected to 2000::154 (2000::154).
220 FTP service ready.
User (2000::154): root
331 Password required for root.
Password:
230 User logged in
Remote system type is H3C

13
get Use get to download a file from the FTP server and save the file.
Syntax get remotefile [ localfile ]
Views FTP client view
Predefined user roles network-admin
Parameters remotefile: Specifies the file to be downloaded.
localfile: Specifies a name for the downloaded file. If you do not specify this argument, the system uses the name of the source file.
Usage guidelines You can perform this operation only after you log in to the FTP server.
To save the downloaded file to the working directory accessed by the ftp command, perform one of the following tasks: • Execute the command without specifying the localfile argument.
• Specify a file name without any path information for the localfile argument, for example, a.cfg.
To save the downloaded file to some other directory, you must specify a fully qualified file name for the localfile argument, for example, flash:/subdirectory/a.cfg.
Examples # Download the a.txt file and save it as b.txt in the working directory accessed by the ftp command. ftp> get a.txt b.txt
local: b.txt remote: a.txt
150 Connecting to port 47457
226 File successfully transferred
1569 bytes received in 0.00527 seconds (290.6 kbyte/s)
# Download the a.txt file to the test directory in the working directory accessed by the ftp command. ftp> get a.txt flash:/test/b.txt
local: flash:/test/b.txt remote: a.txt
150 Connecting to port 47457
226 File successfully transferred
1569 bytes received in 0.00527 seconds (290.6 kbyte/s)
Related commands put
help Use help to display all commands supported by the FTP client.

14
Use help command-name to display the help information for a command.
Syntax help [ command-name ]
Views FTP client view
Predefined user roles network-admin
Parameters command-name: Specifies a command supported by the FTP client.
Usage guidelines In FTP client view, executing the help command is the same as entering ?.
Examples # Display all commands supported by the FTP client. ftp> help
append delete ls quit rmdir
ascii debug mkdir reget status
binary dir newer rstatus system
bye disconnect open rhelp user
cd get passive rename verbose
cdup help put reset ?
close lcd pwd restart
# Display the help information for the dir command. ftp> help dir
dir list contents of remote directory
Related commands ?
lcd Use lcd to display or change the local working directory of the FTP client.
Syntax lcd [ directory | / ]
Views FTP client view
Predefined user roles network-admin
Parameters directory: Changes the local working directory of the FTP client to the specified local directory. There must be a slash sign (/) before the name of the storage medium, for example, /flash:/logfile.
/: Changes the local working directory of the FTP client to the local root directory.

15
Usage guidelines To display the local working directory of the FTP client, do not specify the directory or / argument.
Examples # Display the local working directory. ftp> lcd
Local directory now /flash:
# Change the local working directory to flash:/logfile. ftp> lcd /flash:/logfile
Local directory now /flash:/logfile
ls Use ls to display or save detailed information about files and directories on the FTP server.
Syntax ls [ remotefile [ localfile ] ]
Views FTP client view
Predefined user roles network-admin
Parameters remotefile: Specifies a file or directory on the FTP server.
localfile: Specifies the name of the local file used to save the displayed information.
Usage guidelines You can perform this operation only after you log in to the FTP server.
To display detailed information about the files and subdirectories in the working directory on the FTP server, use the ls command.
To display detailed information about a file or directory on the FTP server, use the ls remotefile command.
To save detailed information about a file or directory on the FTP server to a local file, use the ls remotefile localfile command.
In FTP client view, executing the ls command is the same as executing the dir command.
Examples # Display detailed information about the files and subdirectories in the working directory on the FTP server. ftp> ls
150 Connecting to port 50201
-rwxr-xr-x 1 0 0 1481 Jul 7 15:36 a.txt
drwxr-xr-x 2 0 0 8192 Jul 2 14:33 diagfile
drwxr-xr-x 3 0 0 8192 Jul 7 15:21 ftp
drwxr-xr-x 2 0 0 8192 Jul 5 09:15 logfile
drwxr-xr-x 2 0 0 8192 Jul 2 14:33 seclog
-rwxr-xr-x 1 0 0 40808448 Jul 2 14:33 system-a1801.bin

16
-rwxr-xr-x 1 0 0 3050 Jul 7 12:26 startup.cfg
-rwxr-xr-x 1 0 0 54674 Jul 4 09:24 startup.mdb
-rwxr-xr-x 1 0 0 1481 Jul 7 12:34 x.cfg
226 9 matches total
# Save detailed information about the file a.txt to s.txt. ftp> ls a.txt s.txt
output to local-file: s.txt ? [Y/N]y
150 Connecting to port 50203
226-Glob: a.txt
# Display the content of the file s.txt. ftp> bye
221-Goodbye. You uploaded 0 and downloaded 2 kbytes.
221 Logout.
<Sysname> more s.txt
-rwxr-xr-x 1 0 0 1481 Jul 7 12:34 a.txt
Related commands dir
mkdir Use mkdir to create a subdirectory in the current directory on the FTP server.
Syntax mkdir directory
Views FTP client view
Predefined user roles network-admin
Parameters directory: Specifies the name for the directory to be created.
Usage guidelines You can perform this operation only after you log in to the FTP server.
You must have permission to perform this operation on the FTP server.
Examples # Create a subdirectory named newdir in the current directory of the FTP server. ftp> mkdir newdir
257 "newdir" : The directory was successfully created
newer Use newer to update a local file by using a file on the FTP server.
Syntax newer remotefile [ localfile ]

17
Views FTP client view
Predefined user roles network-admin
Parameters remotefile: Specifies a file on the FTP server.
localfile: Specifies the local file to be updated.
Usage guidelines You can perform this operation only after you log in to the FTP server.
If the local file does not exist, this command downloads the file from the FTP server and saves it locally.
If the file on the FTP server is not newer than the local file, this command does not update the local file.
Examples # Update the local file with the a.txt file on the FTP server. ftp> newer a.txt
local: a.txt remote: a.txt
150 Connecting to port 63513
226 File successfully transferred
1573 bytes received in 0.0293 seconds (52.3 kbyte/s)
open Use open to log in to an FTP server from FTP client view.
Syntax open server-address [ service-port ]
Views FTP client view
Predefined user roles network-admin
Parameters server-address: Specifies the IPv4 address, IPv6 address, or host name of the FTP server.
service-port: Specifies the TCP port number of the FTP server, in the range of 0 to 65535. The default is 21.
Usage guidelines After you issue this command, the system will prompt you to enter the username and password.
After you log in to one FTP server, you must disconnect from the server before you can use the open command to log in to another server.
Examples # In FTP client view, log in to FTP server 192.168.40.7. <Sysname>ftp
ftp> open 192.168.40.7

18
Press CTRL+C to abort.
Connected to 192.168.40.7 (192.168.40.7).
220 FTP service ready.
User (192.168.40.7:(none)): root
331 Password required for root.
Password:
230 User logged in.
Remote system type is H3C.
ftp>
passive Use passive to change the FTP operation mode.
Syntax passive
Default The FTP operation mode is passive.
Views FTP client view
Predefined user roles network-admin
Usage guidelines FTP can operate in either of the following modes: • Active mode—The FTP server initiates the TCP connection. • Passive mode—The FTP client initiates the TCP connection.
When the FTP operation mode is passive, executing this command changes the mode to active.
When the FTP operation mode is active, executing this command changes the mode to passive.
This command is typically used together with a firewall to control FTP session establishment between private network users and public network users.
Examples # Change the FTP operation mode to passive. ftp> passive
Passive mode on.
ftp> passive
Passive mode off.
put Use put to upload a file from the FTP client to the FTP server.
Syntax put localfile [ remotefile ]
Views FTP client view

19
Predefined user roles network-admin
Parameters localfile: Specifies the local file to be uploaded.
remotefile: Specifies the name of the file for saving the uploaded file on the FTP server.
Usage guidelines You can perform this operation only after you log in to the FTP server.
To upload a file in the current working directory, specify a file name without the path for the localfile argument, for example, a.cfg.
To upload a file in some other directory, specify a fully qualified file name for the localfile argument, for example, flash:/subdirectory/a.cfg.
Examples # Upload the a.txt file from the local working directory to the FTP server. Save the file as b.txt. ftp> put a.txt b.txt
local: a.txt remote: b.txt
150 Connecting to port 47461
226 File successfully transferred
1569 bytes sent in 0.000671 seconds (2.23 Mbyte/s)
# Upload the a.txt file from the test directory of the local working directory to the FTP server. Save the file as b.txt. ftp> put flash:/test/a.txt b.txt
local: flash:/test/a.txt remote: b.txt
150 Connecting to port 47461
226 File successfully transferred
1569 bytes sent in 0.000671 seconds (2.23 Mbyte/s)
Related commands get
pwd Use pwd to display the currently accessed directory on the FTP server.
Syntax pwd
Views FTP client view
Predefined user roles network-admin
Usage guidelines You can perform this operation only after you log in to the FTP server.
Examples # Display the currently accessed directory on the FTP server. ftp> cd subdir

20
250 OK. Current directory is /subdir
ftp> pwd
257 "/subdir" is your current location
quit Use quit to terminate the connection to the FTP server and return to user view.
Syntax quit
Views FTP client view
Predefined user roles network-admin
Examples # Terminate the connection to the FTP server and return to user view. ftp> quit
221-Goodbye. You uploaded 0 and downloaded 0 kbytes.
221 Logout.
<Sysname>
Related commands bye
reget Use reget to get the missing part of a file from the FTP server.
Syntax reget remotefile [ localfile ]
Views FTP client view
Predefined user roles network-admin
network-operator
Parameters remotefile: Specifies a file on the FTP server.
localfile: Specifies a local file.
Usage guidelines You can perform this operation only after you log in to the FTP server.
If a file download is not completed due to network or storage space problems, use this command to get the part that has not been downloaded yet.
Examples # Get the part of the s.bin file that has not been downloaded yet. ftp> reget s.bin

21
local: s.bin remote: s.bin
350 Restarting at 1749706
150-Connecting to port 47429
150 38143.3 kbytes to download
226 File successfully transferred
39058742 bytes received in 66.2 seconds (576.1 kbyte/s)
rename Use rename to rename a file.
Syntax rename [ oldfilename [ newfilename ] ]
Views FTP client view
Predefined user roles network-admin
Parameters oldfilename: Specifies the original file name.
newfilename: Specifies the new file name.
Usage guidelines You can perform this operation only after you log in to the FTP server.
Examples # Rename the a.txt file as b.txt. • Method 1:
ftp> rename
(from-name) a.txt
(to-name) b.txt
350 RNFR accepted - file exists, ready for destination
250 File successfully renamed or moved
• Method 2: ftp> rename a.txt
(to-name) b.txt
350 RNFR accepted - file exists, ready for destination
250 File successfully renamed or moved
• Method 3: ftp> rename a.txt b.txt
350 RNFR accepted - file exists, ready for destination
250 File successfully renamed or moved
reset Use reset to clear the reply information received from the FTP server in the buffer.
Syntax reset

22
Views FTP client view
Predefined user roles network-admin
Examples # Clear the reply information received from the FTP server. ftp> reset
restart Use restart to specify the file retransmission offset.
Syntax restart marker
Views FTP client view
Predefined user roles network-admin
Parameters marker: Specifies the retransmission offset, in bytes.
Usage guidelines Use this command to continue with a file retransmission. The file retransmission starts from the (offset+1)th byte.
You can perform this operation only after you log in to the FTP server.
Support for this command depends on the FTP server.
Examples # Set retransmission offset to 2 bytes and retransmit the h.c file. The file has 82 bytes in total. ftp> restart 2
restarting at 2. execute get, put or append to initiate transfer
ftp> put h.c h.c
local: h.c remote: h.c
350 Restart position accepted (2).
150 Ok to send data.
226 File receive OK.
80 bytes sent in 0.000445 seconds (175.6 kbyte/s)
ftp> dir
150 Here comes the directory listing.
-rw-r--r-- 1 0 0 82 Jul 18 02:58 h.c
rhelp Use rhelp to display the FTP commands supported by the FTP server.
Use rhelp protocol-command to display the help information for an FTP command supported by the FTP server.

23
Syntax rhelp [ protocol-command ]
Views FTP client view
Predefined user roles network-admin
Parameters protocol-command: Specifies an FTP command.
Usage guidelines You can perform this operation only after you log in to the FTP server.
Examples # Display the FTP-related commands supported by the FTP server. ftp> rhelp
214-The following FTP commands are recognized
USER PASS NOOP QUIT SYST TYPE
HELP CWD XCWD PWD CDUP XCUP
XPWD LIST NLST MLSD PORT EPRT
PASV EPSV REST RETR STOR APPE
DELE MKD XMKD RMD XRMD ABOR
SIZE RNFR RNTO
214 UNIX Type: L8
Table 1 Command output
Field Description
USER Username.
PASS Password.
NOOP Null operation.
SYST System parameters.
TYPE Request type.
CWD Changes the current working directory.
XCWD Extended command with the meaning of CWD.
PWD Prints the working directory.
CDUP Changes the directory to the upper directory.
XCUP Extended command with the meaning of CDUP.
XPWD Extended command with the meaning of PWD.
LIST Lists files.
NLST Lists brief file description.
MLSD Lists file content.
PORT Active mode (IPv4).
EPRT Active mode (IPv6).

24
Field Description
PASV Passive mode (IPv4).
EPSV Passive mode (IPv6).
REST Restarts.
RETR Downloads files.
STOR Uploads files.
APPE Appends uploading.
DELE Deletes files.
MKD Creates folders.
XMKD Extended command with the meaning of MKD.
RMD Deletes folders.
XRMD Extended command with the meaning of RMD.
ABOR Aborts the transmission.
SIZE Size of the transmission file.
RNFR Original name.
RNTO New name.
rmdir Use rmdir to permanently delete a directory from the FTP server.
Syntax rmdir directory
Views FTP client view
Predefined user roles network-admin
Parameters directory: Specifies a directory on the FTP server.
Usage guidelines You can perform this operation only after you log in to the FTP server.
To perform this operation, you must have delete permission on the FTP server.
Delete all files and subdirectories in a directory before you delete the directory. For more information about how to delete files, see the delete command.
The rmdir command does not delete the files of the specified directory from the recycle bin.
Examples # Delete empty directory subdir1. ftp> rmdir subdir1
250 The directory was successfully removed

25
Related commands delete
rstatus Use rstatus to display FTP server status information.
Use rstatus remotefile to display detailed information about a directory or file on the FTP server.
Syntax rstatus [ remotefile ]
Views FTP client view
Predefined user roles network-admin
Parameters remotefile: Specifies a directory or file on the FTP server.
Usage guidelines You can perform this operation only after you log in to the FTP server.
Support for this command depends on the FTP server.
Examples # Display FTP server status information. ftp> rstatus
211-FTP server status:
Connected to 192.168.20.177
Logged in as root
TYPE: ASCII
No session bandwidth limit
Session timeout in seconds is 300
Control connection is plain text
Data connections will be plain text
At session startup, client count was 1
vsFTPd 2.0.6 - secure, fast, stable
211 End of status
Table 2 Command output
Filed Description
211-FTP server status: Beginning of the display of FTP server status, where 211 specifies the FTP command.
Connected to 192.168.20.177 IP address of the FTP client.
Logged in as root Login username root.
TYPE: ASCII File transfer mode ASCII.
Session timeout in seconds is 300 FTP connection idle-timeout interval is 300 seconds.
Control connection is plain text Control connection type is plain text.

26
Filed Description Data connections will be plain text Data connection type is plain text.
At session startup, client count was 1 FTP connection number is 1.
vsFTPd 2.0.6 - secure, fast, stable FTP version is 2.0.6.
211 End of status End of the display of FTP server status.
# Display the file a.txt. ftp> rstatus a.txt
213-Status follows:
-rw-r--r-- 1 0 0 80 Jul 18 02:58 a.txt
213 End of status
Table 3 Command output
Field Description 213-Status follows: Beginning of the display of the file, where 213 specifies the FTP command.
-rw-r--r--
The first bit specifies the file type. • -—Common. • B—Block. • c—Character. • d—Directory. • l—Symbol connection file. • p—Pipe. • s—socket. The second bit through the tenth bit are divided into three groups. Each group contains three characters, representing the access permission of the owner, group, and other users. • -—No permission. • r—Read permission. • w—Write permission. • x—Execution permission.
1 Number of connections.
0 Name of the file owner.
0 Group number of the file owner.
80 File size, in bytes.
Jul 18 02:58 Date and time when the file was most recently modified.
a.txt File name.
213 End of status End of the display of the file information.
status Use status to display FTP status information.
Syntax status

27
Views FTP client view
Predefined user roles network-admin
Examples # Display FTP status information. ftp> status
Connected to 192.168.1.56.
No proxy connection.
Not using any security mechanism.
Mode: stream; Type: ascii; Form: non-print; Structure: file
Verbose: on; Bell: off; Prompting: on; Globbing: off
Store unique: off; Receive unique: off
Case: off; CR stripping: on
Ntrans: off
Nmap: off
Hash mark printing: off; Use of PORT cmds: on
Table 4 Command output
Field Description
Connected to 192.168.1.56. IP address of the FTP server that is connected to the FTP client.
Verbose: on; Bell: off; Prompting: on; Globbing: off Displays debugging information.
Store unique: off; Receive unique: off The name of the file on the FTP server is unique and the name of the local file is unique.
Case: off; CR stripping: on Does not support obtaining multiple files once and deletes "\r" when downloading text files.
Ntrans: off Does not use the input-output transmission table.
Nmap: off The file name does not use the input-to-output mapping template.
Hash mark printing: off; Use of PORT cmds: on Does not end with a pound sign (#) and uses "PORT" data transmission.
system Use system to display the system information of the FTP server.
Syntax system
Views FTP client view
Predefined user roles network-admin
Usage guidelines You can perform this operation only after you log in to the FTP server.

28
Examples # Display the system information of the FTP server. ftp> system
215 UNIX Type: L8
user Use user to initiate an FTP authentication on the current FTP connection.
Syntax user username [ password ]
Views FTP client view
Predefined user roles network-admin
Parameters username: Specifies the username.
password: Specifies the password.
Usage guidelines If you tried to access an FTP server but failed to pass the authentication, you can use this command to try again before the connection to the FTP server expires.
After you log in to an FTP server, you can initiate an FTP authentication to change to a new account. By changing to a new account, you can get a different privilege without re-establishing the FTP connection.
Make sure the specified username and password have been configured on the FTP server. If the username or password is not configured, this command fails and the FTP connection is closed.
Examples # After a login failure, log in again to the FTP server before the connection expires. • Method 1:
ftp> user ftp hello12345
331 Password required for ftp.
230 User logged in.
• Method 2: ftp> user ftp
331 Password required for ftp.
Password:
230 User logged in.
verbose Use verbose to enable or disable the device to display detailed information about FTP operations.
Syntax verbose

29
Default The device displays detailed information about FTP operations.
Views FTP client view
Predefined user roles network-admin
Usage guidelines This command affects only the current FTP session.
Examples # Disable the device from displaying detailed information about FTP operations. ftp> verbose
Verbose mode off.
# Execute the get command. ftp> get a.cfg 1.cfg
# Enable the device to display detailed information about FTP operations. ftp> verbose
Verbose mode on.
# Execute the get command. ftp> get a.cfg 2.cfg
227 Entering Passive Mode (192,168,1,58,68,14)
150-Accepted data connection
150 The computer is your friend. Trust the computer
226 File successfully transferred
3796 bytes received in 0.00762 seconds (486.5 kbyte/s)

30
TFTP commands tftp
Use tftp to download a file from a TFTP server or upload a file to a TFTP server in an IPv4 network.
Syntax tftp tftp-server { get | put | sget } source-filename [ destination-filename ] [ dscp dscp-value | source { interface interface-type interface-number | ip source-ip-address } ] *
Views User view
Predefined user roles network-admin
Parameters tftp-server: Specifies the IPv4 address or host name of a TFTP server. The host name can be a case-insensitive string of 1 to 253 characters and can contain only letters, digits, hyphens (-), underscores (_), and dots (.).
get: Downloads a file and writes the file directly to the destination folder. If the destination folder already has a file with the same name, the system deletes the existing file before starting the download operation. The existing file is permanently deleted even if the download operation fails.
put: Uploads a file.
sget: Downloads a file and saves the file to memory before writing it to the destination folder. The system starts to write the file to the destination folder only after the file is downloaded and saved to memory successfully. If the destination folder already has a file with the same name, the system overwrites the existing file. If the download or save-to-memory operation fails, the existing file in the destination folder is not overwritten.
source-filename: Specifies the source file name, a case-insensitive string of 1 to 1 to 255 characters.
destination-filename: Specifies the destination file name, a case-insensitive string of 1 to 255 characters. If this argument is not specified, the file uses the source file name.
dscp dscp-value: Specifies the DSCP value for IPv4 to use for outgoing TFTP packets to indicate the packet transmission priority. The value range is 0 to 63. The default is 0.
source { interface interface-type interface-number | ip source-ip-address }: Specifies the source address for outgoing TFTP packets. If you do not specify this option, the device uses the primary IPv4 address of the output interface for the route to the TFTP server as the source address. • interface interface-type interface-number: Specifies an interface by its type
and number. The device will use the interface's primary IPv4 address as the source IPv4 address. For successful TFTP packet transmission, make sure the interface is up and has the primary IPv4 address configured.
• ip source-ip-address: Specifies an IPv4 address. For successful TFTP packet transmission, make sure this address is the IPv4 address of an interface in up state on the device.
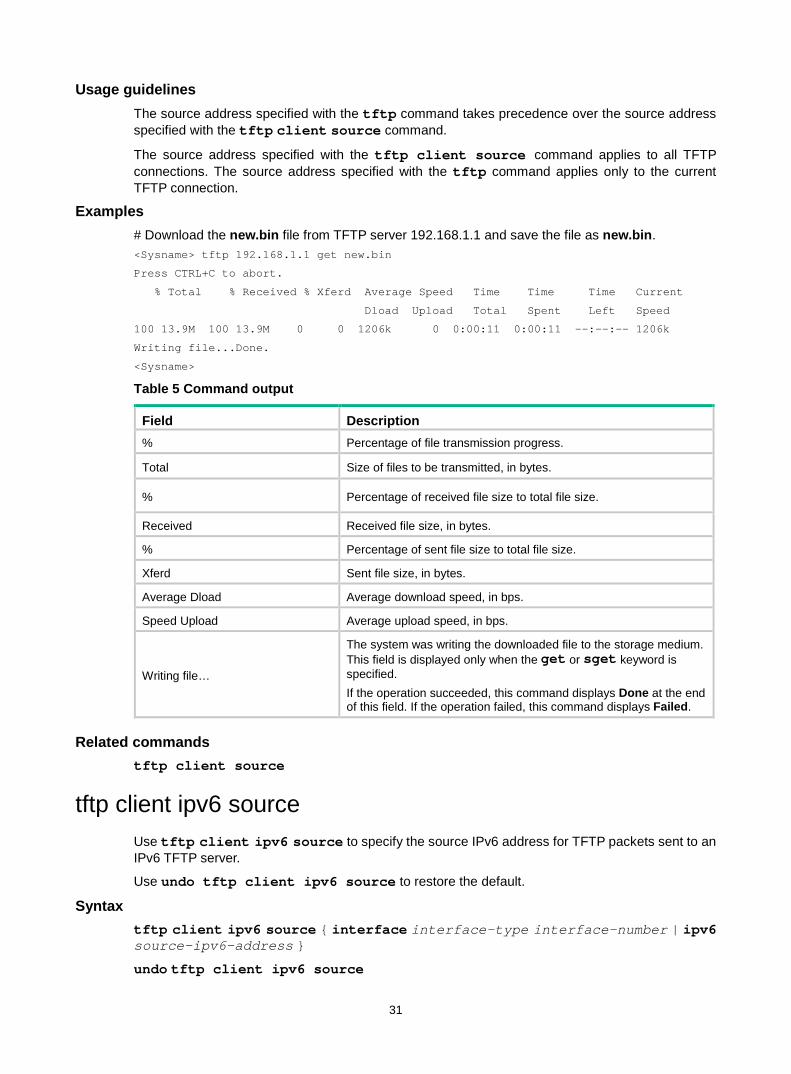
31
Usage guidelines The source address specified with the tftp command takes precedence over the source address specified with the tftp client source command.
The source address specified with the tftp client source command applies to all TFTP connections. The source address specified with the tftp command applies only to the current TFTP connection.
Examples # Download the new.bin file from TFTP server 192.168.1.1 and save the file as new.bin. <Sysname> tftp 192.168.1.1 get new.bin
Press CTRL+C to abort.
% Total % Received % Xferd Average Speed Time Time Time Current
Dload Upload Total Spent Left Speed
100 13.9M 100 13.9M 0 0 1206k 0 0:00:11 0:00:11 --:--:-- 1206k
Writing file...Done.
<Sysname>
Table 5 Command output
Field Description % Percentage of file transmission progress.
Total Size of files to be transmitted, in bytes.
% Percentage of received file size to total file size.
Received Received file size, in bytes.
% Percentage of sent file size to total file size.
Xferd Sent file size, in bytes.
Average Dload Average download speed, in bps.
Speed Upload Average upload speed, in bps.
Writing file…
The system was writing the downloaded file to the storage medium. This field is displayed only when the get or sget keyword is specified. If the operation succeeded, this command displays Done at the end of this field. If the operation failed, this command displays Failed.
Related commands tftp client source
tftp client ipv6 source Use tftp client ipv6 source to specify the source IPv6 address for TFTP packets sent to an IPv6 TFTP server.
Use undo tftp client ipv6 source to restore the default.
Syntax tftp client ipv6 source { interface interface-type interface-number | ipv6 source-ipv6-address }
undo tftp client ipv6 source

32
Default No source address is specified for TFTP packets sent to an IPv6 TFTP server. The device selects a source IPv6 address as defined in RFC 3484.
Views System view
Predefined user roles network-admin
Parameters interface interface-type interface-number: Specifies an interface by its type and number. The device will use the interface's IPv6 address as the source address. For successful TFTP packet transmission, make sure the interface is up and is configured with an IPv6 address.
ipv6 source-ipv6-address: Specifies an IPv6 address . For successful TFTP packet transmission, make sure this address is the IPv6 address of an interface in up state on the device.
Usage guidelines If you execute this command multiple times, the most recent configuration takes effect.
The source address specified with the tftp ipv6 command takes precedence over the source address specified with the tftp client ipv6 source command.
The source address specified with the tftp client ipv6 source command applies to all TFTP connections. The source address specified with the tftp ipv6 command applies only to the TFTP connection that is being established.
Examples # Specify the source IPv6 address of 2000::1 for TFTP packets sent to an IPv6 TFTP server. <Sysname> system–view
[Sysname] tftp client ipv6 source ipv6 2000::1
Related commands tftp ipv6
tftp client source Use tftp client source to specify the source IPv4 address for TFTP packets sent to an IPv4 TFTP server.
Use undo tftp client source to restore the default.
Syntax tftp client source { interface interface-type interface-number | ip source-ip-address }
undo tftp client source
Default No source IPv4 address is specified for TFTP packets sent to an IPv4 TFTP server. The device uses the primary IPv4 address of the output interface for the route to the server as the source address.
Views System view
Predefined user roles network-admin

33
Parameters interface interface-type interface-number: Specifies an interface by its type and number. The device will use the interface's primary IPv4 address as the source address. For successful TFTP packet transmission, make sure the interface is up and has the primary IPv4 address configured.
ip source-ip-address: Specifies an IPv4 address. For successful TFTP packet transmission, make sure this address is the IPv4 address of an interface in up state on the device.
Usage guidelines If you execute this command multiple times, the most recent configuration takes effect.
The source address specified with the tftp command takes precedence over the source address specified with the tftp client source command.
The source address specified with the tftp client source command applies to all TFTP connections. The source address specified with the tftp command applies only to the TFTP connection that is being established.
Examples # Specify the source IP address of 192.168.20.222 for TFTP packets sent to an IPv4 TFTP server. <Sysname> system-view
[Sysname] tftp client source ip 192.168.20.222
Related commands tftp
tftp ipv6 Use tftp ipv6 to download a file from a TFTP server or upload a file to a TFTP server in an IPv6 network.
Syntax tftp ipv6 tftp-server [ -i interface-type interface-number ] { get | put | sget } source-filename [ destination-filename ] [ dscp dscp-value | source { interface interface-type interface-number | ipv6 source-ipv6-address } ] *
Views User view
Predefined user roles network-admin
Parameters tftp-server: Specifies the IPv6 address or host name of a TFTP server. The host name can be a case-insensitive string of 1 to 253 characters and can contain only letters, digits, hyphens (-), underscores (_), and dots (.).
-i interface-type interface-number: Specifies an output interface by its type and number. This option can be used only when the TFTP server address is a link local address and the specified output interface has a link local address. For information about link local addresses, see IPv6 basics in Network Connectivity Configuration Guide.
get: Downloads a file and writes the file directly to the destination folder. If the destination folder already has a file with the same name, the system deletes the existing file before starting the download operation. The existing file is permanently deleted even if the download operation fails.

34
put: Uploads a file.
sget: Downloads a file and saves the file to memory before writing it to the destination folder. The system starts to write the file to the destination folder only after the file is downloaded and saved to memory successfully. If the destination folder already has a file using the same name, the system overwrites the existing file. If the download or save-to-memory operation fails, the existing file in the destination folder is not overwritten.
source-filename: Specifies the source file name, a case-insensitive string of 1 to 255 characters.
destination-filename: Specifies the destination file name, a case-insensitive string of 1 to 255 characters. If this argument is not specified, the file uses the source file name.
dscp dscp-value: Specifies the DSCP value for IPv6 to use in outgoing TFTP packets to indicate the packet transmission priority. The value range is 0 to 63. The default is 0.
source { interface interface-type interface-number | ipv6 source-ipv6-address }: Specifies the source address for outgoing TFTP packets. If you do not specify this option, the device selects a source IPv6 address as defined in RFC 3484. • interface interface-type interface-number: Specifies an interface by its type
and number. The device will use the interface's IPv6 address as the source IPv6 address. For successful TFTP packet transmission, make sure the interface is up and is configured with an IPv6 address.
• ipv6 source-ipv6-address: Specifies an IPv6 address. For successful TFTP packet transmission, make sure this address is the IPv6 address of an interface in up state on the device.
Usage guidelines The source address specified with the tftp ipv6 command takes precedence over the source address specified with the tftp client ipv6 source command.
The source address specified with the tftp client ipv6 source command applies to all TFTP connections. The source address specified with the tftp ipv6 command applies only to the current TFTP connection.
Examples # Download the new.bin file from TFTP server 2001::1 and save the file as new.bin. <Sysname> tftp ipv6 2001::1 get new.bin new.bin
Press CTRL+C to abort.
% Total % Received % Xferd Average Speed Time Time Time Current
Dload Upload Total Spent Left Speed
100 13.9M 100 13.9M 0 0 1206k 0 0:00:11 0:00:11 --:--:-- 1206k
Writing file...Done.
For more information about the command output, see Table 5.
tftp-server acl Use tftp-server acl to use an ACL to control the device's access to TFTP servers in an IPv4 network.
Use undo tftp-server acl to restore the default.
Syntax tftp-server acl acl-number
undo tftp-server acl

35
Default No ACL is used to control the device's access to TFTP servers.
Views System view
Predefined user roles network-admin
Parameters acl-number: Specifies the number of a basic ACL, in the range of 2000 to 2999.
Usage guidelines You can use an ACL to deny or permit the device's access to specific TFTP servers.
Examples # Allow the device to access only TFTP server 1.1.1.1. <Sysname> system-view
[Sysname] acl basic 2000
[Sysname-acl-ipv4-basic-2000] rule permit source 1.1.1.1 0
[Sysname-acl-ipv4-basic-2000] quit
[Sysname] tftp-server acl 2000
tftp-server ipv6 acl Use tftp-server ipv6 acl to use an ACL to control the device's access to TFTP servers in an IPv6 network.
Use undo tftp-server ipv6 acl to restore the default.
Syntax tftp-server ipv6 acl ipv6-acl-number
undo tftp-server ipv6 acl
Default No ACL is used to control the device's access to TFTP servers.
Views System view
Predefined user roles network-admin
Parameters ipv6-acl-number: Specifies the number of a basic ACL, in the range of 2000 to 2999.
Usage guidelines You can use an ACL to deny or permit the device's access to specific TFTP servers.
Examples # Allow the device to access only TFTP server 2001::1. <Sysname> System-view
[Sysname] acl ipv6 basic 2001
[Sysname-acl-ipv6-basic-2001] rule permit source 2001::1/128

36
[Sysname-acl-ipv6-basic-2001] quit
[Sysname] tftp-server ipv6 acl 2001

i
Contents
File system management commands ···························································· 1
cd ······························································································································································· 2 copy ···························································································································································· 2 delete ························································································································································· 4 dir ······························································································································································· 5 file prompt ·················································································································································· 6 fixdisk ························································································································································· 7 format ························································································································································· 8 gunzip ························································································································································· 8 gzip ····························································································································································· 9 md5sum ··················································································································································· 10 mkdir ························································································································································ 10 more ························································································································································· 11 move ························································································································································ 11 pwd ··························································································································································· 12 rename ····················································································································································· 12 reset recycle-bin ······································································································································· 13 rmdir ························································································································································· 14 sha256sum ··············································································································································· 14 tar create ·················································································································································· 15 tar extract ················································································································································· 16 tar list ························································································································································ 17 undelete ··················································································································································· 17

1
File system management commands IMPORTANT: • Before managing storage media, file systems, directories, and files, make sure you know the
possible impact. • A file or directory whose name starts with a dot character (.) is a hidden file or directory. To
prevent the system from hiding a file or directory, make sure the file or directory name does not start with a dot character.
• Some system files and directories are hidden. For correct system operation and full functionality, do not modify or delete hidden files or directories.
File system names, directory names, and file names must be compliant with the naming conventions. For more information about the naming conventions and the methods for specifying the names, see file system management in Fundamentals Configuration Guide.
Before you use the copy, delete, fixdisk, format, gunzip, gzip, mkdir, move, rename, rmdir, or undelete command on a file system, make sure the file system is not write protected.
The following matrix shows the supported storage media on different device models:
Hardware series Model Fixed storage media Hot-swappable storage media
WA6600 series
WA6638 Flash memory USB disk
WA6638i Flash memory USB disk
WA6636 Flash memory USB disk
WA6630X Flash memory Not supported
WA6628 Flash memory USB disk
WA6628X Flash memory Not supported
WA6628E-T Flash memory Not supported
WA6622 Flash memory USB disk
WA6620 Flash memory USB disk
WA6620X Flash memory Not supported
WA6300 series
WA6338 Flash memory USB disk
WA6338-HI Flash memory USB disk
WA6338-LI Flash memory USB disk
WA6330 Flash memory USB disk
WA6330-LI Flash memory USB disk
WA6322 Flash memory Not supported
WA6322H Flash memory Not supported
WA6322H-HI Flash memory Not supported
WA6322H-LI Flash memory Not supported
WA6320 Flash memory Not supported
WA6320-C Flash memory Not supported
WA6320-D Flash memory Not supported

2
Hardware series Model Fixed storage media Hot-swappable storage media WA6320-SI Flash memory Not supported
WA6320H Flash memory USB disk
WA6320H-LI Flash memory USB disk
WA6320H-XEPON
Flash memory Not supported
WAP922 series WAP922E Flash memory Not supported
WAP923 series WAP923 Flash memory USB disk
You cannot access a file system that is being formatted or repaired. To access the file system, wait for the ongoing operation to be completed and then use one of the following methods: • Use the absolute path to specify a file or directory. For example, use the dir flash:/
command to display the files and directories in the flash: file system.
• Use the cd command to change the working directory to the root directory of the file system before accessing a file or directory in the file system. For example, to display the files and directories in the root directory of the flash: file system, perform the following tasks: a. Use the cd flash:/ command to change the working directory to the root directory of the
file system. b. Execute the dir command.
cd Use cd to change the working directory.
Syntax cd { directory | .. }
Views User view
Predefined user roles network-admin
Parameters directory: Specifies the destination directory.
..: Specifies the parent directory. If the working directory is the root directory, an error message appears when you execute the cd .. command. No online help information is available for this keyword.
Examples # Access the test directory after logging in to the device. <Sysname> cd test
# Change to the parent directory. <Sysname> cd ..
copy Use copy to copy a file.

3
Syntax copy source-file { dest-file | dest-directory } [ source interface interface-type interface-number ]
Views User view
Predefined user roles network-admin
Parameters source-file: Specifies the name or URL of the file to be copied. If the file resides on a remote file server rather than on the device, specify the URL of the file. Whether a URL is case sensitive depends on the server.
dest-file: Specifies the name or URL for the destination file. To copy the source file to a remote file server, specify a URL. Whether a URL is case sensitive depends on the server.
dest-directory: Specifies the destination directory or URL. To copy the source file to a remote file server, specify a URL. The device copies the source file to the destination location and saves the file with its original file name. Whether a URL is case sensitive depends on the server.
source interface interface-type interface-number: Specifies the source interface used to connect to the server. After you specify the source interface, the device uses the primary IP address of the source interface as the source IP address for outgoing packets. If you do not specify this option, the device uses the outgoing interface as the source interface.
Usage guidelines You can use the copy command to perform the following tasks:
• Copy a local file and save it locally. • Copy a local file and save it to an FTP or TFTP server. • Copy a file from an FTP, TFTP, or HTTP server and save it locally.
To specify a file or directory, use the following guidelines:
Location Name format Remarks
On the device Use the file name guidelines in Fundamentals Configuration Guide.
N/A
On an FTP server
Enter the URL in the format of ftp://FTP username[:password]@server address[:port number]/file path[/file name].
The username and password must be the same as the username and password configured on the FTP server. If the server authenticates users only by the username, you are not required to enter the password. For example, to use the username a and password 1 and specify the startup.cfg file in the authorized working directory on the FTP server 1.1.1.1, enter ftp://a:[email protected]/startup.cfg.
On a TFTP server
Enter the URL in the format of tftp://server address[:port number]/file path[/file name].
For example, to specify the startup.cfg file in the working directory on TFTP server 1.1.1.1, enter the URL tftp://1.1.1.1/startup.cfg.
To specify an IPv6 address, enclose the IPv6 address in square brackets ([ ]), for example, ftp://test:test@[2001::1]:21/test.cfg.

4
Examples # Copy the test.cfg file in the current directory and save it to the current directory as testbackup.cfg. <Sysname> copy test.cfg testbackup.cfg
Copy flash:/test.cfg to flash:/testbackup.cfg? [Y/N]:y
Copying file flash:/test.cfg to flash:/testbackup.cfg...Done.
# Copy test.cfg from the working directory on FTP server 1.1.1.1. Save the copy to the local current directory as testbackup.cfg. The FTP username is user. The password is private. <Sysname> copy ftp://user:[email protected]/test.cfg testbackup.cfg
Copy ftp://user:[email protected]/test.cfg to flash:/testbackup.cfg? [Y/N]:y
Copying file ftp://user:[email protected]/test.cfg to flash:/testbackup.cfg... Done.
# Copy test.cfg from the current directory. Save the copy to the working directory on FTP server 1.1.1.1 as testbackup.cfg. The FTP username is user. The password is private. <Sysname> copy test.cfg ftp://user:[email protected]/testbackup.cfg
Copy flash:/test.cfg to ftp://user:[email protected]/testbackup.cfg? [Y/N]:y
Copying file flash:/test.cfg to ftp://user:[email protected]/testbackup.cfg... Done.
# Copy test.cfg from the working directory on TFTP server 1.1.1.1. Save the copy to the local current directory as testbackup.cfg. <Sysname> copy tftp://1.1.1.1/test.cfg testbackup.cfg
Copy tftp://1.1.1.1/test.cfg to flash:/testbackup.cfg? [Y/N]:y
Copying file tftp://1.1.1.1/test.cfg to flash:/testbackup.cfg... Done.
# Copy test.cfg from the current directory. Save the copy to the working directory on TFTP server 1.1.1.1 as testbackup.cfg. <Sysname> copy test.cfg tftp://1.1.1.1/testbackup.cfg
Copy flash:/test.cfg to tftp://1.1.1.1/testbackup.cfg? [Y/N]:y
Copying file flash:/test.cfg to tftp://1.1.1.1/testbackup.cfg... Done.
# Copy test.cfg from the working directory on FTP server 2001::1. Save the copy to the local current directory as testbackup.cfg. The FTP username is user. The password is private. <Sysname> copy ftp://user:private@[2001::1]/test.cfg testbackup.cfg
Copy ftp://user:private@[2001::1]/test.cfg to flash:/testbackup.cfg? [Y/N]:y
Copying file ftp://user:private@[2001::1]/test.cfg to flash:/testbackup.cfg... Done.
# Copy test.cfg from the working directory on TFTP server 2001::1. Save the copy to the local current directory as testbackup.cfg. <Sysname> copy tftp://[2001::1]/test.cfg testbackup.cfg
Copy tftp://[2001::1]/test.cfg to flash:/testbackup.cfg? [Y/N]:y
Copying file tftp://[2001::1]/test.cfg to flash:/testbackup.cfg... Done.
delete Use delete to delete a file.
Syntax delete [ /unreserved ] file
Views User view
Predefined user roles network-admin

5
Parameters /unreserved: Permanently deletes the specified file. If you do not specify this keyword, the command moves the file to the recycle bin.
file: Specifies the name of the file to be deleted. Asterisks (*) are acceptable as wildcards. For example, to remove files with the .txt extension in the current directory, enter delete *.txt.
Usage guidelines The delete /unreserved file command deletes a file permanently. The file cannot be restored.
The delete file command (without /unreserved) moves a file to the recycle bin.
A file moved to the recycle bin can be restored by using the undelete command.
Do not use the delete command to delete files from the recycle bin. To delete files from the recycle bin, use the reset recycle-bin command.
If you delete two files that have the same name from different directories, both files are retained in the recycle bin. If you successively delete two files that have the same name from the same directory, only the most recently deleted file is retained in the recycle bin.
Examples # Remove the 1.cfg file from the current directory. <Sysname> delete 1.cfg
Delete flash:/1.cfg? [Y/N]:y
Deleting file flash:/1.cfg...Done.
# Permanently delete the 1.cfg file from the current directory. <Sysname> delete /unreserved 1.cfg
The file cannot be restored. Delete flash:/1.cfg? [Y/N]:y
Deleting the file permanently will take a long time. Please wait...
Deleting file flash:/1.cfg...Done.
Related commands reset recycle-bin
undelete
dir Use dir to display files or directories.
Syntax dir [ /all ] [ file | directory | /all-filesystems ]
Views User view
Predefined user roles network-admin
Parameters /all: Displays all files and directories in the current directory, visible or hidden. If you do not specify this option, only visible files and directories are displayed.
file: Displays a specific file. This argument can use the asterisk (*) as a wildcard. For example, to display files with the .txt extension in the current directory, enter dir *.txt.

6
directory: Displays a specific directory.
/all-filesystems: Displays files and directories in the root directories of all file systems on the device.
Usage guidelines If no option is specified, the command displays all visible files and directories in the current directory.
The directory name of the recycle bin is .trash. To display files in the recycle bin, use either of the following methods: • Execute the dir /all .trash command.
• Execute the cd .trash command and then the dir command.
If multiple users perform file operations (for example, creating or deleting files or directories) at the same time, the output for this command might be incorrect.
Examples # Display information about all files and directories in the current directory. <Sysname> dir /all
Directory of flash:/
...
# Display files and directories in the root directories of all file systems on the device. <Sysname> dir /all-filesystems
Directory of flash:/
...
Directory of usba0:/
...
Table 1 Command output
Field Description Directory of Current directory.
0 -rwh 3144 Apr 26 2018 13:45:28 xx.xx
File or directory information: • 0—File or directory number, which is automatically allocated by the
system. • -rwh—Attributes of the file or directory. The first character is the directory
indicator (d for directory and – for file). The second character indicates whether the file or directory is readable (r for readable). The third character indicates whether the file or directory is writable (w for writable). The fourth character indicates whether the file or directory is hidden (h for hidden, - for visible). Modifying, renaming, or deleting hidden files might affect functions.
• 3144—File size in bytes. For a directory, a hyphen (-) is displayed. • Apr 26 2018 13:45:28—Last date and time when the file or directory was
modified. • xx.xx—File or directory name.
file prompt Use file prompt to set the operation mode for files and directories.
Use undo file prompt to restore the default.

7
Syntax file prompt { alert | quiet }
undo file prompt
Default The operation mode is alert. The system prompts for confirmation when you perform a destructive file or directory operation.
Views System view
Predefined user roles network-admin
Parameters alert: Prompts for confirmation when a destructive file or directory operation is being performed.
quiet: Gives no confirmation prompt for file or directory operations except the recycle bin emptying operation.
Usage guidelines In quiet mode, the system does not prompt for confirmation when a user performs a file or directory operation except the recycle bin emptying operation. The alert mode provides an opportunity to cancel a disruptive operation.
Examples # Set the file and directory operation mode to alert. <Sysname> system-view
[Sysname] file prompt alert
fixdisk Use fixdisk to check a file system for damage and repair any damage.
Syntax fixdisk filesystem
Views User view
Predefined user roles network-admin
Parameters filesystem: Specifies the name of a file system.
Usage guidelines Use this command to fix a file system when space in the file system cannot be used or released.
You can repair a file system only when no other users are accessing the file system.
Examples # Repair file system flash:. <Sysname> fixdisk flash:
Restoring flash: may take some time...

8
Restoring flash:...Done.
format Use format to format a file system.
Syntax format filesystem
Views User view
Predefined user roles network-admin
Parameters filesystem: Specifies the name of a file system.
Usage guidelines The device requires that the file systems on hot swappable storage media be VFAT file systems. To use a file system of a different type on the device, you must use this command to format the file system.
Formatting a file system permanently deletes all files in the file system. If a startup configuration file exists in the file system, back up the file if necessary.
You can format a file system only when no other users are accessing the file system.
A file system to be formatted cannot contain security log files. Only a user with the security-audit user role can delete security log files. For more information about the security-audit user role, see RBAC in Fundamentals Configuration Guide.
Examples # Format file system flash:. <Sysname> format flash:
All data on flash: will be lost, continue? [Y/N]:y
Formatting flash:... Done.
gunzip Use gunzip to decompress a file.
Syntax gunzip file
Views User view
Predefined user roles network-admin
Parameters file: Specifies the name of the file to be decompressed. This argument must use the .gz extension.
Usage guidelines This command deletes the specified file after decompressing it.

9
Examples # Decompress file system.bin.gz: 1. Before decompressing the file, you can display files whose names start with the system. string.
<Sysname> dir system.*
Directory of flash:
1 -rw- 20 Jun 14 2018 10:18:53 system.bin.gz
1048576 KB total (472840 KB free)
2. Decompress the file system.bin.gz. <Sysname> gunzip system.bin.gz
Decompressing file flash:/system.bin.gz..... Done.
3. Verify the decompress operation. <Sysname> dir system.*
Directory of flash:
1 -rw- 0 May 30 2018 11:42:25 system.bin
1048576 KB total (472844 KB free)
gzip Use gzip to compress a file.
Syntax gzip file
Views User view
Predefined user roles network-admin
Parameters file: Specifies the name of the file to be compressed.
Usage guidelines This command saves the compressed file to the file.gz file and deletes the source file.
Examples # Compress file system.bin: 1. Before compressing the file, you can display files whose names start with the system. string.
<Sysname> dir system.*
Directory of flash:
1 -rw- 0 May 30 2018 11:42:24 system.bin
1048576 KB total (472844 KB free)
2. Compress the file system.bin. <Sysname> gzip system.bin

10
Compressing file flash:/system.bin..... Done.
3. Verify the compress operation. <Sysname> dir system.*
Directory of flash:
1 -rw- 20 Jun 14 2018 10:18:53 system.bin.gz
1048576 KB total (472840 KB free)
md5sum Use md5sum to use the MD5 algorithm to calculate the digest of a file.
Syntax md5sum file
Views User view
Predefined user roles network-admin
network-operator
Parameters file: Specifies the name of a file.
Usage guidelines You can use file digests to verify file integrity.
Examples # Use the MD5 algorithm to calculate the digest of file system.bin. <Sysname> md5sum system.bin
MD5 digest:
4f22b6190d151a167105df61c35f0917
mkdir Use mkdir to create a directory.
Syntax mkdir directory
Views User view
Predefined user roles network-admin
Parameters directory: Specifies a directory.
Usage guidelines The name of the directory to be created must be unique in the parent directory.

11
You can create a directory only in an existing directory. For example, to create the flash:/test/mytest directory, make sure the test directory already exists.
Examples # Create the test directory in the current directory. <Sysname> mkdir test
Creating directory flash:/test... Done.
# Create the test/subtest directory in the current directory. <Sysname> mkdir test/subtest
Creating directory flash:/test/subtest... Done.
more Use more to display the contents of a text file.
Syntax more file
Views User view
Predefined user roles network-admin
Parameters file: Specifies the name of a file.
Examples # Display the contents of the test.txt file. <Sysname> more test.txt
Have a nice day.
# Display the contents of the testcfg.cfg file. <Sysname> more testcfg.cfg
#
version 7.1.070, Release 1201
#
sysname Sysname
#
vlan 2
#
return
<Sysname>
move Use move to move a file.
Syntax move source-file { dest-file | dest-directory }

12
Views User view
Predefined user roles network-admin
Parameters source-file: Specifies the name of the source file.
dest-file: Specifies the name of the destination file.
dest-directory: Specifies the name of the destination directory.
Usage guidelines If you specify a destination directory, the system moves the source file to the specified directory without changing the file name.
Examples # Move the flash:/test/sample.txt file to flash:/, and save it as 1.txt. <Sysname> move test/sample.txt 1.txt
Move flash:/test/sample.txt to flash:/1.txt? [Y/N]:y
Moving file flash:/test/sample.txt to flash:/1.txt ...Done.
# Move the b.cfg file to the test2 directory. <Sysname> move b.cfg test2
Move flash:/b.cfg to flash:/test2/b.cfg? [Y/N]:y
Moving file flash:/b.cfg to flash:/test2/b.cfg... Done.
pwd Use pwd to display the working directory.
Syntax pwd
Views User view
Predefined user roles network-admin
Examples # Display the working directory. <Sysname> pwd
flash:
rename Use rename to rename a file or directory.
Syntax rename { source-file | source-directory } { dest-file | dest-directory }
Views User view

13
Predefined user roles network-admin
Parameters source-file: Specifies the name of the source file.
source-directory: Specifies the name of the source directory.
dest-file: Specifies the name of the destination file.
dest-directory: Specifies the name of the destination directory.
Usage guidelines This command is not executed if the destination file or directory name is already used by an existing file or directory in the working directory.
Examples # Rename the copy.cfg file as test.cfg. <Sysname> rename copy.cfg test.cfg
Rename flash:/copy.cfg as flash:/test.cfg? [Y/N]:y
Renaming flash:/copy.cfg as flash:/test.cfg... Done.
reset recycle-bin Use reset recycle-bin to delete files from the recycle bin.
Syntax reset recycle-bin [ /force ]
Views User view
Predefined user roles network-admin
Parameters /force: Deletes all files in the recycle bin without prompting for confirmation. If you do not specify this option, the command prompts you to confirm the deletion operation for each file.
Usage guidelines The delete file command only moves a file to the recycle bin. To permanently delete the file, use the reset recycle-bin command to delete the file from the recycle bin.
Examples # Empty the recycle bin. (In this example there are two files in the recycle bin.) <Sysname> reset recycle-bin
Clear flash:/a.cfg? [Y/N]:y
Clearing file flash:/a.cfg... Done.
Clear flash:/b.cfg? [Y/N]:y
Clearing file flash:/b.cfg... Done.
# Delete the b.cfg file from the recycle bin. (In this example there are two files in the recycle bin.) <Sysname> reset recycle-bin
Clear flash:/a.cfg? [Y/N]:n
Clear flash:/b.cfg? [Y/N]:y
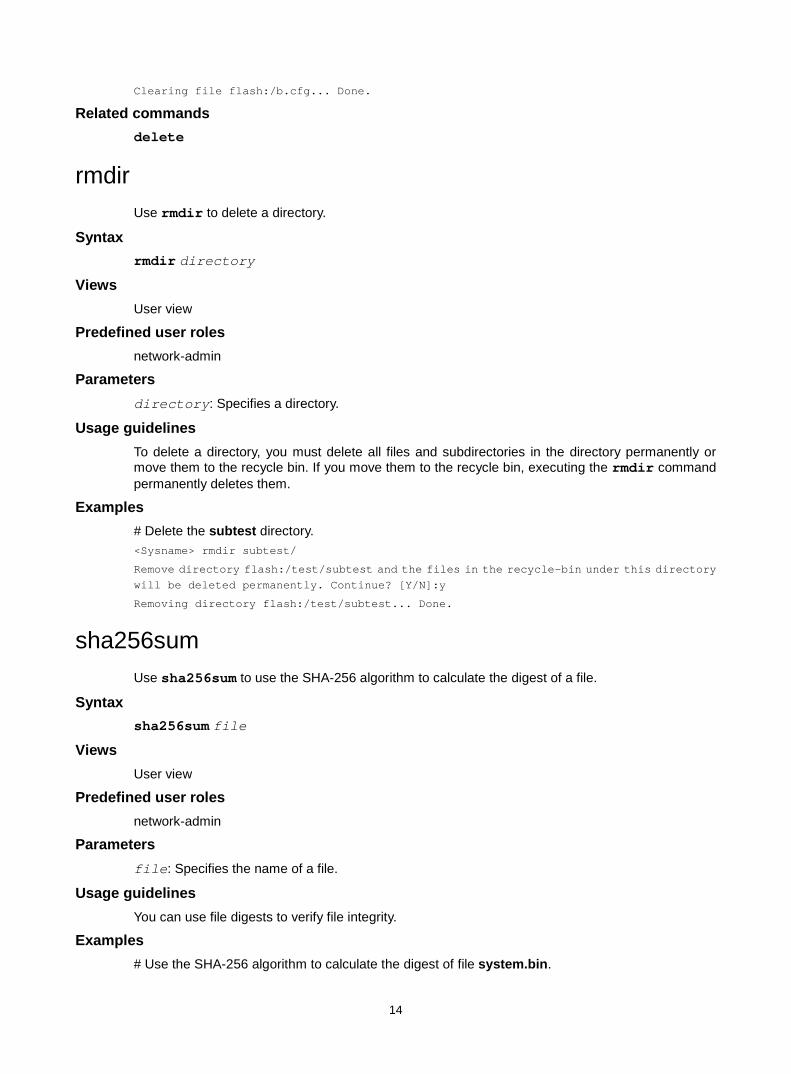
14
Clearing file flash:/b.cfg... Done.
Related commands delete
rmdir Use rmdir to delete a directory.
Syntax rmdir directory
Views User view
Predefined user roles network-admin
Parameters directory: Specifies a directory.
Usage guidelines To delete a directory, you must delete all files and subdirectories in the directory permanently or move them to the recycle bin. If you move them to the recycle bin, executing the rmdir command permanently deletes them.
Examples # Delete the subtest directory. <Sysname> rmdir subtest/
Remove directory flash:/test/subtest and the files in the recycle-bin under this directory will be deleted permanently. Continue? [Y/N]:y
Removing directory flash:/test/subtest... Done.
sha256sum Use sha256sum to use the SHA-256 algorithm to calculate the digest of a file.
Syntax sha256sum file
Views User view
Predefined user roles network-admin
Parameters file: Specifies the name of a file.
Usage guidelines You can use file digests to verify file integrity.
Examples # Use the SHA-256 algorithm to calculate the digest of file system.bin.

15
<Sysname> sha256sum system.bin
SHA256 digest:
0851e0139f2770e87d01ee8c2995ca9e59a8f5f4062e99af14b141b1a36ca152
tar create Use tar create to archive files and directories.
Syntax tar create [ gz ] archive-file dest-file [ verbose ] source { source-file | source-directory }&<1-5>
Views User view
Predefined user roles network-admin
Parameters gz: Uses gzip to compress the files and directories before archiving them. If you do not specify this keyword, the command archives the files and directories without compressing them.
archive-file dest-file: Specifies the archive file name. If you specified the gz keyword, the extension of the archive file name must be .tar.gz. If you did not specify the gz keyword, the extension of the archive file name must be .tar.
verbose: Displays the names of the successfully archived files and directories. If you do not specify this keyword, the command does not display the names of the successfully archived files and directories.
source { source-file | source-directory }&<1-5>: Specifies the files and directories to be archived. The argument can be a space-separated list of up to five items. Each item can be a file or directory name. The files and directories must be in the current working directory.
Examples # Archive the 1.cfg and 2.cfg files and the test directory to a.tar. <Sysname> tar create archive-file a.tar source 1.cfg 2.cfg test
Creating archive flash:/a.tar Done.
# Compress and archive the 1.cfg and 2.cfg files and the test directory to b.tar.gz. <Sysname> tar create gz archive-file b.tar.gz source 1.cfg 2.cfg test
Creating archive flash:/b.tar.gz Done.
# Compress and archive files and directories, and display the successfully archived files and directories. <Sysname> tar create gz archive-file c.tar.gz verbose source 1.cfg 2.cfg test
1.cfg
2.cfg
test/
test/a.log
test/subtest/
test/subtest/aa.log
Related commands tar extract
tar list

16
tar extract Use tar extract to extract files and directories.
Syntax tar extract archive-file file [ verbose ] [ screen | to directory ]
Views User view
Predefined user roles network-admin
Parameters archive-file file: Specifies the archive file name. The extension can be .tar or .tar.gz.
verbose: Displays the names of the successfully extracted files and directories.
screen: Displays the content of the extracted files and directories on the screen. The extracted files are not saved.
to directory: Saves the extracted files and directories to a different directory. The directory argument specifies the directory.
Usage guidelines
IMPORTANT: Before specifying the screen keyword for this command, use the tar list command to identify the types of the archived files. As a best practice, specify the keyword only if all archived files are text files. Displaying the content of an archived non-text file that contains terminal control characters might result in garbled characters and even cause the terminal unable to operate correctly. To use the terminal again, you must close the current connection and log in to the device again.
If you do not specify the screen keyword or the to directory option, the command saves the extracted files and directories to the working directory.
The command saves the extracted files and directories by using their original names. If a file or directory that has the same name as an extracted file or directory already exists in the destination directory, the file or directory is overwritten.
Examples # Extract files and directories from archive file a.tar. <Sysname> tar extract archive-file a.tar
Extracting archive flash:/a.tar Done.
# Extract files and directories from archive file b.tar.gz, and display the names of the successfully extracted files and directories. <Sysname> tar extract archive-file b.tar.gz verbose
1.cfg
2.cfg
test/
test/a.log
test/subtest/
test/subtest/aa.log
# Extract files and directories from archive file c.tar.gz, and display the content of the files on the screen. <Sysname> tar extract archive-file c.tar.gz screen

17
#
version 7.1.070, Release 1201
#
sysname Sysname
#
...
Related commands tar create
tar list
tar list Use tar list to display the names of archived files and directories.
Syntax tar list archive-file file
Views User view
Predefined user roles network-admin
Parameters archive-file file: Specifies the archive file name. The extension can be .tar or .tar.gz.
Examples # Display the names of archived files and directories. <Sysname> tar list archive-file a.tar
1.cfg
2.cfg
test/
test/a.log
test/subtest/
test/subtest/aa.log
Related commands tar create
tar extract
undelete Use undelete to restore a file from the recycle bin.
Syntax undelete file
Views User view

18
Predefined user roles network-admin
Parameters file: Specifies the name of the file to be restored.
Usage guidelines If a file with the same name already exists in the directory, the system prompts whether or not you want to overwrite the existing file. If you enter Y, the existing file is overwritten. If you enter N, the command is not executed.
Examples # Restore the copy.cfg file, which was moved from the root directory of the flash: file system to the recycle bin. <Sysname> undelete copy.cfg
Undelete flash:/copy.cfg? [Y/N]:y
Undeleting file flash:/copy.cfg... Done.
# Restore the startup.cfg file, which was moved from the flash:/seclog directory to the recycle bin. • Method 1:
<Sysname> undelete seclog/startup.cfg
Undelete flash:/seclog/startup.cfg? [Y/N]:y
Undeleting file flash:/seclog/startup.cfg... Done.
<Sysname>
• Method 2: <Sysname> cd seclog
<Sysname> undelete startup.cfg
Undelete flash:/seclog/startup.cfg? [Y/N]:y
Undeleting file flash:/seclog/startup.cfg... Done.

i
Contents
Configuration file management commands ···················································· 1
archive configuration ·································································································································· 1 archive configuration interval ····················································································································· 1 archive configuration location ····················································································································· 2 archive configuration max ·························································································································· 3 backup startup-configuration ······················································································································ 4 configuration encrypt ·································································································································· 5 configuration replace file ···························································································································· 6 display archive configuration ······················································································································ 7 display current-configuration ······················································································································ 8 display current-configuration diff ················································································································ 9 display default-configuration ···················································································································· 10 display diff ················································································································································ 11 display saved-configuration ······················································································································ 12 display startup ·········································································································································· 13 display this ··············································································································································· 14 reset saved-configuration ························································································································· 15 restore startup-configuration ···················································································································· 15 save ·························································································································································· 16 startup saved-configuration ······················································································································ 18

1
Configuration file management commands
archive configuration Use archive configuration to manually archive the running configuration to the configuration archive directory.
Syntax archive configuration
Views User view
Predefined user roles network-admin
Usage guidelines This command saves the running configuration to the specified configuration archive directory with file names generated from the specified name prefix.
Before executing this command, you must use the archive configuration location command to specify a directory and a name prefix for the configuration archives.
Examples # Archive the running configuration. <Sysname> archive configuration
Save the running configuration to an archive file. Continue? [Y/N]: Y
The archive configuration file myarchive_1.cfg is saved.
Related commands archive configuration interval
archive configuration location
archive configuration max
display archive configuration
archive configuration interval Use archive configuration interval to enable automatic running-configuration archiving and set the archiving interval.
Use undo archive configuration interval to disable automatic running-configuration archiving.
Syntax archive configuration interval interval
undo archive configuration interval

2
Default The automatic running-configuration archiving feature is disabled.
Views System view
Predefined user roles network-admin
Parameters interval: Specifies the interval for automatically saving the running configuration. The value range is 10 to 525600, in minutes.
Usage guidelines Automatic configuration archiving enables the system to periodically save the running configuration to the archive directory. After the system finishes an automatic archive, it resets the archiving interval timer.
Before enabling automatic configuration archiving, you must use the archive configuration location command to specify a directory and a name prefix for the configuration archives.
Examples # Set the system to archive the running configuration every 60 minutes. <Sysname> system-view
[Sysname] archive configuration interval 60
Archive file will be saved every 60 minutes.
Related commands archive configuration
archive configuration location
archive configuration max
display archive configuration
archive configuration location Use archive configuration location to specify a directory and file name prefix for archiving the running configuration.
Use undo archive configuration location to restore the default.
Syntax archive configuration location directory filename-prefix filename-prefix
undo archive configuration location
Default No directory or file name prefix is specified on the device for archiving the running configuration.
Views System view
Predefined user roles network-admin

3
Parameters directory: Specifies the archive directory, a string of 1 to 63 characters. The value for this argument must take the format of storage-medium-name:/folder-name. The directory must already exist on the device.
filename-prefix: Specifies a file name prefix for configuration archives, a case-insensitive string of 1 to 30 characters. Valid characters are letters, digits, underscores (_), and hyphens (-).
Usage guidelines Before archiving the running configuration, either manually or automatically, you must specify a directory and file name prefix for configuration archives.
The configuration archives are named in the format of prefix_serial number.cfg, for example, archive_1.cfg and archive_2.cfg. The serial number is automatically assigned from 1 to 1000, increasing by 1. After the serial number reaches 1000, it restarts from 1.
If you change the file directory or file name prefix, the following events occur: • The old configuration archives change to common configuration files. • The configuration archive counter is reset. The serial number for new configuration archives
starts at 1. • The display archive configuration command no longer displays the old configuration
archives.
The configuration archive counter does not restart when you delete configuration archives from the archive directory. However, if the device reboots after all configuration archives have been deleted, the configuration archive counter restarts. The serial number for new configuration archives starts at 1.
The undo archive configuration location command removes the local configuration archive directory and file name prefix settings. The command also performs the following operations: • Disables the configuration archive feature (both manual and automatic methods). • Restores the default settings of the archive configuration interval and archive
configuration max commands.
• Clears the configuration archive information displayed by using the display archive configuration command.
Examples # Set the configuration archive directory as flash:/archive and the archive file name prefix as my_archive. <Sysname> mkdir flash:/archive
Creating directory flash:/archive... Done.
<Sysname> system-view
[Sysname] archive configuration location flash:/archive filename-prefix my_archive
Related commands archive configuration
archive configuration interval
archive configuration max
display archive configuration
archive configuration max Use archive configuration max to set the maximum number of configuration archives.

4
Use undo archive configuration max to restore the default.
Syntax archive configuration max file-number
undo archive configuration max
Default The maximum number is 5.
Views System view
Predefined user roles network-admin
Parameters file-number: Specifies the maximum number of configuration archives. The value range is 1 to 10. Adjust the setting depending on the amount of storage space available.
Usage guidelines Before you execute this command, use the archive configuration location command to specify a configuration archive directory and archive file name prefix on the device.
After the maximum number of configuration archives is reached, the system deletes the oldest archive for the new archive.
Changing the limit setting to a lower value does not cause immediate deletion of excess archives. Instead, the configuration archive feature deletes the oldest n files when a new archive is manually or automatically saved, where n = current archive count – new archive limit + 1. For example, seven configuration archives have been saved before the archive limit is set to four. When saving a new configuration archive, the system first deletes the oldest four (7 – 4 + 1) archives.
If you execute the undo archive configuration location command, the default archive limit is restored.
Examples # Set the maximum number of configuration archives to 10. <Sysname> system-view
[Sysname] archive configuration max 10
Related commands archive configuration
archive configuration location
archive configuration interval
display archive configuration
backup startup-configuration Use backup startup-configuration to back up the main next-startup configuration file to a TFTP server.
Syntax backup startup-configuration to { ipv4-server | ipv6 ipv6-server } [ dest-filename ]

5
Views User view
Predefined user roles network-admin
Parameters ipv4-server: Specifies a TFTP server by its IPv4 address or host name. The host name is a case-insensitive string of 1 to 253 characters. Valid characters include letters, digits, hyphens (-), underscores (_), and dots (.).
ipv6 ipv6-server: Specifies a TFTP server by its IPv6 address or host name. The host name is a case-insensitive string of 1 to 253 characters. Valid characters include letters, digits, hyphens (-), underscores (_), and dots (.).
dest-filename: Specifies the name of the target file used for saving the file on the server. The file must be a .cfg file. The file name is a case-insensitive string of up to 255 characters. If you do not specify a target file name, the source file name is used.
Examples # Back up the main next-startup configuration file to the IPv4 TFTP server at 2.2.2.2 in the public network, and set the target file name to 192-168-1-26.cfg. <Sysname> backup startup-configuration to 2.2.2.2 192-168-1-26.cfg
Backing up the main startup configuration file to 2.2.2.2...
Done.
# Back up the main next-startup configuration file to the IPv6 TFTP server at 2001::2 in the public network, and set the target file name to 192-168-1-26.cfg. <Sysname> backup startup-configuration to ipv6 2001::2 192-168-1-26.cfg
Backing up the main startup configuration file to 2001::2...
Done.
Related commands restore startup-configuration
configuration encrypt Use configuration encrypt to enable configuration encryption.
Use undo configuration encrypt to disable configuration encryption.
Syntax configuration encrypt { private-key | public-key }
undo configuration encrypt
Default Configuration encryption is disabled.
Views System view
Predefined user roles network-admin
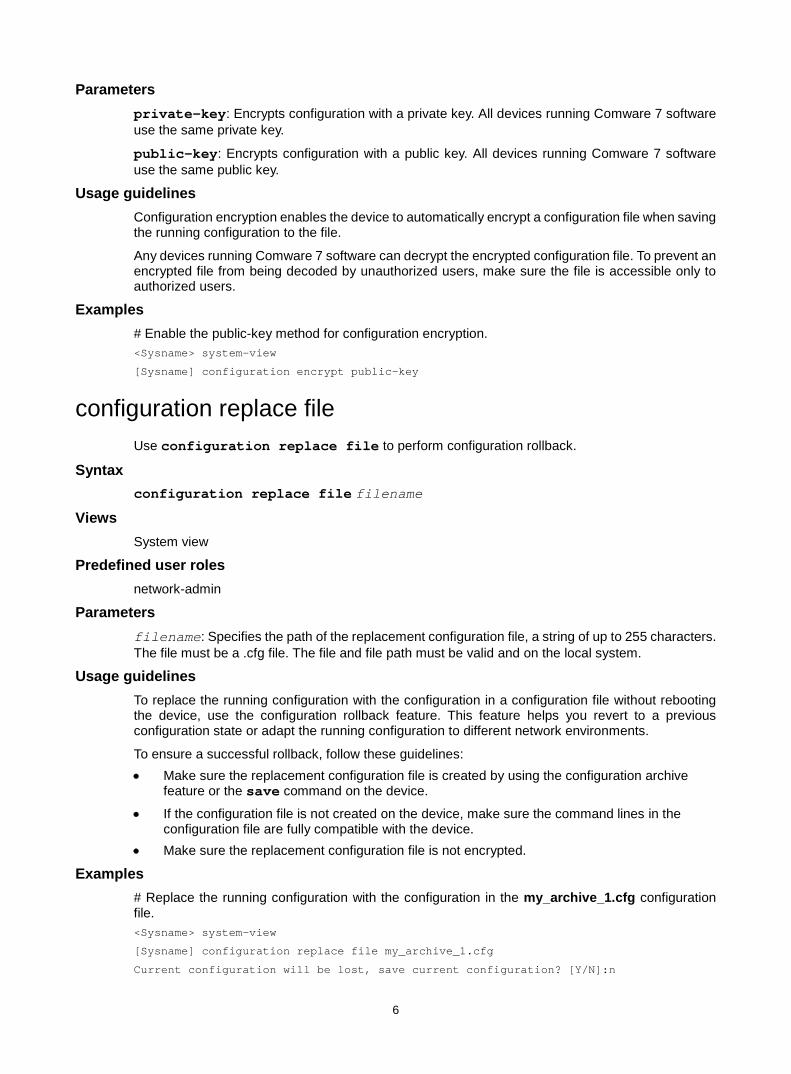
6
Parameters private-key: Encrypts configuration with a private key. All devices running Comware 7 software use the same private key.
public-key: Encrypts configuration with a public key. All devices running Comware 7 software use the same public key.
Usage guidelines Configuration encryption enables the device to automatically encrypt a configuration file when saving the running configuration to the file.
Any devices running Comware 7 software can decrypt the encrypted configuration file. To prevent an encrypted file from being decoded by unauthorized users, make sure the file is accessible only to authorized users.
Examples # Enable the public-key method for configuration encryption. <Sysname> system-view
[Sysname] configuration encrypt public-key
configuration replace file Use configuration replace file to perform configuration rollback.
Syntax configuration replace file filename
Views System view
Predefined user roles network-admin
Parameters filename: Specifies the path of the replacement configuration file, a string of up to 255 characters. The file must be a .cfg file. The file and file path must be valid and on the local system.
Usage guidelines To replace the running configuration with the configuration in a configuration file without rebooting the device, use the configuration rollback feature. This feature helps you revert to a previous configuration state or adapt the running configuration to different network environments.
To ensure a successful rollback, follow these guidelines: • Make sure the replacement configuration file is created by using the configuration archive
feature or the save command on the device.
• If the configuration file is not created on the device, make sure the command lines in the configuration file are fully compatible with the device.
• Make sure the replacement configuration file is not encrypted.
Examples # Replace the running configuration with the configuration in the my_archive_1.cfg configuration file. <Sysname> system-view
[Sysname] configuration replace file my_archive_1.cfg
Current configuration will be lost, save current configuration? [Y/N]:n

7
Now replacing the current configuration. Please wait...
Succeeded in replacing current configuration with the file my_archive_1.cfg.
display archive configuration Use display archive configuration to display configuration archive information.
Syntax display archive configuration
Views Any view
Predefined user roles network-admin
network-operator
Examples # Display information about the configuration archives. <Sysname> display archive configuration
Location: flash:/archive
Filename prefix: my_archive
Archive interval in minutes: 120
Maximum number of archive files: 10
Saved archive files:
No. TimeStamp FileName
1 Wed Dec 15 14:20:18 2010 my_archive_1.cfg
2 Wed Dec 15 14:33:10 2010 my_archive_2.cfg
# 3 Wed Dec 15 14:49:37 2010 my_archive_3.cfg
'#’ indicates the most recent archive file.
Next archive file to be saved: my_archive_4.cfg
Table 1 Command output
Field Description
Location Absolute path of the directory for saving running-configuration archives.
Filename prefix File name prefix for configuration archives.
Archive interval in minutes
Interval (in minutes) for the system to automatically archive the running configuration. If automatic configuration saving is disabled, this field is not available.
Maximum number of archive files Maximum number of configuration archives that can be saved on the device.
Saved archive files Configuration archives that have been saved.
No. Number of a configuration archive.
TimeStamp Time when the configuration archive was created.
Related commands archive configuration

8
archive configuration interval
archive configuration location
archive configuration max
display current-configuration Use display current-configuration to display the running configuration.
Syntax display current-configuration [ configuration [ module-name ] | interface [ interface-type [ interface-number ] ] ]
Views Any view
Predefined user roles network-admin
network-operator
Parameters configuration [ module-name ]: Displays the feature configuration. The module-name argument specifies a feature module. If you do not specify a feature module, the command displays all feature settings you have made.
interface [ interface-type [ interface-number ] ]: Displays interface configuration, where the interface-type argument represents the interface type and the interface-number argument represents the interface number. If you do not specify the interface-type interface-number arguments, the command displays the running configuration for all interfaces. If you specify only the interface-type argument, the command displays the running configuration for all interfaces of this type.
Usage guidelines Use this command to verify the configuration you have made.
If the system has automatically changed the setting you have made for a parameter, this command displays the effective setting instead of the configured one. An automatic change typically occurs because of system restrictions.
This command does not display parameters that are using the default settings.
Examples # Display local user configuration. <Sysname> display current-configuration configuration local-user
#
local-user ftp class manage
password hash $h$6$D5A6pqcGpnZXxFUO$OJqnqffG7m1wTH3C6v+FBCjZZBzqgJjTZlbATl1dnKNlYwFMJcWDMbDn8HD1j4XzuKggDp2LrP40kGIOvQGYhQ==
service-type ftp
authorization-attribute user-role network-operator
#
local-user root class manage

9
password hash $h$6$GcTZyXO04qmom21z$GjeAeDMjP/xtknMLf9NHUNIvebNYR3tkd5aWS6sKbkFh/ECFJZOjh2FVUI0GW7u44fNK6Ke7ANE7dhhAFcytUQ==
service-type ssh telnet terminal
authorization-attribute user-role network-admin
#
return
# Display Ethernet interface configuration. <Sysname> display current-configuration interface gigabitethernet
#
interface GigabitEthernet1/0/1
#
return
display current-configuration diff Use display current-configuration diff to display the differences that the running configuration has as compared with the next-startup configuration.
Syntax display current-configuration diff
Views Any view
Predefined user roles network-admin
network-operator
Usage guidelines This command searches for the next-startup configuration in the following order: 1. The .cfg main next-startup configuration file. 2. The .cfg backup next-startup configuration file if the .cfg main next-startup configuration file is
unavailable.
If both configuration files are unavailable, the system displays a message indicating that no next-startup configuration files exist.
Examples # Display the differences that the running configuration has as compared with the next-startup configuration. <Sysname> display current-configuration diff
--- Startup configuration
+++ Current configuration
@@ -5,7 +5,7 @@
#
sysname Sysname
#
-alias dhc display history-command
+alias dh display hotkey
<Sysname>

10
Table 2 Command output
Field Description
- - - A +++ B
• A represents the source configuration for comparison, which can be Startup configuration, Current configuration, or the name of the source configuration file with its directory information.
• B represents the target configuration for comparison, which can be Current configuration, Startup configuration, or the name of the target configuration file with its directory information.
In this example, the startup configuration and the current configuration are the source and target, respectively.
@@ -linenumber1,number1 +linenumber2,number2 @@
Location information for identifying the command line differences: • -linenumber1,number1—Source configuration section that contains
differences. The linenumber1 argument represents the start line of the section. The number1 argument represents the number of lines between the start line and the end line of the section.
• +linenumber2,number2—Target configuration section that contains differences. The linenumber2 argument represents the start line of the section. The number2 argument represents the number of lines between the start line and the end line of the section.
cmd1 - cmd2 + cmd3 cmd4
Displays command differences. • cmd1 and cmd4—Command lines are contained in both source and
target configurations if they are not prefixed with a minus (-) or plus (+) sign. They provide a context for locating command line differences.
• - cmd2—Command lines are prefixed with a minus sign if they are contained in the source configuration but not in the target configuration.
• + cmd3—Command lines are prefixed with a plus sign if they are contained in the target configuration but not in the source configuration.
In this example, the sample output shows that the alias dhc display history-command command is contained only in the source configuration, and the alias dh display hotkey command is contained only in the target configuration.
Related commands display current-configuration
display diff
display saved-configuration
display default-configuration Use display default-configuration to display the factory defaults.
Syntax display default-configuration
Views Any view
Predefined user roles network-admin
network-operator

11
Usage guidelines Factory defaults are custom basic settings that came with the device. Factory defaults vary by device models and might differ from the initial default settings for the commands.
The device starts up with the factory defaults if no next-startup configuration files are available.
Examples # Display the factory defaults. <Sysname> display default-configuration
display diff Use display diff to display differences between configurations.
Syntax display diff configfile file-name-s { configfile file-name-d | current-configuration | startup-configuration }
display diff current-configuration { configfile file-name-d | startup-configuration }
display diff startup-configuration { configfile file-name-d | current-configuration }
Views Any view
Predefined user roles network-admin
network-operator
Parameters configfile file-name-s: Specifies the source configuration file for comparison.
configfile file-name-d: Specifies the target configuration file for comparison.
current-configuration: Specifies the running configuration. In the display diff current-configuration command, this keyword specifies the source configuration for comparison. In the display diff configfile file-name-s and display diff startup-configuration commands, this keyword specifies the target configuration.
startup-configuration: Specifies the next-startup configuration. In the display diff startup-configuration command, this keyword specifies the source configuration for comparison. In the display diff configfile file-name-s and display diff current-configuration commands, this keyword specifies the target configuration.
Usage guidelines If you specify the startup-configuration keyword, the system searches for the next-startup configuration in the following order: 1. The .cfg main next-startup configuration file. 2. The .cfg backup next-startup configuration file if the .cfg main next-startup configuration file is
unavailable.
If both configuration files are unavailable, the system displays a message indicating that no next-startup configuration files exist.

12
Examples # Display the differences between startup.cfg and test.cfg. <Sysname> display diff configfile startup.cfg configfile test.cfg
--- flash:/startup.cfg
+++ flash:/test.cfg
@@ -5,7 +5,7 @@
#
sysname Sysname
#
-alias dhc display history-command
+alias dh display hotkey
<Sysname>
The output shows that the alias dhc display history-command command is contained only in startup.cfg, and the alias dh display hotkey command is contained only in test.cfg.
# Display the differences between the running configuration and the next-startup configuration. <Sysname> display diff current-configuration startup-configuration
--- Current configuration
+++ Startup configuration
@@ -5,7 +5,7 @@
#
sysname Sysname
#
-alias dhc display history-command
+alias dh display hotkey
<Sysname>
The output shows that the alias dhc display history-command command is contained only in the running configuration, and the alias dh display hotkey command is contained only in the next-startup configuration.
For the command output description, see Table 2.
Related commands display current-configuration
display current-configuration diff
display saved-configuration
display saved-configuration Use display saved-configuration to display the contents of the configuration file for the next system startup.
Syntax display saved-configuration
Views Any view
Predefined user roles network-admin
network-operator

13
Usage guidelines Use this command to verify that important settings have been saved to the configuration file for the next system startup.
This command selects the configuration file to display in the following order: 1. If the main startup configuration file is available, this command displays the contents of the main
startup configuration file. 2. If only the backup startup configuration file is available, this command displays the contents of
the backup file. 3. If both the main and backup startup configuration files are not available, this command does not
display anything.
Examples # Display the contents of the configuration file for the next system startup. <Sysname> display saved-configuration
#
version 7.1.070, Release 1201
#
sysname Sysname
#
ftp server enable
#
telnet server enable
#
domain default enable system
#
vlan 1
#
domain system
#
---- More ----
Related commands reset saved-configuration
save
display startup Use display startup to display the names of the current startup configuration file and the next-startup configuration files.
Syntax display startup
Views Any view
Predefined user roles network-admin
network-operator

14
Examples # Display names of the startup configuration files. <Sysname> display startup
Current startup saved-configuration file: flash:/startup.cfg(*)
Next main startup saved-configuration file: flash:/startup.cfg
Next backup startup saved-configuration file: NULL
Table 3 Command output
Field Description
Current startup saved-configuration file Configuration file that the device has started up with.
Next main startup saved-configuration file Primary configuration file to be used at the next startup.
Next backup startup saved-configuration file Backup configuration file to be used at the next startup.
Related commands startup saved-configuration
display this Use display this to display the running configuration in the current view.
Syntax display this
Views Any view
Predefined user roles network-admin
network-operator
Usage guidelines Use this command to verify the configuration you have made in a certain view.
This command does not display parameters that are using the default settings.
Some parameters can be successfully set even if their dependent features are not enabled. For these parameters, this command displays their settings after the dependent features are enabled.
This command can be executed in any user line view to display the running configuration of all user lines.
Examples # Display the running configuration on GigabitEthernet 1/0/1. <Sysname> system-view
[Sysname] interface gigabitethernet 1/0/1
[Sysname-GigabitEthernet1/0/1] display this
#
interface GigabitEthernet1/0/1
#
return

15
reset saved-configuration Use reset saved-configuration to delete a next-startup configuration file.
Syntax reset saved-configuration [ backup | main ]
Views User view
Predefined user roles network-admin
Parameters backup: Specifies the backup next-startup configuration file.
main: Specifies the main next-startup configuration file.
Usage guidelines
CAUTION: This command permanently deletes the specified next-startup configuration file from the device.
You can delete the main file, the backup file, or both.
To delete a file that is set as both main and backup next-startup configuration files, you must execute both the reset saved-configuration backup command and the reset saved-configuration main command. Using only one of the commands sets the target file attribute to NULL instead of deleting the file.
If you do not specify a configuration file attribute, the reset saved-configuration command deletes the main next-startup configuration file.
Examples # Delete the main next-startup configuration file. <Sysname> reset saved-configuration
The saved configuration file will be erased. Are you sure? [Y/N]:y
Configuration file in flash: is being cleared.
Please wait ...
Configuration file is cleared.
Related commands display saved-configuration
restore startup-configuration Use restore startup-configuration to download a configuration file from a TFTP server and specify it as the main next-startup configuration file.
Syntax restore startup-configuration from { ipv4-server | ipv6 ipv6-server } src-filename
Views User view

16
Predefined user roles network-admin
Parameters ipv4-server: Specifies a TFTP server by its IPv4 address or host name. The host name is a case-insensitive string of 1 to 253 characters. Valid characters include letters, digits, hyphens (-), underscores (_), and dots (.).
ipv6 ipv6-server: Specifies a TFTP server by its IPv6 address or host name. The host name is a case-insensitive string of 1 to 253 characters. Valid characters include letters, digits, hyphens (-), underscores (_), and dots (.).
src-filename: Specifies the name of the configuration file to be downloaded. The file must be a .cfg file. The file name is a case-insensitive string of up to 255 characters.
Usage guidelines Before restoring the configuration file for the next startup, make sure the following requirements are met: • The server is reachable. • The server is enabled with TFTP service. • You have read and write permissions to the server.
Examples # Download test.cfg from the IPv4 TFTP server at 2.2.2.2 in the public network, and specify the file as the main next-startup configuration file. <Sysname> restore startup-configuration from 2.2.2.2 test.cfg
Restoring the next startup-configuration file from 2.2.2.2...
Done.
# Download test.cfg from the IPv6 TFTP server at 2001::2 in the public network, and specify the file as the main next-startup configuration file. <Sysname> restore startup-configuration from ipv6 2001::2 test.cfg
Restoring the next startup-configuration file from 2001::2...
Done.
Related commands backup startup-configuration
save Use save file-url to save the running configuration to a configuration file, without specifying the file as a next-startup configuration file.
Use save [ safely ] [ backup | main ] [ force ] [ changed ] to save the running configuration to a file in the root directory of the storage medium. This command automatically specifies the file as a next-startup configuration file.
Syntax save file-url
save [ safely ] [ backup | main ] [ force ] [ changed ]
Views Any view

17
Predefined user roles network-admin
Parameters file-url: Specifies a file path, a string of up to 255 characters. The file must be a .cfg file.
safely: Saves the configuration file in safe mode. If you do not specify this keyword, the device saves the configuration file in fast mode.
backup: Saves the running configuration to a configuration file, and specifies the file as the backup next-startup configuration file. If you do not specify this keyword or the main keyword, the command specifies the saved file as the main next-startup configuration file.
main: Saves the running configuration to a configuration file, and specifies the file as the main next-startup configuration file. If you do not specify this keyword or the backup keyword, the command specifies the saved file as the main next-startup configuration file.
force: Saves the running configuration to the existing next-startup configuration file without prompting for confirmation. If you do not specify this keyword, the system prompts you to confirm the operation. If you do not confirm the operation within 30 seconds, the system automatically aborts the operation. If you enter Y within the time limit, you can continue the save process and change the target file name during the process.
changed: Overwrites the target configuration file with the running configuration if an inconsistency is detected between the settings in the configuration file and the running configuration. The save command does not take effect if no inconsistency is detected. If you do not specify this keyword, the save command always overwrites the target configuration file with the running configuration.
Usage guidelines If the file specified for this command does not exist, the system creates the file before saving the configuration. If the file already exists, the system prompts you to confirm whether to overwrite the file. If you choose to not overwrite the file, the system cancels the save operation.
This command saves the running configuration to an .mdb binary file as well as a .cfg text file. The two files use the same file name. An .mdb file takes less time to load than a .cfg file.
When you use the save [ safely ] [ backup | main ] [ force ] [ changed ] command, follow these guidelines: • In safe mode, the system saves configuration in a temporary file and starts overwriting the
target next-startup configuration file after the save operation is complete. If a reboot, power failure, or out of memory or storage space event occurs during the save operation, the next-startup configuration file is retained.
• In fast mode, the device directly overwrites the target next-startup configuration file. If a reboot, power failure, or out of memory or storage space event occurs during this process, all settings in the next-startup configuration file are lost.
Safe mode is slower than fast mode, but more secure. As a best practice, specify the safely keyword for reliable configuration saving.
Examples # Save the running configuration to backup.cfg, without specifying the file as a next-startup configuration file. <Sysname> save backup.cfg
The current configuration will be saved to flash:/backup.cfg. Continue? [Y/N]:y
Now saving current configuration to the device.
Saving configuration flash:/backup.cfg. Please wait...
Configuration is saved to device successfully.

18
# Save the running configuration to the main next-startup configuration file without any confirmation required. <Sysname> save force
Validating file. Please wait...
Saved the current configuration to mainboard device successfully.
# Save the running configuration to a file in the root directory of the default storage medium, and specify the file as the main next-startup configuration file. <Sysname> save
The current configuration will be written to the device. Are you sure? [Y/N]:y
Please input the file name(*.cfg)[flash:/backup.cfg]
(To leave the existing filename unchanged, press the enter key):test.cfg
Validating file. Please wait...
Saved the current configuration to mainboard device successfully.
Related commands display current-configuration
display saved-configuration
startup saved-configuration Use startup saved-configuration to specify a file as a next-startup configuration file.
Use undo startup saved-configuration to configure the system to start up with the factory defaults at the next startup.
Syntax startup saved-configuration cfgfile [ backup | main ]
undo startup saved-configuration
Default No next-startup configuration files are specified.
Views User view
Predefined user roles network-admin
Parameters cfgfile: Specifies the path of a configuration file, a string of up to 255 characters. The file must be a .cfg file. The file path can include only the file name, or the storage medium information and file name. If the file is not on the default storage medium, you must specify the file name with storage medium information.
backup: Specifies the configuration file as the backup next-startup configuration file.
main: Specifies the configuration file as the main next-startup configuration file. This is the primary configuration file that the device attempts to load at startup. If the loading attempt fails, the device tries the backup next-startup configuration file.
Usage guidelines If you do not specify the backup or main keyword, the startup saved-configuration command specifies the main next-startup configuration file.
As a best practice, specify different files as the main and backup next-startup configuration files.

19
The undo startup saved-configuration command changes the file attribute of the main and backup next-startup configuration files to NULL. However, the command does not delete the two configuration files.
You can also specify a configuration file as a next startup file when you use the save command to save the running configuration.
Examples # Specify the main next-startup configuration file. <Sysname> startup saved-configuration testcfg.cfg
Please wait ....... Done.
Related commands display startup

i
Contents
Software upgrade commands ········································································ 1
boot-loader file ··········································································································································· 1 bootrom update ·········································································································································· 2 display boot-loader ····································································································································· 4

1
Software upgrade commands boot-loader file
Use boot-loader file to specify startup image files.
Syntax boot-loader file boot filename system filename [ feature filename&<1-30> ] { backup | main }
boot-loader file ipe-filename { backup | main }
Views User view
Predefined user roles network-admin
Parameters boot: Specifies a boot image file.
system: Specifies a system image file.
feature: Specifies a space-separated list of up to 30 feature image files.
filename: Specifies a .bin file in the filesystemname/filename.bin format. The file must be stored in the root directory of a file system on the device. Excluding the file system location section (if any), the value string can have a maximum of 63 characters. For more information about specifying a file, see file system management in Fundamentals Configuration Guide.
ipe-filename: Specifies an .ipe image package file in the filesystemname/filename.ipe format. The file must be stored in the root directory of a file system on the device. Excluding the file system location section (if any), the value string can have a maximum of 63 characters. For more information about specifying a file, see file system management in Fundamentals Configuration Guide.
backup: Specifies the files as backup startup image files. Backup images are used only when main images are not available.
main: Specifies the files as main startup image files. The device always first attempts to start up with main startup files.
Usage guidelines The boot-loader file command overwrites the entire startup image list. To add new startup feature images, specify all feature image files in the old startup image list, including feature image files. The new startup image list will contain only the feature image files that are specified in the command.
To load the specified startup software images, you must reboot the system.
Examples # Specify flash:/all.ipe as the main startup image file. <Sysname> boot-loader file flash:/all.ipe main
Verifying the file flash:/all.ipe on the device.............Done.
H3C WA6330 images in IPE:
boot.bin
system.bin

2
This command will set the main startup software images. Continue? [Y/N]:Y
Add images to the device.
File flash:/boot.bin already exists on the device.
File flash:/system.bin already exists on the device.
Overwrite or rename the new file? [Yes/No/Rename]: R
Please input the file name (*.bin)[boot_1.bin]
(To use the recommended file name, press the Enter key):
Decompressing file boot.bin to flash:/boot_1.bin........................Done.
Please input the file name (*.bin)[system_1.bin]
(To use the recommended file name, press the Enter key):system_backup.bin
Decompressing file system.bin to flash:/system_backup.bin...........................Done.
Verifying the file flash:/boot_1.bin on the device...Done.
Verifying the file flash:/system_backup.bin on the device.............Done.
The images that have passed all examinations will be used as the main startup software images at the next reboot on the device..
# Specify flash:/boot.bin and flash:/system.bin as the main startup boot and system image files. <Sysname> boot-loader file boot flash:/boot.bin system flash:/system.bin main
This command will set the main startup software images. Please do not reboot the device during the upgrade. Continue? [Y/N]:
Verifying the file flash:/boot.bin on the device....Done.
Verifying the file flash:/system.bin on the device..............................Done.
The images that have passed all examinations will be used as the main startup software images at the next reboot on the device.
Related commands display boot-loader
bootrom update Use bootrom update to load the BootWare image from a file system to the Normal BootWare area.
Syntax bootrom update file file [ all | part ]
The following compatibility matrix shows the support of hardware platforms for this command:
Hardware series Model Command compatibility
WA6600 series
WA6638 WA6638i WA6636 WA6630X WA6628 WA6628X WA6628E-T WA6622 WA6620 WA6620X
No
WA6300 series WA6338 Yes

3
WA6338-HI WA6338-LI WA6330 WA6330-LI WA6322 WA6322H WA6322H-HI WA6322H-LI WA6320 WA6320-C WA6320-D WA6320-SI WA6320H WA6320H-LI WA6320H-XEPON
WAP922 series WAP922E Yes
WAP923 series WAP923 Yes
Views User view
Predefined user roles network-admin
Parameters file file: Specifies the file that contains the BootWare image. The file argument represents the file name, a string of 1 to 63 characters.
all: Loads the entire BootWare image, including the basic segment and the extended segment. If you do not specify the all or part keyword, this command restores the entire BootWare image.
part: Loads the extended BootWare image section.
Usage guidelines BootWare images are contained in the .bin Comware boot image file. You can specify a Comware boot image file in this command to upgrade the BootWares in the system before you upgrade the Comware images. If you do not upgrade BootWares before upgrading Comware images, the system automatically upgrades BootWares as necessary when loading Comware images.
The new BootWare images take effect after you reboot the device.
Examples # Use the file a.bin in the root directory of the flash memory to upgrade the BootWare image. <Sysname> bootrom update file flash:/a.bin
This command will update the Boot ROM file, Continue? [Y/N]:y
Now updating the Boot ROM, please wait................Done.
Related commands boot-loader file
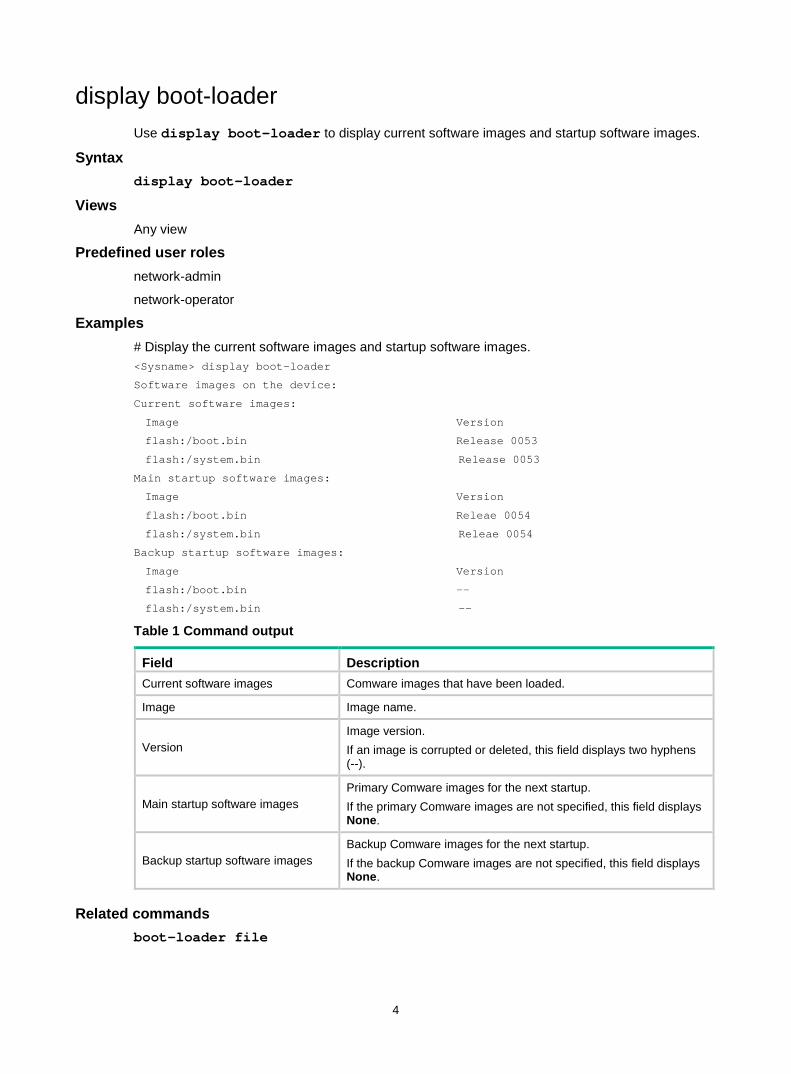
4
display boot-loader Use display boot-loader to display current software images and startup software images.
Syntax display boot-loader
Views Any view
Predefined user roles network-admin
network-operator
Examples # Display the current software images and startup software images. <Sysname> display boot-loader
Software images on the device:
Current software images:
Image Version
flash:/boot.bin Release 0053
flash:/system.bin Release 0053
Main startup software images:
Image Version
flash:/boot.bin Releae 0054
flash:/system.bin Releae 0054
Backup startup software images:
Image Version
flash:/boot.bin --
flash:/system.bin --
Table 1 Command output
Field Description Current software images Comware images that have been loaded.
Image Image name.
Version Image version. If an image is corrupted or deleted, this field displays two hyphens (--).
Main startup software images Primary Comware images for the next startup. If the primary Comware images are not specified, this field displays None.
Backup startup software images Backup Comware images for the next startup. If the backup Comware images are not specified, this field displays None.
Related commands boot-loader file

i
Contents
Tcl commands ······························································································· 1
cli ································································································································································ 1 tclquit ·························································································································································· 1 tclsh ···························································································································································· 2

1
Tcl commands cli
Use cli to enable a Comware command to be executed in Tcl configuration view when it conflicts with a Tcl command.
Syntax cli command
Views Tcl configuration view
Predefined user roles network-admin
Parameters command: Specifies the commands to be executed. They must be complete command lines.
Usage guidelines In Tcl configuration view, if a Comware command conflicts with a Tcl command, the Tcl command will be executed. To execute the Comware command when a conflict occurs, execute the cli command.
Examples # Perform the following steps to execute a Comware command that conflicts with a Tcl command in Tcl configuration view. 1. Execute a Comware command in Tcl configuration view. The output shows that the Comware
command cannot be executed because it conflicts with a Tcl command. <Sysname> tclsh
<Sysname-tcl> system-view
[Sysname-tcl] user-interface vty 0 63
[Sysname-tcl-line-vty0-63] set authentication password simple password1
wrong # args: should be "set varName ?newValue?"
2. Use the cli command to execute the Comware command again. [Sysname-tcl-line-vty0-63] cli set authentication password simple password1
# Execute multiple Comware commands in one operation.
Method 1: [Sysname-tcl] cli "line console 0 ; authentication-mode none"
[Sysname-tcl-line-console0]
Method 2: [Sysname-tcl] cli line console 0 ; cli authentication-mode none
[Sysname-tcl-line-console0]
tclquit Use tclquit to return from Tcl configuration view to user view.

2
Syntax tclquit
Views Tcl configuration view
Predefined user roles network-admin
Usage guidelines To return from Tcl configuration view to user view, you can also use the quit command.
To return to the upper-level view after you execute Comware commands to enter system view or a Comware feature view, use the quit command.
Examples # Return from Tcl configuration view to user view. <Sysname-tcl> tclquit
<Sysname>
Related commands tclsh
tclsh Use tclsh to enter Tcl configuration view from user view.
Syntax tclsh
Views User view
Predefined user roles network-admin
Usage guidelines In Tcl configuration view, you can execute the following commands: • All Tcl 8.5 commands. • Comware commands. The Tcl configuration view is equivalent to the user view. You can use
Comware commands in Tcl configuration view in the same way they are used in user view.
Examples # Enter Tcl configuration view from user view. <Sysname> tclsh
<Sysname-tcl>
Related commands tclquit