
Getting Started with Ubuntu 13.10
151
Transcript of Getting Started with Ubuntu 13.10

Copyright © – by e Ubuntu Manual Team. Some rights reserved.cba
is work is licensed under the Creative Commons Aribution–ShareAlike . License. To view a copy of this license, see Appendix A, visithttp://creativecommons.org/licenses/by-sa/./, or send a leer to CreativeCommons, Second Street, Suite , San Francisco, California, ,USA.
Geing Started with Ubuntu . can be downloaded for free from http://ubuntu-manual.org/ or purchased from http://ubuntu-manual.org/buy/gswu/en_US. A printed copy of this book can be ordered for the priceof printing and delivery. We permit and even encourage you to distribute acopy of this book to colleagues, friends, family, and anyone else who mightbe interested.
http://ubuntu-manual.org
Revision number: Revision date: -- :: -

Contents
Prologue Welcome Ubuntu Philosophy A brief history of Ubuntu Is Ubuntu right for you? Contact details About the team Conventions used in this book
Installation Geing Ubuntu Trying out Ubuntu Installing Ubuntu—Geing started Finishing Installation
e Ubuntu Desktop Understanding the Ubuntu desktop Unity e Launcher e Dash Workspaces Managing windows Browsing files on your computer Files file manager Searching for files and folders on your computer Customizing your desktop Accessibility Session options Geing help
Working with Ubuntu All the applications you need Geing online Browsing the web Reading and composing email Using instant messaging Viewing and editing photos Watching videos and movies Listening to audio and music Burning s and s Working with documents, spreadsheets, and presentations Ubuntu One
Hardware Using your devices Hardware identification Displays Connecting and using your printer
.
Sound Using a webcam Scanning text and images Keyboard and mouse Other devices
Soware Management Soware management in Ubuntu Using the Ubuntu Soware Center Managing additional soware Manual soware installation Updates and upgrades
Advanced Topics Ubuntu for advanced users Introduction to the terminal Ubuntu file system structure Securing Ubuntu Why Ubuntu is safe Basic security concepts Users and groups System updates Firewall Encryption Running Windows Programs on Ubuntu
Troubleshooting Resolving problems Troubleshooting guide Geing more help
Learning More What else can I do with Ubuntu? Open source soware Distribution families Choosing amongst Ubuntu and its derivatives Finding additional help and support e Ubuntu community Contributing
A License Creative Commons Aribution–ShareAlike . Legal Code Creative Commons Notice
Glossary
Credits
Index
Prologue
Welcome
Welcome to Geing Started with Ubuntu, an introductory guide wrien tohelp new users get started with Ubuntu.
Our goal is to cover the basics of Ubuntu (such as installation and work-ing with the desktop) as well as hardware and soware management, work-ing with the command line, and security. We designed this guide to besimple to follow, with step-by-step instructions and plenty of screenshots,allowing you to discover the potential of your new Ubuntu system.
Canonical releases new versions of Ubuntu every six months; everyfourth release is a so-called long-term support () version. Each Ubunturelease has a version number that consists of the year and month numberof the release, and an alliterative code name using an adjective and ananimal. Code names are in consecutive alphabetic order, allowing a quickdetermination of which release is newer. Ubuntu . (code-named SaucySalamander) is considered a regular release and is supported by Canonicalwith patches and upgrades for nine months. e most recent version isUbuntu . (Precise Pangolin), and has support for five years (until April). Whenever a new version of Ubuntu is released, we will incorporateupdates and changes into our guide, and make a new version available athttp://www.ubuntu-manual.org.
Geing Started with Ubuntu . is not intended to be a comprehensiveUbuntu instruction manual. It is a quick-start guide that will get you do-ing the things you need to do with your computer easily, without geingbogged down with technical details. Ubuntu . incorporates many newand improved features, including new icons (some dynamic), more appear-ance options, locally integrated menus, and smart scopes, to name just afew. With the help of this guide, it should not take long before new usersget used to the Unity desktop environment. Unity includes the Starter, theDash, the , indicators, and an on-screen display notification system(). All these features will be explained in this guide.
For more detailed information on any aspect of the Ubuntu desktop, seethe “Ubuntu Desktop Guide,” which can be obtained in any of the followingways:
‣ in the Dash, type help.‣ in the indicator area, click Session indicator ‣Ubuntu Help.‣ go to https://help.ubuntu.com, Ubuntu . ‣Ubuntu Desktop Help.
ere are also many excellent resources available on the Internet. Forexample, on https://help.ubuntu.com you will find documentation on in-stalling and using Ubuntu. At the Ubuntu Forums (http://ubuntuforums.org)and Ask Ubuntu (http://askubuntu.com), you will find answers to manyUbuntu-related questions. You can find more information about Ubuntu’s
online and system documentation in Chapter 8:Learning More.
If something isn’t covered in this manual, chances are you will find theinformation you are looking for in one of those locations. We will try ourbest to include links to more detailed help wherever we can.

.
Ubuntu Philosophy
e term “Ubuntu” is a traditional African concept originating from theBantu languages of southern Africa. It can be described as a way of con- People sometimes wonder how to pronounce
Ubuntu. Each u is pronounced the same as inthe word put except for the last u which ispronounced the same as in the word due.
necting with others—living in a global community where your actionsaffect all of humanity. Ubuntu is more than just an operating system: it isa community of people coming together voluntarily to collaborate on aninternational soware project that aims to deliver the best possible userexperience.
The Ubuntu Promise
‣ Ubuntu will always be free of charge, along with its regular enterprisereleases and security updates.
‣ Ubuntu comes with full commercial support from Canonical and hun-dreds of companies from across the world.
‣ Ubuntu provides the best translations and accessibility features that thefree soware community has to offer.
‣ Ubuntu’s core applications are all free and open source. We want you touse free and open source soware, improve it, and pass it on.
A brief history of Ubuntu
Ubuntu was conceived in by Mark Shuleworth, a successful SouthAfrican entrepreneur, and his company Canonical. Shuleworth recognized To learn more about Canonical, go to http://
www.canonical.com.the power of Linux and open source, but was also aware of weaknesses thatprevented mainstream use.
Shuleworth set out with clear intentions to address these weaknessesand create a system that was easy to use, completely free (see Chapter :Learning More for the complete definition of “free”), and could competewith other mainstream operating systems. With the Debian system as abase, Shuleworth began to build Ubuntu. Using his own funds at first, Debian is the Linux operating system that
Ubuntu is based upon. For more informationvisit http://www.debian.org/.
installation s were pressed and shipped worldwide at no cost to therecipients. Ubuntu spread quickly, its community grew rapidly, and soonUbuntu became the most popular Linux distribution available.
With more people working on the project than ever before, its corefeatures and hardware support continue to improve, and Ubuntu has gainedthe aention of large organizations worldwide.
While large organizations oen find it useful to pay for support services, For information on Ubuntu Server Edition, andhow you can use it in your company, visit http://www.ubuntu.com/business/server/overview.
Shuleworth has promised that the Ubuntu desktop operating systemwill always be free. Ubuntu is installed on an estimated % of the world’scomputers. is equates to tens of millions of users worldwide, and isgrowing each year. As there is no compulsory registration, the percentageof Ubuntu users should be treated as an estimate.
What is Linux?
Ubuntu is built on the foundation of Linux, which is a member of the Unixfamily. Unix is one of the oldest types of operating systems, and togetherwith Linux has provided reliability and security for professional applica-tions for almost half a century. Many servers around the world that storedata for popular websites (such as YouTube and Google) run some variantof Linux or Unix. e popular Android system for smartphones is a Linuxvariant; modern in-car computers usually run on Linux. Even the Mac

is based on Unix. e Linux kernel is best described as the core—almost thebrain—of the Ubuntu operating system.
e Linux kernel is the controller of the operating system; it is responsi-ble for allocating memory and processor time. It can also be thought of asthe program which manages any and all applications on the computer itself.
While modern graphical desktop environments have generally replacedearly command line interfaces, the command line can still be a quick andefficient way of performing many tasks. See Chapter : Advanced Topicsfor more information, and Chapter : e Ubuntu Desktop to learn moreabout and other desktop environments.
Linux was designed from the ground up with security and hardwarecompatibility in mind, and is currently one of the most popular Unix-basedoperating systems. One of the benefits of Linux is that it is incredibly flex-ible and can be configured to run on almost any device—from the smallestmicro-computers and cellphones to the largest super-computers. Unix wasentirely command line-based until graphical user interfaces (s) emergedin (in comparison, Apple came out with Mac ten years later, andMicroso released Windows . in ).
e early s were difficult to configure, clunky, and generally onlyused by seasoned computer programmers. In the past decade, however,graphical user interfaces have grown in usability, reliability, and appear-ance. Ubuntu is just one of many different Linux distributions. To learn more about Linux distributions, see
Chapter 8: Learning More.
Is Ubuntu right for you?
New users to Ubuntu may find that it takes some time to feel comfort-able when trying a new operating system. You will no doubt notice manysimilarities to both Microso Windows and Mac as well as some dif-ferences. Users coming from Mac are more likely to notice similaritiesdue to the fact that both Mac and Ubuntu originated from Unix. eUnity shell, which is the default in Ubuntu, is a completely new concept,which needs some exploring to get used to it. See Chapter : e UbuntuDesktop for more information about the Unity shell.
Before you decide whether or not Ubuntu is right for you, we suggestgiving yourself some time to grow accustomed to the way things are donein Ubuntu. You should expect to find that some things are different fromwhat you are used to. We also suggest taking the following into account:
Ubuntu is community based. at is, Ubuntu is developed, wrien, andmaintained by the community. Because of this, support is probablynot available at your local computer store. Fortunately, the Ubuntucommunity is here to help. ere are many articles, guides, and manualsavailable, as well as users on various Internet forums and Internet RelayChat () rooms that are willing to assist beginners. Additionally, nearthe end of this guide, we include a troubleshooting chapter: Chapter :Troubleshooting.
Many applications designed for Microso Windows or Mac will not runon Ubuntu. For the vast majority of everyday computing tasks, youwill find suitable alternative applications available in Ubuntu. However,many professional applications (such as the Adobe Creative Suite) arenot developed to work with Ubuntu. If you rely on commercial sowarethat is not compatible with Ubuntu, yet still want to give Ubuntu a try,you may want to consider dual-booting. Alternatively, some applications To learn more about dual-booting (running
Ubuntu side-by-side with another operatingsystem), see Chapter 1: Installation.
.
developed for Windows will work in Ubuntu with a program calledWine. For more information on Wine, see Chapter : Advanced Topics.
Many commercial games will not run on Ubuntu. If you are a heavy gamer,then Ubuntu may not be for you. Game developers usually design gamesfor the largest market. Since Ubuntu’s market share is not as substantialas Microso’s Windows or Apple’s Mac , fewer game developersallocate resources towards making their games compatible with Linux. If See Chapter 5: Software Management to learn
more about Ubuntu Software Center.you just enjoy a game every now and then, there are many high qualitygames that can be easily installed through the Ubuntu Soware Center.ere are also a lot of games available at http://store.steampowered.com/browse/linux/.
Contact details
Many people have contributed their time to this project. If you notice anyerrors or think we have le something out, feel free to contact us. We doeverything we can to make sure that this manual is up to date, informative,and professional. Our contact details are as follows:
‣ Website: http://www.ubuntu-manual.org/‣ Reader feedback: [email protected]‣ : #ubuntu-manual on irc.freenode.net‣ Bug Reports: https://bugs.launchpad.net/ubuntu-manual/+filebug‣ Mailing list: [email protected]
About the team
Our project is an open-source, volunteer effort to create and maintain qual-ity documentation for Ubuntu and its derivatives.
Want to help?
We are always looking for talented people to work with, and due to the sizeof the project we are fortunate to be able to cater to a wide range of skillsets:
‣ Authors and editors‣ Programmers (Python or TEX)‣ User interface designers‣ Icon and title page designers‣ Event organizers and ideas people‣ Testers‣ Web designers and developers‣ Translators and screenshoers‣ Bug reporters and triagers
To find out how you can get started helping, please visit http://ubuntu-manual.org/getinvolved.
Conventions used in this book
e following typographic conventions are used in this book:
‣ Buon names, menu items, and other elements are set in boldfacedtype.

‣ Menu sequences are sometimes typeset as File ‣ Save As…, which means,“Choose the File menu, then choose the Save As….”
‣ Monospaced type is used for text that you type into the computer, textthat the computer outputs (as in a terminal), and keyboard shortcuts.

1 Installation
Getting Ubuntu
Before you can get started with Ubuntu, you will need to obtain a copy of Many companies (such as Dell and System76)sell computers with Ubuntu preinstalled. Ifyou already have Ubuntu installed on yourcomputer, feel free to skip to Chapter 2: TheUbuntu Desktop.
the Ubuntu installation image for or . Some options for doing thisare outlined below.
Minimum system requirements
If you are unsure whether it will work on your computer, the Live is agreat way to test things out first. Below is a list of hardware specificationsthat your computer should meet as a minimum requirement.
‣ GHz x processor (Pentium or beer)‣ of system memory ()‣ of disk space (at least is recommended)‣ Video support capable of × resolution‣ Audio support‣ An Internet connection (highly recommended, but not required)
Downloading Ubuntu
e easiest and most common method for geing Ubuntu is to downloadthe Ubuntu image directly from http://www.ubuntu.com/download.Choose how you will install Ubuntu:
‣ Download and install‣ Try it from a or stick
Download and Install / Try it from a DVD or USB stick
For the Download and install, or Try it from a or stick options, selectwhether you require the -bit or -bit version (-bit is recommended formost users), then click “Start download.”
32-bit versus 64-bit
Ubuntu and its derivatives are available in two versions: -bit and -bit.is difference refers to the way computers process information. Comput- 32-bit and 64-bit are types of processor
architectures. Most new desktop computershave a 64-bit capable processor.
ers capable of running -bit soware are able to process more informationthan computers running -bit soware; however, -bit systems requiremore memory in order to do this. Nevertheless, these computers gain per-formance enhancements by running -bit soware.
‣ If your computer has a -bit processor, install the -bit version.‣ If your computer is older, a netbook, or you do not know the type of
processor in the computer, install the -bit version.
If your computer has a -bit processor, select the “-bit” option beforeyou click “Start download.”
.
Downloading Ubuntu as a torrent
When a new version of Ubuntu is released, the download servers can get Torrents are a way of sharing files and informa-tion around the Internet via peer-to-peer filesharing. A file with the .torrent extension ismade available to users, which is then openedwith a compatible program such as uTorrent,Deluge, or Transmission. These programsdownload parts of the file from other people allaround the world.
“clogged” as large numbers of people try to download or upgrade Ubuntuat the same time. If you are familiar with using torrents, you can downloadthe torrent file by clicking “Alternative downloads,” and then “BitTorrentdownload.” Downloading via torrent may improve your download speed,and will also help to spread Ubuntu to other users worldwide.
Burning the DVD image
Once your download is complete, you will be le with a file called ubuntu- While the 64-bit version of Ubuntu is referredto as the “AMD64” version, it will work on Intel,AMD, and other compatible 64-bit processors.
.-desktop-i.iso or similar (i here in the filename refers to the -bitversion. If you downloaded the -bit version, the filename contains amdinstead). is file is a image—a snapshot of the contents of a —which you will need to burn to a .
Creating a bootable USB drive
If your is able to boot from a stick, you may prefer to use a memory stick instead of burning a . Scroll down to “Burn your or create a drive,” select or stick, choose the you are usingto create the drive, and then click Show me how. If you select the “Stick” option, your installation will be running from the memory stick.In this case, references to Live , will refer to the memory stick.
Trying out Ubuntu
e Ubuntu and stick function not only as installation media, butalso allow you to test Ubuntu without making any permanent changes toyour computer by running the entire operating system from the or stick.
Your computer reads information from a at a much slower speed In some cases, your computer will not recognizethat the Ubuntu DVD or USB is present as itstarts up and will start your existing operatingsystem instead. To run Ubuntu from the LiveDVD or USB, we want the computer to lookfor information from the Live DVD or USBfirst. Changing your boot priority is usuallyhandled by BIOS settings; this is beyond thescope of this guide. If you need assistance withchanging the boot priority, see your computermanufacturer’s documentation for moreinformation.
than it can read information off of a hard drive. Running Ubuntu fromthe Live also occupies a large portion of your computer’s memory,which would usually be available for applications to access when Ubuntu isrunning from your hard drive. e Live / experience will thereforefeel slightly slower than it does when Ubuntu is actually installed on yourcomputer. Running Ubuntu from the / is a great way to test thingsout and allows you to try the default applications, browse the Internet, andget a general feel for the operating system. It’s also useful for checking thatyour computer hardware works properly in Ubuntu and that there are nomajor compatibility issues.
To try out Ubuntu using the Live / stick, insert the Ubuntu into your drive, or connect the drive and restart your computer.
Aer your computer finds the Live / stick, and a quick load-ing screen, you will be presented with the “Welcome” screen. Using yourmouse, select your language from the list on the le, then click the buonlabelled Try Ubuntu. Ubuntu will then start up, running directly from theLive / drive.
Once Ubuntu is up and running, you will see the default desktop. Wewill talk more about how to actually use Ubuntu in Chapter : e UbuntuDesktop, but for now, feel free to test things out. Open some applications,change seings and generally explore—any changes you make will not be
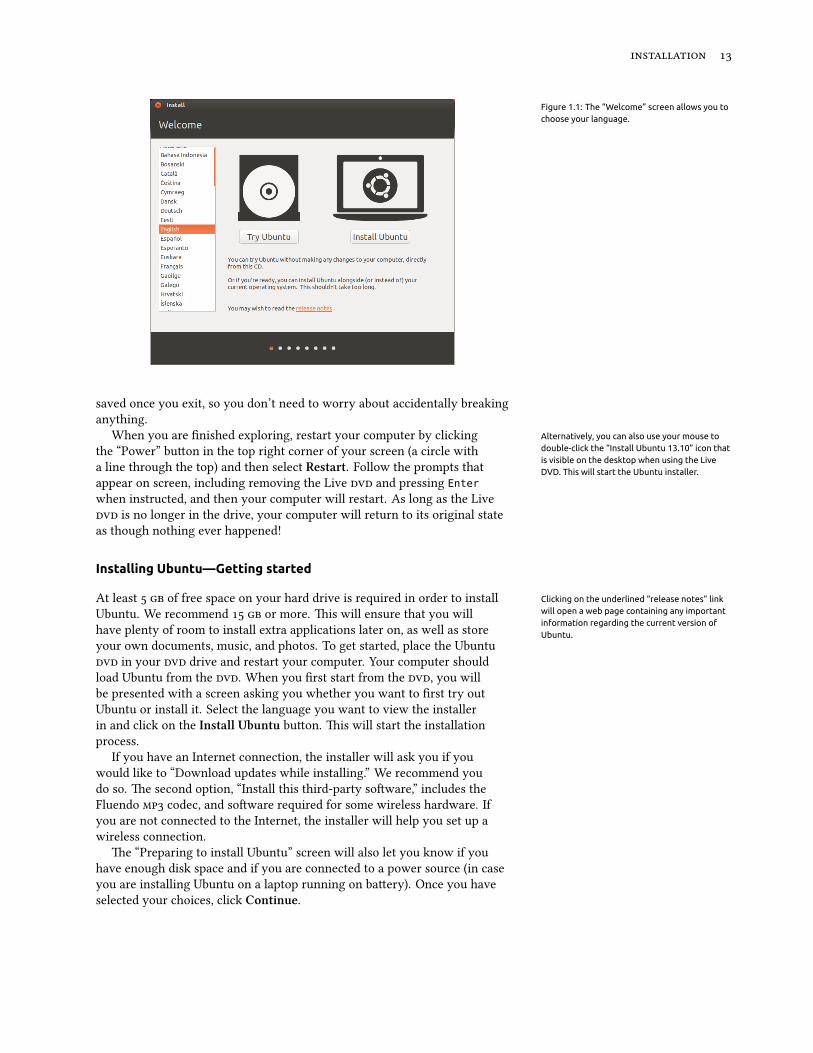
Figure 1.1: The “Welcome” screen allows you tochoose your language.
saved once you exit, so you don’t need to worry about accidentally breakinganything.
When you are finished exploring, restart your computer by clicking Alternatively, you can also use your mouse todouble-click the “Install Ubuntu 13.10” icon thatis visible on the desktop when using the LiveDVD. This will start the Ubuntu installer.
the “Power” buon in the top right corner of your screen (a circle witha line through the top) and then select Restart. Follow the prompts thatappear on screen, including removing the Live and pressing Enterwhen instructed, and then your computer will restart. As long as the Live is no longer in the drive, your computer will return to its original stateas though nothing ever happened!
Installing Ubuntu—Getting started
At least of free space on your hard drive is required in order to install Clicking on the underlined “release notes” linkwill open a web page containing any importantinformation regarding the current version ofUbuntu.
Ubuntu. We recommend or more. is will ensure that you willhave plenty of room to install extra applications later on, as well as storeyour own documents, music, and photos. To get started, place the Ubuntu in your drive and restart your computer. Your computer shouldload Ubuntu from the . When you first start from the , you willbe presented with a screen asking you whether you want to first try outUbuntu or install it. Select the language you want to view the installerin and click on the Install Ubuntu buon. is will start the installationprocess.
If you have an Internet connection, the installer will ask you if youwould like to “Download updates while installing.” We recommend youdo so. e second option, “Install this third-party soware,” includes theFluendo codec, and soware required for some wireless hardware. Ifyou are not connected to the Internet, the installer will help you set up awireless connection.
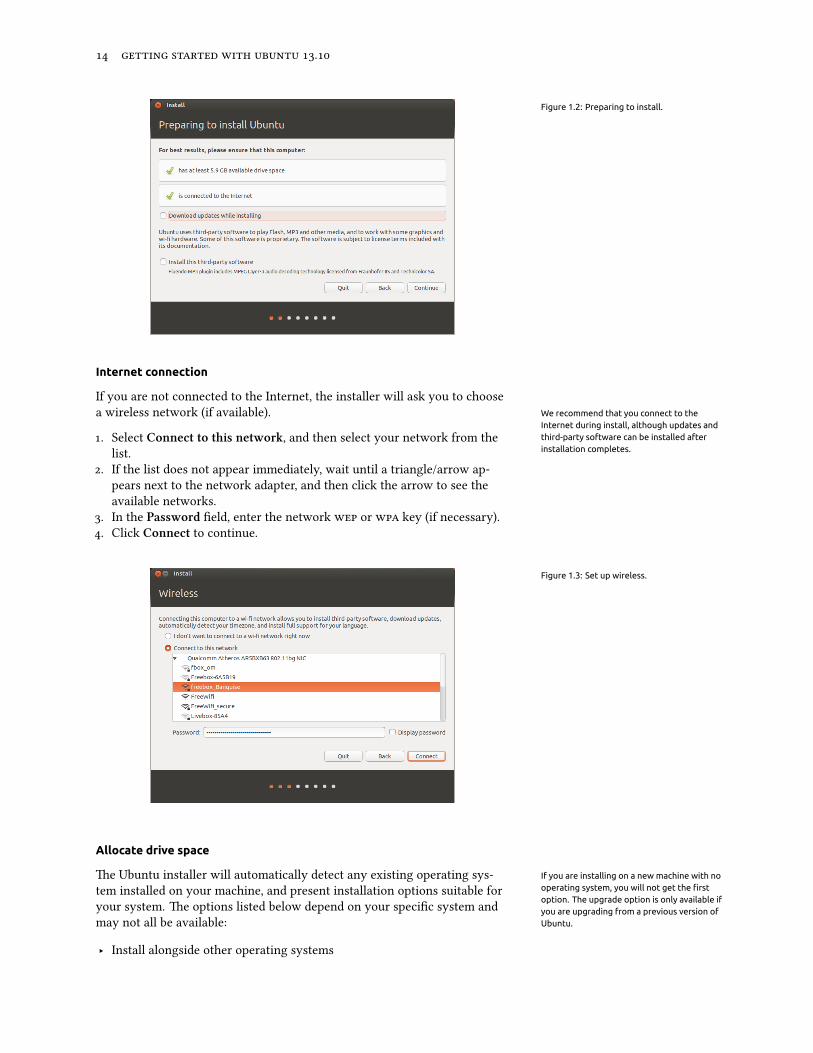
e “Preparing to install Ubuntu” screen will also let you know if youhave enough disk space and if you are connected to a power source (in caseyou are installing Ubuntu on a laptop running on baery). Once you haveselected your choices, click Continue.
.
Figure 1.2: Preparing to install.
Internet connection
If you are not connected to the Internet, the installer will ask you to choosea wireless network (if available). We recommend that you connect to the
Internet during install, although updates andthird-party software can be installed afterinstallation completes.
. Select Connect to this network, and then select your network from thelist.
. If the list does not appear immediately, wait until a triangle/arrow ap-pears next to the network adapter, and then click the arrow to see theavailable networks.
. In the Password field, enter the network or key (if necessary).. Click Connect to continue.
Figure 1.3: Set up wireless.
Allocate drive space
e Ubuntu installer will automatically detect any existing operating sys- If you are installing on a new machine with nooperating system, you will not get the firstoption. The upgrade option is only available ifyou are upgrading from a previous version ofUbuntu.
tem installed on your machine, and present installation options suitable foryour system. e options listed below depend on your specific system andmay not all be available:
‣ Install alongside other operating systems
‣ Upgrade Ubuntu … to .‣ Erase … and install Ubuntu‣ Something else
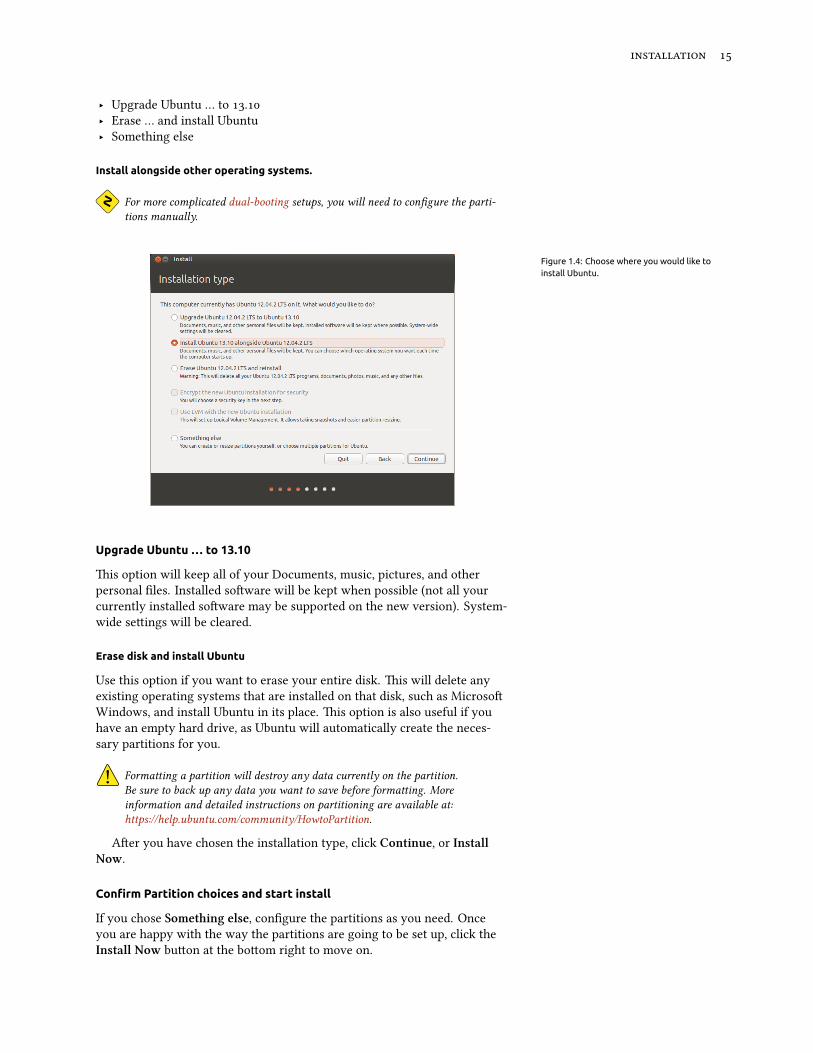
Install alongside other operating systems.
For more complicated dual-booting setups, you will need to configure the parti-tions manually.
Figure 1.4: Choose where you would like toinstall Ubuntu.
Upgrade Ubuntu … to 13.10
is option will keep all of your Documents, music, pictures, and otherpersonal files. Installed soware will be kept when possible (not all yourcurrently installed soware may be supported on the new version). System-wide seings will be cleared.
Erase disk and install Ubuntu
Use this option if you want to erase your entire disk. is will delete anyexisting operating systems that are installed on that disk, such as MicrosoWindows, and install Ubuntu in its place. is option is also useful if youhave an empty hard drive, as Ubuntu will automatically create the neces-sary partitions for you.
Formaing a partition will destroy any data currently on the partition.Be sure to back up any data you want to save before formaing. Moreinformation and detailed instructions on partitioning are available at:https://help.ubuntu.com/community/HowtoPartition.
Aer you have chosen the installation type, click Continue, or InstallNow.
Confirm Partition choices and start install
If you chose Something else, configure the partitions as you need. Onceyou are happy with the way the partitions are going to be set up, click theInstall Now buon at the boom right to move on.
.
To reduce the time required for installation, Ubuntu will continue theinstallation process in the background while you configure important userdetails—like your username, password, keyboard seings and default time-zone.
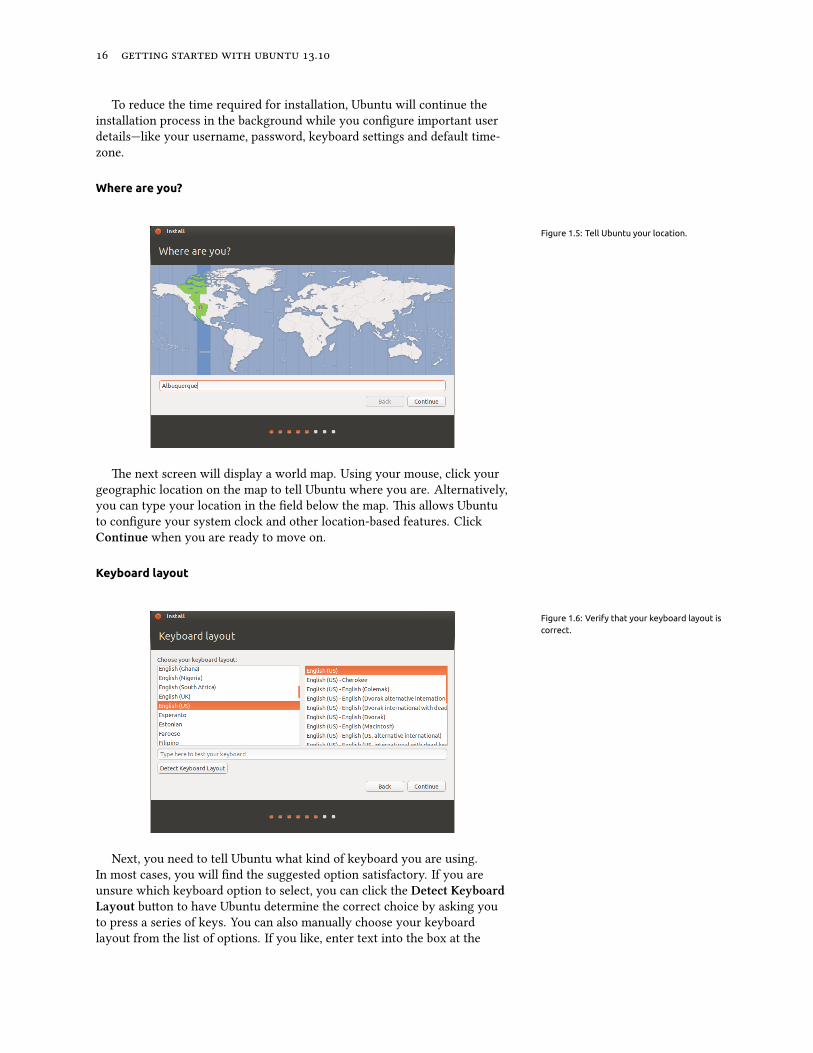
Where are you?
Figure 1.5: Tell Ubuntu your location.
e next screen will display a world map. Using your mouse, click yourgeographic location on the map to tell Ubuntu where you are. Alternatively,you can type your location in the field below the map. is allows Ubuntuto configure your system clock and other location-based features. ClickContinue when you are ready to move on.
Keyboard layout
Figure 1.6: Verify that your keyboard layout iscorrect.
Next, you need to tell Ubuntu what kind of keyboard you are using.In most cases, you will find the suggested option satisfactory. If you areunsure which keyboard option to select, you can click the Detect KeyboardLayout buon to have Ubuntu determine the correct choice by asking youto press a series of keys. You can also manually choose your keyboardlayout from the list of options. If you like, enter text into the box at the
boom of the window to ensure you are happy with your selection, thenclick Continue.
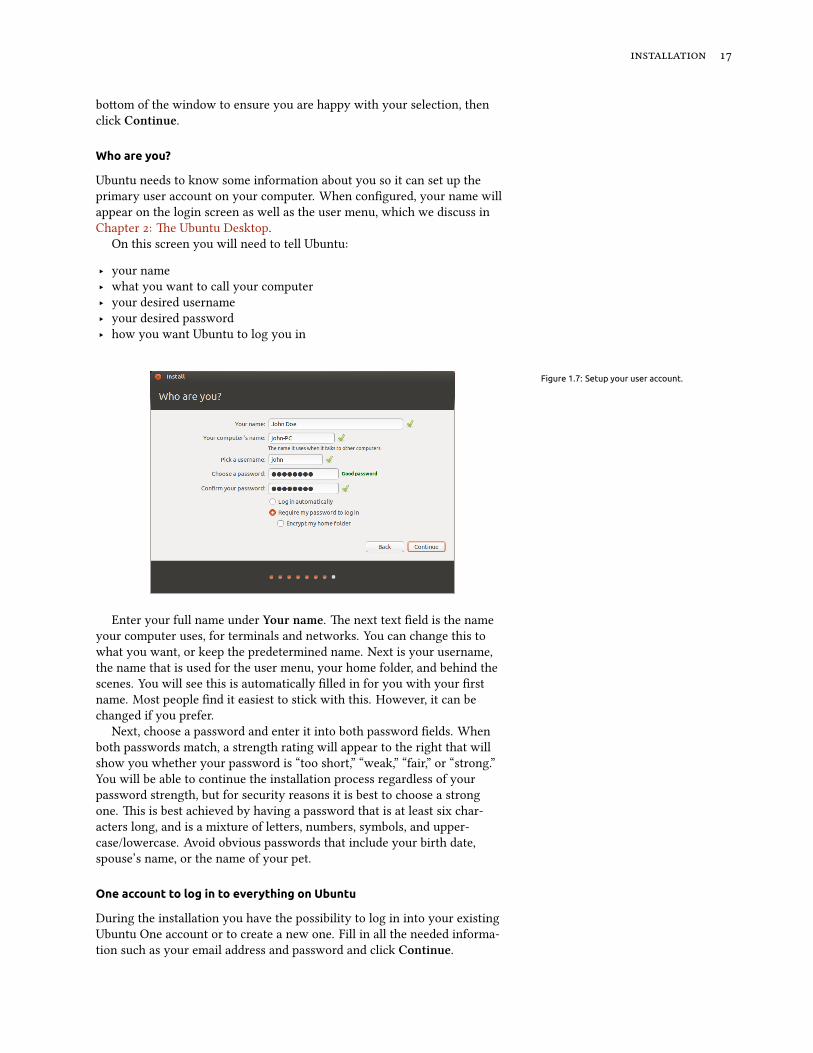
Who are you?
Ubuntu needs to know some information about you so it can set up theprimary user account on your computer. When configured, your name willappear on the login screen as well as the user menu, which we discuss inChapter : e Ubuntu Desktop.
On this screen you will need to tell Ubuntu:
‣ your name‣ what you want to call your computer‣ your desired username‣ your desired password‣ how you want Ubuntu to log you in
Figure 1.7: Setup your user account.
Enter your full name under Your name. e next text field is the nameyour computer uses, for terminals and networks. You can change this towhat you want, or keep the predetermined name. Next is your username,the name that is used for the user menu, your home folder, and behind thescenes. You will see this is automatically filled in for you with your firstname. Most people find it easiest to stick with this. However, it can bechanged if you prefer.
Next, choose a password and enter it into both password fields. Whenboth passwords match, a strength rating will appear to the right that willshow you whether your password is “too short,” “weak,” “fair,” or “strong.”You will be able to continue the installation process regardless of yourpassword strength, but for security reasons it is best to choose a strongone. is is best achieved by having a password that is at least six char-acters long, and is a mixture of leers, numbers, symbols, and upper-case/lowercase. Avoid obvious passwords that include your birth date,spouse’s name, or the name of your pet.
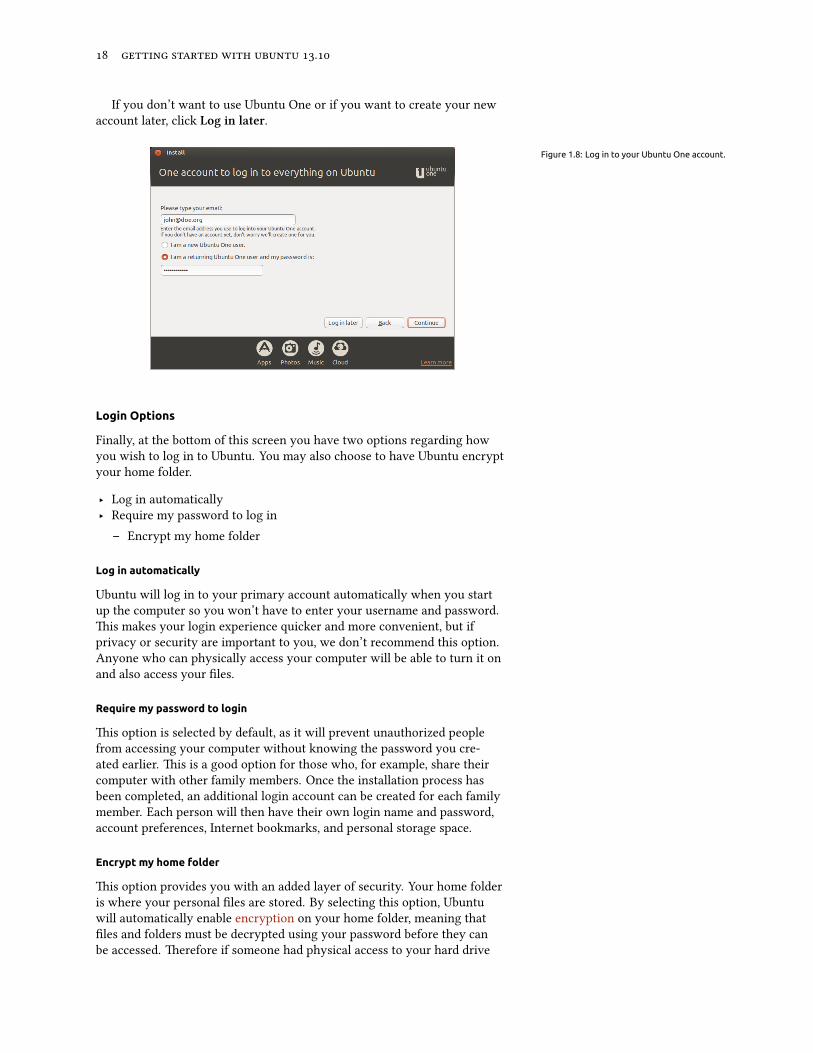
One account to log in to everything on Ubuntu
During the installation you have the possibility to log in into your existingUbuntu One account or to create a new one. Fill in all the needed informa-tion such as your email address and password and click Continue.
.
If you don’t want to use Ubuntu One or if you want to create your newaccount later, click Log in later.
Figure 1.8: Log in to your Ubuntu One account.
Login Options
Finally, at the boom of this screen you have two options regarding howyou wish to log in to Ubuntu. You may also choose to have Ubuntu encryptyour home folder.
‣ Log in automatically‣ Require my password to log in
– Encrypt my home folder
Log in automatically
Ubuntu will log in to your primary account automatically when you startup the computer so you won’t have to enter your username and password.is makes your login experience quicker and more convenient, but ifprivacy or security are important to you, we don’t recommend this option.Anyone who can physically access your computer will be able to turn it onand also access your files.
Require my password to login
is option is selected by default, as it will prevent unauthorized peoplefrom accessing your computer without knowing the password you cre-ated earlier. is is a good option for those who, for example, share theircomputer with other family members. Once the installation process hasbeen completed, an additional login account can be created for each familymember. Each person will then have their own login name and password,account preferences, Internet bookmarks, and personal storage space.
Encrypt my home folder
is option provides you with an added layer of security. Your home folderis where your personal files are stored. By selecting this option, Ubuntuwill automatically enable encryption on your home folder, meaning thatfiles and folders must be decrypted using your password before they canbe accessed. erefore if someone had physical access to your hard drive
(for example, if your computer was stolen and the hard drive removed), theywould not be able to see your files without knowing your password.
If you choose this option, be careful not to enable automatic login at a later date.It will cause complications with your encrypted home folder, and will potentiallylock you out of important files.
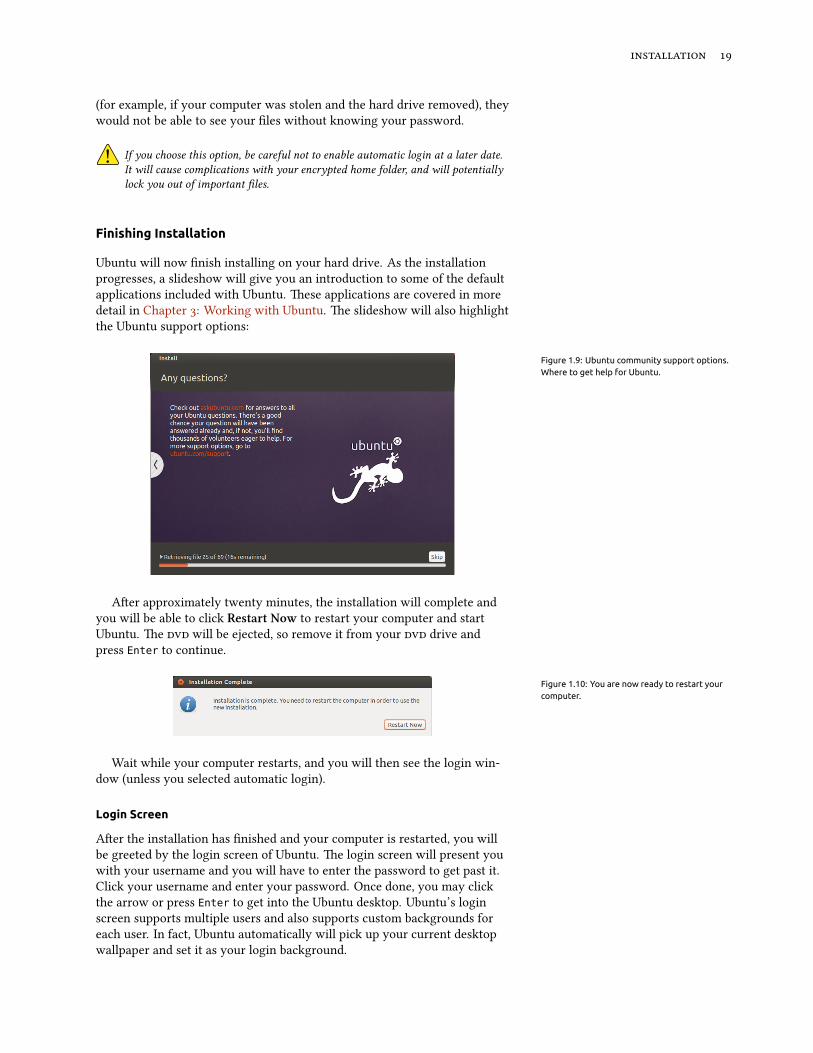
Finishing Installation
Ubuntu will now finish installing on your hard drive. As the installationprogresses, a slideshow will give you an introduction to some of the defaultapplications included with Ubuntu. ese applications are covered in moredetail in Chapter : Working with Ubuntu. e slideshow will also highlightthe Ubuntu support options:
Figure 1.9: Ubuntu community support options.Where to get help for Ubuntu.
Aer approximately twenty minutes, the installation will complete andyou will be able to click Restart Now to restart your computer and startUbuntu. e will be ejected, so remove it from your drive andpress Enter to continue.
Figure 1.10: You are now ready to restart yourcomputer.
Wait while your computer restarts, and you will then see the login win-dow (unless you selected automatic login).
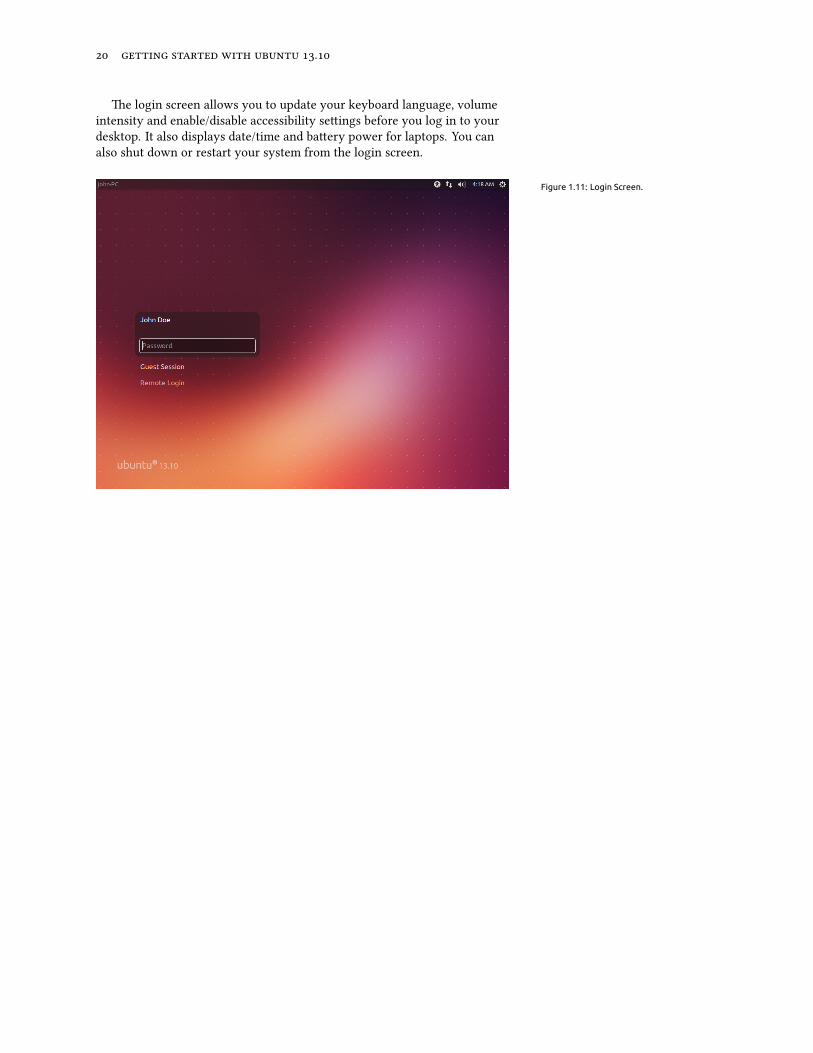
Login Screen
Aer the installation has finished and your computer is restarted, you willbe greeted by the login screen of Ubuntu. e login screen will present youwith your username and you will have to enter the password to get past it.Click your username and enter your password. Once done, you may clickthe arrow or press Enter to get into the Ubuntu desktop. Ubuntu’s loginscreen supports multiple users and also supports custom backgrounds foreach user. In fact, Ubuntu automatically will pick up your current desktopwallpaper and set it as your login background.
.
e login screen allows you to update your keyboard language, volumeintensity and enable/disable accessibility seings before you log in to yourdesktop. It also displays date/time and baery power for laptops. You canalso shut down or restart your system from the login screen.
Figure 1.11: Login Screen.

2 The Ubuntu Desktop
Understanding the Ubuntu desktop
Initially, you may notice many similarities between Ubuntu and otheroperating systems, such as Microso Windows or Mac . is is becausethey are all based on the concept of a graphical user interface ()—i.e.,you use your mouse to navigate the desktop, open applications, move files,and perform most other tasks. In short, things are visually-oriented. ischapter is designed to help you become familiar with various applicationsand menus in Ubuntu so that you become confident in using the Ubuntu.
Figure 2.1: The Ubuntu 13.10 default desktop.
Unity
All -based operating systems use a desktop environment. Desktop envi-ronments encompass many things, including (but not limited to):
‣ e look and feel of your system‣ e way the desktop is laid out‣ How the desktop is navigated by the user
In Linux distributions (such as Ubuntu), a number of desktop environ- To read more about other variants of Ubuntu,refer to Chapter 8: Learning More.ments are available. Ubuntu uses Unity as the default desktop environment.
Aer installing and logging in to Ubuntu, you will see the Unity desktop.is initial view is comprised of the desktop background and two bars—ahorizontal one located at the top of your desktop called the menu bar and avertically-oriented bar at the far le called the Launcher.
.
The Desktop Background
Below the menu bar at the top of the screen is an image covering the entiredesktop. is is the default desktop background, or wallpaper, belonging tothe default Ubuntu . theme known as Ambiance. To learn more aboutcustomizing your desktop (including changing your background), see thesection on Customizing your desktop below.
The Menu Bar
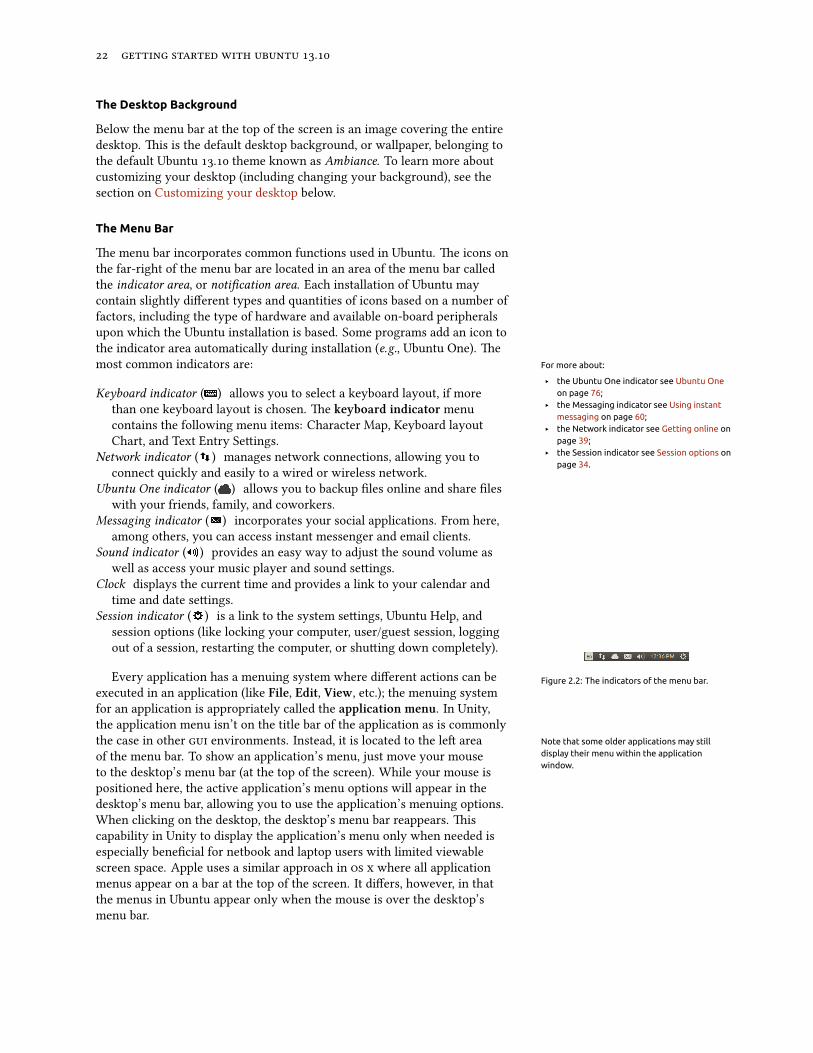
e menu bar incorporates common functions used in Ubuntu. e icons onthe far-right of the menu bar are located in an area of the menu bar calledthe indicator area, or notification area. Each installation of Ubuntu maycontain slightly different types and quantities of icons based on a number offactors, including the type of hardware and available on-board peripheralsupon which the Ubuntu installation is based. Some programs add an icon tothe indicator area automatically during installation (e.g., Ubuntu One). emost common indicators are: For more about:
‣ the Ubuntu One indicator see Ubuntu Oneon page 76;
‣ the Messaging indicator see Using instantmessaging on page 60;
‣ the Network indicator see Getting online onpage 39;
‣ the Session indicator see Session options onpage 34.
Keyboard indicator ( ) allows you to select a keyboard layout, if morethan one keyboard layout is chosen. e keyboard indicator menucontains the following menu items: Character Map, Keyboard layoutChart, and Text Entry Seings.
Network indicator ( ) manages network connections, allowing you toconnect quickly and easily to a wired or wireless network.
Ubuntu One indicator ( ) allows you to backup files online and share fileswith your friends, family, and coworkers.
Messaging indicator ( ) incorporates your social applications. From here,among others, you can access instant messenger and email clients.
Sound indicator ( ) provides an easy way to adjust the sound volume aswell as access your music player and sound seings.
Clock displays the current time and provides a link to your calendar andtime and date seings.
Session indicator ( ) is a link to the system seings, Ubuntu Help, andsession options (like locking your computer, user/guest session, loggingout of a session, restarting the computer, or shuing down completely).
Figure 2.2: The indicators of the menu bar.Every application has a menuing system where different actions can beexecuted in an application (like File, Edit, View, etc.); the menuing systemfor an application is appropriately called the application menu. In Unity,the application menu isn’t on the title bar of the application as is commonlythe case in other environments. Instead, it is located to the le area Note that some older applications may still
display their menu within the applicationwindow.
of the menu bar. To show an application’s menu, just move your mouseto the desktop’s menu bar (at the top of the screen). While your mouse ispositioned here, the active application’s menu options will appear in thedesktop’s menu bar, allowing you to use the application’s menuing options.When clicking on the desktop, the desktop’s menu bar reappears. iscapability in Unity to display the application’s menu only when needed isespecially beneficial for netbook and laptop users with limited viewablescreen space. Apple uses a similar approach in where all applicationmenus appear on a bar at the top of the screen. It differs, however, in thatthe menus in Ubuntu appear only when the mouse is over the desktop’smenu bar.
The Launcher
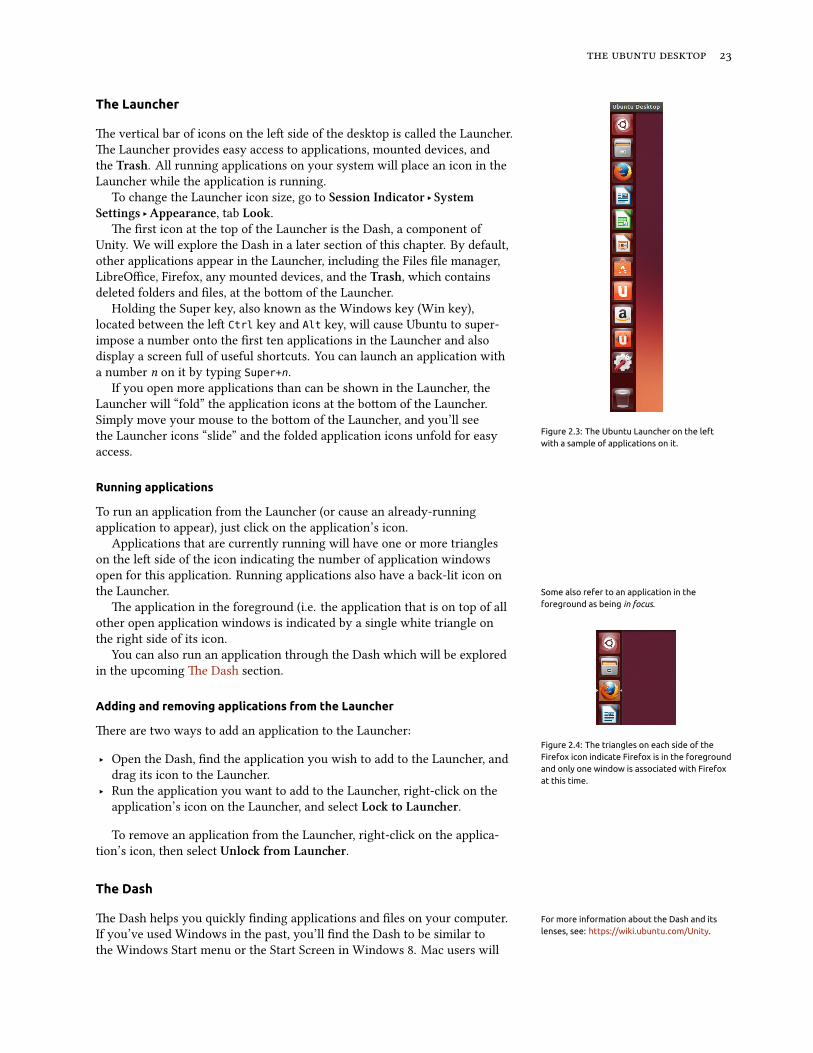
e vertical bar of icons on the le side of the desktop is called the Launcher.e Launcher provides easy access to applications, mounted devices, andthe Trash. All running applications on your system will place an icon in theLauncher while the application is running.
Figure 2.3: The Ubuntu Launcher on the leftwith a sample of applications on it.
To change the Launcher icon size, go to Session Indicator ‣ SystemSettings ‣Appearance, tab Look.
e first icon at the top of the Launcher is the Dash, a component ofUnity. We will explore the Dash in a later section of this chapter. By default,other applications appear in the Launcher, including the Files file manager,LibreOffice, Firefox, any mounted devices, and the Trash, which containsdeleted folders and files, at the boom of the Launcher.
Holding the Super key, also known as the Windows key (Win key),located between the le Ctrl key and Alt key, will cause Ubuntu to super-impose a number onto the first ten applications in the Launcher and alsodisplay a screen full of useful shortcuts. You can launch an application witha number n on it by typing Super+n.
If you open more applications than can be shown in the Launcher, theLauncher will “fold” the application icons at the boom of the Launcher.Simply move your mouse to the boom of the Launcher, and you’ll seethe Launcher icons “slide” and the folded application icons unfold for easyaccess.
Running applications
To run an application from the Launcher (or cause an already-runningapplication to appear), just click on the application’s icon.
Applications that are currently running will have one or more triangleson the le side of the icon indicating the number of application windowsopen for this application. Running applications also have a back-lit icon onthe Launcher. Some also refer to an application in the
foreground as being in focus.
Figure 2.4: The triangles on each side of theFirefox icon indicate Firefox is in the foregroundand only one window is associated with Firefoxat this time.
e application in the foreground (i.e. the application that is on top of allother open application windows is indicated by a single white triangle onthe right side of its icon.
You can also run an application through the Dash which will be exploredin the upcoming e Dash section.
Adding and removing applications from the Launcher
ere are two ways to add an application to the Launcher:
‣ Open the Dash, find the application you wish to add to the Launcher, anddrag its icon to the Launcher.
‣ Run the application you want to add to the Launcher, right-click on theapplication’s icon on the Launcher, and select Lo to Launer.
To remove an application from the Launcher, right-click on the applica-tion’s icon, then select Unlo from Launer.
The Dash
e Dash helps you quickly finding applications and files on your computer. For more information about the Dash and itslenses, see: https://wiki.ubuntu.com/Unity.If you’ve used Windows in the past, you’ll find the Dash to be similar to
the Windows Start menu or the Start Screen in Windows . Mac users will
.
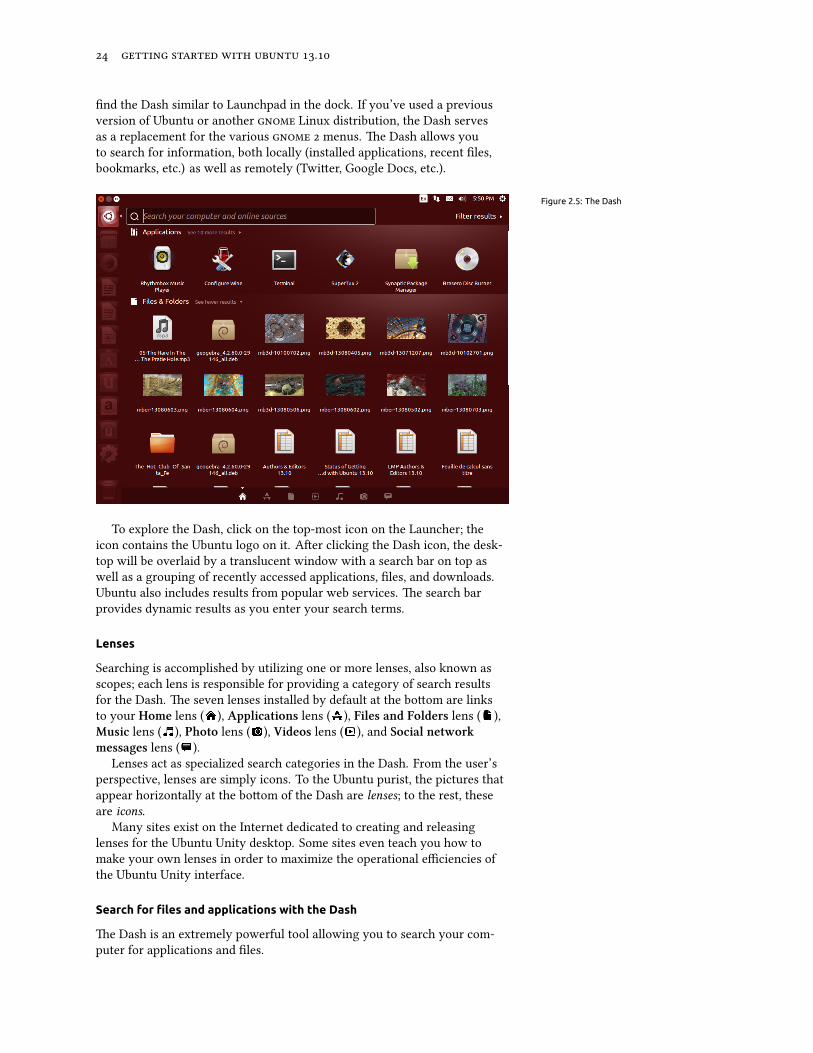
find the Dash similar to Launchpad in the dock. If you’ve used a previousversion of Ubuntu or another Linux distribution, the Dash servesas a replacement for the various menus. e Dash allows youto search for information, both locally (installed applications, recent files,bookmarks, etc.) as well as remotely (Twier, Google Docs, etc.).
Figure 2.5: The Dash
To explore the Dash, click on the top-most icon on the Launcher; theicon contains the Ubuntu logo on it. Aer clicking the Dash icon, the desk-top will be overlaid by a translucent window with a search bar on top aswell as a grouping of recently accessed applications, files, and downloads.Ubuntu also includes results from popular web services. e search barprovides dynamic results as you enter your search terms.
Lenses
Searching is accomplished by utilizing one or more lenses, also known asscopes; each lens is responsible for providing a category of search resultsfor the Dash. e seven lenses installed by default at the boom are linksto your Home lens ( ), Applications lens ( ), Files and Folders lens ( ),Music lens ( ), Photo lens ( ), Videos lens ( ), and Social networkmessages lens ( ).
Lenses act as specialized search categories in the Dash. From the user’sperspective, lenses are simply icons. To the Ubuntu purist, the pictures thatappear horizontally at the boom of the Dash are lenses; to the rest, theseare icons.
Many sites exist on the Internet dedicated to creating and releasinglenses for the Ubuntu Unity desktop. Some sites even teach you how tomake your own lenses in order to maximize the operational efficiencies ofthe Ubuntu Unity interface.
Search for files and applications with the Dash
e Dash is an extremely powerful tool allowing you to search your com-puter for applications and files.
Find files/folders
e Dash can help you find names of files or folders. Simply type a portionof the file or folder name. As you type, results will appear in the Dash. eFiles and Folders lens will also assist in finding files or folders—showingyou the most recently accessed files as well as the most recent downloads.You can use the filter results buon in the top-right corner of the Dash tofilter results by aributes such as file or folder modification times, file type(.odt, .pdf, .doc, .txt, etc.), or size.
Find applications
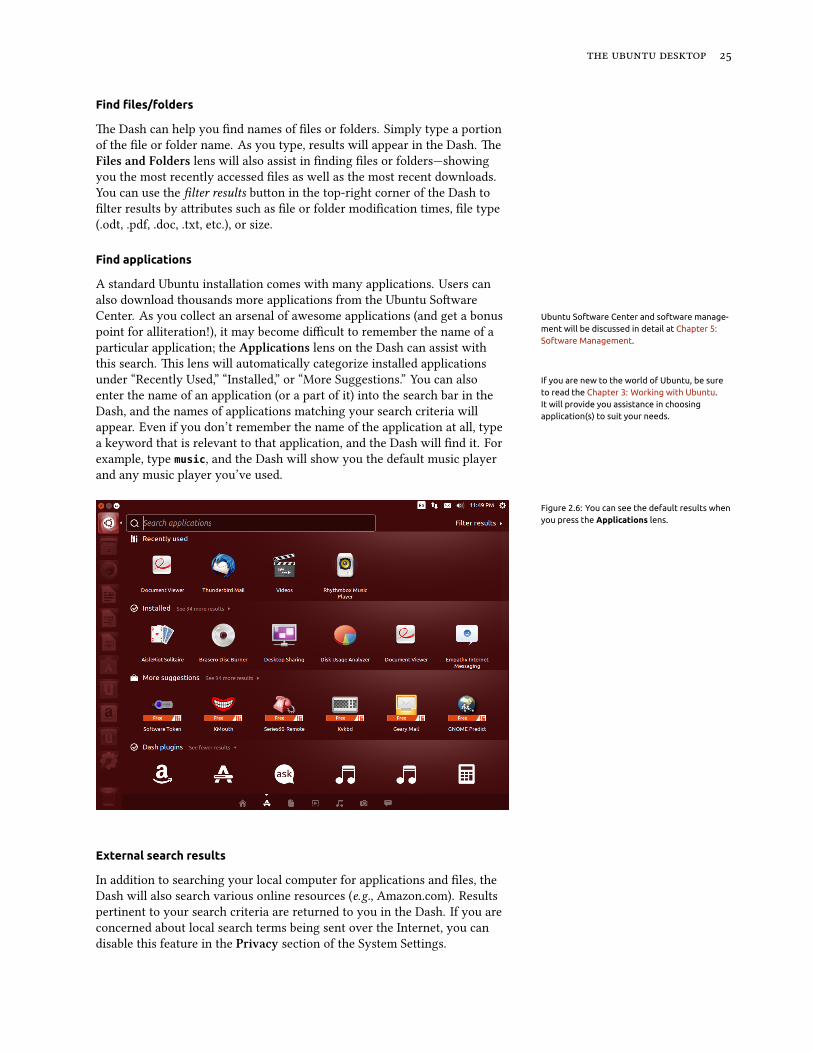
A standard Ubuntu installation comes with many applications. Users canalso download thousands more applications from the Ubuntu SowareCenter. As you collect an arsenal of awesome applications (and get a bonus Ubuntu Software Center and software manage-
ment will be discussed in detail at Chapter 5:Software Management.
point for alliteration!), it may become difficult to remember the name of aparticular application; the Applications lens on the Dash can assist withthis search. is lens will automatically categorize installed applicationsunder “Recently Used,” “Installed,” or “More Suggestions.” You can also If you are new to the world of Ubuntu, be sure
to read the Chapter 3: Working with Ubuntu.It will provide you assistance in choosingapplication(s) to suit your needs.
enter the name of an application (or a part of it) into the search bar in theDash, and the names of applications matching your search criteria willappear. Even if you don’t remember the name of the application at all, typea keyword that is relevant to that application, and the Dash will find it. Forexample, type music, and the Dash will show you the default music playerand any music player you’ve used.
Figure 2.6: You can see the default results whenyou press the Applications lens.
External search results
In addition to searching your local computer for applications and files, theDash will also search various online resources (e.g., Amazon.com). Resultspertinent to your search criteria are returned to you in the Dash. If you areconcerned about local search terms being sent over the Internet, you candisable this feature in the Privacy section of the System Seings.

.
e online search results within the Dash are turned on by default during in-stallation. If you do not want external search results, go to System Settings ‣Privacy ‣ Sear Results and set the “Include online search results” switch tothe Off position. As an added layer of privacy, you can also prevent any searchactivity from being recorded.
Workspaces
Workspaces are also known as virtual desktops. ese separate views ofyour desktop allow you to group applications together, and by doing so,help to reduce cluer and improve desktop navigation. For example, youcan open all of your media applications in one workspace, your office suitein another, and your web browser in a third workspace. Ubuntu has fourworkspaces by default.
e workspaces feature is not activated by default in Ubuntu. To activateworkspaces, click on Session Indicator ‣ System Settings… ‣Appearancethen click on the Behavior tab and click on the Enable workspaces box.When this box is checked, you’ll notice another icon is added to the boomof the Launcher that looks like a window pane. is is the workspacesswitcher.
Switching between workspaces
If you’ve activated the workspace switcher as described above, you canswitch between workspaces by clicking on the workspace switcher iconlocated on the Launcher. is utility allows you to toggle through theworkspaces (whether they contain open applications or not) and choose theone you want to use.
Figure 2.7: The workspace switcher on theLauncher.
Managing windows
When opening a program in Ubuntu (such as a web browser or a text editor—see Chapter : Working with Ubuntu for more information on usingapplications)—a window will appear on your desktop. e windows seen inUbuntu are very similar to those in Microso Windows or Mac . Simplystated, a window is the box that appears on your screen when you start aprogram. In Ubuntu, the top part of a window (the title bar) will have thename of the application to the le (most oen, the title will be the sameas the application’s name). A window will also have three buons in thetop-le corner. From le to right, these buons represent close window,minimize window, and maximize window. Other window managementoptions are available by right-clicking anywhere on the title bar.
Closing, maximizing, restoring, and minimizing windows
To close a window, click on the close buon ( ) in the upper-le corner ofthe window—the first buon on the le-hand side. e buon immediatelyto the right of the close buon is the minimize buon ( ) which removesthe window from the visible screen and places it in the Launcher. Figure 2.8: This is the top bar of a window,
named title bar. The close, minimize, andmaximize buttons are in the top-left corner ofthe window.
is buon doesn’t close the application; it just hides the applicationfrom view. When an application is minimized to the Launcher, the le-sideof the icon in the Launcher will display a triangle showing you the appli-cation is still running. Clicking the icon of the minimized application will
restore the window to its original position. Finally, the right-most buonis the maximize buon ( ) which causes the application to completely fillthe unused displayable space on the desktop. Clicking the maximize buonagain will return the window to its original size. If a window is maximized,its top-le buons and menu are automatically hidden from view. To makethem appear, just move your mouse to the menu bar.
Moving and resizing windows
To move a window around the workspace, place the mouse pointer over thewindow’s title bar, then click and drag the window while continuing to holddown the le mouse buon. You can also move a window by holding theAlt key and then clicking and holding the le mouse buon while pointingat the title bar of the window and dragging the window to a new location.To resize a window, place the pointer on an edge or corner of the windowso that the pointer turns into a larger, two-sided arrow (known as the resizeicon). You can then click and drag to resize the window.
Switching between open windows
In Ubuntu, there are many ways to switch between open windows.
. If the window is visible on your screen, click any portion of it to raise itabove all other windows.
. Use Alt+Tab to select the window you wish to work with. Hold downthe Alt key, and keep pressing Tab until the window you’re looking forappears highlighted in the popup window. en, release the Alt key, andthe application highlighted in the popup will move to the foreground ofyour desktop.
. Click on the corresponding icon on the Launcher by moving your mouseto the le side of the screen and right-clicking on the application’s icon.If the application has multiple windows open, double-click on the icon inorder to select the desired window.
. Press Ctrl+Super+D to hide all windows and display the desktop; thesame works to restore all windows.
Moving a window to different workspace
To move a window to a different workspace, verify that the window isn’tmaximized. If it is maximized, click on the right-most buon on the leside of the title bar to restore it to its original size. en right-click on thewindow’s title bar and select:
‣ Move to Workspace Le, to move the window to the le workspace‣ Move to Workspace Right, to move the window to the right workspace‣ Move to Workspace Down, to move the window to the boom workspace‣ Move to Another Workspace, and then choose the workspace to where
you wish to move the window.
Note that the options available when moving windows to differentworkspaces depends on which workspace contains the window you aremoving. If the window exists in the lower-right workspace, you will not seea Move to Workspace Down because there is no workspace available belowthe lower-right quadrant of a four quadrant workspace.
.
Window always on the top or on visible workspace
At times, you may want to force a window to always be in the foregroundso that it can be seen or monitored while you work with other applications.For example, you may want to browse the web and, at the same time, viewand answer incoming instant message. To keep a window always in theforeground, right-click on the window’s title bar, then select Always OnTop. is window will now be on the top of all windows opened in thecurrent workspace. If you want to have a window always on the top re-gardless of the workspace, right-click on the window’s title bar, then selectAlways on Visible Workspace. is window will now be on top of all otherwindows across all workspaces.
Browsing files on your computer
ere are two ways to locate files on your computer—search for them or ac-cess them directly from their folder. You can search for a file using the Dashor the Files file manager. You can also use the Dash or Files file manager toaccess commonly used folders (such as Documents, Music, Downloads) aswell as the most recently accessed files.
Your Home Folder
e Home folder is used to store personal files. Your Home folder matchesyour login name and is created when your user account is created. Whenopening your personal folder, you will see a collection of several folders,including Desktop (which contains any files that are visible on the desktop),Documents, Downloads, Music, Pictures, Public, Templates, and Videos.ese folders are created automatically during the installation process. Youcan add more files and folders as needed.
Files file manager
Just as Windows has Windows Explorer and Mac has Finder to browsefiles and folders, Ubuntu . uses the Files file manager by default.
The Files file manager window
When you select the Files shortcut in the Launcher, click on a folder in the Folders are also called directories.
Dash, or double-click a folder on the desktop, Ubuntu should open the Filesfile manager. e default window contains the following features:
menu bar e menu bar is located at the top of the screen. e Files menuallows you to modify the layout of the browser, show, browse and re-move bookmarks, open a Help document, open a new window, connectto a server, or quit. Choosing Enter Location will open the Locationstext field where you can enter any location directly.
title bar e title bar shows the name of the currently selected folder. Italso contains the Close, Minimize, and Maximize buons.
toolbar On the right side of the toolbar, there are five buons: Sear(represented by a magnifying glass), View items as a grid, View itemsas a list, View options (represented by a down arrow), and Locationoptions (represented by a cog); clicking on the Sear icon opens a fieldso you can search for a file or folder by name. Clicking on the optionsbuons Location options or View options opens a menu with options.
On the le side of the toolbar, you will see a representation of yourcurrent browsing. is is similar to the history function in most webbrowsers; it keeps track of where you are and allows you to backtrack ifnecessary. You can click on any of the locations to navigate back throughthe file browser. e buons Previous location and Next location allowyou to navigate through previously visited locations.
le pane e le pane of the file browser—titled Places—has shortcuts tocommonly used folders. You can also bookmark a folder through thetoolbar by choosing Location options (gear) ‣Bookmark this Location.Once you have bookmarked the folder, it should appear in the le pane.Regardless of the folder you are currently browsing, the le pane willalways contain the same folders.
right pane e largest pane shows the files and folders within the folderyou are currently browsing.
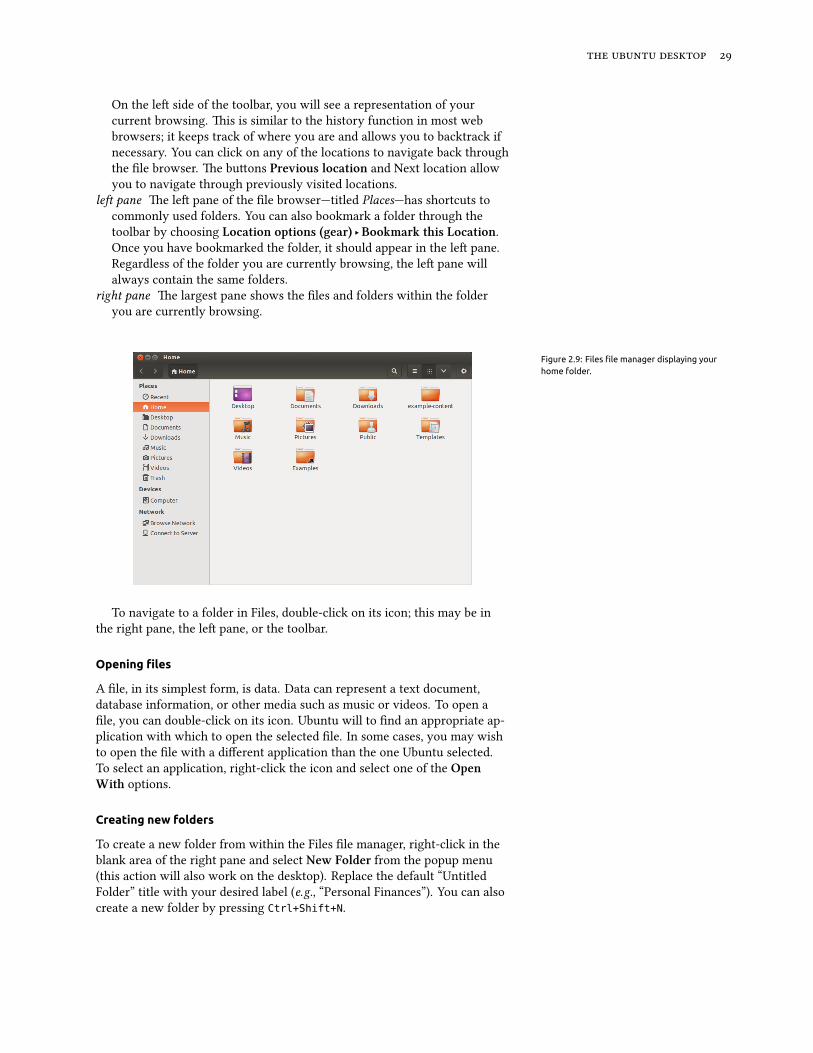
Figure 2.9: Files file manager displaying yourhome folder.
To navigate to a folder in Files, double-click on its icon; this may be inthe right pane, the le pane, or the toolbar.
Opening files
A file, in its simplest form, is data. Data can represent a text document,database information, or other media such as music or videos. To open afile, you can double-click on its icon. Ubuntu will to find an appropriate ap-plication with which to open the selected file. In some cases, you may wishto open the file with a different application than the one Ubuntu selected.To select an application, right-click the icon and select one of the OpenWith options.
Creating new folders
To create a new folder from within the Files file manager, right-click in theblank area of the right pane and select New Folder from the popup menu(this action will also work on the desktop). Replace the default “UntitledFolder” title with your desired label (e.g., “Personal Finances”). You can alsocreate a new folder by pressing Ctrl+Shift+N.
.
Hidden Files and Folders
If you wish to hide certain folders or files, place a dot (.) in front of thename (e.g., “.Personal Finances”). In some cases, it is impossible to hide filesand folders without prefixing them with a dot.
You can easily view hidden files by clicking View options ‣ Show HiddenFiles or by pressing Ctrl+H. Hiding files with a dot (.) is not a securitymeasure—it is simply a way to help you organize your files.
Copying and moving files and folders
You can cut, copy, and paste files or folders in the Files file manager byright-clicking on the item and selecting the corresponding buon from thepopup menu. You can also use the keyboard shortcuts Ctrl+X, Ctrl+C, andCtrl+V to cut, copy, and paste files and folders, respectively.
Multiple files can be selected by le-clicking in an empty space (i.e.,not on a file or folder), holding the mouse buon down, and dragging thecursor across the desired files or folders. is “click-drag” action is usefulwhen you are selecting items that are grouped closely together. To selectmultiple files or folders that are not positioned next to each other, holddown the Ctrl key while clicking on each item individually. Once thedesired files and/or folders are selected, right-click on any of the selecteditems to perform an action just like you would for a single item.
When one or more items have been “copied,” navigate to the desiredlocation, then right-click in an empty area of the window and select Pasteto copy them to the new location. While the copy command can be usedto make a duplicate of a file or folder in a new location, the cut commandcan be used to move files and folders. at is, a copy will be placed in a newlocation, and the original will be removed from its current location.
Note that when you “cut” or “copy” a file or folder, nothing will hap-pen until you “paste” it somewhere. Paste will only affect the most recentitem(s) cut or copied.
To move a file or folder, select the item to move, then click Edit ‣Cut.Navigate to the desired location, then click Edit ‣ Paste. If you click ona file or folder, drag it, then hold down the Alt key and drop it to yourdestination folder, a menu will appear asking whether you want to copy,move, or link the item.
As with the copy command above, you can also perform this action usingthe right-click menu, and it will work for multiple files or folders at once.An alternative way to move a file or folder is to click on the item, and thendrag it to the new location.
Using multiple tabs and multiple Files windows
Opening multiple Files file manager windows can be useful for draggingfiles and folders between locations. You can also have multiple tabs tobrowse multiple locations at once.
To open a second window when browsing a folder in Files, select File ‣New Window or press Ctrl+N. is will open a new window, allowing youto drag files and/or folders between two locations. To open a new tab, clickLocation options (cog) ‣New Tab or press Ctrl+T. A new row will appearabove the space used for browsing your files containing two tabs—both willdisplay the folder you were originally browsing. You can click these tabsto switch between them to click and drag files or folders between tabs thesame as you would between windows.
When dragging items between Files windows or tabs a small symbolwill appear over the mouse cursor to let you know which action will beperformed when you release the mouse buon. A plus sign (+) indicatesyou are about to copy the item, whereas a small arrow means the item willbe moved. e default action will depend on the folders you are using.
Searching for files and folders on your computer
You can search for files and folders using the Dash or the Files file manager. Search for files and folders quickly by pressingCtrl+F in Files and then typing what you wantto find.
Search using the Dash
In the Dash, simply type your search terms in the search bar at the top ofthe Dash.
Alternatively, you may use the Applications or Files & Folders lenses;here you can use a filter to narrow down your search. Open the drop-downmenu on the right side of the search bar. If you’ve selected Applications,you will be able to filter by application type. If you’ve chosen Files & Fold-ers, you can filter by a host of options, including Last modified, Type (e.g.,Documents), or Size. It is sufficient to type the first few leers of the file orfolder for which you are searching.
Search using Files file manager
In Files file manager, click on the magnifying glass buon or press Ctrl+F.is opens the search field where you can type the name of the file or folderyou want to find.
Customizing your desktop
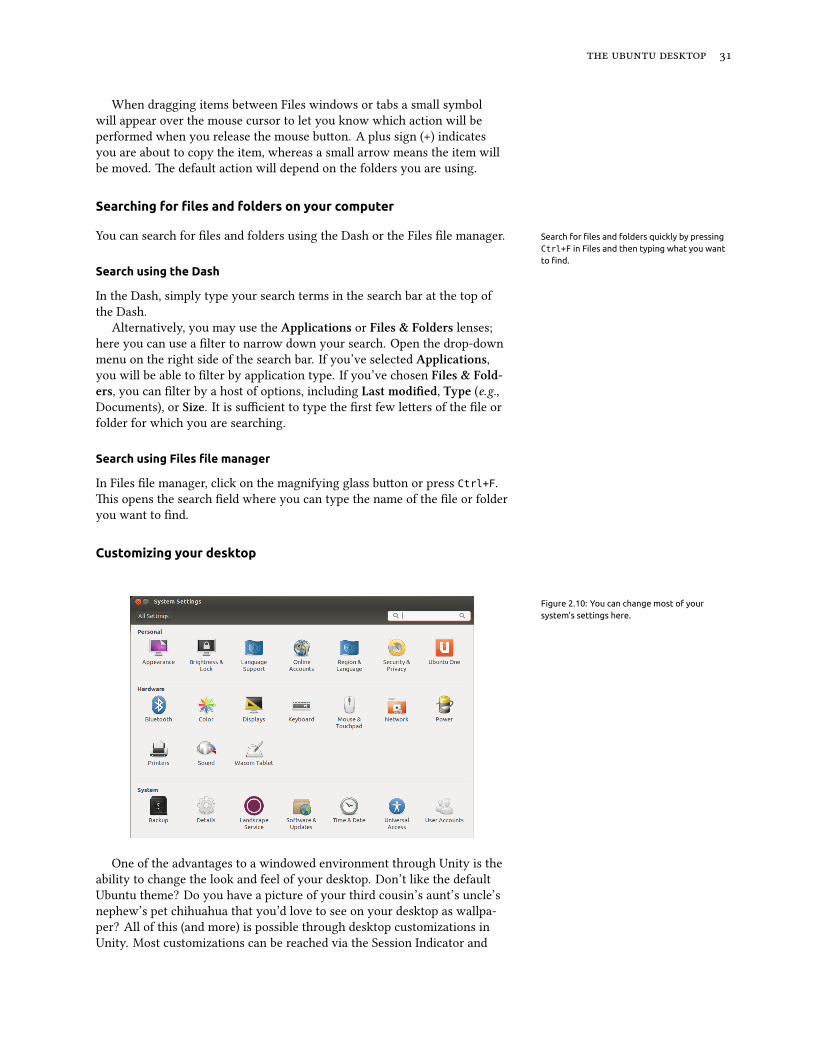
Figure 2.10: You can change most of yoursystem’s settings here.
One of the advantages to a windowed environment through Unity is theability to change the look and feel of your desktop. Don’t like the defaultUbuntu theme? Do you have a picture of your third cousin’s aunt’s uncle’snephew’s pet chihuahua that you’d love to see on your desktop as wallpa-per? All of this (and more) is possible through desktop customizations inUnity. Most customizations can be reached via the Session Indicator and

.
then selecting System Settings to open the System Seings application win-dow. e Dash, desktop appearance, themes, wallpapers, accessibility, andother configuration seings are available here. For more information seeSession options.
Appearance
Figure 2.11: You can change the theme in theLook tab of the “Appearance” window.
The Look tab
rough the Look tab you can change the background, fonts, and windowtheme to further modify the look and feel of your desktop. To begin, openAppearance by either right-clicking on your background and selectingChange Desktop Baground or selecting Session Indicator ‣ SystemSettings ‣Appearance. Select the Look tab.
eme e “Appearance” window will display the current selected back-ground wallpaper and theme. emes control the appearance of your win-dows, buons, scroll bars, panels, icons, and other parts of the desktop. eAmbiance theme is used by default, but there are other themes from whichyou can choose. Just click once on any of the listed themes to give a newtheme a try. e theme will change your desktop appearance immediately.
Desktop background To change the Baground, either select Wallpapers,Pictures Folder, or Colors and Gradients from the drop-down list. WhenWallpapers is selected, you will see Ubuntu’s default selection of back-grounds. To change the background, simply click the picture you would liketo use. You’re not limited to this selection. To use one of your own pictures,click the + buon and navigate to the image you would like to use. endouble-click the image, and the change will take effect immediately. isimage will then be added to your list of available backgrounds. SelectingPictures Folder opens your Pictures folder where you can choose a picturefor the background. e Colors and Gradients buon allows you to setthe background to a solid or gradient color. Click on the Solid Color but-ton, then the Pi a Color to choose a solid color. e Vertical Gradientand Horizontal Gradient buons bring up two Pi a Color buons. Just

choose any two colors you like and see if you have achieved the desiredresult.
Launcher icon size At the boom of the Look tab you find a slider tochange the size of icons on the Launcher. You may choose from a rangebetween and pixels.
The Behavior tab
rough the behavior tab there are several options to change the behaviorof your desktop.
Auto-hide the Launcher Switch the Auto-hide the Launer to either showthe Launcher or reveal it when moving the pointer to the defined hot spot.When turned on, you can choose the reveal location—Le side or Top lecorner—and the reveal sensitivity.
Enable workspaces By default, workspaces are not enabled. You can enableworkspaces by checking this option.
Add show desktop icon to the launcher Check this option if you want toshow the desktop icon on the Launcher.
Accessibility
Ubuntu has built-in tools that make using the computer easier for peoplewith certain physical limitations. You can find these tools by opening theDash and searching for “Universal Access” or by selecting Session Indica-tor ‣ System Settings ‣Universal Access. Use the Seeing tab to manage thetext size, the contrast of the interfaces, enable a zoom tool, or even a screenreader. Selecting high-contrast themes and larger on-screen fonts can assistthose with vision difficulties. You can activate “Visual Alerts” through theHearing tab if you have hearing impairment. You can also adjust keyboardand mouse seings to suit your needs through the Typing and Pointing andCliing tabs, respectively.
Figure 2.12: Universal Access allows you toenable extra features to make it easier to useyour computer.
.
Orca screen reader
Orca is a useful tool for people with visual impairments. Orca comes pre-installed in Ubuntu. To run Orca, click on the Dash, type Orca, and clickon the displayed result. Orca is the “Screen Reader” part of Universal Ac-cess and can be launched once the “Screen Reader” is activated. Orca’svoice synthesizer will activate and assist you through the various optionssuch as voice type, voice language, Braille, and screen magnification. Onceyou have finished selecting your seings, you will need to log out of thecomputer (Orca will offer to do this for you). When you log back in, theOrca seings you selected will automatically run every time you use yourcomputer.
Session options
When you have finished working on your computer, you can choose to logout, suspend, restart, or shut down through the Session Indicator on the farright side of the top panel.
Logging out
Logging out will leave the computer running but return the desktop tothe login screen. is is useful for switching between users, such as whena different person wishes to log in to their account or if you are ever in-structed to “log out and back in again.” You can also log out by pressingCtrl+Alt+Del. Before logging out, always verify that you have saved yourwork in any open application.
Suspend
To save energy, you can put your computer into suspend mode which willsave the current opened applications to internal memory, power off allinternal devices and hardware, and allow you to start back up more quickly.While in a suspended state, the computer will use just a trickle of energy;this is required because the session is saved to internal memory, and if nopower goes to internal memory, the data will be lost. To put your computerin suspend mode, select suspend from the “Session Indicator”.
Rebooting
To reboot your computer, select Shut Down from the “Session Indicator”and click the Restart icon.
Shut down
To totally power down your computer, select Power Off from the “SessionIndicator” and click Power Off.
Other options
From the “Session Indicator”, select Lo/Swit Account to either lock thescreen of the current user or switch user accounts. You can lock your screenquickly by using the keyboard shortcut Ctrl+Alt+L. Locking your screen isrecommended if you are away from your computer for any amount of time.
Getting help
General Help
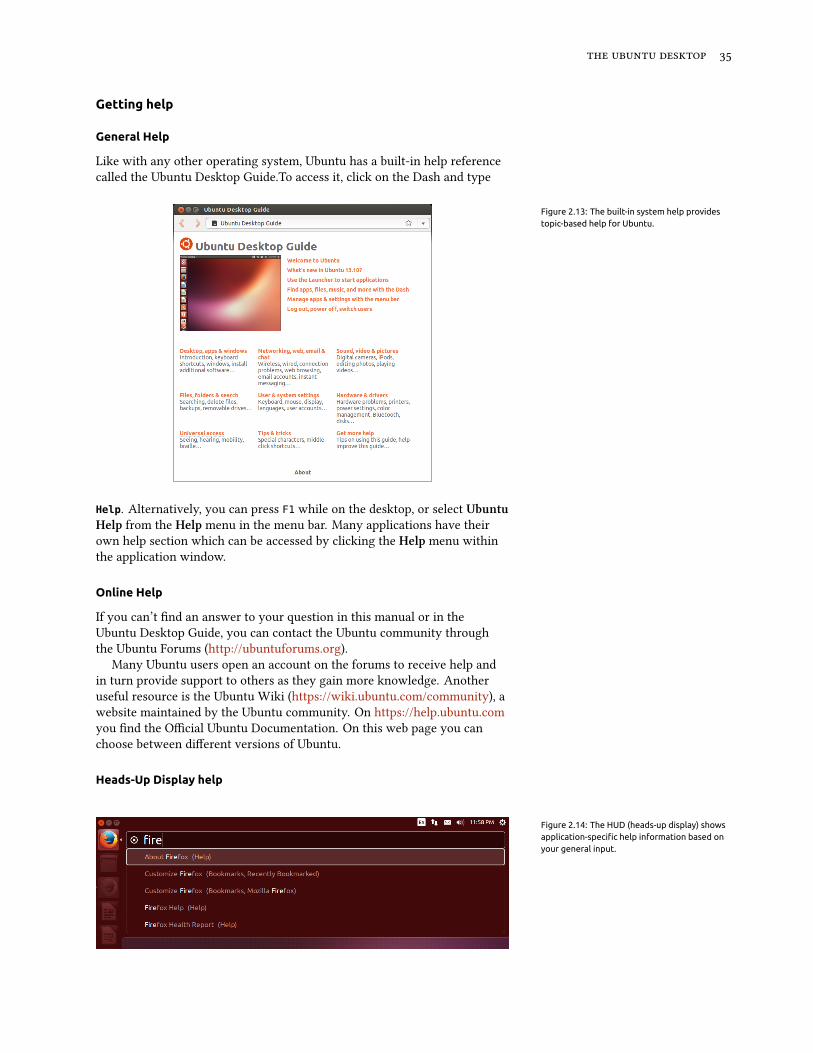
Like with any other operating system, Ubuntu has a built-in help referencecalled the Ubuntu Desktop Guide.To access it, click on the Dash and type
Figure 2.13: The built-in system help providestopic-based help for Ubuntu.
Help. Alternatively, you can press F1 while on the desktop, or select UbuntuHelp from the Help menu in the menu bar. Many applications have theirown help section which can be accessed by clicking the Help menu withinthe application window.
Online Help
If you can’t find an answer to your question in this manual or in theUbuntu Desktop Guide, you can contact the Ubuntu community throughthe Ubuntu Forums (http://ubuntuforums.org).
Many Ubuntu users open an account on the forums to receive help andin turn provide support to others as they gain more knowledge. Anotheruseful resource is the Ubuntu Wiki (https://wiki.ubuntu.com/community), awebsite maintained by the Ubuntu community. On https://help.ubuntu.comyou find the Official Ubuntu Documentation. On this web page you canchoose between different versions of Ubuntu.
Heads-Up Display help
Figure 2.14: The HUD (heads-up display) showsapplication-specific help information based onyour general input.
.
e (heads-up display) is a keyboard-friendly utility to help you findcommands, features, and preferences embedded deep within the stackedmenu structure of an application.
Activate the by tapping the le Alt key on the keyboard. If youwant to know how to load Rhythmbox, the default music player in Ubuntu,then just type rhythmbox in the and the options related to Rhythmboxwill come up in the list of matching results. You can press the Enter keyto active the command. e also works for some applications runningunder WINE. comes in handy in applications with deep menus such asLibreOffice and Gimp.
3 Working with Ubuntu
All the applications you need
If you are migrating from a Windows or Mac platform, you may wonderif the programs you once used are available for Ubuntu. Some of the pro-grams you already use have native Linux versions. For those that don’t,there are free and open source applications that will cover your needs. issection will recommend some alternatives that will work well on Ubuntu.
Most of the applications listed in this section are available via the So-ware Center. ose followed by an asterisk (*) can be downloaded directlyfrom their official websites.
Office Suites
‣ Windows: Microso Office, LibreOffice‣ Mac : iWork, Microso Office, LibreOffice‣ Linux: LibreOffice, KOffice, Office, Kexi (database application)
In Ubuntu you may choose among many office suites. e most popularsuite is the LibreOffice (formerly OpenOffice). Included in the suite:‣ Writer—word processor‣ Calc—spreadsheet‣ Impress—presentation manager‣ Draw—drawing program‣ Base—database‣ Math—equation editor
LibreOffice Suite is installed by default. Note that Base is not installed bydefault and it can be installed through Ubuntu Soware Center.
Email Applications
‣ Windows: Microso Outlook, Mozilla underbird‣ Mac : Mail.app, Microso Outlook, Mozilla underbird‣ Linux: Mozilla underbird, Evolution, KMail
As with office suites, there are multiple options for email applications.One very popular email application is Mozilla underbird, which is alsoavailable for Windows. underbird is the default email application inUbuntu. Another option is Evolution—similar to Microso Outlook, it alsoprovides a calendar.
Web Browsers
‣ Windows: Microso Internet Explorer, Mozilla Firefox, Opera, Chromium,Google Chrome
‣ Mac : Safari, Mozilla Firefox, Opera, Chromium, Google Chrome‣ Linux: Mozilla Firefox, Opera*, Chromium, Google Chrome*, Epiphany
e most popular web browsers can be installed directly from theUbuntu Soware Center. Opera is available for download from http://www.opera.com/browser/download/. Google Chrome is available for downloadfrom https://www.google.com/chrome/.
.
PDF Readers
‣ Windows: Adobe Acrobat Reader, Foxit Firefox and Google Chrome are also able toview PDF files.‣ Mac : Adobe Acrobat Reader
‣ Linux: Evince, Adobe Acrobat Reader, Okular
Evince is a user-friendly and minimalistic reader, and it is the default reader. If Evince doesn’t cover your needs, Adobe Acrobat Reader isavailable for Ubuntu, too.
Multimedia Players
‣ Windows: Windows Media Player, ‣ Mac : icktime, ‣ Linux: Totem, , MPlayer, Kaffeine
For multimedia, Ubuntu users have a wide variety of options for highquality players. VLC is a perennial favorite among videophiles. e classicand user-friendly Totem is the default media player in Ubuntu.
Music Players and Podcatchers
‣ Windows: Windows Media Player, iTunes, Winamp‣ Mac : iTunes‣ Linux: Rhythmbox, Banshee, Amarok, Audacity, Miro
ere are several options for listening to music with Ubuntu: Rhythmbox(installed by default) and Amarok among many others. ese applicationsallow you to listen to music and to your favorite podcasts. Amarok is sim-ilar to Winamp. ere is Miro for those who watch video podcasts and shows from the Internet.
CD/DVD Burning
‣ Windows: Nero Burning , InfraRecorder‣ Mac : Burn, Toast Titanium‣ Linux: Brasero, Kb, Gnome-baker
ere are several popular disk burning applications such as Gnome-baker, Brasero (Ubuntu’s default burner application), burner, and Kb.ese burners are powerful tools, offering user-friendly interfaces andmany features. ey are all open source and free of charge!
Photo Management
‣ Windows: Microso Office Picture Manager, Picasa‣ Mac : Aperture, Picasa‣ Linux: Shotwell, gumb, Gwenview, F-Spot
You can view and manage your favorite photos with Shotwell, Ubuntu’sdefault photo manager, or with gumb, Gwenview, and F-Spot.
Graphics Editors
‣ Windows: Adobe Photoshop, ‣ Mac : Adobe Photoshop,

‣ Linux: , Inkscape
is a very powerful graphics editor. You can create your own graph-ics, taper your photographs, and modify your pictures. , a powerfulalternative to Photoshop, covers the needs of novice users, professionalphotographers, and designers alike. is not installed by default, but theapplication can be installed through the Ubuntu Soware Center.
Instant Messaging
‣ Windows: Windows Live Messenger, , Yahoo! Messenger, GoogleTalk
‣ Mac : Windows Live Messenger, , Yahoo! Messenger, Adium,iChat
‣ Linux: Empathy, Pidgin, Kopete, aMSN
None of the other platform clients have Linux versions. However,you can use Pidgin, Empathy, or Kopete to communicate over most pro-tocols including: , , Google Talk (Jabber/), Facebook, Yahoo!,and . is means you need only one client to communicate with all ofyour friends. e drawback is that some of these clients have limited videosupport. If you are using exclusively, aMSN may be worth a try.
VoIP Applications
‣ Windows: Skype, Google Video Chat‣ Mac : Skype, Google Video Chat‣ Linux: Ekiga, Skype, Google Video Chat
VoIP technologies allow you to talk to people over the Internet. emost popular application is Skype, which is available for Linux. An open-source alternative called Ekiga supports voice communication using the protocol. Note that Ekiga isn’t compatible with Skype.
BitTorrent Clients
‣ Windows: µTorrent, Vuze‣ Mac : Transmission, Vuze‣ Linux: Transmission, Deluge, KTorrent, Flush, Vuze, BitStorm Lite
ere are a number of BitTorrent clients for Ubuntu: Transmission,Ubuntu’s default client, is simple and light-weight. Deluge, Vuze, and KTor-rent offer many features and can satisfy the most demanding of users.
Getting online
is section of the manual will help you to check your connection to theInternet and help you configure it where needed. Ubuntu can connect to theInternet using a wired, wireless, or dialup connection. Ubuntu also supportsmore advanced connection methods, which will be briefly discussed at theend of this section.
A wired connection is when your computer connects to the Internetusing an Ethernet cable. is is usually connected to a wall socket or anetworking device—like a switch or a router.
A wireless connection is when your computer connects to the Internetusing a wireless radio network—usually known as Wi-Fi. Most routers now
.
come with wireless capability, as do most laptops and netbooks. Because ofthis, Wi-Fi is the most common connection type for these types of devices.Wireless connectivity makes laptops and netbooks more portable whenmoving to different rooms of a house and while travelling.
A dialup connection is when your computer uses a modem to connect tothe Internet through a telephone line.
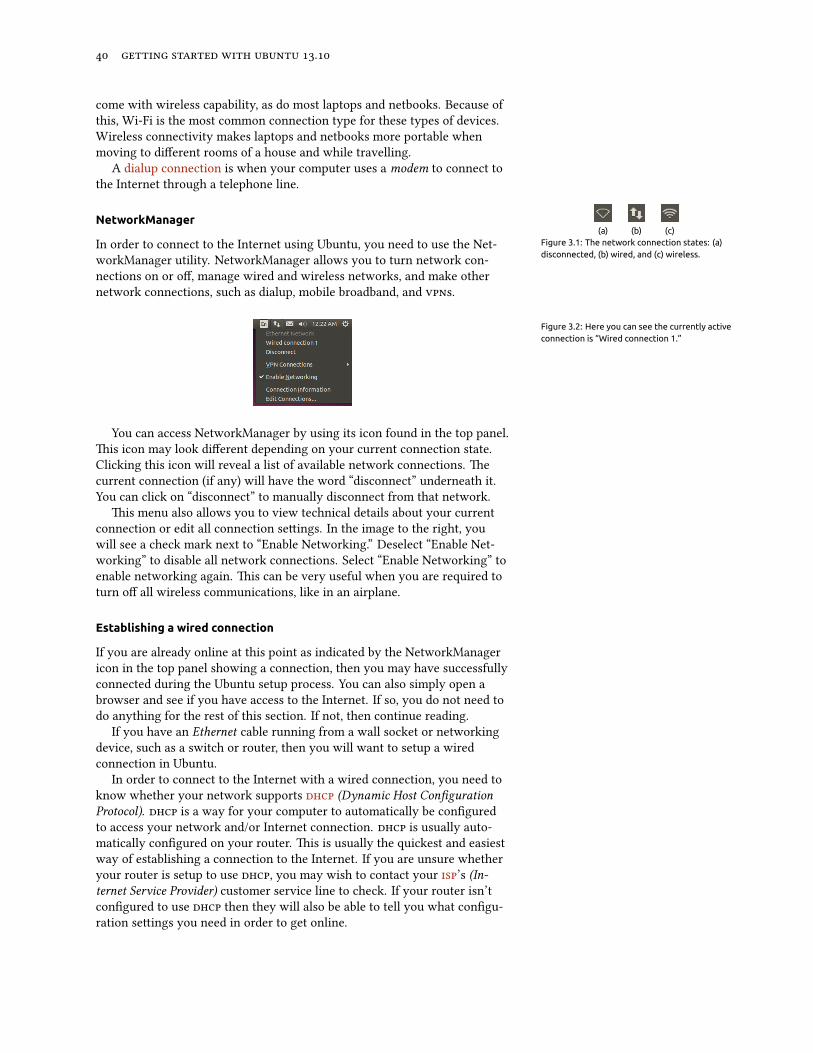
NetworkManager(a) (b) (c)
Figure 3.1: The network connection states: (a)disconnected, (b) wired, and (c) wireless.
In order to connect to the Internet using Ubuntu, you need to use the Net-workManager utility. NetworkManager allows you to turn network con-nections on or off, manage wired and wireless networks, and make othernetwork connections, such as dialup, mobile broadband, and s.
Figure 3.2: Here you can see the currently activeconnection is “Wired connection 1.”
You can access NetworkManager by using its icon found in the top panel.is icon may look different depending on your current connection state.Clicking this icon will reveal a list of available network connections. ecurrent connection (if any) will have the word “disconnect” underneath it.You can click on “disconnect” to manually disconnect from that network.
is menu also allows you to view technical details about your currentconnection or edit all connection seings. In the image to the right, youwill see a check mark next to “Enable Networking.” Deselect “Enable Net-working” to disable all network connections. Select “Enable Networking” toenable networking again. is can be very useful when you are required toturn off all wireless communications, like in an airplane.
Establishing a wired connection
If you are already online at this point as indicated by the NetworkManagericon in the top panel showing a connection, then you may have successfullyconnected during the Ubuntu setup process. You can also simply open abrowser and see if you have access to the Internet. If so, you do not need todo anything for the rest of this section. If not, then continue reading.
If you have an Ethernet cable running from a wall socket or networkingdevice, such as a switch or router, then you will want to setup a wiredconnection in Ubuntu.
In order to connect to the Internet with a wired connection, you need toknow whether your network supports (Dynamic Host ConfigurationProtocol). is a way for your computer to automatically be configuredto access your network and/or Internet connection. is usually auto-matically configured on your router. is is usually the quickest and easiestway of establishing a connection to the Internet. If you are unsure whetheryour router is setup to use , you may wish to contact your ’s (In-ternet Service Provider) customer service line to check. If your router isn’tconfigured to use then they will also be able to tell you what configu-ration seings you need in order to get online.

Automatic connections with DHCP
Figure 3.3: This window displays your IP addressand other connection information.
If your network supports , then you may already be set up for on-line access. To check this, click on the NetworkManager icon. ere shouldbe a “Ethernet Network” heading in the menu. If “Wired connection ” ap-pears directly underneath, then your machine is currently connected andprobably setup for . If “Disconnected” appears in gray underneath thewired network section, look below to see if an option labeled “Wired con-nection ” appears in the list. If so, click on it to aempt to establish a wiredconnection.
To check if you are online, click on the NetworkManager icon in the An IP (Internet Protocol) address is a uniquenumber assigned to your machine so that yourrouter can identify you on the network. Thinkof it like a phone number for your computer.Having this unique address allows the routerto speak to your computer, and thereforesend/receive data.If you are still not online after following these
steps, you may need to try setting up yournetwork connection manually using a static IPaddress.
top panel and select the Connection Information option. You should see awindow showing details of your connection. If your address is displayedas ... or starts with ., then your computer was not successfullyassigned connection information through . If it shows another address(e.g., ...), then it is likely that your connection to therouter was successful. To test your Internet connection, you may want toopen the Firefox web browser to try loading a web page. More informationon using Firefox can be found later in this chapter.
Manual configuration with static address
If your network does not support , then you need to know a few itemsof information before you can get online. If you do not know any of thisinformation, then you call your .
‣ An address—is is a unique address used for identifying your com-puter on the network. An address is always given in four numberedgroups, separated by dots, for example, .... When connect-ing using , this address will periodically change (hence, the name“dynamic”). However, if you have configured a static address, your address will never change.
‣ A network mask—is tells your computer the size of the network towhich it is being connected. It is formaed the same way as the ad-dress, but usually looks something like ....
‣ A gateway—is is the address of the device that your machine looksto for access to the Internet. Usually, this will be the router’s address.
‣ server—is is the address of the (Domain Name Service)server. is what your computer uses to resolve addresses to domain

.
names. For example http://www.ubuntu.com resolves to ....is is the address of the Ubuntu website on the Internet. isused so you don’t have to remember addresses. Domain names (likeubuntu.com) are much easier to remember. You will need at least one server address but you can enter up to three addresses in case oneserver is unavailable. If you do not know your ’s server addresses,Google has servers that anyone in the world can use for free. eaddresses of these servers are: Primary—... Secondary—....
To manually configure a wired connection, click on the NetworkManagericon and select Edit Connections. Make sure you are looking at the Wiredtab inside the “Network Connections” window. e list may already havean entry, such as “Wired connection ” or a similar name. If a connection islisted, select it and click the Edit buon. If no connection is listed, click theAdd buon.
If you are adding a connection, you need to provide a name for theconnection. is will distinguish the connection being added from anyother connections added in future. In the “Connection Name” field, choose aname such as “Wired Home.”
Figure 3.4: In this window you can manually edita connection.
To setup the connection:
. Make sure that the Connect automatically option is selected under theconnection name.
. Switch to the v Settings tab.. Change the Method to “Manual.”. Click on the Add buon next to the empty list of addresses.. Enter your address in the field below the Address header.. Click to the right of the address, directly below the Netmask header
and enter your network mask. If you are unsure, “...” is themost common.
. Click on the right of the network mask directly below the Gatewayheader and enter the address of your gateway.
. In the Servers field below, enter the address of your server(s).If you are entering more than one, separate them with commas—forexample, “..., ...”.
. Click Save to save your changes.
A address is a hardware address for your computer’s network card. Enteringthis information is sometimes important when using a cable modem connection.If you know the address of your network card, this can be entered in theappropriate text field in the Wired tab of the editing window. To find the addresses for all installed networking devices, open a terminal window, and atthe command line prompt, type ifconfig. is will display a lot of informationabout each of the network devices installed on the computer. e wired deviceswill be labeled as LAN, LAN, etc. e wireless devices will appear as WLAN,WLAN, etc.
When you have returned to the Network Connections screen, yournewly added connection should now be listed. Click Close to return to thedesktop. If your connection was configured correctly, the NetworkManagericon should have changed to show an active wired connection. To test ifyour connection is properly set up, simply open a web browser. If you canaccess the Internet, then you are connected!
Wireless
If your computer is equipped with a wireless (Wi-Fi) card and you have awireless network nearby, you should be able to set up a wireless connectionin Ubuntu.
Connecting to a wireless network for the first time
If your computer has a wireless network card, you can connect to a wirelessnetwork. Most laptops and netbooks have a built-in wireless networkingcard.
Ubuntu is usually able to detect any wireless network in range of yourcomputer. To see a list of wireless networks, click on the NetworkMan-ager icon. Under the “Wireless Networks” heading you should see a list ofavailable wireless networks. Each network will be shown by its name and asignal meter to the le showing its relative signal strength. e signal meterlooks like a set of bars similar to what is seen when viewing signal strengthof a cell phone. Simply put, the more bars, the stronger the signal. To im-prove speed and reliability of your wireless connection, try moving closer toyour router or wireless access point.
A wireless network can be open to anyone, or it can be protected witha password. A small padlock will be displayed by the signal bar if anywireless network within range are password-protected. You will need toknow the correct password in order to connect to these secured wirelessnetworks.
To connect to a wireless network, select the desired network by clickingon its name within the list. is will be the name that was used duringthe installation of the wireless router or access point. Most s (Internetservice providers) provide pre-configured routers with a sticker on themdetailing the current wireless network name and password. Most publiclyaccessible wireless networks will be easily identifiable by the name used forthe wireless network—for example “Starbucks-Wireless.”
If the network is unprotected (i.e., the signal meter does not show a pad-lock), a connection should be established within a few seconds—and with-out a password required. e NetworkManager icon in the top panel willanimate as Ubuntu aempts to connect to the network. If the connectionis successful, the icon will change to display a signal meter. An on-screen
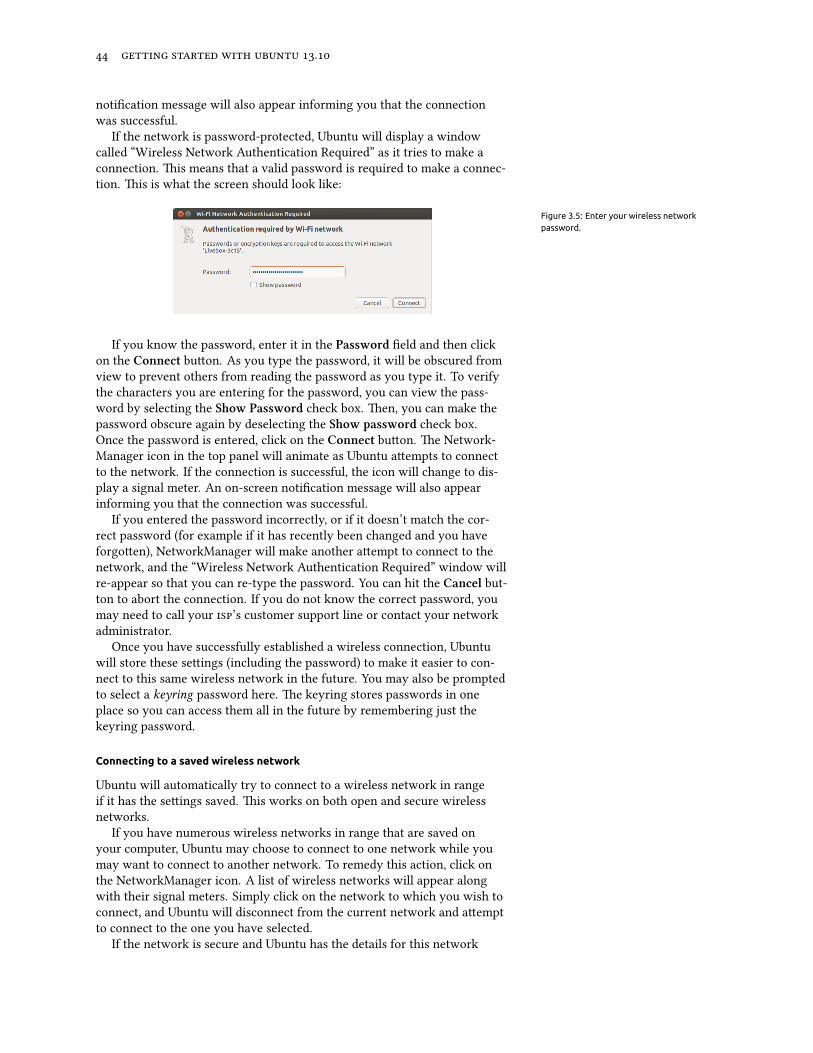
.
notification message will also appear informing you that the connectionwas successful.
If the network is password-protected, Ubuntu will display a windowcalled “Wireless Network Authentication Required” as it tries to make aconnection. is means that a valid password is required to make a connec-tion. is is what the screen should look like:
Figure 3.5: Enter your wireless networkpassword.
If you know the password, enter it in the Password field and then clickon the Connect buon. As you type the password, it will be obscured fromview to prevent others from reading the password as you type it. To verifythe characters you are entering for the password, you can view the pass-word by selecting the Show Password check box. en, you can make thepassword obscure again by deselecting the Show password check box.Once the password is entered, click on the Connect buon. e Network-Manager icon in the top panel will animate as Ubuntu aempts to connectto the network. If the connection is successful, the icon will change to dis-play a signal meter. An on-screen notification message will also appearinforming you that the connection was successful.
If you entered the password incorrectly, or if it doesn’t match the cor-rect password (for example if it has recently been changed and you haveforgoen), NetworkManager will make another aempt to connect to thenetwork, and the “Wireless Network Authentication Required” window willre-appear so that you can re-type the password. You can hit the Cancel but-ton to abort the connection. If you do not know the correct password, youmay need to call your ’s customer support line or contact your networkadministrator.
Once you have successfully established a wireless connection, Ubuntuwill store these seings (including the password) to make it easier to con-nect to this same wireless network in the future. You may also be promptedto select a keyring password here. e keyring stores passwords in oneplace so you can access them all in the future by remembering just thekeyring password.
Connecting to a saved wireless network
Ubuntu will automatically try to connect to a wireless network in rangeif it has the seings saved. is works on both open and secure wirelessnetworks.
If you have numerous wireless networks in range that are saved onyour computer, Ubuntu may choose to connect to one network while youmay want to connect to another network. To remedy this action, click onthe NetworkManager icon. A list of wireless networks will appear alongwith their signal meters. Simply click on the network to which you wish toconnect, and Ubuntu will disconnect from the current network and aemptto connect to the one you have selected.
If the network is secure and Ubuntu has the details for this network
saved, Ubuntu will automatically connect. If the details for this networkconnection are not saved, are incorrect, or have changed, then you will beprompted to enter the network password again. If the network is open (nopassword required), all of this will happen automatically and the connectionwill be established.
Connecting to a hidden wireless network
In some environments, you may need to connect to a hidden wireless net-work. ese hidden networks do not broadcast their names, and, therefore,their names will not appear in the list of available wireless networks evenif they are in range. In order to connect to a hidden wireless network, youwill need to get its name and security details from your network adminis-trator or .
To connect to a hidden wireless network:
. Click on NetworkManager in the top panel.. Select Connect to a hidden wireless network. Ubuntu will then open
the “Connect to Hidden Wireless Network” window.. In the Network name field, enter the name of the network. is is also
known as the (Service Set Identifier). You must enter the name ex-actly how it was given to you. For example, if the name is “Ubuntu-Wireless,” entering “ubuntu-wireless” will not work as the “U” and “W”are both uppercase in the correct name.
. In the Wireless security field, select one of the options. If the networkis an open network, leave the field set to “None.” If you do not know thecorrect seing for the field, you will not be able to connect to the hiddennetwork.
. Click the Connect buon. If the network is secure, you will be promptedfor the password. Provided you have entered all of the details correctly,the network should then connect, and you will receive an on-screennotification informing you that the connection was a success.
As is the case with visible wireless networks, hidden wireless networkseings will be saved once a connection is made, and the wireless networkwill then appear in the list of saved connections.
Disabling and enabling your wireless card
By default, wireless access is enabled if you have a wireless card installed inyour computer. In certain environments (like on airplanes), you may needto temporarily disable your wireless card.
To disable your wireless card, click on the NetworkManager icon anddeselect the Enable Wireless option. Your wireless radio will now be turnedoff, and your computer will no longer search for wireless networks.
To reactivate your wireless card, simply select the Enable Wireless op-tion. Ubuntu will then begin to search for wireless networks automatically.If you are in range of a saved network, you will automatically be connected.
Many modern laptops also have a physical switch/buon built into thechassis that provides a way to quickly enable/disable the wireless card.
Changing an existing wireless network
At times you may want to change the seings of a saved wireless network—for example, when the wireless password gets changed.
To edit a saved wireless network connection:
.
. Click on the NetworkManager icon and select Edit Connections…. A “Network Connections” window will open. Click on the Wireless tab.. By default, saved networks are in chronological order with the most
recently connected at the top. Find the network you want to edit, selectit, and click on the Edit buon.
. Ubuntu will now open a window called “Editing ⟨connection name⟩”,where ⟨connection name⟩ is the name of the connection you are editing.is window will display a number of tabs.
. Above the tabs, there is a field called Connection name where you canchange the name of the connection to give it a more recognizable name.
. If the Connect automatically option is not selected, Ubuntu will detectthe wireless network but will not aempt a connection until it is se-lected from the NetworkManager menu. Select or deselect this option asneeded.
. On the Wireless tab, you may need to edit the field. A is thewireless connection’s network name. If this field isn’t set correctly,Ubuntu will not be able to connect to the wireless network in question.
. Below the is a Mode field. e “Infrastructure” mode means thatyou would be connecting to a wireless router or Access Point. e “ad-hoc” mode is for a computer-to-computer connection (where one com-puter shares another’s connection) and is oen only used in advancedcases.
. On the Wireless Security tab, you can change the Security field. Aselection of “None” means that you are using an open network thatdoesn’t require a password. Other selections in this tab may requireadditional information: /-bit Key is an older security seing still in use by some older
wireless devices. If your network uses this method of security, youwill need to enter a key in the Key field that will appear when thismode is selected.
-bit Passphrase is the same older security as above. However,instead of having a key, your network administrator should haveprovided you with a passphrase to connect to the network.
& Personal is the most common security mode for wirelessnetworking. Once you select this mode, you will need to enter apassword in the Password field.
If your network administrator requires , Dynamic or & Enterprise then you will need to have the administrator helpyou with those modes.
. In the v Settings tab, you can change the Method field from “Auto-matic ()” to “Manual” or one of the other methods. For seing upmanual seings (also known as a static address), please see the sectionabove on manual setup for wired network connections.
. When you finish making changes to the connection, click Apply to saveyour changes and close the window. You can click Cancel at any time toclose the window without saving any changes.
. Finally, click Close on the “Network Connections” window to return tothe desktop.
Aer clicking Apply, any changes made to the network connection willtake effect immediately.
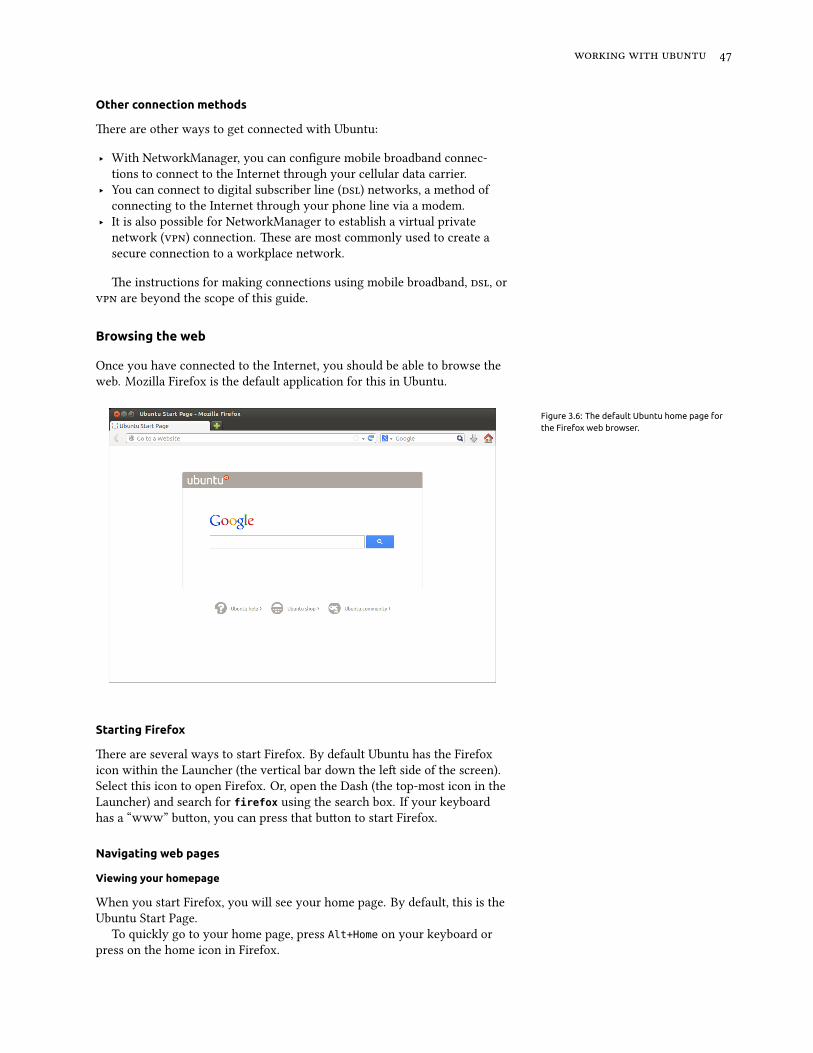
Other connection methods
ere are other ways to get connected with Ubuntu:
‣ With NetworkManager, you can configure mobile broadband connec-tions to connect to the Internet through your cellular data carrier.
‣ You can connect to digital subscriber line () networks, a method ofconnecting to the Internet through your phone line via a modem.
‣ It is also possible for NetworkManager to establish a virtual privatenetwork () connection. ese are most commonly used to create asecure connection to a workplace network.
e instructions for making connections using mobile broadband, , or are beyond the scope of this guide.
Browsing the web
Once you have connected to the Internet, you should be able to browse theweb. Mozilla Firefox is the default application for this in Ubuntu.
Figure 3.6: The default Ubuntu home page forthe Firefox web browser.
Starting Firefox
ere are several ways to start Firefox. By default Ubuntu has the Firefoxicon within the Launcher (the vertical bar down the le side of the screen).Select this icon to open Firefox. Or, open the Dash (the top-most icon in theLauncher) and search for firefox using the search box. If your keyboardhas a “” buon, you can press that buon to start Firefox.
Navigating web pages
Viewing your homepage
When you start Firefox, you will see your home page. By default, this is theUbuntu Start Page.
To quickly go to your home page, press Alt+Home on your keyboard orpress on the home icon in Firefox.
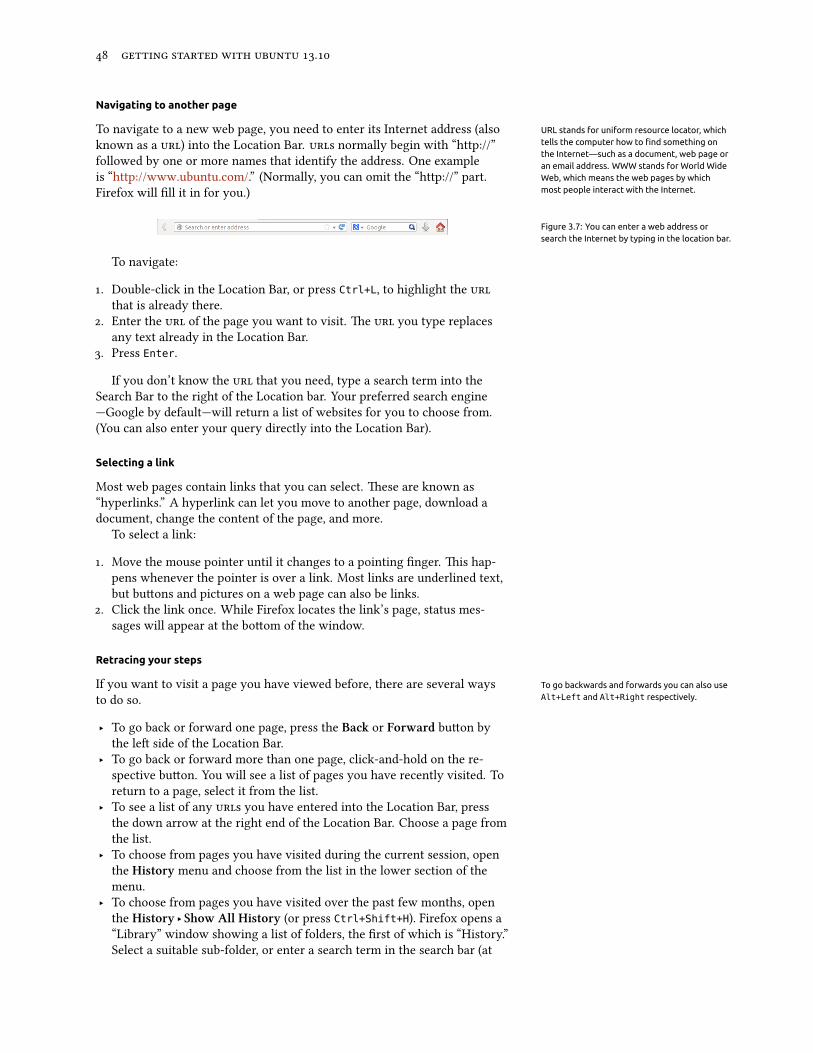
.
Navigating to another page
To navigate to a new web page, you need to enter its Internet address (also URL stands for uniform resource locator, whichtells the computer how to find something onthe Internet—such as a document, web page oran email address. WWW stands for World WideWeb, which means the web pages by whichmost people interact with the Internet.
known as a ) into the Location Bar. s normally begin with “http://”followed by one or more names that identify the address. One exampleis “http://www.ubuntu.com/.” (Normally, you can omit the “http://” part.Firefox will fill it in for you.)
Figure 3.7: You can enter a web address orsearch the Internet by typing in the location bar.
To navigate:
. Double-click in the Location Bar, or press Ctrl+L, to highlight the that is already there.
. Enter the of the page you want to visit. e you type replacesany text already in the Location Bar.
. Press Enter.
If you don’t know the that you need, type a search term into theSearch Bar to the right of the Location bar. Your preferred search engine—Google by default—will return a list of websites for you to choose from.(You can also enter your query directly into the Location Bar).
Selecting a link
Most web pages contain links that you can select. ese are known as“hyperlinks.” A hyperlink can let you move to another page, download adocument, change the content of the page, and more.
To select a link:
. Move the mouse pointer until it changes to a pointing finger. is hap-pens whenever the pointer is over a link. Most links are underlined text,but buons and pictures on a web page can also be links.
. Click the link once. While Firefox locates the link’s page, status mes-sages will appear at the boom of the window.
Retracing your steps
If you want to visit a page you have viewed before, there are several ways To go backwards and forwards you can also useAlt+Left and Alt+Right respectively.to do so.
‣ To go back or forward one page, press the Ba or Forward buon bythe le side of the Location Bar.
‣ To go back or forward more than one page, click-and-hold on the re-spective buon. You will see a list of pages you have recently visited. Toreturn to a page, select it from the list.
‣ To see a list of any s you have entered into the Location Bar, pressthe down arrow at the right end of the Location Bar. Choose a page fromthe list.
‣ To choose from pages you have visited during the current session, openthe History menu and choose from the list in the lower section of themenu.
‣ To choose from pages you have visited over the past few months, openthe History ‣ Show All History (or press Ctrl+Shift+H). Firefox opens a“Library” window showing a list of folders, the first of which is “History.”Select a suitable sub-folder, or enter a search term in the search bar (at

the top right), to find pages you have viewed before. Double-click aresult to open the page.
Stopping and reloading
If a page is loading too slowly or you no longer wish to view a page, press The Reload button is at the right end of theLocation Bar.Esc to cancel it. To reload the current page if it might have changed since
you loaded it, press on the Reload buon or press Ctrl+R.
Opening new windows
At times, you may want to have more than one browser window open. ismay help you to organize your browsing session beer, or to separate webpages that you are viewing for different reasons.
ere are four ways to create a new window:
‣ On the top bar, select File ‣New Window.‣ Press Ctrl+N.‣ Right-click on Firefox’s icon on the Launcher and select Open New
Window.‣ Click on Firefox’s icon on the Launcher using your middle mouse buon.
Once a new window has opened, you can use it exactly the same asthe first window—including navigation and opening tabs. You can openmultiple windows.
Opening a link in a new window
Sometimes, you may want to click a link to navigate to another web page,but do not want the original to close. To do this, you can open the link in itsown independent window.
ere are two ways to open a link in its own window:
‣ Right-click a link and select Open Link in New Window.‣ Press-and-hold the Shift key while clicking a link.
Tabbed browsing
An alternative to opening new windows is to use Tabbed Browsing instead.Tabbed browsing lets you open several web pages within a single Firefox A new tab is independent of other tabs in the
same way that new windows are independentof other windows. You can even mix-and-match—for example, one windowmay contain tabsfor your emails, while another window has tabsfor your work.
window, each independent of the other. is frees space on your desktopas you do not have to open a separate window for each new web page. Youcan open, close, and reload web pages in one place without having to switchto another window.
You can alternate quickly between different tabs by using the keyboardshortcut Ctrl+Tab.
Opening a new blank tab
ere are three ways to create a new blank tab:
‣ Click on the Open new tab buon (a green plus-sign) on the right side ofthe last tab.
‣ On the top bar, open File ‣New Tab.‣ Press Ctrl+T.
.
When you create a new tab, it contains a blank page with the LocationBar focused. Type a web address () or other search term to open a web-site in the new tab.
Opening a link in its own tab
Sometimes, you may want to click a link to navigate to another web page,but do not want the original to close. To do this, you can open the link in itsown tab.
ere are several ways to open a link in its own tab. A tab always opens “in the background”—inother words, the focus remains on the originaltab. The last method (Ctrl+Shift) is anexception; it focuses the new tab immediately.
‣ Right-click a link and select Open Link in New Tab.‣ Press-and-hold the Ctrl key while clicking a link.‣ Click the link using either the middle mouse buon or both le and right
mouse buons simultaneously.‣ Drag the link to a blank space on the tab bar or onto the Open new tab
buon.‣ Press-and-hold Ctrl+Shift while clicking a link.
Closing a tab
Once you have finished viewing a web page in a tab, you have various waysto close it:‣ Click on the Close buon on the right side of the tab.‣ Click the tab with the middle mouse buon or the mouse wheel.‣ Press Ctrl+W.‣ Right-click the tab and select Close Tab.
Restoring a closed tab
Sometimes, you may close the wrong tab by accident, or want to bring backa tab that you have recently closed. Bring back a tab in one of the followingtwo ways:‣ Press Ctrl+Shift+T to re-open the most recently closed tab.‣ Select History ‣Recently Closed Tabs, and choose the name of the tab to
restore.
Changing the tab order
Move a tab to a different location on the tab bar by dragging it to a newlocation using your mouse. While you are dragging the tab, Firefox displaysa small indicator to show the tab’s new location.
Moving a tab between windows
You can move a tab into a new Firefox window or, if one is already open,into a different Firefox window.
Drag a tab away from the tab bar, and it will open into a new window.Drag it from the tab bar into the tab bar of another open Firefox window,and it will move there instead.
Searching
You can search the web from within Firefox without first visiting the homepage of the search engine. By default, Firefox will search the web using theGoogle search engine.
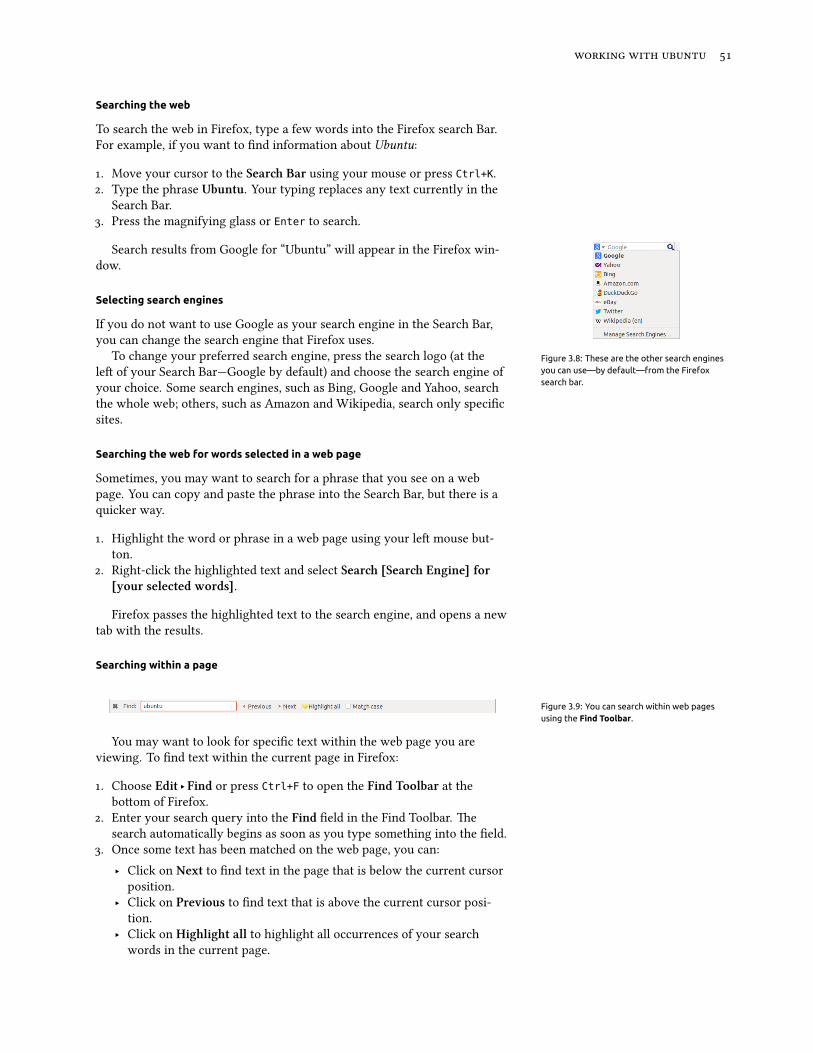
Searching the web
To search the web in Firefox, type a few words into the Firefox search Bar.For example, if you want to find information about Ubuntu:
. Move your cursor to the Sear Bar using your mouse or press Ctrl+K.. Type the phrase Ubuntu. Your typing replaces any text currently in the
Search Bar.. Press the magnifying glass or Enter to search.
Search results from Google for “Ubuntu” will appear in the Firefox win-dow.
Selecting search engines
Figure 3.8: These are the other search enginesyou can use—by default—from the Firefoxsearch bar.
If you do not want to use Google as your search engine in the Search Bar,you can change the search engine that Firefox uses.
To change your preferred search engine, press the search logo (at thele of your Search Bar—Google by default) and choose the search engine ofyour choice. Some search engines, such as Bing, Google and Yahoo, searchthe whole web; others, such as Amazon and Wikipedia, search only specificsites.
Searching the web for words selected in a web page
Sometimes, you may want to search for a phrase that you see on a webpage. You can copy and paste the phrase into the Search Bar, but there is aquicker way.
. Highlight the word or phrase in a web page using your le mouse but-ton.
. Right-click the highlighted text and select Sear [Sear Engine] for[your selected words].
Firefox passes the highlighted text to the search engine, and opens a newtab with the results.
Searching within a page
Figure 3.9: You can search within web pagesusing the Find Toolbar.
You may want to look for specific text within the web page you areviewing. To find text within the current page in Firefox:
. Choose Edit ‣ Find or press Ctrl+F to open the Find Toolbar at theboom of Firefox.
. Enter your search query into the Find field in the Find Toolbar. esearch automatically begins as soon as you type something into the field.
. Once some text has been matched on the web page, you can:‣ Click on Next to find text in the page that is below the current cursor
position.‣ Click on Previous to find text that is above the current cursor posi-
tion.‣ Click on Highlight all to highlight all occurrences of your search
words in the current page.

.
‣ Select the Mat case option to limit the search to text that has thesame capitalization as your search words.
To quickly find the same word or phrase again, press F3.You can skip opening the Find Toolbar altogether.
. Turn on the relevant Accessibility option with Edit ‣ Preferences ‣Advanced ‣General ‣Accessibility ‣ Sear for text when I start typ-ing ‣Close.
. Now, provided your cursor is not within a text field, when you starttyping, it will automatically start searching for text.
Viewing web pages full screen
To display more web content on the screen, you can use Full Screen mode.Full Screen mode hides everything but the main content. To enable FullScreen mode, choose View ‣ Full Screen or press F11. While in full-screenmode, move your mouse to the top of the screen to reveal the andsearch bars.
Press F11 to return to normal mode.
Copying and saving pages
With Firefox, you can copy part of a page so that you can paste it elsewhere,or save the page or part of a page as a file on your computer.
Copying part of a page
To copy text, links or images from a page:
. Highlight the text and images with your mouse.. Right-click the highlighted text and select Copy, or press Ctrl+C.
To copy just a single image, it is not necessary to highlight it. Just right-click the image and select Copy.
You can paste the results into another application, such as LibreOffice.
Copying a link
To copy a text or image link () from a page:
. Position the pointer over the text, link or image. Your mouse pointerchanges to a pointing finger.
. Right-click the link or image to open a pop-up menu.. Select Copy Link Location.
You can paste the link into other applications or into Firefox’s LocationBar.
Saving all or part of a page
To save an entire page in Firefox:
. Choose File ‣ Save Page As from the top bar, or press Ctrl+S. Firefoxopens the “Save As” window.
. Choose a location for the saved page.. Type a file name for the page.

. Press Save.
To save an image from a page:
. Position the mouse pointer over the image.. Right-click the image and select Save Image As. Firefox opens the “Save
Image” window.. Choose a location for the saved image.. Enter a file name for the image.. Press Save.
Changing your home page
Firefox shows the home page when it opens. By default, this is the UbuntuStart Page. You can change your default home page to a new one, or even toseveral new ones.
Figure 3.10: Change Firefox settings in thiswindow.
To change your home page:
. Navigate to the page that you would like to become your new homepage. If you want Firefox to open more than one tab when it starts, opena new tab and navigate to the extra page as many times as you wouldlike. The home page can also be set by entering the
addresses that should be open in the HomePage, with a pipe (“|”) separating pages to beopened in separate tabs.
. Choose Edit ‣ Preferences ‣General ‣ Startup ‣Use Current Pages ‣Close.
Download settings
In Edit ‣ Preferences ‣General ‣Downloads, you can hide or show the The Downloads window shows the progressof currently downloading files, and lists filesdownloaded in the past. It can be used to openor re-download files.
Downloads window, tell Firefox where to place downloaded files, andwhether or not to ask where each time.
Bookmarks
When browsing the web you may want to come back to certain web pagesagain without having to remember the . To do this, you bookmark eachpage. ese bookmarks are saved in the web browser, and you can use themto re-open to those web pages.

.
Bookmarking a page
Aer navigating to a web page you can save its location by bookmarking it.ere are two ways to bookmark a page:
‣ From the top bar, choose Bookmarks ‣Bookmark is Page, or pressCtrl+D. A window opens, allowing you to provide a descriptive name forthe bookmark and a location (within the browser’s bookmarks) to save it.Press Done to save.
‣ Press the star on the right-hand side in the Location Bar. It turns yellow.is saves the page in the Unsorted Bookmarks folder.
Navigating to a bookmarked page
To navigate to a bookmarked page, open the Bookmarks menu from the topbar, and choose your bookmark. Firefox opens the bookmark in the currenttab.
You can reveal the bookmarks, including the Unsorted Bookmarks, in a sidebaron the le of the browser window. Select View ‣ Sidebar ‣Bookmarks, or pressCtrl+B. Repeat, or press the close button at its top, to hide the sidebar.
Deleting or editing a bookmark
To delete or edit a bookmark, do one of the following:
‣ If you are viewing the page already, the star in the Location Bar will beyellow. Press it. Firefox opens a small pop-up window, where you caneither Remove Bookmark or edit the bookmark.
‣ Select Bookmarks ‣ Show All Bookmarks or press Shift+Ctrl+O. Inthe window that opens, you can navigate to bookmarks. Select the oneyou would like to change. To delete, right-click and choose Delete orpress Delete on your keyboard. To edit, change the details shown at theboom of the window.
History
Whenever you are browsing the web, Firefox saves your browsing history.is allows you to come back to a web page that you have recently visitedwithout needing to remember or bookmark the page’s .
To see your most recent history, open the History menu from the topbar. e menu displays several of the most recent web pages that you haveviewed. Choose one of the pages to return to it.
To view the complete history, either:
‣ Select View ‣History or press Ctrl+H to view the history in a sidebar;this replaces the bookmarks sidebar if it is open. (Repeat, or press theclose button at its top, to hide the sidebar.)
‣ Select History ‣ Show All History or press Shift+Ctrl+H to view thehistory in a pop-up window.
Your browsing history is categorized as “Today,” “Yesterday,” “Last days,” “is month,” the previous five months by name, and finally “Olderthan months.” If the history for a category does not exist, that categorywill not be listed. Select one of the date categories in the sidebar to expand
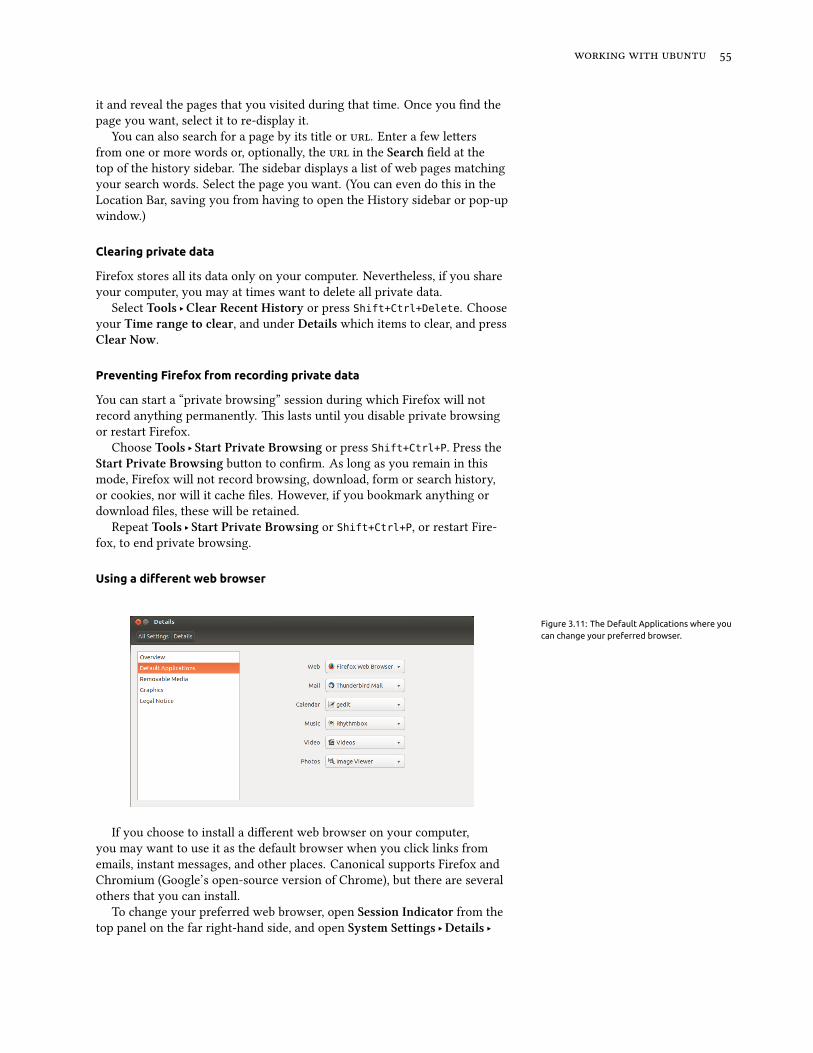
it and reveal the pages that you visited during that time. Once you find thepage you want, select it to re-display it.
You can also search for a page by its title or . Enter a few leersfrom one or more words or, optionally, the in the Sear field at thetop of the history sidebar. e sidebar displays a list of web pages matchingyour search words. Select the page you want. (You can even do this in theLocation Bar, saving you from having to open the History sidebar or pop-upwindow.)
Clearing private data
Firefox stores all its data only on your computer. Nevertheless, if you shareyour computer, you may at times want to delete all private data.
Select Tools ‣Clear Recent History or press Shift+Ctrl+Delete. Chooseyour Time range to clear, and under Details which items to clear, and pressClear Now.
Preventing Firefox from recording private data
You can start a “private browsing” session during which Firefox will notrecord anything permanently. is lasts until you disable private browsingor restart Firefox.
Choose Tools ‣ Start Private Browsing or press Shift+Ctrl+P. Press theStart Private Browsing buon to confirm. As long as you remain in thismode, Firefox will not record browsing, download, form or search history,or cookies, nor will it cache files. However, if you bookmark anything ordownload files, these will be retained.
Repeat Tools ‣ Start Private Browsing or Shift+Ctrl+P, or restart Fire-fox, to end private browsing.
Using a different web browser
Figure 3.11: The Default Applications where youcan change your preferred browser.
If you choose to install a different web browser on your computer,you may want to use it as the default browser when you click links fromemails, instant messages, and other places. Canonical supports Firefox andChromium (Google’s open-source version of Chrome), but there are severalothers that you can install.
To change your preferred web browser, open Session Indicator from thetop panel on the far right-hand side, and open System Settings ‣Details ‣
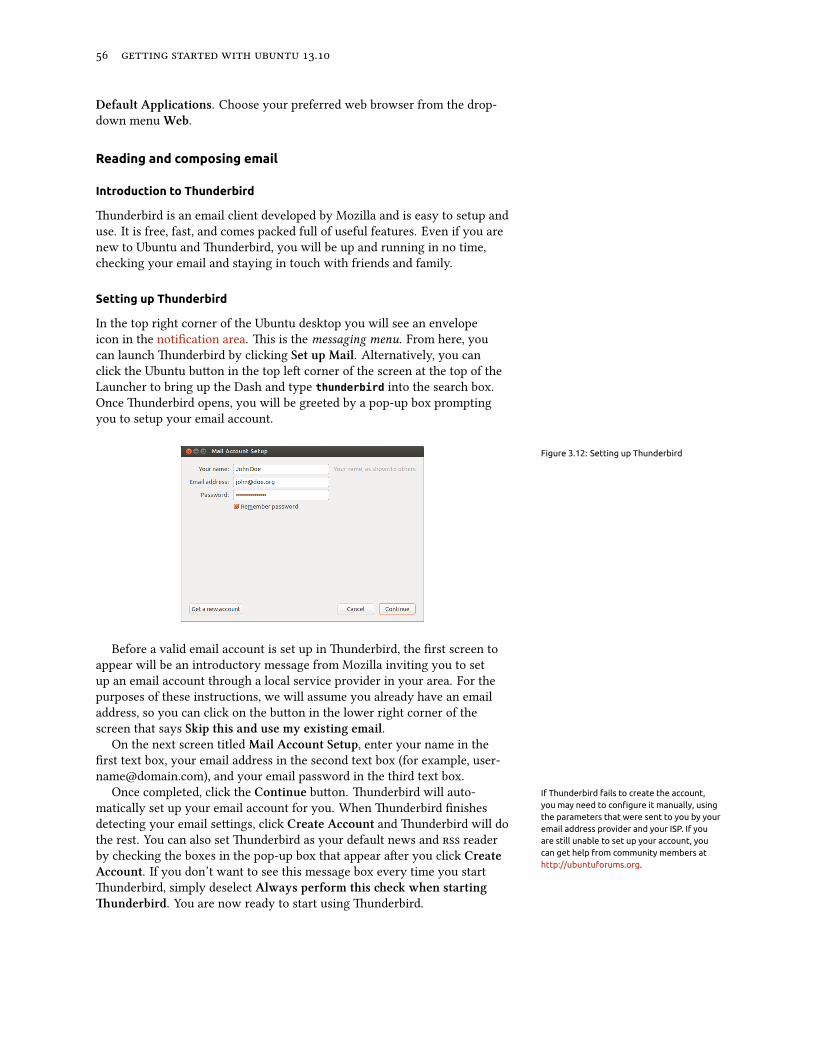
.
Default Applications. Choose your preferred web browser from the drop-down menu Web.
Reading and composing email
Introduction to Thunderbird
underbird is an email client developed by Mozilla and is easy to setup anduse. It is free, fast, and comes packed full of useful features. Even if you arenew to Ubuntu and underbird, you will be up and running in no time,checking your email and staying in touch with friends and family.
Setting up Thunderbird
In the top right corner of the Ubuntu desktop you will see an envelopeicon in the notification area. is is the messaging menu. From here, youcan launch underbird by clicking Set up Mail. Alternatively, you canclick the Ubuntu buon in the top le corner of the screen at the top of theLauncher to bring up the Dash and type thunderbird into the search box.Once underbird opens, you will be greeted by a pop-up box promptingyou to setup your email account.
Figure 3.12: Setting up Thunderbird
Before a valid email account is set up in underbird, the first screen toappear will be an introductory message from Mozilla inviting you to setup an email account through a local service provider in your area. For thepurposes of these instructions, we will assume you already have an emailaddress, so you can click on the buon in the lower right corner of thescreen that says Skip this and use my existing email.
On the next screen titled Mail Account Setup, enter your name in thefirst text box, your email address in the second text box (for example, [email protected]), and your email password in the third text box.
Once completed, click the Continue buon. underbird will auto- If Thunderbird fails to create the account,you may need to configure it manually, usingthe parameters that were sent to you by youremail address provider and your ISP. If youare still unable to set up your account, youcan get help from community members athttp://ubuntuforums.org.
matically set up your email account for you. When underbird finishesdetecting your email seings, click Create Account and underbird will dothe rest. You can also set underbird as your default news and readerby checking the boxes in the pop-up box that appear aer you click CreateAccount. If you don’t want to see this message box every time you startunderbird, simply deselect Always perform this e when startingunderbird. You are now ready to start using underbird.
Around the Thunderbird workspace
Now that you have your email account set up, let’s get to know the un-derbird workspace. underbird is designed to be very user-friendly andeasy to navigate. When you open the application, you will see the mainworkspace with your email folders (all folders window) on the le. On theright of the screen, you will see two windows. e top-right window dis-plays a list of your received email, and the boom-right window displaysthe current email you are viewing. e size of these windows can be easilyresized to suit your viewing environment. To resize the windows, simplyle-click and hold the dividing bar that separates two windows and drag itto the desired position. e All Folders window is where you can see yourmail folders. is window can also include:
Inbox Where your email is stored and accessedEmail address folder You will see one of these folders for each of the ac-
counts you have setupDras Where your dra emails are storedSent mail Where the emails you have sent are storedSpam is is where suspected spam email is stored so you can check them
to make sure you haven’t lost any important emailsTrash is is where messages you’ve deleted are stored so you can double
check to make sure you haven’t accidentally deleted an important email(also one of the local folders)
Important is is where emails you have marked as important are storedStarred is is where emails you have marked with a star are storedPersonal is is where emails you have marked as personal are storedReceipts You can move important receipts to this folder.Travel You can use this folder to store travel emails such as flight times and
bookingsWork You can store work emails in this folder to keep them separate from
your personal emailOutbox Where the emails you are in the process of sending are stored (also
one of the local folders)
Across the top of the underbird workspace, you will see at least fourcontrol buons, Get Mail, Write, Address Book, and Tag. ese are used toget your mail, write your mail, access your address book, and tag your emailmessages.
At the top-right of the All Folders window, you will see a set of quickfilter buons, Unread, Starred, Contact, Tags, and Attament. You can usethese buons to filter your email messages so that you only see your unreadmail, your favorite mail (starred), mail from people in your address book,mail you have tagged, and mail that includes aachments.
If you are accustomed to a more traditional desktop and you have un-derbird maximized to full screen, you might be wondering where the menusare located. ey are still there, and if you want to access them, move yourmouse to the top of the screen and you will see the familiar menus: File,Edit, View, Go, Message, Tools, and Help.
At the top of the window that displays your email, you can see six actionbuons, Reply, Reply All, Forward, Arive, Junk, and Delete. You willfind these very useful for quickly replying to email, forwarding your emailto another person, archiving (backing up) your email, marking an email asjunk mail, and quickly deleting an email. To the le of these quick actionbuons, you will see information about the email you are viewing that

.
includes the sender’s name, the subject of the email, the reply address, andthe recipient of the email.
Using your address book
At the top of the main workspace, you will see the Address Book buon.Click this buon to access your address book. e address book opens in anew window. From here, you can easily organize your contacts. At the topof the address book window, you will see five buons, New Contact, NewList, Properties, Write, and Delete. ey function in the following ways:
New Contact is buon allows you to add a new contact and add as muchdetail as you wish to save, including name, nickname, address, email,additional email, screen name, work number, home number, fax, pagerand mobile/cell number.
New List is buon allows you to add lists for your contacts such asfamily, friends, acquaintances, etc.
Properties is buon allows you to rename your address book name. edefault name is personal address book, but you can change the name asyou see fit.
Write is buon allows you to quickly send an email to a selected contactwithout needing to go back to the main underbird workspace. Simplyselect a contact from your contacts list and click the Write buon tosend them an email.
Delete is buon allows you to quickly delete a contact from your addressbook. Just select the contact you want to delete and press Delete toremove the contact from your address book.
Checking and reading messages
underbird will automatically check your email account for new mes-sages every ten minutes, but if you need to manually check for new mes-sages at any time, le-click the Get Mail buon in the top le corner ofthe workspace. underbird will then check your email account for newmessages and download them.
As they are downloaded, you will see the new email appear in the mes-sage window on the right side of the workspace. When you click on one ofyour emails, it will appear in the window below your email list. If you wantto view your email in a full window, double-le-click your chosen email,and underbird will display the email in a full window in its own tab.
At the top of the open email, you will see information about the email Remote content represent parts of an emailthat may be hosted elsewhere. Remote contentmight consist of video or audio, but mostoften is graphics or HTML content. For securitypurposes, Thunderbird will ask you if you wishto view this remote content.
and the five quick action buons, Reply, Forward, Arive, Junk andDelete as previously discussed. If an email has remote content, you willsee a message asking if you want to display the email or not.
You may want to filter your emails from time to time; this is easily donewith underbird. When you have an email selected and you want to tagthe email, simply click the Tag buon and a drop-down list will be dis-played. In this drop-down list, you have the options to Remove All Tags orMark as…, Important, Work, Personal, To Do, Later. You can also create aNew Tag more suited to your own personal requirements.
Composing Messages
To compose a new email message, click the Write buon in the top le ofthe workspace. is will bring up a new window where you can compose
your new email. In the To: field, enter the email address of the destination—the contact to whom you are sending this email. If there is more than onecontact to whom you are writing, separate multiple recipients with commas.
If a contact that you are addressing is in your address book, you canaddress them by name. Start typing the name of the contact; underbirdwill display the list of mailing contacts below your text. Once you see thecontact you intend to address, click on their email address or use the downarrow key and then press Enter to select the address.
If you would like to carbon-copy (Cc) some contacts, click the To: fieldand select Cc:. Contacts who are listed on the To: and Cc: lines will receivethe email, and will see the rest of the contacts to whom an email was sent.If you would like to send an email to some contacts without disclosing towhom your email was sent, you can send a blind carbon-copy, or Bcc. Toenable Bcc, select Bcc: by clicking the To: field and selecting Bcc:. Anycontacts entered in the Bcc: field will receive the message, but none of therecipients will see the names or emails of contacts on the Bcc: line.
Instead of typing the email addresses or names of the contacts you areaddressing in the message, you can select the contacts from your addressbook. Start typing a few leers from your contact’s first or last name in theTo: field to filter the list to only show mailing contacts. Once you identifythe contact you would like to address, click on their name in the list. Ifyou’ve added the contact in error, delete their address and enter the correctaddress.
You may enter a subject for your email in the Subject field. Messagesshould have a subject to help the recipient identify the general contents ofthe email while glancing at their message list. Enter the contents of your If you do not include a subject in your email,
Thunderbird will warn you about this omission.message in the big text field below the subject. ere is no practical limit onthe amount of text you can include in your message.
By default, underbird will auto-detect the correct format for youremail but you can change this by clicking Options then mouse over Formatand select your preferred option from the list. You have a choice of Auto-Detect, Plain Text Only, Rich Text (HTML) Only, and Plain and Rich (HTML)Text.
When you have finished composing your email, click on the Send buonon the window’s toolbar. Your message will be placed in the Outbox, andwill be sent to your desired recipient.
Attaching files
At times, you may want to send files to your contacts. To send files, youwill need to aach them to your email message. To aach a file to an email You can attach quite a few different file types
to emails, but be careful about the size of theattachments! If they are too big, some emailsystems will reject the email you are sending,and your recipient will never receive it!
you are composing, click on the Atta buon. When the new windowopens, select the file you want to send and click Open. e file you selectedwill then be aached to the email when you click send.
Replying to Messages
In addition to composing new messages, you may want to reply to messagesthat you receive. ere are three types of email replies:
Reply or Reply to Sender sends your reply only to the sender of the messageto whom you are replying.
Reply to All sends your reply to the sender of the message as well as anyaddress in To: or Cc: lines.
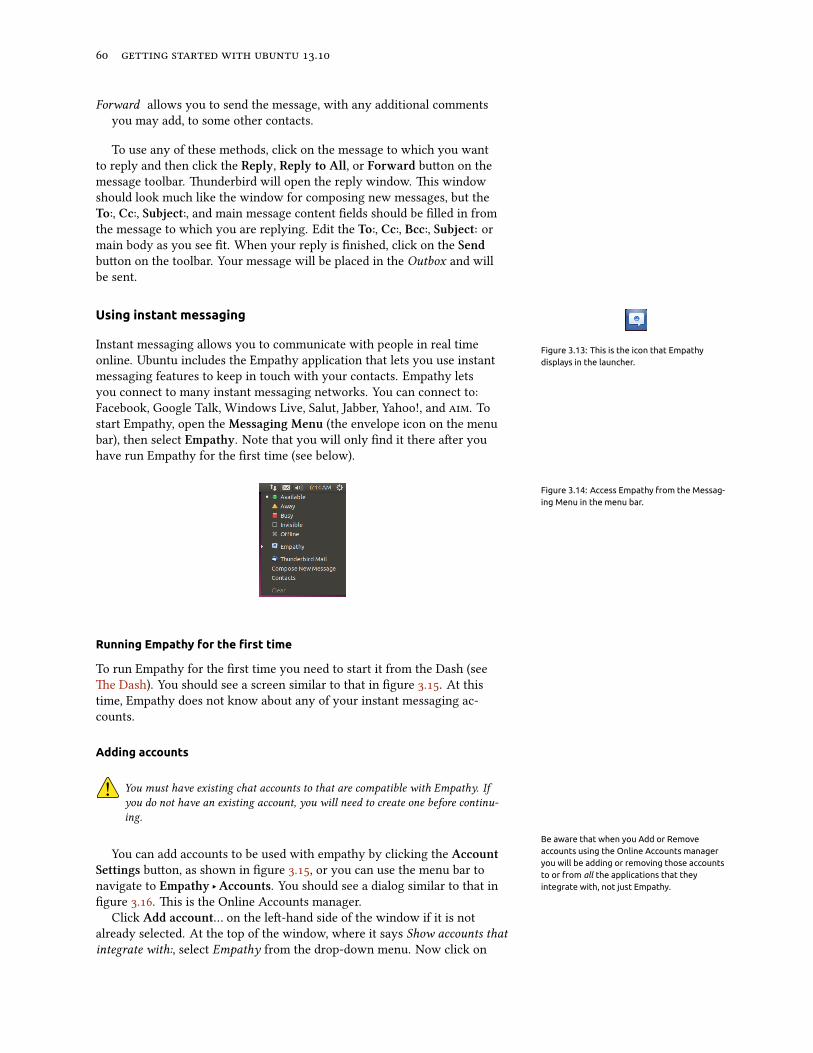
.
Forward allows you to send the message, with any additional commentsyou may add, to some other contacts.
To use any of these methods, click on the message to which you wantto reply and then click the Reply, Reply to All, or Forward buon on themessage toolbar. underbird will open the reply window. is windowshould look much like the window for composing new messages, but theTo:, Cc:, Subject:, and main message content fields should be filled in fromthe message to which you are replying. Edit the To:, Cc:, Bcc:, Subject: ormain body as you see fit. When your reply is finished, click on the Sendbuon on the toolbar. Your message will be placed in the Outbox and willbe sent.
Using instant messaging
Figure 3.13: This is the icon that Empathydisplays in the launcher.
Instant messaging allows you to communicate with people in real timeonline. Ubuntu includes the Empathy application that lets you use instantmessaging features to keep in touch with your contacts. Empathy letsyou connect to many instant messaging networks. You can connect to:Facebook, Google Talk, Windows Live, Salut, Jabber, Yahoo!, and . Tostart Empathy, open the Messaging Menu (the envelope icon on the menubar), then select Empathy. Note that you will only find it there aer youhave run Empathy for the first time (see below).
Figure 3.14: Access Empathy from the Messag-ing Menu in the menu bar.
Running Empathy for the first time
To run Empathy for the first time you need to start it from the Dash (seee Dash). You should see a screen similar to that in figure .. At thistime, Empathy does not know about any of your instant messaging ac-counts.
Adding accounts
You must have existing chat accounts to that are compatible with Empathy. Ifyou do not have an existing account, you will need to create one before continu-ing.
Be aware that when you Add or Removeaccounts using the Online Accounts manageryou will be adding or removing those accountsto or from all the applications that theyintegrate with, not just Empathy.
You can add accounts to be used with empathy by clicking the AccountSettings buon, as shown in figure ., or you can use the menu bar tonavigate to Empathy ‣Accounts. You should see a dialog similar to that infigure .. is is the Online Accounts manager.
Click Add account… on the le-hand side of the window if it is notalready selected. At the top of the window, where it says Show accounts thatintegrate with:, select Empathy from the drop-down menu. Now click on
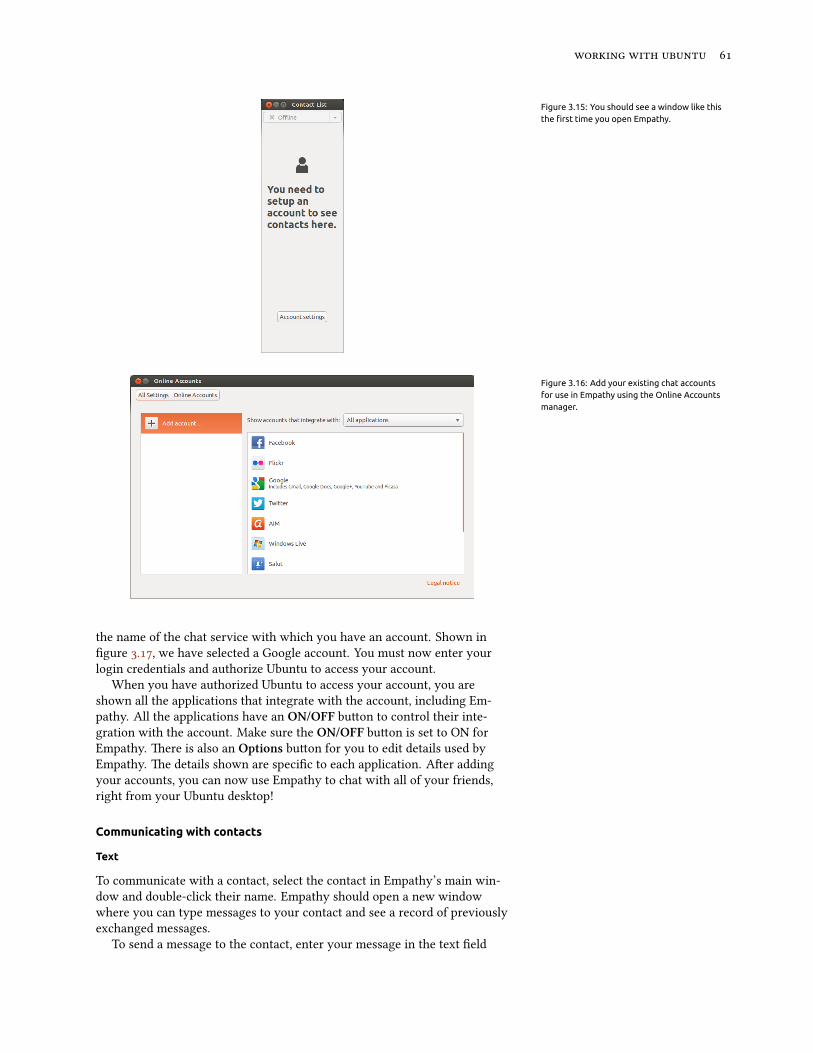
Figure 3.15: You should see a window like thisthe first time you open Empathy.
Figure 3.16: Add your existing chat accountsfor use in Empathy using the Online Accountsmanager.
the name of the chat service with which you have an account. Shown infigure ., we have selected a Google account. You must now enter yourlogin credentials and authorize Ubuntu to access your account.
When you have authorized Ubuntu to access your account, you areshown all the applications that integrate with the account, including Em-pathy. All the applications have an ON/OFF buon to control their inte-gration with the account. Make sure the ON/OFF buon is set to ON forEmpathy. ere is also an Options buon for you to edit details used byEmpathy. e details shown are specific to each application. Aer addingyour accounts, you can now use Empathy to chat with all of your friends,right from your Ubuntu desktop!
Communicating with contacts
Text
To communicate with a contact, select the contact in Empathy’s main win-dow and double-click their name. Empathy should open a new windowwhere you can type messages to your contact and see a record of previouslyexchanged messages.
To send a message to the contact, enter your message in the text field
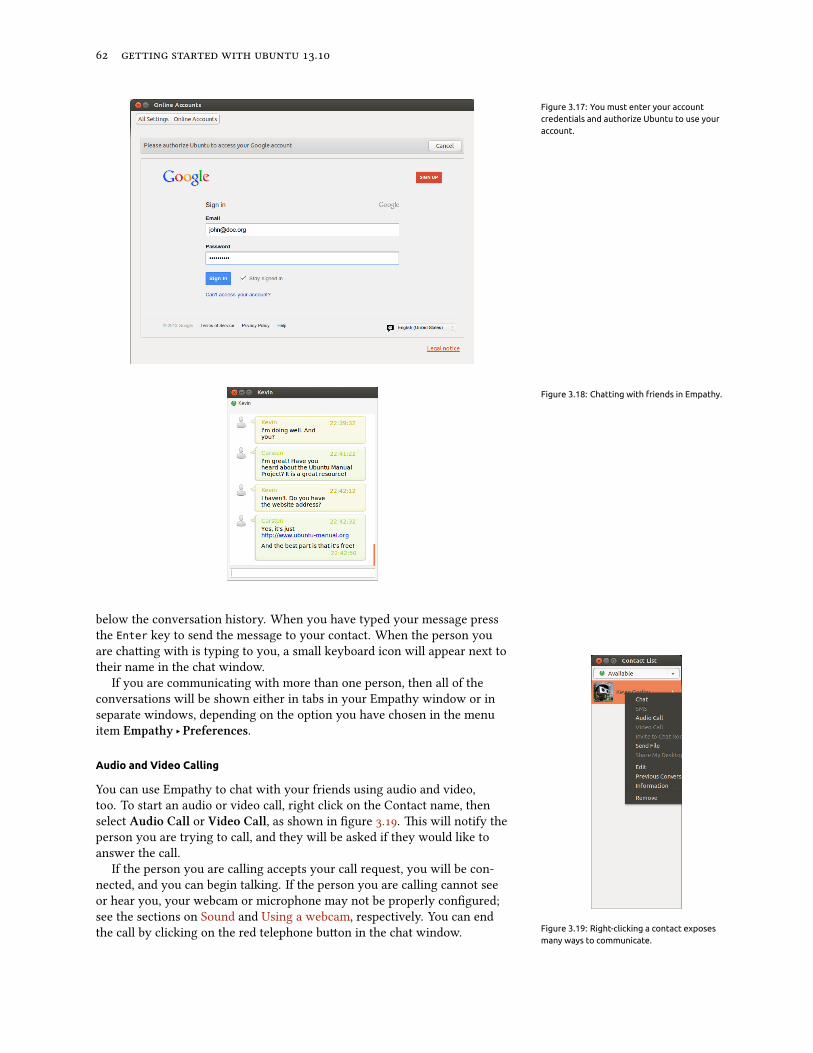
.
Figure 3.17: You must enter your accountcredentials and authorize Ubuntu to use youraccount.
Figure 3.18: Chatting with friends in Empathy.
below the conversation history. When you have typed your message pressthe Enter key to send the message to your contact. When the person youare chaing with is typing to you, a small keyboard icon will appear next totheir name in the chat window.
If you are communicating with more than one person, then all of theconversations will be shown either in tabs in your Empathy window or inseparate windows, depending on the option you have chosen in the menuitem Empathy ‣ Preferences.
Audio and Video Calling
You can use Empathy to chat with your friends using audio and video,too. To start an audio or video call, right click on the Contact name, thenselect Audio Call or Video Call, as shown in figure .. is will notify theperson you are trying to call, and they will be asked if they would like toanswer the call.
Figure 3.19: Right-clicking a contact exposesmany ways to communicate.
If the person you are calling accepts your call request, you will be con-nected, and you can begin talking. If the person you are calling cannot seeor hear you, your webcam or microphone may not be properly configured;see the sections on Sound and Using a webcam, respectively. You can endthe call by clicking on the red telephone buon in the chat window.

Sending and receiving files
Sending a file
When you are in a conversation with a contact and you would like to sendthem a file, right-click the contact in the contact list—as in figure .—and select Send File. Empathy should open the “Select file” window. Findthe file you wish to send, and click on the Send buon. A “File Transfers”window will open showing the file and its transfer progress. When the filetransfer is complete, you can close the “File Transfers” window.
Changing your status
You can use your status to show your contacts how busy you are or whatyou are doing. Your contacts see your status next to your name when theychat with you. You can use the standard statuses, which are:
‣ Available‣ Busy‣ Away‣ Invisible‣ Offline
Two of these statuses have additional functionality. e Invisible statuslets you see which of your contacts are online, but does not allow them tosee that you are online. e Offline status logs you out entirely; you willnot be able to see which of your contacts are online, nor can they see you orchat with you.
You can change your status in one of two ways. e first method isin the main Empathy window from the drop-down list at the top of thewindow.
e same drop-down list lets you set a custom status by choosing “Cus-tom Message…” next to the icon that matches your status. Enter what youwould like your status to say, and click on the green check mark.
e second method is to click the Messaging Icon on the menu bar, asshown in figure .. From this menu, you will see all of the same optionsthat Empathy presents, but accessible without having to open Empathy.
Desktop Sharing
Desktop sharing is a very nice feature available with Ubuntu. It can be usedfor a lot of purposes, like troubleshooting, online meetings, or just showingoff your cool desktop to your friend. It is very easy to get remote desktopsharing working between two Ubuntu machines.
To share your screen, you will first have to set up Desktop Sharing. Openthe Desktop Sharing application from the Dash (see e Dash). Next, selectAllow other users to view your desktop; you may want to deselect Allowother users to control your desktop.
Aer you have Desktop Sharing configured, open Empathy. To beginsharing your desktop, right-click on the contact you wish to share yourdesktop with, and select Share my desktop.
It should be noted that the other user will obviously be able to see theinformation displayed on your screen. Please be sure to keep this in mindif you have documents or files that are of a private nature open on yourdesktop.
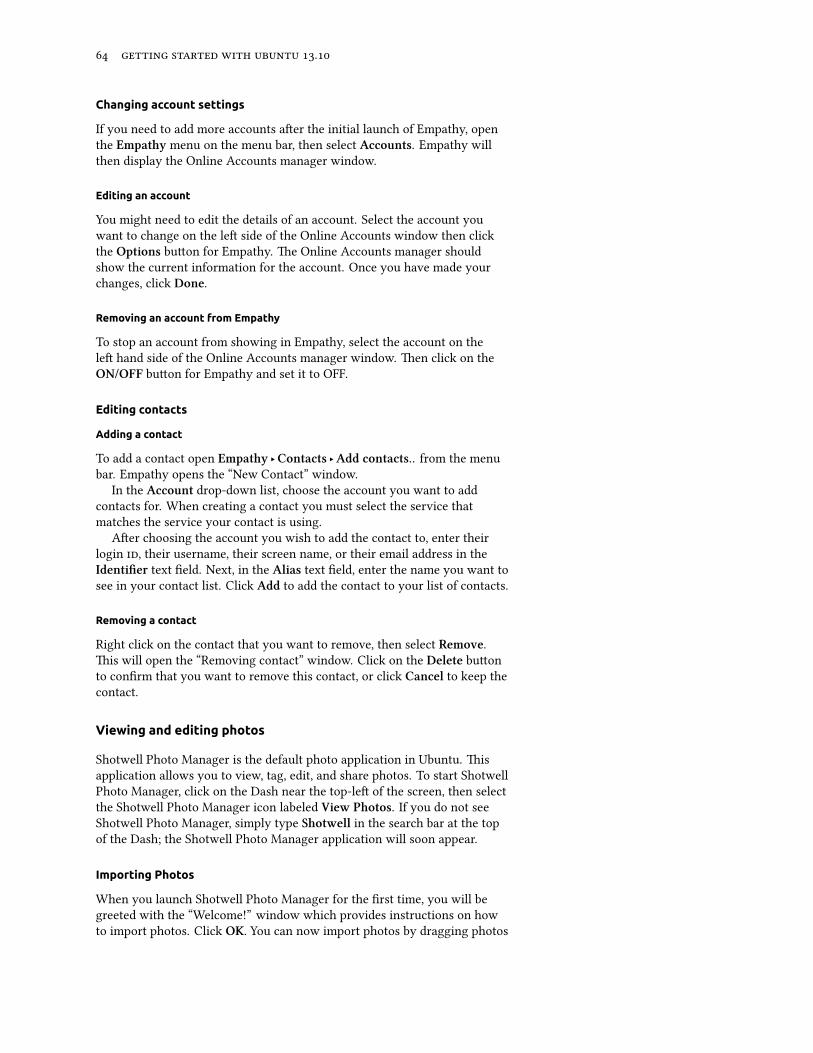
.
Changing account settings
If you need to add more accounts aer the initial launch of Empathy, openthe Empathy menu on the menu bar, then select Accounts. Empathy willthen display the Online Accounts manager window.
Editing an account
You might need to edit the details of an account. Select the account youwant to change on the le side of the Online Accounts window then clickthe Options buon for Empathy. e Online Accounts manager shouldshow the current information for the account. Once you have made yourchanges, click Done.
Removing an account from Empathy
To stop an account from showing in Empathy, select the account on thele hand side of the Online Accounts manager window. en click on theON/OFF buon for Empathy and set it to OFF.
Editing contacts
Adding a contact
To add a contact open Empathy ‣Contacts ‣Add contacts.. from the menubar. Empathy opens the “New Contact” window.
In the Account drop-down list, choose the account you want to addcontacts for. When creating a contact you must select the service thatmatches the service your contact is using.
Aer choosing the account you wish to add the contact to, enter theirlogin , their username, their screen name, or their email address in theIdentifier text field. Next, in the Alias text field, enter the name you want tosee in your contact list. Click Add to add the contact to your list of contacts.
Removing a contact
Right click on the contact that you want to remove, then select Remove.is will open the “Removing contact” window. Click on the Delete buonto confirm that you want to remove this contact, or click Cancel to keep thecontact.
Viewing and editing photos
Shotwell Photo Manager is the default photo application in Ubuntu. isapplication allows you to view, tag, edit, and share photos. To start ShotwellPhoto Manager, click on the Dash near the top-le of the screen, then selectthe Shotwell Photo Manager icon labeled View Photos. If you do not seeShotwell Photo Manager, simply type Shotwell in the search bar at the topof the Dash; the Shotwell Photo Manager application will soon appear.
Importing Photos
When you launch Shotwell Photo Manager for the first time, you will begreeted with the “Welcome!” window which provides instructions on howto import photos. Click OK. You can now import photos by dragging photos

Figure 3.20: Manage your photo collection,enhance your photos while keeping the original,and share your memories online using ShotwellPhoto Manager.
into the Shotwell Photo Manager window or by connecting your camera orexternal storage device to the computer.
From a digital camera Connect your camera to the computer using thedata cable, and power on your camera. If your camera is properly detected,you will see a new window prompting you to launch an application. SelectShotwell Photo Manager in the drop-down menu, then click OK. Yourcamera will be listed in the Shotwell Photo Manager sidebar. Select yourcamera in the sidebar. You will see a preview of the contents stored in thecamera’s memory. Select individual photos by pressing and holding Ctrland clicking on each photo you want to import, and then click ImportSelected on the boom bar of the window. Or, you can choose to import allphotos by clicking Import All.
From your computer You can import photos into Shotwell Photo Managerby dragging photos from the file browser into the Shotwell Photo Managerwindow. Alternatively, you can click File ‣ Import From Folder, then selectthe folder containing the photos you want to import.
From external hard drive, flash drive, or / Importing photosfrom external storage is similar to importing from your computer. Yourexternal storage device may also appear under the Camera label on theShotwell Photo Manager sidebar. Follow the instructions for importing froma camera or computer.
Choosing where Shotwell Photo Manager saves photos
e default location for the Shotwell Photo Manager Library is your Pic-tures folder in your home directory. When importing pictures using the“Import” window, you will be given the option to copy the files to yourLibrary or keep the files in place.
If you have your photos stored on your computer, the option Import inPlace will be suitable. is will prevent photos from being duplicated. If
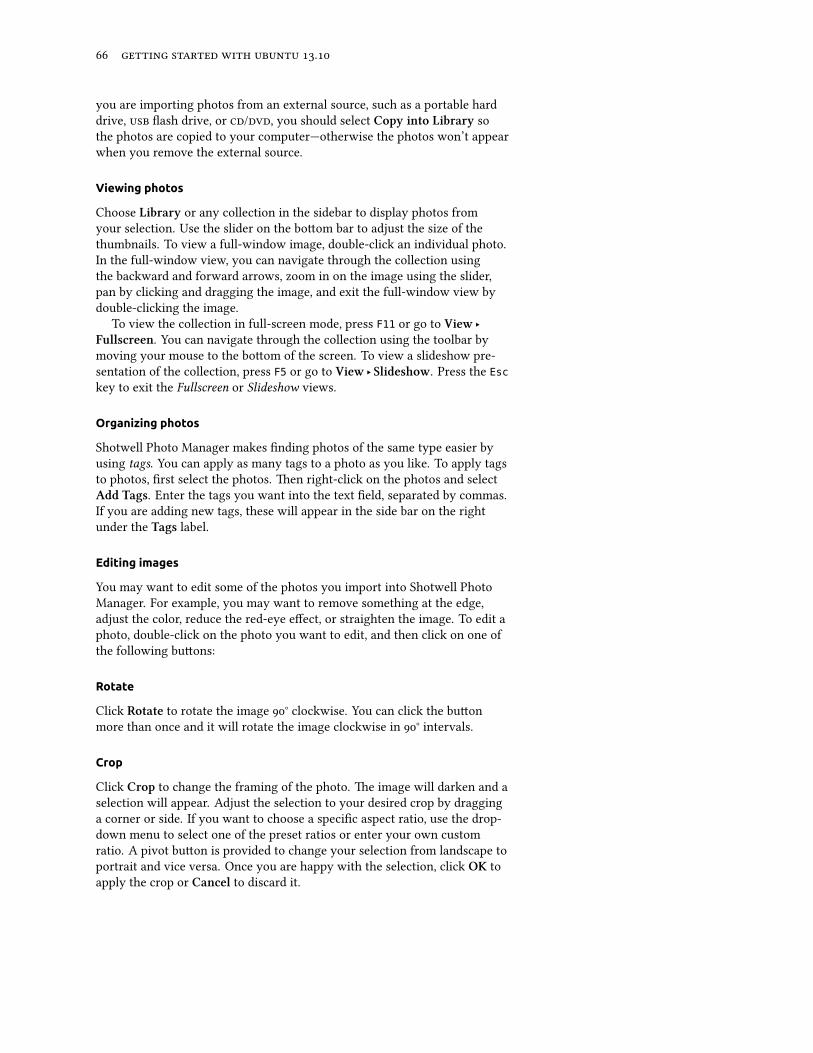
.
you are importing photos from an external source, such as a portable harddrive, flash drive, or /, you should select Copy into Library sothe photos are copied to your computer—otherwise the photos won’t appearwhen you remove the external source.
Viewing photos
Choose Library or any collection in the sidebar to display photos fromyour selection. Use the slider on the boom bar to adjust the size of thethumbnails. To view a full-window image, double-click an individual photo.In the full-window view, you can navigate through the collection usingthe backward and forward arrows, zoom in on the image using the slider,pan by clicking and dragging the image, and exit the full-window view bydouble-clicking the image.
To view the collection in full-screen mode, press F11 or go to View ‣Fullscreen. You can navigate through the collection using the toolbar bymoving your mouse to the boom of the screen. To view a slideshow pre-sentation of the collection, press F5 or go to View ‣ Slideshow. Press the Esckey to exit the Fullscreen or Slideshow views.
Organizing photos
Shotwell Photo Manager makes finding photos of the same type easier byusing tags. You can apply as many tags to a photo as you like. To apply tagsto photos, first select the photos. en right-click on the photos and selectAdd Tags. Enter the tags you want into the text field, separated by commas.If you are adding new tags, these will appear in the side bar on the rightunder the Tags label.
Editing images
You may want to edit some of the photos you import into Shotwell PhotoManager. For example, you may want to remove something at the edge,adjust the color, reduce the red-eye effect, or straighten the image. To edit aphoto, double-click on the photo you want to edit, and then click on one ofthe following buons:
Rotate
Click Rotate to rotate the image ° clockwise. You can click the buonmore than once and it will rotate the image clockwise in ° intervals.
Crop
Click Crop to change the framing of the photo. e image will darken and aselection will appear. Adjust the selection to your desired crop by dragginga corner or side. If you want to choose a specific aspect ratio, use the drop-down menu to select one of the preset ratios or enter your own customratio. A pivot buon is provided to change your selection from landscape toportrait and vice versa. Once you are happy with the selection, click OK toapply the crop or Cancel to discard it.
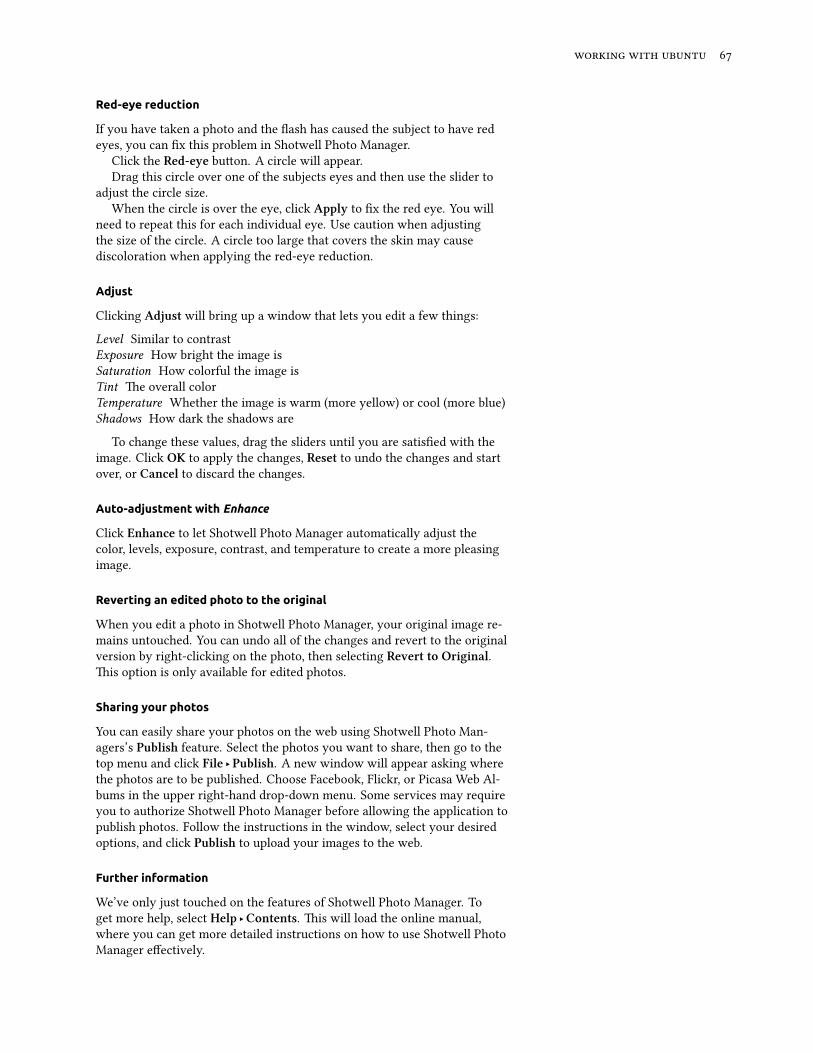
Red-eye reduction
If you have taken a photo and the flash has caused the subject to have redeyes, you can fix this problem in Shotwell Photo Manager.
Click the Red-eye buon. A circle will appear.Drag this circle over one of the subjects eyes and then use the slider to
adjust the circle size.When the circle is over the eye, click Apply to fix the red eye. You will
need to repeat this for each individual eye. Use caution when adjustingthe size of the circle. A circle too large that covers the skin may causediscoloration when applying the red-eye reduction.
Adjust
Clicking Adjust will bring up a window that lets you edit a few things:
Level Similar to contrastExposure How bright the image isSaturation How colorful the image isTint e overall colorTemperature Whether the image is warm (more yellow) or cool (more blue)Shadows How dark the shadows are
To change these values, drag the sliders until you are satisfied with theimage. Click OK to apply the changes, Reset to undo the changes and startover, or Cancel to discard the changes.
Auto-adjustment with Enhance
Click Enhance to let Shotwell Photo Manager automatically adjust thecolor, levels, exposure, contrast, and temperature to create a more pleasingimage.
Reverting an edited photo to the original
When you edit a photo in Shotwell Photo Manager, your original image re-mains untouched. You can undo all of the changes and revert to the originalversion by right-clicking on the photo, then selecting Revert to Original.is option is only available for edited photos.
Sharing your photos
You can easily share your photos on the web using Shotwell Photo Man-agers’s Publish feature. Select the photos you want to share, then go to thetop menu and click File ‣ Publish. A new window will appear asking wherethe photos are to be published. Choose Facebook, Flickr, or Picasa Web Al-bums in the upper right-hand drop-down menu. Some services may requireyou to authorize Shotwell Photo Manager before allowing the application topublish photos. Follow the instructions in the window, select your desiredoptions, and click Publish to upload your images to the web.
Further information
We’ve only just touched on the features of Shotwell Photo Manager. Toget more help, select Help ‣Contents. is will load the online manual,where you can get more detailed instructions on how to use Shotwell PhotoManager effectively.
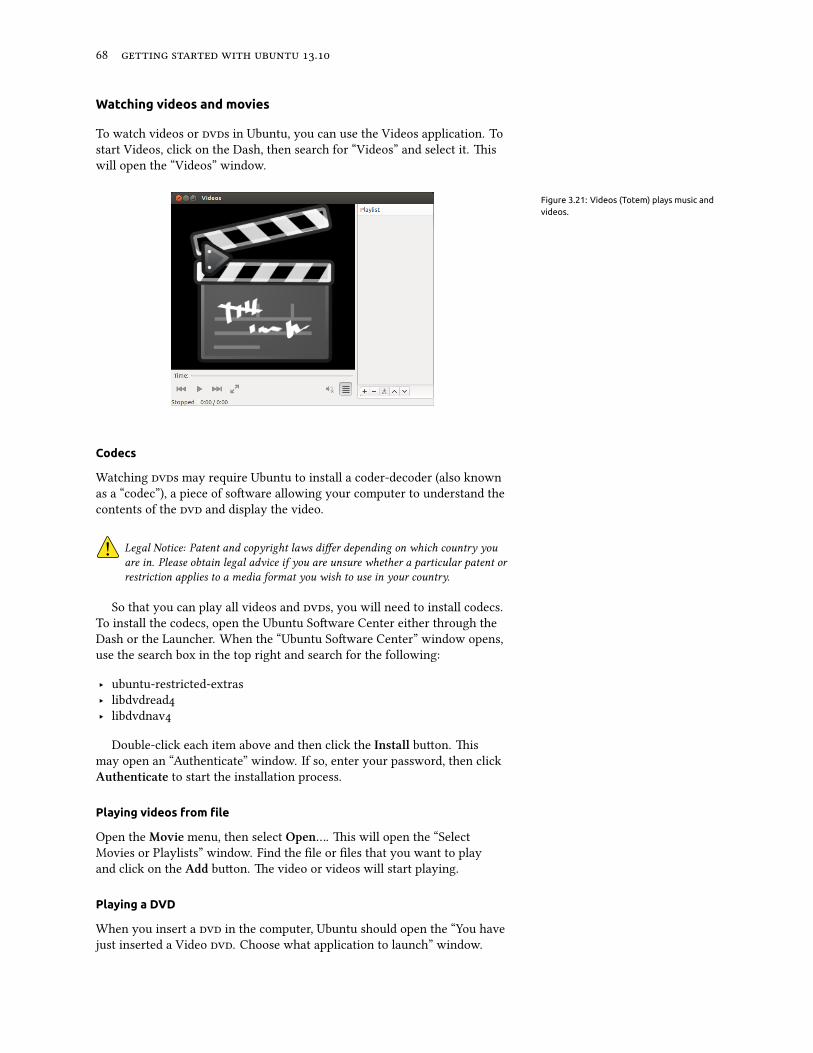
.
Watching videos and movies
To watch videos or s in Ubuntu, you can use the Videos application. Tostart Videos, click on the Dash, then search for “Videos” and select it. iswill open the “Videos” window.
Figure 3.21: Videos (Totem) plays music andvideos.
Codecs
Watching s may require Ubuntu to install a coder-decoder (also knownas a “codec”), a piece of soware allowing your computer to understand thecontents of the and display the video.
Legal Notice: Patent and copyright laws differ depending on which country youare in. Please obtain legal advice if you are unsure whether a particular patent orrestriction applies to a media format you wish to use in your country.
So that you can play all videos and s, you will need to install codecs.To install the codecs, open the Ubuntu Soware Center either through theDash or the Launcher. When the “Ubuntu Soware Center” window opens,use the search box in the top right and search for the following:
‣ ubuntu-restricted-extras‣ libdvdread‣ libdvdnav
Double-click each item above and then click the Install buon. ismay open an “Authenticate” window. If so, enter your password, then clickAuthenticate to start the installation process.
Playing videos from file
Open the Movie menu, then select Open…. is will open the “SelectMovies or Playlists” window. Find the file or files that you want to playand click on the Add buon. e video or videos will start playing.
Playing a DVD
When you insert a in the computer, Ubuntu should open the “You havejust inserted a Video . Choose what application to launch” window.

Make sure that Open Movie Player is chosen in the drop-down list andthen click OK. e “Movie Player” window will open and the movie willbegin.
If the “Movie Player” window is already open, open the Movie menu,then select Play Disc… and the movie will begin.
Listening to audio and music
Ubuntu comes with the Rhythmbox Music Player for listening to yourmusic, streaming Internet radio and managing playlists and podcasts.Rhythmbox can also help you find and purchase music, along with man-aging subscriptions to your favorite feeds.
Figure 3.22: Rhythmbox Music Player
Starting Rhythmbox
ere are several ways to start Rhythmbox.
‣ Open the Dash, type Rhythmbox or Music and click on the RhythmboxMusic Player icon.
‣ Ubuntu comes with an indicator menu in the top bar for sound-relatedapplications and devices. is indicator looks like a speaker. Aer you’veopened Rhythmbox the first time, a link to start Rhythmbox and basiccontrols will be placed here.
If you close Rhythmbox by pressing Alt+F4 or clicking the red close buon( ), it will disappear from view but continue to play in the background.You can still control your music or reopen from the sound indicator. To quitRhythmbox completely, press Ctrl+Q or choose Music ‣it from the menubar.
Playing music
To play music, you must first import music into your library. Choose Mu-sic ‣Add Music… or press Ctrl+O on your keyboard to import a folder con-
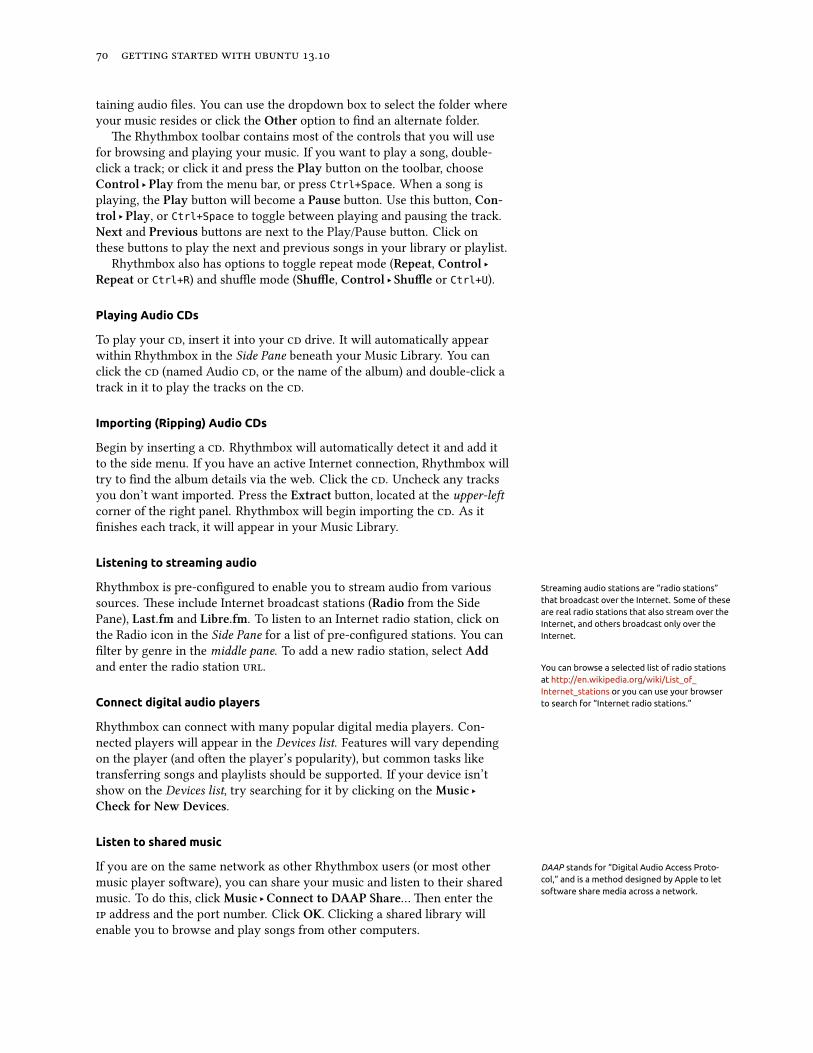
.
taining audio files. You can use the dropdown box to select the folder whereyour music resides or click the Other option to find an alternate folder.
e Rhythmbox toolbar contains most of the controls that you will usefor browsing and playing your music. If you want to play a song, double-click a track; or click it and press the Play buon on the toolbar, chooseControl ‣ Play from the menu bar, or press Ctrl+Space. When a song isplaying, the Play buon will become a Pause buon. Use this buon, Con-trol ‣ Play, or Ctrl+Space to toggle between playing and pausing the track.Next and Previous buons are next to the Play/Pause buon. Click onthese buons to play the next and previous songs in your library or playlist.
Rhythmbox also has options to toggle repeat mode (Repeat, Control ‣Repeat or Ctrl+R) and shuffle mode (Shuffle, Control ‣ Shuffle or Ctrl+U).
Playing Audio CDs
To play your , insert it into your drive. It will automatically appearwithin Rhythmbox in the Side Pane beneath your Music Library. You canclick the (named Audio , or the name of the album) and double-click atrack in it to play the tracks on the .
Importing (Ripping) Audio CDs
Begin by inserting a . Rhythmbox will automatically detect it and add itto the side menu. If you have an active Internet connection, Rhythmbox willtry to find the album details via the web. Click the . Uncheck any tracksyou don’t want imported. Press the Extract buon, located at the upper-lecorner of the right panel. Rhythmbox will begin importing the . As itfinishes each track, it will appear in your Music Library.
Listening to streaming audio
Rhythmbox is pre-configured to enable you to stream audio from various Streaming audio stations are “radio stations”that broadcast over the Internet. Some of theseare real radio stations that also stream over theInternet, and others broadcast only over theInternet.
sources. ese include Internet broadcast stations (Radio from the SidePane), Last.fm and Libre.fm. To listen to an Internet radio station, click onthe Radio icon in the Side Pane for a list of pre-configured stations. You canfilter by genre in the middle pane. To add a new radio station, select Addand enter the radio station . You can browse a selected list of radio stations
at http://en.wikipedia.org/wiki/List_of_Internet_stations or you can use your browserto search for “Internet radio stations.”Connect digital audio players
Rhythmbox can connect with many popular digital media players. Con-nected players will appear in the Devices list. Features will vary dependingon the player (and oen the player’s popularity), but common tasks liketransferring songs and playlists should be supported. If your device isn’tshow on the Devices list, try searching for it by clicking on the Music ‣Che for New Devices.
Listen to shared music
If you are on the same network as other Rhythmbox users (or most other DAAP stands for “Digital Audio Access Proto-col,” and is a method designed by Apple to letsoftware share media across a network.
music player soware), you can share your music and listen to their sharedmusic. To do this, click Music ‣Connect to DAAP Share… en enter the address and the port number. Click OK. Clicking a shared library willenable you to browse and play songs from other computers.
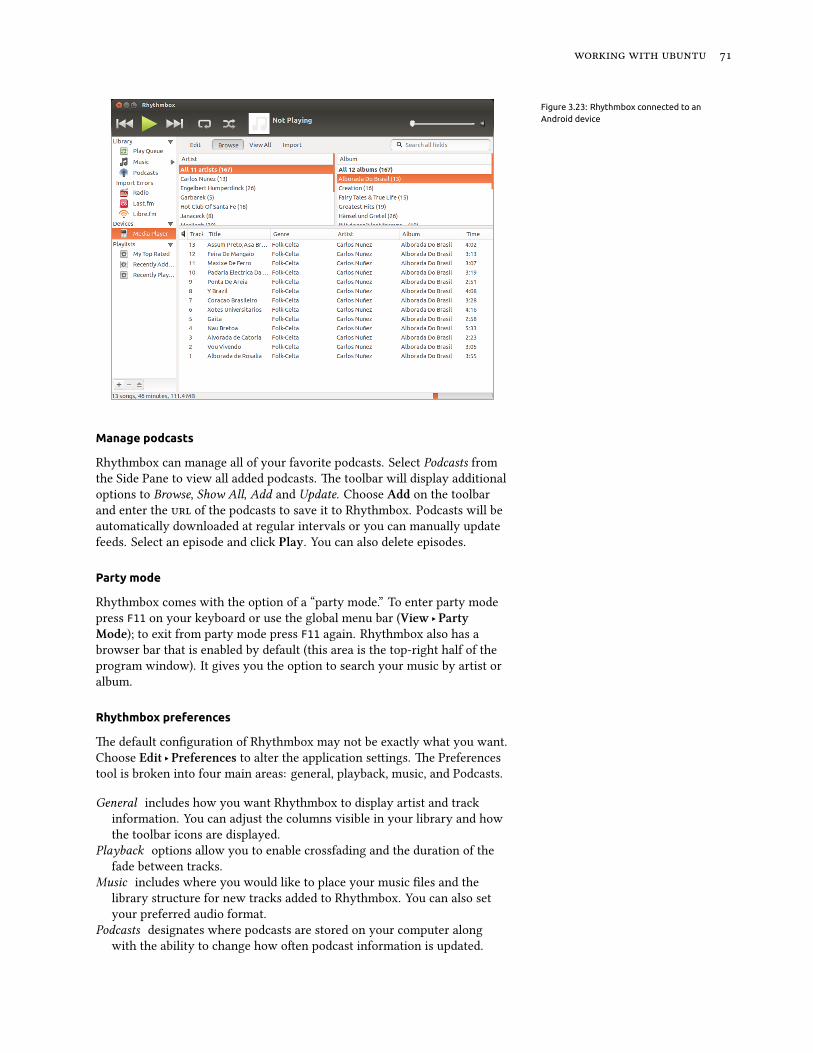
Figure 3.23: Rhythmbox connected to anAndroid device
Manage podcasts
Rhythmbox can manage all of your favorite podcasts. Select Podcasts fromthe Side Pane to view all added podcasts. e toolbar will display additionaloptions to Browse, Show All, Add and Update. Choose Add on the toolbarand enter the of the podcasts to save it to Rhythmbox. Podcasts will beautomatically downloaded at regular intervals or you can manually updatefeeds. Select an episode and click Play. You can also delete episodes.
Party mode
Rhythmbox comes with the option of a “party mode.” To enter party modepress F11 on your keyboard or use the global menu bar (View ‣ PartyMode); to exit from party mode press F11 again. Rhythmbox also has abrowser bar that is enabled by default (this area is the top-right half of theprogram window). It gives you the option to search your music by artist oralbum.
Rhythmbox preferences
e default configuration of Rhythmbox may not be exactly what you want.Choose Edit ‣ Preferences to alter the application seings. e Preferencestool is broken into four main areas: general, playback, music, and Podcasts.
General includes how you want Rhythmbox to display artist and trackinformation. You can adjust the columns visible in your library and howthe toolbar icons are displayed.
Playback options allow you to enable crossfading and the duration of thefade between tracks.
Music includes where you would like to place your music files and thelibrary structure for new tracks added to Rhythmbox. You can also setyour preferred audio format.
Podcasts designates where podcasts are stored on your computer alongwith the ability to change how oen podcast information is updated.
.
Plugins
Rhythmbox supports a wide array of plugins, which add functionality toRhythmbox. Many of the plugins provide basic audio playback, and youmay check a few more boxes, for example, to access the Magnatune Store.To view or change the activated plugins, use the global menu bar (Edit ‣Plugins).
Managing your music
Rhythmbox supports creating playlists. Playlists either are static lists ofsongs to be played in order, or can be smart playlists based on filter criteria.Playlists contain references to songs in your library. ey do not containthe actual songs, but only reference them. So, if you remove a song froma playlist (right-cli on the song ‣Remove from Playlist), the song willremain in your library and on your hard drive.
To create a playlist, choose Music ‣ Playlist ‣New Playlist, press Ctrl+N,or right-click in the lower blank area of the side bar and select New Playlist.It appears in the sidebar as “New Playlist.” Right-click and select Renameto give the new playlist a name of your choosing. Drag songs from yourlibrary to the new playlist in the side pane or right-click on songs and selectAdd to Playlist and pick the playlist.
Smart Playlists are created in a similar way. Choose Music ‣ Playlist ‣New Automatic Playlist or right-click in the lower blank area of the sidebar and select New Automatic Playlist. Define the filter criteria. Youcan add multiple filter rules and select a name. Save. You can update anyplaylist (including the predefined ones) by right-clicking on the name andchoosing Edit.
Rhythmbox supports song ratings. Right-cli a song in your library ‣Properties ‣Details and click on the number of stars. To remove a rating,select zero stars. Other song information such as Title, Artist and Albumcan be changed. Right-cli a song in your library ‣ Properties ‣Basic.
To remove a song, right-cli ‣Remove. To delete a song from your harddrive entirely, right-cli ‣Move to the Rubbish Bin. If you ever want tomove a song, highlight the song (or group of songs) from your library anddrag it to a folder or to your desktop. is will make a copy of the audio filein the new location.
Audio codecs
Different audio files (, , , , etc.) require unique tools to de-code them and play the contents. ese tools are called codecs. Rhythmboxaempts to detect any missing codecs on your system so you can play all ofyour audio files. If a codec is missing, it automatically tries to find the codeconline and guides you through its installation.
Rhythmbox support
Rhythmbox is used by many users throughout the world. ere are a vari-ety of support resources available in many languages.
‣ Help ‣Contents or F1 for the main help.‣ Help ‣Get Help Online to ask questions and report bugs.‣ e Rhythmbox website at http://www.rhythmbox.org/.‣ e Multimedia & Video category of Ubuntu Forums at http://ubuntuforums.
org/forumdisplay.php?f=.

Burning CDs and DVDs
To create a or , open the Dash and search for Brasero Disc Burner.Once you find Brasero, double-click it. is opens the Brasero application.e burning options appearing within Brasero are explained below.
Figure 3.24: Brasero burns music, video, dataDVDs and CDs.
Getting Started
Before you can use Brasero, you need to Create a new project. ere arethree types of media projects available: Audio Project, Data Project, andVideo Project. ere are also two utility projects available: Disc Copy andBurn Image. Make your selection based on your requirements. At this current time, Brasero does not support
Blu-Ray.e following options apply for all projects except Disc Copy and BurnImage.
Adding files to a project
To add files to the list, click the + buon. is buon will open the “SelectFiles” window. Navigate to the file you want to add, click the desired file,then click the Add buon. Repeat this process for each file until all desiredfiles have been added.
Removing files
If you want to remove a file from the project, click the file in the list andclick on the - buon. To remove all the files in the list click on the Broomshaped buon.
Saving a project
To save an unfinished project, choose Project ‣ Save. e “Save CurrentProject” window will be opened. Choose where you would like to save theproject. In the Name: text field, enter a name for the project. Click the Savebuon, and your unfinished project will be saved. When saving a project,you are only saving the parameters of the project; you’ve burned nothing tothe disc at this time.

.
Burning the disc
When you click the Burn… buon, you will see the “Properties of …” win-dow.
You can specify the burning speed in the Burning speed drop-down. It isbest to choose the highest speed.
To burn your project directly to the disc, select the Burn the imagedirectly without saving it to disc option. With this option selected, noimage file is created, and no files are saved to the hard disk. All data issaved to the blank or . Note that Brasero only burns informationonto standard CDs and DVDs; Brasero does not burn data onto Blu-RayDVDs at this time.
e Simulate before burning option is useful if you encounter problemsburning discs. Selecting this option allows you to simulate the disc burningprocess without actually writing data to a disc—a wasteful process if yourcomputer isn’t writing data correctly. If the simulation is successful, Braserowill burn the disc aer a ten second pause. During those ten seconds, youhave the option to cancel the burning process.
Blanking a disk
Some CDs and DVDs have an marking on them. simply indicatesthe disc is Re-Writable, meaning the current data on the disc can be com-pletely erased and new data can be wrien to it. To erase a disc, open theTools menu, then select Blank. e “Disc Blanking” window will be open.In the Select a disc drop-down choose the disc that you would like to erase.
You can enable the Fast blank option if you would like to shorten theamount of time to perform the blanking process. However, selecting thisoption will not fully remove the files; if you have any sensitive data on yourdisc, it would be best not to enable the Fast blank option.
Once the disc is erased (blank), you will see e disc was successfullyblanked. Click the Close buon to finish.
Audio project
If you record your own music, then you may want to transfer this musiconto an audio so your friends and family can listen. You can start anaudio project by clicking Project ‣New Project ‣New Audio Project.
When burning a music , it is important to remember that commercialmusic s usually contains a two-second gap between the songs. To ensureyour music has this same gap between songs, click the file and then clickthe pause buon.
You can slice files into parts by clicking the Knife buon. is opens a“Split Track” window. e Method drop-down gives you four options; eachoption lets you split the track in a different way. Once you have split thetrack, click OK.
In the drop-down list at the boom of the main “Brasero” window, makesure that you have selected the disc where you want to burn the files. enclick the Burn buon.
Data project
If you want to make a back up of your documents or photos, it wouldbe best to make a data project. You can start a data project by clickingProject ‣New Project ‣New Data Project.

If you want to add a folder, click the Folder picture, then enter the nameof the folder.
In the drop-down list at the boom of the main “Brasero” window, besure to select the disc where you want to burn the files. en click the Burnbuon.
Video project
If you want to make a of your family videos, it would be best to make avideo project.
You can start a video project by clicking Project ‣New Project ‣NewVideo Project.
In the drop-down list at the boom of the main “Brasero” window, besure to select the disc where you want to burn the files. en click the Burnbuon.
Disc copy
You can copy a disc by clicking Project ‣New Project ‣Disc copy. isopens the “Copy /” window.
If you have two / drives, you can copy a disc from one to theother, assuming the source disc is in one drive and the destination disc (withblank media) is in the other drive. If you have only one drive you will needto make an image and then burn it to a disc. In the Select disc to copy drop-down choose the disc to copy. In the Select a disc to write to drop-downeither choose image file or the disc that you want to copy to.
Image file
You can make an image file of your data as well An image is a single-filerepresentation of the contents of the disk. e file usually has an .iso or.img extension. An image file is similar a set of zipped files. Change wherethe image file is saved by clicking Properties. is shows the “Location forImage File”. You can edit the name of the file in the Name: text field.
e default location to save the image file is your home folder, but youcan change the location by clicking the + buon next to Browse for otherfolders. Once you have chosen where you want to save the photo or image,click Close.
Returning to the “Copy /” window, click Create Image. Braserowill open the “Creating Image” window and will display the job progress.When the process is complete, click Close.
Burn image
To burn an image, open the Project ‣New Project ‣Burn Image. Braserowill open the “Image Burning Setup” window. Click on the Cli here toselect a disc image drop-down and the “Select Disc Image” window willappear. Navigate your way to the image you wish to burn, click on it, andthen click Open.
In the Select a disc to write to drop-down menu, click on the disc towhich you’d like to write, then click Create Image.

.
Working with documents, spreadsheets, and presentations
LibreOffice Suite is the default office suite when working with documents,spreadsheets, and slide presentations.
Working with documents
If you need to work with documents, you can use the LibreOffice Word The LibreOffice Word Processor is known asLibreOffice Writer. LibreOffice Spreadsheet isknown as Calc, and LibreOffice Presentation isknown as Impress.
Processor. Writer has all the features you need from a modern, full-featuredword processing and desktop publishing tool including an in-built PDFcreator. It’s simple enough for a quick memo, but powerful enough to createcomplete books with contents, diagrams, indexes, and more. You’re free toconcentrate on your message, while Writer will make it look great. To startthe word processor, open the Dash and search for LibreOffice Writer.en select LibreOffice Writer.
Working with spreadsheets
If you need to work with spreadsheets, you can use LibreOffice Spreadsheet(Calc). Calc is the spreadsheet program you’ve always needed. Newcomersfind it intuitive and easy to learn. Professional data miners and numbercrunchers will appreciate the comprehensive range of advanced functions.To start the spreadsheet application, open the Dash and search for LibreOf-fice Calc. en select LibreOffice Calc.
Working with presentations
If you need to work with slides for a presentation, you can use LibreOfficeImpress. Impress is a truly outstanding tool for creating effective multime-dia presentations. Your presentations can be enhanced with D and D clipart, special effects and transition styles, animations, and high-impact draw-ing tools. To start the presentation application, open the Dash and searchfor LibreOffice Impress. en select LibreOffice Impress.
Getting more help
Each of these applications comes with a comprehensive set of help screens.If you are looking for more assistance with these applications, press the F1key aer starting the application.
Ubuntu One
What is Ubuntu One?
Ubuntu One is a service for storing your files online in your Ubuntu OnePersonal Cloud. Your Ubuntu One Personal Cloud is your personal on-line storage space, and it can be accessed in any web browser or using anUbuntu One application (available for Ubuntu, Mac , Windows, iPhone,and Android). Because Ubuntu One stores your files online, it’s the perfectway to backup your files to prevent data loss. You can also use Ubuntu Oneto share files with other people—this makes Ubuntu One a great tool forfriends, families, and collaborative teams. Ubuntu One also provides ser-vices for backing up your contacts and streaming music to mobile devices.e Ubuntu One service is provided by Canonical.

How safe is Ubuntu One?
Before using Ubuntu One, you should keep the following points in mind:
‣ Uploading, downloading and synchronizing your information withUbuntu One is done over an encrypted connection which prevents any-one from eavesdropping on your information as it is being transferred.
‣ Files are not stored by Canonical in encrypted form. It is important tokeep this in mind when deciding what to upload to Ubuntu One. You canuse other means to encrypt you data, such as an encrypted zip file.
‣ Information uploaded to Ubuntu One can potentially be accessed byCanonical. As with similar online services and websites, you are implic-itly trusting them to respect your privacy, so if you feel you cannot trustthem with certain information, don’t upload it to Ubuntu One.
‣ If you violate the Ubuntu One terms and conditions and store illegalmaterial, Canonical may be required to hand the information over to lawenforcement agencies without your consent.
‣ Your online information can be accessed by anybody who knows (or canguess) your account name and password. For this reason, you shouldchoose a strong password and keep it secure.
Getting started with Ubuntu One
To use Ubuntu One, you will need to create a free Ubuntu One accountusing an email address. is free account gives you access to of onlinestorage and the contact syncing service; this amount of space is enoughto store about , music files or , photographs (depending mediaquality). Increased data storage or the music streaming service requires apaid subscription.
ere are two ways to create an Ubuntu One account. You can eithersign up using the Ubuntu One Control Panel (pre-installed in Ubuntu), oryou can sign up on the Ubuntu One website https://one.ubuntu.com byclicking the Sign Up link.
Figure 3.25: This Launcher icon opens theUbuntu One Control Panel.
Creating an Ubuntu One account using the Ubuntu One Control Panel
In the Launcher, click the Ubuntu One icon, as shown in figure .. isshould open the dialog shown in figure ..
Click the I don’t have an account yet – sign me up buon.Fill in the details requested as shown in figure .. Make sure you use a If you do not have an email address, you can get
one for free at gmail.com.valid email address to which you are the only person who has access.You will also see a captcha as part of the registration process. e
captcha acts as a check that it really is a person filling in the form and not acomputer (because a computer won’t be able to read the captcha text). Youshould also review the Terms of Service and Privacy Policy before signingup. When you’re satisfied, click Set Up Account.
Within a few minutes, you will receive an email containing the verifica-tion code. Enter the verification code into the box as shown in figure .and click Next.
If all goes well, you will see a window saying, “You are now logged intoUbuntu One.” Click the Finish buon to dismiss this window. You will
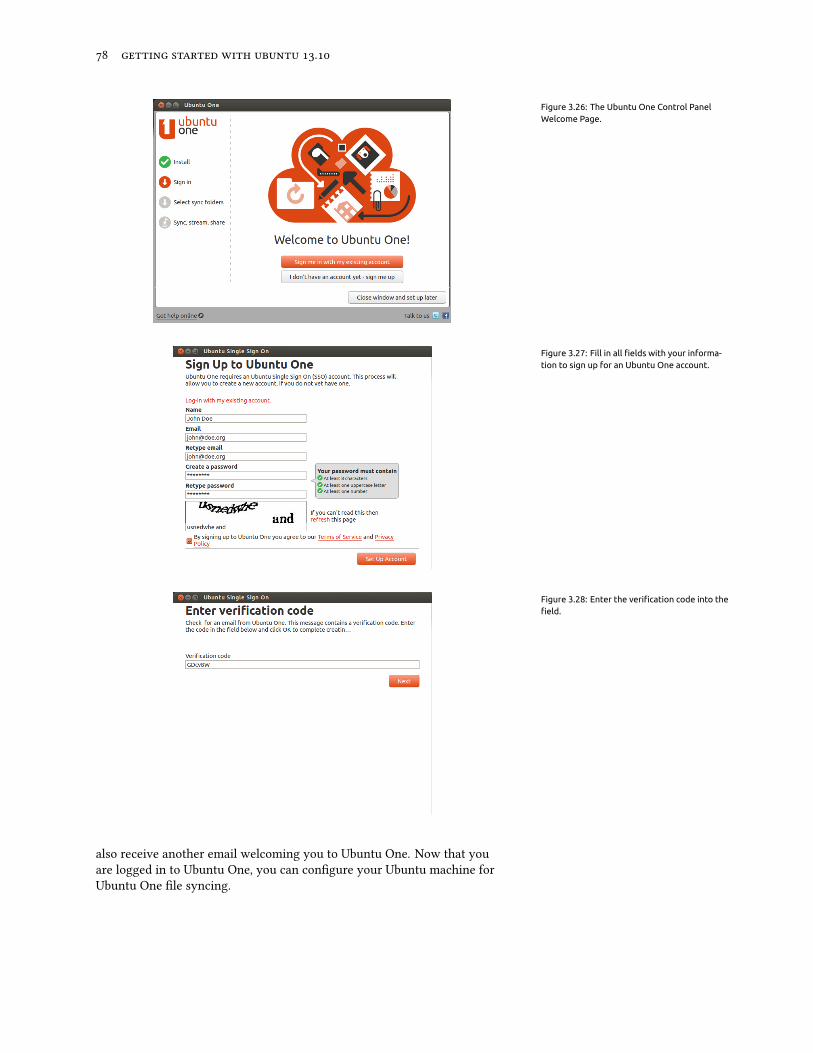
.
Figure 3.26: The Ubuntu One Control PanelWelcome Page.
Figure 3.27: Fill in all fields with your informa-tion to sign up for an Ubuntu One account.
Figure 3.28: Enter the verification code into thefield.
also receive another email welcoming you to Ubuntu One. Now that youare logged in to Ubuntu One, you can configure your Ubuntu machine forUbuntu One file syncing.

Configure your Ubuntu machine for file syncing
e Ubuntu One desktop application syncs your Ubuntu One PersonalCloud with files on your local file system. e term “sync” is short for“synchronize”, meaning the contents of your Ubuntu One local file systemand your Ubuntu One Personal Cloud will be kept identical. Aer logginginto the Ubuntu One desktop application the following dialog (figure .)should appear, allowing you to select which files to sync with your UbuntuOne Personal Cloud.
Figure 3.29: This setup dialog lets you selectwhich existing Ubuntu One folders you wouldlike synced with your machine.
If you have already used your Ubuntu One account, you may have morefolders in this view (figure .). You can choose which Ubuntu One cloudfolders you would like synced with your local file system. If this is the firsttime you are using Ubuntu One, just click the Next buon.
You can also change your Ubuntu One sync connection seings at this time byclicking on the Che Settings buon; you can change things like the maximumupload and download rate, or if notifications should be allowed.
Figure 3.30: This setup dialog lets you selectwhich folders of your local file system youwould like synced with your Ubuntu One cloudstorage.
In the next dialog (figure .), you can choose which of your local filesystem folders you would like synced with your Ubuntu One cloud storage.e folder Ubuntu One is selected for syncing by default, but you can selectadditional folders you may want synced—your pictures, for instance. Once

.
you’re finished selecting folders, click the Finish buon to complete thesetup process. You are now ready to begin using Ubuntu One!
Using Ubuntu One with Files, the file manager
Ubuntu One integrates with Files, the program you use to view your filesystem. You can add, sync, and share files directly from Files.
Adding and Modifying Files
You can add files to your Ubuntu One folder (or any other folder that youhave selected for sync) just as you normally would, and Ubuntu One willautomatically sync them to your personal cloud. For example, if you addyour vacation photos, you should see a notification message on the screensimilar to figure ..
Figure 3.31: When you add files to an UbuntuOne synced folder, they automatically sync toyour personal cloud.
Aer moving the files into the Ubuntu One synced folder, you shouldreceive a notification informing you that syncing has begun. When sync-ing completes, the another notice will appear stating that the syncing hascompleted.
Whenever you add or modify files that are in folders synced with UbuntuOne, they will automatically sync to your personal cloud. Aer syncing iscomplete, you can view the files on the Ubuntu One Web , and they willalso be synced to any other computers or mobile devices that you are usingUbuntu One on.
Managing Folders to Sync
To view which files on your system are currently syncing with Ubuntu One,open the Ubuntu One Control Panel by clicking the Ubuntu One Launchericon as shown in figure .; a dialog similar to that in figure . shouldappear.
Figure 3.32: The Ubuntu One Control Panelshows you which folders in your file system aresynced with your Ubuntu One Personal Cloud.

In the Ubuntu One Control Panel you can see which of your folders aresynced with your Ubuntu One Personal Cloud. You can also add files fromhere, by clicking the Add a folder from this computer buon.
Using Ubuntu One with the Ubuntu One Web UI
You can access your files from any computer using the Ubuntu One Web at https://one.ubuntu.com. A Web UI (User Interface) is a web site that youcan go to and do the same things that you do on your computer. Emails, forinstance, are commonly accessed through a Web UI. When you first reachthe web page, you will need to log in by clicking Log in or Sign up in theupper right-hand corner of the page. On the following page, fill in youremail address and Ubuntu One password, then click the Continue buon.
Once logged in, you should be taken to your Dashboard. e Dashboardshows you a summary of your data usage and keeps you informed of newfeatures in Ubuntu One. To view your files, click the Files link in the navi-gation bar in the upper portion of the page.
Downloading and Uploading Files
To access your files from the Ubuntu One Web , you can simply downloadthem from your personal cloud. To download a file, click More shown tothe right of the file as shown in the browser, then click on Download file asshown in figure .. Clicking Download file will initiate a file downloadthrough your browser.
If you make changes to the file or want to add a new file to your personalcloud, simply click the Upload file buon in the upper portion of the page.is will upload the file into the current folder and overwrite any old ver-sions of the file. Once you have uploaded the file, it will be available in yourpersonal cloud, and will sync to your Ubuntu machine’s local file system.
Figure 3.33: A file’sMore button in the Web UIgives you many options.
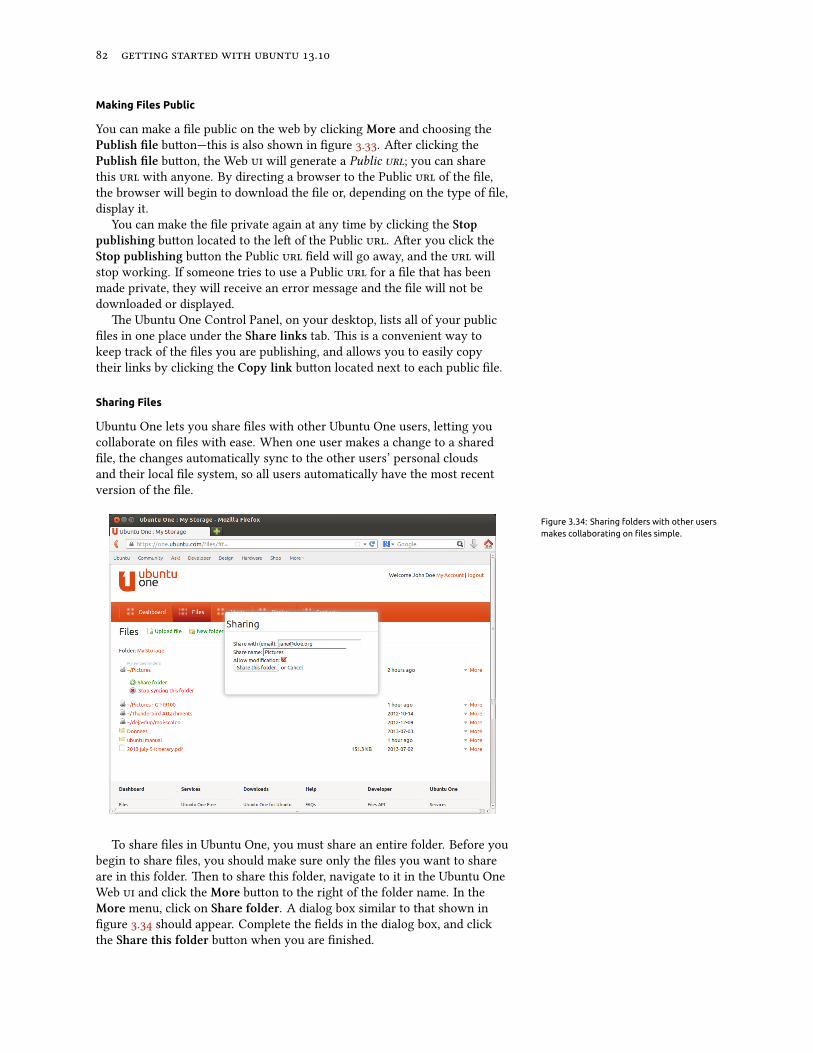
.
Making Files Public
You can make a file public on the web by clicking More and choosing thePublish file buon—this is also shown in figure .. Aer clicking thePublish file buon, the Web will generate a Public ; you can sharethis with anyone. By directing a browser to the Public of the file,the browser will begin to download the file or, depending on the type of file,display it.
You can make the file private again at any time by clicking the Stoppublishing buon located to the le of the Public . Aer you click theStop publishing buon the Public field will go away, and the willstop working. If someone tries to use a Public for a file that has beenmade private, they will receive an error message and the file will not bedownloaded or displayed.
e Ubuntu One Control Panel, on your desktop, lists all of your publicfiles in one place under the Share links tab. is is a convenient way tokeep track of the files you are publishing, and allows you to easily copytheir links by clicking the Copy link buon located next to each public file.
Sharing Files
Ubuntu One lets you share files with other Ubuntu One users, leing youcollaborate on files with ease. When one user makes a change to a sharedfile, the changes automatically sync to the other users’ personal cloudsand their local file system, so all users automatically have the most recentversion of the file.
Figure 3.34: Sharing folders with other usersmakes collaborating on files simple.
To share files in Ubuntu One, you must share an entire folder. Before youbegin to share files, you should make sure only the files you want to shareare in this folder. en to share this folder, navigate to it in the Ubuntu OneWeb and click the More buon to the right of the folder name. In theMore menu, click on Share folder. A dialog box similar to that shown infigure . should appear. Complete the fields in the dialog box, and clickthe Share this folder buon when you are finished.

Once you share the folder, the user you are trying to share the folderwith should receive an email informing them that you would like to sharefolder. ey will then have to accept the share request. If the email ad-dressee you provide does not yet have an Ubuntu One account, they mustfirst sign up for an Ubuntu One account before they can access the sharedfolder.
To stop sharing a folder, navigate to it, click the More buon, and clickStop sharing.
If another user shares a folder with you, you will receive an email in-forming you of the share, and a link to click on to accept the share request.Folders that are shared with you by other users will appear in the SharedWith Me folder inside your Ubuntu One folder (~/Ubuntu One/Shared WithMe/).
To stop syncing files that are shared with you, navigate to the folder inthe Ubuntu One Web , click the More buon, then click the Delete thisshare buon.
Exceeding your Ubuntu One Storage Limit
If you exceed the storage limit of your Ubuntu One account— is thefree limit—Ubuntu One will stop syncing your files to your Ubuntu OnePersonal Cloud.
Remedying an Exceeded Storage Limit
You can do several things to remedy an exceeded storage limit. Amongthem are:
‣ Delete any files you no longer need.‣ Move any files you no longer need synced to another location that is not
synced with Ubuntu One.‣ Purchase additional storage space—you can purchase additional storage
in blocks.
Purchasing Additional Storage Space
You can purchase additional storage space by clicking the Get more storagebuon at the top of the Ubuntu One Control Panel, or at https://one.ubuntu.com/services/. Additional storage is available in blocks. See https://one.ubuntu.com/services/ for the price of additional storage blocks.
Getting Ubuntu One Mobile Apps

.
Figure 3.35: You can purchase additionalstorage space on the Ubuntu One website.Note that the prices shown here were correct atthe date this manual was published.
Figure 3.36: Ubuntu One accepts credit cards,and PayPal for purchasing additional storage.
Figure 3.37: This is the icon for the Ubuntu OneAndroid and iPhone apps.
Ubuntu One has mobile applications for Android and iPhone mobiledevices. ese applications allow you to access your personal cloud fileson-the-go. You can get more information about the Android and iPhoneapplications at https://one.ubuntu.com/downloads/android/ and https://one.ubuntu.com/downloads/iphone/, respectively.
Getting Ubuntu One for Windows or Mac
Ubuntu One also has standalone applications which can sync your UbuntuOne Personal Cloud files to the file system of a Windows or Mac op-erating system. More information can be found at https://one.ubuntu.com/
downloads/windows/ or https://one.ubuntu.com/downloads/mac/, respec-tively.
Music Streaming Service of Ubuntu One
In addition to file syncing, Ubuntu One offers music streaming services.is service is not discussed in this manual, but additional information canbe found at https://one.ubuntu.com/services/music/. e music streamingservice requires a paid subscription. See https://one.ubuntu.com/services/for the price of the service and some aractive special offers.

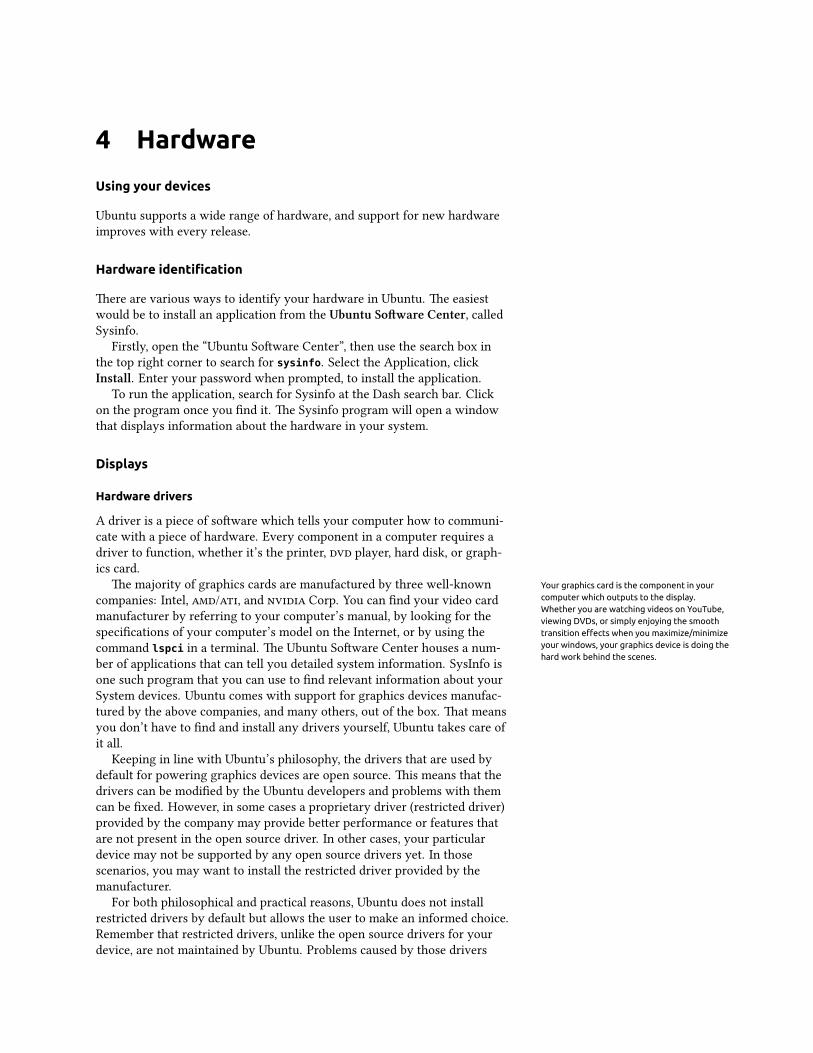
4 Hardware
Using your devices
Ubuntu supports a wide range of hardware, and support for new hardwareimproves with every release.
Hardware identification
ere are various ways to identify your hardware in Ubuntu. e easiestwould be to install an application from the Ubuntu Soware Center, calledSysinfo.
Firstly, open the “Ubuntu Soware Center”, then use the search box inthe top right corner to search for sysinfo. Select the Application, clickInstall. Enter your password when prompted, to install the application.
To run the application, search for Sysinfo at the Dash search bar. Clickon the program once you find it. e Sysinfo program will open a windowthat displays information about the hardware in your system.
Displays
Hardware drivers
A driver is a piece of soware which tells your computer how to communi-cate with a piece of hardware. Every component in a computer requires adriver to function, whether it’s the printer, player, hard disk, or graph-ics card.
e majority of graphics cards are manufactured by three well-known Your graphics card is the component in yourcomputer which outputs to the display.Whether you are watching videos on YouTube,viewing DVDs, or simply enjoying the smoothtransition effects when you maximize/minimizeyour windows, your graphics device is doing thehard work behind the scenes.
companies: Intel, /, and Corp. You can find your video cardmanufacturer by referring to your computer’s manual, by looking for thespecifications of your computer’s model on the Internet, or by using thecommand lspci in a terminal. e Ubuntu Soware Center houses a num-ber of applications that can tell you detailed system information. SysInfo isone such program that you can use to find relevant information about yourSystem devices. Ubuntu comes with support for graphics devices manufac-tured by the above companies, and many others, out of the box. at meansyou don’t have to find and install any drivers yourself, Ubuntu takes care ofit all.
Keeping in line with Ubuntu’s philosophy, the drivers that are used bydefault for powering graphics devices are open source. is means that thedrivers can be modified by the Ubuntu developers and problems with themcan be fixed. However, in some cases a proprietary driver (restricted driver)provided by the company may provide beer performance or features thatare not present in the open source driver. In other cases, your particulardevice may not be supported by any open source drivers yet. In thosescenarios, you may want to install the restricted driver provided by themanufacturer.
For both philosophical and practical reasons, Ubuntu does not installrestricted drivers by default but allows the user to make an informed choice.Remember that restricted drivers, unlike the open source drivers for yourdevice, are not maintained by Ubuntu. Problems caused by those drivers
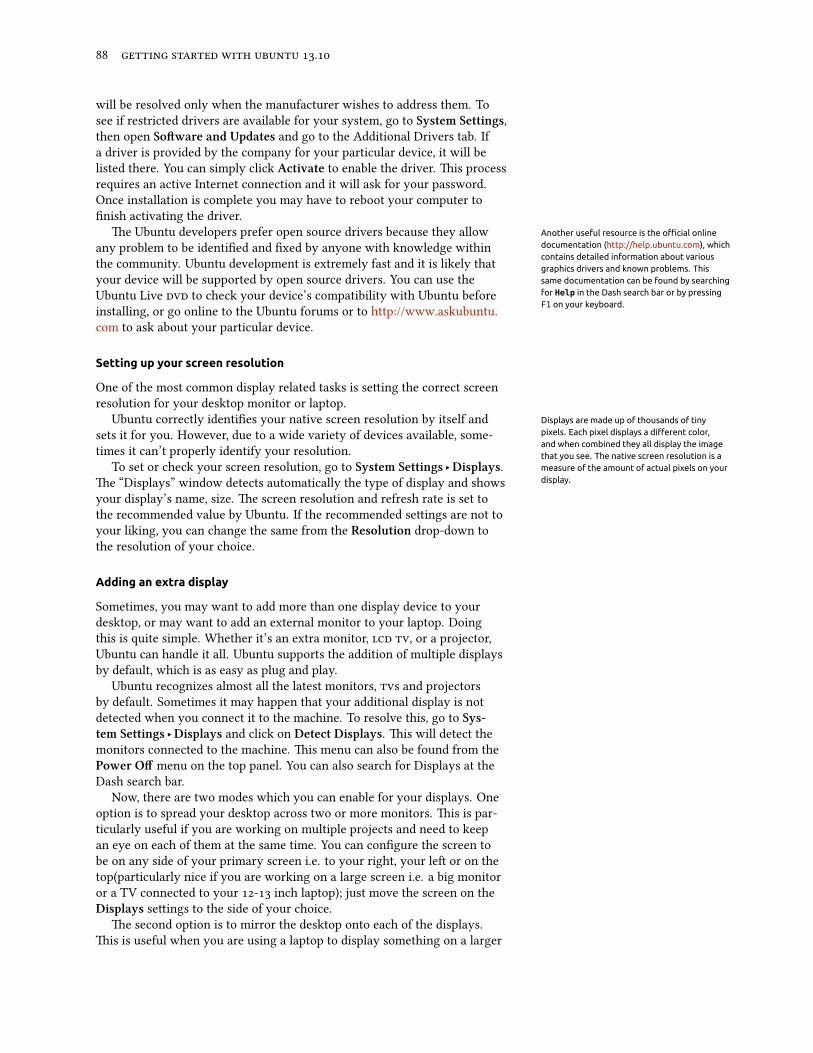
.
will be resolved only when the manufacturer wishes to address them. Tosee if restricted drivers are available for your system, go to System Settings,then open Soware and Updates and go to the Additional Drivers tab. Ifa driver is provided by the company for your particular device, it will belisted there. You can simply click Activate to enable the driver. is processrequires an active Internet connection and it will ask for your password.Once installation is complete you may have to reboot your computer tofinish activating the driver.
e Ubuntu developers prefer open source drivers because they allow Another useful resource is the official onlinedocumentation (http://help.ubuntu.com), whichcontains detailed information about variousgraphics drivers and known problems. Thissame documentation can be found by searchingfor Help in the Dash search bar or by pressingF1 on your keyboard.
any problem to be identified and fixed by anyone with knowledge withinthe community. Ubuntu development is extremely fast and it is likely thatyour device will be supported by open source drivers. You can use theUbuntu Live to check your device’s compatibility with Ubuntu beforeinstalling, or go online to the Ubuntu forums or to http://www.askubuntu.com to ask about your particular device.
Setting up your screen resolution
One of the most common display related tasks is seing the correct screenresolution for your desktop monitor or laptop.
Ubuntu correctly identifies your native screen resolution by itself and Displays are made up of thousands of tinypixels. Each pixel displays a different color,and when combined they all display the imagethat you see. The native screen resolution is ameasure of the amount of actual pixels on yourdisplay.
sets it for you. However, due to a wide variety of devices available, some-times it can’t properly identify your resolution.
To set or check your screen resolution, go to System Settings ‣Displays.e “Displays” window detects automatically the type of display and showsyour display’s name, size. e screen resolution and refresh rate is set tothe recommended value by Ubuntu. If the recommended seings are not toyour liking, you can change the same from the Resolution drop-down tothe resolution of your choice.
Adding an extra display
Sometimes, you may want to add more than one display device to yourdesktop, or may want to add an external monitor to your laptop. Doingthis is quite simple. Whether it’s an extra monitor, , or a projector,Ubuntu can handle it all. Ubuntu supports the addition of multiple displaysby default, which is as easy as plug and play.
Ubuntu recognizes almost all the latest monitors, s and projectorsby default. Sometimes it may happen that your additional display is notdetected when you connect it to the machine. To resolve this, go to Sys-tem Settings ‣Displays and click on Detect Displays. is will detect themonitors connected to the machine. is menu can also be found from thePower Off menu on the top panel. You can also search for Displays at theDash search bar.
Now, there are two modes which you can enable for your displays. Oneoption is to spread your desktop across two or more monitors. is is par-ticularly useful if you are working on multiple projects and need to keepan eye on each of them at the same time. You can configure the screen tobe on any side of your primary screen i.e. to your right, your le or on thetop(particularly nice if you are working on a large screen i.e. a big monitoror a TV connected to your - inch laptop); just move the screen on theDisplays seings to the side of your choice.
e second option is to mirror the desktop onto each of the displays.is is useful when you are using a laptop to display something on a larger

screen e.g. projector. To enable this option just check the box beside Mir-ror displays and click Apply to save the seings. You will get a pop-upnotification asking if you want to keep the current seing or revert to theprevious seing. Click to keep the current seing. Starting from Ubuntu., you can also select whether you want the Unity Launcher in boththe displays or only in the primary display. Ubuntu . introduces beermulti-monitor support for higher resolutions.
Connecting and using your printer
Ubuntu supports most new printers. You can add, remove, and changeprinter properties by navigating to System Settings ‣ Printing. You can alsosearch for Printing from the Dash search bar. Opening Printing will displaythe “Printing-localhost” window.
When you want to add a printer, you will need to make sure that it isswitched on, and plugged into your computer with a cable or connectedto your network.
Adding a local printer
If you have a printer that is connected to your computer with a cablethen this is termed a local printer. You can add a printer by clicking on theAdd Printer buon.
In the le hand pane of the “New Printer” window any printers that youcan install will be listed. Select the printer that you would like to install andclick Forward.
You can now specify the printer name, description and location. Each of If your printer can automatically do doublesided printing, it will probably have a duplexer.Please refer to the instructions that came withthe printer if you are unsure. If you do have aduplexer, make sure the Duplexer Installedoption is checked and then click the Forwardbutton.
these should remind you of that particular printer so that you can choosethe right one to use when printing. Finally, click Apply.
Adding a network printer
Make sure that your printer is connected to your network either with anEthernet cable or via wireless and is turned on. You can add a printer byclicking Add Printer. e “New Printer” window will open. Click the “+”sign next to Network Printer.
If your printer is found automatically it will appear under NetworkPrinter. Click the printer name and then click Forward. In the text fieldsyou can now specify the printer name, description and location. Each ofthese should remind you of that particular printer so that you can choosethe right one to use when printing. Finally click Apply.
You can also add your network printer by entering the address of the The default printer is the one that is automat-ically selected when you print a file. To set aprinter as default, right-click the printer thatyou want to set as default and then click Set AsDefault.
printer. Select “Find Network Printer,” enter the address of the printerin the box that reads Host: and press the Find buon. Ubuntu will find theprinter and add it. Most printers are detected by Ubuntu automatically. IfUbuntu cannot detect the printer automatically, it will ask you to enter themake and model number of the printer.
Changing printer options
Printer options allow you to change the printing quality, paper size andmedia type. ey can be changed by right-clicking a printer and choosingProperties. e “Printer Properties” window will show; in the le pane,select Printer Options.

.
You can now specify seings by changing the drop-down entries. Someof the options that you might see are explained.
Media size
is is the size of the paper that you put into your printer tray.
Media source
is is the tray that the paper comes from.
Color Model
is is very useful if you want to print in Grayscale to save on ink, or toprint in Color, or Inverted Grayscale.
Media type
Depending on the printer you can change between:
‣ Plain Paper‣ Automatic‣ Photo Paper‣ Transparency Film‣ or Media
Print quality
is specifies how much ink is used when printing, Fast Dra using theleast ink and High-Resolution Photo using the most ink.
Sound
Ubuntu usually detects the audio hardware automatically during installa-tion. Audio in Ubuntu is provided by a sound server named PulseAudio.e audio preferences are easily configurable with the help of a very easy touse which comes preinstalled with Ubuntu.
Volume indicator and sound preferences
A volume icon is present on the top panel which provides quick access to anumber of audio related functions. When you click on the volume icon youare greeted with four options: A mute option at the very top, a slider buonwhich you can move horizontally to increase/decrease volume, a shortcut tothe default music player, Rhythmbox, and an option for accessing the SoundSeings. Selecting Sound Seings opens up another window, which providesaccess to options for changing input and output hardware preferences forspeakers, microphones and headphones. It also provides options for seingthe volume level for each application. Sound Seings can also be foundfrom System Settings. It is known as Sound.
Output e Output tab will have a list of all the sound cards available A microphone is used for making audio/videocalls which are supported by applications likeSkype or Empathy. It can also be used for soundrecording.
in your system. Usually there is only one listed; however, if you have agraphics card which supports audio, it will also show up in the list.e Output tab is used for configuring the output of audio. You can in- If you change your sound output device, it will
remain as default.
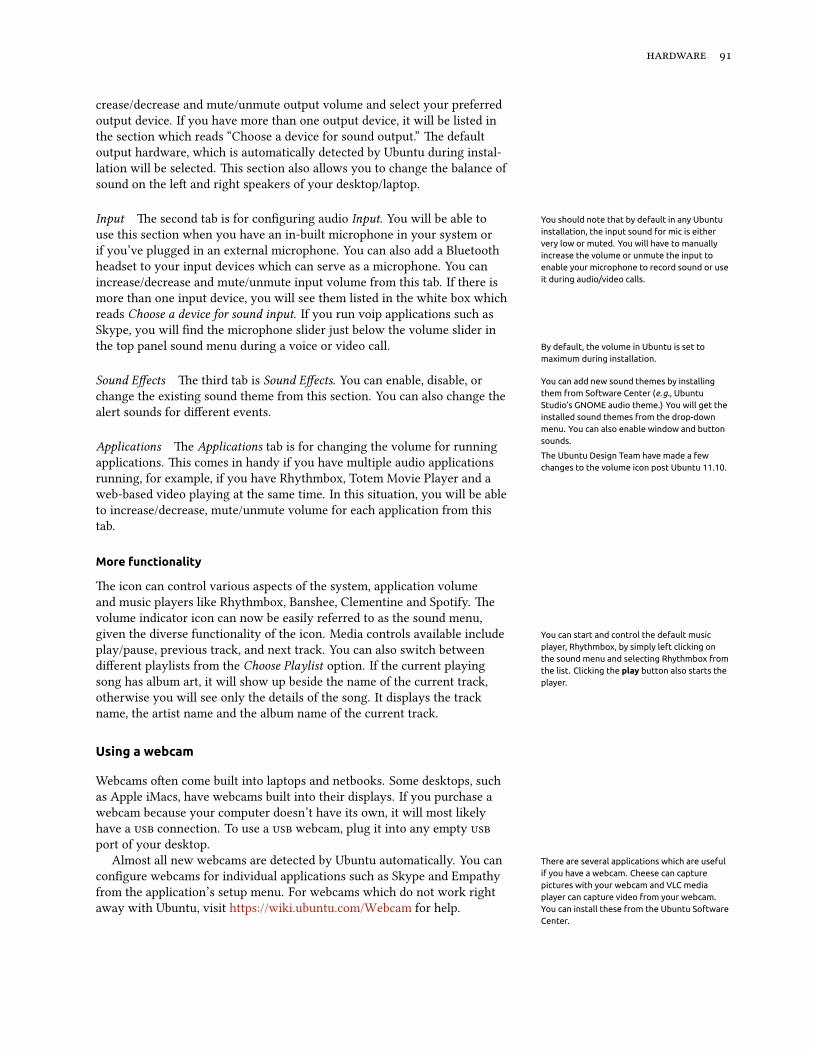
crease/decrease and mute/unmute output volume and select your preferredoutput device. If you have more than one output device, it will be listed inthe section which reads “Choose a device for sound output.” e defaultoutput hardware, which is automatically detected by Ubuntu during instal-lation will be selected. is section also allows you to change the balance ofsound on the le and right speakers of your desktop/laptop.
Input e second tab is for configuring audio Input. You will be able to You should note that by default in any Ubuntuinstallation, the input sound for mic is eithervery low or muted. You will have to manuallyincrease the volume or unmute the input toenable your microphone to record sound or useit during audio/video calls.
use this section when you have an in-built microphone in your system orif you’ve plugged in an external microphone. You can also add a Bluetoothheadset to your input devices which can serve as a microphone. You canincrease/decrease and mute/unmute input volume from this tab. If there ismore than one input device, you will see them listed in the white box whichreads Choose a device for sound input. If you run voip applications such asSkype, you will find the microphone slider just below the volume slider inthe top panel sound menu during a voice or video call. By default, the volume in Ubuntu is set to
maximum during installation.
Sound Effects e third tab is Sound Effects. You can enable, disable, or You can add new sound themes by installingthem from Software Center (e.g., UbuntuStudio’s GNOME audio theme.) You will get theinstalled sound themes from the drop-downmenu. You can also enable window and buttonsounds.
change the existing sound theme from this section. You can also change thealert sounds for different events.
Applications e Applications tab is for changing the volume for runningThe Ubuntu Design Team have made a fewchanges to the volume icon post Ubuntu 11.10.applications. is comes in handy if you have multiple audio applications
running, for example, if you have Rhythmbox, Totem Movie Player and aweb-based video playing at the same time. In this situation, you will be ableto increase/decrease, mute/unmute volume for each application from thistab.
More functionality
e icon can control various aspects of the system, application volumeand music players like Rhythmbox, Banshee, Clementine and Spotify. evolume indicator icon can now be easily referred to as the sound menu,given the diverse functionality of the icon. Media controls available include You can start and control the default music
player, Rhythmbox, by simply left clicking onthe sound menu and selecting Rhythmbox fromthe list. Clicking the play button also starts theplayer.
play/pause, previous track, and next track. You can also switch betweendifferent playlists from the Choose Playlist option. If the current playingsong has album art, it will show up beside the name of the current track,otherwise you will see only the details of the song. It displays the trackname, the artist name and the album name of the current track.
Using a webcam
Webcams oen come built into laptops and netbooks. Some desktops, suchas Apple iMacs, have webcams built into their displays. If you purchase awebcam because your computer doesn’t have its own, it will most likelyhave a connection. To use a webcam, plug it into any empty port of your desktop.
Almost all new webcams are detected by Ubuntu automatically. You can There are several applications which are usefulif you have a webcam. Cheese can capturepictures with your webcam and VLC mediaplayer can capture video from your webcam.You can install these from the Ubuntu SoftwareCenter.
configure webcams for individual applications such as Skype and Empathyfrom the application’s setup menu. For webcams which do not work rightaway with Ubuntu, visit https://wiki.ubuntu.com/Webcam for help.
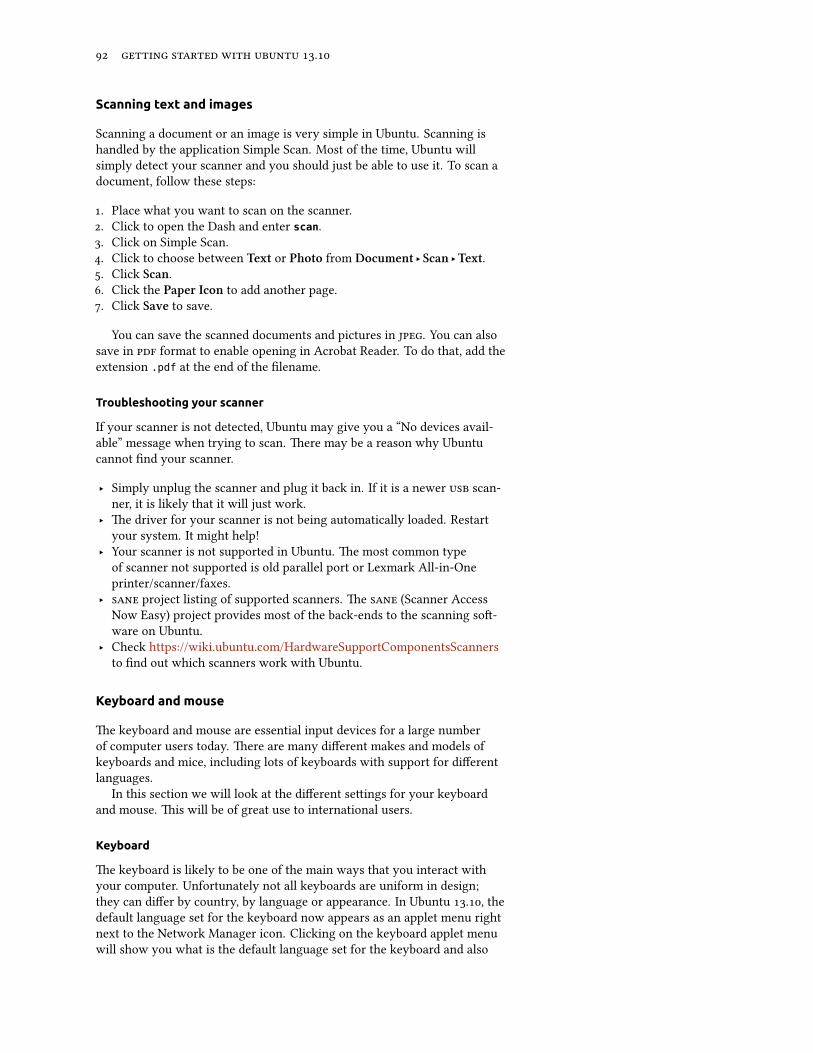
.
Scanning text and images
Scanning a document or an image is very simple in Ubuntu. Scanning ishandled by the application Simple Scan. Most of the time, Ubuntu willsimply detect your scanner and you should just be able to use it. To scan adocument, follow these steps:
. Place what you want to scan on the scanner.. Click to open the Dash and enter scan.. Click on Simple Scan.. Click to choose between Text or Photo from Document ‣ Scan ‣Text.. Click Scan.. Click the Paper Icon to add another page.. Click Save to save.
You can save the scanned documents and pictures in . You can alsosave in format to enable opening in Acrobat Reader. To do that, add theextension .pdf at the end of the filename.
Troubleshooting your scanner
If your scanner is not detected, Ubuntu may give you a “No devices avail-able” message when trying to scan. ere may be a reason why Ubuntucannot find your scanner.
‣ Simply unplug the scanner and plug it back in. If it is a newer scan-ner, it is likely that it will just work.
‣ e driver for your scanner is not being automatically loaded. Restartyour system. It might help!
‣ Your scanner is not supported in Ubuntu. e most common typeof scanner not supported is old parallel port or Lexmark All-in-Oneprinter/scanner/faxes.
‣ project listing of supported scanners. e (Scanner AccessNow Easy) project provides most of the back-ends to the scanning so-ware on Ubuntu.
‣ Check https://wiki.ubuntu.com/HardwareSupportComponentsScannersto find out which scanners work with Ubuntu.
Keyboard and mouse
e keyboard and mouse are essential input devices for a large numberof computer users today. ere are many different makes and models ofkeyboards and mice, including lots of keyboards with support for differentlanguages.
In this section we will look at the different seings for your keyboardand mouse. is will be of great use to international users.
Keyboard
e keyboard is likely to be one of the main ways that you interact withyour computer. Unfortunately not all keyboards are uniform in design;they can differ by country, by language or appearance. In Ubuntu ., thedefault language set for the keyboard now appears as an applet menu rightnext to the Network Manager icon. Clicking on the keyboard applet menuwill show you what is the default language set for the keyboard and also

enable you to access three options : . Character Map . Keyboard Layout .Text Entry Seings..
Figure 4.1: Keyboard applet menu.
Mouse and Touchpad
A mouse is another mode of input and goes hand in hand with the key-board. Ubuntu supports all types of plug and play mice, including touch-pads and trackballs. If you are planning to use a mouse with your laptop,just plug it in and Ubuntu will recognize it instantly.
ere is a seings menu under System Settings ‣Mouse and Tou-pad where you can change the mouse seings such as double-click speed,pointer speed, drag and drop threshold and le handed or right handedclicks. If you are using touchpad on your laptop/netbook you can also in-crease the sensitivity of your touchpad. You can also enable horizontal, edgescrolling and two finger scrolling on your laptop/netbook.
Multitouch and gesture support
Introduced in Ubuntu ., multi-touch and gesture support has beengaining good amount of aention from developers at Canonical. Ubuntunow has full support for multitouch gestures. is means that anyone witha touch-enabled device or interface can use the multitouch features. Oncetriggered, resizing and moving windows in touch-friendly devices can bedone using three fingered tap on an application window.
Ubuntu . improves upon the functionalities incorporated in Ubuntu. for options to enable two-finger scrolling similar to Mac laptopsand desktops. is seing can be enabled from System Setting ‣Mouseand Toupad ‣Toupad. Select “Two-finger scrolling” from the Scrollingoptions. You can also search for Mouse and Touchpad from the Dash searchbar and enable the option. Please note that enabling two finger scrollingwill disable edge scrolling.
Other devices
USB
ports are available as standard on almost all computers available now.ey are used to connect a multitude of devices to your computer. esecould include portable hard drives, flash drives, removable //Blu-raydrives, printers, scanners and mobile phones.
When connected, flash drives and portable hard drives are automaticallydetected—the file manager will open and display the contents of the drive.You can then use the drives for copying data to and from the computer.
All new cameras, camcorders and mobile phone cards are automati-cally detected by Ubuntu. ese cards have different types of data, so awindow will appear with a drop-down menu to choose between video, au-dio import and the file manager—you can choose your desired action fromthis menu.
Firewire
Firewire is a connection on some computers that allows you to transfer data Firewire is officially known as IEEE 1394. Itis also known as the Sony i.LINK and TexasInstruments Lynx.
from devices. is port is generally used by camcorders and digital cameras.If you want to import video from your camcorder you can do so by
connecting your camcorder to the Firewire port. You will need to install a To find out more about Kino, visit http://www.kinodv.org/.
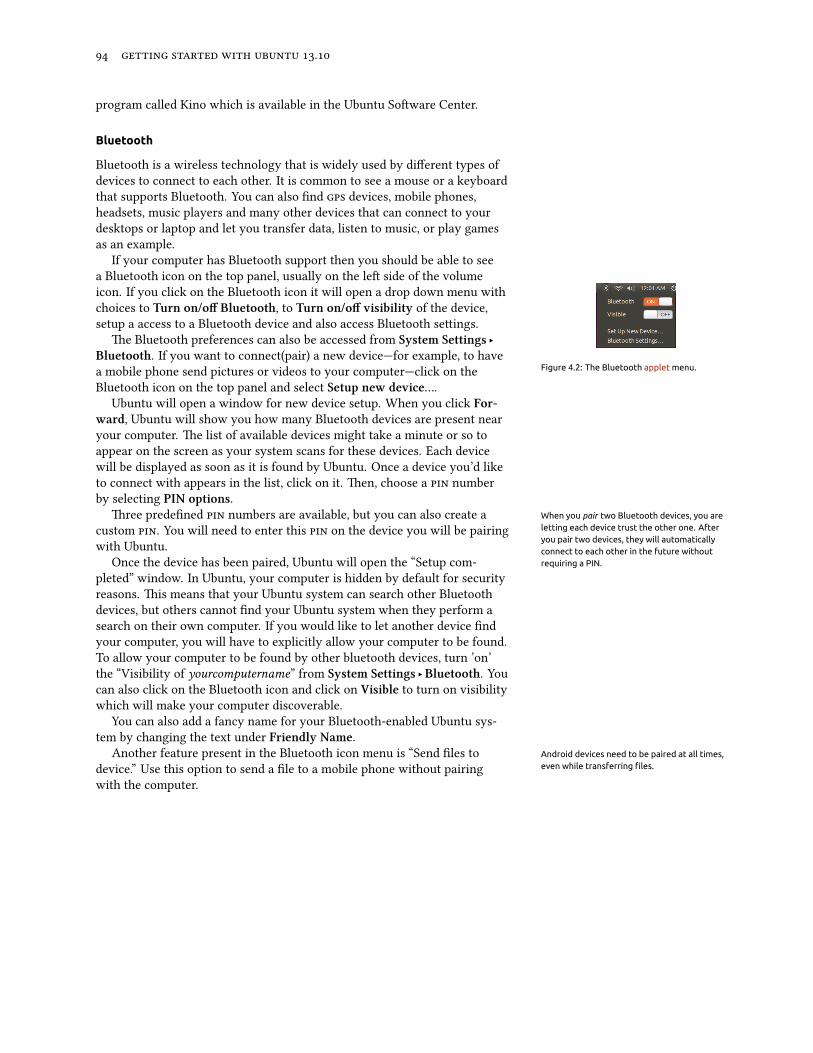
.
program called Kino which is available in the Ubuntu Soware Center.
Bluetooth
Bluetooth is a wireless technology that is widely used by different types ofdevices to connect to each other. It is common to see a mouse or a keyboardthat supports Bluetooth. You can also find devices, mobile phones,headsets, music players and many other devices that can connect to yourdesktops or laptop and let you transfer data, listen to music, or play gamesas an example.
If your computer has Bluetooth support then you should be able to seea Bluetooth icon on the top panel, usually on the le side of the volumeicon. If you click on the Bluetooth icon it will open a drop down menu withchoices to Turn on/off Bluetooth, to Turn on/off visibility of the device,setup a access to a Bluetooth device and also access Bluetooth seings.
Figure 4.2: The Bluetooth applet menu.
e Bluetooth preferences can also be accessed from System Settings ‣Bluetooth. If you want to connect(pair) a new device—for example, to havea mobile phone send pictures or videos to your computer—click on theBluetooth icon on the top panel and select Setup new device….
Ubuntu will open a window for new device setup. When you click For-ward, Ubuntu will show you how many Bluetooth devices are present nearyour computer. e list of available devices might take a minute or so toappear on the screen as your system scans for these devices. Each devicewill be displayed as soon as it is found by Ubuntu. Once a device you’d liketo connect with appears in the list, click on it. en, choose a numberby selecting PIN options.
ree predefined numbers are available, but you can also create a When you pair two Bluetooth devices, you areletting each device trust the other one. Afteryou pair two devices, they will automaticallyconnect to each other in the future withoutrequiring a PIN.
custom . You will need to enter this on the device you will be pairingwith Ubuntu.
Once the device has been paired, Ubuntu will open the “Setup com-pleted” window. In Ubuntu, your computer is hidden by default for securityreasons. is means that your Ubuntu system can search other Bluetoothdevices, but others cannot find your Ubuntu system when they perform asearch on their own computer. If you would like to let another device findyour computer, you will have to explicitly allow your computer to be found.To allow your computer to be found by other bluetooth devices, turn ’on’the “Visibility of yourcomputername” from System Settings ‣Bluetooth. Youcan also click on the Bluetooth icon and click on Visible to turn on visibilitywhich will make your computer discoverable.
You can also add a fancy name for your Bluetooth-enabled Ubuntu sys-tem by changing the text under Friendly Name.
Another feature present in the Bluetooth icon menu is “Send files to Android devices need to be paired at all times,even while transferring files.device.” Use this option to send a file to a mobile phone without pairing
with the computer.
5 Software Management
Software management in Ubuntu
Installing soware in Ubuntu extends the functionality and usability of thisoperating system. is chapter describes the way Ubuntu manages sowareinstallation and how it keeps all soware current.
Package management system
Ubuntu and various other Linux variants use a collection of soware toolscalled a package management system, or package manager. A package man-ager is a collection of tools that make installing, deleting, upgrading, andconfiguring soware easy. A package management system has a databaseof soware called a repository where individual soware is arranged intoa collection called a packages. ese packages, apart from the soware,contain important information about the soware itself, such as the so-ware’s name, description, version, name of the vendor, and a list of variousdependencies upon which the soware relies for proper installation.
Most other operating systems require a user to purchase commercialsoware (online or through a physical store) or search the Internet fora free alternative (if one is available). e correct installation file mustthen be verified for integrity, downloaded, and located on the computer,followed by the user proceeding through a number of installation promptsand options. A package management system removes the user interactionfrom these steps and automates most, if not all, of the installation process.
Ubuntu comes with a package management system called AdvancedPackaging Tool or .
As discussed in Chapter : Working with Ubuntu, Ubuntu offers a widerange of applications for your daily work. Ubuntu comes with a basic setof applications for common tasks, like surfing the Internet, checking email,listening to music, and organizing photos and videos. At times, you mayneed an extra level of specialization. For example, you may want to retouchyour photos, run soware for your business, or play new games. In each ofthese cases, you can search for an application, install it, and use it—usuallywith no extra cost.
Figure 5.1: Software Center iconBy default, Ubuntu provides a centralized point with two different ways
to browse the repositories for searching, installing, and removing soware.
‣ Ubuntu Soware Center‣ Command line apt-get
Ubuntu Soware Center makes searching, installing, and/or removingapplications easy and convenient; it is most oen the application manage-ment system used by both beginning and expert Ubuntu users. We highlyrecommend the Ubuntu Soware Center for searching, installing, andremoving applications, although you can still use the command-line appli-cation apt-get or install and use the advanced application Synaptic PackageManager. Since soware in Ubuntu is delivered in the form of packages,soware installation becomes a one-click, one-step process when using theUbuntu Soware Center.
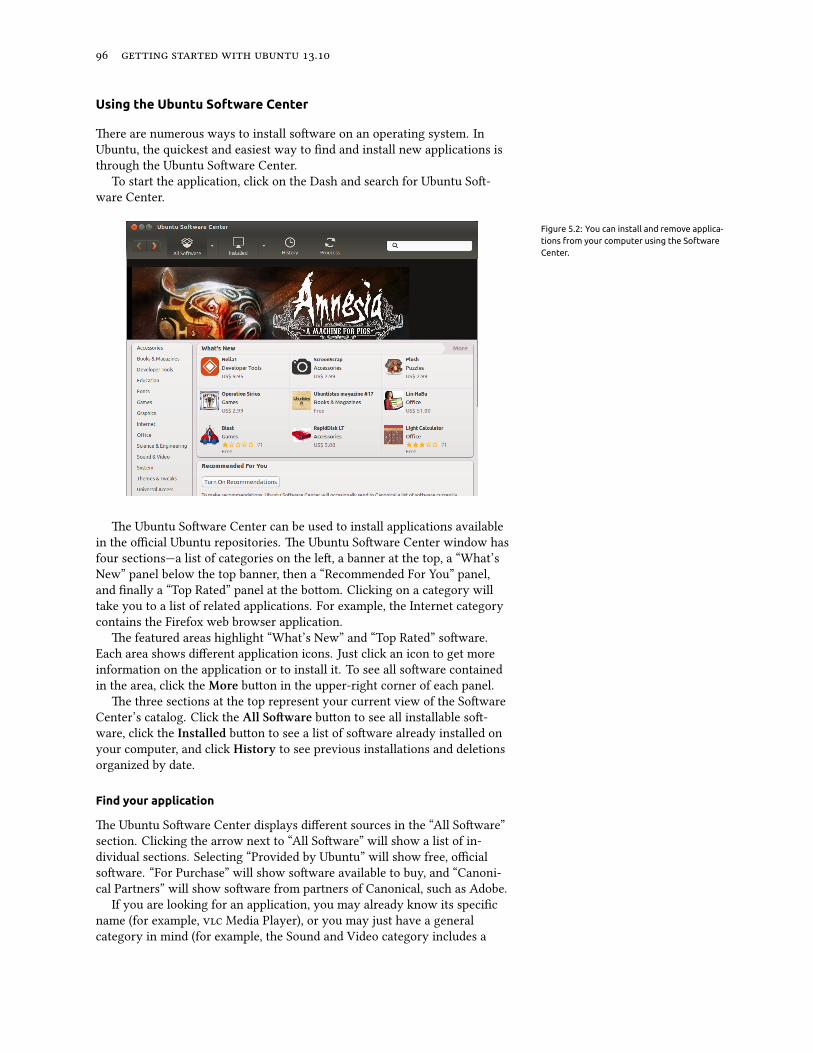
.
Using the Ubuntu Software Center
ere are numerous ways to install soware on an operating system. InUbuntu, the quickest and easiest way to find and install new applications isthrough the Ubuntu Soware Center.
To start the application, click on the Dash and search for Ubuntu So-ware Center.
Figure 5.2: You can install and remove applica-tions from your computer using the SoftwareCenter.
e Ubuntu Soware Center can be used to install applications availablein the official Ubuntu repositories. e Ubuntu Soware Center window hasfour sections—a list of categories on the le, a banner at the top, a “What’sNew” panel below the top banner, then a “Recommended For You” panel,and finally a “Top Rated” panel at the boom. Clicking on a category willtake you to a list of related applications. For example, the Internet categorycontains the Firefox web browser application.
e featured areas highlight “What’s New” and “Top Rated” soware.Each area shows different application icons. Just click an icon to get moreinformation on the application or to install it. To see all soware containedin the area, click the More buon in the upper-right corner of each panel.
e three sections at the top represent your current view of the SowareCenter’s catalog. Click the All Soware buon to see all installable so-ware, click the Installed buon to see a list of soware already installed onyour computer, and click History to see previous installations and deletionsorganized by date.
Find your application
e Ubuntu Soware Center displays different sources in the “All Soware”section. Clicking the arrow next to “All Soware” will show a list of in-dividual sections. Selecting “Provided by Ubuntu” will show free, officialsoware. “For Purchase” will show soware available to buy, and “Canoni-cal Partners” will show soware from partners of Canonical, such as Adobe.
If you are looking for an application, you may already know its specificname (for example, Media Player), or you may just have a generalcategory in mind (for example, the Sound and Video category includes a
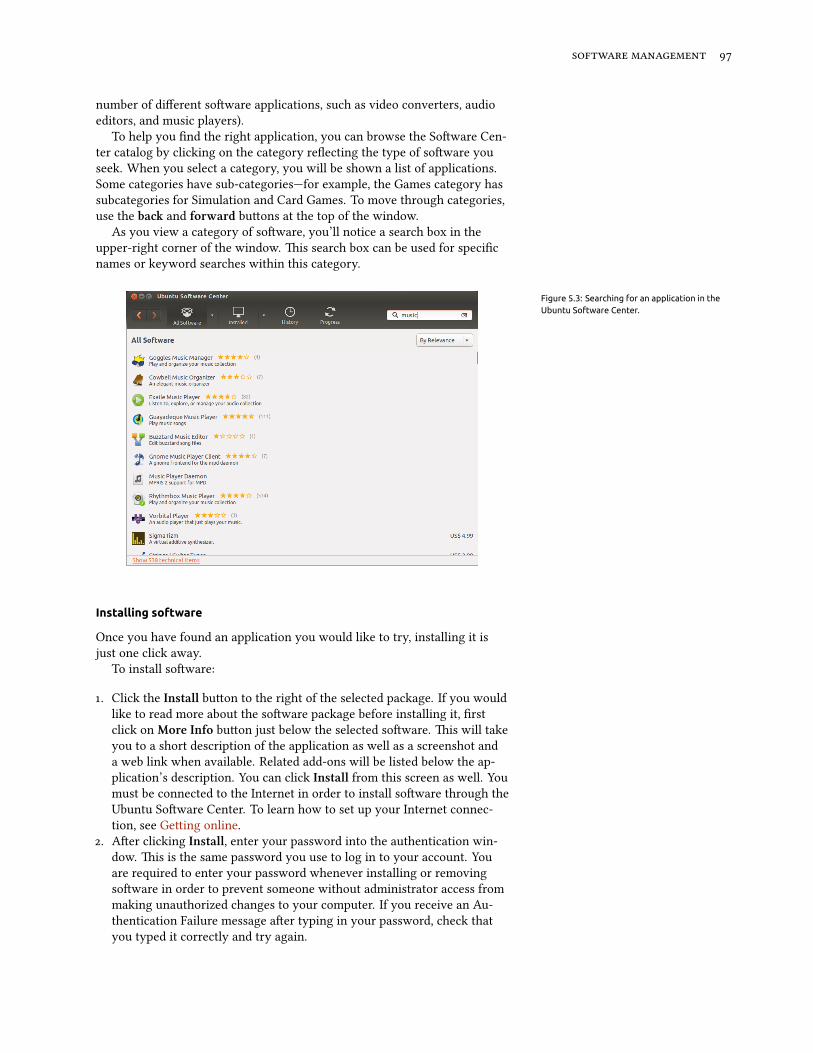
number of different soware applications, such as video converters, audioeditors, and music players).
To help you find the right application, you can browse the Soware Cen-ter catalog by clicking on the category reflecting the type of soware youseek. When you select a category, you will be shown a list of applications.Some categories have sub-categories—for example, the Games category hassubcategories for Simulation and Card Games. To move through categories,use the ba and forward buons at the top of the window.
As you view a category of soware, you’ll notice a search box in theupper-right corner of the window. is search box can be used for specificnames or keyword searches within this category.
Figure 5.3: Searching for an application in theUbuntu Software Center.
Installing software
Once you have found an application you would like to try, installing it isjust one click away.
To install soware:
. Click the Install buon to the right of the selected package. If you wouldlike to read more about the soware package before installing it, firstclick on More Info buon just below the selected soware. is will takeyou to a short description of the application as well as a screenshot anda web link when available. Related add-ons will be listed below the ap-plication’s description. You can click Install from this screen as well. Youmust be connected to the Internet in order to install soware through theUbuntu Soware Center. To learn how to set up your Internet connec-tion, see Geing online.
. Aer clicking Install, enter your password into the authentication win-dow. is is the same password you use to log in to your account. Youare required to enter your password whenever installing or removingsoware in order to prevent someone without administrator access frommaking unauthorized changes to your computer. If you receive an Au-thentication Failure message aer typing in your password, check thatyou typed it correctly and try again.

.
Figure 5.4: Here, clicking on “Install” willdownload and install the package “Stellarium.”
. Wait until the package is finished installing. During the installation(or removal) of programs, you will see an animated icon of rotatingarrows to the right of the History buon at the top of the screen. isanimated icon is labelled Progress. If you like, you can go back to themain browsing window and choose additional soware packages to beinstalled by following the steps above. At any time, clicking the Progressbuon on the top will take you to a summary of all operations that arecurrently processing. You can also click the X to cancel any operationlisted.
Once the Soware Center has finished installing an application, it isready to be used. You can start the newly installed application by going tothe Dash and typing the name of the application in the search bar.
Removing software
Removing applications is very similar to installing soware. First, find theinstalled soware in the Ubuntu Soware Center. You can click on theInstalled buon to see all installed soware listed by categories. Scrolldown to the application you wish to remove. If you click on the arrow nextto the Installed buon, you will find a list of soware providers, which canhelp you narrow your search. You can also enter keywords into the Searchfield to quickly find installed soware, or you can search by date in theHistory tab (more on History below).
To remove soware:
. Click the Remove buon to the right of the selected application.. Enter your password into the authentication window. Similar to in-
stalling soware, removing soware requires your password to helpprotect your computer against unauthorized changes. e package willthen be queued for removal and will appear under the progress section atthe top.
Removing a package will also update your menus accordingly.

Figure 5.5: Here, clicking on “Remove” willremove the package “SuperTux 2.”
Software history
e Ubuntu Soware Center keeps track of past soware management inthe History section. is is useful if you wish to reinstall an applicationpreviously removed and do not remember the application’s name.
ere are four buons in the history section—All Changes, Installations,Updates, and Removals. If you click the arrow next to a day, a list of indi-vidual packages will be shown, along with what was done with them and atwhat time.
Software Recommendations
e Ubuntu Soware Center recommends soware based on the sowarealready installed on your systems. When you enable recommendations,a list of locally installed soware will be periodically sent to servers ofCanonical. Recommendations will appear in the same panel. If you want todisable these recommendations, go to View ‣Turn Off Recommendations.
Figure 5.6: You can turn on Software Rec-ommendations via clicking on the Turn OnRecommendations button.
Figure 5.7: The “People Also Installed” sectionshows applications installed by users who alsoinstalled the application which you are about toinstall.
Managing additional software
Although the Ubuntu Soware Center provides a large library of appli-cations from which to choose, only those packages available within theofficial Ubuntu repositories are listed. At times, you may be interested ina particular application not available in these repositories. It is important
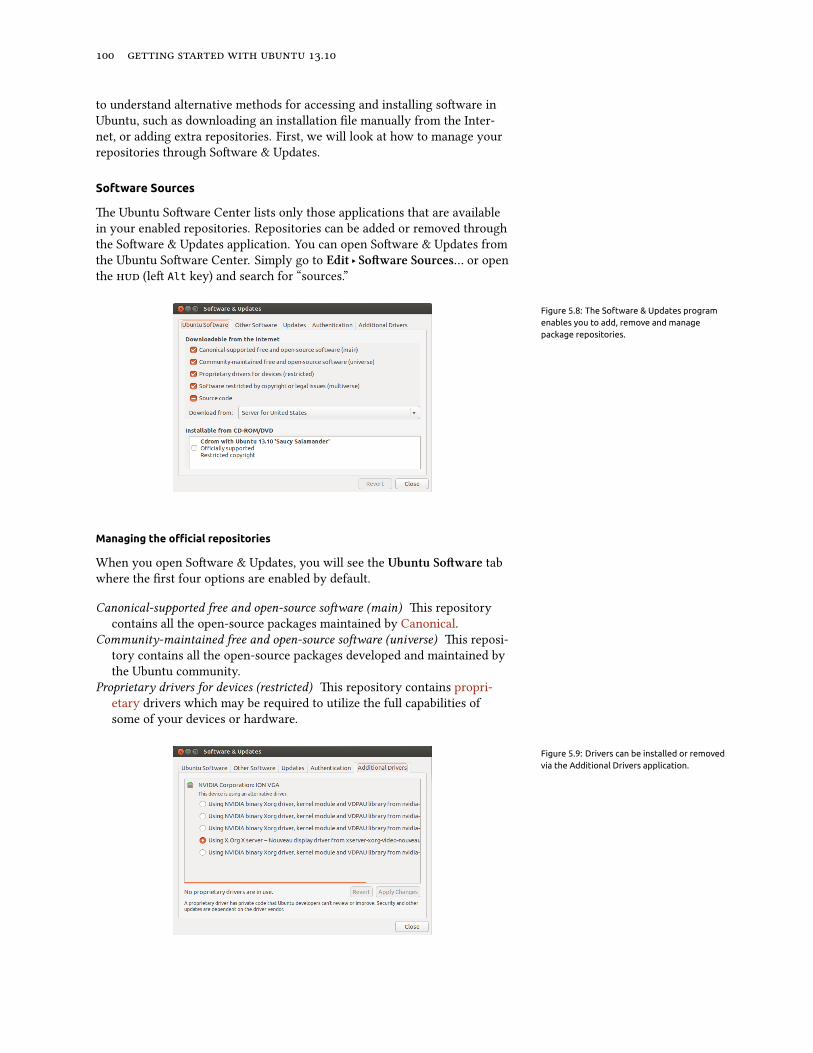
.
to understand alternative methods for accessing and installing soware inUbuntu, such as downloading an installation file manually from the Inter-net, or adding extra repositories. First, we will look at how to manage yourrepositories through Soware & Updates.
Software Sources
e Ubuntu Soware Center lists only those applications that are availablein your enabled repositories. Repositories can be added or removed throughthe Soware & Updates application. You can open Soware & Updates fromthe Ubuntu Soware Center. Simply go to Edit ‣ Soware Sources… or openthe (le Alt key) and search for “sources.”
Figure 5.8: The Software & Updates programenables you to add, remove and managepackage repositories.
Managing the official repositories
When you open Soware & Updates, you will see the Ubuntu Soware tabwhere the first four options are enabled by default.
Canonical-supported free and open-source soware (main) is repositorycontains all the open-source packages maintained by Canonical.
Community-maintained free and open-source soware (universe) is reposi-tory contains all the open-source packages developed and maintained bythe Ubuntu community.
Proprietary drivers for devices (restricted) is repository contains propri-etary drivers which may be required to utilize the full capabilities ofsome of your devices or hardware.
Figure 5.9: Drivers can be installed or removedvia the Additional Drivers application.

Soware restricted by copyright or legal issues (multiverse) is repositorycontains soware possibly protected from use in some states or countriesby copyright or licensing laws. By using this repository, you assumeresponsibility for the usage of any packages that you install.
Source code is repository contains the source code used to build sowarepackages from some of the other repositories. Building applications fromsource is an advanced process for creating packages, and usually onlyconcerns developers. e Source code option should not be selectedunless you have experience with building applications from source.
Selecting the best software server
To distribute applications and soware, Ubuntu grants permission to manyservers all across the world to act as official mirrors to host an exact copy ofall the files contained in the official Ubuntu repositories.
When selecting a server, you may want to consider the following:
Distance to server. is will affect the speed you can achieve with the fileserver—the closer the server to your location, the faster the potentialconnection.
Internet Service Provider. Some Internet service providers offer low-cost orunlimited free downloads from their own servers.
ality of server. Some servers may only offer downloads at a cappedspeed, limiting the rate at which you can install and update soware onyour computer.
Ubuntu will automatically choose an appropriate server while installing.It is recommended these seings not be changed unless your physical loca-tion significantly changes or if you feel a higher speed should be achievedby your Internet connection. e guide below will help in choosing anoptimal server.
Ubuntu provides a tool for selecting the server that provides the fastestconnection with your computer.
Figure 5.10: You can use automatic selection orchoose a server manually.
. Click the dropdown box next to “Download from:” in the Soware &Updates window.
. Select “Other…” from the list.. In the “Choose a Download Server” window, click the Select Best Server
buon in the upper-right. Your computer will now aempt a connectionwith all the available servers, then select the one with the fastest speed.
If you are happy with the automatic selection, click Choose Server toreturn to the Soware & Updates window.
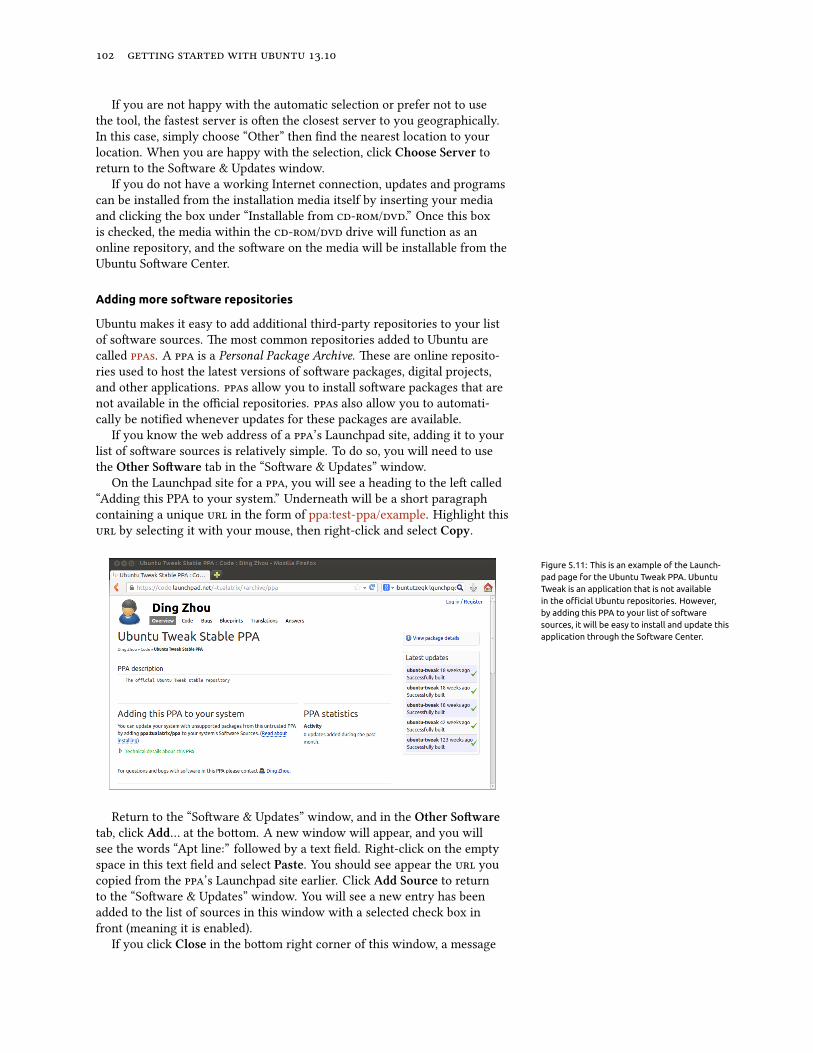
.
If you are not happy with the automatic selection or prefer not to usethe tool, the fastest server is oen the closest server to you geographically.In this case, simply choose “Other” then find the nearest location to yourlocation. When you are happy with the selection, click Choose Server toreturn to the Soware & Updates window.
If you do not have a working Internet connection, updates and programscan be installed from the installation media itself by inserting your mediaand clicking the box under “Installable from /.” Once this boxis checked, the media within the / drive will function as anonline repository, and the soware on the media will be installable from theUbuntu Soware Center.
Adding more software repositories
Ubuntu makes it easy to add additional third-party repositories to your listof soware sources. e most common repositories added to Ubuntu arecalled s. A is a Personal Package Archive. ese are online reposito-ries used to host the latest versions of soware packages, digital projects,and other applications. s allow you to install soware packages that arenot available in the official repositories. s also allow you to automati-cally be notified whenever updates for these packages are available.
If you know the web address of a ’s Launchpad site, adding it to yourlist of soware sources is relatively simple. To do so, you will need to usethe Other Soware tab in the “Soware & Updates” window.
On the Launchpad site for a , you will see a heading to the le called“Adding this PPA to your system.” Underneath will be a short paragraphcontaining a unique in the form of ppa:test-ppa/example. Highlight this by selecting it with your mouse, then right-click and select Copy.
Figure 5.11: This is an example of the Launch-pad page for the Ubuntu Tweak PPA. UbuntuTweak is an application that is not availablein the official Ubuntu repositories. However,by adding this PPA to your list of softwaresources, it will be easy to install and update thisapplication through the Software Center.
Return to the “Soware & Updates” window, and in the Other Sowaretab, click Add… at the boom. A new window will appear, and you willsee the words “Apt line:” followed by a text field. Right-click on the emptyspace in this text field and select Paste. You should see appear the youcopied from the ’s Launchpad site earlier. Click Add Source to returnto the “Soware & Updates” window. You will see a new entry has beenadded to the list of sources in this window with a selected check box infront (meaning it is enabled).
If you click Close in the boom right corner of this window, a message
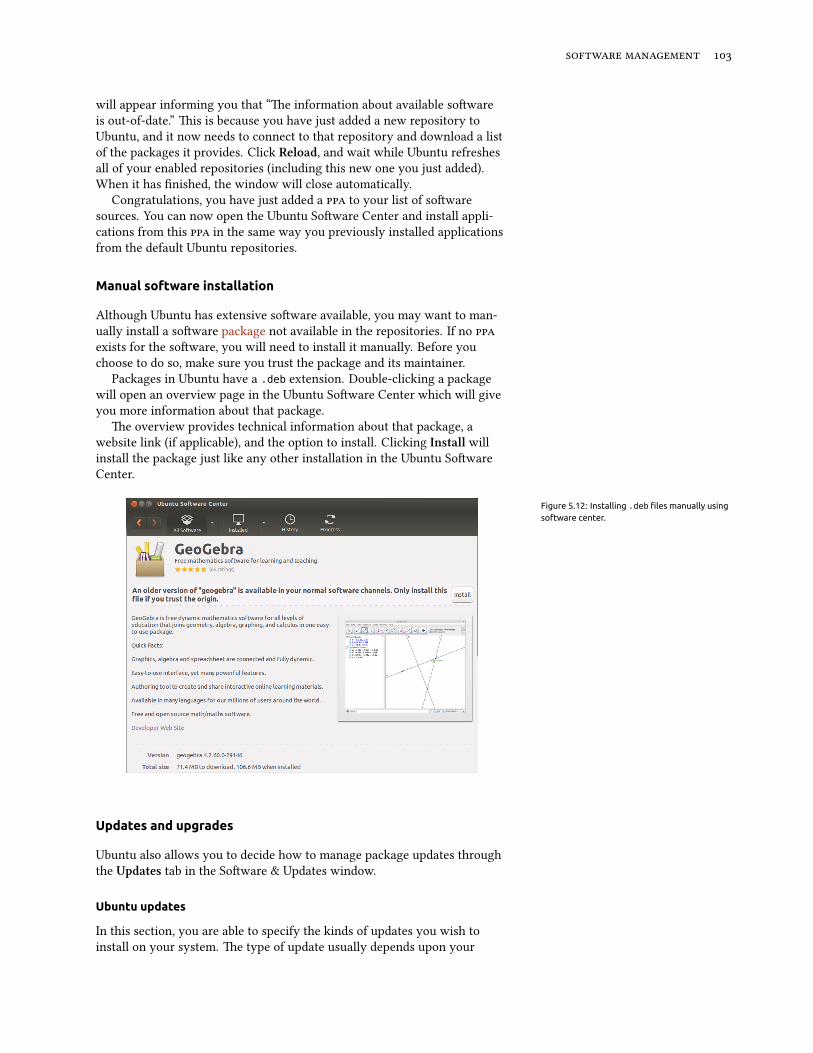
will appear informing you that “e information about available sowareis out-of-date.” is is because you have just added a new repository toUbuntu, and it now needs to connect to that repository and download a listof the packages it provides. Click Reload, and wait while Ubuntu refreshesall of your enabled repositories (including this new one you just added).When it has finished, the window will close automatically.
Congratulations, you have just added a to your list of sowaresources. You can now open the Ubuntu Soware Center and install appli-cations from this in the same way you previously installed applicationsfrom the default Ubuntu repositories.
Manual software installation
Although Ubuntu has extensive soware available, you may want to man-ually install a soware package not available in the repositories. If no exists for the soware, you will need to install it manually. Before youchoose to do so, make sure you trust the package and its maintainer.
Packages in Ubuntu have a .deb extension. Double-clicking a packagewill open an overview page in the Ubuntu Soware Center which will giveyou more information about that package.
e overview provides technical information about that package, awebsite link (if applicable), and the option to install. Clicking Install willinstall the package just like any other installation in the Ubuntu SowareCenter.
Figure 5.12: Installing .deb files manually usingsoftware center.
Updates and upgrades
Ubuntu also allows you to decide how to manage package updates throughthe Updates tab in the Soware & Updates window.
Ubuntu updates
In this section, you are able to specify the kinds of updates you wish toinstall on your system. e type of update usually depends upon your

.
preferences with regards to system stability versus having access to thelatest developments.
Figure 5.13: You can update installed softwareby using the Software Updater application inUbuntu.
Important security updates (saucy-security) ese updates are highly rec-ommended to ensure your system remains as secure as possible. eseupdates are enabled by default.
Recommended updates (saucy-updates) ese updates are not as importantin keeping your system secure. Rather, updates listed in this section willkeep your soware updated with the most recent bug fixes or minorupdates that have been tested and approved. is option is also enabledby default.
Pre-released updates (saucy-proposed) is option is for those who wouldrather remain up-to-date with the very latest releases of applicationsat the risk of installing an update that has unresolved bugs or conflicts.Note that it is possible you will encounter problems with these updatedapplications, therefore, this option is not enabled by default.
Unsupported updates (saucy-backports) ese are updates that have notyet been fully tested and reviewed by Canonical. Some bugs may occurwhen using these updates, and so this option is also not enabled bydefault.
Automatic updates
e middle section of this window allows you to customize how your sys-tem manages updates, such as the frequency with which it checks for newpackages, as well as whether it should install important updates right away(without asking for your permission), download them only, or just notifyyou about them.
Release upgrade
At the boom of the Updates tab in the Soware & Updates window, youwill see a dropdown box labeled Notify me of a new Ubuntu version:. isoption allows you to tell Ubuntu how you would like to handle releaseupdates. is dropdown box contains the following options for notification:
Never Choose this option if you would rather not be notified about anynew Ubuntu releases.
For any new version Choose this option if you always want to have thelatest Ubuntu release, regardless of whether it is a long-term supportrelease or not. is option is recommended for normal home users.
For long-term support versions Choose this option if you need a releasethat will be more stable and have support for a longer time. If you useUbuntu for business purposes, you may want to consider selecting thisoption.Canonical will release a new version of the Ubuntu operating systemevery six months. Most every release is called a normal release. However,every fourth release—or every months—Canonical releases a long-term support () version of the operating system. Long-term supportreleases are intended to be the most stable releases available and aresupported for a longer period of time. Ubuntu . is a normal release.Ubuntu . will be an LTS release.


6 Advanced Topics
Ubuntu for advanced users
To this point, we’ve provided detailed instructions on geing the most fromUbuntu’s basic features. In this chapter, we’ll detail some of Ubuntu’s moreadvanced features—like the terminal, a powerful utility that can help youaccomplish tasks without the need for a graphical user interface (). We’llalso discuss some advanced security measures you can implement to makeyour computer even safer.
is chapter has been wrien with advanced users in mind. If you’renew to Ubuntu, don’t feel as though you’ll need to master these topics toget the most out of your new soware (you can easily skip to the next chap-ter without any adverse impact to your experience with Ubuntu). However,if you’re looking to expand your knowledge of Ubuntu, we encourage youto keep reading.
Introduction to the terminal
roughout this manual, we have focused primarily on the GUI. In orderto fully realize the power of Ubuntu, you will need to learn how to use theterminal.
What is the terminal?
Most operating systems, including Ubuntu, have two types of user inter-faces. e first is a GUI. is is the desktop, windows, menus, and toolbarsyou click to get things done. e second, much older type of interface is thecommand-line interface ().
e terminal is Ubuntu’s CLI. It is a method of controlling some aspectsof Ubuntu using only commands that you type on the keyboard.
Why would I want to use the terminal?
You can perform most day-to-day activities without ever needing to openthe terminal. However, the terminal is a powerful and invaluable tool thatcan be used to perform many useful tasks you might not be able to accom-plish with a . For example:
‣ Troubleshooting any difficulties that may arise when using Ubuntusometimes requires you to use the terminal.
‣ A command-line interface is sometimes a faster way to accomplish atask. For example, it is oen easier to perform operations on many filesconcurrently using the terminal.
‣ Learning the command-line interface is the first step towards moreadvanced troubleshooting, system administration, and soware develop-ment skills. If you are interested in becoming a developer or an advancedUbuntu user, knowledge of the command-line is essential.

.
Opening the terminal
You can open the terminal by clicking Dash then searching for word “term”.You’ll see an application named terminal. Click on this application to opena terminal. Alternatively, you can open the terminal by hiing Ctrl+Alt+Tsimultaneously.
e terminal gives you access to what is called a shell. When you typea command in the terminal, the shell interprets this command, resulting inthe desired action. Different types of shells accept slightly different com-mands. e most popular is called “bash,” and is the default shell in Ubuntu.When the terminal window opens, it will be largely blank with the excep-tion of some text at the top le of the screen, followed by a blinking block,known as a cursor. is text is your prompt—it displays, by default, yourlogin name and your computer’s name, followed by the current directory.e tilde (~) means that the current directory is your home directory. Fi-nally, the blinking block is called the cursor—this marks where text will beentered as you type.
To test a terminal command, type pwd and press Enter. e terminalshould display /home/yourusername. is text is called the “output.” Youhave just used the pwd (print working directory) command, which outputs(displays) the current directory.
Figure 6.1: The default terminal window allowsyou to run hundreds of useful commands.
All commands in the terminal follow the same approach: Type a com-mand, possibly followed by some parameters, and press Enter to performthe specified action. Parameters (also called switches) are extra segmentsof text, usually added at the end of a command, that change how the com-mand itself is interpreted. ese usually take the form of -h or --help, forexample. In fact, --help can be added to most commands to display a shortdescription of the command, as well as a list of any other parameters thatcan be used with that command.
Oen, some type of output will be displayed confirming the action wascompleted successfully, although this can depend on the command beingexecuted. For example, using the cd command to change your current direc-tory (see above) will change the prompt but will not display any output.
e rest of this chapter covers some very common uses of the termi-nal. roughout the second part of this manual, we will continue to referto the command line, particularly when discussing steps involved in trou-bleshooting as well as when describing more advanced management of yourcomputer.
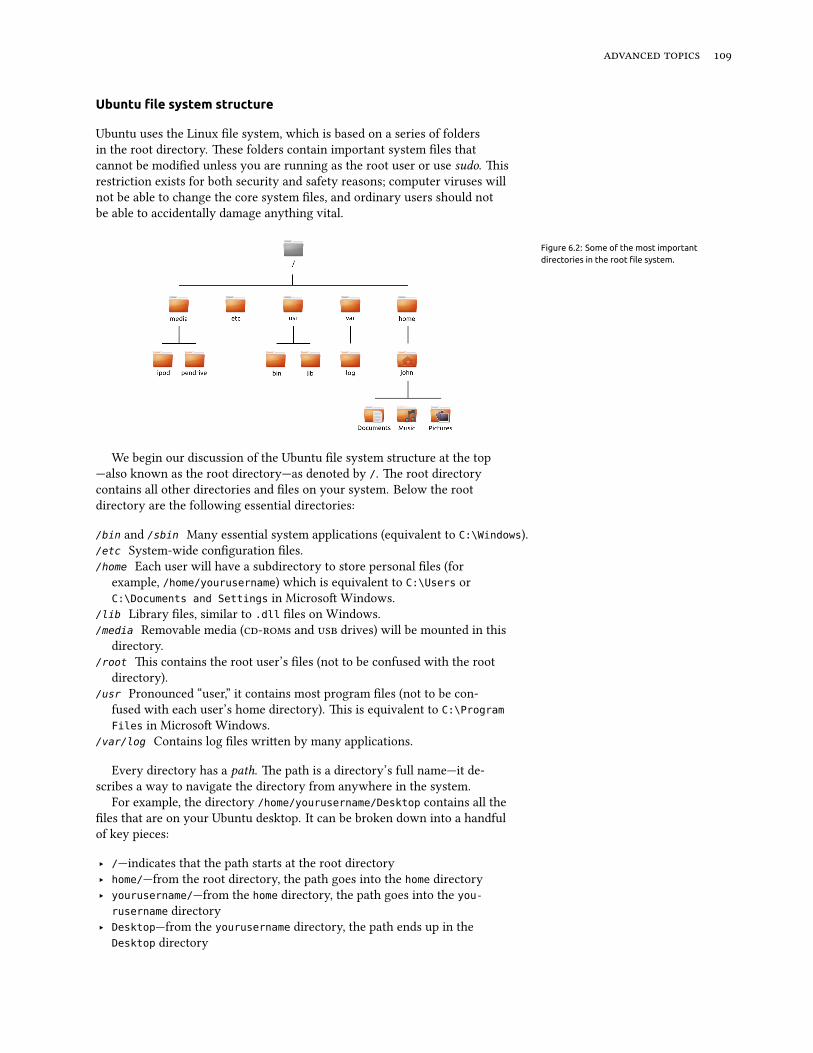
Ubuntu file system structure
Ubuntu uses the Linux file system, which is based on a series of foldersin the root directory. ese folders contain important system files thatcannot be modified unless you are running as the root user or use sudo. isrestriction exists for both security and safety reasons; computer viruses willnot be able to change the core system files, and ordinary users should notbe able to accidentally damage anything vital.
Figure 6.2: Some of the most importantdirectories in the root file system.
We begin our discussion of the Ubuntu file system structure at the top—also known as the root directory—as denoted by /. e root directorycontains all other directories and files on your system. Below the rootdirectory are the following essential directories:
/bin and /sbin Many essential system applications (equivalent to C:\Windows)./etc System-wide configuration files./home Each user will have a subdirectory to store personal files (for
example, /home/yourusername) which is equivalent to C:\Users orC:\Documents and Settings in Microso Windows.
/lib Library files, similar to .dll files on Windows./media Removable media (s and drives) will be mounted in this
directory./root is contains the root user’s files (not to be confused with the root
directory)./usr Pronounced “user,” it contains most program files (not to be con-
fused with each user’s home directory). is is equivalent to C:\ProgramFiles in Microso Windows.
/var/log Contains log files wrien by many applications.
Every directory has a path. e path is a directory’s full name—it de-scribes a way to navigate the directory from anywhere in the system.
For example, the directory /home/yourusername/Desktop contains all thefiles that are on your Ubuntu desktop. It can be broken down into a handfulof key pieces:
‣ /—indicates that the path starts at the root directory‣ home/—from the root directory, the path goes into the home directory‣ yourusername/—from the home directory, the path goes into the you-
rusername directory‣ Desktop—from the yourusername directory, the path ends up in the
Desktop directory
.
Every directory in Ubuntu has a complete path that starts with the / (theroot directory) and ends in the directory’s own name.
Directories and files that begin with a period are hidden. ese are usu-ally only visible with a special command or by selecting a specific option.In the Files file manager, you can show hidden files and directories byselecting the View Options buon located in the upper-right of the win-dow. is will show a dropdown list of options. Select Show Hidden Files.Hidden files can also be shown by simply pressing Ctrl+H in the Files filemanager. If you are using the terminal, then you would type ls -a andpress Enter to see the hidden files and directories. ere are many hiddendirectories in your home folder used to store program preferences. For ex-ample, /home/yourusername/.thunderbird stores preferences used by theunderbird mail application.
Mounting and unmounting removable devices
Any time you add storage media to your computer—an internal or externalhard drive, a flash drive, a —it needs to be mounted before it isaccessible. Mounting a device means to associate a directory name with thedevice, allowing you to navigate to the directory to access the device’s files.
When a device, such as a flash drive or a media player, is mounted inUbuntu, a folder is automatically created for it in the media directory, andyou are given the appropriate permissions to be able to read and write tothe device.
Most file managers will automatically add a shortcut to the mounteddevice in the side bar of your home folder or as a shortcut directly on thedesktop so that the device is easily accessible. You shouldn’t have to physi-cally navigate to the media directory in Ubuntu unless you choose to do sofrom the command line.
When you’ve finished using a device, you can unmount it. Unmounting adevice disassociates the device from its directory, allowing you to eject it. Ifyou disconnect or remove a storage device before unmounting it, you maylose data.
Securing Ubuntu
Now that you know a bit more about using the command line, we can use itto make your computer more secure. e following sections discuss varioussecurity concepts, along with procedures for keeping your Ubuntu runningsmoothly, safely, and securely.
Why Ubuntu is safe
Ubuntu is secure by default for a number of reasons:
‣ Ubuntu clearly distinguishes between normal users and administrativeusers.
‣ Soware for Ubuntu is kept in a secure online repository containing nofalse or malicious soware.
‣ Open-source soware like Ubuntu allows security flaws to be easilydetected.
‣ Security patches for open-source soware like Ubuntu are oen releasedquickly.

‣ Many viruses designed to primarily target Windows-based systems donot affect Ubuntu systems.
Just because Ubuntu implements strong security model by default doesn’tmean the user can “throw caution to the wind.” Care should always betaken when downloading files, opening email, and browsing the Internet.Using a good antivirus program is warranted as well.
Basic security concepts
e following sections discuss basic security concepts—like file permissions,passwords, and user accounts. Understanding these concepts will help youin securing your computer.
Permissions
In Ubuntu, files and folders can be set up so that only specific users canview, modify, or run them. For instance, you might wish to share an impor-tant file with other users, but do not want those users to be able to edit thefile. Ubuntu controls access to files on your computer through a system of“permissions.” Permissions are seings configured to control exactly howfiles on your computer are accessed and used.
To learn more about modifying permissions, visit https://help.ubuntu.com/community/FilePermissions.
Passwords
You should use a strong password to increase the security of your computer.Your password should not contain names, common words, or commonphrases. By default, the minimum length of a password in Ubuntu is fourcharacters. We recommend a password with more than the minimum num-ber of characters. A password with a minimum of eight characters whichincludes both upper and lower case leers, numbers, and symbols is consid-ered strong.
Locking the screen
When you leave your computer unaended, you may want to lock thescreen. Locking your screen prevents another user from using your com-puter until your password is entered. To lock the screen:
‣ Click the session menu icon in the right corner of the top panel, thenselect Lo, or
‣ press Ctrl+Alt+L to lock the screen. is keyboard shortcut can bechanged by going to Session Indicator ‣ System Settings… ‣Keyboard ‣Shortcuts and then selecting System from the list in the le column andclicking on Lo Screen in the right column.
Users and groups
User accounts
When Ubuntu is installed, it is automatically configured for use by a singleuser. If more than one person will use the computer, each person shouldhave his or her own user account. is way, each user can have separate

.
seings, documents, and other files. If necessary, you can also protect filesfrom being viewed or modified by users without administrative privileges.
Like most operating systems, Ubuntu allows you to create separate useraccounts for each person. Ubuntu also supports user groups, which allowsyou to administer permissions for multiple users at the same time.
Every user in Ubuntu is a member of at least one group. At a bare min-imum, the user of the computer has permissions in a group with the samename as the user. A user can also be a member of additional groups. Youcan configure some files and folders to be accessible only by a user and agroup. By default, a user’s files are only accessible by that user, and systemfiles are only accessible by the root user.
Figure 6.3: Add, remove and change the useraccounts.
Managing users
If the account you are using is an administrator account, you can manageusers and groups using the Users and Groups administration application.To find this application, click Session Indicator ‣ System Settings… ‣UserAccounts. en click the Unlo buon and enter your password to unlockthe user seings. Next, select the user that you want to modify from the list.en click on the element that you want to change.
Adding a user Click the + buon underneath the list of the current useraccounts. A window will appear with three fields. e Account Type fieldcontains a list of user account types. Take care in determining what typeof account to assign a user. An Administrator has full access to all areasof Ubuntu, whereas the Standard account type is more limited. e FullName field contains a friendly display name. e Username field is for theactual username. As you enter the user’s full name, the Username field willautomatically fill with a lowercase, no space version of the user’s full name.If you prefer to use a different username for this user, highlight the existingusername and type in the username of your choice. Once all fields arefilled in, click Add. A new dialog box will appear showing the user accountdetails. New accounts are disabled by default. To enable an account, clickthe Account disabled field next to the Password label. A new window willappear allowing you to set the password for the new user.
At the top of the new window is a dropdown menu next to the labelAction. By default, the “set a password now” option will be automaticallyselected. You may also choose “log in without a password”, however, thisis not advised as the account will be available to anyone. e final option,“enable this account” is available once a password has been set. Using this
option allows an administrator to enable or disable an account withoutlosing the password.
Ubuntu provides a way to create a secure password by clicking the gearsbuon located inside of the New password field. A random sequence ofnumbers, leers, and symbols will be entered into this field. You can alsosimply enter a password of your choosing by entering it into the Newpassword field. en, re-enter this same password into the space next toConfirm password.
Ubuntu enforces the password policies on this screen, so pay aention to thestatus information located between the New password and Confirm passwordfields for information about the password you’re seing. If there are problemswith the password, Ubuntu will tell you what is wrong with the password andwill prevent you from entering the same password into the Confirm passwordfield until the new password meets the requirements.
Modifying a user Click on the name of a user in the list of users, then clickon the text entry next to any of the following options:
‣ Account type:‣ Language:‣ Password:‣ Automatic Login:
You may also change the username by clicking on the username at the topand entering a new name.
Deleting a user Select a user from the list and click -. Ubuntu will deacti-vate the user’s account, and you can choose whether to remove the user’shome folder or leave it in place. If a user is removed and the user’s files re-main, the only user who can access the files are the root user—also knownas the superuser—or anyone associated with the file’s group.
Managing groups
Group management is accomplished through the command line (Terminal)or by adding third-party applications (the laer is beyond the scope of thismanual). You will find more information in the section below titled “Usingthe command line”.
Adding a group To add a group, type sudo addgroup groupname and pressEnter, replacing groupname with the name of the group you wish to add.For example, sudo addgroup ubuntuusers will add the group ubuntuusersto the list of groups.
Modifying a group To alter the users in an existing group, type sudoadduser username groupname to add a user, or sudo deluser usernamegroupname and press Enter to remove a user replacing username and group-name in these commands with the actual user and group name with whichyou’re working.
Deleting a group To delete a group, type sudo delgroup groupname andpress Enter, replacing groupname with the name of the group you wish todelete.
.
Applying groups to files and folders
To change the group associated with a file or folder, open the Files file man-ager and navigate to the appropriate file or folder. en, either select thefolder and then click the gears buon in the upper-right of the window andchoose Properties, or right-click on the file or folder and select Properties.In the Properties dialog window, click on the Permissions tab and select thedesired group from the Groups drop-down list. en close the window.
Using the command line
You can also modify user and group seings via the command line, butwe recommend you use the graphical method above unless you have agood reason to use the command line. For more information on using thecommand line to modify users and groups, see the Ubuntu Server Guide athttps://help.ubuntu.com/./serverguide/user-management.html.
System updates
Good security happens with an up-to-date system. Ubuntu provides freesoware and security updates. You should apply these updates regularly.See Updates and upgrades to learn how to update your Ubuntu computerwith the latest security updates and patches.
Trusting third party sources
Normally, you will add applications to your computer via the Ubuntu So-ware Center which downloads soware from the Ubuntu repositories asdescribed in Chapter : Soware Management. However, it is occasionallynecessary to add soware from other sources. For example, you may needto do this when an application is not available in the Ubuntu repositories orwhen you need a version of soware newer than what is currently in theUbuntu repositories.
Additional repositories are available from sites such as http://www.getdeb.net and Launchpad s which can be added as described in So-ware Sources. You can download the packages for some applicationsfrom their respective project sites on the Internet. Alternatively, you canbuild applications from their source code.
Using only recognized sources, such as a project’s site, or variouscommunity repositories (such as http://www.getdeb.net), is more securethan downloading applications from an arbitrary (and perhaps less rep-utable) source. When using a third party source, consider its trustworthi-ness, and be sure you know exactly what you’re installing on your com-puter.
Firewall
A firewall is an application that protects your computer against unautho-rized access by people on the Internet or your local network. Firewallsblock connections to your computer from unknown sources. is helpsprevent security breaches.
Uncomplicated Firewall () is the standard firewall configuration pro-gram in Ubuntu. It runs from the command line, but a program called Gufwallows you to use it with a graphical user interface . See Chapter :Soware Management to learn more about installing the Gufw package.

Once Gufw is installed, start Gufw by clicking Dash ‣Applications ‣Firewall configuration. To enable the firewall, select the Enable option. Bydefault, all incoming connections are denied. is seing should be suitablefor most users.
If you are running server soware on your Ubuntu system (such as aweb server, or an server), then you will need to open the ports theseservices use. If you have no need to run any server applications or services,you will likely not need to open any additional ports.
To open a port click on the Add buon. For most purposes, the Precon-figured tab is sufficient. Select Allow from the first box and then select theprogram or service required.
e Simple tab can be used to allow access on a single port, and theAdvanced tab can be used to allow access on a range of ports.
Encryption
You may wish to protect your sensitive personal data—for instance, finan-cial records—by encrypting it. Encrypting a file or folder essentially “locks”that file or folder by encoding it with an algorithm that keeps it scrambleduntil it is properly decoded with a password. Encrypting your personal dataensures that no one can open your personal folders or read your privatedata without your authorization through the use of a private key.
Ubuntu includes a number of tools to encrypt files and folders. ischapter will discuss two of them. For further information on using en-cryption with either single files or email, see Ubuntu Community Helpdocuments at https://help.ubuntu.com/community.
Home folder
When installing Ubuntu, it is possible to encrypt a user’s home folder. SeeChapter : Installation for more on encrypting the home folder.
Private folder
If you have not chosen to encrypt a user’s entire home folder, it is possibleto encrypt a single folder—called Private—in a user’s home folder. To dothis, follow these steps:
. Install the ecryptfs-utils soware package from the Ubuntu SowareCenter. (For more information about the Soware Center, review Usingthe Ubuntu Soware Center.)
. Use the terminal to run ecryptfs-setup-private to set up the privatefolder.
. Enter your account’s password when prompted.. Either choose a mount passphrase or generate one.. Record both passphrases in a safe location. ese are required if you ever
have to recover your data manually.. Log out and log back in to mount the encrypted folder.
Aer the Private folder has been set up, any files or folders in it willautomatically be encrypted.
If you need to recover your encrypted files manually see https://help.ubuntu.com/community/EncryptedPrivateDirectory.

.
Running Windows Programs on Ubuntu
As many Windows users will know, some programs that you can use on aWindows system cease to work on Ubuntu. For example, LibreOffice workson both Windows and Ubuntu systems, but Microso Office works only on aWindows system. Since many Windows users who use Ubuntu want all oftheir Windows programs back, many programmers have worked together tocreate Wine. Wine is an acronym for “W ine Is Not an Emulator”.
is section will discuss what Wine is, and how to use it on your Ubuntuinstallation. For recent information about Wine, please visit the officialWine website at http://www.winehq.org.
What is Wine?
Wine is a background application that allows Linux and Mac users to installand run Windows programs on their system. While not every Windowsprogram is compatible with Wine, many programs seem to be completelycompatible with Wine while running on Linux or Mac OS. For example,Microso Office may not be compatible without installing additional com-ponents (such as Microso.NET Framework .). e current stable versionof Wine is ., and the most recent development version is ...
Installing Wine
To install Wine Version ., follow the following steps:
If you have a previous version of Wine installed, uninstall Wine before continuingusing the command, sudo apt-get remove --purge wine1.* winetricks &&sudo apt-get autoremove
. Open the terminal and type: sudo apt-add-repository ppa:ubuntu-wine/ppa. is will install the Official Wine .
. Aer the terminal has finished installing the Wine , type: sudo apt-get update. is will update the list.
. Once the terminal has finished refreshing the list, type: sudo apt-get install -y wine1.6 winetricks. is will install Wine . andWinetricks. Winetricks is a soware center for Wine, and is, in mostcases, optional.
Figure 6.4: The Terminal showing the installa-tion of the Wine PPA.
During the installation of Wine and Winetricks, you will have to ac-cept the Microso End User License Agreement and the Microso Core
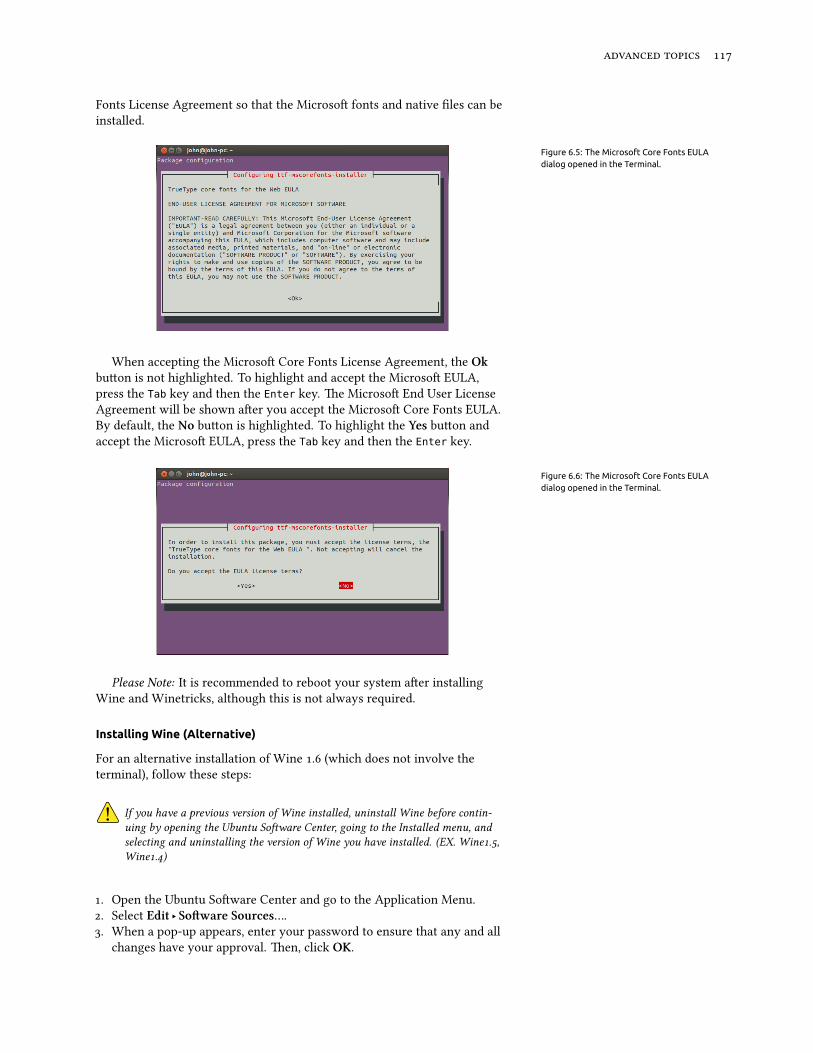
Fonts License Agreement so that the Microso fonts and native files can beinstalled.
Figure 6.5: The Microsoft Core Fonts EULAdialog opened in the Terminal.
When accepting the Microso Core Fonts License Agreement, the Okbuon is not highlighted. To highlight and accept the Microso EULA,press the Tab key and then the Enter key. e Microso End User LicenseAgreement will be shown aer you accept the Microso Core Fonts EULA.By default, the No buon is highlighted. To highlight the Yes buon andaccept the Microso EULA, press the Tab key and then the Enter key.
Figure 6.6: The Microsoft Core Fonts EULAdialog opened in the Terminal.
Please Note: It is recommended to reboot your system aer installingWine and Winetricks, although this is not always required.
Installing Wine (Alternative)
For an alternative installation of Wine . (which does not involve theterminal), follow these steps:
If you have a previous version of Wine installed, uninstall Wine before contin-uing by opening the Ubuntu Soware Center, going to the Installed menu, andselecting and uninstalling the version of Wine you have installed. (EX. Wine.,Wine.)
. Open the Ubuntu Soware Center and go to the Application Menu.. Select Edit ‣ Soware Sources….. When a pop-up appears, enter your password to ensure that any and all
changes have your approval. en, click OK.
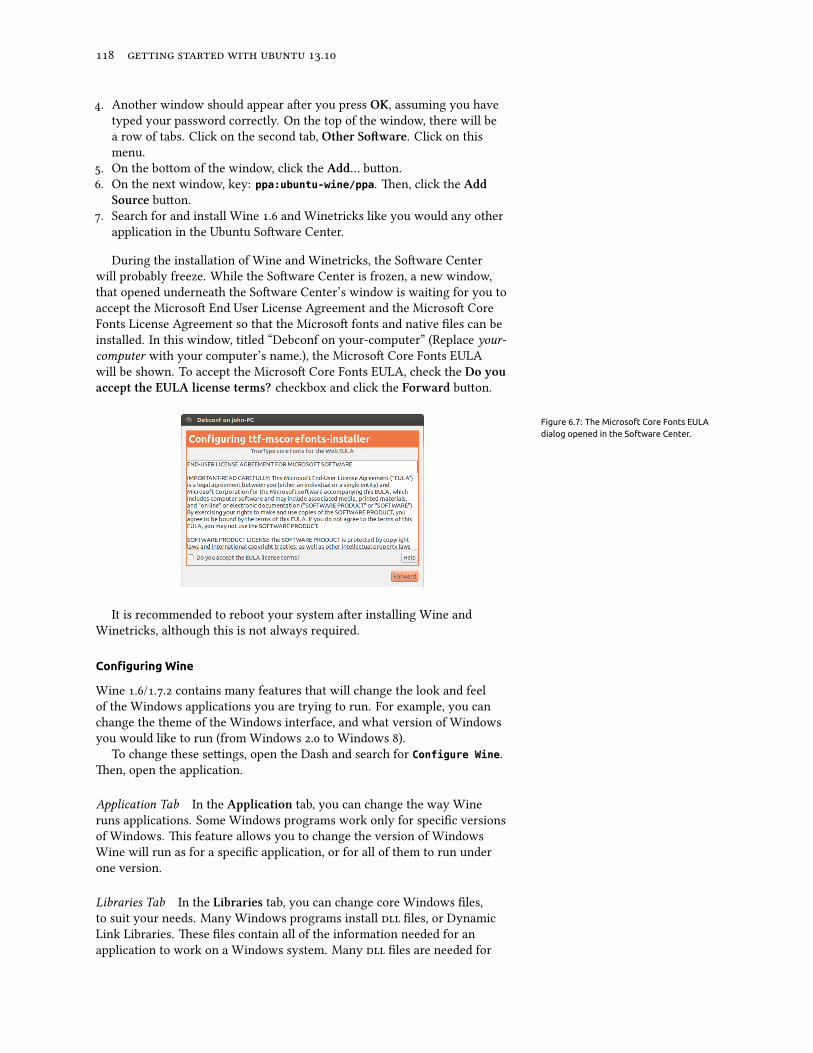
.
. Another window should appear aer you press OK, assuming you havetyped your password correctly. On the top of the window, there will bea row of tabs. Click on the second tab, Other Soware. Click on thismenu.
. On the boom of the window, click the Add… buon.. On the next window, key: ppa:ubuntu-wine/ppa. en, click the Add
Source buon.. Search for and install Wine . and Winetricks like you would any other
application in the Ubuntu Soware Center.
During the installation of Wine and Winetricks, the Soware Centerwill probably freeze. While the Soware Center is frozen, a new window,that opened underneath the Soware Center’s window is waiting for you toaccept the Microso End User License Agreement and the Microso CoreFonts License Agreement so that the Microso fonts and native files can beinstalled. In this window, titled “Debconf on your-computer” (Replace your-computer with your computer’s name.), the Microso Core Fonts EULAwill be shown. To accept the Microso Core Fonts EULA, check the Do youaccept the EULA license terms? checkbox and click the Forward buon.
Figure 6.7: The Microsoft Core Fonts EULAdialog opened in the Software Center.
It is recommended to reboot your system aer installing Wine andWinetricks, although this is not always required.
Configuring Wine
Wine ./.. contains many features that will change the look and feelof the Windows applications you are trying to run. For example, you canchange the theme of the Windows interface, and what version of Windowsyou would like to run (from Windows . to Windows ).
To change these seings, open the Dash and search for Configure Wine.en, open the application.
Application Tab In the Application tab, you can change the way Wineruns applications. Some Windows programs work only for specific versionsof Windows. is feature allows you to change the version of WindowsWine will run as for a specific application, or for all of them to run underone version.
Libraries Tab In the Libraries tab, you can change core Windows files,to suit your needs. Many Windows programs install files, or DynamicLink Libraries. ese files contain all of the information needed for anapplication to work on a Windows system. Many files are needed for

Figure 6.8: The Wine configuration open to theApplication Tab.
a Windows system to run, and are different between versions of Windows.In this feature, you may edit or replace existing files. is allows you tochange the Windows System files, to suit you needs.
ese files should not be edited. ese are core files needed for Wine to runcorrectly. Only edit these files if you have to.
Graphics Tab In the Graphics tab, you can change the look and feel ofhow Wine runs. You can make Wine emulate a Virtual Desktop (this featureopens a new window that will contain any Windows application that iscurrently running while this option is in effect), how the applications look,and what resolution to run the application in.
Desktop Integration Tab In the Desktop Integration tab, you can changethe way buons, menus, and other elements appear in an application. Eachversion of Windows has brought its own unique visual style for its ap-plications. In this feature, you can install and change the applied theme.In this tab, you can also change major file folders. For example, whileusing Ubuntu, your picture folder is located at /home/user/Pictures/but in Windows, your picture folder is located at C:\Documents and Set-tings\User\My Documents\My Pictures\ or C:\Users\User\My Pictures\.is feature allows you tell Wine where your folders are, for quick refer-ence.
Drives Tab In the Drives tab, you can manage the connected drives thatWine will be able to access. Unlike Ubuntu, Windows applies a Drive Leerto each drive. is leer identifies the drive. For example, on every Win-dows system, the C: drive is the core drive. It contains all of the needed filesfor the operating system to work. e C: drive is the equivalent to root (FileSystem, or / ) in Ubuntu. is feature allows you to change the drive leersfor any drive, or add a drive leer for a specific folder in your file system, orfor a drive.
Audio Tab In the Audio tab, you can change the audio seings. is fea-ture allows you to change the audio source that Wine will use for Windowsapplications (speakers, microphones, etc.).
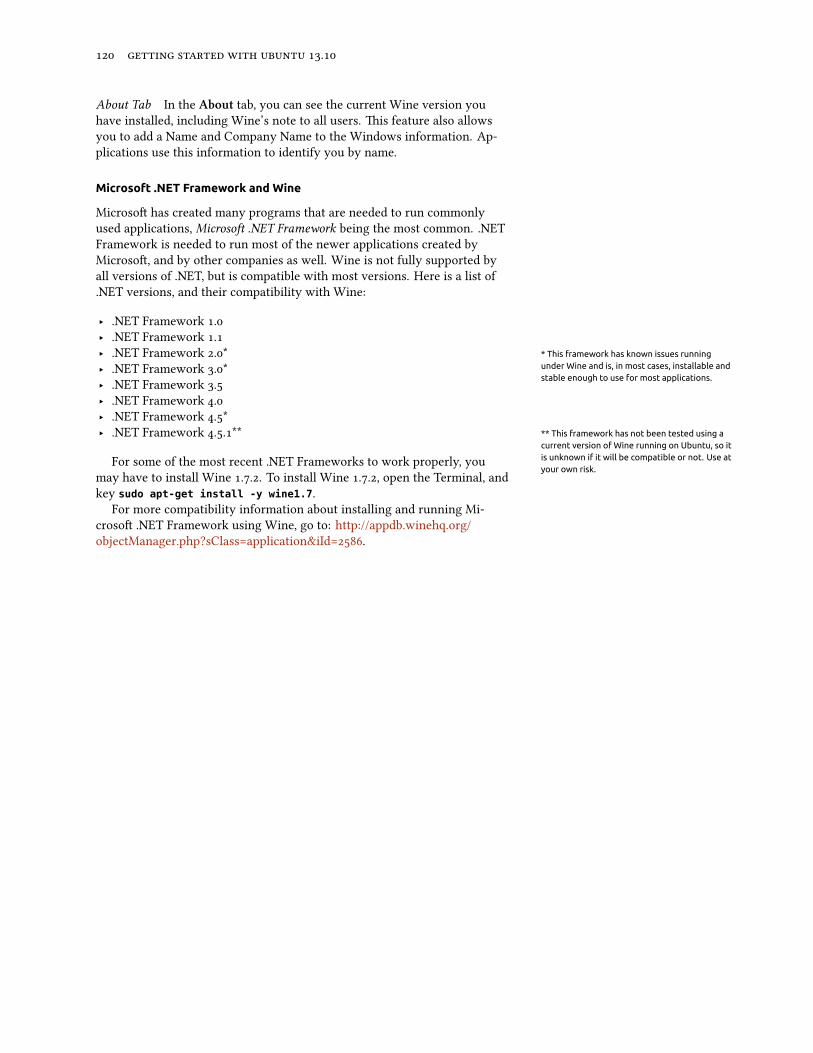
.
About Tab In the About tab, you can see the current Wine version youhave installed, including Wine’s note to all users. is feature also allowsyou to add a Name and Company Name to the Windows information. Ap-plications use this information to identify you by name.
Microsoft .NET Framework and Wine
Microso has created many programs that are needed to run commonlyused applications, Microso .NET Framework being the most common. .NETFramework is needed to run most of the newer applications created byMicroso, and by other companies as well. Wine is not fully supported byall versions of .NET, but is compatible with most versions. Here is a list of.NET versions, and their compatibility with Wine:
‣ .NET Framework .‣ .NET Framework .‣ .NET Framework .* * This framework has known issues running
under Wine and is, in most cases, installable andstable enough to use for most applications.
‣ .NET Framework .*‣ .NET Framework .‣ .NET Framework .‣ .NET Framework .*‣ .NET Framework ..** ** This framework has not been tested using a
current version of Wine running on Ubuntu, so itis unknown if it will be compatible or not. Use atyour own risk.
For some of the most recent .NET Frameworks to work properly, youmay have to install Wine ... To install Wine .., open the Terminal, andkey sudo apt-get install -y wine1.7.
For more compatibility information about installing and running Mi-croso .NET Framework using Wine, go to: http://appdb.winehq.org/objectManager.php?sClass=application&iId=.
7 Troubleshooting
Resolving problems
Sometimes things may not work as they should. Luckily, problems encoun-tered while working with Ubuntu are oen easily fixed. is chapter ismeant as a guide for resolving basic problems users may encounter whileusing Ubuntu. If you need any additional help beyond what is providedin this chapter, take a look at other support options that are discussed inFinding additional help and support later in this book.
Troubleshooting guide
e key to effective troubleshooting is to work slowly, complete all of thetroubleshooting steps, and to document the changes you made to the utilityor application you are using. is way, you will be able to undo your work,or give fellow users the information about your previous aempts—thelaer is particularly helpful in cases when you look to the community ofUbuntu users for support.
Ubuntu fails to start after I’ve installed Windows
Occasionally you may install Ubuntu and then decide to install MicrosoWindows as a second operating system running side-by-side with Ubuntu.is is supported in Ubuntu, but you might also find aer installing Win-dows that you will no longer be able to start Ubuntu.
When you first turn on your computer, a “bootloader” is responsible forinitiating the start of an operating system, such as Ubuntu or Windows.When you installed Ubuntu, you automatically installed an advanced boot- A bootloader is the initial software that loads
the operating system when the computer ispowered up.
loader called . allows you to choose between the various operat-ing systems installed on your computer, such as Ubuntu, Windows, Solaris,or Mac . If Windows is installed aer Ubuntu, the Windows installationremoved and replaced the bootloader with it’s own. As a result, youcan no longer choose an operating system to use. You can restore andregain the ability to choose your operating system by following the stepsbelow, using the same you used to install Ubuntu.
First, insert your Ubuntu into your computer and then restart thecomputer, making sure to instruct your computer to boot from the drive and not the hard drive (see Chapter : Installation). Next, choose yourlanguage (e.g., English) and select Try Ubuntu. Once Ubuntu starts, clickon the top-most icon in the Launcher (the Dash icon). en, search forTerminal using the search box. en, select Terminal in the search results(or press Ctrl+Alt+T). A window should open with a blinking prompt line.Enter the following, and press the Enter key:
$ sudo fdisk -l
Disk /dev/hda: 120.0 GB, 120034123776 bytes255 heads, 63 sectors/track, 14593 cylindersUnits = cylinders of 16065 * 512 = 8225280 bytes
Device Boot Start End Blocks Id System/dev/sda1 1 1224 64228+ 83 Linux
.
/dev/sda2 * 1225 2440 9767520 a5 Windows/dev/sda3 2441 14593 97618972+ 5 Extended/dev/sda4 14532 14593 498015 82 Linux swap
Partition table entries are not in disk order
is output shows that your system (Linux, on which Ubuntu is based) The device (/dev/sda1, /dev/sda2, etc.) weare looking for is identified by the word “Linux”in the System column. Modify the instructionsbelow if necessary, replacing /dev/sda1withthe name of your Linux device.
is installed on device /dev/sda1, but as indicated by the asterisk in theBoot column, your computer is booting to /dev/sda2 (where Windows islocated). We need to fix this by telling the computer to boot to the Linuxdevice instead.
To do this, create a place to connect your existing Ubuntu installationwith your temporary troubleshooting session:
$ sudo mkdir /mnt/root
Next, link your Ubuntu installation and this new folder:$ sudo mount /dev/sda1 /mnt/root
If you’ve done this correctly, then you should see the following:$ ls /mnt/rootbin dev home lib mnt root srv usrboot etc initrd lib64 opt sbin sys varcdrom initrd.img media proc selinux tmp vmlinuz
Now, you can reinstall :$ sudo grub-install --root-directory=/mnt/root /dev/sdaInstallation finished. No error reported.This is the contents of the device map /boot/grub/device.map.Check if this is correct or not. If any of the lines is incorrect,fix it and re-run the script grub-install.(hd0) /dev/sda
Next you’ll want to unmount the hard drive. is ensures that the drivewon’t become corrupted when you reboot:
$ sudo umount /mnt/root
Finally, remove the Ubuntu disc from your drive, reboot yourcomputer, and then start enjoying your Ubuntu operating system onceagain.
is guide may not work for all Ubuntu users due to differences in thevarious system configuration. Still, this is the recommended and mostsuccessful method for restoring the bootloader. If you are followingthis guide and if it does not restore on your computer, then try theother troubleshooting methods at https://help.ubuntu.com/community/RecoveringUbuntuAfterInstallingWindows.
I forgot my password
If you forgot your password in Ubuntu, you will need to reset it using the“Recovery mode.”
To start the Recovery mode, shut down your computer and then startagain. As the computer starts up, press Shift. Select the Recovery modeoption using the arrow keys on your keyboard. Recovery mode should beunder the heading Advanced Options in the list.
Wait until Ubuntu starts up—this may take a few minutes. Once booted,you will not be able to see a normal login screen. Instead, you will be pre-sented with the Recovery Menu. Select root using the arrow keys and pressEnter.
You will now be at a terminal prompt:root@ubuntu:~#

Figure 7.1: This is the grub screen in which youcan choose recovery mode.
To reset your password, enter:# passwd username
Replace “username” above with your username, aer which Ubuntu willprompt you for a new password. Enter your desired password, press theEnter key, and then re-type your password again, pressing Enter againwhen done. (Ubuntu asks for your password twice to make sure you didnot make a mistake while typing). Once you have restored your password,return to the normal system environment by entering:
# init 2
Login as usual and continue enjoying Ubuntu.
I accidentally deleted some files that I need
If you’ve deleted a file by accident, you may be able to recover it fromUbuntu’s Trash folder. is is a special folder where Ubuntu stores deletedfiles before they are permanently removed from your computer.
To access the Trash folder click on the trash icon at the boom of theUnity Launcher.
If you want to restore deleted items from the Trash:
. Open Trash. Click on each item you want to restore to select it. Press and hold Ctrl
to select multiple items.. Click Restore Selected Items to move the deleted items back to their
original locations.
How do I clean Ubuntu?
Ubuntu’s soware packaging system accumulates unused packages andtemporary files through regular updates and use. ese temporary files, alsocalled caches, contain files from all of the installed packages. Over time, thiscache can grow quite large. Cleaning out the cache allows you to reclaimspace on your computer’s hard drive for storing your documents, music,photographs, or other files.
To clear the cache, you can either use the clean, or the autoclean optionfor the command-line program apt-get.
To run clean, open Terminal and enter: The clean command will remove everysingle cached item, while the autocleancommand only removes cached items that canno longer be downloaded (these items areoften unnecessary).
$ sudo apt-get clean
Packages can also become unused over time. If a package was installedto assist with running another program—and that program was subse-
.
quently removed—you no longer need the supporting package. You canremove it with apt-get autoremove.
Load Terminal and enter:$ sudo apt-get autoremove
I can’t play certain audio or video files
Many of the formats used to deliver rich media content are proprietary,meaning they are not free to use, modify, or distribute with an open-sourceoperating system like Ubuntu. erefore, Ubuntu does not include the ca-pability to use these formats by default; however, users can easily configureUbuntu to use these proprietary formats. For more information about thedifferences between open source and proprietary soware, see Chapter :Learning More.
If you find yourself in need of a proprietary format, you can install therequired files from the Ubuntu Soware Center. Ensure that you have theUniverse and Multiverse repositories enabled before continuing. See theSoware Sources section to learn how to enable these repositories. Whenyou are ready to continue, install the necessary soware as follows:
. Open the Ubuntu Soware Center by searching for it from the Dash (thetop-most buon on the Launcher).
. Search for ubuntu-restricted-extras by typing “Ubuntu restrictedextras” in the search box on the right-hand side of the Ubuntu SowareCenter main window. When the Soware Center finds the appropriatesoware, click the arrow next to its title.
. Click Install, then wait while Ubuntu installs the soware.
One program that can play many of these formats is media player.It can be installed from the Ubuntu Soware Center. Once Ubuntu hassuccessfully installed this soware, your rich media content should workproperly.
How can I change my screen resolution?
e image on every monitor is composed of millions of lile colored dotscalled pixels. Changing the number of pixels displayed on your monitor iscalled “changing the resolution.” Increasing the resolution will make thedisplayed images sharper, but will also tend to make them smaller. eopposite is true when screen resolution is decreased. Most monitors havea “native resolution,” which is a resolution that most closely matches thenumber of pixels in the monitor. Your display will usually be sharpest whenyour operating system uses a resolution that matches your display’s nativeresolution.
e Ubuntu configuration utility Displays allows users to change theresolution. Open it by clicking on the session indicator and then on Dis-plays…. e resolution can be changed using the drop-down list withinthe program. Picking options higher up on the list (for example, those withlarger numbers) will increase the resolution.
You can experiment with various resolutions by clicking Apply at theboom of the window until you find one that is comfortable. Typically,the highest resolution will be the native resolution. Selecting a resolutionand clicking Apply will temporarily change the screen resolution to theselected value, and a dialog box will also be displayed for seconds. isdialog box allows you to revert to the previous resolution seing or keep
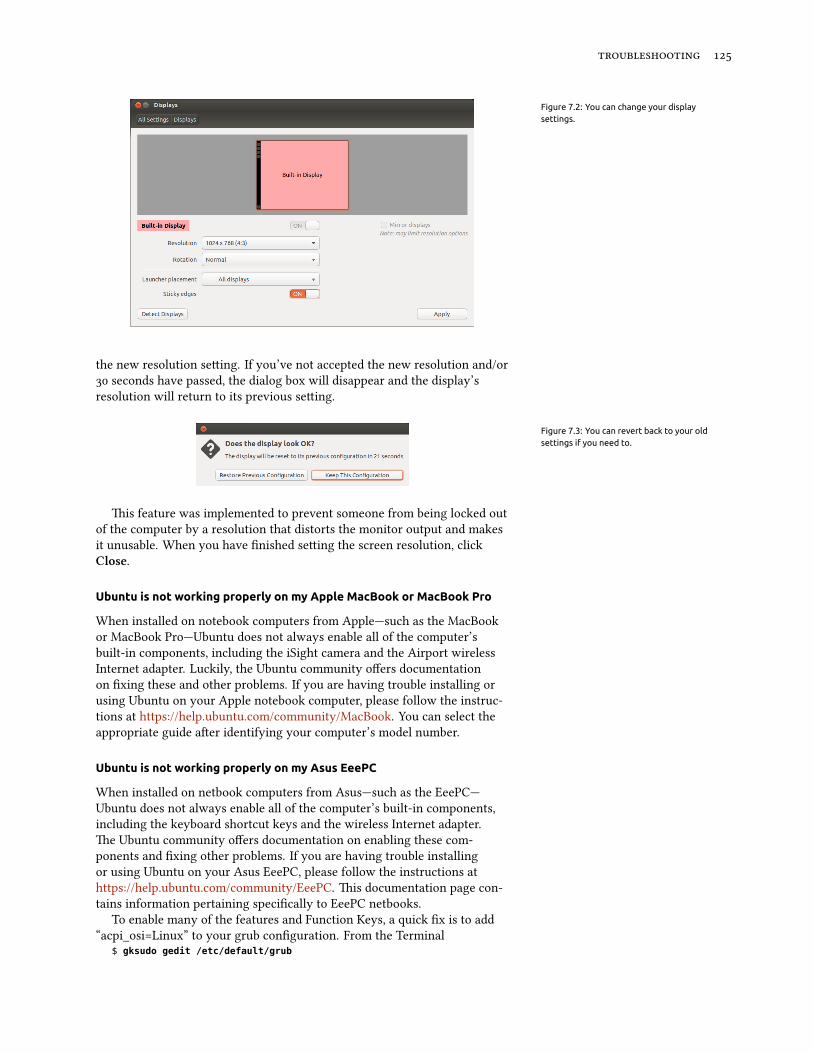
Figure 7.2: You can change your displaysettings.
the new resolution seing. If you’ve not accepted the new resolution and/or seconds have passed, the dialog box will disappear and the display’sresolution will return to its previous seing.
Figure 7.3: You can revert back to your oldsettings if you need to.
is feature was implemented to prevent someone from being locked outof the computer by a resolution that distorts the monitor output and makesit unusable. When you have finished seing the screen resolution, clickClose.
Ubuntu is not working properly on my Apple MacBook or MacBook Pro
When installed on notebook computers from Apple—such as the MacBookor MacBook Pro—Ubuntu does not always enable all of the computer’sbuilt-in components, including the iSight camera and the Airport wirelessInternet adapter. Luckily, the Ubuntu community offers documentationon fixing these and other problems. If you are having trouble installing orusing Ubuntu on your Apple notebook computer, please follow the instruc-tions at https://help.ubuntu.com/community/MacBook. You can select theappropriate guide aer identifying your computer’s model number.
Ubuntu is not working properly on my Asus EeePC
When installed on netbook computers from Asus—such as the EeePC—Ubuntu does not always enable all of the computer’s built-in components,including the keyboard shortcut keys and the wireless Internet adapter.e Ubuntu community offers documentation on enabling these com-ponents and fixing other problems. If you are having trouble installingor using Ubuntu on your Asus EeePC, please follow the instructions athttps://help.ubuntu.com/community/EeePC. is documentation page con-tains information pertaining specifically to EeePC netbooks.
To enable many of the features and Function Keys, a quick fix is to add“acpi_osi=Linux” to your grub configuration. From the Terminal
$ gksudo gedit /etc/default/grub

.
and very carefully change the lineGRUB_CMDLINE_LINUX_DEFAULT="quiet splash"
toGRUB_CMDLINE_LINUX_DEFAULT="quiet splash acpi_osi=Linux"
Save and close the file. en, from the terminal:$ sudo update-grub
Aer the command finishes, and you restart the computer, you will be ableto use the Fn keys normally.
My hardware is not working properly
Ubuntu occasionally has difficulty running on certain computers, usuallywhen hardware manufacturers use non-standard or proprietary compo-nents. e Ubuntu community offers documentation to help you trou-bleshoot many common issues in this situation, including problems withwireless cards, scanners, mice, and printers. You can find the completehardware troubleshooting guide on Ubuntu’s support wiki, accessible athttps://wiki.ubuntu.com/HardwareSupport. If your hardware problemspersist, please see Geing more help for more troubleshooting options orinformation on obtaining support or assistance from an Ubuntu user.
Getting more help
is guide does not cover every possible workflow, task, issue, or problemin Ubuntu. If you require assistance beyond the information in the manual,you can find a variety of support opportunities online.
More details about many support options available to you can be foundat Finding additional help and support later in this book.

8 Learning More
What else can I do with Ubuntu?
At this point, you should now be able to use Ubuntu for most daily activ-ities—such as browsing the web, sending email, and creating documents.Now, you may be interested in learning about other versions of Ubuntuthat may integrate into your digital lifestyle. In this chapter, we’ll introduceadditional versions of Ubuntu designed and specialized for certain tasks.We’ll also provide resources for answering any remaining questions as wellas direct you to how you can get involved in the worldwide communityof Ubuntu users. First, we’ll discuss the technologies that make Ubuntu apowerful collection of soware and a progressive operating system.
Open source software
Ubuntu is open source soware (OSS). OSS differs from proprietary so-ware. Proprietary soware is defined as soware whose source code isnot freely available for modification or distribution by anyone but therightsholder. Microso Windows and Adobe Photoshop are examples ofproprietary soware.
Unlike proprietary soware applications, the soware included withUbuntu is specifically licensed to promote sharing and collaboration. elegal rules governing Ubuntu’s production and distribution ensure thatanyone can obtain, run, or share it for any purpose. Users can modify opensource soware to suit their individual needs, to share it, to improve it, or totranslate it into other languages—provided they release the source code forthese modifications so others can do the same. In fact, the terms of manyopen source licensing agreements actually make it illegal not to do so. isunderstanding helps explain why Ubuntu is called open source soware.For more information regarding Ubuntu’s soware licensing standards, seehttp://www.ubuntu.com/project/about-ubuntu/licensing.
Because OSS is developed by large communities of programmers locatedthroughout the world, it benefits from both rapid development cycles andspeedy security releases when bugs are identified in the soware. In otherwords, OSS is updated, enhanced, and made more secure every day asprogrammers all over the world continue to improve it.
In addition to these technical advantages, OSS also has economic bene-fits. While users must adhere to the terms of an OSS licensing agreementwhen installing and using Ubuntu, they needn’t pay to obtain this license.While not all OSS is free of monetary costs, a vast majority of OSS is avail-able for free.
To learn more about open source soware, see the Open Source Initia-tive’s open source definition, available at http://www.opensource.org/docs/definition.php.
Distribution families
Ubuntu is one of several popular operating systems based on Linux. eseLinux-based operating systems—called Linux “distributions”—may look

.
different from Ubuntu at first glance, but they share similar characteristicsbecause of their common roots.
Linux distributions can be divided into two broad families: the Debianfamily and the Red Hat family. Each family is named for a distribution onwhich subsequent distributions are based. For example, “Debian” refers toboth the name of a Linux distribution as well as the family of distributionsderived from Debian. Ubuntu is part of this family. When describing rela-tionships between various open source projects, soware developers oenuse the metaphor of tributaries connecting to a common body of water.For this reason, you may hear someone say that Ubuntu is located “down-stream” from Debian, because alterations to the Debian family ”flow” intonew versions of Ubuntu. Additionally, improvements to Ubuntu usuallytrickle “upstream”—back to Debian and its family members as the Debianfamily benefits from the work of the Ubuntu community. Other distribu-tions in the Debian family include Linux Mint, Xandros, and CrunchBangLinux. Distributions in the Red Hat family include Fedora and Mandriva.
e most significant difference between Debian-based and Red Hat-based distributions is the system each uses for installing and updatingsoware. ese systems are called Package management systems. Packagemanagement systems are the means by which users can install, remove,and organize soware installed on computers with open source operatingsystems like Ubuntu. Debian soware packages are files, while Red Hatsoware packages are files. e two systems are generally incompati-ble. For more information about package management, review the chapteron Chapter : Soware Management.
You will also find specialized Linux distributions for certain tasks. Next,we’ll describe these versions of Ubuntu and explain the uses for which eachhas been developed.
Choosing amongst Ubuntu and its derivatives
Just as Ubuntu is based on Debian, several distributions are subsequentlybased on Ubuntu. Each differs with respect to the soware included as partof the distribution. Some are developed for general use, while others aredesigned for accomplishing a more narrow set of tasks.
Alternative interfaces
Ubuntu . features a new graphical user interface () based on theopen source desktop. Previous versions of Ubuntu use the desktop. As we explained in Chapter : e Ubuntu Desktop, a “user inter-face” is a collection of soware elements—icons, colors, windows, themes,and menus—that determine how someone may interact with a computer.Some people prefer using alternatives to , so they have createdUbuntu distributions featuring different user interfaces. ese include:
‣ Kubuntu, which uses the graphical environment‣ Lubuntu, which uses the graphical environment‣ Xubuntu, which uses the graphical environment
Additionally, each of these distributions may contain default applicationsdifferent from those featured in Ubuntu. For instance, the default musicplayer in Ubuntu is Rhythmbox. In Lubuntu, the default music player isAqualung, and in Kubuntu, the default is Amarok. Be sure to investigate
these differences if you are considering installing an Ubuntu distributionwith an alternative desktop environment.
For more information about these and other derivative distributions, seehttp://www.ubuntu.com/project/derivatives.
Task-specific distributions
Other Ubuntu distributions have been created to accomplish specific tasksor run in specialized environments and seings.
Ubuntu Server Edition
e Ubuntu Server Edition is an operating system optimized to performmulti-user tasks. Such tasks may include file sharing, website, or emailhosting. If you are planning to use a computer to perform these types oftasks, you may wish to use this specialized server distribution in conjunc-tion with server hardware. While it is possible to run a server-type envi-ronment using only the desktop version of Ubuntu, it is not advised as theServer Edition is beer optimized for the multi-user environment.
is manual does not explain the process of running a secure web serveror performing other tasks with Ubuntu Server Edition. For details on usingUbuntu Server Edition, refer to the manual at http://www.ubuntu.com/business/server/overview.
Edubuntu
Edubuntu is an Ubuntu derivative customized for use in schools and othereducational institutions. Edubuntu contains soware similar to that offeredin Ubuntu but also features additional applications like a collaborative texteditor and educational games.
For additional information regarding Edubuntu, visit http://www.edubuntu.org/
Ubuntu Studio
e derivative of Ubuntu called Ubuntu Studio is designed specifically forpeople who use computers to create and edit multimedia projects. UbuntuStudio features applications to help users manipulate images, composemusic, and edit video. While users can install these applications on comput-ers running the desktop version of Ubuntu, Ubuntu Studio makes them allavailable immediately upon installation.
If you would like to learn more about Ubuntu Studio (or obtain a copyfor yoursel), visit http://ubuntustudio.org/.
Mythbuntu
Mythbuntu allows users to turn their computers into entertainment sys-tems. Mythbuntu helps users organize and view various types of multime-dia content such as movies, television shows, and video podcasts. Userswith tuners in their computers can also use Mythbuntu to record livevideo and television shows.
To learn more about Mythbuntu, visit http://www.mythbuntu.org/.

.
Finding additional help and support
is guide cannot possibly contain everything you’ll ever need to knowabout Ubuntu. We encourage you to take advantage of Ubuntu’s vast com-munity when seeking further information, troubleshooting technical issues,or asking questions about your computer.
It’s important to note that the Internet is full of third-party resourcesas well as individuals who post information on blogs and forums. Whilethese resources can oen seem like great resources, some could be mis-leading or outdated. It’s always best to verify information from third-partysources before taking their advice. When possible, rely on official Ubuntudocumentation for assistance with Ubuntu.
Now, let’s discuss a few of the available resources to learn more aboutUbuntu and other Linux distributions.
Live chat
If you are familiar with Internet Relay Chat (), you can use chat clientssuch as XChat or Pidgin to join the channel #ubuntu on irc.freenode.net. Inthis channel, hundreds of volunteer users can answer your questions or of-fer technical support in real time. To learn more about using Internet RelayChat to seek help with Ubuntu, visit https://help.ubuntu.com/community/InternetRelayChat.
LoCo teams
e Ubuntu community contains dozens of local user groups called “LoCoteams.” Distributed throughout the world, these teams offer support andadvice, answer questions, and promote Ubuntu in their communities byhosting regular events. To locate or contact the LoCo team nearest you,visit http://loco.ubuntu.com/.
Books and Magazines
Many books have been wrien about Ubuntu, and professional magazinesoen feature news and information related to Ubuntu. You will frequentlyfind these resources at your local bookstore or newsstand. Additionally,many of these print publications are also available as digital downloads forpurchase in the Ubuntu Soware Center. To find these resources, launch theSoware Center, then click on “Books & Magazines” in the le panel.
Official Ubuntu Documentation
e Ubuntu Documentation Team maintains a series of official wiki pagesdesigned to assist both new and experienced users wishing to learn moreabout Ubuntu. e Ubuntu community endorses these documents, whichserve as a reliable first point of reference for users seeking online help. Youcan access these resources at http://help.ubuntu.com. To get to the built-inUbuntu Desktop Guide, type help in the Dash.
The Ubuntu Forums
e Ubuntu Forums are the official forums of the Ubuntu community. Mil-lions of Ubuntu users use them daily to seek help and support from oneanother. You can create an Ubuntu Forums account in minutes. To create
an account and learn more about Ubuntu from community members, visithttp://ubuntuforums.org.
Launchpad Answers
Launchpad, an open source code repository and user community, provides aquestion and answer service that allows anyone to ask questions about anyUbuntu-related topic. Signing up for a Launchpad account takes just a fewseconds. You can ask a question by visiting Launchpad at https://answers.launchpad.net/ubuntu.
Ask Ubuntu
Ask Ubuntu is a free, community-driven website for Ubuntu users anddevelopers. Like the Ubuntu Forums, it allows users to post questions forother members of the Ubuntu community to answer. But Ask Ubuntu alsoallows visitors to “vote” on the answers users provide, so the most useful orhelpful responses get featured more prominently on the site. Ask Ubuntu ispart of the Stack Exchange network of websites and is one of the best freeUbuntu support resources available. Visit http://www.askubuntu.com to getstarted.
Search Engines
Because Ubuntu is a popular open source operating system, many usershave wrien about it online. erefore, using search engines to locateanswers to your questions about Ubuntu is oen an effective means ofacquiring help. When using search engines to answer questions aboutUbuntu, ensure that your search queries are as specific as possible. In otherwords, a search for “Unity interface” will return results that are less usefulthan those associated with the query “how to use Ubuntu Unity interface”or “how to customize Ubuntu Unity interface.”
Community support
If you’ve exhausted all these resources and still can’t find answers to yourquestions, visit Community Support at http://www.ubuntu.com/support/community.
The Ubuntu community
Ubuntu is the flagship product created by a global community of passionateusers who want to help others adopt, use, understand, and even modify orenhance Ubuntu. By choosing to install and run Ubuntu, you’ve becomepart of this community. As you learn more about Ubuntu, you may wishto collaborate with others as you promote Ubuntu to new users, to shareUbuntu advice, or to answer other users’ questions. In this section, we’lldiscuss a few community projects that can connect you to other Ubuntuusers.
Full Circle Magazine
Full Circle Magazine is “the independent magazine for the Ubuntu Linuxcommunity.” Released every month, Full Circle Magazine contains reviewsof new soware (including games) for Ubuntu, step-by-step tutorials for

.
projects you can accomplish with Ubuntu, editorials discussing importantissues in the Ubuntu community, and Ubuntu tips from other users. FullCircle Magazine is released in many different formats and is always free.You can download current and back issues of Full Circle Magazine at http://fullcirclemagazine.org/.
The Ubuntu UK Podcast
Produced by members of the UK’s Ubuntu LoCo team, this bi-weekly onlineaudio broadcast (or “podcast”) features lively discussion about Ubuntu andoen includes interviews with Ubuntu community members who work toimprove Ubuntu. Episodes are available at http://podcast.ubuntu-uk.org/.
OMG! Ubuntu!
OMG! Ubuntu! is a weblog that aims to inform the Ubuntu communityabout Ubuntu news, events, announcements, and updates in a timely fash-ion. It also allows Ubuntu users to discuss ways they can promote or shareUbuntu. You can read this blog or subscribe to it at http://www.omgubuntu.co.uk/.
Contributing
Contributing to Ubuntu
As we mentioned earlier in this chapter, Ubuntu is a community-maintainedoperating system. You can help make Ubuntu beer in a number of ways.e community consists of thousands of individuals and teams. If youwould like to contribute to Ubuntu, please visit https://wiki.ubuntu.com/ContributeToUbuntu.
You can also participate in the Ubuntu community by contributing tothis manual. You might choose to write new content for it, edit its chaptersso they are easier for new Ubuntu users to understand and use, or translateit in your own language. Or maybe taking screenshots is your passion!Regardless of your talent or ability, if you have a passion to contribute tothe Ubuntu community in a meaningful way, then the Ubuntu ManualProject invites you to join! To get involved in the Ubuntu Manual Project,visit http://ubuntu-manual.org/getinvolved.
A License
Creative Commons Attribution–ShareAlike 3.0 Legal Code
( ) (“” “”). / . .
, . , .
. Definitions(a) “Adaptation” means a work based upon the Work, or upon the Work
and other pre-existing works, such as a translation, adaptation,derivative work, arrangement of music or other alterations of a lit-erary or artistic work, or phonogram or performance and includescinematographic adaptations or any other form in which the Workmay be recast, transformed, or adapted including in any form recog-nizably derived from the original, except that a work that constitutesa Collection will not be considered an Adaptation for the purpose ofthis License. For the avoidance of doubt, where the Work is a musicalwork, performance or phonogram, the synchronization of the Work intimed-relation with a moving image (“synching”) will be consideredan Adaptation for the purpose of this License.
(b) “Collection” means a collection of literary or artistic works, suchas encyclopedias and anthologies, or performances, phonogramsor broadcasts, or other works or subject maer other than workslisted in Section () below, which, by reason of the selection andarrangement of their contents, constitute intellectual creations, inwhich the Work is included in its entirety in unmodified form alongwith one or more other contributions, each constituting separate andindependent works in themselves, which together are assembled intoa collective whole. A work that constitutes a Collection will not beconsidered an Adaptation (as defined below) for the purposes of thisLicense.
(c) “Creative Commons Compatible License” means a license that islisted at http://creativecommons.org/compatiblelicenses that has beenapproved by Creative Commons as being essentially equivalent to thisLicense, including, at a minimum, because that license: (i) containsterms that have the same purpose, meaning and effect as the LicenseElements of this License; and, (ii) explicitly permits the relicensingof adaptations of works made available under that license under thisLicense or a Creative Commons jurisdiction license with the sameLicense Elements as this License.
(d) “Distribute” means to make available to the public the original andcopies of the Work or Adaptation, as appropriate, through sale orother transfer of ownership.
.
(e) “License Elements” means the following high-level license aributesas selected by Licensor and indicated in the title of this License: Ari-bution, ShareAlike.
() “Licensor” means the individual, individuals, entity or entities thatoffer(s) the Work under the terms of this License.
(g) “Original Author” means, in the case of a literary or artistic work, theindividual, individuals, entity or entities who created the Work or ifno individual or entity can be identified, the publisher; and in addition(i) in the case of a performance the actors, singers, musicians, dancers,and other persons who act, sing, deliver, declaim, play in, interpret orotherwise perform literary or artistic works or expressions of folklore;(ii) in the case of a phonogram the producer being the person or legalentity who first fixes the sounds of a performance or other sounds;and, (iii) in the case of broadcasts, the organization that transmits thebroadcast.
(h) “Work” means the literary and/or artistic work offered under theterms of this License including without limitation any productionin the literary, scientific and artistic domain, whatever may be themode or form of its expression including digital form, such as a book,pamphlet and other writing; a lecture, address, sermon or other workof the same nature; a dramatic or dramatico-musical work; a choreo-graphic work or entertainment in dumb show; a musical compositionwith or without words; a cinematographic work to which are assim-ilated works expressed by a process analogous to cinematography;a work of drawing, painting, architecture, sculpture, engraving orlithography; a photographic work to which are assimilated works ex-pressed by a process analogous to photography; a work of applied art;an illustration, map, plan, sketch or three-dimensional work relativeto geography, topography, architecture or science; a performance; abroadcast; a phonogram; a compilation of data to the extent it is pro-tected as a copyrightable work; or a work performed by a variety orcircus performer to the extent it is not otherwise considered a literaryor artistic work.
(i) “You” means an individual or entity exercising rights under this Li-cense who has not previously violated the terms of this License withrespect to the Work, or who has received express permission fromthe Licensor to exercise rights under this License despite a previousviolation.
(j) “Publicly Perform” means to perform public recitations of the Workand to communicate to the public those public recitations, by anymeans or process, including by wire or wireless means or publicdigital performances; to make available to the public Works in such away that members of the public may access these Works from a placeand at a place individually chosen by them; to perform the Work tothe public by any means or process and the communication to thepublic of the performances of the Work, including by public digitalperformance; to broadcast and rebroadcast the Work by any meansincluding signs, sounds or images.
(k) “Reproduce” means to make copies of the Work by any means includ-ing without limitation by sound or visual recordings and the rightof fixation and reproducing fixations of the Work, including storageof a protected performance or phonogram in digital form or otherelectronic medium.
. Fair Dealing Rights. Nothing in this License is intended to reduce, limit,or restrict any uses free from copyright or rights arising from limitationsor exceptions that are provided for in connection with the copyrightprotection under copyright law or other applicable laws.
. License Grant. Subject to the terms and conditions of this License, Licen-sor hereby grants You a worldwide, royalty-free, non-exclusive, perpet-ual (for the duration of the applicable copyright) license to exercise therights in the Work as stated below:
(a) to Reproduce the Work, to incorporate the Work into one or moreCollections, and to Reproduce the Work as incorporated in the Collec-tions;
(b) to create and Reproduce Adaptations provided that any such Adap-tation, including any translation in any medium, takes reasonablesteps to clearly label, demarcate or otherwise identify that changeswere made to the original Work. For example, a translation could bemarked “e original work was translated from English to Spanish,”or a modification could indicate “e original work has been modi-fied.”;
(c) to Distribute and Publicly Perform the Work including as incorpo-rated in Collections; and,
(d) to Distribute and Publicly Perform Adaptations.(e) For the avoidance of doubt:
i. Non-waivable Compulsory License Schemes. In those jurisdictionsin which the right to collect royalties through any statutory orcompulsory licensing scheme cannot be waived, the Licensor re-serves the exclusive right to collect such royalties for any exerciseby You of the rights granted under this License;
ii. Waivable Compulsory License Schemes. In those jurisdictionsin which the right to collect royalties through any statutory orcompulsory licensing scheme can be waived, the Licensor waivesthe exclusive right to collect such royalties for any exercise by Youof the rights granted under this License; and,
iii. Voluntary License Schemes. e Licensor waives the right to col-lect royalties, whether individually or, in the event that the Licen-sor is a member of a collecting society that administers voluntarylicensing schemes, via that society, from any exercise by You of therights granted under this License.
e above rights may be exercised in all media and formats whethernow known or hereaer devised. e above rights include the right tomake such modifications as are technically necessary to exercise therights in other media and formats. Subject to Section (), all rightsnot expressly granted by Licensor are hereby reserved.
. Restrictions. e license granted in Section above is expressly madesubject to and limited by the following restrictions:
(a) You may Distribute or Publicly Perform the Work only under theterms of this License. You must include a copy of, or the UniformResource Identifier (URI) for, this License with every copy of the WorkYou Distribute or Publicly Perform. You may not offer or imposeany terms on the Work that restrict the terms of this License or theability of the recipient of the Work to exercise the rights granted tothat recipient under the terms of the License. You may not sublicensethe Work. You must keep intact all notices that refer to this Licenseand to the disclaimer of warranties with every copy of the Work

.
You Distribute or Publicly Perform. When You Distribute or PubliclyPerform the Work, You may not impose any effective technologicalmeasures on the Work that restrict the ability of a recipient of theWork from You to exercise the rights granted to that recipient underthe terms of the License. is Section (a) applies to the Work asincorporated in a Collection, but this does not require the Collectionapart from the Work itself to be made subject to the terms of thisLicense. If You create a Collection, upon notice from any Licensor Youmust, to the extent practicable, remove from the Collection any creditas required by Section (c), as requested. If You create an Adaptation,upon notice from any Licensor You must, to the extent practicable,remove from the Adaptation any credit as required by Section (c), asrequested.
(b) You may Distribute or Publicly Perform an Adaptation only under theterms of: (i) this License; (ii) a later version of this License with thesame License Elements as this License; (iii) a Creative Commons juris-diction license (either this or a later license version) that contains thesame License Elements as this License (e.g., Aribution-ShareAlike. US)); (iv) a Creative Commons Compatible License. If you licensethe Adaptation under one of the licenses mentioned in (iv), you mustcomply with the terms of that license. If you license the Adaptationunder the terms of any of the licenses mentioned in (i), (ii) or (iii) (the“Applicable License”), you must comply with the terms of the Ap-plicable License generally and the following provisions: (I) You mustinclude a copy of, or the URI for, the Applicable License with everycopy of each Adaptation You Distribute or Publicly Perform; (II) Youmay not offer or impose any terms on the Adaptation that restrictthe terms of the Applicable License or the ability of the recipient ofthe Adaptation to exercise the rights granted to that recipient un-der the terms of the Applicable License; (III) You must keep intact allnotices that refer to the Applicable License and to the disclaimer ofwarranties with every copy of the Work as included in the Adapta-tion You Distribute or Publicly Perform; (IV) when You Distribute orPublicly Perform the Adaptation, You may not impose any effectivetechnological measures on the Adaptation that restrict the ability of arecipient of the Adaptation from You to exercise the rights granted tothat recipient under the terms of the Applicable License. is Section(b) applies to the Adaptation as incorporated in a Collection, but thisdoes not require the Collection apart from the Adaptation itself to bemade subject to the terms of the Applicable License.
(c) If You Distribute, or Publicly Perform the Work or any Adaptationsor Collections, You must, unless a request has been made pursuantto Section (a), keep intact all copyright notices for the Work andprovide, reasonable to the medium or means You are utilizing: (i) thename of the Original Author (or pseudonym, if applicable) if supplied,and/or if the Original Author and/or Licensor designate another partyor parties (e.g., a sponsor institute, publishing entity, journal) for ari-bution (“Aribution Parties”) in Licensor’s copyright notice, terms ofservice or by other reasonable means, the name of such party or par-ties; (ii) the title of the Work if supplied; (iii) to the extent reasonablypracticable, the URI, if any, that Licensor specifies to be associatedwith the Work, unless such URI does not refer to the copyright no-tice or licensing information for the Work; and (iv) , consistent withSsection (b), in the case of an Adaptation, a credit identifying the
use of the Work in the Adaptation (e.g., “French translation of theWork by Original Author,” or “Screenplay based on original Workby Original Author”). e credit required by this Section (c) may beimplemented in any reasonable manner; provided, however, that inthe case of a Adaptation or Collection, at a minimum such credit willappear, if a credit for all contributing authors of the Adaptation orCollection appears, then as part of these credits and in a manner atleast as prominent as the credits for the other contributing authors.For the avoidance of doubt, You may only use the credit required bythis Section for the purpose of aribution in the manner set out aboveand, by exercising Your rights under this License, You may not im-plicitly or explicitly assert or imply any connection with, sponsorshipor endorsement by the Original Author, Licensor and/or AributionParties, as appropriate, of You or Your use of the Work, without theseparate, express prior wrien permission of the Original Author,Licensor and/or Aribution Parties.
(d) Except as otherwise agreed in writing by the Licensor or as may beotherwise permied by applicable law, if You Reproduce, Distributeor Publicly Perform the Work either by itself or as part of any Adap-tations or Collections, You must not distort, mutilate, modify or takeother derogatory action in relation to the Work which would be prej-udicial to the Original Author’s honor or reputation. Licensor agreesthat in those jurisdictions (e.g. Japan), in which any exercise of theright granted in Section (b) of this License (the right to make Adap-tations) would be deemed to be a distortion, mutilation, modificationor other derogatory action prejudicial to the Original Author’s honorand reputation, the Licensor will waive or not assert, as appropriate,this Section, to the fullest extent permied by the applicable nationallaw, to enable You to reasonably exercise Your right under Section(b) of this License (right to make Adaptations) but not otherwise.
. Representations, Warranties and Disclaimer , , , , , , , , , , , , , , . , .
. Limitation on Liability. , , , , , .
. Termination(a) is License and the rights granted hereunder will terminate automat-
ically upon any breach by You of the terms of this License. Individualsor entities who have received Adaptations or Collections from Youunder this License, however, will not have their licenses terminatedprovided such individuals or entities remain in full compliance with
.
those licenses. Sections , , , , , and will survive any terminationof this License.
(b) Subject to the above terms and conditions, the license granted here isperpetual (for the duration of the applicable copyright in the Work).Notwithstanding the above, Licensor reserves the right to releasethe Work under different license terms or to stop distributing theWork at any time; provided, however that any such election will notserve to withdraw this License (or any other license that has been, oris required to be, granted under the terms of this License), and thisLicense will continue in full force and effect unless terminated asstated above.
. Miscellaneous(a) Each time You Distribute or Publicly Perform the Work or a Collec-
tion, the Licensor offers to the recipient a license to the Work on thesame terms and conditions as the license granted to You under thisLicense.
(b) Each time You Distribute or Publicly Perform an Adaptation, Licensoroffers to the recipient a license to the original Work on the sameterms and conditions as the license granted to You under this License.
(c) If any provision of this License is invalid or unenforceable underapplicable law, it shall not affect the validity or enforceability of theremainder of the terms of this License, and without further actionby the parties to this agreement, such provision shall be reformedto the minimum extent necessary to make such provision valid andenforceable.
(d) No term or provision of this License shall be deemed waived and nobreach consented to unless such waiver or consent shall be in writingand signed by the party to be charged with such waiver or consent.
(e) is License constitutes the entire agreement between the partieswith respect to the Work licensed here. ere are no understandings,agreements or representations with respect to the Work not specifiedhere. Licensor shall not be bound by any additional provisions thatmay appear in any communication from You. is License may not bemodified without the mutual wrien agreement of the Licensor andYou.
() e rights granted under, and the subject maer referenced, in thisLicense were draed utilizing the terminology of the Berne Conven-tion for the Protection of Literary and Artistic Works (as amended onSeptember , ), the Rome Convention of , the WIPO Copy-right Treaty of , the WIPO Performances and Phonograms Treatyof and the Universal Copyright Convention (as revised on July, ). ese rights and subject maer take effect in the relevantjurisdiction in which the License terms are sought to be enforcedaccording to the corresponding provisions of the implementation ofthose treaty provisions in the applicable national law. If the standardsuite of rights granted under applicable copyright law includes addi-tional rights not granted under this License, such additional rights aredeemed to be included in the License; this License is not intended torestrict the license of any rights under applicable law.
Creative Commons Notice
Creative Commons is not a party to this License, and makes no warrantywhatsoever in connection with the Work. Creative Commons will not beliable to You or any party on any legal theory for any damages whatsoever,including without limitation any general, special, incidental or consequen-tial damages arising in connection to this license. Notwithstanding theforegoing two () sentences, if Creative Commons has expressly identifieditself as the Licensor hereunder, it shall have all rights and obligations ofLicensor.
Except for the limited purpose of indicating to the public that the Workis licensed under the CCPL, Creative Commons does not authorize the useby either party of the trademark “Creative Commons” or any related trade-mark or logo of Creative Commons without the prior wrien consent ofCreative Commons. Any permied use will be in compliance with CreativeCommons’ then-current trademark usage guidelines, as may be publishedon its website or otherwise made available upon request from time to time.For the avoidance of doubt, this trademark restriction does not form part ofthe License.
Creative Commons may be contacted at http://creativecommons.org/.


Glossary
Access Point A device that allows for a wireless connection to a local net-work using Wi-Fi, Bluetooth, etc.
applet A small program that runs in a panel. Applets provide useful func-tions such as starting a program, viewing the time, or accessing the mainmenu of an application.
Canonical Canonical, the financial backer of Ubuntu, provides support forthe core Ubuntu system. It has over staff members worldwide whoensure that the foundation of the operating system is stable, as well aschecking all the work submied by volunteer contributors. To learnmore about Canonical, go to http://www.canonical.com.
or command-line interface is another name for the terminal.
desktop environment A generic term to describe a interface for humansto interact with computers. ere are many desktop environments suchas , , and , to name a few.
stands for Dynamic Host Configuration Protocol, it is used by a server to assign computers on a network an address automati-cally.
dialup connection A dialup connection is when your computer uses a mo-dem to connect to an through your telephone line.
distribution A distribution is a collection of soware that is already com-piled and configured ready to be installed. Ubuntu is an example of adistribution.
dual-booting Dual-booting is the process of being able to choose one oftwo different operating systems currently installed on a computer fromthe boot menu. Once selected, your computer will boot into whicheveroperating system you chose at the boot menu. e term dual-booting isoen used generically, and may refer to booting among more than twooperating systems.
encryption Encryption is a security measure, it prevents others from access-ing and viewing the contents of your files and/or hard drives, the filesmust first be decrypted with your password.
Ethernet port An Ethernet port is what an Ethernet cable is plugged intowhen you are using a wired connection.
e (which stands for Graphical User Interface) is a type of user in-terface that allows humans to interact with the computer using graphicsand images rather than just text.
stands for Internet Service Provider, an is a company that providesyou with your Internet connection.
Live A Live allows you to try out an operating system before youactually install it, this is useful for testing your hardware, diagnosingproblems and recovering your system.
stands for long-term support and is a type of Ubuntu release that isofficially supported for far longer than the standard releases.
.
maximize When you maximize an application in Ubuntu it will fill thewhole desktop, excluding the panels.
minimize When you minimize an open application, the window will nolonger be shown. If you click on a minimized application’s icon in theLauncher, it will be restored to its normal state and allow you to interactwith it.
notification area e notification area is an applet on the panel that pro-vides you with all sorts of information such as volume control, the cur-rent song playing in Rhythmbox, your Internet connection status andemail status.
output e output of a command is any text it displays on the next lineaer typing a command and pressing enter, e.g., if you type pwd into aterminal and press Enter, the directory name it displays on the next lineis the output.
package Packages contain soware in a ready-to-install format. Most ofthe time you can use the Soware Center instead of manually installingpackages. Packages have a .deb extension in Ubuntu.
panel A panel is a bar that sits on the edge of your screen. It contains ap-plets which provide useful functions such as running programs, viewingthe time, or accessing the main menu.
parameter Parameters are special options that you can use with othercommands in the terminal to make that command behave differently, thiscan make a lot of commands far more useful.
A personal package archive () is a custom soware repository thattypically contains either packages that aren’t available in the primaryUbuntu repositories or newer versions of packages that are available inthe primary repositories.
prompt e prompt displays some useful information about your computer.It can be customized to display in different colors, display the time, date,and current directory or almost anything else you like.
proprietary Soware made by companies that don’t release their sourcecode under an open source license.
router A router is a specially designed computer that, using its sowareand hardware, routes information from the Internet to a network. It isalso sometimes called a gateway.
server A server is a computer that runs a specialized operating system andprovides services to computers that connect to it and make a request.
shell e terminal gives access to the shell, when you type a command intothe terminal and press enter the shell takes that command and performsthe relevant action.
Soware Center e Soware Center is where you can easily manage so-ware installation and removal as well as the ability to manage sowareinstalled via Personal Package Archives.
Synaptic Package Manager Synaptic Package Manager is a tool that, insteadof listing applications (like the Soware Center) lists individual packagesthat can then be installed, removed and fixed.
terminal e terminal is Ubuntu’s text-based interface. It is a method of

controlling the operating system using only commands entered via thekeyboard as opposed to using a like Unity.
Universal Serial Bus is a standard interface specification for connectingperipheral hardware devices to computers. devices range fromexternal hard drives to scanners and printers.
wired connection A wired connection is when your computer is physicallyconnected to a router or Ethernet port with a cable. is is the mostcommon method of connecting to the Internet and local network fordesktop computers.
wireless connection A network connection that uses a wireless signal tocommunicate with either a router, access point, or computer.

Credits
is manual wouldn’t have been possible without the efforts and contribu-tions from the following people:
Team leads
Kevin Godby—Lead TEXnicianJim Connet—Authors CoordinatorHannie Dumoleyn—Editors Coordinator Translation MaintainerCarsten Gerlach—Screenshots
Authors
Mario BurgosJim Conneomas Corwin
Sayantan DasHannie DumoleynPatrick Dickey
Mehmet Kani
Editors
Jim ConneHannie DumoleynSylvie Gallet
Kevin GodbyMehmet KaniAndrew Montag
David Pires
Screenshots
Sylvie Gallet Carsten Gerlach
Designers
orsten Wilms
Developers
Adnane Belmadiaf Kevin Godby
Translation editors
Fran Diéguez (Galician)Hannie Dumoleyn (Dutch)Sylvie Gallet (French)Aleksey Kabanov (Russian)
Xuacu Saturio (Asturian)Daniel Schury (German)Susah Sebut (Malay)Jose Luis Tirado (Spanish)
Chris Woollard (British English)John Xygonakis (Greek)Andrej Znidarsic (Slovenian)
Past contributors
Bryan Behrenshausen (Author)Senthil Velan Bhooplan (Author)John Cave (Author)Che Dean (Author)Rick Fosburgh (Editor-in-Chie)
Herat Gandhi Amrish (Author)Benjamin Humphrey (Project Founder)Will Kromer (Author)Paddy Landau (Author/Editor)Simon Lewis (Author)

.
Ryan Macnish (Author)Mez Pahlan (Author)Vibhav Pant (Editor)Brian Peredo (Author)Joel Picke (Author)Tony Pursell (Author/Editor)
Kev irk (Author)Kartik Sulakhe (Author)Tom Swartz (Author)David Wales (Author)Chris Woollard (Editor)
Index
-bit versus -bit,
accessibility, screen reader,
alternative interfaces, –Apple, see MacBookapplications
adding and removing, presentation, see LibreOfficerunning, searching, spreadsheet, see LibreOfficeword processor, see LibreOffice
audio, see sound and musicaudio, playing, see Rhythmbox
Bluetooth, booting
troubleshooting,
camera, importing photos, Canonical, s and s
blanking, burning, –codecs, copying, playing, , ripping,
cloud storage, see Ubuntu Onecodecs
audio, video,
command line, see terminal
Dash, Debian, , see also Linuxderivatives, desktop
background, customization,
appearance, background, theme,
menu bar, sharing,
disk, see s and sdisplay
adding secondary, –changing resolution, troubleshooting,
drivers, –dual-booting,
s and s, see s and s
Edubuntu, EeePC
troubleshooting, email, see underbirdEmpathy, –
add accounts, chaing, –desktop sharing, setup,
encryption, see security
file system structure, –Files,
multiple tabs, multiple windows, window,
filesbrowsing, opening files, recovering, sync, see Ubuntu One
files and folderscopying, creating, displaying hidden, moving, searching,
Firefox, –firewall
installing, using,
FireWire, see
gestures, groups, see also users
adding, deleting, files and folders, managing, modifying,
hardwaretroubleshooting,
helpAsk Ubuntu, documentation, forums, Full Circle Magazine, general help, heads-up display (), Launchpad Answers,
live chat, online,
home folder,
, instant messaging, see EmpathyInternet
browsing, –connecting, –wireless,
Internet radio,
kernel, keyboard,
Launcher, running applications,
LibreOffice, Linux, –Linux distributions, –Live , see Ubuntu Live locking the screen, logging out, login options, –
Mac , see MacBookMacBook
troubleshooting, monitor, see displaymounting devices, mouse, Movie Player, multitouch, music, see RhythmboxMythbuntu,
NetworkManager,
open-source soware,
password, see securityphotos, see also Shotwell
editing, importing, viewing,
podcasts, presentation application, printer,
add via , adding via network,
rebooting, Rhythmbox, –

.
Internet radio, playing music, podcasts,
scanner, troubleshooting,
screen, see displaysecurity
encryption, introduction, –passwords, permissions, reseing passwords, screen locking, system updates,
Shotwell, –shuing down, Shuleworth, Mark, slide show, see LibreOfficesoware
adding repository, –email, finding applications, –installation history, installing, –managing, –manual installation, movie players, multimedia players, music players, office suites, reader, podcast readers, presentation, recommendations, removing, repositories,
servers, –spreadsheet, video players, web browser, word processor,
Soware Center, sound
input, output, recording, troubleshooting, volume,
sound effects, spreadsheet, start up, see bootsuspending the computer, system requirements,
terminalabout, using,
underbird, –setup,
torrentUbuntu image,
touchpad,
Ubuntubootable drive, definition of, downloading, history of, installing, –philosophy of,
Ubuntu Live , –Ubuntu One, –Ubuntu Promise, Ubuntu Server Edition,
Ubuntu Soware Center, Ubuntu Studio, Unity, Unix, , unmounting devices, updates
about, –automatic, release updates, –
, users, see also groups
adding, creating during installation, –deleting, managing, modifying,
videotroubleshooting,
videoscodecs, playing,
volume, see sound
webcam, Wi-Fi, windows,
closing, force on top, minimizing, moving, moving between, resizing, restoring, switching,
word processor, workspaces,
is book was typeset with XƎLATEX.
e book design is based on the Tue-LATEX document classes available at http://code.google.com/p/tufte-latex/.
e text face is Linux Libertine, designed by Philipp H. Poll. It is an open fontavailable at http://linuxlibertine.sf.net/.
e captions and margin notes are set in Ubuntu, a font commissioned by Canonicaland designed by Dalton Maag. It is freely available for download at http://font.ubuntu.com/.
e terminal text and keystrokes are set in DejaVu Sans Mono (available at http://dejavu-fonts.org/), originally developed by Bitstream, Inc. as Bitstream Vera.
e cover and title page pictograms contain shapes taken from the Humanity iconset, available at https://launchpad.net/humanity.
e title page and cover were designed using Inkscape, available at http://inkscape.org/.