FireWall-1 GX NGX - Check Point Software
32
Getting Started Guide FireWall-1 GX NGX For additional technical information about Check Point products, consult Check Point’s SecureKnowledge at: http://secureknowledge.checkpoint.com See the latest version of this document in the User Center at: http://www.checkpoint.com/support/technical/documents/ IMPORTANT Check Point recommends that customers stay up-to-date with the latest service packs and versions of security products, as they contain security enhancements and protection against new and changing attacks. Part No.: 701725
-
Upload
khangminh22 -
Category
Documents
-
view
1 -
download
0
Transcript of FireWall-1 GX NGX - Check Point Software

Getting Started Guide
FireWall-1 GX NGX
For additional technical information about Check Point products, consult Check Point’s
SecureKnowledge at:
http://secureknowledge.checkpoint.com
See the latest version of this document in the User Center at:
http://www.checkpoint.com/support/technical/documents/
IMPORTANTCheck Point recommends that customers stay up-to-date with the latest service packs and versions of security products, as they contain security enhancements and protection against new and
changing attacks.
Part No.: 701725


Table Of Contents
Chapter 1Introducing FireWall-1 GX NGX 5Overview 5FireWall-1 GX NGX and IPv6 5About This Guide 6Other FireWall-1 GX Documentation 6
Chapter 2Hardware and Software Requirements 7Minimum Hardware Requirements by Platform 7
Nokia Hardware Requirements 8SecurePlatform Hardware Requirements 8Linux Hardware Requirements 9CrossBeam Hardware Requirements 9
Minimum Software Requirements by Platform 10Nokia Platform Software Requirements 10Linux Platform Software Requirements 10
Chapter 3Pre-Deployment Considerations 11Overview 11Some Useful Terminology 11Deployment Methods 12Installation Types 13
Fresh Installation 13Upgrade Installation 13
Before You Install... 13Licensing FireWall-1 GX NGX 14
Check Point Licenses 14Upgrading FireWall-1 GX Licenses 15
Obtaining Installation Packages 15
Chapter 4Fresh Installation 17
FireWall-1 GX NGX Installation Mechanism 17Fresh Installation on a Nokia Platform 18Fresh Installation on SecurePlatform 19
Install SecurePlatform using FireWall-1 GX NGX CD 19Configure FireWall-1 GX on SecurePlatform 22Configure FireWall-1 GX using WebUI 25
Fresh Installation on Linux 25Initial Configuration 27
Configuration Tool 27Logging into the SmartCenter Server for the First Time 28
Where to From Here? 29
4 Getting Started Guide

CHAPTER 1
Introducing FireWall-1 GX NGX
In This Chapter
OverviewFireWall-1 GX NGX is the latest release of the FireWall-1 GX product, following FireWall-1 GX 2.5. As its name implies, it is based on VPN-1 Pro NGX (R60), thus inheriting all of the features of NGX, as well as full compatibility with the R60 platform.
FireWall-1 GX NGX and IPv6FireWall-1 GX NGX has been launched together with a new IPv6 release named NGX IPv6Pack. While given different names and intended for different types of customers, the two releases contain all of the same capabilities.
For example, if you plan to deploy FireWall-1 GX NGX on your Gn and Gp interfaces, and NGX IPv6Pack at the Gi interface for advanced IMS SIP filtering, you could install a FireWall-1 GX NGX enforcement module on the Gi interface and receive the same capability.
Overview page 5
FireWall-1 GX NGX and IPv6 page 5
About This Guide page 6
Other FireWall-1 GX Documentation page 6
5

About This Guide
About This GuideThis guide assumes a basic familiarity with Check Point products, and that you have read the SmartCenter Guide included on the FireWall-1 GX Media Pack. In this guide you will find information about installing and updating FireWall-1 GX, as well as the platforms supported by FireWall-1 GX deployments.
This Guide is divided into a number of sections and chapters.
• Chapter 1, “Introducing FireWall-1 GX NGX,” is this chapter.
• Chapter 2, “Hardware and Software Requirements,” details the minimum requirements for installing FireWall-1 GX.
• Chapter 3, “Pre-Deployment Considerations,” provides some basic Check Point terminology, and details on supported deployments and installations, licensing information, and where installation packages can be obtained.
• Chapter 4, “Fresh Installation,” provides detailed information on installing the FireWall-1 GX Enforcement Module and SmartCenter server in a fresh environment.
Other FireWall-1 GX DocumentationTo learn what’s new in FireWall-1 GX NGX, read the What’s New document.
For the latest information about this version, read the Release Notes.
Details about working with FireWall-1 GX are available in the FireWall-1 GX NGX User Guide.
All of these documents can be found at:
http://www.checkpoint.com/support/technical/documents/
Note - To utilize the IPv6 functionality in NGX IPv6Pack, an IPv6 license must be attached to both the management server and the Enforcement Module. The IPv6 license is available for download free of charge from the User Center.
6 Getting Started Guide
CHAPTER 2
Hardware and Software Requirements
In This Chapter
Minimum Hardware Requirements by Platform
In This Section
As a general rule of thumb, the memory required to support 200,000 PDP Contexts is 1GB of RAM at a minimum. However, 2GB is recommended.
Minimum Hardware Requirements by Platform page 7
Minimum Software Requirements by Platform page 10
Nokia Hardware Requirements page 8
SecurePlatform Hardware Requirements page 8
Linux Hardware Requirements page 9
CrossBeam Hardware Requirements page 9
7

Minimum Hardware Requirements by Platform
Nokia Hardware Requirements
FireWall-1 GX NGX is supported on IPSO version 3.9 and IPSO version 4.0 on the following Nokia IP platforms:
IP130, IP260, IP330, IP350, IP380, IP530, IP650, IP710, IP740, IP1220, IP1260
And the following flash-based platforms:
IP355, IP385, IP1220, IP1260, IP2250
The minimum hardware requirements for installing FireWall-1 GX NGX on a Nokia IPSO platform are:
SecurePlatform Hardware Requirements
On SecurePlatform, the minimum hardware requirements for installing a FireWall-1 GX NGX are:
For details about SecurePlatform on specific hardware platforms, see http://www.checkpoint.com/products/supported_platforms/secureplatform.html
Memory 256MB Network Adapter One or more Nokia network adapter cards
Processor Intel Pentium III CPU 300+ MHz or equivalent processorFree Disk Space 4GBMemory 256MB (512MB recommended)CD-ROM Drive Yes (bootable)Network Adapter One or more supported network adapter cardsVideo Adapter supports 1024 x 768 resolution
8 Getting Started Guide

Linux Hardware Requirements
Linux Hardware Requirements
On a Linux platform, the minimum hardware requirements for installing FireWall-1 GX NGX are:
CrossBeam Hardware Requirements
On a CrossBeam platform, the minimum hardware requirements for installing FireWall-1 GX NGX are:
Processor Intel Pentium IICPU 300MHz or equivalent processorFree Disk Space 300MBMemory 256MB CD-ROM Drive YesNetwork Adapter One or moreVideo Adapter supports 1024 x 768 resolution
Platform Crossbeam C and X seriesLinux Kernel 2.4.21-20
Chapter 2 Hardware and Software Requirements 9

Minimum Software Requirements by Platform
Minimum Software Requirements by Platform
Nokia Platform Software Requirements
This release supports IPSO 3.9. For the latest information on which IPSO releases are supported, see the Nokia Support Web at http://support.nokia.com.
Linux Platform Software Requirements
This release supports Red Hat Enterprise Linux 3.0. For Red Hat kernel installation instructions, visit: http://www.redhat.com/support/resources/howto/kernel-upgrade.
10 Getting Started Guide

CHAPTER 3
Pre-Deployment Considerations
In This Chapter
OverviewCheck Point software is designed to work across multiple platforms, including Unix, SecurePlatform and pre-configured appliances. The “look-and-feel” of each installation differs depending on the platform.
Some Useful TerminologyThe following are useful terms that you need to be familiar with in order to understand this chapter.
• A Security Policy is created by the system administrator in order to regulate the incoming and outgoing flow of communication.
Overview page 11
Some Useful Terminology page 11
Deployment Methods page 12
Installation Types page 13
Before You Install... page 13
Licensing FireWall-1 GX NGX page 14
Obtaining Installation Packages page 15
11

Deployment Methods
• An Enforcement Module is the engine that actively enforces the organization’s Security Policy. A FireWall-1 GX Enforcement Module includes special GTP-aware services and cellular capabilities.
• The SmartCenter server is the server used by the system administrator to manage the Security Policy. The databases and policies of the organization are stored on the SmartCenter server, and are occasionally downloaded to the Enforcement Module.
• The term SmartConsole refers to different GUI applications that are used to manage different aspects of the Security Policy. For instance, SmartView Tracker is a SmartConsole that manages logs.
• SmartDashboard is a SmartConsole GUI application that is used to create and manage the Security Policy.
Deployment MethodsFireWall-1 GX can be deployed as follows:
• Distributed deployment - SmartCenter server on one machine, enforcement module on another
• Standalone deployment - both the SmartCenter server and the enforcement module are installed on the same machine
A distributed deployment is the most common, as Mobile Operators typically employ a centralized management approach. Standalone deployments are most often used for demonstration purposes.
In both deployments, the following operations must be performed:
• Install the components that will manage or enforce the Security Policy (for instance SmartCenter server, Enforcement Module, Log Server).
• Install one or more SmartConsole clients to manage different aspects of FireWall-1 GX. For instance, SmartDashboard is used by the system administrator to manage and create the Security Policy. Different versions of SmartConsole GUI applications can be installed on the same machine.
12 Getting Started Guide

Fresh Installation
Installation TypesBoth the Enforcement Module and the SmartCenter server for FireWall-1 GX NGX can be installed either via a fresh installation or an upgrade of a previous installation.
Fresh Installation
Fresh installations of FireWall-1 GX include the installation of SmartCenter server and the Enforcement Module (referred to in the installation as FireWall-1 GX). See chapter 4 “Fresh Installation” on page 17 for installation instructions.
Upgrade Installation
SmartCenter Server UpgradePrevious installations of SmartCenter server can be upgraded to the FireWall-1 GX NGX. See the chapter “SmartCenter Upgrade” in the Check Point FireWall-1 GX Upgrade Guide for details on supported upgrade paths and instructions.
Enforcement Module UpgradePrevious installations of the Enforcement Module can be upgraded to FireWall-1 GX NGX. For details, see “Enforcement Module Upgrade” in the Check Point FireWall-1 GX Upgrade Guide.
Alternatively, you can perform a fresh installation of the FireWall-1 GX NGX Enforcement Module as detailed in chapter 4 “Fresh Installation” on page 17, thereby “upgrading” it to FireWall-1 GX NGX.
Before You Install...The SmartCenter server machine and the Enforcement Module machine must be TCP/IP ready. The Enforcement Module machine must include at least two interfaces, where:
• one interface is external
• another interface is internal and faces the protected network
Chapter 3 Pre-Deployment Considerations 13

Licensing FireWall-1 GX NGX
• each interface has a relevant IP address
• all relevant routing information (default, static) is configured properly
In addition, the SmartCenter server should be able to query a DNS server in order to resolve the IP addresses of the machine names.
Licensing FireWall-1 GX NGX
In This Section
Check Point Licenses
Check Point software is activated with a License Key. You can obtain this License Key by registering the Certificate Key that appears on the back of the software media pack in the Check Point User Center https://usercenter.checkpoint.com.
The Certificate Key is used in order to receive a License Key for products that you are evaluating.
In order to purchase the required Check Point products, contact your reseller.
Check Point products are activated as follows:
1 Activate the Certificate Key shown on the back of the media pack via Check Point User Center. The Certificate Key activation process consists of:
• adding the Certificate Key
• activating the products
• choosing the type of license
• entering the software details
2 Once you have a new License Key, you can start the installation and configuration process. During this process, you will be required to:
Check Point Licenses page 14
Upgrading FireWall-1 GX Licenses page 15
14 Getting Started Guide

Upgrading FireWall-1 GX Licenses
• read the End Users License Agreement and if you accept it, click Yes.
• import the license that you obtained from the User Center for the product that you are installing.
Licenses are imported via the Check Point Configuration Tool or, using SmartUpdate.
SmartUpdate allows you to centrally upgrade and manage Check Point software and licenses. The License Keys tie the product license to the IP address of the SmartCenter server. This means that:
• The new license remains valid even if the IP address of the Check Point gateway is changed.
• Only one IP address is needed for all licenses.
• A license can be detached from one Check Point gateway and assigned to another.
Upgrading FireWall-1 GX Licenses
Customers with versions prior to FireWall-1 GX NGX are required to obtain a new license when they upgrade to FireWall-1 GX NGX. Check Point FireWall-1 GX NGX does not work with licenses from previous versions.
The upgrade procedure is free of charge to purchasers of the Software Subscription service (Enterprise Base Support).
The license upgrade can be performed automatically during the upgrade, or manually on the User Center, either before or after the upgrade.
For detailed information about upgrading licenses refer to the Upgrading VPN-1 Pro/Express Licenses to NGX R60 chapter of the NGX R60 Upgrade Guide.
Obtaining Installation PackagesFireWall-1 GX packages are provided on a CD and at the online download center.
Note - Nokia IPSO packages are only available from the download center.
Chapter 3 Pre-Deployment Considerations 15

Obtaining Installation Packages
To download FireWall-1 GX from the download center go to the following site:
http://www.checkpoint.com/techsupport/downloads.jsp
16 Getting Started Guide

CHAPTER 4
Fresh Installation
In This Chapter
FireWall-1 GX NGX Installation MechanismThe FireWall-1 GX NGX installation is based on the VPN-1 Pro NGX (R60) installation. That means that the installation process will first install NGX (R60) - exactly as if NGX was installed, and then silently upgrade the system to FireWall-1 GX NGX via the FireWall-1 GX NGX HotFix package.
Note - FireWall-1 GX NGX is installed to the same directories as NGX (R60).
FireWall-1 GX NGX Installation Mechanism page 17
Fresh Installation on a Nokia Platform page 18
Fresh Installation on SecurePlatform page 19
Fresh Installation on Linux page 25
Initial Configuration page 27
Where to From Here? page 29
17

Fresh Installation on a Nokia Platform
Fresh Installation on a Nokia PlatformInstall FireWall-1 GX NGX using a console-based connection, or using Nokia Network Voyager, which is a secure, Web-based network-element management application. Then use a console-based connection to perform the initial configuration.
FireWall-1 GX NGX software packages for Nokia IPSO 3.9 are available at the online download center in the following location: http://www.checkpoint.com/techsupport/downloads.jsp
Note - For IP2250 or any other Flash-based platform, do not use the FireWall-1 GX NGX IPSO Wrapper package. Instead, install the latest NGX (R60) IPSO Package (not the Wrapper), available at the FireWall-1 GX NGX download site. Then perform the initial configuration as described later in the chapter. Afterwards, install the FireWall-1 GX NGX HotFix package, also available at the download site.
1 Copy the FireWall-1 GX NGX IPSO Wrapper to an FTP server on your network.
2 To install the Wrapper with the use of a console-based connection, enter newpkg at the command prompt and follow the on-screen instructions. To install the Wrapper by using Voyager, continue to the next step.
3 From the Voyager home page, choose System Configuration > Manage Installed Packages > FTP and Install Packages.
4 Enter the appropriate information to connect to the FTP site and download the Wrapper, then click Apply.
5 Select the Wrapper from the Site Listing field, then click Apply.
6 Select the relevant package in the Select a package to unpack area and click Apply.
7 Scroll down and click the install link that appears. This process may take several minutes.
8 Select Yes in the Install box and click Apply.
9 After the installation is complete, connect to the Nokia platform with a console-based connection.
18 Getting Started Guide

Install SecurePlatform using FireWall-1 GX NGX CD
10 Enter cpconfig at the command line; a script guides you through the rest of the process.
Note - When viewing the FireWall-1 GX NGX installation in Voyager, it is displayed as an NGX R60 installation.
Fresh Installation on SecurePlatform
In This Section
Install SecurePlatform using FireWall-1 GX NGX CD
1 Insert the SecurePlatform CD into the CD drive and reboot the computer.
After rebooting, the Welcome to Check Point screen is displayed.
2 Select Enter to confirm the installation. If you do not press Enter within a pre-designated interval, the computer will reboot from the hard disk.
After pressing Enter, the installation program loads for some time. After confirmation, the Welcome menu is displayed.
The following three options appear:
• Device List
• Add Driver
• OK
To continue with the normal installation, select OK and continue to step 3 below.
Install SecurePlatform using FireWall-1 GX NGX CD page 19
Configure FireWall-1 GX on SecurePlatform page 22
Configure FireWall-1 GX using WebUI page 25
Chapter 4 Fresh Installation 19

Fresh Installation on SecurePlatform
• Device List
Selecting Device List displays the Hardware Scan Details menu. You can select an item to get more information.
The Hardware device categories include: OTHER DEVICES, NETWORK DEVICES and AUDIO DEVICES. The information per hardware device includes: class, bus, driver, device, detached, vendor Id, device Id, subVendor Id, subDevice Id and pci Type.
Press Back to return to the Hardware Scan Details menu. Device information can be saved to: Floppy, TFTP, or Serial.
Press OK to continue.
• Add Driver
Selecting Add Driver displays the Devices menu. The system will ask if you have a driver disk.
If you select Yes, you are prompted to insert your driver disk and press OK to continue.
If you select OK again, the system will install the driver.
There are cases in which updated hardware is incompatible with the previous version’s driver. You may receive an error at installation because the operating system could not find the appropriate hard disk driver. Alternatively, installation may be completed, but the hardware does not function properly. The Add Driver feature solves this problem by enabling you to add the missing driver at installation time.
Press OK to continue.
3 After pressing OK, the System Type window screen appears. The system askes: What type of system would you like to
install? • SecurePlatform
• SecurePlatform Pro - including Advanced Routing Suite and additional enhancements (for example, RADIUS authentication of administrators).
Either can be selected. Note that the license for FireWall-1 GX
20 Getting Started Guide
Install SecurePlatform using FireWall-1 GX NGX CD
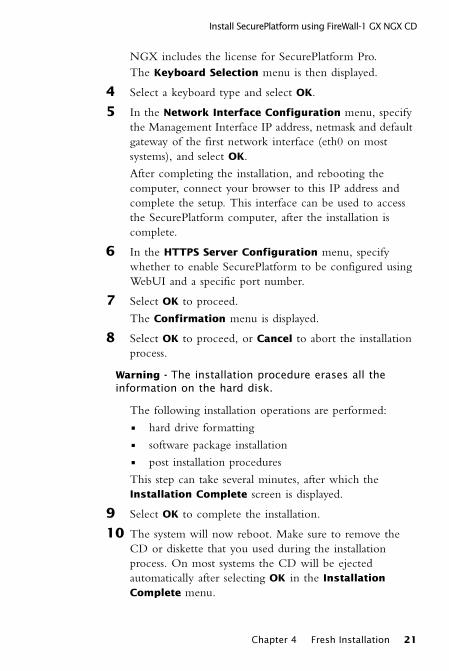
NGX includes the license for SecurePlatform Pro. The Keyboard Selection menu is then displayed.
4 Select a keyboard type and select OK.
5 In the Network Interface Configuration menu, specify the Management Interface IP address, netmask and default gateway of the first network interface (eth0 on most systems), and select OK.
After completing the installation, and rebooting the computer, connect your browser to this IP address and complete the setup. This interface can be used to access the SecurePlatform computer, after the installation is complete.
6 In the HTTPS Server Configuration menu, specify whether to enable SecurePlatform to be configured using WebUI and a specific port number.
7 Select OK to proceed.
The Confirmation menu is displayed.
8 Select OK to proceed, or Cancel to abort the installation process.
Warning - The installation procedure erases all the information on the hard disk.
The following installation operations are performed:
• hard drive formatting
• software package installation
• post installation procedures
This step can take several minutes, after which the Installation Complete screen is displayed.
9 Select OK to complete the installation.
10 The system will now reboot. Make sure to remove the CD or diskette that you used during the installation process. On most systems the CD will be ejected automatically after selecting OK in the Installation
Complete menu.
Chapter 4 Fresh Installation 21
Fresh Installation on SecurePlatform
Configure FireWall-1 GX on SecurePlatform
After the installation from the CD has been completed, and the computer has been rebooted, a first time setup is required in order to:
• configure the network settings
• apply the license
• select which products will be installed
• perform the SmartCenter initial setup, if selected
Perform the First Time Setup, as follows:1 Install SecurePlatform (perform steps 1 to 10 in Install
SecurePlatform using FireWall-1 GX NGX CD).
2 Reboot the machine.
3 Enter a Username and Password.
Note - If you are logging on for the first time, use Admin as your Username and Password. You will be asked to change this Username and Password.
4 Run the sysconfig command (refer to the NGX R60 SecurePlatform and SecurePlatform Pro User Guide for additional information) from the console to configure SecurePlatform, using a text interface.
A Welcome message appears.
5 The command line setup wizard begins, and guides you through the first-time configuration.
6 Select n to proceed to the next menu, or q to exit the Wizard, and press Enter.
7 If you selected n and pressed Enter, the Network
Configuration menu options are displayed. They are:
• Host Name (Set/Show Host Name)
• Domain Name (Set/Show Domain Name)
• Domain Name Servers (Add/Remove/Show Domain Name Servers)
• Network Connections (Add/Configure/Remove/Show Connection)
22 Getting Started Guide

Configure FireWall-1 GX on SecurePlatform
• Routing (Set/Show Default Gateway)
You must configure the following:
• the computer’s name
• the domain name, and up to three DNS servers
• the computer’s network interfaces
• the default gateway
8 Enter the desired option number and press Enter.
The Choose an action menu operation options are displayed.
9 Enter the desired operation option number and press Enter.
Select e and press Enter to return to the previous menu.
10 When you have completed Network Configuration, select n and press Enter to proceed to the next menu, Time
and Date Configuration.
The Time and Date screen appears with the following 4 options:
• Set time zone
• Set date
• Set local time
• Show date and time settings
11 Skip to the next step or select one or more of the options.
After every selection, select p and press Enter to return to the previous menu, or select q and press Enter to exit the Wizard.
12 Type N for next, in order to continue the installation.
The Import Check Point Products Configuration screen appears with the following option: Fetch Import file from TFTP Server.
If you select this option follow and answer the questions that appear.
13 Type N for next, in order to continue the installation.
14 A Welcome message appears.
Chapter 4 Fresh Installation 23

Fresh Installation on SecurePlatform
15 Type N for next, in order to continue the installation. A script guides you through the rest of the process.
16 Read the End-User License agreement.
Press the spacebar to continue to the next License Agreement page.
17 To accept the License Agreement type Y and press Enter.
18 Select to install Check Point Enterprise/Pro software products. (The option Check Point Express is not relevant for this installation.)
19 Select New Installation and N. A list of products appears.
• To install the FireWall-1 GX NGX enforcement module only, select VPN-1 Pro.
• To install the FireWall-1 GX NGX SmartCenter server only, select SmartCenter.
• For a standalone installation, select VPN-1 Pro and SmartCenter.
20 At this point a Welcome message is displayed. Press N to continue.
21 Press Enter and the installation process begins
22 In order to complete the installation process, configure the Enterprise SmartCenter and the Enforcement Module using the Configuration Tool. For more information see “Configuration Tool” on page 27.
23 Reboot the machine.
Once you reboot the machine, IP forwarding is automatically disabled and a default Security Policy is applied to the Enforcement Module. This default Security Policy forbids all inbound connections, except for control connections (for
- VPN-1 Pro - SmartPortal
- SmartCenter - UserAuthority
- Eventia Reporter - Performance Pack
24 Getting Started Guide

Configure FireWall-1 GX using WebUI
example, install policy operations, etc.). This policy remains in place until you have installed the first Security Policy.
Configure FireWall-1 GX using WebUI
Upon completion of the operating system setup and after the computer has been rebooted, a first time setup is required in order to:
• configure the network settings
• apply the license
• select which products will be installed
• perform the SmartCenter initial setup, if selected
To install FireWall-1 GX NGX products using the Web User Interface, refer to the SecurePlatform and Secure Platform Pro NGX R60 Guide.
Fresh Installation on LinuxThis is a console-based process. It is run from the command line, with a main menu that leads you step-by-step through the installation.
In order to begin the installation, mount the CD on the relevant subdirectory and launch the wrapper as follows:
1 Execute the command ./UnixInstallScript in the mounted directory.
2 Type N for next in order to continue with the installation.
3 Read the End-Users License Agreement.
Press the spacebar to continue to the next License Agreement page.
If you want to go directly to the end of the License Agreement, press q on the keyboard.
4 To accept the License Agreement type Y and press Enter.
5 Select Check Point Enterprise/Pro and type N.
Chapter 4 Fresh Installation 25

Fresh Installation on Linux
6 Select New Installation and N. A list of products appears:
• To install the FireWall-1 GX NGX enforcement module only, select VPN-1 Pro.
• To install the FireWall-1 GX NGX SmartCenter server only, select SmartCenter.
• For a standalone installation, select VPN-1 Pro and SmartCenter.
7 In order to complete the installation process, configure the Enterprise SmartCenter and the Enforcement Module using the Configuration Tool. For more information see “Configuration Tool” on page 27.
8 Reboot the machine.
Once you reboot the machine, IP forwarding is automatically disabled and a default Security Policy is applied to the Enforcement Module. This default Security Policy forbids all inbound connections, except for control connections (for example, install policy operations, etc.). This policy remains in place until you have installed the first Security Policy.
Linux
VPN-1 Pro
SmartCenter
-Eventia Reporter
UserAuthority
26 Getting Started Guide

Configuration Tool
Initial Configuration
In This Section
Configuration Tool
The Configuration Tool appears automatically at the end of a new installation. It is also used to reconfigure previously installed components.
Note - You can launch the configuration tool from the console at any time by running the command cpconfig.
Configuration Tool SettingsThe Configuration Tool’s settings are carried out step-by-step in order to complete the installation. The configuration settings reflect the Check Point component that is being installed, and may include:
• Licenses, create a license for the SmartCenter server and Enforcement Module.
• Administrators, create an administrator who has permissions to access the SmartCenter server. This administrator must be given Read/Write permissions in order to create the first Security Policy.
• GUI Clients, add a resolvable name or IP address to the machine on which the SmartConsole is installed. This is required if the SmartConsole clients are installed on any machine other than the SmartCenter server.
• Key Hit Session, enter random key strokes in order to create a random seed that is used for various cryptographic purposes. Once the bar is full, the Key Hit session is complete.
Configuration Tool page 27
Logging into the SmartCenter Server for the First Time page 28
Where to From Here? page 29
Chapter 4 Fresh Installation 27

Initial Configuration
• Certificate Authority, the definitions on this window are used to initiate the Internal Certificate Authority which is used in turn to enable secure communication between the SmartCenter server and its modules.
For some Operating Systems, such as Windows, you must specify the name of the host in which the ICA resides. You may use the default name or supply your own.
The ICA name should be a resolvable name in the format hostname.domain; for example ica.checkpoint.com. It is essential that this name be accurate in order for VPN-1 to work.
• Fingerprint, verifies the identity of the SmartCenter server the first time you login to the SmartConsole.
Upon login to the SmartConsole, a Fingerprint is displayed. The displayed Fingerprint must match the Fingerprint shown now in the Configuration Tool window in order for authentication to succeed. You may choose to export this Fingerprint, so that you may recall it when you login to the SmartConsole for the first time, for verification purposes.
Logging into the SmartCenter Server for the First Time
Login ProcessAdministrators connect to the SmartCenter server via SmartDashboard using a login process that is common to all SmartConsole clients. In this process, the administrator and the SmartCenter server are authenticated, and a secure channel of communication between them is created. After successful authentication has taken place, the selected SmartConsole is launched.
After the first login, the administrator can create a certificate to be used for the purpose of login. Login with a certificate is considered an authentication process that is more secure than a login process using a user name and password. This certificate can be created at a later stage; see the SmartCenter User Guide for details.
28 Getting Started Guide

Logging into the SmartCenter Server for the First Time
Note - The SmartConsole applications included with FireWall-1 GX NGX can coexist with any version of SmartConsole.
Authenticating the Administrator and the SmartCenter Server1 Launch SmartDashboard by selecting Start > Programs
> Check Point SmartConsole R60-GX >
SmartDashboard, and login.
2 Login using the User Name and Password defined in the Configuration Tool’s Administrators page during the SmartCenter server installation.
3 After providing the authentication information, specify the name or IP address of the target SmartCenter server and click OK.
4 Manually authenticate the SmartCenter server with the Fingerprint presented during the configuration process in the Configuration Tool. This step only takes place during first-time login, since when the SmartCenter server is authenticated, the Fingerprint is saved in the SmartConsole machine’s registry.
Where to From Here?You have now learned the basics that you need to get you started. The next step is to obtain more advanced knowledge of your Check Point software.
The Check Point documentation elaborates on this information and is available in PDF format on the Check Point CD. Be sure to also use our Online Help when you are working with the Check Point SmartConsole clients.
For additional technical information about Check Point products, consult Check Point’s SecureKnowledge at
https://secureknowledge.checkpoint.com
Chapter 4 Fresh Installation 29

Where to From Here?
30 Getting Started Guide

INDEX 31
Index
AAdd Driver 20Administrator
authentication 29create 27
Authenticationfingerprint 29
CCertificate Authority 28Check Point Configuration Tool 15Check Point Enterprise/Pro 24Check Point Express 24Check Point Licenses 14
Certificate Key 14Check Point’s SecureKnowledge 29Configuration
SmartCenter Server 27Configuration Tool 24, 26, 27, 28, 29console-based connection 18cpconfig 19CrossBeam
Hardware Required 9
DDevice List 20Devices 20Directory structure 17
EEnd Users License Agreement 15Enforcement Module 24, 26, 27
defined 12Enterprise Base Support 15Enterprise SmartCenter 24, 26
FFetch Import file from TFTP Server 23Fingerprint 28, 29FTP server 18
GGUI Clients 27
HHardware Scan Details 20HTTPS Server Configuration 21
IICA 28Import Check Point Products Configuration 23Installation

Linux 25Nokia 18SecurePlatform 19
Installation Packages 15Internal Certificate Authority 28IP address 27IPSO Wrapper 18IPv6
license 6
KKey Hit Session 27
LLicenses 27
IPv6 6Linux
Hardware Required 9Installation 25Software Required 10
Logging onauthenticating the administrator 29first time 28
MMinimum Hardware Requirements 7
NNetwork Interface Configuration 21Nokia
Hardware Required 8Installation 18Software Required 10
SSecurePlatform 8, 21
Hardware Required 8Installation 19
Security Policydefined 11
SmartCenter serverdefined 12logging in 28
SmartConsoleclients 27defined 12
SmartDashboarddefined 12
SmartUpdate 15
TTime and Date Configuration 23
UUpgrade
Enforcement Module 13licenses 15SmartCenter server 13
WWebUI 21, 25
32 INDEX