Easy Amos Users Guide - eBook-ENG.pdf
434
-
Upload
khangminh22 -
Category
Documents
-
view
3 -
download
0
Transcript of Easy Amos Users Guide - eBook-ENG.pdf

Follow the instructions in Chapter 1
then write your Easy AMOS Registration
Number in this box I-I __ ..... ! _________ --'
when it appears on your screen. Thank you.
DO NOT ATIEMPT TO BACK UP YOUR EASY AMOS MASTER DISCS!
READ CHAPTER 1 FIRST.

F-
fk (~ IL It ~ l....::J
by
Franyois Lionet
© Europress Software Ltd. 1992
Software design and programming
Manuals design and author
Manual layout and typesetting
Manual illustrations
Fran90is lionet
Mel Croucher
Kate Cameron-Daum
Robin Evans
W
No material may be reproduced in whole or part without written permission from Europress Software. While every care has been taken to ensure this product is correct, the Publishers will not be held legally responsible for any errors or omissions in the Manual or software.
ISBN# 9 7818 720 84527
eurOPRESS ": __ g ____ r,_:t: __ ~ __ I\, __ I{ ___ "
Europress Software, Europa House, Adlington Park,
Macclesfield, Cheshire, SK10 4NP.


'AlIo! 'AlIo! Reading this book and using this software can change your life, like computers changed mine! Before computers, I was learning the life of a vet, how to inject vaccine and clean cow's foot. Then I did a big mistake, I bought me some old fashion computer. It was fantastic. My programming passion grew. By the time I graduate, I did not practice as vet at all! And here I am, comfortably sat with my keyboard, writing an intro for Easy AMOS!
So, I warn you, my friend, you may discover a passion for programming lying inside you, and this passion has a lot more chance to grow with a computer like Amiga and a program like Easy AMOS. What you have in your hand is the result of ten years learning. Ten years spent with ugly technical manuals, ugly tools, ugly syntax, ugly programming. But now I have put in this product all I wish I had before. With Easy AMOS, I expect you to become a programmer in a few weeks. Truly. Easy AMOS is more than a learning tool. It is a full language with 350 commands, full help features, examples, programs, musics, graphiCS, datas. We have crammed in your discs hundreds of hours of entertainment.
So stop reading all this intro. Easy AMOS is your entry ticket to the private club of programmers. Hope to seeyournameina commercial game very soon.
Fran<;ois Uonet Easy AMOS programmer
This Guide Book is the one I needed when I began programming, back in 1966. I could have let Easy AMOS lead me by the hand for a bitofinstantsatisfaction. I could have flicked through the Glossary and begun to understand what all the jargon meant. But in those days computer manuals were less friendly than rat poison and not as effective. If you think I've devoted too much space in this book on the needs of absolute beginners and indulging in cartoons, you're probably right. Enjoy it anyway, because I reckon Easy AMOS is a wonderful system. If only it had been around when I was you.,
Mel Croucher Easy AMOS book author
iii

iv
I cut my computing teeth in 1982 at the age of 22, on an Atari 400. There was very little entertainment software then, so I spent a lot of time trying to program. The manuals and books I bought weren't very good, but I kept atit and found programming an absolute thrill. I got a genuine kick out of writing games and practical programs over the following year or two, and my hobby introduced me to many new friends.
The Easy AMOS team members have brought together their combined experiences to produce the ideal package which would have excited, stimulated and encouraged them to learn to program. I am sure you will get a lot out of Easy AMOS. You will have a lot of fun and feel a tremendous sense of achievement as you work your way through this manual. Take it at your own pace and I can guarantee that you will amaze yourself! Happy programming.
ChriS Payne. Managing Director. Europress Software
I spent most of my teens learning to program on an antique 48K Atari-400. Countless hours were spent trying to harness my computer's power, but only short snippets from magazines and highly technical manuals were available to me. Perseverance paid off, and after years of studying and lots of head scratching I managed to master the beast. This taught me a great deal, but it would have been a much easier journey if a detailed manual had been available to explain everything. So knowing how difficult it can be to learn such concepts, please believe me when I tell you you've got it easy! The Amiga 500 may be the most powerful home computer to date, but all the hassle of controlling it is handled by Easy AMOS.
Take your time over learning Easy AMOS. Some concepts will take longer to understand than others, but eventually all the pieces will fit into place and you will become a competent programmer. Who knows, you may be the next Fran<;ois for Europress!
Richard Vanner
Projects Manager. Europress SOftware

Before testing Easy AMOS, I had only ever used my Amiga for playing games. I was a total beginner when it came to programming and an ideal candidate to be a guinea pig. I was told that the package would live up to its name and be easy. Not only was it easy and completely painless, it was also FUN! If I can understand Easy AMOS I'm sure that anyone can! As I was testing the Chapters out of order I tried to make sure that each stood on its own, but if you do find yourself struggling over a particular Chapter don't worry, you can always go on to other Chapters and come back to it later. Whatever you do, make sure you try the "Sound" Chapter: it was amazing when I found out that my computer could talk to me! And even more amazing when I reached the end. I felt I understood how to program! There can never have been an easier way to learn. I hope you enjoy using Easy AMOS as much as I enjoyed testing it.
Ian McFegan :ompany Accountant, Europress Software
"Contents are rich, and rich enough."
(William Shakespeare, 1604)
v

Contents Contents
1: INTRODUCTION 1 6: TEXT 79 hello 2 the character set 80 computer programs 3 using text 83 care of discs 3 text coordinates 84 how to install Easy AMOS 4 moving text 85 let's go! 14 the text cursor 87 your first program 16 text style 90
fonts 91 2: FIRST STEPS 19 keywords 23 7: WORKING WITH THE saving a program 26 KEYBOARD 95 deleting a program 27 moving the text cursor 96 loading a program 29 setting tabs 97 the file selector 30 checking for a keypress 97 the edit screen 32 the Easy AMOS Typing Tutor 100 direct mode 34 keyboard short-cuts 101
3: UP AND RUNNING 37 8: GRAPHICS 103 the Easy AMOS Help System 38 graphic coordinates 104 separating commands 40 drawing lines 105 Rem statements 41 drawing shapes 108 the Default Menu 42 colour 110 the System Menu 42 filled shapes 114 the Search Menu 42 flashing 120 the Blocks Menu 44 rainbows 121
graphical text 125 4: THE BARE BONES 47 strings 48 9: BOBS 127 variables 49 the main menu 131 arrays 53 disc operations 135 functions 54 bank operations 137
the grabber 139 5: LOGIC 59 hot spots 141 labels 60 palette colours 142 loops 66 screen resolutions 144 conditional loops 67 animation 145 numbered loops 68 drawing tools 148 steps 69 using Bobs 153 subroutines 69 conditional jumps 71 10: UNDERSTANDING procedures 72 SCREENS 167 nesting 77 the default screen 169
defining screens 169 IFF screens 171
vi

Contents Contents hiding and showing screens 173 16: PERIPHERALS, DRIVES screen priority 173 AND DISCS 265 moving screens 175 joysticks 266 converting coordinates 178 the mouse 267
printers 271 11: USING SCREENS 181 disc drives 272 switching screens 182 listing fi1es 273 copying screens 185 selecting and naming files 279 scr<..>en colours 188 running programs from disc 280 fade effects 189 the Easy AMOS Disc Editor 283 zooming 192 screen zones 192 17: MEMORY 293 screen blocks 195 addresses 295 compacting screen memory 197 available memory 295 EHBmode 200 allocating memory 296 HAM mode 200 saving memory 298
memory hanks 298 12: SOUND 203 machine code 302 sound effects 204 synthetic speech 205 18: DEBUGGING ERRORS 309 music 207 bugs 310 samples 214 spotting mistakes 310 the Sample Bank Maker 219 help 310 waveforms 223 trapping errors 311 13:MATHS 229
error messages 315 arithmetic 230 19: THE EASY AMOS TUTOR 327 floating point numbers 234 the graduation challenge 328 trigonometry 235 calling the tutor 329 random numbers 238 the tutor screen 330
the control keypad 331 14: CREATING A GAME 239 how the tutor works 332 single-player game 240 evaluating expressions 336 onc or two-player game 244 title sequences 249 20: GLOSSARY 339 hi-score routines 249 keywords and jargon 340 the Easy AMOS ChaIJenge 250 direct mode editor keys 404
editor control keys 405 15: HANDUNG DATA 251 main menu options 408 using data 252 sequential files 254 INDEX 413 random access files 257 designing a database 260
vii


Chapter 1
INTRODUCTION
o hello
o computer programs
o care of discs
o how to install Easy AMOS
o let's go!
o your first program
"The words of Amos; proclaim free-will and publish!"
(Old Testament, Amos 4.5)
1

Chapter 1
HELLO
=,r;;=
o 2
INTRODUCTION
Hello. By the time you finish this book, you will have become an accomplished computer programmer. In fact, before you finish this Chapter you'll be a programmer of some sort! You are going to make your Amiga obey all of your desires and fancies and perform incredible tasks. You are going to create original entertainment and produce useful programs. And best of all, we reckon that you'll enjoy it.
To tell the truth, computer programming is dead easy, but the Amiga has never been the friendliest machine to control. Programming the Amiga used to be plagued by mysterious processes and boring routines, but then something wonderful happened in the world of Amiga programming. We named it AMOS.
AMOS has already been used by tens of thousands of experts and beginners to create superb programs, and one day you may want to explore its wonders too. But now something even better has happened. Easy AMOS!
Easy AMOS is a special version of its big brother AMOS. It doesn't matter if you know a bit about programming already, and it doesn't matter if you are an absolute beginner. The only limit to what you can create with Easy AMOS is your own imagination, because Easy AMOS saves you the time and trouble of having to use out of date ways of programming. The hard work has already been done for you, and Easy AMOS is packed full of expert ideas and brilliant routines all ready to use, either by typing in simple instructions on your keyboard orby selecting from choices on your screen. So get ready for this step-by-step guide to the easiest and most enjoyable way of programming that your Amiga has been longing for.
PLEASE READ THIS CHAPTER BEFORE USING YOUR EASY AMOS DISCS. It will only take a few minutes, and you'll be glad you took this advice.
Chapter 1
Computer programs.
Care of discs.
The drive light
INTRODUCTION
A compu ter program is simply a collection of instructions telling a computer to perform a list of tasks. Programs used to be stored on punched cards, which worked very slowly and couldn't bechanged after use. Then magnetic tape came along, which was still slow, but at least it was cheap and you could record over it. Moderncomputers, like your Amiga, use magnetic discs housed in thin wafers of plastic. These are fast, reliable and tough, and they can hold more programs than a mile of tape or a cartload of punched cards. But there are still a few hazards to watch out for.
Because disc programs are stored magnetically, you must keep them clear of any magnetic objects, like loudspeakers, television sets and microwave ovens. Leaving plastic discs exposed to sun and heat at home or in the back window of a car can warp them beyond use. Contact with sticky fingers, spilled liquids or puppy hairs is not a good idea either. Apart from physical damagetoa disc, you can loose whole chunks of work by doing something silly like eraSing a program by mistake, or suffering a power cut. So for all these reasons, we want you to take the information and examples that makeup Easy AMOS, and make a copy foryourpersonaI use. Then the original Easy AMOS discs can be put a way somewhere safe without any risk of accidental damage.
In the plastic casing of your Amiga keyboard are two small light panels. The main one is marked "POWER", . and it is illuminated all the time that the computer is switched on. The other one is an information light marked "DRIVE",and it lights up wheneveryourinternal disc drive is in use. NEVER remove a disc when this drive light is illuminated, or you may damage yourdisc! 'Hard drive" systems will have an extra drive light, which is illuminated when data is saving or loading from the hard disc.
3

Chapter 1
Easy AMOS discs
Create your discs now!
J...Y
FLOPPY DRIVE USERS
4
INTRODUCTION
Everything you need to create brilliant programs is on the two discs that come with this guide book. What's more, they contain a load of instant examples ready for you to learn from, adapt and use.
Before you go any further, we want you to do some work! Make sure that your Amiga is connected up in the usual way, and get ready to prepare all the Easy AMOS information for your personal use.
Your Amiga comes with a built-in disc drive, where you insert the program discs that communicate with the machine. This drive is called the "internal drive" or "Disc Floppy number 0". We can abbreviate this to '·DFO".
You may be lucky enough to have extra disc drives plugged into your computer, and there can be one or more "floppy" drives, which take exactly the same sort of 3.5-inch square discs as the built-in drive, or you may have a "hard" drive as well, which has a permanent large-memory disc inside. If you're a hard drive user, and you prefer to install Easy AMOS straight onto that drive, miss out the next section of this Chapter and skip straight to the "HARD DRIVE USERS" heading.
How to install Easy AMOS using the Amiga's internal floppy disc drive, "DFO"
The instructions you are about to be given are incredibly simple. The stages of the installation process will appear on your screen automatically, and all you have to do is follow them step by step.
You will need three blank discs on which to make your copy of Easy AMOS, so make sure you have them ready now. If you really want to plan ahead, have an extra disc ready to use for experimenting with your own programs. You'll be writing home-grown programs sooner than you think! That makes four blank discs in all.

Chapter 1
"Flops are part of life's menu, and lain' t missed a course yet" (Rosalind Russell,
1957)
INTRODUCTION
Take out the pair of discs in the Easy AMOS package, labelled:
"Easy AMOS Master Disc 1" and
"Easy AMOS Master Disc 2".
There are also four labels ready to stick on your blank discs, marked:
"Easy AMOS Programs"
"Easy AMOS Examples"
"Easy AMOS Tutorial"
"My Programs"
If your Amiga is switched on, make sure the drive light is not illuminated and take out any disc that may be in the drive. Switch off the computer and count to ten slowly. This gives the computer time to clear out its memory and forget any bad habits that might be lurking there. Make sure that the "mouse" is plugged into its socket at the back of the machine, and get to wo'rk.
Take the disc marked "Easy AMOS Master Disc 1" and look at the small tab in its top right-hand comer. Slid'e this tab downwards so that it covers the small square hole. Your disc is now "write-enabled", and this will allow you to make a special personalised copy of Easy AMOSwithyourownnameappearingonyourtelevision screen. Slide the disc into the internal floppy disc drive. Switch on your Amiga, and after a few clicks and whirs our Welcome Screen will appear on your TV screen looking like this:
5

Chapter 1
6
INTRODUCTION
After ten seconds, or as soon as you press a mouse button or a keyboard key, a new screen will appear headed with these words:
Easy AMOS Work Disc Creator
Before proceeding, you need to select the
nationality of your Amiga's keyboard.
Did you know that the Amiga has all sorts of different keyboard layouts, depending on the country where it is marketed? Easy AMOS does, and now he wants to know which nationality keyboard you are using, so he can talk with the right accent! Slide your mouse around

Chapter 1
Your Registration Number
INTRODUCTION
a bit, and identify the mouse pointer as it moves across the screen. Look at the selection of nationality panels on this screen page, and use the mouse to click on the one that suits your machine. For example, if you have an English Amiga, click on the [English] panel.
Now Easy AMOS is satisfied with his accent, he'd like to get to know you better and asks you to type in your name. Two name boxes are provided on your screen, one for your First name and one for your Surname. If you have remembered to "write-enable" your Master disc, type in your first name and press the large lefthanded arrow key (the [Return] key), then do the same for your surname. You have just "written" your name onto the disc electronically, and after a few seconds the next screen appears.
Your screen will now ask you to "write-protect" your Master discs, so make sure that the plastic tabs in the disc's top right-hand COrner are slid upwards so that you can see through the small square hole. This makes sure that you can't harm the information on your discs by mistake.
When you're happy that everything is in order, move the pointer over the [Ok] panel, and click a mouse button.
Your own unique Registration Number will appear on the screen, and we want you to copy this number onto your Registration card, onto your three Easy AMOS blank disc labels, and into the space provided at the front of this book. Do it now! Please.
Click on [Ok] and you'll be taken to a screen with three control panels, containing the words:
[Install on floppy)
[Install on hard drive]
[EXIT)
7

Chapter 1 INTRODUCTION
8
Move the mouse pointer over the panel that says [INSTALL ON FLOPPY), and click one of the mouse bu ttons. This kicks off the automa tic installation process and changes to a new screen with a reminder that you'll need three extra blank discs. When you've read the introduction words and you are happy to continue, move the mouse pointer over the little [Ok!] panel and click a mouse button to progress to the next screen page.
You have probably realised by now that all the instructions you need to install Easy AMOS are provided on your TV screen, but keep reading anyway, just to make sure.
Easy AMOS should now be on screen with an offer you can't refuse, "Let me install your software."
Let install
me your
software!
Chapter 1
Making your Easy AMOS Programs disc
INTRODUCTION
Insert a blank disc, and click on the left mouse button. If your disc is not blank you'll be asked to confirm with another [Ok!], or click on [Abort) to select another disc. This disc will now be "formatted", and given the name "Easy_AMOS:".
From now on, simply follow the instructions as they appear on your screen. There is an information line at the bottom of the screen which reports on exactly what wonders are being transferred onto your discs, and just above that there is a black Knowledge Transfusion Bar. As soon as Easy AMOS's knowledge begins to flow from disc to disc, you can watch its progress as the bar changes colours.
You'll be told when to remove the blank disc and insert "Master Disc 1" into the drive. Your Amiga will now automatically put Easy AMOS knowledge into its own "memory", and when this has been done you are asked to insert your newly formatted disc.
Now the screen will ask you to repeat the knowledgetransfer process from the Master Disc into the Amiga, then onto your new disc. When the last section of the red line turns to blue, you'll be greeted by a celebration screen telling you that your new disc is now ready.
Remove your brand new disc copy, and stick the "Easy AMOS Programs" label onto it. NOW WRITE PROTECf IT! When you're happy, click on the [Ok!) panel again.
If you think you've made a mistake at any time during this installation process, there's nothing to worry about. At the bottom of the screen is a message saying that if you press the [ESC) key, which is at the top left-hand comer of your Amiga's keyboard, you can stop the installation process and start all over again. OK? Good. It's very unlikely that anything can go wrong if you follow the instructions on the screen.
9

Chapter 1
Making your Easy AMOS Examples disc
Making your Easy AMOS Tutorial disc
Making a disc for your own programs
10
INTRODUCTION
Now that your first new disc is full of Easy AMOS delights, put it to one side along with your Master Disc l,so as nottomix them up with "Master Disc 2" and your other blank discs.
AMOS should be back on screen, asking you to insert your next blank disc for formatting, so do just that and click the left mouse button. This disc will be given the name ··Easy_EXAMPLES:". When prompted, insert '"Master Disc2", followed by your second newlyformaUed disc. You have to swapoverthesediscstwice more. The screen will tell you when.
You'll soon be greeted with a message saying that your Easy AMOS Examples disc is ready. Remove it from the disc drive, WRITE PROTECT IT NOW, and stick on the label printed "Easy AMOS Examples". Click on [Ok!] to proceed.
One more transfer of knowledge to go! So follow the instructions as they appear on the screen once again for your remaining blank disc. When the bar has transformed from black to red then to blue, the screen informs you that your Easy AMOS Tutorial disc is ready. Removeit, WRITE PROTECT IT and stick its label on.
Finally, one more click on the [Ok!] panel brings you to your first big decision.
You'll be writing your own computer programs very soon, and you can "save" them by storing them on disc. We do not advise you to "save" programs on your three new discs, but we DO advise you to format another blank disc NOW, to use for storing home-grown programs. Click on [Format] to do this, or choose [PASS] if you decide to skip our advice!
If you choose to [Format], you'll be asked to type in a name for your programs disc. We suggest that you call it My _Programs,and then press [Return]. Insert a blank

Chapter 1
HARD DRIVE USERS
"It is a hard drive on a twisted lane." (V.l. Lenin, 1915)
INTRODUCTION
disc and then click on the left mouse button to format it. Don't forget to stick on the ready-made "My Programs" label as soon as you remove it from the disc drive. You can format another disc after this if you like, by clicking on [Yes) when the screen offers you the chance.
If you click on [No], you have a choice. If you want to make another set of your three Easy AMOS discs as a back-up in case of accidents, choose the [Create again) box, which will take you back to the [INSTALL ON FLOPPY) screen. If you can't wait to get on with the show, slip your NEW "Easy AMOS Programs" disc into the drive and refresh your Amiga' s electronic mind by pressing the [Control) key on the left-hand side of your keyboard, at the same time as pressing both of the two special "Amiga" keys [A) either side of the long [Space Bar). This "reboots" the machine, and automatically loads up Easy AMOS. LoadingEasy AMOS from scratch is explained later.
The next section is only for users who have hard drives. Floppy drive users should now skip to the last part of this Chapter, headed "Loading Easy AMOS".
How to install Easy AMOS onto hard drive, using the Amiga's internal floppy disc drive, "DFO".
The instructions you are about to be given are incredibly simple. Every stage of the installation process will appear on your screen automatically, and all you have to do is follow them step by step.
Take out the two discs in the Easy AMOS package labelled:
"Easy AMOS Master Disc 1" and
"Easy AMOS Master Disc 2".
11

Chapter 1
o 12
INTRODUCTION
If your Amiga is switched on, take out any disc that may already be in the internal drive, switch off the computer for ten seconds to clear its memory of any bad habits. Make sure that the mouse is plugged in, and get to work.
Boot the hard disc as usual. Insert "Easy AMOS Master Disc 1"" into DfO, and double-click on the resulting disc icon of Master Disc 1. Then double-click on the "EasyInstall" icon.
Select the nationality of your keyboard. For example, if you are using an English keyboard, click on [English].
Follow the prompts and enter your first and last name. Your Easy AMOS registration number will be generated automatically.
Now write-PROTECf the Master Disc and click on [Ok!]. Copy your registration number onto your disc labels, registration card, and into the space provided at the beiginning of this book. Please. Trigger [Ok!] to proceed.
Move the mouse pointer to the [INSTALL ON HARD DRIVE] option, and click a mouse button. This kicks off the automatic installation process.
You are presented with 12 option panels, each one representing a different device name. Click on the device name that you intend to use. For example, if you want to install Easy AMOS on drive DhO, choose the [DhO:] option.
From now on, simply follow thcon-screen instructions. It'sas easy as that! You can select via a file selector or enter a specific device name if you wish.
Once you have selected your hard drive destination, AMOS appears saying 'lctmeinstaIl your software". Lethimhavehis way with your system Once the data has been copied across fromboth of your Master Discs, the screen will tell you about ourautornaticassign feature. Oickon[Ok!] ifyouaresatisfied, and then select [Exit].

Chapter 1
Loading Easy AMOS from the Workbench
Loading Easy AMOS
Easy AMOS AND YOU
INTRODUCTION
For those of you whoarefami1iarwiththe Amiga 'Workbench", you may want to load Easy AMOSdircctly from that. When Workbench is running, simply insert your "Easy AMOS Programs" discandclickon theEasy AMOS icon with your left mouse button. If you've installed Easy AMOSonto hard disc, selecttheappropriateiamsuntil theEasy AMOS icon appears. Of course, Workbench eats up memory that is much better used for Easy AMOS programs!
More experienced users may choose to select Easy AMOS from the eli, which uses "command lines" typed in from the keyboard. In thiscase,enter the world ofEasy AMOS with the following:
EASYAMOS
If you have made a copy of Easy AMOS onto your new disc labelled "Easy AMOS Programs" disc, test-load it now by following these steps:
- Switch off your Amiga for about ten S<.'COnds.
- Put your "Easy AMOS Programs" disc into DR).
- Switch on the computer.
- Easy AMOS will automatically load into memory.
You are now ready to follow our little AMOS character along the programming path. like you, he is setting out free from complicated notions, and like him, we hope you will end up brimming wi th wisdom. You will meet AMOS throughout this guide book, and he'll be making goestappearances in the computer programs we have prepared for you to learn from and enjoy.
Thank you for taking the time and trouble to read this introduction and make your personal copies of Easy AMOS. 1betimehascometowriteyourfirstcomputerprogramusing the system. So, if you're ready, let's go!
13

Chapter 1
LET'S GO!
Identification screen
14
INTRODUCTION
Leave the romputer ronnected up in your usual way for games or practical software. If you use a television set for picturesandsound,that'sfine. Ifyouusearnonitorforvisuals and a hi-fi system for audio, Easy AMOS will take full advantage of your system.
Easy AMOS is ready to roll when you see this identification screen:
By F.Llonel
Easy AMOS is probably the friendliest system you'll ever come across, so you won't be at all surprised to be welcomed with your own name after a few seconds, before getting down to business!

Chapter 1 INTRODUCTION
To create a compu ter program with Easy AMOS, you are given a working area called the EDIT SCREEN. Press a mouse button or any key on your keyboard, to reveal it now. Or simply do nothing but wait. It will appear automatically.
The Edit screen There's a guided tour of the Edit Screen in Chapter2,but you probably want to see some action straight away! So instead of explaining what everything does, just identify the bits that you need for making contact with Easy AMOS immediately. At the top of the screen is an assortment of control panels that are triggered using the mouse. Below that is an Information Line where Easy AMOS keeps you up to date with exactly what's going on in your programming efforts. The main part of the Edit Screen is the working area. This is the Edit Window where you actually write your programs, and there is a little flashing bar waiting to act as your Edit Cursor.
o o Press the [A] key on your keyboard, and a little "a" will appear in the Edit window. Now hold down one of the [Shift] keys and press [A] again. There should be a capital "A" next to the little "a" on screen. This [Shift] key is used if you want to type in any capital letters or symbols that are marked above numbers and punctuation marks on your keyboard. So to type in a "$" symbol, you ~?uld press [Shift] and [4] together. Typeina "4" and a $ now.
Now locate the big key with a turn-left arrow on it, on the right-hand side of the main block of keys, and press it once. This is the [Return] key, and it is used to start a new line when you write your programs, so now the little Edit cursor should be waiting at the beginning of the next line.
15
Chapter 1 INTRODUCTION
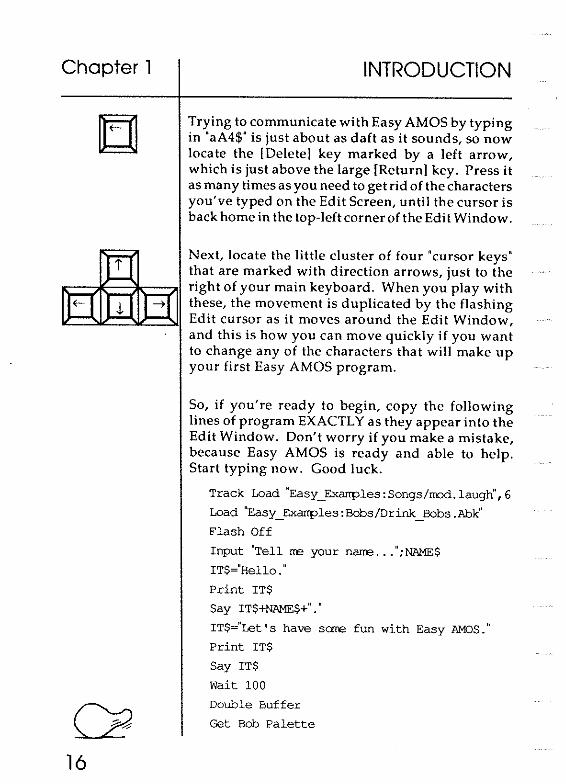
Trying to communicate with Easy AMOS by typing in "aA4$" is just about as daft as it sounds, so nOw locate the [Delete] key marked by a left arrow, which is just above the large [Return] key. Press it as many times as you need to get rid of the characters you've typed on the Edit Screen, until the cursor is back home in the top-left corner of the Edit Window.
Next, locate the little cluster of four "cursor keys" J...!] that are marked with direction arrows, just to the r;;::::;;~::::;7I-.=:;i'11 right of your main keyboard. When you play with
El rtl r::::;r these, the movement is duplicated by the flashing j....i..( l--l. Edit cursor as it moves around the Edit Window,
and this is how you can move quickly if you want
16
to change any of the characters that will make up your first Easy AMOS program.
So, if you're ready to begin, copy the following lines of program EXACTLY as they appear into the Edit Window. Don't worry if you make a mistake because Easy AMOS is ready and able to help Start typing now. Good luck.
Track Load "Easy_ Exarrples: Songs/mod. laugh" , 6
Load "Easy_ Exarrples : Bobs/Drink_ Bobs .Abj('
Flash Off
Input "Tell rre your narre ... "; NAME $
IT$~"Hello ."
Print IT$
Say IT$+NAME$+"."
IT$~"Let' shave SOfr€ fun with Easy AMOS."
Print IT$
Say IT$
Wait 100
Double Buffer
Get Bob Palette

Chapter 1 INTRODUCTION
Cls 0
Ink 2
Plot 0,100
Draw To 320,150
Paint 0,110
Ink 1
Circle 250,50,20
Paint 250,52
Track Play
Y~112
Do
S~50 : E~220 S~l: AN~2
Gosub MOVE
S~220 : ~50 S~-l AN~3
Gosub MOVE
Loop
MOVE:
&=0
For A~S to EStep ST
Bob 1,A,Y,AN
Wait Vbl
&=B+l
If &=6
Y~Y+ST
&=0
End If
Next A
Return
17

Chapter 1
~\ 18
INTRODUCTION
If you think every character in that program is now faithfully reproduced in the Edit window, move the mouse pointer up to the centre of the top line of little panels, and click on the one that says [Test] with your left mouse button.
Easy AMOS reads through your work instantly, and can spot any mistakes. If all is well, the magic words ''No errors" have just appeared in the information line, but the chances are you have put in the wrong character somewhere, or left something out. This is where Easy AMOS starts getting friendly, by displaying a little help message in the information line, as well as moving the flashing Edit cursor to the nearest point in your lines of program where it knows the mistake is lurking. So put any mistakes right until your [Test] delivers the ''No errors' message. Please insert your "Easy AMOS Examples" disc into the intemal drive.
Now get ready to see and hear the results of your first effort. Move the mouse pointer to the box that says [Run], and click the left mouse button. When your Amiga asks you for your name, type it in and press the [Retum) key. And if you can do this with your first program, no wonder your Amiga thinks it will never be the same again.
You've already realised that writing programs with Easy AMOS is not only simple, it's fun. If some of those lines in your program seemed to make sense as you were typing them in, you are well on the way to being a programmer! Easy AMOS is a very sensible and very direct "language" that allows your Amiga to understand anything and everything you want to make it do.
Now [Run] your masterpiece again. In fact [Run] it as many times as you like. Just one more word before you move on to the next Chapter. Congratulations!

Chapter 2
FIRST STEPS
o the Easy AMOS discs
o keywords
o saving a program
o deleting a program o loading a program
o the file selector
o the edit screen
o direct mode
"A journey of a thousand miles must begin with the first step." (Mao Tse-lung, 1947)
19

Chapter 2
The Easy AMOS discs
~ u 20
FIRST STEPS
Easy AMOS is an amazing package. You will use it to write the sort of games and programs you have always dreamed of. Hard drive users should now have all of Easy AMOS stored on their system. For floppy disc users, the three discs you have just crea ted are filled with everything you need to allow you to become a superb computer programmer. Here's how.
The "Easy AMOS Programs" disc
This disc holds your tool-kit for manipulating graphics, text, music, sound effects and most important of all, ideas!
The "Easy AMOS Examples" disc Of course you want to see and hear examples of what Easy AMOS can do, and the programs on this disc have been specially designed for you to learn from and adapt, as you progress through this guide book.
The "Easy AMOS Tutorial" disc
The Tutorial disc will help to teach you how to use Easy AMOS in the most practical ways. There's even a Quiz to check on your new knowledge.
This book is written for absolute beginners, but it will also help more experienced programmers. To get the best out of Easy AMOS, try to read through each Chapter in order of appearance but don't worry if you get stuck along the way, you can always skip through a Chapter and move on at your own pace.

Chapter 2 FIRST STEPS
By following this guide book step-by-step you can take full advantage of everything on offer. If there are any words or ideas that you don't understand, or if you want a quick reference guide, there is a Glossary at the end of this book where you can find explanations of keywords, technical tenns and jargon. There's also a list of what tricks and short-cuts the keys on your keyboard can perform using Easy AMOS.
To make things as clear as possible in these pages, when we rcferto a key on your computer keyboard, it appears like this [Aj.
In the same way, the little option boxes that you can select on your screen by using the mouse pointer arealso given square brackets to separate them from the rest of the text. For example: [Testj
Try out all the examples as they appear, and have as much fun as you can while learning. Lines of computer program that can be typed in, tested and run are shown like this:
!(if' Print" Hello"
When you see the !(if' symbol, you will know that the example that follows it can be typed in to your Edit Screen, and the result will appear on your screen when the example is [Runj. Feel free to experiment and change these examples to see what happens. You can't harm your computer by changing Easy AMOS examples!
21

Chapter 2
22
FIRST STEPS
Now that's clear, let's get programming! Load Easy AMOS as explained in the last Chapter, or if you've already been experimenting and the machine is still switched on, leave your "Easy AMOS Programs" disc in the computer and reboot the machine by pressing the [Control] key at the same time as both of the [Amiga) keys. AMOS will soon appear to greet you.
Click a mouse button or press a key to display the Edit Screen, which looks like this:
~ ~~

Chapter 2
Keywords
FIRST STEPS
If you copied the example at the end of the last Chapter, you will already have written your first program. This next one should be easy in comparison. Type in the following line exactly as it is printed below, and leave it at the top-left comer of the Edit Window. Don't press [Return] yet:
(Jji?' print" Hello"
Easy AMOS programs use all sorts of instructions to tell the Amiga what to do. Many of these instructions take the form of special "keywords", and Easy AMOS recognises them instantly. Now press the [Return] key, and look at that line you typed in. Easy AMOS has already examined i tand spotted a keyword. The keyword has been automatically given a capital letter and separated from what follows it by a space, so your line now looks like this:
Print "Hello"
Wherever possible, Easy AMOS will look at what you type in, and try to make sense of it, even if ir s not typed in perfectly. But if you use the wrong keyword or make an error in the spelling, you will be informed that there isa mistake. Now add another two lines to your program and press the [Return] key after each line, so that it looks like this:
(Jji?' Print "Hello"
Wait 50
Print "I am your program.
There are two keywords used there, and they have the same sort of meaning as in normal English.
23

Chapter 2
"Thi?!f also serve who only stand and wait."
(Milton, 1655)
o 24
FIRST STEPS
This is an instruction that tells the computer to print some information on the screen. In this case the information is a list of characters that make up words. You have put the words inside inverted commas to tell the computer what to print on screen.
WAIT
This keyword is a command that tells the computer to stop the program and wait for as long as you want before moving on to the next instruction. The number that follows it is the number of 50ths of a second to wait, so in your example the program will wait for one second.
Now move your mouse pointer up to the [Run] option at thetopof the screen, and click on the left mouse button to See the results of your work. As soon as you [Run] your program, the blue Edit Screen disappears and a new screen takes its place ready to display the current program. In the case of your example, the word "Hello" should appear on screen in the top left-hand corner, and after a one second wait, "1 am your program" appears below it.
When the program has been completed, Easy AMOS gives you a report which is automatically displayed outside of the working area, at the bottom of the screen. There should be a flashing message telling you at which line your program ended, and below that you are told how to get back to the editing process. If all is well, the following report is now sitting centrally at the bottom of your screen:
End of program at line 3
[ESCAPE] to direct mode, [Space] to editor

Chapter 2
Editing
FIRST STEPS
To adapt or change your work, return to the Edit Screen by pressing the [Spacebar]. Change the characters to be printed and the value that controls the waiting time, and [Run] your edited program. You can alter your program to something like this:
fIj;? Print "Hello again!"
Wait 150
Print "I am your edited program.
That little program will now stay in your computer's "memory" all the time that you leave it switched on, but as soon as the power is turned off, the machine will forget all about it and your work will disappear down the electronic waste pipe. This is annoying, but not a disaster if your program only took a minute to write and another minute to edit. But supposing you write a program that takes hours of work with hundreds of instructions in it: the last thing you want to do is lose it. To store programs on disc, they must first be "saved", and then they can be "loaded" for later use.
Take the blank disc tha t you were asked to "format"" in the lastChapter,and get ready to use it. !fyou have not yet prepared a formatted disc for your own programming examples, do it now and label the disc something like "My Programs", to use for storing examples that you want to keep for later. When you've done that, reboot Easy AMOS, go to the Edit Screen and type in and [Run] this program:
fIj;? Print "I am test number one"
After checking that your example works, return to the Edit Screen, remove your "Easy AMOS Programs" disc and insert the new disc that you've prepared for storing your programs.
25

Chapter 2
Saving a program
"Half our life is spent wishing we'd saved half our life."
26
(Will Rogers, 1927)
FIRST STEPS
Saving an Easy AMOS program is very simple. Press an [Amiga) key and the [S) key together, and a "File Selector" automatically pops up on the screen looking like this:
I I I IDfi~ I 1!]lmj]9 I
I ~ I
I ~O I I ~9 I
The little flashing cursor at the bottom of the File Selector panel is waiting for you to give a name to the program you want to save, so type in this name and then press [Return):
II:? Testl.AMOS
That's it! Your test program has been saved onto the disc, and you have been delivered back to the Edit Screen.

Chapter 2
Keyboard short-cuts
Deleting a program
FIRST STEPS
Make sure that the edit cursor is in your line of program and press [Shift] and [Del] together. Your program has just been wiped off the screen. This isa good illustration of how Easy AMOS uses certain keys acting together to produceshort-cutsinyourediting. Forexample,pressing [Del] on its own will delete the character at the current location of the edit cursor, but if you press [Shift]+[DeI] together, the whole line in which the cursor is sittingwill be erased. There is a long list of similar key presses that provide editing short-cuts, and you can find them at the end of the Glossary.
At the moment, there should be nothing in your Edit Window except the edit cursor. Let's prove that your program has gone by trying to [Run] it. Nothing? Good. Now press [Spacebar] to return to the Edit Screen and look at the information line below the panel of options. At the right-hand side, the following report is given:
Edit: Testl.AMOS
This means tha t Easy AM OS is still expecting you to edit the program you have just saved, named "Testl.AMOS". But let's forget about this program for a while and write another one.
Hold down the [Shift] key and look for a new option that has appeared, called [New]. This option vaporises your current program from the computer's memory altogether, so it is very powerful! Trigger it by moving the mouse pointer to [New], then press the left mouse button. A message appears in the Information Line, saying:
Please confirm ( Yes or No )
27

Chapter 2
"~r--. _:;7
~4
(f1' 28
FIRST STEPS
This is provided to double-check the fact that you want to get rid of your current program altogether, and waits for you topresseither[Y]or[N]. Press [Y]. You may not realise it yet, but you are using the Easy AMOS system like an expert! Choices can be made straight off the screen by triggering various options provided by "menus", or by typing in instructions using the keyboard, and you are already doing both.
The Information Line will ask if you want to save your program, press [N] and it should now report that your last program has gone, and that your next program has yet to be given a name. Type this in:
IUr' Print "and I am test number two"
This time, don't run your new program by selecting the [Run] option with your mouse, but press the [Fl) Key instead. This "function" key has been preprogrammed to run the current program, and you have just been introduced to another range of Easy AMOS short-cuts, which use the function keys at the top of your keyboard to perform special tasks. We'll take a look at what all these keys can do later on, and they are aIJ catalogued in the Glossary.
If you are satisfied that your Test Number Two program is all in order, get ready to save it, but DO NOT press [Amiga)+[S). Instead, hold down the [Shift] key and look at the top of the Edit Screen. A [Save] option has appeared where the [Test) option normally sits. Use your left mouse button to click on the [Save] option, and the file selector pops up again. Now name this program:
IUr' Test2 . AMOS
and press [Return]

Chapter 2
Loading a program
"Well, punk? Is it loaded?"
(Clint Eastwood, 1971)
FIRST STEPS
This is your final introduction to the way Easy AMOS allows you to carry out your wishes. Wherever possible you can choose between using the mouse to trigger options from the screen menus, or type in instructions via the keyboard. You can also use the right mouse button to act as a [Shift] key. It can be easier and faster to operate like this.
Get rid of your current program with [New] followed by [Y] to confirm your action.
Easy AMOS programs are loaded via the File Selector. You can either press [Amiga]+[L] or call up the [Load] option on the Edit Screen by holding down [Shift]. This time, when the selector appears, type in the name of the program you want to load then press [Return]. Try loading your "Testl.AMOS" program, and it should appear in the Edit Window. Now load in "Test2.AMOS".
There can be no problem in remembering the names of one or two programs or "files" on a disc. But when you have dozens of discs each holding several groups of files, you cannot rely on your own memory to sort through them.
Imagine you are running a radio station, and you have a load of music tracks that you want to store for easy reference. Several tracks can be held on an album, and each album is held in a sleeve that gives details about the tracks. You can keep your albums in separate boxes, and you can put a label on each box. If you keep the system up to date, you'll be able to play any track on any album in any box you like, without having to rummage through your whole record library.
29

Chapter 2
THE FILE SELECTOR
Scrolling through files
"Miss Dalrymple, kindly nail my files. "
(Groucho Marx,1938)
Folders
&l 30
FIRST STEPS
A computer "file" is just like a track of music. It is selfcontained, it has its own name, but it can also be held in a "folder" along with other files.
You are now going to learn how to search through and select files, so let's use some ready-made examples. Insert your "Easy AMOS Examples" disc and call up the File Selector with [Load) or [Amiga)+[L). The main window of the File Selector should now be filled with the names of Easy AMOS examples.
When there are more file names on a disc than can be fitted into the window display, you can use the vertical bar on the right-hand side of the window to "scroll" up and down through the list of files. Simply place the mouse pointer in the bar and drag it in the direction you choose, using the left mouse button. There are also four small icons that show direction arrows, with "up" / "down" at the top of the scroll bar, and "left" /"right" below it. Use the mouse to move through the list of files in any direction you want, by selecting an icon and clicking the left mouse button.
Any names in the listing that begin with an asterisk, in other words the' character, are the names of "folders". These are like album sleeves that hold the titles of several different tracks, or the equivalent of a cardboard folder that contains various named documents. You can open any of these folders and take a look at the names of the files inside them by moving the mouse pointer over the name of the folder, and clicking on the left mouse button. It's a bit like examining a family tree, where the name of the folder is the original "parent".
[ParentI
To come out of any folder, and get back to the main list of files, simply click on this option with the left mouse button. You also use the left mouse button to select the following options.

Chapter 2 FIRST STEPS
[Discs)
Change the file list to a list of the available devices (such as disc drives).
[Ok)
This confinns that the file you have highlighted is the one to be selected for loading.
[QUIT)
Use this to leave the File Selector and jump straight back to the Edit Screen.
[SORT)
Normally, filenames are displayed in the order they have been saved onto the disc. This option will perform an automatic A-to-Z sort through all thefileson the disc, and display their names in alphabetical order.
DIRECTORIES If you get lost and want to check and see what files are on a particular disc, there is a simple command you can use directly from the Edit Screen.
DIR
This command tells Easy AMOS to display a "directory'· on screen of all the files and folders that are currently saved on a disc. Go to the Edit Screen now, and make sure that your "Easy AMOS Programs" Disc is in the internal disc drive DFO. Now [Run) this:
~ Dir "DfO:"
The disc's directory should now appear on your screen, with each file name on a separate line, and all folders marked with the "." character. Infonnation is also ~ven in the form of numbers, that tell you how big each file is. Full details about directories and the names of their 'paths" can be found in Chapter 16.
31

Chapter 2
THE EDIT SCREEN GUIDED TOUR
32
FIRST STEPS
If your directory listing is still on screen, press [Spacebar] and welcome back to the Edit Screen! The time has come for you to enjoy everything it has to offer, so here is a short guided tour around its amazing features.

Chapter 2
The Default Menu
The Blocks Menu
The System Menu
The Search Menu
The Information Line
"Long distance information: get my party on the line."
(Chuck Berry, 1959)
FIRST STEPS
At the top of the screen, the Menu Window displays all the commands that are cUlTently available. This is your entry to the Easy AMOS editing features, and it's the menu that always appears when you first enter the Edit Screen. We call it the "Default Menu'. You have already used some of the items on offer, and a full list of what's available in all the editing menus appears at the end of the Glossary in this book.
Hold down the [CtrI] key, and you will see that the Default Menu has been replaced by a new set of options. This is the Blocks Menu, and it provides everything you need for manipulating blocks of computer program.
This is called up from the Default Menu by holding down one of the [Shift) keys, and it contains a selection of important commands for handling complete programs.
When you hold down the [AIt) key, the Search Menu is called up, and its various options are used to handle text.
This line is below the Menu option panels, and it's where Easy AMOSgivesarunningreporton the editing process. The report on the left-hand side of the Information Line isa single letter that tells you what editing "mode" you're using.
I means that new characters will be Inserted wherever the edit cursor is on the screen. That's the normal state of affairs. An 0 can also appear here. See below.
o means that new characters will Overwrite characters that are already displayed in the Edit Window.
L: tells you which Line you are editing.
C: shows the number of the Column the edit cursor is in.
Text: Chip: Fast: report how much memory is available for various tasks.
Edit: displays the name of the program that you are editing.
33

Chapter 2
The Edit Window
DIRECT MODE
34
FIRST STEPS
You have already used the main Edit Window for short home-grown programs that only use a few lines, but most program listings will take up several screens or "pages". If you remember how you scrolled through the File Selector window, you will recognise exactly the same facility here. The right-hand side of the Edit Window features a vertical scroll bar, with a pair of Up/ Down options, and at the bottom of the screen is a horiwntal scroll bar with Left/Right icons in the corner. Use your mouse to scroll through program listings.
Get rid of anything that is in the Edit Window now by deleting it or selecting the [New] option followed by [Y] to confirm your action. If a program is still in your computer's memory, you will be asked if you want to save it. Press [N] to confirm that you don't want to save any current programs.
Easy AMOS is designed to allow you to test out ideas without interfering with your program listings in the main Edit Window. While editing, you can press [Esc] at any time, and jump to "Direct Mode". This provides you with a special screen that appears at the bottom of your display, and you can move it vertically with the arrow keys on your keyboard. Press [Esc] now, and move the blue panel up and down, then position it in the lower half of your screen. Now give Easy AMOS a direct command, like this:
n::Jr Print ~I am in Direct Mode! U
Try another one. For example:
~ Wait 250 : Print "A five second wait."

Chapter 2
"Editors separate the wheat from the chaff. And then print the chaff."
(Adlai Stevenson, 1966)
FIRST STEPS
Function keys When you enter Direct Mode, a list of special pre-set "functions" is displayed in thebl ue panel. These functions can be called up by various key-presses to perform specific tasks, and full details of what they do can be found in the Glossary. At the bottom of the blue panel there is a "prompt" where your typed commands will be displayed one after the other. Every time you press the [Return] key to test out one line of direct commands, a new prompt appears, and the list of functions moves up one line in the panel's display.
Before we end this Chapter, here are three keywords that you can use anywhere in your programs to jump straight back to the editing process.
END
As soon as this command is recognised, it stops the program, and you can either press [Esc] to go to Direct Mode, or [Spacebar] to get to the Edit Screen. Try this example:
~ Print "Easy AMOS"
End
Print "This line will be ignored."
EDIT
Similarly, this instruction tells your computer to leav!! the current program and return you to the Edit Screen, like this:
~ Print "Wait three seconds"
Wait 150
Edit
Print "I'm still waiting to be printed!"
35

Chapter 2
36
FIRST STEPS
DIRECT
Use this command to jump out of your programs when you want to test an idea in Direct Mode. For example:
n? Print "Take me to Direct Mode"
Direct
In the next Chapter, you'll learn how to ask Easy AMOS for help, and then take a closer look at the various menus.

Chapter 3
UP AND RUNNING
o the Easy AMOS Help System
o separating commands
o Rem statements
o the Default Menu
o the System Menu
o the Search Menu
o the Blocks Menu
"All I do is get the big fireworks up and running."
(Werner von Braun, 1958)
aa __
37

Chapter 3
"I hate friends when they come too late to help."
(Euripides, 455 BC)
The Easy AMOS Help System
dJ~ <J \
38
UP AND RUNNING
This is where you use Easy AMOS 'to take real control of your Amiga. In this Chapter, you will write a simple program and learn how to reorganise it to your liking. Before beginning, treat yourself toa little friendly magic!
Easy AMOS provides you with hundreds of keywords, and each one tells the computer to perform a specific task. You can't be expected to learn them all straight away, so they will be introduced in the most logical order as you work your way through this book. It has already been explained that you can check out anything you don't understand in the Glossary, but Easy AMOS is designed to help electronically too.
Display the Edit Screen, and if you are already editing a program, get rid of it with [New] followed by a [Y] to confirm. Now look at your Amiga'skeyboardand locate the [Help] key. Press it, and the Easy AMOS Help Window will appear, ready and willing to give you advice!
At any moment,during editing, you can get information about Easy AMOS keywords that are typed in the Edit Window. To do so, just put the edit cursor on the FIRST LETTER of the keyword you need help with, and press [Help]. Easy AMOS will then try to find information about this keyword, and display it in the Help Window.
There's a vertical scroll bar on the right-hand side of the Help Window, and if the help information is too big to fit in the window, simply click your left mouse button in the scroll bar to drag the text into view. You can also move the whole Help Window up and down your screen, by clicking on its top border with the left mouse button and dragging it vertically.

Chapter 3
• UP AND RUNNING
You can either call for help about a keyword that is already in the Edit Screen, or if you just want informa tion about a word you're not sure about, type it inand trigger the help system. You don't even have to type in the whole word, because Easy AMOS will try to recognise it from the first few characters. For example, you can get information about the keyword "Print" by using the system on any of the following characters:
Pr
Pri
Prin
If the word you are looking for is NOT a genuine Easy AMOS keyword, an apologetic message appears at the topof the Help Window. For example, if you ask for help with "Banana", the following report is given:
Help keyword: "BANANA"
Sorry, help not found!
To get back to the Edit Screen from the Help Window, trigger the [Quitl option with your mouse, or press [Return! or [Esc! or the [Help! key again. Try out the Help System now with the keywords you already know. We told you Easy AMOS was friendly!
Here's a new keyword you can ask Easy AMOS to [Help! explain. It tells the program to wait until a single key is pressed on the Amiga's keyboard before going on to the next instruction.
39

Chapter 3
Separating commands in a line
40
UP AND RUNNING
WAIT KEY
Type in and [Run] the next example. Don't forget, you can press [Fl] to run a program, instead of triggering the [Run] option with your mouse. When the first line has appeared, the program will wait for you to press a key before printing the last line on screen.
!Iff" Print "Wait"
Wait Key
Print "Continue"
Now delete those three lines, and [Run] or [Fl] this:
II§=' Print HWaie : Wait Key : Print "Continue"
So far, you have separated individual instructions by typing them in and then pressing [Return] to put them on a new line of program. But it is perfectly acceptable to give several commands in a single line. They MUST be separated by a colon, just like that last example. As you might expect, Easy AMOS provides short-cuts wherever possible, and you don't have to worry about typing in correct spacings, as long as you stick to the rules. When you use a colon to split up your commands, spacing is automatic, in the same way that keywords are recognised and given a capital letter and a space. Type this in, [Return] and [Run]/[Fl] to prove it:
(('1?" print"I'm so":waitkey:print"neat!U
Now you are a genuine programmer with at least a couple of hours experience, here's a trick of the trade that the experts use to prevent amnesia.

Chapter 3
Rem statements
"R.E.M. man? The best thing ever!"
(Michael Stipe, 1989)
UP AND RUNNING
Imagine that your latest programming masterpiece is so long, and so clever that you can't remember where everything is and what anylhing is supposed to do! What you need is a way to remind yourself what to remember. This is where "Rem" statements come in.
REMor' You can leave a little message anywhere you like in your programs to jog your memory as to what that particular chunk of program is designed to do. This is the last time your intelligence will be insulted by telling you to [Run]/ [FI] a routine. From now on you are considered to be a genuine Easy AMOS programmer, and you know how to make an example work! Run this:
~ Rem This reminder is for rre not my Aroiga
Print "I am an Easy AMOS expert! II
When you begin a line with a Rem statement like that, it is completely ignored as far as the Amiga is concerned, but it can be a great help when you are scrolling through your program and looking for reminders. If you put an apostrophe character (') at the beginning of a line it acts in exactly the same way as a "Rem", and that line is also treated as a comment for your own use and not as a part of your program. For example:
~ , This line is a comment
Print "Easy" : Wait 100 : p~int nAMOS"
A Rem statement can be placed at the end of a line if you prefer, but you are ONLY allowed to use the apostrophe for this purpose at the beginning of a line. So this example is fine:
~ Print ~This example is fine" : Rem Fine
But this example will create an error:
~ Print "Whoops!" : ' I am illegal
41

Chapter 3
MENUS
The Default Menu
The System Menu
The Search Menu
@ 42
UP AND RUNNING
The various options that can be selected at the top of your Edit Screen are just like the menus offered in a restaurant. You make your choice from the list on offer, and Easy AMOS serves it up!
You have already selected from the tasty dishes in the "Default Menu" that appears when you enter the Editor, by choosing options like [Run] and [Test].
You have also had a brieflook at what's on offer in the "System Menu", by holding down a [Shift] key, and selecting options like [New].
Let's take a closer look at the Search Menu next, and see how it can be used to manipulate your program listings.
When editing your own programs, or adapting some of the ready-made examples on your Easy AMOS discs, you will want to be able to find particular charaders such as keywords, numbers, Rem statements, and so on. Once they have been found, you can change them. But in a very long program listing, this could get very tedious and there is no guarantee that you would spot the characters you are looking for. Easy AMOS allows you to spot characters you want to search for automatically! Type in this example now.
~ Print "One man went to mow,"
Pri.nt "Went to mow a meadow."
Print ~One man lost his dog,"
Print "Went to mow a meadow."

Chapter 3
Finding a string
UP AND RUNNING
Place the flashing "text cursor" back at the beginning of the first line of that example on your Edit Screen, then call up the "Search Menu". You cando thisbyc1ickingon the [Search Menul option, or by holding down the [Altl key. The top left-hand menu option should now say [Findl. Trigger it with your left mouse button, and these words will appear in the Information Line:
Enter string to search:
A "string" is simply a number of characters strung together, and you are about go on an automatic search for some characters in your last example. Type in the following characters, then press [Returnl:
~mow
Easy AMOS will now makea search from the position of the text cursor, forwards through your current program, looking for the string of characters that make up "mow". If the search is successful, the text cursor will jump to that location in your listing.
Make sure you are still in the Search Menu and trigger the [Find Nextl option. Your text cursor will jump straight to the next location of the characters you are trying to find. Try that again, to jump to the third occurrence of the characters that make up "mow". If you attempt a further search and there are no more instances of this string of characters, a "Not Found" report will be given. Now trigger the [Find Topl option to jump to the highest location of your string in the program, and press [Returnl.
43

Chapter 3
Replacing a string
The Blocks Menu
44
UP AND RUNNING
Once you've found a string, it's just as easy to replace it with another one. Activate the [Findl option again, delete the "mow' string in the Information Line, and type in "lost" instead. Now hit [Returnl. This time, activate the [Replace] option, and you will be prompted with this line:
Enter string to replace with:
Type in the following replacement string, then press [Returnl:
IIJ1> found
The "lost" string should now be replaced by "found"!
The full list of options on offer in the Search Menu can be found at the end of the Glossary Chapter. But for the time being, let's move on to the choke of options waiting to be used in the "Blocks Menu".
Call up this menu by selecting it from the Default Menu, or by holding down the fOrI] key. As with all the other menus, you can look up how everything works in the Glossary, when you've got the time. As for now, let's have some fun.
With your text cursor at the first character on the top line of your current program, select [Block Startl. It will come as no surprise to learn that you've just marked the beginning of a block of program, ready to be manipulated. Now move the text cursor below the last line of the current example, and click on [Block Endl. The program block you have marked out should now be highlighted. Areyou ready for a little more Easy AMOS magic? Select the [Block Pastel option from the menu, and you will paste a perfect copy of your program listing block into the Edit Window. In fact, [Block Pastel it as many times as you like!

Chapter 3
"The first cut is the deepest."
(Rod Stewart, 1977)
UP AND RUNNING
Now mark the [Block Start) and [Block End) of a few lines of your program, then [Block Cut) it tocutitoutand make it disappear. Next, highlight another block, move your cursor anywhere you fancy in the listing and [Block Move) it! You can mark a block by using your right mouse button for setting the start point (ill'the listing, keeping it held down and dragging the chrsor through the program lines. Release the right button to set the end of your block.
Experiment with the Search Menu as well as the Blocks Menu and have some fun. If you get as far as ninety-nine men mowing meadows, it might be time to move on to the next Chapter.
45

46
Chapter 4
THE BARE BONES
o strings
o variables
o arrays
o functions
"Nothin' but a rag, a bone an' a hank 0' hair."
(Amos and Andy, 1941)
47

Chapter 4
STRINGS r
48
THE BARE BONES
This Chapter provides you with the bare bones that support Easy AMOS programming. These bones are used to build program skeletons, so you have to learn what they do and how they work before you can add on all the juicy chunks and hairy bits that give a program its own look and feel.
Bones thatmakeupa skeleton have some rather peculiar names, but you'll be pleased to learn that Easy AMOS avoids difficult words and ideas wherever possible, so let's start wi th oneof the simplest concepts in computing, known as "strings".
A "string" is a number of characters aU strung together like beads on a necklace. If a string of beads hasn't got a clasp at either end, all the beads fall off, and the necklace ceases to exist. In much the same way, we put a set of quotes at either end of a string of characters, to hold them together and separate them from the rest of the program. We also like to identify each string we create with its own name, not just to give it a sense of belonging, but also so that we can call it up by name and use it later on. We attach a "dollar" symbol $ on the end of a string name, to mark the fact that the name refers to a string.
Characters in a string can be letters, numbers, symbols, or even spaces. Think up a simple string now by giving it a name, followed by the special $ symbol which you type by pressing the [Shift) and (4) keys together. Then define it, by letting the name of the string equal the characters enclosed in quotes. You type in the quote marks by pressing the [Shift) and (2) keys together. Here's an example:
W A$~"Easy AMOS"
Print A$

Chapter 4
VARIABLES
THE BARE BONES
Here's another, using three different strings:
~ A$="Easy"
B$=" "
C$="AMOS"
Print A$+B$+C$
Strings are very useful creations, and they can act on their own or work together, like that last example. Run this example just for fun:
IJ::§" A$="EASY AMOS" - "S"
Print A$
Easy AMOS allows you to play with strings in all sorts of useful ways, and we'll come across them later on in this Chapter. Before that, you need to understand one of the most powerful sets of bones in the programming skeleton. These are called "variables."
There are certain parts of a computer program that are set aside to store the results of calculations. We call the names of these storage locations "variables." If you can think of a variable as the name of a place where a value lives, and that the value can change as a result of a calculation made by your computer, then you will begin to see how useful they are. Like strings, variables are given their own names too, and once a name has been chosen it can be given a value, like this:
IJ::§" SCORE=100
Print SCORE
Thatexamplecreatesa variable with the name of SCORE, and loads it with a value of 100.
49

Chapter 4
Naming variables
50
THE BARE BONES
The rules for naming your variables are very easy to follow. Firstly, all variable names must begin with a letter, so you can name a variable like this:
AMOS2~1
but the following name is not allowed:
2AMOS~1
Secondly, you can't begin a variable name with the letters that make up one of the Easy AMOS "keyword" instructions, because this would confuse your Amiga. So although the followingname would be al right,because the first letters don't make a keyword:
FOOTPRINT~l
this one is not acceptable, because the computer recognises the first five letters as the keyword PRINT:
PRINTFOOT~l
Try typing in those last two examples, then press the [Return) key. In fact, Easy AMOS has spotted the illegal name for you, and pointed out the mistake by splitting the keyword away from the rest of the name.
The next naming rule is very easy. Variable names can be as short as one character and as long as255 characters, buttheycannevercontainablankspace. So the following name is fine:
EASYPEASY~l
But this is an illegal variable name:
EASY PEASY~l

Chapter 4
Types of variables
THE BARE BONES
If you want to split your names up, use the "underscore" character instead of spaces, by pressing the [Shift] and [-I keys together, for example:
I AM A LONG LEGAL VARIABLE NAME~l - -- - - -
There are three types of variable that you can use in your programs.
WHOLE NUMBERS
The first type is where the variable represents a whole number, like 1 or 666. These variables are perfect for holding the sort of values used in computer games. For example:
~ HISCORE~1000000
Print HISCORE
Whole numbers are called "integers", and integer variables can be as high as 147,483,648 and as low as -147,483,648.
REAL NUMBERS
Variables can also represent fractional values, such as 1.2 or 99.9 and results from this sort of variable will be accura te to seven decimal places. Real number variables must always have a "hash" symbol tacked on to the end of their names, which looks like this #. For example:
~ REAL NUMBER4I~3 .14
Print REAL_NUMBER4I
51
Chapter 4
Inputting values
52
THE BARE BONES
STRING VARIABLES This type of variable holds text characters, and the length of that text can be anything from 0 to 65,500 characters long. String variables are distinguished from number variables by a $ character on the end of their names, to tell Easy AMOS that they will contain text rather than numbers. For example:
IW NAME$~"Name" GUITAR$~"Twang"
Print NAME$,GUITAR$
If you want to put information into a variable while a program is running, there is a special command that loads values typed direcly from the keyboard.
INPUT When you use the Input command, you can invent some text to act as a "screen prompt" if you like, in which case you must put a semi-colon between the text and your variable list, like this:
IW Input "Tell me your name ... "; NAME $
Print "Hello ";NAME$
To make that work, [Run] it, answer the screen prompt and then press the [Return] key. Now add a semi-colon to the end of the first line, and notice how your text appears at the position of the flashing text cursor, after you have typed in your data. When you understand how that works, put your computer to work with this:
IW Input "Give me two numbers to add:";A,B
Print A; M plus"; B; " equals "; A+B

Chapter 4
ARRAYS
Creating an array
THE BARE BONES
See how Easy AMOS automatically provides question marks to prompt your next input. Now try and input a text character instead of a number, and Easy AM OS will spot the mistake and ask you to go back to the beginning of the input process with this message:
Please redo from start
Supposing you want to use a whole set of similar variables for something likea table of football results ora catalogue for your record collection. No problem. Any set of variables can be grouped together in what is known as an "array".
Let's say you have 101 titles in your record collection, and you want to tell Easy AMOS the size of the table of variables needed for your array. There is a special keyword for setting up this dimension.
DIM
This is used to dimension an array, so the variables in your record collection table could be set up like this:
IJ:g" Dim ARTIST$ (100) ,TITLE$ (100) , YEAR (100)
Element numbers in arrays always start from zero, so your first and last set of entries might contain these
~c-n::.!'1 variables:
IJ:g" ARTIST$ (0) ="AC/DC"
TITLE$(O)="Blow Up Your Video"
YEAR(0)=1988
ARTIST$ (100) ="ZZ Top"
TITLE$ (100) ="Afterburner"
YEAR(100)=1985
53

Chapter 4
FUNCTIONS
Finding the length of a string
54
THE BARE BONES
To extract elements from your array, you could then use something like this:
~ Print TITLE$(O) ,YEAR(O) ,ARTIST$(O)
Print TITLE$(100) ,YEAR(100) ,ARTIST$(100)
These tables can have as many dimensions as you like, and each dimension can have up to 65,000 elements. Here are some modest examples:
Dim ARRAY (5) ,NUMBERf(5,5,5),WORD$(5,5)
There is a whole set of bones in your Easy AMOS skeleton known as "functions". These are keywords that have one thing in common: they all work with numbers in order to give a result. To make it easy to recognise a new function when it appears in this guide book for the first time, we have placed an "equals" sign in front of it, like this:
=FUNCTION
Easy AMOS provides you with a range of functions used with strings, SO let's go back to your record collection and start manipulating some strings.
=LEN
To discover the number of characters stored in a string, in other words to find out its "length", the LEN function looks at the string and tells you this number. See how this works with the following example:
Dim TITLE$ (2)
TITLE$ (0) ="These"
TITLE$ (1) ="Titles"
TITLE$ (2) ="Get bigger and bigger!"
Print Len (TITLE$(O»
Print Len (TITLE$ (1»
Print Len (TITLE$(2»

Chapter 4
Finding characters in a string
THE BARE BONES
Supposing you want to search through your data, and find out all the records you bought in a particular year, or all the albums recorded by a certain artist, or even all the titles in your posession containing the word "bum".
=INSlR
This function looks to see if a particular string occurs inside another string. If the search fails, a result of zero is given, but if the search is successful then its poSition is reported. Type in this routine:
ICG" Input "Give me an album title:";A$
Input "What word am I searching for?" i B$
Print Instr(A$,B$)
Now [Runl that routine, and experiment with your input strings to test the searching process. For example, you could type in these inputs and see the results:
AFTERBURNER
BURN
BURNING LOVE
BURN
BERNADETTE
BURN
55

Chapter 4
Reading characters in a string
{~ \ (l [\~
56
THE BARE BONES
Normally the search will start from the first character in your text string, but you can start the process from any position you like in the string. Thisisdoneby adding the number of characters from the left of the string which is to become the new start position for the search. For example:
ICY' Print Instr (EASY AMOS BASIC", "SIC")
Print Instr ("EASY AMOS BASIC", 'SIC", 14)
There are three sets of functions tha t are used to read certain characters in a string, and their names give clues to what they are used for.
=LEFT$
=RIGHT$
=MID$
See what result these three lines give:
ICY' Print Left$ ("Easy AMOS", 4)
Print Right$ (Easy AMOS', 4)
Print Mid$ ("Easy AMOS", 3, 5)
Notice how Left$ and Right$ return the number of characters given in the brackets, starting from the lefthand and right-hand end of the string, respectively. Similarly, Mid$ returns characters from the middle of a string, with the first number in the brackets setting the offset from the start of the string and the second number setting the number of characters to be fetched.
Chapter 4
Replacing characters in a string
Placing characters in a string
THE BARE BONES
These three functionscanalso be used to tell Easy AMOS to replace characters in one string with characters copied from another string. For example:
IUii" A$="Very Dull BASIC"
Left $ (A$, 9) ="Easy AMOS"
Print A$
B$="means streets"
Right$(B$,8)=" superb
Print B$
C$="AMOS Basic"
Mid$ (C$, 6,3) ="Mag"
Print C$
=INPUT$
To enter characters into a string variable straight from the keyboard, this function will wait patiently for you to type in the number of characters you specify in brackets. Press [Return] after you enter each character when you [Run] this routine:
~ Print "Please type in ten characters"
A$=Input$(lO) : Print "You typed ";A$
This can be used for inputting passwords, which shouldn't be seen on screen.
57

Chapter 4
Copying characters from a string
Converting strings
58
THE BARE BONES
=STRING$
If you need to create a new string full of copiesofthe first character in an existing string, this function does just that. Simply include the numberof copies you want, like this:
IrP" Print String$ ("Easy AMOS", 10)
That example produces a new string containing ten copies of the character "E".
=VAL
=STR$
This pair of functions is used for string conversion. VAL will convert a list of decimal digits already stored in a string, and change them into a number. For example:
IrP" X=Va1 ('1234")
Print X
To perform the reverse task, STR$ converts a real number variable into a string, like this:
IrP" X$~Str$ (1234)
Print X$
Now that your programming skeleton is ready to obey your commands, the next Chapter will show you how to give it a logical brain!

Chapter 5
LOGIC
o labels
o loops
o conditional loops
o numbered loops
o steps
o subroutines
o conditional jumps
o procedures
o nesting
"Crime is common. Logic is rare. "
(Sir Arthur Conan Doyle, 1893)
59

Chapter 5
DECISIONS
7
"1 been wrestlin' and prll!Jin' and 1 know th' truth at last. "
(Amos, Cold Comfort Farm,
1932)
LABELS
LOGIC
A computer program is nothing more than a bunch of commands that tell your Amiga what to do. If the computer only obeyed a list of instructions one after the other, programs would be very limited and very boring. The magic begins when you teach your machine to think for itself and start making decisions!
The simplest way to get a computer to make a decision is to show it something, and then offer it a choice of things to do depending on what it sees. If computers understood plain English we would say something like, "Look out the window. If it's daytime then go to San Francisco. But if it's not daytime, go to bed."
When this sort of choice is given with Easy AMOS, the computer looks at the condition on offer, and decides if that condition is true or false. If it's true, then the Amiga decides to take one course of action, but if it's false another course of action will be taken.
One course of action could be to jump to a new place somewhere in the list of commands. So you need a way of marking parts of your program with a "label" before telling the computer to go to that label marker and carry out whatever instructions are there. Thisisdeadeasy. A label is set up by giving ita name, then tacking on a colon character so the computer can recognise it and not confuse it with anything else. You can use any letters or number characters you like, including the "underscore" character. Here's an example of a label:
SAN FRANCISCO:

Chapter 5
Going toa label
Goingtoa numbered line
Going to a variable
LOGIC
GOTO
By using label markers, you can now jump to anywhere you like in the program with a GOTO command. Type in this routine which includes the label in that last example, and make sure you understand how it works. Normally, you would have to wait for three minutes to find out if it's day or night:
W Print "What time is it?" : Wait 100
Goto SAN FRANCISCO
Wait 180000
SAN FRANCISCO:
Print Dlt must be daytime!"
Any line in your Easy AMOS programs can be identified by a line number, and you can command the program to GOTO a particular line number too. Here is an example of jumping to a line number:
W Goto 5
Print "I am being ignored. u
5 Print "I am line 5."
Don't confuse the numbers that you give your lines with the number of lines in your programs. In the last example, line 5 is obviously not the fifth line in the routine! In fact this is an old-fashioned way of programming, and labels are much easier to remember and to spot when you look through your programs
You can command the program to GOTO a variable as well,and that variable can be any normal "string" or any number. This example uses one label marker to BEGIN the routine over and over again, and another one to jump into the BED with the right number.
61

Chapter 5
MAKING DECISIONS
62
rr:Jr' BEGIN
Goto "BED" + "2"
End
BED1 :
LOGIC
Print"This Bed will never be used"
BED2:
Print"Welcorne to Bed number two"
wait 10
Goto BEGIN
The time has come to let your Amiga begin to think for itself, and make a decision without any help from you.
IF
THEN These two command words have a similar meaning in Easy AMOS as they do in normal English. IF a condition is true THEN the computer will decide to take one course of action. If it is not true, the machine does something else. Run this little routine, then watch the computer decide what time it is.
ICV' NIGHT~l
DAY~l
Print"What time is it now?" : Wait 150
If NIGHT~DAY Then Goto BED
Print"Time I bought a watch"
Goto WATCHMAKER
BED:
Print "I think it is bed time"
WATCHMAKER:

Chapter 5 LOGIC
Now change the value of NIGHT to another number, and run that routine again. IF you are sure you understand how thecompu terreaches its decision THEN GOTO the next paragraph, or ELSE try again.
ELSE
Your computer also understands the word ELSE when making decisions as to whether something is true or false, so you could change that last routine to something like this:
DAY~l
If NIGHT~DAY Then Goto BED Else Goto POT BED:
Print ~True" End
POT:
Print "False"
There is an even better way to use IF that can trigger off a wholerangeofinstructions,dependingon theoutcome of a single decision. The jargon for this sort of process is a "structured test".
IF
END IF In a structured test. you don't use THEN at all. The test is set up with an IF, and ended with END IF. Every IF statement in your program must be paired off by its own END IF, to tell the computer exactly which bunch of instructions get carried out inside the test. Try out a structured test now, by typing this in exactly and then running it:
63
Chapter 5
Using logic
64
LOGIC
IU7" Input"Type values for A, Band C "; A, B, C
If A=B
Print"A equals B";
Else
Print"A is not equal to B
If A<>B and A<>C
Print"or to e"
End If
End If
In that last example you used the characters "=" and "<>" instead of words, as a sort of short-hand, which your computer had no trouble in understanding. So you better understand what they mean too!
= means "is equal to"
<> means "is not equal to"
> means "is greater than"
< means "is less than"
>= means "is greater than or equal to"
<= means "is less than or equal to"
How about writing a simple computer game to test out what you've learned so far! It's a genuine game oflogic and the computer responds to anything that you throw alit. Look at the way the program uses those short-hand symbols to make a decision, then jumps back to the SECRET label until itis satisfied. Notice how each IF has its own END IF, and how ELSE is used. There's a new command near the beginning too. CLS stands for "clear the screen", and you'll be learning more abou ttha t in the next Chapter. As for now, write this game, then go and find some friends to inflict it on!

Chapter 5 LOGIC
IIi?' Print "Ask your friends to shut their eyes."
Print 'Now you think of a nl.lII'ber betW€;en~
Print "1 and 100 and type it in secretly."
Input A
Cis
Print HAsk your friends to open their eyes. ~
Wait 250
SECRET:
Print "FIND THE SECRET NUMBER"
Input B
If &oA
Print "WELL DONE!"
Else
IfB<A
Print 'WRoNG go higher" Goto SECRET
Else
If B>A
Print "WRONG try lo~r"
End If
End If
End If
Goto SECRET
65

Chapter 5
LOOPS
( <
Leaving a loop
66
LOGIC
Now havea try at injecting some extra fun into thegame,and add as many ELSE ... IF ... END IF tests as you likeafter the Print 'WELL WNE" statement. For example:
I&' Else
If B>~101
Print "Keep your guesses below 100"
Goto SECRET
Don't forget to add another END IFat the end of the prograrn.
To write a separate routine foreach choice of the 100 numbers in that game could get very tedious, and to end up with 100 END IFs is not a very neat way of programming. Thankfully Easy AMOS offers all sorts of short cuts to help you repeat sections of your computer program. These "loops" repeat a routine for as long as necessary.
DO
LOOP
This pair of commands will loop a list of statements forever! Wis used asa marker position in the program for the LOOP to come back to. Try this:
I&' Do
Print "INFINITY" wait 25
LOOp
Now that you've locked yourself into an infinite loop, you better learn how to escape from it.
EXIT
This little command word tells the program to leave a loop right away, and you can use it to escape from any of the sorts ofloops you will come across in this Chapter. Because you can have lots of loops inside one another, when you use EJ(]Tby itself only the innermost loop will

Chapter 5
Conditional loops
LOGIC
be given a short circuit to stop it. But by adding a number after EXIT, the program will understand how many loops you want to leave. Here's an example:
JIY> Do
Do
Input "Type in a nUmber"; X
Print "I the inner loop " am
If X~l Then Exit
If X~2 Then Exit 2
Loop
Print "I am the outer loop~
Loop
Print "And I am outside both loops"
WlllLE
WEND This pair of commands makes the program repeat a group of instructions all the time a particular condition is true. The condition is checked at the start of the loop. WHILE marks the start of this sort of loop, and WEND must be used to position the end of it. Try this simple logic rou tine:
JIY> BLAZES:
Print "Please type in the number 9"
Input X
While X~9
Cls : Print X Wait 50 Goto BLAZES
Wend
Print "That' 5 not a 9! ~
67

Chapter 5
i \ ~ .•...
Numbered loops
68
LOGIC
All the time you obey the screen's wishes by typing in 9, the routine will be repeated. But as soon as you type in another number, you jump out of the loop.
REPEAT
UNTIL
Unlike that last example, instead of checking if a condi lion is true or falseat the start of a loop, this pairof commands is used to check at the end of the loop. As you might expect, REPEAT marks the start of the loop, and it must be paired by UNTILattheend of the loop. Thisexample will go on and on, waiting for you to press a mouse button:
II? Repeat
Print Q r can wait forever" Wait 15
Until Mouse Key<>O
Easy AMOS is continually checking the state of the mouse, so the only way to activate the Until condition in that example is to press a mouse button.
It's all very well handing over the business of making decisions to the computer' sownlogic, but what happens when you want to repeat a loop for the number of times YOU want? No problem. 5ections of your program can be looped to order!
FOR
NEXT
This pair of control words is one of the programmer's classic tricks. Try this now for an instant demonstration of a FOR. . .NEXT loop:
II? For X~l To 7
Print 'SEVEN DEADLY SINS"
Next X

Chapter 5
Steps
LOGIC
Now try this:
n:7 For DAY=l To 365
Print DAY
Next DAY
TO The number of DAYs that have just been printed run from the first TO the last value that you have set. Obviously, the numbers go up one at a time. But suppose you want to change the rules, and onlyprintout one day for every week of the year. Imagine you are climbing a long staircase, one step at a time. Now imagine that you can change the length of your legs to any size you feel like!
STEP All you have to do to change the size of your step is this:
n:7 For DAY=l To 365 Step 7
Print DAY
Next DAY
Now change the size of your step to once every 28'days, or whatever you like, and see the result.
SUBROUTINES Littlegroupsofdancestepsinastageshowaresometimes called 'routines". Packages of program instructions that do a specific task can be thought of as routines too. In which case, it's not too hard to think oflittle packages of instructions as ·subroutines·.
GOSUB RETURN GOSUB is a command which is short for "GO to a SUBroutine", and Easy AMOS has stolen it from the antique days of programming. It works in much the same way as GOTO. For example, if you wanted to jump to a routine marked by a label, you could use this:
69

Chapter 5
"Go, and do not return until everything is achieved. "
(Joseph Stalin, 1941)
70
LOGIC
Gosub LABEL
Alternatively, you can force your program to jump to the group of instructions that start with a particular line number. For example to jump to a subroutine labelled line 10, you would use this:
Gosub 10
Labels and line numbers don't have to be invented by you. The computer is quite capable of creating them as the result of an expression, and you can get your GOSUB to jump to the result of any expression you want, like this:
Gosub X+10
When your program obeys a GOSUB instruction, you can't leave it hanging around there wondering what to do next, so it has to be told to RETURN to the main program. This example demonstrates how:
~ Print "This is the main program"
For HOW~l To 3
Gosub TEST
Next HOW
End
TEST:
Print "Here we go GOSUB" Wait 50
Print "How equals"; HOW
Return

Chapter 5
Conditional jumps
LOGIC
So far, you have learned how to let the computer work out when to jump to another part of the program by taking logical decisions based on all sorts of situations that are either true or false. Now you need a way of planning ahead, and getting the program to make the same kind of jumps whenever it recognises a particular variable. In normal English this would be like saying "Jump to where I tell you ON the following occasion." In Easy AMOS, it's just as simple.
ON This control word can be used to force the program to jump when it recognises a particular variable. But even better than this, the program can be made to jump to all sorts of different locations, depending on the value the variable holds when it is spotted.
ON ... GOTO Try out this little program. It will jump to any of the four possible labels, depending on what value you give X.
IIY' Print "GIVE X A VALUE FROM 1 TO 4 "
Input X
On X Goto LABELl, LABEL2, LABEL3, LABEL4
LABELl:
Print "One for the moneyH
LABEL2:
Print "Two for the show"
LABEL3:
Print "Three to get ready"
LABEL4:
Print "Go cats go"
71

Chapter 5
PROCEDURES
'We have procedures for everything. Even going to the bathroom!' 0. Edgar Hoover,
1955)
72
LOGIC
For that to work properly, X must have a value from 1 up to the number of the highest possible destination, so if you give X a value of zero or five, for example, things will go wrong. In fact the third lineof that program isa very economical way of writing the following lines:
If X~l Then Goto LABELl
If X~2 Then Goto LABEL2
If X~3 Then Goto LABEL3
If X~4 Then Goto LABEL4
Now change the program by swapping around the label numbers, and see what happens.
ON_GOSUB
Exactly the same system can be employed with a GOSUB instead ofcaro. To get the program to jump back to the next instruction after an ON ... GOSUB statement, use RETURN in the usual way.
This Chapler is all about giving your program skeletons a logical brain, so what can be more logical than concentrating on one problem at a time to avoid getting into a complicated mess! This is exactly what "prooedures" are used for. 1hey help you avoid side-tracks and wrong directions by creating small, independent program chunks.
PROCEDURE
ENDPROC A procedure is created in exactly the same way as a normal variable, by giving it a name. The name is then followed by a listofparamelers,andtheproceduremustbeendedbyanEnd Proc command. Procedure and End Proc commands MUST be plaoed on their own individual lines. For example:
~ Procedure HELLO
Print ~Hello, I am a procedure!"
End Proc

Chapter 5
Local variables
Global variables
LOGIC
If you try and [Run) that example, nothing will happen. This is because a procedure must be called up by name from inside your program before it can do anything. Now add the following line at the start of that last example, and [Run) it.
~ HELLO
To help you find the starting positions of procedures in a very long program, Easy AMOS offers a simple shortcut, using two keys. By pressing the [All) key and the [Down Arrow) key together, your edit cursor will jump to the next procedure definition in your programs. To jump to the previous procedure, simply press [All) and [Up Arrow) together. This short-cut works equally well with labels and line numbers!
All the variables that are defined INSIDE a procedure work completely separately from any other variables in your programs. We call these variables "local" to the procedure.
All the variables OUTSIDE of procedures are known as "global" variables and they are not affected by any instructions inside a proced ure. So it is perfectly possible to have the same variable name referring to different variables, depending on whether or not they are local or global.
GLOBAL In a large program, it's often convenient for different procedures to share the same set of global variables, because this offers an easy way of transferring large amounts of information between the procedures. The Global command sets up a list of variables that can be accessed from ANYWHERE in your program. Try this example:
73

Chapter 5
Returning values from procedures
74
Global A,B
TESTl
Print A,B
TEST2
Print A, B
Procedure TESTl
A~A+l : B~B+l
End Proe
Procedure TEST2
End Proe
=PARAM
LOGIC
If you want to return a value or a "parameter" from inside a procedure, you need a way of telling your program where to find this local variable. The Paramfunction takes the result of an expression in an End Proc statement, and returns it to the Param variable.
PARAM$
If the variable you are interested in is a shing variable, the $ character is used. Also note how the pairs of square brackets are used in the following example:
II:§'> JOIN_STRINGS ["one", "two", "three"]
Print Param$
Procedure JOIN_STRINGS[A$,B$,C$]
Print A$,B$,C$
End Proc[A$+B$+C$]
PARAM#
For real number variables, the # character must be used. For example:

Chapter 5
Jumping into a procedure
Jumping out of a procedure
LOGIC
~ JOIN_NUMBERS [1.5,2.25)
Print Param#
Procedure JOIN_NUMBERS[A#,B#)
Print A#, B#
End Proc[A#+B#)
ON . ..PROC
You have already learned how On can be used to jump to a Gosub routine,and irs just as easy to use On for jumping to a procedure. In this case, if a variable holds a particular value, you set up the instruction as follows:
On X Proc PROCEDURE1,PROCEDURE2
Which is the same as saying:
If X=l Then PROCEDURE1
If x=2 Then PROCEDURE2
Of aJUrse you can have as many values triggering off jumps to as many procedures as you want.
POPPROC
Procedures will only return to the main program when the End Proc instruction has been reached. But supposing you need to jump out of a procedure immediately. The Pop Proc instruction provides you with a quick getaway! Try this:
~ Procedure ESCAPE
For PRISON=l To 1000000
If PRISON=10 Then Pop Proc
Next PRISON
Print "I am abandoned."
End Proe
Print "I'm free!"
75

Chapter 5
"My record stands for itself·"
(Margaret Thatcher, 1990)
76
LOGIC
In the next Chapter, you will discover how to handle text. As a prelude to that, here's a demonstration to try out using procedures as well as some new text commands. Type it in stage by stage.
The first line turns off the cursor, and sets the colour of the background screen. Then data is placed inside the square brackets, ready to be sent to a procedure. In this case, our data will bea record of some incredibly famous people, giving their first name, surname, age and occupation.
W Curs Off : Paper 0
RECORD [DFrancois", uLionee ,28, ~Genius"]
Leave that on screen, and now caIl the same procedure with different parameters, by adding these lines:
W RECORD ["Easy" ,"=S", 1, "Carputer Cult"]
RECORD ["Mel" , "Croucher', 43, "unenployed"]
Now set up additional data in variables, by adding these lines:
W A$~"Richard"
B$="Vanneru
AGE~24
OCC$~"Projects Manager"
RECORD [A$,B$,AGE,OCC$]
Here comes the procedure. Add these lines to your example, and then [Run] the program.

Chapter 5
NESTING
LOGIC
~ Procedure RECORD[NAME$,SURNAME$,AGE,CCC$]
Cis 0
Locate 0,3
A$~NAME$+" "+SURNAME$
Centre A$
Locate 0,6
A$~"Age: "+St r$ (Age)
Centre A$
Locate 0,9
A$~"Occupation: "+OCC$
Centre A$
Locate 0,16
Centre "Press a key"
Wait key
End Proc
Many of the examples in this book are set out in a rather fancy way. Little blocks of the programs have been "indented" by placing extra spaces at the start of their lines. This isn't just to make them look prettier (although there's nothing wrong with beautifying the way your programs look) it helps to identify certain routines in your listings.
By pressing the function key [F3] while in the Edit mode, Easy AMOS automa tically indents your program listing. When programmers place a block of program like a subroutine inside another block, they call it "nesting", and these nests can be marked by indenting them.
77

Chapter 5
78
LOGIC
Because you are well on the way to being a computer programmer, you can start taking the ideas shown in these Easy AMOS examples and use them, change them, link them up and expand them for your own programming ideas. Sooner or later your home-grown programs will consist of a lot of routines, and they will take up a lot of lines, so don't forget to make use of Rem statements, labels, and indented nests to find your way around. You won't regret it.
Now that you've got the idea about making the layout of your programs easy to read, the next Chapter isall about how to work wonders with the appearance of the text you see on the screen.

Chapter6
TEXT
o the character set
o using text
o text coordinates
o moving text
o the text cursor
o text style
o fonts
"The secret of all good writing is sound judgement."
(Horace, 13 B.c.)
"The thundering text, the snivelling commentary. " (Robert Graves, 1946)
79

Chapter 6
The character set
80
TEXT
This Chapter explains how to use the advantages of Easy AMOS for handling written text.
Old-fashioned typewriters use tiny hammers to bash ou t preset characters, and more modem machines allow you to swap between a series of different factory-made character designs called "fonts". The trouble with typewriters is that if you make a mistake on paper or want to change text around, you have to use erasers, scissors, glue and a lot of wasted time.
Easy AMOS gives you the freedom to use and create all sorts of text characters, and to handle text as you please, whether you want to design your own newsletter, put a hi-score table in a game, invent dialogue boxes, make a schedule for the tax-man or write a letter to Santa Claus.
Let's see what pre-set characters are available, by running the next routine using a For .. .Next loop that you learned about in the last Chapter:
IJj;" For C~O To 255
Print Chr$(C);
Next C
You should now have six lines of characters on your screen, containing symbois, ietters, numbers and graphic characters. If you want to take the time to count them all, you'll discover that the first 32 are invisible. That's because they are reserved for Easy AMOS to use for special purposes.
Computers need some way of recognIsing what characters are being used, so each character has its own code number from zero to 255. "Ascii" stands for American Standard Codes of Information Interchange, which is the code your computer uses for recognising characters and talking to other machines like printers.

Chapter 6 TEXT
=CHR$ You have just asked Easy AMOS to PrintChr$ in that last example line of code, in other words "please print me a string that contains a single character with an Ascii code numberrangingfromOto255." Find out which characters have which Ascii codes now, bycallingupdifferent code numbers like this:
W Print Chr$ (97)
=ASC
Next, try it the other way around, and use this function to discover the Ascii code number of any character you are interested in. For example:
W Print Asc ("A")
Print Asc ("M")
Print Asc ("0")
Print Asc ("5")
If you want to see the entire visible character set along with their Ascii code numbers, run this routine:
W For C=32 To 255
Print Chr$ (C) ; .. =Ascii Code";
Print Asc (Chr$ (C» : Wait 50
Next C
If your typing speed is not too brilliant, you are going to impress yourself by using your own typing tu torin the next Chapter! Meanwhile, why not cheat a little.
During editing, a character or cursor movement is repeated for as long as its key is held down. This can be a bit frustrating when it causes unwanted characters or cursor movements.
81

Chapter 6
Setting text colours
82
TEXT
KEY SPEED
Is the command that changes the repeat rate while a key is held down. Just say what time lag you want to use, measured in 50ths of a second, followed by the delay speed between each character you type, also in SOths of a second. Slow things down a lot by running this:
W Key Speed 50,50 : Rem One second delay
Now see what effect this has when you hold down a key while editing.
When you are tired of each repeat keystroke taking one second to complete, type the next example:
W Key Speed 1,1 : Rem My brain hurts
Now run that example, then try to edit the key speeds again. It's almost certain tha t your reflexes will have just crumbled and you'll have to reset your Amiga!
The appearance of text can be changed in two main ways: colour and shape. As you would expect, Easy AMOS allows you to alter the way your text looks simply and quickly.
This a good opportunity to go to the toilet, make a cup of tea, switch off your computer, then reload Easy AMOS when you're comfortable. Then you can be sure that the colour presets are all in order.
Are you sitting comfortably? Then imagine that you have a selection of up to 16 different coloured electronic pens, along with 16 different coloured sheets of electronic paper to write on. In fact, there isa much larger selection than this, but we won't worry about that for now. Each colour has its own index number, starting from zero, and when you select colours you just call them up by putting their index number after a Pen or Paper command.

Chapter 6
Using Text
TEXT
PEN
This command sets the colour of your text. Try this:
IUl'" Pen 4 : Print "REDFACES"
Now see what current choice there is in your colour index, using this routine:
IUl'" For INDEX~O To 15
Pen INDEX
Print "Pen number"; INDEX
Next INDEX
PAPER
Use this command to set the colour of the background electronic paper on which you write text. Change paper colours like this:
IUl'" Paper 4 : Pen 2 : Print "White on Red"
INVERSE ON
INVERSE OFF
This is an easy way of swapping over whatever Pen and Paper colours are in use. Prove how simple this is by running the following routine, choosing your own colour index numbers:
~ Pen 2: Paper 4: Print II I am normal II
Inverse On Print III am inverse"
Inverse Off Print "1 am normal again"
There are two useful little functions you can play with to change strings of text, and you may want to make more practical use of them for handling strings in your own programs.
83

Chapter 6
Screen text coordinates
84
=LOWER$ =UPPER$
TEXT
This pair of functions do what you might expect, by changing all the characters in a string into lower case (small letters) or uppercase (capital letters). Typein and run this little routine to see how they work:
W Print Lower$ ("Easy AMOS")
Print Uppers ("Easy AMOS")
When you tell Easy AMOS to Print some text, the characters will be printed starting from wherever the flashing line called the "text cursor" happens to be. For example, when you begin some fresh printing,characters appear starting at the top left-hand comer of the screen. If you think of the screen as being divided up into a grid, with each line of text forming the horizontal grid lines and each character space forming the vertical grid lines, then it is not difficult to think of the positions of each of the grid spaces having their own reference point. We call these screen positions the "text coordinates".
To establish the position of a character, the "x-coordinate" is the number of character spaces from the left-hand side of the screen, and the 'y-coordinate" refers to the number of spaces from the top of the screen. So the top-left hand comer would have x,y-<:oordinates of 0,0. Similarly, the text coordinates 10,5 refer to a position on the screen that is 10 characters to the right and five characters down from the top left-hand comer. You will come across different sizes of characters and even different sizes of useable screen, but this general rule applies to them all.
When the screen displays text or graphics that you no longer want, there isan instant way of wiping the screen clear.

Chapter 6
Clearing the screen
MOVING TEXT
TEXT
CLS This command stands for CLear the Screen, which is exactly what it does. Print some characters now, then wipe the screen clean before you give your next print command, like this:
II:? Print "A load of rubbish" : wait 100
CIs Print "ALL CLEAR" : Wait 100
CIs
You can also clear a screen by filling it with your choice of colour, using an index number from colour zero to the maximum colour number available. Try doing it now, like this:
II:? Print "I've got the blues" : Wait 200
CIs 6
There is no need to clear the whole screen. If you prefer to clear part of the screen and leave the rest as it is, you must type in special x,y-coordinates of the rectangle to be cleared after you select the colour that will fill it. Tell Easy AMOS the location of the top-left hand comer of the new rectangle, then draw this rectangle TO wherever you want the bottom right-hand corner to be. CIs uses "graphic coordinates" instead of character coordinates, and they are explained a little later. Don't forget to put in the commas, even if you don't specify a particular colour number. For example:
II:? Print "This is a black out" : Wait 175
CIs ,80,0 To 120,10
Sooner or later, you will want to make your text look moreattractivebylocatingitatvariousscreenpositions. To save you the trouble of measuring out spacings, Easy AMOS gives you a whole series of simple short cuts.
85

Chapter 6
More text locations
86
TEXT
LOCATE This command moves the text cursor to whatever x,ycoordinates you choose. The new location sets the starting point for all your text printing until you command some other position. You are free to leave out the x or the y-coordinate, but remember to use a comma in place of their location number. So to print at a particular place on the current line, omi t the y-coordina te and try using something like this:
~ Loc"ate 5, : Print uFive from the left H
In the same way, to print at the existing distance across the screen but on different lines, leave out the xcoordinate, like this:
~ Locate ,6 : Print "Six from the top"
Now experiment by printing at your own choice of coordinates, anywhere on the screen. For example:
I&" Locate 7,8 : Print "X"
If you need to move the text cursor back to the top lefthand corner of the screen in a hurry, simply command it to go Home!
HOME Here is the command that automatically locates the cursor to coordinates 0,0. Try this now:
I&" Cls : Locate 10,10 : Print "I am going"
Home : Print "home"
CENTRE Centre is another useful command for locating text. In this case a string of characters is placed at the centre of the screen on the current cursor line, and you don't have to use the Print command. For example, type this in:

Chapter 6
THE TEXT CURSOR
TEXT
IW Locate 0,10
Centre "r am in the centre"
There is a special Easy AMOS function that lets you change the position of where text is to be printed whenevera particular string of characters crops up. This is perfect for things like titles and hi-score tables.
=AT
This is the function used to set up this type of character string, and all you ha vetodo is select thex,y-coordinates for your characters by placing them in brackets, like this:
IW A$~At (10, 5) +"Hello"+At (20, 20) +"again"
Print A$
Once you understand how this works, try positioning you own title or hi-score string, then call it up with a single Print statement. For example:
IW HI SCORE$~At (5, 10) +"Today' s HI SCORE"
SCORE~1234
Print HI_SCORE$;SCORE
There will be times when you need to know exactly where the text cursoris located. Nothing could be easier.
XCURS YCURS These two commands are used to act as variables for holding the current location of your text cursor. So you can call them up like this:
IW Locate 10,10
Locate 20,20
Print Xcurs
Print Ycurs
87

Chapter 6
Setting the text cursor
~ 88
CURS ON
CURS OFF
TEXT
These two commands can be used if ever you want to hide the text cursor and redisplay it later on. This will have no effect at all on your text or other cursors such as the one used by the mouse. Make the text cursor disappear and reappear now.
Do you want to change the appearance of the text cursor and set it to something a bit more personalised?
The shape of the text cursor is made up in exactly the same way as the shape of any other character: a little grid of picture elements, called ··pixels· for short. A pixel is the smallest point on your screen that you can communicate with. Imagine it as a dot with its own location reference. Each of the pre-set characters that you see on screen is a little block made up of a grid of pixels eight across and eight high. You have probably guessed that you can change the shape of any character, not only the text cursor, by changing the arrangement of its pixels. You may also have realised that there is a much more accurate set of coordinates using pixels instead of text characters. But for now, let's concentrate on understanding how pixels make up an individual character.
Look at this diagram showing the individual pixels that could make up the letter • A". Next to it, the same character is represented by numbers.
o 0 o 0 o 0 0 0
o 0 1 1 1 1 0 0
o 1 o 0 o 0 1 0
o 1 o 0 o 0 1 0
o 1 1 1 1 1 1 0
o 1 o 0 o 0 1 0
o 1 o 0 o 0 1 0
o 0 o 0 o 0 0 0

Chapter 6 TEXT
Every pixel that is filled in with the current Pen colour can be represented by a 1, and every pixel that has nothing in it except the current Paper colour can be set with a zero. So the bottom two lines of pixels in the text cursor grid are filled wi th ones, and the rest with zeros. The text cursor character also brings attention to i tself by flashing on and off.
SET CURS
This allows you to set the shape of the text cursor to anything you want. Change the list of pixels for each numbered line of the grid using a special code, like this:
~ Ll~%llllllll
L2~%1l111110
L3~%1l111l00
L4~%1l11lOOO
L5~%1l1lOOOO
L6~%1l100000
L 7~%1l000000
L8~%lOOOOOOO
Set Curs L1,L2,L3,L4,L5,L6,L7,L8
If you have typed that in exactly and run it, your text cursor will have altered shape,and turned into a triangle. N ow try and change its shape to the first letter of your name. When you've done that, turn it into anything you want, like a stick man or a rocket.
Try and input this sort of number and make its sequence begin with zeros, like this:
Ll=%OOOOOlOO
89

Chapter 6
Setting text style
90
TEXT
Easy AMOS will automatically remove the zeros, and change the appearance of the number. For example:
Ll~%lOO
This is quite normal. Easy AMOS prefers to strip away these leading zeros in the display, but their values are completely unchanged.
FLASH
FLASH OFF
If you don't want your text cursor to flash, you can turn it off and then turn it back on again by using the commands Flash or Flash Off, like this:
IG? FlashOff : Set Curs Ll, L2,L3, L4, LS, L6, L7,L8
Time for some fun. You are now going to change the entire appearance of your text characters by mixing any one of eight selections that combine these three styles:
Underline
Bold
Italic
You can choose from a range of zero to 7 to mix and match these style combinations, using the Set Text command.
SET TEXT
This is the command that changes the appearance of your text, and all that's needed is a style number to follow it. Display the available choice now, by typing in this routine:
IG? Cls : For S~O To 7 : Set Text S
Text lOO,S*20+20,"Easy AMOS· : Next S
Chapter 6
Graphic text
TEXT FONTS
TEXT
If you ever need to know which text style is being used at any time, all you have to do is ask.
=TEXT STYLES
This is the function that reveals the index reference of the text style you last selected using Set Text.
Jr7set Text 2 : Text SO,SO,"Style two"
Print Text Styles
You may have spotted the fact that a new command called Text has been introduced in those last two examples, and that the coordinates seem to be much too wide to fit on the screen. This is because you have started to use what is known as "graphic text" instead of the normal pre-set characters,and graphical text is posi tioned using x,y-coordinates numbered in pixels, not characters.
All the drawing and graphics operations are expl<lined in Chapter 8, along with easy-to-use ways of getting the best out of graphic text. For the moment, try to understand that there are two different types of font for use in Easy AMOS. "Text fonts' are used for sets of characters that can be used by the Print command. "Graphic fonts' are much more flexible in terms of style, size and shape.
Now it's time to reveal a little bit of Easy AMOS text magic.
The designs of the characters that appear on your screen makes them easy and practical to use and read. In the old days, sets of characters were cast in metal moulds for printing onto paper,and each set of designs had its own font name. If you wanted to change fonts, all you had to do was design new shapes, carve them into stone, boil up a cauldron of molten lead and cast each character in a new mould. It only took a few days.
91

Chapter 6
92
TEXT
And now for some good news. There are hundreds of different fonts available for use with Easy AMOS at the touch of a button!
GET FONTS SET FONT Your "Easy AMOS Program Disc" contains new fonts ready to be used, and as you would expect, each font has its own index number. The Get Fonts command sets up a list of the different fonts available on your current disc, and you must use it before making any changes to font settings. Then use Set Font to select the style of text to be used. For example:
(G;? Get Fonts
For A~O To 100
Set Font A : T$~"EaSy l\M)S Font" +Str$ (A)
Text 50,100,T$
Wait key : CIs Next A
In practice, you will probably want to Get Fonts at the beginning of a program, so that you can use Set Font later on as many times as you need.
=FONT$ If you want Easy AMOS to give you details about the available fonts, use this function followed by a pair of brackets containing the font number you are interested in. Add the following line to the last routine:
(G;? Get Fonts : Set Font 2
Print Font$ (2)
There should now bea report line at the top of the screen describing font number two, as follows: the name of the font, the height of the font in pixels and the status set to either Disc or Rom (meaning held in memory).
Chapter 6
Adding more fonts
Clearing fonts from memory
Selecting a font by name
Creating your own fonts
TEXT
Your Amiga "Workbench" disc may well have a whole range of extra fonts on it, and Easy AMOS is happy to use them. In addition, there are hundreds of different fonts available on commercial and public domain discs, and you may even want to design your own. New fonts can be installed on your "Easy AMOS Program" disc, and remember never to use the original, but your own copy for this purpose! Copy new font files into the FONTS: directory of the disc.
Here is a neat way to clear any fonts from memory that are not being used. Ifs a procedure that tries to reserve a huge amount of memory, and creates an "out of memory" report. This forces the Amiga to perform a "garbage collection" which gets rid of your unwanted fonts automatically.
IUr' Procedure WIPE FONTS
On Error Goto SKIP
Erase 15 : Reserve As Work 15,10000000
SKIP: Resume SKIP2
SKIP2:
End Proc
To see how fonts are selected by name, open the "'Text_ Tutorials" folder on your" Easy AMOS Tutorial" disc, and load this ready-made example:
Text_Tuto r ial01.AMOS
There are two amazing programs on your "Easy AMOS Examples" disc, that make superb use of home-grown fonts. First of all load:
Font_Creator.Amos
93
Chapter 6
94
TEXT
As you can see from the listing, this program will transfonna normal font intoa giantgraphicfont. You can select anything from simple black and white characters, to cut-outs of fully rolouredpictures! Whenyou [Run) theFontCreator,you'lIbe asked to select an available font from your "Easy AMOS Programs" disc, and then you can enlarge it with a built-in "zoom" facility. Evel)'thing is explained on screen or in the listing.
If you want to see some even more superb effects, load up this example program next:
Scrolling_Text.AMOS
This demonstration scrolls special effects across your screen, and is guaranteed to give you some instant fun. You can use your own fonts, made with the Font Creator, and all the practical steps are set out in the listing. Any keywords or programming ideas that you haven't yet come a,ross will soon be explained in this book.

Chapter 7
WORKING WITH THE KEYBOARD
o moving the text cursor
o setting tabs
o checking for a keypress
o the Easy AMOS Typing Tutor
o keyboard short-cuts
"/ like the keyboards, you get to sit down more."
(Paul McCartney, 1990)
95

Chapter 7 WORKING WITH THE KEYBOARD
This Chapter explains some of the tricks of the programmer's art which control the way information is printed, and it also explains how you can exploit the keyboard in your programs. Let's start with a very simple example:
IJjlP Print "r have been printed"
Now try this:
IJjlP ? "r have also been printed"
PRINT or?
The question-mark character acts in exactly the same way as the Print command, when you use it at the beginning of a line. Easy AMOS will automatically turn "?" into "Print" when the line is recognised. The list of items to be printed can be up to 255 characters long, and it will appear starting from wherever the text cursor is. You can break up your list into separate elements by putting them inside their own pair of quotation marks, and linking them together with a semi-colon, like this:
IJjlP ? "Easy"; "AMOS"
Moving the text Now change that example by linking your elements cursor with a comma instead of the semi-colon;
96
lr:ff' ? "Easy" f "AMOS"
Using the semi-colon causes your data to be printed immediately after the previous value, but a comma moves the cursor to the next "Tab" position on the screen. A tab is an automatic marker that sets up a location for printing, and is often used to layout columns of figures, or to make indentations in text. The use of the [Tab] key is explained in a moment.

Chapter 7
"A kiss can be a question mark or a comma. That's the only punctuation I ever learned. " (Madonna, 1991)
Setting Tabs
Checking for a keypress
"Life is like a tin of sardines: we're all looking for the key."
(Alan Bennett, 1964)
WORKING WITH THE KEYBOARD
Normally, the cursor is advanced downwards by one line after every Print command. But by using the semicolon or comma, you can change the rules. Here's an example:
IIJir' Print "Easy"
Print uAMOS "
Print "Ea"j
Print "sy",
Print "AMOS"
The [Tab] key is the large key above the [Ctrl] key on the left-hand side of your keyboard. Go into the Edit Screen, and tryout the [Tab] key now. Every time you press it, the edit cursor jumps forwards to the next tab marker. Now press [Shift] and [Tab] together, which causes the cursor to jump backwards one tab.
To change the tab settings, press [CtrIJ and [Tab] at the same time, look at the prompt in the Information Line, type in your choice for a new tab value, and then press [ReturnJ. Test out various tab settings now.
As welJ as using your keyboard for typing in programs, it can also be used to interact with your routines once they are running.
=INKEY$
This function checks to see if you have pressed a key, and reports back its value in a string. For example:
IIJir' Do
X$~Inkey$
If X$<>"" Then Print "You pressed a key!"
Loop
97

Chapter 7
98
WORKING WITH THE KEYBOARD
Now use the Inkey$ function to move your cursor around the screen, like this:
~ Print aUse your cursor keys"
Do
X$=Inkey$
If X$<>" , Then Print X$;
Loop
Try typing in characters as well as moving the cursor, and see what happens. The Inkey$ command doesn't wait for you to input anything from the keyboard. If a character is not entered, an empty string is returned.
Inkey$ can only register a key-press from one of the keys that carries its own Ascii code, and the Ascii numbers allocated to each character are explained at the beginning of the last Chapter. This is fine if you want to use Inkey$ for giving the value of most key-presses, but .what about the keys that don't carry an Ascii code, such as [Help]? If Inkey$ detects a key-press from this type of key, it will report that it's come across a character with a value of zero.
=SCANCODE This function helps to check for keys which don't cause a character to be printed. It returns a special key code, known as the "scan code" of a key which has already been entered using the Inkey$ function. Tryout this example:

Chapter 7
Interrupting a program
WORKING WITH THE KEYBOARD
I(ff" Do
While K$=" n
Wend
If ABc (K$) =0 Then Print "No Ascii Code"
Print "The Scancode is";Scancode
K$=""
Loop
Test out that example by pressing various keys, including [Del], [Help] and the function keys [FI] to [FlO]. When you have had enough, interrupt the program by pressing the [etrl] and [e] keys at the same time.
BREAK ON BREAKOFF
If you ever need to turn off the [etrll+[e] facility in order to stop a program being interrupted while a particular routine is running, the Break Off command can be included in your listings. To restart the interrupt feature, use Break On. But BE WARNED, never run a program you are still editing with Break Off activated, or you will lose your work. Make a back-up copy first. If you insist on ignoring this advice, try running this:
I(ff" Break Off
Do
Print "Get out of that!'
Wait key
99

Chapter 7
THE EASY AMOS TYPING TUTOR
100
WORKING WITH THE KEYBOARD
Here' sa great way to improve your keyboard skills. The Easy AMOS TypingTutornotonly helps you to improve the speed of your typing, it also learns how well you are performing and adapts itself to suit your progress. Load it from your "Easy AMOS Tutorial" disc now:
Typing_Tutor.AMOS
Take a look through the listing and read the comments to see how the program has been organised. There are two levels, the "Typing Tutor Letter Game" which uses single key presses, and the "Typing Tutor Phrase Game", where you have to type in the words or phrases that appear on screen as fast as possible.
You'll find examples of how Inkey$ and Chr$ are used with Ascii codes, as well as a simple system for giving you extra time if you press the wrong key and less time when you type in the correct character. Although this is a simple idea, it means that the TypingTutor will always push you to your maximum potential!
Don't forget to tum up the volume on your system to hear the sound effects, and [Run] the game. Select [1] first, and giant individual letters will appear above a timer-bar. Your score and speed are displayed at the bottom of the screen. Keep a record of your best scores, and see how they improve. Later on in this book, you'll learn how to include your own hi-score routines and title pages to tum this sort of practical program into a proper game. You can always quit a game by pressing [Esc] or [Ctrl]+[C].
Only the additional routines have been commented in the "Typing Tutor Phrase Game" listing. You'll find a bonus score, and a long list of "Data" statements where all the phrases to be typed are held. You can change them if you want. To try your hand at typing in whole words and phrases, select option [2] when the title sa:een appears. Good luck!

Chapter 7
Keyboard short-culs
WORKING WITH THE KEYBOARD
You have already used several keyboard short-cuts, such as [FI) to run a program, and the [?) key instead of typing "Print". Make sure you have saved any important programs that may be currently in memory, and get ready to try out some more Easy AMOS techniques.
If it's not in place, load your "Easy AMOS Programs" disc, go into Direct Mode, and look at the list of twenty instructions displayed in the panel. You won't recognise most of them, but they will become familiar as you progress through later Chapters.
Each of these instructions can becalled up from anywhere in the Easy AMOS system by pressing just two keys. They can be called while you are in Direct Mode, or if you are using the Edit Screen, or even from inside an Easy AMOS program. To selectoneof these instructions, you must press one of the [Amiga) keys either side of the [Spacebar) at the same time as one of the function keys. By pressing the LEFT [Amiga) key at the same time as keys [Fl) to [FlO] the first ten instructions are called. When you press the RIGHT [Amiga) key with keys [FI) to [FlO] the instructions numbered II to 20 are given.
For an instant demonstration of this feature, press the left IAmiga] key and [F3) together. This calls the Dir command, which prints a directory of all the files held on your current disc. Now go back to the Edit Screen with F19, by pressing [F9) and the right [Amiga) key at the same time.
!fyou press the left or right [Amiga) key while in the Edit Screen, the same definitions will appear in the edit area.
Are you ready to go graphical? Then you're going to enjoy the next Chapter!
101

102
Chapter 8
GRAPHICS
o graphic coordinates
o drawing lines
o drawing shapes
o colour
o solid shapes
o flashing
o rainbows
o graphical text
"Art is a lie." (Pablo Picasso, 1958)
103

Chapter 8
GRAPHIC C<X>RDINATES
GRAPHICS
Welcome to the artist's Chapter.
You are a computer-graphics artist! Your electronic canvas is 320 pixels wide and 200 pixels high. Your artist's palette can hold several pots of ink, and there are over four thousand bottles of different colours waiting in the art shop. So clear your canvas now with a CIs command, and get ready to create instant computer graphics with Easy AMOS.
Every artist wants to put the right blob of colour at the rightpointon the canvas, tomakeupshapesand patterns. As a computer artist, you need to know the coordinates of each available pixel. You should already be familiar with the idea of x,y-<:oordinates, and as long as you don't confuse graphic coordinates with text coordinates all will be well.
PLOT
This is the straightforward command for filling a single pixel with whatever colour is ready to use on your electronic brush. Plot a point now, wherever you choose on the electronic screen, using any graphic x,ycoordinates between 0,0 and 319,199 like this:
lUi? Plot 160,100
Now give your screen a different coloured pimple. All you have to do is set the graphic coordinates, then specify the number of one of your paint pots, and see what colour is in it. For example:
lUi? Plot 160,100,6
Not very exciting is it. Never mind. Try giving the screen animated bubonic plague! Copy the next routine exactly, and then run it. It uses a new command called Rnd, which makes things happen at random.

Chapter 8
Drawing lines
GRAPHICS
Don't worry how that works for now, put your trust in Easy AMOS and take it for granted that paint pots numbered from zero to 15 are to be used for throwing colour aU over the screen at random. Here goes:
~Curs Off : Flash Off
Do
Plot Rnd(319) ,Rnd(199) ,Rnd(15)
LoOp
Later in this Chapter, you can learn how to change the colours in your ink pots, and use them for instant graphic effects. As for now, there should be sixteen different colours speckling aU over the screen in a random mess. It would be impossible to establish what colour is sitting at any coordinate simply by looking at the screen, so Easy AMOS gives you a command to help.
=POINT This is the command used to teU you the index number of the colour occupying the x,y-coordinates. Try this example:
~ Plot 160,100
Print "The colour is";Point (160, 100)
DRAW
Line drawing is extremely Simple. Pick two sets of coordinates, and use them to teU Easy AMOS to Draw a line from one To the other, like this:
~ Draw 50,50 To 250,150
If you want to draw a line from wherever the graphics cursor is set at the moment, just give the Draw To command foUowed by a single set of coordinates. For example:
~ Draw To 275,175
105

Chapter 8
Line styles
lCX>
GRAPHICS
When you have done that, experiment with line drawing anywhere on the screen, like this:
IG? Draw 10, ° To 319,199
Draw To 275,50
Draw To 0,199
Changing the style of straight lines is very simple. You may remember that there is a way to make sure which pixels are to be filled and which pixels are to remain empty, using the twin or '"binary" numbers zero and one, and thata binary number can be introduced by using the % symbol.
SET LINE
This command tells the Amiga what style of line you want to create, using a binary number made up of 16 "bits". So a normal line, with no gaps in it, can be imagined as a binary number where all the bits are set to ONEs, like this:
%1111111111111111.
But as soon as you introduce ZEROs into the pattern, you set up a dotted line for your drawing operations. Experiment with your own patterns, along these lines:
IG? Set Line %1100000101010011
Draw To 319,199
Draw 160,0 To 160,199
Draw 0,100 To 319,100

Chapter 8 GRAPHICS
Try this example, which draws a range of spider's webs:
~ Flash Off: Palette O,$FFF
SPIDERWEB:
Cls 0
Pen 1 : Paper 0
Locate 0,0
Input "Enter a number bet_en 5 and 50."; S
Curs Off
If S<5 or S>50 Then Goto SPIDERWEB
Cls 0
This is where the web is drawn
, using variable S from Input
For Y=O to 200 Step S
Plot O,Y
Draw To Y,200
Next Y
Locate 10,3 : Print "Press a key toNi
Locate 10,4 : Print "spin another web";
Wait Key
Goto SPIDERWEB
Thefirsttimeyou weaveyourweb,inputthenumber··5·',and draw a dense pattern. Then try and understand why the pattern is so expanded when you input "50". Experiment by changing the Plot coordinates to something like:
~ Plot 100, Y
Draw To Y,150
and mput "5" again, to see how your web has been twisted. Now use Set line to change the style of your web strands.
107

Chapter 8
Drawing shapes
108
GRAPHICS
Here are some Easy AMOS short-cuts for drawing line shapes on the screen. You can even use Set Line with the first one, called Box.
BOX draws the outline of a rectangle, from wherever you set the coordinates of the top left-hand corner To the bottom right-hand comer. For example:
~ Set Line %1010101010101010
Box 50,50 To 275,100
When it comes to circles and ellipses, graphic coordinates are used in much the same way. This time, the x,ycoordinate sets the centre point around which your shape is going to be drawn. The "radius" is the distance from the centre of the shape to the "circumference" or rim of the shape, and it is set by giving the number of pixels making up that distance. Obviously, a circle only has one radius, but an ellipse has two: one for the radius from the centre of the ellipse to its nearest side and one for the radius from the centre to its furthest side.
radius
Chapter 8
Setting the graphics cursor
CIRCLE
ELLIPSE
GRAPHICS
Draw a circle now, by setling the coordinates of its centre, followed by the length of its radius. Then draw an ellipse in the same way, not forgetting to set the length of both the short and the long radius. Try this example:
~ Circle 100,100,45
Ellipse 250,90,30,70
With drawing commands, remember that if you leave out the coordinates from where the shape is to bedrawn, it will appear from the current cursor posi lion. You still have to include the correct number of commas, like this:
~ Draw 0,100 To 160,100
Circle ,,45
GRLOCATE
The graphics cursor sets the starting point for drawing operations. Gr Locate places the graphics cursor at the x,y-coordinates you choose, in the usual way. Try out this example:
~ X~150 : Y~lO
For R~3 To 87 Step 3
Gr Locate X,Y+R
Circle "R
Next R
100

Chapter 8
Setting graphics areas
COLOUR
Choosing colours
110
GRAPHICS
CLIP This command is used to mark out an invisible rectangular area of the screen using the usual graphic coordinates, so that all drawing operations willbeclipped off when they reach the boundaries of the rectangle. To restore the normal screen display, simply use Clip again, leaving out the coordinates. Areas that are preserved outside the clip zone can be used for items such as borders and control panels. To see how this works, insert the following line at the beginning of that last Gr Locate example, and see what effect it has on the circles:
!Iff" Clip 100,30 To 205,140
One of the best features of Easy AMOS is the way it gives you the freedom to exploit your Amiga's superb colourhandling features. The next part of this chapter tells you how.
So far, you have been stuck with a pre-set colour for your ink. The next command explains how to take control and change ink colours to your own preferences.
INK
This is the command for filling the ink pot you are using with your choice of colour from a selection of zero to 64 colour numbers. For example:
!Iff" Ink 5
Draw to 319,199
The Ink command can also be used to set colours for borders around shapes and whatever fills up those shapes, and this will be explained later. Before that, you should understand how different colours are mixed.

Chapter 8
Mixing colours
GRAPHICS
Every shade of colour displayed on a television set or a monitor is composed of various mixtures of the same three primary colours: Red, Green and Blue, or "RGB" for short. There is a range of 16 strengths available for each of the RGB levels in every colour. A zero level is equivalent to "none" of that colour, in other words "black", and the maximum intensity is the equivalent of "all" of that colour.
Because there are three separate components each with 16 possible strengths, the maximum range of shades available is 16 times 16 times 16, which equals 4096 poSSible colours!
The Amiga likes to recognise colours by their RGB components. Unfortunately, it isn't too keen on the normal decimal system of numbers, which we have evolved based on the ten digits we carry around at the end of our arms, known as our "fingers". Your computer prefers to use a system called "hexadecimal", based on 16 digits. Of course, we haven't got 16 different numbers to match up with this way of thinking, so we use all the numbers we have, plus a few letters to make up the difference. Look at this table and try to get familiar with hexadecimals. The top line shows digits in the hexadecimal system, "hex" for short, and the bottom line shows the decimal equivalent.
HEX DIGIT 0 1 2 3 4 5 6 7 8 9 0 ABC D E F
DECIMAL 0 1 2 3 4 5 6 7 8 9 10111213141516
It is not difficult to take a look at what colours are sitting in your first 16 ink pots, and find out how much Red, Blue and Green is being used to make up each colour.
111

Chapter 8
f) I!!!,' ~
112
GRAPHICS
=COLOUR This function takes an ink pot index number enclosed in brackets from zero t031,and tells you what colour value is sitting in that pot. Try and understand what this routine is doing when you ask the Colour function to report on a hexadecimal string of colour value. We use Hex$ for this purpose, in the following way:
~ Curs Off : Flash Off
For C=O To 15 : Ink C
Print Hex$(Colour(C) ,3)
Circle 160,75,10+C
Next C
There should now be a list of 16 colour values in hex code, alongside a bunch of 16 circles using those colours. Every hex number is introduced by a dollar sign. $ is not only used to represent a ··string·'. When used with numbers like this, it introduces a hex number for the Amiga to recognise. So whenever you usea hex number, always put a $ in front of it.
Lookat the first hex value, and the innermost circle. Sure enough, $000 means that there is no Red, no Green and no Blue component in ink potnumberO. Itisdrawn with black ink.
Here are some other values, which should be easy to understand if you refer back to the hex digit! decimal table above.
COLOUR HEX VALUE RGB COMPONENTS
Green $OFO R=O G=F B=O
White $FFF R=F G=F B=F
Violet $FOF R=F G=O B=F
Sickness $A91 R=A G=9 B=1

Chapter 8
'You can have any colour you want, so long as it's black!'
(Henry Ford, 1924)
Setting several colours
GRAPHICS
If that is clear, you are ready to mix your own coloured ink and pour it into whatever ink pot you want. There are 32 pots, called "colour registers" waiting on your palette.
COLOUR This command is used to set a new colou,r ready for use. Follow the command with the colour index number, then the new hex value introduced by the $ symbol, like this: $RGB. Run this'example from Direct mode:
~ Colour O,$FFO
If you have made that last example work, colour register zero no longer holds black ink, but bright yellow. Experiment with mixing your own shades now, and try loading them into different ink pots.
COLOUR BACK This command is used to set the background colour of the screen, that is to say, the areas of screen that are not in use,such as theverytopand bottom. The$RGB value is set in hex as usual, so try changing the background colour now, like this:
~ Colour Back $666
Instead of mixing new colours, existing colours can also be used, like this:
~ Colour Back Colour(l)
Spectacular effects can be achieved by multicolour changes, but assigning individual colours to every paint pot would be a tedious business. Never fear, Easy AMOS has a suitable short cut.
113

Chapter 8
Filled shapes
114
GRAPHICS
PALETTE
'This is a much more powerful command than Colour, and it can be used to set as many or as few colours in your artist's palette asare needed. Your program always startsoffusing a list of pre-programmed or "default" colours sitting in the existing palette. Run this line now, then draw something on the screen:
~ Palette ,$FOO
The second palette colour has changed to red, but all the other colours retain their original settings. Now try this routine, which changes the first five colours in the palette with a hexadecimal poem, and displays the result on the screen. If you don't like the colours or the poetry, feel free to change the values!
~ Palette $FAB,$F1B,$BAD,$ODD,$BOD
Curs Off : Flash Off
For C~o To 4 : Ink C
Print Hex$(Colour(C) ,3)
Bar 50,8*C To l50,8*C+8
Next C
Thereisanewcommand in thatlastexamplecaIled Bar, which is a good introduction to the next section. Reset your colours now, by getting rid of any of your new Palette commands, before you go on.
You should now be familiar with drawing basic shapes, and setting choices of colour. The next stage explains how to combine these skills.
PAINT
Using this command will fill any section of your screen with a solid block of colour. All you have to do is include this command in your program, followed by a set of coordinates located anywhere inside the area of screen you want to paint with the current ink colour. Try this:

Chapter 8
trff> Palette 0, $FOO
Circle 160,100,50
Paint 50,50
GRAPHICS
If that has worked properly, you have just drawn the Japanese national flag on screen.
BAR This isused to draw solid bars of colour by setting up the top left-hand graphic coordinates To the bottom righthand coordinates in the normal way, like this:
Bar 50,50 To 125,175
Shapes with many sides are called 'polygons', and Easy AMOS lets you draw coloured shapes with as many sides as you want, using a single command.
POLYGON
The Polygon command sets up any size and shape if you tell it the coordinates for the beginning and end of each one of its sides, as usual. If the first pair of graphic coordinates is left out, then your shape will begin from the current graphic cursor position. Try and build up different geometric shapes, like this:
trff> Polygon To 250,150 To 135,175 To 200,75
Now fill the screen with intergalactic stalagmites by running the next routine, using random colours, coordinates, heights and widths of triangles. When you've seen enough, try changing the values of the numbers in brackets.
trff> Do
Ink Rnd(15)
Xl=Rnd (250) : Yl=Rnd (150)
H=Rnd(200) : W;Rnd (150)
Polygon Xl,Yl To Xl+w,Yl To Xl+W/2,Yl+H To Xl,Yl
Loop
115

Chapter 8
116
GRAPHICS
Type in and [Run] this example, which creates a mosaic pattern with painted grids ranging from red through to blue. See how it makes use of the graphic commands Palette, Ink, Plot, Draw To and Paint:
tr:P'" Screen Open 0, 320,200, 16, Lowres
Curs Off : CIs 0 : Flash Off
Rem Type in next line as one long line
Palette $O,$FOO,$EOO,$DOO,$COO,$BOO,$AOO,
$901,$B02,$703,$604,$505,$406,
$307,$20B,$109 XA~BO
P~O
YA~20
For D~O To 140 Step 10
Ink 1
Plot D+XA,YA Draw To
Plot XA,D+YA Draw To If P<>O
For S~O To P-l
D+XA,140+YA
140+XA,D+YA
Ink P+l
Paint(P-l)*10+5+XA,S*10+5+YA If S<>P-l
Paint S*10+5+XA, (P-l)*10+5+YA
End If
Next S
End If
P~P+1
Wait Vbl
Screen Swap
Next D Ink 15
Paint 0,0
Ink 0 Paint XA,YA

Chapter 8
More inking
Filling shapes
GRAPHICS
SET PAINT
This is a simple command that switches outlines on and off for any shapes drawn with Polygon and Bar instructions. Follow Set Paint with a value of 1, and borders appear in the previous Ink colour. Follow it with a zero and you are back to normal, with no borders showing. For example:
~ Ink 0,1,2 : Set Paint 1
Bar 5,5 To 200,100
Set Paint 0 : Bar 210,75 To 310,190
Look at the three numbers that follow the Ink command in that last example. After the number that sets the new ink colour there are two more settings.
INK
The Ink command can also have optional settings for paper and border colours. You don't have to set them, as long as commas are used in the right place. The paper colour sets a background colour that will be used for any filling-in patterns. The border colour selects what colour is used for any outline borders on bars and polygons. Try using the following settings in tum for drawing bars, and see the effect, one after the other:
Ink 3 : Rem Set ink colour
Ink ,,5 : Rem Set border outline only
Ink 0,8,2 : Rem Set ink,back,border
Ink 6,13 : Rem Set ink and background
FiIIing shapes with plain colours is all very well, but Easy AMOS allows for a much wider choice of fiIIing effects.
117

Chapter 8
118
GRAPHICS
SETPATIERN
This is used to select from a whole range of pattern numbers. The normal or "default' state of affairs fills shapes with the current ink colour, and is set with a zero, like this:
Set Pattern 0
If Set Pattern is followed by a POSITIVE number from 1 to 34, shapes are filled from a ready-made selection of patterns. Take a look at them now by running this routine:
((ff'DO
For N~O To 34
Set Pattern N
Ink 0,1,2 Set Paint 1
Bar 50,50 To 150,150
Locate 0,0 Print N;
Wait 50
Next N
Loop
If Set Pattern is followed by a NEGATIVE number, shapes are filled by an image held in a special memory bank. These images go by the name of "Bobs', and "Bob' images can be very complicated. So in order to use them as a fill pattern, the Set Pattern command automatically simplifies their colouring and their dimensions. The whole of the next Chapter is devoted to "Bobs", so wait until you understand them before trying Set Pattern with a negative number. For the moment, let's take a look at some ways of changing the appearance of graphics.

Chapter 8
Overwriting styles
GRAPHICS
When graphics are drawn, they nonnally get "written" over what is already on the screen. But there are four alternativedrawingmodesthatchangethewaygraphics appear, and they can be used one at a time, or combined to generate a whole range of effects.
GRWRITING
This command is used to set the various modes used for drawing lines, shapes, filled shapes and graphical text. There are several alternative modes which can be used singly or combined to create dozens of different effects.
Settings are made using a "bit pattern", where the following values give the following results:
Bit 0=0 only draws graphics using the current INK colour.
Bit 0=1 replaces ANY existing graphics with new graphics.
Bit 1=1 changes old graphics that OVERLAP with new graphics.
Bit 2=1 reverses ink and paper colours creating INVERSE VIDEO.
The normal drawing state is where new graphics overwrite old graphics, and replace them. Like this:
JUr' Ink 2, 5 : Text 100, 80, "NORMAL TEXT"
Wait 100 : Gr Writing 1
Text 100,80, "REPLACE"
By setting the Gr Writing bit pattern to zero, only new graphics that are set to the current INK colour will be drawn. This allows you to merge new graphics with an existing background. Try this example:
JUr'Ink 2,5 : Text 100,80, "NORMAL TEXT"
Wait 100 : Gr Writing 0
Text 100,80, "MERGED"
119
Chapter 8
Flashing
120
GRAPHICS
The next examples reverse an image before it is drawn, creating INVERSE VIDEO effects. Add the following lines to the last example to see the result.
~ Wait 100 : Gr Writing 4
Text 100,90, "STENCIL""
Wait 100 : Gr Writing 5
Text 100,100, "REVERSE"
Experiment now with your own values, and see what effect the various overwriting techniques can provide.
Now for something flashy. You will have noticed during your programming that colour number 3 automatically flashes on and off. You also carne across the Flash Off and Flash commands when you were learning about the text cursor.
FLASH is a command that can do much more than affect colour number 3. When Flash is followed by the index number of any colour, that colour will have animated flashing every time it is used, until you command the program otherwise. What's more, you can flash between as many as 16 colours, and set the flash rate to any length that pleases you. It works like this:
Flash 1,"(OAO,50)(FOF,50r
Let's decode that line of program. The colour to be affected follows the Flash command, in this case colour number 1. After the comma, the set of quotation marks can contain up to 16 pairs of brackets, and inside each pair of brackets there are two components. Each pair of brackets represents the colour that is next on the list to be flashed, and how long it will appear for. Colour is set in RGB component values, like the ones in the right-hand column of the table earlier in this chapter. Delay time is set in 50ths of a second.

Chapter 8
RAINBOWS
GRAPHICS
So the last example has the effect of flashing colour number one between a green value and a violet value once every second. See if you can create some special effects using this method, such as flashes of lightning and starbursts. Don't forget Flash Off to prevent these experiments affecting other parts of your programs.
The electronic canvas of a computer artist doesn't have to be blank or boring. Imagine painting on shadows and rainbows! The next command lets you do both.
Copy and run the following program, then get ready to understand how it works. It could be the opening scene of your first artistic production. Where it says "MY NAME presents", you are welcome to insert your own name!
~ Set Rainbow 0,1,16," (If 1, 15) "," ",""
Rainbow 0,56,1,255
Curs Off : Flash Off
Locate .12 : Centre "MY NAME presents"
Wait Key
SET RAINBOW
This command creates a sort of Venetian blind effect which alternates light and shade and can create some excellent rainbows. It works with these parameters, in the following order:
Set Rainbow is followed by an identification number for this rainbow, then a colour index number, then the length of the colour storage table, then the "(Red string)","(Green string)","(Blue string)'"
Look at your last example, and identify each part of the Set Rainbow process as they are explained.
121

Chapter 8
122
GRAPHICS
The rainbow identification number can be between zero and 3. In other words, you can set up to four different rainbows for later use, and number them 0, 1, 2 or 3. Your example sets rainbow number zero.
The colour index number sets the colour to be affected by the rainbow.
Next is the colour storage table size, which can range from 16 all the way up to 65500, with each unit ready to hold one "scan" line of colour. If this value is less than the actual height of your rainbow, the colour pattern gets repeated down the screen.
Finally, the Red, Blue and Green components of the rainbow are set up as "strings", each within their own (brackets). Your example leaves out any reference to the Green and Blue components, which is why your rainbow effect is completely in the Red. The three values in brackets represent this:
(number,step,count).
Number refers to the number oflines assigned toone colour value. Think of it as controlling the "speed" of the sequence.
Step is a value to be added to the colour, which controls the change in this colour.
Count is simply the number of times this whole process is performed.
The best way to understand all this is to change the values in the Set Rainbow line of the example, and see what happens.
Chapter 8 GRAPHICS
RAINBOW Now for the command that is used to display one of your rainbows on screen. Again, let's work through its parameters in order of appearance. They run like this:
Rainbow number, base, vertical position, height
The rainbow number should beobvious, and refers to one of four possible patterns created with Set Rainbow.
The base number is a sort of offset value for the first colour in the Set Rainbow table, and it governs thecydingor repetition of the rainbow on screen.
The vertical position isa eoordinate witha minimum value of 40, and it affects the starting point of the rainbow's display, vertically, on the screen.
Hnally, the heightnumbersets therainbow' s vertical height in screen "scan" lines.
It is worth knowing that only one rainbow at a time can be displayed at a particular scan line, and theone with the lowest identification number will normally be drawn in front of any others.
RAINBOW DEL This is short for rainbow delete. The Rainbow Del command will get rid of all rainbows that have been setup. If you add a rainbow identity number, then only that particular rainbow will be flushed down the electronic toilet. fur example:
Rainbow Del 0
RAIN is a very powerful rainbow instruction, because itallows you to change the colour of any rainbow line to any value you choose. Rainmustbefollowedbyapairofbracketscontaining the number of the rainbow to be changed and the scan line number that is to be affected, like this:
Rain(number,line)=colour
123
Chapter 8
"Enjoy a rainbow without forgetting the forces that made it."
(Mark Twain, 1897)
124
GRAPHICS
The next example works in the following way. Rainbow number 1, with colour index 1, is given a colour table length of 4097 (one entry for every colour value that will be on the screen). The RGB values are left blank, to be set up by the first For ... Next routine that contains the Rain command. The second For ... NextroutineusesRainbow to display a pattern 255 lines long, starting at scan line 40. Do ... Loop is used to repeat this process.
IW Curs Off : Centre "OVER THE RAINBOW"
Set Rainbow 1,1/4097,~~,"H,""
For L~O To 4095
Rain(l,L)~L
Next L
Do
For C~O To 4095-255 Step 4
Rainbow 1,C,40,255
Wait Vbl
Next C
Loop
The stage is fast approaching when your graphics programming will cease to be a bunch oflittle exercises, and you will have the confidence to start linking several routines together to create original computer art. Many of the techniques you can already use will playa part in creating electronic backdrops, instruction panels, title screens, and special effects, no matter what sort of computer programs you are interested in. Easy AMOS can help you release your creative talents, and if you still think that your efforts so far don't begin to compare with your favourite programs, think again.

Chapter 8
Converting coordinates
GRAPHICS
The last part of this Chapter deals with some practical information before you enter the incredible world of animated computer graphiCS. It will be worth your while to read through it, if you have any intention of mixing text and graphics in your own programs.
When text and graphics need to bedisplayed at the same time, you want to be able to relate both the text coordinates and the graphic coordinates together. As you already know they use two different systems, so Easy AMOS provides instant conversion functions.
=XTEXT
=YTEXT
Supposing you want some text to hit a certain graphic target. All you need to do is tell the commands X Text and Y Text the graphic coordinates you are interested in, like this:
I!? Circle 116,99,45
X=X Text(116) : Y=Y Text(99)
Locate X,Y
Print "+K
=TEXT LENGTH Use this function to discover the graphical length of a string of characters. This is important when different sized fonts are involved, and you need to know exactly how many pixels wide a string of text will be.
I!? T$="Easy AMOS"
L=Text Length(T$)
Print L
125

Chapter 8
126
GRAPHICS
=TEXTBASE
This is used in much the same way to work out the height of the "baseline" of the current font. The baseline is the number of pixels from the top of a character set, down to the point where the characters sit on the screen. Obviously, letters that have little tails on them (g, j, p, q and y) dangle below the baseline.
~ Get Fonts : Set Font 2
Print Text Base
text base
Because graphical text fonts have various shapes and sizes, the Print command cannot .be used to position graphical text on screen. Once Text Base has revealed the baseline of a font, this can be used as a graphic coordinate.
TEXT Is the command that prints a string of text at graphic x,ycoordinates. So your text can be printed at any pixel posi tion on screen. Like this:
~ Text 123,123, "That's all folks"

Chapter 9
BOBS
o the Main Menu
o disc operations
o bank operations
o the grabber
o hot spots
o palette colours
o screen resolution
o animation
o drawing tools
o using Bobs
"There's a little red faced man, which is Bobs. "
(Rudyard Kipling, 1901)
127
Chapter 9
BLITTER OBJECTS
The Bob Bank
1
BOBS
This is where Easy AM OS takes off and flies through the realms of computer animation. The good news is that you are at the controls! Anyone who has skipped straight to this Chapter can hardly be blamed, it contains some of the most spectacular tools in the Easy AMOS treasure chest.
Your Amiga contains a chip that goes by the name of the "Blitter". This can copy images to a screen at a rate of almost one million pixels per second, which allows highly professional moving graphics to be displayed. Easy AMOS uses the Blitter to create moveable graphics called "Blitter OBjects", or Bobs for short.
Bobs can be moved around the screen without affecting any other existing graphics. They can feature up to 64 colours and there is no limit to their number, apart from the amount of memory available. You can control them, track them and give them special characteristics if they collide with one another. Best of all, a Bob can be animated to make moving cartoon characters or lumps of exotic machinery, flying text, intergalactic phenomena, in fact anything that your imagination can dream up.
Bobs are held in special blocks of computer memory called "banks". Several different banks can be used, but Memory Bank 1 is always reserved to hold your Bob data. Onee they have been set up, you can deposit and withdraw Bobs from any suitable bank, to use readymade designs, adapt existing ones and best of all, you can create your own design images.
There's a whole host of Bobs waiting to be called up on your "Easy AMOS Tutorial" disc, so make sure that this disc is in your disc drive and let's display a Bob now!

Chapter 9
Displaying a BOB
Loading the Bob Editor
BOBS
The following program loads a Bob file from your "Easy AMOS Tutorial' disc. After removing the cursor and stopping colour 3 from flashing, the screen's palette is set to the palette used by the Bob, and then the screen is cleared to display colour zero. You then position Bob number 1 at selected x,y coordinates, using "image number 1" from the Bob Bank. This isexplained in detail later. Finally, the program waits for a screen "vertical blank". Here goes:
~ Load "Easy_Examples:Bobs!Baby_AMOS.Abk'
Curs Off : Flash Off
Get Bob Palette
CIs ° Bob 1,160,130,1
Wait Vbl
Our favourite cartoon character should now bedisplayed on screen, ready to stride through this Chapter. The Bobs Chapter is split into two sections. The first part is a guided tour of the Easy AMOS Bob Editor, which is an amazing electronic tool-kit for creating, transforming and animating Bobs, simply by selecting options from the screen with the mouse! The second part of this Chapter includes all the Bob commands you will need for making the best use of your own creations in your own programs.
The best way to understand the Bob Editor is to go right ahead and use it. It's ready and waiting on your "Easy AMOS Programs" disc. You can select [Bob Editor) from the Systems Menu by pressing [Shift] and [F7] together. Alternatively, make sure that your "Easy AMOS Programs" disc is loaded, and select the following program using the File Selector:
Bob_Editor . AMOS
129

Chapter 9
Setting up
130
BOBS
When you select the Bob Editor from the Systems Menu, any program you are working on that is still in the main editor will be saved to disc before the Bob Editor is loaded and run automatically.
The Bob Editor is jam packed full of data. In fact it contains so many features that they won't all fit in the amount of memory reserved for the editing buffer if you load the Bob Editor using the File Selector. Don't worry, the Information Line will display a message and ask you to press [Y)es to change the buffer size. When this happens, simply press [Y) and then [Run) the Bob Editor.
Welcome to the Main Menu Screen of the Bob Editor. Before you go any further, let's load some Bobs into the Bob Editor so that you have something practical to work on. For the rest of this Chapter, everything you need is on the "Easy AMOS Tutorial" disc, so have it ready in your disc drive now. For the time being, simply follow these instructions, all will be explained in detail as you progress through this Chapter.
Look at the line of boxed images at the top of the screen. In the top left-hand comer is a panel that says "EASY BOB ED". Next to that is a panel that displays a picture of a disc drive. Click on the disc drive box with your left mouse button, and leave the mousecursor exactly where it is.
A new range of images should now be displayed at the top of the screen, and next to the image of a "pointing finger" click on the box that shows a floppy disc with an arrow pointing to the right towards a "storage bank", using the left mouse button.
A file selector should now appear headed 'Choosea Bob bank". Select the folder marked "'Bobs", then load the "Baby _AMOS.Abk" file. The Main Menu Screen will now fill with various Bob images.

Chapter 9
The Main Menu Screen
2
4
5
BOBS
After this happens, move your mouse pointer to anywhere in the top line of images, and click on your RIGHfmouse button. You are now ready to work some small wonders, so let's get going!
The illustration shows each part of the screen marked with a number, for easy reference. Please identify each of the numbered zones as they are explained.
i 9
131

Chapter 9
.~
132
BOBS
1 MAJOR OPTIONS The line of large icons across the top of the screen represents all the major ways of importing, handling and exporting Bobs.
2 INFORMATION LINE
This line gives a running commentary on what's happening. It tells you how much memory is available, reminds you what you are doing, and provides helpful prompts while creating graphic marvels.
3 DRAWING TOOLS Each of the smaller icons provides one of the special drawing tools for creating and changing the appearance of Bobs.
4 MOUSE COLOURS The first two double-height colour blocks show the colours currently used by the LEFT and RIGHT mouse buttons when drawing. The third colour block shows the colour currently used when BOTH mouse buttons are pressed when drawing.
5 COLOUR PALETTE A vertical display of all the colours in the current palette. The number of colours depends on what sort of "resolution" you are in, and if 64 colours are available, then colours numbered from 32 to 63 will appear side by side of colours 0 to 31. To select a colour, place the mouse pointer over your choice, and click the left or right button. You can even select a THIRD colour by pressing BOTH mouse buttons together, and use that colour in the same way, by pressing both buttons. Of course, if you have a mouse with three buttons, choosing and using a third colour is easier. Select a pair of contrasting colours now, such as white and bright red.
Chapter 9 BOBS
6 CURRENT DISPLAY The box near the top right of the screen reports on the fill pattern that is ready for use. Place the mouse pointer inside it now and run through all the fill patterns available, using the LEFT button to move forwards or the RIGHT button to go backwards through the list. Thecoordinatesof the mouse pointer are also displayed in the middle of this box when you edit Bobs.
7 BANK DISPLAY Bobs held in the "bank" are displayed here, underneath their own number. Each Bob is shrunk in size so that you can view all of it in the display. A Bob is selected for attention by clicking the mouse pointer on it, and its number becomes HIGHLIGHTED. Any Bob that is currently being edited is marked with a STAR in front of its number.
8 BANK SLIDER Because there can be dozens of Bobs in the bank, and there is only space to view a few of them at a time, this slider is puIled up and down with the mouse pointer to display other Bobs in the bank. Use it now to view all the Bobs currently loaded.
9 SCREEN SIZER
Drag this bar to the left or right using the mouse pointer, if you need to change the proportions of the edit screen. The right-hand zone is the EDIT window, the left-hand zone is the ZOOM area where you can view your work in close-up.
10 ZOOM WINDOW
This is the area that displays a blow-up version of the Bob. !tis provided to allow greater accuracy and ease of use while editing your work. The zoom is norrnally set to twice the size of the original graphics, and there is an option to make this four times the size, which is explained later.
133

Chapter 9
MAJOR OPTIONS
134
BOBS
11 EDIT WINDOW Like the Zoom Window, this is a work area. The mouse pointer changes to a cross when inside either theZoomWindowor the Edit Window, and drawing operations will have the same result in both windows no matter which one is being used.
12 VERTICAL ZOOM When the Zoom Window is unable to show all of the Edit Window, this slider indicates other available areas of the Bob. By moving the slider vertically, these areas are displayed in the Zoom Window.
13 HORIZONTAL ZOOM This has the same function and operation as the Vertical Zoom, and moves the display horizontally.
14 SIZER
The size of the current Bob is displayed in the Information Line. To change the size of a Bob, lock the mouse pointer on this gadget and drag it to a new position. You can have Bobs as large as 320 pixelS wide by 200 pixels high, if memory allows. Obviously, you should keep the boundary size of Bobs as tight as possible, to save memory.
Here is your guided tour of all the Major Options in the Bob Editor, as they appear from left to right along the top line of the Main Menu. Please try out each option as you go along, by clicking the left mouse button on the icon shown in the page margin. This will take you to the appropriate Sub Menu.
You can get back to the Main Menu by clicking the left mouse button on the top-left icon on the screen, or by clicking the right mouse button anywhere along the top line oficons. For most operations, stick to the left mouse button, unless told otherwise. If your "Easy AMOS Tutorial" disc is still in its drive, you are ready to begin.

Chapter 9
I~I.'" ~I
BOBS
DISC OPERATIONS
As soon as you click on this option, the original disc icon appears at the top left-hand corner of the screen, and five new icons are revealed along the top of the screen. From left to right, they perform the following wonders:
Load New Bank from Disc
This prepares the Bob Editor to load a new bank of Bob images. A series of helpful messages is provided in the information line, and AMOS himself makes an appearance to ensure that you make the right deeisions. If the "Easy AMOS Tutorial" disc is ready in itsdiscdrive, click on this icon, and then trigger the [YES) option. A file listing will appear, with the request:
Choose a Bob bank
You will normally make your choice by clicking on the folder of Bobs, choosing the file of Bobs that takes your fancy and confirming your choice by clicking on the [OK] option. The Bobs will load automatically, and you will return to the main Edit Screen. If you have already loaded "Baby_AMOS.Abk", simply click on [Quit) to return to the Bob Editor. Please try to resist the temptation of exploring icons at random, and take a little time to follow this guided tour step by step.
Merge New Bank
This is used to insert a complete new bank of Bob images at the position of the seleeted Bob in the current bank. Experiment with this option, and merge a new bank of Bobs with your existing Bobs. Use exactly the same method as you did for loading your original choice, but select a different file of Bob images. When you return to the Edit Screen, click on the slider bar to the right of the vertical block of Bobs on screen, and run it upand down to display the current Bob images in memory. You can see where the new bank has been merged with the Original bank. The Colour Palette will change to the palette used by the newly merged bank of Bob images.
135

Chapter 9
136
BOBS
Save Bank
Please DO NOT use this option while your "Easy AMOS Examples" or "Easy AMOS Tutorial" discs are in the disc drive! To save edited Bobs, insert a suitable WORK disc such as the one you were asked to label "My_Programs", and get ready to save the current bank of Bob images. This option will display a file selector if your Bob bank has no name. When you are satisfied, save the current bank to the appropriate disc for later use, by following the simple on-screen instructions.
Save As
Once again, only use a WORK disc such as "My _Programs" when experimenting with this option. Unlike Save Bank, when you select Save As, a file selector will always be displayed before saving the current bank to the appropriate disc. As with an of these options, Easy AMOS will give you plenty of opportunity to change your mind or [Quitl at any time during the current process. So there is never any need to panic if you make a mistake.
Grab Palette When this icon isselected you won't see anything happen immediately, but the colour palette will be au tomatically updated to the colours ofthe new bank, when that bank is loaded or merged. If you do not select this option, the original palette will remain when you load or merge a new bank. To deselect this icon, simply click on it again.
If you've been experimenting, the colours on your screen may be looking a bit messy, so reload the Bobs in "Baby _AMOS.Abk" with their original palette before continuing.
We now move on t{) the second Major Option, so move the mouse pointer to the top line, and click the right mouse button to return to the Main Menu. Then choose the Bob Bank Operations icon.

Chapter 9 BOBS
BANK OPERATIONS
When you select this Major Option, you take control of all aspects of the Bob bank. The Bank icon moves to the top-left corner of the screen, and the Major Option top line is replaced by a series of eight new Bank icons, as follows:
Get Bob
First, HIGHLIGHT the Bob you are interested in by clicking the mouse pointer over its image in the Bob display on the right-hand side of the screen. Now, click on the Get Bob option, and the highlighted Bob appears in the large Zoom Window and the smaller Edit Window, ready to be worked on. It's highly probable that you really can't wait to have a go at changing the appearance of whatever is sitting in the edit window right now, and there is no harm in experimenting. Please be patient though,and take the trouble to work through this Chapter step by step. There's much more enjoyment to be had in knowing what you are doing. For the time being, try clicking on the small icon showing a pair of arrows pointing up and down, in the line of drawing tools. This will turn the current Bob upside down! Leave it like that.
Put Bob
Once you've changed the appearance of the edited Bob by flipping it on its head, this option puts it back into its memory bank. It will go back to its original location, if the loca tion has been defined. You can see the original location by looking for the Bob with the highlighted identification number, marked with an *.
Put.Bob To
You can select a new Bob to highlight simply by clicking on its image. Use this option if you want to force the edited Bob into the currently highlighted location of the bank, and replace whatever is there. You will be asked to confirm your actions, just to make sure.
137

Chapter 9
138
h::I+ "[I!l]" II_II
BOBS
Insert Bob
This is a fast way of inserting the Bob from the editing window straight into the highlighted position of the bank, without replacing the Bob that is already sitting in that poSition. The other Bobs in the bank will then shunt along to make room for it. Try using this option now.
Delete Bob This will flush the highlighted Bob down the electronic waste disposal unit, so take care when using it. As a safety measure, Easy AMOS will not be happy about deleting any Bob that is not displayed on screen, and even then it will ask you to confirm your wishes. Use it now and delete a Bob.
New
This is even more dramatic than Delete Bob, because it gets rid of ALL the Bobs in the entire memory bank. As usual, AMOS asks you to make sure of your actions before you commit them. If you use it now, you will have to load a new bank before you can continue experimenting with Bob images.
Auto This option is enabled and disabled by clicking the mouse pointer over it, and popping it in and out like a radio button. It affects the AUTO-GET feature which automatically places data into the memory bank by clicking twice on a stored Bob image. You may want to use this option to avoid grabbing hold of some garbage and automatically placing it in amongst your Bobs.
Conf When editing Bobs, there are times when Easy AMOS tries to be helpful by making a personal appearance in cartoon form and asking you to confirm your actions. For example, when you want to ERASE a Bob or use the PUTTOoption. Ifthesereminderscauseanyannoyance,

Chapter 9
I I
BOBS
you can click on this icon to disable the Confirmation reminder. To reactivate it, simply click on the icon again.
THE GRABBER
Once you are familiar with all the Bank operations, you can move on to the next Major Option, the Grabber! This grabs images from IFF pictures, that is to say, graphic screen images saved in a special "Interchangeable File Format" used by graphics packages like Deluxe Paint.
Grab Bob Make sure your "Easy AMOS Tutorial" disc is ready to load from, and select Grab Bob. This time, you will be reminded to load an IFFfile only, and we have provided you with a suitable picture for loading. The file requester only appears if there is no picture currently selected. Please select the following file now:
Easy_Tutorial: Iff/Grab_Me. Iff
When you have confirmed your choice with an [OK], the chosen IFF picture is shown on the screen. As you move the mouse, coordinate lines will follow your movements. Position the mouse pointer at the top left-hand comer of the part of the image you want to use as a Bob, then using the LEFT button keep it held down until you have chosen the bottom right-hand comer. If you make a mistake, click on the RIGHT button. When you are happy with the rectangle of graphicS to be grabbed, click the LEFT button again. The Edit Screen now holds your new image. There is an auto-resolution mode that is explained later, which will ensure the best graphics mode is used.
Put Bob This works in the same way as the "Put Bob To" option in the BANK menu. Itletsyou grab an image and putitinto memory instantly, without having to wander from one menu to another.
139

Chapter 9
140
BOBS
Load Picture
This time, when the file selector appears, you will be reminded to save any current image in the editing area that has not been saved to the Bob bank, then you can select the name of a new picture to load.
Grab Palette
This isoneof those on/ off options, enabled and disabled by a mouse click. If it is ON, the current palette will automatically change to the palette used by the current picture. If it is OFF, no change to the palette will be made.
Reload Picture
This icon is linked up to the nexttwo icons, and the three of them act like radio station selectors. In other words, only one can be pushed in at a time, and when anyone is activated the other two will dick off. With Reload Picture, the graphic image gets completely erased when you go back to the Main Menu, allowing you to create more Bobs. This is useful if you don't have much memory available, and a large IFF screen may be taking up a vast chunk of it.
Pack Picture
This is also a memory saver. It takes the current screen picture, and packs it into a memory bank using "fast RAM", which doesn't eat up display memory. When you leave the Grab menu for the first time, this will take a little while to perform.
Keep Screen
This option will keep the entire screen exactly as it is, providing you have enough memory available in • chip RAM:

Chapter 9 BOBS
THE HOT SPOT
The next Main Option, concerns setting up any Bob "hot spots". In most computer games and in several practical programs, hot spots can be set up inside moving images as coordinate reference points. When these coordinates are recognised, they are used to trigger preset reactions. Because Bobs can vary greatly in size, it's very useful to be able to place a hot spot precisely. Once inside the Hot Spot sub menu, you can go straight into the Zoom or Edit window and use the mouse to place and set the coordinates. Otherwiseuseoneoftheautomaticsettings, as explained next.
Auto Off If you click on this icon, so it looks as if it has been pushed IN, you can use any of the hot spot presets to poSition a hot spot by hand for the current Bob. Ifit isnot used, you will be in Auto mode, which means that every Bob you GET into the edit window will have a hot spot automatically set to the last preset position. This is useful if you want a whole range of Bobs to have their hot spots in the same place.
Hot spot preset There are nine icon boxes, each showing a preset hot spot position. If the Auto option isOFF, you can select the hot spot of the current Bob by clicking on anyone of them. They are, in order of appearance, Top Left, Top Centre, Top Right, Centre Left, Centre, Centre Right, Bottom Left, Bottom Centre "nd Bottom Right. Select a preset now, and check its setting by moving your cursor into the Zoom or Edit window. When you want to get back to the Main Menu, click the right mouse button in the top line of icons, as usual.
You'll be coming across hot spots again, later in this Chapter, along with a ready-made demo program.
141

Chapter 9
142
BOBS
PALETIE COLOURS
Here's a chance to see all that palette theory you met in the last Chapter put into practice! Click on this Major Option icon for the Palette, and get ready to mix some new colours. Acolourrequesterappearsovertheediting screen, alongside the vertical display of all the colours in the current palette. The colour requester is laid out like this.
Ok
IUndol
Inui.tl
ISOFOI
I················ lit~;1
Chapter 9 BOBS
The colour requester acts like a colour mixing box. If the box obscures the images on display in the editing area, you can drag it around the screen by clicking on the top bar to reveal the images. Let's look in the colour requester box now.
On the left are the sixteen values for colour saturation, given in hexadecimals from zero up to F. Next come three sliding bars, one each for the Red, Green and Blue components of each colour. On the right of the panel are four boxes.
[OK] is triggered when you are happy with any colour changes, and want to keep them.
[UNOO] will ignore any of your colour changes, and return the palette to whatever it held before your latest experiments.
[QUIT) leaves the colour requester, and ignores any changes you may have made.
The Colour Code box, shows the value of the RGB components of the current colour, in hexadecimals.
The Colour Panel at the bottom right of the colour requester displays the current colour that is receiving your attention.
To change colours in the current palette, first select one by moving the mouse pointer over any of the colours in the vertical palette display at the left-hand side of the screen. Now dick inside any of the RGB slider bars and move them up and down until you have mixed the new colour you want. Then mix another colour, or use [OK], [UNOO) or [QUIT], as described above.
143

Chapter 9
144
BOBS
If you alter the colour used for the "framework" outlines used within the editing area, be careful not to merge it with the background colour and cause confusion on screen. If this does happen, Easy AMOS will get you out of trouble. Although you use the left mouse button to click on colours of your choice, if you go straight to the vertical palette display and use the right mouse button, you can change the colours of the edit screen directly.
The vertical palette display may show 64 colours instead of 32 in certain modes, and you are welcome to display colour numbers 32 to 63 in the requester and take a look at them. But you can only change colours in the range from zero to 31. This is because the 64 colour mode, known as Extra Half Bright mode, takes the first 32 colours in the palette and creates 32 new colours which are half as bright as the originals. These new colours will only change when their"original" neighbours are changed.
SCREEN RESOLUTIONS Thisis the Menu inchargeofthescreencolourresolutions. It controls the number of colours used by your Bobs, which you may have to adjust to suit various screen formats. To see how powerful it is, have some high definition IFF images displayed in the Bob windows, before you start experimenting.
Adjust This is a very powerful option. If it is ON, any Bob you GET from the bank will adjust the current palette to its own resolution preference. If it is OFF, the number of colours is unchanged. This can have one of two effects. Either the Bob has LESS colours than your current screen, and nothing is lost. Or the Bob has MORE colours than the current screen, and the higher value colours are lost. The bank will remain unchanged until
Chapter 9 BOBS
you deposit the Bob back into it. The Adjust option is normally ON.
Hi-Res
Also an ON/OFF switch, this one selects the current screen mode, with the maximum number of colours in high resolution being 16. Every thing else in the program remains unchanged, except for the colour resolution.
Number of Colours
A choice of six options, instantly selecting the number of colours displayed on the edit screen, as follows: 2, 4, 8, 16,32 or 64.
ANIMATION
This is a great way to test animated movie sequences of Bob images that are currently loaded. Try out the Animation system now, using the "Baby_AMOS.Abk" Bobs. When you click on the Animation icon in the Major Options row, the editing screen gives way to your very own movie animation suite! Animation is merely the eye tricking the brain into believing that a series of still images is continuous movement, just like the crude "flick-art" images in the bottom comer of the left-hand pages of this book.
145

Chapter 9
146
BOBS
Speed: 82
Ou l t
If you are using the standard European screen system, known as PAL, there are 16 individual movie "frames" in the "camera", tha t can take one Bob each. If you are using the American NTSC system, there are eight frames available. Below them is your "movie screen", showing the individual frames animated one after the other. Next to that is a slider bar for adjusting the Speed of animation, from zero for "still video" up to 100 for a "turbo" speed of 50 frames per second (PALl or 60 frames per second (NTSCl for superfast animation. The "Quit" box is down in the bottom right-hand comer. To the right of the animation frames, the current Bob bank can be examined as usual, by running up and down its slider.

Chapter 9 BOBS
To put any Bob into the animation sequence, all you have to do is click on it and it will appear in a camera movie frame. As soon as more than one Bob image has been transferred, your animation sequence begins to move, in the same order that you transferred your images.
To take out any individual Bob from the animation sequence, click on its movie frame image in the "camera" sequence and it will disappear, causing all the following frames to shunt backwards towards the beginning of the sequence and fill the gap.
The position of the Bob animations on the "movie screen" is changed with the mouse pointer, and its hot spot will be automatically positioned beneath the mouse button click.
After you QUITthe animation suite, the sequence is held in memory. So next time you use the Animation icon, your last sequence will come running to greet you.
To delete the sequence from memory, one of three things must happen:
One of the animation Bobs is deleted from the memory bank.
- A new bank is loaded.
- The original bank is erased.
QUIT
Sure enough, the white flag icon gives up the Bob editing process and surrenders to your next bout of programming. Just in case you have forgotten to save anything you may want to use in the future, AMOS appears with a timely reminder. If you called up the Bob Editor from the Systems Menu, Easy AMOS will automatically clear the Bob Editor from memory when you quit, and reload any program that you were previously editing.
147

Chapter 9
DRAWING TOOLS
D
-148
BOBS
But don't quit yet. There's a whole line of smaller icons to explore, containing all of your drawing tools. This menu line is completely independent from the Major Options above it, and you can use these tools at any suitable time. All of these drawing operations ONLY effect the visible part of the Bob being edited. You are invited to tackle them now, from left to right.
DOT PLOT The Easy AMOS dotted plotter! Click on this icon now, and experiment by clicking the mouse button in the editing window to plot single pixels. Then keep the button held down and move the mouse around at different speeds. Now try the other mouse button, then both buttons together to remind yourself that the top three colours in the vertical palette display refer to the left, right and combined mouse buttons. If your mouse has three buttons, the third one will make use of the third colour automatically.
LINE PLOT This gives you a continuous solid line plot, no matter how fast you use it.
DRAW
Before you can use this drawing tool effectively, you have to design it yourself! First of all, set the size and positioning of your own "line" by clicking anywhere in the edit window, holding the mouse button down, dragging it and then letting go. Now use your own shape to paint and draw with. Further along the line of drawing icons, you will see how the MODE button changes certain drawing operations. If it is selected and used with DRAW, then lines are drawn as soon as the mouse button is released.

Chapter 9 BOBS
BOX
Easy! Click the mouse button to set a corner of the box, keep the button held down while you locate the diagonally opposite corner, then let go. One box appears, ready to use as a brush or paste again as many times as you like by moving the mouse and clicking a button. Don't forget that a third colour is available for drawing operations by using both mouse buttons together.
ELLIPSE
This works in exactly the same way as BOX, except that ellipses don't have comers. So set the boundary points instead. Of course, there is nothing to prevent you drawing circles with this method.
AIR-BRUSH
One for all you street artists. Different sprays can be set by clicking the RIGHT mouse button on this icon, revealing a selector menu to customise your airbrush spray can. Both the power of the air supply and the width of your spray nozzle can be adjusted from one up to 99, with an [OK] button to get back and start spraying. Experiment, and see the results for yourself. If you want to spray without customising your own air-brush, click on the air-brush icon with the LEFT mouse button.
BAR
Set up the diagonally opposite comers of a bar in the usual way, and then release the button to fill it with the current colour, or selected pattern. The outline of the bar can be toggled OFF and ON by clicking on the border section of the Current Pattern Display window.
PAINT ROLLER or FILL
Nice and dramatic, this one. Position your paint roller cursor anywhere inside an enclosed shape, and it will be instantly covered with the current fill colour or pattern. Select new patterns from the Pattern Display window.
149

Chapter 9
150
BOBS
TEXT CAPTIONS
Select this icon, click the mouse bu tton in a likely position inside the editor window, and start typing one line of text. Of course you can't fit much text inside a Bob, unless it's a very wide one! Now reposition your text by moving the mouse, and paste it in as many times as you like. Try and create some outline and shadow effects, using different colours.
COpy BLOCK
This is used to copy a block of graphics from one Bob to another. Click on, hold, move and click off to open the box in your picture, ready for pasting.
PASTE BLOCK
This grabs the previous block that you cut out, and restores it wherever you want within the editing area. Paste a few blocks now.
OPAQUE All the time this option is OFF, colour zero of the block you are editing will be transparent. If you click the Opaque button ON, colour zero will be filled by the colour used by the right mouse button.
CLEAR
OK, SO we all make mistakes. One of the most popular options available: the one that clears all your current efforts away, and leaves you with a blank editing window. OK, SO we all make several mistakes. Use the UNDO option to bring it all back again!
The next block of five drawing icons affects the entire image with dramatic results.
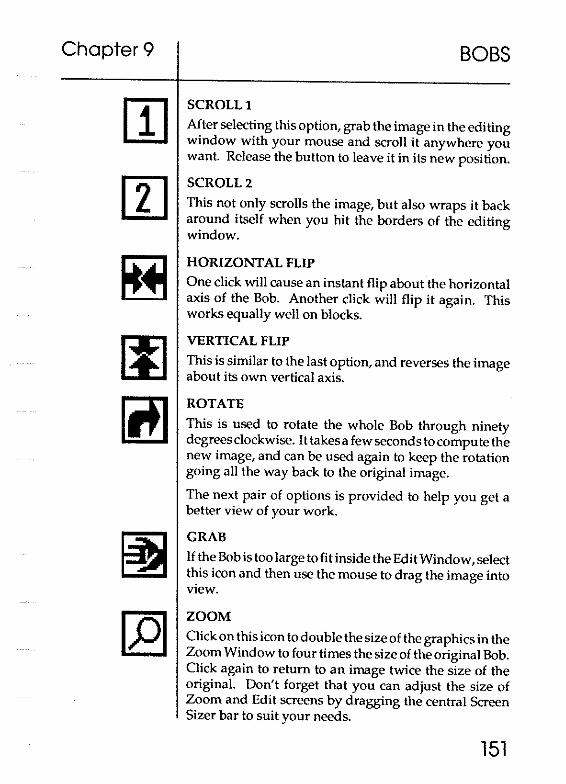
Chapter 9 BOBS
SCROLLl
After selecting this option, grab the image in the editing window with your mouse and scroll it anywhere you want. Release the button to leave it in its new position.
SCROLL 2
This not only scrolls the image, but also wraps it back around itself when you hit the borders of the editing window.
HORIZONTAL FLIP
One click will cause an instant flip about the horizontal axis of the Bob. Another click will flip it again. This works equally well on blocks.
VERTICAL FLIP
This is similar to the last option, and reverses the image about its own vertical axis.
ROTATE
This is used to rotate the whole Bob through ninety degrees clockwise. It takes a few seconds to compute the new image, and can be used again to keep the rotation going all the way back to the original image.
The next pair of options is provided to help you get a better view of your work.
GRAB
If the Bob is too large to fit inside the Edit Window, select this icon and then use the mouse to drag the image into view.
ZOOM
Click on this icon to double the size of the graphics in the Zoom Window to four times the size of the original Bob. Click again to return to an image twice the size of the original. Don't forget that you can adjust the size of Zoom and Edit screens by dragging the central Screen Sizer bar to suit your needs.
151

Chapter 9
IUNDol
152
BOBS
The final group of three options each perform general tasks.
BACKGROUND FRAMEWORK
Every click on this icon selects the next colour in the palette for use as the framework of the edi t screen.
MODE
Presents an UP/DOWN icon that sets the mode for certain drawing operations. UP gives Mode 1, where an object is drawn as soon as you release a mouse button. DOWN selects Mode 2, where you set the shape of a brush before using it to draw with.
UNDO This is the fail-safe icon, allowing you to scrap the last drawing procedure, or cancel a CLEAR operation.
[SPACEBAR]
Pressing the [SpacebarJ key on your Amiga will select the LAST drawing tool that you used. This isa shortcut, allowing you to re-use an item without having to go through the menu process.
MEMORY ALERTS
Because Bobs nibble away at available memory, and because graphic screens eat up large amounts of the stuff, a low-memory alert system is built in to the Bob Editor. These alert messages will automatically appear to help you. Chapter 17 is devoted to the computer's memory, and the Memory Alerts are fully detailed there.

Chapter 9
USING BOBS
BOBS
Mter creating all of these splendid Bobs, you'll want to be able to use them in your own programs. The next section deals with all the commands that help you do just that. Once you understand how to use them, get ready for the next Chapter, when you will be invading the brain of a computer games designer! So if you can drag yourself away from the Bob Editor,get ready to try out the Easy AMOS Bob commands.
Quit the Bob Editor and save your work if you want to, giving your edited Bob bank a new name using the [Save As] icon. When you are satisfied, have the "Easy AMOS Tutorial" disc in your disc drive, because you'll be using some of its ready-made demo programs in the final part of this Chapter.
Call up the File Selector, and open this folder:
*Bob Tutorials
There they are! Sixteen lovely ready-made demos, to save your time and your fingertips, and if the first one seems familiar it's because you used it at the start of this Chapter! Load it now, examine the listing and then run it:
Bob Tutorial01.AMOS
Drawing Bobs BOB
To draw a Bob on the current screen, first create it by givingita number, then specify the screen x,y·<:oordinates where you want it to appear, followed by the image number ofthe Bob in the bank that you wantto assign for this purpose, like the line of the last example which reads:
Bob 1,160,130,1
153

Chapter 9
~ -154
BOBS
That example creates Bob number one, positions it at coordinates 160,130 and uses image number 1 from the Bob bank. Easy isn't it.
Bob numbers normally range from zero to 63, and once a Bob has been created you can leave out the coordinate parameters and the Bob bank image number, and just call it up using its own number. The parameters you leave out will keep their original values. You can also change its appearance or its position by including the right number of commas but leaving out either of those parameters. For example, to change the image of Bob number lto the second image in the Bob bank, but keep it at its current screen position, add these lines to your example:
!(if' Wait 50
Bob 1",2
Wait Vbl
Did you notice that horrible flickering effect? When a Bob moves around the screen, the graphics underneath it are replaced at their original position. Because of technical limitations, using a large number of Bobs on the screen at the same time can cause an ugly flickering effect, due to the fact that Bob images are updated at the sametimeasthescreenimage. Don'tpanic. Easy AMOS has a great way of solving this problem, called a "double buffer". This creates a second invisible copy of the screen, and all graphic operations are performed in this invisible screen without interfering with your screen picture at all. Let's take a look at an example of the "Bob flicker problem" in more detail. Load the next example, read the listing and then run it:
Bob Tutorial02.AMOS
Chapter 9
Curing screen interference
Bob Coordinates
BOBS
DOUBLE BUFFER After you use this command, Easy AMOS will create an invisible screen and use it automatically. There is nothing to worry about, except for the fact that the Double Buffer uses up twice the amount of screen memory. So don't use it for too many screens. To see "the Bob flicker problem solved", try out the next example:
Bob Tutorial03.AMOS
The next example demonstrates flicker-free Bobs moving over background graphiCS:
Bob Tutorial04.AMOS
=XBOB(n) =YBOB(n) These two functions report the current coordinates of the Bob number you are interested in. Because Bobs can zoom across several screens, the coordinates are measured in relation to the current screen. Take a look a t a practical example by examining the next readymade example in the "'Bob_Tutorials· folder on your "Easy AMOS Tutorial" disc:
Bob TutorialOS.AMOS
After lookingat the listing and running the program, use. your mouse to dragour floating cartoon character around the screen, and the Bob coordinates will be displayed automatically.
UMITBOB Thiscommand keeps all Bobs restricted to moving inside an invisible rectangular area of the screen, whose coordinates are set in the usual corner To corner way. If you follow Limit Bob with a Bob number, then only that Bob will be restricted to the boundaries of the rectangle.
155

Chapter 9
Handling Bobs
156
BOBS
The width of the rectangle must always be wider than the width of the Bob, and the x-coordinates are always rounded UP to the nearest 16 pixel boundary. To keep Bob number 1 trapped inside an area, you would use something like this:
Limit Bob 1,0,0 To 320,100
See that in action now, by loading the next Bob example:
Bob Tutorial06.AMOS
Remember that the Bob must be called up with the Bob command before Limit Bob is used, otherwise the limit will have no effect. To restore your Bob's freedom to move around the whole screen, use this command without any coordinates, like this:
Limit Bob
Thenextfourcommandsareused to handle Bobs. When you understand how they work individually, you can see them working together in our next spectacular demo program.
PASTE BOB
This copies an image from the Bob bank and draws it on the screen immediately. Simply follow the command with the screen coordinates where you want the image to be pasted, then the number of the image. For example:
Paste Bob 60,50,4
GET BOB
This command is used to grab an image from the current screen, and load it into the Bob bank. The command must be followed by an image number to be loaded with the grabbed image, and then the coordinates for the corners of the rectangle that you want to make use of.

Chapter 9 BOBS
For example, if you wanted to load a block of graphics into Bob number 1, you could use:
Get Bob 1,Xl,Yl To X2,Y2
You can select an optional screen number from which the image is to be taken, by inserting that number in front of the Bob number. For example, if the image you want is on screen number 0, you could use something like:
Get Bob O,l,Xl,Yl To X2,Y2
BOB OFF
If you want to remove all Bobs from the screen, use this command. By following it with thenumberof a particular Bob, only that Bob will be removed. For example:
Bob Off 1
Any animations and collision routines associated with a Bob that has been removed will no longer operate.
DEL BOB
This is used to delete one or more numbered Bobs from the Bob bank. For example:
Del Bob 1
This would just erase Bob number 1 from the bank, but if you want to delete Bobs 4, 5, 6and 7, for example, use this:
Del Bob 4 To 7
When the last Bobisdeleted from a bank, the whole bank will be removed from memory.
Load the next example program now, to see how Paste Bob, Get Bob, Bob Off and Del Bob can be used.
Bob_Tutorial07.AMOS
157
Chapter 9
Flipping Bobs
158
BOBS
INS BOB The Ins Bob command is used to insert a numbered Bob into the current Bob bank, like this:
Ins Bob 63
=1 BOB Use this function if you need to know the current image number being used by a Bob. For example, if you are interested in Bob number three, you could ask:
Print I Bob (3)
Make sure that the Bob has been drawn, otherwise an "illegal function" message will be displayed.
Suppose you are designing a computer game, and suppose you have an animated cartoon character or an intergalactic ice-cream van moving from left to right or from top to bottom of the screen. Among the drawing tools in the Bob Editor, there isa pair of icons that can flip a Bob horizontally and vertically. You may think that you have to create a whole load of reversed Bobs to make your animations move from right to left or from the bottom to the top, and use up lots of precious memory. Not so!
Easy AMOS gives you three wonderful memory-saving functions to flip your Bobs any way you want: horiwntally, vertically or a double mirror image. When Bobs are flipped in this way, any hot spots are flipped as well, so take care. Either set the original hot spots centrally, or change them in the flipped Bobs as necessary using the Hot Spot command, which is explained later.

Chapter 9
Detecting Bob collisions
BOBS
=HREV Thisis used to tell the Bob generator to display a reversed Bob by flipping it over its own horizontal axis (the xaxis).
=VREV Same process, different axis. The Bob can be flipped over its own vertical axis.
=REV This is used for a full reverse, both vertically and horizontally.
To make any of these three functions perform their particular flip, identify the Bob by its number, follow that with the x,y-coordinates for where the flipped Bob will appear, then give the appropriate Reverse instruction, followed by the new image number in brackets. For example:
Bob 2,121,lOO,Hrev(4)
For an instant demonstration, take a look at the next example in the "'Bob_Tutorials' folder:
Bob Tutorial08.AMOS
When dealing with Bobs, perhaps the most important thing your program needs to know is if or when a collision takes place.
=BOBCOL
This is the function that checks to see if a numbered Bob has collided with another Bob. If a collision is detected, the value -1 (true) is given, otherwise zero (false) is reported. So if you wanted to check on the progress of Bob number 1, you might use this:
C~Bob Col (1)
159
Chapter 9
Setting hot spots
160
BOBS
That would check for collisions with any other Bob, but you can specify a range of Bobs to watch out for by induding their numbers, like this:
C=Bob Col(1,2 To 4)
The status of these Bobs can be examined individually by the Col function, which is explained next.
=COL
This tests the status of a Bob after a Bob Col test. You set up an array of the Bob numbers you are interested in, and the position of that Bob number will report back with a -1 for a collision, or a zero for no collision. For instance, if you wanted a report on the Bob Col example above, you would use:
C2=Col(2) : C3=Col(3) : C4=Col(4)
A report may then be given, something like this:
C2=O, C3=O, C4=-1
meaning that Bob number 1 had collided with Bob number 4, but Bobs 2 and 3 had avoided any collision.
Try the next ready-made example, which displays a continuous collision report at the top of the screen when you run the program:
Bob Tutorial09.AMOS
Collisions are searched for by referring to Bob hot spots. You have already seen how hot spots can be set up in the Bob editor, either freehand, or by using one of nine preset positions. Whether a hot spot lies inside or outside of the visible Bob graphiCS, it is always used as the reference point for coordinate calculations. So if hot spots have to change while a program is running, you will need to know how to set hot spots from inside your programs.

Chapter 9
"The Hot Spot. Like you've never seen. "
(John Lee Hooker, 1990)
BOB PRIORITIES
BOBS
HOTSPOT
To use this command for setting up a new hot spot, simply follow it with the Bob number and the hot spot coordinates measured from the top left-hand corner of that Bob's image. For example:
Hot Spot 1,5,10
You can also use one of nine preset positions which match up with those in the Bob Editor presets. They are represented by the following values, running from the top-left preset through to the bottom-right preset:
$00 (top left)
$01 (mid left)
$10 (top centre)
$11 (mid centre)
$20 (top right)
$21 (mid right)
$02 (bottom left) $12 (bottom centre) $22 (bottom right)
So to set the hot spot of Bob number 5 to its bottom lefthand corner, you would use this:
Hot Spot 5,$02
See the Hot Spot command in action by loading the next example:
Bob_Tutoria110.AMOS
It is important to understand that every Bobautomatically has a priority of importance, and that this priority is based on the Bob's number. So a Bob carries a priority value from zero to 63, and Easy AMOS uses this value to decide in which order Bobs are displayed and which Bobs barge their way in front of others when flying around the screen.
The general rule is that a Bob with a higher priority number will be displayed in front of one with a lower priority number. For example, Bob 5 would cut across Bob 4, but be obscured if Bob 6 crossed its path. So it is clear that this priority system should always be remembered when you number your Bobs.
161

Chapter 9
Bob control commands
162
BOBS
Easy AM OS allows changes in the priority system to suit your needs, by offering an alternative based on the position of Bobs on the screen.
PRIORITY ON
PRIORITY OFF
When you use Priority On, Bobs with the HIGHEST Ycoordinates take priority on the screen. It is usually best to set hot spots at the bottom of Bobs to exploit this priority, and some great perspective effects can be created. All that is needed to reset the original Bob number priorities is to use the Priority Off command. Get your priorities right by examining the next demo:
Bob Tutorialll.AMOS
PRIORITY REVERSE ON
PRIORITY REVERSE OFF
The Priority Reverse On command changes around the entire priority table based on Bob numbers. Not only does it give a lower Bob number priority over a higher Bob number, when you use it with Priority On, it also gives priority to a Bob with the LOWEST Y -coordinate. As you would expect, Priority reverse Off sets the priority system back to normal.
More experienced programmers may want to make use of the next three commands. You'll have to understand a bit of theory first, concerning "logicar and "physical"' screens, and this is covered in the next Chapter. For the time being, it's enough to know what these commands can do, and there is a full explanation in the Glossary at the end of this book.
BOB UPDATE
BOB UPDATE OFF
These commands are used to change the automatic speed at which Bobs are redrawn on the screen.

Chapter 9
Drawing modes
BOBS
BOB DRAW
Thiscan beused to redraw Bobs when certain movements have to be synchronised.
BOB CLEAR
Thiscornrnand canbeused with the Bob Draw cornrnand, and removes active Bobs from the screen then redraws the background graphics beneath them.
Once you have got your Bobs on screen, you may want to change the way they react with the rest of your graphics. The final part of this Chapter explains how to achieve some special effects.
SET BOB
This command is used to chang~ the Bob's drawing mode, and it has the following parameters:
Set Bob nurnber,background,planes,mask
Let's look at those parameters one by one.
Number. This is obvious, and refers to thenumberofthe Bob you are setting.
Background. This sets the way the graphics underneath the Bob are redrawn. There are three values to choose from: zero, a positive number or a negative number.
Zero automatically replaees the old background image when the Bob moves on. This gives a smooth animation effect.
A positive number, such as 1, causes the original background 'graphics to be forgotten and replaced by a solid block of the background colour. This is much faster than the usual drawing method, and can be used for moving Bobs across areas such as plain blue sky.
A regative number, such as -1, turns off the redrawing proeess, and allows you to fill the old graphic image with
. special colours or patterns.
163
Chapter 9
164
BOBS
Planes. This takes the fonn of a 'bit-map" which consists of a "binary' number, where each digit represents one plane of the screen, and each plane represents one bit of the final colour displayed on the screen. Normally, a Bob is drawn in all of the bit planes, with a pattern of %111111. By changing some of these bits from ones to zeros, selected colours are left out and this will generate various special effects.
Mask. Again, this is a bit pattern. All you need to know for now is that nonnally there are two options. If the Bob is to be used wi th a mask, use this:
%11100010
If the Bob is to be used with NO mask set, then use this:
%11001010
It is best to use Set Bob BEFORE displaying Bobs on the screen. The following example would set Bob number 1 moving across the original screen colours, with no mask set:
Set Bob 1,0,%111111,%11001010
Take a look at the next set of examples in the "'Bob_Tutorials' folder on your "Easy AMOS Tutorial' disc:
Bob_Tutoria112.AMOS
The background graphics in that demonstration are not replaced where the upper Bob moves, while the lower Bob is left in its normal mode and the graphics are redrawn.
For a detailed demonstration of the plane parameter, try the next example:
Bob_Tutoria113.AMOS

Chapter 9
Bob masks
"A mask tells us more than a face."
(Oscar Wilde, 1891)
BOBS
Similarly, the following example displays some effects created with the mask parameter, with their titles and bit pattemsdisplayed at the top of the screen when you run the program:
Bob_Tutorial14.AMOS
GET BOB PALETTE This command is used to load the whole colour palette used for your Bobs into the current screen. A mask can be added if you like, which wi11load a selection of these colours only. Each individual colour is represented by one "bit" of the mask set to a zero for OFF and a one for ON. Colours run from right to left, so colour zero is represented by the bit at the right-hand end of the mask, colour 1 is the second from the right, and so on. Supposing there are 16colours in your Bob palette. You would copy the first four colours like this:
Get Bob Palette %0000000000001111
Have a look at a ready-made demonstration using Get Bob Palette by trying the next example in the "'Bob_Tutorials" folder:
Bob_Tutorial1S.AMOS
NO MASK A "mask" means that the background colour (colour zero) around your Bob is made transparent, so that the screen graphics show through. The mask is also used by certain collision detection routines. A mask is automatically set up for every Bob, and the No Mask command takes this mask away, so the entire Bob image is drawn on the screen, including its original background colour and any other graphicS in colour zero. To remove a mask, simply use this command followed by the Bob image you are interested in, like this:
No Mask 1
165

Chapter 9
"Urn, Bob, Is that all? " (Fifi Geldof, 1986)
166
BOBS
Load the following example for a demonstration:
Bob_Tutorial16.AMOS
NEVER remove a mask from a Bob while it is on screen, or you'll scramble its image. Use the Bob Off command first. We will now bob off to the next Chapter, and explain the mysteries of the screen!

Chapter 10
UNDERSTANDING SCREENS
o screen numbers
o screen resolution
o defining a screen
o IFF screens
o hiding and showing screens
o screen priority
o moving screens
o converting screen coordinates
"And the Lord said, Amos, what seest thou?"
(Old Testament, Amos 7,8)
167

Chapter 10
Easy AMOS screens
168
UNDERSTANDING SCREENS
Think of your television set or monitor asa glass window, through which you can view whatever Easy AMOS is displaying on its own "screen". The "screen" used to show Easy AMOS images is not the same as your TV display, because your Easy AMOS screen can be changed in all sorts of ways, while the glass window of your TV set remains fixed.
So far, you've learned how Easy AMOS can show text, graphics and special effects, as well as import spectacular graphic pictures. Up to now, everything has been displayed on a single Easy AMOS "screen" that appears in the glass window display of your TV set. To help you understand all the ideas involved with screens and see the theory put into practice, we've provided another batch of ready-made example programs on your "Easy AMOS Tutorial" disc. You can find them in the folder named:
*Screen Tutorials
Imagine a computerised game of football, where the playing area is represented by a screen. This screen could use a plain green background colour with the pitch marked out in white, or it could use a detailed multi-coloured background image, like the "IFF' pictures explained in the last Chapter. Now imagine your Bobs are used to represent the football players, and that the Bob palette is set up for the various coloured kits worn by the players.
The good news is that you are not restricted to playing on your home pitch, because· there are other screens available for you to use!
Chapter 10
The default screen
Additional screens
Screen resolution
DEFINING A SCREEN
UNDERSTANDING SCREENS
When you run an Easy AMOS program, a screen area is automatically set up to display the results of your work. We call this the "default screen", and it's the Easy AMOS screen you've been using since you first started learning and experimenting. The default screen is given an identity number known as screen zero. It is 320 pixels wide, ZOO pixels high and it can display 16 different colours.
Apart from the default screen, seven more screens can be set up and used for Easy AMOS programs, and each new screen is given an identity number from 1 to 7. When a new screen is set up, it has to be "opened", and this is done by giving it a number, followed by its width, its height, the number of colours to be used and finally the size of the little dots of colour across the screen called pixels. You will open some new screens a little later on.
Until now, you have been looking at a screen that is 320 pixels wide, but this "resolution" can be doubled to 640 pixels across the screen. When the screen is 320 pixels wide it is in "low resolution" or "Lowres" for short. If this is changed to 640 pixels wide, the screen is in "high resolution H 1 known as "Hires",
SCREEN OPEN
You are now ready to "open" additional screens, using the Screen Open command followed by these parameters:
Screen Open number, width, height, cOlours,mode
Let's look at each parameter one by one.
Number is the identification number of the new screen, ranging from 0 to 7. If a screen with this number already exists, it will be scrapped and replaced by this new screen.
169

Chapter 10
170
UNDERSTANDING SCREENS
Width sets up the width of the new screen in pixels. There is nothing stopping you opening a screen that is wider than the phySical limit of the television or monitor display, and extra-wide screens can be manipulated with a Screen Offset command.
Height holds the number of pixels that make up the height of the screen. Like the width, this can be larger than the visible screen height, and scrolled into view.
Colours sets the number of colours to be used for the new screen. The choice for the number of colours that can be selected is 2, 4, 8, 16 or 32. (How to make use of even more colours is explained in the next Chapter).
Mode is your choice of the width of the pixel points on the screen. Lowres is the normal status, allowing 320 pixels to be displayed across the screen. Hires hal ves the width of each pixel and so allows 640 to be displayed.
When the default screen is automatically opened, screen zero is equivalent to this:
Screen Open O,320,200,16,Lowres
To open screen number 1 as an oversize high-resolution screen with eight colours, for example, you would use something like this:
Screen Open 1,600,400,8,Hires
Here is a little routine that opens all eight available screens for you to view. Try it out now:

Chapter 10
IFF screens
UNDERSTANDING SCREENS
IrY' Curs Off : Cis 13 : Paper 13
Print : Centre "Hello, I am SCREEN 0"
For S~l To 7
Screen Open S,320,20,16,Lowres
Curs Off : Cis S+2 : Paper S+2
Centre "And I am SCREEN"+Str$ (S)
Screen Display 8,,50+8*25,,8
Next S
SCREEN CLOSE
This is the command that erases a numbered screen, and frees up the memory it was using for the rest of your programming needs. To get rid of screen number 1, for instance, add this line to the end of the last example:
IrY' Wait 50 : Screen Close 1
DEFAULT
To close all currently opened screens and restore the display back to its original setting, use the Default command. Add another line to your last example, and see the result:
IrY' Wait 50 : Default
In Chapter 9, you carne across pictures saved in "IFF" format and learned how to use them for grabbing Bob images. IFF images can also be loaded directly into your programs.
LOAD IFF
To load an IFF screen from a disc to your current screen, make sure that your "Easy AMOS Tutorial" disc is ready in the disc drive and give the command, followed by the IFF filename. Remember to give a Flash Off command too, to stop unwanted flash effects:
171

Chapter 10
172
UNDERSTANDING SCREENS
I(j;? Flash Off
Load Iff"Easy_ Tutorial : Iff/Grab_Me. Iff"
If you want to load the picture to any other screen, simply include the number of that screen after the IFF filename. You would load the picture to Screen 1 like this:
I(j;? Flash Off
Load Iff "Easy_Tutorial:Iff/Grab_Me.Iff"',l
SAVE IFF
Use this command to save the current screen as an IFF picture file onto a disc. Easy AMOS automatically saves all the screen settings along with the picture, so that when you load this file again it appears in its original state, including any offsets and instructions for "hiding" and "showing" the screen. Use the command, and give the current picture a filename, like this:
Save Iff "My_Programs: Iff/Picture_Narre. Iff"
To save precious disc space, Easy AMOS will compress the data that makes up your IFF picture. If you prefer to save the picture as it is, without using this standard compression system, then you have to add a little "flag" after your filename. If this flag has a value of 0, the screen will not be compressed, for example:
Save Iff ''Myyrograms:Iff/Picture_Narre.Iff"',°
The Save Iff command will work with any screen.

Chapter 10
Hiding and showing screens
Screen priority
UNDERSTANDING SCREENS
So far, the only command you have used for hiding a screen display is the one that clears a screen by erasing it, which is the Cis instruction.
SCREEN HIDE
SCREENSHOW
To remove the current screen from view, the Screen Hide command is used to whisk it away. It can then be restored using the Screen Show command like this:
~ Print "THE CURRENT SCREEN" : Wait 100
Screen Hide : Wait Key
Screen Show
You can temporarily hide any screen you like by including its index number after the command. For example:
Screen Hide 1
The screen can then be revealed with a request to show it, like this:
Screen Show 1
Because screens can be different sizes, and because they can be displayed at different positions on the TV by offsetting or overlapping them, and because there can be up te eight electronic screens queuing up one in front of the other, you need a way of instantly kicking anyone of those screens to the front of the display, in other words, giving it priority.
SCREEN TO FRONT
This command moves the numbered screen of your choice to the front of the display queue. For an instant example, open the "'Screen Tutorials" folder on your "Easy AMOS Tutorial" disc and load the foil owing demo:
173
Chapter 10
174
UNDERSTANDING SCREENS
Screen TutorialOl.AMOS
If the screen number is left out after a Screen To Front command, then the current screen will be brought to the front, otherwise type in and enter the number of any screen you like when you tryout the last example.
SCREEN TO BACK
Use this instruction to move a screen to the background of your display. If another screen is already there, it will be displayed in front of the screen you select. Again, if you omit a screen number after the Screen To Back command, the current screen will be relegated to the back of the display queue. Get rid of any new screens now by [Newling the last example, and try this:
~ Centre "Hello Again, Screen 0 here"
Wait 200
Screen Open 1,320,200,2,Lowres
Centre "Excuse me, make way for Screen 1"
Wait 200 : Screen. To Front 0
Screen 0
Wait 200 Screen To Back
SCREEN
This is the command that allows you to direct ALL graphical and text operations to the screen number of your choice, like this:
~ Screen open 2,320,32,16,Lowres
Screen Display 2"130,,
Screen 0
Plot 0,0 Draw To 320,200
Chapter 10
MOVING SCREENS
UNDERSTANDING SCREENS
Of course, if the screen you choose is outside of the current display area, or is currently hidden, there will be no visible effect. But the graphics will be drawn in memory, waiting to be displayed whenever that screen comes into view or comes out of hiding after a Screen Show command.
=SCREEN Use this function to find out the number of the screen that's currently active, whether or not it is visible:
S=Screen
Once you have set up a screen with Screen Open, it can be positioned and moved anywhere you like on the television display. This means that screens can be made to bounce, slip, slide, flip over, sink out of Sight, and behave in all sorts of odd ways. This also means that screens can overlap, or be displayed alongside one another, and it is not difficult to understand that several different screen modes can be shown at once in separate areas of the display.
SCREEN DISPLAY To position a screen, the Screen Display command is used, followed by these familiar parameters:
Screen Display number, x, y, width, height
Let's examine the parameters one at a time.
Number refers to the number of the screen from 0 to 7.
Thex,y-coordinates are given as "hardware" coordinates, which refer to physical positions on the television screen, not the area used by Easy AMOS screens. These set the poSition from which your Easy AMOS screen will be displayed on the TV screen.
175

Chapter 10
176
UNDERSTANDING SCREENS
X coordinates can range from 0 to 448, and they are automatically rounded down to the nearest 16-pixel boundary. Only the positions between coordinates 112 and 448 are actually visible on the TV screen, so avoid xcoordinates below 112.
Y coordinates can range between 0 and 312, but because every TV setdisplays a s1ightlydifferent visible area, it' s sensible to keep your range between 30 and 300. A small amount of experimenting will reveal what suits your system.
Width sets the width of your screen in pixels, starting from the top left-hand comer of the display. Screen width will also be rounded down to the nearest 16 pixels, and if the width is lower than the original setting, only a part of your image will be shown.
Height is used to set the height of your screen in the same way.
Apart from the screen number, any of the other parameters can be left out provided that the commas are kept in the right places. If parameters are omitted, then the default settings will automatically apply. For example, to display screen zero and keep its original height and width, you could use this:
Screen Display 0,112,40"
Onlyonescreenatatimecanbeshownoneachhorizontal line of the display, but several screens can be put on top of one another. If screens are placed next to each other, in other words if they are sewn together to make a continuous display, there is one line of pixels where the screens meet that plays" dead". You can see the effect by moving your mouse pointer now between the editor window and the menu line, where a line of "dead" pixels occurs.
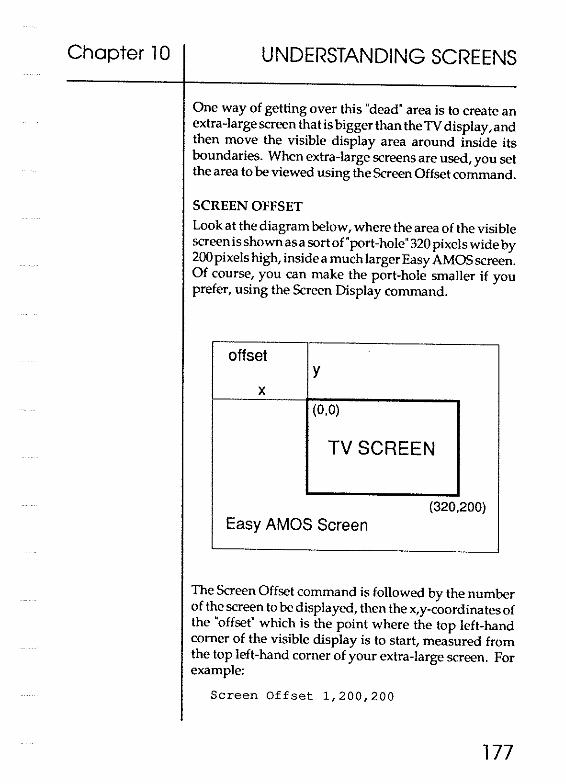
Chapter 10 UNDERSTANDING SCREENS
One way of getting over this "dead" area is to create an extra-large screen that is biggerthan the TV display,and then move the visible display area around inside its boundaries. When extra-large screens are used, you set the area to be viewed using the Screen Offset command.
SCREEN OFFSET
Look at the diagram below, where the area of the visible screen is shown asa sort of "port-hole" 320 pixels wide by 200pixels high, inside a much larger Easy AMOS screen. Of course, you can make the port-hole smaller if you prefer, using the Screen Display command.
offset y
x (0,0)
TV SCREEN
(320,200)
Easy AMOS Screen
The Screen Offset command is followed by the number of the screen to be displayed, then the x,y-coordinates of the "offset" which is the point where the top left-hand corner of the visible display is to start, measured from the top left-hand corner of your extra-large screen. For example:
Screen Offset 1,200,200
177

Chapter 10
"A wide screen makes a picture twice as bad. "
(Sam Goldwyn, 1953)
Converting coordinates
178
UNDERSTANDING SCREENS
For a ready-made example using Screen Display and Screen Offset, look through the listing of our next demo program after loading:
Screen Tutorial02.AMOS
The visible area can be moved around the extra-large screen by changing the offset coordinates, and some very smooth scrolling effects are created like this. These can be used for background graphics in leisure programs, as well as more serious applications like geographic maps or star constellations.
If you are not quite sureaboutthe"hardwarecoordinates" used with the Screen Display command, don't worry. Easy AMOS provides a full set of functions that convert between screen coordinates and hardware coordinates.
=XSCREEN
=YSCREEN
These functions convert a screen coordinate into a hardware coordinate. Try this:
([ff" Do
Print At (0, 0) ; "Mouse Hardware X coord.="
Print At (0, 1) iX Mouse;"
Print At (0, 4) ;"Mouse Software X coord.="
Print At(0,5);X Screen(X Mouse);" "
Loop
=XHARD
=YHARD
This pair of functions work in exactly the same way, and are used to convert screen coordinates into hardware coordinates. Type in the next example, and make sure

Chapter 10 UNDERSTANDING SCREENS
the mouse pointer is in the middle of the screen before you [Run] it.
X Mouse~X Hard(O)
y Mouse~Y Hard(O)
That routine will force the mouse pointer "home" to screen coordinates 0,0 (the top-left comer).
Now that you understand what Easy AMOS screens are, how about using them to give your own programs the professional touch. The next Chapter is packed full of practical ideas, and your "Easy AMOS Tutorial" disc provides all the ready-made examples to demonstrate their use.
179

?
180

Chapter 11
USING SCREENS
o switching screens
o copying screens
o screen colours
o fade effects
o zooming
o screen zones
o screen blocks
o compacting screen memory
o EHBmode
o HAMmode
"[ make full use of the silver screen, especially when I'm drying out."
(W.e. Fields, 1937)
~ ((
181

Chapter 11
SWITCHING SCREENS
182
USING SCREENS
This is where the Easy AMOS screens come alive. Have the "'Screen Tutorials" folder opened on your "Easy AMOS Tutorial" disc, and get ready to make the screen commands work for a living.
When you flick the cartoon panels down in the left-hand corner of this book, and when you use the animation tools in the Bob Editor, you can understand that moving images don't move at all. Graphical movement is an illusion created by a fast sequence of still pictures. Television screens don't display moving images either. They fool the eye and the brain by updating still images on the screen, fifty times a second.
In order to create really smooth moving graphics, your computer has to complete all new drawingoperationsin less than one fiftieth of a second. So if your program can't achieve this, animated graphics will suffer from an ugly little flicker. Easy AMOS solves this problem by using a technique that switches between screens during drawing operations.
This is how it works. Let's call the actual area where images are displayed the "physical screen". Now imagine that thereisa second screen which is completely invisible to the eye, and it's where new drawing operations get done. We'll call that the "logical screen"
Flicker-free movement is achieved by switching between the physical screen and logical screen. The physical screen is displayed as usual, then once the new drawing has been completed on the logical screen, they are swapped over. The old physical screen now becomes the newlogicai screen, and isused to receive the drawing operations that will make up the next picture. This whole process is automatic when using the Double Buffer command that you came across in Chapter 9.

Chapter 11
Synchronising the screen
USING SCREENS
Easy AMOS provides a group of four functions that can be used to give information about the physical and logical screens. You don't have to understand how they work for now. PHYSIC and LOGIC are used to find the identification numbers of the physical and logical screens, whereas PHYBASE and LOGBASE reveal the "address" in the computer's memory of the "bit-planes" of phYSical and logical screens. Advanced users can look these functions up in the Glossary.
SCREEN SWAP This is the command that swaps over the physical and logical screens, so that the display is instantly switched between the two of them. You can try a ready-made example in a moment, but you need to understand one more bit of theory first.
It has already been explained that the image on your screen is updated fifty times every second. Every fiftieth of a second, an image is drawn by an "electron beam" scanning across every line of the screen at incredibly high speed, until itreaches the bottom right-hand comer, at which point the beam switches off and jumps back to the top left-hand comer to start all over again. The period between the completion of a screen and the beginning of the next one is knows as the "vertical blank" period, or VBL for short, and this is when Easy AMOS leaps in to perform important jobs like moving Bobs and swapping screens.
Although a fiftieth of a second seems a very short period to human beings, Easy AMOS thinks of it as a huge waste of time and is eager to get on with any tasks that need doing. This means that your programs could get out of synchronisation with what is actually happening on screen, so Easy AMOS has to be told to wait for the next vertical blank period sometimes, in order to keep in step.
183
Chapter 11
• ---184
USING SCREENS
WAITVBL
This simple command can be included in your programs to achieve perfect screen synchronisation, and it's especially useful after a Screen Swap. See it in action now, by loading this example from the ···Screen_Tutorials" folder:
Screen_Tutorial03.AMOS
AUTOBACK
You may have noticed a new keyword in the listing of that last example. The Autoback command is used to set one of three automatic screen copying modes, depending on what mode number it's followed by. Autoback can be used anywhere in your Easy AMOS programs, to achieve the following results:
Autoback 0
This turns off the Autoback system, and sendsall drawing operations straight to the LOGICAL screen as fast as possible. It can be used where you wantto redraw large chunks of a background screen over and over again. This allows you to perform Bob collision detection routines at regular intervals, without destroying the overall quality of animation effects.
Autoback 1
In this mode, each graphical operation will be performed in BOTH the logical and physical screens, without taking into account the position of your Bobs at all. This means you should only use this mode for drawing OUTSIDE the areas where Bobs may be active, and it's ideal for sections like control panels and hi-score tables, which need to be continually updated during a computer game .

Chapter 11
COPYING SCREENS
USING SCREENS
Autoback 2
ThisAutobackmode(whichisthedefaultmode)automatically rombinesalldrawingoperationwithBobupdates. A1lscreen updates are perfonned once for the LOGICAL screen and then once again for the PHYSICAL screen. This means that anythingdrawnonthebackgroundscreenisdisplayeddirectly undemeathyourBobs. Theobviousresult of using this mode isthatyourgraphicswilltakeatleasttwiceaslongtobedrawn, becausetheprograrn will grind toahaltforat least two vertical blanks each time something is output to the screen!
Any rectangular part of a screen can be ropied and moved almost instantly. Itcan beropied ontothecurrentscreen orany other screen, time and time again.
SCREEN COpy
Screen Copy is the most important screen rommand of all It can be used to achievedassic screen techniquesJike"wiping" from one screen to another, as well as providing all sorts of special effects.
Atitssimplestlevel,Screen Copyropiesonescreen toanother, like this:
Screen Copy Source To destination
Source is the screen number that holds the SOURCE of the image to be copied. This can either be a standard screen number or the number of a logical or physical screen, created using the Logic or Physic rommands.
Destinationholds the DESTINATION screen number ,which is where the image is copied to.
Draw some graphics on screen number zero now, so that you can see the results of the Screen Copy process. First define an area of the screen to be copied, bysettingthe coordinates of its top left-hand and bottom right-hand coordinates, as usual. Then give the position of its new location by setting the new top left-hand coordinates on the current screen. Forexample:
185

Chapter 11
186
USING SCREENS
~Circle 50,50,10 : Wait 100
Screen Copy 0,20,20,70,70 To 0,100,100
Therearenolirnitstothesettlngsforyourcoordinates,andany partsof an image that fall outside of the current visible screen will be chopped off.
For an instant demo, load up this program from the ''Screen Tutorials' folder on your "Easy AMOS Tutorial" Disc:
Screen Tutorial04.AMOS
Whengraphicsarecopied and arriveat their destination, they normally overwrite anything that is already displayed there. By adding an optional 'blitter mode" after the destination coordinates, you can change the way in which the new graphicscombinewithanyoriginalgraphics. In fact there are 255 possible modes, but don't panic. Hereisalistoffiveofthe mostcommonmodes,a1ongwiththeirbinarybit-mapPllterns.
Mode Bit-pattern Effect
REPLACE % 11 000000 Replace destination
INVERT
graphics with a copy of the source image.
%00110000 Repl~ce destination graphics with an inverse video image of the source.
AND % 1 ()()()()()()O Combine togetherthe source and destination images.
OR %11100000 Overlapsourceand destination images.
Exclude OR %01100000 Overlap inverse source with normal destination image.
If that sounds like mumbo-jumbo, don't worry. Load the next ready-made example, and take a look through its listing:
Screen_Tutorial05.AMOS

Chapter 11
Cloning a screen ,
USING SCREENS
Now [Run] the program to see Screen Copy in action, using each of those masks. After the Bob of our cartoon character has been loaded, it will appear in the top-left comer of your screen. Use your mouse pointer to copy the Bob wherever you like with a single click of the left mouse button. Now keep the button held down and move your mouse pointer around the screen to see the full potential of Screen Copy When you've seen enough, press any key to call up the next mask, and repeat the process. Impressive, isn't it.
SCREEN CLONE
To create an identical copy of the current screen, and assign the "clone" to the screen number of your choice, use this command followed by the destination screen number. Try this example for a multi-cloned screen:
~ Screen Open O,320,20,4,Lowres
Flash Off
Screen Display 0"70,,
For S=l To 7
Screen Clone S
Screen Display 8"8*20+70,,
Next S
Print "Start typing>
Do
A$=Inkey$
If A$<>"" Then Print A$;
Loop
187

Chapter 11
Screen COiOUIS
188
USING SCREENS
Screen Cloning is an ideal technique in computer games for two players, with each player having half of the visible display area. There's a working example of this on your "Easy AMOS Examples" disc, which you can examine at your leisure:
Tricycle_Race.AMOS
Your clone uses the same memory area as the original screen, and will be displayed at the same place as the origina\. You can use any of the usual screen operations with the clone, such as Screen Display and Screen Offset. But because there is only one copy of the original screen data in memory, it's impossible to use the Screen command with the cloned copy.
GETPALETIE
This command copies the colours from a numbered screen and loads them into the current screen. The next instant demo on your "Easy AMOS Tutorial" disc demonstrates this, so look at the listing to see how Get Palette sets the palette of screen 1 to that of screen 0 before you [Run] the program:
Screen Tutorial06.AMOS
This is useful when data is being moved from one screen to another with a Screen Copy command, and you need to share the same colour settings for both screens. An optional "mask" can be added after the screen number, which will only let selected colours be loaded. Please see the Get Bob Palette command in Chapter 9 for full details of how to create a "mask", or refresh your memory by looking atthe masks in "Screen_TutoriaIOS.AMOS" again.

Chapter 11
FADE EFFECTS
USING SCREENS
When the image on one screen dissolves and melts into the image of another screen, the effect is called a "fade". Easy AMOS lets you produce some superb fade effects, and we've supplied you with two of our ready-made demos to prove it
APPEAR This command creates a fade between two pictures. Choose the number of the source screen where the picture comes from, then the number of the destination screen whose picture it fades into. Advanced programmers can use the Logic and Physic functions instead of screen numbers. Then choose what sort of fade effect you want, by setting a value that ranges between the number of every pixel on the screen all the way down to one. The next demo program shows a simple but very effective fade, using Appear:
Screen Tutorial07.AMOS
Normally the Appear command will affect the whole of the screen area, but this can be changed so that only part of the screen is faded. All screens are drawn from top to bottom, so you can set the area to be affected with the fade by adding the number of pixelS of that area, like this:
IJ::j? Load "Easy_Tutorial : Bobs/Baby_AMOS .Abk"
Flash Off : Get Bob Palette
Paste Bob 100,0,1
Wait 100
Screen Open 1,320,90,16,Lowres
Flash Off : Get Bob Palette
Appear ° To 1,1,13900
189
Chapter 11
"Where's the cheek that does not fi d ?" a e. (John Keats, 1818)
190
USING SCREENS
That would fade the top part of the default screen into screen 1. For something much simpler followed by something much more spectacular, read on
A completely different set of fade effects can be created using colours instead of pictures.
FADE
The classic "fade to black" movie effect takes the current palette and gradually fades their values to zero. Set the speed of the fade by choosing the number of vertical blank periods between each colour change. Try this now:
~ Flash Off : Curs Off
Centre "GOOD NIGHT"
Fade 5
It is sensible to wait until the fade has ended before going on to the next program instruction,and you can calculate the length of the wait with this formula:
wait = fade speed * 15
So the last example is sure to work with the rest of your program if the third line is changed to this:
~ Fade 5 : Wait 75
By adding a list of colour values the fade effect will generate a new palette, and it is used like this:
~ Flash Off : Curs Off
Centre "RED SKY AT NIGHT"
Fade 5,$lOO,$FOO,$300

Chapter 11 USING SCREENS
You can set up any number of new colours like this, depending on the maximum number allowed in your current graphics mode. Any settings that you leave out will leave those colours completely unchanged by the fade,aslongasyouincludetherightnumberofcommas. For example:
Fade 5"$100,,,$200,$300
There is an even more powerful use of the Fade command, which takes the palette from another screen and fades it into the colours of the current screen. Youse! up the speed in the same way as before, and then add the number of the screen whose palette is to be accessed. By using a negative number instead of a screen number, the palette from the Bob bank will be loaded during the fade.
This next ready-made example will knock your socks off! It was written in less than an hour by Richard Vanner, and the AuthorofthisManuaimustconfessthatRichardisresponsible for all the best demos in the Bobs and Screens Chapters. Get your sunglasses ready and enjoy this one:
Screen Tutorial08.AMOS
There isone more pararneteryou can add if you like,and this creates a mask that allows only certain colours to be faded in. The maskisa bit-pattern from Oto 15, and any bit that is set to 1 will be affected by a colour change. For example:
I&" Load "Easy_Tutorial: Bobs!Baby_ AMOS. Abk"
Screen Open 1,320,90,16,Lowres
Flash Off
Get Bob Palette
Paste Bob 100,0,1
Wait 100
Fade 1 To 0,%1111000011001010
191

Chapter 11
ZOOMING
SCREEN ZONES
192
USING SCREENS
One of the most spectacular screen effects is also one of the simplest.
ZOOM This command takes a rectangular block of graphics, shrinks it or magnifies it and then deposits the new image wherever you want. Follow the Zoom instruction with the number of the screen from where the image will be grabbed, then include the coordinates of the image with the top left-hand coordinates followed by the bottom right-hand coordinates, next specify the number of the destination screen where the resized graphics are going to end up and finally give the new comer-to-comer coordinates of the zoomed image. This example takes an image from screen zero, changes its width and then deposits it on screen number 1. After checking the listing, [Run) the program, and then keep pressing a key to stretch our cartoon character to his limits:
Screen Tutorial09.AMOS
The zoom effect depends entirely on the sizes of your source and destination rectangles, and because Easy AMOS will automatically resize these images, you can stretch them, squash them or zoom them in proportion to one another as you please.
Rectangular chunks of screens can be turned into special numbered "zones". These act as detection areas, and they are very useful in both practical programs and computer games. For example, they can be used to check on the activities of a Bob in a part of the screen, to detect if it has entered or left the area, or collided with another Bob. They can also be used to set up control panels and dialogue boxes, with individual zones representing buttons, switches and triggers for all sorts of options.

Chapter 11 USING SCREENS
The only limit to the number of these detection zones is the amount of available memory, so you could create hundreds of them if necessary. Before screen zones can be set, the right amount of memory has to be reserved for their use.
RESERVE ZONE
Memory is reserved using this command. Reserve Zone allocates the exact amount of memory for the number of zones you want to set up. For example, if you wanted to create a dozen detection areas on the screen, you would use this:
Reserve Zone 12
To restore the reserved memory back to your main program, you simply use this command with no number parameter. Like this:
Reserve Zone
SET ZONE Each zone needs eight "bytes" of memory, and once the memory has been reserved, rectangular zones can be set ready to be tested in action. A number is allocated to the zone, followed by the zone coordinates from the top lefthand To the bottom right-hand comers, like this:
Set Zone 1,50,150 To 75,160
=ZONE
You now need a way of testing to see if an object's coordinates are inside any particular zone. Use the Zone function like this:
Z=Zone(x,y)
After that line has been called, Z will hold the number of the zone at coordinates x,y. If more than one zone has been set up there, the number of the first zone will be held. If no zone has been set up there, a value of zero is held.
193

Chapter 11
194
USING SCREENS
These graphic coordinates normally relate to the current screen, but another screen number can be included in front of the coordinates, like this:
Z~Zone(l,x,y)
You can also use the X Bob and Y Bob functions together with this function to detect the number of any zones visited by a particular Bob. So to keep track of Bob number 5, you would use something like this:
Z~Zone(X Bob(5),Y Bob(5»
=MOUSEZONE
This function works in much the same way, and is used to check if the mouse pointer has entered a zone. For an instant example, take a look at the next demonstration program in the ""Screen Tutorials" folder:
Screen_TutoriallO.AMOS
RESET ZONE
Thiscommand switches off all the detection zones created by Set Zone, butit does NOT return the memory allocated by Reserve Zone back to the, main program. If you follow Reset Zone by any zone number, then only that numbered zone will be switched off. For example:
Reset Zone 1
You can also surround a string of text with a screen zone. This allows you to set up your own menus and dialogue boxes on screen, which will act like the option "buttons" used throughout the Easy AMOS menus.
ZONE$
TheZone$ fu nction works wi th the following parameters:
X$~Zone$(text$,nurnber)
where text$ contains the string of characters for one of

Chapter 11
SCREEN BLOCKS
"The tragedy of the Blocks IS now mere farce. "
(Alexander Dubcek, 1989)
USING SCREENS
your'buttons",andnumberreferstothenumberofthescreen zone to bedefined. In thiscase, the 'button" would beactivated automatically if X$ was printed to the screen.
lfyouhaveused all the wondersoftheEasyAMOSBobEditor, you should be familiar with the idea of grabbing a block of graphics from a screen. To get the best results from this part of the Chapter, open a suitable screen now and load in your favourite IFF picture, or draw some shapes on the screen and fill them with different patterns, ready to grab and use as blocks.
GraphicBlocksarenotsavedalongwithyourprograms,sothe following Block instructions are used to hold and manipulate tempormygraphicsdata. Blocksareveryusefulforsettingup items such as dialogue boxes, by saving background areas beforenewgraphicsgetdisplayed. Theycanbeusedtoereate the "parts" for all sorts of entertainment programs like visual puzzle games, as well as more serious programs such as designing kitchen plan layouts.
GET BLOCK
To grab a rectangular area from the current screen graphics, and tum it into a block, the Get Block command is used, followed by your choice of a block number ranging from one all the way up to 65535 You then set the coordinates of the block to be grabbed as follows: the x,y-coordinates for th.e top left-hand comer of the block, the number of pixels rnakingup the width, then the number of pixels making up the height of the block.
A "mask" code number can be added to the end of these parametersifyoulike.lfthemaskcodeissettoO,theblockwill destroy and replace any graphics that used to occupy its position on the screen. If the mask code is set to 1, the block is givenabackground maskand colour "zero" wilJ be handled as if it is transparent. Here's an example ereating block number 1 with the mask code set to zero.
195

Chapter 11
196
USING SCREENS
Get Block 1,x,y,width,height,O
PUT BLOCK
To redraw a block at its original coordinates on the current screen, simply add the block's identification number to the Put Block command, like this:
Put Block 1
If you want to draw the block at a new position, then add the new x,y-coordinates after the block number. For example:
Put Block l,x2,y2
The next ready-made example demonstrates how Get Block and Put Block can be used to create a very silly, very amusing game. First of all, it pastes four creatures on the screen, ready to be dismembered. Then the Bobs representing heads, bodies and legs can be rearranged at random by pressing a key. Try it out now:
Screen Tutorialll.AMOS
Blocks will normally be displayed using all the available screen "bit planes·. This is the same as a "bit pattern" of % 111111. Ambitious programmers may want to reset the bit planes to create various special effects, so refer back to the differen t settings in the section of this Chapter that deals with the Screen Copy command. As usual, the best way to get to grips with different settings is to experiment with them. This example would put block number 1 at coordinates x2,y2 in inverse video:
Put Block 1,x2,y2,%OOllOOOO
DEL BLOCK
To delete all of your new blocks, and return the memory they used back to the main program, use this command:
Del Block
Chapter 11
COMPACTING SCREEN MEMORY
"The highest compact we can make is the truth between us. "
(Emerson, 1860)
USING SCREENS
If you only want to get rid of a single block, then all you have to do is follow the command with that block's identification number, like this:
Del Block 1
Here is a pair of simple, useful and highly effective commands for reversing the image of a whole block.
HREVBLOCK
This command reverses any numbered block by flipping it over its own horizontal axis. Try grabbing a block now, then put its image back on screen alongside its reversed image.
VREVBLOCK
As you would expect, this is used to flip a block over its own vertical axis. For example:
Vrev Block 1
It's all very well wanting to use spectacular electronic pictures in your programs. But the idea is not so attractive when you find that large amounts of your program memory get gobbled up every time you include a graphics screen. What you need is a way to crunch the data that makes up the screen graphics and pack it into a smaller amount of memory. Then you need a way to unpack it ready for use again. Easy AMOS helps you to do just that.
SPACK
This command stands for "screen pack", and is used to crunch down the memory of the screen you select from screen zero to screen 7 into a file in one of the memory banks from bank zero to bank 15, like this example:
Spack 7 To 15
197

Chapter 11
198
USING SCREENS
If the bank you choose doesn't already exist, Easy AM OS will reserve it for you before packing in the screen data, which includes everything about the image including its mode, size, and any offsets and display positions.
If you only want to packa part of a screen and not bother about the rest of it, simply add the top-left and bottomright corner coordinates, as usual. For example:
Spack 7 To 15,50,50,100,100
Easy AMOS will round off the x-coordinates to the nearest 8 pixel boundary, and then try all sortsofmethods to pack the screen data into the smallest amount of memory. This will take about five seconds to work out.
The next ready-made example loads an IFF picture from your "Easy AMOS Tutorial" disc, packs it, erases the original and then unpacks it to a new screen. Try it out now:
Screens Tutorial12.AMOS
PACK
The Pack command is slightly different from Spack, because it only compresses the image data. This means that the image must be unpacked into an existing screen. Also there will be a slight flicker when the image is unpacked, unless the screens have already been "double buffered." It's better to use Spack for single buffered screens. Screen numbers, memory bank numbers and coordinates for sections of the screen to be packed are used in exactly the same way as with the Spack command, and x-coordinates are rounded to the nearest 8 pixel boundary too.

Chapter 11
OTHER SCREEN MODES
USING SCREENS
UNPACK
As you might expect, this is how a packed image is unpacked. Using double buffered screens will give smooth results, otherwise the unpacking can get a bit messy. ALWAYS make sure that the destination screen is in exactly the same format as the packed picture, unless you want to cause an error message on your screen.
To unpack screen data atits original position, simply say which memory bank you want to unpack, like this:
Unpack 15
To redraw the image starting from new coordinates, include them after the bank number, like this:
Unpack 15,x2,y2
To unpack the image To a particular screen, just give its number, like this:
Unpack 15 To 1
If the screen you select already exists, it will be replaced by the new image. Unpacking normally takes about a second until the image is ready to appear.
There is no point in wasting the computer's memory by having loads of colours sitting in your paint pots if you are only going to use two of them for some simple text. On the other hand, there is no point restricting yourself to 16 or 32 colours if you want to create images that are as realistic as possible. Good news. There are two special screen "modes" that change the number of colours for use.
199
Chapter 11
EHBMode
HAM mode
200
USING SCREENS
Extra Half Bright Mode This screen mode doubles thenumber of available colours to 64, by creating two colours from each of the 32 colour registers. Colour numbers 0 to 31 are loaded straight from one of the colour registers, as normal. But the EHB mode creates an extra set of colours alongside the originals, by looking at their values and dividing them in half. This makes the new set of colours exactly half as bright as the originals. The new set of colours are given numbers from 32 to 63.
Obviously, you can take full advantage of EHB by loading the 32colour registers with the brightest colours available, so that pastel shades are automatically generated. Alternatively, if you were trying to create graphics like an old fashioned photograph, you might want to restrict your 32 colour registers to reds and browns.
Have a look at a demonstration EHB screen now, by loading the next example routine:
Screen Tutorial13.AMOS
Using the EHB mode makes no difference at all to any other parts of your programming, and EHB screens are treated exactly the same as your normal default screen.
Hold And Modify Mode
For an artist to carry 4096 pots of different coloured paint around would be costly, heavy and silly. So an artist uses common colours and mixes them together to get the exact shade needed. Computers use exactly the same trick, allowing you to hold onto an existing colour and modify it very slightly, time and time again. This is the theory behind the Amiga's Hold And Modify mode, or HAM for short.

Chapter 11 USING SCREENS
HAM mode splits up colour values into four separate groups. Colours registers 0 to 15 are nonnal, and all the others exploit the way that all colours are made up from Red, Green and Blue components.
Before you get too excited, it must be said that HAM mode is very difficult to use It's useful for displaying digitised colour pictures, and there are special packages such as the HAM version of "Dpaint 4" which fully exploit the Amiga's colour capabilities.
The last ready-made example that goes with thisChapter opens a HAM screen ready to display all 4096 available colours, like this:
Screen Open O,320,260,4096,Lowres
Look through the listing to see how the Red, Green and Bluecomponents are combined, then [Run] the program to see the result:
Screen_Example14.AMOS
And if you think that's impressive, just wait until you hear what Easy AMOS can do with the Amiga's sound capabilities All is revealed in the next Chapter.
201

202

Chapter 12
SOUND
o sound effects
o synthetic speech
o music
o samples
o the Sample Bank Maker
o waveforms
"Music has charms to soothe a savage breast. "
(William Congreve, 1697)
"Awopbopaloobop Alopbamboom! " (Little Richard, 1957)
203
Chapter 12
BUILT-IN SOUND EFFECTS
204
SOUND
Your Amiga cannot generate good sound effects. Your Amiga can generate absolutely amazing sound effects. It can also play music like a maestro and deliver synthetic speech. Unfortunately, trying to get the best out of its audio output via a dwarf television speaker is like boiling water in a chocolate kettle: pathetic. Do not despair, there is a pair of stereo phono sockets on the back of your machine just waiting to release superb stereo sound into your eardrums. Connect them to a personal stereo or a hi-fi system to liberate the full range of sound frequencies, and Easy AMOS can guarantee that you won't be disappointed.
All Easy AMOS sound commandsoperateindependently from your gameplays and utility routines, so they will never interfere with your programming. On the contrary, they can enhance your work in any way you choose, acting as markers, adding realism, soothing, shocking or providing comic relief.
You can enhance and enliven your programs with any sound effect you like, but to get you started, Easy AMOS comes equipped with a few built-in routines:
BOOM BELL SHOOT
Try this on for size:
~ Boom : Print "On a stormy night."
Wait lOO
Bell 1 : Print "AMOS swatted a bat'"
Wait 50
Shoot : Print "Ouch!"
Chapter 12
SYNTHETIC SPEECH
Saying a phrase
"Little said is soonest mended. " (Cervantes, 1615)
SOUND
Easy AMOS uses a clever interrupt system to manufacture "white noise" for explosive sounds like BOOM and SHOOT, but BELL is a simple pure tone that you can massage by changing its "pitch", varying from BELL 1 for a very deep ring, all the way up to BELL 96 for the sort of high pitched sound that will drive the nearest bat into a frenzy. Now try this:
IGl'" Boom: Wait 100 : Boom
Print "On a stormier night" Wait 50
For F~l To 96
Bell F : Wait F /10+1 : Rem Vary delay
Next F : Print "the bats had revenge"· Wait 50 : Shoot : Wait 50 : Shoot
Print "Ouch!"
You are not restricted to printing words up on your screen. Your Arniga can say them! Before Easy AMOS gets verbal, a NARRATOR device will automatically load off disc in a few seconds. After that, speech is almost instant.
SAY Simply use the SAY command followed by the words and punctuation you want Easy AMOS to speak, inside inverted commas:
IGl'" Say "Welcome Everybody!·'
Normally, any other instructions, music or sound effects in your program will wait until Easy AMOS has finished speaking before they start up again, and this speech mode carries a value of zero. If you set this mode to a value of 1, Easy AMOS is able to speak while executing the rest of your program, although this will result in your basic routines slowing down. Changes in mode value are placed after a phrase, using a comma, like this:
205

Chapter 12
Setting speech effects
206
SOUND
Say "a phrase.", 1
OK, have some fun getting Easy AMOS to say anything that you want with this simple routine, but mind your language!
!Iff'DO
Input "Please tell me what to say:";T$
T$~T$+". "
Say T$
Loop
SET TALK Changing the style of your synthetic speech is very easy, using the command SET TALK followed by four parameters separated by commas:
Set Talk sex, mode, pitch, rate
Sex can be male (0) or female (1), or you can create zombies, leprechauns, and muchelsc besides by playing with the pitch parameter.
Mode has a normal speech setting (0) or a bizarre rhythmic pattern (1).
Pitch changes the audio frequency of the voice from bass (65) up to soprano (320).
Rate tells Easy AMOS how many average words to recite per minute, ranging from a slow drawl (40) to gibberish (400). All or any of these four parameters can be left unspecified as long as you keep the commas in their normal positions. For example:
I'(j?> Set Talk 1,1" : Say uA rhythmic lady."
Set Talk 0,0,320,350 : Say "F ishbubble. "
Set Talk" 65, 40 : Say "Lazy bullfrog."

Chapter 12
MUSICAL PITCH
"Whoever touches pitch will be defiled. "
(The Bible, Ecclesiasticus
13:1)
SOUND
Now try and mix speech with sound effects and text, something like this:
ICV' Boom: Wait 25
Print "It was the stormiest night"
Print "in the mad professor's lab. II
Say "It was the stormiest night, in the mad professor's lab."
For F~l to 5
Shoot : Wait 7
Set Talk ,1,320,50
Bell F
Next F
Wait 50
Boom
Wait 5
Say "oh no"
Try out the second example in this Chapter again. Musical ears may have already guessed that the numbers from 1 to 96 that are used to control the "pitch" of your BELL correspond to the notes on a piano keyboard. 1 is the lowest note you will hear by pressing the furthest left white key on a piano, known as a Boltom C. 2 is equivalent to the black note next to it, which is a C#, and soon to"MiddleC" at 37, then all the way up to 96. Grand piano keyboards run out of notes after 88, and most synthesisers have a lot less than that. In Western music, notes are given their own code letter so that musicians can all refer to the same pitch when they are trying to play together. These letters repeat themselves after twelve notes, and each group of twelve is known as an ~octave".
207

Chapter 12
Pitch values
SOUND CHANNELS
208
SOUND
Here is a table of pitch values, along with their musical note equivalents and octave groupings.
OCTAVE 0 1 2 3 4 5 6 7
NOTE C 1 13 25 37 49 61 73 85
CII 2 14 26 38 50 62 74 86 0 3 15 27 39 51 63 75 87
Oil 4 16 28 40 52 64 76 88 E 5 17 29 41 53 65 77 89 F 6 18 30 42 54 66 78 90 FII 7 19 31 43 55 67 79 91
G 8 20 32 44 56 68 80 92
Gil 9 21 33 45 57 69 81 93 A 10 22 34 46 58 70 82 94
All 11 23 35 47 59 71 83 95 B 12 24 36 48 60 72 84 96
Imagine that your Amiga produces sound like a wide river, flowingoutfrom its innards. Easy AMOS lets you split up this river into four separate channels of sound, all pouring out at the same time. You can enjoy them separately, or mix them together, directing the channels straight ahead, to the left, to the right, increasing and decreasing their volume or blocking them off altogether. Now imagine that each of these channels can be given a different voice. Finally, consider the possibilities of controlling the volume and direction of each channel or voice.
Chapter 12
Changing channel volume
Activating voices
SOUND
VOLUME The VOLUME command changes the level of sound flowing through one or more channels, ranging from 0 for complete silence up to 63 for ear-splitting, like this:
~ For B=O To 63 : Rem B sets volume
Volume B : Bell 80 : Wait 5
Next B
As soon as you set a VOLUME level, all future sounds and music will flow out of your speakers at that level, across all four channels. So you need a way to change the volume of each voice independently from one another.
VOICE Sound tracks are made up of one or more voices that can act independently or together, and the VOICE command is used to activate them. To specify which voices you want to play, VOICE needs a "bit mask" immediately after it, with each bit representing the state of one of the four available "channels" through which the voices can flow. The bit pattern is standard, with the first four bits representing the Amiga's four possible voices. To play a particular voice, its bit must be setto 1, otherwise it will remain silent.
BitO-> Voice 0
Bit1-> voice 1
Bit2-> Voice 2
Bit3-> Voice 3
So the following VOICE commands will have these results:
Voice %0001
Voice %1111
Voice %1001
Rem Activate Voice 0
Rem Activate all Voices
Rem Voices 3 and 0
209
Chapter 12
PLAYING NOTES
Stereo
210
SOUND
You can control the volume of each voice by following the VOLUME command with a chosen voice followed by a level of sound, like this:
Volume voice, sound level
Now try allocating different sounds to various voices, and change their volumes in the following way:
I1:§" Volume %0001,63
Boom : Wait 100
Volume %1110,10
Rem Channel 1 loud
Boom : Wait 50 : Rem Channels 2,3·, 4 soft
Bell 40 : Wait 30 : Volume 50 : Bell 40
PLAY Single notes can be played, allocated to any voice, given a pitch and paused with a delay, all with one PLAY command, like this:
Play voice,pitch,delay
Voice is set in the usual bit-map format and the pitch of the note is set by the numbers from 1 to % in the Octave/Note table above. Delay sets the length of any pause between this PLAYcommandand your nextBasicinstruction,withadelay of zero kicking off your note and immediately jumping to the next Basicinstruction. Youcannowstartto create somestereo hannonies. For example:
I1:§" Play 1,40,0 : Play 2,50,0 : Rem No delay
Wait Key : Rem Hit the keyboard
Play 1,40,15 : Play 2,50,15 : Rem Delay
Rem Playa random sequence of notes
Do
T=Rnd(96): V=Rnd(15): Play V,T,3
Loop

Chapter 12
MAKING TRACKER MUSIC
SOUND
If you can't write your own musical masterpieces, don't worry. Easy AMOS lets you take another composer's musical soundtracksand add them to your home-grown games and utility programs. There are thousands of public domain sound tracks written with systems like Soundtracker, Noisetracker and StarTracker. To make life reaIly easy, we have provided you with special commands that will play any Tracker modules.
TRACK LOAD
is used to load a Tracker module into the memory bank number of your choice. Be careful, because the first thing it will do is erase any existing data in this bank number before loading the new data. The new bank will be caIled "Tracker".
Track Load "modulename", banknumber
TRACK PLAY
To start your Tracker music playing, simply give this command, foIlowed by the appropriate bank number. Try out a song now. Load this off your "Easy AMOS Examples" disc:
~ Track Load "Easy_ Exarrples :Songs/m:x1 . laugh" , 6
Track Play, 6
If you leave out the banknurnber, banknumber6will be used asa default anyway. Most computerised composers use sets of patterns to make up their tunes, which can be repeated in any order that pleases the ear. You can kick off a Tracker sequencefromanyoneofthesepattems, providing you know what they are of course. AIl you have to do is add thepattem nurnberafterthebanknumber. Change the second line of that lastexampleandadd a third lineasfollows. You'llbelaughing all the way to the bank:
~ Track Play 6,12
Track Loop On
211

Chapter 12
Playing AMOS music
"Music means nothing; it is sheer sound. "
(Sir Thomas Beecham, 1926)
212
TRACK LOOP ON TRACK LOOP OFF TRACK STOP
SOUND
Use these commands to make Tracker music loop over and over again, to stop a particular loop, and to stop an of the Tracker music currently being played.
A Tracker module can only be played while an other Easy AMOS music is stopped. Please note that you should ONLY use Tracker instructions while a Tracker module is playing, so don't mix them up with other Easy AMOS sound commands, otherwise you may get some very peculiar noises.
Also, Easy AMOS music controls like Volume and Tempo will have no effect on Tracker modules, which have an of their own controls built in.
MUSIC This command allows you to load and play music created withtheAMOSsystem,Easy AMOS'sbigbrother. Any pieces of music that you want to use must be held in the music bank, which is normally bank 3. You can play these pieces without affecting any other part of your Basic program, because Easy AMOS the musician is highly intelligent. For example, if any sound effects are triggered on a channel currently playing music, that tune will be suspended while the sound effect is playing and will start again from its previous position once the effect is over. You can store several musical arrangements in the same bank, provided there is enough memory, so to ten them apart each melody must be given its own number.

Chapter 12
Stuffing up your passage
Turning music off
Changing volume
Changing speed
SOUND
Up to three different melodies can be started at a time, but each new MUSIC command will stop the current song and hold its status in a stack. When the new song has ended, the original music will start again exactly where it left off. If you do not want your music to play through to the end, you can halt it in one of two ways:
MUSIC STOP will bring the current single passage of music to a halt. If there is any other active music waiting to be played, that music will begin to play at once.
MUSIC OFF is used to completely tum off all music in your program. After using this command, you can only restart your sound track by executing your original MUSIC instructions all over again, right from the beginning.
MVOLUME This command is used to set the volume of a piece of music, or to change its volume. It must be followed by a number between 0 for silence, up to 63 for as loud as possible. Obviously, by setting up a simple loop, you can fade your music up or down.
TEMPO Changing the speed of a piece of music or sound effect can enhance the mood of most programs. The TEMPO command is used to modify the speed of your current tune, and must be followed by a number ranging from 1 for as slow as possible, up to 100 for incredibly fast.
This will work fine unless you have taken music created by the Soundtracker system, which mayinc1ude its own tempo labels. Any such labels will override TEMPO settings in Easy AMOS.
213
Chapter 12
Volume meter
SAMPLED SOUND
214
SOUND
=VUMETER
Most of us are familiar with the sight of Volume Meters (Vumeters) jumping up and down on hi-fi displays. Easy AMOS is not only able to respond to volume, but also uses this function to make your graphics dance around in response to the intensity of your soundtrack. It is used like this:
S~VUMETER(v)
where v is the voice (from 0 to 3) being tested and returning the volume of the current note being played, and s is an intensity value between 0 and 63.
Modern computers are able to store sound frequencies in the form of digits. Your Amiga is a digital sound synthesiser and Easy AMOS is ready, willing and able to exploit its wonders. There are many digital sound samplers on the market, and all you have to do is plug them in to your computer, grab sound samples off CD, cassette or radio and use them. Unfortunately there are two problems in enjoying these sources of superb sound: firstly sampler cartridges are rather expensive, secondly stealing someone else's audio creations is illegal! No problem. There are thousands of public domain sound effects and musical instrument samples that Easy AMOS can import and transform for your own purposes, perfectly and legally. A tiny selection of typical samples is included on your "Easy AMOS Examples" disc, and we'll be loading them in a moment.

Chapter 12
Playing a sound sample
SOUND
SAM PLAY This command squirts a lovely sampled sound through your audio system. It can be qualified in any of the following ways:
SAM PLAY s
SAM PLAY v,s
SAM PLAY v,s,t
where s is the number of the sample to be played, please read on for full details.
v is a bit-map holding a list of all the voices the sample will use, as already explained.
f sets the speed at which the sample will be played back. This setting is given in Hertz, which is a profeSSional standard of measurement, but all you need to know for now is that a rate of 4000 will do for simple sound effects and understandable speech needsa rate of about 10000. Experiment and decide what sui ts your samples best, then experiment again and hear how different playback rates can create different effects from your original sound samples.
If you can't wait to collect your own sound samples, have some fun now with this wonderful little program. It loads up a bank of ready-made samples from your "Easy AMOS Examples" disc, and allows you to play them in random order:
215

Chapter 12
216
SOUND
II7 wad"Easy_ Exarrples : sounds/Block _ Sarrples .abk"
Curs Off : Cls 0 : Paper 0
Locate 0,10
Centre npress a key between A and J~
DO
A$~Inkey$
A~Asc (A$)
If A>96 and A<107
Sam Play A-96
End If
LOOp
Here are the offidal titles of the samples:
A Boioing
B Clang
C Dragon
D Ricochet
E Lemming
F Woodpeck
G Quackers
H Laserzap
I Robostep
J Sharkey
Try playing them rapidly like a mini-drum kit, as well as holding down the keys to get some hammerdrill effects. Good, isn't it.

Chapter 12
Changing a sample bank
SOUND
SAM BANK
Digital sound samples are normally stored in memory bank 5, but you can assign a new memory bank to hold your sound samples with the SAM BANK command. Just include a bank number after this instruction and all future SAM PLAY commands will suck their sounds from that bank. If you set up several parallel banks, Easy AMOS can exploit their delights at any time with a simple call such as:
Sam Bank 4
Time for some more instant sound effects. The next program plays the bank of samples stored on your "Easy AMOS Examples" disc that are used in the "Tricycle Race" game. Load this file first from direct mode:
Now hear what's stored in that memory bank, using this:
IG?' For A~1 to 11
Print "Sample number ";A
For B~1 To 3
Sam Play A
Wait 20
Next B
Next A
217

Chapter 12
Playing a sample from memory
Repeating a sample
218
SOUND
SAM RAW
You don't have to hold a sound sample in a special bank. In fact, it can be stored anywhere that suits you in the computer's memory, loaded using BLOAD, then played with the SAM RAW command. When this type of sample is called up, it is known as a "raw sample", and it's up to you to enter the sample parameters longhand so you can scan through any sound library discs. The parameters are as follows:
Sam Raw voice, address, length, frequency
Voice has already been explained.
Address refers to the location address of your sound sample, and the simplest location is within an existing Easy AMOS memory bank.
Length confirms the digital length of the sample that you want to play in bytes.
Frequency dictates the playback speed of the original sample in Hertz, please refer to SAM PLAY above. A typical raw sample command looks like this:
Reserve as work 10,39852
~''Easy_ Exarrples :Sounds/tricycle _ sarrples .abk"
Bload R$,start(lO)
Sam Raw 15,start(lO),length(lO),lOOO
SAM LOOP
If there is any reason that you need to repeat samples over and over again, Easy AMOS can help you with a single command.·
Sam Loop On
ensures that all sound samples which follow will be looped continuously, whereas
Sam Loop Off
deactivates the routine.

Chapter 12
THE SAMPLE BANK MAKER
SOUND
The whole purpose of Easy AMOS is to make all aspects of computer programming as simple and friendly as possible. That's why we've provided you with a readymade recording studio for creating your own sample banks! Load it from the "Easy AMOS Programs" disc now:
Sample_Bank_Maker.AMOS
The working screen looks like this, so get ready for your guided tour around its amazing capabilities:
219

Chapter 12
Current sample window
Sample bank
220
SOUND
The top of the screen is divided into two. The lefthand side is a special window where the current sample is displayed as a visual "wave pattern". You can load an example and view it in a moment. Silence is represented as a straight line, and sound frequencies are displayed as jagged patterns of vertical lines from the beginning to the end of the sample. As the sample is "played", you will see how the wave pattern corresponds to what you hear. The name of the current sample will be displayed above this window, along with its length in bytes.
The right-hand side is where the contents of the sample bank is displayed. Each sample is listed with its own number, name and length in bytes. As usual, a slider-bar and slider arrows are provided to display any parts of the contents list that are too big to fit into the display.
Between the Current Sample Widow and the list of samples in the bank are two big buttons. These are used to transfer a sample from one side to the other. So you can pull a sample from the bank, test it or work on it while it's in the Current Sample Window, and then transfer it back at the selected position in the bank. If a copied sample is positioned as the last one in your bank, it becomes a new sample to be added at the end of the bank.
An Information Line runs across the whole of the screen. Below that is your panel of working buttons. Let's load up some samples to work on now.
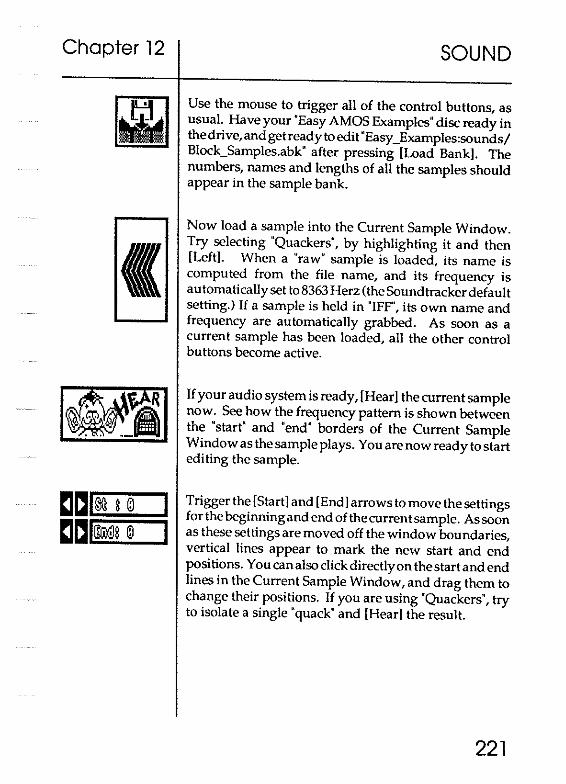
Chapter 12
I
~R
~ .. .. . JI
I I
SOUND
Use the mouse to trigger all of the control buttons, as usual. Have your "Easy AMOS Examples" disc ready in thedrive,andgetreadyto edit "Easy_Examples:sounds/ Block_Samples.abk" after pressing [Load Bank]. The numbers, names and lengths of all the samples should appear in the sample bank.
Now load a sample into the Current Sample Window. Try selecting "Quackers", by highlighting it and then [Left]. When a "raw" sample is loaded, its name is computed from the file name, and its frequency is automatically set to 8363 Herz (the Soundtrackerdefault setting.) If a sample is held in "IFF", its own name and frequency are automatically grabbed. As soon as a current sample has been loaded, all the other control buttons become active.
If your audio system is ready, [Hear] the current sample now. See how the frequency pattern is shown between the "start" and "end" borders of the Current Sample Window as the sample plays. You are now ready to start editing the sample.
Trigger the [Start] and [End] arrows to move the settings for the beginning and end of the current sample. Assoon as these settings are moved off the window boundaries vertical lines appear to mark the new start and end positions. You can also click directly on the start and end lines in the Current Sample Window, and drag them to change their positions. If you are using "Quackers", try to isolate a single" quack" and [Hear] the result.
221

Chapter 12
+++ ++ +
HERTZ
222
SOUND
The frequency at which a sample is played is measured in Hertz, and by changing this frequency you can create wonderful effects. This panel contains "plus" and "minus" buttons with the [+++1 button for rapid raising of the frequency, the [-I button for fine-tuning downwards, and so on. Try changing the frequency of the current sample by decreasing the Hertz setting now, and [Hearl it. Next, raise the frequency until your duck sounds demented. If you use the RIGHT mouse button when setting frequencies, you will get rapid level changes.
Trigger this button if you want to rename your edited sample. You can type in up to eight characters after the prompt, and the new name will appear.
When you've finished editing the current sample, you can [Savel everything that is held between the start and end lines in the Current Sample Window as an "IFF" file. These "Interchangeable File Formats" are commonly used to storedata that can be read by different machines. Any changes you have made to the sample's frequency and name will be saved as well.
Finally, let's look at the remaining buttoris that control the Sample Bank Maker.
Thisinsertsan "empty" sample at the highlighted position in your bank, where it waits to be filled. Use it to copy the current sample to anywhere you like in the bank.
This is a powerful setting, so be careful when you use it. The highlighted sample is deleted from the sample bank when you press this bu tton, and it can NOTbe recovered!
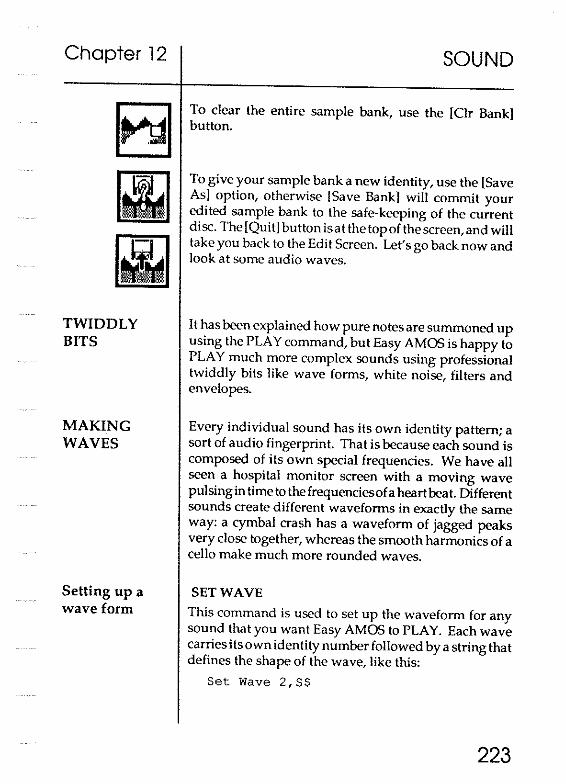
Chapter 12
TWIDDLY BITS
MAKING WAVES
Setting upa wave form
SOUND
To clear the entire sample bank, use the [Clr Bank] button.
To give your sample bank a new identity, use the [Save As] option, otherwise [Save Bank] will commit your edi ted sample bank to the safe-keeping of the current disc. The [Quit] button isat the top of the screen, and will take you back to the Edit Screen. Let's go back now and look at some audio waves.
It has been explained how pure notes are summoned up using the PLAY command, but Easy AMOS is happy to PLAY much more complex sounds using professional twiddly bits like wave forms, white noise, filters and envelopes.
Every individual sound has its own identity pattern; a sort of audio fingerprint. That is because each sound is composed of its own special frequencies. We have all seen a hospital monitor screen with a moving wave pulsing in time to the frequencies of a heart bea t. Different sounds create different waveforms in exactly the same way: a cymbal crash has a waveform of jagged peaks very close together, whereas the smooth harmonics of a cello make much more rounded waves.
SET WAVE
This command is used to set up the waveform for any sound that you want Easy AMOS to PLAY. Each wave carries its own identity number followed by a string that defines the shape of the wave, like this:
Set Wave 2,S$
223

Chapter 12
Assigning waves to channels
224
SOUND
Wave number 0 has already been allocated to the sort of random noise shape that produces percussion effects, wave 1 has been preprogrammed with a smooth shape for generating pure tones, so start your own WAVE numbers from 2 onwards. Shape strings are set using a list of 256 numbers, with each number representing its own part of the complete wa veform. Each number can range from 127 at the peak of any part of the wave, down to-128 at the bottom of a wave pit. Don't forget that Easy AMOS strings can only hold positive numbers, but the solution for entering negatives is easy: simply add 256 to any negative number. Before you can playa waveform, Easy AMOS must be instructed which channels are going to be used for pumping out the sound.
WAVE
The WAVE command assigns whatever wave number you specify to one or more sound channels, in the following way:
Wave 2 To 15
Remember that voices contain a bit-map pattern, and will be unaffected by any wave unless a bit in the pattern is set to 1. If this is done, the appropriate voice will be triggered by PLAY. This can be demonstrated by:
~ Wave ° To %1111 Rem Play all voices
Play 20,10
Wave 1 To %0001 Rem Assign voice zero
Play 60,0

Chapter 12
Assigning samples to waves
Deleting a wave
Assigning a noise wave to a channel
SOUND
SAMPLE
To PLAY one of your samples stored in the sample bank directly in your program, a very powerful command is provided. SAMPLE assigns the specified sample number to the current wave, like:
Sample 1 To 15
And you can choose a range of voices to be set by the SAMPLE command with a standard "bit-map".
You must experiment with the range of notes that any particular sample can handle, but anything between 10 and 50 seems to be satisfactory.
DEL WAVE To get rid of a wave that has been set up with a SET WAVE instruction, simply use this command followed by the number of the wave you wish to vaporise. When this has been done, all voices will be set to the standard default sine wave. The pre-set waves 0 and 1 cannot be eradicated, so you can only delete waves 2 and upwards. For example:
DEL WAVE 2
NOISE Thiscommandhasthesameaffectasassigningthewhite noise waveform zero to the selected voices, and is used to form the foundations for a whole range of special effects such as explosions and percussion drumming. For example:
fUr' Noise To 15
Play 60,50
Play 30,0
225

Chapter 12
Making an audio envelope
226
SOUND
SETENVEL
An envelope is audio jargon for the life cycle enjoyed by individual sounds: the way they are born, live and die away. Like wavefonns,envelopes have their own distinct shapes, usually seen as having four parts: attack (how a sound builds up), decay (the way it fades), sustain (how long it hangs on) and release (the manner in which it ends.) Easy AMOS uses envelopes to change your original wavefonns during their short life, according to a set pattern, and they have the following parameters:
SET ENVEL wave,phase TO duration, volume
Wave is simply the number of the wavefonn you are targeting. Any number can be used, including the 0 and 1 pre-sets.
Phase refers to a particular chunk of the original wavefonn that is to be defined, ranging from 0 to 6.
Duration controls the length of this particular chunk or phase of the waveform, and is expressed by each unit representing one fiftieth of a second. This is how you control the speed of a volume change in any phase of your wavefonn.
Volume specifies the volume to be reached by the end of this phase, ranging from 0 for silence to 63 for full blast. So that:
Set Envel 1,0 To 200,63
will affect waveform number 1, and act on chunk zero (its first phase, lasting 4 seconds), ramping it up to full volume by its end, no matter what its original volume was.

Chapter 12
Filtering sounds
fr'
SOUND
LED
Most tape recorders and hi-fi systems have some sort of filtering system to filter out unwanted hissy frequencies and clean upsound. When you usefiltersthereisalways a trade off between quality against audio definition. You will have to experiment with the LED function and decide for yourself if you want to sacrifice natural high frequencies in order to reduce distortion, and Easy AMOS makes your decision incredibly simple. Use LED ON with your music and sound effects to see if they are more pleaSing. If it works for certain sequences but not for others, allow the original sounds to come through with LED OFF.
In the next Chapter, you will enhance your home-grown creations with your new knowledge, and turn them into audio-visual spectaculars.
227

228

Chapter 13
MATHS
o arithmetic
o floating point numbers
o trigonometry
o random numbers
"1 don't believe in mathematics. "
(Albert Einstein, 1954)
"There are just three steps to heaven."
(Eddie Cochran, 1960)
Chapter 13
ARITHMETIC
230
MATHS
Easy AMOS isn't proud, and is happy to perfonn the most humdrum maths operations. Nothing can be simpler than running this wee sum:
~ Print 2+2
Arithmetic operations are dead easy, provided you use the right symbols:
+ the plus sign always signals addition
- the minus sign is used for subtraction
• but for multiplication an asterisk must be used
/ and division is made using this slash symbol
A in Easy AMOS maths, this character is what is known as an 'exponential symbol'. It means 'raise a number to a given power', which is exactly the same as multiplying a number with itself. so that:
Print 3'5
is the same as typing in:
Print 3*3*3*3*3
Now run this calculation:
~ Print 2+2*2
Something appears to have gone horribly wrong! Everyone knows that 2 plus 2 is four, times two equals 8, but Easy AMOS reckons the answer is 6.
Philosophers might argue that both answers are right, but this would lead to arithmetical chaos. In fact Easy AMOS is only taking your instructions literally, and working on a set of built-in priorities. Make your intentions clear with this:
~ Print (2+2) *2

Chapter 13
Expressions
"The glory of expression is simplicity. "
(Walt Whitman, 1855)
MATHS
A combination of calculations is called an expression, and Easy AMOS handles expressions in strict order of priority. Any 'exponentials' are calculated first. Then any multiplications and divisionsarecalculated,inorder of appearance from left to right. Only after these have been dealt with will additions and subtractions be attended to, again in order from left to right.
You can get round this rigid system by using brackets 0, and anything inside your brackets is evaluated first and treated as a single number.
The following calculation gives a result of 43
IG? Print 10+2*5-8/4+5'2
because it is evaluated in the following order:
5'2 25
2*5 10
8/4 2
10+10 20
20-2 18
18+25 43
If you add two strategic pairs of brackets to the same calculation, you transform its lOgical interpretation, resulting in an answer of 768:
IG? Print (10+2) * (5-8/4+5) '2
because it is now calculated in this order:
10+2 12
5-8/4+5 5-2+5
5-2+5 8
8'2 64
12*64 ~768
231

Chapter 13
VALUES
Comparing values
"The greatest happiness of the greatest number." (Jeremy Bentham,
1781)
232
MATHS
It is obvious that every expression has a value, but expressions need not be restricted to whole numbers (integers), or any sort of numbers. Expressions can also be made up of real numbers or strings of characters. If you need to compare two expressions, Easy AMOS has a pair of functions that wi11look at them and work out which has the maximum or minimum value.
=MAX
=MIN
Different types of expressions cannot be compared in one instruction, so they should not be mixed. If you want to compare the values of two integers,or fractional numbers, or character strings, and find the maximum value, use:
v=MAX(x,y)
v#=MAX(x#,y#)
v$=MAX(x$,y$)
In the same way, if the minimum of two values is wanted from a similar pair, use:
v=MIN(x,y)
v#=MIN (x#, y#)
v$=MIN (x$, y$)
Try to understand why these comparisons give the results listed on the next page:
~ Print Max(99,1)
P.=Min(99,1) : Print A
Print Max("Easy AMOS", "AMOSH)
Print Min ("Easy AMOS", "AMOSN)

Chapter 13
Finding a sign
Absolute values
"A fool kncyws the cost of everything and the value of nothing. "
(Oscar Wilde, 1894)
99
1
Easy AMOS
AMOS
=SGN
MATHS
Any number can have one of three values: negative, positive or zero. Easy AMOS uses the SGN function to discover and tell you the sign of any integer or fractional number.
s~SGN(v)
s~SGN(vi)
The three possible results are these:
-1 if the value is negative 1 if the value is positive o if the value is zero
=ABS
This command is used to convert arguments into a positive number. ABS returns an absolute value of an integer or fractional number, paying no attention to whether the number is positive or negative, in other words, ignoring its sign.
r~ABS(v)
r#~ABS (vi)
for example
~ Print Abs(-l),Abs(l)
will result in
1 1
233

Chapter 13
Square roots
FLOATING POINT NUMBERS
Making integers
Setting accuracy
234
MATHS
=SQR This function calculates the square root of a positive number. That is to say, it finds out what number has to be multiplied byitselfto give the requested value. So the value of 5 will be given for this:
1& Print Sqr (25)
Arguments that consist of a load of numbers either side of a decimal point can often give very messy results in Basicprogramming. The decimal point floats backwards and forwards along such calculations, slowing things up and usually giving levels of accuracy way beyond your needs. Easy AMOS can change these "floating point numbers" to make them more useful in terms of programming speed or accuracy.
=INT In an expression like i=INT( v#), the !NT function rounds down a floating point number to the nearest whole number, the nearest integer. So that:
1& Print lnt (3.99999)
will be rounded down to 3, whereas:
1& Print lnt (-1.1)
is rounded down to-2
FIX
Supposing you are computing your bank balance, but you only want to see your money displayed to the nearest penny, or cent, or pfennig. Easy AMOS uses the FIX instruction to change the way floating point numbers are displayed or printed out.
FlX(n)
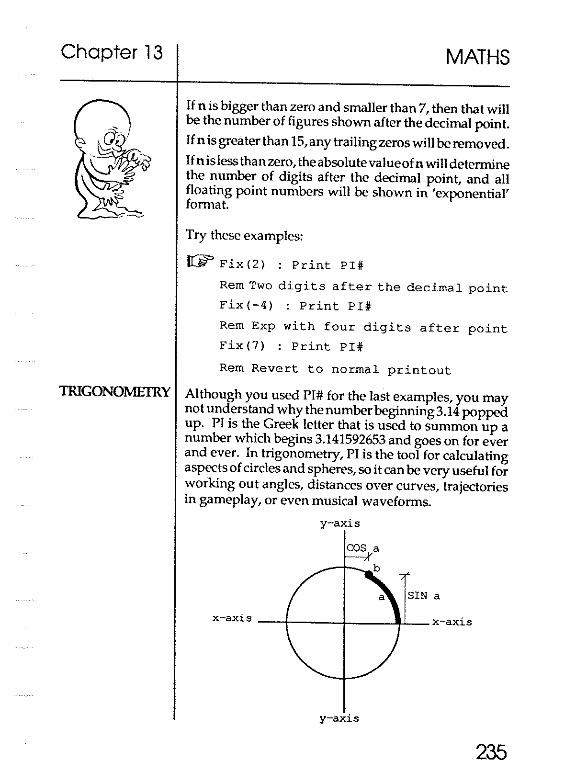
Chapter 13 MATHS
If n is bigger than zero and smaller than 7, then that will be the number of figures shown after the decimal point.
If n is greater than 15,any trailing zeros will be removed.
Ifnisless than zero, theabsolutevalueofn will determine the number of digits after the decimal point, and all floating point numbers will be shown in 'exponential' format.
Try these examples:
II? Fix (2) : Print PIJI
Rem Two digits after the decimal point
Fix(-4) : Print PIJI
Rem Exp with four digits after point
Fix (7) : Print PI4/
Rem Revert to normal printout
TRIGONOMEIRY Although you used PI# for the last examples, you may not understand why the number beginning 3. 14 popped up. PI is the Greek letter that is used to summon up a number which begins 3.141592653 and goes on for ever and ever. In trigonometry, PI is the tool for calculating aspects of circles and spheres, so it can be very useful for working out angles, distances over curves, trajectories in gameplay, or even musical waveforms.
y-axis
SIN a
x-axis _--t ___ + __ -''I-'-_x-axis
y-axis
235

Chapter 13
Using Pi
"Diana and I enjoy the Three Degrees."
(Prince Charles, 1985)
Using degrees
Using radians
236
MATHS
=PI#
To avoid any clashes with your own variable names, use the # character as part of the PI token name.
Supposing you need to know more about a circle. Look at the diagram, where a point has moved from the righthand side of the x-axis up along the perimeter for a distance a, and stopped at position b. Really, we would not refer to a as the number of degrees in the angle between the x-axis and the line from the centre of the circle to point b, because computers normally use units known as 'radians' instead of degrees.
DEGREE If you are unhappy with the complexities of radians, Easy AMOS is happy to accept instructions using degrees.
Once this instruction has been given, all further calls to trigonometry functions will expect to use any angles to be given in degrees, like this:
IG?" Degree
Print Sin(45)
RADIAN As has been explained, your Amiga uses a default by which it expects all angles to be given in radians.
If you have used DEGREE and you want to get back to normal using radians for all future angles, simply give the RADIAN instruction.

Chapter 13
Finding sines
MATHS
=SIN This function calculates how far point b is above the xaxis, and this distance is known as its sine. It always returns a floating point number, for example:
IW Degree
For X~O To 319
Y#~Sin(X)
plot X,Y#*SO+100
Next X
Finding cosines =COS
Going off at a tangent
The distance that point b is to the right of the y-axis is known as the cosine. If b goes to the left of the y-axis, its cosine value becomes negative. Similarly, if it drops below the x-axis, the sine results in a negative value. Try adding the following two lines to your last example between the Plot and Next instructions.
IW Y#~Cos (X)
Plot X,Y#*SO+100
=TAN For any angle, when you divide its sine by its cosine you get what is called its tangent. TAN is the function that gives this tangent. Supposing that a is 45 degrees, making its sine and cosine equal in length. See if you can manipulate the floating point number to give the correct answer for:
IW Degree
A#~4S : Print Tan(A#)
237

Chapter 13
RANDOM
Creating random sequences
238
MATHS
Imagine greeting Easy AMOS every morning with "How are you today?" and the answer al ways came back, ''Very well, thank you." What a predictable relationship that would be. The easiest way to introduce an element of chance or surprise into a program is to throw some numbered options into an electronic pot and allow Easy AMOS to pull one out at random. After one has been selected and used, it gets thrown back into the pot and has an equal chance along with all the others of being used again.
=RND
You can generate integers at random between zero and any number you placein brackets after the RND function. If this number is less than zero, RND will return the last value it pulled out of the pot. Try generating random colours and positions with this:
II:§" Do
C~Rnd(15) : X~Rnd(320) : Y~Rnd(200)
Ink c : Text X, Y, "Easy AMOS AT RANDOM"
Loop
If the number you choose to put in brackets after Rnd is greater than zero, a "real" random number will be generated. If the number equals zero, then the last random number is generated.
Using the random number generator, you can tum Easy AMOS into a card dealer, the creator of an ever-changing galaxy or much more interesting and unpredictable when you ask the question, "How are you today?"

Chapter 14
CREATING A GAME
o single-player game
o one or two-player game
o title sequences
o hi-score routines
o the Easy AMOS Challenge
"Games are a serious business."
(Anacharsis, 600 Be)
239

Chapter 14
BLOCK BUSTER
Procedures
240
CREATING A GAME
Wouldn't it be amazing if you could get inside another prograrnrnersheadandseehowthebrainworks.lmpossible? AnythingispossiblewithEasyAMa>,evenabraintransplant!
The time has come to use all of your new knowledge and experience for the serious business of examining some not so serious games, written by the experts. ThisChaptergivesyou background information about the example games to be found on your Easy AMa> discs. The authors have included loads of helpful notes and comments in their listings, and you can almost hear them thinking aloud, as they explain their techniques to you. FollowthisChapterasyougothroughtheir ideas on screen, and enjoy the games as you learn from them.
Any keywords and techniques you are not sure about can be examined using the [Help] feature, or you can look them up in the Qossary. Let's start with a computing classic!
Please load thisgame from your "Easy AMa>Examples" disc, using the File Selector:
Block Buster.AMOS
It has been written for you by Ronnie Simpson, and you are invited to use the "bat" at the bottomofthescreen to bounce the "ball" and knock "bricks" out of the wall. After playing it a few times, go into the Editor and look through the listing to examine how everything works. There are some very useful notes and tips at the end of the listing, but in case you get lost, these are the main points you should look for.
First of all, identify all these procedures and see what each of them is used for:
RUBOUT[Z]
BAT [Z]
HOLDBALL[Z]
CHECKBAT
BONUS
SETBONUS[C] INIT SETBLCCKS Gl\MECCMPLETE

Chapter 14
"All in all it's just another brick in the wall." (Pink Hoyd, 1979
Variable list
CREATING A GAME
NCMEN
SPEEDUP SLOWOOWN
LIVES
Ml\RKLEVEL
RESET
Here is a table of the variables in the game, to help you understand what they are used for.
A makes a "hard" ball if A=-l
B creates a "magnetic" bat if B=-l C is the bonus number you have won DC delay count to control ball speed DX amount to be added to the ball's X
DY amount to be added to the ball's Y
E is the number of "bricks" in the level H is the zone number under the ball I is the size of the bat being used M indicates the number of lives left Q counts the number of "bricks" that have been
removed, before raising your bonus number S is the score for the current level ST is the score total for all levels SH is the highest score so far
TI dictates the image number for "Smiley"
TX is the amount to be added to Smiley's X TY is the amount to be added to Smiley's Y
u refers to Smiley's X position v refers to Smiley's Y position W is the number of the current level X refers to the Ball's X position Y refers to the Ball's Y position Z has various non-global uses, such as For INext
loops
241

Chapter 14
Arrays
Bob numbers
Programming hints
Setting up the screen
242
CREATING A GAME
Now look for these three arrays, and see how they hold the coordinates of the ''bricks''.
x () holds the X coordinates of all possible brick pOSitions
Y () holds the Y coordinates of all possible brick positions
N () holds the number of "hits" needed for each brick pOSition.
The Bobs have been allocated these numbers:
1 the ball 2 the bat 4 the bonus pointer
5 speed number 6 "Smiley"
This section is a brief tour of some of the most important parts of the program. The "line numbers" referred to are displayed in the Information Line of the Editor Screen, as you scroll up and down the listing. Make sure you have opened all the procedures with [Altl+[F7]. Instead of going through them in order of appearance, let's look at them feature by feature.
(line 218) The screen is loaded from the disc using Load Iff, and then packed to Bank 5.
(line 127) This unpacks the screen at the start of each level of play.
(lines 135 to 146) The data for the ''bricks'' is held in Bank 9, and this data is read before each level of play is started. After establishing the brick's colour and the number of "hits", a screen zone is set up for each brick.

Chapter 14 CREATING A GAME
Moving the bat (line 202) Here's where the mouse is made invisible.
Moving the ball
Speeding up the ball
Animating "Smiley"
(line 109) This limits the mouse to a small area of the screen.
(line 31) The mouse coordinates are transferred to the bat.
(lines 109 and 111) When a different sized bat is selected as a bonus, the Limit Mouse command must be updated to make sure that the bat is kept inside the playing area.
(line 41) The ball is moved by changing the X and Y variables, using OX and DY as the amount to be added in either direction. This is how the different angles of "bounce" are calculated.
(lines 36 to 38) This is where checks are made while the main loop is active, to see if the ball has hit the sides of the playing area, or missed the bat.
(line 39) A test is also made to check if the ball has entered any of the screen zones that represent a brick. If it has, the appropriate brick is removed, otherwise a short delay loop is used to make up for the time it would have taken to erase the briCk.
(line 49) The program is slowed down to playing speed by a delay loop inside of the main loop.
(line 34) When the DC counter reaches its target, the delay loop is shortened and so the ball speeds up.
(line 46) Four different images of the "Smiley" Bob are held in the Bob bank, and these are displayed in tum to give the illusion of movement. A random number has been used to slow down the speed of the animation. Remember, Smiley's images are in bank areas 14 to 17.
(Lines 44,45 and 47) A similar routine to the one used for moving the ball is used to control Smiley's movement and restrictions.
243

Chapter 14
BUILDING A TWO-PLAYER GAME
244
CREATING A GAME
We have provided a useful help file for you to examine, on the "Easy AMOS Examples" disc:
Block_Buster_HELP.AMOS
Feel free to adapt and change this game in any way you want. Later in this Chapter you'll be offered hi-score and title sequences if you want to make use of them.
After that ready-made example, would you like to witness the whole creation process of a computer game, from start to finish? Better still, after learning from the experience of a professional, do you want to rip his game to bits and adapt it for your own use? We thought you would.
"Tricycle Ball" has been written justforyou, by the father of Easy AMOS, Fran~ois Lionet. The object of the game is to use your weird tricycle to bump a ball into your opponent's goal. Play time is spli t into two halves of two minutes each, and there are several modes of gameplay tochoosefrom. You can struggle against another human being or a robot player, and thereisevenademonstration mode, where two robots play against one another . There is also a built-in facility to select an easy or a difficult standard of skill. Best of all there are no rules at all, so anything is allowed, including using your opponent as the ball!
All the facilities of arcade games have been included: timers, on-screen messages, music and sound effects. Best of all, Fran~ois has prepared no less than eight separate files showing exactly how he has built up the program, stage by stage. There are eight files that demonstrate the build-up of the gameplay and the title sequence.

Chapter 14
The automatic learning system
CREATING A GAME
As you would expect from such a friendly programmer, Fran,ois has included an automatic method of spotting each new stage in his creation. So, before you wander through his brain, play the completed game by loading and running TB_Step_S.AMOS which is waiting on your "Easy AMOS Tutorial" disc. Select a human or a robot opponent, or choose the demo mode. You need one or two joysticks to play the game, unless you select demo mode.
When you are satisfied with that, load the first step of the game's creation from the same disc:
TB_Step_l.AMOS
and get ready to have fun as you learn.
Here's how to use the automatic learning system. Start with the first Step of the program you have just loaded. When you have worked your way through it, move on to Step 2, and so on until you reach Step S. [Run] and play with each Step as you go along, and then return to the Editor to examine the listing.
Fran,ois has marked each of his new features with a special code that looks like this:
***
All you have to do is jump to wherever this marker appears, using the [Ctrll+[F] keys or call up the [Find] option from the Editor menu by pressing the [Alt] key, triggering [Find] and typing "***" after the prompt. Once this sequence has been initialised, use [Find Next] or [Ctrl]+[N] to jump to the next original idea. In this way, you don't have to cover old ground as the program Steps build up, and you will be taken directly to new routines as they occur.
245

Chapter 14
STEP ONE
246
CREATING A GAME
The first moves.
Welcome to the first step in this series of ''Tricycle Ban" programs. At this stage, the program is only an idea firing across a few French brain cells, and jotted down on the back of a dirty Metro ticket. Before any games programming can be achieved, we need some graphiCS to work with, SO "our ugly Bobs" are called up. By closing the Editor we can save some memory, and because there is no mouse pointer required, we hide it. Now we specify where the files are to be loaded.
Are you using [Find Next] or [Ctrl]+[N] to jump to the next * * * marker? Then let's continue.
Now we dimension the arrays. Simply read the notes in the listings to see how this works for the coordinates of the player's Bobs, the direction and speed of movement, and how the animation is set up. Next the variables for the Bobs are initialised.
After the "playfield" is unpacked into Screen 1, look at the table that contains all the images to display the player's tricycle. Notice how we check to see if the game has been interrupted, how we synchronise the display using three Wait commands, and how we go faster, slower, turn left, right, brake and move the player. Now you've got the idea of how the [Find Next] works, all we need to ten you in this Chapter is what each Step of the game's evolution contains. Check out all the notes for yourself and explore the author's brain!

Chapter 14 CREATING A GAME
STEP TWO The collisions. Load:
STEP THREE
All the old *** markers from TB_Step_1.AMOS have been erased in this listing, and the * * * marker is only used to locate the new features included in this step of the game's construction.
This stage includes the most important feature of any arcade game: using collision detection to make the game playable. We can exploit three types of collision in this game:
- the relationship between the player's Bob and the field of play. For example, what happens when you crash into the boundary wall of the playfield.
- the relationship between two opposing players' Bobs. For example, what happens if you avoid or collide with the other "tricycle".
- the relationship between the players' Bob and the Bob representing the ball.
The scrolling screen. Load:
TB_Step_3.AMoS
As before only the new features in this step have been commented with the *** marker. Up to now, all the Bobs have been moving around the full-sized Screen 1, but now we focus our viewpoint by making the players the centre of the action using a Screen Copy command. This gives perfect scrolling, but we still have to exploit the Double Buffer command to prevent flicker problems and then synchronise the display. Finally, we are able to create three different windows centred on each of the two players as well as the ball, for a multi-camera effect.
247

Chapter 14
STEP FOUR
"To win at play keep your eyes on the ball."
(Epictetus, 160 AD)
STEP FIVE
STEP SIX
248
CREATING A GAME
The ball. Load:
TB_Step_4.AMOS
To make the ball as realistic as possible, it has to be given its own speed and direction and the capability to fly through the air as well as move along the ground. This step also shows how the baH has been made to bounce and appear to change in size by "zooming" it. Don't forget the whole point of these example programs is that you are invited to change and adapt them, and it is very simple to experiment with the values of the arrays and variables. Forexample, trychangingZBALLtoa different value, and alter the zoom effect.
The robot. Load:
TB_Step_5.AMOS
This kind of arcade game is more entertaining when two humans play against one another, but it must also allow one human to play against the computer. This step shows how a robot player is created, and how the robot is made "intelligent". See how it decides if it should wait and do nothing, or try and hit the other player or go for a goal. It is also demonstrated how the robot can be made more skilful to give its human opponent a tougher challenge, but not so clever that it would be impossible to beat it.
Cleaning up. Load:
TB_Step_6.AMOS
This is where the twiddly bits are added to the gameplay parameters. Goals need to be detected and displayed, a timer must be included and the speed of play needs to be controlled. Players also need to come on and leave the playfield at the appropriate time.

Chapter 14 CREATING A GAME
STEP SEVEN The final game. Load:
STEP EIGHT
HI-SCORES
TB_Step_7.AMoS
This step is where all the sound effects and music get added, and includes the various on-screen messages that you would expect to see in an arcade game. Also, you can learn how different procedures are used to choose playing modes, in other words, your choice of demo mode or a human/robot opponent, and the level of difficulty.
The title. Load:
TB_Step_8.AMOS
This is a completely independent program, and you are welcome to adapt it for your own creations. The TITLE_PAGE procedure is a neat package that demonstrates how to manipulate a screen by reversing, cloning and pasting images, and then animate the result. But we're not quite finished yet.
For the finishing touch, load up the ready-made hi-score program written by Fran,ois and J.P. Cassier.
Load this program from your "Easy AMOS Examples" disc.
HiScores.AMOS
As you would expect, all the information you need is fully commented in the listing, so feel free to use and adapt this colourful program or simply insert the whole routine into your own games!
249

Chapter 14
Olhergames
Tricycle Race
The Easy AMOS Challenge
250
CREATING A GAME
There are some other fully commented example programs on your "Easy AMOS Examples" disc. They have been designed so that you can bolt on your own titles and hi-score routines. Use the knowledge you have gained from earlier Chapters to change the graphics and create your own Bobs, as well as trying out different sound effects, samples and music. Simply load and play them, then examine the listings of these example programs.
In this horizontal bike race, use the mouse or joystick buttons to move your animated Bob from left to right. Load:
Tricycle_Race.AMOS
Are you ready to become an Easy AMOS graduate? Try out this great quiz extravaganza and test your expertise, with AMOS as the Quizmaster and you taking the part of the challenger. Load this file from your "Easy AMOS Tutorial" disc:
Challenge.AMOS
Are you ready for something a little more practical? The next Chapter explains how to use Easy AMOSforcreating a database.

Chapter 15
HANDLING DATA
o using data
o sequential files
o random access files
o designing a database
"It is a capital mistake to theorise before one has data."
(Sherlock Holmes, 1891)
~ __ c:____ _----_>
251
Chapter 15
Placing data
Reading data
252
HANDLING DATA
Using Easy AMOS for nothing but computer games is a bit like using a violin asa baseball bat: it's great fun, but you're missing out on the full potential. This Chapter deals with some of the more practical ways Easy AMOS can be used to handle the information that we call "data".
Let's start by learning how to place items of data in an Easy AMOS program.
DATA
A Data statement lets you include whole lists of useful infonnation in your programs. Each item in the list must be separa ted by a comma, like this:
Data 1,2,3,4
READ
Once you've put your data into the program, you can then tell the computer to Read this type of stored infonnation, one item at a time, and then load it into your variables. For example:
JIY> N=Rnd (100)
Read A$,B,C,D$
Print A$,B,C,D$
Data "Text stringR ,IOa,N, K Easy ~+"AMOSn
We'll come back to that example in a moment. When a program reads data, a special marker jumps to the first item in the first Data statement in the listing. As soon as this item of data has been read, the marker moves on to the next item in the list.
The main rule to remember is that the variables to be read must be of exactly the same type as the data held at the current position. Look at that last example again to see how the different types match up. If you match up one type of stored data with a different type of variable

Chapter 15
Restoring data
HANDLING DATA
after a Read command, an error message will pop up on screen to tell you there's been a mismatch. Experiment and Read a few of your own Data statements now.
The other rule to remember is that a Data statement must be the only statement on the current line, because anything that follows it will be ignored! Try this example to prove it:
~ Read A$ : Print A$
Data "I am OK" : Print "But I'm not"
You can put Data statements anywhere you like in your programs, but if data is stored inside an Easy AMOS procedure it will NOT be accessible from the main program. On the other hand, a procedure can have its own set of Data statements, which are treated completely separately from the rest of the program. Here's an example:
~ EXAMPLE : Read A$ : Print A$
Data "I am main program data"
Procedure EXAMPLE
Read B$ : Print B$
Data "I am procedure data only"
End Proc
RESTORE
If you want to change the order in which your data is read from the order in which it was originally stored, you can change the point where a Read operation will expect to find the next Data statement. The Restore command sets the posi lion of this pointer, by referring to a particular label or line number. For example:
Restore Label
253

Chapter 15
SEQUENTIAL FILES
254
HANDLING DATA
The name of the label can also be calculated as partof an expression, like this:
Restore ~LA"+~BELL"
In the same way, you can Restore to a proper line number or a line number that has been set up as an expression, like this:
Restore LABEL+5
Restore is one of the tricks used by programmers to make the computer select information, depending on the actions of the user. It can be used for question and answer quizzes, adventure games or teaching programs.
As well as allowing you to store and retrieve data inside a single program or file, Easy AMOS can manipulate a whole disc full of information files! Don't forget that files are simply packages of information stored together at a particular location on a disc.
Your Amiga uses two types of disc files: "sequential" files, and "random access" files. Here's how Easy AMOS can get the best out of them.
A sequential file is one that allows you to read your information ONLY in the sequence in which it was originally created. Normally with an Amiga, if you want to change a single item of data in the middle of a sequential file, you have to call up that file from the disc, read the whole file up to and including the item of data you want to alter, change the data and then write the whole file back to the disc!

Chapter 15
"The theoretical without the practical is a tree without fruit."
(Sa'di, 1258)
.. yJ~"
Opening sequential files
HANDLING DATA
Easy AMOS lets you have access to sequential files either for reading data, or for writing it, but never for both at the same time. Before we get on to the theory and a whole host of new commands, let's have a little practice. Use the disc that we recommended you to prepare, labelled "My Programs". Type in this example, which opens a file called SEQUENTIAL.ONE, allows you to input some data, then closes the file:
~Open Out l,"sequential.one"
Input "Please tell me your name" ;N$
Print #l,N$
Close 1
Now let's read back the information stored in our file. Try out this example:
([ff> Open In 1, "sequential. one"
Input #1,N$
Print "r remember you! Hello ";N$
Close 1
Every time you want to access a sequential file, you have to open i~ then access the information and then dose it Those three steps must be done in exactly that order. Here's the list of commands you can use for handling sequential files.
OPEN OUT
Use this command when you want to open a sequential file and writesomedataintoit. Beforeyougivethefilea name, you mustgiveitanumberbetween 1 and 10, whichisthe"channeJ" used to identify your new file when you input or print information to it. If the file name already exists, it will be erased! You have already used the example:
Open Out I, "sequential.one"
255

Chapter 15 HANDLING DATA
Adding to files APPEND
Preparing files
Closing files
Loading data
256
ThisworkslikeOpenOut,butitallowsyou toadd to your files at any time AFTER they've been defined. If the filename already exists, yournewdata will be "appended" toit,inother words it will be added on to the end of that file.
Append I, "sequential. one"
OPEN IN
Use this to get a file ready for reading data from it. If the filename doesn't already exist, Easy AMOS will report the message "File not found".
CLOSE
Don't forget, you MUS[ always close a file after you've finished with it. If you forget to use theOose instruction, any changes you have made to the file will be lost!
PRINT #
Use this command in the same way you use a normal Print instruction,butinsteadofprintinginforrnationonyourscreen it puts it into one of your files. Remember to tell Easy AMOS which channel you want to use, then the name of the file to be created, and don't forget to Oose the file's channel number afterwards.
I!ff" Open Out 2, "sequential. two"
Print #2, "Just testing"
Close 2
Whenyou[Run)fhatexample,nothingappearsonscreenand thedataisprinteddirect\ytothefile.Nowdeletethethreelines of your example and [Run) this:
I!ff" Open In 2, "sequential. two"
Input #2,A$
Print A$
Close 2

Chapter 15
RANDOM ACCESS FILES
HANDLING DATA
The data should now appear on screen after it has been retrieved, using the Input# command. Here's how it works.
INPUT #
This command reads information from a sequential file, and loads these values into a set of variables. As with a normal Input, each value in the list must be separated by a comma.
You can find more information about sequential files in the Glossary, where the following keywords are explained:
LINE INPUT #,SETINPUT,=INPUT$,=EOF,LOF,POF
Are you ready for some more Easy AMOS magic? Random accessfiJesareamazinglyuseful,becausetheyletyougetatthe data stored on a disc in any random order you want. A random access file is made up of chunks of data called "records", and each record has its own identification number. Eve!)' record can be split up into as many smaller chunks as you like, and we call these sections "fields". Each field is used to hold a single item of data.
Thebigdifferencebetweensequentia\fiJesandrandomaccess files is that you must tell Easy AMOS the maximum size of a "field" in advance, before you make use of it.
Afieldcanhold a1lsortsofdata,likeapassword,ora telephone number or even a lineof a poem, and you are welcome to use your imagination to adapt a ready-made program for your own purposes at the end of this Chapter.
Let's say you want to create an electronic phone book. You mightchoosethefollowingfields,withthefollowingmaximum lengths of characters in each:
Field NAME$ TEL$
Maximum length 25 12
257

Chapter 15
Structuring random access files
HANDLING DATA
If you are happy with the fields you want to manipulate and the length of each field, you can set up the structure for your electronic record or database.
OPEN RANDOM
This command is used to open a channel to a random access file, like this:
Open Random 1, "ADDRESS"
FIELD
Now the record structure must be set up, and you use the Field instruction to do this. After stating the channel number, give the maximum number of characters you are catering for in a field followed by its name, like this:
Field 1,25 As NAME $ , 12 As TEL$
You can now place some records in the strings set up by the Field command, for example:
NAME$~"AMOS'
Placing records PUT
258
Once a record has been placed into a string, you can moveit from the Amiga'smemoryintoa "record number" of your random access file. Still using channel 1, your first record would be Put into the random access file like this:
Put 1,1
The next record will become Record 2, and so on until you fill up your address book. Let's try out all of this theory and put it into practice with a phone book. When you have created enough records, type in "exit" when asked to enter a name.

Chapter 15
Reading records
HANDLING DATA
IW Open Random 1, "ADDRESS"
Field 1,25 As NAME$,12 As TEL$
INDEX=l
Do
Input "Enter a name ~ ; NAME $
If NAME$="exit" Then Exit
Input "Enter the phone number "; TEL$
Put 1,INDEX
INDEX=INDEX+1
LoOp
Close 1
Having created your phone book, you'll want to use it.
GET
Ths instruction reads a record stored in a random access file, when you tell it which channel to use, and the number of the record to be read. Forexample,toread thefirstrecord, use this:
Get 1,1
It then loads this record into your field strings, and these strings can be manipulated as you like. Obviously you can only Get record numbers that have been Put onto the disc. Here's an example to tryout:
IW Open Random 1, "ADDRESS"
Field 1,25 As NAME $ , 12 As TEL$
Do
Input REnter Record number "; INDEX
If INDEX=O Then Exit
Get 1,INDEX
Print NAME$
Loop
Close 1
Print TEL$
259

Chapter 15
MAKING A DATABASE
The Easy Database
1. Na .....
HANDLING DATA
Themostsatisfyinghome-grownprograrnsarethosethatcan be adapted for an unlimited number of uses. If you have programmed Easy AMOS to act as an electronic telephone directory, you can transform the same routines to act as a sort of "card index" database for any other purpose: whether you catalogue your stamp collection or draw up a schedule of all your worldly possessiOns for an insurance policy.
You'll be pleased to learn that we've prepared a ready-made database for you to learnfromand adapt It has been specially written by Andrew Forrest Select it off your "Easy AMOS Examples" disc now by loading the following file:
Easy_Database.AMOS
Take a quick look through the listing to see how many of the routines you already recognise and then [Run) the program, which will display the file selector to kick off the proceedings. You willbeasked forthenameofafiletoloadorcreate, so type in something like "Address _ book.DBS'.
This screen will now be displayed:
NQ .1
N i co I a Mlll"':ray
:<: AdW@:!i:!i ~a Cattie Road Whisk",ill ..
3 Pos:tcode HAT 1 4 Ag .. 24
S Phone nut.,"be:r 861 483 2564
260

Chapter 15
"Take a card. Keep it. I've got 51 left."
(Groucho Marx, 1933)
Entering Field Data
HANDLING DATA
This electronic database holds records like a card index, except for the fact that it's smart! Each screen represents one record or card in the index, and the record number is displayed at the top right of screen. The name of the current file is at the top left.
Below this identification line are five "fields" of data, set up to act as a page in an address book, as follows:
1 Name 2 Address
3 Postcode 4 Age 5 Phone number
Eachof these five "fields" is waiting for you to input some data, and to put text into the database all you have to do is click on one of the "fields" with the mouse, then type in some text via the keyboard, pressing [Return] when you've completed each entry. You can use the backspace key to delete any mistakes. Enter some data now in each of the five fields.
At the bottom of the screen is a row of graphic "icons", which are your smart option boxes, triggered by the mouse.
SEARCH
Supposing you know the name of the street where somebody lives, but you can't remember their name. Or supposing you wanttocaU up everyone you know of the same age. No problem! After selecting the Search icon, type in the characters to be searched for: a name, or a number or part of an address. Once it's been found you can continue searching by entering "Y", or stop the search by entering "N" when prompted.
261

Chapter 15
262
HANDLING DATA
SORT
The Sort option looks through all of your data, and organises it in any way you want! When you select this option, you'll be asked to specify a field to be used as the basis of the sort. Simply enter the number corresponding to the field you are interested in. For example, to reorganise your database in alphabetical order by name, enter "1".
GO TO FIRST RECORD When you trigger this option, a search is made for the very first record that has been stored in your database, and it is displayed on screen.
GO TO PREVIOUS RECORD
This calls up and displays the previous entry in your electronic card index, and it can be used as many times as you like to flick back through your data.
GO TO NEXT RECORD
The next page of your address book is revealed every time you select this option.
GO TO LAST RECORD
By triggering this icon, the program jumps straight to the very last record held on file and displaysit on screen.
PRINT RECORD
If you are lucky enough to have a printer, the [PRINT) button is used to outputthe current record to the printer.

Chapter 15 HANDLING DATA
ADD A RECORD
Use this to create a new record in your filing system. Add one now after the last record in your Database.
HELP As you would expect from uS,a [Help] option is supplied, just in case you need reminding how this program works. The Help Screen has a synopsis of these instructions. Press any key to return to the program.
EXIT
This option quits the program and returns to the Easy AMOS Editor.
Add as many records as you like, and try out each of the options. Data is written to the file as you enter your records, and when you [Exit] from the program the file is dosed, which makes sure that all of your data has been saved. When you'vebuiltupyourowndatabase, trigger [Exit] to take another look at the listing. As usual, everything has been fully commented in the listing to help you as much as possible. Go through the program now, read the notes and identify exactly what each routine does and how it works.
How about using all of your new knowledge to improve this program? Here is a list of suggestions that you might like to tryout:
- Add sound effects or speech, every time you trigger an option or enter some data.
- Change the titles of the five fields, and create a database for a library, a music collection, or anything that takes your fancy.
263

Chapter 15
264
HANDLING DATA
Design your own Welcome Screen, and make it appear every time you load your Database. Leave it displayed for a few seconds, fade it, and then reveal the Database screen.
- Make the program automatically remove any commas from the fields, after they have been entered.
- Create a screen prompt that asks you if you are sure you want to quit, after clicking the [Exit! option.
- Limit the number of characters that can be typed into each field, by writing a procedure to replace the Input command.
- Try to include a new [Delete! option that erases a record, which may sound easy, but requires some careful thought.
Finally,rememberthatyourDatabasefileswillbecrcated on the Ram disc, so copy your Database onto a suitable floppy disc or hard drive, using the [Easy disc! option. This will call up the Amazing Easy AMOS Disc Editor, which is waiting to be introduced to you in the next Chapter.
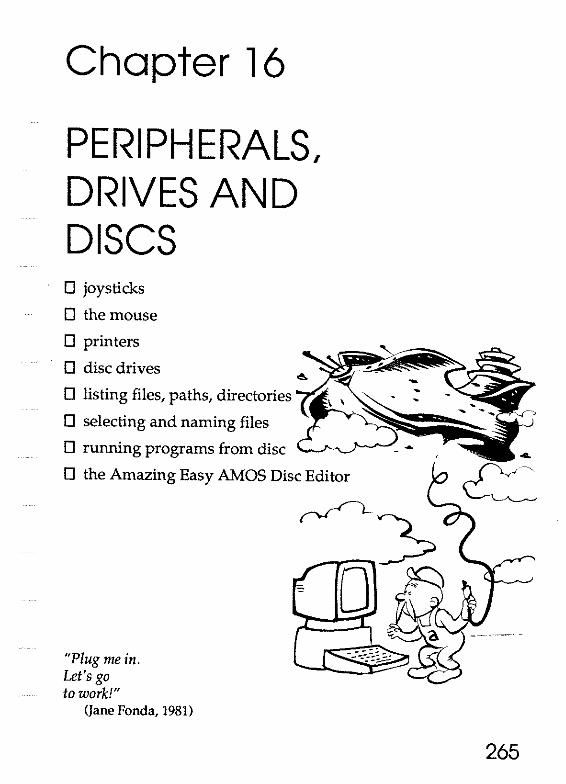
Chapter 16
PERIPHERALS, DRIVES AND DISCS o joysticks
o the mouse
o printers
o disc drives
o listing files, paths, directories
o selecting and naming files
o running programs from disc
o the Amazing Easy AMOS Disc Editor
"Plug me in. Let's go to work!"
(Jane Fonda, 1981)
265

Chapter 16
JOYSTICKS
"One stick of jay surmounts one mile of grief· "
(Rabelais, 1564)
266
PERIPHERALS, DRIVES AND DISCS
This chapter deals with the various devices that can be connected to your computer, often called "peripherals" or "add-ons". This includes joysticks, mouse controllers and printers. It will also cover all the instructions for gaining access to disc drives, disc directories and files.
A joystick can be used to control movement around the screen by pushing its handle in the required direction, and to trigger all sorts of actions by pressing one or more fire-buttons built in to its mechanism. There are two sockets in the back of an Amiga computer, marked "I JOYSTICK" and "2 JOYSTICK", either of which will happily accept a joystick plug. If two users want to control one joystick each for specially written programs, both ports can be used.
To make a joystick interact with your programs, the computer needs to be able to read its movements. Easy AMOS has two useful functions that do just that.
=JOY
This inspects what's happening to thejoystick and makes a report. You have to tell the computer which port the joystick is plugged into. If it's plugged into the joystick port, the computer will expect to look at number (1), and if you are using the mouse port, call that number (0), for example:
Irff" Do
J=Joy (1)
Print Bin$(J,5),J
Loop
Try running that routine now, and see what reports are given when you move the joystick and press its firebutton. The report you get back is given as a "binary" pattern, in other words, it's made upof a pattern of Zeros and ones. Ifanyof the bits in the report is shown as a one,
Chapter 16
THE MOUSE
PERIPHERALS, DRIVES AND DISCS
it means that the joystick has been moved in the direction that relates to that bit. Here' sa list of those bits, and what each of them means:
Bit number
=FIRE
o 1
2
3
4
Meaning
Joystick has been moved Up
Joystick has been moved Down
Joystick has been moved Left
Joystick has been moved Right
Fire-button has been pressed
If you just want to set up a test to see if the fire-button has been pressed, use the Fire function followed by the joystick port number. A value of-l will be given only if the fire button on the relevant joystick has been pressed.
trY'Do
F~Fire (1)
If F~-l Then Centre "Bang!"
Loop
Shoot
Joysticks have become associated with playing computer games, whereas the mouse is more often used in practical programming, but they both do much the same thing.
The mouse cursor has been programmed to look like a pointer arrow, but if you don't like its appearance you are most welcome to change its shape. There are three standard shapes to choose from, with index numbers from 1 to 3, as follows:
267

Chapter 16
268
PERIPHERALS, DRIVES AND DISCS
Number Shape of cursor
1 Arrow pointer
2 Cross-hair
3 Clock
CHANGE MOUSE To change the shape of the pointer arrow, use this command followed by the number of the shape you want, for example:
II:G" Do
For N~l To 3
Change Mouse N
Wait 50
Next N
Loop
There is no need to restrict your choice to these three shapes. If you select an image number greater than three, Easy AMOS will look at whatever Bobs are sitting in their bank, and use oneofthem. The first image in the bank can be called up by using Change Mouse 4, the second by specifying number 5, and so on.
To use Bobs effectively, they must contain no more than four colours, and they have to be exactly 16 pixels wide, although any height is allowed.
HIDE HIDE ON Use this to hide the mouse pointer completely, by making it invisible. It is still working and sending back reports, but you can't see it. Easy AMOS will automatically

Chapter 16
"A Mouse who laughs has a hole nearby. "
(Nigerian proverb)
PERIPHERALS, DRIVES AND DISCS
count the number of times you use the Hide command, and use this number to SHOW the mouse pointer again at your command. If you prefer to keep the mouse pointer invisible all the time, you can use a special version of the Hide command that is always On, like this:
Hide On
SHOW
SHOW ON
This makes the mouse pointer visible again. The system counts the number of times the Hide command has been used, and shows the pointer on screen again, when the number of Shows equals the number of Hides. To bypass the counting system,and reveal the mouse pointer immediately, use Show On.
~Hide
Wait 100
Show
Whether the mouse pointer is visible or not, the computer has to know two things in order to make any use of the mouse. It must know where the mouse pointer is at any time, and if any of the mouse buttons have been pressed.
=XMOUSE
=YMOUSE
This pair of functions report the current location of the x or y-coordinate of the mouse pointer. Because movement is controlled by the mouse rather than by software, coordinates are given in what is known as "hardware" notation. So, if you need to know the x-coordinate of the mouse, for example, use X Mouse like this:
~ Print X Mouse
269

Chapter 16
270
PERIPHERALS, DRIVES AND DISCS
You can also use these functions to set a new coordinate position for the mouse pointer, simply by giving X Mouse or Y Mouse a coordinate value. For example, if you want to change the existing y-coordinate, use something like this:
IG1" y Mouse~150
Print Y Mouse
=MOUSEKEY
The Mouse Key function reads the status of the mouse buttons, and reports back with a binary pattern made up of these elements:
Pattern Report
Bit 0 Left button
Bit 1 Right button
Bit 2 Third button, if it exists
As usual, the numbers zero and one make up the report, and the bit will report back by displaying a one if the relevant button has been pressed, otherwise it will display a zero. Try this routine:
IG1" CUrs Off
DO
Locate 0,0
M=Mouse Key
Print "Bit Pattern ";Bin$(M,8);"Nurrber ",M
Loop
Supposing you want to set up a control panel on your screen, and don't want the mouse pOinter to go wandering outside the area of that panel.

Chapter 16
PRINTERS
"Printing makes knowledge a slave. "
(Napoleon Bonaparte, 1804)
PERIPHERALS, DRIVES AND DISCS
LIMIT MOUSE
This sets up a rectangle for the mouse pointer to move around, and traps it inside the area set by hardware coordinates, from the rectangle's top left To bottom right-hand comer. For example:
~ Limit Mouse 5,5 To 205,105
If you need to give the mouse pointer freedom to move around the entire screen, use the Limit Mouse command on its own without any coordinates, like this:
~ Limit Mouse
Printing text and graphics on screen and looking through your programs during editing is easily done, but if you are lucky enough to use a printer it's just as simple to print out listings on paper.
LPRINT
This is used in exactly the same way as the Print command, but it sends a list of variables to a printer instead of the screen. If you have a printer connected, try this:
n:::ir" Lprint "Print me on paper"
To print out program listings, first go into the Blocks Menu. Now make a block of the program or of any part of it that you want to print out, by clicking on the [Block Start] and [Block End] icons. Then all you have to do is click on the [Block Print] option.
To print all of an edited file, use [Ctrl]+[A] to make a block of the whole file, and then [Block Print].
271
Chapter 16
DISC DRIVES
Identifying floppy drives
Identifying hard drives
Volume names
"There's nothing magic about the discs, they just go round."
(John Lennon, 1968)
272
PERIPHERALS, DRIVES AND DISCS
Easy AMOScontainsa whole host of features for creating, sorting and using the Amiga's electronic filing system, including the Amazing Easy AMOS Disc Editor. As you know, the Amiga normally has one built-in drive that uses 3.5-inch floppy discs, and additional disc drives can be connected to the machine using the correct sockets.
Each disc drive used by your computer is referred to by a simple three letter code, followed by the colon character. The internal floppy disc drive is identified like this:
DfO:
If you use additional floppy drives, they will be called Dft:, then Df2: and so on.
Hard disc drives are identified by a similar code, with the fist hard drive carrying a zero, the second a one, and soon.
DhO:
The Amiga is quite happy to refer to an individual disc by name instead oflooking for a disc drive code, as long as the disc name carries the colon character, like this:
EASY AMOS:
The titles of discs are known as "volume" names, which has nothing todo with sound levels, but is the equivalent of the title of a written volume in a library. Whenever a new blank disc is prepared, it is automatically given the name "Empty", waiting for you to rename it with a suitable title. It is not good practice to give several discs the same name, as both the Amiga and its operator can get confused by sloppy naming.
Chapter 16
Listing files
Paths
PERIPHERALS, DRIVES AND DISCS
As explained, you can think of a disc as a "volume" in a library. That volume can contain one or more "folders" of information, and each folder can hold all sorts of ufiIes",
You should be familiar with sequential files and random access files, which were dealt with in the last Chapter. This section explains all the ways to manage your files on disc from inside your programs, and then the last part of this chapter will explain the Amazing Easy AMOS Disc Editor.
Before any file can be accessed and used, it has to be found in the file directory of its disc. Easy AMOS offers some simple short cuts used to search the contents of a disc and report back the findings.
DIR This tells Easy AMOS to look through the directory of the current disc and list all the files there. Try it now:
IGir' Dir
DIRIW
performs exactly the same task, but displays the list of files in two columns across the screen. So by using this double width you can show twice as many filenames on screen at anyone time.
IGir'Dir/W
There's no need for the Dir command to list every file on the disc. Certain groups of files can be extracted by telling Dir to search along particular "pathways".
273

Chapter 16
274
PERIPHERALS, DRIVES AND DISCS
The broadest of these paths gives the name of a disc or the drive to beexamined. Always add a colon to the disc name to prevent any confusion with the names of files, like this:
Dir"FONTS: '
Dir"DfO: "
The next selective category that can be defined isa single folder of filenames to be listed. For Example:
Dir"songs/"
Dir"Easy_Examples: Songs!"
The path for listing can be even further narrowed, by setting up a set of conditions that must be satisfied by each file to be printed. Each character in the filename must match the characters in your request exactly. Or if you want to make a more general search, you can use the asterisk character ">,, to stand for the instruction "please match this up with any list of characters in the filenames up to the next control character." So that a file named "Music" will be searched for if you command this:
But the use of an asterisk would have a different effect, for example:
Rem List all files starting with M Dir"M*"
That could give the following directory listing:
Music
Mel
Malapropisms

Chapter 16 PERIPHERALS, DRIVES AND DISCS
Similarly, the full-stop character "." matches a filename extension, and is often used wi th the asterisk character to list all the files in a directory with a particular extension, like this:
Dir"* .Mel"
D · "* *" ~r .
Finally, you can use the question-mark character "?" to match up with any single character in a filename. For example:
Dir"EUROP????"
That would list the following filenames if they were in the current directory:
EUROPRESS
EUROPEANS
But it would ignore these filenames, either because the first five characters did not match, or the name was longer than nine characters:
EUROPRESSES
EURIPIDES
EUROPA1992
Any of these listing processes can be stopped and restarted by pressing the [Spacebar J. If any folders appear in the listing, they will automatically be marked with an asterisk, like this:
*AMOS
275

Chapter 16
276
PERIPHERALS, DRIVES AND DISCS
Because some filenames can be too long to fit neatly on a display listing, especially if you are using the Oir /W option, Easy AMOS offers a simple way of setting the style of the directory commands.
SET DIR This command must be followed by a number ranging from one to 100, which sets the number of characters in each filename that will be displayed. There is no effect at all on the names themselves, only the way in which they are displayed. For example:
Set Dir 6
Dir
You can add a string to a Set Oir command, which has the effect of filtering out pathnames from the directory search. All filenames that match up with this filter will be completely ignored. Supposing your directory began like this:
AMO. IFF
AMAS
AMAT.IFF
AMINIBUS
AMINOACID
AMENSROOM. IFF
AMULET
If this Set Oir command was used, it would have the following effect:

Chapter 16
Checking for files
PERIPHERALS, DRIVES AND DISCS
Set Dir 3, "l!. IFF"
AMA
AMI
AMI
AMU
Some programmers have tidy minds and tidy desks. They probably keep up-to-date labels on all of their disks, and know exactly when they updated a file and where they put it. On the other hand, they could be normal. Anyone can lose track of information, and Easy AMOS is ready and able to help your memory. There are three different ways to check and see if a file exists.
=EXIST This looks through the current directory of filenames and checks it against whatever filename you are seeking. If the names match up, then the file exists and a report of -1 will be given for "true··. If the file does not exists a zero will be reported, meaning "false".
As well as individual filenames, Exist will happily check out all sorts of search requests, such as checking to see if a disc drive is connected and ready for operation or whether a particular disc is available for use. It will also look for gibberish without flinching. Here are some examples:
Print Exist ('Dfl~) : Rem External drive
Print Exist ("I don't feel very well")
Print Exist ('MUSIC:") Rem Music disc
277

Chapter 16
278
PERIPHERALS, DRIVES AND DISCS
Here is a practical example:
If Exist ("AMOS Disc .AMOS") Then Edit
=DIR FIRST$ This function provides a string containing the name and the length of the first file on the current disc that matches up with your chosen search path. For example, the next routine would tell you the name of the first file or folder in the directory, followed by the name of the first IFF file in the directory. Obviously this could be the same file.
IJj;P Print Dir First$ ("*. *")
Print Dir First$ ("*. IFF")
Every time you use Dir First$, the whole directpry listing gets loaded into memory, so you can go on to discover the name of the next file in the current directory with the following function.
= DIR NEXT$ Will return the name that comes after the file or folder found by the previous Dir First$ search. If there are no more files to come, a string containing nothing will be given, so you would see this "". Once the last filename has been found, Easy AMOS will automatically grab back the memory that has been used by these routines, and release it for the rest of your program to use. This example will print every file in the current directory:
IJj;P F$=Dir First$ ('* . *")
While F$<>""
Print F$ : Wait 50
F$=Dir Next$
Wend

Chapter 16
Selecting a file
Naming files
PERIPHERALS, DRIVES AND DISCS
=FSEL$ This is the file selection function that lets you choose the files you want straight from disc, using the normal Easy AMOS file selector. In its simplest form, it can work like this:
F$~Fsel$ C'*. IFF")
The string given in brackets is a "path" which sets a searching pattern, in this case any IFF file. You may also include the following options when using Fsel$:
F$~Fsel$(path$,default$,titlel$,title2$)
The default string is used to choose a filename which will be automatically selected if you press [Return] and abort the process.
Titlel$ and Title2$ are optional text strings that set up a title to be displayed at the top of your file selector. For Example:
F$~Fsel$ ("Easy_ Exanples: Bobs/* . *" ,"" :Bobs")
Rem Return to editor if no file selected
If F$~"" Then Edit
Rem Load file and display first Bob
Load F$,O
Bob 1,100,100,1 : Get Bob Palette: Wait Vbl
To create a new folder that can be used to hold a file of computer data, a suitable disc should be ready in the appropriate drive.
279
Chapter 16 PERIPHERALS, DRIVES AND DISCS
MKDIR This makes a new folder on the current disc, and gives it the filename of your choice. For example:
Mkdir "DfO :DIETCHART"
RENAME This command is used to change the name of a file from an old name To a new name. If your choice of new filename already exists, Easy AMOS will remind you with a "file already exists" error message. Rename a file like this:
Rename "Oldnamestring" To "Newnamestring"
Erasing files KILL
Running programs from disc
280
Be careful with this one. It obliterates the named file from the current disc, once and for all. The file that is erased with this command cannot be brought back.
Kill "Filenamestring"
RUN Aswellasthe[Run]or[Fl]facilityforexecutingyourprograrns from the Edit Screen, you can type in the Run command from Direct Mode.
When followed by a file name and used in your program listings, this command is incredibly useful. Supposing you have writtenahugecomputergarne that uses several diffamt levels of play, taking up the wholeofonediscand using much more memory than is available in your Amiga. Each level of playcanbe written as a separateprogrnm, and then saved asa different file name, then at the end of one level your next stage of play can be automatically loaded from the disc, like this:
Run ~Nextlevel. AMOSg

Chapter 16 PERIPHERALS, DRIVES AND DISCS
This rrethod is known as "chaining" programs together. When prognuns are run like this, data SCl"fCl1S will be kept, allowing you to display a screen of graphics while the next level is loading, but the last program will be erased to make room for the next program so any variables will be lost.
COMMAND LINE$
In fact, Easy AMOS does allow you to pass data from one programtoanotherbymakinguseofCommandLines",sothat hi-scores, names and messages can be carried through to the next level of a romputer game. Following are two example programs. Type in Program 1 and then save it on your "My_Programs" disc,givingit the followingnarne:
Programl.AM)S
IJ:Y'" Rem Program 1
Screen Open O,640,200,4,Hires
Rem Greetings sent by previous program
Print "Greetings from 2:" iCommand Line$
Input "Input greetings!"; A$
Command Line$~A$
Print "Running program 2!"
Wait 100
Run "My_Programs :Program2 . AMOS"
When you have saved that, change your program as follows:
281

Chapter 16
282
PERIPHERALS, DRIVES AND DISCS
~ Rem Program 2
Screen Open O,640,200,4,Lowres
Rem Greetings sent by previous program
Print ~Greetings from 1 :"iCommand Line$
Input "Input greetings!"; A$
Command Line$~A$
Print "Running program l!"
Wait 100
Run ~My _P rograms : Programl . AMOS"
Save Program 2, and call it:
Program2.AMOS
Now run Program 2, which is still in memory. After the first blank greeting, the two programs will greet each other until you break with [CtrJ)+[C).
If you've used the File Selector, and Bob Editor and Sample Bank Maker, you already know that Easy AMOS has packed an incredible amount of useful material onto its Programs Disc. There's more! What if all your disc editing needs could be catered for by calling up another Easy AMOS edit screen? Here it comes.
The last part of this chapter is a guided tour of the Amazing Easy AMOS Disc Editor. Call up the System Menu from the Edit Screen now, by pressing the right mouse bu tton, or holding down a [Shift) key, and select [Easy Disc), or press [Shift) and [FBI together.

Chapter 16
THE AMAZING EASY AMOS DISC EDITOR!
PERIPHERALS, DRIVES AND DISCS
You'll probably be able to use the Disc Editor without much help from another guided tour, but read through this as you go along to get the most outof all the features.
The Amazing Easy AMOS Disc Editor is a superfast way of organising all the files on your discs. If you've upgraded to an extra disc drive it is incredibly useful, but single.<Jrive users will find it a superb tool as well. The main concept tha t you have to understand is that all the files on a SOURCE disc can be reorganised and copied to a DESTINATION disc. Here's a view of the Disc Editor Screen:
283

Chapter 16 PERIPHERALS, DRIVES AND DISCS
The screen has two main display zones, clearly headed "Source" and "Destination", with all the DiscEditorcontrol buttons in a stack, between the the two zones. The zone that is currently active has a red bar highlighting its path name, and information about this active path isdisplayed in a line at the bottom of the screen. Nothing will be displayed here if the path name is not valid. As usual, your mouse is used to control the buttons and sliders.
Click on either the [Source] or [Destination] headings to select one of these zones, or simply click anywhere in either of the large display zones which display a list of any directories and files on your Source and Destination discs.
Entering a path To enter a path name, click on the appropriate name name panel, then type in your string of characters from the
keyboard. If an empty string is entered, the current directory is used as the path name. To abort the process, press IEsc].
284
The path names of your Source and Destination MUST be different, and it is always good practice to give each of your discs a different name to avoid confusion.
Next to the path name panels you can find up/down buttons for displaying any lists of files that are too long to fit into the Source or Destination windows. Below these buttons are normal sliders, if you prefer to use them. You can get a continuous scroll of file names towards the mouse cursor, by using the RIGHT mouse button.

Chapter 16
Selecting files
PERIPHERALS, DRIVES AND DISCS
You've already come across a [PARENT] option in the Easy AMOS File Selector, and each path has its own parent button to allow rapid access back to a parent folder after searching through its files. To get into a subdirectory, all you have to do is make two clicks on the folder name you want to open.
Another similarity to the File Selector is the way you display the "device" list, by clicking with the RIGHT mouse button in the active path panel. The available devices (eqUipment for communicating with your Amiga, such as disc drives) will be listed at the top of the window zone. One more click with the RIGHT mouse button will make the device names disappear. To select a device for use, simple click on its name.
To select a file or a directory, place your mouse cursor over its name and click. That's it. De-select by clicking on another file or folder.
The vertical panel of control buttons is used to handle files. here's how.
[ALL] is a short-cut button that selects all of the files listed in the active path, ready for handling.
[CLEAR) performs the opposite task to [ALL]. It deselects all of the files in the active path.
There can be files on your disc that end with an • .info' tag and the [Info] button acts as a switch to turn them on or off in the zone window. You can still copy these files, even if they're not on display, for example, if you are copying entire discs.
285

Chapter 16
Copying Files
286
PERIPHERALS, DRIVES AND DISCS
Files are displayed by name, followed by their length in bytes. If you want to tum off the display of their lengths because the file names are too long for example, the [Size] button acts as a switch to tum them off and on. Even if a file name is shortened in the display, names of up to 64 characters long are still valid. Click on it now, and then redisplay the file lengths with another click.
The little [Flip] button does a big job. It flips both directories over, so that Source becomes Destination, and the old Destination directory becomes the new Source. Try it out now. Note that the active path stays active after a flip.
Pressing the information button [???] will display the EASY Disc credits.
Now let's get down to the business of using the Amazing Easy AMOS Disc Editor for handling files. To copy one or more files or directories, first go to the Sourcedirectory and select one or more of the file names you are interested in. Don't forget, if the files you want to copy are currently displayed in the Destination directory, use the [Flip] button to swap it into your Source.
Now click on the [COPY] button. The Disc Editor will tell you how many files and directories are to be copied, and it will also calcula te if there is enough space available in the Destination directory. It does NOT take into account any space that might be saved by files that you want to overwrite. A Ram disc grabs memory when it needs space, so you can ignore any reports on disc space in this case.

Chapter 16
P.~NAt·1~
IDH~HI
11AK~ DIF:
PERIPHERALS, DRIVES AND DISCS
Pressing [Copy] again will kick off the copying process. The Disc Edi tor will create any directories needed on the Destination disc, then it loads up as many files as it can from the Sourcedisc into the computer's memory, before saving them on the Destination disc.
If you are using more than one disc drive, the process is incredibly easy. For those of you only using the internal floppy disc drive "0£0:", your screen will tell you when to swap over your discs.
The Disc Editor is not just concerned with copying file s r r
from one disc to another. It can perform much simple tasks. Suppose you want to change the names of one 0
more files. Select them with your mouse and then c1ic k on the [RENAME] button. You will be asked to type i n
r and enter the new file names one by one through you selected list. Press the [Esc] key to halt the process at an y time.
To erase one or more files from the disc, select thei r u names in the usual way and click on [DELETEl. A men
will appear, showing the files and directories to be deleted. You nOW have the following choices:
[DELETE] erases the next file only.
[SKIP] jumps over the next file, leaving it on your di sc.
[DEL ALLl will get rid of all the selected files, so be n
se careful when using this very powerful option. You ca stop the deleting process with a click of the mou button.
[ABORT] halts the deleting process, and takes you bac k to the Disc Editor screen.
This is a very simple way of making a new directo ry. e Click on [MAKE D1R] and then type in the name of th
new directory you wish to create.
287

Chapter 16
Hm~ BIG~
Examining files
288
PERIPHERALS, DRIVES AND DISCS
To find out the size of files and directories, select their names and click on the [HOW BIG?] button. You will now be told exactly how big the selected files and directories are, in total bytes.
This is a brilliant service, brought to you as part of the Amazing Easy AMOS Disc Editor, and you must try it out now. Select as many different files as you like, and click on [EXAMINE]. Easy AMOS will now take a look at each file in tum and see if it can recognise them.
It does this by loading a part of each program, and as soon as it gets recognised you will be presented with different options to either [DISPLA Yl, [HEARl, [READ] or [PRINT] the file, depending on what type it is. This will help you to examine the contents of your discs very quickly, while you are reorganising your discs or just browsing through them. Here's a list of the typesoffiles that will be recognised.
IFF pictures and Easy AMOS packed pictures:
When these sorts of pictures are recognised, you are given the option to [DISPLAY] them. The displayed picture will remain on the screen until you press a mouse button.
Bob banks: If you choose to [DISPLAY] a Bob bank on the screen, it will appear in a reduced size on the screen to remind you of an the images stored in the bank.
Ascii text files:
Two choices are offered here. You can either [READ] a text that has been saved in this format, or [PRINT] out the file.

Chapter 16
Formatting discs
PERIPHERALS, DRIVES AND DISCS
IFF samples, Easy AMOS music and sample banks, Soundtracker modules:
If any of these are recognised, you will be asked if you want to [HEAR] them. IFF samples will be played at their original frequency, but you can set a new frequency if you wish. Music banks will be played exactly as they were saved. When you [HEAR] a sample bank, the samples will be played one after the other, although you can select any individual sample and change its playing speed. Soundtrackermodules will be recognised as well as most raw samples.
There are no options provided for the following sorts of files:
IFF music, AmigaDos executable programs, AMOS banks or programs.
Obviously, Easy AMOS has been designed to cater for all your programming needs without ever having to leave the system and go wandering off to less friendly regions like the Workbench. All the way backatthe Easy AMOS installa tion process, you were asked if you wanted to format a blank disc, and now you are given the opportunity to format discs any time you like. When [FORMAT] is selected, you will prepare your new disc in this logical order:
[NAME]: click on this, and then set the name of yournew disc.
[OFx]: choose the name of the drive you want to use for formatting the disc. For example, if you are using the internal floppy drive, select "0£0".
[VERIFY ON] or [VERIFY OFF]. To make sure that your new disc has been formatted perfectly, it will be "verified" after formatting. You can switch this process off if you like, and disc formatting will be twice as fast.
289
Chapter 16
Copying discs
IDISKCO~YI
290
PERIPHERALS, DRIVES AND DISCS
[FORMAT]: now everything is set up, simply click on this option to fonnat your disc. You can [ABORT] the process at any time.
A disc that can be loaded and run as soon as it is popped into a disc drive has to be "installed" first, otherwise you will need a separate program to "boof" it up. You can do this from the Amiga's CLI, but we want you to stay inside the Easy AMOS system instead. That's why advanced users have been provided with the [BOOT ABLE] option.
As well as providing you wi th the easiest possible disc fonnatting, Easy AMOS allows you to make as many copies as you like of entire discs, in much the same way. After [DISC-COPY] is selected, these are the steps for making exact copies of whole discs.
First select the name of the disc drive you want to use as the SOURCE. Next, choose the DESTINATION drive where the new copies will be made. Obviously if you've only got the one internal drive at your disposal both of these names will be the same!
Now choose the number of new copies you want to make of the original Source disc. The Disc Editor will ask for a new Destination disc after each copy has been made, until all of your copies are done.
Select VERIFY ON or OFF, just like in the formatting process. If the verification is ON, then the copying process will be shown in blue on your screen and take twice as long as with verification set to OFF.
Chapter 16
Changing current directory
PERIPHERALS, DRIVES AND DISCS
Finally, hit the [DISC-COPY] button and follow the screen prompts. You'll be pleased to learn that the Amazing Easy AMOS Disc Editor crunches down the disc "tracks" into the computer's memory, to try and save you the time and trouble of swapping over discs more than necessary.
When you have explored the Amazing Easy AMOS Disc Editor, and you are ready to moveon,all you have to do is [QUIT]. But before you quit this Chapter, there's one more feature that needs explaining. How to change directories while editing your programs.
=DIR$
In fact, this keyword isa function as well asan instruction. Dir$ can hold thed irectory name that will be used as the starting point for further disc operations, like this:
IJ:Y> Dir$="DfO: Sounds!"
Print Dir$
This makes life easier, allowing you to Set directories from direct mode.
291

292

Chapter 17
MEMORY
D addresses
D available memory
D allocating memory
D saving memory
D memory banks
D machine code
"Only with beauty wake wild memories"
(Walter de fa Mare, 1943)
''[' II never forget whatshisname. "
(Oliver Reed, 1967)
293

Chapter 17
COMPUTER MEMORY
ROM and RAM
Memory gobblers
294
MEMORY
Computers have brains like new-born puppies. They come to life with a few instinctive habits and remember nothing, because their memories are blank. But computers learn much faster than puppies. Their brains are highly organised and ready to receive instant chunks of information that can be handled in any order you like.
Computer memory uses two types of brain cells. In the first type, instinctive habits are inherited at the factory and buried in special memory cells. You can read what's in these cells but you can't change the contents, so they are known as Read Only Memory, or ROM for short. The second type of brain cells are empty and waiting to learn something new. This is where you plant fresh program ideas and gain access to them as you choose, which is why itiscalled the Random Access Memory, or RAM for short. This type of memory gets erased every time the machine is switched off.
The more you write Easy AMOS programs, the more you'll appreciate that your talent is not restricted by creativity, but by your computer's memory. Complex Basic routines use a surprisingly small amount of memory, but full colour graphics screens and hi-fi sound samples gobble up great lumps of the stuff. When Easy AMOSrecognisesacommand,itonlytakestheequivalent of two characters' storage space, and all functions are stored as two characters in memory, but other needs are not so economic. Luckily, Easy AMOS helps you to make the best possible use of the memory provided for other sorts of information.

Chapter 17
Addresses, bytes and bits
'Long whiskers cannot take the place of brains:
MEMORY
Puppies come equipped with memory storage units in the form of brain cells, but it's difficult to gain acceSs to specific cells and use them for specific tasks such as fetching sticks. Your Amiga hasa more organised brain, with each unit of memory living behind a numbered door, called its 'address'.
(Boris Yeltsin, 1991)
Obviously, you need to know the correct door number of the address to make contact with the data that lives there. Address numbers start at zero, and go up to the highest number in available memory. If no unit of data has moved in to be stored there, the address remains empty.
AVAILABLE MEMORY
One unit of data living at an address in memory is known as a 'byte'. Each byte can hold a number between ° and 255, which has nothing to do with the number of its address, but gives the byte its own characteristics.
, Every byte is made up of eight smaller units of memory ):J called 'bits', and a bi t is the smallest speck of data thatcan
be represented in a computer's memory by a 1 or a 0. Every computer leaves its puppy farm with a particular size of brain, whose size is measured in "kilobytes", or k for short. In actual fact, one k represents 1,024 bytes of memory. So, for example, a machine that is said to have 512k on board isequipped with 524,288 bytes of memory in its brain.
Every time you go into the Easy AMOS Edit Screen, there are three numbers in the middle of the information line concerning the memory available for use. The whole line looks something like this:
I L:l C:l Text:32766 Chip:383416 Fast:240264 Edit:
295

Chapter 17
Memory Alerts
ALLOCATING MEMORY
296
MEMORY
TEXT shows how much memory has been assigned to the Text Buffer, in other words, how many bytes have been allowed for the editor window. You can change this allowance by clicking on the SEARCH MENU in the top right-hand corner of the edit screen, followed bySET TEXT Buffer. Simply type in the new amount of memory to be allocated.
CHIP tells you how much memory can be directly accessed by the Amiga's special brain cells held in custom silicon chips. There are ways to increase this value, which will be explained a little later.
FAST displays how much memory your computer has been given for special rapid access. Easy AMOS will always try and use this FAST memory before examining chip memory.
When using the Bob Editor, Easy AMOS displays helpful messages in the menu screen information line if the available memory is getting low. Everything remains normal as long as there is32k free. Between 24k and 32k, a low-memory, three line, two colour file selector comes into play. A constant alert message is displayed under the editorfrom 12k to 24k. No drawing is allowed at all if there is less than 12k of memory free, because Easy AMOS does not want you to run out of memory!
One of the most frustrating things abou t trainingpu ppies is their haphazard memory. Sometimes the Amiga can be just as daft. It may display a message saying "Out of memory", when it's plain to see from the information line that there is plenty left. Just as the best way to train your puppy is to begin the training session again, you have to switch off your Amiga to unscramble its memory before you can carry on. This is very annoying, so always allocate enough memory before you begin to program.
Chapter 17
Setting the size of the variable area
Finding free memory of variable area
Finding other amounts of available memory
MEMORY
SET BUFFER
To reserve the maximum space for memory banks and screens, Easy AMOS allocates a modest 8k for all your variables. This can be increased to any level, depending on how much memory your Amiga has on board. The variable area must be set aside with Set Buffer as the very first instruction in your program, followed by the number of kilobytes you need. For example, if you want to increase the variable area from 8K to 13k, make the first line of your program:
Set Buffer 13
=FREE To check how many bytes are left free to hold variables, use the Free function:
Il:P" Print Free
Whenever FREE is called, Easy AMOS sets about cleaning up the variable area to provide you with maximum space. This iscalled "garbage collection", and is normally done instantly. However, if the variable area is enormous, garbage collection can take a few seconds, SO don't use FREE where it can interfere with the rapid execution of your program.
=FASTFREE
This function is called up to find out how many bytes in the special Fast memory are still free to be used.
Il:P" Print Fast Free
=CHIPFREE Gives the amount of free chip memory.
Il:P" Print Chip Free
297

Chapter 17
SAVING MEMORY
Closing the editor window
MEMORY BANKS
Permanent and temporary banks
298
MEMORY
=DFREE Returns the total amount of free space left on your current disc, also measured in bytes.
n:::!?' Print Dfree
If you are lucky enough to have an extra 3.5-inch discdrive plugged in to your Amiga, you are unlucky enough to be handing over about 30k of memory for its use. Obviously this memory can be grabbed back by deactivating the external drive before using your computer. But be warned, turning off this drive while the Amiga is switched on will have no affect on memory w ha tsoever.
CLOSE EDITOR You can save 28k of memory without affecting your listings simply by closing theeditor window while your program is running. If there is not enough memory left to reopen the window after you Close Editor, the current display will be erased and the Default screen shown. Simply hit the [Escape] key to get back to the Editor.
You have already been warned that graphics and sound routines are memory gobblers. Their data has to be stored along with the rest of your program, so Easy AMOS has prepared 15 special chunks of memory for their use. These are known as "memory banks".
There are two types of memory bank. Permanent banks are defined once only, and are then always saved along wi th your program. Temporary banks are freshly defined every time you run a program. Here is a list of these memory banks, numbered 1 to 15. The left-hand column tells what sort of data can live there. The middle column shows the number of the bank, and you can see that certain items of data can only be held in banks 1 t04. The right-hand column indicates if the memory bank is Permanent (P) or Temporary (T).

Chapter 17
"Memories are made of this. "
(Val Doonican, 1967)
Reserving a bank
MEMORY
Data Bank State
Bob definitions Bank 1 ONLY P
AMOS music data Bank 3 ONLY P
Sample data Bank 5 default P
Chip workspace Banks 1 to 15 T
Chip Data workspace Banks 1 to 15 P
Fast Memory workspace Banks 1 to 15 T
Fast Memory Data workspace Banks 1 to 15 P
Tracker music data Banks 1 to 15 P
You may remember learning how to allocate memory for detecting movement using Reserve Zone in Chapter 9. In much the same way, a memory bank must be reserved before it can be used. Easy AMOSautomatically allocates certain banks, but the Reserve As command allows you to create any other memory banks you need. Each of the following commands must be followed by the number of the memory bank, a comma, then the length you want in bytes.
RESERVE AS WORK banknumber, length
reserves the stated numberofbytesforuseas a temporary workspace. Easy AMOS always tries to allocate Fast memory for this job, so avoid bringing it into contact with any instructions that need to access the Amiga's blitter chip.
RESERVE AS DATA banknumber, length
reserves a permanent bank of memory of the required length. This area of data will be allocated to Fast memory where possible.
299

Chapter 17
Listing banks in use
\. - ~~ ~ ..
~-J ~v
. D\--
Erasing a bank
300
MEMORY
RESERVE AS CHIP WORK banknumber,length
allocates a workspace of the number of bytes you need using chip memory.
RESERVE AS CHIP DATA banknumber,length
reserves the length of bytes of memory required from chip memory. The bank will be saved along with AMOS programs automatically.
LIST BANK
Use this instruction to find out which memory banks are currently reserved, what type they are, the start of their location and their length. The start and length are given in a number code known as "hexadecimal", which is explained later on, and your listing will look something like this:
Number
1
2
ERASE
Type
Bobs
Work
Start
S:$040F60
S:$05F7AO
Length
L:$OOOO2F
L:$014000
Some people say that you can't teach an old dog new tricks, but there is no such problem when your puppy programs begin to grow up. If you need to clear any memory banks in order to load in new data, use this command followed by the number of the bank to be erased from 1 to 15, like so:
Erase 9
Chapter 17
Saving memory banks
Loading memory banks
MEMORY
SAVE
Before clearing out memory banks and loading in new data, you will want to store your old data and keep it safe, so try saving memory banks onto disc. To show that thissortoffilecontainsa memorybank,alwaysstick "abk" on the end of the file name, which is short for Easy AMOS memory BanK:
Save "filename. abk"
This will take all of the currently defined memory banks and save them to one file on your disc. If you want to save one particular memory bank, simply add its bank number after a comma, like this:
Save nfilename.abk",n
LOAD
Now you need to learn how to load up new memory banks, and as you would expect, AMOS makes it easy.
Load Nfilename.abk"
will erase all current memory banks and replace them with all of the banks held in the named file. If there is only one bank held in the named file, then that bank will be replaced and the others left alone. To insert new data into a particular memory bank, add the number of the bank that is your new target destination, like this:
Load "f ilename. abkN
, n
If you leave outthe number of a target memory bank, the replacement data will be automatically loaded into the bank from where it originated. Bob banks are treated differently. If the bank number n is zero, or left out altogether, the new sprite data will overwrite all of the old sprite data. If any of the bank numbers from 1 to 15 is used, the old data will be kept and the new data will be added to it. In this way, several sprite files can be combined.
301

Chapter 17
Finding bank parameters
MACHINE CODE
"Welcome to the machine!"
(Pink Floyd, 1975)
302
MEMORY
Ambitious programmers may want to have direct access to data held in memory banks, and Easy AMOS is willing to help out.
=START reveals the address in memory where the bank starts. For example:
~ Reserve As Work 3,2000
Print Start (3)
List Bank
=LENGTH
returns the length of a specified memory bank, in bytes:
~ Print Length (3)
If a result of zero is returned, then the bank does not exist. If it contains sprites, then the number of sprites will be returned instead of its length.
Huge amounts of memory can be saved and programs can be speeded up if Basic keywords and routines are bypassed, and direct communication established with a computer's brain. The set of instructions used by microprocessor chips is called . Machine Code', and programs can be written for these chips in 'assembly language'. This type of program has to be coded into a sequence of bytes using an 'assembler', and there are loads of ready-made software packages on the market. If you want to code them yourself, there are several excellent books that will teach you how, and this isn't one of them! But Easy AMOS is quite prepared to cater for your needs if ever you become a Machine Code expert.

Chapter 17
Converting numbers
Hexadecimal conversion
Binary conversion
MEMORY
You can safely ignore the rest of this chapter until the time ever comes when your puppies grow into wise old dogs.
Easy AMOS can convert familiar numbers into two other forms that are recognised by more advanced computer programs. Because human beings have got hands with ten digits, we have developed a system of counting using ten as the base. Butcomputerssometimes use a system with a base of 16 using letters as well as numbers, and this is known as "hexadecimal" notation. Alternatively, there is a system that uses a base of only 2 (either 0 or 1), called "binary" notation.
=HEX$ converts an integer into hexadecimal. You can specify the number of characters to be returned by following the integer with that number. Here are some examples:
ICV' Print Hex$ (65536)
Print Hex$(65536,8)
Print Hex$(Colour(1),3)
=BIN$ converts a number into a binary string. You can choose whether to output all the digits of the number or only a few, from 1 up to 32 digits. Binary numbers are given the % character as a prefix. Try these:
ICV' Print Bin$(255)
Print Bin$(255,16)
303

Chapter 17
Saving binary memory blocks
Loading binary memory blocks
Peeking and poking
304
MEMORY
BSAVE saves an unformatted block of memory in binaryformat. It is used like this:
Bsave "filename", Start (15) +Length (15)
so that the memory stored between Start and the end of Length is saved to "filename", in this case the data in memory bank 15. Bsave must not be used for sprite or icon banks, because their data is not stored as a single block of memory.
BLOAD
loads a file of binary data off disc without affecting the data in any way. It can load data to any given address, or to any numbered memory bank, provided that the memory bank has been reserved and contains enough memory.
Bload file$, address
Bload file$, bank
The process of discovering which byte is living at a particular address is called taking a "peek", and always gives a result from 0 to 255. Similarly, changing the value of a byte at a specific address is known as having a "poke". This is a rapid but often dangerous way of manipulating memory.
=PEEK
returns the byte stored at a given address:
Print Peek (address)
POKE
shoves a number between 0 and 255 into the specified address:
Poke address, number

Chapter 17
Deep peeking and long poking
Finding the address of a variable
MEMORY
=DEEK
reads a two-byte word living at an EVEN address number only.
Print Deek (even numbered address)
DOKE
loads a two-byte number between 0 and 65535 into the memory location at a given address.
Doke address, number
=LEEK
works in the same way as DEEK, but returns a four-byte word.
Print Leek (even numbered address)
LOKE
copies a four-byte number to a specified address.
Loke address, number.
Needless to say, inexperienced programmers should take great care when poking, doking and loking.
=VARPTR
will return the address of the three types of Basic variable.
String variables: the address points to the first character of the string.
Integers: the address of the four bytes containing the variable is given.
Floating point numbers: the address of the four byte "Fast Floating Point Format" is given.
305

Chapter 17
USING MACHINE CODE
Loading machine code
Calling machine code
306
MEMORY
We think that Easy AMOS is so powerful, you will not need to complicate things by using assembly language. The commands are hazardous to use and should be avoided. But if you insist on being reckless, the final section of this chapter has been provided. To combine assembly language routines with your AMOS programs, you are welcome to wade through what may seem like gibberish. You have been duly warned!
PLOAD
is used to reserve a specified memory bank and load it with a machine code program:
PLOAD "machine code filename", bank
The code can contain almost anything, provided that it is completely relocatable and ended by a single RTS instruction.
CALL
calls up and then execu tes machine code from an address or a memory bank.
Call address, parameters
Call bank/parameters
The address can be a specific location or the number of a memory bank already created with Pload. Get back to Easy AMOS Basic using an RTS instruction.
·Parameters· refers to those parameters which will be pushed into the stack, and because they will be pulled out in reverse order remember that the last parameter you enter will be the first one on the stack!
Chapter 17
Talking to registers
"Memory? Well, I never forget a face. But in you r case I'll make an exception. "
(Groucho Marx, 1965)
MEMORY
AREG
is an array of three pretend variables used to pass on information to the computer's address registers. Whenever Call is used, the contents of this array is loaded into address registers AD to A2. When the function is over, they are saved back along with any new information that has been placed in these registers. Registers r can range from D to 6, as in:
a~AREG(r)
AREG(r)~a
DREG
is an arrayof eight integers that holds a copy of the data registers, with r referring to the register numberranging from D to 7 (01 to D7 respectively.) It can be taken for walkies like this:
d~DREG(r)
DREG(r)~d
307

308

Chapter 18
DEBUGGING ERRORS
o bugs
o spotting mistakes
o HELP
o trapping errors
o error messages
"Anyone can make mistakes, but only an idiot persists in his error. II
(Cicero,44BO
309

Chapter 18
SPOTTING MISTAKES
"Tis not enough to help the feeble, but to support him after. "
(William Shakespeare
'Timon of Athens')
HELP
o 310
DEBUGGING ERRORS
Some people call them glitches, or gremlins, but most of us call programming mistakes 'bugs'. These little devils are the software errors that are responsible for messing up our programs. They may be a simple keystroke that has been typed in by mistake, or a command that we forgot to include, or some crazy task that the computer cannot cope with. It is up to us to identify exactly where they are lurking and what they are doing before we can obliterate them. This is known as 'debugging': the process by which we trap errors in our programs.
Whenever a mistake is made in Easy AMOS programming, or when you ask your Amiga to do the impossible, Easy AMOS does its very best to offer first aid, automatically. Easy AMOS not only helps you to spot the error but also tries to explain what it is, where itis, what problems are being caused and how to find the solution. Special messages appear on your screen to point out what is going wrong and where the error is, in the form of an error message followed by the line number where the error lives. If this happens while you are programming, you can try to cure the bug immediately. If it happens while you are testing or running your program, Easy AMOS will take you straight to the offending line as soon as you edit.
In the next Chapter you can learn all about the Easy AMOS TUTOR program, which has been carefully designed to help Easy AMOS programming. You can also ask for [Help] while editing your programs, as explained way back in Chapter 3. When you ask for [Help], Easy AMOS will tell you about the current instruction in an information window on your screen. If you prefer, you can read exactly the same information by lookingupany Easy AMOS instruction in Chapter 20: the Glossary.

Chapter 18
TRAPPING ERRORS
"There are few errors ever avoided."
(Winston Churchill, 1945)
DEBUGGING ERRORS
ON ERROR You can lay plans for handling program errors by telling Easy AMOS that if a mistake crops up then it should go to a special error-handling routine and trap the bug. Error trapping swings into action with the ON ERROR command, and is called up like this:
ON ERROR GOTO label
Whenever a bug occurs in your Basic program, Easy AMOS will jump straight to whatever label you have defined, and this will act as the starting point for your own error correction routine. You can then fix the bug and return safe and sound to your main program. In this way, mistakes can be repaired without the bother of returning to the editor window. You must use RESUME to get back to your program, and this is explained a little later. Take a look at this simple routine:
IIff'Do
Input "Type in two numbers";A,B
Print Ail! divided by ";8;" is ";A/B
LoOp
This will work perfectly until you try to enter a value of zero for B,and Easy AMOS discovers thatitis impossible to divide A by zero. Similar problems can be catered for in advance by setting an error trap, like that on the following page:
311

Chapter 18
"Napoleon learned from his mistakes how to make new ones. "
(AJP Taylor, 1963)
312
DEBUGGING ERRORS
trY' On Error Goto HELP
AGAIN:
Do
Input MType in two numbers"; A, B
Print A;" divided by ";B;" is ";A!B
Loop
Rem Error Handler
HELP:
Print "I'm afraid you are trying to"
Print "divide your number by zero. n
Resume AGAIN : Rem Go back to input
If you are ever unfortunate enough to write an error inside your own error trapping routine, Easy AMOS will grind to a halt in revenge! There are two ways to deliberately disable ON ERROR GOTO. Either use ON ERROR GOTO 0 or call it without any parameters, like this:
On Error:Rem disable error trap
RESUME
Never use GOTO to get back to your Basic program after an error handler, the correct method is the use of RESUME. On its own, RESUME will jump back to the statement which caused the error and try it again. If you specify a line number after RESUME, as in the above example, RESUME will jump back to that line.

Chapter 18 DEBUGGING ERRORS
ON ERROR PROC
You can also trap an error using a procedure. ON ERROR PROC selects a named procedure which is automatically called if there's an error in the main program. In fact, it is a structured version of the ON ERROR COTO command.
Your procedure must be terminated by an END PROC in the usual way, and then you'll need to return to the main program with an add itional call to RESUME, which can be placed just before the final END PROC statement.
Here is an example:
IUr' On Error Proc HELP
Do
Input "Type in two numbers";A,B
Print Ai divided by ";B;" is ";A/B
Loop
Rem Error Handler
Procedure HELP
Print "I 1m afraid you are trying to"
Print "divide your number by zero."
Resume Next: Rem Go back to input
End Proc
313

Chapter 18
ERROR MESSAGES
314
DEBUGGING ERRORS
=ERRN
If you use ON ERROR to create your own error handling routines, you will want to know exactly what sort of error has happened in the main program. Errors discovered while your program is running each have their own ERRor Number, and the number of the last error to be spotted will be returned with the use of the ERRN function in your routine:
n~ERRN
All these errors and their numbers are listed below.
Easy AMOS uses three sets of error messages to help you correct your programming mistakes. Editing messages may appear while you are in themiddleofprogramming. Program messages can crop up when you test your work. Run time messages come complete with their own number code, and they pinpoint errors while your program is up and running. Here is a list of all the error messages that Easy AMOS may try and help you with, as soon as a programming mistake is picked up.
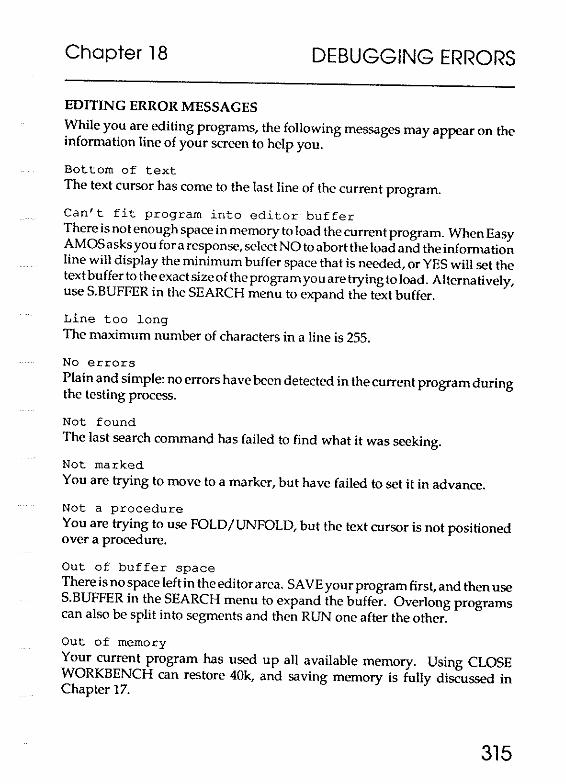
Chapter 18 DEBUGGING ERRORS
EDITING ERROR MESSAGES While you are editing programs, the following messages may appear on the information line of your screen to help you.
Bottom of text The text cursor has come to the last line of the current program.
Can't fit program into editor buffer There is not enough space in memory to load the current program. When Easy AMOS asks you for a response, select NO to abort the load and the information line will display the minimum buffer space that is needed, or YES will set the text buffer to the exact size of the program you are trying to load. Alternatively, use S.BUFFER in the SEARCH menu to expand the text buffer.
Line too long The maximum number of characters in a line is 255.
No errors Plain and simple: no errors have been detected in the current program during the testing process.
Not found The last search command has failed to find what it was seeking.
Not marked You are trying to move to a marker, but have failed to set it in advance.
Not a procedure You are trying to use FOLD/UNFOLD, but the text cursor is not positioned over a procedure.
Out of buffer space There is no space left in the editor area. SAVE your program first, and then use S.BUFFER in the SEARCH menu to expand the buffer. Overlong programs can also be split into segments and then RUN one after the other.
Out of memory Your current program has used up all available memory. Using CLOSE WORKBENCH can restore 40k, and saving memory is fully discussed in Chapter 17.
315
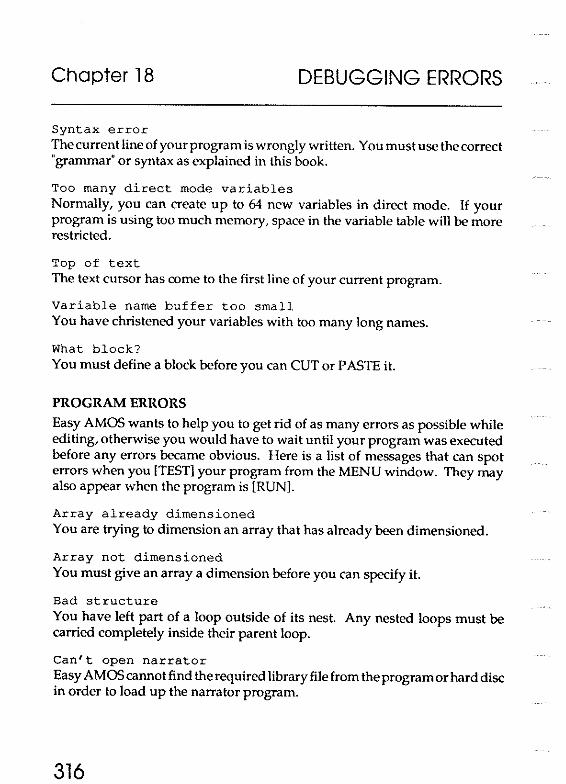
Chapter 18 DEBUGGING ERRORS
Syntax error The current line of your program is wrongly written. You must use the correct "grammar" or syntax as explained in this book.
Too many direct mode variables Normally, you can create up to 64 new variables in direct mode. If your program is using too much memory, space in the variable table will be more restricted.
Top of text The text cursor has come to the first line of your current program.
Variable name buffer too small You have christened your variables with too many long names.
What block? You must define a block before you can CUT or PASTE it.
PROGRAM ERRORS
Easy AMOS wants to help you to get rid of as many errors as possible while editing, otherwise you would have to wait until your program was executed before any errors became obvious. Here is a list of messages that can spot errors when you [TEST] your program from the MENU window. They may also appear when the program is [RUN].
Array already dimensioned You are trying to dimension an array that has already been dimensioned.
Array not dimensioned You must give an array a dimension before you can specify it.
Bad structure You have left part of a loop outside of its nest. Any nested loops must be carried completely inside their parent loop.
Can't open narrator Easy AMOS cannot find the required library file from the program or hard disc in order to load up the narrator program.
316
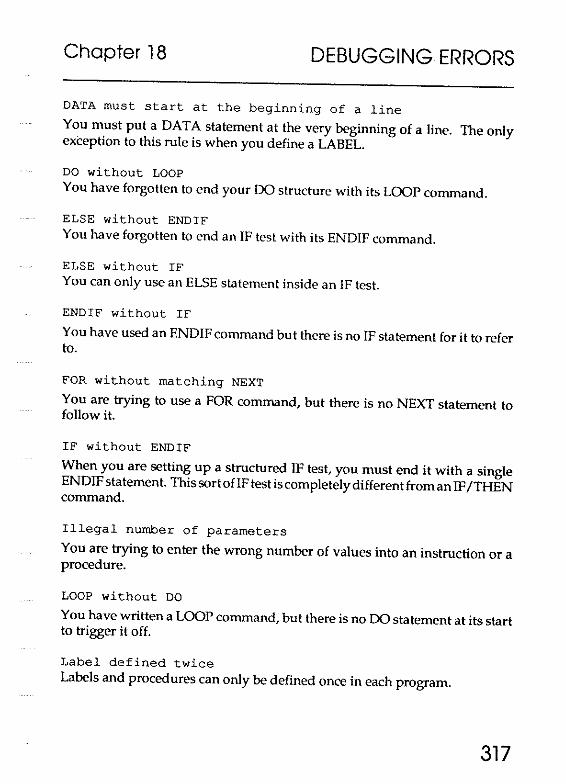
Chapter 18 DEBUGGING ERRORS
DATA must start at the beginning of a line
You must put a DATA statement at the very beginning of a line. The only exception to this rule is when you define a LABEL.
DO without LOOP You have forgotten to end your DO structure with its LOOP command.
ELSE without ENDIF You have forgotten to end an IF test with its ENDIF command.
ELSE without IF You can only use an ELSE statement inside an IF test.
ENDIF without IF
You have used an ENDIFcommand but there is no IF statement for it to refer to.
FOR without matching NEXT
You are trying to use a FOR command, but there is no NEXT statement to follow it.
IF without ENDIF
When you are setting up a structured IF test, you must end it with a single ENDIF statement. This sortofiF test is completely different from an IF/THEN command.
Illegal number of parameters
You are trying to enter the wrong number of values into an instruction or a procedure.
LOOP without DO
You have written a LOOP command, but there is no DO statement at its start to trigger it off.
Label defined twice Labels and procedures can only be defined once in each program.
317

Chapter 18 DEBUGGING ERRORS
Music bank not defined The music number you are seeking is not in the current music bank.
Music bank not found There is no musical bank.
NEXT without FOR You have forgotten to precede a NEXT instruction with its FOR command.
No THEN in a structured test You cannot use IF/THEN inside a structured test, but you can use IF /ENDIF.
No jumps allowed in the middle of a loop! You can only jump out from a loop once you are inside of it. You cannot jump into a loop using a COTO or COSUB statement.
Not a packed bitmap You are trying to UNPACK a databank that is not in bitmap format.
Not a packed screen You are trying to UNPACK data that is not in packed screen format.
Not enough loops to exit You have specified a larger count of loops than the number of active loops available in your EXIT or EXIT IF command.
Out of memory There is not enough memory available to create the variable name buffer. Shorten the names or get some more memory.
Procedure's limits must be alone on a line All PROCEDURE and END PROC statements must begin on their own line.
Procedure not closed You have forgotten to end one of your procedures with an END PROC statement.
Procedure not opened There is an END PROC statement in your program, but its PROCEDURE has not been defined above.
318

Chapter 18 DEBUGGING ERRORS
REPEAT without matching UNTIL There is a REPEAT instruction in your program, but there is no UNTIL statement to go with it.
Sample not defined You are trying to play an audio sample tha t does not exist in the curren t sample bank.
Syntax error Thecurrent line of your program is wrongl y written. You must use the correct "grammar" or syntax as explained in this book.
This array is not defined in the main program You are trying to access an array inside a procedure, but you have forgotten to dimension it in the main program.
UNTIL without REPEAT You have programmed an UNTIL command that does not refer to a previous REPEAT statement.
Undefined label Your program is trying to find a label that you have forgotten to specify.
Undefined procedure You are trying to call up a procedure that does not exist.
Variable buffer can't be cnanged in the middle of a program! Apart from a REM statement, the SET BUFFER command must always be used as the very first line of your program.
Variable buffer too small While Easy AMOS is testing your program, it is possible that the area reserved for variables can overflow. If there is enough memory available, use SET BUFFER to expand this area.
WEND without WHILE There is no WHILE command to go wi th your WEND statement.
WHILE without matChing WEND There is no matching WEND statement to go with your WHILE command
319

Chapter 18 DEBUGGING ERRORS
RUN TIME ERROR8
If Easy AMOS trips over a mistake while your program is running, it will instantly grind to a halt and the offen<'ing instruction will corne under the spotlight with its own error message. As soon as you go back to editing your program, the cursor automatically leaps to the line where the error is lurking. These run time errors each have a special code number which is displayed in brackets immediately after the error message, and these code numbers can be very useful if you are using error trapping. For example, you may want to find the error message that goes with a particular codenumber, by using a line such as:
Error Errn
Address error (25) You are trying to read an odd address in a DEEK or LEEK command, which must always be even. Similarly, OOKE and LOKE cannot load these addresses.
Array already dimensioned (28) You have tried to dimension the same array more than once.
Bad IFF format (30) LOAD IFF can only load IFF screens into memory, and not general purpose IFF files.
Bank already reserved (35) You have tried to create a memory bank that already exists.
Bank not reserved (36) You are trying to select a bank, but you have forgotten to RESERVE it. This error message can also result from certain commands trying to use data from a specific memory bank automatically, such as SAMPLAY.
Block not found (65) You cannot specify a block without first creating it, using GET BLOCK.
Bob not defined (68) You cannot manipulate or PASTE a bob without first setting it up with a BOB command.
320
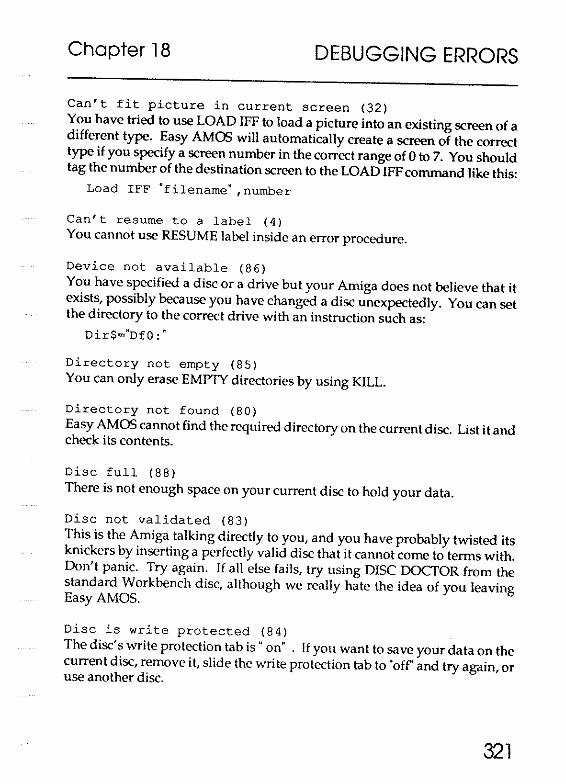
Chapter 18 DEBUGGING ERRORS
Can't fit picture in current screen (32) You have tried to use LOAD IFF to load a picture into an existing screen of a different type. Easy AMOS will automatically create a screen of the correct type if you specify a screen number in the correct range of 0 to 7. You should tag the number of the destination screen to the LOAD IFF command like this:
Load IFF "filename" , number
Can't resume to a label (4) You cannot use RESUME label inside an error procedure.
Device not available (86) You have specified a disc or a drive but your Amiga does not believe that it exists, possibly because you have changed a disc unexpectedly. You can set the directory to the correct drive wi th an instruction such as:
Dir$="DfO: "
Directory not empty (85) You can only erase EMPTY directories by using KILL.
Directory not found (80) Easy AMOS cannot find the required directory on the current disc. List it and check its contents.
Disc full (88) There is not enough space on your current disc to hold your data.
Disc not validated (83) This is the Amiga talking directly to you, and you have probably twisted its knickers by inserting a perfectly valid disc that it cannot come to terms with. Don't panic. Try again. If all else fails, try using DISC DOCTOR from the standard Workbench disc, although we really hate the idea of you leaving Easy AMOS.
Disc is write protected (84) The disc's write protection tab is "on" . If you want to save your data on the current disc, remove it, slide the write protection tab to "off and try again, or use another disc.
321

Chapter 18 DEBUGGING ERRORS
Division by zero (20) You are trying to divide a number by zero, and that is impossible.
End of file (100) The end of the current file has been reached unexpectedly while the disc is being accessed. You should use the EOF function to test for this condition from inside your program.
End of program (10) Easy AMOS has executed the last instruction in your program.
Error not resumed (3) You have come out of an error-handling routine, but forgotten to reset the error using RESUME.
Error procedure must RESUME to end (8) You cannot exit from an error-handling procedure using END PROC, use the RESUME command instead.
Out of stack space (0) There are too many procedure calls nested inside one another. Al though Easy AMOS procedures can call themselves up, this error may occur after about 50 loops. The same can happen with the COSUB command.
File already exists (79) You cannot RENAME a file with the same name belonging to another file or directory on your current disc.
File already opened (97) You cannot OPEN or APPEND a file that is already open.
File format not recognised (95) The LOAD command can only be used to load Easy AMOS files fromdisc. Use BLOAD for files stored in standard Amiga format. Use LOAD IFF for Iff screens.
File is protected against deletion (89) There is an Amiga security command to stop accidental wiping of important system files, this is the PROTECf command to be found on the CLI. You have probably just tried to DELETE one of these protected files.
322

Chapter 18 DEBUGGING ERRORS
File is protected against reading (91) You have requested a file that has been protected from your prying eyes. The PROTECT command is on theCL!, and is explained in the Amiga User'sGuide that you ignored when you unpacked your computer.
File is write protected (90) Youaretryingtochangea file that has been locked with the PROTECT security command.
File not found (81) You have tried to call up a file or a directory that does not exist within the current directory.
File not opened (97) You must use an instruction like OPEN IN, OPEN OUT or APPEND to open access to a file before you can use it to transfer data.
File type mismatch (98) You have used a command that is not allowed with the current file. For example, GET and PUT will not work with sequential files.
Flash declaration error (52) There is a mistake in the animation string that defines a FLASH colour sequence.
Fonts not examined (37) You must first create a list of the available fonts using GET FONTS before you can use the SET FONT command.
I/o error (94) The input/output error implies that there is a corrupted file that cannot be accessed properly. Try again, checking any disc drive connections that may be faulty. If necessary, you may have to resort to the DISC DOCTOR program supplied on your original Workbench disc.
IFF compression not recognised (31) You are trying to load a screen that has been compressed with an unfamiliar system. You should try and re-save your original screen source in standard IFF format.
323

Chapter 18 DEBUGGING ERRORS
Illegal block parameters (66) The values you have entered in a GET BLOCK or PUT BLOCK command are not allowed.
Illegal file name (82) You are trying to use a non-standard file name.
Illegal function call (23) You have made a mistake with the values inan Easy AMOS command. Return to the editor, and identify the likely command in your line of program.
Illegal number of colours (49) You are trying to use the wrong number of colours on screen at once. Check your syntax if you have used SCREEN OPEN, or see Chapter 8 for the list of colour options.
Illegal screen parameter (48) You have specified dimensions using SCREEN OPEN that are not acceptable. Your minimum screen size can be as small as 32x8,and the maximum is 1000 pixels wide.
Input too long (99) Either your input string is too long for a previously dimensioned variable, or you have tried to INPUT# a line of more than 1000 characters.
Label not defined (40) You have included a label in an instruction, but forgotten to define it. Check for mistakes in GOTO, GOSUB or RESTORE statements.
No ON ERROR PROe before this instruction (5) You can only use RESUME LABEL after an ON ERROR PROC command.
No data after this label (41) You cannot RESTORE the data pointer to a line with no DATA statements on that line or subsequent lines.
NO disc in drive (93) Your Amiga does not believe that there is a disc in the drive you are trying to access. Try again.
324

Chapter 18 DEBUGGING ERRORS
NO zone defined (73) You cannot use SET ZONE without first allocating enough memory with RESERVE ZONE.
Non dimensioned array (27) You are trying to refer to an array, but it has not yet been defined.
Not an AmigaDOS disc (92) Easy AMOS can only read discs created on an Amiga. If you want to use discs that are of compatible size but originate from another sort of computer, you will first have to use specialised software to translate your data.
Out of data (33) You may have omitted some information from one of your DATA lines, because a READ command has gone past the last item of DATA in the current program. Alternatively, there may be a typing error in a RESTORE command.
Out of memory (24) Your Amiga thinks that it has run out of available memory storage space. If your information line assures you that there is plenty of sparememory,simply save your program, re-boot and load it back in again. CLOSE EDITOR will save a further 40k by deactivating the editor window when you are not using it.
Out of variable space (11) Normally, Easy AMOS allocates 8k of storage space for your strings and arrays. To increase variable space, use the SET BUFFER command at the beginning of your program.
Overflow (29) The result of a calculation has exceeded the maximum size of a variable.
Program interrupted (9) You have pressed the [Cntr!] and [Cl keys at the same time, to exit directly from your program. This is an information message, not an error.
RETURN without GOSUB (1) RETURN can only be used to exit from a subroutine that was Originally entered with a GOSUB.
325

Chapter 18 DEBUGGING ERRORS
Rainbow not defined (75) You must define your rainbow effect using SET RAINBOW before you canca II it up.
Resume label not defined (6) The label you have specified in a RESUME command does not exist.
Resume without error (7) The RESUME command cannot be executed unless an error has cropped up in your program.
Screen already in double buffering (69) You are trying to call DOUBLE BUFFER more than once on the same screen.
Screen not opened (47) You must open a screen with the SCREEN command before you can access it.
String too long (21) Easy AMOS allows a maximum of 65000 characters in any string.
Too many colours in flash (51) There is a maximum allowance of 16 colour changes in a single FLASH command.
Type mismatch (34) You have assigned an illegal value to a variable.
Valid screen numbers range from 0 to 7 (50) There is a maximum of eight screens that can be opened at anyone time.
256 characters for a wave Audio waves can only be created by a list of 256 bytes.
326

Chapter 19
THE EASY AMOS TUTOR
o the graduation challenge
o calling the tutor
o the tutor screen
o the control keypad
o how the tutor works
o evaluating expressions
"A tutoris better than any book."
(Confucius, 490 BO
327

Chapter 19
THE TUTOR
328
THE EASY AMOS TUTOR
Do you think you've learned everything Easy AMOS has to offer? This is the last Chapter featured in our very own "game show' that tests your knowledge of Easy AMOS. 'Challenge AMOS' is to be found on your "Easy AMOS Tutorial" disc, and if you haven't already played it, treat yourself to an audio-visual extravaganza by loading:
Challenge.AMOS
It's even better than being on a TV quiz show, because when you have proved your knowledge, you will become a genuine Easy AMOS Graduate. Full details on your Graduation Screen! The Challenge questions start on subjects that are covered way back near the beginning of these pages, all the way through to this Tutor Chapter. And don't worry if you get the answers wrong, because you can play the Challenge as many times as you like. All the answers are to be found somewhere in this book, and we wish you every success and look forward to welcoming you on your Easy AMOS Graduation Day!
You are corning to the end of your course in Easy AMOS programming, and we hope that you've found it clear, easy and entertaining. There's one more feature to help you monitor your new knowledge, and we've saved the best until last! If you want to become an Easy AMOS Graduate, you need a Tutor.
A tutor is a personal teacher who is employed to educate and guide a student. Ideally, a tutor should be available at all times to help the student understand anything from basic words to complex ideas. This book can help you in most cases, but it can never get inside your own programs and explain what's going on. Believe it or not, Easy AMOS can!

Chapter 19
Calling the Tutor
THE EASY AMOS TUTOR
The Easy AMOS Tutor is a very simple idea, but it's incredibly powerful. You can call it up and use it to examine any Easy AMOS program, any Easy AMOS routine or even a single expression, and find out exactly what's happening, and why.
To call up the Easy AMOS Tutor from the Editor simply click on the [Tutor] option in the Default Menu, or hit the [F6] key.
TUTOR
Tutor is also a command in its own right, and can be typed from Direct Mode, or included anywhere in your program listing. When called from inside one of your Easy AMOS programs, this command stops the program and summons up the Tutor screen. The tutoring process will then start from the location immediately after the Tutor command, ready to step on through your program one instruction at a time. For example:
~ Print "Time to call the Tutor!"
Wait 100
Tutor
Print "THIS IS IN THE NEXT INSTRUCTION"
Before the next instruction is executed, Tutor takes you straight to its own screen, which is a monitoring system completely controlled by the mouse. You don't even have to type anything in! Try to resist the temptation to start experimenting just yet. Let's go on a proper guided tour by analysing a more complex program.
Trigger the quit icon [Q] in the top right-hand corner of the push-button control keypad on the Tutor Screen, and load up one of the games from your "Easy AMOS Examples" disc now, such as:
Tricyle_Ball.AMOS
329

Chapter 19
Scpeen B Fo~ S:8 To 1
, Hlt
330
THE EASY AMOS TUTOR
[Run] or [Fl] the game, to remind yourself how it looks. After the title sequence, let the game play in Demo mode. Break into the game with [Ctrl]+[C] and then press [Spacebar] to return to the editor.
Now trigger the [Tutor] option or press [F61. and the Tutor Screen will appear, looking something like this:

Chapter 19
Graphic output window
Control keypad
THE EASY AMOS TUTOR
The window in the top left-hand quarter of the Tutor Screen is used to display the graphic output of the current program screen, with the Screen Number displayed above it. It reduces Lowres screens to exactly half of the original size, so that a 320 x 200 screen fits perfectly into this window. If a screen is larger than this default size, you can explore it using the four directional arrOw buttons in the push-button panel. Hires screens are NOT reduced, and you can look around them using the direction arrows as well.
All colour animations such as Flash and Fade will be shown during the monitoring process. If the current screen features more than 16 colours, then colours 16 to 31,32 to 47 and 48 to 63 will each be converted to colours o to 15,so HAM pictures may well produce some bizarre results!
Now try clicking with the left mouse bu tton in the Graphic Output Window, and you will be returned to the original program display for as long as you hold down the button. This is a very useful service, to remind you of exactly what's on the screen you are dealing with
Each of the push-buttons in the control keypad is triggered via the mouse.
Scrolling the screen output Thefourdirectionalarrowsareused to scroll the reduced screen in the graphic output window. Try scrolling down and back up again. The central button in this group selects the screen to be displayed starting from Screen zero and then in order through any additional screens. Flick through the screens now, until you get back to Screen zero again.
331

Chapter 19
I INIT I
How the Tutor works
332
THE EASY AMOS TUTOR
Initialising the Tutor This is the Initialisation button, and it has exactly the same effect as using [Run] from the Editor. Firstly, a [Test] of the program is performed. If Easy AMOS comes across an error, the faulty line will be displayed in a display window at the bottom of the screen. If the [Test] proves successful, and there are no errors to be reported, a [Default] command will be given to the display, and a program pointer will be initialised at the first instruction in the program. If you are using "Tricycle _ Ball.AMOS" to test with the Tutor, chances are that no errors will be reported!
If you don't click on the [INIT] button first, you will not be able to check through the program's instructions step by step.
The Easy AMOS Tutor has been designed to perform all of these useful tasks:
To look at the instructions in your program, one at a time, and to display a report showing the result of what happens when its parameters have been evaluated. In other words it can test out any instruction in the program.
To display Help information about any instruction you select.
To supply you with the result of any expression in your program where possible. If there is an error in the expression, the offending line will bernarked out.
- To provide error message reports.
The Tutor uses two windows, which take up the bottom half of the Tutor Screen. The upper window displays the program listing and the lower window provides all the information on offer.

Chapter 19
Changing the window displays
THE EASY AMOS TUTOR
The Program Listing Window
This window gives you a view of the current program listing. You can look at it, and mark out items to be examined, but you can't change anything in it. Once the Tutor has been [INIT)ialised, helpful markers will be shown in the program listing to remind you of the fonowing points:
The current program location is marked by a black CURSOR with three little arrow-heads. It always appears before theNEXT instruction to be examined.
- You are allowed to set a "break point" in the listing, and these will be marked in INVERSE VIDEO.
Any item that you want information about will be UNDERLINED.
The Information Window
Thisis where all theTutorinfonnationappears. Itstartsoffby displayingthenextinstruction tobeexamined,butastheother Tutor features come into play, infonnation is displayed in the fonowing order, from top to bottom in this window:
Error messages
Information on instructions
Information on expressions
Next instruction to be examined
First parameter of the next instruction
Second parameter, and so on.
Scroll bars are provided to move the display of the program listing, vertically and horizontally in the Program Usting Window. The "centre" button at the top right-hand comer of the Program Usting Window is used to centre the display on the NEXf instruction to be executed. A vertical scroll bar is also available for the Infonnation Window.
333

Chapter 19
334
THE EASY AMOS TUTOR
If you click on the line between the Program Listing Window and the Information Window you can enlarge one window and reducetheothertoa minimum of three lines. Simply drag the window boundary up and down to change size.
Let's examine the bottom line of buttons on the control keypad next.
One step control
Clicking on this button tells the Tutor to examine the next instruction, give a report and then go back and wait for your next action. The black program cursor will now be pointing to the next instruction, and the Information Window will also show the next instruction and give its parameter list, if there is one.
Slow-run control
When you trigger this button, the Tutor will interpret instructions one at a time, and redraw the whole display after each examination. By using this option you can follow the progress of the program listing in "slow motion". To stop the slow-run, click on the stop button.
Stop button
The stop button brings the interpretation process to a halt, and returns you to the Tutor. Pressing [Ctrl]+[C] has the same effect, and so does a "break point" which is explained in a moment. If a non-trapped error is corne across, it will be displayed in the Information Window and you will also be taken back to the Tutor.
Normal-run control
This button will [Run] the program from the Tutor and update the display every 50th of a second, allowing a faster speed of operation. To stop the process, use the stop button.

Chapter 19 THE EASY AMOS TUTOR
Fast-run button
When fast-run is used, the program's own display is used and it is [Run] at full speed. If an error is not found, the only way to come back to the Tutor during a fast-run is to press [Ctr\] and IC] together, or use break points.
How to set a break point Click on the break point button with the left mouse button as usual, then click on the instruction in the program listing wherever you want to set the break. The instruction will be highlighted in inverse video.
The evaluation button
The button marked [VAL] allows you to use a very accurate setting for the evaluation process. Click on the button and then use your mouse to set the precise character that marks the beginning of the expression you want to evaluate. With the button held down, drag it to the character in the listing to mark the end of the expression you are interested in, and release the button to underline the expression. That's it. The evaluation will be reported in the Information Window.
Calling for Help! You need help? You get help! Click on the help button, click on the keyword you need help with to underlineit, and the trusty Easy AMOS Help Window will appear at your service.
Quitting the Tu tor
This button takes you back to the Editor. If the system has been called up from inside a program using the Tutor command, you'll be returned to the program at the instruction immediately after that command.
335

Chapter 19
Evaluating expressions
336
THE EASY AMOS TUTOR
The Tutor may be simple to use, but it is incredibly skilful in the way it analyses expressions and reports the results back to you. Here are the ground rules for a simple demonstration. Run this example to give yourself something to work on, then call up the Tutor:
lIP'" A~l : B=2 : C~3
D=A+B*C-l
Print D
Firstly, the program must be initialised. So press the [INIT) button. Secondly, the expression must be valid, so if you press [VAL) and asked foran evaluation of A+B without initialising B, then you would be asking for the impossible! Also, if you ask for an evaluation of "*", you will told that it's impossible toevaluate something that's plainly idiotic. On the other hand if you ask for an evaluation of something obvious like "1 ", it will be given. Lastly, the expression must be at the same level of procedure as the program pointer.
With the black program cursor still on the first line of the program listing. Trigger [VAL) andaskforanevaluation of D by clicking on "D" in the last line of that example. Result zero! D will only be equal to A+B*C-l when all the expressions have been evaluated.
Ad vance the process by one step, and the cursor moves to the next expression on the first line. Now advance two more steps, and get the correct evaluations for A, Band C from the second line of the program. D will still come back as zero. But by advancing another step, D is given as6.
The [Spacebar) can be used as a keyboard short-<:ut, to advance a single step every time it is pressed.
Chapter 19
"School's out!" (Alice Cooper,
1973)
THE EASY AMOS TUTOR
To get rid of an expression from the Information Window, just click on it with the mouse cursor.
That was a very simple example, of course. But when you are dealing with complex programs, you can use the Tutor with the greatest of ease to extract all sorts of interesting results from the expressions in the listing. Go exploring one of the Easy AMOS example programs now, and test out the Tutor on the juiciest expressions you can find.
Happy Graduation Day!
337

338

Chapter 20
GLOSSARY
"[ have a dream that one day the words of Amos will become clear. " (Martin Luther King,
1963)
339

Glossary
This Chapter is your reference guide to all the words, characters and abbreviations you are likely to need when you use Easy AMOS. It includes all the Easy AMOS instructions, functions, reserved variables, keywords and controls, as well as technical terms, jargon and computer gobbledegook. The easiest way to understand what these terms mean is to show them who's boss. Use the commands fearlessly in your programming and see what happens, because you can't harm your Amiga by experimental programming.
All the words and abbreviations that can be used in Easy AMOS programming are printed in bold upper case letters, like this: APPEAR.
If any of these headings is a function, it has an equals sign in front of it (and if you don't know what a function is, look it up in this Glossary!). For example:
=ABS
Other words and jargon are shown in bold lower case, for example, address.
Certain examples of the use of programming words are shown indented in a different typeface, looking like this.
Print Asc {"A")
If any parts of the program examples are optional, in other words if you can choose whether or not you want to leave them out, they are printed in italics, like this:
Ink colour, paper, border
Obviously these are simplified examples, often using a Print statement for instant understanding. All the uses and subtleties of the programming words are to be found in their appropriate chapters.
When Amiga keys are indicated, they are shown inside square brackets, like this:
[Escape).
340

GLOSSARY OF WORDS, CHARACTERS AND ABBREVIATIONS
=ABS
Glossary
Gives the ABSolute value of a number, taking no account of whether it has a positive or negative sign. The number must be in brackets.
Print Abs (-5)
abk is short for Amos memory BanK, and is used as an extension at the end of a filename to show that the file contains one or more memory banks, like this:
Save "filename. abk"
address is where a unit of data has taken up residence in the computer's memory. It is just like a human address, because you need to know the number before you can make contact.
APPEAR
fades between two graphics screens. You must specify the numbers of the source screen and destination screen, as well as the effect you want ranging from 1 for a single pixel up to the maximum number of the pixels on your screen. Finally, you can state what area of the screen is to be affected, by giving the number of pixels from top to bottom of the screen.
Appear source To destination,effect,pixels
APPEND adds information to the end of an existing sequential file, allowing you to expand your file after it has been defined.
Append channelnumber,name$
AREG creates an array of three "pseudo" variables, used to hold copies of the chip's first three Address, REGisters AD to A2.
Areg(r)=a
341

Glossary
AS please see RESERVE
=ASC gives the Ascii code of a character.
Print Asc ('A")
ascii
stands for American Standard Codes for Information Interchange, a widelyused system of character codes for transferring data between computers, and between computers and other machines like printers. It can also be written as Ascii, or ASCII, but it is always pronounced "Asskcy".
=AT is used to position text on screen from inside a character string.
T$=At (x, y) +"Moved Text"
AUTOBACK
sets the automatic screen copying mode. Mode number 0 sends all graphics to the logical screen. Mode 1 performs each graphical operation to both the physical and logical screens. Mode 2 (the default) combines all drawing operations with the Bob updates.
Autoback modenurnber
BAR draws a filled rectangle at the screen coordinates you want.
Bar xl,yl To x2,y2
Basic
nearly stands for Beginners All-purpose Symbolic Instruction Code, and is still the single most popular computer language in the world. Easy AMOS is a very friendly and very advanced version of Basic.
BELL
plays a tone of pure sound, from a low pitch ofl up to a very high pitch of 96.
Bell pitchvalue
342
Glossary
binary
is a system of numbering using only the the two digits 0 and 1.
=BIN$
converts a number to a BINary String. An optional length parameter can dictate the number's format.
Print Bin$(number)
Print Bin${number,length)
bit
is the smallest piece of data that can be represented in the computer's memory by a 1 or O.
bit-maps
and bit-patterns are little patterns of binary data consisting of a fixed number of bits of memory that eontrol a specific item. You can select if the bits in the pattern are set to a 1 or a zero, and this will change the way they control the item.
blitter
is jargon for the Amiga silicon chip that can copy images to the screen at a rate approaching one million pixels per second.
BLOAD
LOADs Binary data into a specified address or bank number.
Bload file$,address
bob is short for BlitterOBject, a very fast-moving graphic image of up to 64 colours. The only limit to the number of Bobs on display is the amount of available memory.
BOB
draws a Blitter OBject at given coordinates on the current screen. The BOB must have an identification number, followed by the screen coordinates and its image number assigned from the memory bank.
Bob number,x,y,imagenumber
343

Glossary
BOB CLEAR
removes all active Bobs from the screen, and redraws the background graphics. It is used with BOB DRAW (see below).
Bob Clear
=BOBCOL detects COLlisions between the Blitter OBject whose identification number you specify in brackets, with another BOB. If a collision happens, -1 will be returned, if not 0 will be given.
c~Bob Col (number)
BOB DRAW
is used after a BOB CLEAR command, which removes all active Bobs from the logical screen. BOB DRAW then lists all Bobs that have moved since the previous update, saves the background beneath the new screen coordinates and then redraws all active Bobs at their new positions on the logical screen.
Bob Draw
BOB OFF
removes a numbered Blitter OBject from the screen, or removes all Bobs if you leave out the individual number.
Bob Off bobnumber
BOB UPDATE
BOB UPDATE OFF
affects Bobs drawn on the current logical screen at the next vertical blank. BOB UPDATE OFF turns off any automatic screen switching operations and allows Bobs to be redrawn at the required timing using BOB UPDATE. (See SCREEN SWAP and VBL.)
Bob Update Bob Update Off
344

Glossary
BOOM generates an explosive sound effect.
Boom
boot
is computer jargon for kicking a program into action with a special start-up routine. When a program runs simply by inserting the disc on which it lives into the computer, it is said to "auto-boor.
BOX
draws a single lined rectangle at whatever coordinates you choose. Box xl,yl To x2,y2
BREAKOFF BREAK ON turns OFF and turns ON the program-interrupt BREAK routine normally activated by pressing the [Control]+[C] keys.
BSAVE SAVEs a block of memory stored between a start and end location, to a named file. The data is saved in Binary numbers with no special formatting.
Bsave file$, start TO end
buffer is an area of memory set aside as a temporary store for data.
345

Glossary
bug
is a slang expression that refers to a mistake in a computer program, causing problems when you try to TEST or RUN it.
byte isa unit of computer memory made up of 8 bits, and it is large enough to store one character, or a whole number <=255.
CALL
CALLs up a machine code program from an address or bank.
Call address
Caps Lock
is the key on the left side of your keyboard that locks input into capitols, or upper case. It shows a red light when activated, and it can cause unwanted characters if you hit it by mistake.
CENTRE prints characters on the current cursor line at the CENTRE of the screen.
Centre uthis is in the centre"
CHANGE MOUSE
alters the MOUSE pointer on screen to a predefined numbered shape of 1 (arrow),2 (crosshairs) or 3 (clock). Numbers 4 and over use Bobs.
Change Mouse shapenumber
character set
In theory, there are 256 possible characters, each with its own Ascii code between Oand 255. In practice, you can see the visible predefined character set by running this:
For C=32 To 255 : Print Chr$(C);: Next C
=CHIPFREE
returns the amount of FREE CHIP memory.
Print Chip Free
346

Glossary
=CHR$ creates a String containing one CHaRacter whose Ascii code number is specified in brackets.
s$~CHR$ (number)
CIRCLE draws an empty CIRCLE with its centre at coordinates x,y and with a radius r.
Circle x,y,r
Cli stands for Command Line Interface, which allows you to pass commands direct to Amiga DOS via the keyboard. Read your Amiga manual to learn more.
CLIP
limits all drawing operations to a specified screen area, set by your chosen coordinates.
Clip xl,yl To x2,y2
CLOSE
CLOSEs a given file number, or all files if the file number is omitted.
Close filenumber
CLOSE EDITOR CLOSEs the EDITOR window while your program is running, saving 55k of memory.
Close Editor
CLS Clears all or part of a Screen in one of three ways: completely using the current paper colour, completely using a numbered colour, or partially using a block of colour inside given coordinates.
CIs
CIs colour
CIs colour,xl,yl To x2,y2
347

Glossary
=COL tests the status of a Bob after a BOB COLlision instruction. -1 will be given if a collision has been detected with the object whose number is specified in brackets, otherwise 0 will be returned.
c=Col(bobnurnber)
COLOUR
changes a colour in the palette, by setting the strength of its Red, Green and Blue components.
Colour indexnumber,$RGB
COLOUR BACK changes the colour of the display where no screens exist (dead area).
Colour Back $RGB
command
is a word or short phrase like GET BLOCK and PLOT, used in a program asan instruction to perform a specific task. It commands the computer to do a job.
COMMAND UNE$
is a reserved variable used to transfer a set of parameters from one program over to another program. This can be used to carry over items such as a hiscore table.
Command Line$="Hi-score :+STR$ (HI_SCORE)
condition
is something that the program has to decide to be true or false before making a decision.
constants
are numbers or strings that don't change during the course of a program. They are always constant.
control codes
are special characters that do not appear on screen, but do have special actions if printed or plotted.
348
Glossary
COpy
is used to move large chunks of Amiga memory from one location to another. Set the start and finish address of the first and last bytes of your data, and then give the destination address at which your new data is to be loaded. All addresses MUST be even!
Copy start, finish To destination
=COS calculates the COSine of any angle specified in brackets.
Print Cos (angle)
cosine is the ratio of the length of the adjacent side to the hypotenuse, in a right-angled triangle.
crash is a slang expression for a computer program blowing its own brains out. If this happens, a system error message appears on screen.
cursors are indicators showing your current poSition on screen, like the small block in a line you are editing, or the mouse pointer.
cursor keys are the four direction arrow keys at the right of your keyboard, used to move the program cursor around the screen, as well as to control movement during gameplay or utilities. These movements can usually be duplicated using a mouse or a joystick.
CURS OFF CURS ON disables and enables the flashing text CURSor of the current screen, without affecting any other cursors.
349

Glossary
cut and paste is the process of cutting out a block of text, graphics or program, and saving it into memory for pasting somewhere else later on.
DATA
puts a list of DATA items into an Easy AMOS program, which can then be load<.>d into one or more variables using the READ instruction. Each item must be separated by a comma.
Data 1,2,3/Easy AMOS"
debug is the slang expression for tracking down programming mistakes known as bugs and correcting them.
=DEEK reads a two-byte word at a given even address.
Print Deek(address)
DEFFN
creates a user-DEFined FunctioN, used for the quick calculation of values. It must be given a name, followed by a bracketed list of variables separated by commas. The expression can include any Easy AMOS functions, limited to a single line of your program. (See FN).
Def Fn name(variables)=expression
DEFAULT
resets the display screen to its original DEFAULT setting of 320 pixels wide, 200 pixels high and 16 colours, and closes any other open screens.
DEGREE
uses DEGREEs for trigonometry, instead of the default setting which uses radians.
Degree: Print Sin(45)
350

Glossary
degree
In geometry, one degree is the measure of an angle equal to one 360th of the angle traced by one circular revolution of a line with one of itsends fixed to the centre of that circle. The Amiga prefers to use radians instead of degrees and one radian equals 57.296 degrees.
DEL BLOCK
DELetes specific screen BLOCKs when followed by the block's number, or deletes all current screen blocks if not qualified by a block number.
Del Block number
DEL BOB
DELetes a numbered Blitter OBject from the memory bank.
Del Bob number
DEL WAVE
DELetes any numbered sound WAVE, except 0 and 1 which are permanently programmed.
Del Wave number
DfO
is the recognised device name for calling the Amiga's internal floppy disc drive. Additional floppy drives are called Dfl, Df2 and so on.
=DFREE reveals the amount of Disc space FREE for use on the current device, in bytes.
Print Dfree
DhO
is the recognised device name for calling a hard disc drive, plugged into the Amiga. Additional hard drives and/ or partitions will be called Dh 1, Dh2 and so on. Some hard drives may have different device names, such as "work:".
DIM
DIMensions an array by defining a table of variables. The array's size (DIMension) is set by values inside brackets.
Dim variable(x,y,z)
351
Glossary
DIR
prints out the DIRectory of files held on your current disc. Here are some typical uses.
Dir "DfO:" : Rem List all files in internal drive
Dir HEasy_ Examples:" : Rem List all files on named disc
Dir "A*" : Rem List all files starting with A
Dir u*. *" : Rem List all files with an extension
DIRIW
prints out the DIRectory of your current disc in twin column Widths.
Dir /w "DfO:"
DIRECT
exits from the program and jumps to DIRECT mode. This helps with debugging.
=DIR FIRST$
gives you a string containing the name and the length of the FIRST file in the disc DIRectory.
Print Dir First$ ("*. *")
=DIRNEXT$
returns the NEXT filename in the DIRectory listing created by a DIR FIRST$ command.
F$~Dir Next$
=DIR$
creates a string which determines the name of the directory to be used as the starting point for subsequent disc operations.
s$~DIR$
DIR$~s$
352
Glossary
disc drive
refers to the spinning read -write mechanism for the saving and loading of disc data. Normally there is an internal disc drive on the right-hand side of your Arniga, and additional drives can be added by plugging them in to the correct ports of the computer. Please see DfO and DhO.
=DISPLAY HEIGHT gives the HEIGHT of your screen DISPLAY in pixels.
Print Display Height
DO acts as a marker to which a matching LOOP statement can return. To break out of such loops press [Ctrl]+[C]. .
Do : Print "forever~ : Loop
DOKE loads a two-byte number into a given address.
Doke address, value
Dos is short for Disc Operating System, the program instructions that communicate with computer discs.
DOUBLE BUFFER creates a DOUBLE screen BUFFER, as an invisible copy of the current screen. Please see SCREEN SWAP, LOGIC and PHYSIC.
DRAW draws a line between the screen coordinates that you set. Parameters can be omitted.
Draw xl,yl To x2,y2
DRAW TO draws a line from the current graphic cursor location to the new coordinates that you specify.
Draw To x3,y3
353

Glossary
DREG
is a variable used to pass infonnation to the Amiga's 68000 data registers.
d~Dreg (r)
EDIT
stops the current program and returns to the EDITor.
ELLIPSE
draws an outlined ELLIPSE at the coordinates you set, with a specified horizontal and vertical radius.
Ellipse x,y,radiusl,radius2
ELSE
chooses between alternative actions in an IE .. THEN structure.
If condition Then statementl Else statement2
END
exits from the program, followed by [Space Bar) to return to the editor, or [Escape) to jump to direct mode.
END IF
ENDs an IF condition inside a structured test.
If test : Goto Labell : Else Goto Labe12 Endif
ENDPROC
is used to mark the END of a PROCedure. Like PROCEDURE, it must occupy its own line of program.
Procedure NAME
Print "Easy AMOS!"
End Proc
=EOF
tests to see if the End Of a File has been reached, returning -1 for yes and 0 if this has not happened.
flag~Eof(channel)
354

Glossary
ERASE
deletes the contents of the memory bank whose number you specify.
Erase banknurnber
=ERRN
returns the identification Number of a programming ERRor. These numbers are catalogued in Chapter 18.
Europress Software
is possibly the most exciting, dynamic, efficient, talented and far-sighted software house in the galaxy.
=EXIST
checks to see if a file speCified inside brackets EXISTs, returning -1 for true and o for false.
Print Exist ("filename")
EXIT
jumps out of a program loop created by DO ... LOOP, FOR. .. NEXT, REPEAT ... UNTILorWHILE .. .wEND. Unless EXIT is qualified by the number ofloops required, the innermost loop is the one that will act as the jumping out springboard.
Exit loopnumber
Extra Half Bright mode
or EHB for short, is a special screen mode that allows 64 colours to appear on screen instead of the normal 32 colours, by using existing colours to generate new colours exactly half as bright as the originals.
FADE
blends one or more colours to new values, generating screen FADE effects.
Fade 15 : wait 225 : Rem Fade out all colour
Fade 15,$100,$200,$200,$300 : Rem create new palette
Fade speed To screen, mask
355

Glossary
where speed is the number of vertical blank cycles before the next colour change, screen is the number of the screen whose palette is to be faded and mask is an optional bit-pattern specifying which colours are to be changed.
=FASTFREE
returns the number of bytes of FAST memory FREE for use.
Print Fast Free
FIELD
defines a record up to 65535 bytes long, which can be used as a random access file.
Field channel, length As fieldS
file
is self-contained,computerised data that can be saved in its own named folder, just like a paper document.
FILL
is used to fill an area of memory with a four-byte FILL pattern. Setthe start and finish address of the first and last bytes of the memory block to be filled, then give the "long word" four-byte pattern which is to be copied into each group of four memory locations between the start and finish addresses. All addresses MUST BE EVEN!
Fill start To finish, pattern
=FlRE
tests the state of a joystick FIRE-button, returning -1 if a particular button number has been pressed.
x=Fire (number)
FIX
FIXes the precision of floating point numbers, set by the number of decimal points wanted, specified inside brackets.
Fix (numberdecimals) : Print Pi#
356

FLASH
FLASH OFF
Glossary
turns on and turns off a FLASHing colour sequence. The colour to be changed is set by its index number and the sequence of its colour changes, held in sets of brackets, with each new colour stored in RGB format, and colour change delays set in 50ths of a second.
FN
Flash index," (RGB,delay) (RGB,delay)" Flash Off
calls up and executes the user-defined FuNction by its name, followed by an optional variable list. (See Def Fn). Def Fn name (variable list)=expression Print Fn name (variable list)
font describes the style and appearance of the letters, numbers and symbols as they appear when printed on paper or your screen.
=FONT$ returns details about a specified design of numbers and letters known as a FONT. Each font has its own number, and details are given as a string of 38 character codes. (See Get Fonts).
a$~Font$(number)
FOR is used to kick off the repetition of a section of program FOR a specific number of times. It is used with the distance command TO and the countingcomrnand NEXT.
For x~32 To 255 : Print Chr$(x); : Next x
=FREE returns the number of bytes of FREE memory available to hold variables.
Print Free
357

Glossary
=FSEL$ Opens the Easy AMOS File SELector from where a file can be chosen directly from disc, with a search pattern set by your chosen path$. You may also choose a default file name set by default$, and optional text strings to describe a file name. All these choices must be separated by commas and held inside a pair of brackets.
f$=Fsel$(path$,default$,titlel$,title2$)
functions work on numerical values (called arguments) in order to give another value (called the result), and they are used by typing in the name of the function followed by the argument. Functions in this Easy AMOS Glossary are preceded by an equals sign, like this: =FSEL$
function keys
are the two blocks of five keys each at the top of your keyboard, from [Fl] to [FlO]. A full list of key uses can be found at the end of this Glossary.
garbage collection is the slang phrase for cleaning up and reorganising free memory in the variable area. It is usually performed automatically whenever the FREE function is called.
GET fetches a record number stored in an OPENed random access file, and loads this record into strings created by FIELD.
Get channel,recordnumber
GET BLOCK grabs a rectangular screen BLOCK number, of given coordinates from its top left-hand corner to a given width and height in pixels, and puts the block into memory. An optional mask can be created for the new block.
Get Block number,topx,topy,width,height,mask
358

Glossary
GET BOB
grabs a section from a screen of given coordinates and loads it into the Blitter Object memory bank. An optional screen number can be given before the image number.
Get Bob Screen number, image number,xl,yl To x2,y2
GET BOB PALETTE
loads all of your Blitter OBject colours to the current screen. An optional mask can be used to load a selection of these colours.
Get Bob Palette, mask
GET FONTS creates a list of all available fonts from a start-up disc.
Get Fonts
GET PALETTE
copies the P ALEITE colours from a numbered screen and loads them to the current screen. An optional mask can be used to load a selection of these colours.
Get Palette number, mask
GLOBAL defines a list of GLOBAL variables that can be accessed from anywhere inside your Easy AMOS program.
Global variable list
GOSUB
tells the program to GO to a SUBroutine, and must be qualified by a RETURN statement. If the subroutine has a place marker known as a label, the label name is always defined by tacking a colon on the end of its name.
Gosub n : Rem jump to subroutine at line n
Gosub label : Rem jump to this Easy AMOS label
Gosub e : Rem jump to label/line resulting from expr e
359

Glossary
GOTO
instructs the program to GOTOa specified new line number, label or variable.
Goto label
Gato linenumber
Gato variable
GRLOCATE
positions the GRa phicscursor at the LOCATion set by your chosen coordinates, before you start a drawing operation.
Gr Locate x,y
GRWRITING
gives a choice of four alternative GRaphics WRITING modes, qualified by a bitpattern. If Bit 0=0, only the graphics set to the current ink colour will be drawn. If Bit 0=1, new images will completely replace existing images. This is the normal setting. If Bit 1=1, new images will be combined with existing images. If Bit 2=1, all new images will be drawn in "inverse video", which means that the current ink colour will appear as the current paper colour and vice versa.
Gr writing bitpattern
Ham
is short for the Hold And Modify graphics mode, which uses 4,096 colours.
[Help]
when pressed, this key displays the function key presets in !he direct mode window.
hexadecimal
is a system of numbering using a base of sixteen instead of the usual base of ten that we call the decimal system. In hexadecimal the letters A to F are used as well as the numbers 0 to 9.
=HEX$
converts a number into the HEXadecimal system.
Print Hex$(number)
360

Glossary
HIDE
is used to HIDE the mouse pointer from your screen, depending on the number of times specified by a SHOW command.
Hide
HIDE ON ensures the mouse pointer is hidden no matter how many times SHOW is called. \
Hide On
=HIRES
sets the current screen mode to HIgh RESolution, giving a possible screen width of 640 pixelS instead of 320 pixels.
Screen Open 1,640,200,8,Hires
HOME moves your text cursor HOME to the top-left-hand corner of the current screen: in other words to coordinates 0,0.
Home
HOTSPOT sets up a reference point HOT SPOT to be used for coordinate calculations for an image that is stored in the current memory bank. A HOT SPOT can be set at given coordinates or at one of nine pre-defined Positions.
Hot Spot image,x,y
Hot Spot image, position
=HREV REVerses a Bob image by flipping it over its own Horizontal axis. Any hot spots will also be reversed.
Bob number,x,y,image number: Rem Normal image Rem Now flip this image number horizontally Bob number,x,y,HREV(image number)
361

Glossary
HREVBLOCK REVerses a numbered BLOCK of graphics by flipping it Horizontally.
Hrev Block number
=1 BOB tells you the current Image number used by a BlitterOBject whose number you specify in brackets. The result will be zero if the bob is not on current display.
Image=I Bob (number)
icon is a small graphic likeness of an object, concept, technique or message, displayed on your screen, rather like the little figure of a man or woman on public toilet doors. It is a static Bob used to decorate the background of a screen.
IF
is a conditional instruction, qualified by THEN.
If conditions Then statements
More advanced IF instructions can be set up that choose between alternative actions, using AND, OR and ELSE. ENDIF is used to terminate this sort of structured test.
If test : Goto Label : Else Gato Labe12 : Endif
iff stands for Interchangeable File Format, commonly used to pass data between computers. IFF pictures from Dpaint are a classic example.
INK defines the colour to be used by drawing operations. There are two optional parameters that you can tack on, a background colour and a border colour.
Ink colournumber,backgroundnumber,bordernumber
=INKEY$ checks to see if you have pressed a particular KEY, and returns its value in a String.
x$=Inkey$ : If x$<>"" Then Print x$
362

INPUT
loads information into one or more variables.
Input "Feed me a word"; word$
Print "Yum yum n;word$
INPUT#
Glossary
reads information from a file or a device and loads it into a set of variables.
Input# channel, variable list
=INPUT$ reads a number of characters from a file or a device.
x$~Input$(file number,character count)
INS BOB INSerts a Blitter OBject into the memory bank.
Ins Bob bobnumber
=INSTR searches out the occurrences of a string INside another STRing. Locations are returned in the form of the number of characters where the search has been successful, or a zero is returned if the string is not found.
Print Instr (Easy AMOS", "AMOS")
=INT rounds down a floating point number to the nearest whole INTeger, so that decimal numbers are changed into the nearest lower round number.
Print Int(-6.9)
integers are any numbers that can be expressed as the sum or difference of units, in other words, whole numbers like -1, 0 and 1.
363

Glossary
INVERSE OFF INVERSE ON controls the INVERSE mode that swaps text and background colours already set by PEN and PAPER commands.
Inverse On
Inverse Off
i/o
is short for input/output, and refers to the ports used by the processor for communicating with the keyboard, printers, other computers, and so on.
=JOY reads the current status of a JOYstick. Hit is in the mouse port the number 0 should be in brackets, or 1 for the other port. This joystick status is given in the form of a number with the following meanings: l=up, 2=down,4=left, 8=right, 16=fire button pressed. 0 indicates no movement.
Print Joy (portnumber)
k is the abbreviation for 'kilobyte' that is inaccurately used to represent 1,024 bytes of computer memory.
KEY SPEED changes the SPEED of KEYboard action. Lag is the time in 50ths of a second before characters are repeated while a key is held down. Speed is the delay in 50ths of a second between each successive character.
Key Speed lag,speed
keyword is a word which can have a simple meaningin English, but is recognised by the computer as having a special meaning and treated as a command to do something very precise. When a keyword is recognised in your programming, it is automatically given a capital letter and proper spacing in your program listing. So it is quite safe to type your instructions in lower case letters, and let Easy AMOS sort out the capitals and spacings.
364

Glossary
KILL
erases a file from the current disc. Forever!
Kill filename$
label
is used as a place marker at the side of a line of program. Label names can consist of any characters you want, but they must be identified by tacking on a colon at their end. There must be no space before the colon.
labelname:
=LACED sets the interLACE modeof your screen, in the same way that HIRES operates.
Screen Open O,320,400,64,Laced
LED OFF
LED ON
has two effects. It toggles a high fequency sound filter off and on, as well as the power Light on the computer.
Led Off
Led On
=LEEK reads a four-byte word stored at the even numbered address specified inside brackets.
Print Leek (address)
=LEFT$ shows you a specified number of characters at the LEFT hand end of a String.
Print Left$ ("Easy AMOS", 4)
A$~"Hard" : Left$ (A$, 4) ~"Easy"
=LEN reads the LENgth of a string and tells you this number in characters.
Print Len ("1234567890")
365

Glossary
=LENGTH tells you the LENGTH of a memory bank in bytes. If it contains Bobs, then the number of Bobs in the bank will be given instead. You have to put the number of the bank inside a pair of brackets.
Print Length(banknumber)
LIMIT BOB restricts the visibility of a numbered Blitter OBject to the LIMITs of a rectangle on screen. You set up the size of this rectangle by giving its coordinates.
Bob 1,100,100,1
Limit Bob number,xl,yl To x2,y2
LIMIT MOUSE
restricts the MOUSE movements to the LIMITs of a given rectangle on screen. You set up the size of this rectangle by giving its coordinates.
Limit Mouse xl,yl To x2,y2
LINE INPUT
INPUTs a list of variables one at a time, using the [Return] key to enter them separately. This is instead of the comma used in INPUT commands.
Line Input "Enter three numbers"; A, B, C
Print A,B,C
LINEINPUT#
INPUTs a list of variables one at a time from the device opened to #channel, separated by any character you want, instead of the normal comma.
Line Input #channel,separator$,variable list
line numbers
All lines in a computer program have their own physical number. Easy AMOS provides clear messages to tell you which numbers are involved at every stage of your programming. You can also create your own line numbers to act as Labels.
366

Glossary
USTBANK provides a detailed LISTing of the memory BANKs currently reserved. The following information will be shown about each bank: its number, the type of bank it is, its start address in hexadecimal and its length, also in hexadecimal.
List Bank
LOAD LOADs a file of one or more memory banks. An optional destination bank number can be given.
Load "filename" ,number
LOAD IFF LOADs an IFF format graphic to your current screen. If you want to choose an alternative destination screen, simply give its number after the filename.
Load Iff "filename", screen number
LOCATE moves the text cursor to the LOCATion of whatever coordinates you choose. Because you are moving a text cursor, set the location in charactercoordinates and not pixel coordinates.
Locate x,y
=LOF returns the Length of an Open File.
length=Lof(channel)
=LOGBASE returns the address of one of the six possible bit-planes making up the current LOGical screen. The number of the bit-plane you want to find must be inside a pair of brackets. If the plane does not exist, a zero will be returned.
address=Logbase(planenumber)
367

Glossary
=LOGIC tells you the identification number of the LOGICal screen.
Print Logic
LOKE copies a four-byte number into an address.
Loke address, number
LOOP acts as the partner to a DO command, creating a repetitive LOOP.
Do
Print "Eternity"
Loop
=LOWER$ converts all the characters in a string to LOWER case.
Print Lower$ ("Easy AMOS")
=LOWRES sets a screen to LOW RESolution mode. The maximum width of such a screen is 1024 pixels (0 to 1023).
Screen Open O,320,200,16,Lowres
LPRINT
sends a List of variables to a PRINTer instead of the screen.
Lprint"Print me on a printer"
machine code
is a set of instructions used by a microprocessor chip, and programs can be written directly to it in 'assembly language'. Easy AMOS is much more convenient.
368

Glossary
=MAX
compares expressions madeup of strings,integersor real numbers, and shows you the one with the MAXimum value.
Print Max(variablel,variable2)
memory bank
is a section of memory dedicated to a special purpose. Easy AMOS uses 15 memory banksforvariouspurposesinciudingBobs,icons,music,soundsamples,menus, work and data.
menus
for computers are the same as menus for restaurants, providing a list of options displayed on your SCreen from which you can make a choice.
=MID$
returns a string of characters from the MIDdle of a String, set by the number of characters offset from the start, followed by the number of characters to be fetched.
Mid$(A$,position,numbercharacterS)=B$
=MIN
compares expressions made up of strings, integers or real numbers, and returns the one with the MINimum value.
Print Min$(variablel,variable2}
MKDIR
MaKes a new DIRectory folder.
Mkdir folder$
modem
is the abbreviation for MOdulator DEModulator, a device for sending data between computers by squirting it down telephone lines.
=MOUSEKEY
reads the status of the MOUSE KEY buttons, and tells you the result in the form of a bit-pattern. BitO=I meanstheleftbuttonhasbeenpressed,bitO=Omeanstheleftbutton has not been pressed. Bit 1 uses the same system for the right mouse button.
369

Glossary
=MOUSE SCREEN
checks to see which SCREEN the MOUSE pointer is currently occupying.
screen number=Mouse Screen
=MOUSEZONE checks to see which screen ZONE number the MOUSE pointer is currently sitting in.
zone number=Mouse Zone
MUSIC starts playing the piece of MUSIC whose number you call up.
Music number
MUSIC OFF switches OFF all MUSIC.
Music Off
MUSIC STOP STOPS the current MUSIC and starts up any other music that is still active.
Music Stop
MVOLUME sets the Music VOLUME by giving it a number from 0 for silent up to 63 for very loud.
Mvolume number
nesting is the process of placing one or more program blocks inside each other, using indentation to mark the blocks in your program listing.
NEXT
is the counting command that partners FOR, to repeat a section of program a specific number of times.
For x=l To 100 : Print "Easy" : Next x
370

Glossary
NOISE TO assigns white NOISE TO a voice of your choice.
Noise To voicenumber
NO MASK removes the mask from a numbered Bli tterOBject. Without a mask, the Bob's entire image will be displayed on screen, including any transparancies.
No Mask bobnumber
=NOT swaps over all binary digits from 1 to 0, and vice versa. This acts as a logical NOT, where Not(True)=False.
A~Not(%binarynumber)
=NTSC reports back which mode Easy AMOS is running from. 0 means PAL is active and -1 means NTSC is running.
OPEN IN OPENs a file for INput identified via channels 1 to 10.
Open In channeinumber,filename$
OPEN OUT OPENs a file for OUTput, identified via channels 1 to 10.
Open Out channelnumber,filename$
OPEN RANDOM OPENs a RANDOM access file on the current disc. You must define the records that will be used in the random access file with the FIELD command.
Open Random channelnumber,filename$
ON is used to jump to a particular linear procedure, depending ON the occurrence of a variable.
On variable Goto label,label ...
371

Glossary
ON ERROR ON ERROR PROC either can be used to detect and trap an ERROR without having to return to the editor window.
On Error Gate label
On Error Proe name
origin is the term used for the screen graphic coordinates 0,0
PACK compresses and PACKs a whole screen into a numbered memory bank. Sections of the screen can be specified by optional coordinates of the top lefthand corner and bottom right-hand corner.
Pack screennumber To banknumber,xl,yl,x2,y2
PAINT fills an area around coordinates x,y with a colour or pattern. If a mode of ° is selected, PAINTing stops wherever the current border colour is found. If 1 is selected, PAINTing stops at any pixel different from the current INK colour.
Paint x,y,mode
Pal is short for Phase Alternation Line, the common television standard in the UK and Europe, using 625 lines.
PALETTE
sets any combination of current screen colours from the available PALETTE. Colours are made up using hexadecimal notation, making it easier to define the RGB of a colour.
Palette $RGB,$RGB,$RGB
PAPER
sets the colour you choose by its identity number as the background PAPER for your text PEN.
Paper colournumber
372
Glossary
parameter
refers to a value that is always the same, used for sending data to and from procedures. Many commands also need parameters to complete their tasks.
=PARAM
=PARAM#
=PARAM$
tells you what the resulting PARAMeter is, after the most recent procedure has been completed.
A#=Param#
PASTE BOB
gets the image whose number you call from the B1itter OBject memory bank, then PASTEs the Bob at the screen coordinates you set.
Paste Bob x,y,irnagenumber
=PEEK
tells you what 8-bit byte is stored at the address you request in brackets.
B=Peek (address)
PEN
sets the colour of the PEN to be used for writing text in the current screen from one of 64 alternative colours, depending on your current screen mode.
Pen colournurnber
=PHYBASE
tells you the address of the bit-plane number you request in brackets, for the current screen. If the plane does not exist, a value of zero will be given.
address=Phybase(planenumber)
=PHYSIC
tells you the identification number for the current PHYSICal screen.
I=Physic
373

Glossary
=PI# returns the number PI that is used to show the ratio of the diameter of a circle to its circumference.
Print pi
pixel
is a bad abbreviation for PIcture ELement, which is the single addressable dot on a screen display.
PLAY PLAYs a note or waveform with your selected pitch and delay. You can also give an optional combination of voices.
Play voice, pitch, delay
PLOAD reserves the memory bank whose number you call up and LOADs it with machine code.
Pload "filename",banknumber
PLOT
draws a point in the current ink colour at your choice of coordinates. If you want, a new colour can be specified, which will be used for this and all further drawing operations.
Plot x,y,colour
POF changes the reading or writing POsition of a File.
Pof(channelnumber)=position
=POINT tells you the colour index of a POINT at the coordinates you want.
Plot 100,100
Print "The colour at 100,100 is ";Point(100,100)
374

Glossary
POKE shoves a byte represented by a number in the range from 0 to 255 into the add ress you select.
Poke address, number
POLYGON draws a filled POLYGON,or many sided shape, of the current ink colour. The shape of the polygon is set up by any number of screen coordinates.
Polygon xl,yl To x2,y2 To x3,y3 To ...
POPPROC is used if you have to POP out of a PROCedure in a hurry.
Pop Proe
PRINTs items on screen, made up from any groups of variables or constants separated by semi-colons or commas. As a short-cut, the [?] character key can be used instead of PRINT.
Print variable list
? variable list
PRINT# PRINTs a list of variables to a file or to a device that you select by a channel number.
Print #channel,variable list
PRIORITY OFF
PRIORITY ON
changes between Blitter OBject PRIORITY modes. Normally, Bobs barge in front of any objects with a lower Bob number, but PRIORITY ON gives the greatest priority to objects with the highest y coordinates on screen.
375

Glossary
PRIORITY REVERSE OFF
PRIORITY REVERSE ON
toggles the REVERSE effcctof the PRIORITY command for the display of Bobs on screen. PRIORITY REVERSE OFF is the normal mode, but by turning it ON Bobs with the lowest y coordinates will appear in front of those with highery coordinates.
PROCEDURE
creates an Easy AMOS PROCEDURE, identified by a string of characters which make up its name.
Procedure NAME
procedures make programming easier. They are specially created stand-alone program chunks that perform a task without affecting the main program.
program
is simply a collection of commands used to instruct the computer.
PUT
takes a record from memory and PUTs it into a selected record number of a random access file, using your choice of channel number.
Put channelnurnber,recordnumber
PUT BLOCK
copies a numbered graphic BLOCK and PUTs it on the screen at its original position, unless you change the position by adding new coordinates.
Put Block number,x,y
radian
In trigonometry, a radian is the angle subtended by an arc whose length is equal to the radius of a circle. This angle is formed by two radii of a circle that cut off an arc on the circumference that is equal in length to the radius. One radian is equal to 57.296 degrees. The Amiga prefers to use radians instead of degrees, but you can change that with the DEGREE command.
376

Glossary
RADIAN makes sure that all future angles must be entered using radians if you have previously specified DEGREEs.
Radian
=RAIN changes the colour of a line in a RAINbow to any chosen value. The number of the rainbow and the scan line you want to change should be inside brackets.
A=Rain(number,line)
RAINBOW creates a numbered RAINBOW effect, with a base colour created by SET RAINBOW. The coordinate y gives the vertical position followed by the height in scan lines.
Rainbow number,base,y,height
RAINBOW DEL DEletes all RAINBOWs already set up. If you add a rainbow identi tynurnber, then only that number rainbow will be erased.
Rainbow Del number
READ READs information from a DATA statement into a list of variables, using a special marker to locate the next item of data to be read. Variables must be the same type as the data already held at the current position in the program, and as usual, variables are separated by commas in the list.
Read list of variables
REM is a little REMark statement included in your programs that helps you REMember something. The text you use after a REM statement is ignored by the program. The apostrophe character can also be used instead of REM.
Rem This is where I hid myoId socks data , And this is a rem statement too
377

Glossary
RENAME
changes the name of a file.
Rename old$ To newS
REPEAT
is used to kickoff a program loop that REPEATs UNTIL a condition issatisfied.
Repeat
list of statements
Until condition
REQUEST OFF
does not allow the system to display any little screens that pop up in front of the current screen and REQUEST you to perform some sort of action, like inserting a disc.
Request Off
REQUEST ON
is the normal or default REQUESTer mode, where a small screen appears over any other screen, and displays a message requesting you to do something.
Request On
RESERVE AS CHIP DATA
sets aside the required length of bytes from CHIP ram in the memory bank you select.
Reserve As Chip Data banknumber,length
RESERVE AS CHIP WORK
allocates a WORKspace of the required length of bytes using CHIP ram in the selected memory bank.
Reserve As Chip Work banknumber,length
378

Glossary
RESERVE AS DATA
RESERVEs a permanent bank of memory of the required length of bytes.
Reserve As Data banknumber,length
RESERVE AS WORK
RESERVEs the required length of bytes for temporary WORKspace in the memory bank you select.
Reserve As Work banknumber,length
RESERVE ZONE RESERVEs enough memory for the number of detection ZONEs you want, before you define them using SET ZONE. If you leave out the number of zones, all current zone definitions will be wiped out.
Reserve Zone number
reserved variables
perform specific programming tasks already set up within Easy AMOS, such as TIMER and X MOUSE.
RESET ZONE erases all screen ZONEs previously SET. By adding individual zone numbers, only those numbered zones will be wiped out.
Reserve Zone number
RESTORE changes the point where the next READ operation can find a DATA statement, for labels and line numbers you have created (not the physical line numbers of the program).
Restore label
Restore number
RESUME goes back to the statement that caused an error, after it has been dealt with by one of your ON ERROR routines. If you specify a line number or label after RESUME, the program will jump to that point.
Resume linenumber
Resume label
379

Glossary
RESUME LABEL
tells the program to jump to a label after an error.
Resume Label labelname
RETURN exits from a subrou tine and RETURNs to the next Easy AM OS instruction after the original GOSUB. A Gosub statement can have more than one Return command at different places in the routine.
Return
=REV
REVerses a Bob image completely, by flipping it over its own horizontal axis and vertical axis. Any hot spots will also be reversed.
rgb
Bob number,x,y,image number: Rem Normal image
Rem Now flip this image number completely
Bob number,x,y,REV(image number)
is the abbreviation for the system of coloured dots that make up any colour on your screen by combining Red, Green and Blue in various proportions.
=RIGHT$ displays the number of characters you ask for taken from a string, counting from the right-hand side of that string.
Print Right$(A$,numbercharacters)
Right$(A$,numbercharacters)=B$
=RND
generates a RaNDom integer between zero and the number that you choose, placed in brackets. If the number is zero, the previous random number will be reported back.
x=Rnd (number)
380

Glossary
RUN RUNs the current Easy AMOS program from direct mode. If it is followed by a file$, it can be placed inside your program to allow programs to be chained together.
Run file$
SAM BANK assigns a new numbered SAMple memory BANK for use in your program.
Sam Bank number
SAM LOOP OFF SAM LOOP ON disables and enables the SAMple LOOP instruction to repeat all subsequent SAMples continuously.
Sam Loop Off Sam Loop On
SAM PLAY PLAYs the numbered sound SAMple you select. You can also make choices for voices and speed frequency, but you don't have to. Each voice to be played is selected by its bit-map set to 1, and the frequency of playback speed is requested in samples per second ranging from about 4000 for noises up to 10000 or more for speech and music.
Sam Play voice,samplenumber,frequency
SAM RAW plays a sound SAMple from anywhere in memory. Each voice to be played is set by a standard bit-pattern. The addressof the sample is then given, followed by the length of the sample to be played, then its frequency of playback speed in samples per second.
Sam Raw voice, address, length, frequency
381

Glossary
SAMPLE goes to the sample memory bank and assigns the SAMPLE whose number you select to the current sound wave. A range of voices is selected with the standard bit-map format.
Sample number To voices
SAVE SAVEs all memory banks onto disc. If an optional bank number is specified, only that bank number will be saved.
Save "filename.abk",number
SAVE IFF SAVEs the current graphic screen as an IFF picture onto disc. A compression code can be used as an option for compacting the screen before it is saved. This code is set to zero to save the screen as it is, or set to 1 to use the standard file compression system for saving memory.
Save Iff "filename~,compressioncode
SAY commands your Amiga to speak!
Say speech$
=SCANCODE returns the SCANCODE of the last key-press recognised by INKEY$. As well as character keys, this function can also check for keys like [Help] and [Tab].
s=Scancode
scancode is the numeric identity code carried by each different keypress on your keyboard.
SCREEN
sets up the SCREEN whose number you choose, and uses it for graphics and text operations, whether or not that screen is currently displayed.
Screen number
382

Glossary
=SCREEN BASE tells you the BASE address of the SCREEN table that is used to hold a list of dimensions and statistics about your Easy AMOS screens.
table=Screen Base
SCREEN CLONE makes an exact CLONEd copy of the current SCREEN and gives this new copy the screen number of your choice.
Screen Clone number
SCREEN CLOSE erases the numbered SCREEN you specify and frees up its old memory so that it can be used again.
Screen Close number
SCREEN COpy makes COPies of chunks of your screen. The first screen number you select holds the source image, and the second one is the number of the destination screen. You can also use the optional coordinates of xl,yl and x2,y2 for the rectangular source chunk of graphics, and x3, y3 for the top left-hand coordinates of the destination position. Finally, you can include a copying mode to be used.
Screen Copy screenl,xl,yl,x2,y2 To screen2,x3,y3,mode
SCREEN DISPLAY sets up the position of your graphic DISPLAY on the SCREEN number you choose. You can use optional x,y coordinates as well as setting the width and heigh t of the screen in pixels.
Screen Display number,x,y,width,height
SCREEN IflDE temporarily HIDEs the current SCREEN. If you follow the instruction with a screen number, then that screen becomes hidden.
Screen Hide screennumber
383

Glossary
SCREEN OFFSET
changes a screen's top-left position by setting a new origin with the OFFSET coordiantes x and y. This allows oversized screens to be scrolled into view.
Screen Offset number,x,y
SCREEN OPEN
OPENs a SCREEN with a number from 0 to 7 and reserves memory for its use. The wid th and height of the screen is set in pixels, followed by the number of colours you want to use, then your choice of screen mode of zero for low resolution, $8000 for high resolution and 4 for interlaced screens.
Screen Open number,width,height,colours,mode
SCREENSHOW
is used to SHOW a SCREEN that has been hidden with a previous SCREEN HIDE instruction.
Screen Hide number
SCREEN SWAP
SWAPs the display between the current logical and physical SCREENs. You can specify another screen number if you want.
Screen Swap number
SCREEN TO BACK
moves the current SCREEN to the display BACKground. You can specify another screen number to be moved if you want.
Screen To Back number
SCREEN TO FRONT
moves the current SCREEN to the FRONT of the display. You can specify another screen number to be moved if you want.
Screen To Front number
384

Glossary
SET BOB
SETs the drawing mode for drawing a Blitter OBject on screen. First select the number of the bob you want to affect, then choose the state of the background, followed by a bit-map of the screen planes in which the bob will exist. Finally specify if a mask is to be used.
Set Bob number,background,screenplanes,mask
SET BUFFER
SETs the size of the BUFFER that holds your variables to a selected number of kilobytes of memory.
Set Buffer number
SET CURS
alters the shape of the CURSor by changing the bit-patterns L1 to LB.
Set CUrs Ll,L2,L3,L4,L5,L6,L7,L8
SETDIR
controls the style of the DIRectory listing, by setting the number of characters to be displayed from 1 to 100, followed by optional pathnames to be filtered out of directory searches.
Set Dir number,filter$
SETENVEL
changes the volume of a sound ENVELope with the following parameters: the number of the waveform, a phase number from 1 to 6, the duration of the current step set in 50thsof a second and the volume at the end of the phase from o to 63.
Set Envel wave,phase To duration, volume
SET FONT
selects the character FONT number to be used by the next TEXT command. You should create your font list using GET FONTS, before you choose a font setting.
Set Font number
385

Glossary
SET INPUT SETs the characters you want to INPUT to end a line of data. Many computers need both a [Return) and [line feed] character at the end of each line, but the Amiga only needs a [line feed). Make your setting by choosing two ASCII values as your end-of-line characters, or make the second value a negative number if you only want to use a single character.
Set Input 10,-1 Rem Standard Amiga format
Set Input 13,10 : Rem ST compatible format
SET LINE SETs the appearance of all straight LINEs to be drawn using DRAW and BOX. A mask must be set after SET LINE in the form of a 16-bit binary number, anywhere between 0 and 65535.
Set Line %1111000011110000
Set Line %1111111111111111
SETPAlNT
Rem Dotted line
Rem Normal line
SETs the outline mode for shapes drawn using BAR and POLYGON. A mode value of 1 creates a border line of the last INK colour, and a value of zero turns the outline off again.
Set Paint modenumber
SET PATTERN
SETs the PATTERN to be used for filling shapes that you draw, by choosing a pattern number. A value of zero is the normal setting, which completely fills shapes with the current INK colour. If the pattern number is greater than zero, one of the Easy AMOS built-in patterns is used. If it is less than zero, a clipped version of one of your Bobs will be adapted as your fill pattern.
Set Pattern number
SET RAINBOW SETs up a RAINBOW for later display. You must give your new rainbow an identity number from 0 to 3, followed by the colour you want to change using the rainbow. Then set the size of the length of your colour index table in the range 16 to 65500. Finally, give the red, green and blue intensities a value in their own strings.
Set Rainbow number,colour,length,r$,g$,b$
386

Glossary
SET TALK
SETs the style of synthetic speech used with the SAY command. First choose your sex, with a setting of 1 for female or zero for male. Then set the rhythm mode with 1 for on or zero for off. Next you should setthepitch of speech from a low of 65 to a high of 320. Finally, give the rate of speech in words per minute between 40 and 400.
Set Talk sex,ffiode,pitch,rate
SET TEXT
selects the style of TEXT font from a choice of ° for underlined, 1 for bold and 2 for italic.
Set Text stylenumber
SET WAVE
defines the sound of a WAVEform. Waves ° and 1 are permanently set,so start new wave numbers from 2 upwards, then set the shape of the waveform from a list of 256 numbers in a shape$.
Set Wave number,shape$
SET ZONE SETs upa rectangular screen ZONE for testing by ZONE commands. Set your zone by giving it an identity number and then set its coordinates.
Set Zone number,xl,yl To x2,y2
=SGN finds the SiGN of a number, giving a result of -1 for negative, ° for zero or 1 if the number is positive.
s=Sgn(number)
s=Sgn (numbed)
SHOOT
triggers a sound like a cockroach slamming a door. Shoot
387

Glossary
SHOW SHOWs a previously hidden mouse pointer on the screen, whenever the number of SHOWs becomes greater than the number of HIDEs already programmed.
Show
SHOW ON immediately SHOWs a hidden mouse pointer on screen, no matter how many HIDEs have been commanded.
Show On
=SIN calculates the SINe of an angle, resulting in a floating point number.
a~sin(angle)
sine
is the ratio of the length oftheopposite side to that of the hypotenuse, ina rightangled triangle.
SPACK
performs a Screen PACK and saves it into a memory bank. Graphics, modes and all location details are saved in a compressed package, to be unpacked exactly as they were. Give the screen its identity number, followed by the number of the destination memory bank. You can also include optional coordinates to select a part of the screen area to be packed, by including the top right-hand x,y and the bottom left-hand x,y coordinates.
Spack screennumber To banknumber,xl,yl,x2,y2
=SQR calculates the SQuare Root of a number, that is the number that when multiplied by itself results in the number you have selected in brackets.
a#~Sqr (number)
stack
refers to a number of data items 'stacked' in order of usage, with a specific purpose in a computer program.
388

Glossary
=START gives the START address of the memory bank number you place inside a pair of brackets. If the bank contains Bobs, then the number of Bobs is returned.
Print Start(banknumber)
STEP controls the size of any STEPs inside a FOR .. NEXT loop. Normally steps are counted off in units of one at a time, but you can choose any number you want for the size of step.
For x=firstnumber To lastnumber STEP stepnumber
=STR$ converts a number into a STRing. This is handy for use with certain functions that do not allow numbers to be used as parameters, such as CENTRE.
a$~Str$(number)
=STRINGS$ creates a new string made up of as many copies as you want of the first character in an existing string. Just put the original string followed by the number of characters in the new string inside a pair of brackets.
Print String$(c$,numbercharacters)
syntax error in Easy AMOS is similar to making mistakes in the English language when the rules grammar of speeling or:, punctuation am broken. AMOS will always point out a syntax error and try to explain what has gone wrong and where the problem lies.
SYSTEM is used to quit the Easy AMOS SYSTEM if you have clicked on the quit icon, and return to the workbench. If the Easy AMOS disc has already been booted, then SYSTEM will quit Easy AMOS and leave you with a blank screen.
System
389

Glossary
=TAN calculates the TANgent of an angle.
a~Tan(angle)
tangent is the ratio of the length of the opposite side to that of the adjacent side in a right-angled triangle. In other words, the ratio of sine to cosine.
TEMPO changes the speed or TEMPO of a curr~nt piece of music, from 1 (lentissimo) to 100 (presto furioso.)
Tempo speed
TEXT
prints a TEXT string at your choice of coordinates on screen.
Text x,y,t$
=TEXTBASE tells you the position in pixels of the current BASEline for the TEXT font you are using.
b~Text Base
=TEXT LENGTH
tells you the LENGTH of a section of a graphic TEXT character string, giving its width in pixels.
w~Text Length(t$)
=TEXTSTYLE tells you the current TEXT SlYLE set up by SET TEXT.
s~Text Style
390

Glossary
THEN acts as a partner to an IF in a logical choice between alternative actions.
If condition Then statement
TIMER
is a reserved variable that counts off TIME in units of one 50th of a second.
t=Timer
TO
sets destinations or distances in certain commands.
Screen Copy 1 To 2
Set Zone l,xl,yl To x2,y2
Wave 1 To %0001
TRACK LOAD
loads a Tracker sound module into the memory bank number of your choice, erasing any existing data in this bank number before loading the new data. The new bank will be called "Tracker". Bank number 6 is used as a default. Normal Easy AMOS sound commands should NOT be used while Tracker music is being played.
Track Load "modulename",banknumber
TRACK LOOP OFF
turns off a looping Tracker module.
TRACK LOOP ON
causes the current Tracker module to loop.
TRACK PLAY
starts Tracker music playing. Give this command, followed by the appropriate bank number. If the bank number is omitted, 6 is used as a default. A pattern number can also be added as a starting point from which the Tracker module is to be played.
Track Play, banknumber,patternnumber
391

Glossary
TRACK STOP Stops any Tracker music currently being played.
TUTOR calls up the Easy AMOS Tutor, and can be used from the Editor or in Direct Mode.
UNPACK decompresses or UNPACKs a compacted screen in one of three ways. It can open a screen and restore its image from a selected memory bank, or unpack a screen at its original position, or unpack an image and redraw it starting at your choice of coordinates.
Unpack banknumber To screennumber
Unpack banknumber
Unpack banknumber,x,y
UNTIL keeps a REPEAT loop going UNTIL a condi tion has been satisfied.
Repeat
list of statements
Until condition
=UPPER$
converts a string of text into nothing but UPPER case characters.
a$=Upper$ (b$)
USING
is always used after PRINT for making subtle changes to the way output is printed from a variable list. Special characters can be used in a forrnat$, each one having a different effect. These characters are listed at the end of the Glossary, along with their effects.
Print Using format$ivariable list.
392
Glossary
=VAL converts a list of decimal digits stored in a string into a number VALue.
x~Val (v$)
variables
are the names given to identify the values that result from calculations made by computer programs. Variable names can be up to 255 characters long. they must begin with a letter and although they cannot contain any spaces they are allowed to contain the underscore character "_" instead. There are three types of variables used in Easy AMOS, integers, real numbers and string variables.
=VARPTR tells you the address of a VARiable in memory.
address~Varptr(variable)
vdu stands for Visual Display Unit, and generally refers to any unit housing a screen for displaying computer generated images.
VOICE gets one or more voices ready to perform, by setting its individual bit mask to 1.
voice %1111 : Rem Activate all four voices
voices Four voices are used to play sound. Each voice to be selected must have its associated bit set to 1. The standard bit-map is as follows:
BitO-> voice 0
Bitl-> Voice 1
Bit2-> Voice 2
Bit3-> Voice 3
393

Glossary
VOLUME changes the VOLUME of sounds to be played from an intensity of 0 for silent up to 63 for very loud. You can select which voices are to be affected if you want, by setting their individual bits to 1, otherwise they will be unaffected.
Volume voices, intensity
volume is the name created to identify each individual disc. A volume label can be used instead of a drive name with Easy AM OS commands, and if it is not found a "Pleaseinsertvolume··messagewillbereported. New discs are automatically given the name '·Empty", and you can enter a new volume name by choosing the [Rename] option. You are strongly advised to give each of your discs a different name to avoid confusion. Volume names must end with a colon character like this:
MY PROGRAMS:
=VREV REVerses a Bob image by flipping it over its own Vertical axis. Any hot spots will also be reversed.
Bob nurnber,x,y,image number: Rem Normal image
Rem now flip this image number vertically
Bob nurnber,x,y,VREV(imagenumber)
VREVBLOCK
REVerses a numbered BLOCK of graphics by flipping it Vertically.
Vrev Block number
=VUMETER tests the volume of a single voice number from 0 to 3, giving a result from 0 for silence up to 63 for as loud as possible.
intensity~Vumeter(voicenumber)
394

Glossary
WAIT
pauses an Easy AMOS program and makes it WAIT for the number of SOths of a second you specify.
Wait x
WAIT KEY
WAITs for a single KEY to be pressed before acting.
Print "Press a key" : Wait Key : Print "Thank youH
WAITVBL
stops and WAITs until the next Vertical BLank period, the 50th of a second it takes to update a screen. This is ideal for synchronising animation and screen swaps.
Wait Vbl
WAVE
assigns the wave number you select to one or more sound channels. Set the bit pattern of any voices to be used to 1.
Wave number To voices
WlflLE ... WEND
marksthebeginningandendofaloopusedtorepeatasectionofyourprogramWHJLE a'condition remainstrue. Iftheconditiondoesnotresultina valueof-1 for'true", then the loop will be stopped, and the program will go on to the next insruction. You can include AND, OR and NOT structures in your conditions.
While condition
list of statements
Wend
x-axis, y-axis
are nominal reference lines used in trigonometry and certain graphic displays, running through an image from side to side (the x-axis) and from topto bottom (the y-axis).
395

Glossary
=XBOB tells you where the X coordinate is on the current screen of the Blitter OBject whose number you put inside brackets.
xl~X Bob(number)
x-coordinate, y-coordinate are the pair of coordinates that locate an exact point on your screen. X is the distance from the left-hand side of the screen, and y is the distance from the top of the screen.
=XCURS tells you where the X coordinate is of your text CURSor, in text format.
x=Xcurs
=XHARD
converts an X coordinate relative to the current screen into a HARDware coordinate. If an optional screen number is given, then all coordinates will be relative to that screen.
x=Xhard(screen number,xcoordinate)
X MOUSE tells you the hardware X coordinate of the MOUSE pointer. If you give XMOUSE a value then this function can also be used to move the mouse to a specific screen position.
Xl~X Mouse Mouse=Xl
=XSCREEN
converts a hardware X coordinate into a current SCREEN coordinate. If you include an optional screen number inside the coordinate brackets then the coordinate will be relative to that numbered screen.
x=X Screen(screennumber,xcoordinate)
396

Glossary
=XTEXT
converts an X coordinate from graphic format into a TEXT format coordinate, relative to the current screen. If the screen coordinate is outside of this screen then a nega ti ve result will be gi ven.
t=x Text (xcoordinate)
=YBOB
tells you where the Y coordinate is on the current screen of the Bob whose number you put inside brackets.
yl~Y Bob (number)
=YCURS
tells you where the Y coordinate is of your text CURSor, in text format.
y=Ycurs
=YHARD
converts a Y coordinate relative to the current screen into a HARDware coordinate. If an optional screen number is given, then all coordinates will be relative to that screen.
y=Yhard(screennumber,ycoordinate)
YMOUSE
tells you the hardware Y coordinate of the MOUSE pointer. If you give YMOUSE a value, then this function can also be used to move the mouse to a specific screen position.
Yl~Y Mouse
Y Mouse=Yl
=YSCREEN
converts a hardware Y coordinate into a current SCREEN coordinate. If you include an optional screen number inside the coordinate brackets then the coordinate will be relative to that numbered screen.
y=Y Screen(screennumber,ycoordinate)
397

Glossary
=YTEXT converts a Y coordinate from graphic format into a TEXT format coordinate, relative to the current screen. If the screen coordinate is outside of this screen then a negative result will be given.
t=y Text (ycoordinate)
=ZONE tells you the number of the current screen ZONE at the graphic coordinates that you specify inside brackets. You can include an optional screen number if you wish.
n=Zone(screennumber,x,y)
ZOOM magnifies or reduces a section of the screen by ZOOMing in or out. You must specify the number of the source screen from which the picture is to be taken, followed by the coordinates for the top left and bottom right-hand corners of the original picture area. Then say what screen number is to be used as the destination of the new image, followed by the coordinates for the new size of the picture.
Zoom sQurce,xl,yl,x2,y2 To destination,x3,y3,x4,y4
398

Glossary
SYMBOLIC CHARACTERS: The following symbols have specific meanings when used within an Easy AMOS Basic program, which may be different from their meanings in conventional English or mathematical notations.
+ the plus character [Shift]+[;] is used as in standard mathematical notation.
Print 2+2
With PRINT USING, it adds a plus sign to a positive number or a minus sign if the number is negative.
Print Using "+##"; 10
the minus character is used as in standard mathematical notation. Print 2-1
With PRINT USING, it gives a minus sign to negative numbers only. Print Using "-##"; -10
* the asterisk or star character [Shift]+[8] is used instead of the "multiply by" symbol in standard mathematical notation.
Print 2*2
Inside quotation marks, this character can be used as a "wild card", meaning "I am sitting here waiting to be replaced by another character."
A$="**** AMOS"
In a directory search, this character is used to mean "I am waiting to match up with any list of filename letters up to the next control character.'
Dir "A*. *" : Rem List all files starting with A
399
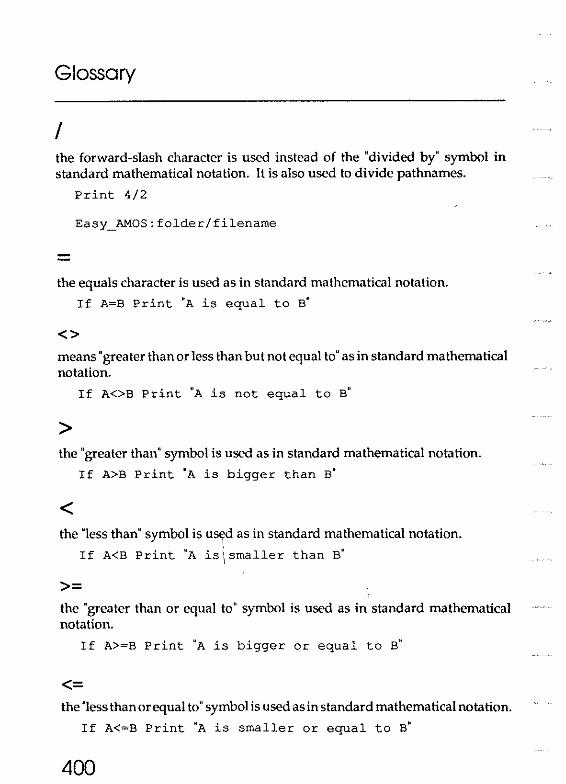
Glossary
/ the forward-slash character is used instead of the "divided by" symbol in standard mathematical notation. It is also used to divide pathnames.
Print 4/2
Easy_AMOS: folder/filename
the equals character is used as in standard mathematical notation.
If A=B Print "A is equal to B"
<> means "greater than or less than but not equal to" as in standard mathematical notation.
If A<>S Print "A is not equal to S"
> the "greater than" symbol is used as in standard mathematical notation.
If A>S Print "A is bigger than S"
< the "less than" symbol is u~d as in standard mathematical notation.
If A<B Print uA is \ smaller than B~
>= the "greater than or equal to" symbol is used as in standard mathematical notation.
If A>~S Print "A is bigger or equal to S"
<= the "less than or equal to" symbol is used as in standard mathematical notation.
If A<~S Print "A is smaller or equal to S"
400

Glossary
1\
the circumflex or exponential character [Shift] +[6] is used to mean "raise to the power of".
Print 5'5
With PRINT USING it causes a number to be printed out in exponential form.
Print Using "This is an exponential number""; 123.45
% theper-centum character [Shift]+[5] precedes numbers given in binary nota tion.
%11111111
# the hash or number character follows a real number variable.
PIt
With PRINT USING it specifies one digit at a time to be printed out from a given variable, with any unused digits being replaced by spaces.
Print Using "#H"; 123456
()
the round brackets characters [Shift]+[9] and [Shift]+IO] act as conventional brackets in numerical expressions.
Print (2+2)*3
the underscore character [Shift]+[-] is used instead of spaces in a file name.
Load "File narne~
, the apostrophe character can be used instead of REM.
'You must remember this a kiss is just a kiss
401

Glossary
II
double quotation marks are used to enclose strings.
• •
A$="This is a string of characters ft
the colon character [Shift]+[;] is used to separate commands in a line of program.
Boom : Wait 100 : Print "Pardon me"
The colon is also used to define a label name, and must come immediately after that name.
LABEL:
It must also be added to the name of a disc to be examined, in order to stop that name being misinterpreted as a file name.
Dir "FONTS:"
, the comma character is used as a separator for items such as parameters and lists of data variables.
Screen Open O,320,200,16,Lowres
Data 1,2,3, HAmOSU
Listed elements that are separated by commas will have their data printed at the next TAB position on the screen.
, the semi-colon character is also used as a separator for lists of items consisting of variables or constants, but the semi-colon will cause data to be printed immediately after the previous value.
Print A,BiCS
With PRINT USING,a semi-colon will cause a number to be centred, butitwiII not output a decimal point.
Print Using "PI is *; *H";pi*
402

Glossary
The full stop character can be used as a decimal point.
3.333
It is also used to mark an extension of a filename.
"Picture. IFF"
With PRINT USING, it places a decimal point and centres it on screen.
Print Using "PI is #.###";PH
$ the dollar symbol [Shift]+[4] is used to indicate a "siring".
a$
It is also used to precede notation given in the hexadecimal system.
$FF
? the question mark character can be used instead of PRINT.
? "The end. Thank you and goodnight."
Overleaf you will find a list of control keys followed by menus available from the Editor.
403

Glossary
DIRECT MODE EDITOR KEYS
This is a list of the editing keys and their effects when in Direct Mode.
[Backspace]
[Del]
[Shift]+[Backspace]
[Shift]+[Del]
[Return]
[Left]
[Right]
[Shift]+[Left]
[Shift]+[Right]
[Help]
[FI]
[F2]to [FlO]
[Esc]
404
Delete character to the left of cursor.
Delete character at cursor current location.
Delete entire current line.
Delete entire current line.
Execute current line of commands.
Move cursor one space left.
Move cursor one space right.
Move cursor to previous word.
Move cursor to next word.
Redisplay function key definitions.
Redisplay last line entered.
Redisplay second-to-last line entered, third-tolast, etc. up to tenth-to-last line entered. The lines are cleared from memory when Direct Mode is left and Main Editing Window is returned to.
Leave Direct Mode. Go to MAIN EDITING WINDOW.

Glossary
THE EDITOR CONTROL KEYS
This is a list of all the Easy AMOS control keys available when in the Main Editor, and their effects.
HELP INFORMATION
[Help]Open Help Window, gain access to Easy AMOS help file information.
CURSOR KEYS
[Left] Move cursor one space left.
[Right] Move cursor one space right.
[Up] Move cursor up to next available line.
[Down] Move cursor down to next available line.
[Shift]+[Left] Move cursor to previous word.
[Shift]+[Right] Move cursor to next word.
[Shift]+[Up] Move cursor to top line of current page.
[Shift]+[Down] Move cursor to bottom line of current page.
[Ctrl+[Up] Display previous page.
[Ctrl+[Down] Display next page.
[Shift]+[Ctr]+[Up] Jump to start of program.
[Shift]+[Ctr]+[Down] Jump to end of program.
[Amiga]+[Left] Scroll program left.
[Amiga]+[Right] Scroll program right.
[Amiga]+[Up] Scroll program up.
[Amiga]+[Down] Scroll program down.
405

Glossary
EDITING KEYS [Backspace]
[Del]
[Return]
[Ctrl]+[I]
[Ctrl]+[U]
[Ctrl]+[Q]
[Ctrl]+[Y]
[Esc]
CUT AND PASTE
[Ctrl]+[B]
[Ctrl]+[E]
[Ctrl]+[C]
[Ctrl]+[S]
[Ctrl]+[M]
[Ctrl]+[P]
[Ctrl]+[H]
MARKER KEYS
Delete character to the left of cursor.
Delete character at cursor current location.
Enter current line/Split existing line.
Insert a line at current position.
Undo/Return last line.
Erase characters in current line from current cursor position.
Delete current line and leave no gap.
Go to direct Mode.
Set beginning of a block.
Set end of a block.
Cut block. Erase from screen and load into memory.
Save block in memory and leave block on screen.
Move block.
Paste block at current cursor position.
Deselect block, remove highlighting.
[Shift]+[Ctrl]+[number] Set a marker at current cursor position, with number between 0 and 9 from numeric keypad.
[Ctrl]+[number]
406
Jump to previously set marker numbered 0 to 9 from numeric keypad.

Glossary
SEARCH AND REPLACE
[AIt]+[Up]
[AIt]+[Down]
[Ctrl]+[F]
[Ctrl]+[N]
[Ctrl]+[R]
TABULATION KEYS
[Ctrl]+[Tab arrows]
[Tab arrows]
[Shift]+[Tab arrows]
Search back through program to last label or procedure definition.
Search forward through program to next label or procedure definition.
Find first occurrence after current cursor position of selected text.
Find next occurrence of selected text.
Replace selected text with replacement text and jump to next occurrence of selected text.
Set Tab stop.
Move whole line at current cursor position to next tab stop.
Move whole line at current cursor poSition to last Tab stop.
PROGRAM CONTROL KEYS
[Amiga]+[S]
[Shift]+[Amiga]+[S]
[Amiga]+[L]
Save program under new name.
Save program under existing name.
Load program
407

Glossary
MAIN MENU OPTIONS This is a list of all the options available from the Easy AMOS Main Menu windows. They can be selected either using the mouse pointer, or by pressing the keys listed alongside the option name.
DEFAULT MENU
Run [Fl] Run current program from memory.
Test [F2] Check entire program for errors. Place edit cursor at first error, if test fails.
Indent [F3] Automatically indent listings of current program. Closed procedures are not affected.
Blocks Menu [F4] or [Ctrl] Display Blocks Menu. Menu options are listed below in this Glossary. Select option via mouse or Function Key. Return to Default Menu by clicking right mouse button, moving pointer out of menu area or pressing a key.
Search Menu [FS] or [AIt] Display Search Menu. Menu options are listed below in this Glossary.
Tutor [F6] Remove default Menu screen and display Tutor Main Screen.
Help [F7] Open Help Window, gain access to Easy AMOS help file information.
Overwrite [F8] Toggle between Insert and Overwrite editing modes. Current mode is displayed in Information Line as I (for Insert) or 0 (for Overwrite).
FoldlUnfold [F9] Takes a procedure definition and folds it out of sight in program listing, leaving only first line of procedure displayed. Unfold by placing cursor over remaining line and select Fold/Unfold.
Line insert [flO] or [Ctrl]+[l]
Insert line at current cursor position.
408

Glossary
SYSTEMS MENU This menu is called up with the right mouse button, or with the [Shift] key,
Load [Shift]+[Fl] or [Amiga]+[L] Loads an Easy AMOS file from disc, via file selector,
Save [Shift]+[F2] or [Shift]+[Amiga]+[S] Save current program with current name, If file name already exists on current disc, it is automatically renamed with ",BAK" extension as a failsafe,
Save As [Shift]+[F3] or [Amiga]+[S]
Save current program with new name,
Merge [Shift]+[F4] Retain current program and place selected program at current cursor position,
Merge Ascii [Shift]+[FS] Retain current program and merge with Easy AMOS Ascii file,
Environment [Shift]+[F6] Select new Edit Scrc'en environment colours with left mouse button,
Bob Editor [Shift]+[F7] Load Bob Edi tor from disc,
Easy Disc [Shift]+[FS] Load Disc Editor,
New [Shift]+[F9] Erase current program, with option to save to disc before erasing,
Quit [Shift]+[FIO] Quit Easy AMOS and return control to eLI or Workbench, with option to save to disc before qUitting,
409

Glossary
BLOCKS MENU
This menu is called up from the Default Menu. As with other options, direct accesses via keyboard are also given.
Block Start [Ctrl)+[B) or [Ctrl)+[Fl) Set start position of current block.
Block Cut [Ctrl)+[C) or [Ctrl)+[F2j Cut out selected block, remove from current position and load into memory.
Block Move [Ctrl)+[M] or [Ctrl]+[F3] Move highlighted block from original position to current cursor position.
Block Hide [Ctrl)+[H) or [Ctrl]+[F4) Deselect block and remove highlighting.
Save Ascii [Ctrl)+[F5) Save selected block to disc in Ascii text file format, for communication with other systems.
Block End [Ctrl)+[E] or [Ctrl]+[F6) Set end position of current block. Block between Start and End position is now highlighted by inverse text display.
Block Paste [Ctrl)+[P) or [Ctrl)+[F7] Paste block already Saved or Stored at current cursor position.
Block Store [Ctrl)+[S) or [Ctrl)+[F8) Copy and save current block into memory, leaving block on screen.
Block Save [Ctrl)+[F9] Save current block as an Easy AMOS program onto disc. Memory banks used in current program will NOT be saved with the listing.
Block Print [Ctrl)+[FlO) Output selected block to compatible printer.
[Ctrl)+[A) This is a special "Select All" command, that is only accessible from the keyboard. It selects the whole of the current program as a block, and is a short-cut enabling the print out of a whole program or saving the program in Ascii format.
410

Glossary
SEARCH MENU
This menu is called from the Default Menu. As with other options direct accesses via keyboard are also given.
Find [Ctrl]+[F] or [Alt]+[Fl] Search forwards from current cursor pOSition for exact match of up to 32 characters, entered via keyboard.
Find Next [Ctrl]+[N] or [Altl+[F2] Search forwards for next occurrence of characters specified by "Find".
Find Top [AIt]+[F3] Search from top of current program for exact match of up to 32 characters, entered via keyboard.
Replace [Ctrl]+[R] or [Alt]+[F4] Before a "Find" command, type replacement new text into the Information Line. After a "Find" command, replace selected old text with replacement new text and jump to next occurrence of selected old text.
Replace All [AIt]+[F5] Replace all OCCurrences of selected text with replacement text, starting from the top of current program. Operation as follows: confirm command by selecting [Yes] option or pressing [Y] key. Enter characters to be searched for and changed. Enter new characters to replace original characters.
Low= Up [AItl+[F6] Easy AMOS must treat lower case and upper case characters of the same letters as identical, during search and replace operations. (a=A).
Low<>Up Easy AMOS must treat lower case and upper case characters of the same letters as different, during search and replace operations. (a<>A).
Open All [AIt]+[F7] Open all folded procedures in current program.
Close All [AIt)+[FB) Close all procedure definitions in current program, if no syntax errors.
411
Glossary
Set Text B [Alt]+[F9] Set Text Buffer: change number of characters available to hold listings.
Set Tab [Ctrl]+[Tab] or [Alt]+[FlO] Set tabulation position. Cursor jumps to appropriate position when [Tab) key is pressed during editing.
412

INDEX
"The words of Amos! Proclaim freewill and publish. "
(Old Testament, Amos 4.5)
413

INDEX Use the Easy AMOS Index to find the page numbers where each entry occurs.
Easy AMOS keywords are shown in capital letters, like this: ABS
Certain words are shown as they appear on your screen, with a capital letter and punctuation mark, for example: Chip: '
All other words and phrases are shown in lower case letters like this: absolu te values
Where a word or a phrase relates to several other topics, the rclated topics are indented below it, as follows:
binary conversion memory blocks numbers
ABS absolute values abk addition address Amos Amos music animation apostrophe symbol 0 APPEAR APPEND AREG arrays arithmethic arithmetical symbols AS ASC ascii codes
414
233,341 233
301,341 230
295,304,305,341 2
212 145,182 41,401
189,341 256,341 307,341
53 230
230,399 299,342 81,342
80,98,342
assembly language 306 asterisk (*) 230,394 AT 87,342 audio envelopes 226 AUTOBACK 184,342
back-up copies 11,290 BAR 115,342 basic 342 BELL 204,342 binary 343
conversion 303 memory blocks 304 numbers 106
BIN$ 303,343 bit 295,345 bit-maps 343 blitter 128,343

INDEX blitter objects (bobs) 128 BREAKOFF 99,345 BLOAD 304,343 BREAK ON 99,345 blocks 44 BSAVE 304,345
cutting 45 buffer 297,345 flipping 197 bugs 310,346 graphic 195 byte 295,346 pasting 44 C: 33 screen 195 CALL 306,346 blocks menu 33,44,410 caps lock 346 BOB 153,343 care of discs 3 BOB CLEAR 163,344 CENTRE 86,346 BOB COL 159,344 centred text 86 BOB DRAW 163,344 CHANGE MOUSE 268,346 BOB OFF 157,344 channels 208
bobs 128,343 character set 80,346 animation 145 checking for files 277 bank operations 137 Chip: 33,296 collisions 159 CHlPFREE 297,346 coordinates 155 CHR$ 81,347 disc operations 135 CIRCLE 109,347 double buffered 155 clearing screens 85 drawing 153,163 eli 13,347 editing 129 CLIP 110,347 flipping 158 CLOSE 256,347 grabbing 139 CLOSE EDITOR 298,347 handling 156 CLS 64,85,347 hot spot 141,160 COL 160,348 image number 154 colons (:) 40,60,402 limits 155 COLOUR 113,348 loading bob editor 129,131 COLOUR BACK 113,348 masks 165 colours 110 modes 163 background 113 numbers 154 components 111 palette 142,165 flashing 120 priority 161 index numbers 112 screen resolutions 144 mixing 111 updating 162 points 105
BOB UPDATE 162,344 palette 114 BOB UPDATE OFF 162,344 setting 113 bold 90 command 40,348 BOOM 204,345 commas C) 96,402 boot 345 COMMAND LINE$ 281,348 BOX 108,345 compacting 197,198 brackets 231,401 condition 348
415
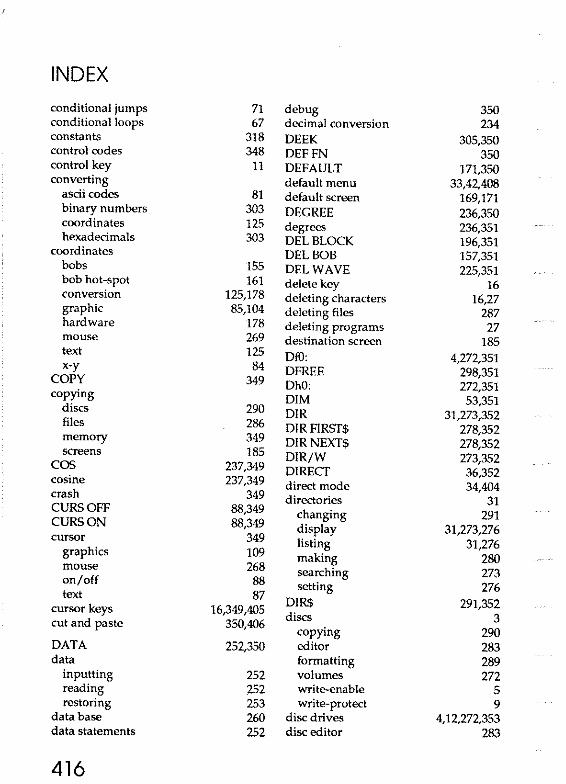
INDEX conditional jumps 71 debug 350 conditional loops 67 decimal conversion 234 constants 318 DEEK 305,350 control codes 348 DEFFN 350 control key 11 DEFAULT 171,350 converting default menu 33,42,408
ascii codes 81 default screen 169,171 binary numbers 303 DEGREE 236,350 coordinates 125 degrees 236,351 hexadecimals 303 DEL BLOCK 196,351
coordinates DEL BOB 157,351 bobs 155 DEL WAVE 225,351 bob hot-spot 161 delete key 16 conversion 125,178 deleting characters 16,27 graphic 85,104 deleting files 287 hardware 178 deleting programs 27 mouse 269 destination screen 185 text 125 Df(): 4,272,351 x-y 84 DFREE 298,351 COPY 349 DhO: 272,351 copying DIM 53,351 discs 290 DIR 31,273,352 files 286 DIRFIRSf$ 278,352 memory 349 DIRNEXT$ 278,352 screens 185 DIR/W 273,352 COS 237,349 DIRECT 36,352 cosine 237,349 direct mode 34,404 crash 349 directories 31 CURS OFF 88,349 changing 291 CURS ON 88,349 display 31,273,276 cursor 349 listing 31,276 graphics 109 making 280 mouse 268 searching 273 on/off 88 setting 276 text 87 DlR$ 291,352 cursor keys 16,349,405
discs 3 cut and paste 350,406 copying 290
DATA 252,350 editor 283 data formatting 289
inputting 252 volumes 272 reading ;1.52 write-enable 5 restoring 253 write-protect 9
data base 260 disc drives 4,12,272,353 data statements 252 disc editor 283
416

INDEX DISPLAY HEIGHT 353 EXIST 277,355 division (/) 230,400 EXIT 66 DO 66,353 exponential symbol (A) 230,401 DOKE 305,353 expressions 231 dollar symbol ($) 48,112,403 extra half bright (EHB) 200,355 dos 353
FADE 190,355 DOUBLE BUFFER 115,353 DRAW 105,353 Fast: 33,296
DRAW TO 105,353 FAST FREE 297,356
drawing FIELD 258,356
lines 105 field data 261
shapes 108 fields 257
solid shapes 114 file selector 26,30
DREG 307,354 files 30,272,356
drive light 3,5 checking 277
drives 4 copying 286
DfO: 4,272,351 deleting 287
DhO: 12,272,351 end 354
floppy 4,272 erasing 280
hard 12,272 examining 30,288
naming 272 first 278 length 367
EDIT 35,354 listing 273 Edit: 33 naming 279 edit screen 15,22,32 next 278 editing keys 406 opening 255 editing window 34,298 paths 273 ELLIPSE 109,354 position 374 ELSE 63,354 random access 257 END 35,354 renaming 280,287 END IF 63,354 selection 279,285 ENDPROC 72,354 sequential 254 envelopes 226 sizing 288 EOF 354 FILL 356 equals (=) 54,64,400 fill styles l18 ERASE 300,355 filled shapes l14 erasing filtering sound 227
bobs 163 FIRE 267,356 files 280 FIX 234,356 memory banks 300,355 FLASH 90,120,357
ERRN 314,355 FLASH OFF 90,357 error handling 313 floating point numbers 234 error messages 315 floppy disc driv 4,272,351 error trapping 311 FN 357 escape key 9 folders 30
417

INDEX
fonts 80,357 HIDE 268,361 creating 93 HIDE ON 268,361 selecting 92 HIRES 170,361 using 93 hi-scores 249
FONT$ 92,357 hold and modify 200,360 FOR 68,357 HOME 86,361 formatting discs 9,10,289 HOTSPOT 161,361 FREE 297,357 HREV 159,361 free memory 297 HREVBLOCK 197,361 FsEL$ 279,358 I 33 full stops (.) 403 I BOB 158,362 functions 54,358 icons 362 function keys 28,35,358 IF 62,63,362 garbage collection 297,358 iff 139,171.172,362 GET 259,358 indenting listings 77 GET BLOCK 195,358 information line 33 GET BOB 156,359 INK 110,117,362 GET BOB PALETTE 165,359 INKEY$ 97,362 GET FONTS 92,359 INPUT 52,363 GET PALETTE 188,359 INPUT# 257,363 GLOBAL 73,359 INI'UT$ 57,363 global variables 73 inputting data 252 GOSUB 69,72,359 INS BOB 158,363
Goro 61,360 installing Easy AMOS 4 a label 61,71 on floppy drive 4
a line number 61 on hard drive 11 a variable 61 INSTR 55,363
graphic blocks 195 INT 234,363
graphic coordinates 85,104 integer variables 51
graphic cursor 109 integers 234,363 greater than (» 64,400 INVERSE OFF 83,364
GRLOCATE 109,360 INVERSE ON 83,364
GRWRITING 119,360 i/o 364 italics 90
ham mode 200,360 hard disc drive 12,272,351 JOY 266,364
hardware coordinates 178 joystick 266
hash symbol (#) 51,236,401 jumps 61,69,71
help 38,310 k 295,364 help key 38,360 keyboard help window 38 check for keypress 97 hexadecimals 111,360 nationality 6 hexadecimal conversion 111,303 scancodes 98 HEX$ 303,360 short-cuts 27,101,404
418

INDEX keyboard loops
speed 82 numbered loops 68 KEY SPEED 82,364 LOWER$ 84,368 keywords 23,364 LOWRES 170,368 KILL 280,365 LPRINT 271,368
L: 33 machine code 302,368 labels 60,365 calling 306 LACED 365 loading 306 LED OFF 227,365 marker keys 406 LED ON 227,365 masks LEEK 305,365 block masks 195 LEFT$ 56,365 bob masks 165 LEN 54,365 voice masks 209 LENGTH 302,366 mathematics 230 less than «) 64,400 MAX 232,369 LIMIT BOB 155,366 memory 294 LIMIT MOUSE 271,366 alerts 296 line allocation 296
drawing 105 chip 297 numbers 366 fast 297 styles 106 free 297
LINE INPUT 257,366 saving 298 LINEINPUT# 257,366 memory banks 298,369 LIST BANK 300,367 erasing 300 LOAD 301,367 finding 302 LOAD IFF 171,367 listing 300 loading loading 301
iff screens 171,367 permanent 298 programs 29 reserving 299
loading Easy AMOS 13 saving 301 from eli 13 temporary 298 from programs disc 13 menus 42,369 from workbench 13 MID$ 56,369
local 73 MIN 232,369 LOCATE 86,367 minus (-) 230,394 LOF 367 MKDIR 280,369 LOG BASE 183,367 modem 369 LOGIC 183,368 modes logic 64 ehb 200 logical screen 184 ham 200 LOKE 305,368 hires 170 LOOP 66,368 lowres 170 loops 66 mouse 267
conditional loops 67 mouse buttons 29,270
419

INDEX
mouse cursor PAPER 83,372 changing shape 268 PARAM 74,373 hiding 268 PARAM# 74,373 limits 271 PARAM$ 74,373 showing 269 parameters 373 zones 194 PARENT 30,285
MOUSE KEY 270,369 PASTE BOB 156,373 MOUSE SCREEN 370 path name 274 MOUSE ZONE 194,370 paths 273 multiplication symbol {*} 230 PEEK 304,373 MUSIC 212,370 PEN 83,373 MUSIC OFF 213,370 per centum symbol (%) 106,401 MUSIC STOP 213,370 peripherals 266 musical note values 208 PHYBASE 183,373 musical pitch 207 PHYSIC 183,373 MVOLUME 213,370 physical screen 182 nesting 77,370 PI# 236,374
NEXT 68,370 pitch values 208 NOISE TO 225,371 pixel 88,374 NO MASK 165,371 PLAY 210,374 NOT 371 PLOAD 306,374 ntsc 146,371 PLOT 104,374 numbers plus (+) 230,394
accuracy 234 POF 374 binary 106,303,343 POINT 105,374 decimals 234 POKE 304,375 floating point 234 POLYGON 115,375 hexadecimals 111,303,360 POPPROC 75,375 integers 234,363 PRINT 24,96,375 random 238 PRINT# 256,375
numbered lines 70 printers 271
0 33 printing on paper 271,392 printing on SCreen 24,96,375,392 OPEN IN 256,371 PRINT USING 392 OPEN OUT 255,371 PRIORITY OFF 162,375 OPEN RANDOM 258,371 PRIORITY ON 162,375 ON 71,75,371 PRIORITY REVERSE OFF 162,376 ON ERROR 311,372 PRIORITY REVERSE ON 162,376 ON ERROR PROC 313,372 PROCEDURE 72,376 origin 372 procedures 72,376
PACK 198,372 data 76 PAINT 114,372 leaving 75 pal 146,372 parameters 74 PALETTE 114,372 returning values 74
420
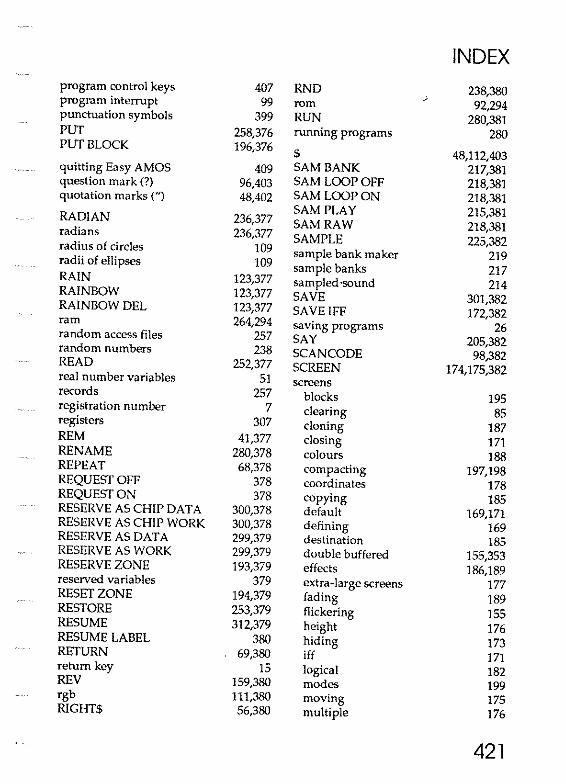
INDEX program control keys 407 RND 238,380 program interrupt 99 rom 92,294 punctuation symbols 399 RUN 280,381 PUT 258,376 running programs 280 PUT BLOCK 196,376
$ 48,112,403 quitting Easy AMOS 409 SAM BANK 217,381 question mark (?) 96,403 SAM LOOP OFF 218,381 quotation marks (U) 48,402 SAM LOOP ON 218,381
SAM PLAY 215,381 RADIAN 236,377 SAM RAW 218,381 radians 236,377 SAMPLE 225,382 radius of circles 109 sample bank maker 219 radii of ellipses 109 sample banks 217 RAIN 123,377 sampled ·sound 214 RAINBOW 123,377 SAVE 301,382 RAINBOW DEL 123,377 SAVE IFF 172,382 ram 264,294 saving programs 26 random access files 257 SAY 205,382 random numbers 238 SCANCODE 98,382 READ 252,377 SCREEN 174,175,382 real number variables 51 screens records 257 blocks 195 registration number 7 dearing 85 registers 307 cloning 187 REM 41,377 closing 171 RENAME 280,378 colours 188 REPEAT 68,378 compacting 197,198 REQUEST OFF 378 coordinates 178 REQUEST ON 378 copying 185 RESERVE AS CHIP DATA 300,378 default 169,171 RESERVE AS CHIP WORK 300,378 defining 169 RESERVE AS DATA 299,379 destination 185 RESERVE AS WORK 299,379 double buffered 155,353 RESERVE ZONE 193,379 effects 186,189 reserved variables 379 extra-large screens 177 RESET ZONE 194,379 fading 189 RESTORE 253,379 flickering 155 RESUME 312,379 height 176 RESUME LABEL 380 hiding 173 RETURN 69,380 iff 171 return key 15 logical 182 REV 159,380 modes 199 rgb 111,380 moving 175 RIGHT$ 56,380 multiple 176
421

INDEX screens SET FONT 92,385
numbers 169 SET INPUT 257,386 offsets 177 SET LINE 106,386 opening 169 SET PAINT 117,386 packing 197 SET PATTERN 118,386 physical 182 SET RAINBOW 12L386 priority 173 SET TALK 206,387 resolution 169 SET TEXT 90,387 saving 172 SET WAVE 223,387 showing 173 SET ZONE 193,387 source 185 SGN 233,387 swapping 185 shift key 15,29 switching 182 SHOOT 204,387 synchronising 183 SHOW 269,388 width 176 SHOW ON 269,388 zones 192 signs 233 zooming 192 SIN 237,388
SCREEN BASE 383 sine 237,388 SCREEN CLONE 187,383 sorting files 31 SCREEN CLOSE 171,383 sound 204 SCREEN COpy 185,383 channels 208 SCREEN DISPLAY 175,383 effects 204 SCREEN HIDE 173,383 envelopes 226 SCREEN OFFSET 177,384 filter 227 SCREEN OPEN 169,384 sample banks 217 SCREENSHOW 173,384 samples 214 SCREEN SWAP 183,384 speech 205 SCREEN TO BACK 174,384 voices 209 SCREEN TO FRONT 173,384 volume 209 scrolling waveforms 223
screens 175 Sound tracker modules 211 text 94 source screen 185 through files 30 space bar 25 through listings 34 SPACK 197,388
search menu 33,42,411 speech 205 searching and replacing 407 square roots 234 selecting files 26 SQR 234,388 semi-colons (;) 52,96,402 stack 388 sequential files 254 START 302,389 SET BOB 163,385 STEP 69,389 SET BUFFER 297,385 steps 69 SET CURS 89,385 stereo 210 SETDIR 276,385 string find 55 SETENVEL 226,285 string replace 44
422
INDEX string variables 52 underlining 90 strings 43,48 underscore symbol U 60,401 STRING$ 57,389 UNPACK 199,392 STR$ 58,389 UNTIL 68,392 structured tests 63 UPPERS 84,392 subroutines 69 USING 392 subtraction 230 VAL 58,393 syntax error 389 values 232 synthetic speech 205 variables 49,393 SYSTEM 389 address 305 system menu 409 arrays 53 tab setting 97,407 global 73 TAN 237,390 integers 51 tangent 237,390 loading 52 TEMPO 213,390 local 73 TEXT 126,390 naming 50 Text: 33,296 real numbers 51 text 80 string 52
centre 86 VARPTR 305,393 colours 82 vdu 393 coordinates 84 vertical blank period 183 cursor 88,96 VOICE 209,393 fonts 91 voices 209,393 graphic text 91,119 VOLUME 209,394 styles 90 volume names 272,394
TEXT BASE 126,390 VREV 159,394 TEXT LENGTH 125,390 VREVBLOCK 197,394 TEXT STYLES 91,390 VUMETER 214,394 THEN 62,391 WAIT 24,395 TIMER 391 WAIT KEY 40,395 title sequences 249 WAITVBL 184,395 TO 69,105,391 WAVE 224,395 TRACK LOAD 211,391 waveforms 223 TRACK LOOP OFF 212,391 assigning 224 TRACK LOOP ON 212,391 deleting 25 TRACK PLAY 211,391 WEND 67,395 TRACK STOP 212,392 WHILE 67,395 tracker modules 211 white noise 205 trigonometry 235 write-enable 5 typing speed 82 write-protect 9 typing tutor 100 tutor 328 x-axis 159 TUTOR 329,392 X BOIl 155,396
423

INDEX x-coordinates 84,3% YMOUsE 269,396 XCURs 87,396 ysCREEN 178,397
X HARD 178,396 YTEXT 125,398
X MOUSE 269,396 ZONE 193,398 X SCREEN 178,396 ZONES 194 X TEXT 125,397 zones
mouse 194 y-axis 159 reserving 193 YBOB 155,397 resetting 194 y-coordinates 84,396 screen 192 YCURs 87,397 setting 193 YHARD 178,397 ZOOM 192,398
424