
d–control 200 mini - Dogtrace
20
d–control 200 mini Electronic training collar – basic training set for one dog d–control 202 mini Electronic training collar – basic training set for two dogs – with a carrying case User Guide EN
-
Upload
khangminh22 -
Category
Documents
-
view
2 -
download
0
Transcript of d–control 200 mini - Dogtrace

d–control 200 miniElectronic training collar – basic training set for one dog
d–control 202 miniElectronic training collar – basic training set for two dogs – with a carrying case
User Guide
EN

2
Declaration of ConformityWe:
VNT electronics s.r.o.Smetanovo náměstí 104
570 01, LitomyšlIČO: 64793826
declare under own responsibility that the product:Electronic training collar
Dogtrace d-control 200 miniis in compliance with essential requirements and other relevant provisions of
Directive 1999/5/EC from 9. 3. 1999meets requirements of General Licence of The Czech Telecommunication Office
according to general licence no. VO-R/10/05.2014-3, and corresponds to the following standarts:ETSI EN 301 489-1 V1.9.2ETSI EN 301 489-3 V1.6.1ETSI EN 300 220-2 V.2.4.1
ETSI EN 60950-1:2006
The product is safe on condition of commonly used in conformity with instruction manual. The Declaration of Conformity is created in exclusive responsibility of producer.
Measuring report no.: 6440-7600/2008 issued by certificated laboratory no.1103 VTÚPV VyškovMeasuring report no.: 6440-697/2008 issued by certificated laboratory no.1103 VTÚPV Vyškov
This declaration of Conformity is created in exclusive responsibility of producer.In Litomyšl 28.8.2014
Ing. Jan Horák executive director
Tel.: +420 731 441 [email protected]
www.dogtrace.com

3
WARNING:The person with a personal instrument to support heart activity (pacemaker, defibrillator) must
respect the relevant precautionary measures. The d–control emits a certain stationarymagnetic field (lower part of the remote controller and RF signals).Frequency= 869, 525 MHz, maximum transmitted power = 25 mW.
Contents
Introduction . . . . . . . . . . . . . . . . . . . . . . . . . . . . . . . . . . . . . . . . . . . . . . . . . . . . . . . . . . . . . . . . . . . . . . . . . . . . . . . . 4Package contents . . . . . . . . . . . . . . . . . . . . . . . . . . . . . . . . . . . . . . . . . . . . . . . . . . . . . . . . . . . . . . . . . . . . . . . . . . . 4Optional accessories . . . . . . . . . . . . . . . . . . . . . . . . . . . . . . . . . . . . . . . . . . . . . . . . . . . . . . . . . . . . . . . . . . . . . . . . 4Product description . . . . . . . . . . . . . . . . . . . . . . . . . . . . . . . . . . . . . . . . . . . . . . . . . . . . . . . . . . . . . . . . . . . . . . . . . 5Battery insertion and replacement . . . . . . . . . . . . . . . . . . . . . . . . . . . . . . . . . . . . . . . . . . . . . . . . . . . . . . . . . . 6Choosing the contact points . . . . . . . . . . . . . . . . . . . . . . . . . . . . . . . . . . . . . . . . . . . . . . . . . . . . . . . . . . . . . . . . 7Switching ON/OFF . . . . . . . . . . . . . . . . . . . . . . . . . . . . . . . . . . . . . . . . . . . . . . . . . . . . . . . . . . . . . . . . . . . . . . . . . . 8Programming (coding) the transmitter with the receiver . . . . . . . . . . . . . . . . . . . . . . . . . . . . . . . . . . . . . 9Transmitter - button functions . . . . . . . . . . . . . . . . . . . . . . . . . . . . . . . . . . . . . . . . . . . . . . . . . . . . . . . . . . . . . 10How to check that your d–control works correctly . . . . . . . . . . . . . . . . . . . . . . . . . . . . . . . . . . . . . . . . . . 12Using d–control training collar in winter . . . . . . . . . . . . . . . . . . . . . . . . . . . . . . . . . . . . . . . . . . . . . . . . . . . . 12Getting the best results . . . . . . . . . . . . . . . . . . . . . . . . . . . . . . . . . . . . . . . . . . . . . . . . . . . . . . . . . . . . . . . . . . . 13 Training tips . . . . . . . . . . . . . . . . . . . . . . . . . . . . . . . . . . . . . . . . . . . . . . . . . . . . . . . . . . . . . . . . . . . . . . . . . . . . . . . 14Caution . . . . . . . . . . . . . . . . . . . . . . . . . . . . . . . . . . . . . . . . . . . . . . . . . . . . . . . . . . . . . . . . . . . . . . . . . . . . 15Maintenance . . . . . . . . . . . . . . . . . . . . . . . . . . . . . . . . . . . . . . . . . . . . . . . . . . . . . . . . . . . . . . . . . . . . . . . . . . . . . . . 15Troubleshooting . . . . . . . . . . . . . . . . . . . . . . . . . . . . . . . . . . . . . . . . . . . . . . . . . . . . . . . . . . . . . . . . . . . . . . . . . . . 16Technical specifications . . . . . . . . . . . . . . . . . . . . . . . . . . . . . . . . . . . . . . . . . . . . . . . . . . . . . . . . . . . . . . . . . . . . 17 Warranty terms and conditions . . . . . . . . . . . . . . . . . . . . . . . . . . . . . . . . . . . . . . . . . . . . . . . . . . . . . . . . . . . . . 18Certificate of warranty . . . . . . . . . . . . . . . . . . . . . . . . . . . . . . . . . . . . . . . . . . . . . . . . . . . . . . . . . . . . . . . . . . . . . 20
Hereby, VNT electronics s.r.o. , declares that this d-control 200 mini is in compliancewith the essential requirements and other relevant provisions
of Directive 1999/5/EC.

4
Introduction
Package contents
Optional accessories
The electronic training collar Dogtrace d–control, consisting of the transmitter and the receiver, it is a modern, safe, reliable, and effective training tool. With the d-control training collar you can make corrections that are suited to your dog‘s temperament and the distraction level of the moment, at the proper time, for maximum training efficiency. However, correcting to stop unwanted behaviour is only a small part of what you can do with the d-control. More importantly, the d-control is a powerful tool for encouraging desired behaviour. It is possible to easily adjust the intensity of the stimulation. Thanks to the ergonomic design and low weight of the receiver, it is suitable for all dog breeds and sizes.
Collar unit (receiver) with the strap (two receivers for d–control 202 mini) Two pairs of contact points (short - 12 mm and long - 17 mm) Two lithium CR2 3V batteries (3 pcs for d–control 202 mini) Transmitter (remote control) with the belt clip User guide and certificate of warranty Carrying case (for d–control 202 mini) Test discharge lamp Transmitter neck strap
Additional receiver Dummy receiver Spare screws Silicone grease
Spare contact points (12 mm, 17 mm, 21 mm) Spare lithium CR2 3V batteries Spare rubber seal Woven or plastic collars - various colours

5
Product description
TRANSMITTER RECEIVER
TRANSMITTER - 1 - Backlit LCD display, 2 - Booster button, 3 - Stimulation button, 4 - Tone signal button, 5 - ON/OFF Switch, 6 - Adjustment of the level of the stimulation, 7 - Dog selection button (dog A, dog B)
RECEIVER - 1 - Strap, 2 - Contact points, 3 - ON/OFF LED Indicator, 4 - indicator area where the ON/OFF magnetic switch is located
DISPLAY - 1 - Indicator of the radio transmission, 2 - Battery power indicator, 3 - Stimulation level indicator (from 0 to 19), 4 - Dog selection indicator (dog A, dog B)
21
7
5
3
4
6
7
6
1
2
3
4
LCD DISPLAY1 2
3
4

6
Battery insertion and replacement
INSERTION (REPLACEMENT) OF THE BATTERY IN THE RECEIVER Unscrew the 4 screws of the top of the receiver using a cross-head screwdriver and remove the lid. Insert the lithium CR2 3V battery into the battery compartment. Please check that and the battery is installed with correct polarity (according to the polarity indicated with the "+" symbol in the battery compartment - see the picture). Wrong polarity may damage the unit. A beep sound is emitted indicating the correct installation of the battery. If the beep sound is not emitted after the battery is inserted, remove it immediately. Initialize the system by using a metal tool (e.g. a screwdriver, scissors, etc.) and short-circuit (connect) both contacts of the battery holder for about 2 seconds (see the picture on the page 16). Please check the correct polarity and try to insert the battery again. Before putting the lid of the receiver back in place, make sure that the rubber seal is correctly seated in its groove. Screw down the 4 screws of the top tightly (do not over tighten them).
Checking the battery statusLED indicator on the receiver‘s front cover indicates the status of the battery:
Checking the battery status
Green flashing LED indicates the battery is fully charged. Red and green flashing LEDs together indicate low battery. Prepare a spare lithium CR2 3V battery and follow the instructions described in the section "Battery insertion and replacement".Make sure that the receiver works correctly.

7
INSERTION (REPLACEMENT) OF THE BATTERY IN THE TRANSMITTERObserve polarity when installing the battery. Reversing the battery will damage the transmitter. Use only lithium CR2 3V batteries.
Battery polarity marks
TIP: You can easily lift up the battery using the small flat-head screwdriver.
TIP
Remove the transmitter battery cover using a cross-head screwdriver. If replacing the battery, remove the old battery and dispose of it properly. Place the lithium CR2 3V battery in the holder and press into place. Put the battery cover back into place and secure with screw.
The battery level is shown at the battery life status bar on the LCD display. Battery fully charged: full battery icon is shown on the LCD display. Low battery: battery empty icon is shown on the LCD display. Prepare a spare lithium CR2 3V battery and follow the instructions described in the section "Insertion (replacement of the battery in the transmitter".
Choosing the contact points
The stimulation is delivered through the receiver contact points. Two different series of contact points are supplied. The length of the contact points must be sufficient to have proper contact with the dog‘s skin, enabling the device to operate correctly. If you have a short-haired dog use the short 12 mm contact points, if you have a long-haired dog replace them with the longer 17 mm contact points supplied with the kit. Carefully tighten them manually (do not use a key). It is possible to purchase the 21 mm long contact points.

8
Switching ON/OFF
Switching ON/OFF the transmitter/Programming the transmitter with the receiver
SWITCHING THE TRASNMITTER ON/OFF
Switching on: Press down for 1 second the button on the transmitter. The LCD display indicates that the unit is active.
Switching off: Again, press down for 1 second the button on the transmitter.
SWITCHING THE RECEIVER ON/OFFA magnet located at the lower part of the transmitter is used to activate or deactivate the magnetic switch located in the receiver.
Switching on: approach the low area of the transmitter where the magnet is located until coming close to the indicator located on the receiver (see the picture), hold for 1 second, the receiver LED indicator will flash in green indicating the receiver is ON.
Switching off: approach the low area of the transmitter where the magnet is located until coming close to the indicator located on the receiver, hold for 1 second, the receiver LED indicator will flash from green to red indicating the receiver is OFF.
To extend the battery life it is necessary to switch off both receiver and transmitter after the training is finished. If the battery will not be in use for a month or longer, it is recommended that it is removed from the receiver.
9
Programming (coding) the transmitter with the receiver
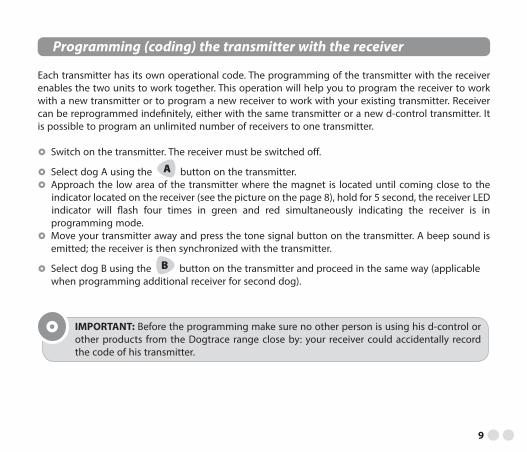
Each transmitter has its own operational code. The programming of the transmitter with the receiver enables the two units to work together. This operation will help you to program the receiver to work with a new transmitter or to program a new receiver to work with your existing transmitter. Receiver can be reprogrammed indefinitely, either with the same transmitter or a new d-control transmitter. It is possible to program an unlimited number of receivers to one transmitter.
Switch on the transmitter. The receiver must be switched off.
Select dog A using the button on the transmitter. Approach the low area of the transmitter where the magnet is located until coming close to the indicator located on the receiver (see the picture on the page 8), hold for 5 second, the receiver LED indicator will flash four times in green and red simultaneously indicating the receiver is in programming mode. Move your transmitter away and press the tone signal button on the transmitter. A beep sound is emitted; the receiver is then synchronized with the transmitter.
Select dog B using the button on the transmitter and proceed in the same way (applicable when programming additional receiver for second dog).
IMPORTANT: Before the programming make sure no other person is using his d-control or other products from the Dogtrace range close by: your receiver could accidentally record the code of his transmitter.

10
Transmitter - button functions
The d–control 200 transmitter is designed to operate with two separate receivers (dog A and dog B). The selected level of stimulations can be different for each receiver.
Button - Tone signalThe receiver emits a beeping noise when a "Tone button" is pressed. If the button is not released after 10 seconds, the tone will automatically turn off. While pressing, an indicator of the radio transmission will appear on the LCD display of the transmitter; the indicator light on the receiver goes from flashing green to permanent green for as long as the button is pressed.
Button - Continuous stimulationPressing the "Stimulation button" gives continuous electric stimulation transmitted by the two contact points located on the receiver as long as the button is pushed. If the button is not released after 4 seconds, the stimulation will automatically turn off as a safety feature. The receiver will be ready to be reactivated once the button has been released. While pressing, an indicator of the radio transmission will appear on the LCD display of the transmitter; the indicator light on the receiver goes from flashing green to permanent red for as long as the button is pressed.
Button - BoosterPressing the "Booster button" gives continuous electric stimulation transmitted by the two contact points located on the receiver as long as the button is pushed. If the button is not released after 4 seconds, the stimulation will automatically turn off as a safety feature. The receiver will be ready to be reactivated once the button has been released. While pressing, an indicator of the radio transmission will appear on the LCD display of the transmitter; the indicator light on the receiver goes from flashing green to permanent red. You can set the level of the Booster stimulation by 0-5 intensity levels higher than
the level you are using on the "Stimulation button". As a result, you do not need to press the button.
11
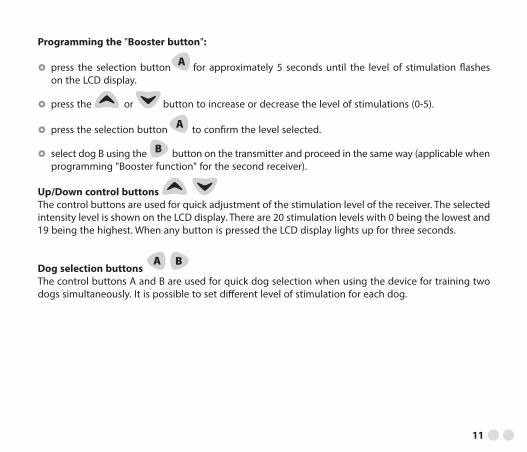
Programming the "Booster button":
press the selection button for approximately 5 seconds until the level of stimulation flashes on the LCD display.
press the or button to increase or decrease the level of stimulations (0-5).
press the selection button to confirm the level selected.
select dog B using the button on the transmitter and proceed in the same way (applicable when programming "Booster function" for the second receiver).
Up/Down control buttonsThe control buttons are used for quick adjustment of the stimulation level of the receiver. The selected intensity level is shown on the LCD display. There are 20 stimulation levels with 0 being the lowest and 19 being the highest. When any button is pressed the LCD display lights up for three seconds.
Dog selection buttonsThe control buttons A and B are used for quick dog selection when using the device for training two dogs simultaneously. It is possible to set different level of stimulation for each dog.

12
How to check that your d–control works correctly
You can check anytime that your d-control is operating correctly.
Before doing so, make sure that the receiver is switched off.
Place the test discharge lamp in contact with each of the contact points as shown in the picture.
Switch on the transmitter and receiver. Press the stimulation button and modify the level of
intensity of the stimulations: the test lamp will come on with more or less intensity according to the selected
intensity level.Location of the test lamp attachment
Using d–control training collar in winter
When using d-control in winter, please keep in mind:
Low humidity – causes less skin conductivity. It is necessary to provide better conductivity between the electrodes of the receiver and the dog‘s skin. This can be achieved by lubricating the
dog’s skin in the touch points of contact points with Vaseline, baby oil, hand lotion, etc. Heavier dog’s coat – it is necessary to tighten the collar so that the permanent contact with the
dog‘s skin is ensured. If the coat is too thick, it is recommended to choose a longer type of contact points.
Battery properties change – temperatures below 0 °C slow down chemical reactions in batteries. To ensure a performance of repetitive stimulations (especially of higher levels), it is recommended to insert a new battery into the receiver for the winter time. During the training, observe continuously dog‘s reactions and increase the stimulation level as needed.
13
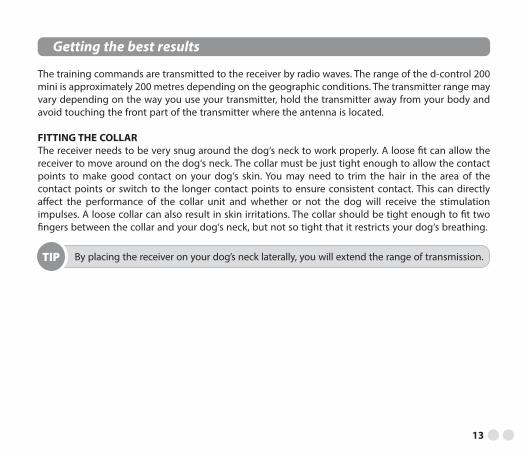
The training commands are transmitted to the receiver by radio waves. The range of the d-control 200 mini is approximately 200 metres depending on the geographic conditions. The transmitter range may vary depending on the way you use your transmitter, hold the transmitter away from your body and avoid touching the front part of the transmitter where the antenna is located.
FITTING THE COLLARThe receiver needs to be very snug around the dog‘s neck to work properly. A loose fit can allow the receiver to move around on the dog‘s neck. The collar must be just tight enough to allow the contact points to make good contact on your dog‘s skin. You may need to trim the hair in the area of the contact points or switch to the longer contact points to ensure consistent contact. This can directly affect the performance of the collar unit and whether or not the dog will receive the stimulation impulses. A loose collar can also result in skin irritations. The collar should be tight enough to fit two fingers between the collar and your dog‘s neck, but not so tight that it restricts your dog‘s breathing.
Getting the best results
TIP By placing the receiver on your dog’s neck laterally, you will extend the range of transmission.

14
Training tips
The trainer’s elementary knowledge in dog training is the prerequisite for using the training collar. Do not hesitate to contact a professional trainer for any further advice.
You can start using the collar with dogs of 6 months of age who has undergone the basic training and are familiar with basic obedience commands including "sit", "down", "stay" etc.
Find proper intensity level for each dog before use. It is very important to set the correct intensity level on your unit before beginning your training sessions to provide the appropriate level of stimulation and avoid over-stimulating your dog.
Eliminate one misbehaviour or teach one obedience command at a time. Be consistent. Give your dog a tone or stimulation with each misbehaviour. After a command is successfully executed, you should always reward or encourage your dog. To teach your dog a reliable recall start training your dog using a long dog tracking lead. Your dog will have to get used to the collar; let the dog wear the collar for a few days, but do not
use it so that your pet does not discover the connection with its attachment and effects. Affirmative and efficient training requires some time: don't hurry! Select a well-known environment your dog is used to. Choose the right moment to press the stimulation button. We recommend not to use the electronic training collar with aggressive-tempered dogs and with
dogs with health problems.
15
Caution
It is important to keep the device clean. Clean the contact points regularly, avoid using any detergentthat contains strong chemicals. To clean your d-control use a soft cloth moistened with water and neutral detergent. The transmitter is not waterproof, so use caution when operating your device in wet
Maintenance
Keep away from children. Do not leave the device in or around a high temperature heat source. Check the receiver for proper tightness of screws and seal before each use. Battery of the receiver needs to be replaced in every two years, check the battery power level before each use. The transmitter is not waterproof, so use caution when operating your device in wet conditions, water can cause irreversible damage to your device. Do not use the electronic training collar for dogs under 6 months of age. Do not use the electronic training collar for pregnant or nursing bitches. Do not use the electronic training collar for dogs with health problems particularly heart disease, unless the use has been approved by veterinarian. Do not use the electronic training collar for dogs that cannot respond appropriately due to injury, illness, senility or age. We recommend that your dog has a preventive medical check before using the electronic training collar. We recommend not to use the electronic training collar with aggressive-tempered dogs. Check the contact area regularly for signs of neck irritations, to prevent neck irritations, the collar should never be worn for more than 12 hours per day. If a rash or sore is found, do not use the collar until the skin has healed. Never connect a leash to the electronic collar; this could cause excessive pressure on the contact points. Always use a separate leash, do not put pressure on the electronic collar.

16
Troubleshooting
If your device seems to operate improperly, read this manual again, check the receiver battery and replace it if necessary. Try to initialize the receiver by removing the battery from the battery holder in the receiver, then use a metal tool (e.g. a screwdriver, scissors, etc.) and short-circuit both contacts of battery holder for approximately two seconds, and then put the battery back in its place observing the correct polarity. A beep sound is emitted indicating the correct installation of the battery. If the problem still persists, try to program the transmitter with receiver again according to the instructions in this manual. If the problem still persists, contact the dealer.
Short-circuit of the receiver
TIP While using the device, it is recommended to check periodically that screws in the receiver lid are tightened correctly.
conditions, water can cause irreversible damage to your transmitter. The receiver is waterproof. The receiver case is provided with a seal that forms a waterproof barrier between the lid and main housing of the case. If the seal is loose, out of alignment or twisted, it will compromise the waterproof integrity of the case. Lubricating the seal with a thin layer of silicone grease will increase its lifespan. We recommend replacing the seal in the receiver every year. It is recommended to remove the battery from the receiver, if the device will not be in use for a month or longer.

17
TRANSMITTERWeight . . . . . . . . . . . . . . . . . . . . . . . . . . . . . . . . . . . . . . . . . . . . . . . 64 grams (without battery)Range . . . . . . . . . . . . . . . . . . . . . . . . . . . . . . . . . . . . . . . . . . . . . . . . approx. 200 meters in the free areaPower supply . . . . . . . . . . . . . . . . . . . . . . . . . . . . . . . . . . . . . . . . . lithium CR2 3V battery Battery life . . . . . . . . . . . . . . . . . . . . . . . . . . . . . . . . . . . . . . . . . . . . 6–12 months, based on usageFrequency . . . . . . . . . . . . . . . . . . . . . . . . . . . . . . . . . . . . . . . . . . . . 869, 525 MHz Maximum transmitted power . . . . . . . . . . . . . . . . . . . . . . . . . 10 mWAntenna . . . . . . . . . . . . . . . . . . . . . . . . . . . . . . . . . . . . . . . . . . . . . . integratedWatertightness . . . . . . . . . . . . . . . . . . . . . . . . . . . . . . . . . . . . . . . not waterproofRadio communication safety and coding . . . . . . . . . . . . . . by microcontrollerNumber stimulation levels . . . . . . . . . . . . . . . . . . . . . . . . . . . . 20Operating temperature . . . . . . . . . . . . . . . . . . . . . . . . . . . . . . . –10 °C to + 50 °CDimensions . . . . . . . . . . . . . . . . . . . . . . . . . . . . . . . . . . . . . . . . . . . 110 × 52 × 29 mm
RECEIVER Weight . . . . . . . . . . . . . . . . . . . . . . . . . . . . . . . . . . . . . . . . . . . . . . . 44 grams (without the strap and the battery)Power supply . . . . . . . . . . . . . . . . . . . . . . . . . . . . . . . . . . . . . . . . . lithium CR2 3V batteryBattery life . . . . . . . . . . . . . . . . . . . . . . . . . . . . . . . . . . . . . . . . . . . . 6 months, based on usageFrequency . . . . . . . . . . . . . . . . . . . . . . . . . . . . . . . . . . . . . . . . . . . . 869, 525 MHzAntenna . . . . . . . . . . . . . . . . . . . . . . . . . . . . . . . . . . . . . . . . . . . . . . IntegratedWatertightness . . . . . . . . . . . . . . . . . . . . . . . . . . . . . . . . . . . . . . . waterproofRadio communication safety and coding . . . . . . . . . . . . . . by microcontrollerOperating temperature . . . . . . . . . . . . . . . . . . . . . . . . . . . . . . . –10 °C to + 50 °CCollar . . . . . . . . . . . . . . . . . . . . . . . . . . . . . . . . . . . . . . . . . . . . . . . . . adjustable to neck sizes from 20 to 70 cm Dimensions . . . . . . . . . . . . . . . . . . . . . . . . . . . . . . . . . . . . . . . . . . . 61 × 40 × 31 mm
Technical specifications

18
VNT electronics Ltd. provides a 2-year warranty on the DOGtraceTM product with respect to defects in material and workmanship under normal use and service from the date of the original purchase.The limited warranty does not cover the following: batteries straps damage resulting from misuse, accident, modification or alteration to hardware or software, tampering, unsuitable physical or operating environment beyond product specifications, improper maintenance, or failure caused by a product for which VNT electronics Ltd. is not responsible.
1. The warranty period commences on the date of purchase. The sales receipt or your purchase invoice showing the date of purchase of the Product, showing the serial number and date of purchase of the Product, is the proof of the date of purchase.
2. Within the warranty period, VNT electronics Ltd. will, at no additional charge; perform repair or replacement of defects in workmanship or parts covered by this warranty.
3. The warranty does not cover damage resulting from:a) transportation, fall, weather, extreme temperatures, improper use, mishandling or negligence after the purchase of the Productb) natural disaster (wind, earthquake, lightning storm etc.)c) maintenance or misuse other than in accordance with the instructions provided by VNT electronics Ltd. in relation to the Productd) modification by a party not authorized by VNT electronics Ltd.
4. The warranty provided only applies to the Product purchased from official authorized dealer.
Warranty Terms and Conditions

19
5. We require that all items being sent for repair must be clean. Items deemed insufficiently clean will be returned to the customer unrepaired. Please do not include the strap or any other accessories if not subject to warranty.
6. Other rights and liabilities of the manufacturer and claimants are based on relevant general obligatory legal regulations of the country where the product was sold.
The content of this user guide may be subject to change without prior notice.
Manufacturer: VNT electronics s.r.o. Smetanovo náměstí 104 570 01 Litomyšl Czech Republic Phone: +420 733 121 890 www.dogtrace.com
Dealer:
Copying of this user guide is strictly prohibited without the prior written consent of VNT electronics Ltd.
Version 2016-4-21 / EN