Code Signing Installation Guide - adgrafics
10
Code Signing Digital Certificates Installation Guide Technical Resources
-
Upload
khangminh22 -
Category
Documents
-
view
0 -
download
0
Transcript of Code Signing Installation Guide - adgrafics

Code Signing Digital Certificates Installation Guide
Technical Resources
Code Signing Certificate Installation Guide
BEFORE YOUR BEGIN- VISTA AND INTERNET EXPLORER 7 USERS 1. Due to the added security that Microsoft has introduced to Vista you will need to make sure all the
following steps are completed before installing your certificate. Missing even one step can cause an error at the final stage of installing the certificate, which will result in the entire process needing to be restarted.
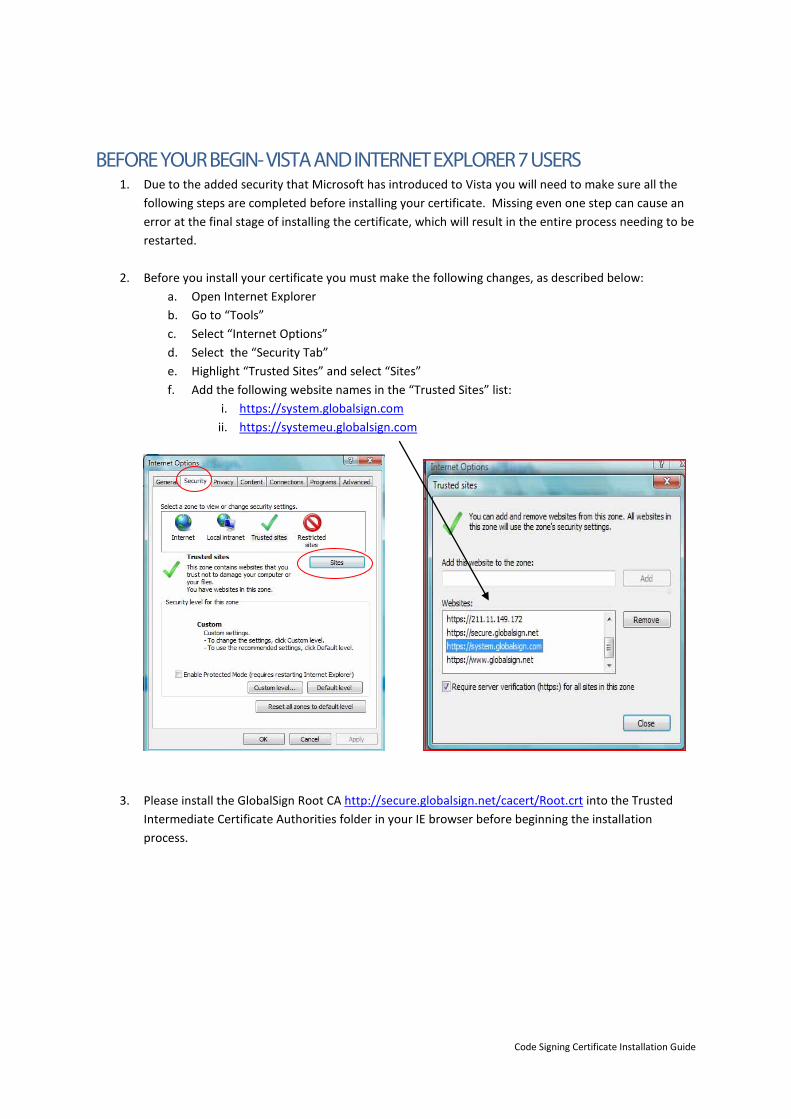
2. Before you install your certificate you must make the following changes, as described below: a. Open Internet Explorer b. Go to “Tools” c. Select “Internet Options” d. Select the “Security Tab” e. Highlight “Trusted Sites” and select “Sites” f. Add the following website names in the “Trusted Sites” list:
i. https://system.globalsign.com ii. https://systemeu.globalsign.com
3. Please install the GlobalSign Root CA http://secure.globalsign.net/cacert/Root.crt into the Trusted Intermediate Certificate Authorities folder in your IE browser before beginning the installation process.

Code Signing Certificate Installation Guide
4. Once you have added GlobalSign to your list of trusted sites, you will want to close Internet Explorer
and re-start. Go back into Internet Options and click on the security tab and then click “Custom Level”.
a. This will open a box called “Security Settings- trusted site zone”
b. You will need to scroll down to the “Active X controls and plug-ins” and change the following default settings:
i. Allow previously unused ActiveX controls to run without prompt: set to Enable ii. Allow Scriptlets: set to Enable
iii. Automatic prompting for ActiveX controls: set to Disable iv. Binary and Script behaviors: set to Enable v. Display video and animation on a webpage that does not use external media player:
set to Disable vi. Download Signed ActiveX controls: set to Prompt
vii. Download unsigned ActiveX controls: set to Prompt viii. Initialize and script ActiveX controls not marked as safe for scripting: Prompt
ix. Run ActiveX controls and plug-ins set to Enable x. Script ActiveX controls marked safe for scripting: set to Enable
c. Click OK d. Click Apply e. Close and re-open your Internet Explorer browser.
5. To begin installation, you will need to open your “pick up” email notification. If you have not yet
received a pick up email notification this means your order is still in the vetting process. All orders placed go through a vetting process to confirm the identity details of the certificate holder; once the vetting is completed you will receive an email notifying you that your digital certificate is ready for “pick up”.
Code Signing Certificate Installation Guide
INSTALLING YOUR CERTIFICATE USING FIREFOX (if using Internet Explorer or Vista, please continue to page 8)
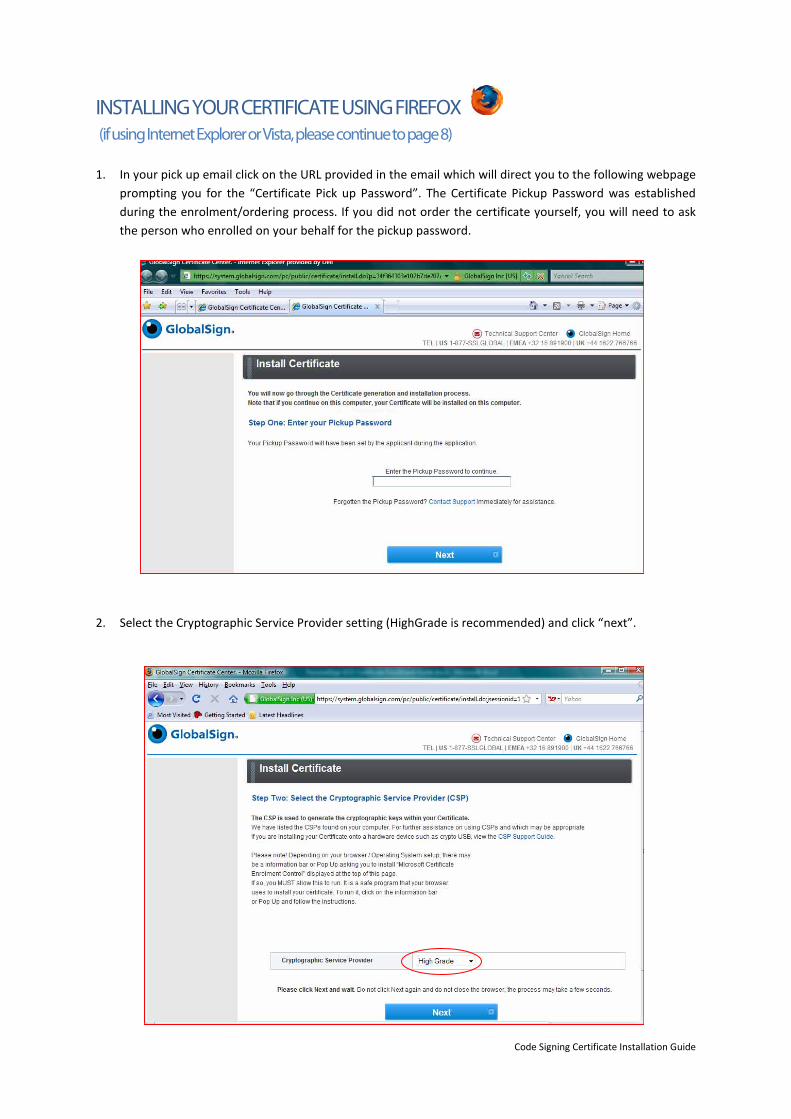
1. In your pick up email click on the URL provided in the email which will direct you to the following webpage
prompting you for the “Certificate Pick up Password”. The Certificate Pickup Password was established during the enrolment/ordering process. If you did not order the certificate yourself, you will need to ask the person who enrolled on your behalf for the pickup password.
2. Select the Cryptographic Service Provider setting (HighGrade is recommended) and click “next”.
Code Signing Certificate Installation Guide
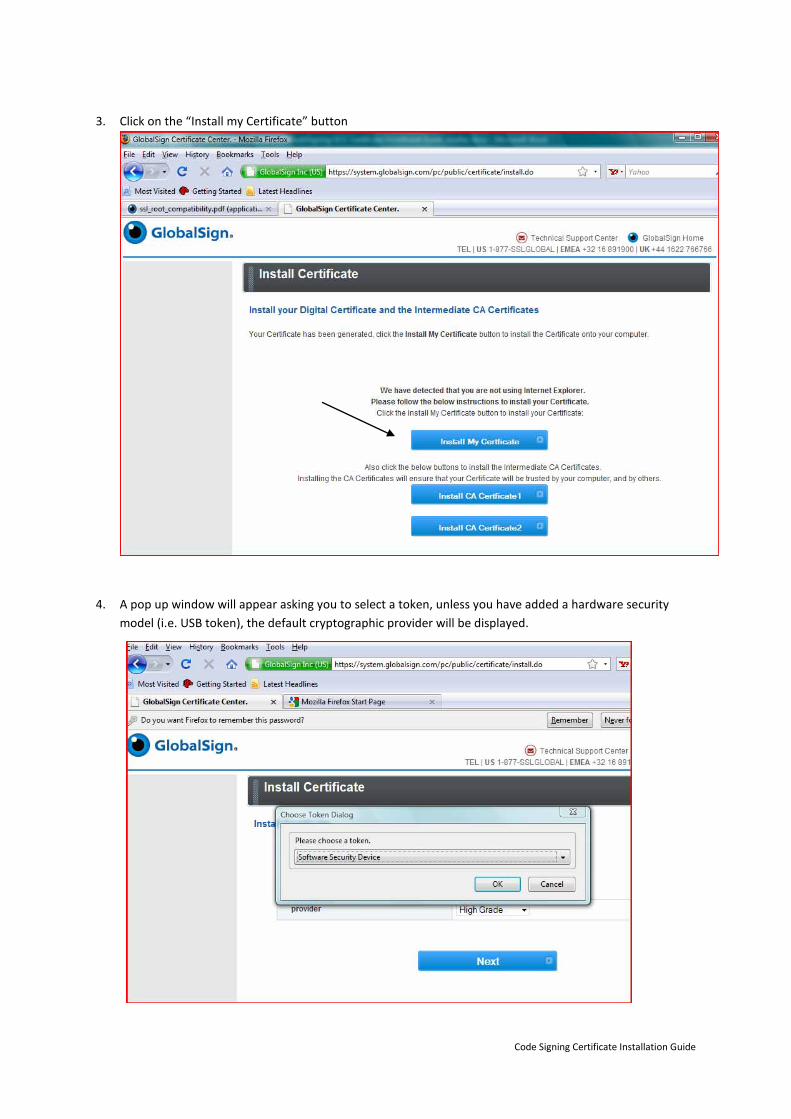
3. Click on the “Install my Certificate” button
4. A pop up window will appear asking you to select a token, unless you have added a hardware security model (i.e. USB token), the default cryptographic provider will be displayed.

Code Signing Certificate Installation Guide
5. Subsequent to the Public/Private key generation which may take a few minutes, you will be able to install your code signing certificate.
6. Next, Click “Install CA Certificate 1 and 2” buttons in order for the full certificate chain to install into your system certificate store.
7. You will receive a message when the installation has been completed.
Code Signing Certificate Installation Guide
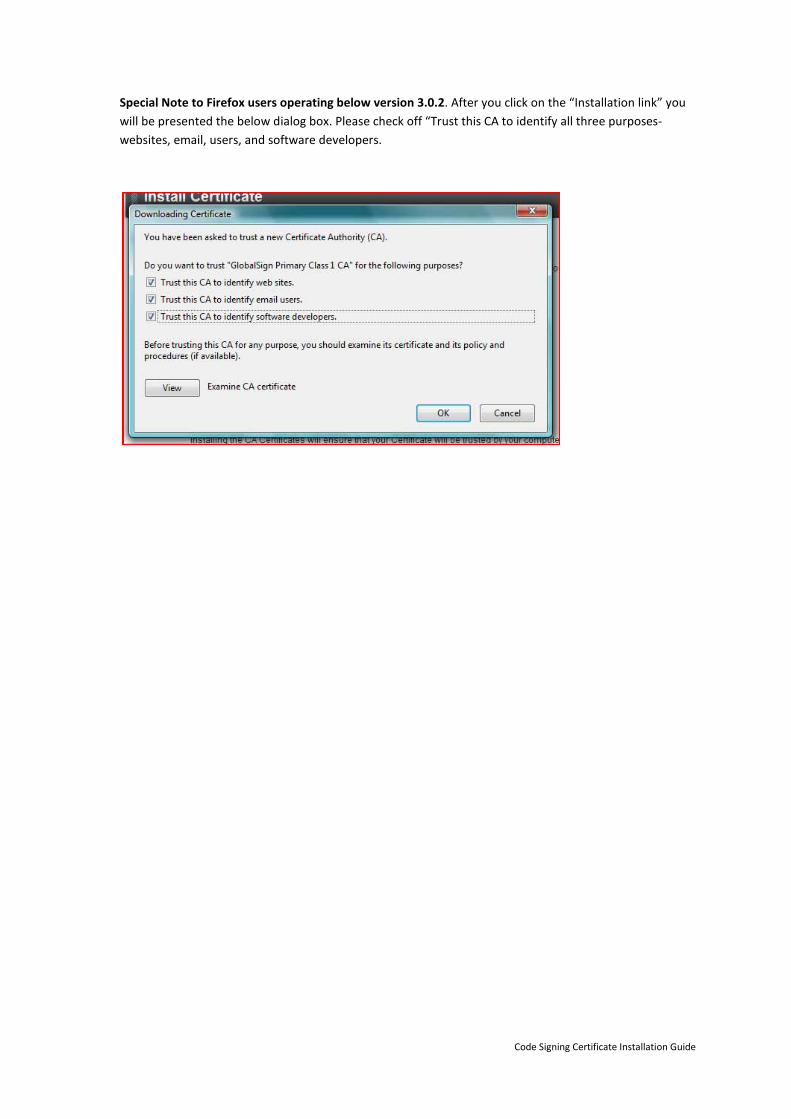
Special Note to Firefox users operating below version 3.0.2. After you click on the “Installation link” you will be presented the below dialog box. Please check off “Trust this CA to identify all three purposes- websites, email, users, and software developers.
Code Signing Certificate Installation Guide
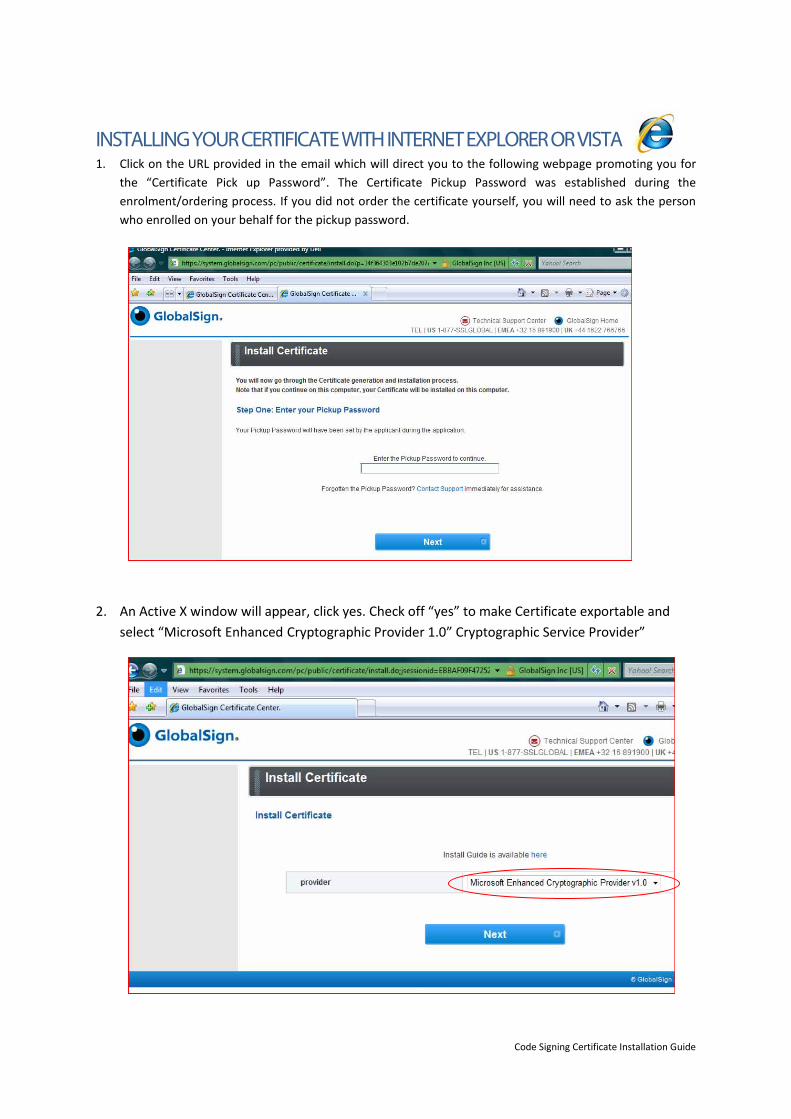
INSTALLING YOUR CERTIFICATE WITH INTERNET EXPLORER OR VISTA 1. Click on the URL provided in the email which will direct you to the following webpage promoting you for
the “Certificate Pick up Password”. The Certificate Pickup Password was established during the enrolment/ordering process. If you did not order the certificate yourself, you will need to ask the person who enrolled on your behalf for the pickup password.
2. An Active X window will appear, click yes. Check off “yes” to make Certificate exportable and select “Microsoft Enhanced Cryptographic Provider 1.0” Cryptographic Service Provider”
Code Signing Certificate Installation Guide
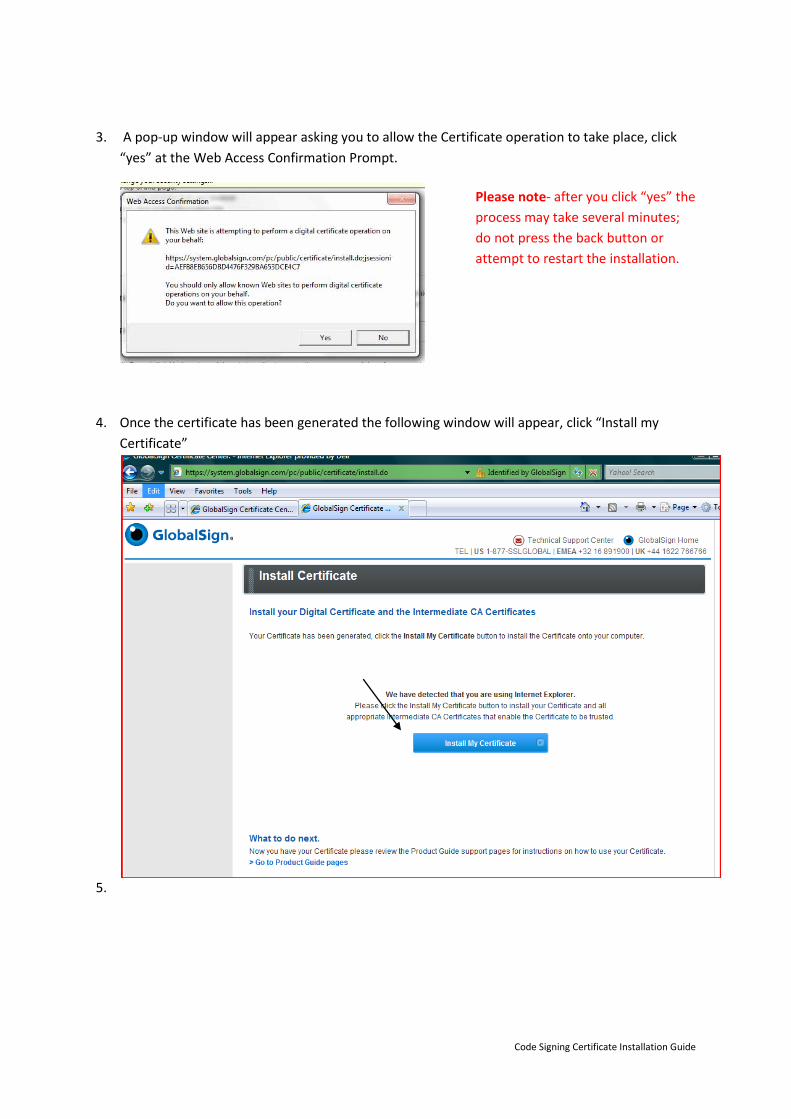
3. A pop-up window will appear asking you to allow the Certificate operation to take place, click “yes” at the Web Access Confirmation Prompt.
4. Once the certificate has been generated the following window will appear, click “Install my Certificate”
5.
Please note- after you click “yes” the process may take several minutes; do not press the back button or attempt to restart the installation.
Code Signing Certificate Installation Guide
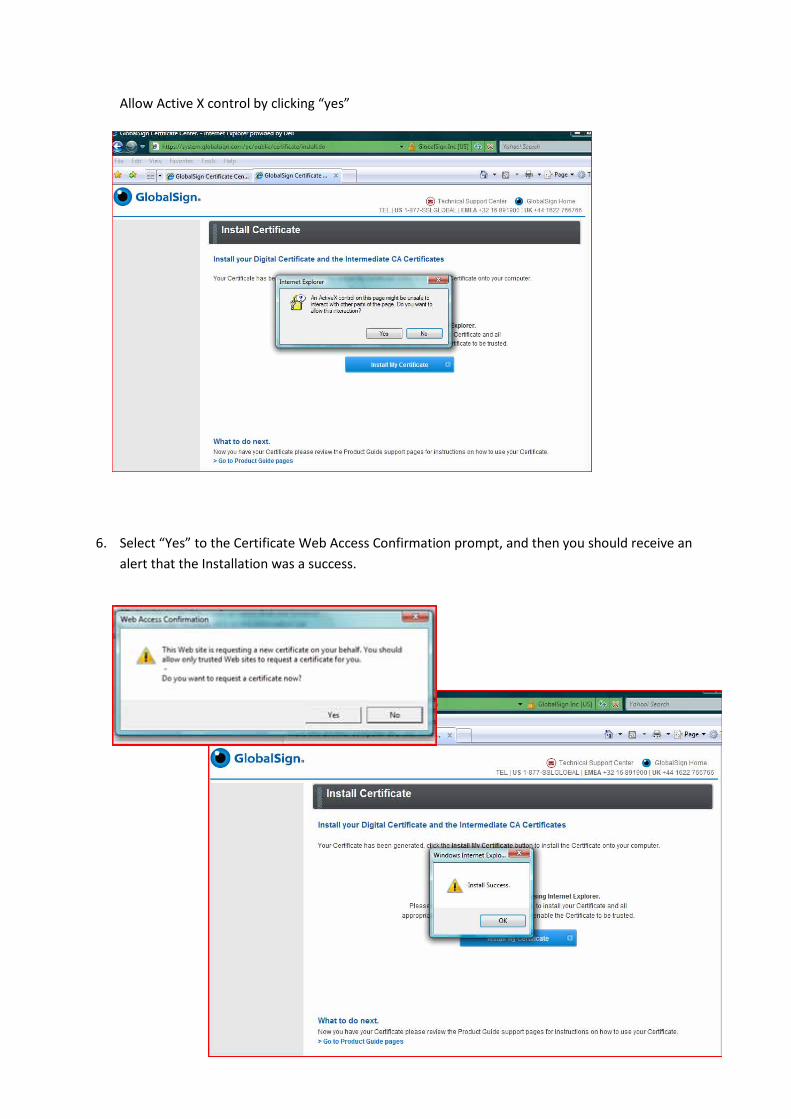
Allow Active X control by clicking “yes”
6. Select “Yes” to the Certificate Web Access Confirmation prompt, and then you should receive an alert that the Installation was a success.