CMS Troubleshooting Guide - Micro Focus
174
Universal CMDB Software Version: 10.33 CMS Troubleshooting Guide Document Release Date: August 2017 Software Release Date: July 2017
-
Upload
khangminh22 -
Category
Documents
-
view
5 -
download
0
Transcript of CMS Troubleshooting Guide - Micro Focus

Universal CMDBSoftware Version: 10.33
CMS Troubleshooting Guide
Document Release Date: August 2017Software Release Date: July 2017

Legal Notices
DisclaimerCertain versions of software and/or documents (“Material”) accessible heremay contain branding from Hewlett-Packard Company (now HP Inc.) and Hewlett PackardEnterprise Company. As of September 1, 2017, theMaterial is now offered by Micro Focus, a separately owned and operated company. Any reference to the HP and HewlettPackard Enterprise/HPEmarks is historical in nature, and the HP and Hewlett Packard Enterprise/HPEmarks are the property of their respective owners.
WarrantyThe only warranties for products and services of Micro Focus and its affiliates and licensors (“Micro Focus”) are set forth in the express warranty statements accompanyingsuch products and services. Nothing herein should be construed as constituting an additional warranty. Micro Focus shall not be liable for technical or editorial errors oromissions contained herein. The information contained herein is subject to change without notice.
Restricted Rights LegendConfidential computer software. Except as specifically indicated otherwise, a valid license from Micro Focus is required for possession, use or copying. Consistent with FAR12.211 and 12.212, Commercial Computer Software, Computer Software Documentation, and Technical Data for Commercial Items are licensed to the U.S. Governmentunder vendor's standard commercial license.
Copyright Notice© 2002 - 2017Micro Focus or one of its affiliates.
Trademark NoticesMICRO FOCUS and theMicro Focus logo, among others, are trademarks or registered trademarks of Micro Focus (IP) Limited or its subsidiaries in the United Kingdom,United States and other countries. All other marks are the property of their respective owners.
Adobe™ is a trademark of Adobe Systems Incorporated.
Microsoft® andWindows® are U.S. registered trademarks of Microsoft Corporation.
UNIX® is a registered trademark of TheOpenGroup.
Documentation UpdatesTo check for recent updates or to verify that you are using themost recent edition of a document, go to: https://softwaresupport.softwaregrp.com.
This site requires that you register for a Software Passport and to sign in. To register for a Software Passport ID, click Register for Software Passport on theMicro FocusSupport website at https://softwaresupport.softwaregrp.com.
You will also receive updated or new editions if you subscribe to the appropriate product support service. Contact your Micro Focus sales representative for details.
SupportVisit theMicro Focus Support site at: https://softwaresupport.softwaregrp.com.
This website provides contact information and details about the products, services, and support that Micro Focus offers.
Micro Focus online support provides customer self-solve capabilities. It provides a fast and efficient way to access interactive technical support tools needed tomanage yourbusiness. As a valued support customer, you can benefit by using the support website to:l Search for knowledge documents of interestl Submit and track support cases and enhancement requestsl Download software patchesl Manage support contractsl Look upMicro Focus support contactsl Review information about available servicesl Enter into discussions with other software customersl Research and register for software training
Most of the support areas require that you register as a Software Passport user and to sign in. Many also require a support contract. To register for a Software Passport ID,click Register for Software Passport on theMicro Focus Support website at https://softwaresupport.softwaregrp.com.
To findmore information about access levels, go to: https://softwaresupport.softwaregrp.com/web/softwaresupport/access-levels.
Integration Catalog accesses theMicro Focus Integration Catalog website. This site enables you to exploreMicro Focus Product Solutions tomeet your business needs,includes a full list of Integrations betweenMicro Focus Products, as well as a listing of ITIL Processes. The URL for this website ishttps://softwaresupport.softwaregrp.com/km/KM01702731.
CMS Troubleshooting Guide
Micro Focus Universal CMDB (10.33) Page 2 of 174

ContentsAbout This Guide 7
Intended Audience 7General Information 7Micro Focus Websites 7
Chapter 1: About Troubleshooting ConfigurationManagementSystem 8
How to Troubleshoot 8General Checks 9Before Calling Support 10
Before Calling Your Support Representative 10Prepare the Generated Data to Be Sent to Micro Focus CustomerSupport Service 11
Retrieve Server Logs by Executing LogGrabber 11Retrieve Probe Logs 12
Available Troubleshooting Resources for UCMDB 13About Log Files 13
UCMDB Log Files 13UCMDB Log Files 14
General Log Files 15Class Model Log Files 17TQL Log Files 18Data-In Log Files 19History Log Files 20Enrichment Log Files 22Dal Log Files 23Authorization Log Files 23UCMDB UI Log Files 24Data Flow Management Log Files 25
Log Severity Levels 29How to Download a Zip File of Log Files and Thread Dumps 29How to Retrieve UCMDB Server Logs for a Specific Time Frame 30How to Use the User Activity Log 31
CMS Troubleshooting Guide
Micro Focus Universal CMDB (10.33) Page 3 of 174

Log Configuration Dialog Box 32Data Flow Probe Log Files 33TQL Parameter Logs 37How to Troubleshoot and Debug Using Generic Adapter Log Files 41
Chapter 2: Troubleshooting Deployment 42Troubleshooting Deployment - UCMDB Server 42Troubleshooting Deployment - Keystore and Truststore 43Troubleshooting Deployment - Configuration Manager 51
Configuration Manager General Limitations and Troubleshooting 51Configuration Manager Upgrade 52Logging In to Configuration Manager 53Configuration Manager Authentications 55
Troubleshooting Deployment - Data Flow Probe 56Chapter 3: Troubleshooting Administration 59
Troubleshooting – Logging In to UCMDB 59Troubleshooting and Limitations – UCMDB Server Administration 61
Troubleshooting Keystore and Truststore 62Troubleshooting and Limitations – Package Manager 71UCMDB Browser - Known Issues 72Troubleshooting - Configure the Enhanced Search Engine 73Troubleshooting - FIPS Deployment 75
Troubleshooting the Data Flow Probes 75Troubleshooting the UCMDB Server 79Troubleshooting the UCMDB UI 82
Troubleshooting - High Availability Mode 86Chapter 4: Troubleshooting Data FlowManagement 88
Troubleshooting and Limitations – Data Flow Probe Setup 89Data Flow Probe Setup - Troubleshooting 89Data Flow Probe Setup - Limitations 92Troubleshooting Probe Auto Upgrade 93
Troubleshooting and Limitations – Multiple CMDB Integration 99CyberArk Integration Troubleshooting and Limitations 101Universal Discovery Troubleshooting and Limitations 104
Troubleshooting – Universal Discovery 105Limitations – Universal Discovery 108
Inventory Discovery Troubleshooting 109
CMS Troubleshooting Guide
Micro Focus Universal CMDB (10.33) Page 4 of 174

How to view all information related to a device in a centralized view? 109How to troubleshoot network availability and latency issue related to adevice? 111
IP Ping and Agent Ping 111SNMP Ping 115Tracert and DNS Query 116
How to check the key indexes of the discovery history information for adiscovered device? 116How to check device related logs for a discovered device? 123
Agent deployment log 123Scanner deployment log 124Virtualization log 125
How to invoke discovery job relevant to the discovered devicemanually and check status to identify potential discovery errors? 125
Install UD Agent 126Update UD Agent 128Upgrade Scanner / Run Scanner / Download Scan File / ParseEnriched Scan File / Run Agentless Scanner 130Uninstall Agent 132Rerun Discovery 133VMware Discovery Jobs 134
How to check which pattern (management zone) is used in thediscovery for a discovered device? 135How to check detailed discovery settings used in the discovery for adiscovered device? 137How to check the SNMP credentials used in the discovery for adiscovered device? 140
Chapter 5: Troubleshooting ConfigurationManager 143Troubleshooting and Limitations – Content Management 143Troubleshooting and Limitations – Federating Data to UCMDB 144Troubleshooting – Explore Views 144Troubleshooting – Review/Authorize 147Troubleshooting and Limitations – Views 149Troubleshooting and Limitations – Policies 149
Chapter 6: Troubleshooting Automated ServiceModeling 150Automated Service Modeling (ASM) Troubleshooting 150Host Discovery by Shell Job 152
CMS Troubleshooting Guide
Micro Focus Universal CMDB (10.33) Page 5 of 174

References 157Add an IP Range to the Ranges Setting 157Discover Load Balancers 157Add or Edit Credentials 157Edit the portNumberToPortName.xml File 158Add or Edit Application Signatures 158
Chapter 7: Troubleshooting Development 159Troubleshooting Migration from Jython Version 2.1 to 2.5.3 159Troubleshooting and Limitations – Developing Generic DatabaseAdapters 161Troubleshooting - Build an Adapter Package 162
Chapter 8: Troubleshooting Hardening 164Troubleshooting and Limitations - Data Flow Credentials Management 164Troubleshooting and Limitations - LW-SSO Authentication 164
Known Issues 164Limitations 165
Chapter 9: TroubleshootingModeling 168Troubleshooting and Limitations – Topology Query Language 168Troubleshooting and Limitations – CI Selector 172
Send documentation feedback 174
CMS Troubleshooting Guide
Micro Focus Universal CMDB (10.33) Page 6 of 174

About This GuideThis guide describes how to troubleshoot problems youmay encounter when using ConfigurationManagement System components. It contains problems and proposed solutions to resolve them.
This chapter includes:Intended Audience 7
General Information 7
Micro Focus Websites 7
Intended AudienceThis guide is intended for administrators and support engineers responsible for administering andmaintaining CMS systems.
General InformationGeneral information aboutConfigurationManagement System can be found athttps://software.microfocus.com/en-us/software/configuration-management-system-database.
Micro Focus WebsitesFor additional information, see the followingMicro Focus websites:
l http://www.microfocus.com
l https://softwaresupport.softwaregrp.com/group/softwaresupport
l Software Support Matrices site:https://softwaresupport.softwaregrp.com/group/softwaresupport/support-matrices
CMS Troubleshooting GuideIntended Audience
Micro Focus Universal CMDB (10.33) Page 7 of 174

Chapter 1: About TroubleshootingConfiguration Management SystemThis chapter includes:
How to Troubleshoot 8
General Checks 9
Before Calling Support 10
Before Calling Your Support Representative 10
Prepare the Generated Data to Be Sent to Micro Focus Customer Support Service 11
Available Troubleshooting Resources for UCMDB 13
About Log Files 13
UCMDB Log Files 13
Data Flow Probe Log Files 33
TQL Parameter Logs 37
How to Troubleshoot and Debug Using Generic Adapter Log Files 41
How to TroubleshootTo solve problems quickly and efficiently:
1. Make yourself familiar with the general troubleshooting information
2. Check if your problem is described in theUniversal CMDB Help Center, the Release Notes orthe troubleshooting sections of applicable guides:
a. To troubleshoot Installation and Upgrade, see theUniversal CMDB Deployment Guide.
b. To troubleshoot Integrations, see theUCMDB Discovery and Integrations Content Guide -HPE Integrations orUCMDB Discovery and Integrations Content Guide - Third PartyIntegrations.
c. To troubleshoot Discovery, see the Universal CMDB Discovery and Integrations ContentGuide Help or the following:
l UCMDB Discovery and Integrations Content Guide - Discovery Activities
l UCMDB Discovery and Integrations Content Guide - Discovery Modules
Micro Focus Universal CMDB (10.33) Page 8 of 174

l UCMDB Discovery and Integrations Content Guide - Supported Content
d. To troubleshoot general administration or configuration tasks, see theUniversal CMDBAdministration Guide.
3. If you cannot find a solution to your problem, report the problem to theMicro Focus CustomerSupport Service. On how to prepare the required data for the support organization, see "Preparethe Generated Data to Be Sent to Micro Focus Customer Support Service" on page 11.
General ChecksBefore proceeding, ensure that:
l You are not running into known limitations that cannot currently be overcome. For specificinformation on Universal CMDB limitations and recommendations, as well as knownUniversalCMDB and non-Universal CMDB problems, see theUniversal CMDB Support Matrix, UniversalCMDB Release Notes or known issues in general across UCMDB. You can also check theKnowledge Base: https://softwaresupport.softwaregrp.com/group/softwaresupport.
l Your problem is not related to third-party hardware or software. In this case, contact the vendorsupport.
l You have the latest Universal CMDB patches or hotfixes installed. Patches and hotfixes can beobtained from:
o To check which UCMDB patches are installed on your system, go to the UCMDB Server JMXconsole and invoke theUCMDB:service=Server Services > viewSystemInformation JMXmethod.
l Check the if your problems is not a known issue or has a solutionmentioned in the latest releasenotes:
UCMDB Content Pack, UCMDB CUP, UCMDB Browser, or Discovery Knowledge Pack
l You have appropriate operating system patches installed
l The system is not running low onmemory – there is sufficient resource allocation on the server
l Check the respective UCMDB logs for each type:
o Client (UI) logs:%temp%\UcmdbLog\log\applet-errors.log (Windows)
o Browser Embedded logs: <UCMDBServer>\runtime\log\ucmdb_browser.log orwarn_log
o Browser Standalone logs : <WebAppServer>\<webappcontext>\<log_folder>
CMS Troubleshooting GuideGeneral Checks
Micro Focus Universal CMDB (10.33) Page 9 of 174

o Server logs: <UCMDBServer>\runtime\log\error.log
o Probe logs: <DataFlowProbe>\runtime\log\probe-error.log
l Check if your problem is not described in the troubleshooting sections of applicable user guides.
Before Calling SupportThis chapter includes:
Before Calling Your Support Representative 10
Prepare the Generated Data to Be Sent to Micro Focus Customer Support Service 11
Before Calling Your Support RepresentativeIf you cannot solve your problem, report it. Before contacting theMicro Focus Customer SupportService, ensure that:
l You have performed the general checks
See "About Troubleshooting ConfigurationManagement System" on page 8.
l You have collected the relevant data about the problem you will send to theMicro Focus CustomerSupport Service:
a. A description of the problem, including timestamps if applicable.
b. A description of your environment:
i. Is this productions or test environment
ii. Is it a new implementation – install or upgrade
iii. Any environment changes prior to the encountered issue
iv. Has the observed behavior ever functioned correctly previously
c. Collect the output of the viewSystemInformation JMX method from the UCMDB server JMXconsole > UCMDB:service=Server Services > viewSystemInformation.
d. Collect the relevant error logs from theGeneral Check section
e. Collect the output of Run Support Handlers from the UCMDB server JMX console >UCMDB:service=Supportability Services > runSupportHandlersForSpecificCategories,use empty categories.
CMS Troubleshooting GuideBefore Calling Support
Micro Focus Universal CMDB (10.33) Page 10 of 174

TheMicro Focus Customer Support Service will then provide you with the further instructions. Youmight be asked to:
1. Enable UCMDB Debugging
2. Prepare the generated data for sending to theMicro Focus Customer Support Service
Prepare the Generated Data to Be Sent to Micro
Focus Customer Support ServiceTheMicro Focus Customer Support Servicemight ask you to gather and send the data they need toresolve a technical issue. Since UCMDB operates in large network environments, the data sometimesmay be difficult to gather. The UCMDB LogGrabber is a tool for collecting and packaging log data. Themethods to use the LogGrabber tool are described below.
Retrieve Server Logs by Executing LogGrabber
This task describes how to retrieve UCMDB Server log files.
l If the UCMDB Server is operational
a. Launch theWeb browser and enter the following address: https://localhost:8443/jmx-console
Youmay have to log in with a user name and password. (Default user name is sysadmin)
b. Search and click UCMDB:service=Server Services to open the JMX MBEAN View page.
c. Click executeLogGrabber.
d. Click Invoke.
e. Provide the downloaded zip package toMicro Focus Customer Support Service.
l If the UCMDB server is not operational
a. Execute the LogGrabber script: <UCMDB_Server_Home>/tools/logGrabber/logGrabber.bat
b. Clear the content of the following folder: <UCMDB_Server_Home>/runtime/log
Make sure NOT to remove the log folder itself.
c. Restart the UCMDB Server.
CMS Troubleshooting GuideBefore Calling Support
Micro Focus Universal CMDB (10.33) Page 11 of 174
d. Allow some time for the problem to reproduce.
e. Execute the LogGrabber script again: <UCMDB_Server_Home>/tools/logGrabber/logGrabber.bat
f. Collect themost recent LogGrabber archive first from <UCMDB_Server_Home>/runtime/logGrabber_xxx.zip and upload it to the Support incident.
g. Once the upload completes in step f, inform Support and upload the LogGrabber output of Stepa.
Retrieve Probe Logs
l If the Probe is operational
a. Launch theWeb browser and enter the following address: https://localhost:8453/
Youmay have to log in with a user name and password. (Default user name is sysadmin)
b. Go toGeneralUtils.
c. Click executeLogGrabber.
d. Click Invoke.
e. Provide the downloaded zip package toMicro Focus Customer Support Service.
l If the Probe is not operational
a. Zip the content of the following folder: <DataFlowProbe>/runtime/log
b. Clear the content of the following folder: <DataFlowProbe>/runtime/log
Make sure NOT to remove the log folder itself.
c. Restart the Data Flow Probe.
d. Allow some time for the problem to reproduce.
e. Zip again the content of the folder: <DataFlowProbe>/runtime/log
f. Collect themost recent log archive first and upload it to the Support incident.
g. Once the upload completes in step f, inform Support and upload the log zip of Step a.
CMS Troubleshooting GuideBefore Calling Support
Micro Focus Universal CMDB (10.33) Page 12 of 174

Available Troubleshooting Resources forUCMDBl Installation troubleshooting. Use to troubleshoot common problems that youmay encounterwhen installing Universal CMDB, and the solutions to those problems. See "TroubleshootingDeployment" on page 42.
l Login troubleshooting. Use to troubleshoot possible causes of failure to log in to UniversalCMDB. See "Troubleshooting – Logging In to UCMDB" on page 59.
l Micro Focus Software Self-solve knowledge base. Use to search for specific troubleshootinginformation on a wide variety of topics. Located on theMicro Focus Software Support site, theMicro Focus Software Self-solve knowledge base can be accessed by selecting Troubleshooting &Knowledge Base from the Universal CMDB Helpmenu.
Note that only registered customers can access the resources on theMicro Focus SoftwareSupport site. Customers who have not yet registered can do so from this site.
l Universal CMDB Log files. Use to troubleshoot CMDB runtime problems. For details, see .
l Data Flow Management log files. Use to troubleshoot DFM problems. For details, see "DataFlow Probe Log Files" on page 33 .
l Query log files. Use to view definitions for query parameter log files. For details, see "UCMDB LogFiles" on the next page.
About Log FilesThis section includes:
UCMDB Log Files 13
Data Flow Probe Log Files 33
TQL Parameter Logs 37
How to Troubleshoot and Debug Using Generic Adapter Log Files 41
UCMDB Log FilesThis section includes:
CMS Troubleshooting GuideAvailable Troubleshooting Resources for UCMDB
Micro Focus Universal CMDB (10.33) Page 13 of 174

UCMDB Log Files 14
Log Severity Levels 29
How to Download a Zip File of Log Files and Thread Dumps 29
How to Retrieve UCMDB Server Logs for a Specific Time Frame 30
How to Use the User Activity Log 31
Log Configuration Dialog Box 32
UCMDB Log Files
CMDB log files enable you to perform basic troubleshooting of CMDB runtime problems. Additionally,by tracking the CMDB behavior in the log files, you can examine the effects of changes made in thesystem. The CMDB is composed of subsystems and each subsystem records to several log files.CMDB Server logs have consistent format. The order is data and time: (format "yyyy-MM-ddhh:mm:ss:SSS") logLevel [Thread Name]. The wrapper log is an exception to this standard. Thesesettings can be changed from log properties files located in theUCMDBServer\conf\log\ folder.
Log files are located in:
l Windows: C:\hp\UCMDB\UCMDBServer\runtime\log
l Linux: /opt/hp/UCMDB/UCMDBServer/runtime/log
Note: UCMDB log levels should be set to the OOTB values. They may be increased wheninvestigating issues. However, after obtaining the required information the log levels should bereverted. Increased log levels for a longer period of timemay have an impact over performance.
If you want to delete the logs, you should delete the content in the log folder only, and never deletethe folder itself. Make sure that the log folder always exists. If the log folder is deletedaccidentally, create the log folder manually before starting up the UCMDB Server.
This section includes the following topics:
l "General Log Files" on the next page
l "Class Model Log Files" on page 17
l "TQL Log Files" on page 18
l "Data-In Log Files" on page 19
l "History Log Files" on page 20
l "Enrichment Log Files" on page 22
CMS Troubleshooting GuideAbout Log Files
Micro Focus Universal CMDB (10.33) Page 14 of 174

l "Dal Log Files" on page 23
l "Authorization Log Files" on page 23
l "UCMDB UI Log Files" on page 24
l "Data Flow Management Log Files" on page 25
General Log Files
Quota Log Parameters
The log name is cmdb.quota.log.
Log File Description
Purpose Quota names, quota values, and current quota levels.
InformationLevel
Quota names and values set in the server and customer levels during a customerload.
Error Level CMDB operations that fail because they exceed quota limits.
Debug Level A count collector runs every nminutes and gathers current counts for all quotas.Collected counts are logged.
BasicTroubleshooting
If operations fail because of quota limits, check the count growth and quotavalues.
CMDB Operation Statistics Log
The log name is cmdb.operation.statistics.log.
The log does not appear in the log folder by default. Only when you perform some specific action, thelog becomes available. For example, when you invoke the resetOperationStatistics JMX method fromthe Framework Services category, it resets CMDB Server Operation Statistics and writes dump tothis log.
Log File Description
Purpose Statistics for all operations performed in the past 15minutes including worstoperation instances.
Information Level Statistics per operation including operation class name, caller application, and
CMS Troubleshooting GuideAbout Log Files
Micro Focus Universal CMDB (10.33) Page 15 of 174

Log File Description
customer ID.
Default of 10 worst operation instances.
Error Level Disables the statistics feature.
Debug Level Not available.
BasicTroubleshooting
Check when there is a performance slowdown.
Configuration Log
The log name is configuration.log.
Log File Description
Purpose Contains basic environment details, including:
l Server version and CUP version
l Database vendor and version
l Content pack version
l High Availability configuration
l Data Flow Probe version
l Changes to settings (each setting is audited in the log)
Information Level Information is written to the log when the system starts up or when a setting ischanged.
Error Level Not available.
Debug Level Not available.
BasicTroubleshooting
Used by Customer Support to help reproduce customer problems.
Keystore and Truststore Password Save Log
The log name is save_store_pass.log.
Log File Description
Purpose Information about installation log: keystore password and truststore passwordsave time and encryption type.
CMS Troubleshooting GuideAbout Log Files
Micro Focus Universal CMDB (10.33) Page 16 of 174

Log File Description
InformationLevel
Operation details.
Error Level Not available.
Debug Level Not available.
BasicTroubleshooting
This is especially useful when installing and starting the UCMDB server. You canuse this log information together with the information in Troubleshooting Keystoreand Truststore.
Keystore and Truststore Password Verify Log
The log name is verify_store_pass.log.
Log File Description
Purpose Information about the installation log: whether keystore password and truststorepassword are saved correctly or not. If server-storepass.conf exists, then theUCMDB server installer will change keystore and truststore passwords withkeytool.
InformationLevel
Operation details.
Error Level Not available.
Debug Level Not available.
BasicTroubleshooting
This is especially useful when installing and starting the UCMDB server. You canuse this log information together with the information in Troubleshooting Keystoreand Truststore.
Class Model Log Files
CI Type Model Log
The log name is cmdb.classmodel.log.
This log should appear when you perform operations on the UCMDB class model, like creating a newCI Type, or adding an attribute on an existing CI Type.
CMS Troubleshooting GuideAbout Log Files
Micro Focus Universal CMDB (10.33) Page 17 of 174

Log File Description
Purpose CI TypeModel errors and debugmessages.
InformationLevel
When a CI TypeModel is loaded, incorrect definitions are logged as informationalmessages. An example of an incorrect definition is duplicate attributes.
Error Level Not available.
Debug Level Every CI Type update includes the following:
l Original CIT in XML format
l New CIT in XML format
l Differences between the CITs
If the CI TypeModel update is rejected, the reason is logged.
BasicTroubleshooting
Compares the differences that the server finds between the original CIT and thenew CIT. This is useful to understand the following scenarios:
l A CIT in a package failed
l An action in the CIT browser applet failed
l An action in the CIT browser applet succeeded when it should have failed
TQL Log Files
CMDB Notification Log
The log name is cmdb.notification.log.
Log File Description
Purpose Notificationmessages from the time of the component's creation in the CMDBuntil the client's listener receives amessage.
Most components receive configuration changes from the CMDB in pushmode,by the notificationmechanism, rather than in pull mode.
InformationLevel
l Startup and shutdown of publishers
l Register and unregister remote and internal listeners
Error Level l Errors whenmessages are published
l Errors whenmessages are received
CMS Troubleshooting GuideAbout Log Files
Micro Focus Universal CMDB (10.33) Page 18 of 174

Log File Description
Debug Level l Uniquemessage ID
l Number of changes that amessage includes as well as more details accordingto the type of themessage (for example, the TQL result version)
l JMS header properties
BasicTroubleshooting
If an application does not receive a notification, check the following:
l a listener is registered with the appropriate notification filter
l amessage is published with data that matches this filter
l amessage is received by the listener (use the uniquemessage ID to verify)
Data-In Log Files
CMDB Model Audit Short Log
The log name is cmdb.model.audit.short.log.
Log File Description
Purpose Information about a CI Type operation: type of operation, data received as input,and what happened to the data in each CIT.
Also contains information about the caller application, execution time, andpersistency time.
InformationLevel
Operation details.
Error Level Not available.
Debug Level Not available.
BasicTroubleshooting
If there are no changes when there should be, check the following:
l Whether the operation exists.
l Whether the input is correct.
l What happened to the data. Theremay have been a false update.
This is especially useful when running DFM to trace the input.
CMS Troubleshooting GuideAbout Log Files
Micro Focus Universal CMDB (10.33) Page 19 of 174

History Log Files
History Log
The log name is history.log.
Log File Description
Purpose Records general history events
Information Level l Auto completion events
l Auto complete table lock/unlock messages
l Tenants bitmask column size handling
l Delete customer fuse notice
Debug Level l Auto completion details
l History Root table handlingmessages
History Audit Update Log
The log name is history.update.audit.log.
Log File Description
Purpose Tracks events saved in the History tables
Information Level l Details all events stored in the history tables
l Event statistics
Debug Level Database statistics
History Partition Log
The log name is history.partition.log.
Log File Description
Purpose l Records history partition data.
l Records the Baseline process events.
Information Level l Add/Remove partition history tables
CMS Troubleshooting GuideAbout Log Files
Micro Focus Universal CMDB (10.33) Page 20 of 174

Log File Description
l Baseline events
l Baseline statistics
Error Level l Table partition failures
l Baseline process failures
Query History Log
The log name is history.queries.log.
Log File Description
Purpose Records all the queries performed on the history tables.
Information Level l Query condition
l Query results summary
Error Level Fuse exceeded
Debug Level l Query condition details
l Query result details
History Class Model Changes Log
The log name is history.classmodel.changes.log.
Log File Description
Purpose Tracks all the class model changes that affect the history tables.
Information Level Class aligningmessages
Error Level Errors that occurred during class aligning
History Purging Log
The log name is history.purge.log.
Log File Description
Purpose Records the History purging process events
CMS Troubleshooting GuideAbout Log Files
Micro Focus Universal CMDB (10.33) Page 21 of 174

Log File Description
Information Level Purging process information
Error Level Errors that occurred during the purging process
Debug Level Details about purged data
Enrichment Log Files
CMDB Enrichment Log
The log name is cmdb.enrichment.log.
Log File Description
Purpose l Enrichment definitions: adding, updating, removing, and calculating.
l Calculation results such as how many CIs were added, how manyrelationships were removed, and so forth.
l Supplies the reason for a calculation failure. Failure in amodel update,however, is not included since it is an asynchronous execution.
InformationLevel
l Add, update, and remove enrichment definitions.
l Add, update, and remove CIs or relationships to or from amodel.
Error Level Calculation failure.
Debug Level Traces the enrichment calculation process.
BasicTroubleshooting
l If no calculation was carried out, check the definition of add enrichment.
l If there are no results, check the finish calculate entry.
CMS Troubleshooting GuideAbout Log Files
Micro Focus Universal CMDB (10.33) Page 22 of 174

Dal Log Files
CMDB Dal Log
The log name is cmdb.dal.log.
Log File Description
Purpose Information about activity that occurred in the data access layer, the layer thatworks with the CMDB.
InformationLevel
Not available.
Error Level l Connection pool errors
l Database errors
l Command execution errors
Debug Level l All DAL commands executed
l All SQL commands executed
BasicTroubleshooting
If you suspect that CMDB actions are taking too long, check the time spent onqueries and updates in the DAL logs and operation logs.
Exception details and ID are entered into the log. The exception ID appears in theexception itself.
Authorization Log Files
CMDB Authorization Management Log
The log name is security.authorization.management.log.
Log File Description
Purpose Audit all modifications related to the authorizationmodel.
InformationLevel
l Creation and deletion of users, user groups, tenants, roles, and resourcegroups.
l Addition and removal of users from user groups, changes to user passwords,
CMS Troubleshooting GuideAbout Log Files
Micro Focus Universal CMDB (10.33) Page 23 of 174
Log File Description
and changes in users' default tenants.
l Addition and removal of permissions from roles and changes in read-onlystatus of roles.
l Addition and removal of resources from resource groups.
l Changes in user role assignments.
l Changes in resource tenant associations.
Error Level Failure to create or modify authorization resources, such as trying to create a userwith an existing name.
Debug Level Web services login requests.
BasicTroubleshooting
May be used to track why a user no longer has a specific permission.
CMDB Authorization Permissions Log
The log name is security.authorization.permissions.log.
This log contains detailed information for authorization and out-of-the-box information. To enable theprint of information, youmay need to set the log level toDEBUG.
Log File Description
Purpose Debug authorization permissions queries.
Debug Level Print all existing permissions for the user currently logged in, whenever they arequeried in the server.
BasicTroubleshooting
To check a specific permission issue,turn on the debug level, perform the action inthe UI, turn the debug level off, and check the log for the existing permissions ofthe user.
It is not recommended to keep this log at debug level, because it generates a largeamount of printed output.
UCMDB UI Log Files
Client-side Applet Logs
The following client side applet logs are also available:
CMS Troubleshooting GuideAbout Log Files
Micro Focus Universal CMDB (10.33) Page 24 of 174

l applet-operations.log. Tracks the operations that are executed from the CMDB UI to the UCMDBserver.
l applet-general.log. General log for the UI.
l applet-cacheStatistics.log. Tracks statistics of the UI cache.
l applet-missing_resources.log.Missing resources log.
l applet-applet-tasks.log. Logs task executions.
l applet-timeMeasure.log. Log for measuring performance.
l applet-memoryTracker.log. Tracks thememory usage of the UI.
l applet-errors.log. Logs the errors that occurred in the UI
Note: UCMDB UI log files are present in the%Temp%/UcmdbLog/log folder on themachinefrom which you access the UCMDB UI.
Data Flow Management Log Files
Data Flow Management log files store information about data flow activity (discovery and integrations),as well as related errors, that occur on the Server side.
mam.AutoDiscovery.log
Contains information about tasks running on the server. The server provides services to the userinterface or the ProbeGateway, such as: activating jobs, processing results from the Probe, or creatingtasks for the Probe.
Level Description
Error All DFM process errors on the server side.
Information Information about requests being processed.
Debug Logs mainly for debugging purposes.
Basic Troubleshooting. Check this log when you have invalid user interface responses or errors youneed to explore. This log provides information to enable you to analyze the problems.
CMS Troubleshooting GuideAbout Log Files
Micro Focus Universal CMDB (10.33) Page 25 of 174

mam.autodiscovery.results.stat.log
Contains the statistics of the results received from the Probe.
mam.autodiscovery.accuratedependency.log
(Deprecated) Contains information about accurate dependency for the Automatic ServiceModelingfeature. This log is related to the old ASM version (before Content Pack 18), and is no longer in use.
mam.dispatch.log
Contains all the dispatch related information.
To enable this log,
1. Locate and open the <UCMDB_Server_Home>/conf/log/mam.properties file.
2. Manually add the following settings into themam.properties file:
log4j.category.mam.dispatch=${loglevel}, mam.dispatch.appender
#######################################
## mam.packaging ##
#######################################
log4j.appender.mam.dispatch.appender=com.mercury.topaz.cmdb.shared.base.log.BetterRollingFileAppender
log4j.appender.mam.dispatch.appender.File=${logs.dir}/mam.dispatch.log
log4j.appender.mam.dispatch.appender.MaxFileSize=${def.file.max.size}
log4j.appender.mam.dispatch.appender.MaxBackupIndex=${def.files.backup.count}
log4j.appender.mam.dispatch.appender.layout=org.apache.log4j.PatternLayout
log4j.appender.mam.dispatch.appender.layout.ConversionPattern=${msg.layout}
3. Save the file.
Autodiscovery Dal Log
The log name ismam.autodiscovery.dal.log.
CMS Troubleshooting GuideAbout Log Files
Micro Focus Universal CMDB (10.33) Page 26 of 174

Log File Description
Purpose Holds information on queries and other actions taken on the server’s databasetables as part of the discovery process.
InformationLevel
A summary of actions taken and their results on the database (such as retrievinginformation, deleting records, and so on).
Error Level All critical errors that occurred during the attempt to access the database.
Debug Level Detailed information on query parameters and/or the results that are retrieved fromthem
BasicTroubleshooting
If there are any database errors or failures (such as connection failed, technicalerror in the query, and so on), the error log is included in this log file also.
workflow_sizing.log
Enabling this log file helps you to collect running statistics (for example, time spent on normalizationand auto delete) of eachmodules on a probe.
How to Enable this log?
To enable this log,
1. On the probe, locate and open the /conf/log/probeGWLog4j.properties and/conf/log/probeMgrLog4j.properties files.
2. Manually add the following settings into each of the above files:
#######################################
### cmdb.workflow.sizing ##
#######################################
log4j.category.cmdb.workflow.sizing=INFO, cmdb_workflow_sizing
log4j.appender.cmdb_workflow_sizing=com.mercury.topaz.cmdb.shared.base.log.BetterRollingFileAppender
log4j.appender.cmdb_workflow_sizing.File=${logs.dir}/workflow_sizing.log
log4j.appender.cmdb_workflow_sizing.Append=true
log4j.appender.cmdb_workflow_sizing.MaxFileSize=512MB
log4j.appender.cmdb_workflow_sizing.Threshold=INFO
log4j.appender.cmdb_workflow_sizing.MaxBackupIndex=10
CMS Troubleshooting GuideAbout Log Files
Micro Focus Universal CMDB (10.33) Page 27 of 174

log4j.appender.cmdb_workflow_sizing.layout=org.apache.log4j.PatternLayout
log4j.appender.cmdb_workflow_sizing.layout.ConversionPattern=<%d> [%-5p][%t] (%F:%L) - %m%n
log4j.appender.cmdb_workflow_sizing.encoding=UTF-8
3. Save the files.
4. Restart the probe.
Sample log
<2015-11-11 13:56:51,459> [INFO ] [ProbeGW Task Results Sender](TaskResultsSenderThread.java:458) -[TaskResultsSenderThread.handleSuccessTriggers.start][desc=update IDmapping,size=1]
<2015-11-11 13:56:51,460> [INFO ] [ProbeGW Task Results Sender](TaskResultsSenderThread.java:481) -[TaskResultsSenderThread.handleSuccessTriggers.stop][desc=update IDmapping,size=1]
Probe Auto Upgrade Log
The log name is probe_auto_upgrade.log.
It shows in theC:\hp\UCMDB\DataFlowProbe\runtime\log\probeUpgradeLogs\<source_version>to<target_version> folder. For example:C:\hp\UCMDB\DataFlowProbe\runtime\log\probeUpgradeLogs\10.32to10.33.
This log file is also sent to the UCMDB server and shows as <domain_name>_probename_auto_upgrade.log in theC:\hp\UCMDB\UCMDBServer\runtime\log\probeUpgradeLogs\<source_version>to<target_version>\failed|success folder.
Log File Description
Purpose Shows the related information when the probe auto upgrade agent upgrades aprobe.
Information Level Shows the console output of normal information.
Error Level Any error that occurs when the probe auto upgrade agent upgrades a probe.
Debug Level N/A
BasicTroubleshooting
Check this log file when the probe upgrade fails.
CMS Troubleshooting GuideAbout Log Files
Micro Focus Universal CMDB (10.33) Page 28 of 174

Log Severity Levels
Each log is set so that the information it records corresponds to a certain severity threshold. Becausethe various logs are used to keep track of different information, each is pre-set to an appropriate defaultlevel. For details on changing the log level, see "Changing Log Levels" below.
Typical log levels are listed below from narrowest to widest scope:
l FATAL. The log records only events that prevent the system from functioning.
l ERROR. In addition to Fatal events, the log records events that adversely affect the immediatefunctioning of the CMDB. When amalfunction occurs, you can check if Error messages werelogged and inspect their content to trace the source of the failure.
l WARN. The log's scope includes, in addition to Fatal and Error-level events, problems for which theCMDB is currently able to compensate and incidents that should be noted to prevent possible futuremalfunctions.
l INFO. The log records all activity. Most of the information is normally routine and of little use andthe log file quickly fills up.
l DEBUG. This level is used by Micro Focus Software Support when troubleshooting problems.
Note: The names of the different log levels may vary slightly on different servers and for differentprocedures. For example, INFOmay be referred to as Always logged or Flow.
Changing Log Levels
If requested by Micro Focus Software Support, youmay have to change the severity threshold level ina log, for example, to a debug level. For details on changing the log level, see "Log Configuration DialogBox" on page 32.
How to Download a Zip File of Log Files and Thread
Dumps
You can produce a zip file that includes all logs and thread dumps. You create the file either through aJMX operation on the client machine, or by running a batch file on the UCMDB Server.
CMS Troubleshooting GuideAbout Log Files
Micro Focus Universal CMDB (10.33) Page 29 of 174

Thread dumps are created periodically: Once aminute, a thread dump snapshot is taken and is savedto a new file in theC:\hp\UCMDB\UCMDBServer\runtime\log\threadDumps folder. Thread dumpfiles from the last hour are kept. This folder also holds the ad hoc Server snapshots that are generatedduring the logGrabber execution.
To generate the zip file from the client machine:
1. Launch theWeb browser and enter the server address, as follows: https://<UCMDB Server HostName or IP>:8443/jmx-console.
Youmay have to log in with a user name and password.
2. UnderUCMDB, click UCMDB:service=Server services to open the JMX MBEAN View page.
3. Locate the executeLogGrabber operation.
4. Click Invoke.
A Server snapshot file with the name LogGrabber_serverSnapshot_<current date and time>.txt is created in the following location:C:\hp\UCMDB\UCMDBServer\runtime\log\threadDumps. This is a thread dump that includesthe threads of the Server framework only.
5. In the File Download dialog box, you can open the logGrabber_<current time>.zip file, ordownload it to the client machine.
To generate the zip file from the UCMDB Server:
1. Access the following folder on the UCMDB Server:C:\hp\UCMDB\UCMDBServer\tools\logGrabber\.
2. Run the logGrabber.bat file.
The LogGrabber_<current time>.zip file is created in the following location:C:\hp\UCMDB\UCMDBServer\runtime. This is a thread dump that includes the threads of theServer framework only.
How to Retrieve UCMDB Server Logs for a Specific Time
Frame
You can produce a zip file containing all UCMDB server logs for a given time frame. This is intended forsupport engineers or other users who need to obtain logs for a specific time frame.
CMS Troubleshooting GuideAbout Log Files
Micro Focus Universal CMDB (10.33) Page 30 of 174

To generate the zip file from the client machine:
1. Launch theWeb browser and enter the server address, as follows: https://<UCMDB Server HostName or IP>:8443/jmx-console.
Youmay have to log in with a user name and password.
2. UnderUCMDB, click UCMDB:service=Server Services to open the JMX MBEAN View page.
3. Locate the executeServerLogParser operation.
4. Enter the start time in the required format.
5. (Optional) Enter an end time. If you do not provide an end time, the current time that the JMXmethod is invoked is used.
6. Click Invoke.
When the process has finished, the file can be downloaded from the browser.
Limitations
l The zip file is also located on the UCMDB server machine as thec:\hp\UCMDB\UCMDBServer\runtime\ParsedLogGrabber_<time>.zip file. For maintenancepurposes, this file must bemanually deleted.
l The folder c:\hp\UCMDB\UCMDBServer\runtime\log\ParsedLogs_<date> is also created andcontains the unzipped contents. For maintenance purposes, this file must bemanually deleted.
l In high availability UCMDB deployments, this JMX method is running against one server only.
l Only logs from the same date can be parsed.
How to Use the User Activity Log
When troubleshooting a problem in your system, another useful tool is the User Activity log. Whenactivated, this log records all the actions performed on your system, enablingMicro Focus SoftwareSupport to reproduce the problem and troubleshoot it.
To activate the User Activity log, first verify that it is enabled:
1. On the UCMDB server, launch theWeb browser and enter the following address:https://localhost:8443/jmx-console
Youmay have to log in with a user name and password.
CMS Troubleshooting GuideAbout Log Files
Micro Focus Universal CMDB (10.33) Page 31 of 174

2. Click UCMDB:service=Settings Services to open the JMX MBEAN View page.
3. Locate the showSettingsByCategory method.
4. Enter General Settings as the category name and click Invoke.
5. Locate themam.web.user.activity.log.enabled setting and verify that it is set to true.
6. If it is set to false, go back to theSettings Services page, and select the setSettingValuemethod.
7. Entermam.web.user.activity.log.enabled as the setting and true as the value and click Invoke.
Next, change the log level to INFO:
1. In the JMX Console, click UCMDB:service=Server Services
2. Locate the loggersLevels method and click Invoke.
3. Locate the com.hp.ucmdb.uiserver.aspects logger and select INFO from the drop-down list.
4. Click Update loggers.
The log is now activated. Perform the actions that led to the problem. The User Activity logautomatically records them.
When you are finished, disable the log using the loggersLevels method and selectingERROR as thelevel for the com.hp.ucmdb.uiserver.aspects logger.
Log Configuration Dialog Box
This dialog box enables you to view Universal CMDB logs and change the log level.
Toaccess
On the Status bar, click Log Level Configuration or select Tools > LogConfiguration... from theModelingmainmenu.
Seealso
"Log Severity Levels" on page 29
User interface elements are described below:
UI Element Description
Apply. Click to apply the selected log level to the log.
CMS Troubleshooting GuideAbout Log Files
Micro Focus Universal CMDB (10.33) Page 32 of 174

UI Element Description
Appender The name of the appender.
Appenderpane
Displays details for the appender you selected in the Loggers pane.
File Click the link to open the log file in an editor.
Max file size Maximum appender file size.
Max backupindex
Maximum number of backup indexes. Default: 5
Loggerspane
An expandable list of Universal CMDB logs. Select the required log from the list: thedetails of the log appear in the lower pane.
Logger pane Displays details for the logger you selected in the Loggers pane.
Loggerstable
Displays a list of loggers (with Logger Name and Log level) for the selected log.
Log level Select a log level from the drop-down list.
Logger'sappender
A string defining the log category. For internal use only.
Appenderfile
The name of the logger's appender file.
Data Flow Probe Log FilesData Flow Probe logs store information about job activation that occurs on the ProbeGateway andProbeManager. The log files can be accessed from the following location:
C:\hp\UCMDB\DataFlowProbe\runtime\log
Note: Alternatively, to access the Data Flow Probe's log files, log in to the JMX console(https://localhost:8453) and, from themain page, select theGeneralUtilsmbean. Activating theexecuteLogGrabber function zips all the Data Flow Probe's log files. Save the .zip file locally onyour client machine.
General Logs
WrapperProbeGw.l Records all the Probe's console output in a single log file.
CMS Troubleshooting GuideAbout Log Files
Micro Focus Universal CMDB (10.33) Page 33 of 174

og l Levels:
o Error. Any error that occurs within the ProbeGateway.o Information. Important informationmessages, such as the arrival or
removal of a new task.
o Debug. N/A
l Basic Troubleshooting:Use this file for any ProbeGateway problemsto verify what occurred with the ProbeGateway at any time as well asany important problems it encountered.
probe-error.log Summary of the errors from the Probe.
l Levels:
o Error. All errors in the Probe components.o Information. N/Ao Debug. N/A
l Basic Troubleshooting:Messages from the Probe's infrastructureonly.
wrapperLocal.log When running the Probe in separatemode (that is, the ProbeManager andProbeGateway are installed on separatemachines), a log file is also savedto the ProbeManager.
l Levels:
o Error. Any error that occurs within the ProbeManager.o Information. Important informationmessages such as received
tasks, task activation, and the transferring of results.
o Debug. N/A
l Basic Troubleshooting:Use this file for any ProbeManager problemsto verify what occurred with the ProbeManager at any time as well asany important problems it encountered.
postgresql.log Displays database related error during the installation.
Note: If this log is empty check in the Event Viewer logs.
pg_upgrade.log Shows the running details of the pg_upgrade.bat script, including thedetails about PostgreSQL upgrade and table splitting.
The log does not appear in the log folder by default. It appears only whenyoumanually run the pg_upgrade.bat script or may appear when you selectthe upgrade option during probe installation.
l Levels:
o Error. Any error that occurs when PostgreSQL upgrade or table
CMS Troubleshooting GuideAbout Log Files
Micro Focus Universal CMDB (10.33) Page 34 of 174

splitting fails.
o Information. Shows the console output and suggestions when itfails.
o Debug. N/A
l Basic Troubleshooting:Check this log file when PostgreSQL upgradeor table splitting fails.
probe_upgrade_conf_merge.log
Shows the related information when probe installer merger configurationfiles.
l Levels:
o Error. Any error that occurs whenmerging configuration files.o Information. Shows the console output of normal information.o Debug. N/A
l Basic Troubleshooting:Check this log file when the probe installer hasproblems.
probe_auto_upgrade.log
Shows the related information when the probe auto upgrade agent upgradesa probe.
It shows in theC:\hp\UCMDB\DataFlowProbe\runtime\log\probeUpgradeLogs\<source_version>to<target_version> folder. For example:C:\hp\UCMDB\DataFlowProbe\runtime\log\probeUpgradeLogs\10.32to10.33.
This log file is also sent to the UCMDB server and shows as <domain_name>_probename_auto_upgrade.log in theC:\hp\UCMDB\UCMDBServer\runtime\log\probeUpgradeLogs\<source_version>to<target_version>\failed|success folder.
l Levels:
o Error. Any error that occurs when the probe auto upgrade agentupgrades a probe.
o Information. Shows the console output of normal information.o Debug. N/A
l Basic Troubleshooting:Check this log file when the probe upgradefails.
Probe Gateway Logs
probeGW- Records all the task results sent from the ProbeGateway to the server.
CMS Troubleshooting GuideAbout Log Files
Micro Focus Universal CMDB (10.33) Page 35 of 174

taskResults.log l Levels:
o Error. N/Ao Information. Result details: task ID, job ID, number of CIs to
delete or update.
o Debug. TheObjectStateHolderVector results that are sent to theserver (in an XML string).
l Basic Troubleshooting:
o If there is a problem with the results that reach the server, checkthis log to see which results were sent to the server by the ProbeGateway.
o The results in this log are written only after they are sent to theserver. Before that, the results can be viewed through the ProbeJMX console (use theProbeGW Results SenderMBean). Youmay have to log in to the JMX console with a user name andpassword.
probeGW-tasks.log Records all the tasks received by the ProbeGateway.
l Levels:
o Error. N/Ao Information. N/Ao Debug. The task's XML.
l Basic Troubleshooting:
o If the ProbeGateway tasks are not synchronized with the servertasks, check this log to determine which tasks the ProbeGatewayreceived.
o You can view the current task's state through the JMX console (usetheDiscovery SchedulerMBean).
Probe Manager Logs
probeMgr-performance.log
Performance statistics dump, collected every predefined period of time,which includes memory information and thread pool statuses.
l Levels:
o Error. N/Ao Information. N/Ao Debug. N/A
l Basic Troubleshooting:
CMS Troubleshooting GuideAbout Log Files
Micro Focus Universal CMDB (10.33) Page 36 of 174

o Check this log to investigatememory issues over time.
o The statistics are logged every 1minute, by default.
probeMgr-adaptersDebug.log
Contains messages that are created following a job execution.
Discovery Rules Engine Log Files
normalization.audit.log Logs information about the processing of the Discovery Rules Engine.
l Levels:
o Error. N/Ao Information. Audits the number of element processed and the
number of CIs that were changed.
Example:
Normalization (OSHV: 8 elements) (Time: 125ms) (ModifiedCIs: 1)
o Debug. N/A
normalization.log Logs detailed information about the processing of the Discovery RulesEngine, enabling you to trace detailed information of the Discovery RuleEngine process.
l Levels:
o Error. All discovery rule processing errors.o Information. Logs all levels of information about the processing
of the Discovery Rules Engine.
o Debug. Logs mainly for debugging purposes.
l Basic Troubleshooting. Check this log when you need to analyzewhy a CI was not enriched by the Discovery Rules Engine.
TQL Parameter LogsThis section contains definitions for TQL parameter log files.
This section includes the following topics:
CMS Troubleshooting GuideAbout Log Files
Micro Focus Universal CMDB (10.33) Page 37 of 174

l "Pattern Statistics Log" below
l "Audit Short/Detailed Log (TQL Perspective)" below
l "Incremental Statistics Log" on the next page
l "Incremental Splitter Log" on page 40
l "Incremental Detailed Log" on page 40
Pattern Statistics Log
The log name is cmdb.pattern.statistics.log.
Log File Description
Purpose General calculation data for each TQL query, updated at predefinedintervals.
Information Level The following information is given for each TQL query:
l name
l average, minimum, andmaximum calculation times
l number of calculations
l last calculation time
l result size
Error Level Not available.
Debug Level Not available.
Basic Troubleshooting l Verify that a specific TQL query was updated.
l Evaluate a TQL query's calculation time.
l Evaluate a TQL query's result size.
Audit Short/Detailed Log (TQL Perspective)
The log name is cmdb.audit.short.log.
Log File Description
Purpose CMDB state changes, CI Type changes, and TQL query results.
You can use this log to follow the results of TQL queries.
CMS Troubleshooting GuideAbout Log Files
Micro Focus Universal CMDB (10.33) Page 38 of 174

Log File Description
Information Level Not available.
Error Level Not available.
Debug Level l Final calculation for TQL queries is logged.
l If the final TQL query calculation is unchanged from the previouscalculation, this is noted.
l If the final TQL query calculation is changed from the previouscalculation, results of the CIs and relationships are recorded in thedetailed log. The number of CIs and relationships are recorded in theshort log.
Basic Troubleshooting l Use this log to verify which notifications are published by the TQLquery subsystem.
l Check the section at the end of each result. This section includesadded, removed, and updated CIs and relationships.
l Track the CIT changes and see if the query results also change. Youcan thus correlate the CIT changes to the results of the querycalculations.
Incremental Statistics Log
The log name is cmdb.incremental.statistics.log.
Log File Description
Purpose Traces the calculation procedure, full or incremental, of every query.
InformationLevel
Not available.
Error Level Not available.
Debug Level l Gives the date, time, query name, and whether an incremental statisticcalculation was performed (yes/no).
l If an incremental statistic calculation was not performed, states the reason,the number of subcalculations (relevant for incremental calculations only), andthe complete calculation time.
BasicTroubleshooting
Monitors the calculation process.
If a specific query calculation takes a long time, check if it is a full or incrementalcalculation:
CMS Troubleshooting GuideAbout Log Files
Micro Focus Universal CMDB (10.33) Page 39 of 174

Log File Description
l If full, check whether a full calculation is necessary.
l If incremental, check how many subcalculations have been performed.
Incremental Splitter Log
The log name is cmdb.incremental.splitter.log.
Log File Description
Purpose Monitors the incremental splitter result made during an incremental calculation.
InformationLevel
Not available.
Error Level Not available.
Debug Level Gives the set of query node numbers of each query graph created by theincremental splitter.
BasicTroubleshooting
If the TQL result calculated by the incremental calculator is wrong, verify that thesplitter result is correct.
Incremental Detailed Log
The log name is cmdb.incremental.detailed.log.
Log File Description
Purpose Monitors the incremental calculation process.
Information Level Not available.
Error Level Not available.
Debug Level Each incremental subcalculation entry includes the following:
l the trigger query node
l the number of elements classified to the trigger query node
l whether the subcalculation step is driven by new elements added to themodel or by existing elements
l the calculated query graph
BasicTroubleshooting
Follows the basic steps of an incremental calculation.
CMS Troubleshooting GuideAbout Log Files
Micro Focus Universal CMDB (10.33) Page 40 of 174

How to Troubleshoot and Debug Using Generic
Adapter Log FilesFor troubleshooting and debugging, use the following:
l Adjust logging levels in these files (set the loglevel variable to TRACE for themost detailed results):
o <UCMDB_DataFlowProbe>\conf\log\fcmdb.push.properties
<UCMDB_DataFlowProbe> is the UCMDB Data Flow Probe installation directory.
o <UCMDB_Server>\conf\log\reconciliation.properties
<UCMDB_Server> is the UCMDB Server installation directory.
l Analyze the following Generic Adapter log files:
o <UCMDB_DataFlowProbe>\runtime\log\fcmdb.push.all.log
o <UCMDB_DataFlowProbe>\runtime\log\fcmdb.push.configuration.log
o <UCMDB_DataFlowProbe>\runtime\log\fcmdb.push.connector.all.log
o <UCMDB_DataFlowProbe>\runtime\log\fcmdb.push.connector.configuration.log
o <UCMDB_DataFlowProbe>\runtime\log\fcmdb.push.mapping.log
o <UCMDB_DataFlowProbe>\runtime\log\fcmdb.push.all.log
l Analyze the following generic log files:
o <UCMDB_DataFlowProbe>\runtime\log\probe-error.log
o <UCMDB_DataFlowProbe>\runtime\log\WrapperProbeGw.log
o <UCMDB_Server>\runtime\log\error.log
o <UCMDB_Server>\runtime\log\cmdb.reconciliation.log
CMS Troubleshooting GuideAbout Log Files
Micro Focus Universal CMDB (10.33) Page 41 of 174

Chapter 2: Troubleshooting DeploymentThis chapter includes:
Troubleshooting Deployment - UCMDB Server 42
Troubleshooting Deployment - Keystore and Truststore 43
Troubleshooting Deployment - ConfigurationManager 51
ConfigurationManager General Limitations and Troubleshooting 51
ConfigurationManager Upgrade 52
Logging In to ConfigurationManager 53
ConfigurationManager Authentications 55
Troubleshooting Deployment - Data Flow Probe 56
Troubleshooting Deployment - UCMDB ServerProblem: The UCMDB Server does not start automatically upon system restart.
Solution:
1. Open theWindows Services dialog box and select theUCMDB_Server service.
2. Open the UCMDB_Server Properties (Local Computer) dialog box.
3. In theGeneral tab, ensure that:
o The Path to executable field points to the correct executable location.
o The service is configured to automatically start (Startup type is Automatic).
4. In the Log On tab, ensure that the service uses the correct user for logon. For details on changingthe service user, see the Hardening section of the UCMDB Help.
5. In theDependencies tab, ensure that the service is configured to have no dependencies (<NoDependencies>).
Micro Focus Universal CMDB (10.33) Page 42 of 174

Troubleshooting Deployment - Keystore andTruststore
Troubleshooting Keystore and Truststore - Non-FIPS mode
Problem: UCMDB server startup failed, and the startup.log shows message similar to the following:
2017-05-04 08:32:17,074 ERROR [WrapperSimpleAppMain] (JettyManager.java:247) -Failure starting jetty serverMultiException[java.io.IOException: Keystore was tampered with, or password wasincorrect, java.io.IOException: Keystore was tampered with, or password wasincorrect]
at org.eclipse.jetty.server.Server.doStart(Server.java:329)at org.eclipse.jetty.util.component.AbstractLifeCycle.start
(AbstractLifeCycle.java:68)at com.mercury.topaz.cmdb.server.manage.servlet.JettyManager.startServer
(JettyManager.java:243)at com.mercury.topaz.cmdb.server.manage.Framework.doStart0(Framework.java:242)at com.mercury.topaz.cmdb.server.manage.Framework.access$100
(Framework.java:102)at com.mercury.topaz.cmdb.server.manage.Framework$2.executeInContext
(Framework.java:221)at com.mercury.topaz.cmdb.server.manage.Framework$2.executeInContext
(Framework.java:218)at
com.mercury.topaz.cmdb.shared.manage.AuthorizationContextUtils.executeInSystemAuthorizationContext(AuthorizationContextUtils.java:24)
at com.mercury.topaz.cmdb.server.manage.Framework.start0(Framework.java:218)at com.mercury.topaz.cmdb.server.manage.Framework.doStartUp(Framework.java:204)at com.mercury.topaz.cmdb.server.manage.Framework.access$000
(Framework.java:102)at com.mercury.topaz.cmdb.server.manage.Framework$1.executeInContext
(Framework.java:186)at com.mercury.topaz.cmdb.server.manage.Framework$1.executeInContext
(Framework.java:183)at
com.mercury.topaz.cmdb.shared.manage.AuthorizationContextUtils.executeInSystemAuthorizationContext(AuthorizationContextUtils.java:24)
at com.mercury.topaz.cmdb.server.manage.Framework.startUp(Framework.java:183)at com.hp.ucmdb.server.Main.startFramework(Main.java:34)at com.hp.ucmdb.server.Main.main(Main.java:23)at sun.reflect.NativeMethodAccessorImpl.invoke0(Native Method)at sun.reflect.NativeMethodAccessorImpl.invoke
CMS Troubleshooting GuideTroubleshooting Deployment - Keystore and Truststore
Micro Focus Universal CMDB (10.33) Page 43 of 174

(NativeMethodAccessorImpl.java:62)at sun.reflect.DelegatingMethodAccessorImpl.invoke
(DelegatingMethodAccessorImpl.java:43)at java.lang.reflect.Method.invoke(Method.java:498)at org.tanukisoftware.wrapper.WrapperSimpleApp.run(WrapperSimpleApp.java:325)at java.lang.Thread.run(Thread.java:745)
Solution A:
Check the verify_store_pass.log (in theC:\hp\UCMDB\UCMDBServer\runtime\log folder), if yousee the followingmessage:
INFO: server-storepass.conf file exists and it contains keystore and truststore.
Do the following:
1. Stop the UCMDB Server.
2. Run commands.
a. Check keystore password.
Windows:
From C:\hp\UCMDB\UCMBServer\bin\jre\bin, run the following commands.
keytool -list -keystoreC:\hp\UCMDB\UCMDBServer\conf\security\server.keystore
Linux:
From /opt/hp/UCMDB/UCMDBServer/bin/jre/bin, run the following commands:
./keytool -list -keystore/opt/hp/UCMDB/UCMDBServer/conf/security/server.keystore
Enter the password that you set up during the installation of UCMDB server. If you see thefollowingmessage:
keytool error: java.io.IOException:Keystore was tampered with, or passwordwas incorrect.
Then the password was not properly set, and you need to change keystore and truststorepasswords using keytool.
b. Change the store password:
Windows:
CMS Troubleshooting GuideTroubleshooting Deployment - Keystore and Truststore
Micro Focus Universal CMDB (10.33) Page 44 of 174

keytool -storepasswd -new <new_keystore_pass> -keystoreC:\hp\UCMDB\UCMDBServer\conf\security\server.keystore -storepass<current_keystore_pass>
Linux:
./keytool -storepasswd -new <new_keystore_pass> -keystore/opt/hp/UCMDB/UCMDBServer/conf/security/server.keystore -storepass<current_keystore_pass>
c. Change the key password (if the store is not empty):
Windows:
keytool -keypasswd -alias <alias> -keypass <currentPass> -new <newPass>-keystore C:\hp\UCMDB\UCMDBServer\conf\security\server.keystore
Linux:
./keytool -keypasswd -alias <alias> -keypass <currentPass> -new<newPass> -keystore/opt/hp/UCMDB/UCMDBServer/conf/security/server.keystore
d. Change the trust store password:
Windows:
keytool -storepasswd -new <new_truststore_pass> -keystoreC:\hp\UCMDB\UCMDBServer\conf\security\server.truststore -storepass<current_truststore_pass>
Linux:
./keytool -storepasswd -new <new_truststore_pass> -keystore/opt/hp/UCMDB/UCMDBServer/conf/security/server.truststore -storepass<current_truststore_pass>
3. Start the UCMDB Server service.
Solution B:
Check the verify_store_pass.log, if you see the followingmessage:
INFO: keystore password and truststore password don't exist.
Or the following:
INFO: server-storepass.conf file doesn't exist.
Do the following:
CMS Troubleshooting GuideTroubleshooting Deployment - Keystore and Truststore
Micro Focus Universal CMDB (10.33) Page 45 of 174

1. Generate the server-storepass.conf file.
Windows:
From theC:\hp\UCMDB\UCMDBServer\bin folder, run the following command:
key-truststore.bat <fips_mode> <new_keystore_pass> <new_truststore_pass>
Linux:
From the /opt/hp/UCMDB/UCMDBServer/bin folder, run the following command:
./key-truststore.sh <fips_mode> <new_keystore_pass> <new_truststore_pass>
where <fips_mode> can be only set to true or false. For non-FIPS modeUCMDB server, false for<fips_mode>.
2. Stop the UCMDB Server.
3. Change keystore password and truststore password with keytool.
From theC:\hp\UCMDB\UCMBServer\bin\jre\bin (Windows) or/opt/hp/UCMDB/UCMBServer/bin/jre/bin (Linux) folder, run the following commands:
a. Change the store password:
Windows:
keytool -storepasswd -new <new_keystore_pass> -keystoreC:\hp\UCMDB\UCMDBServer\conf\security\server.keystore -storepass<current_keystore_pass>
Linux:
./keytool -storepasswd -new <new_keystore_pass> -keystore/opt/hp/UCMDB/UCMDBServer/conf/security/server.keystore -storepass<current_keystore_pass>
b. Change the key password (if the store is not empty):
Windows:
keytool -keypasswd -alias <alias> -keypass <currentPass> -new <newPass>-keystore C:\hp\UCMDB\UCMDBServer\conf\security\server.keystore
Linux:
./keytool -keypasswd -alias <alias> -keypass <currentPass> -new<newPass> -keystore/opt/hp/UCMDB/UCMDBServer/conf/security/server.keystore
CMS Troubleshooting GuideTroubleshooting Deployment - Keystore and Truststore
Micro Focus Universal CMDB (10.33) Page 46 of 174

c. Change the trust store password:
Windows:
keytool -storepasswd -new <new_truststore_pass> -keystoreC:\hp\UCMDB\UCMDBServer\conf\security\server.truststore -storepass<current_truststore_pass>
Linux:
./keytool -storepasswd -new <new_truststore_pass> -keystore/opt/hp/UCMDB/UCMDBServer/conf/security/server.truststore -storepass<current_truststore_pass>
4. Start the UCMDB Server service.
Solution C:
If you only changed keystore password or truststore password during UCMDB server installation, andthen server startup failed and the startup.log shows similar error messages as shown above. You canfollow the instructions provided in Solution A or Solution B, but you need to change the keystorepassword or truststore password that you set during installation.
For example, if you only changed truststore password during installation and you need to generateserver-storepass.conf, run the following command:
Windows: key-truststore.bat <fips_mode> null <new_truststore_pass>
Linux: ./key-truststore.sh <fips_mode> null <new_truststore_pass>
Problem: You have changed schema in UCMDB Server. The server startup failed and the startup.logshows the followingmessage:
2017-05-04 08:32:17,074 ERROR [WrapperSimpleAppMain] (JettyManager.java:247) -Failure starting jetty serverMultiException[java.io.IOException: Keystore was tampered with, or password wasincorrect, java.io.IOException: Keystore was tampered with, or password wasincorrect]
at org.eclipse.jetty.server.Server.doStart(Server.java:329)at org.eclipse.jetty.util.component.AbstractLifeCycle.start
(AbstractLifeCycle.java:68)at com.mercury.topaz.cmdb.server.manage.servlet.JettyManager.startServer
(JettyManager.java:243)at com.mercury.topaz.cmdb.server.manage.Framework.doStart0(Framework.java:242)at com.mercury.topaz.cmdb.server.manage.Framework.access$100
CMS Troubleshooting GuideTroubleshooting Deployment - Keystore and Truststore
Micro Focus Universal CMDB (10.33) Page 47 of 174

(Framework.java:102)at com.mercury.topaz.cmdb.server.manage.Framework$2.executeInContext
(Framework.java:221)at com.mercury.topaz.cmdb.server.manage.Framework$2.executeInContext
(Framework.java:218)at
com.mercury.topaz.cmdb.shared.manage.AuthorizationContextUtils.executeInSystemAuthorizationContext(AuthorizationContextUtils.java:24)
at com.mercury.topaz.cmdb.server.manage.Framework.start0(Framework.java:218)at com.mercury.topaz.cmdb.server.manage.Framework.doStartUp(Framework.java:204)at com.mercury.topaz.cmdb.server.manage.Framework.access$000
(Framework.java:102)at com.mercury.topaz.cmdb.server.manage.Framework$1.executeInContext
(Framework.java:186)at com.mercury.topaz.cmdb.server.manage.Framework$1.executeInContext
(Framework.java:183)at
com.mercury.topaz.cmdb.shared.manage.AuthorizationContextUtils.executeInSystemAuthorizationContext(AuthorizationContextUtils.java:24)
at com.mercury.topaz.cmdb.server.manage.Framework.startUp(Framework.java:183)at com.hp.ucmdb.server.Main.startFramework(Main.java:34)at com.hp.ucmdb.server.Main.main(Main.java:23)at sun.reflect.NativeMethodAccessorImpl.invoke0(Native Method)at sun.reflect.NativeMethodAccessorImpl.invoke
(NativeMethodAccessorImpl.java:62)at sun.reflect.DelegatingMethodAccessorImpl.invoke
(DelegatingMethodAccessorImpl.java:43)at java.lang.reflect.Method.invoke(Method.java:498)at org.tanukisoftware.wrapper.WrapperSimpleApp.run(WrapperSimpleApp.java:325)at java.lang.Thread.run(Thread.java:745)
Solution: You need to re-generate server-storepass.conf, because the new schema does not storeany keystore and truststore passwords.
l If you remember what passwords were specified previously, you can generate the server-storepass.conf file with the following command:
Windows: key-truststore.bat <fips_mode> <new_keystore_pass> <new_truststore_pass>
Linux: ./key-truststore.sh <fips_mode> <new_keystore_pass> <new_truststore_pass>
where <fips_mode> can be only set to true or false. For non-FIPS modeUCMDB server, false for<fips_mode>.
CMS Troubleshooting GuideTroubleshooting Deployment - Keystore and Truststore
Micro Focus Universal CMDB (10.33) Page 48 of 174

l If you don't remember the passwords, follow the instructions in Solution B to regenerate thepasswords.
Troubleshooting Keystore and Truststore - FIPS mode
Problem: If starting the UCMDB server failed, and the startup.log shows message similar to thefollowing:
2017-05-04 08:32:17,074 ERROR [WrapperSimpleAppMain] (JettyManager.java:247) -Failure starting jetty serverMultiException[java.io.IOException: Keystore was tampered with, or password wasincorrect, java.io.IOException: Keystore was tampered with, or password wasincorrect]
at org.eclipse.jetty.server.Server.doStart(Server.java:329)at org.eclipse.jetty.util.component.AbstractLifeCycle.start
(AbstractLifeCycle.java:68)at com.mercury.topaz.cmdb.server.manage.servlet.JettyManager.startServer
(JettyManager.java:243)at com.mercury.topaz.cmdb.server.manage.Framework.doStart0(Framework.java:242)at com.mercury.topaz.cmdb.server.manage.Framework.access$100
(Framework.java:102)at com.mercury.topaz.cmdb.server.manage.Framework$2.executeInContext
(Framework.java:221)at com.mercury.topaz.cmdb.server.manage.Framework$2.executeInContext
(Framework.java:218)at
com.mercury.topaz.cmdb.shared.manage.AuthorizationContextUtils.executeInSystemAuthorizationContext(AuthorizationContextUtils.java:24)
at com.mercury.topaz.cmdb.server.manage.Framework.start0(Framework.java:218)at com.mercury.topaz.cmdb.server.manage.Framework.doStartUp(Framework.java:204)at com.mercury.topaz.cmdb.server.manage.Framework.access$000
(Framework.java:102)at com.mercury.topaz.cmdb.server.manage.Framework$1.executeInContext
(Framework.java:186)at com.mercury.topaz.cmdb.server.manage.Framework$1.executeInContext
(Framework.java:183)at
com.mercury.topaz.cmdb.shared.manage.AuthorizationContextUtils.executeInSystemAuthorizationContext(AuthorizationContextUtils.java:24)
at com.mercury.topaz.cmdb.server.manage.Framework.startUp(Framework.java:183)at com.hp.ucmdb.server.Main.startFramework(Main.java:34)at com.hp.ucmdb.server.Main.main(Main.java:23)at sun.reflect.NativeMethodAccessorImpl.invoke0(Native Method)at sun.reflect.NativeMethodAccessorImpl.invoke
(NativeMethodAccessorImpl.java:62)
CMS Troubleshooting GuideTroubleshooting Deployment - Keystore and Truststore
Micro Focus Universal CMDB (10.33) Page 49 of 174

at sun.reflect.DelegatingMethodAccessorImpl.invoke(DelegatingMethodAccessorImpl.java:43)
at java.lang.reflect.Method.invoke(Method.java:498)at org.tanukisoftware.wrapper.WrapperSimpleApp.run(WrapperSimpleApp.java:325)at java.lang.Thread.run(Thread.java:745)
Solution A:
Check the verify_store_pass.log, if you see the followingmessage:
INFO: server-storepass.conf file exists and it contains keystore and truststore.
Do the following:
1. Change the keystore and truststore passwords using keytool.
For detailed instructions, see the "Generate a new self-signed certificate (hpcert) and sign it withthe default UCMDB root certificate (hproot)" section in theUniversal CMDB FIPS DeploymentGuide.
2. Start the UCMDB Server service.
Solution B:
Check the verify_store_pass.log, if you see the followingmessage:
INFO: keystore password and truststore password don't exist.
Or the following:
INFO: server-storepass.conf file doesn't exist.
Do the following:
1. Make sure you have stopped the UCMDB Server.
2. Generate the server-storepass.conf file.
Windows:
From C:\hp\UCMDB\UCMBServer\bin\jre\bin, run the following command:
key-truststore.bat <fips_mode> <new_keystore_pass> <new_truststore_pass>
Linux:
From opt/UCMDB/UCMBServer/bin/jre/bin, run the following command:
./key-truststore.sh <fips_mode> <new_keystore_pass> <new_truststore_pass>
CMS Troubleshooting GuideTroubleshooting Deployment - Keystore and Truststore
Micro Focus Universal CMDB (10.33) Page 50 of 174

where <fips_mode> can be only set to true or false. For FIPS modeUCMDB server, true for<fips_mode>.
3. Change the keystore and truststore passwords using keytool.
For detailed instructions, see the "Generate a new self-signed certificate (hpcert) and sign it withthe default UCMDB root certificate (hproot)" section in theUniversal CMDB FIPS DeploymentGuide.
4. Start the UCMDB Server service.
Solution C:
If you only changed keystore password or truststore password during UCMDB server installation, andthen server startup failed and the startup.log shows similar error messages as shown above. You canfollow the instructions provided in Solution A or Solution B, but you need to change the keystorepassword or truststore password that you set during installation.
For example, if you only changed truststore password during installation and you need to generateserver-storepass.conf, run the following command:
Windows: key-truststore.bat <fips_mode> null <new_truststore_pass>
Linux: ./key-truststore.sh <fips_mode> null <new_truststore_pass>
Troubleshooting Deployment - ConfigurationManager
Configuration Manager General Limitations and
TroubleshootingLimitations
l The time settings on the UCMDB and ConfigurationManager servers must be synchronized, downto the seconds.
l The time zone and time format on the UCMDB and ServiceManager servers must besynchronized.
CMS Troubleshooting GuideTroubleshooting Deployment - ConfigurationManager
Micro Focus Universal CMDB (10.33) Page 51 of 174

l Youwill not see a new CI type that you created in UCMDB until you log out of ConfigurationManager and then log on again.
l Whenever the time is changed on the ConfigurationManager Tomcat server, the server must berestarted to update the time on the server.
Troubleshooting
Problem. When you start the ConfigurationManager service, you receive the following error message:
Windows could not start the Universal CMDB Configuration Manager on Local
Computer. For more information, review the System Manager Event log. If
this is a non-Microsoft service, contact the service vendor, and refer to
service-specific error code 0.
Solution. Do the following:
1. Go to the <Configuration_Manager_installation_directory>\cnc\bin folder and execute thefollowing command:
edit-server-0.bat
2. Select the Startup tab. In theMode drop-down list (at the bottom), select jvm instead of exe.
3. Click OK.
4. Run your service.
Configuration Manager UpgradeProblem. The upgrade to version 10.23 fails.
Solution: To restore to the previous version, perform the following steps:
l Uninstall ConfigurationManager version 10.23.
l Restore the installation folder for the previous version of ConfigurationManager (that you backed upbefore upgrading) to its original location.
l Restore the database (that you backed up before upgrading).
l Import theWindows registry entry (that you backed up before upgrading).
CMS Troubleshooting GuideTroubleshooting Deployment - ConfigurationManager
Micro Focus Universal CMDB (10.33) Page 52 of 174

Logging In to Configuration ManagerProblem. You have been assigned the appropriate permissions for ConfigurationManager but you arenot able to log in.
Solution. Verify that the following parameters are configured correctly in UCMDB:
l LW-SSO init string: This stringmust not be empty.
l LW-SSO domain: Must be set to the same domain as UCMDB.
l LW-SSO trusted DNS domains: The ConfigurationManager domainmust be listed here, even if it isthe same as the UCMDB domain.
Problem. There is an error in the UCMDB connection.
Solution. One of the followingmay be the cause:
l The UCMDB server is down. Restart ConfigurationManager after UCMDB is fully up (verify thatthe UCMDB server status is Up).
l The UCMDB server is up but the ConfigurationManager connection credentials or URL is wrong.
Problem. After changing UCMDB connection settings (such as changes to: host/port/protocol/SRP),the ConfigurationManager server fails to start.
Solution. Reconfigure ConfigurationManager and specify the UCMDB connection settings that reflectyour latest changes. The reconfiguration wizard (HPCM_10.01.exe) is located in the <Configuration_Manager_installation_directory>\_installation folder.
Problem. Changes to the UCMDB class model are not detected in ConfigurationManager.
Solution. Restart the ConfigurationManager server.
Problem. The ConfigurationManager log contains aUCMDBExecution timeout expired error.
Solution. This occurs when the UCMDB database is overloaded. To correct this, increase theconnection timeout as follows:
1. Create a jdbc.properties file in theUCMDBServer\conf folder.
2. Enter the following text: QueryTimeout=<number in seconds>.
3. Restart the UCMDB server.
CMS Troubleshooting GuideTroubleshooting Deployment - ConfigurationManager
Micro Focus Universal CMDB (10.33) Page 53 of 174

Problem. ConfigurationManager does not allow you to add a view to bemanaged.
Solution. When a view is added to bemanaged, a new TQL is created in UCMDB. If themaximumlimit of active TQLs is reached, the view cannot be added. Increase the limit of active TQLs in UCMDBby changing the following settings in the Infrastructure Settings Manager:
l Max Number Of Active TQLs In Server
l Max Number Of Customer Active TQLs
Problem. The HTTPS Server certificate is not valid.
Solution. One of the followingmay be the cause:
l The validation date of the certificate has passed. You need to get a new certificate.
l The certification authority on the certificate is not a trusted authority. Add the certification authorityto your Trusted Root Certification Authority list.
Problem. When logging in from the ConfigurationManager login page, you get a login error or accessdenied page.
Solution. Check that the LW-SSO settings are correct. For details, see the general LW-SSO referencein the Hardening section of the UCMDB Help.
Problem. The ConfigurationManager server does not start due to entering incorrect databasecredentials.
Solution. If youmade a change to the database credentials and the server fails to start, the credentialsmay be wrong. You need to re-encrypt the database password and enter new credentials in theconfiguration file. Proceed as follows:
1. From a command line, run the following command to encrypt the updated database password:
<Configuration_Manager_installation_directory>\bin\encrypt-password.bat –p<password>
which returns an encrypted password.
2. Copy the encrypted password (including the {ENCRYPTED} prefix), into the db.passwordparameter in the <Configuration_Manager_installation_directory>\conf\database.propertiesfile.
Problem. The ConfigurationManager Tomcat server does not start due to a bind port issue.
Solution. Try one of the following:
CMS Troubleshooting GuideTroubleshooting Deployment - ConfigurationManager
Micro Focus Universal CMDB (10.33) Page 54 of 174

l Run the Post install wizard and replace the ConfigurationManager server ports.
l Abort the other process that occupies the ConfigurationManager ports.
l Manually change the ports in ConfigurationManager configuration files by editing the following file:<Configuration Manager installation directory>\servers\server-0\conf\server.xml andupdating the relevant ports:
o HTTP (8180): line 69
o HTTPS (8143): lines 71, 90
Problem. You receive an "out of memory" message.
Solution. Do the following to change the server startup parameters:
1. Run the following batch file:
<Configuration Manager installation directory>/bin/edit-server-0.bat
2. Change the following settings:
-Dapplication.ms=<inital memory pool size>-Dapplication.mx=<maximum memory pool size>
Problem. Changes in CIs in UCMDB are not reflected in ConfigurationManager.
Solution. ConfigurationManager runs an offline asynchronous analysis process. The process may notyet have processed the latest changes in UCMDB. To resolve this, try one of the following:
l Wait a few minutes. The default interval between analysis process executions is 10minutes. It isconfigurable inAdministration > Settings.
l Execute a JMX call to run the offline analysis calculation on the relevant view.
l InPolicies, click theRecalculate Policy Analysis button. This invokes the offline analysisprocess for all views (whichmay take some time). Youmay also need tomake an artificial changeto one policy and save it.
Configuration Manager AuthenticationsProblem. During authentication of ConfigurationManager after redirection to the UCMDB login page,you are not redirected back to ConfigurationManager but UCMDB opens instead.
CMS Troubleshooting GuideTroubleshooting Deployment - ConfigurationManager
Micro Focus Universal CMDB (10.33) Page 55 of 174

Solution. The ConfigurationManager authentication session cookie is blocked or denied when usingInternet Explorer version 6.0, 7.0 or 8.0 browsers. Add the ConfigurationManager server to theIntranet/Trusted zone in the Internet Explorer security zones on your computer (Tools > InternetOptions > Security > Local Intranet > Sites > Advanced). This allows all cookies to be accepted.
Solution. Make sure that the LW-SSO configuration in UCMDB settings is correct. For details, see thesection about LW-SSO in the Hardening section of the UCMDB Help.
Possible solution. Make sure that you access the application with the Fully Qualified Domain Name(FQDN) in the login URL (for example: http://myserver.companydomain.com/WebApp).
Troubleshooting Deployment - Data Flow ProbeProbe Downgrade or Rollback
Automatic downgrade or rollback of the probe version is not supported. To perform downgrade or torollback a version upgrade, uninstall the probe and then install the required version.
Probe Restart
There are several situations where the Probe automatically restarts itself. For example, when deployinga new Content Pack or applying a CUP. In these cases, the Probe waits for 15minutes to allow therunning jobs to finish, and only then shuts down. Jobs that did not finish in that time (for example, longintegrations) start running again when the Probe restarts.
How to Change the PostgreSQL Database Default Port
To change the port for the PostgreSQL database, that is defined by default in the Data Flow Probeinstallation:
1. Stop the Probe (if already started).
2. Stop the UCMDB Probe DB Service.
3. Modify the port in the following file:
o Windows: C:\hp\UCMDB\DataFlowProbe\pgsql\data\postgresql.conf
o Linux: /opt/hp/UCMDB/DataFlowProbe/pgsql/data/postgresql.conf
The following shows how to change the port from 5432 to 5433:
CMS Troubleshooting GuideTroubleshooting Deployment - Data Flow Probe
Micro Focus Universal CMDB (10.33) Page 56 of 174

Note: If two probes coexist on the samemachine, plan the port usage carefully so that theports used by the two probes do not conflict.
#port = 5432 # (change requires restart) < Old line
port = 5433 # (change requires restart) < New line
4. Make the following changes in theDataFlowProbe.properties file (inC:\hp\UCMDB\DataFlowProbe\conf onWindows, and /opt/hp/UCMDB/DataFlowProbe/confon Linux):
o Change:
jdbc:postgresql://localhost/dataflowprobe
to
jdbc:postgresql://localhost:5433/dataflowprobe
o Change:
appilog.agent.local.jdbc.uri = jdbc:postgresql://localhost/dataflowprobe
to
appilog.agent.local.jdbc.uri =jdbc:postgresql://localhost:5433/dataflowprobe
o Change:
appilog.agent.normalization.jdbc.uri =jdbc:postgresql://localhost/dataflowprobe
to
appilog.agent.normalization.jdbc.uri =jdbc:postgresql://localhost:5433/dataflowprobe
o Change:
appilog.agent.netflow.jdbc.uri =jdbc:postgresql://localhost/dataflowprobe
to
CMS Troubleshooting GuideTroubleshooting Deployment - Data Flow Probe
Micro Focus Universal CMDB (10.33) Page 57 of 174

appilog.agent.netflow.jdbc.uri =jdbc:postgresql://localhost:5433/dataflowprobe
CMS Troubleshooting GuideTroubleshooting Deployment - Data Flow Probe
Micro Focus Universal CMDB (10.33) Page 58 of 174

Chapter 3: Troubleshooting AdministrationThis chapter includes:
Troubleshooting – Logging In to UCMDB 59
Troubleshooting and Limitations – UCMDB Server Administration 61
Troubleshooting Keystore and Truststore 62
Troubleshooting and Limitations – PackageManager 71
UCMDB Browser - Known Issues 72
Troubleshooting - Configure the Enhanced Search Engine 73
Troubleshooting - FIPS Deployment 75
Troubleshooting the Data Flow Probes 75
Troubleshooting the UCMDB Server 79
Troubleshooting the UCMDB UI 82
Troubleshooting - High Availability Mode 86
Troubleshooting – Logging In to UCMDBUse the following information to troubleshoot possible causes of failure to log in to UCMDB.
This section includes the following:
l "Possible Causes for Failure to Log In to UCMDB" below
l "Java Not Installed on Client Machine" on page 61
Possible Causes for Failure to Log In to UCMDB
Use the following information to troubleshoot possible causes of failure to log into Universal CMDB.
Problem/Possible Causes Solutions
Universal CMDB is notstarted successfully.
Indication: The startup.logfile does not include the
Solution 1:Verify that the Universal CMDB Server is up and runningby accessing theWeb console https://<Server name>:8443/web-consolewhere <server name> is the name of the Universal CMDBServer to which you are connecting.
Micro Focus Universal CMDB (10.33) Page 59 of 174

Problem/Possible Causes Solutions
following line:
**** All components started****
Solution 2:Check the database connection:
To check that the database server is up and running:
1. Launch theWeb browser and navigate to:https://localhost:8443/jmx-console.
2. UnderUCMDB, click UCMDB:service=Dal Services to openthe JMX MBean View.
3. Invoke the function getDbContextwith a customerID parametervalue of 1.
4. Check that the operation result shows no problems.
Solution 3:Check that the database connection parameters arecorrect. Ensure that you can log into the database server using thecredentials you provided during the configuration procedure.
Solution 4: Use the cmdb.dal.log file to verify the databaseconnections. The cmdb.dal.log file can be found in the followingdirectory:
l Windows: C:\hp\UCMDB\UCMDBServer\runtime\log
l Linux: /opt/hp/UCMDB/UCMDBServer/runtime/log
Solution 5: To verify that the database connection is valid, in theWindows command interpreter (cmd.exe), type sqlpluscmdb/cmdb@skazal.
The CMDB is corrupted (forexample, a user recordmayhave been deletedaccidentally from theCMDB).
Import a previously backed up database file. For details, see theUniversal CMDB DatabaseGuide.
Important: The Universal CMDB server must be downwhileimporting the database.
Note: When you import a previously backed up database file,you lose all data previously existing in the system.
The Universal CMDB loginfails. This may be due to anincorrect loginname/passwordcombination.
Solution 1:Ensure that you enter a correct login username/password combination.
Solution 2:Restore the default
Universal CMDB login failsdue to unexpected errors.
Solution 1: Select Start > All Programs > UCMDB > UniversalCMDB Server Status and ensure that the service is running.
Solution 2: Look for errors in the following log files:
l C:\hp\UCMDB\UCMDBServer\runtime\log\error.log
CMS Troubleshooting GuideTroubleshooting – Logging In to UCMDB
Micro Focus Universal CMDB (10.33) Page 60 of 174

Problem/Possible Causes Solutions
l C:\hp\UCMDB\UCMDBServer\runtime\log\ui-server.log
If you find errors that are unfamiliar to you, contact Micro FocusSoftware Support.
Universal CMDB fails tostart, even though thepassword was successfullychanged.
Restore the default passwords:
1. Overwrite the existing file by copying theBasic_Authorization.zip file from the following folder:
o Windows: C:\hp\UCMDB\UCMDBServer\content\backupo Linux: /opt/hp/UCMDB/UCMDBServer/content/backup
to the following folder:
o Windows: C:\hp\UCMDB\UCMDBServer\content/basic_packages
o Linux: /opt/hp/UCMDB/UCMDBServer/content/basic_packages
2. Log into the the JMX Console and locate theUCMDB-UI:name=UCMDB Integration service.
3. Run setCMDBSuperIntegrationUser by using the credentials ofUISysadmin.
4. Stop the UCMDB Server.
5. Create a new schema.
6. Restart the UCMDB Server.
Java Not Installed on Client Machine
If Java is not installed on your machine or you have a version older than Java 8, during login amessageis displayed asking you to install the correct Java Runtime Environment version. JRE is needed toview Universal CMDB applets.
Click the relevant button to allow Universal CMDB to install Java from either oracle.com or theUniversal CMDB Server.
Troubleshooting and Limitations – UCMDBServer AdministrationThis section describes troubleshooting and limitations for UCMDB.
CMS Troubleshooting GuideTroubleshooting and Limitations – UCMDB Server Administration
Micro Focus Universal CMDB (10.33) Page 61 of 174

l If thewrapper.java.additional.10=-XX:+HeapDumpOnOutOfMemoryError parameter is set (it isenabled by default) in thewrapper.conf file, then every time the server fails with anOut of Memoryerror, it dumps the full memory to the disk. Since thememory contents could be very large, youshould delete these files to avoid disk space problems.
l Problem:Whenworking in a Firefox browser using Linux, you get anOutOfMemoryError:PermGen space error.
Solution: Follow these steps:
a. Go to the bin directory of the Java installation directory and open the Control Panel.
b. In the Java tab, select View.
c. In the Java runtime environment settings, under Runtime parameters, increase the -XX:MaxPermSize.
l Limitation: Unsupported characters in password when UCMDB is used in integrations
WhenUCMDB is used in integrations, the following characters should not be used in the password:
o All non-ASCII characters (valid ISO 8859/1 characters that are not also ASCII characters)
o The following special characters: the tab character, the space character, and [ \ ] ^ ` { | } ~ " #% &+ , / : < = > ?@
l Problem: The "User {0} has exceeded the maximum number of login sessions"message isdisplayed.
Solution: Ensure that you are properly logged out from other sessions on other computers. Forexample, closing a tab or closing the browser does not immediately close a user session on theserver.
Troubleshooting Keystore and Truststore
Troubleshooting Keystore and Truststore - Non-FIPS mode
Problem: UCMDB server startup failed, and the startup.log shows message similar to the following:
2017-05-04 08:32:17,074 ERROR [WrapperSimpleAppMain] (JettyManager.java:247) -Failure starting jetty serverMultiException[java.io.IOException: Keystore was tampered with, or password wasincorrect, java.io.IOException: Keystore was tampered with, or password was
CMS Troubleshooting GuideTroubleshooting and Limitations – UCMDB Server Administration
Micro Focus Universal CMDB (10.33) Page 62 of 174

incorrect]at org.eclipse.jetty.server.Server.doStart(Server.java:329)at org.eclipse.jetty.util.component.AbstractLifeCycle.start
(AbstractLifeCycle.java:68)at com.mercury.topaz.cmdb.server.manage.servlet.JettyManager.startServer
(JettyManager.java:243)at com.mercury.topaz.cmdb.server.manage.Framework.doStart0(Framework.java:242)at com.mercury.topaz.cmdb.server.manage.Framework.access$100
(Framework.java:102)at com.mercury.topaz.cmdb.server.manage.Framework$2.executeInContext
(Framework.java:221)at com.mercury.topaz.cmdb.server.manage.Framework$2.executeInContext
(Framework.java:218)at
com.mercury.topaz.cmdb.shared.manage.AuthorizationContextUtils.executeInSystemAuthorizationContext(AuthorizationContextUtils.java:24)
at com.mercury.topaz.cmdb.server.manage.Framework.start0(Framework.java:218)at com.mercury.topaz.cmdb.server.manage.Framework.doStartUp(Framework.java:204)at com.mercury.topaz.cmdb.server.manage.Framework.access$000
(Framework.java:102)at com.mercury.topaz.cmdb.server.manage.Framework$1.executeInContext
(Framework.java:186)at com.mercury.topaz.cmdb.server.manage.Framework$1.executeInContext
(Framework.java:183)at
com.mercury.topaz.cmdb.shared.manage.AuthorizationContextUtils.executeInSystemAuthorizationContext(AuthorizationContextUtils.java:24)
at com.mercury.topaz.cmdb.server.manage.Framework.startUp(Framework.java:183)at com.hp.ucmdb.server.Main.startFramework(Main.java:34)at com.hp.ucmdb.server.Main.main(Main.java:23)at sun.reflect.NativeMethodAccessorImpl.invoke0(Native Method)at sun.reflect.NativeMethodAccessorImpl.invoke
(NativeMethodAccessorImpl.java:62)at sun.reflect.DelegatingMethodAccessorImpl.invoke
(DelegatingMethodAccessorImpl.java:43)at java.lang.reflect.Method.invoke(Method.java:498)at org.tanukisoftware.wrapper.WrapperSimpleApp.run(WrapperSimpleApp.java:325)at java.lang.Thread.run(Thread.java:745)
Solution A:
Check the verify_store_pass.log (in theC:\hp\UCMDB\UCMDBServer\runtime\log folder), if yousee the followingmessage:
INFO: server-storepass.conf file exists and it contains keystore and truststore.
Do the following:
CMS Troubleshooting GuideTroubleshooting and Limitations – UCMDB Server Administration
Micro Focus Universal CMDB (10.33) Page 63 of 174

1. Stop the UCMDB Server.
2. Run commands.
a. Check keystore password.
Windows:
From C:\hp\UCMDB\UCMBServer\bin\jre\bin, run the following commands.
keytool -list -keystoreC:\hp\UCMDB\UCMDBServer\conf\security\server.keystore
Linux:
From /opt/hp/UCMDB/UCMDBServer/bin/jre/bin, run the following commands:
./keytool -list -keystore/opt/hp/UCMDB/UCMDBServer/conf/security/server.keystore
Enter the password that you set up during the installation of UCMDB server. If you see thefollowingmessage:
keytool error: java.io.IOException:Keystore was tampered with, or passwordwas incorrect.
Then the password was not properly set, and you need to change keystore and truststorepasswords using keytool.
b. Change the store password:
Windows:
keytool -storepasswd -new <new_keystore_pass> -keystoreC:\hp\UCMDB\UCMDBServer\conf\security\server.keystore -storepass<current_keystore_pass>
Linux:
./keytool -storepasswd -new <new_keystore_pass> -keystore/opt/hp/UCMDB/UCMDBServer/conf/security/server.keystore -storepass<current_keystore_pass>
c. Change the key password (if the store is not empty):
Windows:
keytool -keypasswd -alias <alias> -keypass <currentPass> -new <newPass>-keystore C:\hp\UCMDB\UCMDBServer\conf\security\server.keystore
CMS Troubleshooting GuideTroubleshooting and Limitations – UCMDB Server Administration
Micro Focus Universal CMDB (10.33) Page 64 of 174

Linux:
./keytool -keypasswd -alias <alias> -keypass <currentPass> -new<newPass> -keystore/opt/hp/UCMDB/UCMDBServer/conf/security/server.keystore
d. Change the trust store password:
Windows:
keytool -storepasswd -new <new_truststore_pass> -keystoreC:\hp\UCMDB\UCMDBServer\conf\security\server.truststore -storepass<current_truststore_pass>
Linux:
./keytool -storepasswd -new <new_truststore_pass> -keystore/opt/hp/UCMDB/UCMDBServer/conf/security/server.truststore -storepass<current_truststore_pass>
3. Start the UCMDB Server service.
Solution B:
Check the verify_store_pass.log, if you see the followingmessage:
INFO: keystore password and truststore password don't exist.
Or the following:
INFO: server-storepass.conf file doesn't exist.
Do the following:
1. Generate the server-storepass.conf file.
Windows:
From theC:\hp\UCMDB\UCMDBServer\bin folder, run the following command:
key-truststore.bat <fips_mode> <new_keystore_pass> <new_truststore_pass>
Linux:
From the /opt/hp/UCMDB/UCMDBServer/bin folder, run the following command:
./key-truststore.sh <fips_mode> <new_keystore_pass> <new_truststore_pass>
where <fips_mode> can be only set to true or false. For non-FIPS modeUCMDB server, false for<fips_mode>.
CMS Troubleshooting GuideTroubleshooting and Limitations – UCMDB Server Administration
Micro Focus Universal CMDB (10.33) Page 65 of 174

2. Stop the UCMDB Server.
3. Change keystore password and truststore password with keytool.
From theC:\hp\UCMDB\UCMBServer\bin\jre\bin (Windows) or/opt/hp/UCMDB/UCMBServer/bin/jre/bin (Linux) folder, run the following commands:
a. Change the store password:
Windows:
keytool -storepasswd -new <new_keystore_pass> -keystoreC:\hp\UCMDB\UCMDBServer\conf\security\server.keystore -storepass<current_keystore_pass>
Linux:
./keytool -storepasswd -new <new_keystore_pass> -keystore/opt/hp/UCMDB/UCMDBServer/conf/security/server.keystore -storepass<current_keystore_pass>
b. Change the key password (if the store is not empty):
Windows:
keytool -keypasswd -alias <alias> -keypass <currentPass> -new <newPass>-keystore C:\hp\UCMDB\UCMDBServer\conf\security\server.keystore
Linux:
./keytool -keypasswd -alias <alias> -keypass <currentPass> -new<newPass> -keystore/opt/hp/UCMDB/UCMDBServer/conf/security/server.keystore
c. Change the trust store password:
Windows:
keytool -storepasswd -new <new_truststore_pass> -keystoreC:\hp\UCMDB\UCMDBServer\conf\security\server.truststore -storepass<current_truststore_pass>
Linux:
./keytool -storepasswd -new <new_truststore_pass> -keystore/opt/hp/UCMDB/UCMDBServer/conf/security/server.truststore -storepass<current_truststore_pass>
4. Start the UCMDB Server service.
Solution C:
CMS Troubleshooting GuideTroubleshooting and Limitations – UCMDB Server Administration
Micro Focus Universal CMDB (10.33) Page 66 of 174

If you only changed keystore password or truststore password during UCMDB server installation, andthen server startup failed and the startup.log shows similar error messages as shown above. You canfollow the instructions provided in Solution A or Solution B, but you need to change the keystorepassword or truststore password that you set during installation.
For example, if you only changed truststore password during installation and you need to generateserver-storepass.conf, run the following command:
Windows: key-truststore.bat <fips_mode> null <new_truststore_pass>
Linux: ./key-truststore.sh <fips_mode> null <new_truststore_pass>
Problem: You have changed schema in UCMDB Server. The server startup failed and the startup.logshows the followingmessage:
2017-05-04 08:32:17,074 ERROR [WrapperSimpleAppMain] (JettyManager.java:247) -Failure starting jetty serverMultiException[java.io.IOException: Keystore was tampered with, or password wasincorrect, java.io.IOException: Keystore was tampered with, or password wasincorrect]
at org.eclipse.jetty.server.Server.doStart(Server.java:329)at org.eclipse.jetty.util.component.AbstractLifeCycle.start
(AbstractLifeCycle.java:68)at com.mercury.topaz.cmdb.server.manage.servlet.JettyManager.startServer
(JettyManager.java:243)at com.mercury.topaz.cmdb.server.manage.Framework.doStart0(Framework.java:242)at com.mercury.topaz.cmdb.server.manage.Framework.access$100
(Framework.java:102)at com.mercury.topaz.cmdb.server.manage.Framework$2.executeInContext
(Framework.java:221)at com.mercury.topaz.cmdb.server.manage.Framework$2.executeInContext
(Framework.java:218)at
com.mercury.topaz.cmdb.shared.manage.AuthorizationContextUtils.executeInSystemAuthorizationContext(AuthorizationContextUtils.java:24)
at com.mercury.topaz.cmdb.server.manage.Framework.start0(Framework.java:218)at com.mercury.topaz.cmdb.server.manage.Framework.doStartUp(Framework.java:204)at com.mercury.topaz.cmdb.server.manage.Framework.access$000
(Framework.java:102)at com.mercury.topaz.cmdb.server.manage.Framework$1.executeInContext
(Framework.java:186)at com.mercury.topaz.cmdb.server.manage.Framework$1.executeInContext
(Framework.java:183)at
CMS Troubleshooting GuideTroubleshooting and Limitations – UCMDB Server Administration
Micro Focus Universal CMDB (10.33) Page 67 of 174

com.mercury.topaz.cmdb.shared.manage.AuthorizationContextUtils.executeInSystemAuthorizationContext(AuthorizationContextUtils.java:24)
at com.mercury.topaz.cmdb.server.manage.Framework.startUp(Framework.java:183)at com.hp.ucmdb.server.Main.startFramework(Main.java:34)at com.hp.ucmdb.server.Main.main(Main.java:23)at sun.reflect.NativeMethodAccessorImpl.invoke0(Native Method)at sun.reflect.NativeMethodAccessorImpl.invoke
(NativeMethodAccessorImpl.java:62)at sun.reflect.DelegatingMethodAccessorImpl.invoke
(DelegatingMethodAccessorImpl.java:43)at java.lang.reflect.Method.invoke(Method.java:498)at org.tanukisoftware.wrapper.WrapperSimpleApp.run(WrapperSimpleApp.java:325)at java.lang.Thread.run(Thread.java:745)
Solution: You need to re-generate server-storepass.conf, because the new schema does not storeany keystore and truststore passwords.
l If you remember what passwords were specified previously, you can generate the server-storepass.conf file with the following command:
Windows: key-truststore.bat <fips_mode> <new_keystore_pass> <new_truststore_pass>
Linux: ./key-truststore.sh <fips_mode> <new_keystore_pass> <new_truststore_pass>
where <fips_mode> can be only set to true or false. For non-FIPS modeUCMDB server, false for<fips_mode>.
l If you don't remember the passwords, follow the instructions in Solution B to regenerate thepasswords.
Troubleshooting Keystore and Truststore - FIPS mode
Problem: If starting the UCMDB server failed, and the startup.log shows message similar to thefollowing:
2017-05-04 08:32:17,074 ERROR [WrapperSimpleAppMain] (JettyManager.java:247) -Failure starting jetty serverMultiException[java.io.IOException: Keystore was tampered with, or password wasincorrect, java.io.IOException: Keystore was tampered with, or password wasincorrect]
at org.eclipse.jetty.server.Server.doStart(Server.java:329)at org.eclipse.jetty.util.component.AbstractLifeCycle.start
CMS Troubleshooting GuideTroubleshooting and Limitations – UCMDB Server Administration
Micro Focus Universal CMDB (10.33) Page 68 of 174

(AbstractLifeCycle.java:68)at com.mercury.topaz.cmdb.server.manage.servlet.JettyManager.startServer
(JettyManager.java:243)at com.mercury.topaz.cmdb.server.manage.Framework.doStart0(Framework.java:242)at com.mercury.topaz.cmdb.server.manage.Framework.access$100
(Framework.java:102)at com.mercury.topaz.cmdb.server.manage.Framework$2.executeInContext
(Framework.java:221)at com.mercury.topaz.cmdb.server.manage.Framework$2.executeInContext
(Framework.java:218)at
com.mercury.topaz.cmdb.shared.manage.AuthorizationContextUtils.executeInSystemAuthorizationContext(AuthorizationContextUtils.java:24)
at com.mercury.topaz.cmdb.server.manage.Framework.start0(Framework.java:218)at com.mercury.topaz.cmdb.server.manage.Framework.doStartUp(Framework.java:204)at com.mercury.topaz.cmdb.server.manage.Framework.access$000
(Framework.java:102)at com.mercury.topaz.cmdb.server.manage.Framework$1.executeInContext
(Framework.java:186)at com.mercury.topaz.cmdb.server.manage.Framework$1.executeInContext
(Framework.java:183)at
com.mercury.topaz.cmdb.shared.manage.AuthorizationContextUtils.executeInSystemAuthorizationContext(AuthorizationContextUtils.java:24)
at com.mercury.topaz.cmdb.server.manage.Framework.startUp(Framework.java:183)at com.hp.ucmdb.server.Main.startFramework(Main.java:34)at com.hp.ucmdb.server.Main.main(Main.java:23)at sun.reflect.NativeMethodAccessorImpl.invoke0(Native Method)at sun.reflect.NativeMethodAccessorImpl.invoke
(NativeMethodAccessorImpl.java:62)at sun.reflect.DelegatingMethodAccessorImpl.invoke
(DelegatingMethodAccessorImpl.java:43)at java.lang.reflect.Method.invoke(Method.java:498)at org.tanukisoftware.wrapper.WrapperSimpleApp.run(WrapperSimpleApp.java:325)at java.lang.Thread.run(Thread.java:745)
Solution A:
Check the verify_store_pass.log, if you see the followingmessage:
INFO: server-storepass.conf file exists and it contains keystore and truststore.
Do the following:
1. Change the keystore and truststore passwords using keytool.
For detailed instructions, see the "Generate a new self-signed certificate (hpcert) and sign it withthe default UCMDB root certificate (hproot)" section in theUniversal CMDB FIPS Deployment
CMS Troubleshooting GuideTroubleshooting and Limitations – UCMDB Server Administration
Micro Focus Universal CMDB (10.33) Page 69 of 174

Guide.
2. Start the UCMDB Server service.
Solution B:
Check the verify_store_pass.log, if you see the followingmessage:
INFO: keystore password and truststore password don't exist.
Or the following:
INFO: server-storepass.conf file doesn't exist.
Do the following:
1. Make sure you have stopped the UCMDB Server.
2. Generate the server-storepass.conf file.
Windows:
From C:\hp\UCMDB\UCMBServer\bin\jre\bin, run the following command:
key-truststore.bat <fips_mode> <new_keystore_pass> <new_truststore_pass>
Linux:
From opt/UCMDB/UCMBServer/bin/jre/bin, run the following command:
./key-truststore.sh <fips_mode> <new_keystore_pass> <new_truststore_pass>
where <fips_mode> can be only set to true or false. For FIPS modeUCMDB server, true for<fips_mode>.
3. Change the keystore and truststore passwords using keytool.
For detailed instructions, see the "Generate a new self-signed certificate (hpcert) and sign it withthe default UCMDB root certificate (hproot)" section in theUniversal CMDB FIPS DeploymentGuide.
4. Start the UCMDB Server service.
Solution C:
If you only changed keystore password or truststore password during UCMDB server installation, andthen server startup failed and the startup.log shows similar error messages as shown above. You canfollow the instructions provided in Solution A or Solution B, but you need to change the keystorepassword or truststore password that you set during installation.
CMS Troubleshooting GuideTroubleshooting and Limitations – UCMDB Server Administration
Micro Focus Universal CMDB (10.33) Page 70 of 174

For example, if you only changed truststore password during installation and you need to generateserver-storepass.conf, run the following command:
Windows: key-truststore.bat <fips_mode> null <new_truststore_pass>
Linux: ./key-truststore.sh <fips_mode> null <new_truststore_pass>
Troubleshooting and Limitations – PackageManagerThis section describes some of the troubleshooting issues that might arise when deploying andundeploying packages.
This section includes the following topics:
l "GoldMaster Reports Cannot be Deployed by PackageManager" below
l "Datamodel Resources Cannot Be Undeployed" below
l "Additional Information on Package Deployment Failure" below
l "Package Creation and Deployment in a Non-English Locale" on the next page
Gold Master Reports Cannot be Deployed by Package Manager
If you export a package's resources from PackageManager that includes aGoldMaster reportdefinition, and then export those resources again to another system, the GoldMaster report definition isnot deployed.
Datamodel Resources Cannot Be Undeployed
For a list of the package resources, see Package Resources.
Additional Information on Package Deployment Failure
If package deployment fails, you can check the PackageManager log files for additional information onwhy the deployment failure occurred.
Log files are located in theC:\hp\UCMDB\UCMDBServer\runtime\log folder.
CMS Troubleshooting GuideTroubleshooting and Limitations – PackageManager
Micro Focus Universal CMDB (10.33) Page 71 of 174

Package Creation and Deployment in a Non-English Locale
This section describes the limitations when working in a non-English locale.
l You cannot deploy a package if the server locale is different than the client locale and the packagename contains non-English characters.
l You cannot create a package that contains resources (for example, views and TQL queries) havingnon-English characters in their names, if the server locale is different from the client locale.
UCMDB Browser - Known Issues
Problem: Performance for the UCMDB Browser is slow.
l Possible Solution: Add the variableCATALINA_OPTS to the Operating Systems environmentvariables with values:
-Xms512M -Xmx4096M
Problem: The Tomcat log that contains requests to the UCMDB Browser and their
HTTPS codes becomes too large and is unreadable.
l Solution: Comment out the following lines in the server.xml file, located in <UCMDB_Browser_installation_directory>\webapps\release\conf:
<Valve className="org.apache.catalina.valves.AccessLogValve" directory="logs"prefix="localhost_access_log." suffix=".txt"pattern="%h %l %u %t "%r" %s %b" />
Problem: Icons are not displayed when the Turn Off Data URI support setting is not
disabled.
l Solution: Disable the Turn Off Data URI support setting onWindows as follows:
CMS Troubleshooting GuideUCMDB Browser - Known Issues
Micro Focus Universal CMDB (10.33) Page 72 of 174

a. Click Start, type gpedit.msc in theStart Search box, and then press ENTER.
b. In the navigation pane of the Local Group Policy Editor window, expandComputerConfiguration > Administrative Templates > Windows Components > Internet Explorer> Security Features.
c. In the right pane, double-click Turn Off Data URI support.
d. Select Enabled, click Apply, and then click OK.
e. Go back to the navigation pane of the Local Group Policy Editor window, expandUserConfiguration > Administrative Templates > Windows Components > Internet Explorer> Security Features.
f. Repeat step 3 and step 4.
Troubleshooting - Configure the EnhancedSearch Engine
UCMDB doesn’t start because of the search subsystem manager. What do I do?
Stop UCMDB, delete the folder <UCMDB installation folder>/search, then restart UCMDB.
If the search still does not start, disable it, as explained in "Troubleshooting - Configure the EnhancedSearch Engine" above and revert to the legacy search engine.
The search doesn’t return any results.
In the Topology Search JMX, invoke the followingmethods:
l restoreFactoryDefaults: This restores factory configuration for the search.
l reindex: This recreates a search index for CIs in the UCMDB model. Note, this can take up toseveral hours for large databases (approx 1M CIs/hour).
You can also invoke the reindexCiTypemethod to re-index all the CIs of a given CI type from theCMDB model database.
The search doesn't find CI types that I want.
There are several different possible causes for this. Check the following:
CMS Troubleshooting GuideTroubleshooting - Configure the Enhanced Search Engine
Micro Focus Universal CMDB (10.33) Page 73 of 174

l Check that the attribute and CI type are indexable according to the indexing configuration. If theyare not, add the class attributes configuration item as explained "Troubleshooting - Configure theEnhanced Search Engine" on the previous page.
l Check that you have correct synonyms defined for the class in Class synonyms.
l Check that rating and pageItemCount for this CI are non-zero. Check for rating in the Attributeranking and for pageItemCount in Presentable CI types.
Cardinality conditions don't work or return incorrect results.
In addition to checking attribute synonyms, check that the attribute type is defined as numeric inIndexing Configuration and that units configurationmatches attribute units inSearch_Parser_Configuration_XML.
The search presents too many unwanted results.
l Check if you are you using queries with natural language. This can limit results of the "best guess"of what the user intended.
l If you need to be 100% certain that your query returns results only of one specific CI type, use type:ci-type filter in the query.
l If the two suggestions above don't help, contact the R&D team with your use case and status reportfrom JMX.
Problem with configuration - restore factory defaults
To restore the default configuration XML files from the factory content, go to JMX Console >UCMDB:service=Topology Search Services and invoke the restoreFactoryDefaults()method.
Caution: This method overwrites the current configuration. You should back up the configurationfiles before invoking it.
Logs and debugging info
Logs
search.log logs everything related to searches. Default log level is INFO, only statistics are printed.The log level and number of logs are configured with the search.loglevel variable inconf/log/cmdb.properties.
CMS Troubleshooting GuideTroubleshooting - Configure the Enhanced Search Engine
Micro Focus Universal CMDB (10.33) Page 74 of 174

Status Report
The topology search JMX status report displays all current configuration tables and statistics for thesearch engine component. It is useful to include it when reporting issues to R&D.
Content of Solr Database
By default, the Solr search engine is embedded inside UCMDB server. To query it directly, go to JMXConsole > UCMDB:service=Topology Search Services and invoke the debugSolrQuery()method.
Example queries:
l empty query returns all CIs
l "id:a6693cd46cfd1b4fab0c3551bac9289e" returns a CI with cmdbIda6693cd46cfd1b4fab0c3551bac9289e. This uses Solr/Lucene syntax.
Troubleshooting - FIPS Deployment
Troubleshooting the Data Flow Probes
l When probes finish upgrading, the new keystore/truststore is in place. If the UCMDB Server doesnot perform the last step of turning on FIPS, and HTTPs communication is enabled, in the UCDMBUI, you will see probe disconnected until the UCMDB Server replaces the new FIPSkeystore/truststore in JMX.
l If you want to find out whether an agent has been switched to the FIPS mode, follow the stepsbelow:
a. Run theUDA Status Collector job.
In UCMDB UI, go toData Flow Management > Universal Discovery > DiscoveryModules/Jobs tab > Discovery Modules tree > Tools and Samples > UD AgentManagement, right-click UDA Status Collector, and select Activate.
b. Access the Data Flow Probe JMX console: On the probemachine, launch aWeb browser andenter the following address: https://localhost:8453.
Youmay have to log in with a user name and password.
CMS Troubleshooting GuideTroubleshooting - FIPS Deployment
Micro Focus Universal CMDB (10.33) Page 75 of 174

c. Locate the exportUdaStatusmethod, provide the path, for example, C:\, and then clickInvoke.
d. Go to the probe node and find the uda_status.csv file under the path you specified and open it.
e. Check the agentVersion column in the file. If the agentVersion value is in the <agentversion>-fips format, for example, v10.33.000 build:185-fips, then it means the agent hasbeenmigrated to FIPS mode successfully. Otherwise, it is still a non-FIPS agent.
f. Count the rows where agentVersion value is in the <agent version>-fips format.
l Problem: If HTTPS communication is enabled on the UCMDB Server side, after the UCMDBserver is switched to FIPS mode, data flow probes cannot connect to the UCMDB server.
Solution: Update keystore and truststore values in the ssl.properties file (located in the<DataFlowProbe_Home>\conf\security directory) manually.
To do so,
a. Open the ssl.properties file in a text editor.
b. Locate the following two lines:
javax.net.ssl.keyStore=HPProbeKeyStore.jksjavax.net.ssl.trustStore=HPProbeTrustStore.jks
c. Update the values for the two settings manually to the following:
javax.net.ssl.keyStore=FIPS_HPProbeKeyStore.jksjavax.net.ssl.trustStore=FIPS_HPProbeTrustStore.jks
d. Save the file.
e. Restart the Probe.
l PROBLEM: After adding a new probe to the UCMDB server that was already switched to the FIPSmode, the automatic FIPS switch process for the new probemight fail. This is because once thenewly installed probe is started, it downloads all the resources from the UCMDB server, and whenthe probe gets the probe upgrade package, it would schedule a restart, which blocks the automaticFIPS Switch process. (QCCR1H106144)
Workaround: Once you find that the automatic FIPS Switch process for a new probe failed,
a. Copy the jar files of Zulu JCE Unlimited Strength Policy Files 8 into the%\DataFlowProbe_HOME%\bin\jre\lib\security directory on the Data Flow Probemachine.
b. Add the following line into theDataFlowProbe.properties file on the Data Flow Probe
CMS Troubleshooting GuideTroubleshooting - FIPS Deployment
Micro Focus Universal CMDB (10.33) Page 76 of 174
machine, and then save the file.
probe.fips.status=1
c. Restart the Data Flow Probe.
Note: If the Data Flow Probe is in separatemode, you need to perform the above steps forboth the ProbeManager and ProbeGateway.
l PROBLEM: After switching to the FIPS mode, you cannot log in to the Data Flow Probe JMXConsole using some of the latest versions of Internet Explorer 11, Microsoft Edge, or Firefox. Andwhen using these browsers youmay get “Unsupported Cipher” error message.
Workaround: To resolve the issue, do either of the following:
o Configure your web browser
l For Internet Explorer 11 or Microsoft Edge
A. OnWindows, click Start, in the Search box, enterEdit Group Policy, then click Editgroup policy that shows under Control Panel. The Local Group Policy Editor windowopens.
B. In the navigation pane, go toComputer Configuration > Administrative Templates> Network > SSL Configuration Settings.
C. In the right pane, double-click SSL Cipher Suite Order.
D. In the SSLCipher Suite Order, select theEnabled radio button.
E. In the Options pane, edit the order of SSLCipher Suites by placing a cipher that doesn'tcontain ECDHE in the first place.
F. Click Apply andOK.
G. Restart your computer.
l For Firefox
A. In the Address bar of the web browser, type about:config and press Enter.
B. Click I accept the risk!when prompted.
C. In the Search bar that appears below the Address bar, type ssl3.
All preferences that contain ssl3 are listed.
D. Change the value of all Cipher preferences containing ecdhe to false.
CMS Troubleshooting GuideTroubleshooting - FIPS Deployment
Micro Focus Universal CMDB (10.33) Page 77 of 174

You can enable or disable a preference by toggling its value with a double-click on thepreference name. true indicates that the cipher suite is enabled, false indicates notavailable.
E. Restart Firefox.
o Update the Crypto-J toolkit files to version 6.2.2
i. Close your web browser (Internet Explorer 11, Microsoft Edge, or Firefox).
ii. Stop the UCMDB server and the Data Flow Probe.
iii. Delete the browser cache under theC:\Users\<user>\AppData\Local\Temp\UcmdbAppletJars folder.
iv. Obtain the Crypto-J toolkit files (cryptojce-6.2.2.jar, cryptojcommon-6.2.2.jar, andjcmFIPS-6.2.2.jar).
Note: For information about Crypto-J 6.2.2 files, youmay go tohttps://community.rsa.com/community/products/bsafe/crypto-j-62.
v. On the UCMDB server side:
A. Delete the files under the <UCMDB_server_home>\runtime\jetty-cache folder.
B. Copy the Crypto-J toolkit files (cryptojce-6.2.2.jar, cryptojcommon-6.2.2.jar, andjcmFIPS-6.2.2.jar) to the following folders:
l <UCMDB_server_home>\bin\jre\lib\ext
l <UCMDB_server_home>\deploy\ucmdb-ui\static\appletJars
l <UCMDB_server_home>\deploy\ucmdb-ui\WEB-INF\lib
l <UCMDB_server_home>\integrations\lib
vi. On the Data Flow Probe side, copy the Crypto-J toolkit files (cryptojce-6.2.2.jar,cryptojcommon-6.2.2.jar, and jcmFIPS-6.2.2.jar) from the <UCMDB_server_home>\lib directory, and place them inside the <DataFlowProbe>\lib folder (for example,C:\hp\UCMDB\DataFlowProbe\lib).
vii. Restart the UCMDB server and the Data Flow Probe.
CMS Troubleshooting GuideTroubleshooting - FIPS Deployment
Micro Focus Universal CMDB (10.33) Page 78 of 174

Troubleshooting the UCMDB Server
l Manual steps to make a reader server FIPS ready
In case the enableFipsMode JMX method reports a failure for a reader server, you can performseveral manual steps tomake the reader server FIPS-ready.
Note: These steps are applicable only when the switch to FIPS modewas successful on thewriter server.
The JMX output page displayed after the enableFipsMode JMX method is executed containsdetailed information about the status of the switch to FIPS mode on all the HA cluster servers.Only when the switch to FIPS modewas successful on the writer server, but failed on a readerserver, you can follow the steps below tomake the reader server FIPS ready.
a. Stop all the servers in the HA cluster, including the writer server.
b. Start only the writer server.
After the first startup since FIPS was enabled, the newly generated FIPS compliant files willreside on the writer's file system. Tomake the reader server FIPS ready, you need tomanuallycopy these files to the reader server.
c. Copy the encryption.bin and cmdbSuperIntegrationCredentials.bin files from the writerserver's <UCMDB_Server_Home>/conf/persistence folder and place them in thecorresponding location on the reader server.
d. Copy the fips.conf file from the writer server's <UCMDB_Server_Home>/bin directory andplace it in the corresponding directory on the reader server.
e. Copy the cmdb.conf file from the writer server's <UCMDB_Server_Home>/conf folder andplace it in the corresponding directory on the reader server.
Note: If necessary, correct the database connection details in thedal.datamodel.host.name parameter from the cmdb.conf file.
f. Start the reader server.
l Switch to FIPS JMX output and important log files
When switching the UCMDB Server to FIPS mode, the JMX output result should print informationabout whether the switch to FIPS mode succeeded on all the servers from the HA cluster:
CMS Troubleshooting GuideTroubleshooting - FIPS Deployment
Micro Focus Universal CMDB (10.33) Page 79 of 174

The relevant logs that can be checked for detailed information are:
o security.log - contains detailed information about the switch to FIPS mode process. Thefollowing output is present in the security.log after calling the enableFIPSMode JMX method:
2017-07-10 19:18:13,155 INFO [qtp325079998-215] - Switch to FIPS mode started:2017-07-10 19:18:13,155 INFO [qtp325079998-215] - Starting decrypt with LegacyProviders.2017-07-10 19:18:13,155 INFO [qtp325079998-215] - Triggering the Master Key Decryptstep.......2017-07-10 19:18:14,130 INFO [qtp325079998-215] - Perform decrypt test for the newsuper integration user file.2017-07-10 19:18:14,131 INFO [qtp325079998-215] - Super Integration user credentialsfrom new file are matching the credentials from input? Result: true2017-07-10 19:18:14,131 INFO [qtp325079998-215] - Switch to FIPS mode validationsucceeded!
After calling the enableFIPSMode JMX method, a lot of the FIPS changes will be present intemporary files on disk. When the UCMDB Server is restarted, the security log should also printdetails about the switch between the temporary and current files:
2017-07-10 19:25:33,382 INFO [WrapperSimpleAppMain] - Copy new conf file:..\conf\new_cmdb.conf into old one: ..\conf\cmdb.conf2017-07-10 19:25:33,395 INFO [WrapperSimpleAppMain] - New conf file was deleted?true2017-07-10 19:25:33,432 INFO [WrapperSimpleAppMain] - Copy new file:..\conf\persistence\encryption.bin.new into old one: ..\conf\persistence\encryption.bin2017-07-10 19:25:33,439 INFO [WrapperSimpleAppMain] - Going to delete:..\conf\persistence\encryption.bin.new2017-07-10 19:25:33,439 INFO [WrapperSimpleAppMain] - Copy new file:..\conf\persistence\cmdbSuperIntegrationCredentials.bin.new into old one:..\conf\persistence\cmdbSuperIntegrationCredentials.bin2017-07-10 19:25:33,443 INFO [WrapperSimpleAppMain] - Going to delete:..\conf\persistence\cmdbSuperIntegrationCredentials.bin.new2017-07-10 19:25:36,239 INFO [WrapperSimpleAppMain] - Master key was loaded withsuccess into memory!2017-07-10 19:28:00,666 INFO [WrapperSimpleAppMain] - LWSSO in FIPS mode
CMS Troubleshooting GuideTroubleshooting - FIPS Deployment
Micro Focus Universal CMDB (10.33) Page 80 of 174

2017-07-10 19:28:00,666 INFO [WrapperSimpleAppMain] - Reload configuration withfilename lwsso/ucmdb_fips_mode_lwsso_conf.xml2017-07-10 19:28:00,819 INFO [WrapperSimpleAppMain] - LWSSO in FIPS mode2017-07-10 19:28:00,819 INFO [WrapperSimpleAppMain] - Reload configuration withfilename lwsso/ucmdb_fips_mode_lwsso_conf.xml
o startup.log - contains information which can be consulted to determine whether the UCMDBserver has performed the switch to FIPS.
2017-07-10 19:25:33,450 INFO [WrapperSimpleAppMain] -************************************2017-07-10 19:25:33,450 INFO [WrapperSimpleAppMain] - ******* Starting Framework*******2017-07-10 19:25:33,458 INFO [WrapperSimpleAppMain] - *** Java Version: 1.8.0_922017-07-10 19:25:33,471 INFO [WrapperSimpleAppMain] - *** CMDB Version: 10.33.1852017-07-10 19:25:33,471 INFO [WrapperSimpleAppMain] - *** Java Home:C:\hp\UCMDB\UCMDBServer\bin\jre2017-07-10 19:25:33,472 INFO [WrapperSimpleAppMain] - *** OS Name: WindowsServer 2008 R2 6.12017-07-10 19:25:33,472 INFO [WrapperSimpleAppMain] -************************************2017-07-10 19:25:33,472 INFO [WrapperSimpleAppMain] - Fips mode is enabled.2017-07-10 19:25:33,472 INFO [WrapperSimpleAppMain] - Switching to secure providers2017-07-10 19:25:34,280 INFO [WrapperSimpleAppMain] - Removing the current SunJSSEprovider.2017-07-10 19:25:34,280 INFO [WrapperSimpleAppMain] - Adding the new SunJSSEprovider which is configured in FIPS mode.2017-07-10 19:25:34,280 INFO [WrapperSimpleAppMain] - Changed SunJSSE to use JSafefor SSL.2017-07-10 19:25:34,280 INFO [WrapperSimpleAppMain] - Added the JSafe provider.2017-07-10 19:25:34,300 INFO [WrapperSimpleAppMain] - Start framework init
l Decryption error
In case a decryption error occurs, and the UCMDB server cannot start up, you can do the following:
a. Regenerate the server-fips.keystore/server-fips.truststore files.
For detailed instructions, see Regenerate a new self-signed hpcert and sign it with the defaultUCMDB root certificate.
b. Synchronize password in the database by running the following command:
<UCMDBServer>\bin\key-truststore.bat <FIPS or not? true for FIPS><keystore password> <truststore password>
Example:
C:\hp\UCMDB\UCMDBServer\bin\key-truststore.bat true mykeystorepassmytruststorepass
CMS Troubleshooting GuideTroubleshooting - FIPS Deployment
Micro Focus Universal CMDB (10.33) Page 81 of 174

Troubleshooting the UCMDB UI
1. Applet FIPS preliminary checks
After performing login in the UCMDB UI, there are basic checks done tomake sure the Crypto Jtoolkit and the JCE Unlimited Strength Policy Files are present in the correct location in the JRE.
Pop-up example from the UCMDB UI when the Crypto J toolkit jars and the Unlimited StrengthPolicy Files aremissing:
2. Troubleshooting the SSL Communication between the UCMDB UI and theUCMDB Server
To investigate applet loading issues and SSL communication issues between the UCMDB UI andthe UCMDB Server, we recommend you to enable the Java console from the Java Control Panel.
a. In theAdvanced tab of the Java Control Panel, under the Java Console category, select theShow console radio button.
CMS Troubleshooting GuideTroubleshooting - FIPS Deployment
Micro Focus Universal CMDB (10.33) Page 82 of 174

b. Make sure that under theDebugging category, theEnable logging radio button is selected.
In addition to enabling the Java console, you should also add the -Djavax.net.debug=sslparameter to the JAVA_TOOL_OPTIONS environment variable. (The environment variableshould be present on the client machine if you performed steps in "Task 5. UCMDB UI Migration"for enabling the FIPS mode). After adding the SSL debug flag, you can inspect the output from theJava console when the UCMDB UI is loading.
As an example on how to troubleshoot applet issues, we will use the default hpcert limitation.The default hpcert certificate from server-fips.keystore uses a SAN extension with DNS field setto localhost. This limits the access to the UCMDB UI only from the UCMDB Server Machine(localhost). That is to say, UCMDB UI must be on the samemachine with UCMDB Server, andyou can only use URL https://localhost:8443/ to access the UCMDB Server, neitherhttps://<UCMDB_Server_Name>:8443/ nor https://<UCMDB_Server_IP_Address>:8443/. Incase we try to access the UI with FQDN from amachine different than localhost, since the SANextension DNS name (localhost) from the certificate does not match the URLwe have used toaccess the UI (FQDN of the UCMDB Server), an SSL exception will be thrown in the JavaConsole and the loading of the UCMDB UI will stop.
CMS Troubleshooting GuideTroubleshooting - FIPS Deployment
Micro Focus Universal CMDB (10.33) Page 83 of 174
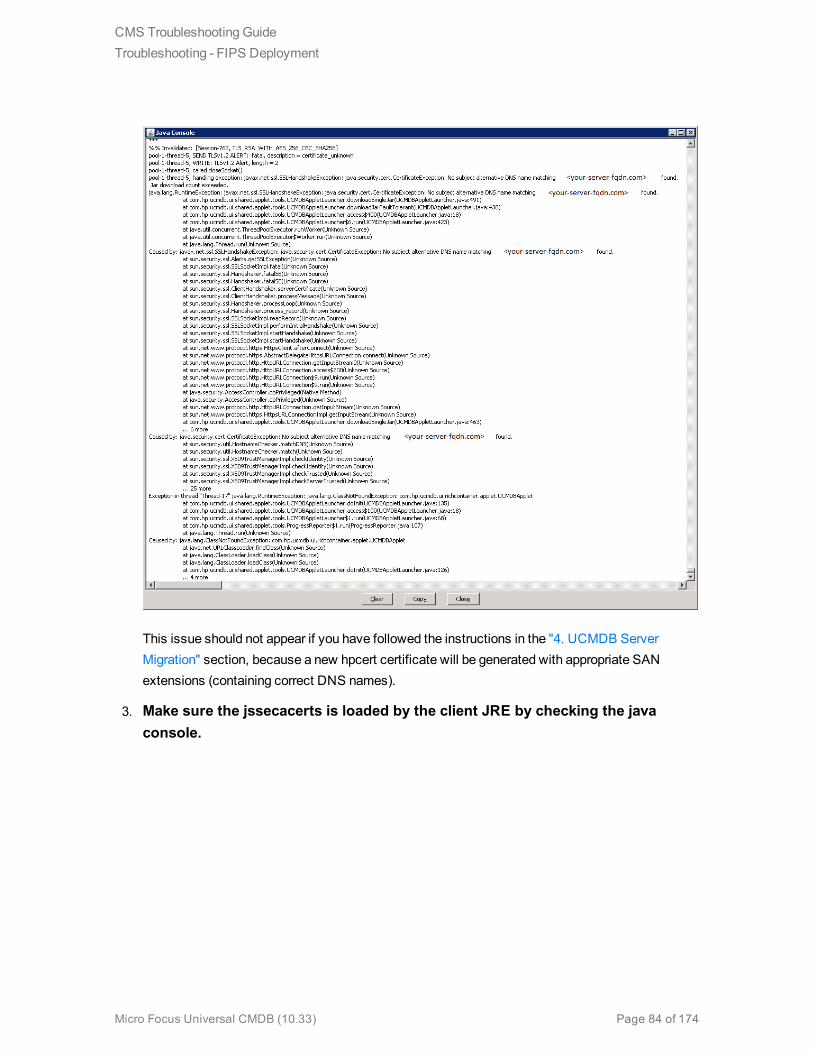
This issue should not appear if you have followed the instructions in the "4. UCMDB ServerMigration" section, because a new hpcert certificate will be generated with appropriate SANextensions (containing correct DNS names).
3. Make sure the jssecacerts is loaded by the client JRE by checking the javaconsole.
CMS Troubleshooting GuideTroubleshooting - FIPS Deployment
Micro Focus Universal CMDB (10.33) Page 84 of 174

4. Customize JRE 7 to use FIPS compliant protocols
If you use use JRE 7 for loading the UCMDB UI, make sure only TLS protocols are checked in theJava Control Panel. You need to un-check SSL 3.0.
CMS Troubleshooting GuideTroubleshooting - FIPS Deployment
Micro Focus Universal CMDB (10.33) Page 85 of 174

Troubleshooting - High Availability ModeUpon every startup of the UCMDB server, the server sends a test message to the cluster to verify if itsuccessfully connected to the cluster. If there is a problem with the connection, themessage fails andthe server is stopped to avoid the whole cluster getting stuck.
Some examples of wrong cluster encryption configuration are:
l Disabled encryption on one node when another node enabled it.
l Wrong or missing cluster.encryption.keystore
CMS Troubleshooting GuideTroubleshooting - High Availability Mode
Micro Focus Universal CMDB (10.33) Page 86 of 174

l Wrong or missing key in the keystore
If the server gets stuck because of a configuration issue, the error message is:
2012-09-11 17:48:23,584 [Thread-14] FATAL - #### Server failed to connect properlyto the cluster and its service is stopped! Please fix the problem and start itagain ####
2012-09-11 17:48:23,586 [Thread-14] FATAL - Potential problems can be: wrongsecurity configuration (wrong or missing cluster.encryption.keystore, wrong key,disabled encryption in a cluster with enabled encryption)
CMS Troubleshooting GuideTroubleshooting - High Availability Mode
Micro Focus Universal CMDB (10.33) Page 87 of 174

Chapter 4: Troubleshooting Data FlowManagementThis chapter includes:
Troubleshooting and Limitations – Data Flow Probe Setup 89
Data Flow Probe Setup - Troubleshooting 89
Data Flow Probe Setup - Limitations 92
Troubleshooting Probe Auto Upgrade 93
Troubleshooting and Limitations –Multiple CMDB Integration 99
CyberArk Integration Troubleshooting and Limitations 101
Universal Discovery Troubleshooting and Limitations 104
Troubleshooting – Universal Discovery 105
Limitations – Universal Discovery 108
Inventory Discovery Troubleshooting 109
How to view all information related to a device in a centralized view? 109
How to troubleshoot network availability and latency issue related to a device? 111
How to check the key indexes of the discovery history information for a discovered device? 116
How to check device related logs for a discovered device? 123
How to invoke discovery job relevant to the discovered devicemanually and check status toidentify potential discovery errors? 125
How to check which pattern (management zone) is used in the discovery for a discovereddevice? 135
How to check detailed discovery settings used in the discovery for a discovered device? 137
How to check the SNMP credentials used in the discovery for a discovered device? 140
Micro Focus Universal CMDB (10.33) Page 88 of 174

Troubleshooting and Limitations – Data FlowProbe Setup
Data Flow Probe Setup - Troubleshooting
Problem: You cannot transfer a Data Flow Probe from one domain to another.
Reason:Once you have defined the domain of a Probe, you can change its ranges, but not the domain.
Solution: Install the Probe again:
1. (Optional) If you are going to use the same ranges for the Probe in the new domain, export theranges before removing the Probe. For details, see Ranges Pane.
2. Remove the existing Probe from UCMDB. For details, see theRemove Domain or Probe buttonin Data Flow Probe SetupWindow.
3. Install the Probe. For details, see the section about installing the Data Flow Probe in theinteractiveUniversal CMDB Deployment Guide.
4. During installation, make sure to give the new Probe a different name to the name given to the oldProbe, or make sure you delete the reference to Probe from the original domain.
Problem: Discovery shows a disconnected status for a Probe.
Solution:Check the following on the Probemachine:
l That the Probe is running
l That there are no network problems
Solution: The probe status is Disconnected orDisconnected (being restarted).
l Search for restart messages in thewrapperProbeGW logs.
l If the probe does not restart, try to take probe thread dump from the disconnected time and searchfor theProbeGW Tasks Downloader thread.
l If there is no probe thread dump, investigate the problematic timeframe in thewrapperProbeGw
CMS Troubleshooting GuideTroubleshooting and Limitations – Data Flow Probe Setup
Micro Focus Universal CMDB (10.33) Page 89 of 174

log. In particular:
o Check if the probe tasks confirmer has been running for more than 5minutes.
o Check if some of the resources are being downloaded for more than 5minutes.
Problem: The connection between the Universal CMDB server and the Probe fails
due to an HTTP exception.
Solution:Ensure that none of the Probe ports are in use by another process.
Problem: A Data Flow Probe node name cannot be resolved to its IP address. If this
happens, the host cannot be discovered, and the Probe does not function correctly.
Solution:Add the host machine name to theWindows HOSTS file on the Data Flow Probemachine.
Problem: After uninstalling the Data Flow Probe, mysqld.exe and associated files
are not deleted.
Solution: To delete all files, restart themachine on which the Data Flow Probe was installed.
Problem: After the UCMDB Server CUP is updated, the Probe fails to start or fails
to connect to server
Solution: The Probe's CUP versionmust be the same as UCMDB Server's CUP version. If the CUPversions are not aligned, youmust update the Probe's CUP version. To do this, see How to Deploy aData Flow Probe CUP.
In some cases, the CUP may need to be deployedmanually on a Probe. For details, see How toDeploy a Data Flow Probe CUP Manually.
Problem: I want to check if my integration probe is connected, but I can't see it
listed in the Data Flow Probe Setup module tree.
Reason: The Data Flow Probe Setupmodule displays only Data Flow Probes for discovery. IntegrationProbes—that is, Probes on Linux machines, andWindows Probes configured for integration only— arenot displayed in the Data Flow Probe Setupmodule.
CMS Troubleshooting GuideTroubleshooting and Limitations – Data Flow Probe Setup
Micro Focus Universal CMDB (10.33) Page 90 of 174

Workaround: To see if an integration Probe is connected, create a dummy integration point and verifythat the Probe is listed among the Probes that can be selected for the integration point (in theDataFlow Probe field). For details, see How to Set Up an Integration Point.
Problem: Troubleshooting PostgreSQL Issues
Solution:
The table below lists the Data Flow Probe database scripts. These scripts can bemodified foradministration purposes, both inWindows and Linux environments.
Note:
l The scripts are located on the Data Flow Probemachine, in the following location:
o Windows: C:\hp\UCMDB\DataFlowProbe\tools\dbscripts
o Linux: /opt/hp/UCMDB/DataFlowProbe/tools/dbscripts
l Data Flow Probe database scripts should be changed for specific administration purposesonly.
Script Description
exportPostgresql [PostgreSQL root accountpassword]
Exports all data from the DataFlowProbedatabase schema to data_flow_probe_export.bin in the current directory
importPostgresql [Export file name] [PostgreSQLroot account password
Imports data from a file created by theexportPostgresql script into theDataFlowProbe schema
enable_remote_user_access Configures the PostgreSQLData Flow Probeaccount to be accessible from remotemachines
remove_remote_user_access Configures the PostgreSQLData Flow Probeaccount to be accessible only from the localmachine (default)
set_db_user_password [new PostgreSQLDataFlow Probe account password] [PostgreSQL rootaccount password]
Modifies the PostgreSQLData Flow Probeaccount password
set_root_password [new PostgreSQL rootaccount password] [Current PostgreSQL rootaccount password]
Modifies the PostgreSQL root account password
CMS Troubleshooting GuideTroubleshooting and Limitations – Data Flow Probe Setup
Micro Focus Universal CMDB (10.33) Page 91 of 174

Problem: The Data Flow Probe database service cannot start.
l Reason:Hosts machinemust not contain "localhost".
Solution:On the Data Flow Probemachine, open
o Windows:%systemroot%\system32\drivers\etc\hosts
o Linux: /etc/hosts
and ensure that all lines containing "localhost" are commented out.
l Reason:Microsoft Visual C++ 2010 x64 Redistributable is installed during the installation of theProbe. If for some reason this redistributable is uninstalled, PostgreSQL stops working
Solution:Check if Microsoft Visual C++ 2010 x64 Redistributable is installed. If not, reinstall it.
Data Flow Probe Setup - Limitations
l When the Probe is running in separatemode on amachine where both the Gateways and theManager share a same installation folder, the Data Flow Probe CUP must be installedmanually.For details, see How to Deploy a Data Flow Probe CUP Manually.
l Data Flow Probe CUPs that were deployedmanually can be uninstalled usingmanual methodsonly. For details, see How to Uninstall Probe CUPs Manually.
l Universal Discovery Agent may not callhome in, but not limited to, the following scenario:
o The callhome IP address that is configured on the Universal Discovery Agent belongs to a clienttype range that is added to a cluster.
Note: The Universal Discovery Agent supports 1 primary and 1 secondary probe.
o The range is amember of a probe cluster.
o The cluster contains two or more probes.
In this scenario, callhomemay not work as expected. Contact Support for assistance in configuringcallhome.
CMS Troubleshooting GuideTroubleshooting and Limitations – Data Flow Probe Setup
Micro Focus Universal CMDB (10.33) Page 92 of 174

Troubleshooting Probe Auto Upgrade
Troubleshooting Probe Auto Upgrade - General
l Limitation: If the auto upgrade fails, retry will not resolve the issue. You need to access thecorresponding probe server and perform manual deployment of version 10.33 probe.
l Known Issue: TheC:\hp\UCMDB\temp folder was created and used by the probe auto upgradeagent during the upgrade process. If you see this folder on your probe server, you can just ignore it,or safely remove it. It has no functional impact.
l Check if resources are placed under the right place after UCMDB server is upgraded toversion 10.33
a. Check if the Data Flow Probe installer is placed under the right place
Go to the <UCMDB_Server>\content\probe_installer directory. This directory should containthe probe installerUCMDB_DataFlowProbe_10.33.exe.
b. Check if the probe auto upgrade agent package is placed under the right place
Go to the <UCMDB_Server>\runtime\probe_upgrade directory. This directory shouldcontain the probe upgrade package probe-patch-windows.zip.
If the probe-patch-windows.zip package does not exist,
i. Go to <UCMDB_Server>\content\probe_patch.
ii. Copy the probe-patch-10.33-windows.zip package to the <UCMDB_Server>\runtime\probe_upgrade directory.
iii. Restart the UCMDB server. UCMDB server will then perform probe auto upgrade.
l Probe auto upgrade log files
Check the probe auto upgrade log files (in the <DataFlowProbe>\runtime\log directory) for moredetails:
o pg_upgrade.log. Shows the running details of the pg_upgrade.bat script, including the detailsabout PostgreSQL upgrade and table splitting.
o probe_upgrade_conf_merge.log. Shows the related information when probe installer mergerconfiguration files.
CMS Troubleshooting GuideTroubleshooting and Limitations – Data Flow Probe Setup
Micro Focus Universal CMDB (10.33) Page 93 of 174

o probe_auto_upgrade.log. In the probeUpgradeLogs subfolder, shows the related informationwhen the probe auto upgrade agent upgrades a probe.
For more details about the log files, see "Data Flow Probe Log Files" on page 1.
l XML Enricher service port conflict issue
Problem: The XMLEnricher servicemay fail to start after the probe upgrade due to port conflict. Inthat case, the probe_auto_upgrade.log is placed under the failed folder, for example, <UCMDB_Server>\runtime\log\probeUpgradeLogs\10.22to10.33\failed. You can find the followingmessage in probe_auto_upgrade.log:
2017-07-14 11:27:11 INFO ServiceControl:106 - Starting XML Enricher service...
2017-07-14 11:27:11 INFO ServiceControl:328 - XML EnricherStatus status:STOPPED
2017-07-14 11:27:11 INFO ServiceControl:381 - Waiting for execution...
2017-07-14 11:27:46 ERROR ServiceControl:394 - Problems occurred duringexecution.
Solution: Check <DataFlowProbe>\runtime\logWrapperEnricher.log, if you find "Portalready in use: 34545", you can change the port for XMLEnricher by editing the<DataFlowProbe>\bin\xmlenriche\WrapperEnricher.conf file, or free the port 34545.
Troubleshooting Probe Auto Upgrade - PostgreSQL Upgrade
l When PostgreSQL finishes upgrade, you can check the PostgreSQL version to verify if the upgradeis successful or not.
In amore general way, you can check the pg_upgrade.log in the <DataFlowProbe>\runtime\logfolder for more details.
If PostgreSQL upgrade is completed successfully, you can find “The new PostgreSQL will beused” message in the pg_upgrade.log file, and you can also see two folders:<DataFlowProbe>\pgsql and <DataFlowProbe>\pgsql.old . The <DataFlowProbe>\pgsql.newfolder was removed when the upgrade is completed successfully. If youmanually run the scriptfrom the <DataFlowProbe>/tools/dbscripts folder to upgrade the database again, the log will tellyou that pgsql.new does not exist, and running the script again has no functional impact to thePostgreSQL installation.
l In some cases the PostgreSQL upgrademay fail. Then you can find three subfolders under<DataFlowProbe>: pgsql, pgsql.old, and pgsql.new. You can also findmore details in the pg_upgrade.log file, which displays messages that may indicate why the upgrade failed. Youmay
CMS Troubleshooting GuideTroubleshooting and Limitations – Data Flow Probe Setup
Micro Focus Universal CMDB (10.33) Page 94 of 174
follow the solutions for different logmessages.
a. Log message: Folder pgsql.new doesn't exist.
l Possible Cause: Something unexpected happened when installing the probe, and theprobe failed to generate the pgsql.new folder.
Solution: Download PostgreSQL resources for the same version from the officialPostgreSQLwebsite and extract the resources to the pgsql.new folder, then rerun the pg_upgrade.bat script.
l Possible Cause: You have already run the script more than once, and the script alreadydeleted the pgsql.new folder previously.
Solution: The PostgreSQL upgrade is completed successfully previously. Just check forthe PostgreSQL version.
b. Log message: The new PostgreSQL database initialization failed.
Possible Cause: The conditions for initdbwere not met.
Solution: Check if the password is correct, or there is no data folder in pgsql.new.
c. Log message: The precheck of the old and new PostgreSQL failed.
Possible Cause: The script did not run in the local system account or has no full control of thefiles.
Solution: Switch to the local system account, or add full control to the whole folder for users,then rerun the script.
d. Log message: PostgreSQL upgrade failed, the old PostgreSQL will still beused.
Possible Cause: The conditions for pg_upgrade.exewere not met.
Solution: Check the conditions for both the old PostgreSQL and the new PostgreSQL, makesure both are fine. You canmanually run the following command to findmore details:
"%DB_PATH%\pg_upgrade.exe" -b "%BASE_DIR%\pgsql\bin" -B "%BASE_DIR%\pgsql.new\bin" -d "%BASE_DIR%\pgsql\data" -D "%BASE_DIR%\pgsql.new\data" -p 5436 -P 5437 -U postgres
e. Log message: Table splitting failed, the old PostgreSQL will still be used.
Possible Cause: There is no ddm_discovery_results table in the database, or the upgradefailed when creating the ddm_discovery_touch_results table.
CMS Troubleshooting GuideTroubleshooting and Limitations – Data Flow Probe Setup
Micro Focus Universal CMDB (10.33) Page 95 of 174

Solution: Check the log details to find out where the problems happened, then check the scripttools\dbscripts\migrateData.cmd.
After resolving issue a ~ issue e above, you can follow the steps below to upgrade PostgreSQLmanually:
a. Stop theUCMDB_Probe_DB service.
b. Remove the content of the pgsql folder and copy the content of the pgsql.old folder into thepgsql folder.
c. Give full control to the user of theDataFlowProbe folder, and then from the<DataFlowProbe>/tools/dbscripts folder run the following command:
pg_upgrade.bat %DB_Password%
d. Once the command is successful run, revert the full control you granted to the user.
Note: During the upgrade, Micro Focus does not keep the configuration files for<DataFlowProbe>\pgsql\data\postgresql.conf, somake sure you reconfigure it after theupgrade (if necessary).
Troubleshooting - Probe Auto Upgrade Agent
Before upgrading a probe, the probe auto upgrade agent checks the environment and the probe status.
a. Check probe version. Only a probe of version 10.22 or higher could be upgrade. For supportedprobe versions, see Supported Versions.
b. Check probe status. Only unionmode probe in non-FIPS mode could be upgraded.
c. Check available disk space. At least 10 GB disk space is required to perform the probe autoupgrade.
If a probe does not satisfy the requirements, it will be restored and back on running.
Important:
l A probe has only one chance for auto upgrade. If the auto upgrade process fails, and the probewas not broken during the process, it would be restored and you will need tomanually upgradeit.
l The probe auto upgrade does not support to upgrade a probe started in consolemode.
CMS Troubleshooting GuideTroubleshooting and Limitations – Data Flow Probe Setup
Micro Focus Universal CMDB (10.33) Page 96 of 174

l How to check if a probe has been upgraded successfully?
You can check the probe_auto_upgrade.log file (in theC:\hp\UCMDB\DataFlowProbe\runtime\log\probeUpgradeLogs folder).
o If the probe has been upgraded successfully, you can see the followingmessage in the log file:
Finished probe upgrade. Probe has been upgraded to [version] [Build]. Probeauto upgrade agent will exit.
o If the probe upgrade failed, there is no upgrade related error message in the probe_auto_upgrade.log file.
For further information about the upgrade failure, check the following log files:
l probe_upgrade_conf_merge.log
l pg_upgrade.log
l probe_post_upgrade.log
For information about the probe log files, see "Data Flow Probe Log Files" on page 1.
o Problem:Sometimes due to the environment, the probe installer may be in hung state andcannot finish the upgrade. If this happens, the probe auto upgrade agent will abort the probeupgrade process and restore the probe.
Solution:You need tomanually upgrade the probe.
o Problem: Log shows that “errors occurred installing probe”, and probe service, probeDB service, or XML Enricher service could not be started. It may happen when errors occurlaunching the probe installer.
Solution:You need tomanually upgrade the probe.
Most likely it is caused by themissing of some properties in the configuration file. If not, youmayneed to check the following log files for further information:
l probe_upgrade_conf_merge.log
l pg_upgrade.log
l probe_post_upgrade.log
Troubleshooting - Three Way Merge Function
When the probe installer is launched, it will merge the following configuration files:
CMS Troubleshooting GuideTroubleshooting and Limitations – Data Flow Probe Setup
Micro Focus Universal CMDB (10.33) Page 97 of 174
l DataFlowProbe.properties
l DataFlowProbeOverride.properties (If exists)
The result is that all the custom configuration settings will be written into theDataFlowProbeOverride.properties file.
Note: The recommended value of theappilog.agent.probe.sendtouchResultsToServer.maxObjects setting inDataFlowProbe.properties for version 10.33 is 500. So if your value is greater than 500, it will bemodified to 500.
The following files will be replaced with the ones from your environment:
l <DataFlowProbe>\conf\postgresql.conf
l <DataFlowProbe>\conf\probeMgrList.xml
l <DataFlowProbe>\conf\WrapperGatewayCustom.conf
l <DataFlowProbe>\conf\WrapperManagerCustom.conf
l <DataFlowProbe>\conf\security\ssl.properties
l <DataFlowProbe>\conf\security\HPProbeKeyStore.jks
l <DataFlowProbe>\conf\security\HPProbeTrustStore.jks
l <DataFlowProbe>\conf\enricher.properties
l <DataFlowProbe>\conf\EnricherServiceSettings.ini
l <DataFlowProbe>\bin\WrapperEnv.conf
l <DataFlowProbe>\bin\wrapper-platform.conf
l <DataFlowProbe>\bin\WrapperManager.conf
l <DataFlowProbe>\bin\WrapperGateway.conf
l <DataFlowProbe>\bin\xmlenricher\WrapperEnricher.conf
Problem:After finishing probe auto upgrade, the probe cannot not be started, andmany properties inDataFlowProbe.properties are empty. This happens when probe backing up configuration files failed.
Solution:You need tomanually upgrade the probe. That is to say, uninstall the probe and installversion 10.33 probemanually.
CMS Troubleshooting GuideTroubleshooting and Limitations – Data Flow Probe Setup
Micro Focus Universal CMDB (10.33) Page 98 of 174

Troubleshooting and Limitations – MultipleCMDB Integration
Troubleshooting
When performing troubleshooting, be sure to check both CMDB server and Probe logs.
l CMDB server logs
o fcmdb.log
o fcmdb.adapters.log
o error.log
o cmdb.reconciliation.log (for population jobs)
l Probe logs
o wrapperProbeGw.log
o fcmdb.log
o fcmdb.adapters.log
o probe-infra.log
Following are some problems that youmay encounter and their solutions.
l Problem. TQL query not active/persistent error message.
TheQuery settings have been changedmanually.
Solution. Run full population to reactivate/persist the query.
l Problem. The number of CIs that is populated is much larger than the requested amount.
Solution. Since the automatic completion feature for reconciliation is turned on by default, it maypopulate the CMDB with additional CIs or links, in order to contain sufficient information to insertthe CIs into the CMDB.
l Problem. Changes are not populated immediately after a job is run.
Changes may take a few minutes to be detected by the livemechanism.
Solution. Wait a few minutes for changes to be populated by your next population job.
CMS Troubleshooting GuideTroubleshooting and Limitations –Multiple CMDB Integration
Micro Focus Universal CMDB (10.33) Page 99 of 174

l Problem. CIs are not populated into the CMDB.
Changes may take a few minutes to be detected by the livemechanism.
Solution. Wait a few minutes for changes to be populated by your next population job.
Check the CMDB reconciliation logs for more information.
l Problem. Deletions are not populated.
Solution:
o Make sure that you have selected theAllow Delete check box in the population job properties.
o Check the query you are running. Deletes are not supported on federated queries, and the agingmechanismmust be used.
l Problem. Queries that contain compound relationships fail.
Solution. If you want to let those TQL queries run, remove subgraph and uncheck Show full pathbetween source and target CIs in the query's Compound Relationship properties, then the queriescan run.
l Problem. Authentication fails.
Solution. Since the UCMDB 9.x /10.x adapter uses the UCMDB API for connection, set up anintegration user to ensure that you provide proper credentials. For details, see "Create an IntegrationUser" in theUniversal CMDB Developer ReferenceGuide.
l Problem. The Data Push job fails with themessage “Remote UCMDB version is not supported.”
Solution. The Data Push flow only supports pushing to UCMDB version 9.05 CUP 9 and laterCUPs, or UCMDB version 10.01 and later (it does not support pushing to UCMDB version 10.00).Upgrade your remote UCMDB or alternatively, run the integration using the population flow.
Limitations
l If the TQL query for a population job (defined on the source) includes CI types or links that do notexist on the target, or links that are not valid, those types or links are ignored in the target datarepository.
l Since the UCMDB 9.x/10.x adapter works with the "changes" population engine, if a populationflow retrieves federated data, no removals aremade in the CMDB, since the federation brings onlyadded or updated data.
CMS Troubleshooting GuideTroubleshooting and Limitations –Multiple CMDB Integration
Micro Focus Universal CMDB (10.33) Page 100 of 174

CyberArk Integration Troubleshooting andLimitationsl Symptom: Received an error message "User <ApplicationID> is not defined" when runningthe checkCyberArkConn.bat script to test connection.
Possible Cause: The application ID is not added to the Safe in CyberArk.
Solution: Add the applicaition ID to the Safe in CyberArk. For detailed instructions, see Createand configure an application ID.
l Symptom: Checking credential failed with an error message similar to the following:
Failed to get credential XYZ, please check the related error logs in probe side.
Scenarios:
o Found the following error messages in theWrapperProbeGw.log:
l ... Failed to get credential for id 52_1_CMS - Failed quering CyberArkPassword, Application ID is empty.
l ...Failed to get credential for id 2_1_CMS - Failed quering attribute fromCyberArk Password.
Possible Cause: Application ID or Classpath is not properly set.
Solution: Set application ID and classpath properly. For detailed instructions, see SetApplicationID and Classpath parameters manually.
o Found the following error message in theWrapperProbeGw.log: Query string not legal.Should be "safe\folder\name".
Possible Cause: The format of the Reference ID is not correct.
Solution: Update the reference ID by strictly following the reference ID format:
<Safe_Name>\<Folder Path>\<ReferenceID>
Where <Safe_Name> is the Safe value in CyberArk, <Folder Path> is the folder where theSafe belongs to, and <ReferenceID> is the name of the CyberArk account you specified or auto-generated in CyberArk.
For example, NancySafe\Root\nancy-cyberark-testing-refid.
o Found the following error message in theWrapperProbeGw.log:
CMS Troubleshooting GuideCyberArk Integration Troubleshooting and Limitations
Micro Focus Universal CMDB (10.33) Page 101 of 174

Password object matching query [object=ABC;Folder=Root;Safe=XYZ] was not found(Diagnotic Info: 9). Please check that there is a password object that answersyour query in the vault and that both the provider and the application userhave the appropriate permissions needed in order to use the password.
Possible Cause: The CyberArk Credential Provider user was not added as amember to theSafe.
Solution: Add the CyberArk Credential Provider user as amember to the Safe in CyberArk, asfollows:
For detailed instructions, see "How to Create and Configure CyberArk Account for theIntegration" on page 1.
o Found the following error message in theWrapperProbeGw.log: Error: CASVL012E UserName [ApplicationID] is invalid.
Possible Cause: This is related to the authentication. TheOS user was not properly set whencreating the Application ID in CyberArk.
Solution: If the Probe is running as a service, addNT AUTHORITY\SYSTEM as OS user.
If the Probe is running as console, add the <hostname\username> as OS User.
l PROBLEM: After enabling CyberArk integration, there are no CyberArk related fields in theProtocol Parameters dialog for some protocols. Is it possible to add CyberArk credential referenceto those protocols?
CMS Troubleshooting GuideCyberArk Integration Troubleshooting and Limitations
Micro Focus Universal CMDB (10.33) Page 102 of 174

Solution: Yes. Apart from UDDI Registry and Universal Discovery protocols (which have nopasswords at all), we can add CyberArk credential reference to these protocols with the help ofJMX methods. For a list of protocols that are supported from JMX, see "Supported Protocols" onpage 1. For detailed instructions, see "How to Add CyberArk Credential for Protocols from JMX" onpage 1.
l Limitation: Probe will not be able to retrieve passwords from CyberArk if it is running on the localsystem account and that this account is not added as amember to the CyberArk Safe.
l PROBLEM: After enabling CyberArk integration and the FIPS mode, check credential for CyberArkfailed onWindows platform. This is because the file path separator "\" in the conf files cannot beproperly processed onWindows platform. (QCCR1H104637)
Solution:When enabling CyberArk integration and the FIPS mode onWindows platforms, makesure you replace the file path separator "\" with "/" in the conf files.
For example, replace the file path separator "\" in the following setting:
wrapper.java.classpath.8=C:\Program Files(x86)\CyberArkApplication\PasswordSdk\JavaPasswordSDK.jar
with "/", as shown below:
wrapper.java.classpath.8=C:/Program Files(x86)/CyberArkApplication/PasswordSdk/JavaPasswordSDK.jar
l PROBLEM: After adding a new probe to the UCMDB server that was already switched to the FIPSmode, the automatic FIPS switch process for the new probemight fail. This is because once thenewly installed probe is started, it downloads all the resources from the UCMDB server, and whenthe probe gets the probe upgrade package, it would schedule a restart, which blocks the automaticFIPS Switch process. (QCCR1H106595)
Workaround: Once you find that the automatic FIPS Swtich process for a new probe failed,
a. Copy the jar files of JCE Unlimited Strength Jurisdiction Policy Files 8 into the%\DataFlowProbe_HOME%\bin\jre\lib\security directory on the Data Flow Probemachine.
For more information about how to obtain the files, see theUniversal CMDB FIPS DeploymentGuide.
b. Add the following line into theDataFlowProbe.properties file on the Data Flow Probemachine, and then save the file.
CMS Troubleshooting GuideCyberArk Integration Troubleshooting and Limitations
Micro Focus Universal CMDB (10.33) Page 103 of 174

probe.fips.status=1
c. Restart the Data Flow Probe.
Note: If the Data Flow Probe is in separatemode, you need to perform the above steps forboth the ProbeManager and ProbeGateway instances.
l PROBLEM:When running discovery jobs or checking credentials, the following error occurs:
Failed to verify application authentication data: Hash XXX is unauthorized.
This is caused by inconsistent hash values between UCMDB and CyberArk Server.
Workaround:Check if the hash value is the same as the one you configured on the CyberArkserver. If different, regenerate the hash value and then fill the new hash value in the CyberArkserver. For instructions, see "How to Calculate Hash Code for JARs with Annotation" on page 1.
Universal Discovery Troubleshooting andLimitationsThis section describes general troubleshooting and limitations related to working with Data FlowManagement.
l "Troubleshooting – Universal Discovery" on the next page
l "Limitations – Universal Discovery" on page 108
Note:
l For details on using log files to perform basic troubleshooting, see:
o "Data Flow Probe Log Files" on page 1
o "UCMDB Log Files" in theUniversal CMDB Administration Guide
CMS Troubleshooting GuideUniversal Discovery Troubleshooting and Limitations
Micro Focus Universal CMDB (10.33) Page 104 of 174

Troubleshooting – Universal Discovery
l "Discovery Results Do Not Appear in the Topology Map" below
l "Triggers Running Unexpectedly in Management Zone" below
l "Job Running Triggers Not Within Probe Limit" below
l "Networks and IPs" on the next page
l "TCP Ports" on the next page
l "Discover Resources on aWindows XP Machine" on page 107
l "Trigger CIs for jobs in amanagement zone are in continuous "Progress" status" on page 107
l "Device attributes are not populating or contain unexpected or null values" on page 107
l "Inventory Discovery by Scanner job fails" on page 107
Discovery Results Do Not Appear in the Topology Map
Problem. Data that should have been discovered during the discovery process does not appear in thetopology map.
Verification. The CMDB cannot retrieve the data or build the query results. Check the DiscoveryResults pane. If the CIs were not created, the problem is occurring during the Discovery process.
Solution. Check the error messages in the probeMgr-services.log file located inC:\hp\UCMDB\DataFlowProbe\runtime\logs.
Triggers Running Unexpectedly in Management Zone
Problem: There are triggers running in theManagement Zone that should not be running.
Reason:Running triggers continue to run in the case where a Probe cluster is bound to theManagement Zone, and the Probes in the cluster are removed from the cluster while the triggers arerunning.
Solution: To stop the triggers running, deactivate and then reactive theManagement Zone.
Job Running Triggers Not Within Probe Limit
Problem:A discovery job is running triggers that are not within its Probe limit.
CMS Troubleshooting GuideUniversal Discovery Troubleshooting and Limitations
Micro Focus Universal CMDB (10.33) Page 105 of 174

Indication: Triggers are not released from a job in the following cases:
Scenario 1
1. ProbeA and ProbeB belong to Cluster1.
2. Range IPs by ICMP is limited to run only on Cluster1. The job runs on both Probes in Cluster1.
3. ProbeB is removed from Cluster1.
4. In the next scheduled run of Range IPs by ICMP, you notice that the trigger is still running on bothProbes in the cluster, even though ProbeB no longer belongs to Cluster1.
Scenario 2
1. ProbeA is in Cluster1; ProbeB is under the Default Domain
2. Range IPs by ICMP is limited to run only on ProbeB.
3. ProbeB is added to Cluster1.
4. In the next scheduled run of Range IPs by ICMP, you notice that the trigger is still running onProbeB, even though ProbeB now belongs to Cluster1.
Solution. Deactivate and then reactive the job.
Networks and IPs
Problem. Not all networks or IPs have been discovered.
Indication. Not all the networks or IPs appear in the topology map results.
Verification. The IP address range in the Data Flow Probe Setup window does not encompass thescope of the networks or IPs that should have been discovered.
Solution. Change the scope of the Discovery range:
1. Select Data Flow Management > Data Flow Probe Setup.
2. Select the Probe and the range.
3. Change the IP address range in the Ranges box as required.
TCP Ports
Problem. Not all TCP ports have been discovered.
Indication. Not all TCP ports appear in the topology map results.
CMS Troubleshooting GuideUniversal Discovery Troubleshooting and Limitations
Micro Focus Universal CMDB (10.33) Page 106 of 174

Verification. Open the portNumberToPortName.xml file (Data Flow Management > AdapterManagement > DDM Infra > Configuration Files > portNumberToPortName.xml), and search forthemissing TCP ports.
Solution. Add the port numbers that should be discovered to the portNumberToPortName.xml file.
Discover Resources on a Windows XP Machine
Problem. Failure to discover resources on amachine running on theWindows platform.
l Solution 1. Start > Settings > Control Panel > System. In the Remote tab, verify that thefollowing check box is selected: Allow users to connect remotely to this computer.
l Solution 2. InWindows Explorer, select Tools > Folder Options. In the View tab, clear theUsesimple file sharing (Recommended) check box.
Trigger CIs for jobs in a management zone are in continuous "Progress" status
Problem. If you notice that trigger CIs for jobs in amanagement zone are in continuous "Progress"status, configure Data Flow Probe to ignore certain call home requests from the Universal DiscoveryAgent.
l Solution. To resolve this issue, change a parameter value as follows:
o GlobalSettings.xml file
o allowCallhomeInterval parameter
o Default is 24.
o Measured in hours that call home requests are ignored.
o Allowable values are any integer greater than 0.
Device attributes are not populating or contain unexpected or null values
Problem. If you notice that certain devices contain unexpected values or contain no values.
l Solution. To resolve this issue, run the Rulebase Support Report and send toMicro Focus Supportfor analysis. For more information, seeUniversal CMDB Modeling Guide.
Inventory Discovery by Scanner job fails
Problem. If you notice that the Inventory Discovery by Scanner job fails.
CMS Troubleshooting GuideUniversal Discovery Troubleshooting and Limitations
Micro Focus Universal CMDB (10.33) Page 107 of 174

Indication. The Communication log contains the following entry: "StepWait XML Enricher Processexecution failed.".
Solution. If BDNA Normalize integration is enabled, troubleshoot BDNA Normalize operation using itsdocumentation or contact BDNA support.
Data push troubleshooting
l How to get a view of the integrations
To get a view of the integrations, run the following command :
SELECT ds.datastore as integration_point_name ,COUNT(*) as nbr_of_records,ds.ds_id FROM SYNC_ID_MAP as ID, SYNC_DATASTORE as DS where id.ds_id =ds.ds_id group by ds.datastore,ds.ds_id
l Clear a given datastore by invoking the removeIdMappingsOfDataStore JMX method
To clear a given datastore, you can invoke theUCMDB:service=FCMDB Synchronizer Services> removeIdMappingsOfDataStore JMX method.
Caution: Make sure you do it only when necessary.
For SM adapters, invoking the removeIdMappingsOfDataStore JMX method will resend all CIs,and then create duplicates.
However, in general it is useful for AM adapter andGeneric Adapter, when there is assumption thatthe data push is corrupted.
Limitations – Universal Discovery
l WhenDiscovery is installed on a non-English operating system, names of modules, ManagementZones, and jobs are limited to English characters (a-z; A-Z).
l When naming entities in Data Flow Management , you can use the following characters:
o Modules: a-z, A-Z, 0-9, hyphen (-), underscore (_), space ( ), and forward slash (/).
o Management Zones: a-z, A-Z, 0-9, hyphen (-), underscore (_), and space ( ).
o Jobs: a-z, A-Z, 0-9, hyphen (-), underscore (_), and space ( ).
o Names can be amaximum length of 50 chars andMUST NOT start with a digit.
CMS Troubleshooting GuideUniversal Discovery Troubleshooting and Limitations
Micro Focus Universal CMDB (10.33) Page 108 of 174

l When entering IP addresses, use only digits and asterisks (*)
l Each Content Pack installation overrides all out-of-the-box resources with the contents of thatContent Pack. This means that any changes youmade to these resources are lost. This applies tothe following resources: Queries, Views, Enrichments, Reports, Discovery Jython scripts,Discovery adapters, Discovery jobs, Discovery resources, Discovery configuration files,Discovery modules, CI Types, and Relationships. (Attributes added to CI Types and Relationshipsare not overridden).
Inventory Discovery TroubleshootingThis chapter includes:
How to view all information related to a device in a centralized view? 109
How to troubleshoot network availability and latency issue related to a device? 111
How to check the key indexes of the discovery history information for a discovered device? 116
How to check device related logs for a discovered device? 123
How to invoke discovery job relevant to the discovered devicemanually and check status toidentify potential discovery errors? 125
How to check which pattern (management zone) is used in the discovery for a discovereddevice? 135
How to check detailed discovery settings used in the discovery for a discovered device? 137
How to check the SNMP credentials used in the discovery for a discovered device? 140
How to view all information related to a device in a
centralized view?
Question: How can I view all relevant information to a device in a centralized view?
To view all information related to a device in a centralized view,
1. SelectModeling > Reports.
2. In the Topology Reports pane, expand Inventory > Node Inventory.
CMS Troubleshooting GuideInventory Discovery Troubleshooting
Micro Focus Universal CMDB (10.33) Page 109 of 174

3. Double-click Node Inventory or right-click it and select Open Report.
The Node Inventory report opens in the right pane.
4. Do either of the following to view device details:
o Select a specific CI in the right pane and drill down to view more details. Or,
o Export the report to PDF, so that you can view all details in grid view. To do so,
i. Right-click Node Inventory, select Export Report > Export to PDF from the contextmenu.
ii. In the Export dialog box, specify file location and file name for the target PDF file.
iii. Click Export.
iv. Click Yeswhen prompted whether you want to open the PDF file now.
CMS Troubleshooting GuideInventory Discovery Troubleshooting
Micro Focus Universal CMDB (10.33) Page 110 of 174

The exported PDF file opens, displaying all details in grid view.
For more information about the topology report, see theUniversal CMDB Modeling Guide.
How to troubleshoot network availability and latency
issue related to a device?
Question: How should I troubleshoot network availability and latency issue relatedto a device?
You can troubleshoot network availability and latency issue related to a device in the following ways:
l IP Ping and Agent Ping
l SNMP Ping
l Tracert and DNS Query
IP Ping and Agent Ping
In DDMi, you can use IP ping and agent ping.
Result of the IP ping looks similar to the following:
CMS Troubleshooting GuideInventory Discovery Troubleshooting
Micro Focus Universal CMDB (10.33) Page 111 of 174

Result of the agent ping looks similar to the following:
In UD, you can use also use IP ping and agent ping via the UDA Status Collector job.
To use IP ping and agent ping
1. In UCMDB, go toData Flow Management > Universal Discovery > Discovery Modules/Jobstab.
2. In the Discovery Modules tree, select Tools and Samples > UD Agent Management > UDAStatus Collector.
3. If the UDA Status Collector job is not activated, right-click UDA Status Collector, and selectActivate.
CMS Troubleshooting GuideInventory Discovery Troubleshooting
Micro Focus Universal CMDB (10.33) Page 112 of 174

4. In the Discovery Progress pane, click theAdd CI button.
5. In the Choose CIs to Add dialog box, select the IP address of your interest, and click theAdd
button.
The UDA Status Collector job will ping using IP and agent port to check.
Note: Agent port can be found in thePort Number parameter value of the UniversalDiscovery Protocol credential. This is a default parameter in the protocol, and is applied to allagent connections using this protocol.
To view the agent port,
a. In the Data Flow Management module, go toData Flow Probe Setup.
b. In the Domains and Probes tree, select a domain of your interest and expand theCredentials node, and then select Universal Discovery Protocol.
c. In the Universal Discovery Protocol credentials displayed in the right pane, check thevalue for thePort Number column.
CMS Troubleshooting GuideInventory Discovery Troubleshooting
Micro Focus Universal CMDB (10.33) Page 113 of 174

6. Click theClose button to exit the Choose CIs to Add dialog box.
To view the IP ping and agent ping result
1. Access the JMX console on the Data Flow Probemachine by launching theWeb browser andenter the following address:
https://localhost:8453/
Youmay have to log in with the user name sysadmin and password.
2. Locate the exportUdaStatus operation to invoke.
On theMBean View page, select type=JobsInformation. Locate the exportUdaStatusoperation.
3. Provide a folder name in theValue field.
4. Click Invoke to run the operation.
CMS Troubleshooting GuideInventory Discovery Troubleshooting
Micro Focus Universal CMDB (10.33) Page 114 of 174

The UDA status is exported to a CVS file.
5. Open the exported CSV file to view details of the result from the UDA Status Collector job.
The CSV file shows status details similar to the following:
SNMP Ping
To run SNMP ping in UDI,
1. In the Data Flow Management module, go toData Flow Probe Setup.
2. In the Domains and Probes tree, expand theCredentials node, and select SNMP Protocol.
All SNMP credentials are displayed in the right pane.
3. Right-click the SNMP credential you want to use to run SNMP ping, and select Check credentialfrom the pop-upmenu.
4. In the Check Credential dialog box, specify the host name or IP address (in IPv4/IPv6 format) ofthe remotemachine on which you want the protocol to run SNMP ping, specify a connection
CMS Troubleshooting GuideInventory Discovery Troubleshooting
Micro Focus Universal CMDB (10.33) Page 115 of 174

timeout (in milliseconds), and select the probe to use.
5. Click OK.
The result returns soon.
Tracert and DNS Query
Currently UD does not have such functionalities as DDMi did.
How to check the key indexes of the discovery
history information for a discovered device?
Question: For a discovered device, how should I check the key indexes of thediscovery history information? For example, when was the device first discovered?When was it last seen?
To answer this question, let’s take a look at the information available from DDMi first:
DDMi Parameter Value
First discovered: 3 weeks 5 days 0 hours ago at:Wednesday, November 19, 2014 20:20:45 Eastern Standard Time
Added tomap: 3 weeks 5 days 0 hours ago at:Wednesday, November 19, 2014 20:48:51 Eastern Standard Time
CMS Troubleshooting GuideInventory Discovery Troubleshooting
Micro Focus Universal CMDB (10.33) Page 116 of 174

DDMi Parameter Value
Last seen: 2minutes 1 second ago at:Monday, December 15, 2014 21:06:55 Eastern Standard Time inping or poll by DDM Inventory
Last moved: 3 weeks 5 days 0 hours ago at:Wednesday, November 19, 2014 20:50:47 Eastern Standard Time
Agent last contacted: 1 day 17 hours 7minutes ago at:Sunday, December 14, 2014 04:01:01 Eastern Standard Time
Agent upgrade time: 2 weeks 6 days 1 hour ago at:Tuesday, November 25, 2014 19:56:04 Eastern Standard Time
Scanner model last updated: 2 weeks 6 days 0 hours ago at:Tuesday, November 25, 2014 20:12:35 Eastern Standard Time
Device last modeled as anunmanaged device:
3 hours 12minutes 6 seconds ago at:Monday, December 15, 2014 17:56:50 Eastern Standard Time
Device last replied to ICMPduringmodeling:
2 weeks 3 days 21 hours ago at:Thursday, November 27, 2014 23:12:44 Eastern Standard Time
Mean break diagnosis time: 2minutes (major alarm)
Agent platform: Windows (x86)
Agent port number: 2738
Agent version: 10.20.000.346
AUM agent upgrade state: No AUM agent
Workflow type: Agent
Scanner version: 9.32.000.2421
Scanner configuration: <default_delta>
Scan file location: https://15.155.155.155/nm/scans/QASERVER1_005056B81459.xsf
Scan type: HP Discovery and Dependency Mapping Inventory
Scan CRC: 295532891
Scanmodification time: 2014-11-25 22:47:26
Mean devicemodeler updaterun time:
4minutes 52 seconds
Recent devicemodeler updaterun times:
4minutes 48 seconds, 4minutes 17 seconds, 6minutes 32seconds, 3minutes 53 seconds
Rulebase id: 266305
CMS Troubleshooting GuideInventory Discovery Troubleshooting
Micro Focus Universal CMDB (10.33) Page 117 of 174

In Universal Discovery, you can find similar attributes for most of DDMi parameters as shown in thetable below:
DDMi Parameter Corresponding Attributes in UD
First discovered: Create Time attribute (of the nodeCI)
Added tomap: N/A
Last seen: Last Access Time attribute (of the nodeCI)
Last moved: N/A
Agent last contacted: Last Access Time attribute (of theUDA CI Type)
Agent upgrade time: LastModifiedTime attribute (of theUDA CI Type)
Scanner model last updated: LastModifiedTime attribute (of the InventoryScannerCI Type)
Device last modeled as an unmanageddevice:
N/A
Device last replied to ICMP duringmodeling:
N/A
Mean break diagnosis time: N/A
Agent platform: Platform attribute (of theUDA CI Type)
Agent port number: Application Listening Port Number attribute (of theUDA CI Type)
Agent version: Version attribute (of theUDA CI Type)
AUM agent upgrade state: N/A
Workflow type: N/A
Scanner version: Version attribute (of the InventoryScannerCI Type)
Scanner configuration: ScannerConfiguration attribute (of theInventoryScannerCI Type)
Scan file location: ProcessedScanFilePath attribute (of theInventoryScannerCI Type)
Scan type: Scan Type attribute (of the InventoryScannerCI Type)
Scan CRC: N/A
Scanmodification time: Last Access Time orScan File Last DownloadedTime attribute (of the InventoryScannerCI Type)
CMS Troubleshooting GuideInventory Discovery Troubleshooting
Micro Focus Universal CMDB (10.33) Page 118 of 174

DDMi Parameter Corresponding Attributes in UD
Mean devicemodeler update run time: N/A
Recent devicemodeler update run times: Scan Duration attribute (of the InventoryScannerCIType)
Rulebase id: N/A
Note: "N/A" indicates that there is no corresponding attribute in UD now.
To check similar information in UD,
1. In UCMDB, go toModeling > IT Universal Manager.
2. In the CI Selector pane, go to theSearch CIs tab.
3. In the Simple searchmode, search for a CI of Node CI type.
a. In theCI Name field, enter a keyword to search, for example, 0528.
b. For theCI Type field, click , locate and select theNodeCI type.
c. Click .
4. Click the node CI in the search result list.
The node CI map displays in the Related CIs pane.
5. In the Filter Related CIs by CI Type sub-pane, locate and select Inventory ScannerandUDA CItypes, then click Filter Related CIs.
The Related CIs map refreshes.
CMS Troubleshooting GuideInventory Discovery Troubleshooting
Micro Focus Universal CMDB (10.33) Page 119 of 174

6. Click the uda or Inventory ScannerCI icon in themap.
In the CI Details pane below themap, check attributes that correspond to DDMi parameters.
The highlighted uda attributes in the screenshot below correspond to similar DDMi parameters.
CMS Troubleshooting GuideInventory Discovery Troubleshooting
Micro Focus Universal CMDB (10.33) Page 120 of 174

The highlighted Inventory ScannerCI attributes in the screenshot below correspond to similarDDMi parameters.
CMS Troubleshooting GuideInventory Discovery Troubleshooting
Micro Focus Universal CMDB (10.33) Page 121 of 174

CMS Troubleshooting GuideInventory Discovery Troubleshooting
Micro Focus Universal CMDB (10.33) Page 122 of 174

How to check device related logs for a discovered
device?
Question: For a discovered device, where should I check the device related logs?Such as agent deployment log, scanner deployment log, virtualization log, and soon.
The following sections provide details about checking device related log in Universal Discovery.
l Agent deployment log
l Scanner deployment log
l Virtualization log
Agent deployment log
The agent related action record (the Install UD Agent job and the Update UD Agent job) can be found inthe Communication Log.
To view communication log for agent related jobs,
1. In UCMDB, go toData Flow Management > Universal Discovery > Discovery Modules/Jobstab.
2. In the Discovery Modules tree, select Tools and Samples > UD Agent Management > InstallUD Agent (orUpdate UD Agent).
3. Right-click Install UD Agent (orUpdate UD Agent), select Activate from the context menu ifthe job is not activated, and wait for the Triggered CIs list to refresh.
4. In the Triggered CIs list in the Discovery Progress pane, click a number with link.
5. In the Look for field that is just enabled, enter the IP address for the target agent and click .
6. Right-click the returned entry, and from the context menu, select Debug > ViewCommunication Log.
CMS Troubleshooting GuideInventory Discovery Troubleshooting
Micro Focus Universal CMDB (10.33) Page 123 of 174

7. In the communication log that opens,
o searchStep [Install Agent] as keyword to locate the log entry where probe starts the agentinstallation
o searchStep [Check Agent Installed] as keyword to locate the log entry that indicateswhether the agent is installed
Scanner deployment log
The Inventory Discovery by Scanner job related action record (the Install UD Agent job and the UpdateUD Agent job) can be found in the Communication Log.
To view communication log for scanner deployment related jobs,
1. In UCMDB, go toData Flow Management > Universal Discovery > Discovery Modules/Jobstab.
2. In the Discovery Modules tree, select Hosts and Resources > Inventory Discovery >Inventory Discovery by Scanner).
3. Right-click Inventory Discovery by Scanner), select Activate from the context menu if the job isnot activated, and wait for the Triggered CIs list to refresh.
CMS Troubleshooting GuideInventory Discovery Troubleshooting
Micro Focus Universal CMDB (10.33) Page 124 of 174

4. In the Triggered CIs list in the Discovery Progress pane, click a number with link of your interest.
5. In the Look for field that is just enabled, enter the IP address for the scanner and click .
6. Right-click the returned entry, and from the context menu, select Debug > ViewCommunication Log.
7. In the communication log that opens,
o searchStep [Run Scanner] as keyword to locate the log entry where the probe starts runningthe scanner
o searchStep [Download Scan File] as keyword to locate the log entry that indicates the probestarts downloading the scan file
Virtualization log
This log is not frequently used in DDMI. However, in UD, the Communication Log for the following jobscan provide you detailed logs about virtualization environments:
l VMware ESX Connection by VIM job
l VMware vCenter Connection by VIM job
How to invoke discovery job relevant to the
discovered device manually and check status to
identify potential discovery errors?
Question: For a discovered device, to identify any potential discovery errors, howshould I invoke discovery job relevant to the device manually, and check theprogress/on-going status of the discovery?
In DDMi, if you find any error in the discovery result, you can run the DDMi jobs in an ad-hoc way. InUD, similar jobs are available to provide similar functionalities.
The table below describes DDMi jobs and the corresponding UD jobs that can be run in an ad-hoc way:
CMS Troubleshooting GuideInventory Discovery Troubleshooting
Micro Focus Universal CMDB (10.33) Page 125 of 174

DDMi Job UD Job
Deploy Agent Install UD Agent
Upgrade Agent Update UD Agent
Run Scanner Run Scanner
Retrieve Scan File Download Scan File
Uninstall Agent Uninstall UD Agent
Run Agentless Scanner Run Agentless Scanner
Enrich XML Parse Enriched Scan File
Run Rulebase The normalization functionality isincluded the Rerun Discovery optionfor each job
Run VMware Discovery VMware discovery jobs
For details, click the UD job of your interest in the table above.
Install UD Agent
To invoke discovery job relevant to the device manually,
1. In UCMDB, go toData Flow Management > Universal Discovery > Discovery Modules/Jobstab.
2. In the Discovery Modules tree, select Tools and Samples > UD Agent Management > InstallUD Agent.
3. Right-click Install UD Agent, select Activate from the context menu if the job is not activated,and wait for the Triggered CIs list to refresh.
4. In the Triggered CIs list in the Discovery Progress pane, click a number with link.
5. In the Look for field that is just enabled, enter the IP address for the target device and click .
6. Right-click the returned entry, and from the context menu, select Run from step > <Select an
CMS Troubleshooting GuideInventory Discovery Troubleshooting
Micro Focus Universal CMDB (10.33) Page 126 of 174

action>.
To check the progress/on-going status of the discovery job,
1. Modify the adapter's configuration tomake sure that the communication log is always created.
In this case, modify the Install UD Agent adapter's configuration.
a. In the Data Flow Management module, go toAdapter Management.
b. In the Resources pane, expandUDAgentManagment > Adapters > InstallUDAgent.
c. In the right pane, click theAdapter Configuration tab.
d. In the Execution Options section, set the following:
l Create communication log: Always
CMS Troubleshooting GuideInventory Discovery Troubleshooting
Micro Focus Universal CMDB (10.33) Page 127 of 174
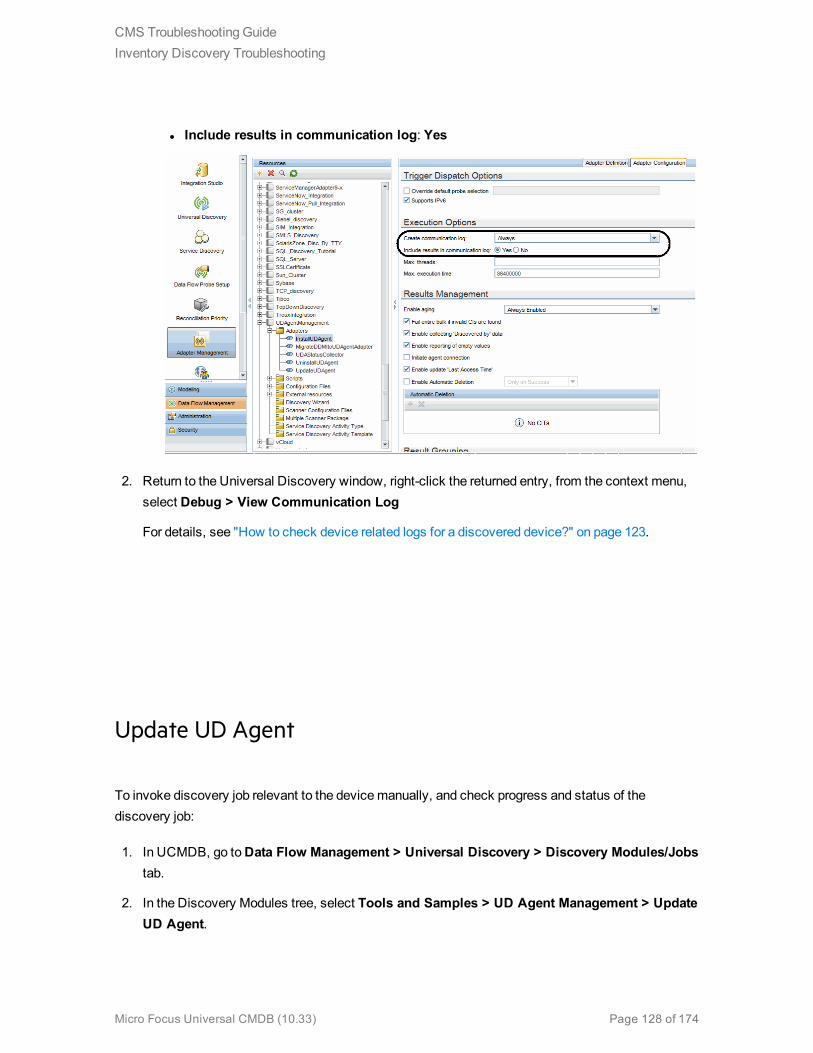
l Include results in communication log: Yes
2. Return to the Universal Discovery window, right-click the returned entry, from the context menu,select Debug > View Communication Log
For details, see "How to check device related logs for a discovered device?" on page 123.
Update UD Agent
To invoke discovery job relevant to the devicemanually, and check progress and status of thediscovery job:
1. In UCMDB, go toData Flow Management > Universal Discovery > Discovery Modules/Jobstab.
2. In the Discovery Modules tree, select Tools and Samples > UD Agent Management > UpdateUD Agent.
CMS Troubleshooting GuideInventory Discovery Troubleshooting
Micro Focus Universal CMDB (10.33) Page 128 of 174

3. Right-click Update UD Agent, select Activate from the context menu if the job is not activated,and wait for the Triggered CIs list to refresh.
4. In the Triggered CIs list in the Discovery Progress pane, click a number with link.
5. In the Look for field that is just enabled, enter the IP address for the target device and click .
6. Right-click the returned entry, and from the context menu, select Run from step > <Select anaction>.
7. To check the progress/on-going status of the discovery job,
a. Modify the Update UD Agent adapter's configuration tomake sure that the communication logis always created.
For detailed instructions, see "To check the progress/on-going status of the discovery job," onpage 127.
b. Right-click the returned entry in the Discovery Progress pane, from the context menu, selectDebug > View Communication Log.
For details, see "How to check device related logs for a discovered device?" on page 123.
CMS Troubleshooting GuideInventory Discovery Troubleshooting
Micro Focus Universal CMDB (10.33) Page 129 of 174

Upgrade Scanner / Run Scanner / Download Scan File /
Parse Enriched Scan File / Run Agentless Scanner
To invoke discovery job relevant to the devicemanually, and check progress and status of thediscovery job:
1. In UCMDB, go toData Flow Management > Universal Discovery > Discovery Modules/Jobstab.
2. In the Discovery Modules tree, select Hosts and Resources > Inventory Discovery >Inventory Discovery by Scanner.
3. Right-click Inventory Discovery by Scanner, select Activate from the context menu if the job isnot activated, and wait for the Triggered CIs list to refresh.
4. In the Triggered CIs list in the Discovery Progress pane, click a number with link of your interest.
5. In the Look for field that is just enabled, enter the IP address for the scanner and click .
6. Right-click the returned entry, and from the context menu, select Run from step > <Select anaction>.
CMS Troubleshooting GuideInventory Discovery Troubleshooting
Micro Focus Universal CMDB (10.33) Page 130 of 174

Note: ToRun Agentless Scanner, before selecting aRun from step option, set UniversalDiscovery Protocol scope toProbes: Disabled.
To do so,
a. In the Data Flow Management module, go toData Flow Probe Setup.
b. ExpandDomains and Probes > DefaultDomain(Default) > Credentials > UniversalDiscovery Protocol.
c. In the right Universal Discovery Protocol pane, right-click a protocol and select Edit.
d. In the Universal Discovery Protocol Parameters dialog box, click theEdit button
for the Network Scope field.
e. In the Scope Definition dialog box, click theEdit button for the Selected Probes
section.
f. In the Selected Probes dialog box, clear the check box forAll Data Flow Probes andclick OK three times to exit.
g. Repeat step c through step f for other protocols.
CMS Troubleshooting GuideInventory Discovery Troubleshooting
Micro Focus Universal CMDB (10.33) Page 131 of 174

h. Click OK to save the changes.
7. To check the progress/on-going status of the discovery job,
a. Modify the Inventory Discovery by Scanner adapter's configuration tomake sure that thecommunication log is always created.
For detailed instructions, see "To check the progress/on-going status of the discovery job," onpage 127.
b. Right-click the returned entry in the Discovery Progress pane, from the context menu, selectDebug > View Communication Log.
For details, see "How to check device related logs for a discovered device?" on page 123.
Uninstall Agent
To invoke discovery job relevant to the devicemanually, and check progress and status of thediscovery job:
1. In UCMDB, go toData Flow Management > Universal Discovery > Discovery Modules/Jobstab.
2. In the Discovery Modules tree, select Tools and Samples > UD Agent Management >Uninstall UD Agent.
3. Right-click Uninstall UD Agent, select Activate from the context menu if the job is not activated,and wait for the Triggered CIs list to refresh.
4. In the Triggered CIs list in the Discovery Progress pane, click a number with link.
5. In the Look for field that is just enabled, enter the IP address for the target device and click .
6. Right-click the returned entry, and from the context menu, select Run from step > <Select anaction>.
CMS Troubleshooting GuideInventory Discovery Troubleshooting
Micro Focus Universal CMDB (10.33) Page 132 of 174

7. To check the progress/on-going status of the discovery job,
a. Modify the Uninstall UD Agent adapter's configuration tomake sure that the communicationlog is always created.
For detailed instructions, see "To check the progress/on-going status of the discovery job," onpage 127.
b. Right-click the returned entry in the Discovery Progress pane, from the context menu, selectDebug > View Communication Log.
For details, see "How to check device related logs for a discovered device?" on page 123.
Rerun Discovery
The RunRulebase feature is implemented in UD normalization, which covers all jobs.
CMS Troubleshooting GuideInventory Discovery Troubleshooting
Micro Focus Universal CMDB (10.33) Page 133 of 174

To invoke the normalizationmanually, in the Discovery Progress pane, right-click the CI entry returnedfrom your search and select Rerun Discovery from the context menu, which will perform thenormalization.
Note:Normalization cannot be invoked alone in UD. By selectingRerun Discovery, you caninvoke the normalization, but would also trigger other operations included in the discovery job inaddition to the normalization.
To check the progress/on-going status of the discovery job,
1. Modify the concerning adapter's configuration tomake sure that the communication log is alwayscreated.
For detailed instructions, see "To check the progress/on-going status of the discovery job," onpage 127.
2. Right-click the returned entry in the Discovery Progress pane, from the context menu, selectDebug > View Communication Log.
For details, see "How to check device related logs for a discovered device?" on page 123.
VMware Discovery Jobs
To invoke the VMware discovery jobmanually,
1. In UCMDB, go toData Flow Management > Universal Discovery > Discovery Modules/Jobstab.
2. In the Discovery Modules tree, select Cloud and Virtualization > VMware > <select a job>.
3. Right-click the selected job, select Activate from the context menu if the job is not activated, andwait for the Triggered CIs list to refresh.
4. In the Triggered CIs list in the Discovery Progress pane, click a number with link.
5. In the Look for field that is just enabled, enter the IP address for the target device and click .
6. Right-click the returned entry, and select Rerun Discovery from the context menu.
CMS Troubleshooting GuideInventory Discovery Troubleshooting
Micro Focus Universal CMDB (10.33) Page 134 of 174

7. To check the progress/on-going status of the discovery job,
a. Modify the concerning adapter's configuration tomake sure that the communication log isalways created.
For detailed instructions, see "To check the progress/on-going status of the discovery job," onpage 127.
b. Right-click the returned entry in the Discovery Progress pane, from the context menu, selectDebug > View Communication Log.
For details, see "How to check device related logs for a discovered device?" on page 123.
How to check which pattern (management zone) is
used in the discovery for a discovered device?
Question: For a discovered device, how should I check which pattern (managementzone) is used in the discovery?
In UD, there are two ways to check themanagement zone used:
CMS Troubleshooting GuideInventory Discovery Troubleshooting
Micro Focus Universal CMDB (10.33) Page 135 of 174

l From IT Universe Manager
a. In theModelingmodule, go to IT Universe Manager.
b. On the Search CIs tab, enter the IP address for a discovered device in theCI Name field,
selectManaged Object for theCI Type field, and click .
c. Click the returned entry on the Search CIs tab. CI details are displayed in the right pane.
d. Go to theProperties tab for the CI and check the value for the following attributes:
l Created By
l Updated By
For example,
l From the Management Zone Description
a. In the Data Flow Management module, go toUniversal Discovery > Zone-Based Discovery.
b. From theManagement Zones tree, select amanagement zone. TheManagement Zonedescription displays in the right pane.
For example
CMS Troubleshooting GuideInventory Discovery Troubleshooting
Micro Focus Universal CMDB (10.33) Page 136 of 174

How to check detailed discovery settings used in the
discovery for a discovered device?
Question: For a discovered device, how should I check the detailed discoverysettings (such as job parameters and scan settings) used in the discovery?
In UD, there are two ways to check detailed settings used in the discovery:
l From UI (the Properties tab and the Edit Inventory Discovery Activity dialog box)
o Run jobs inDiscovery Modules/Jobs
The Properties tab of the Inventory Discovery by Scanner job displays all parameters andscanner settings of the job
i. In UCMDB, go toData Flow Management > Universal Discovery > DiscoveryModules/Jobs tab.
ii. In the Discovery Modules tree, select Hosts and Resources > Inventory Discovery >Inventory Discovery by Scanner).
iii. In the pane, go to theProperties tab.
All parameters and scanner settings of the job are displayed.
o Run jobs in Zone-Based Discovery
i. In theData Flow Management module, go to Universal Discovery > Zone-BasedDiscovery.
ii. From theManagement Zones tree, select amanagement zone.
iii. Right-click a discovery job and select Edit from the context menu.
CMS Troubleshooting GuideInventory Discovery Troubleshooting
Micro Focus Universal CMDB (10.33) Page 137 of 174

The Edit Discovery Activity dialog box opens.
You can find the discovery job parameters and scanner settings in this dialog box.
l From theCommunication Log
a. Modify the configuration of the adapter for the Inventory Discovery by Scanner job tomake surethat the communication log is always created.
i. In the Data Flow Management module, go toAdapter Management.
ii. In the Resources pane, expand InventoryDiscovery> Adapters >InventoryDiscoveryByScanner.
iii. In the right pane, click theAdapter Configuration tab.
iv. In the Execution Options section, set the following:
l Create communication log: Always
CMS Troubleshooting GuideInventory Discovery Troubleshooting
Micro Focus Universal CMDB (10.33) Page 138 of 174

l Include results in communication log: Yes
b. In UCMDB, go toData Flow Management > Universal Discovery > DiscoveryModules/Jobs tab.
c. In the Discovery Modules tree, select Hosts and Resources > Inventory Discovery >Inventory Discovery by Scanner.
d. (Optional) Right-click Inventory Discovery by Scanner), select Activate from the contextmenu if the job is not activated, and wait for the Triggered CIs list to refresh.
e. In the Triggered CIs list in the Discovery Progress pane, click a number with link of yourinterest.
f. In the Look for field that is just enabled, enter the IP address for the scanner and click .
g. Right-click the returned entry, and from the context menu, select Debug > ViewCommunication Log.
CMS Troubleshooting GuideInventory Discovery Troubleshooting
Micro Focus Universal CMDB (10.33) Page 139 of 174

h. In the log that opens, search keywords to check details:
l To locate where the job parameters start in the log, search <params>.
l To locate where the job parameters end in the log, search </params>.
l To locate where the scanner configuration file is used in the log, searchConfig file to beused:.
How to check the SNMP credentials used in the
discovery for a discovered device?
Question: For a discovered device, how should I check the SNMP credentials usedin the discovery?
To check the SNMP credentials used in the discovery, you can search the Communication Log of theHost Connection by SNMP job.
To view communication log for agent related jobs,
1. In UCMDB, go toData Flow Management > Universal Discovery > Discovery Modules/Jobstab.
2. In the Discovery Modules tree, select Network Infrastructure > Host Connection > Host
CMS Troubleshooting GuideInventory Discovery Troubleshooting
Micro Focus Universal CMDB (10.33) Page 140 of 174

Connection by SNMP.
3. (Optional) Right-click Host Connection by SNMP, select Activate from the context menu if thejob is not activated, and wait for the Triggered CIs list to refresh.
4. In the Triggered CIs list in the Discovery Progress pane, click a number with link.
5. In the Look for field that is just enabled, enter the IP address for the target device and click .
6. Right-click the returned entry, and from the context menu, select Debug > ViewCommunication Log.
7. In the log that opens, search <CONNECT start as keyword to locate the entry in the log thatindicates starting from when the device is connected.
For example:
<CONNECT start="08:05:20" duration="4" CMD="client_connect" RESULT="success"type="snmp" credentialsId="7_1_CMS">
<ClientProperties><prop name="protocol_index" value="1" /><prop name="protocol_timeout" value="3000" /><prop name="credentialsId" value="7_1_CMS" /><prop name="cm_credential_id" value="7_1_CMS" /><prop name="snmpprotocol_version" value="version 2c" /><prop name="protocol_type" value="snmpprotocol" /><prop name="snmpprotocol_postfix" value="" /><prop name="port" value="161" /><prop name="protocol_netaddress" value="DEFAULT" /><prop name="ip_address" value="16.187.190.19" /><prop name="snmpprotocol_privalg" value="3DES" /><prop name="snmpprotocol_authalg" value="MD5" /><prop name="protocol_port" value="161" /><prop name="snmpprotocol_retry" value="2" /><prop name="snmpprotocol_snmpmethod" value="getnext" /><prop name="user_label" value="SNMP Protocol Credential 1" /><prop name="snmpprotocol_authmethod" value="noAuthNoPriv" /><prop name="retry" value="2" /><prop name="protocol_username" value="" /><prop name="protocol_in_use" value="false" />
</ClientProperties></CONNECT>
This log example indicates that the device is connected successfully by SNMP and the credentialID is 7_1_CMS.
The log information between the <ClientProperties> and </ClientProperties> tags are thedetails of the SNMP credential used in the discovery. Among these properties information, to find
CMS Troubleshooting GuideInventory Discovery Troubleshooting
Micro Focus Universal CMDB (10.33) Page 141 of 174

out the credential name, you can check the value for the user_label attribute (highlighted above)of the SNMP credential that you defined in the SNMP protocol.
Note: The SNMP community strings you defined in the protocol are encrypted in UD,therefore they are not visible in the log.
CMS Troubleshooting GuideInventory Discovery Troubleshooting
Micro Focus Universal CMDB (10.33) Page 142 of 174

Chapter 5: Troubleshooting ConfigurationManagerThis chapter includes:
Troubleshooting and Limitations – Content Management 143
Troubleshooting and Limitations – Federating Data to UCMDB 144
Troubleshooting – Explore Views 144
Troubleshooting – Review/Authorize 147
Troubleshooting and Limitations – Views 149
Troubleshooting and Limitations – Policies 149
Troubleshooting and Limitations – ContentManagementProblem. Changes in CIs in UCMDB are not reflected in ConfigurationManager.
Solution. ConfigurationManager runs an offline asynchronous analysis process. The process may notyet have processed the latest changes in UCMDB. To resolve this, try one of the following:
l Wait a few minutes. The default interval between analysis process executions is 10minutes. Thisvalue is configurable in underAdministration > Settings.
l Execute a JMX call to run the offline analysis calculation on the relevant view.
l Navigate toPolicies. Click theRecalculate Policy Analysis button. This invokes the offline
analysis process for all views (whichmay take some time). Youmay also need tomake an artificialchange to one policy and save it.
Problem. When you click the Launch UCMDB button, the UCMDB login page appears.
Solution. In order to access UCMDB without logging in again, you need to enable single sign-on. Fordetails, see the section about enabling LW-SSO between ConfigurationManager and UCMDB in theUniversal CMDB Deployment Guide. Additionally, ensure that the ConfigurationManager user loggedon is defined in the UCMDB user management system.
Micro Focus Universal CMDB (10.33) Page 143 of 174

Problem. TheMatching Rules tab does not appear in Universal CMDB when you navigate toManagers > Modeling > CI Type Manager, and select CI Types from the list box in the CI Typespane.
Solution. Navigate toManagers > Administration > Infrastructure Settings in Universal CMDBand set Enable Configuration Manager Matching Rules as True. After you log out and then log inagain, theMatching Rules tab appears in the CI TypeManager.
Troubleshooting and Limitations – FederatingData to UCMDBl Federation only works with CIs in the actual state. Therefore:
o Policy compliance is federated only for CIs in the actual state.
o The authorization status for CIs that were deleted from the actual state is not shown.
l Themaximum number of CIs that can be federated is configurable. To change this number, edit thevalue of theMax Num To Federate setting in the Infrastructure Settings Manager in UCMDB. Fordetails about changing settings, see "Infrastructure Settings Manager" in theUniversal CMDBAdministration Guide. The recommended number of CIs is nomore than 20,000, if large views havebeen enabled in ConfigurationManager. For details about enabling support for large views, see thesection about large capacity planning in the interactiveUniversal CMDB Deployment Guide.
l If the test connection fails, click Details and check the first error in the stack trace for moreinformation.
l Since a CI can bemanaged inmultiple views, the same policy may be applied to the sameCI inmultiple views andmay receive different similarity results, since the similarity groupmay bedifferent in different views.
Troubleshooting – Explore Viewsl Problem. Buttons for creating RFCs are disabled.
Possible reasons:
o The ChangeManagement integration has been disabled for the activated configuration.
o The ChangeManagement integration has been defined, saved, and activated, but the user didnot log in to ConfigurationManager again.
Solution. Do the following:
CMS Troubleshooting GuideTroubleshooting and Limitations – Federating Data to UCMDB
Micro Focus Universal CMDB (10.33) Page 144 of 174

a. Navigate toAdministration > Integrations > Change Management. To configure theintegration, select the check box and provide the details for the ServiceManager configuration.
b. Save and activate the configuration.
c. Log out and then log in again to see the changes take effect.
l Problem. RFC creation fails.
o Reason 1: Incorrect credentials were defined for the integration user underAdministration >Integrations > Change Management > Service Manager.
Solution 1: In ServiceManager, verify that the integration user exists. If required, update thepassword (for details, see the ServiceManager documentation).
o Reason 2: The user does not have the proper credentials to invoke a call to the ServiceManagerweb-service.
Solution 2:Enable the ability to execute the SOAP API for this integration user (for details, seethe ServiceManager documentation).
o Reason 3: The UNL file for this integration has not been loaded into ServiceManager.
Solution 3: To detect if the UNL file has been uploaded, call the following ServiceManagerURL:
<host>:<port example:13080>/sm/7/ucmdcm.wsdl
If the call returns an XML file, then a web-service is on, meaning that the UNL file has beenuploaded. If not, follow the directions in Import a UNL File into ServiceManager.
o Reason 4:AnRFC has been created with at least one of the followingmismatches:
l The service does not exist in ServiceManager.
l One ormore of the selected CIs does not exist in ServiceManager.
l The category value does not match a valid value in ServiceManager.
l The risk assessment value does not match a valid value in ServiceManager.
l The impact value does not match a valid value in ServiceManager.
l The urgency value does not match a valid value in ServiceManager.
Solution 4:Change the values for each of the possible mismatches listed above underAdministration > Application Management > RFC > RFC Creation, so they match with thecorresponding values in ServiceManager. Save and activate the configuration for the settings totake effect.
o Problem. ConfigurationManager doesn’t display RFCs.
CMS Troubleshooting GuideTroubleshooting – Explore Views
Micro Focus Universal CMDB (10.33) Page 145 of 174

Tip: As a first step in identifying whether the problem is in UCMDB or ServiceManager,you can execute a TQL query in UCMDB that fetches all RFCs from ServiceManager. IfRFCs are expected but do not appear in the query's results, it means that there is an issuewith the integration between UCMDB and ServiceManager.
To execute this TQL query: log in to UCMDB and navigate toModeling > ModelingStudio > Resources tab (select Queries as the Resource Type) > ConfigurationManager > Configuration Manager – Do not modify > Generate RFC Queries andexecute amber_rfc_by_id.
l Reason 1: The integration point between UCMDB and ServiceManager is either notcorrectly configured or does not exist.
Solution 1:See the UCMDB documentation for details on how to set up the integrationbetween UCMDB and ServiceManager.
l Reason 2:AnRFC change phase value in the ConfigurationManager settings does notmatch the RFC phase definition in ServiceManager.
Solution 2:Change the value for the RFC Change Phase field in the ConfigurationManagersettings to a valid value (as defined in ServiceManager). Navigate toAdministration >Application Management > RFC > Fetch RFCs Criteria > RFC Filters to change thesettings. Note that the Change Phases field can contain multiple comma-separated values.Save and activate the configuration for the settings to take effect.
l Reason 3: The RFC does not meet the time window condition defined in the ConfigurationManager settings for fetching RFCs.
Solution 3:Make sure that the RFC meets the time window condition in the ConfigurationManager settings, or change the condition so that the RFC matches the time window. Saveand activate the configuration for the settings to take effect.
l Reason 4: The date and time format between the integration user used by ConfigurationManager for this integration has a different format than the corresponding user in ServiceManager.
Solution 4:Make sure that the time format is defined identically for both user instances. InConfigurationManager, the Date Format definition is found underAdministration >Integrations > Change Management > Service Manager > Date Format.
CMS Troubleshooting GuideTroubleshooting – Explore Views
Micro Focus Universal CMDB (10.33) Page 146 of 174

Troubleshooting – Review/Authorizel Problem. Buttons for creating RFCs are disabled.
Possible reasons:
o The ChangeManagement integration has been disabled for the activated configuration.
o The ChangeManagement integration has been defined, saved, and activated, but the user didnot log in to ConfigurationManager again.
Solution. Do the following:
a. Navigate toAdministration > Integrations > Change Management. To configure theintegration, select the check box and provide the details for the ServiceManager configuration.
b. Save and activate the configuration.
c. Log out and then log in again to see the changes take effect.
l Problem. RFC creation fails.
o Reason 1: Incorrect credentials were defined for the integration user underAdministration >Integrations > Change Management > Service Manager.
Solution 1: In ServiceManager, verify that the integration user exists. If required, update thepassword (for details, see the ServiceManager documentation).
o Reason 2: The user does not have the proper credentials to invoke a call to the ServiceManagerweb-service.
Solution 2:Enable the ability to execute the SOAP API for this integration user (for details, seethe ServiceManager documentation).
o Reason 3: The UNL file for this integration has not been loaded into ServiceManager.
Solution 3: To detect if the UNL file has been uploaded, call the following ServiceManagerURL:
<host>:<port example:13080>/sm/7/ucmdcm.wsdl
If the call returns an XML file, then a web-service is on, meaning that the UNL file has beenuploaded. If not, follow the directions in Import a UNL File into ServiceManager.
o Reason 4:AnRFC has been created with at least one of the followingmismatches:
l The service does not exist in ServiceManager.
l One ormore of the selected CIs does not exist in ServiceManager.
CMS Troubleshooting GuideTroubleshooting – Review/Authorize
Micro Focus Universal CMDB (10.33) Page 147 of 174

l The category value does not match a valid value in ServiceManager.
l The risk assessment value does not match a valid value in ServiceManager.
l The impact value does not match a valid value in ServiceManager.
l The urgency value does not match a valid value in ServiceManager.
Solution 4:Change the values for each of the possible mismatches listed above underAdministration > Application Management > RFC > RFC Creation, so they match with thecorresponding values in ServiceManager. Save and activate the configuration for the settings totake effect.
o Problem. ConfigurationManager doesn’t display RFCs.
Tip: As a first step in identifying whether the problem is in UCMDB or ServiceManager,you can execute a TQL query in UCMDB that fetches all RFCs from ServiceManager. IfRFCs are expected but do not appear in the query's results, it means that there is an issuewith the integration between UCMDB and ServiceManager.
To execute this TQL query: log in to UCMDB and navigate toModeling > ModelingStudio > Resources tab (select Queries as the Resource Type) > ConfigurationManager > Configuration Manager – Do not modify > Generate RFC Queries andexecute amber_rfc_by_id.
l Reason 1: The integration point between UCMDB and ServiceManager is either notcorrectly configured or does not exist.
Solution 1:See the UCMDB documentation for details on how to set up the integrationbetween UCMDB and ServiceManager.
l Reason 2:AnRFC change phase value in the ConfigurationManager settings does notmatch the RFC phase definition in ServiceManager.
Solution 2:Change the value for the RFC Change Phase field in the ConfigurationManagersettings to a valid value (as defined in ServiceManager). Navigate toAdministration >Application Management > RFC > Fetch RFCs Criteria > RFC Filters to change thesettings. Note that the Change Phases field can contain multiple comma-separated values.Save and activate the configuration for the settings to take effect.
l Reason 3: The RFC does not meet the time window condition defined in the ConfigurationManager settings for fetching RFCs.
Solution 3:Make sure that the RFC meets the time window condition in the ConfigurationManager settings, or change the condition so that the RFC matches the time window. Saveand activate the configuration for the settings to take effect.
CMS Troubleshooting GuideTroubleshooting – Review/Authorize
Micro Focus Universal CMDB (10.33) Page 148 of 174

l Reason 4: The date and time format between the integration user used by ConfigurationManager for this integration has a different format than the corresponding user in ServiceManager.
Solution 4:Make sure that the time format is defined identically for both user instances. InConfigurationManager, the Date Format definition is found underAdministration >Integrations > Change Management > Service Manager > Date Format.
Troubleshooting and Limitations – ViewsThe following limitations are applicable when working with managed views in ConfigurationManager:
l Views that contain federated TQL queries cannot be selected for addition to themanaged views list.
l If a view contains a node with a date restriction, you will see updated data for this view only if it isconfigured to be updated once per day (not each time the view is updated). To see updated data forsuch a view, use the JMX console tomanually refresh the view.
Troubleshooting and Limitations – PoliciesThe following limitation is applicable when working with policies:
Condition TQL queries must not include attribute conditions on unmanaged attributes.
CMS Troubleshooting GuideTroubleshooting and Limitations – Views
Micro Focus Universal CMDB (10.33) Page 149 of 174

Chapter 6: Troubleshooting AutomatedService ModelingThis chapter includes:
Automated ServiceModeling (ASM) Troubleshooting 150
Host Discovery by Shell Job 152
References 157
Add an IP Range to the Ranges Setting 157
Discover Load Balancers 157
Add or Edit Credentials 157
Edit the portNumberToPortName.xml File 158
Add or Edit Application Signatures 158
Automated Service Modeling (ASM)TroubleshootingThis chapter introduces the general troubleshooting guidelines for problems that may occur during theServiceModeling process.
When an error occurs with a particular CI in the topology map, an error icon appears on the CI.
The following steps demonstrate the basic troubleshooting procedure for such an error:
1. View the error message in the UCDMB Browser.
a. Click the error icon on the CI.
TheDiscovery Issues pane appears and lists all the related discovery issues.
Micro Focus Universal CMDB (10.33) Page 150 of 174

b. Click one of the categories.
A list of errors of the category appears.
c. Click an error to see the detailed error message.
2. Perform one of the following tasks when appropriate.
o For some errors underSoftware Related Errors, you can directly provide somemissinginformation from the UCMDB Browser. As in the above example, if you click theApplicationSignature button, you will be able to add themissing port numbers.
CMS Troubleshooting GuideAutomated ServiceModeling (ASM) Troubleshooting
Micro Focus Universal CMDB (10.33) Page 151 of 174

o Search the error message in this chapter, and try the suggested solutions.
3. Rerun the ServiceModeling task.
Host Discovery by Shell JobThis chapter describes the error messages youmay receive from the Host Discovery by Shell job andprovides suggested solutions.
CMS Troubleshooting GuideHost Discovery by Shell Job
Micro Focus Universal CMDB (10.33) Page 152 of 174

Error Message: The IP address is not in the discovery IP Range
Error Category:Probe Errors
Solution:Add the IP address or range to theRanges setting of the probe. For more information abouthow to do this, see "Add an IP Range to the Ranges Setting" on page 157.
Error Message: Inaccessible network path to target server. Perhaps it is a virtual IP address.
Error Category:Connection Errors
Solution:Add physical IPs as entry points of next hop
CMS Troubleshooting GuideHost Discovery by Shell Job
Micro Focus Universal CMDB (10.33) Page 153 of 174

Error Message:Need credential to the host
Error Category:Credential-related Errors
Solution:Add the valid credentials. For more information about how to do this, see "Add or EditCredentials" on page 157.
CMS Troubleshooting GuideHost Discovery by Shell Job
Micro Focus Universal CMDB (10.33) Page 154 of 174

Error Message:Connection timeout
Error Category: Timeout Errors
Solution:
l Increase the timeout value in protocol settings.
l ForWindows machines, wait for a few minutes and then try again.
Error Message: The discovery job did not find any process listening on port: <port_number>
Error Category:Software Related Errors
Solution:
l Check if the configured account has sufficient privileges to run relevant commands. Specifically,
o ps -e
o netstat -nap
o lsof
Elevate privilege for UNIX credentials.
l Verify if the service is still accessible.
l Check if lsof is installed on the target machine if it runs UNIX.
Error Message:No application signaturematches the process <process_info> listening on port <port_number>
Error Category:Software Related Errors
Solution:Add the signature for the application. For more information about how to do this, see "Add orEdit Application Signatures" on page 158.
Error Message: The following outgoing ports are filtered because they are not inportNumberToPortName.xml
Error Category:Software Related Errors
CMS Troubleshooting GuideHost Discovery by Shell Job
Micro Focus Universal CMDB (10.33) Page 155 of 174

Solution:Add the port number to portNumberToPortName.xml.
To do this, click theApplication Signature button in the error message and then follow theinstructions. Alternatively, you can directly modify the portNumberToPortName.xml file to add theport number.
Error Message: Failed to resolve host name to IP
Error Category: IP-related Errors
Solution:Check DNS server configuration.
Error Message:Need sudo permission
Error Category:Software Related Errors
Solution:Elevate privilege for UNIX credentials to run the relevant command.
Error Message:No lsof installed on the host
Error Category:Software Related Errors
Solution: Install lsof on the target machine.
Error Message: The host is a Solaris local zone
CMS Troubleshooting GuideHost Discovery by Shell Job
Micro Focus Universal CMDB (10.33) Page 156 of 174

Error Category:Software Related Errors
Solution:None for this release. Currently Solaris local zone is not supported by ASM.
ReferencesThis chapter provides instructions for some of the solutions mentioned earlier.
Add an IP Range to the Ranges Setting
1. Go toData Flow Probe Setup > Domains and Probes pane > Domains and Probes root node> a domain > Data Flow Probes > a Data Flow Probe.
2. In theRanges pane, click New Range .
3. Provide the necessary information on theNew Ranges dialog box, and then click OK.
Discover Load Balancers
1. Run the Host Connection by SNMP job.
2. Run one of the following jobs depending on the type of the load balancer:
o F5 BIG-IP LTM by SNMP
o Alteon application switch by SNMP
o Cisco CSS by SNMP
Add or Edit Credentials
1. Go toData Flow Probe Setup > Domains and Probes pane > Domains and Probes root node> a domain > Credentials > a protocol.
2. In the right pane, perform one of the following actions to add or edit an entry:
CMS Troubleshooting GuideReferences
Micro Focus Universal CMDB (10.33) Page 157 of 174

o To add a new connection detail, click Create new connection details for selected protocol
type .
o To edit an existing credential, select the entry and then click Edit connection details forselected protocol type .
3. Provide the information on the dialog box that pops up, and then click OK.
Edit the portNumberToPortName.xml File
1. Go toData Flow Management > Adapter Management.
2. Click theSearch button , and then search for portNumberToPortName.xml.
3. Edit the portNumberToPortName.xml file, and then click Save.
Add or Edit Application Signatures
1. Go toData Flow Management > Adapter Management.
2. In the Resources pane, select Host_Resources_By_TTY > Adapters > TTY_HR_All.
3. In theAdapter Definition tab > Global Configuration Files section, selectapplicationsSignature.xml and then click Edit .
CMS Troubleshooting GuideReferences
Micro Focus Universal CMDB (10.33) Page 158 of 174

Chapter 7: Troubleshooting DevelopmentThis chapter includes:
TroubleshootingMigration from Jython Version 2.1 to 2.5.3 159
Troubleshooting and Limitations – Developing Generic Database Adapters 161
Troubleshooting - Build an Adapter Package 162
Troubleshooting Migration from Jython Version2.1 to 2.5.3Universal Discovery now uses Jython version 2.5.3. All out-of-the-box scripts have been properlymigrated. If you developed your own Jython scripts prior to this upgrade for use by Discovery, youmayrun into the following issues and have tomake the fixes indicated.
Note: Youmust be an experienced Jython developer to make these changes.
String Formatting
l Error message: TypeError: int argument required
l Possible cause:Using string formatting to decimal integer from string variable containing integerdata.
l Problematic Jython 2.1 code:
variable = "43"print "%d" % variable
l Correct Jython 2.5.3 code:
variable = "43"print "%s" % variable
or
variable = "43"print "%d" % int(variable)
CMS Troubleshooting GuideTroubleshootingMigration from Jython Version 2.1 to 2.5.3
Micro Focus Universal CMDB (10.33) Page 159 of 174

Checking String Type
The code below may not work correctly if input contains unicode strings:
l Problematic Jython 2.1 code: isinstance(unicodeStringVariable,'')
l Correct Jython 2.5.3 code: isinstance(unicodeStringVariable,basestring)
The comparison should be done with basestring to test whether an object is an instance of stror unicode.
Non-ASCII character in file
l Error Message:SyntaxError: Non-ASCII character in file 'x', , but no encoding declared; seehttp://www.python.org/peps/pep-0263.html for details
l Correct Jython 2.5.3 code: (add this to the first line in the file)
# coding: utf-8
Import sub-packages
l Error message:AttributeError: 'module' object has no attribute 'sub_package_name'
l Possible cause:A sub-package is imported without explicitly specifying the name of sub-packagein the import statement.
l Problematic Jython 2.1 code:
import aprint dir(a.b)
The sub-package is not explicitly imported.
l Correct Jython 2.5.3 code:
import a.b
or
from a import b
CMS Troubleshooting GuideTroubleshootingMigration from Jython Version 2.1 to 2.5.3
Micro Focus Universal CMDB (10.33) Page 160 of 174

Iterator Changes
Starting from Jython 2.2, the __iter__method is used to loop over a collection in the scope of a for-inblock. The iterator should implement the nextmethod, returning an appropriate element or throw theStopIteration error if it reached the end of the collection. If the __iter__method is not implemented, thegetitemmethod is used instead.
Raising Exceptions
l Jython 2.1 method for raising exceptions is obsolete:raise Exception, 'Failed getting contents of file'
l Recommended Jython 2.5.3 method for raising exceptions:raise Exception('Failed getting contents of file')
Troubleshooting and Limitations – DevelopingGeneric Database AdaptersThis section describes troubleshooting and limitations for the generic database adapter.
General Limitations
l When you update an adapter package, use Notepad++, UltraEdit, or some other third-party texteditor rather than Notepad (any version) fromMicrosoft Corporation to edit the template files. Thisprevents the use of special symbols, which cause the deployment of the prepared package to fail.
l In most of the cases, after making a change, it is needed to reload the adapter on the probe side,otherwise the adapter will not function properly
a. Log in to the probe JMX console: https://localhost:8453/
b. Locate the adapters bean, and reload adapter with the integration point name.
If the adapter is not reloaded after each change, issues may occor (wrong error messages, queryfailures, and so on).
CMS Troubleshooting GuideTroubleshooting and Limitations – Developing Generic Database Adapters
Micro Focus Universal CMDB (10.33) Page 161 of 174

JPA Limitations
l All tables must have a primary key column.
l CMDB class attribute names must follow the JavaBeans naming convention (for example, namesmust start with lower case letters).
l TwoCIs that are connected with one relationship in the class model must have direct association inthe database (for example, if node is connected to ticket theremust be a foreign key or linkagetable that connects them).
l Several tables that aremapped to the sameCIT must share the same primary key table.
Functional Limitations
l You cannot create amanual relationship between the CMDB and federated CITs. To be able todefine virtual relationships, a special relationship logic must be defined (it can be based onproperties of the federated class).
l Federated CITs cannot be trigger CITs in an impact rule, but they can be included in an impactanalysis TQL query.
l A federated CIT can be part of an enrichment TQL, but cannot be used as the node on whichenrichment is performed (you cannot add, update, or delete the federated CIT).
l Using a class qualifier in a condition is not supported.
l Subgraphs are not supported.
l Compound relationships are not supported.
l The external CI CMDBid is composed from its primary key and not its key attributes.
l A column of type bytes cannot be used as a primary key column inMicrosoft SQL Server.
l TQL query calculation fails if attribute conditions that are defined on a federated node have not hadtheir names mapped in the orm.xml file.
Troubleshooting - Build an Adapter PackageThe procedure for building a new push adapter requires complete and correct re-naming and replacing.Any error will likely affect the adapter. The packagemust be unzipped and re-zipped correctly to act asa UCMDB package. Refer to the out-of-the-box packages as examples. Common errors include:
CMS Troubleshooting GuideTroubleshooting - Build an Adapter Package
Micro Focus Universal CMDB (10.33) Page 162 of 174

l Including another directory on top of the package directories in the ZIP file.
Solution: ZIP the package in the same directory as the package directories such asdiscoveryResources, adapterCode, etc. Do not include another directory level on top of this in theZIP file.
l Omitting a critical re-name of a directory, a file, or a string in a file.
Solution: Following the instructions in this section very carefully.
l Misspelling a critical re-name of a directory, a file, or string in a file.
Solution:Do not change your naming convention in mid-stream once you begin the re-namingprocedure. If you realize that you need to change the name, start over completely rather than tryingto retroactively correcting the name, as there is a high risk of error. Also, use search and replacerather thanmanually replacing strings to reduce risk of errors.
l Deploying adapters with the same file names as other adapters, especially in thediscoveryResources and adapterCode directories.
Solution:Youmay be using a UCMDB version with a known issue that prevents mappings filesfrom having the same name as any other adapter in the sameUCMDB environment. If you attemptto deploy a package with duplicates names, the package deployment will fail. This problemmayoccur even if these files are in different directories. Further, this problem can occur regardless ofwhether the duplicates are within the package or with other previously deployed packages.
At this point you can create a new push adapter job in the Integration Studio using the new adapter youjust deployed.
CMS Troubleshooting GuideTroubleshooting - Build an Adapter Package
Micro Focus Universal CMDB (10.33) Page 163 of 174

Chapter 8: Troubleshooting HardeningThis chapter includes:
Troubleshooting and Limitations - Data Flow Credentials Management 164
Troubleshooting and Limitations - LW-SSOAuthentication 164
Known Issues 164
Limitations 165
Troubleshooting and Limitations - Data FlowCredentials ManagementIf you change the default domain name on the UCMDB server, youmust first verify that the Data FlowProbe is not running. After the default domain name is applied, youmust execute theDataFlowProbe\tools\clearProbeData.bat script on the Data Flow Probe side.
Note: Execution of the clearProbeData.bat script will cause a discovery cycle on the Probe sideonce the Probe is up.
Troubleshooting and Limitations - LW-SSOAuthenticationThis section describes known issues and limitations when working with LW-SSO authentication.
Known IssuesThis section describes known issues for LW-SSO authentication.
l Security context. The LW-SSO security context supports only one attribute value per attributename.
Therefore, when the SAML2 token sends more than one value for the same attribute name, only onevalue is accepted by the LW-SSO framework.
CMS Troubleshooting GuideTroubleshooting and Limitations - Data Flow Credentials Management
Micro Focus Universal CMDB (10.33) Page 164 of 174

Similarly, if the IdM token is configured to sendmore than one value for the same attribute name,only one value is accepted by the LW-SSO framework.
l Multi-domain logout functionality when using Internet Explorer 7.Multi-domain logoutfunctionality may fail under the following conditions:
o The browser used is Internet Explorer 7 and the application is invokingmore than threeconsecutive HTTP 302 redirect verbs in the logout procedure.
In this case, Internet Explorer 7may mishandle the HTTP 302 redirect response and display anInternet Explorer cannot display the webpage error page instead.
As a workaround, it is recommended to reduce, if possible, the number of application redirectcommands in the logout sequence.
LimitationsNote the following limitations when working with LW-SSO authentication:
l Client access to the application.
If a domain is defined in the LW-SSO configuration:
o The application clients must access the application with a Fully Qualified Domain Name (FQDN)in the login URL, for example, http://myserver.companydomain.com/WebApp.
Note: The length of the FQDN cannot be longer than the value of theMaximum domainextension length setting in the Infrastructure Settings Manager. The default value is 8.
o LW-SSO cannot support URLs with an IP address, for example, http://192.168.12.13/WebApp.
o LW-SSO cannot support URLs without a domain, for example, http://myserver/WebApp.
If a domain is not defined in the LW-SSO configuration: The client can access the applicationwithout a FQDN in the login URL. In this case, a LW-SSO session cookie is created specifically fora single machine without any domain information. Therefore, the cookie is not delegated by thebrowser to another, and does not pass to other computers located in the sameDNS domain. Thismeans that LW-SSO does not work in the same domain.
l LW-SSO framework integration. Applications can leverage and use LW-SSO capabilities only ifintegrated within the LW-SSO framework in advance.
l Multi-Domain Support.
o Multi-domain functionality is based on the HTTP referrer. Therefore, LW-SSO supports linksfrom one application to another and does not support typing a URL into a browser window,
CMS Troubleshooting GuideTroubleshooting and Limitations - LW-SSOAuthentication
Micro Focus Universal CMDB (10.33) Page 165 of 174

except when both applications are in the same domain.
o The first cross domain link usingHTTP POST is not supported.
Multi domain functionality does not support the first HTTP POST request to a second application(only theHTTP GET request is supported). For example, if your application has an HTTP link toa second application, anHTTP GET request is supported, but anHTTP FORM request is notsupported. All requests after the first can be eitherHTTP POST orHTTP GET.
o LW-SSO Token size:
The size of information that LW-SSO can transfer from one application in one domain to anotherapplication in another domain is limited to 15Groups/Roles/Attributes (note that each itemmaybe an average of 15 characters long).
o Linking from Protected (HTTPS) to non-protected (HTTP) in amulti-domain scenario:
Multi domain functionality does not work when linking from a protected (HTTPS) to a non-protected (HTTP) page. This is a browser limitation where the referrer header is not sent whenlinking from a protected to a non-protected resource. For an example, see:http://support.microsoft.com/support/kb/articles/Q178/0/66.ASP
o Third-Party cookie behavior in Internet Explorer:
Microsoft Internet Explorer 6 contains amodule that supports the "Platform for PrivacyPreferences (P3P) Project," meaning that cookies coming from a Third Party domain are blockedby default in the Internet security zone. Session cookies are also considered Third Party cookiesby IE, and therefore are blocked, causing LW-SSO to stop working. For details, see:http://support.microsoft.com/kb/323752/en-us.
To solve this issue, add the launched application (or a DNS domain subset as *.mydomain.com)to the Intranet/Trusted zone on your computer (in Microsoft Internet Explorer, selectMenu >Tools > Internet Options > Security > Local intranet > Sites > Advanced), which causesthe cookies to be accepted.
Caution: The LW-SSO session cookie is only one of the cookies used by the Third Partyapplication that is blocked.
l SAML2 token
o Logout functionality is not supported when the SAML2 token is used.
Therefore, if the SAML2 token is used to access a second application, a user who logs out of thefirst application is not logged out of the second application.
o The SAML2 token's expiration is not reflected in the application's session management.
Therefore, if the SAML2 token is used to access a second application, each application'ssessionmanagement is handled independently.
CMS Troubleshooting GuideTroubleshooting and Limitations - LW-SSOAuthentication
Micro Focus Universal CMDB (10.33) Page 166 of 174

l JAAS Realm. The JAAS Realm in Tomcat is not supported.
l Using spaces in Tomcat directories. Using spaces in Tomcat directories is not supported.
It is not possible to use LW-SSOwhen a Tomcat installation path (folders) includes spaces (forexample, Program Files) and the LW-SSO configuration file is located in the common\classesTomcat folder.
l Load balancer configuration. A load balancer deployed with LW-SSOmust be configured to usesticky sessions.
l Demo mode. In Demomode, LW-SSO supports links from one application to another but does notsupport typing a URL into a browser window, due to an HTTP referrer header absence in this case.
CMS Troubleshooting GuideTroubleshooting and Limitations - LW-SSOAuthentication
Micro Focus Universal CMDB (10.33) Page 167 of 174

Chapter 9: Troubleshooting ModelingThis chapter includes:
Troubleshooting and Limitations – Topology Query Language 168
Troubleshooting and Limitations – CI Selector 172
Troubleshooting and Limitations – TopologyQuery LanguageThis section describes troubleshooting and limitations for Topology Query Language.
l When creating resources, such as TQL queries, views, and Impact rules, make sure that there areno spaces at the end of the resource name.
l In amulti-tenancy environment, TQL query names cannot contain an@ character.
l When importing a resource (for example, TQL query, view) in amulti-tenancy environment inModeling Studio, for the import to work, the TQL query used for the creation of the view needs tohave as consumer or owner tenant, the tenant associated with the user that performs the import.The user who performs the import of a view has to have at lest view permission on the TQL queryused.
The instructions below are an example for your reference:
a. Create a tenant.
b. Create a role with the following permissions: All permissions on view and folder, andpermissions to access Modeling Studio.
c. Create a user with the above role in the context of tenant from step a.
d. Go toModeling Studio > Resources > View, assign the tenant created in step a for thedesired folder as owner tenant. (Meaning that the views are assigned to the tenant associatedwith the user who will perform the import.)
e. Log in as the new user.
f. In Modeling Studio, import a new view.
l If an error occurs while working with views in theModelingmanagers, when adding CIs to theCMDB, or when updating existing CIs, and the error log indicates that objects aremissing in the
Micro Focus Universal CMDB (10.33) Page 168 of 174

database, do the following:
a. Perform aDB backup.
b. Access the JMX console and run the followingmethods under service=DAL services:
l rebuildModelViews
l rebuildModelDBSchemaAndViews
Caution: Invoking the above JMX method could drop the following: attributes, tables, indexes.Random usage is prohibited.
l If the login takes a long time when navigating to theModelingmodules, go to Infrastructure SettingsManager and set the value of themam.gui.automation.flow.mapping.enabled setting to false.This disables the Automation Flow functionality but improves the login time for theModelingmodules.
l For TQL queries to be valid, they must comply with certain restrictions.
This section includes the following topics:
o "Understanding Validation Restrictions" below
o "Impact Analysis TQLQuery Validation" on the next page
o "Enrichment TQLQuery Validation" on page 171
Understanding Validation Restrictions
For Impact Analysis, Discovery, and Enrichment TQL query types to be valid, they must complywith the following restrictions:
o Unique Names. TQL query elements must have unique names.
o Self Relationships. A TQL query must not contain self relationships, that is, a relationship mustnot lead from a query node to itself, as the following example illustrates:
o Cyclic Graph. The TQL query structure cannot be a closed circle, as shown in the followingexample:
CMS Troubleshooting GuideTroubleshooting and Limitations – Topology Query Language
Micro Focus Universal CMDB (10.33) Page 169 of 174

o Separate Query Nodes and Groups. All the TQL query nodes must be linked to one another,that is, the TQL query cannot contain separate query nodes or groups, as the following exampleillustrates:
Impact Analysis TQL Query Validation
Impact Analysis TQL queries must also comply with the following restrictions:
o Number of query nodes. An Impact Analysis TQL query must consist of at least two querynodes.
o Trigger and affected query nodes must be connected. Theremust be a path of relationshipsfrom the triggered query node to the affected query nodes.
o Selecting query nodes to function as Impact Analysis triggers. When selecting querynodes to function as Impact Analysis triggers, the query nodes must comply with the followingrestrictions:
CMS Troubleshooting GuideTroubleshooting and Limitations – Topology Query Language
Micro Focus Universal CMDB (10.33) Page 170 of 174

l You can select more than one query node as a trigger. However, you cannot define a querynode both as affected and as a trigger.
l If a query node has a relationship whoseminimum limit is 0 (meaning that one of its endsdoes not necessarily have a query node linked to it), the query node that is linked to its otherend cannot be a root cause query node (because it may or may not exist in the TQL query).For details about minimum limits, see "Cardinality Tab". For example, Configuration Itemcannot be either a root cause or affected query node because it is connected to the querynode with aMin limit of 0.
Note: A query node that is hidden cannot be a root cause or an affected query node.
o The connection between trigger and affected query nodes. The trigger query node andaffected query nodes you definemust be connected by a path of relationships from the triggeredquery node to the affected query nodes.
Enrichment TQL Query Validation
Enrichment TQL queries must comply with the following restriction:
o Required elements. You cannot perform Enrichment on a non-required query node, that is, aquery node that does not necessarily appear in the TQL query results.
Example 1. In this example, the TQL query results can be eitherA andB orA andC. Therefore,you cannot add an Enrichment query node to query nodes B orC because they are not requiredelements. You can add an Enrichment query node to query nodeA because it always appears inthe TQL query results. For details on how to add Enrichment query nodes and relationships, seeAdd Enrichment Query Nodes and Relationships to an Enrichment TQLQuery.
CMS Troubleshooting GuideTroubleshooting and Limitations – Topology Query Language
Micro Focus Universal CMDB (10.33) Page 171 of 174

Example 2. In this example, bothA andB are required elements that always appear in the TQLquery results. Only C is not a required element because it has a cardinality of 0. Therefore, youcannot add an Enrichment query node to it.
Troubleshooting and Limitations – CI SelectorThis section describes troubleshooting and limitations for the CI Selector.
Unavailable Views and CIs
The View list in the CI Selector may not display all views in the CMDB, or it may not display thecontents of a view, for any of the following reasons:
l The View list includes only the views for which you have the necessary permissions. Similarly,Searchmode is only available if you have theAllow Search general action permission. To set
CMS Troubleshooting GuideTroubleshooting and Limitations – CI Selector
Micro Focus Universal CMDB (10.33) Page 172 of 174

permissions, selectManagers > Administration > Roles Manager. For more information, seeRoles Manager in theUniversal CMDB Administration Guide.
l Views that are currently inactive appear in red in the View list, but they cannot be selected. In ITUniverseManager, inactive views appear in faded text.
l Out-of-the-box views for which you do not have a licensemay appear in the View list, but theseviews do not contain CIs. For information on the out-of-the-box views, see Predefined Folders andViews.
Note: After deleting one or more query nodes from a TQL query, it can take time for changes tobe updated to the view; meanwhile, the removed CIs appear in the view. If you select one ofthese CIs before it is updated, an error message is displayed. Click theRefresh button to updatethe view.
CMS Troubleshooting GuideTroubleshooting and Limitations – CI Selector
Micro Focus Universal CMDB (10.33) Page 173 of 174
Send documentation feedbackIf you have comments about this document, you can contact the documentation team by email. If anemail client is configured on this system, click the link above and an email window opens with thefollowing information in the subject line:
Feedback on CMS Troubleshooting Guide (Universal CMDB 10.33)
Just add your feedback to the email and click send.
If no email client is available, copy the information above to a new message in a webmail client, andsend your feedback to [email protected].
We appreciate your feedback!
Universal CMDB (10.33) Page 174 of 174