Celebr8 Love Story Mini Album
19
1 Celebr8 Love Story Mini Album Designed by Sandi Kok for Celebr8. You will need: Celebr8 Love Story Mini Paper Pack Double-sided tape (DST) Celebr8 Mini Album kit White cardstock x 3 Black cardstock x 1 Foam tape 1mm and 3mm Brilliance Starlite Black Small, thin piece of ribbon. 3 Super strong magnets Scoreboard Paper trimmer / craft knife Small, sharp scissors for fussy cutting Bone folder Brad Important Information, please read carefully before you start. • All measurements are given in centimetres. • Measurements are given width x height. • Cut all your base pages first and keep all the bits for matting and making tags etc. • Please note which side of the pattern paper is used! Large format photos of each page can be found at the end of the cutting guide. • Fussy cut one of each side of the fussy cutting elements sheets as follows: o PP5815 Cut apart journaling cards. o PP5817 Words and Circles (remember you can use a punch to punch the circles). o PP5818 Floral embellishments. o PP5819 Border strips • Ensure that you use good quality double-sided tape. • DST = double-sided tape AS = Advertising strip (barcode) • RHS = Right hand side LHS = Left hand side • PP = Patterned Paper Album Cover (use photos below to assist) • From white cardstock, cut 2 identical pieces measuring 18cm x 22cm. • Join these 2 pieces of cardstock together to create a single piece of cardstock measuring 36cm x 22cm. • Adhere DST around the outside edge of the hardboard as well as a few strips in the centre of the hardboard. • Starting with the spine, place it in the centre (top and bottom and left to right {approx. 2cm border all around}) of this newly created “outer cover”, then add a piece of 6mm tape on either side of the spine (you need this gap to stop the spine from tearing) before attaching the covers in line with the base of spine. • Pop some DST all around the outer edge of the cardstock. Mitre corners, remove DST and fold cardstock in to complete the outer cover. • From PP5809, cut a piece that measures 15cm x 16,7cm for the front inside cover and stick DST around the outer edges on the wrong/plain side. Make sure that you cut the paper so that you have the little image in your cut piece.
-
Upload
khangminh22 -
Category
Documents
-
view
0 -
download
0
Transcript of Celebr8 Love Story Mini Album

1
Celebr8 Love Story Mini Album
Designed by Sandi Kok for Celebr8.
You will need: Celebr8 Love Story Mini Paper Pack Double-sided tape (DST) Celebr8 Mini Album kit White cardstock x 3 Black cardstock x 1 Foam tape 1mm and 3mm Brilliance Starlite Black Small, thin piece of ribbon. 3 Super strong magnets Scoreboard Paper trimmer / craft knife Small, sharp scissors for fussy cutting Bone folder Brad
Important Information, please read carefully before you start.
• All measurements are given in centimetres. • Measurements are given width x height. • Cut all your base pages first and keep all the bits for matting and making tags etc. • Please note which side of the pattern paper is used! Large format photos of each page can be
found at the end of the cutting guide. • Fussy cut one of each side of the fussy cutting elements sheets as follows:
o PP5815 Cut apart journaling cards. o PP5817 Words and Circles (remember you can use a punch to punch the circles). o PP5818 Floral embellishments. o PP5819 Border strips
• Ensure that you use good quality double-sided tape. • DST = double-sided tape AS = Advertising strip (barcode) • RHS = Right hand side LHS = Left hand side • PP = Patterned Paper
Album Cover (use photos below to assist)
• From white cardstock, cut 2 identical pieces measuring 18cm x 22cm. • Join these 2 pieces of cardstock together to create a single piece of cardstock measuring 36cm x
22cm. • Adhere DST around the outside edge of the hardboard as well as a few strips in the centre of the
hardboard. • Starting with the spine, place it in the centre (top and bottom and left to right {approx. 2cm border
all around}) of this newly created “outer cover”, then add a piece of 6mm tape on either side of the spine (you need this gap to stop the spine from tearing) before attaching the covers in line with the base of spine.
• Pop some DST all around the outer edge of the cardstock. Mitre corners, remove DST and fold cardstock in to complete the outer cover.
• From PP5809, cut a piece that measures 15cm x 16,7cm for the front inside cover and stick DST around the outer edges on the wrong/plain side. Make sure that you cut the paper so that you have the little image in your cut piece.

2
• From PP5808, cut a piece that measures 15cm x 16,7cm for the back inside cover and stick DST around the outer edges on the wrong/plain side. Make sure that you cut the paper so that you have the little image in your cut piece.
• To stop your inside covers from bulging, you will need to do the following: o Add a strip of 12mm tape on each side of the 6mm DST on the hard board (4 pieces in total
running from top to bottom of the spine). o Add another strip of tape to the spine. o Add 2 strips of tape to the inside covers to assist with anchoring the pattern paper.
• Carefully remove the DST from the hardboard, including the DST from the 6mm gap between the hardboard and the pattern paper, and attach the inside covers to both front and back.
• Make up the base pages as per the instructions and adhere to the mini album. • See photos below.

3
4

5
6

7 Decorating the Front Cover and spine
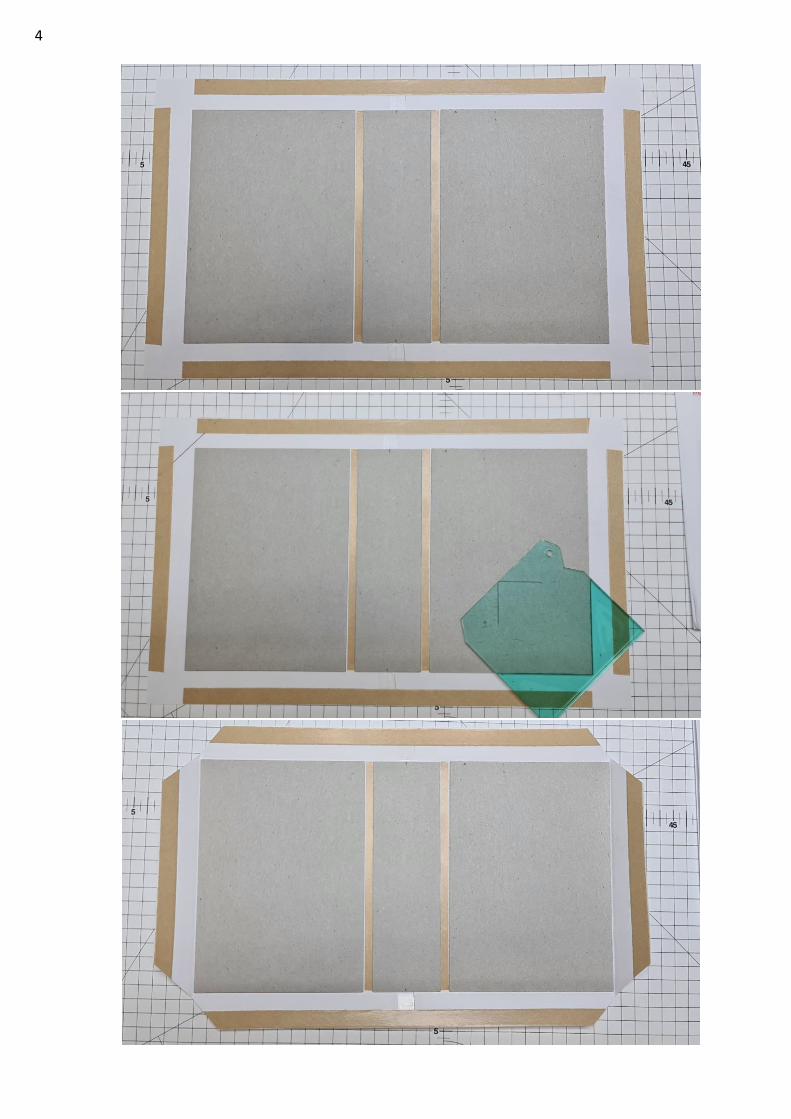
• Using PP5812, cut a square measuring 12,5cm square. Create an envelope using the diagram below. • From point A, measure 5,5cm down each side (you will create 4 points). • Join the points to create little triangles and score with your scoring tool. Picture 1 • From point B, measure 7,5cm down each side (you will create 4 points). • Join the points to create little triangles and score with your scoring tool. Picture 2 • Cut out little notches where the score lines intersect. Picture 3. • Corner round all 4 corners. Picture 4. • Fold to create envelope. Picture 5. • Apply glue to the sides of the base flap to seal the envelope. • Fussy cut elements from PP5818 to decorate the front of the album. • From off cuts, create 2 small tags measuring 5cm x 6cm. Nip of corners and punch a hole. Add
ribbon. • Use an offcut from PP5812 and cut a strip measuring 5cm x 16,5cm. Adhere to spine. • Tie the ribbon supplied in the kit around the album to add some interest and colour to the spine.
1
2
3 4

8
z Page no.
Pattern paper no.
No. to cut
Measurement Additional instructions
1 PP5813 PP5813
1 1
10cm x 15xcm Leave AS on and use offcut on page 10. 19cm x 13cm
Score at 1cm on the 10cm side. Turn 90 degrees and score at 1cm and 14cm on the 15cm side. Apply DST on the right side in the 1cm areas created by the score lines. Mitre corners.
Score at 1cm and 10cm on the 19cm side. Apply DST to the right side in the 1cm area created by the score line. Mitre corners. Adhere to inside of pocket to create a pull out.
5
9
2 PP5814 PP5810 (Cut with page 3)
1 1
10cm x 14,5cm (keep offcut to use on page 11) 5cm x 16,5cm
Stick flat on page 2. Score at 1cm and 15,5cm on the 16,5cm side. Apply DST to the right side in the 1cm area created by the score line. Mitre corners.
3 PP5810 White Cardstock
1 1
10cm x 16,5cm Leave AS on and include in your measurement. 9,5cm x 14cm
Score at 1cm on the 10cm side. Turn 90 degrees and score at 1cm and 15,5cm on the 16,5cm side. Apply DST on the right side in the 1cm areas created by the score lines. Mitre corners. (This pocket is the same construction as the pocket on page 1). Use as pull out for pocket. You may add more if you wish.
4 PP5817 Black cardstock
1 1
10cm x 14,5cm 9,5cm x 14cm
Adhere to page. Cut out grid for tic tac toe…
5 PP5811
1 10cm x 14,5cm
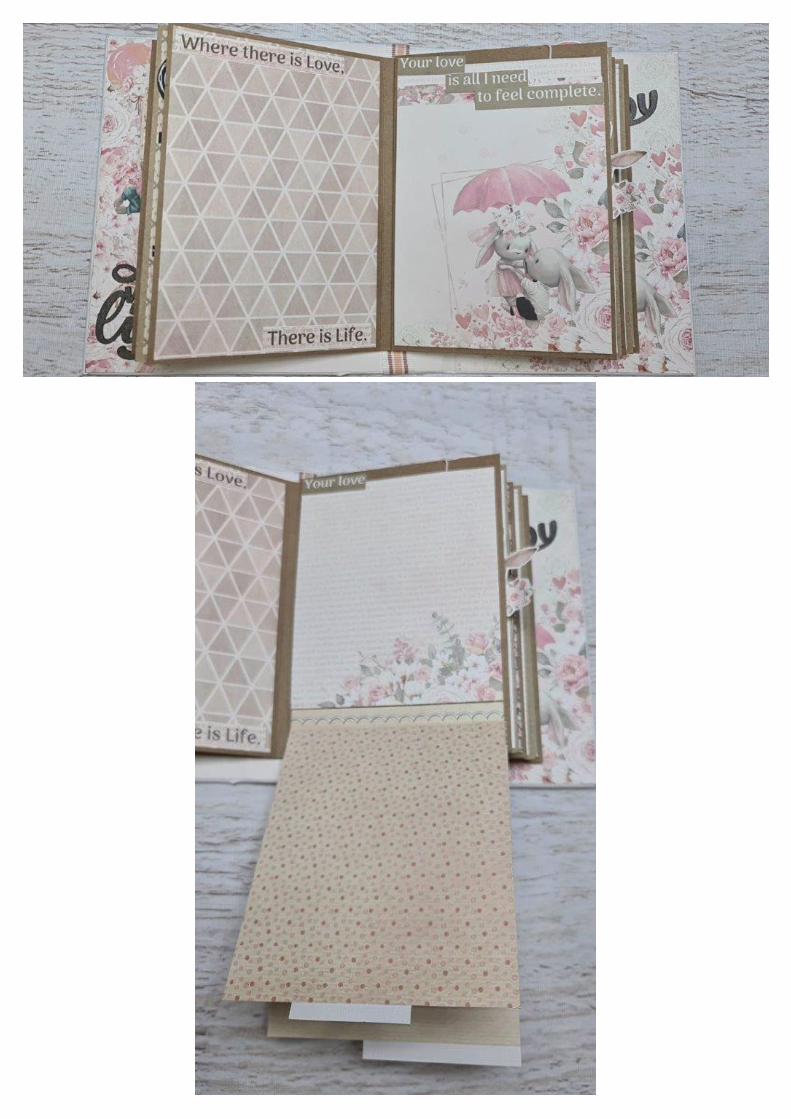
Use cut apart/ journaling card, “Love You with all my Heart”, as a tuck spot. I matted it in black.
6 PP5819
1 10cm x 14,5cm
Use AS “Where there is Love, There is Life.” To decorate page.
7 PP5808 PP5810 PP5814
1 1 1
10cm x 13cm 10cm x 13cm 10cm x 13cm
Score at 12cm on the 13cm side on all three pieces. Apply DST on the right side in the 1cm area created by the score line. Adhere to the bottom of the page to create a top opening waterfall.
10
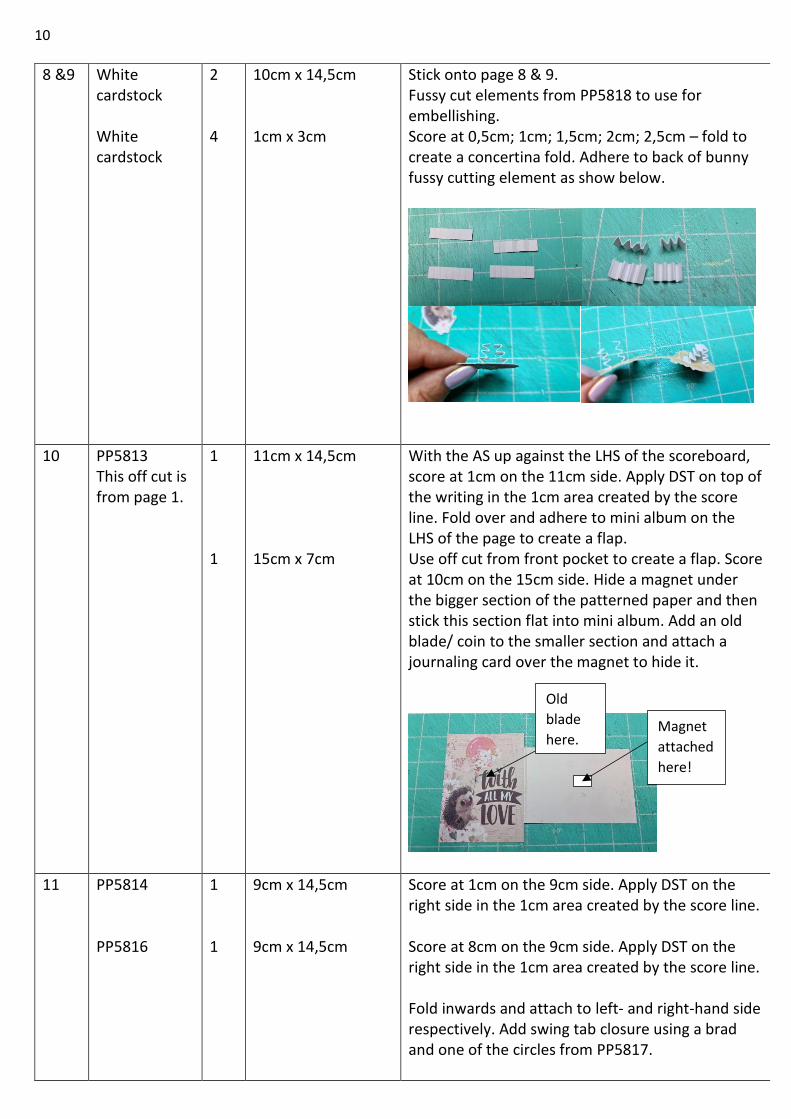
8 &9 White cardstock White cardstock
2 4
10cm x 14,5cm 1cm x 3cm
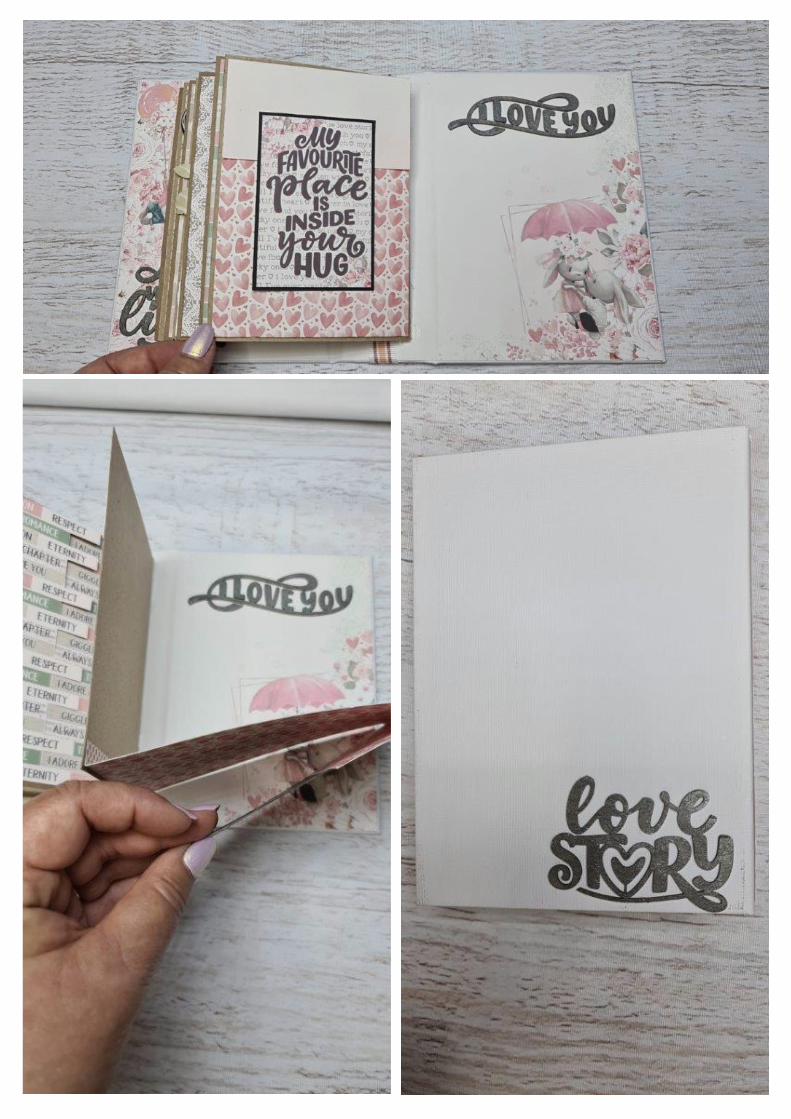
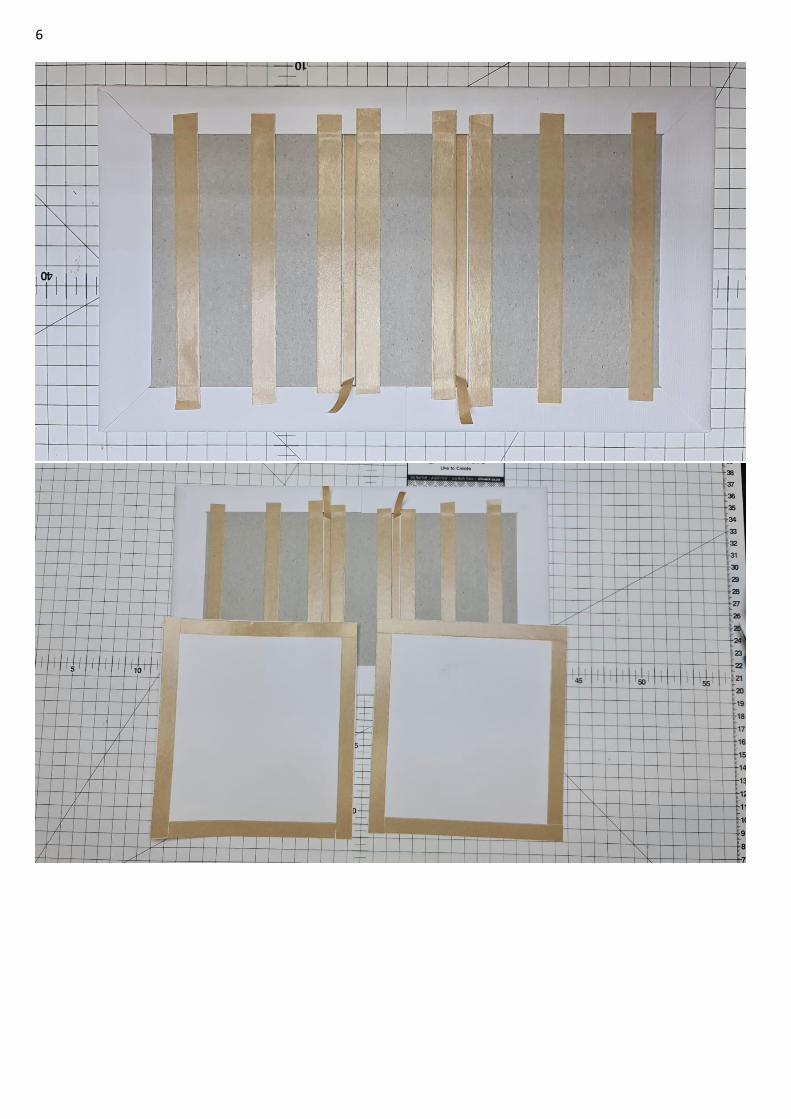
Stick onto page 8 & 9. Fussy cut elements from PP5818 to use for embellishing. Score at 0,5cm; 1cm; 1,5cm; 2cm; 2,5cm – fold to create a concertina fold. Adhere to back of bunny fussy cutting element as show below.
10 PP5813 This off cut is from page 1.
1 1
11cm x 14,5cm 15cm x 7cm
With the AS up against the LHS of the scoreboard, score at 1cm on the 11cm side. Apply DST on top of the writing in the 1cm area created by the score line. Fold over and adhere to mini album on the LHS of the page to create a flap. Use off cut from front pocket to create a flap. Score at 10cm on the 15cm side. Hide a magnet under the bigger section of the patterned paper and then stick this section flat into mini album. Add an old blade/ coin to the smaller section and attach a journaling card over the magnet to hide it.
11 PP5814 PP5816
1 1
9cm x 14,5cm 9cm x 14,5cm
Score at 1cm on the 9cm side. Apply DST on the right side in the 1cm area created by the score line. Score at 8cm on the 9cm side. Apply DST on the right side in the 1cm area created by the score line. Fold inwards and attach to left- and right-hand side respectively. Add swing tab closure using a brad and one of the circles from PP5817.
Magnet attached here!
Old blade here.
11
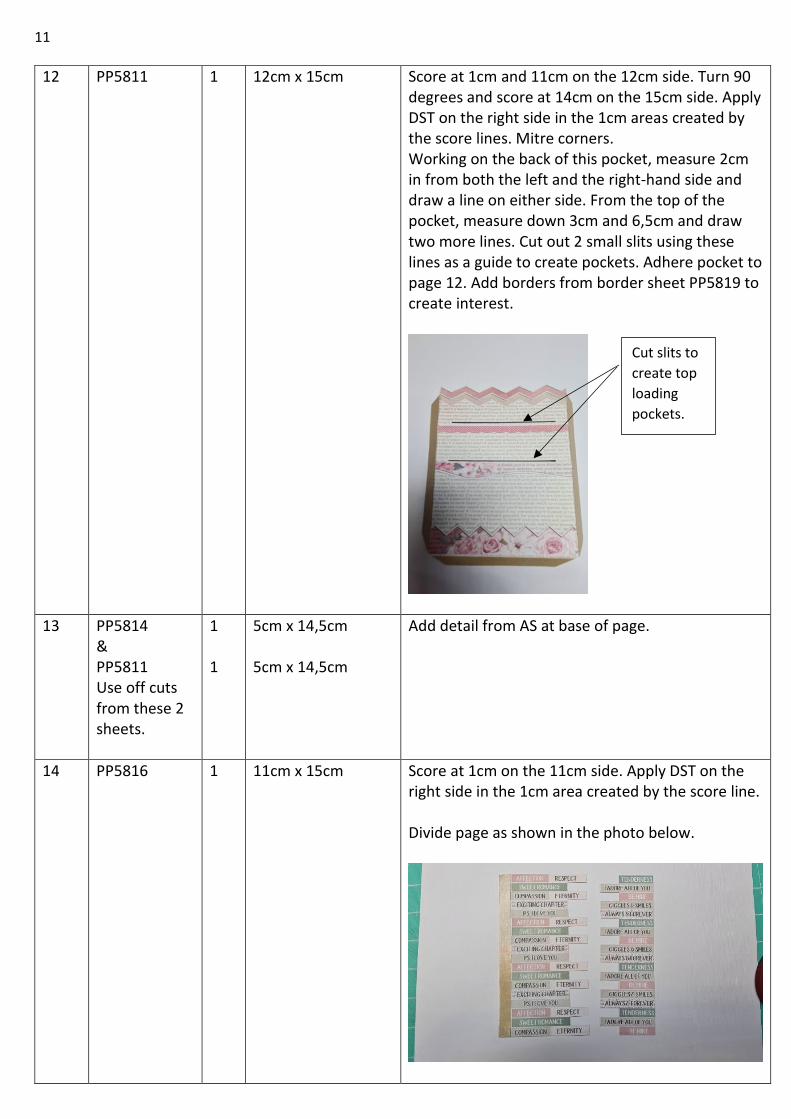
12 PP5811
1 12cm x 15cm Score at 1cm and 11cm on the 12cm side. Turn 90 degrees and score at 14cm on the 15cm side. Apply DST on the right side in the 1cm areas created by the score lines. Mitre corners. Working on the back of this pocket, measure 2cm in from both the left and the right-hand side and draw a line on either side. From the top of the pocket, measure down 3cm and 6,5cm and draw two more lines. Cut out 2 small slits using these lines as a guide to create pockets. Adhere pocket to page 12. Add borders from border sheet PP5819 to create interest.
13 PP5814 & PP5811 Use off cuts from these 2 sheets.
1 1
5cm x 14,5cm 5cm x 14,5cm
Add detail from AS at base of page.
14 PP5816
1 11cm x 15cm Score at 1cm on the 11cm side. Apply DST on the right side in the 1cm area created by the score line. Divide page as shown in the photo below.
Cut slits to create top loading pockets.
12
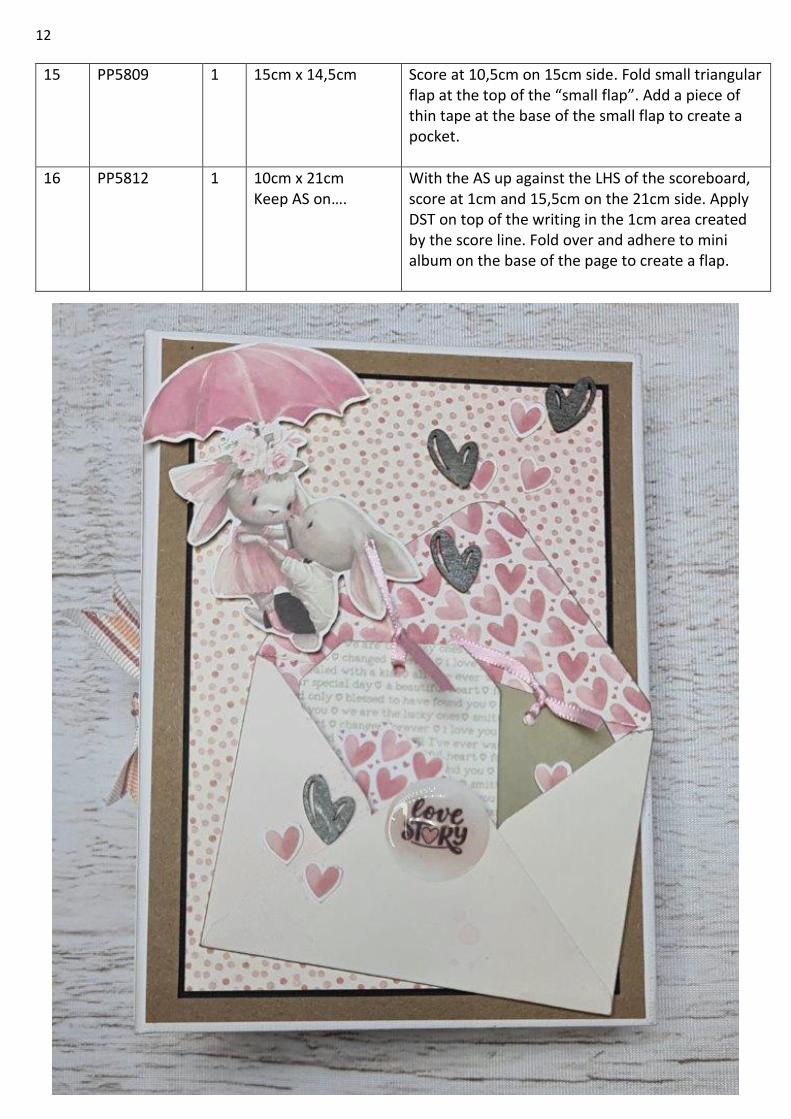
15 PP5809
1 15cm x 14,5cm Score at 10,5cm on 15cm side. Fold small triangular flap at the top of the “small flap”. Add a piece of thin tape at the base of the small flap to create a pocket.
16 PP5812
1 10cm x 21cm Keep AS on….
With the AS up against the LHS of the scoreboard, score at 1cm and 15,5cm on the 21cm side. Apply DST on top of the writing in the 1cm area created by the score line. Fold over and adhere to mini album on the base of the page to create a flap.