CA DLP Endpoint Integration Guide
97
Endpoint Integration Guide Release 14.0 CA DLP 3rd Edition
-
Upload
khangminh22 -
Category
Documents
-
view
1 -
download
0
Transcript of CA DLP Endpoint Integration Guide
Endpoint Integration Guide Release 14.0
CA DLP
3rd Edition

This Documentation, which includes embedded help systems and electronically distributed materials, (hereinafter referred to as the “Documentation”) is for your informational purposes only and is subject to change or withdrawal by CA at any time.
This Documentation may not be copied, transferred, reproduced, disclosed, modified or duplicated, in whole or in part, without the prior written consent of CA. This Documentation is confidential and proprietary information of CA and may not be disclosed by you or used for any purpose other than as may be permitted in (i) a separate agreement between you and CA governing your use of the CA software to which the Documentation relates; or (ii) a separate confidentiality agreement between you and CA.
Notwithstanding the foregoing, if you are a licensed user of the software product(s) addressed in the Documentation, you may print or otherwise make available a reasonable number of copies of the Documentation for internal use by you and your employees in connection with that software, provided that all CA copyright notices and legends are affixed to each reproduced copy.
The right to print or otherwise make available copies of the Documentation is limited to the period during which the applicable license for such software remains in full force and effect. Should the license terminate for any reason, it is your responsibility to certify in writing to CA that all copies and partial copies of the Documentation have been returned to CA or destroyed.
TO THE EXTENT PERMITTED BY APPLICABLE LAW, CA PROVIDES THIS DOCUMENTATION “AS IS” WITHOUT WARRANTY OF ANY KIND, INCLUDING WITHOUT LIMITATION, ANY IMPLIED WARRANTIES OF MERCHANTABILITY, FITNESS FOR A PARTICULAR PURPOSE, OR NONINFRINGEMENT. IN NO EVENT WILL CA BE LIABLE TO YOU OR ANY THIRD PARTY FOR ANY LOSS OR DAMAGE, DIRECT OR INDIRECT, FROM THE USE OF THIS DOCUMENTATION, INCLUDING WITHOUT LIMITATION, LOST PROFITS, LOST INVESTMENT, BUSINESS INTERRUPTION, GOODWILL, OR LOST DATA, EVEN IF CA IS EXPRESSLY ADVISED IN ADVANCE OF THE POSSIBILITY OF SUCH LOSS OR DAMAGE.
The use of any software product referenced in the Documentation is governed by the applicable license agreement and such license agreement is not modified in any way by the terms of this notice.
The manufacturer of this Documentation is CA.
Provided with “Restricted Rights.” Use, duplication or disclosure by the United States Government is subject to the restrictions set forth in FAR Sections 12.212, 52.227-14, and 52.227-19(c)(1) - (2) and DFARS Section 252.227-7014(b)(3), as applicable, or their successors.
Copyright © 2012 CA. All rights reserved. All trademarks, trade names, service marks, and logos referenced herein belong to their respective companies.

CA Technologies Product References
This document references the following CA Technologies products:
■ CA DLP
Contact CA Technologies
Contact CA Support
For your convenience, CA Technologies provides one site where you can access the information that you need for your Home Office, Small Business, and Enterprise CA Technologies products. At http://ca.com/support, you can access the following resources:
■ Online and telephone contact information for technical assistance and customer services
■ Information about user communities and forums
■ Product and documentation downloads
■ CA Support policies and guidelines
■ Other helpful resources appropriate for your product
Providing Feedback About Product Documentation
If you have comments or questions about CA Technologies product documentation, you can send a message to [email protected].
To provide feedback about CA Technologies product documentation, complete our short customer survey which is available on the CA Support website at http://ca.com/docs.

Contents 5
Contents
Chapter 1: Endpoint Deployment 9
Client Installation Features ........................................................................................................................................ 10
Endpoint Requirements ............................................................................................................................................. 12
Limitation of 32-bit Client.msi on 64-bit OS ........................................................................................................ 13
Before Installing on Client Machines.......................................................................................................................... 13
Client Machines - Manual Installations (setup.exe) ................................................................................................... 15
Server Name Resolution ..................................................................................................................................... 16
Post-Installation Tasks ................................................................................................................................................ 16
Customize the Intervention Dialog Banner ......................................................................................................... 17
Uninstalling Client Machines ...................................................................................................................................... 18
Command Line Operations ......................................................................................................................................... 18
Installing with msiexec.exe ................................................................................................................................. 18
Uninstalling Client Machines ............................................................................................................................... 20
SMS Operations .......................................................................................................................................................... 21
Before Installing with SMS .................................................................................................................................. 22
SMS Installation .................................................................................................................................................. 22
SMS Uninstallation .............................................................................................................................................. 26
Snapshot Operations .................................................................................................................................................. 26
Snapshot Installation ........................................................................................................................................... 27
Follow-up Snapshot Installations ........................................................................................................................ 30
Snapshot Considerations..................................................................................................................................... 31
Integration with Centralized Applications .................................................................................................................. 31
Citrix Integration ................................................................................................................................................. 31
Lotus Notes Integration ...................................................................................................................................... 33
Chapter 2: Group Policy Deployments 35
Group Policy Operations ............................................................................................................................................ 35
Before Installing with Group Policy ............................................................................................................................ 36
Create an Administrative Installation Source Image ........................................................................................... 36
Create a Transform: SetParentName.mst ........................................................................................................... 37
Extract the Source Images for the Microsoft Visual C Runtime Libraries ........................................................... 38
Disable InPrivate Browsing for Internet Explorer................................................................................................ 39
Group Policy Installation ............................................................................................................................................ 39
Group Policy Uninstallation ........................................................................................................................................ 41

6 Endpoint Integration Guide
Chapter 3: Client File System Agent 43
About the Client File System Agent ............................................................................................................................ 43
When Do Triggers Activate? ................................................................................................................................ 43
How Does the CFSA Apply Policy to Protect Files? ............................................................................................. 50
Risk of Data Loss If CA DLP Blocks File Move ...................................................................................................... 51
CFSA Terminology ............................................................................................................................................... 52
Deploy the CFSA ......................................................................................................................................................... 54
Which Policies Are Applied?................................................................................................................................ 55
Configure the Local Machine Policy .................................................................................................................... 55
Configure the User Policy .................................................................................................................................... 64
Chapter 4: Client Print System Agent 69
About the Client Print System Agent.......................................................................................................................... 69
What Filters Does the CPSA Use?........................................................................................................................ 70
Which User Policy Is Applied? ............................................................................................................................. 70
CPSA Flow Chart ......................................................................................................................................................... 71
Deploy the CPSA ......................................................................................................................................................... 73
Configure the User Policy .................................................................................................................................... 74
CPSA Optional Registry Changes ......................................................................................................................... 77
Chapter 5: Endpoint Hardening 79
Why Endpoint Hardening? ......................................................................................................................................... 79
CA DLP Outlook Client Agent is Automatically Re-enabled ........................................................................................ 80
Re-enable IE Endpoint Agent Automatically .............................................................................................................. 81
Block Unauthorized Browsers and Email Applications ............................................................................................... 81
Disable InPrivate Browsing for Internet Explorer ....................................................................................................... 82
Prevent Unauthorized Changes to the Internet Explorer Add-on List ....................................................................... 82
Prevent Unauthorized Uninstallation of CA DLP ........................................................................................................ 84
Prevent Unauthorized Changes to CA DLP Services ................................................................................................... 84
Preventing Man-in-the-Middle Attacks ...................................................................................................................... 85
Use File Permissions to Protect Event Data and Document Fingerprints .................................................................. 86
Apply Registry Permissions ........................................................................................................................................ 87
Deploy Server-Side Email Enforcement ..................................................................................................................... 88
Working Offline .......................................................................................................................................................... 88
Automated Endpoint Protection ................................................................................................................................ 89
Chapter 6: Known Issues 91
Firewall Configuration on Windows XP SP2 and 2003 SP1 ........................................................................................ 91
Client File System Agent (CFSA) ................................................................................................................................. 92

Contents 7
CFSA Can Prevent BitLocker From Encrypting USB Devices ................................................................................ 92
Index 93
Appendix A: Accessibility Features 95
Display ........................................................................................................................................................................ 95
Sound ......................................................................................................................................................................... 96
Keyboard .................................................................................................................................................................... 96
Mouse ........................................................................................................................................................................ 97


Chapter 1: Endpoint Deployment 9
Chapter 1: Endpoint Deployment
This section describes how to deploy CA DLP endpoint agents.
Note: Group Policy deployments are described in the next chapter.
This section contains the following topics:
Client Installation Features (see page 10) Endpoint Requirements (see page 12) Before Installing on Client Machines (see page 13) Client Machines - Manual Installations (setup.exe) (see page 15) Post-Installation Tasks (see page 16) Uninstalling Client Machines (see page 18) Command Line Operations (see page 18) SMS Operations (see page 21) Snapshot Operations (see page 26) Integration with Centralized Applications (see page 31)

Client Installation Features
10 Endpoint Integration Guide
Client Installation Features
When you install a CA DLP client machine, the following features are listed in the Custom Setup screen of the client installation wizard:
CA DLP Client
This feature installs the CA DLP infrastructure. This enables the various components to run and communicate. You cannot install other features without also installing the infrastructure.
Management Console
This feature enables the host system to run these consoles:
Administration Console
The Administration console enables CA DLP administrators to manage user accounts, machine accounts, and policies. It also enables administrators to manage scanning jobs and content agents and to view log files.
Data Management Console
The Data Management console (DMC) allows reviewers to search for, view and update the audit status for captured events.
Note: By default, only the Administration console is installed with the Management Console feature.
Content Registration
This enables CA DLP endpoint agents to use Content Agent triggers to detect fingerprinted files.
Agents
These features (or ‘endpoint agents’) enable CA DLP to integrate with e-mail and browser applications on the client machine, and to detect when other specified applications are being used. Endpoint agents include:
Microsoft Internet Explorer Agent
The IE agent can capture and control web activity in Internet Explorer or Windows Explorer, including unauthorized attempts to access web pages, upload or download files, and submit data to a web site.Note: You can optionally turn off integration with Windows Explorer using general variable WGNNOEXPLORER.
Microsoft Outlook Agent

Client Installation Features
Chapter 1: Endpoint Deployment 11
The Outlook endpoint agent can capture and control any Outlook-based email activity. On computers where both the Outlook and Internet Explorer endpoint agents are installed, CA DLP can also capture or control any web activity when Outlook is used as a web browser.
Note: Integration with Outlook browsers requires a minimum version of Internet Explorer (see the Requirements section). It can be optionally disabled using general variable WGNNOOUTLOOKBROWSER.
Lotus Notes Agent
The Notes endpoint agent can capture and control any Notes-based email activity.
Application Agent
The Application endpoint agent can monitor usage of other desktop applications and capture application usage metrics.
File System Agent (CFSA)
The Client File System Agent (CFSA), also known as ‘Policy on Save’, detects and controls attempts to copy or save files to removable storage devices (such as USB flash drives) and network locations, and attempts to burn files onto writable CDs and DVDs. The CFSA can selectively block or allow copying for specified devices or network locations and, if required, apply policy based on a file’s text content or properties.
The CFSA can also scan the local hard disk and apply policy triggers based on a file’s content or properties.
Print System Agent (CPSA)
The Client Print System Agent (CPSA), also known as ‘Policy on Print’, detects and controls attempts to print documents. It applies policy to the documents being printed and uses the results of policy processing to allow or block the print job. The CPSA can also disable the Print Screen button on a user’s keyboard.

Endpoint Requirements
12 Endpoint Integration Guide
Endpoint Requirements
The following are requirements for CA DLP endpoint computers:
Operating System
Microsoft Windows XP, Vista, or 7.
CA DLP endpoint agents also support 64-bit versions of these operating systems. But see the following section for details.
On XP computers, the Client File System Agent (CFSA) and Client Print System Agent (CPSA) require SP2 or later.
CA DLP endpoint agents also support Windows Server 2003 and 2008 for 'centralized application' deployments. These are deployments where users access Outlook or IE on a central server using, for example, Remote Desktop Connection or Citrix.
Note: For details about CA DLP and the Windows XP SP2 firewalls, see the Known Issues (see page 91) section.
Memory
128 MB
Disk space
Allow approximately 45 MB for the CA DLP infrastructure plus an Administration console.
You also need sufficient free disk space to store captured data in a local database. (You can purge this captured data as soon as it has been replicated to the parent server.
Email integration
■ Microsoft Outlook 2003, 2007, or 2010
■ Lotus Notes 7, 8, or 8.5
Note: We recommend to use Outlook 2010 with "Cached Exchange Mode" enabled if the CA DLP client agent is installed. Disabling Cached Exchange Mode results in increased network traffic between the Outlook client and the Exchange Server.
Browser integration
■ Microsoft Internet Explorer 7, 8, or 9
■ Integration with the Microsoft Outlook browser requires Microsoft Internet Explorer 7, 8, or 9
Note: We recommend that you disable InPrivate Browsing (see page 39) in Internet Explorer 8 and 9.
File system integration
The CFSA requires Windows XP SP2 or later.

Before Installing on Client Machines
Chapter 1: Endpoint Deployment 13
Print integration
Before you install the CPSA, close any applications that are running.
For details, see Before Installing on Client Machines (see page 13).
Consoles
To run the Administration console or Data Management console, you require:
■ Microsoft Windows 2003, XP, Vista or 7
■ Microsoft Internet Explorer 7, 8, or 9
Note: If you are installing the Data Management console on Windows 2003 or XP, apply the hotfix described in the following Microsoft knowledge base article: http://support.microsoft.com/kb/950094.
Limitation of 32-bit Client.msi on 64-bit OS
When deploying a client package to a machine with a 64-bit operating system, you typically use client_x64.msi.
But if you want to use a single deployment across hosts with both 32-bit and 64-bit operating systems, you can deploy the 32-bit client.msi package to a 64-bit operating system. However, the client.msi package does not contain any 64-bit binary files. If you choose this deployment option, be aware that the following endpoint features are not supported:
■ Client File System Agent
■ Client Print System Agent
■ Integration with 64-bit version of Microsoft Outlook
■ Integration with 64-bit version of Microsoft Internet Explorer
■ Application Monitor
Before Installing on Client Machines
Before you install CA DLP endpoint agents, note the following issues.
■ Create machine accounts before installing the client software
To simplify mass deployments, you can bulk create new client machine accounts and pre-assign machines to parent servers in advance of the CA DLP rollout. This enables you to deploy multiple client machines using a single source image (which identifies a single parent server) while ensuring that each client machine automatically connects to its 'correct' parent server immediately after installation.
To bulk create new accounts, you use the Account Import feature to import the client machine details from a CSV file.

Before Installing on Client Machines
14 Endpoint Integration Guide
■ If deploying across multiple subnets
CA DLP is designed to operate across subnets. If some or all of your client machines are on a separate subnet to your CMS, computer name resolution must work in both directions.
■ CFSA requires Windows XP SP2
On Windows XP machines, the Client File System Agent requires SP2 or later.
■ Windows XP SP2 firewall
The firewall setting ‘Don’t allow exceptions’ must be turned off on the target machine. For details about CA DLP and this firewall, see the reference below.
■ Close all applications before installing CPSA
Close down all applications that support printing before installing the CPSA, such as Microsoft Office applications. This ensures that the CPSA can detect print jobs sent from these applications. (If an application is already running when you install the CPSA, it will be unable to detect print jobs sent subsequently from that application.)
If you anticipate your users printing .EMF files (a Windows graphics file format) directly from Windows Explorer, you must restart the client machine after installing the CPSA to ensure that it can fully control attempts to print these files.
■ Disable InPrivate Browsing in Internet Explorer
Internet Explorer 8 and 9 have a safety feature that disables IE extensions when InPrivate Browsing is enabled. Because the CA DLP Internet Explorer endpoint agent is an IE extension, CA DLP integration with IE8 or IE9 is disabled when a user enables InPrivate Browsing on the CA DLP host computer.
We therefore recommend that you disable InPrivate Browsing (see page 39).
More information:
Firewall Configuration on Windows XP SP2 and 2003 SP1 (see page 91)

Client Machines - Manual Installations (setup.exe)
Chapter 1: Endpoint Deployment 15
Client Machines - Manual Installations (setup.exe)
To manually install CA DLP endpoint agents
1. Verify that you have local administrator rights on the endpoint computer.
2. Find setup.exe in the root of your CA DLP distribution image. Run setup.exe to launch the CA DLP installation wizard.
The Installation Type screen opens.
3. Click Advanced Installation.
4. In the Advanced Install Options screen, choose Endpoint Agents and then click Install.
This launches the CA DLP client installation wizard in a separate window.
5. In the client installation wizard, navigate to the Custom Setup screen.
6. In the Custom Setup screen, select the components you want to install. If you choose:
■ File System Agent, you must configure your machine policies and user policies after installing.
■ Print System Agent, you must close down all applications before installing the agent.
To install these components to a different location, click Change.
To check whether the target volumes have sufficient free disk space for the selected components, click Disk Space.
Important! If you install to a different location, the target path must not include folders whose names contain Far Eastern characters. The CA DLP infrastructure cannot handle these paths.
7. In the Connectivity screen:
a. Choose the Enterprise Mode option. This installs the client machine as part of a general CA DLP deployment. You now need to specify the parent server.
Note: Standalone Mode is described on Standalone installations.
b. Enter the name or IP address of the parent server (either your CMS or a gateway server). The installation wizard tries to confirm that the specified server exists on the network. It does not check whether it is a valid CMS or gateway. If you specify the CMS or gateway by name instead of IP address, the client machine must be able to resolve this name.
c. If the installation wizard is unable to connect to the specified parent server, for example, because it is not switched on or because you mistyped its address or name, the wizard adds a Bypass Server Validation check box to the screen when you click Next.

Post-Installation Tasks
16 Endpoint Integration Guide
In this situation, either re-enter the correct parent server details or select this check box to bypass or skip the validation. If you choose to bypass the validation, make sure you correctly type the parent server name or IP address otherwise the installation will fail!
8. In the Service Accounts screen, specify the logon accounts used by the CA DLP service. By default, the infrastructure logs on using LocalSystem.
9. In the final wizard screen, click Install to start the file transfer.
10. Perform any necessary post-installation tasks before you start using CA DLP. See the reference below.
More information:
Client Installation Features (see page 10) Server Name Resolution (see page 16)
Server Name Resolution
When you deploy CA DLP to client machines, you will need to identify its parent server (the CMS or gateway) by name or IP address. If you specify the CMS or gateway by its name, you must ensure that the client machines can resolve this name. If they cannot do so, they will be unable to locate it. Choose a method of computer name resolution that suits the needs of your organization, for example, DNS or a WINS server.
Post-Installation Tasks
More information:
Customize the Intervention Dialog Banner (see page 17)

Post-Installation Tasks
Chapter 1: Endpoint Deployment 17
Customize the Intervention Dialog Banner
(Optional) The endpoint intervention dialog displays a built-in banner with the CA Technologies logo. After installation, you can customize the banner image to display your company logo. The custom image can be in PNG, JPG, or BMP format. The recommended size is 419 pixels wide by 42 pixels high, but the dialog auto-adjusts to images with any widths within 402 and 800 pixels.
You can override the built-in dialog banner either by configuring the registry or by providing a file named CustomBanner.png. If the registry override is misconfigured, the built-in banner is used.
To use a custom image, do one of the following:
■ Specify the path to the custom image, including filename, in the CustomBannerPath (REG_SZ) setting under both of the following keys. Create the key if it does not exist yet.
32-bit: HKEY_LOCAL_MACHINE\Software\ComputerAssociates\CA
DLP\CurrentVersion\Userprocess
64-bit: HKEY_LOCAL_MACHINE\Software\Wow6432Node\ComputerAssociates\CA
DLP\CurrentVersion\Userprocess
■ Name the image file CustomBanner.png and place it in both the <WGNINSTALDIR>\client folders:
32-bit: C:\Program Files (x86)\CA\CA DLP\client\
64-bit: C:\Program Files\CA\CA DLP\client\

Uninstalling Client Machines
18 Endpoint Integration Guide
Uninstalling Client Machines
Use the Add/Remove Programs applet to manually uninstall CA DLP from a machine. This applet is part of the Control Panel.
To uninstall using Add/Remove Programs
1. In the Add/Remove Programs screen:
Windows XP: Select ‘CA DLP Client’ and click Change.
Note: If you click Remove instead, you do not get the option to keep the database (see step 3).
2. When the Installation Wizard starts, go to the Program Maintenance screen.
Choose Remove to uninstall CA DLP from the current machine.
3. In the Remove the Program screen, you can choose to keep or remove the local database.
If you choose to keep the database, you can reconnect to it when you reinstall CA DLP. Simply re-enter the user name and password for a valid database account when you next run the installation wizard.
4. The wizard now has all the information it needs and begins the uninstall immediately.
Command Line Operations
More information:
Installing with msiexec.exe (see page 18) Uninstalling Client Machines (see page 20)
Installing with msiexec.exe
When using command lines to install CA DLP on client machines, you can use parameters to identify the parent server and specify a silent installation. You can also use transforms to prevent unauthorized uninstallations and install CA DLP Application Integration.
More information:
Identifying the Parent Server (see page 19) Silent Installations (see page 19) Other Available Transforms (see page 19)

Command Line Operations
Chapter 1: Endpoint Deployment 19
Identifying the Parent Server
When using command lines to install CA DLP on client machines, there are two possible methods for identifying the parent server (either the CMS or a gateway):
■ Using a property
The basic command line syntax for an installation is:
msiexec /i <Path>\client.msi WGNPARENTSERVERNAME=<Server>
Where <Server> is the name or IP address of the parent server. You can find details about the WGNPARENTSERVERNAME general variable in Command line parameters for Msiexec.exe.
■ Using the SetParentName.mst transform
You can use this transform file to identify the parent server. To create this transform, you run a provided script. Full instructions are given on Prevent automatic start-up: DisableAutostart.mst. The command line syntax is:
msiexec /i <Path>\client.msi TRANSFORMS=SetParentName.mst
Silent Installations
Various msiexec.exe options let you specify silent or near-silent installations (or uninstallations). Full instructions are given in Command line parameters for Msiexec.exe.
For example, to specify a completely silent installation that requires no user interaction, the syntax is:
msiexec /i <Path>\client.msi /qn
Other Available Transforms
If necessary, you can use the ClientLockDown.mst transform to prevent users from uninstalling CA DLP with the Add/Remove Programs utility. The command line syntax is shown below.
msiexec /i <Path>\client.msi TRANSFORMS=ClientLockDown.mst
Command Line Operations
20 Endpoint Integration Guide
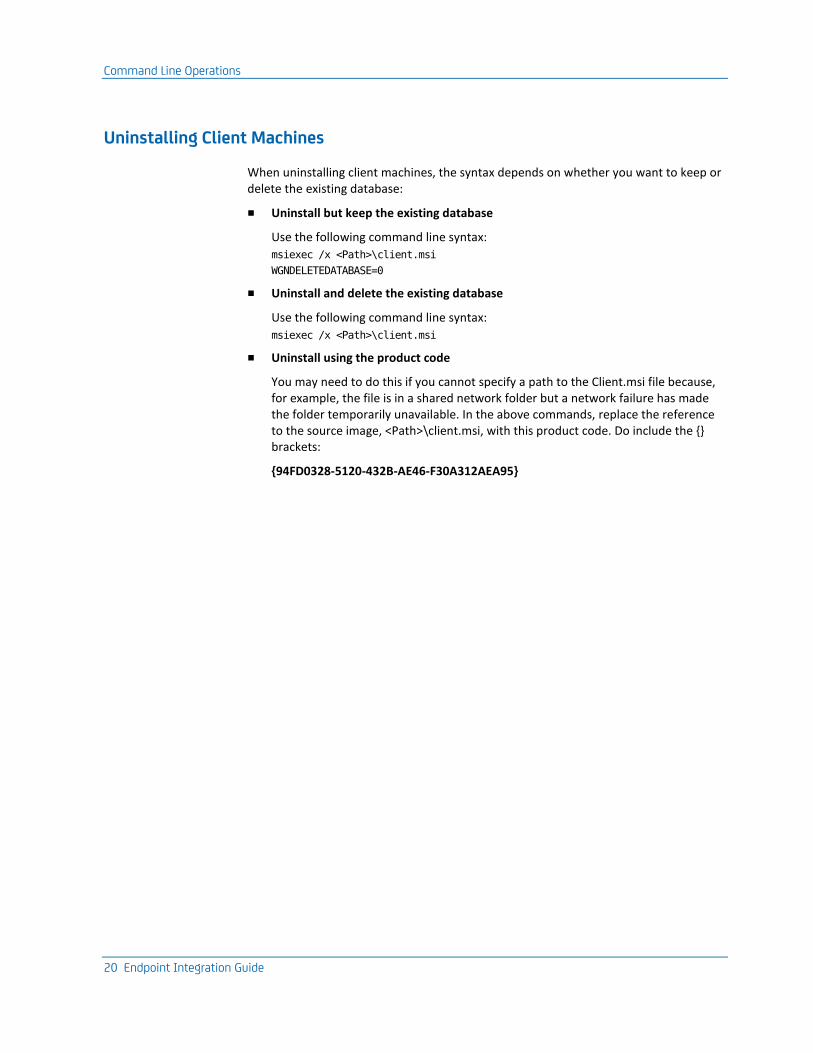
Uninstalling Client Machines
When uninstalling client machines, the syntax depends on whether you want to keep or delete the existing database:
■ Uninstall but keep the existing database
Use the following command line syntax:
msiexec /x <Path>\client.msi
WGNDELETEDATABASE=0
■ Uninstall and delete the existing database
Use the following command line syntax:
msiexec /x <Path>\client.msi
■ Uninstall using the product code
You may need to do this if you cannot specify a path to the Client.msi file because, for example, the file is in a shared network folder but a network failure has made the folder temporarily unavailable. In the above commands, replace the reference to the source image, <Path>\client.msi, with this product code. Do include the {} brackets:
{94FD0328-5120-432B-AE46-F30A312AEA95}

SMS Operations
Chapter 1: Endpoint Deployment 21
SMS Operations
Note: CA DLP deployment has been tested using SMS 2.0 SP3 in conjunction with Windows 2000 SP2. CA DLP may deploy successfully using other versions of SMS and under other service packs, but these have not been tested.
You can remotely deploy CA DLP to client machines using Microsoft Systems Management Server (SMS). When deploying CA DLP using SMS, you base the deployment on a collection of machine accounts. Then you set up a software installation package for this collection. We recommend that you set up the package to use a scheduled, mandatory assignment; this ensures that CA DLP is installed to the client machines at the time when you want.
The SMS installation procedure comprises the following steps
1. Select a machine-based collection.
2. Create a new software installation package.
3. Specify the package folder containing the source files.
4. Define an installation program.
5. Choose the machines to act as package distribution points.
6. Create an advertisement containing the assignment schedule.
7. Deployment start time is defined by the assignment schedule.
These steps are described in the following sections.
SMS Operations
22 Endpoint Integration Guide
Before Installing with SMS
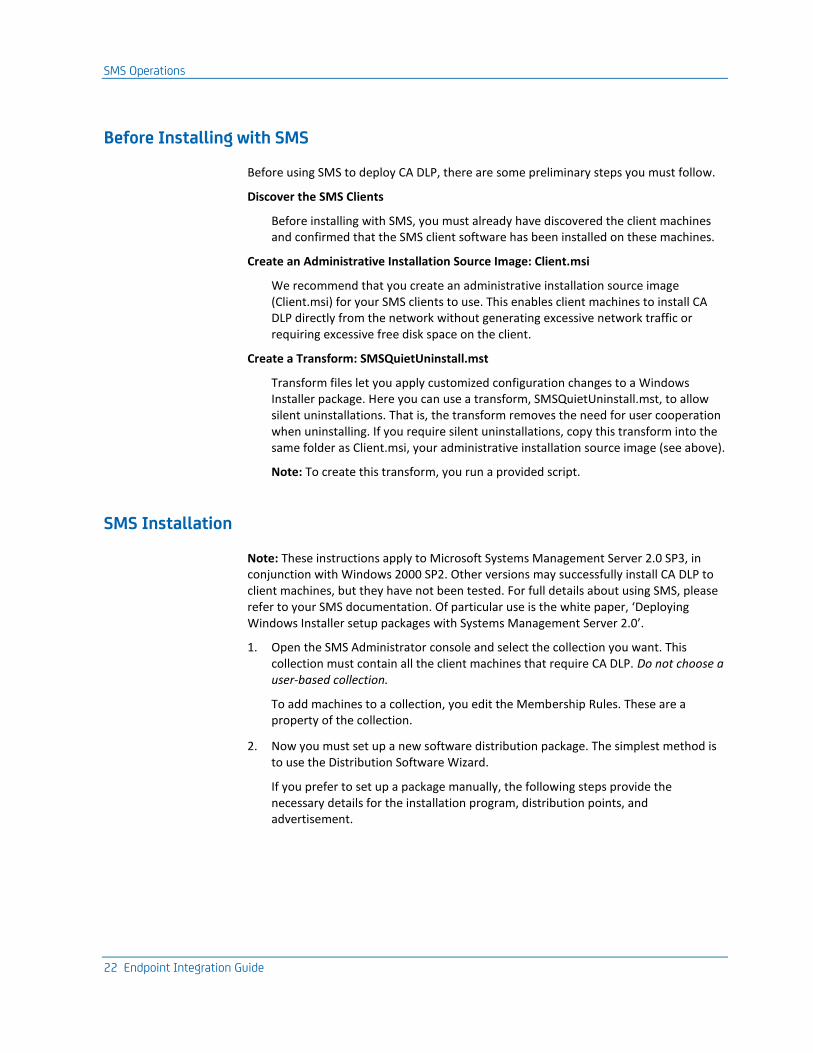
Before using SMS to deploy CA DLP, there are some preliminary steps you must follow.
Discover the SMS Clients
Before installing with SMS, you must already have discovered the client machines and confirmed that the SMS client software has been installed on these machines.
Create an Administrative Installation Source Image: Client.msi
We recommend that you create an administrative installation source image (Client.msi) for your SMS clients to use. This enables client machines to install CA DLP directly from the network without generating excessive network traffic or requiring excessive free disk space on the client.
Create a Transform: SMSQuietUninstall.mst
Transform files let you apply customized configuration changes to a Windows Installer package. Here you can use a transform, SMSQuietUninstall.mst, to allow silent uninstallations. That is, the transform removes the need for user cooperation when uninstalling. If you require silent uninstallations, copy this transform into the same folder as Client.msi, your administrative installation source image (see above).
Note: To create this transform, you run a provided script.
SMS Installation
Note: These instructions apply to Microsoft Systems Management Server 2.0 SP3, in conjunction with Windows 2000 SP2. Other versions may successfully install CA DLP to client machines, but they have not been tested. For full details about using SMS, please refer to your SMS documentation. Of particular use is the white paper, ‘Deploying Windows Installer setup packages with Systems Management Server 2.0’.
1. Open the SMS Administrator console and select the collection you want. This collection must contain all the client machines that require CA DLP. Do not choose a user-based collection.
To add machines to a collection, you edit the Membership Rules. These are a property of the collection.
2. Now you must set up a new software distribution package. The simplest method is to use the Distribution Software Wizard.
If you prefer to set up a package manually, the following steps provide the necessary details for the installation program, distribution points, and advertisement.
SMS Operations
Chapter 1: Endpoint Deployment 23
3. Create a new package and define its Data Source properties.
■ Select the folder containing your administrative installation source image.
■ Choose the option ‘Always obtain files from source directory.’ This permits you to change or update the source files in the administrative installation folder if necessary.
4. Create a new program for the package and define its properties:
a. General: Enter the following program command line. This includes properties that identify the CMS or gateway server and apply a transform:
msiexec /i <Path>\client.msi WGNPARENTSERVERNAME=<CMS>
TRANSFORMS=SMSQuietUninstall.mst; ClientLockDown.mst; EnableAppmon.mst
Note: Command line options for Msiexec.exe are defined on Command line parameters for Msiexec.exe.
When you enter the program command line, note the following:
■ If you specify the CMS or gateway by name, you must ensure that the client machines can resolve its name.
■ If you will require silent uninstallations, you must include the SMSQuietUninstall.mst transform in the installation program.
■ If you want to prevent users from uninstalling CA DLP with the Add/Remove Programs utility, include the ClientLockDown.mst transform. Full instructions are given in Prevent automatic start-up: DisableAutostart.mst.
■ If you want to enable application integration (this enables CA DLP to monitor usage of desktop applications) include the Appmon.mst transform. Full instructions are given in Install application integration: EnableAppmon.mst.
b. Environment: Specify when the program can run: Choose the option ‘Whether or not a user is logged on’.
c. Advanced: Specify the uninstall settings: Select the check box ‘Remove software when no longer advertised’, and enter the following registry key (the ‘product code’). Do include the {} brackets:
{94FD0328-5120-432B-AE46-F30A312AEA95}

SMS Operations
24 Endpoint Integration Guide
d. Now define the program distribution points for the package you created in step 2. These are the source machines from which SMS distributes the installation files contained within the package. To do this, use the New Distribution Points wizard:
Systems Management Server
- Site Database
+ Site Hierarchy
+ Collections
- Packages
- CA DLP Packages
Access Points
Distribution Points
Programs
- Advertisements
- Product Compliance
SMS Tree, Package distribution points and Advertisement
5. Now set up the package advertisement. First, define the General properties. You must select the Package (see step 2), the Program (step 4), and the Collection (step 1):
Advertisement Properties dialog, General tab

SMS Operations
Chapter 1: Endpoint Deployment 25
6. Next, define the advertisement Schedule properties. These specify when the package is advertised to SMS clients. We recommend that you schedule a Mandatory Assignment to ensure that CA DLP is installed on the target clients.
Advertisement Properties dialog, Schedule tab
7. When the advertisement is complete, SMS deploys CA DLP to the target clients as scheduled. Just before deployment, SMS warns users on the target machines that an installation is imminent.
8. As soon as the installation has completed, users must restart their browser, e-mail and other applications for the CA DLP integration features to start.
Note: Before you start using CA DLP, there are things you must do first.
More information:
Before Installing with SMS (see page 22) Server Name Resolution (see page 16) SMS Uninstallation (see page 26)

Snapshot Operations
26 Endpoint Integration Guide
SMS Uninstallation
You can perform a standard uninstallation or a silent uninstallation.
Standard Uninstallation
You can use SMS to uninstall CA DLP from a client machine. Simply remove the machine account from the CA DLP collection. To do this, you edit the membership rules; these are a property of the collection. SMS then immediately uninstalls CA DLP from the target machines. If a browser or email application is open on a target machine, the uninstall goes ahead but does not complete until the user closes the application.
Silent Uninstallation
If you want to uninstall CA DLP silently, you must specify the SMSQuietUninstall.mst transform in the program command line when you set up the installation package. This transform removes the need for user cooperation when uninstalling.
More information:
SMS Installation (see page 22) Before Installing with SMS (see page 22)
Snapshot Operations
This method involves taking a snapshot image of a CA DLP installation on a source machine, then transferring this image to multiple target machines (using a third-party tool).
There is no single term to describe this deployment method (or its variants). Other common names include ghost imaging, ghosting, disk-imaging and cloning, while the snapshot images themselves are also called wraps, wrappers or packages.
Snapshot installations break down into a six step procedure:
1. Prepare the source machine for a CA DLP installation.
2. Using your preferred software tool, create a baseline image of your source machine.
3. Install CA DLP.
4. Generate a snapshot image, based on the changes made by the installation wizard.
5. (Optional) To simplify any follow-up snapshots, we recommend you create and save a new baseline image at this stage.
6. Deploy the CA DLP snapshot image to your target machines.
These steps are described in the following sections.

Snapshot Operations
Chapter 1: Endpoint Deployment 27
More information:
Snapshot Considerations (see page 31)
Snapshot Installation
This section covers the general procedure for snapshot installations. The basic procedure is the same, regardless of which third-party tool you use. However, the exact procedure for generating the snapshot image will naturally vary depending on the tool.
Note: The snapshot image used when testing these instructions was a RapidInstall Package (RIP), created with Altiris RapidInstall 3.1. You may find other third-party tools to be equally effective but these have not been tested.
1. Prepare the source machine
Some pre-configuration of the source machine is necessary to ensure that the final snapshot image contains the correct CA DLP installation information.
a. Run the DisableAutostart.vbs script to generate the DisableAutostart.mst transform.
Find this script in the \Support folder of the CA DLP distribution image.
The transform prevents CA DLP starting automatically after installation. This is necessary to prevent your source machine starting the CA DLP service automatically after step 5.
b. Run the following command:
msiexec /i <path to client.msi> TRANSFORMS=<path to DisableAutostart.mst>
Where client.msi is your administrative source image for client machines. Find a copy of client.msi in the \Windows folder in your CA DLP distribution image>.
For details about DisableAutostart.mst and the TRANSFORMS property in Msiexec.exe commands, see the references at the end of this section.
2. Create a baseline image
Using your preferred snapshot tool, create a baseline image of your source machine. This is an image of the machine before CA DLP has been installed.
For example, if you are using RapidInstall 3.1, you can now set a baseline using the Altiris RIP creation wizard. Proceed to the Installing Applications screen, then stop and create a baseline image.
Snapshot Operations
28 Endpoint Integration Guide
3. Install CA DLP on the source machine
a. Launch the CA DLP installation wizard. To do this, run setup.exe in your CA DLP distribution image.
b. In the Installation Type screen, choose Advanced Installation.
c. In the Advanced Install Options screen, choose Endpoint Agents and then click Install.
This launches the CA DLP client installation wizard in a separate window.
d. In the Connectivity Screen, enter the name or IP address of the parent server.
Alternatively, if you want a generic snapshot that can be easily customized and reused to install clients to different parent servers, you can enter a ‘placeholder’ IP address and select the Bypass Validation check box. This approach allows you to deploy several versions of the snapshot (for example, one for each department in your organization), with each version specifying a different gateway as the parent server.
Note: The placeholder address can be the address of any real machine that is not a CMS or gateway server. You must specify a real machine, otherwise the installation will fail and the snapshot will be incomplete.
e. The installation wizard now has all the information it needs. Click Install to start the file transfer. When this completes, go to step 4.
4. Create a snapshot image of the CA DLP installation
Create a snapshot image of the changes made by the CA DLP installation wizard.
For example, if you are using RapidInstall 3.1, you can resume the Altiris RIP creation wizard and proceed to the Build RIP screen.
Typically, third-party tools let you configure the snapshot image, for example, to automatically reboot the target system after installation. Now is the time to configure the snapshot to meet your deployment requirements.
5. Create a follow-up baseline image
If you anticipate a future need for follow-up snapshot images (for example, to install CA DLP features omitted from the original snapshot), we recommend you now create and save a follow-up baseline image at this stage. This is an image of the source machine after CA DLP has been installed. You can then retrieve and use this baseline to generate future follow-up snapshots.

Snapshot Operations
Chapter 1: Endpoint Deployment 29
6. Deploy the CA DLP snapshot
To deploy the snapshot to your target client machines, choose any method that best suits your organization. For example, you can attach the snapshot to an e-mail and send it to your users; you can save the snapshot to a shared network location; or you can include it in a login script. However:
■ If you specified the actual parent server in step 2, no further steps are required. The snapshot is ready to be installed.
■ If you used a placeholder IP address in step 2, you (or the target users) must now modify the snapshot to replace the ‘placeholder’ address with the actual parent server. To do this, locate the startup.properties file once again. This is in the \System subfolder of the CA DLP installation folder. Find this line:
default.parent=<placeholder parent>
Where <placeholder parent> is the name of the machine whose IP address you specified in step 2. Now change this line to:
default.parent=<actual parent>
Where <actual parent> is the name or IP address of your CMS or a gateway server. See the previous column for an example file extract.

Snapshot Operations
30 Endpoint Integration Guide
Follow-up Snapshot Installations
If required, you can deploy follow-up snapshot images to machines already running CA DLP. For example, if you initially chose not to deploy the Application Integration feature to client machines, you could configure a follow-up snapshot to have the additive, or cumulative, effect of installing Application Integration on top of existing CA DLP installations. The procedure is summarized opposite:
The basic idea is straightforward: On your source machine, you rerun the CA DLP installation wizard on your source machine and choose any new features you want; you then create and deploy a follow-up CA DLP snapshot. In detail, you must:
1. Specify the follow-up baseline image
Using your preferred snapshot tool, start creating a new snapshot image. First, specify the baseline image.
To ensure the follow-up snapshot only contains the latest modifications by the CA DLP installation wizard, you must generate the snapshot from a baseline image of your source machine immediately after the original CA DLP installation. This is why we recommend that you create and save a follow-up baseline image directly after creating the original snapshot. However, if you need to recreate this baseline, you must:
a. Rebuild your source machine.
b. Rerun the original CA DLP installation (step 5, If you want to customize the CA DLP installation, (for example, omitting the CA DLP consoles), do so in the Custom Setup screen; see step 3 in Manual installations (setup.exe).).
c. Create a new baseline image.
2. Modify the original CA DLP installation
Rerun the installation wizard and choose the new features you want to add (or the features you want to uninstall).
3. Create a follow-up snapshot
Using your preferred snapshot tool, create a snapshot image of the changes made by the CA DLP installation wizard.
Unlike the original snapshot, this time you do not need to edit startup.properties.
4. Deploy the follow-up snapshot
Now deploy the snapshot to your target client machines, using any method that best suits your organization.
More information:
Client Installation Features (see page 10)

Integration with Centralized Applications
Chapter 1: Endpoint Deployment 31
Snapshot Considerations
If you use snapshot deployment methods, we recommend that you generate a snapshot image on a source machine that has the same configuration as the target client machines. Specifically, the source machine must have the same operating system and same email application as the target machines.
Likewise, for Microsoft Outlook and Lotus Notes the source and target machines must use the same version of email application. For example, if the target client machines use Microsoft Outlook 2007, we recommend that the source machine is running Microsoft Outlook 2007 when you generate the baseline image.
Integration with Centralized Applications
CA DLP can integrate with centralized applications running on a terminal server or accessed through a Citrix application server product.
Citrix Integration
More information:
Citrix Requirements (see page 32) Command Line Installation for Citrix Endpoint Agent with SQL Server Database (see page 33)

Integration with Centralized Applications
32 Endpoint Integration Guide
Citrix Requirements
We have tested the following Citrix configuration.
Note: CA DLP may integrate successfully under other configurations, but they have not been tested.
Citrix Server
Product
Citrix MetaFrame XP Application Server for Windows, version 1.0 with Service Pack 2 and Feature Release 2.
Applications
Microsoft Internet Explorer 8 (8.0.6001.18702)
Microsoft Excel and Outlook 2007 SP2 (12.0.6425.1000)
Database
Microsoft SQL Server 2005 (we recommend SP2)
Microsoft SQL Server 2005 Express Edition
Microsoft SQL Server 2008
Note: Microsoft Jet is not a suitable database engine for CA DLP agents on Citrix servers.
Command Line Installation for SQL Server Databases
To configure CA DLP endpoint agents on a Citrix server to use a SQL Server database, run a command line installation.
The command line must use database variables to specify such parameters as the database type and name and the primary user credentials. See the next section for an example command.
Client Machines
Operating System
Windows 2003 Professional

Integration with Centralized Applications
Chapter 1: Endpoint Deployment 33
Command Line Installation for Citrix Endpoint Agent with SQL Server Database
To configure CA DLP endpoint agents on a Citrix server to use a SQL Server database, run the following msiexec.exe command in restricted UI mode:
msiexec /i c:\client.msi
WGNPARENTSERVERNAME=<parent>
WGNDATABASETYPE=MSSQL
WGNDATABASESERVER=localhost
WGNDBPRIMARYUSERNAME=WGNUSER
WGNDBPRIMARYPASSWORD=<password>
WGNDBPRIMARYCREATEACCOUNT=1
WGNDBSEARCHUSERNAME=WGNSEARCH
WGNDBSEARCHPASSWORD=<password>
WGNDBSEARCHCREATEACCOUNT=1
WGNDBADMINUSERNAME=sa
WGNDBADMINPASSWORD=<password> /qb
Where WGNDBADMINUSERNAME is the name of a database administrator login. For SQL Server databases, this login is typically 'sa'.
Note: Full msiexec.exe instructions and variable descriptions are available in the 'Technical Information' chapter of the Platform Deployment Guide.
Lotus Notes Integration
At install time, CA DLP modifies users’ notes.ini configuration files to include the CA DLP Notes client agent as a Notes add-in. However, when Notes is running as a centralized application on a terminal server or accessed via Citrix, CA DLP is not always able to locate and update the relevant notes.ini files. If this problem is not addressed, this can mean that CA DLP integration fails for some Notes users, and that their Notes email activity is not monitored.
More information:
Updating notes.ini (see page 34) Integration with a New Notes Installation (see page 34) Integration with Existing Notes Installations (see page 34)

Integration with Centralized Applications
34 Endpoint Integration Guide
Updating notes.ini
To ensure that Notes integration operates correctly, you must ensure that each user’s copy of notes.ini is updated to reference wgnemno.dll. Specifically, you must add this line:
EXTMGR_ADDINS=wgnemno.dll
Integration with a New Notes Installation
If you are deploying a centralized Notes installation for the first time, CA DLP amends the ‘base instance’ of notes.ini. You must then copy this base instance to all users’ home drive (as recommended by IBM—see the note below).
1. Run a shared installation of Notes on the terminal server or Citrix server.
2. Install the CA DLP Notes client agent on the terminal server or Citrix server.
3. CA DLP uses the Path registry value to locate and edit the ‘base instance’ notes.ini. You do not need to manually update notes.ini to reference the wgnemno.dll add-in (see above).
Find this registry value in the following registry key on the terminal server or Citrix server:
HKEY_LOCAL_MACHINE\Software\Lotus\Notes\6.0
4. Copy the base instance notes.ini to each user’s home drive.
Note: For Terminal Services and Citrix MetaFrame implemented on IBM Netfinitity Servers, IBM provide recommended installation procedures for Lotus Notes. For details, visit www.redbooks.ibm.com.
Integration with Existing Notes Installations
If you have already deployed a centralized Notes installation, you must install the CA DLP Notes client agent on the terminal server or Citrix server and then update each user’s copy of notes.ini to reference the wgnemno.dll add-in (see above). You can do this manually or, more likely, by some automated method.

Chapter 2: Group Policy Deployments 35
Chapter 2: Group Policy Deployments
This section describes how to deploy CA DLP to endpoint computers by using Windows Group Policy.
This section contains the following topics:
Group Policy Operations (see page 35) Before Installing with Group Policy (see page 36) Group Policy Installation (see page 39) Group Policy Uninstallation (see page 41)
Group Policy Operations
You can remotely deploy CA DLP to endpoint computers by using Group Policy. Using this method, you must assign to computers; you must not assign to users.
Note: We recommend using the ‘Assigned’ deployment method because, unlike the ‘Published’ method which requires user cooperation, the ‘Assigned’ method enables you to enforce deployment.
The Group Policy installation procedure comprises the following steps
1. Select an organizational unit (OU) containing the machine accounts.
2. Create a new group policy object (GPO) to control the software installation package.
3. Filter the GPO security properties so they apply to the target machines.
4. Define the GPO package properties, including the MSI installation file, the deployment method (‘Advanced assigned’), deployment options, and the MST transform file.
5. Deployment starts as soon as the client machines restart.
These steps are described in the following sections.

Before Installing with Group Policy
36 Endpoint Integration Guide
Before Installing with Group Policy
Before using Group Policy to deploy CA DLP endpoint agents, you must:
1. Create an administrative installation source image.
2. Create a Windows Installer transform file to specify the name of the parent CMS or gateway server.
3. Extract the source images for the Microsoft Visual C Runtime Libraries.
4. (Recommended) Disable InPrivate Browsing for Internet Exploter.
These steps are described in the following sections.
More information
Create an Administrative Installation Source Image (see page 36) Create a Transform: SetParentName.mst (see page 37) Extract the Source Images for the Microsoft Visual C Runtime Libraries (see page 38) Disable InPrivate Browsing for Internet Explorer (see page 39)
Create an Administrative Installation Source Image
To deploy CA DLP to client machines using command-line methods or managed methods such as Group Policy, we recommend that you first perform an administrative installation to your network. This enables client machines to install CA DLP directly from the network without generating excessive network traffic or requiring excessive free disk space on the client.
The administrative installation installs a source image of CA DLP onto the network in a target folder that you specify. The source image is called Client.msi. Store this source image in a network folder that all the target client machines can access.
To perform an administrative installation
Use the /a command-line option for Msiexec.exe.
■ The syntax to create an administrative image for 32-bit client machines is:
msiexec /a <Path>\client.msi
■ The syntax to create an administrative image for 64-bit client machines is:
msiexec /a <Path>\client_x64.msi
Note: See your Microsoft documentation for details about administrative installations.

Before Installing with Group Policy
Chapter 2: Group Policy Deployments 37
Create a Transform: SetParentName.mst
Transform files let you apply customized configuration changes to a Windows Installer package. CA DLP typically provides scripts to create several useful transforms. Find the scripts to generate transforms in the \Support folder of your CA DLP distribution media.
For script-generated transforms, you must copy the script into the same folder as your administrative installation source image, Client.msi or Client_x64.msi. You need write access to this folder. You run the script by double-clicking it in Windows Explorer. The script generates the transform for the administrative installation source image.
Note: If no script is provided, you can obtain the transform from CA Support at http://ca.com/support.
.
For a Group Policy installation, you can use a transform to identify the name or IP address of the CMS or gateway that the client machines connect to.
To create the SetParentName.mst transform
1. Find this script in the \Support folder of your CA DLP distribution media:
CreateParentNameTransform.vbs
2. Copy the script into the folder containing your administrative installation source image.
3. When you run the script, it prompts you for the name or IP address of the CMS or gateway and creates the transform file SetParentName.mst.
Note: If you specify the CMS or gateway by name, you must ensure that the client machines can resolve its name (see Server name resolution).

Before Installing with Group Policy
38 Endpoint Integration Guide
Extract the Source Images for the Microsoft Visual C Runtime Libraries
The CA DLP distribution image includes two Visual C runtime libraries, vcredist_x86.exe and vcredist_x64.exe. These libraries must be present on the host machines before you can install CA DLP. If you need to include these libraries in your Group Policy deployment, you first must extract the 'double wrapped' .msi images and .cab files from the executables.
To extract the source image
1. Find vcredist_x86.exe and vcredist_x64.exe in the \redist folder of the CA DLP distribution image.
2. Extract the vcredist.msi and vcredis1.cab files.
a. (All endpoint computers) Run this command and accept the license agreement:
vcredist_x86.exe /C /T:<path to output folder #1>
Where 'output folder #1' is the target folder for the extracted 32-bit source image.
b. (64-bit endpoint computers only) Run this command and accept the license agreement:
vcredist_x64.exe /C /T:<path to output folder #2>
Where 'output folder #2' is a second target folder for the extracted 64-bit source image.
3. Copy these extracted files to the same location as the Client.msi file that you created as part of your administrative installation source image.

Group Policy Installation
Chapter 2: Group Policy Deployments 39
Disable InPrivate Browsing for Internet Explorer
Internet Explorer 8 and 9 have a safety feature that disables IE extensions when InPrivate Browsing is enabled. Because the CA DLP Internet Explorer endpoint agent is an IE extension, CA DLP integration with IE8 or IE9 is disabled when a user enables InPrivate Browsing on the CA DLP host computer.
To prevent users from circumventing CA DLP control, we recommend that you use a Windows Group Policy to disable InPrivate Browsing on your users' workstations and laptops.
Follow these steps:
1. Launch the Local Group Policy Editor by typing "gpedit.msc" in the Run box.
2. Browse to the following category:
Computer Configuration\Administrative Computer Configuration\
Administrative Templates\Windows Components\Internet Explorer\InPrivate
3. Enable 'Turn off InPrivate Browsing '.
Group Policy Installation
For a Group Policy installation, select an appropriate Active Directory organizational unit (OU) that contains the target computer. Then define a group policy object (GPO) that contains a software installation package. As soon as the GPO is created, CA DLP is deployed to the target computers when they next reboot.
Note: For full details about Group Policy, refer to your Windows documentation.
To deploy using Group Policy
1. Open Active Directory Users and Computers.
Find this application in the Administrative Tools folder.
2. Select an organizational unit (OU).
This OU must contain computers targeted for CA DLP deployment (because you will base the GPO on computer accounts, not user accounts).
3. Create the GPO based on the Group Policy properties of your chosen OU, for example, ‘CA DLP Rollout’.
4. Edit the GPO Security settings to specify which machine accounts the GPO applies to.
For each target computer, enable the Apply Group Policy permission.

Group Policy Installation
40 Endpoint Integration Guide
5. Create a new software installation package for the GPO Computer Configuration (this is a Group Policy property of the OU).
This installation package enables you to assign the software forcibly to target computers.
CA DLP Rollout Policy
- Computer Configuration
- Software Settings
Software Installation
+ Windows Settings
+ Administrative Templates
User Configuration
GPO Computer Configuration, Software Installation
6. Configure the software installation package to point to the Client.msi file that you created as part of your administrative installation source image.
If necessary, configure the package to point to the .msi files for the unwrapped Visual C runtime libraries (see the previous section).
7. Define the properties of the installation package.
a. Deployment method: When prompted, click the ‘Advanced assigned’ method. You must select this method so that you can apply modifications to the package—see step 7.c.
b. Deployment options: If you need the ability to:
■ Selectively uninstall CA DLP from client machines (see the Group Policy Uninstallation section), select the option Uninstall this application when it falls out of the scope of management.
■ Forcibly overwrite any existing versions of CA DLP on client machines, select the advanced option 'Remove previous installations of this product from computers if the product was not installed by Group Policy-based software installation'.
c. Modifications: Specify the following transforms:
■ SetParentName.mst: This transform is essential! It enables the installation package to identify its nominated parent server correctly.
Note: Without this transform, client machines cannot identify their parent server and CA DLP fails to install.
■ Appmon.mst: (Optional) By default, a GPO installation performs a ‘Typical’ setup, which excludes CA DLP application integration. But you can specify this transform to install application integration.
Note: Application integration enables CA DLP to monitor usage of desktop applications.
■ ClientLockDown.mst: (Optional) This transform prevents users from uninstalling CA DLP with the Add/Remove Programs utility.

Group Policy Uninstallation
Chapter 2: Group Policy Deployments 41
8. The GPO is now complete.
CA DLP is deployed to the target client machines automatically when they next reboot.
More information:
Before Installing with Group Policy (see page 36) Group Policy Uninstallation (see page 41)
Group Policy Uninstallation
If you installed CA DLP to a client machine using Group Policy, we recommend that you uninstall using Group Policy.
To do this, go to Active Directory Users and Computers and edit the GPO Security settings (see Group Policy Installation, step 4). For each client machine, remove the Apply Group Policy permission. CA DLP is uninstalled automatically when the client machine next reboots. Alternatively, delete the entire GPO. CA DLP is uninstalled from all client machines referenced by the GPO.


Chapter 3: Client File System Agent 43
Chapter 3: Client File System Agent
This section describes the Client File System Agent (CFSA).
This section contains the following topics:
About the Client File System Agent (see page 43) Deploy the CFSA (see page 54)
About the Client File System Agent
The Client File System Agent (CFSA), also known as ‘Policy on Save’, detects and controls attempts to copy or save files to removable storage devices (such as USB flash drives) and network locations, and attempts to burn files onto writable CDs and DVDs. The CFSA can selectively block or allow copying for specified devices or network locations and, if required, apply policy based on a file’s text content or properties.
The CFSA can also scan the local hard disk and apply policy triggers based on a file’s text content or properties. For example, it can categorize files based on their text content, and delete, replace or move unauthorized files.
When Do Triggers Activate?
The CFSA supports various levels of filtering to determine whether or not a user is allowed to save a file to a removable device or network location. It can also run scheduled scans of the local hard disk.
About the Client File System Agent
44 Endpoint Integration Guide
How Does CA DLP Protect Files on Removable Devices, CDs, or Network Folders?
CA DLP can detect when a user tries to copy files to removable devices (such as USB flash drives or SD cards) and network locations (such as shared folders). It can also detect when a user tries to burn files to CD or DVD.
Opening a file on a removable device
(Optional) When the CFSA detects a user trying to open a file on a prohibited device, it displays an Access Denied message. This message typically warns users that they are barred from saving file changes. You configure the Access Denied message in the user policy.
Note: A prohibited source is any removable device or network location to which write access is denied. Write access may be denied by settings in the local machine policy or by Data In Motion triggers in the user's policy.
Copying a file to a removable device
First, the CFSA applies machine policy in real time to block unauthorized file operations. It can also apply Data In Motion triggers to analyze the file being copied. The process is summarized below and in the following flow chart (see page 46).
1. CFSA checks whether the user is using a trusted application.
Settings in the machine policy identify 'trusted applications'. If the user is using:
■ A trusted application, the CFSA allows the user to copy or save the file. No further policy is applied.
■ Any other application, the CFSA checks the handling for the removable device or network location (see step 2).
2. CFSA checks the handling for the removable device or network location.
Settings in the machine policy define the ‘handling’ for removable devices and network locations. These settings also apply to writable CD and DVD drives. The available handling options are:
Allow write access
Users can always save files to this device, CD drive or network location.
Set to read only
Users are blocked from saving files to this device, CD drive or network location.
Apply user policy
If the user is using a policy-enabled application to copy, save or burn a file, the CFSA applies Data In Motion triggers to the file or document (see step 3). If the application is not policy-enabled, the CFSA blocks the file operation.
You can also configure default handling for unrecognized devices or network locations and custom handling for ‘special devices’ and ‘special locations’.

About the Client File System Agent
Chapter 3: Client File System Agent 45
3. CFSA checks whether the user is using a policy-enabled application.
These are applications that the CFSA can integrate with to apply user policy. If a user copies or burns a file using a policy-enabled application and the device or location handling is set to ‘apply user policy’, the CFSA applies Data In Motion triggers to the file (see step 4).
Important! The only policy-enabled applications recognized by the CFSA in the current release are Windows Explorer (including drag and drop copying) and DOS commands such as copy and xcopy.
4. CFSA applies Data In Motion triggers.
Data in Motion triggers can analyze the text content to detect key phrases or to check whether the file matches a particular document classification. They can use XML Attribute data lookup commands to file attributes such as size, date created, date last modified, and the file author. Each trigger can also apply a further device filter to monitor specific removable devices.
Finally, you can configure triggers to block or allow the file operation, or to categorize the file. You can also configure triggers to encrypt sensitive files being copied to a USB drive (the user must supply a decryption password).

About the Client File System Agent
46 Endpoint Integration Guide
CFSA Flow Chart: Removable Devices, CD Drives, Network Folders
In the diagram below, a user tries to copy a file to a removable device or network location, or burn it to a CD (1). First, the CFSA checks whether the user is using a trusted application (2). If they are, it permits the file to be copied or burnt.
If the user is not using a trusted application, the CFSA checks the device, CD drive or location handling (3). If set to ‘allow write access’, file copying or burning is allowed; if it set to ‘read only’, the file is blocked.
Alternatively, if the handling is set to ‘apply user policy’, the CFSA checks whether a policy-enabled application is being used to copy or burn the file (4):
■ If so, the CFSA applies policy triggers to the file (5). If a control trigger fires (6), this determines whether to block the file operation. If no control trigger fires, the file can be copied or burnt.
■ If the user is not using a policy-enabled application, the file is blocked.

About the Client File System Agent
Chapter 3: Client File System Agent 47

About the Client File System Agent
48 Endpoint Integration Guide
How Does CA DLP Protect Files on the Local Hard Disk?
The CFSA can run scheduled scans of the local hard disk and apply Data At Rest triggers to targeted files. The process is summarized below and in the following flow chart (see page 49).
1. CFSA applies machine policy.
Settings in machine policy determine when and how often the CFSA runs a local file scan.
Other machine policy settings identify the files and folders that you want to scan. For example, you can specify local files or folders that you want to explicitly include or exclude from the scan. You can also choose to only scan files modified since the previous scan.
2. CFSA applies user policy Data At Rest triggers.
When the scan runs, CFSA applies Data At Rest triggers in the user policy.
These triggers analyze the scanned files and apply appropriate control actions. For example, they can categorize files based on their text content. They can also add smart tags to scanned items. The smart tags are either saved with the event matadata in the CMS database or, for Microsoft Office documents, you can apply smart tags to the original document.
Finally, you can configure control actions to delete, replace, or move unauthorized files, or copy scanned files to another location for further investigation.
More information:
CFSA Flow Chart: Scanned Files on Local Hard Disk (see page 49)

About the Client File System Agent
Chapter 3: Client File System Agent 49
CFSA Flow Chart: Scanned Files on Local Hard Disk
In the diagram below, a user saves a file to the local hard disk (1). When the next scheduled file scan runs, the CFSA checks machine policy to determine which files and folders to include (2) and which user policy to apply (3). Files implicitly or explicitly excluded are not scanned (4).
When the scan runs, CFSA applies Data At Rest triggers to the scanned files (5). If a control trigger fires, the CFSA applies an action to the scanned file (6). For example, they can categorize files based on their text content, and delete, replace or move unauthorized files.

About the Client File System Agent
50 Endpoint Integration Guide
How Does the CFSA Apply Policy to Protect Files?
The CFSA applies machine policy and user policy to protect your data in the following ways:
Apply machine policy when files copied to removable devices or network locations
The CFSA detects attempts to copy files onto removable devices, primarily USB flash drives, or to network locations such as shared folders, or to burn files to CD or DVD. It then applies machine policy in real time to block unauthorized saving or copying, based on the device or application being used, or the target network folder. It can also apply Data In Motion triggers to analyze files being copied—see below.
Apply Data In Motion triggers to copied files
The CFSA can apply Data In Motion triggers in real time to files being copied to removable devices or network locations or burnt to CD or DVD. To do this, it channels users into using policy-enabled applications (Windows Explorer or DOS commands) to copy or burn their files by blocking other applications.
The CFSA can then apply Data In Motion triggers based on a file’s properties or text content. It uses the results of policy processing to allow or block the copy operation, or simply to warn the user. Alternatively, you can configure Data In Motion control actions to categorize or encrypt the file being copied.
Note: Data In Motion control actions can only encrypt files being copied to removable devices. They cannot encrypt files being copied to network locations or CD.
Apply Data At Rest triggers to scanned local files
Finally, it can run scheduled scans of the local hard disk and apply Data At Rest policy to targeted files. For example, it can categorize files based on their text content, and delete, replace or move unauthorized files.
More information:
Configure the Local Machine Policy (see page 55) Data In Motion Triggers (see page 65) Data At Rest Triggers (see page 64) Which Policies Are Applied? (see page 55)

About the Client File System Agent
Chapter 3: Client File System Agent 51
Risk of Data Loss If CA DLP Blocks File Move
Symptom:
If a user moves a file (instead of copying it) from a local disk to a USB device and CA DLP blocks the file, the user may lose the file.
Reason:
If a Data In Motion trigger blocks the move operation, the CFSA deletes the file from the target USB device. At the same time, the file is no longer saved on the local disk because it was moved by the user (and the Windows operating system deleted it). Consequently, the file is now lost.
Solution:
First, educate your Windows users about this risk. These users must always copy important files to a USB device. If the copy operation gets blocked, the original file still exists on the local disk.
Second, configure the Data In Motion control action to store a copy of the blocked file in the CMS database. The control action includes a Capture Prohibited Activity? setting. Verify that this setting is True.

About the Client File System Agent
52 Endpoint Integration Guide
CFSA Terminology
Note the following terminology:
CADLPEnc.exe encryption utility
CA DLP uses this utility to encrypt and decrypt sensitive files on removable devices (such as USB drives).
When a user copies a sensitive file onto a USB drive, the encryption utility prompts for a password. CA DLP uses this password to copy an encrypted version of the file onto the removable device. CA DLP also copies the encryption utility onto the USB drive.
When the user wants to copy the encrypted file from the USB drive onto a computer, the utility prompts for the original password. This time, it uses the password to copy a decrypted version of the file onto the computer.
Encryption
The CFSA can encrypt sensitive files being copied onto removable devices such as USB drives. It uses the CADLPEnc.exe encryption utility to prompt the user for a password. It uses this password to encrypt and decrypt the file.
Encryption utility
See CADLPEnc.exe.
File system scan
You can optionally configure the CFSA to run scheduled scans of all targeted files and folders on the local hard disk. You can specify when and how often the scan runs. Machine policy settings allow you to target specific file types or folders.
Handling
This term refers to settings in machine policy that determine how the CFSA handles user attempts to copy or save files to removable devices or network locations. The available options are:
■ Allow write access: The user is allowed to copy or save files to removable devices or network locations.
■ Read only: The user is not allowed to copy or save files to removable devices or network locations unless they are using a trusted application.
■ Apply User Policy To File: If the user copies or saves a file using a policy-enabled application, the CFSA applies Data In Motion triggers to the file.
Policy-enabled applications
These are applications that the CFSA can integrate with to apply user policy. If a user copies a file using a policy-enabled application and the target handling is set to ‘Apply user policy’, the CFSA applies Data In Motion triggers to the file.
The CFSA uses a hard-coded list of policy-enabled applications; you cannot edit this list.

About the Client File System Agent
Chapter 3: Client File System Agent 53
Note: The only policy-enabled applications recognized by the CFSA in the current release are: Windows Explorer (including drag and drop copying); DOS commands such as copy and xcopy; Wordpad.exe; and Notepad.exe.
Policy handling
See handling above.
Prohibited devices
These are any removable devices to which write access is denied. Write access can be denied by settings in the local machine policy or by Data In Motion triggers in the user's policy.
Prohibited network locations
A prohibited network location is any network folder to which write access is denied by settings in the local machine policy.
Special devices or special locations
These are removable devices or network locations explicitly identified in machine policy. They can also include specified writable CD and DVD drives.
You can configure custom handling for these devices and locations. Conversely, you can configure default handling for unrecognized devices or network locations. For example, you may want to allow write access to authorized network folders but make other network locations read only.
Removable devices
These refer to any removable storage device, including USB flash drives, writable CD and DVD drives, and external hard disks. The CFSA is designed to prevent unauthorized file copying to such devices.
Trusted applications
These are applications that are exempt from CFSA control. If a user is using a trusted application to copy or save a file to a removable device or network location, they are always permitted to do so.
Note: By default, lsass.exe is included in the Trusted Application List machine policy settings for the CFSA. Do not remove this application from the machine policy! This is the Local Security Authority System Service and is needed by Windows to perform security-related functions.

Deploy the CFSA
54 Endpoint Integration Guide
Deploy the CFSA
Before you deploy the CFSA, note the minimum Service Pack requirement when installing on Windows XP machines.
To install the CFSA
1. Find setup.exe in the root of your CA DLP distribution image. Run setup.exe to launch the CA DLP installation wizard.
The Installation Type screen opens.
2. Click Advanced Installation.
3. In the Advanced Install Options screen, choose Endpoint Agents and then click Install.
This launches the CA DLP client installation wizard in a separate window.
4. In the client installation wizard, navigate to the Customer Setup screen.
5. In the Custom Setup screen, choose File System Agent.
6. In the final wizard screen, click Install to start the file transfer.
Note: The encryption utility, CADLPEnc.exe, is also installed in the CA DLP installation folder on the endpoint. The CFSA uses this utility to encrypt and decrypt files that your users copy to removable devices such as USB drives.
To configure the CFSA
See the following sections for full details. Briefly, you need to:
1. Edit the machine policy for the host machine.
2. Edit an appropriate user policy.
In particular, you need to set up Data In Motion triggers, Data At Rest triggers, and the Access Denied message.
More information:
Configure the Local Machine Policy (see page 55) Configure the User Policy (see page 64)

Deploy the CFSA
Chapter 3: Client File System Agent 55
Which Policies Are Applied?
CA DLP applies both machine policy and user policy when assessing whether to allow files to be copied to removable devices or network locations.
Machine policy
CA DLP always applies the policy for the endpoint computer hosting the CFSA. BY default, the host computer inherits the common client policy, though you can customize policy for individual endpoint computers.
User policy
When applying Data In Motion triggers to files being copied, the CFSA always applies the policy for the CA DLP user currently logged onto the computer hosting the CFSA.
When applying Data At Rest triggers during a file scan, the CFSA always applies the user policy specified by the Default Policy for Data At Rest setting. This setting is defined in the machine policy.
To quickly roll out the CFSA across multiple client machines, edit the common client policy and the default user policy (or the policy for an appropriate user group). This ensures that the relevant policy settings replicate down to your end-users and their respective endpoint computers as soon as possible. Of course, you can still customize the policies for individual machines and users as necessary.
More information:
Data At Rest Protection Folder (see page 62)
Configure the Local Machine Policy
To configure the CFSA, edit settings in the Client File System Agent folder of the machine policy on each client machine. We recommend that you edit the Common Client Policy. You may also need to adjust settings in the Policy Engine folder.

Deploy the CFSA
56 Endpoint Integration Guide
The key machine policy settings are listed below and described in the following sections:
Policy Engine folder
Maximum Number of Concurrent Operations
Deadlock Detection Timeout (seconds)
Data In Use Protection folder
Included Files; Excluded Files
Removable Devices folder
Treat These Drives As Removable
Trusted Application List
Default Handling
Special Device List
Handling for Special Devices
Network Locations folder
Trusted Application List
Default Handling
Special Locations List
Handling of Special Locations
Data At Rest Protection folder
Included Folders; Excluded Folders
Included Files; Excluded Files
Default Policy for Data At Rest
Enable File System Scan
File System Scan Configuration folder
Start Time
Start Day
Frequency (days)
Data In Use Protection Folder
Settings in this folder determine whether a user is allowed to save or copy files to removable devices or network locations, or burn files to CD or DVD. In both cases, you can define a list of trusted applications; if the user is using a trusted application, then they are always allowed to save or copy files to network locations or removable devices.

Deploy the CFSA
Chapter 3: Client File System Agent 57
Removable Devices Folder
Edit settings in this folder to protect files files being copied to removable devices such as USB drives. These devices can also include SD cards and writable CD or DVD drives.
This folder contains the following settings:
Trusted Application List
These are applications that are exempted from CFSA control. That is, users are permitted to copy files to removable devices using these applications. For example, you may not need to monitor an in-house system application that always encrypts files when saving.
Add the applications you want to exempt from the CFSA. You must supply the executable or process name, such as Winword.exe.
Note: Trusted applications override any device filters. That is, a user can copy a file directly from a trusted application to a removable device, even if the handling for that device blocks such copy operations or applies policy to the file content.
Isass.exe always included
By default, lsass.exe is always included in this list—see the ‘trusted application’ definition in CFSA terminology.
Anti Virus Programs
If a client machine is protected by an anti-virus program, we recommend that you add the process name to the Trusted Application List. For example, add InoRt.exe if it is protected by CA eTrust Threat Management.
Treat These Drives As Removable
This setting instructs the CFSA to handle a fixed drive as if it were a removable drive. For example, some external hard disks declare themselves as being a fixed drive when in fact they are easily removable. Ordinarily, the CFSA would not apply policy to files being saved to these drives. To close this loophole, you can explicitly identify these drives as removable.
In the Treat These Drives As Removable setting, you can add the drive letter or the disk drive name (also called the ‘volume identifier’) set by the manufacturer. Drive letters must include a colon (such as D:). Disk drive names are shown in Windows Device Manager (such as IC25N020ATC504).
Note: The CFSA automatically treats writable CD and DVD drives as removable drives.
Default Handling
The handling determines whether a device is writable or read only. This setting controls attempts to copy files to unlisted devices (that is, any device not in the Special Device List). The available actions are exactly the same as the handling for special devices (see below).
Note: If no special devices are listed, the default handling is applied to all devices.

Deploy the CFSA
58 Endpoint Integration Guide
Special Device List
This is a list of removable devices that require specific handling by the CFSA. For example, you identify the devices you want the CFSA to control or the ones you want it to ignore.
In the Special Device List setting, type the names of the devices that require special handling. You can use ? and * wildcards if required. If a device name contains spaces, you do not need to enclose it in quotes.
Where can I find device names?
Device names are shown in the Windows Device Manager applet. You can also see them in Windows Explorer. When you view the properties of a removable drive, the device name is listed in the Hardware tab of the Properties dialog.
You can also check device names in Windows Device Manager. Note that Device Manager automatically appends 'USB Device' to device names. You must omit this appended text when you specify the device name in the machine policy or user policy. For example, if the Device Manager lists 'Unipraxis DataStick 2.0 USB Device', enter this in the policy as 'Unipraxis DataStick 2.0'.
Handling for Special Devices
This setting determines how the CFSA handles attempts by a user to copy files to any removable device included in the Special Device List. The available actions are:
Allow write access
The user is allowed to copy files to listed devices. Policy is not applied.
Read only
The user is not allowed to copy files to listed devices (unless they are using a trusted application). Policy is not applied.
Apply User Policy To File
If the user attempts to copy a file to a listed device using:
■ A policy-enabled application, policy is applied to the file using Data In Motion triggers.
■ A trusted application, copy operations are always permitted. Policy is not applied to the file.
■ Any other application, the copy operation is blocked; that is, the device is set to read only.
More information:
CFSA Terminology (see page 52)

Deploy the CFSA
Chapter 3: Client File System Agent 59
Network Locations Folder
This folder contains the following settings:
Trusted Application List
These are applications that are exempted from CFSA control. That is, users can save files to any network location if they are using a trusted application.
For example, you may not need to monitor an in-house system application that always encrypts files when saving. By default, lsass.exe is always included in this list—see the trusted application definition in 'CFSA Terminology'.
In the Trusted Application List setting, add the applications you want to exempt from the CFSA. You must supply the executable or process name, such as Winword.exe.
Note: Trusted applications override any network location filters. Users can save files directly from a trusted application to any network location.
Default Handling
This setting determines how the agent handles attempts to copy files to unlisted network locations (that is, any not listed in Special Locations List). The available actions are exactly the same as for special locations (see below).
Note: If no special locations are listed, the default handling is applied to all network locations.

Deploy the CFSA
60 Endpoint Integration Guide
Special Locations List
This setting is a list of network locations that require specific handling by the CFSA. You can either list the locations you want the CFSA to control or the ones you want it to ignore.
When you specify a network location, you must supply the UNC path. This path must use a fully qualified domain name (FQDN). For example:
\\UX-FILESVR-01.UNIPRAXIS.COM\My Project\Reports
Local Drives Listed As Network Drives Over RDC
The CFSA can apply policy to drives mapped over a Remote Desktop Connection (RDC).
The Windows RDC feature allows users to use local disk drives in a remote session. For example, a user working from home connects to their office workstation using RDC. When the RDC session starts, the user can add their local C drive as a network drive on the remote workstation. This network drive represents a security risk, because the user can drag and drop sensitive files from their workstation onto their local C drive.
To apply policy to files being copied to this network drive in an RDC session, add one of the following values to Special Locations List:
\\tsclient\C
\\tsclient\D
\\tsclient\*
These values apply policy to, respectively, the local C drive, local D drive, or all local drives mapped as network drives in an RDC session.
Wildcards
When you specify a UNC path, you can use wildcards to specify the share name, folder name and file name. But do not use wildcards to specify the server. For example, this path is allowed::
\\UX-FILESVR-01.UNIPRAXIS.COM\My Project*\Report*
But this path is not allowed:
\\UX-FILESVR-*.UNIPRAXIS.COM\My Project*\Report*
Spaces
If a UNC path contains spaces, you do not need to enclose it in quotes.

Deploy the CFSA
Chapter 3: Client File System Agent 61
Handling of Special Locations
This setting determines how the CFSA handles attempts to copy files to a network location listed in Special Locations. The available actions are:
Allow write access
The user is allowed to copy files to special locations. Policy is not applied.
Read only
The user is not allowed to copy files to special network locations (unless they are using a trusted application).
Apply User Policy To File
If the user attempts to copy a file to a special location using:
■ A policy-enabled application, policy is applied to the file using Data In Motion triggers.
■ A trusted application, copy operations are always permitted. Policy is not applied to the file.
■ Any other application, the copy operation is blocked; that is, the location is set to read only.
More information:
CFSA Terminology (see page 52)

Deploy the CFSA
62 Endpoint Integration Guide
Data At Rest Protection Folder
Settings in this folder control how often the CFSA runs scheduled scans of the local hard disk. They also determine which drives, folders and files are scanned, and which user policy is applied to scanned files. This folder also includes the File System Scan Configuration subfolder.
Included Folders; Excluded Folders
These settings determine which folders to scan. By default, the CFSA scans all local folders except the \Windows and \Program Files folders, but you can change these. For example, you can specify the main folders you want to scan the Included list, but then use the Excluded list to omit specific subfolders.
By default the Excluded Folders setting uses %SystemRoot% and %ProgramFiles% variables to exclude the \Windows and \Program Files folders.
Included Files; Excluded Files
These settings determine which files to scan within the included folders. By default, the Included setting lists all the common document types such as ‘*.doc’ and ‘*.ppt’. No files are excluded by default, but if required you can use the Excluded list to omit specific file types such as .mp3 or .log files.
Note: The Excluded list takes precedence if there is a conflict. For example, you can include all spreadsheets (‘*.xls’) but exclude specific files such as ‘Holiday_Form.xls’.
Default Policy for Data At Rest
This setting determines which user policy gets applied to scanned files. It defaults to ‘DefaultClientFileUser’. A CA DLP user account with this name is created automatically when you install a CMS. This account is created specifically to apply policy to scanned files across all workstations. Or you can specify a different CA DLP user account (enter the user name, not the full name).
Enable File System Scan
Set this to True to set up regular scans of all included files on the local machine. If you do enable full scans, settings in the File System Scan Configuration folder allow you to set the scan frequency.
More information:
File System Scan Configuration Folder (see page 63)

Deploy the CFSA
Chapter 3: Client File System Agent 63
File System Scan Configuration Folder
These settings determine when and how often the CFSA scans the local hard disk. They specify the time and day when the full scan begins, plus the number of days between each scan.
Start Time
This is specified as ‘minutes after midnight’, so enter 60 to specify a 1am start time.
Start Day
This can be any day of the week or ‘Next’. This specifies when the scan first runs; when it next runs depends on the Frequency. If you choose Next, the scan starts at the next occurrence of the Start Time; this could be later today or tomorrow.
Frequency (days)
This specifies how often the scan runs. For example, to run a scan every Sunday, set the Start Date to Sunday and the Frequency to 7.
To set up daily file scans
1. Set the Start Time as required.
2. Set the Start Day to ‘Next’ and the Frequency to 1.
Note: Do not set the Start Day to a specific day of the week; if the client machine is restarted, the next scan will not run until the next occurrence of the Start Day.
Policy Engine Folder
For performance reasons, you may need to amend these settings in the Policy Engines folder. You must only edit these settings if instructed to do so by CA technical staff:
Maximum Number of Concurrent Operations
Defines the maximum number of files that can be processed simultaneously by a policy engine.
Deadlock Detection Timeout (seconds)
Specifies how long a worker thread must be inactive while processing an event before the policy engine considers the thread to have stalled.

Deploy the CFSA
64 Endpoint Integration Guide
Configure the User Policy
To complete the CFSA configuration, edit your user policies.
■ To configure scheduled scans of the local hard disk, edit the Data At Rest triggers and control actions.
■ To control attempts to copy files to removable devices or network locations, edit the Data In Motion triggers and control actions. Also specify the Access Denied message that users see when a removable device or network location is prohibited.
The key user policy settings are described in the following sections.
Note: Full details about how to edit user policies are in the Policy Guide.
Data At Rest Triggers
Data At Rest triggers include settings that let you specify which types of document you want the CFSA to scan. For example, you can edit the triggers to detect specific file formats (such as Microsoft Word documents) and analyze a file’s text content. This section focuses on the key Data At Rest settings for the CFSA.
Which File Sources?
In each Data At Rest trigger, this setting instructs the trigger to analyze files or documents captured by various CA DLP agents.
Important! Verify that the Client File System Agent check box is selected! This enables the trigger to analyze local files scanned by the CFSA.
Top Level File Lists
All Data At Rest triggers include Top Level File Lists. Use these lists to detect normal files or zip files. You edit these lists to identify the names of files that you want to apply policy to when a scan runs. For example, you can specify:
■ * to analyze all files
■ *.docx to analyze all .docx files
■ A list of specific .zip files to analyze.
For each trigger, you can choose whether to use an Included, Excluded, or Ignored file list.
Individual/Embedded File List
If required, Data At Rest triggers can look for files contained within a zip file or embedded in a master file. To do this, edit the Individual/Embedded File Lists. For each trigger, you can choose to use an Included or Excluded file list.
Using these lists in conjunction with the Top Level File Lists, you can feasibly search all .zip files for a specific file. For example, set Included Top Level Names to *.zip and Included Individual/Embedded File Names to *.doc to search for all .doc files contained within .zip files.

Deploy the CFSA
Chapter 3: Client File System Agent 65
Copy File to Location
Data At Rest control actions also support ‘copy’ actions, permitting you to copy scanned files to an alternative location. When used in combination with a ‘delete’ actions (see below), a copy action effectively becomes a ‘move file’ action.
Intervention
In each Data At Rest control action, the Intervention setting determines how CA DLP handles scanned files. The available options allow you to categorize or delete scanned files. If necessary, you can specify DoD deletions; these ensure that deleted files cannot be recovered (see below). You can also replace deleted files with an explanatory stub file to alleviate any user concerns or categorize the resulting file event.
Note: DoD deletion is forensic deletion, so called because the storage media are purged to ensure that a file cannot be recovered and used to obtain evidence in legal discovery. ‘DoD’ is a reference to Department of Defense approved methods for purging storage media.
Data In Motion Triggers
Data In Motion triggers include general settings that let you specify which types of document you want the CFSA to detect. For information about these general settings, see the Administration console online help.
This section focuses on the key Data In Motion settings for the CFSA. Specifically, you need to edit the following settings in the Data In Motion capture and control triggers:
Which File Sources?
In each Data In Motion trigger, this setting instructs the trigger to analyze files or documents captured by various CA DLP agents.
Verify that the Client File System Agent check box is selected! This enables the trigger to analyze files being copied or saved to removable devices or network locations.
Removable Device or Printer Lists
These settings define a further device filter for the CFSA. You can specify lists of included or excluded devices; these lists are similar to the Special Device List settings in machine policy. If you set up the trigger to use:
■ Included Removable devices, the trigger only fires if a user tries to copy a file to a listed device using a ‘policy-enabled application’.
■ Excluded Removable devices, these devices are exempted from control by the CFSA. But attempts to copy files to any other (unlisted) removable devices, via a policy-enabled application, will fire the trigger.

Deploy the CFSA
66 Endpoint Integration Guide
Top Level File Lists
All Data In Motion triggers include Top Level File Lists. Use these lists to detect normal files or zip files. You edit these lists to identify the names of files that you want to apply policy to. For example, you can specify:
■ * to analyze all files
■ *.docx to analyze all .docx files
■ A list of specific .zip files to analyze.
For each trigger, you can choose whether to use an Included, Excluded or Ignored file list.
Individual/Embedded File List
If required, Data In Motion triggers can look for files contained within a zip file or embedded in a master file. To do this, edit the Individual/Embedded File Lists. For each trigger, you can choose to use an Included or Excluded file list.
Using these lists in conjunction with the Top Level File Lists, you can feasibly search all .zip files for a specific file. For example, set Included Top Level Names to *.zip and Included Individual/Embedded File Names to *.doc to search for all .doc files contained within .zip files.
Intervention
In each Data In Motion control action, the Intervention setting determines how the CFSA handles files being copied to removable devices or network locations. The available options include Block, Warn, Inform and Categorize.
For files copied to removable devices, you can also apply Advise Encryption or Enforce Encryption options (the user must supply a decryption password).
More information:
Configure the Local Machine Policy (see page 55) CFSA Terminology (see page 52)

Deploy the CFSA
Chapter 3: Client File System Agent 67
Access Denied Message Subfolder
If required, you can display a message when a user opens a file from a prohibited source. This message typically warns users that they are barred from saving changes to the file. For example, when you edit the Frequency setting in the \Access Denied Message subfolder, you can set the message to display once only when a user first opens a file from a prohibited source.
Note: A prohibited source is any removable device or network location to which write access is denied. Write access may be denied by settings in the local machine policy or by Data In Motion triggers in the user's policy.
Find the Access Denied Message subfolder in the \Extensions\Client File System Agent folder. This subfolder contains the following settings:
Title, Message
Use Title and Message settings to provide a notification message for users, explaining that they will be unable to save changes to the current file.
Frequency
The Frequency setting determines how often this message is shown. You can set the message to never display, or to display:
■ Once per login: A user only sees the message once in a Windows session. This happens the first time they open a file from a prohibited device or network location.
■ Once per volume mount: A user sees the message if they plug in a prohibited device such as a USB drive and then open a file from that device. The message is only shown the first time they open a file from that device.
■ Once per application: A user sees the message when they open a file from a prohibited source. The message is only shown once per application per Windows session. For example, the message is shown if they open a Microsoft Word document stored on a prohibited USB device. If they then restart Word and open the document again, the message is not shown.
■ Once per application instance: A user sees the message each time they open a file from a prohibited source. As above, the message is shown if they open a Microsoft Word document stored on a prohibited USB device. But now if they restart Word and open the document once more, the message is shown again.


Chapter 4: Client Print System Agent 69
Chapter 4: Client Print System Agent
This section describes the Client Print System Agent (CPSA).
This section contains the following topics:
About the Client Print System Agent (see page 69) CPSA Flow Chart (see page 71) Deploy the CPSA (see page 73)
About the Client Print System Agent
A policy administrator can use the Client Print System Agent (CPSA) to control what information users are allowed to print. You can apply policy triggers when users try to print a file or document and you can also disable the Print Screen button on their keyboard.
The CPSA, or print agent, allows you to closely control the use of printers in your organization:
■ If a user presses the Print Screen button, the print agent checks the user policy to determine whether the button is disabled.
■ Alternatively, if a user attempts to print a document from an application (for example, by choosing File, Print), the print agent checks which application the user is using. If this is an 'ignored application', the user is allowed to print the document. For any other application, the print agent applies Data in Motion triggers.
First, these triggers check whether the printer itself is excluded from policy control. If so, the print job is allowed to continue. Otherwise, the trigger examines the file’s properties and text content. The results of this policy processing determine whether the print agent blocks or allows the print job.
Note: Before installing the CPSA, you must close down all applications that support printing. After installing the CPSA, you must configure it by editing CA DLP registry settings on the host machine and the Data In Motion triggers in your user policies.
About the Client Print System Agent
70 Endpoint Integration Guide
What Filters Does the CPSA Use?
The CPSA is highly flexible and supports various levels of filtering, allowing you to closely control the use of printers in your organization. To determine whether or not a user is allowed to send a document to a specific printer, the agent applies the following filters:
1. Print Screen filter: When a user presses the Print Screen button, the CPSA checks the user policy to determine whether the button is disabled.
Specifically, the CPSA applies the Disable Print Screen? setting in the \System Settings folder. If the button is disabled, the CPSA blocks the print job and optionally displays a notification dialog with an explanatory message.
Note: No print event is generated when the CPSA blocks a Print Screen operation. CA DLP does not save details of these blockings in the CMS database.
2. Application filter: Alternatively if a user attempts to print a file or document from an application (for example, by choosing File>Print in Microsoft Word), the CPSA checks which application the user is using. If this is:
■ Listed in the IgnoredApplicationList registry setting, the CPSA permits the user to send the document to the printer. Policy is not applied.
■ Any other application, the CPSA applies printer and file filters defined within the user policy—see step 3.
3. Printer filter: When the CPSA applies user policy, it uses Data in Motion triggers. First, these triggers check whether the printer itself is subject to, or excluded from, policy control.
If the printer is excluded from policy control, the print request is allowed to continue. Otherwise, the triggers apply a file filter.
4. File filter: Finally, the Data in Motion triggers examine the file’s properties and analyze its text content. The results of this policy processing determine whether the CPSA blocks or allows the print operation.
More information:
CFSA Flow Chart: Removable Devices, CD Drives, Network Folders (see page 46)
Which User Policy Is Applied?
Unlike the CFSA, the CPSA only applies user policy when assessing whether to allow a print job. The actual policy is always that of the user currently logged onto the client machine hosting the CPSA.

CPSA Flow Chart
Chapter 4: Client Print System Agent 71
CPSA Flow Chart
In the diagram below, a user tries to print a file (1). First, the CPSA checks whether the user is printing from an application or is using the Print Screen button.
■ If the user is using the Print Screen button to send the screen contents to a printer (2), the CPSA applies user policy to the print request to determine whether or not the Print Screen button is disabled (2).
■ If printing from an application (4), the CPSA checks the registry to see whether the application is exempt from policy control (5). If so, the CPSA allows the file to be printed. If not, it applies Data In Motion policy triggers (6).
These triggers first check if an authorized printer is being used. If so, the CPSA allows the file to be printed. If not, the file’s properties and text content are analyzed. If the file is not authorized, a control action determines whether to allow the print operation. If the file is authorized, the print operation is allowed.

CPSA Flow Chart
72 Endpoint Integration Guide

Deploy the CPSA
Chapter 4: Client Print System Agent 73
Deploy the CPSA
Before installing the CPSA, close down all applications that support printing.
To install the CPSA
1. Find setup.exe in the root of your CA DLP distribution image. Run setup.exe to launch the CA DLP installation wizard.
The Installation Type screen opens.
2. Click Advanced Installation.
3. In the Advanced Install Options screen, choose Endpoint Agents and then click Install.
The CA DLP client installation wizard launches in a separate window.
4. In the client installation wizard, navigate to the Customer Setup screen.
5. In the Custom Setup screen, choose Print System Agent.
6. In the final wizard screen, click Install to start the file transfer.
To configure the CPSA
See the following sections for full details. Briefly, you need to:
1. Edit the machine policy for the host machine.
2. Edit an appropriate user policy. In particular, you need to edit Data In Motion triggers and (optionally) the Print Screen Denied settings.
More information:
Configure the User Policy (see page 74) CPSA Optional Registry Changes (see page 77)
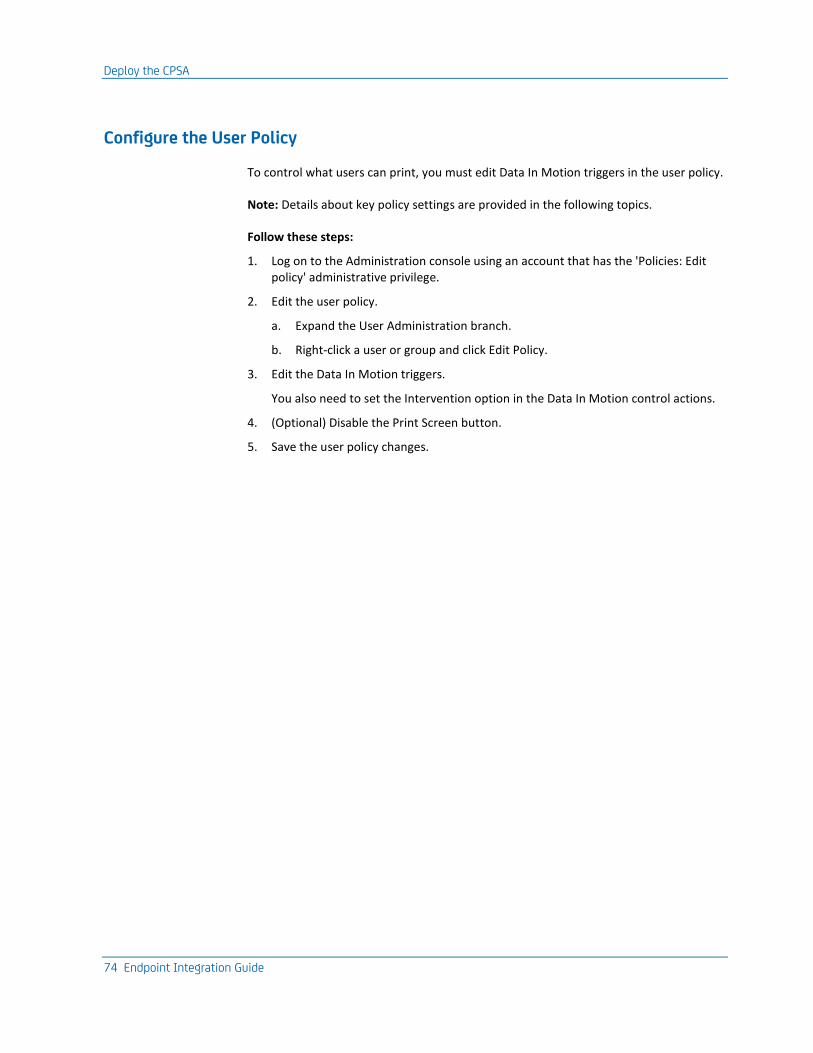
Deploy the CPSA
74 Endpoint Integration Guide
Configure the User Policy
To control what users can print, you must edit Data In Motion triggers in the user policy.
Note: Details about key policy settings are provided in the following topics.
Follow these steps:
1. Log on to the Administration console using an account that has the 'Policies: Edit policy' administrative privilege.
2. Edit the user policy.
a. Expand the User Administration branch.
b. Right-click a user or group and click Edit Policy.
3. Edit the Data In Motion triggers.
You also need to set the Intervention option in the Data In Motion control actions.
4. (Optional) Disable the Print Screen button.
5. Save the user policy changes.

Deploy the CPSA
Chapter 4: Client Print System Agent 75
Data In Motion Triggers
Data In Motion triggers include general settings that let you specify which types of document you want the CPSA to detect. Edit your trigger settings as required. For example, you can specify search text to detect prohibited words or phrases in files being printed. Pay particular attention to these settings:
Which File Sources?
In each Data In Motion trigger, this setting instructs the trigger to analyze files or documents captured by various CA DLP agents. Verify that the following agent is selected:
■ Client Print System Agent
You must select this agent if you want to analyze documents being printed.
Targets (printers)
Use the Targets settings to define the names of printers that you want to monitor or exempt. You can specify lists of included or excluded printers.
Note: Depending on the Which File Sources? setting, the Targets settings can specify lists of removable devices, printer names, network folders, URLs, or writable CD drives.
The printer name typically comprises the printer model plus customized location details. For example, 'HP Color LaserJet 4650 PCL 6 1st Floor'. We recommend that you specify the exact printer name. Printer names are shown in the Devices and Printers applet. You can also use ? and * wildcards, for example, to specify all printers by a specific manufacturer.
If you set up the trigger to use:
■ Included printers, the trigger only fires if a user tries to send a document to a listed printer.
■ Excluded printers, these printers are exempted from control by the CPSA. But attempts to send documents to any other (unlisted) printer will cause the trigger to fire.
Top Level File Names
The concept of a file name is not valid for CA DLP print events. For example, you can print a single page from an unsaved (and unnamed) document. Therefore, you must set the Top Level File Names setting to * (an asterisk wildcard).
Important! Do not set the Top Level File Names setting to any value except '*'. For example, if you change the value from * to myreport.doc or *.docx, the Data In Motion trigger is unable to detect any print events!
About document titles

Deploy the CPSA
76 Endpoint Integration Guide
You can specify document titles. Although file names are not valid for print events, they do typically contain a document title. For Microsoft Office documents, the document title is often the same as the file name. You can therefore use an XML Attribute data lookup command to test the document title of a print event. Include the lookup command in the Data Lookup Command setting.
Intervention
In each Data In Motion control action, the Intervention setting determines how the trigger handles attempts to print documents. The available options include Inform, Warn and, in particular, Block. If set to Warn, CA DLP allows the user to choose whether to continue and send their document to the printer; if set to block, the print operation via the selected printer is denied.
System Settings Folder
The System Settings folder contains the following CFPSA setting:
Disable Print Screen?
If this setting is True, the CPSA blocks a print job when the user presses the Print Screen button. The CPSA can optionally display a notification message—see below.
Note: No print event is generated when the CPSA blocks a Print Screen operation. No policy triggers activate and CA DLP does not save details of these blockings in the CMS database.
Print Screen Denied Message Subfolder
Settings in this subfolder define the message seen by users when they press the Print Screen button (if you have disabled the button). The message typically informs the user that using Print Screen is not allowed. Find this subfolder in the \Extensions\Client Print System Agent folder.
Title; Message
These settings define the text content of the notification message.
Frequency
This setting determines how often the message is shown. For example, you can display the message once per session, when the user first tries to use the Print Screen button.

Deploy the CPSA
Chapter 4: Client Print System Agent 77
CPSA Optional Registry Changes
To configure the CPSA, you can edit the following automatic registry values on each host machine. Briefly, you can define a list of applications you want the agent to ignore (if required) and set the log level.To do this, you modify values in the following registry key:
HKEY_LOCAL_MACHINE\SOFTWARE\ComputerAssociates\CA
DLP\CurrentVersion\ClientPrintAgent
Within this registry key, the registry values you can edit are:
IgnoredApplicationList
Type: REG_SZ
Data: Defaults to empty. This specifies a semicolon-separated list of applications that are exempted from CPSA control. Users are permitted to print documents using these applications. For example, you may not want to monitor the printing of documents from graphics packages.
Note: For changes to this registry setting to take effect, you must restart any relevant application.
LogLevel
Type: REG_DWORD
Data: Defaults to 2. This determines the level of logging for the Client File Print System Agent. For example, you can configure the agent to only log errors or important system messages. Log entries are written to the Activity log (viewable in the Administration console). The supported logging levels are:
1 Errors only
2 Errors and warnings
3 As 2, plus informational and status messages
Note: Setting LogLevel=3 will cause the log file to grow extremely rapidly. This level of logging is provided for testing and diagnostic purposes, for example, it shows storage and retrieval on every resource item.


Chapter 5: Endpoint Hardening 79
Chapter 5: Endpoint Hardening
This section describes measures to control the risk of end users circumventing, disabling, or otherwise avoiding the attentions of the CA DLP endpoint agent.
This section contains the following topics:
Why Endpoint Hardening? (see page 79) CA DLP Outlook Client Agent is Automatically Re-enabled (see page 80) Re-enable IE Endpoint Agent Automatically (see page 81) Block Unauthorized Browsers and Email Applications (see page 81) Disable InPrivate Browsing for Internet Explorer (see page 82) Prevent Unauthorized Changes to the Internet Explorer Add-on List (see page 82) Prevent Unauthorized Uninstallation of CA DLP (see page 84) Prevent Unauthorized Changes to CA DLP Services (see page 84) Preventing Man-in-the-Middle Attacks (see page 85) Use File Permissions to Protect Event Data and Document Fingerprints (see page 86) Apply Registry Permissions (see page 87) Deploy Server-Side Email Enforcement (see page 88) Working Offline (see page 88) Automated Endpoint Protection (see page 89)
Why Endpoint Hardening?
There can be motivation for end users to circumvent, disable, or otherwise avoid the attentions of the CA DLP endpoint agent. Endpoint agents include various email, browser, and application plug-ins and other CA DLP components, including the collection manager (WgnCM) and the CA DLP infrastructure service (WgnInfra).
Important: We recommend one single measure above all others to reduce or eliminate the risk of users tampering with your CA DLP endpoint agent installation: Ensure that users are not given local administrator privileges over their workstations, and that they do not have access to an account with such privileges. Read this guide before installing CA DLP, because some security decisions have an impact on your choice of deployment options.
Most customers already employ methods to limit the ability of users to reconfigure their clients. To ensure maximum compatibility with such methods, the CA DLP endpoint agent does not automatically enable the techniques suggested in this document. However, you can add an extension to the installation process to invoke these techniques automatically.
Contact CA Technologies to discuss your requirements.
The following sections describe further measures that you can use to control the risk.

CA DLP Outlook Client Agent is Automatically Re-enabled
80 Endpoint Integration Guide
CA DLP Outlook Client Agent is Automatically Re-enabled
The CA DLP Outlook agent is an Outlook COM add-in. Typically, if users have the necessary permissions, they can disable Outlook add-ins.
To prevent users from disabling the CA DLP Outlook agent, CA DLP automatically and silently re-enables the agent if a user disables it. After deploying the CA DLP Outlook agent, create the following DWORD registry values to control the re-enabling behavior:
OutlookMonitorIntervalInSeconds
Type: REG_DWORD
Data: Specifies how often CA DLP verifies whether the Outlook client agent is disabled in the current session. (A security feature in Outlook can automatically disable certain add-ins). Set this option to 0 to disable monitoring. Specifically, it checks the registry for the wgnemol.dll name and path.
Default: 5 seconds
OutlookRepairDisabledExtension
Type: REG_DWORD
Data: Specifies whether CA DLP should re-enable the Outlook client agent if it is found to be disabled. If this registry value is set to a non-zero value and the Outlook client agent is found to be disabled, CA DLP re-enables the client agent and writes a Windows application log entry to that effect.
Default: 0 (do not re-enable)
On the machine hosting the Outlook agent, add these two registry values to the following registry key:
HKEY_LOCAL_MACHINE\Software\ComputerAssociates\CA DLP
\CurrentVersion\EMail
Or for 32bit Outlook client running on a 64bit OS under the registry key:
HKEY_LOCAL_MACHINE\Software\WOW6432Node\ComputerAssociates\CA DLP
\CurrentVersion\EMail
Note: For more information about how to configure the Outlook Agent using EmailClientOptions.mst, see the 'Technical Information, Installation Transforms' section in the Platform Deployment Guide.

Re-enable IE Endpoint Agent Automatically
Chapter 5: Endpoint Hardening 81
Re-enable IE Endpoint Agent Automatically
Internet Explorer has an Internet Options setting ‘Enable third-party browser extensions’. This setting is enabled by default, allowing the CA DLP Internet Explorer endpoint agent to operate.
If users disable third-party browser extensions, the CA DLP Internet Explorer agent cannot operate. To prevent users from disabling the CA DLP Internet Explorer agent, CA DLP automatically and silently re-enables this setting if a user disables this setting. No extra configuration is required.
Note: CA DLP can fully integrate with the embedded browser controls in Windows Explorer and Outlook. Web page control triggers operate as normal.
Block Unauthorized Browsers and Email Applications
'Circumvention' means that the user runs an email or browser application for which CA DLP does not offer an endpoint agent. Examples include Firefox, Chrome, Opera, Outlook Express, and Eudora.
To prevent circumvention, configure Application Monitor control actions in the user policy to block users from running these applications.
Follow these steps:
1. Launch the Administration console and open User Administration or Machine Administration.
2. Select a User, Group and click Edit policy.
3. Browse to the following policy path:
Control\Application Monitor\Control Triggers\Application n\
4. Specify the application included in the ban, for example firefox.exe or chrome.exe.
5. Browse to the following policy path:
Control\Application Monitor\Control Actions\Control Action n\
6. Set the Intervention option for the control action to Block.
Starting the application now triggers a block action.

Disable InPrivate Browsing for Internet Explorer
82 Endpoint Integration Guide
Disable InPrivate Browsing for Internet Explorer
Internet Explorer 8 and 9 have a safety feature that disables IE extensions when InPrivate Browsing is enabled. Because the CA DLP Internet Explorer endpoint agent is an IE extension, CA DLP integration with IE8 or IE9 is disabled when a user enables InPrivate Browsing on the CA DLP host computer.
To prevent users from circumventing CA DLP control, we recommend that you use a Windows Group Policy to disable InPrivate Browsing on your users' workstations and laptops.
Follow these steps:
1. Launch the Local Group Policy Editor by typing "gpedit.msc" in the Run box.
2. Browse to the following category:
Computer Configuration\Administrative Computer Configuration\
Administrative Templates\Windows Components\Internet Explorer\InPrivate
3. Enable 'Turn off InPrivate Browsing '.
Prevent Unauthorized Changes to the Internet Explorer Add-on List
Use the Add-on List policy setting to prevent users from uninstalling the CA DLP Internet Explorer agent on endpoints. To additionally disallow all add-ons that are not included in the list, use it with the 'Deny all add-ons unless specifically allowed in the Add-on List' policy setting.
Log on to the computer that is your domain controller. If you have multiple domain controllers, perform the following steps on each one.
Follow these steps:
1. Launch the Local Group Policy Editor by typing "gpedit.msc" in the Run box.
2. Browse to the following category:
Computer Configuration\Administrative Templates\Windows Components\
Internet Explorer\Security Features\Add-on Management.
3. Right-click the ‘Add-on List’ setting and choose Properties.
The Properties dialog opens.
4. Click Enabled to view the enabled add-ons and then click Show.
The Show Contents dialog opens.

Prevent Unauthorized Changes to the Internet Explorer Add-on List
Chapter 5: Endpoint Hardening 83
5. Click Add and enter the following information for the CA DLP Internet Explorer agent:
Value Name
Defines the CLSID (class identifier) of the add-on you want to include on the Add-on list. You obtain the CLSID for an add-on by reading the OBJECT tag from a web page on which the add-on is referenced.
Value
Specifies whether Internet Explorer denies or allows the add-on.
0
Specifies that this add-on is disabled and users cannot manage it through the Add-on Manager.
1
Specifies that this add-on is enabled and users cannot manage it through the Add-on Manager.
2
Specifies that this add-on is enabled and users can manage it through the Add-on Manager.
Example: Enter the CLSID for the CA DLP Internet Explorer agent as Value Name: {521fdca1-d5c5-11d4-b613-000102027bbb}. To prevent users from disabling the CA DLP Internet Explorer agent, enter 1 as Value.
Note: If you disable the Add-on List policy setting, the list is deleted. If the 'Deny all add-ons unless specifically allowed in the Add-on List' policy setting is active, but no add-ons are on the Add-on List, users cannot use any add-ons.

Prevent Unauthorized Uninstallation of CA DLP
84 Endpoint Integration Guide
Prevent Unauthorized Uninstallation of CA DLP
By default, CA DLP is installed in such a way that users can view, modify, or remove the endpoint using the standard Windows utility ‘Add or Remove Programs’. However, CA DLP ships with a sample Microsoft Installer transform script that prevents the user from invoking 'Add or Remove Programs' to modify or uninstall the endpoint.
For command line, Group Policy or SMS installations, you can use a transform to prevent users from uninstalling CA DLP with the Add/Remove Programs utility. The ClientLockDown.mst transform disables the Change and Remove buttons when a user selects CA DLP in the Add/Remove Programs dialog.
Follow these steps:
1. Find the ClientLockDown.vbs script in the \Support folder of your CA DLP distribution media.
2. Run the script.
It creates the ClientLockDown_Client.mst (or ClientLockDown_Client_x64.mst) transform.
3. Copy the transform into the folder containing your administrative installation source image.
4. When you install the client, also deploy the ClientLockDown_Client.mst transform.
msiexec /i path\client.msi ARPSYSTEMCOMPONENT=1
TRANSFORMS=path\ClientLockDown_Client.mst
Prevent Unauthorized Changes to CA DLP Services
The Windows Task Manager displays only one CA DLP service on a client workstation, namely WgnInfra (CA DLP infrastructure service). If the user is not logged on as an Administrator, the Task Manager does not permit the user to stop or shut down the service. Therefore, the presence of the WgnInfra entry in the Task Manager does not jeopardize the integrity of CA DLP.
An administrator can use the Services pane in the Microsoft Management Console and the NET STOP console command to start and stop services. However, by default, a user who does not have local administrator privileges cannot stop WgnInfra.
The Windows Task Manager displays a further process, WgnCM, which is a regular executable. Although it can be shut down using the Task Manager, doing so has little or no effect on the operation of CA DLP: The process is restarted automatically as soon as one of the CA DLP endpoint agent plug-ins encounters an event that requires processing. Once WgnCM has restarted, CA DLP continues to function normally.

Preventing Man-in-the-Middle Attacks
Chapter 5: Endpoint Hardening 85
Preventing Man-in-the-Middle Attacks
CA DLP endpoints rely on network communication between the CA DLP Infrastructure Services to exchange data (such as events, or policies) with their parent server. This network communication makes the endpoint server subject to a possible ‘man-in-the-middle’ attack: In such an attack, the endpoint is not communicating with its real parent, but with a rogue server.
CA DLP uses various combinations of proprietary UDP, and encrypted Java RMI TCP-based protocols for its communications.
1. Before a communication session exchanges data, the protocols verify the identity of the server and client. If the identity is incorrect, the protocol terminates the session and logs the termination.
2. In sessions where important policy data is synchronized, the installation code of the CA DLP system is also verified. The verification helps ensure that the sessions contact the same CA DLP network of clients and servers.
What do realistic and likely attacks look like?
■ It is possible (but, due to the proprietary nature of the communications, unlikely) that attackers develop custom software to spoof the behavior of a parent server. The most realistic form of ‘attack’ would come from a real CA DLP server which is configured to be a rogue server.
■ The most likely attack is the reconfiguration of the endpoints ‘hosts’ or ‘lmhosts’ files: Attackers attempt to map the parent server to a rogue server, or to an invalid IP address, to stop communications with a parent server.
By default, Administrator rights are required to edit these files. Depending upon the actual communications being performed, this reconfiguration can be sufficient to fool an endpoint into certain communications with a ‘rogue’ server.
If this level of protection is insufficient, configure CA DLP to run in Advanced Encryption Mode (FIPS 140-2). This mode uses TLS and certificates to provide the ultimate protection for communications between the endpoint and its parent. Manufacturing a ‘man-in-the-middle’ attack is near-impossible without having first compromised the security of either the endpoint or parent server.
Important: You have to deploy CA DLP in Advanced Encryption Mode from the start. You cannot convert an existing CA DLP deployment to Advanced Encryption Mode.

Use File Permissions to Protect Event Data and Document Fingerprints
86 Endpoint Integration Guide
For CA DLP to be compatible with FIPS 140-2, you deploy it in Advanced Encryption Mode. This section describes the deployment procedure.
Follow these steps:
1. Designate a secure server that is separate from your intended CA DLP enterprise.
2. Generate the self-signed root certificate.
3. Generate the Key Store and Revocation List.
4. Deploy your CA DLP servers and client machines.
a. Create new administrative installation source images.
b. Customize the new source images.
c. Install the servers and client machines from the appropriate source image.
5. Confirm that encryption is correctly configured in the machine policy for all your CA DLP servers and client machines.
6. Secure the critical Advanced Encryption files on your CA DLP servers and client machines so that they can only be accessed by the CA DLP infrastructure.
Note: See the ‘Advanced Encryption Mode’ chapter in the Platform Deployment Guide for further details as part of the CA DLP deployment procedure.
Use File Permissions to Protect Event Data and Document Fingerprints
We recommend to limit user access to event data held in the local endpoint agent database, and to email or web page content in blob files held below the CA DLP data folder. You also want to prevent unauthorized users from tampering with, for example, the document fingerprints stored in content index files in the "C:\ProgramData\CA\CA DLP\data\PRC\IndexCache" folder.
By default, the CA DLP software and data are in some of the following folders, depending on your operating system:
C:\Program Files\CA\CA DLP\
C:\Program Files (x86)\CA\CA DLP\
C:\ProgramData\CA\CA DLP\data\
C:\Documents and Settings\All Users\Application Data\CA\CA DLP\
Note: On an NTFS volume, the "CA" folders typically inherit attributes and permissions from their parent folders. The default file system privileges provide basic protection because users require administrator privileges to modify files in these folders.

Apply Registry Permissions
Chapter 5: Endpoint Hardening 87
Follow these steps:
1. Change the folder attributes of all "CA" folders to System Hidden where necessary.
This attribute prevents users from seeing the CA DLP software and data files.
2. Reduce user permissions to the "C:\ProgramData\CA\CA DLP\data" folder.
3. Reduce user permissions to the "C:\Documents and Settings\All Users\Application Data\CA\CA DLP\" folder.
Important: Ensure that the account under which the CA DLP infrastructure service runs (typically LocalSystem) retains full access to all CA DLP folders!
Apply Registry Permissions
On CA DLP endpoints, you can make the following registry changes:
HKEY_LOCAL_MACHINE\Software\CA DLP
This registry key contains machine-wide settings written only by the installer and the CA DLP infrastructure service.
You can apply permissions to this key using Regedt32 to prevent access by unauthorized users. The SYSTEM (Local System) account requires full access.
HKEY_CURRENT_USER\Software\CA DLP
This registry key contains housekeeping information, written by the runtime integration components and the consoles.
HKEY_CLASSES_ROOT
The install process registers COM servers and file extensions under the HKEY_CLASSES_ROOT registry hive and other integration settings under HKEY_LOCAL_MACHINE\Software\Microsoft registry key.
Important: Tampering with these registry values can jeopardize the integrity of the installation. We do not recommend restrictive permissions here. We strongly recommend that this registry key retains Read access for all user types.
Registry Changes for Endpoint Agents
When you install a CA DLP browser and email endpoint agent, the installer makes changes to the following registry keys:
HKEY_LOCAL_MACHINE\Software\Microsoft\Windows\CurrentVersion
\Explorer\Browser Helper Objects
HKEY_LOCAL_MACHINE\Software\Microsoft\Exchange\Client\Extensions\Wgn

Deploy Server-Side Email Enforcement
88 Endpoint Integration Guide
Deploy Server-Side Email Enforcement
If client-side techniques do not provide sufficient protection (for example, you cannot control Local Administrator rights), you need server-side enforcement. We recommend that you deploy CA DLP email server agents to monitor and control email transiting through your Microsoft Exchange or Lotus Domino servers.
The CA DLP Exchange and Domino server agents can apply policy at the email server regardless of whether the Outlook or Notes client agent has already applied policy, and do so by default if policy has not been applied. Specifically, a server agent can detect whether the CA DLP endpoint agent has already processed a message. If the message has not already been processed, the server agent infers that the CA DLP endpoint agent is either not present on the sender’s client, or has been disabled.
Contact CA Technologies to discuss your requirements.
Working Offline
Microsoft Outlook and Notes both offer users the ability to work offline. This can create potential loopholes within CA DLP.
Prevent Emails From Being Deleted
This problem can only occur with client integration when outgoing e-mail triggers are configured to forward e-mails to other recipients, for example, compliance officers.
CA DLP policy triggers can be configured to forward e-mails to another recipient automatically, for example, a compliance officer. If an e-mail causes such a trigger to fire, both the original e-mail and the forwarded message remain in the outbox of the sender’s local mailbox until the sender goes back online. The sender has opportunity to delete the e-mail intended for the compliance officer before going back online. Although the policy breach is recorded in the CMS, the original e-mail reaches its recipients, but the forwarded message is not sent to the compliance officer because the sender deleted it from their local Outbox.
To help ensure that e-mails are correctly forwarded to compliance officers, we strongly recommend installing a hybrid client and server agent deployment (see previous section).
■ Explicitly configure the Exchange or Domino server agent to reprocess e-mails already processed by an Outlook or Notes client agent.
■ If you do install both client and server agents, edit the ReprocessClientEmails registry value on the Exchange or Domino server. For details, see the Message Server Integration Guide.

Automated Endpoint Protection
Chapter 5: Endpoint Hardening 89
Ensure That Emails Are Captured
This problem can only occur with client integration when outgoing e-mail triggers are configured to perform recipient lookup operations.
CA DLP policy triggers can be configured to look up recipient details on an Exchange or Domino server to process outgoing e-mails. If an e-mail is sent to a distribution list, CA DLP extracts details for each member of the list. But if a user sends an e-mail while disconnected from their organization's e-mail server, CA DLP cannot connect to Exchange or Domino and so cannot extract details for members of distribution lists saved in the local address book. As a result, e-mail triggers set up to detect specific recipients do not fire and the e-mail is not captured or controlled.
This problem applies to users working offline in Microsoft Outlook and running Lotus Notes in ‘island mode’. In Outlook, you cannot expand distribution lists when working offline. In Lotus Notes, you can expand distribution lists when working in island mode, but only if the local address books have been synchronized with the ones on the Domino server.
To help ensure that any policy triggers dependent on recipient details are applied correctly to e-mails sent under these conditions, we strongly recommend installing a hybrid client and server agent deployment.
■ Explicitly configure the Exchange or Domino server agent to reprocess e-mails already processed by an Outlook or Notes client agent.
■ If you do install both client and server agents, edit the ReprocessClientEmails registry value on the Exchange or Domino server. For detals, see the Message Server Integration Guide.
Automated Endpoint Protection
Most customers already employ methods to limit the ability of users to reconfigure their clients. To ensure maximum compatibility with such methods, the CA DLP endpoint agent does not automatically enable the techniques suggested in this document. However, you can add an extension to the installation process to invoke these techniques automatically.
Contact CA Technologies to discuss your requirements.


Chapter 6: Known Issues 91
Chapter 6: Known Issues
This section contains the following topics:
Firewall Configuration on Windows XP SP2 and 2003 SP1 (see page 91) Client File System Agent (CFSA) (see page 92)
Firewall Configuration on Windows XP SP2 and 2003 SP1
For Windows XP SP2 and Windows 2003 SP1, if the Windows Firewall is turned on the CA DLP installation wizard automatically registers the CA DLP infrastructure as a firewall exception. This enables data to replicate unhindered through the firewall between CA DLP machines.
However, this automatic configuration requires the firewall setting ‘Don’t allow exceptions’ to be turned off on the target machine. By default, the firewall is turned on for Windows XP SP2 and off for Windows 2003 SP1.
Important! If ‘Don’t allow exceptions’ is on, the Windows Firewall allows no firewall exceptions, including the CA DLP infrastructure. This means that the client machine will be unable to contact its parent server. As a consequence, the client machine will be unable to receive any user or machine policies. This effectively paralyzes any CA DLP agents on the client machine so they are unable to monitor, capture or control users’ email or Web activity.

Client File System Agent (CFSA)
92 Endpoint Integration Guide
Client File System Agent (CFSA)
CFSA Can Prevent BitLocker From Encrypting USB Devices
The Client File System Agent (CFSA) can affect the operation of the BitLocker To Go encryption feature on endpoint computers.
If the CFSA is installed on an endpoint computer and configured to apply policy to files being copied to removable devices (such as USB drives or SD cards), BitLocker cannot initialize removable devices for encryption. That is, it cannot give these devices the "lockdown treatment". This is because the BitLocker initialization process is denied write access to the device by the CFSA.
Note: This problem only occurs if the CFSA is explicitly configured to apply policy to removable devices. Also, if a removable device has been initialized by BitLocker running on a different computer, the device can used on any endpoint computer hosting the CFSA, even if the CFSA is configured to apply policy to removable devices.

Index 93
Index
A
Access Denied message, CFSA • 67 administrative installation • 36
and Group Policy • 36 advertisements and SMS • 22
B
BitLocker, and CFSA • 92
C
CD drives, and CFSA • 43 CFSA See Client File System Agent • 43 Citrix
integrating with centralized applications • 33 Client File System Agent (CFSA) • 43
Access Denied message • 67 CFSA, BitLocker known issue • 92 deployment overview • 54 flow chart • 46 machine policy • 55 scans, scheduling • 63 terminology • 52 user policy • 55, 64
client machines • 9 before installing • 13 features, available for installation • 10 importing • 13 installation • 18, 22, 26
command line deployment • 18 SMS operations • 22 snapshot operations • 26
Msiexec.exe • 18 uninstalling • 18
Client Print System Agent (CPSA) deployment • 73 flow chart • 71 Print Screen Denied message • 76 registry changes • 77 user policy • 74
Client.msi GPO installation package • 39 SMS distribution package • 22
ClientLockDown.mst transform command line installations • 18
GPO installations • 39 SMS installations • 22
cloning, See snapshot deployment • 26 CMS • 16
name resolution • 16 command line deployment • 18
client machines • 18 CreateParentName.mst transform
command line installations • 18
D
Data Source settings • 22 device lists, for CFSA • 57 Disable Print Screen policy setting • 76 disk-imaging, See snapshot deployment • 26 Distribution Points • 22 DNS
CMS name resolution • 16 DVDs See CD drives • 44
E
EnableAppmon.mst transform command line installations • 18 GPO installations • 39 SMS installations • 22
endpoint hardening • 79
F
features client installation features • 10
follow-up snapshots • 30
G
ghosting or ghost imaging, See snapshot deployment • 26
GPO, installation package • 39 Group Policy • 39
deployment instructions • 39 Group Policy Object See GPO • 39
I
importing client machines • 13
installation features

94 Endpoint Integration Guide
client machines • 10 installation package, GPO • 39
L
Lotus Notes centralized applications, integrating with • 33
M
machine policy configuring
CFSA • 55 Mandatory Assignment, SMS • 22 Microsoft
Systems Management Server See SMS • 21 Msiexec.exe
client machines • 18 SMS • 22
N
network locations, and CFSA • 43 machine policy • 59
O
Organizational Unit See OU • 39 OU
removing clients • 41 selecting • 39
P
package, SMS • 22 Policy on Save See Client File System Agent • 43 policy-enabled applications, definition • 52 Print Screen button, disabling • 70 Print Screen Denied message, CPSA • 76 product codes
command line uninstallations • 20 SMS uninstallations • 22
R
removable devices, and CFSA • 43 definition • 52 machine policy • 57
S
scanning jobs CFSA scheduling • 63 scheduling for CFSA • 63
scheduled deployment, SMS • 22 scheduling CFSA scans • 63 SetParentName.mst transform
GPO installations • 39 silent operations
client installations • 18 SMS uninstallation • 26
SMS • 21, 22, 26 deployment instructions • 22 distribution package • 22 mandatory assignment • 22 overview • 21 program • 22
snapshot deployment • 26 considerations • 31 follow-up installations • 30
syntax client machines, installation • 18 client machines, uninstalling • 20
T
Terminal Services Lotus Notes • 33
transform files ClientLockDown.mst • 22, 39 EnableAppmon.mst • 22, 39 GPO installations • 39 SetParentName.mst • 39 SMS installations • 22 SMSQuietUninstall.mst • 26
trusted applications, definition • 52 trusted applications, for CFSA • 57
U
uninstallation client machines • 18 Group Policy • 41 SMS • 26
USB devices, for CFSA • 57, 92 user policy, for CFSA and CPSA • 64, 74
CFSA • 64 CPSA • 74
W
WINS, and CMS name resolution • 16 wraps or wrappers, See snapshot deployment • 26

Appendix A: Accessibility Features 95
Appendix A: Accessibility Features
CA Technologies is committed to ensuring that all customers, regardless of ability, can successfully use its products and supporting documentation to accomplish vital business tasks. This section outlines the accessibility features that are supported by CA DLP.
Display
To increase visibility on your computer display, you can adjust the following options:
Font style, color, and size of items
Defines font color, size, and other visual combinations.
The CA DLP iConsole also supports a High Visibility mode. This increases the size of text and images in the iConsole screens.
Screen resolution
Defines the pixel count to enlarge objects on the screen.
Cursor width and blink rate
Defines the cursor width or blink rate, which makes the cursor easier to find or minimize its blinking.
Icon size
Defines the size of icons. You can make icons larger for visibility or smaller for increased screen space.
High contrast schemes
Defines color combinations. You can select colors that are easier to see.

Sound
96 Endpoint Integration Guide
Sound
Use sound as a visual alternative or to make computer sounds easier to hear or distinguish by adjusting the following options:
Volume
Sets the computer sound up or down.
Text-to-Speech
Sets the computer's hear command options and text read aloud.
Warnings
Defines visual warnings.
Notices
Defines the aural or visual cues when accessibility features are turned on or off.
Schemes
Associates computer sounds with specific system events.
Captions
Displays captions for speech and sounds.
Keyboard
You can make the following keyboard adjustments:
Repeat Rate
Defines how quickly a character repeats when a key is struck.
Tones
Defines tones when pressing certain keys.
Sticky Keys
Defines the modifier key, such as Shift, Ctrl, Alt, or the Windows Logo key, for shortcut key combinations. Sticky keys remain active until another key is pressed.

Mouse
Appendix A: Accessibility Features 97
Mouse
You can use the following options to make your mouse faster and easier to use:
Click Speed
Defines how fast to click the mouse button to make a selection.
Click Lock
Sets the mouse to highlight or drag without holding down the mouse button.
Reverse Action
Sets the reverse function controlled by the left and right mouse keys.
Blink Rate
Defines how fast the cursor blinks or if it blinks at all.
Pointer Options
Let you do the following:
■ Hide the pointer while typing
■ Show the location of the pointer
■ Set the speed that the pointer moves on the screen
■ Choose the pointer's size and color for increased visibility
■ Move the pointer to a default location in a dialog box