Bushido_Risen_Sun_Rules.pdf - GCT Studios
96
TABLE OF CONTENTS Game Overview 2 Getting ready ....................... 3 Terms and Concepts 4 Cards 10 e Rules 18 Warband Composition .............. 19 Game Setup & Turn ................. 21 Movement & placing ................ 24 Actions ........................... 26 Tests ............................. 30 Ranged Attacks .................... 34 Melee Exchanges................... 38 Wound Table ...................... 43 Special Abilities .................... 45 Model States ...................... 50 Ki Feats ........................... 54 Traits 57 Terrain 70 Scenario Rules 73 Scenarios 77 Keii ............................... 77 Seikyu ............................ 78 Idols .............................. 79 e Factions of Bushido 82 e Ito Clan ....................... 82 Cult of Yurei ....................... 83 Prefecture of Ryu ................... 84 Savage Wave ...................... 85 Temple of Ro-Kan .................. 86 Jung Pirates ....................... 87 e Descension .................... 88 Silvermoon Trade Syndicate ......... 89 Ronin ............................. 90 Minimoto. . . . . . . . . . . . . . . . . . . . . . . . . . 91 Kage Kaze Zoku .................... 92 Shiho Clan......................... 93 e Imperial Court .................. 94
-
Upload
khangminh22 -
Category
Documents
-
view
3 -
download
0
Transcript of Bushido_Risen_Sun_Rules.pdf - GCT Studios

TABLE OF CONTENTSGame Overview . . . . . . . . . . . . . . . . . . . . . . 2
Getting ready . . . . . . . . . . . . . . . . . . . . . . . 3
Terms and Concepts . . . . . . . . . . . . . . . . . .4
Cards . . . . . . . . . . . . . . . . . . . . . . . . . . . . . . 10
The Rules . . . . . . . . . . . . . . . . . . . . . . . . . . . 18Warband Composition . . . . . . . . . . . . . . 19Game Setup & Turn . . . . . . . . . . . . . . . . . 21Movement & placing . . . . . . . . . . . . . . . . 24Actions . . . . . . . . . . . . . . . . . . . . . . . . . . . 26Tests . . . . . . . . . . . . . . . . . . . . . . . . . . . . .30Ranged Attacks . . . . . . . . . . . . . . . . . . . .34Melee Exchanges . . . . . . . . . . . . . . . . . . .38Wound Table . . . . . . . . . . . . . . . . . . . . . .43Special Abilities . . . . . . . . . . . . . . . . . . . .45Model States . . . . . . . . . . . . . . . . . . . . . .50Ki Feats . . . . . . . . . . . . . . . . . . . . . . . . . . .54
Traits . . . . . . . . . . . . . . . . . . . . . . . . . . . . . . 57
Terrain . . . . . . . . . . . . . . . . . . . . . . . . . . . . .70
Scenario Rules . . . . . . . . . . . . . . . . . . . . . . 73
Scenarios . . . . . . . . . . . . . . . . . . . . . . . . . . . 77Keii . . . . . . . . . . . . . . . . . . . . . . . . . . . . . . . 77Seikyu . . . . . . . . . . . . . . . . . . . . . . . . . . . . 78Idols . . . . . . . . . . . . . . . . . . . . . . . . . . . . . . 79
The Factions of Bushido . . . . . . . . . . . . . .82The Ito Clan . . . . . . . . . . . . . . . . . . . . . . .82Cult of Yurei . . . . . . . . . . . . . . . . . . . . . . .83Prefecture of Ryu . . . . . . . . . . . . . . . . . . .84Savage Wave . . . . . . . . . . . . . . . . . . . . . .85Temple of Ro-Kan . . . . . . . . . . . . . . . . . .86Jung Pirates . . . . . . . . . . . . . . . . . . . . . . . 87The Descension . . . . . . . . . . . . . . . . . . . .88Silvermoon Trade Syndicate . . . . . . . . .89Ronin . . . . . . . . . . . . . . . . . . . . . . . . . . . . .90Minimoto. . . . . . . . . . . . . . . . . . . . . . . . . . 91Kage Kaze Zoku . . . . . . . . . . . . . . . . . . . . 92Shiho Clan . . . . . . . . . . . . . . . . . . . . . . . . . 93The Imperial Court . . . . . . . . . . . . . . . . . .94

2 Game Overview
Bushido - Risen Sun, is a game of savage battles, of cunning stratagems and last-ditch defences, and where debts of honour are paid in blood. In Bushido, the fate of the world hangs not on armies but on individual heroes, people of extraordinary capacity, attuned to the all-permeating life force known as Ki. This force is the fabric of the Bushido universe, and those with the appropriate training or natural talent can tap into this energy source and gain seemingly superhuman powers. In the world of Bushido, the delicate tapestry of Ki – and thus the universe itself – is threatened by the forces of imbalance, and it is up to you to protect it – or help rip it apart. In a game of Bushido, nothing less than the fate of the universe is at stake. Are you ready for the challenge of the Way of the Warrior?
Bushido is an exciting skirmish game designed for two players using exquisite 32mm miniatures. Take control of heroes or villains and clash with others for control of the Isles of Jwar! They say that the monks record their histories in scrolls and chanting, while the samurai write their legacy in blood, but in an intense game of Bushido, how you write your account is up to you! You’ll take turns moving your models around the battlefield, then rolling dice to see if your well-planned strategies succeed or fail. Bushido is not only about intense melee between razor-sharp swords and fists, but completing intricate Scenarios to score objectives and win the game. Strategy and savagery go hand-in-hand in a game of Bushido, Risen Sun.
GAME OVERVIEW

3
GETTING READYFor a game of Bushido, each player will need:• A copy of these rules.• A set of Bushido miniatures and
their cards. • A tape measure or a measuring
‘Widget’.• At least ten six-sided (D6) dice in
two different colours. Five in one colour, and five in another.
• Several coins, chips, or dice to track a model’s Ki Tokens during play; some people like to use ten-sided dice for this.
• To protect your cards use plastic card sleeves and a ‘dry wipe’ marker pen.
• An area to play on that is at least 2 foot by 2 foot. Usually, you’ll need a bit more space than this to accommodate dice, cards, snacks, drinks, etc.
• Several bits of terrain. These can vary in size, but no single piece should be larger than 9” x 9”.
• Optionally: Special Attack / Defence Cards for reference and a Bushido Token Set to help track ‘in-game’ states and effects.
Getting Ready

4 Terms and Concepts
Activating Model: The model as chosen by the Active Player currently resolving its action.
Active Player: The player whose turn it is to activate a model.
Base to Base: A model is in Base to Base (abbreviated BtB) with another model if their bases are physically touching. An activating model not in BtB already can only enter BtB with one Enemy model per activation. Some ranges are specified as BtB rather than in inches.
Battlefield: A game of Bushido takes place on a 2x2’ area we call the Battlefield. Models on the Battlefield or designated as being Elsewhere (see Elsewhere) are in play.
Controller: A model’s Controller is the player with whom it is currently Friendly.
Counters: Counters are named for the effect that requires them and may be used to count turn, activations or some other timing effect before they expire. Activation Counters are a particular type of counter. These show how many activations a model can make this turn. See Condition (p.26).
Cover: When Terrain partially blocks LOS to a model, that model gains Cover against Ranged Attacks. A model benefits from Cover from an enemy model if any Line of Sight from the Enemy passes through an
Obscuring or Blocking terrain element that is within 1” of the target model. See Cover (p.36).
Damage Roll: A roll using 2D6, applying any negative or positive modifiers then cross-referencing on the Wound Table in the column equal to the Success Level of the test, to see the number of wounds inflicted on a model. See Damage (p.43).
Deploy: When a model is first put into play it is Deployed onto the battlefield. This is not a Move or Place. A model may not be Deployed into BtB with an Enemy Model or in an Enemy Model’s ZoC. Models are Deployed with no Activation Counters.
Dice Rolls: Bushido uses ordinary six-sided dice. When a die is rolled, the number given is referred to as the value on the die. We use dice in the following ways: D6: The number shown on a single
six-sided die roll2D6: Two dice added together to give
a value between 2 and 12D3: Roll a D6. A roll of 1-2=1, 3-4=2,
5-6=3.D2: Roll a D6. A roll of 1-3=1, 4-6=2.
Some abilities call for a coin flip; this can be represented with a D2 if needed. In some instances a random model or other element may need to be selected, any straightforward method should suffice; assigning each a number then rolling a dice should also work.
TERMS AND CONCEPTS

5
Effects: This is a catch-all term for various rules including Ki Feats, Theme bonuses, Unique Effects, Event Cards or others. Usually, for timing we say “Effects that happen in this phase” or similar; this means any rule that says it happens in that phase.
Elsewhere: Elsewhere is a specific place for models in play but not on the Battlefield. These may be Flanking troops, models flying high over the battle or fighting on another plane of existence. Models in Elsewhere generate Ki tokens as usual and are affected by traits and states (Such as Fire and Regenerate) but do not generate Activation Markers and cannot spend tokens.
Enemy/Friendly: Models can either be Friendly or Enemy models, depending on which player’s Warband they are in; therefore Models in a player’s ‘own’ Warband are considered Friendly, while Models in an Opponent’s Warband are considered Enemy models.
Exhausted: A model with no Activation Counters is considered Exhausted.
Facing: A model’s Facing line is directly in the centre of the front of its base. It should be marked with a line or dot on the model’s base. Ninety degrees either side of a model’s facing line shows it’s Front Arc and should be marked on the model’s base with lines or dots. A model is Facing anything forward of it’s Front Arc.A model is Directly Facing anything in front of it’s facing line.
Faction: Models have a Faction Icon to denote which of the many warring factions from the Jwar Isles they belong to; therefore, if a rule references a Faction, it refers to the Faction Icon printed on the model’s card.
Initiative: The model with the Initiative checks its Attack dice first in Melee Exchanges and declares the use of Ki Boosts and Ki Feats after their Opponent (See Melee Sequence p.40). The Activating model has the Initiative unless a trait, State or game effect changes this.
Ki Boost: A Ki Boost is a special type of Ki Feat that increases statistics.
Killed: When a model has 0 wounds remaining on its Wound Track it is Killed, remove the model from the table. See Wound Track (p.12).
Terms and Concepts
Facing
Front Arc

6
Line of Sight: A model can draw LoS to points in its Facing.LoS is achieved if you can draw a straight line from any part of the origin model’s Base to a point in that origin model’s Facing.
Terrain and models block LoS except for the following:• LoS is not blocked by models and
Terrain elements smaller than the model LoS is being drawn to.
• LoS is not blocked by models (other than the model you are drawing LoS to) and Terrain elements smaller than the model drawing LoS.
LoS may be checked for any model (Friendly or Enemy) at any time.
Markers: Markers are used to mark what States are currently affecting a model. See States (p.53).
Measuring Distances: The unit of measure in Bushido is inches.• Movement distances are measured
from the nearest base edge to the point the model wishes to move following the route the model’s base will take.
• Targeting distances are measured from the nearest base edge of a model to the nearest base edge of the Target.
• Measurements, whether distances, LoS, or other measurements, may be taken at any time for any reason by either player. In timed play, the player whose clock is running always has priority and should not be obstructed by their opponents’ measuring devices.
• When measuring if a model or point is within a given range
then precisely up to that range is considered within. E.g. if the edge of a model’s base is exactly 6” away from its Opponent’s base, it is considered to be within 6”.
• If a range is given as BtB, then the model is in range of itself.
Terms and Concepts
Model A has no LoS to Model B since Models E and D are blocking LoS.Model C is Medium Based, so has LoS to Model A, likewise Model A has LoS to Model C.
Cb
A
DE

7
Modifiers: When a statistic is modified it can never go above double its base value. If results are divided and leave fractions, always round down except in the case of distances, where fractions of inches are kept. Numerical values of traits can be modified. See Traits (p.58).
If an effect requires dice to be substituted, the value of the die is often fixed to some value. It is helpful to physically remove the die and place it, showing that value, with the dice that were rolled. If a dice is substituted, it cannot be re-rolled. If modifiers, rerolls, adding or removal of dice affect any roll then only after all of these have been resolved can a result be determined.
Movement: Movement is measured using a tape measure (Or other measuring devices). If a model must move Toward another game element (such as another model or Terrain piece), then it cannot increase its distance from that element for any part of its movement. If it must move Directly Toward a game element, then it can only move in a straight line drawn from the centre of its base to the centre of the game element. Similarly, a model which must move Away cannot decrease its distance from that element for any part of its movement. If it must move Directly Away from a game element, then it can only move in a straight line drawn from the centre of its base away from the centre of the game element. An activating model can only enter BtB with one Enemy model per activation. Also, see Movement (p.24).
Open and Hidden Information: In Bushido, all information is ‘open’ unless explicitly stated otherwise; it
means that both players are entitled to read any rules, stats, model cards, special cards or any other information pertinent to the game, unless the rules explicitly state the information is hidden. Each player’s Hidden Information should be recorded on one sheet of paper and handed over after the game. If you have a third party, they can be used to check secret information during the game to make sure no mistakes happen.
Owner: A model’s owner is the player who initially recruited the model into their Warband or summoned the model, ignoring any control markers or game effects.
Place: Sometimes Models are Placed on the table instead of moving around the table. See Movement (p.25).
Replace: When a model is replaced, swap the model on the board with the new model.
If the model was not in play, the new model is considered Deployed. The player using the replacing effect chooses the new model’s facing. If the new model has a different sized base, then it must be placed so that the larger base entirely covers the area of the smaller base. If the model being replaced was in BtB with an enemy model, the new model must be placed in BtB with the enemy model if possible. When two models swap positions, replace each model with the other model.
Select: No LoS is needed to select a model; selecting is not targeting. A model may ‘select’ itself.
Terms and Concepts

8
Size: Unless a model’s Size is stated as a trait, it is determined by its base.• Small Base (30mm) = Small Size• Medium Base (40mm) = Medium Size• Large Base (50mm) = Large Size• Huge Base (60mm) = Huge Size
Tiny and Huge models are indicated by Traits. Models with these traits have the given size regardless of base size.
Supporting Dice: When making a Test, up to 2 Dice may be chosen as supporting dice, these each add +1 to the value of the highest dice roll to get the final result.
Targeting: A model must be able to draw LoS to another model to Target it. A model may always Target itself.
Test: Whenever a model attempts an action which may succeed or fail, it’s controlling player rolls dice to complete a Test. The value of the dice rolled will determine if the model succeeds or fails the test. See Tests (p.32).
Timing: Any effect which does not specify when it can be used may be used any time. The exception is during Melee Exchanges or Ranged Attacks - when the timing is restricted as detailed in the Melee Exchanges and Ranged Attacks section (p.36). If both players wish to use such effects the active player goes first.
If an effect does not have a stated expiration time, it ends in the End Phase.
Tokens: Tokens are used to track a model’s resources, such as Ki Tokens.
Virtue Tokens: Many effects give out Virtue Tokens, most commonly the Virtue Trait. This particular type of Token represents different benefits depending on the other models you recruit. Some models have abilities that can only be used by spending a Virtue Token. When a model spends a Virtue Token, you may choose any permitted ability on the card of any Friendly model in play. Note: Some models have abilities only useable by that model; see individual cards for details.
Terms and Concepts
Example: Ito Ayako has the Virtue trait; this allows her to give out Virtue Tokens. Ito Kenzo has a Virtue Token; therefore Kenzo can spend the Virtue Token any time he would be able to use an Instant Ki Feat. He declares that he is spending the Virtue Token. He then consults the other profiles in his Warband. In this case, Kauzhiko and Ito Ayako are in the same Warband. Consulting both profile cards, Kenzo could choose a single benfit from Kazuhiko’s card:
Looking at Ayako’s card, Kenzo could gain one of the following benefits:
Kenzo can choose from any of these five benefits when he spends his token. Deciding that Lightning Reflexes until the End Phase is what he needs, Kenzo picks that benefit from Ayako’s card and spends the Virtue Token to gain Lightning Reflexes.

9
Warband: A player’s Warband consists of recruited, Summoned and Controlled models as well as Special cards.
Zone of Control: In Bushido, every model has a Zone of Control (abbreviated as ZoC) extending 1” from the edge of its base to any point within its LoS. Models ignore Friendly Zones of Control, but once a model enters an Enemy model’s ZoC, it may only move directly towards that model, or directly away, until it leaves the ZoC. Models beginning their activations in one or more Enemy model’s ZoC must either declare an action that allows them to move into BtB with one of those models and move directly toward the enemy model until they reach BtB, or declare another action that allows a move. However, they must move directly away from the enemy model until they
leave the ZoC; or away from all models until they leave all Enemy model’s ZoC if in multiple Zones of Control, after which they can move freely.
Models can ignore the ZoC of Models that are in BtB with Enemy models for movement and declaring or performing actions (Such as Ranged Attack Actions or Scenario Actions which otherwise cannot be performed in a ZoC). If a model moves out of BtB, then it may ignore the ZoC until that move is completed.
Terms and Concepts
Zone of Control

10
PROFILE CARDSA profile card represents models in Bushido. The profile card contains all the rules specific to that model or all models that can be represented by that card. You may also use the profile card to keep track of the wounds sustained by your model(s), Ki Tokens and game effects.
1 . Name: The name of the model(s). If this card represents a unique individual character rather than one or more generic profiles, this has a special border, and the Rice Cost is coloured Gold.
2 . Elemental Icons: Some models are aspected towards one or more of the six elements:
Earth Water Fire Metal Air Void
3 . Base Size
4 . Type: The type indicates all the keywords that refer to the model. A model can have multiple types, these are separated by commas, and a model is always all of its types.
The Name and Types of models can often be referred to by other rules. Traits often have a [Type] that singles out what models the trait affects. This [Type] can also be a model’s name. Plural words are considered the same type as the same singular word for cards with multiple wound tracks.
CARDS
Cards
1
26
7
10 12
8
9
11
4
5a 5b
5c 5d
3

11
5 . Statistics: The number is the model’s base statistic value. Some effects modify a statistic, but it can never go above double its base value. If a statistic is 0, it can be modified to a maximum of 1.
If a “-” icon represents a statistic, then it counts as zero but cannot be modified by positive or negative modifiers.
Some models may have a Ki boost icon to the side of the Statistic value. This is the Statistic’s Boost cost. This is the cost in Ki Tokens to increase the Statistic by 1. Boosts remain only for the current Test or Movement. A player may increase a Statistic multiple times (to a maximum of double its base Statistic), as long as there are Ki Tokens available to do so. Boosts are considered Ki Feats. See Ki Feats (p.56).
a) Melee Pool Statistic: This is the number of dice the model uses when resolving an Opposed Melee test.
b) Ranged Pool Statistic: This is the number of dice the model uses when resolving a Ranged Attack.
Note: Many models will have some Ranged pool statistic even if they do not have a ranged weapon. Perhaps they can be bought a ranged weapon or use the ability in some other way.
c) Move Statistic: The distance the model can move in inches when it makes a movement that specifies this distance. Also, the number of dice rolled for a Move Test.
Cards
Example: Aiko; Unsui, Monk, Shugenja is a Temple of Ro-Kan model.
The Silverback’s trait Bodyguard[Aiko](3”) works on her because her name is Aiko.
An enemy Kyuubi would gain the bonus for Vengeance because she is a Shugenja.
She can be included in the Righteous Warriors theme because she is a Monk.
In addition, she is Unsui and so not a model affected by Ume’s Mentor rule.
Example: Both Kintaru and Fishermen of the Ro-Kan are Fisherman models. Kintaru, because he has it in his type, Fisherman of the Ro-Kan because it’s in the name.
TYPES

12
d) Ki Statistic/Maximum Ki Limit: The Ki statistic is actually 2 statistics represented by two numbers written X/Y. The X number is the model’s Ki statistic. This tells you the amount of Ki Tokens each model represented by this card generates during the Starting Phase and the number of dice it uses for Opposed and Challenge Ki tests.
The second Y number is the model’s Ki Limit, the maximum number of Ki Tokens each model represented by this card can have at any one time. If it would gain more than this, any excess is discarded.
6 . Wounds Track: The number of wounds a model can suffer. When a model suffers wounds an equal amount are marked from its Wound Track. When a model is reduced to 0 wounds remaining on its Wound Track it is Killed; remove the model from the table. When a model Heals wounds, it recovers marked wounds from its Wound Track. A model cannot Heal more than it has marked wounds.
Some cards have multiple Wound Tracks to use for multiple identical models. The number of Wound Tracks is the limit to how many of these models you may recruit in a Warband.
Kami models (see p.64) do not have wound tracks. The number of identical kami models you may include is listed next to it’s Base Size.
7 . Traits: Each model may have several traits that describe how it behaves in the game. This makes those traits easier to find when you need them. Some traits are Weapon Traits; these are listed on the model’s weapon grid and are only in effect when using that weapon. See Traits (p.58).
8 . Ki Feats: Ki Feats available to the model(s). See Ki Feats (p.56).
9 . Melee and Ranged Weapon Grids: All models in Bushido have a melee weapon, though for many they are fists and feet or claws and teeth. Some also have a ranged weapon. The weapon grid also lists any weapon traits that are in effect when using that weapon, as well as any special attacks and defences that are available when using that weapon:
a) Designates the weapon as either a Melee or Ranged Attack weapon. Ranged Weapons have Range Bands.• Short Range (first value):
Ranged Attacks against Targets up to and including this distance are at Short Range.
• Medium Range (second value): Ranged Attacks against Targets beyond Short Range and up to and including this distance are at Medium Range.
• Long Range (third value): Ranged Attacks against Targets beyond Medium Range and up to and including this distance are at Long Range.
• Ranged Attacks against Targets at distances exceeding the weapon’s Long Range automatically fail.
ab
cd
cb
a
Cards

13
b) A weapon’s Strength modifier to any Damage Rolls made by this weapon. (Sp) Indicates a special effect instead of a standard damage roll, see the Unique Effects section of the model’s profile card for details.
c) Any Traits associated with the weapon.
d) Any Special Attacks and Defences available when using that weapon.
10 . Faction symbol: Which Faction the model belongs to. Some models are from the Ronin Faction. Your Warband can only recruit models that belong to your chosen Faction or Ronin models recruitable by your chosen faction as indicated on the Ronin model’s card. See Ronin (p.19).
11 . Unique Effects: Any additional rules that are not Traits or Feats.
11a. Traits Reminder Text: Starter set cards have reminder text for all their traits. Remember this is just a reminder of the rule; the full version is in this rulebook, always look up the complete rules text if there is an issue mid game for clarification.
12 . Rice Cost: The cost to recruit this model into your Warband.
Models with Su are Summoned models that enter play during the game through a Ki Feat or Unique Effect and cannot be recruited when creating your Warband.
Models with Sp are models with a special rule which will be explained on its profile card and cannot be recruited when creating your Warband.
If a card’s Rice Cost is followed with ea, then more than one model represented by that card may be recruited into your Warband. Each model recruited pays the cost specified. If a model’s Rice Cost is increased or decreased by a Theme list or other rule, the original printed Rice Cost is still used for all game effects relying on the Model’s Rice Cost.
Cards

14
SPECIAL CARDSFaction decks include special cards specific to each faction with a Ronin set of special cards available to every faction. Each card can only be recruited once per Warband unless it has the Max (X) trait.
There are three types of Special cards that players can recruit when creating their Warband - Enhancements, Events, and Terrain. Each type acts differently in how and what they affect during the game. These are explained in detail below, but all special cards are comprised of the following features:
1 . Name: The card’s name.
2 . Faction: A Warband can only purchase Special cards with the same Faction symbol as the Warband, or those with the Ronin Faction symbol.
3 . Type: This specifies if it is an Event, Enhancement or Terrain card.
4 . Description: Describes the card’s effects.
5 . Traits: Any traits that apply to that card.
6 . Rice Cost: The cost to recruit the card for the Warband. If the cost is variable it’s X value is chosen and locked at Warband Creation. Costs cannot be modified below 1 Rice.
Some cards say to Discard the card after a specific trigger happens. A Discarded Special card has no effect on the game from that point onward.
ENHANCEMENT CARDS
The player must decide which profile card an Enhancement card is Attached to during the creation of their Warband. During play, place an Attached Enhancement card under the chosen profile card. The model(s) will benefit from the effects detailed on the card for as long as it is Attached to the model(s)’ profile card.
Models with the Insignificant trait cannot have Enhancement cards Attached to their profile cards during Warband creation. Animal, Construct, Kami and Swarm models may only have Enhancement cards that specifically name them as Required.
Some models have multiple profile cards. If a card says X and Y are considered the same model when creating a Warband, then any Enhancement cards bought for either card are moved to the one starting in play before the game.
Cards
12
3
4
5
6

15
Some cards represent multiple models and have multiple wound tracks. Enhancement cards will specify if they can be bought for such models multiple times or can only be bought for a single model on the card. In the case of enhancements applied to a single model on a card representing multiple models, the enhanced model must be distinguishable from otherwise identical models without the enhancement.
Enhancement Card Traits:Equipment: This represents a physical item. A model may have only one Equipment card attached to it.Max (X): This card can be purchased for a Warband up to X times.Required [Type]: This card can only be Attached to the type of model stated.Exclusion [Type]: This card cannot be Attached to the type of model stated.
EVENT CARDS
Event cards are played once, at a time detailed on the card. Once the card is resolved, then it is discarded and removed from the game.
Some event cards may result in another special card being put into play, often as a result of some action on the table. In these cases, the other special card will be printed on the reverse side of the Event card and can only be recruited in this way.
Event Card Traits:Max (X): This card can be purchased for a Warband up to X times.Required [Type]: This card is restricted in how it can be played or recruited and requires a [Type] of model or specifies another restriction.
Cards
12
3
4
6

16
TERRAIN CARDS Terrain cards allow a player to deploy a specified Terrain element on the table during the player’s normal Deployment of their Warband. Terrain elements deployed due to Terrain cards must follow standard rules for Terrain element deployment unless stated on the card.
If restrictions mean that the terrain cannot be deployed, the opposing player must make as small an alteration as possible to allow the bought terrain to be placed.
Terrain Card Traits:Destructible: A model in base contact with this terrain and not in an enemy ZoC can declare a wait action and spend 2Ki to remove it from the table.Max (X): This card can be purchased for a Warband up to X times.Required [Type]: This card is restricted in how it can be played or recruited and requires a [Type] of model.
For Passage, Visibility and Size traits See Terrain (p.72).
Cards
12
3
4
5
6

17
THEME LIST CARDS
A player can only use one Theme per Warband. Themed lists allow you to trade restrictions in Warband composition for other bonuses during gameplay.
Theme Card Traits:Permitted (Type): Only models with a matching type can be recruited into this Warband, Ronin models of the type may only be included if the theme states Ronin of that type are permitted.If a Theme list card does not have this trait, all models from the chosen Faction and all Ronin available to that faction are available to recruit into the theme.Exclusion (Type): Models with a matching type cannot be recruited into this Warband.
If a profile qualifies for both the Permitted and Exclusion of a theme, the Exclusion takes priority, and the model may not be recruited.
Some models or special cards, when recruited into a Warband, permit other models to be recruited. Other models may require a specific model to be recruited into the Warband before they can be included. If a model is permitted in a Theme then any model it allows to be recruited is also allowed in the theme regardless of any Exclusion.
If a model or special card is permitted in a theme list, any model summoned by that model is also allowed to be summoned.
Cards
Example: Aiko is recruited into the Righteous Warriors Theme, Silverback can now be recruited even though animals, gorillas and Silverback are not listed in the Permitted models.
12
3
4
5

18
This section covers the rules of the game.
RULE #1: RULES CONFLICTSWhen two rules come into direct conflict, use the following order of precedence to determine how to proceed:1. If one rule (Rule A) references
another rule (Rule B) by name, then Rule A takes priority. If this does not resolve the conflict, then move on to step 2 below.
2. Rules that prevent something happening take priority over rules that force something to happen. If this does not resolve the conflict, then move on to step 3 below.
3. If effects happen at the same time, the active player chooses the order to resolve them.
The Rules
THE RULES
Example: Kenko uses Slam Attack on Mikio. Mikio has used Mountain Stance which grants immovable. Slam Attack makes no reference to Immovable, or vice versa - so test 1 does not resolve this. However, per test 2, since Immovable is stopping an effect from happening, it takes priority over the Slam rules, and Mikio is not moved or knocked prone.

19
WARBAND COMPOSITIONTo recruit a Warband, players must choose a Rice Limit and a Faction to play.
The Rice Limit determines the size of the game and can be arbitrarily chosen. While you can play games with any amount of Rice you will find the following standard formats:• 70 rice, Introductory level suggested
for quicker games.• 100 rice, Standard game format and
suggested level for events.
A Warband may not be of the Ronin Faction. A player’s Warband in Bushido is made up of several models, and any Special cards from the same Faction and may include Ronin that may be recruited by that Faction.
The Rice Cost of your Warband must come to the total agreed upon with your Opponent. A Player can only recruit one of each card; this does not prohibit the Opponent from recruiting the card for their Warband. Sometimes two or more models are represented by the same profile card. A player can choose to recruit as many models as there are Wound tracks on the profile card.
RONIN MODELSRonin represent wanderers, mercenaries, diplomats, outcasts and other individuals who may fight for more than one Faction. From three Imperial Princesses expecting hospitality from the Tengu to Sojobo leaving his people without a King to seek the enlightenment of the Temple. Ronin each have different
motivations for working with many Factions, but all follow these rules.a) Ronin models can be included in
Warbands of multiple different factions. Ronin models may be recruited into any Warband of a faction that is listed on the Ronin card either by faction symbol or in words.
b) Ronin are NOT considered to be of the faction of the Warband they are recruited into for game effects. If an effect specifies it works only on Faction models, then it does not work on Ronin.
c) Ronin can only have Ronin Enhancement cards and cannot be included in any Faction theme lists unless the theme specifies Ronin of that type.
d) They can be included in Ronin Theme Lists.
e) It is permissible to make a list for a given faction that includes only Ronin models that work for that Faction, but when creating a Warband, you cannot choose Ronin as your Faction.
Example: A Prefecture list using the Blood of the Dragon theme can include Samurai but cannot include Golden Sentinel models as the theme does not include Ronin Samurai.
Example: It is possible to create a Warband entirely made of Ronin. First choose a faction (Prefecture, Ito, Silvermoon etc…) and choose Ronin available to that faction.It is not a “Ronin Faction” list as this is not permitted.
Warband Composition


21
GAME SETUPBefore starting the first Turn, players need to set up the game using the following steps:
1. First, each player should create a Warband. See Warband Creation (p.19).
2. Then either agree on or randomly decide, a Scenario to play. See Scenarios (p.77).
3. Players deploy/nominate any Scenario Objectives as instructed by the Scenario.
4. Players deploy Terrain and then select Deployment Zones. See Terrain (p.72).
When deploying Terrain elements, follow these three steps:a. Players should make a
Deployment Tactical Test; the winner decides which player is Player 1. Player 1 sets up a terrain element first.
b. Players alternate in choosing Terrain elements until at least six elements are deployed. You may continue adding more terrain elements after this, but if one player chooses to stop, the other may only deploy one final terrain piece.
c. The player who chose to stop placing terrain then chooses one of the Deployment Zones as dictated by the scenario.
• No Impassable Terrain element may be deployed within a Scenario or Deployment Zone.
• No Impassable Terrain element may be deployed within 2” of a Scenario Objective or another Terrain element with the Impassable trait.
5. The Winner of the Deployment Tactical Test deploys terrain that is part of their Warband first, followed by the second player deploying terrain from their Warband.
6. Players simultaneously Declare or Record any VIMs. See Scenarios (p.77).
7. Player 1 then decides which player deploys first; that player then deploys their entire force as detailed by the scenario. The second player then deploys their entire force as detailed by the scenario. See the Scout and Flank traits for deployment exceptions (p.67, p.62).
8. The First Turn then begins.
GAME SETUP & TURN
Game Setup & Turn

22
A GAME TURNGames of Bushido are broken down into a number of Turns. How many Turns the game lasts is dictated by the Scenario being played.
Each game Turn is divided into three Phases. The three Phases are the Starting Phase, the Main Phase and the End Phase.
STARTING PHASE1. Roll for Variable Turns. See Scenarios
(p.76).
2. Ki Generation: All models gain a number of Ki Tokens equal to the first number of their Ki Statistic.
3. All models gain 2 Activation Counters each.
4. Tactical Test: Resolve the Tactical Test to see which player is Active.
5. Resolve any effects which happen “In the starting phase”, with the Active Player resolving their effects first in the order of their choice.
6. Players calculate the number of Pass Tokens for the Turn. Each player totals the number of models in their Warband. The player with the least gains the difference in Pass Tokens.
MAIN PHASE1. Starting with the Player chosen to
go first via the Tactical roll.
2. The player becomes the Active Player.1. From this point, the Active Player
may use Active Feats.
3. The Active Player chooses a model in their Warband and declares a Simple or Complex action for it to perform.
Alternatively, the player may spend a Pass Token instead of taking an action with one of their models, if they do, skip to step 5. Players must activate a model if they have models with activation counters available unless they spend a pass token.
4. The model’s action is resolved.
5. The Active player may use Active Feats for the last time this activation.
6. The Opponent then becomes the Active Player and follows from Step 2. If the Opponent is unable to activate any models, then the current player continues to be the Active Player until they are also unable to activate any models.
7. Once neither player can activate a model, move to the End Phase.
Game Setup & Turn

23
END PHASE1. Resolve any effects that occur in
the End Phase (Other than those expressly stated to resolve in another step). Always resolve the adverse effects first.
2. Resolve states that cause Damage in the End Phase (Fire, Bleeding, Poison).
3. Effects that expire in the End Phase now expire.
4. Refer to the Scenario being played and check for the scoring of Victory Points. If this is the final Turn or if all three available Victory Points have been scored, the game ends (Games can only end in the End Phase). If either player has no models left on the table, the game ends, and Victory Points are calculated immediately.
5. Discard any unspent Pass Tokens.
Game Setup & Turn

24
MOVEMENT & PLACING
Movement & Placing
The model moves up to the given distance, along any path, subject to the restrictions for the action or ability that permits a move and may change its Facing at the end of the movement. Changing Facing is considered a movement, even if the model remains in the same place. During this movement, the models base may not pass through another model’s base or impassable terrain. If an effect allows a player to move an opponent’s model, it’s facing may not be changed unless the effect specifically states otherwise.
The model may make a move up to the distance stated (If no distance is given, the walk is up to the model’s Move Statistic in inches) in any direction. A model performing a Walk may not move into an Enemy ZoC or move into or out of BtB with an Enemy model. If an effect allows a player to walk an opponent’s model, that player chooses it’s facing at the end of the walk.
MOVE
WALK
Models can move around the board in a number of ways depending on the action chosen when the model activates or the effects applied to those models. Some models are naturally faster than others, represented by their Move statistic and Move Boost; many models also have abilities or Ki Feats which allow them to move. Any model may use different types of movement by choosing the requisite action; some effects also allow movement; the effect will tell you how the model moves. Effects that are triggered by movement can trigger from any of these.
If a model would be moved past the edge of the game area, then it stops when its base touches the edge of the board. A model cannot be Placed with any part of its base off the board edge.

The model may choose a point within its LoS then rotate to face that point. The model may then make a movement in a straight line, directly towards that point. A model may not Run into an Enemy model’s ZoC, into BtB with an Enemy model, or change its Facing after the movement.
Placing a model is not considered Movement. Just pick up the model and place it in its new permitted location. It does not have a move path, and it ignores ZoC, models and terrain between it, and it’s final location. If a model is Placed, it cannot be placed into the area of an Impassable Terrain Element, another model or into BtB with an Enemy model. Each specific Place effect may have further restrictions. The player Placing the model decides the model’s Facing.
The model Targets an Enemy model, moving up to double its Move Statistic towards that model in a straight line which would bring its base into contact with the Target’s base or ZoC.During this movement, it may not contact an enemy ZoC other than the Target’s. If this movement would cause it to contact another Enemy model’s ZoC, its movement stops immediately before that ZoC. Once in contact with the Targeted model’s ZoC or if the targeted model is in the acting model’s ZoC, the charging model may ignore the ZoC of other Enemy models.Once the charging model contacts the Target model’s ZoC, it must move directly towards the target until it is in BtB. This movement need not be along the straight path of the charge movement.
RUN
PLACE
CHARGE

26
Models in Bushido perform actions to affect the game. The actions a model can take depend on the number of Activation counters on that model and whether it’s in BtB with an Enemy model.
If a model cannot legally declare any actions (due to states, traits or other game effects) when chosen to activate the model immediately becomes exhausted.
Models in BtB with an Enemy model may not declare Actions or Ki Feats with the icon. See Ki Feats (p.56).
The Active Player chooses which model they are activating (the Activating Model) and what Simple or Complex action the model will take.
Remember Exhausted models cannot be chosen to activate, but can still participate in Melee Exchanges if Targeted by a Charge or selected for a Melee action.
CONDITIONDuring the Starting Phase, each model gains 2 Activation Counters. Each time a player becomes the active player, they choose one model with activation counters to perform an action. Once a simple action is completed, remove one Activation Counter. Once a complex action is completed remove two Activation Counters. If a model participates in a Melee exchange has Activation Counters, it loses one Activation Counter for participating in the Melee Exchange in addition to the Activating model who performs the Melee action.
If an effect says a model makes an Action, such as a Walk Action or other Standard Action, even as part of a larger effect or another model’s activation, it loses an Activation Counter. If the effect allows the model to Walk, Melee or other effect but does not make an Action, then it does not lose an Activation Counter.
A model with no Activation counters is Exhausted and cannot be chosen to activate. If a model has only one Activation counter, it cannot declare a complex action.
Actions
ACTIONS
Example: Hanso uses his “Move it!” Ki Feat on two Yarimen. Both Yarimen make a Walk up to their Move Stat in inches, but this is not a Walk Action, so they do not lose an Activation Counter.
Example: Katsumoto uses his Command trait on 2 Yarimen. Both Yarimen declare a melee action. As Command specifies a Simple Action, the Yarimen lose an Activation Counter each.

27
STANDARD ACTIONSStandard actions in the game fall into two categories - Simple or Complex. Simple Actions remove one activation marker, while Complex Actions remove two activation markers. Traits and Unique effects may grant other actions, but they are not considered Standard actions.
SIMPLE ACTIONSMelee Action: Select an enemy model. The Activating model must attempt to enter BtB with the Enemy model by moving up to its Move Statistic in inches. During this movement, it may only enter into the ZoC of the model with whom it is attempting to enter BtB. However, while within that model’s ZoC or if the selected model is in the acting model’s ZoC it may ignore other Enemy models’ Zones of Control.
If at the end of its movement, it is in BtB with the selected Enemy model, it must resolve a Melee Exchange.
Models that are starting their activation in BtB with a single Enemy model may only move around that Enemy model’s base, ignoring the ZoC of enemy models. They may enter BtB with a different chosen model as part of this move. After moving a Melee Exchange is resolved with the chosen model in BtB.
If a model starting its activation in BtB with an Enemy model attempts to enter BtB with another Enemy model and fails to do so, it must resolve a Melee Exchange against the model it started in BtB with. Note you only remove one activation counter from a model for declaring a melee action and being involved in the resulting melee exchange.
Disengage Action: Choose one enemy model in BtB with the activating model. The activating model resolves a Melee Exchange against that model. It must allocate at least as many dice to Defence as to Attack, and if unable to do this (E.g. the model is Aggressive) then it may not attempt a Disengage Action. If the Activating model successfully defends or ends the exchange, not in BtB with the chosen model, after the Melee is resolved, it may make a Walk up to its Move Statistic in inches, ignoring all models in BtB.
Simple Ki Feat Action: The Activating model may attempt a Simple Ki Feat listed on its profile card. Some Ki Feats cannot be used while in BtB; they will have the symbol in their entry on the model’s card. Some Ki Feats can be combined with a Walk. See Ki Feats (p.56).
Actions

28
Ranged Attack Action: The Activating model makes a Ranged Attack (see Ranged Attack, p.36) and may make a Walk up to its move in inches either before or after the Ranged Attack is resolved; you must declare whether you will walk as part of declaring the action. The model cannot make a Ranged Attack while in BtB or within the ZoC of an Enemy model. A model making a Ranged Attack may be referred to as “The Attacker”.
Run Action: The model may make a Run up to 1.5 x its Move Statistic in inches. See Movement (p.24).
Simple Scenario Action: The model may not be in BtB with an Enemy model, or in an Enemy’s ZoC, and must be in BtB with a Scenario Objective. Turn the Activating model to face the objective directly. See the specific Scenario to resolve any other effects of the Action.
Stand Up Action: This action may only be declared if the Activating model is Prone. The model removes its Prone State marker and may change its Facing. After removing the marker, if the model is in BtB with an Enemy model, then resolve a Melee Exchange with a -1 Melee Pool penalty.
Wait Action: The Activating model takes no other action. Instead, it may choose one of the following effects triggered by taking the Wait Action.• Remove all Stunned Markers• Remove all Immobilised Markers• Remove up to 2 Fire Markers• Remove a Reload Marker• An effect triggered by a Wait action,
specified on the model’s card or a special card
• Remove a piece of destructible Terrain which the activating model is in BtB contact with from the table by spending 2Ki.
Walk Action: The Activating model may make a Walk up to its Movement Statistic in inches. See Movement (p.24).
Actions

29
COMPLEX ACTIONSCharge Action: The Activating model makes a Charge move. See Movement (p.24).
If a model does not have enough movement to achieve BtB with its Target, then it cannot declare a charge action on that target. After moving into BtB, a Melee Exchange is resolved. For this Melee Exchange, the charging model gains +2 to its first Damage Roll.
Complex Ki Feat Action: The Activating model may attempt a Complex Ki feat listed on its profile card. Some Ki Feats can be combined with a Walk. See Ki Feats (p.56).
Focus Action: The Activating model gains the number of Ki Tokens equal to its Ki Statistic.
Complex Scenario Action: The model may not be in BtB with an Enemy model or in an Enemy’s ZoC and must be in BtB with a Scenario Objective. Turn the Activating model to face the objective. See the specific Scenario to resolve any other effects of the Action.
Actions

30 Tests
To see whether a model’s action is successful, and how successful, often requires a test.
There are two types of tests in Bushido, Opposed and Challenge. Both tests involve rolling D6’s. Opposed tests pit both players against each other, while Challenge Tests require one player to roll dice against a Challenge Number.
If the result on a die is a natural 1 (After rerolls) then it is ignored when calculating the result of the dice roll, it is removed from the pool entirely and does not count for tiebreakers when counting the number of dice rolled. If all dice rolled result in 1’s, then the final result is considered 0.
If, naturally or because of negative modifiers, a model’s Statistic value used for an Opposed or Challenge test is 0 or less the player still rolls a single die. In Opposed tests, both players gain a die in their pool until both players have at least one die.
Remember that two numbers represent a model’s Ki, the Ki Statistic and the Maximum Ki Limit. When conducting tests relying on the Ki Statistic, the Maximum Ki Limit is not relevant.
When declaring the use of Ki Feats (Including Ki Boosts) during any test, the Opponent declares first and the Activating model or the Model with the Initiative if in a Melee Exchange, declares second.
CONDUCTING RE-ROLLSIf dice must be re-rolled, then re-rolls should be conducted in the following order with Model A being the model with the initiative or the Activating model, and Model B being the Opponent:1. Model B picks any of Model A’s dice;
these dice are then re-rolled. Model B then picks any of their own dice; these dice are then re-rolled.
2. Model A picks any of Model B’s dice; these dice are then re-rolled. Model A then picks any of their own dice; these dice are then re-rolled.
TESTS
Example: Wu-Zang has a base melee pool of 1. In a melee exchange, Wu-Zang is Exhausted and has a Stunned Marker. His current Melee Pool is -1. His opponent, Jin has 3 Melee Pool. Both players gain two dice to bring Wu-Zang up to one die and his opponent to 5 dice.
Example: Hanzo has a Ki Statistic of 2 and a Maximum Ki Limit of 6, represented as 2/6 on his profile card. When Hanzo takes a test relying on the Ki Statistic, his dice pool is two before any modifiers.

31
OPPOSED TESTSThese type of tests require two models to roll a number of dice equal to the Statistic value for the test. For an Opposed Melee Test, for example, you would roll a number of dice equal to the models’ Melee Pool Statistics. Opposed Tests are resolved in the following order:1. The models calculate their dice
pools, deciding if they will use anyabilities, Ki Feats or increase theStatistic being used through a KiBoost. The Active player declaressecond.
2. Both players then roll their dice andconduct any re-rolls.
3. Both players remove any dice witha value of 1.
4. The models apply any modifiersnecessary to their highest die resultrolled. Next, up to two additionaldice that were not removedcontribute +1 per die to the finalresult of the roll. These additionaldice are called Supporting Dice.
5. The final results are then compared,the successful model being theone with the highest final result. Ifone model is successful, the otheris not. The difference between thefinal results is the Success Level ofthe test.
In the case of final results being equal, tiebreakers are used in the following order:1. The player who rolled the highest
number of dice (subtracting rolls of1 from the total) wins.
2. Otherwise, the Active Player wins.
Tests

32
CHALLENGE TESTSThese type of tests require one model to roll a number of dice equal to the Statistic value for the test. These will be called out with a Challenge Number in brackets, for example, Ki Challenge Test (5) or Move Challenge Test (6). The Challenge Number is the number that must be equalled or exceeded by the final result of the dice rolled. If no Statistic is specified, then the Challenge test is made using a single D6. The Challenge Number can also be modified; it is possible for the Challenge number to be zero or negative.
ROLLING A CHALLENGE TEST1. Calculate the model’s dice pool,
deciding if they will use any abilities, Ki Feats or increase the Statistic being used through a Ki Boost.
2. Roll the dice and conduct any re-rolls.
3. Remove any dice with a value of 1.4. Apply any modifiers necessary to
the highest die result rolled. Next, up to two additional dice that were not removed contribute +1 per die to the final result of the roll. These additional dice are called Supporting Dice.
5. The final result is then compared to the Challenge Number; if the Result equals or exceeds the Challenge Number, the Challenge Test is Successful. For tests requiring a Success Level, the difference between the final result and the Challenge Number is the Success Level for the test.
Tests

33
SIZE CHALLENGE TESTSA Size Challenge Test is a Challenge Test using a model’s Size in place of a Statistic. A model taking a Size Challenge Test rolls a number of dice based on its size as shown in the table below. Modifiers are then applied to the result of the roll if applicable.
Size Number of DiceTiny 1
Small 2Medium 3
Large 4Huge 5
Trait ModifierStrong +1Weak -1
Swarm -1
TACTICAL TESTSTactical tests occur at the beginning of every turn and determine who will be the Active Player first in the Turn. Both players nominate a model to perform an Opposed test using a single D6 (applying modifiers from traits such as Tactician or Scout); the player who succeeds decides which player will be the Active Player first in the Turn. This player also declares second when declaring the use of effects during the Starting and End phase until the next Tactical Test. In the case of a tie after checking the number of Dice, there is no Active Player during this roll, so the test must be re-rolled.
FEAR CHALLENGE TESTSFear tests are Challenge tests using the model’s Ki Statistic. Any effects that affect Ki Challenge Tests also affect Fear Tests.
Models with the Fear (X) trait, automatically pass Fear tests with a Challenge Number equal to or lower than their Fear (X) trait. They still take a Fear test if the Challenge Number is higher than their Fear (X) trait.
Resolve a Fear Test when:1. An Activating model declares an
action or effect that would bring it into BtB with an Enemy model with the Fear trait. If the Activating model fails the Fear test, regardless of the action declared, remove one activation counter, (see actions, p.29), and its activation ends. It does not enter the Frightened State.
2. An Activating model with the Fear trait declares an action that would bring it into BtB with an Enemy model. If the Enemy model fails its Fear test then it enters the Frightened State (See Model States, p.53).
Tests

34
A model must have a ranged weapon to make a Ranged Attack. A Ranged Attack is a type of Challenge Test, and the usual rules apply, during a Ranged Attack the use of Instant and Active Ki Feats (And effects that can be used as Instants) is restricted. A model making a Ranged attack may be referred to as “The Attacker”.
To make a ranged attack merely take a number of dice equal to the attacking model’s Ranged Pool Statistic. A model can use Instant Ki Feats including Ki Boosts to modify their Ranged Pool.
Determine the Challenge number based on Range and relevant modifiers.
Make a challenge test as normal, followed by a damage roll based on the Success Level of the test. If ranged attacks target models in BtB with a Friendly model an additional challenge test is required before the damage roll to determine if you hit your target or miss and hit the Friendly model (See Targeting a Model in BtB, p.36).
DETERMINING THE RANGED ATTACK CHALLENGE NUMBER
Range BandBase Challenge
NumberShort 4
Medium 5Long 6
Effect ModifierTarget is Tiny + 1
Target is Small + 0Target is Medium - 1
Target is Large - 2Target is Huge - 3Target is Prone - 1
Target is Surprised - 1Target is in Cover + 2Target Model Ran
(this turn)+ 1
Activating Model Ran (this turn)
+ 1
Activating Model Moved (or will move as part of
this action)+ 1
Activating Model already made a Ranged Attack
this turn.+ 1
Remember Traits such as Brutal, Ranged Defence and others may also modify the roll.
The full timing for Ranged attacks is detailed on the next page.
RANGED ATTACKS
Ranged Attacks

35
1 . a) If the Model has multiple ranged Weapons, choose which one it will make the Ranged Attack with.
b) Target an Enemy model.c) Measure the distance to the
Enemy model and check this distance against the weapon’s Range Bands to see which Range the Ranged Attack is at (see Profile Cards, p.10). If the distance is further than the Long Range of the weapon the action fails, move to step 7.
d) The player Controlling the Targeted model may at this point nominate a different Friendly model as the new Target if:i . Any LoS from the Attacker
crosses through the nominated model’s ZoC before contacting the original Target’s Base.
ii . The nominated model is able to draw LoS to the Activating model and is a valid target for the Ranged Attack.
iii . The nominated model is not Exhausted.
iv . If a model was nominated and the steps I, ii and iii were met, then the nominated model becomes the Targeted model. The new target cannot gain cover unless both the original target and the nominated model had cover from the attacker.
e) Players declare the use of any Ki Feats, traits or Unique Effects by any model. The active player declares second.
Resolve any Ki Feats, traits or Unique Effects at the correct time, in case of conflict, resolve the active player’s effects first.
Ranged Attacks
f) Challenge Number of the Ranged Attack test is calculated based on the Range Band as well as any applicable modifiers.
g) At this point, if the chosen Weapon has the Ammo trait, check if it has Ammo tokens; if not, this ranged attack ends - skip to step 7.
If the Weapon has the Reload trait, check if it has any Reload markers. If it does, this ranged attack ends - skip to step 7.
2 . The Active Player then calculates the dice pool using the model’s Ranged pool Statistic as the base number of dice used, then decides if they will use any of its abilities, use a Ki feat or increase its Ranged pool Statistic through a Ki Boost.a) The Active Player then rolls their dice.b) The Active Player conducts any re-rolls
of dice.c) The Active Player then selects the
highest die and up to two supporting dice, that did not roll a 1, will add +1 to the highest dice rolled. This gives the final result of the Ranged Attack test.
3 . The player compares the final result against the Challenge Number. If the Attack is a success continue to Step 4 a) and 4 b). If the Attack has failed skip to Step 7.
4 . a) The players declare the use of any Instant or Active Ki Feats (Active player declares last).
b) If the target was in BtB with an enemy model, you must now check to see if you hit the correct target.
5 . The Active Player then makes a Damage Roll against the Target model.a) Any model may use instant Ki feats at
this step.6 . The model gains any Reload markers and
removes Ammo Tokens (if applicable) from the weapon on the model’s profile card.
7 . The Ranged Attack is now resolved.a . Any Boosts used for this attack expire.

36
Surprised: A model is Surprised if an Activating Enemy model that did not begin its activation in BtB performs an action that Targets it or brings it into BtB and that Enemy model started it’s activation outside of LoS and remains outside of LoS during movement. Surprised models may not declare Ki Feats or Ki Boosts. Models are only Surprised until the action in which they became Surprised is resolved.
Cover: A model benefits from Cover from an enemy model if any Line of Sight from the Enemy passes through an Obscuring or Blocking terrain element that is within 1” of the target model.
TARGETING A MODEL IN BTBIf a model Targets an Enemy model in BtB with a Friendly model then at step 4b, make a Ranged Challenge test (6), with the following modifiers to the Challenge Number.
Target is Tiny +1Target is Medium -1
Target is Large -2Target is Huge Automatic Success
If the test is successful proceed as normal if however, the test is a failure then the Target of the Attack is changed to the nearest Friendly model in BtB with the original target. The Ranged Attack continues with the new Target.
Example: Model A has clear LoS to model B.Model A has no LoS to model C because model G has a larger base size and blocks LoS.Model A has LoS to model D, but since LoS passes through Obscuring terrain, model D has cover.Model A’s LoS to model E would be completely blocked by the wall, but the wall is Tiny, so does not block LoS to the small based model E. Model E therefore has Cover.The rock is Large, so completely blocks LoS from model A to model F.
Ranged Attack Example: The Active Player activates Tamotsu and declares a Ranged Attack Action. The range is 9”, this is Medium Range for Tamotsu’s Bow and has base Challenge number of 5.Checking modifiers, we add +1 to the Challenge number for moving and +1 because the Target is Tiny for a final Challenge number of 7.Tamotsu has Ranged Pool 3.Rolling a total of 8 (6+1+1=8) Tamotsu has a Success Level of 1. Now we roll damage, Tamotsu rolled a 7 adding +1 for his bow’s Strength.
Wall
Forest
RockAb
c d e
f
g
Ranged Attacks


38
A Melee Attack is a type of Opposed test, and all the usual rules apply, during a melee Attack the use of Instant and Active Ki Feats (And effects that can be used as Instants) is restricted. For a melee exchange, however, two tests are rolled simultaneously, with each model rolling Attack and Defence dice at the same time and applying traits to see which model comes out of the exchange victorious.
MELEE EXCHANGESA melee exchange represents the awesome conflicts between the characters of Bushido using Katanas, Martial Arts, claws and teeth, Magical abilities and other stranger fighting techniques.
Melee exchanges usually occur as part of a Melee Action which allows you to move into BtB contact; often a melee action will be declared when already in BtB contact.
Once in BtB turn both models to face directly toward each other. Next players may declare any Instant Ki feats that will affect the melee, including Ki boosting the melee pool. The defender declares first.
Next players allocate dice pools. Secretly take your dice (You should have two colours of Dice, one for attack and one for Defence) and assign them, so you have a total equal to your melee pool.
You also need to remove dice from the Melee Pool to pay for any Special Attack or Defence.
Once both players have secretly allocated dice, reveal any special Attack or Defence and roll all the dice together.
In Bushido, dice with a value of 1 are removed from tests. Put them to one side they are not counted for the rest of the melee exchange.
The Active player’s model attacks first. Take the value of the highest attack die rolled, and also up to two other attack dice to become a supporting die which each add +1 to the highest value, to find the result of the attack.
Example: Hiro is involved in a Melee Exchange, he has Melee Pool of 4 and spends 3 Ki to add another die.He now has 5 Dice in his Melee Pool and must split them into Attack and Defence. He can choose to put all 5 in Attack, 4 in Attack and 1 in Defence, 3 in Attack and 2 in Defence or any combination totalling 5 dice.
MELEE EXCHANGES
Melee Exchanges

39
The defender does the same with their defence dice, taking the highest and adding +1 for each supporting dice.
If the Attacker succeeds, the difference between the final results is the Success Level of the attack.
Any Special Attack or Defence is applied depending on the outcome.
This is used, along with a 2D6 Damage Roll on the damage table to find the total damage of the attack. (See Damage Roll p.43)
Assuming the defender is still around to make an attack, the defending player can now total his Attack Dice in the same way and check against the Attackers Defence to see if he also caused damage or uses a Special Attack or Defence.
Once the Melee Exchange is over, remove an Activation Counter from both models.
Masaema Aya in in BtB with Chiyo. She activates and declares a Melee action.Aya has Melee Pool 3 and wants to try to damage her opponent, she secretly allocates 2 dice to attack and only 1 to defence relying on her armour to protect her.
Neither player declares any Ki Feats, Chiyo declares Sidestep Defence, Aya does not use a Special. Masaema Aya rolls red dice for attack and a black dice with red pips for defence, while Chiyo rolls green dice for attack and a black dice with green pips for defence.Both players then roll at the same time:
Aya has a total of 6 for her attack and Chiyo has 5 in defence. Aya gets a Success Level 1 damage roll. Chiyo has a total of 5 in attack and Aya has 4 in defence, she also gets a Success Level 1 damage roll.
EXAMPLE MELEE EXCHANGE
Melee Exchanges

40
Note, this timing chart covers every eventuality of combinations of Abilities, Ki Feats, Special Attacks and Defences and all manner of other ‘in game’ occurrences.
Use the following steps to resolve a Melee Exchange:
Melee Exchanges
1 . Rotate both models so that their Facings are aligned with each other.
2 . Choose which weapon will be used for the exchange, non-Activating model first. This will determine which Traits and Special attacks and defences are available.
3 . a) Determine which model has the Initiative. The model with the Initiative is the Attacker the other model the Defender. By default, Activating models have the Initiative, but some traits and States may change this. In all the following steps, the player without the initiative declares any non-simultaneous effects first. Regardless of Initiative the Active Player and Activating Model do not change.
b) Both players may now use Instant Ki Feats to change the initiative. The non-Activating player declares first. If the initiative was changed, the Activating player may then also declare Instant Ki Feats to change the initiative.
c) The initiative is now set and cannot be changed.
4 . Both players then calculate their model’s dice pool using its Melee pool Statistic value as the base number of dice used and apply any modifiers. They then decide if they will use any abilities, Ki Feats or increase the Melee pool Statistic through a Ki Boost. The Defender must declare everything before the Attacker.
5 . Once the players have calculated their dice pools, they must both secretly decide how to allocate the dice between Attack and Defence. If players are using a Special Attack or Special Defence, then they must secretly remove a number of dice from their pool equal to the cost of the Special Attack or Defence (See Special Attacks & Defenses). Also include the use of any effects, including Instant (Or active for the active player) Ki Feats, which alter the cost of Attacks or Defences or add additional Attacks or Defences. The Dice allocation and choice of Special Ability is Hidden Information until simultaneously revealed.
We recommend players use a dice cup, add the correct colours of dice and when you are ready flip the cup face down on the table, keeping it in place, so the dice are not visible. When both players have done this, you can remove the cup and see the dice. a) Two distinct colours of dice are
needed; one colour represents Attack and the other Defence. For example, a model with a Melee pool of 3 may roll either 3 Attack dice, 2 Attack dice and 1 Defence die, 1 Attack die and 2 Defence dice or 3 Defence dice.
6 . Once both players have allocated their dice: a) Declare the use of any effects used
which alter the cost of Attacks or Defences or add additional Attacks or Defences (You will have secretly decided the use of these abilities in Step 5).

41
b) Announce simultaneously if they are using a Special Attack or Defence.
GCT Produces a set of Special Attack and Defence cards, place the chosen card face down and when your opponent has done the same they can be revealed at the same time. It’s important to use the Bluff card whenever you aren’t using a special; otherwise, it tells your opponent when you are!
c) Remember a model can only use one Special Attack or Defence, not both types.
7 . a) If the models are still in BtB both players roll all their dice simultaneously; otherwise, the melee action ends now, the Activating model removes an activation counter.
b) Perform any rerolls in the order given in Conducting Re-rolls (p.30), then remove or add dice last.
See for example Unblockable, Impenetrable Defence traits (p.68).
8 . Both players then calculate their final Attack and Defence results by selecting the highest die of each type (Defence and Attack), each player then collects up to two dice rolled of each type (Attack & Defence) which were not 1’s. Each of these supporting dice will add +1 to the highest dice rolled. The players apply any modifiers from traits and effects to their highest die rolled to get their model’s final Attack and Defence results.a) Remember, if a player rolls no
dice of one type then their final result of that type is 0. If a player rolls no Attack dice, then no Damage Roll is made in Step 9.
Melee Exchanges
9 . If no dice are allocated to Attack, any Special Attacks do not trigger.
If no dice are allocated to Defence, any Special Defences do not trigger.
Any dice that are 1’s are not counted towards resolving the test but still count towards the player having allocated dice in the appropriate dice pool.
10 . The Attacker compares its final Attack result against the Defender’s final Defence result, using Tiebreakers if necessary Note: when checking which player has the most dice for tiebreakers, count all attack and defence dice (That did not roll 1s) for both players towards tiebreakers for both attack and defence. a) If the Attacker was successful apply
the effects of any Special Attacks used by the Attacker and move to Step 11.
b) If the Defender was successful apply any Special Defences used by the Defender. If this results in either model being removed from the table, the defender no longer being in BtB with the Attacker or becoming Prone skip to Step 14 otherwise move to Step 13.
11 . The players declare the use of any Instant Ki Feats for models involved in the exchange.
12 . The Attacker makes a Damage Roll against the Defender and resolve any effects triggered by damage in melee. If this results in either the Defender model being removed from the table, no longer being in BtB with the Attacker or becoming Prone skip to Step 14.
13 . Run through from Step 10 with the Defender becoming the Attacker unless it has already been the Attacker this Melee Exchange.
14 . The Melee Exchange is now resolved, and both models remove one activation counter.
15 . Any Boosts used for this Melee Exchange expire.

42
MELEE POOL MODIFIERSEffect Dice Pool Modifier
Model is Exhausted
-1
Melee Assist-1 per model
AssistingModel is Prone, Blind, Stunned,
Frightened, Held.-1 per State
Model ran this turn -1Model is Surprised -1Model declared a Stand Up action
-1
MELEE ASSISTModels in Melee Exchanges suffer a -1 modifier for each Enemy model in BtB with which they are not currently resolving a Melee Exchange, and which is not also in BtB with a Friendly model. The enemy model is said to be Assisting the Melee.
Surprised: A model is Surprised if an Activating Enemy model that did not begin its activation in BtB performs an action that Targets it or brings it into BtB and that Enemy model started outside of LoS and remains outside of LoS during movement. Surprised models may not declare Ki Feats or Ki Boosts, are always the Attacker second in Melee Exchanges and may not benefit from traits or effects that affect Initiative and suffer a -1 Melee Pool modifier.
They may still declare Special Attacks and Defences. Models are only Surprised until the action in which they became Surprised is resolved.
Melee Exchanges

43
The Success Level indicates which column of the Wound Table the player should consult. The player then makes a Damage Roll using 2D6, adding together results along with any positive or negative modifiers, the result of which determines which row to use to find the number of wounds inflicted by the attack. 1’s are not failures when making a Damage Roll. If the final result would be less than 2, treat it as 2. If the final result would be higher than 12, treat it as 12.
Wound Table
WOUND TABLE
Example: Masaema Aya manages to hit Ito Itsunagi for a Success Level 3, Rolling 2D6 for damage she gets a 3 and 5, adding her Strength of +1 we see a total of 9. Cross-referencing the results on the wound table, we see that Itsunagi Ito suffers 4 wounds.
Success Level 0 1 2 3 4 5 6 7 8 9 10
2 0 0 0 0 1 2 3 4 5 6 7
3 0 0 0 1 2 3 4 5 6 7 8
4 0 0 1 2 3 4 5 6 7 8 9
5 0 0 1 2 3 4 5 6 7 8 9
6 0 1 2 3 4 5 6 7 8 9 10
7 0 1 2 3 4 5 6 7 8 9 10
8 0 1 2 3 4 5 6 7 8 9 10
9 1 2 3 4 5 6 7 8 9 10 11
10 1 2 3 4 5 6 7 8 9 10 11
11 2 3 4 5 6 7 8 9 10 11 12
12 3 4 5 6 7 8 9 10 11 12 13


45
Melee exchanges in Bushido involve samurai sword masters and monks with mystical martial arts; they are not merely about hitting the opponent. A wide variety of different abilities can be used in a melee exchange.
If a model is able to attempt one of these Special Attacks or Defences, it will appear on the model’s profile card in the weapon grid (see Profile Cards, p.10). A model can only use a special attack or defence if it is using the weapon that has it on its grid. These special abilities allow a model to trigger a special effect if it uses the ability and successfully Attacks or Defends.
All Special Attacks and Defences have a bracketed cost after the name text.
E.g. Sidestep Defence (1)
This is the number of dice to remove from the model’s Melee Pool (see Melee Exchanges, p.40) if it chooses to use a Special Attack or Defence. A model’s dice pool cannot be reduced to 0 through the use of a Special Attack or Defence, and if this would happen the player cannot declare that Special Attack or Defence.
A model may only perform one Special Attack or Defence per Melee Exchange.
SPECIAL ABILITIES
Special Abilities

46
Some special Abilities can cause models to move when successful. All movement from Special Abilities ignore enemy model’s ZoC and being in BtB.
• If through a Special Attack or Defence a model would be moved past the edge of the game area then it stops when its base touches the edge of the board.
• If through a movement from a Slam Attack, Throw Attack or Throw Defence a model is moved into BtB with another model then, dependant on the two models’ Sizes, one of the following occurs:• If the model contacted is of equal
size, the moving model stops at the point at which it entered BtB, and both models become Prone.
• If the model contacted is of a larger Size, the moving model stops at the point at which it entered BtB and becomes Prone.
• If the model contacted is of a smaller Size, the moving model continues its movement and pushes the model it contacted directly away from the point of contact a distance that would enable the moving model to continue its movement without contacting the model. Both models become Prone at the end of the movement.
• If through a movement from a Push Attack, Forceback Attack, Drag Defence or Push Defence a model is moved into BtB with another model then the moving model stops at the point at which it entered BtB.
• If an Impassable Terrain element would prevent this movement, then the model must stop at the point of contact with the Terrain element. If this was due to a Slam Attack, Throw Attack or Throw Defence, the model also becomes prone.
Ranged attacks will never have Special Defences because there are no defence dice for a ranged attack. However, ranged weapons may have Special Attacks on their weapon grid.
Special Abilities

47Special Abilities
This can often seem very powerful and random when you start playing because it is!However, the Attacker cannot easily influence the chances of a successful Critical Attack, while the Defender can simply defend heavily to counter it. After playing for many years with Critical Attacks they are not as bad as they seem, but like any powerful ability, they can sometimes be frustrating to be on the wrong side of.
DESIGNER’S NOTE: CRITICAL ATTACKSPECIAL ATTACKSCombo Attack: If the Attack is successful then after resolving a Damage Roll, deduct 2 from the Success Level of the Attack. If the new Success Level is 0 or greater make another Damage Roll against the Defender. Repeat this process until the Success Level is less than 0. If the Success Level of the original attack was 0 or 1, after resolving a Damage Roll, make one additional Damage Roll against the Defender at Success Level 0.Note: If a model has abilities that trigger when damage is caused each damage roll will trigger those abilities separately.
Critical Attack: If this model’s Attack is successful, and the individual dice results of the Damage Roll are the same number, remove the Defender from play.
Drag Attack: If the Attack is successful, move the Attacker 1” directly away from the Defender, then move the Defender 1” directly toward the Attacker. The Defender does not suffer a Damage Roll from this Attack.
Forceback Attack: If the Attack is successful, move the Defender 1” directly away from the Attacker, then move the Attacker 1” directly towards the Defender. The Defender does not suffer a Damage Roll from this Attack.
Grapple Attack: If the attack is successful, the Defender becomes Held. Place a Held marker on the Defender. The Defender does not suffer a Damage roll from this Attack but may not attack during this Melee Exchange.
Powerful Attack: If the Attack is successful, then the Attacker gains +3 to the Damage Roll caused by this Attack.
Push Attack: If the Attack is successful, move the Defender directly away from this model until it leaves this model’s ZoC. The Defender does not suffer a Damage Roll from this Attack.
Sidestep Attack: If the Attack is successful, the Attacker may move away from the Defender until it leaves its ZoC, at which point its movement ends. The attacker makes no damage roll.
Slam Attack: If the Attack is successful, the Defender is moved D3” directly away and becomes prone, minimally the Defender is moved beyond the Attacker’s ZoC. The Defender suffers half the wounds from the Damage Roll caused by this Attack.
Stun Attack: If the attack is Successful, the Defender gains a Stunned Marker after the Damage Roll.

48
Sweep Attack: If the Attack is successful, then the Defender becomes Prone. The Defender suffers half the wounds from the Damage Roll caused by this Attack.
Throw Attack: If the Attack is successful, the Defender is moved D2” in a straight line and becomes prone, minimally the Defender is moved beyond the Attackers ZoC and within LoS of the Attacker. The Defender suffers half the wounds from the Damage Roll caused by this Attack.
EXCEPTIONAL ATTACKS AND DEFENCES
Some techniques are only known to a few Masters of the sword or fist. Exceptional attacks and defences are detailed on individual profile cards; a few examples are detailed below.
Ivory Prison Attack: If this Attack is successful then remove the non-Insignificant, non-Soulless Target from play and deploy a Prone, non-unique Kairai under your control by replacing the target
Gokusatsu Attack: If this attack is Successful, remove the defender and attacker from play. If the enemy model has this Exceptional Attack, then this attack has no effect on either combatant.
SPECIAL DEFENCESCounterstrike Defence: If this Defence is successful, and the Attacker allocated any dice to Attack, then deduct 2 from the Success Level of the Defence. If the Success Level is 0 or greater, then make a Damage Roll against the Attacker using the modified Success Level of the Defence.
Drag Defence: If the Defence is successful, move the Defender 1” directly away from the Attacker, then move the Attacker directly into BtB with the Defender.
Forceback Defence: If the Defence is successful, move the Attacker 1” directly away from the Defender, then move the Defender directly into BtB with the Attacker.
Push Defence: If the Defence is successful, move the Attacker directly away from the Defender until it leaves the defender’s ZoC.
Sidestep Defence: If the Defence is successful, the Defender may move away from the Attacker until it leaves its ZoC.
Sweep Defence: If the Defence is successful, then the Attacker becomes Prone.
Throw Defence: If the Defence is successful, the Attacker is moved D2” in a straight line and becomes prone, minimally the Attacker is moved beyond the Defenders ZoC within LoS of the Defender.
Special Abilities

Akio (blue) is the attacking model. The defender is moved 1” directly away from the attacker.The attacker is then moved directly forward into BtB with the defender.No damage roll is made.
Akio (blue) is the attacking model. The defender is moved directly away from the attacker until they leave the attacker’s Zone of Control.No damage roll is made.
Akio (blue) is the attacking model. The attacker may move away from the defender any distance until it leaves the defender’s Zone of Control.No damage roll is made.
Akio (blue) is the attacking model. The defender is moved D3” directly away from the attacker and gains a Prone marker.After the damage roll, the damage is halved (rounding down).
Akio (blue) is the attacking model. The defender is moved D2” away from the attacker to a point in LoS of the attacker. The attacker may choose the movement path.After the damage roll, the damage is halved (rounding down).
FORCEBACK ATTACK
PUSH ATTACK
SIDESTEP ATTACK
SLAM ATTACK
THROW ATTACK
1”
D3”
D2”
D2”
1”

50
A model may enter into a number of different States during a game. A model may be in more than one State at a time. Markers should be placed on a model, or its profile card to indicate a model’s State to the Opponent.
Berserk: When a model gains a Berserk Marker it gains the Aggressive trait and
immediately gains an Impetuous Marker (see below).This model must declare a Melee if in range of the nearest enemy model; if not it must declare a Charge action if in range of the nearest enemy model, otherwise this model must declare a run action towards the nearest enemy model in the most direct route possible. If the model is unable to Target an Enemy due to a trait, Ki Feat or Unique Effect it may instead perform any action. During the Endphase remove all Berserk markers in play.
Bleed: If a model has Bleed markers it is considered to be Bleeding. During the End
Phase remove the highest value Bleed marker; the model suffers a number of wounds equal to the removed Bleed marker’s value. After this, if the model still has three or more Bleed markers, repeat the process, continuing to do so until the model has only 2 markers.If a Bleeding model Heals any of its marked wounds from its wound track by any means, remove all Bleed markers from it.
Blind: If a model has a Blind marker it cannot draw LoS outside of BtB and suffers a
-1 Melee Pool modifier during Melee exchanges. Blind models may not declare Run or Charge Actions. During the End, Phase remove all Blind markers from each model with any Blind markers. Models with Sixth Sense automatically have Immune [Blind].
Controlled: A Controlled model switches Warbands for a number of actions dependant
on the number of Control markers it has.Whilst Controlled the model generates Ki Tokens normally, but cannot spend or remove any Tokens it possesses, Ki or otherwise. The controlling player may declare any action the model would normally be able to perform without spending Tokens.For each Activation Counter removed from the model, also remove a Control marker. If a model has only one Control marker, it cannot declare Complex Actions. As soon as all the Control markers are removed, the model returns to the original player’s Warband.While Controlled, if an effect applies further Control Markers, instead remove one marker for each Control marker the effect would add.
MODEL STATES
Model States

51
Death Sentence: When a model with any Death Sentence markers is the target of a ranged attack or is involved in a melee exchange, the Attacker gains +1 Melee Pool or +1 Ranged Pool as well as +1 to any Damage Rolls. The benefit for the attacker is the same whether the target has one or multiple Death Sentence markers. During the Starting Phase, a model with a Death Sentence marker may spend 3 Ki to remove one Death Sentence Marker from itself.
Diseased: If a model has Disease markers then during the Starting Phase remove a Disease marker and an Activation counter.
Disguised: While a model has a Disguised (X) marker, Enemy models with a Ki Statistic of 1 or
less cannot Target or voluntarily move into BtB with the Disguised model.If the enemy model has a Ki Statistic of 2 or greater, when making a Ranged Attack or Ki Feat against a Disguised model, once the attack or Feat has been determined to be in range, the Enemy model must make a Challenge (X) Ki test where X is the highest value of Disguise Marker on the Target model.When attempting to move into BtB, determine if the model has enough movement to reach BtB and if so, make a Challenge (X) Ki test.If the Enemy model is successful remove the Disguise marker and resolve the action as normal. If unsuccessful its activation ends before any movement, and it removes an activation counter as if it had completed the attempted action.If a Disguised model declares a Melee, Ranged, Charge or Scenario action; uses the Bodyguard trait; or
participates in a Melee Exchange; remove its Disguise marker.While a model is Disguised enemy models may ignore its ZoC.
Frightened: This model gains the Defensive trait and suffers a -1 Melee Pool and Ranged
Pool modifier. It may not declare actions that would move it into BtB with Enemy models with the Fear trait. During the Main Phase, Frightened models automatically fail Fear tests. During the End Phase, the model must retake the Fear test with the same Challenge Number as it failed when entering the Frightened State if successful remove all Frightened markers.
Held: As long as a model is Held it gains the Defensive trait and cannot declare any
actions except Disengage, Ki Feats usable in Melee or Stand Up. A Held model cannot move or be moved, except to change facing, and suffers a -1 Melee Pool. Remove the model’s Held marker when:· The Holding model is no longer in
BtB with the Held model.· The Holding model participates in
a Melee exchange with another model.
· Or the Held model has successfully Disengaged from the Holding model.
A Model with the Intangible or Agile trait has Immune [Held].
Model States
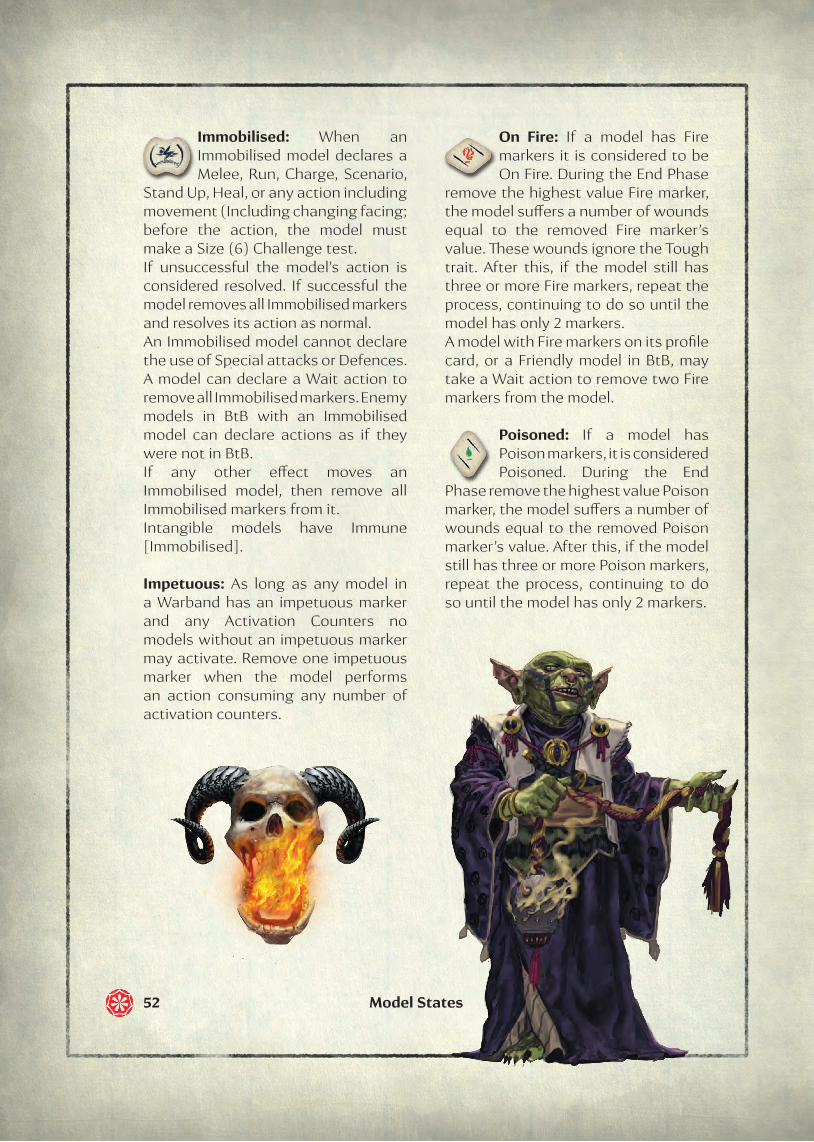
52
Immobilised: When an Immobilised model declares a Melee, Run, Charge, Scenario,
Stand Up, Heal, or any action including movement (Including changing facing; before the action, the model must make a Size (6) Challenge test.If unsuccessful the model’s action is considered resolved. If successful the model removes all Immobilised markers and resolves its action as normal.An Immobilised model cannot declare the use of Special attacks or Defences. A model can declare a Wait action to remove all Immobilised markers. Enemy models in BtB with an Immobilised model can declare actions as if they were not in BtB.If any other effect moves an Immobilised model, then remove all Immobilised markers from it.Intangible models have Immune [Immobilised].
Impetuous: As long as any model in a Warband has an impetuous marker and any Activation Counters no models without an impetuous marker may activate. Remove one impetuous marker when the model performs an action consuming any number of activation counters.
On Fire: If a model has Fire markers it is considered to be On Fire. During the End Phase
remove the highest value Fire marker, the model suffers a number of wounds equal to the removed Fire marker’s value. These wounds ignore the Tough trait. After this, if the model still has three or more Fire markers, repeat the process, continuing to do so until the model has only 2 markers.A model with Fire markers on its profile card, or a Friendly model in BtB, may take a Wait action to remove two Fire markers from the model.
Poisoned: If a model has Poison markers, it is considered Poisoned. During the End
Phase remove the highest value Poison marker, the model suffers a number of wounds equal to the removed Poison marker’s value. After this, if the model still has three or more Poison markers, repeat the process, continuing to do so until the model has only 2 markers.
Model States

53
Prone: If a model is Prone it suffers a -1 Melee Pool penalty and does not block LoS.
Enemy models may ignore it’s ZoC and may choose not to be considered in BtB with them when declaring or performing their actions, meaning the action choice is not restricted by being in BtB with the Prone model.Prone models are always the Attacker second in Melee Exchanges and may not use Special Abilities or benefit from traits or effects that affect Initiative. The only action a Prone model may declare is Stand Up.If a Prone model initiates a Melee Exchange through taking a Stand Up action, it suffers -1 MS modifier for that Melee Exchange, but initiative is not affected.A prone model cannot gain Prone Markers.
Reloading: While a model has Reload Markers, it may not use any weapon with the reload
trait to make Ranged Attacks. A model may perform a Wait Action to remove 1 Reload Marker.
Spirit Block: If a Model has a Spirit Block marker it does not generate Ki Tokens during the
Ki Generation step. At the end of the Ki Generation Step remove one Spirit Block marker from each model with a Spirit Block marker.
Stunned: If a model has a Stunned Marker, it suffers a -1 Melee Pool and -1 Ranged Pool
modifier. During the End Phase remove one Stunned marker from each model with a Stunned marker. An affected model may take a Wait Action to remove all Stunned Markers.
Model States

54
Each model may perform the Ki Feats on its profile card. Ki Feats are categorised in a number of ways; these explain any restrictions on a Ki Feat’s use, the timing of its use, its type and cost in Ki Tokens to use.
All Feats have a cost in Ki tokens; this cost must be spent for the effects of the Ki Feat to be applied. If a model does not have enough Ki tokens, then it may not declare the use of the Ki Feat. The cost of a Ki Feat or Boost cannot be reduced below one Ki token by modifiers, but effects can make feats cost zero if they explicitly state they do. The cost of a Ki Feat can be expressed with either a fixed cost or a variable cost.
Not in Base to Base: All Ki Feats may be used while the model is in Base to Base contact with an enemy model unless it has this Icon.
No Movement: Models performing Simple and Complex Ki Feat actions can Walk up to their Move stat in inches either before or after the Ki Feat is resolved unless it has this icon.
Once per turn:This model may only use this feat once per turn. When the feat is used mark the checkbox on the profile card. Erase the checkbox in the end phase.
Once per game:This model may only use this feat once per game. When the feat is used mark the checkbox on the profile card.
When a Ki Feat can be used depends on its timing. Instant and Active Ki Feats are not considered actions.
Instant:· Can be used at any time, except
during Melee Exchanges or Ranged Attacks - where the timing is restricted as detailed under the Melee Exchanges (p.40) and Ranged Attacks (p.36) sections.
· Because this is not an action, it can be combined with a Simple or Complex action if the model is the Activating model.
Active:· Can only be used at any time
when this model’s Controller is the Active Player, even if it is not the Activating Model except during Melee Exchanges or Ranged Attacks - where the timing is restricted as detailed under the Melee Exchanges (p.40) and Ranged Attacks (p.36) sections.
· Because this is not an action, it can be combined with a Simple or Complex action if the model is the Activating model or can be used when another model is activating.
Other than during a melee exchange or ranged attack, if both players wish to use Instant or Active Ki feats the active player goes first.
Any traits or effects that would impact the result of a dice roll, test or move must be declared, and any cost paid
KI FEATS
Ki Feats

55Ki Feats
before the dice are rolled. Instant and Active Ki Feats as well as Ki Boosts, cannot be used to affect dice that have already been rolled. However, Ki Feats that grant re-rolls may be used after seeing the initial dice values.
Simple:· To use a Simple Ki Feat requires the
model to declare a Simple Ki Feat action.
· Simple Ki Feats can only be used when the model is Activating.
Complex:· To use a Complex Ki Feat requires
the model to declare a Complex Ki Feat action.
· Complex Ki Feats can only be used when the model is Activating.
Ki Feats are further classified by whom they affect:
Personal: The Ki Feat targets the user only.
Target (X”): The Ki Feat affects a specific Target model. The Target must be within X” otherwise the Ki Feat fails and the Ki Tokens paid for the Ki Feat are lost.
Aura: The Ki Feat affects an area that may be either set or variable. The area the Aura covers is expressed as a 360-degree radius measured from the edge of the model’s base. It extends through Terrain elements and models unless stated in the card text, and all models within the Aura’s area are affected (see Measuring Distances, p.6). The model from which the Aura originates is always considered within the Aura. Auras last until the End Phase or until the originating model is removed from play if this is before the End Phase.
Pulse: The Ki Feat affects an area that may be either set or variable. The area the Pulse covers is expressed as a 360-degree radius measured from the edge of the model’s base. It extends through Terrain elements and models unless stated in the card text, and all models within the Pulse’s area are affected. The model from which the Pulse originates is always considered within the Pulse. The Pulse lasts until the end of the current activation.
Special: The Ki Feat is unique in some way and is further described on the model’s profile card.
Opposed Ki feat: Feats with this icon require an opposed Ki test with the target. If the test is successful, the feat takes effect.

56
Surprised: A model is Surprised if an Activating Enemy model that did not begin its activation in BtB performs an action that Targets it or brings it into BtB and that Enemy model started outside of LoS and remains outside of LoS during movement. Surprised models may not declare Ki Feats or Ki Boosts. Models are only Surprised until the action in which they became Surprised is resolved.
KI BOOSTS TO STATISTICSSome models can increase a Statistic through the spending of Ki Tokens (see Profile Cards, p.10) in the Main Phase. These increases are Ki Feats that are Instant and Personal .
The cost of a Ki Feat or Ki Boost cannot be reduced below one Ki Token by standard modifiers, but the cost can be reduced to zero if an effect states explicitly it reduces the cost to zero.
The increase to the Statistic lasts until the current test or movement is resolved. Each Ki Boost is considered a separate Ki Feat.
Example: Sakura targets Kenko with her Psychic Venom Ki Feat. As she began her activation in his back arc, and Kenko never had LoS to her, Kenko is surprised and cannot use his Ki Statistic Boost to defend himself.
Ki Feats

57
Models in Bushido commonly have one or more traits. Some traits have X, Y or Descriptor values in brackets after the trait’s name. This value can be a positive or negative modifier, a range or a Descriptor the trait affects. A Descriptor can be almost anything, from a profile name, Model type, a trait, a kind of Test or a state. When text exactly matches a Descriptor, it is considered a valid condition for game effects.
If a trait is listed on a card without an X or Y value, then it is assumed to be 1 or 1”. Note that values can be negative numbers. Other Traits have restrictions, and those traits only apply when the restrictions are met.
E.g. Believer [Descriptor](X/Y”): Friendly models within Y” of Descriptor reduce the cost of their Ki Feats by X. This trait modifies the cost by the X value. Its Range is the Y” value, and it only affects [Descriptor] Models. Ashinaga Tenaga has the Believer [Villager](1/4”) trait. Villagers within 4” reduce the cost of their Ki Feats by 1.
E.g. Strong [Melee] only applies the strong trait to Melee Damage rolls. Any other damage rolls made are unaffected.
Some traits can be listed as a trait on the model or a weapon trait; these will be correctly shown on the card. If a trait is listed with a weapon on the card, it is treated as a weapon trait and only applies when choosing that weapon.
Players cannot choose whether they use traits but can choose in which order their own model’s traits trigger. Unless stated in their description, traits are always considered to be in effect.
Certain game effects can give a model a new trait. In some cases, where the trait has no numerical values the model gains the trait as stated; however, this is not cumulative with any existing trait. Effects which grant a Trait (X) do not stack, instead choose only the highest value.
Some effects may modify a trait’s value. If the model already has the trait, apply the modifier to the numerical value of the trait. If the model does not have the specified trait, it first gains the trait at value 0 and then applies the modifier to the newly added trait. Effects which grant a Trait (+X) stack, you add all these values together. Range values can also be modified in the same way.
Example: Kuma has Armour (1). If he gains Armour (2) from a nearby Kami of Eternal Earth then he will use the new trait, they are not cumulative. Kuma now has Armour (2)
Example: Naoko of the Ito Clan does not have the Armour trait, but uses Mutation to gain Armour (+1). She first gains Armour (0) and then applies the +1 modifier, giving her Armour (1). If a model had Armour (1) already and gained Armour (+1), it would now have Armour (2).
TRAITS
Traits

58
AAdept [Descriptor](X): When rolling [Descriptor] Tests this model may keep up to X additional supporting dice, beyond the normal 2. These also add +1 to the highest dice value when calculating the final result.
Aggressive: This model must allocate at least as many dice to Attack as to Defence during Melee Exchanges. If a model has both Aggressive and Defensive traits, the effects of both are cancelled.
Agile: When this model activates it may ignore Enemy models in BtB when declaring its action. This model may move out of BtB with Enemy models without the need to perform a Disengage action. If this model does not declare a Disengage action, Stand Up action, melee useable Ki Feat, or Melee action, it must move out of BtB with any Enemy models currently in BtB.This model also has Immune [Held].
Aloof: This model may not perform Scenario Actions.
Ammo (X): This model starts the game with X Ammo tokens. When this model resolves a Ranged Attack, remove an Ammo Token. If this model has no Ammo tokens, it may not make Ranged Attacks.
Armour (X): Reduce the result of Damage Rolls made against this model by X.
Assassin: If this model makes a successful Attack against a Surprised model, it may roll three dice for the Damage Roll caused by the Attack and choose two to add together.
Aware: This model’s LoS extends 360 degrees around its base.
BBanzai!: This model may make a Charge Action as a Standard Simple action, rather than a Complex action.
Bear Stands Alone: While no friendly models are within 3” of this model it gains Indomitable (+1).
Believer [Descriptor](X/Y”): Friendly [Descriptor] models within Y” of this model reduce the cost of their Ki Feats by X. X cannot be less than 0.
Bleed(X/Y): Each time this model inflicts wounds through a Melee Exchange or Ranged Attack to a Non-Soulless Enemy model, that model gains X number of Bleed markers with value Y. If a model has multiple sources of bleed traits, it may only use one at any given time.
Blood of Orochi (X): During the Starting Phase add X Blood of Orochi tokens to a pool. You may place up to 2 tokens from the pool on any number of Friendly Ito Clan cards. Weapons of models with Blood of Orochi tokens gain Poison (1/X) where X is the number of tokens on their card. Remove all Blood of Orochi Tokens in the End Phase.
Traits

59
Bodyguard [Descriptor] (X”): If an Enemy model declares an action that would move it into BtB with a [Descriptor] Friendly model, or Targets the [Descriptor] Friendly model with a Ranged Attack, this model may switch positions with the Friendly model before the action begins if the following conditions are met:• The Friendly model is within X” and
in LoS.• The Friendly model was not in BtB
with an Enemy model at the start of the activation.
• This model is not in BtB with an Enemy model.
• This model is not Exhausted or Prone.• If the Enemy model has Fear, the
bodyguard must pass a fear test.• Both models switching positions
can fit within the space the other model occupied on the table without moving any other models.
• If bodyguarding a larger based model, your opponent places the bodyguard anywhere within the area covered by the larger base then you choose facing.
The Enemy model’s action is then resolved with this model being declared as the Target.
If this model has the Fear trait, the enemy model must make a Fear Test as if this model were its original target.
Once the use of the Bodyguard trait by this model is declared, if this model has a Disguised Marker, remove the Disguised Marker immediately.
Booted: When this model is deployed using Flank, it may immediately make a Walk.
Bravery: This model may re-roll a failed Fear Test. It may only re-roll the same Fear Test once due to this trait. If a model with Bravery gains the Cowardly trait, it is considered to have neither trait. If a model with the Bravery trait makes a Fear test against a model with the Terror trait, the effects of both are cancelled.
Brutal (X): In a Melee Exchange this model adds X to the result when calculating its final Attack result if it allocated any dice to Attack. In a Ranged attack, this model adds X to the result when calculating its final Ranged Attack result.
Example: Model A has the Bodyguard Trait. Model B declares a Ranged Attack Action. If the Target is model C then model A can use Bodyguard.If the Target is model D then it cannot use Bodyguard as model A has no LoS to model D since it is not in its Facing.Model E is not in Bodyguard range.If the Target is model F it cannot use Bodyguard as model F is in BtB with model G.
c
d
e
fg
b
a
Traits

60
CCamouflage (X”): While this model is benefiting from Cover, enemy models cannot Target or enter BtB with this model unless the enemy model is within X” at the start of its activation.
Cavalry(X”): Before or after this model performs any action it may Walk X”.
Channel (X/Y”): Once per turn, during this model’s activation it may remove up to X of its own Ki tokens. Its Controller then chooses any Friendly model(s) within Y” to distribute those Ki tokens to.
Chain Weapon (X): When using this weapon, models involved in a melee exchange with this model reduce their Parry trait by X to a minimum of 0 and lose any Shield rule.
Charging Bonus [Bonus]: When this model makes a Charge action it gains the bracketed Bonus until the end of its current activation. If the bonus is a Weapon Trait, then it applies to all valid weapons. This trait may also be a weapon trait if so the bonus only applies when choosing this weapon.
Cloudwalk: When this model moves it ignores Terrain elements, other models, and Zones of Control. It may end its move in an enemy ZoC. This does not allow a model to move out of Melee unless it also has the Agile trait.
Command [Descriptor](X/Y”): This model may declare a Simple action, Command: The model nominates and activates up to X other non-Exhausted, Friendly [Descriptor] models within Y inches. These models each perform a Standard, Simple action. The order the models activate in is chosen by this model’s Controller after each action is resolved remove an activation counter from the activating model. If a model with the Group trait is chosen you must choose all models on that profile card; if you cannot, then you cannot command any of those models.
Construct: This model provides cover as if it were terrain.
Co-ordinated Attack [Descriptor]: If this model is in a Melee Exchange and one or more Friendly [Descriptor] models is also in BtB with the Enemy model, this model gains +1 Melee Pool bonus.
Example: Model A Camouflage (2”).Model B starts more than 2” away from model A, and so cannot Target model A, even if it moves to within 2” of it.Model C is within 2” so can Target model A.Model D is more than 2” from model A but model A has no Cover from model D so model D can Target model A.
Abc D
Wall
Traits

61
Cowardly: This model must re-roll successful Fear tests. It must only re-roll the same Fear test once due to this trait. If a model with Cowardly gains the Bravery trait it is considered to have neither trait.
Courage (X): When making a Fear Test, modify the result by X.
Cultist (X/Y”): When this model activates it may inflict up to X wounds on any Friendly model(s) within Y”, including itself, that have this trait, up to its X value; a model may not suffer more wounds than it has unmarked boxes. This model gains Ki Tokens equal to the number of wounds inflicted. A model cannot suffer more wounds than the X value of its own Cultist trait each turn. These wounds ignore Tough.
DDefensive: This model must allocate at least as many dice to Defence as to Attack during Melee Exchanges. If a model has both Aggressive and Defensive traits, the effects of both are cancelled.
Disguise (X): This model begins the game with a Disguise (X) marker.
Disease (X): Models damaged by this model gain X Disease markers.
Disturb Flow (X/Y”): All Enemy models must spend an additional X Ki Tokens to perform Ki Feats when within Y” of this model. If in range of multiple enemy models with this trait only use the highest X value.
Dodge (X): During a Melee Exchange this model may pick up to X Attack dice rolled by its Opponent to be re-rolled. The same dice may only be re-rolled once due to this model’s trait.
Dread (X): Models making a fear test against this model reduce their Ki statistic by X. This cannot reduce the number of dice rolled below 1 die. Enemy models with Fear values equal to or higher than this model’s fear value do not automatically pass their fear tests against this model.
Durable: When this model would suffer more than one wound, it only suffers one wound. This trait is resolved after the Tough trait.
Traits

62
EEndurance: This model suffers no Melee penalty for being Exhausted.
Entangling: Successful attacks with this weapon do no damage but cause the target to be Immobilised.
Evasive: This model ignores Enemy models’ Zones of Control during its movement and when declaring actions.
FFear (X): When a model makes a Fear test against this model X is the Challenge Number for the test. Models automatically pass Fear tests with a Challenge Number equal to or lower than their Fear (X) trait, but must still take a Fear test if the Challenge Number is higher than their Fear (X) trait.
Fearless: This model automatically succeeds when taking Fear tests and has Immune [Frightened].
Feint (X): During Melee Exchanges this model may pick up to X Defence dice rolled by its Opponent to be re-rolled. The same dice may only be re-rolled once due to this model’s trait.
Fire (X/Y): Each time this model inflicts wounds using this weapon, the Enemy model gains X Fire Y markers. If a model has multiple sources of fire traits, it may only use one at any given time.
Flank: When this model would be Deployed, this model’s Controller must choose whether this model will use Flank or not. If the player chooses not to use Flank, this model is Deployed as normal. If the player decides the model is using Flank, then the model is left Elsewhere and instead before the game the owning player makes a note of which turn the Flanking models will arrive and notes a neutral table edge: This is Hidden Information. This must be turn 2,3 or 4. In the starting phase of that turn reveal the number and deploy the models anywhere along the chosen edge but not in the Opponent’s Deployment Zone. If a model gains Flank mid game or is removed and returns to play using the flank rules, you immediately note any turn (Not just 2,3 or 4) and neutral edge for that model when it is removed from play: This is Hidden Information. Flanking models generate two Activation Counters when they are Deployed.
Fortune: During Ki Generation, this model’s controller may flip a coin and call heads or tails. If they call successfully, double the number of Ki tokens gained; if not this model gains no Ki tokens instead.
Traits

63
GGroup: All models represented by this profile card activate in the same single activation. Each model on this profile card resolves any movement before any Melee Exchanges are resolved. Melee Exchanges are then resolved in the order the Controlling player chooses.
HHatred [Descriptor]: This Model cannot be included in a Warband that includes [Descriptor] models.
Heal (X): This model may declare a Simple Heal action and attempt to enter BtB with another non-soulless model by moving up to its Move Statistic. If, at the end of its movement, it is in BtB with the chosen model Heal X marked wounds from the Wound Track of the chosen model. This model may choose to heal itself. It may not move if it does so. X cannot be less than 0.
Huge: This model is the Huge Size. Model’s Targeting this model with a Ranged Attack gain a -3 modifier to the Challenge Number of the test.
IImmune [Descriptor]: This model may not gain markers of [Descriptor]. If a model gains the Immune trait, immediately remove all markers of [Descriptor].
Immovable: This model may not be moved or placed except when making a Walk, Run or Charge or by using a rule on a friendly card. This model cannot gain Prone Markers.
Impenetrable Defence: During this model’s Melee Exchanges the Enemy model must remove its highest Attack die rolled before the final Attack result is calculated.
Impetuous(X): During the Starting Phase this model gains X Impetuous markers.While this model has Impetuous Markers, it has the Fearless trait.
Indomitable (X): This model ignores X assisting Enemy models in BtB for penalties during Melee Exchanges.
Insignificant: This model:• Has a ZoC that may be ignored at
all times.• Cannot apply Melee assist
Modifiers.• May not perform Simple Scenario or
Complex Scenario actions.
Intangible: This model ignores Zones of Control, other models and Terrain elements during movement and being in BtB when declaring actions; it may move out of BtB freely. It may not end its move occupying the same area as an Impassable Terrain element or another model. This model also has Immune [Held, Immobilised].
Traits

64
Intimidate: During the Starting Phase, this model can Target an enemy model within 8”, Perform an Opposed Ki test with the Targeted model, if this model is successful the Target gains Cowardly, loses Aggressive and cannot Choose or Target this model with a Melee, Charge or Ranged Attack until the End Phase.
JJump Up: At the start of this model’s activation, but before its action is declared, you may remove any Prone markers from this model.
KKami: When this model is deployed it gains Ki tokens equal to its maximum Ki. When this model would suffer wounds, instead remove an equal number of Ki tokens. If this model has no Ki tokens, it is removed from play. This model may not gain Ki tokens as a result of the Channel trait. This Model cannot have Ki tokens removed as a result of the Leech trait. This model has Immune (Poison/Fire/Bleed/Diseased) and cannot be Healed.
Kata: When rolling for a melee exchange, this model can use natural 1s on its dice to resolve the test as a value of 1 rather than 0. The dice are not removed and can be used as supporting dice to find the final result and remain for tiebreakers.
Ki Block: When this model inflicts wounds with this weapon the Enemy model gains one Spirit Block marker.
LLast Stand: If this model is reduced to 0 wounds, it may still be activated until the end of the Turn and is not removed from play. This model cannot recover wounds through any game effects or traits once its wounds have been reduced to 0. During the End Phase, the model is removed from play.
Leadership [Descriptor](X/Y”): Whilst within Y” Friendly [Descriptor] models add X to the final Result when taking a Fear Test. If in range of multiple models with Leadership, use only the highest X value.
Leech (X/Y”): Once per turn, during this model’s activation it may remove up to X Ki Tokens from any Friendly model(s) within Y” and add them to its own. This cannot take a model over its maximum Ki.
Lightweight: This model does not suffer the modifier for moving during a Ranged Attack when using this weapon.
Lightfooted: While moving, this model treats Difficult Terrain elements as if they were Normal. If a model with this trait gains the Unstable Trait, it counts as having neither trait.
Lightning Reflexes: This model is always the first Attacker in Melee Exchanges. Models with this trait gain the initiative against models with Reach weapons. If both models in a Melee Exchange have this trait, then neither gains the benefit.
Traits

65
MMantra: While making an opposed Ki test, this model can use natural 1s on its dice to resolve the test as a value of 1 rather than zero. The dice are not removed and can each be used as a supporting die to find the final result and remain for tiebreakers.
Mettle (X): When this model is not the Activating model in an opposed Ki test, the attacker must discard its X highest dice rolled before the final result is calculated.
OOni Rage: During Ki Generation, this model may gain an additional number of Ki Tokens equal to D2. If it does, it gains a Berserk Marker.
Order [Descriptor](X/Y”): This model may declare a Complex action, Order: This model immediately nominates X other Friendly [Descriptor] models within Y”. Those models’ gain one Activation counter.
Overwhelm (X): When this model is the Activating model in an opposed Ki test the enemy model must discard its X highest dice rolled before the final result is calculated.
PPack (X/Y”): When this model activates, you may choose up to X non-exhausted friendly models with the Pack trait within Y” to also activate. This model and each model chosen must declare a melee, ranged or charge action against the same target. Each model resolves any movement before any Melee Exchanges are resolved. Melee Exchanges are then resolved in the order the Controlling player chooses.
Parry (X): This model adds X to the Defence result when calculating its final Defence result in Melee Exchanges.
Pierce (X): When this model succeeds with an Attack using this weapon, reduce the Enemy model’s Armour trait by X to a minimum of 0.
Poison (X/Y): Each time this model inflicts wounds through a Melee Exchange or Ranged Attack with this weapon on a non-soulless model, the Enemy model gains X Poison Y markers. If a model has multiple sources of poison traits, it may only use one at any given time.
Protected[Descriptor](X”): Before this model suffers a damage roll as a result of a successful melee or ranged attack you can remove a friendly [Descriptor] model within X” from play and suffer no damage roll.
Prowess [Descriptor](X): During a [Descriptor] Test this model may re-roll up to X of its own dice. It may only re-roll dice once due to this trait.The Descriptors [Attack] and [Defence] refer to Melee Exchanges but are further limited.
Traits

66
RRanged Defence (X): A model making a Ranged Attack against this model modifies the Challenge Number of the test by X.
Rapid Fire (X): When this model declares a Ranged Attack action it may resolve up to X Ranged Attacks during the activation. These Ranged Attacks may Target different models and are resolved in the order this model’s Controller chooses. Each attack may use a different weapon. Remove only one activation counter regardless of the number of Ranged Attacks made by Rapid Fire.
Reach: While using this weapon, it grants this model the Initiative at Step 3 of a Melee Exchange, provided it was not in BtB with its opponent or another Enemy model at the start of the current Activation.If both models in a Melee Exchange would benefit from this Trait, then neither benefits from it.
Regenerate (X): This model Heals X wounds during the End Phase.
Reload (X): When this model makes a Ranged Attack with this weapon it gains X Reload Markers.
Resistance (X): This model modifies the result by X when it participates in an Opposed Ki test and is not the Activating model.
Rise (X): When this model is reduced to 0 wounds, immediately make a Challenge test with a Challenge Number of X. If successful the model Heals all Wounds and becomes Prone. If it fails remove the model from play as normal. Models may not use this trait if their final wounds were caused by the Fire state in the end phase.
Traits

67Traits
SScout (X/Y”): This model may deploy after both player’s normal Deployment and may deploy anywhere within Y” of the Controlling player’s normal Deployment Zone. If a Warband contains one or more models with Scout, the player adds the highest X value to the result of Deployment Tactical Tests. If both players have models with Scout the loser of the Deployment Tactical Test deploys their models with Scout first.
Sacrifice [Descriptor](X”): If this model is not Exhausted or in BtB with an Enemy model, and a Friendly [Descriptor] model is within X” and has been successfully Attacked, its Controller may choose to remove this model from play to cancel the Damage Roll against the Friendly model.
Sharp(X): This model reduces the enemy model’s Tough trait by X, to a minimum of 0, when it succeeds with an Attack with this weapon.
Sixth Sense: This model is never Surprised, ignores the Camouflage trait and has Immune [Blind].
Slow: This model may not declare Run or Charge actions. During a melee exchange, this model will lose the initiative if it is the active model. If this model has Lightning Reflexes, a weapon with the Reach trait or both then it ignores those traits and Slow for the duration of the melee exchange.
Soulless: This model automatically succeeds in all opposed Ki and Fear tests and has Immune [Frightened].
Spirit (X): This model modifies its Ki Statistic by X when resolving Ki tests.
Split Attack: When this model declares a Melee or Charge action it may move into BtB with 2 or more enemy models and ignores their ZoC as long as it is moving closer to a point where it is in BtB with both. After its movement, if it is in BtB with two or more Enemy models, the player may resolve a Melee Exchange with two or more of those models. This model has a penalty of -1 die for each additional melee exchange it will make this activation on all its melee exchanges. Resolve them in the order the Controlling player chooses (so that the model will be left facing the enemy model it fought last). Remove only one Activation Counter from this model after the last Melee Exchange.
Example: Kenko has Split Attack. If he moves into melee with 2 models and performs a melee exchange against both, he takes a -1 die penalty on both exchanges as he is making one additional exchange. Next turn a third enemy model moves into BtB with Kenko. If Kenko makes a split attack against all three models, he will take a -2 Dice penalty on all three melee exchanges.

68
Steadfast: This model may freely choose how to allocate dice in Melee Exchanges when Frightened. If this model declares an action to bring it BtB with a model with Fear and fails the fear test, it must continue with the action and becomes Frightened. While Frightened this model may still declare actions against and enter BtB with models with Fear.
Strategy [Bonus]: Whenever you win the Tactical Roll, this model gains the bracketed bonus.
Strong: This model makes Size tests at +1 Dice. When this model makes a Damage Roll, roll 3D6 and choose the two highest dice. If a model has both Strong and Weak traits, the effects of both are cancelled. This trait may be further modified to specify weapons or Descriptors of weapon, e.g. Strong [Melee].
Stupid: This model cannot declare Wait, Disengage, Scenario or any Complex Actions.
Swarm: This model has a -1 die penalty on size tests. Ranged attacks targeting this model suffer an additional +1 to the Challenge Number.
TTactician (X): This model adds X dice to Tactical Tests.
Terror: If a model makes a Fear test caused by this model it must re-roll the test if it succeeds. Models must only re-roll the same test once due to this trait. If a model with the Bravery trait makes a Fear test caused by this model the effects of both traits are cancelled.
Tiny: This model is Tiny sized. Models Targeting this model with a Ranged Attack add a +1 modifier to the Challenge Number of the test. This model rolls one die for Size Tests.
Tireless: This model does not remove an activation counter as a result of Melee Exchanges initiated by Enemy models.
Tough (X): When this model would suffer Wounds from any source reduce the final number of Wounds by X (If X is negative, instead you will increase the number of wounds taken).
UUnblockable (X): During this model’s Melee Exchanges the Enemy model must remove its X highest Defence dice rolled before the final Defence result is calculated.
Unstable: This model treats each inch moved in Difficult Terrain elements as 4” rather than 2”. If a model with this trait gains the Lightfooted Trait, it counts as having neither trait.
Traits

69
VVengeance [Descriptor]: This model’s melee weapons gain Brutal (+1) and +1 Melee Strength when resolving a melee exchange against a [Descriptor] Model.
Virtue (X”): Once per turn during this model’s activation, it may give a target friendly Faction, non-Soulless, non-Insignificant model within X” a Virtue Token. A model may only have one Virtue Token at any time. A model may spend a Virtue Token at any time it could use an Instant Ki Feat. The benefits of spending the Token depend on the models in play. A model may benefit from only one Virtue bonus per Token unless otherwise stated.
WWeak: This model makes Size Tests at -1 Dice. If this reduces the dice pool to zero, the test automatically fails. When this model makes a Damage Roll, roll 3D6 and choose the two lowest dice. If a model has both Strong and Weak traits, the effects of both are cancelled.
Willpower (X): This model modifies the result by X when calculating its final result in Opposed Ki tests when it is the Activating model.
Traits

70
Terrain elements are categorised by three traits: Passage, Visibility and Size. When Terrain is described, these are listed as [Passage, Visibility, Size].
PASSAGEHow easy is it for a model to move through?
Impassable: Cannot be moved through.
Difficult: Can be moved through but each inch counts as 2 inches moved for any movement whilst within the Terrain element for models making a Walk, Run or Charge. If Enhancing terrain has a sheer drop, this is usually difficult terrain, being pushed, Slammed or Thrown from Huge Enhancing terrain leaves a model prone, and after any damage roll, the damage is not halved.
Normal: No effect to movement.
Ideal: Ideal terrain, such as adequately paved roads or the like can aid in movement. While making walk, run or charges if it crosses the Ideal Terrain at any point then it can add an extra 2” to its total move distance. We suggest Ideal terrain only apply to individual terrain items. If you play on a board with paving marked all over it, do not count the whole table as ideal!
Players should decide before the game starts if any areas of a Terrain element are different.
VISIBILITYCan the Terrain element be seen through when drawing Line of Sight (LoS)?
Clear: No effect on LoS.
Blocking: No LoS can be drawn through any part of the Terrain element that is considered Blocking. If any Los is blocked to the target by Blocking terrain (Assuming there is a clear LoS past the terrain) then the target benefits from Cover if it is within 1” of the terrain piece.
Obscuring: If any Line of Sight to any part of a target’s base is drawn through Obscuring terrain, then the target benefits from cover if it is within 1” of the terrain piece.
Enhancing: Models on hilly terrain or otherwise elevated gain Reach on their Melee Weapons for melee exchanges where a non-Cloudwalk opponent did not begin it’s activation on the same terrain as they hold the high ground. In addition, they ignore models and terrain smaller than the Enhancing terrain for LoS (Though such terrain can still provide cover if a LoS passes through them).
TERRAIN
Terrain

71Terrain
SIZEA terrain element’s size is what is physically represented on the table - but should be agreed upon by both players before the start of the game if either player considers it likely that the Size of a particular piece of terrain might be unclear.
If players cannot agree on the size of a terrain element, by default the Size of a piece of terrain (As with models, Tiny, Small, Medium, Large or Huge) to be the Size of the smallest base it can fit on. If it is too big for a 50mm base, it is Huge. Some Clear terrain has no Size (Water for example) and is listed as Size Zero. Given this definitive test, it should be possible to define the Size of a piece of terrain during the game, as and when it becomes relevant to gameplay. This does not work for some elements, e.g. walls, so it is only to decide when players cannot agree on odd items of terrain. In a Tournament situation, ask the organiser.
For Blocking terrain pieces (see Visibility below) where it is intended that LOS can be drawn over them, then these should be classified as Tiny, such that it is possible to gain Cover, but LOS is not blocked.
Example: Walls can vary in height depending on how these have been modelled. A wall or hedge could be anywhere from model knee height [Difficult, Blocking, Tiny] up to over man/Oni sized [Difficult, Blocking, Huge].
We would recommend that before a game starts, each player highlights any terrain pieces where they consider the size classification may not be totally clear, in particular, whether a terrain piece might be either Tiny or Small, or Large or Huge, and discuss and agree on this with their opponent.
Remember the rules are made to be definitive. A simple check with a gaming laser should solve all cover and LoS issues and while they may not always make sense, based on how the model looks from a “Model’s Eye View”, remember that the static model is representing a soldier who may be actively trying to hug terrain or keep a low profile.
EXAMPLES OF TERRAINTerrain / Passage / Visibility / Size
Woods / bamboo forests / Difficult / Obscuring / As per the terrain pieceWalls/hedges/ Difficult / Blocking / As per the terrain piece, but see above comments re walls/hedgesBuildings / Impassible / Blocking / As per the terrain pieceWater / Difficult / Clear / As per the terrain pieceFog / Normal / Obscuring / As per the terrain piece, although areas of Fog are usually HugeHill / Normal / Enhancing / As per the terrain piece
Some Terrain is bought as a Special Card, and these terrain types are either cards deployed on the table, or on a stated base size. They have Visibility and Passage traits like all terrain and usually have other rules and can even have model traits.

72
TERRAIN SET UPA good table set up has at least 5-6 pieces of different terrain depending on the size of the terrain. Lots of terrain, each covering a smaller area, is better than fewer large pieces. We recommend including at least one of each of:• [Impassable, Blocking, Huge]
terrain, such as a boulder or house.• [Difficult, Clear, Zero] terrain such
as water or tilled fields• [Difficult, Obscuring, Large] such
as a bamboo forest
Then add other items.
Impassable Terrain cannot be deployed within 2” of Scenario Objectives or other impassable terrain. Try to avoid placing it in the area of a scenario or deployment zone. Terrain should be 2” from the edge of the table, but if you have very large items of terrain, these can often be best used by placing them half on the table rather than occupying most of the play area with them.
Other terrain can be set up as you wish but not in contact with other terrain or overlapping. The terrain should be equally spread around the table.
Terrain

73Scenario Rules
Bushido is best enjoyed by playing a Scenario. Whilst beating your opponent into the ground until the last man is standing is fun, especially when learning the rules, there will come a time when you want to explore the full strategically challenging potential that Bushido has to offer.
TYPEAll Scenarios have a Type: Scenario Objectives or Zone Control. Types are linked to the scoring of Victory Points (VP’s) in Scenarios, how this is achieved is dependent on the Scenario and explained under its Victory Conditions.
SCENARIO OBJECTIVESThese are terrain elements on the battlefield that players must attempt to interact with. Scenario Objectives are one of three Alignments (Friendly, Neutral or Enemy) this can be shown on the board by turning the Scenario Objective to face the player’s Deployment Zone to whom it is Friendly or neither showing it is Neutral. If a Scenario Objective is Friendly to a player, then his Opponent considers it Enemy.
In Scenarios, players can use their models to interact with Scenario Objectives through Scenario actions. The effect is detailed under Scenario Objective Interactions. All Scenario Objectives are considered Blocking and Impassable Terrain elements unless specified in the Scenario.
SCENARIO OBJECTIVE INTERACTIONSPlayers can interact with Scenario Objectives by taking Simple or Complex Scenario actions (See Actions). The action needed, Simple or Complex, will be in brackets after the Scenario Objective Interaction. For example: Influence (Simple). The effect of an action depends on the Scenario Objective Interaction of the Scenario.
If there is more than one Interaction available to the model, then the controlling player decides which to use. Only those Interactions outlined in a Scenario can be used. The Interactions will appear as Keywords and are as follows:
Influence (Simple/Complex): The player changes the Alignment of a Scenario Objective one Degree (Enemy - Neutral - Friendly)
SCENARIO RULES

74
Prayer (X) (Simple/Complex): Each player starts the game with X Prayer Tokens. These are placed in a Prayer Pool for each player. The player removes one Prayer Token from their Prayer Pool and scores Scenario Points (SP’s). The number of SP’s scored depends on the Alignment of the Scenario Objective the model is in BtB with.Friendly = 1 Scenario PointNeutral = 2 Scenario PointsEnemy = 3 Scenario Points
Worship (Simple/Complex): The Controller of the model that performs this Scenario Objective Interaction places a Worship marker next to the Scenario Objective in BtB with the model. If the Scenario Objective’s Alignment would be reset instead remove a Worship marker.
Some Scenarios will have additional rules denoted by the following Keywords and their rules are detailed as follows:
Decreasing (Popular): During the End Phase of a Turn after scoring VP’s remove a Scenario Objective on which most Simple Scenario actions were taken. In the event of a tied number of Simple Scenario actions on Scenario Objectives, the scoring player’s Opponent decides which to remove.
Decreasing (Scorer): During the End Phase of a Turn after scoring VP’s remove a Scenario Objective which is Friendly to the player who scored the VP. The scoring player’s Opponent decides which to remove if there is more than one available.
Reset (X/X): During the Starting Phase of Turns X and X reset each player’s Scenario Points total to 0.
Reset Influence (X/X): During the Starting Phase of Turns X and X reset the Alignment of all Scenario Objectives to Neutral.
ZONE CONTROLIn these scenarios, there are areas on the board that the players must battle to Control. A player Controls a Zone if they have a higher Rice Cost of models entirely within the Zone’s area and have more models completely within the Zone’s area than their Opponent. A player gains a number of Scenario Points equal to the Alignment of the Zone during the End Phase.Friendly = 1 SPNeutral = 2 SPEnemy = 3 SP
Scenario Rules

75Scenario Rules
DEPLOYMENTThis section outlines the deployment of the players’ models and if necessary any Scenario Objectives. For models, Deployment can be either Baseline or Corner Square Deployment. This is the area that the players will deploy their models.
Baseline Deployment: Models are set up with the base of the model touching the edge of the board.
If the Scenario uses Scenario Objectives, then players should place them on the board as instructed under this section of the Scenario explanation in conjunction with the Scenario’s diagram. Objectives with the same colour as your deployment zone are Friendly. Uncoloured Objectives are Neutral.
The Scenario Objective’s base size will appear in brackets. There are three different base sizes: Small, Medium and Large.
Corner Square Deployment: Players set up their models completely within a 6” square in opposite corners of the board.
6”
6”

76
GAME LENGTHThe length of a game of Bushido can be Fixed or Variable and lasts a number of Turns detailed below. The game ends at the End Phase of the last Turn or if all of one player’s models are removed from play.
Variable (X): During the Starting Phase of Turn (X) one of the players rolls a single D6. If the result is 4 or more, the game will finish at the end of the Turn, If not then the game continues to the next Turn when this roll will be made again. The game will always finish after the End Phase of the seventh Turn.
Fixed (X): The game finishes after the End Phase of the designated Turn (X).
VICTORY CONDITIONSEach Scenario has three Victory Points (VP’s) available to the players. At the end of the game, the player who has scored the highest number of VP’s is the winner. If both players have scored an equal number of VP’s, then the game is a draw. Only 3 VPs can be scored in any scenario, so both players VP scores combined will always be three or less.
Scenario Rules
SCENARIOS

77
The remaining leagues have been nothing but a blanket of emerald rice paddies and dusty dykes crisscrossing the land. You have been greeted by the lowing of half-submerged water buffalo and the friendly chatter of wrinkled farmers on your way to the grove. At the edge of freshly ploughed fields, swaying palm trees mark the villages and waterholes, while a constant blue haze in the distance, points to where the mountains are. The evenings are an explosion of fireflies, sparks, and stars while the dawn wraps you in ghostly mist and scatters a billion diamonds at your weary feet. After a few more days you find what you have been looking for.
The power here is palpable, it makes your skin prickle and your hairs rise, and it smells like the air during a lightning storm. Before you, in the middle of the glade, are six stone lanterns laid out in a circle. Some are crooked and broken, but all are wrapped in vines and moss and rise from the ground like the bones of a hastily buried corpse. The forest is silent, too silent. From the other side of the glade comes the unmistakable sound of a dry branch snapping under a misplaced footstep. It seems you’re not alone. From out of the trees and bushes come the distinct silhouettes of your mortal enemies readying themselves for the fight.
TYPE:Scenario Objective
DEPLOYMENT:Baseline Deployment6 Scenario Objectives (Small)2 Friendly, 2 Neutral and 2 Enemy
GAME LENGTH:Fixed (6)
SCENARIO OBJECTIVE INTERACTION:Prayer (5) (Simple)
VICTORY CONDITIONS:1 VP To the player with most Scenario Points at the end of Turn 2.1 VP To the player with most Scenario Points at the end of Turn 4.1 VP To the player with most Scenario Points at the end of Turn 6.Reset (3,5)
Keii
SCENARIOSKEII
6”
6”
12”
8”

78
TYPE:Zone Control
DEPLOYMENT:Baseline Deployment3 Zones 4” diameter all Neutral
GAME LENGTH:Fixed (6)
SCENARIO OBJECTIVE INTERACTION:N/A
VICTORY CONDITIONS:1VP To the player who has the most scenario points at the end of turn 2.1VP To the player who has the most scenario points at the end of turn 4.1VP To the player who has the most scenario points at the end of turn 6.Reset (2,4,6)
Your heart beats wildly as the sweat stings your eyes. This is it, no time for discussion or conversation. You try to banish the galloping thoughts from your mind as you and your Warband take to the field. The melee swirls all around you, a constant ebb and flow as both sides try to find a weakness in the other’s defence; if it weren’t so deadly, it could almost be a dance, but it is, and so it becomes a dance of death. Killer instinct takes control, as the sun flashes off sword and steel. Blood sprays and men scream in abject terror. Your nerves hum and your lungs burn, and your heart booms in your ears like a temple gong. Your mouth is bone dry, your tongue like wood and the memory of water so very far away. There is a slight tremble in your hands that must also be defeated. The smell of kicked-up dust and grass are in your nose. You take a deep breath looking left and right for your closest foe. Everything slows, you are above it, looking down, reading the battlefield, studying it, knowing it like one knows the faces of the ones they love. There, in the middle, if victory is to be yours, then it must be held at all cost. No time to wait, you have to push on through. You must be bold and resolute, a rock for your enemy to crash and break upon!
SEIKYU
Seikyu
6”
12”
12”
12”

79
Even in the dry season, the trails are muddy. Under the humid jungle canopy, spears of sunlight intersperse the darkness bathing everything in a mottled, twilight green. It’s hard to see where you are going. Bamboo thickets and patches of elephant grass dot the sides of the winding trail, while blade-grass slices at your face and hands. Mosquitoes and leeches attack with impunity, attaching themselves to wherever they can. Everything is tangled together in one sizeable mass of vegetation, and what may be lurking behind those fronds and oversized leaves is anyone’s guess. Things rustle and slither in the undergrowth, and the air is heavy and wet. Sluggish streams and strange animal calls break the monotony of the trail, and before you know it, the ancient temple lies before you. Strange stone faces peer accusingly at you and your Warband from behind curtains of thick jungle vines. The canopy opens and direct sunlight streams down into the clearing, and there, basking in its rays, like a cobra sunning itself on a rock, are three stone idols of immense power. These squat, toad-like carvings are what you have come here to find. You ready yourselves for the ceremony but are surprised by a flock of birds exploding into the sky as someone, or perhaps something approaches....
TYPE:Scenario Objective
DEPLOYMENT:Corner Deployment3 Scenario Objectives (Small) all Neutral
GAME LENGTH:Fixed (6)
SCENARIO OBJECTIVE INTERACTION:Influence (Simple)
VICTORY CONDITIONS:1VP To the player with the most Friendly Scenario Objectives at the end of Turn 2.1VP To the player with the most Friendly Scenario Objectives at the end of Turn 4.1VP To the player with the most FriendlyScenario Objectives at the end of Turn 6.Decreasing Scorer
IDOLS
Adepticon Idols
6”12”
12”
12”

80

81

82
As deadly as a spitting cobra hiding in wait, the Ito is a Clan unto themselves, and just as the snake sheds its skin, so too are they reborn! Once the laughing stock of Jwar and its surrounds, the Ito is tainted with serpentine powers far beyond our understanding, making them even more dangerous and deceptive. The discovery of an ancient, vine-encrusted temple dedicated to the Snake God, Orochi, has set the Ito on a course of rebellion against the ruling Takashi Clan and their allies. From their home on the jungle island of Izu, they bait the other Clans with honeyed words and venomous flattery. The Ito have accepted the Blessing, the Blood, and the Will of Orochi, even though it has left some of their Clan a shadow of their former selves. They are changed, t ra n s fo r m e d , mutated by the arts of Orochi into beings more serpent than
human, yet more human than the serpent. Masters of speed, poison, and outright cunning, the Ito Clan are a coiled snake around the throats of their enemies, squeezing ever tighter. Renowned for their duplicity and untrustworthiness, it would be unwise to turn your back on the Ito Clan as you’ll never know when they may strike, but strike they will.
The Ito Clan rely on their superior speed and agility to dominate the battlefield. Coupled with lightning-fast reflexes, and the uncanny ability to nearly always strike first, the Ito Clan are as deadly an opponent as you could ever imagine. The Blood of Orochi courses through their veins allowing some of the Clan to poison their weapons, while others have been granted the ability to spit venom at their foes, just like a hooded cobra that’s under attack. While the Takashi Clan use black powder, and the Minimoto uses hot, molten metal, the Ito Clan favour the short-bow for their ranged attacks or when stalking their prey through the palm-fronds and creepers of their island. The steaming Shimagamo jungle is home to more than the just the Ito; two-headed snakes and winged cobras count themselves as allies to the Clan while the chanting, sweating priests, known as Shisai, sharpen their will against those they seek to overthrow. Fang and fury, sword and scale are all brought to bear when the Ito Clan stand on the battlefields of Jwar.
THE FACTIONS OF BUSHIDOTHE ITO CLAN
The Ito Clan

83
Born in shadow, of conspiracy, and a hate for all we hold dear, the power of the Cult is on the rise. Their ranks swell with the incorrigible, the incurable, and those, whom after a lifetime of bad decisions are forced to make the Yureis Bargain, using their very souls as collateral in the vain attempt to skip death...for now at least. Guided by a mysterious ‘puppet master’ called, Kato, and the sinister geisha, Ikiryo, the Cult of Yurei aim to destroy all we hold dear. Kato, adept at the dark arts has found a way to make the dead walk again by using his hand-crafted, porcelain masks as a medium to bring their souls back from beyond the pale. Together, Kato and Ikiryo rob the graves of their enemies, using the contents as a shambling army to reinforce their beliefs. But it’s not just the Risen or Kairai or the Witches that heed the call; there are other unmentionable creatures spawned in the very depths of our worst nightmares, that skitter and slither their way from the primordial to the streets and back alleyways of Jwar. One of the Cult’s greatest strengths is the ability to hide in plain sight, to walk among us, from the humblest of huts to the most opulent of palaces, the Cult is everywhere, and nowhere, all at once. When the moon rides high, and the night is up, and from behind you comes the stutter of stealthy footsteps, will you turn and draw? Or run screaming headlong toward the light? Only time will tell, for as sure as the sun rises in the east if the Cult is
not checked, then this is a choice we will all have to face one day.
Fear is just one of the many elements that the Cult employ in battle, as it can turn the most stalwart of samurai into a gibbering wreck. Then there is the dead that simply will not die! They rise and fight, rise and fight, compelled by the power of the Cult to serve, even in death. The Cult are skilled at draining an opponent’s Ki to use against them, to control them, to turn their will and weapon against their very own allies! Then there are the swarms of rats to contend with, diseased, riddled with plague, but powerful enough to drag you down until they finish you off.
CULT OF YUREI
Cult of Yurei

84
Noble House Takashi, warrior elite, and the rulers of the Isles, the Prefecture of Ryu have won the right to rule after vanquishing the Shiho Clan in what is now known as the Dragon Wars. Despite the defeat of their sworn enemy, they find themselves being summoned to arms yet again, as the Isles are beset by danger from all sides. The end of the war has not brought peace as they had imagined. Demons of old, sinister Cults and open rebellion from the Ito Clan have pushed the Takashi back into the fray. They welcome it; they are born to it, with katana and kaiken, spear and shot, they lead the charge against the enemies of Jwar. The Takashi are masters of martial prowess; wielding an army of ashigaru, led by gunsos, under the dominant eye of samurai, they are more than willing
to teach their enemy a lesson in blood and Bushido. The Takashi has been gifted the power of black powder from the Emperor’s armoury while no other Clans have. Not only is their Mon that of a golden dragon, rampant on a field of blue, but they have them in their ranks as well. Mizuchi’s and Otakebi’s great speed is an asset on the field of battle, and the very sound of them on the wind is known to break the resolve of the fiercest of foes. The warriors of the Takashi are highly trained, expertly led, and fight with courage that is second to none, for they know, without a single doubt, that their words and deeds will live on forever.
The warriors of the Prefecture fight as any cohesive unit should. Their command and control structures are exemplary, allowing them to dominate on the battlefield with ease. A deadly mixture of coordinated attacks, expert leadership, and experienced tacticians enables the Prefecture of Ryu to control wherever they are forced to make a stand. While the rank and file are predominately human, the Prefecture of Ryu is fortunate to count actual dragons as part of their fighting force. Although smaller, the samurai are no less deadly. Masters of Iaijutsu, they would have your head rolling on the ground before your sword had even cleared your scabbard! Well armoured with an array of deadly weapons, the Prefecture of Ryu excel in the art of war; for the harder you train, the easier you fight!
PREFECTURE OF RYU
Prefecture of Ryu

85
Those that have faced it, and survived, call it the ‘Savage Wave’, a wave that destroys virtually everything in its path. But where exactly is this ‘wave’ from? No one is certain. For how can creatures of myth and mystery walk the Isles of Jwar? What does it portend? These are questions being asked in every corner of the isles, from the docks to the temples, and everywhere in-between. The Savage Wave consists of hordes of twilight creatures from the Netherworld called, Bakemono, being driven ever on, by the command of towering beasts known as Oni, whose strength is unquestionable, so too is their fury, ferocity, and strategy in battle. There is an element of extreme cunning in their ways, not brutish or bestial, but careful and considered. Bakemono can vary in size: from smallest to largest it is, Sho Bakemono, then Dai Bakemono, and finally, Rinsho. The Oni, on the other hand, is possibly the most monstrous creature on the Isles. They have tremendous strength and are capable of killing a heavily armoured samurai with a single, well-timed blow. But all this is surface, what lies beneath that sun-reddened skin remains a mystery, and their motives are just as unclear. A recent expedition to the Blue Library, found in the heart of the Empire, has revealed ancient scrolls that make mention of these curious, otherworldly beings many, many, years ago. It seems that this may not be the first Savage Wave to come to Jwar after all.
The Savage Wave is bred for war, and that’s just what Bakemono do, they breed. This allows them to creep from the shadows, and the Netherworld, to swell the numbers of their already prodigious battle-brethren. They employ cunning snares and traps, as well as deadly poisons distilled from mushrooms to thwart their enemies in combat. Being able to ride giant bats certainly gives them a great advantage, as well as using the smaller ones to exsanguinate their enemies. The Bakemono rely on their abundance while the Oni are limited in number. Treading the soil of this strange world, the Oni and their packs of slavering Kaihei, rampage with seeming impunity, causing massive amounts of mayhem wherever they go. The Oni are impetuous, aggressive, and are filled with a blood-red rage that compels them to attack in a berzerk frenzy using whatever weapon’s at hand, even if it is the closest Bakemono!
SAVAGE WAVE
Savage Wave

86 Temple of Ro-Kan
TEMPLE OF RO-KANPebbles, ponds, ripples, cause and effect. A balance in all things and the unravelling of the mysteries of Ki. And what is Ki exactly? It is that unseen life-force that weaves all our tales together in one enormous tapestry. These are just some of the infallible laws and philosophies espoused by the Temple, high up in the Ro-Kan mountains. They once saw themselves as above the conflict and strife that raged all around them, but that was then, and this is now, and with the Cult of Yurie growing ever more dangerous, and the Savage Wave loose upon the land, there is no time for inaction. Masters and monks take to the Isles of Jwar to bring light to the darkness and assistance to those who need it most, and that has always been the poor, and the oppressed. Some monks have
mastery over the elements and bring this to bear when locked in mortal combat with their foes. Others have mastered the intricacies of Ki, and use this arcane power to summon Kami’s to aid in the fight against those that would tip the balance. However, it’s not only the locals who offer support, Yokai, and temples from much further afield have heard the call for help and are sending Sōhei to assist where they can. This includes masters from the temple of Anmuy and the temple of the Brine; even though they have had limited dealings with the Temple Of Ro-Kan, they understand the urgency. For what happens on the Isles of Jwar has broader implications for the world at large.
The adepts of the Temple utilise Ki better than any on the Isles and use this to their endless advantage. They pass it back and forth as required, making it play a vital role in the fight against the darkness. Yokai, as well as natures denizens, fight alongside the temple, and they count on the local populace to help too. When it comes to joining in the fray, the masters and monks from the temple of Ro-Kan are a perfect balance of attack and defence and can adapt to any situation with ease. They have swapped fists for swords and robes for armour, but their superior speed and training has taught some of them to swat arrows to one side while others react with lightning fast reflexes to be able to strike their opponents first.

87
The waves are wild, the decks bloody, and tempests squall their world. But in the vastness of the open seas and oceans, the Jung pirates reign supreme, although individual members of the Carp Clan may disagree. Setting out from the Cove of Chimes, a secret hideaway they visit all but a few times a year, they pillage the waters around the Isles of Jwar and beyond. Their ships are far faster than anything the Takashi or the Empire can muster, and their knowledge of the Frozen and Chrome Seas, unparalleled. The Jung, once allied to a Clan of some renown, now labelled as pirates, hold allegiances that are as fickle and unpredictable as the tides. These motley mariners fear nothing except their Queen, (who is far too murderous to be actual royalty) their Captains, and sailing off the edge of the world. A pirate crew is a family of sorts, and for some, it’s the only life they’ve ever known. Everyone is welcome, regardless of where they come from, even those that hail from below, because beneath the water, a full five fathoms below, life transforms, becoming something both rich and strange, a sea-change if you will, creating singular beings that are aquatic in nature, but more like man in their reasoning. Sharks, crabs, angler fish, piranha, and many, many more, are all given to walk, talk, and live above the waters as humans do. They crew the ships, fight their foes and take their share of the booty. A Jung pirate is just as at home on their boat as they are in the dock-side taverns of Ryu or some other far-flung locale way off the map.
The pirates fight hard, fast, and as furious as the waves beneath their barnacled hulls. Whatever Captain they follow dictates how they fight, and whatever weapon is closest to hand dictates what they fight with. Harpoons, bailing hooks, even nets are deadly in the hands of the Jung. They may be dockside brawlers with no formal training, but that doesn’t mean they are not deadly. There is strength in numbers, and the Jung put this to good use when swarming their foes. Strong, agile, and cunning, with access to razor-sharp teeth, and decapitating crab claws, this makes the Jung a formidable fighting force. With black powder being just one of the many goods they plunder, they now count on firearms as part of their arsenal.
JUNG PIRATES
Jung Pirates

88
In the snow-bound mountain peaks of the Isles of Jwar, lies the hearths and homes of the Tengu, and it is from here, high above the clouds, that they bear witness to all of our follies and foibles. The Tengu have for centuries been mostly unconcerned by the rise and fall of the Clans, or of those who would rule the roost. Such machinations are not their way, and they have little understanding or tolerance for those who do. Ever patient, the Tengu have always seen themselves as above the endless strife that eddies and swirls beneath them in the valleys, plains, and cities of the humans. Revered by the local tribes-folk who share their high peaks, and their beliefs, the Tengu are an island of calm in an ocean of chaos, and yet, with the passing of time and the frequency of armed incursions
into their lands, some have decided to descend, unannounced, to join in the fray. This decision has not been made lightly and has led to a fracturing of the age-old bonds that bind the Tengu together. Blood and violence, like the wind through a Tengu’s wing, is not inconsequential to this magnificent race of bird-folk, and they will stop at nothing to protect their way of life, even if it means pitting Tengu against Tengu. No matter the cost, the Tengu have sworn to bring death to those that would meddle in affairs far beyond their ken.
On the field of battle, there is nothing as fast or manoeuvrable as a Tengu on the move. Clad in armour that affords them ample protection yet does not impede their flying, the Tengu are merciless when working in perfect, winged-harmony, just as the flock does when it wants to achieve its maximum potential. The mighty Kurama are more than a match for any samurai warrior, armed with either a sword or a bow; they fight with a feathered fury the valley-dwellers have seldom seen. Wizened Shisai and Shugenja have also aligned themselves to the breakaway Decension and aim to do whatever is in their power to best aid their flock-mates and allies. Loyal tribes-folk have rallied to the war-banners of the Tengu and are showing their undying support on the battlefield by using their skills as trappers, hunter-gatherers, and savage, mountain top warriors, to deadly effect.
THE DESCENSION
The Descension

89
Jima! A den of unfathomable iniquity, and home to the Silvermoon Trade Syndicate. If your tastes run to easy coin, loose morals, bar brawls, and intoxication, Jima is for you; but always harken to its personal mantra, and that is, ‘ Always pay what you owe.’ For if you don’t, you’ll run afoul of the Silvermoon Trade Syndicate, and you don’t want that, the harbour is full of people who ‘forgot’ to pay their way. They’ll break your knees, take an eye, or snap a limb, quicker than you can say, mah-jong! This criminal enterprise employs Buto, assassins, grifters, spies, and Roses with thorns so sharp they could sever an artery. Violence and beauty operate side-by-side in the Silvermoon Trade Syndicate, so too does business and blackmail; just as long as they generate coin enough to hold the Syndicate’s interest, then all will be well. The Silvermoon Trade Syndicate are beholden to no one, no Clan or House tells them what to do, as they are the power behind the power and the Fist of Iron inside the silken glove. Rumours abound that every dominant Clan is indebted to them in some way, whether they know it or not, and that the financial webs these eternal entrepreneurs weave are so intricate and pervasive that they stretch over the waters to the heart of the Empire and the counting houses of the Emperor himself.
The Silvermoon Trade Syndicate can present themselves in many ways on the battlefield. They can be as
aggressive as any of the Clans are, or, as subtle and deadly as those who prefer to achieve their results in the shadows. The odds always favour the house, and that’s just how the Silvermoon Trade Syndicate like it. High-risk for high reward is the way they do things. Sometimes it is the mere threat of force that makes the Silvermoon so successful, that, and the actual force the Buto do when let loose among their foes. Their Roses, renowned throughout Jwar for their beauty and intoxicating fragrance, are also a thorn in their opponents’ side, as they can easily persuade an enemy to turn his weapons against his, or her, compatriots. The Silvermoon use urchins and orphans and others that may have rejected as just one of the many weapons in their arsenal and speaking of such, the less noticeable the weapon, the better!
SILVERMOON TRADE SYNDICATE
Silvermoon Trade Syndicate
90
How they came to choose this way of life depends on whom you ask. For some, it was the loss of a beloved master that set them on this lonely path; for others, it may have been their only choice. Revenge, glory, adventure, even the humble coin have all been named as the reason they roam the Isles of Jwar lending their skills and sword arm to those who need it. A few prefer to contract their skills to those
whom they perceive to be of good faith, while for others, the stain of a less than reputable alliance is nothing that can’t be washed off...just like their enemies blood. No matter what side of the skirmish line you will find them on, all Ronin have one thing in common, that when the battle’s over, and they got what they came for, it’s time to wander, seeking out new lands, new masters, and new adventures.
RONIN
Ronin

91
The Minimoto take great pride in their work, with some devoting a lifetime to the study of metal and what they can do with it. To know a Minimoto weaponsmith’s name is to understand his entire history, his lineage, his heritage; it is eternal, and, as he feverishly works the heated alloy, his hammer dancing over the glowing metal, you bear witness to him writing his legacy into that weapon. These are more than mere katanas or tetsubos; they are a tongue that will speak for his art even when there is no-one left to tell it. A blacksmith spends countless hours learning the language of the steel, studying its form, its function, and how much it can be stressed before it breaks. The Minimoto Clan apply the same rigorous principles to their soldiers, and thus, they are renowned throughout the Isles of Jwar. Once allied to the Takashi Clan during the Dragon Wars, it seems as if that relationship has cooled somewhat of late as they focus on their own ambitions. There is a curious wind that howls through their Iron Mountains, and their home, Jyoto, and whether it blows fair or foul, remains to be seen, but the Minimoto Clan are nothing if not patient. Never one to seek the fineries and fripperies of court life, they are more than satisfied to spend their days’, mining, smithing, fighting, and singing the Songs of their Ancestors. When let loose, Hear us strike! Your blood becomes our fountain. Armour on! We march to war! The Bear goes over the mountain!
The samurai of the Minimoto Clan are undoubtedly the most heavily armoured warriors in the Isles of Jwar. Add to this their devastating weaponry, and you have a fearsome combination that destroys all that gets in its way. Not the most manoeuvrable of warriors, they are however relentless and single-minded in the pursuit of their enemies. But fear not, for the Ice Witches that share their lofty, icy, peaks ensure that they do not become outmanoeuvred when in melee. Their blacksmiths’ take to the field as well, to assist where they can; be it making pots of molten metal to douse their enemies in, or to repair arms and armour alike. Then there are the bears that have come out of hibernation to fight alongside the Minimoto; they too play a part in the Clan’s path to glory.
MINIMOTO
Minimoto

92
Shrouded in shadow, agile, silent, clad in black raiment and mystery, the members of the Kage Kaze Zoku are the undeniable masters of the covert. Highly skilled assassins and saboteurs, they attack from out of the gloom using every facet of their deadly training to full-effect. These seasoned martial artists are the opposite of the gilded samurai that take to the field of battle with all the pomp and circumstance of a strutting peacock! They do their best to deny they even exist, leaving all we know of them a mixture of myth and mystery. The Kage Kaze Zoku, also known as the Shadow Wind Clan, is an amalgamation of three Houses, namely the Bleeding Moon, the North
Star and the Long Shadow; all under the command of the Grand Master. The structure inside the Houses is a mystery known only to a few, but what is known, is that it comprises of Shadow Crows, the Soulless, and raw recruits identified only as Worms. Their training is a balance of the systematic and the martial and the details of which are nothing more than pure speculation. But what is recognised, is that death waits around every corner, and if the men and women of the Shadow Wind Clan had anything to do with it, they would name it, shinobi...
The warriors of the Shadow Wind Clan are highly specialist and act in smaller numbers than any of their opponents, relying on concealment and stealth to get where they are going to. Their weaponry and gear is suited to their hidden purpose; therefore it includes poison, caltrops, hallucinogens, the deadly shuriken, smoke bombs, even disguises. While some of the Shadow Wind prefer their enemy to die slowly, bleeding out over time, others favour the quick kill using a variety of razor-sharp weapons perfectly suited for meting out death. The Kage Kaze Zoku also employ a fearsome winged beast called a Karapan to act as a look-out or if need be a scout. No slouch in combat, the Karapan has been known to stalk its prey then rend it with its claws and pointed beak. Truly the undisputed masters of the silent kill, the members of the Shadow wind Clan are an elite force to be reckoned with.
KAGE KAZE ZOKU
Kage Kaze Zoku

93
Once they ruled, but now they are in ruins; scattered, leaderless, a House divided. The Eagle fought the Dragon, and the Dragon won, for how could it not? Treachery, misdirection, and uneasy alliances put paid to the Shiho and left them at the mercy of the Takashi Clan. In the years following the Dragon Wars, the Shiho name has hardly been mentioned, until now. Recently, that name is being spoken again, with increasing enthusiasm and excitement as it seems that the only known member of that once proud Clan has returned to the Isles of Jwar. Shiho Hiroto is back to conquer his many foes and destroy the Takashi Clan by any means possible. He is leading a secret war that’s taking place in the rice paddies, jungles, and thickets of Jwar. Shiho Hiroto is choosing to forgo a full-frontal attack, as he and his many men are more than happy to harry, pillage, and disrupt the vital lines of supply, communication, and control, that the Takashi need to regulate the Isles and the populace it contains. Support for the Takashi has always been active in, and around, the cities and larger towns, but out in the hinterland, in the hovels and the hamlets, the Eagle has never died. The Wolf Clan, once staunch supporters of the Shiho have offered assistance to him despite their proximity to Ryu and the Takashi Clan, and Shiho Hiroto knows that with their support, this rebel Clan will once more be able to spread their majestic wings and hunt!
SHIHO CLAN
Shiho Clan

94
Shalla-Bet was an envoy, a herald that bore the might of the Empire wherever he went; and when he spoke, it was the voice of the Emperor that came forth and not his own. To deny him was to deny the Light of Heaven himself, and that would be ill-council indeed. He sat in silence on the gilded floor listening to what their glorious leader had to say.
“What is that?” asked the Emperor, pointing at a chained and slavering being he had only ever seen on scrolls or temple walls.
“Is that what I think it is?” he added.
Shalla-Bet nodded as the beast grunted and tried to free itself from its fetters; the envoy knew that if it escaped it would enjoy nothing more than killing everyone in the room. Shalla-Bet clapped his hands, and the struggling guardsmen manoeuvred the bound creature out into the hallway and down into the bowels of the Palace.
The Emperor sat above Shalla-Bet on an ornate chair carved centuries before. To his right, a gilded birdcage housed a rare rain-bird with lightning blue plumage and a tiny orange beak that glowed like a fanned ember. The Emperor opened the door to the birdcage, releasing the bird. It gave flight, disappearing out the window and into the grounds of the Palace.
“Are there more? “ he asked his envoy.
“The bird or the beast, Emperor?”
“The beast.”
“Undoubtedly.”
The Emperor walked toward a lacquered wooden porch overlooking a verdant garden, his envoy following several measured steps behind.
“For too long we have been looking in the wrong place, Shalla-Bet. The petty squabbles in the west have been a distraction for us. It’s time our focus was elsewhere.”
They watched as an eagle harried the newly freed rain-bird; a single blue feather floated to the manicured lawn when it was over.
“Pack your bags, Shalla-Bet,” ordered the Emperor.
“Where will I be going, Light of Heaven?”
“East, over the waters. To the Isles of Jwar. It’s time for the light of the Rising Sun to banish the shadows... once and for all.”
THE IMPERIAL COURT
The Imperial Court