BRNO UNIVERSITY OF TECHNOLOGY EXTENSION SHIELD FOR ...
40
-
Upload
khangminh22 -
Category
Documents
-
view
2 -
download
0
Transcript of BRNO UNIVERSITY OF TECHNOLOGY EXTENSION SHIELD FOR ...

BRNO UNIVERSITY OF TECHNOLOGY
VYSOKÉ UČENÍ TECHNICKÉ V BRNĚ
FACULTY OF INFORMATION TECHNOLOGYFAKULTA INFORMAČNÍCH TECHNOLOGIÍ
DEPARTMENT OF COMPUTER SYSTEMSÚSTAV POČÍTAČOVÝCH SYSTÉMŮ
EXTENSION SHIELD FOR TESTING OF ARM-BASED
EMBEDDED SYSTEMS
ROZŠIŘUJÍCÍ MODUL PRO TESTOVÁNÍ VESTAVĚNÝCH SYSTÉMŮ S PROCESORY ARM
BACHELOR’S THESISBAKALÁŘSKÁ PRÁCE
AUTHOR PETR VALENTAAUTOR PRÁCE
SUPERVISOR Ing. VÁCLAV ŠIMEKVEDOUCÍ PRÁCE
BRNO 2018


AbstractThe purpose of this Bachelor’s thesis was to design and create an extension shield for testingof the Bulldog library on an ARM-based embedded system. It covers the Bulldog library,describes its supported platforms and their I/O interfaces. The main part of this thesis isfocused on design and manufacture of the extension shield. Its purpose is automating thetedious process of testing hardware.
AbstraktTato bakalářská práce se zabývá návrhem a realizací rozšiřujícího modulu pro testováníknihovny Bulldog na vestavěném systému s procesorem ARM. Zabývá se knihovnou Bull-dog, popisuje podporované platformy a jejich vstup/výstupní rozhraní. Hlavní část práceje zaměřená na tvorbu rozšiřujícího modulu a doprovodný software. Vytvořený produkt siklade za cíl automatizovat zdlouhavé testování hardware.
KeywordsBulldog, embedded systems, testing, Raspberry Pi, ATmega328p, I2C, SPI, UART, PWM
Klíčová slovaBulldog, vestavěné systémy, testování, Raspberry Pi, ATmega328p, I2C, SPI, UART, PWM
ReferenceVALENTA, Petr. Extension Shield for Testing of ARM-Based Embedded Systems. Brno,2018. Bachelor’s thesis. Brno University of Technology, Faculty of Information Technology.Supervisor Ing. Václav Šimek
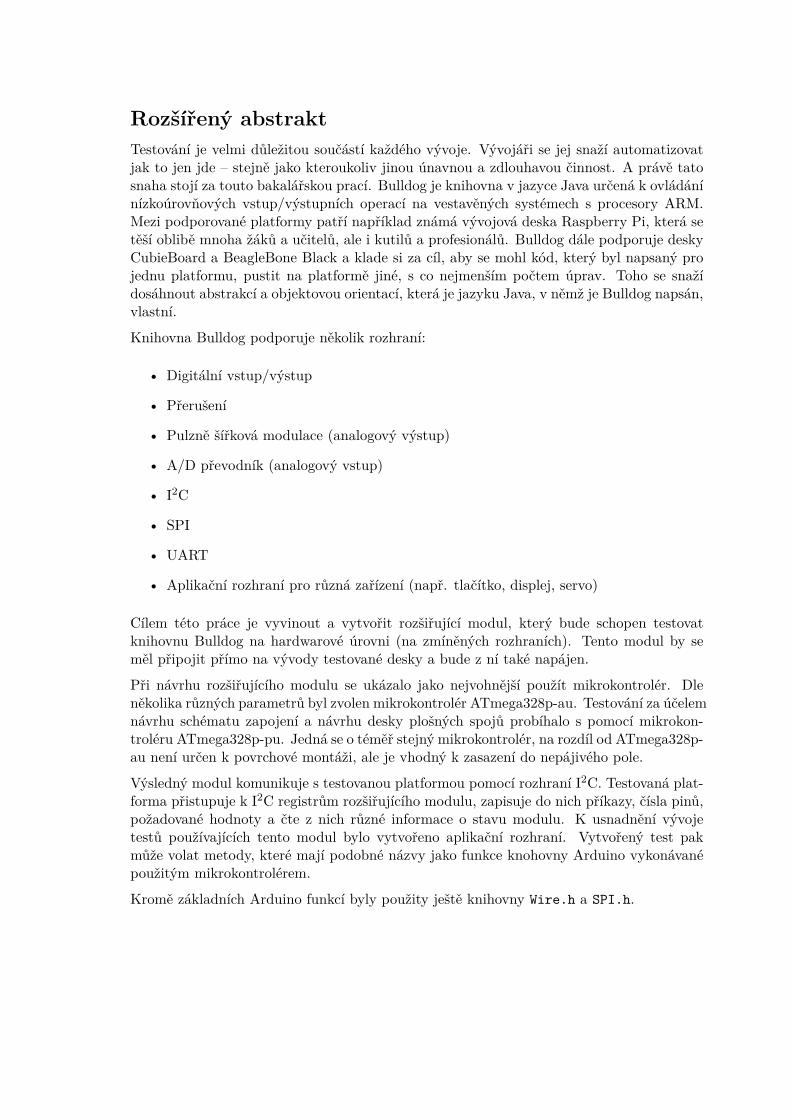
Rozšířený abstraktTestování je velmi důležitou součástí každého vývoje. Vývojáři se jej snaží automatizovatjak to jen jde – stejně jako kteroukoliv jinou únavnou a zdlouhavou činnost. A právě tatosnaha stojí za touto bakalářskou prací. Bulldog je knihovna v jazyce Java určená k ovládánínízkoúrovňových vstup/výstupních operací na vestavěných systémech s procesory ARM.Mezi podporované platformy patří například známá vývojová deska Raspberry Pi, která setěší oblibě mnoha žáků a učitelů, ale i kutilů a profesionálů. Bulldog dále podporuje deskyCubieBoard a BeagleBone Black a klade si za cíl, aby se mohl kód, který byl napsaný projednu platformu, pustit na platformě jiné, s co nejmenším počtem úprav. Toho se snažídosáhnout abstrakcí a objektovou orientací, která je jazyku Java, v němž je Bulldog napsán,vlastní.
Knihovna Bulldog podporuje několik rozhraní:
• Digitální vstup/výstup
• Přerušení
• Pulzně šířková modulace (analogový výstup)
• A/D převodník (analogový vstup)
• I2C
• SPI
• UART
• Aplikační rozhraní pro různá zařízení (např. tlačítko, displej, servo)
Cílem této práce je vyvinout a vytvořit rozšiřující modul, který bude schopen testovatknihovnu Bulldog na hardwarové úrovni (na zmíněných rozhraních). Tento modul by seměl připojit přímo na vývody testované desky a bude z ní také napájen.
Při návrhu rozšiřujícího modulu se ukázalo jako nejvohnější použít mikrokontrolér. Dleněkolika různých parametrů byl zvolen mikrokontrolér ATmega328p-au. Testování za účelemnávrhu schématu zapojení a návrhu desky plošných spojů probíhalo s pomocí mikrokon-troléru ATmega328p-pu. Jedná se o téměř stejný mikrokontrolér, na rozdíl od ATmega328p-au není určen k povrchové montáži, ale je vhodný k zasazení do nepájivého pole.
Výsledný modul komunikuje s testovanou platformou pomocí rozhraní I2C. Testovaná plat-forma přistupuje k I2C registrům rozšiřujícího modulu, zapisuje do nich příkazy, čísla pinů,požadované hodnoty a čte z nich různé informace o stavu modulu. K usnadnění vývojetestů používajících tento modul bylo vytvořeno aplikační rozhraní. Vytvořený test pakmůže volat metody, které mají podobné názvy jako funkce knohovny Arduino vykonávanépoužitým mikrokontrolérem.
Kromě základních Arduino funkcí byly použity ještě knihovny Wire.h a SPI.h.

Schéma zapojení a deska plošných spojů byly navrženy pomocí open-source programu Ki-CAD. Deska byla zhotovena doma tzv. fotocestou. Fotocesta využívá postup zvaný fo-tolitografie, při kterém jsou za pomoci UV záření přeneseny obrazce z masky na vrstvufotorezistu na plošném spoji. Ten je pak rozpuštěn roztokem hydroxidu sodného. Následněje odleptána odhalená měď roztokem chloridu železitého. Takto vyrobená deska pak bylaošetřena pájitelným lakem a navrtána na stojanové vrtačce. Domácí výroba plošného spojeumožnila velmi rychlé iterace ve vývoji rozšiřujícího modulu.
Po osazení součásktami a oživení byl rozšiřující modul testován pomocí logického analyzá-toru a open-source programu sigrok.
Rozšiřující modul je možné programovat přímo z testované platformy pomocí utility avrdude,nebo pomocí AVR ISP programátoru na vyvedených pinech.
Na přiloženém CD je poskytnut i příklad testu, který využívá funkce vyvinutého rozšiřu-jícího modulu.
Hlavní cíl této bakalářské práce – vyvinout a vytvořit rozšiřující modul určený k testováníknihovny Bulldog byl uspokojivě splněn. Vytvořené API navíc usnadní práci s tímto mod-ulem. Kvůli časové tísni však bohužel nedošlo k vytvoření adaptérů pro připojení moduluk platformám CubieBoard a BeagleBone Black.
Během vývoje tohoto zařízení bylo objeveno mnoho chyb v knihovně Bulldog. Napříkladčtení z I2C je v porovnání s ostatními knihovnami občas nespolehlivé a při pokusu o PWMvýstup dojde dokonce ke zhroucení celého operačního systému.
Ukázalo se tak, že byl projekt užitečný k odhalení různých neduhů knihovny. Do budoucnase nabízí různé vylepšení, zejména pak použití modulu ne k testování, ale k rozšíření vs-tup/výstupních rozhraní různých platforem.

Extension Shield for Testing of ARM-Based Em-bedded Systems
DeclarationI hereby declare that I have written this Bachelor’s thesis on my own under the supervision ofIng. Václav Šimek. Additional information was provided by Ing. Pavel Macík of the Red HatCzech s.r.o. All the relevant information sources, which were used during preparation ofthis thesis, are properly cited and included in the list of references.
. . . . . . . . . . . . . . . . . . . . . . .Petr Valenta
May 17, 2018
AcknowledgementsI would like to thank all people who helped me in any way during the development of thisthesis. Huge gratitude goes to my parents and my supervisor Ing. Václav Šimek. Specialthanks belongs to Ing. Pavel Macík who helped me learn many new skills.

Contents
1 Introduction 5
2 Bulldog library 62.1 PWM . . . . . . . . . . . . . . . . . . . . . . . . . . . . . . . . . . . . . . . 72.2 I2C . . . . . . . . . . . . . . . . . . . . . . . . . . . . . . . . . . . . . . . . . 8
2.2.1 Physical layer . . . . . . . . . . . . . . . . . . . . . . . . . . . . . . . 82.2.2 Protocol . . . . . . . . . . . . . . . . . . . . . . . . . . . . . . . . . . 92.2.3 TWI bus . . . . . . . . . . . . . . . . . . . . . . . . . . . . . . . . . 10
2.3 SPI . . . . . . . . . . . . . . . . . . . . . . . . . . . . . . . . . . . . . . . . . 102.3.1 Interface . . . . . . . . . . . . . . . . . . . . . . . . . . . . . . . . . . 102.3.2 Operation . . . . . . . . . . . . . . . . . . . . . . . . . . . . . . . . . 10
2.4 UART . . . . . . . . . . . . . . . . . . . . . . . . . . . . . . . . . . . . . . . 122.5 Supported platforms . . . . . . . . . . . . . . . . . . . . . . . . . . . . . . . 13
2.5.1 Raspberry Pi . . . . . . . . . . . . . . . . . . . . . . . . . . . . . . . 132.5.2 CubieBoard . . . . . . . . . . . . . . . . . . . . . . . . . . . . . . . . 132.5.3 BeagleBone Black . . . . . . . . . . . . . . . . . . . . . . . . . . . . 14
3 Extension shield design 153.1 Existing solutions . . . . . . . . . . . . . . . . . . . . . . . . . . . . . . . . . 153.2 Hardware . . . . . . . . . . . . . . . . . . . . . . . . . . . . . . . . . . . . . 15
3.2.1 Format . . . . . . . . . . . . . . . . . . . . . . . . . . . . . . . . . . 153.2.2 Concept . . . . . . . . . . . . . . . . . . . . . . . . . . . . . . . . . . 163.2.3 Microcontroller selection . . . . . . . . . . . . . . . . . . . . . . . . . 173.2.4 Connection . . . . . . . . . . . . . . . . . . . . . . . . . . . . . . . . 193.2.5 Shield function . . . . . . . . . . . . . . . . . . . . . . . . . . . . . . 193.2.6 Communication . . . . . . . . . . . . . . . . . . . . . . . . . . . . . . 203.2.7 Prototype . . . . . . . . . . . . . . . . . . . . . . . . . . . . . . . . . 20
3.3 Software . . . . . . . . . . . . . . . . . . . . . . . . . . . . . . . . . . . . . . 203.3.1 Arduino . . . . . . . . . . . . . . . . . . . . . . . . . . . . . . . . . . 203.3.2 Shield as a Bulldog device . . . . . . . . . . . . . . . . . . . . . . . . 21
4 Implementation 224.1 PCB . . . . . . . . . . . . . . . . . . . . . . . . . . . . . . . . . . . . . . . . 22
4.1.1 Manufacture . . . . . . . . . . . . . . . . . . . . . . . . . . . . . . . 234.1.2 Drilling . . . . . . . . . . . . . . . . . . . . . . . . . . . . . . . . . . 244.1.3 Assembly . . . . . . . . . . . . . . . . . . . . . . . . . . . . . . . . . 25
4.2 Software . . . . . . . . . . . . . . . . . . . . . . . . . . . . . . . . . . . . . . 274.2.1 Shield . . . . . . . . . . . . . . . . . . . . . . . . . . . . . . . . . . . 27
1

4.2.2 Bulldog . . . . . . . . . . . . . . . . . . . . . . . . . . . . . . . . . . 284.2.3 Programming . . . . . . . . . . . . . . . . . . . . . . . . . . . . . . . 284.2.4 Testing . . . . . . . . . . . . . . . . . . . . . . . . . . . . . . . . . . 28
5 Conclusion 295.1 Bulldog issues . . . . . . . . . . . . . . . . . . . . . . . . . . . . . . . . . . . 295.2 Improvements . . . . . . . . . . . . . . . . . . . . . . . . . . . . . . . . . . . 29
Bibliography 30
A CD Contents 33
B Schematic 34
2

List of Figures
2.1 Logo of the Bulldog library [21] . . . . . . . . . . . . . . . . . . . . . . . . . 62.2 Current–Voltage relationship [10] . . . . . . . . . . . . . . . . . . . . . . . . 72.3 PWM duty cycle [31] . . . . . . . . . . . . . . . . . . . . . . . . . . . . . . . 82.4 Generalized I2C connection diagram [13] . . . . . . . . . . . . . . . . . . . . 92.5 I2C protocol example [1] . . . . . . . . . . . . . . . . . . . . . . . . . . . . . 92.6 SPI bus: master and three slaves [11] . . . . . . . . . . . . . . . . . . . . . . 112.7 A timing diagram showing clock polarity and phase [22] . . . . . . . . . . . 112.8 UART communication example [8] . . . . . . . . . . . . . . . . . . . . . . . 122.9 UART packet [8] . . . . . . . . . . . . . . . . . . . . . . . . . . . . . . . . . 122.10 Raspberry Pi 3 Model B+ [24] . . . . . . . . . . . . . . . . . . . . . . . . . 132.11 CubieBoard6 [23] . . . . . . . . . . . . . . . . . . . . . . . . . . . . . . . . . 142.12 BeagleBone Black [25] . . . . . . . . . . . . . . . . . . . . . . . . . . . . . . 14
3.1 Raspberry Pi with Sense HAT attached [4] . . . . . . . . . . . . . . . . . . 163.2 ATmega328p-au [5] . . . . . . . . . . . . . . . . . . . . . . . . . . . . . . . . 183.3 Concept of connections between shield and tested board . . . . . . . . . . . 193.4 Breadboard prototype . . . . . . . . . . . . . . . . . . . . . . . . . . . . . . 21
4.1 Shield PCB schematic . . . . . . . . . . . . . . . . . . . . . . . . . . . . . . 224.2 Photolithography [9] . . . . . . . . . . . . . . . . . . . . . . . . . . . . . . . 244.3 PCB with a mask . . . . . . . . . . . . . . . . . . . . . . . . . . . . . . . . . 254.4 Powered on Raspberry Pi with a final prototype of the shield . . . . . . . . 26
3

List of Tables
3.1 Parameters for selecting a microcontroller . . . . . . . . . . . . . . . . . . . 173.2 ATmega 328P-au — selected parameters [14, 2] . . . . . . . . . . . . . . . . 183.3 Shield I2C register overview . . . . . . . . . . . . . . . . . . . . . . . . . . . 20
4.1 Bill of Materials . . . . . . . . . . . . . . . . . . . . . . . . . . . . . . . . . 254.2 List of COMMAND register values . . . . . . . . . . . . . . . . . . . . . . . 28
4

Chapter 1
Introduction
Testing is a crucial part of any development process. Testing is a tedious task, and as anyother annoying task, developers strive to automate as much of it as possible.
A similar need for automation is behind this thesis. Bulldog1 — a Java GPIO library —needs a way to automate testing the I/O interfaces it controls. This thesis covers designand creation of an extension shield for this task.
The thesis is divided to several chapters. The next chapter is a research the Bulldoglibrary. Chapter 3 researches existing solutions and describes design of the device. Thefinal product, including accompanying software for the extension shield itself and API forthe Bulldog library, is covered by Chapter 4. Ending with Chapter 5 – Conclusion, whichlooks at achieved results and possible improvements.
1https://github.com/SilverThings/bulldog
5

Chapter 2
Bulldog library
This chapter serves as an overview of the Bulldog library (Figure 2.1). It provides descrip-tion of its various features and introduces supported platforms.
Bulldog is an open source Java library and is a part of the Silverspoon IoT Platform. It isused to control low-level I/O on specific Linux ARM-based single board computers, suchas Raspberry Pi [21].
Figure 2.1: Logo of the Bulldog library [21]
Bulldog library can be compared to the Pi4J Project1. Both libraries are Java-based,however the supported platforms differ [33]. In a performance test, Bulldog has performedbetter than Pi4J. I has been able to change digital output with a frequency of 1.080 MHz,whereas Pi4J reached frequency of only 1 kHz [19]. This was not an official test, and it seemsinconclusive to me, since I was able to find a benchmark of Pi4J in which it was able to reachfrequencies of up to 161 kHz (using OracleJDK 7u10 and HotSpot virtual machine) [34].However since both of these measurements are over two years old, the results are probablydated. Additionally, the switching frequency will probably never approach the frequencypossible with code written in C, using the native library (up to 22 MHz) [30]. This is dueto the more complex nature of Java and overhead introduced by the Java Virtual Machine.
1http://pi4j.com/
6

Bulldog aims to be platform agnostic, that means one piece of code can be run on multipleplatforms. The library’s features include [21]:
• Digital input/output on pins (GPIOs)
• Native Interrupts via epoll (usable on digital input pins)
• Native PWM, ADC
• I2C
• SPI
• UART
• API for several devices (e.g. button, incremental rotary encoder, servos, LCD)
The Bulldog library is currently tested using JUnit framework. The tests are using mockedI/O [21]. This is great for testing of the library itself, but it can’t test the physical I/O.This can be done manually, with an oscilloscope or a logic analyzer, which is very tediousand time consuming task. Thus a need for automated hardware test has arisen. The goalof this thesis is to design and create an extension shield for automated hardware testing ofthe Bulldog library, addressing the aforementioned problem.
2.1 PWM
PWM (Pulse Width Modulation – Figure 2.2) is a method for transmitting analog signalusing digital output pin, which can be used in a wide variety of applications.
Figure 2.2: Current–Voltage relationship [10]
The square wave signal is created by turning the switch between the supply and the loadfully on and off at a constant frequency. The duty cycle (Figure 2.3) – a percentage oftime when the signal is high (on), is modulated to encode desired analog signal level. Thetime during which the supply is applied to the load is also called on-time, as opposed to
7

the off-time when the supply is switched off. Given a sufficiently small period of the signal,any analog value can be encoded with PWM. The signal remains digital all the way fromthe processor to the controlled system, which minimizes noise effects [17].
Figure 2.3: PWM duty cycle [31]
Although this modulation was originally developed to improve efficiency and reduce heatingin control applications [16], it can also be used to encode information for transmission, wherethe pulse width corresponds to an encoded data value.
2.2 I2C
I2C (Inter Integrated Circuit) bus was developed by Philips Semiconductor (now NXP Semi-conductors) in 1980s. It is used primarily for communication between multiple integratedcircuits at close distances (usually on a single circuit board) [3].
2.2.1 Physical layer
Apart from ground (low) and supply voltage (high), I2C uses only two bidirectional lines— SDA (data line) and SCL (clock line). Each line has a pull-up resistor, pulling up theline high. The I2C driver is open drain, that means the device can pull the line low, butcannot drive it high. This is useful in preventing damage that could happen due to a devicedriving the line high while another tries to pull it low [35].
In Standard-mode the clock frequency is 100 kHz, however Fast-mode (400 kHz) and Fast-mode Plus (1000 kHz) exist [29].
Maximum pull-up resistor value depends on the operating frequency of the bus and thetotal capacitance of the bus (which depends mostly on the length and physical propertiesof wiring and the number of connected devices on the bus). Minimum resistance dependson the supply voltage and the amount of current the pin is able to sink. Example formulasfor ATmega168 follow [15]:
Freq < 100kHz =⇒ 𝑅min =𝑉𝑐𝑐 − 0.4V
3mA , 𝑅max =1000ns𝐶bus
(2.1)
Freq > 100kHz =⇒ 𝑅min =𝑉𝑐𝑐 − 0.4V
3mA , 𝑅max =300ns𝐶bus
(2.2)
8

Figure 2.4: Generalized I2C connection diagram [13]
2.2.2 Protocol
Each device connected to the bus can operate as either transmitter or receiver and isrecognizable by a unique address. I2C is using a master/slave model of communication withthe ability to accommodate multiple master devices on one bus, provided that each masterdevice is a multi-master (i.e. supports busy bus detection and is able to follow arbitrationlogic). The master both initiates and terminates any transfer. The clock signal is alwaysgenerated by the current bus master, however in the event known as "clock stretching",some slave devices may drive the clock low if they need more time to prepare data formaster or store data from master [29].
Messages consist of one address frame (7-bit address and one bit to select read or writeoperation) and one or more data frames (8-bit each)(Figure 2.5). One acknowledge bit(sent by receiving device) follows after each frame. SDA can be changed when SCL is lowand is read when SCL is high. This has two exceptions, Start and Stop conditions.
Figure 2.5: I2C protocol example [1]
Figure 2.5 shows an example of a transmission on the I2C bus. The transmission occurs asfollows:
• Idle (free bus) — Both data line and clock line are high. No transmission occurs.
9

• Start condition — Master initiates a transmission by leaving SCL high and pullingSDA low. This notifies any devices on the bus, and the bus is considered busy.
• Transmission — Data is being sent by either master or slave depending on whichoperation master specified in the last bit of address frame. The data is clocked out inmost significant bit (MSB) first manner. After every 8 bits, receiving device respondswith either "acknowledge" (ACK) or "not acknowledge" (NACK). ACK is issued bypulling SDA low, NACK occurs when SDA is high during the last clock cycle. NACKcan occur automatically, due to lack of any action, thanks to the pull-up resistor onSDA.
• Stop condition — Master terminates the transmission by a low to high transition onSDA line while SCL is high.
2.2.3 TWI bus
TWI (Two Wire Interface) bus is essentially the same as I2C bus. It is used by Atmel andother vendors to avoid patenting issues. Depending on the device, some I2C features, suchas clock stretching, general broadcast, or 10-bit addressing, might not be supported [6].
2.3 SPI
SPI (Serial Peripheral Interface) bus is a serial communication interface developed by Mo-torola in the mid 1980s. It is used for a short distance communication between integratedcircuits, primarily in embedded systems.
2.3.1 Interface
SPI uses a master/slave model of communication with a single master device and one ormore slave devices. The bus uses four signal lines (Figure 2.6): SCLK – Clock signal,generated by the master; MOSI – Master Output Slave Input, data line driven from themaster; MISO – Master Input Slave Output, data line driven from the slave and SS – SlaveSelect, driven from the master to each slave individually.
2.3.2 Operation
The master device initiates all communication with slaves by generating the clock signaland selecting a slave device by pulling corresponding SS line low. Master sends the data onMOSI line, while the data from the slave device are received on MISO line (Figure 2.7). Full-duplex data are transmitted on each clock cycle, even when one-directional data transferis intended, therefore it is up to each device to consider the data meaningful or not [18].Master terminates the transmission by pulling SS back to high.
Apart from the clock frequency, the master configures the polarity and phase, using twoparameters: CPOL (clock polarity) and CPHA (clock phase). CPOL specifies the clockcycle, while CPHA specifies when the data is propagated and captured.
10

Figure 2.6: SPI bus: master and three slaves [11]
• CPOL = 0: A logic high indicates a clock cycle, clock idle state is logic low
• CPOL = 1: A logic low indicates a clock cycle, clock idle state is logic high
• CPHA = 0: The data is captured on the leading (first) clock edge
• CPHA = 1: The data is captured on the trailing (second) clock edge
Figure 2.7: A timing diagram showing clock polarity and phase [22]
The combinations of CPOL and CPHA are referred to as modes. If the different slaves arefixed in different modes, the master has to reconfigure itself each time to communicate witha given slave.
11

2.4 UART
UART (Universal Asynchronous Receiver-Transmitter) is a hardware component that re-ceives and transmits asynchronous serial data, first designed by Gordon Bell of DEC (DigitalEquipment Corporation).
Interface
In order to transmit the data from a controlling device, like a CPU to a receiving device,two UART units (Figure 2.8) are used to communicate directly with each other. Thetransmitting UART gets the parallel data from the data bus and converts it into a serialform, to send it from its Tx (transmit) pin to the Rx (receive) pin of the receiving UART.The receiving UART converts the data back into a parallel form for the data bus of thereceiving device [8].
Figure 2.8: UART communication example [8]
Data flow
Because of its asynchronous nature and therefore the lack of a clock signal, both UARTsmust operate at the same pre-configured baud rate. The transmitting UART also needs toadd a start bit and stop bits, defining the beginning and the end of a data packet. Thestart bit is normally held high, so a high to low transition indicates the start of a transfer.To stop the transfer, the transmitting UART drives the line from low to high for two bitdurations.
Optionally, a data packet (Figure 2.9) can also contain a parity bit. Both a parity bit andstart / stop bits are removed when the data is converted back to parallel.
Figure 2.9: UART packet [8]
12

2.5 Supported platforms
As of April 2018, Bulldog library supports three different embedded Linux platforms —Raspberry Pi, CubieBoard, and BeagleBone Black [21].
2.5.1 Raspberry Pi
Raspberry Pi is a name of single-board computers designed by a UK-based charity – theRaspberry Pi Foundation2. The latest iteration — Raspberry Pi 3 Model B+ — is shownin figure 2.10. It uses a Broadcom BCM2837B0 SoC with a 1.4 GHz 64-bit quad-coreARM Cortex-A53 processor. It has 1 GB RAM, 2.4 GHz and 5 GHz IEEE 802.11.b/g/n/acwireless LAN, Bluetooth 4.2, four USB 2.0 ports, Ethernet port, HDMI, 40-pin GPIO headerand more. Operating system is loaded from a MicroSD card [32]. Most operating systemsfor Raspberry Pi are Linux based, including the official operating system – Raspbian.
Its main advantages are large community, low price, and availability.
Figure 2.10: Raspberry Pi 3 Model B+ [24]
2.5.2 CubieBoard
CubieBoard3 is a series of open source hardware single-board computers designed and pro-duced by cubieteam4 in Zhuhai, China. The newest model — CubieBoard6 (fig 2.11) —is powered by Actions S5005 SoC with quad-core ARM Cortex-A9 processor. As with thelatest Raspberry Pi, CubieBoard6 supports WiFi (802.11b/g/n), Bluetooth (4.0), has a Mi-croSD card slot and Ethernet port. It is pricier than the Raspberry Pi, but has additionalfeatures to justify the cost. These features include 2 GB RAM, USB 3.0, SATA, and an8 GB eMMC on-board storage [28].
2https://www.raspberrypi.org/3http://cubieboard.org/4http://www.cubietech.com/5http://www.actions-semi.com/en/productview.aspx?id=209
13

Figure 2.11: CubieBoard6 [23]
2.5.3 BeagleBone Black
BeagleBone Black (fig. 2.12) was first released in 2013 by BeagleBoard.org6, an US-basednon-profit corporation. The latest revision (Rev C) came out in 2014 and uses a TexasInstruments AM3358 SoC with 1GHz Sitara ARM Cortex-A8 processor. It has 4 GB ofon-board eMMC storage. Being the oldest of the boards covered in this chapter, its featuresare lacking compared to them. It has no WiFi or Bluetooth capability, and has only 512 MBof RAM. However, another model of BeagleBone — BeagleBone Wireless — replaces theEthernet port with 802.11 b/g/n 2.4 GHz WiFi and Bluetooth [7]. Considering its age andfeatures, it is pricey compared to the other boards.
Figure 2.12: BeagleBone Black [25]
6https://beagleboard.org/
14

Chapter 3
Extension shield design
The aim of this thesis is to create a shield for different platforms (Raspberry Pi, CubieBoard,BeagleBone Black). The purpose of this shield is to test the Bulldog library on theseplatforms.
This chapter looks into existing solutions for testing embedded devices. Afterwards it coversthe design of an extension shield for testing the Bulldog library.
3.1 Existing solutions
Currently there aren’t many hardware solutions for testing I/O on ARM boards. WiringPi— a C library and a command line utility for controlling Raspberry Pi I/O — was testedusing GPIO expanders and shift registers. This approach has a limited speed, because asingle bit needs 10 clock pulses to get to the shift registers. It also does not test analoginputs or outputs1.
In the embedded hardware industry, automated solutions exist in the form of test fixtures.Devices such as thermostats or even mobile phone CPUs can be tested in different testfixtures [12]. Details about specific testing fixtures are difficult to find since most of themare in-house custom-built solutions.
3.2 Hardware
This section will cover the process of designing the shield.
3.2.1 Format
According to the specification of this thesis, its goal is to build a shield (i.e. dautherboard)for Bulldog’s supported platforms. The term "shield" was used mainly in the Arduinoecosystem, but has since become more widespread.
1http://wiringpi.com/
15

Raspberry Pi extension boards are called HATs (Hardware Attached on Top). BeagleBoneuses the term "cape". An example of Raspberry Pi HAT can be seen in Figure 3.1.
Figure 3.1: Raspberry Pi with Sense HAT attached [4]
Because the platforms don’t share one layout, or even one footprint, it would be verydifficult if not impossible to design one shield that could fit all of them. To design threedifferent shields would be impractical and uneconomic, therefore my proposed solution wasto design a shield that would connect to the boards using wires or adapters.
Wires were ruled out as too complicated and time consuming for the end user. BecauseRaspberry Pi was available, I have decided to design the shield with its pinout in mind.Adapters for BeagleBone Black, CubieBoard, and any other future platform can be addedlater.
3.2.2 Concept
The shield should be able to test I/O interfaces that are supported by the Bulldog library.This means finding a way to test GPIO, I2C, SPI, PWM, UART, and ADC. My first ideawas using shift registers to store a value that could be read later by the tested board itself.One reason this idea was abandoned was because testing anything but GPIO would be toointricate. The other reason being is that the solution wouldn’t be very flexible compared tousing a microcontroller, which could be programmed to change the properties of the shield.
Moreover, microcontrollers possess a wide range of different interfaces, many having all theinterfaces supported by Bulldog library. The tested board could actively communicate withthe microcontroller and control its function (e.g. run different tests). The next step is tofind a suitable microcontroller for this task.
16

3.2.3 Microcontroller selection
In order to be able to test every bulldog feature, the desired microcontroller should haveparameters that are described in Table 3.1.
Since all three boards use output signal voltage of 3.3 V and their inputs are not 5 Vtolerant, another important feature is being able to operate at 3.3 V. Otherwise, levelshifters would be needed in order to protect the tested board (or the shield) from highvoltages. The microcontroller should be powered from the tested board itself, therefore itcan’t draw too much current as it could potentially damage the power rails or crash thesystem running on the board. The information about maximum current you can draw fromthe 3.3 V rail of Raspberry Pi, CubieBoard, and BeagleBone Black is difficult to find andisn’t in any official documents. According to on-line forums, the current you can draw fromRaspberry Pi 3.3 V power rail is at least 50 mA [27]. Both CubieBoard and BeagleBoneBlack should be able to support more. This should be easy to achieve, since there is a lotof microcontrollers that draw less than that.
Microcontroller ParametersDigital input/output RequiredI2C as a slave RequiredSPI as a slave RequiredAnalog input RequiredPWM RequiredUART Required3.3 V source voltage Not Required3.3 V logic level Not RequiredMaximum current draw 50 mA RequiredSmall footprint RequiredLow cost Not Required
Table 3.1: Parameters for selecting a microcontroller
ATmega328P-au by Atmel was selected (Figure 3.2). It complies with all required param-eters and also not required parameters. It is also available at most electronic componentsstore at low prices. Being a core component in many boards from the Arduino family,extensive information about this microcontroller and its many uses is readily available.
17

Figure 3.2: ATmega328p-au [5]
SMD (Surface-Mounted Device) version is preferred over the through hole version due tosmaller footprint and no need to drill any holes. The QFP (Quad Flat Package) will beeasier to solder than other available ATmega328P packages thanks to its extended leads.Some selected parameters are presented in Table 3.2.
ATmega328P-au ParametersOperating Voltage 1.8 V – 5.5 VPeripherals • Six PWM Channels
• 8-channel 10-bit ADC• Two Master/Slave SPI Serial Interface• One Programmable Serial USART• One 2-wire Serial Interface (Philips I2C
compatible)• Internal Calibrated Oscillator
Maximum clock frequency 20 MHzProgram Memory Size 32 kBPower Consumption 0.2 mA (Active at 1 MHz, 1.8 V)Footprint TQFP-32 (7 mm x 7 mm)Price 2 e
Table 3.2: ATmega 328P-au — selected parameters [14, 2]
18

3.2.4 Connection
The shield will be connected directly to the Raspberry Pi 2x20 male header with femaleheader of the same size. On the shield itself, there will be connections between leads ofthe microcontroller and corresponding Raspberry Pi pins, and also any additional passivecomponents needed (e.g. pull-up resistors for SDA and SLC lines). Figure 3.3 shows arough concept.
Figure 3.3: Concept of connections between shield and tested board
The shield will be powered from the board itself. To test all the interfaces, it should beable to set digital output for the board to read with its digital input (and vice versa). Itshould act as an SPI slave, I2C slave, and communicate with the board using UART. Itshould also read PWM signal from the board as an analog input and ouptut PWM signal,which will be read by the tested board.
3.2.5 Shield function
There are two main ways the shield could function. It could act as an independent device,with preprogrammed outputs, and always listening (and answering) on the I2C, SPI, andUART interfaces. However some problems exist. For example the tested board wouldn’tknow, what value the shield read on one of its pins. Some solution would be needed forthis problem (e.g. the shield could read a value on one GPIO pin and then output it on adifferent pin).
The other option requires a communication protocol between the board and the shield. Theboard will actively control the actions of the shield by sending messages. The board shouldalso be able to request data from the shield. The tests can therefore be more complex.
The selected approach is a mix of the two mentioned. The shield will have preprogrammedoutputs, but can be controlled by the tested board.
19

3.2.6 Communication
A communication interface has to be selected. Since the shield will already be connectedwith the board using several interfaces, the selection was narrowed down to UART, SPI,and I2C.
UART was ruled out because of its asynchronous nature. SPI has the highest data rateof the three, but has no standardized communication protocol. I2C was selected becauseit seemed like the easiest to implement and debug, using the register approach. Registersused are shown in Table 3.3.
Name Access Offset DescriptionSTATUS R 0x00 Status of the shield.COMMAND R/W 0x01 Command register (e.g. digital input/output).PIN_NO R/W 0x02 Selected pin.PIN_VALUE R/W 0x03 Selected pin value.CONFIG R/W 0x04 Additional configuration register.ID R 0x05 Identification number of the shield’s HW.VERSION R 0x06 Version of the software.
Table 3.3: Shield I2C register overview
3.2.7 Prototype
Prototyping, the activity of creating prototypes, is an important element in hardware de-sign. Several prototypes were created using a through hole version of the microcontroller— ATmega328p-pu — which is for our purpose identical to the SMD version. This versionis easier to gen in local stores, but its main advantage is being able to insert it into abreadboard. One such prototype can be seen in Figure 3.4.
3.3 Software
In order for the proposed shield to work properly, it has to be accompanied by a program.This program should control I/O interfaces of the shield in such a way that would enablethe tested board to interpret results of the tests.
3.3.1 Arduino
Thanks to using Atmega328p, we can take advantage of the Arduino ecosystem and itsmany libraries2. This will make development of the software for the shield considerablyeasier.
2https://www.arduino.cc/en/Reference/Libraries
20

Figure 3.4: Breadboard prototype
3.3.2 Shield as a Bulldog device
Bulldog library already supports several devices. These are represented as a Java packageswith methods that aim to make using these devices with the Bulldog library easier.
Creation of similar API for the shield could lead to simplifying development of tests usingthis device. This way, the test itself does not have to deal with controlling the communica-tion with the shield, it can use more abstract methods provided by the API.
21

Chapter 4
Implementation
This chapter covers the manufacture of the final product, and provides information aboutthe developed software. PCB schematics and source files are published at GitHub1.
(a) Top side (b) Bottom side
Figure 4.1: Shield PCB schematic
4.1 PCB
The final product is a double sided board designed using an open source software suiteKiCad EDA2. The board was manufactured at home. This section will cover the creationof the board at home. Ordering a PCB has become affordable, but making the board athome enables fast prototyping. Figure 4.4 shows one of the prototypes.
1https://github.com/SilverThings/bulldog-test-shield2http://kicad-pcb.org/
22

The board was designed according to AN2519 - AVR Microcontroller Hardware DesignConsiderations3. This document was useful for designing layout of the PCB and selectingcorrect component values. I2C pull-up resistor value was calculated using 2.1. Figure 4.1shows both sides of the final design.
4.1.1 Manufacture
There are two main ways of making a PCB at home:
• Milling
• Etching
Milling is done using a CNC (Computer Numerical Control) mill. Using a rotary cuttingtool, the mill removes areas of copper in order to create the desired pads and traces [26].It is easier of the two methods, doesn’t require the use of chemicals, but requires moreexpensive equipment. Therefore etching was chosen.
Similarly to the milling process, etching also works in subtractive manner by removingcopper. Ferric chloride is widely used for etching copper PCBs [26]. In order to create thetraces, the etching chemical must be prevented from accessing areas of the board. At home,this is can be done two ways. The toner transfer method uses a laser printer to print anegative of the PCB design on a paper. The toner is then transfered to the board usingheat.
The second method uses a light sensitive material — a photoresist — to coat the board.Using a light-blocking mask, parts of the PCB are exposed to light. A developer is thenused to dissolve parts of the photoresist. A diagram of this process is shown in figure 4.2.
The PCB was made using the etching method with presensitized positive photoresist copper-clad board. Mask was printed using a laser printer onto an ordinary printing paper. Themask was then treated with TRANSPARENT 214 spray, which makes the paper translucentto UV light. The photoresist was exposed using an UV nail curing lamp for 165 seconds.Because time varies based on used equipment and materials, correct exposure time has beenfound by trying different exposure times on one board.
3http://ww1.microchip.com/downloads/en/AppNotes/AN2519-AVR-Microcontroller-Hardware-Design-Considerations-00002519B.pdf
4http://www.kontaktchemie.com/KOC/KOCproductdetail.csp?product=TRANSPARANT%2021
23

Figure 4.2: Photolithography [9]
Because the final product is a double sided board, this had to be done from both sides. Inorder to achieve sufficient precision, guiding crosses were added to each corner of the mask.Guiding holes were drilled into the PCB using a 0.5 mm drill bit. A thin wire was theninserted into each hole and used to guide the mask (Figure 4.3).
After exposing both sides of the board with UV lamp, exposed photoresist was washedaway in a photoresist developer – 1,5% sodium hydroxide solution. The board then mustbe cleaned with water in order to remove any excess developer. Next it was placed inetchant – warm ferric chloride solution, which slowly removed the exposed copper. Afteretching, the board was rinsed off in water and dried. FLUX 10 SK5 spray was applied toboth sides of the PCB to facilitate soldering and protect the copper from corrosion.
4.1.2 Drilling
The PCB had to be drilled in order create vias and mounting holes for the headers. Themounting holes were drilled using a 1 mm PROXXON wolfram vanadium steel drill bit.The vias were drilled with a 0.5 mm PROXXON wolfram vanadium steel drill bit.
I was unable to produce good enough holes with a standard consumer rotary tool. Thereforethe board was drilled on a drill press at Industra6, a makerspace located in Brno.
5http://www.kontaktchemie.com/KOC/KOCproductdetail.csp?product=FLUX%20SK%20106https://industra.space/
24

Figure 4.3: PCB with a mask
4.1.3 Assembly
The board was populated with components listed in Table 4.1 using a soldering iron. Be-cause the holes aren’t plated, through hole components (the two headers) had to be solderedfrom both sides of the PCB. Vias were made conductive by inserting a wire and solderingit to both pads.
Part Number Description Footprint Quantity1 Tantalum Capacitor 100 µF 7343 12 Capacitor 100 nF 0805 43 LED (various colors, forward voltage 2 V) 0805 34 2x3 male header 2.54 mm 15 2x20 female header 2.54 mm 16 Resistor 68R 0805 37 Resistor 10k 0805 18 Resistor 2K7 0805 29 Resistor 330R 0805 310 Tactile switch 7 mm x 7 mm 111 ATmega328p-au TQFP-32 1
Table 4.1: Bill of Materials
25

Figure 4.4: Powered on Raspberry Pi with a final prototype of the shield
26
4.2 Software
This section will provide information about the software powering the shield and describecorresponding methods in the API for Bulldog.
4.2.1 Shield
The code was written in C++ using Visual Studio Code. The program was built usingarduino-mk and flashed with avrdude. It is using Arduino libraries Wire.h and SPI.h.
Initialization
After power up, global variables are set to default values and function setup() is executed,which initializes the shield. Most importantly it starts listening to events on the I2C lines.The current state of the program is stored in registers (described in Table 3.3), which areaccessible through I2C.
Afterwards, the program loops consecutively in the function loop(). Without capturingany I2C events, a "demo output" takes place. The program outputs on all tested interfaces(i.e. digital output, PWM, UART). This is useful for testing interfaces (i.e. digital input,ADC, UART) of the tested board without communicating with the shield. However to usethe shield to its full potential, the board must communicate with the shield via I2C.
Communication
After an I2C write is captured, function receiveEvent() is executed. In this function, theshield reads data sent by a master (to a maximum length of MAX_SENT_BYTES) and savesthem into an array. Based on the size of the array, the shield determines if the masterwants to write data to the shield’s registers or select a register to read from. If the mastersends only one byte of data, it means the master wants to select a register to read from.The offset of this register is the only received byte of data.
If the shields receives more bytes of data, the first byte is an offset and the rest is the datato be written. The data is written in temporary registers and flags are set. The flags arechecked after each block in loop(). If any flags are set, the main register is updated withnewly received values and the loop() is reset. This ensures atomicity of the I/O functions.
Function requestEvent() is executed after an I2C read occurs. The shield checks if it hasany new relevant data, and updates its registers accordingly. Next it starts sending databyte after byte over I2C, starting at register offset selected by the master in previous I2Cwrite event. Data is being sent until the master stops the transmission by generating aStop condition, or until all data is sent.
27

Main loop
The shield performs different actions based on commands received through I2C. Commandsand corresponding actions are described in Table 4.2.
Value Name Description0x00 INPUT Sets mode of a digital pin.0x01 OUTPUT Sets mode of a digital pin.0x20 NO_MODE Initial state.0x21 DIGITAL_INPUT Reads from PIN_NO to PIN_VALUE.0x22 DIGITAL_OUTPUT Writes PIN_VALUE to PIN_NO.0x23 ANALOG_INPUT Reads from PIN_NO to PIN_VALUE.0x24 ANALOG_OUTPUT Writes PIN_VALUE to PIN_NO.0x25 SPI Starts/stops SPI based on PIN_VALUE.0x26 UART Starts/stops UART based on PIN_VALUE.0x27 DEMO Starts/stops demo output based on PIN_VALUE.
Table 4.2: List of COMMAND register values
4.2.2 Bulldog
An API was created to simplify usage of the shield. The shield is represented by aninstance of Java class Atmega328P, which extends class I2cDevice. Methods such asdigitalWrite() and analogRead() can be utilized by the test itself without the need ofmanaging the I2C connection. An example of such a test is located in directory bulldog-examples on the included CD.
4.2.3 Programming
The shield can be programmed using its ISP 6 pin connector with an AVR programmer.Another option is to program it directly from the Raspberry Pi. This capability is possiblethanks to connecting the reset line to the Raspberry Pi. The reset line can be pulled downby the Pi, in order to reset the shield. The board is programmed using avrdude with specialconfiguration file.
4.2.4 Testing
The shield was tested using a logic analyzer and sigrok7 – an open-source signal analysissoftware suite.
7https://sigrok.org/
28

Chapter 5
Conclusion
The goal of this Bachelor’s thesis was to design and create a testing device for the Bulldoglibrary. A shield capable of testing low level I/O interfaces of single-board Linux computers.First part of the thesis researches the Bulldog library, explores its features and supportedplatforms.
Second part of the thesis briefly discusses existing solutions, covers the design of the exten-sion, describes the developed board and accompanying software.
The design and implementation was successful with satisfactory results. The developedshield is based on ATmega328p microcontroller and is able to perform all required functions.
No adapters for BeagleBone Black or CubieBoard were designed due to time constraints.The developed API facilitates creation of tests using the shield.
5.1 Bulldog issues
In the process of designing the shield, several issues with the Bulldog library were discovered.I2C can fail quite often compared to other libraries. In the current build, PWM causes afile system error that crashes the whole operating system.
5.2 Improvements
In the future, this project could improve by supporting additional I/O libraries and boards.
Another interesting area to explore would be performance testing of the I/O interfaces.This might prove difficult to achieve with the used hardware.
The project could also pivot – the developed board is in it’s nature an I2C I/O expander.With a different pinout it could find use in areas other than testing Bulldog supportedplatforms. This functionality could be improved by redesigning the layout of the board andimproving the provided API.
29

Bibliography
[1] Addressing. [Online; visited 2018-04-26].Retrieved from: https://www.i2c-bus.org/addressing/
[2] ATMEGA328P-AU. [Online; visited 2018-05-01].Retrieved from: https://eu.mouser.com/ProductDetail/Microchip-Technology-Atmel/ATMEGA328P-AU
[3] I2C. [Online; visited 2018-04-26].Retrieved from: https://en.wikipedia.org/wiki/I%C2%B2C
[4] Raspberry Pi Sense HAT. [Online; visited 2018-04-29].Retrieved from: https://www.modmypi.com/raspberry-pi/sensors-1061/orientationaccelerometers-1067/raspberry-pi-sense-hat
[5] TQFP ATMEGA328P-AU ATMEGA328P AU IC FOR ARDUINO. [Online; visited2018-05-10].Retrieved from: http://hallroad.org/product/tqfp-atmega328p-au-atmega328p-au-ic-for-arduino/
[6] Introduction into TWI. Feb 2016. [Online; visited 2018-04-27].Retrieved from:https://www.nongnu.org/avr-libc/user-manual/group__twi__demo.html
[7] Meet BeagleBone™ Black Wireless, the newest board in the BeagleBone™ family.Sep 2016. [Online; visited 2018-05-02].Retrieved from:https://beagleboard.org/blog/2016-09-26-meet-beaglebone-black-wireless/
[8] Basics of UART Communication. Apr 2017. [Online; visited 2018-04-18].Retrieved from: http://www.circuitbasics.com/basics-uart-communication/
[9] Photoresist. Apr 2018. [Online; visited 2018-04-29].Retrieved from: https://en.wikipedia.org/wiki/Photoresist
[10] Pulse-width modulation. April 2018. [Online; visited 2018-04-25].Retrieved from: https://en.wikipedia.org/wiki/Pulse-width_modulation
[11] Serial Peripheral Interface Bus. April 2018. [Online; visited 2018-04-20].Retrieved from:https://en.wikipedia.org/wiki/Serial_Peripheral_Interface_Bus
30

[12] Test fixture. Apr 2018. [Online; visited 2018-04-22].Retrieved from: https://en.wikipedia.org/wiki/Test_fixture
[13] Afzal, S.: I2C Primer: What is I2C? (Part 1). [Online; visited 2018-04-26].Retrieved from: http://www.analog.com/en/technical-articles/i2c-primer-what-is-i2c-part-1.html
[14] Atmel: ATmega328/P Datasheet Complete. November 2016. [Online; visited2018-04-25].Retrieved from: http://ww1.microchip.com/downloads/en/DeviceDoc/Atmel-42735-8-bit-AVR-Microcontroller-ATmega328-328P_Datasheet.pdf
[15] Atmel: ATmega48/V / 88/V / 168/V Datasheet Complete. November 2016. [Online;visited 2018-04-22].Retrieved from: http://ww1.microchip.com/downloads/en/DeviceDoc/Atmel-2545-8-bit-AVR-Microcontroller-ATmega48-88-168_Datasheet.pdf
[16] Ball, S. R.: Analog interfacing to embedded microprocessors: real world design.Newnes. 2001. 252–253 pp.
[17] Barr, M.; Massa, A. J.: Programming embedded systems: with C and GNUdevelopment tools. OReilly. 2010. 254–256 pp.
[18] Barr, M.; Massa, A. J.: Programming embedded systems: with C and GNUdevelopment tools. OReilly. 2010. 248–250 pp.
[19] Bunčiak, S.: Bulldog: A surprisingly fast GPIO library. Apr 2016. [Online; visited2018-04-18].Retrieved from: https://opensource.com/life/16/4/bulldog-gpio-library
[20] Bunčiak, S.; Macík, P.: Silverspoon. [Online; visited 2018-03-15].Retrieved from: https://github.com/SilverThings/silverspoon
[21] Datenheld; Bunčiak, S.: Bulldog. [Online; visited 2018-03-10].Retrieved from: https://github.com/SilverThings/bulldog
[22] Dennis, A.: Introduction to Arduino SPI Library with LTC1286 and DAC714. Jul2015. [Online; visited 2018-04-20].Retrieved from: https://www.allaboutcircuits.com/projects/arduino-spi-library-ltc1286-dac714/
[23] Halfacree, G.: CubieBoard 6. Jul 2017. [Online; visited 2018-05-01].Retrieved from:https://www.flickr.com/photos/120586634@N05/sets/72157685713607676
[24] Heath, N.: Raspberry Pi 3 Model B : See all the new features on the board. Mar2018. [Online; visited 2018-04-29].Retrieved from: https://www.techrepublic.com/pictures/raspberry-pi-3-model-b-see-all-the-new-features-on-the-board/
[25] jkrinder: BeagleBone Black. Sep 2016. [Online; visited 2018-05-01].Retrieved from: https://beagleboard.org/Products/BeagleBoneBlack
31

[26] Khandpur, R. S.: Printed circuit boards: design, fabrication, assembly and testing.McGraw-Hill. 2006.
[27] klricks: Current limitation for 3v3 and 5v power rails - Raspberry Pi Forums.[Online; visited 2018-04-28].Retrieved from: https://www.raspberrypi.org/forums/viewtopic.php?t=103354
[28] Lee, A.: CubieBoard6 is released to the overseas users. Dec 2017. [Online; visited2018-05-11].Retrieved from: http://cubieboard.org/2017/12/27/cubieboard6-is-released-to-the-overseas-users/
[29] NXP Semiconductors: I2C-bus specification and user manual. April 2014. rev. 6.[Online; visited 2018-04-22].Retrieved from: https://www.nxp.com/docs/en/user-guide/UM10204.pdf
[30] Pihlajamaa, J.: Benchmarking Raspberry Pi GPIO Speed. Jul 2012. [Online; visited2018-04-19].Retrieved from:http://codeandlife.com/2012/07/03/benchmarking-raspberry-pi-gpio-speed/
[31] Rampelt, J.: PWM programming activity. [Online; visited 2018-04-25].Retrieved from: http://www.siriusmicro.com/chrp3/pwm-c.html
[32] Raspberry Pi Foundation: Raspberry Pi 3 Model B+. [Online; visited 2018-04-29].Retrieved from: https://static.raspberrypi.org/files/product-briefs/Raspberry-Pi-Model-Bplus-Product-Brief.pdf
[33] Savage, R.: The Pi4J Project – Home. [Online; visited 2018-04-10].Retrieved from: http://pi4j.com/
[34] Savage, R.: Raspberry Pi - Java GPIO Frequency Benchmarks. Jan 2013. [Online;visited 2018-04-18].Retrieved from: http://www.savagehomeautomation.com/projects/raspberry-pi-java-gpio-frequency-benchmarks.html
[35] SFUptownMaker: I2C. [Online; visited 2018-04-24].Retrieved from: https://learn.sparkfun.com/tutorials/i2c
32

Appendix A
CD Contents
CD_xvalen20bulldog.............................................Copy of the Bulldog librarybulldog-test-shield
src ............................................................. Source codetestshield......................................................Schematics
bulldog-examples ................................................ Test examplethesis
srcxvalen20-bulldog-test-shield.pdf
33

Appendix B
Schematic
34