A Polyphasic Study on the Taxonomic Position of Industrial Sour Dough Yeasts
Upload
khangminh22Category
view
0download
0
Please note all file contents are Copyright © 2021 Battenkill Communications, Inc. All Rights Reserved.This file is for the buyer’s personal use only. It’s unlawful to share or distribute this file to others in any way
including e-mailing it, posting it online, or sharing printed copies with others.
®
the best of
BREWING WILD/SOUR
© Battenkill Communications, Inc. All Rights ReservedBest of Brew Your Own Magazine Brewing Wild/Sour
BY MICHAEL TONSMEIRE & MATT HUMBARD
remember several years ago Jean Van Roy at Cantillon telling me, ‘You can spontaneously ferment in the United States, but, keep in
mind that it probably won’t be the same way we do it here. You might have to come up with your own program.’ In the case of Allagash they’ve pretty much been able to copy how it is done in Belgium and they are getting amazing/similar results as our friends in Belgium. For us, we’ve had to come up with a couple of hybrid methods to make it happen.”– Vinnie Cilurzo, Brewmaster and Co-Owner of Russian River Brewing Co.
Out of all of the ways to sour a beer, the most romantic is to let the fresh wort ensnare wild yeast and bacteria from the air as it slowly cools. People often refer to Brettanomyces as “wild yeast,” but the truth is that the strains most brewers pitch have been selected, isolated, and propagated and are no longer truly wild. While using untamed microbes may not be as easy as pitching a mixed culture from a Wyeast or White Labs, the flavors created can be far more exciting. A mixed culture of wild yeast and bacteria was the only option for fermenting beer until Louis Pasteur identified and isolated brewer’s yeast (Saccharomyces) 150 years ago. While brewers in Germany and England continue to produce beers with microbes in addition to Saccharomyces (like Berliner weisse and a few traditional old ales), the only place where spontaneous fermentation survived on a commercial scale was in Belgium. However, as public tastes gravitated more towards sweetness, most large Belgian producers began blending pasteurized lambic, fermented in stainless steel, with fruit syrup. With dry, sour beers regaining popularity, the handful of traditional Belgian lambic brewers and gueuze blenders who remain are lauded for producing beers with a balance of acidity and complexity unrivaled by any other fermentation.
Over the last decade, a small number of American brewers have not only started to experiment but have also succeeded with their own spontaneous fermentations. Despite the risks, more than a dozen craft brewers scattered across the country (including New Hampshire, California, Texas, Alaska and Michigan) are fermenting with their own local microflora. Although I have not yet tasted a spontaneously fermented American beer to equal a gueuze from 3 Fonteinen, Girardin or Cantillon, it may only be a matter of time and commitment.
WORT PRODUCTIONWhen planning to spontaneous ferment any beer, you need to start with suitable wort. Standard pale ale wort, for example, is not a good candidate for spontaneous fermentation. Aside from the fact that sour and bitter flavors don’t generally work well together, this type of wort is a poor choice in that even moderate hop levels inhibit some of the bacteria that are needed
to produce these beers. Using the right recipe and wort production techniques will increase the probability of a success. Produce a wort rich in chains of sugar molecules too long to be fermented by Saccharomyces, dextrins and starches. For lambics, this result is traditionally accomplished with a turbid mash. No complex regimen is required, but I suggest using a conversion rest at least in the high 150 °F (around 70 °C) range. Wild Brettanomyces, Lactobacillus and Pediococcus produce the enzymes necessary to ferment these complex carbohydrates. (If you don’t do a turbid mash or accidentally end up with mash temperatures near the lower end of the usual range, don’t worry that your wort won’t sour at all; even the driest beers achieve only about 75% real attenuation.) While any grain bill suitable for a pitched sour beer could be used, every American brewer experimenting with spontaneous fermentation that I have spoken with has stayed close to the lambic template: between 30
WILD FERMENTATIONS AT HOME
1
“I
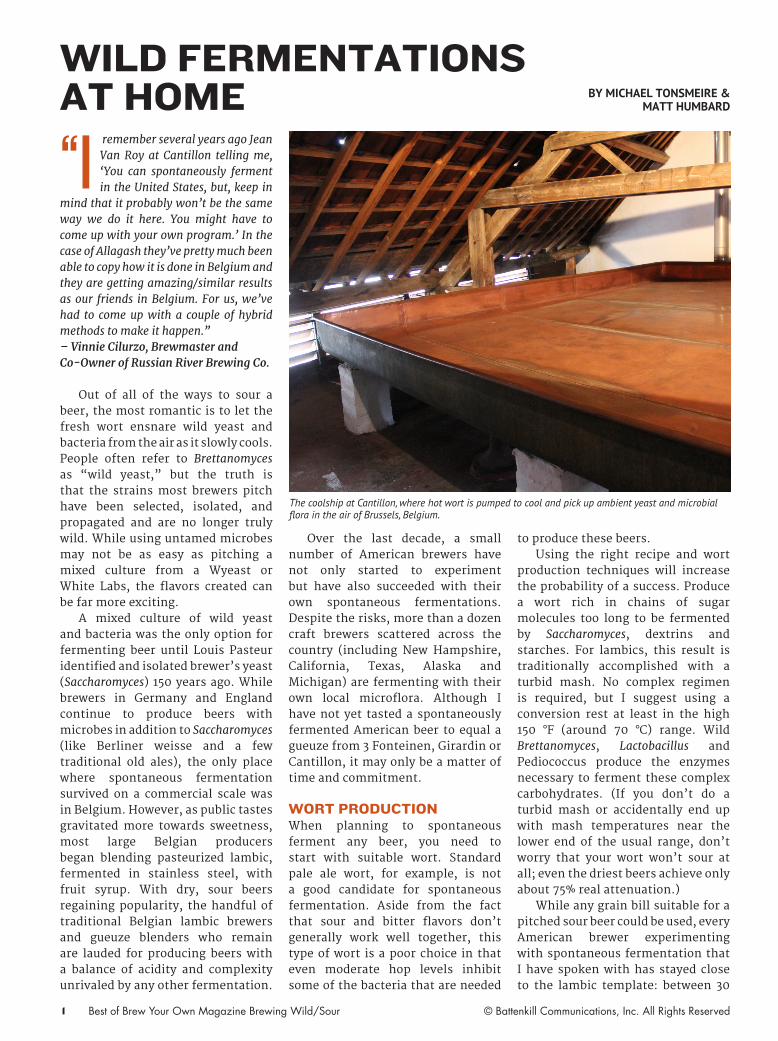
The coolship at Cantillon, where hot wort is pumped to cool and pick up ambient yeast and microbial flora in the air of Brussels, Belgium.
© Battenkill Communications, Inc. All Rights ReservedBest of Brew Your Own Magazine Brewing Wild/Sour2
and 40 percent unmalted wheat, with the remainder being Pilsner malt. Extract brewers can substitute wheat malt extract supplemented with 10% maltodextrin to boost the percentage of dextrins in the wort. Spontaneous fermentation is the single sour beer brewing method that absolutely requires aged hops. Their antimicrobial contribution prevents wild Lactobacillus from reducing the pH of the wort too far before Saccharomyces has sufficient time to complete its fermentation. Aging hops at a warm temperature and exposing them to air causes their alpha acids to oxidize, thus reducing their bitterness contribution. While isomerized alpha acids are partly responsible for the antimicrobial properties of hops, enough other compounds survive, or are created by oxidation, to maintain the desired effect. Many of these other compounds have low solubility characteristics in wort, which is part of the reason that aged hops should be boiled in the wort for an extended period of time (three to four hours). If, on the other hand, you were to use a sufficient amount of un-aged hops to inhibit Lactobacillus, the bitterness they contributed would clash with the sourness in the resulting beer. You can usually buy hops that have already been aged or debittered for a reasonable price. Homebrewers might also consider aging their own hops if planning on frequent spontaneous fermentations. The standard approach is to place whole, low alpha acid hops in a container large enough to allow air circulation. Keep the container out of direct sunlight, and in low humidity to prevent mold growth. After three years properly (poorly) stored hops will smell similar to dried hay. Adequately aged hops will not smell excessively cheesy or off, although their aroma may be slightly unappealing. The extended boil also helps to volatilize any off-aromas. In the absence of aged hops, a method for accelerating the debittering process is to bake the hops at your oven’s lowest temperature setting, stirring occasionally, until tan and crisp. Jeff Sparrow’s book, Wild Brews (2005, Brewers
Publications) suggests 4 ounces of aged hops per 5-gallon batch (120 g in 20 L) as the traditional rate used by Belgian lambic brewers. However, the American brewers I talked to have all settled on lower hopping rates. The range spanned from 2.6 to 3.3 ounces per five gallons (80-100 g per 20 L). The brewers of Allagash tasted a metallic off-flavor in early batches of their spontaneously fermented beers and traced the cause to the traditional lambic hopping rate.
SAFETYAn oft-repeated reassurance to beginning brewers is that no matter how bad a beer tastes, it will not make you sick. Although true with standard fermentation, it is not necessarily the case when it comes to spontaneous fermentation. When I spoke with Jason Perkins, Brewmaster of Allagash, about his coolship, he was audibly nervous at the thought of homebrewers attempting something similar. He warned me that “the things that usually keep you safe aren’t there. You are making a big yummy nutrient soup that all the things you worry about can grow in.” For the first few weeks of fermentation, there is a chance that pathogenic enteric bacteria, like Escherichia coli and Salmonella, might take up residence in your beer. Luckily, as soon as the desired yeast and bacteria lower the pH and pro-duce sufficient alcohol, the danger is gone. Evaluate spontaneous fermentations only by sight and smell for the first month. Do not taste samples early in fermentation. If growing a big vat of E. coli seems like a bad idea, then artifi-cially lower the pH of the wort below 4.4 to prevent these bacteria from reproducing. Acidification could be accomplished with a sour mash, sour worting or acid malt, but adding food grade lactic acid is the easiest method. The off flavors some enteric bacteria produce during the early stage of a spontaneous fermentation can be used by Brettanomyces to produce complex fruity esters, but for many brewers the risk is not worth the reward.
TIMING YOUR BREWOutside temperature is the key indicator for determining the best time to capture wild microbes. Wild Brews reports that during the hot summer months lactic acid bacteria are too prevalent for successful spontaneous fermentation. Several brewers suggested to me that vinegar-producing Acetobacter is the graver concern. Hot summer temperatures also slow natural cooling, allowing thermophilic bacteria more time to flourish before the wort cools below 105 °F (41 °C) where yeast can thrive. Before undertaking their spontaneous fermentation project, the brewers at Allagash compared their weather pattern in Portland, Maine to the epicenter of lambic brewing, Brussels, Belgium. During most of the year, temperatures are similar, but since Maine is much colder in the winter and lambic brewers do not brew in the heat of the summer, Allagash decided to avoid starting spontaneous fermentations in both winter and summer. Jason considers an outside temperature of 40 °F (4.5 °C) to be ideal.
INOCULATIONOne way to think about the process for producing lambic/gueuze is that the wort is being fermenting by a carefully selected and propagated mixed house culture. Microbes floating on the breeze land in the wort and initiate fermentation in the “horny tank,” but at this point the beer is pumped into microbe rich barrels that held previous batches of fermenting lambic. For decades lambic brewers and blenders have been reusing the barrels that have yielded good beer, and getting rid of the ones that have produced less pleasing brews. The first time a barrel is filled with wort it is usually inoculated with microbe laden beer from an established barrel to increase the chances that it will produce high-quality beer. Obviously, for your first batch, you will not have this option. Cool the hot wort in a wide vessel to speed the dissipation of heat and provide more surface area for potential microbe landing sites.
© Battenkill Communications, Inc. All Rights ReservedBest of Brew Your Own Magazine Brewing Wild/Sour
While a copper or stainless steel coolship is traditional for lambic brewers, American breweries without this specialized vessel have used mash tuns, open fermenters, and oak barrels. Rapid cooling is less of a concern for homebrewers because of the smaller volume of wort. As such, your boil kettle is a fine option.
LOCATIONThere are ongoing debates over the best location to expose your cooling wort for inoculation. Lore holds that areas near orchards or vineyards are ideal because the sugar-loving yeasts that ferment the fallen fruit are well adapted to sugary wort. Interestingly, Brasserie Cantillon is located in an urban part of Brussels where only a few cherry trees remain, not the bucolic landscape depicted on their labels. If for any reason you have a pessimistic outlook on the microbes in your neighborhood, you can move your wort to a more favorable location for inoculation. Gabe Fletcher inoculated his first batch of spontaneous fermented beer at Anchorage Brewing by driving the wort filled barrels several hours outside of Anchorage into the wilderness of Slana, Alaska. In Slana, Gabe opened small lids which he had cut into the top of each barrel, thus exposing the wort for two days to the air next to wild blueberry bushes. It seems as if there are as many inoculation techniques as there are breweries attempting it, some prominent examples are highlighted below. For their Coolship series, Allagash installed a shallow stainless steel basin in a small room attached to the side of the brewery. When each three-and-a-half hour boil is complete, the brewers pump the wort into the coolship through a screen that catches any stray hops. The wort is then allowed to sit undisturbed with the windows open and an exhaust fan running until it cools to 60–65 °F (16–18 °C). The exact amount of time to cool depends on outside temperatures, but 12 to 18 hours is the expected range. Once the
wort is cool it is moved to a stainless steel tank to ensure that the microbes that landed on its surface are evenly distributed among the barrels. Three days is the fastest Allagash coolship wort has started fermenting, and some barrels take as long as a week. Fermentation, once it has started, is often so vigorous that the kräusen overflows out of the barrels. Saccharomyces fermentation lasts 10 to 11 days, at which point 80% of apparent fermentables have been consumed. At Jolly Pumpkin in Michigan, the boiled wort for Lambicus Dexterius is sprayed into one of their shallow open-fermenters to kick-start cooling. The wort temperature drops slowly overnight as the brewery’s HVAC (heating, ventilation and air conditioning) system draws in microbe laden air from the outside. The next day, the now cool wort is ready to be pumped into well-used barrels. Fermentation usually starts within 24 hours in oak, 48 hours at the most. Owner and Brewmaster Ron Jeffries credits the quick onset of activity to the microbes in the
wood rather than those that land in the cooling wort from the air. Those same wild microbes also serve to sour all of the other beers that Jolly Pumpkin releases, although they are also pitched with cultured brewer’s yeast. Cambridge Brewing Company in Massachusetts (CBC) spontaneously inoculates the base beer for their potent “imperial” lambics using a unique method. The five oak barrels holding the current batch were first filled with boiling water to kill the microbes living in the wood. The water was emptied and each barrel was filled 20 percent full with boiling wort directly from the kettle. The bunghole of each barrel was covered with cheesecloth. The goal was to draw air from the barrel cellar into each barrel via the vacuum created as the wort and air cooled. The remaining 80 percent of the batch was pumped into CBC’s clean mash tun. The manway was left open, the doors and windows of the brewpub were opened, and fans were run to introduce wild microbes. One day later, the cool wort in the mash
3
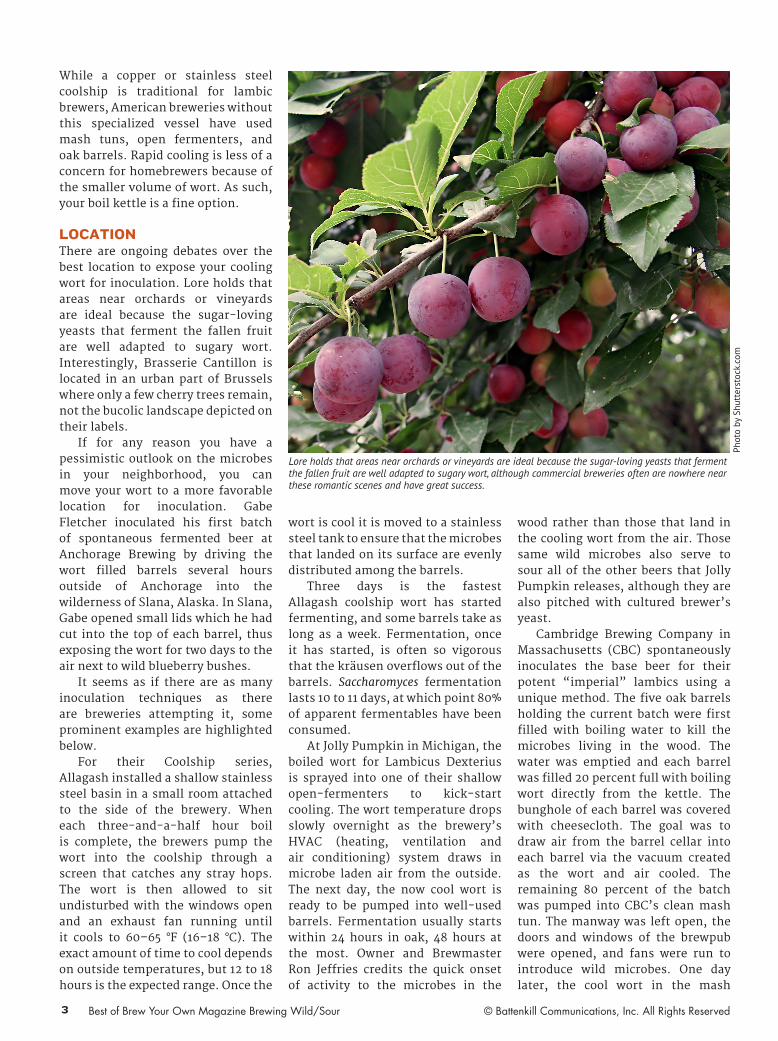
Lore holds that areas near orchards or vineyards are ideal because the sugar-loving yeasts that ferment the fallen fruit are well adapted to sugary wort, although commercial breweries often are nowhere near these romantic scenes and have great success.
Phot
o by
Shu
tter
stoc
k.co
m

© Battenkill Communications, Inc. All Rights ReservedBest of Brew Your Own Magazine Brewing Wild/Sour
tun was used to fill the barrels. The batch took three days to show signs of fermentation, at which point the barrels began erupting with kräusen. The original process for Russian River’s Sonambic (it is transformed into Beatification when it is blended and packaged) started with a complex step mash. After mash-out an overnight sour mash prepared the mash tun for its role as makeshift coolship. The following day, while the wort boiled, the empty mash tun was rinsed with cold water. This water ensured that most of the spent grain was removed, but the lactic acid bacteria that multiplied during the sour mash were still present. Once the boil was complete the wort was pumped through the heat exchanger and into the mash tun. Vinnie eventually settled on 60 °F (16 °C) for the target wort temperature going into the mash tun. This temperature delayed the peak of fermentation for a couple of weeks and led to lower final acidity compared to warmer knockout temperatures. After spending a night in the mash tun, the wort was pumped into wine barrels which had previously aged Russian Rivers’ other sour beers. In late 2011, Russian River in-stalled a 19 ft long by 4 ft wide (5.8 m by 1.2 m) coolship that they began inoculating Sonambic in. As the primary purpose of the sour mash was to inoculate the mash tun with microbes, the sour mash procedure is no longer part of the brewing process.
PERSONAL EXPERIMENTATIONDespite the success that American craft brewers have had with Belgian inspired methods, most homebrewers report poor results from the combination of traditional inoculation methods and fermenta-tion in a glass carboy or plastic bucket. (Because some of the microorganisms at work in a sour fermentation are microaerophiles, organisms that thrive on small amounts of oxygen, buckets are a better choice than carboys since they let in tiny amounts of oxygen over time.) For my first attempt at ferment-ing with microbes native to Washington, DC, I decided to use
a more reliable method. To reduce the risk of catastrophic off-flavors, I captured and propagated multiple wild cultures in advance of brew day. On a chilly March night, I concocted a half gallon (1.9 L) of low gravity, 1.030 (7.5 °P), wort from light dried malt extract, half an ounce (14 g) of three-year-old Willamette hops, and a pinch of yeast nutrient. For this method, the hops do not need to be aged because the bitterness imparted by un-aged hops would be diluted when the starter is pitched into the wort. (However, keep in mind that hops have anti-bacterial properties, so keep the hopping rate low.) After the 15 minute boil, I divided the still hot starter wort into three sanitized metal pots. To prevent insects from getting into the wort as it cooled, I covered each with a single layer of cheesecloth secured with a rubber-band. I placed starters in my backyard (at 42 °F/6 °C), living room (at 62 °F/17 °C) and basement barrel room (at 57 °F/14 °C). The following morning, with the wort cooled, I poured each into its own growler and left them at 62 °F (17 °C). I did not aerate the wort any more than what occurred as it was being funneled into the growlers. I immediately attached a stopper and airlock to each. The first signs of fermentation took three days to appear in the starters, and even then the visual signs indicated only weak activity. I left the three starters alone for three weeks, thus providing adequate time for alcohol and acid production to inhibit enteric bacteria (like E. coli). Even after three weeks, I did not feel safe tasting the starters. I dumped out the “upstairs” starter because it smelled foul and was covered in black mold. The “outside” starter had a few spots of white mold and smelled spicy while the “barrel room” starter had no mold and smelled like over-ripe fruit. Using freshly brewed starter wort, I doubled the volume of the two remaining starters. For this growth step, I crimped a piece of sanitized aluminum foil over the opening of each growler, shaking a few times per day to oxygenate. Both starters resumed fermenting quickly and smelled clean and pleasant. When
fermentation slowed, I attached airlocks to limit oxygen exposure thus preventing the mold from reappearing. At this point I finally tasted the starter beers, and to my relief discovered that they had each developed a fruity yeast flavor and light lemony tartness. I force chilled 5 gallons (19 L) of traditional lambic style wort to 65 °F (18 °C) using my wort chiller. I shook both starters and pitched 1 quart (0.95 L) from each into the cooled wort in a 6-gallon (23-L) fermenter. Visible fermentation took less than 24 hours to appear. Making wild starters is no guarantee of success, since you will not be able to tell how the character of the wild yeast and bacteria will change with additional aging, but it will reduce the chance of producing an undrinkable beer. If you get a particularly wonderful culture, then follow the lead of lambic brewers by repitching your microbes into future batches rather than starting from scratch each time.
FERMENTATIONWhatever technique you choose, once the wort is inoculated, your work is complete for a year or two. Lambics are traditionally left in the primary fermenter so that the Brettanomyces can benefit from the nutrients ejected by autolysing (dying) Saccharomyces cells. I find that this enhances the beer’s rustic, funky character. If you want a cleaner character — think Flemish Red compared to a traditional gueuze — rack the beer off of the trub into another fermenter after the initial vigorous fermentation subsides. While it lasted, the kräusen of my batch was composed of large, delicate bubbles. A light kräusen is a sign that the yeast strains at work are less flocculant than brewer’s yeasts. For the first few months the beer exhibited a strong tropical fruit aroma combined with moderate clove, but these faded as the beer aged. Gabe Fletcher described tasting a similar flavor progression from the spontaneously fermented beer he brewed while still Head Brewer at Midnight Sun (thousands of miles from where I live). At one year old,
4

© Battenkill Communications, Inc. All Rights ReservedBest of Brew Your Own Magazine Brewing Wild/Sour
my beer has a light acidity and a wonderful aroma with hints of pipe tobacco, and spicy Brett funk.
BLENDING/FLAVORINGWith the wide variations in character that spontaneous fermentation produces, all commercial breweries blend batches and barrels to produce their final beer. Allagash Resurgam, the non-fruit version of their Coolship series, is produced by blending several vintages (for example 24-month, 18-month, and 6-month old). Russian River, and Jolly Pumpkin have similar blending programs to produce Beatification and Lambicus Dexterius. You have to be daring to start several of these batches simultaneously, but blending is a requirement of producing a beer with the balance of a great gueuze. Try to inoculate batches in different locations or at different times of the year, to create a wide variety of characters to blend with. Even the best lambic breweries have barrels that are so acidic that their only use is in shining the copper kettles. Spontaneously fermented beers can be flavored just as you would any other sour beer. Allagash produces three fruited versions Red (raspberries), Cerise (Montmorency cherries), and Balaton (Balaton cherries). Before you ask, founder Rob Tod has sworn off the idea of adding the ubiquitous Maine blueberry. CBC adds fruit to their imperial lambic to create Kriek du Cambridge (cherry), and Rosé de Cambrinus, which takes its name (and inspiration) from Cantillon’s cherry and raspberry infused Rosé de Gambrinus. Honey Badger is a similar concept to Hanssens Mead the Gueuze, although rather than blending with mead, Brewmaster Will Meyers adds honey to the base beer. Russian River made their first batch of Framboise for a Cure by aging Sonambic on raspberries. Rather than adding fruit, Jolly Pumpkin blends a small amount of Lambicus Dexterius into its light hoppy Bam Bière to create Bambic. My plan is to add a few pounds of mulberries, harvested from the tree growing in my backyard, to half of the DCambic to impart their unique
earthy fruit flavor and deep purple color. Local fruit will contribute wild yeast of its own, and could be added earlier in the process to increase the role these microbes play in the fermentation.
WHAT ARE YOU WAITING FOR?As with most aspects of brewing sour beer, there is no single preeminent method for starting a spontaneous fermentation. What works for one location or brewer will not work for all. It is important to focus on the commonalities of the methods, ensuring a quick start to fermentation while avoiding too much early activity from Lactobacillus. Once fermentation starts, make sure that you heed the advice presented in “Sour Beer Orientation” from the November 2011 issue of BYO to monitor the progress of the microbes. A quick overview of a plan to spontaneously ferment at home might look something like this: First, decide how much beer you want to produce and in how many batches. More batches will give you more potential different contributions to your sour beer blend, but also (obviously) are more work and each has a non-trivial chance of failure. Round up the requisite numbers of buckets, airlocks, etc., and be sure you have a place to store them long term. Fermentation takes many months at a bare minimum. Second, find out when your overnight temperatures are likely to be in the low 40s °F (around 5 °C) and schedule your brew days. If you live in a rural or semi-rural area, you may also want to scout locations to let your worts cool or to set out starter worts to collect wild microbes to pitch later. Although you could attempt to inoculate your batches by simply exposing them to the air as they cool, you will greatly increase your chances of success by gathering many samples of wild microbes and determining which have the highest potential. On brew day, make your wort in the evening and let it cool overnight. Using cheesecloth or something similar to screen your wort will
keep insects out. The next morning, transfer the wort to a bucket and add your wild microbe starter, if you made one. From this point onward, all you need to do is wait for the beer to ferment and sour. This style of fermentation demands patience, blending and the willingness to dump beer, but with some skill and luck you can make a beer that is more exciting and rewarding than anything fermented with the relative safety of cultured microbes from a tube.
DCambic(5 gallons/19 L, all-grain)OG = 1.050 FG = 1.004SRM = 4 ABV = 6.0%
INGREDIENTS6.25 lbs. (2.8 kg) German Pilsner malt3.20 lbs. (1.5 kg) unmalted wheat3 oz. (85 g) three-year-old Willamette hops (195 min.)
STEP BY STEPUse a turbid mash or single infusion mash (see below). Boil wort for 3 hours 45 minutes with 3 oz. (85 g) of three-year-old Willamette added at 195 minutes left in boil. In the primary fermenter, add 0.75 oz. (21 g) oak cubes that have been boiled for 10 minutes. Age in the primary fermenter until the desired flavor is reached and the gravity is stable. Carbonate to 3.0 volumes. This can be accomplished with the addition of sugar. If using the traditional method, blending old and younger batches, target a combined gravity of 0.003 higher than the gravity of the driest component (carbonation with this method can take a year of bottle conditioning to achieve).
Mash Option: Substitute flaked wheat for the unmalted wheat berries and use a single infusion mash rested at 158°F (70°C) for 45 minutes.
Extract Option: Substitute all of the grain for 5 lbs (2.25 kg) of wheat DME and 9 oz (.25 kg) of maltodextrin.
5

© Battenkill Communications, Inc. All Rights ReservedBest of Brew Your Own Magazine Brewing Wild/Sour
hy does Brettanomyces get all of the attention when it isn’t even responsible for making sour beers sour? Lactobacillus
can do in a week what takes Pediococcus a year! Lactobacillus needs a publicist (or maybe a hype man). Traditional mixed-fermentation sour beers (i.e., those where a wide variety of bacteria and yeast work together) take between a few months and a couple years to reach the desired level of acidity and complexity. While sour beers are rapidly gaining popularity, many homebrewers don’t have enough interest (or fermenters) to age beer that long! Enter Lactobacillus. An active culture, pitched into minimally-hopped wort without competition and held warm can produce enough lactic acid to sour a beer in less than a day. A slow fermentation with many microbes may result in a more interesting flavor profile, but this characteristic is often obscured when brewers produce passion fruit Berliner weisses, Amarillo® dry hopped sour blondes, and tart pink peppercorn citrus zest session ales.
BIOCHEMICAL NERDERYLactobacillus is a genus of bacteria, specifically Gram-positive lactic-acid-producing bacteria, often lumped together with Pediococcus when it comes to souring beer. Under the right conditions Lactobacillus can produce lactic acid quicker than its hardier cousin, and generally does not leave behind the diacetyl or exopoly-saccharides (“sickness”) that require cleanup by Brettanomyces. Lactobacillus is able to reproduce quickly with some species capable of doubling every 20–60 minutes (meaning that each cell at T=0 can result in offspring num-bering millions or billions in just 24 hours!). Sounds pretty ideal: No unpleasant byproducts, grows quickly in a wide range of temperatures (depending on species), sours rapidly, and as an added benefit is a probiotic!
The high growth rate of Lactoba-cillus is one reason why sour mashes are possible. Given the right condi-tions (i.e., warmth, low oxygen, pH below 4.5) a small amount of Lactobacillus present on the grain can dominate all the other wild microbes living on malt. However, if these conditions aren’t maintained perfectly, other far less pleasant microbes can announce their presence by making your house smell like a garbage-dump in the middle of a heat wave. Even under ideal conditions, wild Lactobacillus does not always produce as much acidity as the brewer wants. Before you claim that sour mashes are a traditional part of the process, stop. You’re wrong (unless you’re talking about Tennessee whiskey). Sour mashing is not a common current or historic technique in Germany for producing Gose or Berliner weisse. Most species of Lactobacillus are quite sensitive to hop compounds.
In fact, when brewers (even lambic brewers) talk about the “protective” power of hops, Lactobacillus is the chief microbe they are inhibiting. Isomerized alpha acids prevent Lactobacillus from reproducing by damaging their cell membranes. While there are some moderately hop-tolerant strains, we suggest keeping the IBUs below 5 if you are souring with Lactobacillus. At that sub-flavor-threshold amount there is hardly a reason to add any bittering hops! The trick is that most Lactobacillus sold for brewing produce a variety of compounds in addition to lactic acid. Heterofermentative species (e.g., L. brevis, L. buchneri) convert carbohydrates into lactic acid, ethanol, carbon dioxide, and a small amount of vinegary acetic acid. Homofermentative species (e.g., L. delbrueckii — although not White Labs’ WLP677 — according to Neva Parker, their Head of Laboratory
BREWING WITH LACTOBACILLUS
WBY MICHAEL TONSMEIRE
Phot
o co
urte
sy o
f Whi
te L
abs
6

© Battenkill Communications, Inc. All Rights ReservedBest of Brew Your Own Magazine Brewing Wild/Sour
Operations) are capable of producing approximately twice as many molecules of lactic acid from a given amount of carbohydrate because they do not produce ethanol or carbon dioxide. There are also facultative species (e.g., L. plantarum), which can switch between the two depending on the conditions. Lactobacillus species are a diverse group, with some better suited to the production of sour beers than others.
EXPERIMENTIn order to better understand how different Lactobacillus behave during solo-fermentations, we decided to measure the drop in pH produced
by the most common Lactobacillus species available to homebrewers. The four species we selected were L. buchneri (Wyeast 5335), L. brevis (White Labs WLP672), L. delbrueckii (White Labs WLP677), and L. plantarum (one isolate from Omega Labs OYL-605 Lactobacillus Blend). We inoculated an equal amount of each species into unhopped wort with an original gravity of 1.040 and placed at 86°, 99°, 102°, and 108° F (30°, 37°, 39°, and 42° C). We measured the pH of each sample six times over the course of five days. As a brief chemistry refresher: pH is a logarithmic scale that describes how acidic or basic a solution is. 7 is
neutral, and anything lower than that is acidic. A pH of 3.5 (typical for a finished sour beer — Goose Island Juliet among others per http://embracethefunk.com/ph-readings-of-commercial-beers/) is 10 times more acidic than 4.5 (typical for a non-sour beer), and 100 times more acidic than 5.5 (typical for the mash).
RESULTSEach Lactobacillus species lowered the pH of the wort, but there were significant differences with respect to how acidic the beer became and how the species responded to the different temperatures. Having a species capable of lowering the pH quickly and over a wide range of temperatures is ideal for real-world homebrewing applications. (Refer to the results charts at the end of the story.) L. buchneri had the least visible growth during the experiment, but still lowered the pH more than L. delbrueckii. L. brevis and L. plantarum dropped the pH more than the other two species in a relatively short amount of time at every temperature tested. Despite the reputation for Lactobacillus benefitting from warmer temperatures, L. plantarum was able to lower the pH slightly more rapidly at cooler temperatures compared to higher temperatures (although even the coolest temperature was quite warm compared to most ale yeast fermentations). While all four species were able to drop the pH of the wort, L. plantarum and L. brevis were able to get the pH of the wort to 3.2–3.4 (an ideal range for many sour beers) at a variety of temperatures. L. buchneri was able to adequately sour the beer at 99 °F (37 °C), but struggled to do so at temperatures slightly above or below that. L. delbrueckii remained above pH 4 at all temperatures tested. For comparison, the final pH of many non-sour beers is in the low 4s, making L. delbrueckii unsuitable for sour beers produced in this way. Figure 1 shows the final pH at 120 hours achieved by each species at all temperatures tested. Figure 2 compares the pH drop over time averaged across all experimental temperatures to provide a general
7
Lactobacillus buchneriLactobacillus brevisLactobacillus delbrueckiiLactobacillus plantarum

© Battenkill Communications, Inc. All Rights ReservedBest of Brew Your Own Magazine Brewing Wild/Sour
sense of how each species performed.
PUT THE RESULTS TO WORKWhile some Lactobacillus species produce alpha-glucosidase, which allows them to ferment complex dextrins, many thrive only early in fermentation when simple sugars are available. As a result, pitching Lactobacillus after primary fermentation can result in only minimal souring. In the above experiment, the pH dropped the greatest amount in the first 24 hours for all four species we tested. To quickly sour a beer your process can be as simple as: chill the wort from the boil to the target fermentation temperature in your kettle, pitch an active Lactobacillus culture, affix the lid, and hold the temperature as steady as you can until the desired acidity is reached. At this point you can bring the soured wort up to 150 °F (66 °C) for 30 minutes to pasteurize before chilling and pitching yeast. The advantages of kettle souring compared to sour mashing are speed, reliability, and cleaner flavors. Paired with pasteurization, kettle souring carries no risk of accidentally souring other batches. If you do not want to pasteurize, after the wort is chilled to the desired souring temperature transfer it to a fermenter. Once the desired acidity is attained pitch brewer’s yeast. This does carry cross-contamination risks, so we recommend using a separate set of post-boil equipment that will not come in contact with non-sour beers. Now that we know how to produce a beer with loads of lactic acid quickly, time to address the issues that come with souring a beer before pitching the brewer’s yeast.
#1 Destruction of proteins beneficial to head formation and mouthfeel.One strategy to minimize the negative effects of protease activity by Lactobacillus is to lower the starting pH of the wort to around 4.5 (Sanz et al. 2001 Applied and Environmental Microbiology). This can be accomplished by the addition of a food grade lactic acid solution or through the inclusion of acidulated malt at the end of the mash. The
activity of protein degrading enzymes drops off at lower pH but the growth of Lactobacillus is not inhibited by acidity. If the target pH for a finished beer is 3.5, reducing the pH from 5.5 to 4.5 before fermentation accounts for only 10% of the total acidity. Lactobacillus will take it the rest of the way.
#2 Unhealthy primary fermentation by brewer’s yeast.Monitor the pH drop and be ready to pitch a starter of brewer’s yeast when the pH approaches 3.5. Best practice also calls for dosing additional oxygen and yeast nutrient into the beer along with the pitch, as both of these have been depleted. There are some acid-tolerant brewer’s yeast (Wyeast 3711 French Saison, anecdotally), but no complete listing exists to quantify this characteristic. Another option is a 100% Brettanomyces fermentation, which tend to be acid tolerant and will produce some of the fruity and funky complexity of a mixed-fermentation sours.
CONCLUSIONBy analyzing the behavior of different Lactobacillus species, we were able to demonstrate unique growth patterns as well as differential rates of acidification during fermentation. A beer soured over only a few days with Lactobacillus will not compete with the complexity of a lambic aged with dozens of microbes in oak barrels for a couple years. However, complexity may not be the goal for a refreshing summer quencher or in the base of an aggressively fruited or spiced beer. Loading pounds of fresh sour cherries into a perfect lambic is like making brownies with a bottle of aged imperial stout (delicious, but ultimately a waste). With the right species of Lactobacillus providing the acidity, you can devise a chameleon sour beer ready to accept whatever complementary flavors you send at it!
8
© Battenkill Communications, Inc. All Rights ReservedBest of Brew Your Own Magazine Brewing Wild/Sour
The image is startling: You’re sitting at your computer one evening and run a quick Google search. You think
to yourself, “How hard can this be?” Filled with the exciting unknown, you slowly type in L-a-c-t-o-b-, and immediately, autofill jumps in . . . Lactobacillus plantarum? Lactobacillus brevis? Lactobacillus helveticus? Lactobacillus delbrueckii? Lactobacillus acidophilus? Oh no! The list seems to go on forever and you’re realizing there are so many options. Where do you begin? What do you choose? How sour will your beer be with one versus another? Well, lucky for you, you have this magazine (with this article and many others!), and by the end of this quick read I’m hoping you’ll feel more confident in your choice of Lacto strain. Hopefully you’ll be excited to jump on your next sour brew and confident you’re making the best of this bacteria!
Before we dive in to all the nitty-gritty research, let’s take a step back and start with the basics. Lactobacillus is one of the most common souring organisms used in brewing today. It’s a Gram-positive bacteria that is shaped like a rod. While these facts have little relevance to brewers since it references the organism’s cell wall design, it does have strong correlation to its performance. More important to brewers, Lactobacillus can be separated into two separate groups depending on how they metabolize sugars: Homofermentative and heterofermentative. The difference between these are homofermentative Lactobacillus predominantly produce lactic acid as the end-product and do so using a biological process known as the Embden-Meyerhof-Parnas pathway. Heterofermentative Lactobacillus produce mainly a mixture of lactic acid and acetic acid utilizing a process known as the phosphoketolase pathway.1 Lactobacillus is commonly seen as a spoilage organism but is a major component for the production of a
properly soured beer. There are various sources of
Lactobacillus and different methods to produce a sour beer. You can get a supply of lactic acid bacteria from a laboratory, a bottle culture, from nature, yogurt, or it can even be found on unmashed grains (it’s found on malt husks). There are now even yeast strains, naturally occurring and bioengineered, available that produce alcohol and lactic acid at the same time during fermentation. However, sour beer production can often be broken down into two separate categories: 1. Traditional methods and 2. Quick souring methods. The traditional methods are widely known to be co-fermentation from spontaneous or cultured sources often with barrel/foeder aging. These methods typically have mixed cultures of Saccharomyces, lactic acid bacteria, and even Brettanomyces and Pediococcus. A positive of this wide spectrum of microflora is that it tends
to produce a more complex, flavorful beer. However, it takes much longer, and some brewers don’t have that extra time or space to produce these. The other concern is consistency. It’s not always going to be the same as brews before. This is where the popular “quick souring” methods come into play. Typically, this is done by a mash- or kettle-souring process. Kettle-souring has become one of the more popular methods due to the quick turnaround times and typically consistent fermentations. However, these methods have also been noted to be a bit one-dimensional in aroma and taste in comparison to the flavor profiles of a co-fermented or barrel-aged sour beer.
Now, when we analyze sour beers, we tend to measure acidity by pH. However, pH does not give us the whole story or true picture of a beer’s acid profile. pH is roughly defined as a measurement of the concentration of positively charged free hydronium
THE MANY WAYS TO LACTO BY BRITTNEY CHRISTIANSON (BERG)
Phot
o by
Mat
thew
Hum
bard
9
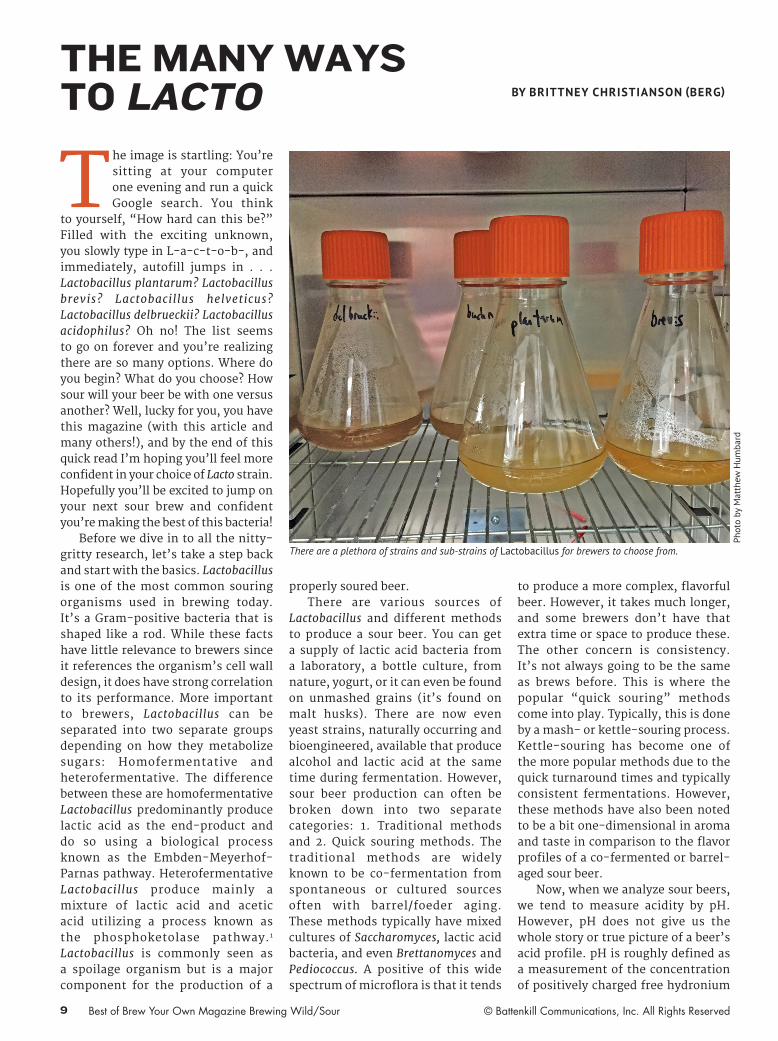
There are a plethora of strains and sub-strains of Lactobacillus for brewers to choose from.

© Battenkill Communications, Inc. All Rights ReservedBest of Brew Your Own Magazine Brewing Wild/Sour
ions. It is calculated as the negative log of a solution’s hydronium ion concentration: pH = -log10 [H3O
+]. In pure water, the concentration of hydronium is 1x10⁻⁷ M, which if you put that in the equation, you get a pH of 7. Anything more qualifies as being acidic, and anything less would be basic.2 Since pH is a logarithmic scale, the difference between each unit (let’s say shifting from a pH of 7 to 6) is actually a tenfold difference in change to a solution’s acidity.
However, sour taste cannot be explained solely due to the measured free hydronium ions. For example, various acids (e.g., acetic vs. lactic) at the same pH will give different levels of perceived acidity and flavors. Within beer, there are also weak acids in the system — which are an undissociated portion of hydronium ions — that plays a role in perceived sourness.
To fully explain acidity, we have titratable or total acidity (TA) as a tool to provide a clearer understanding of sourness. Unlike pH, there is a direct correlation between TA and perceived sourness in beers.3 TA, often provided in g/L, approximates the total amount of acid. It is the sum of free hydronium ions AND the ions
bound to weak acids, which makes it a better indicator of how “sour” a beer is. To find directions on how to test TA, please note the American Society of Brewing Chemists (ASBC) method “Total Acidity Beer-8” offers instructions for free, but note that it does require specialty equipment and solutions not typically found in brewing.4 But if you have any winemaking friends, they may have the necessary tools in their wine labs.
Focusing back on Lactobacillus bacteria (what we’re all here for!), a study conducted by my colleagues, a research team at Lallemand Brewing, compared seven different Lactobacillus strains held at four different temperatures, and then ran a TA analysis on each. The goal was to find a bacteria strain that achieved 3.5 pH or lower in less than 48 hours, has high lactic acid vs. low acetic acid concentration, and to find what temperature would be best to do a kettle sour with each. We wanted to avoid high acetic acid as it can be perceived as harsh or vinegar-like. However, note that in barrel-aged or mixed fermentations, low levels of acetic acid can be found and can be seen as desirable. Fermentations were run at 20 °C (68 °F), 30 °C (86
°F), 40 °C (104 °F), and 50 °C (122 °F). We trialed two different Lactobacillus plantarum strains, two L. delbrueckii strains, a L. helveticus, a L. brevis, and a L. acidophilus strain. Each strain was pitched at 10 g/hL. Look at the four graphs following.
By a quick glance, it is obvious that the best temperatures for these Lactobacillus fermentations were 30 °C (86 °F) and 40 °C (104 °F). The two L. plantarum (A & B) strains were found to be more temperature-sensitive than the other Lactobacillus strains. By looking at the 30 °C (86 °F) chart, Graph B, you can see that the two L. plantarum strains fermented slightly faster than they did at 40 °C (104 °F). However, 40 °C (104 °F) was still a successful fermentation temperature for all the Lactobacillus strains. While temperatures higher than 40 °C (104 °F) resulted in very little change of pH for many of the strains, the two species that handled the higher temperatures slightly better than the others were L. acidophilus and L. helveticus. These are also the strains that produced the most acid out of the bunch (Graph B/40 °C), resulting in pH close to 3.0. Lactobacillus delbrueckii (A & B) and Lactobacillus brevis were the strains that produced
10

© Battenkill Communications, Inc. All Rights ReservedBest of Brew Your Own Magazine Brewing Wild/Sour
the least amount of acid, ending up with a pH around 3.4–3.6. This data provided a strong understanding of what temperatures worked best for each strain, but in order to understand how sour they were and not rely on the pH to show us that information, we ran an acid analysis (Graphs E & F).
Graphs E and F show the levels of lactic acid and acetic acid (g/100 mL) produced by each strain at the different temperatures. A few interesting things to note are: 1. The lower temperatures commonly had the most acetic acid produced, 2. L. brevis had more acetic acid production at the 30–40 °C/ 86–104 °F range, which did not follow suit with the other strains, and 3. For most strains, 40 °C (104 °F) was the sweet spot where acetic acid was lower and lactic acid was high. Although these were all Lactobacillus strains, they all produced different levels of lactic and acetic acid. Even the strains that were the same species (L. plantarum A & B, and L. delbrueckii A & B), behaved differently.
We unfortunately do not have explicit qualitative sensory data for this study, but the conclusions from this were that the different Lactobacillus strains also had distinct and different flavors to them. As an alternative example, a study done by Escarpment Labs focused on co-fermentation of 16 different Lactobacillus strains with a Voss Kveik yeast strain presented at the 2020 World Brewing Congress (WBC 2020).5 They found that “Lactobacillus strain selection impacted yeast ester production,” and that “these results suggest that Lactobacillus-yeast combination may be a productive
route to maximize flavor impact” of sour beers. With this combination, they found that, on average, L. delbrueckii was commonly associated with floral and red fruit flavors and L. brevis was associated with acetic flavors. There were also other strains of L. rhamnosus and L. paracasei that were found to be associated with fruity, banana characteristics. You can see that there are many Lacto strains available to brewers nowadays, and there is much more room for experimentation and research. As noted in the video presentation from the WBC, it would be interesting to see if other yeast strains provide other flavors or, turn the study around, and look at 16 different yeast strains with a single Lactobacillus strain.5 There is still lots to learn!
In summary, before you get overwhelmed by the options of Lactobacillus strains, know what you want your final product to be. How sour do you want your final product? What temperatures can your equipment/kettle hold and for how long? What flavor profile are you looking for? Answering these few questions with information provided should help make the decision of choosing the correct Lactobacillus bacteria a bit easier.
REFERENCES1 Lewis, Michael. Young, Tom. (2002)
Brewing: Second Addition. Kluwer Academic/Plenum Publishers. 319-338.
2 Acids, Bases, pH, and Buffers. Kahn Academy. https://www.khanacademy.org/science/biology/water- acids-and-bases/acids-bases-
and-ph/a/acids-bases-ph-and-bufffers
3 Neta, E. et al. (2007). The Chemistry and Physiology of Sour Taste – A Review. Journal of Food Science. 72(2) R33-R38. https://fbns.ncsu.edu//USDAARS/Acrobat pubs/P329-350/P346.pdf
4 Total Acidity Beer- 8. ASBC Methods. https://www.asbcnet.org/Methods/Methods/Beer-8.pdf
5 Preiss, Richard. (2020). Lactobacillus strain selection impacts sensory and analytical outcome in sour beer. World Brewing Congress [video]. https://www.asbcnet.org/events/LiveWBC/OnDemand/Pages/TechnicalSessions.aspx
11
© Battenkill Communications, Inc. All Rights ReservedBest of Brew Your Own Magazine Brewing Wild/Sour
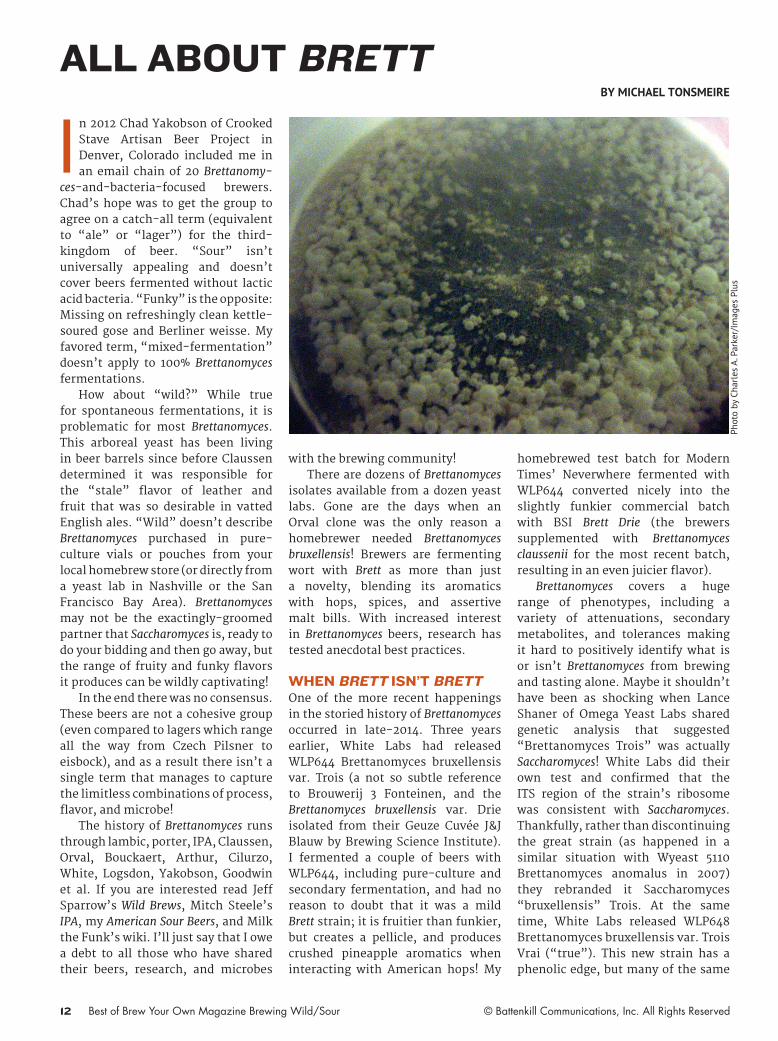
n 2012 Chad Yakobson of Crooked Stave Artisan Beer Project in Denver, Colorado included me in an email chain of 20 Brettanomy-
ces-and-bacteria-focused brewers. Chad’s hope was to get the group to agree on a catch-all term (equivalent to “ale” or “lager”) for the third-kingdom of beer. “Sour” isn’t universally appealing and doesn’t cover beers fermented without lactic acid bacteria. “Funky” is the opposite: Missing on refreshingly clean kettle-soured gose and Berliner weisse. My favored term, “mixed-fermentation” doesn’t apply to 100% Brettanomyces fermentations.
How about “wild?” While true for spontaneous fermentations, it is problematic for most Brettanomyces. This arboreal yeast has been living in beer barrels since before Claussen determined it was responsible for the “stale” flavor of leather and fruit that was so desirable in vatted English ales. “Wild” doesn’t describe Brettanomyces purchased in pure-culture vials or pouches from your local homebrew store (or directly from a yeast lab in Nashville or the San Francisco Bay Area). Brettanomyces may not be the exactingly-groomed partner that Saccharomyces is, ready to do your bidding and then go away, but the range of fruity and funky flavors it produces can be wildly captivating!
In the end there was no consensus. These beers are not a cohesive group (even compared to lagers which range all the way from Czech Pilsner to eisbock), and as a result there isn’t a single term that manages to capture the limitless combinations of process, flavor, and microbe!
The history of Brettanomyces runs through lambic, porter, IPA, Claussen, Orval, Bouckaert, Arthur, Cilurzo, White, Logsdon, Yakobson, Goodwin et al. If you are interested read Jeff Sparrow’s Wild Brews, Mitch Steele’s IPA, my American Sour Beers, and Milk the Funk’s wiki. I’ll just say that I owe a debt to all those who have shared their beers, research, and microbes
with the brewing community!There are dozens of Brettanomyces
isolates available from a dozen yeast labs. Gone are the days when an Orval clone was the only reason a homebrewer needed Brettanomyces bruxellensis! Brewers are fermenting wort with Brett as more than just a novelty, blending its aromatics with hops, spices, and assertive malt bills. With increased interest in Brettanomyces beers, research has tested anecdotal best practices.
WHEN BRETT ISN’T BRETTOne of the more recent happenings in the storied history of Brettanomyces occurred in late-2014. Three years earlier, White Labs had released WLP644 Brettanomyces bruxellensis var. Trois (a not so subtle reference to Brouwerij 3 Fonteinen, and the Brettanomyces bruxellensis var. Drie isolated from their Geuze Cuvée J&J Blauw by Brewing Science Institute). I fermented a couple of beers with WLP644, including pure-culture and secondary fermentation, and had no reason to doubt that it was a mild Brett strain; it is fruitier than funkier, but creates a pellicle, and produces crushed pineapple aromatics when interacting with American hops! My
homebrewed test batch for Modern Times’ Neverwhere fermented with WLP644 converted nicely into the slightly funkier commercial batch with BSI Brett Drie (the brewers supplemented with Brettanomyces claussenii for the most recent batch, resulting in an even juicier flavor).
Brettanomyces covers a huge range of phenotypes, including a variety of attenuations, secondary metabolites, and tolerances making it hard to positively identify what is or isn’t Brettanomyces from brewing and tasting alone. Maybe it shouldn’t have been as shocking when Lance Shaner of Omega Yeast Labs shared genetic analysis that suggested “Brettanomyces Trois” was actually Saccharomyces! White Labs did their own test and confirmed that the ITS region of the strain’s ribosome was consistent with Saccharomyces. Thankfully, rather than discontinuing the great strain (as happened in a similar situation with Wyeast 5110 Brettanomyces anomalus in 2007) they rebranded it Saccharomyces “bruxellensis” Trois. At the same time, White Labs released WLP648 Brettanomyces bruxellensis var. Trois Vrai (“true”). This new strain has a phenolic edge, but many of the same
ALL ABOUT BRETT
IBY MICHAEL TONSMEIRE
12
Phot
o by
Cha
rles
A. P
arke
r/Im
ages
Plu
s
© Battenkill Communications, Inc. All Rights ReservedBest of Brew Your Own Magazine Brewing Wild/Sour
qualities including strong primary fermentation, and tropical hop interactions (more towards passion fruit in my experience).
I relate all this information for two reasons: first, it illustrates that there is plenty of “borrowing” going on between yeast labs (living things are thankfully difficult to patent). Second, there are other microbes, especially from the smaller yeast labs, that have not been tested to confirm the species on the label. Even many of the names used by yeast labs (e.g., B. claussenii, B. lambicus) are no longer recognized by science. Rather than focus on taxonomy, I pay attention to the flavors produced and brewing characteristics (e.g., attenuation, alcohol/acid tolerance, influence of temperature).
BRETT-OLOGYI believe the idea that Brettanomyces requires dextrins to create its myriad flavors is the biggest myth to tackle now that everyone understands that it is yeast not bacteria. Brett is the omnivore of the worty plains. Depending on the strain, it will metabolize glycosides from fruit, hops, and spices; the sugar trehalose released by autolysis; amino acids; cellobiose from wood; and lactose.
The flavors that Brett creates are derived mostly from activity on phenols from the malt and esterification of acids and alcohols. The lactic acid bacteria, especially Pediococcus, benefit from favoring alpha-amylase, which creates the dextrins it eventually converts into lactic acid. Anecdotally, fermentation of simpler carbohydrates by Brettanomyces increases ester production, which explains the fruitier flavors of 100% Brett compared to mixed fermentations.
The result is that I mash my Brett-no-bacteria beers towards the mid-to-low end of the saccharification range, 148–152 °F (64–67 °C). If you are an extract brewer, there is little reason to add maltodextrin to these beers (although most Brett is capable of fermenting dextrins up to nine-glucose-molecules long). A more fermentable wort reduces the risk of over-carbonation when bottling younger beer, which will allow you to
enjoy the progression from fresh-to-funky!
The pH of the beer is a crucial factor in ester production. According to Chad Yakobson’s master’s thesis, higher concentrations of lactic acid reduce production of some of the more interesting aromatics like ethyl caprylate (pineapple and cognac) and ethyl caproate (apple and anise). This tendency is one reason to sour with slow Pediococcus rather than quick Lactobacillus when Brett is included.
Many of the funkier flavor descriptors thrown around such as smoky, Band-Aid®, horse blanket, etc. are phenols. In clean beers, the phenols usually encountered are imparted either by a POF+ yeast (“phenolic off-flavor” e.g., clove in hefeweizen, black pepper in Belgian ales), or malts dried over smoky fire. Brettanomyces has the ability to convert 4-vinylguiacol (clove) into funkier 4-ethylguiacol (4-EG). However, a phenolic brewer’s yeast strain is not required, Brett will relatively quickly complete the conversion itself from ferulic acid (and other precursors) to 4-EG. If you want to increase the funkiness of the finished beer, try starting your mash with a 15 minute ferulic acid rest at 113 °F (45 °C).
Lance Shaner conducted an experiment that refuted the oft-repeated notion that lower pitching rates result in a “more stressed” fermentation that produces a funkier beer. His results indicate that for secondary fermentation, ester production differs somewhat with pitching rate, but phenol production held relatively constant from 50,000 to 2.4 million cells/mL.
BEST PRACTICE IS PRACTICEFor secondary fermentations, Brett will eventually complete its task whether you pitch 1,000,000 or 100 cells per mL. (This is the reason sanitation and separate equipment for clean beers are so vital). The higher pitching rate speeds up the fermentation, but not close to the 10,000X difference in the number of cells! I prefer lower pitching rates in most situations to allow more time in that fun in-between zone where the character of the primary yeast is still
apparent, before the Brett dominates. I pitch more cells for hoppy beers, where I need the Brett character to arrive before the hop aromatics fade.
To experience the transition from fresh-to-funky, follow the lead of Orval, which despite rumors to the contrary, pitches Brett at bottling. This makes split batches and sanitation relatively easy: use an eyedropper to dose 5-10 drops of dilute Brett culture into each bottle before capping. The risk with this technique is that for every 0.001 of carbohydrates fermented after bottling, yeast (Saccharomyces or Brettanomyces) releases 0.5 volumes of carbon dioxide. If you add enough priming sugar to achieve 2.5 volumes and the Brett lowers the FG from 1.005 to 1.002 the beer would contain a potentially dangerous 4 volumes of CO2. Luckily with a low pitching rate, thick bottles, and cellar-temperature storage you can open a bottle every few weeks and refrigerate the remainder if the carbonation reaches disconcerting levels.
Kegs are wonderful for Brett conditioning because they allow you to vent excess pressure. The beers I put on my dedicated non-Saccharomyces tap tend to be 100% Brett, fruited, dry hopped, or keg conditioned for a month or two to get the flavor where I want and then chilled to prolong that moment. I bottle most 100% Brett beers though because Brettanomyces continues to scavenge oxygen, meaning even a pale 5% ABV beer can be delicious at 10 years old!
Don’t be too concerned if you detect some strange notes early on in your fermentation. Tetrahydropyridines (Cheerios®, mousy) and phenols (plastic, medicinal) come and go in young Brett beers much like diacetyl or acetaldehyde, intermediary products in a young Saccharomyces beer.
100% BRETTPitching rate is essential for 100% Brettanomyces fermentations because it needs to be ready to protect the wort from wild microbes. Brett grows more slowly than Saccharomyces and many commercial packages contain fewer cells than the lab’s brewer’s yeast cultures. A stir-plate is the ideal place for growth because Brettanomyces
13

© Battenkill Communications, Inc. All Rights ReservedBest of Brew Your Own Magazine Brewing Wild/Sour
benefits from access to oxygen (which allows them to create considerably more energy per gram of sugar, and healthier cell walls). The drawback of free-access to oxygen is that oxygen allows Brettanomyces to produce acetic acid. Usually the concentration is low enough that the result is pleasantly tart once diluted by the wort; however, if you are particularly sensitive, consider decanting the starter. Acetic acid is also the key component of ethyl acetate, an ester that goes from pleasantly fruity at low levels to nail polish at just slightly higher.
For 100% Brett fermentations, the goal is to pitch at least an ale rate (1 million cells/°P/mL). This can be tricky because pitching rate calculators designed for brewer’s yeast are not accurate for Brett. White Labs and Yeast Bay vials contain 17.5 billion cells (up from 2.5 billion a couple years ago). For a 5-gallon (19 L) batch I start growing them in 0.5 L of wort before stepping to 2.5 L. Wyeast, East Coast Yeast, GigaYeast, and Bootleg Biology can be pitched directly if fresh, otherwise a single step to 2.5 L ensures a healthy fermentation. Once you are familiar with a strain, you can adjust the pitching rate to suit your goals. Complete attenuation should be reached in one to three weeks.
Select a strain that is an attenuative and aggressive fermenter (see below). Isolates from wine or aged beer often struggle to ferment relatively simple sugars, because they have adapted to thrive in a bottle or barrel without maltose present. Pitching a blend is often a good compromise; as the number of strains increases so does the likelihood of complete attenuation (although more strains increase the variability of the results, especially with repitching).
Some Brett strains (e.g., WLP645 Brettanomyces claussenii) produce fantastic flavors fermenting as warm as 85 °F (29 °C). However, I tend to trial strains by pitching around 65 °F (18 °C) and allowing them to ramp to 72 °F (22 °C) to ensure complete attenuation. Warmer fermentations produce more esters; while heat does not seem to reduce phenol production, esters distract, resulting in a fruitier less funky profile.
The biggest drawback to 100%
Brett fermented beers is lack of body and mouthfeel. Most Brett strains are highly attenuative and do not release glycerol into the beer as Saccharo-myces does. Glycerol adds mouthfeel, and is the reasons some saison strains create heft despite ultra-low final gravities. I try to compensate by adding ~125 PPM chloride to the brewing water, and incorporating grains high in protein: Wheat, oats, rye, spelt, quinoa, etc.
POST-MODERN BRETTI fermented my first beers with Brett in 2006, relying on learnings from Jamil Zainasheff, Jeff Sparrow, and the descriptions of a couple beers Tomme Arthur brewed at a little brewpub called Pizza Port in Solana Beach, California. Back then, American brewers were just beginning to stray from the Belgian and English templates.
When I commented on the new “American Wild Ale” category introduced in the 2015 Beer Judge Certification Program Guidelines, my goal was not to rank which Brett flavors are the best, but to stress that balance and deliciousness are the primary goals! Neither pineapple nor horse blanket are preferred, but so too neither should rise to overwhelming intensity or clash with the other flavors of the beer. Describe your beer’s fermentation or character without worrying too much about broad classifications.
I’m glad that it is now common to walk into a brewpub, Homebrew Con, or a homebrew club meeting and sample a variety beers fermented with Brett that I never would have dreamed of! Hopefully in another ten years we’ll see these ideas continue to pinball, with brewers around the world selecting and adapting Brett to suit local tastes, equipment, and ingredients!
14
Commercial Brettanomyces Isolates and Blends
These are some of the commercial cultures that contain Brettanomyces without brewer’s yeast (i.e., fully domesticated Saccharomyces) or lactic acid bacteria.
Fruitier StrainsEast Coast Yeast ECY19 Brettanomyces custersianus*Omega OYL-210 Where Da Funk?*White Labs WLP645 Brettanomyces claussenii*Wyeast WY5151-PC Brettanomyces clausseniiThe Yeast Bay Lochristi Brettanomyces Blend*
Funky-Fruity StrainsBootleg Biology Funk Weapon #2East Coast Yeast ECY24 Brettanomyces nanusEast Coast Yeast ECY30 Brettanomyces naardenensisEast Coast Yeast ECY34 Dirty Dozen*GigaYeast GB144 Sweet Flemish BrettOmega OYL-211 Bit O’ Funk*White Labs WLP648 Brettanomyces bruxellensis Trois Vrai*Wyeast WY5526 Brettanomyces lambicus*The Yeast Bay Beersel Brettanomyces Blend*
Funkier StrainsBootleg Biology Funk Weapon #2Omega OYL-212 Bring On Da FunkOmega OYL-218: All The Bretts*White Labs WLP650 Brettanomyces bruxellensis*White Labs WLP653 Brettanomyces lambicusWyeast WY5112 Brettanomyces bruxellensis*The Yeast Bay Brussels Brettanomyces Blend
* Recommended for primary fermentation

© Battenkill Communications, Inc. All Rights ReservedBest of Brew Your Own Magazine Brewing Wild/Sour
ALSATIAN FUNKY SAISON(5 gallons/19 L, all-grain)OG = 1.047 FG = 1.003IBU = 24 SRM = 3.4 ABV = 6.1% (Including wine)
This beer is all about showcasing an alter-native universe where Germany developed the saison and wild culture of Belgium. Rather than trying to get my hands on Alsatian Gewürztraminer grapes, I blended in a bottle of wine post fermentation. The fruity notes from the wine meld beautifully with the new German hops and lemony-funky-minerally Brettanomyces. The extended warm conditioning also provides an opportunity for the Brettanomyces to free aromatics from glycosides in the hops and wine, and to work under pressure to create flavors quickly so that the fresh hop nose is still evident.
INGREDIENTS9 lbs (4.1 kg) Rahr Standard 2-row malt1.5 lbs. (0.68 kg) Great Western Superior flaked wheat4 oz. (113 g) acidulated malt5.9 AAU Magnum hops (60 min.) (0.5 oz/14 g at 11.8% alpha acids)2 oz. (57 g) Hallertau Blanc hops (hop stand)2 oz. (57 g) Hull Melon hops (hop stand)2 oz. (57 g) Hallertau Blanc hops (dry hop)2 oz. (57 g) Hull Melon hops (dry hop)½ tsp. yeast nutrient (5 min.)½ Whirlfloc tablet (5 min.)The Yeast Bay Saison BlendWhite Labs WLP644 (Saccharomyces “bruxellensis” Trois)Brettanomyces bruxellensis var. CB2 (Jason Rodriguez’s Cantillon isolate)Wyeast WY5223-PC (Lactobacillus brevis)750 ml of German/French white wine (suggested: Trimbach Gewürztraminer)1 cup corn sugar (if priming)
STEP BY STEPSingle infusion mash at 148 °F (64 °C) for 75 minutes. Collect ~6.5 gallons (25 L) of wort in the kettle and boil for 65 minutes adding hops, yeast
nutrients and Whirl-floc according to the ingredient list. At the end of the boil, there should be approximately 5.5 gallons (21 L) in the kettle. Chill to 180 °F (80 °C) and add the hop stand addition, stir and let settle for 20 minutes. Chill to 65 °F (18 °C), aerate the wort with filtered air or pure O2 and pitch with a starter of the yeast and bacteria. This recipe references my own personal mixed culture of yeast and bacteria, feel free to substitute in your own favorite mix of strains and cultures. Ferment at 70 °F (21 °C) until the kräusen falls. Transfer to a keg or secondary vessel and add the dry hops and ½ cup of sugar. After several days, transfer to another keg or bottling bucket, add the bottle of wine and ½ cup of table sugar and allow to sit at cellar temperature for two months to carbonate and to allow yeast-wine interactions. Chill and serve when desired. Can be bottled either after two weeks if the gravity is suitably low, or allow to ferment in a carboy until the gravity is stable before priming and bottling. Aim for 2.8 volumes of CO2 using a priming sugar calculator.
Extract Option:Replace the pale malt, flaked wheat and acidulated malt with 4 lbs. (1.8 kg) extra light dried malt extract, 1.7 lbs. (0.77 kg) wheat dried malt extract and ½ tsp. lactic acid (88%). Stir the extract and lactic acid into 6 gallons (23 L) of water and bring up to a boil. Refer to boil, and fermentation instructions in the all-grain version.
WESTORVAL(5 gallons/19 L, all-grain)OG = 1.050 FG = 1.009 (before Brett)IBU = 35 SRM = 3 ABV = 5.4%
This is my unauthorized imagined collaboration between the monks of Sint-Sixtusabdij Westvleteren and Abbaye Notre-Dame d’Orval. The malt, hops, and primary fermentation are inspired by the flawless Westvleteren Blond (Green Cap) and the bottle conditioning is pure Orval. The result is fantastic around two months
in the bottle when it has herbal hops, peppery yeast, and a mellow earthiness.
INGREDIENTS8 lbs. (3.6 kg) Weyermann Floor-Malted Bohemian Pilsner malt2 lbs. (0.91 kg) Castle pale ale malt10 oz. (280 g) granulated cane sugar7 AAU Northern Brewer hops (70min.) (1 oz./28 g at 7% alpha acids)3 AAU Hallertauer Mittelfruh hops (20 min.) (1 oz./28 g at 3% alpha acids)1.2 AAU Styrian Goldings hops (12 min.) (1 oz./28 g at 1.2% alpha acids)½ tsp. yeast nutrient (5 min.)½ Whirlfloc tablet (5 min.)White Labs WLP530 (Abbey Ale) or Wyeast 3787 (Trappist High Gravity) yeastWhite Labs WLP650 (Brettanomyces bruxellensis) or Wyeast 5112 (Brettanomyces bruxellensis)1 cup corn sugar (if priming)
STEP BY STEPStep mash at 147 °F (64 °C) for 60 minutes then 157 °F (69 °C) for 20 minutes. Boil 90 minutes adding hops according to the ingredient list. At the end of the boil, there should be approximately 5.5 gallons (21 L) in the kettle. Chill to 70 °F (21 °C), aerate the wort with filtered air or pure O2 and pitch with a starter of the yeast and bacteria. Ferment the beer at 75 °F (24 °C) until the kräusen falls. Bottle after two weeks if the gravity is suitably low. Add 5–10 drops of a Brettanomyces culture of your choice to each bottle. Suggestions include WLP650/WY5112 Brettanomyces bruxellensis (originally sourced from Orval) etc. Or mix in 4 fl. oz. (120 mL) of dilute starter culture for the entire batch and allow to age in a carboy until the gravity is stable.
Extract Option:Replace the Pilsner and pale ale malt with 4.5 lbs. (2 kg) Pilsen dried malt extract and 1 lb. (0.45 kg) Muntons light dried malt extract. Stir the extract into 6 gallons (23 L) of water and bring up to a boil. Refer to boil, and fermentation instructions in the all-grain version.
MODERN BRETT RECIPES
15

© Battenkill Communications, Inc. All Rights ReservedBest of Brew Your Own Magazine Brewing Wild/Sour16
like a touch of crystal malt, Special B and chocolate malts in my bruins. My lambic bill, though, is nothing but a Pilsner malt and wheat.
As for hops, I would recommend that homebrewers stay away from any high-alpha variety (such as Simcoe®, Chinook and the likes) and any hop with extremely identifiable characteristics (like Cascade or Amarillo®). I use Tett-nanger almost exclusively. Also, using whole, aged hops that are well past the “organic rot” aroma stage can also make a big impact. It takes planning to make one of these sour gems. A brewer can do one of two things depending on time: Put hops into a breathable container somewhere out of the way for two years, or bake them at very low temperatures (200 ºF or 93 ºC) for several hours (at least 4–6).
Personally, I like to let nature run its course. This will give your beer the aged-hop flavor I find preferable in my sour beer. As for the souring process, the hob-byist needs to acquire the pure cultures. It would be futile to culture from a bottle, and in most cases you would simply be culturing Saccharomyces anyway. The beer in that bottle is so far removed from the source bacteria that it would be nearly impossible to achieve the stage of becoming “ill.” The ill (or sour) stage has been my entire battle with these brews. It is easy to achieve if you’ve got a 400 year-old barrel, teaming with all the required beasts, but to do it in the middle of say, Taiwan or China, where I was for the past several years, or now here in Indiana, it proves more of a challenge.
After a gentle primary (2 months), you will need to inoculate with Pediococcus cerevisiae. This will create a high level of lactic acid. This can take a long while, so consistent monitoring of the fermentation is necessary. It can be extremely disappointing to break out the old barrel thief only to find your lambic isn’t lambic at all — but rather an extremely nasty cesspool of Brettanomyces. Speaking of Brettanomyces, I inoc-ulate with Brettanomyces lambicus after six months. Brettanomyces lambicus produces the immediately identifiable “horse blanket” characteristic. At what levels to inoculate is a matter of debate. Varying amounts of Brettanomyces create a wide spectrum of flavors, so you will need to develop a taste for it and gauge your brewing accordingly.
TIPS FROM THE PROS:BREWING SOURS
IBY BYO STAFF
Ted Miller, Brugge Brasserie in Indianapolis, IN
Peter Bouckaert, New Belgium Brewing Co. in Fort Collins, COnce you have collected the re-quired bacteria for sour beers, it’s crucial to store them properly. I boil up a sugar solution — 10–
14% sugar with some egg white and beer (for bitterness) to maintain and propagate the critters in this liquid. At pitch, add this slurry and a sufficient
amount of regular yeast. Once you have a good solution of bacteria for your sour beer, limiting acid is key. Do this by increasing alcohol, depleting nutrients and reducing pH. A sufficient amount of bacteria-free yeast and temperature control, though, are our main weapons. In most
cases, I start with a well fermentable, lowly hopped wort (15–20 IBU). Let the fermentation rise to room temp. or higher if possible — as high as 95 ºF (35 ºC) — to speed up the depletion of sugars. When fermentation is close to completion, cool as fast as you can to capture the desired lactic sour flavor.
OTomme Arthur, Port Brewing in California (Solana Beach, San Clemente and Carlsbad)
n our Cuveé de Tommé, a Belgian-style dark strong ale, we are looking to support the bourbon barrel character and the strong
charred oak flavors by adding a nice caramel malt base. In our Le Woody Blonde Belgian Style Ale, we attempt-ed to brew a beer with a lighter body and therefore chose no crystal malt, opting to use Vienna malt and flaked corn instead. Hops play an important role in sour beers. There are many compounds that are found in new hops that are not desirable in sour beers. When the hops are aged, those compounds fall to reduced levels. The role of hops in sour ale beers is to provide not bitterness but other acids in a supporting role. We use a process of adding pure
isolated cultures to our brews at specific intervals. It is in this way that we can control and best manipulate the finished beer. Numerous isolated cultures are available to the home-brewer. Other homebrewers and some professional brewers are using dregs of yeast cultured from lambic beers. These cultures contain Pediococcus, Lactobacillous and Brettanomyces. The only drawback to using these types of mixed cultures is the inability to separate each type of fermentation. We add our souring culture (mostly Pediococcus and Brettanomyces) after a one-month primary fermentation. The goal of this fermentation is to attenuate the beer to the proper level and then settle out as much of the yeast from the primary as possible.
This separation of old yeast ensures that we do not develop yeast autolysis, which can produce a burnt rubber smell in the beer. We ensure through the primary fermentation that we have hit our target levels of alcohol, bitterness and attenuation before proceeding to the barrel, which is where the magic happens. For a homebrewer, no extra special equipment is needed. While oak is desired for its oxygen transporting abilities — and widely used in commercial brewing — plastic is an acceptable substitute as it has a permeable membrane allowing oxygen transport as well. If plastic buckets are used, oak chips can be added as a flavoring compound that also provides some tannins.
I

© Battenkill Communications, Inc. All Rights ReservedBest of Brew Your Own Magazine Brewing Wild/Sour17
t Anderson Valley we have about eight years of kettle souring experience. We use this method for making our Goses and, on
occasion, other beers (like our Tropical Hazy Sour beer). We also do a fair amount of barrel souring beers — we have about 1,200 wood barrels in our sour beer production. This process differs greatly from the kettle souring process. It can take anywhere from nine months to four years to sour a beer this way; in contrast kettle souring can be done in less than 8 hours. The flavor that each process creates can be very different as well. We use kettle souring to create clean, sharp, bright tartness and we use our barrel souring process to create a more complex, deeper, funkier range of flavors. For kettle sours, we keep our temperature at about 108–112 °F (42–44 °C). We use a strain of Lactobacillus delbrueckii that seems to work best at that temperature, but each strain is different. We have tried several sources for Lacto, but we prefer the one we get from a lab. It creates flavors we like, and it creates these flavors more consistently
on a regular basis. It is also healthier than some other sources, which makes it easier to grow up to the proper pitching rate. Prior to pitching the Lacto we look for the same pH as we would in any of our other beers (about 5.2). We do a very large pitch of lactic acid bacteria (LAB) and expect to see the pH drop in to our desired range within 6–8 hours. We also exclude oxygen from the process as much as possible and this helps retard unwanted bacteria with no deleterious effects on the LAB. We do not add extraneous acid to our kettle souring process other than to adjust the pH of the brewing water prior to mash-in (which we do for all our beers as our water is quite high in pH). After the Lacto does its thing we prefer a wort pH of 3.35 to 3.25, but will accept wort between 3.4 and 3.2. We are looking for a clean, bright acidity and don’t want the pH to be less than 3.2 or above 3.4. We also use titratable acidity to judge acidity and its quality of impact. Future fruit additions play into our target sourness level to a lesser extent. We are trying to achieve
a harmonious balance of flavors and if a fruit has a very low pH we will factor that into our kettle souring process. Other important factors for kettle souring is to get the wort off the grain (as you would with a “normal” beer) and into the kettle. This needs be done to avoid too much bad funkiness that you would probably get in your wort if you did not sour it fast enough. The second thing is sour your wort fast (in less than 24 hours). To achieve that you need to pitch a good amount of LAB into the kettle; slightly more than one million cells per mL per degree Plato. So about 12 million cells per mL for a 11 or 12 degree Plato wort (1.044–1.048 specific gravity). And the third thing is to exclude oxygen as much as you can. This will help keep the bad funk in check. We blanket the top of the kettle with an inert gas to help keep oxygen out of the process. For much more on the subject, I wrote the book Gose for the Brewer’s Association’s style guideline series and there is a lot of information about kettle souring in there.
SOURING WITH LACTO
ABY DAWSON RASPUZZI
Fal Allen, Anderson Valley Brewing Co. in Boonville, CA
Nicole Reiman & Amanda Oberbroeckling, Odd13 Brewing in Lafayette, COt Odd13 we’ve been kettle souring for about five years. We employ this method any time we produce a sour with
the intention of canning. The kettle souring method is perfect for our process because it provides us with a finished product that maintains the same flavor through the shelf life of the beer. Conversely, we use traditional souring methods with small experimental batches. Most of these are long-term souring processes, typically using Lactobacillus and Pediococcus and aging in barrels or foeders. We have also experimented with open fermentation in foeders. We get our Lacto from Inland Is-land Yeast Laboratories, out of Den-ver, Colorado. We prefer L. delbrueckii because it gives us a quicker sour,
keeping the wort at 115 °F (46 °C). In the past we have also worked with several other Lacto species at various temperatures, including L. brevis, and have found that at incorrect temperatures there is either less activity or too much activity. We chose our current temperature based on the recommendation from our supplier. Our process across all of our production is to acidify our wort to a pH of 5.2 using lactic acid. Then, after the souring phase, we typically target a pH around 3.5; however, the decision to stop the souring process is ultimately determined from sensory evaluation of the wort. As we expand our portfolio to include more fruited sours we do take into consideration the acidity level of the fruit that will be added to the beer, and adjust the
target pH accordingly. This typically results in a higher pH wort so that fruit additions don’t turn the beer too sour. The most important lesson we’ve learned is that kettle souring is its own process that requires great attention to detail, and has its own intricacies that don’t necessarily carry over from traditional brewing methods. The kettle souring process introduces the possibility of less common off flavors, such as isovaleric acid and butyric acid. We’ve learned that it’s important to make sure the process is dialed in — do your homework and come up with a plan before just jumping in. Monitor and control the process, including cleanliness, wort temperature and pH, and gas levels . . . oxygen makes Lacto angry!
A

© Battenkill Communications, Inc. All Rights ReservedBest of Brew Your Own Magazine Brewing Wild/Sour18
Joe Mashburn, Night Shift Brewing in Everett, MAe don’t kettle sour, but rather have a Lactobacillus fermentation phase, follow- ed by a brewer’s yeast fer-
mentation for our Weisse Series releases. We’ve done a single kettle sour and weren’t happy with it, so we moved on from that. Now, we never denature the Lacto and really like the consistency and results of this approach. We produce between 200–300 bbls (6,200–9,300 gallons/235–352 hL) of this style each month. We’ve also used Lacto for more time-intensive Lacto/Brettano-myces/brewer’s yeast fermentations, which are generally destined for oak
barrels that will have adequate time for the Lacto to produce acid and the Brett to do its thing. For our Weisse Series beers, we target a pH of 5.2 in the kettle, just from normal mashing/sparging procedures. We haven’t played around with acidifying prior to Lacto additions, mostly because the 5.2 gives us the results we’re looking for. We use a Lacto culture from Lallemand, but we’ve also tried White Labs and Brewing Science Institute. The Lacto from Lallemand is incredibly easy to use and it comes as a dry pitch so it has a very long shelf life. For that addition we knock out at 100 ˚F (38 °C).
This has been the same for the two different types of Lacto we’ve tried. When the pH reaches 3.2–3.3 we then pitch the brewer’s yeast. Our sours are heavily fruited, so that low of a pH helps the acid come through. When working with Lacto, watch your diacetyl production. We’ve had success eliminating and minimizing diacetyl by adding fruit early in fermentation (day 2). Additionally, during the Lacto fermentation, try to eliminate all oxygen. You could hook up CO2 to an oxygen stone and continue to purge during knockout. If you don’t have an oxygen stone, try not to splash during knockout.
W
he methods of brewing with Brettanomyces weren’t really established; they were created more by default as Brettanomyces
found its way into beer more so than being introduced. That’s why it’s considered a wild fermentation. First, brewers got spontaneous fermentation in styles like lambics and English porters, then came controlled inoculation, primarily in secondary fermentation, or purposeful inoculation to affect the flavor profile. There are four different species of Brettanomyces commonly found in beer: lambicus, bruxellensis, claussenii, and anomalus. Some produce better flavors than others. They’re not all the same by any imagination. Brett adds fruitiness to beers in addition to a high acidity taste, and it can have a pretty incredible impact of keeping the freshness more intact and delaying degradation of the beer, while enhancing the beer at the same time. Brett beers will evolve, as a little bit of fermentation takes place you get new esters that form in the bottle; that’s one of the things that is nice
about a refermented bottle. In addition to creating new esters and flavor compounds in the bottle while aging, what it’s also doing is re-esterification where esters break down and form new esters. There are many good things happening in that beer over time. It is getting dryer, you do lose some esters, but other things are going on to supplant what was there and it evolves well. Some people are doing 100 percent Brett beers, which I have not tried because I have not personally found 100 percent Brett beers to be all that desirable flavor-wise. When brewing a 100% Brett beer, many brewers will wait 6 to 12 months in fermentation. We add Brett in secondary (after adding Saccharomyces in primary) and with the strains we use we give it two weeks conditioning and we see the pellicle forming, pH dropping, and flavor development occurring. At that point the beer is distinct and very flavorful. We make our Seizoen with Saccharomyces yeast for primary fer-mentation and a Seizoen Bretta that has the addition of our unique strand
of Brett, in which the matiness drops out of it. It can almost seem sweeter because of the fruitiness but it is dryer because the malt is not prevalent and the Brett tends to eat up a lot of hop flavors as well, however the bitterness remains constant. Some brewers are really paranoid about bringing Brett into their brewery, or any yeast that is not their brewing strain. In my 25 years of experience, I can say Brett should not be feared— contamination should not be an issue for people with a normal cleaning and sanitation regiment. My advice for anyone who wants to brew with Brett is to experiment with some different strains. Try a few different things, and try to manage the yeast and have a big enough cell count to get you a good start. The other important thing is to have patience and continue evaluating your brew over time. It might take a year to get your head wrapped around it and get your beer moving in a direction you want it to.
BREWING WITH BRETT
T
BY DAWSON RASPUZZI
David Logsdon, Logsdon Organic Farmhouse Ales in Hood River, OR

© Battenkill Communications, Inc. All Rights ReservedBest of Brew Your Own Magazine Brewing Wild/Sour19
Gabe Fletcher, Anchorage Brewing Co. in Anchorage, AK use Brettanomyces because I love how versatile it is. Brett can adapt to almost any situation and almost thrives under stress, plus it has a
huge range of flavor when fermented in different ways. The other big benefit is its shelf-life stability. You can make a super hoppy Belgian DIPA and the Brett will continue to live in the bottle, absorbing any oxygen that is left from the brewing process. After two years the hop flavor is still fresh and there is no cardboard character from the hops oxidizing. Eventually the hops die down, but instead of the beer going stale, the Brett flavors come to the forefront and you have a whole different experience to enjoy. Most of my beers have three different yeast in three different fermentations. I use a Belgian strain for primary fermentation in foundres, and then I secondary with Brett (usually bruxellensis from Wyeast) in small barrels. Lastly, I bottle condition, usually with wine yeast. I have found that layering the flavors from all the different fermentations adds a real depth to the beers. In addition to bruxellensis, I have several other Brett stains in the brewery as well, including some from Chad Yakobson at Crooked Stave in Denver, Colorado. Shaun Hill (brewer at Hill Farmstead in Greensboro, Vermont) and I just brewed a Saison at the brewery using a couple of those strains mixed with some Saison strains that turned out really nice. Brewing Brett beers is not very
different than traditional beers. When I’m making a beer that will spend a long time in barrels I do a higher mash temp, around 158 °F (70 °C), to add more dextrins to the wort so the Brett has something to chew on during it’s long fermentation phase. For beers with a shorter time in barrels, I do a low mash temp, around 146 °F (63 °C), and I won’t go over 13 °Plato for the starting gravity. That way the primary yeast can take care of most of the sugars before the Brett comes into play, allowing a shorter fermentation time for the Brett. I only make Brettanomyces beers, so cross contamination is not an issue. If you work in a brewery that produces non-Brett beers also, then there are added challenges. The most important thing in that situation is to have separate process parts for the Brett beers, i.e. anything that is not stainless steel. You can use the same tanks, just make sure you change all of the gaskets and hoses out. Another big challenge is bottle conditioning. If you are aging the beer for several months in a tank or barrel it is easier because the Brett has time to ferment out all of the non fermentable sugars the regular yeasts couldn’t — reducing the risk of having the bottles blow up after a few months because there was a lot more sugar in the bottle then you thought. If you do want to bottle condition with the Brett, then I would suggest adding the Brett to the tank at the end of fermentation so it has some time to ferment in the tanks to make the beer
dryer. I wouldn’t bottle a Brett beer that was higher then 0.8 to 1 °Plato in gravity. Anything higher than that and you will have too much left over sugar for the Brett to eat later on, which will result in over-carbonated beer. Just to give you an idea, it only takes about 0.5 degrees Plato of sugar to carbonate to 2.5 volumes of CO2. So if you bottled at 1.5 °Plato and then added enough sugar for 2.5 to 3 volumes of CO2, after about 5 months or so you might end up with 5 volumes of CO2! That’s a lot! In the past, I have stopped the fermentation at 2.5 °Plato by cooling it, then I bottle the beer with no sugar added. It takes a little longer to ferment in the bottle, but you end up with nice carbonation and no issues with over-carbonation. To homebrew your Brett beer, start with making your favorite Belgian-style recipe. Let it ferment out in the carboy, transfer to another carboy, add a couple smack packs of Brett, and just let it sit for 6-8 months. Don’t disturb the pellicle that will grow on the top of the beer, that’s what protects the beer from oxidation during the aging process. It looks like mold on the top of the beer if you have never seen one before, it’s a good thing, so don’t dump it! After the 6-8 months, transfer it off the pellicle and bottle condition with a Belgian or wine yeast culture. Give it 3-4 weeks in the bottle and then enjoy. I would leave some out warm for another 3 months and see how it develops.
I
e have two programs for fermenting beer at Pen Druid: Spontaneous and pitched. All our clean beer is fermented
with an indigenous wild yeast that we captured from a flower that was underneath an apple tree beside the brewery. We do not isolate or keep this yeast banked. We merely pitch it batch to batch to keep it going, using the age-
old palate technique to make sure it’s good to pitch. With our spontaneous ferments we rely on the coolship and the resident yeasts and bacteria deep in the wood of the fresh steam cleaned red wine barrels that we use to ferment our spontaneous beers. The difference in these two beers is noticeable. Spontaneous beer made in the traditional method has a long,
lateral palate and a finish that goes forever! It typically has a lactic acid presence, of varying degrees, and no acetic acid. Our wild clean beers are devoid of lactic acid-producing bacteria, so they are crisp and clean. For our spontaneous beers we use traditional spontaneous methods that Belgian lambic producers use in order to make a poor wort that ferments
SPONTANEOUS FERMENTS
WBY DAWSON RASPUZZI
Van Carney, Pen Druid in Sperryville, VA
© Battenkill Communications, Inc. All Rights ReservedBest of Brew Your Own Magazine Brewing Wild/Sour20
very slowly, forms a pellicle to protect against oxidation, and allows microbes to do the work that can take years to complete. Spontaneous ferments allow for this and therefore can produce the most complex beer, which is what we want to drink. We brew these beers in the traditional method, so a ratio of 60/40 Pilsner-to-raw wheat, a traditional turbid mash schedule, and aged hops. Our coolshipping season runs from October–April and fermentation is consistent throughout the season for us. After racking to barrels we don’t touch them at all for 18 months. Then we fruit some of the last brewing season’s barrels, and we do our 1-, 2-, and 3-year-old spontaneous blend. The youngest spontaneous beers we
package is about a year old. We only taste when we are ready to package, and at that point you’ll know what you’ve got. We end up dumping about 25–40% of any given year’s barrels, which is one of the risks you face with spontaneous fermentations. We dump barrels when they are oxidized (cardboard), have any level of ascetic acid (vinegar), ethyl acetate (acetone), butyric acid (puke), isovaleric acid (sock cheese) or in other words the beer is weird or gross. Also, too much oxygen can cause production of aldehydes, which can create bruised fruit flavors that can work in aged barleywines, but typically don’t work in our spontaneous ferments. The key things to prevent oxidation are proper pellicle formation and not touching
the barrels at all. Other issues such as ropiness, diacetyl, acetaldehyde, tetrahydropyridine (THP) and some Dimethyl Sulfide (DMS) and S-Methyl Methionine (SMM) compounds can work themselves out with further aging and patience. When a beer is ready for the bottle is more a matter of experience and less about specific criteria. Why things go wrong in a barrel is the stuff of a PhD thesis, but using your palate to judge what you like and don’t like is the most important thing and that’s the fun part of it! Take pleasure in sampling barrels, making blends, bottling, messing up horribly, sometimes succeeding, and knowing that success is positivity in the face of failure!
o me, the biggest appeal of spontaneous fermentation is the diversity of microbes. One can, in theory, make sour beer using
only one strain of lactic acid bacteria and one strain of yeast from a lab, but I believe the most interesting, complex, inspiring beers are those made from a wide diversity of microbes — hundreds of species potentially — that come from the local environment instead of a lab. At Black Project, all of our beer is inoculated via a 320-gallon (1,200-L) copper coolship. We do two different types of spontaneous beers. One is a traditional lambic-style brew, inoculation, fermentation, and aging. More on the procedures we adhere to on that can be found on Methode Traditionnelle.org. However, we also make some of our base in what we call a spontaneous solera. We have large vessels that were started years ago using mature spontaneously fermented barrels. Since then they have never been completely empty. We remove, say, 25% of the volume to fruit or package, and then replace it with fresh wort from the coolship. It doesn’t create quite the same depth as the traditional style of spontaneous fermentation, but it creates a slightly more consistent product in both character and production time. We prefer the wintertime, when it is cold at night, for our traditional
spontaneous beers. I think the differences between seasons are mostly based on cooling rate vs. what microbes are present in the air. A slow cooling rate means that, for example, enteric bacteria (which are indeed an important early part of the process all year) can get out of hand and ruin the beer before other genera can catch up. I don’t recommend tasting traditional spontaneous beer for at least a month or two. You want to make sure the pH has dropped and alcohol is present, otherwise there is a theoret-ical risk of botulinum poisoning. If you do taste during aging, know that the beer is going to go through cycles early on where it will taste better, then worse, then even better still. You have to experiment and know what your native flora does. Ultimately spontaneous beers are about blending and I think the biggest struggle homebrewers have is not thinking like a blendery. You need many batches of the same beer in order to craft something really good. It is exceptionally rare for us to have one single barrel (out of 150+) that I would sell on its own. I often see homebrewers make one 5-gallon (19-L) spontaneous batch and get disappointed and surprised that it isn’t exactly how they thought it would be . . . but that’s the nature of the game. It is very difficult to do on any level,
but the constraints of homebrewing make it even more challenging. One trick for homebrewers is, instead of one 5-gallon (19-L) batch, try to split that into single-gallon (4-L) sizes. It isn’t an exaggeration to say that 20 components (be they 1-gallon/4-L jugs or 530-gallon/2,000-L foeders) is only a starting point for really getting into blending, which is the essence of these beers and something really unique to the style. Another tip for homebrewers — cool in your kettle. Tiny versions of commercial coolships are a waste of time and money. In the US and in Belgium it takes approximately 12 hours for the wort to cool even with wintertime air temperatures. That’s tough to achieve with 5 gallons (19 L) even in a kettle, let alone a very shallow pan. If the wort cools too quickly it can have drastic effects on microbial growth and procession. Homebrewers can use any base style they like if they aren’t trying to use traditional lambic brewing techniques. Ultimately, I think the best recipes are going to be set up for long aging, which is pretty much a requirement for these beers. That means a wort that is very “unfermentable,” — so mashed quite hot if not using a turbid mash to achieve the same.
TJames Howat, Black Project Spontaneous & Wild Ales, Denver CO

© Battenkill Communications, Inc. All Rights ReservedBest of Brew Your Own Magazine Brewing Wild/Sour21
Are pitching rates similar or different for “wild” type cultures (Lactobacillus, Brettanomyces, Pediococcus, etc.) to that of typical ale yeast?
Do the same priming sugar calculations apply when bottling a 100% Brett fermented beer? Should I expect it to take longer for the bottles to prime since Brett tends to ferment slower?
Pitching rates for wild yeast and bacteria are really all over the place. Brettanomyces species can
be used in place of Saccharomyces species for the primary fermentation of wort into beer. Brettanomyces has become a very popular “wild” yeast in certain brewing circles and imparts an interesting aroma and flavor to a wide range of beer styles. When used as the primary yeast strain the flavor contribution is more up front and immediate compared to when Brettanomyces is added to beer during aging, where the aroma notes develop slowly over time. If you are looking for numbers, the range in pitching rate varies from about 250,000 cells/mL to over 10 million cells/mL, depending on how the yeast is going to be used. If you want to use Brett for the first time, I would use it after primary fermentation is complete and add for bottle conditioning. This yeast is a “super-attenuator” and ferments sugars that ale and lager yeast cannot.
This means that these beers have the potential to be bottle bombs. Heavy bottles, like champagne bottles, are recommended. Pitch with about 1 million cells per mL to give your beer a good shot of developing the aroma that is expected. Bacteria, such as Lactobacillus species and Pediococcus species are completely different, for two big reasons. The first thing separating these bugs from yeast is that they are sensitive to hop acids, and in some cases alcohol strength. This means that souring beers that are highly hopped and high in alcohol can be a real challenge. Even moderately hopped beers can give lactic acid bacteria the cold shoulder and will not turn sour. This is really frustrating when you are intentionally trying to do something that many brewers curse when it happens on its own. I have been in that boat! The other thing about these bac- teria that set them apart from yeast is that it does not take many cells to
affect change. A few hundred cells/mL in the proper setting can grow into a population large enough to have obvious flavor contributions. In comparison to yeast cell densities, bacterial densities are usually much lower. A lager beer that has been thoroughly spoiled by lactic acid bacteria may have only 5,000 cells/mL of the culprit. The interesting thing about bacteria is that they can grow very well by feeding on amino acids associated with autolyzed yeast cells, especially in anaerobic environments. This means that the bottom of a beer tank is a pretty ideal propagation container for bacteria, and beers often sour when held for prolonged time periods with yeast present. The take home message here is that the answer to your question depends on what you want to accomplish by adding these sorts of organisms and how quickly you want results. Most beers produced with these types of cultures are not produced overnight and it is very important to be patient.
Brettanomyces yeast strains are so-called super attenuators because they secrete enzymes that break down carbohydrate
dextrins that remain in wort following mashing. The products of these enzymatic reactions are fermentable. So in a Brett fermentation the beer is either very dry at the time of bottling or will become very dry after bottling. The most important thing you can never forget about Brett beers is that you can quickly end up with bottle bombs if you are not very careful. Most
homebrewers have limited laboratory and pre-bottling testing ability. The best deterrent of the bottle bomb problem is complete fermentation prior to bottling. This may take a couple of months to occur, but beats bottling beer and ending up with a problem. On the other hand, if you are brewing a beer like Orval that is expected to morph during bottle aging, you need to use Champagne bottles. Assuming the fermentation is com-plete the priming rules are the same. If you want faster conditioning you
may want to use fresh Saccharomyces yeast when bottling. But you always must be aware that Brett will dry beers out over time and lead to increased carbonation levels if the beer is bottled with residual dextrins floating about. I recently had a bottle of Green Flash Rayon Vert that was a couple of years old; this beer had a massive level of carbonation that developed in the bottle and accompanying level of Brett assertiveness. This beer was also bottled in glass intended to withstand the pressure developed during aging.
HELP ME, MR. WIZARD
Q
Q
A
A
BY ASHTON LEWIS
Wild Yeast Pitch Rate
Bottle Conditioning Brett Beers

© Battenkill Communications, Inc. All Rights ReservedBest of Brew Your Own Magazine Brewing Wild/Sour
I have started to see more sour beers in my local beer stores. When did these become so popular? I am interested in the different methods used to produce sour beers, especially those used by craft brewers who are canning and bottling sours in 12 ounce (354 mL) bottles and selling these beers for pretty normal prices. I really want to brew some of these beers at home and want to know where to begin!
It took a while for brewers outside of the small sour brewing centers of Belgium and Germany to produce excellent
sours because so much of the science and practice of sour beer brewing was closely guarded ~30 years ago when brewers from other parts of the brewing world began dabbling with sour beer. Jean-Xavier Guinard’s Lambic (Brewer’s Publications, 1990) was really ahead of its time because there were very few U.S. homebrewers, let alone U.S. microbreweries, that were experimenting with sour beers in 1990. In retrospect, it is pretty amazing that JX, as he was known by his colleagues at UC-Davis, was actually brewing sour beers in the UC-Davis brewing lab while completing his Ph.D. because Dr. Michael Lewis was not a big fan of contaminated beer. I remember having a conversation with Dr. Lewis sometime in 1992. We were sitting in his office when the phone rang. I could only hear one side of the conversation, but the topic was clear; a well-known microbrewery was interested in brewing Berliner weisse. Dr. Lewis repeatedly asked the brewmaster on the other end of the line “why do you want to [mess] up your brewery by bringing Lactobacilli into your cellar?” I don’t know if Dr. Lewis’ continual protests influenced this brewer, but the brewery never produced a Berliner weisse. But in the brewing lab, a small collection of JX’s lambics remained in storage for the occasional tasting. I don’t know if those beers were as excellent as I remember them being, but they seemed like the real deal at the time. It was like JX transported the magic from Belgium to Davis using that clichéd blend of art and science. The early sours to hit the US microbrewing scene were brewed in the Belgian tradition. New Belgium launched La Folie in 1997, Tomme Arthur was brewing sours at Pizza
Port in Solano Beach, California in the late 90s, Vinnie Cilurzo was busy up in Santa Rosa, California in the early 2000s and Tim Schwartz was brewing some great sours in Austin, Texas at the Bitter End in the late 90s and early 2000s. Today there are breweries in nearly every state with sour barrel programs. Although many of these beers are produced in less than a year, sour barrel programs require a substantial investment in beer, wood, and space. There is also a higher level of risk with these beers and many breweries simply steer clear of sours that develop in the cellar. I am not sure when U.S. brewers began producing any real volume of Berliner weisse-type beers, and their Gose-inspired cousins, but it was really only after the early Belgian styles were garnering attention in the beer world. Indeed, some of the brewers playing with sour barrels were also playing around with bacteria in the brewhouse. Although traditional Berliner weisse is fermented with a mixed culture of yeast and bacteria, and bottled with the same, modern interpretations can be produced in the brewhouse to keep their fermenters clean of bugs. With the growth of this market segment, the supplies required to produce these beers has also grown. The various bacteria and yeast used to brew these beers have gone from obscure and guarded to readily available from brewing yeast suppliers. Most of the cultures used to sour beer in barrels are mixed, whereas the bacteria used for kettle sours tend to be single strains, or a mixture of Lactobacillus species. Some brewers use yogurt as the source for bacteria, but this can be hit or miss. The most common methods use the brewhouse to produce sterile, very lightly hopped wort. Start with a normal boil or by holding wort at near-boiling temperatures for 20-
30 minutes, effectively pasteurizing the wort. Next use a wort cooler to temper the wort into the 95-122 °F (35-50 °C) range, hit it with carbon dioxide to strip oxygen from the wort and to try to maintain an anaerobic environment. Then add the bacterial culture to get the party started. Most kettle sours only require about 48 hours for the wort to sour, and the progress of souring is usually monitored by pH or titratable acidity (TA). When the process is complete, the sour wort is boiled, cooled, aerated, and pitched with yeast. The beauty of this method is that it keeps the bugs out of the cellar, and only adds a couple of days to the normal brewing process. Since this technique is easiest carried out in the brew kettle, it does have the disadvantage of tying up the kettle and greatly reducing brewhouse utilization. Many breweries have worked around this dilemma by adding sour wort tanks to their brewhouses. If you are new to kettle sours, do yourself a favor and simply buy a pitchable culture. Growing these bacteria is a bit different from growing yeast because the acid production can suppress cell growth. If you want to propagate your own cultures, consider using a carbonate buffer in the propagation media to keep the pH in check. Milk the Funk has some great practical advice on their website regarding techniques to best grow these bugs. While the kettle sour method produces very clean, and sometimes very sour beers, the beers are often criticized by lovers of Belgian sours for being one-dimensional. This is where fruits, herbs, spices, and other beers enter the equation. If you have a great sour base, use it like vinegar in your kitchen and blend with other ingredients. These ingredients can be added at any step of the process depending on what makes the most sense. And this is how many of the
QA
Making Kettle Sours
22
© Battenkill Communications, Inc. All Rights ReservedBest of Brew Your Own Magazine Brewing Wild/Sour
new generation sours are being produced and are key to their success. Although some folks really like things that are simply sour, most like sour foods and beverages that are balanced by sweet, salty, or hot ingredients. This is where blending can transform one-dimensional kettle sours into a wide array of new and interesting flavor combinations.
Sweetness can come in the form of a neutral beer, like a wheat beer, to smooth out acidity and add a little body and texture to beers that can come across as very dry and thin. Fruit juices add sweetness, fruitiness, and aromas. Fruit essences, such as citrus peel oil, can be used to add top notes. Herbs and spices can also be used to add aroma and complex flavors. And
the judicious use of salt and heat may be fun to bring into the mix for certain flavor combinations. These sorts of methods are being used to produce some of the new generation kettle sours that are popping up on the shelves with price tags that are more in-line with IPA. I hope this helps you ease your foot into the sour end of the pool!
23
I have been getting into sour beers lately with two of my latest being Irish reds kettle soured with GoodBelly mango-flavor probiotic juice drink. I stopped the first at a pH of 3.8 and the second at 3.4. Both are great, with the 3.4 the best. Will let the next batch go a bit lower. This started me thinking, obviously the souring bacteria eats sugar to make the lactic acid, so how much of the fermentable sugar is used up? The Irish reds were already expected to result in a low abv. I lost my starting gravity readings on both so I can’t get
any numbers but the taste tells me the finished products are lower than expected. Also, would the lactic acid have messed up the readings anyway? I’m thinking the next batch I may use 50–100% more fermentables. Does that sound reasonable?
Thanks for the interesting question, Duncan. The product you are using as your source of bacteria lists Lactobacillus
plantarum as the only bacterial ingre- dient in this beverage. Lactobacillus plantarum is a facultative hetero-fermentative lactic species. This means that under anaerobic con-ditions, Lactobacillus plantarum be-haves like a homofermentative lactic species and produces lactic acid as its sole metabolic by-product, which then switches to a heterofermenter under aerobic conditions and also produces ethanol, acetic acid, and carbon dioxide. Not all Lactobacillus plantarum strains behave the same, but they generally ferment a wide array of carbohydrates (https://www.ncbi.nlm.nih.gov/pmc/articles/PMC2546631/) and wort is a great growth media for these bacteria. Sounds like you are concerned that these little critters are going to consume too much fermentable sugars and cut into the production of ethanol by yeast? The hydrometer is a pretty handy brewing tool and you can certainly use it to monitor the change in wort density before and after your souring phase. The specific gravity of lactic acid solutions vary by concentration, but over the range seen in wort/beer the specific gravity is not much higher than water. This means that as carbohydrates are metabolized the specific gravity of the wort will drop, and that the wort density at the time of yeast pitching can be
used like the original gravity (OG) of non-sour brews. This is not an exact measurement, but it is a reasonable approximation. One thing to keep in mind about fermentations, in general, is that fermentation by-products often regulate fermentation. In the case of lactic acid fermentations, environmental pH affects metabo-lism. This is why yogurt contains lactose, even after prolonged storage in the presence of lactic acid bacteria. Kettle sours tend to bottom out around pH 3.2, empirically suggesting that the environment is regulating the rate of fermentation. The other practical consideration relevant to your question is the kettle sour process. Most brewers monitor pH during the souring phase and use pH as a control point; for example, if the goal is to reduce pH to 3.4, the brewing process advances to the next step when this goal is achieved. This means that even if lactic acid bacteria are able to consume all fermentable carbohydrates, the brewing process control would prevent that from occurring. The brewers I know who are commercially brewing kettle sours all carefully monitor pH because many of these brewers are looking for flavor consistency as well as efficient use of their equipment; as soon as the wort pH falls to the target level, they are moving on to wort boiling. I am not even going to touch attempting to calculate alcohol content of kettle sours because there
are simply too many variables to consider. The best calculation tools used to approximate alcohol content in beer based on OG and FG are based on lots of data from “normal beer.” In order to develop the same sort of model for sour beers requires a matrix of process measurements in addition to lab analysis of the ethanol content of the finished beer. Sounds like a great project for an eager brewing chemist! Something to consider about these beers is how they stand up on the palate and if there is a real need to boost OG to offset the loss of fermentables during the souring phase. Most kettle sours being produced commercially have average to below-average alcohol concentrations and generally are made from worts in the 10–12 °Plato (1.042–1.050 SG) range, and sometimes lower. Berliner weisse is a great example of a low-alcohol beer that does not leave my palate asking for the missing experience that is often the case with reduced-alcohol, non-sour styles. If you like what you find in the market and want to brew these sorts of beers at home, skip the additional fermentables. Alcohol consumption is dropping globally and brewers are being challenged to produce lower-alcohol alternates to traditional beers. Kettle sours, with their refreshing acidity and high drinkability, are really a style that fits in with this shift. Focus your process and recipe on how your beer stands up to tasting, and make changes from a flavor standpoint first and ABV targets second.
QA
Post-Souring Gravity

© Battenkill Communications, Inc. All Rights ReservedBest of Brew Your Own Magazine Brewing Wild/Sour
GOLD HAMMER GOSE5 gallons/19 L, all-grain)OG = 1.040 FG = 1.006 IBU = 8 SRM = 3 ABV = 4.3%
This is a straightforward recipe for a classic, refreshing, kettle soured Gose.
By Fal AllenINGREDIENTS5.25 lbs. (2.4 kg) pale barley malt 2.8 lbs. (1.3 kg) red wheat malt~2 oz. (57 g) rice hulls 1.9 AAU Chinook hops (45 min.) (0.15 oz./4 g at 12.8% alpha acids)0.02 oz. (0.4 g) Indian coriander (fine ground) (0 min.)0.62 oz. (17.6 g) sea saltLactobacillus culture, such as Wyeast 5335, White Labs WLP672, or WildBrew™ Sour PitchWhite Labs WLP029 (German Ale/ Kölsch) or Wyeast 1007 (German Ale) or SafAle K-97 yeast3⁄4 cup corn sugar (if priming)
STEP BY STEPMash in at 154 °F (68 °C) with the grains and rice hulls. Rest 60 minutes and lauter. As the kettle fills, begin to introduce an inert gas (usually nitrogen, but CO2 works well too) into the top of the kettle. Stop runoff at 1.008. Once the wort is in the kettle, mix in cooled water to achieve a temperature of 118 °F (48 °C) — or recommended pitch temperature from the manufacturer — and a gravity of about 1.034. Add Lactobacillus propagation. Pitching rate is ~500 mL at 1 x 10⁸ cells per mL (or approximately 5 x 10¹⁰ total). Hold at the recommended souring temperature. Allow to sour to desired pH (between 3.3–3.5). Once the pH is reached, boil the wort for 45 minutes, adding hops at beginning of the boil and the coriander at the end.
Pitch German ale yeast at 68–70 °F (20–21°C). At the end of fermentation add the fully hydrated salt solution at a rate of 0.124 oz. per gallon (0.92 g/L). Bottle and prime or keg and force carbonate as usual.
Extract only option: Rice hulls are not needed. Swap out the pale and wheat malts for 2.2 lbs. (1 kg) wheat dried malt extract and 2 lbs. (0.91 kg) extra light dried malt extract. Heat 23 qts. (22 L) to 180 °F (82 °C) and stir in the dried malt extract. Hold at this temper- ature for 15 minutes for pasteurization, then cool wort to Lacto pitching tem-perature. Follow all-grain instructions for the remainder of the steps.
ANDERSON VALLEY BREWING CO.’S BLOOD ORANGE GOSE CLONE(5 gallons/19 L, all-grain)OG = 1.038 FG = 1.005IBU = 12 SRM = 3 ABV = 4.4%
Anderson Valley has become well-known for their variety of fruited Goses. This example uses blood orange juice that imparts tangy citrus notes that complement the Champagne-like flavors.
By Fal Allen
STEP BY STEP5.5 lbs. (2.5 kg) 2-row pale malt2.4 lbs. (1.1 kg) malted white wheat ~2 oz. (57 g) rice hulls 0.43 lb. (195 g) blood orange juice concentrate3.3 AAU Nugget hops (60 min) (0.25 oz./7g at 13.1% alpha acids)0.016 oz. (0.45 g) Indian coriander (fine ground) (5 min.)0.61 oz. (17.2 g) sea saltLactobacillus culture, such as Wyeast 5335, White Labs WLP672, or WildBrew™ Sour PitchWhite Labs WLP029 (German Ale/ Kölsch) or Wyeast 1007 (German Ale) or SafAle K-97 yeast3⁄4 cup corn sugar (if priming)
STEP BY STEPMash in at 150 °F (66 °C) with the grains and rice hulls. Rest 60 minutes and lauter as normal. As the kettle fills, begin to introduce an inert gas (usually nitrogen, but CO2 works well too) into the top of the kettle. Stop runoff at 1.008. Once the wort
is in the kettle, mix in cooled water to achieve a temperature of 118 °F (48 °C) — or recommended pitch temperature from the manufacturer — and a gravity of about 1.034. Add Lactobacillus propagation. Pitching rate is ~500 mL at 1 x 10⁸ cells per mL (or approximately 5 x 10¹⁰ total). Allow to sour to desired pH (between 3.3–3.4). Hold at the recommended souring temperature. Once the pH is reached, boil the wort for 45 minutes, adding hops at beginning of the boil and the coriander at the end.
Pitch German ale yeast at 68–70 °F (20–21°C). Add the blood orange juice concentrate near the end of active fermentation. At the end of fermentation add the fully hydrated salt solution. Bottle and prime or keg and force carbonate as usual.
Extract only option: Rice hulls are not needed. Swap out the pale and wheat malts for 2.2 lbs. (1 kg) wheat dried malt extract and 2 lbs. (0.91 kg) extra light dried malt extract. Heat 23 qts. (22 L) to 180 °F (82 °C) and stir in the dried malt extract. Hold at this temperature for 15 minutes for pasteurization, then cool wort to Lacto pitching temperature. Follow all-grain instructions for the remainder of the steps.
ADDITIONAL WILD/SOUR RECIPES
24
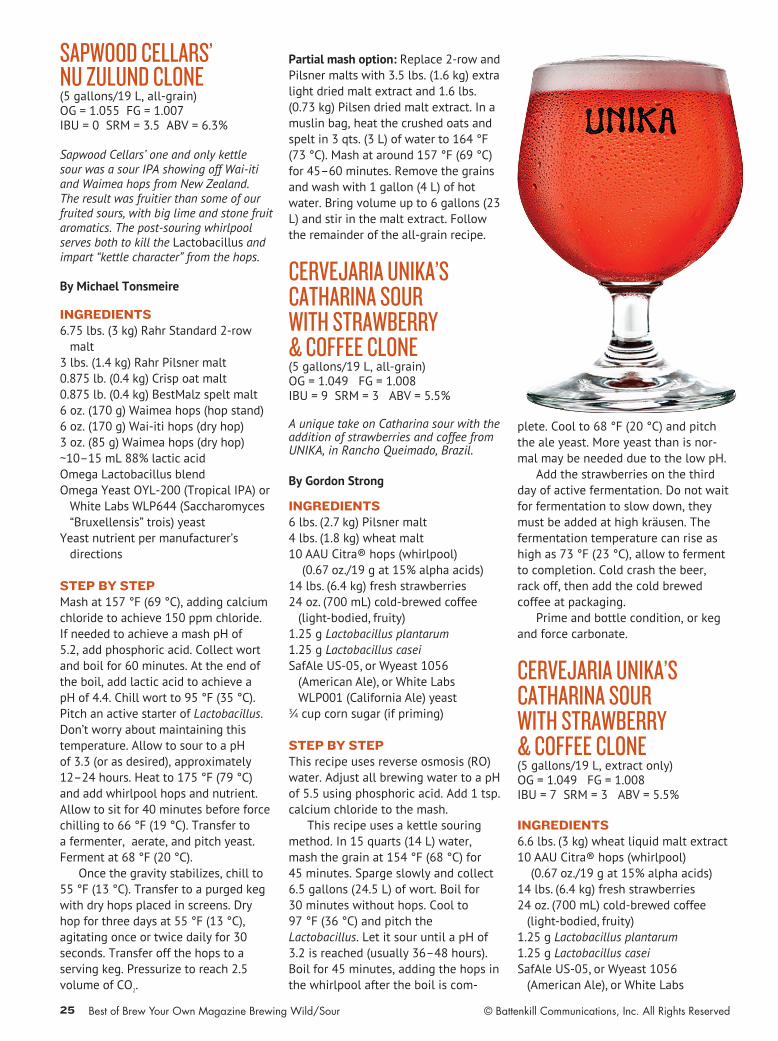
© Battenkill Communications, Inc. All Rights ReservedBest of Brew Your Own Magazine Brewing Wild/Sour
SAPWOOD CELLARS’ NU ZULUND CLONE(5 gallons/19 L, all-grain)OG = 1.055 FG = 1.007IBU = 0 SRM = 3.5 ABV = 6.3%
Sapwood Cellars’ one and only kettle sour was a sour IPA showing off Wai-iti and Waimea hops from New Zealand. The result was fruitier than some of our fruited sours, with big lime and stone fruit aromatics. The post-souring whirlpool serves both to kill the Lactobacillus and impart “kettle character” from the hops.
By Michael Tonsmeire
INGREDIENTS6.75 lbs. (3 kg) Rahr Standard 2-row malt3 lbs. (1.4 kg) Rahr Pilsner malt0.875 lb. (0.4 kg) Crisp oat malt0.875 lb. (0.4 kg) BestMalz spelt malt6 oz. (170 g) Waimea hops (hop stand) 6 oz. (170 g) Wai-iti hops (dry hop)3 oz. (85 g) Waimea hops (dry hop)~10–15 mL 88% lactic acid Omega Lactobacillus blendOmega Yeast OYL-200 (Tropical IPA) or White Labs WLP644 (Saccharomyces “Bruxellensis” trois) yeastYeast nutrient per manufacturer’s directions
STEP BY STEPMash at 157 °F (69 °C), adding calcium chloride to achieve 150 ppm chloride. If needed to achieve a mash pH of 5.2, add phosphoric acid. Collect wort and boil for 60 minutes. At the end of the boil, add lactic acid to achieve a pH of 4.4. Chill wort to 95 °F (35 °C). Pitch an active starter of Lactobacillus. Don’t worry about maintaining this temperature. Allow to sour to a pH of 3.3 (or as desired), approximately 12–24 hours. Heat to 175 °F (79 °C) and add whirlpool hops and nutrient. Allow to sit for 40 minutes before force chilling to 66 °F (19 °C). Transfer to a fermenter, aerate, and pitch yeast. Ferment at 68 °F (20 °C).
Once the gravity stabilizes, chill to 55 °F (13 °C). Transfer to a purged keg with dry hops placed in screens. Dry hop for three days at 55 °F (13 °C), agitating once or twice daily for 30 seconds. Transfer off the hops to a serving keg. Pressurize to reach 2.5 volume of CO2.
Partial mash option: Replace 2-row and Pilsner malts with 3.5 lbs. (1.6 kg) extra light dried malt extract and 1.6 lbs. (0.73 kg) Pilsen dried malt extract. In a muslin bag, heat the crushed oats and spelt in 3 qts. (3 L) of water to 164 °F (73 °C). Mash at around 157 °F (69 °C) for 45–60 minutes. Remove the grains and wash with 1 gallon (4 L) of hot water. Bring volume up to 6 gallons (23 L) and stir in the malt extract. Follow the remainder of the all-grain recipe.
CERVEJARIA UNIKA’S CATHARINA SOUR WITH STRAWBERRY & COFFEE CLONE(5 gallons/19 L, all-grain)OG = 1.049 FG = 1.008IBU = 9 SRM = 3 ABV = 5.5%
A unique take on Catharina sour with the addition of strawberries and coffee from UNIKA, in Rancho Queimado, Brazil.
By Gordon Strong
INGREDIENTS6 lbs. (2.7 kg) Pilsner malt4 lbs. (1.8 kg) wheat malt 10 AAU Citra® hops (whirlpool) (0.67 oz./19 g at 15% alpha acids)14 lbs. (6.4 kg) fresh strawberries24 oz. (700 mL) cold-brewed coffee
(light-bodied, fruity)1.25 g Lactobacillus plantarum1.25 g Lactobacillus caseiSafAle US-05, or Wyeast 1056
(American Ale), or White Labs WLP001 (California Ale) yeast
3⁄4 cup corn sugar (if priming)
STEP BY STEPThis recipe uses reverse osmosis (RO) water. Adjust all brewing water to a pH of 5.5 using phosphoric acid. Add 1 tsp. calcium chloride to the mash.
This recipe uses a kettle souring method. In 15 quarts (14 L) water, mash the grain at 154 °F (68 °C) for 45 minutes. Sparge slowly and collect 6.5 gallons (24.5 L) of wort. Boil for 30 minutes without hops. Cool to 97 °F (36 °C) and pitch the Lactobacillus. Let it sour until a pH of 3.2 is reached (usually 36–48 hours). Boil for 45 minutes, adding the hops in the whirlpool after the boil is com-
plete. Cool to 68 °F (20 °C) and pitch the ale yeast. More yeast than is nor-mal may be needed due to the low pH.
Add the strawberries on the third day of active fermentation. Do not wait for fermentation to slow down, they must be added at high kräusen. The fermentation temperature can rise as high as 73 °F (23 °C), allow to ferment to completion. Cold crash the beer, rack off, then add the cold brewed coffee at packaging.
Prime and bottle condition, or keg and force carbonate.
CERVEJARIA UNIKA’S CATHARINA SOUR WITH STRAWBERRY & COFFEE CLONE(5 gallons/19 L, extract only)OG = 1.049 FG = 1.008IBU = 7 SRM = 3 ABV = 5.5%
INGREDIENTS6.6 lbs. (3 kg) wheat liquid malt extract 10 AAU Citra® hops (whirlpool) (0.67 oz./19 g at 15% alpha acids)14 lbs. (6.4 kg) fresh strawberries24 oz. (700 mL) cold-brewed coffee
(light-bodied, fruity)1.25 g Lactobacillus plantarum1.25 g Lactobacillus caseiSafAle US-05, or Wyeast 1056
(American Ale), or White Labs
25

© Battenkill Communications, Inc. All Rights ReservedBest of Brew Your Own Magazine Brewing Wild/Sour
WLP001 (California Ale) yeast3⁄4 cup corn sugar (if priming)
STEP BY STEPUse 6.5 gallons (24.5 L) of water in the brew kettle. Heat to 158 °F (70 °C) and then turn off the heat. Add the malt extract and stir thoroughly to dissolve completely. You do not want to feel liquid extract at the bottom of the kettle when stirring with your spoon. Turn the heat back on and bring to a boil.
Boil for 30 minutes without hops. Cool to 97 °F (36 °C) and pitch the Lactobacillus. Let it sour until a pH of 3.2 is reached (usually 36–48 hours). Boil for 45 minutes, adding the hops in the whirlpool after the boil is complete. Cool to 68 °F (20 °C) and pitch the ale yeast. More yeast than is normal may be needed due to the low pH.
Follow the remainder of the instructions in the all-grain recipe.
TIPS FOR SUCCESS:The strawberries are prepared by washing, coring, and running them through a juicer, then using the juice and pulp. This is to create more surface area. Use very fresh, ripe strawberries in season. If strawberries are frozen, make sure they are frozen for no more than a week or two. Make sure to account for the extra volume needed in your fermenter for the strawberries.
The coffee is prepared by the cold brew method. Using a 7:1 ratio of water to coffee (7 oz. water per oz. of coffee beans by weight or 700 mL water per 100 g of coffee), combine coarsely ground coffee with cold filtered water, and let steep for 12 hours. Strain the coffee or use a French press. Use the indicated amount of the liquid coffee; measure the finished amount of liquid for the recipe. Use very fresh coffee, preferably from a local roaster who can grind it for you — be sure to tell them it’s for cold brew so they grind it coarsely.
Lactobacillus can be a pure pitch or obtained through probiotic drinks. The brewery uses Lactobacillus from an Italian pharmaceutical supplier, www.probiotical.com. It comes in 50 g sachets; they use 50 g of each in a 211-gallon (800-L) batch, so 2.5
g total should suffice for a 5-gallon (19-L) batch. Many brewers use just plantarum, so it isn’t vital to source both varieties. They switched from using probiotic drinks to make the product vegan-friendly, not because of problems with probiotics.
THE LOST ABBEY BREWING COMPANY’S TEN COMMANDMENTS CLONE(5 gallons/19 L, all-grain) OG = 1.089 FG = 1.006IBU = 34 SRM = 33 ABV = 11%
By Michael Bury
INGREDIENTS10 lbs. (4.54 kg) 2-row pale malt1.5 lbs. (0.68 kg) crystal wheat malt
(55 °L)0.75 lb. (0.34 kg) Special B malt0.75 lb. (0.34 kg) melanoidin malt0.75 lb. (0.34 kg) flaked barley0.4 lb. (0.18 kg) Carafa® II malt1.4 lbs. (0.64 kg) corn sugar1.4 lbs. (0.64 kg) honey6.75 AAU Amarillo® hops (90 min.)
(0.75 oz./21 g at 9% alpha acids)3.25 AAU Magnum hops (45 min.) (0.25
oz./7 g at 13% alpha acids)5 oz. (142 g) blackened raisins (see
Tips for Success)0.5 oz. (14 g) sweet orange peel0.026 oz (0.75 g) fresh rosemaryWLP565 (Belgian Saison) or Wyeast
3724 (Belgian Saison) yeastWLP650 (Brettanomyces bruxellensis)
or Wyeast 5112 (Brettanomyces bruxellensis) yeast
1 cup corn sugar (if priming)
STEP BY STEP Mill the grains, then mix with 4.4 gallons (16.7 L) of 166 °F (74 °C) strike water to achieve a single infusion rest temperature of 152 °F (67 °C). Hold at this temperature for 60 minutes. Mashout to 170 °F (77 °C).
Vorlauf until your runnings are clear before directing them to your boil kettle. Batch or fly sparge the mash to obtain 7 gallons (26.5 L) of wort. Boil for 90 minutes, adding hops at the times indicated above left in the boil. At 15 minutes left in the boil, you can add Irish moss or Whirlfloc as kettle fining
agents.After the boil, add the corn sugar,
honey, raisins, orange peel, and rosemary. Whirlpool for 15–20 minutes before chilling the wort to slightly below fermentation temperature. Pitch saison yeast. Start fermentation around 75 °F (24 °C) and ramp up as it goes. Ferment to completion, which may require a bit of patience and time. Bottle or keg the beer and carbonate to approximately three volumes using Brett Brux yeast.
THE LOST ABBEY BREWING COMPANY’S TEN COMMANDMENTS CLONE (5 gallons/19 L, extract with grains)OG = 1.089 FG = 1.006IBU = 34 SRM = 29 ABV = 11 %
26

© Battenkill Communications, Inc. All Rights ReservedBest of Brew Your Own Magazine Brewing Wild/Sour
INGREDIENTS5.5 lbs. (4.54 kg) extra light dried malt
extract1.5 lbs. (0.68 kg) crystal wheat malt
(55 °L)0.75 lb. (0.34 kg) Special B malt0.75 lb. (0.34 kg) melanoidin malt0.75 lb. (0.34 kg) flaked barley0.4 lb. (0.18 kg) Carafa® II malt1.4 lbs. (0.64 kg) corn sugar1.4 lbs. (0.64 kg) honey6.75 AAU Amarillo® hops (60 min.) (0.8
oz./23 g at 9% alpha acids)3.25 AAU Magnum hops (45 min.) (0.25
oz./7 g at 13% alpha acids)5 oz. (142 g) blackened raisins0.5 oz. (14 g) sweet orange peel0.026 oz. (0.75 g) fresh rosemaryWLP565 (Belgian Saison) or Wyeast
3724 (Belgian Saison) yeastWLP650 (Brettanomyces bruxellensis)
or Wyeast 5112 (Brettanomyces bruxellensis) yeast
1 cup corn sugar (if priming)
STEP BY STEP Bring 2.5 gallons (9.5 L) of water to roughly 152 °F (67 °C). Steep all the milled malt in a nylon bag for 30 minutes then remove. Allow the bag to drain back into the kettle. Add enough water to bring the total volume to 6.5 gallons (24.6 L). Add the dried malt extract, stir, and finally heat to a boil. Follow the all-grain recipe for remaining boil, fermentation, and packaging instructions.
TIPS FOR SUCCESS: Ten Commandments will surely test your faith in microbiota. The brew day should be relatively straight forward except for the blackened raisins and rosemary. A subtle hand is needed for the rosemary addition as too much of the herb will unbalance the beer; The Lost Abbey uses 4 oz. (113 g) in 25 BBLs (775 gallons/29 hectoliters) of wort. As for the raisins, you’re looking for a pleasantly caramelized character that you get via brûléeing the raisins. Lost Abbey uses a large torch to accomplish this task but feel free to use safer alternatives such as a broiler.
The other major difficulty with this beer is the fermentation. The DuPont strain is notorious for stalling around 1.030. However, with a bit of patience and heat, it’ll start back up and finish
fermenting. Note that the strain can tolerate fermentation temperatures up to 90 °F (32 °C). Finally, the beer is carbonated and conditioned using Brett Brux yeast. If you decide to keg the beer, you may want to consider using a funky, dedicated Brett or sour keg. Tomme recommends patience...all the flavors in the beer take months to meld together.
FLANDERS RED(5 gallons/19 L, all-grain) OG = 1.050 FG = 1.010IBU = 16 SRM = 17 ABV = 5.3%
By Gordon StrongINGREDIENTS7 lbs. (3.2 kg) Vienna malt2 lbs. (0.91 kg) flaked maize12 oz. (340 g) dark Munich malt (9 °L)12 oz. (340 g) Caramunich® III malt6 oz. (170 g) Special B malt2 oz. (57 g) chocolate wheat malt3.4 AAU Styrian Goldings hops
(first wort hop) (0.75 oz./21 g at 4.5% alpha acids)
0.5 oz. (14 g) Saaz hops (5 min.) Wyeast 3763 (Roeselare Ale Blend),
or White Labs WLP665 (Flemish Ale Blend), or White Labs WLP655 (Belgian Sour Mix 1), or Yeast Bay WLP4633 (Melange Blend Yeast)
French oak spiral, medium-plus toast3⁄4 cup corn sugar (if priming)
STEP BY STEPThis recipe uses reverse osmosis (RO) water. Adjust all brewing water to a pH of 5.5 using phosphoric acid. Add 0.5 tsp. of calcium chloride and 0.5 tsp. of calcium sulfate to the mash.
This recipe uses a single infusion mash. Use enough water to have a moderately thick mash (1.5 qts./lb. or 3.1 L/kg). Mash the Vienna, Munich, and maize at 153 °F (67 °C) for 60 minutes. Add the remaining specialty malts, raise the temperature to 168 °F (76 °C) and recirculate for 15 minutes.
Sparge slowly and collect 6.5 gallons (24.5 L) of wort. First wort hops go into the kettle early in the sparging phase. Boil the wort for 75 minutes, adding hops at the times indicated in the recipe.
Chill the wort to 66 °F (19 °C), pitch the yeast, and ferment for 12–18
months. Put the oak spiral into the fermenter at the start of fermentation; before using, lightly boil the spiral for 15 minutes, discarding the water and using the spiral.
Rack the beer, prime and bottle condition, or keg and force carbonate.
FLANDERS RED(5 gallons/19 L, partial mash) OG = 1.050 FG = 1.010IBU = 16 SRM = 17 ABV = 5.3%
INGREDIENTS3 lbs. (1.4 kg) pale ale dried malt
extract1 lb. (0.45 kg) Vienna malt2 lbs. (0.91 kg) flaked maize12 oz. (340 g) dark Munich malt (9 °L)12 oz. (340 g) Caramunich® III malt6 oz. (170 g) Special B malt2 oz. (57 g) chocolate wheat malt3.4 AAU Styrian Goldings hops
(first wort hop) (0.75 oz./21 g at 4.5% alpha acid)
0.5 oz. (14 g) Saaz hops (5 min.)Wyeast 3763 (Roeselare Ale Blend),
or White Labs WLP665 (Flemish Ale Blend), or White Labs WLP655 (Belgian Sour Mix 1), or Yeast Bay WLP4633 (Melange Blend Yeast)
French oak spiral, medium-plus toast3⁄4 cup corn sugar (if priming)
STEP BY STEPThis recipe uses reverse osmosis (RO) water. Adjust all brewing water to a pH
27
Phot
o by
Shu
tter
stoc
k.co
m

© Battenkill Communications, Inc. All Rights ReservedBest of Brew Your Own Magazine Brewing Wild/Sour
of 5.5 using phosphoric acid. Add 0.5 tsp. of calcium chloride and 0.5 tsp. of gypsum to the mash.
This recipe uses a single infusion mash. Heat 7.5 qts. (7.1 L) of water to about 165 °F (74 °C). Place the crushed Vienna and Munich malts and maize in a large muslin bag and submerge the bag. Stir to make sure no dough balls exist. Rest at 153 °F (67 °C) for 60 minutes. Add the remaining specialty malts in separate bag, raise the temperature to 168 °F (76 °C) if you can without scorching the bags. Remove both bags and place in a large colander. Wash the grains with 2 gallons (7.6 L) of hot water. Add the malt extract and stir thoroughly to dissolve completely. Top off kettle to 6.5 gallons (24.6 L), add the first wort hop, then turn the heat on and bring to a boil.
Boil the wort for 60 minutes, adding hops at the times indicated. Follow the all-grain instruction for fermentation temperature, aging timeframe, and packaging.
TRADITIONAL LAMBIC(5 gallons/19 L, all-grain)OG = 1.045 FG = 1.008IBU = 10 SRM = 3 ABV = 4.8%
By Paul ZoccoINGREDIENTS6 lbs. (2.7 kg) pale malt2 lbs. (0.9 kg) malted wheat.2 lbs. (0.9 kg) unmalted wheat1 oz. (28 g) aged Styrian Goldings hops (60 min.) Wyeast 3278 (Belgian Lambic Blend) or White Labs WLP 655 (Belgian Sour Mix 1) yeastWyeast 3335 (Lactobacillus buchneri) or White Labs WLP673 (Lactobacillus buchneri)Wyeast 5733 (Pediococcus damnosus) or White Labs WLP (Pediococcus damnosus)Wyeast 5112 (Brettanomyces bruxellensis) or White Labs WLP650 (Brettanomyces bruxellensis)Wyeast 5151 (Brettanomyces claussenii) or White Labs WLP645 (Brettanomyces claussenii)3⁄4 cup corn sugar (if priming)
STEP BY STEP
Combine 2.5 gallons (9.5 L) of 168 °F (75°C) water with the crushed wheat and barley. Mix well and adjust the temperature of the mash to 153 °F (68 °C). Let the mash rest at 153 °F (68 °C) for one hour and then recirculate until the wort runs clear. Sparge with 168 °F (75 °C) water until you get 6.25 gallons (24 L) into the boil kettle, which will be boiled down to 5.25 gallons (20 L).
Add hops when the wort comes to a boil and boil for 60 minutes. After the boil is complete, proceed to chill the wort to below 80 °F (15 °C), and transfer the contents into your fermenter. I ferment my lambics in a 5-gallon (19-L) oak barrel, but if you do not have a barrel then feel free to use your traditional fermenter. Pitch your yeast and bacterial blend (which contain strains of Saccharomyces and Brettanomyces yeasts and the bacterial strains of Lactobacillus, and Pediococcus) and aerate wort.
Aging times can vary but allow it to remain in the fermenter at least a year. After my initial pitch of a yeast/bacteria blend on brew day, I pitch the Lactobacillus and Pediococcus bacteria into the fermenter at three months from the initial brewing date. I then allow the fermentation to continue. At eight months, I pitch separate starters of Brettanomyces bruxellensis, and Brettanomyces claussenii. I don’t perform a secondary transfer, but continue my fermentation in the original vessel.
After a year I like to pull monthly samples to taste how the beer is evolving. Bottle or keg when the taste is what you were shooting for. Bottles can be kept for years and flavors will continue to evolve as they are cellared.
TRADITIONAL LAMBIC(5 gallons/19 L, partial mash)OG = 1.045 FG = 1.008IBU = 10 SRM = 4 ABV = 4.8%
INGREDIENTS4 lbs. (1.8 kg) golden light liquid malt extract2 lbs. (0.9 kg) malted wheat.2 lbs. (0.9 kg) unmalted wheat1 oz. (28 g) aged Styrian Goldings hops (60 min.) Wyeast 3278 (Belgian Lambic Blend)
or White Labs WLP 655 (Belgian Sour Mix 1) yeastWyeast 3335 (Lactobacillus buchneri) or White Labs WLP673 (Lactobacillus buchneri)Wyeast 5733 (Pediococcus damnosus) or White Labs WLP (Pediococcus damnosus)Wyeast 5112 (Brettanomyces bruxellensis) or White Labs WLP650 (Brettanomyces bruxellensis)Wyeast 5151 (Brettanomyces claussenii) or White Labs WLP645 (Brettanomyces claussenii)3⁄4 cup corn sugar (if priming)
STEP BY STEPPlace crushed wheat in a large grain bag. Heat 1.5 gallons (5.7 L) of water to 168 °F (75 °C) and submerge the grain in the water. Try to mix the grain so no dry pockets exist. Let the mash mixture rest at 153 °F (68 °C) for one hour. When the mash is complete, place the grain bag in a large colander and wash with 1.5 gallons (5.7 L) of hot water. Stir in the liquid malt extract and top off the kettle with water to get 6.25 gallons (24 L) of wort into the boil kettle. Follow the remainder of the all-grain recipe.
28
Copyright © 2022 FDOKUMEN