Basic Manual - au
121
Contents Usage Preparation Basic Operations Text Entry Phone Contacts Communication E-mail Multimedia Internet Application Installation Useful Features Roaming Terminal Management / Security Wi-Fi ® /Data Communication Appendix Basic Manual
-
Upload
khangminh22 -
Category
Documents
-
view
2 -
download
0
Transcript of Basic Manual - au

Contents
Usage Preparation
Basic Operations
Text Entry
Phone
Contacts
Communication
Multimedia
Internet
Application Installation
Useful Features
Roaming
Terminal Management / Security
Wi-Fi®/Data Communication
Appendix
Basic ManualFor questions and support Customer Service Center
Regarding General information and charges (Free call)
From regular phones
0077-7-111
From au cell phones
No dialing code required, 157Free Call
Free Call
Free Call
Free Call
Regarding loss, stolen, damage and operations(Free call)
From regular phones From au cell phones
0077-7-113 No dialing code required, 113
If you are unable to access the telephone number above, please dial the number below(Free call)
0120-977-033 (Areas except Okinawa)
0120-977-699 (Okinawa)
February 2012, First edition.Sales: KDDI CORPORATION, Okinawa Cellular Telephone CompanyImporter: Motorola Mobility Japan Inc.Manufacturer: Motorola Mobility, Inc.
The mobile and PHS phone companies will recycle phones, batteries and chargers given by customers regardless of brands at shops carrying label, as an ongoing part of effort to save resources and protect the environment.Mobile, Recycle, Network
Please help out in recycling mobile and PHS phones.

ii
Message
Thank you for purchasing the MOTOROLA RAZR™ IS12 M (referred to as "the product" in this manual).Please read the "Basic Manual (this manual)" before using the product so that you can use it correctly.
memo ◎ For the latest versions of manuals, see the au homepage or inquire at the Customer Center of your nearest au shop.
Downloading the Instruction Manuals
■ Instruction ManualsBasic Manual (this PDF manual) describes basic operations of major functions of the product.The instruction manuals available for the product are the "Setting Guide (Japanese)", "Quick Start Guide (Japanese)", "Safety Guide (Japanese)", "the IS12M full Instruction Manual (Japanese)" and "Basic Manual (this book)". For detailed descriptions on various functions, you can download them from the au website.http://www.au.kddi.com/torisetsu/index.htmlThe "Setting Guide (Japanese)", "Quick Start Guide (Japanese)", and "Safety Guide (Japanese)" are included with the product.
■ Instruction Manual ApplicationThe product comes with a built-in "Instruction Manual Application (Japanese)" where you can view operating instructions.You can download a verson of the operations manual. You can also get explanations of main features with videos and pictures.
How to Launch: On the Home Screen: Apps → Help Center
Safety Precautions
Before you start using the product, be sure to read the "Safety Precautions (▶P. 6)" to ensure correct use.Before you assume that the product is malfunctioning, check for possible remedies in the following au Customer Support area of the au homepage:http://cs.kddi.com/support/komatta/kosho/index.html

1
When using this product
◎ Communication is not possible even inside the service area in places where the signal does not reach (e.g. tunnels and basements). Communication is also not possible in areas of poor reception. Communication may be interrupted if you move into a poor reception areas during a communication. ◎ A feature of communication made on the product is that consistent, high communications quality continues to be maintained even when there is weak reception. When reception is less than the minimum required for a communication, the connection may be cut off. Please remember this. ◎ Since this product uses radio waves, the possibility of communication intercepts by third parties cannot be eliminated. (Though CDMA/GSM/UMTS system has highly secured confidential communication features.) ◎ Since this product is a radio station under the Radio Law, you may be asked to temporarily submit the product for inspection in accordance with the Radio Law. ◎When the micro au IC-Card is inserted in your cell phone, the product number of the cell phone is automatically sent to KDDI CORPORATION for maintenance and monitoring operational status of your cell phone. ◎ Take care not to inconvenience people around you when you use the product in a public place. ◎When the product is used by a child, parents or guardians should thoroughly read the "Instruction Manual" and teach the child how to use it. ◎ This product is compatible with the international roaming service. Each network service described in this manual varies depending on the area and service content. For more details, please see "Roaming" (▶P. 91).
Please Be Considerate
This cell phone will emit weak radio waves when turned on.Please enjoy using the product while considering your surroundings.
■ Usage Forbidden in the Following Locations! • Do not use your cell phone when riding a bicycle, motorbike, or while driving a car. Failure to do so might cause a traffic accident. Use of cell phones while driving a car or motorbike is prohibited by law. Use of a cell phone while riding a bicycle may be punishable by some regulations.
• Do not use this product while you are aboard an airplane. Use of electric devices transmitting radio waves in airplane is prohibited by law. Some airline companies, however, allow their passengers to use cell phones. For details, contact the airline company you use.
■ Be Considerate! • Refrain from using your cell phone in places such as movie theaters, theaters, museums and libraries. Alerts could inconvenience those around you, so please turn your cell phone off or switch it to manner mode.
• Do not use the cell phone on a street where you might interrupt the flow of pedestrians.
• Move to areas where you will not inconvenience others on trains or in hotel lobbies.
• Refrain from talking in a loud voice. • Obtain the permission of other people before you take photos with the cell phone’s camera.
■ Think of Others! • In crowded places such as full trains, there may be people near you who have a pacemaker fitted. For this reason, please turn your phone off.
• Abide by the rules of hospitals and other medical institutions where it is forbidden to use or carry cell phones.

2
Using Features, Services and Applications
• A connection to the Internet may be required to use some functions, services, and applications. Depending on your contract, Internet usage may result in additional charges. For more details, please refer to your service provider.
• You may incur additional charges through the use of some functions, services, and applications. For more details, please refer to your service provider.
Exemptions from Liability
◎ The Company is not liable for any damages arising from earthquakes, lightning, storms, floods or other natural disasters, as well as fires, actions by third parties, other accidents, intentional or mistaken operation by the customer, or use under other unusual conditions outside the responsibility of the Company. ◎ The Company is not liable for any incidental damages (change/disappearance of described content, loss of business income, disruption of business, etc.) arising from use of or inability to use the product. ◎ The Company is not liable for any damages arising from failure to observe the described content of the "Instruction Manual". ◎ The Company is not liable for any damages arising, for example, from malfunction caused by combination with connected devices or software not related to the Company. ◎ Data, etc. registered on the main unit or microSD memory card is sometimes altered or lost due to accident or faults, repair or other handling of the product. The Company is not liable for any damages arising from recovery of this data or lost income. ◎ It is recommended that you backup important data to a PC hard drive. The Company is not liable for any damages resulting from loss or change to registered data regardless of the cause of the fault.
※"The Company" as appears on the product refers to the following companies:Sales: KDDI CORPORATION, Okinawa Cellular Telephone CompanyImporter: Motorola Mobility Japan Inc.Manufacturer: Motorola Mobility, Inc.
Accessories
■ Main Unit
MOTOROLA RAZR™ IS12M※
■ Accessories
MOTOROLA AC Adaptor※
(including micro USB cable)Headphone set (sample)
•MOTOROLA AC Adaptor Operations Manual (Japanese)•Setting Guide (Japanese)•Quick Start (Japanese)•Safety Guide (Japanese)
※� This product has a warranty. Be aware that the warranty is including in the operations guide.
This product comes with the following:
• microSD Memory Card• HDMI Cable

3
Contents
Message ............................................................... iiDownloading the Instruction Manuals .............. iiSafety Precautions .............................................. iiWhen using this product ..................................... 1Please Be Considerate ....................................... 1Using Features, Services and Applications ...... 2Exemptions from Liability ................................... 2Accessories ......................................................... 2
Contents ........................................................3Notations Used in This Document ..................... 5Safety Precautions (Observe Strictly) ................ 6Security Code and PIN Code ............................ 18Features to Protect Your Privacy ..................... 18PIN Code ............................................................ 18Notes on Using Bluetooth®/ Wireless LAN (Wi-Fi®) Functions ...................... 19Notes on packet communication charge ........ 21Notes on Android Market/au one Market/applications........................................................ 22
Usage Preparation ......................................23Parts and Features ............................................ 23micro au IC-Card ............................................... 24Inserting/Removing a microSD Memory Card ..................................................... 25Charging ............................................................. 27Turning On .......................................................... 28Initial Setup ........................................................ 28Switching the Display Language to English ... 28Set Up a Google Account ................................. 28Set up your au one-ID ....................................... 30Settings for Lost Device ................................... 32Basic Operations ............................................... 32
Basic Operations ........................................33Touch and Navigation ....................................... 33Screen Rotation ................................................. 35Home Screen ..................................................... 35Search ................................................................ 38Notification Panel .............................................. 38Starting an Application ..................................... 39
Text Entry ....................................................42Entry Options ..................................................... 42Entry Tips ........................................................... 43Sounds................................................................ 43Date and Time.................................................... 43
Phone ...........................................................44Making Calls ...................................................... 44Receiving Calls .................................................. 46Calling Overseas on an au Phone (au International Phone Service) ...................... 46Making a Call from the Call History ................. 47Making a Call from Frequent Contacts ........... 47Checking Your Phone Number ......................... 47
Contacts ......................................................48Creating a Contact ............................................ 48Viewing Contacts .............................................. 49Editing/Deleting Contacts ................................ 49
Communication ..........................................50Messages ........................................................... 50SMS (C-mail) ...................................................... 51Using au Disaster Countermeasure Application ......................................................... 53Gmail................................................................... 55
E-mail ...........................................................57Sending E-mail .................................................. 57Receiving E-Mails .............................................. 61Setting E-mail .................................................... 62Setting Mail Filters ............................................ 67
Multimedia...................................................70Using the Camera .............................................. 70Photos ................................................................ 71Videos ................................................................. 73
Internet ........................................................75Connecting to the Internet ............................... 75Browser .............................................................. 76
Application Installation ..............................77Usage.................................................................. 77Android Market .................................................. 77au one Market .................................................... 79
Wi-Fi®/Data Communication .....................80Wireless LAN Functionality (Wi-Fi®) ................. 80Bluetooth® Functionality ................................... 81Airplane Mode.................................................... 82
Useful Features ...........................................83Alarm .................................................................. 83Calculator ........................................................... 83Calendar ............................................................. 83Tasks ................................................................... 84
Terminal Management/Security ................85Viewing the Settings Menu ............................... 85Software Update ................................................ 86Screen Lock ....................................................... 86Setting a PIN ...................................................... 88Data Initialization (Reset) .................................. 88Using Anshin Security Pack ............................. 88
Roaming ......................................................91Roaming Services ............................................. 92Configuring Roaming ........................................ 92Making a Call Overseas .................................... 94Receiving a Call Overseas ................................ 95
Contents

4
Contents
Appendix .....................................................96Peripherals ......................................................... 96Troubleshooting ................................................. 96After Sales Service .......................................... 102Main Specifications ......................................... 104Want to Find Out More? .................................. 106Windows Logos ............................................... 106Cellphone Specific Absorption Rate (SAR) ... 106Export Administration Regulations ................ 107Copyrights, Trademarks ................................. 107Radio Frequency (RF) Energy ......................... 109Specific Absorption Rate (ICNIRP) ................ 109Information from the World Health Organization .................................................... 110European Union Directives Conformance Statement ......................................................... 110FCC Notice to Users ....................................... 111Location Services (GPS & AGPS) ................... 111Navigation ........................................................ 112Privacy & Data Security .................................. 112Software Copyright Notice ............................. 112Content Copyright ........................................... 113Open Source Software Information ............... 113Copyright & Trademarks ................................. 113Gracenote® End-user License Agreement .... 114
Index ..........................................................115

5
Notations Used in This Document
■ Key DisplayIn this manual, keys are simplified and illustrated as shown below.
Volume Key(Increase)
Power Key
Volume Key(Decrease)
Search Key
Back Key
Menu Key
Home Key
■ Operations for Selecting Items, Icons, or KeysIn this manual, these types of operations are written out as shown below.The word "tap" means to lightly touch the item or icon on the display with your finger (▶P. 33).
Example Meaning
On the Home Screen:
Apps → CamcorderTap Apps at the lower-right on the Home Screen, then tap Camcorder in the menu that is displayed.
On the Home Screen:
→ Settings → Wireless & networks
Tap on the Home Screen, then tap Settings in the menu that is displayed. Next, tap Wireless & Networks.
※The instruction manuals explain the operation of the product from the home screen. Because of this, depending on the settings, it may not be possible to operate the phone exactly according to the instruction manuals.
■ Illustrations and Screen DiagramsThe illustrations and screen depictions in this manual may vary from the actual product. Also, the screens shown in the illustrations may be missing some portions that you would see on the actual product.
The notations in this manual are abbreviated (such as icons on the top screen).
Actual Screen Manual Example
memo ◎ This document refers to both "microSDHC™ memory cards" and "microSD™ memory cards" as "microSD memory cards" or just "microSD". ◎ This document reflects the most current information at the time when it was created. ◎Reproduction of the content of this manual in part or in whole is prohibited. ◎ The contents of this document may be changed without prior notice. ◎We make every effort to make these documents complete. However if you have any doubts about anything or if there is anything missing, please contact us.

6
Safety Precautions (Observe Strictly)
■ Please read before use and for your safety adhere to them at all times. After reading, store the precautions in a safe place.These "Safety Precautions" describe instructions that should be observed to prevent damage to property or injury to the customer or others using the product.These instructions are divided into the following categories.
■ Term Descriptions
DANGERThis designates that there is a risk of death or serious injury (*1).
WARNING This designates that there is a risk of death or serious injury (*1).
CAUTION This designates that there is a risk of physical harm (*2) or property damage (*3).
※1 Refers to any item that may result in loss of sight, injury, burns (high- and low-temperature), electrical shock, fracture, or poisoning that require hospital admission for treatment.
※2 Injury: This refers to injuries, burns (high- and low-temperature), electric shock, etc. that do not require hospital admission for treatment or long-term hospital attendance as an outpatient.
※3 Refers to damages to physical property such as your house, assets, or pets.
■ Icon Descriptions
Prohibited
This designates an action that must NOT be performed.
Wet handsprohibited
This designates an action that should not be performed with wet hands.
Disassemblyprohibited
This designates that you should not take the component apart.
Wetting with water prohibited
This designates that you should not use the product in a wet environment and avoid water contact.
Instruction
This designates an action that must be performed.
Disconnect plugfrom power outlet
This designates when you should remove the power cable from the wall socket.
■ Precautions Common to the Main Unit, Charging Devices, micro au IC-Card, and Peripheral Devices
DANGER Be sure to read the following hazards before use.
Instruction
Be sure to use only the exclusive peripheral devices.Use of other peripheral devices might cause overheating, ignition, explosion, fault, or leakage of liquid.Peripheral Devices for this Product•AC Adapter (SPN5701A)•microUSB Cable (MOI11HUA)•au Carrying Case F Black (0105FCA) (Sold Separately)
Prohibited
Do not use, store, or leave in any high-temperature environment (by a fire, beside a heating unit, in direct sunlight, in a vehicle, etc.). Doing so may cause ignition, explosion, fault, fire or injury.

7
Instruction
Before entering an area where flammable gas is generated such as a gas station, be sure to turn off the product and stop charging the battery. There is a possibility that it could ignite gas.
Prohibited
Do not put the product in a cooking apparatus such as microwave oven or a pressure vessel. Doing so may cause ignition, explosion, fault, fire or injury.
Prohibited
Do not throw the product into a fire or heat it. Doing so may cause ignition, explosion or fire.
Prohibited
Be sure not to short out the microUSB terminal, HDMI micro terminal, or stereo earbud terminal. Also be careful not to touch any conductive material (metal plating, pencil lead, etc.) to the microUSB terminal, HDMI micro terminal, or stereo earbud terminal or allow them to enter these components. Doing so may cause fire or fault.
Prohibited
If you are using the product while wearing any metallic jewelry or accessories, be sure not to touch the microUSB terminal, HDMI micro terminal, or stereo earbud terminal when charging the phone. Doing so may cause electric shock, ignition, injury or fault.
Prohibited
When plugging the AC adapter into an outlet, do not allow a metal strap or accessory come in contact with the power plug. Doing so may cause fire, electric shock, injury or fault.
Prohibited
Do not expose the camera lens to direct sunlight for an extended period. Due to the light focusing action of the lens, doing so may cause ignition, explosion or fire.
Disassemblyprohibited
The customer is not allowed to disassemble, modify or repair the product. Doing so may cause fault, ignition, electric shock or injury. The Company is not liable even in the event of any nonconformities arising on the product or peripheral devices as a result of modification, etc. Modification of the product is in violation of the Wireless Telegraphy Act.
WARNING Be sure to read the following warnings before use.
Prohibited
Do not drop or subject to strong impact, such as throwing. Doing so may cause explosion, overheating, ignition or fault.
Prohibited
Do not use outside when you can hear thunder. There is a possibility of stroke of lightning and electric shocks.
Prohibited
Be sure not to touch the microUSB terminal, HDMI micro terminal, or stereo earbud terminal with your hand, fingers, or any other part of your body. Doing so may cause electric shock, injury or fault.
Prohibited
If the product is damaged because it is dropped or something, and its display is cracked or internal parts are exposed, do not touch the cracked display or exposed parts with your hands. Doing so may cause electric shock or injury from damaged parts. Contact an au shop or Customer Service Center.
Wetting with water prohibited
Do not splash with water or other liquids. Also, never use in places subject to direct splashing with water or pet urine, etc. or in humid places such as bath areas, or use with wet hands. Doing so may cause electric shock or fault from short-circuiting or corrosion of electronic circuits.In the event that the product is splashed with liquid, immediately disconnect the AC adapters power plug. Faults caused by contact with water or humidity are not covered by the warranty and charges will be incurred for repair.
Prohibited
Do not operate the product while driving an automobile or motorized bicycle, riding a bicycle or walking. Doing so may compromise traffic safety and cause an accident.
Prohibited
If charging is not completed after the specified charging time, stop charging. Doing so may cause leakage of liquid, overheating, explosion or ignition.
8
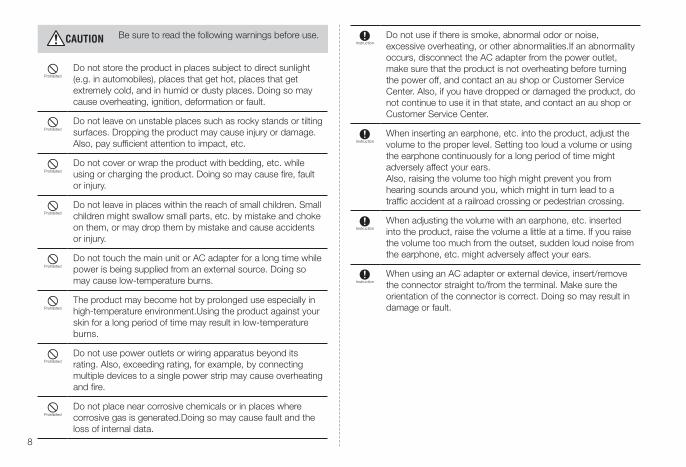
CAUTION Be sure to read the following warnings before use.
Prohibited
Do not store the product in places subject to direct sunlight (e.g. in automobiles), places that get hot, places that get extremely cold, and in humid or dusty places. Doing so may cause overheating, ignition, deformation or fault.
Prohibited
Do not leave on unstable places such as rocky stands or tilting surfaces. Dropping the product may cause injury or damage. Also, pay sufficient attention to impact, etc.
Prohibited
Do not cover or wrap the product with bedding, etc. while using or charging the product. Doing so may cause fire, fault or injury.
Prohibited
Do not leave in places within the reach of small children. Small children might swallow small parts, etc. by mistake and choke on them, or may drop them by mistake and cause accidents or injury.
Prohibited
Do not touch the main unit or AC adapter for a long time while power is being supplied from an external source. Doing so may cause low-temperature burns.
Prohibited
The product may become hot by prolonged use especially in high-temperature environment.Using the product against your skin for a long period of time may result in low-temperature burns.
Prohibited
Do not use power outlets or wiring apparatus beyond its rating. Also, exceeding rating, for example, by connecting multiple devices to a single power strip may cause overheating and fire.
Prohibited
Do not place near corrosive chemicals or in places where corrosive gas is generated.Doing so may cause fault and the loss of internal data.
Instruction
Do not use if there is smoke, abnormal odor or noise, excessive overheating, or other abnormalities.If an abnormality occurs, disconnect the AC adapter from the power outlet, make sure that the product is not overheating before turning the power off, and contact an au shop or Customer Service Center. Also, if you have dropped or damaged the product, do not continue to use it in that state, and contact an au shop or Customer Service Center.
Instruction
When inserting an earphone, etc. into the product, adjust the volume to the proper level. Setting too loud a volume or using the earphone continuously for a long period of time might adversely affect your ears.Also, raising the volume too high might prevent you from hearing sounds around you, which might in turn lead to a traffic accident at a railroad crossing or pedestrian crossing.
Instruction
When adjusting the volume with an earphone, etc. inserted into the product, raise the volume a little at a time. If you raise the volume too much from the outset, sudden loud noise from the earphone, etc. might adversely affect your ears.
Instruction
When using an AC adapter or external device, insert/remove the connector straight to/from the terminal. Make sure the orientation of the connector is correct. Doing so may result in damage or fault.

9
■ Main Unit
DANGER Be sure to read the following hazards before use.
Instruction
The battery pack is a consumable item.If the battery life is extremely short even after it is fully charged and does not improve, you will need to replace the battery. Failure to do so may cause overheating, ignition, explosion or leakage of liquid. The battery is built into the product. If you require a replacement, please visit your local au shop (additional charges may apply). You may also be unable to use your phone during the replacement/repair period. Please note that the length of service life varies depending on the usage condition, etc.
WARNING Be sure to read the following warnings before use.
Prohibited
Do not use a cell phone while driving a car or riding a motorbike or bicycle. Failure to do so may cause a traffic accident. Use of cell phones while driving a car or motorbike is prohibited by law. Use of a cell phone while riding a bicycle may be punishable in some regulations.
Prohibited
Do not use this product while you are aboard an airplane. Use of electric devices transmitting radio waves in airplane is prohibited by law. Some airline companies, however, allow their passengers to use cell phones. For details, contact the airline company you use.
Instruction
The product sometimes affects high-precision electronic devices. So, turn it off near such devices. (Examples of electronic devices that might be affected by the product include cardiac pacemakers, hearing aids, other electronic medical devices, fire alarms, and automatic doors. If you are using an electronic medical device, contact the device manufacturer or retailer for information about the possible affect of radio waves.)
Instruction
When using this product near medical devices or around people with an implanted pacemaker or defibrillator, the radio waves emitted by the device may affect such devices. Please follow the rules below in these situations.1. Those with an implanted pacemaker or implanted
cardioverter-defibrillator should carry or use the product at least 22 cm away from the pacemaker or cardioverter-defibrillator.
2. Turn the product off in crowded trains or other crowded places, since there may be people with a cardiac pacemaker or implanted cardioverter-defibrillator nearby.
3. Pay attention to the following points when using the product inside medical institutions. • Do not bring the product into operating theaters, intensive-care units (ICU) and coronary care units (CCU).
• Turn the product off in hospital wards. • Even if you are in a lobby, etc., be sure to turn the product off when there are electronic medical devices nearby.
• When a medical institution has laid down designated areas where use of the product is prohibited or is not allowed to be brought in, abide by the instructions of that medical institution.
4. When using electronic medical devices other than an implanted pacemaker and implanted cardioverter-defibrillator outside a medical institution (e.g. home medical treatment), check individually with the manufacturer of the electronic medical device regarding the influence of radio waves.
Prohibited
Be aware of your surroundings when talking on the phone, mailing, using the internet, taking photographs or movies, playing games, or using your cell phone in any other way. Failure to do so may cause a traffic accident or physical harm.
Prohibited
Do not use the camera flash in front of a persons eyes. Do not gaze at the light emitting part when the flash is on. Doing so may cause impairment of eyesight, etc. Be especially careful not to take pictures of small children from a very close distance.
Prohibited
Do not light the camera flash toward a driver of a car, motorbike or bicycle. If dazzled by the light, the driver might be unable to drive and cause an accident.

10
Instruction
Sometimes, very rarely some people demonstrate symptoms such as temporary muscle spasms, loss of consciousness, etc. by watching repeatedly flickering screens. Those with a past history of this should consult with a physician beforehand.
CAUTION Be sure to read the following warnings before use.
Instruction
Use of the main unit in an automobile sometimes affects in-vehicle electronic devices, though this rarely happens. If this happens, stop use since this may impair safe travel.
Instruction
If you feel any abnormality with your skin, immediately consult a dermatologist. Itching, rashes, eczema, etc. sometimes occurs depending on your physical constitution and condition. The materials of parts used on the product are as follows:
Usage Area Materials Surface Processing
Outer case (front) Plastic Coating/NCVM (SHADOW BLACK), UV Coating (GRACE WHITE)
Logo plate Anodized aluminum Diamond cut spin
Display panel Glass -
Outer case (center, top) Plastic Paint/NCVM
Outer case (rear) Plastic NCVM (SHADOW BLACK), UV Coating (GRACE WHITE)
Outer case (back plate) Kevlar Printed
Rear logo Polycarbonate NCVM
Power key Anodized aluminum Diamond cut spin
Volume key Plastic -
Camera ring Plastic NCVM
Camera lens Acrylic resin Printed
Rear camera panel Polycarbonate/Acrylic resin
Non-conductive optical thin film
Slot cover Plastic NCVM (SHADOW BLACK), UV Coating (GRACE WHITE)
Prohibited
Do not put the product near any items that use a magnetic field such as ATM cards, floppy disks, credit cards, or telephone cards. Doing so may cause loss of recorded information.
Prohibited
Do not allow liquids, metal objects, burnable items, and other foreign matter to get inside the microSD memory card slot. Doing so may cause fire, electric shock or fault.
Instruction
Always keep the micro au IC-Card slot and microSD memory card slot covers closed during normal use. If the covers are open, dirt or water may get inside causing a fault.
Instruction
If you have a weak heart, be careful when setting the vibration and volume to prevent adverse effects on your heart.
Instruction
Pay attention to items becoming stuck to the main unit. The speaker uses magnets, and so thumbtacks and pins, craft knife blades, staples, and other metal objects sometimes become stuck to the main unit, and cause unexpected injury. Before using the product, be sure to check that there are no foreign objects on the speaker or other parts.
Instruction
Do not put the product directly on sand at a beach, etc. Sand or other small particles might get inside the earpiece, microphone or speaker, causing the volume to drop. If sand gets inside the products main unit, it may cause overheating or fault.
Instruction
When using the product for calling or data communication, be careful not to keep the product in direct contact with your skin for a prolonged period, or not to cover the product with paper, cloth, bedding, etc. The main unit might get hot, causing fire, burns or a fault.

11
■ Charging Devices
WARNING Improper handling may may cause overheating, ignition or electrical shock. Be sure to read the following warnings before use.
Instruction
Do not use at other voltages than the specified power supply voltage. Doing so may cause ignition, fire, overheating or electric shock. • AC adapter: 100 to 240 VAC
The AC adapter plug is for 100 VAC (Japanese specifications). To charge the battery overseas, you need a conversion plug adapter suited to your destination. Do not charge the battery using an overseas travel transformer.
Instruction
Firmly insert the AC adapters power plug into the power outlet down to the base of its pins. Incomplete insertion of the power plug may result in a fire caused by electric shock, overheating and ignition. Do not use the AC adapter if it is damaged or if the outlet is loose.
Prohibited
Do not damage, modify, twist, pull or place a heavy object on the microUSB cable. Do not use a damaged microUSB cable. Doing so may cause electric shock, shorting or fire.
Prohibited
Do not let your hands, fingers and other parts of the body touch the connection terminals. Doing so may cause electric shock, injury or fault.
Prohibited
If you hear thunder, do not touch the power plug. Doing so may cause stroke of lightning and electric shock.
Disconnect plugfrom power outlet
Before cleaning the charging equipment, unplug its power plug from the outlet. If the plug remains plugged in when you clean the equipment, it may cause an electric shock or short circuit. Also, wipe off dust on the charging equipment's power plug. Not doing so could result in a fire.
Instruction
Wipe off dust on the power plug. Doing so may cause fire, burns or electric shock.
Instruction
Install and position in-car devices where they do not hinder driving or safety equipment such as airbags. Failure to do so may cause a traffic accident. Install in-car devices following the instructions of their manuals.
Disconnect plugfrom power outlet
When the AC adapter is not to be used for a long time, disconnect the AC adapters power plug from the power outlet. Failure to do so may cause electric shock, fire or fault.
Wetting with water prohibited
Do not use in places subject to direct splashing with water, pet urine or other liquids. Doing so might result in faults resulting from overheating, fire, electric shock or short-circuiting of electronic circuits. In the event that the product is splashed with liquid, immediately disconnect the AC adapters power plug.
CAUTION Mishandling may cause overheating, ignition, electric shock, etc. Be sure to read the following warnings before use.
Wetting with water prohibited
Do not use in humid places such as bath areas, or connect/disconnect the AC adapter with wet hands. Doing so may cause electric shock or fault.
Instruction
Charge the battery in a stable place. If placed on an inclined surface or wobbly stand, the product might fall causing injury or damage. Also, do not cover or wrap the product with a cloth or bedding. Doing so may cause fire or fault.
Disconnect plugfrom power outlet
When unplugging the charging equipments power plug from the outlet, hold and pull the power plug. Pulling on the microUSB cable may damage it.

12
■ Micro au IC-Card
WARNING Be sure to read the following warnings before use.
Prohibited
Do not put the micro au IC-Card in a cooking apparatus such as a microwave oven or a pressure vessel. Doing so may cause melt, overheating, smoke, loss of data or fault.
CAUTION Be sure to read the following warnings before use.
Instruction
Keep these warnings in mind when inserting or removing the micro au IC-Card. Failure to do so may result in injuries to your hands or fingers.
Instruction
Use only the devices specified by the Company to insert the micro au IC-Card in. Using a device not specified by the Company might cause loss of data or a fault.For the specified devices, contact an au shop or Customer Service Center.
Disassemblyprohibited
Do not disassemble or modify the micro au IC-Card. Doing so may cause loss of data or fault.
Prohibited
Do not use or leave the micro au IC-Card in hot places such as by the fire or a heater. Doing so may cause melt, overheating, smoke, loss of data or fault.
Prohibited
Do not throw the micro au IC-Card into a fire or heat it. Doing so may cause melt, overheating, smoke, loss of data or fault.
Prohibited
Do not touch the IC (metal) part of the micro au IC-Card or short-circuit it. Doing so may cause loss of data or fault.
Prohibited
Do not drop the micro au IC-Card or subject it to strong impact. Doing so may cause fault.
Prohibited
Do not fold, bend or place a heavy object on the micro au IC-Card. Doing so may cause fault.
Wetting with water prohibited
Do not wet the micro au IC-Card. Doing so may cause fault.
Prohibited
Do not scratch the IC (metal) part of the micro au IC-Card. Doing so may cause fault.
Prohibited
Do not store the micro au IC-Card in dusty places. Doing so may cause fault.
Prohibited
Do not store the micro au IC-Card in places exposed to direct sunlight or hot and humid places. Doing so may cause fault.
Instruction
Store the au micro IC-Card out of reach of small children. Failure to do so might cause injury, etc. if they accidentally swallow and choke on it.
■ Stereo Headset
CAUTION Mishandling may cause overheating, ignition, electric shock, etc. Be sure to read the following warnings before use.
Instruction
When playing a game or listening to music etc., adjust the volume to a proper level. Listening to music at a high volume for too long can damage hearing. Even at a proper volume, long-term use can also result in damage to hearing. Also, raising the volume too high might prevent you from hearing sounds around you, which might in turn lead to a traffic accident at a railroad crossing or pedestrian crossing.
Prohibited
Do not wrap the cord around the system. Doing so may reduce signal strength, calls may be interrupted, and you may experience interference.
13
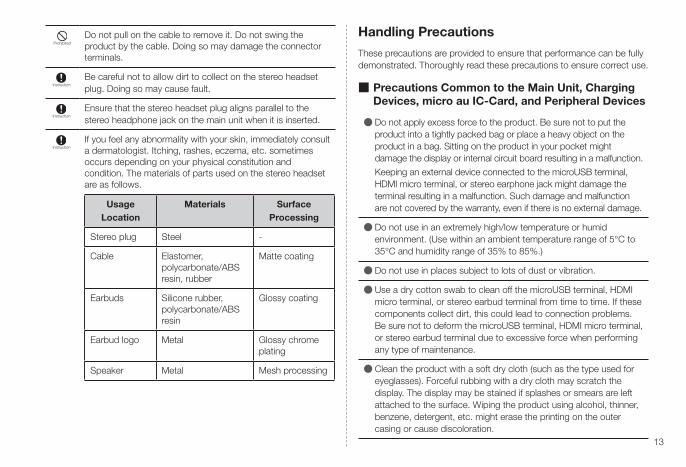
Prohibited
Do not pull on the cable to remove it. Do not swing the product by the cable. Doing so may damage the connector terminals.
Instruction
Be careful not to allow dirt to collect on the stereo headset plug. Doing so may cause fault.
Instruction
Ensure that the stereo headset plug aligns parallel to the stereo headphone jack on the main unit when it is inserted.
Instruction
If you feel any abnormality with your skin, immediately consult a dermatologist. Itching, rashes, eczema, etc. sometimes occurs depending on your physical constitution and condition. The materials of parts used on the stereo headset are as follows.
Usage Location
Materials Surface Processing
Stereo plug Steel -
Cable Elastomer, polycarbonate/ABS resin, rubber
Matte coating
Earbuds Silicone rubber, polycarbonate/ABS resin
Glossy coating
Earbud logo Metal Glossy chrome plating
Speaker Metal Mesh processing
Handling Precautions
These precautions are provided to ensure that performance can be fully demonstrated. Thoroughly read these precautions to ensure correct use.
■ Precautions Common to the Main Unit, Charging Devices, micro au IC-Card, and Peripheral Devices
�● Do not apply excess force to the product. Be sure not to put the product into a tightly packed bag or place a heavy object on the product in a bag. Sitting on the product in your pocket might damage the display or internal circuit board resulting in a malfunction.
Keeping an external device connected to the microUSB terminal, HDMI micro terminal, or stereo earphone jack might damage the terminal resulting in a malfunction. Such damage and malfunction are not covered by the warranty, even if there is no external damage.
�● Do not use in an extremely high/low temperature or humid environment. (Use within an ambient temperature range of 5°C to 35°C and humidity range of 35% to 85%.)
�● Do not use in places subject to lots of dust or vibration.
�● Use a dry cotton swab to clean off the microUSB terminal, HDMI micro terminal, or stereo earbud terminal from time to time. If these components collect dirt, this could lead to connection problems. Be sure not to deform the microUSB terminal, HDMI micro terminal, or stereo earbud terminal due to excessive force when performing any type of maintenance.
�● Clean the product with a soft dry cloth (such as the type used for eyeglasses). Forceful rubbing with a dry cloth may scratch the display. The display may be stained if splashes or smears are left attached to the surface. Wiping the product using alcohol, thinner, benzene, detergent, etc. might erase the printing on the outer casing or cause discoloration.

14
�● Use as far away as possible from land-line phones, TVs and radios. Nearby use might affect them.
�● The product may become warm while charging or during other operations, depending on the situation, but this is not abnormal.
�●When the product is used by a child, parents or guardians should thoroughly read the "Instruction Manual" and teach the child how to use it.
■ Main Unit
�● Do not forcefully press, tap or intentionally subject the display to strong impact. Doing so may cause scratching or damage.
�● Do not forcefully press your fingernails, sharp objects or hard objects against keys or display surface. Doing so may cause scratching or damage.
The touch panel is designed to be lightly touched by fingers. Do not apply strong pressure with your fingers or sharp-pointed objects (such as fingernails, ballpoint pens and pins) on the touch panel display.
In the following cases, the product may not respond to touching the touch panel, or errors in operation may occur.
•Performing operations while wearing gloves•Performing operations with the tip of your fingernails•Performing operations with a foreign object touching the touch
panel surface•Performing operations through a protective sheet or film•Performing operations when there are water droplets or moisture
on the touch panel•Performing operations with wet or damp fingers•Performing operations under water
�● Never use any modified au cell phone. Use of a modified device violates the Radio Law.
You can perform the following operations to view the unique authentication and standard marks (including authentication numbers) for the product.
Instructions: On the home screen: Tap → Settings → About phone → Legal information → Certificate
The product is certified for use as a special wireless device under the Radio Law. Follow the instructions above to view the certification mark which serves as proof of this fact.If the screws of the product are removed and modifications are made to the internal components, the certification of conformity with technical regulations will become invalid. Never use the product without the valid certification. Doing so violates the Radio Law.
�● Contents saved in this product, such as contacts, mails and favorites, might be altered or lost by an accident, fault, repair or mishandling. Be sure to keep a copy of important contents. Note that KDDI CORPORATION and OKINAWA CELLULAR TELEPHONE COMPANY assume no responsibility for any damages or lost profits resulting from altered or lost contents.
�● Note that content data (both charged or free content) saved on the product cannot be returned to the customer when the product is replaced for repair of a fault, for example.
�● This product uses liquid crystal for its display. The display response speed may become slow when the ambient temperature is low, which is due to the property of liquid crystal and not a malfunction. When it returns to a normal temperature, it should return to normal operation.
�● Although the display used on the product is made using high-precision technology, some pixels (dots) might be lit or out at all times. This is not a malfunction.

15
�● Take care not to inconvenience people around you when you use the product in a public place.
�● You are recommended to store copies of individual data such as photos you took, videos and music in your PC by sending each file as mail attachment, etc. Note, however, that you may not be able to make copies of some copyrighted data even by the above-mentioned means.
�● To prevent unlawful modification, the product has been designed so that it cannot be easily disassembled. Modifying the product is prohibited by the Radio Law.
�● Take care not to place magnetized items such as magnetic cards, speakers and TV sets near the product, as it might cause malfunction.Putting strong magnetism close to the product might cause false operation.
�●When you put the product in your pocket or bag, take care so that the display does not come in contact with metal objects or other hard objects. Doing so may cause scratching or damage.
�●When suddenly brought into a warm place from a cold place, or when in a humid location, or when used where temperature suddenly changes (e.g. near the air discharge port of an air conditioner), water droplets (i.e. condensation) are sometimes formed inside the product. Note that when used under conditions such as this, humidity might cause corrosion or a fault.
�●When wiping the display, wipe with a soft, dry cloth. Use of a moistened cloth, glass cleaner or other similar liquid might cause a fault.
�●When connecting/disconnecting the microUSB cable to/from the microUSB connector, make sure that the microUSB cable connector is horizontal with the microUSB connector.
�● Note that applying unnecessary force with the microUSB cable connected to the microUSB connector might cause damage.
�● Do not discard battery packs together with regular trash. Please cooperate in the collection of the product when it is no longer needed to protect the environment and effectively use resources. Old products are collected at au shops and other places.
�● Insert only a commercially available microSD memory card or a commercially available microSDHC memory card into the memory card slot on the product.
�● Do not exert excessive force when attaching/removing a microSD memory card.Failure to do so might result in injuries to your hands or fingers.
�●While writing/reading data to/from a microSD memory card, do not subject the product to vibration or impact, remove the battery pack or turn off the power. Doing so may cause loss of data or fault.
�●When hearing the other party's voice, make sure that the earpiece is placed at the center of your ear. If the earpiece (audio output port) is close by the ear lobe, it may be hard to hear the voice.
�● Even if you cover the microphone to make your voice inaudible to the other party, the other party can hear your voice.
�●When using a hands-free kit, do not have the speaker volume too high. Use it carefully when it is not next to your ear.
�● Do not cover the brightness sensor with your finger or put a sticker on it. Doing so may hinder the brightness sensor from detecting the ambient brightness and functioning correctly.
�● Do not put a sticker, etc. on the proximity sensor. Doing so may cause the sensor to malfunction and make the display always turned off while receiving a call or during a call.
�● The battery for the product is built into the main unit. Do not attempt to replace the battery yourself. For a battery replacement, contact an au shop or Customer Service Center.

16
�● Use in very hot or cold environments, for example, leaving it in an automobile with the windows closed in summer will cause the battery capacity to drop and shorten the available battery usage time. This will also shorten the batterys service life. Try to use the battery pack as far as possible at room temperature.
�● Charge the battery before using the product for the first time after purchase, or if you have not used the product for a long time.
�● The battery is a consumable item.If the battery does not function properly even after it is fully charged and does not improve, you will need to replace the battery. The battery is built into the product. If you require a replacement, please visit your local au shop (additional charges may apply). You may also be unable to use your phone during the replacement/repair period. Note that the length of service life varies depending on the usage condition, etc.
■ Touch Panel
�● Use your finger to operate the touch panel. Do not use ballpoint pens, pencils or other sharp-pointed objects. Using such objects does not only hinder correct operation of the touch panel, but also might cause scratching or damage to the display.
�● Do not put stickers or sheets (e.g. commercially available protective films, peep prevention sheets) on the display. Doing so might hinder correct operation of the touch panel.
�● Do not operate the touch panel with fingernails. Doing so might result in split nails or jammed fingers.
�● If the display surface is dirty or wet with sweat or water, it may not function correctly. In such case, wipe the display surface with a dry, soft cloth.
�●When carrying the product in your pocket or bag, take care not to put the touch panel close to metals or other conductive materials, as it might cause false operation of the touch panel.
■ Charging Devices
�●When not using the AC adapter, remove the AC adapters power plug from the power outlet.
�● Do not wrap the microUSB cable connected to the AC adapter around the adapter itself. Doing so may cause am electric shock, overheating or fire.
�● Do not forcibly bend the AC adapter plug or the connection between the adapter and microUSB cable. Doing so may cause am electric shock, overheating or fire.
■ micro au IC-Card
�● The micro au IC-Card is lent to you by au. In case of loss or damage, the card will be replaced at your expense. When malfunction is suspected, or in case of theft or loss, contact an au shop or PiPit.
�● Do not forcibly remove or insert the micro au IC-Card. Be careful not to exert excessive force when inserting the card into your au cell phone.
�● You are responsible for any damage caused by inserting your micro au IC-Card into some other IC-Card reader/writer, etc.
�● The micro au IC-Card may become warm during use, but this is not a malfunction and you can continue to use the card.
�● Keep the IC (metal) part of your micro au IC-Card clean. Clean the product with a soft dry cloth (such as the type used for eyeglasses).
�● Do not put stickers, etc. on the micro au IC-Card.

17
■ Camera
�●When using the camera, follow common rules of etiquette regarding camera use.
�● Image data might be altered or lost due to malfunction, repair or mishandling of this product. The Company takes no responsibility for recovery of altered or lost data, damages resulting from altered or lost data, and lost profits.
�●When photographing important occasions (such as a wedding), take a trial shot and check the shot image to make sure it is correctly shot.
�● Do not use the camera for recording commercially available books or information of which photographing is not allowed.
�● Do not leave the camera lens exposed to direct sunlight. Imaging elements might be discolored or burnt.
■ Music/Movie Playback
�● Do not listen to music or watch videos while driving a car or motorbike, or riding a bicyle.Use of cell phones while driving a car or motorbike is prohibited by law. (Use of a cell phone while riding a bicycle may be punishable by some regulations.) Also, stay alert to the traffic around you even when walking. Surrounding sounds may not be heard clearly, and gazing at the screen might distract your attention causing a traffic accident. Be especially careful at railroad crossings and pedestrian crossings.
�● Take care not to listen at a very high volume for a long time, as it might affect hearing.
�● Be careful of sound leakage from earphones in trains or other places with many people around you.
■ Copyright/Portrait Rights
�● You are not allowed to copy, modify or edit the data you shot or recorded using this product without consent of the copyright holder, except for personal use, under the copyright law. Also, do not use or modify portraits or names of other individuals without their consent, as it might infringe on rights of portrait.
Note that shooting and recording may be restricted at some live performances, shows and exhibitions even for personal use.
�● Be careful about the copyright and portrait right when posting photos you shot, etc. on Internet homepages.
�● The transfer of images, etc. covered by copyright is not allowed excluding instances laid down separately by the Copyright Act.
■ Regarding the Creation of Copies of Data Stored on this Product
�● Please back up important content recorded or downloaded to the product to an outside source. Content recorded to memory on the product sometimes disappears or is altered by unexpected factors, such as static electricity or a fault, repair, mishandling, etc.
※ How to make backups: Store important data such as contacts, music, shot photos and videos on microSD memory cards. You can also send files as mail attachment or transfer to your PC. Note, however, that there are some data that cannot be copied by using these means.

18
Security Code and PIN Code
There are several different types of security code and PIN Code that are used with this product.The security code and PIN Code used are as follows. Please do not forget these security code and PIN Code as they are required to perform various operations and transactions.
●Security Code
Usage Examples
① Remote operation of the voicemail service or call forwarding service from a standard phone
② Customer service voice response, viewing information, applying for services, or modifying information on the au homepage
Default Value
The four-digit number you decided on when you established your cell phone contract.
●Lock No. ●PIN Code
Usage Examples
Setting or removing the screen lock
Usage Examples
To prevent a third party from using your micro au IC-Card
Default Value
None Default Value
1234
●E-mail folder lock password
Usage Examples When using the e-mail folder lock function
Default Value None
Features to Protect Your PrivacyThis product comes with a variety of functions designed to help protect the privacy of your stored personal data. • Screen lock • E-mail folder lock
PIN Code
If you enter your PIN code incorrectly three times in a row, the code will be locked. If this occurs, you must use the PIN unlock code to remove the lock.
■ PIN CodeIn order to prevent your micro au IC-Card from being used illegitimately by a third party, you can require that a PIN code be entered when the power is turned on. • When you first use the product after purchasing you will not be required to enter a PIN code. However, on the home screen, you can tap → Settings → Location & security → UIM card lock → Set up UIM card lock to require PIN code input.You will be required to enter your PIN code once before you can enable this setting.
• The PIN code is set to "1234" by default, but you can change this to any 4 to 8 digit number you like. "Changing the PIN Code" (▶P. 88)
■ PIN Unlock CodeIf your PIN code is locked, you can enter this code to remove that PIN code lock. • This code is an eight-digit number given at the time of purchase, which is printed on the back side of the plastic card on which your micro au IC-Card is attached.
• Once you have entered the PIN unlock code, tap Unlock PUK Lock on the PUK lock screen and follow the instructions to unlock your PIN and set a new one.
• If the PUK code is incorrectly entered ten consecutive times, contact an au shop, PiPit or Customer Service Center.※ Your PIN code will not be reset even if you perform a complete data
reset.

19
Notes on Using Bluetooth®/Wireless LAN (Wi-Fi®) Functions
Frequency BandBluetooth® and wireless LAN (Wi-Fi®) functions of this product use frequencies in the 2.4 GHz band ranging from 2.402 GHz to 2.480 GHz.
2.4FH1/XX8/DS4/OF4 •Bluetooth®: 2.4 FH1/XX8This product uses the 2.4 GHz band. FH1 is used as the modulation scheme. The interference distance is about 10 m or less. XX8 uses another method and interference distance is about 80m or less.
•Wireless LAN (Wi-Fi®): 2.4 DS4/OF4This product uses the 2.4 GHz band. DS-SS and OFDM are used as the modulation schemes. The interference distance is about 40 m or less.
▃ ▃ ▃All bandwidths between 2.402 GHz to 2.480 GHz can be used, and bands of mobile unit identification devices can be avoided.
The channels used depend on the country.For use in airplanes, check with the airline company in advance.
Bluetooth® Precautions
•The Bluetooth® function of this product conforms to domestic wireless standards in Japan and FCC/EC regulations, and has been certified. There may be restrictions on using Bluetooth® in some countries and areas. When using abroad, please check the regulations in the country or area you are in.
•The 2.4 GHz band used by wireless LAN (Wi-Fi®) and Bluetooth® devices are shared by various other devices. For this reason, Bluetooth® devices use technologies for minimizing effects from other devices using the same radio frequency band.
•In some cases, however, the communication speed and connectable range may be decreased, or disconnection may occur, due to interference by other devices.
Further Bluetooth® Precautions
The frequencies used by the Bluetooth® function of this product are in the 2.4 GHz band. In this frequency band, other similar wireless stations, in-plant wireless stations for mobile unit identification that require a license for use, such as factory production lines, specific small power wireless stations that do not require licenses, amateur wireless stations (collectively called other wireless stations from here on) are operated in addition to home electrical appliances such as microwave ovens, devices for industrial, scientific and medical devices.1. Before using this product, make sure that other wireless
stations are not in operation nearby.2. In the event that instances of radio wave interference have
occurred between this product and other wireless stations, immediately either relocate this product or stop operation of the device (stop emission of radio waves).
3. If you are unclear on any points or are troubled by anything, contact an au shop or Customer Service Center.

20
Wireless LAN (Wi-Fi®) Precautions
•The wireless LAN (Wi-Fi®) function of this product conforms to domestic wireless standards in Japan and FCC/CE regulations, and has been certified. There may be restrictions on using wireless LAN (Wi-Fi®) in some countries and areas. When using abroad, please check the regulations in the country or area you are in.
•Do not use this product in places where electromagnetic waves are generated or near electric products, AV and OA equipment, or other magnetized devices.
•The product will be affected by the waves and electrical interference, increasing interference in the product's communications and communications may become impossible (This is particularly relevant when using a microwave oven).
•Using this product near a TV, radio or similar appliance might cause reception interference and disrupt TV images.
•Searching might not be successful if there are multiple wireless LAN (Wi-Fi®) access points near to the product or the same channel is being used.
•The wireless LAN function cannot be used in airplane. Be sure to turn off the power even in a wireless LAN (Wi-Fi®) compliant airplane. Some airline companies, however, allow their passengers to use cell phones. For details, contact the airline company you use.
Further Wireless LAN (Wi-Fi®) Precautions
The frequencies used by the wireless LAN (Wi-Fi®) function of this product are in the 2.4 GHz band and 5 GHz band. In the 2.4 GHz frequency band, other similar wireless stations, in-plant wireless stations for mobile unit identification that require a license for use, such as factory production lines, specific smallpower wireless stations that do not require licenses, amateur wireless stations (collectively called
other wireless stations from here on) are operated in addition to home electrical appliances such as microwave ovens, devices for industrial, scientific and medical devices.1. Before using this product, make sure that other wireless
stations are not in operation nearby.2. In the event that instances of radio wave interference have
occurred between this product and other wireless stations, immediately either relocate this product or stop operation of the device (stop emission of radio waves).
3. If you are unclear on any points or are troubled by anything, contact an au shop or Customer Service Center.
◎ Connections between this product and all other Bluetooth® and wireless LAN (Wi-Fi®) devices have not been confirmed. Therefore, connections with all Bluetooth® and wireless LAN (Wi-Fi®) devices are not guaranteed. ◎ This product supports security features for wireless communications that are compliant with the Bluetooth® and wireless LAN (Wi-Fi®) standard specifications, but the security may not be sufficient depending on the usage environment and configuration. Be careful when making data communication using Bluetooth® or wireless LAN (Wi-Fi®) function. ◎Wireless LAN (Wi-Fi®) has the advantage that it can be freely connected anywhere within the radio wave range, as it uses radio waves for exchanging information. At the same time, there is a risk that a malicious third party may obtain unauthorized access if security settings have not been configured. You are recommended to configure security settings at your discretion and responsibility. ◎ The Company assumes no responsibility for leakage of data or information that may occur during Bluetooth®/wireless LAN (Wi-Fi®) communication.

21
◎ Since Bluetooth® and wireless LAN (Wi-Fi®) functions use the same frequency band, using both functions at the same may cause radio wave interference resulting in decreased communication speed or disconnection from the network. If connection fails, stop using either of the Bluetooth® and wireless LAN (Wi-Fi®) functions.
5 GHz Band Used by the Wireless LAN (Wi-Fi®)
This product can use three channels on the 5 GHz frequency: W52, W53, W56.
◎ However, use of W52 and W53 are forbidden outside.
Notes on packet communication charge
•Since constant Internet connection is possible with this product, packet communication may be performed automatically by some applications, resulting in high packet communication charges. Therefore, subscription to a packet communication charge discount service is recommended.
•To browse websites, download applications, communicate using applications, send/receive mails and configure various settings, connection to the Internet is required, to which packet communication charge applies. (Download of e-mails such as important information from au and WEB de invoice e-mails will also incur charges.)Even on plans E-simple/E, download of e-mails ([email protected]) will incur packet communication charges. (To use e-mails ([email protected]), it is necessary to join IS NET.)※�Packet communication charge does not apply to wireless LAN (Wi-Fi®)
connection.

22
Notes on Android Market/au one Market/applications
•Be sure to check the security of the application, then install it at your own risk. Some applications might cause virus infection, damage various data, and send out your location information, usage history or personal information stored in your cell phone via the Internet.
•The Company assumes no responsibility for any failures that might be caused by applications you have installed. Repair costs in this case may be charged even during the warranty period.
•The Company assumes no responsibility for any disadvantage brought to you or any third party by applications you have installed.
•A microSD memory card is necessary to use some applications.•Some applications prohibit the product from entering sleep mode
while they are active, or rapidly drain the battery while running in the background.
•The operation procedures and screens of the preinstalled applications and applications you have installed in this product are subject to change without notice, as a result of version upgrades. Also, the operation procedures described in this manual may differ from the actual procedures.

23
Usag
e Prep
aration
Usage Preparation
Parts and Features
※
Menu Key
Stereo Earphones JackConnect a stereo headset accessory.
Power KeyPush...Turn display on and offPush and hold... Turn power on and off
Volume Key (Increase)Volume Key (Decrease)
Display (Touch Panel)
Microphone (Mic)
Search Key
Back Key
microUSB Connector
HDMI Micro Connector
Light Sensor / Proximity Sensor
Notification Light
micro au IC-Card Slot
microSD Memory Card Slot
Home Key
Receiver(Receiver)
Front Camera
※ Do not cover the brightness sensor, proximity sensor, or those surrounding areas with any type of protective cover. It may cause the product to not function correctly.
Back Camera
Camera Light
Speaker
memo ◎ The notification indicator will flash when you have new missed calls or new unread mail.※� Flashes when the display is off.

24
Usag
e Prep
aration
micro au IC-Card
Your micro au IC-Card contains information such as your phone number.The product supports only micro au IC-Cards. You cannot use an au IC-Card from another au cell phone or smartphone.
micro au IC-Card
IC (Metal) Part
■■ If no micro au IC-Card is inserted...The product cannot be used if any IC-Card other than a micro au IC-Card is inserted.If there is no micro au IC-Card inserted, you will be unable to perform the
following operations. will also be displayed.•Making or receiving phone calls※
•Packet communications•Sending or receiving SMS (C-mail)•E-mail (~@ezweb.ne.jp) Initial Settings and Sending/Receiving•Viewing the phone number of the product•Configuring UIM card lock settings•au one-ID Settings•Skype™|au SettingsApart from the above, there may be situations where essential features such as the customer's phone number will not be available.※�Calling emergency services (110 (Police), 119 (Fire/Rescue), or 118 (Coast Guard))
■■ micro au IC-Card Security Pinmicro au IC-Cards include a special security PIN to prevent them from being used illegaly by a third party. This PIN is set to "1234" initially, but you can change it to anything you want (▶P. 88).
How to Insert/Remove the micro au IC-Card
•To insert or remove the micro au IC-Card, turn OFF the power to the product and remove the MOTOROLA AC adapter or any other microUSB plug from the device before doing so.
■ Removing the micro au IC-Card
Remove the micro au IC-Card only after you turn OFF the power to the product and remove the MOTOROLA AC adapter or any other microUSB plug from the device.Open the slot cover and push the micro au IC-Card slowly until you hear it click.Once you hear the click, use your fingers to pull the micro au IC-Card out towards you.Slowly pull the micro au IC-Card all the way out and close the slot cover.

25
Usag
e Prep
aration
■ Inserting the micro au IC-CardInsert the micro au IC-Card only after you turn OFF the power to the product and remove the MOTOROLA AC adapter or any other microUSB plug from the device.Open the protective slot cover, then slowly insert the micro au IC-Card with the IC (metallic) portion facing up until you hear it click into place. Then, close the protective slot cover.
Cutaway
memo ◎Be aware of the direction of the notched edge when removing the micro au IC-Card. ◎Note the following points, which may cause malfunction or damage, when handling the micro au IC-Card:•� Do not touch the IC (metallic) portion of the micro au IC-Card or the IC-Card
terminal in the product.•� Insert the IC-Card in the correct direction.•� Do not use force to attach or remove the IC-Card. ◎ If the micro au IC-Card is not inserted correctly or if there is a problem with the micro au IC-Card, an error message will be displayed. ◎Do not lose the micro au IC-Card after it has been removed.
Inserting/Removing a microSD Memory Card
■ Inserting a microSD Memory CardOpen the protective slot cover, then slowly insert the microSD memory card with the metallic connector portion facing up until you hear it click into place. Then, close the protective slot cover.
memo ◎When accessing the data on a microSD memory card, do not turn off the power or move the cell phone violently. Doing so may corrupt the data.

26
Usag
e Prep
aration
memo ◎ The back, front, top and bottom are marked on a microSD memory card.If you try to force it in, the card may be damaged. ◎ The microSD memory cards that are compatible are as follows (as of January 2012).For all other microSD memory cards, please contact the microSD memory cards vendor for more information.
Buffalo 2 GB, 4 GB, 8 GB, 16 GBPanasonic 2 GB, 4 GB, 8 GB, 32 GBSony 2 GB, 4 GB, 8 GBToshiba 16 GB, 32 GBSanDisk 16 GB, 32 GB※�4 GB or greater indicates the compatibility microSDHC memory cards.※�As of January 2012, the following microSD cards are compatible with this product. For the
latest information on compatible products, please refer to the au home page, or contact the customer service center.
◎ To check the amount of free space remaining on the microSD memory card, on the home screen: tap → Settings → Storage → Available space. ◎Music, photos and other files will be saved to the products internal storage. Depending on the application, and if you have a microSD memory card, you may be able to change the save location. There may also be situations where you have to change the save location.
■ Removing the microSD Memory CardBefore removing the microSD memory card, please unmount the microSD memory card.
Instructions: On the home screen: → Settings → Storage → SD card →�Unmount SD card.
Unmount the microSD memory card, open the protective slot cover, and gently push the microSD memory card in until you hear it click.Once you hear the click, use your fingers to pull the microSD memory card out towards you.Slowly pull the microSD memory card all the way out and close the slot cover.
memo ◎Some applications may not be available for use unless a microSD memory card is present. ◎Do not forcibly pull out the microSD memory card.It may cause damage and data loss. ◎After periods of long use, the microSD memory card may feel warm after removal. This is normal and does not mean any damage has been incurred. ◎ If you unmount the microSD memory card and want to use it again without removing it, you will need to mount it again.Instructions: On the home screen: Tap → Settings → Storage → SD card
→�Mount SD card
■ Formatting a microSD Memory CardBefore you format a microSD memory card, be sure to unmount it first.
Instructions: On the home screen, → Settings → Storage → SD card→ Unmount SD card → Format SD card → Erase SD card → Erase everything → follow the on-screen instructions.
memo ◎All data will be deleted on the microSD memory card.

27
Usag
e Prep
aration
Charging
When you purchase the product, the internal battery is not fully charged. Use the product only after it is fully charged.Use the included microUSB cable to connect the product to the MOTOROLA AC adapter or your personal computer.
Approximately 160 minutes are required to fully charge the battery.
④
②
③①
Push the USB plug into the USB connector.
Push the microUSB plug into the microUSB connector.
Connect the microUSB cable to the charger
Connect the microUSB to the product
microUSB
microUSB Plug
USB Plug
■ Using the MOTOROLA AC Adapter to Charge the Battery
Make the connections in the following order: ① → ② → ③ as shown in the diagram. Perform the steps in reverse to disconnect the product.
■ Using a Personal Computer to Charge the BatteryPlease put the pictures in the order: ④, ③When removing, please follow your PC's instructions for safely ejecting hardware. If you have cancelled the device, please follow the opposite of when connecting.However, there is no need to cancel what the device is doing if using the charge only feature (please see memo).Please follow the opposite order to eject.
When charging, the icon on the status bar will change to .When the power is turned OFF, press or / to display the amount of battery remaining.
Caution: •Confirm the correct orientation before connecting.Forcing the
connection may cause damage.•When charging two devices with the MOTOROLA AC adaptor, it will
take longer for charging to complete.•Charging may take longer if charging from a PC.•The battery is built into the product. If you require a replacement,
please visit your local au shop (additional charges may apply). You may also be unable to use your phone during the replacement/repair period. The lifetime of the built-in battery varies depending on how the product is used.
•When not using your phone for a long period of time, it is recommended that you periodically charge it still to maintain the functionality of the battery.
memo ◎When charging with a PC, depending on your settings it may not be possible to access the internal storage or microSD storage from the device when charging.Follow the below to change the settings, making it possible to use your internal storage and microSD storage even when charging.Settings: Drag the status bar down → USB connection → Charge Only → OK

28
Usag
e Prep
aration
Turning On
■ Turning On the Power
Push down on for over two seconds to power off.When you first power the device on, please follow the "Initial Setup" (▶P. 28) instructions.
■ Turning Off the PowerTo turn off the power, press and hold until the "Phone options" pop up menu appears, then select "Power off".
■ Entering Sleep ModeSleep Mode allows you to turn off the display and all communications functions in order to save battery life.
To enter Sleep Mode, press and hold until the "Phone options" pop up menu appears, then select "Sleep".
To exit Sleep Mode, press and hold for at least 2 seconds.
memo ◎ There is important information included in "Safety Precautions (Observe Strictly)" (▶P. 6) on how to correctly use your phone so you can avoid causing injury or harm to yourself or others when using this product. Please refer to them.When the product is used by a child, parents or guardians should thoroughly read the "Instruction Manual" and teach the child how to use it. ◎Depending on your internet data plan, there may be additional costs incurred when browsing the internet or downloading. For more details, please refer to your service provider. ◎ For detailed information on peripherals, visit the au homepage (http://www.au.kddi.com/).
Initial Setup
When you power on your IS12M for the first time, the Initial Setup Screen is displayed automatically. Follow the directions to set up the device.
Switching the Display Language to English
1. On the Initial Setup screen, tap 言語変更 (Change language).The Select your language screen is display.2. On the Select your language screen, select English.
Set Up a Google Account
Setting up a Google Account allows you to access useful Google applications such as Gmail, Android Market, and Google Talk.The following section explains most of the major settings. (You must also register your first and last name along with a secret question and answer in case you forget your password in addition to the settings listed below.) If you do not have a separate e-mail address to use as an emergency e-mail address, this field may be left blank.
Username
The name to use as your Google Account (user ID) and e-mail address. You can register any username you want, but you cannot use a username that has already been registered.
Password The password required to use your Google Account.

29
Usag
e Prep
aration
1
Create※ If you already have a Google
Account, tap Sign in.※� If you want to set up a Google
Account, tap Create.
Tap the Android Robot in the center of the screen.
2
3 4
Start username registration confirmation
Enter your first and last name, then enter the username you
want to use. → Next
5
Enter password. → Next Enter a question, answer, and emergency e-mail
address to use if you forget your password. → Create
6
7
Confirm the details. → I agree, Next
Enter the text displayed on the screen. → Next
8

30
Usag
e Prep
aration
9
Start Google account creation
10
Confirm backup and restoration settings →�Next※ Unselect the checkbox if you
are not using backups.
When the phone is newly set up, there is no Google Account, only Add account is available. Add account → Google and then follow the on screen instructions to create your Google account before synchronization.To synchronize your Gmail, Gmail Contacts, Calendar, etc. with the
device, on the Home screen, tap →�Settings → Accounts → Select your newly created Google Account and configure the synchronization settings under Data & synchronization once you have completed the initial setup.When completing Google account setup, you will proceed to the Motorola Service contract confirmation. Check Motrola terms of use, after agreeing on the terms you will be proceed to next step. If you do have a MotoCast ID, select Restore now and Next. You will be asked to login to your Motocast ID and you will be able to restore the information from your previous device. If you do not have a MotoCast ID select Do not restore and Next.
Set up your au one-ID
Setting up your au one-ID will allow you to purchase applications on the au one Market with our "au Easy Payment" system and will give you access to other useful au services.
au one-ID※ The au phone number or ID to be registered as your au one-ID (user ID).
au one-ID password
The password required to use your au one-ID.
※ Your au one-ID must be unique.
Finish setup
11

31
Usag
e Prep
aration
1 2
au one-ID OK
au one-IDの設定・保存 (Configure/Save
au one-ID)
3 4
Enter your Security Code. → OK ※ This is the 4-digit number you
entered during the initial setup of the device or when you set up your mobile phone contract.
Enter your password → Read the content and select�利用規約に同意して登録�(Agree to the Terms and
Conditions and Register) ※ If you want to register an au one-ID other
than your au mobile phone number, select お好きなau�one-IDを新規登録したい方はこちら�(I want to register my own au one- ID) to register a new au one-ID.※ If you want to configure an existing au
one-ID, select 取得済みのau�one-IDを登録したい方はこちら�(I already have an au one- ID that I want to register) and follow the instructions.
au one-ID Setup Complete →�設定画面へ�(To Settings Screen)
※ Tap 設定画面へ (To Settings Screen) and enter the information required to issue a new password.
5 6

32
Usag
e Prep
aration
7
Enter your date of birth and your secret question and answer. → 入力完了�(Complete) → 設定�
(Setting)
Registration of date of birth and secret question/answer complete. → 終了�(Finish)
8
アカウントの追加完了(Done adding accounts) → 完了(Done)
9
You can also add a new account from the home screen by tapping → Settings → Accounts → Add account.
Settings for Lost Device
Set the lost device feature on 安心セキュリティパック service.The Anshin Security Pack is a paid-for service.
Please check the information, tap I Accept → Activate → → QuitIn the case that you have applied for the Anshin Security Pack, please perform the settings for VirusBuster™ Mobile for au once you have completed the initial settings.When you first use it, please perform the following operations.
On the home screen: tap Apps → auお客さまサポート��(au Customer Support) → I Agree → follow the on-screen instructions and select your usage method →�サポート&サービス��(Support & Services) → 安心セキュリティパック�(Security Pack) → ウイルスバスター�モバイル�for�au�(VirusBuster Mobile for au) → follow the on-screen instructions※�For more information on the use of the Anshin Security Pack, see "Using Anshin Security Pack"
(▶P. 88)
Basic Operations
Follw the on-screen instructions to check how to open the notification panel, perform a long touch (tap and hold), and using menus (options).1 Tap “1” → follow the on-screen instructions to slide the status bar down → tap the bottom of the notification panel2 Tap “2” → follow the on-screen instructions and long touch → Close
3 Tap “3” → tap →�Good job! Touch to close.→ close "X" → the home screen will be displayed.

33
Basic O
peratio
n
Basic Operations
This chapter will explain the basic operations of the product.
Touch and Navigation
Turning the Display On and Off
The display will turn off automatically if no actions are performed for a certain period of time.
• Press to turn the display on or off. • When talking on the cell phone with it close to your ear, the display will turn off to avoid any unintended operations. When you remove the cell phone from your ear, the display will turn on.
• You can change the amount of time required to elapse before the display turns off automatically.Setting Instructions: On the home screen: → Settings →
Display → Screen timeout • To lock the screen when the display turns off, use the Screen Lock function (▶P. 86).
memo ◎Covering the sensor shown in the diagram will make the touch panel go darker. Be sure not to use any protective cover or film (even transparent ones) on the display that covers this sensor.
Types of Touch
The product's display is a multi-touch screen. The phone can be operated by touching this screen. Other multi-touch actions such as pinching are also supported.
memo ◎ The display is designed to be touched lightly with your fingers. Do not apply strong pressure with your fingers or sharp-pointed objects (such as fingernails, ballpoint pens and pins) on the touch panel display. ◎ In the following cases, the product may not respond to touching the display. Or errors in operation may occur.�• Operations performed while wearing gloves�• Operations performed with your fingernails�• Operations performed with another object resting on the screen�• Operations performed when a protective cover or film is used�• Operations performed with water or condensation on the display�• Operations performed when your fingers are wet or damp (from sweat, rain,
etc.)
• Tap/Double-tap: To lightly touch a menu item or icon on the screen with your finger. Tapping twice in succession on the same spot is referred to as a double-tap.

34
Basic O
peratio
n
• Long Touch: Touching a menu item or icon for a short while. This operation is used to display popup menus or move icons on the home screen.
Example of Long Touching the Wallpaper on the Home Screen
• Drag/Flick/Slide: Moving your finger while touching a menu item or icon (Drag). Quickly sweeping with your finger (Flick). This operation is used to scroll. You can also scroll while keeping your finger on the screen (Slide).
• Pinch: Touching the screen with two fingers (multi-touch) and changing the distance between them. This is used to zoom in and out on Google Maps, web pages, and other types of information.
Example of a reduced-size image
memo ◎When you flick to scroll, you can tap the screen to stop scrolling. ◎When Google Maps is displayed, you can touch the screen with 2 fingers to rotate or adjust the tilt of the map.

35
Basic O
peratio
n
Using the Navigation Keys
• Menu Key: Displays a menu related to the screen that is currently displayed.
• Home Key: Returns to the home screen. Doing a long touch will display recently used applications (▶P. 39). Touching an application will start that application (▶P. 39).
• Back Key: Returns to the previous screen. • Search Key: Performs a text search. You can long touch the search key to perform a voice search.
"Phone options" Pop Up Menu
Push and hold to bring up the "Phone options" pop up menu. On this pop up menu, you can set or deactivate silent mode or airplane mode, put the phone to sleep, or turn the phone off.
Volume Adjustment
Push / . • Pressing the key on the home screen, will change the volume of the ringtone.
• Pressing the key during a call, will change the volume of the call.
• Pressing the key while music or video is playing will change the volume of the media playback.
Screen Rotation
Many applications will be able to rotate the display depending on if the product is horizontal or vertical.
Setting Instructions: On the home screen: Tap → Settings → Display → Auto-rotate screen to turn screen orientation on and rotate the screen automatically depending on the orientation of the product.
Home Screen
Important information is displayed on the home screen. You can tap to display the home screen, even if another application is already running.
Status barDrag down to view notifications
Widgets
PanelFlick left and right to switch between panels.
Dock
Shortcuts
Applications KeyTap to view the applications menu.
• Widget: Allows you to display up-to-date information and change settings for the product via icons. Some widgets will allow you to check information on the home screen. There is no need to start an application.
• Shortcuts: Set your favorite applications and bookmarks.

36
Basic O
peratio
n
• Dock: Always displayed at the bottom of the home screen. Three applications can be placed in the dock.
• Panel: The home screen is organized into several panels (five panels). Flick left and right to switch panels. Different widgets and shortcuts can be set to each panel.Tap on the home screen to bring up a miniature display of all panels. You can then tap on any panel to change to that panel.
• Status Bar: Contains icons that indicate the status of the product.Primary Notification Icons
Downloading New e-mail
Installation complete Warning
On a call Playing music
Connected via USB 3LM Security notification
Missed call VirusBuster™ Mobile for au running
Wireless LAN (Wi-Fi®) available for use
Smart action suggestion
New Gmail Calendar event
New SMS (C-mail)・Voice mail service notification・New call notification
Connected via HDMI
Primary Notification Icons
Bluetooth® ON ※ Signal status (No service: )
GPS in use Roaming※ Connected to wireless
LAN
※ 3G data transfer enabled
Silent mode (vibration ON) ※ CDMA 1X data transfer enabled
Silent mode (vibration OFF) Synchronizing data
Mic muted Alarm set
Speakerphone ON Battery level
Airplane mode Charging
Kana input mode No micro au IC-Card
※When you are logged in to your Google Account a blue icon is displayed.

37
Basic O
peratio
n
Customizing the Home Screen
■ Customizing Widgets, Shortcuts, and WallpaperOn the home screen: Tap → Tap Add to Home pop up menu.From this pop up menu, it is possible to add widgets, shortcuts and change the wallpaper.
memo ◎ To move and delete widgets and shortcuts displayed on the home screen, long touch an item and drag it to another location or panel (move), or drag it to the trashcan at the top of the screen (delete). ◎ The size may change depending on the widget.
Settings: Long touch a widget, then remove your finger. An icon with four corners will be displayed, drag the corners to change the size of the icon.
■ Main WidgetsThe main widgets are as below.•Consolidated Inbox Widget: Check un-read messages. Tap a
widget and select "Widget Settings" to change the name of a widget or change the length of time a notification is displayed for. For more information on adding PCmail accounts, refer to. "Adding a PCmail Account" (▶P. 50).※�When you have unread messages, tap the widget → → Settings to change
the settings.•Music: Play music (play key). Tap a song title to open the music
application.

38
Basic O
peratio
n
•News Widget: View news. Tap a widget, tap (メニューボタン) →�tap "Settings" to change the name of a widget or change the length of time a notification is displayed for and to choose a news source. To add a news source, tap .※�When you have unread news, tap the widget → → Settings to change the
settings.
•Weather Widget: Check the weather. Tap the widget, tap → tap "Settings" to change the temperature units and add a city. Tap to add a city. Tap the widget and flick left or right to display the weather for cities that have been added.※�When you cannot search for a Japanese city with kanji, please use romaji.
For example: Shinjuku•Favorite Contacts Widget: Easily call and message your favorite
contacts. Drag the widget down to display up to 20 of your favorite contacts. Drag the widget down tap →�tap a contact to turn it on →�tap to select the contact to display in the widget.
■ Customizing the DockYou can set three applications in the dock that you use regularly.Settings: To set an application to the quick start area, long touch an
icon on the quick start area and tap the application you wish to set.
Search
Tap to open the search screen.An example of tapping on the home screen.
Touch here to enter text.
Touch to search by voice.
Touch for more search options.
memo ◎Depending on the application in use, the screen displayed when is tapped will vary.For example, when the Contacts screen is displayed you can tap to open the search screen.
Notification Panel
Icons that indicate the status of the product are displayed in the status bar at the top of the screen. Drag down the status bar to display the notification panel. Tap a notification to display more information on the notification.
memo ◎When is displayed in the notification panel, you can tap to remove the notification. Or, tap "Clear" to remove all notifications that can be deleted.

39
Basic O
peratio
n
Starting an Application
All applications can be launched from the Applications Menu.
Instructions: On the home screen: Tap Apps → Flick left or right → Tap the function you want to launch.
Tap to start the Android Market.
Tap to switch between groups and create new groups.
For information on applications in the application menu at time of purchase, see "Application List" (▶P. 39).
Recently Used Applications
Long touch to view a list of applications you have recently used.Touching an application will start that application.
memo ◎You can see a list of recently used applications with the following operation too.
Instructions: On the home screen: Tap Apps → All apps → Recent
and double tapping on a home key will start the application
Double tapping will start the application.Instructions: On the home screen, tap → Settings →
Applications → Double tap home launch → tap the application you wish to start.
Application List
Application Description
3LM Delete data in the IS12M or lock its operations in case of loss of your IS12M (▶P. 89).
Alarm & Timer Set the alarm or timer (▶P. 83).
au one Connect to the au one portal.
au one-ID Settings Make au one-ID Setting (▶P. 30).
au one Market Allows you to install Android applications recommended by au (▶P. 79).
au recommend Easily download au-recommended applications.Applications must be downloaded to use them.
au Wi-Fi接続ツール (au Wi-Fi�connecting tool)
Connects to a Wi-Fi® network easily in an area where au Wi-Fi SPOT is available. Or, you can easily configure your Wi-Fi® settings for any wireless LAN that supports the "simple connection" function.
auお客さまサポート (au Customer Support)
You can check the subscription contents or monthly usage of your au phones etc. with this application. You can change your rate plan, apply for optional services and so on at au Customer Support website.

40
Basic O
peratio
n
Application Description
auスマートパス(au Smart Pass)
You can enjoy over 500 apps by 390 per month! Also coupon, present, photo storage and security apps are available! Please enjoy your safety and comfortable smart Phone life!
au災害対策 (au Disaster Countermeasure)
This is an application in which you can use Disaster Message Board and Early warning mail (earthquake early warnings and disaster/evacuation information) (▶P. 53).
Browser Browse web pages (▶P. 76).
Calculator Use the calculator (▶P. 83).
Calendar Make appointments and view your calendar (▶P. 83).
Camcorder Take videos (▶P. 73).
Camera Take pictures (▶P. 71).
Contacts Register e-mail addresses and phone numbers (▶P. 48).
Downloads View pictures etc. that you have downloaded with the browser (▶P. 76).
E-mail Send and receive e-mails on your au cell (▶P. 57).
Friends Note "au one Friends Note" can manage Native Address Book of your phone and multiple social networking services in just one application.
GLOBAL PASSPORT
Check whether the connected carrier applies to Overseas Double-Teigaku or confirm the method of making international calls and the call fees.
Gmail Send and receive e-mail through Gmail (▶P. 55).
Application Description
Google+ Enables better and easier sharing of information on the web. With Google+ you can easily share only the information you want to share with only the people you want to share it with.
Google Search Enter a search term to search applications and contacts in the product, and web pages (▶P. 38).
GREE_MARKET (GREE Market)
This application allows you to browse games and other content provided by au one GREE. You do not need a GREE account in order to use this application.
Help Center Videos and pictures explaining the main features of the product. You can download and view the operations manual.
Latitude Check the location of your friends and family on Google maps.
LISMO Player Plays music or checks information about the playing music.
Maps Display your current location and your destination on a map. Search for a destination.
Market Use the Android Market (▶P. 77).
Messaging Manage all your messages such as text messages (C-mail), PCmail, social messages (▶P. 50).
Messenger Use the Google+ Messenger. Allows you quickly and easily exchange messages with friends in your Circles.
MOTOPRINT Print images and web pages over Wi-Fi from the product.
My Accounts Set your Facebook and Twitter accounts etc. to this product.

41
Basic O
peratio
n
Application Description
My Files View and manage your files and folders.
My Gallery View the pictures and movies saved to the product.
My Music Play music.
Navigation Get directions to where you want to go. Voice navigation of the destination, etc. can be performed.
News Subscribe to RSS and web pages news feeds.
News & Weather View the top news and weather info.
PCmail Send and receive PCmail.
Phone Make phone calls (▶P. 44).
Places Search for sights, cafes and restaurants near to your current location.
Quickoffice Open, create, edit and share Microsoft® Word documents, Excel spreadsheets and PowerPoint presentations.
Settings Display the settings menu (▶P. 85).
Skype Makes a call or exchanges instant messages (chat).
Smart Actions Use the Smart Actions function to automatically optimize battery usage.
Social Networking Add social networking accounts and use social networking services.
Talk Chat using Google Talk.
Task Manager See applications running and also shut them down.
Tasks Manage tasks and projects (▶P. 84).
Text Messaging Send and receive SMS (C-mail) messages (▶P. 51).
Application Description
Videos Rent and play movies from the Android Market.
Voice Commands Operate the phone and applications with voice commands.
Voice Search Use voice to search web pages.
Webtop Connector View browser reading information when accessing the internet through HD Station (optional (sold separately)) or Lapdock (optional (sold separately)).
YouTube Upload and play videos on YouTube.
ウイルスバスター(VirusBuster)
Blocks improper applications and sites in order to protect young people (▶P. 89).
ニュースEX (News EX)
Check latest news, weather,fortune-telling, etc.
リモートサポート(Remote Support)
Call for technical supports on the phone operations by sharing the screen that you are watching with au operators (▶P. 89).
安心アプリ制限 (Restrict Applications)
Restrict inappropriate applications, Wi-Fi® communication, etc. for children.

42
Text Entry
Text Entry
Use the software keyboard when entering text. Entry: Tap the text entry field → tap 文字 or flick to enter hiragana → tap
to change to predictive text.•Enter hiragana → 変換 to select a candidate.
(Predictive) Conversion CandidatesEnter text for it to be displayed.
Tap or flick to enter text. Text Key
Software Keyboard
memo ◎ Tap when converting to see other conversion candidates.
◎ Tap and hold to not display the software keyboard.
Entry Options
Purpose Operations
Enter numbers, symbols or emoticons
Tap "文字" or "記号" to display the menu where you can enter numbers, symbols of emoticons.
Enter hiragana/katakana/roman characters/numbers/dates/times(Only when displaying the phone keyboard)
Enter hiragana → 英数カナ → tap the conversion candidate. For example: By entering あ → か → さ → わ → 英数カナ, the following candidates will be available.
Move the cursor • Tap the location where you want the cursor to be.
• Tap / .
Select text to cut or copy and paste
Long touch on the text → Select Word → select the area around → tap and hold the text → Cut/Copy
Pasting cut or copied text Move the cursor to the location where you want to paste the text → tap and hold the text → Paste
Delete text to the left of the cursor
Tap .Hold down to keep deleting text.

43
Text Entry
Entry Tips
To change the entry options, touch and hold 文字. • Change Settings: Text entry settings for keyboard sounds, automatic title case, predictive text.
• 10-Key ⇔ QWERTY: Switch between a phone keyboard and the full keyboard.
10-Key QWERTY
• Input Mode: Switch entry modes (hiragana kanji, full katakana, half-byte katakana etc.).Tap 文字 on the software keyboard to switch between the main entry modes.
• Input Method: Switch the software keyboard between iWnn IME (standard keyboard) or the Multi-touch keyboard.The entry method can still be switched by long touching a text entry field and then tapping "Entry Method".
Sounds
■ Manner ModeSettings: On the home screen, tap → Settings → Sound → Silent mode
■ VibrateSettings for whether the cell phone vibrates where there is an incoming call or notification.Settings: On the home screen, tap → Settings → Sound → Vibrate
■ VolumeYou can adjust the volume for notifications, incoming calls, media playback (music etc.) and alarms etc.Settings: On the home screen, tap → Settings → Sound → Volume
■ Ringtone/NotificationSettings: On the home screen, tap → Settings → Sound → Phone ringtone or Notification ringtone
Date and Time
You can set the date, time, timezone and display format.Settings: On the home screen, tap → Settings → Date & Time. If the settings are set to “Automatic”, information about the time and time zone will be collected from the server and used to set the clock of the product.

44
Pho
ne
Phone
Making Calls
Instructions: On the home screen, tap Phone → Dialer → enter phone number →�tap In the case that you want to call a landline, enter the city code even if you are in that location.
Recent Calls ListTouch an entry to call.
Enter a phone number to display details for the same number from your call history or contacts.
Enter a phone number& touch here to call it.
Delete digits you entered.
Return Call
Backspace
Add Number To Contacts
Call
Voice CommandTap to use voice commands.
Phone Number Entry Screen
memo ◎On the phone number entry screen, tap and make a call with 184 or 186 or change the speed dial settings. ◎Speed dial is a function that allows you to hold down a number on the phone number entry screen to make a phone call. On the phone number entry screen, tap and "Speed dial setup" to register a phone number to a key.
Services you can use from your au phone•� Regular national phone call•� Phone national cell phone number, PHS, car phones•� 010 (au international phone services: application not necessary)•� 171 (Disaster Bulletins)•� 177 (Weather forecast: City code not necessary.)•� 117 (Newsletter)•� 104 (Phone number info)•� 115 (Telegram transmission)•� 110 (Emergency report to police)★•� 119 (Emergency report to fire service)★•� 118 (Emergency report to coastguard)★•� 157 (Customer center)•� Ship phone※★�are emergency numbers only. ※The following NTT services cannot be used.
Collect calls, voice dial, dial Q2, 166 (NTT Operations Information) ◎You can use voice commands to send mail, checking your telephone number and launching applications. For more details on use, please tap → Help.

45
Pho
ne
■ Emergency NotificationsIn the case of emergency, this product can send the customers current location (GPS information) to the police, fire services and coast guard.
memo ◎ For more information on police (110), fire services (119), and coast guard (118), please see the related emergency report information here. ◎ There may be occasions where this product cannot send an emergency report. ◎ If you include 184 in front of the emergency numbers (110, 119, 118), the customers phone number and location will not be sent to the emergency responder. ◎ If there is an issue getting signal from the GPS satellite or base station, for example because you are underground, in a building or in the shadow of a tower block, the emergency responder may be provided with a location different than the correct one. ◎ In the case that it is not able to notify through GPS, it will be done through the base station. ◎ The emergency notification feature can only be used within Japan. It cannot be used abroad. ◎ If an emergency report is sent to the police, fire services, coast card, the customer should confirm their precise position verbally. There may be cases where the authorities will not be able to receive the report depending on the area. ◎When an emergency report is made, if the emergency responder feels that there is imminent danger to human lives during a phone call or after one has ended, they will be able to get location information from the caller for a period of time.
Call Screen
Call Timer
Hang up.
Enter numbers during a call.
Turn the speakerphoneon or off.
Mute or unmute the call.
End Call
Dialpad
Speakerphone
MuteTap and you can use the Bluetooth® functionality.
memo ◎ To use Bluetooth® you will first need to pair your devices. For more information on sharing, please see "Bluetooth® Device Connection" (▶P. 81). ◎During a communication tap or to stop displaying the call screen. If you want to return to the call screen, tap on the home screen or drag the status bar at the top of the screen down and tap "Recent Call". ◎When talking on the cell phone with it close to your ear, the display will turn off to avoid any unintended operations. When you remove the product from your ear, the display will turn on. ◎When you are done, tap "End Call" on the call screen.

46
Pho
ne
Receiving Calls
Tap "Take Call" on the call screen.
If you receive a call when your screen is locked, drag to the right.
■ To reject a callTap "Reject" on the call screen.
If you receive a call when your screen is locked, drag to the left.
If you reject a call, an SMS (C-mail) can be sent to the caller's phone. When the screen on the right is displayed, tap the message to send and then "OK". If you tap "Cancel," and SMS (C-mail) will not be sent.
memo ◎ To stop incoming notification sounds, press either , , . ◎You can register received messages and whether or not received SMS (C-mail) is displayed when you reject incoming.Instructions: On the home screen, tap → Settings → Call settings →
Text message reply → Text message reply or Edit messages.
Calling Overseas on an au Phone (au International Phone Service)
You can call international numbers without any special procedures. Example: If you wanted to call an US phone number 212-123-XXXX
1 On the home screen, tap Phone → Dialer.
2 Enter the International Access Code, the Countery Code, the City Code and the phone number.
International Access Codes※1
➡
Country Code (America)
➡
City Code※2
➡
Phone Number
001010or 010
1 212 123XXXX
※1 If you long touch "0" and enter "+", it will automatically become "001010" when calling.
※2 If the city code starts with a "0", omit the "0". (There are some exceptions, including Italy and Moscow).
3 Tap → Call → End Call.
memo ◎ The au international phone service has a monthly charge limit. From the moment you exceed the limit in a month, you will not be able to use the au international phone service. ◎However, the service will be available from the 1st of the following month. You will still be able to use your phone normally within Japan. ◎You can request that the monthly fees be greater than that from au. ◎ If you haven't requested this, you can contact the au international phone service center. au International Phone Service Contact:From au phones (no codes) 157 (free of charge)From landlines 0077-7-111 (free of charge)Opening hours: 9:00 ~�20:00 (everyday) ◎You can transfer calls abroad. ◎ For more information on international access codes, please refer to "International Access Numbers" (please refer to au website).

47
Pho
ne
Making a Call from the Call History
You can select a phone number to call from your call history.
Instructions: On the home screen, tap Phone → Recent → tap on the desired number
Tap ▼ to select type of call history you want to view.
memo ◎ To choose another option such as adding to contacts or displaying the contact, touch and hold the number. ◎ To clear the list, tap → and "Clear List".
Making a Call from Frequent Contacts
Instructions: On the home screen, tap Phone → Favorites → tap on the desired number
memo ◎ To choose another option such as contact details, touch and hold the number. ◎ To add a contact to your favorites, tap the ☆ on the top right of the contacts details screen. When the star is green, that contact has been added to your Favorites.
Checking Your Phone Number
Confirmation: On the home screen, tap → Settings → About phone → Status → My phone Number.

48
Co
ntacts
Contacts
Register numbers, names and addresses.
Instructions: On the home screen, tap Phone → Contacts
GroupCreate & view groupsof contacts.
Touch to view contact information. Touch & holdto call, send a text message, & more.
Touch a letter to jump to contact names that start with the letter.
Add contacts.
Contacts List
Contacts List
memo ◎On the contacts list, tap → enter a name to search for (last, first) to search your contacts list.
Creating a ContactInstructions: On the home screen, tap Phone → Contacts →
→ tap the application to register a contact.
Select a picturefor the contact.
Add more name details.
Add another number.
Remove this number.
Set the number type.
Registering a Contact
When you are done, tap "Save".
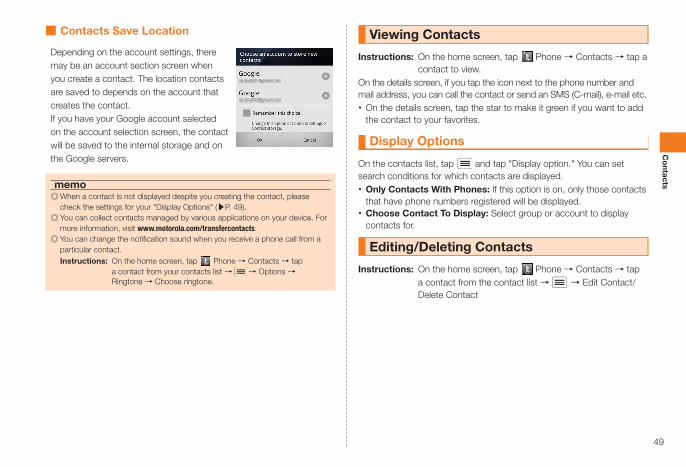
49
Co
ntacts
■ Contacts Save Location
Depending on the account settings, there may be an account section screen when you create a contact. The location contacts are saved to depends on the account that creates the contact.If you have your Google account selected on the account selection screen, the contact will be saved to the internal storage and on the Google servers.
memo ◎When a contact is not displayed despite you creating the contact, please check the settings for your "Display Options" (▶P. 49).. ◎You can collect contacts managed by various applications on your device. For more information, visit www.motorola.com/transfercontacts. ◎You can change the notification sound when you receive a phone call from a particular contact. Instructions: On the home screen, tap Phone → Contacts → tap
a contact from your contacts list → → Options → Ringtone → Choose ringtone.
Viewing Contacts
Instructions: On the home screen, tap Phone → Contacts → tap a contact to view.
On the details screen, if you tap the icon next to the phone number and mail address, you can call the contact or send an SMS (C-mail), e-mail etc. • On the details screen, tap the star to make it green if you want to add the contact to your favorites.
Display Options
On the contacts list, tap and tap "Display option." You can set search conditions for which contacts are displayed. • Only Contacts With Phones: If this option is on, only those contacts that have phone numbers registered will be displayed.
• Choose Contact To Display: Select group or account to display contacts for.
Editing/Deleting Contacts
Instructions: On the home screen, tap Phone → Contacts → tap a contact from the contact list → → Edit Contact/Delete Contact

50
Co
mm
unication
Communication
Messages
Viewing Messages
You can view all your messages such as SMS (C-mail), PCmail and social messaging in one application.
Instructions: On the home screen, tap Apps → Messaging → tap the icon of the message you want to view.
Check for messages now.※Not including SMS (C-mail).
Message Type
Create messages.
Unread Messages
Tap to view a message.Touch and hold to delete etc.
memo ◎ First you will need to create an account that is compatabile with this application such as PCmail or Twitter. ◎ In your inbox, all your messages will be displayed together (SMS (C-mail), PCmail, social messaging). To display certain message types, you can tap a message type to display instead of the consolidated mail box.
◎ If replying or forwarding to PCmail, with your PCmail displayed, tap → Reply/Reply to All/Forward. ◎ To display options, tap and hold a message.
■ Receiving AttachmentsWhen you have received a message with an attachment, tap the file name to view the file.
memo ◎ Tap a file name depending and the download will begin depending on the file. ◎ Tap and hold a file name to save it or share it etc. ◎When sending an receiving large attachments, it is recommended you do so over LAN (Wi-Fi®).
Create Message
Instructions: On the home screen, tap Apps →� Messaging →�� → tap a Message Type (account).
With the message creation screen displayed, enter a subject and message and then send your message.
For PCmail, tap to choose options such as attaching files.
Message Creation Settings
■ Adding a PCmail Account
Instructions: On the home screen, tap Apps → Messaging → → Manage accounts → Add Account
• PCmail: Your individual PCmail account. For more information on accounts, please contact your service provider.
• Corporate Sync: A PCmail account on a company's Exchange server. For more information on the settings, contact your company's IT supervisor.

51
Co
mm
unication
■ Advanced Settings
Instructions: On the home screen, tap Apps → Messaging →��
• Compose: Messaging. • Manage accounts: Add or delete accounts. • Edit Universal Inbox: Select the messaging accounts to be displayed in your consolidated mail box.
• Messaging settings: Change the notification settings for each account type.
SMS (C-mail)
This is a messaging service that allows you to exchange mails with other cell phone users by sending the message to their phone. You can send a maximum of 70 full-byte characters and 140 half-byte characters.
Instructions: On the home screen, tap Apps → Messaging →� Text Messaging
memo ◎When entering a message, tap to save a draft and not send the mail. ◎ The SMS (C-mail) center will store the following SMS (C-mail). Storage time: 72 hours※1
Number that can be stored: No limit※2
※1 Once 72 hours have passed, the SMS (C-mail) will be automatically deleted. ※2 Depending on the receiver and the type of phone sending the SMS (C-mail), the SMS
(C-mail) center may not store it. ◎ The timing of stored SMS (C-mail) delivery is as follows.SMS (C-mail) is stored: Each time the SMS (C-mail) Center receives a new SMS (C-Mail), it will send all SMS (C-mail) stored on the server. Retry delivery: If the receiver is in a place with no reception, or their device is switched off and the stored message cannot immediately be delivered, the SMS will be resent again several times within a maximum period of 72 hours. Delivery after a phone call: If a message could not be delivered, all stored SMS (C-mail) will be sent by the SMS (C-mail) Center when the customer finishes a phone call. ◎ If there is no receiver number notification, the SMS (C-mail) will not be able to be sent. ◎ In the case that characters are sent to a cell phone that does not support them, some text may not be properly displayed. ◎ Even if the SMS (C-mail) send is successful, the message may not be received due to weak signal for example and a message will be displayed saying that it was resent. ◎SMS (C-mail) are free to receive. ◎ The senders phone number will be visible in received SMS (C-mail). ◎ There may be cases where the received mail does not display correctly depending on the content. ◎When you have no free internal memory, you won't be able to receive SMS (C-mail). When you cannot receive SMS (C-mail) please increase your free internal memory by deleting saved SMS (C-mail). ◎SMS (C-mail) that is over 51 full characters/101 half-byte characters will be divided over two messages.

52
Co
mm
unication
SMS (C-Mail) Safety Block
The SMS (C-mail) safety block will reject SMS (C-mail) that includes URLs or phone numbers in the body of text.
memo ◎SMS (C-mail) safety block is active when first used. ◎ If this has been changed before, the details previously set will remain. ◎ The block will affect normal SMS (C-mail) (including pre-paid). E-mail information, voicemail services (notifications etc) and information services will not be affected.
■ SMS (C-mail) Safety Block SettingsTo set the SMS (C-mail) safety block, you will need to send an SMS (C-mail) to a special phone number.
Remove settings Send an SMS (C-mail) saying "Remove" to 09044440010.
Activate settings Send an SMS (C-mail) saying "Activate" to 09044440011.
Remove settings Send an SMS (C-mail) saying "Remove" to 09044440010.
※ Sending an SMS (C-mail) to these numbers is free. ※ Sending an SMS (C-mail) to these 09044440012 numbers is free.
■ SMS (C-mail) Safety Block Rejects a MessageWhen a message is rejected because of the SMS (C-mail) safety block, you will receive an error message indicating that a message could not be received.
SMS (C-mail) Settings
Instructions: On the home screen, tap Apps →� Messaging →� Messaging settings → → Messaging settings
General settings
Delivery reports Check this to receive a SMS (C-mail) when the other person receives your SMS (C-mail).
Message limit Set the number of messages that can be saved by sender.
Display suggestions
Show suggestions while addressing.
Notification settings
Notifications Check this to display a notification in the status bar when you receive a new SMS (C-mail).
Select ringtone Set the notification sound to let you know when you have a new SMS (C-mail).
Vibrate Check this to be notified by your phone vibrating when you receive a new SMS (C-mail).

53
Co
mm
unication
Using au Disaster Countermeasure Application
The au Disaster Countermeasure application is an application that you can use to receive Disaster Message Board and Early warning mail (eEarthquake Early Warnings, Disaster/Evacuation information).
1 On the home screen → Apps → au災害対策 (au Disaster Countermeasure)
Displays the au disaster prevention menu.
au Disaster Countermeasure Menu
■ Disaster Message BoardA Disaster Message Board is a service that you can register for to receive safety information from IS NET for the area you are in when a large disaster happens such as an earthquake of over 6.0. It is also possible to check this information on another phone or from your PC. For more details, please see "Disaster Message Board service" on the au website.
1 au Disaster Countermeasure Menu → 災害伝言板 (Disaster Message Board)Follow the instructions to register/view information.
memo ◎ To register for this service, you must have a (~ezweb.ne.jp) e-mail address. Please set up your e-mail address first. ◎You cannot use this when connected to Wi-Fi®. ◎ The safety information mails are due to start after Spring 2012.
■ Early warning mailEarly warning mails are a service that sends messages to au phones in affected area with Disaster/Evacuation information. When you purchase your phone, it will already be set to receive these Earthquake Early Warnings (Earthquake Early Warnings and Disaster/Evacuation information). When you receive Earthquake Early Warnings, ensure your own safety depending on the circumstances and act in a calm and appropriate manner.

54
Co
mm
unication
1 au Disaster Countermeasure menu → 緊急速報メール (Early warning mail)Displays in your inbox. Select a mail you want to view for more information.
削除 (Delete) Delete received mail.
設定 (Settings) 緊急地震速報 (Earthquake Early Warning) (At the top)
Set whether to receive earthquake early warnings. • Tap 受信する (Receive)/ 受信したい (Not receive) → OK.
災害・避難情報 (Disaster/Evacuation information) (At the top)
Set whether to receive disaster/evacuation information. • Tap 受信する (Receive)/ 受信したい (Not receive) → OK.
音量 (Volume)Set the volume of the receiving sound for earthquake early warnings.
バイブ (Vibrator)Set whether to activate the vibrator when receiving earthquake early warnings.
マナー時の鳴動 (Linkage to Manner mode)Set whether to notify you with Manner mode settings applied while Manner mode is set.
緊急地震速報 (Earthquake Early Warning) (At the bottom)
Check the operations of the receiving sound and vibrator.
災害・避難情報 (Disaster/Evacuation information) (At the bottom)
Check the operations of the receiving sound and vibrator.
memo ◎When you receive an emergency report mail, a special alert will sound. You cannot change this alert. ◎ If it is an emergency earthquake report, when the earthquake is estimated to be of magnitude 5 or higher, you will be notified that tremors are expected (tremors of 4 or above). ◎After an earthquake has occurred, you will be informed of automatic predictions of size, scope and location of tremors, the location of the epicenter (P waves and initial shocks) and subsequent tremors a few seconds ahead (S waves and major shocks). ◎ In areas close to the epicenter, you may not be informed of tremors in time. ◎Disaster/evacuation information will inform you of information relating to the safety of citizens as included in police bulletins and evacuation notices delivered by the government or army. ◎ This service is only within Japan (not available overseas). ◎ Emergency report mails do not incur charges of any kind. ◎ This company does not take responsibility for damages incurred by customers as a result by failures to the reporting system for this service that results in delays or misinformation. ◎ For more information on the emergency earthquake reports sent by the Meteorological Agency, please see the Meteorological Agency website. http://www.jma.go.jp/ ◎When your phone is off or you are in a phone call, you will not receive the emergency report mails. When using your browser or sending. ◎SMS (C-mail)/e-mail or even if you are in a service area you may not get good reception (if you are in a tunnel or underground) so you will not be able to receive the emergency report mails. ◎ If the emergency report is not delivered, it will not be resent. ◎ The transmission method for the emergency reports uses a different system than TV and radio so there may be differences in when the information is provided through these different media. ◎Customers may receive different information depending on their area.

55
Co
mm
unication
Gmail
Gmail is a mail service provided by Google. This product can view mail received by Gmail that can also be viewed in a PC browser. Also, any changes made in your browser will be reflected in your Gmail on your phone. • It is necessary to have a Google account to use Gmail. For more information on Google account settings, please see "Set Up a Google Account" (▶P. 28).
• For detailed information on Usage, on your Gmail inbox, tap →�More → Help. You will be able to view the mobile help.
Inbox
Instructions: On the home screen, tap Apps → Gmail • If it is not displayed in your inbox, please try again a few times. • If you have multiple mail accounts registered, on your inbox, tap
→ Accounts → tap the account you want to use and the accounts you have set will display in your inbox.
■ ThreadsGmail collects messages and replies as an e-mail thread. If a new mail is received in reply to a previous one, that is collected in the same thread. In the event of the topic of the mails changing, a new thread will be created. • When displaying a thread, you will be able to see "X Unread Messages," to indicate how many messages are in the thread. You can display these previously read messages. Instructions: X Read Messages → tap the read message you want to
display. • Long touch a thread to view options such as Archive and Mute. The main options are as below.
Archive Archive/mute the thread so it doesn't display. • If you receive a new mail for an undisplayed thread, the thread will be displayed again. However, if the thread is muted and your mail address is not in the to or cc field, it will not be displayed.
Mute
Delete Delete a thread. If you select only some mails in a thread, you cannot delete them.
Change levels Change the label for the thread.
Report Spam Report a thread as spam.
memo ◎You can do the following to archive or mute a thread so it does not display. Instructions: On your inbox → Go to labels → All Mail•� If it has reappeared in your inbox, touch and hold the thread →�Change
labels →�Inbox →�OK. ◎You cannot create labels on this device. Please use your web browser to access Gmail and create labels.
■ InboxWhen you receive a mail while on the home screen, a will be displayed in the status bar on the top of the screen. Drag the status bar down → New Mail → tap the received message thread.

56
Co
mm
unication
■ Checking for New Mail (Refreshing Gmail)If you have turned your Gmail account synchronization off or you fail to receive your mail, you can manually check for new messages.
Instructions: On your inbox, tap → Refresh
memo ◎When you refresh, your inbox will synchronize to Gmail and the Gmail website. For that reason, emails you have deleted from Gmail on your Web browser will also be deleted on this device. It is not simply checking for new mail. ◎ To change the automatically refreshed settings, please follow the below.Settings: On your inbox, tap → Accounts → → Account
Settings → switch Auto-sync on and off.You can also change the auto-refresh settings of Gmail.Settings: On your inbox, tap → Accounts → → Account
Settings → tap you Google account → switch Sync Gmail on and off.
Viewing Sent Messages and Drafts
Instructions: On your inbox, tap → Go to labels → tap the message label (type) you want to view.
Create Mail
Instructions: On your inbox, tap → ComposeWhen the mail compose screen is displayed, enter the recipient, subject
and message and tap . • On the mail compose screen, tap and select options such as add cc/bcc and attachments.
• When entering a message, tap to save a draft and not send the mail.
memo ◎Sent mail will be treated the same regardless of whether it was sent from this device or your computer. If the receiving device is set to reject mail sent from computers, your mail will not be received.
Reply/Forward
Instructions: On your inbox, tap a thread that has mails which have
been replied to or forwarded and tap ※� When replying to all or forwarding, tap → when creating a
message and select "Reply to All" or "Forward".When the mail create screen displays, enter a subject and message →
tap . • When you want to reply quoting the original email, tap "Quote Reply" on the mail create screen.
• When inserting the original mail at the end, you can tap "Include Original Message".
• When forwarding, enter a recipient.
Receiving Mail Settings
Set the actions for when you receive a mail in your inbox.
Instructions: On your inbox, tap → More → Settings → tap the account you want to make the settings for → Labels To Notify → Inbox → set items for received mail notifications
Email Notification Check this to see a in the status bar on the top of the screen when you receive a new mail.
Ringtone Set the notification sound to let you know when you have a new mail.
Vibrate Set the vibration to let you know when you have a new mail.
Notify Once Set it so that you're only informed when each new mail arrives. When you check this, you will only be informed once even if you receive several mails at a time.

57
E-m
ail
E-mail ([email protected]) is a service that allows you to exchange mails between computers and cell phones that support e-mail. You can send not only text but also photos and video. • A packet communication connection is necessary to use an e-mail application. It is necessary to first set up an e-mail address. When starting the e-mail application for the first time, please first follow the initial set up as directed on-screen.
• When you press "OK" and confirm a mail address and then press "閉じる(Close)".
• It is necessary to make an IS NET application to use e-mail. For those customers who have not applied when purchasing, please contact your au shop or the customer service center.
memo ◎You can use e-mail when travelling overseas. ◎When sending and receiving e-mail, the packet costs change depending on the data size. Usage overseas may incur higher costs. For more information, please see the au catalogue or the au website. ◎Depending on whether there are attachments and the reception in the area you are in, it may take time to download an e-mail.
Sending E-mail
1 On the home screen, tap → Create newto show the mail creation screen.
2 Tap the address field to directly enter an address.
3 Entering an Address
Address Book
Enter a contacts e-mail address as a recipient.
Address group
As all e-mail addresses registered to a contact book as recipients. • If the e-mail addresses in the group exceed the maximum permitted e-mail addresses, the most recipients possible will be added and the rest will be omitted.
• Tap "Add group by Friends Note" to create a group. If you do not have the au one Friends Note application installed or you are using an old version, please download the latest au one Friends Note application from the au one market.
Receive history
Select an e-mail recipient from sent and receive mail history.Put check marks next to the e-mail addresses → Select • → Delete → put a check by e-mail addresses → Delete → Delete to delete history.
Send history
Profile Enter an e-mail recipient from those registered to the device.
Paste※ Paste an e-mail address saved to the clipboard.
※ Will be displayed if there is text saved to the clipboard.
4 Tap the subject field → enter a subjectThe subject can be 50 full-byte characters or 100 half-byte characters.
5 Tap the subject field → enter a subjectThe subject can be 5,000 full-byte characters or 10,000 half-byte characters.
6 Done → Send → Send

58
E-m
ail
memo ◎Animation Decorated are not supported. ◎ In the subject or main text body, you cannot use half-byte kana or half-byte punctuation:�-゛゚、。・「」』 ◎ The number of e-mail you can send in a day is resticted to a total of 1,000 e-mails. ◎ The number of recipients an e-mail can be sent to at once is a maximum of 30, including To/Cc/Bcc.A subject is restricted to 64 characters. ◎ If another carrier's device receives au emoticons, those emoticons will change to match those of the other carrier.※�They may not change depending on the emoticon.
◎ Emoticons that are sent to other devices, phones or computers may not display properly for the recipient. ◎On the send mail creation screen, tap "Save" to save the draft e-mail to your outbox. ◎ The settings may be set to not display the email (▶P. 66)..
Add/Deleting Recipients
To add or delete recipients, edit the recipient fields (To/CC/BCC).
1 Mail creation screen
2 Tap an icon
Add a recipient.For more information on sharing, please see "Sending E-mail" (▶P. 57) section 3.Tap the address field to directly enter an address.Delete a recipient.
To Change the selected recipient to a "To".
Cc Change the selected recipient to a "Cc".
Bcc Change the selected recipient to a "Bcc".
memo ◎You cannot change the type of the first recipient.
Attach data to an e-mail
You can attach a maximum of 5 pieces of data (totalling 2 MB or less) to a mail.
1 Mail creation screen → tap the attachments field
2 Tap the type of date you want to attach
SD Card Attach data from your internal storage.
Gallery (Photo) Attach data from the gallery.
Gallery (Movie) Attach data from the gallery.
Camera (Photo) Take a photo to attach.
Camera (Movie) Take a movie to attach.
Other Use another application to attach data.
memo ◎You can attach data up to 2 MB for each piece of data. ◎After attaching data, tapping the attachment will let you check the attachment.
Deleting an Attachment
1 Mail creation screen → tap on the data to be deleted
2 Delete

59
E-m
ail
Using Emoji Mail (Emoticons)
When creating an email, you can add decorations and emoticons to it easily.
1 Mail creation screen → tap the main text field → Emoji
2 D-Emoji/Picture → ▲
3 Tap an item
Search au one Connect to the internet and search for decoration applications.
Select from my favorite
Search for decorations using other applications.
■ When Using Picture Icons From Your Internal Storage
1 Mail creation screen → tap the main text field → Emoji
2 microSD → Download
3 Tap an item
Search au one Connect to the internet and search for decoration applications.
Select from my favorite
Search for decorations using other applications.
Refresh Search for decoration saved to your internal storage and display it.
Decorating Text
You can send emails where the text has been decorated.
1 Mail creation screen → tap the main text field → enter text
2 DecorationThe decoration menu will be displayed.
3 Select initial decoration → Selection → select location with / Tap"Select All" to select all of the text.
Tap → Delete All Decoration → Delete to delete all decoration.
4 Settings
Font size Change the font size.You can choose between Small, Medium and Large
Font align/effect Change the justification and text effects.Choose between Left align, Center, Right align, Blink, Ticker, Swing.
Font color Choose a font color from 24 colors.
Background color※
You can choose from 24 background colors.
Insert Import pictures and photos saved to your internal storage or your gallery.Choose from Insert image and Insert line.
※ Not selectable when editing the opening/signature.

60
E-m
ail
5 Done → Send → Send
memo ◎With decorated email, you can enter about 10 KB of text including decoration information. ◎ The text can have a maximum of 20 (totalling a maximum of 100 KB) in pictures and decorations.※�Emoticons and pictures that are imported together, can be imported any number of times.※�File formats that can be imported as pictures and decoration are .jpg and .gif.
◎When attaching data using the procedure in "Attach data to an e-mail" (▶P. 58) the total attached data/pictures and decorations is 2 MB. ◎ Even if decorative text is deleted, the information will remain and you won't be able to enter as much text. ◎Decorative mails that are sent to other devices, phones or computers may not display properly for the recipient. ◎When decorative mails are received by imcompatable devices or PCs, it may not display or be received like an ordinary e-mail. ◎ If an e-mail is returned by the server, the text will not be decorated.
■ Use Soku-Deco (Quick Decoration)After entering text, you can automatically change the font/background and decorate the text. Please download the application from the au one Market to use "Soku-Deco".
1 Mail creation screen → tap the main text field → enter text
2 Soku-DecoA preview will be displayed.Tap "Next Proposed" to preview different styles.
3 OK
■ Using TemplatesBy adding messages into template, you can easily create decorated mails.
1 On the home screen, tap → TemplateA list of templates will be displayed.
Tap and "Load from SD Card" to view a list of templates stored in the internal storage. You can use the template once it has been read by the system.
2 Tap a template → Create mail

61
E-m
ail
Receiving E-Mails
1 When receiving an e-mail
When an e-mail has been received, a will be displayed in the status bar and your notification will sound. • The e-mail address, name and subject will be displayed on the status bar. If there is a sender name set for the received e-mail, the set name will be displayed. If the e-mail address is registered to contacts, the name registered to the contact will take priority.
2 Drag down the status bar
3 E-mailDisplay the top e-mail menu.
4 Tap your Inbox or a folder → tap a received e-mailDisplay the contents of a received e-mail.
memo ◎While using your e-mails or other functions, your e-mails will still download in the background. A will flash in the status bar and your e-mail notification will sound. However, if you dont have your mail set to auto-download (▶P. 63), they won't download in the background. ◎ If you do not have your mails set to auto-download (▶P. 63) or if the download failed, the e-mail notification will sound and a will flash. Please manually check for e-mails and download them. ◎Packet costs will be incurred for downloading data, even if the download fails. ◎ The maximum amount of text data that can be sent in one e-mail is 5,000 full-byte characters and 10,000 half-byte characters (around 10 KB). If that is exceeded, the text after the limit will not be downloaded. ◎ There may be cases where the received mail does not display correctly depending on the content.
Receiving/Viewing Attachments
1 Display the e-mail contents
2 Tap an attachment → OpenIf you haven't downloaded the attachment yet, tap the attachment to start downloading it.When the attachment has been received, tap the attachment again and "Open".
memo ◎ Tap an attachment on the mail contents screen and tap Save to SD card. The attached data will then saved to the internal storage. ◎ In normal e-mails (text) the attached data may be viewed within the mail screen. Data formats that can be viewed are .png, .jpg, .gif (including animations) and .bmp.※�They may not be viewable depending on the data.
◎ The maximum picture that can be sent in a decorative mail is 150 KB.

62
E-m
ail
Setting E-mail
1 On the home screen, tap →� �→ E-Mail settings
E-mail settings menu will be displayed.Tap on Inbox/Outbox/Unsent/Search Results → More → E-mail settings to display the e-mail settings menu.
2 Touch the required setting
Receive/display settings
▶P. 63 "Settings Relating to Inbox/Display"
Send/Edit settings
▶P. 64 "Settings Relating to Sending/Creating"
Notifications ▶P. 65 "Notification Settings"
Password setting
Set password/Change password
Change/set the foloder lock password.Enter folder lock password alphanumeric character of 1-16 characters → OK → re-enter the same password → OK → choose a secret question → OK → enter secret question answer → OK • When you have set your password, the password change option will be available.
• If you enter your folder lock password incorrectly three times, you will be prompted with the secret question. Display → enter answer → OK to set a new password.
Reset password
Reset the folder lock password.Enter folder lock password → OK → Reset • This will not be available if you have not set a password.
• When you reset your password, folder locks will also be removed.
Other Settings
▶P. 66 "Change Address and Other Settings"
Update settings
Reset your e-mail address settings.

63
E-m
ail
Backup/Restore
Back up to SD card
You can backup e-mail by folder to the internal storage.Put a check mark by the folders to be backed up → OK�• In�the�case�that�a locked inbox/folder is selected, you will be prompted to enter the folder lock password.
• Attachments will not be backed up.
Restore from SD card
Backup data stored in the internal storage can be accessed using the product.1. Inbox mails/Outbox mails/
Unsent mails/Serch SD card → OK
2. Put a check mark beside data you wish to restore → OK → Add/Overwrite → OK
• Tap select all to select all the data in the list.
• Tap "Up" to open the level above. • Tap "MyFolder" to open MyFolder. • If you have selected data to overwrite, all e-mails (including protected e-mails, unread e-mails and e-mails in locked folders) will be deleted and the backup data will be restored.
E-Mail infomation
Show your e-mail address, e-mail storage and capacity, software version etc. • Tap the e-mail address field → Copy address to copy your e-mail address.
Settings Relating to Inbox/Display
1 On the E-mail settings menu, tap "Receive/display settings"
2 Touch the required setting
receive Set whether e-mails received by the server are automatically downloaded to your device. Remove the check mark to turn this setting to off, you will be notified of new e-mails but they will not be downloaded.
Aut-receive order
Receive all Download sender, subject and text.Receive specified
Download sender, subject and text of specified e-mail addresses. Download only the sender and subject of e-mails from addresses that have not been specified.Address book: Download sender, subject and text of e-mails from addresses registered to your contacts.Specified List: Download sender, subject and text of e-mails from addresses registered to an individual address list.Edit specified List: Register individual addresses. • Tap and select from using an address from your address book, a group, your received e-mail history, your sent e-mail history, a profile or to paste an address in to register an e-mail address.※ The option to paste an address will only be
available if there is text on the clipboard. • To delete a registered address, tap on the address to be deleted and select "Delete".

64
E-m
ail
Aut-receive order
Receive From and Subject
Download only the sender and subject.
Auto-receive attachment
Set whether or not attachment data is automatically downloaded. Put a check mark to set this on and attachment data will be downloaded with the e-mail. If this is set to off, you can download attachment data separately.
Auto-receive attachment size
Set a maximum size for automatic downloads.100 KB, 500 KB, 1 MB, 2 MB
Show name on address book
Set whether the name registered to your contacts displays or not.
Font size Set the font size for text in the e-mail contents and mail creation screens.Extra large, Large, Medium, Small, Extra small
Settings Relating to Sending/Creating
1 On the e-mail settings menu, tap "Send/Edit settings"
2 Touch the required settings
Reply address
Set the address for e-mails to be sent in the case the recipient replies.Set → enter an e-mail address for the reply (up to 64 half-byte characters) → OK
Sender name
Set the name that will be displayed.Set → enter a sender name (up to 12 half-byte characters) → OK
Opening phrase
Enter text that will be included at the beginning of your mails.Set → Opening (up to 1,250 full-byte characters/2,500 half-byte characters or in the case of decoration 2.5 KB) → Done → Set • You can enter a maximum 10 pictures and decorations in the opening.
• If you reach the limits of picture/decorations (maximum of twenty or 100 KB) in your opening and signature, you will not be able to include any pictures or decorations in the main body of your e-mails.
• If you enter the same picture in your opening and signature, separate files will be sent in the e-mail.

65
E-m
ail
Signature Enter text that will be included at the end of your mails.Set → Signature (up to 1,250 full-byte characters/2,500 half-byte characters or in the case of decoration 2.5 KB) → Done → Set • You can enter a maximum 10 pictures and decorations in the signature.
• If you reach the limits of picture/decorations (maximum of twenty or 100 KB) in your opening and signature, you will not be able to include any pictures or decorations in the main body of your e-mails.
• If you enter the same picture in your opening and signature, separate files will be sent in the e-mail.
Quote and reply
Set whether the original e-mail is included in the text of your replies. Put a check mark to set this on and the original e-mail will be included in your replies with the indicator ">". If the original e-mail had decoration, only the first line of the quote will have a ">".
Confirmation dialog before sending
To ensure no misdeliveries, you can set whether a confirmation screen is displayed when you send a mail.
Notification Settings
1 On the e-mail settings menu, tap "Notifications settings"
2 Touch the required setting
Ringer OFF There will be no notification alert.
Preset Set a notification sound that is pre-set in the e-mail application.
Search SD card
Set music in your internal storage as a notification sound.
Other Use another application to set a notification sound.
Vibration Set vibration to alert you when you receive an e-mail.OFF or Pattern 1 - Pattern 5
LED Set whether there is a notification light when you receive an e-mail.OFF or Pattern 1 - Pattern 5
Ringtone duration
Set the length of time for the notification sound or vibration when you receive an e-mail to your inbox or selected folder.Song Vibrate/Time Set • You can set the time between 1 - 60 seconds.
Status bar notification
Set whether the sender or sender/subject are displayed with the notification icon in the status bar when you receive an e-mail or just the notification icon.Sender/Subject, Sender, Only Notification
Sending failure notification
View the reason for why an e-mail failed to send.

66
E-m
ail
Change Address and Other Settings
1 On the e-mail settings menu, tap "Other settings" → OK
2 Touch the required setting
Eメールアドレスの変更�(Change E-Mail Address)
Your e-mail address is automatically decided on initial set-up, but this can be changed.1. Tap the Security code entry field →
enter Security code → Send
2. Agree
3. Tap the e-mail address entry field → enter the part on the left of the @ in your e-mail address (the part that can be changed) → Send → OK
• Enter the part that you want to change up until 30 half-byte characters including "." "" and "_". However, you cannot use "." after another or at the beginning or end. You also cannot use "0" at the beginning.
• Please be aware that after you have changed your e-mail address, you won't be able to use it for a while.
• In the case that the e-mail address you have entered is already in use, you will be asked to choose another e-mail address. Please enter a different e-mail address.
• You can change your e-mail address three times a day.
迷惑メールフィルター�(Spam Filters)
▶P. 67 "Setting Mail Filters"
おススメの設定はこちら�(Recommended Settings Here)
自動転送先�(Auto-Forward)
Register an e-mail address to automatically forward e-mails received by the server.1. Tap the Security code field → Enter
Security code → 送信 (Send)2. Tap the entry field → enter e-mail
address → 送信 (Send) → 終了 (Done)
• You can register up to two e-mail addresses to auto-forward to.
• You can change your fowarding addresses three times a day.※�Clearing the settings is not included in this figure.
• If "エラー!Eメールアドレスを確認してください。 (Error! Confirm your e-mail address)" is displayed, it may be that you have entered characters that cannot be included in an e-mail address or there are restrictions on that e-mail address.
• Please be careful when entering the address as if you make a mistake, the e-mails may be forwarded to an unintended recipient.
• Please be aware that if an error occurs with a forwarding address, an error message may be sent to the original sender of the e-mail.
memo ◎ If you incorrectly enter your security code three times in one day, you will not be able to make any settings until the next day.

67
E-m
ail
Setting Mail Filters
A spam filter rejects particular e-mails, phone numbers and PHS.
■ Using Recommended Settings
1 On the e-mail settings menu (▶P. 62) tap Other settings → OK
2 おススメの設定はこちら (Recommended Settings) →登録 (Register)Suspicious mails/automatically forwarded e-mails will be denied and the spam filter will be set to receive mails from cell phones/PHS/PCs.
■ Advanced Settings
1 On the e-mail settings menu (▶P. 62) tap Other settings → OK
2 迷惑メールフィルター (Spam FIlter) →tap the Security code entry field → enter your Security code → 送信 (Send)
3 Necessary settings
カンタン設定�(Easy Settings)
1. 「携帯」「PHS」「PC」メールを受信(Download Cell Phone, PHS and PCmail)
Suspicious mails and automatically forwarded mails will be rejected and cell phone, PHS and PCmails will be downloaded.
2.�「携帯」「PHS」メールのみを受信(Download Only Cell Phone, PHS Mail
PCmail, suspicious mail and automatically forwarded mail will be denied. Cell phone and PHS mail will be downloaded.

68
E-m
ail
詳細設定�(Advanced Settings)
個別設定�(Individual Settings)
一括指定受信 (Batch Download)Downloads as a batch or rejects mails received from cell phones or the internet.
迷惑メールおまかせ規制 (Spam Mail Rules)
Allow PCmail received by the server to be automatically recognized as spam.
なりすまし規制 (Suspicious Rules)Reject mails that are sent from suspicious addresses. You can choose between 高 (high), 中 (medium) and 低�(low).
HTMLメール規制 (HTML Mail Rules)
You can reject mails that have their text in HTML.
URLリンク規制 (URL Link Rules)You can reject mails that include URLs in the text.
ウィルスメール規制 (Virus Mail Rules)
In the case that a mail received by the server includes an attachment infected with a virus, download will be restricted.
拒否通知メール返信設定 (Mail Rejected Reply)
Set whether a delivery error mail is sent as a reply when an e-mail is rejected by the spam filter.
詳細設定�(Advanced Settings)
指定受信リスト設定�(Download List)
Set priority download for individual e-mails or domains, or mail that includes certain text before the @ of the address.•In the case that an e-mail other than
those registered to the download list is blocked, please set batch download to off.
指定拒否リスト設定�(Blocked List)
Register individual e-mails or domains, or mail that includes certain text before the @ of the address to be blocked.
アドレス帳受信設定�(Address Book Settings)
You can send a mail from the mail address stored in your au one address book or au one Friends Note.
設定確認/解除�(Confirm Settings/Remove)
Remove or confirm settings for the spam filter.
PC設定用ワンタイムパスワード発行�(Issue PC One-Time Password)
▶P. 69 "Setting Spam Filter on your PC"
設定にあたって�(Settings) Display descriptions when setting your spam filter.

69
E-m
ail
memo ◎ If you incorrectly enter your security code three times in one day, you will not be able to make any settings until the next day. ◎Please note that e-mails not received due to spam filter settings will not be recoverable. ◎ The spam filter will work in the following order of priority.Download list (suspicious/forwarded e-mail permitted)>suspicious mail rules>blocked list>download list>address book>HTML rules>URL link rules>batch download>spam filter rules>virus rules ◎Download list (suspicious mails/forwarded mails permitted) is a feature that can allow downloade e-mails to be downloaded despite the suspicious e-mail rules. Through registering foward e-mail addresses to your download list (suspicious mails/forwarded e-mails permitted), those e-mails will be downloaded regardless of whether the e-mail address is in the To or Cc field.※�Please be aware that in the case the address is in the bcc field, this is not supported by this
device. ◎ The delivery rejected notification settings are automatically set to reply in the initial set-up of the spam filter. In the case that it is set to reply, there will be no reply to suspicious mail. ◎ If URL link rules are set, then e-mails that include URLs in the main text like digital magazines and some registration mails will not be received. ◎ If HTML rules are set, you may not receive some e-mails that include any HTML like those sent from PCs or digital magazines. Also some decoration mails from cell phones and PHS, will not be received if this setting is on. ◎ It may be that some e-mails are judged to be from a suspicious domain and therefore not received.These rules are set by domain certificates that are established by the provider that manages the domain from which the e-mail was sent. For more information on the domain certifcate, please contact the provider of the mail service.※�In the case of forwarding e-mail received on a PC, the e-mail will be judged to not be from
the correct domain and blocked.In that case, please register the e-mail address to the download list (suspicious/forwarded e-mail permitted).
■ Setting Spam Filter on your PCYou can set the spam filter on your PC. Access the PCmail Filter Settings available on the "Spam Mail Problems" section of the au website and enter your PC settings one-time password and make the settings you need.Your PC Settings one-time password can be checked by selecting "Issue PC Settings One-Time Password" on the spam mail filter screen.You can connect to the spam mail filter settings from your PC within the next 15 minutes using the password you've been issued. The password will become invalid after 15 minutes.

70
Multim
edia
Multimedia
Using the Camera
This camera has an external and internal camera and both can take photos and movies (▶P. 71, P. 73).
Before Using the Camera
•If the lens section is exposed to direct sunlight for a long period of time, the color filter will change color.
•After leaving this device in a warm environment for a long time, the quality of photos and saved photos may deteriorate.
•The camera is made from delicate parts and inside are elements that can see light and dark. Also when using in dark places, there may be blue, red and white spots.
•If there are finger prints or grease on the lens, the pictures may be blurred. Before taking a picture, wipe the lens with a soft glasses cloth. The lens may become damaged if you are not gentle with the device.
•Please make sure you don't put your fingers or hair over the lens.•Please be careful not to shake your hand. This can result in blurred
pictures. Either hold the device still or use the timer.If there is not enough light in the room, blurriness is more likely to occur.Also be careful that your subject does not move.
•Check that your subject is in the frame and use the shutter. If you move the camera when the shutter goes, your picture may be blurred.
•In a room with fluorescent lamps, you may get flicker on your photos (it cannot be seen by the human eye as it is very slight). Thin lines do not indicate a fault with the camera.
•When taking a movie, do not cover the microphone with your finger. Also, the quality of sound recorded will vary depending on the environment and the loudness of the noise being recorded.
•The color may be different to the actual subject's with photos taken with this device. Depending on the subject and the light, parts may be darker or lighter due to the lens' characteristics. Please also be aware that parts of the subject may appear warped, depending on the lens used.
•When taking a movie of a strong light or interesting subject, there may be purple lines or bands. This is not a fault.
•When using the camera and you move the device suddenly, it may lose focus. Please take another picture if this happens.
•The following subjects may not focus properly.•Plain walls where there is little contrast with the subject•Subjects near a strong light•Subjects that are reflecting a lot of light•Subjects with a horizontal pattern like blinds•When there are a lot of different subjects at different distances•Subjects in a dark place•Subjects that move quickly
•Please do not shine the camera light in a person's eyes. Do not gaze at the light emitting part when the flash is on. Also do not aim the light at other people's eyes. Doing so has a slight chance of damaging eyesight.
•Even if you have manner mode on, there will still be noises when you use the auto-focus and take a picture. This will sound with all uses of the camera. You cannot change this alert.
•When using the camera, slight noises may ne heard of the camera's operation. This is not a fault.

71
Multim
edia
•When you have something showing up in the finder window for a long time or you move the camera around for a long time, the device may become hot. If the temperature of the device increases, please stop using the camera.
•Please try and avoid taking pictures near bright lights as the picture may be dark or unclear.
•When your subject is moving and the subject moves from a light area to a dark area, the picture may get momentarily bright or dark. The picture may also be momentarily distorted.
•When taking pictures in a dark area, there may be an increased possibility of noise and unclear pictures.
•When you put the device in an unsecure place when using the timer, the noise or vibration may cause the product to drop.
•Directly after switching cameras or changing the settings, it may take a short amount of time for the brightness and color to adjust.
•If you battery charge is low and you use the device in a cold environment, you may not be able to use the camera.
•When using the camera on this product, please make sure you use it in a way that does not cause distress to others and in a way that is within the law.
•When other applications are being used, you may not be able to use the camera.
Photos
Take photos and share your photos on the internet.
memo ◎ For more information, please refer to "Before Using the Camera" (▶P. 70) before use.
Take Photos
Take photos and share them on the internet for others to see.
Instructions: On the home screen, tap Camera.
See your last photo.Displays the number of photos you can take.
Switch between front& back cameras.
Take photo.
Switch to camcorder.
Zoomin/out.
Adjust camera settings. Autofocus Box
Finder Screen
To take pictures, tap a point to make it focus and tap . Push to zoom in and out.

72
Multim
edia
memo ◎Photos that you have taken are saved on the internal storage or on a microSD memory card. You can set where photos are saved in "Storage Location" in the camera settings (▶P. 72). ◎ The default photo resolution is wide screen. ◎ Tap the icon on the top left of a photo to check a photo you have just taken.
•� Tap to return to the finder screen.•� Tap Share, to send a photo in a mail or upload to an online service.•� Tap "Other" to display options such as quick upload.•� Tap to show the following options.
Gallery home: Start gallery mode (▶P. 71). Slideshow: Start a still-image slide show. Settings: Change the gallery settings.
Panorama Shots
Take multiple shots to cover a wide area and join them together to make one panorama shot.
Instructions: On the home screen, tap Camera
1. → → Panorama
2.
Take a photo.For the second and subsequent photos, slowly move the camera either up, down, left or right to take in the scene. When you have taken the last photo, all the photos will be joined together to create a panorama.
Camera Settings
Adjust settings to take the best possible photos.
On the finder sceen, tap to display or not display the menu.
(Settings) Widescreen Display the photo size.Turn on for widescreen (6 MP) or off for standard (8 MP).
Geo-tag Turn on to attach location information to a photo.
Storage Location
Select a location to save photos to from internal phone storage or SD card (microSD memory card).
(Effects) Change how the photo looks. Select from normal, monochrome or negative.
(Scene) Select from auto, scenery, sports etc. to match your environment.
(Mode) Single shot Take normal single pictures.
Panorama Take panorama photos (▶P. 72).
Multi-shot Take multiple shots.
Timer Take photos on a timer.
(Exposure) Set how long the lens is open for (exposure).
(Flash) Turn the flash on and off.
memo ◎ To add information location to your movies, first on the home screen tap
→ Settings → Location & security → turn "Use wireless networks" or "Use GPS satellites" on or off.

73
Multim
edia
Videos
Take movies and share your movies on the internet.
memo ◎ For more information, please refer to "Before Using the Camera" (▶P. 70) before use.
Taking Movies
Instructions: On the home screen, tap Apps → Camcorder.
Watch yourlast video.
Displays the number of movies you can take. Record video.
Switch between front & back cameras.
Switch to camera.
Zoomin/out.
Adjust camcorder settings.
Finder Screen
To begin taking a movie, tap . When you are finished taking your movie, tap it again.
memo ◎ Tap the icon in the top left of the screen to view a movie you have just taken. (If there is no preview icon displayed, tap the finder window to show it.)•� Tap "Replay" to replay a movie.•� Share, to send a photo in a mail or upload to an online service.•� Tap "Other" to display options such as Quick upload.•� To show the following options.
Gallery home: Start gallery mode (▶P. 71).Slideshow: Start a still-image slide show.
You can not play videos in slideshow mode.Settings: Change the gallery settings.
HD Videos
Take an HD video and view it on your high definition (HDTV) TV or monitor.
To take an HD video, on the finder screen, tap �→� �→�Video Resolution →�HD+(1080p)/High Definition (720p) and adjust the resolution of your videos.
memo ◎ To take better quality HD movies, tap → Effects or Audio Scenes to
change the settings.

74
Multim
edia
Videos Settings
Adjust settings to take the best possible photos.
On the finder sceen, tap to display or not display the menu.
(Settings) Widescreen Display the video size.
Video Resolution Display video resolution
Geo-tag Turn on to attach location information to a video.
Video stabilization
Correct shaking when taking a video.
Storage Location
Select a location to save videos to from internal phone storage or SD card (microSD memory card).
(Effects) Change how the video looks. Select from Normal, Black and White, Negative, Sepia, Solarize, Red Tint, Green Tint, Blue Tint.
(Audio Scenes)
Select from Stereo, Wind Reduction, Concert, Balanced, Front Facing to match your environment.
(Modes) Change the movie mode. •In Normal video mode the file format is set to mp4. •Video Message mode is fixed at movie file size of
3gp and a video resolution of QVGA (320×240).
(Exposure) Set how long the lens is open for (exposure).
(Light) Turn the camera light on and off depending on the brightness in your environment.
memo ◎ To add information location to your videos, first on the home screen tap
→ Settings → Location & security → turn "Use wireless networks" or "Use GPS Satellites" on or off.

75
Internet
Internet
Connecting to the Internet
This product uses mobile network (packet communication) or wireless LAN (Wi-Fi®) to connect to the internet.•Packet communication (IS NET, au.NET) (▶P. 75"Mobile Network
(Packet Communication) Settings").•Wireless LAN (Wi-Fi®) (▶P. 75"Wireless LAN (Wi-Fi®) Settings
Wireless LAN (Wi-Fi®)").
memo ◎When you do not have IS NET added, you will incur separate au.NET data charges (525 yen per month (tax included)). ◎Adding a data communication service will mean you will have fixed charges when connecting to the internet. For more information on IS NET, au.NET and packet data service charges, please see the latest au catalogue or the au website.
■ Warnings Regarding Use of Packet Communication•When you view websites with pictures, download data such as movies,
or use applications such as widgets that communicate and Google's services, packet communication costs can be high. We recommend you get a fixed rate service.
•To prevent the network becoming overloaded, your download speed may be automatically restricted if you download a lot of data or there is network disturbance.
■ For more information on packet communication charges
Please see the following URL.https://cs.kddi.com/ (au Customer Support)•It is necessary to make an application on first use.
■ au NET Charges
Monthly Usage Charges Charges (only incurred with use)
Communication※ Charges
※�For more information on charges, please see the latest au catalogue or the au website.
■ Mobile Network (Packet Communication) SettingsUse the following procedure to turn the mobile network (packet communication) on and off.
Instructions: On the home screen, tap → Settings → Data Manager → Data enabled
■ Wireless LAN (Wi-Fi®) Settings Wireless LAN (Wi-Fi®)
Settings can be adjusted by doing the following.
Instructions: On the home screen, tap → Settings → Wireless & networks. On the Wireless & network settings screen, tap Wi-Fi on. Next, tap "Wi-Fi settings" to display nearby wireless networks. Tap a network to connect to it.
memo ◎You may incur extra charges when browsing the internet or downloading data depending on your contract. For more details, please refer to your service provider. ◎ If you cannot connect, please contact your service provider.

76
Internet
BrowserView websites.Instructions: On the home screen, tap Apps →� Browser
Tap to enter a website address (URL).Share a website address (URL).
Display bookmarks.
Links Tap to access a site link.Tap and hold to display options.
memo ◎Double tap to zoom in and out (▶P. 33). ◎ to show the following options.
File Downloads
To download a file from your browser, tap the link to the file or tap and hold a picture and select "Save image".Do the following to view files you have downloaded.
Instructions: On the home screen, tap Apps → Downloads → tap the file you wish to view
•To delete a file you have downloaded, put a check mark by the files you want to delete and tap "Delete".
Tap Browser Options
to display the options for the browser. •New window: Open a new window. •Bookmarks: View bookmarks. •Windows: View open windows. •Refresh: Refresh the page youre reading. •Forward: Tap to go back to the current page and display the
page you were at before you went back. •More: Display other options.

77
Ap
plicatio
n Installation
Application Installation
Download and install applications from Android Market or au one Market. Or you can also easily search free au one GREE games on the GREE market.
Usage
There are several games, communication business and leisure applications available. Please choose your applications carefully. Below are some tips on choosing applications. •To protect yourself and your privacy from spyware, phishing, and
viruses, please download your applications from trusted sites such as the Android Market.
•Before installing an application on the Android Market, check the comments and reviews. If you have any doubts on the safety of the application, do not install it.
•Uninstall applications you are not using anymore. You can reinstall an application at a later date if required.
•Downloaded applications will differ but all will use space, memory and battery power. For example, a widget that lets you check your remaining battery power will use less than an application such as a music streaming player. If you think that installed applications are using a lot of memory, data, battery and space, please uninstall some applications. You can reinstall an application at a later date if required.
•Use a contents filter to prevent children from installing unsuitable applications in the same way you can with web pages.
•Some applications may not provide the correct information. Please be especially careful of applications that provide information on health.
memo ◎ For using and installing applications, please see "Notes on Android Market/au one Market/applications" (▶P. 22).
Android Market
Download and install useful applications, games and widgets from the Android market which is provided by Google. •It is necessary to have a Google account to use the Android Market.
For more information on Google account settings, please see "Set Up a Google Account" (▶P. 28).
Instructions: On the home screen, tap Apps → Market
Tap to search films to rent.
Touch to search applications and download.
memo ◎When you have questions or would like to view the Android market help, use
→ Help.

78
Ap
plicatio
n Installation
Application Search and Installation
Instructions: On the home screen tap Apps →� Market → Applications
1 Flick left, right, up to down and tap on applications to install.
→ Enter text → use to search applications.
2 Tap the price key (in the case of free applications, this will be "Download").Information and usage rules for how to use the application will be displayed. These will be different depending on the application.
3 Read the information carefully and if you agree and wish to use the application, follow the installation instructions.Please be careful of applications which want to access a lot of features or data. You are responsible for applications used on the product.If you do not agree, please do not install the application.
memo ◎When purchasing paid applications, please make the purchase before downloading. Payment is done with Google wallet. Google wallet is a service of Google. ◎You only pay for applications once. After you have downloaded and installed it, redownloading the application won't incur further charges. ◎ If you are not happy with an application you have paid for, you may get a refund within a certain amount of time after purchase. Your credit card will not be charged and the application will be uninstalled (deleted). You can only request a return once per application. If you purchase an application that you have received a refund before, you may not get another refund.
Application Management
■ Delete Application Data and CacheCompletely delete all saved application data and delete temporary data.
Instructions: On the home screen, tap → Manage Apps → tap the application you want to clear the data and cache for → Clear data/Clear cache
■ Uninstall ApplicationsRemove applications you are no longer using.
Instructions: On the home screen, tap → Manage Apps → tap the application you wish to uninstall → Uninstall → follow the on-screen instructions.
memo ◎You may not be able to delete this depending on the application.
■ Application MoveYou can move applications to a microSD card or return applications to an internal storage.
Instructions: On the home screen, tap → Manage Apps, tap the application you wish to move → Move to media area (move to internal storage)/Move to phone (move to application storage

79
Ap
plicatio
n Installation
au one Market
You can download and install applications from the au one Market. You can search for applications by categories, keywords or rankings.
Instructions: On the home screen, tap Apps → au one Market
memo ◎ To use some features, you will need an au one-ID. For more information on au one-ID settings, please see "Set up your au one-ID" (▶P. 30). ◎When using the au-one market, please follow the terms of use. Application download and payment application will vary depending on the au one Market distribution. ◎When paying for a purchased application, you will use au 'Kantan Kessai'. au Kantan Kessai is a service that allows you to put payment for an application on your monthly bill. ◎A microSD memory card is necessary to use some applications. The service name au one Market will change in March 2012 to au Market.

80
Wi-Fi ®/D
ata Co
mm
unication
Wi-Fi®/Data Communication
Wireless LAN Functionality (Wi-Fi®)
You can use your home wireless LAN (Wi-Fi®) environment or a public LAN environment to connect to the internet. Using public LAN services can be useful when outside of your home or office.
memo ◎Before using a wireless LAN (Wi-Fi®), please see "Notes on Using Bluetooth®/Wireless LAN (Wi-Fi®) Functions" (▶P. 19).. ◎ There are no guarantees when connecting to public wireless LAN services.
Wireless LAN (Wi-Fi®) On/Off
Instructions: On the home screen, tap → Settings → Wireless & networks → Wi-Fi settings → tap "Wi-Fi" on.
Tap to turn on and search for Wi-Fi® networks.
Display usable Wi-Fi® networks.
Wi-Fi Settings Screen
memo ◎ To extend the life of the battery, please turn wireless LAN (Wi-Fi®) features off when not in use. ◎On the home screen, you can add a widget that turns the Wi-Fi on and off easily. For more information on sharing, please see "Customizing Widgets, Shortcuts, and Wallpaper" (▶P. 37).
◎ To search for Wi-Fi® networks, on the Wi-Fi Settings screen, tap → Scan.
Search/Connect to Wi-Fi® Network
Search and connect to available Wi-Fi® networks.
1 On the home screen, tap → Settings → Wireless & networks → Wi-Fi settings
2 Tap "Wi-Fi" onWhen wireless LAN (Wi-Fi®) is on, you can search for Wi-Fi® networks. If
Wi-Fi is already on, tap and "Scan." View a list of available Wi-Fi® networks.
3 Tap the Wi-Fi® you want to connect to → enter a password (security key) if necessary → ConnectWhen the Wi-Fi® network you want to connect to is not displaying that you can connect to, tap "Add Wi-Fi network" → Network SSID. Enter the security information and tap "Save" to connect.When you are connected, a will be visible in the status bar.
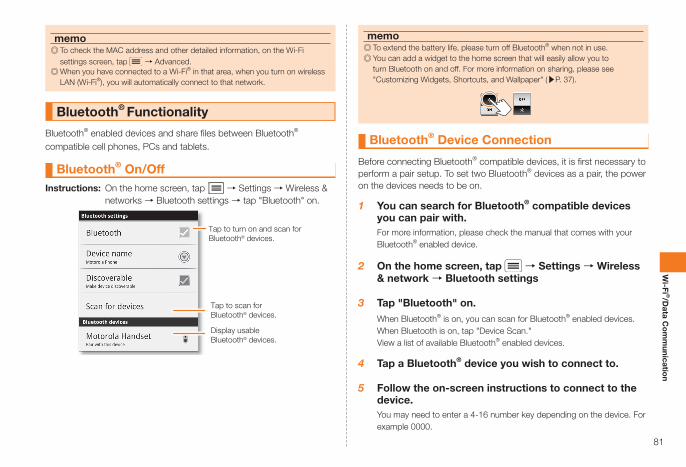
81
Wi-Fi ®/D
ata Co
mm
unication
memo ◎ To check the MAC address and other detailed information, on the Wi-Fi settings screen, tap → Advanced. ◎When you have connected to a Wi-Fi® in that area, when you turn on wireless LAN (Wi-Fi®), you will automatically connect to that network.
Bluetooth® Functionality
Bluetooth® enabled devices and share files between Bluetooth® compatible cell phones, PCs and tablets.
Bluetooth® On/OffInstructions: On the home screen, tap → Settings → Wireless &
networks → Bluetooth settings → tap "Bluetooth" on.
Tap to turn on and scan for Bluetooth® devices.
Tap to scan for Bluetooth® devices.
Display usable Bluetooth® devices.
memo ◎ To extend the battery life, please turn off Bluetooth® when not in use. ◎You can add a widget to the home screen that will easily allow you to turn Bluetooth on and off. For more information on sharing, please see "Customizing Widgets, Shortcuts, and Wallpaper" (▶P. 37).
Bluetooth® Device Connection
Before connecting Bluetooth® compatible devices, it is first necessary to perform a pair setup. To set two Bluetooth® devices as a pair, the power on the devices needs to be on.
1 You can search for Bluetooth® compatible devices you can pair with.For more information, please check the manual that comes with your Bluetooth® enabled device.
2 On the home screen, tap → Settings → Wireless & network → Bluetooth settings
3 Tap "Bluetooth" on.When Bluetooth® is on, you can scan for Bluetooth® enabled devices. When Bluetooth is on, tap "Device Scan." View a list of available Bluetooth® enabled devices.
4 Tap a Bluetooth® device you wish to connect to.
5 Follow the on-screen instructions to connect to the device.You may need to enter a 4-16 number key depending on the device. For example 0000.

82
Wi-Fi ®/D
ata Co
mm
unication
Bluetooth® Device Reconnection
Once you have paired this product with another Bluetooth® device, as long as the feature is on, it will automatically reconnect. Or you can reconnect in the following way.
Instructions: On the home screen, tap → Settings → Wireless & networks → Bluetooth settings → tap the Bluetooth® device you want to reconnect to.
Disconnecting Bluetooth® Devices
The connection will be automatically disconnected when the product or the paired device is turned off. Or you can disconnect in the following way.
Instructions: On the home screen, tap → Settings → Wireless & networks → Bluetooth settings → tap the Bluetooth® device you want to disconnect and follow the on-screen instructions.
Changing Device Name
You can change the name of this product that will be shown when other Bluetooth® devices search for it.
Instructions: On the home screen, tap → Settings → Wireless & networks → Bluetooth settings → Device name → enter a name → OK
Airplane Mode
Turn airplane safe mode on to turn off all wireless connections such as wireless LAN (Wi-Fi®) and Bluetooth®. However, even if you have airplane safe mode on, please do not use this product in areas where it is prohibited such as in hospitals and aircraft.
Instructions: On the home screen, tap → Settings → Wireless & networks → and tap "Airplane mode" on.
memo ◎ Tap and hold → and turn Airplane Safe Mode on and off. ◎Please listen out for information even when in Airplane Safe Mode. ◎You can add a widget to the home screen that will easily allow you to turn airplane safe mode on and off. For more information on sharing, please see "Customizing Widgets, Shortcuts, and Wallpaper" (▶P. 37).

83
Useful Features
Useful Features
Alarm
Instructions: On the home screen, tap Apps → Alarm & Timer
Switch alarm on and off.
To add an alarm, tap → Add alarm → Turn on alarm → Done.When an alarm is active, will be displayed on the status bar.
memo ◎When the alarm rings, drag "Cancel" to the right to turn the alarm off, or tap on the screens to snooze the alarm for 5 minutes. ◎ If the phone is switched off when the alarm is set for, the alarm will not ring. ◎ Even if vibrate is turned off "Vibrate" (▶P. 43), if the alarm is set for vibration, it will still vibrate when the alarm goes off.
Calculator
Instructions: On the home screen, tap Apps → CalculatorThe calculator has a standard calculator interface and a scientific
calculator interface. To switch between them, tap → Advanced panel.
To delete your history, use → Clear History.
Calendar
Instructions: On the home screen, tap Apps → Calendar.
Tap to display the list of scheduled items, day, week and month of scheduled items on your calendar.
Tap an appointment to see more details.
memo ◎By adding the calendar widget to your home screen, you can check your appointments from the home screen.

84
Useful Features
Add Appointment
Open the calendar and tap → enter the appointment title, date and other information → tap Save to add the appointment.In the case that there is a notification like an alarm before the appointment, you can set how long before the start time you are notified. (If the notification is set to 0 minutes, you will be notified at the start of the appointment).
Appointment Management
To edit appointments, tap the appointment you wish to edit → on the
appointment details screen, tap → edit the appointment → tap Save.To delete an appointment, tap the appointment you wish to delete → on
the appointment details screen, tap → Delete event → tap OK.To display today's appointment, tap the calendar icon in the top left → tap Display Today.
Tasks
Instructions: On the home screen, tap Apps → TasksTo add a task, tap → enter task title, date and other information → tap Save.Setting a notification will give you an alarm notification.
Tap to display tasks that are overdue and tasks for today, or display priority or tagged tasks.
Tap to add a task.
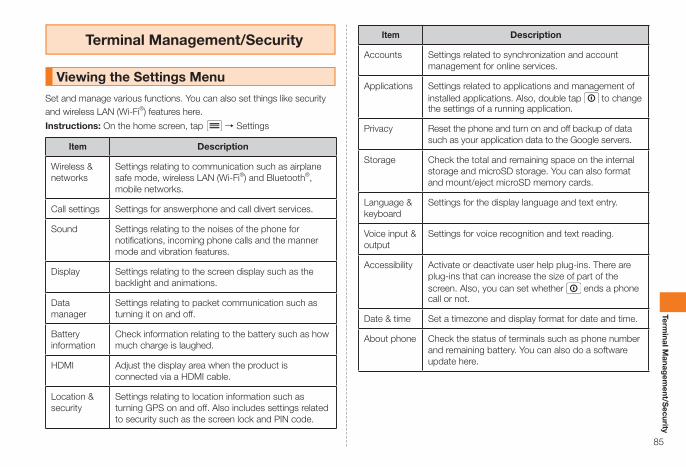
85
Terminal M
anagem
ent/Security
Terminal Management/Security
Viewing the Settings Menu
Set and manage various functions. You can also set things like security and wireless LAN (Wi-Fi®) features here.
Instructions: On the home screen, tap → Settings
Item Description
Wireless & networks
Settings relating to communication such as airplane safe mode, wireless LAN (Wi-Fi®) and Bluetooth®, mobile networks.
Call settings Settings for answerphone and call divert services.
Sound Settings relating to the noises of the phone for notifications, incoming phone calls and the manner mode and vibration features.
Display Settings relating to the screen display such as the backlight and animations.
Data manager
Settings relating to packet communication such as turning it on and off.
Battery information
Check information relating to the battery such as how much charge is laughed.
HDMI Adjust the display area when the product is connected via a HDMI cable.
Location & security
Settings relating to location information such as turning GPS on and off. Also includes settings related to security such as the screen lock and PIN code.
Item Description
Accounts Settings related to synchronization and account management for online services.
Applications Settings related to applications and management of installed applications. Also, double tap to change the settings of a running application.
Privacy Reset the phone and turn on and off backup of data such as your application data to the Google servers.
Storage Check the total and remaining space on the internal storage and microSD storage. You can also format and mount/eject microSD memory cards.
Language & keyboard
Settings for the display language and text entry.
Voice input & output
Settings for voice recognition and text reading.
Accessibility Activate or deactivate user help plug-ins. There are plug-ins that can increase the size of part of the screen. Also, you can set whether ends a phone call or not.
Date & time Set a timezone and display format for date and time.
About phone Check the status of terminals such as phone number and remaining battery. You can also do a software update here.

86
Terminal M
anagem
ent/Security
Software Update
■ Notes on Software Updates • You are charged for data communication when connecting to the Internet from the product by using packet communication.
• When software update is necessary, you will be informed on au homepage, etc. For details, contact an au shop or Customer Service Center (call toll-free 157). Also, users of au phones will receive a notice from au, when software update is necessary to improve the functionality of au phones.
• Please update when your phone is sufficiently charged. If the remaining battery power is not sufficient, the battery may run out and the software update will fail.
• Please check your reception. If you are in an area with insufficient reception, the software update may fail.
• The data registered to your au phone (contacts, pictures, downloads) and your settings information will not change with a software update. However, depending on the au phone's state (if it's damaged or suffered a water spill), then there are no guarantees regarding the data. It is recommended that you back up your data before performing a software update.
• After performing a software update, it may be that the next latest software downloads will automatically start (continuous update).
• If software update has failed or stopped, perform the same again. • If you fail to update software, it may become impossible to operate the product. If this happens, bring it to an au shop or PiPit (not accepted by some shops).
■ Downloading Software to UpdatePlease update your software when you receive notification of an update on your phone.You can check and install software updates even when you have not received a notification.
Instructions: On the home screen, tap → Settings → About phone → System update
memo ◎ For more information on software updates, please see the au website (http://www.au.kddi.com/). ◎ The size of software update data may be 25MB or more. It is recommended that you download update data with wireless LAN (Wi-Fi®).
Screen Lock
You can set a screen lock for when your display turns off to prevent other people from using your phone without permission.
Instructions: On the home screen, tap → Settings → Location & security → Set up screen lock
The Screen Lock Select menu will be displayed.•None: Disable screen unlock secuirty.•Pattern: Draw a pattern to unlock the screen.•PIN: Enter a PIN to unlock the screen.•Password: Enter a password to unlock the screen.
memo ◎You can still call emergency if the screen is locked.

87
Terminal M
anagem
ent/Security
Pattern Lock
Instructions: On the Screen Lock Select menu, tap Pattern → follow the on-screen instructions to draw a pattern → Continue → draw it again to confirm → Confirm
When you want to release the screen lock, you have to draw the pattern you have set.
PIN Lock by Numbers
Instructions: On the Screen Lock Select menu, tap PIN → OK → enter
a PIN → → enter the number again to confirm →
When you want to unlock the screen, enter the PIN you have set → .
Password Lock
Instructions: On the Screen Lock Select menu, tap Password → OK →
enter a password → → enter the number again to confirm →�
When you want to unlock the screen, enter the password you have set →�.
Customizing the Lock Screen
Set the length of time until the screen locks once the display has turned off. If you do not push a key or tap the screen for the set period of time, the screen will automatically lock.
Instructions: On the home screen, tap → Settings → Location & security → Security lock timer → tap a time.
Lock/Lock Release
■ Locking the Screen/Phone • Press to turn the display off. • Wait a moment without pressing anything (when the display is off, the screen lock will be set).
■ Releasing the Screen/Phone LockWhen the display turns off, press and then on the Lock screen drag to the right.If you have set a pattern, PIN or password, follow the on-screen instructions to enter it.
Forgotten Your Pattern, PIN or Password?
If you have forgotten your pattern, PIN or password, please contact the customer service center.

88
Terminal M
anagem
ent/Security
Setting a PIN
To prevent use of the micro au IC by third parties without your permission, you can set it so that you need to enter a PIN code when you turn the product on.
Instructions: On the home screen, tap → Settings → Location & security → Set up UIM card lock → tap UIM card lock on → enter a PIN code → OK
Changing the PIN Code
• When you want to change the PIN code, you must first turn the UIM Card Lock on.
Instructions: On the home screen, tap → Settings → Location & security → Change UIM PIN → enter your current PIN code → OK → enter the new PIN code → OK → enter it again to confirm → OK.
Releasing a PIN Lock
If you enter the PIN code incorrectly three times, the micro au IC-Card will be locked. To release the PIN lock, you will need to set a new PIN code.Instructions: On the PUK lock screen, tap PUK Lock Release → tap
the PIN lock release code entry field → enter your 8 digit PIN → Continue → enter a new PIN → Continue → enter it again to confirm → Continue
memo ◎ For more information on PIN release codes, see "PIN Code" (▶P. 18)
Data Initialization (Reset)
By resetting the phone to shop defaults, you can delete all data on the phone.
Instructions: On the home screen, tap → Settings → Privacy → Factory data reset → follow the on-screen instructions.
Using Anshin Security Pack
Anshin Security Pack
You can be supported for the security of the Android phone totally using three types of applications, “3LM Security”, “Remote Support” and “VirusBuster Mobile for au”. • The Anshin Security Pack is a paid service.
memo ◎Before using location search of Anshin Security Pack•� Note that au shall not be liable for any loss of the users caused by provided
GPS informations. ◎Precautions•� Even if you are within the service area, you may not be able to obtain the
accurate location information in a location where the signal from GPS satellites and base stations is weak.
•� The location information may not be notified if Use GPS satellites is
disabled. To enable it, on the home screen, tap →�Settings →�Location
& security →�Check Use GPS satellites.
•� You can search a terminal whose information of the subscribed au IC-Card matches that of the au IC-Card which is inserted at the time when you use the service for the first time.

89
Terminal M
anagem
ent/Security
■ 3LM Security • If the IS14SH is stolen or lost, you can delete data on the IS14SH. Contact the Customer Service Center to delete the data.
• If the IS14SH is stolen or lost, you can lock the IS14SH remotely. Also, you can unlock the IS14SH remotely.
• When activating “3LM Security” or the IS14SH is locked remotely, the location information of the IS14SH will be sent to the server. Also, you can set the location information to be always sent.
• The terminal information of IS14SH is sent to the server periodically.
■ Remote Support • When you contact us about the operations of the cell phone, the operator will share the screen of your IS14SH with you, and solve the problems directly by supporting your operations.
■ VirusBuster Mobile for au • Countermeasure against improper applications: When you install applications, scan the files and prevent installing improper applications. Also, you can scan applications already installed manually and delete the applications.
• WEB filter: Prevent young people from accessing inappropriate sites such as gambling and dating sites.
• Countermeasure against dangers in WEB: Prevent you from accessing improper sites such as sites which distribute virus and improper applications and phishing sites.
• Blocking incoming calls/SMS: Other than rejecting nuisance calls and SMS, you can also reject messages which contain specific keywords.※ TRENDMICRO, VirusBuster are trademarks of Trend Micro Inc.
Using 3LM Security
1 On the home screen, tap Apps →�3LM →�For Consumer.Alternatively, on the home screen, tap Apps →�auお客さまサポート (au Customer Support) → サポート & サービス (Support & Services) →
安心セキュリティパック (Anshin Security Pack) →�3LM Security →�For
Consumer.When you activate 3LM Security for the first time, the terms of service for 3LM Security are displayed, so tap I Accept [Activate after confirming the contents.
2 Select and set items.
Using Remote Support
1 Contact the Customer Service Center.
2 On the home screen, tap Apps → リモートサポート (Remote Support).Alternatively, on the home screen, tap Apps →�auお客さまサポート (au Customer Support) → サポート & サービス (Support & Services) →
安心セキュリティパック (Anshin Security Pack) →�リモートサポート
(Remote Support).
3 同意する■(Agree).
4 Follow the instructions from the operator.

90
Terminal M
anagem
ent/Security
Using VirusBuster Mobile for au
1 On the home screen, tap Apps →�ウイルスバスター (VirusBuster).Alternatively, on the home screen, tap Apps →�auお客さまサポート (au Customer Support) → サポート & サービス (Support & Services) →
安心セキュリティパック (Anshin Security Pack) →�ウイルスバスター�モバイル for au (VirusBuster Mobile for au).
When you activate VirusBuster for the first time, the license agreement for VirusBuster is displayed, so tap 同意する (Agree) after confirming
the contents. Also, if you have not set up a Google account, a message asking you to set up a Google account appears. Follow the screen to set up one.
2 Select an item.3 Follow the instructions on the screen.
memo ◎Web filter is enabled when you use Android standard browser connected via IS NET or Wi-Fi®.

91
Ro
aming
Roaming
Global passport is an international communication service that allows you to use your domestic cell phone when traveling abroad. This product can use GSM networks, UMTS networks and CDMA networks depending on your destination. • Your cell phone number will be the same and you will be able to talk on global GSM networks, TMTS networks and CDMA networks.
• No special monthly or daily fees or application required. Calls will be charged on the same invoice as calls made in Japan so payment is easy as well. For more information on countries where you can use global passport GSM, global passport CDMA, fees and other services, please see the au website or contact the customer service center.
memo ◎ International roaming is a service that allows you to use your au phone or phone number by connecting to a foreign operators network.
When Using Your Phone Abroad
When using global passport GSM and global passport CDMA abroad, please follow "Configuring Roaming" (▶P. 92) and make the appropriate settings.When using a new contract, you will need to wait two days from your first use in Japan before you can use your phone abroad.
memo ◎ If you havent activated your e-mail (~@ezweb.ne.jp) once in Japan, you wont be able to use data when you travel abroad. Make sure that you activate your e-mail (~@ezweb.ne.jp) while in Japan.
For Your Safety Abroad
Overseas network status is available on the au website. Please confirm before travelling abroad.http://www.au.kddi.com/service/kokusai/tokomae/
■ Set a PIN code so that no third party can use your phone without your permission.
• If your micro au IC-Card in your au phone is lost or stolen. it may be put into another cell phone and mis-used by a third party (including making roaming calls), so it is recommended that you set a PIN code. "Changing the PIN Code" (▶P. 88)
■ If your phone is lost or stolen, Quickly contact au. • If your phone or micro au IC-Card is lost or stolen, please contact us as soon as possible (please refer to au website) so we can block the phone. Please be aware that when your phone is lost or stolen, the customer is liable for any phone or data charges.
■ Be careful making phone calls and using data abroad
• Usage charges vary depending on region and country. • Roaming phone and data charges are not eligible for the same fixed packet fee and discounts that you would receive in Japan.
• Incoming calls received overseas will be charged as well. • Depending on country and area, tapping will incur charges.

92
Ro
aming
Roaming Services
This product is compatible with global passport GSM and global passport CDMA, so you can use services abroad without needing to complete any special procedures. However, you will not be able to use all features. Also, roaming usage is not eligible for your fixed packet data services, so the data charges may be high. The services you can use abroad are as follows.
Communication Service Description
Phone Call Your phone will be able to make international phone calls to Japan, abroad and within the country of destination with the same number you use in Japan.
Internet You can connect to the internet when abroad.
SMS (C-mail)/E-mail (~@ezweb.ne.jp)/Gmail/ PCmail/au one Mail
You can use these abroad.
GPS Location Information※ You can check your current location using GPS when abroad.
※Please set the correct date and time first.•Roaming charges (phone calls and packet communication) are different
from those in Japan. For more information, see "Main Service Areas and Charges" (please refer to au website) and "Packet Service Charges" (please refer to au website).
memo ◎When the length is longer than the length permitted for SMS (C-mail) within your country of destination, part of the SMS (C-mail) wont be sent or the text will be sent in several messages. Or, depending on reception, even if the SMS (C-mail) is stored by the sender, it may not be received by the destination.
Configuring Roaming
■ Usage Image
1 Within Japan, use the au network.
2 Obtain the PRL (roaming area information) (▶P. 93)
3 Set the area of use (▶P. 93).
4 Use the same phone number to talk on global GSM/UMTS/CDMA networks.
5 When you return to Japan, return the network mode (▶P. 93) to CDMA.
1
4
Operations within Japan
Operations Overseas
2 5
3

93
Ro
aming
Obtaining the PRL (Roaming Area Information)
PRL (roaming area information) is the information relating to the area that the roaming cell phone is and the international roaming contracts KDDI (au) has. Please check "PRL Updates" while at your destination.
Instructions: On the home menu, tap → Settings → Wireless & networks → Mobile Networks → PRL update → Update PRL Version → PRL Download → New Files Here
memo ◎Please obtain the latest PRL within Japan before you leave. ◎ If you continue to use old PRL data, you may not be able to use communications depending on the area, so make sure you download the latest PRL data before you leave Japan. ◎When downloading PRL data, you will incur separate packet data fees.
Area Settings
When you arrive at your destination, set the area you are going to use your cell phone in.
1 On the home screen, tap → Settings → Wireless & networks → Mobile networks → Network Mode
2 Tap the area you wish to use the phone.
Global Settings for use abroad (automatically set for CDMA network, GSM/UMTS network).
CDMA※1 Set in the case that you want to use global passport CDMA in Japan or abroad.
GSM/UMTS※2 Set in the case that you want to use global passport GSM in Japan or abroad.
※1 When you select CDMA < tap "System Select" for more information on the usage area.
KDDI only...Setting for when using in Japan. All CDMA...Settings for using global passport CDMA either abroad or in Japan.※2 When you have selected "GSM/UMTS," tap "Network Select" to limit the
networks used and tap "Operator Select" to manually set an operator to connect to.
memo ◎Depending on the network, there will be additional options available such as network roaming, network selection, operator selection, access point name.
Confirm Current Network Type
Confirmation: To confirm the network type, on the home screen tap
→ Settings → Terminal Information → Terminal Status → Mobile Network Type.

94
Ro
aming
Access Data Roaming
The default setting for data roaming on this device is data roaming is off. To activate data services while roaming, perform the following set-up.
Instructions: On the home screen, tap → Settings → Data manager → Global data roaming access → Allow access for all trips/Allow access only for this trip/Deny data roaming access
memo ◎ Turning this on may incur high packet data charges.
Setting Current Time
Instructions: On the home screen, tap → Settings → Date & time If "Auto" is turned on, the date and time will be received from the operators network to which the phone is connected and the difference on your cell phone will be corrected.During GSM/UMTS roaming, if "Auto" is turned off, you can manually set the date settings, time zone and time.During CDMA roaming, you cannot manually set this.
memo ◎Depending on the network, the time adjustment may not be performed correctly. ◎ Timing for time adjustments differ according to the overseas communications partner. ◎Make sure the time on the device is reflecting daylight savings time when applicable. This service cannot be used with some overseas communications partners.
Making a Call Overseas
Calling Abroad From Your Destination (Including Japan)
You can call Japan or other countries from your destination.Example: If you wanted to call an American phone number
212-123-XXXX
1 On the home screen, tap Phone → Dialer
2 + (tap and hold 0) → enter Country Code/Area Code (City Code)/Phone Number → tap
+ (touch and hold)
➡International
Number※1 (U.S.A.) ➡City
Code※2
➡Phone
Number
1 212 123XXXX
※1 When the other person is using global passport, you still enter the country code for Japan (81), regardless of where they are physically located now.
※2 When an area code begins with 0, the 0 should be omitted (except certain areas such as Italy and Moscow).
Calling Within Country of Destination
You can use the same method as in Japan to make calls to landlines and cell phones.However, this is different if using global passport CDMA in North America, Hawaii, Saipan, Mexico.
1 On the home screen, tap Phone → Dialer

95
Ro
aming
2 Area Code (City Code)/Phone NumberIn the case of America, Hawaii and Saipan, enter 1 → Area Code (City Code)/Phone Number.In the case of Mexico/within a city, please enter the phone number.In the case of Mexico/outside the city, enter 01 → Area Code (City Code)/Phone Number.
3
Receiving a Call Overseas
You can receive phone calls when abroad in the same way you would in Japan.For more information on receiving calls, please see "Receiving Calls" (▶P. 46).
memo ◎When you receive a call abroad, the call will be routed through Japan, not matter where you are. The sender will pay charges to Japan, and the other charges will be the responsiblity of the recipient.
■ Incoming Calls from Japan while OverseasCallers can dial your number to call you the same as if you were in Japan.
■ Incoming Calls from Other CountriesRegardless of where the call originates from, calls to this device will pass throughJapan. It is necessary to dial the International Access Number and "81" when calling this product.For example: In the case of receiving a call from an au number in
Korea 090-1234-XXXX
1 International Access Code, Japan Country Code, au Phone Number → Send
International Access Number (U.S.A.) ➡
Japan's Country Code ➡
au Phone Number (currently abbreviated
to 0)
011 81 901234XXXX
memo ◎ For more information on international access codes, please refer to "International Access Numbers" (please refer to au website).

96
Ap
pend
ix
Appendix
Peripherals
�■MOTOROLA AC Adaptor (SPN5701A)
�■microUSB Cable (MOI11HUA)
�■ au Carrying Case F Black (0105FCA) (sold separately)
memo ◎ For information on the latest peripherals and accessories, please see the au website (http://www.au.kddi.com/) or contact the customer service center.
Troubleshooting
Please read this section if you think something may be broken.
Problem Where to Check Reference
The power won't turn on.
•Is the battery dead? Has the phone been fully charged?
•Is there any dirt or foreign particles on the microUSB connector? If the microUSB connector is dirty, wipe it down with a dry cotton swab.
•Are you pressing and holding ?
P. 27P. 28
My battery will not charge.
•Are you sure you have plugged in the MOTOROLA AC adapters power plug into the wall socket properly?
•Is the included microUSB cable connected to the MOTOROLA AC adapter or your personal computer properly?
P. 27
The screen is dark. •Is the screen brightness set too dark?Setting Instructions: On the home screen: Tap -> Settings -> Display -> Brightness -> Adjust Brightness Level and adjust the screen brightness.※�When the brightness is set to auto,
the screen will automatically adjust the brightness depending on the light in the area. When it is set to off, you can adjust it manually.
–

97
Ap
pend
ix
Problem Where to Check Reference
The backlight turns off too quickly.
•Is the time until the backlight turns off set too low?Setting Instructions: On the home screen: Tap -> Settings -> Display -> Screen timeout and tap the time you want to wait until the backlight turns off.※�By reducing the length of time, you
can increase the time between battery charges.
P. 33
The touch panel is unresponsive or is not behaving as expected.(Cannot perform key/touch panel operations.)
•Are you wearing gloves while using the touch panel?
•Are you using your fingernails on the touch panel, or is there any dirt or foreign particles between your finger and the touch panel surface?
•Is there a protective sheet on your touch panel?Some types of protective sheets may result in unresponsive or unintended behavior.
•This product uses a static touch panel. Please touch your fingers directly on the touch panel to operate. Do not use any type of touch pen, etc.
•Are there any water droplets on the display? Are you using a wet hand/finger to perform operations?
•Have you set to lock your screen?※�Enter the pattern, PIN, or password
to unlock the screen.
P. 33P. 86
Problem Where to Check Reference
Screen is not displaying correctly/the screen does not move/nothing happens no matter what key I press (I want to restart my machine)
•If operation becomes unstable, turn the product OFF and ON again.If the popup menu is not displayed even when you hold down and you cannot turn off the power, press and hold , , and together for at least 10 seconds to turn the product OFF and ON again.* Turning the product OFF and ON again will not delete any saved data or applications.
P. 23P. 28
When entering text, I cannot switch to the reduced keyboard layout.(I cannot use any input method other than the full QWERTY keyboard.)
•You can change the software keyboard between a full QWERTY layout and a traditional cell phone reduced keyboard layout.
•When using the reduced keyboard it is possible to change the setting to flick input and toggle input (input is the same as the cell phone).Setting Instructions: On the home screen: Tap -> Settings -> Language & keyboard -> Input method and the select either iWnn IME or the Multi-touch keyboard.
P. 43

98
Ap
pend
ix
Problem Where to Check Reference
The battery runs out too quickly.(The product cannot be used for an extended period of time.)
•Do you have GPS turned on?Setting Instructions: On the home screen: Tap -> Settings -> Location & security -> Use GPS satellites.
•Are you charging the phone enough?* Does the battery icon look like this: (full battery).
•Are you closing open applications when you are done with them?
•Frequently checking e-mail, contacts, or your calendar may result in excessive battery consumption.* You can change the frequency that it syncs with your PCmail (checks for new mail).
Setting Instructions: On the home screen: Tap Apps ->
PCmail -> -> Mail Settings -> Mail Downloading -> Fetch Schedule -> Check Frequency.
* You cannot change the frequency that Gmail, contacts and the calendar sync. Switching auto sync off will improve battery consumption.
•Are you using the included MOTOROLA AC adapter?If using an AC adapter other than the charger sold for the product, it may not charge or it may not charge properly meaning that the battery will not work as it was intended. It may also damage the product so please only use the specified charging equipment.
P. 27
Problem Where to Check Reference
A micro au IC-Card error is displayed.
•Is your micro au IC-Card inserted properly?
•Are you using an incorrect micro au IC-Card?
•Is the micro au IC-Card inserted in the correct direction?
P. 24
Phone calls will not connect.
•Is the micro au IC-Card inserted correctly?
•Are you entering the number starting with the area code?
•Are you in Airplane Mode?
P. 24P. 44P. 82
My ringtone is not playing.
•Do you have the incoming call volume set to 0?
•Are you in Silent Mode?•Have you set the call forwarding
service to "full forwarding"?
P. 35

99
Ap
pend
ix
Problem Where to Check Reference
I cannot make phone calls (the product always displays "Out of Area" or calls cannot be made or received even with full battery.
•Turn the product OFF and ON again, or re-insert the micro au IC-Card.If the popup menu is not displayed even when you hold down and you cannot turn off the power, press and hold , , and together for at least 10 seconds to turn the product OFF and ON again.※�Turning the product OFF and ON
again will not delete any saved data or applications.
•In some cases, due to the nature of the radio waves, you may not be able to make or receive phone calls even if you have what appears to be sufficient signal strength to do so ( ). Change your location and try again.
•In places where there are a lot of people, the radio waves may be mixed and phone calls and mails may not make it out. In such a case, you will get "Please try again later" and an engaged tone. Change your location or wait a while and try again.
P. 23P. 24P. 28
During phone calls I am having difficulty hearing the other party, or their voice is too loud.
•Have you changed your receiver volume?
P. 35
Problem Where to Check Reference
The alarm will not ring.
•If the phone is turned off at the time the alarm is set for, the alarm will not ring.
P. 83
I cannot change the volume or I cannot hear any sound.
•Press or to adjust the volume.
•Depending on the application, it may be possible to change the volume on the touch panel.
•If you are wearing headphones, check to make sure they are connected properly.
P. 35
I forgot my unlock pattern to unlock the screen and now I cannot unlock my phone.
•If you fail to enter the correct unlock pattern five times in a row, you will have to wait 30 seconds before you can try again. Please wait thirty seconds and try again.If "Forgotten Pattern?" is displayed, tap it and follow the on screen instructions to unlock the screen.If you still cannot unlock the screen, please contact your au shop or the customer service center.
P. 87

100
Ap
pend
ix
Problem Where to Check Reference
I am unable to use the wireless LAN (Wi-Fi®) or I cannot connect to any Wi-Fi® networks (wireless access points).
•Are you sure that the wireless LAN (Wi-Fi®) signal is strong enough?
•Have you configured the wireless LAN (Wi-Fi®) settings correctly?
Check the following details to ensure that you can use Wi-Fi®.•When using a home access point,
please check the settings and instruction manual of your access point.
•When using a public wireless LAN service, please check the homepage of the service provider.
•Wireless LAN that can be connected to are "IEEE802.11b" or "g", "n".
P. 80
I cannot use public wireless LAN services.
•Some public wireless LAN services cannot be used. For more information, please see the website of the service provider.
•Are you sure that the Wi-Fi® network (wireless access point) signal is strong enough?Setting Instructions: On the home screen: Tap -> Settings -> Wireless & networks -> Wi-Fi settings -> Open Network Notifications to turn it network notifications on. Now you can view the signal strength for all nearby available Wi-Fi® networks (wireless access points).
–
Problem Where to Check Reference
I cannot play music files.
•This product supports the following file formats.AAC, AAC+, AAC+ Enhanced, AMR NB, AMR WB, MP3, WAV, WMA v9, MIDI
–
I cannot find images, movies, or music that I have saved.
•Open the corresponding application.
–
The product gets warm when in use.
•The product can get warm when charging, running applications, using the web browser, checking mail, using the camera, or playing music and movies. This is normal.If you are experiencing excessive heat, there may be a fault. Please cease usage and take it to an au shop for repair.
–

101
Ap
pend
ix
■ Frequently Asked Questions
Question Answer Reference
Can the product be set to vibrate?
•Yes.Setting Instructions: On the home screen: Tap -> Setting -> Sound -> Vibrate and then change the setting.
P. 43
Can I update the phone?
•No.You cant update the cell phone.Please update the software.
P. 86
Is there a filtering feature?
•Yes.Setting Instructions: On the home screen: Tap -> Settings -> Wireless & networks -> Website filter and then follow the instructions on the screen.
–
Can I use certification type access points?
•Yes.You will need to complete the set-up, and then each time you connect you will need to enter your ID and password.
–
Can I use the phone as a modem when connected to a PC (USB tethering)?
•No. You cannot use it like this. -
Cam I use the same ID for Google wallet that I obtained on my PC?
•Yes. You can. -
Question Answer Reference
Please tell me what data I can synchronize with my PC?
•You can synchronize your Gmail, calendars and contacts via the internet servers.
P. 83P. 48
When is it necessary to use the USB driver?
•You need the USB driver when using the USB mass storage and when charging. When you have the USB connected and use Motorola's Phone Portal or Windows Media Sync, please download the Windows USB driver from the following link.http://www.motorola.com/Support/JP-JA/Consumer-Support/Support-Homepage/USB-and-PC-Charging-Drivers
-
If your problems aren't resolved by the information provided here, have a look at the au Customer Support on the au homepage found at the address below.http://cs.kddi.com/support/komatta/kosho/index.html

102
Ap
pend
ix
After Sales Service
■ When asking for repairFor repair, contact Secure cell phone support center.
During the warranty period
Repairs will be done based on the terms of services of the free-of-charge repair warranty described on the warranty card.
Outside the warranty period
We shall repair the product for a charge as requested by the customer if repair renders it usable.
memo
◎Before handing in the product for repair, make a backup of the contents of memory since they may disappear during repair. Note that the Company shall not be liable for any damages and loss of income should the contents of memory be altered or lost. ◎Recycled parts that meet the Company's quality standards are sometimes used for repair. ◎Collected au cell phones by Replacement cell phone delivery service which you used before are recycled to cell phones for replacement after repairs. Also replaced parts by au after-sales service are collected and recycled by KDDI. They are not returned to customers.
■ Performance parts for repairThe Company retains performance parts for repair of the MOTOROLA RAZR™ IS12M main unit and its peripherals for six years after discontinuation of production. "Performance parts for repair" refers to parts required for maintaining the functions of the product.
■ Warranty cardAt the store of purchase, thoroughly check and read the name of the retailer, date of purchase and other necessary details filled in on the warranty card, and be sure to keep it in a safe place.
■ Secure cell phone support plusAn after-sales service membership program on a monthly basis called "Secure cell phone support plus" (monthly fee: 399 yen including tax) is available for using your au cell phone for a long time without worries. This service expands coverage for many troubles including malfunction, theft and loss. For details of this service, refer to au homepage or contact Secure cell phone support center.
memo ◎You can apply for membership only at the time of purchasing your au cell phone. ◎Once you cancel the membership, you cannot reapply for it until you purchase an au cell phone next time. ◎Note that when changing the model or purchasing an extra cell phone, this service only covers the most recently purchased au cell phone. ◎When an au cell phone is handed over to you or someone else, the Secure cell phone suport plus membership is also handed over to the successor of the cell phone. ◎When you get a new au cell phone by changing the model or purchasing an extra cell phone, the "Secure cell phone support plus" membership for the old au cell phone is automatically canceled. ◎Service contents are subject to change without notice.
■ micro au IC-CardThe micro au IC-Card is lent to you by au. In case of loss or damage, the card will be replaced at your expense. When malfunction is suspected, or in case of theft or loss, contact an au shop or PiPit.

103
Ap
pend
ix
■ After-sales serviceIf you are unsure about anything regarding after-sales service, contact the following service contact.
Customer Service Center (for service canceling procedure or operation in case of loss or theft)
From a land-line phone 0077-7-113 (toll-free)
From an au cell phone 113 (toll-free)
Secure cell phone support center (for loss, theft, damage)
From a land-line phone/From an au cell phone,
0120-925-919 (toll-free) Business hours 9:00-21:00 (7 days a week)
■ au after-sales service informationReplacement cell phone delivery serviceSecure cell phone support plus members
Spontaneous failure 1st year Free of chargeSpontaneous failure after 2nd year "Customer charge
1st: 5,250 yen 2nd: 8,400 yen"
Partially damage, water soak, irreparable damage, theft or loss
Non-Secure cell phone support plus member
Spontaneous failure 1st year No recompenseSpontaneous failure after 2nd yearPartially damage, water soak, irreparable damage, theft or loss※Charge amounts are all tax-included.
Holding over and repairSecure cell phone support plus members
Spontaneous failure 1st year Free of chargeSpontaneous failure after 2nd year Free of charge (three-year warranty)Partially damage Customer charge
Upper limit: 5,250 yenWater soak, irreparable damage No recompenseTheft, loss
Non-Secure cell phone support plus member
Spontaneous failure 1st year Free of chargeSpontaneous failure after 2nd year Actual costPartially damageWater soak, irreparable damage No recompense
(model change)Theft, loss※Charge amounts are all tax-included.
memoReplacement cell phone delivery service
◎When you have trouble with your au cell phone, replacement cell phone (same model, same color, including new battery) is delivered by calling to. Return your damaged cell phone within 14 days after replacement cell phone is delivered. ◎Available up to twice in a year from the day you use this service as a start day. If you do not use this service in the past year at the subscription to this service, it will be 1st and if you use, it will be 2nd.※�For details, refer to au homepage.
Holding over and repair ◎Repairs due to water soak and irreparable damage are not covered by this service. ◎Damages and malfunctions intentionally caused by the customer as well as those due to modification (e.g. disassembly, change of parts, painting, etc.) by the customer are not covered by this service. ◎You cannot receive a refund for replacement of the outer casing due to stains, scratches, paint removal, etc. on the outer casing.

104
Ap
pend
ix
Main Specifications
●�Main Unit *The below data are the estimates of Motorola Mobility, Inc.
Size (width x height x thickness)
approx. 69 mm x 131 mm x 7.1 mm (at thickest part 10.7 mm)
Mass approx. 127 g
Storage approx. 16 GB※�Capacity available to user: approx. 11 GB
(application storage: approx. 3 GB/internal storage: approx. 8 GB)
Display 4.3 inches, approx. 16,770,000 colors, Super AMOLED Advanced
horizontal 540 dots x vertical 960 dots
Calling Time※1
Domestic approx. 580 minutes
Overseas (GSM) approx. 510 minutes
Overseas (CDMA)
approx. 590 minutes: America Mainland/Mexico/Saipan/China Mainland/Hawaii/Korea/Taiwan/Indonesia/Israel/India/Vietnam/Bangladesh/Thailand/Macao/Bermuda/Venezuela※Target countries as of January 2012
Standby Time*1
Domestic approx. 240 hours (Wi-Fi® off)approx. 140 hours (Wi-Fi® on)
Overseas (GSM) approx. 230 hours
Overseas (CDMA)
approx. 220 hours: America Mainland/Mexico/Saipan/China Mainlandapprox. 280 hours: Hawaii/Korea/Taiwan/Indonesia/Israel/India/Vietnam/Bangladesh/Bahamas/Hong Kongapprox. 300 hours: New Zealand/Thailand/Bermuda/Venezuela※Target countries as of January 2012
Charging Time AC approx. 60 minutes
Interface micro au IC-Card slot. microUSB port (B type), HDMI micro port, micro SD memory card slot, 3.5 Φ stereo earphones port
Network environment Wireless LAN (IEEE802.11a/b/g/n standard)※2
Bluetooth® ※3※4
Communication Format
Bluetooth® Standard Ver.4.0+EDR/LE
Output Bluetooth® Standard Power Class2
Communication Distance※5
Good conditions and unobstructed within 10m
※1 Depending on battery charge, settings' features, atomospheric temperature, the reception (areas where waves may not reach or are weak) standby times may be halved. Also, depending on the features being used, standby time and usage time may be reduced.

105
Ap
pend
ix※2 IEEE802.11n supports 2.4 GHz and 5 GHz. This product can use three types of channels for wave bands: W52, W53,
W56.However, use of W52 and W53 are forbidden outside.※3 This product and all Bluetooth® enable products through the method
established by Bluetooth® SIG are confirmed to comply with Bluetooth® standards and will have a certificate.However, depending on the specification and characteristics of the connecting, operations may change and the even if connected you may find it impossible to exchange data.
※4 The supported profile (Standard connection procedure for Bluetooth® communication) is as below.
HSP (Headset Profile) HFP (Hands-Free Profile) A2DP (Advanced Audio Distribution Profile) AVRCP (Audio/Video Remote Control Profile) OPP (Object Push Profile) PBAP (Phone Book Access Profile) HID (Human Interface Device Profile) OBEX (Object Exchange) GAVDP (General Audio/Video Distribution Profile) AVDTP (Audio/Video Distribution Transport Protocol) AVCTP (Audio/Video Control Transport Protocol)※5 This may change due to obstructions between the communicating devices and
reception.
●�Back Camera
Photo Element CMOS
Effective Image Pixels approx. 8,000,000
Photo resolution
Widescreen (6 MP) resolution 3264×1840
standard (8 MP) resolution 3264×2448
Video Resolution
HD+(1920×1080) resolution 1920×1080
High Resolution�(720p) resolution 1280×720
D1�(720×480) resolution 720×480
VGA�(640×480) resolution 640×480
QVGA (320×240) resolution 320×240
●�Front Camera
Photo Element CMOS
Effective Image Pixels approx. 1,300,000
Photo Resolution
Wide Screen (1 MP) resolution 1280×720
standard (1 MP) resolution 1280×960
Video Resolution
high resolution (720p) HD Videoresolution 1280×720, progressive

106
Ap
pend
ix
Want to Find Out More?
For detailed information on using this product or peripherals, visit the au homepage (http://www.au.kddi.com).
Windows Logos
The names of operating systems (Japanese versions) used in this manual are as follows.•Windows 7 is an abbreviation for Microsoft® Windows® 7 (Starter,
Home Basic, Home Premium, Professional, Enterprise, Ultimate).•Windows Vista is an abbreviation for Microsoft® Windows Vista® (Home
Basic, Home Premium, Business, Enterprise, Ultimate).•Windows XP is an abbreviation for Microsoft® Windows® XP
Professional operating system or Microsoft® Windows® XP Home Edition operating system.
Cellphone Specific Absorption Rate (SAR)
Your mobile device is a radio transmitter and receiver. It is designed to conform to technical standards regarding absorption specified by Japan and international guidelines. This mobile device is designed to respect the limits of radio waves recommended by technical standards※1 for SAR specified by Japan and international guidelines.These international guidelines are established by an independent scientific organization (ICNIRP) in conjunction with the World Health Organization (WHO) and include a substantial safety margin designed to ensure safety of all persons, regardless of age and health. The radio wave exposure guidelines use a unit of measurement known as the Specific Absorption Rate, or SAR. The SAR limit for mobile devices is 2.0 W/kg. The SAR of the head area for this mobile device is a maximum of 0.595 W/kg. There may be slight differences between the SAR values for each product, but they all satisfy the limit. The actual SAR value while talking on the phone is usually well below that indicated above. This is because cell phones are designed so that they output only the minimum power required to communicate with cell phone stations.In general, the closer the device is to the base station, the less output there is.This mobile device can be used in locations other than the head.By carrying the mobile device in an au carrying case F black (0105FCA) (sold separately) as recommended by KDDI, this mobile device will satisfy international guidelines※2.If not using an au carrying case F black (0105FCA) (sold separately) as recommended by KDDI, the mobile device should be at a distance of at least 1.5 inches away from the body and whatever product should be free of metal.

107
Ap
pend
ixThe World Health Organization has stated that present scientific information does not indicate the need for any special precautions for the use of mobile devices.They recommend that if you are interested in further reducing your exposure then you can easily do so by limiting your usage or simply using a hands-free kit to keep the device away from the head and body.For more information, please visit the website of the World Health Organization.(http://www.who.int/docstore/peh-emf/publications/facts_press/fact_japanese.htm)
Please refer to the websites listed below if you would like more detailed information regarding SAR.
○Ministry of Internal Affairs and Communications website:
http://www.tele.soumu.go.jp/j/sys/ele/index.htm
○ Association of Radio Industries and Businesses website:
http://www.arib-emf.org/index02.html
○ au website:
http://www.au.kddi.com/
※1�These standards are defined by Wireless Regulations 14-2 of the Radio Law.
※2�In the case that the mobile device is used other than next to the head, the SAR regulations are established by international guidelines (IEC62209-2) of March 2010, but domestic guidelines are currently undergoing consideration by a committee established by the Ministry of Internal Affairs and Communications.(correct as of March 2011)
Export Administration Regulations
This product and peripherals are applying for Japan export qualifications (Foreign exchange and foreign trade laws and related regulations). Furthermore they may apply for Americas Export Administration Regulations. In the case of export or re-export of the product or peripherals, please carry out the necessary procedures for customer duty and fees. For more information, please contact the Ministry of Economy, Trade and Industry or the U.S. Department of Commerce.
Copyrights, Trademarks
• microSD and microSDHC are registered trademarks of the SD Card Association.
• The microSDHC logo is a trademark of SD-3C and LLC.
• Japanese conversion uses Omron Software Co. Ltds iWnn. iWnn is a registered trademark of Omron Software Co., Ltd.iWnn IME © OMRON SOFTWARE Co., Ltd. 2009-2012 all rights reserved.
• Bluetooth® and the Bluetooth® logo are copyright Bluetooth® SIG. Inc. Motorola Mobility, Inc. is authorized for use of this trademark.
• Wi-Fi® is a trademark and registered trademark of Wi-Fi Alliance®.

108
Ap
pend
ix
• Motorola, MOTOROLA, MOTOROLA PHOTON and the Motorola logo are registered trademarks of Motorola Trademark Holdings, LLC.
• Google, the Google logo, Google Maps, Google Talk, Google Latitude, Google Finance, Gmail, YouTube, Picasa, Androidify, Android, Android Market, Google Chrome, Google Latitude are trademarks of Google, Inc.
• Microsoft, Windows, Windows Vista, Exchange, Internet Explorer, Excel and PowerPoint are trademarks and registered trademarks of the Microsoft Corporation of North America.
• Windows Media is a trademark and registered trademark of the Microsoft Corporation of North America.
• Microsoft Word and Microsoft Office are trademarks of the Microsoft Corporation of North America.
• HDMI (High-Definition Multimedia Interface) and the HDMI logo are trademarks and registered trademarks of HDMI Licensing and LLC.
• KEVLAR® is the registered trademark of DuPont and is licensed for use by Motorola Mobility, Inc.
• Copyright © 2010- Three Laws of Mobility. All Rights Reserved.
• TRENDMICRO and Virus Buster are the registered trademarks of TRENDMICRO Corporation.
• Facebook is a trademark of Facebook, Inc. • Skype and related logos and trademarks and the "S" signifier are trademarks of Skype Limited.
• Twitter is a registered trademark of Twitter, Inc. • Jibe mobile is a trademark of Jibe Mobile, Inc. • GREE is a trademark and registered trademark of GREE Inc., registered in Japan.
• Adobe® Flash® is a trademark or registered trademark of Adobe Systems Incorporated in the United States and other countries.
• Apple, iTunes, Mac, Mac OS, Safari are trademarks registered by Apple Inc. in Northe America and other countries.
• Music recognition technologies and related data are provided by Gracenote®.Gracenote provides the industry standard for music recognition technology and related content distribution.For details, visit Gracenotes homepage at: www.gracenote.comCD and music-related data from Gracenote is: Copyright © 2000 - present Gracenote.Gracenote Software: Copyright 2000 - present Gracenote.This product and related services implements one or more of the following patents registered in the United States of America: #5,987,525, #6,061,680, #6,154,773, #6,161,132, #6,230,192, #6,230,207, #6,240,459, #6,330,593, and other registered patents or submitted patents currently under review.Some services have been licensed by Open Globe, Inc. for United States of America patent #6,304,523.Gracenote and CDDB are the registered trademarks of Gracenote.The Gracenote logo, style, and the "Powered by Gracenote" logo are the trademarks of Gracenote.Please refer to the following website for more details about the use of Gracenotes services: www.gracenote.com/corporate
• All other company names and product names used in this text are the trademarks or registered trademarks of their respective companies.
© 2012 Motorola Mobility, Inc. All rights reserved.Product ID: MOTOROLA RAZR™ IS12M

109
Ap
pend
ix
Radio Frequency (RF) Energy
Exposure to RF EnergyYour mobile device contains a transmitter and receiver. When it is ON, it receives and transmits RF energy. When you communicate with your mobile device, the system handling your call controls the power level at which your mobile device transmits.Your mobile device is designed to comply with local regulatory requirements in your country concerning exposure of human beings to RF energy.
RF Energy Operational PrecautionsFor optimal mobile device performance, and to be sure that human exposure to RF energy does not exceed the guidelines set forth in the relevant standards, always follow these instructions and precautions:•When placing or receiving a phone call, hold your mobile device just like you
would a landline phone.• If you wear the mobile device on your body, always place the mobile device in
a Motorola-supplied or approved clip, holder, holster, case, or body harness. If you do not use a body-worn accessory supplied or approved by Motorola, keep the mobile device and its antenna at least 2.5 cm (1 inch) from your body when transmitting.
•Using accessories not supplied or approved by Motorola may cause your mobile device to exceed RF energy exposure guidelines. For a list of Motorola-supplied or approved accessories, visit our Web site at: www.motorola.com.
RF Energy Interference/CompatibilityNearly every electronic device is subject to RF energy interference from external sources if inadequately shielded, designed, or otherwise configured for RF energy compatibility. In some circumstances, your mobile device may cause interference with other devices.
Specific Absorption Rate (ICNIRP)
YOUR MOBILE DEVICE MEETS INTERNATIONAL GUIDELINES FOR EXPOSURE TO RADIO WAVES.Your mobile device is a radio transmitter and receiver. It is designed not to exceed the limits for exposure to radio waves (radio frequency electromagnetic fields) recommended by international guidelines. The guidelines were developed by an independent scientific organization (ICNIRP) and include a substantial safety margin designed to assure the safety of all persons, regardless of age and health.The radio wave exposure guidelines use a unit of measurement known as the Specific Absorption Rate, or SAR. The SAR limit for mobile devices is 2 W/kg.Tests for SAR are conducted using standard operating positions with the device transmitting at its highest certified power level in all tested frequency bands. The highest SAR values under the ICNIRP guidelines for your device model are listed below:
Head SAR CDMA 800/2100, Wi-Fi, Bluetooth 0.595 W/kgBody-worn SAR CDMA 800/2100, Wi-Fi, Bluetooth 0.44 W/kg
During use, the actual SAR values for your device are usually well below the values stated. This is because, for purposes of system efficiency and to minimize interference on the network, the operating power of your mobile device is automatically decreased when full power is not needed for the call. The lower the power output of the device, the lower its SAR value.Body-worn SAR testing has been carried out using an approved accessory or at a separation distance of 2.5 cm (1 inch). To meet RF exposure guidelines during body-worn operation, the device should be in an approved accessory or positioned at least 2.5 cm (1 inch) away from the body. If you are not using an approved accessory, ensure that whatever product is used is free of any metal and that it positions the phone at least 2.5 cm (1 inch) away from the body.
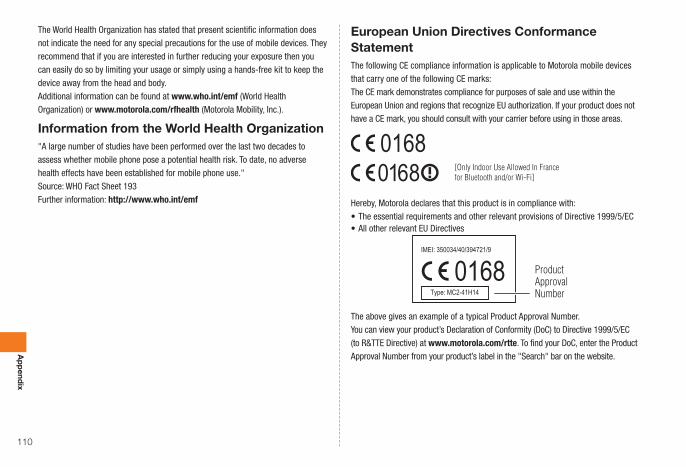
110
Ap
pend
ix
The World Health Organization has stated that present scientific information does not indicate the need for any special precautions for the use of mobile devices. They recommend that if you are interested in further reducing your exposure then you can easily do so by limiting your usage or simply using a hands-free kit to keep the device away from the head and body.Additional information can be found at www.who.int/emf (World Health Organization) or www.motorola.com/rfhealth (Motorola Mobility, Inc.).
Information from the World Health Organization"A large number of studies have been performed over the last two decades to assess whether mobile phone pose a potential health risk. To date, no adverse health effects have been established for mobile phone use."Source: WHO Fact Sheet 193Further information: http://www.who.int/emf
European Union Directives Conformance StatementThe following CE compliance information is applicable to Motorola mobile devices that carry one of the following CE marks:The CE mark demonstrates compliance for purposes of sale and use within the European Union and regions that recognize EU authorization. If your product does not have a CE mark, you should consult with your carrier before using in those areas.
0168 [Only Indoor Use Allowed In Francefor Bluetooth and/or Wi-Fi]0168
Hereby, Motorola declares that this product is in compliance with:•The essential requirements and other relevant provisions of Directive 1999/5/EC•All other relevant EU Directives
0168 Product Approval Number
The above gives an example of a typical Product Approval Number.You can view your product’s Declaration of Conformity (DoC) to Directive 1999/5/EC (to R&TTE Directive) at www.motorola.com/rtte. To find your DoC, enter the Product Approval Number from your product’s label in the "Search" bar on the website.

111
Ap
pend
ix
FCC Notice to UsersThe following statement applies to all products that bear the FCC logo on the product label.This equipment has been tested and found to comply with the limits for a Class B digital device, pursuant to part 15 of the FCC Rules. See 47 CFR Sec. 15.105(b). These limits are designed to provide reasonable protection against harmful interference in a residential installation. This equipment generates, uses and can radiate radio frequency energy and, if not installed and used in accordance with the instructions, may cause harmful interference to radio communications. However, there is no guarantee that interference will not occur in a particular installation. If this equipment does cause harmful interference to radio or television reception, which can be determined by turning the equipment off and on, the user is encouraged to try to correct the interference by one or more of the following measures:•Reorient or relocate the receiving antenna.• Increase the separation between the equipment and the receiver.•Connect the equipment to an outlet on a circuit different from that to which the
receiver is connected.•Consult the dealer or an experienced radio/TV technician for help.This device complies with part 15 of the FCC Rules. Operation is subject to the following two conditions: (1) This device may not cause harmful interference, and (2) this device must accept any interference received, including interference that may cause undesired operation. See 47 CFR Sec. 15.19(3).Motorola has not approved any changes or modifications to this device by the user. Any changes or modifications could void the user’s authority to operate the equipment. See 47 CFR Sec. 15.21.For products that support Wi-Fi 802.11a (as defined in the product specifications available at www.motorola.com), the following information applies. This equipment has the capability to operate Wi-Fi in the 5 GHz Unlicensed National Information Infrastructure (U-NII) band. Because this band is shared with MSS (Mobile Satellite Service), the FCC has restricted such devices to indoor use only (see 47 CFR 15.407(e)). Since wireless hot spots operating in this band have the same restriction, outdoor services are not offered. Nevertheless, please do not operate this device in Wi-Fi mode when outdoors.
Location Services (GPS & AGPS)The following information is applicable to Motorola mobile devices that provide location based (GPS and/or AGPS) functionality.Your mobile device may use Global Positioning System (GPS) signals for location-based applications. GPS uses satellites controlled by the U.S. government that are subject to changes implemented in accordance with the Department of Defense policy and the Federal Radio Navigation Plan. These changes may affect the performance of location technology on your mobile device.Your mobile device may also use Assisted Global Positioning System (AGPS), which obtains information from the cellular network to improve GPS performance. AGPS uses your wireless service provider’s network and therefore airtime, data charges, and/or additional charges may apply in accordance with your service plan. Contact your wireless service provider for details.
Your LocationLocation-based information includes information that can be used to determine the approximate location of a mobile device. Mobile devices which are connected to a wireless network transmit location-based information. Devices enabled with GPS or AGPS technology also transmit location-based information. Additionally, if you use applications that require location-based information (e.g. driving directions), such applications transmit location-based information. This location-based information may be shared with third parties, including your wireless service provider, applications providers, Motorola, and other third parties providing services.
Emergency CallsWhen you make an emergency call, the cellular network may activate the AGPS technology in your mobile device to tell the emergency responders your approximate location.AGPS has limitations and might not work in your area. Therefore:•Always tell the emergency responder your location to the best of your ability; and•Remain on the phone for as long as the emergency responder instructs you.

112
Ap
pend
ix
NavigationThe following information is applicable to Motorola mobile devices that provide navigation features.When using navigation features, note that mapping information, directions and other navigational data may contain inaccurate or incomplete data. In some countries, complete information may not be available. Therefore, you should visually confirm that the navigational instructions are consistent with what you see. All drivers should pay attention to road conditions, closures, traffic, and all other factors that may impact driving. Always obey posted road signs.
Privacy & Data SecurityMotorola understands that privacy and data security are important to everyone. Because some features of your mobile device may affect your privacy or data security, please follow these recommendations to enhance protection of your information:•Monitor access—Keep your mobile device with you and do not leave it where
others may have unmonitored access. Use your device’s security and lock features, where available.
•Keep software up to date—If Motorola or a software/application vendor releases a patch or software fix for your mobile device that updates the device’s security, install it as soon as possible.
•Secure Personal Information—Your mobile device can store personal information in various locations including your SIM card, memory card, and phone memory. Be sure to remove or clear all personal information before you recycle, return, or give away your device. You can also backup your personal data to transfer to a new device.Note: For information on how to backup or wipe data from your mobile device, go to www.motorola.com/support
•Online accounts—Some mobile devices provide a Motorola online account (such as MOTOBLUR). Go to your account for information on how to manage the account, and how to use security features such as remote wipe and device location (where available).
•Applications and updates—Choose your apps and updates carefully, and install from trusted sources only. Some apps can impact your phone’s performance and/or have access to private information including account details, call data, location details and network resources.
•Wireless—For mobile devices with Wi-Fi features, only connect to trusted Wi-Fi networks. Also, when using your device as a hotspot (where available) use network security. These precautions will help prevent unauthorized access to your device.
•Location-based information—Location-based information includes information that can be used to determine the approximate location of a mobile device. Mobile phones which are connected to a wireless network transmit location-based information. Devices enabled with GPS or AGPS technology also transmit location-based information. Additionally, if you use applications that require location-based information (e.g. driving directions), such applications transmit location-based information. This location-based information may be shared with third parties, including your wireless service provider, applications providers, Motorola, and other third parties providing services.
•Other information your device may transmit—Your device may also transmit testing and other diagnostic (including location-based) information, and other non-personal information to Motorola or other third-party servers. This information is used to help improve products and services offered by Motorola.
Software Copyright NoticeMotorola products may include copyrighted Motorola and third-party software stored in semiconductor memories or other media. Laws in the United States and other countries preserve for Motorola and third-party software providers certain exclusive rights for copyrighted software, such as the exclusive rights to distribute or reproduce the copyrighted software. Accordingly, any copyrighted software contained in Motorola products may not be modified, reverse-engineered, distributed, or reproduced in any manner to the extent allowed by law. Furthermore, the purchase of Motorola products shall not be deemed to grant either directly or by implication, estoppel, or otherwise, any license under the copyrights, patents, or patent applications of Motorola or any third-party software provider, except for the normal, non-exclusive, royalty-free license to use that arises by operation of law in the sale of a product.

113
Ap
pend
ix
Content CopyrightThe unauthorized copying of copyrighted materials is contrary to the provisions of the Copyright Laws of the United States and other countries. This device is intended solely for copying non-copyrighted materials, materials in which you own the copyright, or materials which you are authorized or legally permitted to copy. If you are uncertain about your right to copy any material, please contact your legal advisor.
Open Source Software InformationFor instructions on how to obtain a copy of any source code being made publicly available by Motorola related to software used in this Motorola mobile device, you may send your request in writing to the address below. Please make sure that the request includes the model number and the software version number.MOTOROLA MOBILITY, INC.OSS Management600 North US Hwy 45Libertyville, IL 60048USAThe Motorola website opensource.motorola.com (in English only) also contains information regarding Motorola’s use of open source.Motorola has created the opensource.motorola.com website to serve as a portal for interaction with the software community-at-large.To view additional information regarding licenses, acknowledgments and required copyright notices for open source packages used in this Motorola mobile device, please press Menu Key > Settings > About phone > Legal information > Open source licenses. In addition, this Motorola device may include self-contained applications that present supplemental notices for open source packages used in those applications.
Copyright & TrademarksMotorola Mobility, Inc.Consumer Advocacy Office600 N US Hwy 45Libertyville, IL 60048www.motorola.comCertain features, services and applications are network dependent and may not be available in all areas; additional terms, conditions and/or charges may apply. Contact your service provider for details.All features, functionality, and other product specifications, as well as the information contained in this guide, are based upon the latest available information and believed to be accurate at the time of printing. Motorola reserves the right to change or modify any information or specifications without notice or obligation.MOTOROLA and the Stylized M Logo are trademarks or registered trademarks of Motorola Trademark Holdings, LLC. Google, the Google logo, Google Maps, Google Maps Navigation, Google Talk, Google Latitude, Google Finance, Gmail, YouTube, Picasa, Androidify, Android and Android Market are trademarks of Google, Inc. All other product or service names are the property of their respective owners.© 2012 Motorola Mobility, Inc. All rights reserved.Caution: Motorola does not take responsibility for changes/modification to the transceiver.Product ID: MOTOROLA RAZR™ IS12M68016789002

114
Ap
pend
ix
Gracenote® End-user License Agreement
This software product or electronics product includes software provided by Gracenote, Inc. (hereinafter referred to as "Gracenote") of Emeryville, California, USA. This software product or electronics product uses Gracenotes software (hereinafter referred to as "Gracenote software") to recognize music CDs and music files and obtain information such as artist name, track name, and title (hereinafter referred to as "Gracenote data") via an online server or databse in the product (hereinafter referred to as the "Gracenote server") and to use this acquired Gracenote data to perform other functions. The user must not use this Gracenote data in any way other than for the functions intended through the use of this software or electronics product.The user agrees to use the Gracenote data, Gracenote software, and Gracenote server for personal, non-profit use. The user agrees not to provide, copy, transfer, or send the Gracenote software or Gracenote data to any third party. The user agrees not to use the Gracenote data, Gracenote software, or Gracenote server for any purpose other than those explicitly allowed in this document.The customer agrees to forfeit their exclusive usage license required to use the Gracenote data, Gracenote software, and Gracenote server should they infringe upon any of these restrictions. In this case, the user also agrees to stop their use of the Gracenote data, Gracenote software, and Gracenote server.Gracenote owns and holds the rights to all Gracenote data, Gracenote software, and Gracenote servers. Gracenote shall not be held responsible for payment for any information provided voluntarily by the user. The user agrees that Gracenote, Inc. can directly execute any of the rights outlined in this license agreement at any time.
The Gracenote service uses a unique identifier for queries to perform statistical analyses. This identifier is based on a randomly assigned number in order to allow the tally of queries by users of the Gracenote service without any personal identification. For more details, see the Gracenote Privacy Policy for Gracenote services on the Gracenote homepage.The Gracenote software and Gracenote data is provided as-is. Gracenote does not guarantee the accuracy or content of any Gracenote data on Gracenote servers. Gracenote may remove or re-categorize any data on Gracenote servers at any time if required. Gracenote cannot guarantee the functionality of Gracenote servers or the Gracenote software in the event of a Gracenote server error. Gracenote does not guarantee access to expanded or additional services that may be provided by Gracenote in the future to the user. Gracenote reserves the right to stop the service at any time. • Gracenote shall not be held responsible for any implicit product certification of conformity, product certification of conformity for any specific purpose, rights, or innocuous matters nor shall they provide any guarantee implicitly or otherwise. Gracenote does not guarantee the results obtained through the use of the Gracenote software or Gracenote servers. Gracenote shall not be held responsible for any resulting or incidental damages or losses incurred through the use of this service.
© Gracenote, Inc. 2000-present

115
Index
Index
A
Accessibility . . . . . . . . . . . . . . 85After Sales . . . . . . . . . . . . . . 102Airplane Mode . . . . . . . . . . . . 82Alarm . . . . . . . . . . . . . . . . . . . 83Android Market . . . . . . . . . . . 77Application Installation . . . . . 77Applications . . . . . . . . . . . 39, 78
Activation . . . . . . . . . . . . . . . . . . . 39Delete . . . . . . . . . . . . . . . . . . . . . . 78Install . . . . . . . . . . . . . . . . . . . . . . . 78Management . . . . . . . . . . . . . . . . . 78Move . . . . . . . . . . . . . . . . . . . . . . . 78Uninstall . . . . . . . . . . . . . . . . . . . . 78
Appointments. . . . . . . . . . . . . 83Area Settings . . . . . . . . . . . . . 93au Disaster Countermeasure
Application . . . . . . . . . . . . . 53Disaster Message Board . . . . . . . . 53Early warning mail . . . . . . . . . . . . . 53
au International Phone Service . . . . . . . . . . . . . . . . 46
au one Market . . . . . . . . . . . . 79
B
Back Key . . . . . . . . . . . . . . . . 35Battery . . . . . . . . . . . . . . . . . . 27Bluetooth® Functionality . . . . 81
pair setup . . . . . . . . . . . . . . . . . . . 81
Bookmarks . . . . . . . . . . . . . . . 76Browser . . . . . . . . . . . . . . . . . 76
C
Calculator . . . . . . . . . . . . . . . . 83Calendar . . . . . . . . . . . . . . . . . 83Call Block . . . . . . . . . . . . . . . . 46Caller Number Notification . . . 44Call History . . . . . . . . . . . . . . . 47Call Screen . . . . . . . . . . . . . . . 45Camcorder . . . . . . . . . . . . . . . 73Camera . . . . . . . . . . . . . . . 70, 71
Camcorder . . . . . . . . . . . . . . . . . . 73Movies. . . . . . . . . . . . . . . . . . . . . . 73Photos . . . . . . . . . . . . . . . . . . . . . 71
Charging . . . . . . . . . . . . . . . . . 27C-mail . . . . . . . . . . . . . . . . . . . 51
C-Mail Safety Block . . . . . . . . . . . . 52Code Entry . . . . . . . . . . . . . . . 42Communication . . . . . . . . . . . 50Contacts . . . . . . . . . . . . . . . . . 48
Create . . . . . . . . . . . . . . . . . . . . . . 48Display Options . . . . . . . . . . . . . . . 49Edit/Delete. . . . . . . . . . . . . . . . . . . 49Save Location . . . . . . . . . . . . . . . . 49Viewing . . . . . . . . . . . . . . . . . . . . . 49
D
Data Initialization . . . . . . . . . . 88Data Roaming . . . . . . . . . . . . 94Date and Time . . . . . . . . . . . . 94Disaster Message Board . . . 53Display . . . . . . . . . . . . . . . . . . 33
Dock . . . . . . . . . . . . . . . . . . . . 36Customizing . . . . . . . . . . . . . . . . . 38
Double Tap . . . . . . . . . . . . 33, 39Drag . . . . . . . . . . . . . . . . . . . . 34
E
Early warning mail . . . . . . . . . 54E-mail
( ~ @ezweb.ne.jp)Auto-Forward . . . . . . . . . . . . . . . . 66Change E-Mail Address . . . . . . . . . 66Downloading . . . . . . . . . . . . . . . . . 61Initial Setup . . . . . . . . . . . . . . . . . . 57Send . . . . . . . . . . . . . . . . . . . . . . . 57Setting . . . . . . . . . . . . . . . . . . . . . . 62Spam Mail Filter . . . . . . . . . . . . . . . 67
Emergency Notifications . . . 45Emoticon Entry . . . . . . . . . . . 42
F
Flick . . . . . . . . . . . . . . . . . . . . 34Full Keyboard . . . . . . . . . . . . . 43
G
Global Passport . . . . . . . . . . . 91Gmail . . . . . . . . . . . . . . . . . . . . 55
Confirmation . . . . . . . . . . . . . . . . . 55Create . . . . . . . . . . . . . . . . . . . . . . 56Inbox . . . . . . . . . . . . . . . . . . . . . . . 55Reply/Forward . . . . . . . . . . . . . . . . 56Setting . . . . . . . . . . . . . . . . . . . . . . 56Update . . . . . . . . . . . . . . . . . . . . . 56
Google Calendar . . . . . . . . . . 83
H
Help Center . . . . . . . . . . . . ii, 40Home Key . . . . . . . . . . . . . . . . 35
Double Tap . . . . . . . . . . . . . . . . . . 39Home Screen . . . . . . . . . . . . . 35
Customizing . . . . . . . . . . . . . . . . . 37
I
Icons . . . . . . . . . . . . . . . . . . . . 36Initialization . . . . . . . . . . . . . . 88Input method . . . . . . . . . . . . . 43Input Mode . . . . . . . . . . . . . . . 43Instruction Manual
Application . . . . . . . . . . . . . . iiInternational Calls . . . . . . 46, 94International Roaming
Services . . . . . . . . . . . . . . . 91Internet . . . . . . . . . . . . . . . . . . 75iWnn IME . . . . . . . . . . . . . . . . 43
K
Keyboard . . . . . . . . . . . . . . . . 43
L
Lock Release Password . . . . 87Lock Release Pattern . . . . . . 87Lock Release PIN . . . . . . 18, 87Lock Screen . . . . . . . . . . . . . . 87
Customizing . . . . . . . . . . . . . . . . . 87Long Touch . . . . . . . . . . . . . . . 34

116
Index
M
MAC Address . . . . . . . . . . . . . 81Mail
E-mail (~ @ezweb.ne.jp) . . . . . . . 57Gmail . . . . . . . . . . . . . . . . . . . . . . . 55PCmail . . . . . . . . . . . . . . . . . . . . . 50SMS (C-mail) . . . . . . . . . . . . . . 50, 51
Main Specifications . . . . . . . 104Market . . . . . . . . . . . . . . . . . . 77Media Sounds . . . . . . . . . . . . 35Menu Key . . . . . . . . . . . . . . . . 35Messages . . . . . . . . . . . . . . . . 50
Create . . . . . . . . . . . . . . . . . . . . . . 50Settings . . . . . . . . . . . . . . . . . . . . . 50Viewing . . . . . . . . . . . . . . . . . . . . . 50
MessagingCustomizing . . . . . . . . . . . . . . . . . 38
micro.au.IC-Card . . . . . . . . . . 24Inserting . . . . . . . . . . . . . . . . . . . . 25PIN . . . . . . . . . . . . . . . . . . . . . . . . 24Removing . . . . . . . . . . . . . . . . . . . 24
microSD Memory Card . . . . . 25Formatting . . . . . . . . . . . . . . . . . . . 26Inserting . . . . . . . . . . . . . . . . . . . . 25Removing . . . . . . . . . . . . . . . . . . . 26
Mobile Network Settings . . . 75Mobile Network Type . . . . . . 93Movies . . . . . . . . . . . . . . . . . . 73
Setting . . . . . . . . . . . . . . . . . . . . . . 74Taking Photos . . . . . . . . . . . . . . . . 73
Multi-Tap Keyboard . . . . . . . . 43My Phone Number . . . . . . . . . 47
N
Network Mode . . . . . . . . . . . . 93Network Selection . . . . . . . . . 93Notification . . . . . . . . . . . . . . . 38
Calendar (Appointment) . . . . . . . . . 84E-mail (~ @ezweb.ne.jp) . . . . . . . 65Notification Panel . . . . . . . . . . . . . . 38SMS (C-mail) . . . . . . . . . . . . . . . . . 52Tasks . . . . . . . . . . . . . . . . . . . . . . . 84
Notification Icons . . . . . . . . . 36Notification Volume . . . . . . . . 35
O
Operator Select . . . . . . . . . . . 93
P
Packet Communication Settings . . . . . . . . . . . . . . . 75Roaming . . . . . . . . . . . . . . . . . . . . 94
Panel . . . . . . . . . . . . . . . . . . . . 36Password . . . . . . . . . . . . . . . . 18PCmail . . . . . . . . . . . . . . . . . . 50Peripherals . . . . . . . . . . . . . . . 96Phone . . . . . . . . . . . . . . . . . . . 44
Favorites . . . . . . . . . . . . . . . . . . . . 47Hang Up . . . . . . . . . . . . . . . . . . . . 45International Calls . . . . . . . . . . . . . 46Make Call . . . . . . . . . . . . . . . . . . . 44Take . . . . . . . . . . . . . . . . . . . . . . . 46
Phone Keyboard . . . . . . . . . . 43Photos . . . . . . . . . . . . . . . . . . 71
Setting . . . . . . . . . . . . . . . . . . . . . . 72PIN . . . . . . . . . . . . . . . . . . . . . 18
Pinch . . . . . . . . . . . . . . . . . . . . 34PIN Code . . . . . . . . . . . . . 18, 88
Change . . . . . . . . . . . . . . . . . . . . . 88UIM Card Lock . . . . . . . . . . . . . . . 88
PIN LockRelease Code . . . . . . . . . . . . . 18, 88
PRL (Roaming Area Information) . . . . . . . . . . . . 93
Q
Quick Search . . . . . . . . . . . . . 38
R
Reset . . . . . . . . . . . . . . . . . . . . 88Restart . . . . . . . . . . . . . . . . . . 97Ringtone . . . . . . . . . . . . . . . . . 35Roaming . . . . . . . . . . . . . . . . . 91
Service . . . . . . . . . . . . . . . . . . . . . 92Setting . . . . . . . . . . . . . . . . . . . . . . 92
Roaming Area Information . . . 93
S
Safety Precautions . . . . . . . . . 6Screen Direction . . . . . . . . . . 35Screen Lock . . . . . . . . . . . . . . 86
Password . . . . . . . . . . . . . . . . . . . 87Pattern . . . . . . . . . . . . . . . . . . . . . 87PIN . . . . . . . . . . . . . . . . . . . . . . . . 87
Screen Rotation . . . . . . . . . . . 35Search . . . . . . . . . . . . . . . . . . . 38
Applications . . . . . . . . . . . . . . . . . . 78Bluetooth® . . . . . . . . . . . . . . . . . . . 81Contacts . . . . . . . . . . . . . . . . . . . . 48Wi-Fi® Network . . . . . . . . . . . . . . . 80
Search Key . . . . . . . . . . . . . . . 35Settings Menu . . . . . . . . . . . . 85Shortcuts . . . . . . . . . . . . . 35, 37Sleep . . . . . . . . . . . . . . . . . . . . 28Slide . . . . . . . . . . . . . . . . . . . . 34SMS (C-mail) . . . . . . . . . . 50, 52
Setting . . . . . . . . . . . . . . . . . . . . . . 52SMS (C-Mail) Safety Block . . . . . . . 52
Software Update . . . . . . . . . . 86Status Bar . . . . . . . . . . . . . . . . 36Status Icon . . . . . . . . . . . . . . . 36System Selection . . . . . . . . . . 93
T
Taking PhotosHD Videos . . . . . . . . . . . . . . . . . . . 73Panoramic Photos . . . . . . . . . . . . . 72Photos . . . . . . . . . . . . . . . . . . . . . 71Videos . . . . . . . . . . . . . . . . . . . . . . 73
Tap . . . . . . . . . . . . . . . . . . . . . 33Tasks . . . . . . . . . . . . . . . . . . . . 84Text Entry . . . . . . . . . . . . . . . . 42
Setting . . . . . . . . . . . . . . . . . . . . . . 43Time and Date Settings. . . . . 94Time Zone . . . . . . . . . . . . . . . 94Touch Panel . . . . . . . . . . . . . . 33Troubleshooting . . . . . . . . . . . 96Turning Off . . . . . . . . . . . . . . . 28Turning On . . . . . . . . . . . . . . . 28
V
Volume . . . . . . . . . . . . . . . . . . 35

117
Index
W
Wallpaper . . . . . . . . . . . . . . . . 37Website Filter . . . . . . . . . . . . 101Widgets . . . . . . . . . . . . . . . 35, 37Wi-Fi® . . . . . . . . . . . . . . . . . . . 80
Search/Connect to Wi-Fi® Network . . . . . . . . . . . . . . . . . . 80
Setting . . . . . . . . . . . . . . . . . . . . . . 75Settings . . . . . . . . . . . . . . . . . . . . . 75
Wireless LAN (Wi-Fi®) . . . . . . 80Search/Connect to Wi-Fi®
Network . . . . . . . . . . . . . . . . . . 80Settings . . . . . . . . . . . . . . . . . . . . . 75

http://www.au.kddi.com/notice/recycle/index.htmlご不要になったケータイや取扱説明書はお近くのauショップへ
ご不要になったケータイや取扱説明書はお近くのauショップへ
2
http://www.au.kddi.com/notice/recycle/index.htmlPlease take your unneeded phones and manuals to your nearest au shop!
Please take your unneeded phones and manuals to your nearest au shop!
Please make sure you backup and delete and data stored on your old phone. 3
There is something you can do for this world.That is recycling your old phones and
manuals. A service we have just started!
In phones and batteries are precious and
rare metals. We can also recycle the
paper from the manuals.
Paper such as manuals can be turned
into new paper and used to print on
again. To make things better, proceeds of
the recycled materials go to protecting
Japan's forests.
So please take your unneeded phones
and manuals to your nearest au shop!
Thank you for your cooperation.
I got a new phone!
My old phone will be made into a new product that will
be sold in shops!I'll take them to my au shop!
What should I do with my old phone
and manual?
My old phone and manual could be a precious resource.I'm going to recycle them!
I love these phones!
Your manual will be reborn too!
We can recycle those
Please do recycle them
1

Contents
Usage Preparation
Basic Operations
Text Entry
Phone
Contacts
Communication
Multimedia
Internet
Application Installation
Useful Features
Roaming
Terminal Management / Security
Wi-Fi®/Data Communication
Appendix
Basic ManualFor questions and support Customer Service Center
Regarding General information and charges (Free call)
From regular phones
0077-7-111
From au cell phones
No dialing code required, 157Free Call
Free Call
Free Call
Free Call
Regarding loss, stolen, damage and operations(Free call)
From regular phones From au cell phones
0077-7-113 No dialing code required, 113
If you are unable to access the telephone number above, please dial the number below(Free call)
0120-977-033 (Areas except Okinawa)
0120-977-699 (Okinawa)
February 2012, First edition.Sales: KDDI CORPORATION, Okinawa Cellular Telephone CompanyImporter: Motorola Mobility Japan Inc.Manufacturer: Motorola Mobility, Inc.
The mobile and PHS phone companies will recycle phones, batteries and chargers given by customers regardless of brands at shops carrying label, as an ongoing part of effort to save resources and protect the environment.Mobile, Recycle, Network
Please help out in recycling mobile and PHS phones.