Application Manual Release 5 - baixardoc
10
i Enclosure Designer Application Manual Contents Loudspeaker Enclosure Analysis Program Application Manual Release 5
-
Upload
khangminh22 -
Category
Documents
-
view
0 -
download
0
Transcript of Application Manual Release 5 - baixardoc
iEnclosure Designer
Application Manual
Contents
Loudspeaker Enclosure Analysis Program
Application Manual
Release 5

ii Enclosure Designer
Application Manual
Contents
LEAP EnclosureShopApplication Manual
© 2002 - 2003 LINEARX SYSTEMS INC.All Rights Reserved.
Tel: (503) 612-9565Fax: (503) 612-9344
Printed in the United States of America.
February 25, 2003.
This document was produced on a Pentium-4 / 2GHz PC with Win2K using Adobe PageMaker 7.0, Adobe
Illustrator 8.0, Adobe PhotoShop 6.0, MathType 4.0 for mathematics typography, and SnagIt 5.2 for screen
captures. Final masters were produced using an Xerox Docutech image setter. Help files were composed and
compiled using Windows Help Designer 3.1.
iiiEnclosure Designer
Application Manual
Contents
License Agreement and Limited Warranty
Carefully read all of the following terms and conditions of this agreement before opening and using the contents of thispackage. The opening of this package indicates your acceptance of the terms and conditions of this license agreement. If
you are not willing to accept the terms and conditions of this agreement, then you should return the entire product, with the
package seal unbroken, to the place of purchase for a full refund of the purchase price.
■ Copyright OwnershipBoth the program and the documentation are protected under applicable copyright laws. LinearX is the holder of this copyright. Your right to use the program
and the documentation are limited to the terms and conditions described herein. Use of the software unless pursuant to the terms and conditions of this
license, or as otherwise authorized by law, is an infringement of the copyright.
■ Limited Non-Exclusive LicenseYou may: (a) use the enclosed program on a single computer, (b) physically transfer the program from one computer to another provided that the program is
used on only one computer at a time, and that you remove any copies of the program from the computer from which the program is being transferred, (c) make
copies of the program solely for backup or archival purposes. You must reproduce and include the copyright notice and label any backup copy.
You may not: (a) distribute copies of the program or the documentation to others, (b) lease, rent, grant sublicenses, or other rights to the program, (c) provide
use of the program in a computer service business, network, time-sharing multiple CPU or multiple users arrangement without the prior written consent of
LinearX, (d) translate or otherwise alter the program or related documentation without the prior written consent of LinearX.
■ TermsYour license to use the program and the documentation will automatically terminate if you fail to comply with the terms of this agreement. Your license
terminates in the event that you receive a license for an updated version of the product that replaces this product. If a license expiration date is printed on your
documentation, or provided through other means such as a time limited electronic or software key, your license expires on the day as shown in the documen-
tation, or on the day that the electronic or software key expires. If this license is terminated you agree to destroy all copies of the program and documentation.
■ Limited WarrantyLinearX warrants to the original licensee that the disk(s) and or electronic key(s) on which the program is recorded will be free from defects in materials and
workmanship under normal use for a period of ninety (90) days from the date of purchase as evidenced by a copy of your receipt. If failure of the product
components has resulted from accident, abuse, or misapplication of the product, then LinearX or third party licensors shall have no responsibility to replace the
disk(s) or key(s) under this limited warranty.
This limited warranty and right of replacement is in lieu of, and you hereby waive, any and all other warranties, both expressed and implied, including but not
limited to warranties of merchantability and fitness for a particular purpose. The liability of LinearX or third party licensors pursuant to this limited warranty shall
be limited to the replacement of the defective disk(s) or key(s), and in no event shall LinearX or third party licensors be liable for incidental, indirect, punitive,
or consequential damages, including but not limited to loss of use, loss of profits, loss of data or data being rendered inaccurate, or losses sustained by third
parties even if LinearX or third party licensors have been advised of the possibility of such damages. This warranty gives you specific legal rights which may
vary from state to state. Some states do not allow the limitation or exclusion of liability for consequential damages, so the above limitation may not apply to you.
In addition to the foregoing, you should recognize that all complex software systems and their documentation contain errors and omissions. LinearX, its
distributors, and dealers shall not be responsible under any circumstances for providing information on or corrections to errors and omissions discovered at any
time in the product, whether or not they are aware of the errors or omissions. LinearX does not recommend the use of this product in applications in which
errors or omissions could result in loss of life, injury, or other significant loss.
This license agreement shall be governed by the laws of the state of Oregon and shall inure to the benefit of LinearX, its successors, administrators, heirs and
assigns or third party licensors.
■ United States Federal Government RestrictionsIf this software is acquired by or on behalf of the U.S. Federal government or its agencies, this provision applies. Use, duplication, or disclosure of this software
is subject to restrictions set forth in the appropriate FAR 52.227-19 and DFAR 252.227-7013 documents, as applicable. The software is "commercial computer
software" and is licensed only with "Restricted Rights". Other Federal restrictions may also apply.
LinearX Systems Inc.9500 SW Tualatin-Sherwood Rd.Tualatin, OR 97062-8586 USA
TEL:(503) 612-9565 FAX:(503) 612-9344 Internet: www.linearx.com
Copyright 2002, LinearX Systems Inc. All rights reserved. All other Trademarks are the property of their respective owners.

iv Enclosure Designer
Application Manual
Contents
Technical Support
LinearX provides detailed printed manuals and on-line help within the program as the primarysource for user information and assistance regarding the use of this product. If these sources donot contain the answers to your questions, contact LinearX via any of the following methods:
Internet Forums: www.linearx.com/forumsInternet Email: [email protected] Web: www.linearx.comFax: (503) 612-9344Tel: (503) 612-9565
Technical support is free and unlimited at this time, however we reserve the right to charge forthis service in the future as conditions, overhead, and support personnel requirements dictate.
When contacting us regarding a technical support issue, PLEASE follow these steps to aid us inunderstanding and solving your problem:
(1) The About Box contains a procedure for generating a SYSCONFIG.TXT file. This file can be created by the user
through the About Box and contains all of the information about your computer system and operating system. If you
feel that your question could involve issues relating to your computer/operating system, please produce this file and
attach it along with your fax or Email question.
(2) If your question involves specific details or parameters unique to your project and problem, please include a copy of
your design files with the necessary data so that we can reproduce your problem. This is only possible if you are
communicating via an electronic means such as Email or uploading files directly to our web site.
(3) If the issue regards error messages from the program, please include an exact description of the error message
and/or address information that the program reports.
(4) If there are specific steps involved to reproduce the issue, please note these exact steps required so that we can
reproduce the problem.
Technical support hours are: Monday-Friday 9:00AM to 5:00PM Pacific Standard Time.
vEnclosure Designer
Application Manual
Contents
Contents
Tutorial 2: Ported Highpass Enclosure 33
Tutorial 1: Sealed Highpass Enclosure 1
Introduction ix
■ Introduction to Transducer Models■ Introduction to Enclosure Models■ Introduction to System Curves■ Introduction to Guide Curves■ Introduction to Parameter Graphs■ Differences between Transducer Models■ Common Program Features
■ Ported Enclosure Design■ Quick Design Alignments■ High Power Analysis■ Port Linearity Analysis■ Interpreting System Curves■ Enclosure Layout Editing
Tutorial 3: Transducer Location & Diffraction 71■ Sealed Highpass Enclosure■ Woofer & Tweeter Transducers■ Baffle Board Location Effects■ Domain Differences■ Diffraction Analysis■ Enclosure Layout Editing
vi Enclosure Designer
Application Manual
Contents
Contents
AppNote 1: Transmission Line Enclosures 115■ Ported Highpass Model■ Port Area & Length Effects■ Port Standing Waves■ Port Loss & Damping■ Media Characteristics■ Model Comparisons
App Note 2: Loudspeaker Arrays 145■ Sealed Highpass 2x15 Array■ Custom Enclosure Model■ Import 3D Enclosure Shell■ Multi-Enclosure Analysis■ Diffraction Analysis■ Array Comparisons

viiEnclosure Designer
Application Manual
Contents
Introduction
If you have not already read Chapter 2 in the Reference Manual, please do so before
starting the tutorials. It would also be a good idea to read Chapter 3 which will
acquaint you with the many parameter graphs in the program. These will give you
a quick overview of the program. This information will be useful in the tutorials.
TutorialsThere are several tutorials that follow which should help you get started using the
program in the shortest amount of time. Each tutorial introduces new features, and
assumes you are already familiar with the features introduced in previous tutorials.
Note: The first two tutorials introduce the core features of the program.
It is very important that all users read at least Tutorial #1.
EnclosureShop is an extensive program and offers many advanced simulation
features and capabilities. In order to make full use of these capabilities it is
important that the user understand the concepts and terminology. Chapters 4 & 5
in the Reference Manual contain background information which can be referenced
for further explanation of the subject.
It should be noted that there are many ways to operate the program, typically either
from the Main Menu or from the tool buttons. Program operation becomes much
quicker when you learn where a few of the most commonly used tool buttons reside.
You can scan the buttons and view the hints to learn more about their various
functions. The tutorials show the corresponding tool buttons for most of the
commonly used menu items.
Example Design FilesThere are also a number of finished example designs contained in the /Examples
folder. You can browse through these as well which may give you additional
information and application ideas.
There is a high degree of user control over the appearance of graphics in the
program. If you don't like the color schemes used in the examples - simply change
them!
Note: A full color version of the Application Manual is available in the Help file.
viii Enclosure Designer
Application Manual
Contents
1EnclosureShop
Application Manual
Sealed Highpass EnclosureTutorial 1
Tutorial 1
Sealed Highpass Enclosure
HighlightsIntroduction to Transducer Models
Introduction to Enclosure Models
Introduction to System & Guide Curves
Introduction to Parameter Graphs
Differences between Transducer Models
Common Program Features
This example will serve to introduce many of the
commonly used program features. It should help to
answer many basic operational questions that will
arise in any enclosure design. This example will focus
on the three different types of transducer models, to
illustrate their capabilities and differences.
Objectives
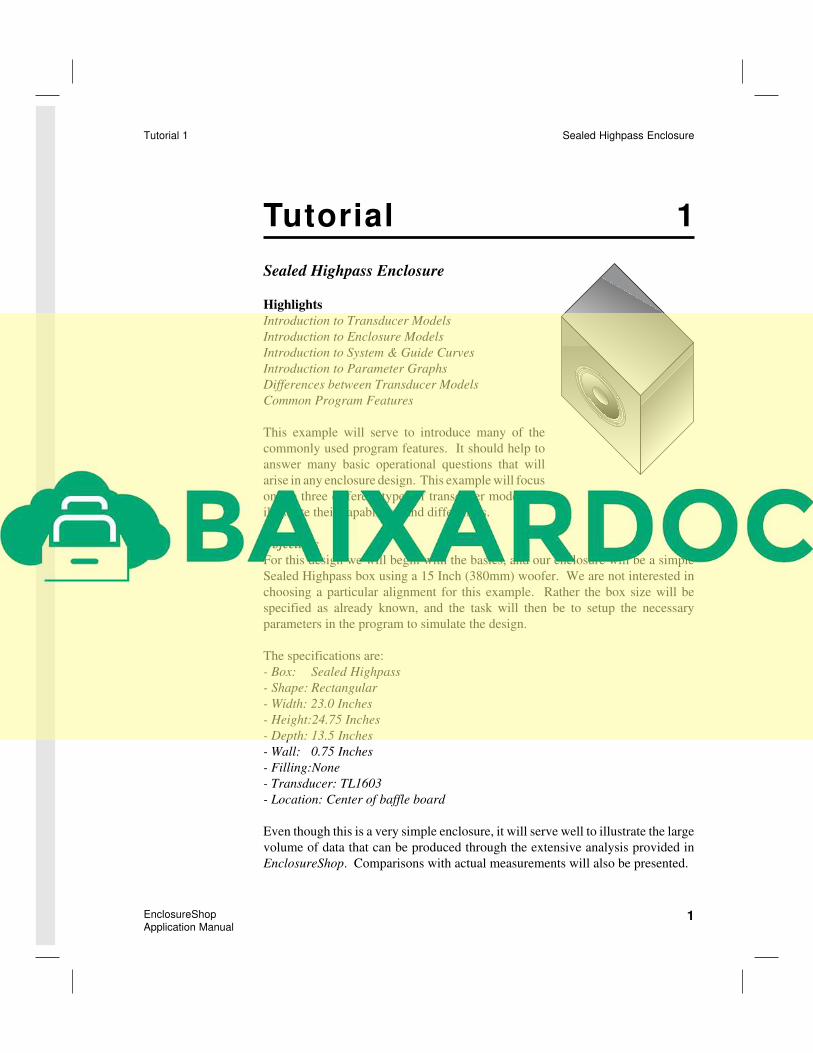
For this design we will begin with the basics, and our enclosure will be a simple
Sealed Highpass box using a 15 Inch (380mm) woofer. We are not interested in
choosing a particular alignment for this example. Rather the box size will be
specified as already known, and the task will then be to setup the necessary
parameters in the program to simulate the design.
The specifications are:
- Box: Sealed Highpass
- Shape: Rectangular
- Width: 23.0 Inches
- Height:24.75 Inches
- Depth: 13.5 Inches
- Wall: 0.75 Inches
- Filling:None
- Transducer: TL1603
- Location: Center of baffle board
Even though this is a very simple enclosure, it will serve well to illustrate the large
volume of data that can be produced through the extensive analysis provided in
EnclosureShop. Comparisons with actual measurements will also be presented.

2 EnclosureShop
Application Manual
Sealed Highpass Enclosure Tutorial 1
Transducer
Before any design can be simulated the transducer model must already reside
in a transducer library file. If this was not the case, we would first need to create
the transducer entry. For this example several transducer models will be used
which have already been prepared in the Tutorial.Ltd library.
Starting the new Design
If you have not already launched the program, do so now. Perform each of the
steps as indicated throughout the following pages. It is assumed that the
program is installed on drive C:\. However, if you have installed it on another
drive you will need to use the appropriate drive selection for your installation
when performing file operations.
First we will create a new design and save it in the Tutorial-1 folder.
■ Select the File | New menu option.
Now we will enter your author information.
■ Select the Graph | Notes menu option.
Enter your name in the Person field, your com-
pany name in the Company field, and a Project
name as shown here in the example.
- Click OK to close the Notes dialog.
■ Select File | SaveAs menu option.Now we will save the design in the existing folder Tutorial-1 under the Projects-
Enclosures folder, and name the file Tutor-1. Locate the Projects-Crossovers
folder and then the Tutorial-1 folder. Enter Tutor-1 in the filename field and
click Save.