10.4.1 - Install PowerCenter on Kubernetes with the Container ...
23
Install PowerCenter on Kubernetes with the Container Utility (10.4.0 - 10.4.1) © Copyright Informatica LLC 2020. Informatica, the Informatica logo, and PowerCenter ® are trademarks or registered trademarks of Informatica LLC in the United States and many jurisdictions throughout the world. A current list of Informatica trademarks is available on the web at https://www.informatica.com/trademarks.html.
-
Upload
khangminh22 -
Category
Documents
-
view
0 -
download
0
Transcript of 10.4.1 - Install PowerCenter on Kubernetes with the Container ...

Install PowerCenter on Kubernetes with the Container Utility (10.4.0 - 10.4.1)
© Copyright Informatica LLC 2020. Informatica, the Informatica logo, and PowerCenter® are trademarks or registered trademarks of Informatica LLC in the United States and many jurisdictions throughout the world. A current list of Informatica trademarks is available on the web at https://www.informatica.com/trademarks.html.

AbstractInformatica provides the Informatica container utility to install the Informatica domain quickly. This article describes how to install PowerCenter from the Docker image through the Informatica container utility on Kubernetes.
Supported Versions• PowerCenter 10.4.0 - 10.4.1
Table of ContentsOverview. . . . . . . . . . . . . . . . . . . . . . . . . . . . . . . . . . . . . . . . . . . . . . . . . . . . . . . . . . . . . . . . . . 3
Container Utility Process Checklist. . . . . . . . . . . . . . . . . . . . . . . . . . . . . . . . . . . . . . . . . . . . . . . . . 3
Before You Begin . . . . . . . . . . . . . . . . . . . . . . . . . . . . . . . . . . . . . . . . . . . . . . . . . . . . . . . . . . . . 4
Verify System Requirements. . . . . . . . . . . . . . . . . . . . . . . . . . . . . . . . . . . . . . . . . . . . . . . . . . . 4
Set Up the Keystore and Truststore Files. . . . . . . . . . . . . . . . . . . . . . . . . . . . . . . . . . . . . . . . . . . . 4
Contact Informatica Global Customer Support. . . . . . . . . . . . . . . . . . . . . . . . . . . . . . . . . . . . . . . . 4
Set Up Databases. . . . . . . . . . . . . . . . . . . . . . . . . . . . . . . . . . . . . . . . . . . . . . . . . . . . . . . . . . 5
Verify Kubernetes Configuration . . . . . . . . . . . . . . . . . . . . . . . . . . . . . . . . . . . . . . . . . . . . . . . . . 7
Generate CI/CD Content for Silent Input Properties File. . . . . . . . . . . . . . . . . . . . . . . . . . . . . . . . . . 7
Build the Informatica Docker Image. . . . . . . . . . . . . . . . . . . . . . . . . . . . . . . . . . . . . . . . . . . . . . . . . 7
Step 1. Choose the Deployment Type. . . . . . . . . . . . . . . . . . . . . . . . . . . . . . . . . . . . . . . . . . . . . . 7
Step 2. Build the Docker Image. . . . . . . . . . . . . . . . . . . . . . . . . . . . . . . . . . . . . . . . . . . . . . . . . . 8
Step 3. Verify the Informatica Docker Image. . . . . . . . . . . . . . . . . . . . . . . . . . . . . . . . . . . . . . . . . 8
Run the Informatica Docker Image to Create a Domain. . . . . . . . . . . . . . . . . . . . . . . . . . . . . . . . . . . . 9
Step 1. Choose the Deployment Type. . . . . . . . . . . . . . . . . . . . . . . . . . . . . . . . . . . . . . . . . . . . . . 9
Step 2. Provide Docker and Kubernetes Auto Scaling Information. . . . . . . . . . . . . . . . . . . . . . . . . . . . 9
Step 3. Provide the Domain Connection Information . . . . . . . . . . . . . . . . . . . . . . . . . . . . . . . . . . . 10
Step 4. Configure the Domain Configuration Repository. . . . . . . . . . . . . . . . . . . . . . . . . . . . . . . . . 11
Step 5. Configure Application Services. . . . . . . . . . . . . . . . . . . . . . . . . . . . . . . . . . . . . . . . . . . . 12
Run the Informatica Docker Image to Join a Domain. . . . . . . . . . . . . . . . . . . . . . . . . . . . . . . . . . . . . 12
Step 1. Choose the Deployment Type. . . . . . . . . . . . . . . . . . . . . . . . . . . . . . . . . . . . . . . . . . . . . 12
Step 2. Provide Kubernetes Auto Scaling Information. . . . . . . . . . . . . . . . . . . . . . . . . . . . . . . . . . . 13
Step 3. Provide the Domain Connection Information . . . . . . . . . . . . . . . . . . . . . . . . . . . . . . . . . . . 13
Step 4. Configure the Domain. . . . . . . . . . . . . . . . . . . . . . . . . . . . . . . . . . . . . . . . . . . . . . . . . . 14
Complete the Post-Install Tasks. . . . . . . . . . . . . . . . . . . . . . . . . . . . . . . . . . . . . . . . . . . . . . . . . . 15
Complete the Domain Configuration. . . . . . . . . . . . . . . . . . . . . . . . . . . . . . . . . . . . . . . . . . . . . . 15
Complete the Domain Integration. . . . . . . . . . . . . . . . . . . . . . . . . . . . . . . . . . . . . . . . . . . . . . . 15
Install the PowerCenter Client. . . . . . . . . . . . . . . . . . . . . . . . . . . . . . . . . . . . . . . . . . . . . . . . . . 15
Starting and Stopping the Informatica Services. . . . . . . . . . . . . . . . . . . . . . . . . . . . . . . . . . . . . . . . 16
Troubleshooting Kubernetes. . . . . . . . . . . . . . . . . . . . . . . . . . . . . . . . . . . . . . . . . . . . . . . . . . . . 16
Appendix A: Sample Silent Properties for CI/CD for Build Image. . . . . . . . . . . . . . . . . . . . . . . . . . . . . . 17
2

Appendix B: Sample Silent Properties for CI/CD for Run Image. . . . . . . . . . . . . . . . . . . . . . . . . . . . . . . 18
OverviewWith a web-based interface in the Informatica container utility, you can easily create standard docker images and create a container using docker.
Docker is an open source platform that provides an isolated environment called containers to run the applications. Docker allows independent containers to run within a single Linux instance. A docker image is an executable package that can run an application, a code, run-time files, environment variables, or configuration files. A container is a run-time instance of an image.
You can configure PowerCenter on Kubernetes to optimize resource management and to enable load balancing for the Informatica domain within the containerized environment. You can also provide horizontal scaling of pods based on the load provided on the domain. The containers are portable across cloud and operating system distribution for Amazon EKS.
Run the Informatica container utility to build or run the docker image to configure the domain. You can build the docker image with the base operating system and Informatica product binaries. With the Informatica container utility, you can create containers using this docker image to configure the Informatica domain.
When you run the docker image, you can install Informatica products with the Informatica container utility and you can create or join a domain.
With the Informatica container utility, you can build or run the docker image with the silent installer. CI/CD or continuous integration and continuous delivery, is a practice that automates the integration and delivery operations in a CI/CD pipeline. With the CI/CD pipeline, you can quickly deploy, test, and deliver the docker image to the production environment. You can generate the docker image from the CI/CD content. The CI/CD content uses the same input values that you used in the Informatica container utility to either build or run the docker image. You can manually replace the sample silent input properties with the CI/CD content before you run the silent installation.
You can create the application services when you run the docker image, or you can create them in the Administrator tool.
Container Utility Process ChecklistPerform the following tasks associated with the installation:
Plan for all installation components within the domain, such as nodes and services.
Complete prerequisites:
•Verify system requirements.
•Configure docker engine.
•Set up keystore and truststore files.
•Extract the Informatica container utility and access the Informatica installer .tar file.
•Verify the license key.
•Set up repository databases.
•Prepare for Kubernetes configuration.
•Generate CI/CD content.
Build the Informatica docker image with base operating system and Informatica binaries.
Run the docker image to configure the Informatica domain.
3

Deploy the docker image quickly or download and run the default image.
Build or run the docker image in silent mode with CI/CD content.
Complete the post-requisites:
•Complete the domain configuration.
•Create the application services.
• Install the PowerCenter Client.
Before You BeginBefore you install the Informatica container utility, verify that the machine meets the pre-installation requirements for the Informatica product installation.
Verify System RequirementsVerify that your environment meets the minimum system requirements for the installation process:
• Disk space of 56 GB in the docker build directory for PowerCenter.
• Disk space of 50 GB in the current working directory for PowerCenter.
• Disk space of 27 GB in the docker configuration directory for PowerCenter.
• Supported image name or one of the following image names for the subscribed base operating system: registry.access.redhat.com/rhel7 or centos:7.
• Register and subscribe the machine where you build the docker images.
• Temporary disk space and permissions
• Patch requirements
Set Up the Keystore and Truststore FilesWhen you install the Informatica services, you can configure secure communication for the domain and set up a secure connection to Informatica Administrator (the Administrator tool). If you configure the security options, you must set up the keystore and truststore files.
Contact Informatica Global Customer SupportWhen you initially contact Informatica Global Customer Support for Informatica installation access, the Informatica Global Customer Support team initiates a shipping request. The shipping team sends the Informatica installation link and license information to you.
You can contact Informatica Global Customer Support online for access to the following files:
• Informatica installer .tar file
• License key
• Informatica client installation
4
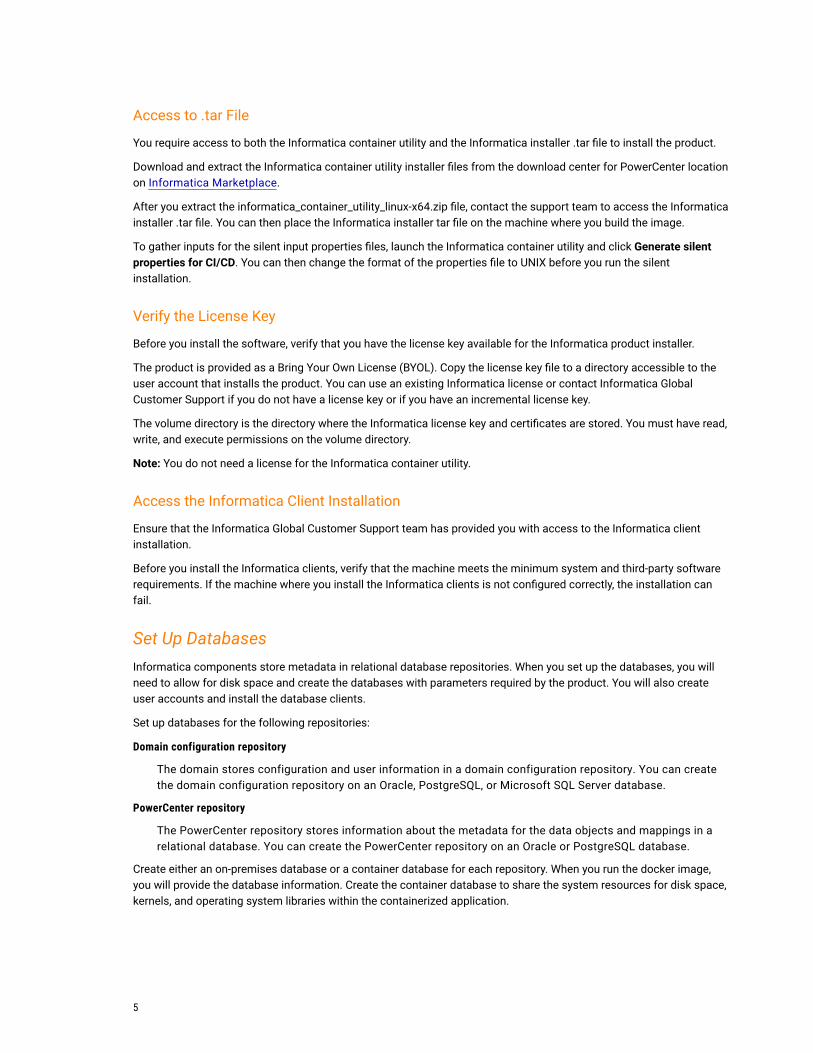
Access to .tar File
You require access to both the Informatica container utility and the Informatica installer .tar file to install the product.
Download and extract the Informatica container utility installer files from the download center for PowerCenter location on Informatica Marketplace.
After you extract the informatica_container_utility_linux-x64.zip file, contact the support team to access the Informatica installer .tar file. You can then place the Informatica installer tar file on the machine where you build the image.
To gather inputs for the silent input properties files, launch the Informatica container utility and click Generate silent properties for CI/CD. You can then change the format of the properties file to UNIX before you run the silent installation.
Verify the License Key
Before you install the software, verify that you have the license key available for the Informatica product installer.
The product is provided as a Bring Your Own License (BYOL). Copy the license key file to a directory accessible to the user account that installs the product. You can use an existing Informatica license or contact Informatica Global Customer Support if you do not have a license key or if you have an incremental license key.
The volume directory is the directory where the Informatica license key and certificates are stored. You must have read, write, and execute permissions on the volume directory.
Note: You do not need a license for the Informatica container utility.
Access the Informatica Client Installation
Ensure that the Informatica Global Customer Support team has provided you with access to the Informatica client installation.
Before you install the Informatica clients, verify that the machine meets the minimum system and third-party software requirements. If the machine where you install the Informatica clients is not configured correctly, the installation can fail.
Set Up DatabasesInformatica components store metadata in relational database repositories. When you set up the databases, you will need to allow for disk space and create the databases with parameters required by the product. You will also create user accounts and install the database clients.
Set up databases for the following repositories:
Domain configuration repository
The domain stores configuration and user information in a domain configuration repository. You can create the domain configuration repository on an Oracle, PostgreSQL, or Microsoft SQL Server database.
PowerCenter repository
The PowerCenter repository stores information about the metadata for the data objects and mappings in a relational database. You can create the PowerCenter repository on an Oracle or PostgreSQL database.
Create either an on-premises database or a container database for each repository. When you run the docker image, you will provide the database information. Create the container database to share the system resources for disk space, kernels, and operating system libraries within the containerized application.
5

Domain Configuration Repository
The domain stores configuration and user information in a domain configuration repository.
You can create the domain configuration repository in one of the following databases.
Oracle
Complete the following tasks to prepare the Oracle database on-premises or in the docker container:
• Create the database with the required parameters, allowing for 200 MB of disk space.
• Set up database user accounts.
• Install compatible versions of the Oracle client and Oracle database server. You must also install the same version of the Oracle client on all machines that require it.
PostgreSQL
Complete the following tasks to prepare the PostgreSQL database on-premises or in the docker container:
• Create the database with the required parameters, allowing for 200 MB of disk space.
• Set up database user accounts.
You do not need to install the PostgreSQL client software, as the installer bundles it with the image.
Microsoft SQL Server
Complete the following tasks to prepare the Microsoft SQL Server database on-premises or in the docker container:
• Create the database with the required parameters, allowing for 200 MB of disk space.
• Set up database user accounts.
• Download the Microsoft SQL Server client and install it on all machines that require it.
PowerCenter Repository
The PowerCenter repository stores information about the metadata for the data objects and mappings in a relational database.
You can create the PowerCenter repository in one of the following databases:
Oracle
Complete the following tasks to prepare the Oracle database for the PowerCenter repository or to create a container database:
• Create the database with the required parameters, allowing for 35 MB of disk space.
• Set up database user accounts.
PostgreSQL
Complete the following tasks to prepare the PostgreSQL database for the PowerCenter repository or to create a container database:
• Create the database with the required parameters, allowing for 35 MB of disk space.
• Set up database user accounts.
You do not need to install the PostgreSQL client software, as the installer bundles it with the image.
6

Verify Kubernetes ConfigurationComplete the following tasks on the machine where you run the Informatica container utility:
1. Install kubectl.
2. Ensure that the Kubernetes cluster that you set up a Kubernetes master node and one or more worker nodes.
3. Ensure that the machine where the container utility runs can communicate with the Kubernetes cluster through the kubectl cluster-info command. The command displays information about the master and services that run in the cluster.
For more information, see the Kubernetes documentation.
Generate CI/CD Content for Silent Input Properties FileBefore you can run the silent installer to build or run the docker image, click Generate silent properties for CI/CD from the Informatica container utility. Use the generated CI/CD values to replace the contents of the silent input properties file. You must convert the properties file to the UNIX format before you run the silent installer.
When you run generate CI/CD, you can copy all the user input values entered to build or run the docker image from the Informatica container utility from a single panel. The generated CI/CD contents are in the supported format of the silent install property files. Manually save the CI/CD contents into the silent input properties file located in the silent installation directory. Convert the properties file to the UNIX format before you run the silent installation.
Build the Informatica Docker ImageBuild a docker image for Informatica products. After you build the docker image, the Informatica container utility uses the docker image to run on containers. Ensure that the Informatica docker image is stored in the local host or docker registry before you install Informatica products in the docker with the Informatica container utility.
Step 1. Choose the Deployment TypeOn the Deployment type page, you must select the deployment type and host instance to build the docker image.
1. Launch the Informatica container utility with the sh startup.sh command. By default, the utility uses port 12386.
To specify the startup command with a different port number, enter the values in the following format: sh startup.sh <required port number>
2. To build the Informatica Docker image, select Build the docker image.
The Deployment type page appears.
3. On the Deployment type page, enter the information for the deployment type.
• Select PowerCenter for the product.
• Choose to host on Amazon Web Services (AWS), Microsoft Azure, or on-premises.
The build image uses Docker as the default deployment type.
4. Optionally, you can choose to provide secure authentication to build the image or deploy the containers on the remote host. If you do not want to set the secure authentication for the containers, go to step 6.
5. If you enable secure authentication, set the authentication type to Password or Key.
• For password type authentication, enter the machine IP address or host name, user name, password, and port to connect to the host machine.
• For key type authentication, enter the machine IP address or host name, user name, path of the host authentication key, and port number.
7

6. Click Next.
The Build the docker image page appears.
Step 2. Build the Docker ImageOn the Build Docker Image page, enter information for the tar file location and the images, or accept the default values to build the docker image.
1. Specify the base operating system path to build the docker image.
• To build the docker image on CentOS, enter a value or select the default value of centos:7.
• To build the docker image on RHEL, enter a value or select the default value of registry.access.redhat.com/rhel7:7.8.
2. Enter the Informatica installer tar file path on the machine where you build the image.
The Informatica container utility uses the tar utility to extract the installer server files to a directory on your machine where you build the image.
3. Specify the docker base image name.
Default is informatica1041:1.0, where 1.0 is the tag name.
4. Enter the docker build directory.
Specify the machine host directory to build the docker image.
Default is /user/home.
5. Select the image type to build.
• To build the image with the Informatica services, select Image for domain and Informatica Services. You can specify this option for the complete installation of the domain and all the services.
• To build the image for the domain and PowerCenter services, select Image for domain, PowerCenter Repository Service, and PowerCenter Integration Service. When you select the option for domain and PowerCenter services, the image consumes lesser disk space compared to the complete installation of the domain with all the services.
Note: The docker image and the required files are available by default with the PostgreSQL version 10 and Oracle version 12c database client.
6. Optionally, you can choose to generate the silent properties for CI/CD.
When you generate silent properties for CI/CD from the container utility, you can also copy all the installation options and the values specified in the container utility and later paste the contents into the property file for the silent installer.
7. Click Build.
Step 3. Verify the Informatica Docker ImageYou can verify that the Informatica image is present in the host specified while building the docker image.
To verify that the Informatica docker image exists, enter the docker images command from the command prompt. Ensure that the values for the tag, image ID, created date, and size information appears for the Informatica docker image.
8

The following sample displays the result of the docker image command:
[root@master abc]#docker imagesREPOSITORY TAG IMAGE ID CREATED SIZEinformatica1041pcrspostgre 1.0 f9923fb2cfa0 20 hours ago 17.7 GB
Run the Informatica Docker Image to Create a DomainYou can install Informatica products by running the docker image. Run the docker image to create nodes in the Informatica domain.
The first time that you run the docker image, choose to create a domain. When you create a domain, the node that you create becomes a gateway node in the domain. The gateway node contains a Service Manager that manages all the domain operations.
Step 1. Choose the Deployment TypeOn the Deployment type page, you must select the deployment type and host instance to run the docker image.
1. Launch the Informatica container utility with the sh startup.sh command. Default port is 12386.
To specify the startup command with a different port number, enter the values in the following format:
sh startup.sh <required port number>2. To run the Informatica Docker image, select Run the docker image.
The Deployment Type page appears.
3. Enter the information for the deployment type.
• Select PowerCenter for the product.
• Choose to host on Amazon Web Services (AWS), Microsoft Azure, or on-premises.
• Select the Kubernetes deployment type.
4. Optionally, you can choose to provide secure authentication to deploy the containers on the remote host. If you do not want to set the secure authentication for the containers, go to step 6.
5. If you enable secure authentication, set the authentication type to Password or Key.
• For password type authentication, enter the machine IP address or host name, user name, password, and port to connect to the host machine.
• For key type authentication, enter the machine IP address or host name, user name, path of the host authentication key, and port number.
6. Click Next.
The Kubernetes Auto Scaling panel appears.
Step 2. Provide Docker and Kubernetes Auto Scaling InformationOn the Kubernetes Auto Scaling page, provide the required information to connect to the docker image and pod.
1. In the Docker and Kubernetes information section, enter the docker image name, pod name, path and file name of the license key, and the volume directory. Enter the existing directory to create tmpfs volume. Ensure that you specify different file paths for the volume directory and the license key directory.
2. Optionally, choose to set Kubernetes autoscaling.
The Horizontal Pod Autoscaler scales the number of pods in a deployment or replica set based on the CPU utilization mentioned for the CPU load factor.
9

Kubernetes creates horizontally scalable worker nodes that are added to the grid with the PowerCenter Integration Service process enabled.
3. If you selected Kubernetes autoscaling, enter the CPU utilization and worker node information to autoscale:
• CPU load factor. Kubernetes autoscales the Informatica worker nodes after monitoring the Kubernetes worker node and only when the Kubernetes worker node reaches the value set for the CPU percentage metrics. Default is 80 percent.
• Maximum number of Informatica worker nodes. The maximum number of worker nodes to create in the domain. Default is 3.
The minimum number of worker node in the domain is 1.
4. Optionally, choose to store data outside of the containers when you select the persistent volume.
If you selected persistent volume, you cannot join the domain.
5. If you selected persistent volume, specify the persistent volume claim name.
6. Optionally, choose to expose additional ports in the container, and enter them as comma separated values.
7. Enter the network name.
You can update the Domain selection section on the same page.
Step 3. Provide the Domain Connection InformationOn the Kubernetes Auto Scaling page, provide information to create a domain, connection details for Informatica Administrator, and whether to secure communication to the domain or not.
1. In the Domain selection section, choose to create a domain.
2. Optionally, choose to enable secure communication for services in the Informatica domain.
By default, if you enable secure communication for the domain, the installer sets up an HTTPS connection. You can also create a domain configuration repository on a secure database.
3. Specify the connection details for Informatica Administrator.
a. If you disabled secure communication for the domain, you can specify whether to set up a secure HTTPS connection for Informatica Administrator.
b. If you enabled secure connection for the domain or if you enabled HTTPS connection, enter the HTTPS port number and the keystore file information. Choose to use a default keystore or a custom keystore file.
• If you use the default keystore, the installer creates a self-signed keystore file named Default.keystore in the following location: <Informatica installation directory>/tomcat/conf/
• If you use a custom keystore, specify the location and password.
4. Specify whether to use the default Informatica SSL certificates or to use your SSL certificates to secure domain communication.
5. If you provide the SSL certificate, specify the location and passwords of the keystore and truststore files. The directories must contain a keystore file named infa_keystore.jks or infa_keystore.pem and a truststore file named infa_truststore.jks or infa_truststore.pem.
6. Click Next.
The Domain database page appears.
10

Step 4. Configure the Domain Configuration RepositoryOn the Domain database page, provide the domain configuration repository database information, JDBC connection information, and specify information for the domain and gateway node.
1. Select the database to use for the domain configuration repository.
2. Optionally, specify if you created a database in the container. If you created a database in the container, complete the container configuration for the domain configuration repository.
3. Enter the database user account and password.
4. Specify whether the database is secure.
If you select the secure database option, provide inputs for the qualified path to the database truststore file, and truststore password.
5. Enter the parameters for the database.
a. If you select Microsoft SQL Server or PostgreSQL, enter the schema name for the database. If you select Oracle, the installer creates the tables in the default schema.
b. To enter the JDBC connection information, you can use either the JDBC URL or the JDBC connection string.
To use the JDBC URL information, select JDBC URL, and specify the following JDBC URL properties:
• Database address. Host name and port number for the database.
• Database service name. Oracle service name, the database name for Microsoft SQL Server, or the database name for PostgreSQL.
Optionally, choose to include additional JDBC parameters.
c. To use a custom JDBC connection string, select JDBC Connection String.
You can use the following syntax in the JDBC connection string to connect to a secure database:Oracle
jdbc:Informatica:oracle://<host name>:<port number>;ServiceName=<service name>;EncryptionMethod=SSL;HostNameInCertificate=<database host name>;ValidateServerCertificate=<true or false>
Microsoft SQL Server
jdbc:Informatica:sqlserver://<host name>:<port number>;SelectMethod=cursor;DatabaseName=<database name>;EncryptionMethod=SSL;HostNameInCertificate=<database host name>;ValidateServerCertificate=<true or false>
PostgreSQL
jdbc:Informatica:postgresql://<host name>:<port number>;DatabaseName=<database name>;EncryptionMethod=SSL;HostNameInCertificate=<database host name>;ValidateServerCertificate=<true or false>
6. In the Domain and node configuration section, enter the keyword and directory for the encryption key for the Informatica domain.
• Encryption key directory. Directory in which to store the encryption key for the Informatica domain. The encryption key is created in the following directory: <Informatica installation directory>/isp/config/keys.
• Keyword. Keyword to use to create a custom encryption key to secure sensitive data in the domain. The keyword cannot contain spaces; must be 8 to 20 characters long; and must include at least one number and one uppercase and lowercase letter.
Note: If you selected persistent volume, the keyword option is not displayed.
11

7. Specify the domain name, node name, domain port number, domain user name, and password. When you enter the information for the domain and the gateway node that you want to create, consider the following guidelines:
• The default domain name is Domain. The domain name must not exceed 128 characters and must be 7-bit ASCII only. The name cannot contain a space or any of the following characters:` % * + ; " ? , < > \ /
• The domain port number must be in the range of 30000 to 32657.
• Informatica container utility exposes the ports from the range <domain port> - <domain port > + 110 ports from the container to the docker host, where the initial port number is the domain port number. Enter the service ports within the supported service port range.
• The password for the domain administrator must be more than 2 characters and must not exceed 128 characters.
8. You can choose to configure application services or run the docker image.
Step 5. Configure Application ServicesOn the PowerCenter Repository Service and PowerCenter Integration Service page, you can choose to create the supported application services and provide the related database information as part of the Informatica container utility tasks.
1. Optionally, you can choose to create the application services.
Enter the name of the PowerCenter Repository Service and the PowerCenter Integration Service.
2. Optionally, specify if you created a database in the container. If you created a database in the container, complete the container configuration for the PowerCenter repository.
3. Enter the database type, user ID, user password, host name, and port. The default port is 1521. Specify the database name or database service name based on the database associated with the PowerCenter repository.
4. Click Deploy.
The docker image runs.
After the docker image run completes, you can view the post-installation summary. You can view the installation log files to get more information about the tasks performed by the utility.
Run the Informatica Docker Image to Join a DomainAfter you create the domain, you can run the Informatica container utility on any machine to join the domain. When you join the domain, you need to create a node on the machine and then add the node to the domain.
Note: If you selected persistent volume, you cannot join the domain.
Step 1. Choose the Deployment TypeOn the Deployment type page, you must select the deployment type and host instance to run the docker image.
1. Launch the Informatica container utility with the sh startup.sh command. Default port is 12386.
To specify the startup command with a different port number, enter the values in the following format:
sh startup.sh <required port number>2. To run the Informatica Docker image, select Run the docker image in the Informatica container utility.
The Deployment type page appears.
12

3. Enter the information for the deployment type selection.
• Select PowerCenter for the product.
• Choose to host on Amazon Web Services (AWS), Microsoft Azure, or on-premises.
• Select the Kubernetes deployment type.
4. Optionally, you can choose to provide secure authentication to deploy the containers on the remote host. If you do not want to set the secure authentication for the containers, go to step 6.
5. If you enable secure authentication, set the authentication type to Password or Key.
• For password type authentication, enter the machine IP address or host name, user name, password, and port to connect to the host machine.
• For key type authentication, enter the machine IP address or host name, user name, path of the host authentication key, and port number.
6. Click Next.
The Kubernetes Auto Scaling panel appears.
Step 2. Provide Kubernetes Auto Scaling InformationOn the Kubernetes Auto Scaling page, provide the required information to connect to the docker image and pod.
1. In the Docker and Kubernetes information section, enter the docker image name, pod name, path and file name of the license key, and the volume directory. Enter the existing directory to create tmpfs volume.
Ensure that you enter different values for the volume directory and the license key directory.
2. Optionally, choose to set Kubernetes autoscaling.
The Horizontal Pod Autoscaler scales the number of pods in a deployment or replica set based on the CPU utilization mentioned for the CPU load factor.
Kubernetes creates horizontally scalable worker nodes that are added to the grid with the PowerCenter Integration Service process enabled.
3. If you selected Kubernetes autoscaling, you must enter the CPU utilization and worker node information to autoscale:
• CPU load factor. Kubernetes autoscales the Informatica worker nodes after monitoring the Kubernetes worker node and only when the Kubernetes worker node reaches the value set for the CPU percentage metrics. Default is 80 percent.
• Maximum number of Informatica worker nodes. Maximum number of worker nodes to create in the domain. Default is 3.
4. Optionally, choose to expose additional ports in the container, and enter them as comma separated values.
5. Enter the network name.
You can update the Domain selection section on the same page.
Step 3. Provide the Domain Connection InformationOn the Kubernetes Auto Scaling page, provide information to join a domain, connection details for Informatica Administrator, and whether to secure communication to the domain or not.
1. In the Domain Selection section, choose to join a domain.
The installer creates a node on the container where you install. You can specify the domain to join.
2. Optionally, choose to enable secure communication for services in the Informatica domain.
13

By default, if you enable secure communication for the domain, the installer sets up an HTTPS connection. You can also create a domain configuration repository on a secure database.
3. Specify the node type that you want to create. If you have previously enabled Kubernetes autoscaling in the Docker Information section, the created node is a gateway. This is because you can only enable Kubernetes autoscale on worker nodes. You can also enable a secure HTTPS connection to the Informatica Administrator.
4. Specify the connection details for Informatica Administrator.
a. If you disabled secure communication for the domain, you can specify whether to set up a secure HTTPS connection for Informatica Administrator.
b. If you enabled secure connection for the domain or if you enabled HTTPS connection, enter the HTTPS port number and the keystore file information. Choose to use a default keystore or a custom keystore file.
• If you use the default keystore, the installer creates a self-signed keystore file named Default.keystore in the following location: <Informatica installation directory>/tomcat/conf/
• If you use a custom keystore, specify the location and password.
5. Specify whether to use the default Informatica SSL certificates or to use your SSL certificates to secure domain communication.
6. If you provide the SSL certificate, specify the location and passwords of the keystore and truststore files. The directories must contain a keystore file named infa_keystore.jks or infa_keystore.pem and a truststore file named infa_truststore.jks or infa_truststore.pem.
7. Click Next.
The Domain Configuration page appears.
Step 4. Configure the DomainOn the Domain Configuration page, provide the domain, node, gateway node, and gateway container information.
1. In the Domain Configuration section, specify the domain name, gateway container name, gateway node port, domain user name, and password.
2. Optionally, choose to join an Informatica domain created through the container database.
3. In the Domain Configuration section, enter the key and directory for the encryption key for the Informatica domain.
• Select the encryption key. Specify the custom site key to secure sensitive data in the domain. Before you can enter the site key path, copy the file from the encryption key directory within the container to the host with the following command: docker cp <container name>: <encryption key directory>/siteKey <dst path in host>
• Encryption key directory. Directory in which to store the encryption key for the Informatica domain. The encryption key is created in the following directory: <Informatica installation directory>/isp/config/keys.
4. Under the Domain Configuration section, enter the node host name, node name, and node port number for the current node. The node host name is the container name of the node.
5. Click Deploy.
The docker image runs.
6. To verify that the container is present in the host specified, run the docker ps -a command from the command prompt.
14

Ensure that you can see the container ID, image, names, command, created date, and status of each container appears.The following sample displays the result of the docker ps -a command:
[root@irlcmg08 source]#docker ps -aCONTAINER ID PORTS IMAGE NAMES COMMAND CREATED STATUS566c418d0972 informaticaltd/pcdqservices:1041pc "/Installer/launcher..." 2 days ago Up 2 days
7. To verify the docker images, run the docker images -a command in the command line.
Ensure that you can see the repository name, tags, and the size information for the images.
After the docker image run completes, you can view the post-installation summary. You can view the installation log files to get more information about the tasks performed by the utility. The installation is complete when the Informatica_<Version>_Services_<timestamp>.log file is created in the installation directory.
Complete the Post-Install TasksAfter you run the Informatica container utility, perform the post-installation tasks.
Complete the Domain ConfigurationTo complete the domain configuration after you install the Informatica services, perform the following tasks:
• Verify locale settings and code page
• Configure Informatica environment variables
• Configure the library path environment variables
• Configure locale environment variables
Complete the Domain IntegrationComplete the following tasks:
Log in to Informatica Administrator.
To connect to the Administrator tool, get the node IP on which the infaserver runs and the NodePort of the pod. To access the Administrator tool in a browser, enter the pod name followed by the NodePort number in the following format:
http://<pod name>:<node port>
For example, http://new-infaserver:32005
Default Administrator tool node port number is 32008.
Create the application services if you did not create it during deployment.
Create the following services:
• PowerCenter Repository Service
• PowerCenter Integration Service
Install the PowerCenter ClientYou can copy the PowerCenter Client installation binaries from the Akamai link that you received when you contacted Informatica Global Customer Support for the Informatica installation tar file. Copy the files to your installation directory and install the PowerCenter Client.
15

You can install the client to create data objects, create and run mappings, and create virtual databases. To install the client, perform the following tasks:
Before you install the client.
Before you install the Informatica client, verify that the minimum installation requirements are met. If the machine where you install the Informatica client is not configured correctly, the installation can fail.
Install the client.
Use the Informatica client installer to install the PowerCenter Client.
Install languages.
To view languages other than the system locale and to work with repositories that use a UTF-8 code page, install additional languages on Windows for use with the Informatica clients.
Configure the client for a secure domain.
When you enable secure communication within the domain, you also secure connections between the domain and Informatica client applications. Based on the truststore files used, you might need to specify the location and password for the truststore files in environment variables on each client host.
Start the PowerCenter Client.
The first time you start the PowerCenter Client, you add the domain and connect to a PowerCenter repository. To connect to the node, you can get the host name and port number from node present on the Administrator tool.
Starting and Stopping the Informatica ServicesRun infaservice.sh to start and stop the Informatica daemon.
You can start the daemon with the infaservice.sh startup command. To stop the daemon, enter the infaservice.sh shutdown command. By default, infaservice.sh is installed in the following directory:
<Informatica installation directory>/tomcat/bin Note: If you use a softlink to specify the location of infaservice.sh, set the INFA_HOME environment variable to the location of the Informatica installation directory.
Troubleshooting KubernetesI tried to build the docker image, but the build image fails.
If build image fails during installer tar file extraction or before the docker build image starts, verify that adequate disk space is available in the current working directory. PowerCenter requires 50 GB disk space in the current working directory.
If the build image fails at the step Copy/Binaries/home/Informatica in the log file, then there is not enough disk space in the docker configuration directory. To find the docker configuration directory, run the docker info command. PowerCenter requires 27 GB disk space in the docker configuration directory.
You can also free up some space from the docker configuration directory when you delete a dangling image. When you create the new build of the image but do not specify a new name, you create a dangling image and the old image becomes the dangling image. Those old images remain untagged and display "<none>" as the name when you run the docker images command.
To delete the dangling images, complete the following steps:
1. To list all dangling images and to get the image ID, run the command: docker images -f dangling=true
16

2. To delete each dangling image, run the command: docker image rm -f <image id>
If the build image fails with the following error, you need to manually pull the docker image:
Sending build context to Docker daemon 25.75GBStep 1/30: FROM registry.access.redhat.com/rhel7:7.7Trying to pull repository registry.access.redhat.com/rhel7 ...Installation Status:ERROR
To fix the issue, you can manually run the following command:
docker pull registry.access.redhat.com/rhel7:7.7
If the build image fails with the following error, the docker build script has failed to access the repository to download dependencies:
This system is not registered with an entitlement server.To register and subscribe the machine where you build the docker image:
1. Run the yum repolist all command to see all the repositories.
2. Use the subscription-manager to register with the following command: subscription-manager repos --enable.
3. To enable custom repositories, run the command: yum-config-manager --enable
If the build image displays the authenticationrequired error when you run the docker pull command to pull the image from RHEL, the authentication with the docker authentication might have expired. Run the docker logout command and then pull the docker image. If the issue persists, try to pull the docker image from registry.redhat.io instead of registry.access.redhat.com. If any issue remains with RHEL, you could try to use Centos7 for proof of concept cases.
I cannot access Administrator tool from the browser for Kubernetes.
Check the IP address from where you access the Administrator tool:
For on-premises, verify that you specify the internal IP of the node on which the pod is running to access the Administrator tool.
For AWS or Azure, verify that you specify the external IP of the node on which the pod is running to access the Administrator tool.
For Azure, you will not have the external IP of the services by default. The service type of pod must be LoadBalancer instead of NodePort. It is from the LoadBalancer service type that you fetch the external IP.
If you want to verify that the external IP in the Administrator tool for Azure and AWS, run kubectl get nodes -o wide command followed by the kubectl get svc -o wide command.
How do I restart an already running pod when it goes down?
When you have a pod that uses the persistent volume, a .yaml file gets generated under the image name folder inside the appconnTemp folder of the user home directory . Run the yaml file manually with the following command to restart the pod with persistent volume: kubectl create -f <file name>.yaml
How do I to connect to different sources in pods?
In case of multiple DSN, you can manually update the ODBC.ini file.
Appendix A: Sample Silent Properties for CI/CD for Build ImageThe following example shows the contents of the file:
DOWNLOAD_AND_RUN=0HubUserName=IMAGE_NAME=informatica1040:1.0
17

INSTALL_EDP=0CLUSTER_TYPE=2HubPassword=OS_NAME=registry.access.redhat.com/rhel7:7.8INFA_REPO=0PRIVATE_HUB=1INSTALL_OPTION=1AMBARI_FILE_LOC=INSTALL_DPM=0SCANNER_FILE_LOC=DPM_TAR_FILE_LOC=productType=PCTAR_FILE_LOC=/home/
Appendix B: Sample Silent Properties for CI/CD for Run ImageThe following example shows the contents of the file:
ENABLE_KERBEROS=0DIS_KEYTAB_FILELOC=MRS_DB_CUSTOM_STRING=jdbc:informatica:oracle://host_name:port_no;ServiceName=MRS_KEYTAB_FILELOC=CMS_KEYSTORE_FILE=DPS_KEYSTORE_PSSWD=CMS_DATA_ACCESS_CONNECT_STRING=OS_NAME=centos:centos7HDFS_SERVICE_PRINCIPAL=CREATE_CONNECTION=trueADVANCE_PORT_CONFIG=0PRIVATE_HUB=1EDP_KERBEROS_KEYTAB_FILE=/etc/merge.keytabEDP_DIS_CUSTOM_SELECTION=falseKSTORE_PSSWD=EDP_DIS_KEYSTORE_PASSWD=CLUSTER_PASSWORD=CMS_DB_UNAME=CPI_CMSWORKING_DIR=/homeDPS_TRUSTSTORE_DIR=SPN_SHARE_LEVEL=YARN_RESOURCE_MANAGER_HTTP_URI=MAX_PORT=EDC_KDC_HOST_IP=DOMAIN_USER=AdministratorLOAD_DATA_DOMAIN=0CONFIRM_HADOOP_AMBARI_PASSWD=HADOOP_KEYSTORE_FILE=DPS_HTTPS_PORT=MRS_SERVICE_NAME_EDP=Model_Repository_Service_EDPTRUSTSTORE_MRS_DB_FILE=PWH_DB_PASSWD=CPI_PWHYARN_QUEUE_NAME=CMS_DB_CUSTOM_STRING=PWH_DB_ADDRESS=insrh74dsg015.informatica.com:1521PCRS_DB_HOST=PWH_DATA_ACCESS_CONNECT_STRING=EDP_DIS_KEYSTORE_DIR=IS_CLUSTER_SSL_ENABLE=EDP_MRS_SSL_DEFAULT_STRING=HADOOP_IMPERSONATION_USER=CATALOGUE_SERVICE_KEYSTORE_PASSWD=EDP_SERVICE_NAME=Enterprise_Data_Preparation_ServiceIMPORT_METHOD=2USE_DB_CONTAINER=falseDPS_CONFIGURE_SERVICES=trueHDFS_SERVICE_NAME_HA=CMS_SERVICE_NAME=CMSEDP_PROTOCOL_TYPE=TRUSTSTORE_DB_FILE=YARN_RESOURCE_MANAGER_SCHEDULER_URI=
18

DPS_DB_HOST=SERVICE_PROVIDER_ID=TRUSTSTORE_MRS_DB_PASSWD=PWH_DB_CUSTOM_STRING_SELECTION=0DB_CUSTOM_STRING=jdbc:informatica:oracle://host_name:port_no;ServiceName=CATALOGUE_SERVICE_KEYSTORE_FILE=DIS_CUSTOM_SELECTION=falseINSTALLATION_ENVIRONMENT=SandboxINSTALL_TYPE=0KSTORE_FILE_LOCATION=LICENSE_KEY_LOC=/root/license.keyEDP_MRS_DB_CUSTOM_STRING_SELECTION=0TRUSTSTORE_DB_PASSWD=AMBARI_FILE_LOC=MRS_DB_TYPE=OracleHADOOP_NODES=AC_PORT=MONITORING_SSL_DEFAULT_STRING=EncryptionMethod=SSL;HostNameInCertificate=;ValidateServerCertificate=false;USER_REALM_NAME=HADOOP_TLS_HTTPS_PORT=KERBEROS_KEYTAB_FILE=/etc/merge.keytabDIS_HTTPS_PORT=18095INSTALL_DPM=0CMS_DB_CUSTOM_STRING_SELECTION=0PWH_DB_TYPE=OraclePCRS_DB_PSSWD=DPS_CUSTOM_HTTPS_ENABLED=falseDPM_TAR_FILE_LOC=NODE_TRUSTSTORE_DIR=CUSTOM_HTTPS_ENABLED=0LOAD_TYPE=lowUSER_INSTALL_DIR=/home/InformaticaPCRS_DB_TYPE=OracleDPS_PROTOCOL_TYPE=HADOOP_TRUSTSTORE_FILE=DPM_LICENSE_KEY_LOC=/data2/EDC_Resources/DataPrivacyManagement.keyPWH_SQLSERVER_SCHEMA_NAME=NEW_HADOOP_AMBARI_PASSWD=DB_CONTAINER_NAME=EDP_CUSTOM_HTTPS_ENABLED=falseCMS_KEYSTORE_PASSWD=DPS_DB_USER=HADOOP_GATEWAY_HOST=SECURITY_DOMAIN_NAME=MONITORING_KEYTAB_FILELOC=MRS_DB_PASSWD=DPS_DB_TRUSTSTORE_PASSWD=EDP_TRUSTSTORE_PSSWD=KRB5_FILE_LOCATION=/etc/krb5.confCMS_ADVANCE_JDBC_PARAM=EDP_DIS_HTTPS_PORT=VOLUME_DIRECTORY=/root/swathi/sharedMRS_ADVANCE_JDBC_PARAM=EDP_DPS_SERVICE_NAME=Interactive_Data_Preparation_ServiceAC_SHUTDWN_PORT=CREATE_PCRS=falseSSL_ENABLED=falseDIS_SERVICE_NAME_EDP=Data_Integration_Service_EDPLOCAL_STORAGE_DIR=/home/toolprod/satish/tempCLOUD_SUPPORT_ENABLE=0IS_SERVICE_NAME=HTTPS_PORT=CATALOGE_SERVICE_KEYTAB_LOCATION=HDFS_HOST_NAME=MONITORING_DB_ADDRESS=DEFAULT_HTTPS_ENABLED=1CLUSTER_HADOOP_DISTRIBUTION_TYPE=EDL_KRB5_FILE_LOCATION=/etc/krb5.confDB_PASSWD=adminEDP_MRS_DB_UNAME=
19
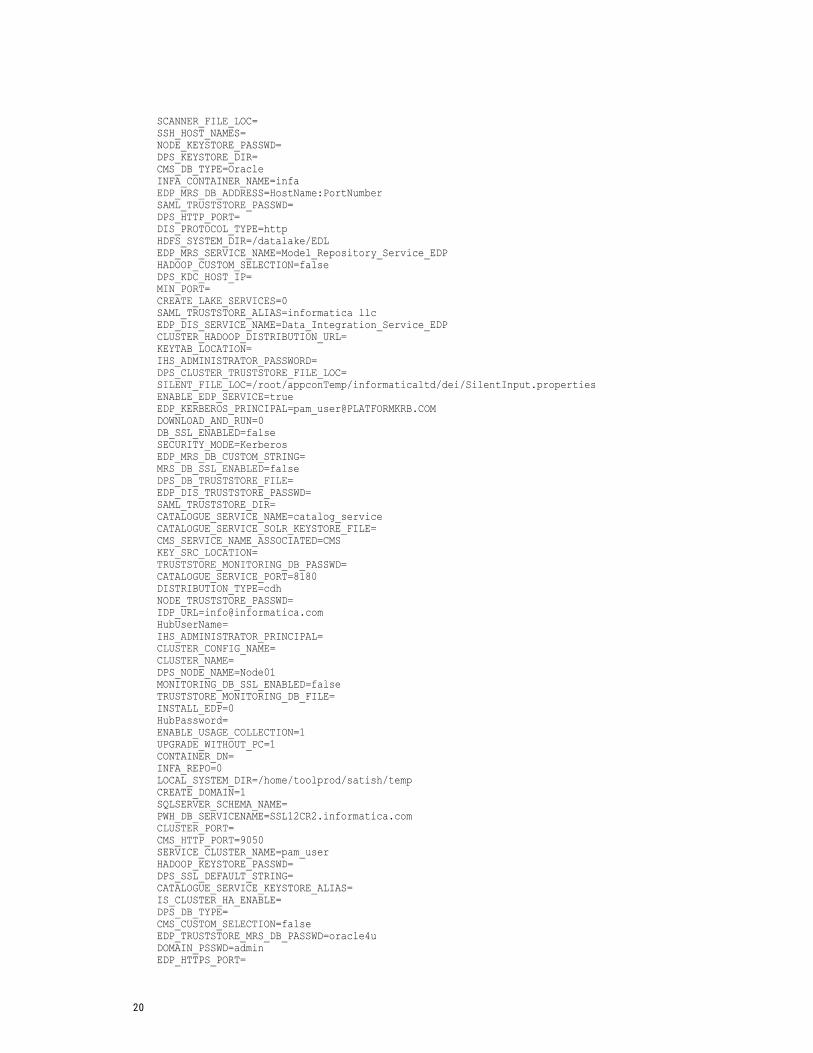
SCANNER_FILE_LOC=SSH_HOST_NAMES=NODE_KEYSTORE_PASSWD=DPS_KEYSTORE_DIR=CMS_DB_TYPE=OracleINFA_CONTAINER_NAME=infaEDP_MRS_DB_ADDRESS=HostName:PortNumberSAML_TRUSTSTORE_PASSWD=DPS_HTTP_PORT=DIS_PROTOCOL_TYPE=httpHDFS_SYSTEM_DIR=/datalake/EDLEDP_MRS_SERVICE_NAME=Model_Repository_Service_EDPHADOOP_CUSTOM_SELECTION=falseDPS_KDC_HOST_IP=MIN_PORT=CREATE_LAKE_SERVICES=0SAML_TRUSTSTORE_ALIAS=informatica llcEDP_DIS_SERVICE_NAME=Data_Integration_Service_EDPCLUSTER_HADOOP_DISTRIBUTION_URL=KEYTAB_LOCATION=IHS_ADMINISTRATOR_PASSWORD=DPS_CLUSTER_TRUSTSTORE_FILE_LOC=SILENT_FILE_LOC=/root/appconTemp/informaticaltd/dei/SilentInput.propertiesENABLE_EDP_SERVICE=trueEDP_KERBEROS_PRINCIPAL=pam_user@PLATFORMKRB.COMDOWNLOAD_AND_RUN=0DB_SSL_ENABLED=falseSECURITY_MODE=KerberosEDP_MRS_DB_CUSTOM_STRING=MRS_DB_SSL_ENABLED=falseDPS_DB_TRUSTSTORE_FILE=EDP_DIS_TRUSTSTORE_PASSWD=SAML_TRUSTSTORE_DIR=CATALOGUE_SERVICE_NAME=catalog_serviceCATALOGUE_SERVICE_SOLR_KEYSTORE_FILE=CMS_SERVICE_NAME_ASSOCIATED=CMSKEY_SRC_LOCATION=TRUSTSTORE_MONITORING_DB_PASSWD=CATALOGUE_SERVICE_PORT=8180DISTRIBUTION_TYPE=cdhNODE_TRUSTSTORE_PASSWD=IDP_URL=info@informatica.comHubUserName=IHS_ADMINISTRATOR_PRINCIPAL=CLUSTER_CONFIG_NAME=CLUSTER_NAME=DPS_NODE_NAME=Node01MONITORING_DB_SSL_ENABLED=falseTRUSTSTORE_MONITORING_DB_FILE=INSTALL_EDP=0HubPassword=ENABLE_USAGE_COLLECTION=1UPGRADE_WITHOUT_PC=1CONTAINER_DN=INFA_REPO=0LOCAL_SYSTEM_DIR=/home/toolprod/satish/tempCREATE_DOMAIN=1SQLSERVER_SCHEMA_NAME=PWH_DB_SERVICENAME=SSL12CR2.informatica.comCLUSTER_PORT=CMS_HTTP_PORT=9050SERVICE_CLUSTER_NAME=pam_userHADOOP_KEYSTORE_PASSWD=DPS_SSL_DEFAULT_STRING=CATALOGUE_SERVICE_KEYSTORE_ALIAS=IS_CLUSTER_HA_ENABLE=DPS_DB_TYPE=CMS_CUSTOM_SELECTION=falseEDP_TRUSTSTORE_MRS_DB_PASSWD=oracle4uDOMAIN_PSSWD=adminEDP_HTTPS_PORT=
20

MONITORING_DB_SERVICENAME=DB_ADDRESS=oracleDIS_SERVICE_NAME=Data_Integration_ServiceHTTPS_ENABLED=0SERVES_AS_GATEWAY=0EDP_MRS_SQLSERVER_SCHEMA_NAME=DOMAIN_HOST_NAME=infaMONITORING_SQLSERVER_SCHEMA_NAME=PCRS_DB_PORT=1521NODE_KEYSTORE_DIR=SERVER_PORT=DOCKER_NETWORK_NAME=OVERRIDE_HADOOP_AMBARI_PSD=falseKDC_CERT_FILE_LOC=DIS_HTTP_PORT=EDP_MRS_ADVANCE_JDBC_PARAM=MRS_DB2_TABLESPACE=EDP_DIS_PROTOCOL_TYPE=DPS_DB_PORT=EDP_MRS_DB2_TABLESPACE=AUTH_MODE=KerberosNODE_NAME=node01CLUSTER_HADOOP_DISTRIBUTION_URL_PASSWD=DB2_TABLESPACE=KERBEROS_CONF_FILE_LOC=/etc/krb5.confENABLE_CUSTOM_SERVICE_PROVIDER_ID=0KERBEROS_DOMAIN_PSSWD=INSTALL_LDM=0CMS_DB_SERVICENAME=SSL12CR2.informatica.comMONITORING_DB_CUSTOM_STRING=CMS_SQLSERVER_SCHEMA_NAME=EDP_TRUSTSTORE_MRS_DB_FILE=/home/toolprod/INFA_Automation/newssldb/keystore_orassl.jksHDFS_PRINCIPAL_NAME=nn/[email protected]_DEST_LOCATION=/home/Informatica/isp/config/keysMRS_SERVICE_NAME=Model_Repository_ServiceDB_UNAME=adminENABLE_CMS_SERVICE=trueCLUSTER_TYPE=2EDP_DIS_TRUSTSTORE_DIR=SERVICE_REALM_NAME=KDC_KEYTAB_LOCATION=/etc/merge.keytabSAML_AUTHENTICATION=falseMONITORING_DB_UNAME=DIS_TRUSTSTORE_DIR=CLUSTER_CONFIG_VALIDATION=0HADOOP_GATEWAY_PORT=8080HOST_SSH_USER=rootMRS_SQLSERVER_SCHEMA_NAME=DOMAIN_PORT=6005DB_SERVICENAME=oraRESUME_INSTALLATION=falseEDP_TRUSTSTORE_DIR=DPS_DB_CUSTOM_STRING_SELECTION=falsePWH_ADVANCE_JDBC_PARAM=EDP_MRS_DB_SERVICENAME=DBServiceNameENABLE_DB_SSL=falseDPS_DB_SCHEMA=CONFIGURE_SERVICES=1MONITORING_ADVANCE_JDBC_PARAM=EDP_HTTP_PORT=MRS_SSL_DEFAULT_STRING=EncryptionMethod=SSL;HostNameInCertificate=;ValidateServerCertificate=false;TUNING_SIZE=sandboxDPS_TRUSTSTORE_PSSWD=KDC_HOST=DOMAIN_CNFRM_PSSWD=adminJOIN_NODE_NAME=DOMAIN_NAME=DomainPCRS_DBTYPE_AZURE=0CATALOGUE_SERVICE_SOLR_KEYSTORE_PASSWD=DB_TYPE=Oracle
21

DIS_TRUSTSTORE_PASSWD=KERBEROS_SECURITY_DOMAIN_NAME=PASSWORD_COMPLEXITY=falseMRS_DB_SERVICENAME=TAR_FILE_LOC=ARCHIVE_FILE=PCRS_SERVICE_NAME=INFA_SERVICES_INSTALLED=falseDIS_KEYSTORE_PASSWD=DPS_CLUSTER_TRUSTSTORE_FILE_PASSWD=YARN_SERVICE_PRINCIPAL=CMS_HTTPS_PORT=CATALOGUE_SERVICE_TLS_HTTPS_PORT=EDP_MRS_DB_TYPE=KDC_TYPE=mit-kdc/active-directoryMRS_DB_ADDRESS=MRS_DB_CUSTOM_STRING_SELECTION=0CMS_PROTOCOL_TYPE=httpPWH_DB_CUSTOM_STRING=IHS_ADMINISTRATOR_SERVER_HOST=CATALOGUE_SERVICE_CUSTOM_SELECTION=falseMONITORING_DB_PASSWD=DPS_DIS_SERVICE_NAME=Data_Integration_Service_EDPJOIN_DOMAIN=0TLS_CUSTOM_SELECTION=falseHIVE_LOCALSTORAGE_FORMAT=DefaultFormatPORT_RANGE=6005-6115ENABLE_DPS_SERVICE=trueIMAGE_NAME=informaticaltd/dei:1040-rc336.updateCATALOGUE_SERVICE_NAME_ASSOCIATED=catalog_serviceTUNE_APPLICATION_SERVICES=trueEDP_MRS_DB_PASSWD=DPS_MRS_SERVICE_NAME=Model_Repository_Service_EDPENABLE_BIGDATA_JOB_RECOVERY=DB_CUSTOM_STRING_SELECTION=0EDP_NODE_NAME=Node01MONITORING_DB2_TABLESPACE=CREATE_MONITORING_STATS=0CLUSTER_NAME_CCO=CREATE_SERVICES=0IHS_REALM=EDP_KEYSTORE_DIR=MONITORING_SERVICE_NAME=EIC_SERVICES_INSTALLED=falseDPS_SERVICE_NAME=Interactive_Data_Preparation_ServiceKDC_DOMAIN_NAME=PLATFORMKRB.COMZOOKEEPER_URI=JOIN_DOMAIN_PORT=CLUSTER_USERID=DPS_DB_PSSWD=EDP_MRS_DB_SSL_ENABLED=LDAP_URL=YARN_RESOURCE_MANAGER_URI=EDP_DIS_HTTP_PORT=MRS_DB_UNAME=adminDPS_DB_SERVICENAME=PCRS_DB_SERVICE_NAME=HADOOP_KEYSTORE_ALIAS=INSTALL_OPTION=2MONITORING_DB_TYPE=OracleCREATE_CCO_CONNECTION=0IS_CLUSTER_SECURE=falseDIS_KEYSTORE_DIR=HDFS_LOCATION=/datalake/DPSCATALOG_ENABLE_EMAIL_SERVICE=falseJOIN_HOST_NAME=HADOOP_SERVICE_PORT=8160PWH_DB2_TABLESPACE=EXTERNAL_CLUSTER_TRUSTSTORE_FILE_LOC=RUN_CLUSTER_PREVALIDATION=0CLUSTER_HOST=
22

HADOOP_SERVICE_NAME=hadoop_servicePWH_DB_UNAME=CPI_PWHproductType=PCCMS_DB_PASSWD=CPI_CMSDOMAINMACHINE_PASSWORDLESS_SSH_ENABLED=0PASS_PHRASE_PASSWD=keySLIDER_MAX_PORT=TRUSTED_CONNECTION=CMS_DB2_TABLESPACE=ASSOCIATE_PROFILE_CONNECTION=0CMS_DB_ADDRESS=insrh74dsg015.informatica.com:1521PCRS_DB_USER=DPS_DB_CUSTOM_STRING=CREATE_EDP_SERVICES=0ADVANCE_JDBC_PARAM=CLUSTER_HADOOP_DISTRIBUTION_URL_USER=HISTORY_SERVER_HTTP_URI=EDP_KEYSTORE_PSSWD=HADOOP_LOG_DIR=MONITORING_DB_CUSTOM_STRING_SELECTION=0DOMAIN_KEYSTORE_ALIAS=TOMCAT_PORT=EXTERNAL_CLUSTER_TRUSTSTORE_FILE_PASSWD=GATEWAY_USERNAME=rootSLIDER_MIN_PORT=
AuthorSujitha Alexander
23