


Bahasa
Halaman
Hukum


1 | P a g e
Device Installation user guide for Bank and ASSK User
2 | P a g e
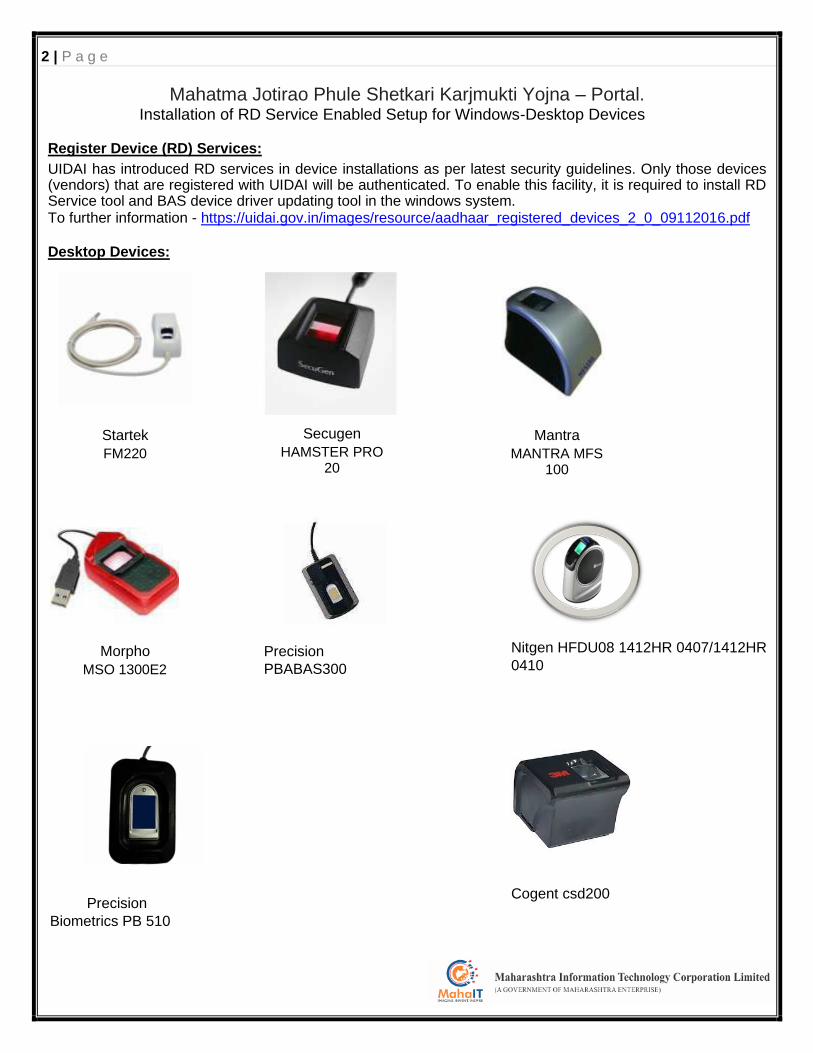
Mahatma Jotirao Phule Shetkari Karjmukti Yojna – Portal. Installation of RD Service Enabled Setup for Windows-Desktop Devices
Register Device (RD) Services:
UIDAI has introduced RD services in device installations as per latest security guidelines. Only those devices (vendors) that are registered with UIDAI will be authenticated. To enable this facility, it is required to install RD Service tool and BAS device driver updating tool in the windows system. To further information - https://uidai.gov.in/images/resource/aadhaar_registered_devices_2_0_09112016.pdf
Desktop Devices:
Startek
FM220
Secugen
HAMSTER PRO 20
Mantra
MANTRA MFS 100
Morpho
MSO 1300E2
Precision
Biometrics PB 510
Precision
PBABAS300
Nitgen HFDU08 1412HR 0407/1412HR
0410
Cogent csd200
3 | P a g e
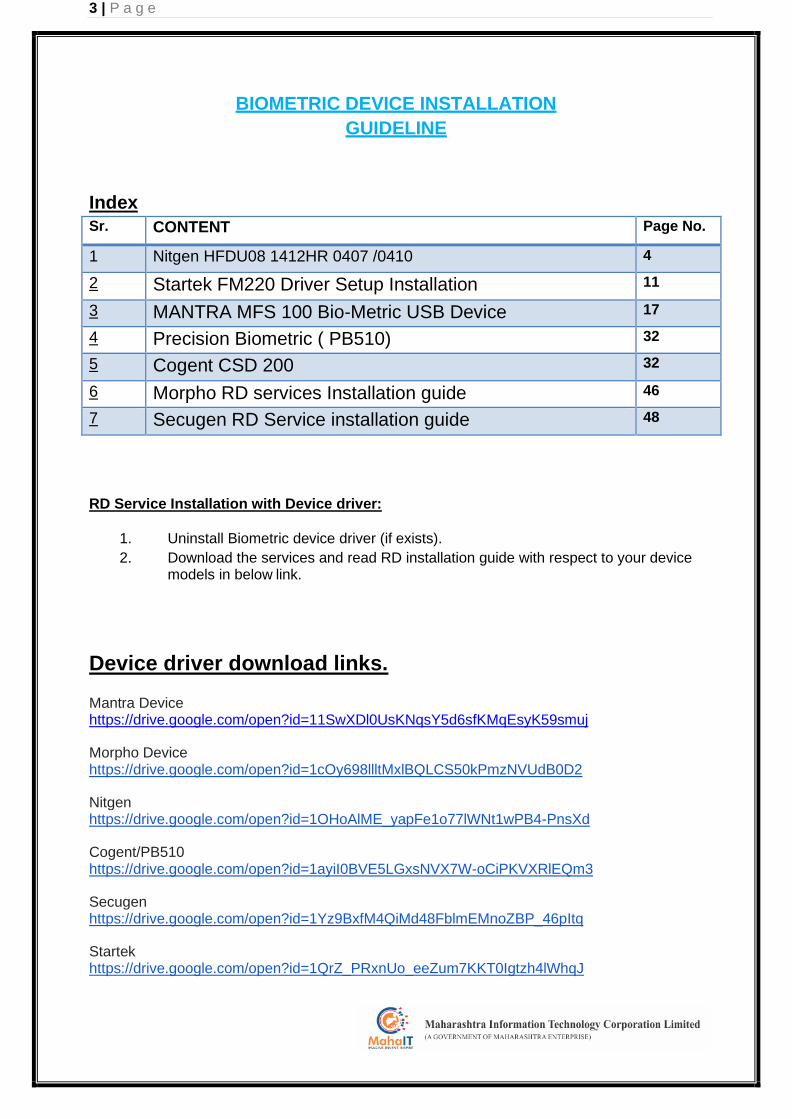
BIOMETRIC DEVICE INSTALLATION
GUIDELINE
Index
Sr. CONTENT Page No.
1 Nitgen HFDU08 1412HR 0407 /0410 4
2 Startek FM220 Driver Setup Installation 11
3 MANTRA MFS 100 Bio-Metric USB Device 17
4 Precision Biometric ( PB510) 32
5 Cogent CSD 200 32
6 Morpho RD services Installation guide 46
7 Secugen RD Service installation guide 48
RD Service Installation with Device driver:
1. Uninstall Biometric device driver (if exists).
2. Download the services and read RD installation guide with respect to your device models in below link.
Device driver download links. Mantra Device https://drive.google.com/open?id=11SwXDl0UsKNqsY5d6sfKMqEsyK59smuj
Morpho Device https://drive.google.com/open?id=1cOy698llltMxlBQLCS50kPmzNVUdB0D2
Nitgen https://drive.google.com/open?id=1OHoAlME_yapFe1o77lWNt1wPB4-PnsXd
Cogent/PB510 https://drive.google.com/open?id=1ayiI0BVE5LGxsNVX7W-oCiPKVXRlEQm3
Secugen https://drive.google.com/open?id=1Yz9BxfM4QiMd48FblmEMnoZBP_46pItq
Startek https://drive.google.com/open?id=1QrZ_PRxnUo_eeZum7KKT0Igtzh4lWhqJ

4 | P a g e
1) Nitgen HFDU08 1412HR 0407
Nitgen HFDU08 1412HR 0410
Installation Instructions
Steps for installing biometric device driver Step 1. Your downloaded file Name would be (Biometric_Device_Driver_v3.12.zip). Unzip file by right click on the zip folder.
Step 2. Please unplug the biometric device from USB port if already connected.
5 | P a g e
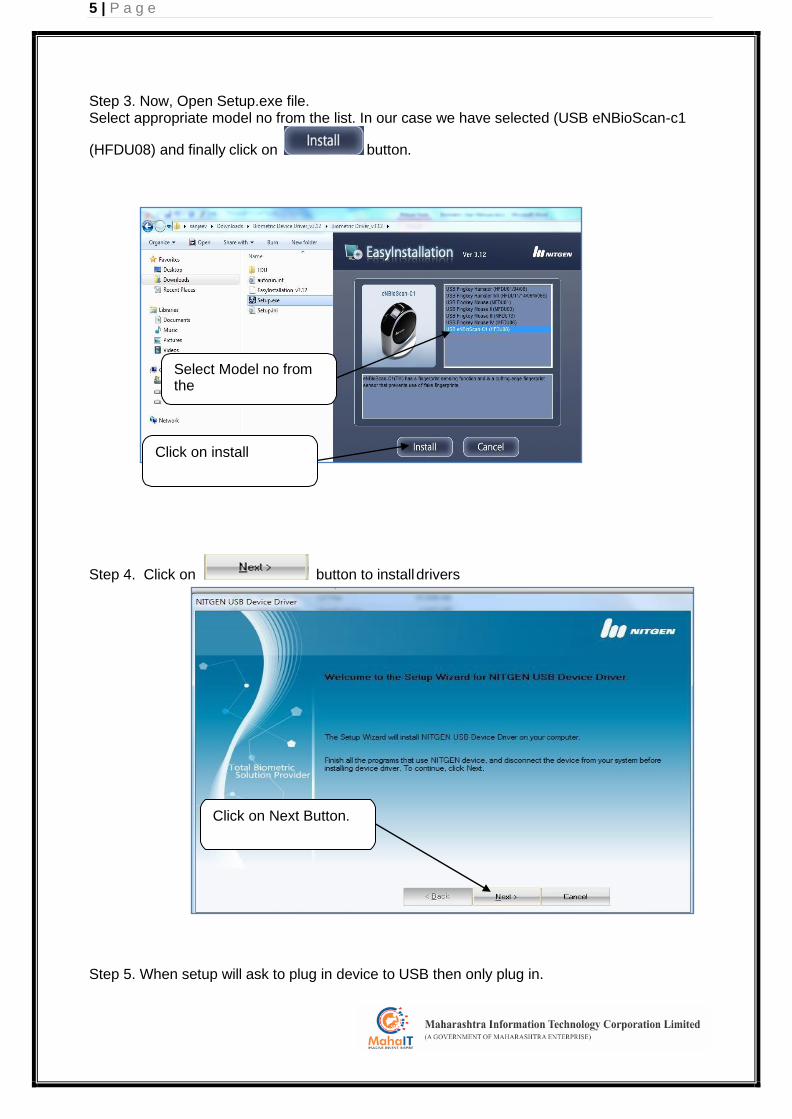
Select Model no from the
list.
Click on install Button.
Click on Next Button.
Step 3. Now, Open Setup.exe file. Select appropriate model no from the list. In our case we have selected (USB eNBioScan-c1
(HFDU08) and finally click on button.
Step 4. Click on button to install drivers
Step 5. When setup will ask to plug in device to USB then only plug in.
6 | P a g e
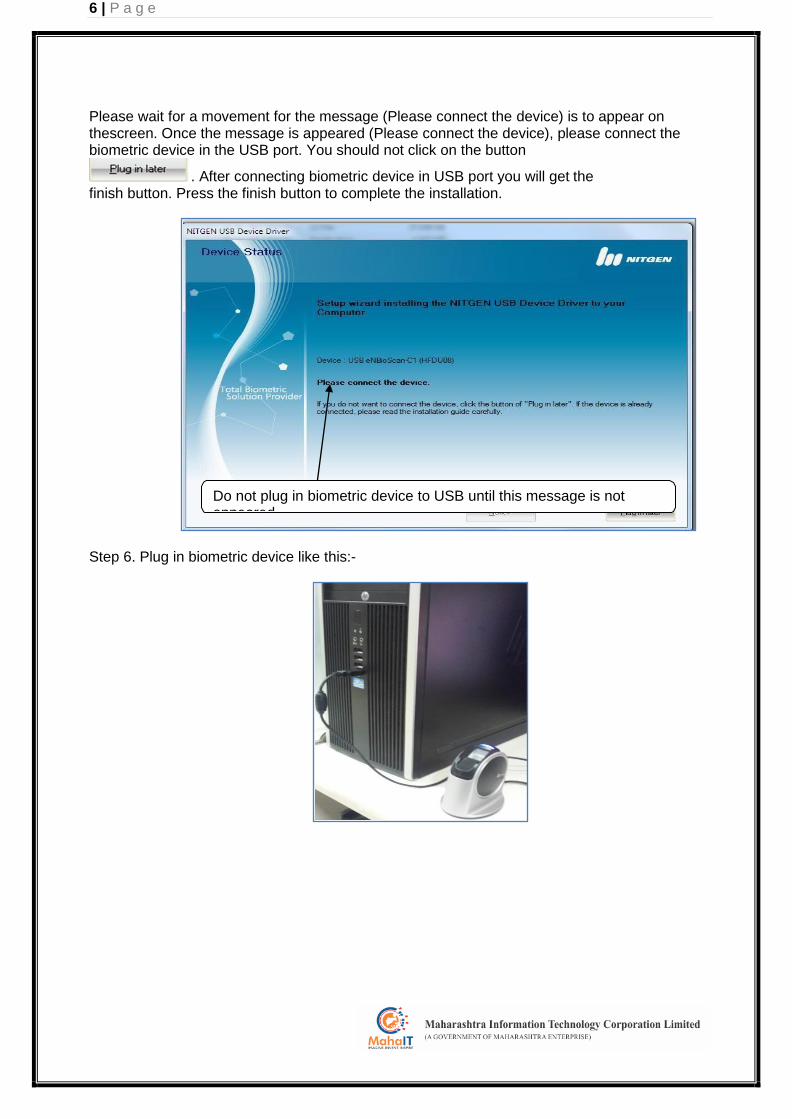
Do not plug in biometric device to USB until this message is not appeared.
Please wait for a movement for the message (Please connect the device) is to appear on thescreen. Once the message is appeared (Please connect the device), please connect the biometric device in the USB port. You should not click on the button
. After connecting biometric device in USB port you will get the finish button. Press the finish button to complete the installation.
Step 6. Plug in biometric device like this:-
7 | P a g e
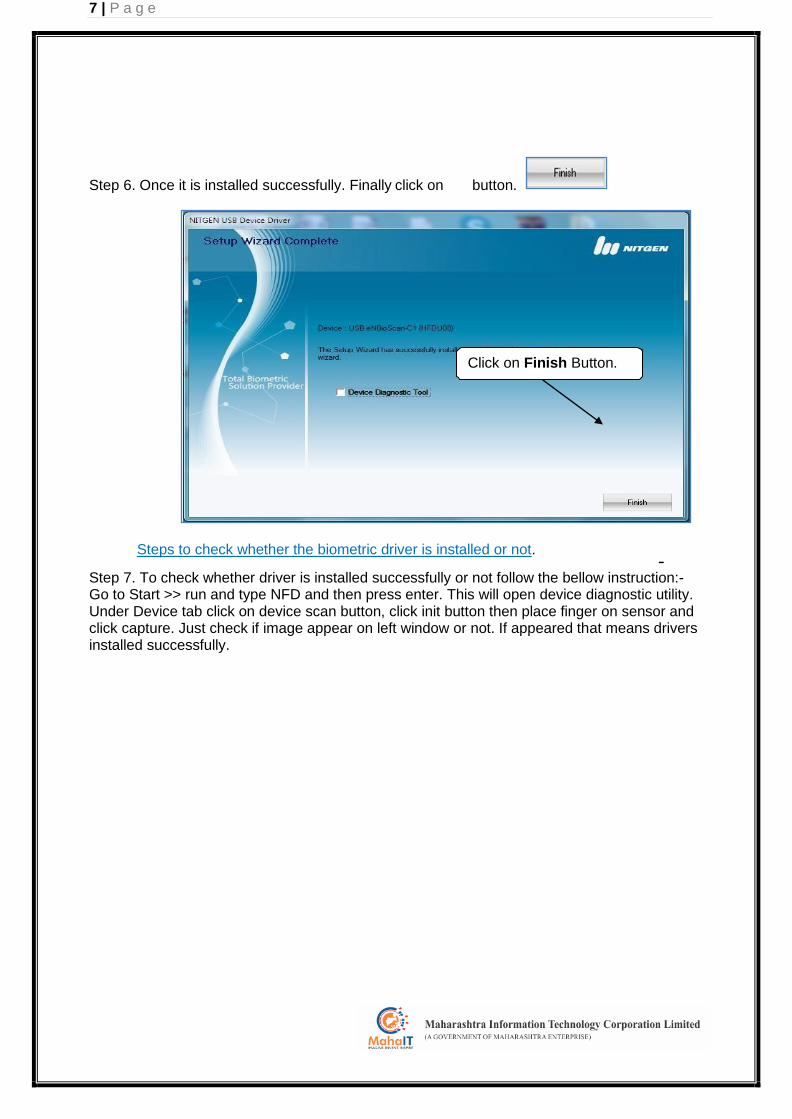
Click on Finish Button.
Step 6. Once it is installed successfully. Finally click on button.
Steps to check whether the biometric driver is installed or not.
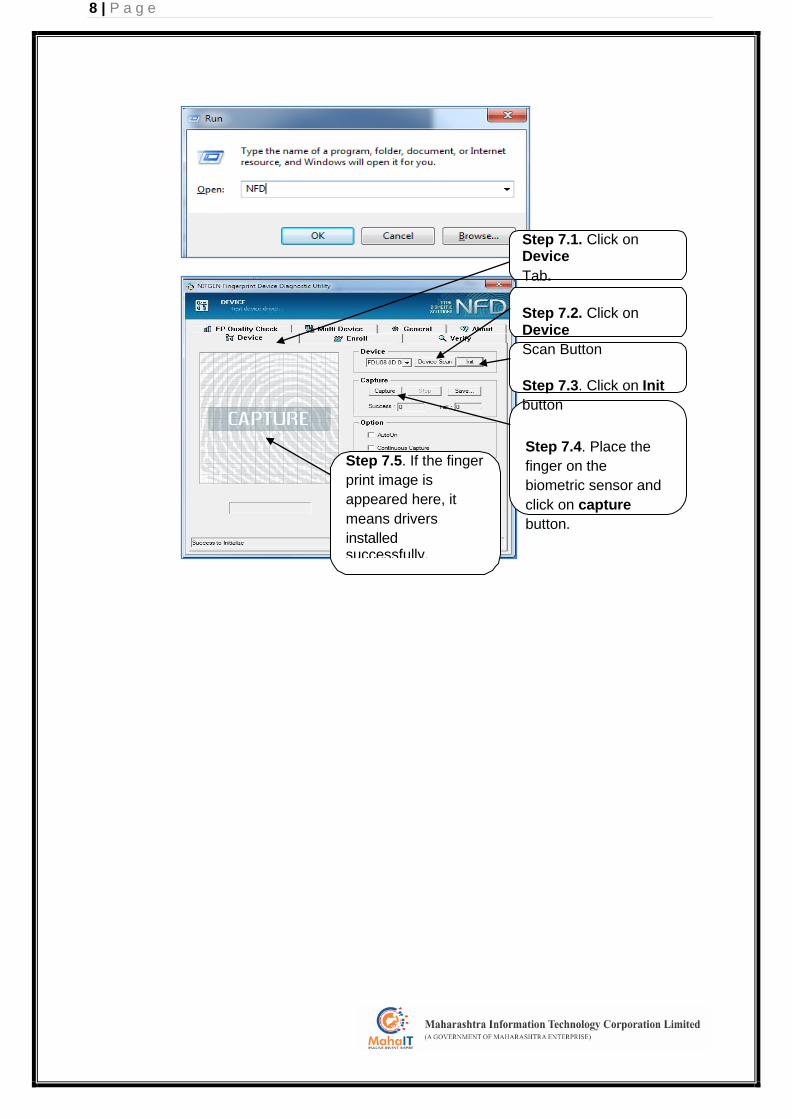
Step 7. To check whether driver is installed successfully or not follow the bellow instruction:- Go to Start >> run and type NFD and then press enter. This will open device diagnostic utility. Under Device tab click on device scan button, click init button then place finger on sensor and click capture. Just check if image appear on left window or not. If appeared that means drivers installed successfully.
8 | P a g e
Step 7.1. Click on Device
Tab.
Step 7.2. Click on Device
Scan Button
Step 7.3. Click on Init
button
Step 7.4. Place the
finger on the
biometric sensor and
click on capture
button.
Step 7.5. If the finger
print image is
appeared here, it
means drivers
installed successfully.
9 | P a g e
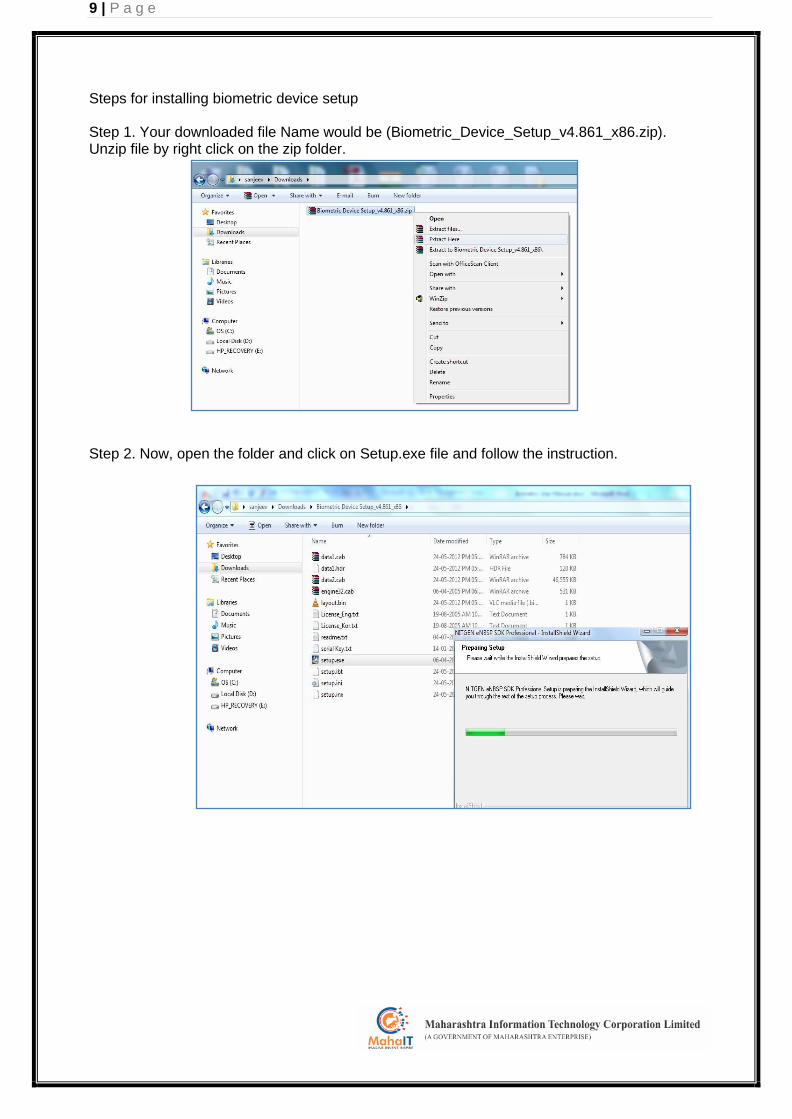
Steps for installing biometric device setup Step 1. Your downloaded file Name would be (Biometric_Device_Setup_v4.861_x86.zip). Unzip file by right click on the zip folder.
Step 2. Now, open the folder and click on Setup.exe file and follow the instruction.
10 | P a g e
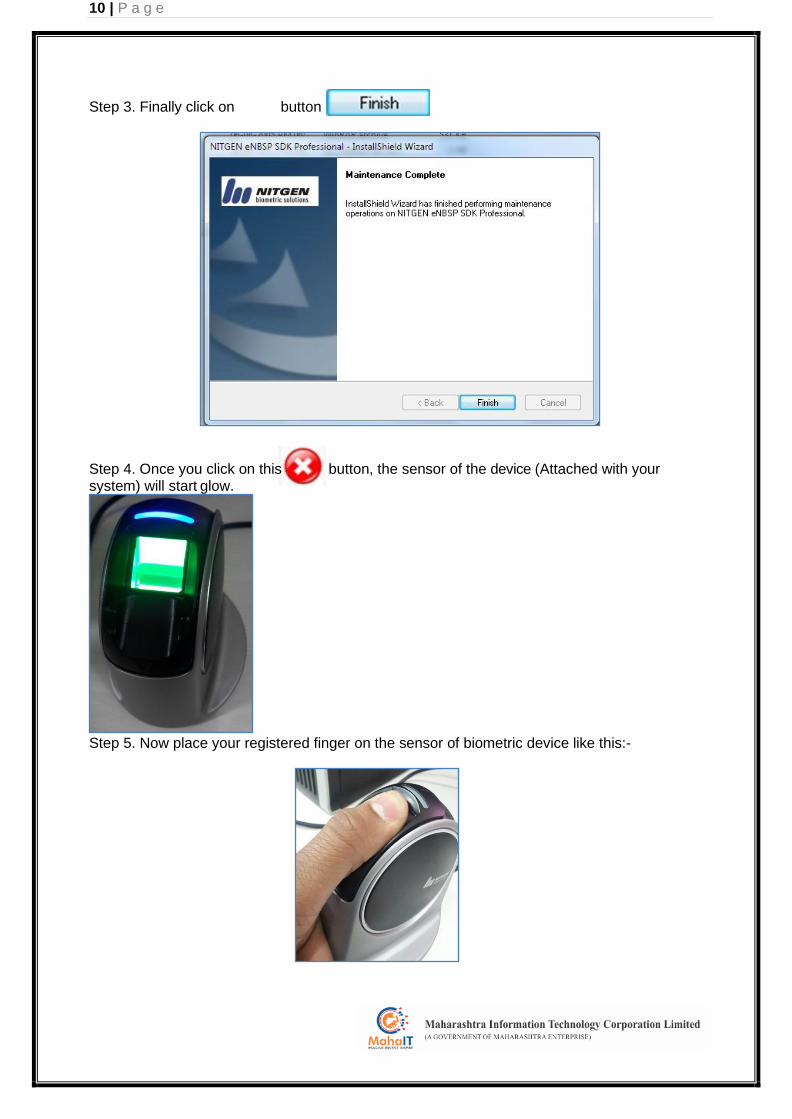
Step 3. Finally click on button
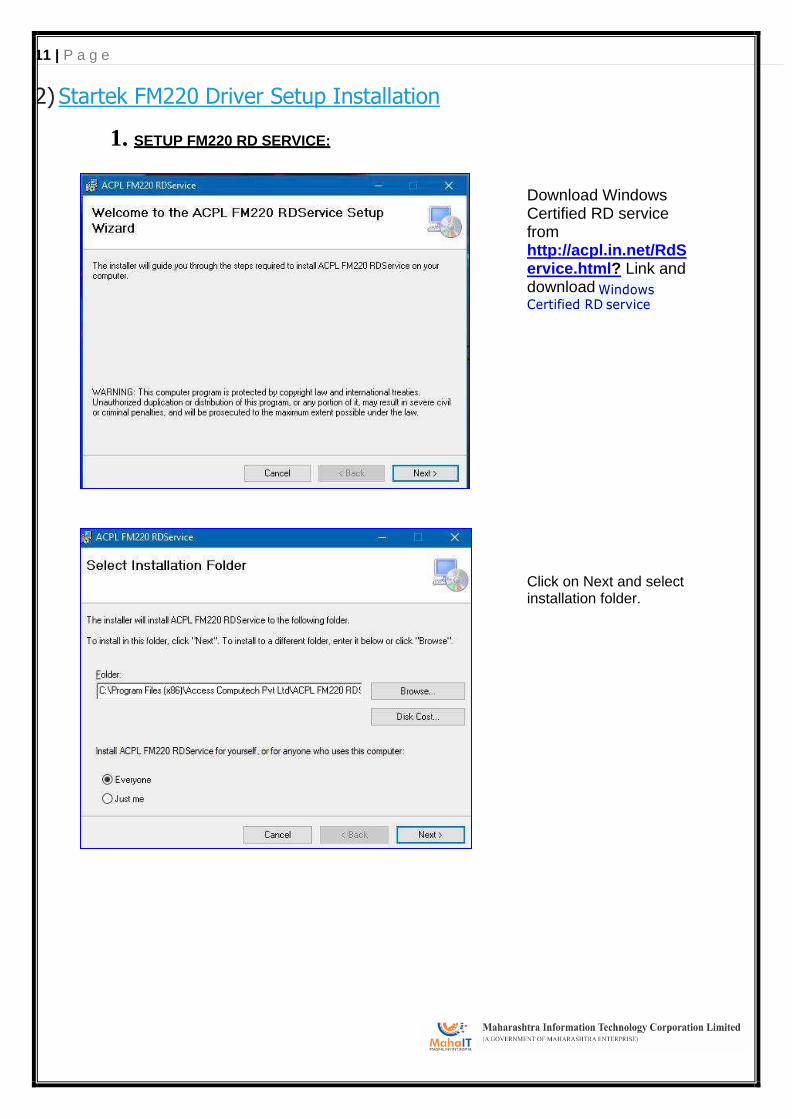
Step 4. Once you click on this button, the sensor of the device (Attached with your system) will start glow.
Step 5. Now place your registered finger on the sensor of biometric device like this:-
11 | P a g e
Windows
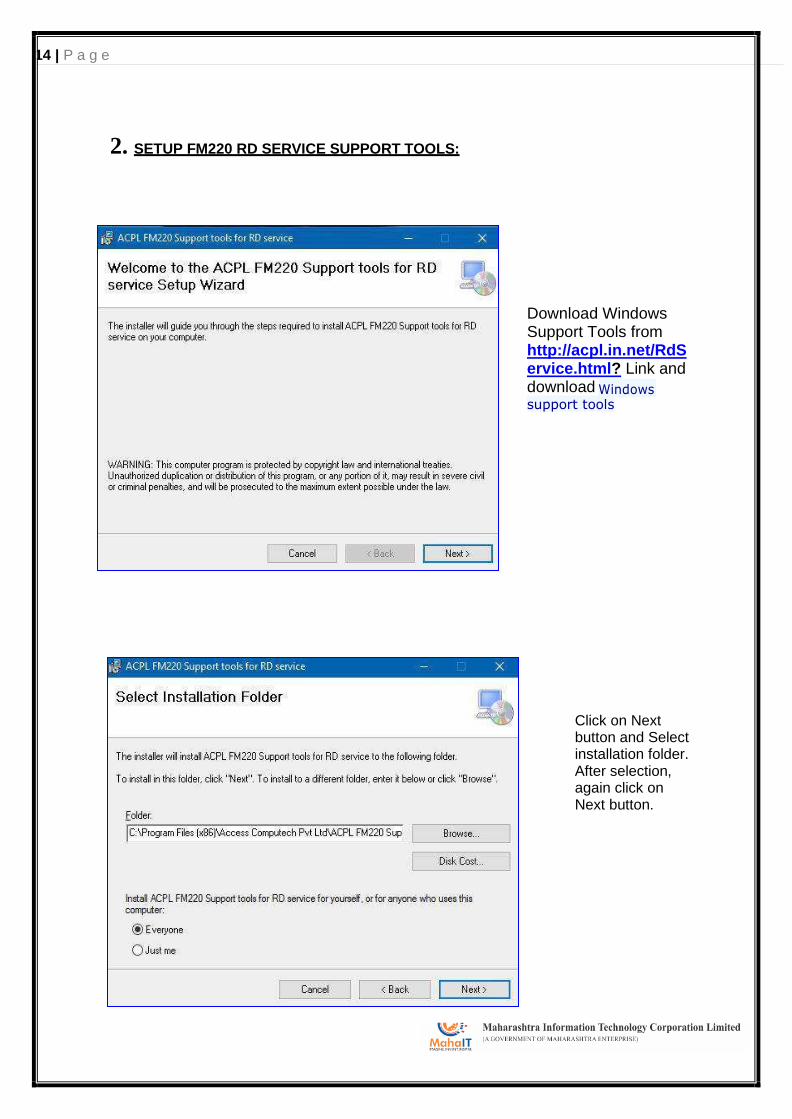
2) Startek FM220 Driver Setup Installation
1. SETUP FM220 RD SERVICE:
Download Windows Certified RD service from http://acpl.in.net/RdS ervice.html? Link and download Certified RD service
Click on Next and select installation folder.

12 | P a g e
Click Next button for Confirm to Start Installation.
Click Next and wait for RD setup to start.
Wait to install all necessary files.

13 | P a g e
Click on Close button for Exit.
14 | P a g e
Windows
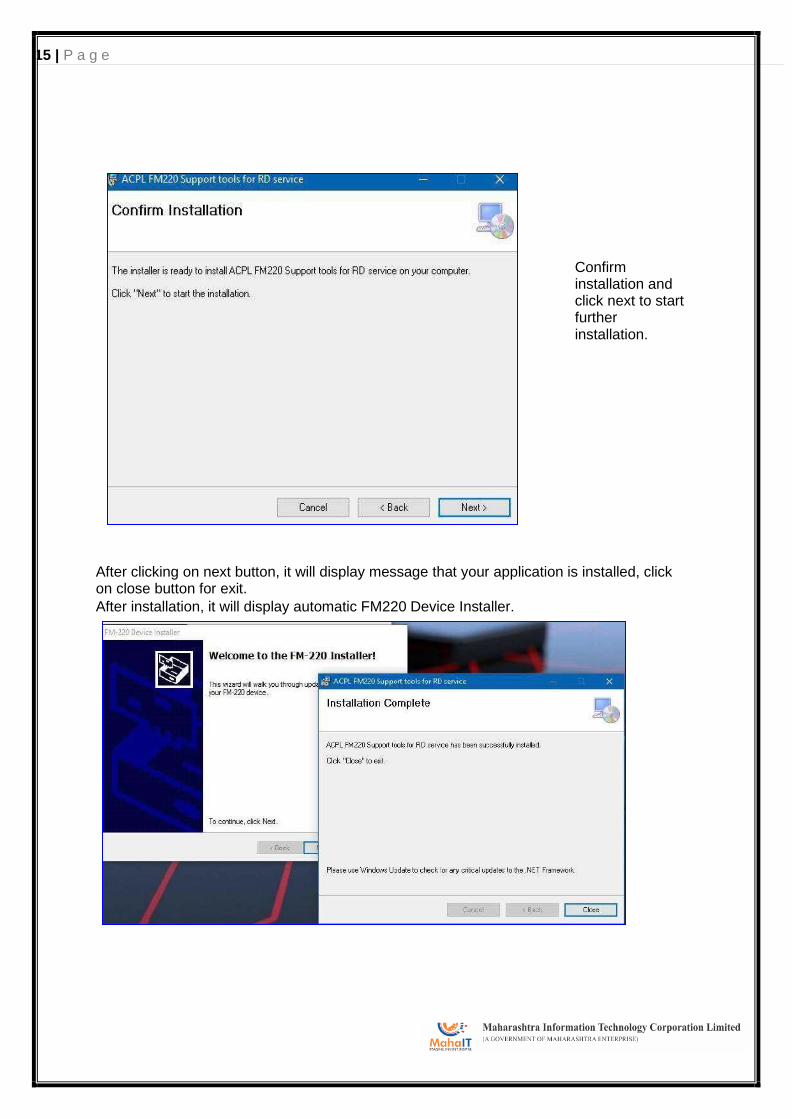
2. SETUP FM220 RD SERVICE SUPPORT TOOLS:
Download Windows Support Tools from http://acpl.in.net/RdS ervice.html? Link and download support tools
Click on Next button and Select installation folder. After selection, again click on Next button.
15 | P a g e
Confirm installation and click next to start further installation.
After clicking on next button, it will display message that your application is installed, click on close button for exit.
After installation, it will display automatic FM220 Device Installer.
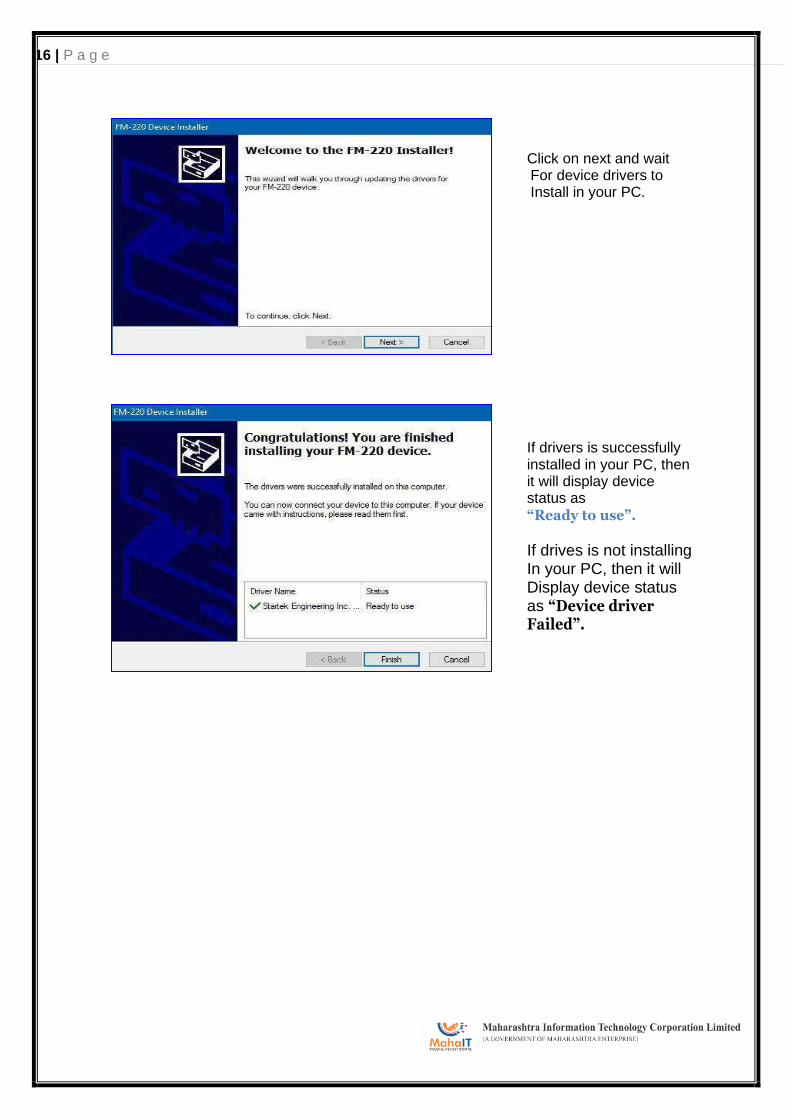
16 | P a g e
Click on next and wait For device drivers to Install in your PC.
If drivers is successfully installed in your PC, then it will display device status as
“Ready to use”.
If drives is not installing In your PC, then it will Display device status as “Device driver Failed”.
17 | P a g e
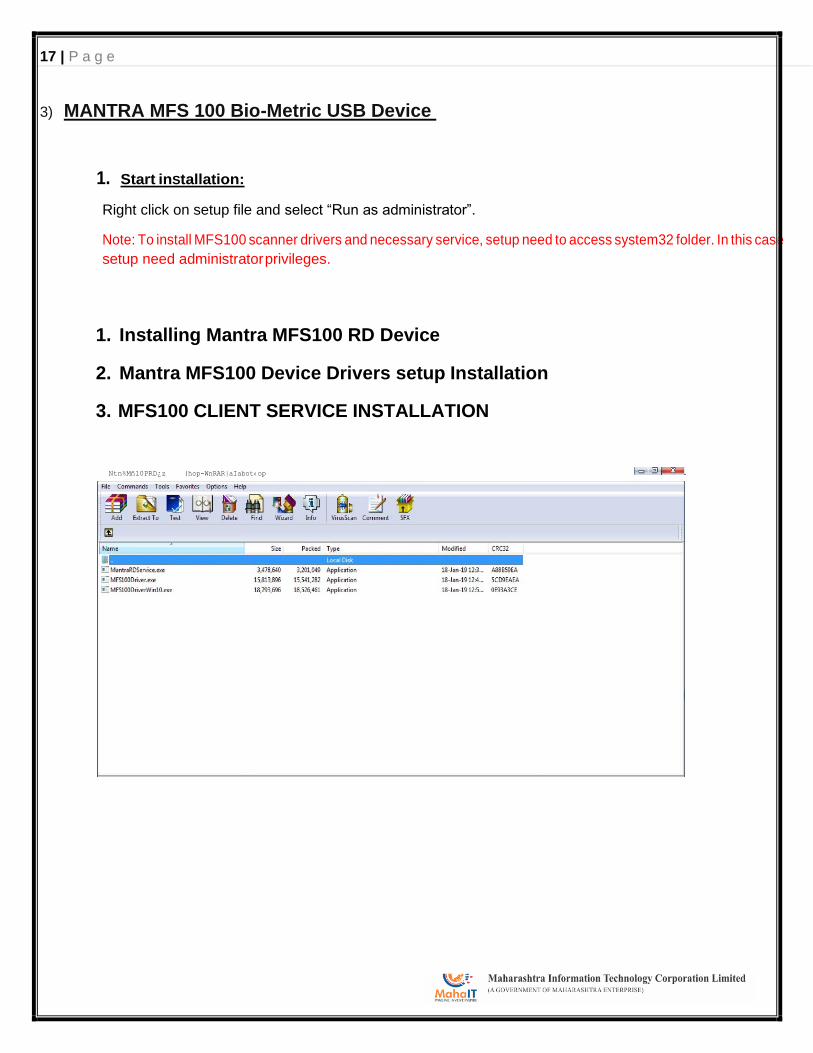
3) MANTRA MFS 100 Bio-Metric USB Device
1. Start inStallation:
Right click on setup file and select “Run as administrator”.
Note: To install MFS100 scanner drivers and necessary service, setup need to access system32 folder. In this case
setup need administrator privileges.
1. Installing Mantra MFS100 RD Device
2. Mantra MFS100 Device Drivers setup Installation
3. MFS100 CLIENT SERVICE INSTALLATION
Ntn%Mñ10PRD¿z (hop-WnRAR|aIabot‹op
18 | P a g e
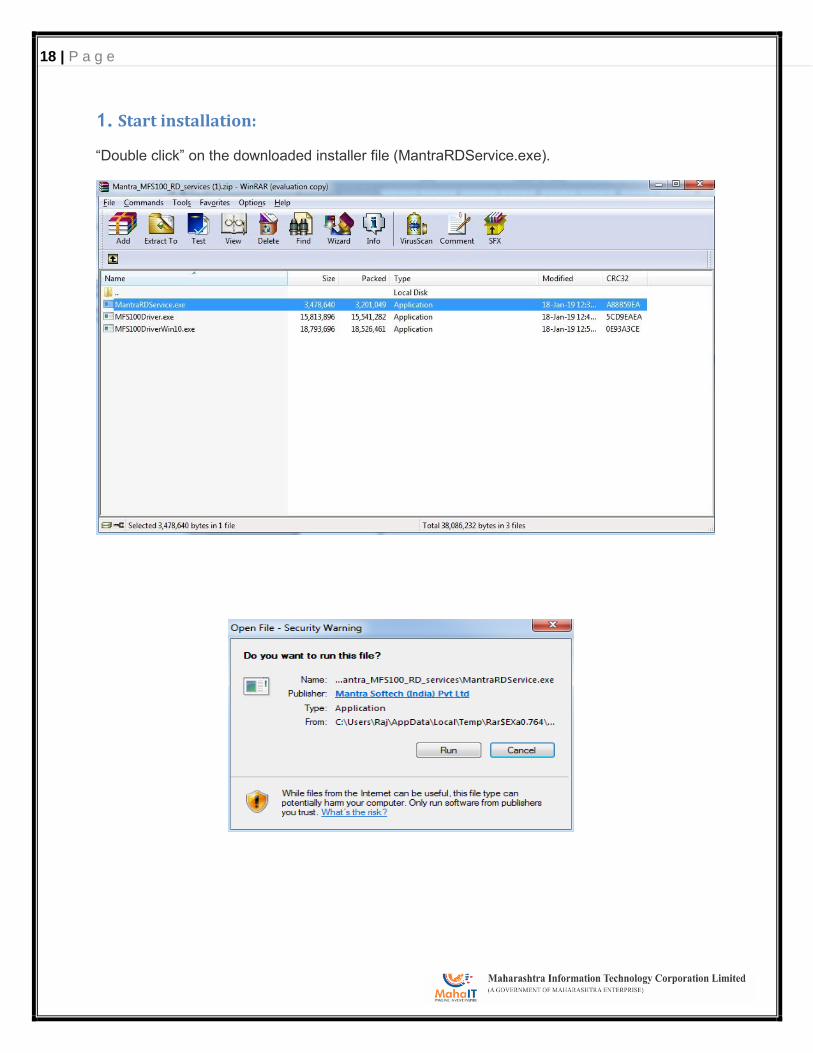
1. Start installation:
“Double click” on the downloaded installer file (MantraRDService.exe).
19 | P a g e
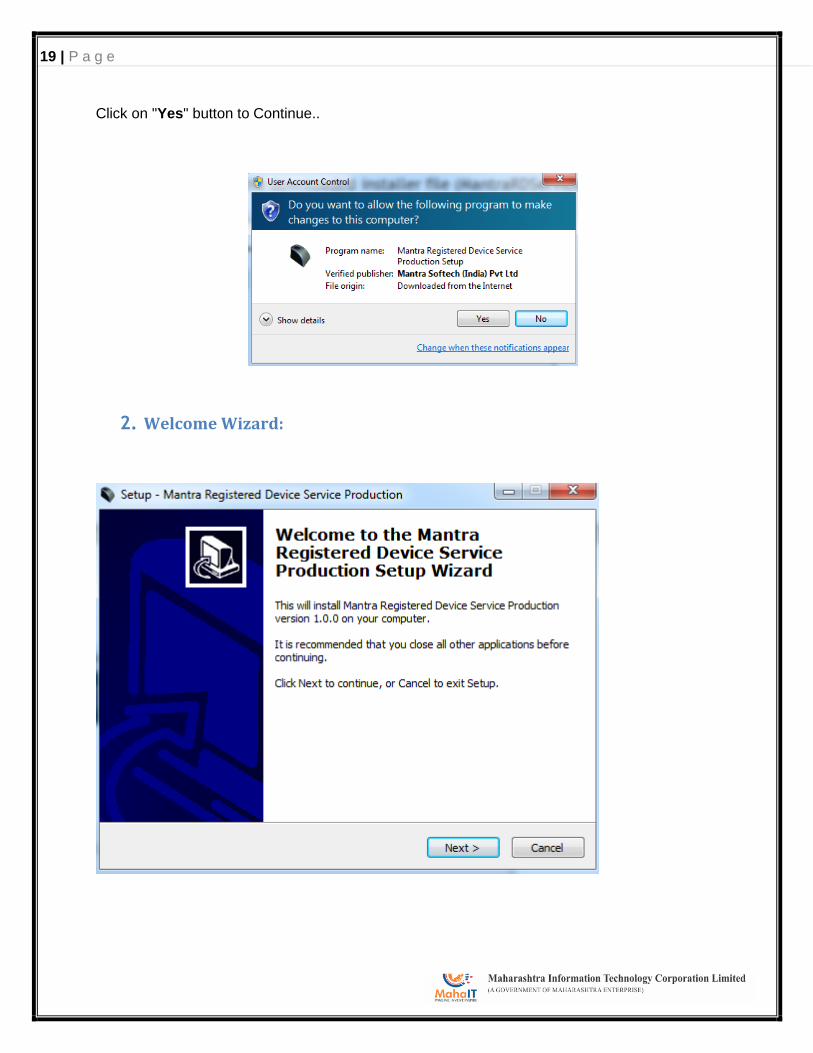
Click on "Yes" button to Continue..
2. Welcome Wizard:
20 | P a g e
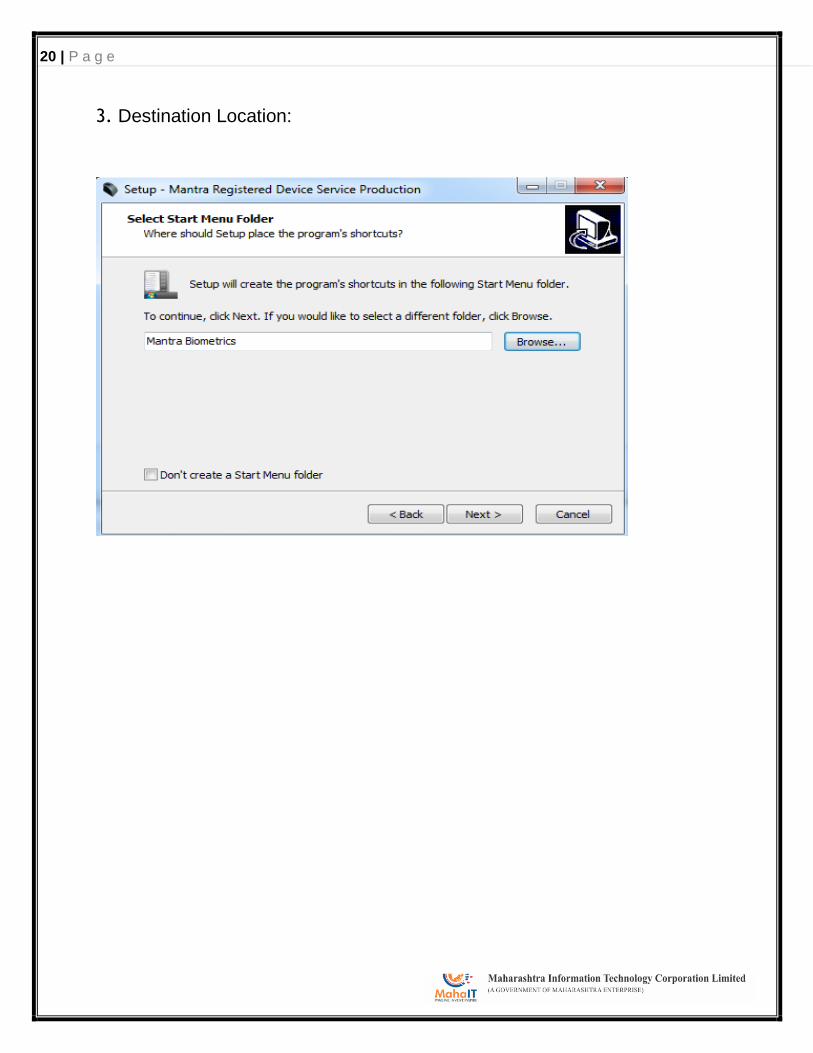
3. Destination Location:
21 | P a g e
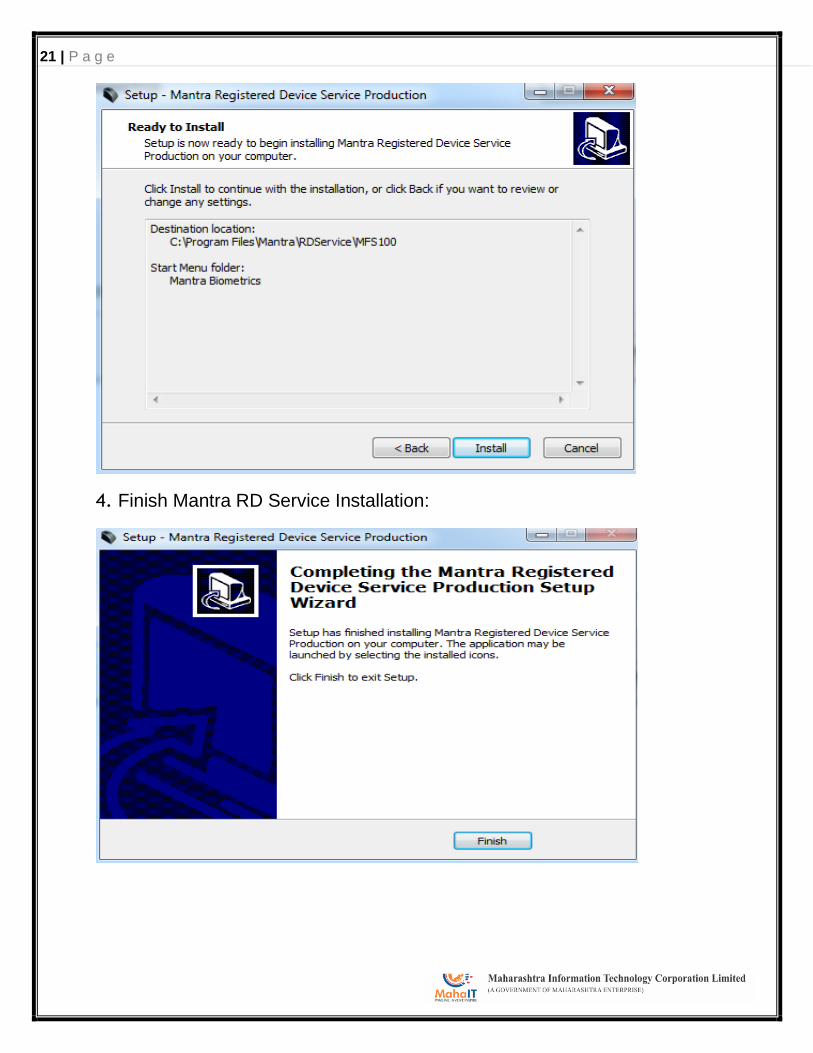
4. Finish Mantra RD Service Installation:
22 | P a g e
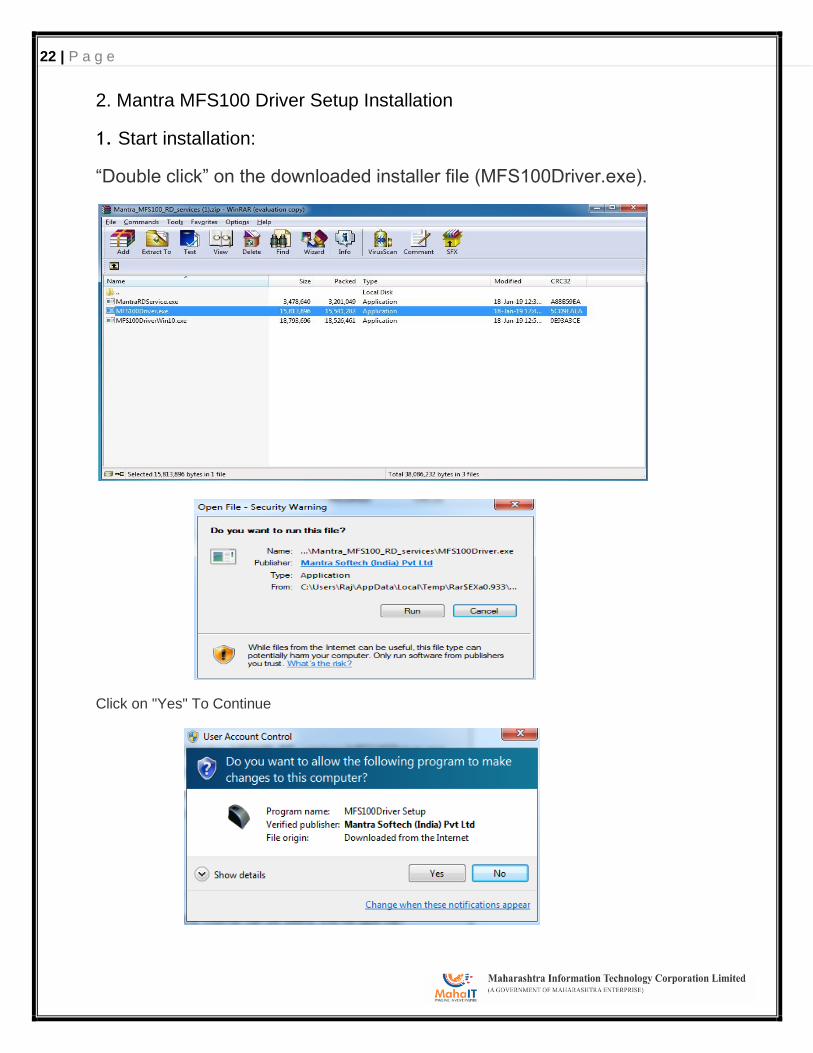
2. Mantra MFS100 Driver Setup Installation
1. Start installation:
“Double click” on the downloaded installer file (MFS100Driver.exe).
Click on "Yes" To Continue
23 | P a g e
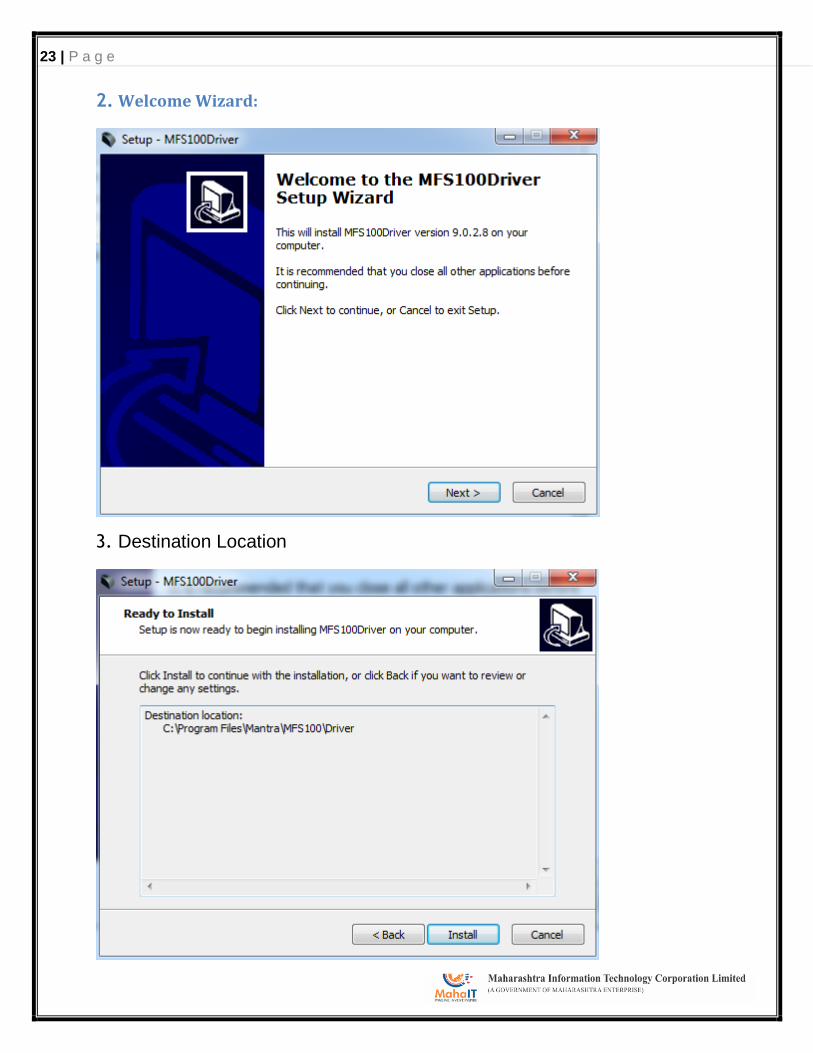
2. Welcome Wizard:
3. Destination Location
24 | P a g e
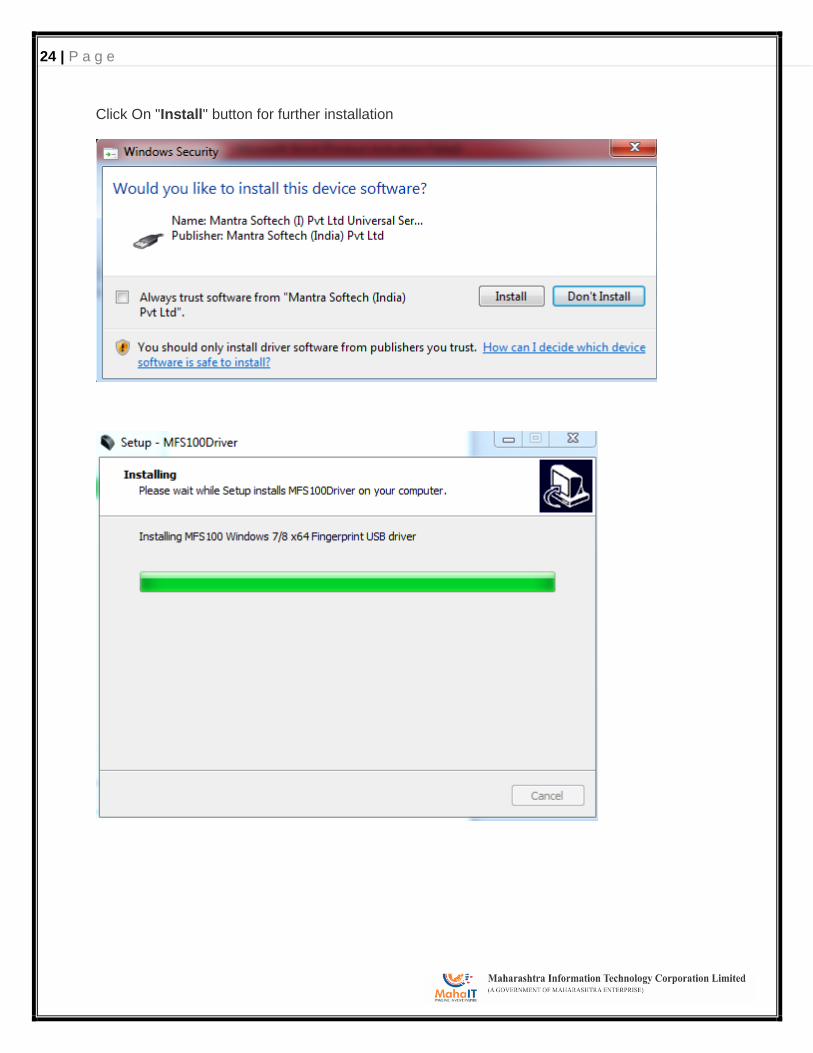
Click On "Install" button for further installation
25 | P a g e
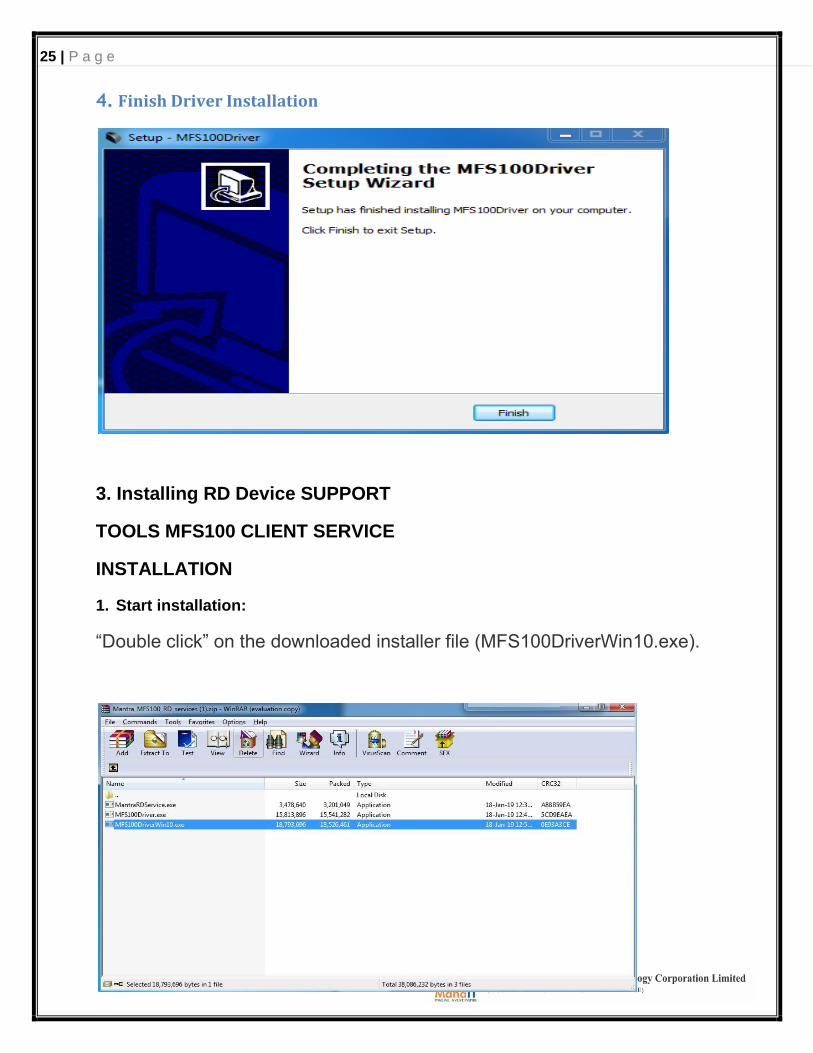
4. Finish Driver Installation
3. Installing RD Device SUPPORT
TOOLS MFS100 CLIENT SERVICE
INSTALLATION
1. Start installation:
“Double click” on the downloaded installer file (MFS100DriverWin10.exe).
26 | P a g e
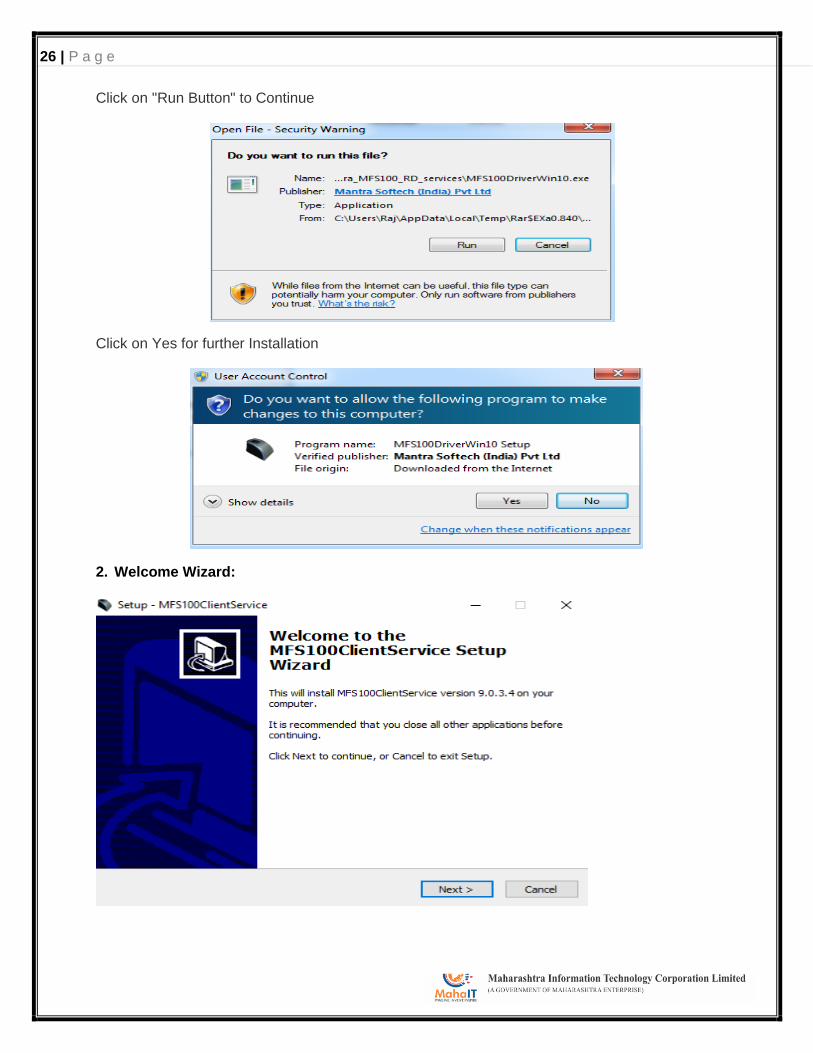
Click on "Run Button" to Continue
Click on Yes for further Installation
2. Welcome Wizard:
27 | P a g e
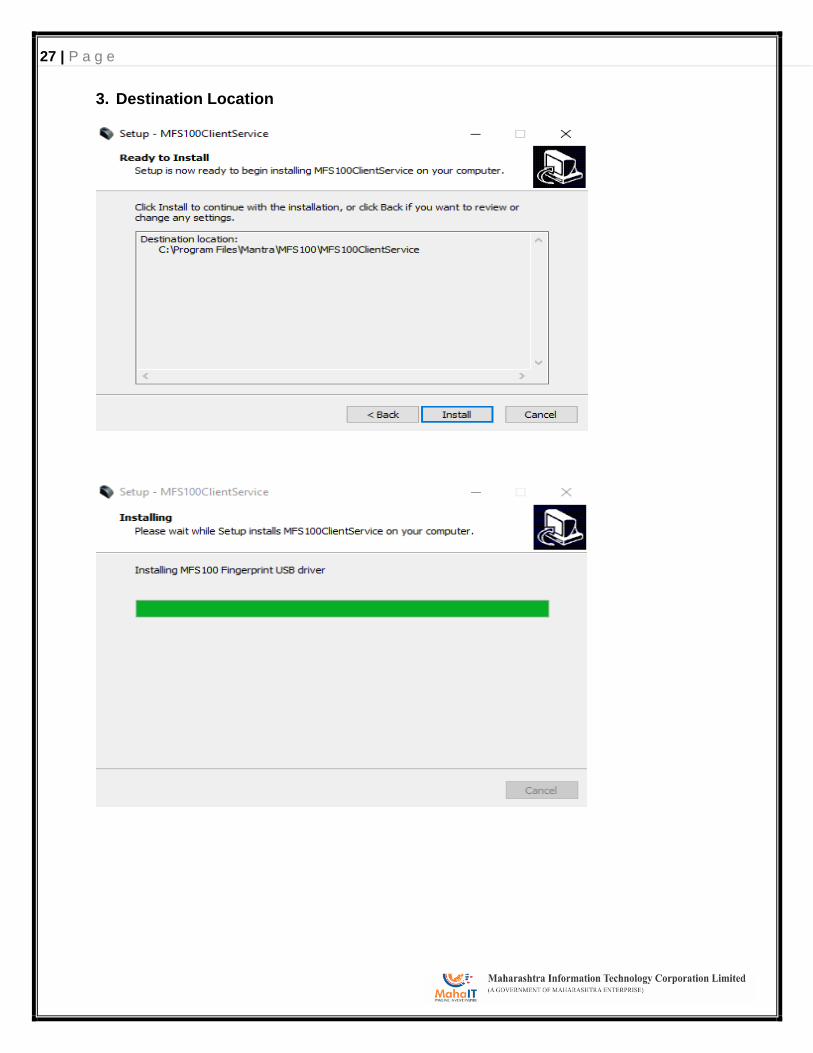
3. Destination Location
28 | P a g e
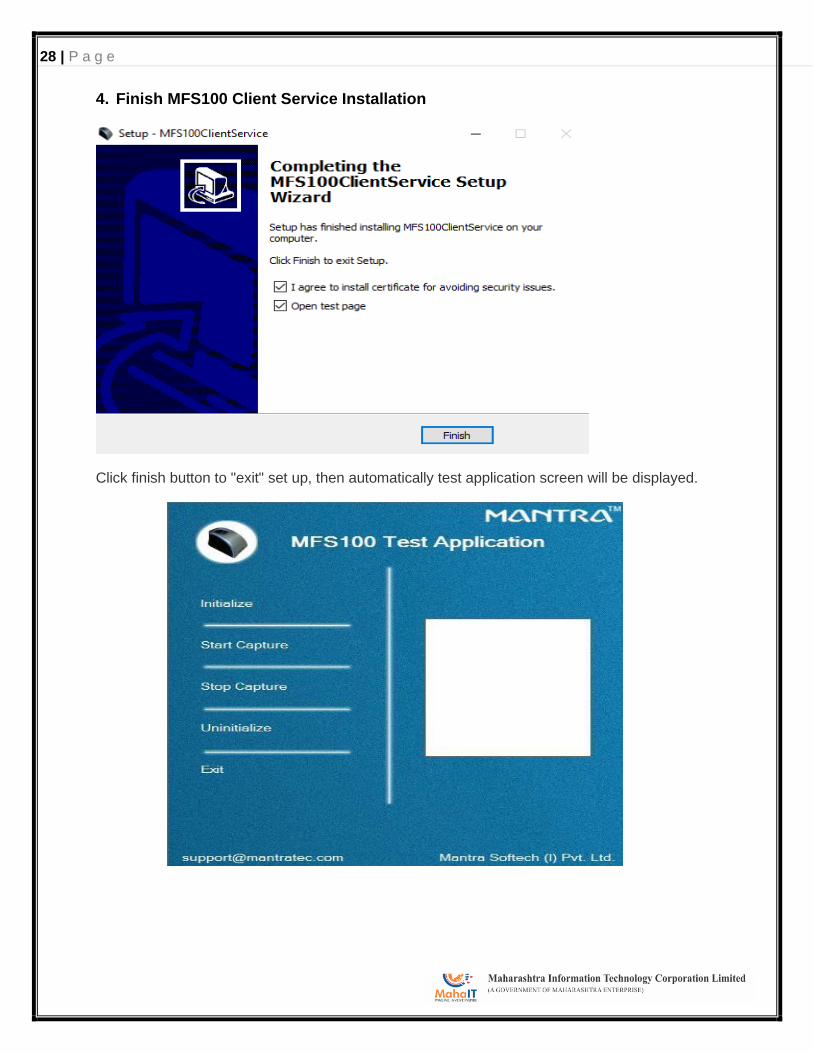
4. Finish MFS100 Client Service Installation
Click finish button to "exit" set up, then automatically test application screen will be displayed.
29 | P a g e
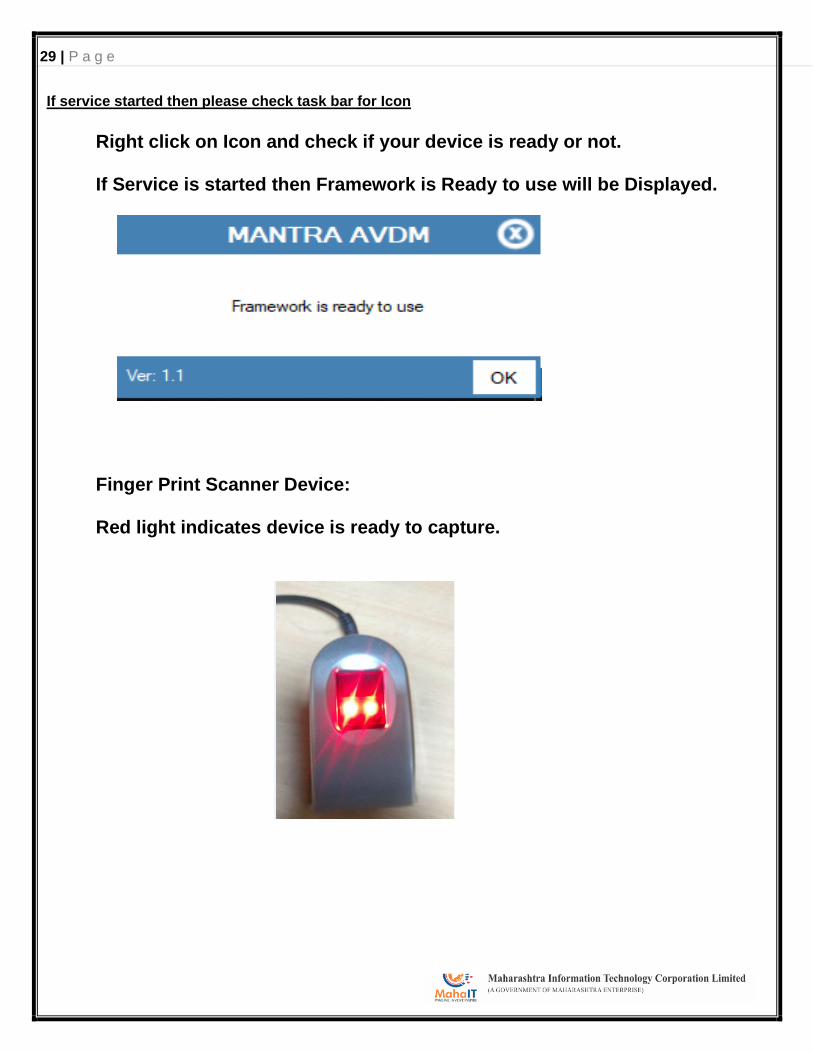
If service started then please check task bar for Icon
Right click on Icon and check if your device is ready or not.
If Service is started then Framework is Ready to use will be Displayed.
Finger Print Scanner Device:
Red light indicates device is ready to capture.
30 | P a g e
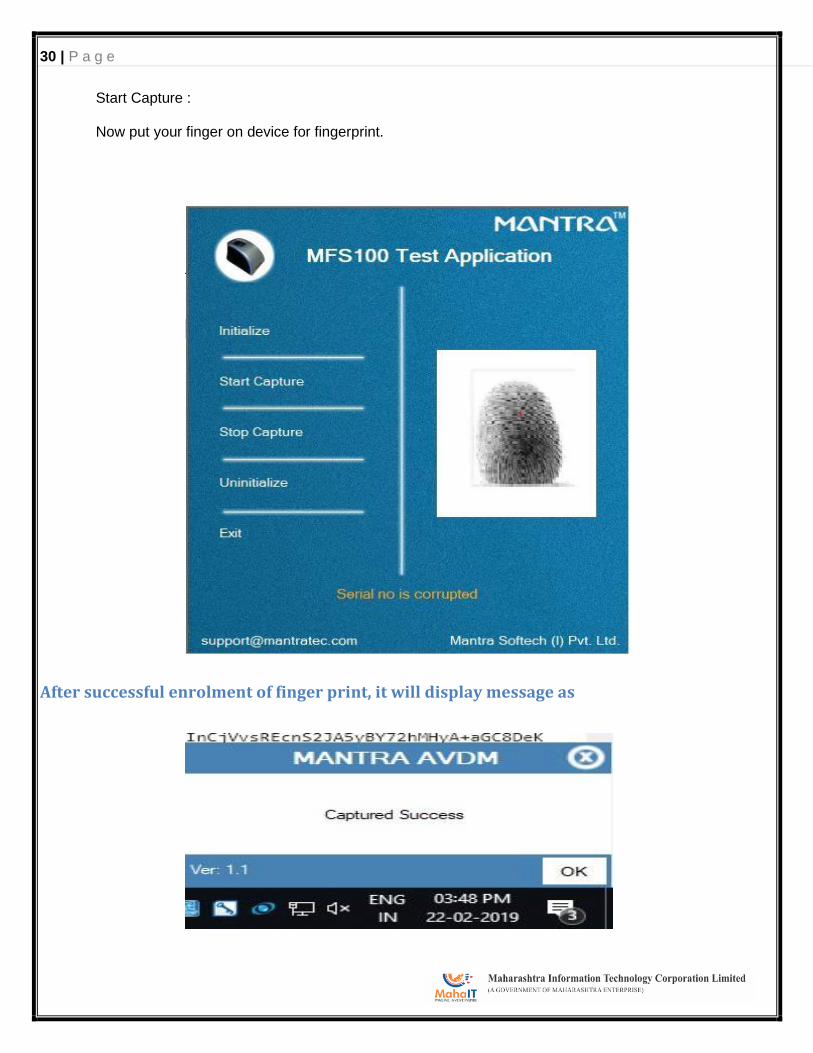
Start Capture :
Now put your finger on device for fingerprint.
After successful enrolment of finger print, it will display message as
31 | P a g e
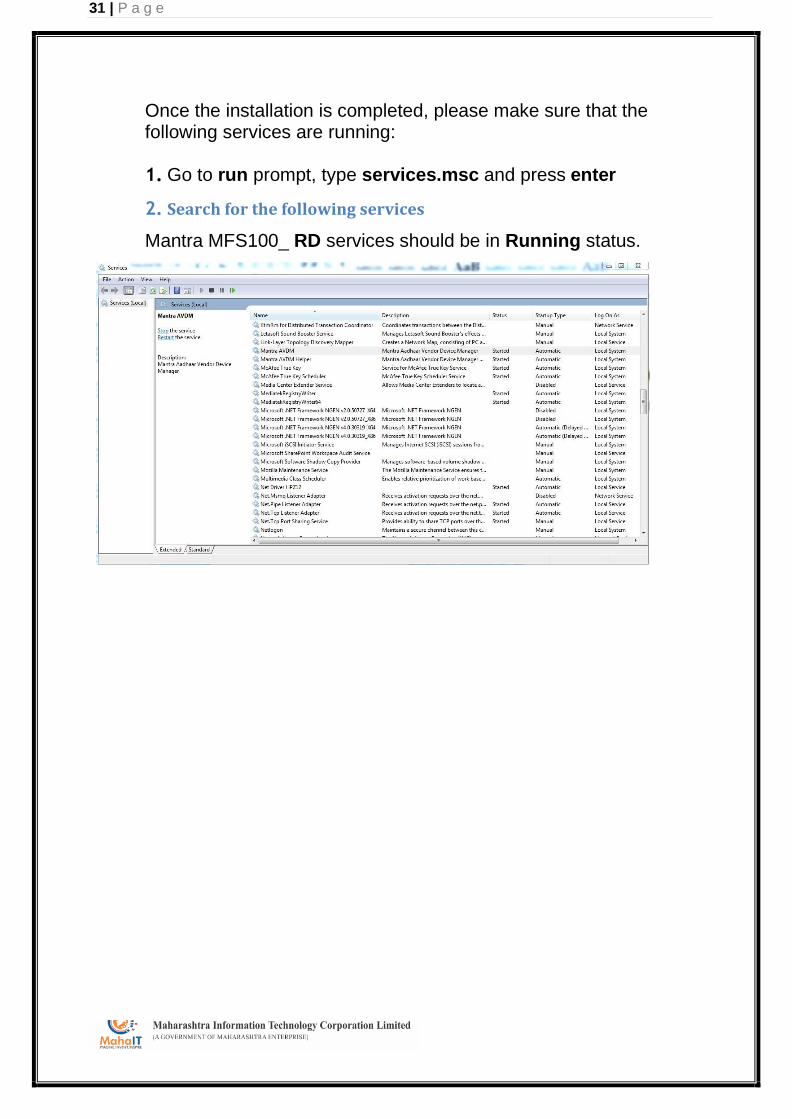
Once the installation is completed, please make sure that the following services are running:
1. Go to run prompt, type services.msc and press enter
2. Search for the following services
Mantra MFS100_ RD services should be in Running status.
32 | P a g e
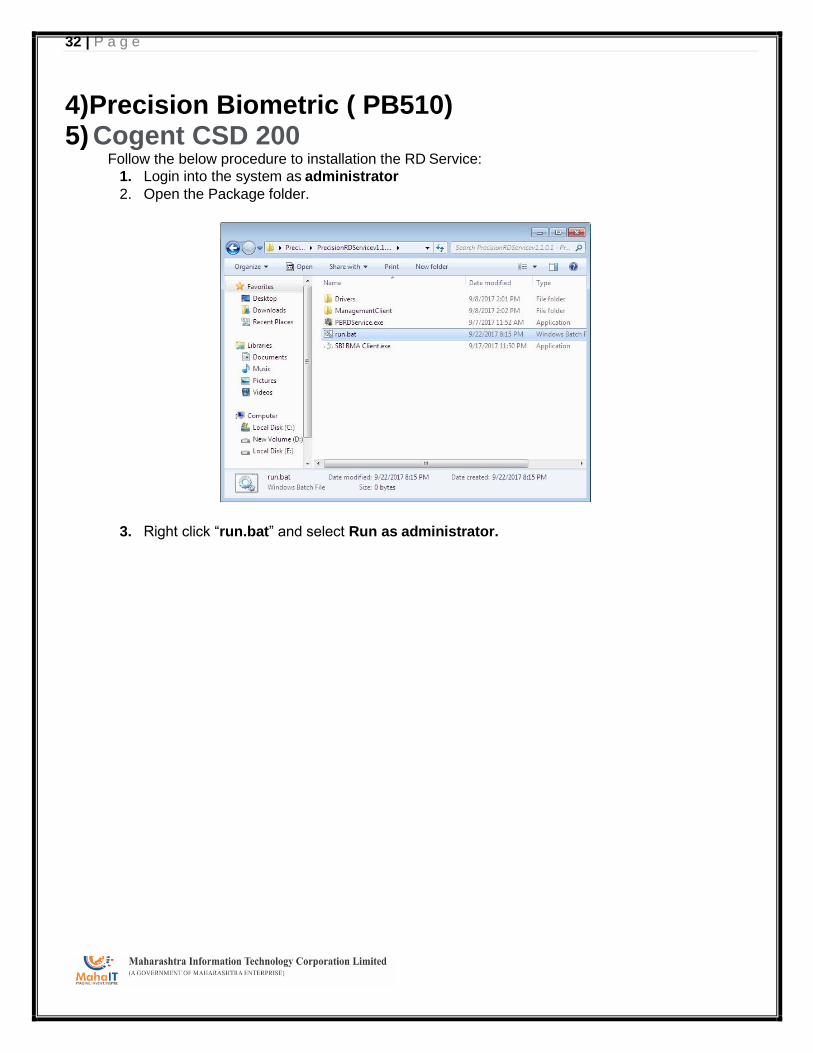
4) Precision Biometric ( PB510) 5) Cogent CSD 200
Follow the below procedure to installation the RD Service:
1. Login into the system as administrator
2. Open the Package folder.
3. Right click “run.bat” and select Run as administrator.
33 | P a g e
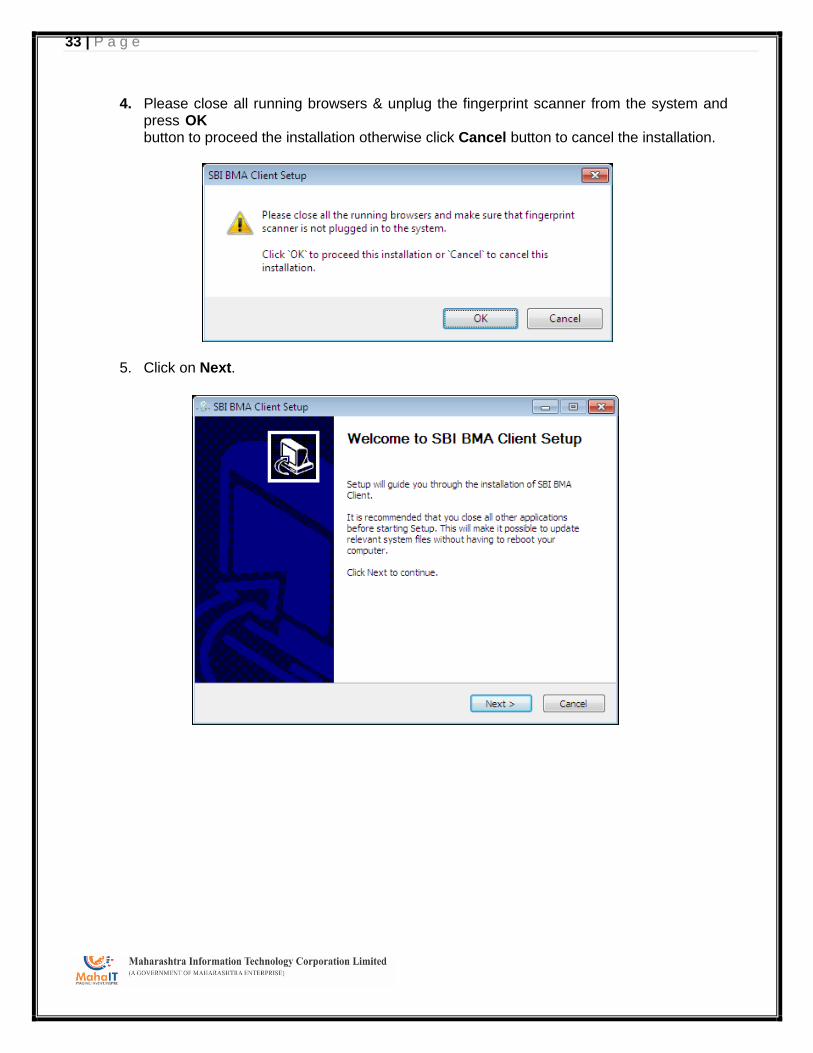
4. Please close all running browsers & unplug the fingerprint scanner from the system and press OK button to proceed the installation otherwise click Cancel button to cancel the installation.
5. Click on Next.
34 | P a g e
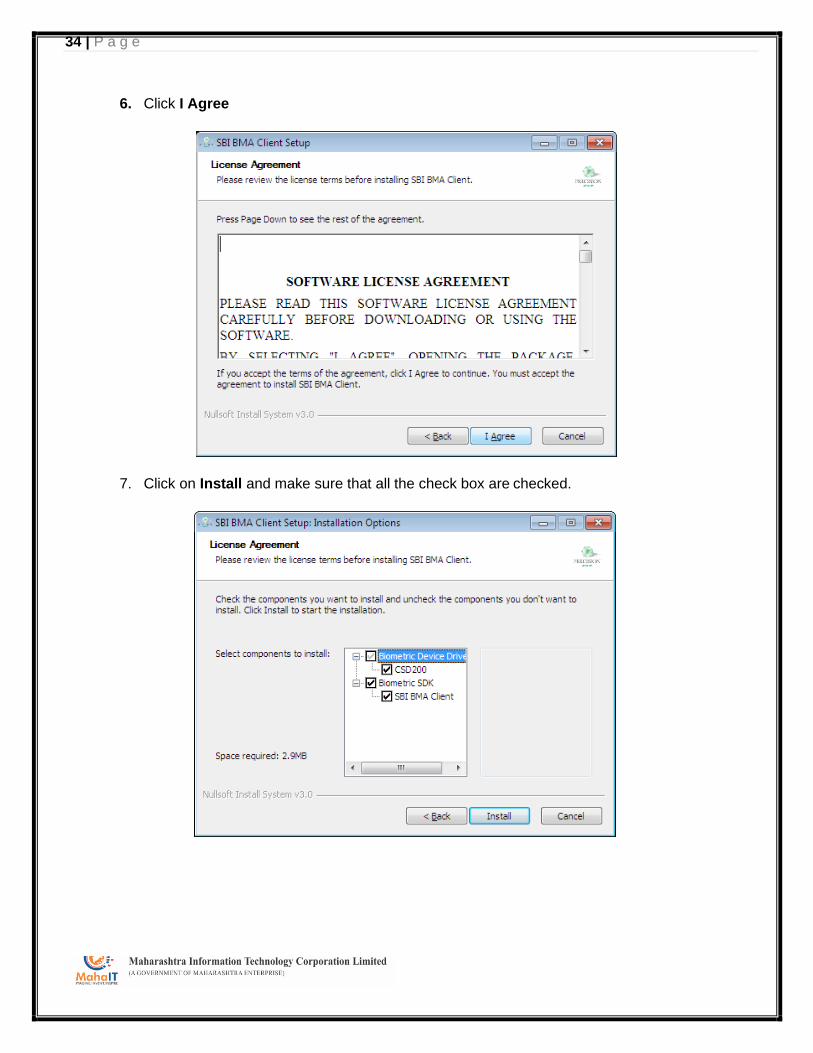
6. Click I Agree
7. Click on Install and make sure that all the check box are checked.
35 | P a g e
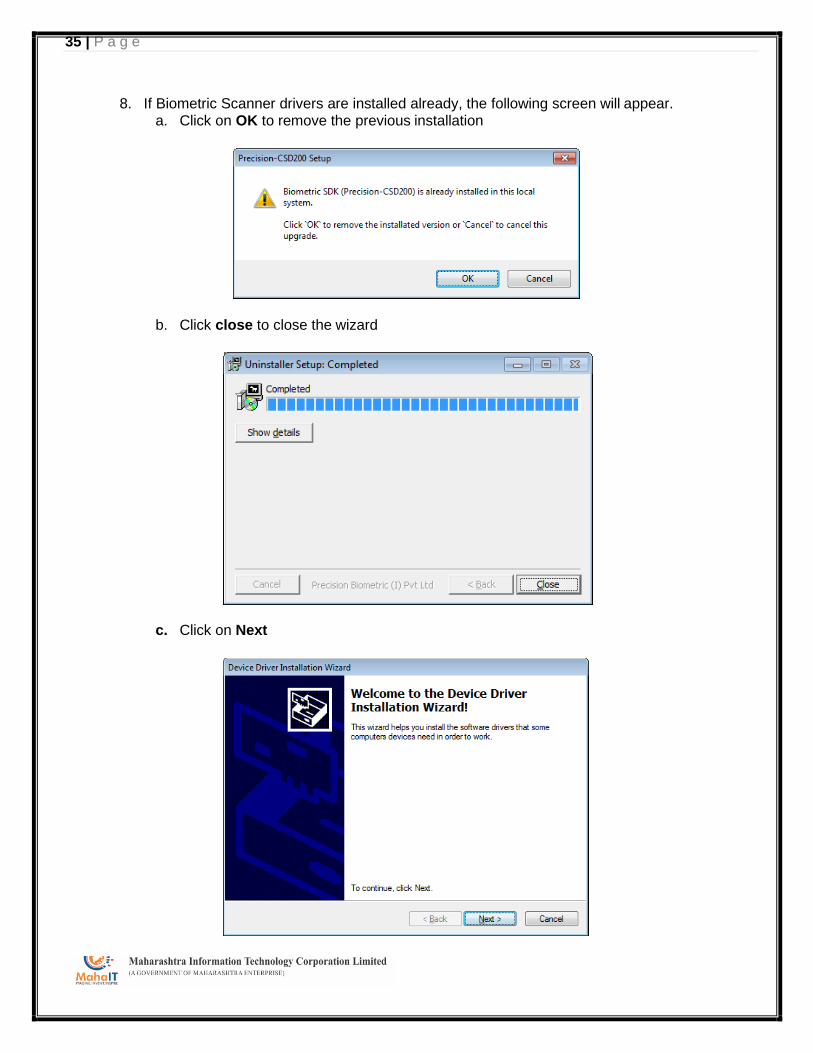
8. If Biometric Scanner drivers are installed already, the following screen will appear. a. Click on OK to remove the previous installation
b. Click close to close the wizard
c. Click on Next
36 | P a g e
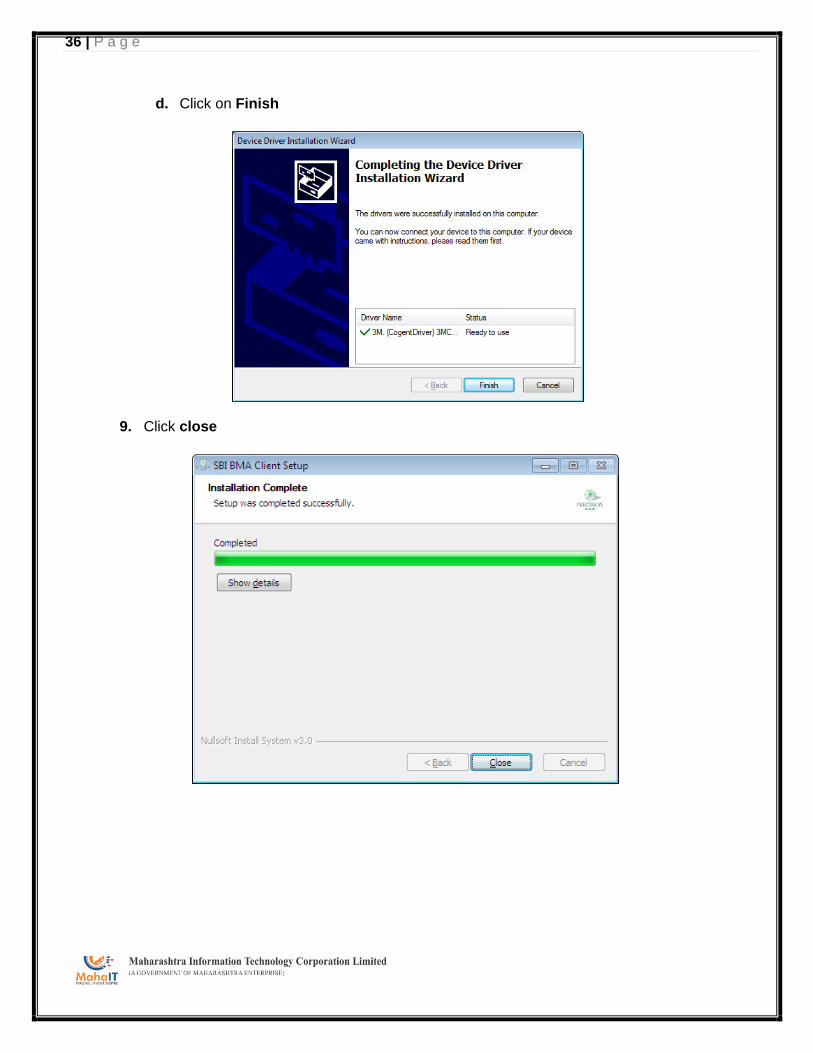
d. Click on Finish
9. Click close
37 | P a g e
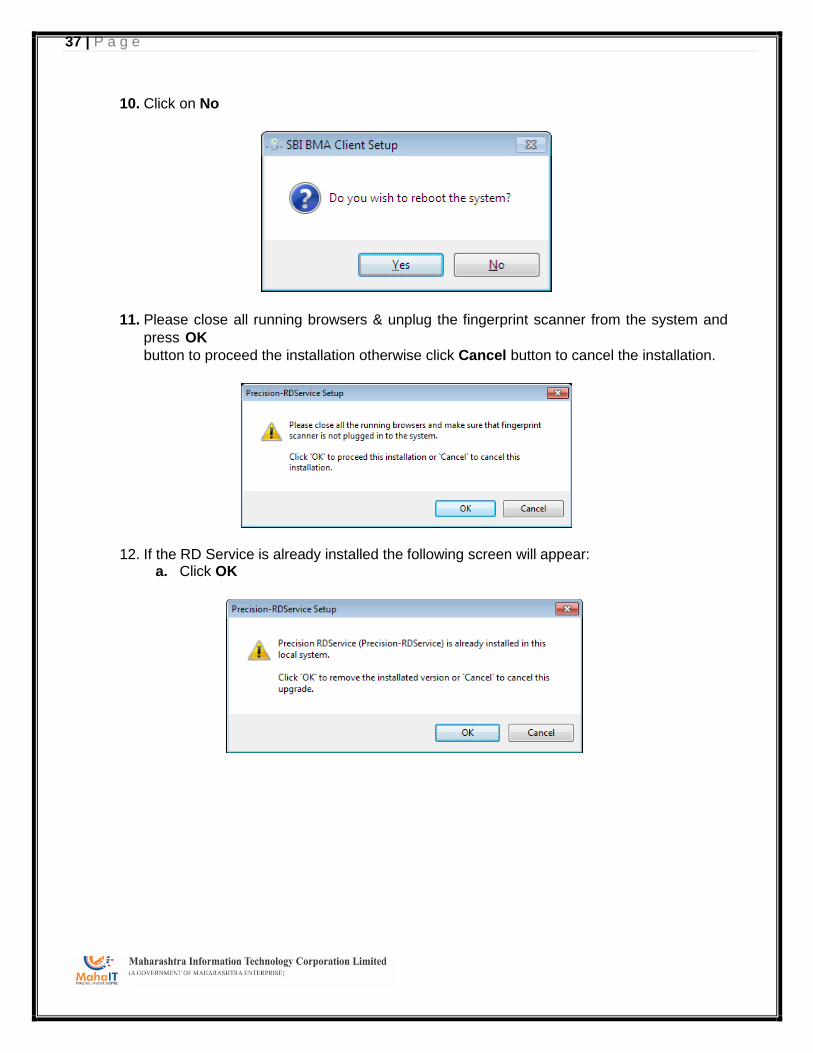
10. Click on No
11. Please close all running browsers & unplug the fingerprint scanner from the system and
press OK
button to proceed the installation otherwise click Cancel button to cancel the installation.
12. If the RD Service is already installed the following screen will appear:
a. Click OK
38 | P a g e
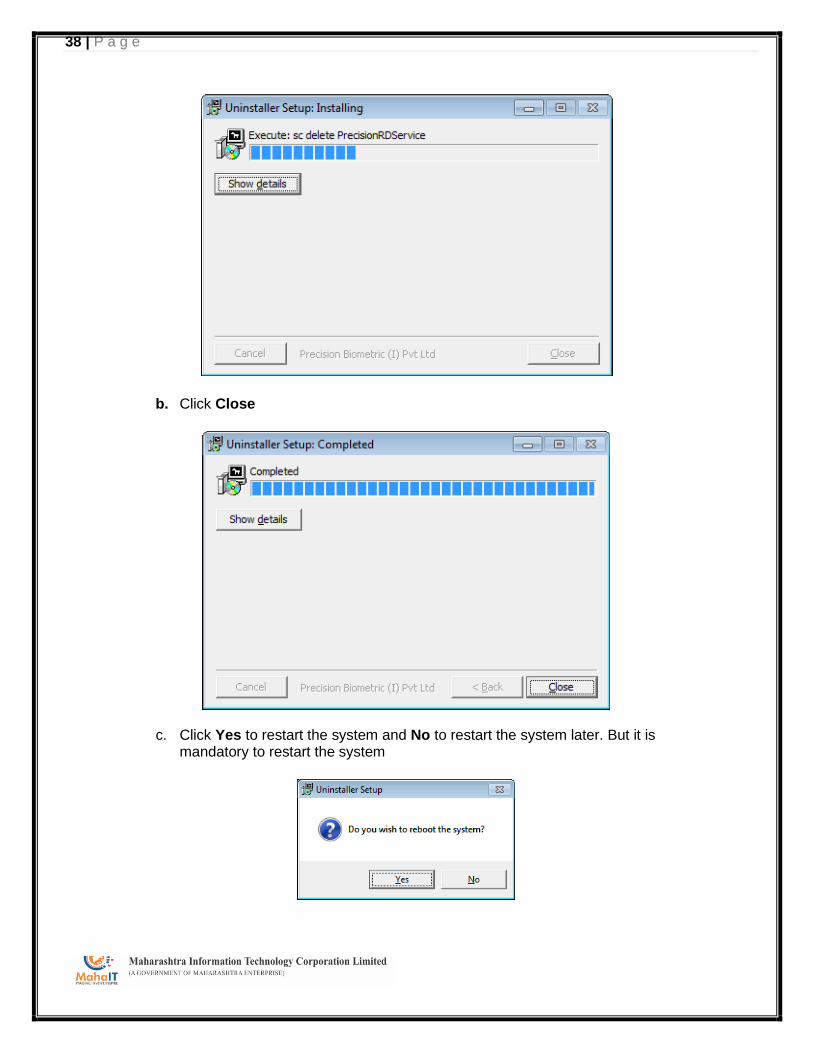
b. Click Close
c. Click Yes to restart the system and No to restart the system later. But it is mandatory to restart the system
39 | P a g e
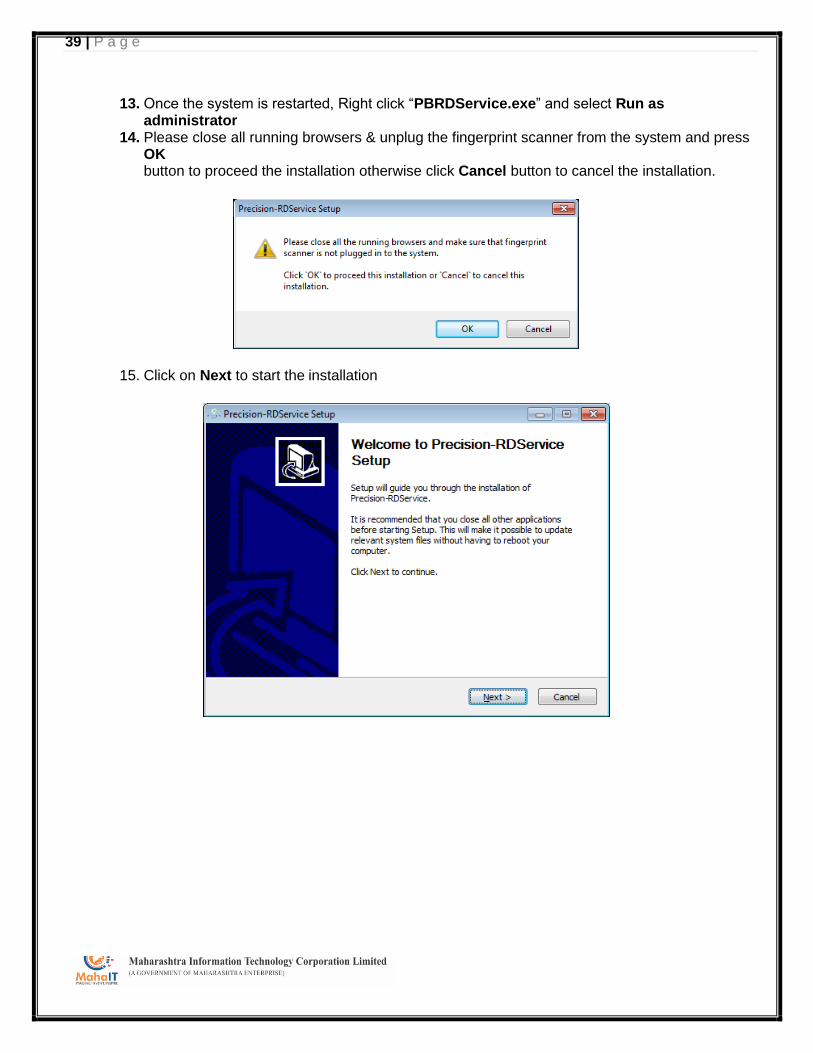
13. Once the system is restarted, Right click “PBRDService.exe” and select Run as administrator
14. Please close all running browsers & unplug the fingerprint scanner from the system and press OK button to proceed the installation otherwise click Cancel button to cancel the installation.
15. Click on Next to start the installation
40 | P a g e
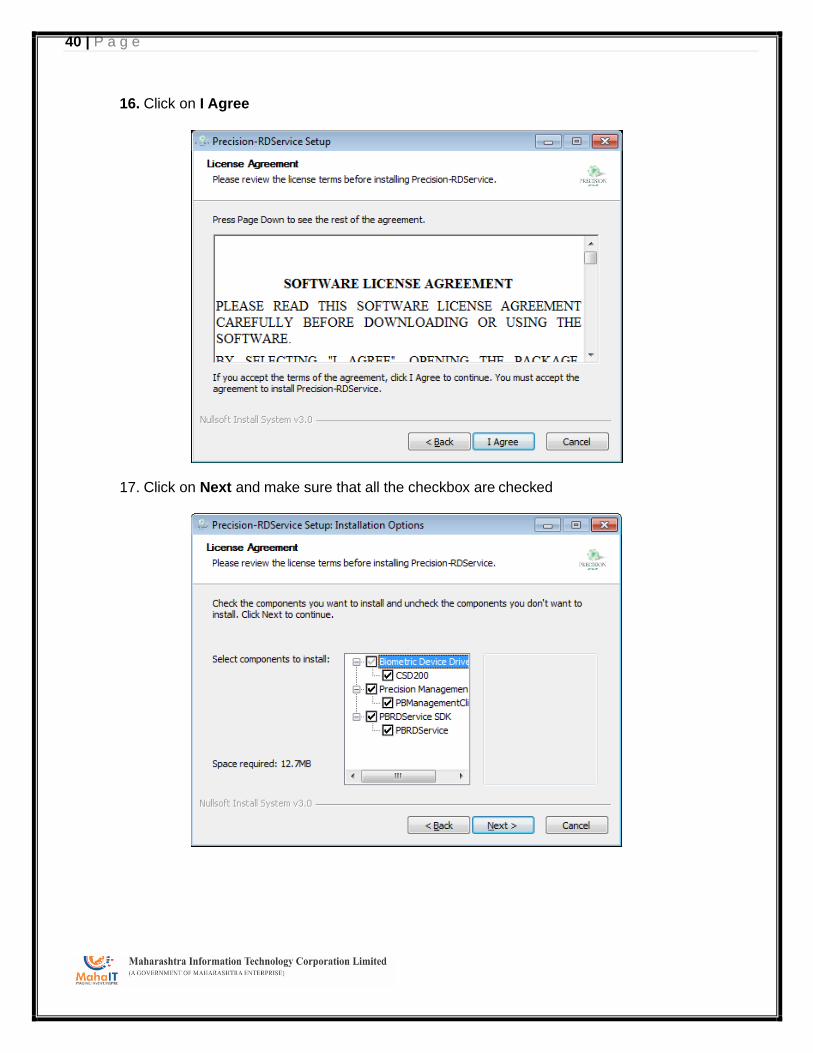
16. Click on I Agree
17. Click on Next and make sure that all the checkbox are checked

41 | P a g e
18. Click on Install
42 | P a g e
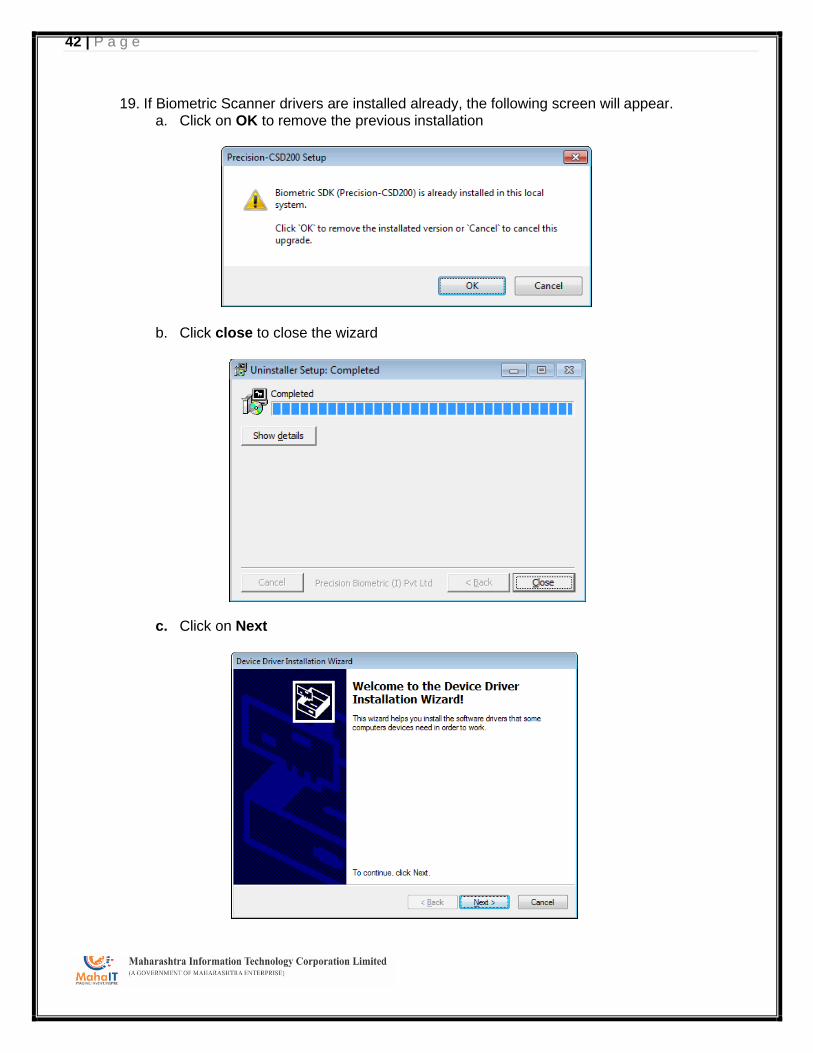
19. If Biometric Scanner drivers are installed already, the following screen will appear. a. Click on OK to remove the previous installation
b. Click close to close the wizard
c. Click on Next
43 | P a g e
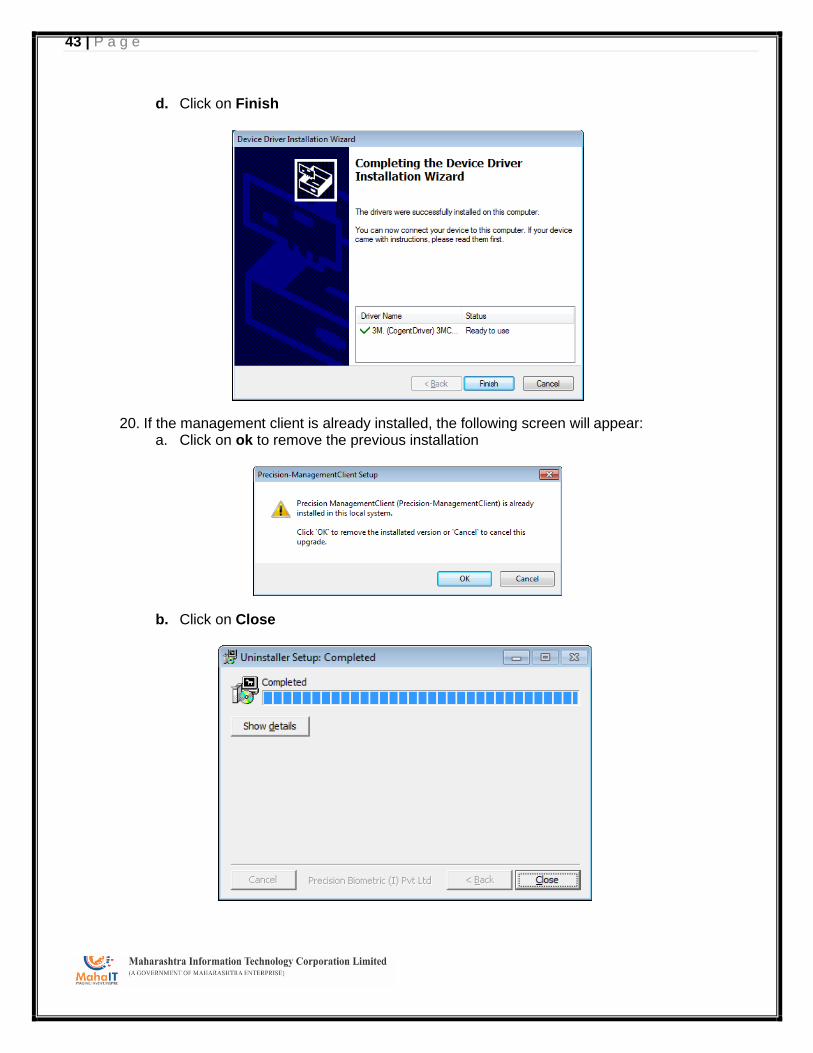
d. Click on Finish
20. If the management client is already installed, the following screen will appear: a. Click on ok to remove the previous installation
b. Click on Close
44 | P a g e
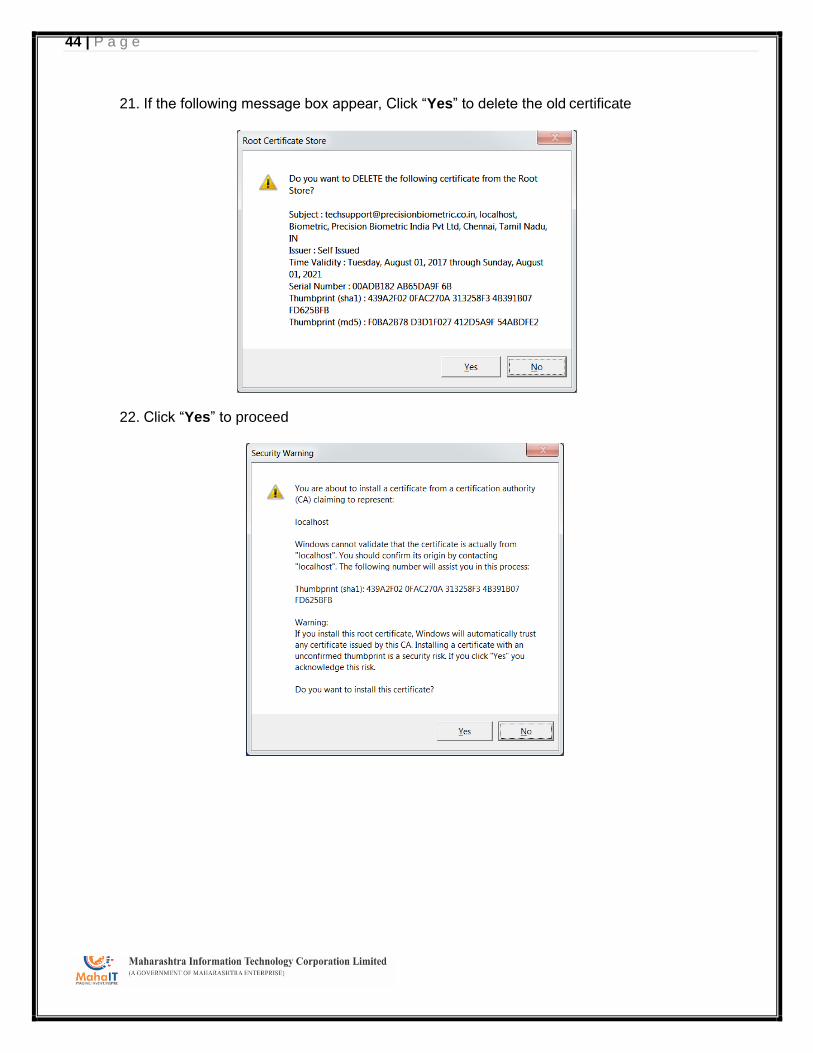
21. If the following message box appear, Click “Yes” to delete the old certificate
22. Click “Yes” to proceed
45 | P a g e
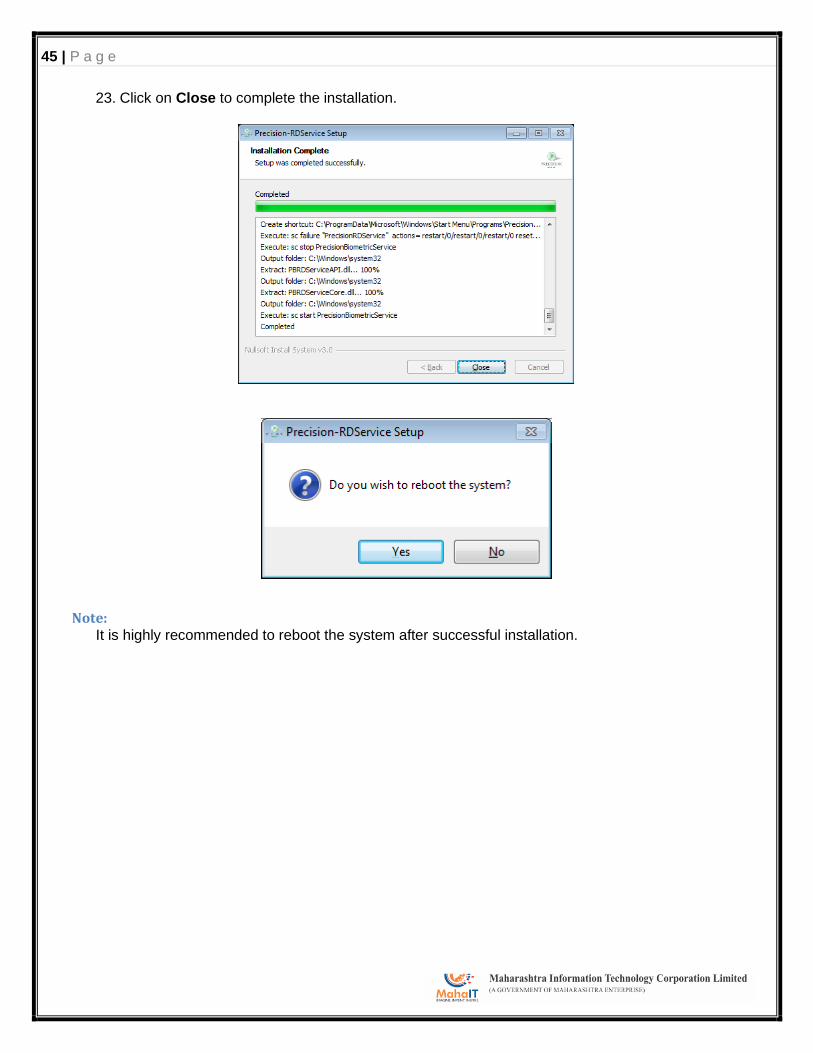
23. Click on Close to complete the installation.
Note: It is highly recommended to reboot the system after successful installation.
46 | P a g e
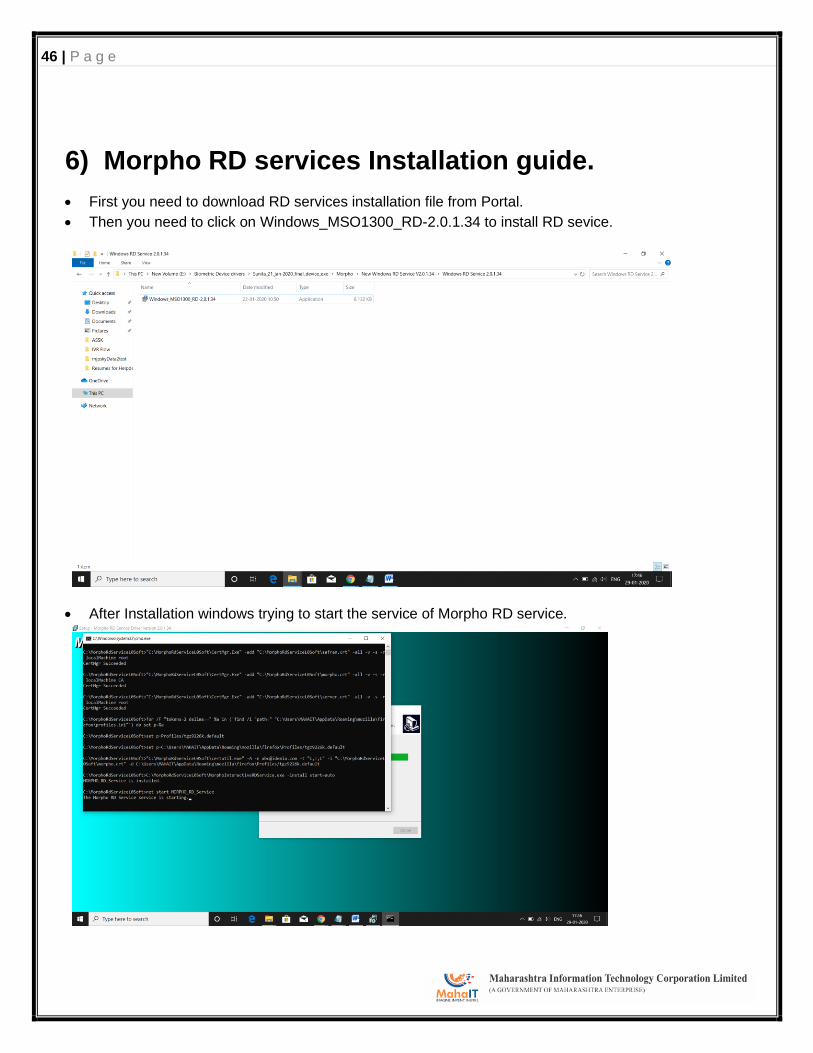
6) Morpho RD services Installation guide.
• First you need to download RD services installation file from Portal.
• Then you need to click on Windows_MSO1300_RD-2.0.1.34 to install RD sevice.
• After Installation windows trying to start the service of Morpho RD service.
47 | P a g e
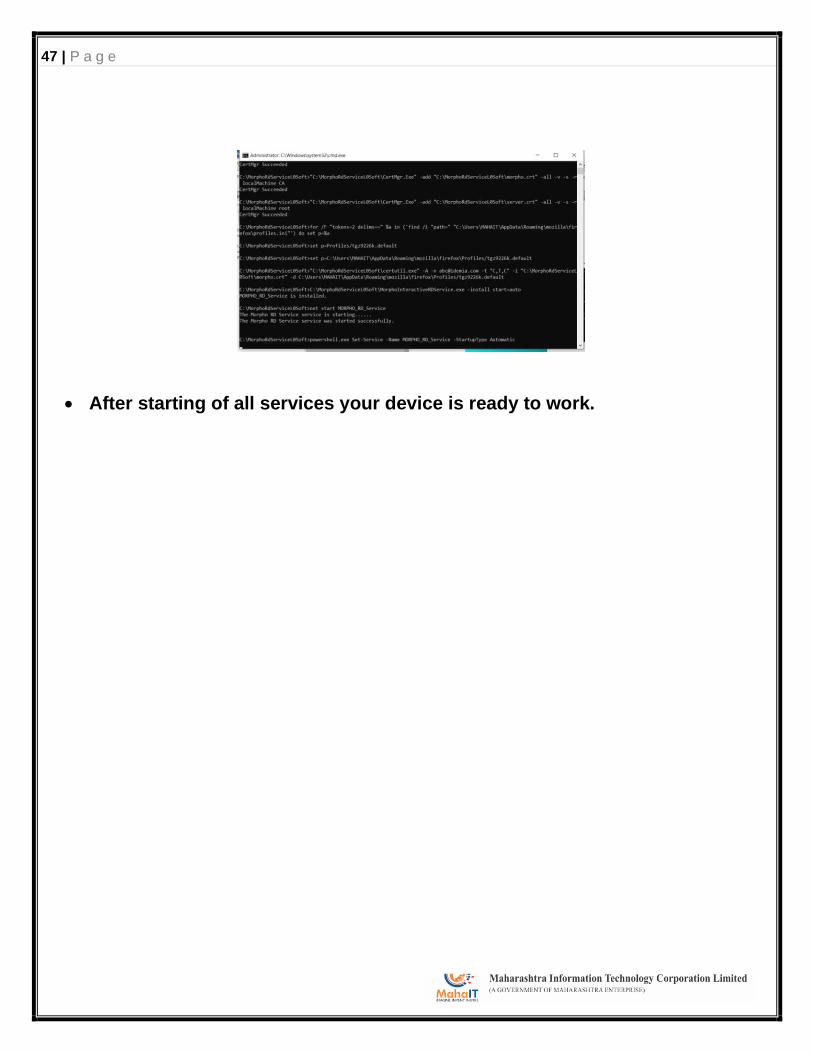
• After starting of all services your device is ready to work.
48 | P a g e
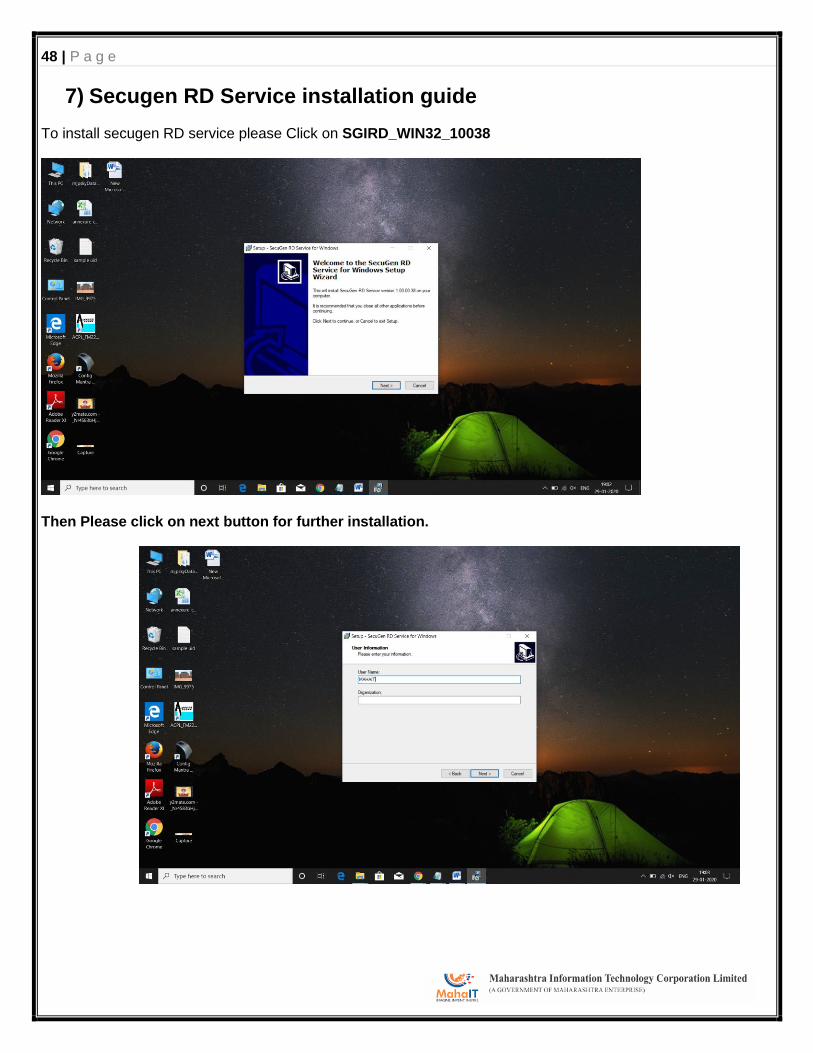
7) Secugen RD Service installation guide To install secugen RD service please Click on SGIRD_WIN32_10038
Then Please click on next button for further installation.
49 | P a g e
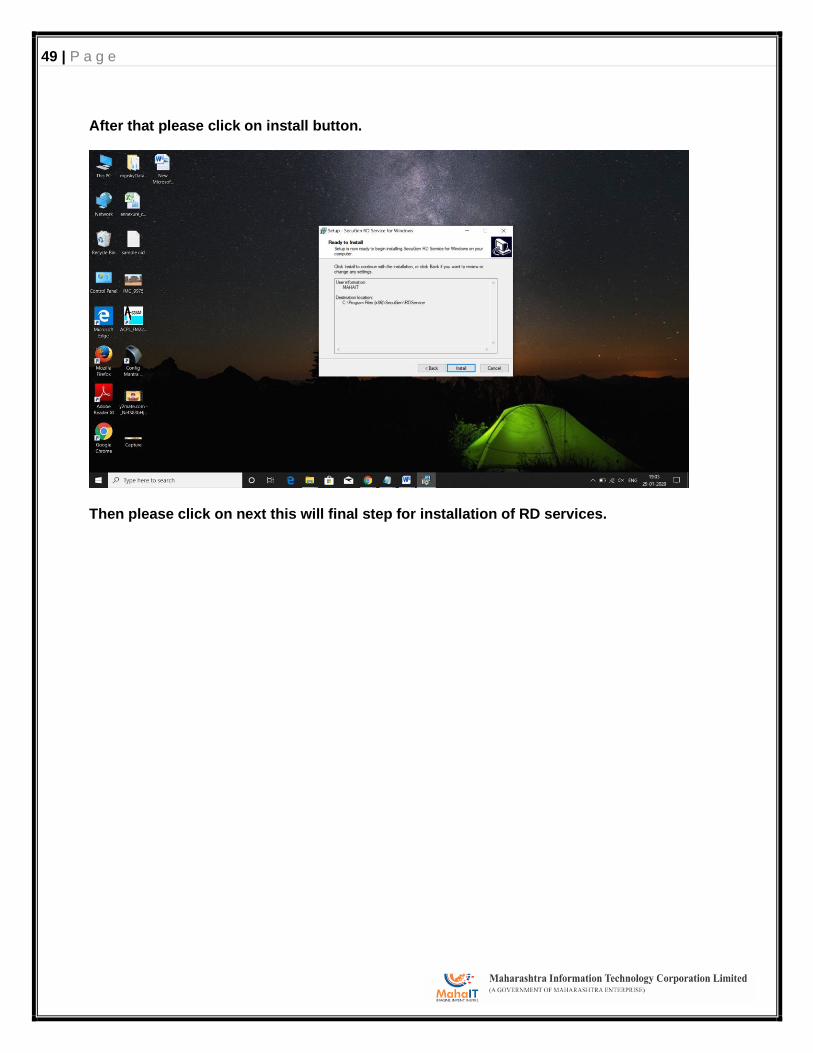
After that please click on install button.
Then please click on next this will final step for installation of RD services.
50 | P a g e
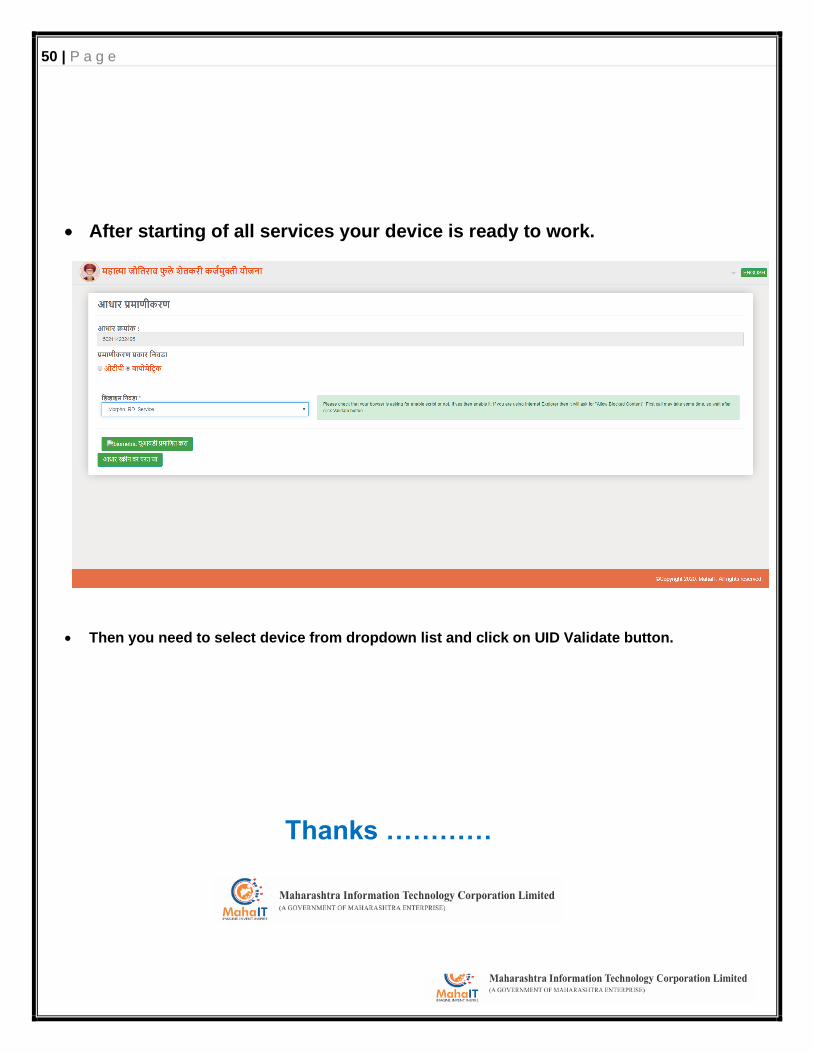
• After starting of all services your device is ready to work.
• Then you need to select device from dropdown list and click on UID Validate button.
Thanks …………
Top Related
Copyright © 2022 FDOKUMEN

