WIRELESS 802.11b PRINT SERVER USER'S GUIDE
24
www.satoamerica.com WIRELESS 802.11b PRINT SERVER USER'S GUIDE Copyright Notice All rights reserved. No part of this publication may be reproduced, stored, in a retrieval system, or transmitted in any form or by any means, electronic, mechanical, photocopying, recording, or otherwise, without the prior written permis- sion of SATO America, Inc. The information contained herein is designed only for use with this SATO product. SATO is not responsible for any use of this information as applied to other products. Neither SATO nor its affiliates shall be liable to the purchaser of this product or third parties for damages, losses, costs, or expenses incurred by purchaser or third parties as a result of accident, misuse or abuse of this product or unauthorized modifications, repairs, or alterations to this product, or (excluding the U.S.) failure to strictly comply with SATO’S op- erating and maintenance instructions. Warranty Notice SATO AMERICA, INC. SPECIFICALLY DISCLAIMS THE IMPLIED WARRANTIES OF MERCHANTABILITY AND FITNESS OF THIS PRODUCT FOR A PARTICULAR PURPOSE. SATO shall not be liable for any errors con- tained in this manual or for any damages resulting from loss of use, data profits, or any incidental or consequential dam- ages arising from the use of SATO products or services. General Notice: Other product names used herein are for identifications purposes only and may be trademarks of their respective owners. SATO disclaims any and all rights in those marks.
-
Upload
khangminh22 -
Category
Documents
-
view
4 -
download
0
Transcript of WIRELESS 802.11b PRINT SERVER USER'S GUIDE

www.satoamerica.com
WIRELESS 802.11b PRINT SERVER
USER'S GUIDE Copyright Notice All rights reserved. No part of this publication may be reproduced, stored, in a retrieval system, or transmitted in any form or by any means, electronic, mechanical, photocopying, recording, or otherwise, without the prior written permis-sion of SATO America, Inc. The information contained herein is designed only for use with this SATO product. SATO is not responsible for any use of this information as applied to other products. Neither SATO nor its affiliates shall be liable to the purchaser of this product or third parties for damages, losses, costs, or expenses incurred by purchaser or third parties as a result of accident, misuse or abuse of this product or unauthorized modifications, repairs, or alterations to this product, or (excluding the U.S.) failure to strictly comply with SATO’S op-erating and maintenance instructions. Warranty Notice SATO AMERICA, INC. SPECIFICALLY DISCLAIMS THE IMPLIED WARRANTIES OF MERCHANTABILITY AND FITNESS OF THIS PRODUCT FOR A PARTICULAR PURPOSE. SATO shall not be liable for any errors con-tained in this manual or for any damages resulting from loss of use, data profits, or any incidental or consequential dam-ages arising from the use of SATO products or services. General Notice: Other product names used herein are for identifications purposes only and may be trademarks of their respective owners. SATO disclaims any and all rights in those marks.
SATO Wireless 802.11b Print Server User's Guide page 2
www.satoamerica.com
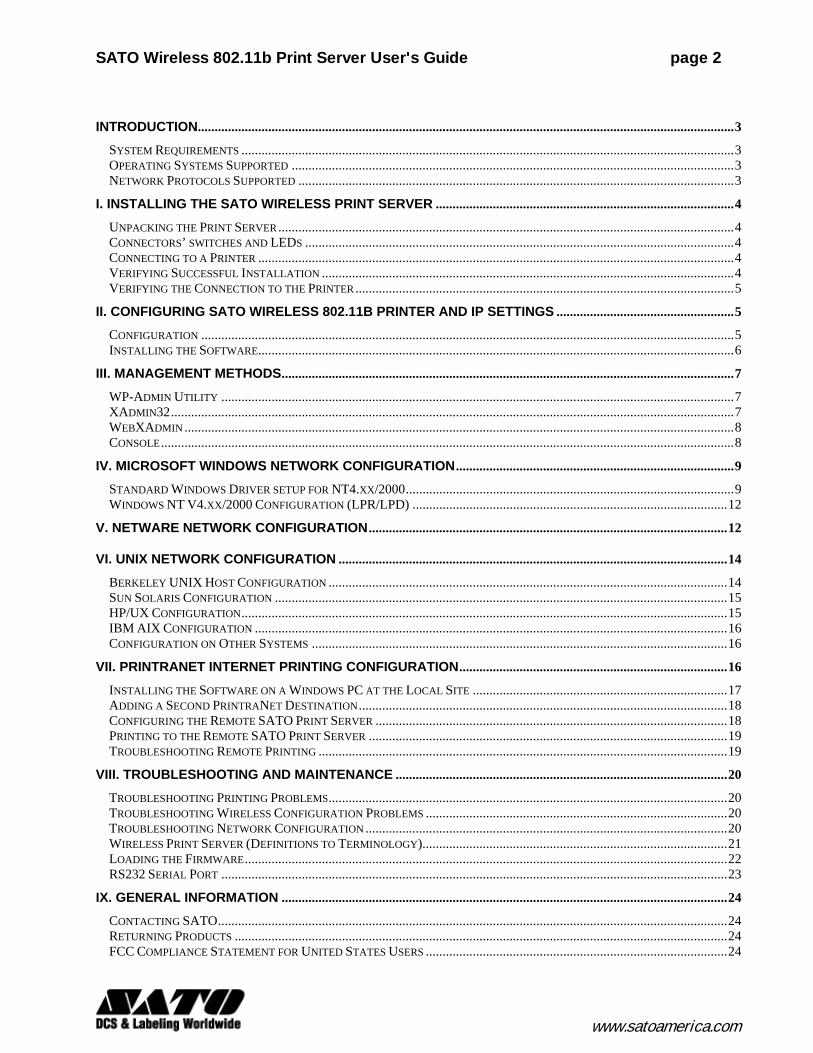
INTRODUCTION................................................................................................................................................................3 SYSTEM REQUIREMENTS ...................................................................................................................................................3 OPERATING SYSTEMS SUPPORTED ....................................................................................................................................3 NETWORK PROTOCOLS SUPPORTED ..................................................................................................................................3
I. INSTALLING THE SATO WIRELESS PRINT SERVER .........................................................................................4 UNPACKING THE PRINT SERVER........................................................................................................................................4 CONNECTORS’ SWITCHES AND LEDS ................................................................................................................................4 CONNECTING TO A PRINTER ..............................................................................................................................................4 VERIFYING SUCCESSFUL INSTALLATION ...........................................................................................................................4 VERIFYING THE CONNECTION TO THE PRINTER.................................................................................................................5
II. CONFIGURING SATO WIRELESS 802.11B PRINTER AND IP SETTINGS .....................................................5 CONFIGURATION ...............................................................................................................................................................5 INSTALLING THE SOFTWARE..............................................................................................................................................6
III. MANAGEMENT METHODS.......................................................................................................................................7 WP-ADMIN UTILITY .........................................................................................................................................................7 XADMIN32........................................................................................................................................................................7 WEBXADMIN ....................................................................................................................................................................8 CONSOLE...........................................................................................................................................................................8
IV. MICROSOFT WINDOWS NETWORK CONFIGURATION...................................................................................9 STANDARD WINDOWS DRIVER SETUP FOR NT4.XX/2000..................................................................................................9 WINDOWS NT V4.XX/2000 CONFIGURATION (LPR/LPD) ..............................................................................................12
V. NETWARE NETWORK CONFIGURATION ...........................................................................................................12
VI. UNIX NETWORK CONFIGURATION ....................................................................................................................14 BERKELEY UNIX HOST CONFIGURATION .......................................................................................................................14 SUN SOLARIS CONFIGURATION .......................................................................................................................................15 HP/UX CONFIGURATION.................................................................................................................................................15 IBM AIX CONFIGURATION .............................................................................................................................................16 CONFIGURATION ON OTHER SYSTEMS ............................................................................................................................16
VII. PRINTRANET INTERNET PRINTING CONFIGURATION................................................................................16 INSTALLING THE SOFTWARE ON A WINDOWS PC AT THE LOCAL SITE ............................................................................17 ADDING A SECOND PRINTRANET DESTINATION..............................................................................................................18 CONFIGURING THE REMOTE SATO PRINT SERVER .........................................................................................................18 PRINTING TO THE REMOTE SATO PRINT SERVER ...........................................................................................................19 TROUBLESHOOTING REMOTE PRINTING ..........................................................................................................................19
VIII. TROUBLESHOOTING AND MAINTENANCE ...................................................................................................20 TROUBLESHOOTING PRINTING PROBLEMS.......................................................................................................................20 TROUBLESHOOTING WIRELESS CONFIGURATION PROBLEMS ..........................................................................................20 TROUBLESHOOTING NETWORK CONFIGURATION ............................................................................................................20 WIRELESS PRINT SERVER (DEFINITIONS TO TERMINOLOGY)...........................................................................................21 LOADING THE FIRMWARE................................................................................................................................................22 RS232 SERIAL PORT .......................................................................................................................................................23
IX. GENERAL INFORMATION .....................................................................................................................................24 CONTACTING SATO........................................................................................................................................................24 RETURNING PRODUCTS ...................................................................................................................................................24 FCC COMPLIANCE STATEMENT FOR UNITED STATES USERS ..........................................................................................24

SATO Wireless 802.11b Print Server User's Guide page 3
www.satoamerica.com
Introduction The SATO Wireless 802.11b Print Server lets you communicate with a SATO printer from anywhere on an 802.11b wireless network. You can use the print server in ad-hoc (peer-to-peer) or infrastructure (access point) wireless mode, as shown below. The print server operates at speeds of up to 11 Mbps on any IEEE 802.11b wireless compatible network.
System Requirements To use the SATO Wireless Print Server for printing from a wireless network, you need an 802.11b wireless network. The wireless network will consist of either of the following: • An 802.11b wireless enabled PC printing straight to the printer (Ad-Hoc or Peer-to-Peer Mode). • An 802.11b wireless Access point allowing wireless and wired Ethernet enabled computers to print to the
SATO Printer. To configure and print to the SATO, you need the following: • The MAC address from the label of the SATO Wireless Print Server (for example: 004017023F96). • The following information from your wireless network administrator:
! Wireless Mode (Infrastructure or Ad-Hoc) ! The SSID (service set identifier) for your wireless network. ! The Radio Frequency Channel of the wireless network. ! If you are using TCP/IP (recommended for Windows Networks) and are not connected to a DHCP
server (for obtaining an IP Address automatically), you will need a unique IP Address for the SATO wireless print server (for example: 192.168.1.14). If the SATO is not on the same IP subnet as the computers you are printing from, you will also need a subnet mask and a router (default gateway) ad-dress.
Operating Systems Supported Windows 95, 98, ME, NT 4, 2000, XP
Network Protocols Supported • TCP/IP ! LPD/LPR ! Raw TCP/IP (port 9100) ! NetBIOS over IP (with SMB)
• Multiple configurable TCP port numbers • TELNET • WINS • DHCP • IPX/SPX ! NetWare RPrinter Bindery mode ! NetWare PServer Bindery mode ! NetWare NPrinter NDS mode with NDPS support ! NetWare PServer NDS mode ! Ethernet II, 802.3, 802.2, 802.2 SNAP Frame types ! Compatible with PCONSOLE, NWADMIN, PRINTCON, and other Novell utilities
• NetBEUI • PrintraNet Internet Printing

SATO Wireless 802.11b Print Server User's Guide page 4
www.satoamerica.com
I. Installing the Sato Wireless Print Server Unpacking the Print Server Your package should contain the following items:
• SATO Wireless Print Server • SATO Wireless Print Server Quick Start Guide • Installation CD-ROM (includes installation software and additional documentation)
If anything is missing from the box, please contact SATO.
Connectors’ switches and LEDs Test Switch. Press down this switch for less than 5 seconds to print a test page on the printer. The test page will show the current wireless and network settings of the SATO wireless print server. Press it down for more than 5 seconds to reset the Sato to its factory default parameters. If you hold the test switch down upon pow-ering up, the print server will power up in Ad-Hoc mode on RF Channel 11 with the SSID of printer. LED Status Indicators: The green light comes on when the unit is powered on, then goes out. The yellow light will come on solid when a wireless network link is established. The green light blinks during wireless net-work activity. Serial Port (DB9): Is used to access the command line console of the SATO for configuration and diagnostics. See Chapter 8 for additional information.
Connecting to a Printer Follow these steps to connect the SATO wireless print server to your printer:
1. Turn printer power off and unplug the power cable. 2. Remove the 2 screws holding the existing port to the back of the printer. 3. Remove existing port by pulling slowly outward. 4. Slide in the SATO Wireless Ethernet adapter and secure the port with the 2 thumbscrews attached to
the port. 5. Turn the Printer on.
Verifying Successful Installation When the printer is powered on, the Wireless Print Server will go through the following startup sequence:
• It runs through a set of power-up diagnostics for a few seconds. If the SATO is operating properly, the yellow and green LEDs will blink momentarily and then go out. If the green light blinks continuously in a regular patter, there is a problem. Try turning the printer off then back on. If the problem persists, contact SATO.
• When a successful connection is made to the SATO Wireless Print Server from another 802.11b wire-
less device like an access point or PC, the yellow light will stay lit. The green light will blink whenever there is wireless networking activity.

SATO Wireless 802.11b Print Server User's Guide page 5
www.satoamerica.com
Verifying the Connection to the Printer Make sure that the port is connected securely to the printer. Then print a test page by pushing the test switch and letting go immediately. If the test page does not print, first make sure all the connections are secure, and make sure the printer is op-erating correctly. Then power the printer off and then on again, and try printing the self-test page again. If you cannot print a test page, refer to the Troubleshooting section of this manual.
II. Configuring SATO Wireless 802.11b Printer and IP Settings Configuration There are three basic steps required to configure the SATO: 1. Configuring the SATO 802.11b settings. To operate on an 802.11b network, you must set the wireless
(ad-hoc or infrastructure), SSID, channel, data rate and WEP encryption. All nodes of a wireless network need to have the same settings in order to communicate with each other.
2. Configuring the IP address settings. You will need to set the IP address, subnet mask, and router ad-dress if you are using TCP/IP, NetBIOS IP, or PrintraNet, or if you want to use the WebXAdmin web-based management utility.
3. Configuring the SATO for operation with the network operating systems. The final step is to config-ure the SATO Wireless Print Server so that you can print to it using one or more network operating sys-tems (for example, Windows NT/2000, NetWare, etc.).
Before You Begin (Checking the Wireless network you’re connection to) • Make sure that you have properly configured your computer for communication on a wireless network. If
you are connecting to the printer through an access point, make sure your computer is in infrastructure mode and it is associated with the access point. If you are printing directly to the printer without an access point, you should be in ad-hoc mode. See the documentation for your wireless adapter for instructions.
Note: If your wireless adapter includes an option for 802.11 Ad-hoc, you must select it if you want to use the printer in ad-hoc mode. If it doesn’t include this option, select Ad-hoc Computer-to-Computer, or whatever mode your adapter uses to communicate on a wireless network without an access point.
• If you are using WEP (Wired Equivalent Privacy) encryption on your wireless network, you will need to temporarily disable WEP on your PC in order to configure the print server. If you are using an access point with WEP enabled and it does not allow non-wep clients to communicate with other non-wep cli-ents, then you will also need to temporarily change the wireless mode of your computer to Ad-hoc (802.11) mode.
Note: If no computers on your network can be set to Ad-hoc mode, you will need to temporarily dis-able WEP on your access point. When you are done configuring the print server, you can re-enable WEP on your computer and change the wireless mode back if necessary.
• If you are using TCP/IP, note your computer’s IP address. The print server will need to be on the same IP segment as the other nodes on your network in order to communicate.
• If you are using infrastructure mode, make sure you have a good signal between your computer and the access point. Most wireless adapters have a utility that shows the wireless signal strength. See your wire-less adapter’s documentation for details.
• If you are using a home gateway or router, you will want to configure the SATO Wireless Print Server from a PC on the same network segment that you want the SATO to be on.

SATO Wireless 802.11b Print Server User's Guide page 6
www.satoamerica.com
Installing the Software Follow these steps to install the WP-Admin software and configure the print server: 1. Insert the SATO Wireless Configuration CD-ROM into your PC. 2. On your Windows PC go to Start and Run. 3. Click on Browse. Go to your CD drive and select the “wpadmin.exe” file. 4. Select Open. Then click OK.
Note: If you are using Windows and don’t have the Java Runtime installed on your system, you will be prompted to install it, click Continue.
5. Follow the on-screen instructions for installing the utility. WP-Admin will automatically start after the installation is done. To run again at a later time, choose Quit. You can then access it through your Pro-gram Group under Etherwind, you will see the WP-Admin Wireless Server Search screen, which will look like this:
6. Click START to begin searching for print servers. WP-Admin will get the information from the print
server(s) and list the Server Name and Ethernet Address (which should correspond with the label on the back of the print server). It might take a minute or two for the print server to show up, especially if you have a large wireless network. Note that by default the name of the SATO print server is XCD_xxxxxx, where xxxxxx is the last six digits of the Ethernet (MAC) address (for example, XCD_08B2C7). Note: If you don’t see the print server in the list, hold down the Test button on the Wireless Print Server for more than 5 seconds to reset it to factory defaults and try the search again. If you still don’t see it, check the troubleshooting section.
7. When you see the print server you want to configure in the list, highlight it and click Configure. If you are using DHCP, wait until the print server gets an IP Address from the DHCP server and is updated on the search screen before configuring (the IP address will change from the default 192.0.0.192 to a new value). Note: If the wireless signal is less than 50% on the search screen, printing performance could be affected. To improve the signal strength, try moving the print server closer to the computer or access point and away from other radio devices such as BluetoothTM wireless devices, microwave ovens, or cordless phones.
8. You will be prompted for the configuration password (the default password is access), type in the pass-word and click OK to continue. The Wireless Server Configuration screen will come up. Note: If you are having trouble configuring a print server, click Cancel to get back to the Search screen, click Clear to clear the list of print servers, and start again from step 4 above.
SATO Wireless 802.11b Print Server User's Guide page 7
www.satoamerica.com
9. The settings of the SATO you selected in the Wireless Server Search screen will be displayed. Many of
the fields will be configured automatically to match the network being used, so you will probably NOT need to change the Wireless Mode, RF Channel, SSID, and Data Rate settings unless you want to want to change the SATO to a different wireless network. • If your network uses WEP encryption, you will need to enable WEP and enter the appropriate WEP
key(s). Contact your system manager to determine what information. • If you are using TCP/IP (recommended for Windows printing) and you do not have a DHCP server
(see note below), you will need to manually assign a valid IP Address, Subnet Mask, and Gateway and then set the Boot Method to Static.
When you are done configuring, click OK. For a Glossary of Terms used for all the settings in WP-Admin, see chapter 8. Note: If you are using DHCP on your network, the SATO Wireless Print Server may have acquired valid IP settings at this point and no further configuration is necessary. This might work well if your DHCP server allows the print server to keep this address permanently, but in most cases, you will want to use a static ad-dress outside the range reserved for DHCP (See your DHCP server documentation for details). This is be-cause when you configure your printer port, it will go to a static IP address. Your Print Server should be configured correctly at this point. Configuring the SATO to print under various operating systems is covered in chapters 4 through 9.
III. Management Methods SATO offers a variety of ways to configure and monitor the Wireless Print Server. These methods are:
WP-Admin Utility • This utility runs on Windows computers, and is used for initial configuration of the print server and al-
lows you to set the wireless settings as well as the basic network settings including TCP/IP. • See the previous section (Configuring the SATO Wireless 802.11b Print Server and IP Settings) for de-
tailed use instructions • Is located on the CD. File name “wpadmin.exe” • After initial installation, this utility can be run from the START menu. • Default password is ACCESS
XAdmin32 • This utility runs on Windows computers and is used for advanced configuration of the print server; it al-
lows you to configure for Netware, TCP/IP settings and more. • A 32-bit graphical utility • Compatible with Windows PC’s running TCP/IP or IPX/SPX Protocols • Is located on the CD. File name “xadmin32.exe”. • After initial installation, this utility can be run from the START menu. • Default password is ACCESS

SATO Wireless 802.11b Print Server User's Guide page 8
www.satoamerica.com
WebXAdmin • Allows the user to configure the SATO with a standard web browser like Netscape Navigator or Micro-
soft Internet Explorer. • No additional software is needed on the system. • Can be used on any system that supports web browser capabilities. • Simply type the IP address into your web browser address bar to connect • Default password is ACCESS *Both the SATO Wireless Print Server and the PC must be configured with an IP address and your browser must be configured to work across a LAN in order to use WebXAdmin.
Console • A command-line oriented console • Contains features not available through WP-Admin, Xadmin32 or WebXAdmin • Default password is ACCESS. • Can be accessed via:
! TELNET ! DEC NCP ! DEC NCL ! ULTRIX ccr ! SATO XCD XConfig NetWare Utility ! Serial port ! WebXAdmin
Note: In all cases, when you are connected, hit RETURN or ENTER to get the "#" prompt, enter password ACCESS (it will not echo) and type anything in response to the "Enter Username>" prompt. When you get the "Local>" prompt, you are ready to enter commands. HP JetAdmin
• HP Windows-based utility • Can be downloaded from the HP web site (http://www.hp.com)
Note: The SATO Wireless Print Server will not appear in the list of configured servers unless TCP/IP or IPX is running on the computer. HP Web JetAdmin
• An HP utility for Windows NT Advanced Server and Windows 2000 • Can be downloaded from the HP web site (http://www.hp.com).
Once it is installed, a web browser on any computer that has access to the Windows NT/2000 server may be used to access the SATO.

SATO Wireless 802.11b Print Server User's Guide page 9
www.satoamerica.com
IV. Microsoft Windows Network Configuration Windows driver installation: After the Wireless Print Server has been assigned an IP address on your network, and you would like to print from a Windows application which does not support our printers, you can install our Windows Drivers. These drivers allow you to setup a printer and a port on the Windows PC which you wish to print from.
Standard Windows Driver setup for NT4.xx/2000 Note: The driver portion of this setup will be different if you are using an application that already supports our printer. In this case you will need to follow the instructions supplied with your application. 1. Go to the Windows Start menu and click on Run. 2. Click on Browse and search the \drivers directory on the CD. Double click on the Prninst.exe program.
The Run Window should display something like this: “G:\” is the drive letter of your CD ROM.
3. Click OK. The following screen will appear:

SATO Wireless 802.11b Print Server User's Guide page 10
www.satoamerica.com
4. Click Next and the following screen will appear:
5. Select the appropriate model printer and then click next. The following screen will appear:

SATO Wireless 802.11b Print Server User's Guide page 11
www.satoamerica.com
6. Select “<add new port in the next step>” and then click on Finish. The following screen will be shown:
7. Select “LAN printer port”. Once selected you will be able to name the port and type in the IP address of the SATO Enhanced Ethernet Adapter that had been previously configured on your network. Under name, give it any unique name. Under IP address, type the address of the port configured by one of the configu-ration programs supplied on the CD, such as Xadmin32. Once you’ve verified that the IP address is cor-rect click on OK. If the LAN Adapter is found the following screen will show pop up:
SATO Wireless 802.11b Print Server User's Guide page 12
www.satoamerica.com
8. Click ok. You will then need to reboot your PC. The install is now done. If you don’t get the above screen you’ll need to check that the IP address is correct and that there are no conflicting addresses on your net-work. For more information on possible network or configuration problems check the Troubleshooting section of the Administrators manual located on the CD.
Windows NT V4.xx/2000 Configuration (LPR/LPD) Note: The driver portion of this setup will be different if you are using an application that already supports our printer. In this case you will need to follow the instructions supplied with your application. 1. Go to the Start button, choose Settings, and then select Printer. Double click on the Add Printer icon
to get the Add Printer Wizard. Click. Select My Computer (Not Network Printer) and click on Next. 2. Select Add Port, select LPR Port from the list of available ports, and click on New Port. 3. Type in the IP address that you wish to assign to the print server in the Name or address of server pro-
viding lpd: box. If you do not have a router on the network, this IP address must match the first three bytes of the IP address of your computer. For example, if your computer has an IP address of 192.189.207.53, your print server must have an address like 192.189.207.27.
4. Type in the print server service name in the Name of printer of print queue on that server: box. If you do not know which service name to use, enter BINARY_P1 and then click on OK:
5. Click on Close. The new print server IP address should be listed and highlighted as an available port. Click on Next.
6. Select the desired printer. Click Have Disk and browse to \driver\winnt on your CD, then click on Next. 7. If the driver already exists, select Keep Existing Driver (if it does not, this step will be skipped), and
then click on Next. 8. If desired, change the name of the printer and/or make it the default and then click on Next. 9. If desired, make the printer shared (so other users can access it), and select the operating system(s) that
these other computers will be running. Click Next. 10. Select Yes when you are asked "Would you like to print a test page?" Click on Finish to complete the
installation. You may now print to the printer as if it were a local printer.
V. NetWare Network Configuration Configuring the Print Server and Print Queue with XAdmin32 (Queue Server Mode) This section covers installation using the Novell client. Note: SATO recommends you use the Novell 32-bit client on your Windows workstation instead of the Micro-soft NetWare client, because it allows direct configuration of print queues without the need for a Novell utility like NWAdmin or PCONSOLE. The SATO Wireless Print Server automatically makes itself known on a NetWare network. The default Net-Ware Print Server name is XCD_xxxxxx_P1, where "xxxxxx" is the last six digits of the Ethernet address (the Ethernet address is on a label that is affixed to the SATO). Note that the NetWare Print Server name is used for either NDS or bindery mode configuration. If you are configuring the first port with XAdmin32, the NDS Printer Name for this port is automatically as-signed as "XCD_xxxxxx_P1 Printer". If you are using an alternate configuration method like NWAdmin, you may assign any unique name for the printer.

SATO Wireless 802.11b Print Server User's Guide page 13
www.satoamerica.com
The Print Server and Printer names are used extensively during the configuration process, so be sure to re-member them. Note that these names are actually the names of the print server's NetWare services. If desired, you can change the default names using XAdmin32 or WebAdmin. Follow these steps to configure the queue server:
1. Make sure you are logged in as ADMIN or equivalent (NetWare 4.xx and above) or SUPERVISOR (NetWare 2.xx and 3.xx).
2. Click Start, select Programs, select the XAdmin32 folder, and then select XAdmin32. 3. Click on the IPX/SPX icon under Filters to set the operating mode to IPX/SPX (TCP/IP mode will
not allow you to configure NetWare print queues directly). The SATO should appear in the list of available printers. If it does not, try selecting Devices from the menu bar and then Search Active De-vices.
4. Double click the Wireless Print Server you want to configure, enter the configuration password (AC-CESS is the default), and click OK.
5. A series of index card tabs will be displayed. Click on the NetWare P1 tab. 6. If it is not already selected, select Queue Server as the operating mode. 7. Click on the inverted triangle button and select the NDS tree. 8. Click the Change... button to select the NDS context where the queue will reside. (If you are using the
Microsoft client, you must type in the name of the context.) The box labeled "Print Server" contains the name of the NetWare Print Server. If you are configuring any other port, this box contains the name of the NDS Printer. If desired, you can change these names. You may now create a print queue. Follow these steps:
1. Click on the Change NDS Queues... button to configure an NDS print queue or click the Change Bindery Queues... to configure a bindery mode queue.
2. Two windows will appear: Available Print Queues and Serviced Print Queues. Go to the Available Print Queues window.
3. If you are configuring an NDS queue, click on the context where the print queue will reside. 4. If you are configuring a bindery queue, click on the volume where the queue will reside (a volume
name will have a file server icon next to it). 5. Click on New Queue. Enter any unique name for the Queue name.
• If you are configuring a bindery queue, click OK and proceed to step 8. • If you are configuring an NDS queue, click Browse, select the file server volume where you
want the queue to reside (a volume name will have a file server icon next to it), and click OK. 6. The queue name will now appear in the Available Print Queues under the selected volume (for bind-
ery mode) or in the selected context (for NDS mode). Click on the desired queue and click Add. The name will now appear in the Serviced Print Queues window.
7. Click Close and then OK. You can now use the print queue from your NetWare workstation. If you want to configure additional queues and ports, you must use the Novell NWAdmin utility (this program is usually found in the Public directory on the NetWare file server). Follow these steps:
1. Start the NWAdmin utility and make sure you are in the right context. (If not, select NDS Browser from the Tools menu and then browse for the desired context.)
2. Select the container where you want the print queue to reside. 3. Select Print Services Quick Setup from the Tools menu. 4. Browse for the NetWare Print Server by clicking on the button next to the Print Server Name win-
dow. 5. Enter the name of the NDS Printer for the desired port in the Name box (for example,
XCD_04ECBA_P1). 6. The Type box should be left at the default Parallel setting. 7. Select the desired banner type.

SATO Wireless 802.11b Print Server User's Guide page 14
www.satoamerica.com
8. Enter any desired name for the print queue. 9. If necessary, browse for the volume. 10. Click Create to create the print queue. You are now ready to use the queue from a NetWare work-
station. You’re now ready to connect it to the appropriate driver.
VI. UNIX Network Configuration The SATO Wireless print server appears to the network as a UNIX host computer with a unique IP address running the line printer daemon (lpd) protocol. As a result, any host computer that supports the Berkeley re-mote-LPR command can spool jobs to the print server without the need for any special software on the host computer. Important Note: Before configuring a UNIX print queue, the SATO must have a valid IP address.
Berkeley UNIX Host Configuration Berkeley UNIX host computers include Linux, Digital Equipment Corporation Digital UNIX, OSF/1, and ULTRIX; Compaq Tru64 UNIX; SunOS (not Solaris), SCO UNIX; and many others. Sun Solaris, HP/UX, IBM AIX users should skip to the appropriate sections later in this manual. Important Notes: Do not use the Linux X-Windows graphical user interface printer configuration utility, because it does not work with SATO print servers. Instead, Linux users should follow the configuration steps listed in this sec-tion. SCO UNIX users should use the rlpconf command to create a printer and automatically configure the /etc/printcap file (you will still need to edit the /etc/hosts file). Enter the print server's service name (XCD_xxxxxx_P1) as the name of the printer (refer to the print server self-test for the exact name of this service), and enter the name of the print server that you assigned in the /etc/hosts file as the remote host name; note that because this name must be unique for each printer, we recommend using the XCD_xxxxxx_P1 service instead of the normal BINARY_P1 service. 1. Edit the /etc/hosts file: (or equivalent local host table). For example: 192.189.207.33 xcdprinter 2. Edit the printcap file: An example of a typical entry in the printcap file is: LaserPrinter:\ :lp=:\ :rm=XCD:\ :rp=BINARY_P1:\ :sd=/usr/spool/lpd/LaserPrinter: "LaserPrinter" is the queuename. "XCD" matches the name in the hosts file. "BINARY_P1" is the print server's service name. (NOTE: Use TEXT_P1 instead of BINARY_P1 for text files.) "sd" is the spool directory. 3. Create the spool directory: The lpd spool directory is usually located in the /usr/spool directory. To cre-ate a new spool directory, use the mkdir command; for example: mkdir /usr/spool/lpd/LaserPrinter

SATO Wireless 802.11b Print Server User's Guide page 15
www.satoamerica.com
4. Print using the standard lpr command: lpr –PLaserJet filename 5. For AT&T based UNIX systems, such as SCO, use the standard lp command: lp –dLaserJet filename
Sun Solaris Configuration To use a SATO Wireless print server with Sun Solaris, first use the Host Manager in the Admintool utility to add the print server IP address and name to the /etc/hosts file.
1. Click on None - Use /etc files on host 2. Click on Apply 3. Click on Edit and then Add Host 4. Enter the print server name as the Host Name (this name is anything you want, but should not have a
"_" character in it). 5. Enter the IP address and Ethernet address of the print server (the Ethernet address has the format
aa:bb:cc:dd:ee:ff) 6. Click Add and then close the Host Manager windows
Then use the Printer Manager in the Admintool utility under Open Windows as follows:
1. Select Edit 2. Select Add 3. Select Add Access to Remote Printer 4. At the PrinterName prompt, type any desired name for the print queue 5. At the Printer Server prompt, type:
name\!servicename
(for example, LaserJet\!BINARY_P1), where: - name matches the print server name as entered in the hosts table. - servicename is the print service name. For binary graphics files use the service BINARY_P1;
for text use the service TEXT_P1.
• Make sure that the Print Server OS is set to BSD (this is the default setting). • Select Add • To print, use the standard lp command; for example:
lp –dLaserJet filename Notes: • We recommend using the /etc/hosts file for the printer name rather than NIS or other name services. • Due to a bug in the Sun lpd implementation on Solaris 2.4 and earlier releases, may cause problems
printing very long print jobs. The workaround is to configure the SATO as an HP JetDirect card using the HP JetAdmin for UNIX software.
• Solaris print queues can also be configured from the UNIX shell using the lpadmin command.
HP/UX Configuration To configure a print server using HP/UX 10.x, use the same program and execute the following steps:
1. When you get a list of options, select Printers and Plotters. 2. Select LP Spooler. 3. Select Printers and Plotters. 4. Select Actions and then Add Remote Printer/Plotter. 5. Enter any name as the Printer Name (this will be the name of the print queue). 6. Enter the IP address of the print server as the Remote System Name.

SATO Wireless 802.11b Print Server User's Guide page 16
www.satoamerica.com
7. Enter the desired print server service name (BINARY_P1 for binary files or TEXT_P1 for text files) as the Remote Printer Name.
8. Check the box next to Remote Printer is on BSD System. 9. You may accept the default values for the remaining items. 10. Click OK to configure the printer. 11. You should now be able to print using the lp -d command with the printer name.
Notes: • The configuration for HP Distributed Print Services and for earlier versions of HP/UX is slightly differ-
ent. • The print server can also be configured as a JetDirect card using HP/UX. To do this, you will need the HP UNIX
Host Printing Software (part of HP's JetAdmin for UNIX).
IBM AIX Configuration To configure a print server on IBM AIX 4.x, use the SMIT program as follows:
1. Enter smit and select Devices 2. Select Printer/plotter 3. Select Manage remote printer subsystem 4. Select Client services 5. Select Remote printer queues 6. Select Add a remote queue 7. Enter the following remote queue settings:
• Name of queue to add (user selectable) • Activate the queue (Yes) • Destination host (SATO IP address; or if you have configured the /etc/hosts file, use the
name of the print server that you specified in that file) • Name of queue on remote printer (BINARY_P1 for binary files or TEXT_P1 for text files) • Name of device to add (user selectable; for example lp0)
8. You should now be able to print using the normal lp -d command. Notes: • The configuration for earlier versions of AIX is slightly different. Refer to the Administrator's Manual on
the CD-ROM for details. • The print server can also be configured as a JetDirect card using AIX. To do this, refer to your AIX
documentation.
Configuration on Other Systems The Sato Wireless Print Server can be used with any computer system that supports either the lpr/lpd protocol or the HP JetDirect card (the Sato parallel port is port 9100 while the serial port is port 9101). Refer to your system’s documentation for information on configuring lpr/lpd or JetDirect print queues.
VII. PrintraNet Internet Printing Configuration The PrintraNet product is a software driver for Windows that allows a PC user at one location to send a print job to a printer connected to a SATO wireless print server at a remote location across the Internet in a simple and transparent manner. For example, a user on a PC in New York could print a document directly from his Microsoft Excel applica-tion program to a printer in Chicago. The PC may be attached to a Local Area Network, or it may be con-nected via a dial-up PPP link to an Internet Service Provider. Because of the low cost of accessing the Inter-

SATO Wireless 802.11b Print Server User's Guide page 17
www.satoamerica.com
net, the PrintraNet software can save the user a significant amount of money in toll charges, particularly when international communications is involved. A new PrintraNet feature allows a user at a remote site to send a text E-mail message directly to a printer connected to a SATO Wireless print server at a remote site. The E-mail will be automatically printed on the printer without the need to run an E-mail program at the remote site. There are two parts to the PrintraNet configuration, the configuration of the local Windows PC and the con-figuration of the remote SATO print server.
Installing the Software on a Windows PC at the Local Site You may configure the local Windows PC to communicate over a LAN using the MAPI or WINSOCK proto-col, or to communicate over a dial-up PPP connection to an Internet Service Provider. To install the PrintraNet software on a Windows PC, execute the following steps:
1. Make sure that the PC is running an E-mail program (for example, Microsoft Outlook) that is capable of sending E-mail messages using either MAPI or WINSOCK. MAPI (Messaging Applications Pro-gram Interface) is used by most popular Windows E-mail packages, while WINSOCK is used by TCP/IP-based mail packages and dial-up Internet Service Providers. If you do not know which method you are using, consult your system manager.
2. Make sure that your E-mail server is capable of sending messages across the Internet. Alternatively, if you are communicating directly from the PC via a modem to an Internet Service Provider, make sure that you have an Internet mail account on the ISP, and that the PC is configured to send E-mail using this account.
3. Start the PrintraNet installation program from the CD ROM and follow the step-by-step instructions. You will need to know the following:
4. The mail transport protocol: MAPI or WINSOCK • The port name you wish to assign to the PrintraNet port (this port is used to access the remote
SATO print server): The name must start with "PNET" and end with a number (for example, PNET3"). Note that each remote SATO print server must have a unique port name associated with it.
• E-Mail Address: Enter any unique legal Internet E-mail address for the remote SATO print server (for example, [email protected]). Note: Internet E-mail addresses cannot have spaces in them.
• Service Name: Enter the service name on the remote SATO print server that you wish to use for printing. This is normally XCD_xxxxxx_P1 for the first parallel port, XCD_xxxxxx_S1 for the first serial port, XCD_xxxxxx_P2 for the second parallel port, or XCD_xxxxxx_S2 for the second serial port., where "xxxxxx" is the last six digits of the Ethernet address (the exact service names can be found by running the print server self-test). If you do not know the service name, you may leave this field blank and the default binary service will be used.
• Your E-Mail Address (WINSOCK users only): enter your E-mail address (for example, [email protected]).
• SMTP E-Mail Server (SMTP users only): Enter the IP address of your SMTP E-mail server (con-sult your network administrator if you do not know this address).
• Desired Notification: You may optionally have the remote SATO print server notify you when the job is complete or when the job fails or both when the job is complete and if it fails. Select the de-sired option and then enter the E-mail address where you want the notification sent (generally you would want the notification sent to your own E-mail address).
5. You must now create a printer on your Windows system using the standard Windows printer setup procedure. To do this, go the Start button, select Settings and then Printers. Select Add Printer to be-gin the printer installation and follow the instructions on the screen.

SATO Wireless 802.11b Print Server User's Guide page 18
www.satoamerica.com
6. Select Local Printer or My Computer (not Network Printer) when you are asked how the printer is connected to your computer.
7. You will also need to know the following • The appropriate SATO Windows driver. • The name of the PrintraNet port that you defined for the remote SATO print server in step 3
(PNET1 by default). 8. With PrintraNet 2.0, you can also:
! Click on the Address Book button to configure other remote destinations. This capability lets you send print jobs to more than one destination without having to create a separate printer for each destination.
! Select the partial E-mail printing option to break up the print job into several small E-mail mes-sages. This allows PrintraNet to work with mail servers that restrict the size of incoming E-mail messages.
9. Select No when asked if you want to print a test page, unless you have already configured the remote SATO print server to receive PrintraNet print jobs.
You have now finished installing the PrintraNet software. If you have only one E-mail printer, go to Step 2, configuring the Remote SATO Print Server.
Adding a Second PrintraNet Destination You should not re-run the install program to add a new E-Mail printer port. Instead, press the Start button, select Settings, and open the Printers window. Click on the icon of a PrintraNet printer, select File from the menu bar, and then choose Properties. Click on the Details tab (or Ports tab) and push the Add Port button. In the Add Port dialog, select the Other radio button and then "PrintraNet Port". Click on OK and it will give you the Port Name dialog (like in the install program). Any unique name can be given here as long as it starts with "PNET" and another port does not already exist with the same name. Then enter the port settings as de-scribed in step 3 of the Installing the Software on a Windows PC at the Local Site section.
Configuring the Remote SATO Print Server The next step is to configure the SATO print server at the remote site. The remote print server can be config-ured with SATO's XAdmin32 Windows configuration utility, or with the SATO WebXAdmin browser-based facility. Before configuring the print server to receive PrintraNet print jobs, check the following: 1. Make sure that the E-mail server at the remote site (the receiving end) is configured to handle the TCP/IP
POP3, and SMTP protocols (SMTP is only required if the notification feature is enabled). 2. Configure the POP3 server on the E-mail server at the remote site with a mail account and password for
the remote printer (generally, the mail account name will be the first part of the name that you assigned in step 3 of the previous section; for example, if you assigned the name [email protected], the account name would be emailprinter). The procedure for configuring a POP3 server varies depending on the op-erating system of the E-mail server, so consult your operating system documentation for details.
3. Make sure that the SATO print server is installed and running with TCP/IP enabled and has a valid IP address assigned to it.
Because access to the E-mail server on most networks is usually restricted, you may need to have your net-work administrator check the configuration and add the mail account. WebXAdmin allows the print server to be managed by any standard web browser using the TCP/IP protocol. In order to use WebXAdmin, IP address must be assigned to the print server and to the PC used for configura-tion.

SATO Wireless 802.11b Print Server User's Guide page 19
www.satoamerica.com
The steps required to configure the print server to receive print jobs from a Windows PC running the Printra-Net software are as follows: 1. Select the name of the desired Sato print server from the list by double clicking on it (XAdmin32) or en-
tering its IP address (WebXAdmin). 2. Click on the Internet tab or button. 3. Enter the IP address of the POP3 server (consult your network administrator if you do not know this ad-
dress). 4. Enter the mailbox name for the remote SATO print server. Usually this will be the first part of the E-mail
address that you entered in step 3 of the Installing the Software on the Windows PC at the Local Site sec-tion (for example, if the E-mail address of the remote print server is emailprinter@xyz, then the mailbox name would be emailprinter.
5. Enter the password for the mailbox, if any. 6. The print server is configured by default to poll the POP3 server every 30 seconds. You may change this
value, if desired. 7. If you have enabled notification, enter the IP address of your SMTP server (consult your network admin-
istrator if you do not know this address). 8. Press the OK button, and exit XAdmin32. You have now configured the print server to receive print jobs.
Printing to the Remote SATO Print Server To print to the remote SATO print server from the local Windows PC, you simply select the printer that you created in Step 1 and print to it the normal manner. For example, to print the remote printer named Email Printer, you would select Print from the menu bar, choose the printer named Email Printer, and then click OK. At this point, the Port Settings dialog box will appear (you may disable this by unchecking the Show this dia-log for each Print Job box). You may then use the Address Book capability or change other parameters. Click OK when you are ready to print, and the job will then be sent over the Internet to the remote SATO print server.
Troubleshooting Remote Printing The first step in troubleshooting is to make sure that you have a valid E-mail connection on both the sending PC and the receiving print server. Try sending an E-mail message from the PC to a user at the remote site who can receive mail via the POP3 server. If this does not work, there may be an E-mail configuration prob-lem on the PC, on the local E-mail server, or on the remote POP3 server. Double check to make sure that the E-mail parameters that you configured on the PC and on the remote print server match those that are config-ured on the E-mail servers. If you get an SMTP error when using a WINSOCK connection, you may need to configure the hosts file on your Windows system. To do this create a file named HOSTS in the \WINDOWS\SYSTEM directory (or edit this file if it already exists) and add an entry for your mail server similar to the following using the DOS edi-tor (substitute the actual IP address and name of your SMTP mail server): 192.189.207.222 mail.Sato.com If you can print small files OK but are having trouble printing large files, the problem may be in the E-mail system. Some E-Mail systems have difficulties printing files that are larger than about 400KB in length. To verify this, try sending the large file as an attachment to an E-mail message. If the file does not reach its des-tination intact, then the problem is with the E-Mail system. The problem can be fixed by using the PrintraNet Partial E-mail Printing option.
SATO Wireless 802.11b Print Server User's Guide page 20
www.satoamerica.com
VIII. Troubleshooting and Maintenance Troubleshooting Printing Problems • First, check the printer to be sure it is online, and has paper and Ribbon (if running in Thermal Transfer
mode). • If the printer is working fine, test the connection between the printer and the print server by pushing the
test button on the back of the printer for less than 5 seconds. Note: • Remember, just because you can’t print a test page doesn’t mean it’s not going to print. Set up the
printer as you normally would and try printing from an application. • If the test page does not print, try resetting the print server to factory defaults by holding the test button
for more than 5 seconds.
Troubleshooting Wireless Configuration Problems • Make sure your computer’s wireless adapter and/or access point is configured properly and note the set-
tings paying special attention to the wireless mode, SSID or network name, WEP or security, and IP Ad-dress settings so you can configure your print server to the same wireless settings.
• Make sure you have a good wireless signal from your PC and from the print server, that the print server is within range (90 meters or 300 feet), and it is away from metal objects and other devices with radio sig-nals (like Bluetooth, Cordless Phones, and Microwave ovens).
• Make sure your computer is set to infrastructure mode if you are connecting through an access point or ad-hoc (802.11 if you are connecting to the print server without an access point. See the documentation for your wireless adapter for details.
• If you are using WEP (Wired Equivalent Privacy) encryption or security on your wireless network, you will need to temporarily disable WEP on your PC in order to configure the print server. If you are using an access point with WEP enabled and it does not allow non-wep clients to communicate with other non-wep clients, then you will also need to temporarily change the wireless mode of your computer to Ad-hoc (802.11) mode. Note: If no computers on your network can be set to Ad-hoc mode, you will need to tem-porarily disable WEP on your access point. When you are done configuring the print server, you can re-enable WEP on your computer and change the wireless mode back if necessary.
• If you want to use WEP encryption or password protect your wireless network, and your wireless adapter or access point normally uses a password or passphrase instead of WEP, it should allow you to enter 0x followed by a ten digit (for 40-bit or 64-bit WEP) or twenty-six digit (for 128-bit WEP) key in hexadeci-mal format (0-9 or A-F).
• If you are experiencing slow performance or are having intermittent problems connecting, try changing the RF channel of your wireless network. This can be done in the WP-Admin Wireless Server Configura-tion screen for the print server. See your wireless adapter and/or access point documentation for more. You will want to change it to at least 3 channels lower or higher than any other wireless networks within range.
Troubleshooting Network Configuration • If you are using TCP/IP, make sure that your computer and the print server are on the same IP segment or
can reach each other with a PING command from the host. The IP Address you assign to the print server must be on the same logical network as your host computers (e.g., if your computer has an IP address of 192.189.207.3, the SATO print server should have an IP of 192.189.207.x, where x is an integer between 1 and 254), or you must properly configure your router address to work with the print server.
• If your print server is set to Auto or DHCP for obtaining an IP Address, it’s possible the print server’s IP Address can change. Either configure your DHCP Server to give the print server a permanent lease, or configure the print server to be on a STATIC address outside the scope of DHCP addresses.

SATO Wireless 802.11b Print Server User's Guide page 21
www.satoamerica.com
Wireless Print Server (Definitions to Terminology) Listed below is a description of each of the fields displayed on the Wireless Server Configuration screen and reasonable values for that field. Once these are all set, click OK to close the Configuration Screen and write the changes to the Server. If you decide NOT to CHANGE the values, select CANCEL to close the Configu-ration Screen and revert to the prior values. Server Name - This is the name of the wireless print server. The default is XCD_xxxxxx (where xxxxxx are the last six digits of the MAC/Ethernet address). You can choose any name for this setting. Many companies have suggested naming practices; check with your System Administrator or Network Manager for policies and practices. Serial Number - This is the fixed number which identifies the SATO Server. It is set during manufacture and does not change after that. Password - This is the SATO Wireless Print Server configuration password. For security, the password is never shown. (The field displays asterisks (*) if you type characters into it.) You must know the password before WP-Admin will show you the Configuration Screen. Users should only put text into this field if they want to change the password. Ask your System Administrator or Network Manager for the correct password; be sure the Administrator/Manager is informed and concurs BEFORE the password is changed. Firmware Revision - This is a static string displaying the correct version of the software embedded in the Server. It can not be modified. IP Address - The IP Address is a set of four bytes, separated by periods. Each byte can have any value be-tween zero (0) and 255 includive. Most company networks have ranges for their IP Addresses. Many have automatic IP set-up, so the IP address may not require configuration. Consult with your network administrator if you are not sure what to put in this field. WorkGroup/Domain - This is the Microsoft Network WorkGroup or Domain in which you want the print server. If you are using NetBIOS or NetBEUI to print, this value should match the PC from which you are printing. Subnet Mask - Companies often have ranges of IP Addresses that can be described by one or more Masks. For example, a mask of 255.255.255.0 allows variation in the last position only. (The first three positions are fixed. The last position can be any value between 1 and 255.) Larger organizations may have masks of 255.255.0.0 -- the first two positions are static and the last two positions are variable. If the IP Address is set automatically, this mask may also be defined automatically. Boot Method - This is the method the wireless print server uses to obtain an IP address. This can be set to Auto, DHCP, BOOTP, RARP, or Static. Auto will try DHCP, BOOTP and RARP, and then set to Static if the IP Address isn't set automatically by the other methods. If your network uses Static configuration, it will be necessary to set the Boot Method to Static and the IP to a particular address. Gateway (or Router) - The Gateway or Router allows connections between different subnets. For example, if a corporation has separate subnets for the Hardware Department, the Software Department, and the Testing Department, they will need a Gateway between subnets to allow the separate groups to communicate. RF Channel - The RF Channel is the wireless channel the print server uses to communicate. The SATO will be able to automatically configure itself in most cases, but you might need to manually set it to the same RF channel as the 802.11b wireless network. This value must match for all nodes on a network to communicate with each other.

SATO Wireless 802.11b Print Server User's Guide page 22
www.satoamerica.com
MAC Address - This series of six numbers, separated by periods, defines the Ethernet address of the Server. For the SATO Servers, the MAC Address is set during manufacturing and will not change. (This should avoid problems caused by multiple devices on an Ethernet network with the same address.) Data Rate - This is the throughput speed in Mbps of the wireless Ethernet connection (1, 2, 5.5, or 11). In most cases with an 802.11b wireless network, it should be set to 11 Mbps. The Data Rate usually does not need setting as it will automatically negotiate to the highest possible rate. SSID - This is the Service Set Identifier (Sometimes referred as Network Name or ESSID). This value must match for all nodes on a subnetwork to communicate with each other. Wireless Mode - Ad-Hoc modes (sometimes referred to as Peer-to-Peer, Computer-to-Computer, 802.11 Ad-Hoc, or IBSS compliant Ad-Hoc) are used when your wireless enabled PC is printing straight to the printer. Infrastructure mode is used when you have an Access point or base station as the hub of your wireless net-work. Pseudo Ad-Hoc is only used for testing and some older 802.11b implementations of Ad-Hoc. Auto mode attempts connection with each of the other methods in turn. Note: If the options on your 802.11b enabled computer are Ad-Hoc, 802.11b Ad-Hoc, and Infrastructure, use the following to determine the settings of the print server:
Computer Print Server Ad-Hoc Pseudo Ad-Hoc 802.11 Ad-Hoc Ad-Hoc (802.11) Infrastructure Infrastructure
WEP Key Disabled - The other Options are 64Bit WEP Key Size and 128Bit WEP Key Size. Be careful -- if one part of the wireless network has WEP enabled, they all must have it enabled with the same key or they cannot communicate. WEP Key Index - This is which WEP key you want to use out of the 4 entered in the 128 / 64 WEP Key field. 128 Bit / 64 Bit WEP Key - This is the 64 or 128 bit WEP key that must match other nodes’ encryption keys in order to communicate: 10 characters for 64 bit, or 26 characters for 128 bit. The SATO uses a Hexadecimal value for WEP. All 802.11b devices have a way of translating their WEP or Security values to 10 (for 40-bit or 64-bit WEP) or 26 (for 128-bit WEP) digit HEX values. Ask the manufacturer of your wireless product how this is done for your PC and/or Access Point.
Loading the Firmware Note: This should only be done if instructed to do so by a SATO America Technical Support Representative. 1. Run the XAdmin32 utility from the Start menu. 2. Right-Click on the print server to be upgraded in the list, and select Load Firmware. 3. If you are using TCP/IP to upgrade, select TFTP PUT from this host. If you are upgrading using IPX/SPX
on a NetWare network to upgrade, select Netware GET from a server (If you are using Netware to up-grade, you need to put the .bin firmware file in the LOGIN directory of the Netware server). Click OK.
4. If you selected TFTP PUT from this host in step 3, enter the configuration password (default is ACCESS) and click Browse to find the .bin firmware file you downloaded. Click Load. The firmware on your Sato will be upgraded to the new version. If you selected Netware GET from a server in step 3, enter the configuration password (default is AC-CESS). Enter the name of the Netware server where you saved the .bin file as the Host Name. Enter the name of the firmware file for File. Click OK. The firmware on your Sato will be upgraded to the new ver-sion.

SATO Wireless 802.11b Print Server User's Guide page 23
www.satoamerica.com
RS232 Serial Port The SATO has one standard PC-compatible 9-pin female D-connectors. The serial port uses PC-compatible 9-pin male D-connectors. Note that the standard off-the-shelf 9-pin female to 25-pin male PC cables will re-quire a null modem in order to connect to most terminals. The pin-outs are as follows: DB9 DTE DCEpin Signal Signal pin pin 1 Not used Not used - - 2 Receive Data Transmit Data 2 3 3 Transmit Data Receive Data 3 2 4 DTR out DSR in 6 20 5 Signal Ground Signal Ground 7 7 6 DSR in DTR out 20 6 7 RTS out CTS in 5 4 8 CTS in RTS out 4 5 9 Not used Not used - - Basically, the cable must connect input signals (e.g., Receive Data) on the o SATO to the equivalent output signals (e.g., Transmit Data) on the device and vice-versa. The serial port can be set to operate in console mode to allow you to configure and diagnose the SATO via a serial terminal (or PC with a terminal emulation program). To enable the console mode manually, turn the printer off, hold down the Test switch and simultaneously powering the printer on. The port will remain in console mode until the unit is power off. You may also nable console mode by connecting remotely to the SATO via WebXAdmin, TELNET, NCP, or XConfig (refer to Chapter 3 for information on how to use these utilities). With WebXAdmin, select Config-ure Port from the main menu, click on serial port S1, select Console Mode, and click Submit. With TELNET or XCONFIG, use the following command: SET PORT S1 CONSOLE ENABLED You can remotely restore the port to normal serial operation by unselecting Console Mode from WebXAdmin or by using the console command SET PORT serialport CONSOLE DISABLED. The serial ports are factory set at 115200bps, 8-bit data, CTS/RTS (Hardware) flow control, and no parity.
SATO Wireless 802.11b Print Server User's Guide page 24
www.satoamerica.com
IX. General Information Contacting SATO Your first point of contact for technical support should be the Distributor or Reseller from whom you bought your SATO Printer from. They are familiar with your needs, and will generally be able to provide you with the fastest and most comprehensive support. If your Distributor or Dealer is unable to answer your questions or is for some reason not available, then con-tact SATO directly at:
Phone: 704-644-1660 or E-mail: [email protected]
Before contacting technical support, please check the Troubleshooting chapter of this manual to isolate any problems and be sure to write down any error messages. Also, make sure that you have the serial number of the product (located on the product label on the card).
Returning Products If you need to return a SATO product for any reason (failures, incorrect shipments, etc.), first contact SATO at 704-644-1660 or [email protected] and request a Return Authorization Number from the SATO Technical Support Group. They will need to know the Model number, Serial number and a detailed description of the problem. Any product sent in without prior authorization or improper documentation may be refused. If there are any questions please contact SATO America’s Technical Support. If the unit is not in warranty, and you do not have an account setup to purchase directly from SATO you must contact the Distributor or Reseller whom you purchased the product from.
FCC Compliance Statement for United States Users This equipment has been tested and found to comply within the limits for a Class B digital device pursuant to Part 15 of the FCC Rules. These limits are designed to provide reasonable protection against harmful inter-ference in a residential installation. This equipment generates, uses, and can radiate radio frequency energy and, if not installed and used in accordance with the instructions, may cause harmful interference to radio or television reception. However, there is no guarantee that interference will not occur in a particular installa-tion. If this equipment does cause interference to radio and television reception, which can be determined by turning the equipment off and on, the user is encouraged to try to correct the interference by one or more of the following measures:
• Reorient or relocate the receiving antenna. • Increase the separation between the equipment and receiver, • Connect the equipment into an outlet on a circuit different from that to which the receiver is con-
nected. • Consult the dealer or an experienced radio/TV technician for help.
The radiated output power is far below the FCC radio frequency exposure limits. Nevertheless, it shall be used in such a manner that the potential for human contact during normal operation is minimized. WARNING Changes or modifications not expressly approved by the manufacturer could void the user’s authority to oper-ate the equipment.


![User's Guide [Print Operations] - StructuredWeb](https://static.fdokumen.com/doc/165x107/631949f24cd7b3442408f855/users-guide-print-operations-structuredweb.jpg)