Sildenafil 4.0—Integrated Synthetic Chemistry, Formulation ...
Upload
khangminh22Category
view
5download
0
VERITAS Volume Manager™ 4.0
Release Notes
Solaris

Disclaimer
The information contained in this publication is subject to change without notice. VERITAS Software Corporation makes no warranty of any kind with regard to this manual, including, but not limited to, the implied warranties of merchantability and fitness for a particular purpose. VERITAS Software Corporation shall not be liable for errors contained herein or for incidental or consequential damages in connection with the furnishing, performance, or use of this manual.
VERITAS Copyright
Copyright © 2004 VERITAS Software Corporation. All rights reserved. VERITAS, the VERITAS logo,and all other VERITAS product names and slogans are trademarks or registered trademarks ofVERITAS Software Corporation. VERITAS and the VERITAS Logo Reg. U.S. Pat & Tm. Off. Other product names and/or slogans mentioned herein may be trademarks or registered trademarks of their respective companies.
VERITAS Software Corporation350 Ellis StreetMountain View, CA 94043USAPhone 650–527–8000 Fax 650–527–2908http://www.veritas.com
Third-Party Copyrights
Data Encryption Standard (DES) Copyright
Copyright © 1990 Dennis Ferguson. All rights reserved.
Commercial use is permitted only if products that are derived from or include this software are made available for purchase and/or use in Canada. Otherwise, redistribution and use in source and binary forms are permitted.
Copyright 1985, 1986, 1987, 1988, 1990 by the Massachusetts Institute of Technology. All rights reserved.
Export of this software from the United States of America may require a specific license from the United States Government. It is the responsibility of any person or organization contemplating export to obtain such a license before exporting.
WITHIN THAT CONSTRAINT, permission to use, copy, modify, and distribute this software and its documentation for any purpose and without fee is hereby granted, provided that the above copyright notice appear in all copies and that both that copyright notice and this permission notice appear in supporting documentation, and that the name of M.I.T. not be used in advertising or publicity pertaining to distribution of the software without specific, written prior permission. M.I.T. makes no representations about the suitability of this software for any purpose. It is provided as is without express or implied warranty.
ii VERITAS Volume Manager Release Notes

Contents
Important Notice for VERITAS Volume Replicator Users . . . . . . . . . . . . . . . . . . . . . . . . 1
Getting Help . . . . . . . . . . . . . . . . . . . . . . . . . . . . . . . . . . . . . . . . . . . . . . . . . . . . . . . . . . . . . . . 2
Using VRTSexplorer . . . . . . . . . . . . . . . . . . . . . . . . . . . . . . . . . . . . . . . . . . . . . . . . . . . . . 3
Downloading from the Web . . . . . . . . . . . . . . . . . . . . . . . . . . . . . . . . . . . . . . . . . . . . 3
Installing from the CD . . . . . . . . . . . . . . . . . . . . . . . . . . . . . . . . . . . . . . . . . . . . . . . . . 4
Using the File Upload Facility . . . . . . . . . . . . . . . . . . . . . . . . . . . . . . . . . . . . . . . . . . 4
Searching the VERITAS Knowledge Base . . . . . . . . . . . . . . . . . . . . . . . . . . . . . . . . . . . 5
Conventions . . . . . . . . . . . . . . . . . . . . . . . . . . . . . . . . . . . . . . . . . . . . . . . . . . . . . . . . . . . . . . . 6
Upgrading Disk Group Versions . . . . . . . . . . . . . . . . . . . . . . . . . . . . . . . . . . . . . . . . . . . . . . 7
Required Solaris Software Patches . . . . . . . . . . . . . . . . . . . . . . . . . . . . . . . . . . . . . . . . . 8
Check for Existing Patches . . . . . . . . . . . . . . . . . . . . . . . . . . . . . . . . . . . . . . . . . . . . . 8
Download Required Patches . . . . . . . . . . . . . . . . . . . . . . . . . . . . . . . . . . . . . . . . . . . 8
Solaris Patches 110934-10 and 113713-01 . . . . . . . . . . . . . . . . . . . . . . . . . . . . . . . . 10
A5x00 Devices . . . . . . . . . . . . . . . . . . . . . . . . . . . . . . . . . . . . . . . . . . . . . . . . . . . . . . 11
DMP Coexistence with Alternate Pathing . . . . . . . . . . . . . . . . . . . . . . . . . . . . . . . . . . 11
Upgrading from VxVM 3.1 and Earlier . . . . . . . . . . . . . . . . . . . . . . . . . . . . . . . . . . 12
Upgrading from VxVM 3.1.1 or VxVM 3.2 . . . . . . . . . . . . . . . . . . . . . . . . . . . . . . . 12
VxVM and VEA Patches . . . . . . . . . . . . . . . . . . . . . . . . . . . . . . . . . . . . . . . . . . . . . . . . . 12
Required VxVM Patch . . . . . . . . . . . . . . . . . . . . . . . . . . . . . . . . . . . . . . . . . . . . . . . . 12
New Features . . . . . . . . . . . . . . . . . . . . . . . . . . . . . . . . . . . . . . . . . . . . . . . . . . . . . . . . . . . . . 13
Changed Features . . . . . . . . . . . . . . . . . . . . . . . . . . . . . . . . . . . . . . . . . . . . . . . . . . . . . . . . . 15
Default Disk Group Behavior in VxVM 4.0 . . . . . . . . . . . . . . . . . . . . . . . . . . . . . . . . . 15
Simplification of Vxinstall . . . . . . . . . . . . . . . . . . . . . . . . . . . . . . . . . . . . . . . . . . . . . . . . 16
iii

Temporary File Systems for Use by DMP . . . . . . . . . . . . . . . . . . . . . . . . . . . . . . . . . . 17
32-Terabyte File support . . . . . . . . . . . . . . . . . . . . . . . . . . . . . . . . . . . . . . . . . . . . . . . . . 17
Denoting a non-VxVM Disk . . . . . . . . . . . . . . . . . . . . . . . . . . . . . . . . . . . . . . . . . . . . . 17
Default Disk Format . . . . . . . . . . . . . . . . . . . . . . . . . . . . . . . . . . . . . . . . . . . . . . . . . . . . 17
VxVM 4.0 Licenses . . . . . . . . . . . . . . . . . . . . . . . . . . . . . . . . . . . . . . . . . . . . . . . . . . . . . . . . 18
CDS Licensing . . . . . . . . . . . . . . . . . . . . . . . . . . . . . . . . . . . . . . . . . . . . . . . . . . . . . . . . . 19
Photon Licensing . . . . . . . . . . . . . . . . . . . . . . . . . . . . . . . . . . . . . . . . . . . . . . . . . . . . . . . 19
Termination of Support Statements . . . . . . . . . . . . . . . . . . . . . . . . . . . . . . . . . . . . . . . . . . 20
Termination of Support for VxVM Releases . . . . . . . . . . . . . . . . . . . . . . . . . . . . . . . . 20
Termination of Sun Support for Solaris 2.6 . . . . . . . . . . . . . . . . . . . . . . . . . . . . . . . . . 21
Additional Changes in Hardware and Format Support . . . . . . . . . . . . . . . . . . . . . . 21
Software Limitations and Problems in VERITAS Volume Manager 4.0 . . . . . . . . . . . . 21
Disk Controller Firmware Upgrades . . . . . . . . . . . . . . . . . . . . . . . . . . . . . . . . . . . . . . 22
T3B Firmware Upgrade on Solaris 9 . . . . . . . . . . . . . . . . . . . . . . . . . . . . . . . . . . . . . . . 23
Installation and Upgrade Issues . . . . . . . . . . . . . . . . . . . . . . . . . . . . . . . . . . . . . . . . . . 24
Utility Issues . . . . . . . . . . . . . . . . . . . . . . . . . . . . . . . . . . . . . . . . . . . . . . . . . . . . . . . . . . . 27
Device Issues . . . . . . . . . . . . . . . . . . . . . . . . . . . . . . . . . . . . . . . . . . . . . . . . . . . . . . . . . . 30
Hot-Relocation Issues . . . . . . . . . . . . . . . . . . . . . . . . . . . . . . . . . . . . . . . . . . . . . . . . . . . 34
DMP Issues . . . . . . . . . . . . . . . . . . . . . . . . . . . . . . . . . . . . . . . . . . . . . . . . . . . . . . . . . . . . 34
Cluster Functionality Issues . . . . . . . . . . . . . . . . . . . . . . . . . . . . . . . . . . . . . . . . . . . . . . 37
Data Integrity Issues . . . . . . . . . . . . . . . . . . . . . . . . . . . . . . . . . . . . . . . . . . . . . . . . . . . . 38
Snapshot and Snapback Issues . . . . . . . . . . . . . . . . . . . . . . . . . . . . . . . . . . . . . . . . . . . 38
Intelligent Storage Provisioning Issues . . . . . . . . . . . . . . . . . . . . . . . . . . . . . . . . . . . . 41
Miscellaneous Issues . . . . . . . . . . . . . . . . . . . . . . . . . . . . . . . . . . . . . . . . . . . . . . . . . . . . 41
Solaris Issues . . . . . . . . . . . . . . . . . . . . . . . . . . . . . . . . . . . . . . . . . . . . . . . . . . . . . . . . . . 44
VEA Issues . . . . . . . . . . . . . . . . . . . . . . . . . . . . . . . . . . . . . . . . . . . . . . . . . . . . . . . . . . . . 46
Internationalization Issues . . . . . . . . . . . . . . . . . . . . . . . . . . . . . . . . . . . . . . . . . . . . . . . 47
Documentation Issues . . . . . . . . . . . . . . . . . . . . . . . . . . . . . . . . . . . . . . . . . . . . . . . . . . . 48
Adding Unsupported Disk Arrays to the JBOD Category . . . . . . . . . . . . . . . . . . . . . . . 49
Available Documentation . . . . . . . . . . . . . . . . . . . . . . . . . . . . . . . . . . . . . . . . . . . . . . . . . . 52
iv VERITAS Volume Manager Release Notes

Displaying Documentation Online . . . . . . . . . . . . . . . . . . . . . . . . . . . . . . . . . . . . . . . . 52
English Versions of the Documentation . . . . . . . . . . . . . . . . . . . . . . . . . . . . . . . . . . . . 53
Printing Documentation . . . . . . . . . . . . . . . . . . . . . . . . . . . . . . . . . . . . . . . . . . . . . . . . . 54
Contents v

vi VERITAS Volume Manager Release Notes

VERITAS Volume Manager Release Notes
This document provides release information for VERITAS Volume Manager™ (VxVM) Release 4.0. This release includes the new VERITAS Enterprise Administrator™ (VEA) graphical user interface.
VERITAS recommends that you copy this document to the /opt/VRTS/doc directory so that the information is available for your future reference. Release Notes are not installed with any Volume Manager package.
VxVM product enhancement is an ongoing process. To check for any additional information about this release, review “New Features” on page 13.
Note Before you install the packages, please review this entire document.
Important Notice for VERITAS Volume Replicator Users If you are using VERITAS Volume Replicator™ (VVR) and VRAS, do not upgrade to VxVM 4.0 until you read the VERITAS Volume Replicator Release Notes for installation requirements.
1

Getting Help VERITAS Volume Manager Release Notes
Getting Help If you have any comments on or problems with VERITAS products, contact VERITAS Technical Support:
◆ U.S. and Canadian Customers: 1-800-342-0652
◆ International Customers: +1 (650) 527-8555
◆ E-mail: [email protected]
For license information:
◆ Phone: 1-650-527-0300
◆ Email: [email protected]
◆ Fax: 1-650-527-0952
For software updates:
◆ Email: [email protected]
For late-breaking news about this release, please see the section called “New Features” on page 13.
For additional technical support information, including:
◆ TechNotes
◆ Product alerts
◆ Hardware compatibility lists
visit the VERITAS Technical Support Web site at:
http://support.veritas.com
For information on purchasing VERITAS products:
◆ Phone: 1-800-327-2232
◆ Email: [email protected]
Before using any vendor supplied Array Support Library (ASL) provided on your product CD, you should visit the VERITAS Technical Support site for information on the latest ASL packages:
http://support.veritas.com
Click on the Knowledge Base Search section, and select “Volume Manager for UNIX” from the Search Product pull-down menu. Enter the search phrase “VERITAS enabled arrays" (quotes must be included in the search).
Any newly issued third party array drivers can later be found at the same site.
2 VERITAS Volume Manager Release Notes

Getting Help
For additional information about VERITAS and VERITAS products, visit the Web site at:
http://www.veritas.com
Using VRTSexplorer The VRTSexplorer program can help VERITAS Technical Support engineers diagnose the cause of technical problems associated with VERITAS products. You can download this program from the VERITAS FTP site or install it from the VERITAS Installation CD. For more information, consult the README file in the support directory on the VERITAS Installation CD.
Downloading from the Web
1. Use a web browser or the ftp program to download the VRTSexplorer program from the following URL:
ftp://ftp.veritas.com/pub/support/vxexplore.tar.Z
Save the file to a temporary directory such as /tmp as shown in the example session below.
2. Log in as root on the system that is experiencing the problem. Extract the contents of the downloaded file to the directory /tmp/VRTSexplorer:
# cd /tmp# zcat vxexplore.tar.Z | tar xvf -
3. Run the VRTSexplorer program located in the VRTSexplorer directory:
# /tmp/VRTSexplorer/VRTSexplorer
4. When VRTSexplorer prompts you for a destination directory for the information that it collects, press Return to accept the default directory /tmp, or enter a path name of your own choice. VRTSexplorer writes the results of its analysis to a compressed tar file named VRTSexplorer_casenumber_hostname.tar.Z in the specified directory.
3

Getting Help VERITAS Volume Manager Release Notes
Installing from the CD
Note VRTSexplorer is part of VRTSspt package
VRTSspt is a group of support tools for troubleshooting a system and collecting information on its configuration. This package is optional; the tools are not required for operation of any VERITAS software. In general, the tools only gather configuration information.
Refer to the README.VRTSspt file in the /support directory for more information
To install the VRTSspt package and VRTSexplorer:
1. Log in as superuser.
2. Place the VERITAS software CD into a CD-ROM drive connected to your system.
3. Load and mount the CD-ROM by starting the volmgt daemon. After starting the daemon, the path is /cdrom/CD_name.
# /etc/init.d/volmgt start
4. Move to the /volume_manager/support directory and install the VRTSspt package:
# cd /cdrom/volume_manager/support# pkgadd –d. VRTSspt
5. The program is installed in the /opt/VRTSspt directory. To run the program, enter:
# /opt/VRTSspt/VRTSexplorer/VRTSexplorer
6. To remove the VRTSspt package, enter:
# pkgrm VRTSspt
Using the File Upload Facility
1. Use the file upload facility of your web browser, or the ftp program, to transfer the VRTSexplorer output file to the VERITAS Technical Support anonymous FTP site:
ftp://ftp.veritas.com/incoming
2. Telephone VERITAS Technical Support at the number listed under “Getting Help” on page 2. Tell them that you have run VRTSexplorer and provide the name of the file that you transferred to the FTP site.
4 VERITAS Volume Manager Release Notes

Getting Help
Alternatively, if you have already been assigned a call ID number by VERITAS Technical Support, send email to [email protected] and. Include your case ID number in the subject line.
Searching the VERITAS Knowledge Base The VERITAS Knowledge Base is an online document resource center that contains all publicly available information on VERITAS products. To access this information:
1. Go to the VERITAS Technical Support website at http://support.veritas.com.
2. Click on the Knowledge Base Search section.
3. Select Volume Manager for UNIX from the Search Product pull-down menu and enter the search phrase “late breaking information”.
This will show you any information that has been amended or added to the VxVM 4.0 product documentation.
5

Conventions VERITAS Volume Manager Release Notes
Conventions The following table describes the typographic conventions used in this document.
Typeface Usage Examples
monospace Computer output, files, directories, software elements such as command options, function names, and parameters
Read tunables from the /etc/vx/tunefstab file.
See the ls(1) manual page for more information.
monospace (bold)
User input # mount -F vxfs /h/filesys
italic New terms, book titles, emphasis, variables replaced with a name or value
See the User’s Guide for details.
The variable ncsize determines the value of...
Symbol Usage Examples
% C shell prompt
$ Bourne/Korn shell prompt
# Superuser prompt (all shells)
\ Continued input on the following line
# mount -F vxfs \ /h/filesys
[ ] In a command synopsis, brackets indicates an optional argument
ls [ -a ]
| In a command synopsis, a vertical bar separates mutually exclusive arguments
mount [ suid | nosuid ]
6 VERITAS Volume Manager Release Notes

Upgrading Disk Group Versions
Upgrading Disk Group Versions All disk groups have a version number associated with them. Each VERITAS Volume Manager release supports a specific set of disk group versions and can import and perform tasks on disk groups with those versions. Some new features and tasks work only on disk groups with the current disk group version, so you need to upgrade existing disk groups before you can perform the tasks. The following table summarizes the disk group versions that correspond to each VERITAS Volume Manager release from 2.0 onward:
VERITAS Volume Manager Release
Cluster Protocol Versions
Disk Group Version
Supported Disk Group Versions
2.0 n/a 20 20
2.2 n/a 30 30
2.3 n/a 40 40
2.5 n/a 50 50
3.0 n/a 60 20-40, 60
3.1 n/a 70 20-70
3.1.1 10, 20 80 20-80
3.2 30 90 20-90
3.5 40 90 20-90
4.0 50 110 20-110
You can use the following command to find out the version number of a disk group:
# vxdg list disk_group_name
You can also determine the disk group version by using the vxprint(1M) command with the -l format option.
To upgrade a disk group, use the following command:
# vxdg [-T version] upgrade disk_group_name
Unless a disk group version is specified, this command upgrades the disk group to the highest version supported by the VERITAS Volume Manager version on your system.
For shared disk groups, the latest disk group version is only supported by the latest cluster protocol version. See Upgrading Cluster Functionality in the VERITAS Volume Manager Administrator’s Guide for more information on changing the cluster protocol version.
To see the current cluster protocol version, type:
# vxdctl support
7

Upgrading Disk Group Versions VERITAS Volume Manager Release Notes
Required Solaris Software Patches Please read this section completely before you install VERITAS Volume Manager 4.0. You must reboot your system after installing the patches.
Caution Do not install VxVM until you have installed the following mandatory patches. The patches must be installed on your system for VxVM to work properly.
Check for Existing Patches
Some required system patches may already be present in your operating system. To display a list of current patches on your system, enter:
# showrev -p
For more information, see showrev(1M).
Download Required Patches
If the patches shown in the required list are not already installed, go to http://sunsolve.Sun.com to download the patches. You need to install the appropriate patches and then reboot.
DISCLAIMER: Patch version and information is determined at the time of product release. For the most current patch version and information, please contact your vendor.
The SUNWscpu package should be shipped as part of the OS. Solaris patches are available from http://www.sun.com/storage/san/index.html.
Required Solaris Patches
For Solaris Version
Sun Patch ID Number and Required Package
Notes
Solaris 9 SUNWscpu package Note that SUNWscpu is a package and should be installed using pkgadd.
113277-08 You must install this patch if you intend to employ SCSI-3 fencing (vxfen) on Solaris 9.
8 VERITAS Volume Manager Release Notes

Upgrading Disk Group Versions
Required Solaris Patches
For Solaris Version
Sun Patch ID Number and Required Package
Notes
Solaris 8 1. SUNWsan package.
2. SUNWscpu package (available on the Solaris 8 CD)
3. 109529 (-06 or higher)
4. 111413 (-06 or higher)
Regardless of whether you have an A5k drive connected, you must install the A5k patches for VERITAS Volume Manager to function. You must install the SUNWsan package and patch 109529 before installing patch 111413. You can then install VERITAS Volume Manager. This order of these steps is important. Note that SUNWsan and SUNWscpu are packages and should be installed using pkgadd.
108827 (-19 or higher) or 108993 (-18 or higher)
108528 (-18 or higher)
110722 (-01 or higher) If you have Sun’s Alternate Pathing (AP), you must install Solaris patch 110722-01 for VERITAS Volume Manager 4.0 to co-exist with the AP driver version 2.3.1. However, you must also upgrade AP. Please see “DMP Coexistence with Alternate Pathing” on page 11 before installing VxVM.
Solaris 7 107473 (-07 or higher) Regardless of whether you have an A5k drive connected, you must install an A5k patch for VERITAS Volume Manager to function.
110722 (-01 or higher) If you have Sun’s Alternate Pathing (AP), you must install Solaris patch 110722-01 for VERITAS Volume Manager 4.0 to co-exist with the AP driver version 2.3.1. However, you must also upgrade AP. Please see “DMP Coexistence with Alternate Pathing” on page 11 before installing VxVM.
106541 (-19 or higher) If you are running Solaris 7, you must install Sun patch ID 106541.
106327 (-5 or higher) If you are running Solaris 7, you must install Sun patch ID 106327.
Note To install the VEA client on Solaris 7 or 8, you must pick up the appropriate java 1.4.1 patches for Solaris 7 or 8. See http://support.veritas.com/docs/264714 for further information.
9

Upgrading Disk Group Versions VERITAS Volume Manager Release Notes
Note If the patchadd -p command gives an error as in the following example: # patchadd -p | grep 111413 /usr/sbin/patchadd[193]: PatchArrElem: subscript out of range.
then you should install the patch 108987-08 (or later).
Solaris Patches 110934-10 and 113713-01
Note This information supersedes information in the Installation Guide under the same heading.
If you are running Solaris 8, Solaris patch 110934-10 should not be installed. If you are running Solaris 9, Solaris patch 113713-01 should not be installed. Installation of these patches will prevent the installation of VxVM, VERITAS Cluster Server and GLM patches.
You can display the currently installed patches and their levels by entering, for example, the command:
# showrev -p | grep 110934
If you have installed 110934-10 on Solaris 8 or patch 113713-01 on Solaris 9, you must either upgrade them or remove them.
The following patch levels have been verified with VxVM 4.0:
◆ 110934 -14
◆ 113713-11
You can install a later version of the patch over the faulty patch. For example, to install the latest revision of a patch, use the patchadd command:
# patchadd 110934-14
You can install an earlier version of the patch, but you must first need remove the existing faulty version of the patch, for example:
# patchrm 110934-10
The patch might not be removable, in which case a message similar to the following will be displayed:
Patch 110934-10 was installed without backing up the originalfiles. It cannot be backed out.
patchrm is terminating
10 VERITAS Volume Manager Release Notes

Upgrading Disk Group Versions
For Solaris 8, patch 110934-10, refer to technote 252441 at http://seer.support.veritas.com/docs/252441.htm. For Solaris 9, patch 113713-01, the workaround is to rename the space file before running patchadd:
# mv /var/sadm/pkg/VRTSvxvm/install/space \ /var/sadm/pkg/VRTSvxvm/install/space.org
# patchadd this_patch_id
For Solaris 8, you can use patch 110934-08 or lower. If you do not have or cannot obtain patch 110934-08, do not install patch 110934-10.
You can successfully install VxVM without either patch.
You can see the latest status of patches 110934-10 and 113713-01 by going to the VERITAS support web site at: http://support.veritas.com
A5x00 Devices
Whether or not you have A5x00 devices connected to your system, you must add the Solaris patches, shown in the table in “Download Required Patches” on page 8, to this release of VERITAS Volume Manager. If you have A5x00 devices attached to your system, you need this patch to use them; if you don’t have A5x00 devices attached to your system, VxVM uses the patches to discover whether such devices exist.
Claiming Devices in the SENA Category
The A5x00 disk arrays are claimed by DMP under the SENA category only if the required libraries are present on the system at the time of VxVM installation.
The libraries are present by default on Solaris 2.8 and Solaris 2.9. For Solaris 2.7, see the table in “Download Required Patches” on page 8 to find the appropriate patch. The patches must be installed before installing VERITAS Volume Manager.
DMP Coexistence with Alternate Pathing VERITAS Volume Manager DMP co-exists with Sun’s Alternate Pathing (AP) driver 2.3.1. For VERITAS Volume Manager versions 3.1.1 and later to function, the DMP driver must always be present on the system. You need to upgrade AP to 2.3.1 and install Solaris patch 110722-01 before upgrading to this release of VERITAS Volume Manager.
Note This patch is required for DMP to co-exist with AP 2.3.1. VERITAS Volume Manager version 4.0 does not support earlier versions of AP.
To confirm which version of the AP driver is installed, run the following command:
# pkginfo -l SUNWapdv | grep VERSION
11

Upgrading Disk Group Versions VERITAS Volume Manager Release Notes
Upgrading from VxVM 3.1 and Earlier
If you were using VERITAS Volume Manager 3.1 and earlier, upgrading to VERITAS Volume Manager 4.0 automatically enables DMP if it was previously disabled.
Note You cannot upgrade directly from VxVM 3.1 to VxVM 4.0; you must first upgrade to VxVM 3.5.
Upgrading from VxVM 3.1.1 or VxVM 3.2
The DMP configuration will remain the same after upgrading from 3.1.1 or 3.2.
VxVM and VEA Patches Please refer to the Patches directory for information about the patches included in this release. You can find the Patches directory at the same level as the pkgs and scripts directories on your CD-ROM:
/cdrom/cdrom0/volume_manager/patches
It is highly recommended that you install all of the patches in this location on your system.
Required VxVM Patch
It is recommended that you install patch 115217-## if the system will be used with CVM. See the VERITAS Volume Manager Installation Guide for instructions on how to install patches. For more specific information on incident fixes in the patch, see the README that accompanies the patch.
12 VERITAS Volume Manager Release Notes

New Features
New Features New features in VERITAS Volume Manager 4.0 include the following:
◆ VERITAS Intelligent Storage Provisioning (ISP)
The ISP Service is an alternative to the traditional method of creating and managing volumes. ISP creates volumes from available storage with capabilities that you specify by consulting the externally defined rule base for creating volumes, and comparing it to the properties of the storage that is available. Because ISP is very rich in functionality, there is a new separate Administrator’s Guide titled VERITAS Volume Manager Intelligent Storage Provisioning Administrator’s Guide.
◆ Enhancements to Device Discovery Layer (DDL)
The Device Discovery Layer was introduced in an earlier release of VxVM. This release enhances the DDL by adding the following functionality:
◆ DDL services are now available to other VERITAS products through VERITAS Enterprise Administrator (VEA).
◆ Dynamic discovery of disks or their attributes
◆ Allowing DMP kernel extensions to support multipathing and/or load balancing in a configuration that is specific to a particular disk array.
◆ Integration with other discovery agents such as Storage Area Network (SAN) Access Layer (SAL) and VERITAS Array Integration Layer (VAIL).
◆ Instant Snapshots
Instant (copy-on-write) snapshots are easier to configure and offer more flexibility of use than traditional third-mirror break-off snapshots. Once created, an instant snapshot is immediately available for use. For preference, new volumes should be configured to use instant snapshots, but this also requires rewriting of administration scripts that assume the traditional third-mirror snapshot model. Legacy volumes can also be reconfigured to use instant snapshots.
◆ Multi-Device Support
Multi-Device Support allows several volumes to be represented by a single logical object. All I/O to and from the underlying logical volume is directed via the I/O interfaces of the volume sets. This feature is designed primarily for the multi-device file system enhancement for VERITAS File System VxFS.
◆ Configuration Backup and Restore Support
Configuration Backup and Restore support allows you to backup and restore or replicate all VxVM configuration data for disk groups and volumes. This applies only to VxVM configuration data and does not apply to user and application data.
13

New Features VERITAS Volume Manager Release Notes
◆ VERITAS Cross-Platform Data Sharing Feature (CDS)
CDS allows the sharing of data between heterogeneous systems where each system has direct access to the physical devices that are used to hold the data. Because CDS is very rich in functionality, there is a new separate Administrator’s Guide titled VERITAS Volume Manager Cross-Platform Data Sharing Administrator’s Guide. CDS does not support VERITAS Volume Replicator (VVR).
◆ Hitachi Extended Copy Facility
The Hitachi E-Copy facility allows a host server to request data movement from disk to tape or to another disk without the overhead of server CPU time I/O during the actual movement of data.
◆ Storage Expert
System Administrators sometimes find that gathering and interpreting data about large and complex configurations can be a difficult task. Consisting of a set of simple commands that collect and analyse VxVM configuration data, Storage Expert produces a summary report that recommends configuration improvements.
◆ Detecting and correcting the Serial Brain Split Condition in a Disk Group
Under certain circumstances a serial split brain condition can occur in a disk group where the actual serial numbers on disks are different from those listed in the configuration database copies on the disks. To recover from such a situation, you can use the vxsplitlines command to diagnose the problem. This command also details the commands that you can use to correct the condition.
◆ Online Node Addition
VxVM now allows you to add a node to a cluster dynamically.
◆ Dynamic LUN Expansion
Previous releases of VxVM did not allow you to take advantage of a change in the size of a disk once the disk had been initialized; any attempt to do so would result in loss of data. However, in this release, Dynamic LUN capability allows you to resize the device while preserving the existing data.
◆ Disability Requirements Conformance
VxVM is compliant with the US Government’s section 508 article.
◆ Menu Driven Installation
With this release, VxVM provides support for installation through a menu-driven front end. This enhancement, which will be common across all VERITAS products, is intended to provide a common look and feel to the installation experience.The traditional installation process using pkgadd is still supported, but users are encouraged to move to the menu-driven interface.
14 VERITAS Volume Manager Release Notes

Changed Features
◆ Unique Number for Messages
To enable easy identification of messages, each message contains a unique identifier. Using this ID number when reporting messages to VERITAS support will enable them to respond more easily to customer requests.
◆ Bookshelf CD
The documentation for all of the Foundation Suite products have now been included on a fully indexed CD.
◆ Support for B_FAILFAST Flag
DMP supports the B_FAILFAST flag if the underlying device driver exports the ddi-failfast-supported property. The B_FAILFAST flag allows the disk drivers to avoid heroic, time-consuming retry behavior when it is not required or is inappropriate. The B_FAILFAST flag is intended to allow modified error recovery behavior in the disk driver when no communication can be established with the device. However it does not dictate specific retry behavior, nor does it imply or guarantee deterministic failure times.
When I/O is requested to a device associated with the ddi-failfast-supported property, and the device has multiple paths available or I/O request is for a Read operation from a volume that has an alternate source (mirror), DMP will set the B_FAILFAST flag in the I/O request. While DMP sets the B_FAILFAST flag, DMP has no knowledge of whether the underlying disk driver’s behavior is influenced by B_FAILFAST.
Changed Features Features changed in VERITAS Volume Manager 4.0 are listed in the following sections.
Default Disk Group Behavior in VxVM 4.0 In previous versions of VxVM, a disk group with the name rootdg (root disk group) was required. For VxVM to function, the rootdg disk group had to exist, and it had to contain at least one disk. This requirement no longer exists, however you might find it convenient to create a system-wide default disk group.
For operations that require a disk group, the system wide default disk group will be used if the VxVM command is not specified with the -g option. The main benefit of creating a default disk group is that the VxVM commands default to the default disk group and you will not need to use the -g option. To verify the default disk group after it has been created, enter the command:
# vxdg defaultdg
15

Changed Features VERITAS Volume Manager Release Notes
Simplification of Vxinstall Because VxVM no longer requires a rootdg to be configured, vxinstall has been much simplified, and you can no longer use this command to configure your system after installation. You should now use vxdiskadm, which is documented in the VERITAS Volume Manager Administrator’s Guide.
16 VERITAS Volume Manager Release Notes

Changed Features
Temporary File Systems for Use by DMP In this release, two temporary file systems are mounted for use by DMP. When they are mounted, output from the df command is similar to the following:
Filesystem Kbytes Used avail Capacity Mounted on...dmpfs 902488 0 902488 0% /dev/vx/rdmpdmpfs 902488 0 902488 0% /dev/vx/dmp
32-Terabyte File support The 4.0 VxFS release supports a new disk layout (version 5) that enables the creation of file systems up to 32 terabytes in size. File systems created on VxFS 4.0 will by default use the new disk layout, but files created on Version 5 can still only be a maximum of two terabytes. File systems larger than 1TB can be created only on 64-bit kernels and must be created on a VERITAS Volume Manager volume. An eight terabyte file system requires a 2K block size, a 16 TB file system requires a 4K block size, and a 32 TB file system requires an 8K block size. An online conversion utility, vxupgrade, is provided to upgrade existing disk layouts to Version 5 on mounted file systems.
Denoting a non-VxVM Disk In previous releases of VxVM, a disk that was not under VxVM control was denoted by “error” disk status in the output of commands such as vxdiskadm. In this release, the phrase online invalid is used to denote a disk that is not under VxVM control. A disk that is marked as online invalid may or may not have previously been under VxVM control. Disks that are listed as online are already under VxVM control.
Default Disk Format With the introduction of the Cross-Platform Data Sharing (CDS) feature, the format for a disk defaults to CDS rather than to sliced which was the format in earlier releases. For instructions on converting from a CDS format disk to a sliced format disk, see the “Creating and Administering Disk Groups” chapter in the VERITAS Volume Manager Administrator’s Guide. The section, “Creating a disk Group,“ includes information on disk formats and disk group formats.
CDS does not normally require an “Add-on” license, however if you want to import a disk group from a platform that is different from your own platform, you will need an “Add-on” license.
17

VxVM 4.0 Licenses VERITAS Volume Manager Release Notes
CDS disk groups have certain physical disk alignment restrictions for subdisk. For more information on this feature and CDS disk groups in general, see the VERITAS Volume Manager Cross-platform Data Sharing for Volume Manager Administrator’s Guide
A further change in this release is that the default disk type is now auto. This means that disks that used to show up in the output from vxdisk list as sliced will now show up as auto:sliced.
VxVM 4.0 Licenses The following table shows the levels of licensing in VERITAS Volume Manager 4.0 and the features supported at each level:
VxVM License Description of Supported Features
Full Concatenation, spanning, rootability, volume resizing, multiple disk groups, co-existence with native volume manager, striping, mirroring, DRL logging for mirrors, striping plus mirroring, mirroring plus striping, RAID-5, RAID-5 logging, Smartsync, hot sparing, hot-relocation, online data migration, online relayout, volume snapshots, Intelligent Storage Provisioning, FastResync with Instant Snapshots, Storage Expert, Device discovery Layer, multipath DMP, and VEA.
Add-on Licenses Features that augment the Full VxVM license such as FlashSnap™ (FastResync and Dynamic Disk Group Split and Join) and clustering functionality (cluster-shareable disk groups and shared volumes).
Note You need a Full VxVM license to make effective use of Add-on licenses to VxVM. For example, FastResync (a FlashSnap license feature) reduces the time taken to resynchronize volume snapshots (a Full VxVM license feature).
To see the license features that are enabled in VxVM 4.0, enter the command:
# vxdctl license
18 VERITAS Volume Manager Release Notes

VxVM 4.0 Licenses
CDS Licensing The ability to import a CDS disk group on a platform that is different from the platform on which the disk group was last imported is controlled by a CDS license. CDS licenses are included as part of the VERITAS Storage Foundation license.
An example of a CDS enabling license (output by the vxlicrep command) is:
License Key = P2CE-I8ZR-USLU-RR8D-YN8P-NN8H
Product NameFoundation Standard
License TypeOEM IDDemo End Date
Editions Product Features :=
VxVM#VERITAS Volume Manager
= VERITAS Storage
= DEMO = 58= Tue Sep 30 01:00:00 2003
(21.5 days from now).= YES
= EnabledCPU Count#VERITAS Volume Manager = Not RestrictedVXFS#VERITAS File System = EnabledCPU Count#VERITAS File System = Not RestrictedQLOG#VERITAS File System = EnabledVERITAS Foundation Suite = Enabled
SPC Lite#VERITAS Storage Manager for Storage Networks = EnabledStorage Expert#VERITAS Volume Manager = EnabledPlatform = un-usedVersion = un-used
Photon Licensing VxVM automatically generates a photon license when it detects an A5k array. In addition, VxVM 4.0 allows you to remove your Photon device for servicing for up to two weeks. To do this, when the current license is due to expire, VxVM automatically removes the old license, and re-issues a new Photon license with another two-week expiration date.
You can now remove your Photon device for servicing, without affecting other operations.
If you perform a license query during this time, you may see information displayed as follows:
License Key =IGUE-WR66-HB9S-V7G3-NE3W-8PPP-PNP8-PZO6-OPProduct Name = VERITAS Volume ManagerLicense Type = DEMO_NODE_LOCKOEM ID = 4090
19

Termination of Support Statements VERITAS Volume Manager Release Notes
Demo End Date = Fri Aug 30 01:00:00 2002 <=====EXPIRATION DATE(13.6 days from now).Node Lock Type = (Hostid and Architecture ID)Features :=PHOTON = EnabledCPU Count = Not Restricted
Note This message does not mean that your Photon array feature license will soon expire permanently. You will not lose the VxVM features associated with the license in 13.6 days time.
Termination of Support Statements
Termination of Support for VxVM Releases The following software is no longer supported by VERITAS:
◆ VERITAS Volume Manager Release 1.3.x
◆ VERITAS Visual Administrator Release 1.3.x
◆ VERITAS Volume Manager Release 2.0.x
◆ VERITAS Volume Manager Release 2.1.x
◆ VERITAS Volume Manager Release 2.2.x
◆ VERITAS Volume Manager Release 2.3.x
◆ VERITAS Volume Manager Release 2.4.x
◆ VERITAS Volume Manager Release 2.5.x
◆ VERITAS Volume Manager Release 3.0.x
◆ VERITAS Volume Manager Release 3.1.x
◆ Solaris 2.3 operating system
◆ Solaris 2.4 operating system
◆ Solaris 2.5 and 2.5.1 operating system
◆ Solaris 2.6 operating system
◆ VERITAS Volume Manager no longer supports the Sun-4c product line:
◆ SPARCstation 1
20 VERITAS Volume Manager Release Notes

Software Limitations and Problems in VERITAS Volume Manager 4.0
◆ SPARCstation 1+
◆ SPARCstation 2
◆ SPARCstation IPC
◆ SPARCstation IPX
◆ SPARCstation SLC
Termination of Sun Support for Solaris 2.6 Sun Microsystems has announced the End of Support Life for Solaris 2.6. Please contact Sun customer support for more information.
Additional Changes in Hardware and Format Support ◆ This release of VERITAS Volume Manager provides documentation only in PDF
format. The documentation is no longer available in Postscript format.
◆ The Sun SparcStorage Array (SSA) is no longer supported. Please disregard any references to this array in all VERITAS Volume Manager documentation.
Software Limitations and Problems in VERITAS Volume Manager 4.0
See the following sections for information about known problems and issues in this release of VERITAS Volume Manager:
◆ “Disk Controller Firmware Upgrades” on page 22
◆ “T3B Firmware Upgrade on Solaris 9” on page 23
◆ “Installation and Upgrade Issues” on page 24
◆ “Utility Issues” on page 27
◆ “Device Issues” on page 30
◆ “Hot-Relocation Issues” on page 34
◆ “DMP Issues” on page 34
◆ “Cluster Functionality Issues” on page 37
◆ “Data Integrity Issues” on page 38
◆ “Miscellaneous Issues” on page 41
21

Software Limitations and Problems in VERITAS Volume Manager 4.0 VERITAS Volume Manager Release Notes
◆ “Snapshot and Snapback Issues” on page 38
◆ “Solaris Issues” on page 44
◆ “VEA Issues” on page 46
Disk Controller Firmware Upgrades This procedure enables you to upgrade disk controller firmware without performing a system reboot. The procedure is a workaround for SUN Bug I.D. 4164338.
Obtain firmware upgrades as appropriate from your disk drive vendor. Download the appropriate files and documentation from the vendor’s support website.
To upgrade disk controller firmware, you do not need to reboot the system or unload the VERITAS Volume Manager in-kernel drivers vxdmp, vxio and vxspec (to guarantee data availability during the firmware upgrade procedure to a disk participating in a RAID mirror configuration).
With DMP enabled on the system with a volume mirrored across 2 controllers on one HBA, set up the configuration as follows:
1. Disable the plex associated with the disk device:
# /opt/VRTS/bin/vxplex -g diskgroup det plex
2. Stop I/O to all disks through one controller of the HBA by executing the following command:
# /opt/VRTS/bin/vxdmpadm disable ctlr=first_cntlr
For the other controller on the HBA, enter:
# /opt/VRTS/bin/vxdmpadm -f disable ctlr=second_cntlr
3. Upgrade the firmware on those disks for which the controllers have been disabled using the procedures that you obtained from the disk drive vendor.
4. After doing the upgrade, enable all the controllers by executing:
# /opt/VRTS/bin/vxdmpadm enable ctlr=second_cntlr
5. Enable the plex associated with the device:
# /opt/VRTS/bin/vxplex -g diskgroup att volume plex
This command takes some time depending upon the size of the mirror set.
22 VERITAS Volume Manager Release Notes
Software Limitations and Problems in VERITAS Volume Manager 4.0
6. Upgrade the disk group:
# vxdg -T version upgrade diskgroup
This command takes some time depending upon the size of the mirror set.
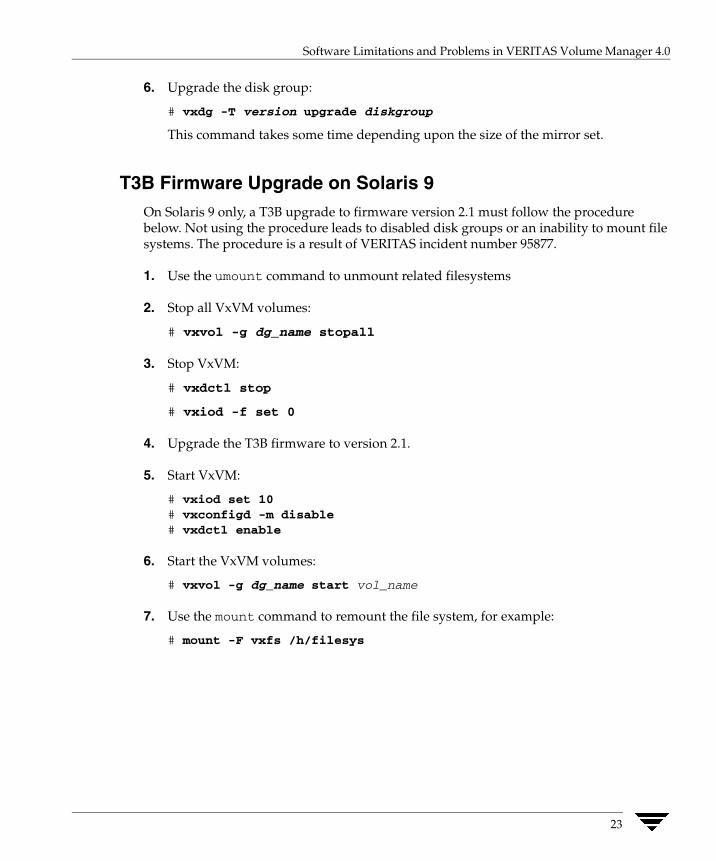
T3B Firmware Upgrade on Solaris 9 On Solaris 9 only, a T3B upgrade to firmware version 2.1 must follow the procedure below. Not using the procedure leads to disabled disk groups or an inability to mount file systems. The procedure is a result of VERITAS incident number 95877.
1. Use the umount command to unmount related filesystems
2. Stop all VxVM volumes:
# vxvol -g dg_name stopall
3. Stop VxVM:
# vxdctl stop
# vxiod -f set 0
4. Upgrade the T3B firmware to version 2.1.
5. Start VxVM:
# vxiod set 10# vxconfigd -m disable# vxdctl enable
6. Start the VxVM volumes:
# vxvol -g dg_name start vol_name
7. Use the mount command to remount the file system, for example:
# mount -F vxfs /h/filesys
23

Software Limitations and Problems in VERITAS Volume Manager 4.0 VERITAS Volume Manager Release Notes
Installation and Upgrade Issues
▼ Initializing Disks Previously Under VxVM Control
If you are planning to initialize disks, check to see if any of the disks were previously under VERITAS Volume Manager control. If so, and if they were used on the same host system, the disk groups they represent are imported automatically during the installation process if the proper deinstallation procedures were not followed. An attempt during installation to initialize or encapsulate disks that were previously under VERITAS Volume Manager control fails. After installation, if you no longer want to use those disk groups, use the destroy option of the vxdg (1M) command to remove those disk groups. Alternately, you can use vxdiskunsetup (1M) to remove the disks from VERITAS Volume Manager control. Be aware that these options can result in data loss if used incorrectly.
▼ Patch Installation and Deinstallation Instructions
For Solaris 7, 8, and 9 releases, refer to the manual pages for instructions on using patchadd and patchrm scripts provided with Solaris.
The following example installs a patch to a standalone machine:
# patchadd 113701-01
The following example removes a patch from a standalone system:
# patchrm 113701-01
For additional examples please see the appropriate manual pages.
▼ Special Install and Uninstall Instructions
You need to use the shutdown command to reboot the system after patch installation or uninstallation:
# shutdown -g0 -y -i6
▼ Recognizing Simple Disks from Earlier Releases
In earlier releases of VxVM, some users minimized the allocation of disks to the diskgroup, rootdg, by associating rootdg with a small disk partition that was characterizedas a simple disk. This procedure would have been achieved by using the command; vxdctl add disk which is no longer supported in VxVM 4.0.[IR 137838]
If you created one of these simple disks, you will need to carry out a procedure similar tothat which is described in the following example.
24 VERITAS Volume Manager Release Notes

Software Limitations and Problems in VERITAS Volume Manager 4.0
Assuming that the simple disk is defined to be on c1t21d0s7, you would see the following entry in /etc/vx/volboot:
disk c1t21d0s7 simple privoffset=1
After upgrading to VxVM 4.0, you must reboot the system. After rebooting, execute the command, vxdisk list, and you will see that c1t21d0s7 is not listed. This is because vxconfigd now ignores disk entries in /etc/vx/volboot.
To retain access to data on a simple disk, use the following procedure:
1. Define a disk access record that will be created in /etc/vx/darecs
# vxdisk define c1t21d0s7 type=simple
2. Request that vxconfigd should extract information from this disk:
# vxdctl enable
3. Discover the name of the disk’s disk group:
# vxprint -th
4. Enable access to the disk’s disk group; rootdg in this example:
# vxvol -g rootdg startall
▼ Error Messages Output by the Upgrade Script
If a swap volume specified in /etc/vfstab is mirrored at the time that upgrade_start is run, the upgrade_finish script starts a resynchronization of the volume. This can cause a message similar to the following to be printed when the command to reboot the system is issued:
xvm:vxvol: tutil0 field for plex plex_name changed unexpectedly
This message can be ignored.
For a system on which the root file system is contained on a mirrored volume, the upgrade_start script can choose a mirror on a disk other than the normal boot disk to perform the upgrade. If this occurs, the reboot after running upgrade_finish can initially fail, claiming that the mirror on the boot disk is stale, as follows:
vxvm:vxconfigd: Error: System boot disk does not have a validrootvol plex.Please boot from one of the following disks:
disk: *diskname*Device: *device*...
vxvm:vxconfigd:Error: System startup failedThe system is down.
25

Software Limitations and Problems in VERITAS Volume Manager 4.0 VERITAS Volume Manager Release Notes
Boot the system from one of the disks named. If the eeprom option use-nvramrc? is set to true, boot the system by specifying vx-diskname.
▼ Partitioning Disks on a Sun StorEdge 6120/6320 Array
If you plan to partition disks on a 6120/6320 array, it is important that you install VxVM and the 6120/6320 Array support Library packages in the correct order. See “Partitioning Disks on 6120/6320 Arrays” in the VERITAS Volume Manager Hardware Notes for more information. [IR 115328]
▼ Host Crashes During an Upgrade
In certain circumstances, the installation software cannot detect that a host has crashed during an upgrade installation. In some cases, the rsh/ssh request hangs for anindefinite period of time.[IR 12988]
▼ Interruption of an Upgrade
If the installation software is interrupted on the local system during certain upgrade situations, VERITAS Volume Manager configurations may be lost after a reboot. If this happens, the entire VERITAS Volume Manager package must be reinstalled and a recover must be done manually by recreating the disks, disk groups, and volumes and restoring the data from backup. [IR 13033]
▼ Volumes showing as DISABLED
When an internal boot disk is encapsulated and the associated boot diskgroup (bootdg) has external fabric disks that are connected through a Fibre Channel switch, any volumes sitting on these external disks after reboot may come up as DISABLED.
If you are upgrading from VxVM 3.5 to VxVM 4.0, before upgrading you should move the volumes on the fabric disks that are part of the rootdg disk group to a different disk group; this action will avoid the issue. [IR 140218]. See “Volumes Showing as DISABLED” on page 33 for further information.
▼ pkgadd vxvm Causes System Hang
See “vxddladm addsupport Hangs in Sun SCSI Enclosure Service (SES) Driver” on page 33 for information.
26 VERITAS Volume Manager Release Notes

Software Limitations and Problems in VERITAS Volume Manager 4.0
▼ “SIGHUP caught” Message on the Console
When running vxinstall on system with a SENA array that is enabled with enclosure naming, you may see a message similar to the following:
newmac.veritas.com console login: Dec 31 00:00:00syseventd[59]: SIGHUP caught
You can safely ignore this message. [Sun Bug ID 4955989, IR 138955]
Utility Issues
▼ Shrinking a Swap Volume
vxassist has no built-in protection to prevent you from shrinking the swap volume without first shrinking what the system sees as available swap space. If it is necessary to shrink the swap volume, the operation must be done in single user mode and the system must be rebooted immediately. Failing to take these precautions can result in unknown system behavior or lock-up. [IR 6154]
▼ Adding a Log and Mirror to a Volume
The vxassist command does not add a mirror and a log when processing a command such as the following:
# vxassist mirror volume layout=log ...
The mirror is added, but the log is silently omitted. To add a log and a mirror, add them in two separate vxassist invocations, as follows:
# vxassist mirror volume ...# vxassist addlog volume ...
[IR 13488]
▼ Using vxdiskadm to Replace a Failed Disk
The vxdiskadm command requires two attempts to replace a failed disk. The first attempt can fail with a message of the form:
/usr/lib/vxvm/voladm.d/bin/disk.repl: test: argument expected
The command is not completed and the disk is not replaced. If you now rerun the command, using Option 5, the replacement successfully completes. [IR 102381]
27

Software Limitations and Problems in VERITAS Volume Manager 4.0 VERITAS Volume Manager Release Notes
▼ Replacement of the old_layout Attribute
The vxdisksetup command gives the error message Attribute unrecognized when the old_layout attribute is used to make a disk into a VxVM controlled disk. The old_layout attribute is no longer supported. Use the noreserve attribute in its place. [IR 121258]
▼ Using vxvol and vxmend with Layered Volumes
The vxvol and vxmend commands do not handle layered volumes very well. When vxmend is executed on the top level volume to change the state of a volume, it is executed only on the top level volume; the change is not propagated to the lower level volumes. As a result, the volume states can become inconsistent and a subsequent vxvol init command might fail.
The vxvol command also exhibits the same problem. When a vxvol init command is executed on the top level volume, the change is not propagated to the volumes corresponding to its subvolumes.
Workaround: When executing the vxvol or vxmend command on a layered volume, first issue the comand to the lower level volumes in a bottom-up fashion; then execute the command on the top-level volume.
In this example, a volume, vol, has two subvolumes, vol-L01 and vol-L02. The state of the volumes is first set to empty, and then the initialization commands are executed:
# vxmend -o force -g mydg fix empty vol# vxmend -o force -g mydg fix empty vol-L01# vxmend -o force -g mydg fix empty vol-L02# vxvol -g mydg init zero vol# vxvol -g mydg init zero vol-L01# vxvol -g mydg init zero vol-L02
[IR 134932]
▼ Growing or Shrinking Layered Volumes
Due to the current implementation of a resize of layered volumes, it is recommended that you do not grow or shrink layered volumes (for example; stripe-mirror, concat-mirror) while resynchronization is ongoing. Note that this limitation does not apply to ISP layered volumes.
Internally, VERITAS Volume Manager converts the layout of layered volumes and updates the configuration database before it does the actual resize. This causes any ongoing operation, such as a resynchronization, to fail.
If the system reboots before the grow or shrink of a layered volume completes, the volume is left with an intermediate layout. In this case, you have to use vxassist convert to restore the volume to its original layout.
28 VERITAS Volume Manager Release Notes
Software Limitations and Problems in VERITAS Volume Manager 4.0
After a layered volume is resized, the volume names, the plex names and the subdisk names associated with the subvolumes, are changed.
▼ vxassist Warning Message When Creating concat-mirror
You may see the following warning message when creating a concat-mirror volume with the max size:
VxVM vxassist Warning V-5-1-364 dm:<volume_name>: No disk spacesmatches specification
As long as the volumes have been successfully created, you can safely ignore the message. [Sun Bug ID 4942149, IR 137344]
▼ vxdiskadm Limits Disk Names to 9 Characters
vxdiskadm truncates default disk names to 9 characters. [Sun Bug ID 4946557, IR 137175]
▼ Harmless Message about a Duplicate vxesd Daemon
The following message might be displayed on the console if another instance of the vxesd daemon is started during system reboot.:
VxVM vxesd ERROR V-5-1-8405 Duplicate daemon check failed
This condition is printed by a duplicate instance of the vxesd daemon when another instance of the daemon is already running. The later instance of the daemon prints the message and dies while the first daemon keeps on running. In that sense, it is harmless and the message can be safely ignored. [Sun Bug ID 4949267, IR 137509]
▼ Starting a volume with Version 20 DCOs
When starting a volume with Version 20 DCOs attached, the volume will sometimes fail with the error message:
Operation requires transaction
This only affects volumes with Version 20 DCOs attached. The most common cause of this error is the situation in which you have shared disk groups and a node is in the process of joining the cluster while the volumes are being started.
You can avoid this error by first starting one node, and only starting the other nodes in the cluster after the master node has started all of the volumes in all of the shared disk groups.
If this error occurs in a SFCFS/RAC environment, follow this procedure to recover:
29

Software Limitations and Problems in VERITAS Volume Manager 4.0 VERITAS Volume Manager Release Notes
1. Bring the volumes online:
# vxvol -g dgname startall
2. Clear the fault:
# hares -clear cvmvoldg resname # hares -clear cfsmount resname
3. Bring the cvmvoldg and cfsmount resources online:
# hares -online resname -sys systemname
[IR 139855]
▼ Disabling a Sub-volume Disables the Parent Volume
If you disable a sub volume in a layered volume, the corresponding parent volume, with which the sub volume is associated, is also disabled. However the disabled parent volume will be inaccurately listed as ENABLED by the vxprint command. [Sun Bug ID 4953389, IR 137854]
▼ Maximum Size of a VxVM Volume
VxVM supports volume lengths up to 2^63-1 disk sectors when using VERITAS-specific ioctl calls. However, system calls such as seek, lseek, read and write are limited to a maximum offset that is determined by the operating system. For a system that supports large files, this is usually 2^63-1 bytes. Otherwise, the maximum offset value is usually 2^31-1 bytes (1 byte less than 2 terabytes). The maximum size of a VERITAS File System 4.0 file system that can be created on a VERITAS Volume Manager 4.0 volume is documented in the VERITAS File System 4.0 Release Notes. [IR 141024]
Device Issues
▼ Hitachi Arrays in Active/Active Mode
When Hitachi DF400 and DF500 arrays are configured as Active/Active mode, performance is degraded. [IR 73154]
▼ Relayout of Volumes on the Root Disk
Do not run the vxrelayout and vxassist commands to relayout a volume that is part of root disk. This action may ruin the layout of the root disk so that you will not be able to boot from the disk. On an encapsulated root disk, a relayout would cause the upgrade to fail. [IR 103991]
30 VERITAS Volume Manager Release Notes

Software Limitations and Problems in VERITAS Volume Manager 4.0
▼ Failure to Add a Disk from a T3 Array
On a T3 array, Volume Manager may get the following failure when trying to add a disk (typically from vxinstall or vxdisksetup):
vxvm:vxdisk: ERROR: Device XXXX: online failedDevice path not valid
This can happen in cases where the T3 disk was re-partitioned (or re-formatted) prior to one or more disks being added. [IR 105173]
▼ SFCFS with I/O fencing not supported on HDS9200
If you attempt to boot a cluster with I/O fencing (PGR) enabled, HDS9200 disks will show up in error state on the slaves. This error does not appear if I/O fencing is disabled. [IR 131926]
▼ Disks in V480 and V880 Internal Disk Enclosures
Fujitsu and Hitachi disks in V480 and V880 internal disk enclosures may not be automatically recognized as JBOD disks. This could potentially cause data corruption if multipathing is not configured correctly. After installing any Sun-qualified FC disks as FRU replacements, or before running vxinstall during installation of VxVM, use the procedure described in “Adding Unsupported Disk Arrays to the JBOD Category” on page 49 to add each such disk to the JBOD category. It is important that both the vendor ID and product ID are specified for each such disk to avoid conflicts with similar disks in other arrays. For Fujitsu disks, the number of characters in the serial number must also be specified. [Sun Bug ID 4900508, IR 133579]
▼ Encapsulation of Disks with Insufficient Space for a Private Region
Disks with insufficient space (less than 2048 disk blocks) for the allocation of an on-disk database copy cannot be encapsulated. The database requires at least the same space as is allocated for other disks in the same disk group. The default size is 2048 blocks. To work around this, relocate the data on the last partition of the disk to a volume on a different disk, and free the space by reducing the partition size to 0.
The space for the database must be allocated from the beginning or the end of the disk, with the exception of the root disk. The root disk can be encapsulated by carving out space from the swap partition if there is no space at the beginning or at the end of the disk. This is done by creating a subdisk for the private partition in the space obtained from the swap partition.
Workaround: The problem of insufficient space on a disk to store private VERITAS Volume Manager information has no workaround. VERITAS Volume Manager requires at least a small region of private storage (2048 blocks) for proper disk identification.
31

Software Limitations and Problems in VERITAS Volume Manager 4.0 VERITAS Volume Manager Release Notes
▼ Restrictions on Using Fabric Devices
Booting off a fabric device is not supported. Also, encapsulating a fabric boot device is not supported, nor is mirroring a locally encapsulated boot device to a fabric device.
▼ Errors When Using JNI Cards
If the model number of your JNI card is one of FCE-1063, FCE2-1063, FCE-6410, FCE2-6410, or FCE2-6412, you may experience error messages of the form:
Oct 22 00:16:16 ds13un jnic: [ID 847178 kern.notice] jnic1: Memoryport parity error detectedOct 22 00:16:16 ds13un jnic: [ID 229844 kern.notice] jnic1: Link DownOct 22 00:16:16 ds13un jnic: [ID 744007 kern.notice] jnic1: Target0:Port0000EF (WWN 500060E802778702:500060E802778702) offline.Oct 22 00:16:18 ds13un jnic: [ID 709123 kern.notice] jnic1: Link UpOct 22 00:16:18 ds13un jnic: [ID 236572 kern.notice] jnic1: Target0:Port0000EF (WWN 500060E802778702:500060E802778702) online.Oct 22 00:16:18 ds13un jnic: [ID 229844 kern.notice] jniContact JNI support for more information.
Workaround: Add the following parameter to the JNI configuration file (jnic.conf):
FcEnableContextSwitch = 1;
▼ I/O Policy Defaults to Balanced for Active/Active Enclosures Only
The man page for vxdmpadm states that balanced is the default I/O policy for enclosures. But this is true only for Active/Active enclosures. Other types of enclosure, such as *Single-active do not default to balanced. [Sun Bug ID 4949454. IR 137411]
▼ Support for Auto Failback with T3 and Sun StorEdge 6120/6320 Arrays
VxVM does not support auto failback with T3 and Sun StorEdge 6120/6320 arrays in MPxIO mode. A vxdctl enable command is required to force I/O to failback to primary path. This issue will be addressed in incident 138942. [Sun Bug ID 4959802].
▼ Sun StorEdge Traffic Manager (SSTM)
The Sun StorEdge Traffic Manager (SSTM) boot support feature that is available through SAN 4.3 is not supported with VxVM 4.0. Booting from the fabric devices as well as the boot encapsulation of fabric devices under SSTM is not supported in VxVM 4.0. [Sun bug ID 4912232, 4909641, 4912667].
32 VERITAS Volume Manager Release Notes

Software Limitations and Problems in VERITAS Volume Manager 4.0
▼ Errors When Using Fabric Disks in Rootdg
When booting the system with an associated boot disk in “bootdg”, and there are volumes on the external fabric disks that are connected through a Fibre Channel switch, you may see messages similar to the following messages on the console:
vxvm:vxconfig: V-5-1-546 Disk disk03 in group rootdg: disk device notfoundvxvm:vxconfig: V-5-1-546 Disk disk04 in group rootdg: disk device notfound
These messages are harmless and can be ignored; Fabric Devices are not available to the operating system during the early stages of the boot process. [Sun Bug ID 4971744. IR140218].
▼ Volumes Showing as DISABLED
When an internal boot disk is encapsulated and the associated boot diskgroup (bootdg) has external fabric disks that are connected through a Fibre Channel switch, any volumes sitting on these external disks after reboot may come up as DISABLED.
Workaround for non-mirrored volumes: If non-mirrored volumes on the external disk are single-plexed (non-mirrored), they can be force started and enabled, after the system is up in multi-user mode, by entering the command:
# vxvol -f -g bootdg volume
If such a non-mirrored volume initially comes up disabled, and has an entry in /etc/vfstab, it will fail to mount during the boot operation. In this circumstance, the volume must be manually mounted.
Impact on mirrored volumes: If these volumes are lying on external fabric disks and they are mirrored, there is a potential for data loss because force starting the volumes manually in some corner cases may not choose the plex with the most up to date data. You are advised not to mirror such volumes.
If you have installed VxVM 4.0 and have such a configuration, you are recommended to move all volumes on the fabric disk, whether mirrored or non-mirrored, out of the boot disk group to avoid this issue.
If you are upgrading from VxVM 3.5 to VxVM 4.0, before upgrading you should move the volumes on the fabric disks that are part of the rootdg disk group to a different disk group; this action will avoid the issue. [IR 140218].
▼ vxddladm addsupport Hangs in Sun SCSI Enclosure Service (SES) Driver
You might experience a hung system after executing a vxddladm addsupport command; this situation can be caused by stale entries in the /dev/es file. A stale entry is a device link that is present in /dev/es, but the device itself is not connected to the machine.
33

Software Limitations and Problems in VERITAS Volume Manager 4.0 VERITAS Volume Manager Release Notes
In some circumstances, the command pkgadd vxvm might cause a system hang because it also executes vxddladm addsupport. In both these circumstance, apply the workaround.
Workaround:
1. Remove entries from the /dev/es file. You need to remove all of the entries because it is not obvious which entries are stale and which are valid.
2. Run the command:
# devfsadm -C
This command recreates /dev/es with valid entries. [IR 115323, IR 140441]
Hot-Relocation Issues
▼ Impact of Hot-Relocation on Performance
Except for rootvol and swapvol, hot-relocation does not guarantee the same layout of data or performance after relocation. It is therefore possible that a single subdisk that existed before relocation may be split into two or more subdisks on separate disks after relocation (if there is not enough contiguous space on a single disk to accommodate that subdisk). [IR 14894]
▼ Disk Information in Notification Messages
W a disk failure occurs, the hot-relocation feature notifies the system administrator of the failure and any relocation attempts through electronic mail messages. The messages typically include information about the device offset and disk access name affected by the failure. However, if a disk fails completely or a disk is turned off, the disk access name and device offset information is not included in the mail messages. This is because VERITAS Volume Manager no longer has access to this information. [IR 14895]
DMP Issues
▼ Non-persistence of I/O Policy
If the I/O policy is set using the vxdmpadm command, this is not persistent across system reboots. To ensure that the same settings are configured following a reboot, create a startup script that resets the values after VERITAS Volume Manager has been started by the /etc/init.d/vxvm-recover script. [IR 140947]
34 VERITAS Volume Manager Release Notes

Software Limitations and Problems in VERITAS Volume Manager 4.0
▼ Usage of dmp_failed_io_threshold Parameter
It is possible that data loss can occur after the failure of a single path in a multipathed environment. This might happen because of an interaction between an Application or file system and Volume Manager. This issue applies to configurations in which:
◆ A release of VxVM between VxVM 3.2 patch 2 and VxVM 4.0 is installed.
◆ VxVM volumes are not mirrored.
◆ There are multiple paths to the disk.
◆ A portion of the I/O path below DMP fails in such a way that the error is not returned to DMP before 10 minutes have elapsed. Examples of failures that have been seen to cause this condition, include bad hardware (HBA, FCOT, GBIC, Switch Port, Array Controller) and HBA reconfigured to retry endlessly.
Note It is the failure condition in the fourth type of configuration that triggers the problem. These failures are rare and are not seen during the normal operation of a healthy SAN.
In VxVM 3.2 patch 2, a new tunable parameter was introduced to prevent devices from experiencing certain failure conditions that would prevent a mirrored I/O from succeeding for an extended period of time. This tunable parameter set a threshold of 600 seconds (10 minutes) for an I/O error to be returned form the device. If the I/O takes longer than 10 minutes to return with an error, DMP assumes that the device is not working and passes the error up to VxVM without retrying the operation. This allows VxVM to use a mirror of the data to satisfy the request without further delay.
Note This is not a time-out. No DMP activity will occur after the 10 minutes has passed. DMP only checks the elapsed time of the I/O after it is returned by the lower layer. If the elapsed time is greater than dmp_failed_io_threshold seconds (default 600), the error will be returned to VxVM without retries. DMP will wait as long as it takes for the I/O to be returned.
If the delay in returning the I/O is caused by a problem in the I/O path to the device rather than the device itself, DMP will incorrectly return the error to the VxVM layer rather than retrying the I/O on another path. If the volume is mirrored, VxVM will satisfy the I/O from the other plex, and detach the plex that failed and prevented the volume from becoming hung.
If the volume is not mirrored, the error will be passed to the File System or application layer. This can result in the File System marking inodes for deletion when they are still valid. If raw volumes are in use, the application might believe that the data on the disk is corrupted when it is actually clean.
35

Software Limitations and Problems in VERITAS Volume Manager 4.0 VERITAS Volume Manager Release Notes
To prevent this possibility in situations where mirrored volumes are not used, the threshold should be tuned to a sufficiently high value that is unlikely to be reached. In the following example, 16 hours is used.
To change the value of dmp_failed_io_threshold, modify the value in /kernel/drv/vxdmp.conf:
dmp_failed_io_threshold=57600
where 57600 introduces a delay of 16 hours (16 x 60 x 60).
After changing the value, reboot the system.
In situations in which mirrored volumes are in use, and an application time-out is being hit when there is still a valid plex with the data, the dmp_failed_io_threshold can be tuned to a smaller value so that the I/O can succeed on the mirror without triggering an application failure.
▼ DMP Failback/Failover Support in Base VxVM
At the time of release, only the following arrays and Operating System versions have been certified for Failback/Failover support:
◆ Arrays: T3, T3+, 6120 arrays
◆ Operating System Version: Solaris 8
If the array is configured as A/PF, vxdmp will not failback the path until you run vxdctl enable.
for the latest certified support matrix, see the VERITAS support web site.
▼ Failover/Failback Support in a CVM Environment
At the time of release, only the following array and operating System versions have been certified for Failback/Failover in a CVM environment:
◆ Arrays: HDS9500 (in MPxIO mode), LST FastT
◆ Operating System Version: Solaris 8
If this array is configured as A/PG, manual failback will only occur after the original primary path is restored by running vxdctl enable on all nodes of the cluster.
If this array is configured as A/PG or A/P, manual failback will only occur after the original primary path is restored by running vxdctl enable on all nodes of the cluster.
Note You will experience some ping-pong effect because each node may be issuing I/O to a different controller. The effect of the ping-pong effect on performance depends on the hardware vendor.
36 VERITAS Volume Manager Release Notes

Software Limitations and Problems in VERITAS Volume Manager 4.0
Cluster Functionality Issues If a node leaves the cluster while a plex is being attached to a volume, the volume can remain in the SYNC state indefinitely. To avoid this, after the plex attach completes, resynchronize the volume manually with the following command:
# vxvol -f resync volume
[Sun Bug I.D. 4087612; IR 20448]
▼ RAID-5 Volumes
VERITAS Volume Manager does not currently support RAID-5 volumes in cluster-shareable disk groups.
▼ File Systems Supported in Cluster-Shareable Disk Groups
The use of file systems other than VERITAS Cluster File System™ (CFS) on volumes in cluster-shareable disk groups can cause system deadlocks.
▼ Reliability of Information About Cluster-Shareable Disk Groups
If the vxconfigd program is stopped on both the master and slave nodes and then restarted on the slaves first, VERITAS Volume Manager output and VEA displays are not reliable until the vxconfigd program is started on the master and the slave is reconnected (which can take about 30 seconds). In particular, shared disk groups are marked disabled and no information about them is available during this time. The vxconfigd program must therefore be started on the master first.
▼ Messages Caused by Open Volume Devices
When a node aborts from the cluster, open volume devices in shared disk groups on which I/O is not active are not removed until the volumes are closed. If this node later joins the cluster as the master while these volumes are still open, the presence of these volumes does not cause a problem. However, if the node tries to rejoin the cluster as a slave, this can fail with the following error message:
cannot assign minor #
This message is accompanied by the console message:
WARNING:minor number ### disk group group in use
37

Software Limitations and Problems in VERITAS Volume Manager 4.0 VERITAS Volume Manager Release Notes
Data Integrity Issues
▼ Disks with Write-Back Caches
Disk drive configured to use a write-back cache, or disk arrays configured with volatile write-back cache, exhibit data integrity problems. The problems occur after a power failure, SCSI bus reset, or other event in which the disk has cached data, but has not yet written it to non-volatile storage. Contact your disk drive or disk array manufacturer to determine whether your system disk drives use a write-back cache, and if the configuration can be changed to disable write-back-caching.
▼ Usage of dmp_failed_io_threshold Parameter
See “DMP Issues” on page 34 for information on this issue.
Snapshot and Snapback Issues
▼ System Crashes During Snapback Operation
The following command executes a default snapback operation, resynchronizing the snapshot plexes from the original volume:
# vxassist -o resyncfromoriginal snapback snapvol
If the system crashes while the snapback operation is still in progress, the snapshot plexes are not associated with any volume when the system comes back up and the volumes are restarted.
To recover from this situation, use the following procedure:
1. Use the following commands to discover the original volume name of each snapshot plex:
# VOLRID=‘vxprint -g diskgroup -p -F “%snap_rid” plexname‘# volprint -g diskgroup -n -v -e v_rid=$VOLRID‘
2. Using the information discovered in step 1, identify the volumes to which the snapshot plexes originally belonged, and reattach them to those original volume as in the following command:
# volplex att original_volume plex1 [plex2 ...]
The following command executes a snapback operation, resynchronizing the original volume from the snapshot plexes:
# vxassist -o resyncfromreplica snapback snapvol
38 VERITAS Volume Manager Release Notes

Software Limitations and Problems in VERITAS Volume Manager 4.0
If the system crashes while the operation is still in progress, the original volume fails with the following error message when the system comes back up:
VxVM vxvol ERROR V-5-1-1198 ume <original volume> has no CLEAN or non-volatile ACTIVE plexes
To correct this situation, use the following procedure:
1. Disassociate all STALE plexes from the original volume:
# vxplex dis staleplex1 [staleplex2 ...]
2. Convert all SNAPTMP plexes in the original volume to ACTIVE:
# vxplex convert state=ACTIVE tmpplex1 [tmpplex2 ...]
3. Restart the original volume:
# vxvol start original_volume
4. Reattach the plexes that you disassociated in step 1:
# vxplex att original_volume staleplex1 [staleplex2 ...
This procedure results in a full synchronization of these plexes from the original volume. [IR 87206]
▼ Starting Space-Optimized Instant Snapshots
Before a space-optimized instant snapshot can be enabled for read/write operations, a disabled underlying cache object must be in the ENABLED state. If the cache volume underneath a cache object is also disabled, this volume must be started before starting the cache object. If this is not done, I/O operations on the space-optimized instant snapshot volume may fail and make the snapshot unusable. If any volume in an instant snapshot hierarchy is started, the volumes which are part of the hierarchy are also started automatically. However, if a space-optimized snapshot is present in the hierarchy, and you use one of the following commands to start the volume, the cache object underneath the snapshot is not enabled automatically:
# vxrecover [-g diskgroup] -s volume# vxvol [-g diskgroup] startall# vxvol [-g diskgroup] start volume
Workaround: Use the following command to start all the volumes in a disk group (for example, after importing it). This operation automatically starts the cache volumes and cache objects before staring the snapshots.
# vxrecover [-g diskgroup] -s
[IR 138087]
39

Software Limitations and Problems in VERITAS Volume Manager 4.0 VERITAS Volume Manager Release Notes
▼ Using Snapshots as Root Disks
It is recommended that you do not use snapshots of the root volume as a bootable volume. (A snapshot can be taken to preserve the data of the root volume, but the snapshot will not be bootable. The data from the snapshot would have to be restored to the original root volume before the machine could be booted with the preserved data.)
▼ Warning Message when Taking a Snapshot of a CFS File System
When taking a snapshot of a CFS file system, the following warning message might appear: vxio: WARNING: vxvm:vxio: Plex plex detached from volume vol
Workaround: No action is required. This behavior is normal and is not the result of an error condition.
▼ File System Check of a Snapshot
Normally, a file system would have no work to do when a snapshot is taken. However, if a CFS file system is not mounted, it is likely that the fsck of the snapshot will take longer than is usually necessary, depending on the I/O activity at the time of the snapshot.
Workaround: When taking a snapshot of a CFS file system, you should ensure that at least one of the volumes defined in the command line is mounted on the CVM master.
▼ Mount Operation Can Cause Inconsistencies in Snapshots
Inconsistencies can arise in point-in-time copies if any of the following snapshot operations are performed on a volume while a file system in the volume is being mounted: vxassist snapshot, vxplex snapshot, vxsnap make, vxsnap refresh, or vxsnap restore.
▼ System May Hang During Snapshot Creation
The following command creates an instant snapshot:
# vxsnap -g diskgroup [-o options ] make snapshot_tuple ...
where each snapshot_tuple specifies a separate snapshot that is to be created.
If a large number of instant snapshots are taken atomically using the vxsnap make command, the command may hang. This happens when the character length of the snapshot tuple arguments (including spaces) exceeds twice the value of pipe size. (The value of pipe size can be found by using the ulimit -a command.)
Workarounds:
❖ When taking multiple snapshots using the vxsnap command, ensure that the sum length of the arguments (including spaces) does not exceed twice the value of pipe size.
40 VERITAS Volume Manager Release Notes

Software Limitations and Problems in VERITAS Volume Manager 4.0
❖ Use the -d description_file option with the vxsnap make command when creating multiple snapshots with large length arguments. First create a description file describing multiple snapshots. The following is an example description file used to create ten space-optimized snapshots on a cache-object:
source=vol0/new=svol0/cache=c0source=vol1/new=svol1/cache=c0source=vol2/new=svol2/cache=c0source=vol3/new=svol3/cache=c0source=vol4/new=svol4/cache=c0source=vol5/new=svol5/cache=c0source=vol6/new=svol6/cache=c0source=vol7/new=svol7/cache=c0source=vol8/new=svol8/cache=c0source=vol9/new=svol9/cache=c0
Then use the following command to take the snapshots:
# vxsnap -g diskgroup -d description_file make
[IR 138354]
Intelligent Storage Provisioning Issues
▼ Creating Application Volumes
To create application volumes successfully, the appropriate licenses must be present on your system. For example, you need a full VERITAS Volume Manager and a VERITAS FlashSnap license to use the instant snapshot feature. Vendors of disk arrays may also provide capabilities that require special licenses for certain features of their hardware. [Sun Bug ID 4948093, IR 137185]
Miscellaneous Issues
▼ Auto-import of Disk Groups
If a disk that failed while a disk group was imported returns to life after the group has been deported, the disk group is auto-imported the next time the system boots. This contradicts the normal rule that only disk groups that are (non-temporarily) imported at the time of a crash are auto-imported.
If it is important that a disk group not be auto-imported when the system is rebooted, the disk group should be imported temporarily when the intention is to deport the disk group (for example, in HA configurations). Use the -t flag to vxdg import. [IR 13741]
41

Software Limitations and Problems in VERITAS Volume Manager 4.0 VERITAS Volume Manager Release Notes
▼ Volumes Not Started Following a Reboot
During very fast boots on a system with many volumes, vxconfigd may not be able to auto-import all of the disk groups by the time vxrecover -s is run to start the volumes. As a result, some volumes may not be started when an application starts after reboot.
Workaround: Check the state of the volumes before starting the application, or place a sleep (sleep sec) before the last invocation of vxrecover. [IR 14450]
▼ Forcibly Starting a Volume
The vxrecover command starts a volume only if it has at least one plex that is in the ACTIVE or CLEAN state and is not marked STALE, IOFAIL, REMOVED, or NODAREC. If such a plex is not found, VERITAS Volume Manager assumes that the volume no longer contains valid up-to-date data, so the volume is not started automatically. A plex can be marked STALE or IOFAIL as a result of a disk failure or an I/O failure. In such cases, to force the volume to start, use the following command:
# vxvol -f start volume
However, try to determine what caused the problem before you run this command. It is likely that the volume needs to be restored from backup, and it is also possible that the disk needs to be replaced. [IR 14915]
▼ Sharing Disk Groups in VVR
If you are using VERITAS Volume Replicator (VVR) 4.0, and plan to share disk groups, you should refer to incident 102598 in the VERITAS Volume Replicator Release Notes. [IR 102598]
▼ Dual Path Support for JBOD configurations
Dual path support for JBOD configurations is currently provided with Storage Foundation QuickStart for backwards compatibility. This support will not be available in future VxVM releases. [IR 125877]
▼ Default Disk Format
If the -i option is not specified to the vxdisksetup command, the disk format defaults to simple, and not cdsdisk as implied by the vxdisksetup(1M) manual page. [IR 137439]
▼ Failure of Memory Allocation
On machines with very small amounts of memory (32 megabytes or less), under heavy I/O stress conditions against high memory usage volumes (such as RAID-5 volumes), a situation occurs where the system cannot allocate physical memory pages any more.
42 VERITAS Volume Manager Release Notes

Software Limitations and Problems in VERITAS Volume Manager 4.0
▼ Using Long Device Paths with Sun Online:Backup
The Sun Online:BackupTM facility does not accept the long device path names for volumes. A limitation of Online: Backup is that it does not accept device paths longer than 24 characters.
Workaround: Use symbolic links to the longer /dev/vx/dsk/volname paths from a shorter pathname.
▼ Messages About VVR Licenses
The following messages may get displayed on the console during a system reboot or during VxVM initialization when you are running vxinstall:
No VVR license installed on the system; vradmind not startedNo VVR license installed on the system; in.vxrsyncd not started
These messages are informational only, and can be safely ignored if you are not a VERITAS Volume Replicator (VVR) user.
▼ Failure of Certain Operations on ISP Volumes
The vxvoladm add log, add mirror, growby and growto operations fail on an ISP volume that is being evacuated. [IR 137800]
▼ Removing Columns from ISP Volumes Containing UFS File Systems
If a UFS file system is configured on an ISP volume, do not specify layout=shrink to the vxvoladm command when removing columns from the volume. A UFS file system cannot be shrunk even if it is first unmounted. See the vxresize(1M) manual page for more information. [IR 139493]
▼ Online Transformation of ISP Volumes
The online transformation of an ISP volume is not necessarily complete if the vxtask command shows that synchronization of the volume has finished. [IR 139576]
▼ Displaying the Association Between Templates and ISP Volumes
If a template is associated with any ISP volumes, you cannot dissociate the template from a storage pool, or uninstall the template from a disk group without first deleting the volumes. To display which templates are associated with ISP volumes, use the following command:
# vxvoladm -g diskgroup printintent volume_name ...
[IR 139790]
43

Software Limitations and Problems in VERITAS Volume Manager 4.0 VERITAS Volume Manager Release Notes
▼ Number of Columns in a RAID-5 ISP Volume
If an ISP volume is created with the RAID-5 capability, the parameters ncols and nmaxcols refer only to the number of data columns, and do not include the parity column. For this reason, the actual number of columns that are created in such a volume is always one more than the number specified. [Sun Bug I.D. 4976891]
Solaris Issues
▼ Compatibility of Kernel Drivers
The versions of the kernel drivers for VERITAS Volume Manager are incompatible with some versions of the Solaris operating system. Multiple kernel modules are installed and properly maintained by the installation and upgrade software. It is possible for a mismatch to occur (for example, if the administrator moves the kernel driver files). If a mismatch occurs, the VERITAS Volume Manager kernel prints a warning message on the console similar to the following message:
WARNING: vxio: incompatible kernel version (5.X), expecting 5.X
If this message is displayed, the system must be booted for recovery (as explained in the VERITAS Volume Manager Troubleshooting Guide) and the correct kernel modules installed. To install the correct kernel module versions, cd to the kernel/drv directory of the mounted root file system. To list the VERITAS Volume Manager kernel modules, use the following command:
# ls -l vxio* vxspec* vxdmp*
The release-specific versions of the kernel modules are stored as module.OS_release, where OS and release are the result of running the uname -s and uname -r commands on the system, respectively.
For example, on a misconfigured system running Solaris 2.6, the listing for vxio* may be similar to the following:
-rw-r--r-- 1 root other 1682424 ... vxio-rw-r--r-- 1 root sys 1647664 ... vxio.SunOS_5.7-rw-r--r-- 1 root sys 1661340 ... vxio.SunOS_5.8-rw-r--r-- 1 root sys 1682424 ... vxio.SunOS_5.9
The size of the vxio kernel module that is in use matches the vxio.SunOS_5.8 version. To correct the problem, copy the SunOS_5.6 versions to the in-use module name:
# cp vxio.SunOS_5.6 vxio
Finally reboot the system. [IR 13312]
44 VERITAS Volume Manager Release Notes

Software Limitations and Problems in VERITAS Volume Manager 4.0
▼ Encapsulation of Swap Partitions
During encapsulation, VERITAS Volume Manager does not consider a partition to be a swap partition unless its partition tag (as shown by prtvtoc) is swap or 3. Any partition used as a swap partition but not tagged as such is encapsulated as a file system. In the vfstab file, a note is made that the partition has been encapsulated, but the vfstab entry is not translated, and thus, the partition is not added as a swap area as part of the boot process. All partitions used as swap must be marked with the swap tag to be properly encapsulated. [IR 13388]
▼ Protection of Block 0 on Disks
Since the disk label is stored in block 0 of the disk, block 0 must not be used (that is, no application should write any information in block 0). Special protection has been built into VERITAS Volume Manager to protect block 0 from being overwritten.
▼ Failure of the dd Command with Large Volumes
The dd command in Solaris uses only lseek() to seek to a particular offset in a file. It does not use llseek(). This causes dd to fail on volumes greater than 2 gigabytes.
▼ Definition of Disk Slice 2
On Solaris, slice 2 of a disk is the full disk by default. When finding connected disks, VERITAS Volume Manager checks slice 2 of a disk. Slice 2 on a disk must always be defined as the full disk slice with a tag of 0x05.
▼ Messages Caused by Long Swap Volume Names
If multiple swap partitions are encapsulated on your disks, VERITAS Volume Manager names them as swapvol, swapvol1, swapvol2, and so on. When the system is rebooted, the following error message is displayed:
/dev/vx/dsk/swapvol2 : Overlapping swap files are not allowed
However, the swap devices are correctly added with no ill effects on the system. To avoid seeing this message, shorten the names of swap volumes (other than swapvol) from swapvoln to swapn.
45

Software Limitations and Problems in VERITAS Volume Manager 4.0 VERITAS Volume Manager Release Notes
VEA Issues
Note Refer to the VERITAS Volume Manager Installation Guide for information on how to set up and start the VEA server and client.
▼ Accessing the Task Log
The task log accessed from the Log tree is not supported. At this time, entries are written to the log file in /var/vx/isis/command.log. [IR 76683, 97076]
▼ Setting a Comment on an ISP Volume
If you create a new ISP volume by right-clicking on a user template and selecting the New Volume menu item, a comment that you specify to the Create Volume Dialog is not set on the volume. To specify a comment for the newly created volume, select the volume, choose Properties from the popup menu, enter a comment in the Comment field and then click OK. [IR 137098]
▼ Administering a Cache Volume Created on an ISP Volume
It may not be possible to use the VEA GUI to add or remove mirrors to or from a cache volume (used by space-optimized instant snapshots) that is created on an ISP volume, or to delete a cache volume. The cache object, but not the cache volume, is visible in the graphical interface.
Workaround: Stop and restart the VEA server. [IR 137625]
▼ Permitting Remote Access to the X Windows Server
The following X Windows system error may occur when starting VEA:
Xlib: connection to "hostname:0.0" refused by serverXlib: Client is not authorized to connect to Server
Workaround: Allow access to the local X server by using the following command:
# xhost + [hostname]
▼ Disk Group Creation Failure with Duplicate Disk ID
VEA fails to create a disk group with a duplicate disk ID, and gives no other options. [Sun Bug I.D. 4923820].
▼ Creating non-CDS disks
By default, VEA always creates CDS disk groups, and will therefore initialize disks with the CDS format. In order to create non-CDS disk groups through VEA, you need to create the following two files (or, edit the files accordingly if they already exist). This changes the
46 VERITAS Volume Manager Release Notes

Software Limitations and Problems in VERITAS Volume Manager 4.0
default format setting for disk creation from format=cdsdisk in the /etc/default/vxdisk file, and the default CDS attribute setting from cds=on in the /etc/default/vxdg file.
1. Create the file /etc/default/vxdisk, and add a line describing the desired non-CDS disk format as: format=simpleor format=sliced
2. Create the file /etc/default/vxdg, and add a line describing the CDS attribute as: cds=off
To create CDS disk groups at a later stage, you will need to change the settings back again to format=cdsdisk and cds=on. For more information, see the VERITAS VolumeManager Cross-Platform Data Sharing Administrator’s Guide.[Sun Bug ID 4913804]
▼ Using the Online Help
Selecting a hyper link from the last item in a list of items may result in the display of text prior to the required text. It may then be necessary to scroll through the displayed help text to find the desired text.
▼ Incorrect vxpool command
The VEA GUI may incorrectly show the -p option as an argument to the vxpool list command, although the command is not actually invoked. [Sun Bug ID4932404, IR 135566].
Internationalization Issues
▼ Some ISP Attributes Have Not Been Translated
The Intelligent Storage Provisioning (ISP) window for annotating a disk is not fully localized. In particular, auto-discovered attributes such as DiskGroup and Enclosure are not translated. [IR 139162]
▼ Inaccuracies in ISP Attribute Fields
The ISP User Template Wizard shows two “attribute value” fields rather than one “attribute value” and one “attribute name” field. [IR 139762]
47

Software Limitations and Problems in VERITAS Volume Manager 4.0 VERITAS Volume Manager Release Notes
Documentation Issues
▼ Undocumented vxsnap Options
The following options to the vxsnap command are not documented on the vxsnap(1M) manual page:
-d description_file Allows tuple definitions to be read from a description file
-m
-t tasktag
instead of from the command line. The tuples may be placed on separate lines in this file.
When used with the print keyword, displays detailed information about a volume’s DCO including the region size, the number of regions represented by each map, and the number of per volume maps.
When used with the syncstart keyword, defines a tag that can be used to track the synchronization task. The specified tag is a sequence of up to 16 alphanumeric characters.
▼ ISP Configuration Definitions File
The name of the ISP configuration definitions file is configuration_database.txt, and not alloc_capabilities.txt as shown in Appendix B, “Available ISP Definitions,” of the VERITAS Volume Manager User’s Guide—VEA. [Sun Bug ID 4972349, IR 140338].
▼ Resizing an ISP Volume
The parameters layout=config and layout=noconfig shown in the section “Increasing the Size of a Volume by a Specified Amount” on page 53 of the VERITAS Volume Manager Intelligent Storage Provisioning Administrator’s Guide should read layout=contig and layout=nocontig. [Sun Bug ID 4963729, IR 140517]
▼ No Pull-down Menu in the Name Storage Pools window
In the VERITAS Volume Manager 4.0 User’s Guide, a statement on page 78, step 6 states:
“Click next to go to the Name Storage Pools page. From the pulldown menu, select the names for your data pool and clone pool”.
However, there is no pull-down menu in the Name Storage Pools window. The Data Pool and Clone Pool text fields are automatically filled with the corresponding names from the selected Organized Principle option in Name Storage Pools window. [Sun bug ID 4964580, IR 140817]
48 VERITAS Volume Manager Release Notes

Adding Unsupported Disk Arrays to the JBOD Category
▼ Adding User Attributes
In the VERITAS Volume Manager 4.0 User’s Guide, a procedure on page 256 guides the user through adding user attributes. However the Guide does not match the software in the following two situations:
◆ Step 2 instructs you to click the Add button, but the this button is not highlighted until you actually add an attribute.
◆ There is no Save or Save and Exit button as mentioned in step 5.
Adding Unsupported Disk Arrays to the JBOD Category
Caution The procedure in this section ensures that dynamic multipathing is set up correctly on an array that is not supported by VERITAS Volume Manager. Otherwise, VERITAS Volume Manager treats the independent paths to the disks as separate devices, which can result in data corruption.
Use this procedure when adding an unsupported disk array after VERITAS Volume Manager has been installed:
1. Use the following command to identify the vendor ID and product ID of the disks in the array:
# /etc/vx/diag.d/vxdmpinq device_name
where device_name is the device name of one of the disks in the array (for example, /dev/vdsk/c1t20d0s2). Note the values of the vendor ID (VID) and product ID (PID) in the output from this command. For Fujitsu disks, also note the number of characters in the serial number that is displayed. The following is sample output:
# /etc/vx/diag.d/vxdmpinq /dev/rdsk/c1t20d0s2Vendor id (VID) : SEAGATEProduct id (PID): ST318404LSUN18GRevision : 8507Serial Number : 0025T0LA3H
In this example, the vendor ID is SEAGATE and the product ID is ST318404LSUN18G.
49

Adding Unsupported Disk Arrays to the JBOD Category VERITAS Volume Manager Release Notes
2. Enter the following command to add a new JBOD category:
# vxddladm addjbod vid=vendorid pid=productid [length=serialno_length]
where vendorid and productid are the VID and PID values that you found from the previous step. For example, vendorid might be FUJITSU, IBM, or SEAGATE. For Fujitsu devices, you must also specify the number of characters in the serial number as the argument to the length argument (for example, 10).
Note In VxVM 4.0, a SEAGATE disk is added as a JBOD device by default.
Continuing the previous example, the command to define an array of disks of this type as a JBOD would be:
# vxddladm addjbod vid=SEAGATE pid=ST318404LSUN18G
3. Enter the following command to bring the array under VxVM control:
# vxdctl enable
4. To verify that the array is now supported, enter the following command:
# vxddladm listjbod
The following is sample output from this command for the example array:
VID PID Opcode Page Code Page Offset SNO length=================================================================SEAGATE ALL PIDs 18 -1 36 12
5. To verify that the array is recognized, use the vxdmpadm listenclosure command as shown in the following sample output for the example array:
# vxdmpadm listenclosure allENCLR_NAME ENCLR_TYPE ENCLR_SNO STATUS=========================================================OTHER_DISKS OTHER_DISKS OTHER_DISKS CONNECTEDDisk Disk DISKS CONNECTED
The enclosure name and type for the array are both shown as being set to Disk. You can use the vxdisk list command to display the disks in the array:
# vxdisk listDEVICE TYPE DISK GROUP STATUSDisk_0 auto:none - - online invalidDisk_1 auto:none - - online invalid...
50 VERITAS Volume Manager Release Notes

Adding Unsupported Disk Arrays to the JBOD Category
6. To verify that the DMP paths are recognized, use the vxdmpadm getdmpnode command as shown in the following sample output for the example array:
# vxdmpadm getdmpnode enclosure=DiskNAME STATE ENCLR-TYPE PATHS ENBL DSBL ENCLR-NAME==================================================================Disk_0 ENABLED Disk 2 2 0 DiskDisk_1 ENABLED Disk 2 2 0 Disk...
This shows that there are two paths to the disks in the array.
For more information, enter the command vxddladm help addjbod, or see the vxddladm(1M) and vxdmpadm(1M) manual pages.
51

Available Documentation VERITAS Volume Manager Release Notes
Available Documentation The following documents accompany this VERITAS Volume Manager release:
◆ VERITAS Volume Manager Release Notes (this document)
◆ VERITAS Volume Manager Hardware Notes
◆ VERITAS Volume Manager Installation Guide
◆ VERITAS Volume Manager Administrator’s Guide
◆ VERITAS Volume Manager User’s Guide—VEA
◆ VERITAS Volume Manager Troubleshooting Guide
◆ VERITAS Flashsnap Point-In-Time Copy Solutions Administrator’s Guide
◆ VERITAS Volume Manager Cross-platform Data Sharing for Volume Manager Administrator’s Guide
◆ VERITAS Volume Manager Intelligent Storage Provisioning Administrator’s Guide
◆ VERITAS Volume Replicator Release Notes
◆ VERITAS Volume Replicator Installation Guide
◆ VERITAS Volume Replicator Configuration Notes
◆ VERITAS Volume Replicator Administrator’s Guide
◆ VERITAS Volume Replicator Administrative Services Administrator’s Guide
◆ Online manual pages
VEA provides online help files for both VxVM and VVR. To access the online help files, select the appropriate item from the Help menu or click Help in a dialog box.
Displaying Documentation Online This product includes online documentation in Adobe Portable Document Format (PDF) formats. You can view the documents online in this format.
To view PDF documents, you must use the Adobe Acrobat Reader. You can use Acrobat reader as a stand-alone application, or as a plug-in to your web browser. However, VERITAS Software assumes no responsibility for the correct installation or use of Acrobat Reader. For more information on the latest versions of Acrobat Reader, or for help with installation problems, visit the Adobe web site at: http://www.adobe.com.
52 VERITAS Volume Manager Release Notes

Available Documentation
English Versions of the Documentation The manuals are provided on the CD-ROM under the /CD_path/volume_manager/docs directory. If you have installed the VRTSvmdoc package, the documents are available at /opt/VRTSvxvm/docs:
◆ VERITAS Volume Manager Installation Guide
/opt/VRTSvxvm/docs/vxvm_ig.pdf
◆ VERITAS Volume Manager Administrator’s Guide
/opt/VRTSvxvm/docs/vxvm_ag.pdf
◆ VERITAS Volume Manager Troubleshooting Guide
/opt/VRTSvxvm/docs/vxvm_tshoot.pdf
◆ VERITAS Volume Manager Hardware Notes
/opt/VRTSvxvm/docs/vxvm_hwnotes.pdf
◆ VERITAS Volume Manager User’s Guide — VEA
/opt/VRTSvxvm/docs/vxvm_ug.pdf
◆ VERITAS FlashSnap Point-In-Time Copy Solutions Administrator’s Guide
/opt/VRTSvxvm/docs/pitc.pdf
◆ VERITAS Volume Manager Cross-platform Data Sharing for Volume Manager Administrator’s Guide
/opt/VRTSvxvm/docs/cdsag.pdf
◆ VERITAS Volume Manager Intelligent Storage Provisioning Administrator’s Guide
/opt/VRTSvxvm/docs/vxvm_ispag.pdf
Unformatted manual pages related to the VERITAS Volume Manager are located in the volume_manager/pkgs/VRTSvmman/reloc/VRTS/man directory on the CD-ROM. If you have installed the VRTSvmman package, the manual pages can be found in the /opt/VRTS/man directory. If you add this directory to your MANPATH environment variable, you can view these manual pages with the man(1) command.
The Volume Replicator manuals are installed under the following directories:
◆ VERITAS Volume Replicator Administrator’s Guide
/opt/VRTSvxvm/docs/vr_ag.pdf
◆ VERITAS Volume Replicator Configuration Notes
/opt/VRTSvxvm/docs/vr_config.pdf
53

Available Documentation VERITAS Volume Manager Release Notes
Printing Documentation To print the documentation, you must have access to a PostScript printer. If you are not sure how to do this, or whether or not you have this functionality, consult your system administrator.
You can print the documents using the print options in your Acrobat Reader viewer.
54 VERITAS Volume Manager Release Notes

Index
A A5x00 devices 11 alternate pathing
coexistence with DMP 11 application volumes 41 arrays
Hitachi 30 T3 31
auto failback 32
B B_FAILFAST 15 bookshelf CD 15 booting
error messages 33
C cache objects
starting 39 capabilities
licenses 41 CDS
disks and VEA 46 new feature 14
clusters issues 37
cluster-shareable disk groups CFS 37 reliability of information 37
concat mirror misleading message 29
configuration backup and restore 13 cross-platform data sharing (CDS) 14 CVM
failover/failback support 36 patch 12
D daemon
vxesd 29
data loss 35 DCO
version 20 29 dd
failure 45 ddi-failfast-supported 15 device discovery layer (DDL) 13 disk controller firmware 22 disk format
default 42 disk group
default behavior 15 disk group versions 7
upgrading 7 disk groups
auto-import 41 sharing in VVR 42
disk name truncated to 9 characters 29
disks CDS and VEA 46 initializing previously under VxVM control 24 insufficient space for encapsulation 31 replacing with vxdiskadm 27 simple 24 slice 2 45 write-back caches 38
DMP arrays certified for failover/failback 36 coexistence with alternate pathing 11 issues 35, 38 temporary file systems 17
dmp data loss 35
DMP (dynamic multipathing) SENA category devices 11
dynamic lun expansion 14
55

F fabric devices
restrictions 32 fabric disks
booting 33 file support
32-terabyte 17 Fujitsu disks 31
G getting help 2
H Hitachi disks 31 Hitachi extended copy feature 14 hot-relocation 34
disk failure 34
I I/O policy
non-persistence of 34 If 46 instant snapshots 13 intelligent storage provisioning (ISP) 13 ISP
administering a cache volume 46 attributes not translated 47 columns in a RAID-5 volume 44 configuration definitions file 48 inaccuracies in attribute field 47 resizing a volume 48 setting a comment on a volume 46
ISP volumes adding or removing columns 43 displaying associated templates 43 failure of operations on 43 online transformation of 43
J JBOD
adding unsupported disk arrays 49 dual path support 42
JNI cards errors 32
K kernel drivers
compatibility 44 knowledge base 5
L layered volumes
growing and shrinking 28 using vxvol and vxmend 28
licensing 19 add-on 18 CDS 19 full 18 photon 19 VVR 43
limitations software 21
log adding 27
long swap volume names 45
M memory allocation
failure 42 menu driven installation 14 mirror
adding 27 multi-device support 13
N new feature
online node addition 14 serial split brain 14 storage expert 14
new features 13 bookshelf CD 15 configuration backup and restore 13 cross-platform data sharing (CDS) 14 device discovery layer (DDL) 13 disability requirements conformance 14 dynamic lun expansion 14 Hitachi extended copy facility 14 instant snapshots 13 intelligent storage provisioning (ISP) 13 menu driven installation 14 multi-device support 13 unique number for error messages 15
O old layout attribute
replacement 28 Online backup
long device path names 43 online help 47 online invalid 17 online node addition 14
56 VERITAS Volume Manager Release Notes

P patches 12
A5x00 devices 11installation 24uninstallation 24
pkgaddsystem hang 34
pulldown menu 48
R RAID-5
no support in cluster-shareable disk groups 37
releases temination of support 20
restoring VxVM configuration 14, 15root disk
relayout 30
S serial split brain 14SES driver
system hang 33SFCFS
i/o fencing not supported 31SIGHUP
console message 27snapback
system crash 38snapshot
system hangs during creation of 40snapshots
CFS file system 40file system check 40mount operations 40starting 39using as root disks 40
Solarisissues 44
space-optimized instant snapshotsstarting 39
storage expert 14sub-volume
disabling 30parent 30
Sun SCSI Enclosure Service (SES)driversystem hang 33
Sun StorEdge 6120/6320 32sun StorEdge 6120/6320
no support for auto failback 32
Sun StorEdge 6120/6320 array partitioning disks 26
Sun StorEdge Traffic Manager 32swap partitions
encapsulation 45swap volume
shrinking 27
T T3 array
no support for auto failback 32T3B firmware upgrade 23
U unique number for error messages 15upgrade
host crash 26interruption 26
upgrade scripterror messages 25
user attributesadding 49
VV480 enclosures
replacing disks in 31V880 enclosures
replacing disks in 31VEA
disk group creation failure 46issues 46vxpool 47
volumesforcibly starting 42maximum size 30not started during reboot 42showing as DISABLED 26starting with version 20 DCO 29
VRTSexplorer 3vxdiskadm
truncates disk names to 9 characters 29vxdmpadm
default I/O policy 32vxesd 29vxinstall
simplification 16vxpool 47vxsnap
undocumented options 48VxVM
57

obtaining system information 3 XVxVM configuration X windows server
restoring 14, 15 permitting access 46
58 VERITAS Volume Manager Release Notes
Copyright © 2022 FDOKUMEN