USE CARPENTRY TOOLS AND EQUIPMENT CPCCCA2002B
214
USE CARPENTRY TOOLS AND EQUIPMENT CERTIFICATE II IN BUILDING AND CONSTRUCTION (PATHWAY – TRADES) CPCCCA2002B LEARNER’S GUIDE BUILDING AND CONSTRUCTION BC2190
-
Upload
khangminh22 -
Category
Documents
-
view
2 -
download
0
Transcript of USE CARPENTRY TOOLS AND EQUIPMENT CPCCCA2002B

USE CARPENTRY TOOLS AND EQUIPMENTCERTIFICATE II IN BUILDING AND CONSTRUCTION
(PATHWAY – TRADES)CPCCCA2002B
LEARNER’S GUIDE
BUILDING AND CONSTRUCTION
BC2190

CPCCCA2002B
Use carpentry tools and equipment
Learner’s guide

Copyright and Terms of Use
© Department of Training and Workforce Development 2016 (unless indicated
otherwise, for example ‘Excluded Material’).
The copyright material published in this product is subject to the Copyright Act 1968
(Cth), and is owned by the Department of Training and Workforce Development or,
where indicated, by a party other than the Department of Training and Workforce
Development. The Department of Training and Workforce Development supports
and encourages use of its material for all legitimate purposes.
Copyright material available on this website is licensed under a Creative Commons
Attribution 4.0 (CC BY 4.0) license unless indicated otherwise (Excluded Material).
Except in relation to Excluded Material this license allows you to:
Share — copy and redistribute the material in any medium or format
Adapt — remix, transform, and build upon the material for any purpose, even commercially
provided you attribute the Department of Training and Workforce Development as
the source of the copyright material. The Department of Training and Workforce
Development requests attribution as: © Department of Training and Workforce
Development (year of publication).
Excluded Material not available under a Creative Commons license:
1. The Department of Training and Workforce Development logo, other logos and trademark protected material; and
2. Material owned by third parties that has been reproduced with permission. Permission will need to be obtained from third parties to re-use their material.
Excluded Material may not be licensed under a CC BY license and can only be used
in accordance with the specific terms of use attached to that material or where
permitted by the Copyright Act 1968 (Cth). If you want to use such material in a
manner that is not covered by those specific terms of use, you must request
permission from the copyright owner of the material.
If you have any questions regarding use of material available in this product, please
contact the Department of Training and Workforce Development.
Training Sector Services
Telephone: 08 6212 9789
Email: [email protected]
Website: www.dtwd.wa.gov.au

This resource contains the unit of competency from the CPC08 Construction, Plumbing and Services Training Package – CPCCCA2002B Use carpentry tools and equipment © Commonwealth of Australia, used under Creative Commons Attribution‑No Derivative Works 3.0 Australia licence <www.creativecommons.org.au>.
Australian Standard® is a registered trade mark of Standards Australia Limited ACN 087 326 690.
This product contains various images ©Thinkstock 2014, used under licence. These images are protected by copyright law and are not to be reproduced or re‑used in other materials without permission from the owner of Thinkstock.
© VET (WA) Ministerial Corporation 2014
All rights reserved. No part of this publication may be reproduced, stored in a retrieval system or transmitted in any form or by any means, electronic, mechanical, photocopying, recording or otherwise, without the prior written permission of the Department of Training and Workforce Development.
While every effort has been made to ensure the accuracy of the information contained in this publication, no guarantee can be given that all errors and omissions have been excluded. No responsibility for loss occasioned to any person acting or refraining from action as a result of the material in this publication can be accepted by the Department of Training and Workforce Development.
This publication is available in alternative formats upon request.
Produced in partnership with:
Published by and available from:
Department of Training and Workforce Development
1 Prospect Place West Perth WA 6005Tel: (08) 6212 9700 Fax: (08) 9227 8393Email: [email protected]: www.vetinfonet.dtwd.wa.gov.au
First published 2014
ISBN 978‑1‑74205‑921‑1

© VET (WA) Ministerial Corporation 2014 BC2190 3
Contents
Welcome ................................................................................................................. 5Qualification overview.............................................................................................. 5
Unit overview ........................................................................................................... 6
Skills recognition and recognition of prior learning (RPL)........................................ 8
Resources ............................................................................................................... 8
Self‑checklist ........................................................................................................... 8
About the icons ...................................................................................................... 10
Section 1 – Planning and preparing for a work task ........................................ 11Introduction .............................................................................................................11
Finding out what to do ........................................................................................... 12
Assessing site conditions ...................................................................................... 15
Organising tools, plant and equipment .................................................................. 16
Organising materials.............................................................................................. 17
Working safely ....................................................................................................... 19
Environmental issues ............................................................................................ 24
Section 2 – Hand tools ........................................................................................ 25Introduction ............................................................................................................ 25
Types of hand tools ............................................................................................... 26
Section 3 – Power tool safety ............................................................................. 85Introduction ............................................................................................................ 85
Working with power tools ....................................................................................... 86
Electrical safety ..................................................................................................... 86
Section 4 – Power tools ...................................................................................... 97Introduction ............................................................................................................ 97
Types of power tools.............................................................................................. 98

BC2190 © VET (WA) Ministerial Corporation 20144
Use carpentry tools and equipmentCPCCCA2002B
Section 5 – Clean‑up ......................................................................................... 147Introduction .......................................................................................................... 147
Waste management ............................................................................................ 148
Tools, plant and equipment.................................................................................. 153
Storage of tools, plant and equipment ................................................................. 154
Annex A – Unit details
Annex B – Assessments

© VET (WA) Ministerial Corporation 2014 BC2190 5
Welcome
Welcome to the learner’s guide for CPCCCA2002B Use carpentry tools and equipment.
This guide will take you through the process of learning how to identify, select, use and maintain carpentry tools, plant and equipment. Skills and knowledge will be developed in workplace communication, planning and organising, work health and safety (WHS), quality requirements and relevant legislation.
Areas of explanation include:
• planning and preparing for work tasks
• identifying and selecting tools, plant and equipment including hand, power and pneumatic tools
• using and maintaining tools, plant and equipment
• cleaning up the work area.
In addition to the classroom‑based training for this unit, you will also spend time in the workshop, working with carpentry tools and equipment.
Qualification overviewThis unit of competency, CPCCCA2002B Use carpentry tools and equipment, forms part of Certificate II in Building and Construction (Pathway – Trades), a pre‑vocational course for learners seeking to gain an apprenticeship in the building and construction industry. The focus of this course is on developing relevant technical, vocational and interpersonal competencies as well as skills, knowledge and experiences that may be transferable to other industry areas. You will also gain employability skills relevant to an entry level employee of the industry.
The first component of the course consists of seven core units of competency (common to 11 construction trades) and a period of work placement. This component, which would typically be delivered over a one‑year period, is designed to provide learners with a tradesperson’s introduction to the building and construction industry.
In the second component of the course, typically undertaken in the second year of study, you will choose from 10 trade‑specific streams of units of competency that enable you to focus your learning on a particular trade such as bricklaying, painting or carpentry.
To progress further in the industry, beyond this introductory level, you will then need to gain an apprenticeship in your chosen trades area, or pursue further training within the building and construction field.
Note: If you are completing this unit as part of a different qualification, your lecturer will give you the relevant information.
BC2190 © VET (WA) Ministerial Corporation 20146
Use carpentry tools and equipmentCPCCCA2002B
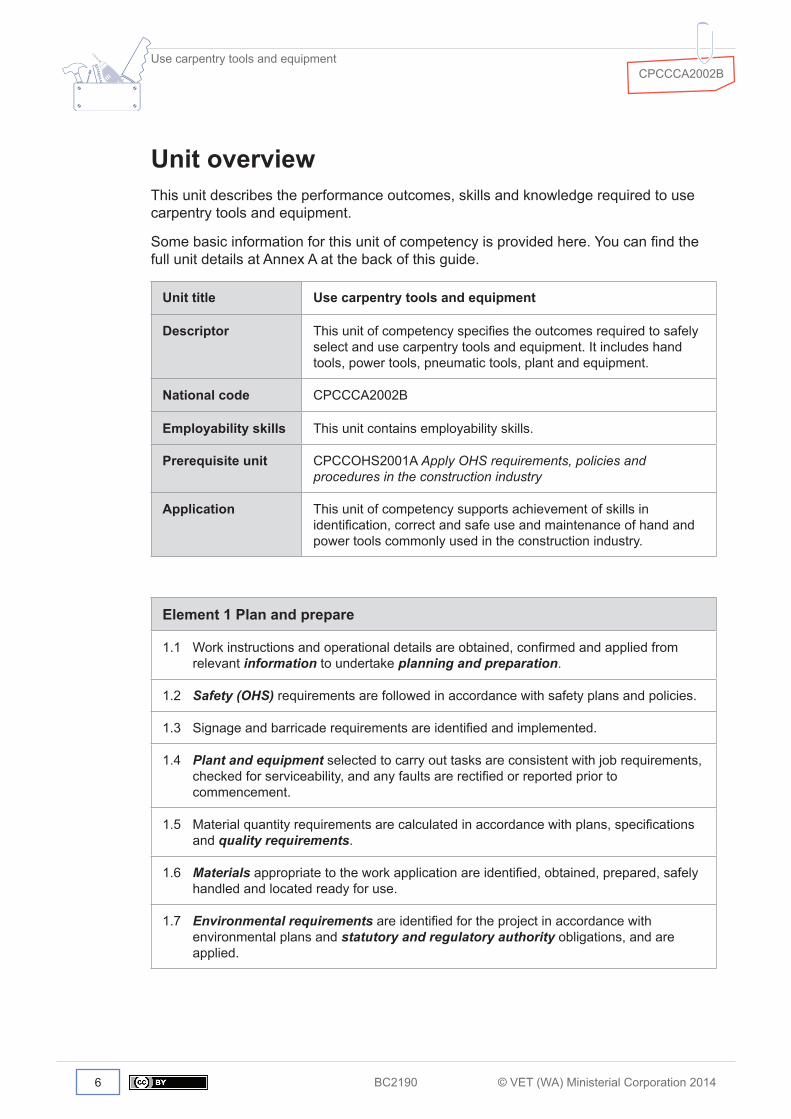
Unit overviewThis unit describes the performance outcomes, skills and knowledge required to use carpentry tools and equipment.
Some basic information for this unit of competency is provided here. You can find the full unit details at Annex A at the back of this guide.
Unit title Use carpentry tools and equipment
Descriptor This unit of competency specifies the outcomes required to safely select and use carpentry tools and equipment. It includes hand tools, power tools, pneumatic tools, plant and equipment.
National code CPCCCA2002B
Employability skills This unit contains employability skills.
Prerequisite unit CPCCOHS2001A Apply OHS requirements, policies and procedures in the construction industry
Application This unit of competency supports achievement of skills in identification, correct and safe use and maintenance of hand and power tools commonly used in the construction industry.
Element 1 Plan and prepare
1.1 Work instructions and operational details are obtained, confirmed and applied from relevant information to undertake planning and preparation.
1.2 Safety (OHS) requirements are followed in accordance with safety plans and policies.
1.3 Signage and barricade requirements are identified and implemented.
1.4 Plant and equipment selected to carry out tasks are consistent with job requirements, checked for serviceability, and any faults are rectified or reported prior to commencement.
1.5 Material quantity requirements are calculated in accordance with plans, specifications and quality requirements.
1.6 Materials appropriate to the work application are identified, obtained, prepared, safely handled and located ready for use.
1.7 Environmental requirements are identified for the project in accordance with environmental plans and statutory and regulatory authority obligations, and are applied.

© VET (WA) Ministerial Corporation 2014 BC2190 7
Welcome
Element 2 Identify and select hand, power and pneumatic tools
2.1 Hand, power and pneumatic tools, their functions, operations and limitations are identified and selected.
2.2 OHS requirements for using hand, power and pneumatic tools are recognised and adhered to.
2.3 Lubricants, hydraulic fluid and water are checked according to manufacturer recommendations.
Element 3 Use tools
3.1 Hand tools used are appropriate to the task and materials and are in accordance with OHS requirements.
3.2 Power and pneumatic tools are safely and effectively used in accordance with manufacturer recommendations and state or territory OHS requirements.
3.3 Tools are sharpened and maintained according to manufacturer recommendations.
Element 4 Identify, select and use plant and equipment
4.1 Plant and equipment are selected and used consistent with OHS requirements and the needs of the job.
4.2 Lubricants, hydraulic fluid and water are checked according to manufacturer recommendations.
4.3 Plant and equipment are maintained in accordance with manufacturer recommendations and standard work practices.
Element 5 Clean up
5.1 Work area is cleared and materials disposed of, reused or recycled in accordance with legislation, regulations, codes of practice and job specification.
5.2 Plant, tools and equipment are cleaned, checked, maintained and stored in accordance with manufacturer recommendations and standard work practices.

BC2190 © VET (WA) Ministerial Corporation 20148
Use carpentry tools and equipmentCPCCCA2002B
Skills recognition and recognition of prior learning (RPL)You are encouraged to discuss with your lecturer any previous courses or work experience in which you have participated so that it can be recognised. Evidence must be provided.
ResourcesNo specific resources are required for this unit.
RequiredYou will need to provide the following:
• an A4 notepad
• an A4 file for notes, handouts and printed documents
• pens, pencils, eraser and highlighters.
Self‑checklistAs you work through this guide you should return to this checklist and record your progress. Where you understand something and think that you can perform it ‘easily’, congratulations. Where your response is ‘with help’ – revise the material in that section and/or discuss with your lecturer or other learners in your group.
CPCCCA2002B Use carpentry tools and equipment I understand
Element 1 Plan and prepare Easily With help
1.1 Work instructions and operational details are obtained, confirmed and applied from relevant information to undertake planning and preparation.
1.2 Safety (OHS) requirements are followed in accordance with safety plans and policies.
1.3 Signage and barricade requirements are identified and implemented.
1.4 Plant and equipment selected to carry out tasks are consistent with job requirements, checked for serviceability, and any faults are rectified or reported prior to commencement.
1.5 Material quantity requirements are calculated in accordance with plans, specifications and quality requirements.

© VET (WA) Ministerial Corporation 2014 BC2190 9
Welcome
1.6 Materials appropriate to the work application are identified, obtained, prepared, safely handled and located ready for use.
1.7 Environmental requirements are identified for the project in accordance with environmental plans and statutory and regulatory authority obligations, and are applied.
Element 2 Identify and select hand, power and pneumatic tools Easily With help
2.1 Hand, power and pneumatic tools, their functions, operations and limitations are identified and selected.
2.2 OHS requirements for using hand, power and pneumatic tools are recognised and adhered to.
2.3 Lubricants, hydraulic fluid and water are checked according to manufacturer recommendations.
Element 3 Use tools Easily With help
3.1 Hand tools used are appropriate to the task and materials and are in accordance with OHS requirements.
3.2 Power and pneumatic tools are safely and effectively used in accordance with manufacturer recommendations and state or territory OHS requirements.
3.3 Tools are sharpened and maintained according to manufacturer recommendations.
Element 4 Identify, select and use plant and equipment Easily With help
4.1 Plant and equipment are selected and used consistent with OHS requirements and the needs of the job.
4.2 Lubricants, hydraulic fluid and water are checked according to manufacturer recommendations.
4.3 Plant and equipment are maintained in accordance with manufacturer recommendations and standard work practices.
Element 5 Clean up Easily With help
5.1 Work area is cleared and materials disposed of, reused or recycled in accordance with legislation, regulations, codes of practice and job specification.
5.2 Plant, tools and equipment are cleaned, checked, maintained and stored in accordance with manufacturer recommendations and standard work practices.
BC2190 © VET (WA) Ministerial Corporation 201410
Use carpentry tools and equipmentCPCCCA2002B
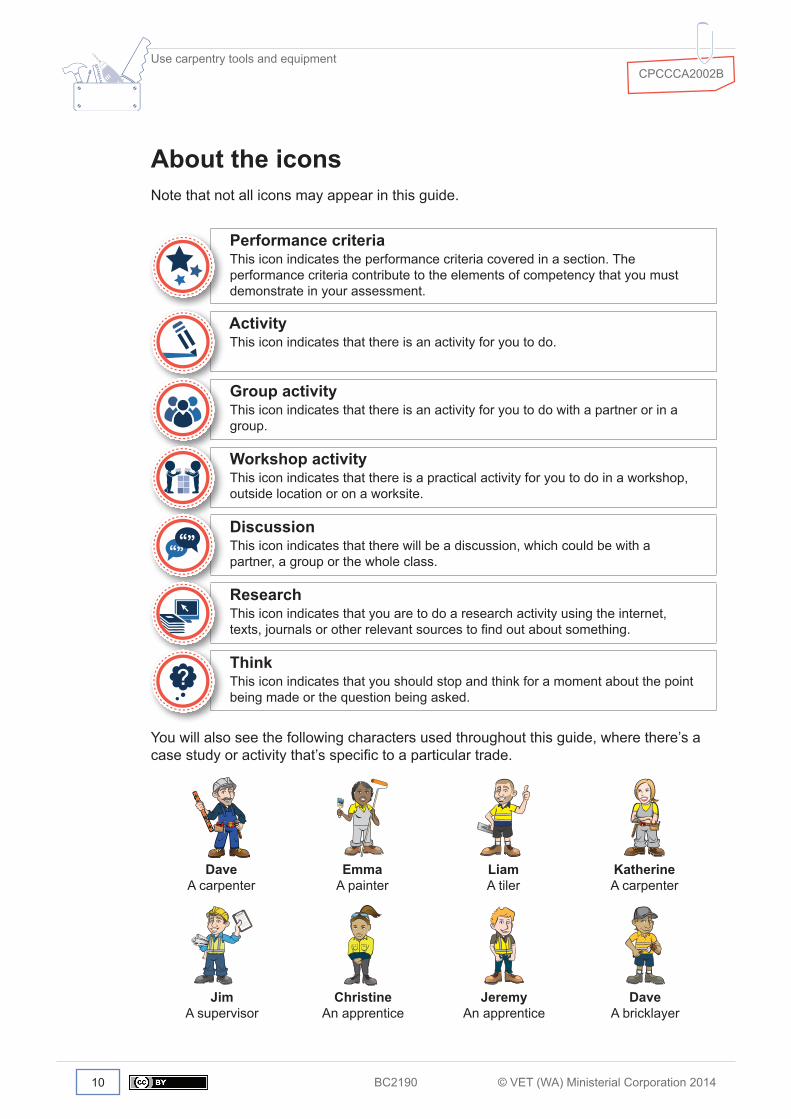
About the iconsNote that not all icons may appear in this guide.
Performance criteriaThis icon indicates the performance criteria covered in a section. The performance criteria contribute to the elements of competency that you must demonstrate in your assessment.
Activity This icon indicates that there is an activity for you to do.
Group activity This icon indicates that there is an activity for you to do with a partner or in a group.
Workshop activityThis icon indicates that there is a practical activity for you to do in a workshop, outside location or on a worksite.
Discussion This icon indicates that there will be a discussion, which could be with a partner, a group or the whole class.
Research This icon indicates that you are to do a research activity using the internet, texts, journals or other relevant sources to find out about something.
Think This icon indicates that you should stop and think for a moment about the point being made or the question being asked.
You will also see the following characters used throughout this guide, where there’s a case study or activity that’s specific to a particular trade.
DaveA carpenter
EmmaA painter
LiamA tiler
KatherineA carpenter
JimA supervisor
ChristineAn apprentice
JeremyAn apprentice
DaveA bricklayer

© VET (WA) Ministerial Corporation 2014 BC2190 11
Section 1 – Planning and preparing for a work task
IntroductionAs a carpenter on a construction site or in a joinery workshop, you’ll be required to use a large variety of tools and equipment to complete your work tasks. Every job you do requires planning and preparation before you even pick up a tool.
You will need to consider:
• the task and the work environment
• the tools and equipment you’ll be using
• the materials you’ll need
• the safety and environmental requirements.
Performance criteria1.1 Work instructions and operational details are obtained, confirmed and applied from
relevant information to undertake planning and preparation.
1.2 Safety (OHS) requirements are followed in accordance with safety plans and policies.
1.3 Signage and barricade requirements are identified and implemented.
1.4 Plant and equipment selected to carry out tasks are consistent with job requirements, checked for serviceability, and any faults are rectified or reported prior to commencement.
1.5 Material quantity requirements are calculated in accordance with plans, specifications and quality requirements.
1.6 Materials appropriate to the work application are identified, obtained, prepared, safely handled and located ready for use.
1.7 Environmental requirements are identified for the project in accordance with environmental plans and statutory and regulatory authority obligations, and are applied.

BC2190 © VET (WA) Ministerial Corporation 201412
Use carpentry tools and equipmentCPCCCA2002B
12
Finding out what to doBefore undertaking any construction project or task, it’s important you know exactly what you’re required to do and how to do it effectively and safely.
There are many sources of information that you’ll use to identify work tasks, including:
• instructions from your supervisor
• plans, working drawings and specifications for the project
• manufacturers’ recommendations or instructions
• legislation, Regulations and standards
• toolbox meetings (safety information meetings)
• safety signs
• memos, bulletins and schedules.
Activity 1.1 Finding information
Your lecturer will provide you with some examples of construction plans, specifications and/or drawings. List five types of information that can be found on these documents. An example has been done for you.
Document Type of information
Floor plan
Room dimensions
© VET (WA) Ministerial Corporation 2014 BC2190 13
Section 1 – Planning and preparing for a work task
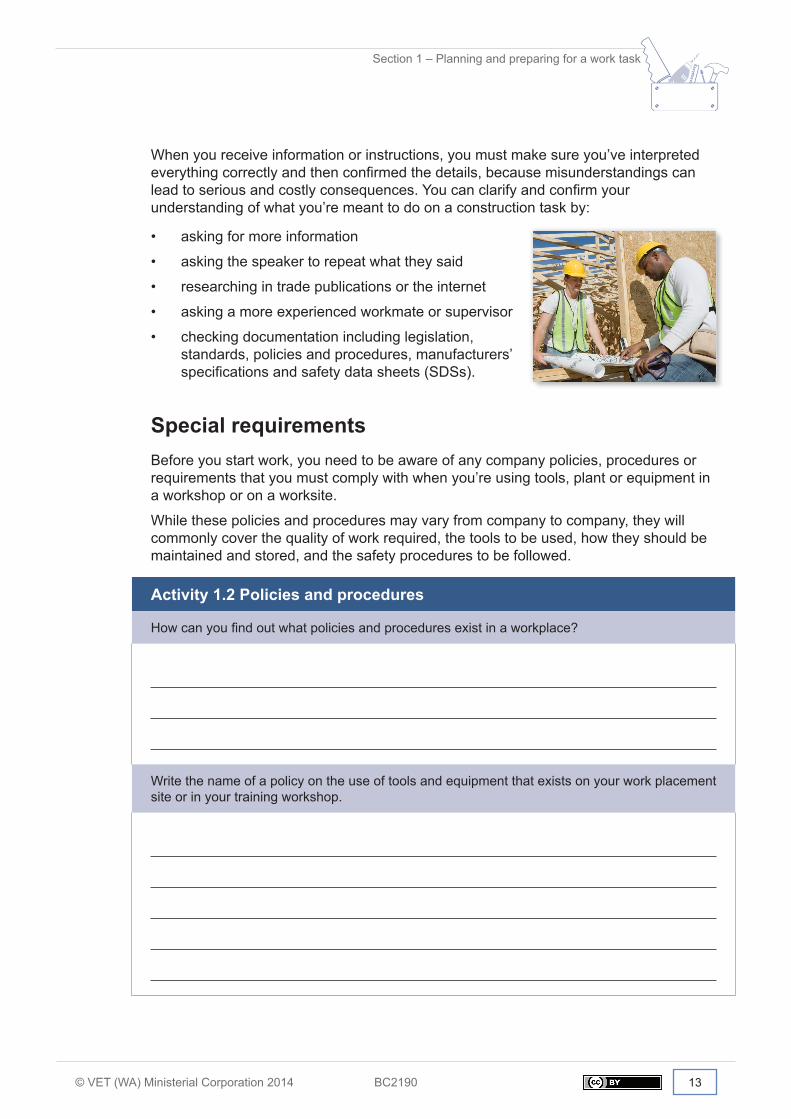
When you receive information or instructions, you must make sure you’ve interpreted everything correctly and then confirmed the details, because misunderstandings can lead to serious and costly consequences. You can clarify and confirm your understanding of what you’re meant to do on a construction task by:
• asking for more information
• asking the speaker to repeat what they said
• researching in trade publications or the internet
• asking a more experienced workmate or supervisor
• checking documentation including legislation, standards, policies and procedures, manufacturers’ specifications and safety data sheets (SDSs).
Special requirementsBefore you start work, you need to be aware of any company policies, procedures or requirements that you must comply with when you’re using tools, plant or equipment in a workshop or on a worksite.
While these policies and procedures may vary from company to company, they will commonly cover the quality of work required, the tools to be used, how they should be maintained and stored, and the safety procedures to be followed.
Activity 1.2 Policies and procedures
How can you find out what policies and procedures exist in a workplace?
Write the name of a policy on the use of tools and equipment that exists on your work placement site or in your training workshop.

BC2190 © VET (WA) Ministerial Corporation 201414
Use carpentry tools and equipmentCPCCCA2002B
14
Laws and RegulationsMany aspects of building and construction are governed by laws and Regulations. For example, the times that power tools, plant and equipment can be used on a worksite are restricted in some circumstances and there are penalties if these restrictions are not adhered to.
You must also take into consideration the WHS Regulations in Australia that state that all electrical equipment used in construction work must be regularly inspected, tested and maintained by a competent person to ensure it’s safe for use.
Activity 1.3 Regulations
Use the internet to find the website for your local council and explore the site to find information for builders.
What restrictions apply to the use of tools and equipment in residential areas within your area? List them below.
Most power tools, plant and equipment must also comply with Australian quality and safety standards, and tools should be inspected before use to check that they comply with Australian Standards®.

© VET (WA) Ministerial Corporation 2014 BC2190 15
Section 1 – Planning and preparing for a work task
Activity 1.4 Australian Standards®
Use the internet to find the Australian Standards® that relate to the use of tools and equipment in the building and construction industry.
Write the full names of these Standards below.
Assessing site conditionsConstruction site conditions should be inspected and assessed before any work is started. This process can include:
• identifying potential hazards
• locating site sheds for the safe storage of materials and equipment
• determining the position of power supplies
• identifying a water supply and sanitary arrangements
• identifying waste disposal procedures and facilities
• locating suitable access (entry) and egress (exit) points.
You’ll need this information to determine what tools and equipment are available, where and how they’ll be used and the supporting facilities like power sources that are available so you can complete your tasks. It’s also essential that you plan and prepare carefully so that you ensure your own health and safety and that of your workmates.

BC2190 © VET (WA) Ministerial Corporation 201416
Use carpentry tools and equipmentCPCCCA2002B
16
Organising tools, plant and equipmentOnce you’ve determined what work task you’re going to do (the job) and where you’re going to do it (the site), you have to make sure you’ve got the right tools, plant and equipment.
All equipment needs to be assessed before it’s used to make sure it’s suitable for the job. For example, the tools used to work with timber, metal or masonry can be quite different. For instance, you wouldn’t use a large sledgehammer to drive in small nails.
Some plant and equipment is expensive and used only rarely so it may be hired when needed. Part of the planning process may also involve contacting hire companies to check availability or organise delivery.
It’s particularly important that tools and equipment are inspected for defects or faults before you start work. You must report any problems you find immediately to a storeperson or supervisor.
Activity 1.5 Benefits of planning
In a small group, discuss the benefits of planning what tools, plant and equipment you will need before you start a task or project. What might happen if you try to figure out what you need as you go along?
Note down the main points from your discussion below.

© VET (WA) Ministerial Corporation 2014 BC2190 17
Section 1 – Planning and preparing for a work task
Organising materialsEstablishing the materials needed for a task and making sure they’re located where they’re needed are vital aspects of all construction tasks.
Information about the materials needed, details of the preferred type or brand, required characteristics, eg size, quality, fire resistance, colour and quantity needed is generally found in the plans and specifications for the building project.
The materials must meet certain standards, particularly in relation to safety and application, ie how and where materials can be used. These are called quality requirements and details of these can be found in:
• legislation and codes of practice
• Australian Standards®
• company policies and procedures
• manufacturers’ specifications.
Materials should be available where they’re needed and when they’re needed, eg just before the tradesperson who needs them is ready to start, to make sure they’re not in the way, stolen or damaged. Storage of materials when they arrive and how they’ll be safely handled must also be considered.

BC2190 © VET (WA) Ministerial Corporation 201418
Use carpentry tools and equipmentCPCCCA2002B
18
Activity 1.6 Organising materials
Your lecturer will give you details of a carpentry task. Use the information provided to answer the following questions.
List the materials required.
Quantity
List three suppliers of these materials in your area.
Describe what needs to be done when the materials are delivered. Consider handling, location and storage.

© VET (WA) Ministerial Corporation 2014 BC2190 19
Section 1 – Planning and preparing for a work task
Working safelyWhenever you’re using any tools, plant or equipment, it’s vital that you do so safely and in accordance with WHS legislation, Regulations and codes of practice.
All sites will have a site safety plan that outlines safe work practices and the actions that need to be taken in certain situations, including who to contact in an emergency, evacuation procedures and details of first aid personnel.
It’s important that you familiarise yourself with this document and know exactly what you have to do to work safely and respond appropriately in emergencies.
Activity 1.7 Safety plans
List five safety procedures or rules that exist in your training workshop. How is the information made available? An example has been done for you.
Procedure/rule Information/instructions
Evacuation procedures Safety induction, signs
1.
2.
3.
4.
5.

BC2190 © VET (WA) Ministerial Corporation 201420
Use carpentry tools and equipmentCPCCCA2002B
20
Hazards and risksConstruction sites contain many dangers or hazardous situations which need to be identified and eliminated where possible. You can achieve this by making an inspection of the site and completing or referring to safety documentation.
Activity 1.8 Safety documentation
Give details of the following safety documents and their purpose.
Job safety analysis (JSA)
Safe work method statement (SWMS)
Safety data sheet (SDS)
These documents are often mandatory on construction sites to ensure the safety of all workers, site visitors or members of the public.
Most construction sites have policies and procedures that tell you how to report hazards, accidents or incidents (near‑misses). If you have an accident, near‑miss or spot any potential hazards on site, you should contact your employer or supervisor immediately and let them know.

© VET (WA) Ministerial Corporation 2014 BC2190 21
Section 1 – Planning and preparing for a work task
Activity 1.9 Reporting hazards, accidents and near‑misses
What are the procedures for reporting a hazard, accident or near‑miss on your work placement site or in your workshop?
1.
2.
3.
4.
5.
6.
Personal protective equipmentPersonal protective equipment (PPE) is anything that’s used or worn by construction workers to minimise risks to their health or safety.
PPE must be seen as the last line of defence for protection against workplace hazards and should be used only where there are no other control measures available or in addition to other control measures.

BC2190 © VET (WA) Ministerial Corporation 201422
Use carpentry tools and equipmentCPCCCA2002B
22
Activity 1.10 PPE
With a partner, identify the PPE you may need for carpentry tasks. Make a list and give an example of when or why it might be used.
PPE Purpose/Use
When you choose PPE, it’s important that it complies with the relevant Australian Standards®, is suitable for the work to be carried out and the workplace conditions.It’s the employer’s responsibility to provide employees with appropriate PPE (free of charge) and it’s the worker’s responsibility to use the equipment and look after it.

© VET (WA) Ministerial Corporation 2014 BC2190 23
Section 1 – Planning and preparing for a work task
Signs and barricadesWhen you’re working with tools, plant and equipment, it’s important that safety signage and barricades are put in place to warn other workers, site visitors or members of the public about any potential hazard.
Activity 1.11 Safety signs
Describe what each of the following signs means and what type of sign it is. Choose from prohibition sign, mandatory sign, danger sign or hazard warning sign.
Type
Meaning
DANGER OF DEATH
Type
Meaning
DO NOTENTER
Type
Meaning
Type
Meaning
Barricades may be required to restrict access to areas where cutting tools or tools like nail guns that fire projectiles are used.

BC2190 © VET (WA) Ministerial Corporation 201424
Use carpentry tools and equipmentCPCCCA2002B
24
Environmental issuesAll construction projects have the potential to negatively affect the environment by consuming natural resources and producing waste.
In Australia, there are laws to make sure that damage to the environment is controlled and minimised. Most large worksites will have an environmental management plan (EMP) to ensure that appropriate management strategies and practices are followed during a project.
You must be aware of the impact of your tasks and work practices and your responsibilities with regard to the site EMP. When you use tools, plant and equipment, the potential environmental hazards include:
• noise pollution created by power tools and power generation plant
• dust from cutting, planing and shaping tools
• soil contamination from leaks or spills of fuel, oil or lubricants
• toxic substances including asbestos, timber treatments, insecticides, solvents and cleaning products.
Activity 1.12 Waste management
Minimising waste in construction is cost‑effective and environmentally friendly.
Discuss with your class ways you can plan for effective waste management on site or in a workshop.
Make a list of your ideas below.

© VET (WA) Ministerial Corporation 2014 BC2190 25
Section 2 – Hand tools
IntroductionCarpentry hand tools have been used for hundreds of years and, in many cases, their basic design has changed very little. They can be divided into three categories:
• hand (manual)
• power (electrical and battery)
• pneumatic (compressed air).
These days, carpenters tend to use power and pneumatic tools, because they’re faster and require less physical effort. However, having a selection of hand tools available and knowing how to use them is important as there may be occasions when a power source (electricity or compressed air) is not available, or a job has a particular detail that requires the use of a hand tool.
In this section, we’ll look at the main types of hand tools you’ll be using for your carpentry tasks. In addition to what’s covered in this guide, your lecturer will take you through hand tools training in the workshop.
Performance criteria2.1 Hand, power and pneumatic tools, their functions, operations and limitations are
identified and selected.
2.2 OHS requirements for using hand, power and pneumatic tools are recognised and adhered to.
3.1 Hand tools used are appropriate to the task and materials and are in accordance with OHS requirements.
3.3 Tools are sharpened and maintained according to manufacturer recommendations.

BC2190 © VET (WA) Ministerial Corporation 201426
Use carpentry tools and equipmentCPCCCA2002B
Types of hand toolsHand tools can be divided into categories, each with a specific function or purpose. In this section, you’ll look at tools in the following categories:
• measuring and marking out
• saws
• impelling
• planes
• chisels
• shaping
• boring
• holding and supporting
• setting out
• levelling.
Measuring toolsThe first step in almost every carpentry project is being able to correctly transfer measurements from working drawings or plans onto the materials being used. There are many measuring devices available and the appropriate tool will depend on the type of work being carried out.
Measuring and marking out are generally carried out at the same time; however, we’ll look at them separately for now as the tools used for each are quite specific.
Retractable tape measure
Retractable tape measures have a built‑in coil spring which automatically retracts the blade into the casing when it’s released.
They’re used mostly by site carpenters but can also be useful on larger joinery projects. There are a variety of sizes available but the most common are 5–7.5 m.

© VET (WA) Ministerial Corporation 2014 BC2190 27
Section 2 – Hand tools
Wind‑up tape measure
Wind‑up tape measures are used for measuring long distances, eg when setting out buildings.
Their blades can be made of steel, plastic or linen and they are available in a variety of sizes (20–100 m). Wind‑up tapes are retracted manually.
Steel rule
Steel rules are used mostly in joinery workshops, rather than on building sites, but are useful for a range of carpentry work. They are generally available in lengths from 150 mm to 1 m.
Scale rule
Scale rules are used by carpenters to convert measurements between working (scaled) drawings and the actual dimensions of a project, without having to resort to any mathematical calculations.
The scale will depend on the type of drawing being used, but the most common scales are the following:
• 1:500 for large site plans
• 1:200 for suburban house blocks
• 1:100 for floor plans and elevations
• 1:20, 1:10, 1:5 and 1:2 for smaller details.

BC2190 © VET (WA) Ministerial Corporation 201428
Use carpentry tools and equipmentCPCCCA2002B
Folding rule
Folding rules are used mostly in joinery workshops. They can be made from hardwood or plastic and are generally available in 1 m lengths.
Markings are placed at 1 mm, and numbers are written every 10 mm. These days, folding rules have been largely replaced by retractable tape measures and steel rules.
Activity 2.1 Choosing the right measuring tool
Which ruler(s) would you use for the following tasks?
Measuring the length of a long wall (over 30 m)
Converting measurements from a floor plan to cut a piece of timber
Making a 600 mm × 900 mm window frame in a joinery workshop
Making a 2.4 m high wall frame on a construction site
Safety – Measuring tools
• The blades on retractable tape measures draw back automatically when released so you must take care to avoid injury to yourself or damage to the blade.
• Folding rules should not be flipped open as this can cause injury to other people or damage to the rule itself.

© VET (WA) Ministerial Corporation 2014 BC2190 29
Section 2 – Hand tools
Care and maintenance – Measuring tools
• Avoid using tape measures in wet or damp conditions. If this is unavoidable, wipe metal blades with an oily cloth to stop them from rusting.
• Don’t leave measuring tapes or rulers exposed for long periods to the direct rays of the sun, as they may buckle or degrade.
• When using tape measures in dusty or sandy conditions, don’t let debris be retracted into the case, as this can cause damage to the retraction mechanism.
• Don’t be rough with the blade or the tape housing on retractable tape measures, and always retract the blade gently. Don’t let it ‘fly’ back in.
Activity 2.2 Toolkit – Measuring tools
Depending on the type of carpenter you choose to be (site carpenter or bench joiner), you may not need to buy all the measuring tools we’ve just looked at.
Make a list of the measuring tools you would buy for your own toolkit.
Briefly describe why you chose these tools.

BC2190 © VET (WA) Ministerial Corporation 201430
Use carpentry tools and equipmentCPCCCA2002B
Marking out toolsAs you measure materials, you mark the cutting points, lines and angles.
Marking out tools include squares, bevels and gauges which are used to determine the angles and straight edges required, and pencils, spurs and knives that create the actual marks.
Squares and bevels
Squares and bevels are used by carpenters to mark guide lines on timber at an angle. The square or bevel a carpenter chooses to use usually depends on the angle required for the cut.
Try square
Try squares are used to mark out lines at 90° to the face and/or edge of a piece of timber. They consist of two parts:
• the ‘stock’ which is held against the side of the timber to position the square
• the ‘blade’ which provides a straight edge to draw the lines.
Try squares are precision tools used mostly in joinery workshops where tasks require greater accuracy or finer detail.
Note: In carpentry, the term ‘square’ is often used to describe a line that is at a 90° angle to another surface. If a line or angle is described as ‘out of square’, it means that it is not exactly 90°.
Mitre square
Mitre squares are similar to try squares in that they have a stock and a blade; however, the blade on a mitre square projects from both sides of the stock to form angles of 45° and 135°, allowing a carpenter to mark out lines on timber at these angles.
Mitre squares are used mostly in joinery workshops.

© VET (WA) Ministerial Corporation 2014 BC2190 31
Section 2 – Hand tools
Try/mitre square
Mostly used in joinery workshops, this square is a combination of the try square and the mitre square. While this tool can be used to mark out an accurate line at 90° to the face/edge of a piece of timber, the top inside corner of the stock is cut to an angle of 45° for marking out lines at that angle.
As the stock on the try/mitre square is slightly shorter in length (due to the 45° angle), you must take care to hold the stock firmly against the timber to avoid unintended movement.
Activity 2.3 Carpentry angles
Why do you think there are tools to mark 90° and 45° in carpentry? Why are these two angles important?
Write your answers below.
Look around the room you’re in, and identify the construction features that have been created using 90° and 45° angles. List them below.
90° angles
45° angles

BC2190 © VET (WA) Ministerial Corporation 201432
Use carpentry tools and equipmentCPCCCA2002B
Combination square
Combination squares are used mostly for site carpentry and are very versatile.
They can be used as a square or mitre square and have additional features such as a scribing spur and a spirit level that allow them to be used for a number of other functions.
Sliding bevel
Sliding bevels are used to set out lines at any angle other than 90°. They have a stock with an adjustable blade which is set to the required angle and then locked with a thumb lever.
Sliding bevels are used in both joinery workshops and site carpentry.

© VET (WA) Ministerial Corporation 2014 BC2190 33
Section 2 – Hand tools
Operation
Let’s put measuring together with marking out and see how a task is carried out.
Step 1 Step 2
Hold the stock firmly against the face/edge of the timber.
Move the blade to the required position and draw or score a line along the outside edge of the blade.
Operating tips – Squares and bevels
• It’s essential that you hold the stock firmly against the face/edge of the timber when you’re marking lines to avoid moving the blade and creating lines that are ‘out of square’.
• For greater accuracy, draw lines along the outside edge of the blade whenever possible.
• Draw lines slowly, and in a smooth, continuous stroke. Don’t apply too much pressure to the pencil/pen.
Safety – Squares and bevels
• Squares and sliding bevels are generally considered to be low‑risk tools. However, you should take care with sharp edges, corners and ends – particularly with steel tools.

BC2190 © VET (WA) Ministerial Corporation 201434
Use carpentry tools and equipmentCPCCCA2002B
Care and maintenance – Squares and bevels
• Don’t drop squares. They’re precision tools that can be easily damaged.
• Store them out of rain or damp conditions, as steel components can become rusty.
• Maintain the steel blade by rubbing it with an oily rag to prevent rusting.
• Check squares regularly for accuracy.
Procedure for checking squaresSquares and bevels can become inaccurate over time. Before you use any square or bevel, complete the following check to make sure that it’s creating an accurate 90° angle.
1. Hold the stock firmly against a piece of straight timber.
2. Draw a line on the timber along the blade.
3. Flip the square over and hold the stock firmly against the timber.
4. Check the line. If it’s still parallel to the blade, the angle is accurate and the tool is square.

© VET (WA) Ministerial Corporation 2014 BC2190 35
Section 2 – Hand tools
Gauge
Gauges are used to scribe (scratch) lines along the length and/or width of timber. There are three types of gauges that you’ll use in carpentry, and each has been designed for a specific purpose.
Marking gauge
Marking gauges are used to scribe a single line along the grain of the timber parallel to the edge. They consist of a stock, a beam and a spur (a pointed steel pin that creates the mark on the timber).
Marking gauges are commonly used in both joinery workshops and site carpentry.
Mortise gauge
Mortise gauges are similar to marking gauges but they have two spurs instead of one. The distance between the double spurs can be adjusted to produce parallel gauge lines along the grain of the timber.
Mortise gauges are used in joinery workshops to mark out mortise and tenon joints (a common 90° joint used for corners and framing), hence the name.

BC2190 © VET (WA) Ministerial Corporation 201436
Use carpentry tools and equipmentCPCCCA2002B
Cutting gauge
Cutting gauges are different from other gauges in that they’re designed to scribe a parallel line across the grain of the timber. They have a knife edge rather than a spur to allow the fibres in the grain to be severed.
Cutting gauges can be used to mark out dovetail joints.
Activity 2.4 Scribing
Why do you think gauges use a spur to scribe a line on the material rather than making the mark with a pencil?
What are the disadvantages of marking material this way?

© VET (WA) Ministerial Corporation 2014 BC2190 37
Section 2 – Hand tools
Operation
Step 1 Step 2 Step 3
Hold the gauge with your index finger pressing firmly against the stock.
Lay the beam on the timber and roll the stock forward so that the spur meets the timber at a slight angle.
Push the stock away from you, ensuring that it is held firmly against the timber.
Operating tips – Gauges
• If you don’t hold the stock firmly against the timber, the spur can follow the grain. This will result in a wavy line. You can avoid this by pushing sideways with one hand while holding the end of the gauge between the finger and thumb of your other hand.
• Avoid digging the spur too deeply into the timber. You can produce a much straighter line if you scribe the timber lightly several times rather than making one deep scribe.
Safety – Gauges
• Gauges are generally considered to be low‑risk tools; however, you should take care with sharp knife edges or the points of the spurs.
Care and maintenance – Gauges
• Don’t drop gauges. Spurs can be damaged and they need to be sharp to produce quality work.
• Maintain gauges by rubbing the beam with an oily rag to allow the stock to move freely.

BC2190 © VET (WA) Ministerial Corporation 201438
Use carpentry tools and equipmentCPCCCA2002B
Knives, scribes and pencils
There are a variety of other tools you can use to mark, scribe or cut lines on timber to provide yourself with an accurate guideline to follow. These are an essential part of any carpenter’s toolkit.
Marking knife
Used mostly in joinery, marking knives are for cutting lines across the grain of timber.
They can be very accurate when sharpened correctly (on one side only) but you must take care as lines cannot be easily erased if you make a mistake.
Utility knife
Utility knives are multi‑purpose and have a retractable blade.
In carpentry, these knives are used mostly for cutting plasterboard.
Scribe
Similar to marking knives, scribes are also used to mark lines across the grain of timber. They have a sharpened point rather than a blade.
They’re good for marking out where pencil lines may be hard to see, like on dark timber such as jarrah.

© VET (WA) Ministerial Corporation 2014 BC2190 39
Section 2 – Hand tools
Case study – Accident in the workshop
Christine and Jeremy were in the joinery workshop making window frames. Christine needed a 6 mm wood chisel but had left hers in the storeroom, so she asked Jeremy to lend her his chisel.
Just as Jeremy was handing the chisel to Christine, she was distracted by their boss, Katherine, calling her name from across the room. Turning around to see what was going on, Christine tripped on the waste material surrounding her workbench and fell towards Jeremy. As she fell, her arm pushed into the blade of the chisel Jeremy was holding and she got a nasty cut.
Activity 2.5 Accident in the workshop
What could each person have done to prevent the accident?
Christine
Jeremy
Katherine
Who is responsible for first aid on a worksite?

BC2190 © VET (WA) Ministerial Corporation 201440
Use carpentry tools and equipmentCPCCCA2002B
Carpenter’s pencil
Carpenter’s pencils are large pencils which contain rectangular lead. These pencils produce a thicker line than ordinary pencils and are ideal for marking out on sawn (rough) timber.
Primarily used for site carpentry, their large size and shape make them unsuitable for use on joinery work where finer detail is required.
Drawing/standard pencil
Drawing pencils are used primarily to mark out fine work in joinery and cabinet construction. They can also be used by site carpenters for second fix carpentry, eg doors, skirting boards, architraves.
The grade of the pencil is important – 2H grade pencils keep their sharpness for longer than softer grades, eg 2B. However, they create very fine lines that may be difficult to see on dark timber such as jarrah.
Operating tips – Knives, scribes and pencils
• For greater accuracy, make sure that pencils remain sharp throughout the marking out process.
• Look for utility knives that allow you to break segments off the blade when they become dull or chipped.
Safety – Knives, scribes and pencils
• All tools with sharp or pointed ends can cause injury so you should always take care when handling knives, scribes and pencils.
• Utility knife blades are extremely sharp and you should always retract the blade back into the knife when you’re not using it.
Care and maintenance – Knives, scribes and pencils
• You can sharpen the blade of a marking knife with an oilstone. Utility knives have disposable blades and these should be replaced regularly.
• A utility knife or chisel can be used to sharpen a carpenter’s pencil. You should always direct the cutting movement away from your body to avoid injury.

© VET (WA) Ministerial Corporation 2014 BC2190 41
Section 2 – Hand tools
Activity 2.6 Toolkit – Marking out tools
Make a list of the marking out tools you would buy for your own toolkit.
Briefly describe why you chose these tools.

BC2190 © VET (WA) Ministerial Corporation 201442
Use carpentry tools and equipmentCPCCCA2002B
SawsBecause of the availability of power saws these days, hand saws are being used less and less. However, carpenters still need to be proficient in the use of hand saws as there may not be a power source on some construction sites, or it may be quicker and more efficient to use a small handsaw for some jobs.
Saws can be split into two groups:
• traditional hand saws – used for larger timber sections
• back saws – used for smaller detailed work.
Traditional hand saws
Hand saws are classified by their purpose, the length of their blade, and the size and shape of their teeth. Saw teeth size is measured by the number of teeth in a 25 mm length of blade.
10 20 30
Tooth size
12 teeth per 25 mm 6 teeth per 25 mm
10 20 30
Tooth size
12 teeth per 25 mm 6 teeth per 25 mm
Note: Saw teeth sizes are sometimes referred to as TPI because saw teeth were originally measured in ‘teeth per inch’.An inch is a unit in the imperial system of measurement that was used in Australia before the conversion to the metric system in the 1970s. The imperial system is still used in the USA, where many tools are manufactured.An inch is approximately 25 mm, which is how that measurement came to be used to determine saw teeth size in Australia.
Rip saw
Rip saws have teeth with a square‑faced edge (like a chisel) and are used to cut timber along the grain, ie in the direction the fibres run.
They’re the largest of the hand saws and are available in lengths up to 750 mm with 3–6 teeth per 25 mm.

© VET (WA) Ministerial Corporation 2014 BC2190 43
Section 2 – Hand tools
Crosscut saw
As the name suggests, crosscut saws are used to cut timber across the grain. Their bevelled teeth have a sharper cutting edge than a rip saw, allowing them to cut the fibres of the grain.
They’re available in lengths up to 650 mm and have 6–8 teeth per 25 mm.
Activity 2.7 Saws and timber grain
In carpentry, cutting along the grain is called ‘ripping’ and across the grain is called ‘crosscutting’.
Why do you think rip saws are almost impossible (and dangerous) to use for crosscutting timber?
Panel saw
Panel saws are generally used to cut sheet materials such as plywood and particle board.
They are available in lengths up to 550 mm, and have 10 teeth per 25 mm.
Hard point saw
Hard point saws have teeth which have been specially treated to stay sharper for longer. As the teeth are too hard to resharpen, they’re considered to be ‘throwaway’ saws and are usually disposed of once they become blunt or damaged.
These days traditional hand saws are seen as ‘old school’ because the time and effort required to sharpen them means that it is more cost‑effective to use relatively inexpensive hard point saws and replace them when required.

BC2190 © VET (WA) Ministerial Corporation 201444
Use carpentry tools and equipmentCPCCCA2002B
Back saws
Back saws have a steel or brass strip on the back of the saw which stiffens the blade so that straight lines can be cut more accurately. The three most commonly used back saws are the:
• tenon saw
• dovetail saw
• gent’s saw.
Tenon saw
Tenon saws, as the name suggests, were designed primarily to cut tenon joints. However, they can also be used to cut other types of carpentry joints, mouldings and beads (lengths of shaped timber).
Tenon saws are generally 250 mm and 350 mm long and their teeth size is 10–14 teeth per 25 mm.
Dovetail saw
Smaller than the tenon saw and with finer teeth, the dovetail saw is primarily designed to cut dovetail joints used in joinery. However, they can also be used to cut mouldings and beads.
Dovetail saws are generally between 200–250 mm long and their teeth size is 16–20 teeth per 25 mm.
Gent’s saw
Gent’s saws are the smallest of the back saws and are used primarily for small detail work. They’re between 100–250 mm long with up to 32 teeth per 25 mm.

© VET (WA) Ministerial Corporation 2014 BC2190 45
Section 2 – Hand tools
Activity 2.8 Reinforcement
If the reinforcement on back saws increases the cutting accuracy, why aren’t all saws reinforced?
Discuss with a partner and list the reason(s) below.
Miscellaneous saws
There are a number of other saws used by carpenters which have been designed for specific purposes. These include the:
• coping saw
• hacksaw (including the junior hacksaw)
• keyhole saw.
Coping saw
Coping saws have a very narrow blade which is tensioned by a spring frame.
They’re used primarily to cut curves in timber, but they can also be used to cut away waste in joints like dovetails and bridles.
BC2190 © VET (WA) Ministerial Corporation 201446
Use carpentry tools and equipmentCPCCCA2002B
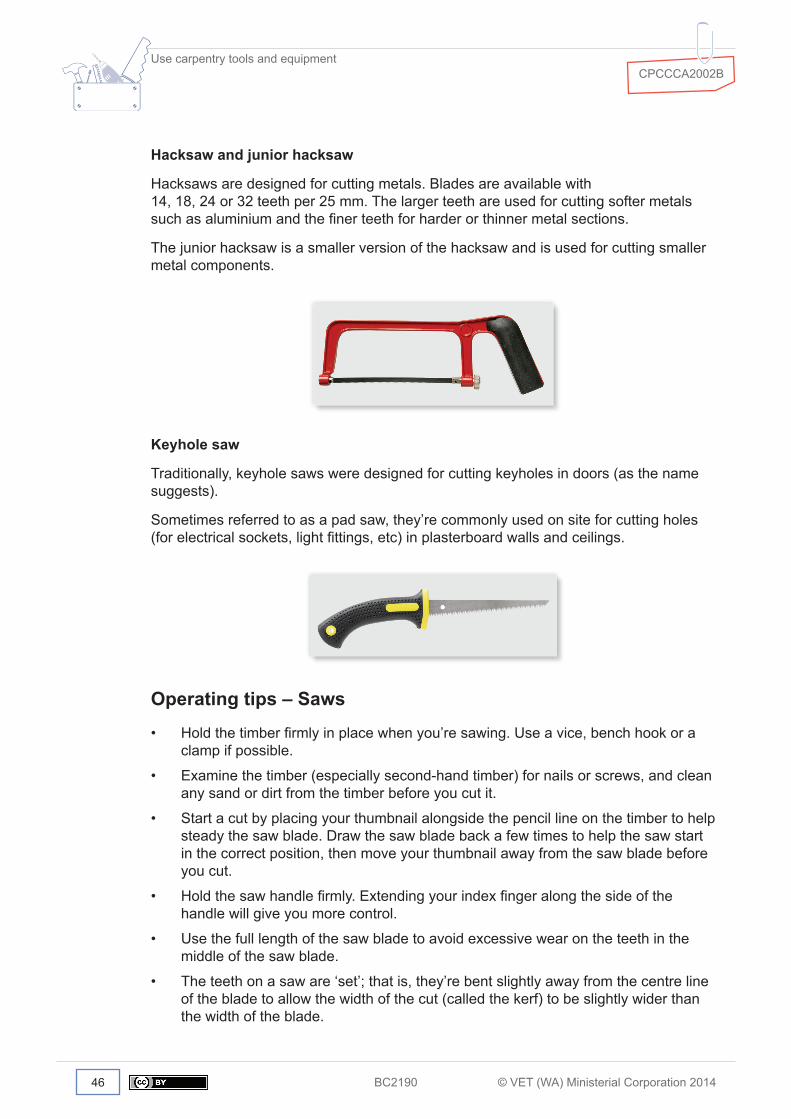
Hacksaw and junior hacksaw
Hacksaws are designed for cutting metals. Blades are available with 14, 18, 24 or 32 teeth per 25 mm. The larger teeth are used for cutting softer metals such as aluminium and the finer teeth for harder or thinner metal sections.
The junior hacksaw is a smaller version of the hacksaw and is used for cutting smaller metal components.
Keyhole saw
Traditionally, keyhole saws were designed for cutting keyholes in doors (as the name suggests).
Sometimes referred to as a pad saw, they’re commonly used on site for cutting holes (for electrical sockets, light fittings, etc) in plasterboard walls and ceilings.
Operating tips – Saws
• Hold the timber firmly in place when you’re sawing. Use a vice, bench hook or a clamp if possible.
• Examine the timber (especially second‑hand timber) for nails or screws, and clean any sand or dirt from the timber before you cut it.
• Start a cut by placing your thumbnail alongside the pencil line on the timber to help steady the saw blade. Draw the saw blade back a few times to help the saw start in the correct position, then move your thumbnail away from the saw blade before you cut.
• Hold the saw handle firmly. Extending your index finger along the side of the handle will give you more control.
• Use the full length of the saw blade to avoid excessive wear on the teeth in the middle of the saw blade.
• The teeth on a saw are ‘set’; that is, they’re bent slightly away from the centre line of the blade to allow the width of the cut (called the kerf) to be slightly wider than the width of the blade.

© VET (WA) Ministerial Corporation 2014 BC2190 47
Section 2 – Hand tools
Kerf
If you don’t create this extra space, the saw will jam when timber fibres on each side of the cut spring back against the blade. This can cause you injury and damage to the blade. The kerf should be about 1.5 times the thickness of the blade.
Safety – Saws
• Saws are designed to cut through a variety of materials. It’s vital that you take care when using saws as they can easily cut through skin and bone.
• You should inspect all saws for damage before you use them and if you find defects, send them for repair immediately.
Care and maintenance – Saws
Regular maintenance will help the saw to perform at its best and will protect the operator from harm. A sharp saw is less likely to cause an accident than a blunt one.
• Avoid using saws in wet or damp conditions. If this is unavoidable, wipe the blade with an oily cloth to prevent rust. If rust forms on the blade or if a coating of sap builds up, clean it off with steel wool.
• Any build‑up on the blade will increase drag and make the saw harder and more dangerous to use. As with all tools, keep your saws clean.
• Protect the points of the saw teeth when the saw is not in use. This can be done by making a sleeve for the cutting edge of the saw from a length of PVC conduit.

BC2190 © VET (WA) Ministerial Corporation 201448
Use carpentry tools and equipmentCPCCCA2002B
Activity 2.9 Toolkit – Saws
Make a list of the saws you would buy for your own toolkit.
Briefly describe why you chose these tools.
© VET (WA) Ministerial Corporation 2014 BC2190 49
Section 2 – Hand tools
Impelling toolsImpelling tools are those that drive or push something. They include hammers, mallets, screwdrivers and nail punches.
Hammers
Hammers are used for a variety of purposes in construction, including driving nails, pins and pegs into surfaces, and for demolition. They’re available in many shapes and sizes. The hammers the carpenter requires depend on the type of task being undertaken.
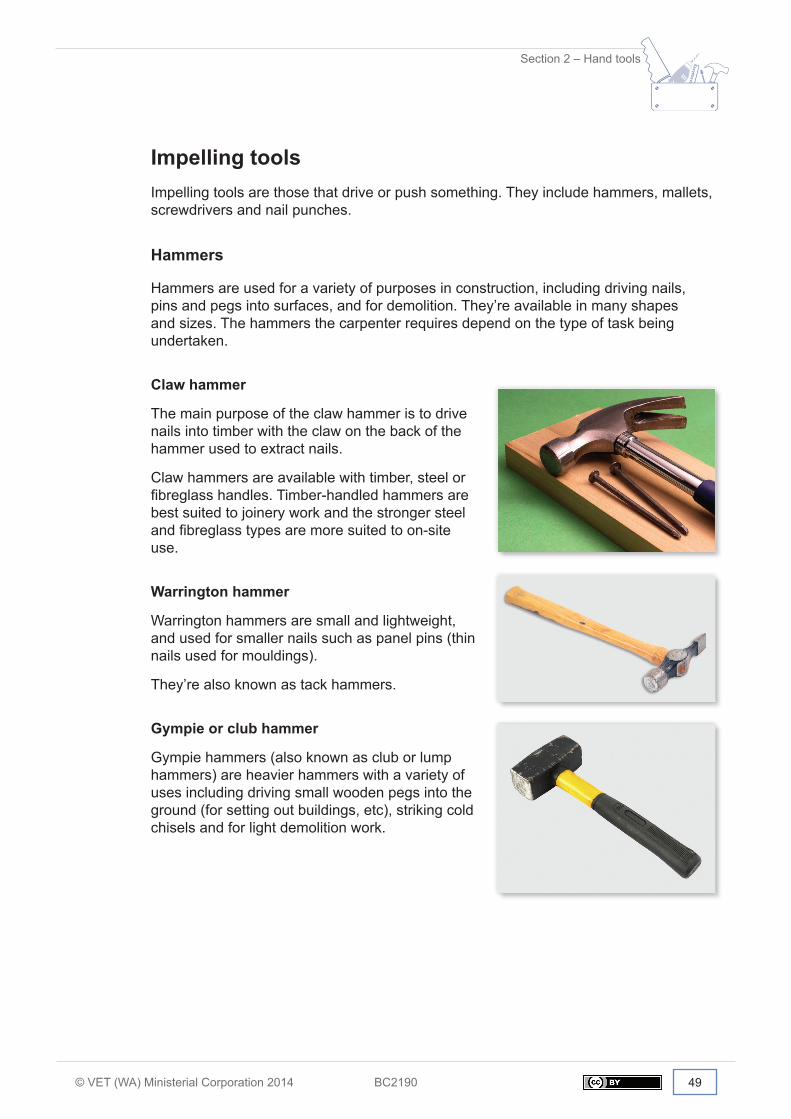
Claw hammer
The main purpose of the claw hammer is to drive nails into timber with the claw on the back of the hammer used to extract nails.
Claw hammers are available with timber, steel or fibreglass handles. Timber‑handled hammers are best suited to joinery work and the stronger steel and fibreglass types are more suited to on‑site use.
Warrington hammer
Warrington hammers are small and lightweight, and used for smaller nails such as panel pins (thin nails used for mouldings).
They’re also known as tack hammers.
Gympie or club hammer
Gympie hammers (also known as club or lump hammers) are heavier hammers with a variety of uses including driving small wooden pegs into the ground (for setting out buildings, etc), striking cold chisels and for light demolition work.

BC2190 © VET (WA) Ministerial Corporation 201450
Use carpentry tools and equipmentCPCCCA2002B
Activity 2.10 Communication barriers
Some tools are called different names in other countries. There are even differences between the states and territories of Australia.
See what you can find out about the different names used for tools, then discuss with a partner how can you make sure that you can communicate clearly with workmates who have come from other places.
Make a list of suggestions below. Include examples of the different names you know of.
Sledgehammer
Sledgehammers are very heavy hammers used to drive large wooden pegs into the ground (for setting out buildings, etc) and for heavy demolition work.
They generally have a longer handle than most hammers. This enables the operator to put more energy into the ‘swing’ motion for heavier work.

© VET (WA) Ministerial Corporation 2014 BC2190 51
Section 2 – Hand tools
Operating tips – Hammers
• Select the correct hammer for the task to be undertaken.
• Hold the hammer near the bottom of the handle. Don’t ‘strangle’ it by holding its neck near the head.
• When you’re using a hammer to drive nails, both your elbow and your wrist should be moving. A stiff wrist will produce a less effective tapping action and hurt your arm.
• When driving a nail into something that is not solid or could move easily, eg thin timber, hold something heavy against the back of the object such as a gympie or sledgehammer. This is called a ‘dolly’ and it will absorb the force of the hammer blows and steady the job.
• If you put a piece of plywood beneath the head of the hammer when you’re extracting nails, this will prevent damage to the timber surface.
Safety – Hammers
• Always wear safety glasses when you’re using hammers. It may also be compulsory to wear safety glasses on some worksites, and failure to comply with this rule could result in disciplinary action.
• Never strike two hammers together. Hammerheads are made from case‑hardened steel so that they don’t get damaged by the nails they strike. This makes the steel very hard, but also very brittle. Hitting two hammerheads together can cause one to chip and you could receive serious eye injuries from flying chunks of metal.
• Hammers with cushioned handles can ease the effects of vibration and the pressure of continually squeezing the handle. The handles of hammers or mallets can also be insulated as a safeguard when working on or around live electrical components.
Care and maintenance – Hammers
• Hammers that show any signs or damage or defect should be repaired or replaced. Repairs should be carried out only by a qualified person.
• If nails bend while you’re hammering, the face of the hammer may be dirty. Rubbing it on abrasive paper (sandpaper) or concrete will clean off build‑up such as sap or glue.
• If a hammer ‘rings’ when it’s used, it could mean that the head is loose. You should make regular checks to ensure that the hammer is safe to use.

BC2190 © VET (WA) Ministerial Corporation 201452
Use carpentry tools and equipmentCPCCCA2002B
Activity 2.11 Toolkit – Hammers
Make a list of the hammers you would buy for your own toolkit.
Briefly describe why you chose these tools.
Screwdrivers
Screwdrivers are available in many different sizes with a variety of tips (the shape of the head). Screwdriver tips are sized and shaped to suit the drive of the screw. Traditional screwdriver tips include the following.
Slotted head Phillips head Pozidriv®
These have a conventional straight screwdriver blade. They are less common nowadays, because they are difficult to drive with a powered screwdriver.
These are self‑centring and the driver is less likely to slip off the head when it’s being driven.
These are similar to Phillips heads but have slightly different shaped slots which allow more torque to be used without ‘slipping out’. This allows them to drive the screw more tightly.

© VET (WA) Ministerial Corporation 2014 BC2190 53
Section 2 – Hand tools
The following newer screwdriver heads are becoming more commonly used.
Square drive Torque head
These screwdrivers have a square drive that allows the screw to be placed on the driver before driving (without falling off). They allow greater tightening of the screw with a powered driver.
Similar to a square drive, these screwdrivers have a star‑shaped drive that allows greater tightening of the screw with a powered driver.
Activity 2.12 Choosing the right tool
Jeremy is helping to hang a door and Dave has asked him to get a screwdriver. When he gets to the van, he realises there are a lot of different screwdrivers in the toolkit. He isn’t sure which type Dave is after, and he doesn’t want to look foolish in front of his boss.
What should Jeremy do?
What could Dave have done to help Jeremy with his decision?

BC2190 © VET (WA) Ministerial Corporation 201454
Use carpentry tools and equipmentCPCCCA2002B
Bradawls
Bradawls are used to make small holes in wood (known as a pilot hole) or other materials to help the insertion of a nail or screw. They have a blade similar to that of a small slotted head screwdriver and a handle made from plastic or timber.
The blade is placed across the fibres of the timber and twisted 90° which displaces the fibres, creating a hole.
Operating tips – Screwdrivers
• Always use a screwdriver that matches the size and type of screw.
• To avoid slippage, keep the screwdriver directly in line with the screw being driven.
• Avoid using excessive force by allowing the thread to draw the screw into the timber.
• Screwdrivers shouldn’t be used for activities like prising nails, chiselling or stirring paint. Never use pliers to turn a screwdriver as they can damage the screwdriver, the screw and the material.
Safety – Screwdrivers
• Screwdrivers can cause both cutting and puncture wounds so you should handle them carefully at all times.
• Never carry screwdrivers in your pockets. Hold the handle outward when you’re passing the tool to another operator.
• Dirt or grease can make the handle and the blade slippery and hard to control. Use a clamp or vice to hold materials whenever possible rather than bracing with your hands or legs. They can be injured if the screwdriver slips.
• Bradawls are very sharp tools and improper use can easily result in injury. You should never use a bradawl underarm, as a slip can cause the point to be brought up towards the head or eyes.
Care and maintenance – Screwdrivers
• Screwdrivers with rounded or damaged tips should be filed square. A rounded tip can slip out of the screw slot and cause injury to the user or damage to material.
• Screwdrivers should be stored in a rack or pouch to avoid damage and allow easy access.
• As with all tools, keep your screwdrivers clean.

© VET (WA) Ministerial Corporation 2014 BC2190 55
Section 2 – Hand tools
Miscellaneous impelling tools
Carpenters may also include the following impelling tools in their toolkits for more specialised tasks.
Mallet
Mallets are used primarily to strike wood chisels, although they can also be used to assemble joinery components such as window and door frames.
Mallets have two main components – a head (generally hard rubber) and a shaft which is generally made from a hard‑wearing timber such as beech.
Nail punch or centre punch
Nail punches are used (with a hammer) to drive the heads of nails below the surface of timber for a neater finish. The nail hole can then be filled before painting or varnishing.
Similar to the nail punch is the centre punch which is used to punch a small mark into materials such as timber or steel before drilling. Its tip is more pointed than the nail punch’s.
Pincers
Pincers are used to remove small nails where the use of a claw hammer is restricted.
The handle has a built‑in claw, which can be used to prise up the head of the nail to ease its removal.

BC2190 © VET (WA) Ministerial Corporation 201456
Use carpentry tools and equipmentCPCCCA2002B
Wrecking bar or pinch bar
Wrecking bars have a number of uses, including the removal of larger nails from timber and as a lever in the demolition or dismantling of a structure or building.
Activity 2.13 Toolkit – Screwdrivers and impelling tools
Make a list of the screwdrivers and impelling tools you would buy for your own toolkit.
Briefly describe why you chose these tools.

© VET (WA) Ministerial Corporation 2014 BC2190 57
Section 2 – Hand tools
PlanesDespite the widespread use of electrical power planes these days, no carpenter’s toolkit is complete without at least one or two hand planes.
Hand planes fall into two major categories – bench planes and block planes. The difference is the direction of the bevel of the cutting iron (the part of the plane that does the planing).
• On bench planes, the bevel always faces down.
• On block planes, the bevel always faces up.
The angle of the cutting iron means that bench planes are designed to plane with the grain (the direction of the fibres in the timber), while block planes are designed to plane end grain or against the grain of the timber.
Bench planes
There are three types of bench planes you’ll use most frequently, as shown here.
Smoothing plane Jack plane Try plane
Smoothing planes are 250 mm in length. These shorter bench planes are useful for planing timber to create a smooth surface to prepare the timber for its final finish, eg paint, varnish.
Jack planes are slightly larger at 350 mm in length and are used for dressing timber (planing to size) and fitting doors, window sashes, etc.
Try planes are the biggest of the bench planes at 450–600 mm in length. They’re used primarily to straighten the edges of boards in an operation known as ‘jointing’.
The size of the plane and its shape affect the function each plane can perform.

BC2190 © VET (WA) Ministerial Corporation 201458
Use carpentry tools and equipmentCPCCCA2002B
Block planes
Block planes are used for cutting rather than smoothing. The three most common types you’ll use are shown here.
Block plane Shoulder plane Bullnose plane
Block planes are small hand planes which typically have the iron bedded at a lower angle than other planes, with the bevel up. They’re designed to cut end grain and are usually small enough to be used with one hand.
Shoulder planes have a blade that finishes flush with the edges of the plane, allowing trimming right up to the edge of a work piece.
They’re used primarily to trim the shoulders and faces of tenons.
Similar to shoulder planes, bullnose planes are designed to plane right into corners of joints or frames.
The blade is positioned almost up to the end of the plane’s body and consequently very little material is missed in a corner while planing.

© VET (WA) Ministerial Corporation 2014 BC2190 59
Section 2 – Hand tools
Specialist planes
Some jobs will require the use of a specialist plane. Three types of specialist planes are shown here.
Rebate plane Side rebate plane Bench rebate plane
Rebate planes (also known as rabbet planes) are hand planes designed in wood.
Side rebate planes perform a similar function to rebate planes but with the blade set on the side of the plane.
They’re used to ease the side of grooves or, in other situations, where a conventional plane is unable to reach.
Bench rebate planes are the largest of the rebate planes and are used for planing larger rebates in doors, window frames, etc.
Rebate
Note: The term ‘rabbet’ is an Old French word meaning recess.

BC2190 © VET (WA) Ministerial Corporation 201460
Use carpentry tools and equipmentCPCCCA2002B
Router plane (Granny’s tooth)
The router plane is designed to clean out the bottoms of trenches such as housing joints and grooves. It’s also known as a ‘granny’s tooth’ because of its distinctive narrow cutting blade.
Router planes are rarely used these days, as the hand router has been replaced by the electric router.
Activity 2.14 Choosing the right plane
Which plane would you choose to complete the following tasks?
Task Type of plane
Planing the edge on a door
Cleaning out the bottom of a housing joint
Planing end grain of timber
Finishing timber ready for varnish

© VET (WA) Ministerial Corporation 2014 BC2190 61
Section 2 – Hand tools
Parts of a plane
Although planes vary in detail, most have the following parts.
• Frog – the part that the blade assembly is mounted on; it can be adjusted fore and aft (forwards and backwards) so that the cutter is positioned over the mouth.
• Mouth – the slot in the base of the plane through which the cutter protrudes.
• Adjustment screw for depth of cut – the nut located behind the frog that controls the amount of cutter that protrudes beneath the body of the plane.
• Lateral adjustment lever – enables the cutter to be tilted to the left or right so that it protrudes evenly beneath the plane body.
• Toe and heel – the front and back of the plane.
The cutter assembly
The heart of any plane is the cutting iron (also called the blade or the plane iron) which does the cutting. It’s attached to the backing iron which has a small slot near the top that allows the lateral (sideways) adjustment of the cutter.
The lower end of the backing iron has a curved bump and, as the cutting iron slices a shaving from the surface of the wood, this bump forces it to curl away from the cutting edge and break into shavings. The lever cap holds the cutting and backing iron assembly firmly to the frog.

BC2190 © VET (WA) Ministerial Corporation 201462
Use carpentry tools and equipmentCPCCCA2002B
Cutting iron Lever capBacking iron
When you’re reassembling a plane after the cutting iron has been stripped down and sharpened, it’s important that you put the individual parts together the correct way. The bump on the backing iron and the bevel on the cutting iron must be opposite one another.
The following diagram shows how the cutting iron and the backing iron should be reassembled.
The front of the backing iron should be 1–2 mm away from the cutting edge of the cutting iron.
Operating tips – Planes
• Always plane timber in the direction of the grain. This will minimise the risk of tearing the face of the timber.
• Make sure that you locate any nails or screws below the surface of the timber well before you start planing.

© VET (WA) Ministerial Corporation 2014 BC2190 63
Section 2 – Hand tools
Safety – Planes
• Avoid putting your fingers under the body of the plane. Cutting irons are very sharp and can cause injury.
• Ensure that the cutting iron remains sharp by carrying out regular maintenance. Dull or blunt cutting irons require more effort to plane the timber, and this can lead to accidents.
Care and maintenance – Planes
• Lay a plane on its side or on a block between uses to prevent damage to the cutting iron.
• Keep the sole (underside) and cheeks (sides) of the plane lightly oiled to prevent rust and reduce friction.
• Keep the cutting iron sharp. Ten minutes spent grinding and honing – the two processes involved in sharpening a cutting iron – is time well spent.
Activity 2.15 Toolkit – Planes
Make a list of the planes you would buy for your own toolkit.
Briefly describe why you chose these tools.

BC2190 © VET (WA) Ministerial Corporation 201464
Use carpentry tools and equipmentCPCCCA2002B
ChiselsChisels, like planes, are designed to remove timber using a sharp cutting edge. There are several types of chisels and each has been designed to suit particular tasks. They’re available in a range of sizes, depending on the type; however, common width sizes are 6 mm, 10 mm, 13 mm, 19 mm and 25 mm.
Firmer chisel
Firmer chisels are general purpose wood‑cutting tools with a rectangular section blade.
The blade has parallel sides and tapers slightly from the handle to the cutting edge.
Bevelled edge chisel
Bevelled edge chisels are nearly identical to firmer chisels; however, their blades are bevelled on the top face of the two long sides, and sometimes the top as well.
The bevelled edges allow the chisels to be used to work undercuts such as dovetail housing. It reduces the rigidity of the blade, making it suitable only for lighter carpentry work.
Paring chisel
Paring chisels can be either of the firmer or the bevelled edge type; however, the blade is much longer – approximately 175 mm – enabling it to be used to pare (chisel) long housings such as those found in stair or shelf construction.
Activity 2.16 Choosing tools
These chisels have very small differences in their design and uses. Discuss the differences with your class and suggest whether it’s practical to carry a tool for every purpose.
Make notes about your conclusions below.

© VET (WA) Ministerial Corporation 2014 BC2190 65
Section 2 – Hand tools
Mortise chisel
Mortise chisels are used for chopping out joints or chiselling away waste wood. They’re usually used for cutting mortise joints (slots in timber), because they’re strong enough to withstand heavy blows with a mallet.
Gouge chisel
Gouge chisels are similar to conventional chisels except that their blades are curved in cross‑section, not flat.
They’re available with two different types of blade – those with the cutting bevel ground on the outside, known as ‘out‑cannel’ and used for hollowing out timber and carving, and those ground on the inside known as ‘in‑cannel’ and used for scribing concave surfaces.
Cold chisel
Although cold chisels are not woodworking tools, most carpenters will have one in their toolkit.
They’re used with a mallet to chip away bricks, concrete and masonry.
Operating tips – Chisels
• Strike chisels only with a mallet. Avoid striking them with a hammer as this can cause damage to the chisel handles.
• Check timber for knots, staples, nails, screws or other foreign objects before chiselling, to avoid damaging the cutting edge.
• Use a vice or clamps to hold the timber securely while you’re chiselling.

BC2190 © VET (WA) Ministerial Corporation 201466
Use carpentry tools and equipmentCPCCCA2002B
Safety – Chisels
• Never use a chisel with the cutting edge facing towards you. If you’re using the chisel for paring (cutting thin slices of timber), hold the chisel in both hands behind the cutting edge at all times.
• If a handle becomes loose, splintered or cracked, it should be replaced or repaired by a qualified person.
• Carrying out regular maintenance ensures that the cutting edge on your chisels remains sharp. Dull or blunt chisels require more effort to use and can lead to accidents.
Care and maintenance – Chisels
As a carpenter it’s important to learn how to maintain chisels and the cutting irons in planes. Depending on the type of work you’re carrying out, they may have to be regularly sharpened to ensure you’re able to work safely and efficiently.
You sharpen a chisel or cutting iron in two steps – grinding then honing.
Grinding
Grinding involves holding the chisel or cutting iron against a grinding wheel until all defects have been ground away and the bevel on the chisel or cutting iron is at the correct angle (approximately 25°).
A chisel or cutting iron may need grinding if the cutting edge is damaged or blunt, or if the bevel has become too rounded for a sharp edge to be honed on to it.

© VET (WA) Ministerial Corporation 2014 BC2190 67
Section 2 – Hand tools
Remember the following points when you’re grinding a chisel or cutting iron.
• The tool rest must be set with clearance between it and the grinding wheel so that nothing can get jammed in the gap and cause the wheel to shatter.
• Hold the blade at a constant angle all the time. You can tilt the tool rest if you need to so that you can maintain a constant grinding angle.
• Dip the chisel or cutting iron in water every few seconds to help keep the blade cool, as metal will heat up quickly under the grinder.
• Keep the chisel or cutting iron moving across the edge of the grindstone at all times. This will help to wear the grinding wheel evenly as well as give a straight edge to the blade.
• Use a dressing tool on the grinding wheel periodically to ensure that the outer surface of the grinding wheel remains flat.
• Wear safety glasses at all times, even though the grinder has a safety shield.
Activity 2.17 Tool sharpening
There are specialist services available in most areas to sharpen tools. What are the benefits of having a professional complete this task?
Use the internet to locate a company that specialises in sharpening tools in your area. Write their name and contact details below.

BC2190 © VET (WA) Ministerial Corporation 201468
Use carpentry tools and equipmentCPCCCA2002B
Honing
Honing means rubbing a chisel or cutting iron on an oilstone to get a razor‑sharp edge on the tool.
Oilstones
Oilstones are blocks of fine‑grained stone used to sharpen blades. They can be natural or synthetic.
Natural stones are cut from rock. Because they’re soft and expensive, they’re used by specialists only in the fine woodwork industry.
Synthetic stones are usually made from aluminium oxide and have a coarse side and a fine side.
Oilstones are porous and can become clogged with abraded (worn down) metal which makes them less effective. You can avoid this by using oil to float away the particles of metal.
Some oils thicken over time and clog the stone so they may have to be soaked and washed in kerosene to remove the metal particles.
Diamond honing stones are becoming more popular. They’re made of steel with diamond dust mixed in and can be used dry (no oil or water).
Stones are available in several sizes but the most common size is 200 mm × 50 mm × 25 mm.
Remember the following points when you’re honing a chisel or cutting iron.
• The honing angle should be about 5° steeper than the grinding angle (approximately 30°), so that only the front edge of the tool is honed.
Honing bevel
Grinding bevel
30o 25o
• The chisel or cutting iron should be moved from side to side (across the oilstone) as well as back and forth. This will ensure that the oilstone wears evenly (remains flat). You can restore a worn stone to a flat surface by rubbing it on concrete.

© VET (WA) Ministerial Corporation 2014 BC2190 69
Section 2 – Hand tools
Activity 2.18 Toolkit – Chisels
Make a list of the chisels you would buy for your own toolkit.
Briefly describe why you chose these tools.
Shaping toolsShaping tools are usually used to finish or clean up shaped surfaces. They let you make fine changes to the size and shape of articles created in a variety of materials including timber, metal, plastic and gypsum (plasterboard).
File
Files are steel bars with a case‑hardened surface and a series of sharp, parallel teeth on all sides. They’re used to remove fine amounts of material from timber, metal and plastic objects.
Files are available in various shapes and sizes including flat, square, round and triangular. Carpenters usually have an assortment of files in their toolkit.

BC2190 © VET (WA) Ministerial Corporation 201470
Use carpentry tools and equipmentCPCCCA2002B
Rasp
Rasps are coarse files with sharp, raised, pointed teeth. As they have larger clearance between teeth, they’re usually used on softer, non‑metallic materials such as timber.
Surform
Surforms are a cross between a plane and a rasp, and are used mostly to plane the edges of plasterboard. They consist of a steel strip with holes punched out with the rim of each hole sharpened to form a cutting edge. The strip is mounted in a carriage or handle.

© VET (WA) Ministerial Corporation 2014 BC2190 71
Section 2 – Hand tools
Spokeshave
Spokeshaves are similar to planes and have short soles that enable them to work on concave (curving in) and convex (curving out) surfaces. They’re used for the final working and cleaning‑up of curved edges. Spokeshaves should be pushed rather than pulled.
There are two types of spokeshave:
• flat soled which can be used for planing narrow edges and convex curves
• round soled for convex curves.
Note: Spokeshaves were originally used by wheelwrights to shave the spokes on old‑fashioned, wooden wheels.
Operating tips – Shaping tools
• Use files by pushing the file forward across the timber rather than dragging the file backwards (which can cause damage to the teeth).
• Always hold a spokeshave in both hands and push it away from your body.
Safety – Shaping tools
• Always use files and rasps with handles to avoid cutting and scraping injuries.
• Because files and rasps produce very fine dust or filings, wear eye protection at all times when using them. A dust mask is also recommended.
• When using a surform, never place your fingers beneath the body of the tool, as the teeth are very sharp and can cause injury.
Care and maintenance – Shaping tools
• The teeth on files and rasps can quickly become clogged with timber or metal shavings. This is called ‘pinning’ and it makes the file less effective. Use a wire brush to remove any waste material from the file or rasp.
• The cutting irons of spokeshaves are maintained by following the same procedure as that used with the cutting iron on a bench plane.
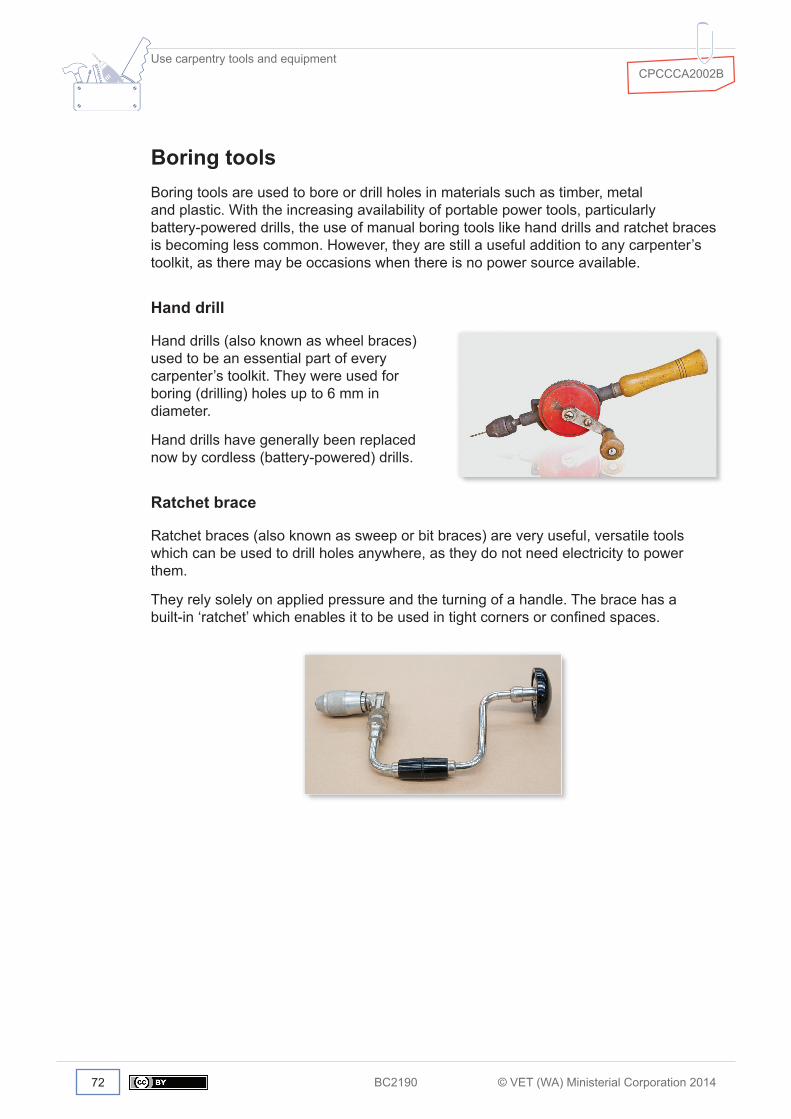
BC2190 © VET (WA) Ministerial Corporation 201472
Use carpentry tools and equipmentCPCCCA2002B
Boring toolsBoring tools are used to bore or drill holes in materials such as timber, metal and plastic. With the increasing availability of portable power tools, particularly battery‑powered drills, the use of manual boring tools like hand drills and ratchet braces is becoming less common. However, they are still a useful addition to any carpenter’s toolkit, as there may be occasions when there is no power source available.
Hand drill
Hand drills (also known as wheel braces) used to be an essential part of every carpenter’s toolkit. They were used for boring (drilling) holes up to 6 mm in diameter.
Hand drills have generally been replaced now by cordless (battery‑powered) drills.
Ratchet brace
Ratchet braces (also known as sweep or bit braces) are very useful, versatile tools which can be used to drill holes anywhere, as they do not need electricity to power them.
They rely solely on applied pressure and the turning of a handle. The brace has a built‑in ‘ratchet’ which enables it to be used in tight corners or confined spaces.

© VET (WA) Ministerial Corporation 2014 BC2190 73
Section 2 – Hand tools
Auger bit
Auger bits are used with ratchet braces to bore larger holes in timber. Sizes generally range from 6–38 mm.
The most commonly used auger bits are the:
• Irwin® bit
• Jennings bit
• centre bit.
Auger bits have a central threaded worm which draws the bit into the wood, while the spur on the cutters scribe the cut which outlines the hole.
Operating tips – Boring tools
• To ensure that the drill bit doesn’t slip and damage the material being drilled, use a centre punch or bradawl to start a hole in the material before you drill.
• Clamp the work piece to avoid unwanted movement during drilling.
• To avoid splitting the timber when drilling, either clamp a block onto the timber where the bit will emerge or drill from both sides.
Safety – Boring tools
• Always wear PPE such as safety glasses when drilling to avoid injury from debris, especially when drilling overhead.
• Although hand drills and ratchet braces are reasonably safe tools to use, you must take care with drill bits, as their cutting edges are very sharp and can easily cause injury.
• Take care when drilling to ensure that no pipes and/or cables are damaged with drill bits.
Care and maintenance – Boring tools
• Clean away dust from around the gear wheel and pinions of the hand drill occasionally to avoid them getting blocked and jammed up.
• Oil the moving parts of the hand drill or ratchet brace to prevent rusting or seizing.

BC2190 © VET (WA) Ministerial Corporation 201474
Use carpentry tools and equipmentCPCCCA2002B
Holding and supporting toolsYou’ll often need to hold or support timber while it’s being cut, or keep components together during the assembly, such as the screwing or gluing together of doors, frames, cabinets, etc.
The tools used for this purpose are called holding and supporting tools, and you’ll most likely have a good collection of different types of these that you’ll use regularly.
Let’s look at a few of the most common.
Sash clamp
Sash cramps consist of a straight steel bar with a fixed head at one end and an adjustable slide at the other.
They’re generally used in pairs in the final assembly of joinery work to provide the pressure required to hold the joints on frames together until they’re secured by either wedges or the setting of adhesive.

© VET (WA) Ministerial Corporation 2014 BC2190 75
Section 2 – Hand tools
G clamp
G clamps are general purpose clamps used to clamp items before and after assembly. Their name comes from the shape of the clamp which has a curved frame and straight screw head resembling the letter ‘G’.
F clamp or quick‑release clamp
The F clamp (also known as a quick‑release clamp) also takes its name from its shape. The F clamp is similar to a G clamp, but it has a wider opening capacity (throat). F clamps are ideal for clamping timber to a workbench or saw stool, or temporarily holding items such as kitchen cabinets together before a more permanent fixing can be made.
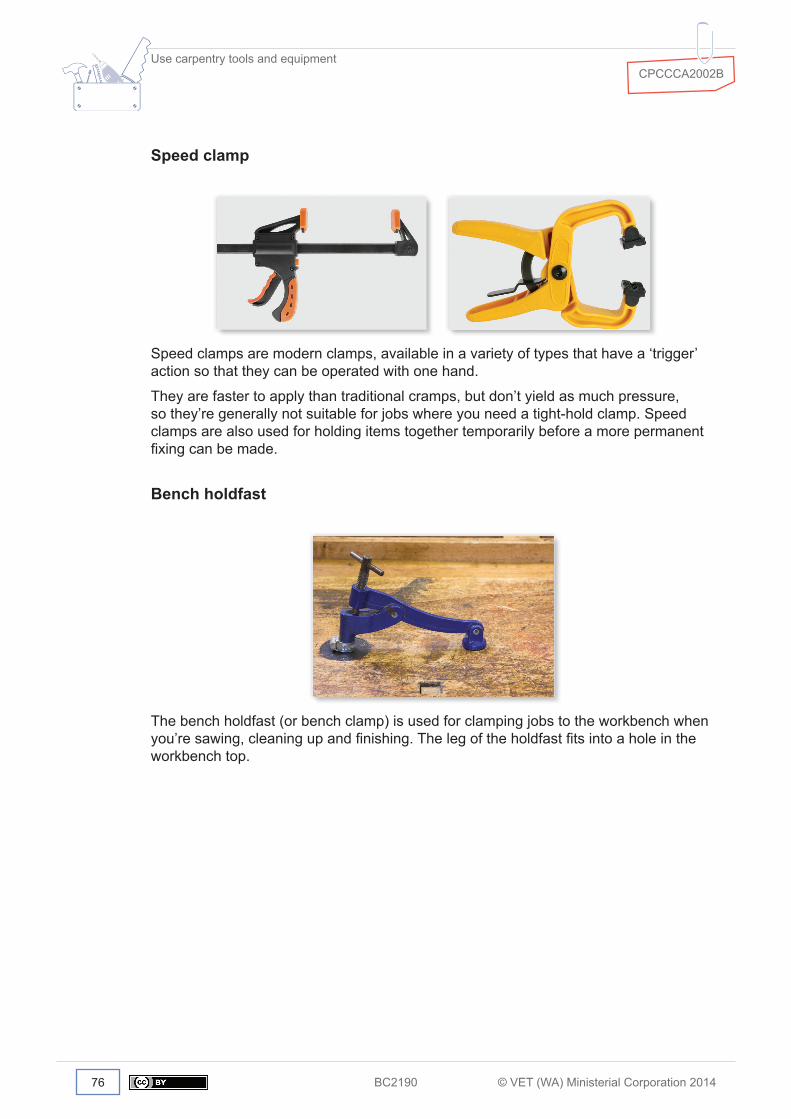
BC2190 © VET (WA) Ministerial Corporation 201476
Use carpentry tools and equipmentCPCCCA2002B
Speed clamp
Speed clamps are modern clamps, available in a variety of types that have a ‘trigger’ action so that they can be operated with one hand.
They are faster to apply than traditional cramps, but don’t yield as much pressure, so they’re generally not suitable for jobs where you need a tight‑hold clamp. Speed clamps are also used for holding items together temporarily before a more permanent fixing can be made.
Bench holdfast
The bench holdfast (or bench clamp) is used for clamping jobs to the workbench when you’re sawing, cleaning up and finishing. The leg of the holdfast fits into a hole in the workbench top.
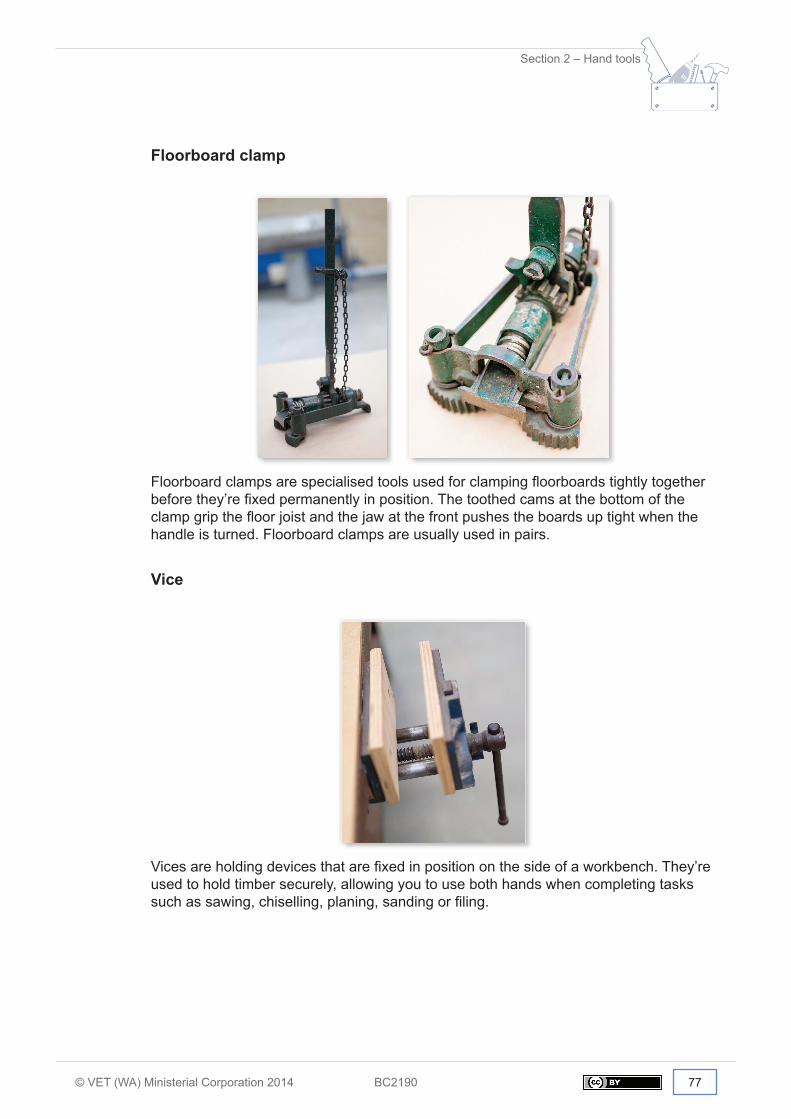
© VET (WA) Ministerial Corporation 2014 BC2190 77
Section 2 – Hand tools
Floorboard clamp
Floorboard clamps are specialised tools used for clamping floorboards tightly together before they’re fixed permanently in position. The toothed cams at the bottom of the clamp grip the floor joist and the jaw at the front pushes the boards up tight when the handle is turned. Floorboard clamps are usually used in pairs.
Vice
Vices are holding devices that are fixed in position on the side of a workbench. They’re used to hold timber securely, allowing you to use both hands when completing tasks such as sawing, chiselling, planing, sanding or filing.

BC2190 © VET (WA) Ministerial Corporation 201478
Use carpentry tools and equipmentCPCCCA2002B
Bench hook
Bench hooks are simple holding devices which ‘hook’ over the edge of the workbench or other surface, and are used to hold small timbers while they’re being cut to length. For safety reasons, it’s advisable to clamp the bench hook into the vice on the workbench.
Saw stool
A carpenter’s saw stool (or saw horse) is a simple timber construction used, usually in pairs, to support timber and sheet materials, eg plywood, chipboard, while they are set out and cut to size. Although traditionally used by carpenters, many other tradespeople use a similar frame to help them with their work.
A pair of saw stools can be used along with planks (strong, thick boards) to form a temporary workbench.

© VET (WA) Ministerial Corporation 2014 BC2190 79
Section 2 – Hand tools
Door block
Door blocks are simple ‘home‑made’ devices used to hold a door steady when it’s being planed to size on site. They’re usually made from a one‑metre length of 90 × 45 mm (or similar) timber, and have a cut‑out for the thickness of the door and an allowance for a wedge that’s used to secure the door in place.
Operating tips – Holding and supporting tools
• When using holding or supporting tools, put a piece of off‑cut timber between the material and the holding plate(s) to avoid making marks or dents on your work.
Safety – Holding and supporting tools
• Holding and/or supporting tools are generally considered low risk; however, always be careful to keep your hands out of the way when using a vice or clamp to avoid any injury.
Care and maintenance – Holding and supporting tools
• There’s no special care or maintenance required for holding and supporting tools – just the standard considerations such as keeping them clean, and checking them before you use them to ensure they’re working properly.

BC2190 © VET (WA) Ministerial Corporation 201480
Use carpentry tools and equipmentCPCCCA2002B
Setting out toolsSetting out is covered thoroughly in the unit CPCCCA3002A Carry out setting out; however, we’ll take a look here at the main tools and equipment involved.
Stringline
Stringlines are some of the oldest and most basic hand tools used in building and construction. They are typically used in the setting out of buildings to create a straight line between two points.
Carpenters use stringlines to check that timber components (such as floor joists, wall frames and roof rafters) have been installed correctly and are in line with each other.
Chalk line
Chalk lines (also known as snap lines) are used in setting out for creating temporary straight lines, usually over long distances, on floors, ceilings, walls, etc.
They’re basically stringlines with chalk embedded into the string. The stringline is placed across the surface to be marked and pulled tight, then plucked or snapped sharply, causing the line to strike the surface and transfer the chalk onto it.
This creates a straight line. You can buy powdered chalk of various colours to refill the outer casing. Be careful when using a chalk line in wet conditions, as the chalk can become damp and clog up the line.

© VET (WA) Ministerial Corporation 2014 BC2190 81
Section 2 – Hand tools
Plumb‑bob
Plumb‑bobs (also known as plumblines) are heavy metal objects with a pointed tip attached to the end of a stringline. They’re used to transfer points vertically, eg from ceiling to floor, and for checking that a surface is plumb (upright). Plumb‑bobs can be very accurate, but they can also be awkward to use in windy conditions.
Carpenter’s roofing square
Roofing squares, as the name suggests, are designed primarily for setting out angles for roofing components. However, when fitted with a fence across the blades, they can also be used for setting out stairs.
They are often used in joinery and cabinet work to draw square lines and to check frames, cabinets, etc for ‘square’ (90°).

BC2190 © VET (WA) Ministerial Corporation 201482
Use carpentry tools and equipmentCPCCCA2002B
Builder’s square
Builder’s squares are used by carpenters in the setting out of buildings to make sure that corners are exactly 90°. They’re made up of three pieces of timber (approximately 120 × 19 mm) fixed together to form an exact right angle. The legs of the square should be as long as possible but also easy to manoeuvre (approximately 1.5–2 m).
Star picket
Star pickets are a type of fence post (also called a T‑post or Y‑post, depending on their cross‑sectional shape). They’re made of steel and can be used to support various types of wire, wire mesh or plastic barrier fencing mesh.
They’re often used when setting out buildings to construct hurdles/profiles to mark the outside perimeters of a building. Another tool called a star picket driver – a steel cylinder with handles on each side – is used to drive star pickets into the ground.
The sharp ends of star pickets can be hazardous. Exposed ends should be protected with plastic protection caps.

© VET (WA) Ministerial Corporation 2014 BC2190 83
Section 2 – Hand tools
Levelling toolsLevelling is covered thoroughly in the unit CPCCCA3023A Carry out levelling operations; however, we’ll take a look here at the main tools and equipment involved.
Spirit level
Spirit levels are made up of a body (generally made from aluminium), with a sealed glass tube which is partially filled with ‘spirit’ and contains a bubble of air. The position of the bubble is used to indicate whether a surface is plumb (vertical) or level (horizontal).
Care and maintenance – Spirit levels
Spirit levels are very delicate and can be easily damaged. Take care to avoid dropping your spirit level, as that will almost certainly throw it out of level. You should check it regularly for accuracy using the following method.
1. Use a pencil and a spirit level to mark a line onto a wall; this can be either plumb (vertical) or level (horizontal).
2. Turn the spirit level around and recheck the pencil line for accuracy.
3. If there is any discrepancy in the reading, the spirit level is out and should be either repaired or discarded.
Line level
Line levels are miniature spirit levels which have a hook on each end. The hooks enable the line level to be suspended on a stringline and used to transfer datums from one point to another. The line level is not very accurate and is used mostly for checking falls in concrete paths.

BC2190 © VET (WA) Ministerial Corporation 201484
Use carpentry tools and equipmentCPCCCA2002B
Water level
As water finds its own level, the water level in its simplest form is a clear plastic tube filled with water which can be used to transfer datums/levels (heights on a construction site) from one point to another.
They’re particularly useful when transferring datums from one room to another when there is no clear line of sight.
Optical level
An optical level in its simplest form is a telescope (usually with a magnification of around 20×) mounted on a swivelling base. A sausage level (or circular level) is fixed to the telescope, enabling it to be adjusted, so that it’s exactly level. The optical level is used along with a staff (a specially marked rule used to measure the difference in height between datums on a construction site).
Laser level
There are several types of laser levels available, and they have replaced optical levels to a certain extent. The types of laser level most used in building and construction are as follows.
• Rotating – This type of laser level is like a miniature lighthouse. The laser projects a beam out from a rotating prism and sweeps around 360°, forming a horizontal plane. The speed of rotation can be altered from zero to very fast.
• Aimable – This type of laser level projects a beam but it does not rotate automatically. Instead, the operator needs to aim the beam at the target with a remote control handset. Buttons on the handset allow the operator to move the laser beams to the desired position.
• Continuous plane – In this type, the laser beam is reflected from an inverted cone at the top of the instrument. It spreads a continuous plane of laser light through 360°. Because of the low intensity of this type of laser, the beam is invisible to the eye and a receiver must be used to detect the laser.

© VET (WA) Ministerial Corporation 2014 BC2190 85
Section 3 – Power tool safety
IntroductionAs a carpenter you’ll be required to work with a range of tools, plant and equipment. These tools will vary in type, purpose, make and model but you must consider WHS requirements for every tool you use.
Safety is the most important consideration when you’re selecting and using any tools, plant or equipment. If you choose the wrong tools or use them in an unsafe manner, it can result in an injury or accident.
Power tools are particularly dangerous, because they run at high speeds and/or pressure and can cause very serious injuries.
Before you get to the power tools section of this guide, you’ll be looking at safe working practices and how to implement them to ensure your own safety and that of other workers. Your lecturer will also take you through some safety training in the workshop.
Performance criteria1.2 Safety (OHS) requirements are followed in accordance with safety plans and policies.
2.2 OHS requirements for using hand, power and pneumatic tools are recognised and adhered to.
3.1 Hand tools used are appropriate to the task and materials and are in accordance with OHS requirements.
3.2 Power and pneumatic tools are safely and effectively used in accordance with manufacturer recommendations and state or territory OHS requirements.
3.3 Tools are sharpened and maintained according to manufacturer recommendations.

BC2190 © VET (WA) Ministerial Corporation 201486
Use carpentry tools and equipmentCPCCCA2002B
Working with power toolsThe following are some important tips for you when you’re working with power tools.
• If you don’t know how to operate a tool safely, don’t use it. Power tools in particular should be used only by fully trained operators.
• Choose the correct tool for the job and identify its limitations before you start any task.
• When using power tools, it’s important that you’re alert at all times. Never use a tool if you’re tired, unwell or under the influence of drugs or alcohol.
• Be aware of your surroundings, the limitations of your work area and the presence of other people.
• Never disturb anyone who is using a power tool. Wait for them to finish what they’re doing before trying to attract their attention.
• Keep the working environment clean and tidy, and make sure there is adequate lighting.
• Always wear the correct PPE when using any tools, plant or equipment.
Electrical safetyAlthough there are other power sources available for carpentry tools, eg batteries and compressed air, electricity is still the most commonly used power source within the construction industry.
Electricity is extremely dangerous and can cause serious injury or death, not just to the operator but to others working nearby. When you’re working with electricity, you must choose tools with appropriate safety features. You must maintain their condition and use safe work practices at all times.
Most modern power tools are ‘double‑insulated’. This means that they have two layers of insulating material (usually plastic) between the live components and the operator. These tools do not require an earthing wire (used to divert electricity away from the operator and into the earth), so they’re fitted with a two‑pin plug or a plug that has a third unconnected pin to help hold the plug in the power point.
Double‑insulated tools are identified by this symbol.
Note: You should avoid older power tools (made before 1980) as they do not have the required safety features. Many were made with metal housings and may not have proper earthing.
If you’re not sure, ask a qualified electrician to check the tool for you.

© VET (WA) Ministerial Corporation 2014 BC2190 87
Section 3 – Power tool safety
Extension leads, plugs and sockets
All power tools have cables which need to be plugged into a 240 volt power supply. Extension leads are often used to allow tools to be operated at various locations around a work area. You must take particular care to protect these cables and leads from being damaged or becoming a hazard to others working nearby.
Keep the following important tips in mind when you’re working with cables and extension leads.
• Always keep the extension lead of a power tool over your shoulder so that it’s well away from cutters, blades or other equipment.
• Never carry or lower a power tool by its cable, and never disconnect a power tool by pulling on the power cable. Always disconnect by removing the plug.
• Don’t use extension leads while they’re coiled up, as they can get very hot if they’re tightly coiled when current is running through them.
• Don’t try to repair damaged extension leads yourself. Repairs should be carried out by a licensed electrician only.
• Electric tools and extension leads must have clear or moulded plugs and sockets so that any damaged connections can be seen. Sockets on extension leads must also have an extended rim or shroud to prevent anything getting into the gap between the plug and socket and touching the live pins.
• Never allow traffic such as wheelbarrows or vehicles to run over power cables or extension leads. Protect cables and leads with timber or suspend them overhead.
• Make sure power cables and extension leads are not a trip hazard.
Testing and tagging
On construction sites, all power tools and extension leads must be inspected and tagged every three months by a licensed electrician. A colour‑coded tag indicates when the inspection was carried out. Before you use any power tool, you must check that it has the correct tag, namely:
• Red – January to March
• Green – April to June
• Blue – July to September
• Yellow – October to December.
You may find it easier to remember the order of the colours by using the mnemonic RuGBY.

BC2190 © VET (WA) Ministerial Corporation 201488
Use carpentry tools and equipmentCPCCCA2002B
Fuses and circuit breakers
Devices that cut off the power in an emergency have been developed to help prevent electricity‑related injuries or deaths. However, you must remember that they do not guarantee the safety of the operator and other workers. You still have to take responsibility for working safely with electricity.
A fuse contains a thin piece of wire through which the electricity flows. If the circuit is overloaded or a fault develops in an electric tool, the wire melts and the circuit is broken; that is, the electricity is shut off.
A residual current device (commonly referred to as an RCD) is a gadget in an electrical circuit that measures electrical current.
If a fault arises in the circuit, the circuit breaker detects that the current flowing into the tool and the current flowing out are not equal and it immediately trips and cuts off the electricity supply. RCDs are fitted with a test and reset button and this check should be carried out before it’s used to make sure it’s working properly.

© VET (WA) Ministerial Corporation 2014 BC2190 89
Section 3 – Power tool safety
Electricity on a construction site
Construction sites have particular electrical hazards that you may not come across in other workplaces. These include unprotected power sources, unsecured cables and extension leads, bad weather conditions and hazardous materials. Remember the following points when you’re working on a construction site.
• Be aware of the location of temporary power sources and cabling, and take care when moving or operating tools and equipment (particularly cutting tools).
• Never use an electrical power tool in the rain. The impurities in water conduct electricity and increase the risk of the current entering your body. Keep power cables dry, especially where they’re joined.
• Never use power tools near combustible liquid or gases. Power tools can produce sparks which may ignite these materials and cause explosions or fires.
Battery‑powered toolsBattery‑powered tools (often referred to as cordless tools) are becoming more popular with a wide range of tools now available. Although these tools are relatively safe to use, you should consider the following safety issues.
• Lithium batteries are deemed hazardous, because they can overheat and ignite under certain conditions.
• Always store batteries in cool, dry conditions. They should never be allowed to become too hot or to freeze.
• Batteries should only be recharged with a compatible battery charger. Allow discharged batteries to cool down before recharging.
• Battery chargers are plugged into a 240 volt power source and should therefore be tested and tagged by a qualified electrician.
• Rechargeable batteries contain hazardous materials and should not be placed in the rubbish bin. They should always be disposed of at a recycling centre.

BC2190 © VET (WA) Ministerial Corporation 201490
Use carpentry tools and equipmentCPCCCA2002B
Pneumatic powerPneumatic tools are powered by air or gas under pressure rather than electricity. The compressed air is transferred to the tool from an air compressor by hose and is expelled with significant force. Compressed air tools should be used only by fully trained operators.
Bear in mind the following when you’re using a pneumatic tool.
• Do not attempt to disconnect compressed air hoses unless they are protected by a valve (a device that regulates the flow of air).
• Do not use compressed air hoses to clean away sawdust or other waste material from the work area, as flying debris can cause serious injury.
• Compressed air hoses must never be directed towards yourself or others, as the air is dispersed at a very high pressure. Air blown under the skin, eg into an open wound, can result in infection, or even stroke or heart attack.
• Traffic such as wheelbarrows or vehicles should never be allowed to cross air hoses, because the extra pressure on the hose can damage the compressed air equipment.
• Do not allow air hoses to become a trip hazard.
Moving parts
All power tools have moving parts which can be very dangerous, because the operator, the tool’s power cable or the material being worked on can be caught and drawn into hazardous positions. Depending on the tool, there are risks of cutting and crushing injuries.
The following are some general safety tips for all power tools.
• Always keep the extension lead of a power tool over your shoulder so that it’s well away from cutters, blades, etc.
• Avoid wearing loose clothing and jewellery including chains, bracelets and rings. Long hair should always be tied back.
• Keep materials clear of moving parts until the tool has reached full speed.
• Never put a power tool down until the rotating parts have come to a complete stop.

© VET (WA) Ministerial Corporation 2014 BC2190 91
Section 3 – Power tool safety
Stability
When you’re using tools, plant and equipment, you should always remain in full control of the machine. To achieve this, it’s important that you follow these safety procedures.
• Where possible, always use two hands on the machine.
• Stand with your feet in a stable position and avoid overstretching.
• Avoid using power tools in hazardous weather conditions such as strong winds and rain.
• Take extra care when you’re working in awkward positions, confined spaces or at heights.
• Always clamp work pieces securely to stop them from moving.
Guards
All power tools have features built into them for your protection. Guards cover moving parts and cutting blades so that you don’t come into contact with these hazards. It’s extremely important that you inspect safety features before use to ensure they’re working correctly.
• Tying up or removing guards or safety devices is very dangerous and may be a breach of WHS law.
• Never use a tool if the guards or any safety features are missing or damaged.
Emergency stop buttons
Most modern larger power tools and machinery now have an emergency stop button – usually a large, red button near the main controls of the tool or machinery. If you press this button, you will immediately cut power to the tool or machine.
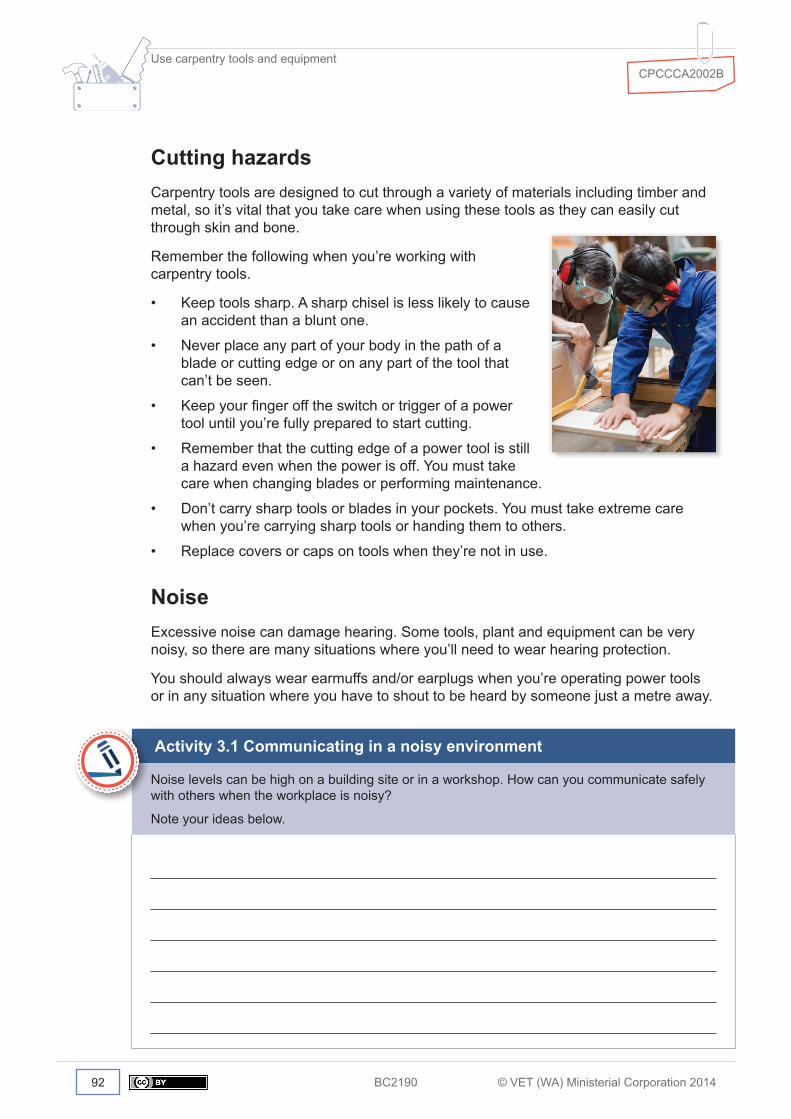
BC2190 © VET (WA) Ministerial Corporation 201492
Use carpentry tools and equipmentCPCCCA2002B
Cutting hazardsCarpentry tools are designed to cut through a variety of materials including timber and metal, so it’s vital that you take care when using these tools as they can easily cut through skin and bone.
Remember the following when you’re working with carpentry tools.
• Keep tools sharp. A sharp chisel is less likely to cause an accident than a blunt one.
• Never place any part of your body in the path of a blade or cutting edge or on any part of the tool that can’t be seen.
• Keep your finger off the switch or trigger of a power tool until you’re fully prepared to start cutting.
• Remember that the cutting edge of a power tool is still a hazard even when the power is off. You must take care when changing blades or performing maintenance.
• Don’t carry sharp tools or blades in your pockets. You must take extreme care when you’re carrying sharp tools or handing them to others.
• Replace covers or caps on tools when they’re not in use.
NoiseExcessive noise can damage hearing. Some tools, plant and equipment can be very noisy, so there are many situations where you’ll need to wear hearing protection.
You should always wear earmuffs and/or earplugs when you’re operating power tools or in any situation where you have to shout to be heard by someone just a metre away.
Activity 3.1 Communicating in a noisy environment
Noise levels can be high on a building site or in a workshop. How can you communicate safely with others when the workplace is noisy?
Note your ideas below.

© VET (WA) Ministerial Corporation 2014 BC2190 93
Section 3 – Power tool safety
VibrationThe vibrations produced by some power tools can result in damage to blood vessels and nerves. Where possible, limit the amount of time you spend using a single tool or performing a repetitive action. You must take a break if you develop tingling in your hands or arms.
Some tools are specially designed to reduce the amount of vibration you experience and you can wear anti‑vibration gloves when you can’t avoid prolonged use of power tools.
DustWhen you’re using any power tool, some form of dust, wood chip or waste material will be produced. How that affects you will depend on the material being used. Some materials are more dangerous than others and you must be particularly aware of the risks involved when you’re working with the following materials.
• When asbestos fibres are released into the air, they can be extremely hazardous. If you inhale them, you may develop asbestosis, lung cancer and mesothelioma – all fatal diseases.
• Materials such as bricks, mortar and concrete contain silica. When you drill into these materials, silica dust is produced and very small particles are released into the air. This dust can cause lung diseases such as silicosis.
• Medium‑density fibreboard (MDF) is made from fine particles of wood which are bonded together with resin adhesive (urea formaldehyde). The resin contained in MDF is a potential health hazard and you should not breathe it in.
• CCA‑treated timber contains chemicals (copper, chromium and arsenic) which are used to preserve the timber and can be hazardous to your health if you inhale or swallow them.
Where possible, use dust extraction equipment with power tools that produce dust, chips or waste material as well as the appropriate PPE. At the very least, ensure you’re working in a well‑ventilated space.

BC2190 © VET (WA) Ministerial Corporation 201494
Use carpentry tools and equipmentCPCCCA2002B
Faulty toolsOccasionally tools, plant or equipment become defective, damaged or faulty. Faulty tools can be extremely hazardous and must be reported immediately, even if the fault doesn’t directly affect you and the task you’re doing.
If you notice a faulty tool and don’t report it, a co‑worker who uses that tool later may be injured if they don’t realise that there is a problem with it.
Attach a repair tag to a faulty tool and report it for repair to a supervisor.
Here are some important points to remember.
• Never use an electrical tool with a faulty switch.
• Stop using an electrical tool if it gets very hot or smells of smoke.
MaintenanceRegular maintenance ensures that tools remain safe to use, and perform with greater efficiency. All tools, plant and equipment should be inspected for faults, properly maintained and serviced on a regular basis.
Note: Power and pneumatic tools must be isolated (disconnected from the power source or air supply) before any adjustment or fault finding is carried out.
When you’re carrying out maintenance, repairs or adjustments, it’s important that you refer to the manufacturer’s specifications and recommendations. When carrying out repairs, use only the tools supplied with the tool or equipment.
All maintenance and repairs should be carried out by a qualified person, as tools can be made more dangerous if correct procedures are not followed. If in doubt, always consult a licensed electrician or the manufacturer/supplier.

© VET (WA) Ministerial Corporation 2014 BC2190 95
Section 3 – Power tool safety
Labels on power tools
All power tools will have a data label attached to the body of the tool. This label contains important information which you must be aware of. It may include the following details:
• the manufacturer’s name
• the AS number showing that the tool has been designed and manufactured to Australian Standards®
• the double insulation symbol
• the model name of the tool and a serial number which you will need to refer to when ordering replacement parts or accessories
• the electrical information (for mains‑powered tools), including:
◦ voltage (electrical pressure)
◦ hertz – (frequency)
◦ amps (current flow)
◦ watts (amount of power used)
• the electrical information (for battery‑powered tools), including:
◦ voltage (pressure)
◦ amp‑hours (capacity of the battery)
• air supply information (for air‑powered tools), such as:
◦ litres per minute (air consumption)
◦ bar (air pressure).
• sizes of belts (belt sanders).
Depending on the tool, it may also contain information such as the:
• RPM – the number of revolutions per minute the motor makes
• maximum chuck size (drills and routers)
• maximum depth of cut (power saws)
• maximum length of nail that can be used (nail guns)
• width of blades (planes).

BC2190 © VET (WA) Ministerial Corporation 201496
Use carpentry tools and equipmentCPCCCA2002B
EmergenciesAn emergency is any situation that:
• develops suddenly
• seriously threatens the safety, health or lives of those involved
• seriously threatens to damage or destroy property or the environment
• requires immediate action.
Typical construction site emergencies are fires, toxic and/or flammable vapour emissions, vehicle/mobile plant accidents, structural collapses, bomb threats, chemical spills or injuries to personnel caused by falls or accidents.
It’s extremely important that you’re aware of the correct procedures to follow in the event of an emergency.
Responding to an emergency
There are procedures for employees to follow in emergency situations, so that everybody understands what to do and how to do it.
Managers, supervisors and health and safety representatives (HSRs) will present this information in the workplace by way of signs, pamphlets, toolbox meetings, formal training and activities (demonstrations and drills) and staff induction.
Make sure you read and listen to this information carefully the first time you encounter it, because in a real emergency, you won’t have time to read the emergency signage and procedures.
One of your major responsibilities as an employee is to understand, practise and be able to follow the workplace emergency procedures. This includes:
• identifying who you should report to in an emergency
• having the basic firefighting and first aid skills that all employees need
• understanding the evacuation procedures.

© VET (WA) Ministerial Corporation 2014 BC2190 97
Section 4 – Power tools
IntroductionThese days, power tools have largely replaced hand tools, because they allow site carpenters and bench joiners to work with increased speed, more efficiency and greater accuracy.
Power tools are available with a variety of power sources including mains power, battery and compressed air.
Carpenters use a range of power tools to cut, shape and install timber in building construction and fit‑out. There are several categories of power tools, each designed to carry out specific functions. They’re usually available in a range of shapes and sizes.
In this section, we’ll look at the main types of power tools you’ll be using for your carpentry tasks. In addition to what’s covered in this guide, your lecturer will provide you with power tools training in the workshop.
Performance criteria2.1 Hand, power and pneumatic tools, their functions, operations and limitations are
identified and selected.
2.2 OHS requirements for using hand, power and pneumatic tools are recognised and adhered to.
2.3 Lubricants, hydraulic fluid and water are checked according to manufacturer recommendations.
3.2 Power and pneumatic tools are safely and effectively used in accordance with manufacturer recommendations and state or territory OHS requirements.
3.3 Tools are sharpened and maintained according to manufacturer recommendations.

BC2190 © VET (WA) Ministerial Corporation 201498
Use carpentry tools and equipmentCPCCCA2002B
Types of power toolsIn this section you’ll look at power tools in the following categories:
• drills
• saws
• sanders
• planes
• routers and trimmers
• nail guns.
Power drillsDrills – used to bore holes into building materials – were one of the first tools to be converted from hand to electric power.
Electric drills have been available since the 1950s and their basic design and shape haven’t changed a great deal. There’s now a large range of drills made for a variety of specialised purposes which have become very affordable.
Speed
The speed shown on the data plate of most power drills is the ‘no load’ speed. This is the speed the drill will turn when there is no resistance. The actual operating speed may drop by as much as 40% when a full load is applied, but this will be within the design limits of the drill.
The speed of a drill is measured in revolutions per minute (rpm) and while cheaper drills may have only one speed, most electric drills have at least two. A gearbox reduces the speed of the motor to suit the type of drill bit used or the material being drilled.
Many modern drills are fitted with an electronic speed control which allows a wider range of speeds. This can be useful for projects which require holes to be drilled into a variety of materials. The speed control is usually a small dial located near the trigger.
Light‑duty drills have a speed of approximately 4500 rpm. Medium‑duty drills have a lower speed – around 1800 rpm – but have more torque (turning power). Heavy‑duty drills are slower still with a common speed of 550 rpm. These larger drills are usually fitted with a side handle, because they have a great deal of torque and, if a large diameter bit jams, the drill can twist out of the operator’s grip.

© VET (WA) Ministerial Corporation 2014 BC2190 99
Section 4 – Power tools
Chuck
A chuck is the part of a drill that holds the drill bit. There are a number of chucks available and they’re all designed to hold the drill bit tightly so that it doesn’t become loose while you’re drilling a hole.
Older drills have a ‘keyed chuck’, which means they need to be tightened or loosened with a chuck key. Newer drills have keyless chucks which can be tightened or loosened by hand. This is far more convenient, because there’s no need to carry a chuck key around with you and the drill bits can be changed more quickly.
Keyed chuck with key SDS Keyless chuck
Special direct system (SDS) drills with a quick‑release chuck are also available. These larger drills have a collar on the chuck which, when pulled back, automatically opens and releases the drill bit. Although they’re very effective, special bits have to be purchased to fit the SDS drill and they’re not compatible with other drills/chucks.
Chuck sizes
Drills can vary according to their chuck size, as that determines the largest diameter drill bit that can be used. Chuck size can be found on the data label on a drill. Common sizes in the building industry are 10–16 mm.
Reduced shank drill bits allow holes of a larger diameter than the chuck size to be drilled, eg a 16 mm bit can be fitted to a 13 mm chuck; however, this can subject the motor to more strain than it can cope with. Manufacturers match the chuck size to the capabilities of the motor.
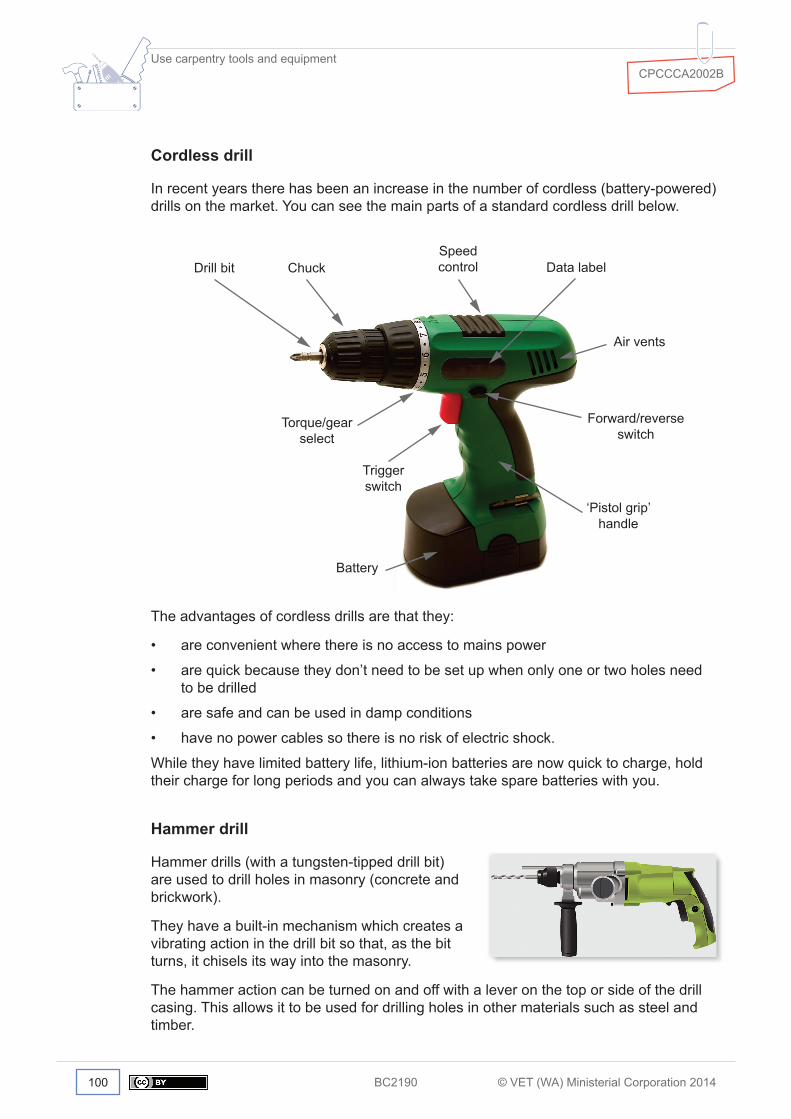
BC2190 © VET (WA) Ministerial Corporation 2014100
Use carpentry tools and equipmentCPCCCA2002B
Cordless drill
In recent years there has been an increase in the number of cordless (battery‑powered) drills on the market. You can see the main parts of a standard cordless drill below.
Forward/reverse switch
‘Pistol grip’handle
Speedcontrol
Torque/gear select
Triggerswitch
Air vents
Data label
Battery
ChuckDrill bit
The advantages of cordless drills are that they:
• are convenient where there is no access to mains power
• are quick because they don’t need to be set up when only one or two holes need to be drilled
• are safe and can be used in damp conditions
• have no power cables so there is no risk of electric shock.
While they have limited battery life, lithium‑ion batteries are now quick to charge, hold their charge for long periods and you can always take spare batteries with you.
Hammer drill
Hammer drills (with a tungsten‑tipped drill bit) are used to drill holes in masonry (concrete and brickwork).
They have a built‑in mechanism which creates a vibrating action in the drill bit so that, as the bit turns, it chisels its way into the masonry.
The hammer action can be turned on and off with a lever on the top or side of the drill casing. This allows it to be used for drilling holes in other materials such as steel and timber.

© VET (WA) Ministerial Corporation 2014 BC2190 101
Section 4 – Power tools
Rotary hammer drill
Rotary hammer drills are very heavy‑duty drills designed for drilling into masonry. They have a more powerful hammering action than a regular hammer drill. Most models have a chuck designed to take SDS drill bits as normal drill bits won’t fit.
Some of the larger rotary hammer drills have accessories such as a small pick or chisel that can be attached and used as a type of miniature jackhammer.
Drill bit
The drill bit is the cutting component of a drill and is available in many shapes and sizes. While some were originally designed to be used only in hand‑powered drills, these days there are many drill bits which can be used in both hand drills and power drills.
Twist bit
Twist bits are the most common drill bits used by carpenters, because they’re very versatile and can be used on wood, metal or plastic.
They’re manufactured in a variety of sizes with the most common ranging from 1–12 mm. They can be used in hand, power or battery‑operated drills.
Twist bits are general purpose and suitable for use with timber, metal or plastic. They’re available in many sizes, with the most popular ranging from 1–13 mm. Double‑ended twist bits are also available, but they’re rarely used in carpentry.
Spade bit
Spade bits are general purpose drill bits used for drilling larger holes into timber. Holes can be drilled quickly using spade bits, but they tend to be quite rough‑sided, so they’re used mostly where appearance is not important.
Spade bits are generally available in sizes ranging from 6–38 mm in diameter.

BC2190 © VET (WA) Ministerial Corporation 2014102
Use carpentry tools and equipmentCPCCCA2002B
Power auger bit
A power auger bit is another general purpose drill bit used for drilling larger holes into timber. The advantage of the power auger is that it produces clean‑sided holes.
You must take care as the worm (thread) on the front of the drill bit can pull it into the timber very quickly.
Power auger bits are generally available in sizes ranging from 6–32 mm in diameter.
Dowel bit
Dowel bits (sometimes referred to as ‘lip and spur’ bits) are specialist bits used to drill holes for the insertion of wooden dowels.
They produce a flat‑bottomed hole and have a centre spur (point) which is used to ensure that holes are drilled with greater accuracy. This enables opposing holes to line up with each other.
These bits are generally available in diameters of 6 mm, 8 mm and 10 mm.
Forstner bit
Forstner bits are used in a drill press (an upright‑standing, fixed drill that can be mounted on a cabinet or to the floor).
They’re used to produce a clean, accurate and (if necessary) flat‑bottomed hole (often referred to as a ‘blind hole’).
Forstner bits are generally available in sizes ranging from 10–50 mm in diameter.
Countersink bit
Countersink bits are used to produce a countersunk or tapered recess which is used to accommodate screw heads.
A clearance hole must be drilled into the material first and the countersink bit should be run at high speed to ensure a quality finish.
Countersink bits can be used on timber, plastic or metal, and are generally available in diameters of 10 mm, 13 mm and 19 mm.

© VET (WA) Ministerial Corporation 2014 BC2190 103
Section 4 – Power tools
Masonry bit
Masonry bits are used to drill holes in brickwork and concrete. They have a tungsten carbide tip (TCT) which is a hard‑wearing material often used on the cutting edge of tools to extend its life.
Masonry bits are generally available in sizes ranging from 4–25 mm in diameter.
Sharpening drill bits
The angle between the two cutting edges on a twist bit should be 120°. You can check this by holding two hexagonal nuts together.
The drill tip should fit neatly into the angle between them.
If a drill bit becomes blunt, worn or damaged, it can be resharpened on a grinding wheel. However, there are tools available that will automatically sharpen the tip of the drill bit to the correct angle.
Spade bits can be resharpened by holding them in a vice and filing the cutting edge and centre spur with a fine, flat file.

BC2190 © VET (WA) Ministerial Corporation 2014104
Use carpentry tools and equipmentCPCCCA2002B
Operation
Step 1 – Pre‑check
� Identify and put on the appropriate PPE.
� Check the power drill and extension lead for any visible signs of damage.
� Check the tag on the power drill and extension lead for the last inspection date.
� Select and fit the correct drill bit for the task and material, eg timber, metal, plastic or masonry.
� Set the drill to the correct speed and torque for the size of your drill bit. Remember: Big drill bit – slower speed; smaller bit – faster speed.
� Turn on the ‘hammer’ action (if required).
� Check that chuck/drill bit is tightened.
� Ensure the material to be drilled is held securely.
Step 2 Step 3
Set the drill to the correct speed for the material being drilled. The harder the material, the slower the speed.
Drill a pilot hole or use a centre punch to help guide larger drill bits.
Step 4 Step 5
Hold the drill firmly and begin drilling, removing the bit on a regular basis to clear the dust and avoid overheating.
Reduce the pressure on the drill when nearing the end of the operation, to avoid ‘snatching’ or ‘grabbing’.

© VET (WA) Ministerial Corporation 2014 BC2190 105
Section 4 – Power tools
Operating tips – Power drills
• Don’t put the motor under excess stress by forcing the drill. Allow the thread to pull the bit into the material.
• To avoid splitting the timber when drilling, either clamp a block onto the timber where the bit will emerge or drill from both sides.
Safety – Power drills
• Always wear safety glasses when you’re drilling into timber, metal or masonry and when drilling holes overhead.
• Always wear ear protection when drilling into masonry.
• Clamp the work piece to avoid unwanted movement during drilling.
• Beware of the drill ‘grabbing’ (especially if drilling metal) as this can make you lose grip on the drill which can result in an injury.
• Use a side handle on bigger drills, especially when using large diameter bits.
Care and maintenance – Power drills
• Never cover the air vents in a drill casing as they keep the motor cool by allowing air to circulate.
• Never lay a drill (or any other power tool) in sand. This can cause damage to the motor and sand to be blown into the operator’s face.
• Remove the drill bit from the hole occasionally and clear any build‑up of dust. This helps to prevent the drill bit from overheating or jamming.
Activity 4.1 Drills – Safety hazards
Think back to what you know about safety in relation to power tools. What do you think are the main risks involved with using drills? What safety tips would you add to the checklist in Step 1?
Note your thoughts below.

BC2190 © VET (WA) Ministerial Corporation 2014106
Use carpentry tools and equipmentCPCCCA2002B
Power sawsPower saws are used by site carpenters and bench joiners to cut a variety of materials including timber, plywood, chipboard and MDF.
There are three types of power saw:
• portable circular saw
• drop saw
• reciprocating saw.
Circular saw
No other power tool has given carpenters a greater advantage over old hand‑powered methods than the portable circular saw (also known as a skill saw). It’s widely used on construction sites for cutting timber and sheet materials such as plywood and chipboard.
The circular saw is used primarily for ripping and cross‑cutting, but it can also be adjusted to perform a number of other operations such as grooving, rebating and trenching as well as making bevelled and compound cuts.

© VET (WA) Ministerial Corporation 2014 BC2190 107
Section 4 – Power tools
The key parts of a circular saw are shown here.
Lowerguard
CrownguardExhaust
port
Blade
Base plate
The base plate can be tilted by up to 45° (degrees) to allow angle cuts (called bevelled cuts) to be made. Depth of cut is set by moving the base plate up or down in relation to the saw blade. A fence is an accessory often used with a circular saw, which connects to the underside of the base plate, and is used for ripping narrow strips from timber and sheet products.
The crown guard covers the top of the saw blade and also directs the sawdust to an exhaust port at the side of the saw. The blade is safely inside the crown guard and held in place by a large bolt.
The lower guard is spring‑loaded and retracts when the saw is cutting through timber. Its purpose is to protect the operator from the blade once cutting is complete.
The size of a circular saw is determined by the diameter of the blade. The most common size for site carpentry work is 235 mm; however, 160 mm, 185 mm and 210 mm sizes are also available.
The size of the saw determines the maximum depth of cut that can be performed.
For example, a 235 mm blade will enable a cut of about 85 mm. If the base plate is tilted to 45°, the maximum depth of the cut will be reduced to about 60 mm.

BC2190 © VET (WA) Ministerial Corporation 2014108
Use carpentry tools and equipmentCPCCCA2002B
Blades
There are many types and sizes of blade available for circular saws. The important specifications for a blade are:
• the diameter of the blade
• the diameter of the hole in the middle of the blade.
On some brands of saw, the hole in the blade is the same size as the saw’s arbor (shaft). On other saws, the blade has a larger hole which fits over a locating spigot. Some replacement blades have a large hole and are sold with various sized adaptor rings to fit any saw.
Rather than ‘xx teeth per 25 mm’ as with hand saws, the size of a circular saw blade’s teeth are specified by how many teeth there are around the blade’s perimeter. Saw blades are available in a variety of sizes as per the following examples.
A blade with a few large teeth will cut more quickly but the cut will be ‘rough’.
A blade with smaller teeth will give a finer cut but will cut more slowly.
You can find this information on the side of the saw blade. A blade labelled 235 × 32 × 22 is 235 mm in diameter, has a 32 mm diameter hole in the centre and a total of 22 teeth on its outer edge.
Various teeth profiles are available, depending on the type of work to be carried out, eg ripping, cross‑cutting, compound cuts or cutting sheet materials.
All saw blades are available with a small tungsten carbide tip on each tooth. These are more hard‑wearing than ordinary steel blades and are ideally suited for cutting sheet materials such as plywood and chipboard MDF, which can quickly dull the blade due to the adhesives used in their manufacture.

© VET (WA) Ministerial Corporation 2014 BC2190 109
Section 4 – Power tools
Operation
Step 1 – Pre‑check
� Identify and put on the appropriate PPE.
� Check the power cord (and extension lead, if used) for any visible signs of damage.
� Check the tag on the power saw and extension lead for the last inspection date.
� Select and fit the correct saw blade for the task, ie ripping, cross‑cutting, combination or tungsten carbide tipped.
� Adjust the saw blade to the required depth of cut.
� Check that the retractable blade guard is working correctly and isn’t damaged.
� Adjust the base plate to set the saw to the required angle.
� Set the fence to the required width.
� Check all adjustment devices are tight.
� Make sure you hold securely the timber to be cut. The best way to do this is to clamp it to saw stools or a workbench.
� Ensure dust extraction system is fitted (if required).
Step 2 Step 3
Rest the front of the base plate on the timber before starting a cut. Position the power cable over your shoulder (away from the blade).
Hold the saw in both hands and pull the trigger to start the saw. Allow the saw to reach full speed before you start to cut the timber.

BC2190 © VET (WA) Ministerial Corporation 2014110
Use carpentry tools and equipmentCPCCCA2002B
Step 4 Step 5
Feed the saw blade into the timber slowly. Allow the saw blade to do the work – do not force the cut. The blade guard should automatically retract as you move the saw along the timber.
At the end of the saw cut, allow the blade to complete the cut before you release the trigger. The blade guard should spring back into place (covering the saw blade). Let the saw blade come to a complete standstill before you rest the saw on the ground.
Operating tips – Power saws
• Always keep both hands on the saw, if possible.
• Hold the saw only by the handle and the front knob.
• The waste timber should be to the right of the saw so that the widest part of the base plate rests on the timber.
Safety – Power saws
• Keep the power cable away from the blade. The safest place for it is over your shoulder.
• Never place your fingers under the base plate or near the saw blade. Remember that the saw is designed to cut through the hardest timber and it won’t slow down if your finger, wrist, arm, leg or power cords get in the way.
• The lower guard on a circular saw is spring‑loaded and there for your protection. Under no circumstances should the lower guard be fixed back by wire or string.

© VET (WA) Ministerial Corporation 2014 BC2190 111
Section 4 – Power tools
Care and maintenance – Power saws
• Always refer to the manufacturer’s data label found on the power saw for make and model information when ordering replacement parts.
• When fitting a new blade to the saw, make sure the teeth below the base plate point forward. Before you make any adjustments, you must ensure that the saw is disconnected from the power source (unplugged).
• Keep saw blades dry to avoid rust.
• Clean the blade with an oily rag and remove any build‑up of adhesive or sap to avoid drag.
• Never cover the air vents in the casing as they keep the motor cool by allowing air to circulate.
Drop saw
Drop saws (also known as chop saws or mitre saws) are a variation of the portable power saw. They consist of a blade and a motor which is mounted onto a short portable bench. They are widely used by ‘second fixing’ carpenters (carpentry carried out after the plaster has been applied to the walls) for cutting skirting, architraves, etc.
The cut is made by pulling a trigger on the handle and ‘dropping’ the saw blade down into the work piece. Most drop saws are fitted with a clamp for holding the timber against the fence. The blade can be set square to the fence or swivelled up to 45° on either side. It can also be tilted to produce bevelled and compound cuts.

BC2190 © VET (WA) Ministerial Corporation 2014112
Use carpentry tools and equipmentCPCCCA2002B
Cuts
Drop saws have a number of adjustments which enable them to perform a variety of functions including the following.
Crosscuts at 90° to the edge of the work piece, made with the table set at 0°.
Angled crosscuts, made by adjusting the table to the required angle. The table should be rotated to the required angle and locked firmly into position.
Bevelled cuts, made by setting the table to 0° and tilting the blade to the required angle (between 0° and 45°) and locking firmly into position.

© VET (WA) Ministerial Corporation 2014 BC2190 113
Section 4 – Power tools
Compound cuts which are a combination of angle cuts (made by adjusting the angle of the table) and bevelled cuts (made by tilting the angle of the blade)
Note: Drop saw adjustments vary depending on the manufacturer and model. Read the manufacturer’s instructions carefully before you use a drop saw.
Operation
Step 1 – Pre‑check
� Identify and put on the appropriate PPE.
� Check the power cord and extension lead for any visible signs of damage.
� Check the tag on the drop saw and extension lead for the last inspection date.
� Select and fit the correct saw blade for the task, eg ripping, cross‑cutting, combination or tungsten carbide tipped.
� Check that the retractable blade guard is working correctly and isn’t damaged.
� Adjust the saw table to set the saw to the required angle.
� Set the saw blade to the required bevel (if required).
� Check all adjustment devices are tight.
� If using a ‘stop’ to cut a number of pieces the same length, place the stop on the same side as your hand (allowing the waste piece of timber to move away from the blade).
� Check timber for straightness by ‘sighting’ along the edge.
� Ensure the timber to be cut is held securely against the fence with your left hand. Clamp shorter lengths of timber to the drop saw.
� Ensure dust extraction system is fitted (if required).

BC2190 © VET (WA) Ministerial Corporation 2014114
Use carpentry tools and equipmentCPCCCA2002B
Step 2 Step 3
Check timber for straightness. If the timber being cut is slightly ‘bowed’ (curved), the timber should be positioned with the bow facing outwards.
Grip the handle of the drop saw firmly, pull the trigger and allow the saw to reach full speed before you start to cut the timber. Release the blade guard lock and slowly lower the saw blade into the timber.
Step 4 Step 5
Feed the saw blade into the timber slowly. Allow the saw blade to do the work – do not force the cut. The blade guard should automatically retract as you move the saw into the timber.
When the cut is complete, release the trigger and wait for the saw blade to stop moving before you lift it away from the timber. Ensure that the blade guard springs back to protect the saw blade.

© VET (WA) Ministerial Corporation 2014 BC2190 115
Section 4 – Power tools
Operating tips – Drop saw
• When you’re performing compound or bevelled cuts, take particular care to prevent the blade from coming into contact with your fingers.
• Always maintain a firm grip on the handle.
Safety – Drop saw
• Always wear the correct PPE such as safety glasses and/or a face mask, hearing protection, dust mask, etc.
• The blade guard is an essential safety device and should never be removed or tied back.
• Never place your fingers between the work piece and the fence.
• Always make sure the blade has stopped moving before you lift it away from the work piece, as offcuts can be thrown across the workshop and cause you and others injury.
Care and maintenance – Drop saw
• When fitting a new blade to the saw, make sure the blade is compatible with the saw and that the saw teeth face in the correct direction.
• Always isolate the drop saw from its power source (unplug it) before you attempt to change the blade or carry out any maintenance.
• Regularly lubricate moving parts to ease operation.
Reciprocating saw
The cutting action on a reciprocating saw is achieved by the saw blade moving with a repetitive up‑and‑down or back‑and‑forth motion which allows the saw to cut through a variety of materials with ease. The reciprocating saws most commonly used by carpenters are the jigsaw and the sabre saw.

BC2190 © VET (WA) Ministerial Corporation 2014116
Use carpentry tools and equipmentCPCCCA2002B
Jigsaw
Although jigsaws cut more slowly than circular saws, they can cut curved shapes into materials such as timber, metal and plastic. They’re commonly found in joinery workshops but can also be useful on site for cutting holes in, for example, kitchen worktops for sinks.
Most models now have a variable speed control so that you can select the best speed for the job. Fast speeds are more suitable for cutting timber and slower speeds for cutting metal. The base plate of a jigsaw can be tilted to allow bevelled cuts.
The teeth of a jigsaw point upward, so the cutting is done during the up‑stroke. This can result in damage to the surface of the timber, especially on sheet materials such as plywood. If necessary, clearance must be allowed for the edges to be cleaned up afterwards.
There are blades available with teeth which point downwards and these are useful when cutting material such as plastic laminates. However, you must take extreme care when using this type of blade as it can cause the saw to ‘lift’ away from the work surface. To prevent this, always maintain downward pressure on the saw.
Some models have a mechanism which produces an orbital motion in the blade. This means that the blade moves forward on the up‑cut and pulls back for the down‑cut which results in a faster (but possibly rougher) cut. A control allows the orbital motion to be reduced to zero for clean cutting.

© VET (WA) Ministerial Corporation 2014 BC2190 117
Section 4 – Power tools
Blades
There is a great variety of blade types available for various cutting jobs.
As with hand saws, tooth size on jigsaw blades is measured as ‘teeth per 25 mm’. Blades for cutting timber have coarse to medium teeth, whereas blades for cutting metal or plastic have finer teeth, similar in shape to those of a hacksaw.
Scroll blades are thin, very narrow and suitable for making cuts with tight curves.
Sabre saws
A sabre saw is a heavier duty saw which can be used for cutting through timber, metal and plastic and is ideal for cutting sections from a framed wall for a door, window or air conditioner.
Blades are available in various lengths and with various teeth sizes to suit different materials. The stroke of the blade is about 30 mm.

BC2190 © VET (WA) Ministerial Corporation 2014118
Use carpentry tools and equipmentCPCCCA2002B
Operation
Step 1 – Pre‑check
� Identify and put on the appropriate PPE.
� Check the power cord and extension lead for any visible signs of damage.
� Check the tag on the reciprocating saw and extension lead for the last inspection date.
� Select and fit the correct saw blade for the required task, ie cutting timber, metal or plastic.
� Select the correct speed for the required task.
� Set the base plate to the required bevel (if required).
� Check all adjustment devices are tight.
� Check that the work piece is securely clamped to avoid unwanted movement during cutting.
Step 2 Step 3
Place the front of the base plate on the material with the motor off before you start the cut. Ensure adequate clearance under or behind the work piece for the blade to move up and down.
Grip the handle firmly, pull the trigger and allow the saw blade to reach full speed before you start to cut the timber.

© VET (WA) Ministerial Corporation 2014 BC2190 119
Section 4 – Power tools
Step 4 Step 5
When cutting, allow the blade to do the work. Do not force the cut, especially on curves as cutting too quickly may cause the blade to wander or break.
At the end of the cut, release the trigger and allow the blade to stop moving before you lift it from the work piece.
Operating tips – Reciprocating saws
• Keep the base plate of the saw in contact with the work piece at all times.
• Cutting face‑side down will help to reduce splitting out of grain. Alternatively, use a blade that cuts on the down stroke.
• Don’t try to cut curves too tight for the width of the blade.
• Lifting the blade from the cut while it’s still moving may result in damage to the blade and/or the surface of the work piece.
Safety – Reciprocating saws
• Always wear the correct PPE.
• Don’t put your fingers beneath the base plate or work piece.
• Keep the power cable over your shoulder and away from the blade.
• If cutting through a floor or wall, make sure there are no electrical wires or pipes in the path of the saw blade.

BC2190 © VET (WA) Ministerial Corporation 2014120
Use carpentry tools and equipmentCPCCCA2002B
Care and maintenance – Reciprocating saws
• Always refer to the manufacturer’s data label for make and model information when ordering replacement parts.
• When fitting a new blade to the saw, make sure that the teeth point forward.
• Never cover the air vents in the casing as they keep the motor cool by allowing air to circulate.
Activity 4.2 Saws – Safety hazards
Think back to what you know about safety in relation to power tools. What do you think are the main risks involved with using power saws? What safety tips would you add to the checklist in Step 1?
Note your thoughts below.

© VET (WA) Ministerial Corporation 2014 BC2190 121
Section 4 – Power tools
Power sandersPower sanders have an abrasive surface and are used by site carpenters and bench joiners to shape and/or finish work. As with all power tools, they reduce the time and effort required to complete a task. Depending on the type of work and the required finish, carpenters use belt sanders or orbital sanders.
Belt sander
Belt sanders are used both in the joinery workshop and on construction sites. They have two rollers, one of which is driven by the motor. A continuous belt passes over the rollers and is held flat on the job by a base plate (called a platen). The undriven roller can be tilted slightly from side to side, which allows the belt to be adjusted so that it ‘tracks correctly’ (remains central to the base).
Belt sanders have the advantage of removing wood quickly, which makes them useful for flushing joints and removing defects. However, they’re not suitable for fine finishing or for use on thin veneers.
Belts are available in several lengths and widths to suit the various models of power sanders on the market. Different grit grades are also available. Before buying replacement belts, the data label on the sander should be checked to establish the length and width of belt suitable for that model.

BC2190 © VET (WA) Ministerial Corporation 2014122
Use carpentry tools and equipmentCPCCCA2002B
Orbital sander
Orbital sanders (also known as finishing sanders) sand in a circular motion, and are used to achieve a fine, smooth finish on timber surfaces. They are not suitable for ‘flushing off’ joints or removing wood quickly. A reciprocating sander is very similar to the orbital sander but its motion is back and forth rather than circular.
The base of the sander has a soft rubber pad and the abrasive paper is held to it by a spring clip. This paper can be bought in packs of pre‑cut pieces or cut to size from standard sized sheets or rolls. The base of the sander rotates in a circular motion at approximately 12 000 rpm.
The circular motion of the abrasive paper can leave swirl marks on the timber surface, which may only become visible after you’ve stained or polished the timber. If a very fine finish is required, you should carry out a final sanding by hand in the direction of the grain.
Replacement belts and paper
Belts and paper are available to suit the various models of power sanders on the market. Different grit grades are also available.
Before you buy replacement belts, check the data label for the correct length and width.

© VET (WA) Ministerial Corporation 2014 BC2190 123
Section 4 – Power tools
Operation
Step 1 – Pre‑check
� Identify and put on the appropriate PPE.
� Check the sander and power/extension lead for any visible signs of damage.
� Check the tag on the sander and power/extension lead for the last inspection date.
� Select and fit the correct grade of abrasive paper for the required task.
� Check the abrasive paper for any visible signs of damage and change it if necessary.
� Ensure a dust bag is fitted.
� Secure the work piece to avoid unwanted movement during sanding.
Step 2 Step 3
Start the sander before bringing it into contact with the work piece to avoid the sander ‘running away from you’.
Lift the sander away from the timber before stopping it. This will stop it from damaging the work piece.
Step 4
Keep the sander moving at all times, as holding it in one place will cause it to sand a hollow in the job.
Step 5
Moving the sander allows you to see what you are doing to the work piece.

BC2190 © VET (WA) Ministerial Corporation 2014124
Use carpentry tools and equipmentCPCCCA2002B
Operating tips – Power sanders
• Don’t apply excessive pressure to the sander. The weight of the tool itself applies sufficient pressure to the job.
• Use a slow, gentle backwards and forwards movement. A common error made when using a power sander is to vigorously work the machine backwards and forwards. The additional motion makes little difference to the 200 or so rotations per second produced by the machine, and scratch marks may be left on the timber surface.
Safety – Power sanders
• The dust created by a sander is extremely fine and therefore hazardous. Some sanders are fitted with dust bags or attachment points for vacuum systems.
If these are not available, wear a dust mask.
Care and maintenance – Power sanders
• Empty the dust bag regularly. If it gets more than half full, it won’t collect the dust properly.
• Always refer to the manufacturer’s data label found on the sander for make and model information when ordering replacement parts.
• Never cover the air vents in the casing as they keep the motor cool by allowing air to circulate.
Activity 4.3 Sanders – Safety hazards
Think back to what you know about safety in relation to power tools. What do you think are the main risks involved with using powersanders? What safety tips would you add to the checklist in Step 1?
Note your thoughts below.

© VET (WA) Ministerial Corporation 2014 BC2190 125
Section 4 – Power tools
Case study – Communicating in a noisy environment
Dave is using a router plane to make a set of stairs. He has followed the safety advice in the manufacturer’s recommendations by wearing the correct PPE, so he’s decked out with earmuffs, a dust mask and safety glasses.
Jeremy calls out Dave’s name, because he needs to ask him something, but Dave can’t hear him over the noise of the router because his hearing is protected by his earmuffs.
Activity 4.4 Communicating in a noisy environment
What could Jeremy do to get Dave’s attention in this noisy area?
Power planes
Electric planes are regularly used on construction sites for planing the edges of doors during the fitting process. They can also be used to perform operations such as chamfering (removing the corner of a piece of timber on an angle) and rebating (taking a square recess out of the corner of a piece of timber).
Although electric planes vary from model to model, they are all very similar in appearance and have many of the same features.

BC2190 © VET (WA) Ministerial Corporation 2014126
Use carpentry tools and equipmentCPCCCA2002B
Operation
Step 1 – Pre‑check
� Identify and put on the appropriate PPE.
� Check the power cord and extension lead for any visible signs of damage.
� Check the tag on the plane and extension lead for the last inspection date.
� Check that the plane blades are sharp and set correctly and replace them if necessary.
� Ensure the correct blades for that particular make and model are used.
� Check the dust bag is fitted (if required).
� Adjust to the required depth of cut by turning the knob at the front of the machine. This knob also acts as a handle.
� Secure work piece to avoid unwanted movement during sanding. Use both hands to hold the plane.
Step 2 Step 3
Place the front of the plane on the timber and check that the blades are not in contact with the timber.
Pull the trigger and allow the blades to reach full speed. At the start of the cut, the pressure should be on the front of the plane.

© VET (WA) Ministerial Corporation 2014 BC2190 127
Section 4 – Power tools
Step 4 Step 5
Maintain pressure on the front knob and push the plane slowly along the timber to produce a better quality finish.
At the end of the cut, transfer the pressure onto the rear of the plane. Failure to do this will result in the ends of the timber being rounded off.
Operating tips – Power planes
• Plane off no more than 3 mm at a time, as deeper cuts, especially in hard wood, may overload the motor. Don’t force the cut; give the plane time to cut.
• When you’re planing narrow edges, you can keep the plane more stable if you attach a fence and keep it against the face of the timber.
• You can form rebates with a plane. The fence and the depth gauge should be attached to the plane when you’re doing this.
Safety – Power planes
• Never place your fingers beneath the base of the plane.
• As with all power tools, place the extension lead over your shoulder, away from the cutting edge.
• Beware of screws, nails, staples or loose knots in the timber. These can not only damage the electric plane but cause you serious injury.
• Unplug the plane before you change blades or make adjustments to fences or depth gauges.
• Use only the tools supplied with the plane when installing cutters. Changing cutters with makeshift spanners can be extremely dangerous.
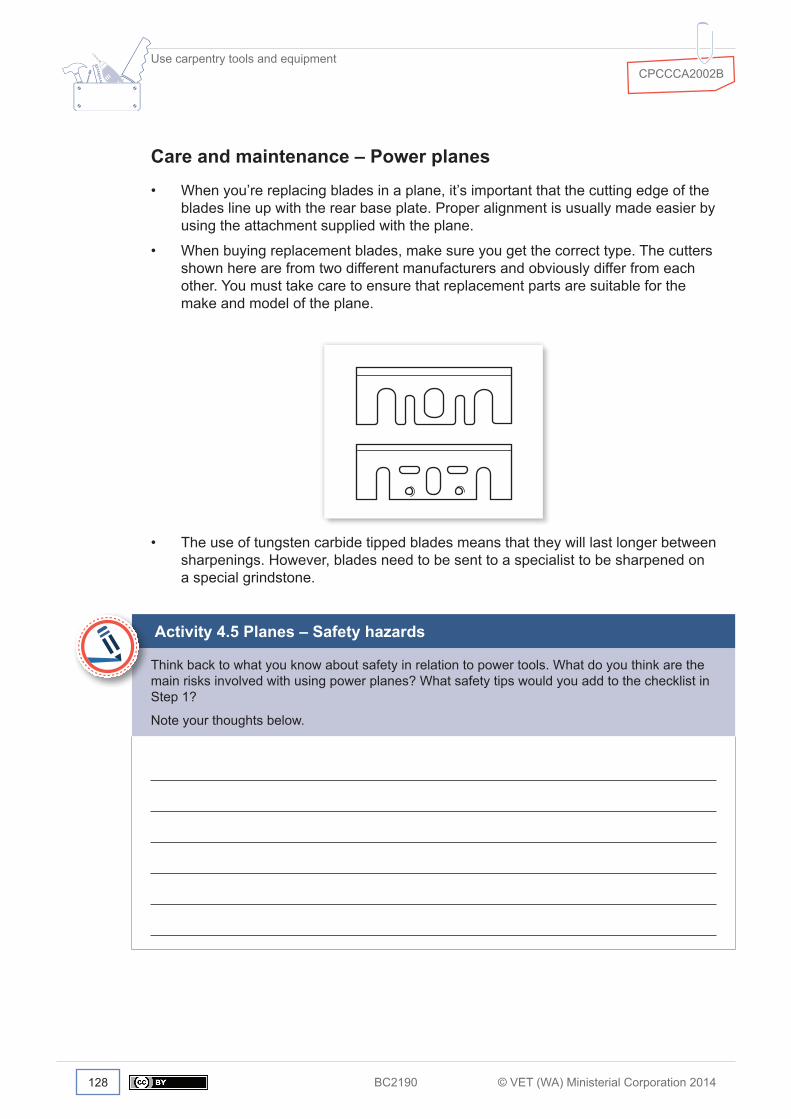
BC2190 © VET (WA) Ministerial Corporation 2014128
Use carpentry tools and equipmentCPCCCA2002B
Care and maintenance – Power planes
• When you’re replacing blades in a plane, it’s important that the cutting edge of the blades line up with the rear base plate. Proper alignment is usually made easier by using the attachment supplied with the plane.
• When buying replacement blades, make sure you get the correct type. The cutters shown here are from two different manufacturers and obviously differ from each other. You must take care to ensure that replacement parts are suitable for the make and model of the plane.
• The use of tungsten carbide tipped blades means that they will last longer between sharpenings. However, blades need to be sent to a specialist to be sharpened on a special grindstone.
Activity 4.5 Planes – Safety hazards
Think back to what you know about safety in relation to power tools. What do you think are the main risks involved with using power planes? What safety tips would you add to the checklist in Step 1?
Note your thoughts below.
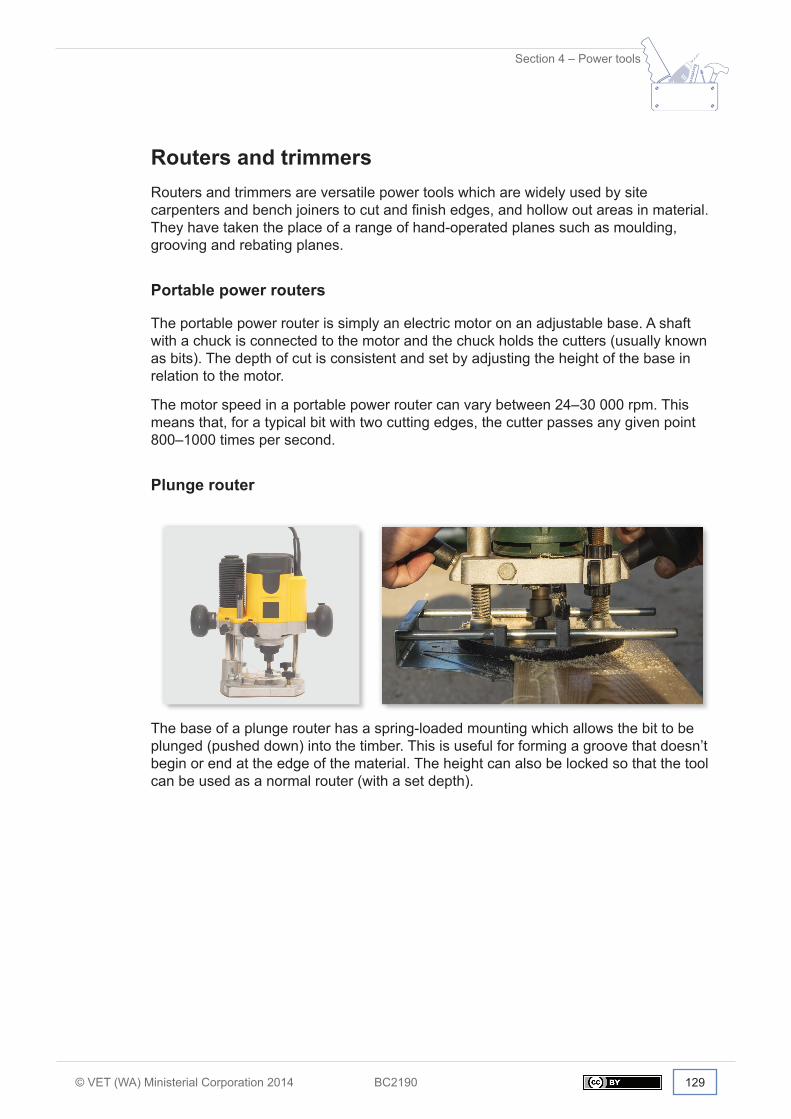
© VET (WA) Ministerial Corporation 2014 BC2190 129
Section 4 – Power tools
Routers and trimmersRouters and trimmers are versatile power tools which are widely used by site carpenters and bench joiners to cut and finish edges, and hollow out areas in material. They have taken the place of a range of hand‑operated planes such as moulding, grooving and rebating planes.
Portable power routers
The portable power router is simply an electric motor on an adjustable base. A shaft with a chuck is connected to the motor and the chuck holds the cutters (usually known as bits). The depth of cut is consistent and set by adjusting the height of the base in relation to the motor.
The motor speed in a portable power router can vary between 24–30 000 rpm. This means that, for a typical bit with two cutting edges, the cutter passes any given point 800–1000 times per second.
Plunge router
The base of a plunge router has a spring‑loaded mounting which allows the bit to be plunged (pushed down) into the timber. This is useful for forming a groove that doesn’t begin or end at the edge of the material. The height can also be locked so that the tool can be used as a normal router (with a set depth).

BC2190 © VET (WA) Ministerial Corporation 2014130
Use carpentry tools and equipmentCPCCCA2002B
Trimmers
A trimmer is a specialised router which is used mostly for trimming plastic laminates after they have been glued down. It’s much smaller than a normal router but can perform many of the same operations on a smaller scale.
Trimmers are often used by site carpenters to form housings for door hinges.
Router accessories
Most routers are supplied with some standard accessories including fences, template guides and bits. Additional accessories such as templates for stair manufacture can be bought or made.
Fence
A fence is a guide that is often used with an edge‑forming bit that does not have a guide roller or pilot to run along the edge of the timber. It is attached to the router by using ‘fence arms’ which are adjusted to the correct width before being secured into position. You can fine‑tune it by adjusting the thumbscrew located at the side of the fence.
You can also use a fence when cutting a groove parallel to the edge of the material.
Template guide
A template guide is fixed to the base of a router and used to guide a cutter inside a template. The cutter protrudes through the guide and traces a path that is the same shape as the template (or pattern).
Templates are often used in stair manufacture or for producing a number of identical shapes or housings, eg for cutting housings for door hinges.
An allowance has to be made in the template which is equal to the distance from the edge of the cutter to the outside edge of the template guide.

© VET (WA) Ministerial Corporation 2014 BC2190 131
Section 4 – Power tools
Router cutter or bit
There are many different router cutters and/or bits available. Some are used for forming rebates and grooves for jointing and other practical purposes, and others are used for forming decorative mouldings.All router bits are secured into the router with a collet – a sleeve with a split in the side. When the chuck is tightened, the collet is squeezed tight and grips the shaft of the bit.
Incorrect fitting of the collet or bits can result in very serious injury to the operator.
Most router bits have a 6 mm or 12 mm shaft. A 12 mm shaft fits directly into the chuck, but a 6 mm shaft needs a reduction sleeve.
Trimmers have a 6 mm chuck.
Router bits can be divided into the following four categories.
Straight bit
Straight bits cut grooves, trenches and rebates. They can be used to form:
• housings for shelving and stair construction
• grooves for drawer bottoms
• rebates in doors and windows for plywood or glass.

BC2190 © VET (WA) Ministerial Corporation 2014132
Use carpentry tools and equipmentCPCCCA2002B
They’re available with different ends for forming a variety of shaped grooves such as those shown here.
Edge‑forming bit
Edge‑forming bits produce a shaped edge to timber or manufactured boards such as MDF.
The bottom of the bit runs along the edge of the board and acts as a guide for the depth of cut. This guide can be a solid pilot or have a small wheel with a bearing race (ball bearing). The latter is preferred because the solid pilot revolves at the same speed as the cutter and can scorch (burn) the wood, especially soft woods such as pine.

© VET (WA) Ministerial Corporation 2014 BC2190 133
Section 4 – Power tools
Some bits can be used to cut more than one shape either by altering the amount that the bit protrudes through the base or by using roller bearings of different diameter.
Trimmer bit
Trimmer bits have cutters which are exactly the same width as the ball bearing guide roller. They’re used for trimming sheet materials such as plywood and melamine after they’ve been glued down.
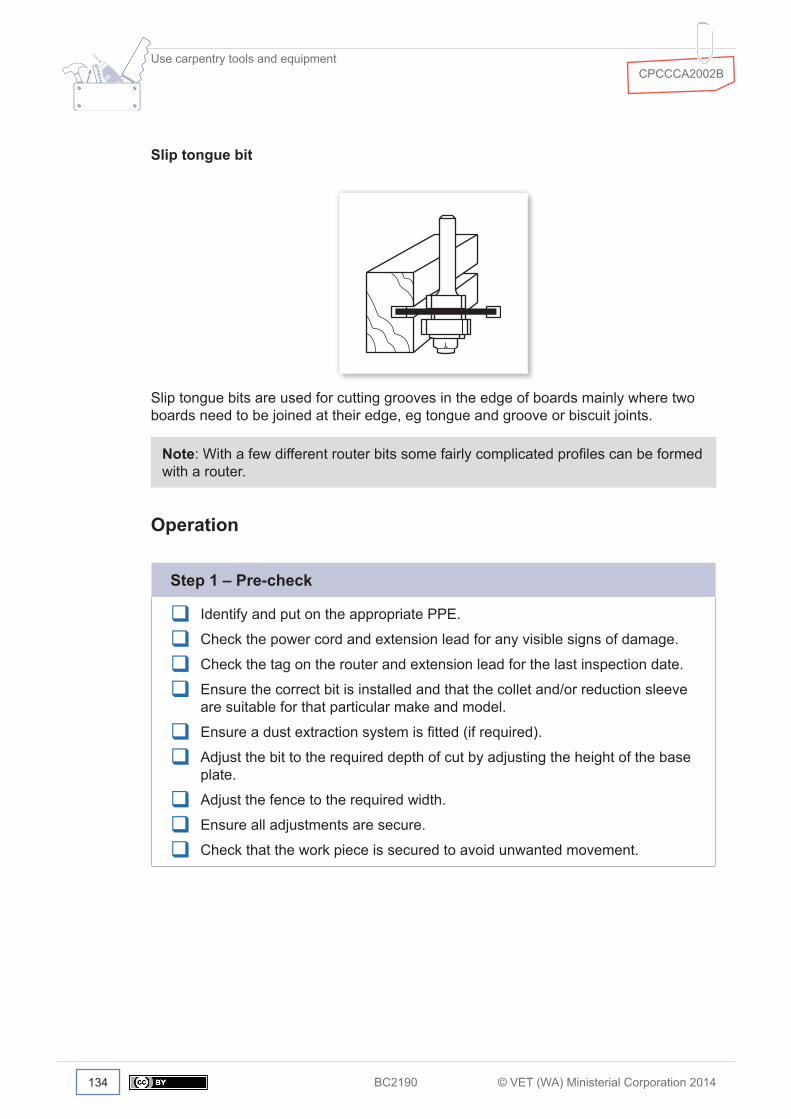
BC2190 © VET (WA) Ministerial Corporation 2014134
Use carpentry tools and equipmentCPCCCA2002B
Slip tongue bit
Slip tongue bits are used for cutting grooves in the edge of boards mainly where two boards need to be joined at their edge, eg tongue and groove or biscuit joints.
Note: With a few different router bits some fairly complicated profiles can be formed with a router.
Operation
Step 1 – Pre‑check
� Identify and put on the appropriate PPE.
� Check the power cord and extension lead for any visible signs of damage.
� Check the tag on the router and extension lead for the last inspection date.
� Ensure the correct bit is installed and that the collet and/or reduction sleeve are suitable for that particular make and model.
� Ensure a dust extraction system is fitted (if required).
� Adjust the bit to the required depth of cut by adjusting the height of the base plate.
� Adjust the fence to the required width.
� Ensure all adjustments are secure.
� Check that the work piece is secured to avoid unwanted movement.

© VET (WA) Ministerial Corporation 2014 BC2190 135
Section 4 – Power tools
Step 2 Step 3
Place the router on the timber and make sure the cutters are not in contact with the timber. Hold the router with both hands at all times.
Start the motor and allow the cutters to reach maximum speed. ‘Plunge’ the router cutter into the timber to the preset depth and lock in place.
Step 4 Step 5a
Move the router cutter at a steady pace. Moving the router puts unnecessary pressure on the motor, but remember that if you move the router too slowly, it can cause burns to the surface of the timber.
If you’re using a router to form a moulding on the inside of a frame, the router should be run around the inside of the frame in a clockwise direction.

BC2190 © VET (WA) Ministerial Corporation 2014136
Use carpentry tools and equipmentCPCCCA2002B
Step 5b Step 6
If you’re using a router to form a moulding on the outside of a frame, run it around the outside of the frame in an anticlockwise direction.
At the end of the cut, release the lock and allow the cutter to move upwards away from the timber. Turn the motor off and ensure the cutters have stopped moving before you move the router away from the work piece.
Operating tips – Routers and trimmers
• Once you’ve set up a router, do a ‘test run’ on a piece of waste material first to ensure it has been set up correctly.
• When planing narrow edges, you can keep the plane more stable if you attach the fence and keep it against the face of the timber.
• The cutting depth should never be more than half the width of the cutter.
Safety – Routers and trimmers
• Always wear PPE such as safety glasses, a face mask, ear plugs and a dust mask.
• It is strongly recommended that you use a dust extraction system whenever you’re operating a router, as the fine dust particles produced can be very hazardous to your health and that of others around you.
• Don’t put your fingers beneath the base plate or work piece, and keep the power cable over your shoulder and away from the blade.
• Disconnect from the power source whenever you make any alterations or carry out maintenance to the router.

© VET (WA) Ministerial Corporation 2014 BC2190 137
Section 4 – Power tools
Care and maintenance – Routers and trimmers
• If you’re using a dust extraction system, check the dust bag and empty it regularly. If it gets more than half full, it won’t collect the dust properly.
• Always refer to the manufacturer’s data label found on the router for make and model information when ordering replacement parts.
• Whenever you make any alterations to or carry out maintenance on the router, avoid bending the power cable as this can cause the wires inside the cable to break. Allow the cable to pass down the side of the workbench.
• Never cover the air vents in the casing as they keep the motor cool by allowing air to circulate.
Pneumatic nail guns
Pneumatic (air‑powered) nail guns are used widely in the construction industry to drive fixings such as nails and staples into building materials. Although there’s a wide variety of types and sizes of nail guns, they all work on a similar principle – when you pull the trigger, a pulse of compressed air operates a piston, pushing a plunger which punches the fixing into the material. It’s just a matter of choosing the right nail gun for the job.
Size Fixing Purpose
Large Nails (50–90 mm) Floor, wall and roof framing
Medium Nails (30–60 mm) Light framing, joinery, etc
Small (also known as a bradder)
Panel pins (15–25 mm)
Staples
Beads, plywood, etc
Nail guns operate with an air pressure of 500–800 kPa (kilopascals) or 70–120 psi (pounds per square inch). The air pressure is adjusted at the source to suit the job, eg hardness of the timber, length of nail.
Nails, pins and staples are glued together into strips or coils which are loaded into the gun’s magazine. When you’re choosing nails or other fixings, it’s essential you make sure that they’re compatible with the design of the nail gun.

BC2190 © VET (WA) Ministerial Corporation 2014138
Use carpentry tools and equipmentCPCCCA2002B
Coil nails Framing nails
While strips are standard in most nail guns, the advantage of coil magazines is that they can hold up to 250 or 300 nails (depending on nail size). This makes them suitable for situations where numerous nails are required, eg hanger straps, triple grips, decking, claddings.
Larger guns have a muzzle bracket connected to the valve mechanism. The bracket must be pressed against something before the gun will fire. This safety device prevents the gun from firing accidentally.
Case study – Working with other tradespeople
Dave is using a pneumatic nail gun to construct a decking area. The decking is 40 strips of decking wide and 6 metres long. Each metre length of decking requires 12 nails.
If there are 80 nails in one strip of nails, how many strips of nails will Dave have to order for the job? Allow 10% extra strips for waste.
Activity 4.6 Calculations
Show your working out below.

© VET (WA) Ministerial Corporation 2014 BC2190 139
Section 4 – Power tools
Gas nail guns
Gas nail guns are powered by a small cylinder of gas and a rechargeable battery. The advantage of these guns is that they are not connected to a hose and compressed air supply so they’re portable and safer to use. The gas cylinders, however, need to be replaced and the batteries recharged and this can be costly.
Operation
Step 1 – Pre‑check
� Identify and put on the appropriate PPE.
� Select the correct nail gun for the task.
� Check the nail gun, air hoses and connections for any visible signs of damage.
� Select and fit the correct nails for the gun, eg bradder, framing, coil or staples.
� Ensure that the air pressure is adjusted to suit the job, eg hardness of the timber, length of nail.
� Fire a nail into scrap timber to check that the air pressure and nails are suitable.
Step 2 Step 3
Do not operate the trigger until the base plate of the nail gun is in contact with the material being fixed. Adjust the air pressure by starting with a low setting and increasing until the correct setting has been achieved.
Always fire a test nail into a piece of scrap timber to ensure that the air pressure is correctly adjusted to suit the job. This will vary depending on the hardness of the timber or the length of nail.

BC2190 © VET (WA) Ministerial Corporation 2014140
Use carpentry tools and equipmentCPCCCA2002B
Step 4 Step 5
Maintain a firm grip on the nail gun and apply pressure to the material being fixed. Failure to apply sufficient pressure can result in ‘kickback’ and possible ricochet of the nail or staple.
Remove the nail gun from the material being fixed and disconnect it from the air supply if it needs to be reloaded or when you’re finished nailing. Never leave a nail gun unattended.
Operating tips – Pneumatic nail guns
• Some larger nail guns have a strong recoil, so you should always maintain a firm grip to ensure you have control of the gun.
• Don’t rapid‑fire nails by continuously holding the trigger.
• Hold the work piece securely to avoid unwanted movement during nailing.
Safety – Pneumatic nail guns
• Never, under any circumstances, point a nail gun at or towards anyone.
• If possible, keep your hands and feet away from the muzzle when firing.
• Don’t carry a nail gun around with your finger on the trigger.
• Not all nail guns have the same safety features, so it’s essential that you read the manufacturer’s instruction manual before you use any nail gun.
• Disconnect the gun from the air supply when you’re reloading it.
• Don’t use a nail gun if the muzzle bracket is not working properly.
• Keep compressed air streams away from your body.
• When disconnecting air hoses, hold the ends so that they don’t whip around.
• Don’t kink hoses to cut off air. All hoses should have connectors with shut‑off valves.

© VET (WA) Ministerial Corporation 2014 BC2190 141
Section 4 – Power tools
There are laws that require warning signs to be put up when a nail gun is being used so that anyone entering the workplace is aware of the risks.
The actual wording for the sign is usually governed by state or territory WHS Regulations.
Care and maintenance – Pneumatic nail guns
• Always refer to the manufacturer’s data label on the nail gun for make and model information when ordering replacement parts.
• You should never modify nail guns, as this will make them no longer safe to use and no longer in accordance with the manufacturer’s specifications.
Lubricating nail guns
To keep nail guns operating smoothly and to prevent jamming, you must lubricate them to reduce wear on their moving parts. You can do this by using one of the following procedures.
In‑line lubrication
This system has a reservoir of oil in the air line between the receiver and the tool. As the air passes across the reservoir, a mist of oil is drawn into the air stream and passes through the tool as it’s used.
Manual lubrication
This is done by simply dropping a few drops of oil into the inlet end of the tool.
Use only approved oil that comes with the tool or is recommended in the manufacturer’s guide.
Airflow

BC2190 © VET (WA) Ministerial Corporation 2014142
Use carpentry tools and equipmentCPCCCA2002B
Case study – Maintenance
Katherine is trying to use a pneumatic nail gun on some frames, but it isn’t working correctly and keeps jamming. She thinks it probably needs lubricating but isn’t sure how to do it, and she can’t find the manufacturer’s instructions for the nail gun. She just wants the gun fixed, because this job has to be finished today and she’s already running behind.
Activity 4.7 Maintenance
What should Katherine do to get the nail gun fixed? Write the steps you think she should take.
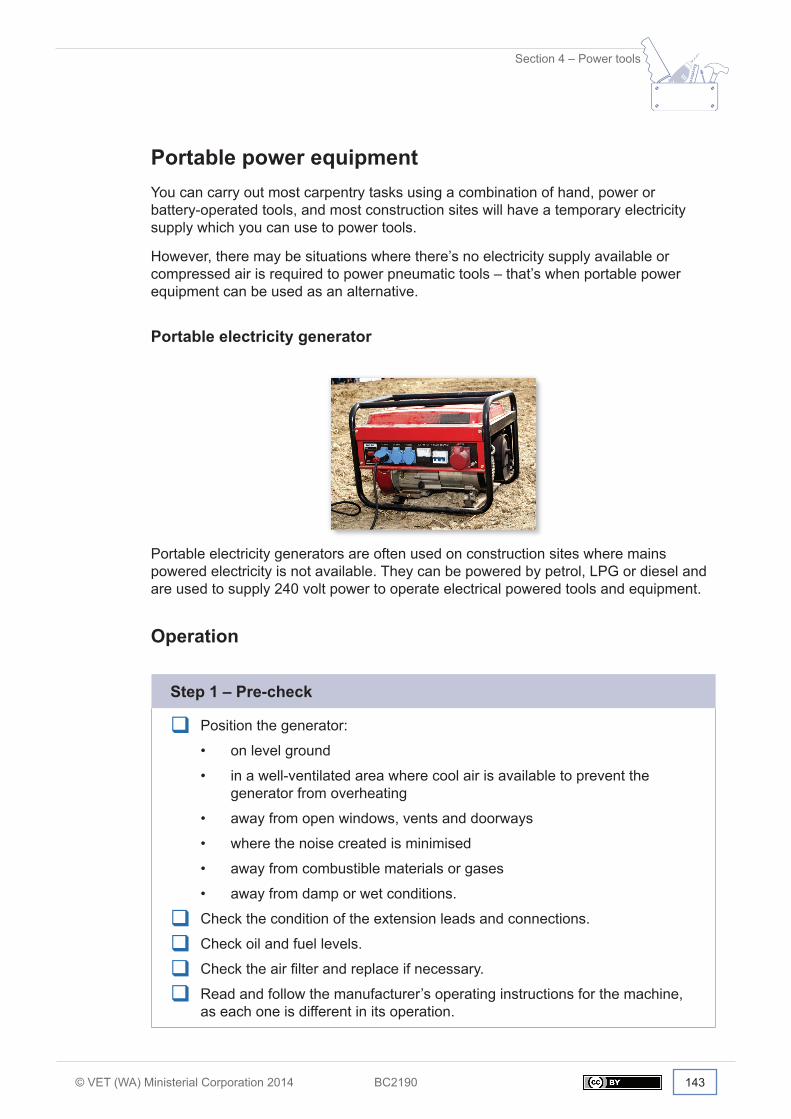
© VET (WA) Ministerial Corporation 2014 BC2190 143
Section 4 – Power tools
Portable power equipmentYou can carry out most carpentry tasks using a combination of hand, power or battery‑operated tools, and most construction sites will have a temporary electricity supply which you can use to power tools.
However, there may be situations where there’s no electricity supply available or compressed air is required to power pneumatic tools – that’s when portable power equipment can be used as an alternative.
Portable electricity generator
Portable electricity generators are often used on construction sites where mains powered electricity is not available. They can be powered by petrol, LPG or diesel and are used to supply 240 volt power to operate electrical powered tools and equipment.
Operation
Step 1 – Pre‑check
� Position the generator:
• on level ground
• in a well‑ventilated area where cool air is available to prevent the generator from overheating
• away from open windows, vents and doorways
• where the noise created is minimised
• away from combustible materials or gases
• away from damp or wet conditions.
� Check the condition of the extension leads and connections.
� Check oil and fuel levels.
� Check the air filter and replace if necessary.
� Read and follow the manufacturer’s operating instructions for the machine, as each one is different in its operation.

BC2190 © VET (WA) Ministerial Corporation 2014144
Use carpentry tools and equipmentCPCCCA2002B
Safety – Portable electricity generators
• Never use a generator in an enclosed area. Generator engines can produce toxic fumes, eg carbon monoxide.
• Use a battery‑powered carbon monoxide detector in the area where you’re running the generator to protect yourself and others from a dangerous build‑up of fumes.
• Petrol and its vapour can also be extremely flammable. Allow the compressor engine to cool before refuelling.
• If you use extension leads, ensure they are earthed and check the maximum current rating of the extension lead (10 amps, 13 amps etc).
Care and maintenance – Portable electricity generators
• Maintain the generator according to the manufacturer’s maintenance guide to ensure best performance and safety.
• Always refer to the manufacturer’s data label for make and model information when ordering replacement parts.
• Make sure the equipment is cleaned after use and before storage. Remove any fuel by using the drainage valve or by using a syphon.
• Clean and replace the air filter regularly.
• If a generator is stored for a long time, start it up and run it occasionally.
Pneumatic compressor
The pneumatic compressor is a device which compresses and stores air under pressure. It is used to operate nail guns, paint spraying equipment, sandblasters and small air tools.
Compressors can be either a permanent fixture in a joinery workshop or a portable unit used for work on a construction site. They’re driven by a motor that can be powered by either petrol, LPG, diesel or electricity.

© VET (WA) Ministerial Corporation 2014 BC2190 145
Section 4 – Power tools
Operation
Step 1 – Pre‑check
� Position compressor:
• on level ground
• in a well‑ventilated area where cool air can prevent the compressor from overheating
• away from open windows, vents and doorways
• where the noise created is minimised
• away from combustible materials or gases
• away from damp or wet conditions.
� Check the condition of air hoses and connections, and make sure all joints are coupled (connected) properly.
� Check oil and fuel levels and the condition of the air filter.
Step 2 Step 3
Start the compressor following the manufacturer’s instructions for the compressor. The air cocks should all be opened. After the engine has been started and had enough time to warm up, the air cocks may be closed.
Adjust the air pressure by alternating the regulator to suit the tool being used. Most pneumatic tools will not operate properly if the pressure is too low. If the pressure is too high, the tool may be damaged.
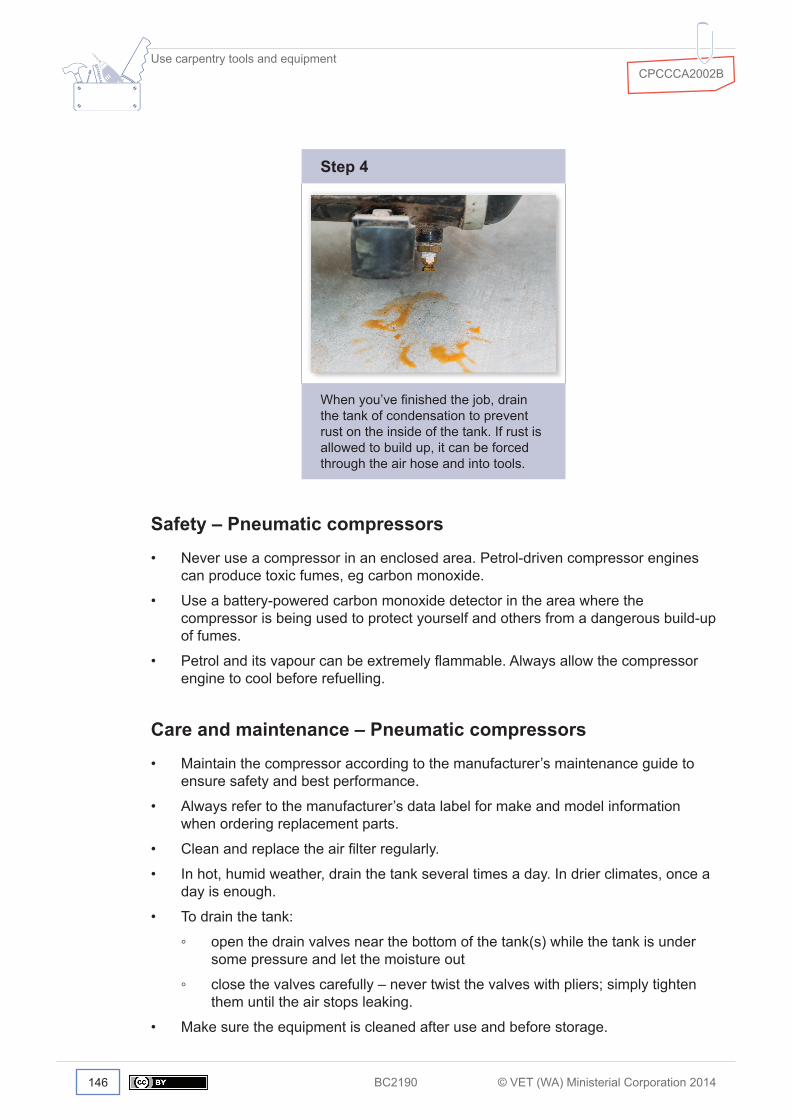
BC2190 © VET (WA) Ministerial Corporation 2014146
Use carpentry tools and equipmentCPCCCA2002B
Step 4
When you’ve finished the job, drain the tank of condensation to prevent rust on the inside of the tank. If rust is allowed to build up, it can be forced through the air hose and into tools.
Safety – Pneumatic compressors
• Never use a compressor in an enclosed area. Petrol‑driven compressor engines can produce toxic fumes, eg carbon monoxide.
• Use a battery‑powered carbon monoxide detector in the area where the compressor is being used to protect yourself and others from a dangerous build‑up of fumes.
• Petrol and its vapour can be extremely flammable. Always allow the compressor engine to cool before refuelling.
Care and maintenance – Pneumatic compressors
• Maintain the compressor according to the manufacturer’s maintenance guide to ensure safety and best performance.
• Always refer to the manufacturer’s data label for make and model information when ordering replacement parts.
• Clean and replace the air filter regularly.
• In hot, humid weather, drain the tank several times a day. In drier climates, once a day is enough.
• To drain the tank:
◦ open the drain valves near the bottom of the tank(s) while the tank is under some pressure and let the moisture out
◦ close the valves carefully – never twist the valves with pliers; simply tighten them until the air stops leaking.
• Make sure the equipment is cleaned after use and before storage.

© VET (WA) Ministerial Corporation 2014 BC2190 147
Section 5 – Clean‑up
IntroductionThe final stage of any construction project is clearing the worksite.
State and territory Regulations usually require a site to be kept and left in a clean and safe condition.
It is the responsibility of all construction workers to make sure they know the site policies and procedures for maintaining a tidy, organised and safe workplace including:
• safe waste disposal
• recycling of materials
• maintenance and storage of tools and equipment.
Carpenters can spend years building up a good reputation with builders and clients, and how they leave the job can form a lasting impression.
Performance criteria5.1 Work area is cleared and materials disposed of, reused or recycled in accordance with
legislation, regulations, codes of practice and job specification.
5.2 Plant, tools and equipment are cleaned, checked, maintained and stored in accordance with manufacturer recommendations and standard work practices.

BC2190 © VET (WA) Ministerial Corporation 2014148
Use carpentry tools and equipmentCPCCCA2002B
Waste managementAfter every construction project, waste products like timber offcuts and damaged or surplus materials are left over and must be disposed of appropriately.
There are laws which outline how waste materials should be dealt with and large fines can be issued if these are not followed. Companies and contractors usually develop policies and procedures to make sure everyone complies with these requirements.
Facilities for waste management on a worksite or in a joinery workshop may include:
• general and recycling bins
• hazardous material containers and spill kits
• dust extraction devices
• cleaning supplies.
Activity 5.1 Choosing products
Sometimes we can cause more problems during site clean‑up by using products such as soaps and cleaners that are not environmentally safe or friendly.
With your classmates, discuss what products might be used during a site clean‑up. Can you think of any environmentally friendly alternatives?
Make notes of your ideas below.

© VET (WA) Ministerial Corporation 2014 BC2190 149
Section 5 – Clean-up
Recycling materialsCarpentry materials are expensive and it’s good practice to recycle or reuse leftover material whenever possible. This also reduces the amount of waste going to landfill – an important environmental consideration.
At the end of a task or project, material should be sorted and disposed of, stored or moved on to the next project accordingly.
• Leftover materials in good condition and in useable sizes or quantities can be kept for future projects, if appropriate storage is available.
• Some used materials can be salvaged but may have to be cleaned or treated first. Timber can be reused or recycled but must be de‑nailed before relocating.
• There are special requirements for the disposal of hazardous waste and information can be found in safety data sheets (SDSs). For example, CCA‑treated timber should not be burned, as it contains arsenic and the fumes are toxic if inhaled. There are laws which restrict the disposal of asbestos and this is usually carried out by licensed specialists.

BC2190 © VET (WA) Ministerial Corporation 2014150
Use carpentry tools and equipmentCPCCCA2002B
Activity 5.2 Handling and disposing of hazardous and toxic materials
With the help of your lecturer and classmates, work through the following list of hazardous and/or toxic materials that can be found on a building site and what’s involved in their handling, disposal and recycling. You may be able to add another two or three materials to the list.
You may need to refer to standards, Regulations and legislation to find out whether there are mandated requirements, or look at policy documents. Your lecturer will help you with this.
AsbestosIssues for handling
Issues for disposal/procedures to follow
CCA‑treated timberIssues for handling
Issues for disposal/procedures to follow

© VET (WA) Ministerial Corporation 2014 BC2190 151
Section 5 – Clean-up
Broken glassIssues for handling
Issues for disposal/procedures to follow
Solvents, paints, adhesivesIssues for handling
Issues for disposal/procedures to follow
Issues for handling
Issues for disposal/procedures to follow

BC2190 © VET (WA) Ministerial Corporation 2014152
Use carpentry tools and equipmentCPCCCA2002B
Issues for handling
Issues for disposal/procedures to follow
Issues for handling
Issues for disposal/procedures to follow

© VET (WA) Ministerial Corporation 2014 BC2190 153
Section 5 – Clean-up
Tools, plant and equipmentTools can be expensive and they need to be looked after when a job is completed to ensure that they remain in good working condition and are safe to use and ready for the next project.
InspectionBefore you start a job you must first check tools and equipment for damage or faults. For example:
• with leads and cables – check for fraying or exposed wires, bent or loose plugs
• with cutting edges and blades – check whether they are blunt or damaged
• with metal components – look for corrosion or rust.
If you find any faults, attach a repair tag and remove the equipment from use immediately. Report all faults on a worksite or in a workshop to a storeperson or supervisor. Damaged tools must be repaired but this should be done only by trained personnel. Some faults can be fixed only by a specialist or licensed electrician.
Check the dates on inspection tags to make sure that power tools and extension leads are still safe to use and in accordance with Regulations. Make a note of upcoming inspection dates if they’re likely to occur before the next time the tool is used.
CleaningIt’s essential that you clean tools and equipment thoroughly before you put them in storage or move on to a new project.
• Wipe all tools to clear away dust or debris and remove substances like grease or sap.
• Pay particular attention to tools that have been used in wet or damp conditions. Clean them with an oily rag to prevent rust and, if rust exists, remove it with steel wool or a wire brush.
• Use compressed air tools such as ‘blow down’ guns to clean dust from tools, but take extreme care. You should always wear appropriate PPE to avoid injury.
• Lubricate moving or adjustable parts of tools to allow smooth, continuous operation. Lubrication reduces friction between moving parts, helps them to last longer and makes the machine more energy efficient.
• Remove any fuel left in plant or equipment. Old fuel can go stale and affect performance. It could also present a fire hazard if it’s not removed.
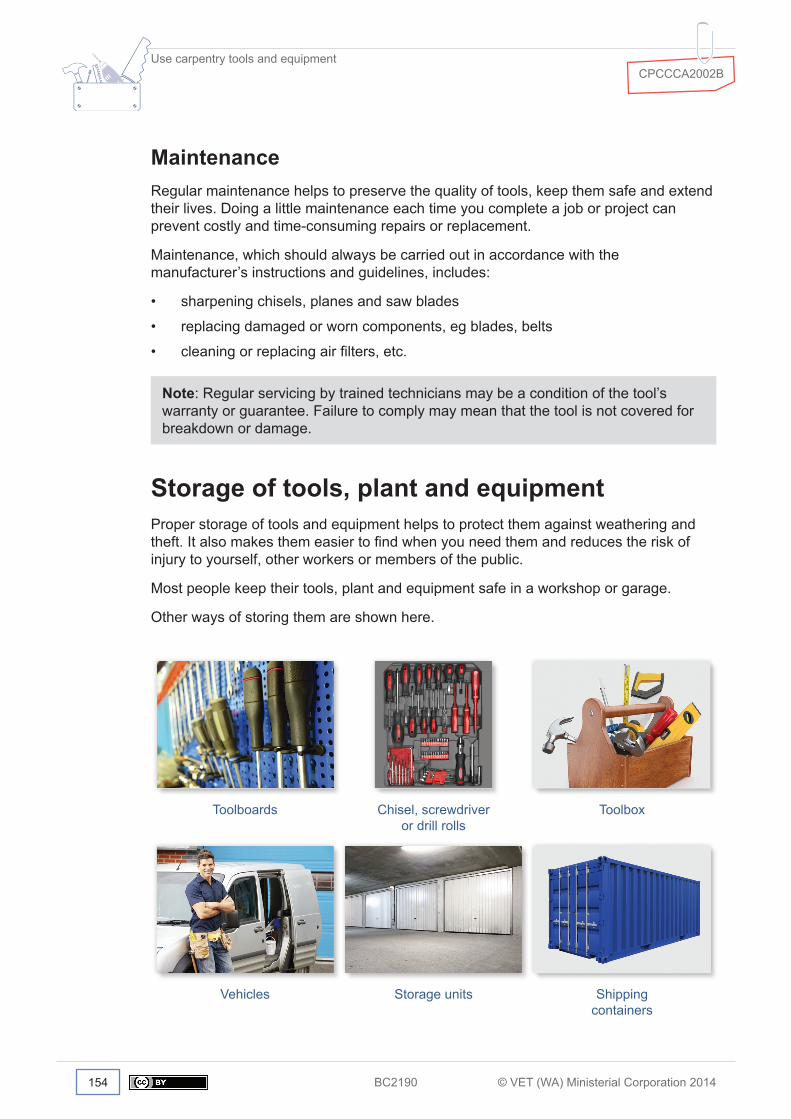
BC2190 © VET (WA) Ministerial Corporation 2014154
Use carpentry tools and equipmentCPCCCA2002B
MaintenanceRegular maintenance helps to preserve the quality of tools, keep them safe and extend their lives. Doing a little maintenance each time you complete a job or project can prevent costly and time‑consuming repairs or replacement.
Maintenance, which should always be carried out in accordance with the manufacturer’s instructions and guidelines, includes:
• sharpening chisels, planes and saw blades
• replacing damaged or worn components, eg blades, belts
• cleaning or replacing air filters, etc.
Note: Regular servicing by trained technicians may be a condition of the tool’s warranty or guarantee. Failure to comply may mean that the tool is not covered for breakdown or damage.
Storage of tools, plant and equipmentProper storage of tools and equipment helps to protect them against weathering and theft. It also makes them easier to find when you need them and reduces the risk of injury to yourself, other workers or members of the public.
Most people keep their tools, plant and equipment safe in a workshop or garage.
Other ways of storing them are shown here.
Toolboards Chisel, screwdriver or drill rolls
Toolbox
Vehicles Storage units Shipping containers

© VET (WA) Ministerial Corporation 2014 BC2190 155
Section 5 – Clean-up
When you’re storing tools and equipment, they should:
• be protected from sun damage, flooding and damp conditions
• be organised and accessible
• be stored in their original packaging or specially designed storage boxes where possible
• have accessories like drill bits and blades removed if necessary
• have all sharp edges covered with sleeves or caps
• be kept in a secure, locked environment.
Note: Documentation such as operating instructions and warranties should be kept with the tools and equipment where possible or stored together in an easily accessible place.

BC2190 © VET (WA) Ministerial Corporation 2014156
Use carpentry tools and equipmentCPCCCA2002B


© VET (WA) Ministerial Corporation 2014 BC2190 Annex A 1
Annex A – Unit details
Unit title Use carpentry tools and equipment
Descriptor This unit of competency specifies the outcomes required to safely select and use carpentry tools and equipment. It includes hand tools, power tools, pneumatic tools, plant and equipment.
National code CPCCCA2002B
Employability skills This unit contains employability skills.
Prerequisite unit CPCCOHS2001A Apply OHS requirements, policies and procedures in the construction industry
Application This unit of competency supports achievement of skills in identification, correct and safe use and maintenance of hand and power tools commonly used in the construction industry.
Element 1 Plan and prepare
1.1 Work instructions and operational details are obtained, confirmed and applied from relevant information to undertake planning and preparation.
1.2 Safety (OHS) requirements are followed in accordance with safety plans and policies.
1.3 Signage and barricade requirements are identified and implemented.
1.4 Plant and equipment selected to carry out tasks are consistent with job requirements, checked for serviceability, and any faults are rectified or reported prior to commencement.
1.5 Material quantity requirements are calculated in accordance with plans, specifications and quality requirements.
1.6 Materials appropriate to the work application are identified, obtained, prepared, safely handled and located ready for use.
1.7 Environmental requirements are identified for the project in accordance with environmental plans and statutory and regulatory authority obligations, and are applied.
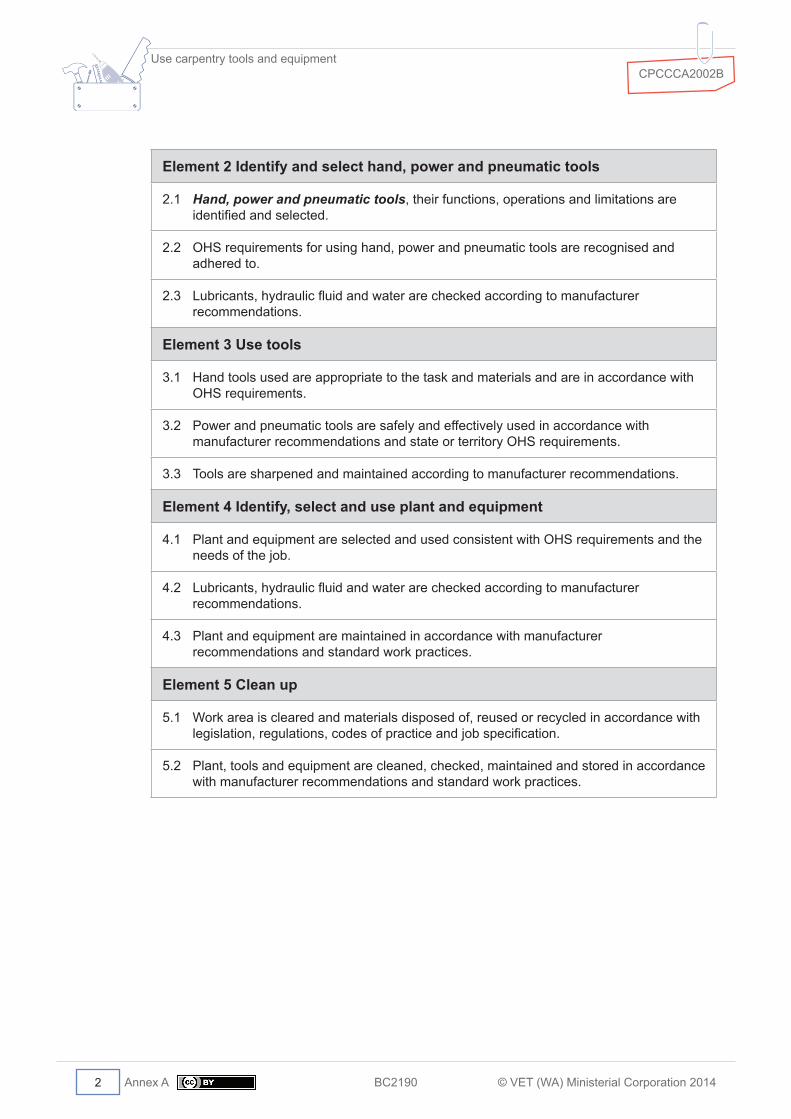
Annex A BC2190 © VET (WA) Ministerial Corporation 2014
Use carpentry tools and equipmentCPCCCA2002B
2
Element 2 Identify and select hand, power and pneumatic tools
2.1 Hand, power and pneumatic tools, their functions, operations and limitations are identified and selected.
2.2 OHS requirements for using hand, power and pneumatic tools are recognised and adhered to.
2.3 Lubricants, hydraulic fluid and water are checked according to manufacturer recommendations.
Element 3 Use tools
3.1 Hand tools used are appropriate to the task and materials and are in accordance with OHS requirements.
3.2 Power and pneumatic tools are safely and effectively used in accordance with manufacturer recommendations and state or territory OHS requirements.
3.3 Tools are sharpened and maintained according to manufacturer recommendations.
Element 4 Identify, select and use plant and equipment
4.1 Plant and equipment are selected and used consistent with OHS requirements and the needs of the job.
4.2 Lubricants, hydraulic fluid and water are checked according to manufacturer recommendations.
4.3 Plant and equipment are maintained in accordance with manufacturer recommendations and standard work practices.
Element 5 Clean up
5.1 Work area is cleared and materials disposed of, reused or recycled in accordance with legislation, regulations, codes of practice and job specification.
5.2 Plant, tools and equipment are cleaned, checked, maintained and stored in accordance with manufacturer recommendations and standard work practices.

© VET (WA) Ministerial Corporation 2014 BC2190 Annex A
Unit details
3
Required skills and knowledge
Required skills• communication skills to:
◦ determine requirements
◦ enable clear and direct communication, using questioning to identify and confirm requirements, share information, listen and understand
◦ follow instructions
◦ read and interpret:
▪ documentation from a variety of sources
▪ plans, specifications and drawings
◦ report faults
◦ use language and concepts appropriate to cultural differences
◦ use and interpret non‑verbal communication, such as hand signals
• numeracy skills to apply measurements and make calculations
• organisational skills, including the ability to plan and set out work
• planning and organising skills to prepare for work tasks
• teamwork skills to work with others to action tasks and relate to people from a range of cultural and ethnic backgrounds and with varying physical and mental abilities
• technological skills to use:
◦ a range of mobile technology, such as two‑way radio and mobile phones
◦ voice and hand signals to access and understand site‑specific instructions.

Annex A BC2190 © VET (WA) Ministerial Corporation 2014
Use carpentry tools and equipmentCPCCCA2002B
4
Required knowledge• carpentry materials
• carpentry tool use techniques
• construction terminology
• job safety analysis (JSA) and safe work method statements
• material safety data sheets (MSDS)
• materials storage and environmentally friendly waste management
• plans, specifications and drawings
• processes for the calculation of material requirements
• quality requirements of carpentry tools and equipment
• relevant Acts, regulations and codes of practice
• tools and equipment safety manuals and instructions
• types, characteristics, uses and limitations of plant, tools and equipment
• workplace and equipment safety requirements.

© VET (WA) Ministerial Corporation 2014 BC2190 Annex A
Unit details
5
Evidence guideThe evidence guide provides advice on assessment and must be read in conjunction with the performance criteria, required skills and knowledge, range statement and the Assessment Guidelines for the Training Package.
Overview of assessment
This unit of competency could be assessed in the workplace or a close simulation of the workplace environment, provided that simulated or project‑based assessment techniques fully replicate construction workplace conditions, materials, activities, responsibilities and procedures.
Critical aspects for assessment and evidence required demonstrate competency in this unit
A person who demonstrates competency in this unit must be able to provide evidence of the ability to:
• locate, interpret and apply relevant information, standards and specifications
• comply with site safety plan and OHS legislation, regulations and codes of practice applicable to workplace operations
• comply with organisational policies and procedures, including quality requirements
• safely and effectively use tools, plant and equipment
• communicate and work effectively and safely with others
• identify and select hand tools for given tasks
• safely use and maintain a minimum of rules, tapes, squares, hammers, hand saws, hand planes and chisels for given tasks
• identify power and pneumatic tools for a given task
• safely use a minimum of a power saw, electric plane, impact power drill, nail gun and compressor or equivalent types of equipment for given tasks
• maintain equipment according to manufacturer’s recommendations or organisational requirements.

Annex A BC2190 © VET (WA) Ministerial Corporation 2014
Use carpentry tools and equipmentCPCCCA2002B
6
Context of and specific resources for assessment
This competency is to be assessed using standard and authorised work practices, safety requirements and environmental constraints.
Assessment of essential underpinning knowledge will usually be conducted in an off‑site context.
Assessment is to comply with relevant regulatory or Australian standards’ requirements.
Resource implications for assessment include:
• an induction procedure and requirement
• realistic tasks or simulated tasks covering the mandatory task requirements
• relevant specifications and work instructions
• tools and equipment appropriate to applying safe work practices
• support materials appropriate to activity
• workplace instructions relating to safe work practices and addressing hazards and emergencies
• material safety data sheets
• research resources, including industry‑related systems information.
Reasonable adjustments for people with disabilities must be made to assessment processes where required. This could include access to modified equipment and other physical resources, and the provision of appropriate assessment support.

© VET (WA) Ministerial Corporation 2014 BC2190 Annex A
Unit details
7
Method of assessment
Assessment methods must:
• satisfy the endorsed Assessment Guidelines of the Construction, Plumbing and Services Training Package
• include direct observation of tasks in real or simulated work conditions, with questioning to confirm the ability to consistently identify and correctly interpret the essential underpinning knowledge required for practical application
• reinforce the integration of employability skills with workplace tasks and job roles
• confirm that competency is verified and able to be transferred to other circumstances and environments.
Validity and sufficiency of evidence requires that:
• competency will need to be demonstrated over a period of time reflecting the scope of the role and the practical requirements of the workplace
• where the assessment is part of a structured learning experience the evidence collected must relate to a number of performances assessed at different points in time and separated by further learning and practice, with a decision on competency only taken at the point when the assessor has complete confidence in the person’s demonstrated ability and applied knowledge
• all assessment that is part of a structured learning experience must include a combination of direct, indirect and supplementary evidence.
Assessment processes and techniques should as far as is practical take into account the language, literacy and numeracy capacity of the candidate in relation to the competency being assessed.
Supplementary evidence of competency may be obtained from relevant authenticated documentation from third parties, such as existing supervisors, team leaders or specialist training staff.

Annex A BC2190 © VET (WA) Ministerial Corporation 2014
Use carpentry tools and equipmentCPCCCA2002B
8
Range statementThe range statement relates to the unit of competency as a whole. It allows for different work environments and situations that may affect performance. Bold italicised wording, if used in the performance criteria, is detailed below. Essential operating conditions that may be present with training and assessment (depending on the work situation, needs of the candidate, accessibility of the item, and local industry and regional contexts) may also be included.
Information includes:
• diagrams or sketches
• instructions issued by authorised organisational or external personnel
• manufacturer specifications and instructions where specified
• memos
• MSDS
• organisation work specifications and requirements
• plans and specifications
• regulatory and legislative requirements pertaining to using carpentry tools and equipment
• relevant Australian standards
• safe work procedures related to using carpentry tools and equipment
• signage
• verbal or written and graphical instructions
• work bulletins
• work schedules.
Planning and preparation include:
• work site inspection
• equipment defect identification
• assessment of conditions and hazards
• determination of work requirements.

© VET (WA) Ministerial Corporation 2014 BC2190 Annex A
Unit details
9
Safety (OHS) is to be in accordance with legislation, regulations, codes of practice, organisational safety policies and procedures, and project safety plan and may include:
• emergency procedures, including emergency shutdown and stopping, extinguishing fires, organisational first aid requirements and evacuation
• handling of materials
• hazard control
• hazardous materials and substances
• safe operating procedures, including the conduct of operational risk assessment and treatments associated with:
◦ earth leakage boxes
◦ lighting
◦ power cables, including overhead service trays, cables and conduits
◦ restricted access barriers
◦ surrounding structures
◦ traffic control
◦ trip hazards
◦ work site visitors and the public
◦ working at heights
◦ working in confined spaces
◦ working in proximity to others
◦ working with dangerous materials
• organisational first aid
• personal protective clothing and equipment prescribed under legislation, regulations and workplace policies and practices
• use of firefighting equipment
• use of tools and equipment
• workplace environment and safety.
Plant and equipment include:
• 240v power supplied
• compressor
• generator
• hand held or small single person operated equipment
• pneumatic driven.
Quality requirements include relevant regulations, including:
• Australian standards
• internal company quality policy and standards
• manufacturer specifications, where specified
• workplace operations and procedures.

Annex A BC2190 © VET (WA) Ministerial Corporation 2014
Use carpentry tools and equipmentCPCCCA2002B
10
Materials include: • bricks
• concrete components
• concrete masonry units
• glass
• insulation
• joinery units
• metal sheeting
• paints and sealants
• plaster or fibre cement sheeting
• reconstituted timber products
• reinforcement materials
• scaffolding components
• structural steel sections and components
• timber.
Environmental requirements include:
• clean‑up protection
• noise and dust
• vibration
• waste management.
Statutory and regulatory authorities include:
• federal, state and local authorities administering applicable Acts, regulations and codes of practice.
Hand, power and pneumatic tools include:
• hand tools:
◦ cutting, planing, boring and shaping
◦ fixing, fastening and percussion tools
◦ holding tools
◦ setting out, marking out and levelling tools
• power tools (portable and static):
◦ electrical and pneumatic operated tools
◦ gas driven tools
◦ hoses
◦ leads.

© VET (WA) Ministerial Corporation 2014 BC2190 Annex B 1
Annex B – Assessments
Assessment planThe assessments suggested here for this unit are designed to assess your competency in the elements as listed in the unit details at Annex A to this guide. There are two components to the assessment.
Assessment Elements
Assessment 1 – Saw stool
For this assessment, you will complete a series of planning documents and be observed as you build a timber saw stool.
All
Assessment 2 – Toolbox
For this assessment, you will complete a series of planning documents and be observed as you build a timber toolbox in the workshop.
All
Note: Your lecturer may provide you with alternative assessments.
Individual learning and assessment needsLearners have different learning styles and needs. Please let your lecturer know if there is anything that may have an effect on your learning.
Results and appealsThere is a process to be followed should you wish to appeal the result of your assessment. Please ask your lecturer for more information about this.

Annex B BC2190 © VET (WA) Ministerial Corporation 20142
Use carpentry tools and equipmentCPCCCA2002B

© VET (WA) Ministerial Corporation 2014 BC2190 Annex B 3
Assessments
Assessment 1 – Saw stool
IntroductionFor this assessment, you will complete a series of planning documents and be observed as you build a timber saw stool.
Your work practices will be observed by your lecturer, assessor or work placement supervisor. You will be assessed on your ability to demonstrate the skills and knowledge required to:
• plan and prepare a work task
• identify, select and use carpentry tools and equipment
• clean up the work area, dispose of excess materials, and maintain tools and equipment.
RequirementsThe ‘Workshop observation checklist’ will be used for observation purposes. This checklist must be completed and signed by your lecturer, assessor or supervisor.
All other instructions for this assessment task, which contains six assessment activities, are provided in this guide. Your lecturer will provide you with additional instructions regarding the workshop‑based component of the assessment.
Materials and equipmentThe following assessment activity worksheets are provided in this guide:
• Assessment activity 1.1 Identify the task
• Assessment activity 1.2 Special requirements
• Assessment activity 1.3 Tools list
• Assessment activity 1.4 Materials list
• Assessment activity 1.5 Safety checklist and job safety analysis
• Assessment activity 1.6 Workshop observation checklist.
Your lecturer will provide information about access to the tools, equipment and materials you’ll need for this assessment.

Annex B BC2190 © VET (WA) Ministerial Corporation 20144
Use carpentry tools and equipmentCPCCCA2002B

© VET (WA) Ministerial Corporation 2014 BC2190 Annex B 5
Assessments
CPCCCA2002B
Use carpentry tools and equipment
Assessment 1 – Saw stool
Name Date
I have received feedback on this assessment.
Signature Date
Assessor’s initials

Annex B BC2190 © VET (WA) Ministerial Corporation 20146
Use carpentry tools and equipmentCPCCCA2002B

© VET (WA) Ministerial Corporation 2014 BC2190 Annex B 7
Assessments
Det
ail a
t top
of l
egSa
w s
tool
600 mm
Plan
of t
op
Hou
sing
10
mm
dee
p
T
Elev
atio
n
1000
mm
S
150
mm
E
90
°
End
elev
atio
n
20 m
m
9 m
m
32 m
m
35 m
m
Set o
ut fo
r bev
els
ES
T
125 mm
E =
end
bev
el
S =
sid
e be
vel
T =
top
bev
el
450
mm
True
leng
th o
f leg
arri
s =
642
mm

Annex B BC2190 © VET (WA) Ministerial Corporation 20148
Use carpentry tools and equipmentCPCCCA2002B

© VET (WA) Ministerial Corporation 2014 BC2190 Annex B 9
Assessments
Assessment activity 1.1 Identify the task
Briefly describe the task you will complete for this assessment using the plan provided in this guide and the instructions you receive from your lecturer.
Consider the following questions.
• What is the object?
• What is the overall size of the object (eg use outside dimensions)?
• What materials will it be made of?
• How long do you have to complete the task?
List the steps you will take to complete the task.
1.
2.
3.
4.
5.

Annex B BC2190 © VET (WA) Ministerial Corporation 201410
Use carpentry tools and equipmentCPCCCA2002B
6.
7.
8.
9.
10.

© VET (WA) Ministerial Corporation 2014 BC2190 Annex B 11
Assessments
Assessment activity 1.2 Special requirements
List any regulatory requirements eg policies and procedures, legislation, Australian Standards®, that may apply to this task.
In the right‑hand column, describe the requirement type eg safety, quality, environmental.
You may need to do some research online or check information on an SDS.
Requirement Type
Environmental requirements
Describe what you intend to do to satisfy the following environmental requirements.
Waste management
Clean‑up
Noise
Dust

Annex B BC2190 © VET (WA) Ministerial Corporation 201412
Use carpentry tools and equipmentCPCCCA2002B
Assessment activity 1.3 Tools list
List the tools you intend to use to complete the task. When you have collected the tools, conduct a pre‑check and identify any faults and maintenance issues.
Use the right‑hand column to describe their condition.
Note: Not all tool types will be required for this task.
Hand tools Power/pneumatic tools Condition
Marking out tools
Cutting tools
Impelling tools

© VET (WA) Ministerial Corporation 2014 BC2190 Annex B 13
Assessments
Hand tools Power/pneumatic tools Condition
Planing tools
Sanding tools
Holding tools
Plant and equipment

Annex B BC2190 © VET (WA) Ministerial Corporation 201414
Use carpentry tools and equipmentCPCCCA2002B
Faulty tools
List and describe any faults you find in the tools you have collected for the task. Describe what you did when you identified a faulty tool.

© VET (WA) Ministerial Corporation 2014 BC2190 Annex B 15
Assessments
Ass
essm
ent a
ctiv
ity 1
.4 M
ater
ials
list
List
the
mat
eria
ls y
ou w
ill n
eed
to c
ompl
ete
the
task
.
Mat
eria
ls
Item
no
.D
escr
iptio
n/na
me
of c
ompo
nent
Type
Size
1Le
ngth
Size
2W
idth
Size
3Th
ickn
ess
Qua
ntity
1 2 3 4 5 6 7 8
Fixi
ngs
and
adhe
sive
s
Item
no
.D
escr
iptio
n/na
me
of c
ompo
nent
Type
Size
Qua
ntity
1 2 3 4 5

Annex B BC2190 © VET (WA) Ministerial Corporation 201416
Use carpentry tools and equipmentCPCCCA2002B
Assessment activity 1.5 Safety checklist
Tick the boxes next to any safety requirements or hazards that may apply to this task. Add any issues not listed in the spaces provided.
Make notes in the right‑hand column about the steps you’ll take to ensure you’re working safely.
When you have completed the checklist, use the information to complete the JSA.
Training
� Safe use of tools or equipment
� Manual handling
�
�
Site conditions
� Site/workshop access
� Access to work areas
� Toilets/amenities access
� Signage and barricades
� Environment
� Hazardous materials
� Public safety
� Traffic control
�
PPE
� Eye protection
� Hearing protection
� Respiratory protection
� Foot protection
� Hand protection
� Head protection
� Sun safety
�
�

© VET (WA) Ministerial Corporation 2014 BC2190 Annex B 17
Assessments
Tools and equipment
� Plant and equipment
� Hand tools
� Electrical and pneumatic tools
� Cables and leads
�
�
High risk
� Scaffolding
� Working at heights
� Welding
� Excavations
� Overhead wires
�
�
Emergency
� Emergency plan
� First aid plan
�
�

Annex B BC2190 © VET (WA) Ministerial Corporation 201418
Use carpentry tools and equipmentCPCCCA2002B
Job
safe
ty a
naly
sis
Dat
e:JS
A nu
mbe
r:
Loca
tion
of w
ork:
Act
ivity
:
Nam
e:A
ppro
ved
by (n
ame)
:
Act
ivity
Haz
ards
Ris
k co
ntro
l mea
sure
sW
ho is
resp
onsi
ble
List
the
task
s in
the
orde
r th
ey w
ill b
e ca
rrie
d ou
t.Li
st th
e ha
zard
s as
soci
ated
with
eac
h ta
sk.
List
the
cont
rol m
easu
res
requ
ired
to m
inim
ise
the
haza
rd.
Nam
e th
e pe
rson
re
spon
sibl
e fo
r m
inim
isin
g th
e ha
zard
.

© VET (WA) Ministerial Corporation 2014 BC2190 Annex B 19
Assessments
Act
ivity
Haz
ards
Ris
k co
ntro
l mea
sure
sW
ho is
resp
onsi
ble

Annex B BC2190 © VET (WA) Ministerial Corporation 201420
Use carpentry tools and equipmentCPCCCA2002B
Assessment activity 1.6 Workshop observation checklist
During the assessment activity, did you observe the learner: Yes No N/APart 1 – Identify and select hand, power and pneumatic toolsa) identify and select hand, power and pneumatic tools and identify
their functions, operations and limitations?b) recognise and adhere to WHS requirements for using hand, power
and pneumatic tools?c) check lubricants, hydraulic fluid and water according to
manufacturer recommendations?Part 2 – Use toolsa) use hand tools appropriate to the task and materials and in
accordance with WHS requirements?b) safely and effectively use power and pneumatic tools in accordance
with manufacturer recommendations and state or territory WHS requirements?
c) sharpen and maintain tools according to manufacturer recommendations?
Part 3 – Identify, select and use plant and equipmenta) select and use plant and equipment consistent with WHS
requirements and the needs of the job?b) check lubricants, hydraulic fluid and water according to
manufacturer recommendations?c) maintain plant and equipment in accordance with manufacturer
recommendations and standard work practices?Part 4 – Clean upa) clear work area and dispose of, reuse or recycle materials in
accordance with legislation, regulations, codes of practice and job specification?
b) clean, check, maintain and store plant, tools and equipment in accordance with manufacturer recommendations and standard work practices?
During the assessment activity, did you observe the learner demonstrate the following required skills?• communication skills to:
◦ determine requirements? ◦ enable clear and direct communication, using questioning to
identify and confirm requirements, share information, listen and understand?
◦ follow instructions? ◦ read and interpret documentation from a variety of sources? ◦ read and interpret plans, specifications and drawings? ◦ report faults? ◦ use language and concepts appropriate to cultural
differences? ◦ use and interpret non‑verbal communication, such as hand
signals?• numeracy skills to apply measurements and make calculations?• organisational skills, including the ability to plan and set out work?• planning and organising skills to prepare for work tasks?• teamwork skills to work with others to action tasks and relate to
people from a range of cultural and ethnic backgrounds and with varying physical and mental abilities?

© VET (WA) Ministerial Corporation 2014 BC2190 Annex B 21
Assessments
• technological skills to use:
◦ a range of mobile technology, such as two‑way radio and mobile phones?
◦ voice and hand signals to access and understand site‑specific instructions?
During the assessment activity, did you observe the learner demonstrate knowledge of the following?• carpentry materials?• carpentry tool use techniques?• construction terminology?• job safety analysis (JSA) and safe work method statements?• material safety data sheets (MSDS)?• materials storage and environmentally friendly waste management?• plans, specifications and drawings?• processes for the calculation of material requirements?• quality requirements of carpentry tools and equipment?• relevant Acts, regulations and codes of practice?• tools and equipment safety manuals and instructions?• types, characteristics, uses and limitations of plant, tools and
equipment?• workplace and equipment safety requirements?During the assessment activity, did you observe the learner demonstrate the following critical aspects for assessment?• locate, interpret and apply relevant information, standards and
specifications?• comply with site safety plan and WHS legislation, regulations and
codes of practice applicable to workplace operations?• comply with organisational policies and procedures, including
quality requirements?• safely and effectively use tools, plant and equipment?• communicate and work effectively and safely with others?• identify and select hand tools for given tasks?• safely use and maintain a minimum of rules, tapes, squares,
hammers, hand saws, hand planes and chisels for given tasks?• identify power and pneumatic tools for a given task?• safely use a minimum of a power saw, electric plane, impact power
drill, nail gun and compressor or equivalent types of equipment for given tasks?
• maintain equipment according to manufacturer’s recommendations or organisational requirements?
Feedback to learner
Learner’s name: Assessor’s name:
Learner’s signature: Assessor’s signature:
Date: Date:

Annex B BC2190 © VET (WA) Ministerial Corporation 201422
Use carpentry tools and equipmentCPCCCA2002B

© VET (WA) Ministerial Corporation 2014 BC2190 Annex B 23
Assessments
Assessment 2 – Toolbox
IntroductionFor this assessment, you will complete a series of planning documents and be observed as you build a timber toolbox.
Your work practices will be observed by your lecturer, assessor or work placement supervisor. You will be assessed on your ability to demonstrate the skills and knowledge required to:
• plan and prepare a work task
• identify, select and use carpentry tools and equipment
• clean up the work area, dispose of excess materials, and maintain tools and equipment.
RequirementsThe ‘Workshop observation checklist’ will be used for observation purposes. This checklist must be completed and signed by your lecturer, assessor or supervisor.
All other instructions for this assessment task, which contains six assessment activities, are provided in this guide. Your lecturer will provide you with additional instructions regarding the workshop‑based component of the assessment.
Materials and equipmentThe following assessment activity worksheets are provided in this guide:
• Assessment activity 2.1 Identify the task
• Assessment activity 2.2 Special requirements
• Assessment activity 2.3 Tools list
• Assessment activity 2.4 Materials list
• Assessment activity 2.5 Safety checklist and job safety analysis
• Assessment activity 2.6 Workshop observation checklist.
Your lecturer will provide information about access to the tools, equipment and materials you’ll need for this assessment.

Annex B BC2190 © VET (WA) Ministerial Corporation 201424
Use carpentry tools and equipmentCPCCCA2002B

© VET (WA) Ministerial Corporation 2014 BC2190 Annex B 25
Assessments
CPCCCA2002B
Use carpentry tools and equipment
Assessment 2 – Toolbox
Name Date
I have received feedback on this assessment.
Signature Date
Assessor’s initials

Annex B BC2190 © VET (WA) Ministerial Corporation 201426
Use carpentry tools and equipmentCPCCCA2002B
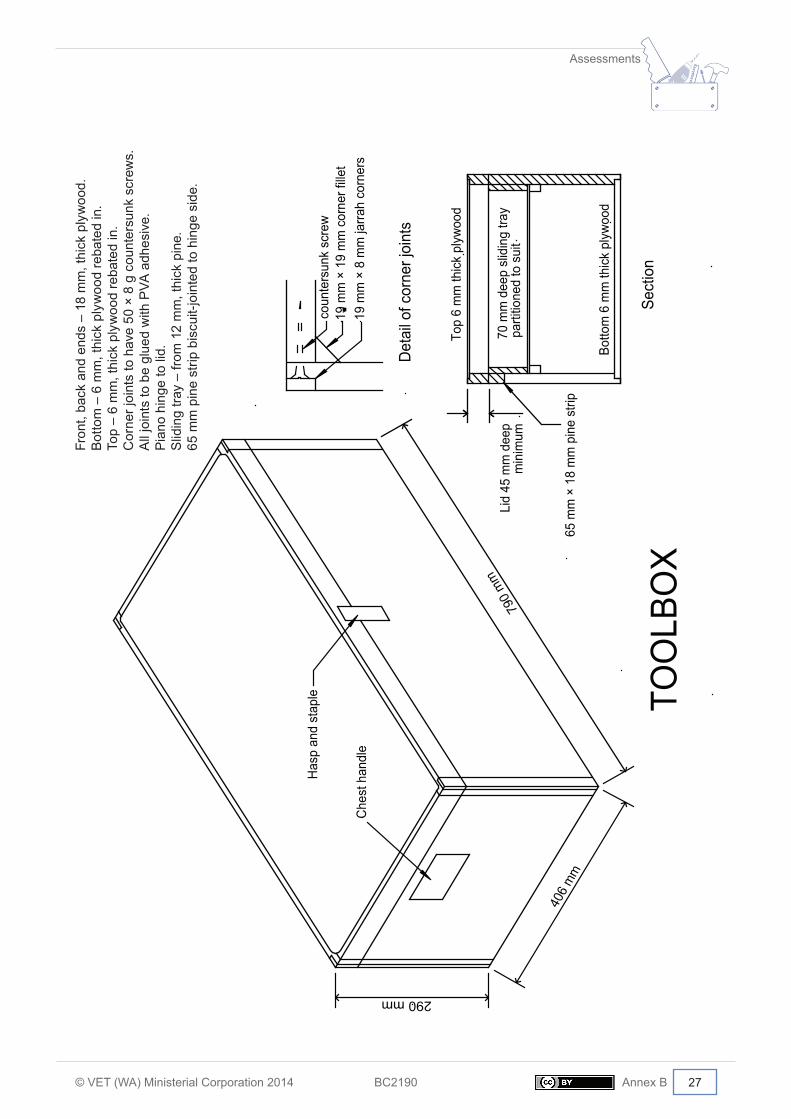
© VET (WA) Ministerial Corporation 2014 BC2190 Annex B 27
Assessments
Det
ail o
f cor
ner j
oint
s
19 m
m ×
8 m
m ja
rrah
corn
ers
TOO
LBO
XSe
ctio
n
Fron
t, ba
ck a
nd e
nds
– 18
mm
, thi
ck p
lyw
ood.
Botto
m –
6m
m, t
hick
ply
woo
d re
bate
d in
.
Top
– 6m
m, t
hick
ply
woo
d re
bate
d in
.
Cor
ner j
oint
s to
hav
e 50
x 8
g C
/S s
crew
s.
All j
oint
s to
be
glue
d w
ith P
VA a
dhes
ive.
Pian
o hi
nge
to li
d.
Slid
ing
tray
– fro
m 1
2mm
, thi
ck p
ine.
Lid
45 m
m d
eep
min
imum
Botto
m 6
mm
thic
k pl
ywoo
d
70 m
m d
eep
slid
ing
tray
parti
tione
d to
sui
t
Top
6 m
m th
ick
plyw
ood
Has
p an
d st
aple
Che
st h
andl
e
406
mm
290 mm
790
mm
19 m
m ×
19
mm
cor
ner f
illet
coun
ters
unk
scre
w
65 m
m ×
18
mm
pin
e st
rip
Fron
t, ba
ck a
nd e
nds
– 18
mm
, thi
ck p
lyw
ood.
Bot
tom
– 6
mm
, thi
ck p
lyw
ood
reba
ted
in.
Top
– 6
mm
, thi
ck p
lyw
ood
reba
ted
in.
Cor
ner j
oint
s to
hav
e 50
× 8
g c
ount
ersu
nk s
crew
s.A
ll jo
ints
to b
e gl
ued
with
PVA
adh
esiv
e.Pi
ano
hing
e to
lid.
Slid
ing
tray
– fro
m 1
2 m
m, t
hick
pin
e.65
mm
pin
e st
rip b
iscu
it‑jo
inte
d to
hin
ge s
ide.

Annex B BC2190 © VET (WA) Ministerial Corporation 201428
Use carpentry tools and equipmentCPCCCA2002B

© VET (WA) Ministerial Corporation 2014 BC2190 Annex B 29
Assessments
Assessment activity 2.1 Identify the task
Briefly describe the task you will complete for this assessment using the plan provided in this guide and the instructions you receive from your lecturer.
Consider the following questions.
• What is the object?
• What is the overall size of the object (eg use outside dimensions)?
• What materials will it be made of?
• How long do you have to complete the task?
List the steps you will take to complete the task.
1.
2.
3.
4.
5.

Annex B BC2190 © VET (WA) Ministerial Corporation 201430
Use carpentry tools and equipmentCPCCCA2002B
6.
7.
8.
9.
10.

© VET (WA) Ministerial Corporation 2014 BC2190 Annex B 31
Assessments
Assessment activity 2.2 Special requirements
List any regulatory requirements eg policies and procedures, legislation, Australian Standards® that may apply to this task.
In the right‑hand column, describe the requirement type eg safety, quality, environmental.
You may need to do some research online or check information on an SDS.
Requirement Type
Environmental requirements
Describe what you intend to do to satisfy the following environmental requirements.
Waste management
Clean‑up
Noise
Dust

Annex B BC2190 © VET (WA) Ministerial Corporation 201432
Use carpentry tools and equipmentCPCCCA2002B
Assessment activity 2.3 Tools list
List the tools you intend to use to complete the task. When you have collected the tools, conduct a pre‑check and identify any faults and maintenance issues.
Use the right‑hand column to describe their condition.
Note: Not all tool types will be required for this task.
Hand tools Power/pneumatic tools Condition
Marking out tools
Cutting tools
Impelling tools

© VET (WA) Ministerial Corporation 2014 BC2190 Annex B 33
Assessments
Hand tools Power/pneumatic tools Condition
Planing tools
Sanding tools
Holding tools
Plant and equipment

Annex B BC2190 © VET (WA) Ministerial Corporation 201434
Use carpentry tools and equipmentCPCCCA2002B
Faulty tools
List and describe any faults you find in the tools you have collected for the task. Describe what you did when you identified a faulty tool.

© VET (WA) Ministerial Corporation 2014 BC2190 Annex B 35
Assessments
Ass
essm
ent a
ctiv
ity 2
.4 M
ater
ials
list
List
the
mat
eria
ls y
ou w
ill n
eed
to c
ompl
ete
the
task
.
Mat
eria
ls
Item
no
.D
escr
iptio
n/na
me
of c
ompo
nent
Type
Size
1Le
ngth
Size
2W
idth
Size
3Th
ickn
ess
Qua
ntity
1 2 3 4 5 6 7 8
Fixi
ngs
and
adhe
sive
s
Item
no
.D
escr
iptio
n/na
me
of c
ompo
nent
Type
Size
Qua
ntity
1 2 3 4 5
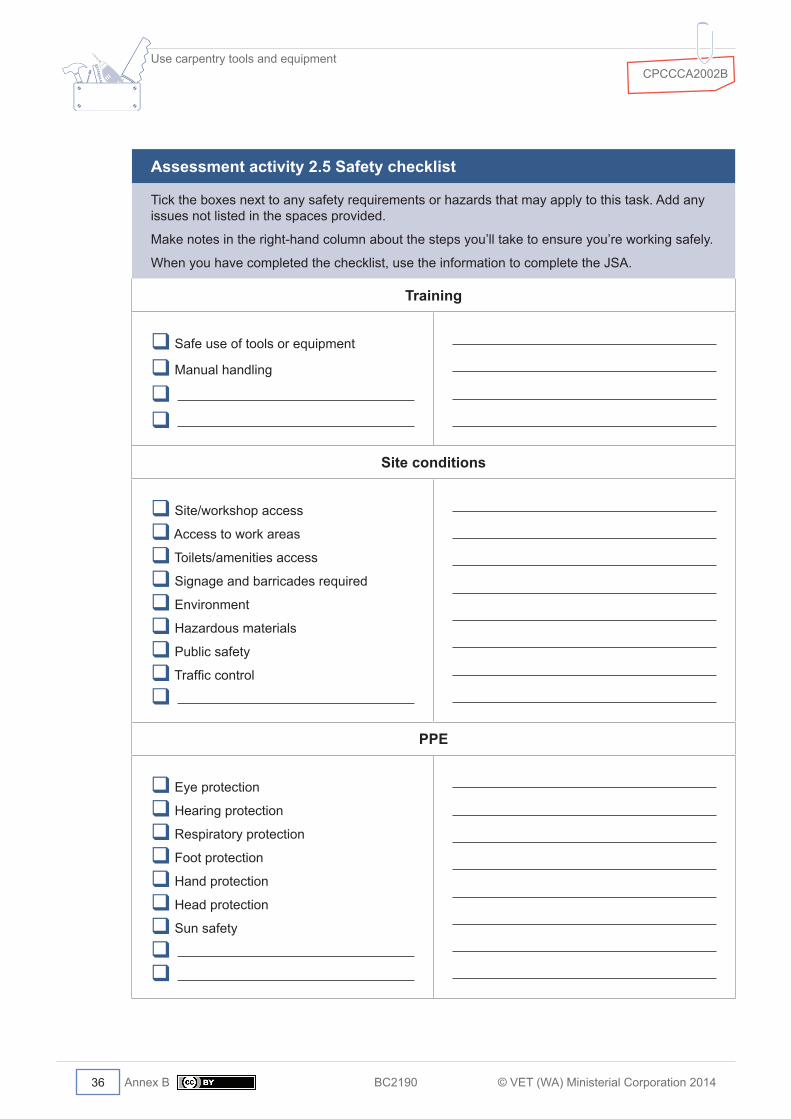
Annex B BC2190 © VET (WA) Ministerial Corporation 201436
Use carpentry tools and equipmentCPCCCA2002B
Assessment activity 2.5 Safety checklist
Tick the boxes next to any safety requirements or hazards that may apply to this task. Add any issues not listed in the spaces provided.
Make notes in the right‑hand column about the steps you’ll take to ensure you’re working safely.
When you have completed the checklist, use the information to complete the JSA.
Training
� Safe use of tools or equipment
� Manual handling
�
�
Site conditions
� Site/workshop access
� Access to work areas
� Toilets/amenities access
� Signage and barricades required
� Environment
� Hazardous materials
� Public safety
� Traffic control
�
PPE
� Eye protection
� Hearing protection
� Respiratory protection
� Foot protection
� Hand protection
� Head protection
� Sun safety
�
�

© VET (WA) Ministerial Corporation 2014 BC2190 Annex B 37
Assessments
Tools and equipment
� Plant and equipment
� Hand tools
� Electrical and pneumatic tools
� Cables and leads
�
�
High risk
� Scaffolding
� Working at heights
� Welding
� Excavations
� Overhead wires
�
�
Emergency
� Emergency plan
� First aid plan
�
�

Annex B BC2190 © VET (WA) Ministerial Corporation 201438
Use carpentry tools and equipmentCPCCCA2002B
Job
safe
ty a
naly
sis
Dat
e:JS
A nu
mbe
r:
Loca
tion
of w
ork:
Act
ivity
:
Nam
e:A
ppro
ved
by (n
ame)
:
Act
ivity
Haz
ards
Ris
k co
ntro
l mea
sure
sW
ho is
resp
onsi
ble
List
the
task
s in
the
orde
r th
ey w
ill b
e ca
rrie
d ou
t.Li
st th
e ha
zard
s as
soci
ated
with
eac
h ta
sk.
List
the
cont
rol m
easu
res
requ
ired
to m
inim
ise
the
haza
rd.
Nam
e th
e pe
rson
re
spon
sibl
e fo
r m
inim
isin
g th
e ha
zard
.

© VET (WA) Ministerial Corporation 2014 BC2190 Annex B 39
Assessments
Act
ivity
Haz
ards
Ris
k co
ntro
l mea
sure
sW
ho is
resp
onsi
ble

Annex B BC2190 © VET (WA) Ministerial Corporation 201440
Use carpentry tools and equipmentCPCCCA2002B
Assessment activity 2.6 Workshop observation checklist
During the assessment activity, did you observe the learner: Yes No N/APart 1 – Identify and select hand, power and pneumatic toolsa) identify and select hand, power and pneumatic tools and identify
their functions, operations and limitations?b) recognise and adhere to WHS requirements for using hand, power
and pneumatic tools?c) check lubricants, hydraulic fluid and water according to
manufacturer recommendations?Part 2 – Use toolsa) use hand tools appropriate to the task and materials and in
accordance with WHS requirements?b) safely and effectively use power and pneumatic tools in accordance
with manufacturer recommendations and state or territory WHSrequirements?
c) sharpen and maintain tools according to manufacturerrecommendations?
Part 3 – Identify, select and use plant and equipmenta) select and use plant and equipment consistent with WHS
requirements and the needs of the job?b) check lubricants, hydraulic fluid and water according to
manufacturer recommendations?c) maintain plant and equipment in accordance with manufacturer
recommendations and standard work practices?Part 4 – Clean upa) clear work area and dispose of, reuse or recycle materials in
accordance with legislation, regulations, codes of practice and jobspecification?
b) clean, check, maintain and store plant, tools and equipment inaccordance with manufacturer recommendations and standardwork practices?
During the assessment activity, did you observe the learner demonstrate the following required skills?• communication skills to:
◦ determine requirements?◦ enable clear and direct communication, using questioning to
identify and confirm requirements, share information, listenand understand?
◦ follow instructions?◦ read and interpret documentation from a variety of sources?◦ read and interpret plans, specifications and drawings?◦ report faults?◦ use language and concepts appropriate to cultural
differences?◦ use and interpret non‑verbal communication, such as hand
signals?• numeracy skills to apply measurements and make calculations?• organisational skills, including the ability to plan and set out work?• planning and organising skills to prepare for work tasks?• teamwork skills to work with others to action tasks and relate to
people from a range of cultural and ethnic backgrounds and withvarying physical and mental abilities?

© VET (WA) Ministerial Corporation 2014 BC2190 Annex B 41
Assessments
• technological skills to use:
◦ a range of mobile technology, such as two‑way radio andmobile phones?
◦ voice and hand signals to access and understand site‑specificinstructions?
During the assessment activity, did you observe the learner demonstrate knowledge of the following?• carpentry materials?• carpentry tool use techniques?• construction terminology?• job safety analysis (JSA) and safe work method statements?• material safety data sheets (MSDS)?• materials storage and environmentally friendly waste management?• plans, specifications and drawings?• processes for the calculation of material requirements?• quality requirements of carpentry tools and equipment?• relevant Acts, regulations and codes of practice?• tools and equipment safety manuals and instructions?• types, characteristics, uses and limitations of plant, tools and
equipment?• workplace and equipment safety requirements?During the assessment activity, did you observe the learner demonstrate the following critical aspects for assessment?• locate, interpret and apply relevant information, standards and
specifications?• comply with site safety plan and WHS legislation, regulations and
codes of practice applicable to workplace operations?• comply with organisational policies and procedures, including
quality requirements?• safely and effectively use tools, plant and equipment?• communicate and work effectively and safely with others?• identify and select hand tools for given tasks?• safely use and maintain a minimum of rules, tapes, squares,
hammers, hand saws, hand planes and chisels for given tasks?• identify power and pneumatic tools for a given task?• safely use a minimum of a power saw, electric plane, impact power
drill, nail gun and compressor or equivalent types of equipment forgiven tasks?
• maintain equipment according to manufacturer’s recommendationsor organisational requirements?
Feedback to learner
Learner’s name: Assessor’s name:
Learner’s signature: Assessor’s signature:
Date: Date:

Annex B BC2190 © VET (WA) Ministerial Corporation 201442
Use carpentry tools and equipmentCPCCCA2002B


USE CARPENTRY TOOLS AND EQUIPMENTCERTIFICATE II IN BUILDING AND CONSTRUCTION (PATHWAY – TRADES)
CPCCCA2002B
LEARNER’S GUIDE
DESCRIPTIONThis learner’s guide contains a mix of content and hands-on activities that support the unit CPCCCA2002B Use carpentry tools and equipment from the Certificate II in Building and Construction (Pathway – Trades). The course, and this guide, focus on the skills and knowledge required to get your career started as a tradesperson in the building and construction industry.
The topics covered in this guide include:
• how to select and safely use carpentry tools and equipment • hand tools• power tools• pneumatic tools• plant and equipment used for carpentry tasks.
Suggested assessment activities are also included. Note: this guide may be used for this unit as part of other qualifications within the building and construction industry.
EDITIONEdition 1, 2014
COURSE / QUALIFICATIONCertificate II in Building and Construction (Pathway – Trades)
UNIT OF COMPETENCYCPCCCA2002B Use carpentry tools and equipment
RELATED PRODUCTSThis resource is part of a series that supports core and trade-specific elective units of the Certificate II in Building and Construction (Pathway – Trades) qualification. Please refer to our product catalogue for more information.
ORDERING INFORMATION:Tel: (08) 6212 9700 Fax: (08) 9227 8393 Email: [email protected] can also be placed through the website: www.vetinfonet.dtwd.wa.gov.au
9 7 8 1 7 4 2 0 5 9 2 1 1
BC2190 USE CARPENTRY TOOLS AND EQUIPMENT –
LEARNER’S GUIDEISBN 978-1-74205-921-1