The Woods in Your Backyard - A guide to your woodlands.
138
i I The Woods in Your Backyard A guide to your woodland A publication from the Maine Forest Service Department of Agriculture, Conservation & Forestry
-
Upload
khangminh22 -
Category
Documents
-
view
3 -
download
0
Transcript of The Woods in Your Backyard - A guide to your woodlands.

i
I
The
Woods in Your
Backyard
A guide to your woodland
A publication from the Maine Forest Service
Department of Agriculture, Conservation & Forestry


The Woods in Your Backyard
First published in 1999, Revised 2020
(2nd Edition)
Maine Forest Service
Department of Agriculture, Conservation & Forestry
Phone: (207) 287-2791
E-mail: [email protected]
https://www.maine.gov/dacf/mfs/index.shtml
Printed in Maine on certified paper under Appropriation 014 01A 2662 12
The
Woods in Your
Backyard
A guide to your woodland

The Maine Forest Service
The Maine Forest Service was established in 1891 to ensure Maine’s citizens the greatest economic and social benefits from the trees and forestlands of the state.
The primary responsibilities of the Maine Forest Service include:
To develop through information, education and formal publications a greater public awareness and appreciation of forests as Maine’s basic economy and renewable resource;
To provide advice and assistance in forest management to woodland owners;
To maintain and improve the scenic beauty, wildlife habitat and recreational values of Maine;
To encourage and promote appropriate forestland management practices;
To protect Maine’s forests from fire, insects, diseases, and other natural enemies; and
To enforce Maine’s forestry laws and rules by preventing violations, intervening with potential problems and, as a last resort, taking enforcement action.

i
Acknowledgements
The following current or former Maine Forest Service staff were instrumental in the development of this guide:
Dan Jacobs
Rondi Doiron
Kim Ballard
Aaron Bergdahl
Terri Coolong
Patty Cormier
Julie Davenport
Kevin Doran
Shane Duigan
Amy Emery
Randy Lagasse
Gregory Lord
Donald Mansius
Oliver Markewicz
Greg Miller
Morten Moesswilde
Kent Nelson
Jan Santerre
Andrew Shultz
Sandra Walczyk
Other contributors:
Paul Catanzaro, Extension Associate Professor, University of Massachusetts at Amherst
Nancy Olmstead, Invasive Plant Biologist, Maine Natural Areas Program
Ted Shina, Senior Operations Forester, Huber Resources
Haris Sohail, Epidemiologist, Maine Center for Disease Control and Prevention
Original 1999 author: Christine R. Parrish
Cover illustration by Terri Lee Mills
Disclaimer The laws, rules and regulations described in this publication are simplified summaries. For more information about forestry regulations, download your copy of The Forestry Rules of Maine at digitalmaine.com/for_docs/52/.

ii
Maine Forest Service Signature Publications
Forest Trees of Maine: Centennial Edition 1908-2008
This is the most popular publication in the Maine Forest Service’s library, and different versions have been available to the people of Maine for over 100 years. It contains user-friendly descriptions of 78 different tree species, including all of Maine’s commercially important native trees. This publication is available for purchase, or it can be downloaded for free. To order, call 207-287-2791 or go to https://www.maine. gov/dacf/mfs/publications/handbooks_ guides/forest_trees/index.html to download your copy.
Best Management Practices for Forestry: Protecting Maine’s
Water Quality Forestry Best Management Practices (BMPs) are the tools and techniques used to protect water quality when harvesting timber. BMPs are based on a few basic principles that allow loggers to select the most effective and efficient BMP practices for their timber harvest. This publication is the “go-to” BMP field manual for loggers, foresters, and landowners across the state. See https://www1.maine.gov/dacf/ mfs/publications/handbooks_guides/ bmp_manual.html.
Best Management Practices for Forestry:
Protecting Maine’s Water Quality
Third Edition
iii
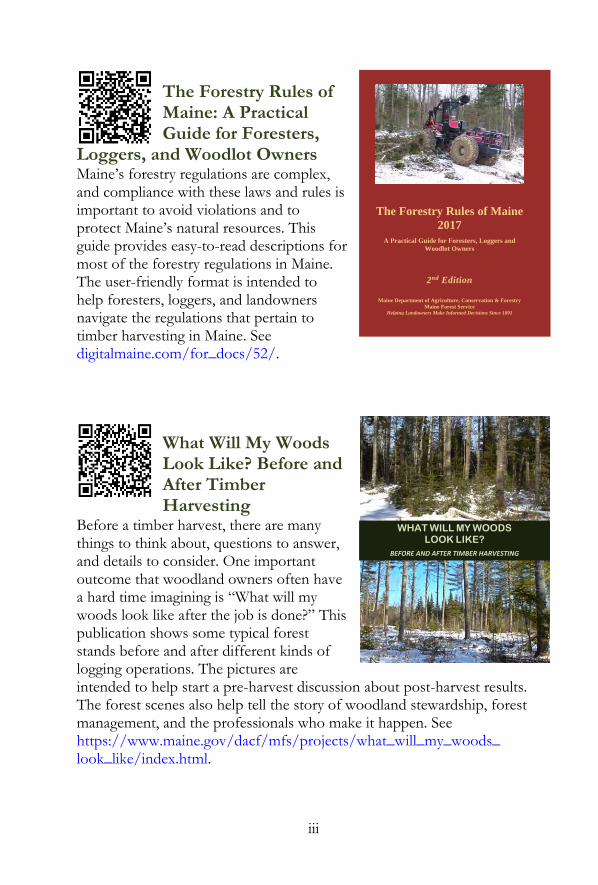
The Forestry Rules of Maine: A Practical Guide for Foresters,
Loggers, and Woodlot Owners Maine’s forestry regulations are complex, and compliance with these laws and rules is important to avoid violations and to protect Maine’s natural resources. This guide provides easy-to-read descriptions for most of the forestry regulations in Maine. The user-friendly format is intended to help foresters, loggers, and landowners navigate the regulations that pertain to timber harvesting in Maine. See digitalmaine.com/for_docs/52/.
What Will My Woods Look Like? Before and After Timber Harvesting
Before a timber harvest, there are many things to think about, questions to answer, and details to consider. One important outcome that woodland owners often have a hard time imagining is “What will my woods look like after the job is done?” This publication shows some typical forest stands before and after different kinds of logging operations. The pictures are intended to help start a pre-harvest discussion about post-harvest results. The forest scenes also help tell the story of woodland stewardship, forest management, and the professionals who make it happen. See https://www.maine.gov/dacf/mfs/projects/what_will_my_woods_ look_like/index.html.
WHAT WILL MY WOODS LOOK LIKE?
BEFORE AND AFTER TIMBER HARVESTING
The Forestry Rules of Maine
2017
A Practical Guide for Foresters, Loggers and
Woodlot Owners
2nd Edition
Maine Department of Agriculture, Conservation & Forestry
Maine Forest Service Helping Landowners Make Informed Decisions Since 1891

iv
Maine Forest Service Information Sheets
The Maine Forest Service (MFS) has a number of Information Sheets, covering a wide range of forestry topics, available at https://www.maine.gov/dacf/mfs/policy_management/ information_sheets.html. Some of the Information Sheets relevant
to landowners just getting started include “Wildlife Habitat and Forest Management,” “The Maine Forest,” and “Developing a Forest Management Plan.” If you are interested, visit the MFS website and check out all these great Information Sheets:
1. Weeding and Thinning Young Forest Stands
2. Pruning Your Forest Trees
3. Developing a Forest Management Plan
4. Boundary Line Information
5. Timber Harvesting in Shoreland Zones
6. Wood Harvests: Worker's Compensation and Landowner Liability
7. Invasive Plants in Maine Forests
8. Fundamental Best Management Practices for Water Quality Protection
9. What is Silviculture? An Introduction for Woodland Owners
10. Some Things to Consider When Buying Forestland
11. Information Sheet #11 has been discontinued
12. Wildlife Habitat and Forest Management
13. Avoiding Timber Trespass & Timber Theft
14. Vernal Pools—Important Wildlife Habitat
15. Forest Management and Vernal Pools
16. Proper Sizing of Land Management Road Stream Crossings
17. The Maine Tree Growth Tax Law
18. Tree Growth Tax Law Plan Review: A Guide for Municipal Assessors
19. The Maine Forest
20. Maine's Celebrated White Pine: History, Identification, and Management
21. Managing White Pine Stands in Maine: A Landowner's Guide
22. Regenerating White Pine Stands in Maine: A Landowner's Guide
23. Pruning White Pine: A Reference Guide for Foresters
24. Principal Disease and Insect Pests of White Pine in Maine
25. Statewide Standards for Timber Harvesting and Related Activities in Shoreland Areas
26. Wetland Crossings
27. Making Maple Syrup for Fun and Profit
28. Emerald Ash Borer Information for Maine Landowners
29. Emerald Ash Borer Guidance for Maine Forest Managers

v
Table of Contents
1. Knowing Your Woods ......................................................... 1
Introduction ........................................................................................................ 1
Gathering Woodland Information .................................................................. 6
Forestry Basics.................................................................................................... 9
Your Woodland, Your Values ........................................................................ 18
Backyard Family Activity #1: Scouting Your Land—A Woodland Expedition ......................................................................................................... 24
2. Optimizing Non-Timber Resources ................................ 28
What are Non-Timber Resources? ................................................................ 28
Improving Your Woods for Wildlife ............................................................ 28
Beauty and Adventure Out Your Backdoor ................................................ 35
Producing Specialty Products ......................................................................... 39
Backyard Family Activity #2: Making Maple Taffy .................................... 47
Backyard Family Activity #3: Plant a Hard Mast Species .......................... 49
3. Woodland Hazards ........................................................... 52
Navigating Through Your Woods ................................................................. 52
Hazard Trees .................................................................................................... 55
The Woods During Hunting Season............................................................. 58
Hazardous Plants and Insects ........................................................................ 59
Backyard Family Activity #4: Using a Compass ......................................... 64
Backyard Family Activity #5: The Three-Legged Compass Walk ........... 66
4. Protecting Your Woods .................................................... 68
Soils, Water, and Areas of Special Importance ............................................ 68
Invasive Species ................................................................................................ 73
Keeping Your Woods Safe from Wildfire .................................................... 77
“Good Fences Make Good Neighbors” ...................................................... 80
Planning for the Future ................................................................................... 83

vi
Backyard Family Activity #6: Getting Down and Dirty—The Soil Beneath Your Feet ........................................................................................... 85
Follow-Up Activity: Digging a Soil Pit ......................................................... 88
5. Growing & Harvesting Timber ........................................ 89
Introduction ...................................................................................................... 89
Tools for Your Timber Resource .................................................................. 89
Pruning to Increase Value ............................................................................... 90
Harvest Planning Considerations .................................................................. 93
Types of Timber Products .............................................................................. 96
Working with a Professional Forester ........................................................... 98
Property Tax Programs ................................................................................... 99
Backyard Family Activity #7: Assessing Timber Potential ...................... 101
6. From Great Ideas to Action: Planning is the Key! ......... 104
Introduction .................................................................................................... 104
Foresters and Loggers ................................................................................... 104
Ask Questions ................................................................................................ 106
Taking a Walk-Through ................................................................................ 107
What is Good Forestry? ................................................................................ 107
You and Your Woods: Two Examples ....................................................... 108
Backyard Family Activity #8: Creating a Plan for Work and Fun .......... 117
“Do You Know” Answers ................................................... 120
Glossary .............................................................................. 123
Do You Know?
Fun questions about Maine’s natural history and geography with answers starting on page 120. There is one “Do You Know” question in each chapter and they are easily identified by the dark red outline.

1
1 33
Knowing Your Woods
Introduction Your woodland, however small, is valuable to you and your family for a variety of reasons. Spending time in the woods can improve your physical and mental health and your outlook on life. The woods can also produce commercially valuable forest products and opportunities for outdoor recreation.
Actively managing your woods promotes healthy trees and helps to ensure a sustainable flow of benefits over time. Although you benefit the most from the careful management of your woods, your good stewardship also contributes to a healthy environment and economy.
Depending on your interests and the size of your property, you can earn income, teach conservation practices to your children, or create a community hiking trail. Not only can you have fun doing these activities, but you don’t have to go anywhere. The woods are right out your back door!
Your Woods are Always Working The woods may seem quiet and restful, except for singing birds and rustling leaves, but healthy woods are working behind the scenes to:
Provide homes for wildlife.
Purify the air.
Clean the water.
Lower winter heating costs.
Cool homes in the summer.
Reduce traffic noise.
Provide a sense of privacy.
Grow commercial forest products.
Increase property values.
Stream near Baxter State Park. Photo: Dan Jacobs

2
You Decide How Much Time, Effort, and Money Many reasons exist for investing time, effort, and money in your woods, but how much of each you spend is up to you. You may only want to walk around and get to know your property a little better. On the other hand, you may want to get actively involved and make some woodland improvements. Some project possibilities include:
Planting trees and shrubs that attract wildlife.
Creating cross-country skiing and hiking trails.
Putting up nesting boxes for birds. See https://www.birds. cornell.edu/k12/educators-guide-to-nest-boxes/ for information about nesting boxes.
Cutting firewood while improving habitat for wildlife.
Turning trees into lumber for your own use.
Creating a scenic picnic spot.
About This Resource Guide This resource guide will help you to understand the woods in your backyard and provide ideas about how to work with your property—whether you own a 1-acre lot or 20 acres on the edge of town.
A directory of state agencies and natural resource-based organizations can be found starting on page 3. These agencies are good initial contacts and a great source of additional information on a variety of topics.
“Backyard Family Activities” are included at the end of each chapter to help you learn more about your property as a family. The activities are most suitable for older children and teens, and they all require adult supervision. Teachers and youth group leaders can adapt them for use with older students. When completed, the Backyard Family Activities also provide a planning framework for working in your woods.
Important forestry terms are shown in boldface type, and they are defined in the Glossary on page 123.
Nesting box. Photo: Rondi Doiron
3
Primary Resources The following agencies and organizations often collaborate to provide a wide range of information, services, and training for small-acreage landowners. They are good initial contacts for information and can also direct you to local forestry professionals.
Maine Forest Service
The Maine Forest Service (MFS) provides information and assistance to landowners on science-based forestry practices, logging, insects and diseases of forest trees, and forest fire prevention and control. See the back cover of this publication for the name and number of your local MFS District Forester.
Forest Information Center: 207-287-2791; [email protected]
General Wildfire Information: 800-750-9777
o For campfire permits, contact the local fire department or MFS:
▪ Southern Region: 207-624-3700
▪ Central Region: 207-827-1800
▪ Northern Region: 207-435-7963
o To report a fire emergency: 911
Forest Health and Monitoring Division (insects and disease information): 207-287-2431; https://www.maine.gov/dacf/mfs/ forest_health/index.htm
Website: https://www.maine.gov/dacf/mfs/index.shtml
MFS District Forester Program
The MFS District Forester Program is a great resource for landowners just getting to know and understand the woods they own. District Foresters are located throughout the state and can provide landowners with free advice and information on tree identification, tree health, forestry planning, wood markets, and upcoming workshops and events. In many cases, District Foresters are available to walk through your woods and discuss your goals in person. A map that provides the locations and contact information for each District Forester is provided on the back cover of this publication.
4
Maine Board of Pesticides Control
The Maine Board of Pesticides Control provides landowners with information on the safe use of pesticides and can provide contact information for licensed applicators.
General Information: 207-287-2731
Email: [email protected]
Website: https://www.maine.gov/dacf/php/pesticides/ index.shtml
Maine Christmas Tree Association
The Maine Christmas Tree Association is a great source of information on the production and marketing of Christmas trees.
General Information: 207-793-4658
Email: [email protected]
Website: http://www.mainechristmastree.com/
Maine Department of Inland Fisheries & Wildlife
Maine Inland Fisheries & Wildlife biologists provide assistance in creating and maintaining habitat for Maine’s native fish and wildlife species.
General Information: 207-287-8000
Website: https://www.maine.gov/ifw/
Maine Maple Producers Association
The Maine Maple Producers Association is a great source of information on upcoming events, maple recipes, maple products, and Maine Maple Sunday.
Website: https://mainemapleproducers.com/
Maine Natural Areas Program
The Maine Natural Areas Program (MNAP) provides information on invasive plant identification, ecology, mapping, and management. MNAP also maintains the Advisory List of Invasive Plants for Maine and publishes the Maine Invasive Plants Field Guide as a resource for landowners, foresters, and loggers.
General Information: 207-287-8044
Website: https://www.maine.gov/dacf/mnap/

5
Maine Tree Farm Program
“The mission of the Maine Tree Farm Program is to help Maine’s family woodland owners realize the full potential of their woods while providing forest products and other woodland benefits in a recognizably sustainable manner.”
Tree Farm Coordinator: 207-613-6837
Website: http://mainetreefarm.org/
Maine Woodland Owners
Maine Woodland Owners (MWO) is a nonprofit membership organization that encourages sound forest management practices on small properties. MWO offers informative workshops on a variety of topics, including chainsaw safety, tree identification, woodland management for wildlife, and more. There are nine local chapters around the state and membership is not required to attend workshops.
General Information: 207-626-0005
Website: https://www.mainewoodlandowners.org/
Soil and Water Conservation Districts
Maine’s Soil and Water Conservation Districts (SWCDs) hold workshops, set up demonstrations, offer educational programs, and help landowners get one-on-one technical assistance.
Website: https://www.maine.gov/dacf/about/commissioners/ soil_water/index.shtml
University of Maine Cooperative Extension
The University of Maine Cooperative Extension provides practical information on topics ranging from gardening and nutrition to the production and marketing of maple syrup. Call for a catalog of publications or the contact information for your local Cooperative Extension agent.
General Information: 800-287-0274 (Instate) or 207-581-3188
Soil testing kits: https://umaine.edu/soiltestinglab/home/kit-request/
Website: extension.umaine.edu/

6
Gathering Woodland Information You’re probably excited to start working on your land, but you should first gather some basic information about your property and your woods. This initial step involves both ground-level observation and online research.
A basic assessment of your property’s natural resources will give you an idea of what projects and activities you can realistically pursue. As much as you might like the idea of boiling down sap to make maple syrup, if you don’t have maple trees, doing so won’t be possible. So, how do you begin your assessment, and what should you include? A good first step is to obtain or draw a map of your property that includes the location of your boundary lines and the important physical features. A boundary survey map will be the most accurate, but these are not always available. Another option is to visit your town office and get a copy of the tax map that includes your lot. Keep in mind, tax maps are generally not very accurate but will give you a rough idea about your lot’s location and its boundaries. With a little creativity, you can also sketch a rough map from the distances and bearings in your deed. This approach will require some knowledge of orienteering and basic geometry.
Once you have a map of your property, you can work on getting aerial photographs and satellite images of your woods. These are helpful in locating different plant species, physical structures, and waterbodies. Google Earth is a great source for these images and can be downloaded at https://www.google.com/earth/. This free program provides current aerial images for the entire state. Once you have opened the program, type either the GPS coordinates of your property or your street address into the search bar in the upper left corner of the screen. Google Earth will then zero in and provide an overhead view of the area that includes your woods.
Source: Google Earth
Pond
Woods
House and Yard

7
Zoom in and move the aerial image around. Make mental notes of what you see. Is your house in the middle of your lot or near the edge? Can you see roads, trails, wetlands, or streams? You should quickly realize that there is a lot to learn from aerial and satellite imagery.
Once you have the recommended maps and imagery, you may decide to go one step further and locate soils information for your property. The US Department of Agriculture (USDA) provides maps and information for the various soils that occur in Maine. Using the tools on the USDA’s Web Soil Survey website, you will be able to identify the soils on your property (see https://websoilsurvey.sc.egov.usda.gov/App/HomePage.htm). This information can be very helpful, because soil types and soil properties greatly determine which plant and tree species will grow in an area. If you are interested in forest soils, there is an in-depth discussion of this subject starting on page 68.
What You May Find on Your Property
Once you have gathered some basic information about your property using maps and online resources, it is time to step outside and explore your woods. Taking mental and written notes about your property’s natural resources and key features is important. If you are unfamiliar with your property or you are concerned about getting lost, read “Navigating Through Your Woods” (page 52) before starting your scouting adventure. As an alternative to walking through your woods to gather information, you may be able to start the process by staying within sight of your house and making observations about your property’s features.
Once you are in your woods, take careful note of the types of trees that grow on your land. Two distinct types of forests exist in Maine. The state straddles the warmer growing conditions of southern New England and the colder conditions to the north in Canada. As a result, hardwoods are common in southern and central portions of the state where the climate is milder. Hardwoods are deciduous trees with broad leaves that have their seeds enclosed in fruit. In contrast, softwoods are common in the northern and eastern parts of the state because they are well suited to the shorter growing season. Softwoods are cone-bearing trees (conifers) with needles that are retained through the winter. Keep in mind that factors other than climate, such as soil type and aspect, also help determine which species will grow well in specific locations.

8
Another important feature to look for is surface water. Waterbodies, such as ponds and streams, add value to your property in terms of wildlife habitat and aesthetics. They are important to both aquatic and terrestrial life and need to be protected from damage when you are working in your woods.
At the edge of your property, you might find blazed trees, trees with colored plastic ribbon, ancient rock walls, or old wire fence. This evidence may indicate the location of your boundary line. Boundary lines are very important when you are working on your land. Therefore, you should take the time to carefully describe and record the evidence you find.
Of the boundary evidence listed earlier, rock walls are also a wonderful link to the past use of the land. They often mark the boundary between two fields cleared by hard-working farmers long ago. When people stopped farming these fields, they gradually returned to a forested condition. You might want to note these interesting historical features as you travel through your woods.
Rock wall. Photo: Rondi Doiron
B Stream in Houlton. Photo: Dan Jacobs

9
Other historical features you may find on your property include old foundations and dug wells. Be careful of old wells and make sure they are clearly marked and sealed to prevent accidents. Look carefully around these historical features, and you may find ancient fruit trees and other interesting remnants of old homesteads.
Assessing the natural and man-made features of your property will give you a good idea of its past use and future potential. Once you’ve mapped everything you’ve found, you’ll have a much greater understanding of your woods and be better informed to make decisions regarding your property. “Backyard Family Activity #1: Scouting Your Land” at the end of this chapter (page 24) will help you systematically walk through your woodland and document its features.
Forestry Basics This publication will cover many basic principles of forestry and will likely contain answers to some of the questions you have about your woods and your property. For instance, have you ever wondered:
What you should know before planting a tree in your front yard?
Whether unsightly fallen trees and dead branches have any value?
How to make maple syrup?
How the forest changes over time?
Keep reading and you will find the answers to these questions.
Introduction
Let’s start our discussion on “forestry basics” by describing how forests originate, grow, and change over time. Then we’ll explore some important and interesting woodland features.
Forests can originate in a wide variety of ways. In general, trees either grow in an area naturally or they are planted. Most trees in Maine reproduce when their seed germinates and seedlings begin to grow. However, many hardwood species can also reproduce by sprouting from their roots or from a freshly cut stump. For example, quaking aspen readily sprouts from its root system when it’s cut down (or harvested). Trees that originate from sprouts usually grow very fast but are often crooked and malformed. In certain situations, planting trees makes sense. This is usually the best option to make certain your land is growing the exact species you desire. Because

10
planting costs money and takes significant effort, we are lucky that planting is not typically necessary in Maine.
Succession is the replacement of one plant community with another over time. Generally speaking, plants that require lots of sunlight are eventually replaced by plants that can handle varying degrees of shade. Foresters use the terms shade-intolerant and shade-tolerant to describe these two types of plants. In addition, the first plants to occupy a site (such as an abandoned potato field) are called pioneer species. Pioneers are intolerant of shade and can quickly take over bare ground because they produce lots of seed and they grow rapidly. However, pioneer species are also short-lived. That means that shade-tolerant plants living beneath the pioneers will eventually have room to grow into the overstory.
There are many tree species native to Maine. They range from very intolerant to extremely tolerant of shade. The following is a list of species arranged in order of shade tolerance:
Very shade-intolerant: quaking aspen, paper birch, pin cherry
Intermediate shade tolerance: yellow birch, eastern white pine
Shade-tolerant: sugar maple, balsam fir, red spruce
Extremely shade-tolerant: eastern hemlock
Based on the above list, it is easy to see that an abandoned farm field will first be occupied by species like paper birch and pin cherry. Over time and as these species die, yellow birch and eastern white pine may start to dominate the area. Eventually, the most shade-tolerant species, like sugar maple and red spruce, may assume the leadership role.
Succession. Source: Rondi Doiron
Annual Perennial Shrubs Shade-INTOLERANT Shade-TOLERANT plants plants and hardwoods over softwoods over grasses shade-tolerant shade-tolerant softwood seedlings softwood seedlings Time

11
The diagram on the previous page is a simple illustration of how the abandoned field we have been describing may change over time. Keep in mind, that this process can be altered (and set-back) by disturbances such as logging, severe windstorms, and catastrophic wildfires. When there are no great disturbances, changes can be gradual and take many decades.
As trees grow, they compete with one another for light, nutrients, and water. In a crowded forest, some trees will outcompete and outgrow the others. In contrast, some trees will lose the race, grow less, and possibly become stunted. Given this dynamic, it is easy to see that smaller trees are not necessarily younger trees. These trees may have been outcompeted by superior and faster-growing trees. The bottom line is that smaller trees may or may not be younger trees. In addition, trees with plenty of room to grow are most likely to increase in size the fastest. If you are interested in improving the growth and health of your trees, working with a forester can help you achieve the best results.
Your woods may be made up of trees that vary greatly in age or of trees that are all nearly the same age. Various mixtures of these two conditions may also exist throughout your woods. Forests composed of trees of varying ages are called uneven-aged. These forests have trees of various sizes and likely contain a variety of tree species. In contrast, many forests are made up of trees that are close to each other in age. As we already discussed, these even-aged forests may contain smaller trees that were outcompeted by faster growing trees of the same age. An easy way to envision an even-aged forest is to consider a tree plantation established when a farm field was abandoned. In such a situation, all the trees were planted in the same year and are the same age. Don’t be overly concerned with which condition
Even vs. uneven-aged. Source: Rondi Doiron

12
applies to your woods, because most of the management suggestions in this book can be used to help you meet your goals in both even- and uneven-aged forests.
At this point, you may be wondering how foresters view the woods and think about forest management to meet landowner goals. Foresters typically focus management on smaller units of areas, called stands, that can be combined to make up larger areas or landscapes. Simply put, stands are forested areas with similar characteristics. These areas are similar in terms of species, tree sizes, and tree ages. They are convenient units for foresters to manage and can range greatly in size. Your property may be composed of many small stands or it may be composed of just one large stand.
On a larger scale, landscapes cover vast areas and are composed of multiple stands and possibly multiple ownerships. Keep in mind, the forestry work done in one part of the landscape can have impacts on the landscape as a whole. Therefore, it is important to consider the “big picture” as you and your forester implement work within individual stands.
The forestry basics in this section might seem complex, but they are necessary as a foundation to build upon. Don’t worry about remembering every detail discussed. You can always read this section again at a later time and refresh your memory on key concepts.
Maine’s Forest Types
Two terms that are important to understand in our discussion of forest types are hardwood and softwood. The term hardwood refers to all broadleaf deciduous trees. Two examples of hardwood species are paper birch and red maple. On the other hand, softwood is a term used to refer to cone-bearing species such as red spruce and balsam fir.
Forest cover types are groups of tree species that tend to grow together under similar conditions. Some of the cover types found in Maine include spruce-fir, northern hardwood, pine-oak, aspen-birch, and pure species. Although many species may grow together in a cover type, two or three species are most common. You don’t need to memorize the cover types but being aware of them can improve your understanding of your woodland.

13
The spruce-fir cover type, which consists primarily of red spruce and balsam fir, is the most common type in northern and eastern Maine. Balsam fir is a short-lived species and finding one over 80 years old is uncommon. In contrast, red spruce is longer-lived and finding one that is over 120 years old is not considered unusual. This is the forest cover preferred by moose, lynx, spruce grouse, and the gray jay.
Red spruce. Photo: MFS Balsam fir. Photo: MFS
Spruce-fir cover type. Photo: Randy Lagasse

14
Northern hardwood cover types are mostly made up of deciduous species that are also known as broadleaf trees or hardwoods. This type is found throughout the state but is most common in the southern, central, and western regions. Colorful fall foliage usually indicates that a woodland has mixed hardwoods. Yellow birch, sugar maple, and American beech are the most common species in this cover type. Other deciduous species, such as white ash, paper birch, and red oak may also be found in this type. The white-tailed deer, black-throated blue warbler, and black-capped chickadee are common here.
Yellow birch. Photo: MFS Sugar maple. Photo: MFS American beech. Photo: MFS
Northern hardwood cover type. Photo: Dan Jacobs

15
The pine-oak cover type, which is common in the southern part of Maine, is primarily composed of eastern white pine and northern red oak. This type may include other tree species as well. Gray squirrels, wild turkeys, and white-tailed deer tend to live in this cover type.
Eastern white pine. Photo: MFS
Northern red oak. Photo: MFS
Pine-oak cover type. Photo: Oliver Markewicz

16
Aspen-birch cover types are usually composed of quaking aspen (also known as poplar or popple) and paper birch. Both are pioneer species that grow well in disturbed areas and don’t like shade. Other species, like pin cherry and red maple, often grow with aspen and birch. Partridge (also known as ruffed grouse) often call this cover type “home.”
Quaking aspen. Photo: MFS
Paper birch. Photo: MFS
Bigtooth aspen. Photo: MFS
Aspen-birch cover type. Photo: Dan Jacobs

17
Pure stands, or stands composed of mostly one species, may originate from planting, thinning, or natural processes. These types of stands can be found in all regions of the state. Some of the species commonly found growing in pure stands include white spruce, red pine, white pine, and beech.
Not all woodlands fit neatly into one of the types discussed. So, how do you figure out what you have? Start by asking yourself some questions. Does your property have mostly evergreens with a few hardwoods in gaps and edges? Or, do you see mostly hardwoods with a few tall pines? Determining whether you have hardwoods or softwoods is a good place to start. From there, you can identify some of the most common trees in your woods by using the MFS publication Forest Trees of Maine (see page ii).
MNAP’s Natural Landscapes of Maine: A Guide to Natural Communities and Ecosystems is a great source of information on the types of forests and natural areas in Maine. To order call 207-287-8044 or go to https://www.maine.gov/ dacf/mnap/about/publications/ community_classification.htm. Source: MNAP
Pure stand. Photo: Dan Jacobs

18
Changes in the Maine Woods Over Time
The Maine woods and the woods in your backyard are always changing. As we already discussed, succession is the replacement of one plant community with another over time. Let’s dig deeper and look at how natural disturbances, changes in land use, and the actions of people influence the forest and the landscape.
Natural events such as wildfires, insect infestations, and windstorms can have a huge impact on the forest. In fact, these events can devastate forested areas that are thousands of acres in size. Luckily, heavily impacted forests in Maine eventually recover—likely growing more trees than before. For example, the spruce budworm infestation of the 1970s and 1980s defoliated tens of thousands of acres of spruce and fir forests. Today, these same areas are full of younger and healthier trees that are now large enough to harvest for valuable forest products. Furthermore, most of these trees became established naturally without the need for planting.
People clear land for homes and for agriculture and harvest trees for a variety of uses. These activities can have long-lasting impacts on the landscape, but most ground in Maine “wants” to be forested and tends to return to this condition. Think about a cleared area in the woods and how it grows back to shrubs and trees within a few short years. The ability of the land in Maine to grow trees is even more pronounced when we find abandoned homesteads that have been overtaken by the forest. The best evidence of these homesteads is often an “ancient” cellar hole full of trees.
In short, it is important to recognize the great ability of the Maine woods to bounce back following a disturbance or the abandonment of a non-forest land use. On a large scale, a great illustration of this is the increase in the amount of forestland in Maine over the past century. From 1908 to 2018, the percentage of the state covered in trees has increased from 75% to 89%. This is mainly due to a decrease in agriculture and the ability of the land to grow trees. It is obvious that the relentless nature of our woods has helped make Maine the most forested state in the nation.
Your Woodland, Your Values Your goals and objectives for your woodland can be as extensive and varied as the unique history behind your property. Recreation, firewood production, privacy, timber income, wildlife viewing, or any combination of these interests may be the driving forces behind your continued ownership of your woods. Because you always have a choice between retaining or

19
selling your property, it is important to articulate the personal reasons for keeping your land forested. In fact, research has shown that woodland owners with clearly defined goals are more likely to have a positive ownership experience over the long term.
Your woodland is also an important part of Maine’s natural landscape. It protects soil and water, promotes biodiversity, and provides wildlife habitat. As trees take up carbon dioxide and release oxygen, they improve the air we breathe and even help to mitigate climate change. As a careful steward of your piece of the Maine woods, you should take added satisfaction in knowing that you’re promoting a healthy forest and environment for future generations.
Improving Your Woodland
Establishing Objectives
Get to know and appreciate your woods by spending time exploring, observing, and reflecting. Consider what the forest means to you and to the surrounding landscape. Such understanding is fundamental to good forest management.
Wood splitter. Photo: MFS
20
Considering your objectives and what it takes to meet them is an important step in planning the management of your woods. The following is a list of possible objectives and the actions you can take to reach them:
A. Maintain and Improve Ecosystem Health
Your forestland is alive with communities of creatures interacting within a complex system. Each species is important to the proper function of the forest ecosystem. You can enhance your forest’s ecological health if you:
Manage for a diversity of native species.
Locate and protect rare and endangered species.
Reduce or eliminate invasive species.
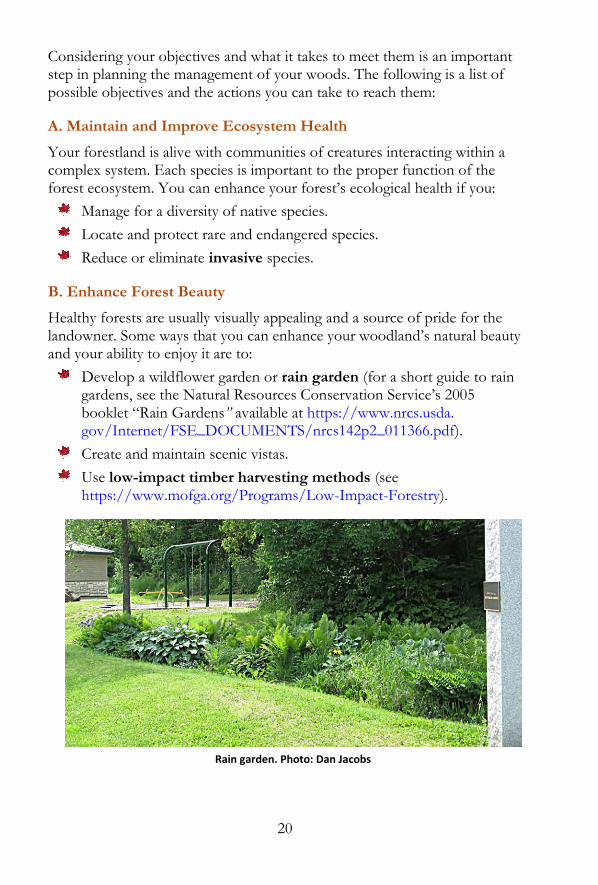
B. Enhance Forest Beauty
Healthy forests are usually visually appealing and a source of pride for the landowner. Some ways that you can enhance your woodland’s natural beauty and your ability to enjoy it are to:
Develop a wildflower garden or rain garden (for a short guide to rain gardens, see the Natural Resources Conservation Service’s 2005 booklet “Rain Gardens” available at https://www.nrcs.usda. gov/Internet/FSE_DOCUMENTS/nrcs142p2_011366.pdf).
Create and maintain scenic vistas.
Use low-impact timber harvesting methods (see https://www.mofga.org/Programs/Low-Impact-Forestry).
Rain garden. Photo: Dan Jacobs

21
C. Provide Recreation Opportunities
Your woods provide almost unlimited opportunities for you to get out and recreate. You can improve your woodland for outdoor recreation if you:
Create or maintain trails for hiking, riding, biking, skiing, bird-watching, hunting, and cross-country skiing.
Establish picnic areas.
Set up a family campsite.
D. Improve Wildlife Habitat
The amount, condition, and variety of wildlife species in your woods depends largely on the management techniques you employ. To support abundant wildlife, the forest must offer space, food, water, and protection from predators and weather. The following measures can enhance wildlife habitat:
Avoid monocultures, and grow a variety of species, ages, and sizes of trees and plants.
Retain some standing dead trees to provide roosts and nesting sites. A good source of information about bird conservation and forestry in Maine is Audubon’s Forestry for Maine Birds website at https://www. maineaudubon.org/projects/ forestry-for-maine-birds/.
Seed native grasses and clover on logging roads, trails, and woodyards to provide food for wildlife.
E. Conserve and Improve Soil and Water Quality
Fallen leaves continually create and enrich forest soil. Tree roots and tiny creatures break up woodland soil, making it porous and capable of holding enormous amounts of moisture. Water from rain and melting snow filters through the soil, providing drinking water and nourishing plant life, as it moves downhill to feed lakes and other waterbodies. The following practices
Standing dead tree. Photo: Dan Jacobs

22
can help to protect your woodland, ensure cleaner water, and reduce soil erosion:
Establish or maintain forested areas adjacent to streams, lakes, and ponds.
Use low-impact timber harvesting methods to minimize soil disturbance.
Use Best Management Practices (BMPs) to protect water quality when doing ground-disturbing activities or projects (see the MFS publication Best Management Practices for Forestry listed on page ii).
F. Generate Timber Income
Just as an untended garden seldom produces bumper crops of vegetables, a neglected woodland seldom produces large quantities of high-value timber. You can take the following measures to increase the amount and value of the timber on your property:
Give trees with the most potential to increase in value more room to grow.
Plant trees at a favorable spacing in open areas with good soils.
Prune trees with the potential to produce high-value sawlogs.
G. Produce Specialty Products
Specialty products include maple syrup, nuts, fruits, berries, and Christmas trees. These and other non-timber forest products can provide income while your timber is growing to a commercial size. Some suggestions for producing and improving the production of specialty products include:
Thin stands of sugar maples to grow healthier trees and promote greater sap yields.
Remove vegetation competing with nut- or fruit-producing trees and shrubs like hazelnuts, chokecherries, highbush cranberries, and apple trees.
Plant a small forest opening with Christmas trees. Assistance is available from the Maine Forest Service, as well as the Maine Christmas Tree Association (see Primary Resources, page 4).
Chokecherries. Photo: MFS

23
Developing a Management Plan
Management plans are written documents prepared by a forester or by a landowner with some professional guidance. If you have elaborate objectives or plan to do some timber harvesting, working with a professional forester is strongly advised.
A basic plan may contain a list of landowner objectives, a description and map of the property, and a description of the work needed to meet the objectives. MFS often has funding to help eligible landowners pay for professionally prepared plans. Visit the MFS website and the WoodsWise Incentives to Stewardship Enhancement page for current program information (see https://www.maine.gov/dacf/mfs/policy_management/wwi.html).
A management plan provides valuable information about your property as well as suggestions to help you reach your goals. You will find more information on planning as you read the remainder of this book.
In addition, the Kennebec Woodland Partnership’s guide Your Woodland: A Resource Guide for Kennebec County Landowners provides an excellent introduction to woodland ownership and forestry. Although the focus area is Kennebec County, the concepts in this publication are applicable statewide. The guide can be found at https://www.maine.gov/dacf/mfs/projects/ kennebec_woodlands/skw/index.html.
Do You Know?
#1. Do you know the name of Maine’s official state tree? Answer on page 120
“Managing your woodland means making decisions about what’s important to you.”
- Your Woodland: A Resource Guide for Kennebec County Landowners

24
Backyard Family Activity #1: Scouting Your Land—A Woodland Expedition With a pencil, a map of your woods, and the “Woodland Expedition Checklist”( next page), you can get to know your woods pretty well. Scout with your family or neighbors and compete as teams to find the most items on the checklist. You may also decide to sketch the locations of the items you find on a map as you work.
If you scout in teams, create a Master Map so that members of each team can sketch what they find when they finish. After this activity is complete, it’s a good idea to make some photocopies of the finished Master Map and add the other Backyard Family Activities to it as you do them. Before you know it, you’ll have an informative and useful tool that you can use for years to come.
The directions that follow assume that you will work in teams.
Getting Ready
1. Draw a map or rough sketch of your property using your property deed descriptions, boundary markers on the ground, or aerial imagery from Google Earth. For now, a rough map will suffice. If you have several acres, it’s a good idea to flag your property lines before you start scouting. This will help you stay oriented during the activity.
2. Your scouting teams should be familiar with the section “Gathering Woodland Information” (page 6) or you can explain the concepts to your scouts prior to starting the activity. Many middle-school children have already learned some of these concepts in school.
ACTIVITY
Items Needed
Copies of the Woodland Expedition Checklist for all expedition members (next page)
Copies of a property boundary map for each team (either a rough sketch or precise map)
Pencils with erasers
Optional Items
Colored flagging tape to mark property boundaries (available at hardware stores)
Whistles on strings
Clipboards (to make drawing on the map easier)

25
3. Decide how many stops you’ll make to gather information based on the size of your woods. If your property is 300 feet long, you may want to stop every 20 steps to do a quick inventory. If it’s 10 acres, stop every 200 steps so that you can finish the activity in an hour or so.
4. If you have more than one team, you’ll need to assign them different parallel paths to travel through your woods. All teams should begin their expeditions on the same starting line and end on the same finish line.
Although not essential, providing each team a compass bearing can help them travel in a straight line. If you’re interested in basic compass skills, check out “Backyard Family Activity #4: Using a Compass” (page 64), and do that activity before this one.
5. Read the section “Navigating Through Your Woods” (page 52) before you venture into the woods. Getting lost is easier than it seems—especially if your property is part of a larger woodland. Before you begin exploring, be sure that everyone knows how to find their way back to a common meeting place within a certain timeframe. You may also decide to issue each scout an inexpensive whistle with instructions to use it only if they’re lost. If you plan to go alone, be sure to tell someone where you are headed and when you plan to be back.
Woodland Expedition Checklist
Boundary marker or boundary tree
Birch tree
Oak tree
Maple tree
Pine tree
Spruce or fir tree
Stream
Wet area
Rocky outcropping
Old stone wall
Steep slope
Land depression
Rotting log
Gap / forest opening
Shade-tolerant tree
Shade-intolerant tree
Ferns
Woods / field edges
Even-aged woods
Uneven-aged woods
Foundations

26
The Activity
In this activity, you’ll get to know the woods in your backyard a little better. You’ll identify and record the items listed in the Woodland Expedition Checklist that you find on your property. The end product will be a map of your woods showing features such as tree species, waterbodies, and steep slopes.
Timeframe
One to two hours, depending on the size of the property and how many stops you make. Allow an extra half hour for each team to put their information on a Master Map that everyone can see at the end of the activity.
Steps
1. Review the Woodland Expedition Checklist out loud and make sure everyone is familiar with the terms. Keep in mind, many of the terms are defined in the Glossary (page 123) and in Chapter 1, “Knowing Your Woods” (page 1).
2. Review the safety protocols.
3. Review how to recognize the property lines. Your property lines may be identified with colored flagging, blazed trees, rock walls, wire fences, or other markers.
4. Set the distance between each stop. Decide how many parallel lines you’ll need and how far apart they should be. If there are multiple scout teams, assign each team one or more parallel lines to explore.
5. Mark your approximate location on the map at each stop.
6. At each stop, record on the map the number of each checklist item found. Be sure to write small or come up with your own shorthand so that everything will fit on the map. Keep in mind, the types of trees that grow on your property will probably vary from site to site. Therefore, the more lines you walk, the better picture you’ll have of what grows in your woods.

27
7. Have the teams meet to create a Master Map at the end of the activity. If you are doing this activity alone or with only one team, make several parallel lines through your property and label the map as you go. When you finish your expedition, you’ll have completed your Master Map and you’ll have a good idea where important features are located on your property.
Woodland Expedition Observation Tips
Do you see hardwoods, softwoods, or both?
Are the hardwoods big, medium, or small in size? Record approximate / average heights and diameters.
Are the softwoods big, medium, or small? Record approximate / average heights and diameters.
How close together do the trees grow?
Are the trees difficult to walk through? If so, they are crowded. Are they 10 feet or more apart? If so, they may be well-spaced.
Do you have to climb over downed trees? If so, note the downfall.
Source: Dan Jacobs
LYCETTE

28
2
Optimizing Non-Timber Resources
What are Non-Timber Resources? Many people own land in Maine to generate income from the sale of timber. However, land is also valuable as a source of non-timber products and resources. To a small landowner, these non-timber products and resources can be incredibly important. They include wildlife, scenery, recreational opportunities, products like maple syrup, and more. Use the information provided in this chapter as you begin to discover the non-timber resources on your property.
Improving Your Woods for Wildlife Viewing, enjoying, and providing wildlife habitat are the most important goals of many woodland owners. Some are avid birdwatchers and know every species of warbler that arrives in May. Some enjoy spending fall mornings in a deer stand or walking trails for grouse. Others listen for the chorus of wood frogs and peepers on rainy spring evenings. Whether you’re a long-time wildlife watcher or just beginning to identify common species, improving your woods for wildlife can be fun and rewarding.
Woodland Features Important for Wildlife
The landscape in Maine is highly variable and every woodland provides wildlife habitat; however, certain features can greatly increase the value of your property for a variety of wildlife species. Some of the woodland features that are especially valuable to wildlife include forest edges, riparian areas, vernal pools, mast trees and shrubs, snags, the forest floor, and
Ruffed grouse. Photo: MFS
29
leaf litter. If you have any of these features on your property, you’ve found a good place to start looking for wildlife.
The place where two different habitat types meet is called an edge. Examples of edges include the zone where a field changes to woods or where a spruce plantation changes to a hardwood stand. Edges usually have greater plant diversity and are home to many species of animals. Brushy edges between woods and fields tend to have excellent cover and food for birds, small mammals, deer, and medium-sized mammals.
One of the most important habitat features occurs at the edges of ponds, streams, and wetlands. This habitat, called the riparian area, has both terrestrial and aquatic species. Many songbirds, ducks, and amphibians rely on riparian areas for breeding and nesting. Mammals often use the cover that such areas provide to travel in concealment. In addition, many animals that live upland also make regular trips to the riparian area for water and food.
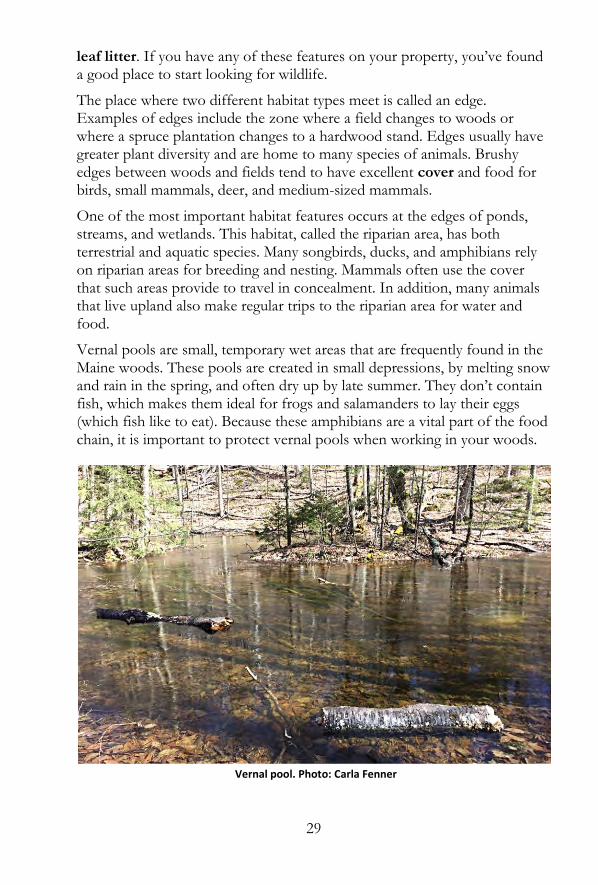
Vernal pools are small, temporary wet areas that are frequently found in the Maine woods. These pools are created in small depressions, by melting snow and rain in the spring, and often dry up by late summer. They don’t contain fish, which makes them ideal for frogs and salamanders to lay their eggs (which fish like to eat). Because these amphibians are a vital part of the food chain, it is important to protect vernal pools when working in your woods.
Vernal pool. Photo: Carla Fenner
30
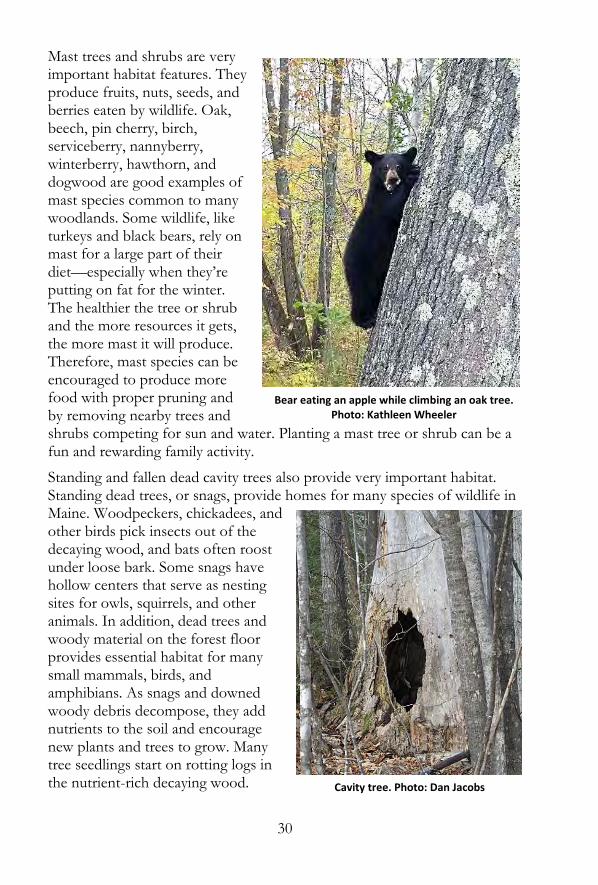
Mast trees and shrubs are very important habitat features. They produce fruits, nuts, seeds, and berries eaten by wildlife. Oak, beech, pin cherry, birch, serviceberry, nannyberry, winterberry, hawthorn, and dogwood are good examples of mast species common to many woodlands. Some wildlife, like turkeys and black bears, rely on mast for a large part of their diet—especially when they’re putting on fat for the winter. The healthier the tree or shrub and the more resources it gets, the more mast it will produce. Therefore, mast species can be encouraged to produce more food with proper pruning and by removing nearby trees and shrubs competing for sun and water. Planting a mast tree or shrub can be a fun and rewarding family activity.
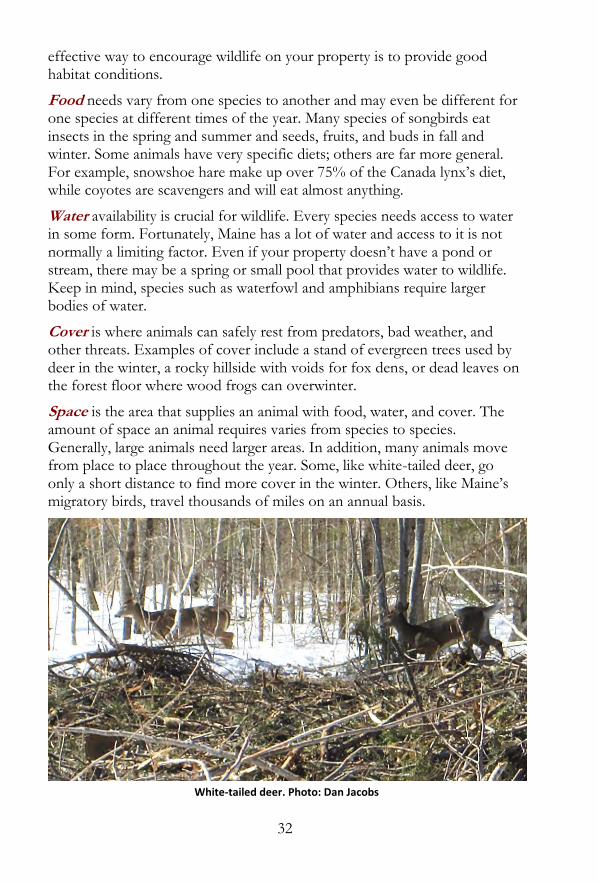
Standing and fallen dead cavity trees also provide very important habitat. Standing dead trees, or snags, provide homes for many species of wildlife in Maine. Woodpeckers, chickadees, and other birds pick insects out of the decaying wood, and bats often roost under loose bark. Some snags have hollow centers that serve as nesting sites for owls, squirrels, and other animals. In addition, dead trees and woody material on the forest floor provides essential habitat for many small mammals, birds, and amphibians. As snags and downed woody debris decompose, they add nutrients to the soil and encourage new plants and trees to grow. Many tree seedlings start on rotting logs in the nutrient-rich decaying wood.
Bear eating an apple while climbing an oak tree. Photo: Kathleen Wheeler
Cavity tree. Photo: Dan Jacobs

31
Although cleaning out snags and underbrush is sometimes aesthetically pleasing, dead wood is very important for wildlife and the future productivity of a woodland. You can maintain or improve the wildlife habitat of your forest by leaving dead and decaying materials in areas where they aren’t safety hazards.
The forest floor is an important feature of the woods in your backyard. It is home to small woodland flowers, bushes, tree seedlings, small mammals, ground-nesting birds, insects, amphibians, and many other forms of life. Small mammals like voles use fallen, rotting logs for hiding places and escape routes. Ruffed grouse (commonly known as partridge) use them as “drumming” logs during the spring courtship season. One of the most important but most overlooked pieces of the woodland puzzle is decaying wood and leaves, known as leaf litter. This material is home to earthworms, beetles, and microscopic organisms that recycle organic matter back into nutrient-rich soil.
As you explore your woodland, you will find many other features that provide important habitat for wildlife.
Habitat Components
The abundance and diversity of wildlife on your property is due, in large part, to the available habitat. Habitat is simply the living requirements that wildlife need to survive—access to food, water, cover, and space. Each species has its own habitat needs, which can range from very specific (habitat specialists) to very broad (habitat generalists). The easiest and most
Leaf litter. Photo: Dan Jacobs
32
effective way to encourage wildlife on your property is to provide good habitat conditions.
Food needs vary from one species to another and may even be different for one species at different times of the year. Many species of songbirds eat insects in the spring and summer and seeds, fruits, and buds in fall and winter. Some animals have very specific diets; others are far more general. For example, snowshoe hare make up over 75% of the Canada lynx’s diet, while coyotes are scavengers and will eat almost anything.
Water availability is crucial for wildlife. Every species needs access to water in some form. Fortunately, Maine has a lot of water and access to it is not normally a limiting factor. Even if your property doesn’t have a pond or stream, there may be a spring or small pool that provides water to wildlife. Keep in mind, species such as waterfowl and amphibians require larger bodies of water.
Cover is where animals can safely rest from predators, bad weather, and other threats. Examples of cover include a stand of evergreen trees used by deer in the winter, a rocky hillside with voids for fox dens, or dead leaves on the forest floor where wood frogs can overwinter.
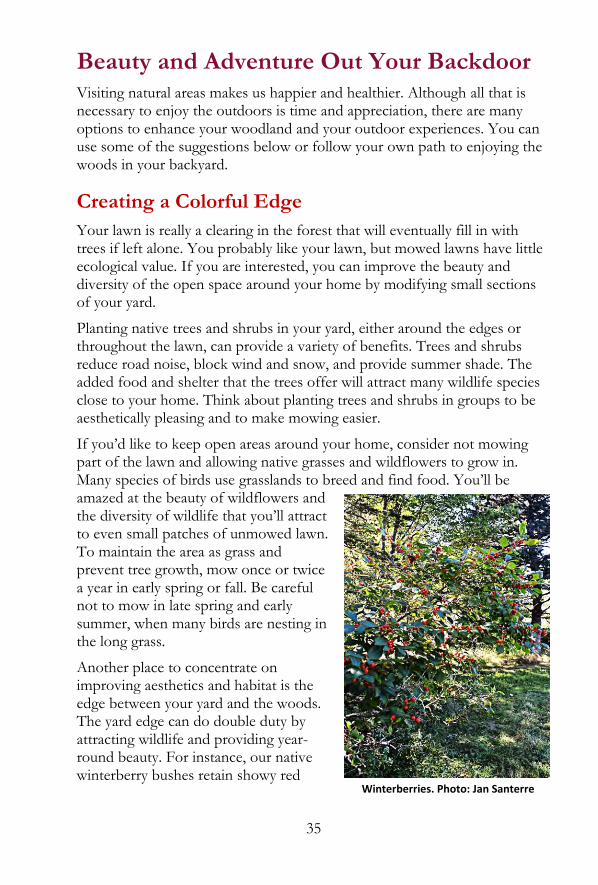
Space is the area that supplies an animal with food, water, and cover. The amount of space an animal requires varies from species to species. Generally, large animals need larger areas. In addition, many animals move from place to place throughout the year. Some, like white-tailed deer, go only a short distance to find more cover in the winter. Others, like Maine’s migratory birds, travel thousands of miles on an annual basis.
White-tailed deer. Photo: Dan Jacobs

33
Improving Wildlife Habitat on your Property
Working to improve habitat on your property can increase the amount and diversity of wildlife. However, it is important to distinguish between habitat improvement and feeding wildlife. Artificially feeding wildlife can cause more harm than good, because animals can easily become dependent on concentrated food sources. Diseases can also spread rapidly at feeding stations, and some artificial foods are difficult for wildlife species to digest.
Improving wildlife habitat should start with gathering information. Walk through your woodland, identify some of the wildlife species you have, and note what kind of habitat they’re using. Keep in mind, you have to work with what you have and be reasonable about what types of wildlife your property can support. If you want to encourage a specific species, research its habitat needs or consult with a wildlife biologist or forester.
Protecting and enhancing certain woodland features can be very beneficial to wildlife. To encourage interior-forest songbirds, like the scarlet tanager, you can maintain mature forest and canopy cover. If you notice deer congregating in a dense softwood stand in the winter, protect this area during any timber harvests and maintain it for shelter. As we mentioned before, you can also plant native species of mast trees or improve the health of existing mast sources to increase the food supply. Further, planting native nectar-producing flowers and shrubs around your yard will attract hummingbirds and butterflies. In short, there are many ways to increase the amount and diversity of wildlife on your property.
Honey bee, ruby throated hummingbird, and eastern tiger
swallowtail butterfly. Photos: Cheri Bellavance

34
For specific recommendations on habitat improvements for your woodland, consider consulting a private wildlife biologist or a Maine Department of Inland Fisheries & Wildlife biologist (see Primary Resources, page 4).
Endangered and Threatened Species
When doing work to improve your woodland, it is important to be mindful of endangered and threatened species of plants and animals. These species often have special protection under state and federal law. Working to protect the habitat of endangered and threatened species is an important part of being a responsible woodland owner. A list of endangered and threatened fish and wildlife species can be found on the Maine Department of Inland Fisheries & Wildlife website at https://www.maine.gov/ifw/fish-wildlife/wildlife/endangered-threatened-species/listed-species.html.
A list of rare plants can be found on the Maine Natural Areas Program website at https://www.maine.gov/ dacf/mnap/features/rare_plants/index.htm.
Family Pets and Wildlife
Efforts to increase wildlife numbers and diversity are more successful when landowners keep household pets under control. Even the sweetest and laziest family pets can have devastating impacts on wildlife. This is especially true during the nesting season for birds. Each year, thousands of ground-nesting birds are killed by household pets. Keeping your dogs and cats from roaming in the woods between May and late July is one of the best actions you can take to protect wildlife. In addition, small pets are just another link in the food chain when they step outside the door. Larger animals like hawks, owls, coyotes, and bobcats see them as prey. As a thoughtful landowner, consider how your pets can impact or be impacted by wildlife.
New England cottontail. Photo: MassWildlife
35
Beauty and Adventure Out Your Backdoor Visiting natural areas makes us happier and healthier. Although all that is necessary to enjoy the outdoors is time and appreciation, there are many options to enhance your woodland and your outdoor experiences. You can use some of the suggestions below or follow your own path to enjoying the woods in your backyard.
Creating a Colorful Edge
Your lawn is really a clearing in the forest that will eventually fill in with trees if left alone. You probably like your lawn, but mowed lawns have little ecological value. If you are interested, you can improve the beauty and diversity of the open space around your home by modifying small sections of your yard.
Planting native trees and shrubs in your yard, either around the edges or throughout the lawn, can provide a variety of benefits. Trees and shrubs reduce road noise, block wind and snow, and provide summer shade. The added food and shelter that the trees offer will attract many wildlife species close to your home. Think about planting trees and shrubs in groups to be aesthetically pleasing and to make mowing easier.
If you’d like to keep open areas around your home, consider not mowing part of the lawn and allowing native grasses and wildflowers to grow in. Many species of birds use grasslands to breed and find food. You’ll be amazed at the beauty of wildflowers and the diversity of wildlife that you’ll attract to even small patches of unmowed lawn. To maintain the area as grass and prevent tree growth, mow once or twice a year in early spring or fall. Be careful not to mow in late spring and early summer, when many birds are nesting in the long grass.
Another place to concentrate on improving aesthetics and habitat is the edge between your yard and the woods. The yard edge can do double duty by attracting wildlife and providing year-round beauty. For instance, our native winterberry bushes retain showy red
Winterberries. Photo: Jan Santerre

36
berries that are eaten by many species of birds through the winter. A diverse edge can provide pale green leaves in the spring, bright flowers in the summer, blazing leaves in the fall, and showy berries in the winter.
You may also focus some effort on improving the beauty of the interior of your woods. Planting woodland wildflowers inside your woods, or in small openings in the woods, can add color and increase plant diversity. Transplanting woodland wildflowers is not recommended, because success rates are generally low. Further, some wildflowers are protected by law. Do yourself a favor and plant woodland wildflower seeds and seedlings that are purchased from established garden centers.
When planting new trees, shrubs, herbs, and wildflowers, keep in mind that not all species grow well in every location. Consider soil type, drainage, sunlight, and other conditions before you decide what to plant. Guides to landscaping, wildlife habitat improvement, and native gardening will help in planning. Local garden centers and landscapers can also be helpful resources.
Before beginning to plant any trees, shrubs, or wildflowers, you should gather some information about native and non-native plants. The latter have served horticultural purposes for centuries and growing them is sometimes alright. However, some non-native plants become invasive. These plants grow very aggressively, outcompete native vegetation, and hurt ecological health. Even if they’re not invasive, non-native plants often don’t provide the same habitat benefits to wildlife as native vegetation. You can find more information in the “Invasive Species” section of this book (page 73).
Viewing Wildlife
You can easily integrate wildlife-viewing spots into the woods in your backyard. Projects can be as simple as hanging a nesting box at the edge of your backyard or as complicated as constructing a boardwalk over a small wetland. Some wildlife species, such as frogs and robins, are not easily disturbed by the presence of humans. Other species, however, require a sense of safety before they’ll nest or den. They may even abandon their attempts to raise a family if disturbed.
If you know of a wildlife gathering place in your woods, consider building a natural looking blind from sticks and brush. Blinds are camouflaged viewing areas useful for both birdwatching and wildlife photography.
If you don’t have a particular viewing spot in mind, think about creating a blind that allows you to observe a small field or a superior mast tree. These

37
structures can range from extremely simple to very elaborate. How much time and effort you put into creating a blind is up to you. For more information about wildlife blinds, visit the Audubon website and check out the great article on this topic at https://www.audubon.org/magazine/ summer-2017/windows-another-world-take-tour-bird-blinds.
Creating Scenic Views
Sometimes, landowners remove all underbrush, rotting logs, and dead lower tree limbs in order to create a “park-like” look in their woods. Although this practice may make the woods look “tidy,” it discourages many wildlife species by removing the cover that is an essential part of their habitat. It also decreases the amount of nutrients available to return to the soil and can negatively affect tree and plant health.
Some ways to create views while maintaining wildlife habitat include:
Select small portions of your woodland for understory clearing. Leave more complex stands adjacent to ones “aesthetically” improved.
Create small openings to view landscapes and convert the openings to food plots for wildlife. This is simply an opening where grasses and herbaceous vegetation dominate.
Properly prune mast-producing trees to enhance views, improve aesthetics, and keep trees healthy.
Wildlife blind. Photo: Shane Duigan

38
A Path Through the Woods: Creating Trails
With a little planning, a simple walking or cross-country ski trail requires little work to build and maintain. A loop trail that takes advantage of terrain features such as dips, slopes, and rocky outcroppings will allow you easy access to your woods. Even on small properties, a trail can provide intimate access into the woods and an opportunity to view wildlife and scenery close to home.
The following are some tips to consider when planning a trail:
Assess the trail location in the fall and spring to determine the need for surfacing material or a boardwalk in wet areas.
Keep in mind, low areas may become wet and muddy.
Winter use may require the pruning of trailside trees to a greater height.
Ski trails should be designed with gentle curves for easy turning.
If your property is adjacent to existing trails or is part of a larger woodland, your neighbors may be interested in helping to create a longer community trail.
Simple Enjoyment
Although you can actively work on your woodland in many ways, from gardening to creating vistas and trails, you needn’t do any of these things to enjoy the natural beauty. Simply going into the woods to look, listen, and take in what is around you can be a tremendous joy and a source of peace. In fact, many people just enjoy looking out their kitchen window at a beautiful tree. In short, take the opportunity to enjoy your woods whenever you have extra time or need a break.
Walking trail. Photo: Dan Jacobs

39
Producing Specialty Products Specialty products are non-timber commodities that can be derived from the forest and sold. There are many products, such as medicinal plants and maple syrup, that fit into this category. In this section, we will focus on wreath brush, maple syrup, and Christmas trees.
Wreath Brush
Balsam fir is the most popular species for making wreaths in Maine and it grows very well across much of the state. If you have balsam fir trees growing on your property, you may be able to gather wreath brush to sell or for personal use. There are many large and small wreath makers located around the state and finding one to purchase your brush should not be too difficult. Many wreath makers attend local craft fairs to sell their products and to network. Attending one of these events and talking to wreath makers may be a good place to start your journey.
To find quality balsam fir trees on your property, look along field edges or in open areas within your woods. If you are lucky, you will find a group of balsam fir trees with easy-to-reach, live lower branches. Under the right conditions, these trees can provide you with brush for years to come. Making sure that each tree has plenty of room to grow and is receiving good amounts of sunlight, is essential to producing quality brush into the future. If you do not have balsam fir trees growing on your property, you may consider planting some in an open field or a little-used section of your lawn. For suggestions on planting balsam fir, review the “Christmas Tree Production” section of this book (page 42).
Gathering wreath brush, or tipping, is very easy and can be a good way to get outside and enjoy nature. You can start collecting wreath brush around the beginning of November when the trees are dormant. Needles that are mostly flat are preferred for wreaths. Fortunately, these types of needles are often found on branches that are within five feet of the ground. When gathering brush on cold days, the tips of
Collecting wreath brush. Photo: Nick Woodward

40
branches can be broken off quite easily. If they are not easy to break, you can remove the tips with pruning clippers. Keep in mind, you only need to remove one to three feet of each branch when gathering brush for wreaths. Because wreath brush is usually purchased by the pound, you will probably need a pickup truck or trailer to deliver it to a buyer.
If you have softwood trees growing on your property, and you are frugal, you might consider leaning some evergreen brush up against the side of your house for insulation. When the snow finally comes, this will protect the basement wall and lower section of your home from winter winds. If you’re a gardener, brush can be used in place of straw to cover bulbs in the fall. Whatever use you find for evergreen brush, it’s abundant in Maine and will likely remain in great supply for generations to come.
Please keep in mind that collecting wreath brush on someone else’s property requires written permission. More information on this topic can be found in the MFS publication The Forestry Rules of Maine (see page iii).
Maple Syrup
For New England’s earliest settlers, maple sugar was often the most available sweetener. Although probably a myth, people have said that a Pilgrim breakfast sometimes included popcorn in milk sweetened with maple sugar. Today, syrup and other maple products from Maine are sold to people all over the world. Maple syrup production is a growing industry, and small woodland owners can participate in this rewarding activity and the expanding maple marketplace.
The raw ingredient of pure maple syrup is sap from maple trees. Although sugar maples are preferable for their higher sugar content and other attributes, the sap of red maples will suffice. For personal use, 12 healthy trees will probably produce 2 plus gallons of syrup per year. A small commercial operation requires at least 1 or 2 acres stocked with 50 to 75 maple trees on each acre.
Sugar maple. Photo: MFS

41
To gather sap, drill a small hole approximately 2 to 2½ inches deep in a live tree and hammer in a spout (also called a tap or spile). The size of the drill bit will be 5/16 or 7/16 inches and depends on the size of spout used. This activity is known as tapping. You should only tap trees larger than 10 inches in diameter and install one tap per tree. People frequently gather sap with special buckets or bags that hang from the taps. Commercial producers typically use a tubing system, that operates by gravity and vacuum, to collect large volumes of sap.
Sap runs in the spring when the nighttime temperature is below freezing and the daytime temperature is above freezing. This “rule of thumb” is a very simplistic description of the conditions necessary for sap flow, because other weather-related factors also play big roles. In Maine, the sugaring season typically starts in March and ends in April. The timing varies.
The amount of sap required to make a gallon of syrup depends on the sugar content. For sap with a 2% sugar content, you’ll need 42 gallons to make 1 gallon of syrup. Generally, an average sugar maple will yield about one quart of syrup per year.
To produce syrup, boil raw sap until it has the desired sugar content. In Maine, sap becomes syrup when it reaches approximately 66% sugar. Two widely-used methods for measuring the sugar content of “syrup” are described in Bulletin #7036 (see information on the next page). Because making syrup requires large quantities of sap, boiling must take place outside or in a dedicated building called a sugarhouse. Professional sugarmakers use special equipment, such as evaporators, to boil sap. Small producers often use large kettles or flat pans to boil sap on an open fire. In addition, many sugarmakers produce a range of maple products from their syrup including candy, cream, and jelly.
To sell maple products in Maine, you must obtain a license from the Department of Agriculture, Conservation and Forestry. All license holders must follow syrup grading and labeling requirements. The grade of maple
Collecting sap. Photo: Allison Kanoti
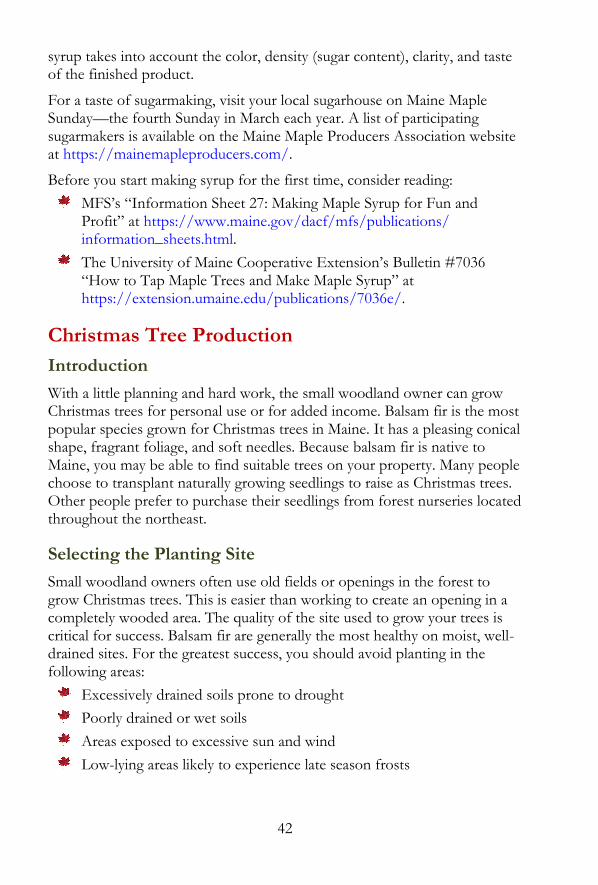
42
syrup takes into account the color, density (sugar content), clarity, and taste of the finished product.
For a taste of sugarmaking, visit your local sugarhouse on Maine Maple Sunday—the fourth Sunday in March each year. A list of participating sugarmakers is available on the Maine Maple Producers Association website at https://mainemapleproducers.com/.
Before you start making syrup for the first time, consider reading:
MFS’s “Information Sheet 27: Making Maple Syrup for Fun and Profit” at https://www.maine.gov/dacf/mfs/publications/ information_sheets.html.
The University of Maine Cooperative Extension’s Bulletin #7036 “How to Tap Maple Trees and Make Maple Syrup” at https://extension.umaine.edu/publications/7036e/.
Christmas Tree Production
Introduction
With a little planning and hard work, the small woodland owner can grow Christmas trees for personal use or for added income. Balsam fir is the most popular species grown for Christmas trees in Maine. It has a pleasing conical shape, fragrant foliage, and soft needles. Because balsam fir is native to Maine, you may be able to find suitable trees on your property. Many people choose to transplant naturally growing seedlings to raise as Christmas trees. Other people prefer to purchase their seedlings from forest nurseries located throughout the northeast.
Selecting the Planting Site
Small woodland owners often use old fields or openings in the forest to grow Christmas trees. This is easier than working to create an opening in a completely wooded area. The quality of the site used to grow your trees is critical for success. Balsam fir are generally the most healthy on moist, well-drained sites. For the greatest success, you should avoid planting in the following areas:
Excessively drained soils prone to drought
Poorly drained or wet soils
Areas exposed to excessive sun and wind
Low-lying areas likely to experience late season frosts

43
To ensure that your site is fertile enough to grow Christmas trees, you may consider sending a soil sample for analysis. You can get a soil testing kit from the University of Maine Cooperative Extension offices (see Primary Resources, page 5). It is inexpensive and easy to send soil samples for analysis, and the lab will provide suggestions to help you improve your soil.
Preparing the Site
It is common to plant Christmas trees in rows to make caring for the trees easier. Typically, the rows are five feet apart and the trees planted in each row are five feet apart. If you are planning a larger plantation, try to provide a wide path for equipment every few rows. Each planting location will need to be treated chemically or mechanically to remove existing vegetation prior to planting. For chemical treatment, it is often best to hire a licensed pesticide applicator. A list of applicators is available from the Maine Board of Pesticides Control (see Primary Resources, page 4). Mechanical treatment involves removing the sod and weeds from the planting location with a shovel or small tractor. Using either method, treat at least one square foot for each tree. If the area you intend to plant contains woody brush, it must be chemically treated prior to planting. Woody brush is very prone to sprouting when it is mechanically cut, and this makes the use of herbicides almost unavoidable.
Planting Christmas Trees
As mentioned previously, balsam fir seedlings can be purchased from forest nurseries or transplanted from other locations on your property. Containerized seedlings, purchased from established nurseries, offer the best opportunity for success. They can be purchased in trays that contain many seedlings for very reasonable prices. Although they must be watered until planting, containerized seedlings are generally easy to care for.
If you are interested in minimizing costs, you may be able to transplant small tree seedlings to grow as Christmas trees. This means digging up seedlings from around your property and planting them in your Christmas tree plantation or a transplant bed. If you decide to transplant seedlings to grow as Christmas trees, get advice from other growers or from the Maine Christmas Tree Association (see Primary Resources, page 4).
Spring planting is highly recommended for two reasons. First, there is usually plenty of moisture in the soil at this time of year. Second, spring planting allows your trees’ roots to develop and build mass prior to the onset of winter. In short, you will have the greatest success by planting in the spring after the last hard frost.

44
To guarantee that you have trees ready for harvest year after year, it is important to stagger your planting. In other words, plant some trees each year for several successive years. It is also prudent to plant a few extra trees each year to compensate for those that do not survive.
Videos on proper planting procedures can be found on the Arbor Day Foundation website at https://www.arborday.org/trees/index-planting.cfm.
A helpful tree planting publication is Penn State Extension’s Forest Landowners Guide to Tree Planting Success (see http://extension.psu.edu/forest-landowners-guide-to-tree-planting-success).
Tending Christmas Trees as They Grow
The top five items that must be addressed as your Christmas trees grow are fertilization, weed control, protection from pests, corrective pruning, and shearing. The following is a brief description of each:
Fertilization should start the year following planting. The type and amount of fertilizer applied will be included in the recommendations made by the soil testing lab. Usually a small amount of granular fertilizer (such as 10-10-10) spread around each tree is sufficient.
Weed control will be necessary each summer. If your trees are planted in rows, you can consider mowing. For landowners growing a small number of trees, a weed trimmer may be sufficient—just be careful not to damage the bark by trimming too close. Herbicides can also be
Christmas trees. Photo: Jan Santerre

45
extremely effective but require the user to follow the product label and safety precautions. You can get guidance from licensed pesticide applicators, the Maine Christmas Tree Association, or the Maine Board of Pesticides Control (see Primary Resources, page 4).
Forest pests such as spruce budworm, balsam twig aphid, and balsam gall midge can cause significant damage to balsam fir Christmas trees. These insects can damage foliage and make your trees unsuitable for sale or personal use. Contact the MFS Forest Health and Monitoring Division (see Primary Resources, page 3) for assistance with the identification and control of these pests.
Corrective pruning is often necessary to address growth deformities. It is common for balsam fir to have multiple leaders (tops). With a good pair of bypass pruners, it is easy to remove all but the most vigorous leader. Other corrective pruning measures are learned through experience, research, and consultation with other growers.
Shearing Christmas trees is similar to trimming shrubs and is done to create trees with a desirable shape. Shearing is commonly done at the end of the growing season. Various tools can be used, but hand shears are probably the safest for beginners. As with corrective pruning, proficiency in shearing will come with experience, through research, and through consultation with other growers.
Shearing. Photo: Callnan Family Christmas Trees

46
Grading and Harvesting Your Christmas Trees
Once you have quality trees that are large enough, you can begin harvesting for personal use or for sale. It usually takes six to eight years from the time of planting until the first harvest. The grading of Christmas trees refers to rating them for quality. Some trees will have deficiencies in terms of shape, taper, color, or fullness that makes them less appealing and less suitable for sale. Again, proficiency in grading will come with experience, research, and working with other growers.
Christmas trees are typically harvested starting in early November. It is best to cut the trees as low to the ground as possible to facilitate replanting. Once the tree is cut, the lower branches should be removed to create a one-foot long handle. As you are cutting and transporting your trees, be careful not to damage the branches or trunk. Trees with noticeable damage will be much harder to sell. If you plan to produce a large number of trees for sale, you might consider purchasing a baler. Balers are specialized pieces of equipment used by commercial growers and can often be found used at reasonable prices.
In short, raising Christmas trees can be fun and profitable. With a little effort, even a small woodland owner has the ability to raise a few trees for personal use.
For additional information, see Christmas Trees for Pleasure and Profit by R. D. Wray (2008), available in various formats from online retailers or by asking your local bookseller.
Do You Know?
#2 The name of the highest mountain in Maine? Answer on page 120

47
Backyard Family Activity #2: Making Maple Taffy Aside from profit, a big part of making maple syrup is having fun with your family, friends, and visitors. Most commercial sugarhouses are open to the public on Maine Maple Sunday. Maple producers use this day to educate the public, show off their operations, and sell syrup and other maple products. Products other than syrup that are produced by Maine’s sugarmakers include hard candy, jelly, butter, and granulated sugar. Taffy is one of the easiest maple treats to make, and sugarmakers often give out samples on Maple Sunday. Making taffy with your family is a great introduction to value-added maple products.
Getting Ready
1. If possible, visit a local sugarhouse and purchase a pint or quart of syrup. A great time to visit is during Maine Maple Sunday. Get a list of participating sugarhouses at https://mainemapleproducers.com/.
2. In the event that your local sugarhouse is closed for the season, you can purchase Maine maple syrup at many grocery stores. Avoid products labeled “pancake syrup”—they aren’t pure maple.
The Activity
In this activity, you will use Maine maple syrup to make delicious maple taffy.
Timeframe
30 minutes with all materials in place.
ACTIVITY
Items Needed
A pint of Maine maple syrup
Outside table
Cookie sheet
Snow or shaved ice
Popsicle sticks
A candy thermometer

48
Steps
1. Place the cookie sheet on a table outside and fill it with two to three inches of snow or shaved ice. You may also use blocks of ice on a cookie sheet.
2. Heat a pint of maple syrup to 234oF on your stove to make taffy on snow or shaved ice. Heat the syrup to 236oF to make taffy on blocks of ice. Overheating will only change the consistency of the taffy.
Tip #1: Use a pot with at least twice the volume of the syrup you’re heating.
Tip #2: Have some butter, margarine, or maple defoamer on hand in the event that the syrup starts to boil over.
3. Pour the heated syrup in thin lines or ribbons across the snow or ice.
4. Wind the cooling syrup around a popsicle stick by placing the end of the stick in a line of syrup and rolling it over and over. Doing this will produce taffy on a stick.
5. Eat and enjoy! Don’t forget to clean up any spilled syrup to avoid attracting nuisance animals to your backyard.
Making maple taffy. Photo: Spring Break Maple and Honey

49
Backyard Family Activity #3: Plant a Hard Mast Species Mast is the botanical name for the nuts, seeds, or fruits of trees and shrubs that are eaten by wildlife. Hard mast includes nuts and seeds such as acorns, hickory nuts, and walnuts. Mast trees can serve as a food source for wildlife while providing you with many other benefits. Planting a mast tree in your yard can provide you with shade on hot summer days and can help beautify your property. Although there are many species that can be planted to provide food for wildlife, planting a native species is the best option for wildlife and for optimal tree growth. For example, northern red oak grows well throughout the state, has red leaves in the fall, and produces nutrient-rich acorns. Shagbark hickory, black walnut, and disease-resistant chestnuts are other good options. Visit your local garden center to check out some native mast-producing species and don’t forget to have fun planting your tree with family and/or friends.
Getting Ready
1. Select a location. If possible, the planting site should be sunny and not too wet. Assess the site for obstacles by first looking up—avoid planting too close to overhead wires, other trees, or buildings. Your tree will grow. Therefore, select a site at least 3’ from pavement or fencing, 15’ from buildings or other trees, and at least 25’ from overhead electric wires. Check the planting site for underground utilities and contact Dig Safe at 811 (or 888-DIG-SAFE) at least 72 hours before planting.
2. Select a tree. Take time during the winter months to look at online nursery catalogs and tree guides to make sure you select the right tree for your location. It is often best to preorder trees through local nurseries in the winter to get the best selection of species. It is also a good idea to speak with the nursery staff about the types of trees best suited to your
ACTIVITY
Items Needed
Tree(s) for planting
Digging tools (spade, shovel)
Garden soil
Compost
Mulch
Stakes and canvas webbing (suggested only for trees requiring staking)
Bypass pruning shears

50
planting site. Many factors, in addition to the site, can also contribute to the species of tree you select. These factors include the type of wildlife you hope to attract (or not attract!), susceptibility to health problems, and tree features such as flowers. While larger caliper trees may make a more immediate impact on your landscape, smaller 10- to 15-gallon containerized trees are best for this activity. One person can transport a smaller tree without large equipment, and the planting hole will be manageable to dig with hand tools. To get the best results, make sure the tree you select is free of common problems such as crossing and rubbing branches, damage to the trunk, and evidence of insect and disease problems.
The Activity
The purpose of this activity is to plant a mast-producing tree that will benefit wildlife on your property.
Timeframe
30 minutes once the tree is at the planting site.
Steps
1. Move your tree to the planting location, and remember trees are not 2x4’s. Lift or carry your tree by its root packaging, most likely a planting pot, rather than by its trunk or branches. Once at the planting location, remove all trunk and branch packaging including trunk wrap, twine around the branches, and tags. Prune any broken or dead branches while you are able to easily reach them.
2. When you are ready to begin digging the planting hole, remove the root packaging. This is necessary to assess the root ball and take some measurements. These measurements will help you to dig a properly sized planting hole. The depth of the planting hole should be the same as the height of the root ball. The width of the planting hole should be two to
Northern Red Oak. Photo: Dan Jacobs

51
three times the width of the root ball measured at the widest point. The process of digging an appropriately sized planting hole is described well in the USDA Forest Service’s Tree Owner’s Manual (see https://www.fs. usda.gov/naspf/publications/tree-owners-manual-national-edition).
3. Gently place your tree in the center of the planting hole and check that it is straight from two different angles. Backfill the hole with the original soil if possible. If there is not enough, mix the native soil half and half with organic garden topsoil and compost. Fill the planting hole to the top of the root ball and break up any soil clods. Then water the root ball and the entire backfilled area.
4. Once the soil is settled at the correct planting depth, add a two- to four-inch layer of mulch over the entire planting area. More mulch is not better, because it can prevent the roots from getting oxygen. In addition, piling mulch on the trunk is an invitation for pests and can encourage decay.
5. If your tree is unstable or in a very windy area, you can use one to three stakes and canvas straps attached loosely on the trunk to anchor it (see the USDA’s diagram on this page). Be sure to remove the stakes and straps in one to two years.
6. Watering your tree can be the most important thing you do to ensure its survival. For the first three years, regular weekly watering throughout the growing season is recommended. Apply 1.5 gallons of water for every inch of trunk diameter. Less water is needed during periods of rainy weather.
7. Installing a trunk guard made of plastic tubing or wire mesh will keep small mammals from chewing the bark during the winter. Make sure the guard is not in contact with the bark, and that you remove it in the spring. Finally, review the USDA Forest Service’s Tree Owner’s Manual for guidance on tree care after planting.
If the root ball is unstable, use 1-3 stakes attached LOW on the trunk.
If the trunk is bending, use 1 stake attached HIGHER (at least 6 inches below the first set of branches).
Remove stakes after 1-2 years.
Tree stakes. Source: USDA

52
3
3. Woodland Hazards
Navigating Through Your Woods A fun afternoon in the woods can quickly turn to panic if you get lost or feel that you’re lost. Even experienced foresters can get turned around in the woods. People often get lost because they are not paying attention to their surroundings and they are unfamiliar with the area. Simply put, the key to successfully navigating through the woods is to stay alert and observe your surroundings.
Everyone should own a simple magnetic compass. The most useful have a clear baseplate and a turning bezel. A compass and a GPS can help you find your way back but only if you orient yourself prior to heading into the woods. If you don’t know your starting location, a compass isn’t much good. Completing “Backyard Family Activity #4: Using a Compass” (page 64) will help you get comfortable using this important tool. Additionally, if you have a handheld GPS, learn how to use it before heading into the woods. Keep in mind, most smartphones have internal GPS systems. For most people exploring the Maine woods, the most important GPS functions are marking a waypoint and navigating to a waypoint. You can learn about these functions and more by reading your users’ manual or by watching online videos. Because electronic devices sometimes fail, you should never rely solely on a GPS or smartphone to navigate through the woods.
Completing “Backyard Family Activity #4: Using a Compass” on page 64 will help you get comfortable using this important tool.
Bezel
Baseplate

53
Before you head outside, try to find a map of your property. A good map of your property can be very useful in navigating through your woods—especially when used with a compass and a GPS. You might have a survey map, which is very accurate, or a copy of the town tax map. Using these existing maps and the deed description of your property, you should be able to identify your ownership and its boundary lines on Google Earth. Google Earth is easily found with an internet search and can provide you with valuable information about your woods. In fact, you can draw your boundary lines on the satellite imagery in Google Earth and print a basic map that you can take with you in the woods. This basic map can be used to identify natural and man-made features on or near your land. It should be fairly easy to identify roads, ponds, streams, fields, and structures. You can even label these features on your paper map to help you navigate through your woods when you are working on projects or enjoying the outdoors.
As mentioned earlier, staying alert to your surroundings is important to avoid getting lost. Even if you are using a map and compass, you should still take the time to make mental notes about your surroundings. Pay close attention to the trees, logs, hills, rocks, ridges, and man-made items that you pass. Look to your left and right and turn frequently to look behind you. The large tree that you passed may look totally different from the other side. Are you going uphill? Then you need to go downhill to get back to your house or vehicle. If you change direction, associate it with the terrain and features around you. Continually ask yourself, “if I had to return to where I started, where would I go?” Everything you observe will eventually become part of the puzzle you must assemble to stay oriented.
One natural object that can help you stay oriented is the sun. In our area, the sun rises in the east, moves to the south, and sets in the west. At noon, the sun is to the south. Therefore, if you know the time of day and the sun is visible, you’ll have a rough idea of what direction you’re heading. Learning to associate times of day with the sun’s position, in relation to landmarks, can be very helpful in determining where you are.
A good mnemonic device to remember the order of the cardinal directions is “Never Eat Shredded Wheat.” Using this device, clockwise from north is east, then south, and finally west. If you’re facing north, east will be on your right and west on your left. Facing south, west is on your right and east is on your left.
Keep in mind, no one can walk in a perfectly straight line. In general, we all tend to walk in
ever
hredded
a t
h e a t

54
a large circle that is often determined by handedness. If you’re right-handed, you’ll tend to veer to the right over time. You can offset this tendency by making a conscious effort to pass on the left side of objects that are directly in front of you.
It’s always a good idea to take precautions in case you do get lost. These days getting lost generally means that you might come back hungry and cold after someone finds you. Taking the following actions can help you get home safely:
Always let someone know where you’re going and what time you think you’ll be back. Then stick to your plan.
Be prepared for the worst. Bring warm clothing, water, a tarp or large garbage bag, a small flashlight, a whistle, waterproof matches, snacks, a knife, and a watch. The weather can change rapidly, and you might have to spend time under adverse conditions. Fortunately, assembling a basic survival kit is a good rainy day activity for children of all ages.
Observe your surroundings and be able to identify landmarks from different viewpoints.
Drink lots of water. You can survive several days without food but not without water.
Don’t eat anything from the woods unless you’re sure it’s edible.
Don’t panic if you think you’re lost. Sit down, take a few deep breaths, and think rationally. You may find that you can mentally retrace your route through the woods.
If you decide that you really are lost, stay put! People who are panicking move quickly and usually go out of the area where search and rescue teams are looking for them. They also don’t hear people calling out for them because they’re making noise themselves.
Find a safe place to shelter yourself from the elements before dark. Pile up dried leaves to insulate yourself from the ground and put up your tarp for overhead protection.
If you’re in a group, stay together! Don’t allow anyone to go out and search for the way back because this may result in the need for individual searches. Being with others will also help you maintain a positive outlook.
Learning to use a map and compass to navigate through the woods is the best approach to avoid getting lost. The effective use of these tools can also increase your efficiency and reduce your travel time. For a great introduction to compass use, complete the two Backyard Family Activities at the end of

55
this chapter. In addition, the short videos listed below may be useful as you learn more about orienteering and navigation:
“How to Use a Compass” is a helpful video produced by REI Co-op and found at https://www.youtube.com/watch?v=0cF0ovA3FtY.
“Orienting a Map and Compass” is another helpful video produced by the Boy Scouts and can be found at: https://www.youtube.com/ watch?v=a2aGiUl1u4c.
Hazard Trees Hazard trees are trees with structural defects that make them likely to fall and injure people or damage property. In addition, trees that appear healthy but have large dead branches can also be very dangerous. Large dead branches have the potential to cause tremendous damage if they break off and hit a target. Although structurally weak trees and large dead branches are often hazards that need to be removed, sometimes they can be safely retained in the woods to provide wildlife habitat.
Identifying Hazard Trees
Answering the following questions will help you determine whether a tree is a hazard:
Will the tree hit people, cars, buildings, powerlines, or anything else of value if it falls? Check the area around dead or unhealthy trees for potential targets.
Has the tree lost a lot of branches, bark, or needles lately? If so, its health may be in decline.
Does the tree have deep, open cracks in the trunk or branches? Cracks eventually lead to breaks.
Does the tree have lightning damage? Lightning strikes can kill the roots that anchor a tree to the ground.
Do decay conks grow from the main stem? Does it have black cankers or hollow spots? Entire living branches can unexpectedly break free and fall from a rotting trunk. Decay conks. Photo: Aaron Bergdahl

56
Is the tree leaning to one side or does it have considerably more branches on one side? The uneven distribution of weight can increase the risk of the tree falling.
Do structurally weak sprouts grow from the tree? These often form when improper pruning methods, such as topping, are used.
Although trees often become hazards naturally, people can injure and weaken trees in many ways. For instance, improper pruning practices can negatively impact tree health and resistance to breakage. As mentioned previously, the practice of topping large trees can increase the risk of structural failure. If you are planning to prune a large tree, consider contacting a licensed arborist and reading the USDA’s booklet “How to Prune Trees” prior to starting work (see https://www.fs.usda.gov/treesearch/pubs/12602).
Trees can also be easily injured during the construction of buildings, driveways, woods roads, or trails. Harm from such activities can weaken trees and predispose them to insects or diseases that may kill them. Covering the roots of existing trees with large amounts of fill and driving heavy equipment over roots can cause serious damage. Trees with weakened root systems can unexpectedly fall (or blow down) with high winds.
When choosing a new tree to plant, make sure that the species is well-suited to the planting location. Proper planning will keep you from planting a tree that is likely to become a hazard in the future. For advice selecting the proper tree species and planting location, visit the Project Canopy website at https://www.maine.gov/dacf/mfs/policy_management/project_canopy/ resources/right_tree_right_place.html.
Topped tree. Photo: Greg Miller

57
Managing Hazard Trees
Immediately evaluate dead or damaged trees in areas where they can fall on anything of value. Trees that make an area unsafe should be removed as soon as possible. Removing hazard trees can be dangerous and it is advised to have the work performed by a licensed arborist. These professionals are specially trained and insured. A list of licensed arborists can be found at https://www.maine.gov/dacf/php/arborist/ArboristList.shtml.
How we deal with a hazard tree depends largely on location. In other words, we typically deal with hazard trees in the woods differently than hazard trees near our home or camp. Hazard trees in the woods don’t generally require immediate attention like hazard trees in your yard. The best way to stay safe is to be aware of your surroundings at all times. As you walk through the woods, scan the area around you for dead trees, large dead branches, and tree tops hung up in surrounding trees. If a dead tree is present near a frequently used trail, cut it down as soon as possible. If it isn’t near any trails, leave it to provide wildlife habitat. The following point cannot be stressed enough: if you are not trained or experienced in tree felling, hire a professional to do the work.
“Widowmaker.” Photo: Dan Jacobs
Arborist. Photo: MFS

58
The Woods During Hunting Season Staying safe during hunting season is easier then you may think and takes just a few extra steps before going into the woods to work or recreate. If you properly posted “No Trespassing” signs along your boundary line, you most likely won’t have hunters in your woods. If your property is part of a larger wooded area, however, people may be hunting nearby.
Hunting Seasons
Hunting seasons are set based on the species of game animal. Because the greatest number of game species are hunted in the fall, this is the most likely time of year for you to encounter hunters on or near your property. Keep in mind that white-tailed deer is one of the most popular game species in North America and you should take additional safety precautions during this season. The Maine Department of Inland Fisheries and Wildlife’s “Summary of Hunting Laws” that lists hunting regulations and seasons can be found at http://www.eregulations.com/maine/hunting/.
When Hunters are Most Active
The peak times for animal activity and hunting are sunrise and sunset. Avoid being in hunting areas during those times, because you’ll be less visible in the dim light. If you must be out at those times, use a headlamp or flashlight and wear reflective material.
Wear the Right Colors
Wearing blaze orange, also known as hunter orange, is one of the best ways to ensure your safety in the woods during hunting season. Maine law requires anyone hunting during any firearm season to wear blaze orange clothing. For the complete rules on blaze orange clothing, go to https://www.maine.gov/ifw/hunting- trapping/hunting-laws/hunting- equipment.html#hunterorange.
Although these requirements are for hunters, landowners should follow them when working in the woods during hunting season. If you don’t
White-tailed deer. Photo: Dan Jacobs

59
have such clothing, most sporting goods stores sell inexpensive blaze orange vests and hats. Whatever articles you decide to wear should be visible from all sides. Also, remember to avoid wearing white during deer season. Hunters can mistake a flash of white clothing for a deer’s tail.
Make Noise
Although being out in the woods is often about peace and quiet, hunting season is no time to walk silently through the forest. Talking with your companions, whistling, and singing aloud are great ways to make yourself known to hunters. If you hear shooting close by, yell to alert hunters to your presence and location.
Pet Safety During Hunting Season
Keeping your pet safe during hunting season is also very important. Blaze orange vests, collars, and bandanas are available for dogs and will fit other pets of similar sizes. Attaching a small bell to your pet’s collar can also help distinguish it from other woodland animals.
Hazardous Plants and Insects The Maine woods can be a very safe place if you know how to identify a few natural hazards. Such hazards include poison ivy, poison sumac, ticks, mosquitoes, and browntail moth caterpillars.
Poisonous Plants
Two of the most commonly encountered plants in Maine, that are known to cause severe skin irritation, are poison ivy and poison sumac. Irritation typically results when skin comes in contact with the roots, stems, leaves, flowers, or fruit of either plant. In addition, the smoke from burning these plants, and any clothes that come in contact with these plants, can also be hazardous. Washing with a poison ivy cleaning product is the best way to remove the poisonous oils from skin, clothes, and tools.
Pet safety. Photo: Rondi Doiron

60
Poison Ivy
Poison ivy is widespread throughout the state. It grows as an aerially-rooted climbing vine on trees; a trailing vine; or an erect shrub along stonewalls, fencerows, roadsides, and waterbodies.
The leaves are dark green, very shiny, and arranged in groups of three. You might try to remember the old saying “leaves of three, let it be.” In the fall, poison ivy is often fiery red.
Other plant parts that can help you identify poison ivy include the fruit and the roots. The fruit is a creamy white, ribbed, globular, BB-sized berry; and the roots are often covered in reddish hairs.
Poison Sumac
Poison sumac grows as a small tree in low, wet swamps. It is most common in the southern half of Maine.
The leaves of poison sumac are 7 to 14 inches long and are composed of 7 to 13 smaller leaves. These smaller leaves are called leaflets. Unlike the twigs of staghorn sumac, the twigs of poison sumac do not have hairs.
The fruit is a globe-shaped, slightly compressed, thin-fleshed, white berry about 1/5 inch in diameter. It is produced in clusters that ripen in September and persist on the tree into the winter.
Hazardous Pests
Ticks, mosquitoes, and browntail moth caterpillars are among Maine’s most common and harmful insect pests. These three pests can cause short-lived discomfort as well as serious illness. Therefore, minimizing your contact with these insects is critical to your health and safety in the woods.
Poison ivy. Photo: MFS
Poison sumac. Photo: MFS

61
Ticks
About 15 different species of ticks live in Maine. One of them, the deer tick, can transmit the bacterium that causes Lyme disease. This disease frequently starts with a rash and flu-like symptoms. Left untreated, it may cause neurological problems. Keep in mind, ticks are common in Maine and several species are known to spread serious diseases.
Therefore, you should consider taking the following precautions to avoid tick bites when visiting the woods in your backyard:
Tuck your pant legs into your socks or wear gaiters treated with permethrin.
Tuck your shirt into your pants.
Wear light-colored long-sleeved clothing to more easily see ticks.
Use a repellant that is approved by the EPA for use on skin—such as DEET, picaridin, IR3535, or oil of lemon eucalyptus.
Apply permethrin to clothing and be sure to follow the directions on the label.
Consult with your veterinarian about tick repellents for pets.
Inspect yourself, your companions, and your pets for ticks periodically while in the woods and when you get back home. Ticks often attach to body folds, behind the ears, and in the hair.
Shower and wash your clothes immediately after returning from the woods. Drying clothes on high heat for 15 minutes effectively kills ticks.
The prompt removal of ticks is very important. With tweezers, grasp the tick as close to the skin as possible and pull gently but firmly until it lets go. With a tick removal spoon, line the notch up with the tick’s mouthparts and
Source: Maine Center for Disease Control

62
apply downward pressure. Then slide the spoon forward to remove the tick. Place the tick in rubbing alcohol to kill it and apply antiseptic to the bite. You should talk with your healthcare provider if you develop a bull’s-eye rash or flu-like symptoms after a tick bite. To submit a tick for identification or testing, visit https://extension.umaine.edu/ticks/.
Mosquitoes
Approximately 40 different species of mosquitoes live in Maine. Of these, only about half are biting pests. In the past, mosquito-borne illnesses didn’t threaten Maine, but that’s no longer true. Recently, the increased incidence of Eastern Equine Encephalitis (EEE) and West Nile Virus has caused concern in the northeast. To help prevent bites and the transmission of disease, use an EPA-approved repellent such as DEET, picaridin, IR3535, or oil of lemon eucalyptus. You can also apply permethrin to your clothing, but make sure to follow the directions on the product label. For additional protection from mosquitos, consider wearing long pants and long-sleeved shirts when you are in the woods.
For more information on ticks and mosquitoes, visit the MMCRI Lyme & Vector-borne Disease Lab at https://mmcri.org/?page_id=1090 or see the Maine CDC’s Tick and Mosquito FAQs at https://www.maine.gov/ dhhs/mecdc/infectious-disease/epi/vector-borne/tick-messaging.shtml.
Browntail Moth Caterpillar
The browntail moth caterpillar has tiny poisonous hairs that cause a skin rash similar to poison ivy on sensitive individuals. People may develop dermatitis from direct contact with the caterpillar or indirectly from contact with airborne hairs. The hairs become airborne by being dislodged from the caterpillars or by being cast off when the caterpillars molt. Most people affected by the hairs develop a localized rash that will last from a few hours up to several days. For some sensitive individuals the rash can be severe and last for several weeks. Respiratory distress from inhaling the hairs has also been reported and can be very serious.
Browntail moth. Photo: MFS

63
The following precautions may help people living in or visiting browntail moth-infested areas:
Avoid places heavily infested by caterpillars.
Take a cool shower and change clothes after any activity that might involve contact with browntail moth hairs.
Dry laundry inside during June and July to avoid having the hairs become impregnated in clothing.
Wear a respirator, goggles, and coveralls when performing activities that may stir up caterpillar hairs. These activities include mowing, raking, weed trimming, and removing pupal webbing from eaves and boats.
Use caution cleaning debris left by caterpillars because the toxin is extremely stable and remains a hazard for a number of years. Summer residents should bear this in mind when opening and cleaning cottages that have been closed all winter. Wet mopping prior to vacuuming or dusting is advised.
Talk with your healthcare provider if you develop a severe reaction to the browntail moth.
Be aware that the likelihood of contacting browntail moth hairs increases during dry windy conditions.
Contact 211 Maine to get answers to frequently asked questions on browntail moth biology, pesticide options, health concerns, management, and public policy. You may reach this service by dialing 211 (or 866-811-5695), texting your zip code to 898-111, or emailing [email protected].
Do You Know?
#3. Which large mammal eats ants, raspberries, and beech nuts before sleeping through the winter?
Answer on page 120

64
Backyard Family Activity #4: Using a Compass While a GPS app on your phone can be a very useful tool, you should also learn to use a compass in case your battery fails or phone malfunctions. Plus, navigating with a compass is just plain fun!
For this activity, you will need a basic compass with an adjustable bezel, a notepad, and a pencil. Silva, Brunton and Suunto are all recognized brands that can be easily be found online. An azimuth compass is recommended for this activity because it is the easiest and most intuitive to operate. The dial (or bezel) on an azimuth compass is divided into 360 degrees and north is both 0o and 360o.
ACTIVITY
Items Needed
Basic compass with an adjustable bezel
Notepad
Pencil

65
Getting Ready Examine your compass and be able to identify the following parts:
1. The magnetic needle is jiggly and moves around inside the dial (or bezel). The end that points North is usually red, and the end that points South is usually white. The degrees, which range from 0 to 360 on an azimuth compass, are located on the bezel.
2. The direction of travel arrow may be long and skinny or may be just a triangle. This arrow is printed on the baseplate and is the only one on the compass that doesn’t move. It may be obvious or difficult to find. Make sure you can find yours.
3. The orienting arrow is the larger arrow on the rotating bezel. It often appears in the form of an outline.
The Activity In this activity, you will learn to use a compass to navigate in a predetermined direction, stay on course towards a destination, and return to your starting point. This activity is designed to be completed with an azimuth compass.
Timeframe 30 minutes or less.
Steps
1. Choose some place you will recognize when you come back, such as a bush or mark on the ground. Hold the compass flat in the palm of your hand with the direction of travel arrow pointing directly away from your body. You will always use the compass in this position. Don’t rotate the compass while you are using it!
2. Hold your arm out straight and point the direction of travel arrow to some recognizable landmark in the distance—maybe a large pine tree. You don’t want something located in your backyard, that’s too close. Turn your body, not your compass! Make sure your palm (and compass) stay level.
3. With the direction of travel arrow pointed at the landmark (pine tree), rotate the bezel until the orienting arrow is aligned with the red end of the magnetic needle. You can remember which end you need to align with the saying “put the red in the shed.”

66
4. Read the azimuth off the bezel where it coincides with the direction of travel arrow and write it on your notepad.
5. Now walk to your landmark (the large pine) and step around it. Hold your compass out in front of you and turn your whole body (not the compass or your arm) until the magnetic needle lines up with the orienting arrow again. Look ahead along the direction of travel arrow and find another landmark that falls on this line. You must keep the magnetic needle centered within the orienting arrow while sighting on the next landmark. This is how you travel in a straight line using a compass.
6. To return to your starting point, stand in front of the large pine and turn your bezel 180° from the direction you were traveling. You may need to use your notebook to do some simple math. If your initial azimuth (x) is less than 180o, the math will be (x + 180). You will add 180 to your initial azimuth. In contrast, you must subtract 180 from your initial azimuth (x) when x is greater than 180o. In this case, the math is (x – 180). As you can see, your answer must always fall between 0° and 360°.
Suppose you get turned around while you are hiking or hunting in the woods. Even knowing the basics of how to use a compass will help you choose a basic direction of travel and stick to it. If you recognize a distant landmark, point your direction of travel arrow at it, put “red in the shed,” and sight on a closer landmark on the same azimuth. Walk to the closer landmark, step around it, and put the “red in the shed” again to find another landmark. Repeating these steps you will leapfrog to your destination.
Backyard Family Activity #5: The Three-Legged Compass Walk The three-legged compass walk will help you get even more comfortable with your compass. It works best in a large field or parking lot. In addition, it’s important to walk with your normal stride to form a triangle with equal sides.
ACTIVITY
Item Needed
Basic azimuth compass with an adjustable bezel

67
As in “Backyard Family Activity #4: Using a Compass,” you will need a basic azimuth compass with an adjustable bezel.
Getting Ready
Review the “Getting Ready” section for “Backyard Family Activity #4: Using a Compass” (page 64) before starting this activity.
The Activity
In this activity, you will learn to travel through an area using a triangle-shaped route. The route will take you back to your starting point.
Timeframe
30 minutes or less.
Steps
1. Choose a starting point. Turn the bezel of your compass so that 40° is lined up with your direction of travel arrow. Then turn your body with the compass extended in front of you until the red end of the magnetic needle is in the orienting arrow (“red in the shed”). Pick a certain number of steps to walk (25, 50 or 100), and walk across the field or parking lot keeping the needle inside the arrow. You won’t be looking at a landmark but at your compass the whole time.
2. Add 120° to your original 40° to get 160°. Turn your bezel so that 160° is lined up with the direction of travel arrow. Turn slowly and put the magnetic needle inside the orienting arrow. Then walk in that direction the same number of steps you walked the first time.
3. Add another 120° to your 160° to get 280° and follow the same procedure as in Step 2. Once you have traveled the same distance as before, you will be back at your starting point.
You just traveled a route that formed an equilateral triangle. You can make this activity more challenging by placing a quarter between your feet when you start. Then try to end your walk in the exact spot that you began. Try the activity several times to become more comfortable with your compass. Once you’ve mastered this activity, consider trying a four-legged walk (square-shaped route) by turning the compass bezel 90° at each corner.

68
4
4. Protecting Your Woods
Soils, Water, and Areas of Special Importance
Soil: The Foundation of Your Land and Woods
The types of trees and plants that will grow in a certain location is greatly determined by the soil. Further, the importance of healthy soil to a healthy forest cannot be stressed enough.
The basic ingredients of soil fall into two categories: mineral soil (silt, sand, and clay) and organic matter (decomposing plant and animal material). Soil varies from place to place, and the amount of sand, silt, clay, and organic matter affects its nutrient content and its ability to hold water. Soils with a lot of clay tend to be sticky, poorly drained, and vary in fertility. Sandy soils tend to be gritty, excessively drained, and low in fertility. Soils with a high ratio of silt feel smooth, have good drainage, and are generally fertile. Loam is a term that is commonly heard by landowners. But what is it? Simply put, it is soil with a fairly even mixture of sand, silt, and clay. To increase the nutrient content (fertility) of any soil type previously described, you might try adding some organic matter. This may be advisable when establishing a rain garden, starting a wildlife food plot, or planting a mast tree. Soils with higher amounts of organic matter tend to be richer in nutrients.
If you’ve ever dug a hole on your property, you probably noticed different colored layers within the soil. These layers are called horizons and have been given universally accepted labels by soil experts. From the uppermost horizon down, these Soil profile. Source: Natural Resources
Conservation Service
Horizons O
A
B
C
0” 2”
10”
30”
48”

69
layers include the O, A, B, C, and R horizons. The organic component of the soil is greatest near the surface and diminishes as depth increases. In contrast, the mineral component of the soil becomes greater with increasing depth. It is important to understand that soil layers take a long time to develop and aren’t easily replaced. To illustrate this point, consider that it takes between 100 and 600 years to form 1 inch of topsoil. In areas devoid of vegetation, this topsoil can be eroded by wind and water in less than one year.
If you would like to know which types of soil can be found on your property, consider getting a soil survey map from the US Department of Agriculture (USDA). They have field offices all over the state and can provide you with a free soil map. Along with the map, you will get information about each type of soil found on your property. This information includes the suitability of each soil type to grow specific trees and plants. You may find this very helpful in planning improvements to the woods in your backyard.
These maps and the associated information about each soil type are also available online using the USDA Web Soil Survey at https://websoilsurvey.sc.egov.usda.gov/App/HomePage.htm.
To get an even better understanding of the soils in your woods, you can get a soil testing kit from the University of Maine Cooperative Extension offices (see Primary Resources, page 5). It is inexpensive and easy to send soil samples to the lab for analysis. A great benefit of the analysis is the recommendations you will receive to improve the soil for the plants you specify.
Gathering soil for a soil testing kit. Photo: Jan Santerre
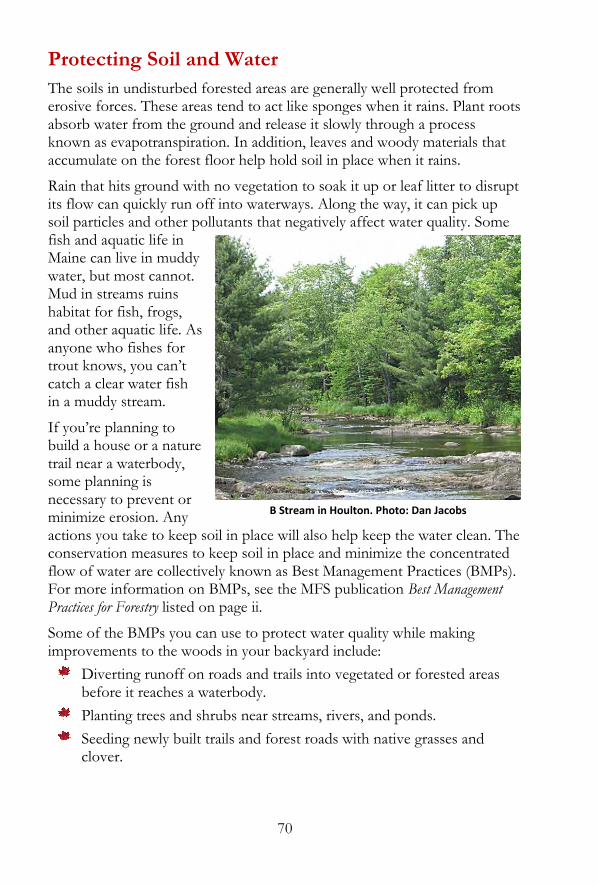
70
Protecting Soil and Water
The soils in undisturbed forested areas are generally well protected from erosive forces. These areas tend to act like sponges when it rains. Plant roots absorb water from the ground and release it slowly through a process known as evapotranspiration. In addition, leaves and woody materials that accumulate on the forest floor help hold soil in place when it rains.
Rain that hits ground with no vegetation to soak it up or leaf litter to disrupt its flow can quickly run off into waterways. Along the way, it can pick up soil particles and other pollutants that negatively affect water quality. Some fish and aquatic life in Maine can live in muddy water, but most cannot. Mud in streams ruins habitat for fish, frogs, and other aquatic life. As anyone who fishes for trout knows, you can’t catch a clear water fish in a muddy stream.
If you’re planning to build a house or a nature trail near a waterbody, some planning is necessary to prevent or minimize erosion. Any actions you take to keep soil in place will also help keep the water clean. The conservation measures to keep soil in place and minimize the concentrated flow of water are collectively known as Best Management Practices (BMPs). For more information on BMPs, see the MFS publication Best Management Practices for Forestry listed on page ii.
Some of the BMPs you can use to protect water quality while making improvements to the woods in your backyard include:
Diverting runoff on roads and trails into vegetated or forested areas before it reaches a waterbody.
Planting trees and shrubs near streams, rivers, and ponds.
Seeding newly built trails and forest roads with native grasses and clover.
B Stream in Houlton. Photo: Dan Jacobs
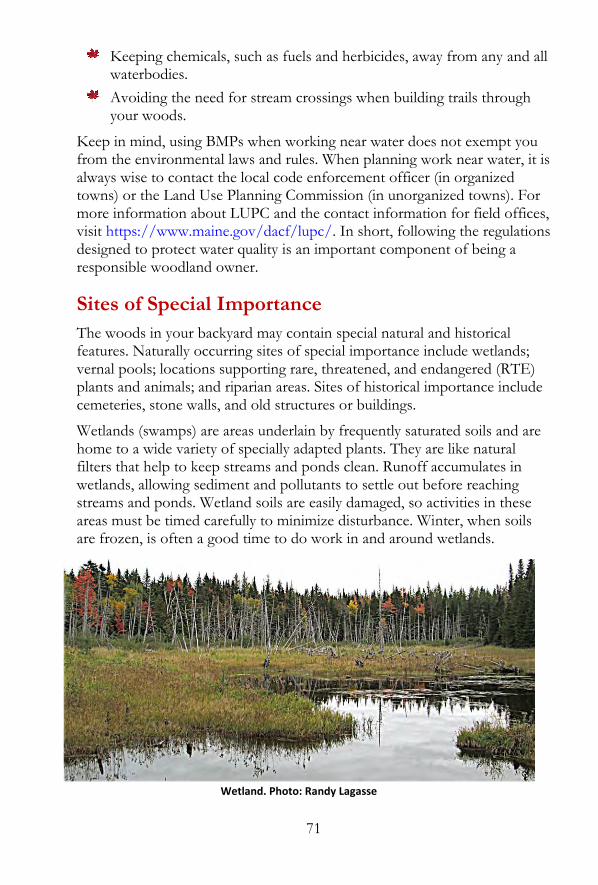
71
Keeping chemicals, such as fuels and herbicides, away from any and all waterbodies.
Avoiding the need for stream crossings when building trails through your woods.
Keep in mind, using BMPs when working near water does not exempt you from the environmental laws and rules. When planning work near water, it is always wise to contact the local code enforcement officer (in organized towns) or the Land Use Planning Commission (in unorganized towns). For more information about LUPC and the contact information for field offices, visit https://www.maine.gov/dacf/lupc/. In short, following the regulations designed to protect water quality is an important component of being a responsible woodland owner.
Sites of Special Importance
The woods in your backyard may contain special natural and historical features. Naturally occurring sites of special importance include wetlands; vernal pools; locations supporting rare, threatened, and endangered (RTE) plants and animals; and riparian areas. Sites of historical importance include cemeteries, stone walls, and old structures or buildings.
Wetlands (swamps) are areas underlain by frequently saturated soils and are home to a wide variety of specially adapted plants. They are like natural filters that help to keep streams and ponds clean. Runoff accumulates in wetlands, allowing sediment and pollutants to settle out before reaching streams and ponds. Wetland soils are easily damaged, so activities in these areas must be timed carefully to minimize disturbance. Winter, when soils are frozen, is often a good time to do work in and around wetlands.
Wetland. Photo: Randy Lagasse

72
If you have woodland areas that are wet in the spring but dry up in the summer, you might have a temporary forested wetland called a vernal pool. Vernal pools are generally 1/10th to 1 acre in size and provide important spring breeding sites for frogs, toads, salamanders, insects, and turtles. In addition, some vernal pools are home to rare and protected species. A great source of information on vernal pools is Forestry Habitat Management Guidelines for Vernal Pool Wildlife. This publication can be found at http://www.maineaudubon.org/wp-content/uploads/2017/03/Forestry-Habitat-Management-Guidelines-for-Vernal-Pool-Wildl.pdf.
RTE species and habitats are not confined to preserves and parks—they can occur right in your own backyard. Having an RTE species on your property can be a rewarding experience. However, keeping these species safe from harm is an important responsibility of a good steward and landowner. The Maine Natural Areas Program (MNAP) maintains a list of RTE plant species and habitats and can help you determine which ones might occur on your property (see Primary Resources, page 4).
Areas adjacent to waterbodies are called riparian areas. They both influence and are influenced by the waterbody. The trees in riparian areas provide shade that helps to support coldwater fish like brook trout. Riparian areas also provide travel corridors for a variety of wildlife and are often home to RTE plant and animal species. Because these areas are highly susceptible to damage, special consideration is necessary when undertaking activities such as cutting trees or building trails.
Activities in and adjacent to wetlands, vernal pools, RTE sites, and riparian areas are regulated by state and federal agencies and by municipal governments. Before starting work in or around these areas, contact the MFS for help determining which agencies regulate your proposed activity. The Forestry Rules of Maine publication can help you get started (see page iii).
Sites of historical importance include stonewalls, cemeteries, cellar holes, old buildings, and
Eagle. Photo: Pam Wells

73
Native American sites. Though not a growing part of your woods, these features represent an important cultural legacy and can even provide clues about the land-use history of your property. With the exception of work requiring excavation, most forest management activities pose little threat to these cultural features. Improvements, such as walking paths, can even be built to observe these points of interest. To learn more about sites of historical importance that may be on your property, contact the Maine Historic Preservation Commission at https://www.maine.gov/mhpc/home.
Invasive Species
What Are Invasive Species?
Invasive species pose a serious threat to the forests of Maine and possibly to the health of the woods in your backyard. By federal definition, an invasive species is an organism that is not originally from an area and causes harm to the environment, the economy, or human health. Invasive insects, diseases, and plants all have the potential to negatively impact your woods. Examples of invasive species already impacting the health of Maine’s forests include emerald ash borer, winter moth, hemlock woolly adelgid, and Asiatic bittersweet. Maine’s web portal, https://www.maine.gov/portal/about_me/invasives.html, provides a jumping off point to learn more about invasive insects, diseases, and plants.
Recognizing and Managing Invasive Plants
Invasive plants are one of the biggest threats to Maine’s forests. That means they can be a significant threat to the woods in your backyard. Invasive plants can either grow in water (aquatic) or grow on land (terrestrial). The threats to Maine’s forests come primarily from terrestrial invasive plants, which often lack the natural predators and diseases that control their populations in their native habitat. These plants can move into an area and completely outcompete native forest vegetation. Because they grow very fast, they are able to hog sunlight, water, and nutrients—a big problem if you enjoy having trees in your woods. Invasive plants can also drastically
Emerald ash borer. Photo: MFS

74
change animal habitat by crowding out native species that provide food, cover, and nesting sites.
You may be wondering how these invaders got here. Surprisingly, many of these plants were imported for landscaping and conservation uses. Although Maine now has a “Do Not Sell” list of invasive plants, accidental introductions through contaminated soil or equipment are still possible. Some invasive plant seeds can hitchhike in nursery stock, so always monitor new plantings.
Recognizing Invasive Plant Species
Although many invasive plant species threaten the Maine woods, we can narrow the list down to the five that you are most likely to encounter on your property. MNAP provides detailed information on each of these species as well as many other invasive plants at https://www.maine.gov/ dacf/mnap/features/invasive_plants/invasives.htm.
Asiatic Bittersweet
Asiatic bittersweet (Celastrus orbiculatus) is a deciduous vine that climbs by winding around and growing over other vegetation. These vines can strangle trees and shrubs and overwhelm entire plant communities.
Asiatic bittersweet can be found on a variety of sites but prefers forest edges. In these areas it can grow around and over other plants while receiving good amounts of sunlight. It is also commonly found in road ditches, abandoned fields, and open woods. Birds, that eat the fruit of Asiatic bittersweet in the winter, play a big role in the spread of this invasive plant. In addition, humans contribute to the problem by discarding flower arrangements that contain this plant in the woods.
Asiatic bittersweet ripe and unripe fruit. Photo: MNAP

75
Japanese Barberry
Japanese barberry (Berberis thunbergii) is a woody shrub with numerous arching spine-bearing branches. This plant was a popular ornamental, because the leaves turn striking shades of red and orange in the fall. It usually grows about three feet high but can reach up to six feet.
Because it tolerates both sun and shade, Japanese barberry can live in a variety of places. It is most often found in old fields, along powerlines, in road ditches, and within floodplains. However, it is also known to be successful in both open and dense woods.
Shrubby Honeysuckles
Shrubby honeysuckles—both Morrow’s and Tartarian (Lonicera morrowii and Lonicera tatarica)—are upright deciduous shrubs that can grow as high as 16 feet.
Invasive shrub honeysuckles move into new areas quickly and form a dense layer that shades the ground. They prefer open locations but tolerate moderate to full shade. In addition, they grow in soils that range from moist to very dry. A short time ago people promoted them for ornamental use and erosion control.
Multiflora Rose
Multiflora rose (Rosa multiflora) is another highly aggressive colonizer of open land and forest edges. This rose is a prolific seed-producing perennial shrub with thorny stems.
Multiflora rose is capable of creating dense thickets that crowd out other vegetation, and its thorny branches snag on clothes and skin. Like many of the species we’ve discussed, multiflora rose continues to spread with the help of birds.
Japanese barberry. Photo: MNAP
Morrow’s honeysuckle flowers and fruit. Photos: MNAP
Multiflora rose. Photo: MNAP

76
Norway Maple
Norway maple (Acer platanoides) is a deciduous tree common across the northeast. It usually grows 40 to 50 feet tall but can reach 90 feet on good sites. Unlike native maples, Norway maple’s leaf stalks (or petioles) ooze white sap when broken.
Norway maple is capable of producing a large volume of seeds and the seedlings are very shade tolerant. In fact, the seedlings are often found growing in the forest understory. Treatments to control Norway maple should account for its ability to vegetatively sprout from cut stumps.
‘Crimson King’ is a cultivated variety of Norway maple that has purple-red colored leaves and is often (incorrectly) referred to as red maple. Although the sale of any type of Norway maple is prohibited in Maine, the ‘Crimson King’ is somewhat common throughout the state.
Managing Invasive Plant Species
Dealing with invasive species on your property is very difficult. The first and most important step is to prevent new introductions of invasive plants whenever possible. Think about how invasive plants are arriving. Check with your garden supplier and ask if the plants you plan to purchase are native to Maine. Planting native species is always the best option. Then monitor areas where machinery or materials (mulch, hay, fill, etc.) were brought onto your property. These can carry invasive plant seeds or plant fragments.
The second step is to take time to properly evaluate the invasive plant situation on your property. Identifying which species you have and mapping the locations will make control efforts much more successful. Look for both large concentrations of plants and individual plants scattered throughout your woods. Taking this step to deal with invasive plants, before they become too firmly established, will save time and money in the long run.
The third step is to prioritize and set goals for your property. Controlling invasive plants can be a long, tiresome, and potentially expensive process. If you have a serious problem, it may not be economically feasible or even possible to deal with the situation all at once. Therefore, it’s important to focus on high-priority areas such as significant timber stands, important
Norway maple tree and leaves. Photos: MNAP

77
wildlife habitats, or historic sites. Setting realistic goals for managing invasive plants will help keep you on track and make the effort easier. A good approach is to treat isolated plants first and then make your way towards areas with greater numbers of invasives.
The fourth step is to implement manual, mechanical, or chemical control measures. Manual methods include pulling up or cutting plants by hand. Be sure to properly dispose of the plants, because they can resprout from the roots. Mowing is an effective type of mechanical control that works well for some invasive plants in certain locations. In many cases, chemical control with herbicides is the best option to reduce or eliminate invasive plant populations. It is important to follow the label instructions when using any herbicide. Remember, the label is the law. If you plan to apply herbicides over large areas or near waterbodies, first consult with a licensed pesticide applicator (see Maine Board of Pesticides Control, page 4). The fact sheets available on the MNAP website provide species-specific control methods that should increase your success (see https://www.maine.gov/dacf/mnap/ features/invasive_plants/invsheets.htm).
Finally, monitoring is extremely important to determine the effectiveness of control treatments. Controlling invasive plants is often a long process—especially when they’re well established. As you work and recreate in your woods, be on the lookout for invasive plants, and be prepared to take action if you find them.
Keeping Your Woods Safe from Wildfire
Maine Homeowners and Wildfires
In the northeast, wildfires are not as prevalent as in other parts of the country. On average, Maine’s Forest Rangers respond to nearly 500 wildfires that burn about 500 acres annually. That’s still a lot of fires and the data indicates that 75% of all Maine wildfires destroy, damage, or threaten structures. Although Maine may not have thousands of wildfires each year, like western states, we still have much to concern us.
Have you ever flown at a low altitude over the Pine Tree State and seen the vast green carpet of trees? Maine is the most heavily forested state and has thousands of homes built within the Wildland Urban Interface (WUI). The WUI is where homes and forests meet, and that presents challenges for both wildland and structural firefighters. Like many parts of the northeast, Maine’s WUI area is growing as people move away from cities to live in less populated and more heavily forested areas.

78
In other heavily populated areas along the East Coast, homeowners can expect the fire department to arrive within five or ten minutes. In contrast, most of the fire departments covering our WUI areas rely on local volunteer firefighters. During the afternoon, when most wildfires occur, these firefighters are at their jobs. This means that their response time is much slower than that of full-time firefighters.
Reducing Wildfire Risk
You can reduce the risk of a wildfire damaging your home with a few simple, low-cost measures. If your house is fairly new, some of these recommendations may already be in place.
Maine’s Forest Rangers recommend an average of 30 feet of “defensible space” between any structures and forested areas. This area doesn’t have to be devoid of all trees and shrubs, but you can manage it to minimize risk. Properly executed, “fire resistant landscaping” could save your home from a wildfire. One method is to make pockets of shrubs and vegetation separated by well-watered grass and gravel paths that function as firebreaks. Another idea is to use the three Rs to lessen the amount of flammable vegetation near structures. These include: Reducing the amount of vegetation, Replacing softwood trees with less volatile hardwoods, and Removing most of the trees and shrubs within 30 feet of structures.
By studying how houses burn when wildfires erupt in the WUI, fire scientists discovered that such fires don’t create a “wall of flames” that burns every house in an area. Typically, only certain houses catch fire. Once
In order to keep a wildfire from threatening your home, Maine’s Forest Rangers recommend at least 30’ of defensible space between your home and the forest.
Does the vegetation near your home or camp look like this? If so, it may be at higher risk for damage from a wildfire.
Source: MFS

79
they investigated these devastating fires, they concluded that many houses caught fire from airborne embers. Wind can carry these hot embers up to half a mile. They land in nooks and crannies that retain fine combustible materials such as needles, leaves, and bark mulch. Once these fine particles ignite, they spread to other parts of the structure. To reduce this risk, keep needles and leaves off roofs and away from decks and foundations.
Reducing Brush on Your Property
Reducing the amount of brush near your home and other structures is another way to lessen the risk. Take it to the transfer station, rent a brush chipper, drag it further into the woods, spread it out to decompose, or have a controlled and safe brush-pile fire. If you decide to burn your brush, make sure to obtain a burn permit by contacting your local fire department or go to the Maine Burn Permit System website (www.maineburnpermit.com), and be sure to follow Maine’s open-burning laws.
Although burning your brush pile during a light rain or in the evening doesn’t sound like fun, those are generally the safest times. Most escaped brush-pile fires occur during the mid-afternoon, when temperatures are highest, the relative humidity is lowest, and the winds are the strongest.
Focus your time and energy on removing “fine forest fuels” such as needles, leaves, and woody material smaller than your wrist. Larger tree limbs and stumps may look unsightly, but they’re actually less of a fire hazard. This type of material tends to be dense and hold a lot of moisture.
Thinking Like a Wildland Firefighter
“Situational awareness” means being aware of the risk of wildfire at all times. Wildland firefighters learn to always maintain situational awareness to protect themselves, the public, and Maine’s forest resources.
You should also be aware of the fire conditions in your area. Identify possible ignition sources (such as powerlines, illegal campsites, etc.) and be able to direct the fire department or a Maine Forest Ranger to the nearest water source. Under no circumstances should you attempt to fight a wildfire yourself.
To keep informed on the dryness of the forest (and the potential for a wildfire), visit https://www13.informe.org/burnpermit/public/index.html and click on the “Forest Fire Danger Report.” This report comes out each day at 9:00 am and indicates the fire danger classification for 12 zones throughout Maine.

80
“Good Fences Make Good Neighbors”
Establishing Boundaries
Robert Frost’s observation that “Good fences make good neighbors” is as true today as when he wrote it. With higher land and timber values, clearly marked boundaries are even more important today than they were in the past. The following information about boundary lines will help you avoid disputes with your neighbors:
An “established boundary line” means a line identified by monuments, blazed trees, signs, pins, reference points, or other markers that show a change in ownership between abutting properties. The abutting landowners must agree on the placement of these established boundary line markers, or they must be established by a licensed surveyor.
Only a licensed surveyor can establish a boundary line if no blazes or monuments currently exist. Land surveyors are specialists in measuring land, the recognition of field evidence, and the laws for the surveying of real property. The licensing law and a list of licensed surveyors are available from the State Board of Licensure for Professional Land Surveyors at https://www.maine.gov/pfr/professionallicensing/ professions/surveyors/index.html.
Corner post. Photo: Dan Jacobs

81
A landowner or a licensed forester may maintain a boundary line where some monuments or blazes still exist. If you cannot see from one blaze to another, you should probably hire a licensed surveyor.
Monuments, like stone posts or iron bars, are relatively permanent features established by surveyors. In contrast, tree blazes are not permanent and only mark the approximate location of the boundary line. Blazes, however, may be considered monuments when they are mentioned in your deed.
If any part of a tree lies on a boundary line, it may only be harvested with permission from the abutting landowner.
Maintaining Boundaries
Once your boundary line has been established by a licensed surveyor, it will need periodic maintenance to stay visible. You should plan to check the condition of your line periodically, and also plan to do some maintenance work every five to ten years. The following suggestions will help you properly maintain your boundary line over time:
Clear a path along the boundary line for easy traveling and line visibility. Prune limbs to head height and cut small trees. Make sure to throw the brush onto your own property and to get permission before cutting vegetation on your neighbor’s side of the line.
Avoid blazing well-formed, large, or valuable trees. Blazes should be about four to five inches in diameter and located about five feet above the ground. Blaze often enough so that it is possible to see from one blaze to another easily.
Don’t blaze over old blazes. They are important supporting evidence of the original location of the line. It’s acceptable to blaze directly above or below an existing blaze, as long as there is a large portion of the original blaze showing.
Old tree blazes. Photo: MFS
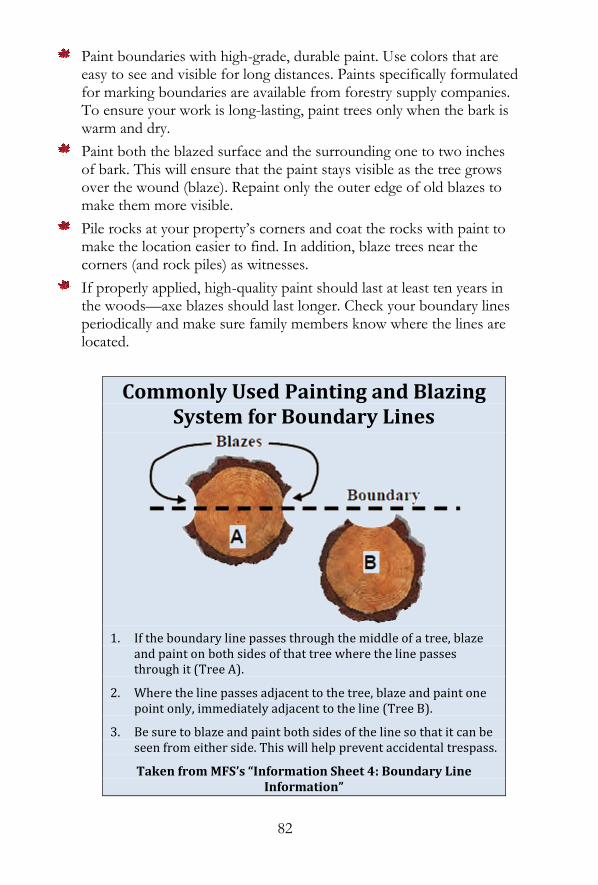
82
Paint boundaries with high-grade, durable paint. Use colors that are easy to see and visible for long distances. Paints specifically formulated for marking boundaries are available from forestry supply companies. To ensure your work is long-lasting, paint trees only when the bark is warm and dry.
Paint both the blazed surface and the surrounding one to two inches of bark. This will ensure that the paint stays visible as the tree grows over the wound (blaze). Repaint only the outer edge of old blazes to make them more visible.
Pile rocks at your property’s corners and coat the rocks with paint to make the location easier to find. In addition, blaze trees near the corners (and rock piles) as witnesses.
If properly applied, high-quality paint should last at least ten years in the woods—axe blazes should last longer. Check your boundary lines periodically and make sure family members know where the lines are located.
Commonly Used Painting and Blazing System for Boundary Lines
1. If the boundary line passes through the middle of a tree, blaze
and paint on both sides of that tree where the line passes through it (Tree A).
2. Where the line passes adjacent to the tree, blaze and paint one point only, immediately adjacent to the line (Tree B).
3. Be sure to blaze and paint both sides of the line so that it can be seen from either side. This will help prevent accidental trespass.
Taken from MFS’s “Information Sheet 4: Boundary Line Information”

83
Timber Harvesting and Boundaries
Maine law protects adjoining landowners from timber trespass and damages that occur during logging operations. If you’re considering harvesting timber, you should know and understand the timber harvesting regulations.
You can find summaries of boundary line, timber trespass, and slash disposal regulations in the MFS publication The Forestry Rules of Maine (see page iii). In addition, MFS’s “Information Sheet 4: Boundary Line Information” at https://www.maine.gov/dacf/mfs/publications/ information_sheets.html is a great resource.
Planning for the Future Your land is part of your legacy. As a good steward, it is important to plan what will happen to your land after you are gone. In fact, planning for the future may be the most important action you can take as a landowner.
Why Plan?
Your “estate” is the total value of all your assets. These include your land, house, bank accounts, and investments. An estate plan ensures that your assets are distributed in a way that will meet the financial and personal needs of you and your heirs.
When dividing assets among family members, it can be challenging to account for their emotional as well as financial needs. The good news is that land is a flexible asset that lends itself to creative solutions to meet your goals. The planning process takes time, and the earlier you start, the more options you will have for your land. According to the Maine Woodland Owners’ (MWO) publication Creating a Legacy: A Guide to Planning Your Land’s Future, the six succession planning steps are:
1. Get started: Estimate the value of your property.
2. Look to the future: Establish your vision and goals.
3. Expand the conversation: Engage others.
4. Create a succession plan.
5. Create an estate plan.
6. Create a calendar.

84
Although there are a variety of resources available on succession planning, the MWO guide is a great publication to help you get started. Included in this guide are seven worksheets to help landowners record the essential elements used in succession planning. These include a personal balance sheet and worksheets on values and goals, strategies for succession, and legal and financial instruments. The guide is free with a MWO membership. To order the guide, see MWO listed in Primary Resources on page 5 or go to https://www.mainewoodlandowners.org/store#!/Creating-a-Legacy-A-Guide-to-Planning-Your-Lands-Future/p/43784141/category=2796145.
Do You Know?
#4. The name of the private logging road that extends 96 miles from Millinocket, Maine to St. Zacharie, Quebec?
Answer on page 120
Source: Maine Woodland Owners

85
Backyard Family Activity #6: Getting Down and Dirty—The Soil Beneath Your Feet The soil beneath the woods in your backyard is full of hidden life. Tiny soil microorganisms (and bigger animals like earthworms and millipedes) are the original recyclers. They turn old leaves, dead trees, and other organic matter into nutrient-rich soil. They also create tiny spaces within soil that allow oxygen and water to flow through it.
It can be a lot of fun to poke around beneath the mysterious surface of the soil to see what’s below. At the same time, you can determine the quality of your soil in a more scientific manner by collecting a sample and sending it in for analysis. The University of Maine Cooperative Extension offices have soil testing kits with instructions (see Primary Resources, page 5). A lab in Maine will analyze your soil for a small fee and give you some ideas about what you can grow on your property. But first, you get to play in the dirt!
Getting Ready
If you didn’t do “Backyard Family Activity #1: Scouting Your Land” (page 24), now is a great time to go back and do this activity. It will be useful if you want to put all the Backyard Family Activities together to make a plan.
The Activity
In this activity you will collect soil samples and assess their properties. You will also look for differences among your soil samples and differences in vegetation among your sample locations.
Items Needed
Shovel or garden trowel
Several small glass jars (mason or jelly jars with lids work great)
Magnifying glass
Pen or pencil
Soil Checklist (next page)
Compass (optional)
A photocopy of your Master Map (optional)
ACTIVITY

86
Soil Checklist
Describe what grows on the site. Are there softwoods (like pine and spruce), hardwoods (like oak and maple), ferns, or mosses?
Describe the terrain. Is the site on a hill or slope? Is it in a flat area or depression?
Describe the soil’s color. Is it orange-brown, the color of coffee grounds, or khaki-colored? Does it look more like chocolate ice cream or whole wheat bread?
Describe the soil’s smell. Does it smell fresh, clean, rich, or like rotten eggs?
Describe the feel and texture of the soil by rubbing it between your fingers. Does it feel gritty like sand or sticky like clay? It may also feel smooth like silt.
Describe the soil particles. Look closely with a magnifying glass. Are they large, small, or both? Can you see them easily?
Describe any little creatures in the soil. What do you see? Draw them if you don't know what they are.
Describe the organic components you see in the soil—such as pieces of leaves, twigs, small roots, seeds or nuts.
Timeframe
One to two hours.
Steps
1. Follow the compass bearings established in “Backyard Family Activity #1: Scouting Your Land,” or simply walk through your woods until you notice a change in vegetation type. If you made a Master Map, stop and draw the vegetation boundary line on it. For example, the transition from a hardwood forest to a mossy area with ferns may indicate a soil change.
2. Dig a small hole in both areas. Although soil pits are usually three feet deep, a foot or less should be sufficient for this activity.
3. Take samples of the topsoil from each location (about three or four inches down) and put them in separate jars. Do not fill the jars

87
completely or pack down the soil in the jars. A half cup of soil from each site should be enough.
4. Label the jars Site #1, Site #2, and so on. Write the site numbers down on the Master Map if you’re using one.
5. With your magnifying glass, look closely at the soil samples and describe what you find. You may find earthworms, parts of leaves, pebbles, and/or twigs in your sample. Then compare your samples to one another using the “Soil Checklist.” If you have a copy of the Master Map, write your soil notes on it in the appropriate locations for each soil-sample site.
6. Take your samples home and add enough water to almost fill each jar. Then put the lids on and shake hard for several minutes—until all the soil is suspended in water. No clumps should remain. Then let the samples sit overnight without moving them.
7. The soil will settle in layers with the largest particles (like pebbles) reaching the bottom first. The largest particles will be followed by sand, silt, and clay (on top). Organic matter may float. Once the soil has settled and the layers are established, you can compare your samples. Compare the thickness of the soil layers in each sample. Look for organic matter floating in the water in one or more of your samples. Take your time to study the samples and have fun making comparisons.
8. Now think about how the differences in your soil samples may relate to the differences in the vegetation between the sample locations. Why do you think you found certain trees and vegetation in one site but not the other? Does the soil give you any clues?
9. Send your soil samples to the lab for analysis using a kit from the University of Maine Cooperative Extension office (see Primary Resources, page 5). When you get the results, compare them to what you observed.
This Backyard Family Activity was adapted from American Forest Foundation, Project Learning Tree, Soil Stories (1993).
Source: Rondi Doiron
Water/Organic Material
Clay
Silt
Sand
Pebbles

88
Follow-Up Activity: Digging a Soil Pit This follow-up activity is intended to expand upon the work you did in “Backyard Family Activity #6: Getting Down and Dirty.” It will give you a better understanding of the soils found in your woods and soil properties in general.
In this activity, you will dig one or more holes (pits) in your woods that are deep enough for you to see the different soil layers. The layers (or horizons) will vary in color and should be fairly easy to distinguish. Starting below the leaf litter, these layers include the organic layer (O horizon), the topsoil (A horizon), and the underlying mineral soil layers (B and C horizons).
A soil pit allows you to see and feel the texture of the different colored soil layers. Try to make some observations about the ratio of sand, silt, and clay in each layer. Comparing the properties of the different soil layers can be challenging and informative.
Selecting the location of your soil pit or pits should be a fun and thoughtful process. If you observe a significant change in vegetation in your woods, you may want to dig more than one pit to compare the soils. In this case, the sample locations from the previous activity can be re-used. The result will be one soil pit located in each of the two vegetation types. If you dig only one pit, think about choosing a place that’s representative in slope and vegetation to the rest of your property.
To complete this activity, you’ll need a sharp-edged shovel to dig a pit with clean, sharp sides. This will allow you to clearly see the different soil horizons. Stop digging when you’ve reached a depth of about three feet. Remember, the soil will change color and texture from layer to layer.
Now it’s time to create a sketch of the layers in your soil pit (or pits). Estimate the thickness of each layer and note it on your sketch. The Soil Checklist from the previous activity can help you gather information and better understand the soil layers you uncover. In addition, The Soils of Maine by Ferwarda, et al. (1997) will be useful as you make observations about the soil and its various layers (see https://digitalcommons.library.umaine.edu/ cgi/viewcontent.cgi?referer=https://www.google.com/&httpsredir=1&article=1001&context=aes_miscreports).
The information you gathered in this activity will be helpful as you plan and implement projects in the woods in your backyard.

89
5
5.Growing & Harvesting Timber
Introduction If you are interested in generating supplemental income from your property’s natural resources, it may be worth considering growing and harvesting timber. In addition to the financial benefits, timber harvesting is a tool that can be used to make a variety of improvements to the woods in your backyard. For instance, a small harvest could be used to create scenic vistas or forest openings for wildlife. Furthermore, the income generated through timber harvests can be used to complete a variety of projects or to help pay your property taxes. In short, growing and harvesting timber can be a good complement to the other activities you are pursuing on your property.
Tools for Your Timber Resource Harvesting timber is one of many tools in a forester’s toolbox. Tree planting, precommercial thinning, and pruning can also be used to increase the health and productivity of your woodland. A licensed forester can help you decide which practices are best to meet your goals and can help arrange a contractor to perform the recommended work. Although these practices require a financial investment, you can greatly reduce the cost by doing the work yourself. The following is a brief overview of planting, precommercial thinning, and pruning:
Planting. You can plant trees in old fields, forest openings, or recently harvested timber stands. It is usually best to plant native species that are a good match for the soil and level of shade.
Precommercial thinning. You can help a young forest grow better by removing some of the trees. Essentially, the best or most desirable trees are given more room to grow. The trees that are cut down are generally left in the woods to decompose because they are too small to sell.
Pruning. You can often improve the quality and health of your trees by removing some of the lower branches. However, pruning must be done properly to avoid causing injury to your trees. See the following

90
section “Pruning to Increase Value” for guidance on proper pruning techniques.
If you’re interested in growing timber, sources of information and assistance abound. A good first step is to call your local MFS District Forester (see the back cover). The primary job of District Foresters is to assist landowners in making informed decisions about their woodland. The MFS also publishes a list of private foresters who can help you with all aspects of forest management. This list is available at https://www.maine.gov/dacf/mfs/ policy_management/wwi/stew_foresters_web.pdf.
Pruning to Increase Value Pruning is an easy and effective way to improve the woods in your backyard. To maximize your success, follow the guidelines in this section.
Reasons to Prune
Pruning is the practice of removing unwanted branches from living trees. You might prune to make a tree safer, to improve the health or appearance of a tree, or to increase a tree’s commercial value. In this section, we will focus on pruning trees to improve your financial results from an eventual timber sale.
Economic Benefits of Pruning
Pruning can increase the commercial value of your crop trees by increasing the volume of clear lumber. Because clear lumber generally commands a premium over knotty lumber, pruning makes good economic sense for many woodland owners growing timber. In fact, past studies on eastern white pine in Maine have found that the value of pruned trees were 13.5% greater than the value of unpruned trees (see MFS “Information Sheet 2: Pruning Your Forest Trees” at https://www.maine.gov/dacf/mfs/ publications/information_sheets.html). That’s good news for the engaged woodland owner that is willing to invest some time and effort to improve future timber sale returns.
When to Prune
Dead branches can be pruned any time of the year, but live branches should be removed when trees are dormant in the fall and winter. This timing is particularly important for hardwood species. In terms of tree age, it is best

91
to begin pruning when trees are young and the branches are small. This allows each tree to produce the most knot-free wood and clear lumber. Further, removing small branches is healthier for trees than removing large limbs.
How to Prune
The following suggestions will help you get the most from pruning your trees:
Tree Selection
Selecting and marking the trees prior to pruning will save you time and labor. This can be done by you or your forester.
Prune only trees with healthy crowns that receive direct sunlight. Where necessary, remove competing vegetation in close proximity to the trees you intend to prune.
Focus your pruning on high-valued species with straight trunks. Do not prune trees with trunk damage, forks, or large-diameter branches.
In some timber stands, you may prune up to 150 trees per acre. However, you may also decide to prune a much smaller number.
Proper Pruning Method
First, make an undercut to prevent the bark from tearing. Next, safely remove the branch by making your second cut farther from the stem (see diagram C).
Last, cut along the outside ridge of the branch collar (the slightly raised ridge surrounding the union of the branch and the stem). Cut as close as possible without damaging the collar. Cutting into the branch collar will cause unnecessary injury to the main stem of the tree.
The technique for pruning softwood species like white spruce is slightly different than Pruning. Source: USDA

92
the technique for pruning hardwood species like sugar maple. Both techniques can be found in the USDA booklet, “How to Prune Trees,” at https://www.fs.usda.gov/treesearch/pubs/12602.
Pruning Height
Trees grown for timber should be pruned to a height of either 17 feet (one 16-foot log and a 1-foot stump) or 25 feet (two 12-foot logs and a 1-foot stump). This usually requires removing branches in increments over time.
Don’t remove more than one-third of the live crown. For example, if the live crown is 15 feet high, don’t remove more than 5 feet of the live branches.
The pruning of individual trees may be done over many years to achieve the desired pruned height, while maintaining two-thirds live crown.
Branches rubbing the main stem should be removed whenever possible.
Pruning Equipment
Purchase high-quality pruning tools from a forestry supply company or reputable garden center.
Use a short-handle pruning saw or pruning shears for lower branches.
Use a pole pruning saw for branches higher than five or six feet.
Never prune with an axe.
Record Keeping
Because pruning can add value to your trees, it is a good idea to keep records of their location and the date of pruning.
Good records can help you negotiate a fair price for your timber when it is time to sell.
Notarized pruning records can be entered into the local registry of deeds miscellaneous book. This can be a great benefit to your heirs and should be carefully considered in the legacy planning process.
For general guidance on pruning, you should consider contacting your local MFS District Forester. If you would like a detailed pruning plan with instructions, use the Stewardship Forester list at https://www.maine.gov/ dacf/mfs/policy_management/wwi/stew_foresters_web.pdf to locate a consulting forester.

93
Harvest Planning Considerations There are many things to consider when planning a timber harvest on your property. Three of the most important considerations include wood markets, access to your property and timber, and type of harvesting equipment. In this section, we will discuss integrating these factors into the planning process for timber harvests.
Wood Markets
Because the markets for timber products are constantly changing, we recommend working with a licensed forester to get the best financial outcome. Sometimes it is advisable to wait for prices to improve for certain forest products before implementing a harvest. A forester can help you make that determination. Keep in mind, no one has a crystal ball to predict what forest products will be valuable in the future. Therefore, maintaining a healthy and diverse forest is important to financial success. Having a mixture of different tree species of various ages, across your property, can be a good hedge in times of changing or volatile markets.
Access to Timber
Woodland access roads are typically necessary to implement timber harvests and many other forestry practices. In terms of harvesting, access roads are needed for timber to be loaded onto trucks for delivery to mills across the state. If an old road exists on your property, it might be improved to meet the current standards for logging and trucking. Don’t get too concerned with road-building costs until you consider your payment options and the type of road you will need for your harvest. You should also consider that your timber harvest income should more than cover any road-building costs. It is a good idea to discuss this with your forester and logger ahead of time.
Access road. Source: Dan Jacobs

94
The two most common ways for landowners to pay for access roads are through upfront payments directly to construction contractors or by accepting somewhat lower stumpage prices. Stumpage is a forestry term that means the income landowners receive from selling timber. Accepting a lower price for your timber may be the least painful way to pay for road work. This concept will be discussed again later in this chapter.
There are two basic types of roads and two basic levels of road work that may be used to provide access to your property. The two types are winter roads and all-season roads. Winter roads require the least amount of construction work and rely on frozen ground to support trucks and logging equipment. In contrast, all-season roads require the greatest amount of work and have the highest cost. All-season roads are built to a high standard and can serve as year-round access to your property. The two basic levels of road work are new construction and upgrading existing roads. This is like the difference between building a new house or renovating an old house. Be aware that sometimes old roads are in very poor condition and may be very costly to improve for logging.
A professional forester can help you determine the type of access road that is necessary to implement your forestry practices and provide you with options to pay for the work. Your forester can also help you make certain that water quality and other non-timber resources are protected during and after construction. As mentioned earlier in this publication, the techniques
Winter road. Source: Dan Jacobs

95
used to keep soil in place and minimize the concentrated flow of water on roads and trails are called BMPs. For woodland access roads, BMPs form a system that works to protect water quality and sensitive natural features. Keep in mind that BMPs can also protect your road investment and help your road last for years to come. For more information on BMPs, see the MFS publication Best Management Practices for Forestry (listed on page ii).
Harvesting Equipment
The type of harvesting equipment used on your property is a very important consideration. In many situations, a logger that uses a chainsaw and cable skidder is a good fit for your harvest. These types of loggers are generally referred to as conventional loggers. The cable skidders (or tractors) they employ are designed to drag the cut trees and logs out of the woods and to the access road. Conventional loggers are often a good choice for smaller properties with a limited amount of space to operate multiple pieces of heavy equipment.
For larger ownerships, a mechanical harvesting system may be the most efficient option. These systems take several forms and often include technologically advanced equipment that harvests timber at a rapid rate. Because these systems employ multiple pieces of large equipment, they generally need more room to operate. As with many aspects of timber harvesting, it is a good idea to speak with your forester about the type of logging equipment best suited to your harvest and your property.
Cable skidder. Photo: Dan Jacobs

96
Types of Timber Products Dozens of commercially valuable tree species grow in Maine. They are used to manufacture wood and paper products that are sold both locally and around the world. Some of the products made from trees harvested in Maine include toothpicks, lumber, paper, and shingles. If you own more than a couple acres of forestland in Maine, you may be able to harvest forest products now or sometime in the future. That said, it is important to have realistic expectations for your property.
Forwarder. Photo: Dan Jacobs
Log pile. Photo: Dan Jacobs

97
A professional forester can assess your woods and determine which species will grow best. The type of soils (or site quality) across your woodland has an enormous impact on which tree species you can grow and what timber products you can produce. Fertile ridges are often well suited to growing northern hardwoods that may eventually yield valuable sawlogs. In contrast, low-lying areas may be best for growing species such as spruce and fir. When large enough, trees of these species may be sold to mills that produce lumber used in home construction. If you have an interest in growing and harvesting timber, it is a good idea to favor species with the greatest economic potential that are also a good fit for the soils found on your property. To get an idea of the prices being paid for various species and products, check out the most recent MFS Stumpage Report for your county at https://www.maine.gov/dacf/mfs/publications/annual_reports.html #stumpage.
What is Stumpage?
Stumpage, or the income landowners receive from selling timber, is typically paid to the landowner in increments as timber is cut and sold to mills. The amount of income a woodlot can generate is difficult to estimate, because so many factors influence stumpage prices and harvest volumes.
The following is a short list of factors that influence stumpage prices and/or timber sale income:
Species harvested. Some species are more valuable than others.
Harvest volume. Logging equipment is very expensive to move and large harvest volumes help offset logging costs.
Size of trees. It takes many small trees to equal the volume of wood in a large tree. In short, harvesting small trees is usually costlier.
Tree/log quality. The highest-quality trees usually produce the most valuable products.
Logging terrain. Steep, wet, or rocky terrain can make harvesting difficult and increase logging costs.
Sawmill sign. Photo: Dan Jacobs

98
Distance to public roads. Private logging roads can be expensive to build, maintain, and plow.
Equipment. Operating costs vary with the type of harvesting equipment a logger uses and/or owns.
Time of year. Logging costs and the prices mills pay for wood often change from season to season.
Landowner needs or special requirements. Constraints on harvest activities that impede production can increase logging costs. An example of a landowner constraint is the requirement to leave skid trails free of slash or logging residues.
Market demand. Mills may lower prices when there is a surplus of wood.
Distance to market. Sometimes mills will pay more for wood that is hauled longer distances.
Involvement of a licensed forester. There are several ways that a forester can charge for timber sale administration services. A common approach is to charge a small percentage of the stumpage paid to landowners. This directly reduces timber sale income.
Landowner knowledge of market value. Knowledge is the key to success. Landowners should have an understanding of current stumpage prices prior to negotiating with a logger.
Type of harvest (i.e., partial or clearcut). Cutting all of the trees in an area (clearcutting) is more efficient than leaving a percentage of healthy, undamaged trees (partial harvest). In short, partial harvests can increase logging costs.
Regulatory constraints. Complying with regulations can be challenging and may reduce harvest volumes. Highly regulated areas may have increased logging costs and reduced stumpage prices.
As you can see, there are many factors that influence stumpage prices. A key point to stress is that increased logging costs typically reduce stumpage prices and timber sale income. If you do a little research and work with reputable professionals, you will be very likely to achieve good financial results.
Working with a Professional Forester The MFS recommends that landowners work with a licensed forester to help plan and administer timber harvests. Selecting a forester with good references can help you avoid many problems and ensure that your harvest

99
goes well. The Stewardship Forester list at https://www.maine.gov/dacf/ mfs/policy_management/wwi/stew_foresters_web.pdf provides contact information for many professional foresters across the state.
If you decide to harvest timber, review the following checklist to ensure you are on the right path:
Select a licensed forester to plan and oversee the timber harvest. A licensed forester can help with the remaining items on this checklist.
Choose a logger after checking references and professional credentials.
Address landowner liability and workers’ compensation insurance with your forester and logger.
Make certain abutting landowners agree with the location of your boundary line. In addition, properly mark your boundary line prior to harvesting timber.
Have a general understanding of the forestry regulations and review the MFS publication The Forestry Rules of Maine (see page iii).
Notify your neighbors about the harvest. This can help you maintain good relationships with abutting landowners.
Have a written contract signed by all parties involved in the harvest. Contract basics can be found on page 118 of The Forestry Rules of Maine. Further, sample contracts are available from organizations such as Maine Woodland Owners (see Primary Resources, page 5).
Property Tax Programs Maine’s “current use” property tax programs, which offer landowners a reduction in their assessed value, include Tree Growth, Open Space, Farmland, and Working Waterfront. The two programs most applicable to woodland owners are Tree Growth and Open Space, but woodland owners interested in actively managing their forest resources most often choose Tree Growth.
Although the Tree Growth program can significantly reduce property taxes on woodland, landowners must meet eligibility criteria to enroll their property. In addition, they must meet certain requirements to keep land enrolled in the program over time.
Two of the most important eligibility requirements include a minimum acreage and a current forest management plan. Tree Growth has a ten-acre minimum to enroll, and the land must be forested. In addition, all enrolled acres must be included in an up-to-date written forest management plan

100
prepared by a licensed forester. The plan, which includes a stand-type map for the property, must be kept current and updated every ten years.
Because the intent of Tree Growth is to promote active forest management, landowners cannot leave enrolled woodlands idle or treat them as nature preserves. Land thus classified must undergo forest management and the eventual harvest of forest products.
If you’re interested in managing your woods for the production of forest products, such as firewood or maple syrup, Tree Growth may be a good fit for you. Consider your reduced property taxes under Tree Growth as a small reward for good forest management and for supporting Maine’s forest economy. For additional information, refer to MFS “Information Sheet 17: The Maine Tree Growth Tax Law” at https://www.maine.gov/dacf/mfs/ publications/information_sheets.html.
You may also contact the Property Tax Division at the Maine Bureau of Revenue Services at 207-624-5608 or https://www.maine.gov/revenue/ propertytax/homepage.html.
To begin the process of enrolling your forestland in Tree Growth, contact a licensed forester. The Stewardship Forester map on the MFS website provides contact information for many professional foresters across the state: https://www.maine.gov/dacf/mfs/policy_management/ stewardship_foresters.html.
Tree growth map sample. Source: MFS

101
Do You Know?
#5. The name of Maine’s deepest lake? Answer on page 120
Backyard Family Activity #7: Assessing Timber Potential The various trees that make up your woods may yield valuable forest products now or in the future. Some of the timber products derived from trees include lumber, paper, and tool handles. Sawlogs, used for lumber, come from higher-quality trees that are free from rot and excessive branches. In contrast, pulpwood, that is used to produce paper, may come from much lower-quality trees. This activity will give you a glimpse at the timber production potential of your woods.
Getting Ready
Before starting the activity become familiar with the book the Forest Trees of Maine (see page iii). This book contains descriptions of all the trees native to Maine. It also has a list of the forest products that each species has the potential to produce. It will probably be easier to complete this activity in the summer or early fall when the hardwood species still have leaves. When you are trying to identify a tree, assess individual tree parts and match them to the images and descriptions in the book. In the summer, you will have leaves and needles, bark, twigs, and cones and seeds to use for identification. If you are extremely motivated to complete this activity, try using the summer or winter keys on pages 10 and 12 of the Forest Trees of Maine. Don’t forget to keep this activity fun!
ACTIVITY
Items Needed
A copy of the Forest Trees of Maine (see page iii)
A roll of blue flagging (available at most hardware stores)
The Master Map from “Backyard Family Activity #1: Scouting Your Land” (page 24)
A compass as used in “Backyard Family Activity #4: Using a Compass” (page 64)

102
The Activity
In this activity you will walk through your woods, identify trees by species, and assess the trees you find for timber products. This activity requires that you have completed “Backyard Family Activity #1: Scouting Your Land” and “Backyard Family Activity #4: Using a Compass.”
Timeframe
One to two hours.
Steps
1. As in “Backyard Family Activity #1: Scouting Your Land,” you will walk through your woods and stop periodically to gather information. Decide how many stops you’ll make, based on the size of your woods. It might be a good idea to set a goal of making at least 10 stops. If your property is 300 feet long, you may want to stop every 20 steps to gather information. If it’s 10 acres, stop every 200 steps so that you can finish the activity in an hour or so.
2. Upon arriving at each stop, mark your location in the woods using blue flagging. Then mark your location on the Master Map from “Backyard Family Activity #1.” Tying a piece of blue flagging to a small tree or shrub will make it easier to identify the location where you stopped. You will be stepping away from this point to assess a tree.
3. Select the tree closest to your stopping location that lies along your line of travel. The tree can be any size but should be at least five feet tall.
4. Use the Forest Trees of Maine to identify the tree by species. If you know it is a birch, but are unsure which species, then indicate birch on your Master Map. However, it is best to identify the exact species (such a yellow birch). Don’t be afraid to make an educated guess.
5. Record the size of the tree under the species. You can use the categories small, medium, and large. Grabbing the stem of a small tree, your fingers will touch. If you hug a medium sized tree, your hands will touch. You will not be able to touch your hands when you hug a large tree.
6. Use the Forest Trees of Maine to determine which forest products a tree might yield. The uses for every tree are provided at the end of each species description. Write the potential products on your map under the species and size.

103
7. Once you have made all your stops and recorded all the suggested information, it is time to assess your map. Look at the species you found and the timber products that may be produced. Your large trees may have valuable products now. In contrast, it may be many years before your small trees are large enough to contain any forest products.
Example 1: You make ten stops and find many small sugar maple and yellow birch trees. From this you may conclude that it will be many years before you can harvest timber from your property. With good management and time, you may eventually have sawlogs to sell.
Example 2: You make five stops and find large fir and spruce at each. This leads you to believe that you have valuable timber that is ready to harvest.
8. Hopefully, this was a fun exercise that made you think about forest products. It was also a good introduction to using the Forest Trees of Maine to identify different tree species. This activity was not intended to provide an accurate inventory or the basis for forest management. If you are really interested in growing and harvesting timber, you should work with a licensed forester. Information about licensed foresters is provided in the next chapter, “From Great Ideas to Action.”
Mondo ash tree in Yarmouth, Maine. Photo: Jan Santerre

104
6
6. From Great Ideas to Action: Planning is the Key!
Introduction We’ve covered a lot of ground so far in this book, and hopefully you have gained valuable knowledge about your piece of the Maine woods. Many forestry concepts, project ideas, and educational activities have been discussed and you may feel a little overwhelmed. At this point, you are probably thinking about implementing some projects and working towards the goals you have set. In other words, you are likely ready to put your ideas into action.
The amount of help you need to reach your goals depends, in large part, on their complexity. If your goals are simple, like planting some hard mast trees to attract wildlife, then the resources recommended in this book may be all you need. However, if you’ve decided to improve the health and vigor of your maple trees and start producing maple syrup, then you may need professional advice and a written plan.
Your first step should be to decide what you want to accomplish. Next, you will need to determine whether your objectives are realistic and affordable. Then you will be ready to decide on the type and amount of assistance you will need to implement your ideas and reach your goals. Landowners with complex goals or an interest in harvesting timber should consider working with a licensed forester.
Foresters and Loggers Even if you own a very small piece of land, it’s worth knowing the difference between loggers and foresters. This knowledge is even more important if you are interested in harvesting timber.
Loggers are skilled at cutting, processing, and marketing trees and usually pay the landowner a pre-negotiated price as timber is cut and sold to mills. Most of the loggers in Maine are educated and certified by programs that promote safe, efficient, and environmentally sound logging practices. In

105
addition, many of Maine’s loggers are members of professional organizations and frequently attend educational workshops. As you can see, the majority of loggers in Maine are highly trained and very professional.
In Maine, foresters are licensed professionals. Foresters take a long-term view of the forest and help landowners meet their goals. The requirements to obtain and keep a forester license include formal and continuing education, on-the-job training, and adherence to a strict code of ethics.
At the landowner’s request, foresters can assess wildlife habitat, recreational opportunities, and other woodland features. Once a forester collects and analyzes information about your woodland, he or she can prepare a written management plan that acts as a decision-making guide. If you choose to harvest timber, a forester can help you find a logger and help ensure that the harvest meets your objectives.
Foresters charge for services in several common ways. Some have a set rate for each service, others take a percentage of the income from the timber harvests they oversee, and still others charge an hourly fee. It is standard practice to ask foresters for references from previous clients. Talking with a landowner who has worked with a forester over a number of years will give you a good idea whether he or she will manage your property in accordance with your goals and values.
Logger. Photo: Dan Jacobs
Forester. Photo: Dan Jacobs

106
Ask Questions The Maine Forest Service strongly recommends that landowners work with licensed foresters to plan and oversee timber harvesting. Along with the many non-economic values that woodlands offer, they are also an investment. Standing trees are worth money. Over time and with proper management, they may be worth more. Just like stocks, some trees are worth more than others, and market prices for wood varies. Trees are also more or less valuable depending on the species, size, and quality. Foresters who work on your behalf will tell you when it is in your best interest to cut trees and when it is best to let them grow a while longer.
In addition to timber, there are many other valuable features and resources in your woods. These include: aesthetic beauty, wildlife habitat, clean water, and productive soil. Whereas a well-planned harvest can protect and improve these values these features, they can be impaired and degraded by poor logging practices. Especially when it comes to visual impact, it’s important to discuss the outcomes before the job starts. Ask for pictures of completed work, or better yet, visit finished harvests and talk to the landowner about how their harvest went. To see some photos of typical woodlots before and after harvesting, check out the MFS booklet entitled “What Will My Woods Look Like?” (see page iii) or ask your District Forester about it (see back cover).
If you plan to arrange a timber harvest without the help of a licensed forester, there are steps you can take to make sure you and the logger are on the same page to achieve your goals. After all, this is one of the most important decisions you will make concerning your woodlot. As with working with any professional, these steps include asking the potential logger for references and checking those references, asking to see past harvest jobs the logger has done in similar forest conditions, and having a signed contract with the logger. It is important to have a written contract that legally protects you and your property when you are selling timber. Contracts are tools that literally get you, your forester, and your logger on the same page. A helpful sample contract (or agreement) can be found on the Maine Woodland Owners website at https://www. mainewoodlandowners.org/links-apps. Also, a brief overview of written contracts can be found in MFS’s “Information Sheet 6: Wood Harvests: Worker's Compensation and Landowner Liability” at https://www.maine.gov/dacf/mfs/publications/information_sheets.html.

107
Taking a Walk-Through Many foresters are willing to visit your property and provide general management suggestions. This service will likely come at a cost, but foresters may roll the expense into the price of a forestry plan or some other future charge for their services. In addition, the MFS offers free advice to landowners, and District Foresters can even visit your woods for a short walk-through.
It is a good idea to prepare a list of your objectives and the woodland features you value prior to meeting with a forester. A professional should work with you, keep your interests in mind, and tell you if your objectives are practical. In addition, the forester you choose to work with should be willing to answer your questions and help you learn about your property.
MFS District Forester Program
The MFS District Forester Program is a great resource for landowners just getting to know and understand the woods they own. District Foresters are located throughout the state and can provide landowners with free advice and information on tree identification, tree health, forestry planning, wood markets, and upcoming workshops and events. In many cases, District Foresters are available to walk through your woods and discuss your goals in person. A map that provides the locations and contact information for each District Forester is provided on the back cover of this publication.
What is Good Forestry? Good forestry utilizes science-based management practices to promote the health of the forest and meet landowner goals. It means taking into consideration the sustainability of both woodland “crops” and the ecological health of the forest. In many cases, foresters utilize management strategies that mimic natural processes to achieve desired results. For example, logging may be carried out in a way that is similar to a natural disturbance such as a windstorm. As an owner of a small piece of the Maine woods, good forestry should mean using accepted forestry practices to reach your goals and improve your woodland for future generations.

108
You and Your Woods: Two Examples If you’ve read some of the earlier chapters of this book, you’re aware that a wide variety of subjects have been discussed. This section will bring together many of those subjects and put them into context using two examples. The following two examples illustrate how small property owners worked toward meeting their woodland goals.
Woodland Example 1
This nine-acre property is fairly flat with a mixture of aspen, cherry, white birch, gray birch, and balsam fir. Most of the property is old pastureland and much of the aspen has broken branches from winter storms. A dense thicket of shade-tolerant spruce and fir are growing beneath the sun-loving hardwoods, and many have umbrella-shaped tops from growing in the understory for a long period of time.
Old stonewalls that used to border field edges run through the woods. An old white pine with a dead top grows next to one of the walls in the middle of the woods. A small patch of hemlock is located in the back corner of the property. This patch is the edge of a larger hemlock stand that extends onto the neighboring property.
Landowner Objectives
The owners want to walk through the woods, which currently isn’t easy, because of the dense conifer thickets. They also want to improve wildlife habitat and the overall health of the forest. They don’t like how the damaged aspens look and want to do something about them. They’ve also noticed shelf mushrooms, or conks, growing on the birch but aren’t sure how this affects tree health.
Aspen over fir. Photo: Dan Jacobs

109
Example 1: Map of the property before the project is completed
Source: Greg Miller
Aspen and Birch Over Spruce and Fir
Licensed Forester

110
Actions
The landowners decide to pay a forester to walk through their woods for a couple of hours and answer some questions. In addition, the forester will prepare a map of the property that can be updated as projects are completed and work is done. Keeping their priorities in mind, the forester tells them that the aspen is overly mature and diseased with canker. The broken branches no longer produce buds, which are a favorite food for partridge (ruffed grouse) in the late winter and early spring. Further, broken and hanging branches are safety risks and could fall at any time.
Shelf mushrooms growing on some of the birch indicate internal decay. Several could serve as snag trees for wildlife and the others cut to reduce safety hazards. The forester recommends leaving the cut birch on the forest floor for wildlife use and to replenish the soil.
The big old pine with the dead top already has woodpecker holes on one side but will stand for a long time without being a hazard. However, it is important to reassess its condition every few years. The forester tells the landowners that cutting much of the aspen and some of the birch would be the best fit for their priorities of improving access and wildlife habitat.
Thinning out some of the conifers in the understory will provide the remaining trees more room to grow, thus diversifying the characteristics of the woods. They could also leave some of the understory untouched to provide dense cover for wildlife.
Harvesting the aspen is a small job and it will be difficult (but not impossible) to find a logger willing to do it. The forester estimates that the amount of timber removed will be approximately 3 truckloads or about 20 cords. The landowners will probably make little money on this harvest, but
Hairy woodpecker. Photo: Pam Wells
Two different species of shelf mushrooms on a birch tree. Photo: Aaron Bergdahl

111
the intent is to improve the forest. To find a logger, the landowners ask their forester for recommendations. The forester supplies a list of trained loggers in the area. It takes some searching, but they finally find an independent logger that has time for a small job.
The landowners, and the forester on their behalf, negotiate a contract with the logger. It is important to understand that contracts help get everyone on the same page and protect all the parties involved in the harvest. The forester also reminds the landowners that they must file a Forest Operations Notification with the Maine Forest Service if they plan to sell any wood.
Working with the forester, the landowners flag a loop trail for the woodcutter to haul the logs out. Seeding the trails with native grasses and clover, following the harvest, will help protect soil and water and also provide food for wildlife. With a little exploration, the forester finds that the hemlock patch at the back of the property appears to be an important piece of a larger deer wintering area. The owners and the forester agree that leaving it alone is best.
In the end, these landowners achieved their goals with the help of a licensed forester—and with a bit of research and hard work.
Hemlock stand. Photo: MFS

112
Example 1: Map of the property after the project is completed
Licensed Forester
Aspen and Birch Over Spruce and Fir
Source: Greg Miller

113
Woodland Example 2
This property has a house on 1.5 acres of mixed northern hardwoods. The woods are primarily composed of oak, birch, and maple of varying heights. Some ornamental conifers grow near the house and a large, old white pine grows near the edge of the lawn.
Landowner Objectives
The owners, a young couple with two children, like to watch birds and would like to make maple syrup for their own use and to give as gifts. They would also like to emphasize the beauty of the birch and maple trees. Their primary consideration is to make sure their actions improve the overall health of their property.
Mixed northern hardwoods. Photo: Dan Jacobs

114
Example 2: Map of the property before the project is completed
Actions
The owners clearly mark their property boundaries and, using the Forest Trees of Maine (see page ii), identify many of the trees in their woods. They find that many of the trees they thought were sugar maples are actually red maples. The red maples will produce sap, though it won’t be as sweet as that from sugar maples. To find out if the maples are large enough to tap, they measure the circumference of two dozen trees at shoulder height. A few of the trees have trunks over 31 inches in circumference (10 inches diameter)
Ornamental
conifers
White pine tree
Blazed & flagged boundary
Iron pin
Iron pin
- Red maple - Sugar maple - Big sugar maple
- Young mixed hardwood
- Birch Small birch
Iron pin
Iron pin
KEY - Ornamental
- White pine
- Oak
Source: Terri Lee Mills

115
and meet the minimum recommended size for tapping. They mark each tree they plan to tap with colored flagging to make them easier to find.
On a hand-drawn map of their property, they record notes about the size and health of the trees. Some maples growing close to other trees have small crowns. These won’t be good sap producers unless they have room to spread out in the canopy and grow more leaves. The landowners decide to help the largest maples with the biggest crowns by cutting down competing trees. They also decide to take a chainsaw safety class and do the work themselves.
When they first scouted their woods, the owners noticed several large sugar maples on the neighboring property. They decide to contact the neighbors to tell them about their maple sugaring plans and ask if they are willing to have their trees tapped in exchange for some maple syrup. After discussing how maple syrup is made, the neighbors readily agree and ask if they could join in during the maple sugaring season.
The big white pine at the back of the lawn has a huge dead branch. The owners think it might be diseased and contact the MFS Forest Health and Monitoring Division (see Primary Resources, page 3). From the information they obtain, they believe that the branch was damaged in a storm and they hire a licensed arborist to remove it.
The owners consider pruning the lower branches of many trees over the entire lot to create a more park-like look. After finding out that this kind of pruning discourages some wildlife, they decide to prune only one small area growing red oak. They also plan to put in a loop trail to take advantage of birdwatching opportunities.
In short, the goals of these owners were achievable with a moderate amount of guidance from natural resource professionals. Please note how they made good decisions in terms of safety by hiring an arborist to remove a hazard and by completing a chainsaw safety class. This example illustrates how motivated landowners can work to complete projects and achieve their goals.

116
Example 2: Map of the property after the project is completed
Do You Know?
#6. The year of the last log drive down the Kennebec River? Answer on page 120
Ornamental conifers
White pine
tree
Blazed & flagged boundary
Iron pin
Iron pin
KEY - Ornamental
- White pine
- Oak
- Red maple - Sugar maple - Big sugar maple
- Young mixed hardwood
- Birch Small birch
Foot path
Iron pin
Iron pin
Source: Terri Lee Mills
117
Backyard Family Activity #8: Creating a Plan for Work and Fun Hopefully, you have found a great deal of useful information in this book. The eight Backyard Family Activities and numerous additional ideas for woodlot projects may seem overwhelming. At this point, you may be asking yourself which projects and ideas to take action on—and in what order. In this Backyard Family Activity, you will get organized and create a workplan that will keep you motivated to improve, enjoy, and understand the woods in your backyard.
Getting Ready
1. With your family, brainstorm a list of projects you would like to complete on your property. You can use the Backyard Family Activities and the ideas in this book, or you can think up your own projects. Some of the suggestions in this book include creating a wildlife blind, making maple syrup, and establishing a rain garden.
The following list of Backyard Family Activities may be helpful in your brainstorming session:
#1. “Scouting Your Land.” A basic map of your property will be useful no matter what you decide to do, and you can improve it as you discover more about your land (page 24).
#2. “Making Maple Taffy.” A great introduction to value-added maple products (page 47).
#3. “Plant a Hard Mast Species.” Hard mast species of trees and shrubs can greatly improve wildlife habitat (page 49).
#4. “Using a Compass.” Navigating around your woods can be fun (page 64).
#5. “The Three-Legged Compass Walk.” Navigating with a compass is an important skill for people enjoying the Maine woods (page 66).
ACTIVITY
Items Needed
Pencils, colored markers or pens, notepaper
Folders or a binder
A wall calendar
Copies of notes and maps from previously completed Backyard Family Activities

118
#6. “Getting Down and Dirty.” Learning about your soil will help you understand the limitations on what you can accomplish with your property (page 85).
#7. “Assessing Timber Potential.” Your property may be able to generate timber income now or in the future (page 101).
#8. “Creating a Plan for Work and Fun.” A work plan will help you reach your goals (page 117).
2. When you finish your list, discuss all the items and identify your top priorities. Which projects do you want to focus on first?
3. It is also important to discuss how much time you are willing to spend on each project. Some projects, like making maple syrup, are very involved and time-consuming. In contrast, some projects listed in this book can be completed in a few hours or less. Consider starting with an easy to complete project and move on to more challenging projects in the future.
4. The woods in your backyard should be fun, so don’t make your family projects a chore. Staying flexible on deadlines will keep them from becoming tedious. However, some planning is necessary, and this activity will help you stay on track.
The Activity
The purpose of this activity is to create a work plan for the woods in your backyard that includes a schedule for the completion of multiple projects.
Timeframe
Two hours at most to create a plan.
Steps
1. Make a list of the projects you want to complete. They can be based on the Backyard Family Activities, other project suggestions in this book, or your own ideas. After you make a comprehensive list, decide which three projects you want to complete first.
2. If you still aren’t sure which projects are the most important to you, it might be a good idea to start with the basics. You will get a good overview of your woodlot and learn some forestry fundamentals by completing Backyard Family Activities #1, #4, and #6. If you have already completed these, start working on more difficult projects.

119
3. Once you have prioritized your “short list” of projects, write down the steps necessary to complete each one. This will be easy if you are using the Backyard Family Activities in this book—because the steps are spelled out. However, there is always room to expand upon the information already provided. At this point, you may want to arrange your notes and project information in a binder or set of folders.
4. Create a list of the materials you will need and the approximate cost of each. Some projects can be completed with little or no cost, but some may require a financial investment. For instance, building a rain garden is not very difficult, but you will need to purchase some plants from a local garden center. This is a good time to evaluate project cost and your budget.
5. Use a monthly wall calendar to list when specific work needs to take place. For example, you could thin maple stands in the fall when the foliage is beautiful and the mosquitoes are gone. Use a different colored pen for each of your projects, and you’ll see at a glance what work/action is related to which project. You may decide to keep your calendar with your “project binder” or you may want to hang it on a wall—so it is always visible.
6. Fill your project binder or folders with all the paperwork from your projects and stay organized. Good recordkeeping is important when you are completing projects on your property.
7. You may also use your project calendar to record where and when you see certain plants and animals. For instance, you might mark the date that you first notice red maples flowering or the date you saw a deer eating from an apple tree. Just remember to make staying organized fun.
You will be able to complete a lot of work and have a lot of fun by staying organized and following your work plan. Don’t forget to enjoy the projects you work on in your woods. As mentioned earlier, it is wise to start with an “easy to complete” project and work towards those that are more challenging.

120
“Do You Know” Answers
Answer: Eastern White Pine
Maine is known as the “Pine Tree State” and eastern white pine is the official tree of the State of Maine. Eastern white pine is found throughout the state and is considered extremely valuable for the production of lumber. According to the most recent Register of Big Trees, the largest eastern white pine in Maine is 105 feet tall and is located in the town of Sumner.
Answer: Mount Katahdin
Mount Katahdin is a key feature within Baxter State Park and is 5,267 feet high. The mountain and Baxter State Park are easily accessible from the Medway exit on I-95. Numerous trails wind their way up Mount Katahdin, and Baxter State Park offers many opportunities for hiking, fishing, and camping. For more information, visit the park website at https://baxterstatepark.org/.
Mount Katahdin. Photo: Jensen Bissell
Eastern white pine. Photo: Aaron Bergdahl

121
Answer: Black Bear
Black bears are the smallest of the three species of bear in North America. They are very fast, are great climbers, and can live to be 30 years old. The current population of black bears in Maine is estimated to be between 24,000 and 36,000. For information on avoiding conflicts with bears, visit the Maine Inland Fisheries and Wildlife website at https://www.maine.gov/ifw/.
Answer: Golden Road
The Golden Road was built in the 1970s and was designed as a main artery for the transportation of timber. Interestingly, the construction of the Golden Road coincided with the end of the river drives. Two spectacular sights along the Golden Road are Big Eddy and Ripogenus Dam. An internet search for these sights as well as the West Branch of the Penobscot River will provide you with many ideas for exploring the Golden Road.
Golden Road. Photo: Dan Jacobs
Black bear. Photo: Game Camera Artistry

122
Answer: Sebago Lake
Sebago is Maine’s second largest lake, behind Moosehead Lake, and is 307 feet deep. It provides drinking water for much of southern Maine and is surrounded by parks, resorts, and campgrounds. Sebago Lake is a popular place to fish for landlocked salmon, lake trout, and bass. If you are interested in visiting the lake, it is only a short drive from the city of Portland.
Answer: 1976
1976 was the year of the last log drive down the Kennebec River. The log drive stretched from Moosehead Lake to downstream mills as far south as Augusta. For generations, log drives were an important method for transporting timber from deep in the woods to mills throughout the state. The federal Clean Water Act of 1972 paved the way for the transportation of wood over the roads—as opposed to down Maine’s many rivers.
Log drive. Photo: Great Northern Paper
Sebago Lake. Photo: Shane Duigan

123
Glossary Arborist: A licensed professional who works with clients to assess the health and safety of shade and ornamental trees. They can recommend and perform treatments such as tree felling, tree removal, and pruning.
Aspect: The compass direction (north, south, east, or west) toward which a slope faces.
Aspen-birch cover type: A wooded area composed of quaking aspen (also known as poplar or popple) and paper birch. Both are pioneer species that invade disturbed areas but don’t grow well in the shade. Other species, like pin cherry and red maple, often grow with aspen and birch.
Baler: A piece of equipment that compresses cut Christmas trees and bundles them in netting for easier shipping.
Blazed tree: A tree marked with an ax and painted to delineate a boundary line.
Branch collar: The swollen area of trunk tissue that forms around the base of a branch.
Canopy: The more or less continuous cover formed by tree crowns in a forest.
Conifer: A cone-bearing tree.
Cover: Protected places where animals can feel safe. For example, a red fox den in a rocky hillside.
Crop Tree: Trees favored by a landowner to enhance a stand’s future timber value.
Deciduous: Trees that lose all their leaves annually. Trees such as maple, ash, cherry, and larch are deciduous.
Disturbance: A natural or man-made event that causes a change in forest cover. Common forest disturbances in New England include clearing for agriculture, windstorms, ice storms, fires, floods, logging, mining, and development.
Edge: The boundary between two ecological communities. For example, the transition from a field to a forest is an edge. Edges often provide valuable habitat for a variety of wildlife species.

124
Even-aged: A stand in which most of the trees originated at roughly the same time. Even-aged stands can result from clearcutting and planting, catastrophic wildfires, or the abandonment of cleared land.
Forest cover type or Forest type: An association of tree species that have similar ecological requirements. Some common forest types in Maine are spruce-fir, northern hardwood, pine-oak, and aspen-birch. Forest types are often simplified into the categories of hardwood, softwood, and mixed wood.
Forest floor: The home to small woodland flowers and bushes, tree seedlings, small mammals, ground-nesting birds, insects, amphibians, and many other kinds of life.
Gap: A canopy opening generally less than two acres in size. Gaps create habitat conditions that are often beneficial to certain wildlife species.
Habitat: The food, water, cover, and space required by wildlife.
Hardwood: A general term referring to deciduous trees with broad leaves and seeds enclosed in fruit.
Invasive: Non-native plants and animals that cause economic, environmental, and health problems when introduced to an area.
Leaf litter: Decaying wood and leaves on the forest floor. It is home to earthworms, beetles, and microscopic organisms that recycle rotting material into nutrient-rich soil.
Loam: Soil with a fairly even ratio of sand, silt, and clay mixed with organic matter. A preferred soil type for many agricultural purposes.
Low-impact timber harvesting method: Any technique or combination of techniques that reduces the negative impact of timber harvesting on soil, water, trees left to continue growing, and wildlife habitat.
Management plan: A written document based on a landowner’s objectives and the resources on the ground. It guides future activities to care for the land and accomplish the landowner’s objectives over the long term.
Mast trees and shrubs: Woody plants that produce fruits, nuts, or seeds eaten by wildlife.
Mineral soil: The non-organic component of soil composed of sand, silt, and clay.
Monoculture: Forest stands composed of one species and often established by planting.

125
Northern hardwood cover type: A cover type made up mostly of deciduous tree species that are also known as hardwoods. Colorful fall foliage usually indicates that a woodland is composed of a variety of hardwoods. Yellow birch, sugar maple, and American beech are the most common species in this cover type.
Open woods: Forested areas with numerous gaps or openings in the canopy.
Overstory: The part of the forest canopy formed by the crowns of the largest trees. The uppermost canopy layer.
Pine-oak cover type: Common to the southern part of Maine. This cover type primarily includes white pine and red oak. However, it may include red pine and a variety of other oaks.
Pioneer species: Sun-loving species that grow quickly in newly created openings.
Pure stand: A stand composed almost entirely of one tree species. They can occur naturally or as a result of thinning or tree planting. Pure stands of red pine, white pine, hemlock, and beech are common in some parts of the state.
Rain garden: Low-lying areas landscaped with perennial flowers and native vegetation to soak up water and manage storm runoff.
Riparian area: Areas directly adjacent to waterbodies and wetlands. They are important to more kinds of wildlife than any other habitat type in the state.
Shade-intolerant: Species that grow well in full sun but not well in shade. Pioneer species are most often shade-intolerant.
Shade-tolerant: Species capable of growing in the shade. They tend to be secondary species that follow pioneer species during the process of succession.
Site: The combination of biotic, climatic, topographic, and soil conditions of an area. It largely determines the character and productivity of forest stands.
Snag: Dead standing trees. Snags serve as perches and provide important food and cover for a wide variety of wildlife species.
Softwood: A general term referring to cone-bearing trees that have needles and retain them in the winter.

126
Soil map: A map that depicts the different kinds of soil in an area. They are available from the Natural Resource Conservation Service (NRCS) or online using Web Soil Survey.
Space: The entire area that an animal requires to find food, water, and cover. Space needs vary from one species to the next and can also vary seasonally within the same species.
Spruce-fir cover type: A forest cover type that primarily consists of red spruce and balsam fir. It is the most common type in northern and eastern Maine.
Stand: A group of forest trees of sufficiently uniform species, age, and condition to be considered a homogeneous unit for management purposes.
Stumpage: A forestry term that means the income landowners receive from selling timber. The textbook definition is the value of standing trees in a forest.
Succession: The natural replacement of one plant community by another over time.
Thinning: A forestry treatment in which some trees are cut (or removed) from a stand to provide more room for the remaining trees to grow.
Topping: A harmful pruning practice where the vertical stem and primary upper branches on larger trees are cut back to stubs.
Topsoil (A horizon): A nutrient rich soil layer below the O horizon (organic layer) and above the B horizon (mineral layer).
Understory: The lower layers of vegetation in the forest.
Uneven-aged: A forested area with trees of three or more distinct age classes.
Vernal pool: An ephemeral body of water that fills in the spring, holds water for at least ten days, dries up by fall, and does not contain fish. Vernal pools are an extremely important habitat for a variety of amphibians and reptiles.

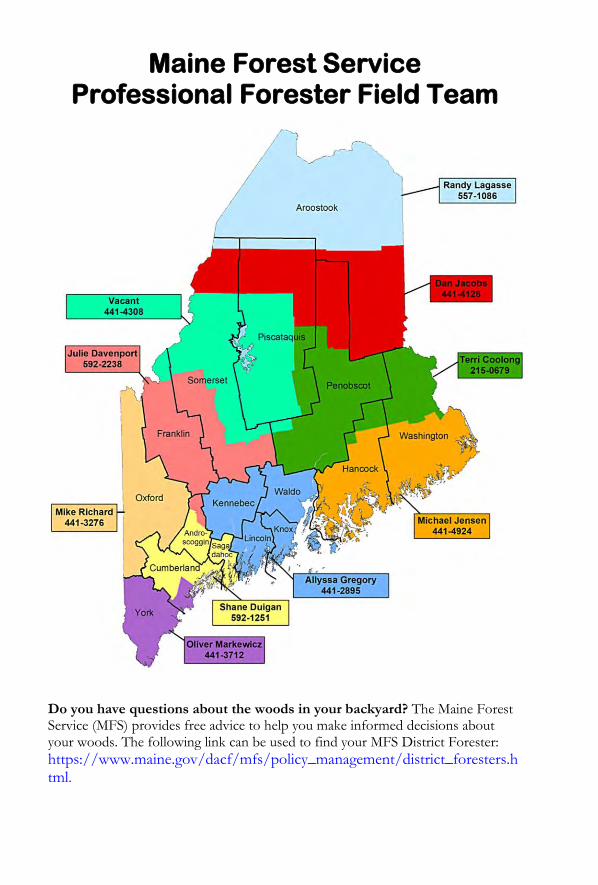
Maine Forest Service Professional Forester Field Team
Do you have questions about the woods in your backyard? The Maine Forest Service (MFS) provides free advice to help you make informed decisions about your woods. The following link can be used to find your MFS District Forester:
https://www.maine.gov/dacf/mfs/policy_management/district_foresters.html.