Super User Manual - STM Environmental
60
Super User Manual
-
Upload
khangminh22 -
Category
Documents
-
view
0 -
download
0
Transcript of Super User Manual - STM Environmental

Super User
Manual
Copyright © <Year> <Your company/name>
1
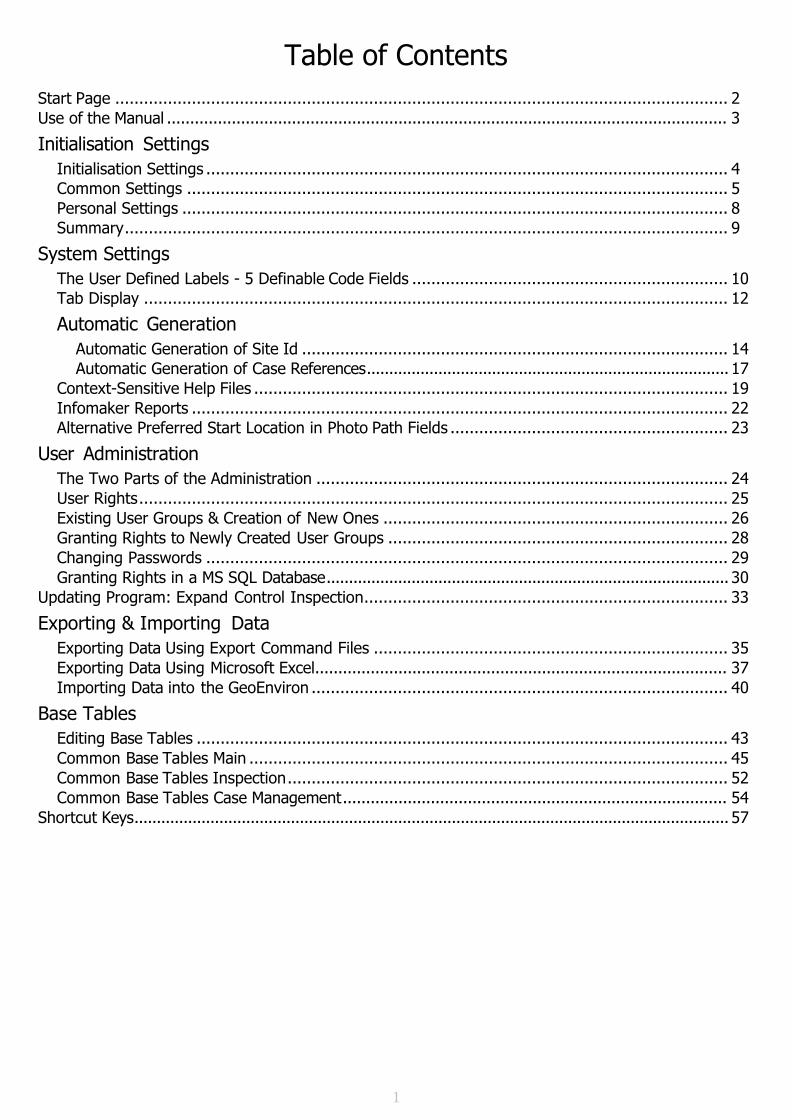
Table of Contents
Start Page ................................................................................................................................ 2
Use of the Manual ......................................................................................................................... 3
Initialisation Settings
Initialisation Settings ............................................................................................................. 4
Common Settings ................................................................................................................. 5
Personal Settings .................................................................................................................. 8
Summary .............................................................................................................................. 9
System Settings
The User Defined Labels - 5 Definable Code Fields .................................................................. 10
Tab Display .......................................................................................................................... 12
Automatic Generation
Automatic Generation of Site Id ......................................................................................... 14
Automatic Generation of Case References ................................................................................. 17
Context-Sensitive Help Files ................................................................................................... 19
Infomaker Reports ................................................................................................................ 22
Alternative Preferred Start Location in Photo Path Fields .......................................................... 23
User Administration
The Two Parts of the Administration ...................................................................................... 24
User Rights ........................................................................................................................... 25
Existing User Groups & Creation of New Ones ........................................................................ 26
Granting Rights to Newly Created User Groups ....................................................................... 28
Changing Passwords ............................................................................................................. 29
Granting Rights in a MS SQL Database .......................................................................................... 30
Updating Program: Expand Control Inspection ............................................................................ 33
Exporting & Importing Data
Exporting Data Using Export Command Files .......................................................................... 35
Exporting Data Using Microsoft Excel ......................................................................................... 37
Importing Data into the GeoEnviron ....................................................................................... 40
Base Tables
Editing Base Tables ............................................................................................................... 43
Common Base Tables Main .................................................................................................... 45
Common Base Tables Inspection ............................................................................................ 52
Common Base Tables Case Management ................................................................................... 54
Shortcut Keys ..................................................................................................................................... 57

2
Welcome to the Super-User Manual

3
The Manual and its Usage
The present manual takes a closer look at the features, which Super Users of GeoEnviron should include in their
considerations when they are setting up the system for other users.
The manual describes GeoEnviron common base tables, the initialisation settings, the system settings, user
administration, and many other subjects.
The material is under continuous development, as we add new tables to the database all the time.
This edition corresponds to Version 6.0 of GeoEnviron. However, some of the pictures might still be from earlier versions.
The content assumes a broad knowledge of the GeoEnviron system – corresponding to the course material ’GeoEnviron
Basics’, and to the course material for the various modules.

4
Initialisation Settings
The initialisation settings are used to determine things such as which database should be presented as the default
database in the logon dialog; which programs are opened by buttons on the toolbar; whether the site id is automatically
generated etc.
Prior to version 5.8, the initialisation settings were located in a text file called Geoenvir.ini (usually located in the
Geokon\Geoenvir\Ini_file folder). In version 5.8, the .ini file has been scrapped and the settings are now stored in the
GeoEnviron database and the Windows system registry. All the settings are now accessible via a system base table
making it easier and simpler for users to access and manage them.
The settings have been divided into common and personal settings. Common settings are settings that are global for all
users while personal settings are settings that can be defined for each specific user.
The base table that allows you to view and edit these settings is accessible via the 'System Adm|Settings' menu. If you are
logged on as a system administrator, then you will be presented with an 'Initialisation Settings' menu option. If not, you will
be presented with a 'Personal Settings' menu.
Messages
If you open the initialisation settings dialog when are logged on as a system administrator, you will be presented with 3 tab
folders entitled Messages, 'Initialisation Settings' and 'Personal Settings'.
The messages tab folder contains text used in the message dialog boxes that pop up throughout the system. For
maintenance reasons, please ensure you inform us if you ever find the need to alter any of this text.

5
Common Settings The 'Common settings' tab is only available to the System Administrator and contains information that the system uses to
ocate resources such as bitmap symbols as well determine whether certain features such as the automatic generation of
site and case ids should be enabled or disabled. Although all of the settings are global, a number (i.e. hide_archive) can be
overridden by a corresponding personal setting.
Hover the mouse over each option to see a short description of each parameter. The title header buttons allow you to sort
he data.
Below is a brief description of all the common settings keys.
We use a colour code: For those statements you might wish to change, the explanation is in black. For those statements
you should not change, it is in red. They are already included at the installation.
Group Key Value Description P
about url_addr www.geokon.dk Do not alter! X
about url_text www.geokon.dk Do not alter! X
bore_journal lithos lithos Subdirectory for display layer bitmaps
used in GE Boreholes.
X
bore_journal lithos_p lithosp Subdirectory for printable layer bitmaps
used in the Boreholes module.
X
bore_journal package package Subdirectory for display package type
bitmaps used in the Boreholes module.
X
bore_journal package_p packagep Subdirectory for printable package type
bitmaps used in the Boreholes module.
X
bore_journal samples samples Subdirectory for display sample type
bitmaps
used in the Boreholes module.
X
bore_journal samples_p samplesp Subdirectory for printable sample type
bitmaps used in the Boreholes module.
X
bore_journal symbol_path C :\Program Files\Geokon\
GeoEnviron\Symbols
Main directory (full path) for symbols
and bitmaps used in the Boreholes module.
X
case allow_change_caseno no Permits reassignment of case number.
Enter yes to turn on. Enter no to turn off.
case aut_case no Automatic generation of case number.
Enter yes to turn on. Enter no to turn off.
case case_seq_no part1 Defines whether auto generated ID
should consist of one or two parts. Used in the Planning Module.
Allowed values are part1 or part2.
case count_seq_no part2 Defines whether auto generated ID
should consist of one or two parts. Used in Environmental modules. Allowed values are part1 or part2.
case id word Word processing system to use when
creating standard letters using mail merge.
Default value is word.
colorservice w_base 0 Do not alter! X
colorservice w_item 12632256 Do not alter! X
dwfocus color 12639424 Background colour used to highlight the
field that has focus. Do not alter!
X
expand control_year 5 Interval in years for generation of
expandable controls.
expand inspec_year 5 Interval in years for generation of
inspections.

6
geoview default_map_id
Default map id used in the GeoView
module.
geoview default_symbol C :\Program Files\Geokon\
GeoEnviron\Symbols\rb.bmp
Path to bitmap used in the GeoView
module.
geoview screen_width_cm 28 Screen width in cm used in the GeoView
module.
GIS run C :\Program Files\MapInfo\
Professional\Mapinfow.exe
Path to external GIS program. X
help help_gen
Path to context sensitive help file for the
Overview of Sites module.
help help_insp
Path to context sensitive help file for the
PPC module.
help help_jour
Path to context sensitive help file for the
C ase Management module.
help help_site
Path to context sensitive help file for the
C ontaminated Land module.
help help_surv
Path to context sensitive help file for the
Surveys module.
help help_wcat
Path to context sensitive help file for the
Water C atchment module.
help help_wmill
Path to context sensitive help file for the
Windmills module.
help help_wst
Path to context sensitive help file for the
Waste Management module.
help helpfile P:\Geokon\Geoenv.hlp Path to context sensitive GeoEnviron
help file.
infomaker run C :\Program Files\
InfoMaker 10.0\Im100.exe
Path to Infomaker external report
generator.
X
initservice created_by 1 Initial value for corrected records. Do
not alter!
initservice update_init 1 Multi-correction of case officer. Turned
on as standard. Enter 0 to turn off.
internet run C :\Program Files\Internet
Explorer\Iexplorer.exe
Path to internet browser. X
pictures path
Do not alter!
pictures photo_path
Alternative preferred start location in
photo path fields.
site_id allow_change_site_id yes Permits reassignment of Site Ids in Site
modules.
Enter yes to turn on. Enter no to turn off.
site_id aut_case yes Automatic generation of Site Ids in the
C ase Management module.
Enter yes to turn on. Enter no to turn off.
site_id aut_insp yes Automatic generation of Site Ids in the
PPC module. Enter yes to turn on. Enter no to turn off.
site_id aut_site yes Automatic generation of Site Ids in the
C ontaminated Land module. Enter yes to turn on. Enter no to turn off.
site_id aut_tank yes Automatic generation of Site Ids in the
Tank Register module. Enter yes to turn on.
Enter no to turn off.
site_id count_seq_no part1 Defines whether auto generated Site IDs
should consist of one or two parts.
Allowed values are part1 or part2.

7
site hide_archive yes Defines whether archived sites are
displayed within the system and its associated reports.
Default value is yes. Enter no to turn off.
X
spreadsheet run C :\Program Files\
MS Office\Office10\Excel.exe
Path to spreadsheet program. X
survey_id aut_survey yes Automatic generation of Survey Ids in
the Surveys module. Enter yes to turn on.
Enter no to turn off.
survey_id count_survey_no part1 Defines whether auto generated Survey
IDs should consist of one or two parts.
Allowed values are part1 or part2.
tabservice servicetype 3 Text colour for tab pages containing
data.
Do not alter!
X
tabservice tablog 0 Do not alter! X
tank_damage path C :\Program Files\Geokon\
GeoEnviron\Symbols
Path to bitmaps and symbols used in the
Tank Register module.
X
userreport path
Path to execution file defined in
Infomaker external report generator.
X
wordproc docsopen no Permits integration to DocsOpen
program.
X
wordproc run C :\Program Files\
MS Office\Office11\Word.exe
Path to word processing program. X
Parameters with a P in the last column can also be defined as personal settings keys that can be defined for each specific
user.

8
Personal Settings
The personal settings are used to determine which database should be presented as the default database in the logon
dialog.
The 'Personal Settings' tab allows you to personalise the way GeoEnviron is set up. Only a limited number of the modifiable
parameters (i.e. database set up parameters etc) are displayed when you first open the folder. You should click the 'Show
All/Selected' button to view all of the parameters.
Click the 'Show/Hide Description' button to see a short description of each parameter. The title header buttons allow you to
sort the data.
Please note! Any changes of personal settings will be activated the next time you logon to GeoEnviron.
Below is a description of some of the most useful personal settings keys.
Group Key Value Description C
Database database Geo_MS_UK Name of default database available for
connection. The name is also presented in the logon dialog.
Database dbms OLE-MSS Protocol used to connect to the default database.
Available values are ODBC or OLE-MSS.
Database servername TYPHOON Name of server (if any) that is running the default database.
Database integrated 1 Specifies whether the default database
should use integrated logon. If yes, enter the value 1.
GeoMap Geoset X:\Geo_Test_UK\MapX\ES\
Geo_Test_UK.gst
Path to Geoset file used in the GeoMap
module.
GIS run C :\Program Files\MapInfo\ Professional\Mapinfow.exe
Path to external GIS program. X
infomaker run C :\Program Files\
InfoMaker 10.0\Im100.exe
Path to Infomaker external report generator.
X
internet run C :\Program Files\Internet Explorer\Iexplorer.exe
Path to internet browser. X
param start_module C ontaminated Land Specifies a module to automatically open up on logon to GeoEnviron.
C lick the button to bring up a dialog
from which you can select the module of choice.
site hide_archive no Defines whether archived sites are
displayed within the system and its associated reports.
Default value is yes. Enter no to turn off.
X
spreadsheet run C :\Program Files\
MS
Office\Office10\Excel.exe
Path to spreadsheet program. X
wordproc run C :\Program Files\
MS
Office\Office11\Word.exe
Path to word processing program. X
zoom width 1024 Specifies width of program window on the
screen.
Default is 800 pixels.

9
Summary
As you can see, it is primarily the paths to other programs in your department, it is necessary to set up. They are used by
the system in connection to a number of fields in the modules. The user can make these calls in two ways - either via the
toolbar icons or via the File menu.
It is also possible to use some of the more special calls – e.g. to InfoMaker or the user-defined InfoMaker reports – to call
other programs instead. However, the look of the icons cannot be changed.

10
The User Defined Labels - 5 definable code fields
The user-defined labels are 5 special code fields, placed in most of the modules. Using GeoEnviron the user-defined labels
are adaptable for whatever purpose there might be in the particular administration. This definition is database dependent and
is typically carried out before the system is taken into use.
The user defined labels allow you to define the purpose of 5 of the fields within the site registration casement in all the
GeoEnviron registration modules (except the Borings and Samples modules).
Within the black frame the 5 user defined labels are shown. These code fields can be redefined by needs. They are
located in the Registration Casement of all GeoEnviron registration modules (with some logical exceptions).
The name definition is done in the data window opened by choosing the menu item 'Base Tables > Common Base Tables >
Main' and the 'User Defined Labels/Label Names' sub tab.
Previously the definitions specified were global meaning that they were applied to all GeoEnviron modules. It is now possible
to have module specific user defined labels and associated codes. 3 numbered ranges have been set to allow users with
multiple GeoEnviron modules to define labels and codes that are specific for each module.
The ranges are as follows:
1-5 This is the default number range. Labels defined within this range are displayed in all modules unless module specific
labels have been defined.
6-10 Labels created in this range are only displayed within the Contaminated Land module.
11-15 Labels created in this range are only displayed within the Pollution Prevention and Control (Environmental Permits)
module.
16-20 Labels created in this range are only displayed within the Case Management module.
21-25 Labels created in this range are only displayed within the Contaminated Land Planning (Enforcement) sub-module.
26-30 Labels created in this range are only displayed within the Flood Assets module
Please note! You will not need to change the setup of USDLs unless you have more than one GeoEnviron module.
The 'Label Names' sub tab allows you to define the label names while the remaining sub tabs allow you to define selectable
records for each field. Note: the changes you make to text labels will not take effect until you have shut down and started
up the database again.

11

12
Tab Display
Two facilities introduced with Version 4 regard the display tabs in the modules.
Firstly, it is possible to switch off the tabs, so they are hidden in the modules - typically tabs not used in an administration.
Secondly, it is possible to show when tabs are empty by greying the tab titles.
We shall take a closer look at these facilities in the following sections.
Tab Invisibility
In most of the recording modules in GeoEnviron, it is now possible to define which tabs to display, and which to hide. This
definition is made for the system as a whole, which means that the definition will be effective for all users. The definition is
made in the window shown below. It is opened with the menu item 'System Adm > Settings > Tabpages.
The window ’Tab Administration’ works like this. You choose the module window in the left pane; and then you define in the
right pane which tabs to hide. Every time you have defined tabs in a module, you click the 'Save' button.
Please Note! This menu item is only visible and accessible if you logged into the system with DBA rights (cf the chapter
'User Administration').
Tab Greying
As mentioned, it is possible to show empty tabs by a greying of tab titles. This facility is available in all modules.
The picture below shows the Contaminated Land module with the facility 'Tab greying' switched on:
The facility 'Tab greying' is switched on in the initialisation settings dialog by these keys values:
[tabservice]
tablog=0
servicetype=3

13
From the greying of the tab titles, here it is possible to tell that under the level 1 tab 'Company Inspection' there have on ly
been recorded data in the 'Company' tab on this main record.

14
Automatic Generation of Site Id
All sites modules in the GeoEnviron system can be turned on for automatic generation of a new site id when you create a
new main record. In addition, it can be specified whether the site id should consist of two or three parts. The last part will
always be a running number.
When the system is set up for generation of a site id consisting of three parts, the facility will work in the following way:
Start opening the module in which you want to add a new site - or if your module is already open, move your focus
to the Registration Casement and activate the Insert-button.
Then click at the button on the right of the 'Site Id' field
A new window now pops up. Here you click at the 'Part 1'-button.
In a similar way, select the second part of the site id via the 'Part 2'-button.

15
Notice that the code description text for part 1 and 2 are inserted into the dialog.
Finally, click at the 'Ok'-button. The generated site id is hereby inserted into the 'Site Id' field in the Registration
Casement.
When the system is set up for generation of a site id only consisting of two parts, just jump over the use of the 'Part 2' -
button.
Setting up the Automatic generation of Site Id
The 'Automatic generation of Site Id' facility can be turned on for each module group in the initialisation settings dialog by
these keys values:
[site_id
aut_site = "yes" Activates Contaminated Land
aut_case = "yes" Activates Case Management
aut_water = "yes" Activates Water Catchment
aut_insp = "yes" Activates PPC
aut_waste = "yes" Activates Waste Management
count_seq_no = "part2" Running number generation on basis of part 1 & part 2 -
alternately on the basis of "part 1"
allow_change_site_id = "yes" Activates the ability to change the site id
Base Tables for the Automatic generation of Site Id
As part of the Automatic generation of Site Id facility there are 2 base table tabs, where the code lists for the part 1 and part
2 of the Site Id are defined for the various modules or module groups.

16
Select the menu item 'Base Tables > Common Base Tables > Main'. In this window you will find the base tables as sub
tabs under the tab 'Id Formation'. These sub tabs look like this:
The two tabs work the same way. In the first field (called 'Module'), enter what modules group the definition is made fore.
Here the selectable choices are: Contaminated land, Inspection (PPC), Water Catchment, Waste Management, Case
Management, Planning and Windmill. In the second field ('Part1' or 'Part2'), enter the Id part (typically ended by '-' or '/'). In
the third field, enter a description of the code.

17
Automatic Generation of Case Reference Number
When recording cases at the 'Case Details' tabs in the system, there is a similar possibility of turning automatic generation
of Case File number on.
Start clicking at the button in the 'Case Ref*' field ) and select the codes for Part 1 via
the list boxes. Then click at the 'New'-button - hereby a new File no. is generated and inserted into the Case Ref* field. A
description of the case is also inserted into the Case Subject* Field.
Setting up the Automatic generation of Case Reference number
Adding these key values in the initialisation settings dialog will turn on the facility 'Automatic generation of Case File
number'.
Case Description
aut_case = "yes" Activates autogeneration of Case Ref number
id= "word" Only required when using the Case Management module
Unlike the 'Automatic generation of Site Id' facility, the setup of the 'Automatic generation of Case File number' do not offer
the possibility of defining whether the Case File No. should consist of two or three parts – per definition a Case File No.
always consist of three parts, where the last part is a running number.
In the window where the case file no. is generated (see the picture above), if the 'Part 2' button is not used, the running no.
assigned by pressing the 'New' button will be generated on the basis of part 1. So when you only want your case file
number to consist of two parts (a code and a running no.), the solution is not to define any codes on the 'Part 2' base table
sub tab and skip the use of the 'Part 2' button when generating case file numbers.
Select the menu item 'Base Tables > Common Base Tables > Case Management'. In this window you will find the two base
tables as sub tabs under the tab 'Case Structure'. On the 'Part 1' and 'Part 2' sub tabs the selectable codes for the first and
second part of the case file number are defined (here the '-' symbol between the parts is added automatically).

18
The 'Part 2' sub tab consists of three columns. Only the codes in the second column (the 'Part 2b' column) are added to the
case file numbers. The first column makes it possible to group the codes. Within each of these groups you can add similar
codes in the second column - as long as the combination is unique. And, of cause, all records may contain different
descriptions.

19
Context-Sensitive Help Files
In GeoEnviron, it is possible for the user to implement specially designed context-sensitive help files in all modules. Here
'context-sensitive' means that the file is easy to call from the related data window.
In such help files, you may include how the various fields should be used; and which fields are required, which are optional -
in your administration.
Usage of Help Files
Inside a data window, you invoke the particular (context-sensitive) help file by pressing the function key F1 - or by invoking
the menu item 'Help/Context Help'.
Set-up and Design of Help Files
For the users to invoke the context-sensitive help files, these common settings keys values must be added in the
initialisation settings dialog. Those key values define where the help files are - their names and paths:
[help] Denotes the area 'help' for the program
path = "[:\geokon\geoenvir]" Working directory for all help files
helpfile = "p:\geokon\geoenvir\geoenv.hlp" Path to the general GeoEnviron help file
help_insp = "p:\geokon\geoenvir\PPC.hlp" Path to help file for PPC (inc related waste tab)
help_site = "p:\geokon\geoenvir\Cont.hlp" Path to help file for contaminated land, tank
registration and Active Risk
help_wst = "p:\geokon\geoenvir\waste.hlp" Path to help file for Waste Carriers and Treatment
Plants
help_wcat = "p:\geokon\geoenvir\water.hlp" Path to help file for Water Supplies, Boreholes and
Samples
help_surv = "p:\geokon\geoenvir\surv.hlp" Path to help file for survey and Remediation
help_jour = "p:\geokon\geoenvir\surv.hlp" Path to help file for Case Management
help_gen = "p:\geokon\geoenvir\gen.hlp" Path to help file for Overview of Sites
The first three lines marked with ’!’ are normally already present from the installation of GeoEnviron, so you do not need to
add them. But other lines calling context-sensitive help files must be added. It is, of course, important to place the help files
in a directory on the server, to which all users have access - otherwise the calls will not work.
You do not prepare a separate help file for each module. The modules are combined in groups, sharing the same help file.
Each data window in the separate modules (for the particular group) has a unique number. This number is transmitted to
the help file when you invoke the context-sensitive help. 7 separate context-sensitive help files can be designed. The
module groups cover the following modules:
Company: The PPC or Company module (incl. the vertical Waste tab for information regarding Waste Production)
Contamination: The Contaminated Land module, the Tank Register module and the Activity Risk module
Water Supply: The Water Supply (Water Catchment) module, The Boreholes module and the Samples module
Project: The Survey (Project Manager) module and the Remediation module
Waste: The Waste Carriers module and the Treatment Plants module
Case: The Case Manager module, and …
General: The Overview of Sites module
A context-sensitive help file can e.g. be prepared in the program ForeHelp. When you design such a help file, you must use
different numbers to refer to tabs/data windows.
The numbers can be found in the modules by right clicking inside the data window. Then select the menu item ’Properties’.
Now the property window is shown, displaying varied information:

20
At the top you can see the name of the field you right-clicked; then the name of the data window; the name of the help file;
and lastly - in the parenthesis - the number which you must use to refer to the data window.
Please note that the last line is only shown when a help file is defined for the particular module group. If not, you must
include a call to a help file in the common settings keys values. Type the name of the help file you are working on (or any
other name for that matter).
More about calling the help files
When we are programming in PowerBuilder – the programming tool we use for creating GeoEnviron – automatically each
data window are assigned an item number. The item number used when invoking a context-sensitive help file, are put
together by adding another number to the data window item number. When more modules are using the same help file, 100
are added in the first module, 200 are added in the second module, 300 are added in the third module, etc. This means that
the modules data window item numbers will be within the interval 100-199, 200-299, 300-399, etc.
In the following table the item number intervals are listed for each module group:
Module Group Module Item no. Interval
Company PPC / Company (incl. the vertical
Waste Production tab)
100-199
Contamination Contaminated Land 100-199
Tank Register 200-299
Activity Risk 400-499
Water Supply Water Supply / Water Catchment 100-199
Borings 200-299
Samples 300-399
Project Surveys / Project Manager 100-199
Remediation (Soil Handling) 200-299
Waste Waste Carriers 100-199
Treatment Plants 200-299
Case Case Management 100-199
General Overview of Sites 100-199

21

22
InfoMaker Reports
Another facility included in GeoEnviron, is calling of specially designed InfoMaker reports directly from GeoEnviron.
About InfoMaker Reports
InfoMaker is a Report Generator, supplied by the company Sybase. By the way, the same company also supplies the
programming tool (PowerBuilder) and the database server program (Sybase SQL Anywhere 7), which we use.
We often supply InfoMaker together with GeoEnviron. In this system, you may define your own reports - with layout and
extraction of data from the GeoEnviron database. One or more reports may be compiled to an executable file (.exe) - i.e. a
program file that may be run independently of the InfoMaker program. It still extracts data from GeoEnviron for the reports. It
is the use of such an executable file, which is implemented in GeoEnviron.
Calling InfoMaker Reports
The specially designed InfoMaker reports are invoked with this button on the GeoEnviron tool bar – or by the menu item
'Files > User Reports'.
For the call of the report program to work in GeoEnviron, its path must be added to the initialisation settings dialog:
[UserReport] path = "p:\geokon\info_exe\georap.exe"
The report program is placed in a server directory, to which all user have rights - e.g. in a subdirectory of \Geokon, in which
GeoEnviron always is installed. Now the program may be invoked from the icon on the Tool Bar – or the above-mentioned
menu item.

23
Alternative Preferred Start Location in Photo Path Fields
Browser buttons return to the last location visited when clicked.
Note: This functionality can be overridden in the case of photo links by entering the preferred start location in the photo path
field in the initialisation settings dialog.

24
User Administration
In this chapter, we shall look at how user rights can be defined from different points of view.
It is important to set up a system like GeoEnviron, so it matches your organisation. Only then the System Administrator
can grant and restrict user rights in an adequate way.
The Two Parts of the Administration
The system works in two dimensions:
A system for granting user rights to various tables in the database.
A system for classification of the sites in categories – e.g. confidentiality level, or area of responsibility of
departments. This classification is then associated with users.

25
User Rights
The system can be described in the following way:
Various users are created in the system with User Name and Password. If you want to create User Groups, the members must first be created as single users. (Menu item: 'System Adm > User Adm. and Privileges > User Maintenance')
The newly created users are either associated with existing User Groups (see below) – or you create new User Groups for them. (Menu item: 'System Adm > User Adm. and Privileges > Group Maintenance')
To the newly created groups, you grant rights for every table in the database: Select (Read),
Update, Insert (Add), Delete, or All (see below). (Menu item: 'System Adm > User Adm. and Privileges > Table Privileges')
Only users with database administration rights - typically the System Administrator - may grant rights to users and user
groups.

26
Existing User Groups – and Creation of New Ones
Various user groups are already created in the system - and made ready for adding new users to them.
The 2 groups 'Readuser' and 'Writeuser' give rights to all tables in the database (reading or writing, respectively). As you
may have noted, these 2 groups are inside the group GEOKON. All new groups you create must also be there to obtain
logon rights.
User Groups
We have pre-included a series of new, differentiated user groups in the databases of a part of our customers. These groups
and their rights are as follows:
Usergroup Rights
READUSER Search and read in all tables
Delete, update, insert, read in all operational tables, but not for base tables.
Delete, update, insert, read in all base tables
Delete, update, insert, read in all tables reg. inspection, i.e. the modules PPC /Company, Agriculture and Open Country Inspection. NB! Not for base tables
WRITEUSER
SYSMGR
INSP_USER
MST_USER Delete, update, insert, read in all tables, i.e. the module MST Standard Report. NB! Not for base tables
Delete, update, insert, read in all tables reg. the module Soil Movement. NB! Not for base tables.
Delete, update, insert, read in all tables reg. the module Contaminated Land. NB! Not for base tables.
Delete, update, insert, read in all tables reg. the module Surveys. NB! Not for base tables.
Delete, update, insert, read in all tables reg. the module Tank. NB! Not for base tables.
Delete, update, insert, read in all tables reg. the module Water Supply. NB! Not for base tables.
REM_USER
SITE_USER
SURV_USER
TANK_USER
WCAT_USER

27
A user may be allocated to more user groups. Super users – who shall administer base tables - must be allocated to the
group SYSMGR as well as to either WRITEUSER (for updating tables in all modules) or the relevant module specific user
groups.
If you do not wish to work with the latter, a user must be allocated to both READUSER and WRITEUSER. This means they
have the right to select (read) from base tables, and to update all operational tables. If a user also shall be able to update
base tables, he must be allocated to SYSMGR. (In earlier versions, the WRITEUSER group also was granted the right to
update base tables.)
Delete, update, insert, read in all tables reg. the module Waste Management. NB! Not for base tables.
Delete, update, insert, read in all tables reg. the module
Journal. NB! Not for base tables.
WST_USER
CSM_USER

28
Granting Rights to Newly Created User Groups
As mentioned, you must grant rights to newly created user groups. The picture below shows the window where you do this:
You follow the instruction in the upper left of the window for all tables in the database.
Self-explanatory are the rights Select (Read), Update, Insert (Add), Delete, or All.
The right Alter means that you may edit the table structure. Users normally do not need these right - not even super users.
Please be aware that the Rights buttons have three settings: a marker in a white box (granted right); an empty white box
(no right); a marker in a grey box (right granted from other places).

29
Changing Passwords
As a user, you may any time change your own password. It is done in the following way:
Choose the menu item: ’System Adm > User Adm. and Privileges Maintenance of Users’, whereby a new window
is opened.
Click on your initials (user name) in the box ’User ID’.
Click ’Change’.
In the box which now appears, you type your new password twice. Click OK. Click OK (in ’Maintenance of Users’.

30
Granting Rights in an MS SQL Database
The above-mentioned creation of users and granting of rights can only be done from GeoEnviron when you use a Sybase
SQL Anywhere database.
If you use an MS SQL Database, you must use the program 'Enterprise Manager' (included). For an instruction in using
this we refer to the documentation of this program (included).
Classification
The classification system is designed to handle multi-user solutions where more departments use the same database. You
can limit the access of users to the data of other departments.
The system works like an umbrella over the system of granting rights. The system can be described in the following way:
Firstly, you define the categories in the classification – typically by assigning names to various departments. Then you switch on the classification system. (Menu item: 'System Adm.ClassificationClassifications')
Hereafter, you create all users in the system. (Menu item: 'System Adm. > User Adm. and Privileges > Maintain Users')
Then you create user groups. And every group is granted rights to the defined classification categories. You may grant rights to reading, writing, or no rights. Writing includes Select (Read), Update, Insert (Add), and Delete. Furthermore, one of the categories can be chosen as standard category for the creation of new sites. (Menu item: 'System Adm. > Classification > Maintain Class. Groups')
Lastly, the users are allocated to user groups. As the groups are associated with the classification categories, a user may only be in one of the groups. (Cf. the previous section on user rights, where a user, of course, may be in more than one group.) (Menu item: 'System Adm.Classification Maintain Class. Groups')
Functionality of the Classification System
After the set-up, the system works in this way. A new site is automatically associated with the classification category,
which was chosen as standard for the group to which the user belongs (see above).
You can see which classification category a site belongs to by hovering over the i-button (information button) in the
registration casement of a module. (NB: The Classification system does not include bore and sample data.)
This will bring up the information window.
If you as a user have writing rights to more categories, and a standard category was not chosen for the user group to which
you belong, you will be prompted to select a category when you create a new site.
You may change the site’s category by choosing the menu item ’System Adm.ClassificationClass. Change’.
Classification in an MS SQL Database
The classification set-up can only be done from GeoEnviron when using a Sybase SQL Anywhere database (not a MS SQL
database).
Windows for Set-up of the Classification System
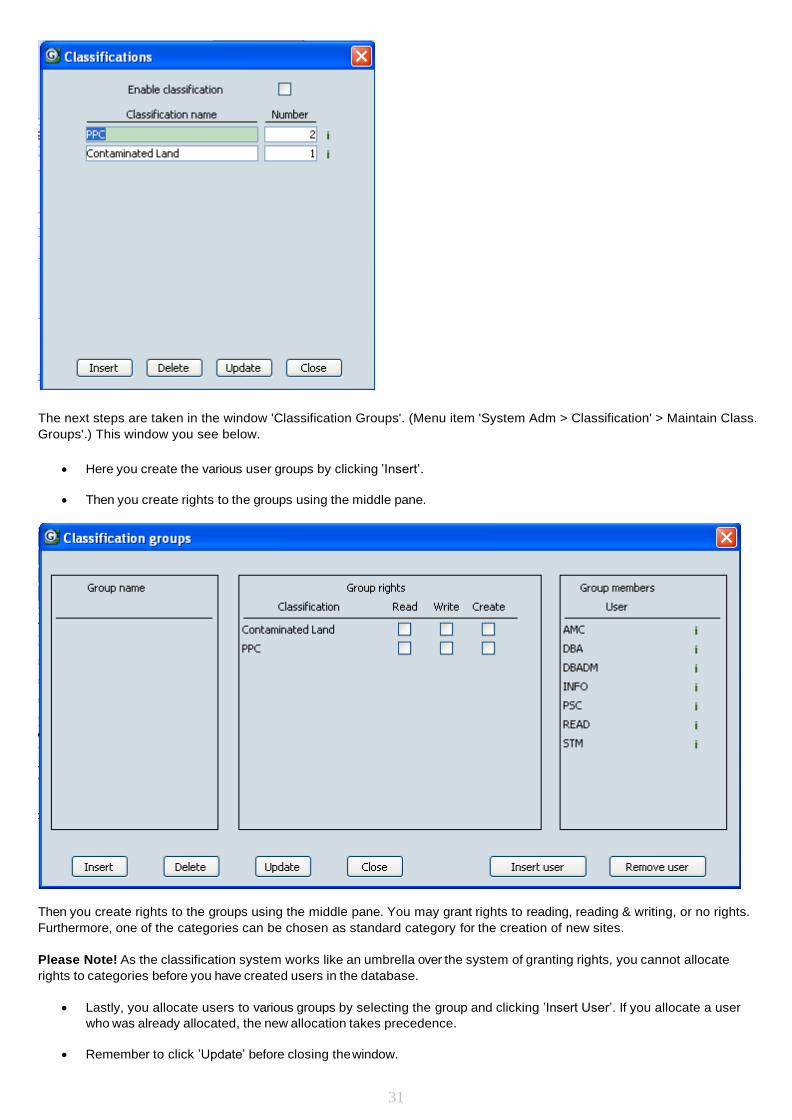
The window below is where you start. (Menu item 'UserAdm > Enable/Disable Classifications'.) Here you create the
various classification categories, and you switch on the classification system. Then you close the window.
31
The next steps are taken in the window 'Classification Groups'. (Menu item 'System Adm > Classification' > Maintain Class.
Groups'.) This window you see below.
Here you create the various user groups by clicking ’Insert’.
Then you create rights to the groups using the middle pane.
Then you create rights to the groups using the middle pane. You may grant rights to reading, reading & writing, or no rights.
Furthermore, one of the categories can be chosen as standard category for the creation of new sites.
Please Note! As the classification system works like an umbrella over the system of granting rights, you cannot allocate
rights to categories before you have created users in the database.
Lastly, you allocate users to various groups by selecting the group and clicking ’Insert User’. If you allocate a user
who was already allocated, the new allocation takes precedence.
Remember to click ’Update’ before closing the window.

32
Please Note! Only users with rights as Classification Administrator may allocate rights to users and user groups. (Rights
as Classification Administrator are granted under the base tables tab 'Case Officers'. See the chapter Common Base
tables.)

33
Updating Program: Expand Control Inspection
Under the menu item 'System Adm. > Batch Updating Programs > Expand Controls', you will find the updating program
'Expand Control Inspection'.
In the description of the tab Case in the PPC module, we mentioned the possibility of generating 'Expandable Controls and
Inspection' for a certain duration. They are generated without an expiry date – and run automatically for two years from the
generation date.
However, it is possible to expand the duration for two more years by means of the updating program 'Expand Control
Inspection'. Use the commando button 'Expand'. (Please see picture of the program below.)
Please Note As the modules 'PPC' and 'Water Supply' both include the facility Expandable Controls and Inspection,
controls/inspections from both modules will be shown in the window when you run the program.
When you click the Retrieve button, all expandable controls and inspections that are registered in the database will be
listed in the program window. If a case officer is stated, only he/she will be able to see the list. The list includes 'Site Id', the
site’s 'Name', and the 'Case Description' from the case tab.
The column 'Next Date' shows the first control or inspection date, which will be generated at the expansion. (Controls and
inspections are generated for two years from the expansion date.) The column 'Days' shows the number of days between
the controls/inspections (= number of months x 30 days).
The column 'C. Officer' shows the case officer initials from the case tab. The column 'Comments' contains the remarks that
were associated with the controls/inspections, when they were generated.
The latter two columns may be amended before you expand. You may also change the status of controls/inspections as
expandable controls. You do this by marking one of the fields for the particular control/inspection. Then you click the Delete
button. When you have made a correction/ deletion in the window, you must remember to click Update to save the changes

34
in the database.
Please Note When you delete a control/inspection in this window, you do not delete any of the existing
controls/inspections, which you can see on the tabs 'Follow-up' and 'Inspection List'. You just remove the option of further
expanding the fixed control/inspection!
You expand all expandable controls and inspections in the window by clicking the 'Expand' button.

35
Exporting data from the GeoEnviron Database
Exporting Data Using Export Command Files
The following is a brief description of how you export data from tables in the GeoEnviron database using Export Command
files. The data is exported to a tab delimited text file which you can then open up in Excel.
Export Command files are available from the client area of the STM Environmental website.
You can use the Export Command function available under 'System Adm| Import/Export Data|Import to table' within
GeoEnviron to export data from any table in GeoEnviron. You may wish to do this for a variety of reasons. For example, you
may wish to edit data for a number of sites in Excel and then import the data back into the database. Sometimes you may
wish to export an empty table just so that you can obtain the structure of the table. You can then open up the table in Excel
and populate it ready for importing back into the database.
Finding out the name of the table you wish to export data from
Before using the Export Command files, you need to find out the name of the table you wish to export data from. You can
do this by right clicking in the field you wish to export and selecting "Properties".
Each of the data windows within the GeoEnviron graphical user interface (GUI) provides a view into one or more of the tables
within the database. Each of the fields within the GeoEnviron GUI corresponds to a field/column within a table in the
database. You can find out the name of the table and the field/column name by right clicking within the field and selecting

36
Properties from the context menu (see figure above).
After right clicking in the 'Site Name' field and selecting Properties a dialog box appears giving information on column name
and data window clicked in.
The first line (Column Name) gives the name of the table (site) and name of the column (site_name) that has been clicked
in.
You can use this procedure to ascertain the name of the table a field belongs to in any part of the GeoEnviron GUI.
Exporting the data
Now you know the name of the table you wish to export data from, you are ready to go ahead and use the Export Command
file (ECF) functionality. First you need to find the ECF that has the same name as the table you wish to export data from
(i.e. site.cmf). You should have received a folder with a number of ECFs in it. If you open the file in Notepad you will see that
it contains an SQL script that looks like:
unload select site.txt select
This script unloads the contents of the site table (including column headers) to a text file. The text file will be saved in the
same location as the ECF. After running the ECF, you can open and edit the text file in Excel. The steps involved in running
an ECF are described below.
1) Save the command files to your disk and extract them.
2) Next log on to the database as super user.
3) Go to 'System Adm > Import\Export > Import to Table'
4) Click the 'Export Command File' button
5) In the browser that appears, navigate to the location of the command files
6) Select the command file that has the same name as the table you wish to export data from. Click Open.
7) The table unload process will start. When it is complete it will prompt you to save a log file. This is not necessary.
8) The Export routine should have created a text file containing the exported data in the same location as the command file.
The text file will have the same name as the export command file (with the exception of the file name extension .cmf)

37
Exporting Data using Microsoft Excel
Microsoft Query gives you the ability to log on to a database and export data from one or more tables.
Note: You will need to have Microsoft Query installed to be able to export data into Excel. This is usually available as a
standard part of the office software. If it is not installed, contact your IT department and they should be able to install it.
Open a NEW Excel Workbook.
Select 'Data > Import External Data > New Database Query' from the main menu.
The 'Choose Data Source' dialog appears. Select the data source you wish to export data from (i.e. Geoenvir) and click OK.
The ODBC configuration dialog will appear. Input your username and password into the login tab and click OK.
After connecting to the data source the Query Wizard dialog will appear allowing you to select the tables you wish to
include in your query.
You may be greeted with the ODBC configuration dialog will appear. Input your username and password into the login tab and click OK.
Find the table by either scrolling down through the list of available tables. Add all the table columns to your query by
selecting the table name clicking the arrow button.
Alternatively click the + sign next to the table name to view all the columns in the table. You can then add individual
columns to your query by selecting them and clicking the arrow button.

38
You can create simple single table queries using the Query Wizard.
Continue clicking the Next button until you come to the Finish dialog. Ensure that the 'Return data to Excel' radio button is
selected and click Finish.
Select the appropriate worksheet option (i.e existing worksheet or new worksheet) and click OK.
The data will be copied from the database to Excel. You can find out more about exporting data to Excel in the Excel’s
online help.
Alternatively you can create more complex multiple table queries using Microsoft Query. This is similar to the
query tool found in Microsoft Access.

39

40
Importing data into the GeoEnviron Database
Each of the data windows within the GeoEnviron graphical user interface (GUI) provides a view into one or more of the tables
within the database. Each of the fields within the GeoEnviron GUI corresponds to a field within the database. You can
quickly find out the name of the database table and the column name the field lies in by right clicking within the field and
selecting Properties from the pop up menu (see figure below).
After selecting Properties a dialog showing information on the column and field names appears.
Formatting Data before importing
Data importation is a fairly straight forward process if the data has been properly formatted. You need to structure the data
ensuring that each column has the correct header.
To get an idea of the table structure (i.e. column names etc), you can export a copy of the table that you wish to import into
using the Query wizard in Excel (see the 'Exporting data from GeoEnviron to Excel' guide) or use one of the export
command files which are available for download from the client area on the STM Environmental website.
Setting up Data Import Templates
The example below shows how to set up the site.txt template for importing basic Site data into the database:
The table contains a series of records. Each record can be identified by its own unique 'primary key' as it is known in
database terminology. In the case of the Site table, the primary key is the site_seq_no which is short for 'site sequence
number'. Therefore each record should have its own unique site_seq_no. When importing data into the Site table, it is
advisable to give the first record a large number such as 100100001 as shown in the example above. The subsequent
ecords can be populated using the 'fill by series' functionality in MS Excel.
As a general rule, when importing data into your database, you should ensure that data is imported into the basetables first.
This is because in many instances, the main tables reference the basetables using what are known as 'foreign keys'. For
example you will not be able to import site data into site table (i.e. the main registration casement) before you have imported
data into the 'Site Type' table.
You will notice that in the above figure, each site is given PIIA as the site_type_id. In order for you to be able to import data
rom the above table into the database, a site_type whose site_type_id is PIIA must exist in the 'Site Type' basetable. This
procedure is the same as when you are creating a site manually in GeoEnviron. You would enter the 'Site Id', followed by the
Site Name' and then the 'Site Type', which is selected from a look up table or basetable (see figure below).

41
Below is another figure showing how to set up data in the Activity.txt file for importing into the 'Site Use History' tab folder.
n the case of the activity table, the primary key is the act_seq_no which is short for activity sequence number. Each site
use or activity must have its own unique act_seq_no. Again it is advisable to allocate a large number to the first activity (i.e.
10010001) as shown in the figure above. Each activity is referenced to a site using the site_seq_no. Both these fields as
well as act_type_id field are required fields and must therefore be completed.
Each table has a Created and 'Created By' field. The former is a date field. The date must be entered in reverse order (i.e.
Year, Month, Day - 2003.08.12). The latter refers to the logon id of the person who created the record.
After you have finished populating the data files you should ensure that you save the files in text tab delimited format. You
do this by selecting 'Save As' from the MS Excel File menu and then selecting Text (Tab delimited) from the 'Save as Type
drop-down list. The file name should have the same name as the table that you wish to import data into. Click Save and the
data file should be ready for importing.
Data Importation
You should always logon to the database using the super user account (Geokon for Sybase DBs or Import for Microsoft
SQL DBs ) when importing data or executing patches to the database.

42
The data importation window in GeoEnviron is accessed via the menu 'System Adm > Import/Export Data> Import to Table'.
The functions that are needed to import data into the database are described below.
The 'Execute Load File' function is most commonly used to import data files into the database. This function inserts new
records as well as updates existing records into a table i.e. it combines the two functions above into one.
The 'Reload Data (Delete)' function deletes the existing contents of a table and inserts the records from your import file
into the table in one operation.
Beware!! Using this function on the Site table causes the sites and all the underlying information to be deleted.
The 'Insert Data From File' function inserts the records from your import file into a table.
The 'Update Data From File' function updates existing records. Use this function if you have made changes to your import
data file and would like to update the database with those changes.
You begin importing data files by clicking one of the Data import buttons. In most instances the 'Execute load file' button
will be used. Browse to the file you wish to import, select it and then click Open. The import of the data will start
automatically.
When the data import is completed, a dialog will appear telling how many records were read, inserted or updated a well as
how errors occurred.
Database Importation Errors
You may receive a variety of error messages when attempting to import data. Any errors received will usually be related to
errors in data file formatting. Unfortunately the messages are generated directly by the database and therefore cannot be
converted to a language that is more 'user friendly'.
The variety of errors you may receive are too numerous to describe them all here. However, with a little experience and
common sense, you will soon begin to understand them.
If you receive errors after importing a data file, you will be prompted for a location to save the error log file after pressing
Cancel in the 'Choose load file' dialog. It is always advisable to save this file and send it to us if the errors received are in
connection with the execution a database patch.
Whenever you receive an error, you should re-examine the data import table and correct any formatting mistakes. If you
have difficulty in locating the source of the error, please feel free to contact us and we will try to assist.

43
Editing Base Tables
In the following chapters, we shall look at all the Base Tables which the system uses. Base Tables are typically code lists
in the system, but it can also be other definitions, which are necessary for particular parts of the system to work.
In this first chapter, you will find general guidelines for the editing of Base Tables. In the next chapters, we shall look a t the
general Base Tables – used across the modules.
Base Tables of the System
Before you can start using the GeoEnviron system, the necessary base tables have to be encoded into the system.
Geokon will define a large number of these code lists. These code lists can be changed and adjusted to meet the specific
requirements (unless they are standard code lists, defined by an Environmental Agency or other authorities).
Elsewhere in the system you may experience that no codes have been defined yet – or that they only consist of a few test
codes. Here, the user will have to enter the necessary codes into the system, which of course requires a systematic
investigation of the registration requirements in the individual data windows, where the respective codes are used.
If, upon delivery of this system, data has been converted from previous systems, a number of code lists will also be affected
by this, meaning that previously used codes often will be added to the relevant code lists.
About Adding Codes
You can easily add new codes to the different code lists at any time – before adding a new code, you typically use the list
box key left of the code field to see which codes have already been defined.
About Changing Codes
When you want to edit existing code tables/base tables, there are a few things you should be aware of. Normally, we
recommend not changing the code itself, but the contents in the fields ’Name’, ’Map Name’, ’Comments’ and ‘Sorting Key’
can be changed.
When you change the code itself, you will usually be reminded that it is impossible, since the code will be referred to
several places in the database. If, on the other hand, you are permitted to change the code, it may be because the code is
not used elsewhere. The problem is that you cannot always rely on that. And if there are references to the code, three
things can happen where it is used:
The old code is replaced by the new code,
Where the old code is used, the fields will become blank and zero filled or
All sub records, where the old code is used, will be deleted
To avoid these unfortunate situations, we recommend the following procedure when a code is replaced by a new code:
1. First, create the new code that is to replace the old
2. Replace the old code with the new everywhere in the system/database where it is used
3. Finally, delete the old code
These 3 steps can either be done manually or by means of a SQL select, which we (STM Environmental) can assist you
with defining.
About Deleting Codes
When you try deleting a code, you will often be notified that it is impossible because it is referred to in different places of the
database. But even if the code is referred to in the database, it is not always certain that you will come across this
obstacle. Where a deleted code is referred, two things can happen; see item b) and c) in the paragraph above.
To avoid these unfortunate situations, it is important that you make sure that there are no references to a code before you
delete it.
Entering and Editing Base tables
Base tables is entered and changed by using the menu ’Base Tables’:
The amount of menu items in the menu 'Base Tables' depends on how many modules are installed in the program.
Try selecting the menu item ’Base Tables > Environmental Permits’. A window similar to the one shown below will now

44
appear on the screen.
As you can see, the fields are empty when you open the window. Here, you must also start by retrieving data from the
database (- and that applies for every tab that you click on. So…
Click the Retrieve key or press Alt+r.
The fields of the window are now filled with information and a scrollbar has appeared on the right side of the window. By
pulling it with the mouse or by clicking the downward arrow at the bottom of the scrollbar, you can page down through the
current base tables records.
If you wish to add a base table record do the following
Click the Insert key or press Alt+i
Fill out the fields of the base tables window
Click the Update key or press Alt+o
And if you wish to delete a base table record do the following
Place the cursor on the base table record you wish to delete
Click on the record in order for the cursor to blink (- important!)
Click the Delete key or press Alt+s
Click the Update key or press Alt+o
Please Note! If it is not possible to delete a code, it may be because the record referred to have been selected in
connection with a site. In that case deleting is denied – to make sure that no errors will occur in the database.
Only when the base table record is not used in the description of all the sites contained in the database, you are allowed to
delete.
If you are denied adding or deleting base tables, this may also be caused by something else; the fact that you do not have
access rights for this action.
The GeoEnviron user administration is further described in the chapter User Administration.

45
Common Base Tables
In this chapter, we shall look at Base Tables, which are general for the system – i.e. are defined and used across the
modules.
Base Tables for the InfoBase tools are not included here, as they are already described in the course material ’Base
Program, Overview Module and Fundamental Principles’.
Where do you find the common Base Tables?
Base Tables common for all modules can be found as 3 sub menu items in the menu 'Base Tables > Common Base
Tables'. The sub menu items are 'Main', 'Inspection', and 'Case Management'. Each of these menu items contains base
table tabs in that particular field. All the Base Tables you find there will be explained in the following sections.
Common Base Tables: Main
Persons/Contacts Details
Menu item: 'Base Tables Common Base Tables Main', the tab 'Addresses/Persons/Contacts Details'
Usage: Names and addresses of individuals/companies, associated with one or more sites are centrally stored in this
table. The table can thus be used as a general address book.
Field Positions: Contact and address tabs (All places with which an individual is associated).
Table Name: addresses
Name 1Max 80 char. Required field. Enter building name
Road Code List box Choose road code from the list box, and enter building no. and sub no.
Address Max 80 char Enter the address as text
Postcode List box Required field. Choose postal code from the list box. Ref. to the postcode table.
Country List box Choose country from the list box. Ref. to the country code table.
Name 2Max 55 char. If the address related to a company, enter the name of the contact person in this field.
Job Title Max 30 char. Job title of (contact) person.
Company No Max 30 char. Central Company number
E-Mail Max 50 char. E-mail address of contact/company
Tel. No Max 15 char. Telephone No of contact/company
Fax No Max 15 char. Fax No of contact/company
Mobile No Max 15 char. Mobile No of contact/company
P/C Type List box Choose address type from the list box. Ref. to the person/contact type table.
Person/Contact Types
Menu item: 'Base Tables > Common Base Tables > Main', the tab 'Addresses/Address Types'
Usage: When an address is associated, the address types are used to specify the association in the particular case. More
types can be specified.
Field Positions: All places where an address can be associated.

46
Table Name: address_type
Type Id Max 6 char Required field. Identifies address type
Type Name Max 30 char Required field. Name of address type
Postcodes
Menu item: 'Base Tables > Common Base Tables > Main', the tab 'Addresses/Postcodes'
Usage: Used for the registration of postal codes. Identifies postal district and associated town name.
Field Positions: In the registration casement of modules, and in connection with central registration of addresses.
Table Name: postal_codes
Post code Max 8 char Required field. Identification of postcode
Area name Max 30 char Required field. Name of area
Town/City Max 30 char Poss. town/city name
Country or Adm. Area
Menu item: 'Base Tables > Common Base Tables > Main', the tab 'Addresses', and the sub tab Country (World version) or
'Adm. Area' (UK version).
Usage: Used for the registration of countries or administrative areas. Identifies country or administrative area code and
name.
Field Positions: In connection with central registration of addresses.
Table Name: country
Id .........................................................................................................................................................................
Max 6 char ........................................................................... ..............................................................................
Required field. Country code
Name Max 30 char Required field. Name of country
Comments Max. 80 char For remarks
Land Register
Menu item: 'Base Tables > Common Base Tables > Main', the tab 'Addresses/Land Register'
Usage: Used for registration of the land register number.
Field Positions: On land register tabs of modules, and other places where land register numbers can be associated.
Table Name: land_register
Charge Type Id ....................................................................................................................................................
Max 12 char .................................................................................................................................... ......................
Required field. Enter Type Id
Description Max 60 char Required field. Name of land register
Road Code or Street

47
Menu item: 'Base Tables > Common Base Tables > Main', the tab 'Addresses', and the sub tab 'Road Code' (World
version) or Street (UK version).
Usage: Code list for roads or streets in the system.
Field Positions: In the registration casement of the modules, and in the address register.
Table Name: road_codes
Road Code
Max 12 char
Identification of road code
Road Name Max 40 char Name of road
Municipality
from list box.
Max ? char Reference to municipality table. Activate text button or Alt+L, and choose municipality
Mapsheets
Menu item: 'Base Tables > Common Base Tables > Main', the tab 'GIS/Mapsheets'
Usage: Defines either co-ordinate systems to be used for GIS integration or (but not in the UK ver.) mapsheets to be used
in the internal GeoView Mapsheet system. Only the *-marked definition fields are used when defining a co-ordinate system.
When defining Mapsheets, see the more detailed description in the section 'Base Tables for Mapsheet Viewing' later in this
chapter.
Field Positions: The 'Map Id' fields at the 'GIS Co-ordinates' or 'Mapsheets' tabs in the various modules.
Table Name: mapsheet
Mapsheet Id* Max 15 char.................................................................................................................. ...................
Required field. Enter Id for mapsheet or co-ordinate system
Name* Max 30 char Name description for mapsheet or co-ordinate system
Type of Map* Dropdown list Description of the map type. Choose co-ordinate system or mapsheet from the list or type
it in yourself.
Projection* Dropdown list Map projection details. Choose from the list or type it in yourself.
Scale of Map Integer Enter the scale of map, i.e. 10000, 5000
Path to Map Max 255 char Enter a path to a map file
Comments Max 120 char Enter comments
Coordinates,
type of * Dropdown list Enter type of coordinates. Choose either meter or decimal degrees from the list.
Nw, Ne, Sw and Se X 6 decimals Enter NW, NE, SW and SE corner X co-ordinate of mapsheet.
Nw, Ne, Sw and Se Y 6 decimals Enter NW, NE, SW and SE corner Y co-ordinate of mapsheet.
Theme, Type, Status and Action Codes
Menu item: 'Base Tables > Common Base Tables > Main'. Under the 'GIS' tab, the tabs 'Theme', 'Type', 'Status' and
'Action Codes'.
Usage: These base tables are not used pt.

48
Co-ord. Quality
Menu item: 'Base TablesCommon Base TablesMain', the tab 'GIS/Co-ord. Quality'
Usage: Used to indicate the source of the coordinate set – and thereby its quality.
Field Positions: The field 'X,Y-Accuracy' on mapsheet tabs in all modules.
Table Name: map_coord_qual
Code Max 6 char.................................................................................................................. ...............................
Required field. Code of coordinate source
Name Max 60 char Required field. Name of coordinate source
Short Name Max 20 char Short name of coordinate source
Comments Max 255 char Comments
Sort No Integer Determines the display order
Label Names of User Defined Labels
Menu item: 'Base TablesCommon Base TablesMain', the tab 'User Defined Labels/Label Names'
Usage: During set-up of the system, you may define the names of 5 code fields (to the right of the registration casement of
modules). The database administrator should enter the definition – before operational data are entered into the system.
Field Positions: To the right of the registration casement of modules.
Table Name: adm_unit_label
Label No 1,2,3,4 or 5 Required field. Enter Label number.
Label Name Max 30 char Required field. Label name, e.g. ’Land District’, ’Local Counsil’, ’Main Catchment’,
’Respon. Authority’, and ’Reserved’.
Codes for the User Defined Labels
Menu item: 'Base Tables > Common Base Tables > Main', the tab 'User Defined Labels/[Name Def. for User Defined
Labels 1-5]'
Usage: When the names of 5 User Defined Labels are defined, the system must be restarted. Then you can see these
names on the Base Tables tabs - and you may enter codes for the defined fields.
Field Positions: To the right of the registration casement of modules.
Table Name: adm_unit_1, adm_unit_2, adm_unit_3, adm_unit_4, adm_unit_5
Code ....................................................................................................................................................................
Max 6 char ..........................................................................................................................................................
Required field. Id code, e.g. county code.
Name Max 40 char Required field. Name of code, e.g. county name.
Site ID Part 1
Menu item: 'Base Tables > Common Base Tables > Main', the tab 'Site ID Formation/Site ID (Part 1)'
Usage: Defines the selectable codes for the first part of a automatically generated Site ID.

49
Field Positions: First part of the contents in the field 'Site ID' in the registration casement of the site modules.
Table Name: site_struc1
Module Dropdown List ............................................................................................................... ............................
Required field. Select from the list of modules/module groups in the system.
Part 1 Max 8 char Required field. Enter 1st part of site ID (delimiter included).
Part1 Description Max 50 char Description of 1st part of the site ID.
Site ID Part 2
Menu item: 'Base Tables > Common Base Tables > Main', the tab 'Site ID Formation/Site ID (Part 2)'
Usage: Defines the selectable codes for the second part of a automatically generated Site ID.
Field Positions: Second part of the contents in the field 'Site ID' in the registration casement of the site modules.
Table Name: site_struc2
Module Dropdown List ............................................................................................................... ............................
Required field. Select from the list of modules/module groups in the system.
Part 2 Max 5 char Required field. Enter 2nd part of site ID (delimiter included).
Part2 Description Max 50 char Description of 2nd part of the site ID.
Project Id (Part 1 and 2)
Menu item: 'Base Tables > Common Base Tables > Main'. Under the 'ID Formation' tab, the tabs 'Project Id (Part 1)' and
'Project Id (Part 2)'.
Usage: These base tables are not used pt.
Site Type
Menu item: 'Base Tables > Common Base Tables > Main', the tab 'Other/Site Type'
Usage: To categorise sites in various types – inside the same system type.
Field Positions: In the registration casement of the site modules, either with field name 'Site Type' or just 'Type'.
Table Name: site_type
Type Id Max 6 char Required field. Id code for site type; may refer to an official classification
Site Type Max 30 char Required field. Name of site type. Either type one in or choose one from the dropdown list.
System Type Dropdown list Required field. Choose from the list. The system type decides in which modules the site
type is selectable. The 'Inspection' type is directed to the PPC module.
Comments Max 120 char Description of site type
Project Type or Survey Type
Menu item: 'Base Tables > Common Base Tables > Main', the tab 'Other', and the sub tab 'Project Type' (World
version) or 'Survey Type' (UK version).
Usage: To categorise projects or surveys in various types – inside the same system type.
Field Positions: 'Project Type' field in the registration casement of the Surveys module.
Table Name: survey_types

50
Type Id Max 6 char Required field. Id code for project type; may ref. to an official classification
Survey Type Name Max 30 char Required field. Name of project type.
System Type Dropdown list Required field. Choose from the list. The system type decides in which modules the
project type is selectable. Only the 'Projects' type directed to the Surveys module, is available.
Note Type
Menu item: 'Base Tables > Common Base Tables > Main', the tab 'Other/Note Type'
Usage: Used for definition of note types, selectable on the note tabs in the modules. (The PPC module uses independent
note types, defined in the PPC base tables.
Field Positions: Note tabs in all modules, with the exception of the PPC module.
Table Name: note_titles
Sort Key Integer ..................................................................................................................... ...............................
Required field. Determines the display order of note types.
Note Type Name Max 40 char Required field. Name of note type.
Case Officer
Menu item: 'Base Tables > Common Base Tables > Main', the tab 'Other/ Case Officer'
Usage: Used to indicate the case officer making the registration.
Field Positions: All places where a case officer can be indicated.
Table Name: case_officer
Code ....................................................................................................................................................................
Max 6 char ............................................................................... ...........................................................................
Required field. Case officer id
Name Max 60 char Required field. Name of case officer
Abbreviation Max 20 char Enter abbreviation for the case officer
Sort No Integer Decides the display order of names.
Classification Adm. By checking this field, rights are granted to the officer to
administer the classification system.
System Adm. By checking this field, rights are granted to the officer to administer the system.
Active Makes the case officer active and selectable in list boxes; not active case officers are only selectable in query mode.
County
Menu item: 'Base Tables > Common Base Tables > Main', the tab 'Other/ County'
Usage: Used for registration of counties.
Field Positions: The field 'County' in the registration casement of the Boreholes module.
Table Name: gsc_county
Code Max 6 char County code

51
County Name Max 60 char Name of county
Abbreviation Max 20 char Enter abbreviation for the county
Sort No Integer Decides display order
District
Menu item: 'Base Tables > Common Base Tables > Main', the tab 'Other/ District'
Usage: Used for registration of districts.
Field Positions: The field 'District' in the registration casement of the Boreholes module – and the field 'Geographic
Source' on the tab 'Waste Transport/Registration' in the module Waste Carriers, and also on the tab 'Received Waste
/Registration' in the module Treatment Plant.
Table Name: gsc_district
Code Max 6 char District code
District Max 60 char Name of district
Short Name Max 20 char Short name of district
Sort No Integer Decides display order
Document Links
Menu item: 'Base Tables > Common Base Tables > Main', the tab 'Other/Document Links'
Usage: Defines calls of other programs. Used e.g. in connection with integration of journal systems, but can also be used
for calling all types of files. (This table is not used in the Contaminated Land module).
Field Positions: The 'Open' fields at the 'Case Files' tab in the PPC module and the 'Case Overview' tab in the Case
Management module.
Table Name: ext_command
Id Max 10 char Identification of external command
Name Max 15 char Short name description – shown on button
Type Dropdown list Select command type from list
Command Max 225 char Indicate command to be executed
Description Max 225 char Description of command
Server Program Max 30 char Name of DDE server
Server Topic Max 30 char Name of DDE topic
Item Max 30 char Name of DDE item
Pre Command Max 10 char Choose a possible command, to be executed first
Error Command Max 10 char Choose a possible command to be executed in the case of errors. Hereafter, the original
command is executed again.

52
Common Base Tables: Inspection
Plan Periods or Planning Periods
Menu item: 'Base TablesCommon Base TablesInspection', the tab 'Plan Periods' (World version) or 'Planning Periods' (UK
version).
Usage: Defines plan periods which you may choose from at the establishment of inspection. The length of periods (the
number of periods per year) is optional. However, the report 'No of Inspections' which counts the number of inspections for
each period can max. handle 4 periods per year.
NB! The defined periods may not overlap each other. This will result in errors in the system!
At the establishment of expandable inspection, there must be defined periods for at least 2 years ahead – otherwise the
system gives an error message.
Field Positions: The field 'From & To Period' on the tab 'Inspections/Inspection List' – plus in the generation boxes behind
the buttons 'Periodical Inspections' and 'Generate Controls' respectively on the 'Inspection List' and 'Follow-up' tabs.
Table Name: ind_plan_period
Year Integer ..................................................................................................................... .....................................
Required field. Year of the planning period
Period No Integer Required field. Unique No for the period
From Date Date Field Required field. Beginning of period
To Date Date Field Required field. End of period
Inspections/Follow Up or Inspections/Appointments
Menu item: 'Base TablesCommon Base TablesInspection', the tab 'Inspections/Follow Up' (World version) or 'Inspections/
Appointments' (UK version).
Usage: Defines the various types of (internal) controls & inspections, which can be used in the module.
Field Positions: The fields 'Type' on the tabs 'Inspection List' and 'Follow-Up' or 'Appointments/Tasks'.
Table Name: ind_inspec_types
Id Max 6 char Required field. Inspection type code
Name Max 40 char Required field. Name of inspection type
Type Dropdown list Required field. Indicate type - either 'Control' or 'Inspection'. The type decides if the code may be
chosen on the tab 'Inspection' or the tab 'Follow-Up'.
Next Inspec. Dropdown list If an inspection type is set to 'Yes' it can be used to generate the next inspection on the
'Inspection List' tab when an executed inspection of this type is registered on the tab and an inspection frequency (in
month) is registered on the Company tab.
Enforcement Types
Menu item: 'Base Tables > Common Base Tables > Inspection', the tab 'Enforcement Types '.
Usage: Defines various types of enforcement, which may be effectuated towards a company.
Field Positions: The field 'Type' on the tab 'Inspections/Enforcement'.
Table Name: ind_enforce_types
Type Id Max 6 char ................................................................................................................. ............................
Required field. Enforcement type code

53
Name Max 60 char Required field. Name of enforcement type
Control Points
Menu item: 'Base TablesCommon Base TablesInspection', the tab 'Control Points'.
Usage: The checkpoints are note headings of remarks, which are associated with an accomplished inspection.
Field Positions: The field 'Control Point' on the tab 'Inspections/ Inspection Comments'.
Table Name: ind_control_items
Control Point Id Max 6 char ................................................................................................................. ...............
Required field. Control point Code
Name of Control Point Max 40 char Required field. Name of control point

54
Common Base Tables: Case Management
Case Types
Menu item: 'Base Tables > Common Base Tables > Case Management', the tab 'Case Types'.
Usage: Defines various case types that you may choose from in the modules. When the attributes 'Permission' or 'Waste
Water Permission' is allocated to a case type, there will be an automatic transfer of the date from the field 'Case Completed
on the 'Case' tab to the fields 'Permission Date' or 'WW Permission' on the 'Company' tab in the PPC module.
Field Positions: The field ' Case Type' on the tab 'Case Information/Case Details'.
Table Name: ind_acttype
Case Type Id Max 6 char.................................................................................................................. ...................
Required field. Case type code
Name Max 30 char Required field. Name of case type
Permission Case Dropdown list See the description above.
Department
Menu item: 'Base Tables > Common Base Tables > Case Management', the tab 'Department'.
Usage: Defines the various departments using the GeoEnviron system.
Field Positions: The field 'Department' on the 'Case Information/Case Details' tab in various modules (e.g. the PPC module).
Table Name: csm_department
Department Max 6 char Required field. Code for department
Name Max 30 char Required field. Name of department
Events
Menu item: 'Base Tables > Common Base Tables > Case Management', the tab 'Events'.
Usage: Defines the events, which can take place during the progress of a case. The events (and their associated
movements) are registered under the 'Case Information/ Progress' tab, and are used in connection with the calculation of
time usage under the same tab.
You may get a deeper understanding of the use of events in the course material for the PPC module (the section on the tab
'Case Information/Progress').
Field Positions: The field 'Events' on the tab 'Case Information/Progress'.
Table Name: ind_event_code
Event Code Max 6 char .................................................................................................... ...................................
Required field. Event Code
Name Max 40 char Required field. Name of event
Movement Dropdown list Required field. Movement, either 'In - Internal', 'Out - Internal', 'In - External', 'Out -
External' or 'None'.
Parameters (UK version only)
Menu item: Base Tables > Common Base Tables > Case Management', the tab Parameters.
Usage: Defines a directory structure where case documents are saved to. For each year a new main directory and a
subdirectory for each case type is created when clicking the 'Create New Dir. Structure' button. A document is saved to the

55
subdirectory of the case type of the case the document belongs to.
Table Name: csm_param
Year Integer Required field. Current year.
Document Path Max 255 char Enter the path to where you want the directory structure for documents to be created.
Templates (UK version only)
Menu item: 'Base TablesCommon Base TablesCase Management', the tab Templates.
Usage: Defines selectable Word document templates.
Field Positions: 'Mail Merge' tab in Case Management section of site modules.
Table Name: csm_template
Template name Max 12 char ................................................................................................................. ...............
Name of document template.
Template Description Max 60 char Description of the template, e.g. its use.
Init Max 6 char Initials of person, if template is private. Activate List (L) button or Alt+L, and choose the initials of
a case officer from list box.
Department Max 6 char Department code, if template belongs to a department.
Activate List (L)button or Alt+L, and choose the department code from list box.
Path Max 250 char Path to the template file. Activate button, and choose the template file in the dialog.
Note Titles (UK version only)
Menu item: 'Base Tables > Common Base Tables > Case Management', the tab 'Note Titles'.
Usage: Defines note headings, selectable on the case note tab.
Field Positions: Note tab in Case Management section of site modules.
Table Name: ind_note_title
Note Title no. ........................................................................................................................... ............................
Integer............................................................................................... ....................................................................
Required field. Note title number.
Note Title Max 40 char Required field. Heading of note type.
Case Status (UK version only)
Menu item: 'Base Tables > Common Base Tables > Case Management', the tab 'Case Status'.
Usage: Defines status of cases.
Field Positions: 'Case Details' tab in Case Management section of site modules.
Table Name: ind_case_status
Status Id Max 6 char Required field. Case status Id code.
Status Name Max 40 char Case status name.
Comments Max 120 char Description of case status.

56
System Type Dropdown list Required field. Choose from the list. The system type decides in which modules the case
status code is selectable.
Stage (UK version only)
Menu item: 'Base Tables > Common Base Tables > Case Management', the tab Stage.
Usage: Describes stage of documents.
Field Positions: Document tab in Case Management section of site modules.
Table Name: document_stage
Stage Id Max 6 char......................................................................................................................... .................
Required field. Stage Id code.
Stage Descript Max 60 char Required field. Description of stage.

57
Shortcut Keys
The following pages will give you a complete overview of the shortcut keys you can use in GeoEnviron.
Shortcut Keys in GeoEnviron
Command buttons
The Update button: Alt+u
The Insert button: Alt+i
The Delete button: Alt+d
The Find button: Alt+f
Retrieve button (only in search mode): Enter or Alt+r
Abort search mode: Esc
The Overview window
Display Overview window (only in Registration Casement) Alt+s
In the overview window:
A record down or up: Arrow keys
One page down (window viewing): Page Down
One page Up (window viewing): Page Up
Go to first record: Ctrl+Home
Go to last record: Ctrl+End
Sorting in first column: Shift+F1
Sorting in second column: Shift+F2 – etc.
Go to records starting with (in active column): Letter or number
Back to Registration Casement: Space bar
Window Navigation
To next data field: Tab-key
To previous data field: Shift+Tab
Select tabs (more times for different levels): Ctrl+t
Next tab: Arrow key
Previous tab: Arrow key
Shift to next open window: Ctrl+Tab
List boxes
Display list box for active code field: Alt+l
In list boxes:
A record down or up: Arrow keys
One page Down (window viewing): Page Down
One page Up (window viewing): Page Up
Sorting in first column: Shift+F1
Sorting in second column Shift+F2 – etc.
Go to records starting with (in active column): Letter or number
Select record: Enter
Dd-code fields (Dropdown list boxes)
When the cursor is in the field:
Next Option: Arrow key
Previous Option: Arrow Key
Select and go to next field: Tab-key
Menu options

58
Activate menu (press once) Alt-key Then:
The Menu 'File' f
The Menu 'Edit' e
The Menu 'View' v
The Menu 'Site Modules' s
The Menu 'Other Modules'o
The Menu 'Base Tables' a
The Menu 'InfoBase' b
The Menu 'Documentation' u
The Menu 'System Adm.' y
The Menu 'Reports' p
The Menu 'Window' w
The Menu 'Help' h
Next menu or enter sub menu: Arrow key
Previous menu or exit sub menu: Arrow key
Go down in menu: Arrow key
Go up in menu: Arrow key
Select menu item: Enter
Exit menu (deactivate): Alt-key
Copying text or numbers
When text or numbers are selected:
Copy Ctrl+c
Cut Ctrl+x
Paste (Where the cursor is placed) Ctrl+v
Printing
Print (active data window etc.) Ctrl+p
The GeoView Map Window
When the 'Select' function is selected:
Insert site/activity on the map: i+mouse click
Move site/activity on the map: m+mouse click
Remove site/activity from the map: r+mouse click
Go to site data in respective module: Ctrl+mouse click
In all windows
Refresh record (Retrieves from database) F5
Close window Ctrl+F4
Exit program Alt+F4
In an empty program window
Set language Ctrl+Shift+Alt+l