Street Fighter IV Guide
95
Street Fighter IV Guide Dear friends, it's been a while. Sure, Capcom's released plenty of fighting games over the last ten years—your Capcom vs. SNKs, your Capcom Fighting Evolution, your Anniversary Collection, etc.—but nothing gets the competitive juices flowing like a good ol' fashioned numeral change. More than a decade after Street Fighter III, Capcom finally learns to count to IV. Whether your old skills are rusty due to neglect or you never developed your fighting strategies beyond learning all of the characters' special moves, our Street Fighter IV guide is packed with the sort of tips we hope will elevate your game beyond scrub level. In this Street Fighter IV strategy guide, you'll find: BASICS // Both simple and advanced strategy for general Street Fighter IV play. CHARACTERS // Moves lists and strategies for the game's 25 playable characters. SECRETS // Learn how to unlock the game's many hidden characters, including Akuma and Gouken. Guide by: Mark Ryan Sallee © 2009, IGN Entertainment, Inc. May not be sold, distributed, transmitted, displayed, published or broadcast, in whole or part, without IGN’s express permission. You may not alter or remove any trademark, copyright or other notice from copies of the content. All rights reserved. Page1 © 2009 IGN Entertainment, Inc.
-
Upload
khangminh22 -
Category
Documents
-
view
2 -
download
0
Transcript of Street Fighter IV Guide

Street Fighter IV Guide
Dear friends, it's been a while.
Sure, Capcom's released plenty of fighting games over the last ten years—your Capcom vs. SNKs, your Capcom Fighting Evolution, your Anniversary Collection, etc.—but nothing gets the competitive juices flowing like a good ol' fashioned numeral change. More than a decade after Street Fighter III, Capcom finally learns to count to IV.
Whether your old skills are rusty due to neglect or you never developed your fighting strategies beyond learning all of the characters' special moves, our Street Fighter IV guide is packed with the sort of tips we hope will elevate your game beyond scrub level.
In this Street Fighter IV strategy guide, you'll find:
� BASICS // Both simple and advanced strategy for general Street Fighter IV play.
� CHARACTERS // Moves lists and strategies for the game's 25 playable characters.
� SECRETS // Learn how to unlock the game's many hidden characters, including Akuma and Gouken.
Guide by: Mark Ryan Sallee
© 2009, IGN Entertainment, Inc. May not be sold, distributed, transmitted, displayed, published or broadcast, in whole or part, without IGN’s express permission. You
may not alter or remove any trademark, copyright or other notice from copies of the content. All rights reserved.
Page1© 2009 IGN Entertainment, Inc.

Street Fighter IV Basics
The Attack
By far Street Fighter IV's biggest addition to the classic Street Fighter formula is the Focus Attack, which every character can execute by pressing MP + MK. While each character's Focus has a unique look, range and damage rating, they all share the same general properties.
The most prominent property is the hyper armor effect, which lets you absorb one hit from the opponent without being interrupted from your Focus Attack. While absorbing the hit does not completely negate the damage from the hit (you take the damage, but it regenerates quickly as long as you don't get hit again), it does let you immediately follow with a counter hit.
Here's an example of its use: If an opponent jumps at you with an air attack, you can begin a Focus Attack to absorb that hit and then release the MP + MK input to instantly counter attack. If, alternatively, you blocked the attack, you would suffer a frame disadvantage because of block stun and would not be able to counter attack until block stun wore off.
«What's New to Street Fighter
Combo System Wake-Up Game Glossary »
Ultra Combos
Ultra combos are very similar to the super combos you're likely familiar with. Throughout a fight, a meter fills up (in this case, the revenge meter) and when it's at least half full you can execute an ultra combo. Every character has an ultra combo (Gen has two) and generally they do lots of damage. That's the basic gist of ultras, but there's more to them than flashy animations. Two things make ultra combos unique to Street Fighter IV. 1) You build the revenge meter needed for ultra combos by taking damage rather than dealing it. The more damage you take, the more your meter fills and the more full the revenge meter when you perform the ultra combo the more damage the attack will deal. 2) Ultra combos cannot cancel other attacks. This makes them markedly different from super combos, which can cancel normal and special attacks. Since ultra combos can't cancel other attacks, comboing into ultras usually takes some ingenuity.
Focus Attack
Page2© 2009 IGN Entertainment, Inc.

There are three stages of the Focus Attack that change depending on how long you hold down the MP + MK input. If you quickly tap the input, you still get the brief hyper armor effect of the Focus Attack but the attack itself won't have any special properties (though it will crumple on counter hit). If you hold down MP + MK for a second, just until your character flashes, the Focus Attack will crumple the opponent, leaving them vulnerable to a follow-up attack. If you charge the Focus Attack entirely, holding down MP + MK until the attack automatically unloads, the strike becomes unblockable in addition to causing the crumble effect.
Canceling
But wait, there's more! The Focus Attack offers much more depth than a simple attack that may or may not be blockable. The ultimate quality of Focus Attacks is their cancelability. Yes, we made that word up.
There are two different cancels associated with Focus Attacks, the simplest being the dash cancel. While charging a
Focus Attack, you can opt to cancel the attack by dashing either backward or forward (just double tap or ) before your character actually follows through with the strike.
This cancel has a couple of uses: 1) You can use is as a feint to play mind games with the opponent; 2) You can execute a Focus Attack to use its hyper armor property and then cancel it so that you don't actually have to follow through with the lengthy attack animation. The second use is especially effective against projectiles. Instead of blocking a fireball, you can start a Focus Attack to absorb the fireball and then dash cancel forward to immediately move closer to the opponent. This tactic is key for characters that don't have projectile attacks of their own and need to close the distance against fireball-tossing jerks.
You can also dash cancel a Focus Attack after it hits. By dash canceling after the hit connects, you can recover from the attack more quickly and more easily follow up with a combo on the crumpled opponent as he falls to the floor. To
execute this dash cancel, simply double tap or any time after releasing the MP + MK input. As long as the Focus Attack actually connects with the opponent, your character will interrupt the usual lag animation after the Focus Attack
Page3© 2009 IGN Entertainment, Inc.

with a dash for an immediate follow up.
Dash canceling isn't the only cancel related to Focus Attacks, though. Focus Attacks can themselves cancel just about any ground-based attack by simply inputting MP + MK in the middle of the ground attack animation, provided you've got some spare super meter (a Focus Attack cancel consumes half of a super gauge). As a quick and simple example, stand next to an opponent and tap HP and immediately follow with MP + MK. The Focus Attack will cancel the usual lag of the standing HP attack and go instantly into the Focus Attack. While this will make for some easy and simple combos, it's not especially useful and not worth the super meter it costs...until you combine the Focus Attack cancel with the dash cancel.
FADC - Focus Attack Dash Cancel
Pardon us if this gets a bit complicated, but it's important to learn the most powerful new technique in Street Fighter IV, the Focus Attack dash cancel (FADC). Cancel a ground attack with a Focus Attack and then cancel that Focus Attack with a dash to essentially reset your standing and let you follow up with another attack. You can use the FADC to set up combos that wouldn't otherwise work because the moves that set up those combos have too much recovery time. The FADC cancels that recovery time to let you capitalize on the hit stun caused by the initial move.
Here's an example of the FADC at work: Ryu's Shoryuken attack ( + P ) knocks the opponent into the air and they drop lifelessly to the ground. But because Ryu's attack also sends him into the air, by the time he recovers from the Shoryuken he can't do anything to take advantage of the lifeless opponent. But, if you hit with the Shoryuken and cancel with the FADC, you can forego the recovery of the Shoryuken move and instantly follow with an attack, like Ryu's Metsu Hadoken ultra combo.
Quick Tip
When should you dash cancel? This is easy to remember: always. Basically there is no reason not to dash cancel a Focus Attack, whether it's an early dash cancel to interrupt the Focus Attack or a late dash cancel to negate the recovery animation of the Focus.
Page4© 2009 IGN Entertainment, Inc.

There are lots of ways to combo in Street Fighter IV, but before we get into that we should define what a combo really is. From the Abridged BS Dictionary of MRS, EIC, San Francisco:
So a combo isn't just any combination of attacks, but specifically a combination of attacks that connect, one after the other, with the opponent unable to block them. If you start a combo and land the first hit, the opponent will be helpless until the combo ends (or until you botch the combo). You'll know you've landed a combo in Street Fighter IV when the game shows the combo counter on the screen.
There are five basic combo types in Street Fighter IV, four of them dating back to the days before Street Fighter even counted combos.
Jump-In Combos
Jump-in combos are probably the easiest to connect with. For the sake of discussion, we'll assume you're Ryu. Jump at an opponent with a j.HK attack to start the combo. When the j.HK connects, it puts the opponent into a fairly lengthy hit stun, allowing you to land from the jump and combo another hit. For a very basic jump-in combo with Ryu, connect a j.HK and, as soon as you touch the ground, follow with a c.HK.
This isn't terribly important, but it's worth knowing why jump-in combos work. Jump-in combos are similar to link combos—described below—in that you are forcing the opponent into a lengthy hit stun with a strong attack and then following quickly with another attack before the opponent recovers from that hit stun. What makes jump-ins unique is that landing from a jump effectively cancels the recovery animation of your attack. For a self-demonstration of the canceling effect of landing from a jump, try this. As Ryu, jump straight up in the air and immediately press HK. Ryu kicks on the way up, and as he comes down from the jump his leg spins around behind him. Now try jumping straight up again, only this time pressing HK just before you hit the ground. Ryu will perform the same kick, but the landing will cancel the lengthy recovery animation, letting you instantly follow with a ground attack.
Link Combos
Link combos rely on hit stun and quick attacks that can take advantage of that hit stun. More powerful attacks generally cause more hit stun, leaving a bigger window for linking in another hit, but also usually have more recovery time, making it more difficult to attack again before the opponent's hit stun wears off. A quick example of an easy link combo can be
«What's New to Street Fighter
Combo System Wake-Up Game Glossary »
Combo System
Combo
Any string of attacks that become unblockable once the first hit in the string has connected. Example: If Ryu lands a j.HK from deep in, he can land from the jump and connect a c.MK before the opponent can recover from the first hit and block. When the second hit, the c.MK, connects, Ryu can cancel into his Hadoken and, again, the attack will connect before the opponent can recover from the last hit.
Cross-Ups
A cross-up is similar to a jump-in and sets up the same combo options as do jump-in attacks. For more details on cross-ups, read our wake-up game breakdown.
Page5© 2009 IGN Entertainment, Inc.

performed with Ryu. Stand right next to the opponent and quickly fire off three c.LK attacks. The c.LK doesn't cause much hit stun, but because the following c.LKs are so quick they are still able to combo.
A more useful example of a link combo, also with Ryu, again starts with a c.LK. After the c.LK lands, follow with a quick c.LP which creates enough hit stun that you can follow by landing a c.MP. The timing of link combos is pretty exact, so don't be surprised if your link doesn't always create a combo. But link combos are excellent for starting even more devastating combos, by way of canceling.
Cancel Combos
A cancel, at its most basic, is an action that interrupts another action. As we detailed above, jump-in combos are possible because the act of landing from a jump cancels the j.HK animation. But there are much more interesting ways to cancel.
The most common cancel combo is a two-in-one combo. A two-in-one starts with a normal attack that is canceled by a
special or super attack. Here's an example of a two-in-one combo with Ryu: Ryu does a c.MK by pressing + MK that
hits the opponent, and two-in-ones into a Hadoken by inputting + P before the c.MK animation completes. The Hadoken interrupts the c.MK attack after the kick has connected, making the combo possible. If you were to attack with a c.MK and follow with a Hadoken without canceling, the two attacks would not combo.
Most normal attacks can be canceled into special or super attacks, but not all. And note that not all normal attacks create enough hit stun for the ensuing special or super attack to actually combo. Experiment with your character of choice to find out which normals can be canceled, which specials can cause the cancel, and which series of attacks and cancels actually results in a combo.
Street Fighter IV also allows super combos to cancel special attacks, letting you connect with a special (like a regular Hadoken fireball) and then cancel that special to super (like Ryu's Shinku Hadoken) to form a combo. Generally, you'll want to utilize the two-in-one in order to execute the super combo's input before the special attack is finished. As Ryu,
input + P to fireball and immediately follow with + P to two-in-one the Shinku Hadoken.
Page6© 2009 IGN Entertainment, Inc.

There's one more type of cancel combo, this one involving the Focus Attack that's new to Street Fighter IV. It's complicated, so check out our Focus Attack breakdown for the phat skinny.
Target Combos
Target combos—also known as chain combos—are similar to link combos but are much easier to execute. Similar to link combos, target combos involve connecting multiple normal attacks together to form the combo. Unlike link combos, the normal attacks in target combos are specially formulated to allow each following attack to cancel the previous attack. Typically, a normal attack cannot cancel another normal attack. But target combos break that rule.
Only some characters have target combos and they are always very specific (and listed in the moves list). There's no room for creativity with target combos—you take what you're given. Some examples of target combos include Ken's standing MP xx HP. On their own, target combos are typically not impressive, but you can combine them with other combos (like jump-ins and cancels) to build effective damage.
Juggle Combos
The systems for juggle combos have historically been pretty varied in Street Fighter. Street Fighter Alpha 3 has perhaps the most robust juggle combos, and while Street Fighter IV's juggles don't approach the absurdity of A3's, there is some room for a bit of juggling fun. A juggle combo involves connecting with an attack that causes the opponent to fall from the air and then connecting with another attack before they hit the ground.
Not all attacks that drop the opponent from the air leave the opponent vulnerable to a juggle, and even if you find an attack that leaves the opponent vulnerable to a juggle, not all attacks are capable of juggling. Typically, EX versions of special attacks are more likely to successfully juggle than non-EX versions. Super combos and ultra combos are also usually good about connecting as juggles.
Page7© 2009 IGN Entertainment, Inc.

A quick example of an effective juggle can be demonstrated with Sakura. Executing her standard Shunpukyaku does not set up a juggle, but an EX-Shunpukyaku will knock the opponent into the air, leaving him/her vulnerable to a juggle combo. In this specific case, Sakura can juggle with most any of her attacks. Her Sakura Otoshi string is an especially ripe example of juggling, letting you juggle the opponent three times in the air.
Now that you've understood the basics of comboing, it's time to start experimenting. All of the above combo types can work together to form longer, more complicated and more damaging combos. Here's an example of a combo that combines multiple combo types with Ryu: j.HK, s.HP xx Shoryuken xx FADC, Metsu Hadoken. You've got a jump-in, a two-in-once cancel, a Focus Attack Dash Cancel, and an ultra combo juggle all in one. And that's just one example. The possibilities are endless if you've got the creativity and dedication to piece together the effective combos necessary for success in the competitive field of Street Fighter.
While not all attacks knock down opponents, many do. To the average player, these knock downs may feel like momentary lulls in the action, quick breaks that must be endured before the fight can resume. To the thinking fighter, however, the dynamics of a knockdown are much more interesting. When one fighter is knocked down, you've entered the wake-up game.
For the sake of discussion, we'll assume that you, as Ryu, are knocking down your opponent. As the opponent gets up from off the ground, you have a lot of options for continuing your offense. To play it safe, you can simply toss a fireball from a distance, timed so that it will connect with the opponent as soon as they stand up. Obviously, this attack can be easily guarded, but that's not necessarily a bad thing for you. Forcing the opponent to guard like this will earn you a bit of chip damage. As well, it continues pressure, keeping you in control of the fight instead of letting the momentum reset to neutral.
To counter your fireball, the opponent—let's assume Ken—has options, as well. The obvious counter is to simply block. While this will save him from most damage, it doesn't leave Ken in a very advantageous position. Alternatively, Ken can take advantage of invincibility frames in one of his attacks in order to wake up and immediately pass through your fireball. In the case of Ken, his Shoryuken attack starts with invincibility frames. Also, like most other characters, his super and ultra combos start with invincibility frames.
So clearly your fireball to the downed opponent isn't a flawless offense, but it is at least safe. Other options aren't so
«What's New to Street Fighter
Combo System Wake-Up Game Glossary »
Wake-Up Game
Page8© 2009 IGN Entertainment, Inc.

safe but yield greater rewards. While the opponent is on the ground, you can jump at them with a meaty j.HK. To block the j.HK, the opponent will have to stand up and block high. If the opponent tries to guard low, your j.HK will connect, letting you move into a combo attempt. If the j.HK is blocked, you can immediately follow with a crouching attack—such as c.MK—to once again force the opponent to change guard, this time forcing them to very quickly move to a low guard.
Or better yet, you can jump at the opponent with a meaty cross-up attempt. Ryu's j.MK is an excellent cross-up move, and attacking with this as the opponent stands up not only forces the opponent to guard high but also forces the opponent to guard in the opposite direction in order to be successful in defending your attack. Guarding meaty cross-ups can be pretty difficult for even the best Street Fighter players, though only if you keep the opponent guessing. If you always attack with a cross-up, they'll learn to always block the opposite direction. But if you perfect your spacing and mix together cross-ups and regular meaty jump-ins, the opponent will have a tough job discerning which attack you're using at any given time, making it very difficult to defend.
The opponent isn't helpless against your meaty jump-ins and cross-ups, though. As before, Ken can counter with a Shoryuken to take advantage of the move's invincibility frames and high attack priority. A Shoryuken beats almost every other attack in the game, so your j.HK is no match for Ken's counter. But countering with a Shoryuken isn't quite as simple as it sounds.
There are two limits to Ken's ability to wake-up attack as a counter measure against you. The first is execution, as your j.HK is an easier attack to execute than Ken's Shoryuken. In the heat of battle, it's pretty easy to pressure with the j.HK and pretty easy for Ken to mess up his counter input. But assuming your opponent is pretty good and has no trouble with the Shoryuken input, there's yet another limit.
If Ken whiffs the Shoryuken, he leaves himself vulnerable. And here's where things get interesting. Depending on your style of play, you can bait Ken into waking up with a Shoryuken without ever launching a meaty attack. You can do this by purposely whiffing an attack early, before Ken wakes up, to make him think you're going on the offensive. If you then turn and defend against Ken's Shoryuken, he'll be left vulnerable, letting you move in to take advantage and set up a new attack.
The wake-up game is very much a war of minds, each player threatening with their tools while the other tries to guess what the opponent will do. Against AI opponents, these mind games are useless. But when you get to playing flesh-and-blood human opponents, mind games like this play a major role in the outcome of a fight.
Cross-Ups
When fighting on the ground, most all attacks can be blocked with a low guard. To get around the impenetrable defense, you can perform a jumping attack which will force the opponent to guard high. But both of these blocks require simply holding backward in the same direction. While you are forcing the opponent to switch between low and high guards, making him/her work for the defense, there's not that much chance of error. A cross-up fixes that. A cross-up is a jumping attack performed as you jump over the opponent that connects with the opponent from behind. An example of a good cross-up is Fei Long's j.MK. When you jump over the opponent from the left side of the screen, though Fei Long is facing the right and still kicks toward the right, the j.MK attack is capable hitting behind Fei Long. For an opponent to guard against a cross-up, he/she must not only change their guard to a high guard but must also press toward the attacker to guard, instead of away from the attacker. Judging the difference between a normal jump-in and a cross-up is often difficult in the heat of battle, so by forcing the opponent to change many directions of his/her guard, you are much more likely to connect your hit, letting you move into a combo.
Page9© 2009 IGN Entertainment, Inc.

«What's New to Street Fighter
Combo System Wake-Up Game Glossary »
Command Key
LP = Light Punch MP = Medium Punch HP = Hard Punch
LK = Light Kick MK = Medium Kick HK = Hard Kick
P = Any Punch K = Any Kick
PPP = All Three Punches KKK = All Three Kicks
s. = attack while standing c. = attack while crouching j. = attack while jumping
+ = both inputs simultaneously xx = cancel FADC = see here
Glossary
Air
Refers to any action performed while jumping. Example: Akuma can perform an air fireball by executing + P after jumping.
Block Stun
A temporary moment after blocking an attack during which a player cannot do anything but block. Block stun lasts only a few frames of animation. Example: Ken performs a LP Shoryuken and Ryu blocks the attack. Because of block stun, Ryu cannot immediately retaliate with an attack of his, and by the time block stun wears off (just a few frames) Ken will have usually recovered from the Shoryuken.
Buffer
Buffering is inputting commands, usually for special and super moves, early so as to complete the input at the exact
moment that the move can come out. Example: Zangief's Spinning Pile Driver command ( + P )
includes pressing which frequently makes Zangief jump while you're trying to execute the grab. However, you can whiff a LP to "lock" Zangief to the ground until the LP animation ends. During the animation, input the 360 motion—since Zangief is stuck in the grounded animation, he will not accidentally jump. To complete the buffer, you want the 360 motion to end at the same time as the LP animation and complete the Spinning Pile Driver input with + P. If buffered correctly, the LP will whiff and Zangief will immediately execute his grab after the LP animation.
Cancel
A cancel interrupts an animation from one action to let you perform a new action. There are many different forms of cancels in Street Fighter, but the most common is a two-in-one.
Cheap
A fake word cried by people that are not good at Street Fighter. Example: Mark Ryan Sallee backs Colin Moriarty into a corner and Colin cries, "Stop being so cheap!"
Page10© 2009 IGN Entertainment, Inc.

Combo
Any string of attacks that become unblockable once the first hit in the string has connected. Example: If Ryu lands a j.HK from deep in, he can land from the jump and connect a c.MK before the opponent can recover from the first hit and block. When the second hit, the c.MK, connects, Ryu can cancel into his Hadoken and, again, the attack will connect before the opponent can recover from the last hit.
Corner
The corners of the playing field are the far edges of the screen that represent the boundaries of the arena. The act of cornering involves backing an opponent into a corner and repeatedly attacking, taking advantage of the fact that the opponent cannot retreat. Example: Ryu backs Ken into a corner and keeps him there by throwing Hadokens rapidly and using Shoryukens to knock Ken out of the air if he tries to jump toward Ryu.
Cross-Up
A jumping attack that forces the defender to guard in the opposite direction the attacker comes from. Example: Ryu is on the left, Ken is on the right. In the standoff, Ryu is holding left to guard. Ken jumps over Ryu and attacks with MK, forcing Ryu to hold right in order to block the attack.
Crumple
The unique hit stun effect caused by a charged Focus Attack, crumple leaves the opponent vulnerable to a follow-up attack or combo as he or she slowly falls—or crumples—to the ground.
FADC (Focus Attack Dash Cancel)
FADC refers to canceling a ground attack with a Focus Attack and then canceling that Focus Attack with a dash (usually a
forward dash) to set up a combo. Example: Ryu can FADC ( MP + MK ) his Shoryuken to combo his Metsu Hadoken.
Frames
Typically refers to frames of animation. A typical half-second-long animation will consist of roughly 30 frames, and each frame could have different properties. Example: Some frames of Ryu's Hadoken are simply start-up frames with no attack. Next come attack frames during which the fireball is formed. Finally, there are recovery frames to end the animation. Also see: Invincibility Frames. Frames may also prefer to frames of gameplay, not related to character animation. If we assume the game is running at 60 frames per second, there are 60 frames in each second of gameplay during which actions can take place.
Frame Advantage
A frame advantage implies that one character has frames of gameplay during which they can execute an action but the opponent cannot. Example: Ryu jumps in on Ken and attacks with a j.HK, which Ken blocks. As Ryu lands, he has a frame advantage—until the frames of Ken's hit stun wear off, Ryu can attack while Ken cannot.
Hit Stun
Like block stun, hit stun is a temporary moment after being hit during which you cannot do anything. Unlike block stun, during hit stun you cannot even block. Hit stun is what allows combos to form—you hit an opponent with one move, and they are frozen by a few frames of hit stun during which you can follow up with another attack. Example: Ryu jumps in deep and hits Ken with a j.HK. The hit stun from the j.HK gives Ryu enough time to land and connect with another attack, such as c.MK, before Ken can retaliate or even block. The combo is born.
Page11© 2009 IGN Entertainment, Inc.

Hyper Armor
Hyper armor allows a character to get hit by an attack from the opponent without incurring hit stun, being knocked down, or otherwise interrupting the hyper armor-affected character's actions. Example: Ryu performs his Focus Attack by pressing and momentarily holding MP + MK. When the Focus Attack is charged, Ryu gains temporary hyper armor properties—if Ryu is attacked during this Focus animation, he will take the hit but continue executing the Focus Attack. Because of hyper armor, the attack is not interrupted as any regular attack would be.
Invincibility Frames
Animation frames, usually part of a special or super move, during which the character is invincible and will pass through attacks from the opponent. Example: Ryu's Shoryuken uppercut has invincibility frames at the start of the move. If Ken throws a Hadoken fireball at Ryu, Ryu can execute a Shoryuken and use the invincibility frames to pass through the fireball without being hit.
Jump-In (Attack)
A jumping normal attack launched after jumping toward an opponent, connecting on the downward arc of the jump animation. Example: Ryu jumps toward Ken and on his way down from the jump hits Ken with a j.HK. A jump-in attack is a typical combo setup.
Jump-In Deep
A slight modification to a typical jump-in attack. Jumping in deep essentially means waiting longer on the downward arc of the jump to hit the attack button, resulting in hitting the opponent in the legs with the jumping attack.
Meaty (Attack)
The other side of a "wake-up" situation, a meaty attack seeks to hit an opponent immediately as they wake up from a knockdown. Example: Ken knocks down Ryu with a c.HK and just as Ryu is standing up, Ken jumps at Ryu with a meaty j.HK.
Negative Edge
For normal moves, pressing and releasing an attack button acts as just one input. However, for special and super moves, pressing and releasing acts as two separate inputs of the same attack button. This is negative edge. Example: If you press and hold HP with Ryu and no directional input, you will get one punch attack. If you then release that HP button with no directional input, nothing will happen. If, however, you input the motion for a Hadoken and release the HP button at the end of it, the release of HP acts as a button press to complete the Hadoken input. We promise, it's useful. Because of negative edge, you should always press and release an attack button when you're trying to execute a special move—since it acts as two separate inputs, you're more likely to correctly time the input for the special attack.
Normal (Attack)
A normal attack is any attack that does not require special directional inputs to perform. There are some exceptions, as many characters have normals that are modified with directional inputs but are still not special attacks. The defining characteristic of a normal is that a normal cannot cancel another normal. Example: As Ryu, pressing the HP button with no
directional inputs performs a normal Hard Punch. Pressing + HP with Ryu will perform an alternate normal attack.
Overhead (Attack)
An overhead attack is performed on the ground but hits high, forcing the opponent to guard it while standing. Typically, most ground-based attacks can be blocked while crouching, since the vast majority of ground-based attacks hit either mid or low. Overhead attacks are the exceptions, making them effective in keeping the opponent guessing. Example: Ryu's
+ MP is an overhead normal punch that will connect if the opponent is blocking from a crouch.
Page12© 2009 IGN Entertainment, Inc.

Piano Input
Rapidly tapping, in immediate succession, each of the three punch or kick attacks, in order to better guarantee correct timing for special move inputs. Because of the way Street Fighter recognizes inputs for special moves, inputting button presses piano-style acts as six different inputs (via negative edge). Typically, this technique is used with arcade stick setups where the buttons are lined up next to each other and the player can drum-roll his/her fingers across the three
buttons. Example: Input timing for Ryu's wake-up Shoryuken is tough, so you can input on the control stick and then use piano inputs, quickly tapping off HP, MP, LP, essentially giving you six chances to correctly time the punch attack with the exact wake-up moment at which Ryu can start the defensive attack.
Poke
Refers to a ground attack, typically with lots of horizontal range. Pokes are usually quick and not part of combos, just attacks that are thrown out with the intent to pressure opponents and are usually safe when blocked. Some pokes, when landed, can lead to combos. Example: Ryu's c.MK is a very good poke, a quick, rangy attack that can be canceled into a special or super if it lands.
Priority
Determines which attacks "beat" other attacks. Every attack has a priority level. If both opponents attack at the same time, the attack with the higher priority "beats" the other and connects. If priority levels are similar, the attacks may "trade." Example: Ryu jumps in on Ken with a j.HK, but Ken counters with a Shoryuken. Since the Shoryuken has greater priority, Ken's attack wins and knocks Ryu down while Ken is untouched. Also see: Trade.
Safe
A description for a move that, when blocked, does not leave the attacker vulnerable to a counter attack. Safe attacks usually have quick recovery or induce lots of hit stun to keep the target frozen even if the attack is blocked. Example: Cammy's LK Cannon Spike is typically safe when blocked, but not safe when whiffed.
Special (Attack)
A special attack typically requires a combination of directional inputs capped off with one attack button input. Special attacks, if performed at the correct time, can cancel many normal attacks. Example: Ryu's Hadoken, performed by. Some specials require no directional inputs, such as Zangief's Lariat, performed by simply pressing LP + MP + HP.
Super (Combo)
A super attack is any attack that consumes a full bar of your super meter. Typically, super attacks require double motion
inputs capped off with a single attack input. Example: Ryu's Shinku Hadoken super is performed by inputting
+ P.
Tiger Knee / TK
Has two meanings, the most obvious is simply the name of one of Sagat's special moves. When not referring to Sagat's special, Tiger Knee, or "TK," refers to performing a special move in the air immediately upon jumping off the ground via a
modified directional input that starts on the ground. Example: Akuma can throw a Hadoken from the air by inputting
+ P after jumping. Alternatively, Akuma can TK his air Hadoken by starting the motion on the ground— —
and extending the directional input with before pressing + P. In this situation, the acts as both a jump input and the final directional input for the Hadoken. By TKing Akuma's Hadoken, he can perform the move sooner in his jump which opens up strategical advantages.
Trade
When both opponents attack at the same time and both opponents get hit, they have traded blows. Example: Ryu jumps in on Ken with a j.HK and at the same time Ken counters with a c.HP. Both fighters' attacks connect as they trade and neither fighter gains the upper hand.
Page13© 2009 IGN Entertainment, Inc.

Turtling
Excessive defense. A turtling opponent focuses only on blocking, not on offense, making him/her difficult to damage. Turtling is sometimes a result of fear, but also can be an effective tactic if the player is winning the round and time is about to expire.
Two-in-One (Combo)
Essentially canceling a normal attack into a special attack, using the input for the first attack as part of the input for the special attack. In order to two-in-one cancel a normal move, that normal move must connect with the opponent—it can
successfully hit or be blocked, but it must connect. Example: Ryu does a c.HK by pressing + HK that gets blocked, and
two-in-ones into a Hadoken by inputting + P before the c.HK animation completes. Also see: Cancel.
Wake-Up
"Wake-up" is a general adjective for actions performed by a character after he/she is knocked down onto the ground and is getting up. Example: After Ryu gets knocked down by a c.HK from Ken, he wake up with a Shoryuken, going right into the attack before even moving to a standing animation.
Whiff
Simply means to miss with an attack. Usually when referred to in terms of strategy, whiffing is intentionally missing with a normal attack to either allow for buffering a special or super move, or to make the opponent block or anticipate being hit.
Page14© 2009 IGN Entertainment, Inc.

Street Fighter IV Characters
Character Select
Page15© 2009 IGN Entertainment, Inc.

Fighter Overview
Fei Long is pretty simple on the surface, but being successful with him requires some careful thinking. Unlike a lot of characters, Fei Long doesn't have a projectile attack. As you get better with Fei Long, this isn't a problem, but getting over the initial hurdle can put new players off of trying to use Fei Long.
Getting past projectiles to make the fight a close-up affair should be your constant goal with Fei Long. His
Rekkukyaku kick ( + K ) arcs upward in the middle of the attack and will let you pass over the top of most fireballs. Doing this requires some prediction on your part, however, as it's difficult to use the fireball-evading properties as a reaction. An EX version of the Rekkukayku, however, can be used as a reactionary counter to projectiles. The EX Rekkukyaku will past through fireballs and instantly move you close to the opponent. Unfortunately, the kick isn't exactly safe, so make sure that it's actually going to hit the opponent, not just connect and get blocked.
The safer way to get inside fireballs is with judicial use of dash canceling Focus Attacks, using the hyper armor frames at the start of the Focus Attack to absorb projectiles and then dash through them. Once you're inside, you can utilize Fei Long's outstanding cross-up attack. His j.MK is one of the game's easiest cross-ups to combo off of. Connect it and you can land from the jump and connect a s.HP and cancel into any of Fei Long's three main attack specials. If the cross-up attempt gets blocked, you can use his new Tenshin throw instead.
The Tenshin throw ( + K ) is unblockable. It doesn't deal damage like normal throws, but it does set the opponent up for a combo. For a few frames after the Tenshin, the opponent cannot block. You've got enough time to land a s.HP and work a combo from there. You can fairly easily make the Tenshin count for roughly double the damage of a normal throw, but sadly the move's got myriad start-up frames so it's much slower than a regular throw, hindering its
Fei Long Character Select »
Complete arcade mode as Abel to unlock Fei Long.
Page16© 2009 IGN Entertainment, Inc.

use.
Since Fei Long's super isn't especially good and difficult to combo into, we suggest using your super meter more for EX attacks (like the aforementioned Rekkukyaku) and FADC techniques. Pressure constantly with his c.HP—it's got great
range and does good damage—mixing in his Chokkarakusho ( + MK ) to hit overhead, taking advantage of low-guarding opponents.
Combos
Moves List
j.MK ( cross-up ) s.HP xx + P ( x3 )
This is a pretty good bread-and-butter combo for Fei Long. It does solid damage (especially if you use an EX version of Rekkaken) and is relatively easy to pull off from a connected cross-up.
s.HP xx + K xx FADC xx + HK + PPP
This combo consumes quite a bit of meter but if you can land it it's worth the effort. Canceling the Shienkyaku (
+ K ) with an FADC lets you knock the opponent into the air, at which point you can catch them with the Rekkukyaku
( + K ). As you land after the Rekkukayku, you can follow with Fei Long's ultra. Sadly, most of the ultra hits miss, but the combo does collectively deal solid damage. You can also use the first half of the combo (before the ultra combo) as a general method of attack. Since it involves FADCing the Shienkyaku, it's pretty safe even when blocked.
+ K c.MP xx + P
If you land a Tenshin throw, this is a good way to capitalize and use up your super meter. The timing for cancelling c.MP into the Rekkashinken is pretty tough but it's definitely possible, making this a good way to effectively make your super unblockable (since it starts with a throw).
Chokkarakusho + MK NORMAL
A nice, quick overhead that'll catch a lot of people off-guard, especially if you frequently poke low. Use Chokkarakusho as a meaty attack when you don't expect to eat a wake-up counter—most opponents wake up and immediately guard low. It doesn't do much damage, but it's irritating and the damage will add up.
Engekishu + HK NORMAL
Eh. The two hits combo, but you can't do anything after they land. It's a decent way to punish attacks that bounce the opponent away from you, but at max range Fei Long's two kicks won't both connect. Meh.
Page17© 2009 IGN Entertainment, Inc.

Rekkaken + P ( x3 optional ) SPECIAL
Rekkaken is good for combos, but be careful when using it for general poking. The move can be very effective on its own—use it as a quick poke to beat fireballers before they can launch their projectiles—but if you're going to poke with Rekkaken you should be poking from max range. Make sure just the tip of Fei Long's fist connects because a blocked Rekkaken can leave you very vulnerable to a counter attack. As a poke, you generally should only be using one Rekkaken at a time, not the entire three-hit string unless you know it's going to connect.
Shienkyaku + K SPECIAL
This is a good anti-air attack with good priority. The horizontal range on the Shienkyaku is worse than a shoto's Shoryuken, so use the Shienkyaku mostly as a counter to deep jump-in attempts and cross-ups.
Rekkukyaku + K SPECIAL
As mentioned above, this is a good answer to fireballs, provided you can predict the fireball and execute early. The EX Rekkukayku will pass through fireballs at any time, so it's more reactionary. Just make sure you connect with the opponent or you'll eat a counter. It is possible to link combo when you land from the attack, but the window for input is so slim that we don't think it's practical.
Tenshin + K SPECIAL
Also mentioned above, the Tenshin does no damage on its own but leaves the opponent open to a combo. It's a bit more rangy than Fei Long's normal throws, but has much more start-up so it's not easy to connect. If you're very aggressive and get the opponent to be very defensive, be ready to use the Tenshin throw for a combo, but don't use it place of regular throws.
Rekkashinken + P SUPER COMBO
Decent damage but it's hard to combo into. Probably the best property of the super combo is that it passes through fireball and other incoming attacks due to early invincibility frames. If you get knocked down, use it as a wake-up counter to a close fireball or jump-in attack. But really, we think Fei Long's super meter is best used for EX attacks.
Rekkashingeki + PPP ULTRA COMBO
It's got roughly the same attributes as the Rekkashinken, good for going through fireballs up close and waking up with, but difficult to combo into. You can get three of the hits to connect off of an FADC'd Shienkyaku and that may be worth the meter spent.
Props to reader Tyler P. for help with Fei Long.
Page18© 2009 IGN Entertainment, Inc.

Fighter Overview
Cammy disappoints us. Not that she's bad, but a couple of promising aspects to her game just don't work how we want them to. First and foremost is that Cammy has lost a good cross-up move. In past games, her j.LK as a cross-up acts as a good lead into quick combos into Spiral Arrow. Doesn't work in Street Fighter IV—if you can manage to make j.LK hit as a cross-up (it's tough), it hits so high that by the time Cammy reaches the ground the hit stun is worn off. No more j.LK cross-up combos for Cammy, then.
And then her Cannon Strike ( + K in air ) disappointingly does not hit low-guarding opponents. It's an air attack that can be blocked while crouching, which spoils some of our fun. The Cannon Strike can cross-up pretty well, but like the j.LK it doesn't leave you time to combo off of it unless you hit the opponent crouching.
Fortunately, Cammy has other strengths in her game that keep her competitive. She's got a number of ways to combo
into her ultra, and they're not particularly difficult. After connecting with the second hit of her Quick Spin Knuckle (
+ P ) you can immediately follow with an ultra combo to connect the majority of the hits, enough to deal some serious damage. Similarly, after connecting with her Razor's Edge Slicer (the slide kick that follows her Hooligan Combination if you let the jump follow through completely) you can trigger Cammy's ultra and connect with the opponents as they fall to the ground.
Cammy can also pretty easily combo into her super, making her always capable of dealing considerable damage off of basic hits. And that plays into what's always been Cammy's mode of operation: pressure. As a Cammy player, you should always press the action, pushing forward with s.MK as a good, rangy poke and occasionally throwing in c.MK
Cammy Character Select »
Complete arcade mode as C. Viper to unlock Cammy.
Page19© 2009 IGN Entertainment, Inc.
attacks, hoping they connect. If you land a c.MK, you can cancel it into a Spiral Arrow ( + K ) for quick, simple damage. But beware that Spiral Arrow isn't very safe in Street Fighter IV.
What is pretty safe is her Cannon Spike ( + K ). The attack has good priority and moves forward at a pretty sharp angle, which makes it an excellent anti-air attack. But it's also worth throwing out as you pressure opponents when you expect them to try and counter your low-priority pokes. The Cannon Spike will beat most attacks, and even if it gets blocked Cammy will bounce away from the opponent, making her virtually safe from counter attack, though this depends on the opponent. Some characters with quick, long-range attacks will likely be able to capitalize on Cammy's long recovery. As well, whiffing with the Cannon Spike is dreadfully dangerous.
Combos
+ P + K xx FADC xx + KKK
If you connect a Quick Spin Knuckle ( + P ) near a corner, you can juggle the opponent with a Cannon
Spike ( + K ). Cancel that Cannon Spike with a FADC—dashing backward instead of forward—and you can catch the opponent again with an ultra combo before he/she hits the ground. The ultra doesn't hit completely, but it does still do serious damage. Cammy's pressure should move the opponent near the corner, and you can use this as a counter to a fireball from decently far away.
+ K ( in air ) s.HP xx + HK xx + K
If you land the Cannon Strike ( + K in air ) deep (or as a cross-up on a crouching opponent), you can land into a
combo starting with s.HP or c.MK. From there you can cancel into a Spiral Arrow ( + HK ), and if you've got the meter continue it with a super combo,
+ KK + KKK
We're not entirely sure how useful this is, but we're kinda proud to have found it out. If you TK Cammy's EX Cannon Strike, you get a high-priority heavy attack with virtually zero recovery lag. You can utilize the hit stun from the attack (and zero recovery) by going into a normal ground combo, or by connecting Cammy's rad ultra combo.
Page20© 2009 IGN Entertainment, Inc.

Moves List
Cannon Spike + K SPECIAL
Great anti-air (use it against opponents that try to jump-in on you) with fantastic horizontal range—compare it to a shoto Shoryuken. The priority is good, but not untouchable. Very safe when blocked, but just don't whiff it as you'll be left pretty vulnerable to a counter. You can also use the Cannon Spike to hop over fireballs and gain some ground, but we suggest doing this only from full screen.
Spiral Arrow + K SPECIAL
Unfortunately it's not as safe as it was in Street Fighter II. Spamming with Spiral Arrow will leave you open to a counter attack, even at max range. But the move is still useful for quick combos and the HK version can be canceled into Cammy's super combo for good damage. The EX version of the Spiral Arrow will pass through fireballs, and its fast travel and solid range makes it an excellent counter to projectiles.
Quick Spin Knuckle + P SPECIAL
Perhaps Cammy's best answer to projectiles. The Quick Spin Knuckle rolls through fireballs and has a pretty big window of invincibility, so you can start the Quick Spin Knuckle early or execute it just before a fireball touches Cammy to pass through. But fireballs aren't the only attacks that Cammy passes through. You can use the Spin Knuckle as a counter to jump-in attacks, rolling through the opponent's air attack and catching them as they land. Cammy's head is still vulnerable. As mentioned earlier, you can follow a connected Spin Knuckle with an ultra combo. You can also cancel into Cammy's super or, if in a corner, follow with a simple Cannon Spike.
Hooligan Combination + P SPECIAL
The Hooligan Combination works into Cammy's pressure game. If you pressure the opponent into a turtling guard, cancel a c.MK into a HP Hooligan Combination and grab the opponent. Unfortunately, this is another aspect of Cammy's game that saddens us; Cammy's Hooligan Combination grab does not work against crouching opponents. That's a pretty big blow to Cammy's pressure game, though you can still use it to get close to a crouching opponent (still cancel the air roll with the grab attempt) so you can throw once you land.
Cannon Strike + K ( in air ) SPECIAL
Decent priority over Cammy's normal air attacks, and it will actually trade with shoto Shoryukens. Since Cammy sort of stalls in the air while starting the move, you can use it to mess with your opponent's timing. Sadly the attack doesn't connect with low-guarding opponents, but it will cross them up. The EX version can be used while jumping backward (non-EX versions can't) which means you can Tiger Knee (TK) the move. That'd be pretty awesome if the attack counted as an overhead, but it doesn't. Still, you can use the TK Cannon Strike to combo into Cammy's ultra.
Spin Drive Smasher + K SUPER COMBO
Fairly easy to combo into off of a HK Spiral Arrow or any version of the Quick Spin Knuckle. The super has some invincibility at the beginning so it'll pass through fireballs early.
Gyro Drive Smasher + KKK ULTRA COMBO
Similar to the Spin Drive Smasher, the Gyro Drive Smasher will pass through fireballs and other attacks at the very start of the ultra. Best of all, Cammy's got lots of combos that can lead into the Gyro Drive, making it particularly deadly. Even on its own, though, outside of combos, the Gyro Drive's range and speed is good for catching opponents off guard. Bait an opponent into throwing a projectile at mid range and Cammy can react with the ultra for lots of damage.
Page21© 2009 IGN Entertainment, Inc.

Fighter Overview
First thing to know about Akuma is that while he's got some things Ryu doesn't, he's not as good as Ryu. Also, he's got really low health, which means that every hit from the opponent takes a greater percentage of Akuma's health than for most any other character (only Seth's health is likely worse). That low health is a major part of Akuma's weakness versus Ryu, but it's definitely not the only thing. Still, he's got some useful tactics if you can manage to not get hit.
Akuma can be played in one of two ways. His air
fireball, the Zanku Hadoken ( + P in air ), is good for both offense and a runaway defense. To play a runaway game with Akuma, jump backwards with his air fireballs to keep the opponent off of you. If the opponent breaks through this iron clad (uhhh) defense, Akuma can teleport through the opponent.
During Akuma's teleport ( or + PPP or KKK ), he is entirely invincible, though as he comes out of the teleport he is vulnerable for a few frames.
More likely, you'll have better success with a severe offense, though executing this successfully takes considerable practice. You can't let up. Cross-up attempts work well with j.MK. If you land the cross-up, combo into a LK Tatsumaki
( + LK ) and you can juggle the opponent with a Goshoryuken ( + P ) after the Tatsu hits.
If the j.MK cross-up attempt is blocked, go into a poking string. You can cancel into a teleport to move away and reset,
attempt a throw, or cancel one of your pokes into a Hyakkishu ( + K ) to continue the pressure. Unfortunately, the air kick doesn't hit overhead, so it can be blocked with a low guard. But if your opponent gets too comfortable with
blocking low, you can nail 'em with a Zugaihasatsu ( + MP ) for a quick overhead.
Akuma Character Select »
Akuma must be unlocked. It's complicated.
Page22© 2009 IGN Entertainment, Inc.

Learn to use Akuma's teleport for positioning, but also learn its limits. If you just teleport up to an opponent, he/she will have a frame advantage and will be able to hit you before you recover. That doesn't mean you should avoid using teleports, though. Defensively, they're great for getting away from a pushy opponent (such as, mmm, Zangief). Offensively, they're good for positioning after a knock down. If you drop an opponent with a throw, teleport after him/her to keep up pressure, instead of letting the distance reset the fight's momentum. You can also teleport through aggressive projectiles and buffer the inputs for his ultra combo so that Akuma immediately moves into the attack.
Combos
j.MK ( cross-up ) c.MK xx + LK + HP
This is more or less Akuma's bread-and-butter combo. Unlike the other shotos in the game, Akuma can juggle combo off of
his LK Tatsumaki ( + LK ), and a HP Shoryuken is the best damage you can get. You can get a similar effect by just throwing out c.LK attacks and, if they land, cancel into the LK Tatsu to work in the juggle.
s.HK c.LK xx + LK + HP
This is just another way to get into the LK Tatsumaki ( + LK ) so that you can work in a discouraging juggle combo. After the second hit of the s.HK (started from a half step away from the opponent—the kick is different if your right next to the opponent), you can link the c.LK and cancel that into the LK Tatsu and work in Akuma's bread-and-butter juggle.
MP + MK LP LP LK HP
If you land a Focus Attack, you can combo into Akuma's super (or ultra). This is probably the only situation in which you'd want to actually use Akuma's super. Note that it's better to cancel your Focus Attack with a backward dash instead of a forward dash. If your Raging Demon input doesn't finish before the dash, you might end up tagging the opponent with a jab before the super comes out, and he/she will be able to jump right out of it.
Page23© 2009 IGN Entertainment, Inc.

Moves List
Zugaihasatsu + MP NORMAL
This attack hits overhead, which means that even though it's a ground attack it will connect with an opponent that is turtling behind a low guard. Throw it into your close pokes for quick damage, or even use it as a meaty attack as most opponents will wake up with a low guard.
Tenmakujinkyaku + MK ( in air, at peak of forward jump ) NORMAL
You can combo off of this if it connects in the air. The best thing about the kick is that it causes Akuma to pause momentarily in the air, which can throw off the timing of your opponent. It also shoots down at a pretty steep angle, which means that it'll hit from the front off of the same jump that would normally work for a j.MK cross-up. If your opponent gets wise to your cross-up attempts, try mixing it up with this diving kick.
Gohadoken + P SPECIAL
This is a pretty standard fireball, but that's a good thing. It travels full screen, has good speed, and will let you dominate projectile wars against anyone that isn't Ryu, Ken or Sagat. The Gohadoken is also a good way to end a poke string that gets blocked on the ground as it'll leave you safe (and deal a sliver of chip damage).
Shakunetsu Hadoken + P SPECIAL
This fireball is a lot slower to come out than Akuma's Gohadoken, so it's harder to react with. But, it does have a very good strength in that the HP version of the Shakunetsu Hadoken hits three times. Not only does it do more damage (both on hit and in chip damage), but more importantly the fireball will eat fireballs from opponents, pass through and continue to hit. Other characters need to use EX fireballs to get that effect, but Akuma gets it for free. Even better, the HP version of his Shakunetsu will even eat EX fireballs from opponents, as they all hit twice and the HP Shakunetsu hits three times.
Zanku Hadoken + P ( in air ) SPECIAL
Akuma's air fireball is another unique quality that you'll want to abuse if you pick him over the more traditional shotos. The three punch buttons give you three different angles on the projectile. You can use the Zanku Hadoken as you jump backward to keep the opponent away, or use it as you jump forward to effectively make your jump safe. After knocking an opponent down, jump and launch a light Zanku to hit them just as they stand up. It's an important aspect of Akuma's pressure game.
Goshoryuken + P SPECIAL
Like the other shoto characters, Akuma's Shoryuken is a great attack. It's got outstanding priority, which means it'll beat pretty much every other attack that the opponent tries to counter with. Use the LP Goshoryuken as a wake-up attack to counter any meaty jump-ins.
Tatsumaki Zankukyaku + K SPECIAL
As mentioned earlier, Akuma can juggle off of his LK Tatsumaki Zankukyaku, and it's easy to combo into the attack from a c.LK, c.MK, or s.HK. The MK and HK versions of the Tatsumaki will also pass through mid-height projectiles, though the first few frames of the attack are still vulnerable to fireballs.
Hyakkishu + K SPECIAL
This is mostly good for applying pressure. A c.MK poke normally has some recovery time on it, which would make jumping at the opponent afterward a bit of a slow maneuver. But you can cancel that same c.MK poke with the Hyakkishu to negate that recovery lag and immediately go into more pressure. Sadly, the air kick from the Hyakkishu is blockable with a low guard, but you can at least grab an opponent (press LP + LK while in the air) that's comfortably crouching in guard.
Page24© 2009 IGN Entertainment, Inc.

Fighter Overview
Despite having shoto-esque moves, Gouken plays completely different compared to Ryu and Ken. His fireball, for general purpose firing, isn't as good as the typical shoto Hadoken. His Tatsumaki kick travels vertically rather than horizontally, and his Shoryuken equivalent is a horizontal dash, not a vertical strike.
Those are sort of the obvious discrepancies, but the real differences are in how Gouken plays. Because
his Gohadoken ( + P ) isn't very fast, you won't use it much in fireball wars. Instead, to combat incoming projectiles, utilize the invincibility of
Gouken's dashing Senkugoshoha ( + P ) to pass through the opponent's fireballs and blast him/her in the head. But since that move doesn't act like an anti-air (like Ryu's Shoryuken does), you'll have to figure out other ways to keep a jumping opponent off of you. Try countering with a s.HK up close, or catch the opponent's incoming attack with a
high Kongoshin ( + P or K ).
Ashura Senku or + PPP or KKK SPECIAL
Akuma's teleport starts instantly, making him instantly invincible, but it ends with some recovery frames during which he is a sitting duck. For this reason, it's best to use the teleport defensively or to cover distance after knocking down an opponent.
Raging Demon LP LP LK HP SUPER COMBO
Suuucks. Damage is weak and the Raging Demon doesn't even cross the entire screen. Grabbing an opponent is difficult enough with Akuma's ultra since neither of these attacks has very good priority and both are easily interrupted. Oh yeah, the super is also slow. Save your meter for EX attacks instead.
Wrath of the Raging Demon LP LP LK HP ULTRA COMBO
This is more like it. Akuma's ultra does pretty outstanding damage (roughly 60% damage versus most opponents) and it's unblockable. It's fast, it travels the entire length of the screen, and it looks cool. Alright, so not everything is peachy in Wrath of the Raging Demon land. While the move is unblockable, opponents can easily slip it by simply jumping over it, even if Akuma is right next to the opponent and even if you start the attack before an opponent wakes up from a knock down. To be successful with the ultra, you need to time it properly. Wait for the opponent to jump and you can catch him/her upon landing from the jump. You can also teleport through a projectile and breaking out the ultra as Akuma ends his warp.
Gouken Character Select »
Gouken must be unlocked. It's complicated.
Page25© 2009 IGN Entertainment, Inc.
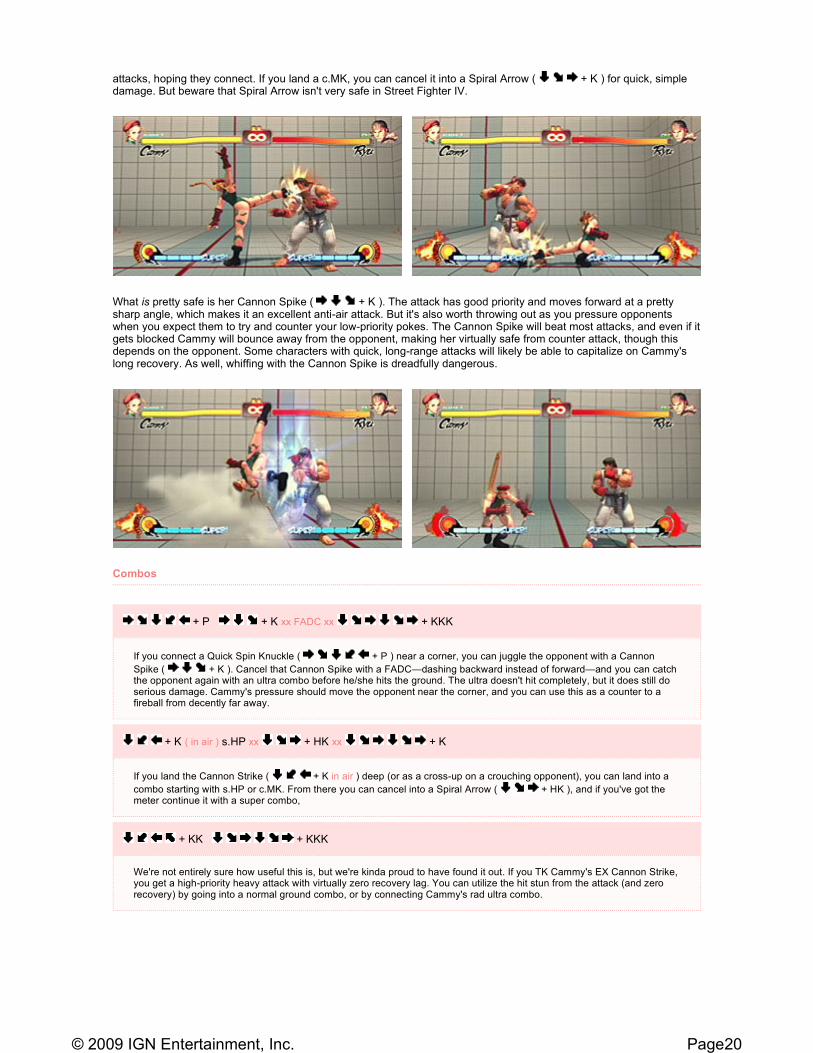
What really makes Gouken unique is his ability to combo, especially into his ultra combo. Connect with an EX
Senkugoshoha ( + PP ) mid-screen and you can follow with a normal Senkugoshoha to catch the opponent before he/she hits the ground. Or, if you connect the move in the corner, you can catch the opponent with Gouken's
ultra, the Shin Shoryuken ( + PPP ). Gouken can also combo into his Shin Shoryuken off of a backward throw.
Unfortunately, Gouken's throw range is exceptionally weak. You can extend it slightly by kara-throwing off of his s.HK—to do that, try tapping HK just barely before inputting the throw command. Just before Gouken performs the grabbing animation, he'll hop forward a bit, which lets you land the grab from further out. Being able to reliably connect Gouken's back throw is pretty key to success, as it'll give you an unblockable entry to his ultra. And even if you don't have an ultra,
can catch the opponent with a Tatsumaki Gorasen ( + K ) which is especially nasty in EX form.
Gouken's also got some good normals. His s.HK has great speed and range, though priority isn't fantastic. Strangely, his c.MK doesn't hit low like most do. Instead, Gouken's c.MP—go figure—acts a lot like most characters' c.MK, hitting low with decent range and cancelability, so use it as a poke. His c.HP is another good poke, with good priority and hit stun, letting you combo even one of Gouken's slow, slow fireballs.
Page26© 2009 IGN Entertainment, Inc.

Combos
Moves List
+ K K s.HP xx + PP + HP
You can start this combo with a normal jump-in or with Gouken's dope Hyakkishu ( + K ) air kick. If you hit it deep
enough, you can combo a s.HP which cancels into Gouken's EX Senkugoshoha ( + PP ). That attack knocks the opponent into the air, leaving him/her vulnerable to a juggle with a second Senkugoshoha. The second doesn't need to be an EX version.
c.MP xx + HK xx FADC xx + PPP
As mentioned earlier, Gouken's c.MP is a much better low poke than his c.MK. Connect with it and you can cancel into his
MK or HK Tatsumaki ( + HK ). And, if you've got some super to spare and an ultra in the oven, you can FADC the very first hit of the Tatsu, dash forward and catch the opponent with Gouken's rockin' ultra combo.
( in corner ) j.HP s.HP xx + PP + PP + PPP
This combo doesn't necessarily have to start in a corner, but you've got to be pretty close—after the Senkugoshoha (
+ PP ), you need to be pressed up against the corner of the screen. After the Senkugoshoha connects you can
instantly juggle with Gouken's ultra, or you can tack on some extra damage by first juggling with his EX Gohadoken (
+ PP ) and then catching the opponent with the ultra. The damage difference is worth the riskier combo if you can nail it consistently.
Sakotsukudaki + MP NORMAL
This attack hits overhead, which means that even though it's a ground attack it will connect with an opponent that is turtling behind a low guard. Throw it into your close pokes for quick damage, or even use it as a meaty attack as most opponents will wake up with a low guard.
Tenmakujinkyaku + MK ( in air, at peak of forward jump ) NORMAL
You can combo off of this if it connects real deep. The best thing about the kick is that it causes Gouken to pause momentarily in the air, which can throw off the timing of your opponent. It also shoots down at a pretty steep angle, which means that it'll hit from the front off of the same jump that would normally work for a j.MK cross-up. If your opponent gets wise to your cross-up attempts, try mixing it up with this diving kick.
Page27© 2009 IGN Entertainment, Inc.

Gohadoken + P ( hold to change level ) SPECIAL
Gouken is fairly slow to launch his fireball, but the projectile's got some things to make up for that. Firstly, you can charge the attack to get two hits out of it, which is especially good for soaking up incoming fireballs and continuing through. Also, each punch button gives you a different angle on the fireball. The LP Gohadoken goes straight across the screen like a normal projectile, but the other punches give you an angled fireball good for knocking opponents out of the air. Charge an angled Gohadoken and opponents will frequently try to jump to dodge it. But if you've charged a MP Gohadoken, you can knock the opponent out of the air. Surprise! The HP version seems to go at an unnecessarily steep angle, so stick to the LP and MP versions.
Senkugoshoha + P SPECIAL
Remember that this goes through fireballs. That's key. You can use the Senkugoshoha to cover ground against a runaway opponent, quickly dashing across the screen while skipping past fireballs simultaneously. The attack's also good for combos. The EX version knocks the opponent into the air for a juggle.
Tatsumaki Gorasen + K SPECIAL
Be careful with this move as a whiffed Tatsumaki will leave Gouken very, very open. It's good for combos, though strangely the LK version won't combo off of a c.MP like the MK and HK versions will. The best use of the Tatsumaki is to juggle after a back throw. The combination does more damage than Gouken's forward throw, so it's worth the risk if you can nail it consistently.
Hyakkishu + K SPECIAL
This is mostly good for applying pressure. A c.MP poke normally has some recovery time on it, which would make jumping at the opponent afterward a bit of a slow maneuver. But you can cancel that same c.MP poke with the Hyakkishu to negate that recovery lag and immediately go into more pressure. Unlike Akuma's version of the attack, Gouken's air kick that you can execute after the Hyakkishu must be blocked high! That's pretty huge, making it a lot more viable as a combo starter.
Kongoshin + P or K SPECIAL
If an opponent hits you during the Kongoshin, Gouken will absorb the attack (similar to a Focus Attack, you take the damage but it recovers) and instantly counter with a pretty powerful strike. You need to use P attack buttons to counter mid and high attacks, or K attack buttons to counter low strikes. Alternatively, you can use the EX version and Gouken will counter either low or high attacks.
Forbidden Shoryuken + P SUPER COMBO
This is a pretty good super that's very easy to combo—for example, you can connect a Senkugoshoha and cancel it into the Forbidden Shoryuken. But...Gouken's EX attacks are so good that we suggest spending the super meter on them instead of the super. Though if you get the chance to combo the super, take advantage.
Shin Shoryuken + PPP ULTRA COMBO
Gouken's ultra is very comboable and very powerful, which are really the keys to Gouken's viability. He can combo off of a backward throw, off of an EX Senkugoshoha in the corner, or off of a FADC'd Tatsumaki mid-screen. A successful Shin Shoryuken combo can completely change the tide of battle, capable of dealing 60-70% damage, depending on the opponent.
Page28© 2009 IGN Entertainment, Inc.
Fighter Overview
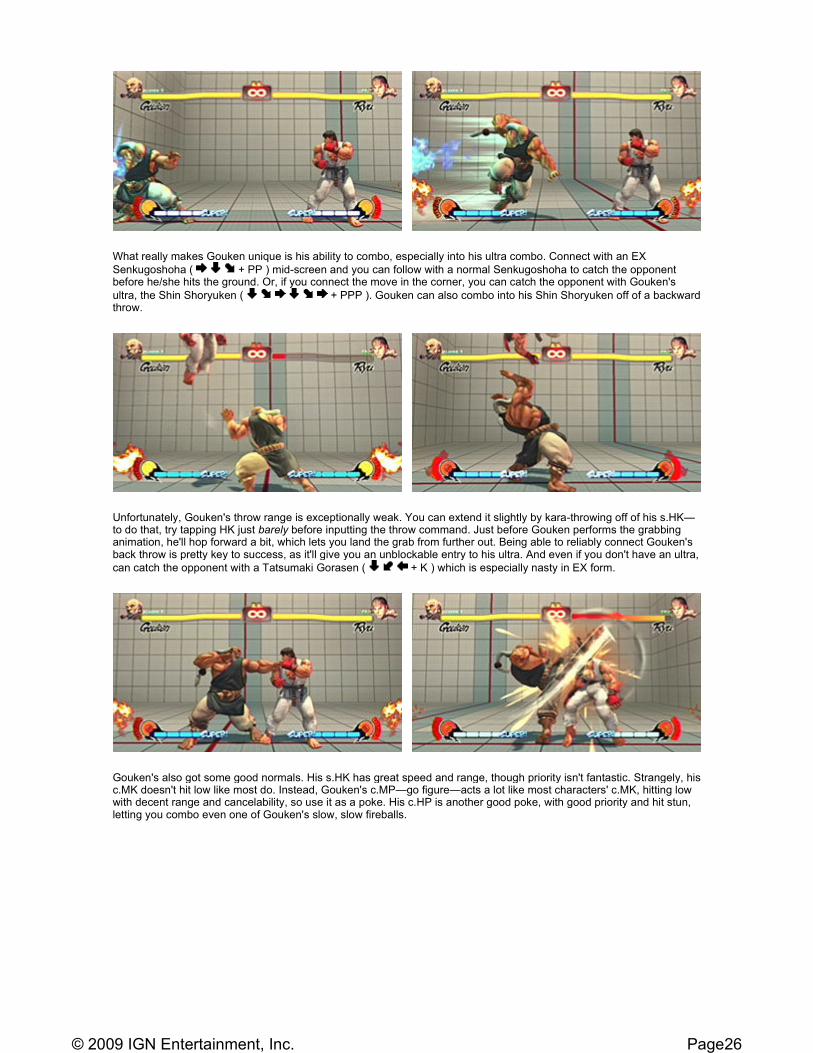
If you're at all familiar with past Street Fighter games, you know Dhalsim is a distance specialist. It's not rocket science: He's got long arms, a good fireball, and in Street Fighter IV he's got new tools to help him even more. As a Dhalsim player, you should always be looking to increase the distance between you and the opponent to take advantage of Dhalsim's obvious strengths.
From a distance, throw out LP Yoga Fires (
+ LP ). The MP and HP versions of the fireball are faster and cause a knock down, but they don't travel nearly as far. Follow your slow Yoga Fires with s.HP and c.HP pokes. If an opponent gets comfy behind a low guard, try jumping backward and tagging the
opponent with an instant overhead j.HP (you'll have to move the stick/pad back to neutral). These techniques are mostly for stalling and spacing, though you'll catch the opponent with the pokes occasionally. Really, Dhalsim's damage comes in punishing the opponent as he/she tries to get near you.
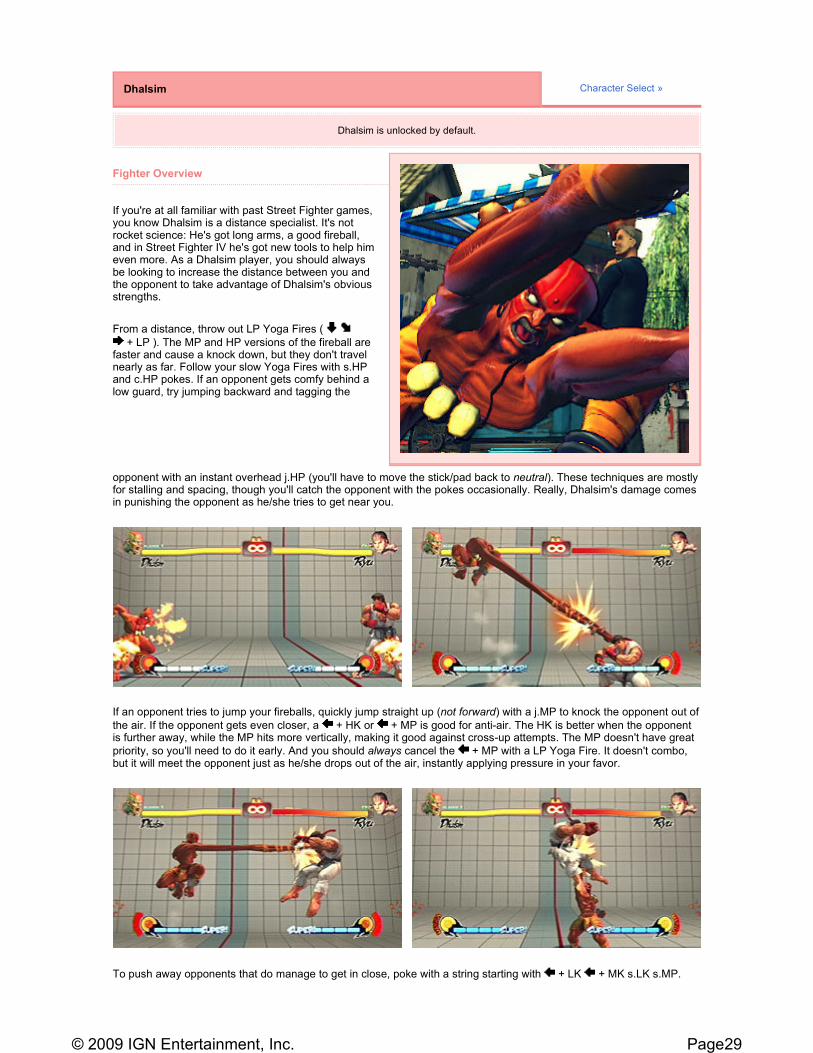
If an opponent tries to jump your fireballs, quickly jump straight up (not forward) with a j.MP to knock the opponent out of
the air. If the opponent gets even closer, a + HK or + MP is good for anti-air. The HK is better when the opponent is further away, while the MP hits more vertically, making it good against cross-up attempts. The MP doesn't have great
priority, so you'll need to do it early. And you should always cancel the + MP with a LP Yoga Fire. It doesn't combo, but it will meet the opponent just as he/she drops out of the air, instantly applying pressure in your favor.
To push away opponents that do manage to get in close, poke with a string starting with + LK + MK s.LK s.MP.
Dhalsim Character Select »
Dhalsim is unlocked by default.
Page29© 2009 IGN Entertainment, Inc.
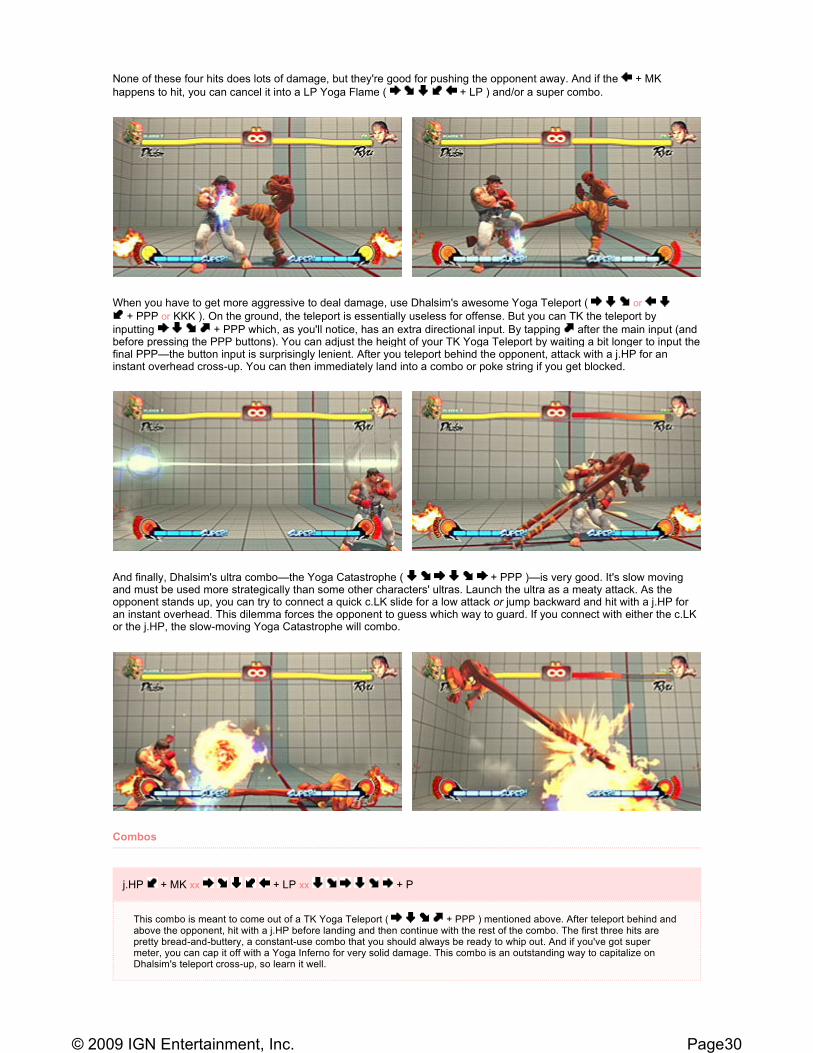
None of these four hits does lots of damage, but they're good for pushing the opponent away. And if the + MK
happens to hit, you can cancel it into a LP Yoga Flame ( + LP ) and/or a super combo.
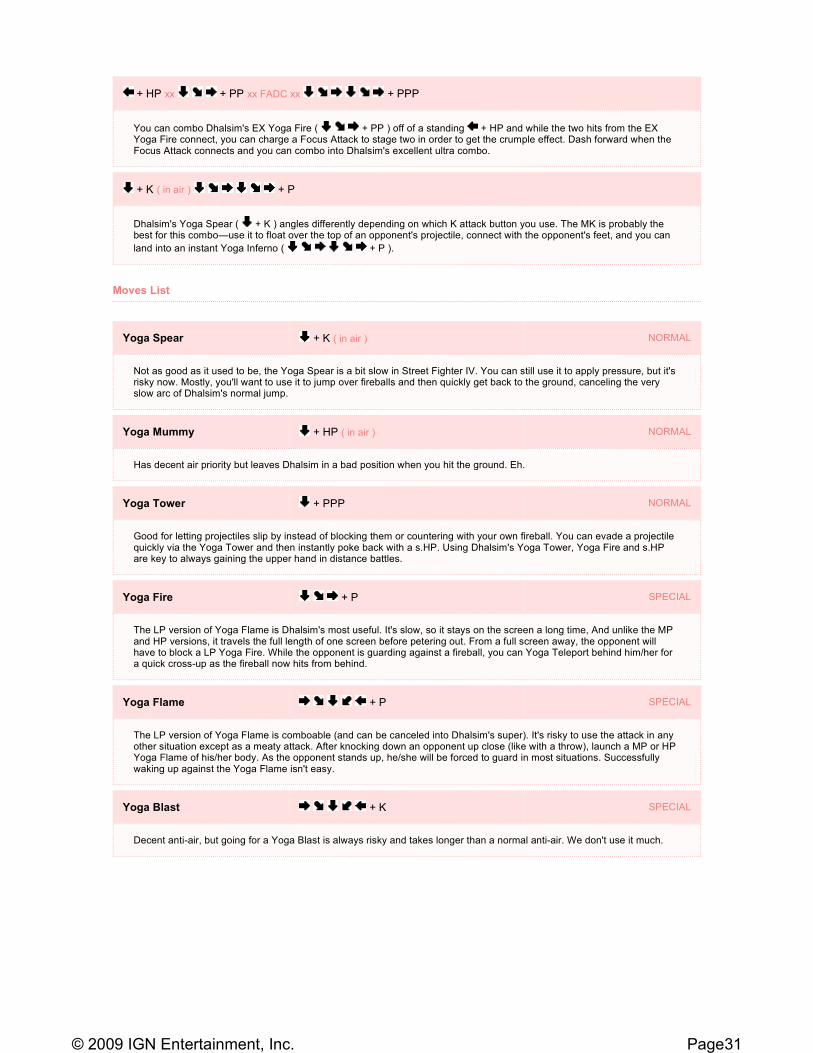
When you have to get more aggressive to deal damage, use Dhalsim's awesome Yoga Teleport ( or
+ PPP or KKK ). On the ground, the teleport is essentially useless for offense. But you can TK the teleport by
inputting + PPP which, as you'll notice, has an extra directional input. By tapping after the main input (and before pressing the PPP buttons). You can adjust the height of your TK Yoga Teleport by waiting a bit longer to input the final PPP—the button input is surprisingly lenient. After you teleport behind the opponent, attack with a j.HP for an instant overhead cross-up. You can then immediately land into a combo or poke string if you get blocked.
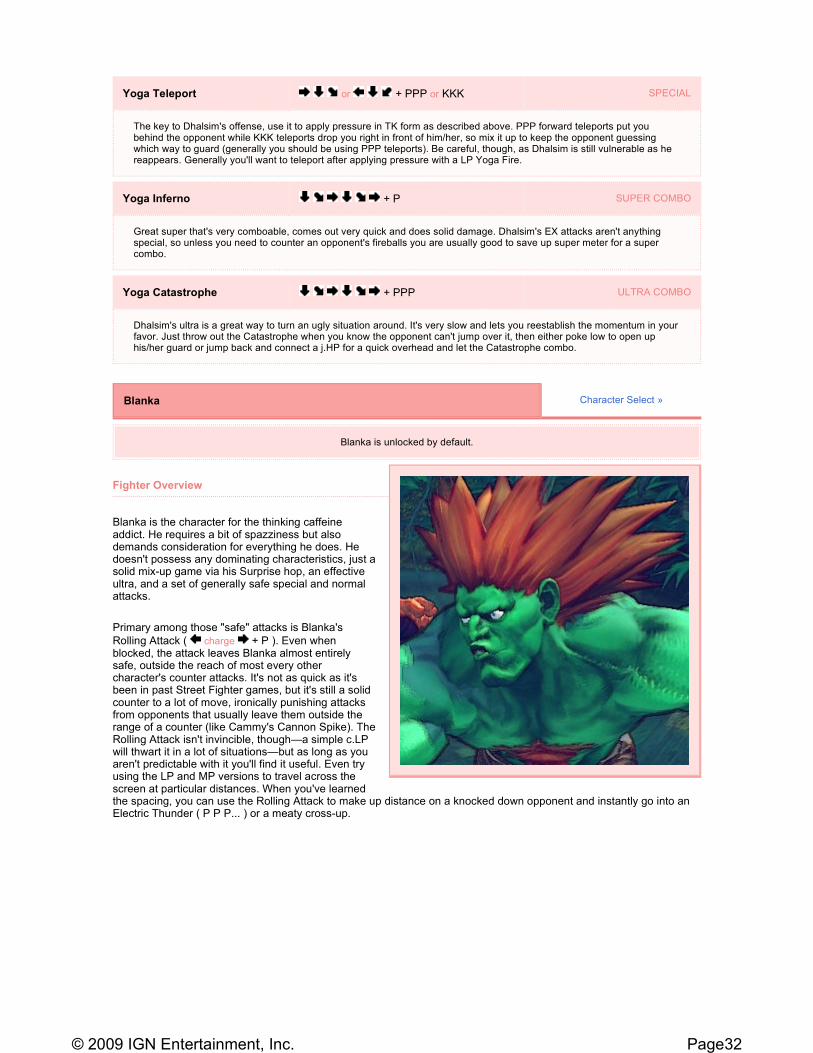
And finally, Dhalsim's ultra combo—the Yoga Catastrophe ( + PPP )—is very good. It's slow moving and must be used more strategically than some other characters' ultras. Launch the ultra as a meaty attack. As the opponent stands up, you can try to connect a quick c.LK slide for a low attack or jump backward and hit with a j.HP for an instant overhead. This dilemma forces the opponent to guess which way to guard. If you connect with either the c.LK or the j.HP, the slow-moving Yoga Catastrophe will combo.
Combos
j.HP + MK xx + LP xx + P
This combo is meant to come out of a TK Yoga Teleport ( + PPP ) mentioned above. After teleport behind and above the opponent, hit with a j.HP before landing and then continue with the rest of the combo. The first three hits are pretty bread-and-buttery, a constant-use combo that you should always be ready to whip out. And if you've got super meter, you can cap it off with a Yoga Inferno for very solid damage. This combo is an outstanding way to capitalize on Dhalsim's teleport cross-up, so learn it well.
Page30© 2009 IGN Entertainment, Inc.
Moves List
+ HP xx + PP xx FADC xx + PPP
You can combo Dhalsim's EX Yoga Fire ( + PP ) off of a standing + HP and while the two hits from the EX Yoga Fire connect, you can charge a Focus Attack to stage two in order to get the crumple effect. Dash forward when the Focus Attack connects and you can combo into Dhalsim's excellent ultra combo.
+ K ( in air ) + P
Dhalsim's Yoga Spear ( + K ) angles differently depending on which K attack button you use. The MK is probably the best for this combo—use it to float over the top of an opponent's projectile, connect with the opponent's feet, and you can
land into an instant Yoga Inferno ( + P ).
Yoga Spear + K ( in air ) NORMAL
Not as good as it used to be, the Yoga Spear is a bit slow in Street Fighter IV. You can still use it to apply pressure, but it's risky now. Mostly, you'll want to use it to jump over fireballs and then quickly get back to the ground, canceling the very slow arc of Dhalsim's normal jump.
Yoga Mummy + HP ( in air ) NORMAL
Has decent air priority but leaves Dhalsim in a bad position when you hit the ground. Eh.
Yoga Tower + PPP NORMAL
Good for letting projectiles slip by instead of blocking them or countering with your own fireball. You can evade a projectile quickly via the Yoga Tower and then instantly poke back with a s.HP. Using Dhalsim's Yoga Tower, Yoga Fire and s.HP are key to always gaining the upper hand in distance battles.
Yoga Fire + P SPECIAL
The LP version of Yoga Flame is Dhalsim's most useful. It's slow, so it stays on the screen a long time, And unlike the MP and HP versions, it travels the full length of one screen before petering out. From a full screen away, the opponent will have to block a LP Yoga Fire. While the opponent is guarding against a fireball, you can Yoga Teleport behind him/her for a quick cross-up as the fireball now hits from behind.
Yoga Flame + P SPECIAL
The LP version of Yoga Flame is comboable (and can be canceled into Dhalsim's super). It's risky to use the attack in any other situation except as a meaty attack. After knocking down an opponent up close (like with a throw), launch a MP or HP Yoga Flame of his/her body. As the opponent stands up, he/she will be forced to guard in most situations. Successfully waking up against the Yoga Flame isn't easy.
Yoga Blast + K SPECIAL
Decent anti-air, but going for a Yoga Blast is always risky and takes longer than a normal anti-air. We don't use it much.
Page31© 2009 IGN Entertainment, Inc.
Fighter Overview
Blanka is the character for the thinking caffeine addict. He requires a bit of spazziness but also demands consideration for everything he does. He doesn't possess any dominating characteristics, just a solid mix-up game via his Surprise hop, an effective ultra, and a set of generally safe special and normal attacks.
Primary among those "safe" attacks is Blanka's
Rolling Attack ( charge + P ). Even when blocked, the attack leaves Blanka almost entirely safe, outside the reach of most every other character's counter attacks. It's not as quick as it's been in past Street Fighter games, but it's still a solid counter to a lot of move, ironically punishing attacks from opponents that usually leave them outside the range of a counter (like Cammy's Cannon Spike). The Rolling Attack isn't invincible, though—a simple c.LP will thwart it in a lot of situations—but as long as you aren't predictable with it you'll find it useful. Even try using the LP and MP versions to travel across the screen at particular distances. When you've learned the spacing, you can use the Rolling Attack to make up distance on a knocked down opponent and instantly go into an Electric Thunder ( P P P... ) or a meaty cross-up.
Yoga Teleport or + PPP or KKK SPECIAL
The key to Dhalsim's offense, use it to apply pressure in TK form as described above. PPP forward teleports put you behind the opponent while KKK teleports drop you right in front of him/her, so mix it up to keep the opponent guessing which way to guard (generally you should be using PPP teleports). Be careful, though, as Dhalsim is still vulnerable as he reappears. Generally you'll want to teleport after applying pressure with a LP Yoga Fire.
Yoga Inferno + P SUPER COMBO
Great super that's very comboable, comes out very quick and does solid damage. Dhalsim's EX attacks aren't anything special, so unless you need to counter an opponent's fireballs you are usually good to save up super meter for a super combo.
Yoga Catastrophe + PPP ULTRA COMBO
Dhalsim's ultra is a great way to turn an ugly situation around. It's very slow and lets you reestablish the momentum in your favor. Just throw out the Catastrophe when you know the opponent can't jump over it, then either poke low to open up his/her guard or jump back and connect a j.HP for a quick overhead and let the Catastrophe combo.
Blanka Character Select »
Blanka is unlocked by default.
Page32© 2009 IGN Entertainment, Inc.

Electric Thunder is generally safe on block and will beat out a lot of attacks, though most every character has a pretty good counter that'll hit Blanka through the electricity, so don't abuse it. Try to get knock downs, especially off of Blanka's
Amazon River Run ( + HP ) slide attack which actually passes under most projectiles. When you've got the knock
down, you can start trying to mix up with Blanka's Forward Surprise ( + KKK ). You can bait opponents into a counter and then hop through them, or just hop to the other side of a downed opponent and go for a meaty low attack, a fun cross-up.
Blanka's c.MK is key to his combos, as it's a quick low attack that's easily canceled into his Rolling Attack and also links with a lot of his other normals. His j.MK is a solid cross-up. His aforementioned Amazon River Run slide travels half the screen and trips the opponent. It's a great poke, though not very safe if blocked.
And then Blanka's ultra combo is pretty tricky. When you activate the ultra, Blanka slams the ground before rolling toward the opponent. And while that ground slam doesn't count as a hit and doesn't deal any damage, it actually does act like a hit in the combo in that it can "connect" with the opponent and leave them vulnerable to the rest of the hits from the very powerful ultra. That first slam is a low hit that must be guarded low, but the next part of the ultra—the actual first hit—connects overhead and must be blocked with a high guard. It's surprisingly tricky and is a good counter to incoming pokes. And to extend the range on the ultra, you can pre-empt it with a quick Forward Surprise hop.
Page33© 2009 IGN Entertainment, Inc.

Combos
Moves List
j.HK c.MK s.LP xx charge + HP
A nice and simple way to capitalize on a successful jump-in, though note that the last three hits of the combo work outside of a jump-in. Blanka's c.MK is an all-around good attack, and easily links into his s.LP which cancels into his Rolling Attack. You can use those last three hits to punish opponents on the ground, or just poke with c.MK and unload the other two hits if it connects.
j.MK c.LP xx P P P...
Another decent jump-in, though this combo also works as a cross-up. His j.MK is a very easy cross-up. Though note that if you cross up the opponent, you'll need to use the EX version of Electric Thunder in order for it to combo.
j.HK c.MK charge + PPP
Impressively, Blanka can combo into his ultra off of a simple link. His c.MK has such a good frame advantage (thanks Viscant!) that the initial slam of his ultra combo will prevent the opponent from recovering from hit stun before the ultra hits. And if you haven't yet noticed, Blanka's ultra does massive damage, equal to Zangief's devastating ultra.
Rock Crusher or + MP ( up close ) NORMAL
Sort of looks like an overhead, but it's not. You can cancel the attack after the first hit (before the second hit) into a Rolling Attack or Blanka's super.
Amazon River Run + HP NORMAL
This low slide has excellent range and lets Blanka pass under most projectiles, so it's very good for catching opponents and knocking them down. Be careful with abusing it, though, as it leaves Blanka vulnerable at most ranges. Try to find the max range at which you can connect with it—it'll surprise you and keep you safer.
Surprise or + KKK NORMAL
Mostly you'll be using the Forward Surprise, which lets you hop through an opponent. It doesn't do any damage, and in fact Blanka doesn't even gain any invincibility. But it's good for mix-ups, especially against opponents that you've knocked down. Just before they get up, hop through the opponents with a Forward Surprise to avoid a wake-up and/or go for a low poke cross-up. You can also use it to cross-up when the opponent isn't knocked down, especially effective if you can buffer Blanka's ultra from it.
Page34© 2009 IGN Entertainment, Inc.
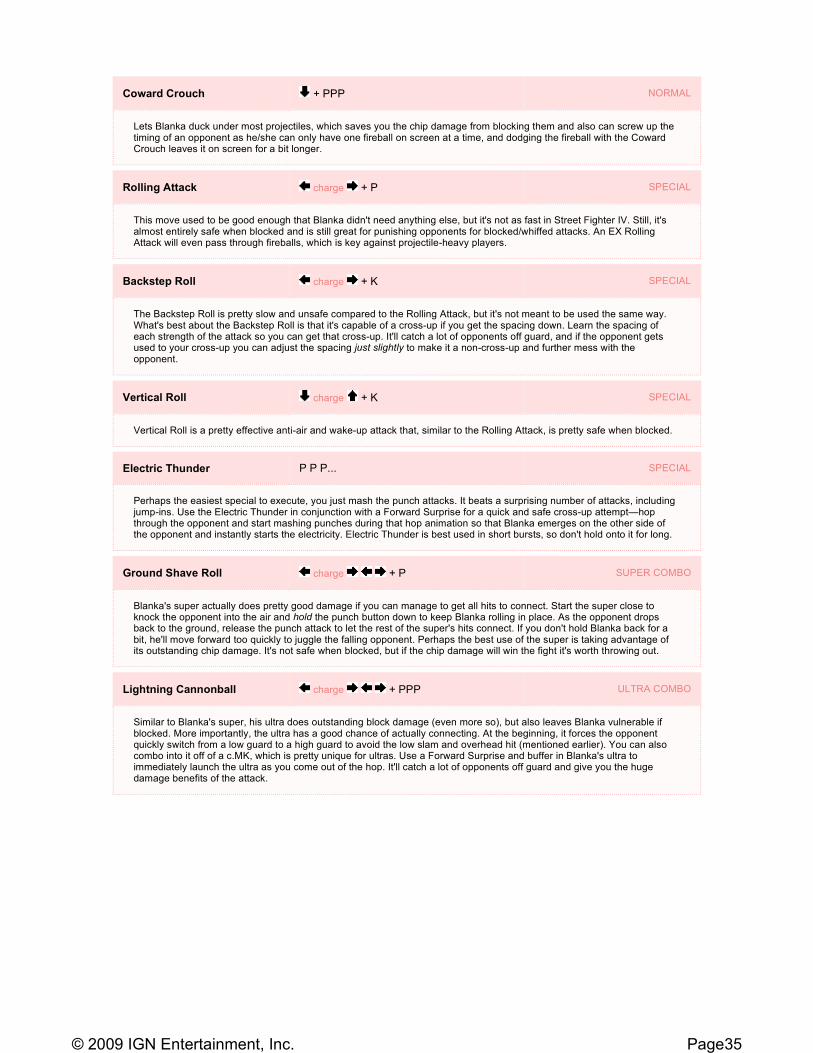
Coward Crouch + PPP NORMAL
Lets Blanka duck under most projectiles, which saves you the chip damage from blocking them and also can screw up the timing of an opponent as he/she can only have one fireball on screen at a time, and dodging the fireball with the Coward Crouch leaves it on screen for a bit longer.
Rolling Attack charge + P SPECIAL
This move used to be good enough that Blanka didn't need anything else, but it's not as fast in Street Fighter IV. Still, it's almost entirely safe when blocked and is still great for punishing opponents for blocked/whiffed attacks. An EX Rolling Attack will even pass through fireballs, which is key against projectile-heavy players.
Backstep Roll charge + K SPECIAL
The Backstep Roll is pretty slow and unsafe compared to the Rolling Attack, but it's not meant to be used the same way. What's best about the Backstep Roll is that it's capable of a cross-up if you get the spacing down. Learn the spacing of each strength of the attack so you can get that cross-up. It'll catch a lot of opponents off guard, and if the opponent gets used to your cross-up you can adjust the spacing just slightly to make it a non-cross-up and further mess with the opponent.
Vertical Roll charge + K SPECIAL
Vertical Roll is a pretty effective anti-air and wake-up attack that, similar to the Rolling Attack, is pretty safe when blocked.
Electric Thunder P P P... SPECIAL
Perhaps the easiest special to execute, you just mash the punch attacks. It beats a surprising number of attacks, including jump-ins. Use the Electric Thunder in conjunction with a Forward Surprise for a quick and safe cross-up attempt—hop through the opponent and start mashing punches during that hop animation so that Blanka emerges on the other side of the opponent and instantly starts the electricity. Electric Thunder is best used in short bursts, so don't hold onto it for long.
Ground Shave Roll charge + P SUPER COMBO
Blanka's super actually does pretty good damage if you can manage to get all hits to connect. Start the super close to knock the opponent into the air and hold the punch button down to keep Blanka rolling in place. As the opponent drops back to the ground, release the punch attack to let the rest of the super's hits connect. If you don't hold Blanka back for a bit, he'll move forward too quickly to juggle the falling opponent. Perhaps the best use of the super is taking advantage of its outstanding chip damage. It's not safe when blocked, but if the chip damage will win the fight it's worth throwing out.
Lightning Cannonball charge + PPP ULTRA COMBO
Similar to Blanka's super, his ultra does outstanding block damage (even more so), but also leaves Blanka vulnerable if blocked. More importantly, the ultra has a good chance of actually connecting. At the beginning, it forces the opponent quickly switch from a low guard to a high guard to avoid the low slam and overhead hit (mentioned earlier). You can also combo into it off of a c.MK, which is pretty unique for ultras. Use a Forward Surprise and buffer in Blanka's ultra to immediately launch the ultra as you come out of the hop. It'll catch a lot of opponents off guard and give you the huge damage benefits of the attack.
Page35© 2009 IGN Entertainment, Inc.

Fighter Overview
We think Chun-Li is a bit of a dark horse in the game as she's got great all-around skills but doesn't have the damage capacity (both taking and dealing) to make her a no-brainer like Sagat or Zangief. She's got solid pokes, a decent mix-up game, and fairly simple combos into her super and ultras. Just try not to get hit.
Her best poke is probably her s.MP which has good speed, good range and can even be canceled into a special or super. Her c.LK is a solid poke from a bit closer in, and her s.HP is also effective, especially to punish. When you poke out of range of a s.MP, go for a c.HK for a possible trip. For anti-air tactics, another couple of her normals are pretty effective depending on the range the opponent jumps in from. From a distance. her s.HK is fantastic. It's fast and has superb range but unfortunately doesn't hit crouching opponents but it's perfectly suited to intercepting airborne opponents. Her s.MK from a distance is similar, though its range isn't as good making it better as an anti-air against opponents who jump in from close.
Chun-Li's mix-up game is attributable to a couple of attacks. Her Hazanshu ( + K ) hits overhead and comes out pretty quickly. You can cancel a c.MK into the Hazanshu for a quick low-high and keep up forward pressure.
Chun-Li's Kakukyakuraku ( + HK ) can't be canceled into, but it's a pretty rad insta-cross-up that's good against turtling opponents and as a meaty attack. If the Kakukyakuraku hits low (against a crouching or waking-up opponent), you can even combo off of it, making the kick a pretty nasty tool in the wake-up game.
While poking, occasionally cancel a poke (like a c.MK poke) into her Hyakuretsukyaku, or Lightning Kicks, ( K K K... ) for a possible combo if your poke connects, or settle for chip damage and the safety of the attack. You can combo into
Chun-Li Character Select »
Chun-Li is unlocked by default.
Page36© 2009 IGN Entertainment, Inc.
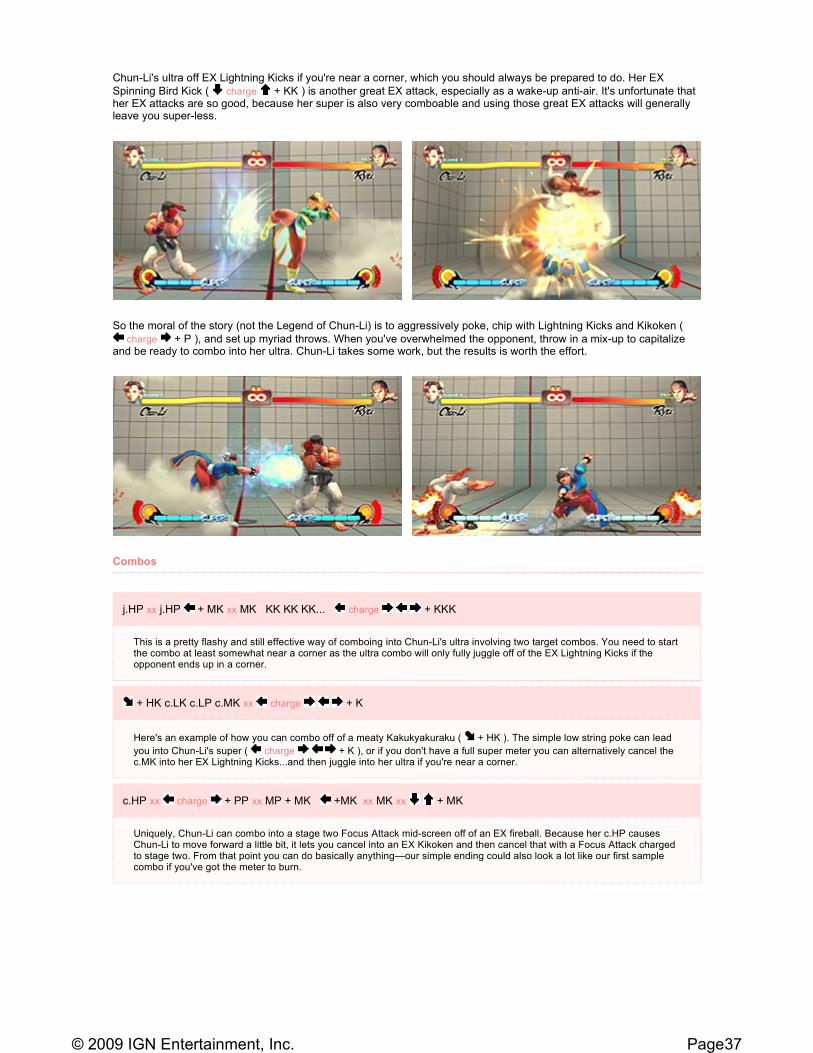
Chun-Li's ultra off EX Lightning Kicks if you're near a corner, which you should always be prepared to do. Her EX
Spinning Bird Kick ( charge + KK ) is another great EX attack, especially as a wake-up anti-air. It's unfortunate that her EX attacks are so good, because her super is also very comboable and using those great EX attacks will generally leave you super-less.
So the moral of the story (not the Legend of Chun-Li) is to aggressively poke, chip with Lightning Kicks and Kikoken (
charge + P ), and set up myriad throws. When you've overwhelmed the opponent, throw in a mix-up to capitalize and be ready to combo into her ultra. Chun-Li takes some work, but the results is worth the effort.
Combos
j.HP xx j.HP + MK xx MK KK KK KK... charge + KKK
This is a pretty flashy and still effective way of comboing into Chun-Li's ultra involving two target combos. You need to start the combo at least somewhat near a corner as the ultra combo will only fully juggle off of the EX Lightning Kicks if the opponent ends up in a corner.
+ HK c.LK c.LP c.MK xx charge + K
Here's an example of how you can combo off of a meaty Kakukyakuraku ( + HK ). The simple low string poke can lead
you into Chun-Li's super ( charge + K ), or if you don't have a full super meter you can alternatively cancel the c.MK into her EX Lightning Kicks...and then juggle into her ultra if you're near a corner.
c.HP xx charge + PP xx MP + MK +MK xx MK xx + MK
Uniquely, Chun-Li can combo into a stage two Focus Attack mid-screen off of an EX fireball. Because her c.HP causes Chun-Li to move forward a little bit, it lets you cancel into an EX Kikoken and then cancel that with a Focus Attack charged to stage two. From that point you can do basically anything—our simple ending could also look a lot like our first sample combo if you've got the meter to burn.
Page37© 2009 IGN Entertainment, Inc.

Moves List
Kakukyakuraku + HK NORMAL
A brainless cross-up that anyone can execute, it's especially effective as a meaty attack as opponents wake up. If you hit a standing opponent, you can't combo off of it, but connect with a crouching opponent (or just waking up) and you can easily string it into a super or even ultra combo.
Rear Spin Kick + LK NORMAL
Very short range and a lot of recovery, we don't see any use for it. Unfortunately it'll spoil some pressuring with c.LK as it's
easy to accidentally hit instead of and end up with the Rear Spin Kick when you don't want it.
Kakusenshu + MK NORMAL
Very rangy poke, but it's a bit slow. If you poke yourself out of range of Chun-Li's s.MP, you can use this kick to continue pressure and move back in.
Kintekishu + MK NORMAL
As a poke, it's got good range but is a bit slow. The good thing is that the Kintekishu kick acts as a target combo, letting
you move into another pair of attacks for a ready-made combo ( MK + MK ).
Yosokyaku + MK ( in air ) NORMAL
You can perform this kick up to three times in the air if the hits connect (blocked or not) so they're good for applying air pressure but probably not as good in Street Fighter IV as they were in II.
Hyakuretsukyaku K K K... SPECIAL
Lightning Kicks are very safe when blocked and so give you some free chip damage if you can cancel a poke into them. The EX version sees Chun-Li hop forward a bit to add range to the kicks and if they connect you can even juggle an opponent if he/she is near a corner. Abuse!
Kikoken charge + P SPECIAL
The LP Kikoken is the only one that travels a full screen length before petering out, though the HP version is quicker and so is a much better option when you're poking up close. Her EX fireball is as good as any other, but should really only be used to counter other EX fireballs or for chip damage.
Hazanshu + K SPECIAL
Hits overhead, so the opponent has to block it with a high guard. Pressure with low attacks and cancel into the Hazanshu to both maintain pressure and go for the mix-up. Her LK version is most usable up-close. The MK and HK versions are good for hopping over fireballs and mid-range. Hit with an EX Hazanshu for a knock down and you can move into a cross-up with her Kakukyakuraku.
Spinning Bird Kick charge + K SPECIAL
Decent anti-air in EX form, the Bird Kick is generally best for a quick combo off of her c.HP attack.
Senretsukyaku charge + K SUPER COMBO
Pretty easily comboed into off of any of Chun-Li's cancelable pokes (such as s.MP, c.MK, etc.). If you've got the meter, by all means, though don't expect a lot of opportunities to use it since you'll likely be using meter for Chun-Li's EX attacks.
Page38© 2009 IGN Entertainment, Inc.

Fighter Overview
Ryu's the same simple, basic character he's always been, But despite lacking some of the obvious benefits other shotos have, Ryu is arguably still the best Shotokan fighter in Street Fighter IV. Largely, it's because he can so easily combo into his ultra.
Maybe "easy" isn't the right word to describe his ultra combo setups, rather "plentiful" and "effective" are more accurate. Though Ryu's easiest ultra combo setup is actually pretty easy. Knock an opponent out
of the air with a LP Shoryuken ( + LP ) and Ryu will land early, letting you launch a Metsu
Hadoken ultra ( + PPP ) to catch the opponent as he/she falls. While that easy combo only works against an opponent that was already in the air, you can use Shoryuken's to pop up opponents from the ground and cancel with a Focus Attack Dash cancel. Since Ryu doesn't follow the opponent into the air with the full Shoryuken, you can ready an ultra combo to catch the body as it falls.
Ryu's even got a good super combo that can be used to juggle in the same way described for his ultra, by knocking the opponent out of the air with a Shoryuken. It's also easily canceled into off of a normal combo that ends with a fireball. But of course, winning with Ryu isn't just about relying on his ultra and super. His standard combos are simple and
effective. Do a lot of low poking with c.MP and c.MK and cancel into a Hadoken ( + P ) for safe, damaging
poking. When the opponent gets too comfortable blocking low, hit him/her with a Collarbone Breaker ( + MP ) for a quick overhead strike.
Hosenka charge + KKK ULTRA COMBO
Passes through fireballs for a long time, so you can use it to counter projectiles from pretty far back. It's got great range and comes out quick, so it's also good for punishing mistakes. And of course, you can combo into it fairly easily, as outlined above.
Ryu Character Select »
Ryu is unlocked by default.
Page39© 2009 IGN Entertainment, Inc.
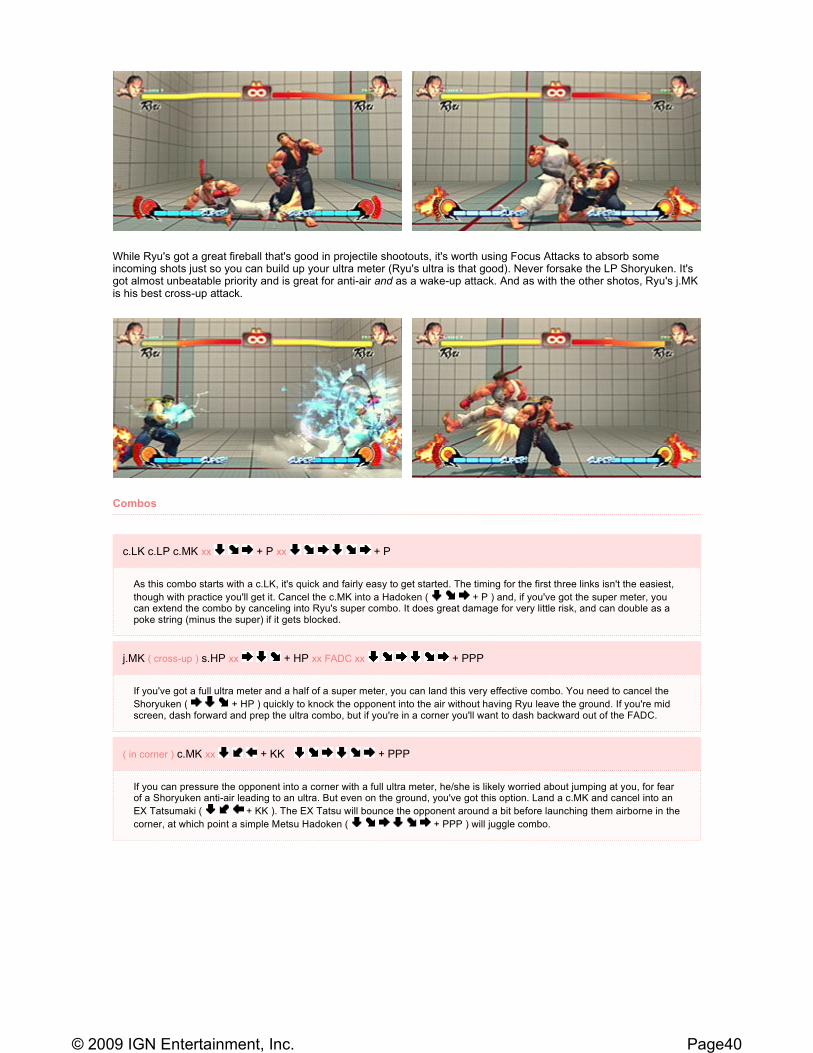
While Ryu's got a great fireball that's good in projectile shootouts, it's worth using Focus Attacks to absorb some incoming shots just so you can build up your ultra meter (Ryu's ultra is that good). Never forsake the LP Shoryuken. It's got almost unbeatable priority and is great for anti-air and as a wake-up attack. And as with the other shotos, Ryu's j.MK is his best cross-up attack.
Combos
c.LK c.LP c.MK xx + P xx + P
As this combo starts with a c.LK, it's quick and fairly easy to get started. The timing for the first three links isn't the easiest,
though with practice you'll get it. Cancel the c.MK into a Hadoken ( + P ) and, if you've got the super meter, you can extend the combo by canceling into Ryu's super combo. It does great damage for very little risk, and can double as a poke string (minus the super) if it gets blocked.
j.MK ( cross-up ) s.HP xx + HP xx FADC xx + PPP
If you've got a full ultra meter and a half of a super meter, you can land this very effective combo. You need to cancel the
Shoryuken ( + HP ) quickly to knock the opponent into the air without having Ryu leave the ground. If you're mid screen, dash forward and prep the ultra combo, but if you're in a corner you'll want to dash backward out of the FADC.
( in corner ) c.MK xx + KK + PPP
If you can pressure the opponent into a corner with a full ultra meter, he/she is likely worried about jumping at you, for fear of a Shoryuken anti-air leading to an ultra. But even on the ground, you've got this option. Land a c.MK and cancel into an
EX Tatsumaki ( + KK ). The EX Tatsu will bounce the opponent around a bit before launching them airborne in the
corner, at which point a simple Metsu Hadoken ( + PPP ) will juggle combo.
Page40© 2009 IGN Entertainment, Inc.
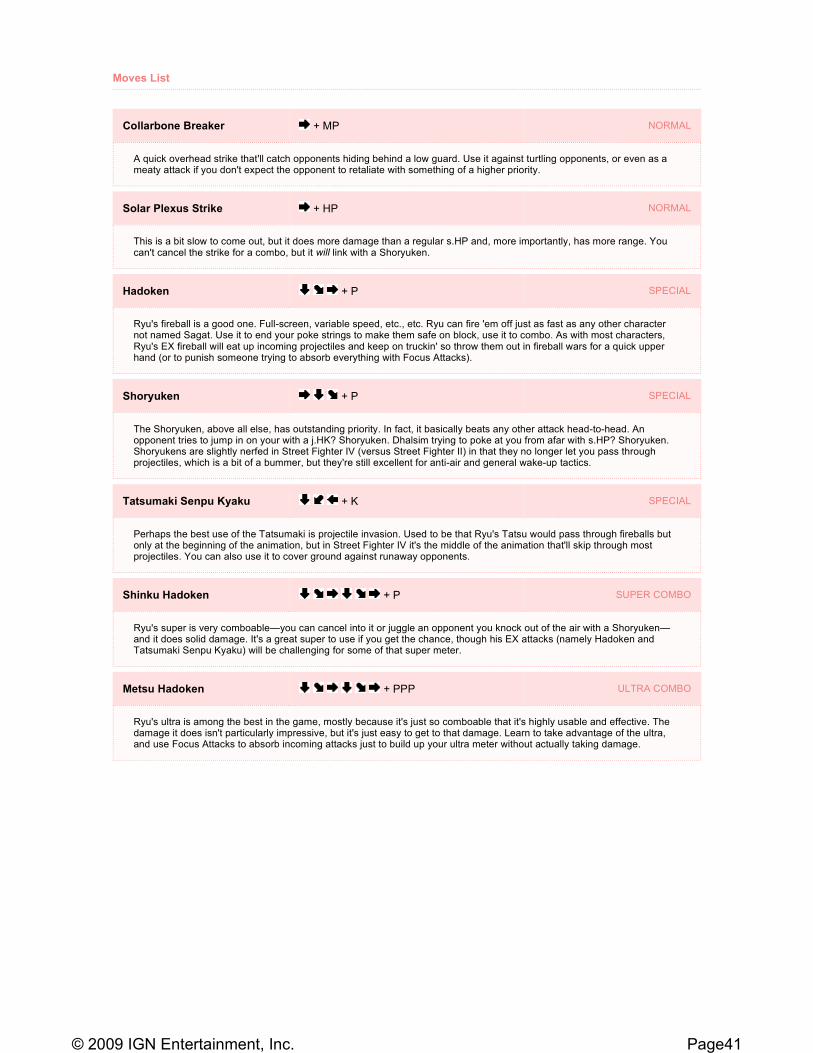
Moves List
Collarbone Breaker + MP NORMAL
A quick overhead strike that'll catch opponents hiding behind a low guard. Use it against turtling opponents, or even as a meaty attack if you don't expect the opponent to retaliate with something of a higher priority.
Solar Plexus Strike + HP NORMAL
This is a bit slow to come out, but it does more damage than a regular s.HP and, more importantly, has more range. You can't cancel the strike for a combo, but it will link with a Shoryuken.
Hadoken + P SPECIAL
Ryu's fireball is a good one. Full-screen, variable speed, etc., etc. Ryu can fire 'em off just as fast as any other character not named Sagat. Use it to end your poke strings to make them safe on block, use it to combo. As with most characters, Ryu's EX fireball will eat up incoming projectiles and keep on truckin' so throw them out in fireball wars for a quick upper hand (or to punish someone trying to absorb everything with Focus Attacks).
Shoryuken + P SPECIAL
The Shoryuken, above all else, has outstanding priority. In fact, it basically beats any other attack head-to-head. An opponent tries to jump in on your with a j.HK? Shoryuken. Dhalsim trying to poke at you from afar with s.HP? Shoryuken. Shoryukens are slightly nerfed in Street Fighter IV (versus Street Fighter II) in that they no longer let you pass through projectiles, which is a bit of a bummer, but they're still excellent for anti-air and general wake-up tactics.
Tatsumaki Senpu Kyaku + K SPECIAL
Perhaps the best use of the Tatsumaki is projectile invasion. Used to be that Ryu's Tatsu would pass through fireballs but only at the beginning of the animation, but in Street Fighter IV it's the middle of the animation that'll skip through most projectiles. You can also use it to cover ground against runaway opponents.
Shinku Hadoken + P SUPER COMBO
Ryu's super is very comboable—you can cancel into it or juggle an opponent you knock out of the air with a Shoryuken—and it does solid damage. It's a great super to use if you get the chance, though his EX attacks (namely Hadoken and Tatsumaki Senpu Kyaku) will be challenging for some of that super meter.
Metsu Hadoken + PPP ULTRA COMBO
Ryu's ultra is among the best in the game, mostly because it's just so comboable that it's highly usable and effective. The damage it does isn't particularly impressive, but it's just easy to get to that damage. Learn to take advantage of the ultra, and use Focus Attacks to absorb incoming attacks just to build up your ultra meter without actually taking damage.
Page41© 2009 IGN Entertainment, Inc.

Fighter Overview
Like most characters that lack a projectile, much of E. Honda play involves working around the opponents' fireballs. Honda's got a number of useful tools to do so, plus some very damaging, simple combos. As a Honda player, you want to try and make the fight an up-close battle, patiently working past the opponent's defenses and fireballs to get inside. Once your inside, be ready to capitalize on the advantage.
The main tool for breaking through a stream of projectiles is Honda's Sumo Smash butt stump (
charge + K ). Use the MK or HK version of the butt slam to pass up through an incoming projectile and close the gap between you and the opponent. Sadly, the LK version of the Sumo Smash doesn't have the same ability to pass through projectiles, which limits your ability to work with precise spacing, moving forward enough to gain ground but to not put yourself in range for a counter from the opponent. There are two options here: 1) You can use the strength of Sumo Smash that will actually hit the opponent, and if you're real good with the spacing
you can actually use the special attack for a cross-up, or 2) jump straight up and use Honda's + HP in the air to just barely push forward in the air.
The second option lets you gain ground in careful increments and also gives you a good strike that's a good counter to an opponent's jumping offensive. Or you can land with the j.HP from a vertical jump, land and tick into a Oicho Throw
( + P ). The Oicho Throw has excellent range (much more than Honda's standard grabs) and does great damage, so it should be a big part of your offensive.
Another solid tool in Honda's offense is his s.HK, which has great speed, good range and solid priority. His j.MK is a solid cross-up, though to combo off of it you'll need to hit pretty deep. As a cross-up, we suggest generally using it to tick
E. Honda Character Select »
E. Honda is unlocked by default.
Page42© 2009 IGN Entertainment, Inc.

into Honda's Oicho and then go into Sumo Slam cross-ups. His Sumo Headbutt ( charge + P ) is, of course, another great attack that you'll want to abuse. It won't get you past fireballs, but it will beat most other attacks so it's a great counter to pokes and jump-in attempts. Best of all, it's basically completely safe when blocked.
Combos
Moves List
j.HK c.MK xx charge + HP xx charge + P
E. Honda's bread-and-butter combo is good with and without super. Jump-in with Honda's meat stick (his j.HK kick), land
with a c.MK and cancel into a Headbutt. To cancel into Honda's super, use the charge motion of the Headbutt as the
first two inputs for the Super Killer Head Ram, so you only need to quickly tap + P to get the super.
j.MK ( cross-up ) c.LK c.LP xx charge + HP
A solid cross-up that requires some pretty precise timing. After the cross-up, you can't just land with a c.MK and cancel into Headbutt because you lose your back charge when hopping over the opponent. But connecting the c.LK c.LP link will give you just enough time to build the charge and cancel into the super.
MP + MK charge + PPP
Uhhh, nothing complicated (or creative) here. Obviously, you can connect a Focus Attack and combo into Honda's super,
though there is a bit of a trick here to make it easier. After unloading the Focus Attack, double tap away from the
opponent and hold on the second tap to start the charge. After the back dash you'll have a full charge which lets you easily connect the ultra.
Shikofumi + HK SPECIAL
This overhead kick knocks down on contact, but it's pretty slow and easy to correct for so we don't use it much.
Hundred Hand Slap P P P... SPECIAL
Good for chip damage and general pressure because it's pretty safe when blocked. You'll want to start buffering in the P button mash during a forward dash or jump 'cause there's nothing more futile than a Honda standing there going through various whiffed punches trying to get the Hand Slap.
Sumo Headbutt charge + P SPECIAL
Great power, great priority, unfortunately doesn't go through fireballs. Use it as a counter to meaty jump-ins, or just against virtually any attack up close as it'll beat most everything that isn't a projectile.
Page43© 2009 IGN Entertainment, Inc.

Fighter Overview
Zangief is a very good character in Street Fighter IV. If you already know that then you don't really need to be told why, but we know from experience that a vast portion of Street Fighter players don't know how to use Zangief. He's really quite straight-forward once you get down the basics of executing his 360 motion grabs, but getting there can be a challenge if you've never before endeavored to learn Zangief's trade.
It all depends on your ability to buffer 360 motions behind other animations. A lot of people have difficulty executing 360s because part of the motion
requires you to press which will cause you to jump if your timing isn't great. But by buffering the 360 (and 720) input behind other animations, you can use the animation to keep Zangief grounded while you press
and prevent him from jumping. A very basic
example: dash forward by double tapping and input the 360 motion during the dash animation. If your timing is right, Zangief will finish the dashing animation and then immediately perform his grab animation. You should also learn piano input techniques to make the timing even easier.
Sumo Smash charge + K SPECIAL
The MK and HK versions will pass through fireballs on the way up, so they're a great counter to opponents with projectiles on the brains. Try to learn the spacing very well because, if you're smart about it, you can use the Sumo Slam to cross-up the opponent, landing just behind the opponent (instead of on top of or to the side of him/her) to break through the guard. The EX version is especially good for comboing.
Oicho Throw + P SPECIAL
Great range and damage, you'll want to use instead of normal grab attempts so learn to execute it like you take breaths. Ticking into the Oicho is a little tricky as you can cancel a normal into the Oicho but it won't grab. You need to throw a tick attack and wait a half step before throwing to avoid a whiffed grab. Note: It seems that his LP Oicho has more range than the other versions, so stick with it.
Super Killer Head Ram charge + P SUPER COMBO
Very comboable off of an up-close Sumo Headbutt and it does very impressive damage. It's even more useful than his ultra combo. The start of the attack has some invincibility so it's good against jump-ins and even fireballs from mid-screen.
Ultimate Killer Head Ram charge + PPP SUPER COMBO
Passes through projectiles (among other things) at start up. It's good as an anti-air attack, working against both jump-ins and retreating jumps. Good damage, simple execution. Especially effective off of a connected Focus Attack—we suggest dash canceling backward to start the back charge.
Zangief Character Select »
Zangief is unlocked by default.
Page44© 2009 IGN Entertainment, Inc.
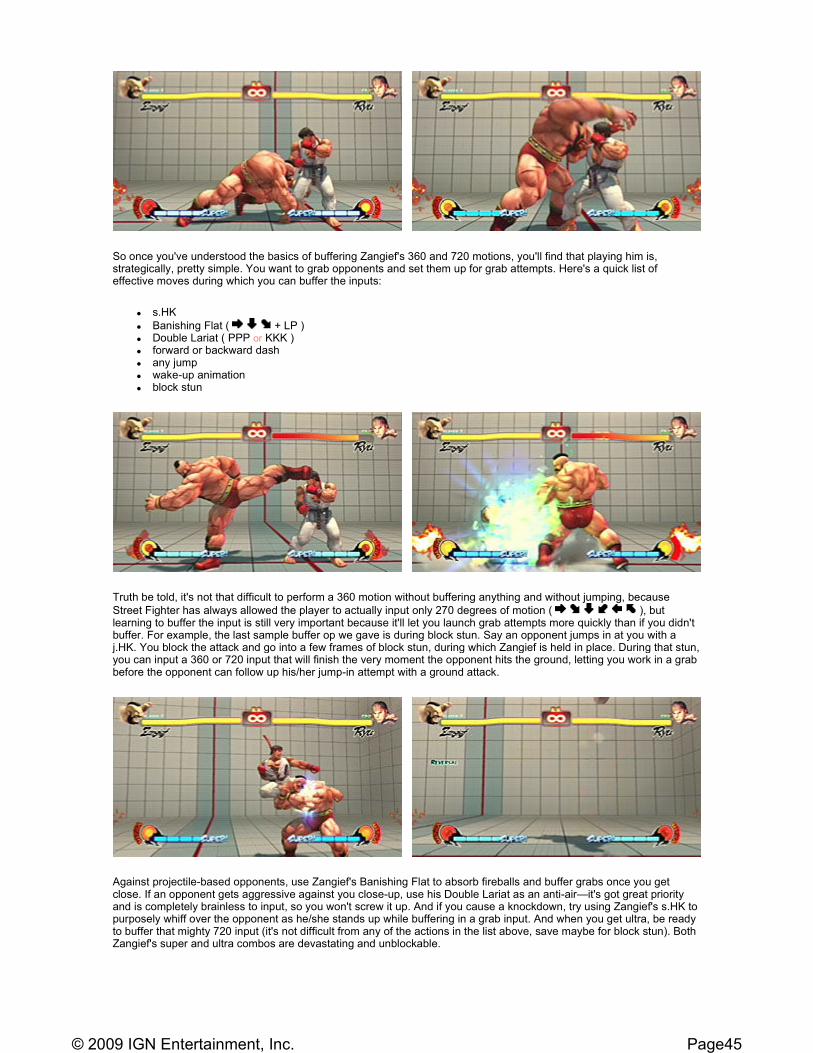
So once you've understood the basics of buffering Zangief's 360 and 720 motions, you'll find that playing him is, strategically, pretty simple. You want to grab opponents and set them up for grab attempts. Here's a quick list of effective moves during which you can buffer the inputs:
� s.HK
� Banishing Flat ( + LP ) � Double Lariat ( PPP or KKK ) � forward or backward dash � any jump � wake-up animation � block stun
Truth be told, it's not that difficult to perform a 360 motion without buffering anything and without jumping, because
Street Fighter has always allowed the player to actually input only 270 degrees of motion ( ), but learning to buffer the input is still very important because it'll let you launch grab attempts more quickly than if you didn't buffer. For example, the last sample buffer op we gave is during block stun. Say an opponent jumps in at you with a j.HK. You block the attack and go into a few frames of block stun, during which Zangief is held in place. During that stun, you can input a 360 or 720 input that will finish the very moment the opponent hits the ground, letting you work in a grab before the opponent can follow up his/her jump-in attempt with a ground attack.
Against projectile-based opponents, use Zangief's Banishing Flat to absorb fireballs and buffer grabs once you get close. If an opponent gets aggressive against you close-up, use his Double Lariat as an anti-air—it's got great priority and is completely brainless to input, so you won't screw it up. And if you cause a knockdown, try using Zangief's s.HK to purposely whiff over the opponent as he/she stands up while buffering in a grab input. And when you get ultra, be ready to buffer that mighty 720 input (it's not difficult from any of the actions in the list above, save maybe for block stun). Both Zangief's super and ultra combos are devastating and unblockable.
Page45© 2009 IGN Entertainment, Inc.

Combos
Moves List
...
Eh, Zangief really isn't a combo character. You should be focusing on grab attempts buffered from the actions listed above.
( in air ) + LK ( cross-up ) c.LK xx PPP
Okay, okay, so here's a Zangief combo. His Double Knee Drop ( + LK ( in air ) ) is actually a very good cross-up, but to combo off of it you'll have to connect it pretty low. Use it as a meaty attempt to break up the predictability of repeated grab setups.
( in air ) + HP c.LP c.LP c.LK s.MP
Flying Body Attack ( + HP ( in air ) )—or Body Splash, as we prefer to call it—has good priority, crosses up, and induces plenty of hit stun for simple combos. The string that follows isn't too difficult to connect, as far as link combos are concerned, and it does pretty good damage for a combo that uses no specials or super and doesn't leave you vulnerable if blocked. If you land the Body Splash as a cross-up, knock one of the c.LP attacks out of the combo as the first three hits will push the opponent too far for the last s.MP to connect.
Flying Body Attack + HP ( in air ) NORMAL
Good for cross-up attempts and as a general jump-in because it has such a wide hit box that it squashes a lot. As a meaty cross-up, if it gets blocked you can tick into a grab attempt.
Double Knee Drop + LK ( in air ) NORMAL
A good cross-up, comes out quick so it beats a lot of attacks in the air, but it's hard to combo off of because it doesn't give much hit stun.
Headbutt + MP or HP ( in air ) NORMAL
A decent anti-air? Seems a pretty particular move, we don't use it but maybe we're way off base.
Long Kick + HK NORMAL
Extends the range of Zangief's crouching sweep, it's good for catching opponents who think they're safely outside your range. Use sweeps to cause knockdowns so you utilize Zangief's solid meaty game.
Page46© 2009 IGN Entertainment, Inc.
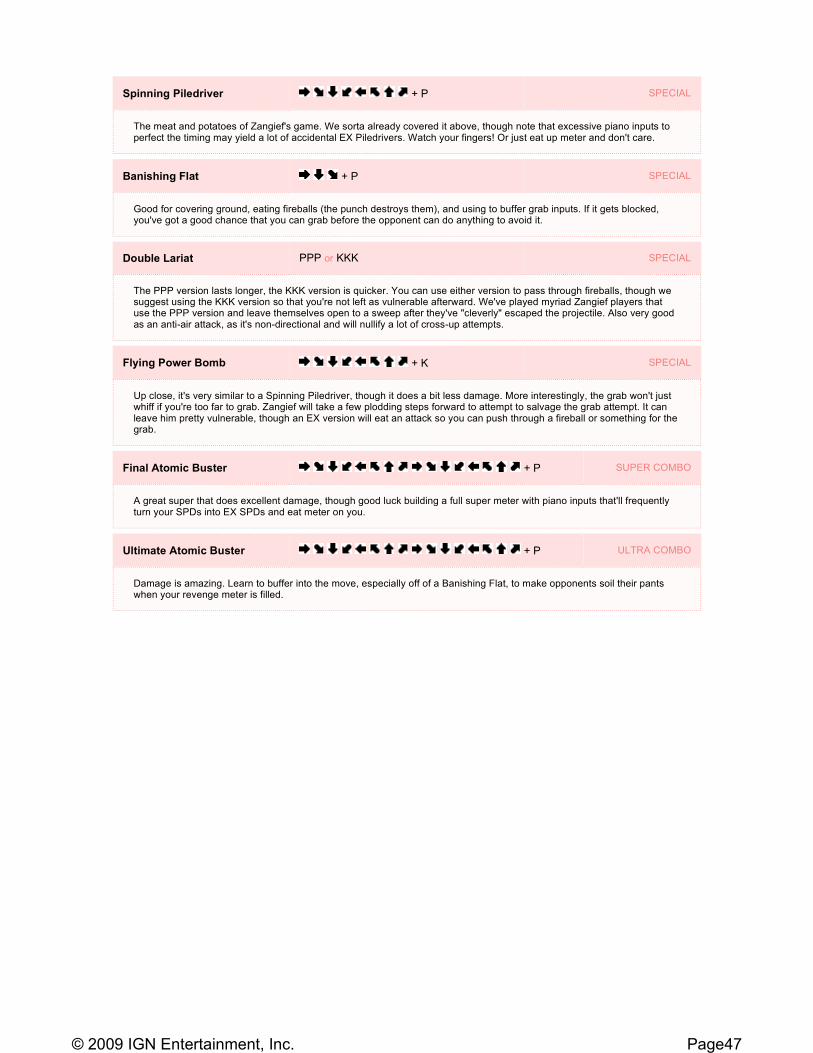
Spinning Piledriver + P SPECIAL
The meat and potatoes of Zangief's game. We sorta already covered it above, though note that excessive piano inputs to perfect the timing may yield a lot of accidental EX Piledrivers. Watch your fingers! Or just eat up meter and don't care.
Banishing Flat + P SPECIAL
Good for covering ground, eating fireballs (the punch destroys them), and using to buffer grab inputs. If it gets blocked, you've got a good chance that you can grab before the opponent can do anything to avoid it.
Double Lariat PPP or KKK SPECIAL
The PPP version lasts longer, the KKK version is quicker. You can use either version to pass through fireballs, though we suggest using the KKK version so that you're not left as vulnerable afterward. We've played myriad Zangief players that use the PPP version and leave themselves open to a sweep after they've "cleverly" escaped the projectile. Also very good as an anti-air attack, as it's non-directional and will nullify a lot of cross-up attempts.
Flying Power Bomb + K SPECIAL
Up close, it's very similar to a Spinning Piledriver, though it does a bit less damage. More interestingly, the grab won't just whiff if you're too far to grab. Zangief will take a few plodding steps forward to attempt to salvage the grab attempt. It can leave him pretty vulnerable, though an EX version will eat an attack so you can push through a fireball or something for the grab.
Final Atomic Buster + P SUPER COMBO
A great super that does excellent damage, though good luck building a full super meter with piano inputs that'll frequently turn your SPDs into EX SPDs and eat meter on you.
Ultimate Atomic Buster + P ULTRA COMBO
Damage is amazing. Learn to buffer into the move, especially off of a Banishing Flat, to make opponents soil their pants when your revenge meter is filled.
Page47© 2009 IGN Entertainment, Inc.
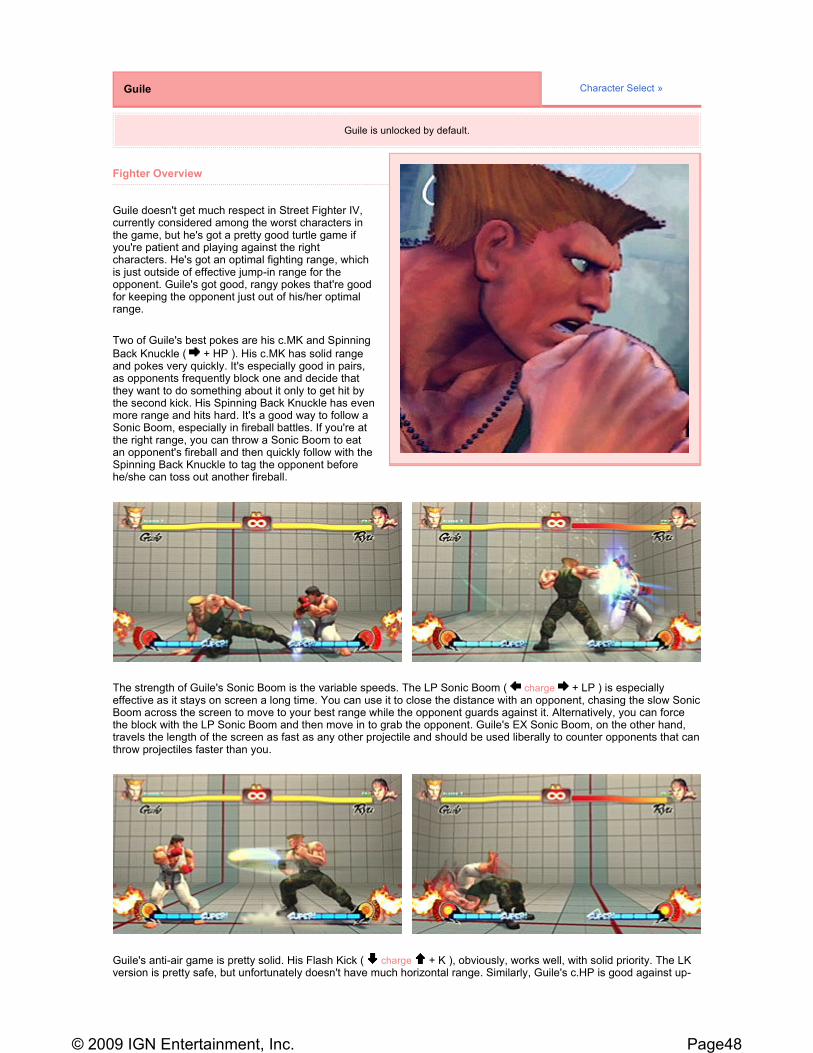
Fighter Overview
Guile doesn't get much respect in Street Fighter IV, currently considered among the worst characters in the game, but he's got a pretty good turtle game if you're patient and playing against the right characters. He's got an optimal fighting range, which is just outside of effective jump-in range for the opponent. Guile's got good, rangy pokes that're good for keeping the opponent just out of his/her optimal range.
Two of Guile's best pokes are his c.MK and Spinning
Back Knuckle ( + HP ). His c.MK has solid range and pokes very quickly. It's especially good in pairs, as opponents frequently block one and decide that they want to do something about it only to get hit by the second kick. His Spinning Back Knuckle has even more range and hits hard. It's a good way to follow a Sonic Boom, especially in fireball battles. If you're at the right range, you can throw a Sonic Boom to eat an opponent's fireball and then quickly follow with the Spinning Back Knuckle to tag the opponent before he/she can toss out another fireball.
The strength of Guile's Sonic Boom is the variable speeds. The LP Sonic Boom ( charge + LP ) is especially effective as it stays on screen a long time. You can use it to close the distance with an opponent, chasing the slow Sonic Boom across the screen to move to your best range while the opponent guards against it. Alternatively, you can force the block with the LP Sonic Boom and then move in to grab the opponent. Guile's EX Sonic Boom, on the other hand, travels the length of the screen as fast as any other projectile and should be used liberally to counter opponents that can throw projectiles faster than you.
Guile's anti-air game is pretty solid. His Flash Kick ( charge + K ), obviously, works well, with solid priority. The LK version is pretty safe, but unfortunately doesn't have much horizontal range. Similarly, Guile's c.HP is good against up-
Guile Character Select »
Guile is unlocked by default.
Page48© 2009 IGN Entertainment, Inc.

close jump-ins, but only works if the opponent is pretty close. For opponents jumping from further back, a simple s.MK is surprisingly effective.
Other quick notes on Guile: His j.LK is his only cross-up, but comboing off of it is tough because it doesn't give you much hit stun to work with. You can maintain a back charge while using Guile's Knee Bazooka ( ) to move forward, though be
careful doing so up close. Guile's target combo ( c.MK xx + MP ) is effective because it hits low and then immediately overhead, and it's a solid meaty attack if you don't expect a counter.
Combos
j.HP c.MP xx charge + LP + HP
This is a pretty typical bread-and-butter jump-in combo for Guile. If you're in a corner, you can even tack on a couple of extra hits after the jump-in j.HP by connecting first with a c.LK c.LP.
( in corner ) j.HP c.MP xx charge + PP xx MP + MK charge + KKK
This only works in a corner, so we're unsure of its usefulness. But if you can start it, hit the opponent with an EX Sonic Boom and you can cancel it with a Focus Attack which you can charge to stage two and still combo. The stage two Focus Attack crumples the opponent, letting you then combo Guile's ultra. We suggest that you begin charging the ultra the moment you hit the Focus Attack and don't worry about dash canceling the Focus Attack to get closer.
c.MK xx charge + K xx charge + K
This is a pretty simple way to combo into Guile's super combo, which is an effective way to punish an opponent up close.
To cancel the Flash Kick into the super combo, your input should actually look more something like charge + K xx
+ K which gives you the Flash Kick based off of diagonal inputs (instead of straight up and down inputs). You can use those diagonal inputs to act as the first two inputs of the super combo, letting you quickly buffer into the super for the combo.
Page49© 2009 IGN Entertainment, Inc.

Moves List
Straight Chop + MP NORMAL
A solid overhead strike that's a good meaty attack when the opponent expects you to poke low.
Spinning Back Knuckle + HP NORMAL
Great range and even pretty good speed, use it as pressure from a distance other characters need to use fireballs. If an opponent gets reliant on projectiles, you can match one of his/her fireballs with a Sonic Boom and then follow with a Spinning Back Knuckle to catch the opponent before another fireball comes out.
Knee Bazooka or + LK NORMAL
Not real useful except that it lets you move forward while still holding on the controls, so you can maintain a back charge while moving toward the opponent. Up close, it's a bit dangerous.
Rolling Sobat or + MK NORMAL
The forward moving Rolling Sobat has decent range and speed and will even float over low sweeps from the opponent. The reverse Sobat is good when you're retreating, as it lets you move backward while still throwing out a poke.
Reverse Spin Kick or + HK NORMAL
This acts as an overhead in some games, but not in Street Fighter IV. It's still got pretty good range, but a shame it only comes out if you're up close anyway.
Guile High Kick + HK NORMAL
A decent anti-air from a crouch, and you can even juggle an EX Flash Kick off of it, no matter how it hits. Still, we can't help
thinking that there'd be so many more uses for it if was activated by a instead.
Sonic Boom charge + P SPECIAL
A very good projectile. Throw LP Sonic Booms for the hang time and chase them across the screen to cover distance. Guile has a bit less recover time on his Sonic Boom than most other projectile throwers, so take advantage by throwing a Sonic Boom to intercept an incoming fireball and then jumping to action (either by literally jumping or with a Spinning Back Fist).
Flash Kick charge + K SPECIAL
A good anti-air, though the LK version doesn't have much horizontal range to speak of. It's decent in combos off of c.MP and can even cancel into Guile's usable super combo.
Double Flash Kick charge + K SUPER COMBO
Does solid damage and is fairly easy to combo into once you learn to buffer the input from a Flash Kick. Guile's EX Sonic Boom is good enough that you may never see meter for the super, but if you can do without those super projectiles it's worth going for the super combo.
Flash Explosion charge + KKK SUPER COMBO
Does good damage if you can manage to connect it. Your best bet is using it to punish opponents that whiff big attacks or as a counter to a jump-in. Unfortunately, it's tough to reliably connect the ultra which is part of the reason why Guile isn't considered especially good in Street Fighter IV.
Page50© 2009 IGN Entertainment, Inc.

Fighter Overview
We're gonna go ahead and tell you that Ken, in Street Fighter IV, isn't as good as Ryu. Both his super and ultra combos are not as good as Ryu's, but that's not to say Ken doesn't have strengths of his own. And strangely, Ken's own strengths are buried in his MK attack.
There's nothing special about a standard s.MK, and even his c.MK is pretty ordinary. Useful, but ordinary. What is special is Ken's Forward Step Kick (
+ MK ), which has outstanding horizontal range and comes out pretty quickly. Use the Forward Step Kick to gain ground on the opponent and apply constant pressure, occasionally throwing in c.MKs
which you can cancel into Hadokens ( + P ). As a poke. the Forward Step Kick is great but it's got an even more important use. Most characters in Street Fighter IV have kara throws, and a few even have useful kara throws, but Ken's kara throw, using Forward Step Kick, is simply amazing.
The idea behind a kara throw is that you interrupt the forward motion of a normal attack by canceling it with a throw attempt. With Ken, you can utilize the big step at the beginning of his Forward Step Kick and cancel the attack before he
actually kicks forward using a throw. The input for this kara is + MK LP + LK, with the LP + LK coming immediately after inputting the Forward Step Kick. This is easier if you've got an arcade stick, with which you can roll your fingers across first the MK and immediately to the throw input.
The use of the kara throw is that it greatly extends the range of Ken's throw, letting you punish opponents with a grab as a counter to an opponent's attack that might normally leave them behind punishment range. And after a knock down, you can wait for the opponent to get up outside the range of his/her throw, but within the range of Ken's kara throw. As
Ken Character Select »
Ken is unlocked by default.
Page51© 2009 IGN Entertainment, Inc.

soon as the opponent stands up, kara-cancel Ken's Forward Step Kick to grab the opponent and slam him/her back to the ground where you can repeat the process or set up a cross-up.
Ken's j.MK his is best cross-up, and if that lands you can combo into Ken's target combo with s.MK xx s.HP which, then,
can go into a fireball or Shoryuken ( + P ). Constantly threaten cross-up combos while applying pressure with c.MK and Forward Step Kick. With the opponent always afraid of a potential kara, you can make Ken very effective.
Combos
j.MK ( cross-up ) s.MP xx s.HP xx + HP xx + P
This combo starts with Ken's solid j.MK cross-up. If it lands, it's easy enough to combo into Ken's target combo ( ) and then go into a Hadoken canceled into his super, or into Ken's Shoryuken ( ) if you don't have enough super meter.
c.LK c.LP c.MK xx + HP
The beauty of this combo is its safety and simplicity. When you've worked your way in close with Forward Step Kicks, poke with this string. It'll all combo if timed properly, and if ended with the Hadoken ( ) it's very safe when blocked.
c.MK xx + HP xx FADC xx + PPP
This is a good way to get into Ken's ultra meter when you've got it ready. The key part is canceling the HP Shoryuken after the second hit. It'll knock the opponent into the air long enough to dash forward and catch the falling body with an ultra combo.
Page52© 2009 IGN Entertainment, Inc.

Moves List
Inazuma Kick + MK NORMAL
A basic overhead attack, use it when you're poking in close and the opponent gets too comfortable behind a low guard.
Forward Step Kick + MK NORMAL
The very key to Ken's success. Use it as a rangy poke and to cover ground on a retreating opponent. And, as described above, you'll want to abuse Ken's kara throw with the Forward Step Kick.
Thunder Kick + HK NORMAL
Another overhead option for Ken, this one isn't as quick as his Inazuma kick but has more horizontal range, thanks to the forward step Ken takes before unloading the foot. But the best use of the Thunder Kick is the ability to feint it by holding down HK. The big step may make an opponent guard up, but you can feint it and go into a throw instead of the kick. It's slowness is a problem, though.
Hadoken + P SPECIAL
Ken's got an all-around good fireball that covers the entire length of the playing field. Use it to end poke strings to make them safe, use them as meaty attacks on opponents as they wake up, and use it in combos to transition to Ken's solid super.
Shoryuken + P SPECIAL
Contrary to popular belief, it's actually better to use Ken's LP Shoryuken most of the time. In combos, the HP version will get you a couple more hits and a bit more damage, but as a general anti-air to throw out, use Ken's LP Shoryuken. He recovers from the attack much more quickly than the HP version, so you're not left as desperately vulnerable if you whiff.
Tatsumaki Senpukyaku + K SPECIAL
Like the other shoto Tatsumakis in Street Fighter IV, Ken can use his to pass through low- and mid-height fireballs, though the beginning frames of the Tatsu are still vulnerable. An EX Tatsumaki in the air makes for a decent cross-up and combo starter.
Shoryureppa + P SUPER COMBO
Ken's super is one of the more usable in the game. It's easy to combo into and can even be used as a wake-up attack to combat incoming meaty attempts.
Shinryuken + PPP ULTRA COMBO
Hit with Ken's ultra in close and you'll get an impressive flurry of attacks that deals solid damage. You can combo into the ultra off of a FADC'd HP Shoryuken, though you have to wait for the second hit of the Shoryuken before canceling. If you don't hit the attack in close, Ken will fly straight up in the air with a lot of vertical range. You can thus use the ultra as a counter to cross-up attempts, though don't expect to get much damage from it.
Page53© 2009 IGN Entertainment, Inc.
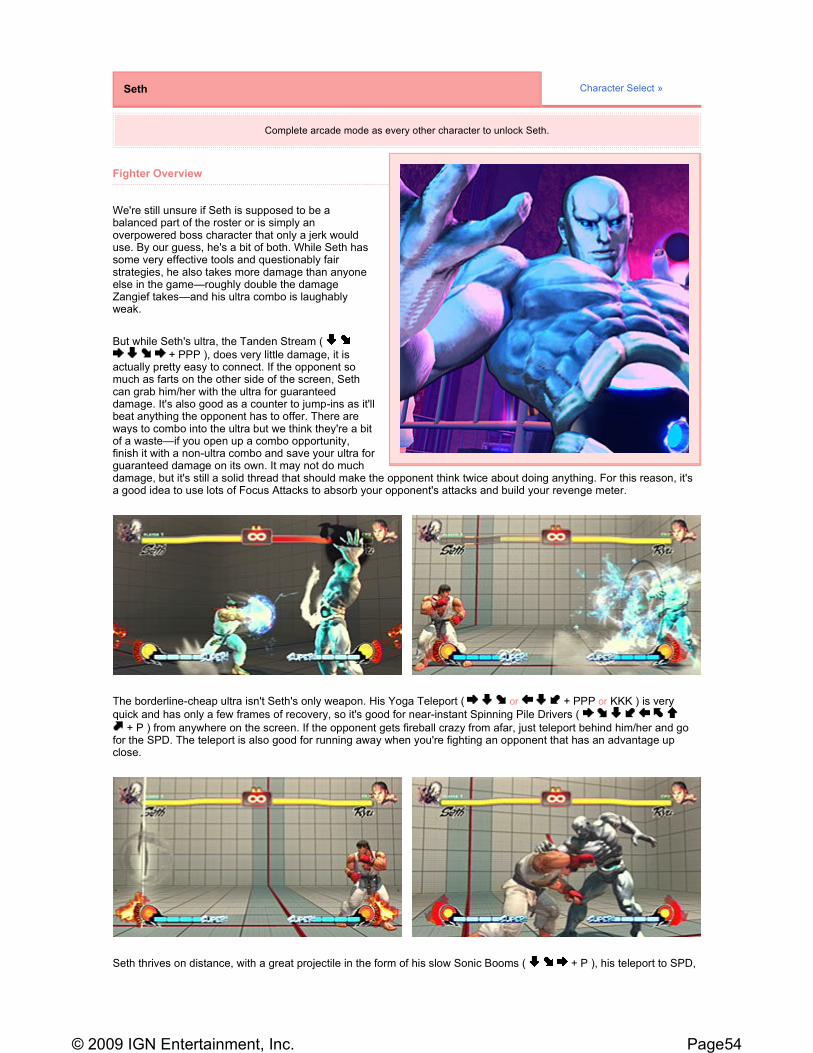
Fighter Overview
We're still unsure if Seth is supposed to be a balanced part of the roster or is simply an overpowered boss character that only a jerk would use. By our guess, he's a bit of both. While Seth has some very effective tools and questionably fair strategies, he also takes more damage than anyone else in the game—roughly double the damage Zangief takes—and his ultra combo is laughably weak.
But while Seth's ultra, the Tanden Stream (
+ PPP ), does very little damage, it is actually pretty easy to connect. If the opponent so much as farts on the other side of the screen, Seth can grab him/her with the ultra for guaranteed damage. It's also good as a counter to jump-ins as it'll beat anything the opponent has to offer. There are ways to combo into the ultra but we think they're a bit of a waste—if you open up a combo opportunity, finish it with a non-ultra combo and save your ultra for guaranteed damage on its own. It may not do much damage, but it's still a solid thread that should make the opponent think twice about doing anything. For this reason, it's a good idea to use lots of Focus Attacks to absorb your opponent's attacks and build your revenge meter.
The borderline-cheap ultra isn't Seth's only weapon. His Yoga Teleport ( or + PPP or KKK ) is very
quick and has only a few frames of recovery, so it's good for near-instant Spinning Pile Drivers (
+ P ) from anywhere on the screen. If the opponent gets fireball crazy from afar, just teleport behind him/her and go for the SPD. The teleport is also good for running away when you're fighting an opponent that has an advantage up close.
Seth thrives on distance, with a great projectile in the form of his slow Sonic Booms ( + P ), his teleport to SPD,
Seth Character Select »
Complete arcade mode as every other character to unlock Seth.
Page54© 2009 IGN Entertainment, Inc.

and the speed of his wall jump. The wall jump is really surprisingly good, as Seth clears the length of the screen much quicker than any wall jumper. After the wall jump, attack with Seth's j.HK which is a great jump-in and acts as an excellent cross-up attack, good for setting up virtually any combo. And his s.HP is similar to Dhalsim's, reaching far across the screen to hit underneath incoming fireballs.
Combos
Moves List
j.HK c.LK c.LP c.MP xx + K
This is a decent way to capitalize on connecting a j.HK from Seth's wall jump to punish an opponent's projectile. The
ground string is also a decent way to poke, canceling into the Hyakuretsukyaku ( + K ) if it connects or into a Sonic Boom if it gets blocked.
j.HK ( cross-up ) s.HP xx + P xx + P
A clean, simple way into Seth's super combo. His super isn't very powerful on its own, similar to his ultra, but in this combo it actually does pretty solid damage. The super is good enough in combos that it's worth shying away from using Seth's EX attacks so that you can build the super meter.
c.MK xx + P xx MP + MK s.HP xx + HP xx FADC xx + MK + MK + MK + HK
We'll say this one's a bit more flash than practicality, but it does pretty solid damage and isn't a terrible way to burn a full super meter. Seth is pretty unique in that he can combo into a stage two Focus Attack off of a non-EX move, and he can do it anywhere on screen (not just in a corner). After crumpling the opponent, move in and FADC a Shoryuken to pop him/her into the air, at which point you can jump straight up and connect the full series of Seth's air stomps.
Yosokyaku + MK ( in air ) NORMAL
Similar to Chun-Li's + MK air kick, this'll trigger with any sort of jump (forward, backward, straight up) and even has
decent air-to-air priority. After three of the + MK you can also follow with a + HK for a possible four-hit air combo.
Tenmakujinkyaku + HK ( in air ) NORMAL
It's possible to combo off of this as a jump-in, though you've got to hit pretty deep with it. Use the Tenmakujinkyaku to interrupt a jump that would otherwise yield a cross-up and get from it instead a regular jump-in. You can use this to mess with your opponent's anticipation of a cross-up.
Sonic Boom + P SPECIAL
Very good projectile, the LP version being pretty slow and staying on the screen a long time. You can throw out a LP Sonic Boom and then teleport behind the opponent for a cross-up and combo. Use the Sonic Boom to lure opponents into projectile wars and then beat 'em with a wall jump combo.
Page55© 2009 IGN Entertainment, Inc.
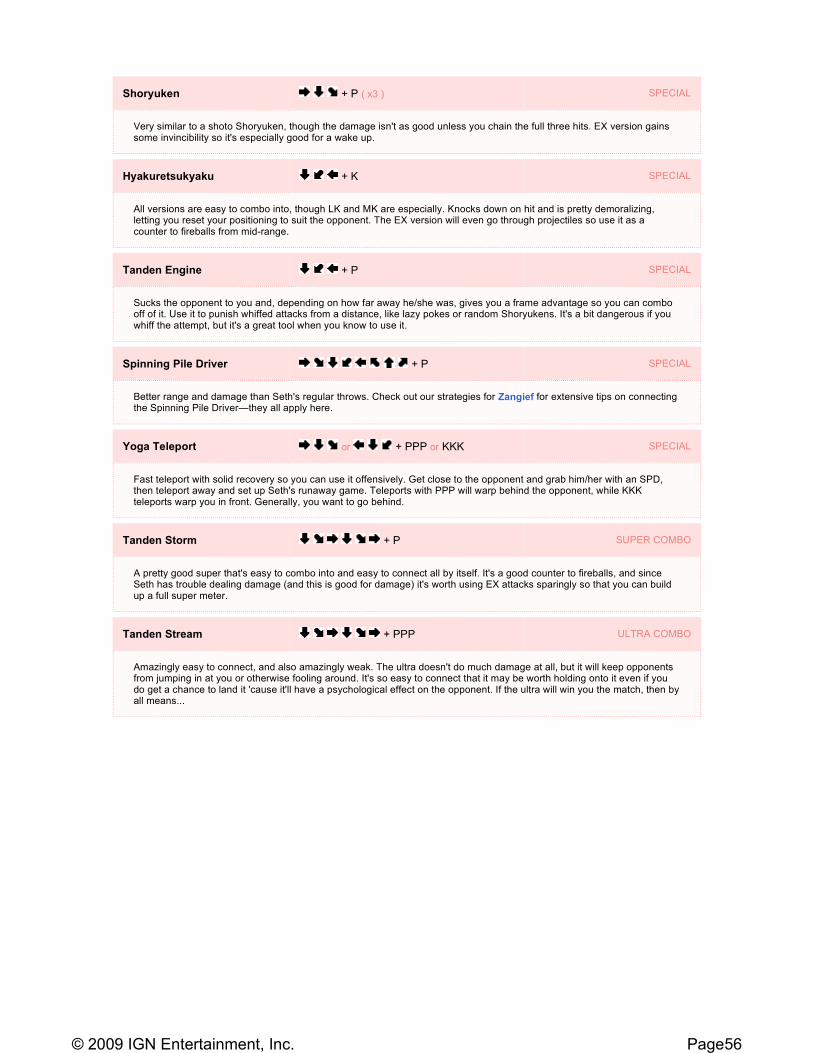
Shoryuken + P ( x3 ) SPECIAL
Very similar to a shoto Shoryuken, though the damage isn't as good unless you chain the full three hits. EX version gains some invincibility so it's especially good for a wake up.
Hyakuretsukyaku + K SPECIAL
All versions are easy to combo into, though LK and MK are especially. Knocks down on hit and is pretty demoralizing, letting you reset your positioning to suit the opponent. The EX version will even go through projectiles so use it as a counter to fireballs from mid-range.
Tanden Engine + P SPECIAL
Sucks the opponent to you and, depending on how far away he/she was, gives you a frame advantage so you can combo off of it. Use it to punish whiffed attacks from a distance, like lazy pokes or random Shoryukens. It's a bit dangerous if you whiff the attempt, but it's a great tool when you know to use it.
Spinning Pile Driver + P SPECIAL
Better range and damage than Seth's regular throws. Check out our strategies for Zangief for extensive tips on connecting the Spinning Pile Driver—they all apply here.
Yoga Teleport or + PPP or KKK SPECIAL
Fast teleport with solid recovery so you can use it offensively. Get close to the opponent and grab him/her with an SPD, then teleport away and set up Seth's runaway game. Teleports with PPP will warp behind the opponent, while KKK teleports warp you in front. Generally, you want to go behind.
Tanden Storm + P SUPER COMBO
A pretty good super that's easy to combo into and easy to connect all by itself. It's a good counter to fireballs, and since Seth has trouble dealing damage (and this is good for damage) it's worth using EX attacks sparingly so that you can build up a full super meter.
Tanden Stream + PPP ULTRA COMBO
Amazingly easy to connect, and also amazingly weak. The ultra doesn't do much damage at all, but it will keep opponents from jumping in at you or otherwise fooling around. It's so easy to connect that it may be worth holding onto it even if you do get a chance to land it 'cause it'll have a psychological effect on the opponent. If the ultra will win you the match, then by all means...
Page56© 2009 IGN Entertainment, Inc.
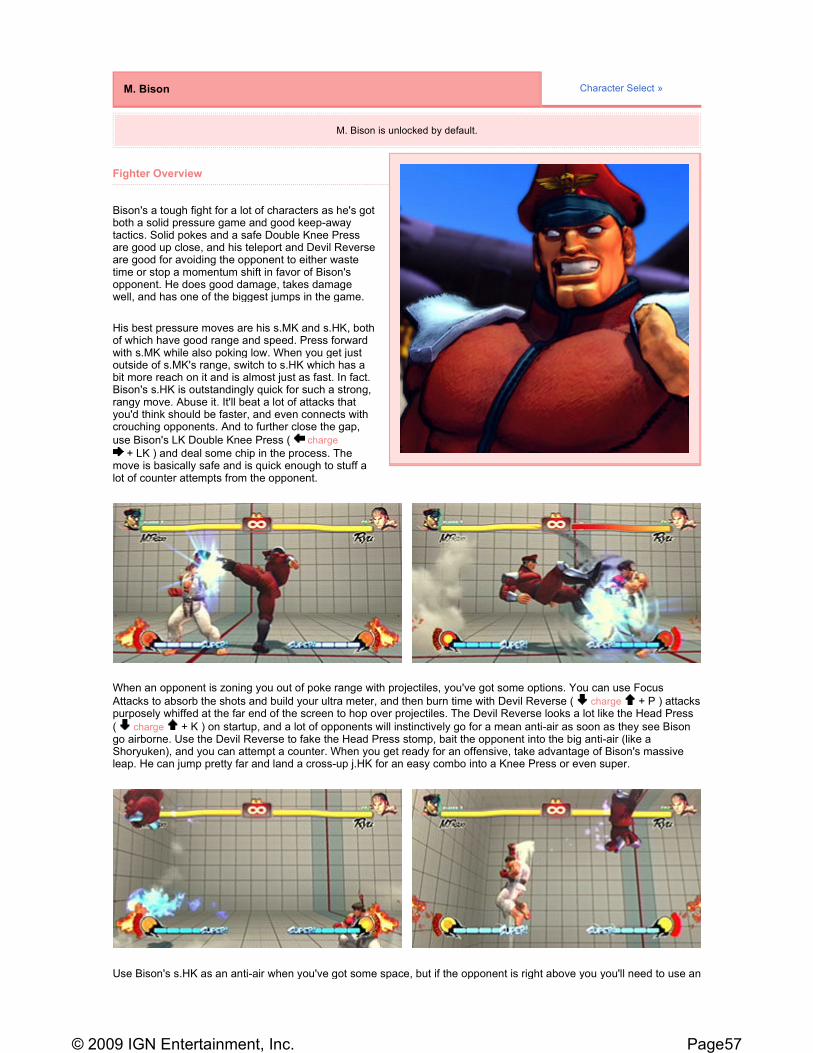
Fighter Overview
Bison's a tough fight for a lot of characters as he's got both a solid pressure game and good keep-away tactics. Solid pokes and a safe Double Knee Press are good up close, and his teleport and Devil Reverse are good for avoiding the opponent to either waste time or stop a momentum shift in favor of Bison's opponent. He does good damage, takes damage well, and has one of the biggest jumps in the game.
His best pressure moves are his s.MK and s.HK, both of which have good range and speed. Press forward with s.MK while also poking low. When you get just outside of s.MK's range, switch to s.HK which has a bit more reach on it and is almost just as fast. In fact. Bison's s.HK is outstandingly quick for such a strong, rangy move. Abuse it. It'll beat a lot of attacks that you'd think should be faster, and even connects with crouching opponents. And to further close the gap,
use Bison's LK Double Knee Press ( charge
+ LK ) and deal some chip in the process. The move is basically safe and is quick enough to stuff a lot of counter attempts from the opponent.
When an opponent is zoning you out of poke range with projectiles, you've got some options. You can use Focus
Attacks to absorb the shots and build your ultra meter, and then burn time with Devil Reverse ( charge + P ) attacks purposely whiffed at the far end of the screen to hop over projectiles. The Devil Reverse looks a lot like the Head Press
( charge + K ) on startup, and a lot of opponents will instinctively go for a mean anti-air as soon as they see Bison go airborne. Use the Devil Reverse to fake the Head Press stomp, bait the opponent into the big anti-air (like a Shoryuken), and you can attempt a counter. When you get ready for an offensive, take advantage of Bison's massive leap. He can jump pretty far and land a cross-up j.HK for an easy combo into a Knee Press or even super.
Use Bison's s.HK as an anti-air when you've got some space, but if the opponent is right above you you'll need to use an
M. Bison Character Select »
M. Bison is unlocked by default.
Page57© 2009 IGN Entertainment, Inc.

EX attack to gain some invincibility. Bison's EX Head Press is good for the job as you wake up, as you'll pass through any incoming meaty attacks and immediately stomp on the opponent's head for trying. His EX Psycho Crusher (
charge + PP ) is similarly good for escaping bad situations. And while his EX Knee Press doesn't have anti-air uses, it is good for passing through fireballs to shift momentum in Bison's favor.
Combos
Moves List
j.HK ( cross up ) c.LP c.LP c.MK xx charge + MK
A good example of how to capitalize on Bison's excellent cross-up. The j.HK causes lots of hit stun for a cross-up, so comboing the c.LPs afterward isn't a challenge. Nail the three-hit link down and you can easily cancel into a Knee Press which can, in turn, even be canceled into a super combo if you've got the meter.
j.MP xx j.MP charge + KKK
This is the primary setup for Bison's ultra. Use his j.MP xx j.MP target combo as an anti-air, knocking the opponent out of a jump. Start charging immediately and you'll land first, letting Bison pull out the ultra and catch the falling opponent.
MP + MK s.HP xx charge + HK xx charge + K
A lot of the top Japanese players we've seen playing as Bison use lots of Focus Attacks and this is a solid, easy way to capitalize on a connected Focus Attack, provided you've got a full super meter. We won't blame you if you don't.
Psycho Crusher charge + P SPECIAL
It's fast and does good damage, but it leaves Bison pretty vulnerable when blocked. We suggest only using Psycho Crusher in combos when it's a guaranteed hit, or when using the EX version to get away from an aggressive opponent up close. It does do solid chip damage, so it's not a bad move near the end of a match for the final bit of health.
Double Knee Press charge + K SPECIAL
Probably Bison's best move. Use the LK Knee Press as general pressure and it's largely safe. It acts similar to Psycho Crusher but doesn't have the massive vulnerability of the latter move.
Head Press charge + K SPECIAL
It has surprisingly good priority in air-to-air clashes, beating out a lot of attacks you wouldn't think it'd beat (like Sagat's Tiger uppercut). The EX version is especially good as an anti-air, as Bison will pass through an incoming meaty jump-in and stomp the opponent for his/her trouble.
Page58© 2009 IGN Entertainment, Inc.

Fighter Overview
Sagat is not a complicated character. And yet, he is, at present, considered to be the most devastating fighter in the Street Fighter IV roster. The two elements of Sagat's game that make him so powerful are his Tiger Shots and his easily comboable ultra which deals massive damage.
Sagat's Tiger Shots are faster than any other character's projectile in the game, which means that you can dominate a projectile war against pretty much everybody (Dhalsim's got tools to make it
difficult). Stick mostly to Low Tiger Shots (
+ K ) until you expect the opponent to try and jump over your barrage, at which point a High Tiger Shot
( + P ) will knock him/her out of the air. As a Sagat player, you are generally at an advantage to fight from a distance, so do your best to keep the fight there.
Devil Reverse charge + P SPECIAL
Looks like the Head Press at the beginning, so you can bait opponents into trying to anti-air Bison and then immediately flip out of the forward jump and either retreat to the back of the screen or go for a hit. Can also use the jump to cross the screen and never activate the air punch in order to land next to the opponent and go for a grab.
Bison Warp or + PPP or KKK SPECIAL
The invincibility on the teleport starts instantly, so it's good for dodging full screen fireballs, as well as for putting distance between you and an opponent who's got a momentum advantage. There's a lot of recovery time at the end of the teleport, though, so it's no good for offense. You should basically always be teleporting away from the opponent.
Knee Press Nightmare charge + K SUPER COMBO
Has invincibility at startup so you can pass through fireballs and jump-ins. As well, it's easily comboed into. But since Bison sort of needs his EX attacks, it's a bit doubtful you'll get to use his super much.
Nightmare Booster charge + KKK ULTRA COMBO
Has a bit of invincibility at startup, but not much. It's best used after knocking the opponent out of the air with the j.MP xx j.MP target combo.
Sagat Character Select »
Sagat is unlocked by default.
Page59© 2009 IGN Entertainment, Inc.

If an opponent gets through your fireballs, poke with s.LK and cancel into a Low Tiger Shot. Even if it's blocked, it's a good poke string to push back the opponent with. As well, c.MK is an excellent poke, with solid range and a low hit to break a high guard. You can cancel that, too, with a Low Tiger Shot. You can also push opponents back with a Tiger
Knee Crush ( + K ) as it's a fairly safe attack.
Unfortunately, Sagat's LP Tiger Uppercut ( + LP ) has very, very little horizontal range, while his other two uppercuts leave Sagat very open if you whiff with them. You can extend the horizontal range of his LP Tiger Uppercut by
first triggering a Low Step Kick ( + LK ) and canceling it with an uppercut before the kick even comes out. But really, when you throw a Tiger Uppercut you should be ready to FADC it. This habit is both for safety and for Sagat's greatest strength...
By FADCing a Tiger Uppercut, you can pop an opponent into the air, setting him/her up for a juggle combo that includes
Sagat's devastating Tiger Destruction ultra ( + KKK ). If an opponent is standing over your downed body, wake up with a Tiger Uppercut and FADC it. If it lands, you can go right into Sagat's ultra or just land a High Step
Kick ( + HK ) for more time to see if the combo is connecting. If that High Step Kick lands, you can still combo into Sagat's ultra.
Page60© 2009 IGN Entertainment, Inc.

And that plays into another of Sagat's tools for keeping the opponent at bay. If you've got a full ultra meter, you can always threaten with a High Step Kick as an anti-air against an incoming jump-in attempt. If that High Step Kick connects as an anti-air, you can juggle an ultra combo. The damage dealt is pretty crazy, and combined with Sagat's great fireballs and very high hit point count makes Sagat arguably the best character in the game.
Combos
j.LK ( cross-up ) c.LK xx + HK xx + K
Sagat's j.LK is his only cross-up, and it's not especially good. To combo off of it, you'll have to connect very low to the ground, so it's mostly useful as a meaty attempt. But if you can connect it, you can combo into a Low Tiger Shot and cancel into Sagat's super ( ). We're not sure it's totally worth it, since Sagat needs meter for EX Tiger Shots and FADCs, but if you want to polish off an opponent this isn't a bad way to do it. And if you're in a corner, you can continue by juggling with an ultra combo.
c.MK xx + HP xx FADC xx + HK + KKK
This is a fairly obvious route into Sagat's awesome ultra combo if you've got the meter, and highlights why you should probably save Sagat's super meter for his FADCs. Cancel the Tiger Uppercut quickly and dash forward to connect the High Step Kick, off of which you can pretty easily juggle with Sagat's ultra.
+ HK ( anti-air ) + HK + KKK
It's a shame this combo works so well, unless you're a Sagat player in which case it's quite awesome. If an opponent jumps at you, tag him/her with a High Step Kick. You don't even have to be immediately ready to fire off the ultra, because Sagat can juggle with a second High Step Kick before finally deciding that, yeah, about now would be a pretty sweet time to tag the opponent with an ultra, I guess.
Page61© 2009 IGN Entertainment, Inc.

Moves List
Heavy Tiger Blow + HP NORMAL
This is a solid overhead that does good damage and even has pretty solid range. Throw it out after s.LK and c.MK pokes fail to bust through an opponent's low guard.
Low Step Kick + LK NORMAL
It's pretty slow and leaves Sagat vulnerable afterward. Don't use it as a kick. What you can use it for is extending the range on Sagat's supers. Interestingly, the Low Step Kick can be canceled into a special before it even connects. Mostly this is useful for stretching the horizontal range of a LP Tiger Uppercut.
High Step Kick + HK NORMAL
Doesn't hit opponents that are on the ground, but it's a great anti-air and easily juggles 1) with itself and 2) with Sagat's ultra.
High Tiger Shot + P SPECIAL
Fast fireball that travels high. It'll pass over the heads of crouching opponents, which lets them more quickly jump at you. But it's good for knocking opponents out of the air when you suspect they're trying to jump.
Low Tiger Shot + K SPECIAL
The better Tiger Shot for most uses. It can't be crouched under, but it is easier to hop over than the High Tiger Shot. Still, it should be your main choice for a projectile. And encouraging opponents to jump against Sagat isn't necessarily a bad thing...
Tiger Uppercut + P SPECIAL
The LP version has pretty weak horizontal range, and the other versions have quite a bit of recovery time. Generally, you should be FADCing your Tiger Uppercuts, using them as a lead into Sagat's ultra. They've still got solid priority and do good damage, and you can extend the horizontal range by canceling a Low Step Kick.
Tiger Knee Crush + K SPECIAL
Good priority and speed on this horizontally rangy attack. It's a good counter to a fireball up close as it'll usually beat the projectile. And since the Tiger Knee knocks down on hit, you can begin pressuring with Low Tiger Shots afterward, or even go for a j.LK cross-up.
Tiger Genocide + K SUPER COMBO
Solid, easily comboable super combo that does solid damage. Still, we think Sagat's super meter is better saved for EX attacks and FADCs.
Tiger Destruction + KKK ULTRA COMBO
The key to Sagat's power. You can easily juggle the ultra for most hits off of a High Step Kick, an FADC'd Tiger Uppercut, an EX Low Tiger Shot in the corner, and even off of Sagat's super in a corner. When Sagat's ultra meter starts flashing, the opponent should be very afraid.
Page62© 2009 IGN Entertainment, Inc.

Fighter Overview
We regret to inform you that, at present, Vega is considered possibly the worst character in Street Fighter IV. Maybe second worst. But really, it doesn't mean that he's terrible, for he's actually got some very good tools. His main problems are that 1) he takes a lot of damage, 2) he doesn't deal a lot of damage, and 3) his ultra and super combos are pretty shoddy.
What Vega does have in his favor is an arsenal of solid pokes. His c.MP has outstanding range and speed. His s.HP has even better range, though it's slower so it won't be as frequently used. Either attack is great for punishing opponents whose blocked attacks leave them with a space cushion that makes them normally difficult to counter (e.g. Blanka's Rolling Attack, or Cammy's Cannon Spike). And c.MP can even be canceled into Vega's specials—use
Rolling Crystal Flash ( charge + P ) as a follow-up poke, or use an EX Barcelona Attack (
charge + KK ) for a flashy combo.
Vega's s.HK is an excellent anti-air attack. It's got great horizontal range and beats out a lot of incoming jump-ins because it can hit the opponent so early—just kick as soon as the opponent jumps if you're near enough. Try to keep the opponent at a range just where Vega's c.MP connects and his s.HK rules as an anti-air. If you're aggressive with your
poking, it can be hard for a lot of opponents to break through. His Piece of Mercury ( + MK ) has slightly more range than a c.MP and looks a lot like an overhead, but it's not. This is baffling.
As we mentioned earlier, Vega's super combo is shoddy. We might go further and say it sucks. but thankfully you shouldn't have the chance to use it often as Vega's EX attacks can be quite good. His EX Barcelona Attack hits on the way up, which means you can use it in combos as demonstrated below. His EX Sky High Claw lets Vega pass through incoming projectiles, making it a solid counter to opponents who endlessly smother you with fireballs.
Vega Character Select »
Vega is unlocked by default.
Page63© 2009 IGN Entertainment, Inc.
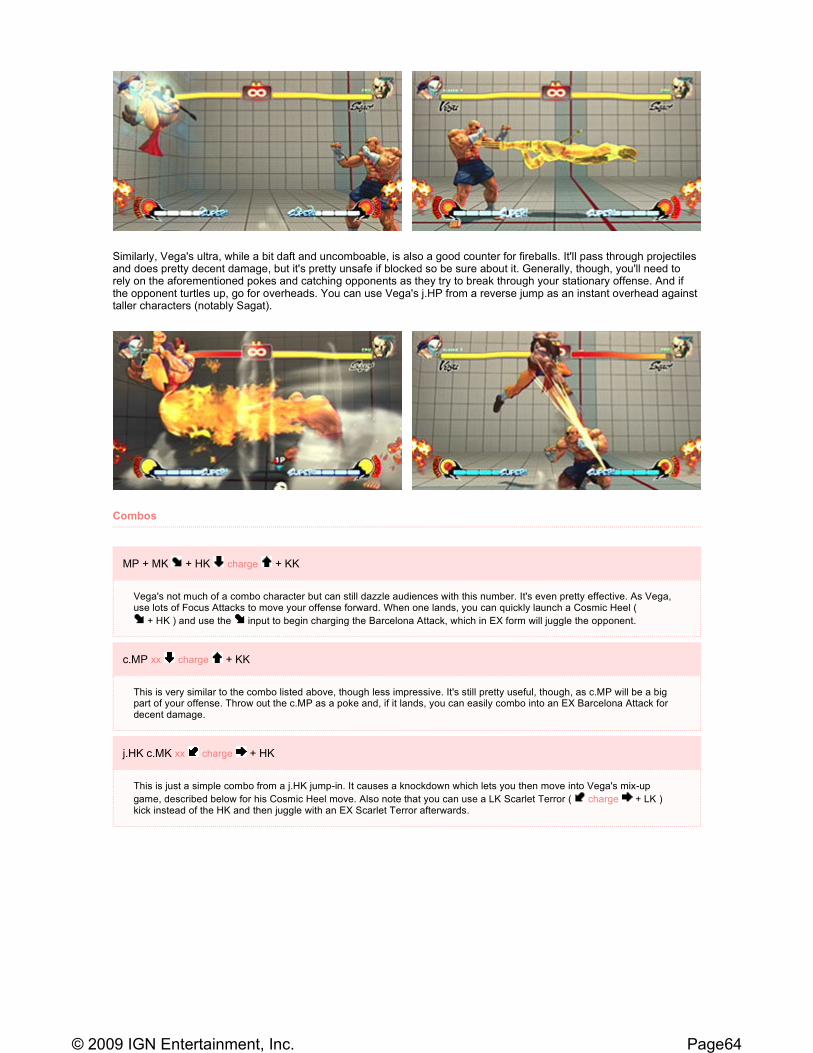
Similarly, Vega's ultra, while a bit daft and uncomboable, is also a good counter for fireballs. It'll pass through projectiles and does pretty decent damage, but it's pretty unsafe if blocked so be sure about it. Generally, though, you'll need to rely on the aforementioned pokes and catching opponents as they try to break through your stationary offense. And if the opponent turtles up, go for overheads. You can use Vega's j.HP from a reverse jump as an instant overhead against taller characters (notably Sagat).
Combos
MP + MK + HK charge + KK
Vega's not much of a combo character but can still dazzle audiences with this number. It's even pretty effective. As Vega, use lots of Focus Attacks to move your offense forward. When one lands, you can quickly launch a Cosmic Heel (
+ HK ) and use the input to begin charging the Barcelona Attack, which in EX form will juggle the opponent.
c.MP xx charge + KK
This is very similar to the combo listed above, though less impressive. It's still pretty useful, though, as c.MP will be a big part of your offense. Throw out the c.MP as a poke and, if it lands, you can easily combo into an EX Barcelona Attack for decent damage.
j.HK c.MK xx charge + HK
This is just a simple combo from a j.HK jump-in. It causes a knockdown which lets you then move into Vega's mix-up
game, described below for his Cosmic Heel move. Also note that you can use a LK Scarlet Terror ( charge + LK ) kick instead of the HK and then juggle with an EX Scarlet Terror afterwards.
Page64© 2009 IGN Entertainment, Inc.
Moves List
Piece of Mercury + MK NORMAL
Not an overhead attack, despite looking like one. It's still got more range than Vega's c.MP poke and will let you move a bit closer to the opponent so you can go back to poking with quicker attacks. It's safer than sliding after the opponent with c.HK.
Cosmic Heel + HK NORMAL
Not only is this kick good for combos (as evidenced above), but it's also good for setting up a mix-up game with Vega. Knock down an opponent and you can use the Cosmic Heel to hop over his/her downed body. Time it right (just as the opponent gets up) and you can bait a lot whiffed counters, or go for a meaty c.MK to mix up the opponent's guard and land a quick combo.
Back Slash PPP or KKK NORMAL
These reverse flips are good for passing through fireballs. The KKK flip is quicker, so it's good when you're closer to the opponent, but the PPP flip is less likely to get hit at the tail end by a slow fireball if the opponent starts to get tricky with the timing.
Rolling Crystal Flash charge + P SPECIAL
A good pressure move that does solid chip damage, as well. Do a lot of c.MP poking and cancel into a LP Rolling Crystal Flash to extend your poke and occasionally catch opponents that try to break out of your poke range. It can also be used for some free chip damage as a meaty attack (use the HP version), though against opponents with strong wake-up counters (like a shoto Shoryuken) you're flirting with danger.
Scarlet Terror charge + K SPECIAL
A good anti-air, since you'll likely be charging most of the time anyway. If a LK Scarlet Terror hits, you can follow up and juggle with an EX version.
Sky High Claw charge + P SPECIAL
If you must use it, use the HP version as the other two punches leave Vega too high in the air. But generally, you should stay away from the attack except to A) catch opponents after frequently faking Flying Barcelona Attacks, as the Sky High Claw is much faster, or B) use an EX Sky High Claw to pass through and punish projectiles.
Flying Barcelona Attack charge + K SPECIAL
To use the Barcelona Attack effectively you'll have to be tricky with it. On the one hand, the attack announces itself pretty early, so opponents can generally react to it and counter you consistently. But you can use this to your advantage. Activate the attack but hold away from the opponent on the controls and you can frequently bait counter attacks that often leave the opponent vulnerable. It's difficult to capitalize on the vulnerability, but it is possible. And then, of course, when the opponent thinks you're not going to do anything with the Barcelona Attack, you can actually go for the gold. The grab is great, and even the claw strike has pretty good priority and causes a knock down.
Remove Claw + P SPECIAL
???
Flying Barcelona Special charge + K SUPER COMBO
It sucks, don't use it. Seriously, your super meter is better spent on EX attacks and making your Rolling Crystal Flashes safe with FADCs.
Page65© 2009 IGN Entertainment, Inc.

Fighter Overview
Balrog is a bit of a beast, just like he's always been, but he plays significantly different from his Street Fighter II self. Combos are hugely important to good ol' Rog's new game, and while a bit of rush down will work, he's got even better tools for dealing with projectiles and rangy characters so patient sitting-back (waiting to explode) becomes the name of the game.
All of Balrog's EX dashing moves get a bit of hyper armor, which lets Balrog absorb one hit from the opponent and keep on charging forward for the attack. This'll let him blast through fireballs at full-screen distance to tag the opponent, giving him a great weapon against projectiles so long as you've got a bit of meter. When you don't have meter, use
Buffalo Head ( charge + P ) to hop through fireballs and close the gap between you and the opponent. Balrog's Turn Around Punch ( PPP or KKK ( charge and release ) ) will also go through fireballs as Balrog rolls around, and with that move you can maintain your back-charge and even cancel into a super.
Once you're able to get through projectiles and other rangy attacks, you can make use of Balrog's excellent mix-up game. His dashing attacks all look pretty similar at the start but you can make them hit high, mid or low depending on
which attack you use. A Dash Low Straight ( charge + P ) will hit low and trip an opponent that isn't guarding low,
while a Dash Swing Blow ( charge + P ( hold ) ) hits overhead, breaking through a low guard. The Dash Swing Blow doesn't knock down, but it does give Balrog a bit of a frame advantage so that you can connect a c.LK and cancel into another special.
Bloody High Claw charge + KKK ULTRA COMBO
You can't combo into it, so it's utility is a bit suspect. but the ultra is at least good for punishing fireball throwers. The Bloody High Claw will pass through fireballs, so if you suspect a projectile is about to be thrown you can trigger the attack. It's also effective against jumpers.
Props to reader Edward for help with Vega.
Balrog Character Select »
Balrog is unlocked by default.
Page66© 2009 IGN Entertainment, Inc.

Be aggressive once you get in close, poking with low jabs and canceling into Low Straights and Swing Blow to mix up
against the opponent. Go for throws a lot, too—you can even purposely whiff a Dash Upper ( charge + K ) against a crouching opponent to immediately get close and then grab.
For anti-air, use Balrog's Buffalo Head up close. His s.MP and c.HP are also decent anti-air attacks. To knock a jumping opponent from the air at a distance, a Dash Upper will do. His c.HK is his best range poke with good speed and knockdown on hit. Learn to flow everything together and, when you get a chance to land a combo, work in a Buffalo Head and you can get a pretty easy ultra combo juggle for solid damage.
Combos
j.HK c.LP c.LP c.LK xx charge + P charge + PPP
This combo is an example of what you should be going for with Balrog. You can take out the j.HK and start the ground string as a series of pokes that, if they connect, can be canceled into the rest of the combo. When you perform the Buffalo
Head special to knock the opponent into the air, your input should actually look like charge + P so that you maintain your back-charge, letting you quickly break out the ultra. In order for the ultra to connect, you'll need to hold down a K button after triggering it—it causes Balrog to attack with Dash Uppers instead of Dash Straights. Release K to let at least one of the hits whiff (we suggest making the first hit a Dash Upper, whiffing the second hit with a Dash Straight, and then holding K throughout the rest of the combo for Uppers) or you risk the possibility of missing with the final hit, which is the one that does the damage.
Page67© 2009 IGN Entertainment, Inc.

Moves List
charge + KK c.LP c.LP xx charge + P
This is a combo that you can threaten from a distance against opponents that toss lots of fireballs. The EX Dash Upper will pass through a fireball and, if it connects, you can combo a couple of c.LP attacks which can then cancel into a special. If you do the Buffalo Head like we've outlined here, you can further the combo by juggling with Balrog's ultra combo provided you've got meter.
charge + P ( hold ) c.LK xx charge + HP xx charge + P
Here's a good way to capitalize on connecting Balrog's overhead Dash Swing Blow, which is good for throwing into a series of low pokes to break the opponent's guard. You can land a c.LK after the hit and cancel that into a special. Here we've canceled into a Dash Straight and then into Balrog's dope super combo, though you can also go into a Buffalo Head and juggle an ultra combo if that suits you better.
Dash Straight charge + P SPECIAL
Good for poking as it's pretty safe on block and has great range. Use the P button that gives you just the distance you need to keep the move as safe as possible. If you use a HP, for example, when you're in close, Balrog will stop closer to the opponent and be more open to a counter attack.
Dash Upper charge + K SPECIAL
Good for knocking the opponent out of the air if he/she tries to jump at you from a distance. The EX version even leaves the opponent vulnerable to a follow-up combo (so theoretically you could connect four EX Dash Uppers into one combo).
Dash Low Straight charge + P SPECIAL
Hits low, so it's good for catching opponents as they try to back away from Balrog's mean face. It's not as safe on block as his regular Dash Straight so be especially mindful of the P button you use to carefully pick the length of Balrog's forward dash.
Dash Low Smash charge + K SPECIAL
Probably Balrog's least useful dashing move. It hits a bit higher than a Dashing Straight but still manages to connect with a crouching opponent, but it seems to leave Balrog with the least distance between him and his opponent, so you're more vulnerable after it. Barring angry e-mails that tell us we're wrong, we suggest not using it.
Dash Swing Blow charge + P ( hold ) SPECIAL
Hits overhead and leaves the opponent vulnerable to a follow-up combo starting with a c.LK hit. It doesn't hit as immediately as Balrog's other dashing attacks and isn't as safe on block but it's got probably the best chance of connecting when you're in close and applying pressure.
Buffalo Head charge + P SPECIAL
Lets Balrog pass through fireballs and it's a good anti-air. Learn to abuse it, and try to do it while maintaining a back-charge
by inputting charge + P for the attack. Perhaps the best use of the Buffalo Head is that you can juggle Balrog's ultra off of it, so make it a part of all your combos.
Page68© 2009 IGN Entertainment, Inc.
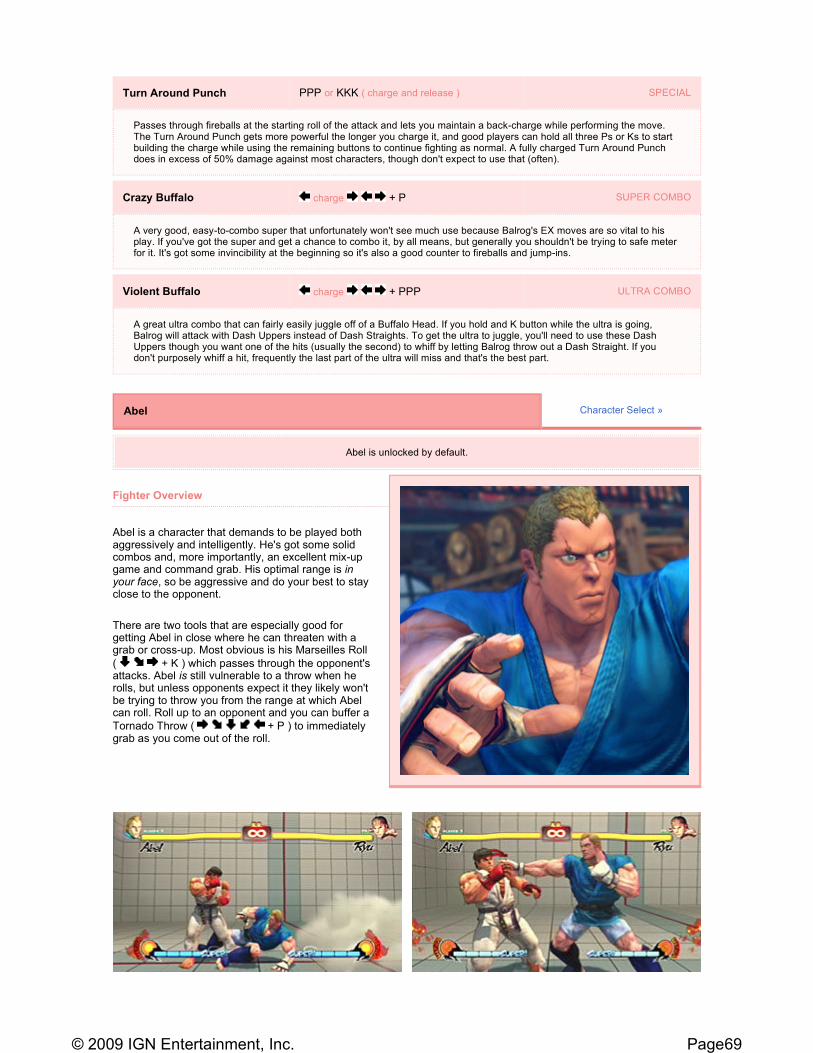
Fighter Overview
Abel is a character that demands to be played both aggressively and intelligently. He's got some solid combos and, more importantly, an excellent mix-up game and command grab. His optimal range is in your face, so be aggressive and do your best to stay close to the opponent.
There are two tools that are especially good for getting Abel in close where he can threaten with a grab or cross-up. Most obvious is his Marseilles Roll
( + K ) which passes through the opponent's attacks. Abel is still vulnerable to a throw when he rolls, but unless opponents expect it they likely won't be trying to throw you from the range at which Abel can roll. Roll up to an opponent and you can buffer a
Tornado Throw ( + P ) to immediately grab as you come out of the roll.
Turn Around Punch PPP or KKK ( charge and release ) SPECIAL
Passes through fireballs at the starting roll of the attack and lets you maintain a back-charge while performing the move. The Turn Around Punch gets more powerful the longer you charge it, and good players can hold all three Ps or Ks to start building the charge while using the remaining buttons to continue fighting as normal. A fully charged Turn Around Punch does in excess of 50% damage against most characters, though don't expect to use that (often).
Crazy Buffalo charge + P SUPER COMBO
A very good, easy-to-combo super that unfortunately won't see much use because Balrog's EX moves are so vital to his play. If you've got the super and get a chance to combo it, by all means, but generally you shouldn't be trying to safe meter for it. It's got some invincibility at the beginning so it's also a good counter to fireballs and jump-ins.
Violent Buffalo charge + PPP ULTRA COMBO
A great ultra combo that can fairly easily juggle off of a Buffalo Head. If you hold and K button while the ultra is going, Balrog will attack with Dash Uppers instead of Dash Straights. To get the ultra to juggle, you'll need to use these Dash Uppers though you want one of the hits (usually the second) to whiff by letting Balrog throw out a Dash Straight. If you don't purposely whiff a hit, frequently the last part of the ultra will miss and that's the best part.
Abel Character Select »
Abel is unlocked by default.
Page69© 2009 IGN Entertainment, Inc.

Abel's other tool for getting in close isn't as obvious. His Forward Kick ( + MK ) is a solid pressure poke, but it holds a
unique property. You can cancel the Forward Kick by tapping to initiate a forward dash. Poke with the Forward Kick and cancel it with a dash to quickly get inside and pressure the opponent into blocking. During the forward dash you can buffer in a command grab, just continue pressuring with pokes, or roll through the opponent to cross 'em up from behind.
After a rolling cross-up, you can go for a grab or try to combo a c.MK / c.MP into Abel's Change of Direction series. Though the Change of Direction series has a bit of a mix-up built in—you can threaten with overheads with P attacks or go low with K attacks to force the opponent to change guard—it won't be terribly effective against players that learn that they can punish Abel in the middle of the string. It's not easy to punish so feel free to abuse it against most opponents, but don't be surprised if someone with a full super meter sneaks in a super combo.
His s.LK is another excellent poke, with great range and speed, so use it up close before whipping out a Forward Kick to cancel into a dash. His j.MK is a solid cross-up, though to combo off of it you'll need to hit pretty deep. His c.HP is a bit slow to be the effective anti-air that it looks like, but it's still an important attack that you should get used to canceling with the Marseilles Roll. The second hit of the c.HP knocks the opponent into the air, leaving him/her vulnerable to a juggle. If you cancel with a Marseilles Roll you've still got most of your juggle options—what makes the roll important is that if the c.HP gets blocked you're not left as vulnerable.
Page70© 2009 IGN Entertainment, Inc.

Combos
Moves List
j.MK ( cross-up ) c.MP xx + P + P + P
Abel's j.MK is a very good cross-up that you can land from far out. The rest of the combo is pretty self-explanatory, though if you get blocked you can try to mix up the Change of Direction with K attacks instead of P attacks, which forces the opponent to guard low.
c.HP xx + LK + HP or + P
Off of a c.HP it actually isn't necessary to cancel into the Marseilles Roll before connecting the Falling Sky grab (
+ P ). But, what the roll lets you do is effectively make the c.HP safe (or safer) if it happens to get blocked. As well, the roll lets you combo instead into Abel's super combo, which won't combo straight off of a c.HP juggle.
MP + MK c.HP xx + PPP
Focus Attacks will be another good tool for working your way inside as an Abel player. If you land one and have an ultra meter, this is a pretty solid way to get into the ultra combo for great damage.
Forward Kick + MK NORMAL
Solid poke that turns great because you can cancel it with a forward dash and keep up pressure or go for a grab. Learn to love it.
Change of Direction + P SPECIAL
If you use P attacks after the initial Change of Direction you'll force the opponent to guard high, and if you use K attacks you force the opponent to guard low. You can mix and match your Ps and Ks for a decent mix-up game, though be careful against opponents with a full super meter as they'll be able to punish you between blocked hits.
Wheel Kick + K SPECIAL
Notably, the Wheel Kick hits as an overhead and can be canceled into from a c.MK for a decent and easy low/overhead combo. The MK and HK versions are even good for passing over projectiles, though the timing is a bit tricky—you need to perform the move early. For easier timing, an EX Wheel Kick will simply roll through fireballs with little timing necessary.
Marseilles Roll + K SPECIAL
Passes through attacks, including fireballs, to let you get in close. You can even pass through an opponent to appear on the other side of him/her for a cross-up. Beware that you can be thrown out of a roll, and as well there are a few frames at the end during which Abel is vulnerable before he can attack or block. Still, the roll is very important for his pressure game.
Falling Sky + P SPECIAL
No good as an anti-air, it's only really useful as a combo off of Abel's c.HP and Marseilles Roll.
Tornado Throw + P SPECIAL
Has better range than a normal throw and does more damage. Use it often, especially after rolls and after canceling Abel's Forward Kick with a dash. Basically all of your pressure tactics with Abel will ultimately result in a Tornado Throw.
Page71© 2009 IGN Entertainment, Inc.
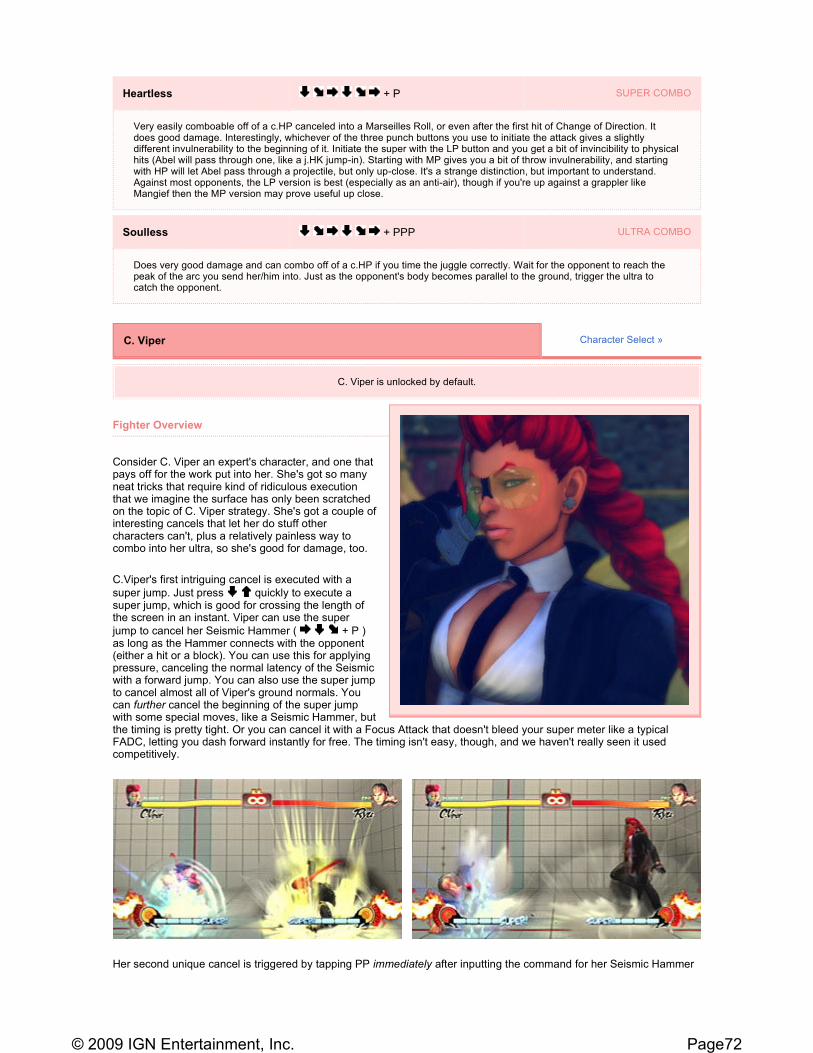
Fighter Overview
Consider C. Viper an expert's character, and one that pays off for the work put into her. She's got so many neat tricks that require kind of ridiculous execution that we imagine the surface has only been scratched on the topic of C. Viper strategy. She's got a couple of interesting cancels that let her do stuff other characters can't, plus a relatively painless way to combo into her ultra, so she's good for damage, too.
C.Viper's first intriguing cancel is executed with a
super jump. Just press quickly to execute a super jump, which is good for crossing the length of the screen in an instant. Viper can use the super
jump to cancel her Seismic Hammer ( + P ) as long as the Hammer connects with the opponent (either a hit or a block). You can use this for applying pressure, canceling the normal latency of the Seismic with a forward jump. You can also use the super jump to cancel almost all of Viper's ground normals. You can further cancel the beginning of the super jump with some special moves, like a Seismic Hammer, but the timing is pretty tight. Or you can cancel it with a Focus Attack that doesn't bleed your super meter like a typical FADC, letting you dash forward instantly for free. The timing isn't easy, though, and we haven't really seen it used competitively.
Her second unique cancel is triggered by tapping PP immediately after inputting the command for her Seismic Hammer
Heartless + P SUPER COMBO
Very easily comboable off of a c.HP canceled into a Marseilles Roll, or even after the first hit of Change of Direction. It does good damage. Interestingly, whichever of the three punch buttons you use to initiate the attack gives a slightly different invulnerability to the beginning of it. Initiate the super with the LP button and you get a bit of invincibility to physical hits (Abel will pass through one, like a j.HK jump-in). Starting with MP gives you a bit of throw invulnerability, and starting with HP will let Abel pass through a projectile, but only up-close. It's a strange distinction, but important to understand. Against most opponents, the LP version is best (especially as an anti-air), though if you're up against a grappler like Mangief then the MP version may prove useful up close.
Soulless + PPP ULTRA COMBO
Does very good damage and can combo off of a c.HP if you time the juggle correctly. Wait for the opponent to reach the peak of the arc you send her/him into. Just as the opponent's body becomes parallel to the ground, trigger the ultra to catch the opponent.
C. Viper Character Select »
C. Viper is unlocked by default.
Page72© 2009 IGN Entertainment, Inc.
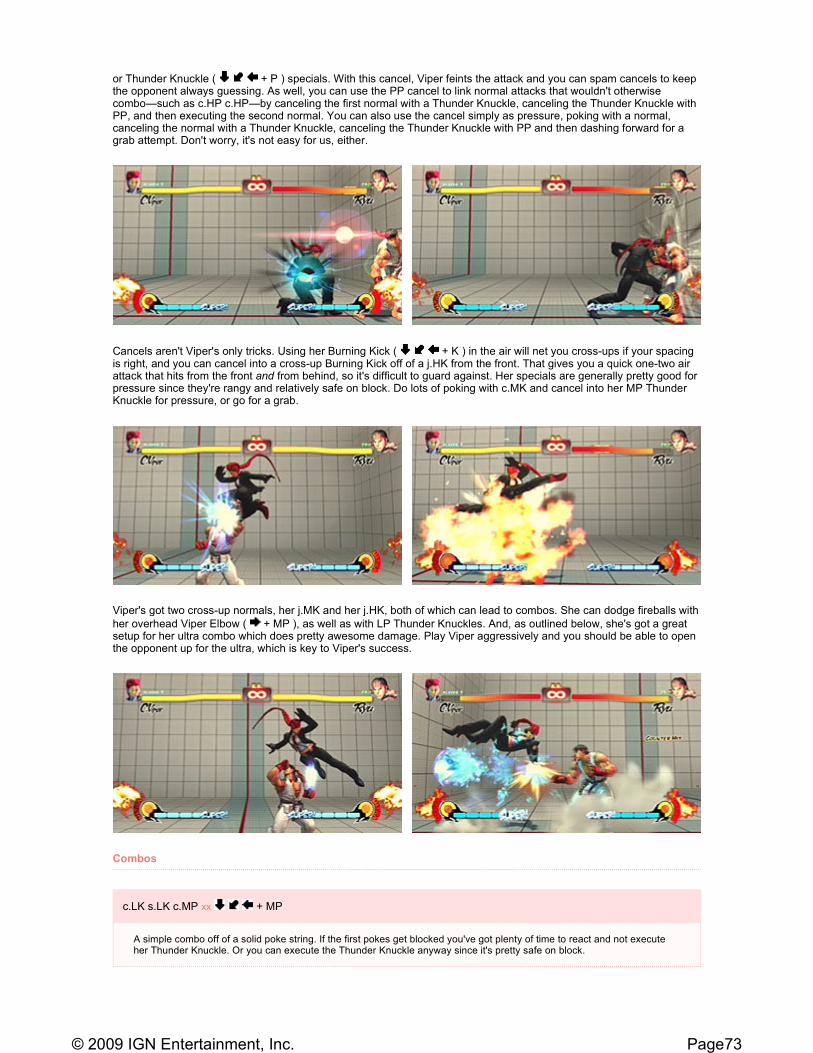
or Thunder Knuckle ( + P ) specials. With this cancel, Viper feints the attack and you can spam cancels to keep the opponent always guessing. As well, you can use the PP cancel to link normal attacks that wouldn't otherwise combo—such as c.HP c.HP—by canceling the first normal with a Thunder Knuckle, canceling the Thunder Knuckle with PP, and then executing the second normal. You can also use the cancel simply as pressure, poking with a normal, canceling the normal with a Thunder Knuckle, canceling the Thunder Knuckle with PP and then dashing forward for a grab attempt. Don't worry, it's not easy for us, either.
Cancels aren't Viper's only tricks. Using her Burning Kick ( + K ) in the air will net you cross-ups if your spacing is right, and you can cancel into a cross-up Burning Kick off of a j.HK from the front. That gives you a quick one-two air attack that hits from the front and from behind, so it's difficult to guard against. Her specials are generally pretty good for pressure since they're rangy and relatively safe on block. Do lots of poking with c.MK and cancel into her MP Thunder Knuckle for pressure, or go for a grab.
Viper's got two cross-up normals, her j.MK and her j.HK, both of which can lead to combos. She can dodge fireballs with
her overhead Viper Elbow ( + MP ), as well as with LP Thunder Knuckles. And, as outlined below, she's got a great setup for her ultra combo which does pretty awesome damage. Play Viper aggressively and you should be able to open the opponent up for the ultra, which is key to Viper's success.
Combos
c.LK s.LK c.MP xx + MP
A simple combo off of a solid poke string. If the first pokes get blocked you've got plenty of time to react and not execute her Thunder Knuckle. Or you can execute the Thunder Knuckle anyway since it's pretty safe on block.
Page73© 2009 IGN Entertainment, Inc.
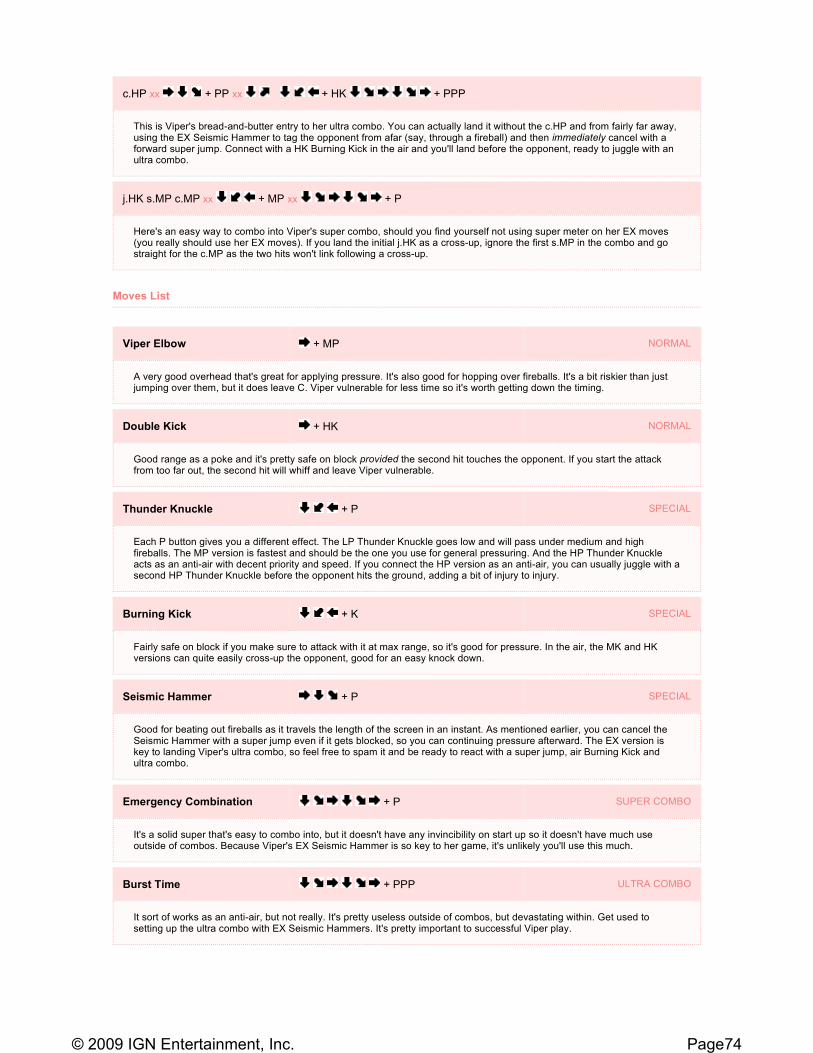
Moves List
c.HP xx + PP xx + HK + PPP
This is Viper's bread-and-butter entry to her ultra combo. You can actually land it without the c.HP and from fairly far away, using the EX Seismic Hammer to tag the opponent from afar (say, through a fireball) and then immediately cancel with a forward super jump. Connect with a HK Burning Kick in the air and you'll land before the opponent, ready to juggle with an ultra combo.
j.HK s.MP c.MP xx + MP xx + P
Here's an easy way to combo into Viper's super combo, should you find yourself not using super meter on her EX moves (you really should use her EX moves). If you land the initial j.HK as a cross-up, ignore the first s.MP in the combo and go straight for the c.MP as the two hits won't link following a cross-up.
Viper Elbow + MP NORMAL
A very good overhead that's great for applying pressure. It's also good for hopping over fireballs. It's a bit riskier than just jumping over them, but it does leave C. Viper vulnerable for less time so it's worth getting down the timing.
Double Kick + HK NORMAL
Good range as a poke and it's pretty safe on block provided the second hit touches the opponent. If you start the attack from too far out, the second hit will whiff and leave Viper vulnerable.
Thunder Knuckle + P SPECIAL
Each P button gives you a different effect. The LP Thunder Knuckle goes low and will pass under medium and high fireballs. The MP version is fastest and should be the one you use for general pressuring. And the HP Thunder Knuckle acts as an anti-air with decent priority and speed. If you connect the HP version as an anti-air, you can usually juggle with a second HP Thunder Knuckle before the opponent hits the ground, adding a bit of injury to injury.
Burning Kick + K SPECIAL
Fairly safe on block if you make sure to attack with it at max range, so it's good for pressure. In the air, the MK and HK versions can quite easily cross-up the opponent, good for an easy knock down.
Seismic Hammer + P SPECIAL
Good for beating out fireballs as it travels the length of the screen in an instant. As mentioned earlier, you can cancel the Seismic Hammer with a super jump even if it gets blocked, so you can continuing pressure afterward. The EX version is key to landing Viper's ultra combo, so feel free to spam it and be ready to react with a super jump, air Burning Kick and ultra combo.
Emergency Combination + P SUPER COMBO
It's a solid super that's easy to combo into, but it doesn't have any invincibility on start up so it doesn't have much use outside of combos. Because Viper's EX Seismic Hammer is so key to her game, it's unlikely you'll use this much.
Burst Time + PPP ULTRA COMBO
It sort of works as an anti-air, but not really. It's pretty useless outside of combos, but devastating within. Get used to setting up the ultra combo with EX Seismic Hammers. It's pretty important to successful Viper play.
Page74© 2009 IGN Entertainment, Inc.

Fighter Overview
If you've played as Yun in Street Fighter III, Rufus will probably feel comfortably familiar, though he's not a complete copy. Rufus plays similarly aggressive and relies on quick combos to build damage. To augment his combo capabilities, Rufus has solid normal attacks and a decent mix-up game.
Much of Rufus's aggressive nature is based on his
Falcon Kick ( + MK ( in air ) ) which is similar to Yun's own dive kick. You can perform the kick any time during a jump, which means you can hop off the ground and immediately drop back down. It's good for starting combos—though it can be blocked from a standard crouch guard, you can use it as an effective cross-up—because it's safe when blocked and easy to throw out, but there are other uses. From a distance, you can jump against an opponent with a good anti-air (like Canon Spike or Shoryuken) and quickly cancel the jump with the Falcon Kick. Eager opponents will frequently trigger their anti-air reflexes and leave themselves open to a counter from Rufus.
One of the reasons Rufus's offense is so good is that he has multiple setups for landing his ultra combo. You can FADC
the high LK follow-up to his Messiah Kick ( + K ) and juggle the opponent anywhere on screen with the ultra. In
a corner, you can juggle the ultra off of...1) a s.HK from afar, 2) a Fragrance Palm ( + HP ), 3) a combo ending with
Galactic Tornado ( + P ), or 4) an anti-air Snake Strike ( + P ). Basically, any time you've got a full revenge meter and you've got the opponent backed into (or near) a corner, the opponent should be afraid.
From a distance, poke with Rufus's impressive c.HP that reaches across roughly three quarters of the screen. His s.HP is an awesome reactionary anti-air, and Snake Strike works as a solid anti-air as well. If you can predict the opponent's jump, meet him/her in the air with Rufus's j.HK which counts for two hits and leaves the opponent vulnerable to a juggle. If you catch the opponent at the peak of his/her jump, follow with an EX Snake Strike anywhere on screen and you get a
Rufus Character Select »
Rufus is unlocked by default.
Page75© 2009 IGN Entertainment, Inc.
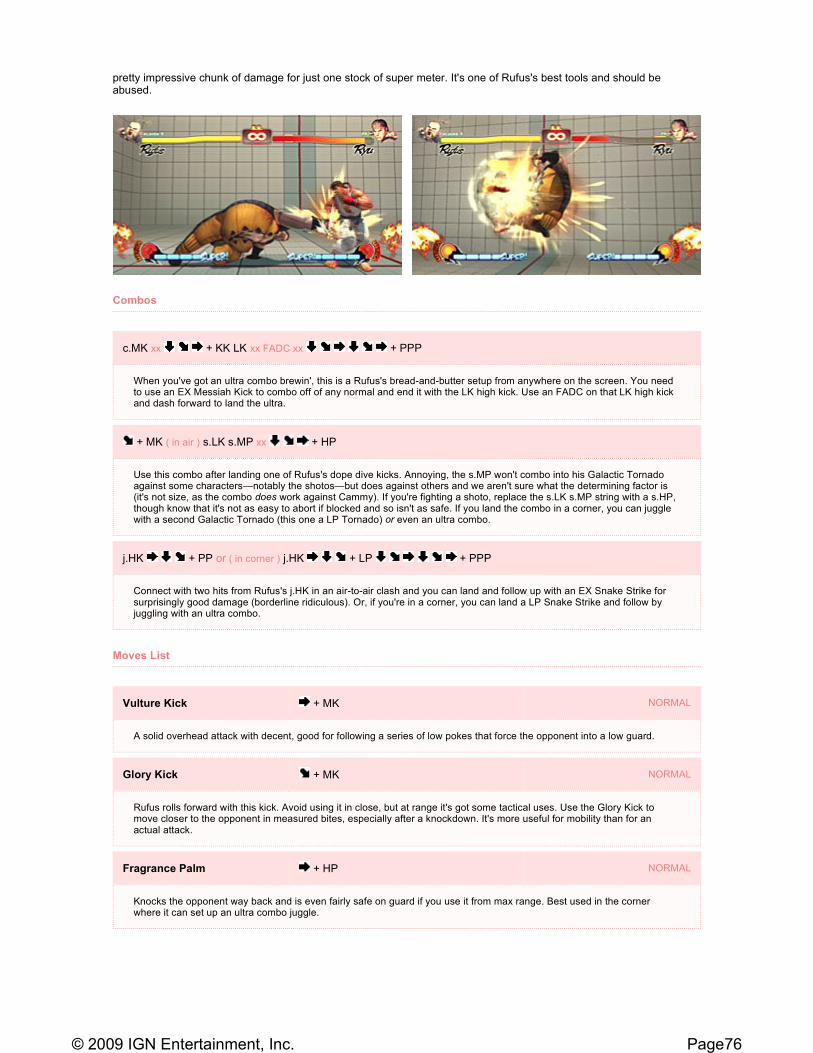
pretty impressive chunk of damage for just one stock of super meter. It's one of Rufus's best tools and should be abused.
Combos
Moves List
c.MK xx + KK LK xx FADC xx + PPP
When you've got an ultra combo brewin', this is a Rufus's bread-and-butter setup from anywhere on the screen. You need to use an EX Messiah Kick to combo off of any normal and end it with the LK high kick. Use an FADC on that LK high kick and dash forward to land the ultra.
+ MK ( in air ) s.LK s.MP xx + HP
Use this combo after landing one of Rufus's dope dive kicks. Annoying, the s.MP won't combo into his Galactic Tornado against some characters—notably the shotos—but does against others and we aren't sure what the determining factor is (it's not size, as the combo does work against Cammy). If you're fighting a shoto, replace the s.LK s.MP string with a s.HP, though know that it's not as easy to abort if blocked and so isn't as safe. If you land the combo in a corner, you can juggle with a second Galactic Tornado (this one a LP Tornado) or even an ultra combo.
j.HK + PP or ( in corner ) j.HK + LP + PPP
Connect with two hits from Rufus's j.HK in an air-to-air clash and you can land and follow up with an EX Snake Strike for surprisingly good damage (borderline ridiculous). Or, if you're in a corner, you can land a LP Snake Strike and follow by juggling with an ultra combo.
Vulture Kick + MK NORMAL
A solid overhead attack with decent, good for following a series of low pokes that force the opponent into a low guard.
Glory Kick + MK NORMAL
Rufus rolls forward with this kick. Avoid using it in close, but at range it's got some tactical uses. Use the Glory Kick to move closer to the opponent in measured bites, especially after a knockdown. It's more useful for mobility than for an actual attack.
Fragrance Palm + HP NORMAL
Knocks the opponent way back and is even fairly safe on guard if you use it from max range. Best used in the corner where it can set up an ultra combo juggle.
Page76© 2009 IGN Entertainment, Inc.

Falcon Kick + MK ( in air ) NORMAL
Great for general pressure. Priority isn't great so it'll get beat by a lot of stuff, but it's quick and recovers the instant you hit the ground so it's fairly safe on block. Cross-up crouching opponents and use the Falcon Kick to enter combos and keep close to the opponent.
Messiah Kick + K SPECIAL
The standard kick is good for hopping over projectiles at long range. But the EX version is where the magic is. The EX Messiah Kick is highly comboable and even good as an anti-air. It's got some invincibility and will even pass through projectiles, making it a fairly easy attack to connect. That you can use it to lead into Rufus's ultra combo makes it a vital bit of his game.
Galactic Tornado + P SPECIAL
Good for general purpose combos and pressure. Recovery is good enough that Rufus is basically safe when it's blocked.
To combo the MP and HP version, make sure you hold on the controls after inputting the motion and Rufus will push forward as he rolls. The move even absorbs projectiles during the roll animation and during the strike, so it's a good counter to fireballers.
Snake Strike + P SPECIAL
A solid anti-air, the LP and MP versions are pretty safe to throw out at random and even hop over fireballs. Most deadly is the EX version which does impressive damage if all the hits connect. Check the combos above for an example of its damage.
Spectacle Romance + P SUPER COMBO
A solid super that's easy to combo in virtually all the same setups that work for Rufus's ultra. But you won't be using it. Rufus's EX attacks are too good to not use just so you can build up meter for his super combo.
Space Opera Symphony + PPP ULTRA COMBO
Easily comboable, as we've already gone over. We suggest using lots of Focus Attacks to absorb projectiles so you can build up your revenge meter multiple times during a round. Whiff the ultra and Rufus is left very vulnerable while he continues to execute most of the combo, but connect with it and you'll get some serious damage. Learn the ultra setups so that they become second nature—when you've got the meter, be ready to capitalize.
Page77© 2009 IGN Entertainment, Inc.
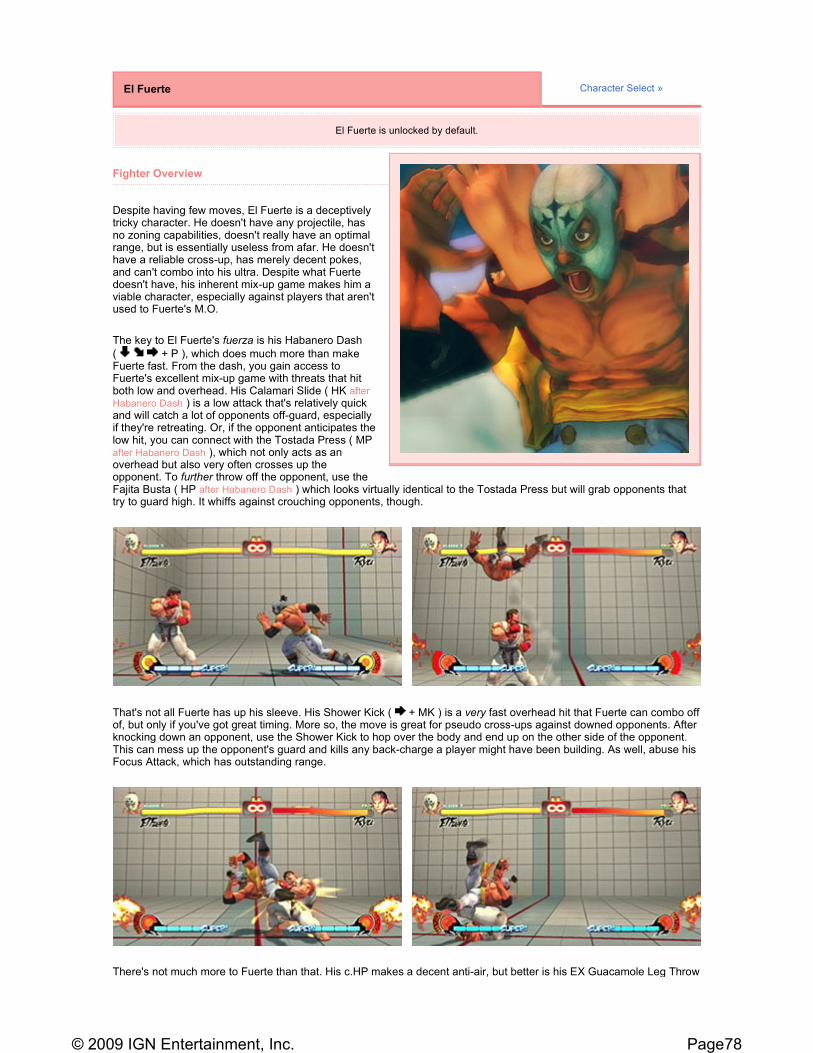
Fighter Overview
Despite having few moves, El Fuerte is a deceptively tricky character. He doesn't have any projectile, has no zoning capabilities, doesn't really have an optimal range, but is essentially useless from afar. He doesn't have a reliable cross-up, has merely decent pokes, and can't combo into his ultra. Despite what Fuerte doesn't have, his inherent mix-up game makes him a viable character, especially against players that aren't used to Fuerte's M.O.
The key to El Fuerte's fuerza is his Habanero Dash
( + P ), which does much more than make Fuerte fast. From the dash, you gain access to Fuerte's excellent mix-up game with threats that hit both low and overhead. His Calamari Slide ( HK after Habanero Dash ) is a low attack that's relatively quick and will catch a lot of opponents off-guard, especially if they're retreating. Or, if the opponent anticipates the low hit, you can connect with the Tostada Press ( MP after Habanero Dash ), which not only acts as an overhead but also very often crosses up the opponent. To further throw off the opponent, use the Fajita Busta ( HP after Habanero Dash ) which looks virtually identical to the Tostada Press but will grab opponents that try to guard high. It whiffs against crouching opponents, though.
That's not all Fuerte has up his sleeve. His Shower Kick ( + MK ) is a very fast overhead hit that Fuerte can combo off of, but only if you've got great timing. More so, the move is great for pseudo cross-ups against downed opponents. After knocking down an opponent, use the Shower Kick to hop over the body and end up on the other side of the opponent. This can mess up the opponent's guard and kills any back-charge a player might have been building. As well, abuse his Focus Attack, which has outstanding range.
There's not much more to Fuerte than that. His c.HP makes a decent anti-air, but better is his EX Guacamole Leg Throw
El Fuerte Character Select »
El Fuerte is unlocked by default.
Page78© 2009 IGN Entertainment, Inc.

( + KK ), which has some invincibility to go through an opponent's jump-in attack. His aforementioned Habanero Dash is good for baiting opponents, dashing toward them and then stopping (or hopping back) with Sudden Stop ( LP after Habanero Dash ) or Back Step ( LK after Habanero Dash ) to hopefully elicit a whiffed Shoryuken or equivalent. You
can punish with an ultra. The Fuerte Flying Giga Buster ultra ( + KKK ) is also good against jump-ins.
Combos
Moves List
MP + MK s.HK xx + HK
Fuerte's Focus Attack is a really good one, so you should abuse it, and this is a quick, simple way to capitalize on it. His s.HK behaves differently up close, knocking the opponent into the air so that you can combo with the Guacamole Leg Throw. An EX Guacamole Throw does a bit more damage.
j.HP s.HP xx MK ( charge and release ) xx + K
You'll need to start charging the Quesadilla Bomb ( MK ( charge and release ) ) before starting this combo, which you can do by simply holding down the MK button. You may not ever get a chance to use Fuerte's super combo because he needs meter for EX attacks, but if you do find yourself with meter to spare then this combo is worth landing.
s.HP xx + P LP HP xx + P HK
No, this combo isn't easy, but all the cool kids are doing it and it's potentially very powerful. The gist is that you land a s.HP up close, cancel it with a Habanero Dash, stop the Habanero Dash with Sudden Stop, and then immediately hit with another s.HP up close...which you cancel into Habanero Dash and basically loop forever, or until the opponent is stunned. The timing isn't easy, though. After the Dash, you need to very quickly tap LP~HP by rolling your fingers over the buttons. It's easy to botch the spacing after a hit or two, so we suggest quickly ending the combo with a Calamari Slide for a knock down, from which you can go back into Fuerte's mix-up game.
Shower Kick + MK NORMAL
Do not underestimate this kick. It hits overhead, is very quick, and can even let you combo a s.LP or s.LK which can lead to more. Best of all, you can use it to hop over the fallen bodies of opponents you've knocked down, ruining their back-charges and making your offense more difficult to guard.
Habanero Dash + P SPECIAL
Key to Fuerte play. We covered it pretty extensively above, but note also that an EX Habanero Dash has some hyper armor properties, so you can absorb an incoming attack while running. That's good for charging through projectiles and making up distance on opponents that try to keep Fuerte away.
Page79© 2009 IGN Entertainment, Inc.

Fighter Overview
Sakura is all about constant action and mixing it up against the opponent. Getting to the skill level where you can successfully mix up takes some dedication, but if you can build the skills you need you'll have in Sakura an excellent character to satisfy the aggressive needs of offense-oriented players.
The key to Sakura's mix-up is her EX Shunpukyaku
( + KK ), which knocks the opponent into the air, leaving him/her vulnerable to a juggle. After knocking the opponent into the air, follow with a j.LK. This isn't the most damage-oriented option at Sakura's disposal, but it'll let you hit the ground before the opponent and establish the mix-up. Take one step forward and you can nail the opponent with a c.HP from the front just as they land. Or take two steps forward and you can hit the opponent with a c.HP...from behind. If it sounds too simple to be effective, note that judging whether Sakura is going to end up behind or in front is almost impossible for the opponent. By using this mix-up tactic, you essentially force the opponent to guess which way to guard. If you hit the opponent with that c.HP, you can cancel into another EX Shunpukyaku to restart the mix-up.
Quesadilla Bomb K ( charge and release ) SPECIAL
We dunno if this is really any good. Seems no one is using it and the time it takes to charge is pretty long (about three full seconds). It is the only move that Fuerte can use to combo into his super, however.
Guacamole Leg Throw + K SPECIAL
In EX form, this is Fuerte's best anti-air attack. Use it especially as a wake-up counter to meaty jump-ins.
El Fuerte Dynamite + K SUPER COMBO
Decent super combo that's not to tough to setup, but you'll likely be spending super meter on EX Guacamole Leg throws so don't expect to use it often.
El Fuerte Flying Giga Buster + KKK ULTRA COMBO
A good response to whiffed attacks like Shoryukens and also good against jump-ins as Fuerte will pass through the opponent's air attack and make the grab when he/she lands. It's unblockable and will connect with opponents whether they're standing or crouching.
Sakura Character Select »
Complete arcade mode as Ryu to unlock Sakura.
Page80© 2009 IGN Entertainment, Inc.

Fortunately, Sakura's got options for comboing into her EX Shunpukyaku. You can cancel many of her normals, including c.MK and c.HP. But her safest way into the setup requires some pretty specific timing. Sakura's normal LK
version of her Shunpukyaku ( + LK ) is a very safe attack, and if it lands it even gives Sakura the ability to combo a LK afterward. You can cancel that LK (c.LK or s.LK) into the EX Shunpukyaku, which should really be the focus of your Sakura play.
Her EX Shunpukyaku also lets you combo into Sakura's ultra, which is a handy trick. When you're not comboing, use Sakura's s.HK as a general purpose poke—it's got great range, is fast, and out-prioritizes a lot of things. Her c.HP is a very solid anti-air attack, and her j.LK is a functional cross-up. Stay aggressive and wait for the opponent to slip up, letting you roll into her mix-up game. Once you've got the momentum in your favor, it shouldn't be too tough to keep up the pressure and take the quick KO.
Combos
j.LK ( cross-up ) s.LK xx + HP xx + K
Sakura's j.LK is her only legit cross-up, and it doesn't induce a lot of hit stun. Still, it will let you land and connect another LK (standing or crouching), which gives you enough hit stun to cancel into a HP Shouoken. That combo on its own is good for pretty solid damage, but if you've got super meter to spare you can cancel into Sakura's super combo to cap off the combo.
Page81© 2009 IGN Entertainment, Inc.

Moves List
c.MK xx + LK c.LK xx + KK + K P P P
This combo starts with the basic mix-up setup described earlier, but instead of leaving it up to chance to deal more damage you end the combo with Sakura's Otoshi air claps. The most difficult part here is connecting the c.LK after the LK Shunpukyaku. Trust us, it's possible, and with practice the timing will come easily. The best part of this combo is that it's
pretty safe. Throw out the c.MK xx + LK at will. If it gets blocked, no biggie—you're basically safe from a counter. If it lands, you've got time to react and continue with the rest of the combo.
c.HP xx + KK + KKK
This is, more or less, Sakura's bread-and-butter lead into her ultra combo. Really, you can cancel a number of her ground normals into the EX Shunpukyaku. Once that lands, wait for the opponent to just begin falling back down to earth. As they do, activate Sakura's ultra combo and it'll connect fully, giving you pretty serious damage for not too much effort.
Flower Kick + MK NORMAL
A decent overhead kick that's good to throw into your pressure game when the opponent gets complacent with a low guard. If you've scared the opponents away from waking up with a high-priority attack (like a Shoryuken), you can very frequently nail 'em with the Flower Kick as they wake up. Range is pretty good, too, so you can use the Flower Kick to follow a series of low pokes that push you outside of normal poking range.
Hadoken + P SPECIAL
Not a big part of Sakura's game, but her Hadoken still has uses. You can hold down the P button to charge the Hadoken for a big blast with very little range. Though the range is weak, the charged Hadoken is good for wake-up situations and even works as a decent anti-air. Against characters with better projectiles, you're not going to win any fireball wars, so don't get sucked into them.
Shouoken + P SPECIAL
Shouoken doesn't have the priority of shoto Shoryuken's, but it does have better horizontal range, making it a decent way to punish opponents whose attacks leave them just outside of normal striking range. You can quite easily combo into Shouoken off of a LK and then cancel the Shouoken into Sakura's super combo, should you want to. The HP version of the attack does considerable chip damage, which you can abuse near the end of fights.
Shunpukyaku + K SPECIAL
The LK version of the Shunpukyaku is basically entirely safe when blocked. In fact, as mentioned earlier, you can actually land a LK after the special and continue the combo. This makes the LK Shunpukyaku a great combo starter, as it's easy to throw out and react if the move hits. But the real star here is the EX Shunpukyaku, which launches the opponent into the air. After that, you can juggle with a Shouoken, an Otoshi juggle, Sakura's ultra combo, or the outstanding mix-up game described earlier.
Sakura Otoshi + K SPECIAL
The Otoshi doesn't have much use outside of juggle combos, though the EX version does have excellent horizontal range and can be used to hop fireballs. After hopping a fireball you can punish by clapping Sakura's hands over the opponent's head. It's a pretty risky move outside of combos, though, so we don't really suggest it.
Haru Ichiban + K SUPER COMBO
Sakura's super starts with some invincibility frames, so it's good for going through fireballs or punishing sloppy meaty attacks as you wake up. It's also fairly easy to combo into her super by canceling Shouoken. Still, we think her super meter is better used for EX attacks.
Page82© 2009 IGN Entertainment, Inc.
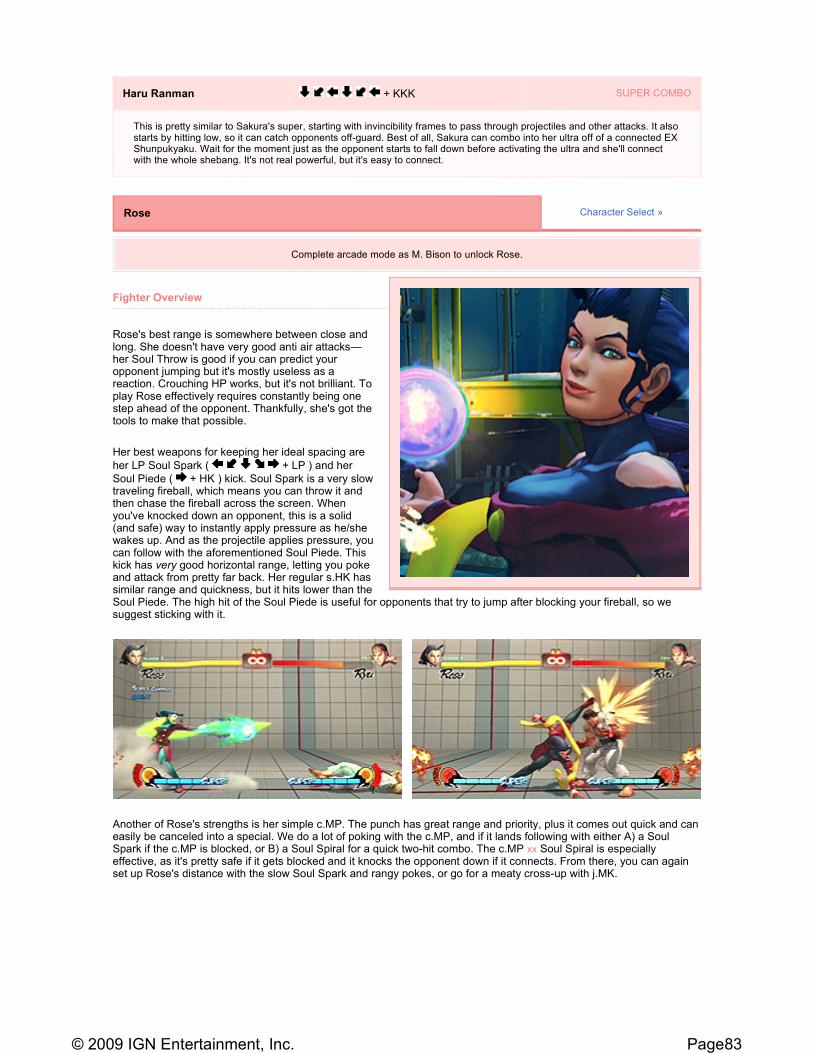
Fighter Overview
Rose's best range is somewhere between close and long. She doesn't have very good anti air attacks—her Soul Throw is good if you can predict your opponent jumping but it's mostly useless as a reaction. Crouching HP works, but it's not brilliant. To play Rose effectively requires constantly being one step ahead of the opponent. Thankfully, she's got the tools to make that possible.
Her best weapons for keeping her ideal spacing are
her LP Soul Spark ( + LP ) and her
Soul Piede ( + HK ) kick. Soul Spark is a very slow traveling fireball, which means you can throw it and then chase the fireball across the screen. When you've knocked down an opponent, this is a solid (and safe) way to instantly apply pressure as he/she wakes up. And as the projectile applies pressure, you can follow with the aforementioned Soul Piede. This kick has very good horizontal range, letting you poke and attack from pretty far back. Her regular s.HK has similar range and quickness, but it hits lower than the Soul Piede. The high hit of the Soul Piede is useful for opponents that try to jump after blocking your fireball, so we suggest sticking with it.
Another of Rose's strengths is her simple c.MP. The punch has great range and priority, plus it comes out quick and can easily be canceled into a special. We do a lot of poking with the c.MP, and if it lands following with either A) a Soul Spark if the c.MP is blocked, or B) a Soul Spiral for a quick two-hit combo. The c.MP xx Soul Spiral is especially effective, as it's pretty safe if it gets blocked and it knocks the opponent down if it connects. From there, you can again set up Rose's distance with the slow Soul Spark and rangy pokes, or go for a meaty cross-up with j.MK.
Haru Ranman + KKK SUPER COMBO
This is pretty similar to Sakura's super, starting with invincibility frames to pass through projectiles and other attacks. It also starts by hitting low, so it can catch opponents off-guard. Best of all, Sakura can combo into her ultra off of a connected EX Shunpukyaku. Wait for the moment just as the opponent starts to fall down before activating the ultra and she'll connect with the whole shebang. It's not real powerful, but it's easy to connect.
Rose Character Select »
Complete arcade mode as M. Bison to unlock Rose.
Page83© 2009 IGN Entertainment, Inc.

And perhaps Rose's best strength is her ultra combo. It doesn't do a massive amount of damage but it is fairly easy to make it a guaranteed hit. If an opponent jumps in at you, fire off the ultra near the peak of his/her jump and the ultra is free damage. Obviously, opponents will get wise to the strategy and will tend to shy away from jumping in on a Rose with a full ultra meter, but that's not a bad thing. Since her anti-air options aren't great, making the opponent afraid of jumping actually helps your game, letting you comfortably set up that mid-range that Rose dominates.
Rose's EX attacks aren't particularly useful, but her super combo is very easy to combo into. For this reason, we suggest shying away from wasting meter on EX attacks unless it really makes sense, because you'll want a full meter for a super combo when the opportunity arises.
Combos
j.MK ( cross-up ) c.HP xx + K xx + P
This is Rose's bread-and-butter. Learn it, love it. You can start the combo with a cross-up as advertised, or simply use the
c.HP xx + K bit to punish opponents (to punish attacks that don't have a lot of recovery, use c.MP instead of c.HP ). The super is, obviously, optional, but if you've got the meter then this is probably the best way for Rose to burn it. The combo does solid damage and isn't too tough to pull off. Hurray!
Page84© 2009 IGN Entertainment, Inc.
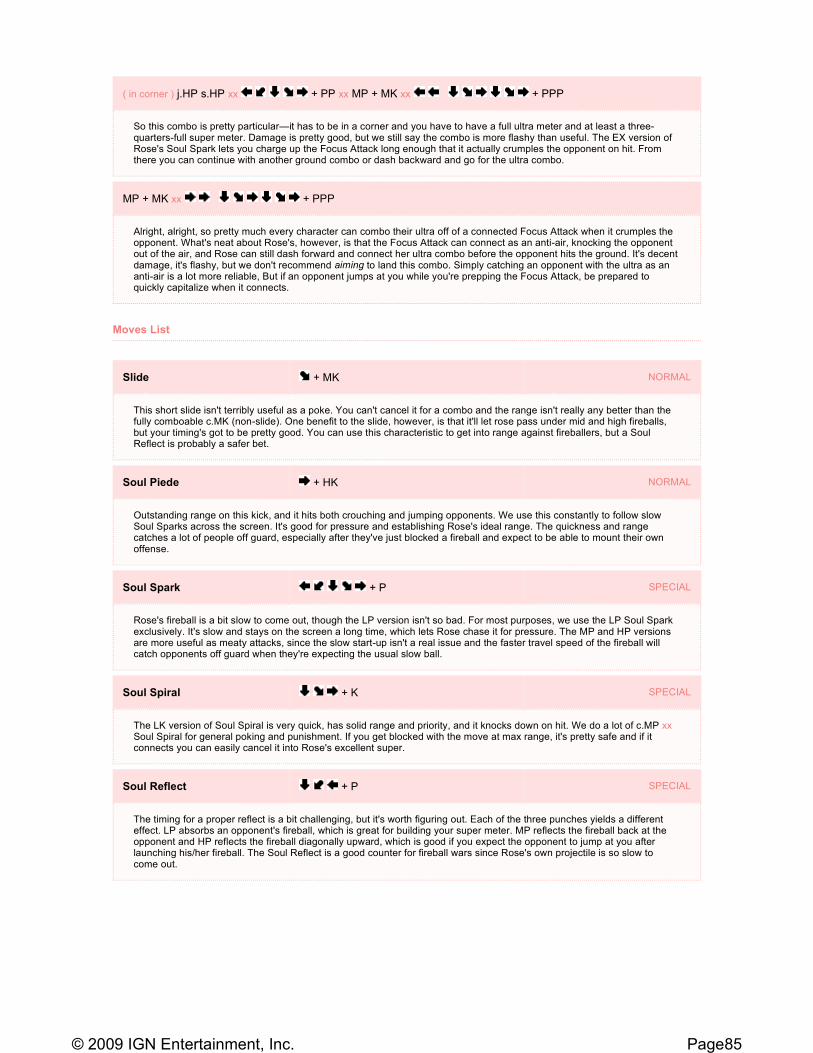
Moves List
( in corner ) j.HP s.HP xx + PP xx MP + MK xx + PPP
So this combo is pretty particular—it has to be in a corner and you have to have a full ultra meter and at least a three-quarters-full super meter. Damage is pretty good, but we still say the combo is more flashy than useful. The EX version of Rose's Soul Spark lets you charge up the Focus Attack long enough that it actually crumples the opponent on hit. From there you can continue with another ground combo or dash backward and go for the ultra combo.
MP + MK xx + PPP
Alright, alright, so pretty much every character can combo their ultra off of a connected Focus Attack when it crumples the opponent. What's neat about Rose's, however, is that the Focus Attack can connect as an anti-air, knocking the opponent out of the air, and Rose can still dash forward and connect her ultra combo before the opponent hits the ground. It's decent damage, it's flashy, but we don't recommend aiming to land this combo. Simply catching an opponent with the ultra as an anti-air is a lot more reliable, But if an opponent jumps at you while you're prepping the Focus Attack, be prepared to quickly capitalize when it connects.
Slide + MK NORMAL
This short slide isn't terribly useful as a poke. You can't cancel it for a combo and the range isn't really any better than the fully comboable c.MK (non-slide). One benefit to the slide, however, is that it'll let rose pass under mid and high fireballs, but your timing's got to be pretty good. You can use this characteristic to get into range against fireballers, but a Soul Reflect is probably a safer bet.
Soul Piede + HK NORMAL
Outstanding range on this kick, and it hits both crouching and jumping opponents. We use this constantly to follow slow Soul Sparks across the screen. It's good for pressure and establishing Rose's ideal range. The quickness and range catches a lot of people off guard, especially after they've just blocked a fireball and expect to be able to mount their own offense.
Soul Spark + P SPECIAL
Rose's fireball is a bit slow to come out, though the LP version isn't so bad. For most purposes, we use the LP Soul Spark exclusively. It's slow and stays on the screen a long time, which lets Rose chase it for pressure. The MP and HP versions are more useful as meaty attacks, since the slow start-up isn't a real issue and the faster travel speed of the fireball will catch opponents off guard when they're expecting the usual slow ball.
Soul Spiral + K SPECIAL
The LK version of Soul Spiral is very quick, has solid range and priority, and it knocks down on hit. We do a lot of c.MP xx Soul Spiral for general poking and punishment. If you get blocked with the move at max range, it's pretty safe and if it connects you can easily cancel it into Rose's excellent super.
Soul Reflect + P SPECIAL
The timing for a proper reflect is a bit challenging, but it's worth figuring out. Each of the three punches yields a different effect. LP absorbs an opponent's fireball, which is great for building your super meter. MP reflects the fireball back at the opponent and HP reflects the fireball diagonally upward, which is good if you expect the opponent to jump at you after launching his/her fireball. The Soul Reflect is a good counter for fireball wars since Rose's own projectile is so slow to come out.
Page85© 2009 IGN Entertainment, Inc.
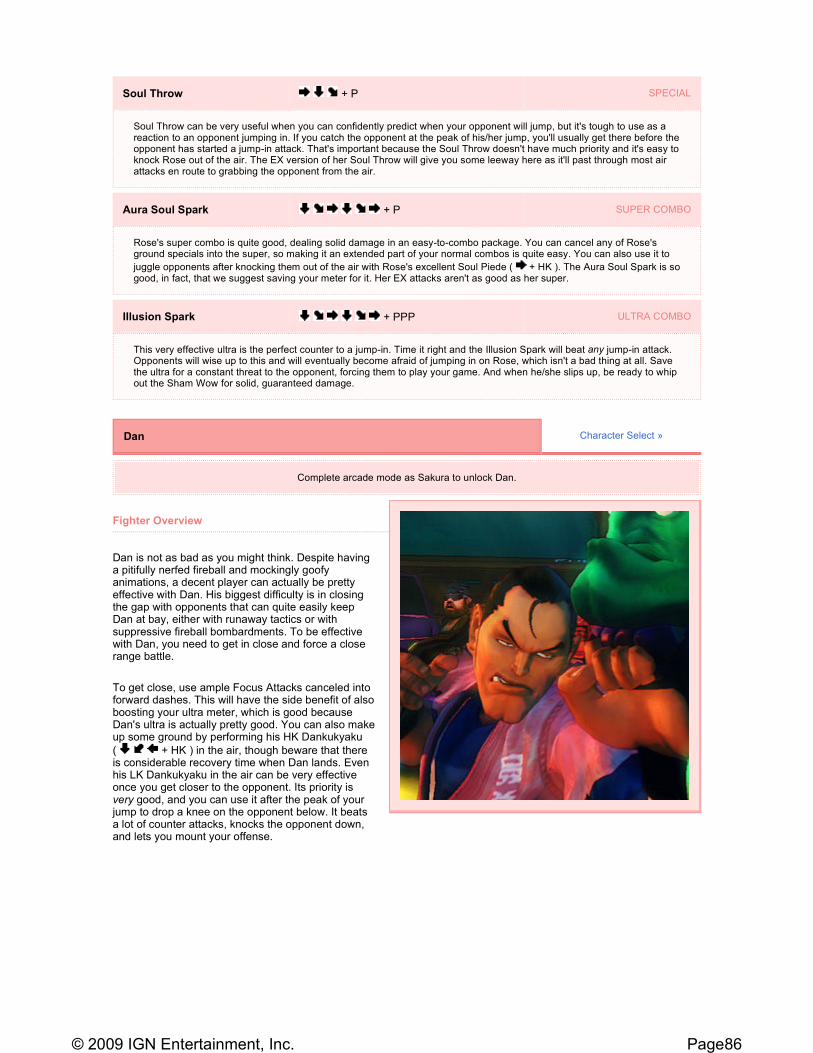
Fighter Overview
Dan is not as bad as you might think. Despite having a pitifully nerfed fireball and mockingly goofy animations, a decent player can actually be pretty effective with Dan. His biggest difficulty is in closing the gap with opponents that can quite easily keep Dan at bay, either with runaway tactics or with suppressive fireball bombardments. To be effective with Dan, you need to get in close and force a close range battle.
To get close, use ample Focus Attacks canceled into forward dashes. This will have the side benefit of also boosting your ultra meter, which is good because Dan's ultra is actually pretty good. You can also make up some ground by performing his HK Dankukyaku
( + HK ) in the air, though beware that there is considerable recovery time when Dan lands. Even his LK Dankukyaku in the air can be very effective once you get closer to the opponent. Its priority is very good, and you can use it after the peak of your jump to drop a knee on the opponent below. It beats a lot of counter attacks, knocks the opponent down, and lets you mount your offense.
Soul Throw + P SPECIAL
Soul Throw can be very useful when you can confidently predict when your opponent will jump, but it's tough to use as a reaction to an opponent jumping in. If you catch the opponent at the peak of his/her jump, you'll usually get there before the opponent has started a jump-in attack. That's important because the Soul Throw doesn't have much priority and it's easy to knock Rose out of the air. The EX version of her Soul Throw will give you some leeway here as it'll past through most air attacks en route to grabbing the opponent from the air.
Aura Soul Spark + P SUPER COMBO
Rose's super combo is quite good, dealing solid damage in an easy-to-combo package. You can cancel any of Rose's ground specials into the super, so making it an extended part of your normal combos is quite easy. You can also use it to
juggle opponents after knocking them out of the air with Rose's excellent Soul Piede ( + HK ). The Aura Soul Spark is so good, in fact, that we suggest saving your meter for it. Her EX attacks aren't as good as her super.
Illusion Spark + PPP ULTRA COMBO
This very effective ultra is the perfect counter to a jump-in. Time it right and the Illusion Spark will beat any jump-in attack. Opponents will wise up to this and will eventually become afraid of jumping in on Rose, which isn't a bad thing at all. Save the ultra for a constant threat to the opponent, forcing them to play your game. And when he/she slips up, be ready to whip out the Sham Wow for solid, guaranteed damage.
Dan Character Select »
Complete arcade mode as Sakura to unlock Dan.
Page86© 2009 IGN Entertainment, Inc.
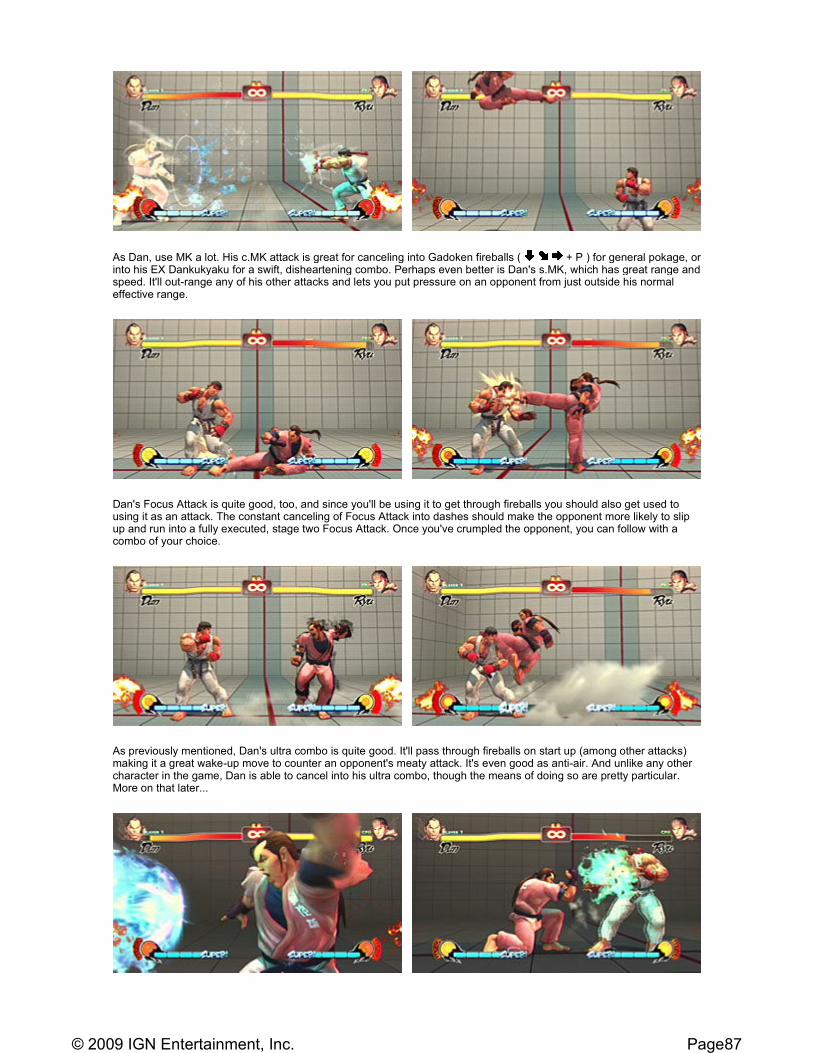
As Dan, use MK a lot. His c.MK attack is great for canceling into Gadoken fireballs ( + P ) for general pokage, or into his EX Dankukyaku for a swift, disheartening combo. Perhaps even better is Dan's s.MK, which has great range and speed. It'll out-range any of his other attacks and lets you put pressure on an opponent from just outside his normal effective range.
Dan's Focus Attack is quite good, too, and since you'll be using it to get through fireballs you should also get used to using it as an attack. The constant canceling of Focus Attack into dashes should make the opponent more likely to slip up and run into a fully executed, stage two Focus Attack. Once you've crumpled the opponent, you can follow with a combo of your choice.
As previously mentioned, Dan's ultra combo is quite good. It'll pass through fireballs on start up (among other attacks) making it a great wake-up move to counter an opponent's meaty attack. It's even good as anti-air. And unlike any other character in the game, Dan is able to cancel into his ultra combo, though the means of doing so are pretty particular. More on that later...
Page87© 2009 IGN Entertainment, Inc.

Combos
Moves List
j.MK ( cross-up ) c.MK xx + KK
We count this as Dan's most useful combo. While in close, we do a lot of poking with c.MK, and if it connects you can
cancel into his EX Dankukyaku ( + KK ) for a quick combo. Add a cross-up j.MK to the beginning of that and you've got yourself a very usable combo. If the first hits of the combo are blocked, cancel the c.MK with a Gadoken instead of the EX Dankukyaku—it'll leave you safe and won't waste your meter, unlike the EX Dankukyaku which leaves you very vulnerable and eats meter for nothing when blocked.
j.HK s.HP xx + HP xx FADC xx + HK
You can start this combo as a jump-in or ignore the j.HK and use it as a way to punish opponents that whiff with attacks
that leave them open. Cancel the Koryuken ( + P ) with an FADC and dash forward, at which point you can catch the opponent in the air with two hits of his HK Dankukyaku. The damage on this combo is surprisingly good if you can land all hits and it's definitely worth the half of a super meter that it costs to pull off.
MP + MK xx c.HP xx + HP xx + HP + HK xx + PPP
This combo is more for show than anything, as it costs a full super meter and a hyper meter. But it's still pretty neat, and if you need the damage to cap off a round, it's not a bad choice. Here we start the combo with a level two Focus Attack,
though a jump-in will work as well. What happens after the c.HP is a bit of magic—can cancel his Gadoken ( + P )
into his Legendary Taunt ( + HP + HK ), a super combo that does no damage. But while the Legendary Taunt is charging you can start buffering the input for Dan's ultra combo which will—magically—cancel the Legendary Taunt and combo. There's nothing more epic.
Gadoken + P SPECIAL
As a fireball, this is pretty terrible. It travels just halfway across the screen before petering out and it's really not much good in a fireball war. Your timing has to be a lot better than the opponent's in order to even neutralize a fireball war, and it's impossible to win one. Still, the Gadoken is an excellent tool for poking. Poke at opponents with c.MK and cancel into Gadoken for a safe way to end your poke string. The EX version of the Gadoken will even let you—at least in a corner—combo a level two Focus Attack.
Koryuken + P SPECIAL
The LP version of the Koryuken doesn't have much horizontal range, but it's still got good priority and quick recovery. Better yet is the MP version, which extends the horizontal range (good for anti-air) but doesn't leave Dan hanging too long.
Dankukyaku + K SPECIAL
Any version of the Dankukyaku can combo off of a HP (standing or crouching), but the EX kicks can combo off of much more, including a c.MK. Be careful with the Dankukyaku as it'll leave you open when blocked. The LK version in the air has great priority and speed, it being capable of winning a lot of air clashes. And you can use the HK version in the air to increase hang time, letting you cross the screen quickly or stay in the air long enough to evade a fireball as it passes under you—just jump backward before executing the Dankukyaku and Dan's momentum will continue backward.
Hissho Buraiken + P SUPER COMBO
Not the best super. In fact, it's probably among the worst. The range of the Hissho Buraiken is very short, and even if you connect with the first few hits there's a possibility of pushing the opponent outside the range of the later hits. If you whiff the end of the attack, Dan is left way open. Really, you're better off using the meter for EX attacks and FADCs. Or, if you wanna be flashy...
Page88© 2009 IGN Entertainment, Inc.

Fighter Overview
Gen is not an easy nut to crack. If your finger dexterity is less than stellar, you might consider playing someone else. Gen has two different stances that each has its own set of moves and being successful with Gen requires toggling back and forth between the two stances frequently, often for just one attack at a time. That said, if you do have the patience and diligence to learn Gen, he can pay off with a solid cross-up game and multiple setups for super and ultra combos.
The Mantis stance is the better general-purpose stance, largely because it has better pokes. Both c.HP and c.HK are solid, rangy stabs. His s.LK and s.MK are better for pressure as they're quick and Gen can throw 'em from a forward walk. Do a lot of poking with c.MK canceled into Hyaurenko ( ( from Mantis ) P P P... ). If the c.MK connects, you'll get a nice little combo, and if it's blocked you'll get free, safe chip
damage. His Gekiro ( ( from Mantis ) + K ) is a solid anti-air, though not much for a wake-up move. For a better wake-up, you'll want to switch stances...
...to the Crane stance. The Crane stance's normals aren't fantastic, but its specials—especially the Oga ( ( from Crane )
charge + K ) series—are worth toggling over for. The EX Oga is a good way to escape an impending meaty jump-in, but that's not the only use for the move. After bouncing off the wall, you've got a few optional dive kicks that all hit
overhead and bounce the opponent into the air. The Falling Kick ( ( after Ceiling Jump ) ) is particularly useful as you can just slightly adjust the timing of the dive kick to make it a cross-up or a non-cross-up. It's pretty difficult to guard and
leaves the opponent open to a juggle, making it a great setup for his Ryukoha ( ( from Crane ) + KKK )
Legendary Taunt + HP + HK SUPER COMBO
...there's always the Legendary Taunt. This isn't a brilliant super combo, but it does have a unique property. Unlike any other attack in the game, the Legendary Taunt can be canceled into an ultra combo. And since you can cancel into the Legendary Taunt, that means that you can use the Legendary Taunt in the middle of a combo as a gateway to the ultra. For an example, check the third combo listed above. Another use: You can execute the Legendary Taunt as bait. When the opponent goes to capitalize on your idiocy, you can cancel into Dan's ultra to catch the opponent off guard.
Shisso Buraiken + PPP ULTRA COMBO
Thankfully, Dan's ultra combo makes up for his weak supers. The ultra has invincibility on start up so you can pass through projectiles and jump-ins. It's a great wake-up attack to counter meaty attempts, and it even does solid damage.
Gen Character Select »
Complete arcade mode as Chun-Li to unlock Gen.
Page89© 2009 IGN Entertainment, Inc.
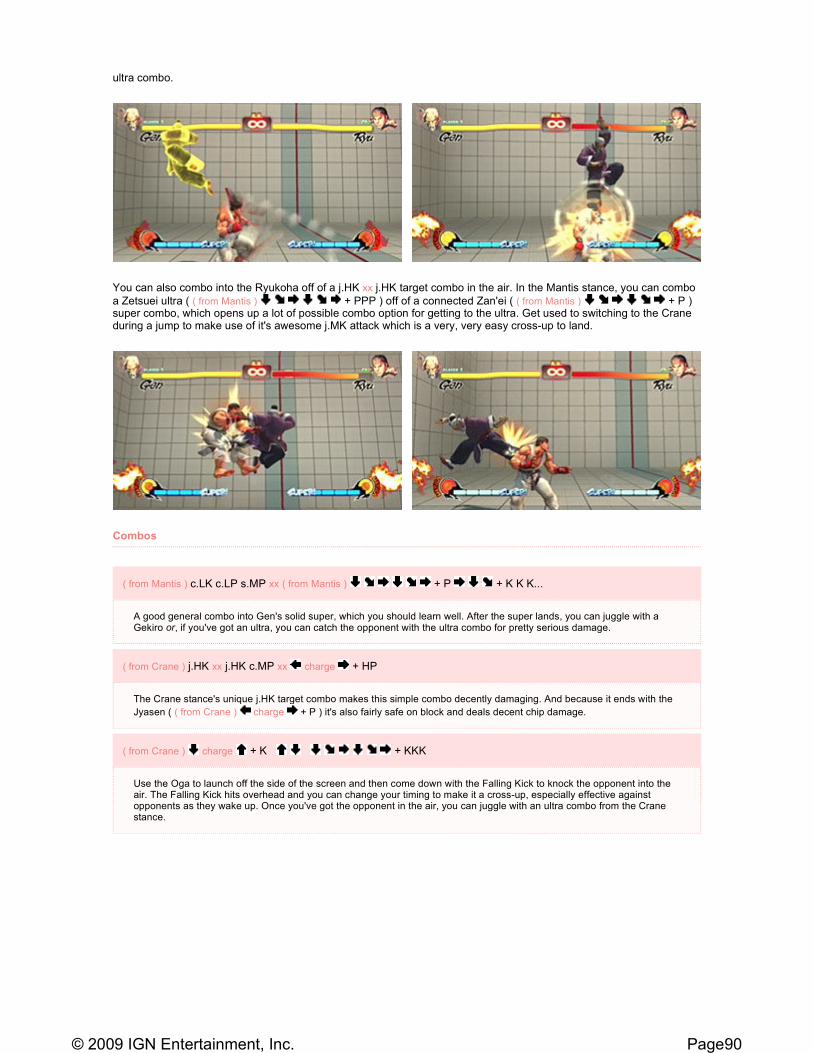
ultra combo.
You can also combo into the Ryukoha off of a j.HK xx j.HK target combo in the air. In the Mantis stance, you can combo
a Zetsuei ultra ( ( from Mantis ) + PPP ) off of a connected Zan'ei ( ( from Mantis ) + P ) super combo, which opens up a lot of possible combo option for getting to the ultra. Get used to switching to the Crane during a jump to make use of it's awesome j.MK attack which is a very, very easy cross-up to land.
Combos
( from Mantis ) c.LK c.LP s.MP xx ( from Mantis ) + P + K K K...
A good general combo into Gen's solid super, which you should learn well. After the super lands, you can juggle with a Gekiro or, if you've got an ultra, you can catch the opponent with the ultra combo for pretty serious damage.
( from Crane ) j.HK xx j.HK c.MP xx charge + HP
The Crane stance's unique j.HK target combo makes this simple combo decently damaging. And because it ends with the
Jyasen ( ( from Crane ) charge + P ) it's also fairly safe on block and deals decent chip damage.
( from Crane ) charge + K + KKK
Use the Oga to launch off the side of the screen and then come down with the Falling Kick to knock the opponent into the air. The Falling Kick hits overhead and you can change your timing to make it a cross-up, especially effective against opponents as they wake up. Once you've got the opponent in the air, you can juggle with an ultra combo from the Crane stance.
Page90© 2009 IGN Entertainment, Inc.
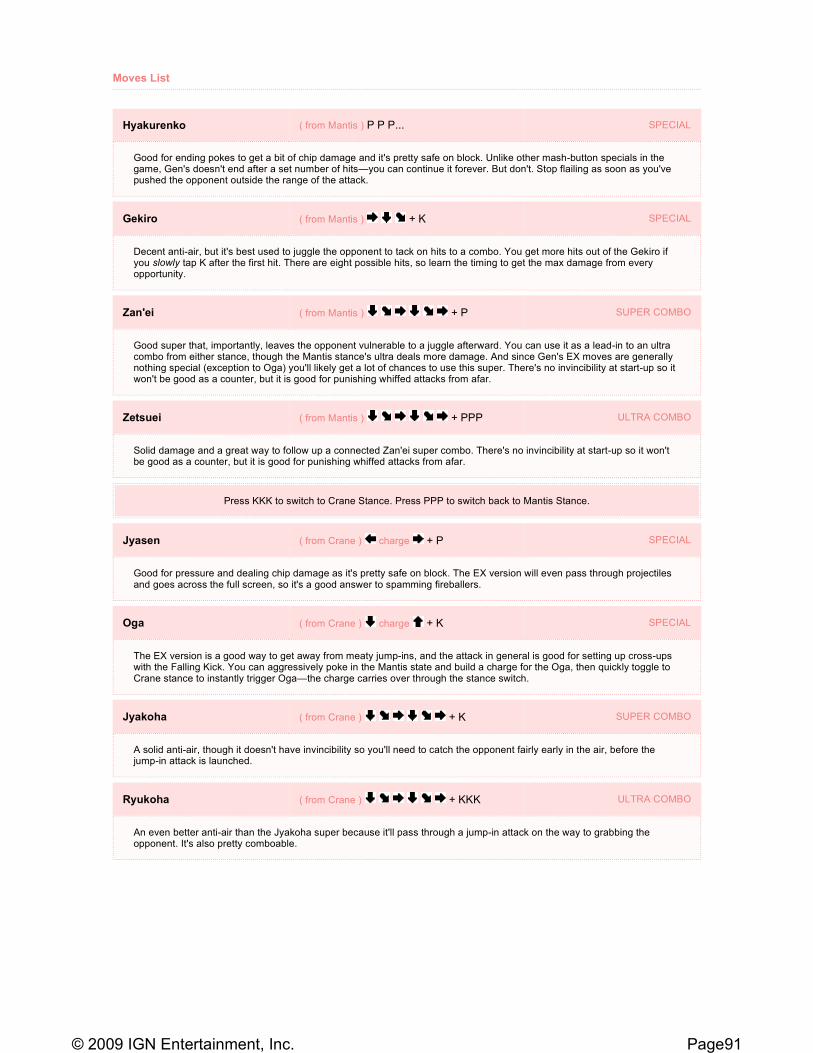
Moves List
Hyakurenko ( from Mantis ) P P P... SPECIAL
Good for ending pokes to get a bit of chip damage and it's pretty safe on block. Unlike other mash-button specials in the game, Gen's doesn't end after a set number of hits—you can continue it forever. But don't. Stop flailing as soon as you've pushed the opponent outside the range of the attack.
Gekiro ( from Mantis ) + K SPECIAL
Decent anti-air, but it's best used to juggle the opponent to tack on hits to a combo. You get more hits out of the Gekiro if you slowly tap K after the first hit. There are eight possible hits, so learn the timing to get the max damage from every opportunity.
Zan'ei ( from Mantis ) + P SUPER COMBO
Good super that, importantly, leaves the opponent vulnerable to a juggle afterward. You can use it as a lead-in to an ultra combo from either stance, though the Mantis stance's ultra deals more damage. And since Gen's EX moves are generally nothing special (exception to Oga) you'll likely get a lot of chances to use this super. There's no invincibility at start-up so it won't be good as a counter, but it is good for punishing whiffed attacks from afar.
Zetsuei ( from Mantis ) + PPP ULTRA COMBO
Solid damage and a great way to follow up a connected Zan'ei super combo. There's no invincibility at start-up so it won't be good as a counter, but it is good for punishing whiffed attacks from afar.
Press KKK to switch to Crane Stance. Press PPP to switch back to Mantis Stance.
Jyasen ( from Crane ) charge + P SPECIAL
Good for pressure and dealing chip damage as it's pretty safe on block. The EX version will even pass through projectiles and goes across the full screen, so it's a good answer to spamming fireballers.
Oga ( from Crane ) charge + K SPECIAL
The EX version is a good way to get away from meaty jump-ins, and the attack in general is good for setting up cross-ups with the Falling Kick. You can aggressively poke in the Mantis state and build a charge for the Oga, then quickly toggle to Crane stance to instantly trigger Oga—the charge carries over through the stance switch.
Jyakoha ( from Crane ) + K SUPER COMBO
A solid anti-air, though it doesn't have invincibility so you'll need to catch the opponent fairly early in the air, before the jump-in attack is launched.
Ryukoha ( from Crane ) + KKK ULTRA COMBO
An even better anti-air than the Jyakoha super because it'll pass through a jump-in attack on the way to grabbing the opponent. It's also pretty comboable.
Page91© 2009 IGN Entertainment, Inc.
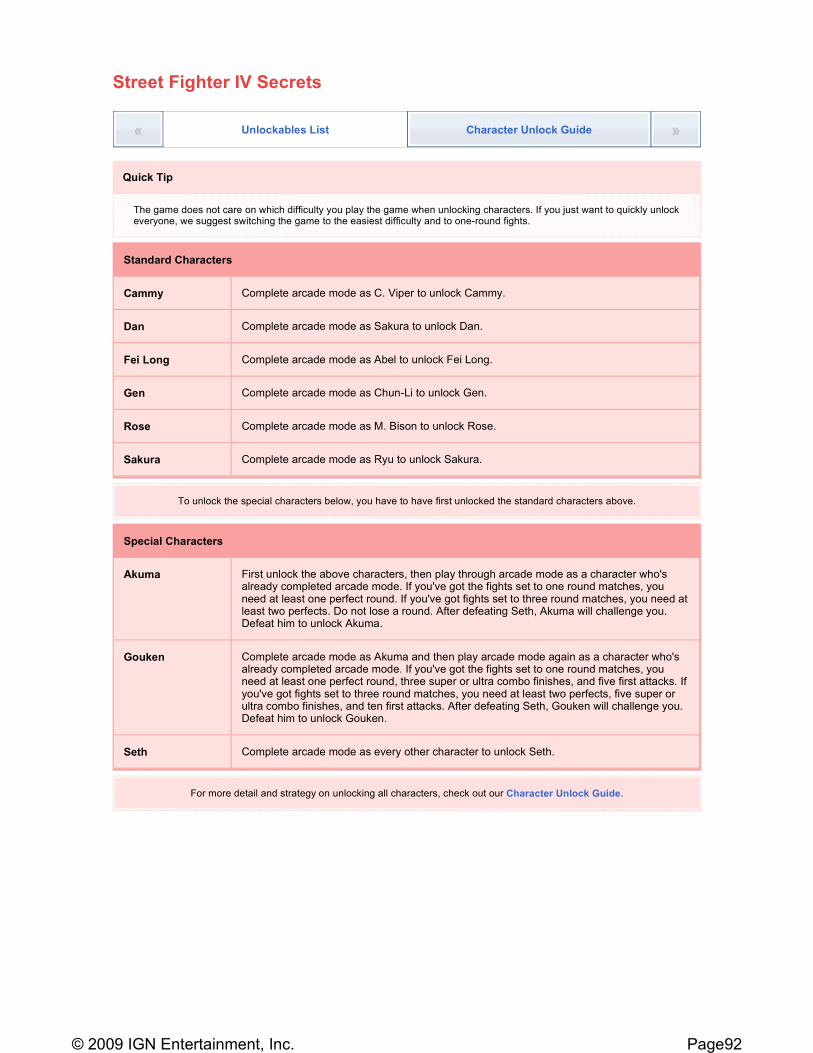
Street Fighter IV Secrets
« Unlockables List Character Unlock Guide »
Quick Tip
The game does not care on which difficulty you play the game when unlocking characters. If you just want to quickly unlock everyone, we suggest switching the game to the easiest difficulty and to one-round fights.
Standard Characters
Cammy Complete arcade mode as C. Viper to unlock Cammy.
Dan Complete arcade mode as Sakura to unlock Dan.
Fei Long Complete arcade mode as Abel to unlock Fei Long.
Gen Complete arcade mode as Chun-Li to unlock Gen.
Rose Complete arcade mode as M. Bison to unlock Rose.
Sakura Complete arcade mode as Ryu to unlock Sakura.
To unlock the special characters below, you have to have first unlocked the standard characters above.
Special Characters
Akuma First unlock the above characters, then play through arcade mode as a character who's already completed arcade mode. If you've got the fights set to one round matches, you need at least one perfect round. If you've got fights set to three round matches, you need at least two perfects. Do not lose a round. After defeating Seth, Akuma will challenge you. Defeat him to unlock Akuma.
Gouken Complete arcade mode as Akuma and then play arcade mode again as a character who's already completed arcade mode. If you've got the fights set to one round matches, you need at least one perfect round, three super or ultra combo finishes, and five first attacks. If you've got fights set to three round matches, you need at least two perfects, five super or ultra combo finishes, and ten first attacks. After defeating Seth, Gouken will challenge you. Defeat him to unlock Gouken.
Seth Complete arcade mode as every other character to unlock Seth.
For more detail and strategy on unlocking all characters, check out our Character Unlock Guide.
Page92© 2009 IGN Entertainment, Inc.

« Unlockables List Character Unlock Guide »
Note
The following ten step process may not be the only way to unlock the characters of Street Fighter IV, but following this guide will guarantee you unlock everyone very quickly.
01 Setting Up
From the main menu, select Arcade Mode and set the difficulty to "EASIEST" and the rounds to "1." The time setting doesn't matter, but we don't suggest changing it—running out of time, even if it causes you to win, could make satisfying conditions for Akuma and Gouken difficult.
02 Unlock Sakura
Complete Arcade Mode with Ryu to unlock Sakura.
03 Unlock Dan
Complete Arcade Mode with Sakura to unlock Dan.
04 Unlock Gen
Complete Arcade Mode with Chun-Li to unlock Gen.
05 Unlock Rose
Complete Arcade Mode with M. Bison to unlock Rose.
Page93© 2009 IGN Entertainment, Inc.

06 Unlock Cammy
Complete Arcade Mode with C. Viper to unlock Cammy.
07 Unlock Fei Long
Complete Arcade Mode with Abel to unlock Fei Long.
08 Unlock Akuma
Complete Arcade Mode with a character you've already run through Arcade Mode, as well as satisfy the following conditions:
A. Lose no rounds. B. Get at least one perfect round. (If you have
the matches set to three rounds instead of one, you'll need at least two perfects.)
To do this, we suggest playing with a character with a good fireball, such as Ryu. The first characters in Arcade Mode are easiest to perfect, so focus early on getting your required number of perfects. Just stand back and launch fireballs until you defeat the opponents. Then simply run through Arcade Mode normally, without losing a round. On the "EASIEST" setting, this is very easy. If you lose a round, just restart Arcade Mode. When you defeat Seth and you've fulfilled the requirements, Akuma will challenge you. Defeat him to unlock Akuma—if you've got the game set to "EASIEST," he's a pushover.
09 Unlock Gouken
Complete Arcade Mode with Akuma. Complete Arcade Mode with a character you've already run through Arcade Mode, as well as satisfy the following conditions:
A. Lose no rounds. B. Get at least one perfect round. (If you have
the matches set to three rounds instead of one, you'll need at least two perfects.)
C. Win at least three fights with super or ultra combos. (If you have the matches set to three rounds instead of one, you'll need at least five super or ultra combo finishes.)
D. Be the first to attack in at least five rounds. (If you have the matches set to three rounds instead of one, you'll need at least ten first attacks.)
To do this, we suggest playing with a character with a good fireball, such as Ryu. The first characters in Arcade Mode are easiest to perfect, so focus first on getting your required number of perfects. Just stand back and launch fireballs until you defeat the opponents. If you happen to get hit, you should change your objective; instead of trying to get a perfect, you should get the opponent low on health and let him/her attack you to build your revenge meter, trying to win the round with an ultra combo. On one round matches, it's hard to build a full super meter so we strongly suggest going for ultras instead. Getting the required number of first attacks is pretty easy with a fireball character. Just start every match with a fireball and on the "EASIEST" setting, the opponent rarely, if ever, blocks. There are eight fights total in Arcade Mode, so you'll have to earn your perfects and ultra combo finishes within those eight fights. It does not matter in which order you complete these goals. When you defeat Seth and you've fulfilled the requirements, Gouken will challenge you. Defeat him to unlock Gouken—if you've got the game set to "EASIEST," he's a pushover.
Page94© 2009 IGN Entertainment, Inc.

10 Unlock Seth
Complete Arcade Mode with Balrog... ...and complete Arcade Mode with Blanka... ...and complete Arcade Mode with Cammy... ...and complete Arcade Mode with Dan... ...and complete Arcade Mode with Dhalsim... ...and complete Arcade Mode with E. Honda... ...and complete Arcade Mode with El Fuerte... ...and complete Arcade Mode with Fei Long... ...and complete Arcade Mode with Gen... ...and complete Arcade Mode with Gouken... ...and complete Arcade Mode with Guile... ...and complete Arcade Mode with Ken... ...and complete Arcade Mode with Rose... ...and complete Arcade Mode with Rufus... ...and complete Arcade Mode with Sagat... ...and complete Arcade Mode with Vega... ...and complete Arcade Mode with Zangief to unlock Seth.
Page95© 2009 IGN Entertainment, Inc.