Steve Smith's Advanced Setup Guide - Addendum - gplworld
28
Steve Smith's Advanced Setup Guide Part One Part One | Part Two | Addendum See also: Steve Smith's Secrets of Online Setups, 60/60/1 Setups and F2 Superguide Steve Smith has written an extensive addendum to his book, Four Wheel Drift: A Car Guy's Guide to Grand Prix Legends. In order for the book to be included in the box with GPL, it went to press prior to the completion of GPL's development process. As a result, there are many details which Steve was unable to incorporate in the book. Through the miracle of the World Wide Web, we had the first part of Steve's addendum in your hands within a matter of days of the appearance of GPL on retail shelves. Here's the Advanced Setup Guide. Overview This is a section (don't call it a forum!) devoted to setup advice. I'm the guy who wrote the strategy guide ("Four-Wheel Drift") that ships with the game. But GPL was a whole different ballgame when I turned in the manuscript three months ago. Alison has generously given me this space to discuss anything I may have inadvertantly left out of the book, what has changed since the book was written, what we've learned since, and--occasionally--to correct any, ah, misunderstandings. Particularly about setups. Thus, I welcome the opportunity to "rewrite" the book online, and to grow the database of what we know about GPL's setups for all to see, and--hopefully--to profit by. But I don't want this to be just another laundry list of blind setups, grabbed off the page, and madly driven just once before joining hundreds of other discards in the Recycle Bin of history. So, let's talk about it. I'll start off with the book's most glaring omission--why no Ferrari--explain it, and move on to other topics, like trail-braking, which I said in the book was ill-advised, but which, after being hammered unmercifully by my peers, deserves a second look. Or "Low-Rider" setups: to drool for in July; nixed at the last moment, it is rumored, by David Kaemmer, who thought the setups looked ridiculously unrealistic. They did; you could always spot the ringer among the AI cars--it was the one with the pavement-scraping ride-height and acutely angled halfshafts. Anyway, here are some of the topics I'll throw open to discussion: 1. The Mystery of The Missing Marque 2. Taming the Wild Lotus 3. Making the Eagle Fly 4. For the Compleat Novice 5. Forza Ferrari! 6. Ferrari Redux 7. The 400-hp Go-Kart 8. Completing the Circle 9. The Joy of Formula 2 10. Further to Formula 2 11. Discussion 12. Erata If you want to join in the melee, email me. I welcome your response on any of these issues, but Steve Smith's Advanced Setup Guide http://alison.hine.net/gpl/smith.htm 1 von 13 20.10.2019, 00:43
-
Upload
khangminh22 -
Category
Documents
-
view
3 -
download
0
Transcript of Steve Smith's Advanced Setup Guide - Addendum - gplworld
Steve Smith's
Advanced Setup Guide
Part One
Part One | Part Two | Addendum
See also: Steve Smith's Secrets of Online Setups, 60/60/1 Setups and F2 Superguide
Steve Smith has written an extensive addendum to his book, Four Wheel Drift: A Car Guy's Guide to
Grand Prix Legends. In order for the book to be included in the box with GPL, it went to press prior to
the completion of GPL's development process. As a result, there are many details which Steve was
unable to incorporate in the book.
Through the miracle of the World Wide Web, we had the first part of Steve's addendum in your hands
within a matter of days of the appearance of GPL on retail shelves.
Here's the Advanced Setup Guide.
Overview
This is a section (don't call it a forum!) devoted to setup advice. I'm the guy who wrote the strategy
guide ("Four-Wheel Drift") that ships with the game. But GPL was a whole different ballgame when I
turned in the manuscript three months ago. Alison has generously given me this space to discuss
anything I may have inadvertantly left out of the book, what has changed since the book was written,
what we've learned since, and--occasionally--to correct any, ah, misunderstandings.
Particularly about setups.
Thus, I welcome the opportunity to "rewrite" the book online, and to grow the database of what we
know about GPL's setups for all to see, and--hopefully--to profit by. But I don't want this to be just
another laundry list of blind setups, grabbed off the page, and madly driven just once before joining
hundreds of other discards in the Recycle Bin of history.
So, let's talk about it. I'll start off with the book's most glaring omission--why no Ferrari--explain it,
and move on to other topics, like trail-braking, which I said in the book was ill-advised, but which,
after being hammered unmercifully by my peers, deserves a second look. Or "Low-Rider" setups: to
drool for in July; nixed at the last moment, it is rumored, by David Kaemmer, who thought the setups
looked ridiculously unrealistic. They did; you could always spot the ringer among the AI cars--it was
the one with the pavement-scraping ride-height and acutely angled halfshafts.
Anyway, here are some of the topics I'll throw open to discussion:
1. The Mystery of The Missing Marque
2. Taming the Wild Lotus
3. Making the Eagle Fly
4. For the Compleat Novice
5. Forza Ferrari!
6. Ferrari Redux
7. The 400-hp Go-Kart
8. Completing the Circle
9. The Joy of Formula 2
10. Further to Formula 2
11. Discussion
12. Erata
If you want to join in the melee, email me. I welcome your response on any of these issues, but
Steve Smith's Advanced Setup Guide http://alison.hine.net/gpl/smith.htm
1 von 13 20.10.2019, 00:43

Editor's Note
I differ slightly with Steve's rating of
the Ferrari's competitiveness relative
to the other cars. I feel that the
Ferrari is superior to the Eagle almost
everywhere except Monza and Spa,
where its lack of top end power can't
be offset by its excellent handling.
I believe the Ferrari is probably the
equal of the Lotus at several tracks,
including Mosport and Zandvoort,
where it clearly outclasses the Eagle.
It's a superb racing weapon for more
difficult tracks like Mexico, Rouen,
and the Ring.
The Ferrari is the best car at Monaco,
but sadly it's uncompetitive at Monza.
All in all, the Ferrari is a sweet car to
drive, probably the most delightful of
all the cars in the game. When the
track gets nasty, the Ferrari rocks!
- Alison
reserve the right to edit them for grace, brevity, eloquence, or sanity.
--Steve Smith
Sidebars
Monza: Our Own Private Skid Pad
Ferrari
The Mystery of the Missing Marque
What happened to Ferrari? The marque is in the game, but
each and every reference to Ferrari was excised from the
book like Col. Kurtz' innoculated arms in "Apocalypse Now."
Gonzo. What happened? Beats me. Probably Papy's bete noir,
licensing "issues." I doubt that it was because of anything
embarrassing I might have said about Ferrari in the
manuscript. Far from it; I bent over backwards to praise the
312 as the best car, overall, in the game.
The 312 is relatively easy to drive; although not the easiest--
that distinction belongs to the BRM. It's reasonably quick;
although not as fast as the fleet Lotus (it's about on a par
with the Eagle at most tracks, and faster than the others
almost everywhere). It's quite versatile; equally at home on
tortuous tracks like Monaco and on more open circuits like
Zandvoort. It has a well-rounded power curve; not much on
the high-end (its weakest suit, oddly enough), nor an
abundance of low-end grunt, but a nice fat mid-range. It's
agile; although not as nimble as the Brabham, but more so
than the lanky Eagle. It's simple to set up; neither as finicky
as the Lotus nor as vague (unresponsive) as the BRM. And
over the long haul, particularly in full-length GPs, its reliability
should stand it in good stead if you're going to make a run at
the World Drivers Championship.
In short, the Ferrari is the best-balanced car of the lot; a car
you can start with, learn with, and stick with. If you can't get
a handle on the tricky-to-drive Lotus, I'd recommend the 312
as your next best bet.
Here are two setups I've developed for the Ferrari at Monza (which will be our test track for basic
setups for all cars--I'll explain why in a sidebar).
Mon_Fer_Q (qualifying; 4 gallons/6 laps)
LF: 21 psi/65 lbs/2&3 shox/-1.25 deg. camb./1.0-in bumpers/174/174/174 deg.
RF: 21/75/4&2/-1.0/1.0/168/166/164
RR: 20/80/5&3/-.50/1.0/202/200/198
LR: 20/75/5&4/-.75/1.0/204/204/204
(N.B. The last three numbers on each line are the tire temps, as measured at the S/F line, OMI on the
left and IMO on the right, just as they are shown in the box on the setup pages.)
Toe: 0.0/.175 in., F&R
Bars: 100/60 lbs., F&R
SRH: 2.0/2.25 in., F&R
Steve Smith's Advanced Setup Guide http://alison.hine.net/gpl/smith.htm
2 von 13 20.10.2019, 00:43

Monza
Our Own Private Skid Pad
Just as in the book, we're going to
work on our setups at Monza...and
for the same reasons. Plus one more:
now that we have hard numbers to
go by, I'll be adding tire temperatures
(at the S/F line) and mph figures (at
easily located "data points" around
the track) to the setups.
The tire temps will be measured after
several laps at speed at the
Start/Finish line. Assuming you know
how to use camber and pressure to
"zero" the temperature differences
across the tread, you should be
seeing about the same figures as
me...if you're using the same setups.
If your temps are higher, you're
probably driving faster than I am and
need to add a touch of positive
camber (and maybe drop the
pressure a scosh). If they're less, add
a little negative camber and maybe a
little more air. (Discussed in the
book.) Note that the leftside temps
will always be higher because you
just came off a sustained righthand
turn (Parabolica), although they
should be even across the tread. The
rightside temps will be staggered,
with the inside higher than the middle
by a couple of degrees, and the
outside will be another couple of
degrees cooler than the middle.
We'll also measure the speed at the
S/F line, and at various locations
around the track. In general, these
are the speeds you should be seeing
on a really good lap:
S/F line: 170 mph
Vmax, front straight: 190+
BB: 56% F
G1: 14/46 (10.19)
G2: 15/31 ( 6.41)
G3: 17/31 ( 5.65)
G4: 19/28 ( 4.57)
G5: 25/31 ( 3.84)
R&P: 10/31
Ramps: 85/45
Clutches: 3
Data points (see sidebar):
S/F line: 165 mph
Vmax, front straight: 190
Vmin, Curva Grande: 135
Vmax, between the C.G. and the 1st Lesmo: 170
Vmin, 1st Lesmo: 80
Vmax, between the Lesmos: 120
Vmin, 2nd Lesmo: 85
Vmin, Ascari/Vialone: 175
Vmax, back straight: 190
Vmin, Parabolica: 70
For a short-race setup (11 laps), I added 3 gallons of fuel,
dropped the RF 1 psi, added 10 lbs. to the bars, moved the
brake bias forward 1 percent, reduced the coast-side angle to
30 deg., and lengthened the higher gears.
I'm not representing these setups as the be-all and end-all,
but they should provide a good starting point for discussion.
Here's how I arrived at the numbers:
First, note that the setups are asymmetrical. Monza is one of
two tracks where asymmetrical setups seem to work (the
Glen is the other), but asymmetrical setups don't work for all
cars...at least, not equally well. (I'll cover this in another
sidebar, later.)
There are three ways to make a setup asymmetrical.
1. The geometry. This is generally to be avoided because
if you get the front cambers much more than a quarter-
degree apart, almost any car will get squirrelly under
braking.
2. The springs.
3. The shocks.
Since the key to good laps at Monza is being able to take the
Ascari turn flat out, and since the tendency is for most cars is
to push here, note that by stiffening up the right side (and/or
softening the left), you can get good grip on the righthand
turns and still sustain a modicum of oversteer to help you
around the fast left sweepers (Ascari and the Della Rogia). I
added a quarter-degree of negative camber on the right side,
and spread the springs apart 10 lbs. at the front (where the
temps are farther apart, side to side), but only 5 lbs. apart at
the rear (where the temps are closer together).
Steve Smith's Advanced Setup Guide http://alison.hine.net/gpl/smith.htm
3 von 13 20.10.2019, 00:43

Vmin, Curva Grande: 135
Vmax, between the C.G. and
the 1st Lesmo: 175
Vmin, 1st Lesmo: 80
Vmax, between the Lesmos:
120
Vmin, 2nd Lesmo: 85
Vmin, Ascari/Vialone: 175
Vmax, back straight: 190+
Vmin, Parabolica: 70
It should go without saying that these
speeds are approximate...and will
differ from car to car as well as from
setup to setup. But each setup will be
accompanied with real numbers
measured at these points, so you can
use them to compare to your setups.
I prefer this method to lap times
because it has less to do with your
driving ability and more to do with
your setup. It breaks down a lap into
easily reproducible sections for more
accurate analysis. If you look at your
10 best laps, you should be able to
interpolate these figure (they're not
averages, they're observed maxima
and minima). If you can string all the
best numbers together in one perfect
lap, you may be the next Ayrton
Senna, but for the purposes of dialing
in the right setup, it isn't necessary.
The shocks are usually the key to getting the car to "feel"
right. I arrived at these values through a lot of cut & try. The
only "theory" involved is that the extra bump compliance on
the left side allows the chassis to roll into the turn without the
sharp spikes (G-loading) that comes from stiff shocks, which
is matched by extra rebound compliance on the right side.
The opposite shock values (LF rebound & RF jounce) are an
attempt to balance the overall shock response and minimize
"snaking."
To get the car as low as practicable, I lowered the bump
rubbers to their minimum (1 in.), and set the ride height for
an inch in the front and an inch and a quarter in back. This is
to minimize weight transfer, minimize scraping the tub under
braking, and to prevent the suspension from bottoming under
acceleration. These values seem to work for every car at
Monza.
The bars are a little softer in qualifying for maximum grip; a
little harder in racing trim for faster steering response in
traffic.
The toe is zero at the front to reduce rolling resistance. You
can add a quarter-inch of toe-out for better front end bite
without much of a speed penalty (maybe 1 mph), but the
front end "hunts" when the car rocks side to side. The rear
toe-in is used to fine-tune the balance under full power in the
Ascari curve (less toe = more oversteer).
The coast-side ramp angle is 60 deg. for qualifying to soften
the transition from throttle on to throttle off entering the
Curva Grande, and 45 deg. for the race to enhance the "faux"
ABS effect discussed in the book. Likewise, the brake bias is
1% further aft for qualifying for maximum stopping power,
and moved forward 1 click for more stability during the race
(as well as allowing some trail-braking, which helps protect
your line--you don't have to leave the door quite so wide
open).
I usually lengthen the gears for the race, both to reduce the amount of available torque (controlling
wheelspin for a whole race is a lot more tiring than preventing it for one hot lap) and to keep the
engine from overrevving (especially when another car gives you a "tow"). The ratios shown allow you
to use either G3 or G4 for the Curva Grande, and either G2 or G3 for the Lesmos, but G4 isn't tall
enough here to power through the Ascari curve. The overriding concern is that you be able to get back
on the power sooner rather than later in the Lesmos and--especially--the Parabolica (although I find I
still have to short-shift, feather the throttle, or both in the final turn).
Comments? I'd like to hear your opinion. Email me.
--Steve Smith
Taming the Wild Lotus
The Lotus 49 is a very difficult car. Difficult to drive and difficult to set up. You can be one click away
from perfection and it will still handle like a Fairthorpe Electron on a bad suspension day. But if you
chance upon the magic numbers, the car will suddenly snap into focus and--if you're good enough--
start going like stink.
Unlike the BRM, say, where you can run the numbers up and down to very little effect (MG Mitten once
sold a set of rubber tools so you could play with the SU carburetor's settings to your heart's content
without messing up the factory defaults), every tiny adjustment to the 49 will result in dramatic
changes in the car's behavior. Unfortunately, like genetic mutations, most of them will only make
things worse.
Steve Smith's Advanced Setup Guide http://alison.hine.net/gpl/smith.htm
4 von 13 20.10.2019, 00:43

And unlike the Ferrari or the Eagle, which reward you with actionable feedback, theoretically-correct
approaches to setting up the Lotus mostly lead to frustration, not solutions. For example, as the
lightest car in the game, it should take the lightest (softest) springs in the game. But the car is so
tricky to drive that you'll willingly trade some grip (which comes from supple suspension compliance)
for better driveability. You wind up with a much stiffer suspension than logic would lead you to believe.
Thus, I have no idea whether the following is a good setup or not. It's simply the best I can do after
hundreds and hundreds of laps, trying every darn thing I can think of. Let me know if it works for you.
Mon_Lot_Q (qualifying; 4 gallons/6 laps)
LF: 20 psi/65 lbs/3&4 shox/-1.50 deg. camb./1.0-in bumpers/189/189/189 deg.
RF: 21/70/4&3/-1.25/1.0/169/167/165
RR: 20/80/5&4/-1.25/1.0/205/204/202
LR: 19/70/4&5/-.75/1.0/214/214/215
(N.B. The last three numbers on each line are the tire temps, as measured at the S/F line, O/M/I on
the left side and I/M/O on the right, just as they are shown in the boxes on the setup pages.)
Toe: -.025/0.0 in., F&R
Bars: 110/80 lbs., F&R
SRH: 2.0/2.25 in., F&R
BB: 56% F
G1: 14/45 9.96
G2: 16/32 6.20
G3: 18/29 4.99
G4: 19/25 4.08
G5: 27/30 3.44
R&P: 10/31
Ramps: 85/60
Clutches: 2
Data points (see sidebar):
S/F line: 175 mph Vmax, front straight: 193
Vmin, Curva Grande: 136
Vmax, between the C.G. and the 1st Lesmo: 177
Vmin, 1st Lesmo: 76
Vmax, between the Lesmos: 122
Vmin, 2nd Lesmo: 82
Vmin, Ascari/Vialone: 178
Vmax, back straight: 192
Vmin, Parabolica: 69
What can we learn from this? The main reason I'm uncertain about this setup is because of the
difficulty I had in preventing the car from pushing in the Curva Grande and the Curva Ascari. In theory,
the Cosworth-engined Lotus has more than enough torque to steer with the throttle, even in fifth gear.
Indeed, increasing the number of clutches to 3 or more will result in breaking the rear wheels loose
with the slightest application of the throttle, but the breakaway is too sudden, too violent for me to
handle. I went as low as one clutch, which works better in the slow-speed corners (the Parabolica and
the Lesmos), but is too weak to be effective in the Ascari, and barely enough to get the job done in the
C.G. With 2 clutches, you have to be more precise in feathering the throttle in the slow stuff, but it
transmits enough torque to control the car in the faster turns.
I even reversed the toe settings from those I used for the Ferrari: one click of toe-out in the front (for
better "bite"), and zero toe in the rear. Normally, no rear toe would send any other car into
Steve Smith's Advanced Setup Guide http://alison.hine.net/gpl/smith.htm
5 von 13 20.10.2019, 00:43

uncontrollable oversteer, but it works fine with the 49. In combination with the toe-out at the front, I
could power through the C.G. and the Ascari faster than I've ever gone before. But the stiffer springs
and bars seem to have cut my speeds through the slower turns. Wierd. (The car's fantastic
acceleration more than makes up for the slightly slower corner speeds. For example, it comes off the
Parabolica a mile-an-hour slower than the Ferrari, but is already 10 mph faster at the S/F line. It is a
rocket.)
The rest of this qualifying setup is standard stuff. For a racing setup, I made the usual adjustments: a
lower coast-side ramp angle in conjunction with one percent more forward weight bias (to enhance
stability under braking), but the big change you have to make is to lengthen the top three gears so
you're not as likely to overrev the engine. The Cosworth is unrealistically fragile, IMO. (In the real
world, it was--and is--a remarkably robust engine, as witness their sheer numbers in vintage racing.)
If you buzz it to nine grand in every gear, you will reduce it to rubble within a half-dozen laps. Thus,
you want to keep it under, say, 8500-8700 (the F10 view doesn't do a very good job of conveying this
gen), particularly in longer races. Note that even when you have the damage model set to "None" (in
Training) you can still blow the engine sky-high.
But it's still a b*tch to drive. I like to be super-smooth, but driving this car is really taxing. If I was a
better driver, I'd love this car, but I'm not even good enough to like it much. The next car I'll set up,
the Eagle, is more my style...and a pistol at Monza!
--Steve Smith
Making the Eagle Fly
After suffering the Calvinist discipline of shepherding the Lotus around Monza, the Eagle is as welcome
as a weekend in Bangkok. It's smooth, supple, forgiving--an almost hedonistic pleasure to drive--and
particularly well-suited to the wide-open spaces of Monza. The Eagle's forte is high-speed bends...as
witness the highest speeds I've yet seen in the Curvas Grande and Ascari (Vialone): it dips only briefly
to 136 mph in the former, and effortlessly sustains 178+ through the latter (see Data Points below).
Not that the Eagle slouches through the slower corners (the Lesmos and the Parabolica). Indeed, its
only shortcoming is an anemic low-end, which makes wheelspin easy enough to control, but gives it
sluggish acceleration coming off the slow turns: only 168 mph at the S/F line and 117 between the
Lesmos. OTOH, its top speed beats all the other cars in the game (I've seen 195-196 mph with
different gearing).
Moreover, the Eagle accomplishes all this with almost symmetrical settings (the geometry is
symmetrical, front-to-back; and the shocks are symmetrical side-to-side; only the springs are
altogether asymmetrical), making it easier to gather the car up if you push it over the edge. You can
set the suspension fairly soft (for best grip) and still retain excellent driveability, and you can power
through the Ascari curve without resorting to oddball toe settings.
My race setup demands few changes. The forward brake-bias of 56% given here doesn't have to be
changed; neither do the ramp angles or clutchpacks. But once again, the engine is unrealistically
fragile (that is frangible; I'm not speaking to long-term reliability, which should properly be awful). The
power peak is at 10,000 rpm, which would normally mean you could rev it to 10.5K with no fear, but I
blew one in a 6-lap Novice race soft-shifting at 9.5K, so choose gears as long as you dare (and still be
competitive). Makes you wonder what that rev-limiter is for, huh?
Mon_Eag_Q (qualifying; 4 gallons/6 laps)
LF: 20 psi/65 lbs/3&4 shox/-1.00 deg. camb./1.0-in bumpers/185/185/184 deg.
RF: 20/75/4&3/-1.00/1.0/168/166/165
RR: 19/75/4&3/-.75/1.0/210/207/205
LR: 19/80/3&4/-.75/1.0/214/214/215
(N.B. The last three numbers on each line are the tire temps, as measured at the S/F line, OMI on the
left side and IMO on the right, just as they are shown in the boxes on the setup pages.)
Toe: 0.0/0.075 in., F&R
Steve Smith's Advanced Setup Guide http://alison.hine.net/gpl/smith.htm
6 von 13 20.10.2019, 00:43

Bars: 90/60 lbs., F&R
SRH: 2.0/2.25 in., F&R
BB: 56% F
G1: 12/35 9.04
G2: 16/32 6.20
G3: 17/29 5.29
G4: 24/34 4.39
G5: 22/26 3.66
R&P: 10/31
Ramps: 85/60
Clutches: 3
Data points (see sidebar):
S/F line: 169 mph (172)
Vmax, front straight: 193 (194)
Vmin, Curva Grande: 136 (135)
Vmax, between the C.G. and the 1st Lesmo: 175 (175)
Vmin, 1st Lesmo: 76 (79)
Vmax, between the Lesmos: 117 (115)
Vmin, 2nd Lesmo: 84 (82)
Vmin, Ascari/Vialone: 179 (170)
Vmax, back straight: 194 (194)
Vmin, Parabolica: 72 (70)
The figures in parentheses are from Matt Sentell's wild 1:30 lap of Monza in the Eagle included in the
replays that ship with the game. He almost loses it in the C.G., so that number is an interpolation. Or,
as they say, "The hurrier I go, the behinder I get."
--Steve Smith
For the Compleat Novice
I am inspired by a bug to tackle a couple of setups for the unlovely, unloved BRM. An overweight loser,
to be sure, but which has one shining virtue: it is a superb trainer for trickier-to-drive rolling stock like
the Eagle T1G. The bug is this: if you select Automatic Shifting, the tranny goes nuts, shifting back and
forth between second- and third- gear. The solution is obvious: by the time you get to the full-blown
GP cars, you should long ago have been weaned away from crutches like automatic transmission.
But, while we're at it, if the BRM is the easiest car in the game, 6-speed and all, then why not the
easiest setup for the easiest variant of the easiest car: the low-powered, 4-speed BRM Novice Trainer,
with automatic everything: shifting, Braking Help, and Throttle Help? At the easiest track: Monza. You
probably don't want to screw up your own .sts file, so you might want to sign up as the chauffeur of
the Compleat Novice's car under a nom de drive like New B. Racer, or Wanna B., or L8BRKR. Handy
when friends drop over unexpectedly; you've got a car they can drive fast right out of the box without
embarrassing themselves.
If you're of a mind, you can edit .ini files so you can also race your Novice Trainer, a class 1 car (GP
cars are class 3), against suitably subdued AI cars, and you can download substitute AI files from this
site that will bunch up the field, slow them down, or spread them out. But let's start with a setup that
makes the most of the 4-speed BRM: it's good for 2-minute laps, which will put you comfortably ahead
of the other BRMs (Irwin is usually the quickest), but still several seconds behind Clark, Brabham, et
al.
Mon_BRM_Nov (4 gallons/6 laps)
Steve Smith's Advanced Setup Guide http://alison.hine.net/gpl/smith.htm
7 von 13 20.10.2019, 00:43

LF: 21 psi/70 lbs/2&3 shox/-1.00 deg. camb./1.0-in bumpers/141/140/138 deg.
RF: 21/75/4&3/-.50/1.0/124/123/123
RR: 20/85/4&2/+.25/1.0/151/151/151
LR: 20/80/2&4/-.75/1.0/159/157/157
(N.B. The last three numbers on each line are the tire temps, as measured at the S/F line, OMI on the
left side and IMO on the right, just as they are shown in the boxes on the setup pages.)
Toe: 0.0/0.275 in., F&R
Bars: 100/60 lbs., F&R
SRH: 2.0/2.25 in., F&R
BB: 54/46% F&R
G1: 13/35 8.35
G2: 16/35 5.81
G3: 24/34 4.39
G4: 22/25 4.39
R&P: 10/31
Ramps: 85/30
Clutches: 5
Data points (see sidebar):
S/F line: 120 mph
Vmax, front straight: 128
Vmin, Curva Grande: 110
Vmax, between the C.G. and the 1st Lesmo: 125
Vmin, 1st Lesmo: 70
Vmax, between the Lesmos: 90
Vmin, 2nd Lesmo: 72
Vmin, Ascari/Vialone: 125
Vmax, back straight: 130
Vmin, Parabolica: 65
The only remarkable thing about this setup is that the rear cambers are a full degree apart! I must've
been stonkers. Under the circumstances, the tightly-coupled coast angles (x/30) help keep the rear
wheels from brake-steering. Relatively stiff bars, soft springs (for such a heavy car) and shox. Tires
never really do get up to grippier temps.
Matching the Bark to the Hype
If you're ready for the real thing, there is no easier a full-boat GP car than the 6-speed BRM T115.
Sadly, despite having a couple of extra gears with which to row this stentorian beast around Monza,
the ungainly H-16 is not up to the challenge. Almost everywhere at our reference track (see Data
Points), the BRM is simply a good 5 or 10 mph slower than the Eagle (in parentheses), despite the
BRM's surprising speed whilst actually in the turns. It's the acceleration out of them that proves the
T115's undoing.
Mon_BRM_4G6L (4 gallons/6 laps)
LF: 21 psi/90 lbs/4&3 shox/-1.50 deg. camb./1.0-in bumpers/173/173/174 deg.
RF: 21/100/5&4/-1.25/1.0/165/162/161
RR: 20/105/4&3/-.75/1.0/209/207/205
LR: 20/100/3&2/-1.00/1.0/211/211/211
(N.B. The last three numbers on each line are the tire temps, as measured at the S/F line, OMI on the
Steve Smith's Advanced Setup Guide http://alison.hine.net/gpl/smith.htm
8 von 13 20.10.2019, 00:43
left side and IMO on the right, just as they are shown in the boxes on the setup pages.)
Toe: 0.0/0.175 in., F&R
Bars: 80/50 lbs., F&R
SRH: 2.0/2.25 in., F&R
BB: 54/46% F&R
G1: 13/46 10.97
G2: 14/33 7.31
G3: 16/30 5.81
G4: 19/29 4.73
G5: 25/34 4.22
G6: 23/29 3.91
R&P: 10/31
Ramps: 85/60
Clutches: 4
Data points (see sidebar):
S/F line: 164 mph (169)
Vmax, front straight: 187 (193)
Vmin, Curva Grande: 132 (136)
Vmax, between the C.G. and the 1st Lesmo: 170 (175)
Vmin, 1st Lesmo: 74 (76)
Vmax, between the Lesmos: 114 (117)
Vmin, 2nd Lesmo: 80 (84)
Vmin, Ascari/Vialone: 169 (179)
Vmax, back straight: 188 (194)
Vmin, Parabolica: 65 (72)
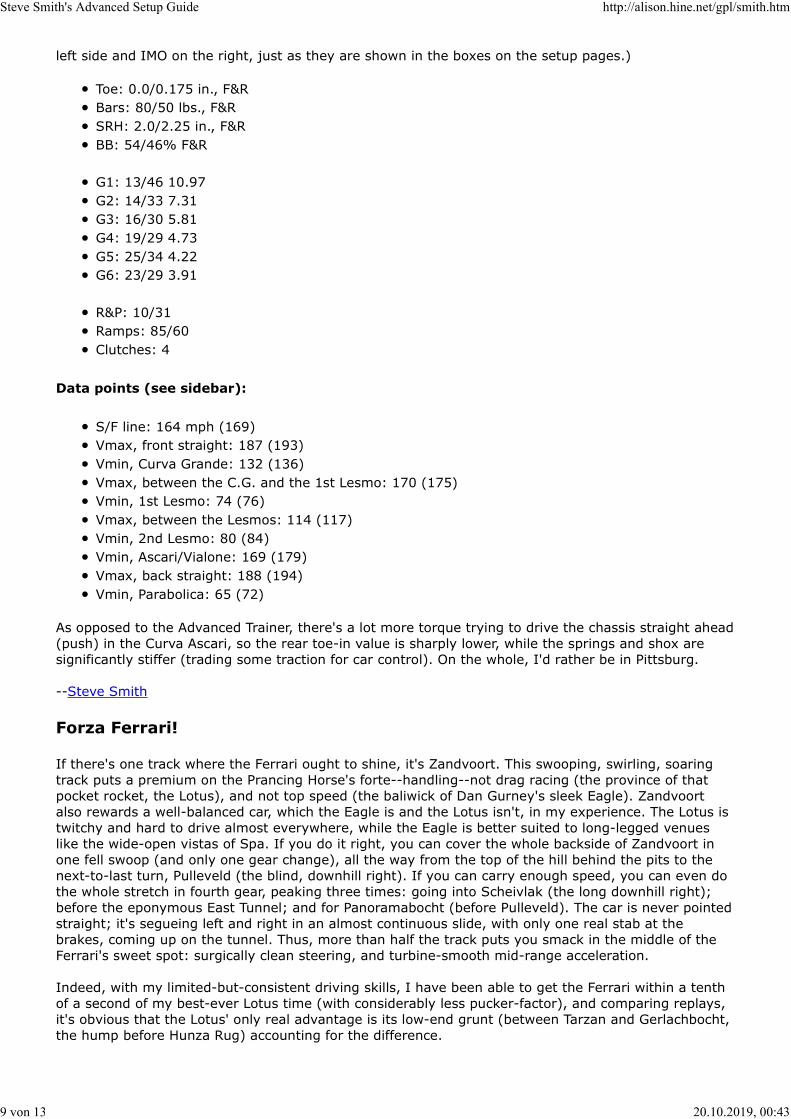
As opposed to the Advanced Trainer, there's a lot more torque trying to drive the chassis straight ahead
(push) in the Curva Ascari, so the rear toe-in value is sharply lower, while the springs and shox are
significantly stiffer (trading some traction for car control). On the whole, I'd rather be in Pittsburg.
--Steve Smith
Forza Ferrari!
If there's one track where the Ferrari ought to shine, it's Zandvoort. This swooping, swirling, soaring
track puts a premium on the Prancing Horse's forte--handling--not drag racing (the province of that
pocket rocket, the Lotus), and not top speed (the baliwick of Dan Gurney's sleek Eagle). Zandvoort
also rewards a well-balanced car, which the Eagle is and the Lotus isn't, in my experience. The Lotus is
twitchy and hard to drive almost everywhere, while the Eagle is better suited to long-legged venues
like the wide-open vistas of Spa. If you do it right, you can cover the whole backside of Zandvoort in
one fell swoop (and only one gear change), all the way from the top of the hill behind the pits to the
next-to-last turn, Pulleveld (the blind, downhill right). If you can carry enough speed, you can even do
the whole stretch in fourth gear, peaking three times: going into Scheivlak (the long downhill right);
before the eponymous East Tunnel; and for Panoramabocht (before Pulleveld). The car is never pointed
straight; it's segueing left and right in an almost continuous slide, with only one real stab at the
brakes, coming up on the tunnel. Thus, more than half the track puts you smack in the middle of the
Ferrari's sweet spot: surgically clean steering, and turbine-smooth mid-range acceleration.
Indeed, with my limited-but-consistent driving skills, I have been able to get the Ferrari within a tenth
of a second of my best-ever Lotus time (with considerably less pucker-factor), and comparing replays,
it's obvious that the Lotus' only real advantage is its low-end grunt (between Tarzan and Gerlachbocht,
the hump before Hunza Rug) accounting for the difference.
Steve Smith's Advanced Setup Guide http://alison.hine.net/gpl/smith.htm
9 von 13 20.10.2019, 00:43

As usual, this setup will be of limited benefit to the hottest sim drivers, but might prove enlightening to
intermediate drivers struggling with a field of over-zealous AI cars.
Zan_Fer_4G8L (4 gallons/8 laps)
LF: 21 psi/70 lbs/3&3 shox/-1.00 deg. camb./1.0-in bumpers/177/177/177 deg.
RF: 21/80/4&3/-1.00/1.0/139/137/135
RR: 20/85/3&3/-.75/1.0/170/166/163
LR: 20/85/3&3/-.75/1.0/182/182/182
(N.B. The last three numbers on each line are the tire temps, as measured at the S/F line, OMI on the
left side and IMO on the right, just as they are shown in the boxes on the setup pages.)
Toe: -0.025/.225 in., F&R
Bars: 90/60 lbs., F&R
SRH: 2.25/2.25 in., F&R
BB: 55/45% F&R
G1: 14/32 7.87
G2: 17/30 6.08
G3: 24/33 4.74
G4: 21/26 4.27
G5: 25/27 3.72
R&P: 9/31
Ramps: 85/60
Clutches: 1
No surprises here. As is typical of my setups, it is soft (better grip, dicier car control). If I changed
anything, it would be to stiffen the bars (to reduce roll) and the shocks (to quicken side-to-side
transients), and go even softer on the springs...but that would entail readjusting the ride height and
cambers. As it is, I found the front end was scraping with my usual one-inch of suspension travel, so I
raised it a quarter inch to match the rear. The front springs are mildly asymmetrical. The front toe is a
click negative for more "bite" when you turn in, and the rear toe is a couple of clicks more positive
than normal to curb the oversteer induced by all those wild powerslides (the only way to drive this
track).
The gearing could probably stand some tweaking, too; it really depends on whether you're lugging or
overrevving in G3 or G4, thus, it's a matter of personal preference. [N.B. G1 is way too long for racing
starts; but it's tall enough to use in the Hunza Rug hairpin, so you can gain a slight advantage in
qualifying.] As are the ramp angles--you want the differential largely unlocked on the coast side to
avoid sudden spikes on and off the throttle; you only need 85/45 if you don't have your brakes dialed
in. Better drivers can also probably cope with more than one clutch, but I was struggling to get the
power down coming off Hunze Rug.
Data points:
Rather than measure speeds at corner apexes here, I decided it might be more precise (some of the
apexes seem ill-defined) to take readings directly abeam of the 10 camera positions around the track,
thus:
Camera 1: ca. 150 mph
Camera 2: 60
Camera 3: 90
Camera 4: 55
Camera 5: 105
Camera 6: 95
Camera 7: 130
Steve Smith's Advanced Setup Guide http://alison.hine.net/gpl/smith.htm
10 von 13 20.10.2019, 00:43

Camera 8: 120
Camera 9: 110
Camera 10: 105
Let me know how (and if) this works for you.
--Steve Smith
Ferrari Redux
I went back to my older Ferrari @ Monza setups to see if there was anything I'd learned in the last
couple of months that might apply, and arrived at the following setup...which turns out not to be that
much different. Slightly more negative front camber, much less asymmetry, a scosh less ride height, a
few clicks less rear toe, a slightly taller top gear (I kept blowing engines), a teench more front brake
bias, etc. Very stable.
Mon_Fer_4G6L (4 gallons/6 laps)
LF: 20 psi/65 lbs/2&3 shox/-1.25 deg. camb./1.0-in bumpers/205/203/201 deg.
RF: 20/75/4&2/-1.25/1.0/172/170/168
RR: 20/80/4&3/-.50/1.0/206/204/202
LR: 20/75/3&4/-.50/1.0/212/211/210
(N.B. The last three numbers on each line are the tire temps, as measured at the S/F line, OMI on the
left side and IMO on the right, just as they are shown in the boxes on the setup pages.)
Toe: -0.025/.075 in., F&R
Bars: 90/60 lbs., F&R
SRH: 1.75/2.00 in., F&R
BB: 56/44% F&R
G1: 14/46 10.19
G2: 15/31 6.41
G3: 17/30 5.47
G4: 19/27 4.41
G5: 26/32 3.82
R&P: 10/31
Ramps: 85/45 (or 85/60 w. BB: 57/43)
Clutches: 4
But I realize this is flogging a dead horse (so to speak). Alison's right; the 312 is "sadly uncompetitive"
at Monza. I just love driving the damn thing.
--Steve Smith
The 400-hp Go-Kart
There's a controversey currently raging among the GPL cogniscenti. Wolfgang Woeger, described by
some as "the fastest GPL driver in the world," has been winning a lot of races with a setup that--
theoretically--shouldn't work at all. He's been taking all the free jounce/bump travel out of the
suspension by shortening the bump rubbers to the minimum (one inch) and setting the SRH (static
ride height) also at one inch, thus taking all the compliance out of the suspension and creating--in
effect--a 400-hp go-kart.
In theory, this shouldn't work because it raises the spring (and bar) rates to infinity--or close to it--so
the car should be skittering across the bumps like a stone skipping across a pond. Of course, there
*aren't* any high-frequency bumps in GPL (there are some gentle undulations, but no real sharp
Steve Smith's Advanced Setup Guide http://alison.hine.net/gpl/smith.htm
11 von 13 20.10.2019, 00:43

bumps), which might account for the anomaly...but, then, go-karts (and AA Fuel dragsters) don't have
any suspensions, either, and they work fine--just ask Michael Schumacher or John Force. In truth,
there *is* some complaince in these real-world examples--chassis flex (totally absent in the sim) and
the "give" in the tire sidewalls--but I doubt that the smidgen of compressability in the bump rubbers
(it's progressive...and probably equals several hundred lbs./in.) accounts for its efficacy in Woeger's
GPL setups. A singularity in the physics model, Mr. Kaemmer? To be fair, dropping the chassis onto the
bump stops doesn't affect droop/rebound, so the inside tire will still maintain a modicum of contact
with the road.
Nonetheless, this phenom is worth a look, if only to see The Impossible for yourself.
Here is Woeger's "Just Say No" setup for the Lotus at Spa. (When Doug Arnao said Spa can take the
stiffest suspensions in the game, he wasn't just whistling "I Can't Drive 55.")
Spa_Lot_Wolfi1
LF: 17 psi/100 lbs/2&3 shox/-1.25 deg. camb./1.0-in bumpers
RF: 20/100/2&3/-1.25/1.0
RR: 21/70/2&3/-1.00/1.0
LR: 21/70/2&3/-1.00/1.0
Toe: -0.0/.175 in., F&R
Bars: 120/70 lbs., F&R
SRH: 1.0/1.0 in. (!), F&R
BB: 56/44% F&R
G1: 15/38 7.85
G2: 17/29 5.29
G3: 18/26 4.48
G4: 25/31 3.84
G5: 24/26 3.36
R&P: 10/31
Ramps: 85/60
Clutches: 2
I tried this setup and found it surprisingly driveable, much easier to control than I ever would have
imagined. (My zeal for soft, grippy setups knows no bounds...as is well known; in some circles I'm
known as Mr. Softie--no Viagra jokes, please!) It was very manageable exiting Malmedy, quite stable
through the infamous Masta Kink, and exhibited only a touch of oversteer under full power coming up
out of Stavelot. Everywhere else, it felt more like a real race car than anything else I've tried in
GPL...and almost completely eliminated the notorious front-end lateral "porpoising" (hunting) that has
plagued every Papy sim since "IndyCar Racing." Best of all, my lap times were a tick faster than any of
my high-compliance setups (admittedly, not the best choice for the twitchy Lotus chassis).
Figuring if a little is good, a lot is better, I decided to see what would happen if you took ALL the
complaince out of the suspension. I raised the springs, bars, and shocks to their highest values and
had a go. Disaster! Totally undriveable. Further experimentation revealed Woeger's spring rates are
right on the money, but the car (and my lap times) responded nicely to stiffer bars. On a hunch, I
raised the bump/jounce shock values to the max (5) in a calculated attempt to "spread" the transition
to the ultra-stiff bumpers, and after some cut-and-try, wound up with slightly softer droop/rebound
numbers, to allow the inside wheels some downward deflection. This (with a few subtle changes to the
tire pressures, brake balance, and gear ratios) is the result:
Spa_Lot_Wolfi_Mod
LF: 19 psi/100 lbs/5&4 shox/-1.25 deg. camb./1.0-in bumpers/178/178/181 deg.
RF: 20/100/5&4/-1.25/1.0/161/159/158
RR: 21/70/5&4/-1.00/1.0/200/199/196
Steve Smith's Advanced Setup Guide http://alison.hine.net/gpl/smith.htm
12 von 13 20.10.2019, 00:43

LR: 20/70/5&4/-1.00/1.0/203/205/205
(N.B. The last three numbers on each line are the tire temps, as measured at the S/F line, OMI on the
left side and IMO on the right, just as they are shown in the boxes on the setup pages. Sorry, I didn't
record the corresponding numbers for Woeger's original setup.)
Toe: 0.0/.175 in., F&R
Bars: 160/100 lbs., F&R
SRH: 1.0/1.0 in. (!), F&R
BB: 54/46% F&R
G1: 15/38 7.85
G2: 17/29 5.29
G3: 19/27 4.41
G4: 26/32 3.82
G5: 24/26 3.36
R&P: 10/31
Ramps: 85/60
Clutches: 2
This worked like gangbusters: I knocked almost a full *six seconds* off my previous best time. It may
defy the laws of physics...but it's made a believer out of me. Thanks, Wolfi!
Try it and let me know what you think.
--Steve Smith
Continue to Part Two
Steve Smith's Advanced Setup Guide http://alison.hine.net/gpl/smith.htm
13 von 13 20.10.2019, 00:43

Steve Smith's
Advanced Setup Guide
Part Two
Part One | Part Two | Addendum
Completing the Circle
Constant-reader Grant Hargrave (a Canadian who's had the incredible luck to live in Paris for the past
several years) writes to remind me that while I have published my idea of hot setups for the F2 and F3
BRM, I omitted to do likewise for the full-zoot F1 BRM. So he took the bull by the horns, and, "After
reading your thing about the 400hp go-kart (Wolf Woeger's "zero-compliance" approach to chassis
settings), I went to Monza, jumped in my BRM, bumped up the roll bars and wheel rates by an
arbitrary amount, and improved my best BRM time by a significant amount. The car was much more
controllable--it felt like there was glue on the tires. I did three laps, set my best time (no spins; that
too may be a record), and the only way I could lose it was by trying to take the Curva Grande at full
tilt."
Grant omitted to include his settings, so I took a stab at implementing Wolfi's thesis myself:
Mon_BRM_Wolfish
LF: 20 psi/85 lbs/4&5 shox/-1.25 deg. camb./1.0-in bumpers/180/180/181 deg.
RF: 21/95/4&5/-1.25/1.0/161/159/156
RR: 20/105/4&5/-1.00/1.0/210/208/204
LR: 19/100/4&5/-1.00/1.0/214/214/215
(N.B. The last three numbers on each line are the tire temps, as measured at the S/F line, OMI on the
left side and IMO on the right, just as they are shown in the boxes on the setup pages.)
Toe: -.025/.075 in., F&R
Bars: 120/100 lbs., F&R
SRH: 1.0/1.0 in. (!), F&R
BB: 52/48% F&R
G1: 13/46 10.97
G2: 15/33 6.82
G3: 20/38 5.89
G4: 18/29 4.99
G5: 21/29 4.28
G6: 26/32 3.82
R&P: 10/31
Ramps: 85/45
Clutches: 4
This indeed also resulted in a new personal-best BRM time for yr. obt. srvnt., so I retroactively applied
the same recipe to a Spa setup (where Herr Woeger achieved his initial success):
Spa_BRM_Wolfish
LF: 20 psi/90 lbs/4&5 shox/-1.25 deg. camb./1.0-in bumpers/182/183/184 deg.
RF: 20/100/4&5/-1.25/1.0/166/164/162
Steve Smith's Advanced Setup Guide http://alison.hine.net/gpl/smith-2.htm
1 von 10 20.10.2019, 00:44

RR: 20/110/4&5/-1.00/1.0/212/210/208
LR: 20/105/4&5/-1.00/1.0/217/218/219
Toe: -.025/.125 in., F&R
Bars: 120/90 lbs., F&R
SRH: 1.0/1.0 in. (!), F&R
BB: 52/48% F&R
G1: 14/46 10.19
G2: 15/32 6.61
G3: 17/30 5.47
G4: 21/32 4.72
G5: 25/33 4.09
G6: 27/32 3.67
R&P: 10/31
Ramps: 85/45
Clutches: 4
A nice ride, and another best (for my BRM) laptime, but alas, I don't see much future in this. The BRM
is never going to be competitive (except in spec races), so why bother? OTOH, Alison is having
excellent results with the Hond...er, Murasama and the, ah, Coventry, so next I will see what I can eke
out of these chassis with rock-hard suspensions.
--Steve Smith
The Joy of Formula 2
As usual, Dave Kaemmer was right. The godfather of auto racing sims (and auteur of Papyrus' legion of
genre-defining games) warned me not to dismiss out of hand GPL's lower-powered Formula 2 and
Formula 3 cars (called--for legal reasons--the Advanced Trainer and Novice Trainer, resp.) in "Four-
Wheel Drift," the strategy guide that shipped with the game. So what did I do? I dismissed the F2 and
F3 cars out of hand.
My reasoning was that these "training wheels" (ca. 270 horsepower for the F2 car and ca. 135 hp for
the F3, according to Kaemmer, although the real-world figures were more like 200 and 125 hp; they
also have slightly less grip) are so different from the full-blown Formula 1 cars (called "Grand Prix" cars
in the game, again for legal reasons) that nothing you might learn from mastering them would prepare
you for the shock of the 400-hp GP cars (with about as much traction as a modern NASCAR stocker--
their speeds up through the Esses at Watkins Glen are startlingly similar).
My solution: short shift. By simply keeping the revs below about 6000 rpm, I reckoned you could get
familar with the F1 car chassis without all that tire-shredding torque, and not have to unlearn all those
bad habits you'd likely acquire from driving the mild-mannered F2/F3 chassis. In other words, you
can't realistically "practice" for a nuclear strike; you either do it or you don't.
I have come belatedly to appreciate the joys of the "trainers," particularly the F2 cars, not so much as
learning aids (I still don't think they have much application here), but in their own right. Sure, they're
easier to drive. And more rewarding. As anybody who's ever owned a Fiat 750 knows, it's a lot more
fun to drive a little car fast than a big one. However, that's not the half of it.
The implications for online racing are potentially enormous. If anybody puts together a viable F2 or F3
series (or both), GPL will have the "farm" system it needs. And unlike the F1 events, F2 and F3 races
have little or no appeal to the kind of bozos who like to crash out of races, taking as many legitimate
competitors with them as possible. (Although, heck, there are already "over-40" online leagues for
duffers like me.) Or to those who can cut the occasional 1:05 lap at the Glen...but can't keep it on the
road for a 9-lap sprint race. You really have to be *serious* about racing to want to drive in the low-
powered classes.
Implications for AI racing, too. I find the AI cars much easier to contend with in the lower classes.
Steve Smith's Advanced Setup Guide http://alison.hine.net/gpl/smith-2.htm
2 von 10 20.10.2019, 00:44

Instead of worrying about controlling my own car (the F1 cars always feel like I have a tiger by the
tail...and can't let go), I have a lot more freedom to concentrate on the opposition. (You can force the
AI cars to race at F2 or F3 speeds simply by going to your player.ini file and changing the "driverRating
=" figure in the Personal Information stanza to "2" for F2 or "1" for F3...confusing, but true.)
Not only do the F2/F3 cars require different driving techniques (it's much harder to use the throttle to
steer the car, for one thing; for another, you will also come to treasure every precious rpm that you've
squandered in the big cars; and you'll find the correct "line" becomes much more important...and do-
able), they also require different setups. Having 400 horsepower on tap can mask a lot of chassis
faults. Making do with less is tricky. By now I've spent a hundred hours or so in the little buzz-bombs
(they have a stentorian, 4-cylinder honk), and am here to report that they are *enormously* sensitive
to minute changes in shock and--particularly--toe settings (more so than, say, spring and bar rates, to
which they are kind of numb, except at the extremes).
But while the F2 cars are within a couple of seconds-per-lap of the F1 times (at most tracks), the F3
cars are way off the pace. So slow that half the corners at Spa, say, simply cease to exist. You can take
the Masta kink (or Monza's Curva Grande) flat out, for example. (I know, I know--you never lift
anyway.) There is some historical precedent here. The F3 cars raced on many of the same circuits (the
F3 bash at Monte Carlo was infamous), and the F2 cars sometimes raced concurrently with the F1
fields (Jackie Ickx was sensational at the German GP in a F2 Matra), but for the most part, the F3 cars
simply aren't all that challenging (nor, with only 4 gears, are they that easy to set up), so I'll confine
the rest of this discussion to the F2 Lotus. (Tip: the AI cars are a pushover at Silverstone, if you
haven't won a race yet.)
Another couple of benefits: the F2 and--particularly--the F3 engines aren't nearly as frangible as the
GP cars', and the lower-powered cars don't lunge off the line with as much ferocity.
As ornery as the Lotus is in its F1 guise, it is a dreamboat to drive in F2. Again, the best in class, but
without the life-and-death struggle to keep it on the road. Another couple of arbitrary limitations: I
have yet to master the Ring (I'm saving the best for last); I have never liked Mexico; and I'm still
embarrassingly slow at Monte Carlo, so I offer no advice for these tracks. As for the others:
Kya_Lot_F2
LF: 21 psi/80 lbs/4&5 shox/-1.00 deg. camb./1.0-in bumpers/172/174/174 deg.
RF: 21/80/4&5/-1.00/1.0/153/150/148
RR: 21/90/4&4/-.75/1.0/163/162/159
LR: 21/90/4&4/-.75/1.0/172/172/171
(N.B. The last three numbers on each line are the tire temps, as measured at the S/F line, OMI on the
left side and IMO on the right, just as they are shown in the boxes on the setup pages.)
Toe: -.025/.025 in., F&R
Bars: 100/80 lbs., F&R
SRH: 1.25/1.25 in., F&R
BB: 52/48% F&R
G1: 14/33 7.31
G2: 17/29 5.29
G3: 19/27 4.41
G4: 26/33 3.94
G5: 22/25 3.52
Vmax: 166 mph
R&P: 10/31
Ramps: 85/60
Clutches: 1
Track notes: This seems like the lowest-traction venue in GPL, but two of the slowest turns
(Crowthorne and Clubhouse) are reverse camber, which doesn't help. I tried to set the car up the way
Steve Smith's Advanced Setup Guide http://alison.hine.net/gpl/smith-2.htm
3 von 10 20.10.2019, 00:44

CART teams do for low-speed, high-G street circuits (e.g., disconnect the bars), but after a lot of
fruitless experimentation I wound up with settings little different from the other tracks in GPL.
Mon_Lot_F2
LF: 21 psi/75 lbs/5&5 shox/-1.25 deg. camb./1.0-in bumpers/168/168/168 deg.
RF: 21/80/5&5/-1.25/1.0/146/144/142
RR: 20/85/4&4/-.75/1.0/176/174/172
LR: 20/90/4&4/-.75/1.0/180/180/180
Toe: -.025/.000 in., F&R
Bars: 120/60 lbs., F&R
SRH: 1.25/1.25 in., F&R
BB: 54/46% F&R
G1: 14/45 9.96
G2: 16/30 5.81
G3: 21/32 4.72
G4: 21/27 3.99
G5: 22/25 3.52
Vmax: 168 mph
R&P: 10/31
Ramps: 85/60
Clutches: 2
Track notes: I've been 'round the barn with asymmetrical setups here, but in the end I'm only willing
to risk dissimilar spring rates (asymmetrical geometry tends to throw the car off balance under
braking). Unlike the big cars, you don't need to promote oversteer for the della Roggia and Ascari
turns. I set the coast-side ramp angle high to smooth the throttle transients, and simply ate the
braking hit at the end of the back straight.
Mos_Lot_F2
LF: 21 psi/80 lbs/4&5 shox/-1.00 deg. camb./1.0-in bumpers/166/164/162 deg.
RF: 21/80/4&5/-1.00/1.0/148/146/144
RR: 21/90/3&4/-.75/1.0/169/168/166
LR: 21/90/3&4/-.75/1.0/167/167/167
Toe: -.025/.025 in., F&R
Bars: 100/80 lbs., F&R
SRH: 1.75/1.75 in., F&R
BB: 52/48% F&R
G1: 14/45 9.96
G2: 17/31 5.65
G3: 19/28 4.57
G4: 21/27 3.99
G5: 27/31 3.56
Vmax: 154
R&P: 10/31
Ramps: 85/60
Clutches: 1
Track notes: Like Zandvoort, you've got to have the right intermediate gears here, because you use
Steve Smith's Advanced Setup Guide http://alison.hine.net/gpl/smith-2.htm
4 von 10 20.10.2019, 00:44

them a lot. Likewise, you need the right G1 to pull you out of the Moss hairpin without wheelspin.
Likewise, the right top gear, so you peak just going over the crest of the hill. (Can-Am cars did
spectacular back-flips here in the late '60s.) Also like Zandvoort, you need absolute steering authority--
you cannot afford an "off."
Rou_Lot_F2
LF: 21 psi/90 lbs/4&4 shox/-1.00 deg. camb./1.0-in bumpers/150/151/151 deg.
RF: 21/90/4&4/-1.00/1.0/135/134/133
RR: 21/80/3&4/-.75/1.0/160/158/157
LR: 21/80/3&4/-.75/1.0/163/164/164
Toe: -.025/.075 in., F&R
Bars: 110/70 lbs., F&R
SRH: 1.50/1.50 in., F&R
BB: 54/46% F&R
G1: 14/32 7.09
G2: 17/29 5.29
G3: 25/34 4.22
G4: 19/23 3.75
G5: 22/25 3.52
Vmax: 167
R&P: 10/31
Ramps: 85/45
Clutches: 1
Track notes: The Nouveau Monde hairpin is a pisser, isn't it? I invariably overshoot or undershoot. You
need to move the brake balance forward so you can retain some ability to steer whilst braking. I'll
admit to trying to learn Rouen with all the driver "aids" (ABS, ATC, auto shifter) turned on, but that
darned hairpin almost always gets me anyway. I juggled the gears until the shift points were moved
away from corner exits (where spiking the torque can unsettle the car).
Sil_Lot_F2
LF: 21 psi/75 lbs/3&4 shox/-1.00 deg. camb./1.0-in bumpers/145/146/147 deg.
RF: 21/85/3&4/-1.00/1.0/136/134/133
RR: 21/90/3&4/-.75/1.0/161/159/157
LR: 20/85/3&4/-.75/1.0/161/161/162
Toe: -.025/.025 in., F&R
Bars: 100/80 lbs., F&R
SRH: 1.25/1.25 in., F&R
BB: 52/48% F&R
G1: 14/45 9.96
G2: 16/30 5.81
G3: 18/28 4.82
G4: 25/33 4.09
G5: 19/23 3.75
Vmax: 151
R&P: 10/31
Ramps: 85/60
Clutches: 2
Steve Smith's Advanced Setup Guide http://alison.hine.net/gpl/smith-2.htm
5 von 10 20.10.2019, 00:44

Track notes: Handling is immaterial here; the track is a 5-pointed star, so you just need to have the
right gears to pull smartly from one point to the next. Even the Hangar Straight, which looked so long
in Geoff Crammond's F1 sims, is barely good for 150 mph in a F2 car. All in all, a boring track with a
low cockpit workload (unlike, say, Mosport, which really wrings you out). Drag racing, anyone?
Spa_Lot_F2
LF: 21 psi/100 lbs/5&4 shox/-1.25 deg. camb./1.0-in bumpers/162/163/164 deg.
RF: 21/100/5&4/-1.25/1.0/149/148/147
RR: 21/90/5&3/-.75/1.0/179/178/176
LR: 20/90/5&3/-.75/1.0/183/184/185
Toe: .000/.000 in. (!), F&R
Bars: 120/60 lbs., F&R
SRH: 1.00/1.00 in. (!), F&R
BB: 52/48% F&R
G1: 15/38 7.85
G2: 17/31 5.65
G3: 18/26 4.48
G4: 26/32 3.82
G5: 29/32 3.42
Vmax: 174
R&P: 10/31
Ramps: 85/45
Clutches: 2
Track notes: Just as with the F1 cars, Spa demands the stiffest setups in the game. To maximize your
Vmax (top speed), you can set the front and rear toe to zero to minimize rolling resistance. Note that
I've applied Wolfi Woeger's "zero compliance" (low-rider) setup principle here. Seems to work; I've
been competitive with the AI cars.
WG_Lot_F2
LF: 20 psi/90 lbs/3&4 shox/-1.00 deg. camb./1.0-in bumpers/171/171/172 deg.
RF: 21/100/4&3/-1.00/1.0/140/137/135
RR: 21/95/4&3/-.75/1.0/168/165/162
LR: 20/90/3&4/-.75/1.0/176/176/175
Toe: -.025/.000 in., F&R
Bars: 100/90 lbs., F&R
SRH: 1.50/1.50 in., F&R
BB: 54/46% F&R
G1: 12/35 10.05
G2: 17/29 5.88
G3: 24/34 4.88
G4: 21/26 4.27
G5: 24/26 3.73
Vmax: 160
R&P: 9/31
Ramps: 85/30
Clutches: 1
Steve Smith's Advanced Setup Guide http://alison.hine.net/gpl/smith-2.htm
6 von 10 20.10.2019, 00:44
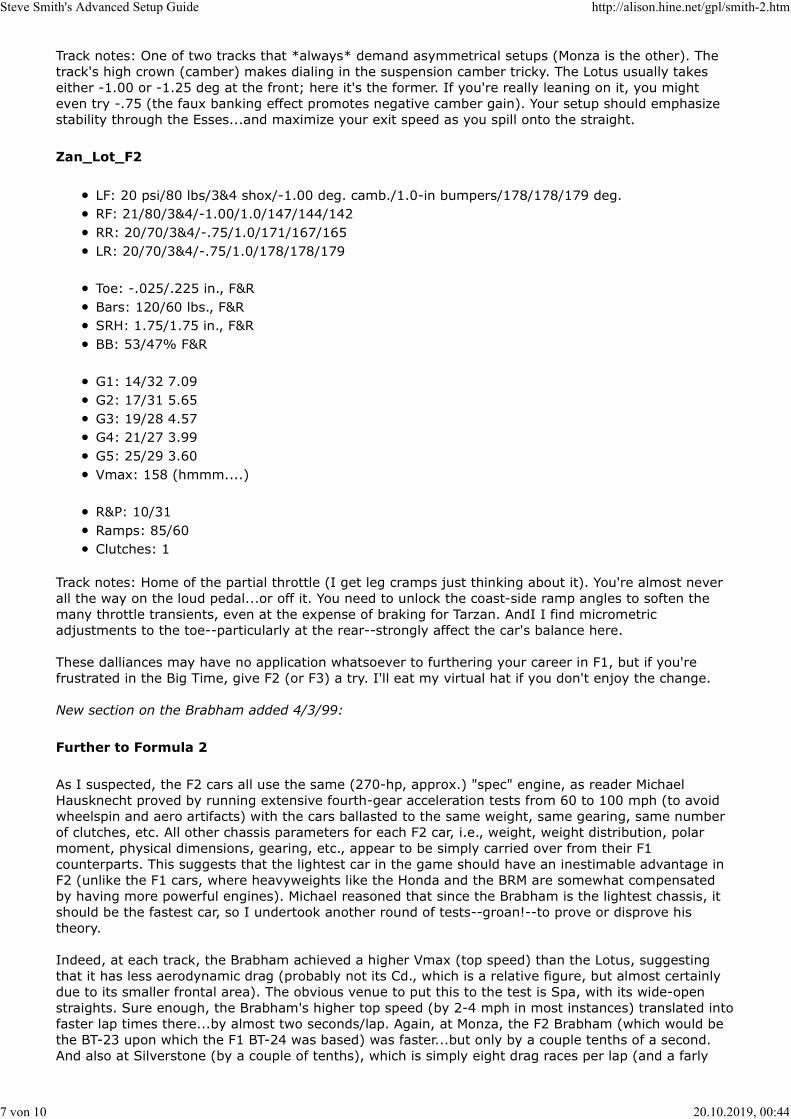
Track notes: One of two tracks that *always* demand asymmetrical setups (Monza is the other). The
track's high crown (camber) makes dialing in the suspension camber tricky. The Lotus usually takes
either -1.00 or -1.25 deg at the front; here it's the former. If you're really leaning on it, you might
even try -.75 (the faux banking effect promotes negative camber gain). Your setup should emphasize
stability through the Esses...and maximize your exit speed as you spill onto the straight.
Zan_Lot_F2
LF: 20 psi/80 lbs/3&4 shox/-1.00 deg. camb./1.0-in bumpers/178/178/179 deg.
RF: 21/80/3&4/-1.00/1.0/147/144/142
RR: 20/70/3&4/-.75/1.0/171/167/165
LR: 20/70/3&4/-.75/1.0/178/178/179
Toe: -.025/.225 in., F&R
Bars: 120/60 lbs., F&R
SRH: 1.75/1.75 in., F&R
BB: 53/47% F&R
G1: 14/32 7.09
G2: 17/31 5.65
G3: 19/28 4.57
G4: 21/27 3.99
G5: 25/29 3.60
Vmax: 158 (hmmm....)
R&P: 10/31
Ramps: 85/60
Clutches: 1
Track notes: Home of the partial throttle (I get leg cramps just thinking about it). You're almost never
all the way on the loud pedal...or off it. You need to unlock the coast-side ramp angles to soften the
many throttle transients, even at the expense of braking for Tarzan. AndI I find micrometric
adjustments to the toe--particularly at the rear--strongly affect the car's balance here.
These dalliances may have no application whatsoever to furthering your career in F1, but if you're
frustrated in the Big Time, give F2 (or F3) a try. I'll eat my virtual hat if you don't enjoy the change.
New section on the Brabham added 4/3/99:
Further to Formula 2
As I suspected, the F2 cars all use the same (270-hp, approx.) "spec" engine, as reader Michael
Hausknecht proved by running extensive fourth-gear acceleration tests from 60 to 100 mph (to avoid
wheelspin and aero artifacts) with the cars ballasted to the same weight, same gearing, same number
of clutches, etc. All other chassis parameters for each F2 car, i.e., weight, weight distribution, polar
moment, physical dimensions, gearing, etc., appear to be simply carried over from their F1
counterparts. This suggests that the lightest car in the game should have an inestimable advantage in
F2 (unlike the F1 cars, where heavyweights like the Honda and the BRM are somewhat compensated
by having more powerful engines). Michael reasoned that since the Brabham is the lightest chassis, it
should be the fastest car, so I undertook another round of tests--groan!--to prove or disprove his
theory.
Indeed, at each track, the Brabham achieved a higher Vmax (top speed) than the Lotus, suggesting
that it has less aerodynamic drag (probably not its Cd., which is a relative figure, but almost certainly
due to its smaller frontal area). The obvious venue to put this to the test is Spa, with its wide-open
straights. Sure enough, the Brabham's higher top speed (by 2-4 mph in most instances) translated into
faster lap times there...by almost two seconds/lap. Again, at Monza, the F2 Brabham (which would be
the BT-23 upon which the F1 BT-24 was based) was faster...but only by a couple tenths of a second.
And also at Silverstone (by a couple of tenths), which is simply eight drag races per lap (and a farly
Steve Smith's Advanced Setup Guide http://alison.hine.net/gpl/smith-2.htm
7 von 10 20.10.2019, 00:44

low Vmax), favoring the Brabham's lighter weight...cornering ability--or the lack of it--to the contrary
notwithstanding.
Everywhere else, however, the Lotus (which would be the Lotus 48, no relation whatsoever to the 49)
cut slightly faster laps, probably because it's easier to drive at the limit. That is, easier for *me* to
drive. (N.B. Since the Ferrari is also reasonably light, I tried a couple of setups for Zandvoort, a pure
handling track where the F1 Ferrari always shows up well against the competition. [There *was* a F2
Ferrari, BTW, the Tipo 166, but it didn't appear until 1968, Tino Brambilla up.] No joy. I have no idea
why, and I'm too burned out by now to conjure any effete theories, much less the tests that would
prove them out.) Anyway, these are the setups I brewed up for the Brabham.
Kya_Bra_F2
LF: 20 psi/80 lbs/4&5 shox/-1.00 deg. camb./1.0-in bumpers
RF: 21/80/4&5/-1.00/1.0
RR: 21/85/3&4/-1.00/1.0
LR: 20/85/3&4/-1.00/1.0
Toe: -.025/0.0 in., F&R
Bars: 100/50 lbs., F&R
SRH: 1.25/1.25 in., F&R
BB: 52/48% F&R
G1: 14/33 7.31
G2: 17/29 5.29
G3: 24/32 4.59
G4: 19/22 3.99
G5: 24/24 3.44
Vmax: 172 mph
R&P: 9/31
Ramps: 85/60
Clutches: 1
Track notes: Sorry, I lost my tire-temp notes. Given the Brabham's higher top speed and the
extraordinary length of the straight here, I was surprised that the Lotus was faster...at least with me at
the wheel. A better chauffeur could undoubtedly get more out of the BT-23 chassis, but he/she be not
me.
Mon_Bra_F2
LF: 20 psi/70 lbs/5&5 shox/-1.25 deg. camb./1.0-in bumpers/180/180/180 deg.
RF: 21/80/5&5/-1.25/1.0/151/148/146
RR: 21/85/4&4/-1.00/1.0/186/184/180
LR: 20/80/4&4/-1.00/1.0/196/196/196
(N.B. The last three numbers on each line are the tire temps, as measured at the S/F line, OMI on the
left side and IMO on the right, just as they are shown in the boxes on the setup pages.)
Toe: -.025/.025 in., F&R
Bars: 100/50 lbs., F&R
SRH: 1.25/1.25 in., F&R
BB: 52/48% F&R
G1: 14/45 9.96
Steve Smith's Advanced Setup Guide http://alison.hine.net/gpl/smith-2.htm
8 von 10 20.10.2019, 00:44

G2: 17/29 5.29
G3: 24/34 4.39
G4: 27/32 3.67
G5: 23/24 3.24
Vmax: 174 mph (before the Parabolica)
R&P: 10/31
Ramps: 85/45
Clutches: 1
Track notes: This setup is only 2/10ths sec. faster than my Lotus setup, and not nearly as easy to
drive. For qualifying, I shorten G2-G5 and just rev it to death (although I still have to shift up and
down between the two Lesmos, something I'd go to almost any lengths to avoid in the squirrelier F1
cars).
Sil_Bra_F2
LF: 21 psi/70 lbs/4&5 shox/-1.00 deg. camb./1.0-in bumpers/166/167/167 deg.
RF: 21/75/4&5/-1.00/1.0/164/163/160
RR: 21/80/4&4/-.75/1.0/194/192/191
LR: 20/75/4&4/-.75/1.0/191/190/187
Toe: -.025/.025 in., F&R
Bars: 130/60 lbs., F&R
SRH: 1.50/1.75 in., F&R
BB: 53/47% F&R
G1: 14/32 7.87
G2: 17/29 5.88
G3: 24/32 4.59
G4: 25/29 3.99
G5: 23/24 3.59
Vmax: 155 mph
R&P: 9/31
Ramps: 85/60
Clutches: 1
Track notes: What can I say? The world's most boring track. It's hard to imagine Blighty managed to
produce superstars like Moss, et alia, if this is where they learned to race. Too bad the 1967 British GP
wasn't held at Brands Hatch. And those 4-abreast starts! Yackety-schmackety.
Spa_Bra_F2
LF: 20 psi/75 lbs/4&5 shox/-1.00 deg. camb./1.0-in bumpers/181/181/181 deg.
RF: 21/75/4&5/-1.00/1.0/160/159/158
RR: 20/80/3&4/-1.00/1.0/194/192/189
LR: 20/80/3&4/-1.00/1.0/196/198/199
Toe: -.025/0.0 in., F&R
Bars: 110/70 lbs., F&R
SRH: 1.25/1.50 in., F&R
BB: 53/47% F&R
Steve Smith's Advanced Setup Guide http://alison.hine.net/gpl/smith-2.htm
9 von 10 20.10.2019, 00:44

G1: 14/32 7.09
G2: 17/29 5.29
G3: 24/33 4.26
G4: 28/32 3.54
G5: 24/24 3.10
Vmax: 179 mph (before the dreaded Masta kink)
R&P: 10/31
Ramps: 85/60
Clutches: 2
Track notes: I had to powerslide the car around like Black Jack (Brabham) himself to smooth out the
response/gain of the car's suspension system, i.e., it's easier to drive fast than slow. This is a Q and
Novice-race setup, with G4 short enough that you max out before Haut de la Cote (at the top of the
hill), and again before Blanchimont, the penultimate turn. For longer races, where engine fragility
becomes critical, I lengthen G4 to 25/28 (3.47) to keep the engine under 7500 rpm and/or eliminate 2
shifts.
For comparative purposes, here are my best F2 times to date (bear in mind, I'm not the fastest knife in
the drawer, but the setups above were good enough to get me on the front row at each track with a
box-stock driver.ini and a well-seasoned NPT):
Kyalami/Lotus 1:28.16
Mexico/Lotus 2:01.76
Monza/Brabham 1:37.32
Mosport/Lotus 1:30.68
Rouen/Lotus 2:12.28
Silverst'n/Brabham 1:37.32
Spa/Brabham 3:38.16
The Glen/Lotus 1:11.17
Zandvoort/Lotus 1:33.73
I'm sure you can do better. Make my day: email me and tell me by how much.
-- Steve Smith
Continue to Addendum
Steve Smith's Advanced Setup Guide http://alison.hine.net/gpl/smith-2.htm
10 von 10 20.10.2019, 00:44

Steve Smith's
Advanced Setup Guide
Addendum
Part One | Part Two | Addendum
Discussion
Erata
Discussion
Promises, Promises
I'm braking early enough [for Big Bend] but I'm over-estimating how much speed I can carry and
coming in too hot. When I do get it right I'm too busy congratulating myself to remember to brake for
the Ninety!
--Art McEwen, [email protected]
Infuriating, isn't it? After a while, it will come to you just from having done it a hundred times. Or,
more precisely, from not doing it a hundred times: "If I hate going off there so much, how come I do it
every lap?" And of course it comes near the end of the lap, so if you think you're on a hot one, the
tendency is to push it...just a little too hard. This is one mighty incentive to develop setups that work
for you...and to learn driving techniques, like trail-braking (which demands some chassis-tuning
savvy), which will see you through BB. Like many turns in GPL (the first Lesmo is another example),
I've abandoned the old racers'-school approach of using all the road to straighten out the turn, instead
using all the road to "buy" some extra space for braking: come in low on the inside (not on the other
side of the crown on the left), and if you're carrying too much speed, you can use the width of the
track, diagonally, to brake in a straight line. You wind up on the left side of the track just past the apex
pointing kind of the wrong way...but still on the pavement. Your lap is ruined, but at least you don't
have to suffer the ignominy of yet another Shift-R.
Another SCCA Regional-level "rule of thumb" you can ignore in GPL is using the brakes once per corner
entry. I've watched Matt Sentell dance on the pedals all the way to the apex, pumping the brakes in
short, asynchronous strokes; alternating with a fairly aggressive throttle, frequently using both at once
(which only works if you have the throttle and brakes on separate axes--impossible with some
controllers like the TSW2). He kind of_urges_the car around BB, relentlessly. As you gather experience,
you can segue smoothly from the first approach ("against the rail" in horse-racing parlance) to
something both more conventional (approaching the turn from the outside) and more radical (real-
world race-instructor Doug Arnao was appalled--he watched Matt's fancy footwork for a couple of very
hairy laps before leaning over to me and whispering "Overdriving").
Actually, the part of the Glen I have the most trouble with is the nameless lefthand kink between BB
and the Ninety. If you do it right, you use the energy stored in the springs like a pendulum to whip-saw
you back from exiting BB to your entry into the kink (staying close to the lefthand verge). Then,
exiting the kink, stay to the right, and brake in a straight line on the inside, against the rail, for the
Ninety. Gearing here can be tricky, too. Basically, you want to avoid having to shift up again after the
left kink, but this usually means you either lug the engine well below its power peak through the kink
(making it near-impossible to steer with the throttle), or risk blowing the engine overrevving in a lower
gear. Frustrating.
Watkins Glen is one wierd little track in GPL. The right setup can make a huge difference in your
comfort level. When, as, and if I ever find the time, I'll try and come up with something special (the
Brabham worked well for me here) and post it.
--Steve Smith
Steve Smith's Advanced Setup Guide - Addendum http://alison.hine.net/gpl/smith-a.htm
1 von 5 20.10.2019, 00:45

You might also want to check out a new article about Jim Clark's driving technique, entitled "Why Jim
Clark had the Edge". - Alison
Give 'Em a Brake
"I'm a bit confused about your discussion of brake bias. It seems to me that adding rear bias would
make the car more stable under braking, and adding front bias would increase the overall braking
performance because of forward weight transfer (the fronts are less likely to lock up under neutral
brake bias). In your [Advanced Setup Guide], you convey the opposite idea, and suggest front brake
bias for stability. Could you please elucidate this for me?"
--George Mohr
This goes to the old truism, "A sliding tire has no directional integrity." If you lock up the fronts, the
still-rolling rears simply follow along behind. If you lock up the rears, they will try to pass the fronts.
But you can skip the theory, and go straight to the field test: move the balance rearward, switch to the
Nintendo view (F10), and watch smoke pour off the rears as the car spins. Move it forward and you can
stop the car in a straight line as smoke billows from the fronts, only not as fast as you can if you adjust
the balance to get smoke to appear simultaneously at all four corners. If you want to trail-brake or just
want a little extra stability, you move the balance a percent or two ahead of the theoretical optimum.
BTW, I got one helluva argument going by suggesting the fastest way to stop a car is to lock up all four
tires. Burning rubber will give you maximum traction (ask any drag racer), but with seriously reduced
directional stability (which is why dragsters have their rear wheels much closer together than the
fronts). Let the flames begin!
"I'm focusing on brakes because I'm being out-braked by the AI (particularly going into Parabolica).
They appear to be trail braking, but I can't get that technique nailed. I was hoping for a setup fix
(read, I too lame to drive better!). They come into that corner about 5 MPH faster than me, get a bit
loose, and hook up just right to nail the apex."
--George Mohr
It ain't you, it's the "A" in AI. They are all (to a man, even the backmarkers) Sierra Hotel going into the
'bolica. OTOH, they are slow as mud hens going through the Curva Grande, and not much better going
into the first Lesmo...even though their lap times (when the GHS is working) are the same as yours.
The solution--to avoid being passed--that presents itself is simple: block them going into the final turn.
You can sometimes fake them out on the Rettifilio Centrale by weaving, but it's better to sit astride the
center of the track going in, then trail-brake to an early apex (a pretty good idea in any case, but it
does take some adjustments to your setup and driving technique), and force them to try to take you
on the outside coming out. Just keep "spilling" wide (unwinding steering lock) and try to "scrape them
off your shoe" against the guardrail. This makes them mad as hell, as you'll be able to hear from the
sound of the hornet-swarm behind you.
That's to avoid losing position. For passing, try to keep on their tail(s) traversing the length of the front
straight. If you can stick within maybe two car-lengths, you will get enough of a tow to "slingshot" past
them just as you hit the (premature) braking marks on the "groove." Don't forget a) you're going to be
going into the C.G. 5 mph faster than usual, so you're going to need a lot more than "threshold"
braking, and b) you should be prepped for this with a longer-than-normal 5th gear.
If you can't get close enough to catch a draft, you can still pull a car length or two on them going
through the C.G., which may put you close enough to outbrake them going into Lesmo # 1 (they're
much slower here than going into the Parabolica), or, if not, take a late apex and try to get inside them
between the two Lesmos. I wish I could say this works for me, but I usually lose my cool and spin it.
--Steve Smith
Putting the AI in Their Place
"I'm focusing on brakes because I'm being out-braked by the AI (particularly going into Parabolica).
They appear to be trail braking, but I can't get that technique nailed. I was hoping for a setup fix
(read, I too lame to drive better!). They come into that corner about 5 MPH faster than me, get a bit
loose, and hook up just right to nail the apex. Whew."
Steve Smith's Advanced Setup Guide - Addendum http://alison.hine.net/gpl/smith-a.htm
2 von 5 20.10.2019, 00:45

--George Mohr
It ain't you, it's the "A" in AI. They are all (to a man, even the backmarkers) Sierra Hotel going into the
'bolica. OTOH, they are slow as mud hens going through the Curva Grande, and not much better going
into the first Lesmo...even though their lap times (when the GHS is working) are the same as yours.
The solution--to avoid being passed--that presents itself is simple: block them going into the final turn.
You can sometimes fake them out on the Rettifilio Centrale by weaving, but it's better to sit astride the
center of the track going in, then trail-brake to an early apex (a pretty good idea in any case, but it
does take some adjustments to your setup and driving technique), and force them to try to take you
on the outside coming out. Just keep "spilling" wide (unwinding steering lock) and try to "scrape them
off your shoe" against the guardrail. This makes them mad as hell, as you'll be able to hear from the
sound of the hornet-swarm behind you.
That's to avoid losing position. For passing, try to keep on their tail(s) traversing the length of the
straight. If you can stick within maybe two car-lengths, you will get enough of a tow to "slingshot" past
them just as you hit the (premature) braking marks on the "groove." Don't forget a) you're going to be
going into the C.G. 5 mph faster than usual, so you're going to need a lot more than "threshold"
braking, and b) you should have prepped for this with a longer-than-normal 5th gear.
If you can't get close enough to catch a draft, you can still pull a car length or two on them going
through the C.G., which may put you close enough to outbrake them going into Lesmo # 1 (they're
much slower here than going into the Parabolica), or, if not, take a late apex and try to get inside them
between the two Lesmos. I wish I could say this works for me, but I usually lose my cool and spin it.
--Steve Smith
Topping Out in the Eagle
I have been running the Eagle, and am starting to put together very consistant laps (I even ran a race
that for over six laps in a row my times were within .25 sec of each other), but I need more speed to
compete with the Lotus.
Racing at Rouen in an Eagle is difficult too; the lightweight Lotus just flys up the long uphill section,
passing my Eagle like it's standing still. I feel like I am topped out in the Eagle. Any suggestions?
(Switching to Lotus is not an option, except to compare.)
--Brain Heiland
Hmmmmn, the Eagle is usually the fastest car in the game...at least in the players' hands (I can't
remember being blown off in a straight line by any AI cars except the Murasama). I've seen 195 mph
in the Eagle at Monza, and 200 at Spa (on the slightly downhill Masta straight). If you're not getting
this, the obvious place to look is at the gearing, but before you do, check your controller's calibration:
there's no way you can tell if you're not getting full throttle or not, so re-calibrating might fix your
problem.
If it turns out it is the gearing, there are two schools of thought. One says gear tight, so you reach
peak rpm sooner, and carry that speed all the way down the straight (albeit at a lower Vmax), although
you will have to "ride" the rev limiter to avoid overrevving the engine. The other says simply go for the
highest observed Vmax. I'm a member of the latter school, if for no other reason than I don't have the
discipline: if I see a car whiz past me and I'm feathering the throttle, I'll put it to the wood and blow
the engine...every time.
The Lotus, BTW, may be lightweight, but its top speed is nothing special--normally at least a couple of
mph slower than the Eagle. It gets its superior lap times from tremendous mid-range acceleration.
--Steve Smith
Crooked Braking
<<[My] main problem is that the car keeps on wandering over to the right under braking. I've tinkered
with camber, rollbar stiffness, etc., but I can't seem to stop it happening. Is it possible to cure or at
least tame this?>>
Steve Smith's Advanced Setup Guide - Addendum http://alison.hine.net/gpl/smith-a.htm
3 von 5 20.10.2019, 00:45

--Paul Thorp <[email protected]>
If it's_consistently_to the right, you can rule out driver error...unless there's something you're not
telling. And if your suspension settings are symmetrical, then it's probably a miscalibrated controller. If
your setups are asymmetrical (not recommended except for the few lopsided tracks like Monza and the
Glen), then coaxing them back towards some semblance of symmetry ought to help.
The only other condition I know of under which the car pulls to one side or the other is after you've hit
something with the car hard enough to bend a suspension arm. If this happens, don't bother trying to
soldier on; it only gets worse (like Clark's wheel getting more and more adrift the last 3 laps of the
U.S. GP that year). If you're in a Novice race, hit Shift-R. Otherwise, park it.
--Steve Smith
I Want to Take You Higher
I was wondering if you have any Ferrari setup tips for Spa-Francorchamps. I can't seem to get as much
straightline speed as the computer Ferraris, no matter what changes I make. The chassis feels good
and the car drives real sweet, but I'm at least 4-5 MPH slower down the Masta straight than the
computer Ferraris. In the corners I can hold my own, but the lack of top end is killing me. I can accept
not having the same top speed as the Eagle or the Lotus, but I ought to be able to get the same top
speed as the AI Ferraris. If you can help me wring more top speed out of my Ferrari at Spa, I would be
very happy. Right now my highest speed is 196 (right before I brake for the kink). That just isn't good
enough.
--Steve Cook
"Ought to"? Sorry. The AI cars don't play by the same rules as our cars. Their physics model is greatly
simplified (or else the game would require massively parallel Katmai CPUs), and sometimes we get
spanked in ways that seem unfair. Among other things, they seem to be able to continually pull peak
revs that would reduce our motors to smoking slag heaps within a couple of laps. Have you noticed
that they also require tiny, delicate steering inputs, as opposed to the wild, lock-to-lock oscillations
necessary to keep our bolides greasy-side down?
Nonetheless, you might be able to eke a few more mph out of your Ferrari (although I haven't seen
more than 196 mph myself). The most promising avenue to explore is your speed coming off Malmedy
at the head of the Masta straight. Anything you can gain here will not only carry extra speed all the
way down the straight, it may also add a few mph at the far end. And, obviously, the later you can
delay your braking--and the less you have to brake--will also squeeze out a few more rpm. (Achim
Trensz is currently the record holder of my informal Vmin contest through the kink: he's seen 176
mph...about 20 mph better than my best!)
Beyond that, there's not much more that your setup can add. You can fiddle with the gearing; trying
incremental changes in both directions (the Ferrari--uncharacteristically--seems to develop more
torque than horsepower, so I'm inclined to go taller). If you can't find the perfect ratio with, say, a 9/31
ring & pinion, you can swap in an 8/31 or a 10/31 and adjust G5. You can reduce the rolling resistance
with higher tire pressures (which may reduce overall grip) and set the toe to zero, front and rear
(which will almost certainly give you more oversteer). I don't think Papy modeled the aerodynamic
resistance of wind passing under the car or I'd suggest a Lo-Rider setup...but you never know. OTOH,
I'm pretty sure they modeled the drivetrain's internal friction, so you might see some minuscule
improvement by reducing the slippage in the differential (say, ramp angles of 30/30 with 5 clutches),
but, no, I won't take that puppy out for a test drive.
Maybe nitrous? Hydrazine?
--Steve Smith
Erata
Taruffi's Book
Jeffrey Hunsberger writes:
Steve Smith's Advanced Setup Guide - Addendum http://alison.hine.net/gpl/smith-a.htm
4 von 5 20.10.2019, 00:45

"When I read in the back of Four Wheel Drift that "The Technique of Motor Racing" was out of print, a
red flag went up for me. I had purchased the book recently from a Border's Book Store. It is published
by Robert Bentley, Inc. Automotive Publishers.
"You can even order the book online!"
Who Said "Less is More"?
A reader wrote: "As you (or was it Nietsche?) noted, however, whatever makes you faster is also
harder."
That would be "Fast Freddie" Nietzsche.
--Zarathustra
Rising Temperatures
I'm sorry I didn't address this sooner: In "Four-Wheel Drift" (the strategy guide), I said that the proper
operating range of the tires was "very roughly," 110 to 180 degrees. This guesstimate was based on
early builds, before the correct physics models were in place...and it was flat-out wrong. As is now
embarrassingly apparent, the appropriate range is more like 160 to 230 degrees. That is, until you get
the tires warmed up to the lower figure, the tires will feel slippery. Basically, you do this by driving like
hell for a lap or so, deliberately spinning the wheels, locking the brakes, and sliding the car around.
(Spa's long downhill sweeper at Burnenville, early in the lap, will put plenty of heat in the tires, as will
the first dozen or two turns at the Ring...if you survive!) On TV, you see drivers zig-zagging their cars
on the "formation" (nee pace) lap, but I have it on good(year) authority that this accomplishes very
little. (In the game, it will likely whip-saw you into a terminal spin.)
If you continue to drive like a maniac, however, you may overheat the tires, whereupon they revert to
feeling greasy. This happens about the time you start to see "flash" readings of 240 deg. or more. You
can take a "snapshot" of your tires' temps at any point on the track by hitting the Esc key, and
returning to the pits for a look-see at the setup page (exiting the Curvas Grande or Ascari at Monza,
for example), but the most common reference point is at the S/F (start/finish) line. Even at a track like
Kyalami or Zandvoort, where the S/F line is a long ways from the last corner, the tires will retain
enough heat to give you a valid reading.
Although how hard you're driving is the most influential factor affecting the temps, other things do
have an effect. Stiffer suspension settings, lower tire pressures, more toe (-out or -in at the front; -in
at the rear), a heavier fuel load, less power-side lock in the differential, a greater number or severity of
turns, even taller ride heights will all tend to increase the temps. Banked turns (like those at Mexico
and the Glen) will tend to reduce the temps (less "hysteresis," or squirm). But basically, if you're not
getting at least 160 deg. at the front end (which almost invariably runs cooler) and 180 deg. at the
rear, you're not driving hard enough. On average, my setups give me about 165-175 at the front, and
205-215 at the rear. The Novice and Advanced Trainers are the exception: they run much cooler. (I
suspect Papy didn't model smaller tires; only less weight and horsepower.)
--Steve Smith
Steve Smith's Advanced Setup Guide - Addendum http://alison.hine.net/gpl/smith-a.htm
5 von 5 20.10.2019, 00:45