Roland MV-8000 v3.5 TurboStart - Audiofanzine
119
®ÂØÒňΠ® MV-8000v3.5 Production STUDIO Congratulations on your purchase of the Roland MV-8000. This TurboStart contains step- by-step instructions that will quickly introduce you to the MV-8000’s major features. Press PROJECT. Use the CURSOR buttons to select CREATE NEW PROJ, and then press ENTER. Press F5 (Execute). If you’d like to save changes made to the current project—press F5 (Yes). If you’d like to create the new project without saving—press F1 (No). Press INSTRUMENTS. Press MENU, select Load Patch, and then press ENTER. If a hard drive doesn’t appear in the upper left-hand corner of the display, press F1 (Select Drive), select Hard Drive, and then press F5 (Select). Turn the VALUE dial to select the PATCHES folder, and press ENTER to open it. Note: You can press the 3CURSOR button to back out of the folder. Turn the VALUE dial to select the DRUMKITS folder, and then press ENTER. Turn the VALUE dial to select any drum kit, and then press F5 (Load) to open the ASSIGN TO PART/LIBRARY window. Turn the VALUE dial to select Part 1, and then press F5 (Execute). After the patch has finished loading, press INSTRUMENTS—you see the patch loaded into Part 1. Play the VELOCITY PADS to hear the drum kit. Press SEQUENCE, and then F1 (Pattern). Press the 6CURSOR to select the first MIDI track. Press F2 (Track Param) to open the TRACK PARAMETER window. In the Output Assign field, select Part 1, which is your drum kit. Press SEQUENCE, and then F1 (Pattern). Select your MIDI track, and then press REC to open the PATTERN RECORDING PARAMETER window. The MV-8000’s click (metronome) sounds. Set Record Mode—to OverDub1. Count In to—1Meas. Pattern Length—to 2Meas. Input Quantize Type—to Grid. Practice your beat by playing along with the click. When you’re ready to record your beat, press PLAY. On the fifth click, start playing the VELOCITY PADS for two measures. At the end of the Measure 2, your beat loops around and you hear what you’ve recorded. Tip: You can put the MV-8000 into Rehearsal mode by pressing the REC button without pressing STOP first. This allows you to try out extra drum parts without recording them. Press REC a second time to return the MV-8000 to Record mode. When you’re finished, press STOP. Connect the left and right line outputs of a CD player, DJ mixer, DVD player, or synth to the MIC/LINE inputs of the MV-8000. Press SAMPLING, and then set Sample Type—to Stereo. Input Select—to Analog. Start Trigger—to Manual. Stop Trigger—to Manual. While playing the external source, watch the meters on the left side of the display, and adjust the SENS L/R knobs to ensure a good level. At the point where you’d like to begin sampling, press F5 (Start). At the point where you’d like to stop sampling, press F5 (Stop)—the RESULTS window opens and displays the waveform of your new sample.
-
Upload
khangminh22 -
Category
Documents
-
view
4 -
download
0
Transcript of Roland MV-8000 v3.5 TurboStart - Audiofanzine

®ÂØÒňήMV-8000v3.5 Production STUDIO
Congratulations on your purchase of the Roland MV-8000. This TurboStart contains step- by-step instructions that will quickly introduce you to the MV-8000’s major features.
Press PROJECT.Use the CURSOR buttons to select CREATE NEW PROJ, and then press ENTER.Press F5 (Execute).
If you’d like to save changes made to the current project—press F5 (Yes).If you’d like to create the new project without saving—press F1 (No).
Press INSTRUMENTS.Press MENU, select Load Patch, and then press ENTER.If a hard drive doesn’t appear in the upper left-hand corner of the display, press F1 (Select Drive), select Hard Drive, and then press F5 (Select).Turn the VALUE dial to select the PATCHES folder, and press ENTER to open it.
Note: You can press the 3CURSOR button to back out of the folder.
Turn the VALUE dial to select the DRUMKITS folder, and then press ENTER.Turn the VALUE dial to select any drum kit, and then press F5 (Load) to open the ASSIGN TO PART/LIBRARY window.Turn the VALUE dial to select Part 1, and then press F5 (Execute).After the patch has finished loading, press INSTRUMENTS—you see the patch loaded into Part 1.Play the VELOCITY PADS to hear the drum kit.
Press SEQUENCE, and then F1 (Pattern).Press the 6CURSOR to select the first MIDI track.Press F2 (Track Param) to open the TRACK PARAMETER window.In the Output Assign field, select Part 1, which is your drum kit.
Press SEQUENCE, and then F1 (Pattern).Select your MIDI track, and then press REC to open the PATTERN RECORDING PARAMETER window. The MV-8000’s click (metronome) sounds.Set
Record Mode—to OverDub1.Count In to—1Meas.Pattern Length—to 2Meas.Input Quantize Type—to Grid.
Practice your beat by playing along with the click.When you’re ready to record your beat, press PLAY. On the fifth click, start playing the VELOCITY PADS for two measures. At the end of the Measure 2, your beat loops around and you hear what you’ve recorded.
Tip: You can put the MV-8000 into Rehearsal mode by pressing the REC button without pressing STOP first. This allows you to try out extra drum parts without recording them. Press REC a second time to return the MV-8000 to Record mode.
When you’re finished, press STOP.
Connect the left and right line outputs of a CD player, DJ mixer, DVD player, or synth to the MIC/LINE inputs of the MV-8000.Press SAMPLING, and then set
Sample Type—to Stereo.Input Select—to Analog.Start Trigger—to Manual.Stop Trigger—to Manual.
While playing the external source, watch the meters on the left side of the display, and adjust the SENS L/R knobs to ensure a good level.At the point where you’d like to begin sampling, press F5 (Start).At the point where you’d like to stop sampling, press F5 (Stop)—the RESULTS window opens and displays the waveform of your new sample.

®ÂØÒňήMV-8000v3.5 Production STUDIO
Follow the instructions in the “Sampling From an External Source” section.From the RESULTS window, press F3 (Quick Assign).Press F5 (AsgnToPatch)—the PATCH QUICK ASSIGN window opens.Tap the VELOCITY PAD from which you’d like to play the sample.Set Part to 2 to avoid overwriting any drums in the kit assigned to Part 1.Press F5 (Execute).Press INSTRUMENTS—Part 2 is automatically selected.Play the VELOCITY PAD from Step 4 to hear your sample.
Insert an audio CD into the MV-8000’s CD-ROM drive.Press IMPORT—the IMPORT window appears.Press F1 (Select Drive), select Audio CD, and then press F5 (Select)—the CD’s track listing appears in the display.Select the CD track you wish to import and press F5 (Import) to open the SET TIME window.Adjust the In Time and Out Time to specify the section of the CD track you wish to import. Press F3 (Play) to play the section between the In and Out points.Press F5 (Execute)—the RESULTS window opens and displays the waveform of your new sample.
If you’d like to assign the sample to a pad—follow the instructions in the section above, entitled “Assigning Your Sample to a Pad.”If you’d like to assign the sample to an audio phrase—follow the instructions in the next section.
Audio phrases are longer samples—typically drum loops or instrument riffs—that will automatically match the tempo of your song without changing pitch.
Follow the instructions in the “Importing Audio From a CD” section.From the RESULTS window, press F3 (Quick Assign).Press F3 (AsgnToAPhrs)—the AUDIO PHRASE QUICK ASSIGN window opens.
Play VELOCITY PAD 1 and press F5 (Execute).Press AUDIO PHRASES.Press F5 (Edit) to open the AUDIO PHRASE EDIT window.Adjust the Start Point so the sample starts perfectly on the beat.Adjust the End Point so the sample ends perfectly on the beat.Play VELOCITY PAD 1 and count the total number of beats in the sample. Enter this data in the BPM Base Note field. For example, if the sample is exactly two measures long and each measure has four beats, select x 8, which means “four quarter notes times two measures,” or eight quarter notes.
Tip: If you know the tempo of your sample, note the Audio Phrase BPM display in the upper right-hand corner. If it shows a similar tempo, you’ve more than likely chosen the correct BPM Base Note value.
CURSOR to the BPM Sync switch and turn the VALUE dial to switch it on.
Audio phrases are arranged within a pattern or song on audio tracks.
Press SEQUENCE, and then F1 (Pattern).Select the audio track. While holding SHIFT, press REC—the AUDIO PHRASE STEP REC window appears.Press VELOCITY PAD 1 repeatedly until you reach the end of the pattern.Press STOP.
Press SEQUENCE.If your song contains a Pattern track, select it. If not, press MENU, select Add Pattern Track, and then press ENTER.While holding SHIFT, press REC—the PATTERN STEP REC window appears.Press F4 (Put Pattern) to open the PUT PATTERN window.In the Pattern field, select the pattern with which you wish to start the song. In our example, that’s Pattern 1.In the Times field, choose the number of times you wish the pattern to repeat.Press F5 (Execute). If you’ve created more than one pattern, repeat Steps 5-7.Press STOP.


3 4 5 6


→ →


1
Loading Patches
®ÂØÒňΙ
Workshop
© 2005, 2006 Roland Corporation U.S.All rights reserved. No part of this publication may be reproduced in any form without the written permission of Roland Corporation U.S.
MVWS02
MV-8000

2
About the MV-8000 Workshop Series
Roland’s MV-8000 Production Studio is packed with features for making music. It’s a heavy-duty sampler that can do all sorts of things with sounds you sample or import. Its sequencer has 136 tracks for MIDI sequencing and playing back audio, and its set of editing tools is deep. It’s a great box for performing—using its pads or an attached MIDI keyboard—and, of course, it can even burn a CD of your final master mix.
Each MV-8000 Workshop Series booklet focuses on one MV-8000 topic, and is intended as a companion to your MV-8000 Owner’s Manuals.
This booklet requires MV-8000 O.S. 3.5 or higher. You can download the latest O.S. for free from www.RolandUS.com.
About This Booklet
The MV-8000 comes with lots of patches. The PATCHES folder on its hard drive holds 103 of them. Also, each project—including every demo project—has its own patch library. You can load any of these patches. This booklet explains how.
The Buttons, the LCD, or a VGA?
With the MV-8000, you can work on the built-in LCD or on an optional color VGA monitor. You can use the MV-8000’s front-panel controls, or a mouse on your VGA screen. No matter how you like to work, there’s an easy way to get things done.
Probably the best idea is to work primarily with a mouse on a VGA, using the MV-8000’s buttons to quickly get in and out of MV-8000 screens. The procedures in this booklet typically assume you’ll be working this way.
If you’re not, don’t worry, because the VGA windows and LCD screens are essentially the same. There are clickable VGA icons for all of the MV-8000’s buttons. You can also press an onscreen button by clicking your mouse or by pressing an F button on the MV-8000. The main difference has to do with how you deal with settings—or “parameters”—and how you select objects.
If you’re using a mouse: If you’re using the MV-8000’s buttons:
You select parameters and objects with a left click. You change the selected
parameter’s value by turning the scroll wheel. You can display an object’s menu by right-clicking the object.
You select parameters and objects with the 3, 4, 5, and 6
CURSOR buttons. Change a selected parameter’s value by turning the
VALUE dial or by pressing DEC and INC.
Left click Right click
Scrollwheel
Understanding the Symbols in This Booklet
Throughout this booklet, you’ll come across information that deserves special attention—that’s the reason it’s labeled with one of the following symbols.
A note is something that adds information about the topic at hand.
A tip offers suggestions for using the feature being discussed.
Warnings contain important information that can help you avoid possible damage to your equipment, your data, or yourself.

3
About Patch Loading
How Many Patches at a Time?
Whenever you’ve got the MV-8000 turned on, you’re in one of the songs in the currently loaded project. For each song in a project, you can load and use up to 16 patches at a time.
To learn more about what a project is, see the MV-8000 Creating a New Project Workshop booklet.
Each patch is played by one of the song’s 16 “parts.” You can think of each part as a separate instrument—in fact, to display the song’s parts and their patches, you press the INSTRUMENTS button.
To try out any of these patches, select its part, and then play the pads or a connected MIDI keyboard.
When you save a project, each song’s patches—and the samples they play—are automatically saved with the project.
All the Patches That Fit
Before you play or work on a project, the project is loaded into the MV-8000’s RAM (for “Random Access Memory”). RAM also holds all of a project’s samples, patches, and songs.
Depending on how many samples a project has, and how long they are, it’s possible to be out of room when you attempt to load a patch. If you’re just getting into your MV-8000, though, it’s not likely to happen very soon.
The MV-8000 ships from the factory with generous 128 MB of RAM. If you need more, you can expand it up to 512 MB, as explained in the MV-8000 Owner’s Manual.
RAM is cleared whenever you power off the MV-8000, so it’s always important to save your project before you turn off the MV-8000.
Where a Loaded Patch Goes
You can load patches:• from the current project’s library—into the currently selected
part.• in the MV-8000 PATCHES folder or in another project—into
any part and/or add it to the current project’s library.
Load a patch into a part, orload it into the project library.
A Patch Needs a Part to Play It
When you want to load a patch from the current project’s library, you start by selecting the part that’ll play it—once you’ve done this, you can then load the patch into the part.
If you’re loading a patch from the PATCHES folder or another project, you select the part to be used as you load the patch.
We’ll explain how to do both of these things later.

4
The Project Library Collects Patches
There are a number of reasons you might want to load a patch into the current project’s library. Here are the three most common reasons:
• You might be collecting patches you plan to use in a project, but you’re not ready to assign them to parts yet.
• You’re gathering patches you might want to use, maybe even instead of patches you’re already working with.
• You might be planning to use a patch in other project songs—patches you stash in the project library can be used in any of the project’s songs.
Loading the Current Project’s Patches
If you’re new to the MV-8000, try this procedure with the Version 3 demo project loaded, as we’ve done here.
To load a patch from the current project’s patch library:
1. Press INSTRUMENTS to display the current song’s 16 parts, and use the MV-8000’s 6 or 5 CURSOR buttons to select the part you want to have play the patch. (We’ve selected Part 6 here for no particular reason.)
2. Click Library to see what’s in the project’s patch library.
You can also open the library from the INSTRUMENTS window by turning the scroll wheel on your mouse or the VALUE dial on the MV-8000.
3. Select a patch you’d like to load. (We’ve selected the fourth patch in the picture above.)
If you want to try out a patch before loading it, click Preview and play it on the pads or a connected MIDI keyboard.
4. Click Use This to load the patch into the part you chose in Step 1.
The MV-8000 returns you to the INSTRUMENTS window, with the patch loaded into the selected part. You can now play the patch on the MV-8000’s pads, or on a connected MIDI keyboard.

5
Loading Patches from Outside the Project
Here’s how to load a patch into the current song from the MV-8000’s PATCHES folder, or from another project.
Both procedures start the same way.
In the following two sections, we’ll work with a new, blank project. To learn how to create a project, see the MV-8000 Workshop booklet Creating a New Project.
Navigating to a Patch Outside the Project
1. Press INSTRUMENTS to display the INSTRUMENTS window.
2. Press the MENU button to display the Instruments menu.
3. Select Load Patch as shown above, and click Select to display the contents of the MV-8000’s hard drive.
If what you see doesn’t look like this, press 3 repeatedly until it does.
If “Hard Disk” doesn’t appear in the upper left of the screen, click Select Drive, choose Hard Disk, and then click Select.
At this point, you’ll navigate to the patch you want to load, as described later on in “Loading a Patch from the PATCHES Folder” and “Loading a Patch from Another Project.”
Trying Out a Patch Without Loading It
Once you navigate to a patch, you can try it out without adding it to your project until you’re sure you want to. Here’s how.
1. Select the patch you want to hear, and then click Preview—the MV-8000 temporarily loads the patch and its samples, and then displays the IMPORT PREVIEW window.
3. Check out the patch by playing it on the pads or on a connected MIDI keyboard.
4. If you:• don’t want to load the patch—click Stop.• decide you do want to load the patch—click Import.

6
Loading a Patch from the PATCHES Folder
1. After following the instructions in “Navigating to a Patch Outside the Project,” double-click the PATCHES folder.
As you can see, the PATCHES folder contains other folders that make it easy to find the type of patch you want.
2. Double-click the folder you’d like to check out to see what’s in it. (We’ve double-clicked the GUITAR folder here.)
If you’d like to close the project folder you’re in and select another project, click the Up Folder icon, or press 3.
3. Select the patch you want to load. (We selected Afro Mute 1 in the picture at the left.)
4. Click Load.5. Finish up by jumping ahead to “Picking the Place the Patch
Goes,” which follows the next section (click here).
Loading a Patch from Another Project
1. After following the instructions in “Navigating to a Patch Outside the Project” on Page 5, double-click the PROJECTS folder to display the projects on the MV-8000’s hard drive.
2. Double-click the project that contains the patch you want to load. (We double-clicked MVDEMO_V3 here.)
The Up Folder icon

7
If you’d like to close the project folder you’re in and select another project, click the Up Folder icon, or press 3.
3. Double-click the selected project’s PATCHES folder to display the contents of the project’s patch library.
4. Select the patch you want to load, and click Load.5. Finish up by following the steps below in “Picking the
Place the Patch Goes.”
Picking the Place the Patch Goes
When you load a patch from outside the current project, you can load it to a part in the current song and/or to the currently loaded project’s patch library.
1. Set:• Part—to the part you’d like to have play the patch. To
load the patch into an empty part, select a part that currently holds a patch named “Init Patch.” (Set the Part parameter to Off if you only want to load the patch into the current project’s patch library.)
• Library—to the location in the current project’s patch library where you’d like to store the patch. To load the patch into an empty library location, select a location that currently holds a patch named “Init Patch.” (Set the Library parameter to Off if you only want to load the patch into a part.)
Any patch called “Init Patch” is just a placeholder in an empty part or library location. When you create your own patches, be sure to rename them so they’re not called “Init Patch” to avoid confusion later.
2. If:• you’ve selected an Init Patch part or library location—
click Execute.• you’re replacing a patch in a part, and the patch is also in
the project’s library—click Execute so that the patch in the library still works.
• you’re replacing a patch and want to erase its samples altogether to save space in RAM—click With Delete.

8
Loading Multiple Patches from the Same Folder
To load more than one patch from a folder at the same time:
1. Navigate to the desired patch folder.2. Select each patch you want, and click Mark On/Off.
When you click Mark On/Off, you checkmark or un-checkmark the highlighted patch.
3. Click Load. The MV-8000 asks what you want to do.
4. To:• load the patches into a series of parts—set the Part
parameter to the first part you want to use. The MV-8000 automatically selects a set of parts starting with the one you’ve chosen.
• Load the patches into a series of project library locations—set the Library parameter to the first library location you want to use. The MV-8000 automatically selects a set of locations starting with the one you’ve chosen.
5. Click Execute to finish loading the patches.
Getting Rid of Patches
Whenever you load a patch, its samples get loaded into the MV-8000’s sample RAM, and when you save the project on your hard drive, the samples get saved with it. Once samples are in a project, they stay there, taking up space, even if you decide you don’t want to use their patch in any of the project’s songs after all. That’s why it’s a good idea to delete unwanted patches—and their samples—from the current project.
When you load a patch from the MV-8000 PATCHES folder or from another project, feel free to delete the patch from the current project. It’ll still be safe and sound on the MV-8000’s hard drive, stored in the PATCHES folder or in the project you loaded it from.
If a patch and its samples exist only in the current project, though, deleting the patch will erase it—and its samples—completely.
To delete a patch:
1. Press the INSTRUMENTS button.2. Select the part that’s playing the patch.
The patch you want to delete has to be assigned to a part in order to be deleted. If it’s not currently assigned to a part, select a part, click Library, select the patch, and then click Use This.
3. Press the MENU button, and then select Delete Patch.
4. Click Select—the MV-8000 asks if you’re sure you want to proceed.

9
Click:• Yes—to continue.• No—to cancel the operation.• Assign Only—to delete the patch, but leave the samples
in sample RAM. This allows you to continue to use the samples in the project, even if their patch is gone. (Of course, this doesn’t clear them from the project.)
If you click Yes in Step 4, the MV-8000 reminds you that it’s about to delete samples that may be being used by another patch, as an audio phrase, or in a recorded track, and asks again if you’re sure you want to continue.
5. Press Yes to finish deleting the patch and its samples.
The End
We hope you’ve found this workshop helpful. Keep an eye out for other MV-8000 Workshop booklets, all available for downloading at www.RolandUS.com.
For the latest MV-8000 updates and support tools, visit the Roland U.S. Web site at www.RolandUS.com. If you need personal assistance, call our amazing Product Support team at 323-890-3745.

1
Sampling
®ÂØÒňΙ
Workshop
© 2005, 2006 Roland Corporation U.S.All rights reserved. No part of this publication may be reproduced in any form without the written permission of Roland Corporation U.S.
MVWS03
MV-8000

2
About the MV-8000 Workshop Series
Roland’s MV-8000 Production Studio is packed with features for making music. It’s a heavy-duty sampler that can do all sorts of things with sounds you sample or import. Its sequencer has 136 tracks for MIDI sequencing and playing back audio, and its set of editing tools is deep. It’s a great box for performing—using its pads or an attached MIDI keyboard—and, of course, it can even burn a CD of your final master mix.
Each MV-8000 Workshop Series booklet focuses on one MV-8000 topic, and is intended as a companion to your MV-8000 Owner’s Manuals.
This booklet requires MV-8000 O.S. Version 3.5 or higher. You can download the latest O.S. from www.RolandUS.com.
About This Booklet
The MV-8000 is a powerful sampler. Use it to sample your own sounds, and use them as audio phrases that lock to a beat, or in playable patches. You can even “resample” the MV-8000 itself. This booklet explains how to sample on the MV-8000.
The Buttons, the LCD, or a VGA?
On the MV-8000, you can work on the built-in LCD or on an optional color VGA monitor. You can use the MV-8000’s front-panel controls, or a mouse on your VGA screen. No matter how you like to work, there’s an easy way to get things done.
Probably the best idea is to work primarily with a mouse on a VGA, using the MV-8000’s buttons to quickly get in and out of MV-8000 screens. The procedures in this booklet typically assume you’ll be working this way.
If you’re not, don’t worry, because the VGA windows and LCD screens are essentially the same. There are clickable VGA icons for all of the MV-8000’s buttons. You can also press an onscreen button by clicking your mouse or by pressing an F button on the MV-8000. The main difference has to do with how you deal with settings—or “parameters”—and how you select objects.
If you’re using a mouse: If you’re using the MV-8000’s buttons:
You select parameters and objects with a left click. You change the selected
parameter’s value by turning the scroll wheel. You can display an object’s menu by right-clicking the object.
You select parameters and objects with the 3, 4, 5, and 6
CURSOR buttons. Change a selected parameter’s value by turning the
VALUE dial or by pressing DEC and INC.
Left click Right click
Scrollwheel
Understanding the Symbols in This Booklet
Throughout this booklet, you’ll come across information that deserves special attention—that’s the reason it’s labeled with one of the following symbols.
A note is something that adds information about the topic at hand.
A tip offers suggestions for using the feature being discussed.
Warnings contain important information that can help you avoid possible damage to your equipment, your data, or yourself.

3
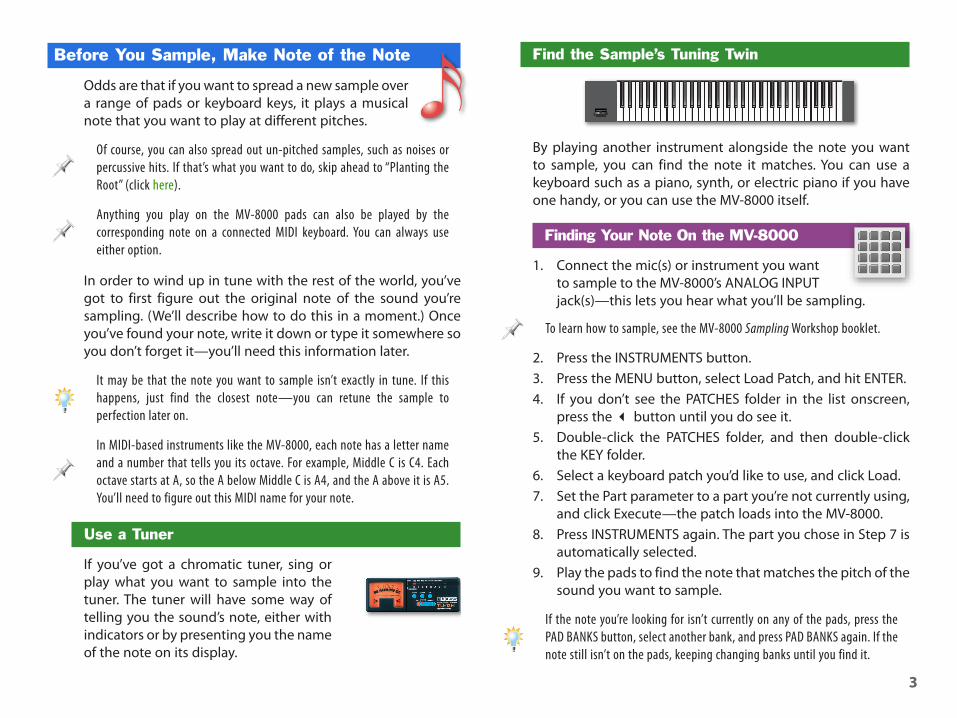
Some Things You Need to Know About Sampling
How a Sound Becomes a Sample
Here’s how a sound winds up on your MV-8000 as a sample:
1. The MV-8000 receives the sound, or “audio,” you want to sample from one or more of its analog input jacks—Use the PHONO inputs for connecting a turntable. Use the MIC/LINE inputs for connecting microphones—or “mics”—and instruments.
2. The MV-8000 converts the audio into a digital “sample”—It stashes the sample in an area of memory called “sample RAM,” so you can play it and work on it.
A new sample stays in sample RAM until you shut off the MV-8000 or load a different project. If you do either of these things before saving the current project, your sample is lost, so, um, don’t.
3. You save the current project—The samples in sample RAM are stored in the project’s SAMPLE folder on the MV-8000’s hard drive. Once you’ve done this, you can turn off the MV-8000 or load a different project, and you can always get back your samples by re-loading their projects.
You can also sample a CD player’s outputs using the methods we’ll discuss in this booklet, but you’ll get even better results importing audio from a CD using the MV-8000’s built-in CD player. To learn how to do this, see the MV-8000 Workshop booklet called Importing a Sample from CD.
For most of the examples in this booklet, we’re working in a new, empty project. You can add samples to an existing project, or start out fresh with a new one. To learn how to create a new project, see the MV-8000 Creating a New Project Workshop booklet.
Two Ways You Can Use Samples
There are basically two ways to use samples on the MV-8000. You can use them:
• as audio phrases. • in a patch.
You can play audio phrases and patches from the pads or an attached MIDI keyboard, but they’re not the same thing—each one is designed for a different musical use.
Anything you play from the MV-8000 pads can also be played from a connected MIDI keyboard. We’ll talk only about the pads to make things easier to read—but remember you can always use either option.
You can also simply record on the MV-8000 just as you would with any digital multitrack recorder. This is sampling, too, in a way. To learn more, see the MV-8000 Direct Recording Workshop booklet.
What’s an Audio Phrase?
An audio phrase is a recording you trigger by striking a pad—to stop it, you hit its pad again. An audio phrase can be a:
• sampled beat loop.• a sampled vocal.• an instrumental performance.
What makes audio phrases interesting is that you record them on audio tracks that can keep them locked in time to your song’s tempo. If the audio phrase’s original tempo is different than the song’s, the MV-8000 adjusts it to fit. If a song’s tempo changes, the audio phrase automatically stretches or shrinks to match it. This makes audio phrases great for beat loops.
You can put an audio phrase on every pad in a project if you like. With 16 pads, and 32 banks of pads, that’s 512 audio phrases in a project, provided you have enough sample RAM.

4
What’s a Patch?
A patch puts a sampled note on each of the MV-8000 pads for playing. A pad in a patch may trigger a sample of:
• a note played on a drum or cymbal in a drum kit.• a note played on a percussion instrument.• a note played by a musical instrument.• a note sung by a singer.• a sound effect.
Unlike audio phrases that you just start and stop, a patch is something you play like an instrument. In fact, you select patches in the MV-8000’s INSTRUMENTS window.
When you record with a patch, you record onto a MIDI track. This lets you edit your performance until it sounds exactly the way you want it to, using the MV-8000’s potent set of MIDI editing tools.
Since a MIDI track is made up of instructions for recreating your performance, and not the sound of the patch itself, it always stays in time if your song’s tempo changes.
Audio Phrase or Patch? You Can Decide Later.
If you know you want to sample something, but aren’t yet sure how you want to use it, go ahead and sample it anyway. You can deal with it later on using the MV-8000’s Sample Manager. Meanwhile, it’ll be safely stored in your project’s SAMPLE folder until you’re ready to decide how you want to use it.
About Expanding Sample RAM
The MV-8000 ships with 128 MB of sample RAM, and you can expand it up to 512 MB, as described in the MV-8000 Owner’s Manual. The more RAM, the more samples you can use in a project. If you’re planning to use lots of samples in your music—especially loops, since they take up more space—we recommend expanding your sample RAM.
If you run out of room as you sample, think about expanding your sample RAM. You can also clean out unused stuff from a project—see the MV-8000 Workshop Getting the Most from Sample RAM booklet.
Sampling a Sound
The Hookup
Connect your mic or mics, instrument or turntable to the MV-8000 using its rear-panel ANALOG INPUT jacks.
When you’re not using your PHONO jacks, keep the included shorting pin inserted in them.
If you’re using:
• a single mic, an electric guitar, bass, or other single-output instrument—connect it to the jack labeled “MIC/LINE L.”
• a keyboard or other stereo instrument—connect its left and right outputs to the MIC/LINE L and R jacks, respectively.
• a turntable—connect its left and right outputs to the PHONO L and R jacks, respectively.
You can use either the MIC/LINE or the PHONO jacks, but not both at the same time.

5
If you’ve installed an optional MV8-OP1 Audio I/O Expansion board in your MV-8000, you can connect a stereo digital device—such as a synth with digital outputs—to one of the MV8-OP1’s digital inputs.
Turning On Your Inputs
After making your connection, you’ve got to tell the MV-8000 which jacks you want to use.
1. Press the SYSTEM button.2. Select Global from the SYSTEM menu to
display the GLOBAL window.
Whenever you want to select a numbered menu item—such as the Global menu item—you can also select it by pressing its number on the MV-8000’s numeric keypad and hitting ENTER.
If you’ve installed an optional MV8-OP1 expansion board, you’ll see its digital connectors here.
The Input Select parameter is automatically set to Analog unless you’ve installed an MV8-OP1. If you have, select the desired digital input: Coaxial, Optical, or R-BUS.
3. Set the Input Type parameter to:• Mono—if you’re sampling only from the MIC/LINE L
jack.• Stereo—if you’re sampling from both the MIC/LINE L
and R jacks, or from the two PHONO inputs.
Setting Your Analog Sampling/Input Level
1. Press the MIXER button to display the MIXER (AUX/FX/AUDIO PHRASE/INPUT) window.
IN (A) level
If the AUX/Phrs/In pane isn’t visible—as shown here—click its tab at the top of the window to bring it forward.
2. Set the IN (A) fader’s level to 100, as shown above.3. While listening to the sound you want to sample, adjust the
front-panel SENS knob for each analog input you’re using so that the level shown in the IN (A) meters onscreen is as loud as possible without lighting its red Clip indicators.
Clip indicators
If you’re sampling in stereo, set the L and R knobs to the same position.
Once they light, the Clip indicators stay lit to make sure you see that there’s been a too-loud moment even if you didn’t see it happening. To switch the Clip indicators back off, click the Reset Peak button.

6
The Sampling Setup
1. Press the SAMPLING button to display the SAMPLING window.
The meters and Reset Peak button here work
the same way as they did in the GLOBAL
window. This lets you double-check your
sampling level.
This bar shows how much sample RAM you have left for sampling in the current project—the more white, the more room.
2. Set Sample Type to the type of sample you’d like to create. If you’re just using the MIC/LINE L jack, set it to Mono.
If you’re using both MIC/LINE jacks, a turntable, or a digital instrument, you’ll normally set Sample Type to Stereo. To make a mono sample containing both sides of a stereo sound, set Sample Type to Mono.
Automatic or Manual Sampling
Start
You can start sampling manually or automatically by setting the Start Trigger parameter as desired. Set it to:
• Manual—to start sampling when you click the Start button at the bottom of the window.
• Level—to begin sampling automatically when the sound you’re sampling reaches a certain volume level.
The Level Start Trigger Pad and Play settings are used in resampling, which we’ll get to in a bit.
When you set Start Trigger to Level, the Level and Pre Sample Time parameters become active. Here’s what they do:
• Level—The MV-8000 automatically starts sampling when the input signal reaches the level specified by this parameter.
• Pre Sample Time—The MV-8000 can add a little bit of time to the front of a sample to help ensure that the very beginning of its sound isn’t chopped off. Try leaving it set to 0ms (“0 milliseconds”). If you find you’re missing anything at the front of your sample, increase the Pre Sample Time value.
Stop
You can also stop sampling manually or automatically by setting the Stop Trigger parameter as desired. Set it to:
• Manual—to stop sampling when you click the Stop button at the bottom of the window. (We know you can’t see that button now, but once sampling begins, you will.)
• Beat—so that sampling ends after a certain number of beats. You select the number of beats you want using the Beat parameter. It becomes active when you choose Beat as your Stop Trigger value.
If you want to stop sampling using the Beat setting, press the BPM/TAP button and set the current song tempo so it matches what you’re sampling. Of course, for this to work, you need to know the sample’s tempo.
• Time—so that sampling ends after a certain amount of time. You select the amount of time you want by setting the Time parameter that becomes active when you choose Time as your Stop Trigger value.

7
Other Sampling Options
The checkboxes at the bottom of the screen turn some sampling options on or off:
• Auto Divide—When you turn Auto Divide on, the MV-8000 creates a new sample each time there’s silence that lasts as long as the Gap Time setting. (The Gap Time parameter becomes active when you switch on Auto Divide.) This feature can be handy when you’re sampling a few things in a row, and don’t want to stop in-between.
Auto Divide provides a “quick-and-dirty” way to create multiple samples of related sounds. A better approach, though, is to make one big sample of all of the sounds and then use the MV-8000’s Auto Chop feature to slice them up. After Auto Chop, each sample starts precisely at the beginning of its sound—it’s ready to by played right away, with no further editing. To learn more about Auto Chop, see the MV-8000 Auto Chop Workshop booklet.
• Auto Emphasis—If you’ve got a sound you’d like to brighten up during sampling, turn on Auto Emphasis, which increases the treble content in the sound.
• Auto Normalize—Auto Normalize boosts the volume of your sample to its loudest, and therefore best, level. It’s generally a good idea to turn Auto Normalize on.
Resampling
The MV-8000 allows you to sample the MV-8000 itself—or more specifically, its main stereo outputs—using a process called “resampling.” You might resample the MV-8000 to:
• capture an entire mix as a stereo sample—that you can burn onto an audio CD.
• create insanely complex sounds—by sampling a sound over and over, tweaking it or adding more effects each time.
To get to the RESAMPLING window, click the Re-Sampling tab at the top of the SAMPLING window.
To resample the MV-8000’s output in stereo, set Sample Type to Stereo, as shown here. To squash it down to mono, set Sample type to Mono.
The parameters for resampling are the same as for sampling, though, for resampling, you’ll want to set Start Trigger to:
• Pad—to begin sampling when you strike a pad. Use the Pad setting when you’re resampling an MV-8000 audio phrase. When you hit a pad that plays the audio phrase, resampling automatically begins, too.
• Play—to begin sampling when you hit the sequencer PLAY button. When you’re capturing a whole mix as a new sample, use this setting. Hit PLAY to play the mix, and resampling automatically begins.
To resample an MV-8000 patch, sequence the note(s) you want to resample and use the Play Start Trigger setting.
The Sampling Session
Once you’ve set all the parameters in the SAMPLING—or RESAMPLING—window as desired, you’re ready to sample. Here’s how.

8
To Begin Sampling
To begin sampling, click Start. If Start Trigger is set to:
• Manual—sampling starts immediately, so go ahead and play or sing the sound you want to sample.
• Level—the MV-8000 waits for your sound. Once the sound reaches the Start Trigger level, sampling begins.
• Pad—the MV-8000 waits for you to strike your sound’s pad. Once you hit it, sampling begins.
• Play—the MV-8000 waits for start playback of the sequencer. Once you hit PLAY, sampling begins.
To Stop Sampling
If Stop Trigger is set to:
• Manual—click Stop.• Beat—don’t do anything. Sampling automatically stops
after the specified number of beats.• Time—don’t do anything. Sampling automatically stops
after the specified amount of time.
What You See Is What You Got
Once sampling ends, the MV-8000 shows you your sample in the RESULTS window.
If you’ve turned on Auto Divide, you’ll see a list of the samples you’ve made. Click on a sample, and then click OK to see it in the RESULTS window.
In the RESULTS window, you prepare the sample for use by trimming it—this saves sample RAM and makes using the sample easier—and setting its beat grid.
1. Begin by setting the Start Point value exactly at the beginning of the sample’s sound. As you increase the value, the green Start Point flag moves to the right toward the sound’s waveform onscreen.
You can select and adjust any of the Start Point’s digits individually. Try starting with the fifth digit from the right to move the green flag quickly, and then make smaller adjustments by setting the digits to its right.
Listen to your Start Point setting by clicking Preview—the sample should play immediately without anything being chopped off the front.
The green Start Point
flag
When you’re done, the green flag sits at the left edge of the sound.
2. Set the End Point so that the red End point flag’s at the end of the sample’s sound, as shown on the next page.
If you’re going to use your sample as a loop, turn on the Loop Parameter so the sample loops when you press Preview—this makes finding the exact End Point much easier.

9
We sampled one extra beat in this loop so that we’d know exactly where to set the red End Point flag—right before the extra beat.
3. Set the BPM Base Note parameter to the number of beats in your sample so the MV-8000 can automatically move beat lines into place onscreen, and so it can calculate the sample’s tempo, or “BPM,” for “Beats Per Minute.”
Number of beats in the sampleMV-8000 figures out BPM
Light gray beat lines moved into place
Setting the BPM Base Note also lets the MV-8000 time-stretch or time-shrink a sample when it’s used as an audio phrase.
4. Click Name to display the EDIT SAMPLE NAME window, where you can name the sample. Naming a sample’s a good idea—if you have a bunch of unnamed samples, things can get confusing fast. When you’re done naming the sample, click OK to return to the RESULT window.
5. Checkmark the Truncate box so that when you leave this window, the MV-8000 trims away everything before the Start Point location and after the End Point. This way, you won’t use up sample RAM on stuff you don’t need.
We named our sample “Broke Beat.”
If you didn’t normalize your sample back in the SAMPLING or RE-SAMPLING screen—and would like to do it now—checkmark the Normalize box.
If you’re not ready to assign your sample to an audio phrase or patch, you can stash it away for now in the project’s sample RAM by clicking OK. At some later point, you can select the sample in the PROJECT menu’s Sample Manager and click Quick Assign to display the window shown below.
6. Click Quick Assign to display the Quick Assign window.
If you have a sample containing multiple sounds, or want to slice up a loop, you can click the Chop button to create a patch with each sound on its own pad. See the MV-8000 Workshop Auto Chop booklet for details.
In the next couple of sections, we’ll explain how to set up a sample as an audio phrase (click here) or get it into a patch (click here).

10
Making an Audio Phrase
In the Quick Assign window shown on Page 9, click AsgnToAPhrs (for “Assign to Audio Phrase”)—the AUDIO PHRASE QUICK ASSIGN window appears.
The currently selected pad is outlined in
black.
Any pad that already plays an audio phrase is gray.
Select a pad for playing the sample as an audio phrase by:
• dialing in the desired pad—using the Assign To parameter.• striking the desired pad—in the current pad bank. To
change pad banks, press the PAD BANKS button, pick the bank you want, click Close, and then hit the desired pad.
Once you’ve selected the pad you want, click Execute.
To play the audio phrase, press the AUDIO PHRASE button—the AUDIO PHRASES (PAD) window appears, and you can play the phrase’s pad.
We assigned Broke Beat to the first pad in the first pad bank.
If the audio phrase’s pad bank isn’t shown, press PAD BANKS to select the right bank.
Setting Up How the Audio Phrase Behaves
With the AUDIO PHRASES (PAD) window open, hit the pad that plays the audio phrase, and then press the QUICK EDIT button—the audio phrase’s parameters appear in the AUDIO PHRASE EDIT window.
In the AUDIO PHRASE EDIT window, you can set how the audio phrase plays. Here’s what its parameters do:
• Pad Play—sets the way the pad plays the audio phrase:• Gate—In Gate mode, the pad plays its audio phrase for
only as long as you hold down the pad.• Trigger—In Trigger mode, the audio phrase’s pad acts
as an on/off switch. The first time you hit the pad, its audio phrase plays. (If it’s set to loop, it’ll keep playing.) The second time you hit the pad, it stops.
• Drum—In Drum mode, striking a pad causes its audio phrase to play all the way through, and then stop, whether the pad is set to loop or not. If you hit the pad a second time, it starts playing again from the top.

11
• Loop Mode—If you’d like your audio phrase to loop, set Loop Mode to something other than Off. You can choose:• Start-End—so the audio phrase plays all the way
through over and over.• Loop-End—so the audio phrase plays from the start,
and then repeats from the Loop Point setting to the end of the sample over and over.
If you turned on looping back on the RESULTS screen, your audio phrase is set to Start-End by default.
The Loop Point parameter becomes active when you set Loop Mode to Loop-End.
• BPM Base Note, Start Point, End Point—These parameters from the RESULTS screen appear again here for your convenience, and act the same way.
• Loop Point—When Loop Mode is set to Loop-End, Loop Point is the location in the sample where looping begins.
• Level—This sets the overall volume of the audio phrase.• Velocity Control—Turn this on if you want the volume of
the audio phrase to be controlled by how hard you hit its pad.
If you want all of your audio phrases to always be as loud as possible, hit the FIXED VELOCITY button—located above the pads—so it lights. By default, this’ll make them all loud, all the time.
• Coarse Tune—Use Coarse Tune to shift the tuning of the audio phrase up or down in keyboard (semitone) steps.
• Fine Tune—Use Fine Tune to shift the tuning of the audio phrase up or down by 1/100ths of a semitone.
• Reverse—You can flip an audio phrase around by turning Reverse on.
• BPM Sync—With BPM sync on, the tempo of the audio phrase becomes automatically locked with the MV-8000’s sequencer. This parameter is the key to one of the best reasons for using audio phrases.
• Stretch Type—This parameter selects the quality of the MV-8000’s time-stretching or -shrinking when BPM Sync is turned on. Higher values generally mean higher quality. If you’re not sure how to set this, leave it set to Auto.
• Excl. Group—If you’ve got two or more audio phrases that you never want to hear at the same time, assign them to the same exclusive group. (There are 31 of them.) If an audio phrase in an exclusive group is already playing when you trigger another one, the first one is automatically stopped—this is a handy way to make sure certain audio phrases never overlap.
The AUDIO PHRASE EDIT Window Buttons
The buttons at the bottom of the window offer more options:
• Menu button—Click this button, or press MENU, to display options that allow you to re-name the audio phrase, or export it for use in another project or to your computer.
• SampleList—You can display the project’s sample list by clicking this. If you want to, you can replace the audio phrase’s sample from the sample list.
• Sample Edit—Clicking this takes you to the audio phrase’s sample-editing screen.
• LengthLock—Click this to lock the length of the audio phrase’s loop. You can then adjust the place where it starts.
• Chop—You can send your audio phrase’s sample to the Chop window by clicking this.
12
• Command—This button displays a menu of operations the MV-8000 can perform on your audio phrase’s sample:• Emphasis—Turn this on to add a high-end boost to
your sample, if you want to.• Normalize—If you haven’t already normalized your
sample, and want to now, use this command.• Time Stretch—If you want to permanently change the
tempo of your sample, use this command.• Truncate—If you haven’t already trimmed your sample,
and want to now, use this command.• Set Mono—This makes a stereo audio phrase mono.
Making a Patch
Here’s how to get a sample into a patch for playing. You can create a patch that plays just one sound—such as a kick drum—you’ll record by itself on a sequencer track. Or maybe you want to add a new sample to an already-existing patch.
To add a sample to a patch that already exists, that patch has to be in the current project and assigned to one of the parts in the current song.
In the Quick Assign window shown on Page 9, click AsgnToPatch—the PATCH QUICK ASSIGN window appears.
The currently selected pad is outlined in
black.
Any pad that already plays a sample is gray.
This shows you the the key, or keys, that play the sample from a connected MIDI keyboard.
1. Select the desired part. If you want to:• create a new patch that plays your sample—select a
part that’s set to Init Patch (as shown above).• add your sample to an already-existing patch—select a
part that’s playing that patch.
2. Select the pad that’ll play your new sample by:• dialing in the desired pad—using the first Assign To
parameter. (The second one is grayed-out.)• striking the desired pad—in the current bank. To change
pad banks, press the PAD BANKS button, pick the bank you want, click Close, and then hit the desired pad.
Though you’ll normally assign your sample to an unused pad, you can actually stack up to four samples on a pad. This lets you create layered sounds or set the pad to play different samples depending on how hard you whack it, as explained on Page 58 of the MV-8000 Owner’s Manual.
To learn how to play samples across a range of pads, at different pitches, see the MV-8000 Spreading a Sample Across the Pads Workshop booklet.
3. Click Execute. The MV-8000 takes you back to the SAMPLING screen in
case you want to create another sample.
Playing Your Patch
1. Press the INSTRUMENTS button to display the current song’s instruments in the INSTRUMENTS window.
2. Select the part that uses your patch.3. Strike the pad that plays your sample.
Normally, you control the volume of a sound by how hard you hit its pad. To automatically make your sounds loud, light the FIXED VELOCITY button above the pads. By default, this’ll make your sounds play at full volume.

13
Controlling the Behavior of the Sample
Follow the instructions in “Playing Your Patch” on Page 12, and then press the QUICK EDIT button to display the PARTIAL EDIT window.
In this window, you set the behavior of the “partial” that plays the sample.
A partial is a group of up to four samples that are played together by a pad or by a range of pads.
Sample Volume and Stereo Position Settings
• Level—This parameter sets the volume of the partial that plays the sample.
You can adjust the overall volume of the patch, too, and that interacts with this parameter’s setting. It’s a good idea in a single-sample patch to set this to 127 (all the way up). If you’ve got multiple samples in the patch, use this parameter to set their volumes relative to each other, with the sample you want to be the loudest set to 127.
• Pan—This sets the stereo location of the partial.
If you’re working in a patch that contains a bunch of drum kit sounds, you can pan their individual partials to sound like a real drum kit.
When you record with a patch, its track has its own Pan setting that shifts the stereo position of all of the samples in the patch to the left or right.
Cause of Effects
• Output Assign—sets where the sample’s sound goes. You can select:• Mix—so the sample is sent directly into the main
MV-8000 mix as is.• Aux1-4—so the sample is sent to the Aux bus feeding
the MFX (for “Multi-Effects”) effect processor. This allows you to add MFX to the sample.
You can also send related samples to the same Aux bus, allowing you to change all of their volumes at once in the MIXER (AUX/FX/AUDIO PHRASE/INPUT) window.
If you’ve installed an optional MP8-OP1 audio expansion board, you can send the sample to a single output jack (Mlt1-8) or to a stereo pair of output jacks (M1/2-7/8).
• DlyCho Send—sets the amount of delay or chorus you want to add.
• Rev Send—sets the amount of reverb you want to add.
Playing Fast and Playing Rolls
• Assign Type—This parameter sets what happens when you play fast notes or rolls. If you set it to:• Mult—the sample plays through each time you hit the
pad. This setting produces the most natural sound.• Sngl—each time you hit the pad, it cuts off the
previous note, creating a more mechanical sound.

14
Finger on the Trigger
• One Shot—Turn this parameter on so that the sample plays all the way through when you strike its pad. This makes the pad act like a trigger: Strike it quickly and the sample plays without your having to hold down the pad.
If you turn on One Shot, and the sample still doesn’t play all the way through, go down to the Amplifier R (for “Release”) parameter at the bottom of the window and turn it all the way up.
Me. No, Me.
• Excl Group—When you assign two or more partials to the same exclusive group, they cut off each other’s notes. In drum-kit patches, the open hi-hat and closed hi-hat partials are typically set to the same exclusive group. This way, the closed hi-hat partial stops the open hi-hat sound the same way that closing a real hi-hat stops its open sound.
For Further Study
To learn about the window’s remaining advanced parameters and buttons, see the MV-8000 Owner’s Manual.
Saving Your Work
Since the MV-8000 clears its RAM at power-down, you’ve got to save your work to avoid losing it when you turn off the MV-8000.
Saving an Audio Phrase
To save your audio phrases, simply save the project they’re in. You can do this at shutdown, or—to play it really safe—right now:
1. Press the PROJECT button.2. Select Save Project.3. When the MV-8000 asks if you’re sure you
want to save the project, click Yes.
Saving and Naming a Patch
Now that you’ve made your patch, there’s a little housekeeping to do. We recommend you rename your patch—so you can find it later, and so you know it’s no longer an Init Patch—and that you then save it into your project’s patch library.
Naming Your Patch
1. Press INSTRUMENTS and make sure the patch’s part is selected.
2. Click Patch Edit to display the PATCH EDIT window.3. Press MENU and select Patch Name.4. Click Select to display the EDIT PATCH NAME screen.5. Name your patch.6. Press 3 repeatedly until the SELECT CATEGORY window
opens, and then assign the patch to a category to make it even easier to find.
7. Click Select to confirm your choice, and then OK to exit the naming window.

15
Saving Your Patch
1. Press INSTRUMENTS and make sure the patch’s part is selected.
2. Click Library and select the project library location where you’d like to save your patch. You can put it anywhere you want. If you’re saving a new patch, pick an Init Patch location. If you’ve added your samples to an existing patch, select that patch’s location to update it with the new version.
3. Press Write Here, and then Yes to finish the operation.
When you’re done working on the MV-8000, shut it down properly by pressing SHUTDOWN, and be sure to save your project. If you don’t, all your work will be lost when your turn off the MV-8000.
The End
We hope you’ve found this workshop helpful. Keep an eye out for other MV-8000 Workshop booklets, all available for downloading at www.RolandUS.com.
For the latest MV-8000 updates and support tools, visit the Roland U.S. Web site at www.RolandUS.com. If you need personal assistance, call our amazing Product Support team at 323-890-3745.


3 4 5 6


3


3 4 5 6


3


1
Direct Recording
®ÂØÒňΙ
Workshop
© 2005, 2006 Roland Corporation U.S.All rights reserved. No part of this publication may be reproduced in any form without the written permission of Roland Corporation U.S.
MVWS06
MV-8000

2
About the MV-8000 Workshop Series
Roland’s MV-8000 Production Studio is packed with features for making music. It’s a heavy-duty sampler that can do all sorts of things with sounds you sample or import. Its sequencer has 136 tracks for MIDI sequencing and playing back audio, and its set of editing tools is deep. It’s a great box for performing—using its pads or an attached MIDI keyboard—and, of course, it can even burn a CD of your final master mix.
Each MV-8000 Workshop Series booklet focuses on one MV-8000 topic, and is intended as a companion to your MV-8000 Owner’s Manuals.
This booklet requires MV-8000 O.S. Version 3.5 or higher. You can download the latest O.S. from www.RolandUS.com.
About This Booklet
The MV-8000’s Direct Recording feature lets you record vocals or instruments into the MV-8000 alongside your sequenced tracks—there’s no sampling involved, just straight-ahead recording. This booklet explains how to use Direct Recording.
The Buttons, the LCD, or a VGA?
On the MV-8000, you can work on the built-in LCD or on an optional color VGA monitor. You can use the MV-8000’s front-panel controls, or a mouse on your VGA screen. No matter how you like to work, there’s an easy way to get things done.
Probably the best idea is to work primarily with a mouse on a VGA, using the MV-8000’s buttons to quickly get in and out of MV-8000 screens. The procedures in this booklet typically assume you’ll be working this way.
If you’re not, don’t worry, because the VGA windows and LCD screens are essentially the same. There are clickable VGA icons for all of the MV-8000’s buttons. You can also press an onscreen button by clicking your mouse or by pressing an F button on the MV-8000. The main difference has to do with how you deal with settings—or “parameters”—and how you select objects.
If you’re using a mouse: If you’re using the MV-8000’s buttons:
You select parameters and objects with a left click. You change the selected
parameter’s value by turning the scroll wheel. You can display an object’s menu by right-clicking the object.
You select parameters and objects with the 3, 4, 5, and 6
CURSOR buttons. Change a selected parameter’s value by turning the
VALUE dial or by pressing DEC and INC.
Left click Right click
Scrollwheel
Understanding the Symbols in This Booklet
Throughout this booklet, you’ll come across information that deserves special attention—that’s the reason it’s labeled with one of the following symbols.
A note is something that adds information about the topic at hand.
A tip offers suggestions for using the feature being discussed.
Warnings contain important information that can help you avoid possible damage to your equipment, your data, or yourself.

3
Where Direct Recording Gets Recorded
When you record vocals or instruments with Direct Recording, the MV-8000 stashes your audio in its sample RAM, and holds it there until you save your current project. When you save the project, everything in sample RAM is saved onto the MV-8000’s hard drive in the project’s SAMPLE folder.
Since your recordings aren’t permanently saved until you save their project, it’s critically important that you save the project before turning off the MV-8000 or loading another project. If you don’t save the project first, your recordings will be lost.
Obviously, the larger your sample RAM, the more recordings you can fit in there. The MV-8000 ships with a generous 128 MB of sample RAM, which amounts to over 25 minutes of mono Direct Recording, or just shy of 13 minutes of stereo Direct Recording. You can expand your sample RAM up to 512 MB, as described in the MV-8000 Owner’s Manual.
Direct Recording shares sample RAM with anything you’ve sampled, as well as with the samples played by any instruments you’ve loaded. As a result, when you’ve got samples loaded, there’ll be less Direct Recording time available.
The Direct Recording Session
The Direct Recording Hookup
Connect your mic(s) or instrument to the MV-8000 using its rear-panel ANALOG INPUT jacks.
When you’re Direct Recording, keep the included shorting pin inserted in the PHONO jacks.
If you’re using:
• a single mic, an electric guitar, bass, or other single-output instrument—connect it to the MIC/LINE L jack.
• a keyboard or other stereo instrument—connect its left and right outputs to the MIC/LINE L and R jacks, respectively.
If you’ve installed an optional MV8-OP1 Audio I/O Expansion board in your MV-8000, you can connect a digital device—such as a synth with digital outputs—to one of the MV8-OP1’s digital inputs.
Turning On Your Inputs
After making your connection, you’ve got to tell the MV-8000 which jacks you want to use.
1. Press the SYSTEM button.2. Select Global from the SYSTEM menu to
display the GLOBAL window.
Whenever you want to select a numbered menu item—such as the Global menu item—you can also select it by pressing its number on the MV-8000’s numeric keypad and hitting ENTER.
If you’ve installed an optional MV8-OP1 expansion board, you’ll see its digital connectors here.

4
The Input Select parameter is automatically set to Analog unless you’ve installed an MV8-OP1. If you have, you can select a digital input: Coaxial, Optical, or R-BUS.
3. Set the Input Type parameter to:• Mono—if you’re recording only from the MIC/LINE L
jack.• Stereo—if you’re recording from both the MIC/LINE L
and R jacks, the two PHONO inputs, or a digital input.
Setting Your Direct Recording Level
1. Press the MIXER button to display the MIXER (AUX/FX/AUDIO PHRASE/INPUT) window.
IN (A) level
If the AUX/Phrs/In pane isn’t visible—as shown here—click its tab at the top of the window to bring it forward.
2. Set the IN (A) level to 100, as shown above.3. While listening to the sound you want to record, adjust the
front-panel SENS knob for each analog input you’re using so the level shown in the IN (A) meters onscreen is as loud as possible without lighting its red Clip indicators.
Clip indicators
If you’re recording in stereo, set the L and R knobs to the same position.
Once they light, the Clip indicators stay lit to make sure you see that there’s been a too-loud moment even if you didn’t see it happening. To switch the Clip indicators back off, click the Reset Peak button.
The Direct Recording Setup
1. Press SEQUENCE and select an unused audio track. Each audio track has a little audio symbol to its left, shown here.
If you have no available audio tracks, press the MENU button and select Add Audio Tracks... to create the desired number of new audio tracks.
2. Use the MEAS 7 and/or 8 buttons to move to the location in the project where you want to begin recording.
3. Press the REC button—the metronome starts and the RECORDING PARAMETER (AUDIO) window appears.

5
4. Set:• Rec Mode—to Direct Rec.• Input Type—to Mono or Stereo if you need to change
it. This is the same setting you saw in the GLOBAL window, so it’s set to the same value you selected there.
• Count In—to the number of measures you want to hear before recording actually begins.
• Metronome Mode—as desired. It can play during recording only, during recording and playback, or all the time.
If you’ll be recording along to already-sequenced tracks, you probably won’t want to hear the metronome. To turn it off, set Metronome Mode to Off. To learn about additional metronome options, see the MV-8000 Owner’s Manual.
We’ll discuss two of the remaining parameters in the “Auto Punch” section. (The Input Quantize parameter is not available for direct recording.)
The Direct Recording Process
1. Press the PLAY button to begin recording. The countoff measures go by and recording starts.
2. When you’ve finished recording, press the STOP button.
3. To play back your recording, press the TOP button or use the 7 and 8 buttons to move to the beginning of your recording, and then hit PLAY.
If you don’t like what you’ve recorded, press the UNDO/REDO button to get rid of it. When you do this, UNDO/REDO flashes to show that you can change your mind and get back your recording by pressing UNDO/REDO once more. You can change your mind until you make your next recording.
Once you’ve got a recording you like, press PROJECT, and then select Save Project to store your work on the MV-8000 hard drive. This ensures that you won’t forget to save the project later. Use Save Project often as you work.
Auto Punch
You can re-record a section of a recorded track by “punching” the section you want to fix. When you begin re-recording, you “punch in.” When you stop re-recording, you “punch out.”
The MV-8000 offers an Auto Punch feature that makes this easy to do. To punch a section of a track:
1. Hold down SHIFT and press the AUTO PUNCH button. This turns on Auto Punch and opens the AUTO PUNCH window.
When Auto Punch is on, its icon lights blue on the VGA.A red bar appears on the VGA above the section to be punched.
The Auto Punch window
In the AUTO PUNCH window, you can set the locations where you want to start and stop re-recording.
2. Set:• Punch In—to where you want to begin re-recording.
You can select the desired bar, beat, or tick.

6
• Punch Out—to where you want to stop recording. You can select the desired bar, beat or tick, here, too.
If you don’t want to be bothered with bars, beats, and ticks, just play the section you want to punch. Click the AUTO PUNCH window’s Now In button when you get to the place where you want to start recording, and click the Now Out button where you want to stop recording.
3. When you’re ready, press the REC button—you’ll see your punch points in the RECORDING PARAMETER (AUDIO) window.
4. Use 7 and/or 8 to move to a place before the section you want to punch.
5. Press PLAY—the MV-8000 waits to actually begin recording until it reaches the Punch In location, and automatically stops recording when it reaches the Punch Out location.
6. Press STOP when you’re done.
Naming the Track
It’s a good idea to name each recorded track so you don’t have to remember which one it is. To name a track:
1. Double-click on the track’s name to display the EDIT TRACK NAME window, or press MENU and select Track Name...
To learn how to name tracks when you’re working on the built-in LCD, click here.
2. In the EDIT TRACK NAME window, name the track as desired and click OK.
Editing a Direct Recording
You can edit your recording the same way you’d edit the audio on any MV-8000 audio track. A detailed discussion of track-editing is beyond the scope of this booklet, but here are a few tips to get you started.
See the MV-8000 Version 2.0 Owner’s Manual for details on editing sequence tracks.
Selecting What You Want to Edit
To learn how to edit audio when you’re working on the built-in LCD, click here.
To select an entire recording for editing on the VGA, you can:
• click the audio symbol next to its track name so it turns dark.
• click directly on the recording.
To select a portion of a recording for editing:
1. Click the audio symbol next to its track name so it turns dark.
2. Select the Range tool and drag from left to right over the portion of the recording you want to edit.
Remember to click the Arrow button to the left of the Range tool once you’ve finished selecting the portion of the recording you want to edit.
The Range tool

7
The Edit Pop-Up
When you’ve selected a recording—or a portion of it—right-click your mouse in the playlist area to display the Edit pop-up. It’s filled with editing options for the recording.
The same menu appears when you’re editing MIDI tracks—the items that are unavailable now are for MIDI editing only.
This menu item: Allows you to:Move... move the selected audio to a different time
location and/or track.Copy & Paste... copy the selected audio to a different time
location and/or track, replacing whatever’s already there.
Copy & Insert... copy the selected audio to a different time location and/or track, inserting it at the desired location. If audio’s already there, it’s pushed back in time so it starts at the end of the inserted audio.
Erase replace the selected audio with silence.Cut delete the selected audio, sliding any audio
that follows it into its place.Copy as Audio Phrase... assign the selected audio to one of the
MV-8000 pads as an audio phrase.Audio Event Parameter control the behavior of the recording. We’ll get
into the AUDIO EVENT PARAMETER window in detail in “Audio Event Parameters.”
Copy as New Pattern... and Paste Pattern... have to do with managing MV-8000 patterns—we’re not concerned with that here.
Dragging, Dropping
You can also use your mouse to move and/or copy the recording on your VGA. To:
• move the recording—click the recording and drag it to the desired position.
• copy the recording—hold down SHIFT and drag a copy of the recording to the desired position.
Audio Event Parameters
When you select Audio Event Parameter from the Edit pop-up, the AUDIO EVENT PARAMETER window appears.
This parameter: Sets:Level the basic level of the recording.Coarse Tune the tuning of the recording, in keyboard steps,
or “semitones.”Fine Tune the tuning of the recording, in 100ths of a
semitone.BPM Sync whether or not the recording’s tempo is locked
to the sequence tempo so it automatically stays in time even if the sequence tempo changes after Direct Recording.
Stretch Type the algorithm the MV-8000 uses to keep the recording in time when BPM Sync is on. Higher values result in higher audio quality. If you’re not sure of the setting to use, set this to Auto.

8
This parameter: Sets:BPM the tempo of the recording. This is set by
default to the sequence’s tempo during Direct Recording.
Click the onscreen Move button to change the recording’s starting location. Click the Sample Edit button to display a window where you can—among other things—normalize the recording to make it as loud as possible, or convert a stereo recording into a mono one.
Working on the Built-In LCD: Special Cases
Usually—as we’ve said—there are only small differences between working on a VGA or on the built-in LCD. This booklet contains a few exceptions, though: naming a track, selecting audio for editing, and opening the Edit Pop-Up menu. The following sections explain how to do these things on the LCD.
If you’re working on a VGA, you can skip the following sections—you’ve already learned how to do these things.
Naming a Track on the Built-In LCD
1. Press SEQUENCE to display the SEQUENCE screen.2. Use 6 or 5 to select the desired track.
The track label becomes dark when the track is selected.
3. Press MENU, and select Track Name... to open the EDIT TRACK NAME window.
4. Use the VALUE dial and the 3 and 4 buttons to enter the name you want.
5. Press F5 (OK) when you’re done.
If you jumped to this section from Page 6, click here to jump back.
Editing on the Built-In LCD
Selecting a Recorded Region for Editing
1. Press SEQUENCE.2. Press F5 (Seq Edit) to display the SEQUENCE EDIT screen.3. Use 6 or 5 to select the track you want to edit, and then
press F1 (Track Sel). If you’d like to edit all of your tracks at the same time, hit F2 (All Track Sel).
4. If you see any numbers in the Region In/Out box, press F3 (Rgn In/Out) once or twice to remove them.
Press F3 (Rgn In/Out) to clear this box.
5. Move to the beginning of the section you want to edit, and then press F3 (Rgn In/Out).

9
6. Move to the end of the section you want to edit—as you do, the selected region becomes highlighted.
7. Press F3 (Rgn In/Out) again. If you’d like to start over again, hit F3 (Rgn In/Out) twice.
If you jumped to this section from Page 6, click here to jump back.
Quick-Selecting a Single Measure for Editing
You can use the Quick Region feature to choose a single measure for editing. Here’s how:
1. Press SEQUENCE.2. Press F5 (Seq Edit) to display the SEQUENCE EDIT screen.3. Use 6 or 5 to select the track you want to edit.
The track label becomes dark when the track is selected.
4. Move to the beginning of the measure you want to edit, and then press F4 (Quick Rgn)—the measure turns dark to show that it’s now selected for editing.
To start over again, hit F3 (Rgn In/Out) twice.
If you jumped to this section from Page 6, click here to jump back.
Opening the Edit Menu on the Built-In LCD
1. After selecting the desired audio region on the SEQUENCE EDIT screen, press F5 (Command) to open the Edit Menu.
2. Select the desired menu item and hit ENTER.
To jump to a list of the menu items that have to do with editing your recording, click here.

10
The End
We hope you’ve found this workshop helpful. Keep an eye out for other MV-8000 Workshop booklets, all available for downloading at www.RolandUS.com.
For the latest MV-8000 updates and support tools, visit the Roland U.S. Web site at www.RolandUS.com. If you need personal assistance, call our amazing Product Support team at 323-890-3745.


3 4 5 6
3


3

1
Getting the Most from Sample RAM
®ÂØÒňΙ
Workshop
© 2005, 2006 Roland Corporation U.S.All rights reserved. No part of this publication may be reproduced in any form without the written permission of Roland Corporation U.S.
MVWS08
MV-8000

2
About the MV-8000 Workshop Series
Roland’s MV-8000 Production Studio is packed with features for making music. It’s a heavy-duty sampler that can do all sorts of things with sounds you sample or import. Its sequencer has 136 tracks for MIDI sequencing and playing back audio, and its set of editing tools is deep. It’s a great box for performing—using its pads or an attached MIDI keyboard—and, of course, it can even burn a CD of your final master mix.
Each MV-8000 Workshop Series booklet focuses on one MV-8000 topic, and is intended as a companion to your MV-8000 Owner’s Manuals.
This booklet requires MV-8000 O.S. Version 3.5 or higher. You can download the latest O.S. from www.RolandUS.com.
About This Booklet
As you work on a project, your MV-8000’s sample RAM can fill up with unwanted stuff, leaving you no room for new samples. This booklet explains how to reclaim this wasted space by “optimizing” your project.
The Buttons, the LCD, or a VGA?
On the MV-8000, you can work on the built-in LCD or on an optional color VGA monitor. You can use the MV-8000’s front-panel controls, or a mouse on your VGA screen. No matter how you like to work, there’s an easy way to get things done.
Probably the best idea is to work primarily with a mouse on a VGA, using the MV-8000’s buttons to quickly get in and out of MV-8000 screens. The procedures in this booklet typically assume you’ll be working this way.
If you’re not, don’t worry, because the VGA windows and LCD screens are essentially the same. There are clickable VGA icons for all of the MV-8000’s buttons. You can also press an onscreen button by clicking your mouse or by pressing an F button on the MV-8000. The main difference has to do with how you deal with settings—or “parameters”—and how you select objects.
If you’re using a mouse: If you’re using the MV-8000’s buttons:
You select parameters and objects with a left click. You change the selected
parameter’s value by turning the scroll wheel. You can display an object’s menu by right-clicking the object.
You select parameters and objects with the 3, 4, 5, and 6
CURSOR buttons. Change a selected parameter’s value by turning the
VALUE dial or by pressing DEC and INC.
Left click Right click
Scrollwheel
Understanding the Symbols in This Booklet
Throughout this booklet, you’ll come across information that deserves special attention—that’s the reason it’s labeled with one of the following symbols.
A note is something that adds information about the topic at hand.
A tip offers suggestions for using the feature being discussed.
Warnings contain important information that can help you avoid possible damage to your equipment, your data, or yourself.

3
How Sample RAM Gets Jammed Up
The MV-8000 ships with a generous 128 MB of sample RAM, and you can expand it all the way up to 512 MB—see the MV-8000 Owner’s Manual for details.
To learn more about what sample RAM is, see the MV-8000 Sampling Workshop booklet.
No matter how much RAM you have, you may find yourself in a situation like this: you’re only using a few patches or audio phrases in your project, but you find you’ve run out of room for new patches or samples. Here’s how this can happen.
Hunting for the Right Patch
To learn how to load patches stored on your hard drive, see the MV-8000 Loading Patches Workshop booklet.
When you’re searching for the patches you want to use in a project, each patch you check out has to be loaded into the MV-8000 before you can hear it. When you do this, the patch’s samples are loaded into sample RAM.
If you decide you don’t want to use a patch, and move on to the next one you want to check out, the first patch’s samples remain in sample RAM, taking up space. Try out a bunch of patches, and you can see how lots of space in sample RAM gets used up fast.
You can avoid this problem by manually deleting a patch along with its samples after you’ve checked it out. (We describe how to do this in detail in the MV-8000 Loading Patches Workshop booklet.) Of course, it means stopping your patch search over and over to take care of this housekeeping.
Experimenting with Samples
To learn about sampling on the MV-8000, check out the following MV-8000 Workshop booklets: Sampling, Auto Chop, Importing a Sample from CD, Direct Recording, Spreading a Sample Across the Pads.
A similar thing can happen if you’re fooling around with making samples. Even when you decide not to use a sample, it’s still in sample RAM unless you stop and delete it.
As with an unwanted patch, you can get rid of each of these samples, one-by-one. You’d go to the MV-8000’s Sample Manager in the PROJECT menu, select the sample, click Command, and use the Delete option. Again, this can take some time if you’ve got lots of samples to toss.
Edited Copies
Destructive sample editing operations—such as normalizing, truncating, and so on—offer you the choice of replacing a sample with the edited version, or of creating a new, edited copy. If you make copies of samples during editing, you may wind up with multiple versions of the same sample, even though you’re only actually using one.
Wasted Notes
If you load an instrument that has lots of samples running up and down the pads, and you’re only playing a few notes, all of its extra, unplayed samples tag along, taking up space in sample RAM.

4
Sticky Stuff
Let’s say you start a project one day and try out a lot of patches, or you make a lot of samples you decide not to use. Eventually, you find the sounds you want and get down to business. At the end of the day, you save your project.
Here’s the thing: when you save the project, all the unused stuff gets saved, too. The next time you load the project, all of this unwanted data gets loaded right alongside the good stuff. Ba-boom! Suddenly you’re out of room for new patches or samples.
The Solution: Optimization
The MV-8000 offers a special operation that trims away everything in sample RAM that you’re not using. It’s called “optimizing” a project.
Optimization removes:
• samples that belong to patches you’re not using.• individual samples you’ve made that you’re not using.• unused copies of samples you’re using.• samples in patches for notes you’re not playing.
Optimizing can’t read your mind, so it doesn’t know if you intend to use something in sample RAM that you’re not using yet. It searches for data that’s not being used now, and deletes it. Therefore, don’t optimize your project if you’ve got stuff in sample RAM you may want to use later on. (Of course, you can always reload discarded patches from your hard drive later on if you need to.)
How to Optimize a Project
1. Press PROJECT and select Sample Manager from the PROJECT menu—this opens up the SAMPLE MANAGER window.
2. Press the MENU button to display the Sample Manager’s MENU pop-up.
3. Select Optimize and click Select—the MV-8000 displays a warning to remind you that anything in sample RAM that’s not currently being used is about to get tossed out.
4. Click Yes to proceed.5. When optimization’s complete, save your project by
selecting Save Project from the PROJECT menu.

5
The End
We hope you’ve found this workshop helpful. Keep an eye out for other MV-8000 Workshop booklets, all available for downloading at www.RolandUS.com.
For the latest MV-8000 updates and support tools, visit the Roland U.S. Web site at www.RolandUS.com. If you need personal assistance, call our amazing Product Support team at 323-890-3745.


3 4 5 6


1
Getting Around the MV-8000’s Hard Drive
®ÂØÒňΙ
Workshop
© 2005, 2006 Roland Corporation U.S.All rights reserved. No part of this publication may be reproduced in any form without the written permission of Roland Corporation U.S.
MVWS10
MV-8000

2
About the MV-8000 Workshop Series
Roland’s MV-8000 Production Studio is packed with features for making music. It’s a heavy-duty sampler that can do all sorts of things with sounds you sample or import. Its sequencer has 136 tracks for MIDI sequencing and playing back audio, and its set of editing tools is deep. It’s a great box for performing—using its pads or an attached MIDI keyboard—and, of course, it can even burn a CD of your final master mix.
Each MV-8000 Workshop Series booklet focuses on one MV-8000 topic, and is intended as a companion to your MV-8000 Owner’s Manuals.
This booklet requires MV-8000 O.S. Version 3.5 or higher. You can download the latest O.S. from www.RolandUS.com.
About This Booklet
All of your MV-8000 sounds and songs are stored on its internal hard drive. If you’re not a computer user, you may find a hard drive’s file and folder system confusing. This booklet explains how to get around on your MV-8000’s hard drive.
The Buttons, the LCD, or a VGA?
On the MV-8000, you can work on the built-in LCD or on an optional color VGA monitor. You can use the MV-8000’s front-panel controls, or a mouse on your VGA screen. No matter how you like to work, there’s an easy way to get things done.
Probably the best idea is to work primarily with a mouse on a VGA, using the MV-8000’s buttons to quickly get in and out of MV-8000 screens. The procedures in this booklet typically assume you’ll be working this way.
If you’re not, don’t worry, because the VGA windows and LCD screens are essentially the same. There are clickable VGA icons for all of the MV-8000’s buttons. You can also press an onscreen button by clicking your mouse or by pressing an F button on the MV-8000. The main difference has to do with how you deal with settings—or “parameters”—and how you select objects.
If you’re using a mouse: If you’re using the MV-8000’s buttons:
You select parameters and objects with a left click. You change the selected
parameter’s value by turning the scroll wheel. You can display an object’s menu by right-clicking the object.
You select parameters and objects with the 3, 4, 5, and 6
CURSOR buttons. Change a selected parameter’s value by turning the
VALUE dial or by pressing DEC and INC.
Left click Right click
Scrollwheel
Understanding the Symbols in This Booklet
Throughout this booklet, you’ll come across information that deserves special attention—that’s the reason it’s labeled with one of the following symbols.
A note is something that adds information about the topic at hand.
A tip offers suggestions for using the feature being discussed.
Warnings contain important information that can help you avoid possible damage to your equipment, your data, or yourself.

3
Files and Folders
Everything you do on the MV-8000 gets saved on its hard drive as a “file.” (On computers, these are also called “documents.”) Each sample is a file, each project is a file, each patch, and so on. As you can imagine, it’s easy to wind up with dozens, hundreds, even thousands, of files on a hard drive.
To help keep all of these bazillion files organized—and to allow you to find what you’re looking for when you want to load something into the MV-8000—files are stored in groups of files called “folders.”
Each folder has a sensible name that tells you what’s inside it, and has a folder icon to the left of its name to make it easy for you to tell a folder from a file.
The folder idea comes from computer desktops, which are modeled on real-world office desktops. The idea is that when you want to put away a bunch of documents, you put them in folders, just like in a real office.
Sometimes a folder contains a bunch of other folders that contain similar files, as we’ll see. Keeping the folders themselves organized makes the job of finding things that much easier.
The main idea is that folders help you organize things in such a way that you don’t have to remember where anything is—you can just go looking, and the folder names guide you to the file you want.
CD-ROMs and floppy disks may also use folders for keeping their files organized. Getting around on them is exactly the same as getting around on your hard drive.
Let’s say you’re looking for a synth patch to load from the MV-8000’s hard drive. You’d start by looking at a list of the hard drive’s main folders. Whaddya know? There’s a folder there called “PATCHES.”
Open up the PATCHES folder, and there’s a SYNTH folder.
The name of the folder you’re now looking inside.
Open that up, and there you are: a list of synth patches.
Folder icon

4
Up and Down
Using folders can be a bit like drilling down through a pile of stuff, and sometimes climbing back up and out. It feels like this because you view the contents of one folder at a time. Here’s what we mean.
You’d start with the hard drive’s main folders. This group of folders is located at the hard drive’s “root level.”
The root-level folders are also sometimes called “top-level” folders due to this whole digging-down thing—these folders are at the top of the pile.
You open the root-level PATCHES folder and look inside it. Ah. There are folders in there for different patch types.
You open the SYNTH folder, and you see a list of synth-patch files. You’ve just dug down from the PATCHES folder into the SYNTH folder.
Hmm, maybe you want a bass patch. You move back up and out of the SYNTH folder, back to the PATCHES folder.
Open the BASS folder—you’re digging down again.
You decide you don’t want a bass patch. Climb out of the BASS folder and back up to the list of folders in the PATCHES folder.
See what we mean by up-and-down? Now let’s talk about the mechanics of getting around your hard drive.
You won’t climb back up from where you are once you find the file or location you want—you’ll go ahead and load, save, or import your file. We’ve presented the example above for demonstration purposes.

5
Getting Into the Hard Drive in the First Place
You’ll need to get around your hard drive when you:
• load—a project, patch, or sample.• save—a project, patch, or sample.
You can learn how to load and save projects, patches, and samples in the MV-8000 Owner’s Manual and in other MV-8000 Workshop booklets.
As you begin the process of loading or saving something on the MV-8000, you’ll soon find yourself looking at the contents of your hard drive.
Understanding LOAD and SAVE Windows
Your view of your hard drive is pretty much the same whether you’re loading or saving something, so let’s discuss what you’ll find in all of the LOAD and SAVE windows.
Up Folder icon
File/Folder list
F5 button label
Current drive
CURSOR key
Gauge area
Select Drive button
Location
• Location—This shows the name of the folder whose contents you’re currently viewing. (Here, we’re at the root level—not in a folder—so no folder name is displayed.)
• Current drive—This shows the name of the drive you’re currently working with, along with a picture of it. In most cases, this’ll be the MV-8000’s hard drive, as shown here.
• Select Drive button—Click this button to select a new drive from the SELECT DRIVE menu. You can choose the hard drive, an audio CD (for importing audio), a CD-ROM (for importing sample data files), or a floppy disk.
In the MV-8000, a “drive” is any disk you can use for loading, importing, or saving data. Its own internal hard drive is a drive. So is any currently inserted audio CD, CD-ROM, or floppy disk.
• CURSOR key—The CURSOR key provides a little “cheat sheet” that shows you which 3, 4, 5, and/or 6 buttons are currently active. This changes depending on what you’re viewing and what you’ve got selected onscreen.
• Gauge area—A memory gauge is a bar that shows the amount of free space you have for the job at hand. In our illustration, you see how much wave memory is available because we’re loading patches and their samples. You may also see a Seq Memory gauge that shows how much room you have for sequence data, or a Hard Disk gauge that tells you how much empty hard disk space you have left.
• Up Folder icon—Click this icon to move up and out of the current folder. We’ll discuss this more later.
• File/Folder list—This area of the window shows you the contents of the hard drive’s root level, or of the folder you’ve currently got open.
When you’re importing files, each file’s type and size may be displayed in the File/Folder list’s Ext and Size columns, depending on the operation you’re performing.
• F5 button label—The job performed by the F5 button depends on what you’re doing. Most operations end with a press of the F5 button.

6
Opening and Closing Folders
Opening a Folder
To open, or look inside, a folder, start by selecting the folder on the display.
You can open the selected folder in three ways. You can:
• double-click it.• press the flashing ENTER button.• press the 4 CURSOR button.
Closing a Folder
When you close a folder, the display moves you back up one level—you’ll see the folder from the outside, along with any other folders or files stored in the same place.
You can close the current folder by:
• pressing the 3 CURSOR button.• clicking the Up Folder icon.
If you ever get lost and can’t figure out where you are on the hard drive, keep pressing 3 until you get back to the drive’s root level.
CURSOR Button Cheat Sheet
Here’s a quick cheat sheet that shows you what the CURSOR buttons do when you’re moving around the hard drive:
Moves up the screen, selecting the file or folder
above the currently selected one.
Moves down the screen, selecting the file or folder
below the currently selected one.
Opens a selected folder.
Exits the current folder.
The End
We hope you’ve found this workshop helpful. Keep an eye out for other MV-8000 Workshop booklets, all available for downloading at www.RolandUS.com.
For the latest MV-8000 updates and support tools, visit the Roland U.S. Web site at www.RolandUS.com. If you need personal assistance, call our amazing Product Support team at 323-890-3745.
Up Folder icon

1
Working with External MIDI Instruments
®ÂØÒňΙ
Workshop
© 2005, 2006 Roland Corporation U.S.All rights reserved. No part of this publication may be reproduced in any form without the written permission of Roland Corporation U.S.
MVWS11
MV-8000

2
About the MV-8000 Workshop Series
Roland’s MV-8000 Production Studio is packed with features for making music. It’s a heavy-duty sampler that can do all sorts of things with sounds you sample or import. Its sequencer has 136 tracks for MIDI sequencing and playing back audio, and its set of editing tools is deep. It’s a great box for performing—using its pads or an attached MIDI keyboard—and, of course, it can even burn a CD of your final master mix.
Each MV-8000 Workshop Series booklet focuses on one MV-8000 topic, and is intended as a companion to your MV-8000 Owner’s Manuals.
This booklet requires MV-8000 O.S. Version 3.5 or higher. You can download the latest O.S. from www.RolandUS.com.
About This Booklet
The MV-8000 can act as the command center of a MIDI studio. This booklet explains how to play MIDI instruments—including computer-based soft synths—from the MV-8000’s pads, as well as how to use MIDI sounds in your MV-8000 sequences.
The Buttons, the LCD, or a VGA?
On the MV-8000, you can work on the built-in LCD or on an optional color VGA monitor. You can use the MV-8000’s front-panel controls, or a mouse on your VGA screen. No matter how you like to work, there’s an easy way to get things done.
Probably the best idea is to work primarily with a mouse on a VGA, using the MV-8000’s buttons to quickly get in and out of MV-8000 screens. The procedures in this booklet typically assume you’ll be working this way.
If you’re not, don’t worry, because the VGA windows and LCD screens are essentially the same. There are clickable VGA icons for all of the MV-8000’s buttons. You can also press an onscreen button by clicking your mouse or by pressing an F button on the MV-8000. The main difference has to do with how you deal with settings—or “parameters”—and how you select objects.
If you’re using a mouse: If you’re using the MV-8000’s buttons:
You select parameters and objects with a left click. You change the selected
parameter’s value by turning the scroll wheel. You can display an object’s menu by right-clicking the object.
You select parameters and objects with the 3, 4, 5, and 6
CURSOR buttons. Change a selected parameter’s value by turning the
VALUE dial or by pressing DEC and INC.
Left click Right click
Scrollwheel
Understanding the Symbols in This Booklet
Throughout this booklet, you’ll come across information that deserves special attention—that’s the reason it’s labeled with one of the following symbols.
A note is something that adds information about the topic at hand.
A tip offers suggestions for using the feature being discussed.
Warnings contain important information that can help you avoid possible damage to your equipment, your data, or yourself.

3
The Heart of Your MIDI Studio
If you have other MIDI instruments—hardware synths, samplers, or soft synths running on a computer—you can play their sounds from your MV-8000, using them alongside MV-8000 patches and audio phrases in your MV-8000 songs.
While this booklet explains making MIDI connections and the MV-8000’s MIDI settings, it assumes you have a basic understanding of MIDI.
Throughout this booklet, we’ll refer to all external MIDI devices as simply “MIDI instruments” to make things easier to read.
To learn how to operate an external MIDI instrument or a computer/soft synth setup, see its documentation.
Listening to Your MIDI Instruments
You’ll need a way to hear both the MV-8000 and your MIDI instruments when you want to use them together. There are basically two ways to do this. You can:
• listen through a mixer—by connecting the MV-8000 and the MIDI instruments to the mixer and listening to the mixer’s output. (To learn how to set up a mixer, see its documentation.)
• listen through the MV-8000—if you’re using the MV-8000 with a single MIDI instrument, or if you’ve connected multiple MIDI instruments to a mixer. We’ll explain this option in detail in “Listening Through the MV-8000,” next.
To find out how to get the best sound from a MIDI instrument, see its documentation.
Listening Through the MV-8000
Making a Direct Audio Connection
You can listen to a MIDI instrument—or a mixer—in stereo through the MV-8000 by connecting its:
• analog stereo outputs—to the MV-8000’s L and R MIC/LINE jacks.
When you’re not using the PHONO jacks, keep the included shorting pin inserted in them.
• digital output—to a digital input on an optional MV8-OP1 Audio I/O Expansion board (purchased separately) installed in your MV-8000.
In addition to simplicity, there’s another advantage to listening directly through the MV-8000: If you decide to sample your MIDI instrument(s), you’re already set up to do so.
Selecting the MV-8000 Input(s) You’re Using
1. Press the MV-8000’s SYSTEM button.2. Select Global from the SYSTEM menu to display
the GLOBAL window.
Whenever you want to select a numbered menu item—such as the Global menu item—you can select it by pressing its number on the MV-8000’s numeric keypad and hitting ENTER.

4
If you’ve installed an optional MV8-OP1 expansion board, you’ll see its digital connectors here.
Input Select is always set to Analog unless you’ve installed an MV8-OP1. If you have, you can also select the Coaxial, Optical, or R-BUS digital input.
3. Set the Input Type parameter to Stereo.
Setting The MIDI Instrument’s Listening Level
1. Press the MV-8000 MIXER button to display the MIXER (AUX/FX/AUDIO PHRASE/INPUT) window.
IN (A) level
If the AUX/Phrs/In pane isn’t visible—as shown here—click its tab at the top of the window to bring it forward.
2. Set the IN (A) fader’s level to 100, as shown above.
3. If you’re using the analog inputs, listen to your MIDI instrument and adjust the SENS knob for each input so that the level shown in the IN (A) level meter onscreen is as loud as possible without lighting its red Clip indicators.
Clip indicators
Typically, you’ll set the L and R SENS knobs to the same position.
Once they light, the Clip indicators stay lit to make sure you see your volume’s too high. To unlight them, click the Reset Peak button.
Connecting the MV-8000 to Other MIDI Devices
About the MV-8000’s Two MIDI OUT Jacks
The MV-8000 has two MIDI OUT jacks on its rear panel: MIDI OUT A and MIDI OUT B.
Each MIDI OUT jack can transmit MIDI data on 16 MIDI channels, allowing you to play 16 individual MIDI sounds.
Since each jack has its own set of 16 MIDI channels, together they allow you to play and control up to 32 individual MIDI instrument sounds.
Add a third MIDI OUT, as well as a second MIDI IN jack, by connecting a Roland DIF-AT24—purchased separately—to an installed MV8-0P1.

5
MIDI Connection Options
To make MIDI connections, you’ll need a MIDI cable—purchased separately—for each MIDI instrument you plan to use.
• You can connect the MV-8000 directly to one or two MIDI instruments—Connect one of the MV-8000 MIDI OUT jacks to the MIDI IN jack on each MIDI instrument.
MIDI OUT A MIDI OUT B
MIDI IN
MIDI IN
You can use either MV-8000 MIDI OUT jack for a single MIDI instrument. If you’re using two, either MIDI OUT jack is fine for either MIDI instrument.
If your MIDI instrument has a keyboard, you can use it for sequencing on the MV-8000 by connecting its MIDI OUT jack to the MV-8000’s MIDI IN jack.
• You can “daisy-chain” MIDI instruments—If a MIDI instrument has a MIDI THRU jack, it can pass the MIDI data it receives from the MV-8000 to the MIDI IN jack of another MIDI instrument. This lets you connect several MIDI instruments, one-after-another, to either MV-8000 MIDI OUT jack.
MIDI
IN
MIDI
THRU
MIDI OUT A or B
MIDI
IN
Each instrument in a MIDI daisy-chain gets its data a little later than the instrument before it. Keep your MIDI rhythm sounds tight by placing their instruments as close as possible to the beginning of the daisy-chain.
Using MIDI Instruments in a Sequence
Pads, Plus
For recording sequencer tracks, you can use the MV-8000’s pads and/or a MIDI controller—such as a MIDI keyboard with or without its own sounds—connected to the MV-8000’s MIDI IN jack.
Preparing the MV-8000 for MIDI Sequencing
1. Press the SYSTEM button to display the SYSTEM menu.2. Select MIDI to open the MIDI window.
3. Make sure Multi Timbre Sampler Mode is set to Off as shown above. This accomplishes two things:• The MV-8000 pads and a MIDI keyboard connected
to the MV-8000’s MIDI IN jack play the MIDI sound controlled by the currently selected sequencer track.
• As you play a MIDI instrument from the MV-8000 pads or a connected MIDI keyboard, you can also record your playing into the MV-8000’s sequencer.

6
Setting Up the MIDI Instrument
On each MIDI instrument you’ll be using, you’ll need to select the desired sound, or sounds. If you’re using a:
• single-sound MIDI instrument—choose the sound you want the MV-8000 to play.
• drum machine—select the drum or percussion kit you want the MV-8000 to play.
• multitimbral MIDI instrument—set up the instrument’s parts so that they play the desired sounds, and so that each part receives MIDI data on the correct MIDI channel.
A multitimbral MIDI instrument can play multiple sounds on separate MIDI channels. The instrument is typically divided into “parts,” with each playing its own sound on its own MIDI channel.
The MV-8000 can select sounds in a MIDI instrument automatically as the sequencer plays using MIDI Program Change messages. To learn more, see “EVENT LIST EDIT screen” on Page 214 of the MV-8000 Owner’s Manual.
If Your MIDI Instrument Has a Keyboard
To use a keyboard with its own sounds for MV-8000 sequencing, only the MV-8000 should actually play those sounds. Check the keyboard’s manual to learn how to temporarily disable the playing of its sounds directly from the keyboard. (In the Roland Juno-D shown above, for example, you’d turn off the Local Control parameter.)
Choosing MIDI Instrument MIDI Channels
Here are some things to keep in mind as you set up your MIDI instrument(s):
• If you’re using both of the MV-8000’s MIDI OUT jacks, you’ve really got 32 completely separate MIDI channels to choose from. Get used to thinking of these as A 1-16 and B 1-16 when you assign MIDI channels to the sounds you want to play.
• In order for an MV-8000 sequencer track to play a MIDI sound, its track has to be set up to send out MIDI data on the sound’s MIDI channel. When you set up your MIDI instrument(s), keep track of each sound’s MIDI channel since you’ll need this information later when you set up its track.
• Normally, each MIDI channel controls a single sound or drum/percussion kit in a MIDI instrument. Therefore, set each sound—whether it’s the only sound played by a MIDI instrument, or a part in a multitimbral MIDI instrument—to its own unique MIDI channel.
If you want to layer two or more MIDI sounds so that they play exactly the same thing, you can play them from the same MV-8000 sequencer track by setting them to respond to the same MIDI channel.
Preparing to Record a MIDI Instrument Track
The MV-8000 sequencer has two types of tracks:
• audio tracks—play onboard audio phrases.• MIDI tracks—play MV-8000 patches and/or sounds in MIDI
instruments.
When you want to sequence a MIDI instrument’s sound, use a MIDI track. You can identify a MIDI track in a song by the note icon to the left of its name.

7
A MIDI track can play an internal MV-8000 patch and a MIDI instrument sound at the same time. You’ll see how to do this in “Setting up a MIDI Instrument Track” below.
When you create a new project using the default settings, the song the MV-8000 automatically loads contains four MIDI tracks. Likewise, when you create a new song using the default settings, the song has four MIDI tracks.
If your song has no MIDI tracks, or if you’ve used all the MIDI tracks it has, you can easily create new ones, as we’ll see.
Creating a MIDI Instrument Track
Whether you want to work with a MIDI track that already exists, or you want to add a new MIDI track, you’ll use the same two settings to set up the track for playing a MIDI instrument. These are the Output Assign and MIDI parameters.
To set up a MIDI track that already exists:
1. If you’re not already on the SEQUENCE screen, press SEQUENCE.
2. Select the MIDI track you want to use by pressing the 6 or 5 buttons to highlight it. (If you’re using a VGA, you can also select it by clicking its name.)
3. Click Track Param to open the TRACK PARAMETER window where you’ll find the two parameters.
When you’re creating a new MIDI track:
1. If you’re not already on the SEQUENCE screen, press SEQUENCE.
2. Press the MENU button.3. Select Add New MIDI Track... to open the ADD MIDI
TRACK window where you’ll see the two parameters we’re concerned with.
Tell the MV-8000 how many new MIDI tracks you want to add by setting the Number of Tracks parameter.
The Output Assign Parameter
The setting of the Output Assign parameter decides whether or not the track’s notes get sent to an MV-8000 part in order to play its patch.
To learn about parts and patches, see “About Patch Loading” on Page 3 in the MV-8000 Loading Patches Workshop booklet.
You can set Output Assign to Off, or set it to the part whose patch you want the MIDI track to play.
When you want the track to play only a MIDI instrument, set Output Assign to Off.

8
The MIDI Parameter
The MIDI parameter selects the MIDI channel that carries the track’s data to its MIDI sound. Set it to the MIDI channel you selected for the sound when you set up its MIDI instrument. You can set MIDI to:
• Off—so that the track sends out no MIDI data.• A-1 through A-16—so that the track’s data is sent on one of
the 16 MIDI channels coming out of the MIDI OUT A jack.• B-1 through B-16—so that the track’s data is sent on one of
the 16 MIDI channels coming out of the MIDI OUT B jack.
Once you’ve set the MIDI parameter, we recommend naming your track to avoid confusing it with other tracks. Click Name to open the EDIT TRACK NAME window where you can name the track.
Automatic MIDI Instrument Patch Selection
A MIDI instrument’s track can automatically select the desired sound when you start playback of an MV-8000 song or pattern from the top. It does this by sending the MIDI instrument the required Program Change and Bank Select MIDI messages. Here’s how to set this up.
Before proceeding, see the MIDI instrument’s documentation to learn the Program Change and Bank Select messages for the sound you want to select from the MV-8000.
1. If you’re not already on the SEQUENCE screen, press SEQUENCE.
2. Select the desired MIDI track by pressing the 6 or 5 buttons to highlight it. (If you’re using a VGA, you can also select it by clicking its name.)
3. Click Track Param to open the TRACK PARAMETER window.
You select an external patch with the Prog and Bank. H and L parameters.
4. Set:• Prog—to the desired sound’s Program Change value.• Bank. H—the the desired sound’s MSB value.• Bank. L—the the desired sound’s LSB value.
You can set up other tracks the same way by selecting them using the Track parameter, and then setting their parameters as desired.
5. When you’re done, click Close.
Ready to Go
That’s it. At this point you can record your MIDI instrument track the same way you’d record a track that plays an MV-8000 patch. To learn about sequencing on the MV-8000, see the MV-8000 Owner’s Manual.
The End
We hope you’ve found this workshop helpful. Keep an eye out for other MV-8000 Workshop booklets, all available for downloading at www.RolandUS.com.
For the latest MV-8000 updates and support tools, visit the Roland U.S. Web site at www.RolandUS.com. If you need personal assistance, call our amazing Product Support team at 323-890-3745.

1
Using the MV-8000 with an External Sequencer
®ÂØÒňΙ
Workshop
© 2005 Roland Corporation U.S.All rights reserved. No part of this publication may be reproduced in any form without the written permission of Roland Corporation U.S.
MVWS12
MV-8000

2
About the MV-8000 Workshop Series
Roland’s MV-8000 Production Studio is packed with features for making music. It’s a heavy-duty sampler that can do all sorts of things with sounds you sample or import. Its sequencer has 136 tracks for MIDI sequencing and playing back audio, and its set of editing tools is deep. It’s a great box for performing—using its pads or an attached MIDI keyboard—and, of course, it can even burn a CD of your final master mix.
Each MV-8000 Workshop Series booklet focuses on one MV-8000 topic, and is intended as a companion to your MV-8000 Owner’s Manuals.
This booklet requires MV-8000 O.S. Version 3 or higher. You can download the latest O.S. for free from www.RolandUS.com.
About This Booklet
The MV-8000 can act as a powerful sample player when it’s used with a computer sequencing program, or with a standalone hardware sequencer. It can play up to 16 patches at a time, or 15 patches along with time-stretchable audio phrases. This booklet explains how.
The Buttons, the LCD, or a VGA?
On the MV-8000, you can work on the built-in LCD or on an optional color VGA monitor. You can use the MV-8000’s front-panel controls, or a mouse on your VGA screen. No matter how you like to work, there’s an easy way to get things done.
Probably the best idea is to work primarily with a mouse on a VGA, using the MV-8000’s buttons to quickly get in and out of MV-8000 screens. The procedures in this booklet typically assume you’ll be working this way.
If you’re not, don’t worry, because the VGA windows and LCD screens are essentially the same. There are clickable VGA icons for all of the MV-8000’s buttons. You can also press an onscreen button by clicking your mouse or by pressing an F button on the MV-8000. The main difference has to do with how you deal with settings—or “parameters”—and how you select objects.
If you’re using a mouse: If you’re using the MV-8000’s buttons:
You select parameters and objects with a left click. You change the selected
parameter’s value by turning the scroll wheel. You can display an object’s menu by right-clicking the object.
You select parameters and objects with the 3, 4, 5, and 6
CURSOR buttons. Change a selected parameter’s value by turning the
VALUE dial or by pressing DEC and INC.
Left click Right click
Scrollwheel
Understanding the Symbols in This Booklet
Throughout this booklet, you’ll come across information that deserves special attention—that’s the reason it’s labeled with one of the following symbols.
A note is something that adds information about the topic at hand.
A tip offers suggestions for using the feature being discussed.
Warnings contain important information that can help you avoid possible damage to your equipment, your data, or yourself.

3
The MV-8000 as a Multitimbral Sampler
If you use an external sequencer, you can play MV-8000 sounds using Multi Timbre Sampler mode.
In the MV-8000’s Multi Timbre Sampler mode, it acts as a “multitimbral” sampler. This means that it can play up to 16 sounds independently and at the same time—it’s as if the MV-8000 contains a bunch of little samplers.
Each of these “little samplers” is called a “part.” Each part has its own settings and can play its own patch.
If you’ve sequenced on the MV-8000, you’re already familiar with the MV-8000’s parts.
The INSTRUMENTS window shows you the settings for the 16 parts of the currently loaded project. To see it, press the INSTRUMENTS button.
Each of the 16 parts receives MIDI data on its own channel. Parts 1-16 receive data on MIDI Channels 1-16, respectively. In an external sequencer, a track can record and play back the data for a single MIDI channel, which then plays the corresponding part’s sound in the MV-8000.
Playing Audio Phrases via MIDI
Multi Timbre Sampler mode isn’t just about patches—you can also play any audio phrase in Pad Banks 1 through 8 from an external sequencer. You can even lock an audio phrase’s timing to the tempo of an external sequencer, just as you can lock it to the MV-8000’s own built-in sequencer.
To learn about the differences between patches and audio phrases, see “Two Ways You Can Use Samples” on Page 3 of the MV-8000 Sampling Workshop booklet.
When you play audio phrases from an external sequencer, the MV-8000 borrows one of the 16 parts, leaving 15 parts for playing patches. We’ll explain this more later.
You can play audio phrases assigned to Pad Banks 1-8 because MIDI can play up to 128 different notes, and Pad Banks 1-8 give you 128 pads.

4
Turning On Multi Timbre Sampler Mode
To turn on Multi Timbre Sampler mode:
1. Press SYSTEM to display the SYSTEM menu.2. Select MIDI to display the MV-8000 MIDI
parameters.
3. Set the Multi Timbre Sampler Mode parameter to On.4. If you’d like to play audio phrases from the external
sequencer, set Audio Phrase Rx Channel to the MIDI channel you’d like to use. If you don’t want to play audio phrases, set Audio Phrase Rx Channel to Off.
When you select a MIDI channel for playing audio phrases, the same-numbered part becomes unavailable for playing patches. (With the settings shown above, that would be Part 16.)
Locking Audio Phrases to the Sequencer Tempo
Any audio phrase whose BPM Sync parameter is turned on can be locked to an external sequencer’s tempo.
To learn about the audio phrase BPM Sync parameter, see “Setting Up How an Audio Phrase Behaves” on Page 10 of the MV-8000 Sampling Workshop booklet.
This is possible because the MV-8000 can be synchronized—or “slaved”—to the sequencer using a special type of MIDI timing data called “MIDI clock.” MIDI clock travels from the external sequencer into the MV-8000’s MIDI IN jack along with the rest of the sequencer’s MIDI data.
Any time-based effects you use on the MV-8000—such as delays, flangers, and so on—can also be synchronized with the external sequencer tempo.
Before setting up the MV-8000 as a MIDI clock slave, make sure your external sequencer isn’t currently playing.
To slave the MV-8000 to incoming MIDI clock data:
1. On the MV-8000, press SONG SETUP.2. Select SYNC to show the SYNC
window.
3. Set Sync Mode to Slave-MIDI (MIDI).
If your MV-8000’s MIDI OUT A or B jack is connected to the external sequencer’s MIDI IN—or if you’re using a MIDI patchbay—turn off the jack’s MIDI Clock Output parameter, as shown above. This will prevent a MIDI clock loop that can badly confuse your entire MIDI system.
External sequencer
MV-8000

5
Setting Up the External Sequencer
In the sequencer, create a track for the MIDI channel of:
• each MV-8000 part—that plays a patch you want to use.• the Audio Phrase RX Channel—if you’ll be using audio
phrases. To sync them to the sequencer’s tempo, set the sequencer to send MIDI clock data during playback.
To learn how to do these things, see your sequencer’s manual. Once you’ve set up the sequencer, you’re ready to go.
Working in Multi Timbre Sampler Mode
As you play MV-8000 sounds from your sequencer, you’ll operate the MV-8000 in Multi Timbre Sampler mode.
Multi Timbre Sampler Mode Home Base
Your base of operation in Multi Timbre Sampler mode is the INSTRUMENTS window—it’s the place where you can load patches you need, and where you can adjust their part settings.
To learn how to load patches, see the MV-8000 Loading Patches Workshop booklet.
The EFFECTS and MIXER Windows
As you work in Multi Timbre Sampler mode, you may also want to tweak your:
• effects—Press the EFFECTS button to select and edit the effects your MV-8000 patches and audio phrases use.
• mixer settings—Press the MIXER button to adjust the levels, panning, effects, and output routings of your patches and audio phrases.
You can actually control many of the settings we’ve just mentioned from your sequencer using MIDI Control Change messages. See the MV-8000 Owner’s Manual for details on these advanced operations.
While your external sequencer is playing, stay in the MV-8000’s INSTRUMENTS, EFFECTS, and MIXER windows—or on the SEQUENCER screen—to ensure successful Multi Timbre Sampler mode operation.
Audio Phrase Operations
As you work with an external sequencer, you can edit existing audio phrases—or assign new ones—whenever the sequencer is stopped. Press AUDIO PHRASES, as usual, to perform any audio phrase operations you like. When you’ve finished, press the INSTRUMENTS button before resuming sequencer playback or recording.
You can sample while an external sequencer is playing MV-8000 sounds. This lets you sing or play along and capture your performance as a sample. You can then stop the sequencer and use Quick Assign to send the sample to a patch, or assign it as an audio phrase. See the MV-8000 Sampling Workshop booklet for more details on sampling.

6
The End
We hope you’ve found this workshop helpful. Keep an eye out for other MV-8000 Workshop booklets, all available for downloading at www.RolandUS.com.
For the latest MV-8000 updates and support tools, visit the Roland U.S. Web site at www.RolandUS.com. If you need personal assistance, call our amazing Product Support team at 323-890-3745.

1
Automation
®ÂØÒňΙ
Workshop
© 2006 Roland Corporation U.S.All rights reserved. No part of this publication may be reproduced in any form without the written permission of Roland Corporation U.S.
MVWS13
MV-8000

2
About the MV-8000 Workshop Series
Roland’s MV-8000 Production Studio is packed with features for making music. It’s a heavy-duty sampler that can do all sorts of things with sounds you sample or import. Its sequencer has 136 tracks for MIDI sequencing and playing back audio, and its set of editing tools is deep. It’s a great box for performing—using its pads or an attached MIDI keyboard—and, of course, it can even burn a CD of your final master mix.
Each MV-8000 Workshop Series booklet focuses on one MV-8000 topic, and is intended as a companion to your MV-8000 Owner’s Manuals.
This booklet requires MV-8000 O.S. Version 3.5 or higher. You can download the latest O.S. from www.RolandUS.com.
About This Booklet
With automation, the MV-8000 memorizes and plays back mix settings for you, helping you create the perfect mix for a song or pattern. This booklet explains how to use the MV-8000’s automation features.
The Buttons, the LCD, or a VGA?
On the MV-8000, you can work on the built-in LCD or on an optional color VGA monitor. You can use the MV-8000’s front-panel controls, or a mouse on your VGA screen. No matter how you like to work, there’s an easy way to get things done.
Probably the best idea is to work primarily with a mouse on a VGA, using the MV-8000’s buttons to quickly get in and out of MV-8000 screens. The procedures in this booklet typically assume you’ll be working this way.
If you’re not, don’t worry, because the VGA windows and LCD screens are essentially the same. There are clickable VGA icons for all of the MV-8000’s buttons. You can also press an onscreen button by clicking your mouse or by pressing an F button on the MV-8000. The main difference has to do with how you deal with settings—or “parameters”—and how you select objects.
If you’re using a mouse: If you’re using the MV-8000’s buttons:
You select parameters and objects with a left click. You change the selected
parameter’s value by turning the scroll wheel. You can display an object’s menu by right-clicking the object.
You select parameters and objects with the 3, 4, 5, and 6
CURSOR buttons. Change a selected parameter’s value by turning the
VALUE dial or by pressing DEC and INC.
Left click Right click
Scrollwheel
Understanding the Symbols in This Booklet
Throughout this booklet, you’ll come across information that deserves special attention—that’s the reason it’s labeled with one of the following symbols.
A note is something that adds information about the topic at hand.
A tip offers suggestions for using the feature being discussed.
Warnings contain important information that can help you avoid possible damage to your equipment, your data, or yourself.

3
Automation Basics
What Is Automation?
When you mix a song or pattern, there are a lot of things to get right. You’ve got to figure out:
• where to turn tracks off or on as the music plays• your mixer settings for the whole song or pattern, whether
they stay the same or change as the music plays• any changes you want to make to the sound of your
patches as the music plays• your effects.
All of this can add up to a quite a bit of stuff to remember and do. With automation, though, the MV-8000 remembers and does everything for you so that:
• changes that occur as the music plays happen perfectly every time, automatically.
• as you work on a mix, you can automate things bit-by-bit, slowly building up the perfect mix at your own pace.
• if you need to take a break, everything is right there when you come back, days, months, or even years later.
Automating Track Mutes
Here’s how to automate the way you want tracks to turn off or on as a song or pattern plays:
1. On the SEQUENCE or PATTERN screen, hold down SHIFT, and then press the PAD BANKS button to display the TRACK MUTE window.
Mute bank icons
Each track in your song or pattern is assigned to a pad in the TRACK MUTE window.
If your song or pattern has more than 16 tracks, the track you want may be assigned to a pad in another mute bank. To display a different mute bank:
• set the Track Bank value as desired, or• click the mute bank icon for the bank you want.
If there are enough pads for all of your tracks in a single mute bank—as shown above—the Track Bank value becomes unchangeable, and the other banks’ icons are grayed-out, as they are here.
You can change mute banks as you record mute automation if you need to.
+

4
2. Use the TOP or MEAS buttons to go to the place in the song where you want to start recording automation.
3. Hit the RECORD button to display the RECORDING PARAMETER (MUTE CONTROL) window, and then set Rec Mode to Replace.
To lock your track muting and un-muting to the beat, turn on the Input Quantize parameter. In most cases, the (120) setting will work. If you don’t like what you get, try other Input Quantize values as you re-record your automation.
4. Hit PLAY to begin recording automation data.5. As the song plays, press the pads as desired to mute and
un-mute tracks—when a track is muted, its onscreen pad is darkened.
Your moves are recorded on the Mute Control Track belonging to your song or pattern.
6. Press STOP when you’re done.
To immediately re-do the automation data you’ve just recorded, hit UNDO, and then repeat Steps 2-7. You can also re-do your automation at a later time by performing Steps 1-7 again.
Playing Back Automated Track Mutes
Turning a Track’s Mute Automation On or Off
You can turn off the playback of mute automation for individual tracks. Here’s how:
1. On the SEQUENCE or PATTERN screen, select a track whose mute automation you want to turn off or on.
2. Click Track Param, and then select Mute Control, as shown here.
3. Set Mute Control to:• On—to play back the track’s mute automation.• Off—to disable the track’s mute automation.
Turning All Track Mute Automation On or Off
To disable the playback of all mute automation, turn off the Mute Control Track:
1. On the SEQUENCE or PATTERN screen, hold down SHIFT and press PAD BANKS.
2. Press MENU, and then select Track Mute Setup to display the TRACK MUTE SETUP window.
3. Set Mute Control Track to:• Off—to turn off all mute automation.• On—to play back mute automation.

5
Automating an Audio Track’s Level
You automate an audio track’s level by recording changes you make on the MIXER screen. The automation data is recorded onto its own MIDI track.
Before you begin automating, we recommend naming your audio track on the SEQUENCE screen—this makes it easier to find its channel strip on the MIXER screen later. On a VGA, double-click the track’s name, or on the internal LCD, hit MENU and select Track Name...
1. On the SEQUENCE or PATTERN screen:• select an unused MIDI track—and click Track Param.• create a new MIDI track—by right-clicking the track list
and selecting Add MIDI Tracks...
2. In the TRACK PARAMETER or ADD MIDI TRACKS window, set Output Assign to the AMix value that contains the audio track’s number and name.
In these screens, we’ve selected Track 1—our Synth audio track.
3. Click Close in the TRACK PARAMETER window, or click Execute in the ADD MIDI TRACKS window.
We recommend naming your automation MIDI track right away to avoid confusion later.
4. Press MIXER and click Audio Track at the top of the window to display the MIXER (AUDIO TRACK) screen.
Each of the eight audio tracks you can have in a song has a slider for automating its level.
5. Locate your audio track’s channel strip by its name—you’ll find the audio track’s name at the top of one of the strips—and then move its slider to see the audio track’s level change. When you’re done, set the level back to the desired value.
If the slider doesn’t work, make sure the ASSIGNABLE SLIDER button isn’t lit. If it is, press it once to turn it off.
6. Use the TOP or MEAS buttons to go to the place in the song where you want to start recording automation.
7. Hit the RECORD button, and then set Rec Mode to Replace. (You can change any other settings in this window as desired.)

6
8. Hit PLAY to begin recording automation data.9. As the song plays, move the audio track’s slider as
desired.10. Press STOP when you’re done.
To immediately re-do the automation data you’ve just recorded, hit UNDO, and then repeat Steps 6-10. You can also re-do your automation at a later time by performing Steps 1-10 again.
You can actually automate any of the audio track’s parameters using the VALUE dial. In Step 5, select the current value of the parameter you want to automate, and in Step 9, use the VALUE dial to make your changes.
Automating an Internal MIDI Track’s Level
Here’s how to automate the level of a MIDI track when it’s playing an internal MV-8000 patch.
Each internal MV-8000 patch is played through one of 16 “parts.” When you automate a MIDI track that’s playing an internal patch, you’re actually automating its part.
Any MIDI track can play any part, so you have to begin by figuring out which part the track is playing.
• If you’re working on a VGA—select the MIDI track and take a look at the Out Part parameter above the tracks. It’ll tell you the part the track’s playing.
• If you’re working on the built-in LCD—press 6 or 5 to select the MIDI track, and then press F2 (Track Param). Output Assign shows the part the track is playing.
Once you’ve figured out your part, you’re ready to go.
1. On the SEQUENCE or PATTERN screen:• select an unused MIDI track—and click Track Param.• create a new MIDI track—by right-clicking the track list
and selecting Add MIDI Tracks...
MIDI track automation is recorded on its own, separate MIDI track.
2. In the TRACK PARAMETER or ADD MIDI TRACKS window, set Output Assign to the part you want to automate.
In these screens, we’ve selected Part 1, with its RawStereoDrums patch.
3. Click Close in the TRACK PARAMETER window, or click Execute in the ADD MIDI TRACKS window.

7
We recommend naming your automation MIDI track right away to avoid confusion later.
4. Press MIXER and F2 (Part 1-8) or F3 (Part 9-16) to display the part you’re automating.
5. Press ASSIGNABLE SLIDER to it lights.6. Use the TOP or MEAS buttons to go to the
place in the song where you want to start recording automation.
7. Hit the RECORD button, and then set Rec Mode to Replace. (You can change any other settings in this window as desired.)
8. Hit PLAY to begin recording automation data.9. As the song plays, move the first slider to automate the
desired level changes.
If your slider moves are changing the level of more stuff than you expect, see “Lotsa Tracks, One Part,” below.
10. Press STOP when you’re done.
To immediately re-do the automation data you’ve just recorded, hit UNDO, and then repeat Steps 6-10. You can also re-do your automation at a later time by performing Steps 1-10 again.
You can automate other aspects of a part using the sliders. To learn more about using the assignable sliders when you’re automating MIDI tracks, see “MIDI Track Automation and the Sliders” on Page 11.
Lotsa Tracks, One Part
As you probably know, you can play the same part from as many MIDI tracks as you like. While handy, this can cause confusion when you’re automating.
Let’s say you record a bass drum, snare, and hi-hat on separate tracks, and they’re all playing the same part’s patch. If you try to automate level changes throughout the song for, let’s say, the hi-hat, you’ll wind up changing the level for the whole kit instead. This is because—aha!—automation applies to the part, and that means the whole patch at once.
The solution is to assign the same patch to multiple parts, so you can automate each track’s drum kit sound individually.

8
Automating an External MIDI Track’s Level
To learn about using external MIDI devices with the MV-8000, check out the Working with External MIDI Instruments MV-8000 Workshop booklet.
Here’s how to automate external sounds played by an MV-8000 MIDI track.
1. On the SEQUENCE or PATTERN screen:• select an unused MIDI track—and click Track Param.• create a new MIDI track—by right-clicking the track list
and selecting Add MIDI Tracks...
MIDI track automation is recorded on its own, separate MIDI track.
2. In the TRACK PARAMETER or ADD MIDI TRACKS window, set the MIDI parameter to the MIDI jack and channel number for the external sound the MIDI track’s playing.
In these screens, we’ve selected MIDI Jack A’s MIDI Channel 1.
3. Click Close in the TRACK PARAMETER window, or click Execute in the ADD MIDI TRACKS window.
We recommend naming your automation MIDI track right away to avoid confusion later.
4. Press ASSIGNABLE SLIDER to it lights.5. Use the TOP or MEAS buttons to go to the
place in the song where you want to start recording automation.
6. Hit the RECORD button, and then set Rec Mode to Replace. (You can change any other settings in this window as desired.)
7. Hit PLAY to begin recording automation data.8. As the song plays, move the first slider to automate the
desired level changes.
9. Press STOP when you’re done.
To immediately re-do the automation data you’ve just recorded, hit UNDO, and then repeat Steps 5-9. You can also re-do your automation at a later time by performing Steps 1-9 above again.
You can automate other aspects of a part using the sliders. To learn more about using the assignable sliders when you’re automating MIDI tracks, see “MIDI Track Automation and the Sliders” on Page 11.

9
Automating C-Knob MFX Edits
The C1, C2, and C3 knobs can control three parameters in the current MFX preset. You can automate changes you make with the knobs, recording the automation on its own MIDI track.
With this preset, C1-C3 control the MFX Chorus Mode, Chorus Dir/FX, and Chorus Input parameters, respectively.
You can assign the C knobs to any MFX parameters you like in the KNOB ASSIGN pop-up described on Page 377 of the MV-8000 Owner’s Manual.
1. On the SEQUENCE or PATTERN screen:• select an unused MIDI track—and click Track Param.• create a new MIDI track—by right-clicking the track list
and selecting Add MIDI Tracks...
2. In the TRACK PARAMETER or ADD MIDI TRACKS window, set Output Assign to MFX, as shown here.
3. Click Close in the TRACK PARAMETER window, or click Execute in the ADD MIDI TRACKS window.
We recommend naming your automation MIDI track right away to avoid confusion later.
4. Press the EFFECT button and press 5 until the MFX area is highlighted, as shown here.
If the MFX area isn’t highlighted, the C knobs control parameters in the highlighted effect area.
5. Use the TOP or MEAS buttons to go to the place in the song where you want to start recording automation.
6. Hit the RECORD button, and then set Rec Mode to Replace. (You can change any other settings in this window as desired.)
7. Hit PLAY to begin recording automation data.8. As the song plays, move the C knobs as desired to
automate your MFX tweaks.9. Press STOP when you’re done.
To immediately re-do the automation data you’ve just recorded, hit UNDO, and then repeat Steps 5-9. You can also re-do your automation at a later time by performing Steps 1-9 above again.

10
Playing Back C-Knob MFX Automation
Automation captures C-knob movements themselves, not the parameter values they produce. To play back C-knob MFX automation correctly, make sure your MFX and C knobs are set up exactly as they were when the automation was recorded. This means that:
• your MFX processor must be using the same preset.• C1, C2, and C3 must be assigned to the same MFX
parameters.
This won’t be an issue when you play back C-knob MFX automation right after recording it, since none of these settings change by themselves. And when you save your project, all of the settings are saved, as well.
You only need to double-check your settings if you’ve changed them before saving your project, or after re-loading it.
You don’t have to have the MFX area highlighted in the EFFECTS window during C-knob MFX automation playback.
Digging Deeper Into Automation
Automating Other MIXER Screen Channels
The MIXER screens hold more than audio track channels and MIDI track parts. They also contain the:
• audio phrase channels—with the level, pan, chorus/delay send, and reverb send parameters for audio phrases.
• audio input channel—with the level, pan, chorus/delay send, and reverb send parameters for your live input.
• AUX 1-4 channels—with parameters that control the level, chorus/delay send, and reverb send of the four AUX busses.
Typically, an AUX buss carries sounds from two or more mixer channels to the MFX. You can also use AUX busses to create headphone mixes or send sounds to another device. See the MV-8000 Owner’s Manual to learn more.
• delay/chorus channel—so you can automate the level of the delay/chorus effect, as well as its reverb send.
• reverb channel—allowing you to automate the level of the reverb effect.
In case you don’t know what a send does, a chorus/delay send controls the amount of a channel’s sound that gets sent into the chorus/delay. A reverb send controls the amount of a channel’s sound that goes into the reverb.
You can automate the settings of any of these MIXER screen channels using the steps in “Automating an Audio Track’s Level” on Page 5, with the following changes:
• In Step 2—when you want to automate:• the audio phrase channel—select Mixer A.Phrs.• the audio input channel—select Mixer Input.• an AUX bus—select the Mixer AUX value that contains
the number of the bus you want to automate.• the delay/chorus channel—select Mixer DlyCho.• the reverb channel—select Mixer Reverb.
• In Steps 4 and 5—navigate to the desired MIXER window and highlight the parameter you want to automate.
• In Step 9—use the selected channel’s slider for adjusting its level, or use the mouse wheel or VALUE dial to adjust its highlighted parameter.

11
MIDI Track Automation and the Sliders
When the ASSIGNABLE SLIDER button is lit during MIDI track automation, the sliders send out MIDI CC (“Control Change”) messages that the MV-8000 records onto your automation track.
By default, this slider: controls the part’s: using MIDI CC #:Slider 1 volume 7Slider 2 stereo panning 10Slider 3 reverb send 91Slider 4 chorus send 93Slider 5 cutoff 74Slider 6 resonance 71Slider 7 attack time 73Slider 8 release time 72
When you want to automate a filter sweep of a MIDI track sound, use Slider 5 to change the sound’s filter cutoff setting.
You can change the CC messages the sliders produce. This lets you automate all sorts of changes to the sound played by a MIDI track. Here’s how to change what the sliders do:
1. Press SYSTEM and select Slider to display the ASSIGNABLE SLIDER window, shown here.
These are the sliders’ current CC assignments and the parameters they automate.
2. To change a slider’s CC message, highlight its current value and use the wheel on your mouse or use the VALUE dial to select the desired CC number.
Not all CC numbers control part parameters in the MV-8000. If your MIDI track is playing a sound in an external MIDI device, though, check the device’s documentation—CC numbers that MV-8000 parts don’t use may be able to control the external sound in some interesting way.
Advanced Automation Techniques
Here are some of the more adventurous things you can do with automation.
Programming Automation on a Track
Use the MV-8000’s Create Continuous Data command to program a series of parameter values that move smoothly from one value to another.
As with all other automation except for track mutes, Create Continuous Data automation should be recorded onto its own MIDI track.
Create Continuous Data can produce perfect song fade-outs with CC #7 Volume, and super-smooth filter sweeps using CC #74 Cutoff.

12
Here’s how to use Create Continuous Data:
1. On the SEQUENCE or PATTERN screen:• select an unused MIDI track—and then click Track
Param.• create a new MIDI track—by right-clicking the track list,
and selecting Add MIDI Tracks...
2. In the TRACK PARAMETER or ADD MIDI TRACKS window, set Output Assign to the channel you want to automate.
Here, we’re programming automation for our Synth audio track.
To automate:• an audio track channel—set Output Assign to the AMix
value that contains the desired audio track’s number and name.
• a MIDI track’s part—set Output Assign to the part the MIDI track is playing.
• C-knob MFX changes—set Output Assign to MFX.
If you’re programming automation for multiple tracks at the same time—such as when you’re creating a song or pattern fadeout—repeat Steps 1 and 2 for each track you want to automate.
Don’t forget to name your automation MIDI track(s) right away to avoid confusion!
3. Click Close in the TRACK PARAMETER window, or click Execute in the ADD MIDI TRACKS window.
4. In the ruler on the SEQUENCE or PATTERN screen, click and drag your mouse across the desired region of the song or pattern so it becomes highlighted.
5. Click the MIDI track symbol for the track you’re programming so it becomes highlighted—as shown here—and so the region selected in Step 4 becomes darkened in the selected track.
If you’re programming automation on multiple tracks, repeat Step 5 for all of those tracks.
If you’re working on the internal LCD, skip over to “Programming Automation on the LCD” on Page 13. (You can click here to jump there if you like.)
6. Right-click in the SEQUENCE window’s work area to display the Edit pop-up, and then select Create Continuous Data... to display the CREATE CONTINUOUS DATA window.

13
7. Set the Event parameter to any of the following values:• Control Change—to program a series of MIDI CC values
such #7 Volume, #10 Pan, #74 Cutoff, or #77 Vibrato Depth.
• Channel Aftertouch—to program a series of channel-pressure values that affect an entire patch, including any notes that were played before the automation data in the song, and that are currently sustaining.
• Poly Aftertouch—to program a series of polyphonic-pressure values that affect only patch notes that occur at the same time as the poly aftertouch data.
• Pitch Bend—to program a series of pitch-bend values.
The Channel Aftertouch, Poly Aftertouch, and Pitch Bend values apply only to MIDI track part automation.
8. If you selected:• Control Change in Step 7—set Number to the desired
CC value.• Poly Aftertouch in Step 7—you can set Note to add poly
aftertouch events that apply only to a particular note.
9. Set:• Value From—to the starting value for your automation
data.• Value To—to the ending value for your automation
data.
10. Set Curve to the way you want the automation to move from its starting point to its end point.
11. Set Interval Time to the number of steps you want the MV-8000 to use to get from the starting value to the ending value. This sets the smoothness of the change.
12. Click Execute to create your new automation data.
Programming Automation on the LCD
Use the previous steps for programming automation on the internal LCD, with the following changes:
Instead of Steps 4-61. Press F6 (Seq Edit) and use the MEAS buttons to move to
the place where you want your programmed automation to start.
2. Press F3 (Reg In/Out) until you see the current location appear as the first value in the Region In/Out area, as shown to the right.
the Region In/Out area
3. Move to the place where you want the automation to end, and then press F3 (Reg In/Out) again to enter your current location as the Out point in the Region In/Out area.
4. Press 6 and/or 5 to highlight a track you want to program, and then press F1 (Track Sel) so that the region becomes highlighted on the track.

14
5. Repeat Step 4 for any other tracks you want to program.6. Press F5 (Command), and then
select Create Continuous Data... to display the CREATE CONTINUOUS DATA window.
Instead of Step 121. Press F5 (Execute).
Editing Automation in an Event List Editor
Since automation is MIDI data, you can edit it in an Event List editor, cleaning up its timing, tweaking values, or even moving track mutes from track to track.
Navigating to an Event Editor
Audio Track, MIDI Track, and C Knob Automation
1. On the SEQUENCE screen, select the desired automation track and click Event List.
Track Mute Automation
1. Hold down SHIFT and press PAD BANKS.2. Press MENU, and then select Mute Control Track.
Editing Events
Audio Track, MIDI Track, and C Knob Automation
Double-click a value you want to edit, and then dial in the desired new value. You can edit the following values:
Bar CC number ValueBeat Tick
MFX automation data for the C1 knob appears as CC 16 (General 1). C2’s data appears as CC 17 (General 2), and C3’s as CC 18 (General 3).
To lock in changes, click the Close button in the upper-left corner of the Event List. To exit the list, click Close again.
To learn about the tools and options in an Event List window, see the MV-8000 Owner’s Manual.
Track Mute Automation
Double-click a value you want to edit, and then dial in the desired new value. You can edit the following values:
Bar Track number Mute on/off switchBeat Tick

15
If you’d like to change the track that’s being muted at any time, select an existing Mute On event and change its track number to the desired track.
To lock in your changes, click the Close button in the upper-left corner of the Event List. To close the window, click the Close button again.
Click Track Sel to filter your view so that only the desired tracks’ mutes appear. To learn about the other tools and options in the window, see the MV-8000 Owner’s Manual.
Editing Automation by Scaling its Values
Using the Change Continuous Data tool, you can scale a series of automation values up or down, or change their values relative to each other. Here’s how:
1. Perform Steps 1-5 in “Programming Automation on a Track” on Page 11 to select the desired song or pattern region, and then choose Change Continuous Data... in Step 6 to display the CHANGE CONTINUOUS DATA window.
2. Select the type of data you want to scale by setting the Event parameter.
3. If you selected:• Control Change in Step 2—select the CC number of the
automation data you want to scale.• Poly Aftertouch in Step 2—set the range of notes whose
poly aftertouch automation data you’d like to scale.
4. The Magnify parameter can force the values in the selected region into a new shape, changing their relationship to each other. As you adjust the Magnify parameter’s value, watch the diagram to the right to see the shape you’re applying. (If you don’t want to use Magnify, set it to 0%.)
5. Use the Bias value to raise or lower all of the values in the selected region by the same amount. Settings above 0 increase the values, and settings below 0 lower them. To leave them as they are, set Bias to 0.
6. Click Execute to complete the scaling operation.
Combining Automation Data on a Track
Our instructions so far explain how to record a single type of automation on each automation track. Working this way makes it easier to redo or edit your automation, so it’s the way we recommend you work. But it’s not the only way to go.
Advanced users may be comfortable with combining different types of automation on the same track. In this way, you can:
• automate two or more parameters at the same time when you automate an audio track or other MIXER screen channel.
• work two or more parameters DJ-style with the sliders as you automate an internal or external MIDI track.
When you’re automating more than one parameter at a time, you have to redo all of that automation if you want to redo any of it.
You can use other Rec Mode settings for recording automation if you don’t mind combining automation data.
With Rec Mode set to an Overdub value, you can even record automation data onto a MIDI track that already holds note or performance data. There’s rarely a need to squoosh things up like this, though, with 128 MIDI tracks.

16
The End
We hope you’ve found this workshop helpful. Keep an eye out for other MV-8000 Workshop booklets, all available for downloading at www.RolandUS.com.
For the latest MV-8000 updates and support tools, visit the Roland U.S. Web site at www.RolandUS.com. If you need personal assistance, call our amazing Product Support team at 323-890-3745.

1
Using EQ
®ÂØÒňΙ
Workshop
© 2006 Roland Corporation U.S.All rights reserved. No part of this publication may be reproduced in any form without the written permission of Roland Corporation U.S.
MVWS14
MV-8000

2
About the MV-8000 Workshop Series
Roland’s MV-8000 Production Studio is packed with features for making music. It’s a heavy-duty sampler that can do all sorts of things with sounds you sample or import. Its sequencer has 136 tracks for MIDI sequencing and playing back audio, and its set of editing tools is deep. It’s a great box for performing—using its pads or an attached MIDI keyboard—and, of course, it can even burn a CD of your final master mix.
Each MV-8000 Workshop Series booklet focuses on one MV-8000 topic, and is intended as a companion to your MV-8000 Owner’s Manuals.
This booklet requires MV-8000 O.S. Version 3.5 or higher. You can download the latest O.S. from www.RolandUS.com.
About This Booklet
The MV-8000’s built-in EQ lets you adjust the tone of your audio tracks and MIDI track patches so they sound just the way you want them to. This booklet explains how to use the MV-8000 EQ, and includes a bunch of tips if you’re new to EQ.
The Buttons, the LCD, or a VGA?
On the MV-8000, you can work on the built-in LCD or on an optional color VGA monitor. You can use the MV-8000’s front-panel controls, or a mouse on your VGA screen. No matter how you like to work, there’s an easy way to get things done.
Probably the best idea is to work primarily with a mouse on a VGA, using the MV-8000’s buttons to quickly get in and out of MV-8000 screens. The procedures in this booklet typically assume you’ll be working this way.
If you’re not, don’t worry, because the VGA windows and LCD screens are essentially the same. There are clickable VGA icons for all of the MV-8000’s buttons. You can also press an onscreen button by clicking your mouse or by pressing an F button on the MV-8000. The main difference has to do with how you deal with settings—or “parameters”—and how you select objects.
If you’re using a mouse: If you’re using the MV-8000’s buttons:
You select parameters and objects with a left click. You change the selected
parameter’s value by turning the scroll wheel. You can display an object’s menu by right-clicking the object.
You select parameters and objects with the 3, 4, 5, and 6
CURSOR buttons. Change a selected parameter’s value by turning the
VALUE dial or by pressing DEC and INC.
Left click Right click
Scrollwheel
Understanding the Symbols in This Booklet
Throughout this booklet, you’ll come across information that deserves special attention—that’s the reason it’s labeled with one of the following symbols.
A note is something that adds information about the topic at hand.
A tip offers suggestions for using the feature being discussed.
Warnings contain important information that can help you avoid possible damage to your equipment, your data, or yourself.

3
What EQ Can Do for You, and How It Does It
The following section explains what EQ is. If you already about EQ and how it works, feel free to skip ahead to “How to Work the MV-8000’s EQ Tools.” (You can click here if you’d like to jump there now.)
What Is EQ?
Equalization, or “EQ” for short, lets you shape the tone, or “timbre,” of each track. The treble and bass controls on any music player are a form of EQ, but the MV-8000’s EQ is much more precise.
Bass Treble
With EQ, you can select any aspect of a sound and make it louder or softer. EQ a kick to make it punchier, bring out a snare’s crack, add life to a vocal, or do anything else your mix needs. You can even dig out hard-to-hear sounds—like a conga in a percussion set—or turn others down using EQ.
How Does EQ Work?
We don’t want to get too technical, but here’s the little bit of science you really do need to know to get a handle on EQ.
Sound Waves, AKA “Frequencies”
Each sound you hear is actually made up of a bunch of sound waves happening at the same time, with each one humming along at its own speed, or “frequency.” You don’t hear these sound waves separately—but together, they make a sound sound the way it does.
Sound waves at different frequencies add different things to a sound. For example, the:
• deep parts of a sound—like the bottom of a bass synth, or the thump of a kick drum, are made by slow, or “low-frequency,” sound waves.
• in-your-face parts of a sound—like the notes of a human voice or electric guitar, or the “crack” of a snare, are made by medium-frequency sound waves.
• bright parts of a sound— like the breath sound in a voice, the crispy part of a snare, or the sizzle of a cymbal are made by fast, “high-frequency” sound waves.
People usually refer to sound waves by their frequencies. So instead of talking about “low-frequency sound waves,” they’ll talk about “lows.” Mid-frequency sound waves are “mids,” and high-frequency sound waves are, you’ve got it, “highs.”
It Only Hertz When I Laugh
In EQ, sound wave frequencies are described in “Hertz,” which is abbreviated as “Hz.” The only exception on the MV-8000 is 10,000 Hz. It’s referred to as “10 kHz,” short for “10 kiloHertz.” Numbers, numbers—in the end, you use your ears when you EQ. The numbers just help us talk about it.
The MV-8000’s EQ values go down to 100 Hz, in the warm area of a bass, or where a kick drum thumps. The highest is 10 kHz, in the middle of a hihat’s sound, or where you’ll find the breath in a human voice. We’ll talk more about specific frequencies in our tips later on.
We’ll also explain how to find what you want to EQ by using your ears, so don’t worry about having to memorize a lot of specific frequencies.
++
= a sound

4
What EQ Does, Exactly
When you use EQ, you:
• select the frequency, or frequencies, whose volume you want to change.
• adjust the selected frequencies volume by:• boosting—or raising, their volume.• cutting—or lowering, their volume.
Okay, science class over.
Audio vs. MIDI Track EQ
On the MV-8000, you can EQ audio tracks, and MIDI tracks that play internal MV-8000 patches. With:
• an audio track—EQ is applied directly to the recorded track.
• a MIDI track—EQ is applied to the part whose instrument is played by the MIDI track. What you’re doing is EQ-ing the track’s instrument, not the track itself, which is really just MIDI data.
To learn about parts, see Page 3 of the MV-8000 Loading Patches Workshop booklet.
Any MIDI track can play any part’s instrument, so you’ll want to start by identifying the part(s) you want to EQ. If you’re working on a VGA, select each MIDI track you want to EQ and look at the Out Part parameter above the tracks—it’ll tell you the part the track’s playing. If you’re working on the built-in LCD, press 5 or 6 to select each MIDI track, and then press F2 (Track Param) to find out the part it’s playing.
How to Work the MV-8000’s EQ Tools
Getting to the EQ Screen
1. Press MIXER to open a MIXER window:
2. Display the:• audio track you want to EQ—by clicking the Audio
Track tab, or by pressing F1 (Audio Track).• part whose instrument you want to EQ—by clicking the
Part 1-8 or Part 9-16 tab, or by pressing F2 (Part 1-8) or F3 (Part 9-16).
3. Once your audio track or part is displayed, press F5 (→EQ) to display its EQ settings.
In this song, there are just four audio tracks.

5
The EQ Parameters
You set an EQ parameter the same way you would any other MV-8000 parameter: select it, and then adjust its value.
Each audio track and part has its own vertical strip of EQ parameters. From top-to-bottom they are:
• EQ Sw (for “EQ Switch”)—turns the EQ strip on or off for the audio track or part.
• EQ High section—for EQ-ing the high-frequency content of the audio track or part. The section’s two parameters are:• Gain [dB]—Positive
values boost the selected frequency range’s volume. Negative values cut it. 0 values do nothing to the sound. Gain [dB] can be set from -15 to 15.
• Freq [Hz]—This parameter selects the lowest frequency to be boosted or cut. The MV-8000’s high-frequency EQ is a “shelving” EQ that boosts or cuts all of the high frequencies starting with the one you select. You can set this anywhere from 1000 Hz to 10 kHz.
• EQ Mid section— for EQ-ing the middle frequencies of the audio track or part. The section’s three parameters are:• Gain [dB]—Positive values boost the selected frequency
or frequency range’s volume. Negative values cut it. It can be set from -15 to 15.
• Freq [Hz]—This selects the frequency to be boosted or cut. You can select any frequency from 100 Hz to 10 kHz.
• Q—The EQ Mid section is a “parametric” EQ that can grab a range, or “band,” of frequencies below and above the one you select. The Q parameter grabs a narrower band of frequencies with lower values, or a wider one with higher values. Q can be set from 0.5 to 16.0 (that’s octaves, but don’t worry about it).
• EQ Low section—for EQ-ing the low-frequency content of the audio track or part. The section’s two parameters are:• Gain [dB]—Positive values boost the selected frequency
range’s volume. Negative values cut it. 0 values do nothing to the sound. Gain [dB] can be set from -15 to 15.
• Freq [Hz]—This parameter selects the highest frequency to be boosted or cut. The MV-8000’s low-frequency EQ is also a shelving EQ, boosting or cutting all of the low frequencies up to the one you select. You can set this anywhere from 100 Hz to 1000 Hz.
Each strip offers you three EQ sections so you can boost or cut up to three aspects of an audio track or a part’s instrument.
EQ Techniques, Tips and Tricks
Finding Frequencies By Ear
There’s no better way to find something you want to EQ than by using your ears, and there’s a pretty easy way to find the frequencies you need to adjust.
But first...
Audio track name or part number
EQ Switch
EQ High section
EQ Mid section
EQ Low section

6
Do Your Speakers or Headphones Lie to You?
Sadly, the answer is probably “yes.” But that’s okay. Let’s talk a bit about your speakers or headphones before we go on.
Most speakers and headphones color your sound in some way. In fact, you probably like the way they make your music sound. But remember that not everyone will be listening on your system, and you want your music to sound good everywhere. If your speakers are hyping your sound, you need to remember this as you EQ.
For example, let’s say your speakers or headphones have extra bass. If you EQ your music to have the right amount of bass for your system, it may not have enough bass on another system that doesn’t have a pumped-up bottom. Or, if your speakers or headphones sound too warm, and you brighten your mix to make up for it, your music may be piercing on other systems.
There are two basic ways to figure out what’s really going on:
• Try other speakers or headphones—If you can try out your music on other systems, do it so you can hear how your music sounds elsewhere.
• Study your CDs—Listen to several CDs you like through your speakers or headphones and, when you EQ, try to make your music sound the same.
Getting to really know your listening system can take a little effort and practice, but you’ve got to do it to get your EQ—and your mixes in general—right. Okay? No more lies.
Boost, Cut, and Sweep
Before starting, turn down the MV-8000’s MASTER volume knob a little—the sound can get a bit harsh as you search for frequencies.
1. If you’re looking for a frequency you want to:• boost—turn the EQ Mid Gain
[dB] all the way up.• cut—turn the EQ Mid Gain
[dB] all the way down.
2. Set Q to .5 to narrow your search.3. Select the EQ Mid section’s Freq
[Hz] parameter and turn the VALUE dial all the way down.4. As you play the track you’re EQ-ing. slowly turn the VALUE
dial up to “sweep” through the Freq [Hz] values until you find what you’re listening for.
5. If you need to, continue sweeping up and down with the VALUE dial until you find the frequency you want.
6. Adjust the Q parameter to narrow or widen the range of selected frequencies so you’re grabbing what you need.
7. Return to the Gain [dB] parameter and set it to 0.8. Boost or cut the selected frequency as much as you want.
If you’re boosting a frequency, set Gain [dB] to the amount of boost you want to add, and then back down a little. If you’re cutting, set Gain [dB] the way you want, and then turn it up a tiny bit. After listening really hard while you’re hunting down frequencies, you can lose your perspective a bit, and Pultec’s Law helps cure this form of temporary insanity.
We used the EQ Mid section here since it sweeps through all of the MV-8000’s available frequencies. If you know you’re looking for a low-end frequency, use the same technique—except for Steps 2 and 6—with the EQ Low parameters. Likewise, if you’re looking for a high-end frequency, you can use it with the EQ High parameters, also except for Steps 2 and 6.
Gain [dB]Freq [Hz]
Q

7
What’s Where
While every recording’s unique, here are some guidelines for where to start looking for things people often want to EQ.
Kick DrumWhen you want to EQ a kick drum’s: Try this frequency:thump 100 Hzskin snap 5000 Hz
Snare DrumWhen you want to EQ a snare drum’s: Try this frequency:bang 400 Hzcrack 2000 Hzcrispness 5600 Hz
Other Drum Kit SoundsWhen you want to EQ a: Try this frequency:drumstick tip hitting the hihat 4000 Hzhihat’s sizzle 10 kHzcymbal’s sizzle 10 kHzdrumstick tip on a cymbal’s bell 1000 Hztom’s warmth 300 Hztom’s skin 6300 Hz
SingerWhen you want to EQ a singer’s: Try this frequency:warmth 180 Hznotes 1000 Hzbreathiness 10 kHz
BassWhen you want to EQ a bass’s: Try this frequency:warmth 160 Hznotes 500 Hzbass overtones, or “air” 5000 Hz
OtherWhen you want to EQ: Try this frequency:an acoustic guitar’s sparkle 10 kHzan electric piano’s tines, or “sparkle” 6300 Hza synth’s overtones, or “air” 8000 Hz
Assorted EQ Tips
Fixing Things with EQ
EQ can be very handy for solving problems. Here are some common examples.
Muddiness
It’s not unusual to have several instruments that add lower frequencies to a mix, making the whole bottom end unclear, or “muddy.”
If a mix sounds muddy, try cutting the low end of audio tracks and instruments that don’t really need to sound warm. Sometimes, a sound will be adding low frequencies you can’t even hear, except that they muddy up the mix.
Some engineers and producers routinely cut the bottom—everything below 150 Hz—out of any instrument that doesn’t really need to have much, such as vocals, guitars, and electric pianos. Obviously, basses do rely on a fat bottom, so don’t do this to your basses.

8
Dullness
If an audio track or instrument sounds lifeless or muffled, try adding a 10 kHz boost using the EQ High parameters.
Sibilance
If a singer’s “s” sounds are too loud, try cutting the vocal around 7100 Hz, or just below that.
Other EQ Ideas
Make Good EQ Neighbors
If different sounds are playing in the same note range, they can get in each other’s way, making it hard to hear the sounds clearly. Often you can bring out one sound by EQ-ing another instrument out of its way. Using the boost, cut, and sweep technique we described on Page 6, see if cutting frequencies from one sound makes the other more clear.
Don’t Add Mud
Make sure you’re not adding mud to the mix by boosting the bottom of your audio tracks or instruments too much. Add bottom to sounds in small doses, and listen carefully to avoid problems.
EQ with Complicated Tracks and Instruments
If an audio track or instrument contains multiple sounds—a drum loop would be a good example—pay attention as you EQ one sound to make sure you’re not affecting the track or instrument’s other sounds in a way you don’t like.
Moving Things Forward and Back
While you use panning to move sounds left and right in a mix, you can use EQ to make sounds seem closer to the listener or farther away. For example, you’d want a lead singer to sound like he or she is at the front of the band—other voices and instruments may sound best “behind” him or her.
To move sounds forward on your imaginary stage, boost them in the 1000-3000 Hz range using the EQ Mid parameters. To move them back, cut the same frequencies.
The End
We hope you’ve found this workshop helpful. Keep an eye out for other MV-8000 Workshop booklets, all available for downloading at www.RolandUS.com.
For the latest MV-8000 updates and support tools, visit the Roland U.S. Web site at www.RolandUS.com. If you need personal assistance, call our amazing Product Support team at 323-890-3745.

�®
Digital Sampler Compatibility Guide This document lists the compatible options for Roland’s line of digital samplers. For more information go to www.RolandUS.com or call us at 323-890-3740. DJ-70 Current OS: 1.05 EPROM Internal Sample Memory: 2MB expandable to 4MB SIMM: 30 pin 1MB, 100ns or faster External Drives: The DJ-70 has a SCSI interface – see Appendix 2 for compatible drives DJ-70MKII Current OS: 1.02 EPROM Internal Sample Memory: 2MB expandable to 32MB SIMM: 72 pin 8MB or 16MB External Drives: The DJ-70MKII has a SCSI interface – see Appendix 2 for compatible drives Fantom-G6/7/8 Current OS: 1.30 Internal Sample Memory: 32MB expandable to 544MB DIMM: 168 pin 64/128/256/512MB PC100 or PC133 External Memory / Drives: The Fantom-G6/G7/G8 has USB connections for loading/saving/backing up files (USB key up to 4GB) as well as MIDI I/O Fantom-S/S88 Current OS: 1.09 Internal Sample Memory: 32MB expandable to 288MB DIMM: 168 pin 64/128/256/512MB PC100 or PC133 Memory Card: 8-128MB 3.3v SmartMedia card External Drives: The Fantom-S/S88 has a USB connection for loading/saving/backing up files Fantom-X6/7/8 Current OS: 1.07 / 2.10 Internal Sample Memory: 32MB expandable to 544MB DIMM: 168 pin 64/128/256/512MB PC100 or PC133 Memory Card: Up to 1GB memory card with PCM-CIA card adaptor External Drives: The Fantom-X6/X7/X8 has a USB connection for loading/saving/backing up files and MIDI I/O Fantom-Xa Current OS: 1.05 Internal Sample Memory: 4MB expandable to 516MB DIMM: 168 pin 64/128/256/512MB PC100 or PC133 Memory Card: Up to 1GB memory card with PCM-CIA card adaptor External Drives: The Fantom-Xa has a USB connection for loading/saving/backing up files and MIDI I/O JS-30 Current OS: 1.03 EPROM Internal Sample Memory: 1MB expandable to 4MB SIMM: 30 pin 1MB, 100ns or faster External Drives: the JS-30 has a SCSI interface – see Appendix 2 for compatible drives Juno-G Current OS: 2.00 Internal Sample Memory: 4MB expandable to 516MB DIMM: 168 pin 64/128/256/512MB PC100 or PC133 Memory Card: Up to 1GB memory card with PCM-CIA card adaptor External Drives: The Juno-G has a USB connection for loading/saving/backing up files and MIDI I/O
©2009 Roland Corporation U.S. Page 1

�®
Digital Sampler Compatibility Guide MC-09 Current OS: 1.00 Memory Card: 2-128MB 3.3v SmartMedia card MC-808 Current OS: 1.03 Internal Sample Memory: 4MB expandable to 516MB DIMM: 168 pin 128/256/512MB PC100 or PC133 Memory Card: Up to 1GB memory card with PCM-CIA card adaptor External Drives: The MC-808 has a USB connection for loading/saving/backing up files MC-909 Current OS: 1.23 Internal Sample Memory: 16MB expandable to 272MB DIMM: 168 pin 128 or 256MB PC100 or PC133 Memory Card: 8-128MB 3.3v SmartMedia card External Drives: The MC-909 has a USB connection for loading/saving/backing up files MS-1 Current OS: 1.12 Memory Card: 2-20MB Sandisk type ATA Type II Flash RAM PCMCIA card MV-8000 Current OS: 3.54 Internal Sample Memory: 128MB expandable to 512MB DIMM: 168 pin 128/256/512MB PC100 or PC133 External Drives: The MV-8000 has a USB connection for loading/saving/backing up files MV-8800 Current OS: 1.01 Internal Sample Memory: 128MB expandable to 512MB DIMM: 168 pin 128/256/512MB PC100 or PC133 External Drives: The MV-8800 has a USB connection for loading/saving/backing up files S-750 Current OS: 2.25 Internal Sample Memory: 2MB expandable to 18MB SIMM: 30 pin, 4x8MB, 100ns or faster External Drives: The S-750 has a SCSI interface – see Appendix 2 for compatible drives Video: The S-750 can output video using a Black & White composite signal S-760 Current OS: 2.24 Internal Sample Memory: 2MB expandable to 32MB SIMM: 8MB - 72 pin type 2-megaword x 32 D-RAM module. 16 4-megabit D-RAMS built-in. Access time-80ns. 16MB – 72 pin type 4-megaword x 32 D-RAM module. 16 4-megabit D-RAMS built-in. Access time-80ns. External Drives: The S-760 has a SCSI interface – see Appendix 2 for compatible drives Video: The S-750 can output video with either S-Video or Color Composite signals S-770 Current OS: 2.25 Internal Sample Memory: 2MB expandable to 16MB SIMM: 30 pin, 1x8MB, 100ns or faster External Drives: The S-770 has a SCSI interface – see Appendix 2 for compatible drives Video: The S-770 can output video using a Black & White composite signal
©2009 Roland Corporation U.S. Page 2

�®
Digital Sampler Compatibility Guide SP-700 Current OS: 1.12 EPROM Internal Sample Memory: 8MB expandable to 32MB SIMM: 30 pin, 4x8MB, 100ns or faster External Drives: The SP-700 has a SCSI interface – see Appendix 2 for compatible drives SP-202 Current OS: 1.03 CPU Memory Card: 2 or 4MB 5v SmartMedia card SP-303 Current OS: 1.02 Memory Card: 8-64MB 3.3v SmartMedia card SP-404 Current OS: 1.05 Memory Card: 32MB-1GB Type 1 Compact Flash card SP-404SX Current OS: 1.00 Memory Card: 1GB-32GB SD card SP-505 Current OS: 1.02 Memory Card: 8-128MB 3.3v SmartMedia card SP-555 Current OS: 1.03 Memory Card: 128MB-2GB Type 1 Compact Flash card SP-606 Current OS: 1.09 Memory Card: 16-512MB Type 1 Compact Flash card SP-808 Current OS: 1.050 External Drive: The SP-808 has an optional SCSI interface for connecting an external Zip 100 drive SP-808EX Current OS: 1.001 External Drive: The SP-808EX has an optional SCSI interface for connecting an external Zip 100/250 drive VariOS Current OS: 1.07 Memory Card: PC Card Compact Flash type II compliant External Drives: The VariOS module has a USB connection for interfacing with a computer VP-9000 Current OS: 1.12 Internal Sample Memory: 8MB expandable to 136MB SIMM: 16 or 32MB – 72 pin FPM or EDO 5v External Drives: The VP-9000 has a SCSI interface – see Appendix 2 for compatible drives
©2009 Roland Corporation U.S. Page 3

�®
Digital Sampler Compatibility Guide V-Synth Current OS: 2.00 Memory Card: PC Card or CF card w/ PCM-CIA card adaptor External Drives: The V-Synth has a USB connection for loading/saving/backing up files and MIDI I/O V-SynthGT Current OS: 2.00 Memory Card: USB key (up to 2 GB) External Drives: The V-SynthGT has a USB connection for loading/saving/backing up files plus MIDI and Audio I/O V-SynthXT Current OS: 2.02 Memory Card: PC Card or CF card w/ PC card adaptor External Drives: The V-Synth has a USB connection for loading/saving/backing up files plus MIDI and Audio I/O XV-5080 Current Operation System: 1.30 Internal Sample Memory: 64MB expandable to 128MB SIMM: 32 or 64MB – 72 pin FPM or EDO (2 slots) Memory Card: 2-128MB 5 or 3.3v SmartMedia card External Drives: The XV-5080 has a SCSI interface – see Appendix 2 for compatible drives Appendix 1 – Contact Sources Memory Bell Micro www.bellmicro.com Meritline www.meritline.com OEMPCWorld www.oempcworld.com SoundLogic www.ramona.com/Soundlogic Think Computer www.thinkcomputerproducts.com Cables Redmond Cable www.redmondcable.com SCSI Drives APS www.apstech.com CDW www.cdw.com Glyph www.glyphtech.com Rorke Data www.rorke.com SoundLogic www.ramona.com/Soundlogic Sounds Big Fish Audio www.bigfishaudio.com East-West www.soundsonline.com Ilio Entertainment www.ilio.com Midi Mark www.midimark.com NorthStar www.northstarsamples.com Q Up Arts www.quparts.com SampleHeads www.sampleheads.com Spectrasonics www.spectrasonics.net
©2009 Roland Corporation U.S. Page 4

�®
Digital Sampler Compatibility Guide
©2009 Roland Corporation U.S. Page 5
Appendix 2 – External Drives CD-ROM Drives Chinon CDX-431/435 Plextor M-5024D Sony CDR-6111 Chinon CDX-525/535 Plextor DM-3028 Sony CDU-55S MediaVision Reno Drive Plextor DM-5024 Sony Apple CD-300/300E NEC CDR-74/84 Plextor PX-43CS Sony CDU-561 NEC CDR-25/35/36/37/38 Plextor PX-65XS Sony CDU-76S NEC CDR-210/211 Plextor PX-85CS Sony CSD-7611M NEC CDR-410 Plextor PX-12CSE Sony Apple 600E+ NEC CDR-510/511 Roland CD-5 Toshiba XM-3301/3401 Panasonic LK-RC503 (CR 503) Roland CD-Rack Toshiba XM-4402A Phillips PCA80SC Roland VS-CDR Toshiba TMX-5201B Pioneer DR-U24X Roland VS-CDRII Toshiba XM-3501 Pioneer DRM602X (S-760 only) Roland VS-CDR3 Toshiba XM-5701TA Pioneer DRM604X (S-760 only) Sony CDU-541 Toshiba XM-620 Hard Drives Note: Most SCIS hard drives that are fully compatible with Macintosh computers will work with the S-700 series of digital samplers. Our S-700 Series samplers format up to 600MB per drive. Optical Drives Fujitsu M2512 Ricoh RS-5031E Olympus MOS321 Ricoh RS-9200 Panasonic Gemini PCD 4x Sony RMO-350/360 Panasonic MOdrive Sony RM-S-550 Ricoh RS-3100E Sony SMO-F521 Removable Media Drives SyQuest 44/88/105/135/200/270 Iomega Jaz 1GB Iomega Bernouli 150MB Iomega Zip 100/250 * The Jaz and Zip drives require v2.24 for the S-760 and v2.25 for the S-750/770. The SP-700 will need the v1.12 EEPROM tupdate to support the newer Zip drives. The JS-30 requires v1.03 to work with Zip 100 drives. The DJ-70MKII needs v1.02 to operate the Jaz drive. The SP-808 can use both Zip 100 and 250 drives but only 100MB disks. SCSI DAT Drives Wang Data DAT 1300 Archive Python Data DAT 4360XT TEAC Data Cassette MT-2ST/F50 * The S-750/770 must be in Hacker Mode to use Data DATs Appendix 3 – Monitors These monitors require special adapter cables. See Redmond Cable in Appendix 1. Atari SC-1224 Mitsubishi Diamondscan Atari SC-1435 NEC 3D Commodore 1080 Sony KV1311 Commodore 1084 Sony PVM Darius TSM-1431 Taxan 610/420 Magnavox 8762 Zenith ZVM133