
Residential Field Guide - Comfort Ready Home
98
Residential Field Guide
-
Upload
khangminh22 -
Category
Documents
-
view
0 -
download
0
Transcript of Residential Field Guide - Comfort Ready Home

Residential Field Guide

2
This Field Guide is a resource for weatherization, HVAC and water heating contractors, and utility partners to assist with Bonneville Power Administration, or BPA, qualifying energy-efficiency projects. This document reflects BPA energy-efficiency incentives and minimum requirements in the current Implementation Manual, effective Oct. 1, 2019 through Mar. 31, 2022. Incentives are assessed during this period and changes may be made after this date. Incentives may vary between utilities, and additional terms and conditions may apply. Contact the local serving utility or a local Comfort Ready Home Field Specialist to confirm incentives and requirements.
See page 10 for Field Specialist contact information and page 92 for local utility contact information.

COMFORT READY HOME PROGRAM
MEET YOUR SUPPORT TEAM

4
SUPPORT TEAM
Today, our homes are much more than where we live. They provide a place of stability and security. In some cases, they serve as our offices and our schools. Now more than ever, we want our homes to be comfortable, healthy and safe.
Your local utility and BPA rely on the contractor community to help homeowners improve their homes by making them more energy efficient, not only to save money, but also to give homeowners a better place to live.
When you — the contractor — offer homeowners a full suite of services to help them weatherize their homes, your work provides invaluable customer satisfaction. Utility incentives and energy-efficiency improvements you make, such as high-quality insulation, air sealing, windows, doors, water heating and HVAC installations, create a positive impact that helps your community thrive and your business grow.
We developed Comfort Ready Home to give contractors the tools to build their business at no cost. As a member of the Comfort Ready Home Residential Contractor Network, you will receive training and ongoing technical support to be a leader in energy-efficient home upgrades. We can help take your work to the next level and connect you with customers who are ready to invest in energy efficiency.
This Field Guide is just one of the tools available through the Comfort Ready Home program. In these pages, you’ll find technical resources to help with specific projects, guides to help with customer kitchen-table conversations, checklists for quality installations and quick links to resources.
Additional free tools are available at ComfortReadyHome.com. There you can access local utility incentive programs online, live workshop training and support from our Field Specialists. We will support you in building a stronger business and provide tools to help your customers make smart investments in their homes.
More than anything, we thank you for taking the time to join the Residential Contractor Network and helping homeowners in the Northwest save money and live more comfortably.
Sincerely,
Partnering together for thriving communities.
Jess Kincaid
Residential Sector Lead Energy Efficiency Bonneville Power Administration
Rob Burr
BPA Program Manager Energy Efficiency Bonneville Power Administration
Charlotte Morrow
Implementation Program Manager Comfort Ready Home

5
TABLE OF CONTENTS
Contents
INTRODUCING COMFORT READY HOME ......................................................................................................8
HOW TO USE THE PROGRAM .........................................................................................................................9
Benefits to Contractors ...........................................................................................................................................................................9
Benefits to Utilities ....................................................................................................................................................................................9
Field Specialists ........................................................................................................................................................................................10
ENVELOPE MEASURES ....................................................................................................................................12
AIR SEALING ......................................................................................................................................................................................... 13
At A Glance – Single Family Prescriptive Air Sealing ............................................................................................................................14
INSULATION ......................................................................................................................................................................................... 16
Attic, Wall and Floor Insulation ..............................................................................................................................................................16
At A glance – Single Family Attic Insulation ..........................................................................................................................................18
Complementary Prep Work: Identifying Roof Leaks..........................................................................................................................20
Complementary Prep Work: Mechanical Ventilation – Venting Bath Fans and Dryers .................................................................. 22
At A Glance – Single Family Wall Insulation ......................................................................................................................................... 24
At A Glance – Single Family Floor Insulation ........................................................................................................................................ 26
Complementary Work: Ground Barrier................................................................................................................................................28
At A Glance – Manufactured Home Belly Insulation ...........................................................................................................................30
At A Glance – Manufactured Home Roof Insulation ........................................................................................................................... 32
WINDOWS AND DOORS..................................................................................................................................................................... 34
Prime Window and Doors Replacement ..............................................................................................................................................34
Low-e Storm Windows ...........................................................................................................................................................................34
Exterior Insulated Doors ........................................................................................................................................................................34
At A Glance – Prime Window and Patio Doors .................................................................................................................................... 35
At A Glance – Low-E Storm Windows ................................................................................................................................................... 37
At A Glance – Insulated Exterior Doors ................................................................................................................................................39
PRESCRIPTIVE DUCT SEALING ........................................................................................................................................................... 41
At A Glance – Prescriptive Duct Sealing ............................................................................................................................................... 42
MECHANICAL MEASURES ............................................................................................................................ 44
HVAC .................................................................................................................................................................................................... 45
At A Glance – Ductless Heat pumps .....................................................................................................................................................46
At A Glance – Advanced Smart Thermostats ......................................................................................................................................48

6
TABLE OF CONTENTS
PTCS Heat Pumps And Duct Sealing ....................................................................................................................................................50
PTCS Duct Sealing ...................................................................................................................................................................................51
Commissioning, Controls, And Sizing Of Heat Pumps Below 9.0 HSPF .............................................................................................51
WATER HEATING ..................................................................................................................................................................................52
At A Glance – Heat Pump Water Heater ...............................................................................................................................................54
ADDITIONAL MEASURES ...............................................................................................................................56
Programmable Line Voltage Thermostats .......................................................................................................................................... 57
Clothes Washers ..................................................................................................................................................................................... 57
Clothes Dryers .........................................................................................................................................................................................58
Advanced Power Strips ..........................................................................................................................................................................58
Energy Saver Kits ....................................................................................................................................................................................59
Electric Vehicle Chargers .......................................................................................................................................................................59
BRINGING THE PROGRAM TO MARKET ...................................................................................................... 60
CONSUMER AND WORKER SAFETY .................................................................................................................................................. 61
DELIVERING EXCEPTIONAL CUSTOMER SERVICE .......................................................................................................................... 65
Considerations For Behavior While In Customer’s Homes .................................................................................................................65
Covid Considerations ............................................................................................................................................................................66
HOW TO HANDLE CUSTOMER OBJECTIONS ....................................................................................................................................67
Objections Are Opportunities ............................................................................................................................................................... 67
Be Prepared .............................................................................................................................................................................................68
INCREASE YOUR SALES OPPORTUNITIES ......................................................................................................................................... 71
Combining Complementary Efficiency Upgrades .............................................................................................................................. 71
PRODUCT GUIDES .........................................................................................................................................73
SIMPLE AND EFFECTIVE AIR SEALING ...............................................................................................................................................74
DUCT SEALING.....................................................................................................................................................................................75
WINDOW AND DOOR REPLACEMENT ...............................................................................................................................................76
DUCTLESS HEAT PUMPS .....................................................................................................................................................................78
HIGH-EFFICIENCY HEAT PUMP WATER HEATERS ............................................................................................................................79
LOW-INCOME OR INCOME QUALIFIED CUSTOMERS ................................................................................. 81
HOW TO PARTNER WITH AND REFER CUSTOMERS TO NON-PROFIT ENERGY EFFICIENCY PROGRAMS ............................... 82
ONE MISSION, TWO PROGRAMS ...................................................................................................................................................... 82
YOUR CUSTOMER MAY QUALIFY FOR FREE UPGRADES ............................................................................................................... 82

7
TABLE OF CONTENTS
CONNECT WITH YOUR LOCAL RESOURCES TO UNDERSTAND THE REQUIREMENTS .............................................................. 83
NORTHWEST RESOURCES ................................................................................................................................................................. 83
EN ESPAÑOL ................................................................................................................................................... 84
En Resumen: Sellado De Aire Prescriptivo Unifamiliar ........................................................................................................................85
En Resumen: Ventanas Y Puertas De Patio Previamente Preparadas ..............................................................................................87
En Resumen: Sellado De Ductos Prescriptivo ......................................................................................................................................89
RESOURCES AND REFERENCES ................................................................................................................... 91
Utility Manager Contacts ...................................................................................................................................................................... 92

8Back to Table of Contents
BPA and Northwest utilities have a shared goal of increasing our weatherization achievements by 10 times, and quadrupling our HVAC and water-heating projects to meet the growing energy demands in the region. In this guide, you will find helpful technical and program information for many of BPA’s residential incentive offerings. This guide will continue to grow over time with expanded resources and information. Always contact your local utility program for specifics on current incentives and requirements. A list of Northwest utility contacts is available on page 92.
In addition, when you join the Comfort Ready Home Residential Contractor Network you will have access to new customers and utility incentives for your energy-efficient weatherization, HVAC and water-heating installations.
To become a Comfort Ready Home Contractor, complete an application online at ComfortReadyHome.com/join.
Not all services are available in every area, so check with your local utility or find your local Field Specialist at ComfortReadyHome.com/field-specialists.
Introducing Comfort Ready Home
The Comfort Ready Home program helps communities become
more energy efficient, healthier and more comfortable through
home weatherization, HVAC and water-heating upgrades. We
make affordable energy-efficiency upgrades possible for every
home by connecting electric utilities, contractors and homeowners
with each other, and with the tools they need to make smart
energy-efficiency decisions.
○ Marketing Toolkits: Download templates and guides to help you drive participation in residential energy-efficiency programs.
○ Online Trainings: Resources to help you engage with customers and technical trainings to help you perform quality installations of energy-efficient home upgrades.
○ Product Guides: Tools for you to help homeowners choose the right energy-efficient products for their home.
○ Contractor Database: A space for homeowners to find qualified local contractors (like you!) to help make smart, energy-efficient upgrades.
○ Field Specialists: Field Specialists provide program and technical support for contractors and utilities, and are available to answer any questions you have about the program.
PROGRAM RESOURCES AT NO COST TO YOU INCLUDE:
PROGRAM OVERVIEW

9Back to Table of Contents
Contractors
Visit the online Contractor Info Hub at ComfortReadyHome.com/infohub to access the Learning Center, download the contractor-focused marketing toolkit and more. Here, contractors also have the option to join the Comfort Ready Home Residential Contractor Network, which allows them to connect with homeowners in their area who are ready to invest in home comfort and energy efficiency.
Utilities
Get started by working with your local Field Specialist who can deliver a detailed plan to support your program. Utilities can also visit the Utility Center at ComfortReadyHome.com/utilities to take advantage of Comfort Ready Home training programs, marketing support and more. Utilities can use all services to capture long-term energy savings by augmenting your existing offers or establishing new programs.
How to Use the Program
BENEFITS TO CONTRACTORS
○ Access to new customers through the Comfort Ready Home Residential Contractor Network.
○ Free online sales and technical training courses available 24/7 in the Learning Center.
○ A dedicated marketing toolkit with sales tools and customizable materials.
○ Personalized support from a Comfort Ready Home Field Specialist in your area.
BENEFITS TO UTILITIES
○ Tools to meet your residential energy-efficiency program goals.
○ Access to a network of trusted residential contractors.
○ A marketing toolkit developed specifically for utilities.
○ Dedicated support from a Comfort Ready Home Field Specialist.
The Comfort Ready Home program provides contractors and
utilities with a menu of tools, resources and services to enhance their
residential weatherization, HVAC and water-heating offerings.
PROGRAM OVERVIEW

10Back to Table of Contents
Field Specialists
The Comfort Ready Home team of Field Specialists is here to support contractors throughout the region. Field Specialists provide one-on-one training on program requirements, incentive paperwork, and support with technical questions and tough projects. Contact your local Field Specialist when you have questions, challenges or need information. Visit our website at ComfortReadyHome.com to search for utility program offerings and Field Specialists in your project area. Additional staff may be added to ensure regional coverage of BPA's territory.
PROGRAM OVERVIEW
Idaho (Northern), Washington (NE), Montana
Scott Mayfield
509-290-0534
Oregon (Central, Central Valley/Coast, Southern Valley/Coast), California (Northern)
Ben Reher
541-326-9039
Oregon (NW)
Cyrus Collins
503-705-7039
Idaho (Southern), Nevada, Wyoming
Random Navarro
208-573-5822

11Back to Table of Contents
PROGRAM OVERVIEW
Washington (SW)
Ben Rousseau
503-683-1775
Washington (NW, Olympic Peninsula/Coastal)
Troy Zdzieblowski
503-890-2230
Washington (SE), Oregon (NE)
David Olivas
503-823-0813

ENVELOPE MEASURES

13Back to Table of Contents
ENVELOPE MEASURES
Controlling air leaks is critical to a successful weatherization job. Being able to control when and how air moves into and out of a home will increase the thermal performance, and improve the indoor air quality and longevity of the building.
The ultimate goal of air sealing is to establish an effective air barrier, sealing the large air leaks first. Prescriptive Air Sealing only requires finding and sealing all accessible air leaks. For a more precise measure, Whole-Home Air Sealing requires using a blower door to find and seal all accessible air leaks, which can be very efficient and effective when done correctly.
Sometimes air leaks provide ventilation to exhaust pollutants and admit fresh air. However, air leaks can bring pollutants into the home as easily as they expel or dilute them. Indoor air-quality problems may arise if airflow is reduced without paying attention to the home’s existing conditions and ventilation. In addition, air sealing may influence whether an indoor combustion appliance, such as a gas furnace or fireplace, will vent its gases out of the chimney properly or pull them into the living space (depending on the location).
Successful Air Sealing Projects
Common air sealing products include expanding spray foam, rigid insulation, caulk and sheet metal. This measure may be performed as a standalone measure, but also complements attic insulation and floor insulation.
Prescriptive Air Sealing is an incremental process that reduces air leaks in a home by finding and sealing all accessible holes and penetrations between attics, crawl spaces and conditioned spaces. A list of required steps is in the checklist in the At a Glance guide. Prescriptive Air Sealing does not require a blower door test or a certified technician; however, some utilities may have additional requirements.
Prescriptive Air Sealing can be performed in an attic and/or crawlspace, and may be eligible for an incentive for each space independently. The attic and crawlspace may be completed separately and at different times.
In contrast, Whole-Home Air Sealing requires a blower door test to obtain a measurement of building tightness before and after air sealing. Whole-Home Air Sealing is best performed by a certified technician. Qualifying certifications for Whole-Home Air Sealing include: Performance Tested Comfort Systems, Building Performance Institute, Home Energy Rating System, and Weatherization Assistance Program trainings. Requirements for performing this work can be found in the BPA Residential Weatherization Specifications.
Air Sealing
AIR-LEAK REDUCTION IS CRUCIAL. AIR LEAKS CAN
○ Account for up to 40% of a building’s heat loss.
○ Move moisture into and out of a house, leading to air quality issues or damage to building components.
OBJECTIVES OF AIR SEALING
○ Protect insulation’s thermal resistance to save energy.
○ Avoid moisture migration into building cavities.
○ Increase comfort.
○ Improve indoor air quality.

14Back to Table of Contents
Specification ChecklistFor details on all BPA requirements for this measure, please refer to the 2016 BPA Residential Weatherization Specifications.
□ Attic hatch/door and pull-down stair covers: gasket or weather-stripping. Vertical and horizontal hatches, or pull-down stairs between conditioned space and attic or crawlspace. Must provide an effective air seal and be durably installed to the use-case of the hatch.
□ Duct boots/penetrations: mastic, caulk, or other airtight seal installed around the perimeter of duct boots between the boot and the ceiling.
□ Chases, soffits and floor joists under knee walls: blocked with rigid material and sealed with caulk or foam. Maintain clearance from combustible materials, typically 3 to 4 inches, but check local codes.
□ Fire-rated materials used as appropriate near heat-producing devices.
□ Recessed-cans/Non-IC rated fixtures: foam, caulk or another airtight seal installed between fixture and ceiling; or a drywall or another non-flammable air-sealed insulation box or hat installed over fixture. Shield extended 3 to 4 inches above new attic insulation. No insulation covers the top of the box or hat fixture.
□ Recessed-cans/IC-rated fixtures: fixture sealed between interior finish and the fixture. Fixture is not covered with spray foam and openings in the fixture are not sealed. Attic insulation is installed over the fixture.
□ Bath fans: foam, caulk, or other airtight seal installed around perimeter of bath fans. Fire-resistant caulk used for bath fans with a heat source. Gaps larger than 1 inch spanned with sheet metal.
□ Top plates and electrical or plumbing penetrations, sill plates for basement wall rim joists: drywall-to-top-plate connections, wood-to-wood or concrete seams, penetrations through the plate sealed with foam or caulk.
Single-Family Prescriptive Air Sealing
ENVELOPE MEASURES: AT A GLANCE
Espanol? Mira aqui.
PREPARATION
○ Before air sealing attics and crawlspaces, ensure no leaks or water intrusion exists prior to installing insulation.
○ Verify attic and crawlspace each meet local and state codes for ventilation, typically 1/150 or 1/300 if the vents are well distributed between high and low on the roof, or distributed evenly around the crawl perimeter.
○ Ensure home is free of existing moisture, mold and relative-humidity issues.
○ Ensure home has at least one operational exhaust fan, ducted to the exterior, per the guide "Complementary Prep Work: Mechanical Ventilation Guide — Venting Bath Fans and Dryers" ( Page 22 ).
○ If combustion appliances are present, ensure the presence of or install a UL- or CUL-approved carbon monoxide detector.
○ Confirm use of correct materials identified for air sealing structural leaks vs air leaks around high- temperature items such as flues, chimneys and recessed-can lights.
○ Identify inaccessible locations.
• Building structure, framing and mechanically fastened materials block access.
• Opportunities immediately adjacent to eave line: top plates, balloon framed walls, soffits and can lights.
• Penetrations beneath/behind 5 inches of insulation, i.e. blown in attic and batt in floor.
Download Checklist
Pre-Condition: Not air sealed.
Post-Condition: All accessible gaps and penetrations have been sealed.
Connect with the local serving utility to confirm pre- and post-condition requirements.

15Back to Table of Contents
Installation Examples
ENVELOPE MEASURES: AT A GLANCE
Sealed chase or cavity. Courtesy of Oregon Housing and Community Services and Oregon Energy Coordinators Association
Open/unsealed chase or cavity. Courtesy of Oregon Housing and Community Services and Oregon Energy Coordinators Association
Non-IC fixture with drywall shield (hat). Courtesy of Advanced Energy
Unsealed non-IC fixture. Courtesy of Advanced Energy
Unsealed penetration (heat-producing). Courtesy of U.S. Department of Energy Weatherization Program Trainers' Consortium (DOE WAP TC)
Sealed penetration (heat-producing). ○ Surrounded by sheet metal.
○ 3-inch clearance maintained.
○ Fire-resistant sealant.
Courtesy of U.S. Department of Energy Weatherization Program Trainers' Consortium (DOE WAP TC)
Floor joists under kneewall (blocked with rigid material and sealed with caulk). Courtesy of U.S. Department of Energy
Floor joists under kneewall (not blocked with rigid material and unsealed). Courtesy of U.S. Department of Energy
MINIMUM REQUIRED DOCUMENTATION
You can use the Optional Weatherization Data Collection Form to collect this information. Contact the serving utility for specifics on required documentation.
1. Square footage of sealed area and age of home.
2. Contractor invoice showing order or purchase date and cost.
3. Documentation that the measure requirements have been met (e.g., manufacturer, model number, type, size and quantity of product installed or used).
PAIRS WELL WITH
□ Home Insulation.
□ Prescriptive Duct Sealing.
□ Performance Tested Comfort Systems, or PTCS, Duct Sealing.

16Back to Table of Contents
Adding attic, wall and floor insulation can improve the thermal performance of a home, but it can also cause problems if not properly installed. Insulate to the maximum level possible and always consider effective air sealing when installing insulation. Check with your local utility weatherization program for specific requirements for existing and installed insulation levels.
Attic Insulation
Several factors will determine what insulation measure(s) will produce the greatest comfort and energy savings, and which may improve building durability. Homes that have little-to-no insulation in attics, floors and walls will always benefit by adding as much insulation as possible in each assembly. For existing Single-family site-built and Multifamily buildings, attic insulation will typically offer the biggest return on investment in terms of pure energy savings and comfort. To maximize savings and building durability, air sealing and passive ventilation should be paired with attic insulation.
The attic often has the most space to add insulation and may offer at least twice that of other assemblies. The available depth to insulate an attic may be anywhere from 6 to 24 inches. A wall will usually have a maximum in-wall depth of 6 inches and a Single-
family site-built or Multifamily building floor will have 6 to 12 inches of floor joist available to be insulated.
Attics also tend to be the hottest places in the home during the summer and as cold as the outside during winter months. This means the temperature difference between the inside of the home and unheated spaces, which is the driver for heat loss and gain, is often the greatest between the home and the attic. Installing insulation to help reduce conductive and radiant losses from the ceiling to an attic or roof offers a greater opportunity than installing it around walls and floors.
Wall and Floor Insulation
Insulating floors has a unique benefit because homeowners are in contact with their floors for much of their time indoors. Keeping floors warmer provides greater comfort. Homeowners can also benefit from wall insulation. Exterior walls typically make up the largest single surface area of the thermal boundary of a home. Walls often consist of framed and drywalled portions, and windows and doors. Properly installed ENERGY STAR® windows will absolutely help an exterior wall assembly's overall performance. However, exterior walls can be insulated to a higher value and homes almost always have more exterior wall square footage than window square footage. Reference the Windows and Doors (page 39) section of this guide for additional details.
This is similar for manufactured homes with a few key differences. Depending on the design, manufactured homes with a belly or rodent barrier beneath the floor and a flat or bowed roof may have as much or more room for floor insulation than the ceiling/roof area does. This can change the priorities in manufactured homes between ceiling and floor insulation in terms of benefits for the resident. Of course, if either is under-insulated, it will benefit by adding insulation. Manufactured home walls typically do
ENVELOPE MEASURES
Professionally installed insulation will help maintain more constant and comfortable temperatures, while preventing build-up of moisture and condensation.
Insulation

17Back to Table of Contents
ENVELOPE MEASURES
not present the same opportunities for adding insulation. It is more difficult to add insulation, the wall depth could be as thin as 3 inches and the structural integrity of the home may not support the weight of additional wall insulation.
It’s worth repeating that insulating all under-insulated assemblies is beneficial for energy savings and comfort.
The bottom line for insulation is that it is always worth examining the potential for adding new insulation, comparing it to the existing insulation, then estimating the incentives you may be able to provide to help lower the cost for the resident.
Successful Insulation Projects
○ Always consider air sealing when adding insulation in a Single-family home attic, floor or crawlspace.
○ For existing Single-family site-built and Multifamily buildings, look at attics first as the best opportunity to reduce energy bills and increase comfort.
○ For manufactured homes, look closely at the options, but consider the belly/floor as the best opportunity to reduce energy bills and increase comfort for the homeowner.
○ Roof/ceiling insulation for manufactured homes falls under program incentives for attic insulation.

18Back to Table of Contents
ENVELOPE MEASURES: AT A GLANCE
Single-Family Attic Insulation
Specification ChecklistFor details on all BPA requirements for this measure, please refer to the 2016 BPA Residential Weatherization Specifications.
□ Pack insulation against the eave baffle or roof deck to achieve the highest possible R-value in places where the full intended thickness of insulation won’t fit.
□ Install insulation to the surface between the conditioned space and attic with a uniform R-value/consistent depth. Level the insulation if necessary.
□ Insulate vertical access doors to at least R-11 and horizontal access hatches to at least R-30.
□ Permanently attach weatherstripping to the attic-access door or frame to create an effective air seal between the door frame and the door. Repair air leaks or replace the door prior to insulating.
□ Pull-down stairs: Weatherstripped and insulated to a minimum of R-10. New assemblies include minimum R-5 and weatherstripping.
□ Attic walls and knee walls: insulated to meet requirements, insulation covered with vapor permeable air barrier if attic is used for storage, access door insulated to minimum R-13 and weatherstripped. Block frame the opening between floors with an air barrier.
□ All attic insulation shall meet manufacturer-specified density.
PREPARATION
○ Ensure no existing roof leaks or failing roof flashing.
○ Remove degradable and absorbent materials that might rot from in the attic.
○ Baffles and shields should be rigid, non-combustible materials attached to framing, and extend a minimum 4 inches above new insulation, with 3 inches of clearance around non-IC fixtures, flues and chimneys.
○ Vent baffle openings should be equal or greater than the soffit vents in the bays, should extend to the exterior side of the top plate and be attached to rafters.
○ Install a dam around openings to maintain the insulation level to the edge of the opening.
○ Install one depth ruler facing the attic entrance for every 300 square feet of attic area.
○ If water pipes are not covered by at least 1 inch of attic insulation, wrap the pipes with at least one-inch-thick insulation.
○ Each attic space must meet applicable local and state codes for ventilation.
○ New and existing exhaust fans must be sealed and vent directly to the outdoors.
○ Insulation in contact with active knob-and-tube wiring must be approved in writing by a licensed electrician.
Download Checklist
Pre-Condition: R-0 to R-38
Post-Condition: R-38, preferably to R-49. R-49 required if the existing insulation is between R-31 and R-38.
Connect with the local serving utility to confirm pre- and post-condition requirements.

19Back to Table of Contents
Installation Examples
Weatherstripped and insulated hatch.Courtesy of Advanced Energy
Uninsulated, not weatherstripped.Courtesy of Advanced Energy
ENVELOPE MEASURES
MINIMUM REQUIRED DOCUMENTATION
You can use the Optional Weatherization Data Collection Form to collect this information. Contact the serving utility for specifics on required documentation.
1. Documentation that the measure requirements have been met (e.g., manufacturer, model number, type, size and quantity of equipment or product installed or used).
2. Documentation of pre- and post- insulation R-values, and square footage of installed insulation.
3. Primary heating type.
4. Invoice showing order or purchase date, cost, post-condition.
PAIRS WELL WITH
□ Prescriptive Air Sealing.
□ Prescriptive Duct Sealing.
□ Floor Insulation.
□ Whole-House Air Sealing
Attic insulated and all prep work completed. Courtesy of U.S. Department of Energy
Attic not prepped or insulated. Courtesy of U.S. Department of Energy
Open knee wall insulated and covered. Courtesy of Advanced Energy
Open knee wall uninsulated. Courtesy of Advanced Energy
Roof-to-wall heel insulated to at aleast R-13. Courtesy of U.S. Department of Energy
Roof-to-wall heel uninsulated. Courtesy of Advanced Energy

20Back to Table of Contents
Completing complementary preparation steps are not required but ensure your workspace is ready for air sealing, insulation, or improvements to the duct system. Make sure spaces are clean, protected from the elements and pests, and that weatherization measures are completed to specifications to ensure the updates perform as designed and have the long-term durability expected.
Identifying roof leaks is an important preliminary step when completing any attic insulation job. Follow these recommendations to ensure a quality job, a satisfied customer and to meet utility incentive requirements for some weatherization measures.
Assemble patching materials such as patches, nails and screws, putty tape, roof sealants and roof coatings/replacement materials.
○ Deal with any ponding issues on flat Single-family or Multifamily roofs or bowed manufactured home roofs.
○ Based on interior, attic and exterior inspections, prepare to repair known and suspected roof leaks.
• Of immediate interest are roof penetrations, level changes and intersections. Check for proper flashing and soft spots on the roof-decking materials.
• Include flashing and lapped roofing materials in valleys and around chimneys.
○ Identify the source of the attic moisture. Moisture caused by air leaks is typically widely distributed under the roof deck and located above an obvious source such as can lights, bath exhaust fans, etc. Moisture caused by roof leaks typically includes visible staining and is concentrated in specific areas such as downslope from roof penetrations or under valleys.
○ Gutters should be pitched to the downspouts. There should be no more than a 40-foot length of gutter without a downspout. In areas where tree leaves might cause clogging, gutters and downspouts should be oversized so leaves and debris will be flushed more easily.
○ Downspouts should be securely fastened to the house. Elbows and straight sections should be fastened together with pop rivets. Screws that project into the downspout can lead to clogging.
Installation Examples
All flashings and penetrations inspected for leaks.Courtesy of U.S. Department of Energy
Interior moisture source not corrected. This problem is due to an unvented fan.Courtesy of Pennsylvania College of Technology
ENVELOPE MEASURES
Identifying Roof LeaksCOMPLEMENTARY PREP WORK

21Back to Table of Contents
Inspect all downspouts for proper connection. Rusting, disconnected downspout.
Identifying Roof Leaks (continued)
ENVELOPE MEASURES

22Back to Table of Contents
Completing complementary preparation steps are not required but ensure your workspace is ready for air sealing, insulation, or improvements to the duct system. Make sure spaces are clean, protected from the elements and pests, and that weatherization measures are completed to specifications to ensure the updates perform as designed and have the long-term durability expected.
Ensuring properly vented bath fans and dryers is an important preliminary step when completing any attic insulation job. Follow these recommendations to ensure a quality job, a satisfied customer and meet utility incentive requirements for some weatherization measures.
○ Exhaust fan and dryer ducts must be sheet metal or HVAC flex-duct and insulated to a minimum of R-4 if in an aunconditioned space. Vinyl coil ducts must be replaced.
○ Any newly installed exhaust ducts must be sized correctly.
• Up to 100 CFM can use 5-inch duct.
• Up to 135 CFM can use 6-inch duct.
• Up to 150 CFM can use 7-inch duct.
○ All exhaust fans must vent to the outdoors. Ducts must be mechanically fastened using sheet metal screws or clamps and be substantially airtight. Mechanical fasteners must not interfere with dampers.
○ Exhaust fan ducts should be adequately supported to prevent sagging, be as straight as possible to maximize effective airflow and have no more than two 90-degree turns, or equivalent. Dryer vents should be limited to 25 feet in length.
Mechanical Ventilation Venting Bath Fans and Dryers
COMPLEMENTARY PREP WORK

23Back to Table of Contents
Mechanical Ventilation: Venting Bath Fans and Dryers (continued)
Properly vented to exterior.Courtesy of U.S. Department of Energy
Not insulated, vented to exterior or properly supported. Courtesy of U.S. Department of Energy
Vented to exterior.Courtesy of U.S. Department of Energy
Poorly ducted, vented to attic. Courtesy of U.S. Department of Energy
Installation Examples
ENVELOPE MEASURES

24Back to Table of Contents
ENVELOPE MEASURES: AT A GLANCE
Single-Family Wall Insulation
Specification ChecklistFor details on all BPA requirements for this measure, please refer to the 2016 BPA Residential Weatherization Specifications.
□ Insulate the wall to the highest practical R-value, at least R-11 for 4-inch walls, R-21 for 6-inch walls. Fill all cavities in all exterior walls, including small cavities above, below and on the sides of windows and doors.
□ Blown-in cavity insulation shall be installed so it completely fills the cavity, with adequate density per the manufacturer’s specifications to ensure no settling.
• Fiberglass dense pack ~2 lb/ft³.
• Cellulose dense pack ~4 lb/ft³.
□ Tube-fill method is the preferred methodology for all wall blows, except for scenarios where framing, blocking or restrictions in the wall cavity prevent this method.
• Block wall-mounted heaters to prevent contact with insulation. If you can’t install blocking, don’t fill the cavity with insulation.
□ Open walls: insulated to at least R-11 for 4-inch walls, R-21 for 6-inch walls. Consider moisture when selecting insulation materials for below-grade walls.
PREPARATION
□ Inspect walls for evidence of moisture damage. If condition of the siding, sheathing or interior wall finish indicates an existing moisture problem, no sidewall insulation should be installed until the moisture problem has been identified and corrected.
□ Inspect indoor surfaces of exterior walls to ensure they are strong enough to withstand the force of blowing-in insulation. Add screws or other reinforcement to weak walls, if feasible.
□ Inspect for interior openings from which insulation may escape such as balloon-framing openings in the attic or crawlspace, pocket doors, un-backed cabinets, interior soffits and closets. Seal openings as necessary to prevent insulation from escaping.
□ Knob-and-tube wiring: active knob-and-tube wiring must be approved in writing by a licensed electrician if it will come into contact with insulation.
□ Wall-mounted heaters: blocked to prevent contact with insulation. If blocking can’t be installed, cavity isn’t filled with insulation.
Download Checklist
Pre-Condition: R-0
Post-Condition: R-11 or greater
Connect with the local serving utility to confirm pre- and post-condition requirements.
RECOMMENDED
□ Holes that will be covered by siding must be plugged and must be completely covered by the siding. If a plug is partially exposed, for example, by falling between two pieces of shake siding, the plug must be covered by properly lapped building paper.
□ Holes drilled through the siding must be plugged, sealed, weatherproofed and ready to paint. If the surface of the plug is below the surface of the siding, the hole must be filled with non-shrinking filler.
□ If walls are balloon framed, blocking shall be installed at the top and bottom of the walls at each floor.

25Back to Table of Contents
ENVELOPE MEASURES: AT A GLANCE
PAIRS WELL WITH
□ Window and Door Replacement.
□ Attic Insulation.
□ Underfloor Insulation.
□ Air Sealing.
MINIMUM REQUIRED DOCUMENTATION
You can use the Optional Weatherization Data Collection Form to collect this information. Contact the serving utility for specifics on required documentation.
1. Documentation that the measure requirements have been met (e.g., manufacturer, model number, type, size and quantity of equipment or product installed or used).
2. Documentation of pre-and post- insulation R-values, and square footage of installed insulation.
3. Primary heating type and home type.
4. Invoice showing order or purchase date and cost.
Installation Examples
Hose has no kinks and includes a sponge to reduce leakage at penetration when insulating. Courtesy of South Seattle Community College
Hose has major kink. Courtesy of South Seattle Community College
Insulation access holes plugged and sealed with solid plugs. Courtesy of U.S. Department of Energy
Vented plugs for insulation access holes.
Infrared dense wall pack. Courtesy of Advanced Energy
Infrared poor wall insulation. Courtesy of Advanced Energy
Insulating brick or stucco wall from interior. Courtesy of South Seattle College
Brick wall to be insulated from exterior.

26Back to Table of Contents
ENVELOPE MEASURES: AT A GLANCE
Single-Family Floor Insulation PREPARATION
□ Evaluate crawlspace for ground moisture, crawlspace venting, plumbing leaks, presence of ground cover, and existing rodent infestations and debris.
□ Remove all degradable and absorbent scrap materials from the crawlspace, especially wood and cardboard. Repair any water leaks and moisture damage prior to performing work.
□ Bulk-water problems and plumbing leaks must be repaired, and standing water drained before insulating.
□ Extend all exhaust ducts, such as those for down-flow kitchen ranges and dryers, to the outside of the crawlspace with a code-approved end cap.
□ If necessary, install a new 6-mil ground-moisture barrier before installing underfloor insulation.
□ The total net-free area of foundation vents must meet code requirements, typically not be less than 1 square foot for each 150 square feet of underfloor area as a default standard, or 1/300 when vents are evenly distributed around the perimeter.
□ Ensure access hatches from the interior or exterior close completely and securely. Weatherstrip and insulate any hatches that connect to the conditioned area of the home.
Specification Checklist
□ Size batts to fill the entire joist bay and cut to fit around obstructions so no gaps, voids or compression exist.
□ If the installed batt has a vapor-retarder facing, the facing must be installed against the floor sheathing or be removed.
□ Support fiberglass batts so they remain in contact with the subfloor using the following materials, starting no more than 3 inches from the ends:
• Wood lath needs to be a minimum of ¼ x 1 inch for spans up to 48 inches. Spans greater than 48 inches must use 1 x 2 lumber.
• Twine must be non-stretching polypropylene or polyester.
• Wire must be stainless steel, copper or an equivalent material of similar corrosion resistance, with a minimum diameter of 0.040-inch, size 18 AWG.
• Fasteners must be corrosion resistant screws, nails or power-actuated staples that can penetrate wood 5/8 inch. DO NOT USE SELF-SUPPORTING HANGERS.
• Spray-foam insulation typically needs no support. When installing fiberglass batts or blown fiberglass underneath foam, as additional floor insulation or as an ignition barrier, support the fiberglass insulation.
• Walls between conditioned space and underfloor spaces:
• If the floor-joist cavities are open between the conditioned and unconditioned spaces, block with a rigid material and seal with caulk or foam.
• Insulate the walls to a minimum of R-11 for a 2 x 4 cavity and R-21 for a 2 x 6 cavity.
• Protect underfloor insulation for un-skirted crawlspaces and cantilevered floors with an air barrier.
For details on all BPA requirements, refer to the 2016 BPA Residential Weatherization Specifications.
Download Checklist
Pre-Condition: R-0 to R-11 R-12 to R-19
Post-Condition: R-19, R-25 or R-30 R-30
Connect with the local serving utility to confirm pre- and post-condition requirements.

27Back to Table of Contents
ENVELOPE MEASURES: AT A GLANCE
Installation Examples
Insulation fills cavity, properly supported.Courtesy of U.S. Department of Energy
Insulation does not fill cavity and not properly supported.Courtesy of ENERGY STAR®, U.S. Environmental Protection Agency
Insulation in full contact with floor.Courtesy of ENERGY STAR, U.S. Environmental Protection Agency
Air gap between floor and insulation.Courtesy of U.S. Department of Energy
Crawl hatch insulated and weatherstripped.Courtesy of Dan Wildenhaus
Crawl hatch NOT insulated or weatherstipped.Courtesy of U.S. Department of Energy and Oregon Energy Coordinators Association
Vented to minimum amount and well distributed.Courtesy of Dan Wildenhaus
Poorly vented and not evenly distributed.Courtesy of Dan Wildenhaus
PAIRS WELL WITH
□ Prescriptive Air Sealing.
□ Prescriptive or PTCS Duct Sealing.
MINIMUM REQUIRED DOCUMENTATION
You can use the Optional Weatherization Data Collection Form to collect this information. Contact the serving utility for specifics on required documentation.
1. Documentation that the measure requirements have been met (e.g., manufacturer, model number, type, size and quantity of equipment or product installed or used).
2. Documentation of pre-and post- insulation R-values and square footage of installed insulation.
3. Primary heating type.
4. Invoice showing order or purchase date, cost, post-condition.
Inadequate Crawlspace Vents
Crawlspace Vents 1 per 300 sq ft. floor

28Back to Table of Contents
Completing complementary preparation steps ensures that your workspace is ready for air sealing, insulation, or duct improvements. Make sure that spaces are clean, protected from the elements and pests, and that weatherization measures are completed to specifications to ensure the updates perform as designed — and have the long-term durability expected. Verify that a ground-moisture barrier is present in the crawlspace or install a new ground-moisture barrier before installing underfloor insulation.
○ Acceptable materials for a ground-moisture barrier include the following:
• 6-mil black polyethylene.
• UV-stabilized and opaque polyethylene.
• Existing black 4-mil polyethylene may remain if it is in good condition.
○ Overlap seams by 12 inches. Best practice is to seal seams.
○ Treat unconditioned basements with exposed soil the way you would a vented a crawlspace. Cover the exposed soil with a ground-moisture barrier.
Installation Examples
Clean, dry and covered.Courtesy of U.S. Department of Energy
Standing water.Courtesy of U.S. Department of Energy
ENVELOPE MEASURES
Ground Barrier COMPLEMENTARY PREP WORK

29Back to Table of Contents
Ground Barrier (continued)
Seams overlap, laps up foundation.Courtesy of U.S. Department of Energy
Missing ground cover.Courtesy of U.S. Department of Energy
ENVELOPE MEASURES
30Back to Table of Contents
ENVELOPE MEASURES: AT A GLANCE
Manufactured Home Belly Insulation PREPARATION
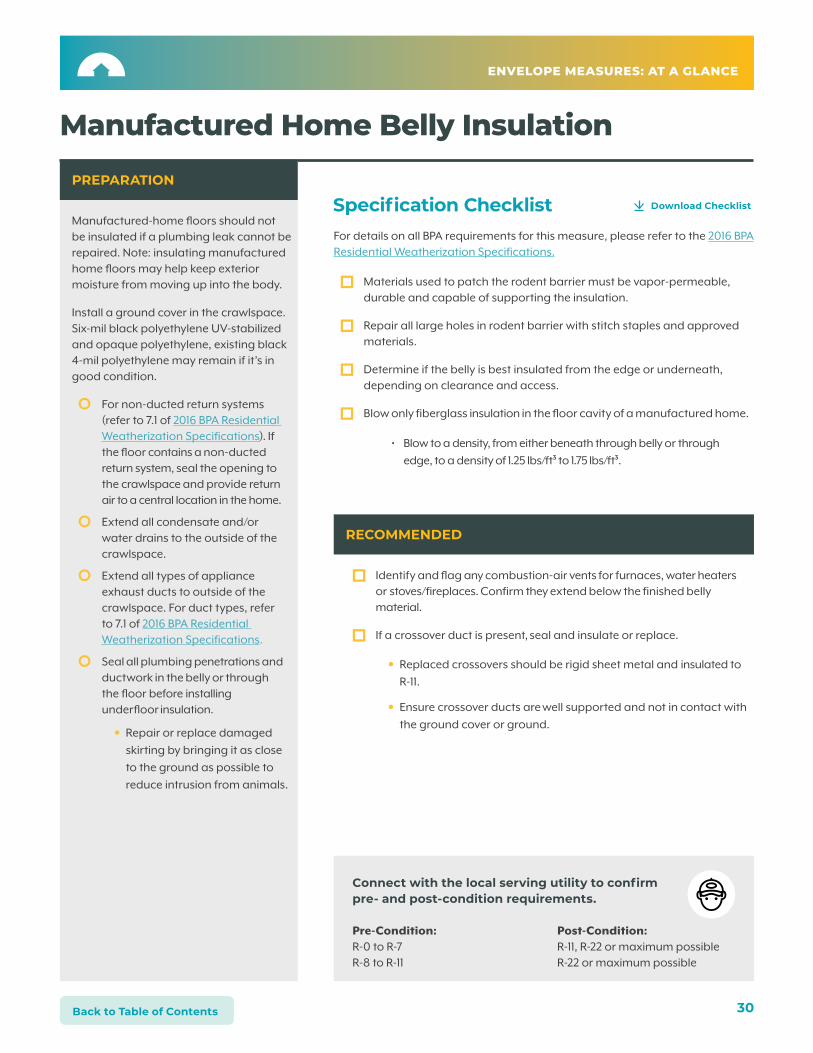
Manufactured-home floors should not be insulated if a plumbing leak cannot be repaired. Note: insulating manufactured home floors may help keep exterior moisture from moving up into the body.
Install a ground cover in the crawlspace. Six-mil black polyethylene UV-stabilized and opaque polyethylene, existing black 4-mil polyethylene may remain if it’s in good condition.
○ For non-ducted return systems (refer to 7.1 of 2016 BPA Residential Weatherization Specifications). If the floor contains a non-ducted return system, seal the opening to the crawlspace and provide return air to a central location in the home.
○ Extend all condensate and/or water drains to the outside of the crawlspace.
○ Extend all types of appliance exhaust ducts to outside of the crawlspace. For duct types, refer to 7.1 of 2016 BPA Residential Weatherization Specifications.
○ Seal all plumbing penetrations and ductwork in the belly or through the floor before installing underfloor insulation.
• Repair or replace damaged skirting by bringing it as close to the ground as possible to reduce intrusion from animals.
Specification Checklist
□ Materials used to patch the rodent barrier must be vapor-permeable, durable and capable of supporting the insulation.
□ Repair all large holes in rodent barrier with stitch staples and approved materials.
□ Determine if the belly is best insulated from the edge or underneath, depending on clearance and access.
□ Blow only fiberglass insulation in the floor cavity of a manufactured home.
• Blow to a density, from either beneath through belly or through edge, to a density of 1.25 lbs/ft³ to 1.75 lbs/ft³.
For details on all BPA requirements for this measure, please refer to the 2016 BPA Residential Weatherization Specifications.
Download Checklist
Pre-Condition: R-0 to R-7 R-8 to R-11
Post-Condition: R-11, R-22 or maximum possible R-22 or maximum possible
Connect with the local serving utility to confirm pre- and post-condition requirements.
RECOMMENDED
□ Identify and flag any combustion-air vents for furnaces, water heaters or stoves/fireplaces. Confirm they extend below the finished belly material.
□ If a crossover duct is present, seal and insulate or replace.
• Replaced crossovers should be rigid sheet metal and insulated to R-11.
• Ensure crossover ducts are well supported and not in contact with the ground cover or ground.

31Back to Table of Contents
ENVELOPE MEASURES: AT A GLANCE
Installation Examples
Clean crawl, good ground cover.Courtesy of Oregon Housing and Community Services and Oregon Energy Coordinators Association
Unprepped crawl, disconnected dryer vent, poor ground cover.Courtesy of U.S. Department of Energy
Insulating belly from edge fill method.Courtesy of U.S. Department of Energy
Uninsulated belly with duct leakage.Courtesy of Pennsylvania College of Technology
Reparied and supported belly material.Courtesy of Pennsylvania College of Technology
Belly is not whole.Courtesy of Pennsylvania College of Technology
PAIRS WELL WITH
□ Manufactured Home Roof Insulation.
□ Manufactured Home Heat Pump Installation.
□ Heat Pump Water Heater for Manufactured Homes.
MINIMUM REQUIRED DOCUMENTATION
You can use the Optional Weatherization Data Collection Form to collect this information. Contact the serving utility for specifics on required documentation.
1. Documentation that the measure requirements have been met (e.g., manufacturer, model number, type, size and quantity of equipment or product installed or used).
2. Documentation of pre-and post- insulation R-values, and square footage of installed insulation.
3. Primary heating type.
4. Invoice showing order or purchase date, cost, post-condition.
Properly fixing skirting.Courtesy of Santa Fe Community College
No skirting around home.Courtesy of Pennsylvania College of Technology

32Back to Table of Contents
ENVELOPE MEASURES: AT A GLANCE
Manufactured Home Roof Insulation
PREPARATION
Effective methods for insulating manufactured home floors, walls and roof cavities have been developed over the past 25 years. Insulation should not be installed if moisture problems found in wall and roof cavities cannot be corrected. Blowing a closed mobile-home roof cavity is similar to blowing a closed wall cavity, only the insulation does not have to be as dense. Fiberglass blow-in insulation is preferred. Cellulose should not be used due to moisture absorption, density and weight. For high elevations, colder climates, or conditions where the existing roofing needs extensive repairs, rigid insulation on top of the bowed or flat roof deck is highly recommended.
○ Inspect all ceiling and roof penetrations for leaks, water damage or physical damage. Repair as needed before insulating ceiling cavities.
• Address any ponding/standing water issues on the roof.
○ If the ceiling cavity contains a non-ducted return-air system, seal the opening to the attic and provide return air to a central location in the home.
○ For vented roof cavities, comply with all applicable requirements for Single-family attic prep.
○ Determine if edge fill, gable fill, interior fill or top fill with continuous insulation is most appropriate.
Specification Checklist
□ For flat or bowed roofs to include exterior insulation, insulate to at least R-7 with rigid insulation and cover the roof insulation with EPDM, TPO or new roofing product/membrane.
□ Insulate attics under pitched roofs to at least R-22 and ventilate the attic to comply with Single-family attic insulation requirements.
□ Confirm all roof materials, drains, gutters, penetrations and seams are reinstalled properly to avoid any negative effects in the future.
□ Insulate ceiling cavities under flat or crowned metal roofs by completely filling them with blown-in fiberglass insulation. Seal all existing attic ventilation except existing roof jacks.
• Blown-in cavity insulation shall be installed so it completely fills the cavity, with adequate density per the manufacturer’s specifications to ensure no settling.
• Fiberglass blown fill ~0.8 to 1.6 lb/ft³.
For details on all BPA requirements for this measure, please refer to the 2016 BPA Residential Weatherization Specifications.
Download Checklist
Pre-Condition: R-0 to R-17
Post-Condition: R-22 or Maximum Possible R-30 or Maximum Possible
Connect with the local serving utility to confirm pre- and post-condition requirements.
RECOMMENDED
□ If the manufactured home has a gas, propane or wood-burning space heater, fireplace, stove or other combustion device, install a hardwired carbon monoxide detector.
□ Ensure any existing gutter and downspouts are returned to original or better condition.

33Back to Table of Contents
ENVELOPE MEASURES: AT A GLANCE
Installation Examples
Roof penetration properly sealed.Courtesy of Oregon Housing and Community Services and Oregon Energy Coordinators Association
Penetrations should be sealed from the outside.Courtesy of Pennsylvania College of Technology
Edge of roof secured and gutter re-attached.Courtesy of Santa Fe Community College
Gutter not properly attached, potential leaks at roof edge. Courtesy of Santa Fe Community College
Insulated manufactured home roof through edge.Courtesy of Santa Fe Community College
Uninsulated manufactured home roof.Courtesy of U.S. Department of Energy
PAIRS WELL WITH
□ Manufactured Home Floor Insulation.
□ Manufactured Home Heat Pump Installation.
□ Heat Pump Water Heater for Manufactured Homes.
MINIMUM REQUIRED DOCUMENTATION
You can use the Optional Weatherization Data Collection Form to collect this information. Contact the serving utility for specifics on required documentation.
1. Documentation that the measure requirements have been met (e.g., manufacturer, model number, type, size and quantity of equipment or product installed or used).
2. Documentation of pre-and post- insulation R-values, and square footage of installed insulation.
3. Primary heating type.
4. Invoice showing order or purchase date, cost, post-condition.
Fully insulated bowed roof to consistent density.
Uninsulated roof cavity.
Loose fill density of 0.8 to 1.6 lbs/ft3

34Back to Table of Contents
ENVELOPE MEASURES
Old, leaky windows and doors are commonly identified as a major issue which can impact overall home durability and comfort. Windows and doors are often in disrepair due to years of operation and exposure to the elements. In some cases, older, well-used windows and doors create drafts because they do not close completely. In extreme cases, they can allow rainwater and excessive condensation to drain into wall and floor framing, compromising the structure.
In homes built before 1990, it is common to find window types such as single-paned windows and aluminum-framed windows that offer minimal resistance to heat loss in the winter and can cause discomfort for occupants. Windows without Low-emissivity, or Low-E, glazing allow solar energy to overheat the house in summer.
Upgrading to windows with insulated, Low-E glass is recommended when home occupants experience high energy bills, problems with window operation, noticeable leakage and/or damaged and decayed frame(s), and/or condensation
Prime Window and Patio Door Replacement Windows and patio doors not only let sunshine and people in, they also allow air into and out of your home. Older windows and patio doors tend to be single-paned, uninsulated, and often have deteriorating or minimal weatherstripping. Installing newer, energy-efficient windows and patio doors can result in lower heating and cooling costs.
Low-E Storm Windows
Installing new, affordable, ENERGY STAR-certified, Low-E storm windows is a great way to help reduce home heating and cooling energy costs. A window with Low-E coating reduces heat loss when it is cold and Low-E coatings with a low solar transmittance, or TSOL, can block excessive solar heat during summer months.
Exterior Insulated Doors
Increase the energy efficiency of a home by installing a new exterior insulated door. A new door can improve the aesthetics of a home, increase security and durability, save energy and increase the home’s comfort. New doors are typically better insulated than older wood and steel doors. This allows the door to hold heat in during winter and keep it out during summer.
Windows and Doors
Replacing an uninsulated or compromised door with a new ENERGY STAR-rated door is recommended when:
○ Drafts are noticed.
○ Light is visible between the door leaf and frame.
○ Hinges are worn and noisy. The door does not operate properly or scrapes along floor.
○ Insects are able to enter the home when the door is closed.

35Back to Table of Contents
ENVELOPE MEASURES: AT A GLANCE
Prime Window and Patio Doors Espanol? Mira aqui.
QUALIFICATIONS
May be eligible for Single-family, Multifamily, manufactured homes. Primary heating must be electrical. Pre-existing windows and patio doors must be: (1) single-paned with/without storms, any frame type (e.g., metal, wood, or vinyl) or (2) double-pane, metal frame only.
The replacement windows must have an NFRC minimum U-value of 0.30 or 0.22 for windows, and 0.35 or 0.30 for patio doors.
Window and patio door measures in Single-family and manufactured homes must be installed according to the 2016 BPA Residential Weatherization Specifications.
Specification Checklist □ Confirm all windows and patio doors are installed with NFRC stickers
attached.
□ Support the bottom rail of a patio door within ½ inch of the exterior edge of the frame.
□ Ensure replacement window and window opening have been properly incorporated into the home’s water-resistive barrier using proper flashing techniques for each specific window type.
□ Verify windows are caulked and sealed properly including structural frame, exterior wood, frame, sash, trim, stops and sills. Use of backer rod or non-expanding foam and caulk where gaps are greater than 3/8 inch.
□ Confirm all hardware and fasteners are aluminum, stainless steel or another noncorrosive material.
□ Verify that windows operate smoothly and safely.
□ Ensure jobsite is left clean and orderly. All scrap material, tools and equipment have been removed.
Download Checklist
Pre-Condition: Single-paned with/without storms (metal, wood, or vinyl) or double-pane, metal frame only.
Post-Condition: U-Values: Windows 0.30 - 0.22, Patio Doors 0.35 - 0.30
Connect with the local serving utility to confirm pre- and post-condition requirements.

36Back to Table of Contents
ENVELOPE MEASURES: AT A GLANCE
Installation Examples
Double-paned window, installed with proper flashing.
Uninsulated window with condensation.
Backer rod for sealing around window. Courtesy of U.S. Department of Energy
High-expansion foam, not appropriate around windows.
Proper flashing window to weather barrier.Courtesy of U.S. Department of Energy
Improperly flashed window.Courtesy of U.S. Department of Energy
PAIRS WELL WITH
□ Attic, Floor, Wall Insulation.
□ Whole-House Air Sealing.
□ HVAC Upgrades.
MINIMUM REQUIRED DOCUMENTATION
You can use the Optional Weatherization Data Collection Form to collect this information. Contact the serving utility for specifics on required documentation.
1. Description of home (Single-family, Multifamily or manufactured).
2. Number and square footage of windows or patio doors replaced.
3. Pre-condition (frame type, i.e., wood, metal, single-or double-paned).
4. Primary heating type.
5. Invoice showing order or purchase date, cost, post-condition U-value (NFRC stickers or other verification).
6. Documentation that the measure requirements have been met (e.g., manufacturer, model number, type, size and quantity of equipment or product installed or used).
Backer rod and caulk complete seal around window frame.Courtesy of U.S. Department of Energy
Incomplete seal around newly installed window.Courtesy of U.S. Department of Energy
Proper fit window, level, and sealed. Courtesy of Santa Fe Community College
Window install not sealed, improperly fit.Courtesy of U.S. Department of Energy

37Back to Table of Contents
ENVELOPE MEASURES: AT A GLANCE
Low-E Storm Windows QUALIFICATIONS
Specification Checklist □ When installed with an existing metal frame window, the storm window
frame must not be in direct contact with the metal frame. Use framing lumber or furring strips to create space between window frames.
□ Storm window must have same opening type as existing window (i.e., double hung, slider, etc.) to facilitate summertime ventilation and egress.
□ New Low-E storm windows must be installed per manufacturer's specifications.
□ Must be permanently fastened with screws and not designed for seasonal removal.
□ Install storm window so that the Low-E coating is facing the interior of the home.
□ Make sure the gap around the perimeter of the window is even. A 1/16-inch gap is ideal.
□ Caulk the sides and top of the window opening before you screw the window into place. Storm windows are designed to allow water or condensation to drain, so do not caulk the bottom.
□ Verify that windows with openings operate smoothly and safely.
□ Ensure jobsite is left clean and orderly. All scrap material, tools and equipment have been removed.
□ Confirm all hardware and fasteners are aluminum, stainless steel or another noncorrosive material.
Download Checklist
Pre-Condition: Single-paned, any frame type (e.g., metal, wood, or vinyl) without existing storm windows or double-paned, metal frame only without existing storm window.
Post-Condition: New ENERGY STAR Low-E storm window.
Connect with the local serving utility to confirm pre- and post-condition requirements.
○ May be eligible for Single-family, Multifamily low-rise, manufactured homes (Multifamily mid- and high-rise buildings are not eligible).
○ Existing window condition must be either (1) single-paned, any frame type (e.g., metal, wood, or vinyl) without existing storm windows; or (2) double-paned, metal frame only without existing storm windows.

38Back to Table of Contents
ENVELOPE MEASURES: AT A GLANCE
Installation Examples
Single-paned aluminum window with well-fit storm window.Courtesy of U.S. Department of Energy
Single-paned aluminum window with no storm or low-e protection.Courtesy of U.S. Department of Energy
PAIRS WELL WITH
□ Attic, Floor, Wall Insulation.
□ Whole-House Air Sealing.
□ HVAC Upgrades.
MINIMUM REQUIRED DOCUMENTATION
You can use the Optional Weatherization Data Collection Form to collect this information. Contact the serving utility for specifics on required documentation.
1. Description of home (Single-family, Multifamily or manufactured).
2. Number and square footage of windows replaced.
3. Pre-condition (frame type, i.e., wood, metal, single- or double-paned).
4. Primary heating type.
5. A copy of the ENERGY STAR product list showing the product, or the product information insert or packaging that includes the ENERGY STAR logo.
6. Invoice showing or purchase date and cost.
7. Documentation that the measure requirements have been met (e.g., manufacturer, model number, type, size and quantity of equipment or product installed or used).

39Back to Table of Contents
ENVELOPE MEASURES: AT A GLANCE
Insulated Exterior DoorsQUALIFICATIONS
○ The new door must be a pre-hung, ENERGY STAR-qualified door and include replacement of the threshold.
○ If the door is not ENERGY STAR-certified, or the ENERGY STAR list is not accessible, utilities may comply by documenting that the door meets ENERGY STAR specifications.
○ New door glazing must meet or exceed the following U-factor rating: opaque less than or equal to 0.17, ½ lite must be less than or equal to 0.25, and greater than ½ lite must be less than or equal to 0.30.
○ Ensure the new door frame is square, has equal margins around the door and that the margins are insulated, sealed and caulked.
○ Verify the jamb is not bowed and the door is not warped or twisted.
○ Inspect and test door hardware, fasteners, strike plate and latch are flush, installed correctly, functioning and properly adjusted.
○ Make sure weatherstripping is installed and sealing in the corners, corner pads are in place and that the threshold/sill is continuously bedded with caulk.
Specification Checklist
□ All replacement hardware/fasteners: stainless steel or another corrosion-resistant material.
□ Older door: carefully remove, leave housing structure and door trim undamaged, and repair or replace framing structure if rotted.
□ Door sub-sill: ensure area is solid and level before installation. Use acrylic caulk, a minimum of three beads 1-inch apart along the full width of sub-sill.
□ Installation: shims must be installed approximately 8 inches from top and bottom corners, at the hinges, and above and below strike plate. The door must be centered and plumb in opening with straight jambs. Screws, at least 3-inches long, should be installed through jamb, shims and into framing.
□ Space between jamb and rough opening: must be filled with low-expanding foam or caulk. Backer rod should be installed in gaps larger than 3/8 inch.
□ The door must be incorporated into the home’s water-resistive barrier.
□ Doors exposed to wind-driven rain or without overhang: Install riding-cap flashing overlapping sides of door frame.
□ Doors with overhanging head flashing: new flashing must be tucked behind existing head flashing.
□ Doors without overhanging metal head flashing: install new metal head flashing at top of door frame, behind existing siding and building paper.
□ Metal head flashing: must be installed behind the exterior siding at least 1 inch, with a downward bending lip of at least ¼ inch on front and ends of metal head flashing.
□ Exterior wood: must be caulked and primed. All filler and trim pieces must be thoroughly caulked, including brick molding, door frame, and trim on all sides and ends.
□ Finished door, latch and lockset: ensure they operate smoothly. Closed door should evenly compress weatherstripping.
□ Jobsite to be left clean and orderly: all scrap material, tools and equipment must be removed.
Download Checklist
Pre-Condition: Substandard exterior door, such as one that does not contain an insulating material and/or one where the weatherstripping has degraded by at least 50%.
Post-Condition: Pre-hung, ENERGY STAR-qualified door, with a new threshold.
Connect with the local serving utility to confirm pre- and post-condition requirements.
Please refer to the ENERGY STAR specifications for residential doors for more details.

40Back to Table of Contents
ENVELOPE MEASURES: AT A GLANCE
Installation Examples
New ENERGY STAR door. Inefficient door needs to be replaced.
PAIRS WELL WITH
□ Whole-House Air Sealing.
□ Prescriptive Air Sealing.
□ Attic, Floor and Wall Insulation.
□ Ductless or Air-Source Heat Pump.
MINIMUM REQUIRED DOCUMENTATION
You can use the Optional Weatherization Data Collection Form to collect this information. Contact the serving utility for specifics on required documentation.
1. Documentation that the measure requirements have been met (e.g., manufacturer, model number, type, size and quantity of equipment or product installed or used).
2. Description of home (Single-family, Multifamily or manufactured).
3. ENERGY STAR product list showing the product, or packaging that includes the ENERGY STAR logo.
4. Documentation of the door’s pre- and post-conditions.
5. Invoice showing date and cost.
Good weatherstripping. Courtesy of U.S. Department of Energy
Bad air leaks around door. Light is visible in the cracks.Courtesy of U.S. Department of Energy
Closed-cell foam seals the gap.Courtesy of U.S. Department of Energy
Loose-fill insulation allows moisture and air infiltration.Courtesy of U.S. Department of Energy
Properly sealed and flashed doors prevent water damage.Courtesy of U.S. Department of Energy
Improperly flashed door has structural damage due to water penetration.Courtesy of U.S. Department of Energy
End dam
Corner sealed or soldered
Back dam
End dam
Lip

41Back to Table of Contents
ENVELOPE MEASURES
HVAC ducts located in unconditioned spaces can lose energy to their surroundings through air leaks and heat transmission through the walls of the duct. This heat loss wastes energy and can cause comfort problems when not enough heated air reaches distant rooms. Small gaps throughout ductwork results in significant energy losses, as does uninsulated ductwork in exterior spaces.
Sealing gaps in ductwork, and repairing or reconnecting older duct connections, helps ensure conditioned heat or cooled air gets to the correct space, instead of being wasted in areas such as attics or crawlspaces.
Prescriptive duct sealing is offered for existing Single-family and manufactured homes with ducts connected to electric heat. Become familiar with the Prescriptive Duct Sealing Program Requirements for Technicians as well as the Prescriptive Duct Sealing Specifications.
For more complicated jobs or jobs where you’re conducting an HVAC upgrade, the PTCS Duct Sealing measure is a preferred solution. More information on PTCS is detailed in this guide and can also be found on the BPA Residential PTCS Essentials webpage.
To be trained and certified for Prescriptive Duct Sealing, contractors must:1. Create an account on the PTCS Virtual School.
2. Watch the Prescriptive Duct Sealing Webinar and pass the exam.
3. Submit a completed and signed Certified Technician Form to [email protected].
4. Create an account on the PTCS Registry.
Questions: Contact PTCS customer service at [email protected] or 1-800-941-3867.
Prescriptive Duct Sealing

42Back to Table of Contents
ENVELOPE MEASURES: AT A GLANCE
Prescriptive Duct Sealing Espanol? Mira aqui.
QUALIFICATIONS
□ This applies to repairing and sealing existing ductwork in Single-family homes and manufactured homes, heated with an electric forced air furnace and/or a heat pump.
□ Prescriptive duct sealing shall be performed by a technician certified in prescriptive duct sealing or an approved alternative. Prescriptive duct sealing program requirements, and technicians shall be listed as active in the PTCS Online Registry.
□ At least 30% of the supply ducts must be in unconditioned space unless there is a high-pressure leak within 15 feet of an air handler in an unconditioned space.
□ The presence of insulation alone shall not be considered a barrier to accessibility unless the contractor suspects asbestos may be present. In this case, the contractor shall stop work immediately and notify the homeowner that the site requires professional assessment, and possibly remediation prior to duct sealing.
□ Ducts must not have been previously sealed through the PTCS or BPA’s Prescriptive Duct Sealing program unless a utility pre-inspection confirms additional duct sealing is required.
Specification Checklist
□ All accessible portions of the duct system shall be repaired and mechanically fastened where needed and properly supported.
• Interior sections of ineffective or damaged ducts shall be repaired or replaced before duct sealing.
□ All accessible portions of the duct which require sealing shall be exposed and sealed with approved materials. The following are examples of sealing opportunities: plenum; air-handler cabinet to plenum; plenum-to-takeoff connections; finger/dovetail joints; branch T’s, Y’s and L’s; supply-and-return boots; duct-to-duct connections; gores on adjustable elbows; end caps.
□ Large gaps in ducts should be repaired with sheet metal and sheet metal screws or mesh-reinforced tape and mastic.
• All metal ducts shall be secured with at least three screws at each connection.
• All flexible ducts connections to rigid ducts shall be tightly fastened at both inner and outer lining using a compression (Panduit or equivalent) strap tightened with a manufacturer-approved tensioning tool.
□ Loose tape shall be removed from rigid metal ducts prior to sealing. Secured tape that remains must be completely covered with mastic, which shall extend at least 1/2 inch beyond the tape edge on either side and be at least 1/8 inch thick.
□ Cloth-backed duct tape shall not be used to seal, secure or fasten ducts.
□ All rigid duct joints shall be sealed with UL-181 listed mastic, applied per manufacturer specifications.
Download Checklist
Your project might have unique requirements. See the BPA Prescriptive Duct Sealing Specifications for additional details.
Pre-Condition: Unsealed and accessible ductwork.
Connect with the local serving utility to confirm pre- and post-condition requirements.

43Back to Table of Contents
ENVELOPE MEASURES: AT A GLANCE
Installation Examples
Duct properly supported. Courtesy of Advanced Energy
Duct is not properly supported. Courtesy of Advanced Energy
PAIRS WELL WITH
□ Duct Insulation.
□ Home Insulation.
□ Prescriptive Air Sealing.
□ Air Source Heat Pump.
MINIMUM REQUIRED DOCUMENTATION
You can use the Optional Weatherization Data Collection Form to collect this information. Contact the serving utility for specifics on required documentation.
1. Invoice showing order or purchase date and cost.
2. Prescriptive Duct Sealing Form.
3. If entered into the PTCS registry, the printed Registry Installation Report.
Plenum sealed with water based, fiber embedded duct sealing mastic.Courtesy of Advanced Energy
Unsealed duct plenum.Courtesy of Advanced Energy
Flex duct is properly fastened to metal duct with mechanically tightened strap. Courtesy of Advanced Energy
Flex duct is not mechanically fastened to metal duct.Courtesy of Advanced Energy

MECHANICAL MEASURES

45Back to Table of Contents
MECHANICAL MEASURES
Mechanical systems play a large role in a building’s energy use. Efficient, properly working systems, along with programmable thermostats, can substantially reduce energy consumption without any impact on historic building fabric.
Efficient heating equipment can reduce electric energy use by an estimated 50%, compared to electric resistance heat.
Heat pumps are generally a better option for the more temperate climates across the Northwest because they heat and cool the home through heat transfer to and from the ambient outdoor air temperature with the same piece of equipment. In fact, heat pumps are typically 2.4 to 4 times more efficient than electric furnaces and baseboard heaters. Heat pumps can provide comfort and value on par with gas and propane furnaces if installed and ducted with proper planning and commissioning. Heat pumps move heat with refrigeration using the same process as a refrigerator or an air conditioner. An air-source heat pump is similar to an air conditioner, except for a reversing valve that allows refrigerant to follow two different paths: one for heating and one for cooling. Heat pumps also come with auxiliary electric resistance heat, also called strip heat. The energy efficiency of a heat pump is largely determined by how much of the heating load can be handled by the heat pump’s compressor without the aid of the strip heat.
The efficiency for new heat pumps is designated as Heating System Performance Factor, or HSPF, for heating performance and Seasonal Energy Efficiency Rating, or SEER, for cooling performance. New heat pumps have HSPFs from 8 to more than 10, and SEERs ranging from 14 to more than 18. For split heat-pump systems with an indoor and outdoor coil, the system efficiency varies with the match of these coils. Consult the manufacturer to determine the combined efficiencies.
An efficient heating and cooling unit and a well-insulated/air-sealed building envelope is of little use if the conditioned air doesn’t reach the main living spaces of the house. Duct leakage, poor filter and blower maintenance, a clogged evaporator coil, and inadequate supply and return ducting can all contribute to significant energy, comfort, safety and durability problems.
Always check with the local utility on available incentives and minimum specifications in your area.
Your local utility may offer incentives for ductless heat pumps, air-source heat pumps, ground-source heat pumps, duct sealing and thermostats. For air-source heat pumps, we offer incentives for standard heat pumps and variable-speed heat pumps, with and without commissioning through PTCS.
More information on PTCS is detailed in this guide and can also be found on the BPA Residential PTCS Essentials webpage.
HVAC

46Back to Table of Contents
MECHANICAL MEASURES: AT A GLANCE
Ductless Heat Pumps
APPLICATIONS
○ Displacing the home’s heating load with a single- or multiple-head system or replacing entire heating load with multiple systems. In smaller homes, a single multi-headed system may replace entire load.
○ Existing homes where plug-in electric heaters are confirmed as the primary heating system in the home.
○ Single-family residential additions where the primary electric or nonelectric system’s duct work has not been extended to the addition and/or where the current heating source in the addition is electric zonal.
○ Only one ductless heat pump, or DHP, may be claimed per home, regardless of the number of outdoor or indoor units installed and regardless of the home’s square footage.
○ For whole-home centrally ducted heat pump installations a PTCS Air-Source Heat Pump or Air Source Heat Pump Conversion without PTCS is recommended.
Specification Checklist □ HSPF: Ductless or ducted mini-split must be a split-system heat pump
employing an inverter-driven outdoor compressor, with inverter-driven or variable-speed indoor blower, rated with a minimum of 9.0 HSPF.
□ DHP or ducted mini-split must be listed on BPA’s DHP Qualified Product List or Northeast Energy Efficiency Partnership (NEEP) Cold Climate Specification List.
□ DHP must be installed on a dedicated electrical circuit, according to manufacturer’s specifications and the Best Practices for Installing Ductless Heat Pumps Guide.
Download Checklist
RECOMMENDED
May be required by your local utility.
□ Systems should be designed, sized and selected to offset at least 30% of the building’s heating load at the winter designated temperature for the homes location.
□ When installing refrigerant lines, create new flares using appropriate R410A flaring tool and measurement gauge. DO NOT USE manufacturer-provided tubing flares and fitting.
□ Set the outdoor unit on a stable, level surface and secure to the pad, risers and/or resting surface using bolts.
• Install outdoor unit in clear area that allows optimal airflow through fan.
□ Insulation must cover entire line set length to avoid condensation and decreased efficiency, and protect the outdoor line set from insulation damage with rigid line hide and building-code approved line set protection.
□ Condensate drains must slope downhill. They can be routed with line set and run to a suitable termination point, away from crawlspaces and walkways.
Pre-Condition: Electric forced air furnace or electric resistance zonal heat (baseboards, wall heaters, IR panels, ceiling cable heat) as the primary heating system.
Connect with the local serving utility to confirm pre- and post-condition requirements.

47Back to Table of Contents
MECHANICAL MEASURES: AT A GLANCE
Installation Examples
Displacement of electric-resistance heat is incentivized. Courtesy of NW Ductless Heat Pump Project
One incentive per home, regardless of the number of indoor heads.Courtesy of Better Built NW
PAIRS WELL WITH
□ Prescriptive Air Sealing.
□ Insulation.
□ Heat Pump Water Heater.
MINIMUM REQUIRED DOCUMENTATION
Contact the serving utility for specifics on required documentation.
1. Use the Ductless and Ducted Mini-Split Heat Pump Form.
2. Manufacturer, model number, type, size and quantity of product installed.
3. Invoice showing order or purchase date, cost.
HSPF exceeds minimum of 9.0 per specification.Courtesy of ENERGY STAR, U.S. Environmental Protection Agency
HSPF is below 9.0 specification.Courtesy of ENERGY STAR, U.S. Environmental Protection Agency
All line set/refrigerant lines properly insulated. Courtesy of PTCS
Line set/refrigerant lines not completely insulated.Courtesy of NW Ductless Heat Pump Project
QUALIFIED PRODUCT LIST AND GUIDES
○ Best Practices for Installing Ductless Heat Pumps
○ BPA’s DHP Qualified Product List
Condensate drain is connected to downspout. Courtesy of NW Ductless Heat Pump Project
Condensate directly leaks onto a walkway.Courtesy of NW Ductless Heat Pump Project

48Back to Table of Contents
MECHANICAL MEASURES: AT A GLANCE
Advanced Smart Thermostats
APPLICATIONS
○ Homes heated with an electric forced-air furnace or non-variable speed centrally ducted air source heat pump or ground-source heat pump.
○ Existing homes where the existing thermostat is non-qualifying.
○ Single-family existing homes, low-rise Multifamily units and manufactured homes.
○ One smart thermostat per qualifying system, with a limit of two per household.
○ Note: Advanced Thermostats are NOT recommended for variable-speed heat pumps or for DHPs.
Specification Checklist □ Thermostat must be on BPA’s Residential Smart Thermostat Qualified
Product List (QPL). To meet the standards of the QPL, thermostats must have an independent evaluation(s) demonstrating energy savings for the thermostat, or ENERGY STAR certification.
□ Thermostat must have a built-in occupancy sensor with the function set to “on.”
□ Thermostat must be set to the geographic location where it is located (home).
□ Thermostat must be Wi-Fi enabled with remote access.
□ Thermostat must be 7-day programmable or have learning-based scheduling.
□ If the thermostat controls a heat pump, it must be programmed to control the heat pump and have heat pump auxiliary-heat control and optimization.
Download Checklist
Pre-Condition: Electric-resistance heat furnace, air-source heat pump or ground-source heat pump and existing non-qualifying thermostats.
Connect with the local serving utility to confirm pre- and post-condition requirements.
PAIRS WELL WITH
○ Prescriptive Air Sealing.
○ Prescriptive Duct Sealing.
○ Insulation.
○ PTCS and non-PTCS Air-Source Heat Pumps.
○ Heat Pump Water Heater.
RECOMMENDED
□ Educate homeowner on thermostat operation and programming.

49Back to Table of Contents
MECHANICAL MEASURES: AT A GLANCE
Installation Examples
PAIRS WELL WITH
□ Prescriptive Air Sealing.
□ Prescriptive Duct Sealing.
□ Insulation.
□ PTCS and non-PTCS Air-Source Heat Pumps.
□ Heat Pump Water Heater.
MINIMUM REQUIRED DOCUMENTATION
1. Smart Thermostat Project Information Form.
2. Manufacturer, model number and serial number of each thermostat.
3. Heating system controlled by the thermostat.
QUALIFIED PRODUCT LIST AND GUIDES
○ Residential Smart Thermostat Qualified Products List.
Smart thermostat with occupancy sensor.
Standard programmable thermostat.Courtesy of U.S. Department of Energy

50Back to Table of Contents
MECHANICAL MEASURES
PTCS Heat Pumps and Duct Sealing
Air-Source Heat Pumps, Ground-Source Heat Pumps and Duct Sealing
Installing high-efficiency equipment can help significantly reduce home heating and cooling costs. Commissioning the equipment ensures it operates in the most efficient way and delivers the rated efficiency. PTCS is a Northwest-regional program for utilities to improve homeowner comfort and increase energy savings. The program promotes quality installations of high-efficiency heat pumps and the proper sealing of ducts. PTCS specifications help ensure heat pumps and duct sealing result in a more comfortable home and more reliable energy use. The PTCS program includes classroom, field and webinar trainings, third-party quality assurance inspections and support for PTCS-certified contractor technicians. Project data is captured and verified in a regional PTCS Online Registry Database.
Measures
PTCS Air Source Heat Pump (standard and variable speed).
PTCS commissioning of heat pumps with an efficiency rating of 9.0 HSPF/14 SEER or higher. For additional information, visit BPA Heat Pumps.
○ Conversion from an electric forced-air furnace.
○ Upgrade from any heating system.
Contact the serving utility for specific requirements.
To review all of the participation requirements, please read the PTCS Duct Sealing and Heat Pump Program Participation Requirements document.
□ All PTCS technicians must be trained and certified in PTCS according to the Program Requirements.
□ Projects must be installed/ commissioned to program technical installation specifications.
□ All PTCS projects must be listed in the PTCS Online Site Registry.
TRAINING FOR PTCS
For information on training opportunities, please see the Announcements section on ptcs.bpa.gov, reach out to the customer service team at [email protected], or contact a PTCS trainer in your area. Supplemental informational videos can be found here:
○ YouTube Channel.
○ Virtual PTCS School.
For quick access to guides and best practices, forms, specifications, marketing materials and other resources, visit BPA Residential HVAC Essentials.
MINIMUM REQUIRED PAPERWORK

51Back to Table of Contents
Specification and Project Forms
○ PTCS Air Source Heat Pump Specifications.
○ PTCS Air Source Heat Pump Specifications. (Spanish).
○ PTCS Air Source Heat Pump Form (Optional).
○ PTCS Air Source Heat Pump Form (Optional). (Spanish).
○ PTCS Heat Pump and Central Air Conditioner Sizing Calculator.
○ PTCS Duct Sealing Specifications.
○ PTCS Duct Sealing Specifications. (Spanish).
○ PTCS Duct Sealing Form (Optional).
○ PTCS Duct Sealing Form (Optional). (Spanish).
○ PTCS Closed Loop Ground Source Heat Pump Specifications.
○ PTCS Ground Water Source Open Loop Heat Pump Installation Specifications.
○ PTCS Ground Source Heat Pump Form (Required).
PTCS Commissioning, Controls and Sizing of heat pumps below 9.0 HSPF.
PTCS commissioning of heat pumps applies to commissioning any new air-source heat pump with an HSPF below 9.0 when replacing any heating system type, adding an air-source heat pump to an existing Single-family or manufactured home without any previously existing primary heating system, or installing a new heat pump in Single-family new construction. For additional information, visit BPA Heat Pumps.
PTCS Ground-Source Heat Pump (open and closed loop).
For additional information, visit the PTCS Essentials Page
○ Conversion from an electric forced-air furnace or replacing an electric boiler used for forced-air hydronic heating or zonal radiant heat.
○ Upgrade from any electric heating system.
○ Compressor-only replacement.
PTCS Duct Sealing.
For additional information, visit BPA PTCS and Prescriptive Duct Sealing.
○ Available for existing ducts in existing homes.
○ Ducts must be connected to electric heat.
○ PTCS work must be performed by a PTCS technician listed in the online site registry and certified according to the PTCS Program Requirements.
○ Eligible installations must be entered in the online site registry.
For further assistance, contact PTCS by phone at 1-800-941-3867 or email [email protected].
https://www.bpa.gov/EE/Sectors/Residential/Documents/BPA_PTCS_Open_Loop_Ground_Water_Source_Spec.pdf

52Back to Table of Contents
MECHANICAL MEASURES
Water Heating
Heat pump water heaters are a proven technology known to improve water-heating energy efficiency. They are more available, efficient and reliable than ever, with products carrying a minimum of a 10-year warranty on tank and parts. Water heating accounts for roughly 18% of home energy use, so by upgrading to a heat pump water heater, homeowners can reduce energy consumption and operating costs by up to 60% compared to standard electric water heaters. Additionally, they can deliver more hot water than standard electric resistance tanks.
Standard water heaters require a significant amount of energy to heat water. In contrast, heat pump water heaters use less than half the energy to heat the same amount of water. They can reduce the amount of heat that must be created by extracting heat from the surrounding air and transferring it to the water inside the tank.
Unitary (drop-in) Heat Pump Water Heaters
Unitary systems are heat pump water heaters in one part, with the air-to-refrigerant heat exchanger integrated onto the top of the tank inside a home or garage. Unitary systems are useful in several design scenarios by offering advantages, including:
○ Simple replacement installs in many configurations such as garages and larger vented, conditioned or partially conditioned spaces.
○ Modern equipment, particularly units at Tier III or higher on the Qualified Products List are quiet and typically come with 10-year warranties.
○ Unitary equipment provides the option to have no venting, vent to exhaust, vent the incoming air, or vent both, depending on the location and surrounding conditions.
Hot air in
heat pump
cold water in
hot water out
cold air out
hot air in
heat pump
cold air out
expansion valve
compressorwater tank
electric heating elements
condenser coil filled with hot refrigerant heats water in tank

53Back to Table of Contents
MECHANICAL MEASURES
Split-System Heat Pump Water Heaters
Split systems are heat pump water heaters in two parts, with the air-to-refrigerant heat exchanger designed to be located outside. With the heat pump outside, and the tank inside or in a garage, the two components are then connected with piping. Split systems are useful in several design scenarios by offering advantages, including:
○ Some split systems currently on the market use carbon dioxide as a refrigerant, which has an insignificant global warming potential, compared to conventional refrigerants like R-134a.
○ The tank can be in a confined space without access to airflow or a heat source.
○ No cool air is created inside the house.
○ The heat pump is outside the house, reducing indoor noise.
Installation Considerations
Installing a heat pump water heater is essentially the same as installing an electric resistance water heater, so no additional trades are needed onsite. Discuss with customers the location of the new heat pump water heater as scenarios and locations that will benefit from venting the intake and/or exhaust will have an increased price but will reduce the chances of comfort issues due to cold air felt in the home. When installing a heat pump water heater, please consider the following best practices:
○ Follow manufacturer specifications regarding water heater clearance, intake and exhaust configurations, and seismic strapping.
○ Position the unit so the control panel is facing outward and easily accessible to the homeowner.
○ Make sure all data-connection ports are accessible.
○ Aim the exhaust air away from the center of the room so it does not inadvertently blow on anyone walking past. Also, direct exhaust away from any thermostats if present.
○ If installing in a conditioned space (inside the heated portion of the home), consider ducting either the exhaust, or both the exhaust and intake to reduce cool air being added into the home.
○ Note: it’s a best practice to install a UL- or CUL-certified carbon monoxide detector in the home when exhausting an interior installed heat pump water heater and the home contains a natural draft gas, propane, wood or oil appliance such as a stove or fireplace.
○ Ensure the intake air path is sufficiently free and open. For some installations, a ducted inlet and/or exhaust may be appropriate.
○ Ensure that the positioning allows for easy access to inspect the water heater and controls, change the air filter and drain the tank.
○ Check your local codes and plan for proper drainage of condensate. Ensure the water heater is level so condensate properly collects into — and drains from — the condensate collection pan, if used.
○ Provide minimum R-10 foam pad under the heat pump water heater to minimize unnecessary heat loss through the bottom of the water heater.
○ Insulate the hot water piping to at least the minimum requirements in accordance with your local codes.
○ If installing on a floor susceptible to water damage, install a drain pan to guard against any problems from future leaks.
For more Information, please check out the HotWaterSolutionsNW.org resources or the BetterBuilt NW Heat Pump Water Heater Technical Guide.

54Back to Table of Contents
MECHANICAL MEASURES: AT A GLANCE
Heat Pump Water HeatersREQUIREMENTS
Unitary & split-system heat pump water heaters must be:
○ Listed on BPA’s Heat Pump Water Heater Qualified Products List.
○ Installed according to manufacturer’s specifications.
○ A maximum of one heat pump water heater measure may be claimed per home. Accessory dwelling units with separate plumbing systems qualify, even if they are on the same electrical meter.
○ Available for new and existing Single-family homes and manufactured homes.
Split-system heat pump water heaters must also meet the following qualifications:
○ All water or refrigerant lines connecting the tank and outdoor units shall be insulated with minimum R-4.
○ If domestic hot water pipes outdoors are freeze-protected with heat cable, the cable shall be installed per manufacturer’s instructions, underneath the insulation and shall be thermostatically controlled to prevent the tape from operating above 38 degrees Fahrenheit.
○ No resistance heating is allowed, except heat tape for freeze protection.
○ System plumbed with a thermal mixing valve and equipped with internal check valves on the hot and cold water lines connecting to it.
Specification Checklist
□ Follow manufacturer specifications regarding water heater clearance and seismic strapping.
□ Position the unit so the control panel is facing outward and easily accessible to the homeowner. Make sure all data connection ports are accessible.
□ Aim the exhaust air away from the center of the room so it does not inadvertently blow on anyone walking past. Direct exhaust away from any thermostats.
□ Ensure the intake air path is clear of obstruction, and the filter can be removed for cleaning and maintenance.
□ Ensure that the positioning allows for easy access to inspect the water heater and controls, change the air filter and drain the tank.
□ Provide condensate drainage as required by local code. Ensure the water heater is level so condensate properly collects into, and drains from, the condensate collection pan if used.
□ Provide minimum R-10 foam pad under the heat pump water heater to minimize unnecessary heat loss through the bottom of water heater.
□ Insulate the hot water piping to at least the minimum requirements in accordance with your local codes.
□ If installing on a floor susceptible to water damage, install a drain pan to guard against any problems from future leaks.
□ Wiring is grounded and proper wire gauge is used. Note: Most heat pump water heaters still have full-size resistance elements, so wiring requirements are identical to standard electric-resistance water heaters.
□ Mode of operation is set, at a minimum, to hybrid, and preferably heat-pump only.
□ Jobsite is left clean and orderly. All scrap material, tools and equipment have been removed.
Download Checklist
Connect with the local serving utility to confirm pre- and post-condition requirements.

55Back to Table of Contents
Installation Examples
PAIRS WELL WITH:
□ Ductless or Air-Source Heat Pump.
□ Whole-House Air Sealing.
□ Attic, Floor and Wall Insulation.
□ Water Pipe Insulation.
□ Appliance Measures.
MINIMUM REQUIRED PAPERWORK
Contact the serving utility for specifics on required documentation.
QUALIFIED PRODUCT LIST AND GUIDES
○ Heat Pump Water Heaters Qualified Product List in Excel or PDF.
○ Better Built NW Heat Pump Water Heater Technical Guide.
Meets minimum efficiency and found on QPL. Courtesy of Northwest Energy Efficiency Alliance
Does not meet minimum efficiency.Courtesy of Santa Fe Community College
Insulate water pipes to prevent heat loss. Courtesy of NW Ductless Heat Pump Project
Uninsulated hot water pipe from water heater.Courtesy of ENERGY STAR®, U.S. Environmental Protection Agency
When insulation is not enough, use heat tape to prevent freezing.
Frozen pipe develops leak.
Drain pans can help prevent messes and water damage.
No drain pan or leak detection.

ADDITIONAL MEASURES

57Back to Table of Contents
ADDITIONAL MEASURES
Programmable Line Voltage Thermostats
Programmable line voltage thermostats are typically used to control baseboard, ceiling and wall heaters. The thermostat saves energy by controlling set schedules and enabling the heater to be turned on or off when the room temperature is not within a set range. Improved thermostat accuracy also helps save energy, and can help reduce heating and cooling costs.
Benefits:
○ Turns your HVAC system on or off when the thermostat detects the room temperature is not within a certain set range. Includes a temperature-sensing device.
○ Allows flexible programming to suit any type of schedule.
Air-Source Heat Pump Conversion (without PTCS)
This measure is for air-source heat pump installations that do not follow the PTCS installation specification. Air-source heat pumps installed according to PTCS installation specifications and requirements qualify for higher energy savings and payments. Some BPA utilities may offer incentives for converting non-variable speed and variable-speed ducted heat pumps from existing forced-air furnaces in existing site-built and manufactured homes. Non-variable speed systems typically operate in a simple on and off mode, while variable speed units can operate more efficiently at variable stages between on and off. BPA relies on the Air Conditioning, Heating and Refrigeration Institute, or AHRI — a third-party testing entity — to certify the energy efficiency of equipment, using HSPF metrics for efficiency during the heating season and SEER during cooling season. To qualify for this measure, all systems must be AHRI certified, the HSPF must be at least 9.0, and the SEER must be at least 14. Please note that there are no further installation requirements to commission
the system.
Check with your local serving utility for available incentives on these other BPA-qualifying measures.
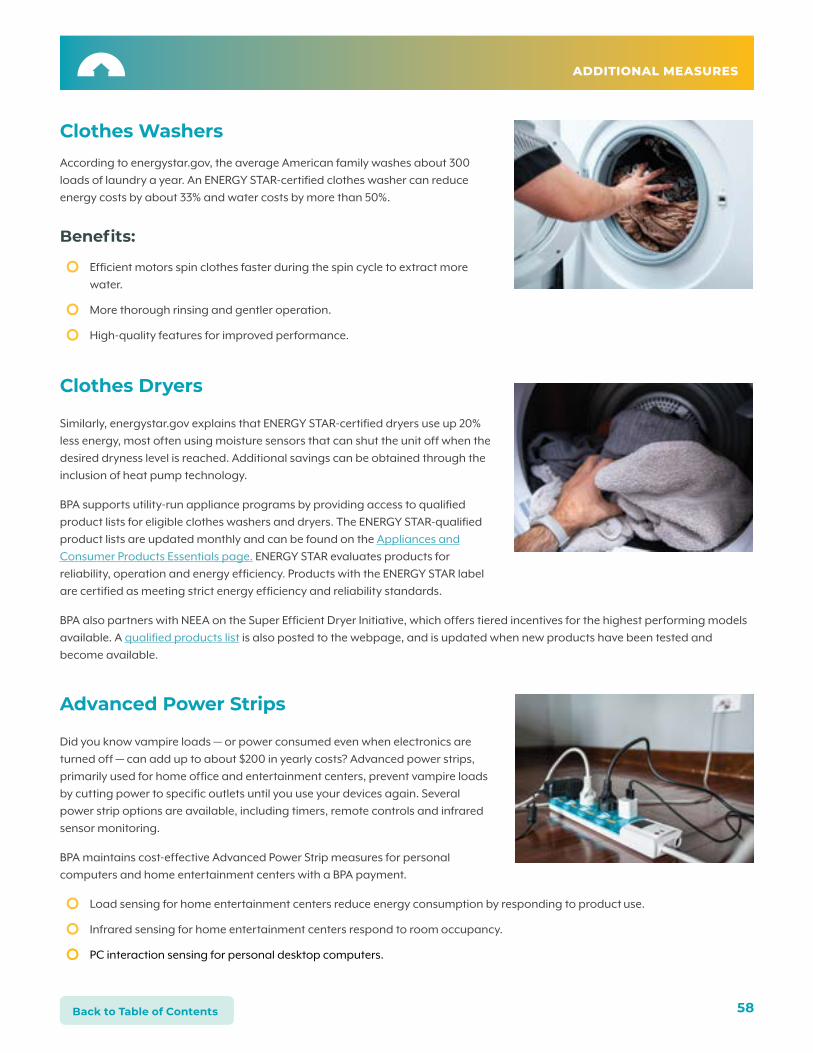
58Back to Table of Contents
Clothes WashersAccording to energystar.gov, the average American family washes about 300 loads of laundry a year. An ENERGY STAR-certified clothes washer can reduce energy costs by about 33% and water costs by more than 50%.
Benefits:
○ Efficient motors spin clothes faster during the spin cycle to extract more water.
○ More thorough rinsing and gentler operation.
○ High-quality features for improved performance.
Clothes Dryers
Similarly, energystar.gov explains that ENERGY STAR-certified dryers use up 20% less energy, most often using moisture sensors that can shut the unit off when the desired dryness level is reached. Additional savings can be obtained through the inclusion of heat pump technology.
BPA supports utility-run appliance programs by providing access to qualified product lists for eligible clothes washers and dryers. The ENERGY STAR-qualified product lists are updated monthly and can be found on the Appliances and Consumer Products Essentials page. ENERGY STAR evaluates products for reliability, operation and energy efficiency. Products with the ENERGY STAR label are certified as meeting strict energy efficiency and reliability standards.
BPA also partners with NEEA on the Super Efficient Dryer Initiative, which offers tiered incentives for the highest performing models available. A qualified products list is also posted to the webpage, and is updated when new products have been tested and become available.
Advanced Power Strips
Did you know vampire loads — or power consumed even when electronics are turned off — can add up to about $200 in yearly costs? Advanced power strips, primarily used for home office and entertainment centers, prevent vampire loads by cutting power to specific outlets until you use your devices again. Several power strip options are available, including timers, remote controls and infrared sensor monitoring.
BPA maintains cost-effective Advanced Power Strip measures for personal computers and home entertainment centers with a BPA payment.
○ Load sensing for home entertainment centers reduce energy consumption by responding to product use.
○ Infrared sensing for home entertainment centers respond to room occupancy.
○ PC interaction sensing for personal desktop computers.
ADDITIONAL MEASURES

59Back to Table of Contents
Lighting
Lighting has many functions in day-to-day life. It brightens functional spaces, creates ambiance and can help improve security. Light Emitting Diodes, or LEDs, and Compact Fluorescent Light Bulbs, have been in the market for several years — making it easier to access energy-efficient lighting choices for your home.
Benefits:
ADDITIONAL MEASURES
○ Efficient lighting options like LEDs use about 75% less energy than an incandescent bulb.
○ LEDs produce much less heat, so they are safer to operate and last at least six times longer.
○ Energy-efficient bulbs produce the same amount of light while reducing the amount of energy used to illuminate your home.
○ Provide a range of applications, such as reading lamps, overhead lighting, novelty lighting and landscaping.
Energy Saver Kits
Energy Saver Kits are a collection of items such as high-efficiency lighting, advanced power strips, aerators or showerheads that can be quickly and easily installed to reduce your home electricity use. Many utilities offer Energy Saver Kits to customers who are interested in low- or no-cost solutions.
Electric Vehicle Chargers
Efficient Electric Vehicle Chargers, or EV Chargers, help reduce the energy used to charge electric vehicles by reducing standby losses, or energy consumption when the vehicle is fully charged. BPA offers a measure for efficient chargers that meet the ENERGY STAR-standard for Level 2 EV Chargers. More information is available on the ENERGY STAR website.
For quick access to guides and best practices, forms, specifications, marketing materials and other resources, visit BPA Residential Appliances & Consumer Products Essentials.

COMFORT READY HOME
BRINGING THE PROGRAM TO MARKET

61Back to Table of Contents
BRINGING THE PROGRAM TO MARKET
Consumer and Worker Safety
Construction can be a safe occupation when workers are aware of the hazards and when their employer
implements an effective Safety and Health Program. There are numerous potential hazards that a
participating contractor may encounter while on a jobsite. The primary reasons for construction site injuries are
electrical incidents, falls, trenching and excavation, and struck by falling debris.
According to the Department of Labor’s Occupational Safety and Health Administration, or OSHA, one out of every five workplace fatalities is a construction worker. Workplace safety is of paramount importance to the Comfort Ready Home program and is expected to be a priority of all program contractors. Program contractors are strongly encouraged to develop a Safety and Health program that addresses the specific workplace hazards associated with the work they perform.
Comfort Ready Home strives to encourage the highest standards of safety for contractors and Field Specialists. All program contractors and Field Specialists will be required to adhere to OSHA guidelines and protocols for workplace safety pertaining to the scope of work being performed. Contractors and Field Specialists are encouraged to acquire OSHA training and certification cards. More information about obtaining an OSHA 10 or OSHA 30 Certification Card can be found here.
Comfort Ready Home will focus on the minimum care and safety that contractors need to be aware of while implementing residential home weatherization, HVAC and water-heating measures. These include but are not limited to:
General Site Safety
○ Every Residential Contractor Network contractor is encouraged to appoint a safety representative that will be onsite each day and act as a champion for safety.
○ Maintain a supply of emergency supplies including a first aid kit, eye wash, blood-borne-pathogen kit and fire extinguisher.
○ Provide emergency information in vehicles and at job sites including emergency contact lists, MSDS sheets, OSHA posters, copy of company safety and health program, training records and toolbox/tailboard safety meeting records.
○ Ensure facility security and public safety precautions by including a site perimeter fence, warning signs, travel and access ways, adequate lighting for site and public, necessary detours and canopies for sidewalks, traffic control plan, marked covers and barricades for holes, guardrails and visitor controls.

62Back to Table of Contents
○ Promote good housekeeping with well-maintained exits and access ways, trash receptacles, materials storage, remove projecting nails and puncture hazards, organize and/or remove material trash piles and provide proper toilet facilities.
Electrical Safety
○ Have a lockout/tagout program in place.
○ Make sure all power tools are in good condition and removed from service when found to be defective.
○ Use heavy-duty, three-prong, flexible extension cords, with no splices or taps. Make sure your heavy-duty cords can handle the amperage of your power tools.
○ Make sure all temporary lighting has adequate bulb covers and is suited for the location, has no empty sockets and is not used as a power drop.
○ Identify the location of all underground and overhead power lines prior to digging, drilling or use of overhead equipment.
○ Cover all live electrical parts and knockouts.
Fall Protection
○ Develop a residential fall protection plan and provide training and certification to employees.
○ Install guardrails wherever necessary including a 42-inch top, 21-inch mid, 4-inch toe with 200# capacity and 3-inch rail deflection.
○ Barricade or cover holes and openings clearly marked HOLE or COVER with a capacity of 2x the intended load.
○ Provide, inspect and maintain personal fall arrest systems including full body harness, shock-absorbing lanyard, double locking snap hocks and 5,000 lb.-capacity anchorage point.
○ Include falling object protection as part of the fall protection plan with the use of hard hats, canopies and debris nets.
Fire Safety
○ Have a fire prevention and evacuation plan in place.
○ Inspect fire extinguishers for correct type, adequate number and date of expiration.
○ Ensure proper storage of all flammable gases and liquids.
○ Obtain hot-work permits and assign a fire watch when necessary.
○ Implement a smoking policy.
○ Identify fire hydrant location(s).
Hand and Power Tools
○ Train and require employees to use power tools properly.
○ Inspect power tools frequently, at a minimum before each use. Tag and remove damaged tools from service.
○ Confirm that tools are equipped with the required guards, cutoffs, kill switches and anti-restart functioning.
BRINGING THE PROGRAM TO MARKET

63Back to Table of Contents
○ Inspect air hoses frequently for deterioration and damage. Make sure all whipchecks and safety pins are in place.
○ Only use tools that are effectively grounded or double insulated.
○ Know what the proper personal protective equipment, or PPE, is for the tool and wear it.
○ Properly store all power tools when not in use.
Personal Protective Equipment
○ Provide and require the use of PPE, including hard hats, safety glasses and goggles, hand protection, foot protection, hearing protection, protective coveralls and/or aprons, and traffic/high-visibility vests.
Scaffolding
○ Assign a competent person designated to oversee erection, use and dismantling of all scaffoldings.
○ Ensure all scaffolding is cross-braced, level and secure, properly anchored to structure, has proper ladders and access points, all coupling pins are in place, and use adequate base plates and mud sills.
○ Install guardrails and overhead protection wherever necessary.
○ Use proper fall protection and procedures when erecting and dismantling.
○ Provide employee training.
Stairways and Ladders
○ Inspect all ladders daily.
○ Only use heavy-duty ladders rated for the load they will carry.
○ Remove damaged ladders from service immediately.
○ Train employees in the proper use of ladders and ensure they follow ladder protocols.
○ Always anchor ladders and extend three feet above the landing.
○ Use the proper pitch between 30 and 50 degrees from parallel.
Hazardous Substances
○ Have an abatement plan in place and keep a file onsite.
○ Provide employee training and certification. Keep copies of certification records onsite.
○ Provide and maintain hazmat-containment systems.
○ Properly store and dispose of all hazardous substances.
○ Keep MSDS sheets onsite for all substances that will be used or stored onsite.
Reduce/Replace Products Containing Volatile Organic Compounds
○ Encourage installation contractors to reduce the use of building materials that contain high levels of Volatile Organic Compounds whenever possible or when reasonable alternative products are available.
BRINGING THE PROGRAM TO MARKET

64Back to Table of Contents
Residential Home Air-Quality Concerns and Protocols
○ Ensure participating contractors are hypersensitive when considering how to maintain and improve air quality of the home projects they are working on, as the air quality of homes is a critical factor to consider when installing weatherization measures. Some key considerations to address when improving the energy efficiency of a home include:
• Ensure proper venting is in place and/or added as needed to maintain air quality and avoid moisture from condensation. Venting considerations include, but are not limited to, attic ventilation in soffits and gable ends. Verify that roof baffles are not covered or collapsed. Crawlspaces also need to be adequately vented and/or venting added as part of the scope of work to maintain a dry and healthy environment.
• Require the correct use of vapor barriers. This includes vapor barriers in attics and crawlspaces. Always adhere the vapor barrier to the conditioned space adding insulation on the unconditioned side. Additionally, vapor barriers such as plastic sheathing on the ground in crawlspaces, will be required to prevent moisture and air-quality issues.
• Do not create an air-quality issue. Contractors must be properly trained NOT to create air-quality issues in the home.
• Practice proper moisture protection and water diversion. Window and door installers cannot allow moisture to penetrate the building envelope where it can cause mold, mildew and structural damage.
Combustion Appliance Zones
○ Pay special attention to Combustion Appliance Zone(s) in the home. Areas of concern include the space that your water heater, furnace, wall/floor heater, and/or boiler is located, and the location of gas or wood fireplace, gas stove, gas oven, gas broiler, and gas dryer are located. Some energy-saving projects, especially whole-home and prescriptive air sealing, can affect these zones. Be aware, test and install carbon monoxide detectors to reduce the risk from combustion appliances.
BRINGING THE PROGRAM TO MARKET

65Back to Table of Contents
Comfort Ready Home delivers exceptional customer service. All participants of Comfort Ready Home are
encouraged to deliver the best customer service experience, while simultaneously endeavoring to identify
shortcomings in service, and make improvements wherever and whenever necessary.
Keeping the Residential Contractor Network, utility staff and homeowners safe and healthy is our number one priority.
Customer Service: Behavior While in a Customer’s Home
○ Always be polite and respectful when dealing with end-use and utility customers.
○ Try to be flexible and cater to the customer’s schedule, needs, wants and concerns as much as possible.
○ Strive to impress them throughout the bidding, installation, cleanup and verification process.
○ Do not make a mess. Use booties to cover work boots and shoes. Lay down floor coverings and protect furniture in work areas. Remove all waste material, dust and debris when work is complete.
○ Let customers know what disruption they can expect in and around their home while you’re working.
○ Carry business cards and distribute them to customers.
○ Remove hats while in the home and while talking with customers.
○ Do not use profanity in front of customers.
○ Be aware of loud noises and warn those in the area to take precautions prior to commencing work.
Do your best to anticipate problems.
○ Inclement weather conditions, backordered material, or a simple misunderstanding can all impact the smooth flow of a project.
Do not wait for the customer to complain.
○ Communicate with your customer as soon as you become aware of an issue.
○ Do not try to hide or sugarcoat a problem. Honesty is vital to your reputation.
○ Be prepared to offer a solution for how you are going to address the problem.
○ Properly communicating and dealing with unavoidable issues can help gain customer trust, reduce customer anxiety and turn a negative experience into a positive one.
Delivering Exceptional Customer Service
BRINGING THE PROGRAM TO MARKET

66Back to Table of Contents
COVID Considerations:
○ Do your best to get as much information over the phone prior to arriving on site.
○ Check the CDC and local health authority websites prior to the visit for any COVID-19 related updates (www.cdc.gov/coronavirus/2019-ncov/index.html).
○ When scheduling a visit, ask the customer what their comfort level is with a site visit.
○ Ask if anyone planning to be present during the installation has been exposed to or has tested positive for COVID-19 or if anyone in their household is self-isolating or immunocompromised prior to agreeing to the visit. If yes, schedule the visit after threat of the contagion has passed.
○ Ensure your customer is informed, aware of and agrees to adhere to COVID-19 precautions.
○ Request before and after photos from the customer for documentation prior to a visit to reduce the amount of time required in the home.
○ Complete visits in a small group setting only.
○ Spot and react to symptoms. If the homeowner, utility staff or Field Specialist are experiencing any substantially similar symptoms to COVID-19 (cough, fever, or flu-like symptoms), reschedule your visit.
○ Use proper PPE, including a mask, gloves, safety glasses and any additional PPE as recommended by the CDC and local guidelines.
○ Maintain 6 feet of physical distance.
○ Recommend no handshaking or sharing of tools, including pens and pencils.
○ Avoid direct contact with high-touch surfaces, such as doorknobs, light switches, door handles, toilets, etc. as much as possible.
○ Avoid touching your eyes, nose and mouth.
○ Cover your mouth with a tissue if you cough or sneeze and then throw it away. If a tissue is unavailable, sneeze or cough into your elbow.
○ Wear safety glasses to protect eyes from any potential particles, when possible.
○ If you use disposable gloves during your visit, discard when done.
○ Keep alcohol wipes, if available, in your vehicle to wipe down surfaces.
○ Use hand sanitizer, when available, before and after each visit. As soon as possible, wash your hands thoroughly with soap and water.
BRINGING THE PROGRAM TO MARKET

67Back to Table of Contents
Objections are Opportunities
Listening to your customer’s objections is one of the most difficult and dreaded aspects of a salesperson’s life. Whether the objections are real, perceived, bad timing or the standby budget issues, how you handle them can make or break a sale. Handling them poorly will doom a sale. Handling them calmly without being defensive and with reasoned value responses will increase your success in getting to yes! Remember that the most common reason why customers object is they do not have enough information to see the value in your proposal. Think of your time responding to their concerns as moving the conversation forward and closer to getting the job.
Top sellers give these tips on handling objections:
○ Hit pause: When the homeowner brings up a concern, take a deep breath and pause for a few seconds. Consider what they said, think about what you want to say and then respond. You are making a conscious choice to pause.
○ Not so fast: Slow down your talking speed. While talking fast conveys uncertainty and confusion, slowing down your talking speed projects authority, confidence and knowledge. It will also help you think more clearly.
○ Say Less: While most of us love to talk about our products and services, top sellers learn to say less. So, when an objection is brought up, put on the talking brakes. If not, you will lose your customers, ear and likely talk beyond answering their concerns. Stay focused on their concern.
○ So, what you’re saying is…: An excellent way to address their specific concerns is by asking a question. It not only helps you better understand what they are asking but it makes the homeowner feel understood and helps to build trust.
○ I hear you: Having your customer feel that you are listening is very powerful as it relates to getting the sale. By responding to an objection or concern using a phrase like “That’s a valid concern, Mary", you come off as someone who is on their side and cares about them.
BRINGING THE PROGRAM TO MARKET
How to Handle Customer Objections

68Back to Table of Contents
Be Prepared
We tend to think that each of the homeowners’ objections are unique to them and their home, but that is often not the case. After a few instances of working with homeowners, you will notice some common concerns. The more comfortable you become handling them with confidence, the more credible you sound.
Start by writing the objectives down and grouping similar ones together, such as budget, quality, pricing, value, etc. How have you answered them in the past? What responses worked best? What did not get you the response you wanted? What responses moved the sales process along?
For example, “Your price is too high.” Respond that their investment will pay back within a certain amount of time or that their home will be more comfortable, along with saving energy. You can also point to the product guides online showing what the estimated payback period is.
No single response is perfect, but over time, you will find the responses that work best to reduce homeowner anxiety and build trust.
Propose a solution to overcome their objection. Make sure it is based on helping past customers with the same concerns. Restate the buyer’s objection, assure them other homeowners have had similar issues and share how you found ways to help them. Mention that in some cases, previous homeowner concerns were based on a misconception you were able to satisfy with your solution.
How effective you are at handling objections will overcome the homeowner’s apprehension to saying yes to using your product and services, which will translate to more sales. Remember that handling objections is your opportunity to fully explain your value. By taking time to discuss their objections, the more confident homeowners become in your value responses and the less fear they have in saying yes to your proposal. Giving value responses to their objections reduces fears and breaks down barriers, which outweighs any risk in working with you and your company.
BRINGING THE PROGRAM TO MARKET
TWELVE COMMON OBJECTIONS AND HOW TO OVERCOME THEM:
1. “I’m not interested, but you can send me information.”
Ask a few qualifying questions that will help you send potential customers targeted and relevant information that relates to their home needs. You will not only be more likely to get a future call back, but it also gives you a more targeted approach when you reach out to them again.
2. “Your price is too high.”
Do not reduce your price until you have explained the value that your solution provides. Bring up past jobs you have completed with other homeowners. Discuss the value your solutions provided and how happy the homeowners were after your installation. Comparing solutions will pay off and allows the customer to see the value you propose, even if it may cost more than they expected. People determine value by comparing solutions.
3. “I heard a different solution from your competitor.”
Do not get defensive when the homeowner brings up your competitor(s). You were advised not to bad mouth your competitors but that does not mean you can't make a strong case for your own products and/or services. Create a spreadsheet of your strengths and weaknesses, compared to your competitors. This is where preparation comes in.

69Back to Table of Contents
Develop responses or value conversations that help steer customers towards your strengths, products and solutions, and move away from your weaknesses.
“It’s good you’re looking at all your options. My goal is to meet your needs and find the best solution for your home. That is why we have tailored our solutions to homeowners like you. Here is what I suggest.”
4. “It’s not a good time.”
When someone says it’s not good timing, do not get discouraged. Use it as an opportunity. Ask qualifying questions to establish that there is a need. Your next goal is to find a good time to reconnect. One of the best ways to move up a timeline is by establishing urgency. Establish it by identifying value to the homeowner by having the cost-of-waiting conversation. Show them how waiting could cost them money or have other negative effects (cold/hot rooms during cold spikes or heat waves. They will be more likely to want to reconnect sooner. Giving them something to think about so when you talk again, they are more likely to move forward. You will also start to build trust and ultimately make it easier to close the deal.
5. “This seems like too big of a project.”
It is not uncommon to propose many improvements to a homeowner, which can be overwhelming. Homeowners may not fully understand how much they will like their home when you finish the project, so the improvements can be difficult for them to visualize. So, when the homeowner says it’s too much money or too much work, start with a small project. Once they have completed one project and are happy with the result, they are more likely to do another. Who are they going to call for the future upgrade? You, of course! You're the one who worked with them before and earned their trust.
6. “You do not offer this in your product.”
Many times, customers get caught up in a special feature of a competitor’s product. Although it may sound nice, it may not have much value to that specific customer in that location. Ask the customer why they like that feature and what they expect to get from it. Many times, you will find that your product can meet the same need without the added expense. You might also be able to show the customer the feature is not needed to get the value they want.
7. “I need to get more quotes.”
It is very common for people to get other quotes. You’re probably not going to change their minds, so turn it into an advantage. Explain to the owner that you will give them a price, but you also want to make sure that they are getting the right system installed in their home. Offer to write out product specs, must haves and things to look out for that other companies may not provide or leave out. Position yourself as an expert and a partner to build trust and present you and your company in the best possible light.
BRINGING THE PROGRAM TO MARKET

70Back to Table of Contents
8. “I cannot afford it.”
Money is often an issue for customers, especially those in lower income brackets. First, help them understand the cost of waiting. Every day they put off the improvement is a day they are paying more for electricity. Being able to discuss how home improvements help save on utility bills will help the customer make an informed decision and see the benefit of acting sooner than later. Understanding the potential energy savings of your offerings and knowing how to convey this information will help you close more sales. Second, make sure you are well-versed in financing options available to your customers. Ask the local serving utility about available financing options or zero interest loans for weatherization. In addition to standard financing options such as credit cards and bank loans, most utilities offer special financing for energy-efficiency projects. Additionally, there are local, regional and national financing programs dedicated to energy-efficiency projects. Get to know how to apply for these programs and how to help your customers gather information to complete applications.
9. “It seems too complicated.”
Remember that what may be common and easy for you may seem overwhelming for the average consumer. New technology, utility rebates, demo, construction, installation, financing, warranties, etc. can all add up to what appears to be an insurmountable task. Find ways to make it easy for the customer to understand and participate. Make sure your customers understand that you will be there supporting them every step of the way. Introduce customers to their Comfort Ready Home Field Specialist and let them know there are experts ready and willing to walk them through the process step-by-step.
10. “I support the coal, oil and/or gas industry, not energy efficiency.”
This objection may come in many forms. Some customers see energy efficiency as an economic or political issue. It is best to focus on non-energy benefits for these customers. Try to keep the conversation directed at improved comfort, less maintenance and reduced energy costs. For instance, new windows will help keep a home cool in the summer, warm in the winter and significantly reduce outside noise pollution, in addition to saving energy.
11. “Where is the incentive money coming from?”
Often customers are concerned with how incentive programs receive funding. They may have concerns about increased taxes, wasteful utility spending or even a type of a scam. You do not need to be an expert on this subject, but it is best to have an answer. Explain to the customer that a very small portion of every customer’s utility bill gets set aside to fund these programs, and they must participate to receive rebates and incentives. Direct your customer to contact their utility or visit the utility’s website to verify it is legitimate.
12. “Why is the utility going to give me money to use less energy?”
A perceptive customer will question why the utility wants to give them money to use less of the product they sell. Again, you do not need to be an expert on this subject, but it is best to have an answer. Explain to the customer that it is actually in the utility’s best interest. It is cheaper to use less energy than it is to build new power plants. Offering incentives for energy-efficient home upgrades help the utility save energy and keep rates lower for everyone.
BRINGING THE PROGRAM TO MARKET

71Back to Table of Contents
Combining Complementary Efficiency Upgrades
According to a study by the National Association of Home Builders¹, 9 out of 10 people buying a home would choose a house with energy-efficient features over a cheaper, less efficient home. Simply saying, “buyers don’t care” about energy efficiency is no longer a viable excuse. The homeowner’s expectations have changed. They now expect and desire to have an energy-efficient home. This is a nationwide shift in owner expectations in the market. One of the main disconnects between an owner installing more efficient systems is education. We think we are educating the homeowner, but ask yourself, are we really? How can we help them see that combining energy-efficiency measures where possible will increase their comfort and provide greater energy savings? That’s where cross-selling comes into play.
Cross-Selling Efficiency Upgrades
○ Unlike upselling, which is encouraging your customer to buy a higher priced piece of equipment or service over the current proposal, cross-selling is when you recommend a product or service that complements your customer’s existing energy-efficient upgrade. For example, adding floor insulation at the same time you add insulation in the attic. They complement each other and likely will enhance the project that was first proposed or considered. Another example is when installing a smart thermostat, educate the homeowner or decision-maker on the benefits of air and duct sealing.
BRINGING THE PROGRAM TO MARKET
Increase Your Sales Opportunities
MANY UPGRADE OPTIONS PAIR WELL AND COMPLEMENT EACH OTHER.
AIR AND DUCT SEALING
• Attic Insulation
• Floor Insulation
SINGLE-FAMILY INSULATION
• Air Sealing
• Duct Sealing
• Smart Thermostat
MULTIFAMILY INSULATION
• Line Voltage
• Advanced Smart Thermostats
MANUFACTURED HOME INSULATION
• Duct Sealing
• Heat Pump Water Heater
HEAT PUMP WATER HEATER
• Ductless Heat Pump
• Single-Family Insulation
DUCTLESS HEAT PUMP
• Heat Pump Water Heater
• Windows and Doors
• Single-Family Insulation
WINDOWS AND DOORS
• Single-Family Insulation
• Multifamily Insulation
AIR-SOURCE HEAT PUMP
• Duct Sealing
• Smart Thermostat
1. Schwarz, R. (2019). The Misconception that Buyers "Don't Care" About Home Performance. The Energy Logic. https://theenergylogic.com/blog/the-misconception-
that-buyers-dont-care-about-home-performance-2/

72Back to Table of Contents
QUICK TIPS
○ Connect a homeowner with other installers for energy-efficient measures. Sometimes you can’t do it all. The same goes for providing energy-efficient products and services for a homeowner. If you do not provide it, recommend partners you have a mutually beneficial agreement with to install those measures. Then they can do the same for you on their projects.
○ Create targeted lists of past buyers.You can provide the homeowner with other energy-efficiency measures at any time; it doesn’t necessarily have to happen while you’re installing their current requests. Look back at your previous installations and determine what improvements current customers could add to what they already installed to save them more money and energy. Also, determine how you can show them the benefits based on past cross-sell installs, current utility incentives and available tax credits.
○ Remind customers why they chose you. You have discussed past energy-efficiency improvement installations, offered a complementary project that will enhance their home's comfort and save money, but the customer is still not ready to say yes. Make a note to remind them why they selected you. You have already earned their trust and now you are recommending additional energy-efficiency improvements that in combination with your previous installation only makes their home more comfortable and valuable. Remember, they are more likely to listen to your recommendation because of the service you delivered.
○ Make data-driven suggestions. Use industry studies or personal experiences when suggesting complementary systems beyond what the initial customer request. They are more likely to listen if you can show them real numbers or describe a similar experience that makes sense and how it benefits them.
○ Educate your homeowners. Homeowners may not fully understand the value of your services or why they should invest in multiple upgrades. You can illustrate the benefits of each system upgrade and how they are interrelated. Once they understand this, they are more likely to listen to your suggestions on package benefits. You can also offer to send them information that supports bundling upgrades to further illustrate the benefits.
BRINGING THE PROGRAM TO MARKET
Check with your local Field Specialist who may be able to point you to reputable contractors in the Residential Contractor Network to offer complementary services.
Key TakeawayThe idea is always about proposing the best suite of solutions that address the customer’s pain points and meet or exceed their project expectations. Second to that is the opportunity to increase your sale’s project size. After all, happy customers drive referrals and project volume keeps your crews in the field. Who doesn’t want both of those benefits?

COMFORT READY HOME
PRODUCT GUIDES
SALES TIP: Print these guides to help facilitate conversations with your customers.
74Back to Table of Contents
Did you know that air leakage and improperly installed insulation can waste 20% or more of the energy used to heat and cool your home? That’s why air sealing is an important and cost-effective way to increase comfort throughout your home, while minimizing your utility bill.
Effective air sealing blocks uncontrolled airflow into your home that can undermine even the most high-performance insulation systems. This will leave you with a quieter, more comfortable home that wastes less energy and lasts longer.
Incentives and Savings
An incentive of up to $200 may be available. Check with your local utility for offers and information about insulation, air sealing and other weatherization opportunities for your home.
Air sealing is often considered the cornerstone to a comfortable and healthy home. While it is a cost-effective measure on its own, it is best when correctly paired with well-installed insulation and properly sized HVAC equipment. The savings from air sealing can vary depending on factors such as the size of your home, accessibility to leakage points and the type of heating system. Effective air sealing should last for at least 40 years in a home.
PRODUCT GUIDES
Simple and Effective Air Sealing
○ Improves comfort by reducing drafts.
○ Reduces pollutants, including wildfire smoke, entering from outside.
○ Reduces noise from the surrounding environment.
○ Less moisture and less pest entry from crawlspaces, garages and attics.
○ Improved insulation performance.
○ More efficient heating and cooling.
RECOMMENDED FOR:
○ Electrically heated homes getting duct sealing.
○ Electrically heated homes with an operational exhaust fan.
○ Electrically heated homes getting attic and underfloor insulation installed.
CUSTOMER BENEFITS

75Back to Table of Contents
Sealing and repairing gaps in ductwork or reconnecting older duct connections helps ensure conditioned warm or cool air is delivered efficiently and effectively throughout your house. If ducts in the home are damaged or disconnected, this air is often wasted in areas such as attics or crawlspaces.
If your Single-family home or manufactured home has ducts connected to an electric heat source such as an electric furnace or a heat pump, a qualified contractor can perform Prescriptive Duct Sealing, a service in which new or existing ductwork is repaired and sealed, or Performance Tested Comfort Systems Duct Sealing, which also includes leakage testing.
Duct sealing allows your home’s heating and cooling system to perform to its highest standard, with conditioned air flowing optimally to each room. This means less wasted energy and enhanced comfort throughout the house.
Cost, Payback and Incentives
The typical cost for duct sealing is $300–$700, and the simple payback period is typically between 3 and 8 years. Effective duct sealing has an estimated lifespan of 40 years.
An incentive of up to $250 may be available. Check with your local utility for information about insulation, air sealing and other weatherization opportunities for your home.
PRODUCT GUIDES
Duct Sealing
○ More comfortable homes with better heating and cooling distribution.
○ A safer heating and cooling system with a minimized risk of backdrafts, which can cause gases to be drawn back into the home instead of vented outdoors.
○ Savings on utility bills due to decreased energy loss.
○ Potential for better indoor air quality due to leakage control.
RECOMMENDED FOR
○ Homes with ductwork older than 6 years.
○ Homes with ducts located in garages, crawlspaces and attics.
○ Electrically heated homes that are getting air sealing or insulation installed.
CUSTOMER BENEFITS
Typical Cost (With Installation)
Payback Period Utility Incentives
$300–$700 3–8 years Up to $250

76Back to Table of Contents
In older homes, windows and patio doors tend to be single-paned and uninsulated with deteriorating or minimal weatherstripping. Along with uninsulated doors, these can contribute to air leaks and energy loss.
High-performance windows and insulated doors offer energy savings, thanks to energy-efficient technology, and protection from water and drafts. This means increased comfort in your home and reduced energy bills for years to come.
Cost, Payback and Incentives
Windows and Patio Doors
High-performance windows offer better insulation and greater control over airflow, while reducing stress on your heating and cooling systems, and improving the look of your home. The typical cost for windows is $20–$32 per square foot or $440–$700 per window, although this can vary significantly based on installation considerations, the number of windows being installed and their efficiency rating. Patio door pricing can depend on the style and size of the door.
The payback period for windows and patio doors is typically over 20 years, but this does not consider the reduced risk of water damage caused by window leaks or the increased curb appeal for resale value. Typical incentives for windows and patio doors range from $4–$6 per square foot. Check with your local serving utility for offers.
PRODUCT GUIDES
Window and Door Replacement
○ Prevents water and moisture entering the house through the walls, which can cause moisture damage and weaken the building structure.
○ Reduce outside noise.
○ Help eliminate drafts, cold spots and overheated spaces.
○ Insulated exterior doors reduce drafts.
○ When installed properly, Low-E storm windows, which minimize the amount of infrared and ultraviolet light that passes through the glass, reduce heat loss and drafts by offering greater insulation.
CUSTOMER BENEFITS

77Back to Table of Contents
Typical Cost
Typical Utility Incentives
Windows and Patio Doors
$20–$32/ft2 $4–$6/ft²
Low-E Storm Windows
$60–$200/window Up to $2/ft²
Exterior Doors $350–$1,000 Up to $40
Low-E Storm Windows
Low-E storm windows are easy to install and cost a fraction of replacement windows. In fact, installing a Low-E storm window may reduce your utility bill just as much as replacing the entire window.
The typical cost for a Low-E storm window is $60–$200 per window if you install it yourself. The payback period for Low-E storm windows is about one year. An incentive of up to $2 per square foot may be available. Check with your local utility for offers.
Exterior Doors
New exterior doors often fit and insulate better than older wood doors, resulting in lower heating and cooling costs. The typical cost for energy- efficient insulated exterior doors with fiberglass, wood cladding or steel with polyurethane foam cores is $350–$1,000.
An incentive of $350–$1,000may be available for a new energy-efficient insulated door. Check with your local utility for offers.
RECOMMENDED FOR
○ High-performance windows and patio doors are a good match for electrically heated homes that are getting insulation or a new heat pump installed.
○ High-performance windows and patio doors work well in homes with single-paned windows or windows that regularly fog up.
○ Homes with uninsulated wood exterior doors benefit most from upgrading to energy-efficient insulated doors.
○ Low-E storm windows are good for homes with standard double-hung windows.
PRODUCT GUIDES

78Back to Table of Contents
High-efficiency ductless heat pumps, also known as ductless mini-splits, use up to 50% less energy than electric-resistance heating such as furnaces, baseboard and wall heaters. Plus, ductless heat pumps also provide cooling, meaning a single system can deliver year-round comfort for your home.
Heat pumps heat and cool more efficiently because they transfer heat instead of creating it. This process requires significantly less energy. Ductless heat pumps use this principle to extract and concentrate heat from the outdoor air. That conditioned air is delivered inside the home using refrigerant lines connected to one or more indoor heads, distributing the air throughout the home.
Ductless heat pumps can replace or supplement your home’s existing electric heating and cooling system. Extended capacity models are available for homes in particularly cold regions. Compared to a full centrally ducted system installation, ductless heat pumps are relatively easy to install and can even pay for themselves in savings over time.
Cost, Payback and Incentives
The typical cost for a single ductless heat pump is $3,500–$6,000, including installation.
The simple payback period for ductless heat pumps is typically 4–8 years if properly sized. Ductless systems are anticipated to last 15–20 years.
An incentive of up to $800 may be available. Check with your local utility for offers.
PRODUCT GUIDES
Ductless Heat Pumps
○ Reduce heating energy use up to 50%, compared to electric-resistance heating systems.
○ Built-in cooling is an added benefit for homes with electric-resistance heat only.
○ Uniformly heat main living area, eliminating hot and cold spots common with some types of heating.
○ Meet heating needs even when outdoor temperatures fall below 32 degrees Fahrenheit, and 5 degrees Fahrenheit for cold climate models.
○ Relatively low cost and easy to install compared to a full centrally ducted system.
○ Can supplement existing heating systems.
RECOMMENDED FOR
○ Homes with electric heating.
○ Homes without ductwork, including baseboard, wall heaters or radiators.
CUSTOMER BENEFITS
Typical Cost Payback Period Utility Incentives
$3,500–$6,000 4–8 years Up to $800

79Back to Table of Contents
Standard electric water heaters account for nearly 20% of the energy used by an average home — more than the refrigerator, dishwasher, clothes washer and dryer combined.
However, an energy-efficient option exists. Heat pump water heaters, also known as hybrid water heaters, use heat pump technology to transfer heat from the surrounding air to water in the tank. This uses as little as one-third of the energy consumed by standard electric water heaters, which generate heat to produce hot water.
Heat pump water heaters can provide more hot water per hour than similarly sized standard electric water heaters, and they come with 10-year warranties. Based on average home use, the increased efficiency can save you up to $3,600 on your utility bills over the heat pump water heater’s lifetime compared to a standard electric unit.
Types of heat pump water heaters include:
○ Integrated, standalone units that work well in unconditioned spaces and can be fitted with intake and/or exhaust ducts for installations in conditioned living spaces.
○ Split systems with a heat pump compressor that is separate from the tank to provide flexibility in installation locations.
PRODUCT GUIDES
High-Efficiency Heat Pump Water Heaters
○ Reduces water-heating energy consumption and operating costs by up to 66%, compared to standard electric water heaters.
○ When properly sized, delivers more hot water than a standard electric-resistance tank.
○ Offers a minimum 10-year manufacturer warranty on tank and parts.
○ Many models offer leak detection and Wi-Fi connectivity.
RECOMMENDED FOR
○ Homes with electric water heating, particularly with water heaters 10 years or older.
○ Installations in garages or basements.
CUSTOMER BENEFITS

80Back to Table of Contents
Cost, Payback and Incentives
The average cost for a 50-gallon heat pump water heater is about $1,200, and between $2,000–$4,000, including installation. Pricing is affected by factors including tank size and any accommodations that must be made for the location of the installation.
You can save money by installing your own heat pump water heater. See this from Hot Water Solutions to learn more.
The incremental price difference, or the additional cost compared to a standard electric tank water heater, is about $850. The simple payback period for heat pump water heaters is typically 2–6 years.
An incentive of up to $700 may be available. Check with your local utility for offers.
Typical Cost (With Installation)
Payback Period Utility Incentives
$2,000–$4,000 2–6 years Up to $700
PRODUCT GUIDES

COMFORT READY HOME
LOW-INCOME OR INCOME-QUALIFIED CUSTOMERS

82Back to Table of Contents
How to partner with and refer customers to non-profit energy efficiency programs
Energy-efficiency installations can have high upfront costs for homeowners, making access difficult to many energy-efficient upgrades for lower-income or income-qualified residents. Historically, lower-income residents often pay a much higher percentage of their household income on utility bills.
Fortunately, participating utilities, tribal partners, state agencies and community action agencies, or CAAs, can offer rebates and incentives to income-qualified homeowners and renters to encourage energy-efficiency projects and installations. This can greatly decrease utility bills, fix health and safety issues such as water damage and mold, make their homes more comfortable, and improve indoor air quality.
Much of the energy-efficiency work in the region is accomplished through incentives paid to both public utilities and their customers, so it is important that programs are structured to allow customers of all income levels to have access. For more than three decades, BPA, public utilities, CAAs, tribes and states have worked to address this issue, improving equitable access to energy efficiency for all Northwest residents.
One mission, two programs
As part of BPA’s work to ensure energy-efficiency accessibility to rate payers of all income levels, BPA operates two low-income energy-efficiency programs. Funding from both low-income programs can be used in the same home, as long as they are not used on the same measure.
○ One is managed by public utilities through their Energy Efficiency Incentives. Unlike other incentive-funded projects, or measures, the costs of many measures are reimbursed dollar-for-dollar and do not require payment from income-qualified homeowners, though some measures do have a cost cap. Incentives can extend to home repairs necessary to maintain the effectiveness and durability of an installation.
○ The other low-income energy-efficiency program is a grant program distributing federal program funds to state and tribal
partners. CAAs are typically involved in delivering those services.
Your customer may qualify for free upgrades
To help make sure your customer does not miss out on no-cost energy-efficiency opportunities, you can use the below chart based on 2021 federal poverty income levels to help guide your conversations with customers. Include this in your bid and let your customer know that if they qualify, you can help with the free installation or connect them to the agency that will help.
Income qualifications follow the U.S. Department of Energy Weatherization Assistance Program definition of 200% of the federal poverty-income level based on household size unless a statewide eligibility definition is provided. In the Northwest, state minimum income levels for participation are often higher than the federal level. All existing housing types (Single-family, manufactured and Multifamily) are eligible for low-income measures, although not all measures are applicable to each housing type. For additional details see the BPA Energy Efficiency Low-Income New Opportunities Guide.
The table below represents an example of qualifying income levels only for the year 2021. The federal poverty-income level may be redefined every year and states may have their own income-qualification requirements. Click here to check guidelines and your state's definition for the most up to-date federal poverty-income level.
LOW-INCOME OR INCOME QUALIFIED CUSTOMERS

83Back to Table of Contents
Example: 2021 Federal Poverty Income Level for the 48 Contiguous States Subject to change year-over-year.
# of people in family/ household
Federal Poverty Guideline 200% of the
Federal Poverty Guideline
1 $12,880 $25,760
2 $17,420 $34,840
3 $21,960 $43,920
4 $26,500 $53,000
5 $31,040 $62,080
6 $35,580 $71,160
7 $40,120 $80,240
8 $44,660 $89,320
LOW-INCOME OR INCOME QUALIFIED CUSTOMERS
Utility Low Income Programs State CAA Programs
Idaho Community Action Partnership of Idaho
Montana Montana Energy Assistance Offices
Oregon Oregon Home Weatherization Services
Washington Washington State Weatherization Programs
Note: some states have higher income allowances for program participation. State-specific data can be found here: Idaho | Montana | Oregon | Washington
Connect with your local resources to understand the requirements
Because there are so many partners involved in low-income opportunities and each state is slightly different, you can rely on your Comfort Ready Home Field Specialist to help you better understand the requirements, incentives and rules for participating where you live, and the homeowners you serve.
Your Field Specialist can help you coordinate with your county’s CAA and understand what incentives are available directly from your utility. The Field Specialist can also help you with the required paperwork and provide tips on talking with homeowners about available opportunities.
Northwest Resources
Follow these links to find specific utility programs and agencies that serve your area.

COMFORT READY HOME
EN ESPAÑOL

85Back to Table of Contents
Sellado de aire prescriptivo unifamiliar
MEDIDA DE ENEVELO TERMAL
Lista de verificación de especificaciones:
Para obtener detalles sobre todos los requisitos de BPA para esta medida, consulte las Especificaciones de climatización residencial de BPA del 2016.
□ Escotilla o puerta del ático y coberturas de escaleras desplegables: Juntas o burletes. Escotillas verticales y horizontales, o escaleras desplegables entre el espacio acondicionado y el ático o los espacios de acceso. Debe proporcionar un sello de aire eficaz y estar instalado de forma duradera a la cubierta de la compuerta.
□ Fundas/penetraciones de ductos: Masilla u otro sello hermético instalado alrededor del perímetro de las fundas de los ductos entre la funda y el techo.
□ Cavidades para ductos, sofitos y vigas de piso debajo de los muros bajos: Bloqueados con material rígido y sellados con masilla o espuma. Mantenga un espacio libre de materiales combustibles, generalmente de 3 a 4 pulgadas, pero consulte los códigos locales para mayor seguridad. Materiales resistentes al fuego utilizados según lo indicado cerca de dispositivos que producen calor.
□ Ventiladores de baño: Espuma, masilla u otro sello hermético instalado alrededor del perímetro de los ventiladores de baño. Masilla resistente al fuego utilizada para ventiladores de baño con calentador. Espacios mayores de 1 pulgada cubiertos con chapa metálica.
□ Placas superiores y penetraciones eléctricas o de plomería, placas de umbral para las vigas del borde de la pared del sótano: Conexiones entre paredes de yeso y placas superiores, uniones de madera a madera o concreto, penetraciones a través de placas selladas con espuma o masilla.
□ Cavidades abiertas: Parte superior de las paredes de perfilería huecas: Espuma, masilla u otro sello hermético instalado en la parte superior de las paredes de perfilería huecas y en las paredes abiertas entre las áreas de áticos de dos niveles. El perímetro de cada espacio entre vigas debe ser espumado o enmasillado.
□ Accesorios empotrados y accesorios sin clasificación IC: Espuma, masilla u otro sello hermético instalado entre el accesorio y el techo; o una pared de yeso u otro protector de aislamiento con sello de aire no inflamable instalado sobre el accesorio. Protector extendido de 3 a 4 pulgadas por encima del nuevo aislamiento del ático. Ningún aislamiento cubre la parte superior del protector/accesorio.
□ Accesorios empotrados y accesorios con clasificación IC: Accesorio sellado entre el acabado interior y el accesorio. El accesorio no está cubierto con espuma de aerosol y las aberturas en el accesorio no están selladas. Puede usarse una caja con sellado hermético o una cubierta prefabricada. El aislamiento del ático se instala sobre el accesorio.
PREPARACIÓN
○ Asegúrese de que no haya fugas ni intrusión de agua antes de aislar los áticos o los espacios de acceso a sellar.
○ Verifique que cada ático o espacio de acceso cumpla con los códigos locales y estatales de ventilación, generalmente 1/150 ó 1/300 si las rejillas de ventilación están bien divididas entre alto y bajo en el techo o distribuidas uniformemente alrededor del perímetro de acceso.
○ Asegúrese de que la casa esté libre de problemas de humedad o moho.
○ Asegúrese de que la casa tenga al menos un extractor de aire en funcionamiento, con conductos que den al exterior según la guía de medidas de preparación del contratista.
○ Si hay aparatos de combustión, asegúrese de que haya un detector de monóxido de carbono aprobado por la UL o CUL, o instale uno.
○ Confirme el uso de los materiales correctos identificados para sellar fugas estructurales de aire y no para fugas de aire alrededor de objetos de altas temperaturas como ductos de humo, chimeneas y luces empotradas en el techo.
○ Identifique las ubicaciones inaccesibles.
○ La estructura del edificio, materiales sujetos mecánicamente que bloquean el acceso.
○ Oportunidades inmediatamente adyacentes a la línea de los aleros, las placas superiores, las paredes de perfilería huecas, los sofitos y las luces empotradas en el techo.
○ Penetraciones debajo o detrás de 5 pulgadas de aislamiento, por ejemplo, soplado en el ático, guata en el piso.
Descargar la lista de verificacion
Condiciones previas: Sin sello contra fugas de aire; califica para aislamiento.
Condiciones posteriores: Sello contra fugas aire en ubicaciones de alto valor.
Póngase en contacto con su empresa de luz para confirmar los requerimientos de las condiciones previas y posteriores.

86Back to Table of Contents
MEDIDA DE ENEVELO TERMAL
Ejemplos de instalación
Cavidad sellada. Cortesía de Oregon Housing and Community Services y Oregon Energy Coordinators Association
Cavidad abierta o sin sello. Cortesía de Oregon Housing and Community Services y Oregon Energy Coordinators Association
Accesorio no IC con cubierta de yeso (tapa). Cortesía de Advanced Energy
Accesorio no IC sin sello. Cortesía de Advanced Energy
Penetración sin sello (dispositivos que emiten calor). Cortesía de DOE Weatherization Program Trainers’ Consorcio (DOE WAP TC)
Penetración sellada (dispositivos que emiten calor).
○ Rodeada de chapa metálica
○ Espacio libre de 3 pulgadas
○ Sellador resistente al fuego
Cortesía de DOE Weatherization Program Trainers’ Consorcio (DOE WAP TC)
Vigas del piso debajo de muro bajo (bloqueadas con material rígido y selladas con masilla). Cortesía del Departamento de Energía de los EE.UU
Vigas del piso debajo de muro bajo (sin bloqueo con material rígido y sin sello). Cortesía del Departamento de Energía de los EE.UU
MÍNIMA DOCUMENTACIÓN REQUERIDA
Puede consultar el Formulario opcional de recolección de datos de climatización para encontrar esta información. Contacte a su empresa de luz para saber qué documentos se requieren.
1. Metros cuadrados del área en la que se aplicó el sellado y antigüedad de su hogar.
2. Factura que refleje el pedido o la fecha de compra y el costo.
SE COMBINA BIEN CON
□ Aislamiento del hogar.
□ Sellado de ductos prescriptivo.
□ Sellado de ductos Sistema de Confort Probado por el Rendimiento (PTCS).

87Back to Table of Contents
MEDIDA DE ENEVELO TERMAL
CALIFICACIONES
Podría ser elegible para casas unifamiliares, multifamiliares y prefabricadas. La calefacción principal debe ser eléctrica. Las ventanas y puertas de patio preexistentes deben ser: (1) de un solo panel con / sin protección contra tormentas, cualquier tipo de marco (p. Ej., Metal, madera o vinilo) o (2) de doble panel, solo con marco de metal.
Las ventanas de reemplazo deben tener un valor-U mínimo de 0.30 para ventanas y 0.35 para puertas de patio, 0.22 para ventanas y 0.30 para puertas de patio para nivel de incentivo elevado, según el NFRC (National Fenestration Rating Council, por sus siglas en inglés).
Lista de verificación de especificaciones:
Las ventanas y puertas de patio en casas unifamiliares y prefabricadas deben ser instaladas de acuerdo con las Especificaciones de Climatización Residencial BPA.
□ Confirme que todas las ventanas/puertas de patio estén instaladas y tengan etiquetas NRFC
□ Respalde el riel inferior de una puerta de patio a ½ pulgada del borde exterior del marco.
□ Asegúrese de que la ventana de reemplazo y la apertura de la ventana se hayan montado correctamente en la barrera contra agua de la casa utilizando técnicas adecuadas para cada tipo específico de ventana.
□ Verifique que las ventanas estén enmasilladas y selladas correctamente, incluyendo el marco estructural, la madera exterior, las bases, las molduras, los topes y los umbrales. (Use una varilla de respaldo o espuma no expandible y selle los espacios mayores a 3/8 de pulgada).
□ Confirme que todos los herrajes y sujetadores sean de aluminio, acero inoxidable u otro material no corrosivo.
□ Verifique que las ventanas funcionen de manera correcta y segura.
□ Asegúrese de que el lugar de trabajo quede limpio y ordenado. Debe removerse todo el material de desecho, las herramientas y el equipo.
Condición Previa: De un solo panel con o sin protección contra tormentas, cualquier tipo de marco (por ejemplo, metal, madera o vinilo) o (2) de doble panel, solamente con marco de metal.
Condición Posterior: Valor U de 0.30 para ventanas y 0.35 para puertas de patio.
Contacte a su empresa de electricidad para confirmar los requerimientos para condiciones previas y posteriores.
Ventanas y puertas de patio previamente preparadas
Descargar la lista de verificacion

88Back to Table of Contents
MEDIDA DE ENEVELO TERMAL
Ejemplos de instalación
Ejemplos de instalación
Ventana de doble panel, instalada con tapajuntas adecuado.Cortesia of Oregon Housing and Community Services and Oregon Energy Coordinators Association
Ventana con condensación por falta de aislamiento.Cortesia of PA WTC
Barilla de respaldo para sellar alrededor de ventanas.Cortesía del Departamento de Energía de los EE.UU.
Espuma de alta expansión. No apropiada para usar.
Ventana instalada apropiadamente con tapajuntas para el clima.Cortesía del Departamento de Energía de los EE.UU.
Ventana con tapajunta instalada inapropiadamente.Cortesía del Departamento de Energía de los EE.UU.
SE COMBINA BIEN CON
□ Aislamiento de paredes, pisos y áticos.
□ Sellado de aire de todo el hogar.
□ Mejoras HVAC.
DOCUMENTACIÓN MÍNIMA REQUERIDA
Puede usar el Formulario opcional de recolección de datos de climatización para documentar esta información. Contacte a su empresa de electricidad para documentos requeridos especificos.
1. Descripción de la vivienda (unifamiliar, multifamiliar o prefabricada).
2. Número y pies cuadrados de ventanas o puertas de patio reemplazadas.
3. Condiciones previas (tipo de marco, es decir, de madera, metal, con un solo panel o doble panel).
4. Tipo de calefacción principal.
5. Documentación final de la factura del contratista del programa:
1. Fecha de pedido o compra2. Costo3. Valor-U de la condición
posterior (etiquetas NRFC u otra verificación).
Backer rod and caulk complete seal around window frame.Cortesía del Departamento de Energía de los EE.UU.
Barilla de respaldo y masilla completando el sello alrededor del marco de la ventana.Cortesía del Departamento de Energía de los EE.UU.
Encaje apropiado de una ventana. Estable y sellado.Cortesía de Santa Fe Community College
Instalación de ventana sin sello y encaje inapropiado.Cortesía del Departamento de Energía de los EE.UU.

89Back to Table of Contents
Sellado de ductos prescriptivo
MEDIDA DE ENEVELO TERMAL
CALIFICACIONES
○ Los ductos necesitan estar conectados a una fuente de calor eléctrica, como un calentador eléctrico o un compresor con fuente de aire.
○ Esto aplica a la reparación y sellado de ductos existentes en casas unifamiliares y casas prefabricadas, calentadas con calefacción eléctrica de aire forzado y/o un compresor.
○ El sellado de ductos prescriptivo debe ser realizado por un técnico certificado en sellado de ductos, o una alternativa aprobada, como se indica en los Requisitos del programa de sellado de ductos prescriptivos, y los técnicos deben estar activos en el registro en línea.
○ Al menos el 30% de los ductos de suministro necesiten estar ubicados en un espacio no acondicionado y ser accesibles. [Excepción: Cuando hay fugas de alta presión operativa en un espacio no acondicionado, el sistema debe ser elegible para el sellado de ductos, incluso si menos del 30% de los ductos de suministro están en un espacio no acondicionado. Una fuga de alta presión de operación se define como cualquier fuga que ocurra en la línea principal dentro de una distancia de 15 pies del calentador, especialmente aquellas en la conexión del calentador o pleno sobre el cielorraso].
○ La presencia de aislamiento por sí solo no se considerará una barrera para la accesibilidad, a menos que el contratista sospeche que puede haber asbestos; en cuyo caso, el contratista deberá detener el trabajo inmediatamente y notificar al propietario de la vivienda que el sitio requiere una evaluación profesional, y posiblemente una reparación, antes de que se pueda realizar el trabajo de sellado de ductos.
○ Los ductos no deben haberse sellado con anterioridad a través del sistema Sistema de Funcionamiento Probado de Confort o el programa de sellado de ductos prescriptivo de BPA, a menos que una inspección previa de la empresa de servicios públicos confirme que se requiere sellado adicional de ductos.
Lista de verificación de especificaciones: Su proyecto podría tener requerimientos especiales. Consulte las especificaciones de sellado de ductos prescriptivo de BPA para más detalles.
□ Todas las partes accesibles del sistema de ductos deberán repararse y sujetarse mecánicamente, cuando sea necesario, y deberán estar debidamente soportadas.
• Las secciones interiores de los ductos ineficaces o dañados deben repararse o reemplazarse antes de sellar los ductos.
□ Todas las partes accesibles del ducto que requieran sellado deben estar expuestas y selladas con materiales aprobados. Los siguientes son ejemplos de oportunidades de sellado: Pleno sobre el cielorraso; unidad climatizadora a pleno sobre el cielorraso; conexiones del pleno sobre cielorraso al despegue; juntas de cola de milano o de dedo; ramas T’s, Y’s y L’s; acoples de suministro y retorno; conexiones de ducto a ducto; codos ajustables y tapas.
□ Los espacios grandes en los ductos deben repararse con láminas de metal y tornillos para láminas de metal o con cinta reforzada con malla y masilla.
• Todos los ductos de metal deben asegurarse con al menos tres tornillos en cada conexión.
• Todas las conexiones de ductos flexibles a ductos rígidos deben sujetarse firmemente tanto en el revestimiento interior como en el exterior mediante una correa de compresión (Panduit o equivalente) apretada con una herramienta tensora aprobada por el fabricante.
□ Se debe quitar la cinta suelta de los ductos de metal rígido antes de sellar. La cinta asegurada que quede debe cubrirse completamente con masilla que se extenderá al menos 1/2 pulgada más allá del borde de la cinta a cada lado y tendrá al menos 1/8 de pulgada de espesor.
□ Al sellar, asegurar o sujetar ductos, no debe usarse cinta adhesiva para ductos con respaldo de tela.
□ Todas las juntas de ductos rígidos deben sellarse con masilla listada UL-181, aplicada según las especificaciones del fabricante.
□ Cuando se retire el aislamiento del ducto, el aislamiento deberá ser reinstalada y fijada de forma segura al sistema del ducto mediante sujetadores mecánicos como correas de plástico permanentes, hilo de nailon o material de sujetado especificado por el fabricante del aislamiento.
□ Siempre que haya un aparato de combustión (gas, propano, aceite, madera) en la casa, el garaje u otro espacio adjunto, se debe instalar un detector de monóxido de carbono con certificación UL, C-UL o equivalente.
Condición Previa: ductos accesibles sin sellar.
Póngase en contacto con su empresa de electricidad para confirmar las condiciones previas y posteriores.
Descargar la lista de verificacion

90Back to Table of Contents
MEDIDA DE ENEVELO TERMAL
Ejemplos de instalación
Ducto con soporte apropiado. Cortesía de Advanced Energy
Ducto con soporte no apropiado.Cortesía de Advanced Energy
SE COMBINA BIEN CON
□ Sellado de aire en todo el hogar.
□ Aislante de attico, piso, y pared.
□ Compresor de calor de fuente de aire.
DOCUMENTACIÓN MÍNIMA REQUERIDA
1. Formulario de sellado de ductos prescriptivo.
2. Factura que refleje el pedido o la fecha de compra y el costo.
3. De haberse anotado en el registro de PTCS, copia impresa del reporte de instalación.
Pleno sobre el cielorraso sellado con masilla selladora de ductos incrustada en fibra a base de agua.Cortesía de US Department of Energy
Ducto de pleno sobre cielorraso sin sellar.Cortesía de Advanced Energy
El ducto flexible está bien sujeto al ducto de metal. Cortesía de Advanced Energy
El ducto flexible no está mecánicamente sujeto al ducto de metal.Cortesía de Advanced Energy

91Back to Table of Contents
Resources and References
○ Weatherization Essentials Page
○ BPA Residential Weatherization Specifications
○ BPA Weatherization Best Practices Field Guide
○ ENERGY STAR® Qualified Homes
○ Energy Out West Weatherization Field Guide
○ HVAC Essentials Page
○ PTCS Essentials Page
○ Water Heating Essentials Page
○ Appliance Essentials Page
○ BPA Implementation Manual (IM) Document Library
○ BPA Implementation Manual
RESOURCES

92Back to Table of Contents
Utility Rep Phone Email Sub-Region
City of Albion Debbie Swanson/Michelle Ouellette 888-883-9873 [email protected] Southern Idaho
City of Bonners Ferry Lisa Ailport 206-267-3105 [email protected] Northern Idaho
City of Burley Debbie Swanson/Michelle Ouellette 888-883-9873 [email protected] Southern Idaho
City of Delco Debbie Swanson/Michelle Ouellette 888-883-9873 [email protected] Southern Idaho
City of Heyburn Debbie Swanson/Michelle Ouellette 888-883-9873 [email protected] Southern Idaho
City of Minidoka 208-532-4101 Southern Idaho
City of Plummer Sara Gauthier 208-686-1641 [email protected] Northern Idaho
City of Rupert Debbie Swanson/Michelle Ouellette 888-883-9873 [email protected] Southern Idaho
City of Soda Springs Debbie Swanson/Michelle Ouellette 888-883-9873 [email protected] Southern Idaho
City of Weiser Debbie Swanson/Michelle Ouellette 888-883-9873 [email protected] Northern Idaho
Clearwater Power Greg Hansen 208-743-1501 [email protected] Northern Idaho
East End Mutual Electric Debbie Swanson/Michelle Ouellette 888-883-9873 [email protected] Southern Idaho
Fall River Electric Jan Dean 208-652-7431 [email protected] Southern Idaho
Farmers Electric Coop Debbie Swanson/Michelle Ouellette 888-883-9873 [email protected] Southern Idaho
Idaho County Light & Power Rita Holman 208-983-1610 [email protected] Northern Idaho
Idaho Falls Power Jason Bird 208-612-8443 [email protected] Southern Idaho
Kootenai Electric Cooperative Gery Hirsch 208-765-1200 [email protected] Northern Idaho
Lost River Electric Cooperative Denise Johnson 208-588-3311 [email protected] Southern Idaho
Northern Lights Elissa Glassman 208-263-5141 [email protected] Northern Idaho
Raft River Rural Electric Co-op Carl Boden 208-645-2926 [email protected] Southern Idaho
Riverside Electric Cooperative Debbie Swanson/Michelle Ouellette 888-883-9873 [email protected] Southern Idaho
Salmon River Electric Co-Op Tyler Thayn208-879-2283 x105
[email protected] Southern Idaho
Southside Electric Cooperative Amber Whitaker/Jared Teeter 888-883-9879 [email protected] Southern Idaho
United Electric Cooperative Chris Seibold 208-679-2222 [email protected] Southern Idaho
Idaho
Utility ContactsUtilities work in partnership with BPA to offer incentives. Each utility offers incentive programs and packages to serve the needs of their customers and each utility program is unique. Working directly with your utility will make sure you have the most up-to-date information on what incentives are available for homeowners. Contact your local utility representative for details on utility program offerings. If you would like to change the way your contact information is displayed, contact [email protected].
UTILITY CONTACTS

93Back to Table of Contents
Utility Rep Phone Email Sub-Region
City of Troy Clint Taylor 406-295-4540 [email protected] NW Montana
Flathead Electric Cooperative Adam Steele 406-751-5291 [email protected] NW Montana
Glacier Electric Co-Op Jonnalea Tatsey 406-873-5566 [email protected] NW Montana
Lincoln Electric Cooperative Brent Holder 406-882-3307 [email protected] NW Montana
Mission Valley Lyle Neiss 406-883-7910 [email protected] NW Montana
Missoula Electric Cooperative Dan Rogers 406-541-6333 [email protected] NW Montana
Ravalli Electric Co-Op Joanne Meier 406-961-3001 [email protected] SW Montana
Vigilante Electric Cooperative Rod Siring 406-683-2327 [email protected] SW Montana
Montana
Utility Rep Phone Email Sub-Region
Wells Rural Electric Company Debbie Swanson/Michelle Ouellette 888-883-9873 [email protected] Nevada
Nevada
Utility Rep Phone Email Sub-Region
Blachly-Lane Electric Cooperative
541-688-8711 [email protected] Valley/Coast Oregon
Central Electric Cooperative Ryan Davies 541-312-7742 [email protected] Central Oregon
Central Lincoln PUD Wade Carey 541-574-2068 [email protected] NW Oregon
City of Ashland Dan Cunningham 541-552-2063 [email protected] Valley/Coast Oregon
City of Bandon Beth Hagar 541-347-2437 [email protected] Valley/Coast Oregon
City of Canby Dee Anne Wunder 503-266-1156 [email protected] NW Oregon
City of Cascade Locks Gordon Zimmerman 541-374-8484 [email protected] NW Oregon
City of Drain Steve Dahl 541-836-2417 [email protected] Valley/Coast Oregon
City of Forest Grove Michelle Stromberg 503-992-3253 [email protected] NW Oregon
City of Hermiston Steve Meyers 541-289-1344 [email protected] NE Oregon
City of McMinnville Sara Bernards 503-435-3115 [email protected] NW Oregon
City of Milton-Freewater Pat Didion 541-938-8237 [email protected] NE Oregon
City of Monmouth Laura Chrestenson 503-838-3526 [email protected] NW Oregon
Oregon
UTILITY CONTACTS

94Back to Table of Contents
Utility Rep Phone Email Sub-Region
Clatskanie PUD Brian Fawcett 503-728-2163 [email protected] NW Oregon
Columbia Basin Electric Cooperative
Andy Fletcher 541-676-9146 [email protected] NW Oregon
Columbia Power Co-Op Josh Hamilton 541-934-2311 [email protected] Valley/Coast Oregon
Columbia River PUD Tim Lammers 503-397-8155 [email protected] NW Oregon
Consumers Power, Inc Thomas Elzinga 541-929-8532 [email protected] NW Oregon
Coos-Curry Electric Cooperative Jacob Knudsen [email protected]
Southern Valley/Coast Oregon
Douglas Electric Cooperative Todd Munsey 541-673-6616 [email protected] Valley/Coast Oregon
Emerald PUD Rob Currier 541-744-7402 [email protected] Valley/Coast Oregon
Eugene Water & Electric Board* Matt Lutter 541-685-7545 [email protected] Valley/Coast Oregon
Harney Electric Cooperative Stephanie Bowen 541-573-2061 [email protected] Central Oregon
Hood River Electric Cooperative Libby Calnon 541-354-1233 [email protected] NW Oregon
Lane Electric Cooperative John Murray 541-484-1151 [email protected] Valley/Coast Oregon
Midstate Electric Cooperative Teresa Lackey 541-536-7232 [email protected] Central Oregon
Northern Wasco County PUD Travis Hardy 541-298-3311 [email protected] NE Oregon
Oregon Trail Co-Op Susie Snyder 541-620-0756 [email protected] NE Oregon
Salem Electric Marcos Huerta 503-362-3601 [email protected] NW Oregon
Springfield Utility Board David Harris 541-744-3775 [email protected] Valley/Coast Oregon
Surprise Valley Electrification Corporation
DJ Northrup 530-233-3511 [email protected] Valley/Coast Oregon
Tillamook People's Utility District Ryan Perry 503-842-2535 [email protected] NW Oregon
Umatilla Electric Cooperative Steve Meyers 541-289-1344 [email protected] NE Oregon
Umpqua Indian Utility Cooperative
Brian Boswell, PE 541-839-3122 [email protected] Valley/Coast Oregon
Wasco Electric Cooperative Traci Brock 541-296-2740 [email protected] NE Oregon
West Oregon Electric Cooperative
Debbie Swanson/Michelle Ouellette 888-883-9873 [email protected] NW Oregon
Oregon (continued)
UTILITY CONTACTS

95Back to Table of Contents
UTILITY CONTACTS
Utility Rep Phone Email Sub-Region
Alder Mutual 360-569-2718 [email protected] SW Washington
Benton PUD Chris Johnson 509-582-2175 [email protected]/Yakima Washington
Benton REA Eric Miller 509-786-8265 [email protected]/Yakima Washington
Big Bend Electric Cooperative Kelly A. Haugh 509-659-1700 [email protected]/Yakima Washington
City of Blaine Jeannie Mayotte-Davies 360-332-8820 [email protected] NW Washington
City of Centralia Ashley Stahl 360-330-7512 [email protected] SW Washington
City of Cheney Daryce Hoffman 509-498-9230 [email protected] NE Washington
City of Chewelah Richard Hixson 509-935-833 [email protected] NE Washington
City of Eatonville Abby Gribi 360-832-3361 [email protected] NW Washington
City of Ellensburg Julie Coopock 509-962-7204 [email protected]/Yakima Washington
City of Milton - (WA) Richard Hutchinson 253-922-8738 [email protected] NW Washington
City of McCleary Todd Baun360-495-3667 x103
Olympic Peninsula/Coastal Washington
City of Port Angeles Joey Currie 360-457-0411 [email protected]
Olympic Peninsula/Coastal Washington
City of Richland* Dawn Senger 509-942-7436 [email protected]/Yakima Washington
City of Sumas - (WA) Sunny Aulakh 360-988-5711 [email protected] NW Washington
Clallam County PUD Michael Currie 360-565-3415 [email protected]
Olympic Peninsula/Coastal Washington
Clark Public Utilities* Debbie DePetris 360-992-3000 [email protected] SW Washington
Columbia REA Charlie DeSalvo 509-526-4041 [email protected]/Yakima Washington
Consolidated Irrigation District No. 19
509-924-3656 [email protected] NE Washington
Cowlitz County Public Utility District*
Dan Meyers 360-501-9561 [email protected] SW Washington
Washington
*This utility has additional requirements for participating in their contractor network. Contact this utility for additional information.

96Back to Table of Contents
Utility Rep Phone Email Sub-Region
Elmhurst Mutual Power & Light Co. Michelle Boyd 253-531-4646 [email protected] NW Washington
Energy Northwest 360-352-1027 NW Washington
Ferry County Public Utility District No. 1 Ed Forsman 509-775-3325 [email protected] NE Washington
Franklin PUDAmy Valencia/Maurilio Lopez/Julie Anderson
509-546-5967 [email protected]/Yakima Washington
Grant PUD Rich Cole 509-793-1508 [email protected]/Yakima Washington
Grays Harbor PUD Dan Kinnaman 800-562-7726 [email protected]
Olympic Peninsula/Coastal Washington
Inland Power and Light Lindsey Hobbs 509-789-4249 [email protected] NE Washington
Jefferson County PUD Bill Graham 360-385-8375 [email protected]
Olympic Peninsula/Coastal Washington
Kalispel Tribal Utilities 509-481-4700 NE Washington
Kittitas Public Utility District Kelly Carlson 509-933-7200 [email protected] Tri-Cities/Yakima
Klickitat PUD Anita Clever 509-773-7622 [email protected] SW Washington
Lakeview Light & Power Anita Clever 509-773-7622 [email protected] NW Washington
Lewis County PUD*Alicia Harmanson/Jacob Henry
360-345-1493 [email protected] SW Washington
Mason County PUD #1 Kim Buckingham 360-877-5249 [email protected]
Olympic Peninsula/Coastal Washington
Mason County PUD #3 Koral Miller 360-426-0777 [email protected]
Olympic Peninsula/Coastal Washington
Modern Electric Water Company Terri Richey 509-755-9003 [email protected] NE Washington
Nespelem Valley Electric Co-Op Renee TIllman 509-634-4571 [email protected] NE Washington
Ohop Mutual Light Company 253-847-4363 NW Washington
Okanogan County Electric Co-op David Gottula 509-996-2228 [email protected] NE Washington
Okanogan County PUD Kim Johnson 509-422-8428 [email protected] NE Washington
Washington (continued)
UTILITY CONTACTS
*This utility has additional requirements for participating in their contractor network. Contact this utility for additional information.

97Back to Table of Contents
Utility Rep Phone Email Sub-Region
Orcas Power & Light Cooperative Lindsay Gross 360-376-3587 [email protected]
Olympic Peninsula/Coastal Washington
Pacific County PUD #2 Lori Holmes 360-942-2411 [email protected] SW Washington
Parkland Light & Water Alan Kakaley 425-785-7709 [email protected] NW Washington
Pend Oreille PUD Autumn Rice509-447-6720509-447-6375
[email protected] NE Washington
Peninsula Light Company Renee Fiedler 253-853-1386 [email protected]
Olympic Peninsula/Coastal Washington
Port of Seattle 206-787-3000 NW Washington
Seattle City Light Joe Fernandi 206-684-3729 [email protected] NW Washington
Skamania County Public Utility District #1
Debbie Swanson/Michelle Ouellette
888-883-9873 [email protected] SW Washington
Snohomish County PUD* John Petosa 425-783-8254 [email protected] NW Washington
Tacoma Public Utilities* Hollis Tamura 253-502-8363 [email protected] NW Washington
Tanner Electric Cooperative Lisa Peabody 425-888-0623 [email protected] NW Washington
Town of Milton 253-922-8733 [email protected] NW Washington
Town of Steilacoom 253-581-1912 NW Washington
Town of Sumas Sunny Aulakh 360-988-5711 [email protected] NW Washington
USN Bangor Michael Capuano 360-396-0062 [email protected] NW Washington
USN Bremerton Michael Capuano 360-396-0062 [email protected] NW Washington
Vera Irrigation DistrictDebbie Swanson/Michelle Ouellette
888-883-9873 [email protected] NE Washington
Wahkiakum PUD Lia Sealund 360-795-3266 [email protected] SW Washington
Whatcom PUD Paul Siegmund 360-384-4288 [email protected] NW Washington
Yakima Power Jim Haver 509-865-7697Tri-Cities/Yakima Washington
Washington (continued)
UTILITY CONTACTS
*This utility has additional requirements for participating in their contractor network. Contact this utility for additional information.

98Back to Table of Contents
UTILITY CONTACTS
Wyoming
Utility Rep Phone Email Sub-Region
Lower Valley Energy Amy Walton 307-739-6045 [email protected] Wyoming
*This utility has additional requirements for participating in their contractor network. Contact this utility for additional information.