Pulse Oximeter - Technical Education Modules
30
NEST-ED Technical Modules February 2021 Newborn Essential Solutions and Technologies-Education (NEST-ED) Technical Modules provide educational support for each of the technologies included in the NEST360° bundle for newborn care. These materials are intended to strengthen locally developed neonatal and technical trainings in pre-and in-service settings and are not intended to be comprehensive technical guidelines or device-specific manuals. FACILITATING THE CLINICAL USE AND TECHNICAL REPAIR OF TECHNOLOGIES FOR NEWBORN CARE IN LOW-RESOURCE SETTINGS
-
Upload
khangminh22 -
Category
Documents
-
view
7 -
download
0
Transcript of Pulse Oximeter - Technical Education Modules

NEST-ED Technical Modules February 2021 Newborn Essential Solutions and Technologies-Education (NEST-ED) Technical Modules provide educational support for each of the technologies included in the NEST360° bundle for newborn care. These materials are intended to strengthen locally developed neonatal and technical trainings in pre-and in-service settings and are not intended to be comprehensive technical guidelines or device-specific manuals.
FACILITATING THE CLINICAL USE AND TECHNICAL REPAIR OF TECHNOLOGIES FOR NEWBORN CARE IN LOW-RESOURCE SETTINGS

page 2 Technical Education Modules
DISCLAIMER Newborn Essential Solutions and Technologies-Education Technical Modules: Pulse Oximeter This series reflects the work of the NEST360° team through a joint effort with partner organisations. Some rights reserved. This work is available under the Creative Commons Attribution-ShareAlike 4.0 International license (CC BY-SA 4.0; https://creativecommons.org/licenses/by-sa/4.0/). Under the terms of this license, you may copy, redistribute and adapt the work in any medium or format for any purpose, even for commercial purposes, provided you indicate whether any changes were made and that the work is appropriately cited, as indicated below. In any use of this work, there should be no suggestion that NEST360° endorses any specific organisation, products, or services. The unauthorised use of the NEST360° names or logos is not permitted. If you adapt the work, then you must license your work under the same or equivalent Creative Commons license. If you create a translation of this work, you should add the following disclaimer along with the suggested citation: “This translation was not created by Newborn Essential Solutions and Technologies (NEST360°). NEST360° is not responsible for the content or accuracy of this translation. The original English edition shall be the binding and authentic edition”. Suggested citation. NEST360°. Newborn Essential Solutions and Technologies-Education – Technical Modules: Respiratory Support: Pulse Oximeter. (February 2021). License: CC BY-SA 4.0. Rights and licensing. For queries on rights and licensing, see the full legal code for the Creative Commons Attribution-ShareAlike 4.0 International license (CC BY-SA 4.0; https://creativecommons.org/licenses/by-sa/4.0/). Please contact [email protected] to obtain a version of the series that may be more easily adapted and integrated into other materials. Third-party materials. If you wish to reuse material from this work that is attributed to a third party, such as tables, figures or images, it is your responsibility to determine whether permission is needed for reuse and to obtain permission from the copyright holder. The risk of claims resulting from infringement of any third-party-owned component in the work rests solely with the user. General disclaimers. All reasonable precautions have been taken by NEST360° to verify the information contained in this publication. The mention of specific companies or of certain manufacturers’ products does not imply that they are endorsed or recommended by NEST360° in preference to others of a similar nature that are not mentioned. The published material is being distributed without warranty of any kind, either expressed or implied. The responsibility for the interpretation and use of the material lies with the reader. In no event shall NEST360° or affiliated partner institutions be liable for damages arising from its use. The authors have made every effort to check the accuracy of all information and instructions for use of any devices or equipment. As knowledge base continues to expand, readers are advised to check current product information provided by the manufacturer of each device, instrument, or piece of equipment to verify recommendations for use and/or operating instructions. In addition, all forms, instructions, checklists, guidelines, and examples are intended as resources to be used and adapted to meet national and local health care settings’ needs and requirements.

page 3 Technical Education Modules Respiratory Support – Pulse Oximeter
TABLE OF CONTENTS
NEST-ED ......................................................................................................... 1
TECHNICAL MODULES ...................................................................................... 1
D ISCLA IMER . . . . . . . . . . . . . . . . . . . . . . . . . . . . . . . . . . . . . . . . . . . . . . . . . . . . . . . . . . . . . . . . . . . . . . . . . . . . . . . . . . . . . . . . . . . . . . . . . . . . . . . . . . . . . . . . . . . . . . . . . . . . . . . . . . 2
TA BLE OF CO NTENTS . . . . . . . . . . . . . . . . . . . . . . . . . . . . . . . . . . . . . . . . . . . . . . . . . . . . . . . . . . . . . . . . . . . . . . . . . . . . . . . . . . . . . . . . . . . . . . . . . . . . . . . . . . . . . . . . . . 3
PREFAC E . . . . . . . . . . . . . . . . . . . . . . . . . . . . . . . . . . . . . . . . . . . . . . . . . . . . . . . . . . . . . . . . . . . . . . . . . . . . . . . . . . . . . . . . . . . . . . . . . . . . . . . . . . . . . . . . . . . . . . . . . . . . . . . . . . . . . . . . 4
A BBR EV IAT IO NS . . . . . . . . . . . . . . . . . . . . . . . . . . . . . . . . . . . . . . . . . . . . . . . . . . . . . . . . . . . . . . . . . . . . . . . . . . . . . . . . . . . . . . . . . . . . . . . . . . . . . . . . . . . . . . . . . . . . . . . . . . . 5
NO MENCLAT URE . . . . . . . . . . . . . . . . . . . . . . . . . . . . . . . . . . . . . . . . . . . . . . . . . . . . . . . . . . . . . . . . . . . . . . . . . . . . . . . . . . . . . . . . . . . . . . . . . . . . . . . . . . . . . . . . . . . . . . . . . . 5
I NTRODUCT IO N . . . . . . . . . . . . . . . . . . . . . . . . . . . . . . . . . . . . . . . . . . . . . . . . . . . . . . . . . . . . . . . . . . . . . . . . . . . . . . . . . . . . . . . . . . . . . . . . . . . . . . . . . . . . . . . . . . . . . . . . . . . 6
RESPIRATORY SUPPORT ................................................................................. 9
PULSE OXIMETER ............................................................................................ 9 1 CL IN ICAL PRO BLEM . . . . . . . . . . . . . . . . . . . . . . . . . . . . . . . . . . . . . . . . . . . . . . . . . . . . . . . . . . . . . . . . . . . . . . . . . . . . . . . . . . . . . . . . . . . . . . . . . . . . . . . . . . . . . . 1 0
2 ASSESSMENT . . . . . . . . . . . . . . . . . . . . . . . . . . . . . . . . . . . . . . . . . . . . . . . . . . . . . . . . . . . . . . . . . . . . . . . . . . . . . . . . . . . . . . . . . . . . . . . . . . . . . . . . . . . . . . . . . . . . . . . . . . 1 0
3 MA NAGEMENT . . . . . . . . . . . . . . . . . . . . . . . . . . . . . . . . . . . . . . . . . . . . . . . . . . . . . . . . . . . . . . . . . . . . . . . . . . . . . . . . . . . . . . . . . . . . . . . . . . . . . . . . . . . . . . . . . . . . . . . . 1 5
4 I NFECT IO N PREV ENT IO N . . . . . . . . . . . . . . . . . . . . . . . . . . . . . . . . . . . . . . . . . . . . . . . . . . . . . . . . . . . . . . . . . . . . . . . . . . . . . . . . . . . . . . . . . . . . . . . . . . . . . . 1 8
5 CO MPL ICAT IONS . . . . . . . . . . . . . . . . . . . . . . . . . . . . . . . . . . . . . . . . . . . . . . . . . . . . . . . . . . . . . . . . . . . . . . . . . . . . . . . . . . . . . . . . . . . . . . . . . . . . . . . . . . . . . . . . . . 20
6 CAR E & MA INTENAN C E . . . . . . . . . . . . . . . . . . . . . . . . . . . . . . . . . . . . . . . . . . . . . . . . . . . . . . . . . . . . . . . . . . . . . . . . . . . . . . . . . . . . . . . . . . . . . . . . . . . . . . . . 2 1
7 TRO UBL ESHOOT ING & R E PA IR . . . . . . . . . . . . . . . . . . . . . . . . . . . . . . . . . . . . . . . . . . . . . . . . . . . . . . . . . . . . . . . . . . . . . . . . . . . . . . . . . . . . . . . . . . . 24
8 R EFER ENC ES . . . . . . . . . . . . . . . . . . . . . . . . . . . . . . . . . . . . . . . . . . . . . . . . . . . . . . . . . . . . . . . . . . . . . . . . . . . . . . . . . . . . . . . . . . . . . . . . . . . . . . . . . . . . . . . . . . . . . . . . . . 30

page 4 Technical Education Modules Respiratory Support – Pulse Oximeter (Acare Lifebox)
PREFACE
This series has been designed with the intent of supporting the clinical use and technical repair of technologies in newborn care units. Newborn Essential Solutions and Technologies-Education (NEST-ED) Technical Modules provide educational support for each of the technologies included in the NEST360° bundle for newborn care. These materials are intended to strengthen locally developed neonatal and technical trainings in pre- and in-service settings. Of note, these materials are not intended to be comprehensive technical guidelines or to replace the use of device-specific user and service manuals or textbooks. They are to be used to facilitate the implementation of comprehensive newborn care, including bubble CPAP, in a resource limited setting. The NEST-ED Technical Modules were developed through a combination of international standard review, international expert feedback, and multinational NEST360° expert consensus opinion. NEST-ED Modules form the backbone of all lectures, power points, job aids, and other supportive education materials supplied by NEST360°.
THIS IS ONE MODULE IN A SERIES OF NEST-ED CLINICAL & TECHNICAL MODULES AVAILABLE.
To view the full series, visit the NEST360° Resources website.
page 5 Technical Education Modules Respiratory Support – Pulse Oximeter (Acare Lifebox)
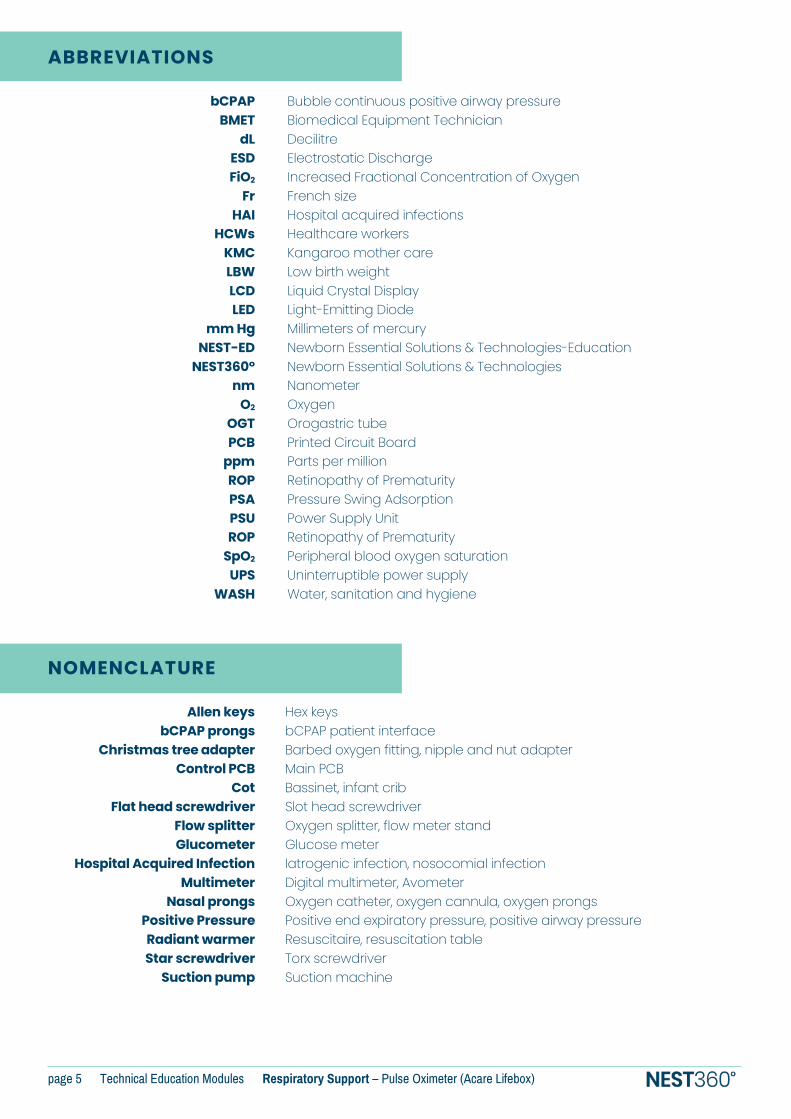
ABBREVIATIONS
bCPAP Bubble continuous positive airway pressure BMET Biomedical Equipment Technician
dL Decilitre ESD Electrostatic Discharge FiO2 Increased Fractional Concentration of Oxygen
Fr French size HAI Hospital acquired infections
HCWs Healthcare workers KMC Kangaroo mother care LBW Low birth weight LCD Liquid Crystal Display LED Light-Emitting Diode
mm Hg Millimeters of mercury NEST-ED Newborn Essential Solutions & Technologies-Education
NEST360° Newborn Essential Solutions & Technologies nm Nanometer
O2 Oxygen OGT Orogastric tube PCB Printed Circuit Board
ppm Parts per million ROP Retinopathy of Prematurity PSA Pressure Swing Adsorption PSU Power Supply Unit ROP Retinopathy of Prematurity
SpO2 Peripheral blood oxygen saturation UPS Uninterruptible power supply
WASH Water, sanitation and hygiene
NOMENCLATURE
Allen keys Hex keys bCPAP prongs bCPAP patient interface
Christmas tree adapter Barbed oxygen fitting, nipple and nut adapter Control PCB Main PCB
Cot Bassinet, infant crib Flat head screwdriver Slot head screwdriver
Flow splitter Oxygen splitter, flow meter stand Glucometer Glucose meter
Hospital Acquired Infection Iatrogenic infection, nosocomial infection Multimeter Digital multimeter, Avometer
Nasal prongs Oxygen catheter, oxygen cannula, oxygen prongs Positive Pressure Positive end expiratory pressure, positive airway pressure Radiant warmer Resuscitaire, resuscitation table Star screwdriver Torx screwdriver
Suction pump Suction machine

page 6 Technical Education Modules Respiratory Support – Pulse Oximeter (Acare Lifebox)
Introduction The NEST-ED Technical Modules have been prepared to help technical staff and students understand the basics of when and how to use equipment essential to newborn care. More importantly, the Technical Modules support staff in troubleshooting common issues, as well as prepare staff to repair equipment when it breaks down or malfunctions. Modules may be used by teaching institutions, to supplement current newborn care curricula, or by hospitals, clinical departments and individuals to update their knowledge and to better facilitate the effective and safe use of newborn care equipment. Modules should be used alongside device user and service manuals to provide additional context as needed. Whilst reading this series, navigate to the Table of Contents by clicking the NEST360° logo that appears at the bottom right corner of each page: Every module has a similar structure with sections and subsections. The sections have similar headings and subheadings to make it easy for the user to navigate them. However, words may have different meanings for the various cadres of staff reading them and so to reduce misinterpretation, the heading titles are explained below. The NEST-ED Technical Modules are intended as a flexible resource that hospitals and partners can adapt to their specific needs. The Technical Modules consist of generic content that can be applied to any model within a device category, coupled with model specific device images that can be exchanged for alternative images depending on the devices available at your facility. Individuals who are interested in gaining access to the editable NEST-ED Technical Modules should contact the NEST Training Materials Coordinator (Anniina Lockwood, [email protected]) or the NEST Biomedical Tech Training Director (Sara Liaghati-Mobarhan, [email protected]).
CLINICAL PROBLEM
This section provides useful information on the clinical application of a device that would bear relevance to the biomedical team, not only to aid in their troubleshooting, but also for user training.
ASSESSMENT
This section explains how the device works, and what kinds of patients it is useful for. This section also includes comprehensive diagrams of internal and external views of the devices, including consumables that may be used with the device. This section also contains detailed descriptions of key device components (including alarms) and includes a diagram of typical device flow (including components and how they interact with each other, electrical current and fluid movement through the device if relevant).

page 7 Technical Education Modules Respiratory Support – Pulse Oximeter (Acare Lifebox)
MANAGEMENT
This section focuses on clinical management and provides step by step directions on how to set the device up for a patient, followed by instructions on starting the patient on the device and monitoring a patient whilst on the device. This section also describes how to remove the equipment from the patient when it is no longer needed. Although a biomedical engineer or a technician will not be responsible for providing care, understanding these steps will be useful in training and when assessing the device. INFECTION PREVENTION
This section lays out the basic infection prevention measures that should always be taken when handling equipment, followed by directions for disinfecting the equipment both during and after use. This section also describes the crucial Infection Prevention and Control steps that are particularly relevant to biomedical engineers and technicians. COMPLICATIONS
This section explains some of the common but serious clinical complications that relate to and can arise from the use of the equipment (e.g., complications that will be seen or directly apply to the patient). Biomedical engineers' and technicians' understanding of potential complications for the patient is crucial to ensure patient safety. This section also describes common device complications (e.g., complications that will be seen or directly apply to the device). CARE & MAINTENANCE
This section describes where to place equipment for use, how to safely handle devices and their consumables, whether calibration is recommended, and how to decommission the equipment. Biomedical engineers and technicians are responsible for second-line care and maintenance to ensure the equipment lasts to their potential lifetime; as such, this section also lists the necessary daily, weekly, monthly and annual preventive maintenance steps required to keep the device in good working condition. First-line care and maintenance is the responsibility of the user and is described in the NEST-ED Clinical Modules.
TROUBLESHOOTING & REPAIR
This section describes steps that should be taken when a device malfunctions and first-line troubleshooting efforts have failed to address the issue. This section describes tools and spare parts that might be required to prepare for repairs and to troubleshoot failures, and provides a list of components commonly provided with the device to ensure that all components return to the ward post-repair. Finally, this section also explains steps for testing, repairing, and replacing specific parts of the device.

page 8 Technical Education Modules Respiratory Support – Pulse Oximeter (Acare Lifebox)
REFERENCES & ALERTS
References & alert boxes are included within each module to provide clarity on areas where recommendations are governed by published standards, evidence, and/or expert opinion. This is included for the dual purpose of facilitating (1) feedback and continuous improvement of NEST-ED Technical Modules and (2) implementer review of content for incorporation in local trainings.
ALERT 0.0 Subject QUERY ALERT BOXES appear where there may be controversy or disagreement. In these cases, ale rt boxes provide background to the recommendations that are made in the body of the document. Relevant documents are cited and brief explanation of reasoning for current module content provided.
ALERT 0.0 RECOMMENDATION ALERT BOXES appear where there are recommendations based largely on expert opinion or consensus, or to emphasize an important element of care. Relevant documents are cited and brief explanation of reasoning for current module content provided.

page 9 Technical Education Modules Respiratory Support – Pulse Oximeter (Acare Lifebox)
Respiratory Support Pulse Oximeter

page 10 Technical Education Modules Respiratory Support – Pulse Oximeter (Acare Lifebox)
1 Clinical Problem Assessment of oxygen saturation with a pulse oximeter is necessary in clinical management of patients in all hospital settings. In newborn care units, pulse oximeters are used during routine assessment on admission and for continuous monitoring of patients. Pulse oximeters should also be used during treatment for all sick or at-risk patients, or those on oxygen therapy (1.1a, 1.1b), CPAP (1.2), or any form of assisted ventilation. (1.3)
2 Assessment Peripheral pulse oximetry is a non-invasive method of measuring pulse rate and oxygen saturation (oxygen bound to haemoglobin in the capillaries) using infrared & red light. Pulse oximeters may be used to help determine the severity of an infant’s illness by evaluating if blood oxygen saturation (SpO2) is low and if respiratory support is needed. Pulse oximeters also may be used to assess the success of treatment and determine a need for increasing or decreasing respiratory interventions to achieve target SpO2. Pulse oximeters may be:
Fixed/tabletop (2.1) (for continuous reading of one patient) Handheld (2.2) (for continuous or spot reading of vital signs)
1.1a Oxygen
concentrator.
1.1b Oxygen
cylinder.
1.2 Bubble CPAP. 1.3 Ventilator.

page 11 Technical Education Modules Respiratory Support – Pulse Oximeter (Acare Lifebox)
Finger clip (2.3) (for spot reading of vital signs; only appropriate for adult or older paediatric patients. NOT recommended for use in neonatal patients)
To facilitate more accurate readings, patient signal should be both strong and stable. Patient movement, blood flow and external sources of light may impact the stability of the patient’s trace. Examples of a “normal signal” and potential “poor traces” are below. (2.4)
The same tabletop and handheld pulse oximeter can be used for adult, paediatric, and neonatal patients. The alarm settings on the pulse oximeter should be changed accordingly and appropriately sized probes used. Probe size will vary depending on patient age. Finger clip pulse oximeters are not recommended for use in neonatal patients. Normal SpO2 for neonatal patients should be:
90%–100% if not on oxygen 90–95% on oxygen (Alert 2.1)
If SpO2 readings are less than 90% 15 minutes after birth, the patient should be considered for supplemental oxygen therapy (see oxygen concentrator module). Assess that the reading accurately reflects the clinical situation of the patient by checking the correspondence between oxygen saturations, heart rate, and clinical condition.
Alert 2.1 Oxygen targets in newborns Exact oxygen saturation targets for premature newborns remains an area of controversy. However, most authorities agree that saturations between 90–95% are reasonable to minimise complications associated with low and high oxygen levels, including death, neurodevelopmental impairment, and retinopathy of prematurity.1–4
2.1 Fixed pulse oximeter 2.2 Handheld pulse oximeter 2.3 Finger clip oximeter; not for use in neonatal patients.
2.4 Trace examples. Blood saturation is recorded over time.

page 12 Technical Education Modules Respiratory Support – Pulse Oximeter (Acare Lifebox)
HOW IT WORKS Oxygen is carried in the bloodstream by binding to haemoglobin in red blood cells. Each haemoglobin can carry four oxygen molecules and at that point becomes 100% saturated. The colour of blood depends on how much haemoglobin is saturated with oxygen. Haemoglobin that is carrying oxygen is called oxygenated haemoglobin (oxyhaemoglobin) and appears bright red, while deoxygenated haemoglobin (deoxyhaemoglobin) appears dark red.
Pulse oximeters differentiate between the light absorbing properties of oxygenated haemoglobin and deoxygenated haemoglobin at two different wavelengths in red spectrum and use this differential and changes in local blood volume (resulting from heartbeat pulses) to calculate SpO2 of pulsating arterial blood.
2.5 Main external components of a pulse oximeter.
2.6 Main internal components of a pulse oximeter .
Audio Feedback
Probe Entry Port
LCD
Keys
Control & Signal Processing Board
Battery TerminalInterface

page 13 Technical Education Modules Respiratory Support – Pulse Oximeter (Acare Lifebox)
TYPICAL DEVICE FLOW

page 14 Technical Education Modules Respiratory Support – Pulse Oximeter (Acare Lifebox)
MAIN COMPONENTS The following device components should be similar regardless of model. However, specific locations, visual setup and component type may vary by brand and device model. Refer to model service and user manuals if different from the displayed model for more device-specific information.
LCD A typical pulse oximeter displays the oxygen saturation, heart rate and the plethysmograph (or waveform of measured pulses). Some additional features may include perfusion index, battery power, alarm limits, and visible (and audible) warning lights and indicators.
Probe The probe is made up of a sensor, cable and attachment head and is the first point of failure for most pulse oximeters. The pulse oximeter probe sensor has two main components: a photodiode and a pair of LEDs that emit red and infrared light (typically in wavelengths of 660 nm and 940 nm, respectively). These components may be arranged transmissively (with the LEDs and photodetector arranged opposite to each other, with the body measurement site in between) or reflectively (with the LEDs and photodetector arranged next to each other, along the body; in this instance, the photodetector collects light signals bounced back from the body tissue). The most common of these probes is transmissive, making selecting the correct location critical to collect a measurement. When attached to the peripheral tissue (ear, finger or foot), oxyhaemoglobin partially absorbs the infrared light (at a 940 nm wavelength) and deoxyhaemoglobin (venous and capillary) absorbs red light (at a 660nm wavelength). The non-absorbed transmissive or reflective light signals are then detected by the photo detector. Pulse oximeter probes may be proprietary to the device brand or generic. The entry port should exactly match the end of the probe. In most ports, there is only one way to correctly connect the probe. Generic probes may need an adapter to fit into the pulse oximeter device port. The adapter typically has a proprietary end and a generic entry port.
Control Circuit Board Located internally, the control circuit board mainly consists of memory circuits, multiplexers, current to voltage converters, filters and a microprocessor. The control PCB identifies and isolates the absorbance of the pulsatile fraction of arterial blood component light signals from the absorbance due to non-pulsatile light signals from capillary blood. These signals then undergo amplification, filtration and artefacts rejection. The microprocessor determines the percent of oxygen in the blood by comparing the concentration of oxyhaemoglobin to deoxyhaemoglobin at two different light wavelengths using the formula below.5
Formula 2.1 SpO2 Calculation

page 15 Technical Education Modules Respiratory Support – Pulse Oximeter (Acare Lifebox)
3 Management Management covers how to use the pulse oximeter, including set up for a patient, patient commencement, care whilst on the device and removal of the patient from the device. These instructions are helpful for a biomedical engineer or technician both in user training and in assessing the appropriate functionality of the device.
SETTING UP FOR A PATIENT
1 Follow hand washing procedures.
2 Collect: Pulse oximeter Pulse oximeter probe 70% alcohol solution Cotton swab
3 Connect the probe. (3.1) Check the shapes of the pulse oximeter port and the external probe sensor. If these
are not the same size, an adapter is needed. This should be provided with the pulse oximeter.
Connect the probe connector to the pulse oximeter probe port, paying attention to the orientation of the probe and probe port. Be careful not to bend the pins as the probe is inserted.
4 Turn on pulse oximeter by pressing and holding the power button. (3.2) The display should turn on.
3.1 Connect probe. 3.2 Turn on pulse oximeter.

page 16 Technical Education Modules Respiratory Support – Pulse Oximeter (Acare Lifebox)
5 Check for a red light on the probe. If the probe displays a red light, take steps to prepare patient for device. If the probe does not display a red light, follow the guidelines in Pulse Oximeter: Troubleshooting & Repair | If the pulse oximeter is turning on, but no trace is showing.
6 Clean the pulse oximeter probe thoroughly using alcohol and a cotton swab.
STARTING A PATIENT Follow hand-washing procedures. Select best location on patient to collect reading (e.g., on the wrist/foot or fingers/toes) and clean location with alcohol and gauze.
1 Adhesive (disposable) wrap probe: Remove the wrap probe from its packaging and peel from its plastic base. Place the part of the tape with the sensor, sensor side down, on the wrist whilst
palm-side up or on the sole of the foot. The wrist is only suitable for preterm babies. Wrap the adhesive strip around the wrist or foot to secure in place.
2 Rubber (reusable) wrap probe: (3.3) Place the part of the wrap probe with the sensor, sensor side down, on the wrist
whilst palm-side up or on the sole of the foot. (3.4) Wrap the rubber connecting strip around the wrist or foot (3.5), thread through
hole and tighten to secure in place. (3.6) Ensure the light and sensor are opposite each other.
3 Clip probe: Squeeze tips of the clip probe to open. Place gently on patient’s fingers or toes and
release. Wrap and clip probes should be firmly placed without need to be held. The probe should not be so tight as to cause pressure on the skin or impair circulation.
3.3 Rubber wrap probe. 3.4 Rubber wrap probe is placed sensor-side down on the sole of the foot.

page 17 Technical Education Modules Respiratory Support – Pulse Oximeter (Acare Lifebox)
CARING FOR A PATIENT
1 Allow the patient’s trace to stabilise before reading SpO2 and heart rate. (3.7) These should correspond to patient’s clinical condition. If they do not correspond, reposition the probe to ensure good contact with the patient.
2 Record SpO2 and heart rate in patient documentation. Pulse oximeters are inaccurate for readings under 70%; readings between 20% and 60% do not correlate to clinical deterioration or improvement. (Alert 3.1) A low reading should alert you to look for a problem with the probe fixation, baby or oximeter.
3 If continuously monitoring patient, periodically check the sensor site (3.8) during monitoring for evidence of skin damage. If the pulse oximeter probe is attached too tightly, inappropriately or too long at one site, pressure sores may develop. The warmth of the light may irritate the skin of a premature baby which is why the probe needs regular repositioning.
3.5 Wrap rubber connecting strip around foot. 3.6 Thread through hold & tighten to secure.
3.7 Allow the patient’s trace to stabilise. 3.8 Check sensor site for signs of skin damage.

page 18 Technical Education Modules Respiratory Support – Pulse Oximeter (Acare Lifebox)
Alert 3.1 Accuracy Thresholds for Pulse Oximeters WHO-UNICEF Technical Specifications and Guidance for Oxygen Therapy Devices6 lists accuracy of ±2% between 70–100% SpO2 as a minimum requirement for all types of pulse oximeters. Additionally, during NEST360˚ technical testing and review, most (if not all) devices were only tested by the manufacturer to guarantee accuracy within a certain precision between 70–100%.
REMOVING A PATIENT Removing the probe from the patient varies based on the type of probe in use:
1 If using an adhesive wrap probe: peel adhesive away from patient and pull probe away from patient. Disinfect probe site on patient and wrap probe with 70% alcohol if reusing.
2 If using a rubber wrap probe: unthread rubber connecting strip through the hole. Pull probe away from patient. Disinfect probe site on patient and the wrap probe with 70% alcohol.
3 If using a clip probe: press on the tips of the clip probe to open. Gently pull away from patient. Disinfect probe site on patient and clean probe with 70% alcohol.
4 Infection Prevention Routine and adequate cleaning of medical devices is critical to prevent hospital-acquired infections in newborn care units.
CLINICAL INFECTION PREVENTION
1 Clean hands with soap and water or 70% alcohol before and after assessing a patient using a pulse oximeter or handling any probes that will be used on a patient.
2 Ensure that all patient-related consumables (including probes) are new or have been cleaned thoroughly before use. Any patient-related consumables must be cleaned before they are used to assess another patient using the pulse oximeter.
3 When using the pulse oximeter, the device should be placed in a secure location to prevent drops and breakages. The device should never be placed inside a bed, cot or bassinet.

page 19 Technical Education Modules Respiratory Support – Pulse Oximeter (Acare Lifebox)
DISINFECTION AFTER USE
1 Clean reusable probes with 70% alcohol. Adhesive probes are specified for single-use; if reusing, disinfect sensor with alcohol. (Alert 4.1)
2 If pulse oximeters or patient consumables (including probes) are not cleaned thoroughly before use, infection can be transmitted. Care should be taken particularly for consumables marked as single-use but are reused (such as adhesive wrap probes). Between patients, wipe down the pulse oximeter with alcohol. (4.1) Be careful not to submerge or drip alcohol onto the pulse oximeter or any of its cables.
Alert 4.1 While many pulse-oximeter probes are designed to be single use devices, cost and logistical constraints make this unrealistic in many low resource settings. Recommendations for cleaning single use devices were taken from Infection Prevention and Control: Reference Manual for Health Care Facilities with Limited Resources, Jhpiego.7 Vigilance by healthcare workers to assess that pulse-oximeter readings correlate to patient’s heart rate and clinical condition is especially critical when re-using probes meant for single-use. It is not known how rapidly pulse-oximeter probes degrade or become inaccurate with re-use.
BMET INFECTION PREVENTION
1 Any piece of equipment used in providing patient care must be handled carefully, as it may be contaminated and have the potential to spread infection.
2 Clean and disinfect pulse oximeter housing and components whilst wearing PPE as appropriate (e.g., rubber gloves, apron, face protection, etc.) before any repairs or maintenance are made.
3 Avoid any contact between used piece of equipment and skin, mucosa or clothing.
4 Post-maintenance decontamination of all tools and surfaces used should be done with 70% alcohol or according to manufacturer guidelines. Do not use equipment until it has fully dried following decontamination.
4.1 Wipe down the pulse oximeter probe and pulse oximeter with alcohol-soaked gauze between patients.

page 20 Technical Education Modules Respiratory Support – Pulse Oximeter (Acare Lifebox)
Alert 4.2 Disinfecting Equipment Disinfection of equipment should always comply with manufacturer guidelines. WHO recommends 0.5% dilution of chlorine (0.5% or > 100ppm available sodium hypochlorite) as the standard disinfectant for materials and surfaces contaminated by blood or body fluids.8 For metal and rubber surfaces, which may be corroded by chlorine, 70% alcohol is also commonly utilised for low level disinfection. Other appropriate low-level disinfectants include quaternary ammonium, improved hydrogen peroxide and Iodophor germicidal detergent.7 Phenolic germicidal detergent is also identified but should not be used in neonatal wards since affordable, effective alternatives are available; and, there are concerns it may cause hyperbilirubinemia and/or neurotoxicity in neonates.9 See dedicated NEST360° module on Infection Prevention and Control for further details on risks, benefits and utilisation of chemical disinfectants. For comprehensive guidance on infection prevention and control we recommend utilising Reference Manual for Health Care Facilities with Limited Resources Infection Prevention and Control (Caston-Gaa & Ruparelia, 2018).
5 Complications Equipment in newborn care units are highly specialised. Without proper knowledge and skills, this equipment can be potentially dangerous for the infants, families and care providers.
CLINICAL COMPLICATIONS
Misdiagnosis: a poor trace (5.1) may contribute to misdiagnosis and can result from: Hypovolaemia/hypotension: poor peripheral perfusion may cause a false reading Movement: may create noise on the trace or delay the stabilisation of the trace Peripheral cyanosis/anaemia: poor oxygen delivery to the tissues, compromises
measured saturation. Saturation readings below 70% are not reliable as clinical guides.
Hypothermia: causes poor peripheral perfusion, which can provide an inaccurate representation of the oxygen saturation within the blood.
Pressure sores: if the pulse oximeter probe is attached too tightly, inappropriately or too long at one site, pressure sores may develop. The warmth of the light may irritate the skin of a premature baby which is why the probe needs regular repositioning.
DEVICE COMPLICATIONS
Poorly fitting probes can lead to inaccurate saturation measurements: if the probe is too large for the patient, the probe will shift in place, creating issues both in terms of inconsistent measurement due to multiple contact points as well as the potential to have

page 21 Technical Education Modules Respiratory Support – Pulse Oximeter (Acare Lifebox)
no direct contact points with the skin. If the probe is too small for the patient, blood flow may be constricted. Also, the light and sensor must be positioned opposite each other.
Patient movement: as the patient moves, the contact point between the probe and the patient moves along the patient’s skin. This movement provides an inconsistent measurement because it samples from various contact points in the skin, rather than remaining in the same contact point of tissue. This may cause the reading to be noisy or take time to stabilise. Some oximeters designed for newborns have purpose-built motion-cancelling algorithms to minimise false readings and alarms.
Strong light: if strong light (e.g., phototherapy, exam lights, or sunlight) is on a probe sensor, the light signal from the pulse oximeter probe may be drowned out by the stronger environmental light, leading to incorrect results. A cloth covering of the sensor site will protect it from bright light.
Oximeter alarm settings: pulse oximeters may have adult, paediatric, and neonatal settings in the same device. (5.2) Pulse oximeters are usually set to a default adult setting. If the pulse oximeter is not set to neonatal parameters, alarms may sound inappropriately. If settings are visually incorrect, check the user manual for device-specific instructions on changing the settings.
6 Care & Maintenance Biomedical engineers and technicians are responsible for second-line care and maintenance to ensure equipment lasts to their potential lifetime.
(A) (B)
5.1 Pulse oximeter set to adult. 5.2 Icons designating adult (A) and neonatal (B) settings.

page 22 Technical Education Modules Respiratory Support – Pulse Oximeter (Acare Lifebox)
POWER SOURCE A pulse oximeter is powered by replaceable or rechargeable (6.1) batteries. If using a rechargeable device, users should regularly charge the pulse oximeter when not in use to ensure power in the event of an outage.
WARD LOCATION The device and associated probes should be stored in a clean, dry, and secure area. When using the pulse oximeter, the device should be placed in a secure location to prevent drops and breakages. The device should never be placed inside a bed, cot or bassinet. All patient-related consumables should be stored in a clean, dry location. Keep cleaned probes separate from those waiting to be cleaned. Any cables should be loosely wrapped and secured, preventing sharp bends, pinches or kinks, which will decrease their lifetime.
DEVICE CALIBRATION Manufacturers do not recommend calibration for any pulse oximeter components. Pulse oximeters automatically remove any variation or gain because the pulse oximeter algorithm uses a data ratio calculation to assess SpO2.
DECOMMISSIONING Assuming appropriate use and consistent maintenance, a pulse oximeter may last three years or longer. Reusable pulse oximeter probes may last up to six months or longer. Product developers define the probe cabling and connections to the sensor and probe head as the weakest parts of the device. Probes should be handled with care and users should be given consistent reminders about the correct use of the probe to extend its life. Pulse oximeters are relatively low-cost; in such models, component breakages (i.e., control PCBs and LCDs) may cost more to repair than to replace. In those cases, decommissioning may be the most sensible option. A notable exception to this is the pulse oximeter probe, which is typically considered a long-lived consumable rather than a spare component. If the LCD or control PCB is still in good condition, these parts may be repurposed for other devices. Typically, the control PCB should only
6.1 Rechargeable pulse oximeter with power
port and charging cable.

page 23 Technical Education Modules Respiratory Support – Pulse Oximeter (Acare Lifebox)
be repurposed for devices of the same manufacturer and model, although components from the circuit board may be desoldered and repurposed independently.
PREVENTIVE MAINTENANCE
After Each Use Between patients, turn off the pulse oximeter. Wipe down the pulse oximeter housing and
probe components with 70% alcohol. Be careful not to submerge or drip alcohol onto the pulse oximeter or any of its cables.
Check all parts are present and connected. Check cables are not twisted and remove from service if any damage is visible.
See Pulse Oximeter: Disinfection After Use and Alert 4.1 for more information.
Weekly Unplug, remove equipment cover (if applicable), clean and disinfect exterior surface with 70%
aclohol Tighten any loose screws and check parts are fitted tightly. Check operation of all lights, indicators and visual displays. Check probe disconnection alarm. Document preventive maintenance actions taken.
Monthly Perform Weekly preventive maintenance steps. Test the pulse oximeter functionality:
Set up the device for use. Turn on the pulse oximeter. Connect probe and check for a red light.
Connect a clip probe and test readings on your finger for normal saturations (above 90%).
Document preventive maintenance actions taken.
Quarterly Perform Monthly preventive maintenance steps. Assess the control PCB and battery terminals for any liquid, rust or electrical damage. Document preventive maintenance actions taken.
Annually Perform Quarterly preventive maintenance steps. Confirm supply of spare pulse oximeter probes and batteries are adequate to support
estimated replacement for next year. Document preventive maintenance actions taken.

page 24 Technical Education Modules Respiratory Support – Pulse Oximeter (Acare Lifebox)
7 Troubleshooting & Repair Biomedical engineers & technicians are responsible for providing rapid maintenance, troubleshooting & repair support for users.
PREPARE FOR REPAIR
ACCESSIBLE TOOLS SPARE PARTS DEVICE CHECKLIST
Digital multimeter Philips, star & flat head screwdrivers Needle-nosed pliers Wire strippers Allen keys Fine grain sandpaper
Probe Batteries Charger (if applicable) LCD screen Control PCB Buttons
Pulse oximeter Pulse oximeter probe Charger (if applicable) Probe adapter (if applicable)
TROUBLESHOOTING FAILURES
The pulse oximeter does not turn on. Probable Cause: Discharged or damaged batteries Components to Check: Battery level (if rechargeable) or voltage and physical condition
Power switch physical integrity & continuity Control PCB physical & electrical integrity and continuity
The pulse oximeter turns on, but no trace is displayed. Probable Cause: Damaged or incompatible probe Components to Check: Probe physical condition, security & compatibility
Control PCB physical & electrical integrity and continuity
The pulse oximeter turns on, but buttons do not respond to pressure. Probable Cause: Fluid damage Components to Check: Internal button physical condition

page 25 Technical Education Modules Respiratory Support – Pulse Oximeter (Acare Lifebox)
The pulse oximeter turns on, but takes time to stabilise the trace. Probable Cause: Movement or light interference Components to Check: Patient movement
Measurement site perfusion, condition & cleanliness Environmental ambient light
Discoloured or black spots obstruct view of the display. Probable Cause: Damaged LCD Components to Check: LCD physical integrity
REPAIR & REPLACE Where technically possible and not likely to obstruct clinical care, repairs may be made within the newborn care ward. Use discretion to determine if this is appropriate or if the device should be removed to the biomedical workshop for more testing or repair.
Testing, repairing & replacing the batteries The pulse oximeter battery is typically responsible for powering all display, measurement and alarm functions. If the pulse oximeter is not turning on, the batteries should be visually assessed for rust or other physical damage. (7.1) Depending on the severity of the damage, rust or other build-up present on the battery terminals can be gently scraped off with very fine sandpaper or dissolved with an appropriate agent depending on battery type (vinegar for alkaline batteries and a paste of baking soda with water if acidic). Wear goggles and rubber gloves throughout the cleaning process. Both the voltage across the battery terminals and the continuity of the wires from the battery to the control board should be tested and the battery or wires replaced if necessary. Specifications for battery voltage should be available in the manufacturer’s service manual.
(A) (B)
7.1 (A) Battery build-up over time (B) New battery.

page 26 Technical Education Modules Respiratory Support – Pulse Oximeter (Acare Lifebox)
Testing, repairing & replacing the probe The pulse oximeter cabling and connections to the sensor and probe head are the weakest parts of the device. Remove the probe by holding the probe close to the base and gently extract it. The probe cable should never be pulled on to remove the probe from the device. Replace with a new probe and test SpO2 levels. (7.2, 7.3) Pulse oximeter probes are typically difficult to fully repair; best practice is to replace with a new probe when possible. Generic sensors are not always compatible with all pulse oximeters, even if the probe goes easily into the probe port. If a red light is showing on the probe sensor but no trace is displayed, the generic sensor may not be compatible with the pulse oximeter model. (7.4)
Testing & replacing control PCB and associated components In most cases, if one element of the control PCB has malfunctioned, the entire control PCB should be replaced. Visually assess the PCB for burnt or damaged components. (7.5 – 7.9) Internal wiring continuity leading from the power supply to the control PCB and from the control PCB to various controls may also be assessed for replacement.
Alert 7.1 Printed Circuit Boards (PCBs) contain components that are sensitive to electrostatic discharge (ESD) and can damage the board if not handled properly. As when handling any ESD-sensitive PCB, observe standard ESD safety procedures. Pulse oximeter circuit boards are very small and easy to damage. If repairs are needed on the circuit boards, perform all maintenance gently and with extreme caution to avoid unnecessary damage.
7.2 Remove probe by base connector.
7.3 Visually compare probe and probe port.
7.4 Not all probes will work with all pulse oximeters.

page 27 Technical Education Modules Respiratory Support – Pulse Oximeter (Acare Lifebox)
Assessing & repairing the buttons Check that the device is disconnected from all sources of power before visually assessing the buttons for fluid damage internally. (7.10, 7.11) If fluid is present near or on the buttons or control PCB, wipe the fluid from the unit thoroughly using a non-abrasive cloth. If the buttons are damaged beyond repair, contact the manufacturer to request a replacement part.
7.5 Unscrew the back of the pulse oximeter.
7.6 Gently pry off the back housing.
7.7 Open pulse oximeter to view components.
7.8 Remove key pad and assess components. 7.9 Gently pull up circuit boards to replace.

page 28 Technical Education Modules Respiratory Support – Pulse Oximeter (Acare Lifebox)
Assessing light & movement interference If strong light (e.g., phototherapy, exam lights, or sunlight) is on a probe sensor, the light signal from the pulse oximeter probe may be drowned out by the stronger environmental light, leading to incorrect results. A cloth covering of the sensor site will protect it from bright light. If a patient is particularly active, the contact point between the probe and the patient may move along the patient’s skin. This movement provides an inconsistent measurement because it samples from various contact points in the skin, rather than remaining in the same contact point of tissue. This may cause the reading to be noisy or take time to stabilise. Some oximeters designed for newborns have purpose-built motion-cancelling algorithms to minimise false readings and alarms.
Testing & replacing the LCD The LCD is typically damaged due to incorrect use, particularly when the user pushes with too much force on the screen. If the damaged areas do not hinder viewing or use of the display, the pulse oximeter may be used without significant issues. However, if the damaged areas prevent easy use, the LCD should be replaced. (7.12) Contact the manufacturer to request a replacement part specific to the pulse oximeter model. In some cases, the LCD is soldered on to the circuit board; in these instances, request a replacement board as necessary.
7.10 Confirm location on circuit board for key components.
7.11 Check the keys for water damage.

page 29 Technical Education Modules Respiratory Support – Pulse Oximeter (Acare Lifebox)
Alert 7.2 Repurposing Parts In some cases, parts on the unit may be replaced with a repurposed or recycled part from another piece of equipment being used for parts. Repurposed parts should be considered with caution and guidance from the manufacturer to ensure specifications of the repurposed part is compatible with the equipment. This includes spare parts and accessories that may not be compatible with multiple systems.
7.12 If the LCD is removable, gently prise off the housing and replace.

page 30 Technical Education Modules Respiratory Support – Pulse Oximeter (Acare Lifebox)
8 References 1. Bancalari, E. & Claure, N. Oxygenation Targets and Outcomes in Premature Infants. JAMA 309, 2161 (2013). 2. Cummings, J. J., Polin, R. A., & Committee on Fetus and Newborn. Oxygen Targeting in Extremely Low Birth
Weight Infants. Pediatrics 138, e20161576 (2016). 3. Manja, V., Lakshminrusimha, S. & Cook, D. J. Oxygen Saturation Target Range for Extremely Preterm
Infants: A Systematic Review and Meta-analysis. JAMA Pediatr. 169, 332 (2015). 4. Polin, R. A. & Bateman, D. Oxygen-Saturation Targets in Preterm Infants. N. Engl. J. Med. 368, 2141–2142
(2013). 5. Nitzan, M., Romem, A. & Koppel, R. Pulse oximetry: fundamentals and technology update. Med. Devices
Auckl. NZ 7, 231–239 (2014). 6. WHO-UNICEF technical specifications and guidance for oxygen therapy devices. (World Health
Organization and the United Nations Children’s Fund (UNICEF), 2019). 7. Curless MS, Ruparelia CS, Thompson E, and Trexler PA, eds. 2018. Infection Prevention and Control:
Reference Manual for Health Care Facilities with Limited Resources. Jhpiego: Baltimore, MD. 8. World Health Organization, Regional Office for the Western Pacific, World Health Organization, &
Regional Office for South-East Asia. Practical guidelines for infection control in health care facilities. (World Health Organization, Regional Office for Western Pacific ; World Health Organization, Regional Office for South-East Asia, 2004).
9. Sharma, G., Zaka, N. & Hailegebriel, T. Infection Prevention and Control at Neonatal Intensive Care Units. (2018).