Principles of shooting video Contents - University of the ...
28
Principles of shooting video 1 University of the Highlands and Islands 2016 Contents Planning...................................................................................................................................... 4 Background............................................................................................................................. 4 Location .................................................................................................................................. 4 Audio considerations.............................................................................................................. 5 Intro/outro ............................................................................................................................. 5 On screen ............................................................................................................................... 5 Misc. ....................................................................................................................................... 5 The shoot ................................................................................................................................... 6 Consult your plan ................................................................................................................... 6 Deciding where to shoot ........................................................................................................ 6 Camera settings...................................................................................................................... 6 Camera positioning .................................................................................................................... 7 Positioning the subject ........................................................................................................... 7 Setting up the camera ............................................................................................................ 7 Camera Positioning and Framing........................................................................................ 8 Composition ............................................................................................................................... 8 Rule of thirds .......................................................................................................................... 9 Steps: .................................................................................................................................. 9 The rule of thirds .............................................................................................................. 10 Basic filmmaking techniques ............................................................................................ 10 Framing .................................................................................................................................... 10 Shot Types ........................................................................................................................ 11 Video length ............................................................................................................................. 11 How Video Production Affects Student Engagement: An Empirical Study of MOOC Videos ............................................................................................................................... 11 Equipment ................................................................................................................................ 12 Mobile device ................................................................................................................... 12 Recording with smart phones - Pros: ............................................................................... 12 Recording with smart phones - Cons:............................................................................... 13 Microphone ...................................................................................................................... 13 Cameras ............................................................................................................................ 14 Tripod................................................................................................................................ 14
-
Upload
khangminh22 -
Category
Documents
-
view
2 -
download
0
Transcript of Principles of shooting video Contents - University of the ...
Principles of shooting video
1 University of the Highlands and Islands 2016
Contents Planning...................................................................................................................................... 4
Background ............................................................................................................................. 4
Location .................................................................................................................................. 4
Audio considerations .............................................................................................................. 5
Intro/outro ............................................................................................................................. 5
On screen ............................................................................................................................... 5
Misc. ....................................................................................................................................... 5
The shoot ................................................................................................................................... 6
Consult your plan ................................................................................................................... 6
Deciding where to shoot ........................................................................................................ 6
Camera settings ...................................................................................................................... 6
Camera positioning .................................................................................................................... 7
Positioning the subject ........................................................................................................... 7
Setting up the camera ............................................................................................................ 7
Camera Positioning and Framing ........................................................................................ 8
Composition ............................................................................................................................... 8
Rule of thirds .......................................................................................................................... 9
Steps: .................................................................................................................................. 9
The rule of thirds .............................................................................................................. 10
Basic filmmaking techniques ............................................................................................ 10
Framing .................................................................................................................................... 10
Shot Types ........................................................................................................................ 11
Video length ............................................................................................................................. 11
How Video Production Affects Student Engagement: An Empirical Study of MOOC Videos ............................................................................................................................... 11
Equipment ................................................................................................................................ 12
Mobile device ................................................................................................................... 12
Recording with smart phones - Pros: ............................................................................... 12
Recording with smart phones - Cons:............................................................................... 13
Microphone ...................................................................................................................... 13
Cameras ............................................................................................................................ 14
Tripod ................................................................................................................................ 14

Principles of shooting video
2 University of the Highlands and Islands 2016
Lighting ............................................................................................................................. 15
Storage media ................................................................................................................... 15
Battery packs and charges ................................................................................................ 16
Subject .............................................................................................................................. 16
Props ................................................................................................................................. 17
Your plan ........................................................................................................................... 17
During the shoot ...................................................................................................................... 17
Audio .................................................................................................................................... 17
Lighting ................................................................................................................................. 18
Lead In .................................................................................................................................. 18
Lead Out ............................................................................................................................... 18
Cutting .................................................................................................................................. 18
Continuous running .............................................................................................................. 18
Consistency........................................................................................................................... 18
Interviewer/ee...................................................................................................................... 19
Beyond the simple interview ................................................................................................... 19
Narrative ............................................................................................................................... 19
5 Step Technique .................................................................................................................. 19
Activity .............................................................................................................................. 19
Subject .............................................................................................................................. 20
Setting scene ..................................................................................................................... 20
Over the shoulder ............................................................................................................. 20
Interest shot ..................................................................................................................... 20
How to deal with mistakes....................................................................................................... 21
Dealing With Mistakes ...................................................................................................... 22
Lighting ..................................................................................................................................... 22
Main light ............................................................................................................................. 22
Backlighting .......................................................................................................................... 22
Lighting ............................................................................................................................. 23
Audio ........................................................................................................................................ 23
Audio ................................................................................................................................. 23
Wardrobe/clothing .................................................................................................................. 23
Clothing ............................................................................................................................. 23

Principles of shooting video
3 University of the Highlands and Islands 2016
Jewellery ........................................................................................................................... 24
Hair ................................................................................................................................... 25
Third party audio...................................................................................................................... 26
Free music ......................................................................................................................... 26
Transcripts ................................................................................................................................ 26
More on transcripts .......................................................................................................... 26
Transferring the video.............................................................................................................. 27
Memory cards ...................................................................................................................... 27
USB cable .............................................................................................................................. 27
WikiHow - How to Transfer Photos from an iPhone to a Computer ................................ 27
Useful resources ...................................................................................................................... 28

Principles of shooting video
4 University of the Highlands and Islands 2016
Planning Before you begin make sure you have a plan.
"If you fail to plan, you’re planning to fail"
You might deviate slightly from your plan on the day, however, without some idea of what
to expect there is an increased likelihood of things going wrong. Often you only get a single
opportunity to shoot a film so you need to be prepared to capture everything you require.
Draw up a shooting list that includes times, subjects and locations, this will keep you on
track. Irrespective of who you are creating the video for there are several questions you
need to consider before you begin. The more you can answer up-front the better informed
your decisions will be as you proceed. Many of the answers to these questions will generate
further questions…and even if they don’t mean anything to you right now they are all
questions you will have to ask before the end of your project.
Background
• What is the purpose of the video?
• What content will be covered?
• Who is the target audience?
• What themes will be covered?
• Does this video link into other areas?
• Will this video be standalone or contextualised when viewed?
• Who will participate?
• How many video clips will there be?
• How many speakers per clip?
Location
• Who do I need to get permission from to film here?
• Is there a quiet room at the location?
• Can we remove background noise?
• Are there people in neighbouring rooms?
• Are there suitable power points for equipment?
• What is the existing lighting like?
Principles of shooting video
5 University of the Highlands and Islands 2016
• How long will we have without interruption in the room?
• Do we need teleprompting/flash cards?
• Will there be an interviewer?
• Will we use props/decoration?
• Is there or do we need a backdrop?
Audio considerations
• How many speakers at one time?
• Do you require background music? copyright?
• Where will the transcripts be stored?
Intro/outro
• What are the video titles?
• Will you show the speakers name/job title/organisation?
• Does the video require a splash screen?
• Do any logos need to be included?
• What is the copyright statement?
• How will credits be displayed?
On screen
• Backdrops?
• Subject position?
• Props/decoration?
• Inserting footage/slides/images?
Misc.
• Will you be using scripts?
• What permission will you need from contributors?
Considering all of these questions should help you create a plan for your shoot. This plan will
help guide you during your shoot ensuring that you select an appropriate setting, record at
the highest possible quality and address all the points you want to in your video. In addition,
Principles of shooting video
6 University of the Highlands and Islands 2016
a well-planned video shoot can save considerable time, effort and resources during the
editing process.
The shoot Consult your plan
• Consider your aims.
• Have your final result in mind when you film:
o introduction;
o key content;
o final points;
o themes and messages;
o review scripts if available;
o review storyboards.
Deciding where to shoot
Choosing an appropriate location will depend on several factors;
• narrative
• aesthetic
• space constraints
• facilities (power, parking, toilets)
• noise
• opportunity.
Camera settings
Many cameras now have an auto-mode feature. For the majority of situations you
encounter, this will be sufficient to record videos. This advice is suitable for small handy
cams, DSLRs, digital camcorders and smart devices many of which provide auto-exposure
and auto-focus settings that will allow clear video to be captured in environments with
reasonable lighting. Those more familiar with photography and video recording equipment
and practices will be able to utilise the manual functions to provide more control over the
camera's features and create higher quality videos.

Principles of shooting video
7 University of the Highlands and Islands 2016
Camera positioning Positioning the subject
Find a spot with a background that helps to inform the scene. Alternatively use an
interesting generic space that does not confuse the viewer. Keep the subject as far from the
back wall as possible and position the camera as close as is practical. This is represented in
Diagram 2. The wide angle of the lens combined with the distance to the background will
add depth to the scene.
Diagram 1: Subject too close to the background.
Diagram 2: Subject further away from the wall to create depth.
Setting up the camera
Set the height of the camera lens roughly at the same height as the interviewee’s eye line.
Position the camera slightly off centre to the subject. Some adjustments may need to be
made to keep lighting and equipment out of the line of site.

Principles of shooting video
8 University of the Highlands and Islands 2016
Camera Positioning and Framing
This UHI video looks at camera positioning and framing for filming interviews and talk head
style videos.
Composition The way a shot is put together on screen can make a huge different to how viewers engage
with a video. The 'rules' of composition in video are the same no matter what level of
production is being used so the ideas discussed here are the same whether you’re
conducting an interview for television or a blockbuster movie.
The first step would be to place the subject in screen. Choose your type of shot and adjust
the lens, the position of the camera, or the position of the subject to achieve the desired
shot. Consider space for titles of graphical elements if these will be added in post
production. Examples of good shots are shown below.

Principles of shooting video
9 University of the Highlands and Islands 2016
Rule of thirds
The rule of thirds is an effective compositional rule used in all creative industries
highlighting the importance of positioning within the frame. Using this rule will enable you
to shoot video that is balanced.
Steps:
• Split your frame into 9 sections using an imaginary grid of horizontal and vertical
lines
• Place your subject along one of the lines or at the intersection
Following this simple rule will always give you favourable results.
Principles of shooting video
10 University of the Highlands and Islands 2016
The rule of thirds
This short film covers the Rule Of Thirds - one of the easiest ways to make a big difference to
your photo composition. Divide the viewfinder with two imaginary vertical and horizontal
lines so it's now in thirds.
Basic filmmaking techniques
Additional guidance on how to set up and compose a shot for a talking head or interview
can be found in Nathan Rae's guide to Basic filmmaking techniques.
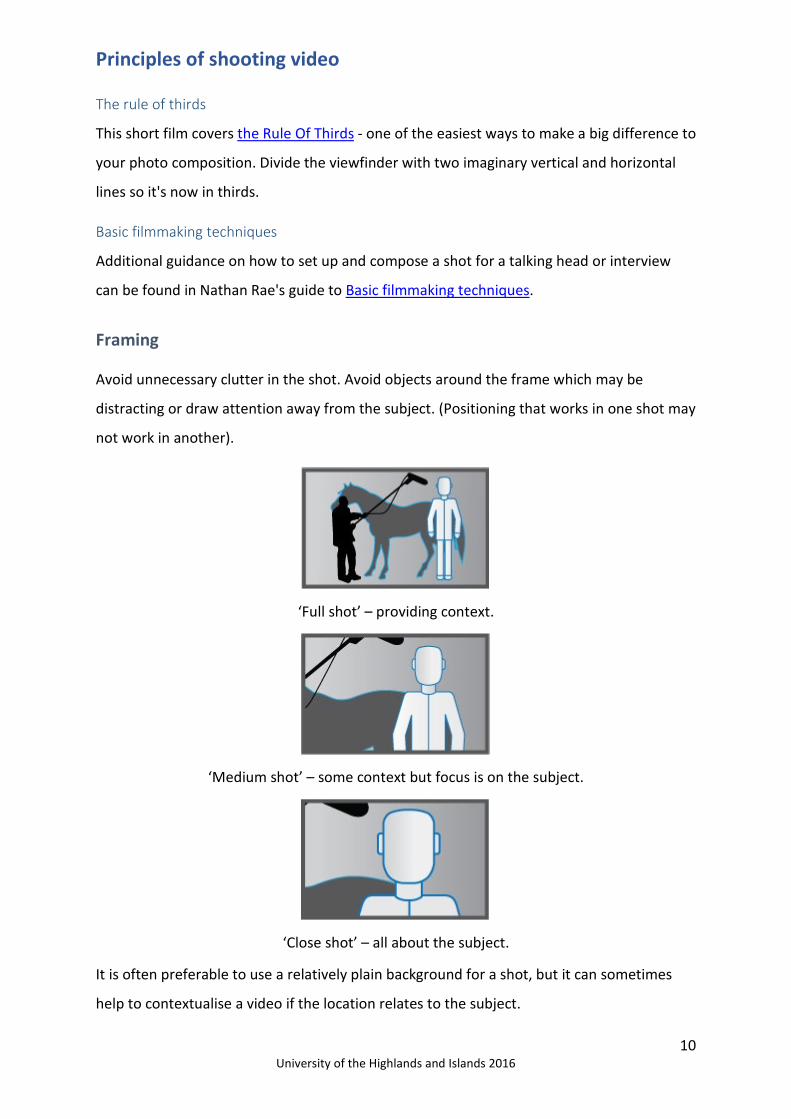
Framing Avoid unnecessary clutter in the shot. Avoid objects around the frame which may be
distracting or draw attention away from the subject. (Positioning that works in one shot may
not work in another).
‘Full shot’ – providing context.
‘Medium shot’ – some context but focus is on the subject.
‘Close shot’ – all about the subject.
It is often preferable to use a relatively plain background for a shot, but it can sometimes
help to contextualise a video if the location relates to the subject.

Principles of shooting video
11 University of the Highlands and Islands 2016
Shot Types
This UHI video explains what some of the most common shot types are and how they are
composed.
Video length How Video Production Affects Student Engagement: An Empirical Study of MOOC Videos
Recent research suggests that the optimum video length is 6 minutes in length, therefore it
is advisable to break longer content up into shorter chunks. In the case of a lecture the
content should be cut into a number of microlectures, each one being a logical chunk that
addresses a specific theme or topic.
Keeping videos short has a number of benefits:
• For the instructor there is less pressure during the production, because instead of
having to sit down and record a single full length lecture they can record a number of
small videos over a longer period of time.
• Smaller videos can provide a long term benefit because they will be easier to update
over time. When information has to be changed or updated the tutor will only have
to recreate one shorter video instead of re-recording all of the video content.
• Students also benefit from shorter videos as it makes it easier for them to absorb
each video in their own time and at their own pace.
• Many students now use mobile devices to access learning content on-the-go.
Keeping videos short means they do not have to use up their download allocation
streaming large amounts of data.
• Shorter videos can be more easily integrated into a virtual learning environment and
contextualised to create a narrative for students to work through and engage with.
• Splitting the video content enables the insertion of other resources or activities
between each video, creating a more dynamic learning environment for students.
Principles of shooting video
12 University of the Highlands and Islands 2016
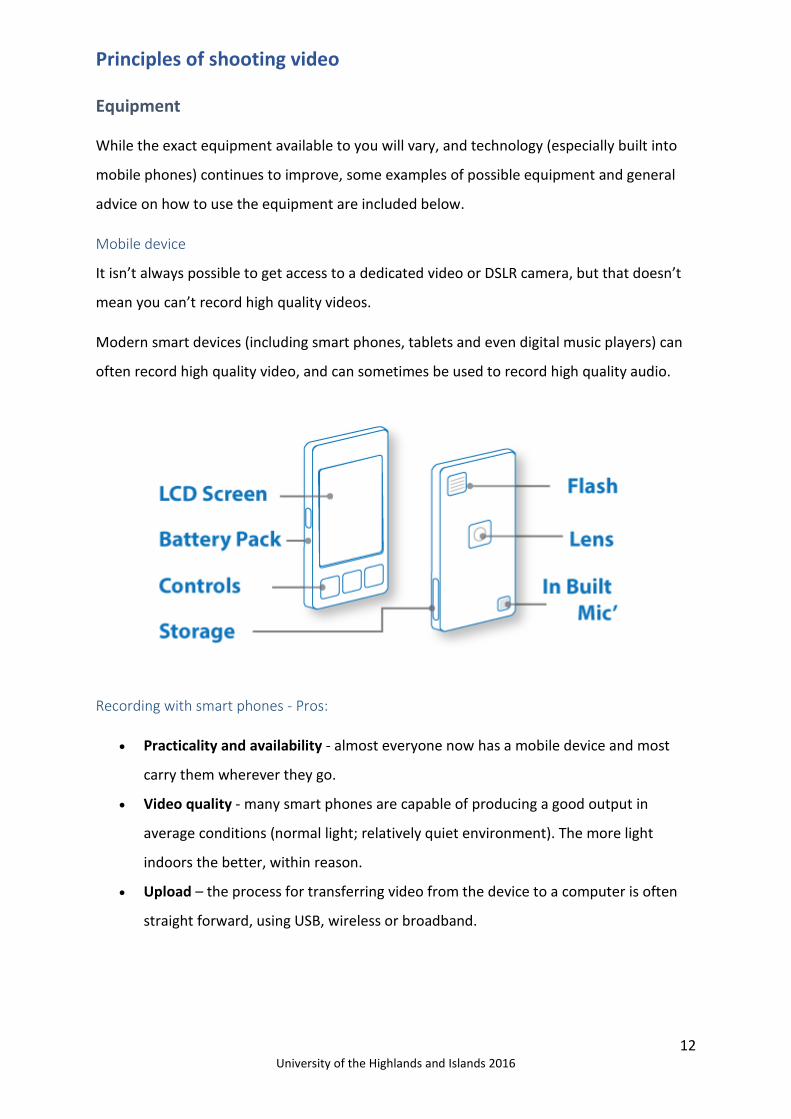
Equipment While the exact equipment available to you will vary, and technology (especially built into
mobile phones) continues to improve, some examples of possible equipment and general
advice on how to use the equipment are included below.
Mobile device
It isn’t always possible to get access to a dedicated video or DSLR camera, but that doesn’t
mean you can’t record high quality videos.
Modern smart devices (including smart phones, tablets and even digital music players) can
often record high quality video, and can sometimes be used to record high quality audio.
Recording with smart phones - Pros:
• Practicality and availability - almost everyone now has a mobile device and most
carry them wherever they go.
• Video quality - many smart phones are capable of producing a good output in
average conditions (normal light; relatively quiet environment). The more light
indoors the better, within reason.
• Upload – the process for transferring video from the device to a computer is often
straight forward, using USB, wireless or broadband.

Principles of shooting video
13 University of the Highlands and Islands 2016
Recording with smart phones - Cons:
• Lack of stability – very few tripods are able to hold smart devices, so filming with a
smart device often has to be completely handheld. While some devices will have
functions to alleviate camera shake, it is rare for this to be completely removed. This
can be extremely distracting to the viewer and can make the video less effective.
While ‘shaky’ camera techniques can be beneficial to action blockbusters they
detract from factual videos. To alleviate this in situations where a tripod is not
available it is best to record videos in short bursts, ensure your device is as stable as
possible, and make use of anything that can substitute for a stand or tripod.
• Sound quality - without an external microphone you are at the mercy of your
phone's inbuilt microphone. Some are better than others. If an external microphone
or recorder can’t be used do your best to get close to the subject and look for a quiet
location.
• Lack of standardisation – smart devices come with a variety of operating systems,
hardware and applications, so the quality of videos recorded and the process for
transferring them to a computer can vary significantly. It is important to bear this in
mind when creating content, as it might not always be possible to transfer files from
smart devices to computers within your organisation.
While it is often tempting to record videos with smart devices in portrait mode, it is best to
shoot them in landscape. We are used to watching videos in landscape, so shooting in
portrait can unnecessarily alienate and distract the viewer instead of allowing them to
engage with your video.
This UHI video looks at some of the options when it comes to recording equipment.
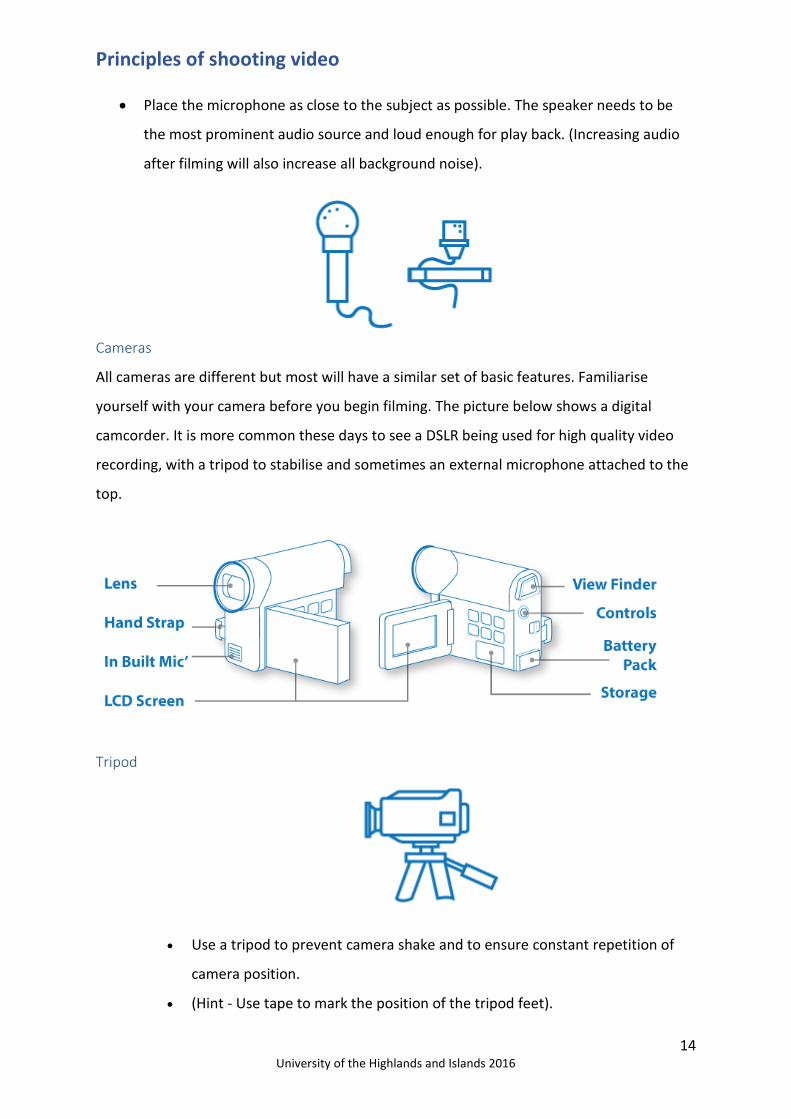
Microphone
• In-built microphones, the ones inside devices, are often poor quality. Directional
microphones or remote/lapel microphones are recommended.
• Where external microphones are unavailable the subject should be located as close
to the built-in microphone as possible and extra care should be taken to ensure that
background noise is kept to a minimum.
Principles of shooting video
14 University of the Highlands and Islands 2016
• Place the microphone as close to the subject as possible. The speaker needs to be
the most prominent audio source and loud enough for play back. (Increasing audio
after filming will also increase all background noise).
Cameras
All cameras are different but most will have a similar set of basic features. Familiarise
yourself with your camera before you begin filming. The picture below shows a digital
camcorder. It is more common these days to see a DSLR being used for high quality video
recording, with a tripod to stabilise and sometimes an external microphone attached to the
top.
Tripod
• Use a tripod to prevent camera shake and to ensure constant repetition of
camera position.
• (Hint - Use tape to mark the position of the tripod feet).
Principles of shooting video
15 University of the Highlands and Islands 2016
• When editing scenes maintaining a constant camera position helps to provide
a seamless transition.
• Maintaining a constant camera position helps to provide a seamless
transition when editing scenes.
• Where a tripod is unavailable techniques to keep the camera steady should
be employed. Making use of any surfaces you can lean against can be useful
and certain ways of holding cameras can add stability. Examples how to hold
cameras to increase stability can be seen on the Digital Photography School
website.
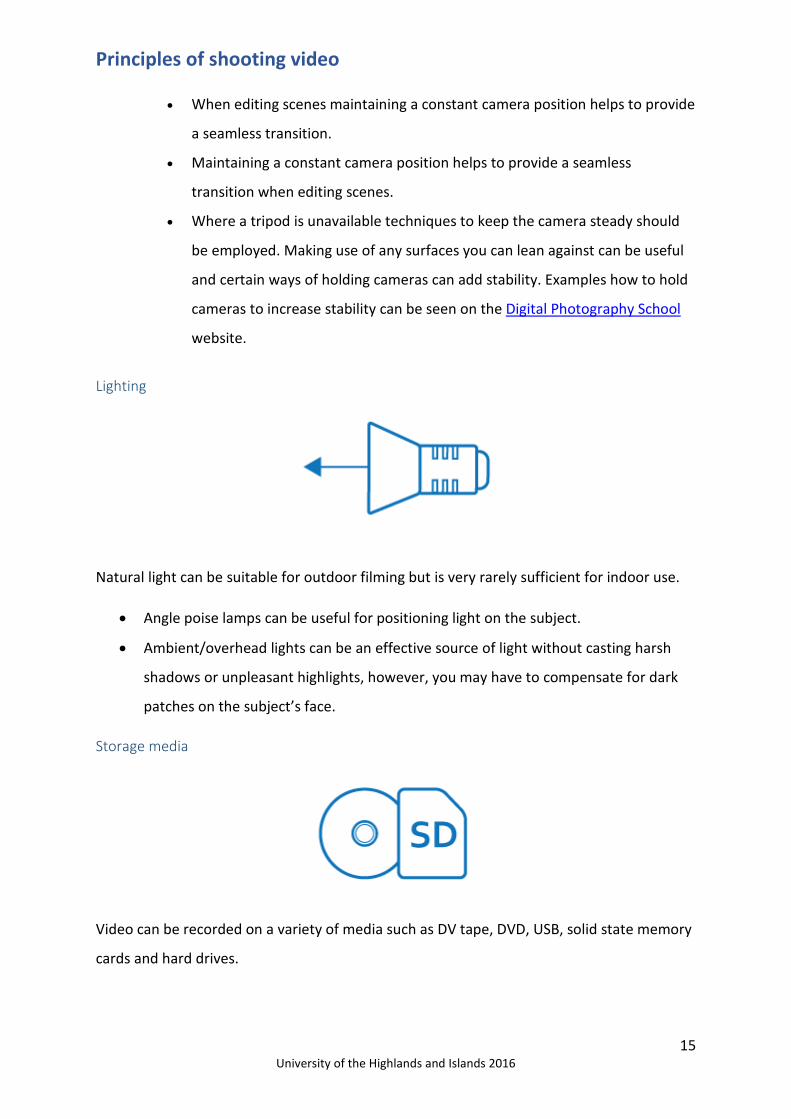
Lighting
Natural light can be suitable for outdoor filming but is very rarely sufficient for indoor use.
• Angle poise lamps can be useful for positioning light on the subject.
• Ambient/overhead lights can be an effective source of light without casting harsh
shadows or unpleasant highlights, however, you may have to compensate for dark
patches on the subject’s face.
Storage media
Video can be recorded on a variety of media such as DV tape, DVD, USB, solid state memory
cards and hard drives.
Principles of shooting video
16 University of the Highlands and Islands 2016
Before you begin recording make sure you have adequate storage to accommodate the
amount of video you plan to record.
Battery packs and charges
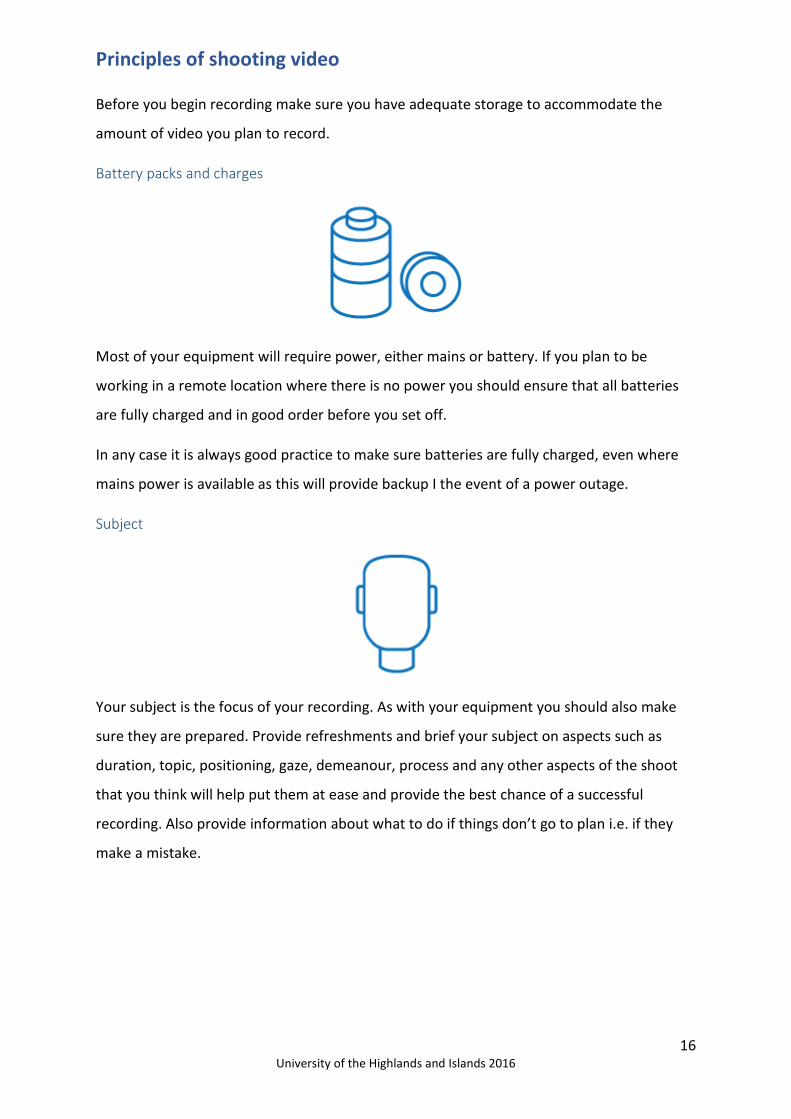
Most of your equipment will require power, either mains or battery. If you plan to be
working in a remote location where there is no power you should ensure that all batteries
are fully charged and in good order before you set off.
In any case it is always good practice to make sure batteries are fully charged, even where
mains power is available as this will provide backup I the event of a power outage.
Subject
Your subject is the focus of your recording. As with your equipment you should also make
sure they are prepared. Provide refreshments and brief your subject on aspects such as
duration, topic, positioning, gaze, demeanour, process and any other aspects of the shoot
that you think will help put them at ease and provide the best chance of a successful
recording. Also provide information about what to do if things don’t go to plan i.e. if they
make a mistake.
Principles of shooting video
17 University of the Highlands and Islands 2016
Props
This covers any items that will appear in the recording over and above the subject(s), their
outfits and the electrical equipment.
Props can be used as a visual cue to help inform the viewer, as part of a demonstration, or
simply as an item of decoration to improve the composition of the shot.
Your plan
Failing to plan is planning to fail!
Before you begin make sure you have a plan. You can deviate from your plan on the day but
without some idea of what is ahead of you, things are likely to go wrong.
If this is your only opportunity to film then you need to be prepared to get everything you
need. Storyboard where possible. Rough out a shooting list, including times, subjects,
locations.
During the shoot Audio
Reduce background noises as much as possible. The speaker needs to be the most
prominent source of audio and loud enough for play back. Increasing audio after filming will
also increase unwanted background noise.
Principles of shooting video
18 University of the Highlands and Islands 2016
Lighting
Ensure the subject is illuminated. If back lit (e.g. in front of window) ensure an additional
(spot) light is directed on the subject to counter silhouetting.
Lead In
Start recording slightly before the beginning of action or speech to avoid cut offs when
editing. There is often a slight shake at the beginning of the footage that needs to be cut
out.
Lead Out
End recording slightly after the action or speech to avoid cut offs when editing. Consider the
fade out of a clip once the speaker has finished talking. This may require a few extra seconds
of footage before you stop recording.
Cutting
Keep sections short and concise for easier editing. Make sure there is a lead in and lead out
between sections.
(Hint - If you intend to use an important sentence as a sound bite make sure the speaker
doesn’t run into another sentence. You might end up having to cut in the middle of a word).
Continuous running
Too many short clips can lead to large increases in the tie it takes to organise your video
when you get to the editing stage. Continue to record between short sections as this will
keep your footage together and give context to content.
This also minimises the potential of missing the start or end of a comment by pressing
record too late or stop too early.
Consistency
Keep both camera and subject in the same position for the length of shoot for consistency
of editing. Additional shots can be made to be cut in. Repeat content from different angles if
required.

Principles of shooting video
19 University of the Highlands and Islands 2016
Interviewer/ee
When recording an interview record the questions and the answers separately. Position the
interviewee and interviewer so that edited footage appears natural. e.g. Interviewer on
right of screen looking left with interviewee on left of screen looking right.
Beyond the simple interview Narrative
Any filming situation should contain a form of narrative. The camera represents the
viewpoint of your audience and so you must take them on a journey. Move where they
would move and look at the things that they would look at. If you pose a question with one
shot you must answer it with the next.
• Common Tricks – Hand reaching for a door > Subject enters a new room.
• Managing Expectations – Deviating from the norm is confusing.
5 Step Technique
The 5 step technique is a commonly used set up in many filming situations. Recognising and
capturing these basic shots will give you a narrative that can be followed in the editing
room.
Activity
The activity of interest e.g. pouring the contents
of a test tube into a beaker.

Principles of shooting video
20 University of the Highlands and Islands 2016
Subject
The person performing the activity.
Setting scene
Wide shot of the subject performing the activity
within the relevant surroundings.
Over the shoulder
The activity from the view of the subject or third party.
Interest shot
Highlighting a point of interest or filming from an obscure angle.
Principles of shooting video
21 University of the Highlands and Islands 2016
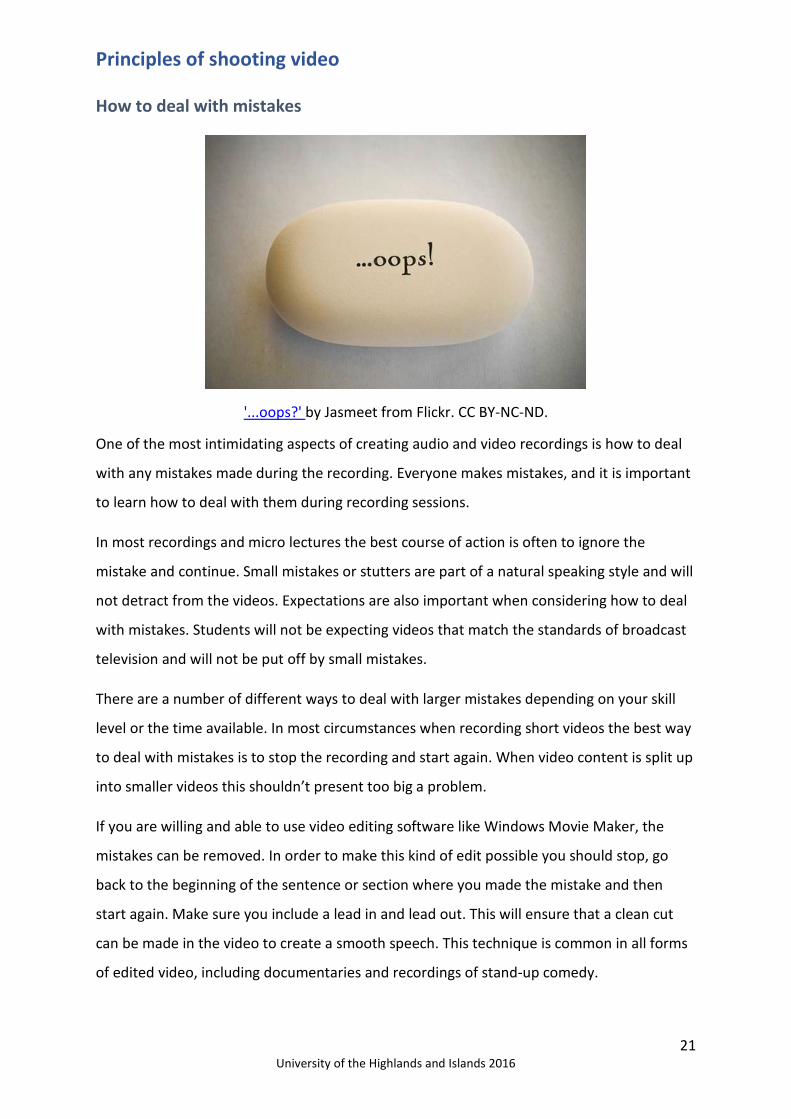
How to deal with mistakes
'...oops?' by Jasmeet from Flickr. CC BY-NC-ND.
One of the most intimidating aspects of creating audio and video recordings is how to deal
with any mistakes made during the recording. Everyone makes mistakes, and it is important
to learn how to deal with them during recording sessions.
In most recordings and micro lectures the best course of action is often to ignore the
mistake and continue. Small mistakes or stutters are part of a natural speaking style and will
not detract from the videos. Expectations are also important when considering how to deal
with mistakes. Students will not be expecting videos that match the standards of broadcast
television and will not be put off by small mistakes.
There are a number of different ways to deal with larger mistakes depending on your skill
level or the time available. In most circumstances when recording short videos the best way
to deal with mistakes is to stop the recording and start again. When video content is split up
into smaller videos this shouldn’t present too big a problem.
If you are willing and able to use video editing software like Windows Movie Maker, the
mistakes can be removed. In order to make this kind of edit possible you should stop, go
back to the beginning of the sentence or section where you made the mistake and then
start again. Make sure you include a lead in and lead out. This will ensure that a clean cut
can be made in the video to create a smooth speech. This technique is common in all forms
of edited video, including documentaries and recordings of stand-up comedy.

Principles of shooting video
22 University of the Highlands and Islands 2016
Dealing With Mistakes
This UHI video walks you through how to deal with recording mistakes.
Lighting Lighting the subject is vital during any video production. Whether it is a recording of a
lecture, a ‘talking head’ style video or a demonstration, it is important that the subject is
well lit.
In most situations shooting in a well lit room, whether from natural or artificial light sources,
should be more than adequate for the videos you will be looking to produce, but it is always
important to consider how this light will affect your recording.
Main light
You should always aim to ensure that the main light source is facing towards the subject of
the video. During talking head interviews this will ensure that the speaker is visible on
screen and that they are clearly the focus of the video. Lighting any demonstrations in this
manner will ensure that processes or equipment are well illuminated on screen and are
clearly visible.
Additional light sources should be used to remove any unwanted shadows created by the
main light source. This is especially important during interview style videos, where the
additional shadows could make the speaker look somewhat sinister, adding an unwanted
element to any message you are trying to deliver.
Backlighting
Where possible the main source of light should always be in front of the subject and not
directed towards the camera, however it is not always possible to shoot this way. If the
main light source is located behind the subject this will backlight the subject and make them
appear in silhouette. While this can be used artistically in certain situations, it is not suitable
for educational videos.
In situations where the only option is to have a subject backlit it is important to take steps
to reduce this effect and provide more light for the subject. When a reflector is available this
can be used to direct the available light to the subject, however where one isn’t available an
Principles of shooting video
23 University of the Highlands and Islands 2016
additional light source can be added to balance the lighting. The additional light should be
directed towards the subject, which should make them stand out against the background.
Lighting
This UHI video explains a basic lighting setup, how you can use ambient light and even how
you can make your own lighting equipment.
Audio While our focus so far has been on video, the accompanying audio is often the primary
method of message delivery in education videos. Whether through recorded lectures,
interviews, or the narration during a demonstration, the core message is often delivered in
the audio component rather than the video component.
Some of the steps for recording high quality audio are straightforward and include choosing
a location where background noise and interruptions will be limited, switching off mobile
phones, and locating the microphone as close as possible to the speaker. Ensure that you
test the sound quality before you begin recording.
The acoustics of the room used for the recording are also very important. Where possible
large rooms and rooms with hard floors should be avoided as these environments will add
unwanted echoes and background noise to the recording.
High quality audio is often more important than high quality video.
Audio
This UHI video goes through the basics of audio recording for video – how to do it, what
equipment to use and some of the potential pitfalls.
Wardrobe/clothing Before you shoot your video it is advisable to provide your subjects with some basic
information about what to wear and what not to wear.
Clothing
Certain clothing and accessories can present a problem for video recording.
Principles of shooting video
24 University of the Highlands and Islands 2016
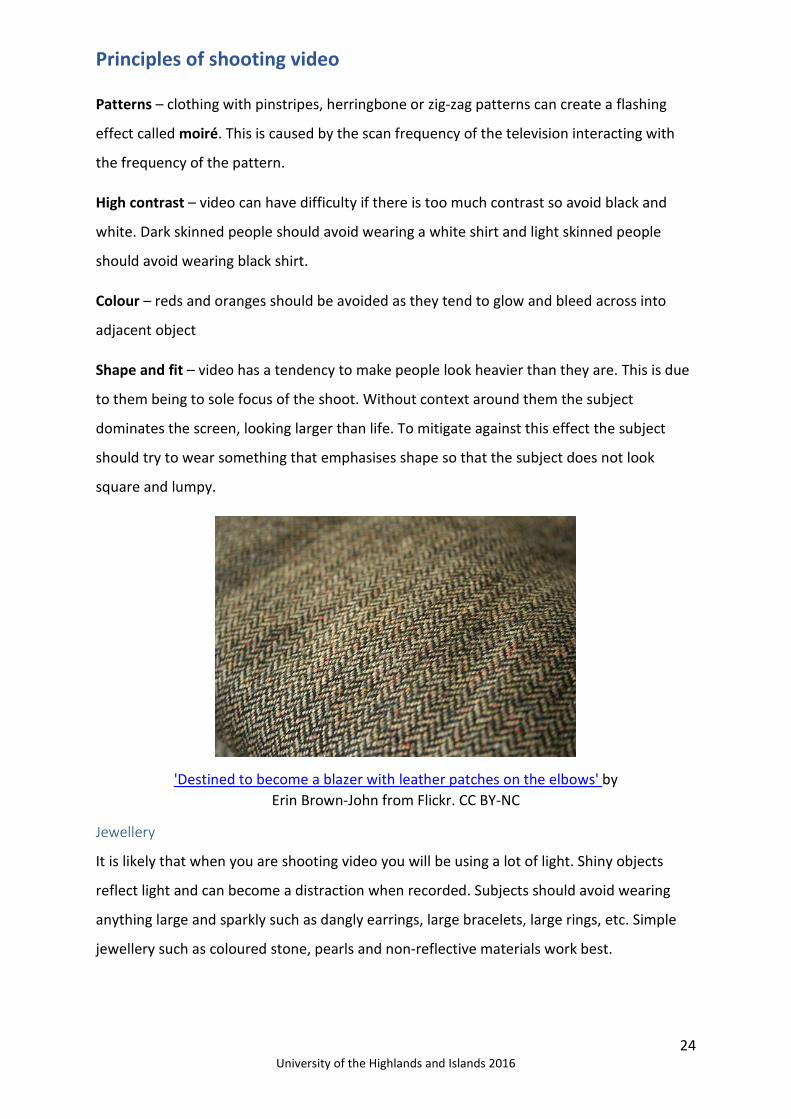
Patterns – clothing with pinstripes, herringbone or zig-zag patterns can create a flashing
effect called moiré. This is caused by the scan frequency of the television interacting with
the frequency of the pattern.
High contrast – video can have difficulty if there is too much contrast so avoid black and
white. Dark skinned people should avoid wearing a white shirt and light skinned people
should avoid wearing black shirt.
Colour – reds and oranges should be avoided as they tend to glow and bleed across into
adjacent object
Shape and fit – video has a tendency to make people look heavier than they are. This is due
to them being to sole focus of the shoot. Without context around them the subject
dominates the screen, looking larger than life. To mitigate against this effect the subject
should try to wear something that emphasises shape so that the subject does not look
square and lumpy.
'Destined to become a blazer with leather patches on the elbows' by Erin Brown-John from Flickr. CC BY-NC
Jewellery
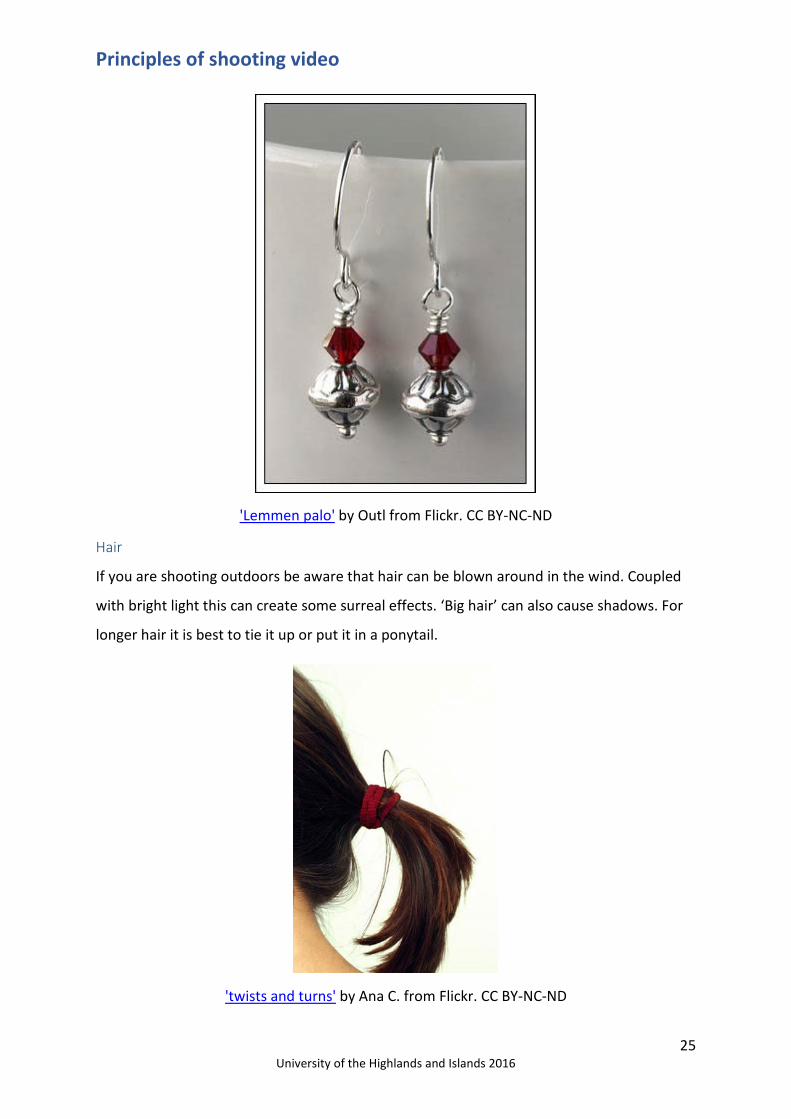
It is likely that when you are shooting video you will be using a lot of light. Shiny objects
reflect light and can become a distraction when recorded. Subjects should avoid wearing
anything large and sparkly such as dangly earrings, large bracelets, large rings, etc. Simple
jewellery such as coloured stone, pearls and non-reflective materials work best.
Principles of shooting video
25 University of the Highlands and Islands 2016
'Lemmen palo' by Outl from Flickr. CC BY-NC-ND
Hair
If you are shooting outdoors be aware that hair can be blown around in the wind. Coupled
with bright light this can create some surreal effects. ‘Big hair’ can also cause shadows. For
longer hair it is best to tie it up or put it in a ponytail.
'twists and turns' by Ana C. from Flickr. CC BY-NC-ND

Principles of shooting video
26 University of the Highlands and Islands 2016
Third party audio Even during videos with no narration, the inclusion of background music can enhance the
user experience. Watching videos with no background noise can feel unnatural, so the
inclusion of background music can be very important to keep the viewer's attention.
Free music
As with the inclusion of any external media, there are copyright restrictions on what can be
used but a number of sources of usable audio are available. Below is a list of three sites that
provide free music. Make sure you read the copyright restrictions and attribution
information before use.
• Free Music Archive
• MUSOPEN
• Audionautix
Transcripts It is important to create transcripts or descriptions any time audio or video are used to
deliver educational material.
The primary reason for this is in order to meet the legal requirements for accessibility. It is
important that no students are disadvantaged, therefore text versions of video and audio
content provide and alternative means of accessing the material.
Transcripts should include all teaching content. If you have used a script in the production of
your audio or video, then this can be shared to meet this need. In other situations, a
transcript will have to be made. Where videos that include demonstrations or activities, a
text description should be supplied.
The inclusion of transcripts and text descriptions provide benefits to all students, not just
those with additional needs. The transcripts and text descriptions provide alternatives to
those who are unable to access videos for technological reasons and also allow those who
prefer to read content a more suitable method of delivery.
More on transcripts
More advice and guidance on transcripts can be found on the uiAccess website.
Principles of shooting video
27 University of the Highlands and Islands 2016
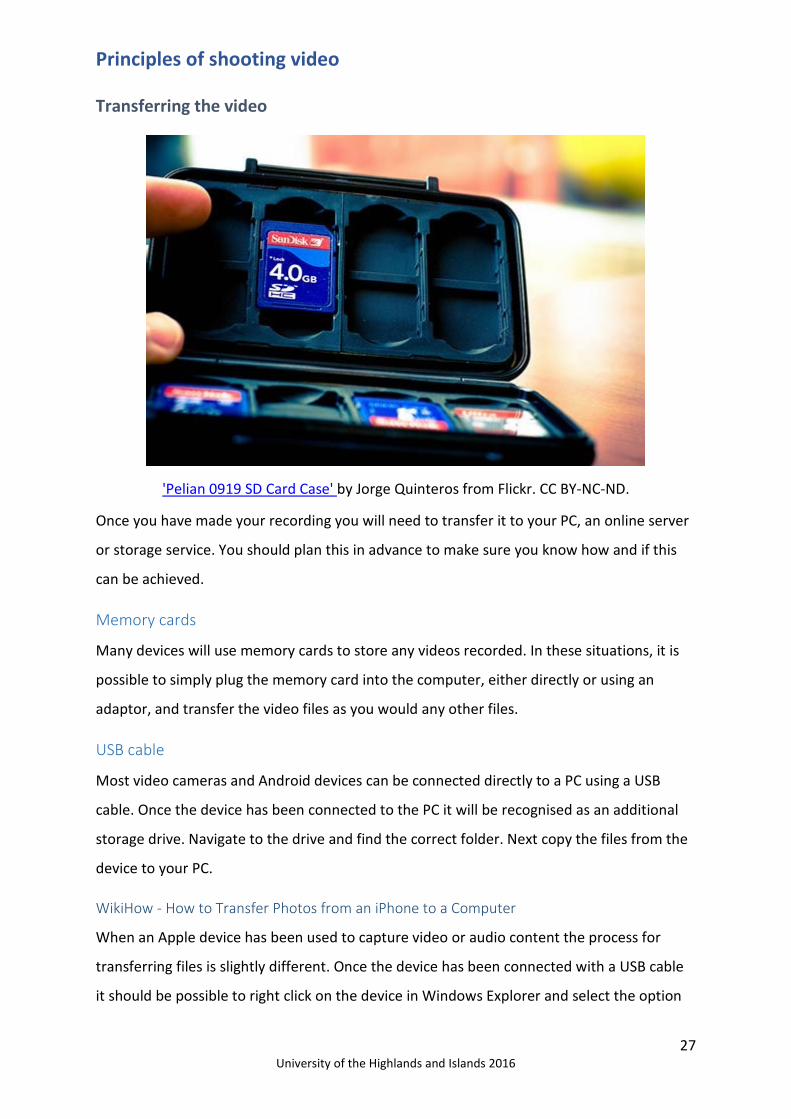
Transferring the video
'Pelian 0919 SD Card Case' by Jorge Quinteros from Flickr. CC BY-NC-ND.
Once you have made your recording you will need to transfer it to your PC, an online server
or storage service. You should plan this in advance to make sure you know how and if this
can be achieved.
Memory cards
Many devices will use memory cards to store any videos recorded. In these situations, it is
possible to simply plug the memory card into the computer, either directly or using an
adaptor, and transfer the video files as you would any other files.
USB cable
Most video cameras and Android devices can be connected directly to a PC using a USB
cable. Once the device has been connected to the PC it will be recognised as an additional
storage drive. Navigate to the drive and find the correct folder. Next copy the files from the
device to your PC.
WikiHow - How to Transfer Photos from an iPhone to a Computer
When an Apple device has been used to capture video or audio content the process for
transferring files is slightly different. Once the device has been connected with a USB cable
it should be possible to right click on the device in Windows Explorer and select the option
Principles of shooting video
28 University of the Highlands and Islands 2016
“Import pictures and videos” to copy images and videos to the default images and video
folders on your computer. Further advice on transferring content from Apple devices to PCs
can be found on WikiHow.
Useful resources • UHI media services (TV recording, Fuse, Camtasia Relay)
• UHI Mahara - Help with Helix
• Basic Cinematography: How To Light An Interview (3 Point Lighting Tutorial) -
YouTube
• Basic Filmmaking Techniques E01 - Camera Position and Framing - YouTube
• Animoto tool
• “Straight to Camera Talking Head” versus “Documentary Style Interview”
• Cool and Credible Web Video: Old Rules, No Rules, or New Rules?
• Jisc video guide - conducting video interviews
• Best practices for using and creating video
• Jisc video guide
• Video As A Learning Tool: A Mixed Blessing?
• Educational Video Production: When educators become Producers
• The Impact of Video in Education Infographic
• The Effective Use of Video in Online Courses Infographic
• Video use and Higher Education: Options for the future
• Let’s use video to reinvent education – Ted talk by Salman Khan
• BBC Active – Education videos: ten ways to use them well
• What is Flipped Learning?
• The University of Queensland – The pedagogical benefits of video
• Flipped-Learning Toolkit: Overcoming Common Hurdles
• Flipped Institute – How to flip the classroom
• The University of Queensland – Flipped Classroom