New High Flow Acrylics - Just Paint
16
JUST PAINT Published by Golden Artist Colors, Inc. / Issue 29 Issue 29 page 1 ©2013 Golden Artist Colors, Inc. By Elaine Salazar Historically, wood panels were used for paintings long before the adoption of flexible fabric supports. Most of the earliest icons still intact from the 2nd and 3rd century as well as a large portion of the Renaissance paintings were created on solid wood panels. Many of Raphael’s paintings for example are painted on primed wood panels. The method for preparing the panels was laborious as the solid wood was first dried well and sanded very smooth. It was then covered with layers of ground made by mixing gypsum (pounded into powder) with hide glue made from animal skins. The panel was then sanded and burnished until it was smooth and ready for painting. While these early works were all painted on prepared solid wood panels, there are many more options available for artists today. Technology has created numerous types of manufactured panels, engineering them to have very specific attributes, and eliminating some of the disadvantages of using solid wood. A solid wood panel still has all the original cellular structure of the tree from which it was Self portrait, artist Raphael, 1506 – oil on panel From Mark Golden To our old friends and those newly discovering Just Paint, we welcome you. I’m delighted to share our new High Flow Acrylics with you! We’ve worked hard on this product, maintaining qualities artists have enjoyed when using our Airbrush Colors. High Flow Acrylics, our thinnest product line, dramatically extends the range of possibilities beyond Airbrush. Sarah Sands shares innovations that allowed our Technical Director, Jim Hayes, to develop this paint, while Amy McKinnon and Mike Townsend detail the many applications this new addition to our acrylic system offers. I’m sure as you use these paints, even more options will be discovered! In Just Paint 28, we committed to dedicating the next several issues to explore various substrates used by artists in their work. In Just Paint 29 we asked two materials specialists to share their insights and years of research into understanding solid and hardboard panels. Elaine Salazar, President of Ampersand Art Supply has provided us a thoughtful technical examination New High Flow Acrylics By Sarah Sands It’s all about a fear of water, the art of levitation, and the fact that size matters. From there it’s just an issue of context. Down one path are tales of summer pool parties and magic shows; down the other a world of pigment particles coaxed into fluid paint. Considering we are about to pull you in that direction, we likely have some explaining to do. The Opportunity For most of us the world of fluid paints, airbrush colors and liquid inks form a continuum with only the most vague and fuzzy boundaries. After all, where does one group end and the other start? With just the smallest of tweaks the same color flowing through a brush or being atomized in the air can find itself being pushed through the dense felt tip of a marker or sliding down the narrow slit of a calligrapher’s nib. The paint being poured one moment might be called upon to make the most delicate and precise markings the next. Faced with this dizzying array (cont. on page 6) (cont. on next page) (cont. on page 15) Understanding Wood Supports for Art - A Brief History Canadian Artist David Doody takes advantage of the versatility of High Flow Acrylics, allowing him the freedom to incorporate different painting styles and tools into his mixed media artwork.
-
Upload
khangminh22 -
Category
Documents
-
view
0 -
download
0
Transcript of New High Flow Acrylics - Just Paint

JUST PAINTPublished by Golden Artist Colors, Inc. / Issue 29
Issue 29 page 1 ©2013 Golden Artist Colors, Inc.
By Elaine Salazar
Historically, wood panels were used for paintings long before the adoption of flexible fabric supports. Most of the earliest icons still intact from the 2nd and 3rd century as well as a large portion of the Renaissance paintings were created on solid wood panels. Many of Raphael’s paintings for example are painted on primed wood panels. The method for preparing the panels was laborious as the solid wood was first dried well and sanded very smooth. It was then covered with layers of ground made by mixing gypsum
(pounded into powder) with hide glue made from animal skins. The panel was then sanded and burnished until it was smooth and ready for painting.
While these early works were all painted on prepared solid wood panels, there are many more options available for artists today. Technology has created numerous types of manufactured panels, engineering them to have very specific attributes, and eliminating some of the disadvantages of using solid wood. A solid wood panel still has all the original cellular structure of the tree from which it was
Self portrait, artist Raphael, 1506 – oil on panel
From Mark Golden
To our old friends and those newly discovering Just Paint, we welcome you. I’m delighted to share our new High Flow Acrylics with you! We’ve worked hard on this product, maintaining qualities artists have enjoyed when using our Airbrush Colors. High Flow Acrylics, our thinnest product line, dramatically extends the range of possibilities beyond Airbrush. Sarah Sands shares innovations that allowed our Technical Director, Jim Hayes, to develop this paint, while Amy McKinnon and Mike Townsend detail the many applications this new addition to our acrylic system offers. I’m sure as you use these paints, even more options will be discovered!
In Just Paint 28, we committed to dedicating the next several issues to explore various substrates used by artists in their work. In Just Paint 29 we asked two materials specialists to share their insights and years of research into understanding solid and hardboard panels. Elaine Salazar, President of Ampersand Art Supply has provided us a thoughtful technical examination
New High Flow AcrylicsBy Sarah Sands
It’s all about a fear of water, the art of levitation, and the fact that size matters. From there it’s just an issue of context. Down one path are tales of summer pool parties and magic shows; down the other a world of pigment particles coaxed into fluid paint. Considering we are about to pull you in that direction, we likely have some explaining to do.
The OpportunityFor most of us the world of fluid
paints, airbrush colors and liquid inks
form a continuum with only the most vague and fuzzy boundaries. After all, where does one group end and the other start? With just the smallest of tweaks the same color flowing through a brush or being atomized in the air can find itself being pushed through the dense felt tip of a marker or sliding down the narrow slit of a calligrapher’s nib. The paint being poured one moment might be called upon to make the most delicate and precise markings the next. Faced with this dizzying array (cont. on page 6)
(cont. on next page)
(cont. on page 15)
Understanding Wood Supports for Art - A Brief History
Canadian Artist David Doody takes advantage of the versatility of High Flow Acrylics, allowing him the freedom to incorporate different painting styles and tools into his mixed media artwork.

Key: Amp HB (Ampersand Proprietary Hardboard, Std. HB (Standard Hardboard), HDF (High Density Fiberboard), MDF (Medium Density Fiberboard) Note: Physical characteristics can change depending on the natural wood used to manufacture the product. These data points are taken from examples of various manufacturers in the wood industry.
Issue 29 page 2 ©2013 Golden Artist Colors, Inc.
made. This structure is susceptible to differential expansion and contraction in three directions as the wood is exposed to different climate and humidity levels. Manufactured or engineered wood panels in contrast, break down the structure of the wood into various sizes of chips or fiber clusters which create a more uniform, stronger, and stable substrate when compressed into a panel.
Given the plethora of engineered wood - from laminated materials such as plywood to natural wood pulp fiber panels such as hardboard and resin bonded medium density fiberboards - it is important to understand the characteristics of these substrates and their suitability for your painting support. In this article it is impossible to cover all the different wood supports but we have attempted to provide an understanding of the physical characteristics of some of the more commonly available engineered wood substrates that artists use.
The engineered wood industry measures mechanical and physical characteristics like density, internal bond, and other various mechanical characteristics in wood substrates to guide users of their products in selecting the appropriate panel for a project. For example, the boat industry uses marine plywood that is engineered for high moisture resistance as opposed to interior plywood that doesn’t have extensive waterproofing. In much the same way, an artist can use these mechanical and physical characteristics to determine what may be the most appropriate material for their painting application. The key for using a wood
substrate for artwork is to a) determine its dimensional stability and stiffness as you want your work to remain flat and to weather the transition through different ambient climates, and b) to use the proper methods for sealing and finishing the wood substrate to protect your artwork over time.
While there are many defining characteristics regarding these two concerns in engineered wood, we consider four critical characteristics important to determine the dimensional stability and surface preparation of a wood panel:
Density is measured by the weight of the panel in pounds per cubic foot and is critically important because panels that have a lower density tend to be more prone to warping and more difficult to prime. When density is increased without any other changes, it tends to improve stiffness, internal bond strength and most important, the susceptibility of moisture absorption
causing differential expansion and warping. In the chart below you can see that MDF (medium density fiberboards) panels have lower densities than those of HDF (high density fiberboards) panels and hardboards. This means that MDF, especially thinner panels will be much more susceptible to water intake than HDFs and more prone
to warping. You can use a thicker MDF to mitigate against warping but excessive moisture absorption will still be an issue for primer integrity and potential mold growth within the panel. Also, when priming these panels, extensive fiber raising (swelling of surface fibers) takes place as the panel absorbs moisture, requiring
much more priming and sanding. A denser panel in comparison will accept a smoother coating of primer, reducing the number of gesso layers needed to properly prepare a panel with a smooth painting ground.
Hardboard and high density fiber-boards for example have a higher density and will absorb less moisture and be less prone to warping or fiber raising. Moreover, hardboard that has also been tempered exhibits even more resistance to these problems. It is why it is considered one of the better substrates for commercial finishes. In contrast, plywood has a lower density than HDF and hardboard with a surface porosity and roughness of raw wood making priming and sealing it challenging. To its credit however, plywood is relatively dimensionally stable due to the cross lamination of the plies thereby reducing warping from differential expansion and contraction with change in moisture content, particularly with thicknesses of ¾” or more.
Internal Bond is the force that it takes to pull a material apart in a direction perpendicular to the surface and is expressed in pounds per square inch (psi). This is an important physical characteristic because it measures a panel’s physical integrity and describes how well it is bonded. It is an especially important characteristic in composite boards made from wood fiber such as MDF, HDF, and hardboard as it is critical that the fiber be bonded together sufficiently to be used for different applications. In the realm of artist painting panels, if you are painting large works on a thin 1/8” panel you want to make sure you are
Density in lbs/ft3
Amp HB0
10
20
30
40
50
60
70
80
1/8” Std. HB 1/8” HDF 1/8” MDF 3/8” MDF Plywood
Internal Bond in psi
1/8” HDF0
50
100
150
200
250
300
Amp HB 1/8” MDF 1/8” std HB 3/8” MDF
Key: Amp HB (Ampersand Proprietary Hardboard, Std. HB (Standard Hardboard), HDF (High Density Fiberboard), MDF (Medium Density Fiberboard) Note: Physical characteristics can change depending on the natural wood used to manufacture the product. These data points are taken from examples of various manufacturers in the wood industry.

Issue 29 page 3 ©2013 Golden Artist Colors, Inc.
working with a stiff, warp resistant panel that has a minimum bond strength of 150 psi.
Modulus Of Rupture (MOR) is a measure of the maximum breaking strength of the board. Measured as pounds per square inch (psi), this is considered the ultimate unit of strength of a material in flexure or bending and has become the common measurement of strength in composite boards such as MDF, HDF, and hardboard. This is an important measurement for determining dimensional stability, particularly stiffness in larger panels. In plywood, the typical measurement of this same strength quality is MOE or modulus of elasticity which is really a test of the plywood’s ability to resist bending.
Moisture Content can be one of the most damaging elements to the substrate of a painting. In wood products including all the panels under discussion, moisture is always present in varying amounts expressed as a percentage of the oven dried weight of the wood. Water exists in wood in two basic ways: 1) Free Water which can occupy the cell cavities and totally saturate the fiber structure of the wood (up to 200% moisture content, much as water saturates available spaces in a sponge) and, 2) Bound Water which has actually created a chemical bond with the cellulose molecules in the cell walls of the wood (an average of 12% moisture content).
With most wood products Free Water does not concern us regarding differential shrinkage and expansion of the wood product. It can come and go
as it wishes without causing shrinkage problems such as warping. Although, an excess of Free Water in wood can cause mold growth and create problems with paint adhesion. After all the Free Water has been dried away, Bound Water begins to leave, each molecule of water breaking its chemical bonds with the cellulose molecule and evaporating out of
the wood, causing overall shrinkage.In other words, Bound Water begins to leave the wood under drier conditions and returns under more humid conditions with the wood shrinking and swelling accordingly, a constant change of dimensions. Unfortunately, if the shrinking causes excessive warping, the lignin (the natural glue that holds the cells together) will ‘set,’ making the warp permanent.
The intent of engineered wood products such as plywood and fiberboard is to break up this natural configuration of wood’s cellular variety and to somewhat homogenize the orientation of the chips or fiber so that these directional shrinkage forces cancel each other out to minimize warping, even out density and surface characteristics and in general, to make a more usefully consistent ‘piece of wood’. Here’s where engineered wood panels have a substantial advantage over solid wood panels. Composite panels such as hardboard and plywood will change at about 1/10th the rate of solid wood. But within engineered wood products, there are some that are better than others.
Linear expansion and moisture absorbtion tests help differentiate the differences among substrates in terms of how effective they are staying dimensionally stable. Smooth two sided (S2S) hardboard’s moisture content for example is very stable throughout its lifecycle. Due to the density and naturally bonded fibers, humidified hardboard will range from 4 – 5% with the maximum absorption generally not exceeding 9% under the most
humid conditions in ambient storage. Ampersand’s hardboard has the least amount of linear expansion in high humidity tests, showing a less than .02% linear expansion. Humidified HDF and MDF boards have moisture contents of 5 – 6% and have a linear expansion of .3% to .4% depending on the manufacturer.
There are various implications for artist supports in considering these different physical and mechanical characteristics of various wood products. Striving for the best dimensional stability is critical. However, preparing a panel appropriately is important too. If you are working with substrates that have high moisture content and low densities for example, it is best to use a “balanced” preparation method by priming both sides of the panel. Failing to do so may result in excessive warping.
In the following we will discuss several substrates that are commonly used by artists and painting panel manufacturers.
Hardboard is most commonly associated with Masonite®, as this was the first “brand” of hardboard invented by William Mason in 1942. Incidentally, Masonite no longer makes hardboard and very few plants in the world still manufacture this unique substrate due to the high cost of manufacturing. Beyond physical characteristics, the most significant difference between hardboard and fiberboard panels (both MDF and HDF) is the method of manufacturing. MDF and HDF panels use a dry process method and use synthetic binders or formaldehyde based agents for binding the wood fibers. In comparison, hardboard uses a wet/dry process method that relies on the natural cellulosic lignin as binders within the wood to cement the fibers together and make the panel solid. No additional additives are necessary in the wet process.
The wet/dry process used to manufacture hardboard produces both a smooth one side (S1S) panel and a smooth two side (S2S) panel. Wet process manufacturing separates the wood’s fiber bundles or particles using physical grinding and steam pressure, and then they float them in large vats
Modulus of Rupture in psi
Amp HB Plywood*0
1000
2000
3000
4000
5000
6000
7000
8000
1/8” HDF 1/8” Std. HB 1/8” MDF 3/8” MDF
Key: Amp HB (Ampersand Proprietary Hardboard, Std. HB (Standard Hardboard), HDF (High Density Fiberboard), MDF (Medium Density Fiberboard) Note: Physical characteristics can change depending on the natural wood used to manufacture the product. These data points are taken from examples of various manufacturers in the wood industry. * Plywood MOR is based on the average of several 3/4” thick plywood made from different species of wood.
(cont. on page 13)

Issue 29 page 4 ©2013 Golden Artist Colors, Inc.
Plywood as a Substrate for PaintingBy Mark D. Gottsegen
The original form of plywood was invented in the Mediterranean around 3400 B.C. by Egyptians during a shortage of quality wood for use in shipbuilding. Immanuel Nobel (father of Alfred Nobel) invented the rotary knife that is used to peel veneers from logs used to make plywood, and the first patent for modern plywood was issued in 1856.
Plywood that came along in the 19th Century were relatively simple constructions of 3 or 5 veneers (also known as plies) of softwood (spruce, pine, cedar) glued together so that the grain direction of each veneer ply was perpendicular to the adjacent veneer. The thickness of each ply was determined by the operator of the rotary knife and the requirements of the clients. The surface veneers could be thinner than the core veneer(s); the minimum number of plies in a sheet is three (between 1.5 and 4.5 mm thick) (1/16” and 3/16”), and the standard size of a sheet is 1.25 x 2.4 m (4’ x 8’). (Some specialty sheets are 0.9 x 1.5 m [3’ x 5’] or 1.5 x 1.5 m [5’ x 5’].) The advantage of a composite construction like this is that plywood is much less likely to split, warp, crack, or splinter when nailed near the edges. They are also very hard to bend, in the thicker versions.
The earliest use of plywood was in the construction of boats and buildings. Now it’s used in a long list of applications from the structural to the decorative to the specialty (for instance, there are special types of plywood designed to be bendable). Artists also use plywood as a construction material for sculpture and as a support for paintings.
I have to assume that most artists want to make art that at least outlives them. I also think that a lot of artists aspire to have their work in museums or large collections, where they will be well cared for. But as we realize, most art is not in museums or in well cared for collections. It’s in ordinary homes,
where the environment (temperature, humidity, and light) is much less controlled. It’s therefore important to consider the quality of the product if we want to choose something that’s durable. We can get away with using less than the highest quality material if we do certain things to strengthen the support and protect it.
Here’s a short list of various types of plywood available, accompanied by a brief description of each:
1. Softwood plywood. Plywood with core and surface veneers of pine, spruce, cedar, or redwood. The most commonly found plywood, in thicknesses from 6 mm (1/4”) to 30 mm (5/4”).
2. Hardwood plywood. Mainly birch, but also ash, oak, red oak, maple, mahogany, Philippine mahogany (luan, not real mahogany). Birch is the most commonly found, at 18 mm (3/4”) thick.
3. Aircraft plywood. Made of birch or maple, with special high-strength adhesives.
4. Decorative or cabinet-grade plywood. Mainly ash, birch, oak, red oak, maple, mahogany, Philippine mahogany (luan, not real mahogany), rose wood, teak, and many others, usually in the 18 mm (3/4”) thickness. For countertops, this kind of plywood may be faced with Formica® or other water and dent resistant plastic material.
5. Marine plywood. All hardwood plywood with voidless core veneers, with a special water and boil-proof adhesive. In various thicknesses.
6. Others: fire-retardant, moisture-resistant, sign-grade and pressure-treated. These are all treated with special chemicals for a specific purpose, and come in various thicknesses.
Quality Panels
The inevitable questions about plywood include “How do I pick a quality panel for my paintings?” (assuming you’re looking for quality) and “How do I prepare the panels for painting?”
A panel good enough for an artist to use should have
one side (call it A) whose surface is smooth and free of knots, voids, plugs, and seams. The reverse side (B) can be slightly less perfect - perhaps with some sanded plugs - but if A is good, that does not necessarily mean only slightly less good; there can be some very poor quality B sides out there! Also inspect all four edges - there shouldn’t be any voids, and the cut edges should be clean and vertical to the face planes. If you’re planning on using a 6 mm (1/4”) panel, it will probably have softwood veneers - pine or luan. If you want to use a thicker panel of, say, 18 mm (3/4”), birch is probably the most accessible hardwood veneer you’ll find. Moreover, birch plywood can have a very tight, smooth surface without a prominent grain that’s easy to size and prime. The quality of birch plywood can vary from species to species, however, so give your panel a thorough inspection.
Bracing Panels
If you’re going to use a panel thinner than 18 mm, down to 6 mm, it will have to be braced in order to keep the panel in plane. Panels 30 x 30 cm down to about 15 x 15 cm need only perimeter bracing; panels 15 x 15 cm usually do not need bracing as long as you can equalize the face surface tensions by coating both sides of the panel with equal numbers of coatings. Panels larger than 30 x 30 cm will need perimeter bracing and cross-bracing. Cross-bracing should be applied every 30 cm in both directions (horizontal and vertical).
These “auxiliary supports,” as I call the bracing, ought to be built as units separate from the panel, and then applied to the panel. The usual size for a stick is 5 x 10 cm (nominal
Lap-joint bracing for a rigid support, with all joints to be screwed and glued.

Issue 29 page 5 ©2013 Golden Artist Colors, Inc.
1” x 2”), although for large panels (up to 2.4 x 1.2 m [8’ x 4’]), I’ve used 5 x 20 cm (1” x 4”) sticks. Most artists use store bought 5 x 10 cm pine sticks, but colleagues who make these panels as a profession have found them to have a strong potential for warping; they prefer to cut their own 18 mm x 10 cm sticks from 18 mm thick plywood, which, because of the glue used in their manufacture and the nature of their construction, are less likely to warp.
The easiest joints for the average artist/woodworker to make, where one stick meets another, are lap joints. Where cross-braces cross each other, use double lap joints. The tools you need to make braces include a carpenter’s square, a back saw and a chisel. Cut the sticks, make the joints, and assemble the auxiliary support with yellow aliphatic wood glue used by carpenters; allow it to dry overnight. I’ve also used construction adhesive (in a caulking tube) for the job, as it dries more quickly. Once the frame is dry, it can be glued as a single unit to the back of your panel. For this, I recommend the yellow wood glue instead of the construction adhesive; it’s more durable. Lay the panel on the floor and apply heavy weights to its surface to ensure a good bond between the panel and bracing. Allow to cure overnight. If you have a good number of simple squeeze clamps you can clamp the panel and bracing together, and stand the contraption on edge to get it out of the way.
Surface Additions
A rigid substrate is definitely recommended for painting in oil, but a lot of artists don’t like the smooth and hard surface of a panel - whether plywood or another product. You can apply a linen, cotton, paper, or museum board surface to the face of the panel to soften the surface a bit and give it some texture. I use an acrylic dispersion gel medium for this because it gives me a lot of open time to reposition the material.
You can cut the fabric to nearly the exact size of the panel (leave a little for trimming) or make it about 10 cm larger in both dimensions, so as to have enough extra fabric to wrap around the edge onto the back of the panel or bracing. This makes a nice edge for decorating, should you choose to do something like that. Paper can
be wrapped too, but it’s harder to do because machine-made paper has a grain that resists against bending.
Then, coat the surface of the panel with the gel medium about 1 mm thick using a brush, a roller, or a spatula. Put the fabric on it and position it so it’s hanging evenly over all the edges. Smooth any wrinkles with your hands, working from the center outward towards the edges. Once you’re satisfied with the position of the material, use a rubber brayer to roll the fabric down, again working from the center towards the edges. This will get rid of any bubbles and also make a good bond between the material and the panel surface. Some of the medium will squeeze out at the edges. It’s useful to coat both surfaces before attaching the material and while you’re at it, you can coat the cut edges of the plywood for their protection as well.
If you’re trimming the material flush with the edges of the panel, do it now, before the gel medium dries. Use a single-edge razor or a utility knife.
If you’re folding the fabric over the edge, turn the object over and put it face-down on a clean surface. Paint the gel medium on the edges and a bit of the reverse of the panel, then pull the material up and over the edges and attach at the back. I like to make a neat corner with no bulges by cutting out a neat square of the fabric at each corner so that the seams meet along the corner - that makes framing much easier. Stand the panel on edge and let it dry overnight.
To prep the fabric for oil painting with an oil ground, size the fabric with an acrylic dispersion medium designed for the purpose, and then apply an oil ground - traditional lead white in oil, oil/alkyd with titanium white, stack process lead white oil ground. Be sure to follow the manufacturer’s instructions and health warnings if you’re using a ground with lead carbonate in it. Two thinned coats of primer/ground are better than one. Use odorless mineral spirits as the thinner and be sure you have superior ventilation or wear a respirator. Allow to dry until dry-to-touch, usually 3 - 7 days in a warm environment.
To prep the fabric for painting in acrylic dispersion paints, size it with an acrylic dispersion medium designed to
prevent Support Induced Discoloration (SID). GOLDEN GAC 100 is a good one. Then apply two to four coatings of a high quality acrylic dispersion primer/ground.
If you want to paint on the uncovered plywood surface, it still needs to be sized. The wood surface is unevenly absorbent and a size will even that out. Then you can apply an oil ground - traditional lead white in oil, oil/alkyd with titanium white, stack process lead white oil ground. Follow the precautions as above, and use a minimum of two coatings.
If you want to use an acrylic dispersion primer/ground, size it with something like GOLDEN GAC 100 to prevent SID, and then two to four coatings of a high quality acrylic dispersion primer/ground.
Suppose you want to paint in egg tempera? Make a modern glue/chalk gesso and apply five to ten coats of it to the sized panel. As you are doing so, ponder the meaning of gesso: an Italian word meaning “plaster” or “gypsum.”
The final item to consider is how to educate your clients about keeping your paintings. A label is a good instructor, containing every bit of information about the painting from the construction of the support, to the contents of the size, the ground, the paint, and any final surface coating, using brand names where possible. In addition, you’ll want to tell the client that the optimum environment for storage/display excludes ultraviolet light, and keeps the temperature up to 24°C (75°F) +/- 5°, with the Relative Humidity at about 45% +/- 15%. Most homes can achieve the temperature requirements, but it’s very expensive to meet the museum standard for RH, so don’t make too big a deal out of that. Above all, you want your clients to be able to enjoy your artwork for as long as they wish, right?
References available online at www.goldenpaints.com/justpaint.

Issue 29 page 6 ©2013 Golden Artist Colors, Inc.
of applications, it’s little wonder artists will often reach for different products at each turn. Acrylics however have always had a certain identity as a shape shifting, almost protean substance that could take on whatever properties were needed. And so the hope was always there for creating a magical middle ground, perfectly balanced between all these various tasks.
Why High Flow Acrylic?While High Flow Acrylics (HFA)
are replacing Airbrush Colors, they are not simply a recasting or tweaking of that line. Built from the ground up, HFA are based on completely new formulations that use a different set of binders, a broader range of pigments, and come ready for use in a much wider scope of applications. At the same time, for the vast majority of the colors we were very careful to maintain the excellent sprayability that artists had come to rely on when using the Airbrush Colors in the past. That said, when wanting to explore some of the newer offerings that use fairly large pigment particles, such as the genuine iron oxides and mica-based iridescents, some adjustments to tip sizes and techniques might be needed. Please see the articles on High Flow applications in this issue, as well as the Tech Sheet on our website, for more details.
ChallengesThe main challenge in creating High
Flow Acrylics was maximizing the dispersion and stabilizing the pigments in such a fluid system. Each pigment presented its own puzzle and required its own balancing act in formulating. Once a basic formula was in place, however, it still needed to pass a series of quality control and application testing to make sure it could perform at the highest possible level. It was not unusual for a color to go through 10-15 trials before meeting these demands.
Getting WetThe first hurdle can often come as
a surprise to most people. At some point, when working with a water-based system, the pigments will need to get wet. That much seems obvious. What is surprising is how many of these pigments are hydrophobic, meaning literally to have a phobia or
fear of water. As if death by drowning topped their list of nightmares. To overcome this we use wetting agents and surfactants to lower the surface tension of water and act as a form of go-between; one end of their molecule being attracted to the surface of the pigment while the other is pulled outward towards the watery world that surrounds it. This allows water-based binders to flow more easily across the pigment surface while displacing any air; a process known as “wetting out”.
Breaking Up Is Hard to Do
Beyond the initial wetting, pigments need to be well dispersed in the binder. It is actually rare for pigments to exist at their smallest, primary-particle size since extremely strong inter-molecular forces cause them to stick together in various ways, initially forming tightly bound clusters of particles, called aggregates, which then form the building blocks for larger, more open clusters called agglomerates. Breaking these groupings apart requires the powerful shear forces of paint mixers and mills. While this allows the pigment to be evenly dispersed in the binder, and will increase tint strength, one needs to find ways to keep the pigments from regrouping, or even worse, from eventually crashing and forming a hard layer at the bottom.
Some Typical Specific Pigments Gravity
Quinacridones / ~1.5 Phthalocyanines
Ultramarine Blue 2.3
Raw Sienna 3.0
Titanium White 4.0
Red Iron Oxide 5.0
Electrostatic Stabilization
Steric Stabilization
Stabilization Getting particles that are invariably
heavier than water to stay in suspension and not simply crash to the bottom of the container can seem like something just shy of the miraculous. This is especially true if you consider that the pigments we work with weigh ~1.5 to 5 times more than an equal volume of water; which is the same as saying that they are ~1.5 to 5 times more dense - a ratio known as a material’s Specific Gravity.
As if that was not bad enough, as pigments continually bump into each other they have a strong tendency to stick together in a process known as flocculation. These groupings then become increasingly heavy until they can no longer stay in suspension and drift downward. By controlling how that happens, one can make sure a paint forms loose, weakly bound clumps that are easier to break up and get back into a smooth, homogenous solution. This is basically why one is asked to “shake the paint thoroughly” before each use.
How pigments are kept apart and stabilized is based generally on two methods. One is electrostatic, where particles are surrounded by similarly charged layers (either positive or negative) and so repel each other, like magnets. The other is called steric, which involves adding polymers where one end is attached to the particle surface and the other branches out into the surrounding medium. They are structured in such a way that they are inhibited from coming too close to similarly treated particles, essentially creating a cushion or barrier. Picture a group of women in hoop skirts packed into an elevator, where even the best of friends will have difficulty moving closer together, much less embracing. In water-based systems it is also quite common to use both approaches at the same time, forming a combined electrosteric combination, which is the direction we took.
How Large Can Small Be?
While weight and forces of attraction present significant challenges, particle size by itself is likely one of the most dominant physical traits impacting both performance and formulation. The pigments we used ranged from
High Flow Acrylics(cont. from page 1)

Issue 29 page 7 ©2013 Golden Artist Colors, Inc.
A one foot cube has 6 square feet of surface area.
Divide that into quarters, and now there is 12 square feet of surface area or twice as much.
Divide again and you have 24 square feet of surface but the overall volume has stayed the same.
carbon black and organics like Phthalocyanines and Quinacridones, with primary particle sizes of 1/10th of a micron and less, and aggregates up to 12.5 microns, to natural and synthetic iron oxides with primary particles of 1-5 microns and aggregates up to 25 microns, and finally mica-based iridescents which had the largest size at 60 microns. To put those numbers in context, 40 microns is the smallest particle visible to the human eye, while a human hair runs between 50-100 microns in width.
As pigments get smaller the ratio of their surface area to volume, as well as mass, goes up dramatically. For example, a one foot cube of marble has 6 square feet of surface area; divide that into quarters (or 3 inch cubes), and you now have 24 square feet of surface, or four times the amount, all the while keeping the same total volume. Continue the process until you have a fine powder and you
will literally end up with millions of square feet of surface area to coat and contend with. As the amount of binder needed to wet out all those surfaces
increases, choosing and balancing the various materials that interact or attach themselves to the surfaces of these particles, such as the surfactants we mentioned earlier, become an ever more critical part of the picture.
Going With the Flow
All the engineering behind the scenes, all the trials and the tweaks, really had just one purpose in mind from the start – to create a line of colors that flow and perform effortlessly, not simply through various tools and
applications, but across the boundaries of painting, drawing, and spraying. It also brings the durability of the acrylic system, with all of its advantages and
compatibility with other GOLDEN products, to the worlds of inks and airbrush colors. From all those vantage points, High Flow Acrylics is truly a new
addition that creates fresh possibilities for expression.
For more information and to see the new High Flow Acrylics video visit www.goldenpaints.com/HighFlow.
High Flow Acrylics are formulated for a broad range of applications, including drawing with refillable markers. Marker blanks come in a variety of sizes, with a variety of tips and can be filled with GOLDEN High Flow Acrylics. Be sure that the marker blank comes with a bearing or barundum to help agitate the paint when shaken.
Issue 29 page 8 ©2013 Golden Artist Colors, Inc.
By Amy McKinnon
The ease we all feel in picking up a pen and writing something down has facilitated us to translate, transcribe and transform the thoughts in our heads to a tangible surface. While this may work very easily in everyday life, traditional inks can present problems when used within artwork from issues of permanence to compatibility with other materials, to adhesion. The advantages of inks come from hundreds of years of improving the technology of their delivery. Meaning as ubiquitous as the modern pen is, it is a highly evolved system for delivering a dye based fluid system onto paper. All of this makes for a successful tool for transcribing thoughts onto paper, but it is less successful as a permanent artists’ tool. Among the advantages of the new High Flow Acrylic paint is that it allows artists the peace of mind that they are using a product designed for use in art but with the fluidity and ease of use typically reserved only for inks and office grade products.
As is typical around here, we have done a wide series of exercises and tests using these new colors in order to support the many different uses this line will be expected to perform for artists. What I have attempted to create is a list of current best practices
and starting points for using the High Flow Acrylic paints within a drawing tool and evaluating the performance color by color, on a range of substrates. For simplicity sake, (not something we are well noted for), I’ve chosen 8 colors to represent the larger full line of 49 colors. Each color represents a particular pigment particle size as this proved to be the most important singular property influencing High Flow’s attributes in different writing implements. The pens, refillable markers and other ink delivery devices were chosen based on what artists use and what is most popular.
When using pigmented paints in pens (quill, technical, ruling, or calligraphic) or markers (daubers, nylon tips or sponge mops), the number one deciding factor in the fineness of line is pigment particle size. “Will that particle, which is size x really fit into a size x nib and continue to flow?” We filled, dipped, wrote, scribbled, hatched and cleaned each color in each pen and marker to understand and highlight the properties of each of our color groupings. Our choice of substrates included typical writing surfaces and a variety of acrylic grounds that offer a range of options and attributes that can be explored with each device and color used. In addition to how the individual pens
and markers worked we also looked at how they needed to be cleaned, the ease of cleaning them, and the general maintenance when in use and when stored.
One of the great perks with introducing the High Flow line was being able to add colors that had been otherwise unavailable in our older Airbrush color line. Some of these new additions have the largest pigment particle size within the line. These include all the Iridescent colors, Fluorescent colors and some of the inorganic mineral pigments. While these colors did perform well in most pens and markers, they also required greater maintenance while working.
Since High Flow Acrylics are paint and not simply another ink, we found it imperative to evaluate substrates well beyond the typical paper surfaces. In addition to cold and hot pressed watercolor paper we tested frosted polyester, raw and gessoed canvas, Black Gesso, Sandable Hard Gesso, Acrylic Ground for Pastels, Molding Paste, Absorbent Ground, Regular Gel (Gloss) and a number of different paints and pastes. Common sense often dictates what pen or marker should be used on what particular surface. For example, using a crow quill pen on Fiber Paste does not showcase the delicate smooth line created by the crow quill but instead causes the pen to skip over the low parts of the hard Fiber Paste texture thus dictating the movement of the pen. The more textured, grittier, bumpier substrates
High Flow Acrylic Application: Pen and Markers
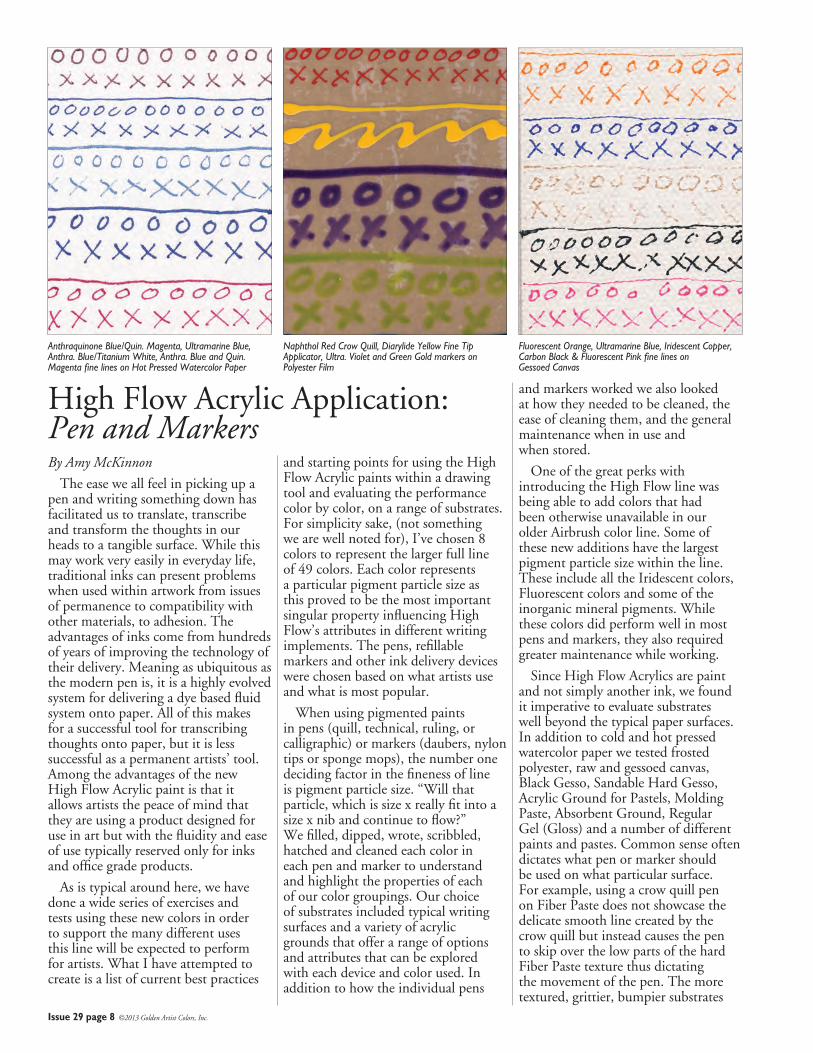
Anthraquinone Blue/Quin. Magenta, Ultramarine Blue, Anthra. Blue/Titanium White, Anthra. Blue and Quin. Magenta fine lines on Hot Pressed Watercolor Paper
Fluorescent Orange, Ultramarine Blue, Iridescent Copper, Carbon Black & Fluorescent Pink fine lines on Gessoed Canvas
Naphthol Red Crow Quill, Diarylide Yellow Fine Tip Applicator, Ultra. Violet and Green Gold markers on Polyester Film

Issue 29 page 9 ©2013 Golden Artist Colors, Inc.
do not offer surfaces compatible with pens that deliver thin, delicate lines but on the other hand they work great with markers. Overall, smoother surfaces provided better grounds for thinner, more delicate lines and while it is possible to use technical and crow quill pens on the rougher surfaces, doing so required slower and more deliberate movements.
Paper. High Flow Acrylics function much like a standard ink on paper. On hot pressed watercolor paper the lines were crisp and the marks were even. Cold pressed watercolor paper, due to increased texture and varied absorbency, made for lines with slightly fuzzier edges and the paint did not flow as well. Overall, due to the absorbent nature of most papers, the High Flow absorbed well into the paper, making less of a paint film sitting atop the surface and thus exhibited little to no sheen.
Frosted Polyester Film. Similar to cold pressed watercolor paper this surface was very smooth and created crisp, even flowing lines. The surface offers no drag to the stylus and creates no skips or chattering when written upon. There is no absorbency to this surface so the High Flow sits on top, showing its film, sheen and profile.
Canvas; Raw And Gessoed. On raw canvas it was difficult to get an even, consistent line from technical pens and crow quill pens. Gessoed canvas provided a better surface on which to write. The delicate marks made were
crisp due to the balanced absorbency of the gesso. The thinness of the paint on the gessoed surface showcased the canvas texture by concentrating in the recesses of the weave.
Panel With Gesso, Sandable Hard Gesso, Black Gesso. Both Gesso and Sandable Hard Gesso provided great surfaces to write on and worked similarly in the acceptance of the paint. They both exhibited similar levels of absorbency in terms of how much of a sheen or profile the paint had on the surface. Black Gesso worked similarly although due to its color, should be reserved for lighter and brighter paint choices as the darker paints only show sheen when viewed at an angle. Black Gesso strongly showcased Iridescent and Fluorescent colors much better than white surfaces allowing the paint to pop out, especially with more delicate, thin marks.
Absorbent Ground. This was a more challenging surface to write on. The thin metal styluses scratched across the surface showing its delicate dry nature and while the mark was successful, the experience was less so. When the refillable markers were used, there were fuzzy edges due to the increased absorbency of the ground. Much like watercolor paper, there was no profile or sheen to the paint as it had soaked into the ground.
Molding Paste. Proving to be one of the best acrylic surfaces to write on, it worked similarly to the frosted
polyester film in regards to smoothness and experience but with some absorbency. The quality of the marks made was very good with a balanced level of absorbency, showing some sheen and profile to the marks made. The marks did not have the fuzzy edges seen on the more absorbent surfaces but rather, had a softness to the edges.
Acrylic Ground For Pastels. Its sandy texture added for some resistance when writing upon with the finer styluses and an uneven absorbency caused the marks made by the markers and other tools to bleed, making for a less controlled mark.
Regular Gel (Gloss). This surface held the marks beautifully; producing clean crisp lines with the finer marks made and with lessened absorbency, did not bleed with the markers. The challenge with this surface was the softness and flexibility and how that affected application. The markers went on fine but the thinner needle-like metal styluses easily stabbed at the surface with the slightest amount of pressure. The sheen and profile of the mark were evident.
Painted Surfaces. The marks made on painted surfaces depended largely on the nature of the paint and its application. Thin paint films on harder surfaces worked better with the finer styluses while thicker, more flexible ones were easily stabbed by the pen tip. Markers had no problem going onto dried paint films and overall, produced marks that were anticipated.
Fluorescent Pink, Teal, Iridescent Gold & Naphthol Red Crow Quills, Diarylide Yellow Fine Tip Applicator on Black Gesso
Naphthol Red Crow Quill, Diarylide Yellow Fine Tip Applicator, Ultra. Violet and Green Gold in refillable markers on Molding Paste
Sepia, Pyrrole Orange, Sap Green/Green Gold & Transparent Phthalo Blue in refillable markers on Sandable Hard Gesso

Issue 29 page 10 ©2013 Golden Artist Colors, Inc.
The pens that were chosen for this testing represent a very small percentage of what is available. The potential of what could conceivably work with High Flow Acrylics in regards to pens and markers is huge and while we tested some of the more popular options and did not have problems, we cannot guarantee that the mechanisms of some pens will not be damaged with the use of acrylics in them. For this reason we recommend reading any literature that accompanies the pen or marker and contacting the manufacturer regarding how long to leave the pen filled and how to clean it. In some cases it was found that the solvent based cleaners recommended to clean the pens were not necessary since High Flow can be cleaned up with water. Certain pens, especially fountain pens that have elaborate channels and mechanisms can be much harder to clean and may work for a few times but can quickly become clogged due to the fact that the paint will pool and dry inside the pen in areas that are inaccessible. It is therefore not advisable to use your expensive fountain pen with this permanent acrylic paint.
Technical Pens. The smallest size pen that all of the High Flow Acrylic colors worked in all of the time was .5 mm. This means that there were no issues in .5 mm and larger. Some of the smaller sized technical pens were able to accommodate all of the colors but not with the consistency desired. The smallest size we tested, .13 mm, did not allow for any color to come
through the pen. The next largest sizes (.25 mm, .30 mm and .35 mm) worked for all of the colors but when the Fluorescent and Iridescent colors were used, the tip needed to be wetted occasionally and the pens needed to be cleaned after each use. Even though this size orifice tended to be fussier, the amazing thin line can be quite exquisite and something to investigate. We were able to leave the pens filled for several weeks without cleaning, but would recommend that they be cleaned after each use or every few days as leaving the acrylic in the pen any longer could ruin the mechanism.
Crow Quill Pens. Crow quill pens worked beautifully. The paints with the larger pigment particle size demanded more dipping and more cleaning but due to the design of the nib, this was a very easy process that included dipping the nib into water and wiping it with a soft cloth.
Markers. Marker blanks come in a variety of sizes with a variety of tips and can be filled with High Flow. Be sure that the marker blank comes with a bearing or barundum to help agitate the paint when shaking. Overall the Iridescent colors worked in the markers and created a consistent mark for about one week before requiring increased priming of the tip. The Fluorescent colors worked in the markers for just under a month. With the exception of Titanium White and Titan Buff, which required more priming after several weeks, the rest of the colors worked beautifully for the next several
months with a few exceptions. The heavier mineral pigments, including the Transparent Red Iron Oxide, Yellow Oxide, Raw Umber, Ultramarine Blue and Raw Sienna needed increased priming and shaking prior to use. After roughly 3-4 months most of the markers still work and work well although they do require increased shaking, priming of the felt tip (depressing prior to writing) and in some cases a slight wetting of the felt tip (quick dip in water). It is highly recommended to change the felt tip when needed and to purchase marker blanks that allow for tip replacement.
Styluses. With many of the styluses that we tested we saw some consistencies worth noting. Speed of motion when writing or drawing is essential. Slow and steady produces the cleanest and most consistent quality line. Often moving too quickly across the surface will cause skipping or chattering. Maintenance of the writing implement is essential to the quality of the mark made but also to the future functionality of that stylus.
High Flow Acrylics offer a lot of opportunity previously unavailable with traditional inks or thicker acrylic paints. We have only skimmed the surface in regards to the potential of where artists will take these paints and while we encourage pushing the limits, we also recommend testing where those boundaries lie so the control is in hand of the user as opposed to the limitations of the tools.
Anthra. Blue 3x0 .25, Anthra. Blue/Quin. Mag. 00 .30, Ultra. Blue 0 .35, Anthra. Blue/Titanium White #1 .50, and Anthra. Blue #2 .60 Tech. Pens on Soft Gel
Ultramarine Blue, Iridescent Copper, Carbon Black, Fluorescent Pink and Teal High Flow marks with a Crow Quill Pen on Gesso
Sepia, Pyrrole Orange, Sap Green/Green Gold and Transparent Phthalo Blue High Flow colors in refillable markers on Absorbent Ground

Issue 29 page 11 ©2013 Golden Artist Colors, Inc.
By Michael Townsend
High Flow Acrylic Applications: Airbrush
The new GOLDEN High Flow Acrylics are an amazingly versatile paint! As one of the folks here in my earlier Research and Development days at GOLDEN, I spent countless hours conducting application testing of the Airbrush Colors, so I have to admit that the idea of a new paint line that was also going to replace my precious Airbrush line made me a little uneasy at first. Would this new paint live up to the expectations of our dearly departed Airbrush Colors? Thankfully they have, but it was clear to us all that a good amount of testing would be necessary in order to assure us they hit the mark!
Testing for the sprayability of paints doesn’t come with a blueprint. Ready to spray acrylic paints cannot dry inside the airbrush and clog the tip, yet they need to dry as quickly as possible once sprayed in order to keep pace with the painting process. We created a series of repeatable tests covering a gamut of spraying benchmarks to learn which formula proved to be the best overall.
We expect that any ready to spray paint will have the ability to achieve good atomization and a smooth durable layer. Uniform color gradation allows for soft blending and is important, but the pivotal test separating “good”
airbrush paint from “GREAT” airbrush paint is the continuous fine line test – a.k.a. the ‘loop de loop test. The paint is sprayed at a specific air pressure (40 psi) using an airbrush with a .25 mm nozzle, and then you spray as long of a fine line as possible without skipping or stopping. This is a very demanding test for the material. If a trial batch has what it takes, it then moves onto the next brutal test, the Dagger Stroke Test. This stroke is a mainstay technique for freehand airbrushing. It is essential for creating lettering, animal hair, and a host of other everyday needs. What makes this stroke so demanding for the paint is a constant stop/start throttling of the paint. The trigger is toggled open and closed in an instant, increasing the likelihood of paint drying in the nozzle and on the
GOLDEN High Flow continuous fine line test – a.k.a. the ‘loop de loop test’.
GOLDEN High Flow dagger stroke test – the mainstay technique for freehand airbrushing.
High Flow Acrylics for Airbrush, Striping, Textiles, Marbleizing and Staining
needle. Clogging during this technique is the kiss of death for any paint. You simply cannot paint with continual skipping happening.
All of the most critical colors in the High Flow line performed remarkably well during this testing. As expected, some of the unique colors like the Iridescents, Fluorescents and certain mineral pigments with much larger pigment sizes simply required the larger .5 mm orifice to improve their performance.
Another area of airbrush testing involved the use of masking tapes, frisket (masking films created for airbrush illustration purposes) and other adhesive materials to alleviate the concern of paint pull-up while working. The High Flow Acrylics are designed to have a tough, fast drying paint surface that is resistant to paint pull-up. We tested a wide variety of masking tapes and frisket to see if there were any issues. During testing we applied a uniform layer of High Flow color onto Crescent® Board, and allowed 5 minutes for drying. Strips of masking were then applied. One set was removed shortly after burnishing. Another set was left on for several hours before removing.
We also looked at the ability of each frisket to adhere to the dried High Flow Acrylic paint layers, using standard frisketing techniques. The concept was to create a simple outline of shapes, apply frisket, and spray three

Issue 29 page 12 ©2013 Golden Artist Colors, Inc.
areas with color, replacing the mask as needed for the design to see which frisket performed best with the paints.
Beyond just the use of the High Flow Acrylics in a typical airbrush I also investigated using the colors in a Beugler Striper. This device has been around for decades, mostly known to sign-painters and the custom automotive crowd. To create an ideal paint for this tool I found it best to blend the Fluid Acrylics with the High Flow Acrylics. While a few mixtures will require some amount of fine tuning, a 3:1 Fluid Acrylic to High Flow Acrylic mixture tends to be an excellent starting point. You can likewise use the High Flow Acrylics to thin any of our paint lines since they all work together as part of our Acrylic System. The value of this approach is that an artist can create any viscosity of paint, from practically as thin as water to as thick as our Heavy Body paint and not lose color strength.
High Flow Acrylic Applications: Textiles
As with the GOLDEN Airbrush Colors, these new High Flow Acrylics can be used for textile work intended to be laundered, but will require the addition of GAC 900 – our heat-set fabric medium. This is a critical addition as the High Flow Acrylics will have a lot of color wash out during laundering otherwise. The addition of GAC 900 is an easy 1:1 mix with High Flow. The addition of GAC 900 also helps to thin the paints and add some additional retarders to improve penetration into the fabric.
When doing highly detailed fabric work, it is very helpful to apply a base layer of GAC 900 and heat-press it down afterwards. By doing so, you create a smooth painting surface compared to the relatively bumpy fabric pile. In many instances, airbrushing is used to produce soft color gradations as when doing portraiture. These paint layers are often incomplete and even with a layer of GAC 900 applied as a base, the color can still be prone to lifting. A topcoat application of GAC 900, followed by another heat-pressing should result in a smooth surface and soft hand that launders well.
High Flow Acrylic Applications: Marbleizing
Paper and fabric marbleizing is another use for a thin paint such as High Flow Acrylics, but as with any paint used for this painting technique, one should always expect to modify the paints in order to achieve quality results. Marbling is easy to learn but difficult to master. There are so many
variables that impact the process, some of which are not easily controllable. Sometimes a color that worked terrific for you yesterday simply does not want to cooperate today. Maybe the colors used next to it are different and they are influencing it. Perhaps the marbling bath is getting contaminated with color. Maybe the barometric pressure is completely different due to the changing weather. The point in all of this is to keep good notes and be consistent with your technique and mixing processes.
During testing of High Flow colors for marbling techniques, most colors produced wonderful results without tweaking. However, the Iridescent colors were incredibly aggressive and pushed everything else to the edge of the tray. I found that by simply swapping out this High Flow color for its Fluid Acrylic equivalent, I was able to continue working. This is a fairly common practice for many marblers, who use whatever color or paint mixture it takes to get desired results. GOLDEN Acrylics are formulated to be compatible with each other, so mixing and matching, even blending together before marbling is perfectly acceptable.
High Flow Acrylic Applications: Staining
The High Flow Acrylics also work exceptionally well for large fields of color right from the bottle. They flow readily across a surface and are easy to push around with watercolor brushes on raw or primed canvas, watercolor papers and other painting supports. While they can be diluted with water or modified with Airbrush Transparent Extender or other fluid acrylic
3:1 Fluid Acrylic to High Flow Acrylic mixture tends to be an excellent starting point for paint in a Beugler Striper.
Frisket airbrush testing on GOLDEN High Flow Acrylics looks at the ability of the frisket to adhere to the dried paint layer.
The GOLDEN Acrylic System allows for mixing and matching of High Flow Acrylics with other colors for marbleizing applications.

Issue 29 page 13 ©2013 Golden Artist Colors, Inc.
mediums, if left alone they will produce intense color. High Flow Acrylics work over wet surfaces with expected staining and bleeding. They produce incredibly fascinating wet into wet effects due to their inherent differences in pigment particle size and densities. Just as with other staining techniques, it is important to understand the absorbency of your substrate. On unprimed canvas, for example, the sizing used to weave the canvas may prevent the immediate penetration of the stain, so either pre-wetting the canvas to create a broader stain or adding a small amount of Acrylic Flow Release to the High Flow Acrylics may be necessary to create a more controlled penetration in the canvas. Ultimately, we expect the High Flow Acrylics to offer artists an entirely new vocabulary of tools to create their art.
High Flow Acrylics work exceptionally well for large fields of color right from the bottle.
of water. This method removes the lamella which contains many of the lignins and tannins that can cause discoloration. Many of the water soluble chemicals and acids that exist in the wood are also leached out leaving an almost inert fiber. The wood fibers are then randomly aligned parallel to the surface, and using heat and pressure, are made into a solid core panel.
Smooth One Side (S1S) is delivered to the presses on a wire mesh screen. S2S is hot-pressed between two smooth plates, making it a very dense and low moisture content board. With S2S hardboard there is standard hardboard and tempered hardboard. Both are made the same and in the same process. However, hardboard goes through one more step in the process to make it tempered. With tempered hardboard, a small amount of pH neutral oil (only 1.8 oz for a 4 ft x 8 ft sheet) is applied with a roll coater at the time the board leaves the press. According to chemical coating engineers, the oil “tempering” is invisible and does not leave a homogenous film on the panel. The purpose of this process is to make the board stronger and less prone to warping. The board is not impregnated with oil as has been incorrectly written in some artist handbooks. In fact, S2S hardboard is considered one of the best substrates for painting, laminating, and construction in the wood industry and is used extensively by artists.
Medium Density Fiberboards (MDF) and High Density Fiberboards (HDF) are engineered panels that are made through a dry process that completely breaks down the particles of wood and reconstitutes them into a new panel using heat, pressure and a binder. One of the most common binders used in their manufacture is urea-formaldehyde, leading to potential problems with out-gassing. However, today many MDF manufacturers have voluntarily developed low-emitting and no added urea-formaldehyde (NAUF) panels so there are a growing number of non-formaldehyde alternatives on the market. The technology in the area of dry process manufacturing fiberboards is expanding and we continue to see
new improved panels, especially in high density boards coming to the market.
MDF and HDF typically have densities anywhere from 55 lb/ft3 to 60 lb/ft3. However, manufacturers of these dry process fiberboards have successfully developed high density fiberboards with an internal bond strength as high as 270 psi which provides a much more stable surface than MDF panels, which on average exhibit an internal bond strength of 155 psi. Using a variety of resins mixed with the wood fiber, they are able to achieve quite a dimensionally stable panel. However, the dry process still leaves a porous surface and there is some fiber raising/swelling on HDF, but it is nowhere near the fiber swelling that you get with MDF panels. More layers of sealing and gesso are required to eliminate the fiber raising on MDF. Artists choosing to work on MDF or HDF should cautiously gesso both sides of their panels to improve the dimensional stability of the surface.
Plywood is built up of sheets of veneer and lumber called plies laid with the grain direction perpendicular
Understanding Wood Supports for Art(cont. from page 3)
to one another and then united under pressure by an adhesive bonding agent. Plywood’s cross-laminated construction provides superior dimensional stability and resistance to warping or buckling when exposed to moisture. Plywood can be made from either softwoods or hardwoods and is graded for outdoor industrial use or hardwood/decorative interior use. Outdoor industrial plywoods use exterior bonding glues that are moisture resistant while hardwood/decorative plywoods use interior bonding glues and typically are sanded with the face and back made from high quality hardwoods. Maple, Baltic Birch, and Basswood are just some of the hardwood plywood options available in the market.

Issue 29 page 14 ©2013 Golden Artist Colors, Inc.
While very dimensionally stable, plywood as an artist support does have some disadvantages. What is critically important for artists when choosing plywood as an art support is the a) overall thickness of the plywood panel and the face veneers and b) the quality of the veneer. The best choice would be a ¾” die board, which is plywood where every ply is made of an equal thickness of the same type of wood. This type of plywood is exceptionally dimensionally stable.
Typically the rule of thumb is, the more plies, the more stable the panel. Since each of the plies are thin (1.6 mm to 4.8 mm), thinner plywood must be braced or the support will experience warping. Beware of plywood with a veneer that appears evenly finished but is paper thin. This type of plywood will inevitably exhibit checking (cracking of the veneer layer) once you prime the surface. Secondly you want to make sure that there are no seams in the plywood veneer. Again, over time the thin plywood veneer will open as the artwork is exposed to different levels of humidity. Finally, different veneers will prime differently. For example, birch veneers will exhibit more fiber raising which will require more sealing and priming of the surface, while basswood and maple typically have a tighter even grain and require less priming and sealing. Completely sealing and priming the plywood with several layers of gesso is essential to eliminate future cracking of the veneers in the plywood which then would impact the artist’s paint film.
Braced/Cradled Panels
In order to give a panel extra support, bracing or “cradling” is often used. Today’s artists are fortunate in that manufactured panels are dimensionally stable enough to be cradled or braced. However, much more research must be done on this subject as more wood panels, many of which are imported, are exhibiting structural issues such as warping and bowing. These panels are typically made with thin 3 mm plywood and braced with solid wood strips. While aesthetically these panels are very appealing, there may be an inherent imbalance in the construction of these panels, especially larger ones. Thinner plywood tends to warp and when braced with a solid wood strip, there will be a tendency for any warp
Top: Surface checking on gessoed plywood. Bottom: Wood panel on left has not been sealed prior to applying gesso, exhibiting Support Induced Discoloration. Panel on right has a sealing layer prior to applying final gesso layer.
in the plywood to force a change in the solid wood strip and vice versa as the panel is exposed to humidity changes. As discussed earlier in this article, solid wood strips still have their original cell structure and are more susceptible to dimensional change as the relative humidity of the air changes. In Ampersand Art’s extensive experience manufacturing cradled panels, we have seen that bracing large panels with high quality plywood will give you the best protection against warping. Ampersand Art uses a 13-ply plywood for bracing their museum panels over solid wood strips due to the stability of the plywood. The dimensional stability of a 13 ply birch plywood provides a much more dimensionally stable strip of wood, which is less prone to warping. Additionally, do not nail or screw the cradle onto the panel, or you will affect the painting surface over time. With wood expansion and contraction, nails will come loose over time. Use professional grade wood glues to adhere the panel to the bracing system.
Sealing And Priming
With the exception of encaustic wax which acts as a sealer, all wood panels should be sealed with a good primer before painting artwork on them. Lignins and tannins that naturally exist in the wood can actually leach through
the ground and affect a painting if a panel is not properly sealed and primed. The image (left) demonstrates how a panel without a sealer will yellow while a sealed panel will block the tannins from leaching through to the painting ground.
There are several recommended methods and resources to learn about sealing and priming a panel. The updated Painter’s Handbook by Mark Gottsegen is an excellent resource. Ampersand Art Supply also has a section on their website for sealing and priming unfinished panels. Ampersand recommends using GOLDEN GAC 100 to seal panels followed by several layers of gesso or an acrylic dispersion. Gamblin Oil Painting Ground can also be used to seal and finish a panel prior to painting with oils.
Prepared/Ready To Use Panels
While it is not the intent of this article to evaluate primed artist wood panels that are available to artists on the market, the information in this article can be used to evaluate the construction of the wood panel itself. Over the last 20 years Ampersand has developed a process for sealing wood, specifically hardboard for its museum series panels and high density boards used for its value series panels. Prior to coating the panels with the actual painting ground (i.e. Gessobord™, Claybord™ grounds), Ampersand primes the wood substrate in a two part process with a tannin blocking sealer/coating system specifically developed to eliminate support induced discoloration in an artwork. The first “fill coat” serves to seep into the top fibers of the hardboard to begin the first part of the sealing process. This fill coat is applied with a precision roll coater that ensures penetration of the coating into the fiber of the board and creates a good bond between the board and the sealer. The second coating completes the sealing process and provides a good adhesion layer for the different painting grounds that are applied to the sealer coat. Again, sealing wood is essential and should be a practice followed by artists preparing their own panels or any manufacturer creating prepared panels for artists to create their works of art.
References available online at www.goldenpaints.com/justpaint.

Issue 29 page 15 ©2013 Golden Artist Colors, Inc.
By Emma Golden
April 13, 2013 marked the opening of an exhibition of works by the Golden Foundation’s 2012 Artists in Residence. These seven talented artists were not only the first to attend the Golden Foundation Residency program in 2012, but were those who marked, with distinction, the 2013 inaugural year of the Foundation’s alumni gallery show, Made in Paint. With one more opportunity to gather with the residents, friends and community, the exhibition opened on a lovely evening in New Berlin to an audience of over 200 people.
The gallery, named in honor of Sam and Adele Golden, highlighted three works by each of the resident artists. Gallery Director, Jim Walsh orchestrated the incredible show of artwork, which varied in size, shape, substrate and medium. A common thread among these artists was their passion for exploration and pushing their personal boundaries. Made in Paint celebrates the relationship that
has existed from the beginning of painting history between artists and their materials.
Erin Treacy’s work shows layered marks on canvas mimicking flora and fauna from previous travels and research; Jennifer Ann Norman’s orbital sanding reveals excavated layers of thick, “dripping over the edge” poured mediums, and explores the relationship between perception and image; Lynette Stephenson produced a new body of work with previously unexplored paints and mediums; Elizabeth Blau’s paintings integrate mixed media elements on canvas; Karima Klasen experiments with a wide range of materials and color, translating urban surroundings within a geometric language; Mel Prest’s paintings on large scale paper are works of structured spaces, created by the mapping of language, light and sound; and Kevin Witzke created an apparatus with the help of the GOLDEN engineering department, which pulled 16 feet of canvas through a trough of water
containing ground stone, soil and anthracite collected at the residency. The progressive sediment marks deposited upon the canvas highlight the ancientness of the pigments and geological cycles.
Though Made in Paint ended August 30th, 2013, you can still view the show online at www.thesagg.org through a virtual tour. For a show catalog, contact [email protected]. The Golden Foundation’s second Made in Paint alumni show will take place in the Spring of 2014, highlighting the works of this year’s 18 artists in residence. For further information about the Golden Foundation and residency program, go to www.goldenfoundation.org.
The works are also available for purchase. Please contact Foundation Executive Director Barbara Golden at [email protected] for pricing.
MADE IN PAINTat the Sam & Adele Golden Gallery of these solid supports in her article,
“Understanding Wood Supports for Art”. Elaine has worked tirelessly to develop the most extensive range for artists, and in doing so has become a preeminent expert in the area of wood supports.
In “Plywood as a Substrate for Painting,” noted author and educator, Mark D. Gottsegen provides expertise gained over 3 decades of teaching, writing and lecturing on art materials. Through Mark’s website, AMIEN, a non-profit professional resource for artists, Mark has consulted with thousands of artists on the proper use of materials. Mark’s book, The Painter’s Handbook, continues to be an important art materials resource.
I hope this issue provides valuable insights into the nature of art materials. I want to thank so many of you who have shared your comments about the value that our newsletter brings. It remains a passion for so many of us here who delight in the process and sharing of creative discovery.
Mark Golden
From Mark Golden
(cont. from page 1)

JUST PAINTGolden Artist Colors, Inc.188 Bell RoadNew Berlin, NY 13411-3616 USA
PRSRT STDU.S. Postage
PAIDIthaca, NY
Permit #780
Return service requested
Issue 29 September 2013
Articles: Mark Golden, Elaine Salazar, Mark Gottsegen, Sarah Sands,
Amy McKinnon, Mike Townsend, Emma Golden
Editor: Jodi O’Dell
Publisher: Golden Artist Colors, Inc.
188 Bell Road, New Berlin, NY 13411-3616
607-847-6154 800-959-6543
Fax: 607-847-6767
Email: [email protected]
www.goldenpaints.com
www.WilliamsburgOils.com
www.thesagg.org
© 2013 Golden Artist Colors, Inc. All rights reserved. The contents of this publication may not be reproduced either in whole, or in part, without the consent of Golden Artist Colors, Inc. Golden Artist Colors is an Employee Owned Company.13629
By Emma Golden
Heading into our 5th Residency Session of 2013 and feeling invigorated as ever! We certainly learned a lot from year 1 and with the increase from 3 sessions last year to 6 sessions this year, the amount of creativity and energy in the Barn is immense.
As an international program, we are excited to welcome artists from several different countries into the small town of New Berlin, including Israel, Australia and the UK.
Each 4-week residency session begins with the arrival of the 3 Resident Artists on Sunday. This gives them Monday to settle in and set up their studios. It seems to be tradition at the Golden Foundation that every event begins with a meal together, so Monday evening we ask the artists to prepare an informal, short talk about their work for after dinner with the Technicians from Golden Artist Colors. This event gets the conversations started as Tuesday is our first “technical” down the road at the GOLDEN factory. Technicals involve learning, playing and exploring materials and tools of paint. These workshops range from providing an overview of materials, to gaining a deeper understanding of specific processes or resources. During the residency, the artists meet for at least 5 technicals.
Residency Program: 2013 - 2014
New this year, artists will not only be using GOLDEN Acrylics, but Williamsburg Handmade Oils will also be spotted in the artists’ studios. We outfitted the building with ventilation systems and fire safe equipment to allow for the safe use of oils, expanding the range of materials accessible to the artists during their stay. There are also hands-on workshops in image transfers, digital grounds, faux finishing tools, varnishing and oil paints to name a few.
On the final Wednesday of each residency, we open the Barn to the public, inviting folks to attend an Open Studios event from 5pm-7pm. The community gets a chance to walk through the artists’ studios and see their works in progress. Our last Open Studios of 2013 are scheduled for October 9th and November 13th.
The Deadline for the 2014 Residency Year is coming upon us quickly: September 23rd, 2013. If you are interested in applying, go to www. goldenfoundation.org. Artist Sarah Dineen exploring materials in her
Artist Residence Studio.