Module 3 - Creating a Microsoft ASP.NET Web Form
42
Creating a Microsoft ASP.NET Web Form 3-1 Module 3 Creating a Microsoft ASP.NET Web Form Contents: Lesson 1: Creating Web Forms 3-3 Lesson 2: Adding and Configuring Server Controls in a Web Form 3-12 Lab: Creating a Microsoft ASP.NET Web Form 3-31
-
Upload
khangminh22 -
Category
Documents
-
view
4 -
download
0
Transcript of Module 3 - Creating a Microsoft ASP.NET Web Form
Creating a Microsoft ASP.NET Web Form 3-1
Module 3 Creating a Microsoft ASP.NET Web Form
Contents: Lesson 1: Creating Web Forms 3-3
Lesson 2: Adding and Configuring Server Controls in a Web Form 3-12
Lab: Creating a Microsoft ASP.NET Web Form 3-31

3-2 Developing Web Applications Using Microsoft® Visual Studio® 2008 SP1
Module Overview
Web Forms are the user interface (UI) elements that give your Web applications their look and feel. A Web Form presents information to the user in any type of browser, and it implements application logic by using server-side code. Microsoft® Visual Studio® .NET provides an intuitive drag-and-drop interface to create the UI for your Web application. In this module, you will learn how to create Web Forms and populate them with server controls.

Creating a Microsoft ASP.NET Web Form 3-3
Lesson 1 Creating Web Forms
Web Forms consist of a combination of markup, code, and controls that run on a Web server, such as Microsoft® Internet Information Services (IIS). Web Forms are commonly referred to as Microsoft® ASP.NET™ pages or ASPX pages. You can create Web Forms by using Microsoft® Visual Basic® or Microsoft® Visual C#®. When creating Web Forms, you can choose to place or not to place the code in a separate file.
In this lesson, you will learn what a Web Form is and how to create a Web Form. You will also learn how to identify the key characteristics of Web Forms.
Lesson Objectives:
After completing this lesson, you will be able to:
• Describe an ASP.NET Web Form.
• Create an ASP.NET Web Form.

3-4 Developing Web Applications Using Microsoft® Visual Studio® 2008 SP1
What Is a Web Form?
Key Points Web Forms are the containers for the text and controls that you want to display in the browser. Web Forms generate HTML and send it to the browser. However, controls that run the UI remain on the Web server. This split between the client-side interface and the server-side code is a crucial difference between Web Forms and traditional Web pages. On a traditional Web page, the code is processed by the browser on the client-side. By contrast, Web Forms send only the markup and any client-side script to the browser; the page processing remains on the server. This split between the client-side interface and the server-side code increases the number of supported browsers and enhances the security and functionality of the Web page.
The .aspx Extension Web Forms have an .aspx extension and often consist of two separate files:
• The .aspx file that contains the UI for the Web Form.
• The .aspx.vb or .aspx.cs file that contains the supporting code. This file is called the code-behind file.
Page Directives, Declarations, and Elements Five levels of directives, declarations, and elements define the functions of a Web Form:
• The Page directive and associated attributes define global functions.
• The !DOCTYPE element and associated attributes are used to specify the document type definition (DTD) to which the Web Form conforms.
• The HTML element and associated attributes are used to verify that the Web Form contains HTML elements.
• The body element and associated attributes define the display of a page.
• The form element and associated attributes define how groups of controls are processed.

Creating a Microsoft ASP.NET Web Form 3-5
Page Directive and Attributes The page directive, @ Page, defines the page-specific attributes that are used by the ASP.NET page parser and compiler. You must include only one page directive tag for each Web Form. The following examples show the typical attributes for the Page directive for a new Visual C# and Visual Basic Web Form.
[Visual Basic] <%@ Page Title="" Language="VB" CodeFile="Default.aspx.vb" Inherits="_Default" %>
[Visual C#] <%@ Page Title="" Language="C#" AutoEventWireup="true" CodeFile="Default.aspx.cs" Inherits="_Default" %>
The attributes of a page directive include:
• AutoEventWireUp. The AutoEventWireUp attribute is used to indicate if the event methods page-level events are automatically wired up. This means that the Page_Load event, for instance, is automatically wired up to be caught and handled, if you add the corresponding event handler and add some code to it, to the code-behind file. For Visual C#, the default value is true, but for Visual Basic, the default value is false. When AutoEventWireup is true, ASP.NET does not require that you explicitly bind event handlers to page events, such as Load or Init. Instead, handlers are automatically bound to events at run time, based on their name and signature. For each event, ASP.NET searches for a method that is named according to the pattern, Page_eventname, such as Page_Load or Page_Init. ASP.NET first checks for an overload that has the typical event-handler signature—Object and EventArgs. If an event handler with this signature is not found, ASP.NET checks for an overload that has no parameters. When AutoEventWireup is false, you must explicitly bind event handlers to events. In that case, the method names do not have to follow a pattern.
• CodeFile. The CodeFile attribute specifies the path to the referenced code-behind file for a page that uses the two-file configuration. This attribute is used together with the Inherits attribute to associate the code-behind file that carries the logic that supports the Web Form.
• Inherits. The Inherits attribute defines the name of the code-behind class that the page inherits. The Inherits attribute is case sensitive when the page language is Visual C#, and it is not case sensitive when the page language is Visual Basic. This attribute is used with the CodeFile attribute, which contains the path to the source file for the code-behind class. Notice how the CodeFile attribute in the preceding examples specifies a file starting with Default, but the value for the Inherits attribute is set to _Default. This is because Default is a keyword in Visual Basic, and Visual Studio 2008 SP1 automatically prefixes the class name with an underscore to prevent name conflicts. This is the same for Visual C#, where there is no Default keyword. However, remember that default is a keyword in Visual C#, which is case sensitive.
• Language. The Language attribute specifies the programming language in which the code on the Web Form is written, that is, the programming language, the inline code, and code declaration blocks on the page are compiled. Some of the values for this attribute are Visual C# and Visual Basic, and the values are used to indicate the compiler to parse and compile the page.
• Title. The Title attribute specifies the title of the page, and it is displayed as the caption of the browser, and on the tab, if your browser session is tabbed. Setting this attribute has the same effect as adding a title element within the HTML element. However, if both are specified, the Title attribute of the Page directive takes precedence.
3-6 Developing Web Applications Using Microsoft® Visual Studio® 2008 SP1
Note: The CodeFile and Inherits attributes are used in a two-file configuration when you create a Web Form and select the option to place code in a separate file, which is the default. Single-file Web Forms do not use these attributes.
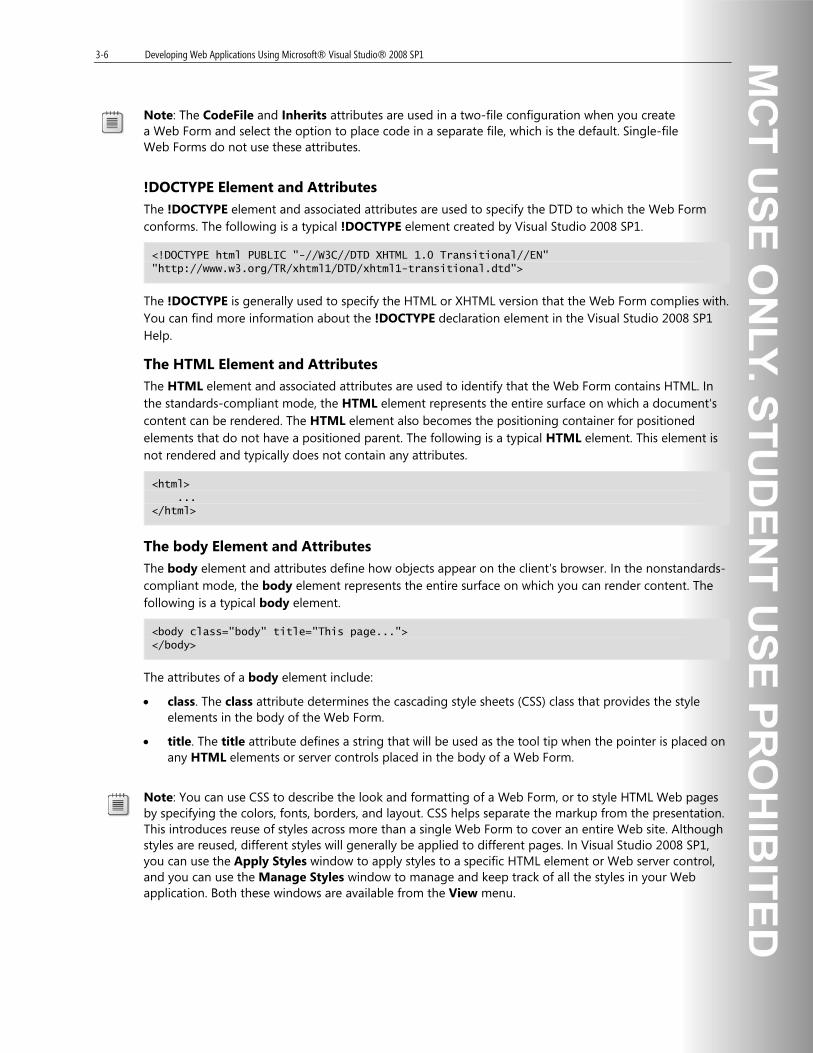
!DOCTYPE Element and Attributes
The !DOCTYPE element and associated attributes are used to specify the DTD to which the Web Form conforms. The following is a typical !DOCTYPE element created by Visual Studio 2008 SP1.
<!DOCTYPE html PUBLIC "-//W3C//DTD XHTML 1.0 Transitional//EN" "http://www.w3.org/TR/xhtml1/DTD/xhtml1-transitional.dtd">
The !DOCTYPE is generally used to specify the HTML or XHTML version that the Web Form complies with. You can find more information about the !DOCTYPE declaration element in the Visual Studio 2008 SP1 Help.
The HTML Element and Attributes The HTML element and associated attributes are used to identify that the Web Form contains HTML. In the standards-compliant mode, the HTML element represents the entire surface on which a document's content can be rendered. The HTML element also becomes the positioning container for positioned elements that do not have a positioned parent. The following is a typical HTML element. This element is not rendered and typically does not contain any attributes.
<html> ... </html>
The body Element and Attributes
The body element and attributes define how objects appear on the client's browser. In the nonstandards-compliant mode, the body element represents the entire surface on which you can render content. The following is a typical body element.
<body class="body" title="This page..."> </body>
The attributes of a body element include:
• class. The class attribute determines the cascading style sheets (CSS) class that provides the style elements in the body of the Web Form.
• title. The title attribute defines a string that will be used as the tool tip when the pointer is placed on any HTML elements or server controls placed in the body of a Web Form.
Note: You can use CSS to describe the look and formatting of a Web Form, or to style HTML Web pages by specifying the colors, fonts, borders, and layout. CSS helps separate the markup from the presentation. This introduces reuse of styles across more than a single Web Form to cover an entire Web site. Although styles are reused, different styles will generally be applied to different pages. In Visual Studio 2008 SP1, you can use the Apply Styles window to apply styles to a specific HTML element or Web server control, and you can use the Manage Styles window to manage and keep track of all the styles in your Web application. Both these windows are available from the View menu.
Creating a Microsoft ASP.NET Web Form 3-7
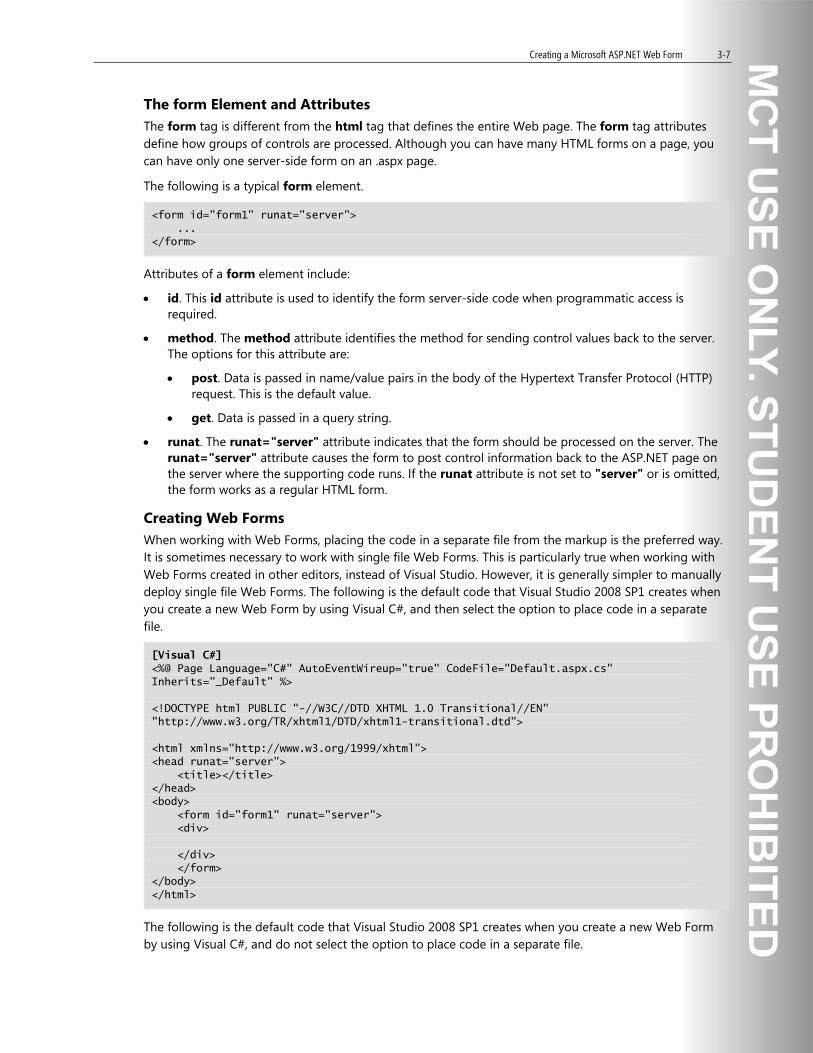
The form Element and Attributes The form tag is different from the html tag that defines the entire Web page. The form tag attributes define how groups of controls are processed. Although you can have many HTML forms on a page, you can have only one server-side form on an .aspx page.
The following is a typical form element.
<form id="form1" runat="server"> ... </form>
Attributes of a form element include:
• id. This id attribute is used to identify the form server-side code when programmatic access is required.
• method. The method attribute identifies the method for sending control values back to the server. The options for this attribute are:
• post. Data is passed in name/value pairs in the body of the Hypertext Transfer Protocol (HTTP) request. This is the default value.
• get. Data is passed in a query string.
• runat. The runat="server" attribute indicates that the form should be processed on the server. The runat="server" attribute causes the form to post control information back to the ASP.NET page on the server where the supporting code runs. If the runat attribute is not set to "server" or is omitted, the form works as a regular HTML form.
Creating Web Forms When working with Web Forms, placing the code in a separate file from the markup is the preferred way. It is sometimes necessary to work with single file Web Forms. This is particularly true when working with Web Forms created in other editors, instead of Visual Studio. However, it is generally simpler to manually deploy single file Web Forms. The following is the default code that Visual Studio 2008 SP1 creates when you create a new Web Form by using Visual C#, and then select the option to place code in a separate file.
[Visual C#] <%@ Page Language="C#" AutoEventWireup="true" CodeFile="Default.aspx.cs" Inherits="_Default" %> <!DOCTYPE html PUBLIC "-//W3C//DTD XHTML 1.0 Transitional//EN" "http://www.w3.org/TR/xhtml1/DTD/xhtml1-transitional.dtd"> <html xmlns="http://www.w3.org/1999/xhtml"> <head runat="server"> <title></title> </head> <body> <form id="form1" runat="server"> <div> </div> </form> </body> </html>
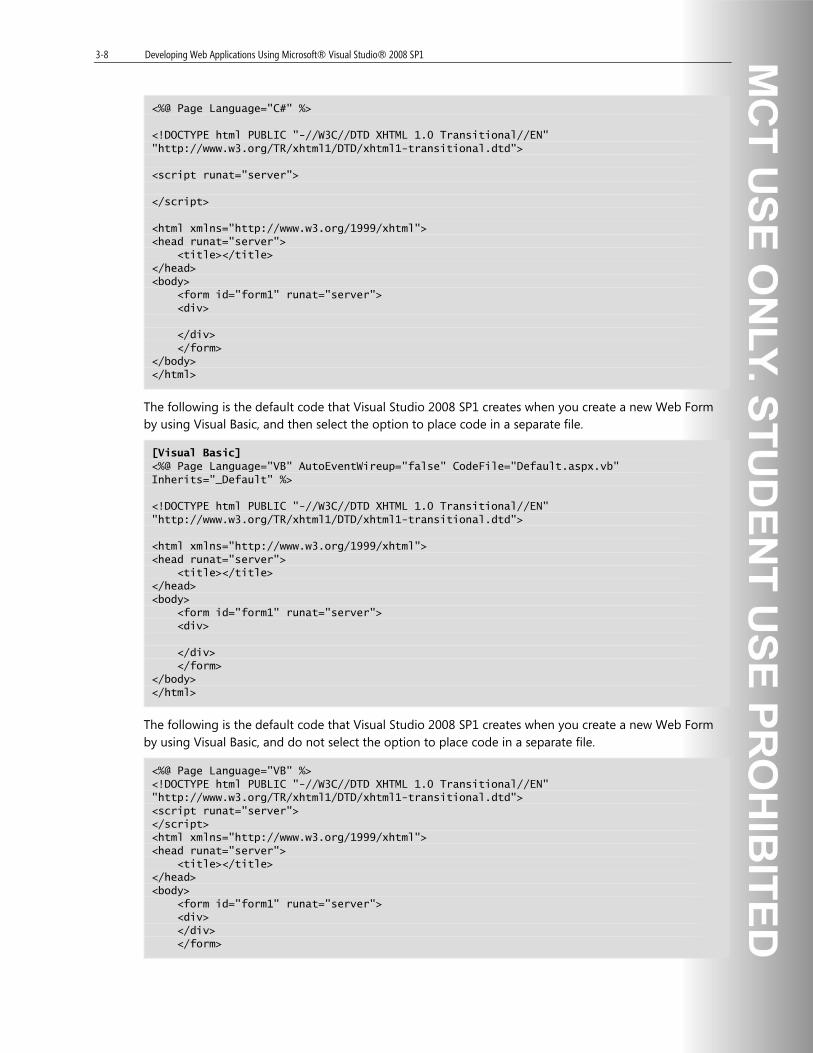
The following is the default code that Visual Studio 2008 SP1 creates when you create a new Web Form by using Visual C#, and do not select the option to place code in a separate file.
3-8 Developing Web Applications Using Microsoft® Visual Studio® 2008 SP1
<%@ Page Language="C#" %> <!DOCTYPE html PUBLIC "-//W3C//DTD XHTML 1.0 Transitional//EN" "http://www.w3.org/TR/xhtml1/DTD/xhtml1-transitional.dtd"> <script runat="server"> </script> <html xmlns="http://www.w3.org/1999/xhtml"> <head runat="server"> <title></title> </head> <body> <form id="form1" runat="server"> <div> </div> </form> </body> </html>
The following is the default code that Visual Studio 2008 SP1 creates when you create a new Web Form by using Visual Basic, and then select the option to place code in a separate file.
[Visual Basic] <%@ Page Language="VB" AutoEventWireup="false" CodeFile="Default.aspx.vb" Inherits="_Default" %> <!DOCTYPE html PUBLIC "-//W3C//DTD XHTML 1.0 Transitional//EN" "http://www.w3.org/TR/xhtml1/DTD/xhtml1-transitional.dtd"> <html xmlns="http://www.w3.org/1999/xhtml"> <head runat="server"> <title></title> </head> <body> <form id="form1" runat="server"> <div> </div> </form> </body> </html>
The following is the default code that Visual Studio 2008 SP1 creates when you create a new Web Form by using Visual Basic, and do not select the option to place code in a separate file.
<%@ Page Language="VB" %> <!DOCTYPE html PUBLIC "-//W3C//DTD XHTML 1.0 Transitional//EN" "http://www.w3.org/TR/xhtml1/DTD/xhtml1-transitional.dtd"> <script runat="server"> </script> <html xmlns="http://www.w3.org/1999/xhtml"> <head runat="server"> <title></title> </head> <body> <form id="form1" runat="server"> <div> </div> </form>

Creating a Microsoft ASP.NET Web Form 3-9
</body> </html>
Note: The !DOCTYPE declaration specifies the DTD to which the Web Form conforms. The default declaration ensures that the tags in the form are rendered by using XHTML standards in browsers that support HTML 4.0, or later.
Form Views
You can view Web Forms in Source view, which contains the markup and code as plain text. Also, in Design view, you can easily see the actual layout of the HTML elements and controls on the Web Form. It is possible to switch between the views by clicking the tabs at the lower part of the form window.
Question: What are the two components that make up Web Forms?

3-10 Developing Web Applications Using Microsoft® Visual Studio® 2008 SP1
How To Create a Web Form
Key Points
Creating New Web Applications
When you create a new Web application or Web site in Visual Studio 2008 SP1, a default Web Form named Default.aspx is automatically included in the project.
To create a new ASP.NET Web Application project and a default Web Form 1. In Visual Studio 2008 SP1, on the File menu, point to New, and then click Project.
2. In the New Project dialog box, under Project types, click Visual Basic or Visual C#.
3. In the Templates box, click ASP.NET Web Application.
4. In the Name and Location boxes, type the name and location for the project, and then click OK.
Visual Studio 2008 SP1 creates a new Web application and a default Web Form named Default.aspx. This Web Form is based on the code-behind model.
To create a new ASP.NET Web Site project and a default Web Form 1. In Visual Studio 2008 SP1, on the File menu, point to New, and then click Web Site.
2. In the New Web Site dialog box, in the Templates box, click ASP.NET Web Site.
3. In the Language list, click Visual Basic or Visual C#.
4. In the Location box, type the location for the Web site, and then click OK.
Visual Studio 2008 SP1 creates a new Web site and a default Web Form named Default.aspx. This Web Form is based on the code-behind model.
Creating Additional Web Forms If you are expanding an existing project, you can use Solution Explorer to add additional Web Forms.

Creating a Microsoft ASP.NET Web Form 3-11
To add a Web Form to an existing Web Application or Web Site 1. In Solution Explorer, right-click an existing Web project or Web site name, and then click Add New
Item. Alternatively, in Solution Explorer, right-click an existing Web project or Web site name, and on the Website menu, click Add New Item, or press CTRL+SHIFT+A.
2. In the Add New Item dialog box, in the Templates box, click the Web Form template.
3. In the Name box, type the name of the Web Form.
4. In the Language list, click Visual Basic or Visual C#.
5. To create a code-behind file, select the Place code in separate file check box, and then click Add.
Visual Studio 2008 SP1 creates a new Web Form and adds it to the existing Web project or Web site.
Question: Which tool can you use to add additional Web Forms if you are expanding an existing project?
3-12 Developing Web Applications Using Microsoft® Visual Studio® 2008 SP1
Lesson 2 Adding and Configuring Server Controls in a Web Form
ASP.NET server controls run on the server and encapsulate UI and other related functionalities. These server controls are different from standard HTML controls in that the supporting logic runs on the server and not in the user's browser.
In this lesson, you will learn how to use ASP.NET server controls such as buttons, text boxes, and lists.
Lesson Objectives: After completing this lesson, you will be able to:
• Describe an ASP.NET server control.
• Describe the types of server controls.
• Save the View state of server controls.
• Add and configure HTML server controls.
• Add and configure Web server controls.
• Determine the appropriate server control for a Web Form.

Creating a Microsoft ASP.NET Web Form 3-13
What Is a Server Control?
Key Points ASP.NET server controls run on the server and encapsulate user interface (UI). Server controls include buttons, text boxes, and lists. You can use server controls in ASP.NET Web Forms and respond to events in ASP.NET Web Form code-behind classes.
The following is an example of a Button Web server control.
<asp:Button id="Button1" runat="server" Text="Submit" />
The following is an example of an input HTML server control.
<input type="text" value="Submit" runat="server" />
runat="server" Server controls have a runat attribute, which can only be set to the value of server.
Note: In some situations, to function correctly, server controls require a client script. If a user has disabled scripting in the browser, the controls might not function as you intend. However, most of the intrinsic controls will work correctly with or without client-side scripting.
Another feature of server controls is that the View state, the settings, and the user input for the control are automatically saved when the page is passed between the client and the server. Traditional HTML elements are stateless and revert to their default settings when the page returns from the server to the client.
Note: For more information about View state, see the “Saving View State" topic, later in this lesson.
3-14 Developing Web Applications Using Microsoft® Visual Studio® 2008 SP1
Built-in Functionality The functionality of a server control relates to what happens when the user clicks a button or a list box. These processes are called event handlers. As a Web Form programmer, you need to determine the event handlers that will be implemented for each server control.
Common Object Model
In ASP.NET, server controls use a common object model; as a result, they share several attributes. For example, when you want to set the background color for a Web server control, you always use the same BackColor attribute, regardless of the control. The following markup for a Web server control button shows some of the typical attributes of a server control.
<asp:Button id="Button1" runat="server" BackColor="Red" Width="238px" Height="25px" Text="Web control" />
Creating Browser-Specific HTML
When a page is rendered for a browser, the Web server controls determine the type of browser that is requesting the page, and then deliver the appropriate HTML.
For example, if the requesting browser supports client-side scripting such as Microsoft® Internet Explorer® 4.0 or later, the controls create client-side script to implement their functionality. However, if the requesting browser does not support client-side script, the controls create server-side code and require more round trips to the server to obtain the same functionality.
The following is the XHTML that you would write to create a text box with the default text, “Enter your Username”.
<asp:TextBox id="UserNameTextBox" runat="server" Width="238px" Height="25px">Enter your Username</asp:TextBox>
When a user, using Windows® Internet Explorer® 8, accesses this page, the common language runtime creates the following HTML element, customized for Internet Explorer 8.
<input name="UserNameTextBox" id="UserNameTextBox" style="width: 238px; height: 25px;" type="text" value="Enter your Username" />
Because the server control creates customized HTML for the features that are available in the client's browser, you can write code for the latest browsers and not worry about browser errors. Your code will work even if users do not have the latest versions of browsers.
Question: How can you detect browser capabilities on ASP.NET Web pages?

Creating a Microsoft ASP.NET Web Form 3-15
Types of Server Controls
Key Points There are many different server controls that are available in ASP.NET. Some server controls closely resemble traditional HTML elements, while other server controls are specific to ASP.NET. The wide range of controls helps you customize your Web Form to match your application.
HTML Server Controls
By default, HTML elements on a Web Form are not available to the server. HTML elements are treated as plain text that is passed through to the browser. However, you can add the runat="server" attribute to convert HTML elements to HTML server controls. This exposes the HTML elements as elements that you can program by using server-side code.
The following are some of the most commonly used HTML elements, which both HTML server controls and Web Server controls, are rendered as:
Element Name Description Example
a This is an anchor element that is used to link to another page, image, or other resource.
<a href="/Page2.aspx" title="Go To Page 2.">Page 2</a>
br This is a self-closing element that adds a line break to the page.
<br />
Img This is a self-closing element that embeds an image on the page.
<img src="/login.png" alt="Log in to web application." />
input This element is used to <input type="text"

3-16 Developing Web Applications Using Microsoft® Visual Studio® 2008 SP1
Element Name Description Example
specify different types of input elements, including a submit button, text box, check box, radio button, file selection control, and a hidden control.
name="UserName">
select This element is used to create a selection “menu”, with at least one choice to select.
<select size="3" name="OptionList"> <option selected value="Option1"> Option 1</option> <option value="Option2"> Option 2</option> <option value="Option3"> Option 3</option> </select>
title This element is used to specify the page title.
<title>Login Page</title>
Web Server Controls Web server controls include form-type controls such as buttons, lists, and text boxes, and special-purpose controls such as calendars. Web server controls are more abstract than HTML server controls. The object model does not necessarily reflect the HTML syntax. This makes Web server controls more flexible and powerful than HTML server controls.
Web server controls are server controls that are created specifically for ASP.NET. Unlike HTML server controls, Web server controls will not function if the runat="server" attribute is missing.
Because Web server controls are based on a common object model, all controls share several attributes, including asp:ControlType and an id attribute. Web server controls exist in the System.Web.UI.WebControls namespace and you can use them in any Web Form.
Standard Web Server Controls Standard controls contain two groups of controls:
• Intrinsic controls. Intrinsic controls match the simple HTML elements such as buttons, lists, and text boxes. You use these controls in the same manner that you use HTML server controls.
• Complex controls. Complex controls are controls that work with static and dynamic data, or controls that act as containers for other controls, or controls that include multiple functions. An example of a complex control is the Calendar control, which provides an appointment calendar that helps a user select a date in the correct format.
Intrinsic standard Web server controls correspond to simple HTML elements. The following table describes some of the commonly used intrinsic Web server controls.
Web server control HTML control equivalent Web server control function
<asp:Button... /> <input type="submit" />
Creates a button that sends a request to the server

Creating a Microsoft ASP.NET Web Form 3-17
Web server control HTML control equivalent Web server control function
<asp:CheckBox... /> <input type=”checkbox”>
Creates a check box that can be selected
<asp:HyperLink... />
<a href="…" /> Creates a hyperlink to an HTML anchor tag
<asp:Image... /> <img src="…" /> Creates an area that is used to display an image
<asp:ImageButton... />
<input type=”image” /> Creates a button that incorporates the display of an image, instead of text
<asp:Label... /> <span> </span> Creates text that users cannot edit
<asp:ListBox... /> <select size="5"> </select>
Creates a list of choices and enables multiple selections
<asp:Panel... /> <div> </div> Creates a borderless division on the form that serves as a container for other controls
<asp:RadioButton... />
<input type=”radiobutton”>
Creates a single radio button control
<asp:Table... /> <table> </table> Creates a table
<asp:TextBox... /> <input type=”text” /> Creates a text box control
Complex standard controls provide rich functionality to your Web Form by inserting complex functions into your Web Form. The following table describes some of the complex controls.
Control Function
AdRotator Displays a predefined or random sequence of images
Calendar Displays a graphic calendar on which users can select dates
FileUpload Provides users with a way to upload a file from to the server
Wizard Provides navigation and a UI to collect related data across multiple steps
Data Controls
Data controls contain two groups of controls:
• Data-bound controls. Data-bound controls are used to display data from a data source.
• Data source controls. Data source controls are used as an intermediary control between a data source such as a database or an XML file, and one or more data controls.
Note: For more information about data controls, see Module 8, "Managing Data in an ASP.NET 3.5 Web Application."
The following table describes the data-bound controls.

3-18 Developing Web Applications Using Microsoft® Visual Studio® 2008 SP1
Control Function
DataList Displays rows of database information in a customizable format.
DetailsView Displays a single row from a data source by using a tabular layout where each row field is displayed as a row of its own.
FormView Displays a single row from a data source by using a layout defined by a template.
GridView Displays tabular data in a grid.
ListView Displays data in a format that you define by using templates and styles. Implicitly supports edit, insert, and delete operations in addition to the sorting and paging functionality. This is also true if the control is not bound to a data source.
Repeater Displays information from a data set by using a set of HTML elements and controls that you specify. The Repeater control repeats the element once for each record in the data set.
The following table describes some of the commonly used data source controls.
Control Function
LinqDataSource Connects to data from either a database or an in-memory data collection such as an array, and exposes Language-Integrated Query (LINQ) to Web developers
SqlDataSource Connects to data that is located in a relational data base, such as Microsoft® SQL Server®
XmlDataSource Connects to data in XML format, whether hierarchical or tabular
SiteMapDataSource Exposes navigation data retrieved from a site map provider
Note: For more information about LINQ, see Module 9, "Managing Data Access Tasks by Using LINQ."
Validation Controls Validation controls are hidden controls that validate user input against predetermined patterns. If the user input does not conform to the requirements, an error message is displayed.
Validation controls incorporate logic that allows you to test user input. To test user input, you can associate a validation control with the input control, and then specify the conditions for valid user input.
Note: For more information about validation controls, see Module 6, "Validating User Input."
The following table describes the validation controls.
Control Function
CompareValidator Requires that the input matches a second input or existing field
CustomValidator Requires that the input matches a condition such as prime or odd numbers

Creating a Microsoft ASP.NET Web Form 3-19
Control Function
RangeValidator Requires that the input is within a specified range
RegularExpressionValidator Requires that the input matches a specified format such as a U.S. telephone number, or a strong password that consists of numbers and letters
RequiredFieldValidator Requires that the user enters some value before the control is processed
ValidationSummary Collects all the validation control error messages for centralized display
Login Controls Login controls work together to provide a robust login solution that requires very little code.
Note: For more information about login controls, see Module 15, "Securing a Microsoft ASP.NET Web Application."
The following table describes the Login controls.
Control Function
ChangePassword Enables users to change the Web site password
CreateUserWizard Used to add a new user to the Web site
Login Displays a user interface for user authentication, including user name and password text boxes, and a Login button
LoginName Displays a user's login name, if logged in
LoginStatus Displays a login link for users who logged on and a logout link for logged-on users
LoginView Displays different information to anonymous users and logged-on users
PasswordRecovery Used to retrieve user passwords
Navigation Controls Navigation controls are used to create navigational aids on ASP.NET Web pages, including menus and breadcrumbs.
The following table describes the navigation controls.
Control Function
Menu Supports displaying a main menu and submenus, but also allows you to define dynamic menus
SiteMapPath Displays a navigation path/breadcrumb showing the current page location
TreeView Displays hierarchical data in a tree structure

3-20 Developing Web Applications Using Microsoft® Visual Studio® 2008 SP1
Example of Equivalent Controls The following example shows the HTML code for three button controls: an HTML button, an HTML server control button, and a Web server control button. All button controls appear identical on the user’s browser. The HTML button can raise only client-side events, but the HTML server control button and the Web server control button raise server-side events.
The following is an HTML button control.
<INPUT type="button" value="HTML Button" />
Adding the attribute, runat="server", converts the preceding HTML button control to an HTML server control that will run on the server. Note that in addition to the runat="server" attribute, you must add an id attribute for the control to function as a server control.
The following example shows the HTML server control button.
<INPUT type="button" value="HTML Server Control" id="Button1" runat="server" />
The following example shows the Web server control button.
<asp:Button id="Button1" runat="server" Text="Web control" />
Question: Which types of server controls exist for ASP.NET?

Creating a Microsoft ASP.NET Web Form 3-21
Saving View State
Key Points One of the problems for Web sites is how to save the state of controls, related to settings and user input, on a Web page as the HTML is sent back and forth between the client and the server. It is true for any HTTP-based technology that Web Forms are stateless by nature, which means that the server does not retain any information between client requests.
ASP.NET Web Forms handle this problem of storing server control state by adding a hidden control, __VIEWSTATE, which records the state of the controls on the Web Form. Specifically, __VIEWSTATE is added to the server-side form element and only records the state of controls in this section. As the page travels back and forth from the client to the server, the server control state is kept with the page and can be updated at either end of the transaction—at the client or at the server.
View state is the method that the ASP.NET page framework uses to preserve page and control values between round trips. When the HTML markup for the page is rendered, the current state of the page and values that must be retained during postback are serialized into base 64-encoded strings. These values are then put into the View state hidden field. This process makes it simple for server controls to automatically retain their values between server round-trips, without any coding. View state is only useful with the same Web Form as it travels back and forth between the client and server. You cannot use View state between different Web Forms. View state keeps the load on the server small, but performance can suffer because of the increased HTML size, which means that it takes longer to render the page on the client.
Because the state of the Web page is kept inside the server form, the Web page can be randomly routed in a Web server farm and does not have to keep returning to the same server. The advantage of the View state process is that the programmer can focus on the page design and does not have to build the infrastructure to keep track of the page state.
You can use View state to persist application data that is specific to a single page, including a product ID or a user ID. You can also use View state in other scenarios, such as for statistical reasons if you want to know how many times a user postbacks the same page in sequence to the server.

3-22 Developing Web Applications Using Microsoft® Visual Studio® 2008 SP1
Disabling and Enabling ViewState By default, a Web Form saves the View state of the controls on the Web Form. However, for Web Forms with multiple controls, the size of the __VIEWSTATE properties value field can slow the performance. To maximize page performance, you might want to disable the __VIEWSTATE attribute at the page level and enable the View state only for selected controls.
To disable the View state at the Web page level, set the EnableViewState attribute of the Page directive. The following code illustrates this.
<%@ Page EnableViewState="False" %>
To enable the View state for a specific control, set the EnableViewState attribute of the control. The following code illustrates this.
<asp:ListBox id="ListBox1" EnableViewState="true" runat="server" />
Control State ASP.NET control state allows you to store information that is specific to the control that cannot be disabled.
Controls can have both View state and control state. You use the View state to maintain the control's content and the control state to maintain the core behavior of the control. For controls that must repopulate their content each time the user requests a page, such as a control that displays a grid of data, you can disable the View state and use only the control state.
HiddenField Control
You can use the HiddenField Web server control as an additional method to store a value that you want to persist across posts to the server. You use the Value property to specify the value of the control and create an event handler for the ValueChanged event. This event is called each time the value of the control changes between posts to the server. The following code shows how to declare a HiddenField control with a value of 1.
<asp:HiddenField id="HiddenField1" runat="server" value="1"/>

Creating a Microsoft ASP.NET Web Form 3-23
Adding and Configuring HTML Server Controls
Key Points HTML controls on a Web Form are not available to the server. By converting HTML controls to HTML server controls, you can expose them as elements to your server-side code. This conversion allows you to use the controls to trigger events that are handled on the server.
HTML server controls include the runat="server" attribute and must reside in a containing form element.
The advantage of HTML server controls is that they help you quickly update existing pages to Web Forms. In addition, you can optimize the performance of a page by determining and adjusting the controls so that they work locally on the browser, but are processed on the server.
HTML Server Control Example You can drag and drop the HTML elements from the HTML tab of the Toolbox to add them to the Web Form. You can then configure the controls by setting the properties, by using the Properties window.
The following code shows a simple HTML text box control that is processed on the client side by the browser.
<input id="Text1" type="text" />
The following code is generated when you drag and drop the control from the Toolbox to the Web Form.
<input id="Text1" type="text" />
Adding the runat="server" attribute converts the element to an HTML server control that is processed on the server side by ASP.NET.
<input id="Text1" type="text" runat="server" />
3-24 Developing Web Applications Using Microsoft® Visual Studio® 2008 SP1
Question: What are the features offered by HTML server controls?

Creating a Microsoft ASP.NET Web Form 3-25
Adding and Configuring Web Server Controls
Adding and Configuring Web Server Controls To add and configure Web server controls, you need to perform the following steps:
1. Open Microsoft Visual Studio 2008 SP1.
2. In Solution Explorer, right-click the Default.aspx Web Form, and then click View Markup.
3. In the Default.aspx window, click Design.
4. In the Default.aspx window, click Toolbox.
5. In Toolbox, expand Standard, and then double-click the TextBox control.
6. In the Properties window of the TextBox control, change the value of the (ID) property to SampleTextBox.
7. In the Properties window of the TextBox control, set the Text property to Sample.
8. In the Default.aspx window, click Toolbox.
9. In Toolbox, expand Standard, and then double-click the Calendar control.
10. In the Properties window of the Calendar control, change the value of the (ID) property to SampleCalendar.
When rendered to the client, the TextBox control looks as follows:
<input name="SampleTextBox" type="text" value="Sample" id="SampleTextBox" />
This is a straight “conversion” from a TextBox server control to an HTML input element of type, text. However, for more complex Web server controls, such as the Calendar control, the rendering looks as follows:
<table id="SampleCalendar" cellspacing="0" cellpadding="2" title="Calendar" border="0" style="border-width:1px;border-style:solid;border-collapse:collapse;">
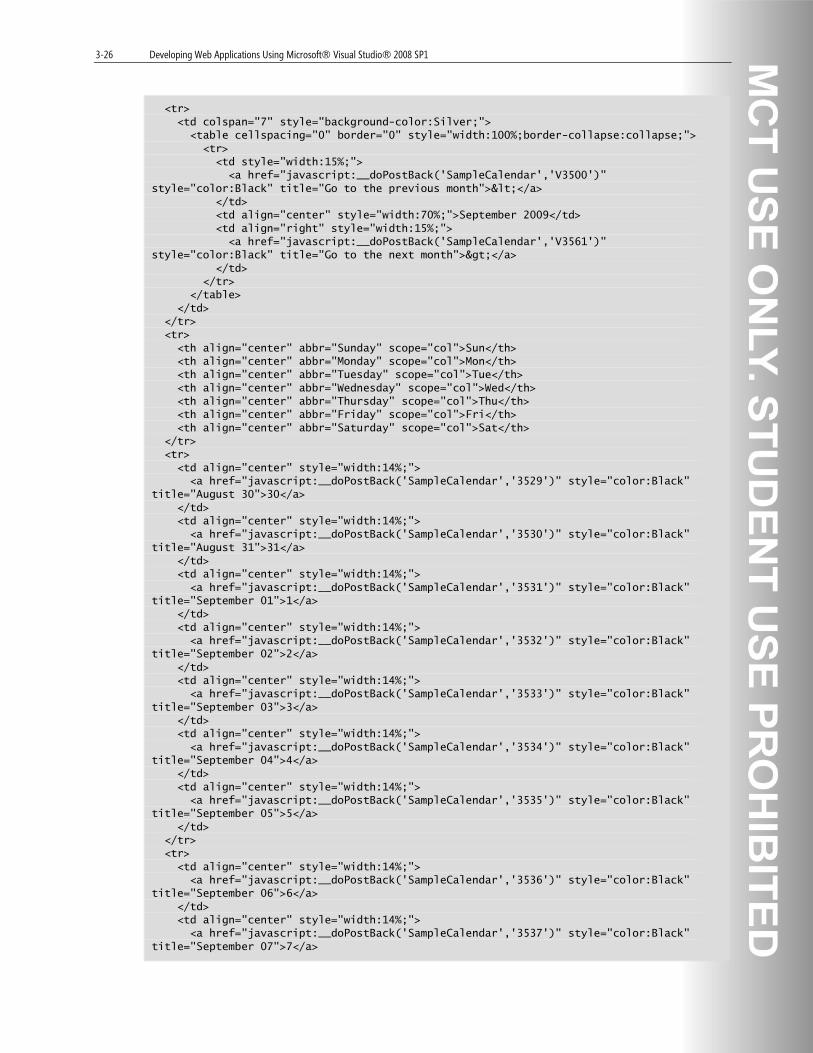
3-26 Developing Web Applications Using Microsoft® Visual Studio® 2008 SP1
<tr> <td colspan="7" style="background-color:Silver;"> <table cellspacing="0" border="0" style="width:100%;border-collapse:collapse;"> <tr> <td style="width:15%;"> <a href="javascript:__doPostBack('SampleCalendar','V3500')" style="color:Black" title="Go to the previous month"><</a> </td> <td align="center" style="width:70%;">September 2009</td> <td align="right" style="width:15%;"> <a href="javascript:__doPostBack('SampleCalendar','V3561')" style="color:Black" title="Go to the next month">></a> </td> </tr> </table> </td> </tr> <tr> <th align="center" abbr="Sunday" scope="col">Sun</th> <th align="center" abbr="Monday" scope="col">Mon</th> <th align="center" abbr="Tuesday" scope="col">Tue</th> <th align="center" abbr="Wednesday" scope="col">Wed</th> <th align="center" abbr="Thursday" scope="col">Thu</th> <th align="center" abbr="Friday" scope="col">Fri</th> <th align="center" abbr="Saturday" scope="col">Sat</th> </tr> <tr> <td align="center" style="width:14%;"> <a href="javascript:__doPostBack('SampleCalendar','3529')" style="color:Black" title="August 30">30</a> </td> <td align="center" style="width:14%;"> <a href="javascript:__doPostBack('SampleCalendar','3530')" style="color:Black" title="August 31">31</a> </td> <td align="center" style="width:14%;"> <a href="javascript:__doPostBack('SampleCalendar','3531')" style="color:Black" title="September 01">1</a> </td> <td align="center" style="width:14%;"> <a href="javascript:__doPostBack('SampleCalendar','3532')" style="color:Black" title="September 02">2</a> </td> <td align="center" style="width:14%;"> <a href="javascript:__doPostBack('SampleCalendar','3533')" style="color:Black" title="September 03">3</a> </td> <td align="center" style="width:14%;"> <a href="javascript:__doPostBack('SampleCalendar','3534')" style="color:Black" title="September 04">4</a> </td> <td align="center" style="width:14%;"> <a href="javascript:__doPostBack('SampleCalendar','3535')" style="color:Black" title="September 05">5</a> </td> </tr> <tr> <td align="center" style="width:14%;"> <a href="javascript:__doPostBack('SampleCalendar','3536')" style="color:Black" title="September 06">6</a> </td> <td align="center" style="width:14%;"> <a href="javascript:__doPostBack('SampleCalendar','3537')" style="color:Black" title="September 07">7</a>

Creating a Microsoft ASP.NET Web Form 3-27
</td> <td align="center" style="width:14%;"> <a href="javascript:__doPostBack('SampleCalendar','3538')" style="color:Black" title="September 08">8</a> </td> <td align="center" style="width:14%;"> <a href="javascript:__doPostBack('SampleCalendar','3539')" style="color:Black" title="September 09">9</a> </td> <td align="center" style="width:14%;"> <a href="javascript:__doPostBack('SampleCalendar','3540')" style="color:Black" title="September 10">10</a> </td> <td align="center" style="width:14%;"> <a href="javascript:__doPostBack('SampleCalendar','3541')" style="color:Black" title="September 11">11</a> </td> <td align="center" style="width:14%;"> <a href="javascript:__doPostBack('SampleCalendar','3542')" style="color:Black" title="September 12">12</a> </td> </tr> <tr> <td align="center" style="width:14%;"> <a href="javascript:__doPostBack('SampleCalendar','3543')" style="color:Black" title="September 13">13</a> </td> <td align="center" style="width:14%;"> <a href="javascript:__doPostBack('SampleCalendar','3544')" style="color:Black" title="September 14">14</a> </td> <td align="center" style="width:14%;"> <a href="javascript:__doPostBack('SampleCalendar','3545')" style="color:Black" title="September 15">15</a> </td> <td align="center" style="width:14%;"> <a href="javascript:__doPostBack('SampleCalendar','3546')" style="color:Black" title="September 16">16</a> </td><td align="center" style="width:14%;"> <a href="javascript:__doPostBack('SampleCalendar','3547')" style="color:Black" title="September 17">17</a> </td> <td align="center" style="width:14%;"> <a href="javascript:__doPostBack('SampleCalendar','3548')" style="color:Black" title="September 18">18</a> </td> <td align="center" style="width:14%;"> <a href="javascript:__doPostBack('SampleCalendar','3549')" style="color:Black" title="September 19">19</a> </td> </tr> <tr> <td align="center" style="width:14%;"> <a href="javascript:__doPostBack('SampleCalendar','3550')" style="color:Black" title="September 20">20</a> </td> <td align="center" style="width:14%;"> <a href="javascript:__doPostBack('SampleCalendar','3551')" style="color:Black" title="September 21">21</a> </td> <td align="center" style="width:14%;"> <a href="javascript:__doPostBack('SampleCalendar','3552')" style="color:Black" title="September 22">22</a> </td>

3-28 Developing Web Applications Using Microsoft® Visual Studio® 2008 SP1
<td align="center" style="width:14%;"> <a href="javascript:__doPostBack('SampleCalendar','3553')" style="color:Black" title="September 23">23</a> </td> <td align="center" style="width:14%;"> <a href="javascript:__doPostBack('SampleCalendar','3554')" style="color:Black" title="September 24">24</a> </td> <td align="center" style="width:14%;"> <a href="javascript:__doPostBack('SampleCalendar','3555')" style="color:Black" title="September 25">25</a> </td> <td align="center" style="width:14%;"> <a href="javascript:__doPostBack('SampleCalendar','3556')" style="color:Black" title="September 26">26</a> </td> </tr> <tr> <td align="center" style="width:14%;"> <a href="javascript:__doPostBack('SampleCalendar','3557')" style="color:Black" title="September 27">27</a> </td> <td align="center" style="width:14%;"> <a href="javascript:__doPostBack('SampleCalendar','3558')" style="color:Black" title="September 28">28</a> </td> <td align="center" style="width:14%;"> <a href="javascript:__doPostBack('SampleCalendar','3559')" style="color:Black" title="September 29">29</a> </td> <td align="center" style="width:14%;"> <a href="javascript:__doPostBack('SampleCalendar','3560')" style="color:Black" title="September 30">30</a> </td> <td align="center" style="width:14%;"> <a href="javascript:__doPostBack('SampleCalendar','3561')" style="color:Black" title="October 01">1</a> </td> <td align="center" style="width:14%;"> <a href="javascript:__doPostBack('SampleCalendar','3562')" style="color:Black" title="October 02">2</a> </td> <td align="center" style="width:14%;"> <a href="javascript:__doPostBack('SampleCalendar','3563')" style="color:Black" title="October 03">3</a> </td> </tr> <tr> <td align="center" style="width:14%;"> <a href="javascript:__doPostBack('SampleCalendar','3564')" style="color:Black" title="October 04">4</a> </td> <td align="center" style="width:14%;"> <a href="javascript:__doPostBack('SampleCalendar','3565')" style="color:Black" title="October 05">5</a> </td> <td align="center" style="width:14%;"> <a href="javascript:__doPostBack('SampleCalendar','3566')" style="color:Black" title="October 06">6</a> </td> <td align="center" style="width:14%;"> <a href="javascript:__doPostBack('SampleCalendar','3567')" style="color:Black" title="October 07">7</a> </td>

Creating a Microsoft ASP.NET Web Form 3-29
<td align="center" style="width:14%;"> <a href="javascript:__doPostBack('SampleCalendar','3568')" style="color:Black" title="October 08">8</a> </td> <td align="center" style="width:14%;"> <a href="javascript:__doPostBack('SampleCalendar','3569')" style="color:Black" title="October 09">9</a> </td> <td align="center" style="width:14%;"> <a href="javascript:__doPostBack('SampleCalendar','3570')" style="color:Black" title="October 10">10</a> </td> </tr> </table>
This is a complex conversion from a Calendar server control to several HTML elements, including a table element and some client-side JavaScript code.
Question: What are the additional features offered by Web server controls?
3-30 Developing Web Applications Using Microsoft® Visual Studio® 2008 SP1
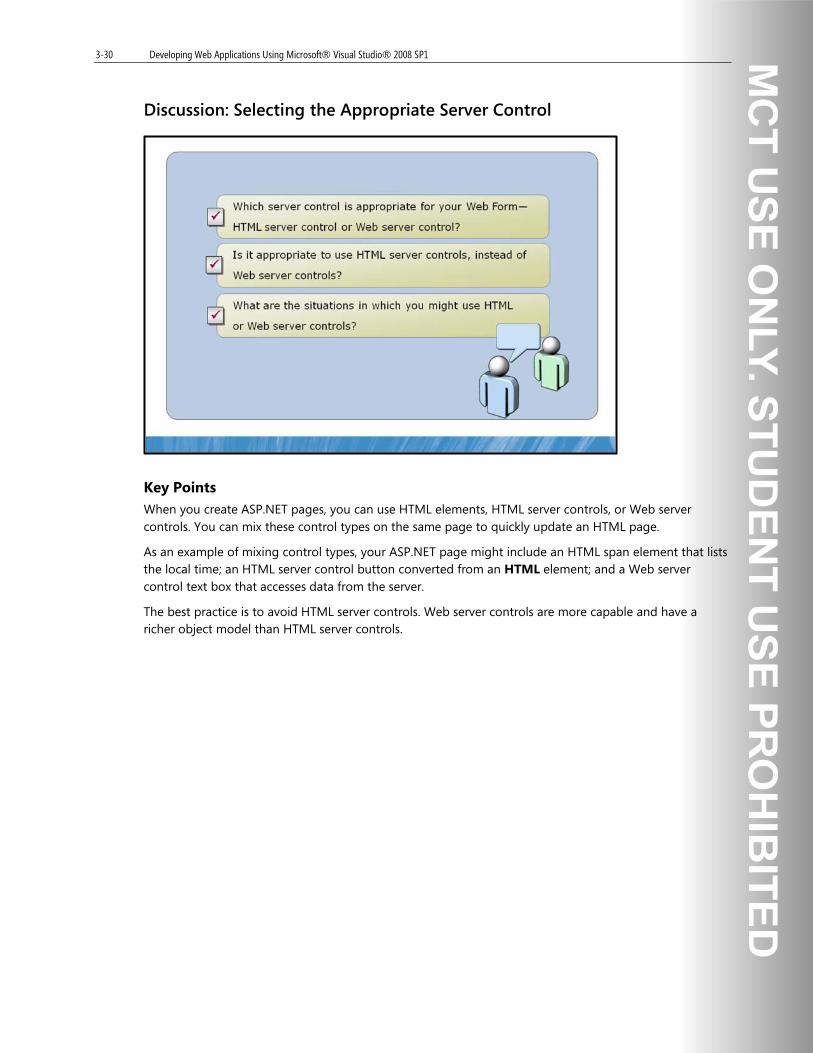
Discussion: Selecting the Appropriate Server Control
Key Points When you create ASP.NET pages, you can use HTML elements, HTML server controls, or Web server controls. You can mix these control types on the same page to quickly update an HTML page.
As an example of mixing control types, your ASP.NET page might include an HTML span element that lists the local time; an HTML server control button converted from an HTML element; and a Web server control text box that accesses data from the server.
The best practice is to avoid HTML server controls. Web server controls are more capable and have a richer object model than HTML server controls.

Creating a Microsoft ASP.NET Web Form 3-31
Lab: Creating a Microsoft ASP.NET Web Form
Note: You can perform tasks in this lab either by using Visual Basic or Visual C# programming language. If you are using Visual Basic as your programming language, refer to the steps provided in Section 1 of the lab page. If you are using Visual C# as your programming language, refer to the steps provided in Section 2 of the lab page.
Lab Introduction
In this lab, you will add a Web Form to an ASP.NET Web application, then add server controls to the Web Form, and then configure its properties.
Lab Objectives
After completing this lab, you will be able to:
• Open an ASP.NET Web site project.
• Create a new Web Form.
• Apply a stylesheet to the Web Form.
• Add a server control to the Web Form and configure its properties.
• Apply styles to the HTML elements and server controls.
Lab Setup
For this lab, you will use the available virtual machine environment. Before you begin the lab, you must:
• Start the NYC-CL1 virtual machine, and then log on by using the following credentials:
• User name: Student
• Password: Pa$$w0rd

3-32 Developing Web Applications Using Microsoft® Visual Studio® 2008 SP1
Lab Scenario
You are a developer at Contoso, Ltd., which is a large organization with a global customer base. Your organization uses .NET applications to create, customize, and manage its customer information. Your organization has created a Web site to manage customer data and services in ASP.NET.
Contoso, Ltd. wants to create an application to maintain and update the customer information. You need to customize the application to meet the specific requirements of the sales team. Updating the customer information is an ongoing process for the sales team and the application requires updates based on the feedback from senior developers and other stakeholders. You need to build a user interface that meets the defined requirements.
Create an application and build a user interface that is easy to update and modify, by using ASP.NET server controls.

Creating a Microsoft ASP.NET Web Form 3-33
Section 1: Visual C#
Exercise 1: Creating a Web Form The main tasks for this exercise are as follows:
1. Start the virtual servers.
2. Open an existing ASP.NET Web site.
3. Add a Web Form to the Web site.
Task 1: Start the virtual server. • Open the 2310D Lab Launcher.
• Start the 2310D-NYC-CL1 virtual machine.
• Log on to NYC-CL1 as Student, with the password, Pa$$w0rd.
Task 2: Open an existing ASP.NET Web site. • Open Microsoft Visual Studio 2008 SP1.
• Open the CustomerManagement solution from the D:\Labfiles\Starter\M3\CS folder.
Task 3: Add a Web Form to the Web site. • Add the InsertCustomer.aspx Web Form to the CustomerManagement Web site.
Results: After completing this exercise, you should have opened the existing CustomerManagement Web site and added the InsertCustomer Web Form.

3-34 Developing Web Applications Using Microsoft® Visual Studio® 2008 SP1
Exercise 2: Adding and Configuring Server Controls in Web Forms The main tasks for this exercise are as follows:
1. Add an existing style sheet to the Web Form.
2. Copy an existing CSS table layout to the Web Form.
3. Add the server controls to the Web Form and configure their basic properties.
4. Set the control properties to the Web Form.
5. Apply a predefined style to the Web Form.
Task 1: Add an existing style sheet to the Web Form. • Add the Sites.css file to the InsertCustomer Web Form.
• Open the InsertCustomer Web Form in the Design view.
• View the styles added in the stylesheet by using the Manage Styles window.
Task 2: Copy an existing CSS table layout to the Web Form. • Copy the content of the D:\Labfiles\Starter\M3\CSSTableLayout.txt file and insert between the
opening and closing div tags in the InsertCustomer Web Form.
• Apply the customertable style to the div element by using the Apply Styles window.
• Save the changes and view the InsertCustomer Web Form in a Web browser.
Task 3: Add the server controls to the Web Form and configure their basic properties. • Add the Label control from the Toolbox to the first cell of the left column in the div element,
change the (ID) property to CustomerNameLabel, and then set the Text property to Name:.
• Add the Textbox control from the Toolbox to the first cell of the right column in the div element, and change the (ID) property to CustomerNameTextBox.
• Add the Label control from the Toolbox to the second cell of the left column in the div element, change the (ID) property to CustomerAddressLabel, and then set the Text property to Address:.
• Add the Textbox control from the Toolbox to the second cell of the right column in the div element, and change the (ID) property to CustomerAddressTextBox.
• Add the Label control from the Toolbox to the third cell of the left column in the div element, change the (ID) property to CustomerPhoneLabel, and then set the Text property to Phone:.
• Add the Textbox control from the Toolbox to the third cell of the right column in the div element, and change the (ID) property to CustomerPhoneTextBox.
• Add the Label control from the Toolbox to the fourth cell of the left column in the div element, change the (ID) property to CustomerZipCodeLabel, and then set the Text property to Zip Code:.
• Add the Textbox control from the Toolbox to the fourth cell of the right column in the div element, and change the (ID) property to CustomerZipCodeTextBox.
• Add the Label control from the Toolbox to the fifth cell of the left column in the div element, change the (ID) property to CustomerCityLabel, and then set the Text property to City:.
• Add the Textbox control from the Toolbox to the fifth cell of the right column in the div element, and change the (ID) property to CustomerCityTextBox.
• Add the Label control from the Toolbox to the sixth cell of the left column in the div element, change the (ID) property to CustomerStateLabel, and then set the Text property to State:.

Creating a Microsoft ASP.NET Web Form 3-35
• Add the Textbox control from the Toolbox to the sixth cell of the right column in the div element, and change the (ID) property to CustomerStateTextBox.
• Add the Label control from the Toolbox to the seventh cell of the left column in the div element, change the (ID) property to CustomerEmailAddressLabel, and then set the Text property to Email Address:.
• Add the Textbox control from the Toolbox to the seventh cell of the right column in the div element, and change the (ID) property to CustomerEmailAddressTextBox.
• Save the changes and view the InsertCustomer Web Form in a Web browser.
• Add the Button control from the Toolbox to the footer of the table in the div element, change the (ID) property to CustomerInsertButton, and then set the Text property to Insert.
• Add the Button control from the Toolbox to the footer of the table in the div element, change the (ID) property to CustomerCancelButton, and then set the Text property to Cancel.
• Save the changes and view the InsertCustomer Web Form in a Web browser.
• Close Internet Explorer.
• Save the changes and view the default Web Form in a Web browser.
Task 4: Set the control properties to the Web Form. • Set the MaxLength property of the CustomerNameTextBox and CustomerAddressTextBox
controls to 50.
• Set the MaxLength property of the CustomerPhoneTextBox, CustomerCityTextBox, and CustomerStateTextBox controls to 30.
• Open the InsertCustomer Web Form in the Source view.
• Set the MaxLength property of the CustomerZipCodeTextBox control to 10.
• Set the MaxLength property of the CustomerEmailAddressTextBox control to 40.
• Save the changes and view the InsertCustomer Web Form in a Web browser.
Task 5: Apply a predefined style to the Web Form. • Apply the predefined template style to the body element of the InsertCustomer Web form to the
body element.
• Save the changes and view the InsertCustomer Web Form in a Web browser.
Results: After completing this exercise, you should have designed the initial version of the InsertCustomer Web Form for your Web site.
3-36 Developing Web Applications Using Microsoft® Visual Studio® 2008 SP1
Section 2: Visual Basic
Exercise 1: Creating a Web Form The main tasks for this exercise are as follows:
1. Start the virtual servers.
2. Open an existing ASP.NET Web site.
3. Add a Web Form to the Web site.
Task 1: Start the virtual server. • Open the 2310D Lab Launcher.
• Start the 2310D-NYC-CL1 virtual machine.
• Log on to NYC-CL1 as Student, with the password, Pa$$w0rd.
Task 2: Open an existing ASP.NET Web site. • Open Microsoft Visual Studio 2008 SP1.
• Open the CustomerManagement solution from the D:\Labfiles\Starter\M3\VB folder.
Task 3: Add a Web Form to the Web site. • Add the InsertCustomer.aspx Web Form to the CustomerManagement Web site.
Results: After completing this exercise, you should have opened the existing CustomerManagement Web site and added the InsertCustomer Web Form.

Creating a Microsoft ASP.NET Web Form 3-37
Exercise 2: Adding and Configuring Server Controls in Web Forms The main tasks for this exercise are as follows:
1. Add an existing style sheet to the Web Form.
2. Copy an existing CSS table layout to the Web Form.
3. Add the server controls to the Web Form and configure their basic properties.
4. Set the control properties to the Web Form.
5. Apply a predefined style to the Web Form.
Task 1: Add an existing style sheet to the Web Form. • Add the Site.css file to the InsertCustomer Web Form.
• Open the InsertCustomer Web Form in the Design view.
• View the styles added in the stylesheet by using the Manage Styles window.
Task 2: Copy an existing CSS table layout to the Web Form. • Copy the content of the D:\Labfiles\Starter\M3\CSSTableLayout.txt file and insert the content
between the opening and closing div tags in the InsertCustomer Web Form.
• Apply the customertable style to the div element by using the Apply Styles window.
• Save the changes and view the InsertCustomer Web Form in a Web browser.
Task 3: Add the server controls to the Web Form and configure their basic properties. • Add the Label control from the Toolbox to the first cell of the left column in the div element,
change the (ID) property to CustomerNameLabel, and then set the Text property to Name:.
• Add the Textbox control from the Toolbox to the first cell of the right column in the div element, and change the (ID) property to CustomerNameTextBox.
• Add the Label control from the Toolbox to the second cell of the left column in the div element, change the (ID) property to CustomerAddressLabel, and then set the Text property to Address:.
• Add the Textbox control from the Toolbox to the second cell of the right column in the div element, and change the (ID) property to CustomerAddressTextBox.
• Add the Label control from the Toolbox to the third cell of the left column in the div element, change the (ID) property to CustomerPhoneLabel, and then set the Text property to Phone:.
• Add the Textbox control from the Toolbox to the third cell of the right column in the div element, and change the (ID) property to CustomerPhoneTextBox.
• Add the Label control from the Toolbox to the fourth cell of the left column in the div element, change the (ID) property to CustomerZipCodeLabel, and then set the Text property to Zip Code:.
• Add the Textbox control from the Toolbox to the fourth cell of the right column in the div element, and change the (ID) property to CustomerZipCodeTextBox.
• Add the Label control from the Toolbox to the fifth cell of the left column in the div element, change the (ID) property to CustomerCityLabel, and then set the Text property to City:.
• Add the Textbox control from the Toolbox to the fifth cell of the right column in the div element, and change the (ID) property to CustomerCityTextBox.
• Add the Label control from the Toolbox to the sixth cell of the left column in the div element, change the (ID) property to CustomerStateLabel, and then set the Text property to State:.

3-38 Developing Web Applications Using Microsoft® Visual Studio® 2008 SP1
• Add the Textbox control from the Toolbox to the sixth cell of the right column in the div element, and change the (ID) property to CustomerStateTextBox.
• Add the Label control from the Toolbox to the seventh cell of the left column in the div element, change the (ID) property to CustomerEmailAddressLabel, and then set the Text property to Email Address:.
• Add the Textbox control from the Toolbox to the seventh cell of the right column in the div element, and change the (ID) property to CustomerEmailAddressTextBox.
• Save the changes and view the InsertCustomer Web Form in a Web browser.
• Add the Button control from the Toolbox to the footer of the table in the div element, change the (ID) property to CustomerInsertButton, and then set the Text property to Insert.
• Add the Button control from the Toolbox to the footer of the table in the div element, change the (ID) property to CustomerCancelButton, and then set the Text property to Cancel.
• Save the changes and view the InsertCustomer Web Form in a Web browser.
• Close Internet Explorer.
• Save the changes and view the default Web Form in a Web browser.
Task 4: Set the control properties to the Web Form • Set the MaxLength property of the CustomerNameTextBox and CustomerAddressTextBox
controls to 50.
• Set the MaxLength property of the CustomerPhoneTextBox, CustomerCityTextBox, and CustomerStateTextBox controls to 30.
• Open the InsertCustomer Web Form in the Source view.
• Set the MaxLength property of the CustomerZipCodeTextBox control to 10.
• Set the MaxLength property of the CustomerEmailAddressTextBox control to 40.
• Save the changes and view the InsertCustomer Web Form in a Web browser.
Task 5: Apply a predefined style to the Web Form. • Apply the predefined template style to the body element of the InsertCustomer Web form.
• Save the changes and view the InsertCustomer Web Form in a Web browser.
Results: After completing this exercise, you should have designed the initial version of the InsertCustomer Web Form for your Web site.

Creating a Microsoft ASP.NET Web Form 3-39
Lab Shutdown After you complete the lab, you must shut down the 2310D-NYC-CL1 virtual machine and discard any changes.
Important: If the Close dialog box appears, ensure that Turn off and delete changes is selected, and then click OK.
3-40 Developing Web Applications Using Microsoft® Visual Studio® 2008 SP1
Lab Review
1. What are the advantages of Web Form controls?
2. What type of Web server controls are used in the lab?
Creating a Microsoft ASP.NET Web Form 3-41
Module Review and Takeaways
Review Questions 1. How can you verify that a Web page with an .aspx extension is a Web Form?
2. How can you verify that a Web page with an .aspx extension contains intrinsic ASP.NET Web server controls?
3. What type of markup or script does a Web server control generate on the client?
Real-World Issues and Scenarios 1. You want to add a page to your Web application that you can work with by using server-side code.
What is the easiest way to implement this?
2. You want to add a title to a Web Form. What is the easiest way to implement this?
Best Practices Mention some best practices in the context of your own business situations.

3-42 Developing Web Applications Using Microsoft® Visual Studio® 2008 SP1