Metamorphic epiphany -- 3D animation
17
Colby College Colby College Digital Commons @ Colby Digital Commons @ Colby Senior Scholar Papers Student Research 1998 Metamorphic epiphany -- 3D animation Metamorphic epiphany -- 3D animation Michael G. Corr Colby College Follow this and additional works at: https://digitalcommons.colby.edu/seniorscholars Part of the Computer Sciences Commons Colby College theses are protected by copyright. They may be viewed or downloaded from this site for the purposes of research and scholarship. Reproduction or distribution for commercial purposes is prohibited without written permission of the author. Recommended Citation Recommended Citation Corr, Michael G., "Metamorphic epiphany -- 3D animation" (1998). Senior Scholar Papers. Paper 54. https://digitalcommons.colby.edu/seniorscholars/54 This Senior Scholars Paper (Open Access) is brought to you for free and open access by the Student Research at Digital Commons @ Colby. It has been accepted for inclusion in Senior Scholar Papers by an authorized administrator of Digital Commons @ Colby.
-
Upload
khangminh22 -
Category
Documents
-
view
0 -
download
0
Transcript of Metamorphic epiphany -- 3D animation
Colby College Colby College
Digital Commons @ Colby Digital Commons @ Colby
Senior Scholar Papers Student Research
1998
Metamorphic epiphany -- 3D animation Metamorphic epiphany -- 3D animation
Michael G. Corr Colby College
Follow this and additional works at: https://digitalcommons.colby.edu/seniorscholars
Part of the Computer Sciences Commons
Colby College theses are protected by copyright. They may be viewed or downloaded from this
site for the purposes of research and scholarship. Reproduction or distribution for commercial
purposes is prohibited without written permission of the author.
Recommended Citation Recommended Citation
Corr, Michael G., "Metamorphic epiphany -- 3D animation" (1998). Senior Scholar Papers. Paper
54.
https://digitalcommons.colby.edu/seniorscholars/54
This Senior Scholars Paper (Open Access) is brought to you for free and open access by the Student Research at Digital Commons @ Colby. It has been accepted for inclusion in Senior Scholar Papers by an authorized administrator of Digital Commons @ Colby.
oUetam(Jrphic ~piphtV1f? A 3D ANIMATION
by
Michael G. Corr
Submitted in Panial Fulftllment of the Requirements of the Senior Scholars Program
COLBY COLLEGE 1998
APPROVED:
. -~ (L _ tl~
~. Atmore; Media Services Reader
Mil-T Chair. Independ~Ommittee
As far back as I can remember, I have always been interested in studio art. Whether it be
painting, drawing, printmaking, or photography, it has consistently been a part of my life. Upon
enrolling in Colby, I became interested in computers and decided to major my undergraduate college
career in Computer Science. Not forgetting past interests, I continued my studio art education, taking
several classes within the Art department. In due time, I began combining interests and began
studying Computer Graphics and Design. With limited resources in this field at Colby I the majority of
my computer graphic education and experience has been done on my own time apart from regular
classroom work. As time progressed, so did my interests. Starting with simple image manipulation of
digitally scanned photographs, I moved on to Web Page design, eventually leading to Desktop
Publishing. Ultimately, I wanted to take a step funher and expand my overall computer graphic
knowledge by learning 3D modeling and animation. With even fewer resources in 3D animation at
Colby, I perceived having trouble finding the information and tools I would need to gain the
necessary skills for this new field.
The Senior Scholars program gave me the opponunity to find and acquire the necessary tools
to pursue my interest. This program also allowed me to devote the proper amo~nt of time required for
learning these new tools.
After deciding to spend the majority of my Senior year towards 3D animation, it was
~ece ssary to do research to better develop a project from which I could maximize my learning
experience. I started by researching various software packages and platforms that were suitable for
my needs. Computer hardware and software costs have a tendency to accumulate very rapidly, so cost
wac; a large consideration when designing the project. From my research, I was fortunate to talk to
several established 3D artists with more experience in 3D animation. Their input and suggestions
helped me with my decisions. I concluded to use a software package called 3D Studio MAX produced
by Kinetix, a subsidiary of a more well known 3D architectural software company, Autodesk. The
software I chose is native to the Windows platform, more specifically the WindowsNT operating
system. Knowing that Colby is a Macintosh based campus, finding a machine to use for my project
was also an issue. While researching the topic, I looked into 3D software for the Macintosh platform,
but none, within a reasonable price range, were suitable for what I wanted to do.
The next step in developing my project was to come up with a story to animate. It took me a
few weeks, but eventually I was able to put something together that would be substantial and
interesting enough to animate .

The story starts with a young traveler hiding outside the window of his true love, waiting for
her to accompany him on his next journey. Little does he know, her father is also waiting, and has a
different plan for the two young lovers. After a narrow escape, the two settle in for the night under a
tree in the woods. Upon falling asleep, the traveler has a dream that raises a few existential questions
he has about his own life. From this point onward, the world appears very different to him. He no
longer has the same understandings from which he can base the choices he makes.
The first scene of the traveler waiting outside the window is based on a Jimi Hendrix tune
called "Wait Until Tomorrow." The first scene consists of a word by word animation of the song's
lyrics. The very first camera shot is of the traveler standing in the garden with his arms crossed and
shivering. Behind him is a ladder leaning up against his love's bedroom window. When creating the
animation, I was conscious of timing. There are certain key points in the music and lyrics that were
intentionally coordinated with the animation. For example, the point at which the girl's feet touch the
ground after descending the ladder, or the camera cut from the father in the tree back to the two
lovers, or the timing of the father's first gunshot. I felt this tight coordination was important to clearly
show the relationship between the song's lyrics and the animation. I did not want the viewer [Q think
the music was simply background noise to set the mood, or the like. Without the lyrics, I felt the
animation would be hard to understand and would lose the viewers' interest.
The second scene, of the young traveler's dream, is taken from an old Chinese Taoist story
found in the Chuang-Tzu writings. Chuang-Tzu writes of a Taoist priest who falls asleep by the river.
While sleeping, he has a dream that he is really a butterfly. However the dream continues with the
butterfly falling asleep and dreaming he is the priest. The story brings up a metaphysical idea on
existence; who is who and what is really real? In other words, is the priest real and the butterfly just a
dream, or the butterfly real and the priest a dream?
I learned of this story while away at Dartmouth College during my Junior year. While at
Dartmouth, I took a class on Chinese Taoism, where we read such scriptures as Chuang-Tzu and Te
Tao Ghing. Over the past few years, I have been having a few existential ideas myself and have
become very intrigued by the topic. I found many 'Of the stories and ideas of Taoism related to ideas
and questions I had previously come up with on my own. I felt the story of the butterfly would not
only be fun (0 animate, but would help bring a deeper meaning to the story as well as express my own
ideas through the work .
Not having a firm understanding of how long it would take to animate my story, I had
developed the story further, expecting [0 animate it in its entirety. The original story continues with
the two lovers waking up the next morning and finding they had run off into the woods. The two
continue on their journey coming across several other characters along the way, including a fish and a
frog. Eventually they reach a mountain which the two climb up and after some struggle, reach the top.
It is at this point the young traveler, having been enlightened, realizes it is time for him to move on,
alone. After the two embrace and say their last goodbye, the traveler walks through a magical
doorway, taking him into a new realm. Upon entering the new realm, the traveler is overcome by the
power and mystification of what he sees. What is before him will be told in the next story ...
Upon being accepted to the Senior Scholars program, my next step was to fmd adequate
funding for the project. The software I chose has a standard retail price of $3400, with an educational
price tag of only $1200. I knew it would not be easy to find $1200, but it was at least more feasible
than finding $3400. Having never applied for special funding before, my first attempt was somewhat
naive. My first inclinations were to write to the Art department and Computer Science departments
since my project incorporated aspects of both disciplines. By this time however, it was now summer
and getting in contact with the appropriate professors and faculty was not only difficult. but for some
persons, impossible.
Through the grapevine. I heard about the Special Projects Funding offered through the Dean
of Faculty department. However, by the time I heard about this resource and my application letter had
been sent, the committee had finished their regularly scheduled meetings and would not be
congregating again until late summer.
At the time, I was working for a large advertising finn in New York City, and decided to ask
my employer if the company would be willing to give me a sponsorship. To my dismay. the firm did
not offer such things to summer employees. My only option at this point was to wait until the
beginning of the school year.
Upon returning to school, my current luck did not change much for the better. After inquiring
about the status of my funding application to the Special Project Funding, I was told they had never
received it. Meanwhile, I had been talking to the chairpersons of both the Art and Computer Science
departments and after several meetings, I seemed to be running down a tunnel with no light at the end.
Although my project had been approved, it was pending on the fact that I could find the necessary
funding to support it. There was a point in early Fall where I was considerably worried if my project
had any future or not.
Things started to change after resubmitting my application to the Special Projects Committee.
They had accepted my funding proposal and was offering $400 towards the project. This was great
news, but I still needed another $800 for the software as well as a machine to use. Things continued
to look better once one of my project Readers, Batya Friedman, of the Computer Science department,
informed me that the department was looking to purchase a new Windows machine for their lab. She
offered to let me pick the configurations so as I could use it for my project. Great, now all that
remained was another $800, but resources were running out.
My other project Reader, Sam Atmore, in Media Services, introduced me to Bill Dennen from
Information Technology and Services. After a few meetings with Bill, he agreed to have ITS pay for
the rest of my costs. As a compensation for everyone's generosity, I decided to offer something back
to Colby, by starting a weekly workshop on Computer Art and Graphic Design. For one night a
week, 1 taught a one hour workshop, open to the Colby community, on various aspects of computer
art. Topics ranged anywhere from proper scanning techniques, to Adobe Photoshop skills, to web
design, to desktop publishing skills. I even had a workshop on 3D design. The workshops, entitled
"The Computer Art Workshop" proved to be quite successful. On average, attendance to a workshop
was 8 to 12people, including both staff and students. Because of the Workshop's success, it has
been bumped up to club status, so as to gain more recognition and access to funding possibilities.
Plans are also currently under way to offer a Jan-Plan course on Desktop Publishing.
With the funding issues solved, purchasing the high priced software needed to happen soon>I
was already behind schedule. Unfortunately, more problems arose when trying to acquire the
software from an educational discount software retailer. At Colby. ITS is responsible for the
purchasing of all public use software. However, according to the software distributor, ITS did not
qualify for the educational discount because ITS is not a student nor faculty. Dealing with this issue
and trying to find alternative routes to the purchase of the software, delayed me even more. Again, it
looked as if 1 would not be able to start my project, and would have to cancel the whole thing. At one
point, someone suggested 1 purchase the software myself and have ITS reimburse the costs.
Frustrated with the current situation, 1 acted on this suggestion and had the software in my hands the
next afternoon. However, now it was unclear if ITS could reimburse me because of ownership of
license issues. Eventually, all problems were resolved and 1 could begin my work.
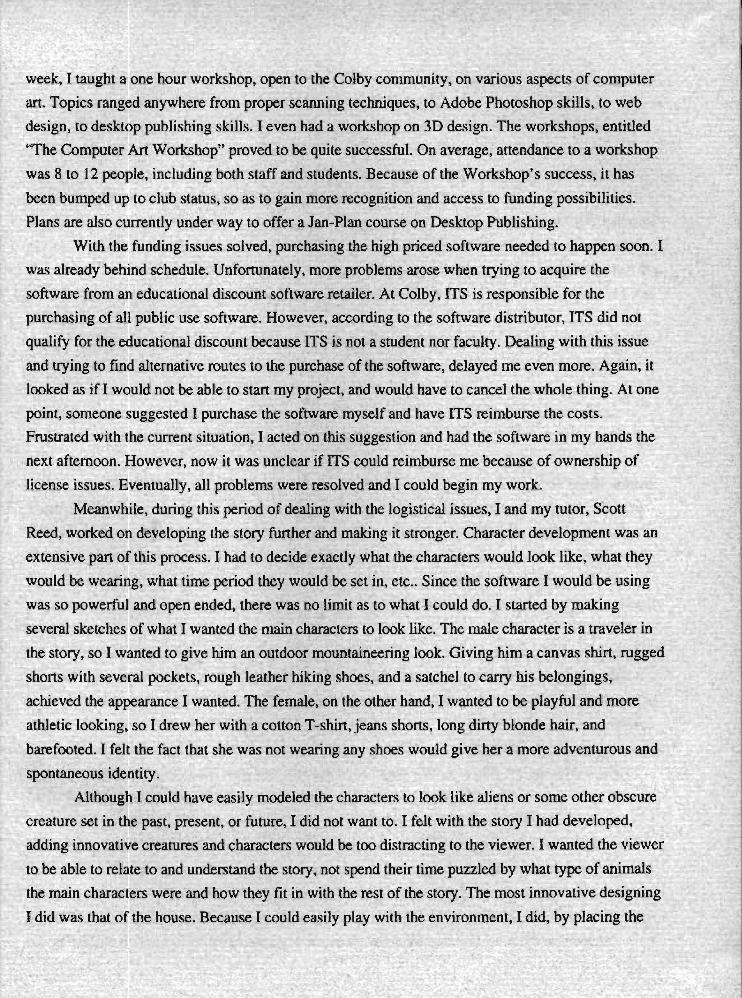
Meanwhile, during this period of dealing with the logistical issues, 1 and my tutor, Scott
Reed, worked on developing the story further and making it stronger. Character development was an
extensive part of this process. I had to decide exactly what the characters would look like, what they
would be wearing, what time period they would be set in. etc .. Since the software 1 would be using
was so powerful and open ended, there was no limit as to what I could do. 1 started by making
several sketches of what 1 wanted the main characters to look like. The male character is a traveler in
the story, so I wanted to give him an outdoor mountaineering look. Giving him a canvas shirt, rugged
shorts with several pockets, rough leather hiking shoes, and a satchel to carry his belongings,
achieved the appearance I wanted. The female. on the other hand, 1 wanted to be playful and more
athletic looking, so 1 drew her with a cotton T-shirt, jeans shorts, long dirty blonde hair, and
barefooted. 1 felt the fact that she was not wearing any shoes would give her a more adventurous and
spontaneous identity.
Although 1 could have easily modeled the characters to look like aliens or some other obscure
creature set in the past, present, or future, I did not want to. 1 felt with the story 1 had developed,
adding innovative creatures and characters would be too distracting to the viewer. I wanted the viewer
to be able to relate to and understand the story, not spend their time puzzled by what type of animals
the main characters were and how they fit in with the rest of the story. The most innovative designing
1 did was tlfat of the house. Because 1 could easily play with the environment, 1did, by placing the

setting of the story 20 to 30 years into the future. Not too far that the characters needed space suits,
but far enough into the future that architecture styles had changed.
After developing the general look of the characters, I bad to focus on what their faces would
look like. For this, Scott gave me several old Colby Face Books, from which I made numerous
sketches. As mentioned, the male character is a traveler, so I wanted a young man, mid 20s, with a
more rugged look; broad chin, high cheek bones, and a weathered face. The girl needed a more
playful but strong look. With figure drawing not being one of my strong points, I had a difficult time
getting down on paper what I saw in my head. After several attempts of drawing from images in the
Face Book, I realized that two of my friends had the basic looks I wanted. From several sketches and
photographs of my two models, Michael Soares and Melissa Carpenter, I was able to get what I was
looking for.
With the animals in the story, I wanted to be more creative. The butterfly and fish were to be
kept realistic, but I wanted to create a new creature, possibly something that was the morph of two
separate animals. For this, I looked through various books from the library and made several
drawings. I came up with a creature that was a mix between a frog and spider. Because of time
issues, I never ended up modeling this creature, bur I wish I had.
After the complications had been settled with the purchasing of the software, I finally started.
There are three main aspects to 3D animation; modeling, animating, and material mapping, all to be
done sequentially. Modeling is the building and creation of the objects to be used in the animation.
There are several ways to model objects, given the various tools within the software. To begin with,
there is a small library of principle shapes and objects including spheres, boxes, cones, cylinders,
polygons, and a teapot. There is also a large library of modifier tools with which any object can easily
be altered.
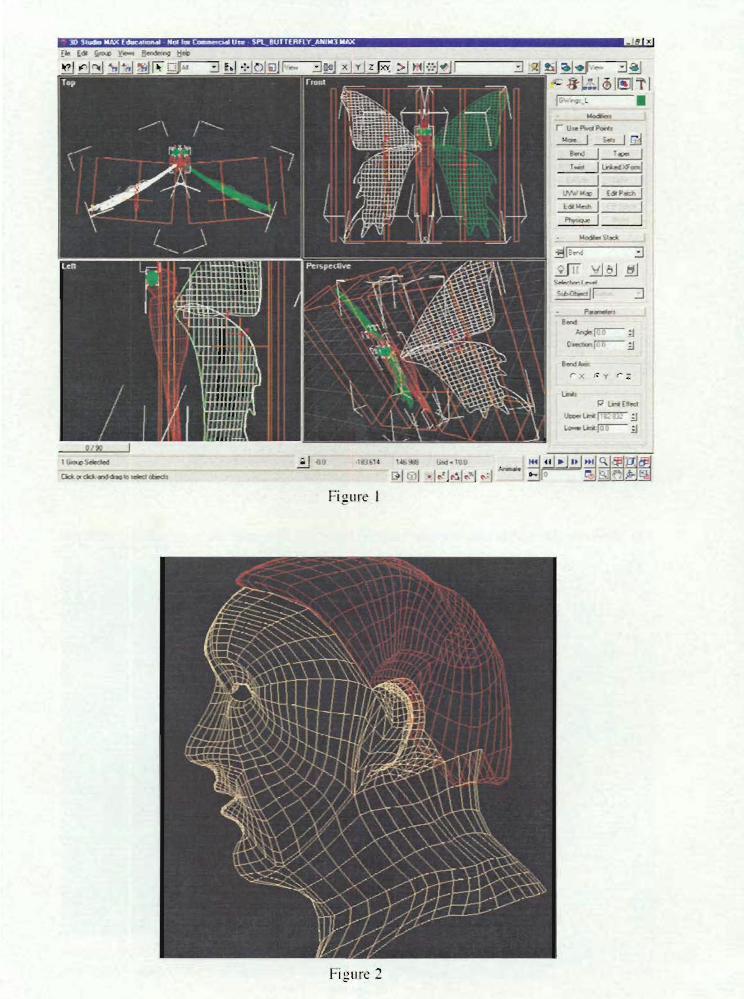
The butterfly, I fell, would be the easiest to build, so I started with it first. To begin, with a
line tool, I drew the torso's profile, and using a lathe tool, lathed the profile 360° to give it a full
body and 3 dimension. For the wings, I used the line tool again to draw the outline, and then used an
extrude tool to give it depth. For the eyes, I simply used a sphere, modified with a skew modifier.
The antennas being cylinders altered by stretch and bend modifiers. Using a mirror feature, I was able
to make mirrored copies of the wing, eye and antennae I had created, to give the butterfly a pair of
each. Within an afternoon, I had a realistic looking butterfly. (figure 1)
The next things to model, which I knew would be the hardest, were the human characters.
Not having done this before, I was not sure what would be the best way to do so. As mentioned
earlier, the software I was using is very open ended as to how one can build and model objects. The
hard part was not creating an object with realistic human features, but to create an object that was
optimal for both realism and animation. AIl objects are made up of polygon faces. The more faces an
object has, the more realistic it can appear, but also the more information the software needs to

maintain. Too much information, and the software could be brought 'to its knees' trying to compute
and display it.
My first instinct when creating the characters, was to use the library of principle shapes. I
figured a head is simply an oval shaped sphere, arms and legs being cylinders, and the torso a skewed
sphere. It is possible, with this software, to create an object then switch to a sub-object mode and
modify it further, like a ball of clay. Taking vertices, I could pinch and pull a principle object until it
looked like a face, or arm, or hand, etc .. After a considerable amount of work, my characters started
looking how I envisioned them. Unfortunately, as I found out later, the techniques I used prevented
them from being animated properly.
Knowing that my resources at Colby would be extremely limited, I had bought several books
on the subject. These books were my main source for information, I decided early on, rather than
spend a great deal of time reading through all of the books to learn the software, I would learn as I
worked. When faced with a task I did not know how to complete, I would simply look it up. One
book from my collection focused only on biped character development. After further reading, I
discovered that my initial instincts were incorrect, and that the best way to model animate objects was
to use patch objects. Patches come in only two shapes, squares and triangles. To build an object with
patches, one starts with a single patch and then bends, twists, pulls, and stretches the corners until the
patch looks like a particular section, or 'patch' of the object. A new patch is then attached to an edge
of the first patch. This new patch is also, bent, twisted, pulled, and stretched until it looks as desired.
Slowly, patches are continuously attached together until a final, closed object has been formed,
(Figure 2) One great benefit to modeling animate objects is the fact that almost everything is
symmetrical in this world. So, many times only part of an object needs to be created and then simply
mirrored. With .this in mind, I only had to model half of the character, and mirrored it to form the
whole body.
Soon, I was back on track and had two new characters roughly modeled. While trying to
animate the two characters later on, I found I frequently had to go back to my patch models and make
modifications, but none too drastic .
A wonderful aspect of 3D modeling is once you create an object, you 'have' that object. In
other words, the object exists in both time and space, so one can manipulate it in any way and as
frequently as one likes. After creating my characters, I could use these same ones again, in another
story, giving them an entirely new animation and personality. The concept is similar to toy dolls,
since I could also give my characters a whole new wardrobe. This feature of 3D modeling was useful
when creating the father for the story. Instead of starting from scratch and building an entirely new
character, I was able to copy the male traveler patch model and make modifications. By giving the
new patch model more wrinkles, less hair, eye glasses, and a pot-belly, I had a new, unique
character.

With four characters already modeled, I decided it was time to start creating objects to develop
the environment. I began with the girl's house first. While driving through Colorado a few years ago,
the house used in Woody Allen's movie, "The Sleeper" was pointed out to me from the road. The
house always stuck out in my mind because of its futuristic 'bubble' architecture. The house,
although built to represent the future, somehow fit in with the present and did not draw unwanted
attention to itself. I remembered this unique characteristic when designing the house for my
animation, since I wanted my 'world' to be set in the present with only a few futuristic aspects. The
mailbox, seen at the end of the first scene, was designed to match the house.
With a good portion of the objects modeled, I was ready to animate. The software I purchased
for the project included a plug-in called, Character Studio. With this extension, biped characters could
easily be animated. The software included built in skeletons with which I could animate using
footsteps. I simply had to lay down the footsteps where I wanted the characters to move, and the
software would map out the movement of the skeletons, giving them a basic walking, running. or
jumping movement. I could then further modify the movement to my liking.
When animating objects, animation is not done frame by frame, but by key-frames. By this I
mean, only the key points where movement changes, is it necessary to animate. For example, if I
wanted a ball object to move from point A to point B over a time of 5 seconds, I would start by
positioning the ball at point A in time frame T, then click the record button. Next, using the Frames
Per Second rate, I would calculate how many frames would be needed for 5 seconds to elapse. At
30fps, 5 seconds calculated to be 150 frames, so moving the frame slider ahead by this amount would
put me at the correct time. At this new frame, I would position the ball at point B and once again, click
the record button. The software would then calculate the position of the ball for all the frames in
between. Every time there was a change in the movement of an object, a key-frame was created.
Using the Track View, I could further modify keys to my needs. (Figure 3) With this method, I
was able to make modifications to the animation of the characters, moving their limbs and
expenditures to my liking. Once the skeletons where animated, I mapped their movement to the patch
character models I created earlier. Using this technique, every movement the skeletons made, their
mapped counterpart of the patch character would make an identical movement.
One of the draw backs of working with these skeletons is once the transition is made to the
patch characters, the animation does not always tum out as expected. Occasionally, a body part may
map incorrectly from the skeleton, or overlap with another part, and make the animation appear
unrealistic. In addition, some animation keys set by the software, not by myself, did not always
behave as I would have liked them to. Sometimes, I found myself fighting with the software over
control of these keys . I would want them to be modified in a certain way. but the software had other
plans in mind.
In addition to animating characters, I also had to place camera objects into the scene, and
animate them as well. This technique is similar to movie cinematography. Just as a film director has to
decide what camera shots to use, and how to move them throughout the movie, so did I. Many
professional 3D animators study acting and film directing since numerous skills and techniques cross
over between disciplines. The software I used has built in viewports: front, back, left , right, etc., but
these are utilized only for viewing the scene and objects in a working mode. They are not very useful
to be used as camera shots for the final animation.
The entire story was broken up into individual scenes. Not until one scene was completed
would I begin the next. The animation process of the first scene, with the guy waiting for his
girlfriend, took much longer than expected. I credit this to the fact that not only was the animation
long and complicated, but my animation skills were also still developing. Not until late January had I
reached a point where I was ready to move onto the next scene. At this point, I realized the entire
story I had written would not be able to be animated. I had to condense the story into one that could
reasonably be completed by the end of the school year. With this in mind, Scott and I decided the first
two scenes, with a few modifications, would be acceptable as a comprehensive and complete story,
with a beginning and an end.
The second scene, of the butterfly dream, was a much simpler scene to animate. I began
working with the butterfly first, simply for a change of pace. To animate him, I started by animating a
single complete flap of the wings. Using and animating bend modifiers to the wings and torso, I was
able to give the butterfly a natural looking movement. I proceeded by copying the animation of the
single wing flap and setting it on a loop to continuously repeat. To move the butterfly itself, I could
have used the technique mentioned above, of using key-frames. but I wanted the flight pattern of the
butterfly to be more randomized and easily modifiable. This earlier technique would have made it
difficult to accomplish this. The best way to achieve what I wanted was through the use of a path
controller. Using the line tool, I created a path in 3 dimensional space for the butterfly to follow.
Using the path control modifier, I instructed the butterfly to follow the path while it continuously
flapped its wings. Later, once the path was set to my approval, I could hide it so as not to be seen in
the final animation.
As part of making the newly condensed story complete and comprehensive, a new scene was
added to the beginning. Furthermore, both Scott and I agreed, with the camera angles I was currently
using in the first scene. it was a little confusing and unclear as to what exactly was happening in the
story. So to kill two birds with one stone, a new opening scene was added, of a butterfly flying down
from the sky to the feet of the traveler. With this new segment, I was able to place a camera to follow
the butterfly as it flew down, and simultaneously show the viewer the environment and setting of the
animation. This new scene also helped clarifywhat the large purple structure was; a house. Since it is
a 'futuristic' house, I felt it was a little unclear. The use of the butterfly also made the connection
between the first and second scenes more comprehensible. Having the butterfly appear in both the
beginning and end, helped bring a completeness to the story, an opening and closing.
Once all of the animation was blocked out, a large portion of time was spent fine tuning and
smoothing edges, both to the animation and models. Eventually I was able to start rendering
everything together, including music and sound effects.
Rendering is a large factor when creating 3D animations. When working on objects and
scenes, the software and computer need to display to the user all of the information given to it. The
more information a scene has, the longer it takes for the software to compute and display. For this
reason, it is best to work with as little information at a time as possible. This is why the animation of
the characters was done using skeletons and not the actual skin patch models. This is also why it is
best to work in a wireframe mode. In a wire frame mode, there are no opaque sides, everything is
'see through' so the software has much less to display. (Figure 4)
Once the scene is ready, it is rendered. Rendering is the compilation of all the information
assigned to objects and scenes. This includes animation movement, keys, color, lighting, shading,
materials, etc .. The rendering process can be very long. For example, the first scene of my animation
had a large number of objects and characters. For two minutes of animation, it took over 26 hours to
render. In comparison, the animation of the second scene, of the butterfly dream, was a lot simpler
and had much fewer objects. For a similar animation time of just under two minutes, it only took 12
hours to render. This rendering time is important since the computer, while rendering, is unable to be
used for any other work. This includes continuing work on other objects and animation. In addition,
if after rendering I find something wrong, I must make the proper modifications and then repeat the
entire rendering process over.
This was an enticing part of the 3D animation process for me. This concept of being unable to
see my final artwork until several hours after I had completed it, was new for me. With other
mediums like painting, as I painted I could see my entire work, there was no waiting. With 3D
creation, as I worked I had to envision what I thought, or hoped, my final product would look like. It
took some time and training to be successful at forecasting the end result, but certainly feasible.
Another aspect of 3D modeling that took time to adapt to, was the fact that I was creating 3
dimensional objects in a 2 dimension space. Many times it was difficult manipulating objects how I
wanted. Frequently, when a piece was not moving correctly, or I could not find the correct vertex to
move, I would get very frustrated. I wanted to 'grab the object and move the aggravating piece with
my physical hands and not a computer mouse. It is important to point out that the only means of
'contact' I had with my 3 dimensional objects were a keyboard and mouse. In contrast. a sculptor
creating similar objects can physically touch and rum his creation; I could not.
As mentioned earlier, there are three main parts to 3D design; modeling, animating, and
material mapping. Material mapping is when texture and color are 'mapped' to an object. For

example, to make a wall out of bricks, I would not create a single brick object, make several copies of
it, and then build a wall from them. Instead, I would make a single box object the entire size of the
wall, then map a brick wall texture to the box. The texture would give the box a realistic effect,
including bumps, texture, and color.
Originally, because of time and lack of experience with material mapping, I was not planning
to add materials and would leave my animation as was. However, I wanted to at least give the
butterfly more life and color, so I made an attempt at mapping a material to its wings. I started by
digitally scanning in a picture of a swallowtail butterfly, and modified the colors of the wings to my
liking. From there, I isolated a single wing from the scanned image and used it to map onto the wings
of my butterfly. As it turned out, the whole process was a lot simpler than I had thought, and it made
the butterfly look ten times better. Because of this, I became obsessed and started mapping materials
to everything.
The 3D software I used for the project included a small library of materials from which I tried
using as much as I could. I was able to find a grass texture for the-ground, stone and concrete for the
rocks and house, and a few others as welL However, for the clothing of the characters, I was unable
to find materials acceptable for my needs. While working late one night in the lab, I realized I was
wearing a pair of canvas pants that would look great on my male character. So, I took my pants off,
scanned in a small section and made my own new texture to add to the library and map to my
character. In ten minutes a copy of my pants had gone from my legs to my character's legs. After
learning how to make my own textures, and so as not to do a strip show in the computer lab, I came
better prepared the next time with some spare clothes to scan. Soon enough, the female character was
wearing my jeans and tee-shirt, the father was wearing my jeans and a modified version of the tee
shirt, and the male character's shoes were given a leather texture, taken from a scanned section of my
leather belt.
The ~arne process of making materials can be used to incorporate images into a scene. For
example, the opening scene takes place at night under a full moon in a rural area. To give this effect, I
took pictures one night when the moon was full, overlooking Waterville. After scanning the image, I
mapped it to a giant box object acting as the sky.
Along with adding materials, lights are important too. Lights are used to create the proper
atmosphere. Using the light objects supplied by the software, I was able to simulate light cast by a full
moon. With these lights I was also able to hide the box object displaying the image of Waterville, and
make the image blend into the background to appear natural.
This process was not easy and could have been done better, given more time. Many
professionals spend years perfecting their skills with material mapping and lighting, I had to perfect
mine in a weekend. The final lighting was acceptable as it created the effects I wanted, but
occasionally, there is an object that is not lit well enough or is illuminated too much.
Upon completion of the material mapping and final rendering, the entire animation was
compiled together. After adding titles and credits, the animation was finally complete. It was a long
and educational year, but it was certainly worth it, as I was able to produce a final product I was
proud of. Most importantly I was proud that the goals I had set for the project where accomplished.
For starters, I wanted to make the animation as professional and 'tight' as possible. Since the final
animation was only four and a half minutes, there was no room for superfluous animation or effects.
Everything incorporated into the animation had to have meaning and value. As mentioned earlier,
there are several key points in the animation that show the direct correlation between the animation and
lyrics . I did not want the music to appear as simply background noise. I wanted it to have significant
meaning.
The second scene shows a strong relationship to the music as well. For this scene, I used a
song written by Procol Harum, performed by Annie Lennox, "Whiter Shade of Pale." Notice the
timing of the camera panning through the traveler's eye, or the pace at which the butterfly flaps his
wings.
Another goal I had set for myself was to show consistency within the animation . In the first
scene, the male traveler is introduced by a camera pan up from his feet to his face. The father is
introduced in a similar way but with a different camera angle, to present the effect of danger. In the
dream sequence. the camera movement used to pan through the traveler's eye before entering the
dream, is repeated after completing the dream. This was done to suggest that the butterfly could now
be dreaming of the priest and not vice versa. For both characters, the camera pans through the left eye
in similar manners.
In the three different scenes there is a tree. all copies of each other with slight variations. In the
first scene. the father is sitting in the tree with the arms of the tree bent around him, hiding him,
casting dark shadows. In the second scene the traveler sits beneath the tree and falls asleep. In this
instance, the tree's aImS are bent around him as if giving him a hug, or protecting and comforting
rum. In the final scene, the butterfly starts his flight from a branch of the tree. This time, the tree's
arms are opened upwards, as if to say, "Go on. fly little butterfly. fly."
The lighting on the traveler after he is awakened from the dream is important as well. As he
lifts his head and looks towards the camera, a light is cast on his face, more specifically his eye; the
same eye used to show the dream. This lighting effect is used to indicate that the traveler has now
been enlightened, he has seen the epiphany and is now a changed, or metamorphosed person.
. 1
I J I ·1'" r~ I" I ..:
_ ltJ J(
r
e_ r: o' • y r ;:
Figure
Figurc .2

• • • • • •• •• • • • • • • • • • • •
•• • • •
• •• • • •• • •• • •• • • • • •
• •
• • • •
• • • • • • • • • •
- tMltt' ~ .Ll . -.J-.J 2U r:o;
....... ... • • • • •• •• • • •
GIl
•"
,,,1I 1)
, ; :"; 1<1 I I " ,1 S
• • • •• •• • ·..... 0 ... • 0 ~ 0 0
..:.J ...J ~ ...J ~ "' 0 . -*1 .-.- .& . ~31 - Figure 3
. ., "
~~ ~~~ 1* 1 I ~;J
Fi :.!1Ir<.' -4

I would like to thank all those who have helped make this project possible.
Scott Reed; my Tutor. For his patience, insightful suggestions and strong critiques.
Sam Atmore and Batya Friedman. My Readers, for their help and support.
The Senior Scholars Committee; For accepting my project and allowing me to purse my interest.
Bill Dennen, ITS, and the Special Projects Fund; my Sponsors. For placing their confidence in me.
Michael Soares and Melissa Carpenter; my models. For their willingness to help.
Mitchell Goodman; my friend. For responding so quickly to my late night cries for MAX help.
and,
Mom, Dad, and Brad; my family. For believing in me.