Manage Laboratory Work Outside the Classroom - MrFerriero.com
Upload
khangminh22Category
view
8download
0
Manage NAS protocols with SystemManagerONTAP 9NetAppJuly 20, 2022
This PDF was generated from https://docs.netapp.com/us-en/ontap/concept_nas_provision_overview.html on July 20, 2022. Always check docs.netapp.com for thelatest.

Table of Contents
Manage NAS protocols with System Manager. . . . . . . . . . . . . . . . . . . . . . . . . . . . . . . . . . . . . . . . . . . . . . . . . . . 1
NAS management overview with System Manager . . . . . . . . . . . . . . . . . . . . . . . . . . . . . . . . . . . . . . . . . . . . . 1
Provision NFS storage for VMware datastores . . . . . . . . . . . . . . . . . . . . . . . . . . . . . . . . . . . . . . . . . . . . . . . . 1
Provision NAS storage for home directories . . . . . . . . . . . . . . . . . . . . . . . . . . . . . . . . . . . . . . . . . . . . . . . . . . 2
Provision NAS storage for Linux servers using NFS . . . . . . . . . . . . . . . . . . . . . . . . . . . . . . . . . . . . . . . . . . . . 3
Manage access using export policies . . . . . . . . . . . . . . . . . . . . . . . . . . . . . . . . . . . . . . . . . . . . . . . . . . . . . . . 5
Provision NAS storage for Windows servers using SMB. . . . . . . . . . . . . . . . . . . . . . . . . . . . . . . . . . . . . . . . . 5
Provision NAS storage for both Windows and Linux using both NFS and SMB . . . . . . . . . . . . . . . . . . . . . . . 8
Secure client access with Kerberos . . . . . . . . . . . . . . . . . . . . . . . . . . . . . . . . . . . . . . . . . . . . . . . . . . . . . . . . 10
Provide client access with name services . . . . . . . . . . . . . . . . . . . . . . . . . . . . . . . . . . . . . . . . . . . . . . . . . . . 11
Manage directories and files . . . . . . . . . . . . . . . . . . . . . . . . . . . . . . . . . . . . . . . . . . . . . . . . . . . . . . . . . . . . . 12
Manage host-specific users and groups with System Manager. . . . . . . . . . . . . . . . . . . . . . . . . . . . . . . . . . . 12
Monitor NFS active clients . . . . . . . . . . . . . . . . . . . . . . . . . . . . . . . . . . . . . . . . . . . . . . . . . . . . . . . . . . . . . . . 15
Enable NAS storage. . . . . . . . . . . . . . . . . . . . . . . . . . . . . . . . . . . . . . . . . . . . . . . . . . . . . . . . . . . . . . . . . . . . 16

Manage NAS protocols with System Manager
NAS management overview with System Manager
The topics in this section show you how to configure and manage NAS environments with
System Manager in ONTAP 9.7 and later releases.
If you are using the classic System Manager (available only in ONTAP 9.7 and earlier), see these topics:
• NFS configuration overview
• SMB configuration overview
System Manager supports workflows for:
• Initial configuration of clusters that you intend to use for NAS file services.
• Additional volume provisioning for changing storage needs.
• Configuration and maintenance for industry-standard authentication and security facilities.
Using System Manager, you can manage NAS services at the component level:
• Protocols – NFS, SMB, or both (NAS multiprotocol)
• Name services – DNS, LDAP, and NIS
• Name service switch
• Kerberos security
• Exports and shares
• Qtrees
• Name mapping of users and groups
Provision NFS storage for VMware datastores
Before using Virtual Storage Console for VMware vSphere (VSC) to provision NFS
volumes on an ONTAP based storage system for ESXi hosts, enable NFS using System
Manager for ONTAP 9.7 or later.
After creating an NFS-enabled storage VM in System Manager, you then provision NFS volumes and manage
datastores using VSC.
Beginning with VSC 7.0, VSC is part of the ONTAP Tools for VMware vSphere virtual appliance, which includes
VSC, vStorage APIs for Storage Awareness (VASA) Provider, and Storage Replication Adapter (SRA) for
VMware vSphere capabilities.
Be sure to check the NetApp Interoperability Matrix to confirm compatibility between your current ONTAP and
VSC releases.
To set up NFS access for ESXi hosts to datastores using System Manager Classic (for ONTAP 9.7 and earlier
releases), see NFS configuration for ESXi using VSC overview
For more information, see TR-4597: VMware vSphere for ONTAP and the documentation for your VSC
1

release.
Provision NAS storage for home directories
Create volumes to provide storage for home directories using the SMB protocol.
This procedure creates new volumes for home directories on an existing SMB-enabled storage VM. You can
accept systems defaults when configuring volumes or specify custom configurations.
You can create FlexVol volumes, or for large file systems with high performance requirements, you can create
FlexGroup volumes. See also Provision NAS storage for large file systems using FlexGroup volumes.
You can also save the specifications of this volume to an Ansible Playbook. For more details, go to Use Ansible
Playbooks to add or edit volumes or LUNs.
Steps
1. Add a new volume in an SMB-enabled storage VM.
a. Click Storage > Volumes and then click Add.
b. Enter a name, select the storage VM, and enter a size.
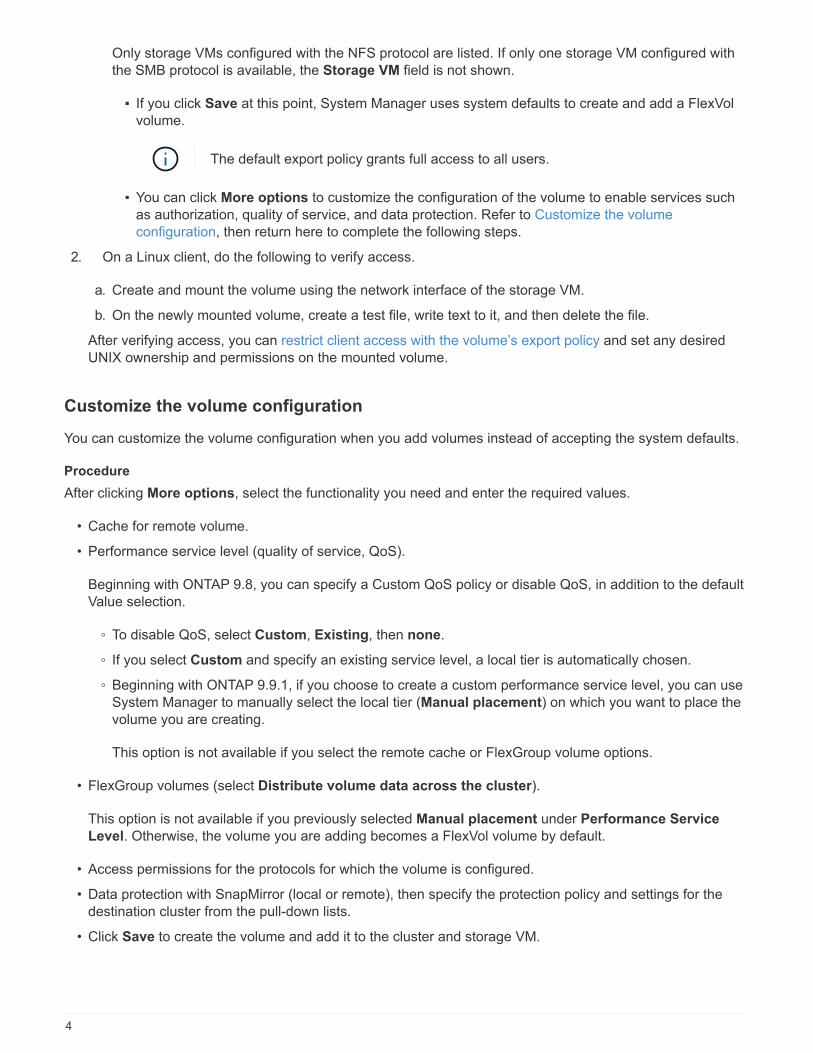
Only storage VMs configured with the SMB protocol are listed. If only one storage VM configured with
the SMB protocol is available, the Storage VM field is not shown.
▪ If you click Save at this point, System Manager uses system defaults to create and add a FlexVol
volume.
▪ You can click More options to customize the configuration of the volume to enable services such
as authorization, quality of service, and data protection. Refer to Customize the volume
configuration, then return here to complete the following steps.
2. Click Storage > Shares, click Add, and select Home Directory.
3. On a Windows client, do the following to verify that the share is accessible.
a. In Windows Explorer, map a drive to the share in the following format:
\\_SMB_Server_Name__Share_Name_
If the share name was created with variables (%w, %d, or %u), be sure to test access with a resolved
name.
b. On the newly created drive, create a test file, and then delete the file.
Customize the volume configuration
You can customize the volume configuration when you add volumes instead of accepting the system defaults.
Procedure
2

After clicking More options, select the functionality you need and enter the required values.
• Cache for remote volume.
• Performance service level (quality of service, QoS).
Beginning with ONTAP 9.8, you can specify a Custom QoS policy or disable QoS, in addition to the default
Value selection.
◦ To disable QoS, select Custom, Existing, then none.
◦ If you select Custom and specify an existing service level, a local tier is automatically chosen.
◦ Beginning with ONTAP 9.9.1, if you choose to create a custom performance service level, you can use
System Manager to manually select the local tier (Manual placement) on which you want to place the
volume you are creating.
This option is not available if you select the remote cache or FlexGroup volume options.
• FlexGroup volumes (select Distribute volume data across the cluster).
This option is not available if you previously selected Manual placement under Performance Service
Level. Otherwise, the volume you are adding becomes a FlexVol volume by default.
• Access permissions for the protocols for which the volume is configured.
• Data protection with SnapMirror (local or remote), then specify the protection policy and settings for the
destination cluster from the pull-down lists.
• Click Save to create the volume and add it to the cluster and storage VM.
After you save the volume, return to Step 2 in the workflow to complete provisioning for home
directories.
Provision NAS storage for Linux servers using NFS
Create volumes to provide storage for Linux servers using the NFS protocol with ONTAP
System Manager (9.7 and later).
This procedure creates new volumes on an existing NFS-enabled storage VM. You can accept system defaults
when configuring volumes or specify custom configurations.
You can create FlexVol volumes, or for large file systems with high performance requirements, you can create
FlexGroup volumes. See also Provision NAS storage for large file systems using FlexGroup volumes.
You can also save the specifications of this volume to an Ansible Playbook. For more details, go to Use Ansible
Playbooks to add or edit volumes or LUNs.
If you want details about the range of ONTAP NFS protocol capabilities, consult the NFS reference overview.
Steps
1. Add a new volume in an NFS-enabled storage VM.
a. Click Storage > Volumes and then click Add.
b. Enter a name, select the storage VM, and enter a size.
3
Only storage VMs configured with the NFS protocol are listed. If only one storage VM configured with
the SMB protocol is available, the Storage VM field is not shown.
▪ If you click Save at this point, System Manager uses system defaults to create and add a FlexVol
volume.
The default export policy grants full access to all users.
▪ You can click More options to customize the configuration of the volume to enable services such
as authorization, quality of service, and data protection. Refer to Customize the volume
configuration, then return here to complete the following steps.
2. On a Linux client, do the following to verify access.
a. Create and mount the volume using the network interface of the storage VM.
b. On the newly mounted volume, create a test file, write text to it, and then delete the file.
After verifying access, you can restrict client access with the volume’s export policy and set any desired
UNIX ownership and permissions on the mounted volume.
Customize the volume configuration
You can customize the volume configuration when you add volumes instead of accepting the system defaults.
Procedure
After clicking More options, select the functionality you need and enter the required values.
• Cache for remote volume.
• Performance service level (quality of service, QoS).
Beginning with ONTAP 9.8, you can specify a Custom QoS policy or disable QoS, in addition to the default
Value selection.
◦ To disable QoS, select Custom, Existing, then none.
◦ If you select Custom and specify an existing service level, a local tier is automatically chosen.
◦ Beginning with ONTAP 9.9.1, if you choose to create a custom performance service level, you can use
System Manager to manually select the local tier (Manual placement) on which you want to place the
volume you are creating.
This option is not available if you select the remote cache or FlexGroup volume options.
• FlexGroup volumes (select Distribute volume data across the cluster).
This option is not available if you previously selected Manual placement under Performance Service
Level. Otherwise, the volume you are adding becomes a FlexVol volume by default.
• Access permissions for the protocols for which the volume is configured.
• Data protection with SnapMirror (local or remote), then specify the protection policy and settings for the
destination cluster from the pull-down lists.
• Click Save to create the volume and add it to the cluster and storage VM.
4

After you save the volume, return to Step 2 in the workflow to complete provisioning for Linux
servers using NFS.
Other ways to do this in ONTAP
To perform this task with… Refer to…
System Manager Classic (ONTAP 9.7 and earlier) NFS configuration overview
The ONTAP command line interface (CLI) NFS configuration overview with the CLI
Manage access using export policies
Enable Linux client access to NFS servers by using export policies.
This procedure creates or modifies export policies for an existing NFS-enabled storage VM.
Steps
1. In System Manager, Click Storage > Volumes.
2. Click an NFS-enabled volume and click More.
3. Click Edit Export Policy and then click Select an existing policy or Add a new policy.
Provision NAS storage for Windows servers using SMB
Create volumes to provide storage for Windows servers using the SMB protocol using
System Manager, which is available with ONTAP 9.7 and later.
This procedure creates new volumes on an existing SMB-enabled storage VM and creates a share for the
volume root (/) directory. You can accept systems defaults when configuring volumes or specify custom
configurations. After initial SMB configuration, you can also create additional shares and modify their
properties.
You can create FlexVol volumes, or for large file systems with high performance requirements, you can create
FlexGroup volumes. See also Provision NAS storage for large file systems using FlexGroup volumes.
You can also save the specifications of this volume to an Ansible Playbook. For more details, go to Use Ansible
Playbooks to add or edit volumes or LUNs.
If you want details about the range of ONTAP SMB protocol capabilities, consult the SMB reference overview.
Steps
1. Add a new volume in an SMB-enabled storage VM.
a. Click Storage > Volumes and then click Add.
b. Enter a name, select the storage VM, and enter a size.
Only storage VMs configured with the SMB protocol are listed. If only one storage VM configured with
the SMB protocol is available, the Storage VM field is not shown.
▪ If you click Save at this point, System Manager uses system defaults to create and add a FlexVol
volume.
5
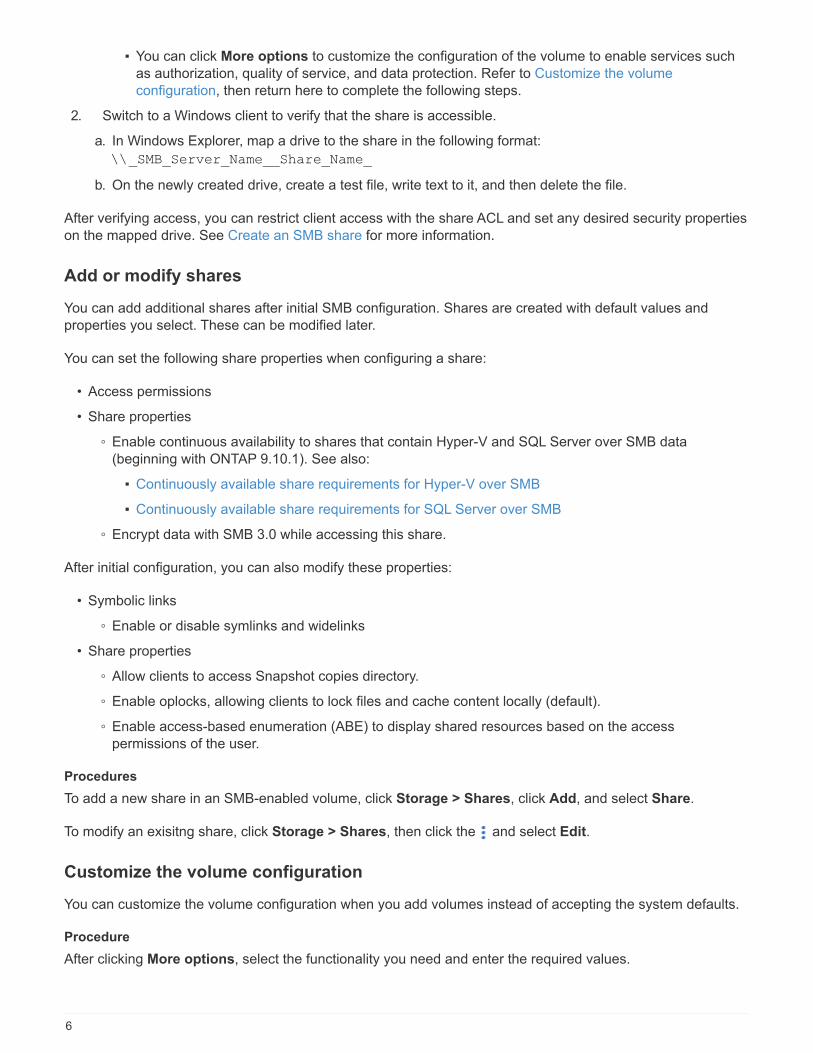
▪ You can click More options to customize the configuration of the volume to enable services such
as authorization, quality of service, and data protection. Refer to Customize the volume
configuration, then return here to complete the following steps.
2. Switch to a Windows client to verify that the share is accessible.
a. In Windows Explorer, map a drive to the share in the following format:
\\_SMB_Server_Name__Share_Name_
b. On the newly created drive, create a test file, write text to it, and then delete the file.
After verifying access, you can restrict client access with the share ACL and set any desired security properties
on the mapped drive. See Create an SMB share for more information.
Add or modify shares
You can add additional shares after initial SMB configuration. Shares are created with default values and
properties you select. These can be modified later.
You can set the following share properties when configuring a share:
• Access permissions
• Share properties
◦ Enable continuous availability to shares that contain Hyper-V and SQL Server over SMB data
(beginning with ONTAP 9.10.1). See also:
▪ Continuously available share requirements for Hyper-V over SMB
▪ Continuously available share requirements for SQL Server over SMB
◦ Encrypt data with SMB 3.0 while accessing this share.
After initial configuration, you can also modify these properties:
• Symbolic links
◦ Enable or disable symlinks and widelinks
• Share properties
◦ Allow clients to access Snapshot copies directory.
◦ Enable oplocks, allowing clients to lock files and cache content locally (default).
◦ Enable access-based enumeration (ABE) to display shared resources based on the access
permissions of the user.
Procedures
To add a new share in an SMB-enabled volume, click Storage > Shares, click Add, and select Share.
To modify an exisitng share, click Storage > Shares, then click the and select Edit.
Customize the volume configuration
You can customize the volume configuration when you add volumes instead of accepting the system defaults.
Procedure
After clicking More options, select the functionality you need and enter the required values.
6

• Cache for remote volume.
• Performance service level (quality of service, QoS).
Beginning with ONTAP 9.8 you can specify a Custom QoS policy or disable QoS, in addition to the default
value selection.
◦ To disable QoS, select Custom, Existing, then none.
◦ If you select Custom and specify an existing service level, a local tier is automatically chosen.
◦ Beginning with ONTAP 9.9.1, if you choose to create a custom performance service level, you can use
System Manager to manually select the local tier (Manual placement) on which you want to place the
volume you are creating.
This option is not available if you select the remote cache or FlexGroup volume options.
• FlexGroup volumes (select Distribute volume data across the cluster).
This option is not available if you previously selected Manual placement under Performance Service
Level. Otherwise, the volume you are adding becomes a FlexVol volume by default.
This option is not available if you previously selected *Manual placement under Performance
Service Level. Otherwise, the volume you are adding becomes a FlexVol volume by default.
Access permission for the protocols for which the volume is configured.
*Data protection with SnapMirror (local or remote), then specify the protection policy and settings
for the destination cluster from the pull-down lists.
*Click *Save to create the volume and add it to the cluster and storage VM.
You can customize the volume configuration when you add volumes instead of accepting the system defaults.
Procedure
After clicking More options, select the functionality you need and enter the required values.
• Cache for remote volume.
• Performance service level (quality of service, QoS).
Beginning with ONTAP 9.8, you can specify a Custom QoS policy or disable QoS, in addition to the default
Value selection.
◦ To disable QoS, select Custom, Existing, then none.
◦ If you select Custom and specify an existing service level, a local tier is automatically chosen.
◦ Beginning with ONTAP 9.9.1, if you choose to create a custom performance service level, you can use
System Manager to manually select the local tier (Manual placement) on which you want to place the
volume you are creating.
This option is not available if you select the remote cache or FlexGroup volume options.
• FlexGroup volumes (select Distribute volume data across the cluster).
This option is not available if you previously selected Manual placement under Performance Service
Level. Otherwise, the volume you are adding becomes a FlexVol volume by default.
• Access permissions for the protocols for which the volume is configured.
7

• Data protection with SnapMirror (local or remote), then specify the protection policy and settings for the
destination cluster from the pull-down lists.
• Click Save to create the volume and add it to the cluster and storage VM.
After you save the volume, return to Step 2 in the workflow to complete provisioning for
Windows servers using SMB.
Other ways to do this in ONTAP
To perform this task with… Refer to…
System Manager Classic (ONTAP 9.7 and earlier) SMB configuration overview
The ONTAP command line interface SMB configuration overview with the CLI
Provision NAS storage for both Windows and Linux usingboth NFS and SMB
Create volumes to provide storage for clients using either the NFS or SMB protocol.
This procedure creates new volumes on an existing storage VM enabled for both NFS and SMB protocols.
You can create FlexVol volumes, or for large file systems with high performance requirements, you can create
FlexGroup volumes. See also Provision NAS storage for large file systems using FlexGroup volumes.
You can also save the specifications of this volume to an Ansible Playbook. For more details, go to Use Ansible
Playbooks to add or edit volumes or LUNs.
Steps
1. Add a new volume in a storage VM enabled for both NFS and SMB.
a. Click Storage > Volumes and then click Add.
b. Enter a name, select the storage VM, and enter a size. Only storage VMs configured with both the NFS
and SMB protocols are listed. If only one storage VM configured with the NFS and SMB protocols is
available, the Storage VM field is not shown.
c. Click More Options and select Share via NFS.
The default setting grants full access to all users. You can add more restrictive rules to the export policy
later.
d. Select Share via SMB.
The share is created with a default Access Control List (ACL) set to "Full Control" for the Everyone
group. You can add restrictions to the ACL later.
e. If you click Save at this point, System Manager uses system defaults to create and add a FlexVol
8

volume.
Alternatively, you can continue to enable any additional required services such as authorization, quality of
service, and data protection. Refer to Customize the volume configuration, then return here to complete the
following steps.
2. On a Linux client, verify that the export is accessible.
a. Create and mount the volume using the network interface of the storage VM.
b. On the newly mounted volume, create a test file, write text to it, and then delete the file.
3. On a Windows client, do the following to verify that the share is accessible.
a. In Windows Explorer, map a drive to the share in the following format:
\\_SMB_Server_Name__Share_Name_
b. On the newly created drive, create a test file, write text to it, and then delete the file.
After verifying access, you can restrict client access with the volume’s export policy, restrict client access
with the share ACL, and set any desired ownership and permissions on the exported and shared volume.
Customize the volume configuration
You can customize the volume configuration when you add volumes instead of accepting the system defaults.
Procedure
After clicking More options, select the functionality you need and enter the required values.
• Cache for remote volume.
• Performance service level (quality of service, QoS).
Beginning with ONTAP 9.8, you can specify a Custom QoS policy or disable QoS, in addition to the default
Value selection.
◦ To disable QoS, select Custom, Existing, then none.
◦ If you select Custom and specify an existing service level, a local tier is automatically chosen.
◦ Beginning with ONTAP 9.9.1, if you choose to create a custom performance service level, you can use
System Manager to manually select the local tier (Manual placement) on which you want to place the
volume you are creating.
This option is not available if you select the remote cache or FlexGroup volume options.
• FlexGroup volumes (select Distribute volume data across the cluster).
This option is not available if you previously selected Manual placement under Performance Service
Level. Otherwise, the volume you are adding becomes a FlexVol volume by default.
• Access permissions for the protocols for which the volume is configured.
• Data protection with SnapMirror (local or remote), then specify the protection policy and settings for the
destination cluster from the pull-down lists.
• Click Save to create the volume and add it to the cluster and storage VM.
After you save the volume, return to Step 2 in the workflow to complete multiprotocol provisioning for Windows
and Linux servers.
9

Other ways to do this in ONTAP
To perform these tasks with… See this content…
System Manager Classic (ONTAP 9.7 and earlier) SMB and NFS multiprotocol configuration overview
The ONTAP command line interface SMB configuration overview with the CLI
NFS configuration overview with the CLI
What the security styles and their effects are
Case-sensitivity of file and directory names in a
multiprotocol environment
Secure client access with Kerberos
Enable Kerberos to secure storage access for NAS clients.
This procedure configures Kerberos on an existing storage VM enabled for NFS or SMB.
Before beginning you should have configured DNS, NTP, and LDAP on the storage system.
Steps
1. At the ONTAP command line, set UNIX permissions for the storage VM root volume.
a. Display the relevant permissions on the storage VM root volume: volume show -volume
root_vol_name-fields user,group,unix-permissions
The root volume of the storage VM must have the following configuration:
Name… Setting…
UID root or ID 0
GID root or ID 0
UNIX permissions 755
b. If these values are not shown, use the volume modify command to update them.
2. Set user permissions for the storage VM root volume.
a. Display the local UNIX users: vserver services name-service unix-user show -vserver
vserver_name
The storage VM should have the following UNIX users configured:
User name User ID Primary group ID
nfs 500 0
root 0 0
Note: The NFS user is not required if a Kerberos-UNIX name mapping exists for the SPN of the NFS
10

client user; see step 5.
b. If these values are not shown, use the vserver services name-service unix-user modify
command to update them.
3. Set group permissions for the storage VM root volume.
a. Display the local UNIX groups: vserver services name-service unix-group show
-vserver vserver_name
The storage VM should have the following UNIX groups configured:
Group name Group ID
daemon 1
root 0
b. If these values are not shown, use the vserver services name-service unix-group modify
command to update them.
4. Switch to System Manager to configure Kerberos
5. In System Manager, click Storage > Storage VMs and select the storage VM.
6. Click Settings.
7. Click under Kerberos.
8. Click Add under Kerberos Realm, and complete the following sections:
◦ Add Kerberos Realm
Enter configuration details depending on KDC vendor.
◦ Add Network Interface to Realm
Click Add and select a network interface.
9. If desired, add mappings from Kerberos principal names to local user names.
a. Click Storage > Storage VMs and select the storage VM.
b. Click Settings, and then click under Name Mapping.
c. Under Kerberos to UNIX, add patterns and replacements using regular expressions.
Provide client access with name services
Enable ONTAP to look up host, user, group, or netgroup information using LDAP or NIS
to authenticate NAS clients.
This procedure creates or modifies LDAP or NIS configurations on an existing storage VM enabled for NFS or
SMB.
For LDAP configurations, you should have the LDAP configuration details required in your environment and
you should be using a default ONTAP LDAP schema.
Steps
11
1. Configure the required service: click Storage > Storage VMs.
2. Select the storage VM, click Settings, and then click for LDAP or NIS.
3. Include any changes in the name services switch: click under Name Services Switch.
Manage directories and files
Expand the System Manager volume display to view and delete directories and files.
Beginning with ONTAP 9.9.1, directories are deleted with low-latency fast directory delete functionality.
For more information about viewing file systems in ONTAP 9.9.1 and later, see File System Analytics overview.
Step
1. 1. Click Storage > Volumes. Then expand a volume to view its contents.
Manage host-specific users and groups with SystemManager
Beginning with ONTAP 9.10.1, you can use System Manager to manage users and
groups that are specific to a UNIX or Windows host.
You can perform the following procedures:
Windows UNIX
• View Windows users and groups
• Add, edit, or delete a Windows group
• Manage Windows Users
• View UNIX users and groups
• Add, edit, or delete a UNIX group
• Manage UNIX Users
View Windows users and groups
In System Manager, you can view a list of Windows users and groups.
Steps
1. In System Manager, click Storage > Storage VMs.
2. Select the storage VM, then select the Settings tab.
3. Scroll to the Host Users and Groups area.
The Windows section displays a summary of the number of users in each group associated with the
selected storage VM.
4. Click in the Windows section.
5. Click the Groups tab, then click next to a group name to view details about that group.
6. To view the users in a group, select the group, then click the Users tab.
12
Add, edit, or delete a Windows group
In System Manager, you can manage Windows groups by adding, editing, or deleting them.
Steps
1. In System Manager, view the list of Windows groups. Refer to View Windows users and groups.
2. On the Groups tab, you can manage groups with the following tasks:
To perform this action… Perform these steps…
Add a group 1. Click .
2. Enter the group information.
3. Specify privileges.
4. Specify group members (add local users, domain
users, or domain groups).
Edit a group 1. Next to the group name, click , then click Edit.
2. Modify the group information.
Delete a group 1. Check the box next to the group or groups you
want to delete.
2. Click .
Note: You can also delete a single group by
clicking next to the group name, then clicking
Delete.
Manage Windows Users
In System Manager, you can manage Windows users by adding, editing, deleting, enabling, or disabling them.
You can also change the password of a Windows user.
Steps
1. In System Manager, view the list of users for the group. Refer to View Windows users and groups.
2. On the Users tab, you can manage users with the following tasks:
To perform this action… Perform these steps…
Add a user 1. Click .
2. Enter the user information.
Edit a user 1. Next to the user name, click , then click Edit.
2. Modify the user information.
13

Delete a user 1. Check the box next to the user or users you want
to delete.
2. Click .
Note: You can also delete a single user by
clicking next to the user name, then clicking
Delete.
Change user password 1. Next to the user name, click , then click Change
Password.
2. Enter the new password and confirm it.
Enable a user 1. Check the box next to each disabled user you
want to enable.
2. Click .
Disable a users 1. Check the box next to each enabled user you
want to disable.
2. Click .
View UNIX users and groups
In System Manager, you can view a list of UNIX users and groups.
Steps
1. In System Manager, click Storage > Storage VMs.
2. Select the storage VM, then select the Settings tab.
3. Scroll to the Host Users and Groups area.
The UNIX section displays a summary of the number of users in each group associated with the selected
storage VM.
4. Click in the UNIX section.
5. Click the Groups tab to view details about that group.
6. To view the users in a group, select the group, then click the Users tab.
Add, edit, or delete a UNIX group
In System Manager, you can manage UNIX groups by adding, editing, or deleting them.
Steps
1. In System Manager, view the list of UNIX groups. Refer to View UNIX users and groups.
2. On the Groups tab, you can manage groups with the following tasks:
To perform this action… Perform these steps…
14
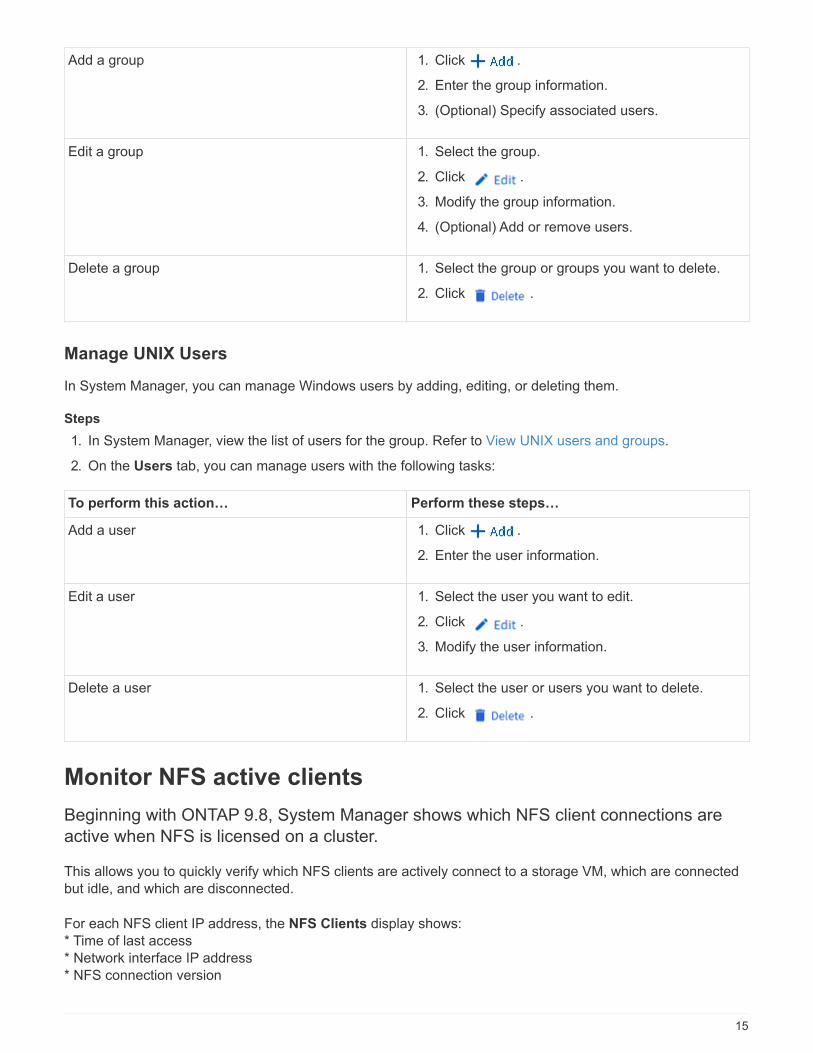
Add a group 1. Click .
2. Enter the group information.
3. (Optional) Specify associated users.
Edit a group 1. Select the group.
2. Click .
3. Modify the group information.
4. (Optional) Add or remove users.
Delete a group 1. Select the group or groups you want to delete.
2. Click .
Manage UNIX Users
In System Manager, you can manage Windows users by adding, editing, or deleting them.
Steps
1. In System Manager, view the list of users for the group. Refer to View UNIX users and groups.
2. On the Users tab, you can manage users with the following tasks:
To perform this action… Perform these steps…
Add a user 1. Click .
2. Enter the user information.
Edit a user 1. Select the user you want to edit.
2. Click .
3. Modify the user information.
Delete a user 1. Select the user or users you want to delete.
2. Click .
Monitor NFS active clients
Beginning with ONTAP 9.8, System Manager shows which NFS client connections are
active when NFS is licensed on a cluster.
This allows you to quickly verify which NFS clients are actively connect to a storage VM, which are connected
but idle, and which are disconnected.
For each NFS client IP address, the NFS Clients display shows:
* Time of last access
* Network interface IP address
* NFS connection version
15

* Storage VM name
In addition, a list of NFS clients active in the last 48 hours is also shown in the Storage>Volumes display and
a count of NFS clients is includes in the Dashboard display.
Step
1. Display NFS client activity: Click Hosts > NFS Clients.
Enable NAS storage
Enable NAS storage for Linux servers using NFS
Modify storage VMs to enable NFS servers for serving data to Linux clients.
This procedure enables an existing storage VM. It is assumed that configuration details are available for any
authentication or security services required in your environment.
Steps
1. Enable NFS on an existing VM: click Storage > Storage VMs, select a storage VM, click Settings, and
then click under NFS.
2. Open the export policy of the storage VM root volume:
a. Click Storage > Volumes, select the root volume of the storage VM (which by default is volume-name
_root), and then click on the policy that is displayed under Export Policy.
b. Click Add to add a rule.
▪ Client specification = 0.0.0.0/0
▪ Access protocols = NFS
▪ Access details = UNIX Read-Only
3. Configure DNS for host-name resolution: click Storage > Storage VMs, select the storage VM, click
Settings, and then click under DNS.
4. Configure name services as required.
a. Click Storage > Storage VMs, select the storage VM, click Settings, and then click for LDAP or
NIS.
b. Include any changes in the name services switch file: click in the Name Services Switch tile.
5. Configure Kerberos if required:
a. Click Storage > Storage VMs, select the storage VM, and then click Settings.
b. Click in the Kerberos tile and then click Add.
Enable NAS storage for Windows servers using SMB
Modify storage VMs to enable SMB servers for serving data to Windows clients.
16

This procedure enables an existing storage VM. It is assumed that configuration details are available for any
authentication or security services required in your environment.
Steps
1. Enable SMB on an existing VM: click Storage > Storage VMs, select a storage VM, click Settings, and
then click under SMB.
2. Open the export policy of the storage VM root volume:
a. Click Storage > Volumes, select the root volume of the storage VM (which by default is volume-
name_root), and then click on the policy that is displayed under Export Policy.
b. Click Add to add a rule.
▪ Client specification = 0.0.0.0/0
▪ Access protocols = SMB
▪ Access details = NTFS Read-Only
3. Configure DNS for host-name resolution:
a. Click Storage > Storage VMs, select the storage VM, click Settings, and then click under DNS.
b. Switch to the DNS server and map the SMB server.
▪ Create forward (A - Address record) and reverse (PTR - Pointer record) lookup entries to map the
SMB server name to the IP address of the data network interface.
▪ If you use NetBIOS aliases, create an alias canonical name (CNAME resource record) lookup entry
to map each alias to the IP address of the SMB server’s data network interface.
4. Configure name services as required
a. Click Storage > Storage VMs, select the storage VM, click Settings, and then click under LDAP or
NIS.
b. Include any changes in the name services switch file: click under Name Services Switch.
5. Configure Kerberos if required:
a. Click Storage > Storage VMs, select the storage VM, and then click Settings.
b. Click under Kerberos and then click Add.
Enable NAS storage for both Windows and Linux using both NFS and SMB
Modify storage VMs to enable NFS and SMB servers to serve data to Linux and Windows
clients.
This procedure enables an existing storage VM. It is assumed that configuration details are available for any
authentication or security services required in your environment.
17

Steps
1. Enable NFS on an existing VM: click Storage > Storage VMs, select a storage VM, click Settings, and
then click under NFS.
2. Enable SMB on an existing VM: click under SMB.
3. Open the export policy of the storage VM root volume:
a. Click Storage > Volumes, select the root volume of the storage VM (which by default is volume-
name_root), and then click on the policy that is displayed under Export Policy.
b. Click Add to add a rule.
▪ Client specification = 0.0.0.0/0
▪ Access protocols = NFS
▪ Access details = NFS Read-Only
4. Configure DNS for host-name resolution:
a. Click Storage > Storage VMs, select the storage VM, click Settings, and then click under DNS.
b. When DNS configuration is complete, switch to the DNS server and map the SMB server.
▪ Create forward (A - Address record) and reverse (PTR - Pointer record) lookup entries to map the
SMB server name to the IP address of the data network interface.
▪ If you use NetBIOS aliases, create an alias canonical name (CNAME resource record) lookup entry
to map each alias to the IP address of the SMB server’s data network interface.
5. Configure name services as required:
a. Click Storage > Storage VMs, select the storage VM, click Settings, and then click for LDAP or
NIS.
b. Include any changes in the name services switch file: click under Name Services Switch.
6. Configure Kerberos if required: click in the Kerberos tile and then click Add.
7. Map UNIX and Windows user names if required: click under Name Mapping and then click Add.
You should use this procedure only if your site has Windows and UNIX user accounts that do not map
implicitly, which is when the lowercase version of each Windows user name matches the UNIX user name.
This procedure can be done using LDAP, NIS, or local users. If you have two sets of users that do not
match, you should configure name mapping.
18

Copyright Information
Copyright © 2022 NetApp, Inc. All rights reserved. Printed in the U.S. No part of this document
covered by copyright may be reproduced in any form or by any means-graphic, electronic, or
mechanical, including photocopying, recording, taping, or storage in an electronic retrieval system-
without prior written permission of the copyright owner.
Software derived from copyrighted NetApp material is subject to the following license and disclaimer:
THIS SOFTWARE IS PROVIDED BY NETAPP “AS IS” AND WITHOUT ANY EXPRESS OR IMPLIED
WARRANTIES, INCLUDING, BUT NOT LIMITED TO, THE IMPLIED WARRANTIES OF
MERCHANTABILITY AND FITNESS FOR A PARTICULAR PURPOSE, WHICH ARE HEREBY
DISCLAIMED. IN NO EVENT SHALL NETAPP BE LIABLE FOR ANY DIRECT, INDIRECT,
INCIDENTAL, SPECIAL, EXEMPLARY, OR CONSEQUENTIAL DAMAGES (INCLUDING, BUT NOT
LIMITED TO, PROCUREMENT OF SUBSTITUTE GOODS OR SERVICES; LOSS OF USE, DATA, OR
PROFITS; OR BUSINESS INTERRUPTION) HOWEVER CAUSED AND ON ANY THEORY OF
LIABILITY, WHETHER IN CONTRACT, STRICT LIABILITY, OR TORT (INCLUDING NEGLIGENCE OR
OTHERWISE) ARISING IN ANY WAY OUT OF THE USE OF THIS SOFTWARE, EVEN IF ADVISED OF
THE POSSIBILITY OF SUCH DAMAGE.
NetApp reserves the right to change any products described herein at any time, and without notice.
NetApp assumes no responsibility or liability arising from the use of products described herein,
except as expressly agreed to in writing by NetApp. The use or purchase of this product does not
convey a license under any patent rights, trademark rights, or any other intellectual property
rights of NetApp.
The product described in this manual may be protected by one or more U.S. patents,
foreign patents, or pending applications.
RESTRICTED RIGHTS LEGEND: Use, duplication, or disclosure by the government is subject to
restrictions as set forth in subparagraph (c)(1)(ii) of the Rights in Technical Data and
Computer Software clause at DFARS 252.277-7103 (October 1988) and FAR 52-227-19 (June 1987).
Trademark Information
NETAPP, the NETAPP logo, and the marks listed at http://www.netapp.com/TM are trademarks of
NetApp, Inc. Other company and product names may be trademarks of their respective owners.
19
Copyright © 2022 FDOKUMEN