在MAC OSX 以WIFI 接駁安裝LBP151dw 驅動程式步驟(以OSX ...
13
在 MAC OSX 以 WIFI 接駁安裝 LBP151dw 驅動程式步驟 (以 OSX 10.11 作示範) LBP151dw printer driver Installation Guide for MAC OSX via WIFI (OSX 10.11 as example) **注意: 安裝驅動程式前請勿接駁 USB 線,以免系統發生錯誤** **Caution: Prior to the installation, please do not connect the USB port to avoid system error** 1. 到佳能網站 https://hk.canon/en/support/imageCLASS%20LBP151dw/model 下載印表機的網絡設定工具 - MF/LBP Network Setup Tool Please visit https://hk.canon/en/support/imageCLASS%20LBP151dw/model Download the network setup tool of the printer - MF/LBP Network Setup Tool 2. 開啟「Canon MF/LBP Network Setup Tool」 Open “Canon MF/LBP Network Setup Tool”
-
Upload
khangminh22 -
Category
Documents
-
view
0 -
download
0
Transcript of 在MAC OSX 以WIFI 接駁安裝LBP151dw 驅動程式步驟(以OSX ...
在 MAC OSX 以 WIFI 接駁安裝 LBP151dw 驅動程式步驟 (以 OSX 10.11 作示範)
LBP151dw printer driver Installation Guide for MAC OSX via WIFI (OSX 10.11 as example)
**注意: 安裝驅動程式前請勿接駁 USB 線,以免系統發生錯誤**
**Caution: Prior to the installation, please do not connect the USB port to avoid system error**
1. 到佳能網站 https://hk.canon/en/support/imageCLASS%20LBP151dw/model
下載印表機的網絡設定工具 - MF/LBP Network Setup Tool
Please visit https://hk.canon/en/support/imageCLASS%20LBP151dw/model
Download the network setup tool of the printer - MF/LBP Network Setup Tool
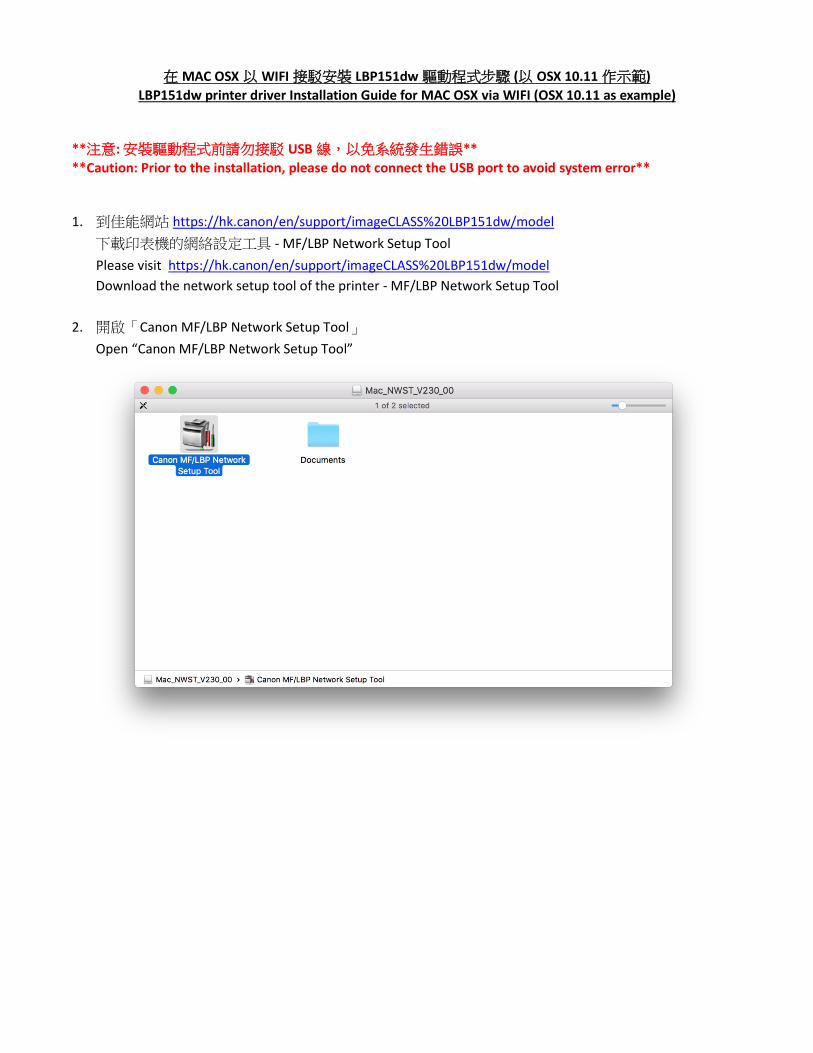
2. 開啟「Canon MF/LBP Network Setup Tool」
Open “Canon MF/LBP Network Setup Tool”
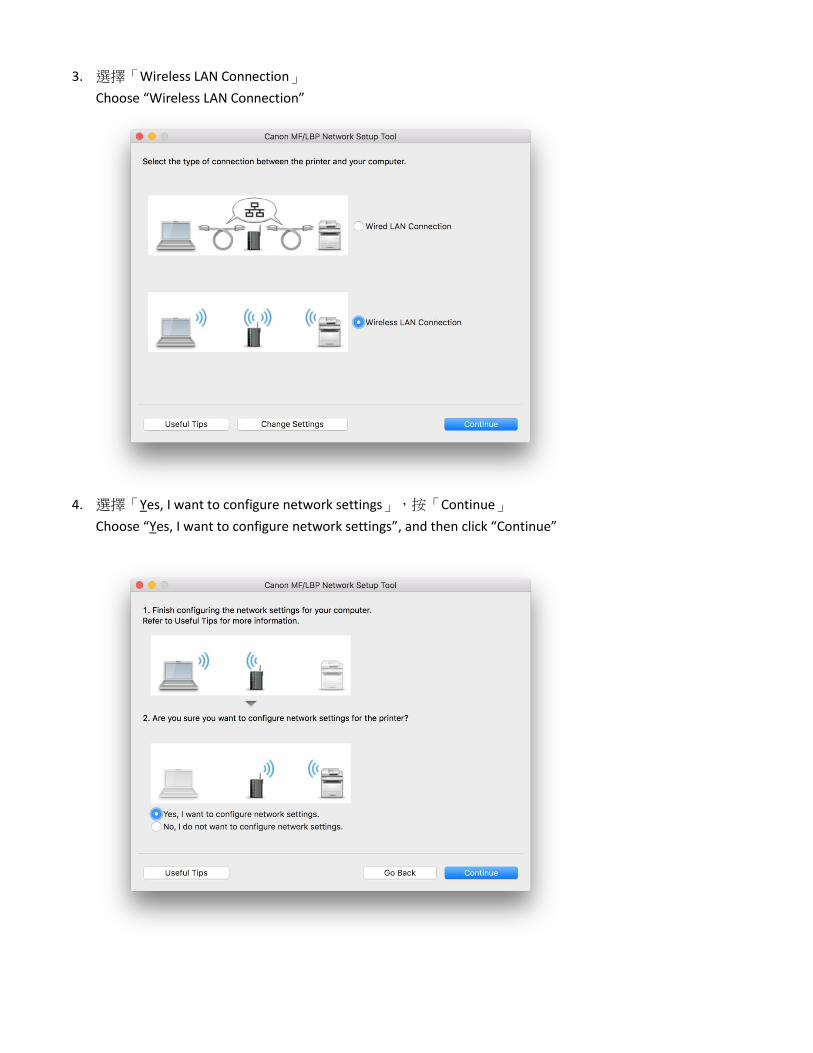
3. 選擇「Wireless LAN Connection」
Choose “Wireless LAN Connection”
4. 選擇「Yes, I want to configure network settings」,按「Continue」
Choose “Yes, I want to configure network settings”, and then click “Continue”
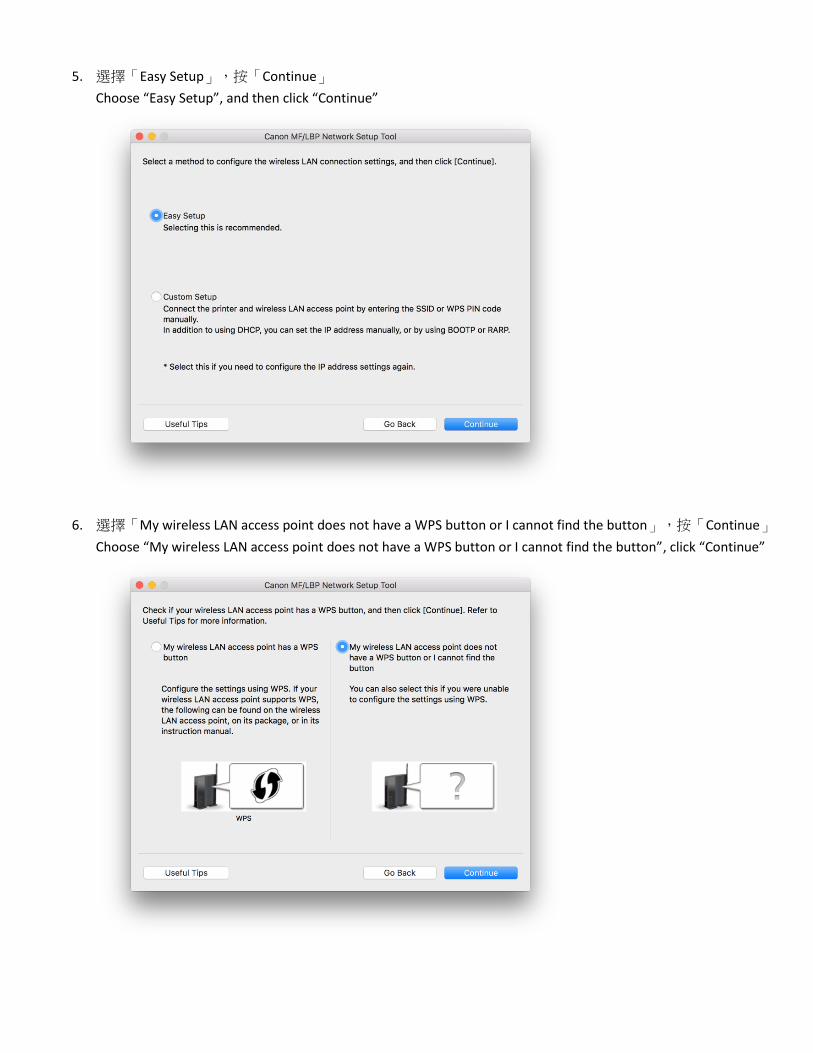
5. 選擇「Easy Setup」,按「Continue」
Choose “Easy Setup”, and then click “Continue”
6. 選擇「My wireless LAN access point does not have a WPS button or I cannot find the button」,按「Continue」
Choose “My wireless LAN access point does not have a WPS button or I cannot find the button”, click “Continue”
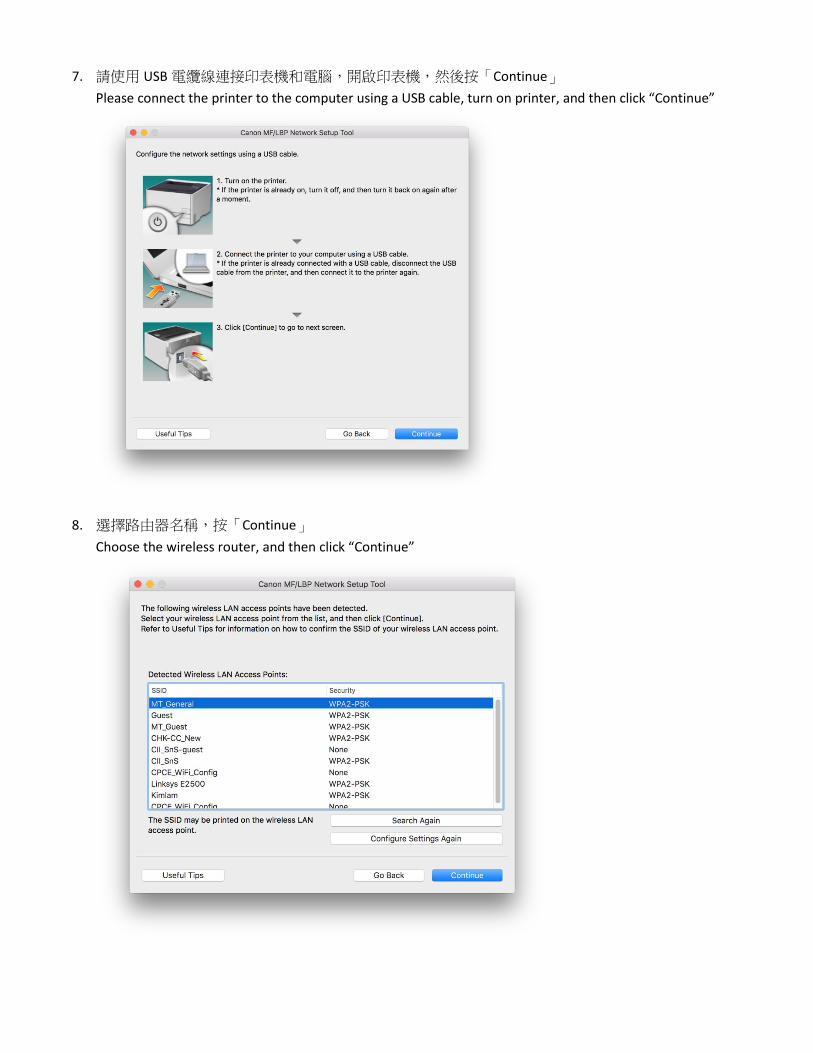
7. 請使用 USB 電纜線連接印表機和電腦,開啟印表機,然後按「Continue」
Please connect the printer to the computer using a USB cable, turn on printer, and then click “Continue”
8. 選擇路由器名稱,按「Continue」
Choose the wireless router, and then click “Continue”
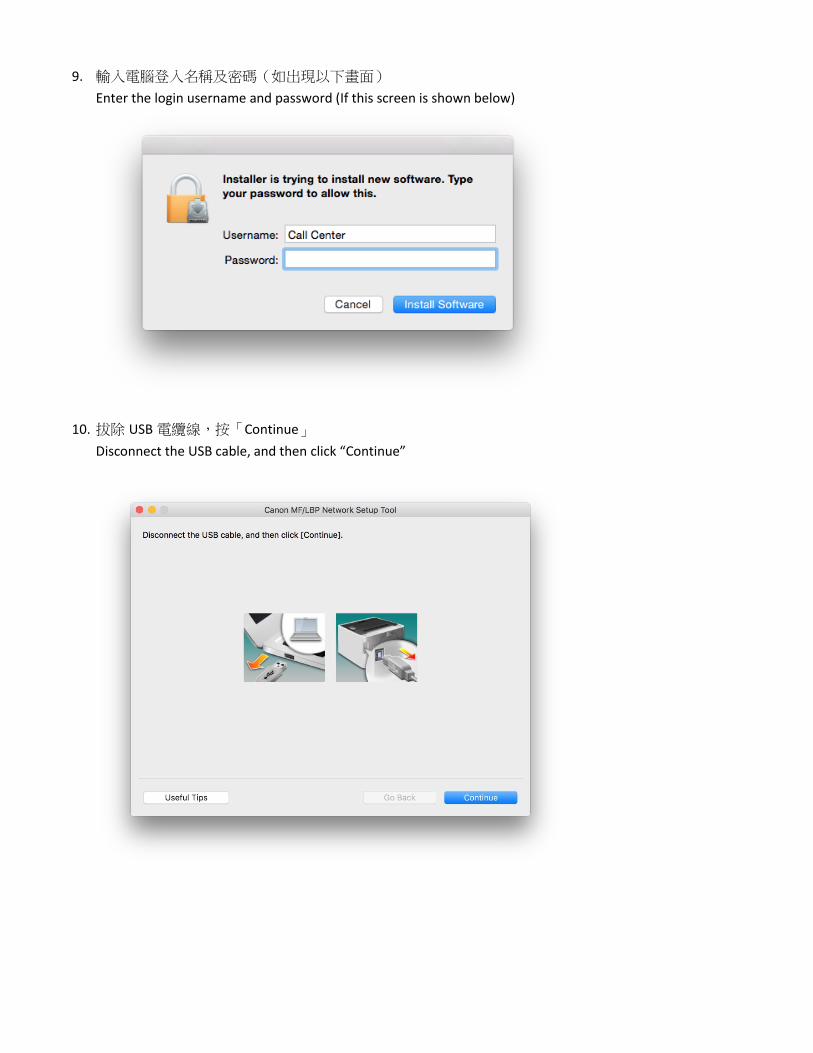
9. 輸入電腦登入名稱及密碼(如出現以下畫面)
Enter the login username and password (If this screen is shown below)
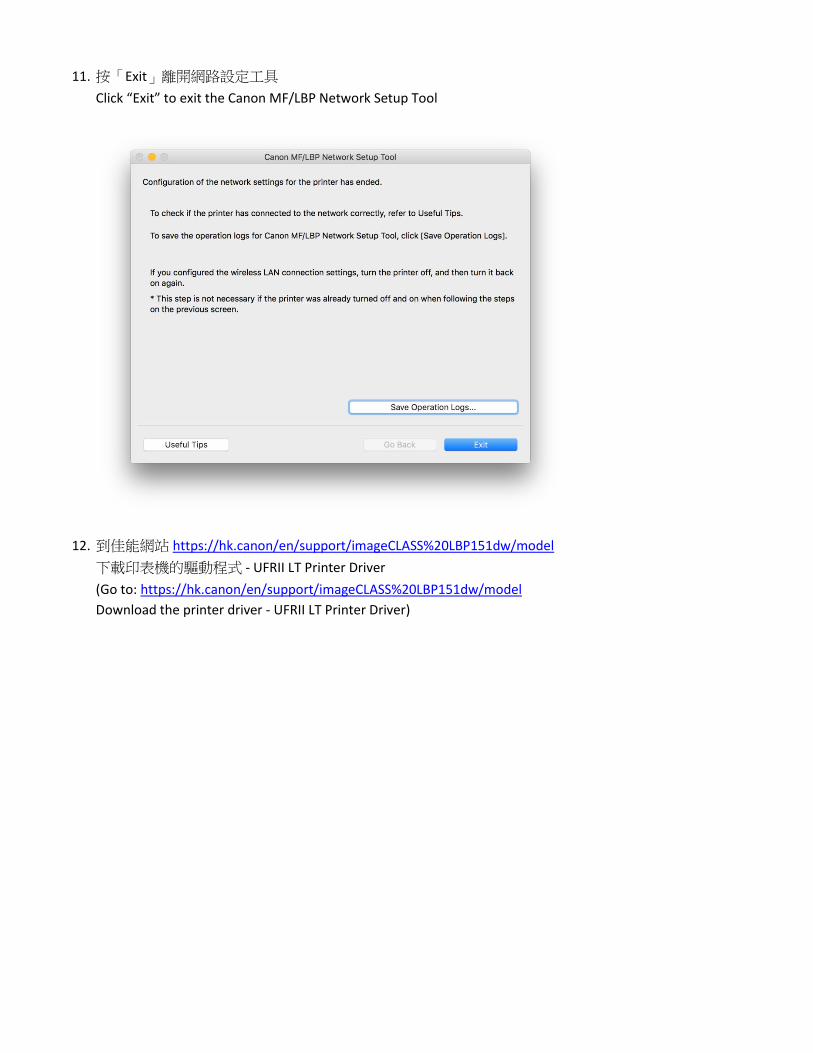
10. 拔除 USB 電纜線,按「Continue」
Disconnect the USB cable, and then click “Continue”
11. 按「Exit」離開網路設定工具
Click “Exit” to exit the Canon MF/LBP Network Setup Tool
12. 到佳能網站 https://hk.canon/en/support/imageCLASS%20LBP151dw/model
下載印表機的驅動程式 - UFRII LT Printer Driver
(Go to: https://hk.canon/en/support/imageCLASS%20LBP151dw/model
Download the printer driver - UFRII LT Printer Driver)
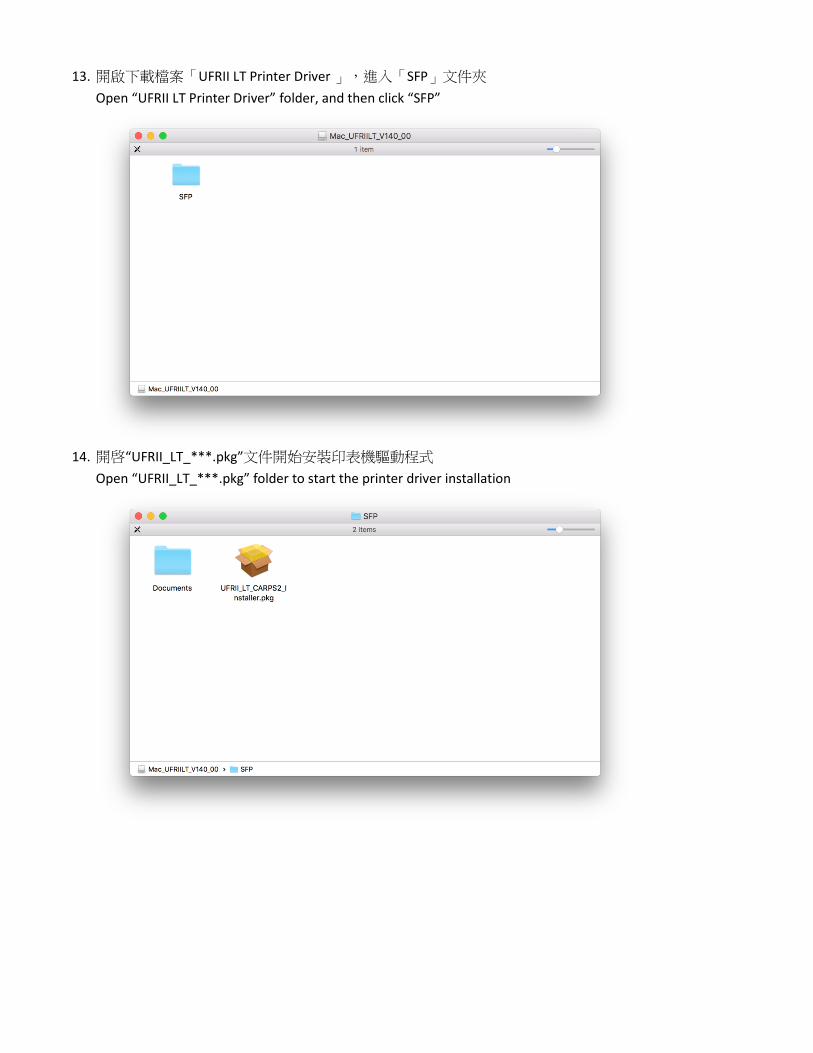
13. 開啟下載檔案「UFRII LT Printer Driver 」,進入「SFP」文件夾
Open “UFRII LT Printer Driver” folder, and then click “SFP”
14. 開啓“UFRII_LT_***.pkg”文件開始安裝印表機驅動程式
Open “UFRII_LT_***.pkg” folder to start the printer driver installation
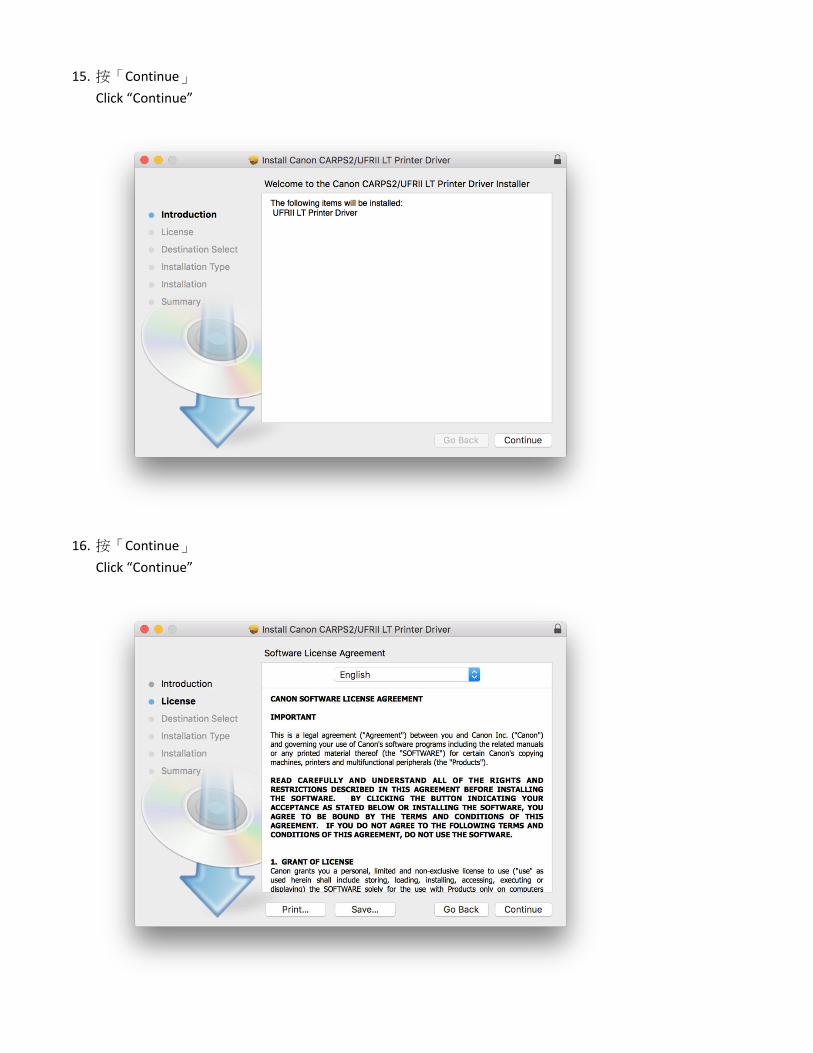
15. 按「Continue」
Click “Continue”
16. 按「Continue」
Click “Continue”
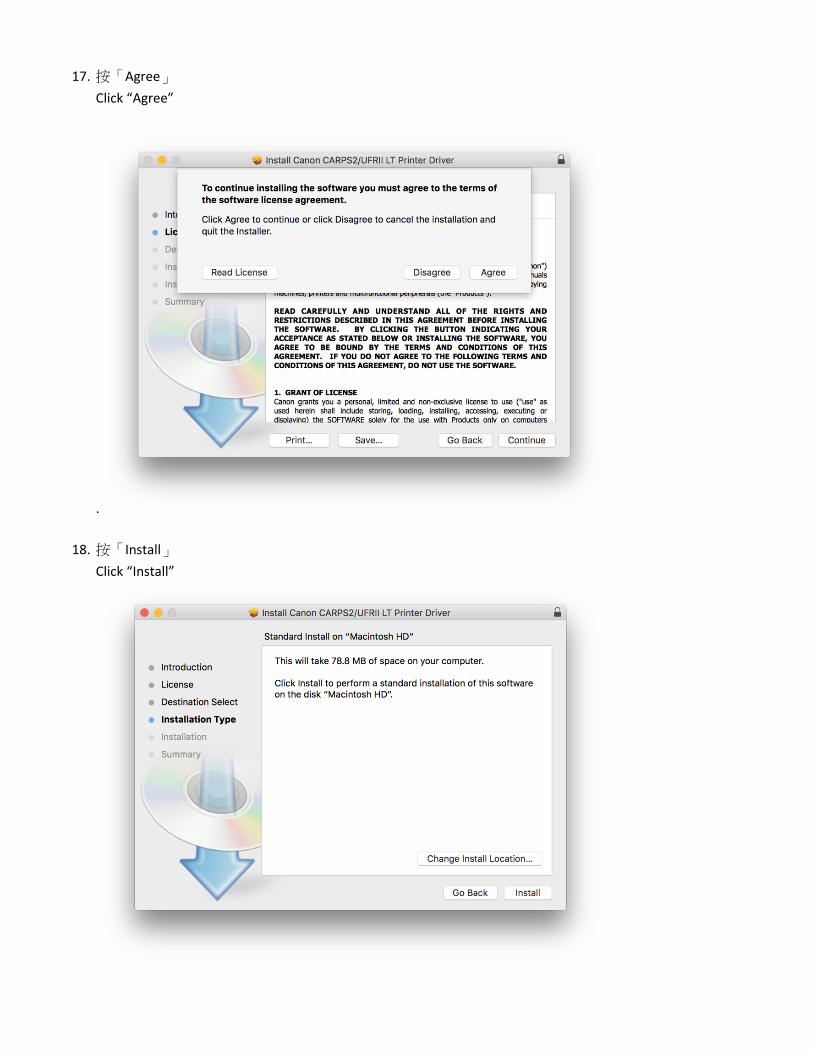
17. 按「Agree」
Click “Agree”
.
18. 按「Install」
Click “Install”
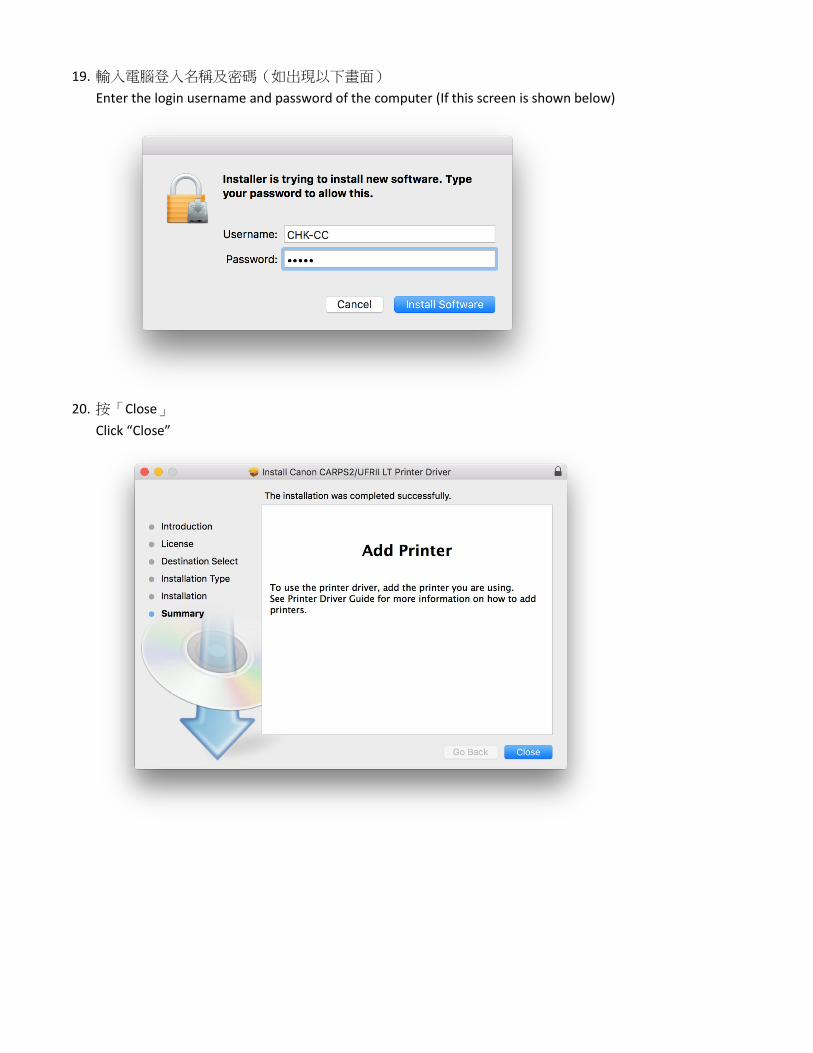
19. 輸入電腦登入名稱及密碼(如出現以下畫面)
Enter the login username and password of the computer (If this screen is shown below)
20. 按「Close」
Click “Close”

21. 完成安裝驅動程式後需新增印表機,按一下電腦左上角< >圖案,選擇<系統偏好設定>,再選擇
<印表機和掃描器>
After finished the driver installation, please click the top left corner of the computer < > icon, click <System
Preferences>, and then click <Printers and Scanners>
22. 於 [列印和掃描器 (Printers& Scanners)] 視窗,按一下「+」按鈕加入印表機
In the [Printers & Scanners] window, click the "+" button to register the printer
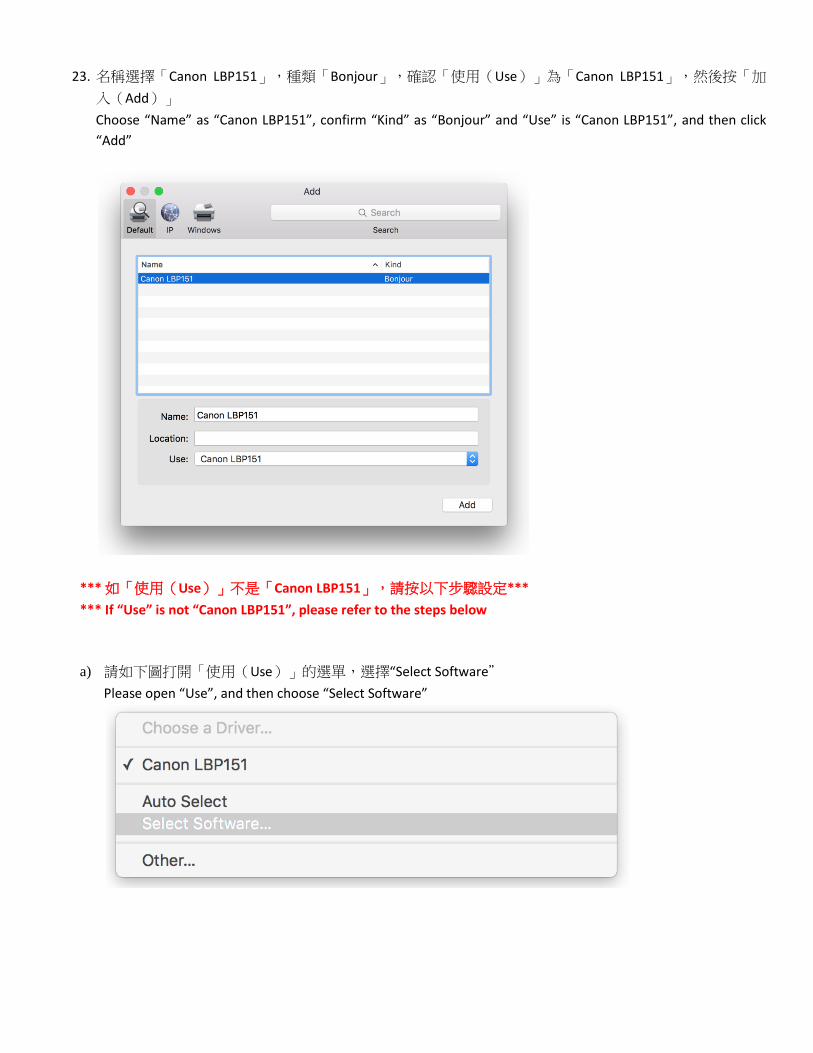
23. 名稱選擇「Canon LBP151」,種類「Bonjour」,確認「使用(Use)」為「Canon LBP151」,然後按「加
入(Add)」
Choose “Name” as “Canon LBP151”, confirm “Kind” as “Bonjour” and “Use” is “Canon LBP151”, and then click
“Add”
*** 如「使用(Use)」不是「Canon LBP151」,請按以下步驟設定***
*** If “Use” is not “Canon LBP151”, please refer to the steps below
a) 請如下圖打開「使用(Use)」的選單,選擇“Select Software"
Please open “Use”, and then choose “Select Software”
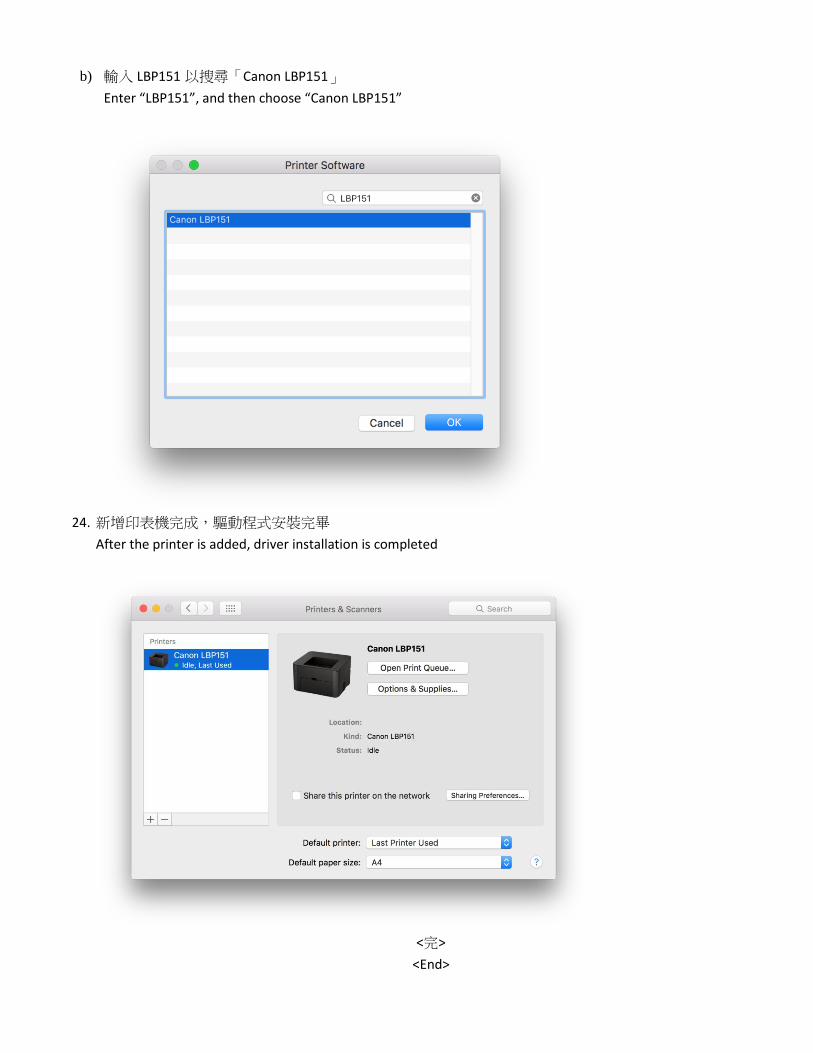
b) 輸入 LBP151 以搜尋「Canon LBP151」
Enter “LBP151”, and then choose “Canon LBP151”
24. 新增印表機完成,驅動程式安裝完畢
After the printer is added, driver installation is completed
<完>
<End>