Liquid Machines Gateway for SharePoint Installation and ...
78
Liquid Machines Gateway for SharePoint Installation and Central Administration Guide Version 2.1 Liquid Machines, Inc. 100 Fifth Avenue, 5 th Floor Waltham, MA 02451 1.877.88LIQUID (1.877.885.4784) www.liquidmachines.com
-
Upload
khangminh22 -
Category
Documents
-
view
3 -
download
0
Transcript of Liquid Machines Gateway for SharePoint Installation and ...

Liquid Machines Gateway for SharePoint Installation and Central Administration Guide
Version 2.1
Liquid Machines, Inc.
100 Fifth Avenue, 5th Floor
Waltham, MA 02451
1.877.88LIQUID (1.877.885.4784)
www.liquidmachines.com

Liquid Machines Gateway for SharePoint Installation and Central Administration Guide
Liquid Machines, Inc. Page ii
Copyright/Disclaimer
Copyright © 2003 - 2010 Liquid Machines, Inc. All rights reserved. Confidential and proprietary information of Liquid Machines, Inc.
The material in this document may not in whole or in part be copied, photocopied, reproduced, translated, or converted to any electronic or machine-readable form without the prior written consent of Liquid Machines. The information in this document is for informational use only, is subject to change without notice, and should not be construed as a commitment by Liquid Machines. Liquid Machines assumes no responsibility or liability for any errors or inaccuracies that may appear in this document.
This document and the software described in this document are furnished under a license accompanying the software and may be used only in accordance with the terms of such license. By using this document, you agree to the terms and conditions of that license.
>> For other copyright and trademark information, see the Liquid Machines Copyright, included in this document package.
How to Contact Liquid Machines, Inc. Liquid Machines, Inc.
100 Fifth Avenue, 5th Floor
Waltham, MA 02451
Phone: 1.877.88LIQUID (1.877.885.4784)
www.liquidmachines.com
Liquid Machines Gateway for SharePoint Installation and Central Administration Guide
Liquid Machines, Inc. Page iii
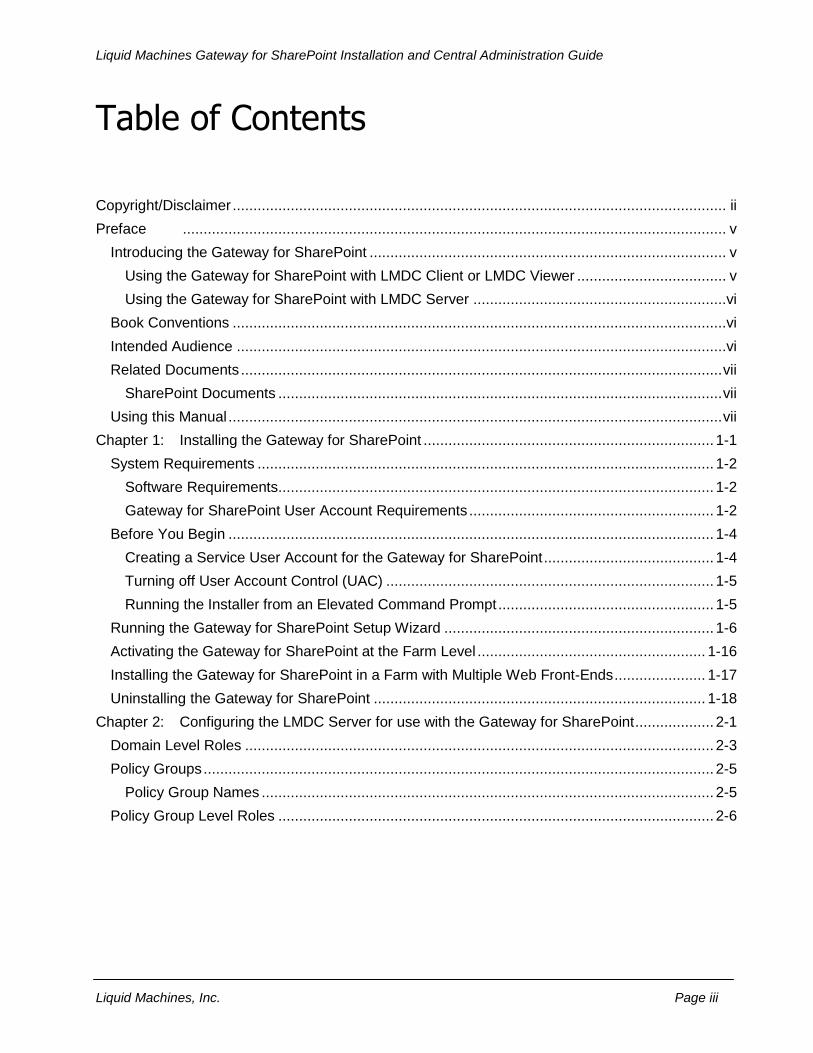
Table of Contents
Copyright/Disclaimer ....................................................................................................................... ii
Preface ................................................................................................................................... v
Introducing the Gateway for SharePoint ...................................................................................... v
Using the Gateway for SharePoint with LMDC Client or LMDC Viewer .................................... v
Using the Gateway for SharePoint with LMDC Server .............................................................vi
Book Conventions .......................................................................................................................vi
Intended Audience ......................................................................................................................vi
Related Documents .................................................................................................................... vii
SharePoint Documents ........................................................................................................... vii
Using this Manual ....................................................................................................................... vii
Chapter 1: Installing the Gateway for SharePoint ...................................................................... 1-1
System Requirements .............................................................................................................. 1-2
Software Requirements ......................................................................................................... 1-2
Gateway for SharePoint User Account Requirements ........................................................... 1-2
Before You Begin ..................................................................................................................... 1-4
Creating a Service User Account for the Gateway for SharePoint ......................................... 1-4
Turning off User Account Control (UAC) ............................................................................... 1-5
Running the Installer from an Elevated Command Prompt .................................................... 1-5
Running the Gateway for SharePoint Setup Wizard ................................................................. 1-6
Activating the Gateway for SharePoint at the Farm Level ....................................................... 1-16
Installing the Gateway for SharePoint in a Farm with Multiple Web Front-Ends ...................... 1-17
Uninstalling the Gateway for SharePoint ................................................................................ 1-18
Chapter 2: Configuring the LMDC Server for use with the Gateway for SharePoint ................... 2-1
Domain Level Roles ................................................................................................................. 2-3
Policy Groups ........................................................................................................................... 2-5
Policy Group Names ............................................................................................................. 2-5
Policy Group Level Roles ......................................................................................................... 2-6

Liquid Machines Gateway for SharePoint Installation and Central Administration Guide
Liquid Machines, Inc. Page iv
Chapter 3: Enabling and Configuring the Gateway for SharePoint at the Farm Level via Central Administration........................................................................................................ 3-1
Farm Level Configuration Using the RMS Policy Server........................................................... 3-2
Farm Level Configuration Using the LMDC Policy Server ........................................................ 3-5
Enabling IRM at the Farm Level ........................................................................................... 3-5
Configuring IRM at the Farm Level: ...................................................................................... 3-8
Notifying the Site Owner of the Gateway for SharePoint ........................................................ 3-10
Chapter 4: Advanced Topics ..................................................................................................... 4-1
Migration Strategy .................................................................................................................... 4-2
Operational Continuity Considerations .................................................................................. 4-2
Caveats ................................................................................................................................ 4-3
Sample Migration Plan .......................................................................................................... 4-3
Command Line Configuration using STSADM .......................................................................... 4-6
IRM Configuration ................................................................................................................. 4-6
InfoPath Configuration ........................................................................................................ 4-10
Chapter 5: Troubleshooting ....................................................................................................... 5-1
Introduction .............................................................................................................................. 5-2
Common Problems .................................................................................................................. 5-3
Gateway Trace Logs .............................................................................................................. 5-13
Appendix A: Sample Emails to Notify the Site or Document Library Owner of the Gateway for SharePoint .............................................................................................................................. A-1
Sample Email when using RMS Policy Server ......................................................................... A-2
Sample Email when using LMDC Policy Server ....................................................................... A-3
Index .......................................................................................................................... Index-1

Liquid Machines Gateway for SharePoint Installation and Central Administration Guide
Liquid Machines, Inc. Page v
Preface
Welcome to the Liquid Machines Gateway for SharePoint Installation and Central Administration Guide. This document describes the requirements for installation and the installation process. It also describes the configuration tasks to be performed by the Central Administrator, also known as the System or Farm Administrator. Lastly, it provides troubleshooting procedures related to installation and administration of the Gateway for SharePoint.
Introducing the Gateway for SharePoint The Liquid Machines Gateway for SharePoint can be operated in a variety of different rights management configurations. Gateway set-up, management and functionality vary depending on whether or not the implementation includes the Liquid Machines Document Control Server, which provides policy management features and an extended Enterprise Rights Management permission set.
Using the Gateway for SharePoint with LMDC Client or LMDC Viewer Liquid Machines Gateway for SharePoint, working together with the Liquid Machines Document Control Client (LMDC Client) or the Liquid Machines Viewer (LM Viewer) extends Microsoft‟s Information Rights Management (IRM) by adding support for additional file formats and enhancing the ability to securely collaborate outside of SharePoint. Like the IRM protectors built into SharePoint 2007, the Gateway for SharePoint applies Rights Management Service (RMS) protection to files when they are checked out of a list or library and removes the protection when the file is uploaded to SharePoint.
Additionally, the Gateway for SharePoint (and the LMDC Client or LM Viewer) enables the following additional features:
The Gateway for SharePoint allows SharePoint to protect additional file types, including PDF. Users with LMDC Client or LM Viewer can work with these additional file types.
The Liquid Machines protector creates an issuance license which includes all authorized users, allowing all authorized users to share protected information outside of SharePoint, without requiring that each user download the files directly from SharePoint.

Liquid Machines Gateway for SharePoint Installation and Central Administration Guide
Liquid Machines, Inc. Page vi
Using the Gateway for SharePoint with LMDC Server When the Liquid Machines Gateway for SharePoint is used together with the Liquid Machines Document Control Server, all policies generated by the Gateway for SharePoint will be stored and managed by the LMDC policy server, which provides for additional capabilities:
Documents downloaded from SharePoint can be protected with Liquid Machines Advanced Enforcement policies, which include an extended permission set, including auditing and the ability to change or remove policies.
Enhanced offline management capabilities which allow users to work with content for a centrally configured amount of time disconnected from the network.
All IRM permissions (including print) can be varied by user or group for each document list or library.
Changes to SharePoint permissions dynamically update IRM permissions – even for documents already downloaded from SharePoint.
The Gateway for SharePoint is compatible with versions 7.0 and 7.1 of the Liquid Machines Document Control Server. It is important that you know which version of the Server you are using, as there are some minor differences in the way you configure the Server for use with the Gateway for SharePoint.
Book Conventions CAUTION: Cautions the user of actions that may result in operational issues or data
loss.
NOTE: Identifies important points, helpful hints, special circumstances, or alternative methods.
This guide also uses the following typographical conventions:
>> Blue indicates a cross-reference. A cross reference provides the location of additional information related to the topic. For example: >> For more information, see Intended Audience on page vi.
Bold Indicates a selection from a menu or a button name. For example:
From the Settings menu, select Document Settings Library.
Bold is also used for field names and values, file names, and emphasis.
Intended Audience This guide is intended for the Central Administrator who is responsible for installing the Liquid Machines Gateway for SharePoint on the SharePoint server and performing initial configuration of the SharePoint farm. This person is often a member of the IT department and is responsible for setting up SharePoint. This guide is also intended for the LMDC Administrator, responsible for setting up the LMDC Server for use with the Gateway for SharePoint.

Liquid Machines Gateway for SharePoint Installation and Central Administration Guide
Liquid Machines, Inc. Page vii
Related Documents This section lists documents related to the Gateway for SharePoint and SharePoint in general.
Liquid Machines Gateway for SharePoint Configuration Guide for Site Owners
SharePoint Documents The following documents provide information on SharePoint:
MSDN‟s Information Rights Management in Windows SharePoint Services Overview: http://msdn.microsoft.com/en-us/library/ms458245.aspx
Microsoft Technet Office SharePoint Server 2007: http://technet.microsoft.com/en-us/library/cc303422.aspx
Microsoft Technet Plan Information Rights Management: http://technet.microsoft.com/en-us/library/cc261728.aspx
Microsoft Technet Configure Information Rights Management (Office SharePoint Server): http://technet.microsoft.com/en-us/library/cc262566.aspx
The following documents provide information on Microsoft RMS:
Microsoft website: http://www.microsoft.com/windowsserver2003/technologies/rightsmgmt/default.mspx
Using this Manual This user guide contains the following chapters and appendices:
Chapter 1: Installing the Gateway for SharePoint – Describes the requirements and prerequisites for installing the Gateway for SharePoint. It also provides the detailed installation and uninstallation procedures.
Chapter 2: Configuring the LMDC Server for Use with the Gateway for SharePoint – Describes how to configure Domain Level Roles, Policy Groups, and Policy Level Roles on the LMDC Server for use with the Gateway for SharePoint.
Chapter 3: Enabling and Configuring the Gateway for SharePoint at the Farm Level via Central Administration – Describes how to enable and configure the Gateway for SharePoint at the Farm Level. This includes different procedures depending on the Policy Server you are using.
Chapter 4: Advanced Topics – Describes advanced topics including Migration Strategy and Command Line Configuration using the stsadm command.
Chapter 5: Troubleshooting – Describes troubleshooting of problems that may occur during the installation or use of the Gateway for SharePoint.
Appendix A: Sample Emails to Notify the Site Owners of the Gateway for SharePoint – Provides sample emails that you can use to notify SharePoint Site Owners of the capabilities of the Gateway for SharePoint.
Index – Provides an index to aid you in locating information.

Liquid Machines Gateway for SharePoint Installation and Central Administration Guide
Liquid Machines, Inc. Page viii

Liquid Machines Gateway for SharePoint Installation and Central Administration Guide
Liquid Machines, Inc. Page 1-1
Chapter 1: Installing the Gateway for SharePoint
This chapter describes how to install the Liquid Machines Gateway for SharePoint on the SharePoint server.
Topics included in this chapter are:
System Requirements
Before You Begin
Running the Gateway for SharePoint Setup Wizard
Activating the Gateway for SharePoint at the Farm Level
Installing the Gateway for SharePoint in a Farm with Multiple Web Front-Ends
Uninstalling the Gateway for SharePoint

Liquid Machines Gateway for SharePoint Installation and Central Administration Guide
Liquid Machines, Inc. Page 1-2
System Requirements For each SharePoint server, you install one instance of the Gateway for SharePoint. The SharePoint Server must be Information Rights Management (IRM)-enabled to use the Gateway for SharePoint.
>> If you are using the RMS Policy Server and the RMS Security Service: If the SharePoint server is not IRM-enabled, refer to the Microsoft SharePoint documentation for instructions on enabling IRM.
Software Requirements Microsoft Office SharePoint Server (MOSS) 2007 or Microsoft Windows SharePoint Server
(WSS) 3.0
.NET Framework 3.5
A Rights Management Policy Server
Microsoft Rights Management Services in Windows Server 2003 or Windows Server 2008
Liquid Machines Document Control, version 7.
For installations using the RMS as the Security Service and Windows Server 2003 only: Installation of the Microsoft Rights Management Service Client. (This installation is not required for Windows Server 2008, because Windows Server 2008 comes with the RMS Client installed.)
Gateway for SharePoint User Account Requirements The following Technet article discusses how to install Microsoft Office SharePoint Server 2007 with least-privilege administration:
http://technet.microsoft.com/en-us/library/cc298465.aspx
This installation guide refers to several accounts using the names defined in the Technet article:
The Setup user account, as described in the Technet article referenced above, should be used to run the Liquid Machines Gateway for SharePoint installation program on each web front-end in the farm. No permissions beyond those described are necessary.
The Server farm account or database access account, as described in the Technet article referenced above, is the identity that will run the following portions of Gateway for SharePoint code:
Farm-level IRM configuration
SharePoint Timer Service jobs that synchronize SharePoint Access Control List with the LMDC Server's policies.
Notes:
SharePoint Timer Service jobs only apply when using the LMDC Server as the Policy Server.
Network communication with the LMDC Server takes place using the LMDC Server Credentials, described below.

Liquid Machines Gateway for SharePoint Installation and Central Administration Guide
Liquid Machines, Inc. Page 1-3
The Liquid Machine Gateway for SharePoint requires two additional user accounts to operate:
The Service User Account. This account is used as the process identity for a COM+ service application which runs on each web front-end in the SharePoint farm. This account must start with the same privileges as the Server farm/database access account, as described in the Technet article referenced above. In addition, this account must be granted the following permissions and roles:
The "Log on as service" Windows permission on each web front-end.
SharePoint Farm Administrator. This is read-only access to use the extensions list and other product configuration items.
The role of "Site Collection Administrator" for all SharePoint Site Collections in which IRM is to be used. (This is set from the Site Actions | Site Settings | Users and Permissions | Site collection administrators in individual sites).
db_owner permission on the databases used by Site Collections in which IRM is to be used. This is read-only access to open and use SharePoint lists and is necessary for generating ACL. Note: This permission is only necessary if RMS is selected as the Security Service.
The user should be added to the Performance Monitor Users Group (see Figure 1-1).
Figure 1-1: Add User to Performance Monitor Users Group

Liquid Machines Gateway for SharePoint Installation and Central Administration Guide
Liquid Machines, Inc. Page 1-4
On the RMS Server, this user must be granted the Read and Read & Execute file system permissions on the file:
c:\Inetpub\wwwroot\_wmcs\Certification\ServerCertification.asmx
Note: This requirement only applies when using RMS as the Security Service.
The LMDC Server Policy Administrator account. This account is used to perform policy management on the LMDC Server via web service calls from the SharePoint web front-ends. This account requires no particular privileges on the SharePoint servers, but does require the following administrative privileges on the LMDC Server:
In each policy group created for use by the Gateway for SharePoint (for more information, see Policy Groups on page 2-5), this user must have the following administrative rights:
Edit Policies
Edit Role Members
The user must is also required be an LMDC Administrator (global admin) in order to operate with domain roles.
(Note: This account is only required when using the LMDC Server as the Policy Service.)
Before You Begin This section describes the prerequisites that must be in place before installation.
If you are using the RMS Policy Server and the RMS Security Service Only: Verify that SharePoint is installed and configured to be IRM-enabled.
Create a service user account.
Turn off User Account Control or Run the Installer from an Elevated Command Prompt (only required if you are installing the Gateway for SharePoint on a Windows 2008 server).
Determine which Policy Server you want to use (RMS or LMDC).
Determine which Security Service you want to use if you selected the LMDC Policy Server (RMS or LMDC).
Know which file types you want to protect.
Creating a Service User Account for the Gateway for SharePoint Before installing the Gateway for SharePoint, you must create a service user account for the Gateway for SharePoint service. This user provides a Windows identity under which the service runs and communicates with the Microsoft Right Management Services (RMS) or LMDC depending on the Policy Server and Security Service you are using. This account will never be used by an actual user, but it must be created before you run the setup wizard because the User Name and Password of the service user account are required to complete the installation.
To create the service user account, you access the domain controller and set up a Windows identity under which the service runs.
The service account must meet the requirements specified in Gateway for SharePoint User Account Requirements on page 1-2.

Liquid Machines Gateway for SharePoint Installation and Central Administration Guide
Liquid Machines, Inc. Page 1-5
From the SharePoint perspective, the service user should have:
Full control on the parent web – in the case when the inherited permissions are set up for the document library, or
Full control on the document library – in the case when there are unique rights for the document library (these rights are not inherited).
If the service user account is not configured properly, and you install the Gateway for SharePoint, you may find that that documents protected by the Gateway for SharePoint either fail to open or the documents may open unprotected. If this occurs, check the Windows Event logs and the SharePoint logs for errors.
>> For information on error messages that may appear in the logs if the service user is not configured correctly, see Chapter 5: Troubleshooting.
Turning off User Account Control (UAC) If you are installing the Gateway for SharePoint on a Windows 2008 server, you will need to turn off User Account Control before installing the Gateway for SharePoint.
To perform this procedure, you must be able to log on with or provide the credentials of a member of the local Administrators group.
To turn off User Account Control:
1. Select the Start button, and then select Control Panel.
2. In the Control Panel, select User Accounts.
3. In the User Accounts window, select User Accounts.
4. In the User Accounts tasks window, select Turn User Account Control on or off.
5. If UAC is currently configured in Admin Approval Mode, the User Account Control message appears. Select Continue.
6. Uncheck the Use User Account Control (UAC) to help protect your computer check box, and then select OK.
7. Select Restart Now to apply the change right away, or click Restart Later and close the User Accounts tasks window.
Running the Installer from an Elevated Command Prompt Alternatively, if you do not wish to disable UAC as described in the previous section, you may open a command prompt in elevated mode and run the installer from there.
To run the installer from an elevated command prompt:
1. Select the Start button, and right-click on the Command Prompt icon.
2. Select Run as administrator.
3. In the command prompt, change to the drive and directory of the Gateway for SharePoint installation media.
4. Run either LiquidMachines-Sharepoint-Gateway-x64.msi (for 64 bit operating systems) or LiquidMachines-SharepointGateway-x86.msi (for 32 bit operating systems) by typing one of the two filenames completely and pressing the Enter key.

Liquid Machines Gateway for SharePoint Installation and Central Administration Guide
Liquid Machines, Inc. Page 1-6
Running the Gateway for SharePoint Setup Wizard The Setup wizard is used to prepare for the installation and then perform the installation. To run the Gateway for SharePoint Setup Wizard:
1. Launch the Gateway for SharePoint Setup Wizard.
The Welcome screen displays (see Figure 1-2).
Figure 1-2: Welcome Screen

Liquid Machines Gateway for SharePoint Installation and Central Administration Guide
Liquid Machines, Inc. Page 1-7
2. Select Next to continue with the installation.
The End-User License Agreement displays (see Figure 1-3).
Figure 1-3: End-User License Agreement Screen
3. Read the License Agreement. (To print the agreement, select Print.)
4. Select the check box to accept the terms in the License Agreement.
5. Select Next to continue. The Destination Folder screen displays (see Figure 1-4).
Figure 1-4: Destination Folder Screen

Liquid Machines Gateway for SharePoint Installation and Central Administration Guide
Liquid Machines, Inc. Page 1-8
6. The default destination folder displays on this screen. To install the Gateway for SharePoint in the default destination folder, select Next.
To install the Gateway for SharePoint to an alternate location, select Change. The Change Destination Folder screen displays (see Figure 1-5).
Figure 1-5: Change Destination Folder Screen
7. Browse to the selected folder and select OK, and then select Next. The Enter Service Account screen displays (see Figure 1-6).
Figure 1-6: Enter Service Account Screen

Liquid Machines Gateway for SharePoint Installation and Central Administration Guide
Liquid Machines, Inc. Page 1-9
8. Enter the User Name and Password of the Gateway Service account on this screen. The User Name must be entered using the following syntax: .
If the Gateway Service User has not been defined, the installation cannot be completed.
>> For more information on defining the Service User, see Creating a Service User Account for the Gateway for SharePoint on page 1-4.
9. Select Next.
The installer will attempt to validate the credentials that were entered. If the User Name or Password is incorrect, a dialog displays (see Figure 1-7).
Figure 1-7: User Name or Password of Service User is Incorrect
Select OK and re-enter the User Name and Password on the Enter Service Account screen.
10. The Select File Extensions screen displays (see Figure 1-8).
Figure 1-8: Select File Extensions Screen

Liquid Machines Gateway for SharePoint Installation and Central Administration Guide
Liquid Machines, Inc. Page 1-10
11. From this screen, select the file extensions that will be automatically IRM-protected for this installation of the Gateway for SharePoint. In most cases, you will only want to select file types that can be consumed by the IRM-enabled client agent that your organization has chosen. The Select File Extension screen simplifies this action by providing Predefined File Extension Sets on the left side of the screen which correspond to the file types supported by each Liquid Machines client agent. The possible choices for the Predefined File Extension Sets are provided in Table 1-1.
NOTE: Liquid Machines PDF for RMS users should choose the Most Common selection.
Table 1-1: Predefined File Extension Sets for the Gateway for SharePoint
Selection Files Included
Most Common doc, docm, docx, dot, dotm, dotx, pdf, ppsm, ppsx, ppt, pptx, pot, potm, potx, pps, xla, xls, xlam, xlsm, xlsx, xltx, xps
LMDC Client
Typical
3dxml, cgm, cgr, dfx, dif, dlt, doc, docm, docx, dot, dotm, dotx, dwg, dxf, emf, emz, eps, fdf, gif, ids, jpg, mht, mhtml, mst, pcx, pdf, pln, png, pot, potm, potx, ppa, pps, ppsm, ppsx, ppt, pptm, prn, ps, psd, rtf, slk, svg, svgz, tif, tmp, txt, vda, vsd, vst, wps, xfdf, xla, xlam, xls, xlsb, xlsm, xlsx, xlt, xltx, xlw, xps, zip
LM Viewer Typical
123, 3dxml, all, ans, asc, asp, bmp, cgm, cgr, db, dbf, dif, dlt, doc, docm, docx, dot, dotm, dotx, dwg, dxf, emf, emz, eps, fdf, fm3, gif, ids, jpg, lwp, mcw, mht, mhtml, mpp, msg, mst, odg, odp, ods, odt, pct, pcx, pdf, pln, png, pot, potm, potx, ppa, pps, ppsm, ppsx, ppt, pptm, pptx, prn, prz, ps, psd, qpw, rtf, sda, sdc, sdd, sdw, shw, slk, svg, svgz, sxc, sxd, sxi, sxw, tif, tmp, txt, uue, vda, wk1, wk3, wk4, wks, wmf, wpd, wps, wq1, xfdf, xla, xlam, xls, xlsb, xlsm, xlsx, xlt, xltx, xlw, xps, zip
Custom 123, 3dxml, ai, all, ans, asc, asm, asmdot, asp, bmp, bom, cgm, cgr, db, dbf, dif, dlt, doc, docm, docx, dot, dotm, dotx, drw, drwdot, dwg, dxf, easm, edrw, emf, emodel, emz, eprt, eps, fdf, fm3, frm, gif, hcg, hdm, hsf, htm, ids, igs, jpg, lwp, map, mcw, mht, mhtml, mpp, msg, mst, odg, odp, ods, odt, pct, pcx, pdf, pln, png, pot, potm, potx, ppa, pps, ppsm, ppsx, ppt, pptm, pptx, prn, pro, prt, prtdot, prz, ps, psd, qpw, rtf, sat, sda, sdc, sdd, sdw, shw, sec, sldasm, sldblk, sldbomtbt, slddrw, sldlfp, sldprt, sldsffvt, sldwekdfvt, slk, step, stl, svg, svgz, sxc, sxd, sxi, sxw, swj, swp, sym, tbl, tif, tmp, txt, u3d, uue, vda, vss_out, win, wk1, wk3, wk4, wks, wmf, wpd, wps, wrl, wq1, x_b, xaml, xfdf, xla, xlam, xls, xlsb, xlsm, xlsx, xlt, xltx, xlw, xps, zip
12. If you select a predefined set of file extensions, you will have the opportunity to add or remove file extensions from the list.
If you choose Custom, the list of files types available displays in the Available Extensions List. Select one or more file types to be supported by the Gateway for SharePoint in the Available Extensions List and use the controls described in Table 1-2 to select the files. Selected files appear in the Selected Extensions List.
If you choose Most Common, LMDC Client Typical, or LM Viewer Typical, you can also use this screen to add or remove file extensions from the selected list to customize these predefined selections. The files supported in the predefined list are shown in the Selected Extensions List and all other file types available are listed in the Available Extensions List. Use the controls listed in Table 1-2 to move files in or out of the Selected Extensions List, as needed.

Liquid Machines Gateway for SharePoint Installation and Central Administration Guide
Liquid Machines, Inc. Page 1-11
Table 1-2: Controls on Select File Extensions Screen
Control Description
>> Moves all files from the Available Extensions List to the Selected Extensions List.
> Moves the selected files from the Available Extensions List to the Selected Extensions List. To select multiple files, use the standard Windows controls for selecting multiple files. (Holding Shift while selecting files selects the range of files between your first and last selection, and holding CTRL while selecting files selects only the specific files you click on.)
< Moves the selected files from the Selected Extensions List to the Available Extensions List. Use this selection to remove files that you do not want supported by the Gateway for SharePoint. To select multiple files, use the standard Windows controls for selecting multiple files. (Holding Shift while selecting files selects the range of files between your first and last selection, and holding CTRL while selecting files selects only the specific files you click on.)
<< Moves all files from the Selected Extensions List to the Available Extensions List. Use this selection to clear the list of supported files and begin again.
Based on the selections made on this screen, the Windows Registry keys listing the supported files for this installation are defined. Once you have completed the wizard, the Central Administrator can modify the file types selected when you configure IRM at the Farm level.
>> For instructions on changing the file types when you are using an RMS Policy Server, see Farm Level Configuration Using the RMS Policy Server on page 3-2.
>> For instructions on changing the file types when you are using the LMDC Policy Server, see Configuring IRM at the Farm Level on page 3-8.
13. When you are satisfied with the file extension settings, select Next.
14. The Select Policy Server screen displays (see Figure 1-9).
Figure 1-9: Select Policy Server Screen

Liquid Machines Gateway for SharePoint Installation and Central Administration Guide
Liquid Machines, Inc. Page 1-12
15. Select the Policy Server that will be used by the Gateway for SharePoint as described in Table 1-3.
Table 1-3: Select the Policy Server to be used by the Gateway for SharePoint
Selection Description
Use Microsoft Windows Rights Management server as policy server.
Select this option, if you will not use the LMDC Server. All policies generated by SharePoint will be stored and managed via the Microsoft RMS Server. This selection extends Microsoft‟s IRM by adding support for additional formats and enhancing the ability to securely collaborate outside of SharePoint.
In this mode, you enable IRM at the farm level, but there is no Site Level configuration. The List level configuration is similar to the default SharePoint.
Use Liquid Machines Document Control server as policy server.
Select this option if you will use the LMDC Server along with SharePoint (using either LMDC or RMS as Security Service to generate and manage cryptographic keys). When you make this selection, all policies generated by SharePoint will be stored and managed by the LMDC Policy Server which provides an extended permission set, including auditing, enhanced offline management, and dynamic policy updates.
SharePoint Permissions Levels are mapped to Policy Group Roles defined in the LMDC Server. For each IRM-enabled document library, the Gateway for SharePoint will generate a protection policy on the LMDC Server. Each policy will have membership that mirrors the associated document library‟s membership in SharePoint. Each member‟s LMDC role will be configured based on the SharePoint Permission Level to LMDC Policy Role mapping.
In this mode, the Gateway for SharePoint software allows you to configure IRM at the Farm level. You also configure SharePoint at the Site level (map the SharePoint Permission Levels to the LMDC Policy Roles in the LMDC Server) and the List level.

Liquid Machines Gateway for SharePoint Installation and Central Administration Guide
Liquid Machines, Inc. Page 1-13
16. Select Next. If you select to use the Microsoft Windows Rights Management server as the policy server, skip to Step 19 as you do not need to select the Security Service. If you select to use the Liquid Machines Document Control server as the policy server, the Select Security Service screen displays as shown in Figure 1-10.
Figure 1-10: Select Security Service
17. Select the Security Service to be used with the LMDC Policy Server. The Security Service that will be used to generate and manage encryption keys. Your choices are:
Liquid Machines Document Control Security Service. Use the LMDC Security Service with the LMDC Policy Server. If you make this selection, it is assumed that all users have access to the LMDC Client from which they can open documents from SharePoint (see Figure 1-10).
Microsoft Windows Rights Management Services. Use the Microsoft RMS Security Service with the LMDC Policy Server. If you chose this option, the Allow IRM Compatible Policies check box displays (see Figure 1-11).
Select the Allow IRM Compatible Policies check box if some of your users do not have LMDC Clients and will be opening files in the Office 2003/2007 Windows client. If you choose this option, you will select the Security Profile (Advanced Security or IRM Compatible) at the Site level.

Liquid Machines Gateway for SharePoint Installation and Central Administration Guide
Liquid Machines, Inc. Page 1-14
Figure 1-11: Select RMS Security Service
18. Click Next.
19. The Ready to Install Liquid Machines Gateway for SharePoint screen displays (see Figure 1-12).
Figure 1-12: Ready to Install Liquid Machines Gateway for SharePoint

Liquid Machines Gateway for SharePoint Installation and Central Administration Guide
Liquid Machines, Inc. Page 1-15
You are now ready to start the installation of the Gateway for SharePoint.
Select:
Install, to begin the installation,
Back, to review or change your installation settings, or
Cancel, to exit the wizard.
20. When the installation is complete, the completed screen displays (see Figure 1-13).
Figure 1-13: Completed the Gateway for SharePoint Setup Wizard Screen
21. Click Finish to exit the Setup Wizard.

Liquid Machines Gateway for SharePoint Installation and Central Administration Guide
Liquid Machines, Inc. Page 1-16
Activating the Gateway for SharePoint at the Farm Level NOTE: This procedure only applies to installations for which the LMDC Policy Server
has been selected. If you are using the RMS Policy Server, skip this procedure.
To activate the Gateway for SharePoint at the Farm Level:
1. Access the SharePoint site and log in.
2. On the Central Administration page, select the Operations tab (see Figure 1-14).
Figure 1-14: Operations Screen

Liquid Machines Gateway for SharePoint Installation and Central Administration Guide
Liquid Machines, Inc. Page 1-17
3. Under the Global Configuration heading in the righthand column, select Manage Farm Features. The Liquid Machines Manage Farm Features screen displays (see Figure 1-15).
Figure 1-15: Manage Farm Features Screen
4. Select the Activate button to the right of the Liquid Machines Gateway for SharePoint Configuration item.
The Gateway for SharePoint is now ready to use.
Installing the Gateway for SharePoint in a Farm with Multiple Web Front-Ends If you are installing the Gateway for SharePoint in a Farm environment with two or more web front-ends, the installation process is modified for all web front-ends, except the first one.
To install in a SharePoint farm with multiple web front-ends:
1. Install the Gateway for SharePoint on the first web front-end as described in Running the Gateway for SharePoint Setup Wizard starting on page 1-6. When you perform this installation, you will enter all the settings for the SharePoint Farm. These settings will be used for all the remaining web front-ends in the Farm.
2. Install the Gateway for SharePoint on all the remaining web front-ends by performing Steps 1-9 and then Steps 19-21 of the installation procedure described in Running the Gateway for SharePoint Setup Wizard starting on page 1-6. You will skip Steps 10-18 of the procedure as you will not need to configure the File Extensions, Policy Server, or Security Service for each additional web front-end. The setting specified on the first web front-end will be used for all web front-ends in the farm. After you enter the credentials for the Gateway Service User for each web front-end, the Ready to Install confirmation screen displays for each additional web front-end.

Liquid Machines Gateway for SharePoint Installation and Central Administration Guide
Liquid Machines, Inc. Page 1-18
Uninstalling the Gateway for SharePoint You can uninstall the Gateway for SharePoint using the Add or Remove Programs selection from the Windows Control Panel. (You can also re-run the installation program to uninstall the Gateway for SharePoint. (When you re-run the installation program, an option to uninstall the program displays.)
NOTE: Before uninstalling the Gateway for SharePoint, please consider the following ramifications:
When you uninstall the Gateway for SharePoint (configured to use the RMS Policy Service and the RMS Security Service), after it has been used, the SharePoint reverts back to native IRM protection. When you uninstall the Gateway for SharePoint (configured to use the LMDC Policy Service and the LMDC or RMS Security Service), after it has been used, the SharePoint reverts back to no protection.
If you remove the Gateway for SharePoint, files of the file types that were previously protected by the Gateway for SharePoint may not be protected when they are downloaded and you may not be able to upload these files. Also, the files may behave like files with protections that were added outside of SharePoint (incompatible protections).
The installation procedure includes three main steps:
Deactivate the Liquid Machines Gateway for SharePoint Configuration feature.
(Optional) Convert the Policy Names to a user-friendly format.
When using the Gateway for SharePoint with the LMDC Policy Server, the Gateway assigns policy names using a unique identifier. Each SharePoint List is associated with a unique identifier of the policy that is stored on the server. A policy name will be represented by a globally unique identifier or GUID (a special type of identifier used in software applications in order to provide a reference number which is unique in any context).
The following are examples of typical policy names:
85D51579-6FC5-4fee-AE80-BA3E37950871
A1F5B059-267D-4405-9639-5571834D35AE
If you uninstall the Gateway for SharePoint, these policy names are kept within the SharePoint List. When protection is provided using native SharePoint IRM or the Gateway for SharePoint (with an RMS Policy Server), the policy names (which are not user friendly) will be used for the ad-hoc policy names.
The Gateway for SharePoint provides an stsadm command that can be run to replace the ad-hoc policy names to user friendly names. If you choose to run this command, the unique identifier representing the policy name is replaced with the user-friendly policy name that was defined during the List Level Configuration.
Uninstall the Gateway for SharePoint using the Add or Remove Programs selection from the Windows Control Panel.

Liquid Machines Gateway for SharePoint Installation and Central Administration Guide
Liquid Machines, Inc. Page 1-19
The following procedure describes how to perform all of these steps to uninstall the Gateway for SharePoint software:
1. To deactivate the Liquid Machines Gateway for SharePoint Configuration feature, access the SharePoint site and log in.
2. On the Central Administration page, select the Operations tab.
3. Under the Global Configuration heading in the righthand column, select Manage Farm Features. The Liquid Machines Manage Farm Features screen displays (see Figure 1-16).
Figure 1-16: Manage Farm Features Screen
4. Select the Deactivate button to the right of the Liquid Machines Gateway for SharePoint Configuration item. You can now begin to uninstall the Gateway for SharePoint.
5. (Optional) Convert the Policy Names to a user-friendly name by executing the following stsadm command:
stsamd.exe –o irmconvertpolicynames
This command goes through all Lists on the SharePoint farm and changes policy names from the format created by the Gateway for SharePoint (GUID) to a user-friendly format. The user-friendly names that replace the GUID names are the names that were entered in the User Defined Policy Name fields specified during the List Level Configuration.
>> For more information on the List Level Configuration, see Chapter 2 of the Liquid Machines Gateway for SharePoint Configuration Guide for Site Owners.
If this command is used before the Gateway for SharePoint is uninstalled, newly downloaded files protected using native IRM protectors or the Gateway for SharePoint with an RMS Policy Server will be protected with ad-hoc policies with user-friendly names.
6. Select Add or Remove Programs (or Programs and Features in Microsoft Windows Server 2008) from the Control Panel.
NOTE: All screenshots in this section apply to Windows Server 2003. The procedure is the same for both Windows 2003 and Windows 2008, although the screens may be slightly different.

Liquid Machines Gateway for SharePoint Installation and Central Administration Guide
Liquid Machines, Inc. Page 1-20
7. Select Liquid Machines Gateway for SharePoint in the list of currently installed programs (see Figure 1-17).
Figure 1-17: Locate the Liquid Machines Gateway for SharePoint Application
8. Select Remove. You are asked to confirm that you want to remove the application (see Figure 1-18).
Figure 1-18: Confirm That You Want to Remove the Application
9. Select Yes. The application is removed. A progress bar displays indicating the progress of the removal (see Figure 1-19).
Figure 1-19: The Progress Bar Showing the Removal of the Gateway for SharePoint

Liquid Machines Gateway for SharePoint Installation and Central Administration Guide
Liquid Machines, Inc. Page 2-1
Chapter 2: Configuring the LMDC Server for use with the Gateway for SharePoint
This chapter describes how to create Domain Level Roles, Policy Groups, and Policy Group Level Roles in the LMDC Server to be used with Gateway for SharePoint. These roles will be mapped to the SharePoint Permission Levels during configuration of the Gateway for SharePoint and will be used to provide controlled access to the content protected by the gateway.
NOTE: You do not need to configure the LMDC Server if you have selected to use the Gateway for SharePoint with the RMS Policy Service and the RMS Security Service. Skip to Chapter 3: Enabling and Configuring the Gateway for SharePoint at the Farm Level.
The Domain Level Roles that you create are the default roles that will be mapped to SharePoint Permission Levels initially. The Policy Group Level Roles are the roles that will be mapped to the SharePoint Permission Levels during configuration of the Gateway for SharePoint by the SharePoint Site Owner.
Topics included in this chapter are:
Domain Level Roles
Policy Groups
Policy Group Level Roles
NOTE: Before proceeding, be sure that you know which version of the Liquid Machines Document Control Server you are using. Server version 7.0 and later are compatible with the Gateway for SharePoint. This section describes how to create Domain Level Roles, Policy Groups, and Policy Group Level Roles. Server version 7.1 and later, the way these groups and roles are created has changed. Be sure to reference the appropriate instructions when creating these groups and roles.

Liquid Machines Gateway for SharePoint Installation and Central Administration Guide
Liquid Machines, Inc. Page 2-2
Figure 2-1 shows a sample set of domain level roles, policy groups, and policy group level roles to be defined on the LMDC Server. Each of the items to be created by the LMDC Administrator on the LMDC Server are marked with an asterisk (*) in the figure.
Figure 2-1: Creating Roles and Policy Groups in the LMDC Server

Liquid Machines Gateway for SharePoint Installation and Central Administration Guide
Liquid Machines, Inc. Page 2-3
Domain Level Roles Before configuring the Gateway for SharePoint for use with IRM, the LMDC Administrator must create two IRM roles at the Policy Domain level for use by the gateway, as described in Table 2-1. These Domain Level roles are shown in Figure 2-1 as SP Default and SP Gateway.
Table 2-1: Domain Level Roles for Use with the Gateway for SharePoint
Domain Level Role Settings Value
SharePoint Gateway Role
This role allows the Gateway for SharePoint Service Account to apply and remove protection from documents flowing in and out of SharePoint document libraries.
This role is a Domain level role. The following is an example of the settings for this role:
Name for Role:
Include in Policy Polls
Role Scope:
Users:
Content Rights:
Policy Rights:
Policy Auditing:
Access Rights:
Enter the name of SharePoint Gateway role. For example, SP Gateway.
Do not check this box.
Select Reusable for the Policy Domain from the drop-down list. (Only applies to Server version 7.0.)
None. No users are added to a reusable role when it is initially created.
Select the Read check box, or whatever content rights you want to use.
None. Do not select the Select policy via Policy Droplet control check box. Select the Change existing policy to another policy check box, if desired.
Select the Audit User Actions check box, if desired. Protect and unprotect operations are always performed using the credentials of the Gateway for SharePoint Service Account and will be audited as such. Other auditable events, which occur in response to end user actions, will be reported using the end user‟s credentials.
Under Expiration, select Access never expires.
Under Offline use, select the Allow offline use check box, if desired.

Liquid Machines Gateway for SharePoint Installation and Central Administration Guide
Liquid Machines, Inc. Page 2-4
Domain Level Role Settings Value
SharePoint Default Role
This role is used as the default role to which all SharePoint Permission Levels are initially mapped. Therefore, all SharePoint users accessing content will be in this role, until the SharePoint Site Owner maps the SharePoint Permission Levels to IRM Roles.
The content rights granted by the default role may be set according to your preference. Generally, you will grant only the Read permissions. In some cases, you may elect to grant no permissions at all, which will cause downloaded documents to be unusable until the SharePoint Site Owner performs the mapping.
This role is a Domain level role. The following is an example of settings for this role:
Name for Role:
Include in Policy Polls
Role Scope:
Users:
Content Rights:
Policy Rights:
Policy Auditing:
Access Rights:
Enter the name of SharePoint Default role. For example, SP Default
Do not check this box.
Select Reusable for the Policy Domain from the drop-down list. (Only applies to Server version 7.0.)
None. No users are added to a reusable role when it is initially created.
Select the Read and Write check boxes, or whatever content rights you want to use.
None. Do not select the Select policy via Policy Droplet control check box. Select the Change existing policy to another policy check box, if desired.
Select the Audit User Actions check box, if desired. Protect and unprotect operations are always performed using the credentials of the Gateway for SharePoint Service Account and will be audited as such. Other auditable events, which occur in response to end user actions, will be reported using the end user‟s credentials.
Under Expiration, select Access never expires.
Under Offline use, select the Allow offline use check box, if desired.
>> For a complete description of how to create domain level roles in the Liquid Machines Document Control Server, refer to the online Help for the version of the Server you are using (version 7.0 or version 7.1).

Liquid Machines Gateway for SharePoint Installation and Central Administration Guide
Liquid Machines, Inc. Page 2-5
Policy Groups The Gateway for SharePoint creates dynamic policies on the LMDC Server to protect documents flowing into and out of SharePoint document libraries. These policies are created inside one or more Policy Groups, depending on the Security Service that is enabled on the LMDC Server. You must create the appropriate Policy Groups on the LMDC Server. After creating the Policy Groups, you create one or more LMDC Policy Roles in each Policy Group to which SharePoint Permission Levels will be mapped.
Figure 2-1 shows an example of a Policy Group named SP-UPMRMS.
Policy Group Names When you create Policy Groups, you must name them carefully, according to the conventions defined in this section.
The Policy Group names consist of two parts: a prefix and a suffix. A sample policy group name might be: SP-UPMRMS where SP is the prefix and -UPMRMS is the suffix.
Both parts of the name are important and must be entered carefully in the LMDC Server. The prefix is also used during the Farm level configuration of the Gateway for SharePoint.
To name a Policy Group:
1. Define the prefix.
Since the Gateway for SharePoint may use multiple Policy Groups, the Central Administrator must choose a text string that will serve as a prefix in the names of each Policy Group. The prefix is the first part of the Policy Group name entered on the LMDC Server. It will also be entered during Farm level configuration (in the LMDC Policy Group Prefix field on the Liquid Machines Gateway for SharePoint Options Screen as described on page 3-9).
It is recommended that you choose a prefix that identifies the group as belonging to the Gateway for SharePoint. The following are typical LMDC Policy Group prefixes:
SharePointGateway
SharePoint
SP
If multiple SharePoint farms are running the Gateway for SharePoint and using the same LMDC Policy Server, this prefix can also be used to partition the Gateway for SharePoint policies by farm.

Liquid Machines Gateway for SharePoint Installation and Central Administration Guide
Liquid Machines, Inc. Page 2-6
2. Select the appropriate suffix.
The second part of the name is a suffix that the gateway uses for permissioning. Unlike the prefix, you may not choose your suffix. You select the suffix that applies to your configuration and enter it exactly as shown below when creating the Policy Group. Note that the suffixes all start with a dash (-).
If you are using RMS as the Security Service, the Gateway for SharePoint supports RMS-backed policies in two different Enforcement modes:
For RMS-backed IRM Compatible Enforcement mode, the suffix must be: -RMS
For Advanced Enforcement mode, the suffix must be: -UPMRMS
If you are using LMDC as the Security Service, the suffix must be: -UPMLMKS
3. Once you define the policy group name, enter it on the LMDC Server when you are creating the Policy Group.
The following are examples of policy group names for the different security services. In these examples, the prefix is defined as: SP.
SP-RMS (for RMS-backed IRM Compatible mode)
SP-UPMRMS (for Advanced Enforcement mode)
SP-UPMLMKS (for LMKS backed policies)
>> For a complete description of how to create policy groups in the Liquid Machines Document Control Server, refer to the online Help for the version of the Server you are using (version 7.0 or version 7.1).
Policy Group Level Roles The following set of permission levels will be present in a typical SharePoint site:
Full Control
Design
Contribute
Read
Limited Access
Assigning a permission level to a user controls the SharePoint content and features that are available to that user inside the SharePoint environment. In order for content that is downloaded from SharePoint to be accessible by appropriately permissioned users when it leaves SharePoint, you must create a complementary set of LMDC Policy Roles on the LMDC Server. These roles must be created within the Policy Groups that were created and described in Policy Groups on page 2-5.
Liquid Machines Gateway for SharePoint Installation and Central Administration Guide
Liquid Machines, Inc. Page 2-7
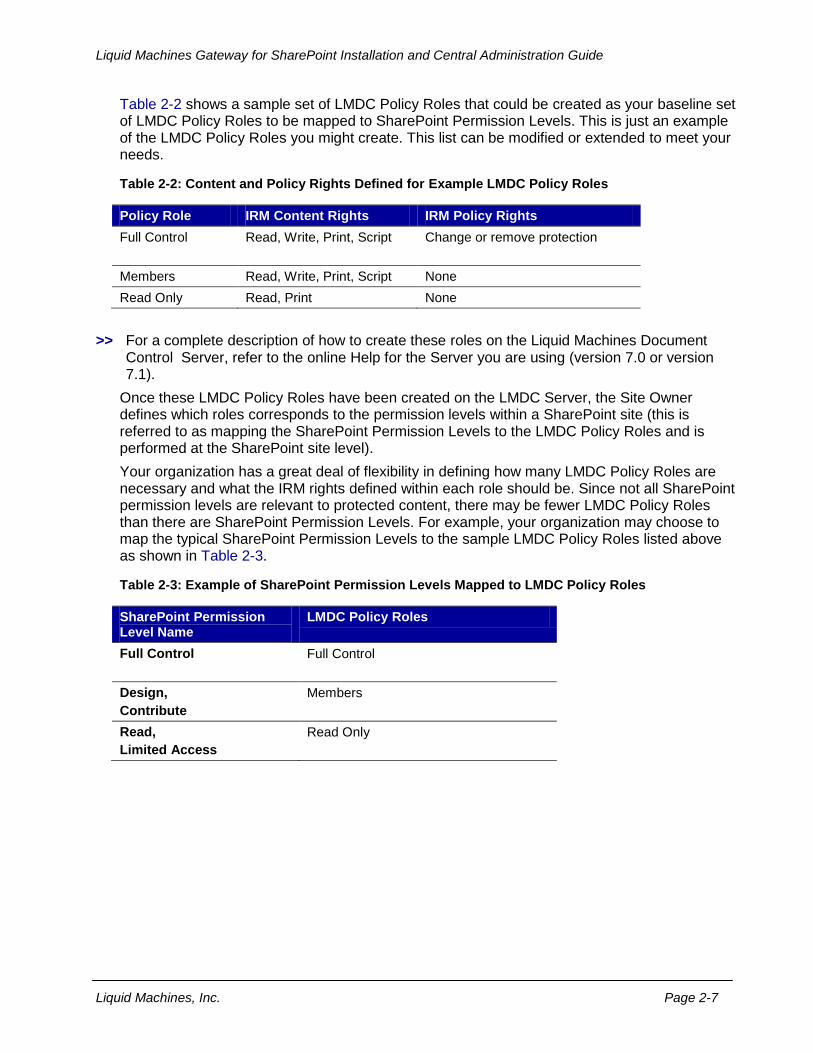
Table 2-2 shows a sample set of LMDC Policy Roles that could be created as your baseline set of LMDC Policy Roles to be mapped to SharePoint Permission Levels. This is just an example of the LMDC Policy Roles you might create. This list can be modified or extended to meet your needs.
Table 2-2: Content and Policy Rights Defined for Example LMDC Policy Roles
Policy Role IRM Content Rights IRM Policy Rights
Full Control Read, Write, Print, Script Change or remove protection
Members Read, Write, Print, Script None
Read Only Read, Print None
>> For a complete description of how to create these roles on the Liquid Machines Document Control Server, refer to the online Help for the Server you are using (version 7.0 or version 7.1).
Once these LMDC Policy Roles have been created on the LMDC Server, the Site Owner defines which roles corresponds to the permission levels within a SharePoint site (this is referred to as mapping the SharePoint Permission Levels to the LMDC Policy Roles and is performed at the SharePoint site level).
Your organization has a great deal of flexibility in defining how many LMDC Policy Roles are necessary and what the IRM rights defined within each role should be. Since not all SharePoint permission levels are relevant to protected content, there may be fewer LMDC Policy Roles than there are SharePoint Permission Levels. For example, your organization may choose to map the typical SharePoint Permission Levels to the sample LMDC Policy Roles listed above as shown in Table 2-3.
Table 2-3: Example of SharePoint Permission Levels Mapped to LMDC Policy Roles
SharePoint Permission Level Name
LMDC Policy Roles
Full Control
Full Control
Design,
Contribute
Members
Read,
Limited Access
Read Only

Liquid Machines Gateway for SharePoint Installation and Central Administration Guide
Liquid Machines, Inc. Page 2-8

Liquid Machines Gateway for SharePoint Installation and Central Administration Guide
Liquid Machines, Inc. Page 3-1
Chapter 3: Enabling and Configuring the Gateway for SharePoint at the Farm Level via Central Administration
This chapter describes how to enable and configure the Gateway for SharePoint at the Farm level. The process is slightly different depending on whether you selected to use an RMS Policy Server or the LMDC Policy Server during installation. This chapter is divided into two sections, one for each policy server.
Topics included in this chapter are:
Farm Level Configuration Using the RMS Policy Server
Configuring IRM at the Farm Level
Farm Level Configuration Using the LMDC Policy Server
Enabling the Gateway for SharePoint at the Farm Level
Configuring IRM at the Farm Level

Liquid Machines Gateway for SharePoint Installation and Central Administration Guide
Liquid Machines, Inc. Page 3-2
Farm Level Configuration Using the RMS Policy Server To enable IRM at the farm level when using the RMS Policy Server:
1. Access the SharePoint site and log in.
2. On the Central Administration page, select the Operations tab (see Figure 3-1).
Figure 3-1: Operations Screen

Liquid Machines Gateway for SharePoint Installation and Central Administration Guide
Liquid Machines, Inc. Page 3-3
3. Under the Security Configuration heading in the left column, select Information Rights Management. The Information Rights Management screen displays (see Figure 3-2).
Figure 3-2: Enable IRM on the Information Rights Management Screen

Liquid Machines Gateway for SharePoint Installation and Central Administration Guide
Liquid Machines, Inc. Page 3-4
4. Complete the fields as described in Table 3-1.
Table 3-1: Fields on Information Rights Management Screen
Field Description
Information Rights Management
IRM helps protect sensitive files from being misused or distributed without permission once they have been downloaded from the specified server. In this field, you select the location of the Windows RMS server. Possible choices are:
Do not use IRM on the server.
Use the default RMS server specified in Active Directory.
Use this RMS server. If you select this option, enter http://rms_server where rms_server is the fully qualified host name of your RMS server.
File Formats to be Protected
Select the file types (supported extensions) to be protected by SharePoint for Gateway when they are removed from SharePoint. The files types to be protected were selected during installation. If you want to change the file types to be protected, you can do that now by selecting Change from this field.
If you select Change, the field expands to allow you to change the supported extensions:
For information on changing the settings, see Steps 11 and 12 on page 1-10. When you are satisfied with the settings, select Apply changes to make the changes. You can select Discard changes to leave the settings as they were before you made changes.
5. When you are done, select OK. You are returned to the SharePoint Operations screen.

Liquid Machines Gateway for SharePoint Installation and Central Administration Guide
Liquid Machines, Inc. Page 3-5
Farm Level Configuration Using the LMDC Policy Server This section describes how to enable IRM at the Farm level and then configure the Farm level based on that selection.
Enabling IRM at the Farm Level To enable IRM at the farm level when using the LMDC Policy Server:
1. Access the SharePoint site and log in.
2. On the Central Administration page, select the Operations tab (see Figure 3-3).
Figure 3-3: Operations Screen

Liquid Machines Gateway for SharePoint Installation and Central Administration Guide
Liquid Machines, Inc. Page 3-6
3. Under the Security Configuration heading in the left column, select Information Rights Management. The Liquid Machines Gateway for SharePoint Options screen displays (see Figure 3-4).
Figure 3-4: Enable IRM on the Liquid Machines Gateway for SharePoint Options Screen

Liquid Machines Gateway for SharePoint Installation and Central Administration Guide
Liquid Machines, Inc. Page 3-7
4. To enable IRM, select the Enable IRM on the SharePoint Farm check box in the Enable Information Rights Management field.
A number of additional fields display on the screen (see Figure 3-5).
Figure 3-5: Additional Fields on Liquid Machines Gateway for SharePoint Options Screen

Liquid Machines Gateway for SharePoint Installation and Central Administration Guide
Liquid Machines, Inc. Page 3-8
Configuring IRM at the Farm Level: Once you have selected the Enable IRM on the SharePoint Farm check box, additional fields display (see Figure 3-5). Complete these fields to configure IRM at the Farm level when you are using an LMDC Policy Server.
To configure IRM at the Farm Level when using an LMDC Policy Server:
1. Complete the fields as described in Table 3-2.
Table 3-2: Fields on Liquid Machines SharePoint Gateway Options Screen
Field Description
File Formats to be Protected
Select the file types (supported extensions) to be protected by the SharePoint for Gateway when they are accessed (or downloaded) from SharePoint. The files types to be protected with IRM were selected during installation. If you want to change the file types to be protected, you can do that now by selecting Change from this field.
If you select Change, the field expands to allow you to change the supported extensions:
For information on changing the settings, see Steps 11 and 12 on page 1-10. When you are satisfied with the settings, select Apply changes to make the changes. You can select Discard changes to leave the settings as they were before you made changes.
Liquid Machines Document Control Server Name
Enter the name of the LMDC Server that will be used by the Gateway for SharePoint to manage policies used by the SharePoint. The name must be entered in the following format:
[servername.domain]
For example, you might enter: lmdc.lmss.com, where lmdc is the server name and lmss.com is the domain.
Liquid Machines Gateway for SharePoint Installation and Central Administration Guide
Liquid Machines, Inc. Page 3-9
Field Description
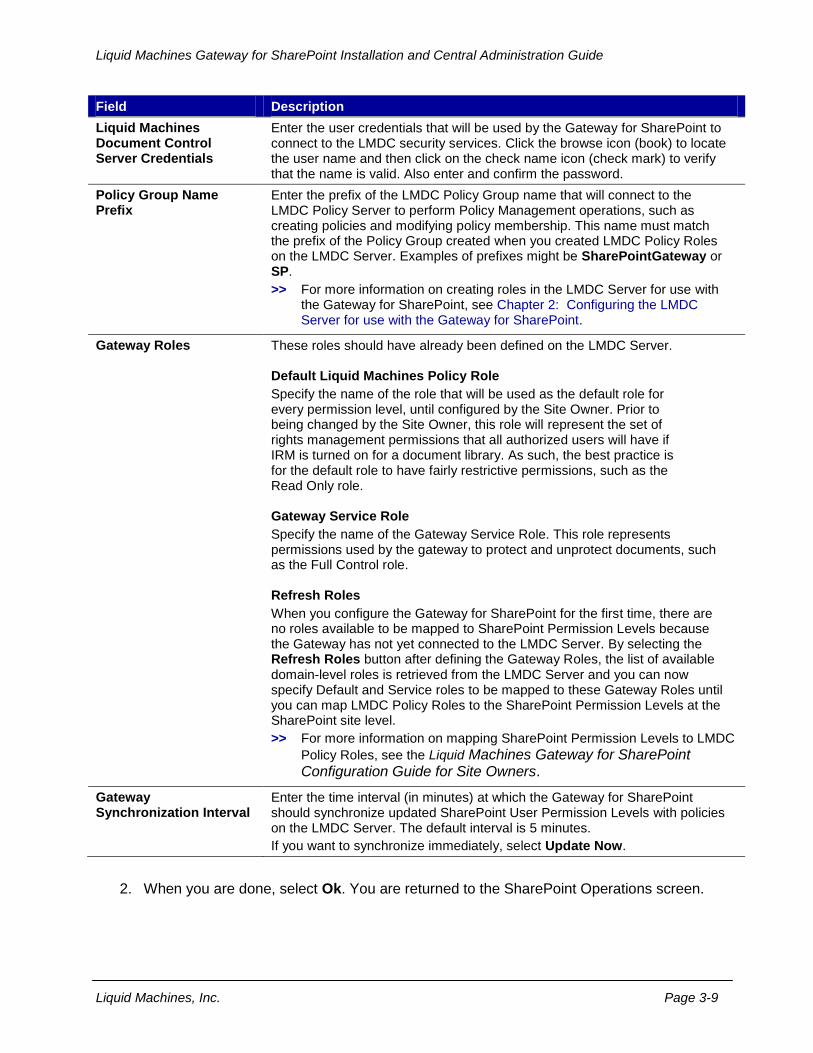
Liquid Machines Document Control Server Credentials
Enter the user credentials that will be used by the Gateway for SharePoint to connect to the LMDC security services. Click the browse icon (book) to locate the user name and then click on the check name icon (check mark) to verify that the name is valid. Also enter and confirm the password.
Policy Group Name Prefix
Enter the prefix of the LMDC Policy Group name that will connect to the LMDC Policy Server to perform Policy Management operations, such as creating policies and modifying policy membership. This name must match the prefix of the Policy Group created when you created LMDC Policy Roles on the LMDC Server. Examples of prefixes might be SharePointGateway or SP.
>> For more information on creating roles in the LMDC Server for use with the Gateway for SharePoint, see Chapter 2: Configuring the LMDC Server for use with the Gateway for SharePoint.
Gateway Roles These roles should have already been defined on the LMDC Server. Default Liquid Machines Policy Role
Specify the name of the role that will be used as the default role for every permission level, until configured by the Site Owner. Prior to being changed by the Site Owner, this role will represent the set of rights management permissions that all authorized users will have if IRM is turned on for a document library. As such, the best practice is for the default role to have fairly restrictive permissions, such as the Read Only role. Gateway Service Role
Specify the name of the Gateway Service Role. This role represents permissions used by the gateway to protect and unprotect documents, such as the Full Control role. Refresh Roles
When you configure the Gateway for SharePoint for the first time, there are no roles available to be mapped to SharePoint Permission Levels because the Gateway has not yet connected to the LMDC Server. By selecting the Refresh Roles button after defining the Gateway Roles, the list of available domain-level roles is retrieved from the LMDC Server and you can now specify Default and Service roles to be mapped to these Gateway Roles until you can map LMDC Policy Roles to the SharePoint Permission Levels at the SharePoint site level.
>> For more information on mapping SharePoint Permission Levels to LMDC
Policy Roles, see the Liquid Machines Gateway for SharePoint Configuration Guide for Site Owners.
Gateway Synchronization Interval
Enter the time interval (in minutes) at which the Gateway for SharePoint should synchronize updated SharePoint User Permission Levels with policies on the LMDC Server. The default interval is 5 minutes.
If you want to synchronize immediately, select Update Now.
2. When you are done, select Ok. You are returned to the SharePoint Operations screen.

Liquid Machines Gateway for SharePoint Installation and Central Administration Guide
Liquid Machines, Inc. Page 3-10
Figure 3-6 shows the relationship between the information configured at the SharePoint Farm level by the Central Administrator (Policy Group Name Prefix and the Gateway Roles) and the information configured in the LMDC Server (Domain Level Roles, Policy Groups, and Policy Group Roles).
Figure 3-6: Relationship Between the Items Configured at the SharePoint Farm Level on the Gateway for SharePoint and the Roles and Policy Groups Configured on the LMDC Server
Notifying the Site Owner of the Gateway for SharePoint When the installation and farm level configuration of the Gateway for SharePoint are complete, contact the SharePoint Site Owners to advise them that the installation is complete and that they can now configure the SharePoint at the Site level (if required) and at the List level. You will also inform them of the file types to be protected by the Gateway for SharePoint.
There are two different sample emails provided in Appendix A: Sample Emails to Notify the Site or Document Library Owner of the Gateway for SharePoint that you can use as models for notifying the SharePoint Site Owner of the Gateway for SharePoint:
If you are using the RMS Policy Server, see page A-2.
If you are using the LMDC Policy Server, see page A-3.

Liquid Machines Gateway for SharePoint Installation and Central Administration Guide
Liquid Machines, Inc. Page 4-1
Chapter 4: Advanced Topics
This chapter described advanced topics related to the Gateway for SharePoint.
Topics included in this chapter include:
Migration Strategy
Command Line Configuration using STSADM

Liquid Machines Gateway for SharePoint Installation and Central Administration Guide
Liquid Machines, Inc. Page 4-2
Migration Strategy This section presents a phased migration strategy for organizations who wish to deploy the Liquid Machines Gateway for SharePoint v2.0 into an existing SharePoint IRM infrastructure.
This information is intended for IT Infrastructure Administrators, SharePoint Farm Administrators, and SharePoint Site Owners, all of whom have a role in the migration process.
This migration strategy applies to organizations who:
Have a significant amount of SharePoint infrastructure that is protected by SharePoint's native IRM protector.
Intend to use the advanced enforcement capabilities of Liquid Machine's Policy Service and the Windows RMS/AD-RMS security service.
Plan a phased deployment of the Liquid Machines Document Control Client and/or Viewer, such that at any given time, some users may have the software while others may still be using native IRM via Microsoft Office 2003 or 2007.
Operational Continuity Considerations In order to be able to work with content protected using advanced protection policies provided by the LMDC Server/Gateway for SharePoint, end-users must have the LMDC Client or LMDC Viewer software installed on their desktop systems. Since the deployment of the LMDC Client or LMDC Viewer across a large organization may be an incremental process, the Gateway for SharePoint allows the simultaneous use of IRM Compatible and Advanced Enforcement policies. This allows for a subset of your user population to migrate to Advanced Enforcement policies, while the rest remains IRM Compatible.
They two types of policies have the following characteristics:
Both types of policies are stored on the LMDC Server.
Both types of policies are created and managed by the Gateway for SharePoint.
Documents protected by IRM Compatible policies can be consumed by IRM-enabled applications such as the Microsoft Office 2003/2007 suite, without the LMDC Client or Viewer being present.
Documents protected by Advanced Enforcement policies can be consumed only if the LMDC Client or Viewer is installed.
The type of policy (IRM Compatible or Advanced Enforcement) is chosen at the SharePoint Site level and applies to all IRM-protected document libraries and lists in that site. When the Gateway for SharePoint is installed, the default enforcement mode will be IRM Compatible. This means that all IRM-enabled document libraries will be converted to use IRM Compatible protection policies, allowing users to continue without the LMDC Client/Viewer to continue to download and consume protected content, with a few caveats (described in detail below). As your organization progresses in its rollout of LMDC Client and Viewer software to end-users, you must determine which SharePoint Sites no longer require IRM Compatible access, and configure them to use Advanced Enforcement.
>> For more information on selecting Advanced Enforcement, see “Site Level Configuration” in Chapter 2 of the Liquid Machines Gateway for SharePoint Configuration Guide for Site Owners.
As soon as the configuration change is made, newly-downloaded content will protected by Advanced Enforcement policies.

Liquid Machines Gateway for SharePoint Installation and Central Administration Guide
Liquid Machines, Inc. Page 4-3
Caveats Once the LM Gateway for SharePoint is installed, it may no longer be possible to upload
edited protected content which was protected previously by SharePoint's built-in IRM protector. For this reason, your end-users should be alerted that all in-progress edits of protected content must be completed and saved/upload to SharePoint before you install the new Gateway software.
The LM Gateway for SharePoint extends IRM protection to many more file types than those covered by the native SharePoint IRM protector. SharePoint's IRM architecture dictates that the set of file types subject to protection is configured at the server level and cannot vary between document libraries and sites on a machine. For this reason, the Liquid Machines Gateway for SharePoint offers this configuration at the farm level. Once you have chosen to enable protection for a particular file type (.jpg, for example), it will affect that file type in all protected document libraries across the farm, regardless of whether their sites are configured for IRM Compatible or Advanced Enforcement. As a practical matter, it means
that such files (all .jpg files, for example) will be encrypted and no longer usable by users who do not have the LMDC Client or Viewer installed. (This caveat does NOT apply to Microsoft Office documents or files from other applications which support IRM on their own.)
Sample Migration Plan The following scenario lists the sequence of tasks necessary to complete a typical migration of the type described above. The hypothetical organization performing the migration has a SharePoint farm with the following topology and configuration:
Three SharePoint web front-end machines: SP_Alpha, SP_Bravo, SP_Charlie. One Windows Server to be used as the LMDC Server: LMDC_Alpha. Four SharePoint Sites: R&D, Sales, Finance, Human Resources.
All document libraries in all sites have SharePoint IRM enabled.
Step 1: Installation Planning
a. [IT Infrastructure] Set a date on which installation of the Liquid Machines Gateway for SharePoint will be performed. Send an email to all end-users informing them of the service outage during the install procedure, and requiring them to check in all outstanding changes to protected documents before the install begins.

Liquid Machines Gateway for SharePoint Installation and Central Administration Guide
Liquid Machines, Inc. Page 4-4
Step 2: Installation
a. [SharePoint Farm Admin] Take all public SharePoint sites offline so that the server software can be installed on the web front-end machines. (This is not strictly necessary, but users trying to use the sites may experience errors if they try to use SharePoint during this time.)
b. [IT Infrastructure] Follow the Liquid Machines Gateway for SharePoint installation instructions as described in Running the Gateway for SharePoint Setup Wizard on page 1-6 to install and configure the LMDC Server on LMDC_Alpha.
NOTE: This task does not affect SharePoint operations and can be done before the service outage window.
i. Be sure to create Policy Groups and appropriate Roles for both IRM Compatible and Advanced Enforcement Policies as described in Policy Groups on page 2-5 and Policy Group Level Roles on page 2-6.
c. [IT Infrastructure] Install the Liquid Machines Gateway for SharePoint on SP_Alpha.
i. Select Liquid Machines Document Control server as the policy server. ii. Choose Microsoft Windows Rights Management Services as the security
service and select the option to Allow IRM Compatible policies to be used. d. [IT Infrastructure] Install the Liquid Machines Gateway for SharePoint on SP_Bravo.
e. [IT Infrastructure] Install the Liquid Machines Gateway for SharePoint on SP_Charlie.
Step 3: Farm-Level Configuration
a. [SharePoint Farm Admin] In SharePoint Central Administration, configure Information Rights Management as described in Farm Level Configuration Using the LMDC Policy Server on page 3-5.
The service window is now complete and all document libraries are protected with IRM Compatible policies. The public web sites may be re-enabled and everyone who previously had access to documents may begin to use them again.
Step 4: Site-Level Configuration
At the point in the process, users will have default access permissions to protected content until the Site Owner for each particular site supplies explicit mappings of SharePoint Permission Levels to LMDC Policy Roles as described in “Site Level Configuration” in Chapter 2 of the Liquid Machines Gateway for SharePoint Configuration Guide for Site Owners. The default access permissions are the SharePoint Default Role Permissions that were configured at the Farm level. These are used until the Permission Level Mapping is completed.
a. [R&D Site Owner] Configure the Permission Level to LMDC Policy Role Mapping.
b. [Site Owners of the Sales, Finance, and Human Resources sites] Repeat Step 4a to configure the Permission Level to LMDC Policy Role Mapping for each site.
NOTE: Site Owners should leave the Security Profile in IRM Compatible mode until they are sure that all site users have received the LMDC Client and/or Viewer software.

Liquid Machines Gateway for SharePoint Installation and Central Administration Guide
Liquid Machines, Inc. Page 4-5
Step 5: Conversion of the R&D SharePoint Site from IRM Compatible to Advanced Enforcement
a. [IT Infrastructure] Roll out the LMDC Client and/or Viewer software to the end-users of the R&D site.
b. [R&D Site Owner] Configure the Site to use Advanced Enforcement policies as described in “Site Level Configuration” in Chapter 2 of the Liquid Machines Gateway for SharePoint Configuration Guide for Site Owners.
c. Repeat Steps 5a and 5b the Sales, Finance, and Human Resources Sites, as desired.

Liquid Machines Gateway for SharePoint Installation and Central Administration Guide
Liquid Machines, Inc. Page 4-6
Command Line Configuration using STSADM
IRM Configuration Windows SharePoint Services 3.0 includes the stsadm tool for command-line administration of Windows SharePoint Services servers and sites. You must be an administrator on the local computer to use stsadm, and stsadm must be run on the server itself.
The stsadm command line tool provides a method for performing the Windows SharePoint Services 3.0 administration tasks at the command line or by using batch files or scripts. The stsadm command provides access to operations not available by using the Central Administration site, such as changing the administration port. The command line tool has a more streamlined interface than Central Administration, and it allows you to perform the same tasks. There are certain operations and certain parameters that are only available by using the command-line tool. Additional details are provided at Technet:
http://technet.microsoft.com/en-us/library/cc288979.aspx.
Liquid Machines Gateway for SharePoint extends the built-in capabilities of stsadm, extending the command set to include actions for controlling IRM configuration. The full set of IRM-related configuration commands are listed below.
stsadm -o irmenable Enables IRM for the Server Farm.
Signature:
stsadm.exe -o irmenable
-extensionsset <supported extension set>
-servername <LMDC server name in servername.domain:port format>
-userlogin <User name in domainalias\username format>
-useremail <User login in username@domain format>
-password <Password>
-policygroupprefix <Policy Group Prefix>
-serviceermrole <Name of the ERM Role used by service account>
-defaultermrole <Name of the default ERM Role>

Liquid Machines Gateway for SharePoint Installation and Central Administration Guide
Liquid Machines, Inc. Page 4-7
stsadm -o irmdisable Disables IRM for the Server Farm.
Signature:
stsadm.exe -o irmdisable
stsadm -o irmsupportedfileextensions Controls file extensions set that are supported by the Gateway.
Signature:
stsadm.exe -o irmsupportedfileextensions
-action {set/retrieve}
[-extensionsset {comma separated list of the extensions to
support} ]
stsadm -o irmeditfarmsettings Provides editing capabilities of the IRM configuration settings for the
Server Farm.
Signature:
stsadm.exe -o irmeditfarmsettings
-action {set/retrieve/remove}
<-settingname>
<-settingvalue>
Possible settings (settingname - settingvalue pairs):
-servicecredentials
-userlogin <DOMAINALIAS\username>
-useremail <username@domain>
-password <password>
-servername <servername.domain:port>
-policygroupprefix <policygroupprefix>
-ermroles
-serviceermrole <serviceaccountermrole>
-defaultermrole <defaultermrole>

Liquid Machines Gateway for SharePoint Installation and Central Administration Guide
Liquid Machines, Inc. Page 4-8
stsadm -o irmeditlistsettings Provides editing capabilities of the IRM configuration settings for the
SharePoint List.
Signature:
stsadm.exe -o irmeditlistsettings
-listurl <URL of the target list>
-action {set/retrieve/remove}
<-settingname>
<-settingvalue>
Possible settings (settingname - settingvalue pairs):
-policyinfo
-policyname <User defined policy name>
-policydescription <Description of the policy>
-policycontact <Contact Info for the policy.>
-additionaloptions
-reject {true/false} <True in case need to reject externally
protected.>
-expire {true/false} <True in case protection of the library
should expire at specified date.>
[-expiredate {MM/dd/yyyy} <Date when SPList protection should
expire.>]
stsadm -o irmeditsitesettings Provides editing capabilities of the IRM configuration settings for the
SharePoint Site.
Signature:
stsadm.exe -o irmeditsitesettings
-siteurl <URL of the target web site>
-action {set/retrieve/remove}
<-settingname>
<-settingvalue>
Possible settings (settingname - settingvalue pairs):
-rolesmapping
-sourcefile <File to use to export or import Role Mappings>

Liquid Machines Gateway for SharePoint Installation and Central Administration Guide
Liquid Machines, Inc. Page 4-9
stsadm -o irmturnoff Turn Off IRM protection for the specified SP List.
Signature:
stsadm.exe -o irmturnoff
-listurl <url of the target list>
stsadm -o irmturnon Turn On IRM protection for the specified SP List.
Signature:
stsadm.exe -o irmturnon
-listurl <URL of the target list>
-policyname <User defined name of the policy.>
-policydescription <Description of the policy to be
applied.>
-policycontact <Contact info to be applied for the
policy.>
-reject {true/false} <True in case need to reject
externally protected.>
-expire {true/false} <True in case protection of the
library should expire at specified date.>
[-expiredate {MM/dd/yyyy} <Date when SPList
protection should expire.>]
stsadm -o irmsynchronizepolicies Invoke Synchronization of the UPM policies for the specified scope.
Signature:
stsadm.exe -o irmsynchronizepolicies
-scope {farm/site}
-siteurl <url of the target web site>
For information about other operations and parameters, use one of the following commands:
stsadm.exe –help, or
stsadm.exe -help <operation>

Liquid Machines Gateway for SharePoint Installation and Central Administration Guide
Liquid Machines, Inc. Page 4-10
InfoPath Configuration The Liquid Machines Gateway for SharePoint does not protect Microsoft InfoPath documents. If you wish to use Microsoft‟s protector for these files, you will need to enable Microsoft‟s default IRM protection by using the command line tool stsadm.
There are two commands can be used to specify these settings through stsadm.
stsadm -o setproperty -pn irmrmscertserver –pv http://<RMS-Server-Name>
This command specifies the custom RMS server that should be used. Enter the appropriate name to replace <RMS-Server-Name>.
stsadm -o setproperty -pn irmrmsusead -pv true
This command specifies that SharePoint should use the RMS server specified in the Active Directory.
For information about other operations and parameters, use one of the following commands:
stsadm.exe –help, or
stsadm.exe -help <operation>
Additional details are provided in the following document (refer to the subsections on irmrmsusead and irmrmscertserver):
http://technet.microsoft.com/en-us/library/cc288979.aspx

Liquid Machines Gateway for SharePoint Installation and Central Administration Guide
Liquid Machines, Inc. Page 5-1
Chapter 5: Troubleshooting
This chapter describes how to troubleshoot problems with installation or other problems reported by the SharePoint Site Owner.
Topics included in this chapter are:
Introduction
Common Problems
Gateway Trace Logs
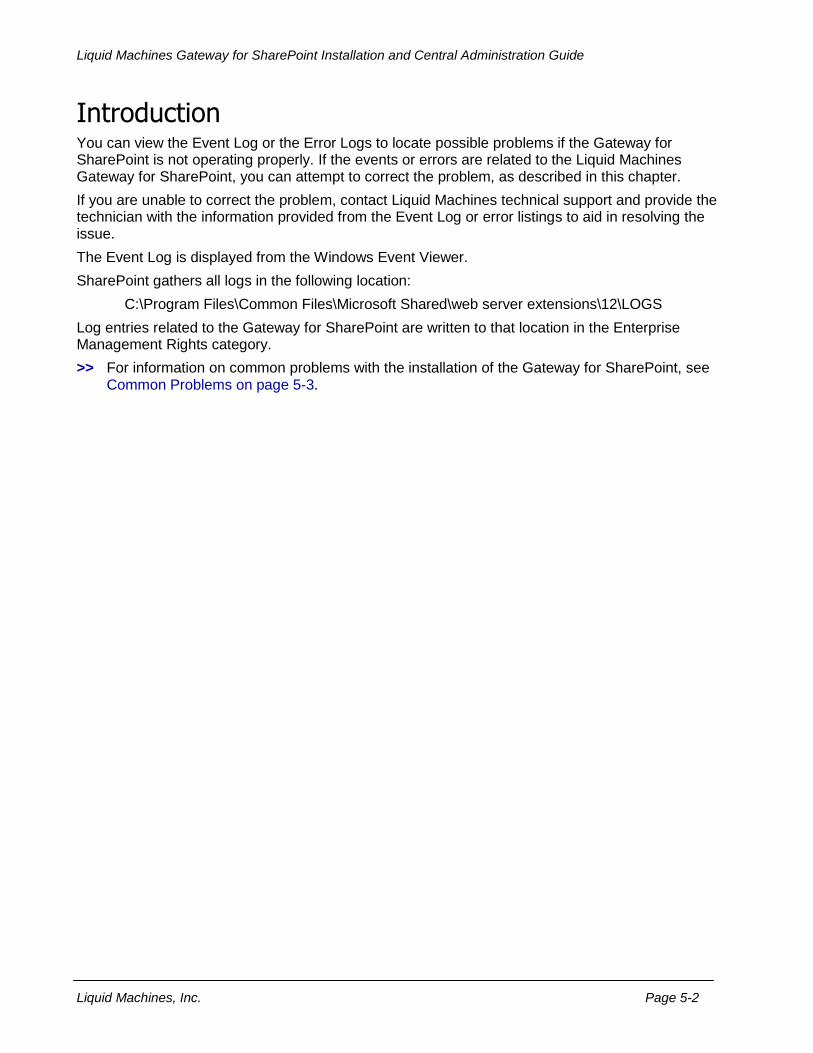
Liquid Machines Gateway for SharePoint Installation and Central Administration Guide
Liquid Machines, Inc. Page 5-2
Introduction You can view the Event Log or the Error Logs to locate possible problems if the Gateway for SharePoint is not operating properly. If the events or errors are related to the Liquid Machines Gateway for SharePoint, you can attempt to correct the problem, as described in this chapter.
If you are unable to correct the problem, contact Liquid Machines technical support and provide the technician with the information provided from the Event Log or error listings to aid in resolving the issue.
The Event Log is displayed from the Windows Event Viewer.
SharePoint gathers all logs in the following location:
C:\Program Files\Common Files\Microsoft Shared\web server extensions\12\LOGS
Log entries related to the Gateway for SharePoint are written to that location in the Enterprise Management Rights category.
>> For information on common problems with the installation of the Gateway for SharePoint, see Common Problems on page 5-3.

Liquid Machines Gateway for SharePoint Installation and Central Administration Guide
Liquid Machines, Inc. Page 5-3
Common Problems Table 5-1 lists some common problems, their possible causes, and suggested actions.
Table 5-1: Common Problems for the Gateway for SharePoint
Troubleshooting Scenarios and Possible Cause(s)
Suggested Actions
You wish to change the account under which the Content Protection Service runs.
Possible Cause(s):
The service user account information was entered incorrectly.
The service user account was removed from the domain.
Verify that the User Name and Password for the Service User are correct. The Service User account can be specified using the Component Services Management Console as follows:
From the Start button, select Run.
Type dcomcnfg.exe and click OK.
Select Expand Component Services >> Computers >> My Computer >> COM+ Applications.
Right-click on LQMI Content Protection Service and then select Properties >> Identity Tab.
Specify the User Name and Password for the Service User account on the Identity tab.
Check the rights of the user in the SharePoint library or list, and on the SharePoint Server machine.

Liquid Machines Gateway for SharePoint Installation and Central Administration Guide
Liquid Machines, Inc. Page 5-4
Troubleshooting Scenarios and Possible Cause(s)
Suggested Actions
The following errors may appear in the Windows Application Event Log:
Source: Enterprise Rights Management Message: Can't compose ACL, list <list-id>is missing: System.Data.SqlClient.SqlException: Cannot open database "<content database name>" requested by the login. The login failed. Login failed for user '<service account name>'.
Source: Windows SharePoint Services 3 Message: Insufficient SQL database permissions for user <service account name> in database “<content database name>” on SQL Server instance „<SQL server instance name>'. Additional error information from SQL Server is included below. EXECUTE permission denied on object 'proc_GetTpWebMetaDataAndListMetaData', database <content database name>', schema 'dbo'.
Possible Cause(s):
The service account cannot access the SharePoint object model because it does not have access to the content database.
Grant the service account read/write access to the content database on the SQL server.

Liquid Machines Gateway for SharePoint Installation and Central Administration Guide
Liquid Machines, Inc. Page 5-5
Troubleshooting Scenarios and Possible Cause(s)
Suggested Actions
Service accounts require access to the administrative object model. If the service account does not have permissions to access some part of that model, the following messages may appear in the Windows Application Event log:
Source: Enterprise Rights Management Message: Exception occurred: Access is denied. (Exception from HRESULT: 0x80070005 (E_ACCESSDENIED))
Possible Cause(s):
The service account cannot access the SharePoint object model because it does not have the SharePoint administrative rights to do so.
The service account must be named as a site collection administrator and must have owner permissions on all contained lists on which IRM is enabled (if not inheriting permissions from the site collection).
The following message may appear in the Windows Security Event Log:
Keywords: Audit Failure Source: Microsoft Windows Security Auditing Task Category: Logon Details: An account failed to log on. (The account name listed will be the service account)
OR
The following message may appear in the Windows System Event Log:
Source: DistributedCOM EventID: 1004 General: DCOM got error "1326" and was unable to logon <service account name> in order to run the server: {4425BD94-9B1E-48D0-B0B6-A74AC141C5AA}
Possible Cause(s):
The service has failed to start because the service account could not log on to the SharePoint Server. Reasons for this include:
Bad credentials.
OR
The account was disabled, locked out or deleted.
If the account has been disabled or locked out, the system administrator must re-enable the account. If the account does not exist, or if it is no longer valid to use the original service account credentials, the credentials can be changed by setting the identity of the LQMI Content Protection Service COM+ application using the Component Services Management Console.

Liquid Machines Gateway for SharePoint Installation and Central Administration Guide
Liquid Machines, Inc. Page 5-6
Troubleshooting Scenarios and Possible Cause(s)
Suggested Actions
One or more file types that you expect to be protected are not being protected.
Possible Cause(s):
IRM is not enabled.
OR
Files are being opened from the cache.
OR
The file extension for the selected file type was not selected during the installation of the Gateway for SharePoint.
Try the following actions:
Verify that IRM is enabled for the server.
To verify that IRM is enabled server, the SharePoint Site Owner (or any other user with Full Control access) can perform the following steps:
Open SharePoint.
Select the library of interest.
Open the Settings menu and select Document Library Settings. The Customize Selected Library or List screen displays.
If the Information Rights Managements selection appears in the Permissions and Management menu, then IRM has been enabled. If the Information Rights Managements selection does not appear, refer to the Microsoft SharePoint documentation listed in Related Documents on page vii for information on how to enable IRM.
If IRM is enabled for the server, verify that IRM is enabled for the SharePoint library or list containing the file in question.
To verify that IRM is enabled for the selected library or list, the SharePoint Site Owner (or any other user with Full Control access) can perform the following steps:
Open SharePoint and select the library of interest.
Open the Settings menu and select Document Library Settings. The Customize Selected Library or List screen displays.
Select Information Rights Managements from the Permissions and Management menu and select the permissions you wish to grant users of the library or list.
If IRM is enabled, but the file is still unprotected, verify that the file is still unprotected when it is downloaded from its original source by performing the following steps:
Clear your Internet cache.
Close and then restart your Browser.
Open the file again.
Continued on next page…

Liquid Machines Gateway for SharePoint Installation and Central Administration Guide
Liquid Machines, Inc. Page 5-7
Troubleshooting Scenarios and Possible Cause(s)
Suggested Actions
From previous page…
If the file remains unprotected after performing the actions above, check the Registry on the SharePoint Server to verify that the extension for the file in question has been included in the installation.
Open the Registry Editor and navigate to the following key: HKEY_LOCAL_MACHINE\SOFTWARE\Microsoft\ Shared Tools\Web Server Extensions\LQMI.LMSG.IrmProtector.Impl\
Open the string value Extensions and view the list of file extensions. If the file extension is not listed, you can add it by editing the string value to include it.
If the file extension is missing, it can be added from the Farm level configuration screen.
Files are not protected when they are downloaded and files either will not upload or they upload with protections from outside of SharePoint.
This behavior may be the result if you have downloaded the files and then the file type was removed from the list of supported file extensions for this installation of the Gateway for SharePoint. You may also see this behavior if files were downloaded, then the Gateway for SharePoint was uninstalled.
To determine the cause of the problem:
Verify that either the file type was removed from the Gateway for SharePoint, or the Gateway for SharePoint was uninstalled.
If the file type has been removed or the Gateway for SharePoint has been uninstalled, there are four methods (using an RMS-enabled client or another tool) to unprotect documents that had been previously protected by the Gateway for SharePoint.
Method 1: For Users with Full Rights to the Document. If you have full rights to the document, then simply open the document in the native application and remove the protection. If the document is a native Office document (Word, Excel or PowerPoint), use Office 2003 or 2007 with or without the LMDC Client, just as you would work with any other protected document. Older versions of Office will require that you have the LMDC Client or LM Viewer.
If the document is not native Office, then you will need the LMDC Client installed to unprotect the document.
NOTE: You cannot work with protected documents, either with or without the Gateway for SharePoint, if the proper application software is not installed.
Continued on next page…

Liquid Machines Gateway for SharePoint Installation and Central Administration Guide
Liquid Machines, Inc. Page 5-8
Troubleshooting Scenarios and Possible Cause(s)
Suggested Actions
From previous page…
Method 2: For Users Who Do Not Have Full Rights. If you do not have full rights, then any user who DOES have full rights can unprotect the documents. This can be done using Method 1 above, but by a different user.
A user has full rights if he or she is an "Owner" in a library or list, or if the user under which the Gateway account was running.
Method 3: Imassignpolicy (if you have purchased the LMDC client). Using lmassignpolicy, you can supply credentials of any Full Rights user (see above) and use the "unprotect" flag to unprotect any files that have been downloaded to one's desktop or network share. An example of how to use lmassignpolicy follows:
If necessary, unzip the contents of lmassignpolicy.zip to your desktop.
Open a command prompt and navigate to the folder containing lmassignpolicy.
Type: lmassignpolicy [email protected] password=password -u c:\file-location-and-file-name
If the user has full rights to the documents, then there is no need to supply the username and password. You can simply enter the following on the command line:
lmassignpolicy -u c:\file-location-and-file-name
NOTE: The user can also use wildcards to unprotect several files at once:
lmassignpolicy -u "c:\My Documents\SharePoint Drafts\*"
NOTE: If the username and password are used, the username and password are in CLEAR TEXT (visible for all to see).
Method 4: lmunsecure (if you have purchased the LMDC Client). The lmunsecure tool allows you to unprotect multiple documents at once. To use lmunsecure for RMS protected documents, supply the credentials of an RMS Super User. For more information, refer to the lmunsecure documentation.

Liquid Machines Gateway for SharePoint Installation and Central Administration Guide
Liquid Machines, Inc. Page 5-9
Troubleshooting Scenarios and Possible Cause(s)
Suggested Actions
The Event Log contains the following:
Event ID 1: Unexpected and General Errors
Message: An unexpected error has encountered. Please note following unique handing ID as link to additional details. Handling Instance ID: {0} Error Details: {1}
Parameters:
Param0: The unique ID attached to the handling chain for this handling instance; Param1: Additional details of the event that was occurred;
This event indicates an unexpected issue in the Gateway Workflow.
The Error Details parameter can be used to identify a more detailed description of the problem.
To obtain more details about the issue, perform the following steps.
Record the Handling Instance ID (GUID) in the event log.
Navigate to the GW Logs folder located at: %ALLUSERSPROFILE%\Application Data\Liquid Machines\Gateway for SharePoint\Logs\.
Perform a text search for the Handling Instance ID in the log files located in that folder.
The Results files (usually two files will contain the ID) should be sent to Liquid Machines Product Support with a description of the error for further analysis.
The Event Log contains the same message as the previous item AND the Error Details parameter contain the following:
Unable to establish a connection to the server {0}
Where parameter {0} contains the name of the Policy Server that is currently used.
This event indicates that the associated Policy Server cannot be accessed at the moment.
Please make sure the Policy Server is up, running, and accessible from the machine that has the Gateway for SharePoint installed.

Liquid Machines Gateway for SharePoint Installation and Central Administration Guide
Liquid Machines, Inc. Page 5-10
Troubleshooting Scenarios and Possible Cause(s)
Suggested Actions
The Event Log contains the following:
Event ID 2: Serviced Component General Error
Message: Request to the Gateway for SharePoint Serviced Component fails. Verify if COM+ is configured properly. Reinstall of the gateway may fix this problem. Additional details: Error Code {0} Error Message {1}
Parameters:
Param0: Error Code; Param1: Error Message;
This event indicates major issues with Liquid Machines Gateway for SharePoint COM+ Component, or COM+ services themselves.
Param1 contains a detailed description of the problem.
The troubleshoot this issue, perform the following steps:
Navigate to the Component Services Management Console (select Start > Control Panel > Administrative Tools > Component Services).
Locate the LQMI Content Protection Service under the COM+ Applications Node.
Restart the LQMI Content Protection Service.
Make sure the COM+ System Application Windows Service is enabled and running.
If COM+ loses its identity, the following message is written to Param1:
The server process could not be started because the configured identity is incorrect. Check the username and password.
This message indicates the identity that is used by the serviced component is incorrect. Retyping the user name and password can temporarily fix the problem.
To avoid this problem in the future, make sure the account has “logon as batch” privileges defined in the domain.
The Event Log contains the following:
Event ID 4: Required Policy Group Does Not Exist
Message: Required policy group {0} does not exist on the server.
Please create it and make sure service account has full access to this policy group.
Parameters:
Param0: Policy Group Name;
The event indicates that the Policy Group required by the Gateway for SharePoint does not exist, or the Policy Group was removed.
This event can also indicate that the Service Account does not have appropriate permissions for the required Policy Group.
To fix this issue, perform the following actions:
Create a Policy Group on the LMDC Server (entered during Farm Level Configuration), with the name required by the Gateway for SharePoint, OR make sure the corresponding policy group exists.
Make sure the Service Account (entered during Farm Level Configuration) has full rights on the required Policy Group.

Liquid Machines Gateway for SharePoint Installation and Central Administration Guide
Liquid Machines, Inc. Page 5-11
Troubleshooting Scenarios and Possible Cause(s)
Suggested Actions
The Event Log contains the following:
Event ID 5: Policy Server Does Not Exist.
Message: Entered protection server cannot be located. Please ensure server name is not misspelled, port is valid, and specified server can be accessed.
This event indicates that the Policy Server specified during Farm Level Configuration cannot be accessed.
To fix this issue, perform the following actions:
Make sure the LMDC Server is up and running.
Make sure the LMDC Server can be accessed from the machine on which the Gateway for SharePoint is installed.
The Event Log contains the following:
Event ID 23: Gateway Account Permissions
Message: Service Account user does not have enough permission on the Protection Server to perform an operation. Please verify correct service account role is applied and protection server is available. Additional error details {0}. Parameters:
Param0: Additional Error Details;
This event indicates that the Gateway Service account does not have enough permission on the policy associated with the document library.
To troubleshoot this issue, perform the following actions:
Verify the Service Account Identity (this is the identity that Service Component uses) was not removed from the corresponding policy.
Perform a manual synchronization of the policies (either using the user interface or the stsadm commands).
Make sure the Service Account Identity is not part of the target document library ACL. If an IRM role that does not have Full Rights is associated with Service Identity, the Gateway for SharePoint will not be able to perform protect and unprotect operations.
The Event Log contains the following:
Event ID 24: UPM Policy Not Found
Message: Requested UPM policy cannot be found. Please make sure LMDC Server is accessible and IRM settings on the SharePoint Server Farm are configured properly. Additional error details {0}. Parameters:
Param0: Additional Error Details;
This event indicates that the Policy associated with the target Document Library cannot be accessed.
To troubleshoot this issue, perform the following actions:
Verify that the Policy Server is running and accessible from the machine on which the Gateway for SharePoint is installed.
Verify that the Policy Group required by the Gateway for SharePoint exists on the LMDC Server.
Perform a manual synchronization of the policies (either using the user interface or the stsadm commands) to make sure the policy exists (this will verify that the policy has not been removed from the Policy Server).

Liquid Machines Gateway for SharePoint Installation and Central Administration Guide
Liquid Machines, Inc. Page 5-12
Troubleshooting Scenarios and Possible Cause(s)
Suggested Actions
Attempts to download protected content may fail or the Gateway Settings pages fail to open (Site Level or List Level) and errors similar to the following may appear in the Windows Application Event Log:
Source: Enterprise Rights Management
Message: An unexpected error has encountered. Please note following unique handing ID as link to additional details. Handling Instance ID: <guid-value> Error Details: The Web application at http://someserver.yourcompany.com/sites/Corporate/Shared Documents could not be found. Verify that you have typed the URL correctly. If the URL should be serving existing content, the system administrator may need to add a new request URL mapping to the intended application.
Make sure that the URL being used to access the SharePoint has been configured properly as outlined in the following TechNet article:
Configure alternate access mapping.

Liquid Machines Gateway for SharePoint Installation and Central Administration Guide
Liquid Machines, Inc. Page 5-13
Gateway Trace Logs Liquid Machines Gateway for SharePoint writes logs to two separate places:
The Event Log
The Trace Logs
Only events with Error and Critical severity are written to the Event Log. The log level for the events that will be written to the trace logs can be configured. By default only events with a severity of Information and higher are written to the trace logs.
The Gateway trace logs are stored in the specific subfolder in the AllUsersProfile folder, which is created during installation. By default, this folder is created in the following location:
For Window 2003 family:
c:\Documents and Settings\All Users\Application Data\Liquid Machines\Gateway for ForSharePoint\Logs\
For Windows 2008 family:
c:\ProgramData\Liquid Machines\Gateway for SharePoint\Logs
You can configure the granularity of the trace logs using the Gateway configuration file as follows:
1. Locate the logging configuration file.
The configuration file is named entlib.config and can be found in the Gateway installation folder.
2. Locate <categorySources> section in the file.

Liquid Machines Gateway for SharePoint Installation and Central Administration Guide
Liquid Machines, Inc. Page 5-14
3. The Gateway trace logs are controlled by 4 entries:
<add switchValue="Information" name="CommandLine">
<listeners>
<add name="Command Line Trace Listener" />
</listeners>
</add>
<add switchValue="Information" name="Core">
<listeners>
<add name="Core Trace Listener" />
</listeners>
</add>
<add switchValue="Information" name="Timer">
<listeners>
<add name="Timer Trace Listener" />
</listeners>
</add>
<add switchValue="Information" name="Web">
<listeners>
<add name="Web Trace Listener" />
</listeners>
</add>
Each entry controls the logging level on the specific Gateway context. There are four separate contexts:
CommandLine
Core
Timer
Web
Each context corresponds to a separate process under which the Gateway is being executed. Log entries from different contexts are written to different trace log files. See Table 5-2 for details.

Liquid Machines Gateway for SharePoint Installation and Central Administration Guide
Liquid Machines, Inc. Page 5-15
Table 5-2: Gateway Context Levels
Context Name Description Target Log File
CommandLine GW commands that are executed under context of the stsadm tool (custom stsadm commands).
Executed under the stsadm.exe process.
For example when executing role synchronization through the stsadm tool command, all log entries will be written in the CommandLine context (to the cmd_trace.log file).
cmd_trace.log
Core The Gateway part that is run under context of the serviced component (server hosted COM+ service).
Executed under the dllhost.exe process.
Gateway core functionality (protect/unprotect) operations are executed under this context.
core_trace.log
Timer The Gateway SharePoint timer jobs are executed under this context.
Executed under the owstimer.exe process.
For example when Role synchronization is executed by the Gateway timer job, all log entries will be written to the corresponding log file.
timer_trace.log
Web The Gateway Web user interface pages are executed under this context.
Executed under the w3wp.exe process.
For example when Role synchronization is executed using manual invocation through Farm Level or Site Level user interface page, all trace log entries will be written under this context.
web_trace.log
Separate switches for different contexts allow configuring different logging levels depending on the context. For example, when role synchronization is not properly executed through Timer Jobs, the corresponding logging context can be configured to include more details for that context.

Liquid Machines Gateway for SharePoint Installation and Central Administration Guide
Liquid Machines, Inc. Page 5-16
4. To configure logging level for each separate context, the value of the switchValue property should be changed for specific context:
<add switchValue="Information" name="Core">
where switchValue can be:
ActivityTracing
Verbose
Information
Warning
Error
Critical
Off
All
The recommended value for troubleshooting purposes is Verbose.
Logging changes are applied after corresponding process are restarted. So for example, if the Core context logging level was changed from Information to the Verbose, then the COM+ service should be restarted in order to apply new logging settings.
Example: To change Logging level for the Gateway Timer Job, the following section:
<add switchValue="Information" name="Timer">
<listeners>
<add name="Timer Trace Listener" />
</listeners>
</add>
should be replaced with:
<add switchValue="Verbose" name="Timer">
<listeners>
<add name="Timer Trace Listener" />
</listeners>
</add>
NOTE: Separate log files are locked by process. If the logging system cannot open a log file for writing, it creates a separate log file with a unique name in the same folder. The unique name is created by appending unique identifier (GUID) to the beginning of the log file.
If the Gateway has separate context running in a few processes (for example there could be few IIS processes w3wp.exe, then separate processes will write to separate log files. When gathering log files, be sure to take all log files from the logs folder.

Liquid Machines Gateway for SharePoint Installation and Central Administration Guide
Liquid Machines, Inc. Page A-1
Appendix A: Sample Emails to Notify the Site or Document Library Owner of the Gateway for SharePoint
This appendix provides two sample emails that can be used to notify SharePoint Site Owners and/or Document Library Owners of the Gateway for SharePoint.
If you have installed and configured the system to use the RMS Policy Server, see page A-2.
If you have installed and configured the system to use the LMDC Policy Server, see page A-3.

Liquid Machines Gateway for SharePoint Installation and Central Administration Guide
Liquid Machines, Inc. Page A-2
Sample Email when using RMS Policy Server This appendix provides a sample email that can be used to notify the SharePoint Site Owner and/or Document Library Owner that the installation of the SharePoint for Gateway is complete.
To: SharePoint Site Owners
From: IT Department Responsible for Installing the Liquid Machines Gateway for SharePoint
Subject: Liquid Machines Gateway for SharePoint Installation Complete
Our organization has implemented Information Rights Management (IRM) to encrypt and protect sensitive documents when they are removed from SharePoint. We are using Microsoft RMS together with Liquid Machines Gateway for SharePoint to accomplish this.
The Gateway for SharePoint has been installed on the following front-end web servers:
MachineName_1
MachineName_2
MachineName_3
All three machines have been set up to enable IRM protection for the following commonly used file types:
doc ppsx xla docm ppt xls docx pptx xlam dot pot xlsm dotm potm xlsx dotx potx xltx pdf pps xps ppsm
You can set up IRM protection for a document library or list by selecting the Settings menu, then selecting Document Library Settings, and then selecting Information Rights Management. For more information enabling IRM at the List level, see the Liquid Machines Gateway for SharePoint Configuration Guide for Site Owners.
If you need additional file types protected, contact IT to request such changes.
If you have any questions regarding the installation, please contact IT at X1234.
Thank you,
John Doe
IT Department
XXXX Corporation

Liquid Machines Gateway for SharePoint Installation and Central Administration Guide
Liquid Machines, Inc. Page A-3
Sample Email when using LMDC Policy Server This appendix provides a sample email that can be used to notify the SharePoint Site Owner that the installation of the SharePoint for Gateway is complete.
You will notice that there is a table in the email below indicating the names of the LMDC Policy Roles that have been created in the LMDC Server and the permissions defined in each role. The information in the table below is just an example of what you might include in the table. You will need to fill in that table on your own with the permissions your LMDC Administrator has created for you.
This table provides the Site Owner with the information they need to map the SharePoint Permission Levels to the appropriate LMDC Policy Roles.
To: SharePoint Site Owners
From: IT Department Responsible for Installing the Liquid Machines Gateway for SharePoint
Subject: Liquid Machines Gateway for SharePoint Installation Complete
Our organization has implemented Information Rights Management (IRM) to encrypt and protect sensitive documents when they are removed from SharePoint. We are using Microsoft RMS together with Liquid Machines Gateway for SharePoint to accomplish this.
The Gateway for SharePoint has been installed on the following front-end web servers:
MachineName_1
MachineName_2
MachineName_3
All three machines have been set up to enable IRM protection for the following commonly used file types:
doc ppsx xla docm ppt xls docx pptx xlam dot pot xlsm dotm potm xlsx dotx potx xltx pdf pps xps ppsm
This installation uses the Liquid Machines Document Control Policy Server to store and manage rights management policies.
(continued on next page)

Liquid Machines Gateway for SharePoint Installation and Central Administration Guide
Liquid Machines, Inc. Page A-4
Before you and the Document Library Owners can turn on IRM for specific document libraries, you must map the SharePoint Permission Levels to their appropriate LMDC Policy Roles that were created on the LMDC Server. The roles available to you include the following:
LMDC Policy Role IRM Content Rights IRM Policy Rights
Full Control Read, Write, Print, Script Change or remove protection
Members Read, Write, Print, Script None
Mapping the SharePoint Permission Levels to the LMDC Policy Roles allows rights management policies to be automatically generated for each document library. This mapping defines which users get what management permissions, based on their SharePoint Permission Level.
[For Sites Using the RMS Security Service: You will need to select a security profile during SharePoint Site configuration. This requires that you understand who is using the SharePoint site and whether or not the Liquid Machines Document Control Client has been deployed to your users.]
Either you or the Document Library Owner must enable IRM protection for each document library or list by selecting the Settings menu, then selecting Document Library Settings, and then selecting Information Rights Management. You will need to enable IRM for a library and list in order to have the dynamic policies protect your content.
For more information on mapping SharePoint Permission Levels and enabling IRM at the List level, see the Liquid Machines Gateway for SharePoint Configuration Guide for Site Owners.
If you need additional file types protected, contact IT to request such changes.
If you have any questions regarding the installation, please contact IT at X1234.
Thank you,
John Doe
IT Department
XXXX Corporation

Liquid Machines Gateway for SharePoint Installation and Central Administration Guide
Liquid Machines, Inc. Index-1
Index
.
.NET Framework 3.5, 1-2
A
Activating Gateway for SharePoint at farm level, 1-16
Audience, vi
B
Book conventions, vi
C
Changing file types, 3-4, 3-8
Command line configuration using stsadm, 4-6
Configuring Gateway for SharePoint at the farm level, 3-1 LMDC Server, 2-1
Configuring IRM at farm level using LMDC Policy Service, 3-8
Contacting Liquid Machines, ii
Copyright, ii Creating
service user account, 1-4
D
Disabling user account control, 1-5
Documents related, vii SharePoint, vii
Domain Level Roles creating on the LMDC Server, 2-3
E
Elevated Command Prompt running Installer from, 1-5
Enabling Gateway for SharePoint at the farm level, 3-1
Enabling IRM at Farm Level using LMDC Policy Service, 3-5 at Farm Level using RMS Policy Service, 3-2
F
Farm level activating Gateway for SharePoint, 1-16 configuring Gateway for SharePoint at, 3-1 enabling Gateway for SharePoint at, 3-1
Farm level configuration using LMDC Policy Server, 3-5 using RMS Policy Server, 3-2
File types changing, 3-4, 3-8 selecting, 1-9 supported, 1-10, 1-12
G
Gateway for SharePoint installation wizard, 1-6 installing, 1-1 introducing, v migration strategy, 4-2 notifying Site Owners of, 3-10 system requirements, 1-2 uninstalling, 1-18
Gateway for SharePoint with LMDC Policy Server notifying Site Owners, A-3
Gateway for SharePoint with RMS Policy Server notifying Site Owners, A-2
I
InfoPath configuration using stsadm, 4-10
Installation prerequisites for, 1-4
Installation wizard Gateway for SharePoint, 1-6
Installing Gateway for SharePoint, 1-1, 1-6 multiple web front-ends, 1-17
Introducing Gateway for SharePoint, v

Liquid Machines Gateway for SharePoint Installation and Central Administration Guide
Liquid Machines, Inc. Index-2
L
Liquid Machines contacting, ii
LMDC Client Using Gateway for SharePoint with, v
LMDC Policy Server configuring Farm, 3-5 selecting, 1-11
LMDC Security Service selecting, 1-13
LMDC Server configuring, 2-1, 2-2 creating Domain Level Roles, 2-3 creating Policy Group Level Roles, 2-6 creating Policy Groups, 2-5 Using Gateway for SharePoint with, vi
LMDC Viewer Using Gateway for SharePoint with, v
M
Microsoft RMS, 1-2 Migration Strategy
for Gateway for SharePoint, 4-2 MOSS 2007, 1-2
N
Naming Policy Groups, 2-5
Notifying Site Owners of Gateway for SharePoint, 3-10 of Gateway for SharePoint with LMDC Policy
Server, A-3 of Gateway for SharePoint with RMS Policy
Server, A-2
P
Policy Group Level Roles creating on the LMDC Server, 2-6
Policy Groups creating on the LMDC Server, 2-5 naming, 2-5
Policy Server selecting, 1-11
Prerequisites for installation, 1-4
R
Related Documents, vii
Requirements software, 1-2 system, 1-2
Rights Management Policy Server, 1-2 RMS Policy Server
configuring Farm, 3-2 selecting, 1-11
RMS Security Service selecting, 1-13
Running Installer from Elevated Command Prompt, 1-5
S
Sample Migration Plan, 4-3 Security Service
selecting, 1-13 Selecting
file types, 1-9 Policy Server, 1-11 Security Service, 1-13
Service user account creating, 1-4
SharePoint documents, vii
stsadm command line configuration, 4-6 for InfoPath configuration, 4-10
System requirements, 1-2
T
Troubleshooting, 5-1 Turning off
user account, 1-5
U
Uninstalling Gateway for SharePoint, 1-18
User account control turning off, 1-5
Using Gateway for SharePoint with LMDC Client or Viewer, v with LMDC Server, vi
Using this Manual, vii
W
Web front-ends installing multiple, 1-17
WSS 3.0, 1-2


![[MS-CSOM]: SharePoint Client Query Protocol - NET](https://static.fdokumen.com/doc/165x107/63277049cedd78c2b50d9361/ms-csom-sharepoint-client-query-protocol-net.jpg)