
FreeBSD Handbook - Classici Stranieri
652
FreeBSD Handbook The FreeBSD Documentation Project
-
Upload
khangminh22 -
Category
Documents
-
view
0 -
download
0
Transcript of FreeBSD Handbook - Classici Stranieri

FreeBSD Handbook
The FreeBSD Documentation Project

FreeBSD Handbookby The FreeBSD Documentation ProjectPublished February 1999Copyright © 1995, 1996, 1997, 1998, 1999, 2000, 2001 by The FreeBSD Documentation Project
Welcome to FreeBSD! This handbook covers the installation and day to day use of FreeBSD Release 4.3. Thismanual is a work in progress and is the work of many individuals. Many sections do not yet exist and some of thosethat do exist need to be updated. If you are interested in helping with this project, send email to the FreeBSDdocumentation project mailing list <[email protected]>. The latest version of this document is alwaysavailable from the FreeBSD World Wide Web server (http://www.FreeBSD.org/). It may also be downloaded in avariety of formats and compression options from the FreeBSD FTP server (ftp://ftp.FreeBSD.org/pub/FreeBSD/doc)or one of the numerous mirror sites. If you would prefer to have a hard copy of the handbook, you can purchase oneat the FreeBSD Mall (http://www.freebsdmall.com/). You may also want to Search the Handbook(http://www.FreeBSD.org/search.html).
Redistribution and use in source (SGML DocBook) and ’compiled’ forms (SGML, HTML, PDF, PostScript, RTF and so forth) with or without
modification, are permitted provided that the following conditions are met:
1. Redistributions of source code (SGML DocBook) must retain the above copyright notice, this list of conditionsand the following disclaimer as the first lines of this file unmodified.
2. Redistributions in compiled form (transformed to other DTDs, converted to PDF, PostScript, RTF and otherformats) must reproduce the above copyright notice, this list of conditions and the following disclaimer in thedocumentation and/or other materials provided with the distribution.
Important: THIS DOCUMENTATION IS PROVIDED BY THE FREEBSD DOCUMENTATION PROJECT "AS IS"AND ANY EXPRESS OR IMPLIED WARRANTIES, INCLUDING, BUT NOT LIMITED TO, THE IMPLIEDWARRANTIES OF MERCHANTABILITY AND FITNESS FOR A PARTICULAR PURPOSE ARE DISCLAIMED. INNO EVENT SHALL THE FREEBSD DOCUMENTATION PROJECT BE LIABLE FOR ANY DIRECT, INDIRECT,INCIDENTAL, SPECIAL, EXEMPLARY, OR CONSEQUENTIAL DAMAGES (INCLUDING, BUT NOT LIMITEDTO, PROCUREMENT OF SUBSTITUTE GOODS OR SERVICES; LOSS OF USE, DATA, OR PROFITS; ORBUSINESS INTERRUPTION) HOWEVER CAUSED AND ON ANY THEORY OF LIABILITY, WHETHER INCONTRACT, STRICT LIABILITY, OR TORT (INCLUDING NEGLIGENCE OR OTHERWISE) ARISING IN ANYWAY OUT OF THE USE OF THIS DOCUMENTATION, EVEN IF ADVISED OF THE POSSIBILITY OF SUCHDAMAGE.


Table of ContentsI. Getting Started ........................................................................................................................................................11
1 Introduction ......................................................................................................................................................121.1 Synopsis...............................................................................................................................................121.2 Welcome to FreeBSD! .........................................................................................................................121.3 About the FreeBSD Project .................................................................................................................15
2 Installing FreeBSD.............................................................................................................................................12.1 Synopsis.................................................................................................................................................12.2 Installation Guide...................................................................................................................................12.3 Supported Hardware ..............................................................................................................................92.4 Troubleshooting ...................................................................................................................................192.5 Advanced Installation Guide ...............................................................................................................21
3 Unix Basics ......................................................................................................................................................243.1 Synopsis...............................................................................................................................................243.2 Permissions ..........................................................................................................................................243.3 Directory Structures.............................................................................................................................253.4 Shells....................................................................................................................................................253.5 Text Editors..........................................................................................................................................283.6 For More Information... .......................................................................................................................28
4 Installing Applications: Packages and Ports ....................................................................................................314.1 Synopsis...............................................................................................................................................314.2 Finding your application......................................................................................................................334.3 Using the Packages System .................................................................................................................334.4 Using the Ports Collection ...................................................................................................................364.5 Troubleshooting ...................................................................................................................................414.6 Advanced Topics..................................................................................................................................47
II. System Administration..........................................................................................................................................48
5 Configuration and Tuning.................................................................................................................................495.1 Synopsis...............................................................................................................................................495.2 Initial Configuration.............................................................................................................................495.3 Core Configuration ..............................................................................................................................515.4 Application Configuration ...................................................................................................................525.5 Starting Services ..................................................................................................................................525.6 Virtual Hosts ........................................................................................................................................545.7 Configuration Files ..............................................................................................................................545.8 Tuning with sysctl................................................................................................................................595.9 Tuning disks.........................................................................................................................................595.10 Tuning kernel limits...........................................................................................................................60
6 The FreeBSD Booting Process.........................................................................................................................62
4

6.1 Synopsis...............................................................................................................................................626.2 The Boot Blocks: Bootstrap Stages 1 and 2 ........................................................................................626.3 Loader: Bootstrap Stage Three ............................................................................................................636.4 Kernel Interaction During Boot ...........................................................................................................666.5 Init: Process Control Initialization.......................................................................................................676.6 Shutdown Sequence.............................................................................................................................68
7 Users and Basic Account Management............................................................................................................697.1 Synopsis...............................................................................................................................................697.2 The Superuser Account........................................................................................................................697.3 System Accounts .................................................................................................................................697.4 User Accounts......................................................................................................................................707.5 Modifying Accounts ............................................................................................................................707.6 Limiting Users .....................................................................................................................................757.7 Personalizing Users .............................................................................................................................777.8 Groups..................................................................................................................................................78
8 Configuring the FreeBSD Kernel .....................................................................................................................808.1 Synopsis...............................................................................................................................................808.2 Why Build a Custom Kernel?..............................................................................................................808.3 Building and Installing a Custom Kernel ............................................................................................808.4 The Configuration File.........................................................................................................................838.5 Making Device Nodes .........................................................................................................................958.6 If Something Goes Wrong ...................................................................................................................96
9 Security.............................................................................................................................................................999.1 Synopsis...............................................................................................................................................999.2 Introduction..........................................................................................................................................999.3 Securing FreeBSD .............................................................................................................................1019.4 DES, MD5, and Crypt .......................................................................................................................1089.5 S/Key .................................................................................................................................................1099.6 Kerberos.............................................................................................................................................1149.7 Firewalls.............................................................................................................................................1229.8 OpenSSL............................................................................................................................................1329.9 IPsec...................................................................................................................................................1329.10 OpenSSH .........................................................................................................................................138
10 Printing .........................................................................................................................................................14210.1 Synopsis...........................................................................................................................................14210.2 Introduction......................................................................................................................................14210.3 Basic Setup ......................................................................................................................................14310.4 Advanced Printer Setup ...................................................................................................................15710.5 Using Printers ..................................................................................................................................19010.6 Alternatives to the Standard Spooler ...............................................................................................198
5

10.7 Troubleshooting ...............................................................................................................................19911 Disks.............................................................................................................................................................203
11.1 Synopsis...........................................................................................................................................20311.2 BIOS Drive Numbering ...................................................................................................................20311.3 Disk Naming....................................................................................................................................20411.4 Mounting and Unmounting Filesystems..........................................................................................20511.5 Adding Disks ...................................................................................................................................20811.6 Virtual Disks: Network, Memory, and File-Based Filesystems.......................................................21011.7 Disk Quotas .....................................................................................................................................21111.8 Creating CDs ...................................................................................................................................215
12 Backups ........................................................................................................................................................21912.1 Synopsis...........................................................................................................................................21912.2 Tape Media ......................................................................................................................................21912.3 Backup Programs.............................................................................................................................22212.4 What about Backups to Floppies? ...................................................................................................229
13 The X Window System ................................................................................................................................23213.1 Synopsis...........................................................................................................................................23213.2 Overview..........................................................................................................................................23213.3 Installing XFree86 ...........................................................................................................................23213.4 XFree86 4.X Configuration .............................................................................................................25013.5 Using Fonts in XFree86...................................................................................................................25413.6 The X Display Manager...................................................................................................................25713.7 Desktop Environments.....................................................................................................................260
14 Localization - I18N/L10N Usage and Setup ................................................................................................26614.1 Synopsis...........................................................................................................................................26614.2 The Basics........................................................................................................................................26614.3 Using Localization...........................................................................................................................26714.4 Advanced Topics..............................................................................................................................27414.5 Localizing FreeBSD to Specific Languages ....................................................................................275
15 Sound............................................................................................................................................................28015.1 Synopsis...........................................................................................................................................28015.2 Locating the Correct Device ............................................................................................................28015.3 Recompiling the Kernel ...................................................................................................................28215.4 Creating and Testing the Device Nodes...........................................................................................28215.5 Common Problems ..........................................................................................................................283
III. Network Communications.................................................................................................................................285
16 Serial Communications ................................................................................................................................28616.1 Synopsis...........................................................................................................................................28616.2 Serial Basics.....................................................................................................................................28616.3 Terminals .........................................................................................................................................286
6

16.4 Dial-in Service .................................................................................................................................29516.5 Dial-out Service ...............................................................................................................................30816.6 Setting Up the Serial Console..........................................................................................................313
17 PPP and SLIP ...............................................................................................................................................32217.1 Synopsis...........................................................................................................................................32217.2 Using User PPP................................................................................................................................32217.3 Using Kernel PPP ............................................................................................................................33717.4 Using PPP over Ethernet (PPPoE) ..................................................................................................34617.5 Using SLIP.......................................................................................................................................350
18 Advanced Networking..................................................................................................................................36318.1 Synopsis...........................................................................................................................................36318.2 Gateways and Routes.......................................................................................................................36318.3 Bridging ...........................................................................................................................................36718.4 NFS..................................................................................................................................................36918.5 Diskless Operation...........................................................................................................................37418.6 ISDN................................................................................................................................................37718.7 NIS/YP.............................................................................................................................................38118.8 DHCP...............................................................................................................................................39818.9 DNS .................................................................................................................................................40118.10 Network Address Translation daemon (natd) ................................................................................411
19 Electronic Mail .............................................................................................................................................41619.1 Synopsis...........................................................................................................................................41619.2 Using Electronic Mail......................................................................................................................41619.3 Troubleshooting ...............................................................................................................................41719.4 Advanced Topics..............................................................................................................................420
IV. Advanced topics ..................................................................................................................................................423
20 The Cutting Edge .........................................................................................................................................42420.1 Synopsis...........................................................................................................................................42420.2 FreeBSD-CURRENT vs. FreeBSD-STABLE.................................................................................42420.3 Synchronizing Your Source .............................................................................................................42920.4 Using make world .........................................................................................................................430
21 Contributing to FreeBSD..............................................................................................................................44421.1 What is Needed................................................................................................................................44421.2 How to Contribute ...........................................................................................................................44821.3 Donors Gallery.................................................................................................................................45221.4 Core Team Alumni ..........................................................................................................................45521.5 Development Team Alumni.............................................................................................................45621.6 Derived Software Contributors ........................................................................................................45621.7 Additional FreeBSD Contributors ...................................................................................................45721.8 386BSD Patch Kit Patch Contributors.............................................................................................497
7

22 Source Tree Guidelines and Policies............................................................................................................50222.1 MAINTAINER on Makefiles ..............................................................................................................50222.2 Contributed Software.......................................................................................................................50222.3 Encumbered Files ............................................................................................................................50522.4 Shared Libraries...............................................................................................................................506
23 Kernel Debugging ........................................................................................................................................50823.1 Debugging a Kernel Crash Dump with gdb ....................................................................................50823.2 Debugging a Crash Dump with DDD..............................................................................................51123.3 Post-Mortem Analysis of a Dump ...................................................................................................51223.4 On-Line Kernel Debugging Using DDB .........................................................................................51223.5 On-Line Kernel Debugging Using Remote GDB............................................................................51623.6 Debugging Loadable Modules Using GDB.....................................................................................51723.7 Debugging a Console Driver ...........................................................................................................518
24 Linux Binary Compatibility .........................................................................................................................51924.1 Synopsis...........................................................................................................................................51924.2 Installation .......................................................................................................................................51924.3 Installing Mathematica ....................................................................................................................52324.4 Installing Oracle...............................................................................................................................52524.5 Installing SAP R/3 (4.6B - IDES)....................................................................................................52924.6 Advanced Topics..............................................................................................................................547
V. Appendices ............................................................................................................................................................549
A. Obtaining FreeBSD ......................................................................................................................................550A.1 CDROM Publishers ..........................................................................................................................550A.2 DVD Publishers ................................................................................................................................550A.3 FTP Sites...........................................................................................................................................551A.4 Anonymous CVS ..............................................................................................................................558A.5 Using CTM .......................................................................................................................................563A.6 Using CVSup ....................................................................................................................................567A.7 AFS Sites ..........................................................................................................................................589
B. Bibliography .................................................................................................................................................590B.1 Books & Magazines Specific to FreeBSD ........................................................................................590B.2 Users’ Guides....................................................................................................................................590B.3 Administrators’ Guides .....................................................................................................................591B.4 Programmers’ Guides .......................................................................................................................591B.5 Operating System Internals...............................................................................................................592B.6 Security Reference ............................................................................................................................593B.7 Hardware Reference..........................................................................................................................593B.8 UNIX History....................................................................................................................................593B.9 Magazines and Journals ....................................................................................................................594
C. Resources on the Internet .............................................................................................................................595
8

C.1 Mailing Lists .....................................................................................................................................595C.2 Usenet Newsgroups...........................................................................................................................606C.3 World Wide Web Servers ..................................................................................................................607C.4 Email Addresses................................................................................................................................610C.5 Shell Accounts ..................................................................................................................................610
D. FreeBSD Project Staff ..................................................................................................................................611D.1 The FreeBSD Core Team..................................................................................................................611D.2 The FreeBSD Developers .................................................................................................................611D.3 The FreeBSD Documentation Project ..............................................................................................620D.4 Who is Responsible for What ...........................................................................................................622
E. PGP Keys ......................................................................................................................................................624E.1 Officers ..............................................................................................................................................624E.2 Core Team Members .........................................................................................................................624E.3 Developers.........................................................................................................................................625
9

List of Tables11-1. Physical Disk Naming Conventions ..................................................................................................................205
List of Examples4-1. Downloading a package and then installing it locally ...........................................................................................336-1. boot0 screenshot ....................................................................................................................................................626-2. boot2 screenshot ....................................................................................................................................................636-3. An insecure console in /etc/ttys .............................................................................................................................677-1. Changing the configuration for adduser ................................................................................................................707-2. rmuser interactive account removal .......................................................................................................................727-3. Interactive chpass by Superuser.............................................................................................................................737-4. Interactive chpass by Normal User........................................................................................................................747-5. Changing your password .......................................................................................................................................747-6. Changing another user’s password as the superuser..............................................................................................757-7. Adding a group using pw(8)..................................................................................................................................787-8. Adding somebody to a group using pw(8) ............................................................................................................787-9. Using id(1) to determine group membership.........................................................................................................7811-1. Using vnconfig to mount an existing filesystem image.....................................................................................21011-2. Creating a New File-Backed Disk with vnconfig ..............................................................................................21011-3. md memory disk ................................................................................................................................................21118-1. Branch office or Home network ........................................................................................................................37918-2. Head office or other LAN..................................................................................................................................380A-1. Checking out something from -CURRENT (ls(1)) and deleting it again:..........................................................561A-2. Checking out the version of ls(1) in the 3.X-STABLE branch:..........................................................................562A-3. Creating a list of changes (as unified diffs) to ls(1)............................................................................................562A-4. Finding out what other module names can be used:...........................................................................................562
10

I. Getting Started

Chapter 1 Introduction
Restructured, reorganized, and parts rewritten by Jim Mock <[email protected]>, 17 January 2000.
1.1 SynopsisThank you for your interest in FreeBSD! The following chapter covers various items about the FreeBSD Project,such as its history, goals, development model, and so on.
FreeBSD is a 4.4BSD-Lite based operating system for the Intel architecture (x86) and DEC Alpha based systems.Ports to other architectures are also underway. For a brief overview of FreeBSD, see the next section. You can alsoread about the history of FreeBSD, or the current release. If you are interested in contributing something to theProject (code, hardware, unmarked bills), see the contributing to FreeBSD section.
1.2 Welcome to FreeBSD!Since you are still here reading this, you most likely have some idea as to what FreeBSD is and what it can do foryou. If you are new to FreeBSD, read on for more information.
1.2.1 What is FreeBSD?In general, FreeBSD is a state-of-the-art operating system based on 4.4BSD-Lite. It runs on computer systems basedon the Intel architecture (x86), and also the DEC Alpha architecture.
FreeBSD is used to power some of the biggest sites on the Internet, including:
• Yahoo! (http://www.yahoo.com/)
• Hotmail (http://www.hotmail.com/)
• Apache (http://www.apache.org/)
• Be, Inc. (http://www.be.com/)
• Blue Mountain Arts (http://www.bluemountain.com/)
• Pair Networks (http://www.pair.com/)
• Whistle Communications (http://www.whistle.com/)
12

Chapter 1 Introduction
• BSDi (http://www.osd.bsdi.com/)
and many more.
1.2.2 What can FreeBSD do?FreeBSD has many noteworthy features. Some of these are:
• Preemptive multitasking with dynamic priority adjustment to ensure smooth and fair sharing of the computerbetween applications and users, even under the heaviest of loads.
• Multi-user facilities which allow many people to use a FreeBSD system simultaneously for a variety of things.This means, for example, that system peripherals such as printers and tape drives are properly shared between allusers on the system or the network and that individual resource limits can be placed on users or groups of users,protecting critical system resources from over-use.
• Strong TCP/IP networking with support for industry standards such as SLIP, PPP, NFS, DHCP, and NIS. Thismeans that your FreeBSD machine can inter-operate easily with other systems as well as act as an enterpriseserver, providing vital functions such as NFS (remote file access) and e-mail services or putting your organizationon the Internet with WWW, FTP, routing and firewall (security) services.
• Memory protection ensures that applications (or users) cannot interfere with each other. One application crashingwill not affect others in any way.
• FreeBSD is a 32-bit operating system (64-bit on the Alpha) and was designed as such from the ground up.
• The industry standard X Window System (X11R6) provides a graphical user interface (GUI) for the cost of acommon VGA card and monitor and comes with full sources.
• Binary compatibility with many programs built for Linux, SCO, SVR4, BSDI and NetBSD.
• Thousands of ready-to-run applications are available from the FreeBSD ports and packages collection. Whysearch the net when you can find it all right here?
• Thousands of additional and easy-to-port applications are available on the Internet. FreeBSD is source codecompatible with most popular commercial Unix systems and thus most applications require few, if any, changes tocompile.
• Demand paged virtual memory and “merged VM/buffer cache” design efficiently satisfies applications with largeappetites for memory while still maintaining interactive response to other users.
• SMP support for machines with multiple CPUs.
• A full complement of C, C++, Fortran, and Perl development tools. Many additional languages for advancedresearch and development are also available in the ports and packages collection.
13

Chapter 1 Introduction
• Source code for the entire system means you have the greatest degree of control over your environment. Why belocked into a proprietary solution at the mercy of your vendor when you can have a truly Open System?
• Extensive on-line documentation.
• And many more!
FreeBSD is based on the 4.4BSD-Lite release from Computer Systems Research Group (CSRG) at the University ofCalifornia at Berkeley, and carries on the distinguished tradition of BSD systems development. In addition to the finework provided by CSRG, the FreeBSD Project has put in many thousands of hours in fine tuning the system formaximum performance and reliability in real-life load situations. As many of the commercial giants struggle to fieldPC operating systems with such features, performance and reliability, FreeBSD can offer them now!
The applications to which FreeBSD can be put are truly limited only by your own imagination. From softwaredevelopment to factory automation, inventory control to azimuth correction of remote satellite antennae; if it can bedone with a commercial UNIX product then it is more than likely that you can do it with FreeBSD, too! FreeBSDalso benefits significantly from the literally thousands of high quality applications developed by research centers anduniversities around the world, often available at little to no cost. Commercial applications are also available andappearing in greater numbers every day.
Because the source code for FreeBSD itself is generally available, the system can also be customized to an almostunheard of degree for special applications or projects, and in ways not generally possible with operating systemsfrom most major commercial vendors. Here is just a sampling of some of the applications in which people arecurrently using FreeBSD:
• Internet Services: The robust TCP/IP networking built into FreeBSD makes it an ideal platform for a variety ofInternet services such as:
• FTP servers
• World Wide Web servers (standard or secure [SSL])
• Firewalls and NAT (“IP masquerading”) gateways.
• Electronic Mail servers
• USENET News or Bulletin Board Systems
• And more...
With FreeBSD, you can easily start out small with an inexpensive 386 class PC and upgrade all the way up to aquad-processor Xeon with RAID storage as your enterprise grows.
• Education: Are you a student of computer science or a related engineering field? There is no better way oflearning about operating systems, computer architecture and networking than the hands on, under the hoodexperience that FreeBSD can provide. A number of freely available CAD, mathematical and graphic designpackages also make it highly useful to those whose primary interest in a computer is to get other work done!
14

Chapter 1 Introduction
• Research: With source code for the entire system available, FreeBSD is an excellent platform for research inoperating systems as well as other branches of computer science. FreeBSD’s freely available nature also makes itpossible for remote groups to collaborate on ideas or shared development without having to worry about speciallicensing agreements or limitations on what may be discussed in open forums.
• Networking: Need a new router? A name server (DNS)? A firewall to keep people out of your internal network?FreeBSD can easily turn that unused 386 or 486 PC sitting in the corner into an advanced router with sophisticatedpacket-filtering capabilities.
• X Window workstation: FreeBSD is a fine choice for an inexpensive X terminal solution, either using the freelyavailable XFree86 server or one of the excellent commercial servers provided by X Inside. Unlike an X terminal,FreeBSD allows many applications to be run locally, if desired, thus relieving the burden on a central server.FreeBSD can even boot “diskless”, making individual workstations even cheaper and easier to administer.
• Software Development: The basic FreeBSD system comes with a full complement of development tools includingthe renowned GNU C/C++ compiler and debugger.
FreeBSD is available in both source and binary form on CDROM and via anonymous FTP. See Obtaining FreeBSDfor more details.
1.3 About the FreeBSD ProjectThe following section provides some background information on the project, including a brief history, project goals,and the development model of the project.
1.3.1 A Brief History of FreeBSDContributed by Jordan K. Hubbard <[email protected]>.
The FreeBSD project had its genesis in the early part of 1993, partially as an outgrowth of the “Unofficial 386BSDPatchkit” by the patchkit’s last 3 coordinators: Nate Williams, Rod Grimes and myself.
Our original goal was to produce an intermediate snapshot of 386BSD in order to fix a number of problems with itthat the patchkit mechanism just was not capable of solving. Some of you may remember the early working title forthe project being “386BSD 0.5” or “386BSD Interim” in reference to that fact.
386BSD was Bill Jolitz’s operating system, which had been up to that point suffering rather severely from almost ayear’s worth of neglect. As the patchkit swelled ever more uncomfortably with each passing day, we were inunanimous agreement that something had to be done and decided to try and assist Bill by providing this interim“cleanup” snapshot. Those plans came to a rude halt when Bill Jolitz suddenly decided to withdraw his sanction fromthe project without any clear indication of what would be done instead.
15

Chapter 1 Introduction
It did not take us long to decide that the goal remained worthwhile, even without Bill’s support, and so we adoptedthe name “FreeBSD”, coined by David Greenman. Our initial objectives were set after consulting with the system’scurrent users and, once it became clear that the project was on the road to perhaps even becoming a reality, Icontacted Walnut Creek CDROM with an eye towards improving FreeBSD’s distribution channels for those manyunfortunates without easy access to the Internet. Walnut Creek CDROM not only supported the idea of distributingFreeBSD on CD but also went so far as to provide the project with a machine to work on and a fast Internetconnection. Without Walnut Creek CDROM’s almost unprecedented degree of faith in what was, at the time, acompletely unknown project, it is quite unlikely that FreeBSD would have gotten as far, as fast, as it has today.
The first CDROM (and general net-wide) distribution was FreeBSD 1.0, released in December of 1993. This wasbased on the 4.3BSD-Lite (“Net/2”) tape from U.C. Berkeley, with many components also provided by 386BSD andthe Free Software Foundation. It was a fairly reasonable success for a first offering, and we followed it with thehighly successful FreeBSD 1.1 release in May of 1994.
Around this time, some rather unexpected storm clouds formed on the horizon as Novell and U.C. Berkeley settledtheir long-running lawsuit over the legal status of the Berkeley Net/2 tape. A condition of that settlement was U.C.Berkeley’s concession that large parts of Net/2 were “encumbered” code and the property of Novell, who had in turnacquired it from AT&T some time previously. What Berkeley got in return was Novell’s “blessing” that the4.4BSD-Lite release, when it was finally released, would be declared unencumbered and all existing Net/2 userswould be strongly encouraged to switch. This included FreeBSD, and the project was given until the end of July1994 to stop shipping its own Net/2 based product. Under the terms of that agreement, the project was allowed onelast release before the deadline, that release being FreeBSD 1.1.5.1.
FreeBSD then set about the arduous task of literally re-inventing itself from a completely new and rather incompleteset of 4.4BSD-Lite bits. The “Lite” releases were light in part because Berkeley’s CSRG had removed large chunksof code required for actually constructing a bootable running system (due to various legal requirements) and the factthat the Intel port of 4.4 was highly incomplete. It took the project until November of 1994 to make this transition, atwhich point it released FreeBSD 2.0 to the net and on CDROM (in late December). Despite being still more than alittle rough around the edges, the release was a significant success and was followed by the more robust and easier toinstall FreeBSD 2.0.5 release in June of 1995.
We released FreeBSD 2.1.5 in August of 1996, and it appeared to be popular enough among the ISP and commercialcommunities that another release along the 2.1-STABLE branch was merited. This was FreeBSD 2.1.7.1, released inFebruary 1997 and capping the end of mainstream development on 2.1-STABLE. Now in maintenance mode, onlysecurity enhancements and other critical bug fixes will be done on this branch (RELENG_2_1_0).
FreeBSD 2.2 was branched from the development mainline (“-CURRENT”) in November 1996 as theRELENG_2_2 branch, and the first full release (2.2.1) was released in April 1997. Further releases along the 2.2branch were done in the summer and fall of ’97, the last of which (2.2.8) appeared in November 1998. The firstofficial 3.0 release appeared in October 1998 and spelled the beginning of the end for the 2.2 branch.
The tree branched again on Jan 20, 1999, leading to the 4.0-CURRENT and 3.X-STABLE branches. From3.X-STABLE, 3.1 was released on February 15, 1999, 3.2 on May 15, 1999, 3.3 on September 16, 1999, 3.4 onDecember 20, 1999, and 3.5 on June 24, 2000, which was followed a few days later by a minor point release update
16

Chapter 1 Introduction
to 3.5.1, to incorporate some last-minute security fixes to Kerberos. This will be the final release in the 3.X branch.
There was another branch on March 13, 2000, which saw the emergence of the 4.X-STABLE branch, nowconsidered to be the "current -stable branch". There have been several releases from it so far: 4.0-RELEASE cameout in March 2000, 4.1 was released in July 2000, 4.2 in November 2000, and 4.3 in April 2001. There will be morereleases along the 4.X-stable (RELENG_4) branch throughout 2001.
Long-term development projects continue to take place in the 5.0-CURRENT (trunk) branch, and SNAPshot releasesof 5.0 on CDROM (and, of course, on the net) are continually made available from the snapshot server(ftp://current.freebsd.org/pub/FreeBSD/snapshots) as work progresses.
1.3.2 FreeBSD Project GoalsContributed by Jordan K. Hubbard <[email protected]>.
The goals of the FreeBSD Project are to provide software that may be used for any purpose and without stringsattached. Many of us have a significant investment in the code (and project) and would certainly not mind a littlefinancial compensation now and then, but we are definitely not prepared to insist on it. We believe that our first andforemost “mission” is to provide code to any and all comers, and for whatever purpose, so that the code gets thewidest possible use and provides the widest possible benefit. This is, I believe, one of the most fundamental goals ofFree Software and one that we enthusiastically support.
That code in our source tree which falls under the GNU General Public License (GPL) or Library General PublicLicense (LGPL) comes with slightly more strings attached, though at least on the side of enforced access rather thanthe usual opposite. Due to the additional complexities that can evolve in the commercial use of GPL software we do,however, prefer software submitted under the more relaxed BSD copyright when it’s a reasonable option to do so.
1.3.3 The FreeBSD Development ModelContributed by Satoshi Asami <[email protected]>.
The development of FreeBSD is a very open and flexible process, FreeBSD being literally built from thecontributions of hundreds of people around the world, as can be seen from our list of contributors. We are constantlyon the lookout for new developers and ideas, and those interested in becoming more closely involved with the projectneed simply contact us at the FreeBSD technical discussions mailing list <[email protected]>.The FreeBSD announcements mailing list <[email protected]> is also available to those wishingto make other FreeBSD users aware of major areas of work.
Useful things to know about the FreeBSD project and its development process, whether working independently or inclose cooperation:
17

Chapter 1 Introduction
The CVS repository
The central source tree for FreeBSD is maintained by CVS (http://www.cyclic.com/CVS/index_html)(Concurrent Version System), a freely available source code control tool that comes bundled with FreeBSD.The primary CVS repository (http://www.FreeBSD.org/cgi/cvsweb.cgi) resides on a machine in Santa ClaraCA, USA from where it is replicated to numerous mirror machines throughout the world. The CVS tree, as wellas the -CURRENT and -STABLE trees which are checked out of it, can be easily replicated to your ownmachine as well. Please refer to the Synchronizing your source tree section for more information on doing this.
The committers list
The committers are the people who have write access to the CVS tree, and are thus authorized to makemodifications to the FreeBSD source (the term “committer” comes from the cvs(1) commit command, which isused to bring new changes into the CVS repository). The best way of making submissions for review by thecommitters list is to use the send-pr(1) command, though if something appears to be jammed in the system thenyou may also reach them by sending mail to <[email protected]>.
The FreeBSD core team
The FreeBSD core team would be equivalent to the board of directors if the FreeBSD Project were a company.The primary task of the core team is to make sure the project, as a whole, is in good shape and is heading in theright directions. Inviting dedicated and responsible developers to join our group of committers is one of thefunctions of the core team, as is the recruitment of new core team members as others move on. The current coreteam was elected from a pool of committer candidates in October 2000. Elections are held every 2 years.
Some core team members also have specific areas of responsibility, meaning that they are committed toensuring that some large portion of the system works as advertised.
Note: Most members of the core team are volunteers when it comes to FreeBSD development and do notbenefit from the project financially, so “commitment” should also not be misconstrued as meaning“guaranteed support.” The “board of directors” analogy above is not actually very accurate, and it may bemore suitable to say that these are the people who gave up their lives in favor of FreeBSD against theirbetter judgment! ;-)
Outside contributors
Last, but definitely not least, the largest group of developers are the users themselves who provide feedback andbug fixes to us on an almost constant basis. The primary way of keeping in touch with FreeBSD’s morenon-centralized development is to subscribe to the FreeBSD technical discussions mailing list<[email protected]> (see mailing list info) where such things are discussed.
18

Chapter 1 Introduction
The list of those who have contributed something, which made its way into our source tree, is a long andgrowing one, so why not join it by contributing something back to FreeBSD today? :-)
Providing code is not the only way of contributing to the project; for a more complete list of things that needdoing, please refer to the how to contribute section in this handbook.
In summary, our development model is organized as a loose set of concentric circles. The centralized model isdesigned for the convenience of the users of FreeBSD, who are thereby provided with an easy way of tracking onecentral code base, not to keep potential contributors out! Our desire is to present a stable operating system with alarge set of coherent application programs that the users can easily install and use, and this model works very well inaccomplishing that.
All we ask of those who would join us as FreeBSD developers is some of the same dedication its current people haveto its continued success!
1.3.4 The Current FreeBSD ReleaseFreeBSD is a freely available, full source 4.4BSD-Lite based release for Intel i386, i486, Pentium, Pentium Pro,Celeron, Pentium II, Pentium III (or compatible) and DEC Alpha based computer systems. It is based primarily onsoftware from U.C. Berkeley’s CSRG group, with some enhancements from NetBSD, OpenBSD, 386BSD, and theFree Software Foundation.
Since our release of FreeBSD 2.0 in late 94, the performance, feature set, and stability of FreeBSD has improveddramatically. The largest change is a revamped virtual memory system with a merged VM/file buffer cache that notonly increases performance, but also reduces FreeBSD’s memory footprint, making a 5MB configuration a moreacceptable minimum. Other enhancements include full NIS client and server support, transaction TCP support,dial-on-demand PPP, integrated DHCP support, an improved SCSI subsystem, ISDN support, support for ATM,FDDI, Fast and Gigabit Ethernet (1000Mbit) adapters, improved support for the latest Adaptec controllers, and manyhundreds of bug fixes.
We have also taken the comments and suggestions of many of our users to heart and have attempted to provide whatwe hope is a more sane and easily understood installation process. Your feedback on this (constantly evolving)process is especially welcome!
In addition to the base distributions, FreeBSD offers a ported software collection with thousands of commonlysought-after programs. At the time of this printing, there were over 5,400 ports! The list of ports ranges from http(WWW) servers, to games, languages, editors, and almost everything in between. The entire ports collection requiresapproximately 100MB of storage, all ports being expressed as “deltas” to their original sources. This makes it mucheasier for us to update ports, and greatly reduces the disk space demands made by the older 1.0 ports collection. Tocompile a port, you simply change to the directory of the program you wish to install, type make install, and letthe system do the rest. The full original distribution for each port you build is retrieved dynamically off the CDROMor a local FTP site, so you need only enough disk space to build the ports you want. Almost every port is also
19

Chapter 1 Introduction
provided as a pre-compiled “package”, which can be installed with a simple command (pkg_add) by those who donot wish to compile their own ports from source.
A number of additional documents which you may find very helpful in the process of installing and using FreeBSDmay now also be found in the /usr/share/doc directory on any machine running FreeBSD 2.1 or later. You mayview the locally installed manuals with any HTML capable browser using the following URLs:
The FreeBSD Handbook
file:/usr/share/doc/handbook/index.html
The FreeBSD FAQ
file:/usr/share/doc/faq/index.html
You can also view the master (and most frequently updated) copies at http://www.FreeBSD.org/.
20

Chapter 2 Installing FreeBSDRestructured, updated, and parts rewritten by Jim Mock <[email protected]>, January 2000.
2.1 SynopsisThe following chapter will attempt to guide you through the installation of FreeBSD on your system. It can beinstalled through a variety of methods, including anonymous FTP (assuming you have network connectivity viamodem or local network), CDROM, floppy disk, tape, an MS-DOS partition, or even NFS.
No matter which method you choose, you will need to get started by creating the installation disks as described inthe next section. Booting into the FreeBSD installer, even if you are not planning on installing FreeBSD right away,will provide important information about compatibility with your hardware. This information may dictate whichinstallation options are even possible for you. It can also provide clues early-on in the process to potential problemsyou may come across later.
If you plan to install FreeBSD via anonymous FTP, the only things you will need are the installation floppies. Theinstallation program itself will handle anything else that is required.
For more information about obtaining FreeBSD, see the Obtaining FreeBSD section of the Appendix.
By now, you are probably wondering what exactly it is you need to do. Continue on to the installation guide.
2.2 Installation GuideThe following sections will guide you through preparing for and actually installing FreeBSD. If you find somethingmissing, please let us know about it by sending email to the FreeBSD documentation project mailing list<[email protected]>.
2.2.1 Preparing for the InstallationThere are various things you should do in preparation for the installation. The following describes what needs to bedone prior to each type of installation.
The first thing to do is to make sure your hardware is supported by FreeBSD. The list of supported hardware shouldcome in handy here. ;-) It would also be a good idea to make a list of any “special” cards you have installed, such asSCSI controllers, ethernet cards, sound cards, etc.. The list should include their IRQs and IO port addresses.
1

Chapter 2 Installing FreeBSD
2.2.1.1 Creating the Installation Floppies
You may need to prepare some floppy disks. These disks will be used to boot your computer in to the FreeBSDinstall process. This step is not necessary if you are installing from CDROM, and your computer supports bootingfrom the CDROM. If you do not meet these requirements then you will need to create some floppies to boot from.
Note: If you are not sure whether your computer can boot from the CDROM it does not hurt to try. Just insert theCDROM as normal and restart your computer. You might need to adjust some options in your BIOS so that yourcomputer will try and boot from the CDROM drive before the hard disk.
Tip: Even if you have the CDROM it might make sense for you to download the files. There have been occasionswhere bugs in the FreeBSD installer have been discovered after the CDs have been released. When thishappens the copies of the images on the FTP site will be fixed as soon as possible. Obviously, it is not possibleto update the CDs after they have been pressed.
1. Acquire the boot floppy images
These are files with a .flp extension. If you have a CDROM release of FreeBSD then you will find the files inthe floppies subdirectory. Alternatively, you can download the images from the floppies directory(ftp://ftp.FreeBSD.org/pub/FreeBSD/releases/i386/4.3-RELEASE/floppies/) of the FreeBSD FTP site or yourlocal mirror.
The names of the files you will need varies between FreeBSD releases (sometimes) and the architecture you willbe installing on. The installation boot image information(ftp://ftp.FreeBSD.org/pub/FreeBSD/releases/i386/4.3-RELEASE/floppies/README.TXT) on the FTP siteprovides up-to-the-minute information about the specific files you will need.
2. Prepare the floppy disks
You must prepare one floppy disk per image file you had to download. It is imperative that these disks are freefrom defects. The easiest way to test this is to format the disks for yourself. Do not trust pre-formatted floppies.
Important: If you try to install FreeBSD and the installation program crashes, freezes, or otherwisemisbehaves one of the first things to suspect is the floppies. Try writing the floppy image files to some otherdisks, and try again.
3. Write the image files to the floppy disks.
The image files, such as kern.flp, are not regular files you copy to the disk. Instead, they are images of thecomplete contents of the disk.
2

Chapter 2 Installing FreeBSD
This means that you can not use commands like DOS’ copy to write the files. Instead, you must use specifictools to write the images directly to the disk.
If you are creating the floppies on a computer running DOS then we provide a tool to do this called fdimage.
If you are using the floppies from the CDROM, and your CDROM is the E: drive then you would run this:
E:\� tools\fdimage floppies\kern.flp A:
Repeat this command for each .flp file, replacing the floppy disk each time. Adjust the command line asnecessary, depending on where you have placed the .flp files. If you do not have the CDROM then fdimage
can be downloaded from the tools directory (ftp://ftp.FreeBSD.org/pub/FreeBSD/tools/) on the FreeBSD FTPsite.
If you are writing the floppies on a Unix system (such as another FreeBSD system) you can use the dd(1)command to write the image files directly to disk. On FreeBSD you would run:
# dd if=kern.flp of=/dev/fd0
On FreeBSD /dev/fd0 refers to the first floppy disk (the A: drive). /dev/rfd1 would be the B: drive, and soon. Other Unix variants might have different names for the floppy disk devices, and you will need to check thedocumentation for the system as necessary.
2.2.1.2 Before Installing from CDROM
If your CDROM is of an unsupported type, please skip ahead to the MS-DOS Preparation section.
There is not a whole lot of preparation needed if you are installing from one of BSDi’s (http://www.osd.bsdi.com/)FreeBSD CDROMs (other CDROM distributions may work as well, though we cannot say for certain as we have nohand or say in how they created). You can either boot into the CD installation directly from DOS using theinstall.bat or you can make floppies with the makeflp.bat command.
If the CD has El Torito boot support and your system supports booting directly from the CDROM drive (many oldersystems do NOT), simply insert the first CD of the set into the drive and reboot your system. You will be put into theinstallation menu directly from the CD.
If you are installing from an MS-DOS partition and have the proper drivers to access your CD, run the install.batscript provided on the CDROM. This will attempt to boot the FreeBSD installation directly from DOS.
Note: You must do this from actual DOS (i.e., boot in DOS mode) and not from a DOS window under Windows.
For the easiest interface of all (from DOS), type view. This will bring up a DOS menu utility that leads you throughall of the available options.
3

Chapter 2 Installing FreeBSD
If you are creating the boot floppies from a UNIX machine, see the Creating the Boot Floppies section of this guidefor examples.
Once you have booted from DOS or floppy, you should then be able to select CDROM as the media type during theinstall process and load the entire distribution from CDROM. No other types of installation media should be required.
After your system is fully installed and you have rebooted (from the hard disk), you can mount the CDROM at anytime by typing:
# mount /cdrom
Before removing the CD from the drive again, you must first unmount it. This is done with the following command:
# umount /cdrom
Do not just remove it from the drive!
Note: Before invoking the installation, be sure that the CDROM is in the drive so that the install probe can find it.This is also true if you wish the CDROM to be added to the default system configuration automatically during theinstallation (whether or not you actually use it as the installation media).
Finally, if you would like people to be able to FTP install FreeBSD directly from the CDROM in your machine, youwill find it quite easy. After the machine is fully installed, you simply need to add the following line to the passwordfile (using the vipw command):
ftp:*:99:99::0:0:FTP:/cdrom:/nonexistent
Anyone with network connectivity to your machine can now chose a media type of FTP and type in ftp://yourmachine after picking “Other” in the FTP sites menu during the install.
Note: If you choose to enable anonymous FTP during the installation of your system, the installation program willdo the above for you.
2.2.1.3 Before installing from Floppies
If you must install from floppy disk (which we suggest you do NOT do), either due to unsupported hardware orsimply because you insist on doing things the hard way, you must first prepare some floppies for the installation.
At a minimum, you will need as many 1.44MB or 1.2MB floppies as it takes to hold all the files in the bin (binarydistribution) directory. If you are preparing the floppies from DOS, then they MUST be formatted using the MS-DOS
4

Chapter 2 Installing FreeBSD
FORMAT command. If you are using Windows, use Explorer to format the disks (right-click on the A: drive, andselect "Format".
Do NOT trust factory pre-formatted floppies! Format them again yourself, just to be sure. Many problems reportedby our users in the past have resulted from the use of improperly formatted media, which is why we are making apoint of it now.
If you are creating the floppies on another FreeBSD machine, a format is still not a bad idea, though you do not needto put a DOS filesystem on each floppy. You can use the disklabel and newfs commands to put a UFS filesystemon them instead, as the following sequence of commands (for a 3.5" 1.44MB floppy) illustrates:
# fdformat -f 1440 fd0.1440# disklabel -w -r fd0.1440 floppy3# newfs -t 2 -u 18 -l 1 -i 65536 /dev/fd0
Note: Use fd0.1200 and floppy5 for 5.25" 1.2MB disks.
Then you can mount and write to them like any other filesystem.
After you have formatted the floppies, you will need to copy the files to them. The distribution files are split intochunks conveniently sized so that 5 of them will fit on a conventional 1.44MB floppy. Go through all your floppies,packing as many files as will fit on each one, until you have all of the distributions you want packed up in this fashion.Each distribution should go into a subdirectory on the floppy, e.g.: a:\bin\bin.aa, a:\bin\bin.ab, and so on.
Once you come to the Media screen during the install process, select “Floppy” and you will be prompted for the rest.
2.2.1.4 Before Installing from MS-DOS
To prepare for an installation from an MS-DOS partition, copy the files from the distribution into a directory named,for example, c:\FreeBSD. The directory structure of the CDROM or FTP site must be partially reproduced withinthis directory, so we suggest using the DOS xcopy command if you are copying it from a CD. For example, toprepare for a minimal installation of FreeBSD:
C:\� md c:\FreeBSD
C:\� xcopy e:\bin c:\FreeBSD\bin\ /s
C:\� xcopy e:\manpages c:\FreeBSD\manpages\ /s
Assuming that C: is where you have free space and E: is where your CDROM is mounted.
If you do not have a CDROM drive, you can download the distribution from ftp.FreeBSD.org(ftp://ftp.FreeBSD.org/pub/FreeBSD/releases/i386/4.3-RELEASE/). Each distribution is in its own directory; forexample, the bin distribution can be found in the 4.3/bin(ftp://ftp.FreeBSD.org/pub/FreeBSD/releases/i386/4.3-RELEASE/bin) directory.
5

Chapter 2 Installing FreeBSD
For as many distributions you wish to install from an MS-DOS partition (and you have the free space for), installeach one under c:\FreeBSD — the BIN distribution is the only one required for a minimum installation.
2.2.1.5 Before Installing from QIC/SCSI Tape
Installing from tape is probably the easiest method, short of an online FTP install or CDROM install. The installationprogram expects the files to be simply tarred onto the tape, so after getting all of the distribution files you areinterested in, simply tar them onto the tape like so:
# cd /freebsd/distdir# tar cvf /dev/rwt0 dist1 ... dist2
When you go to do the installation, you should also make sure that you leave enough room in some temporarydirectory (which you will be allowed to choose) to accommodate the full contents of the tape you have created. Dueto the non-random access nature of tapes, this method of installation requires quite a bit of temporary storage. Youshould expect to require as much temporary storage as you have stuff written on tape.
Note: When starting the installation, the tape must be in the drive before booting from the boot floppy. Theinstallation probe may otherwise fail to find it.
2.2.1.6 Before Installing over a Network
There are three types of network installations you can do. Serial port (SLIP or PPP), Parallel port (PLIP (laplinkcable)), or Ethernet (a standard ethernet controller (includes some PCMCIA)).
The SLIP support is rather primitive, and limited primarily to hard-wired links, such as a serial cable runningbetween a laptop computer and another computer. The link should be hard-wired as the SLIP installation does notcurrently offer a dialing capability; that facility is provided with the PPP utility, which should be used in preferenceto SLIP whenever possible.
If you are using a modem, then PPP is almost certainly your only choice. Make sure that you have your serviceprovider’s information handy as you will need to know it fairly early in the installation process.
If you use PAP or CHAP to connect your ISP (in other words, if you can connect to the ISP in Windows withoutusing a script), then all you will need to do is type in dial at the ppp prompt. Otherwise, you will need to know howto dial your ISP using the “AT commands” specific to your modem, as the PPP dialer provides only a very simpleterminal emulator. Please refer to the user-ppp handbook and FAQ (../FAQ/ppp.html) entries for further information.If you have problems, logging can be directed to the screen using the command set log local ....
6

Chapter 2 Installing FreeBSD
If a hard-wired connection to another FreeBSD (2.0-R or later) machine is available, you might also considerinstalling over a “laplink” parallel port cable. The data rate over the parallel port is much higher than what istypically possible over a serial line (up to 50kbytes/sec), thus resulting in a quicker installation.
Finally, for the fastest possible network installation, an ethernet adapter is always a good choice! FreeBSD supportsmost common PC ethernet cards; a table of supported cards (and their required settings) is provided in the SupportedHardware list. If you are using one of the supported PCMCIA ethernet cards, also be sure that it is plugged in beforethe laptop is powered on! FreeBSD does not, unfortunately, currently support hot insertion of PCMCIA cards duringinstallation.
You will also need to know your IP address on the network, the netmask value for your address class, and the nameof your machine. If you are installing over a PPP connection and do not have a static IP, fear not, the IP address canbe dynamically assigned by your ISP. Your system administrator can tell you which values to use for your particularnetwork setup. If you will be referring to other hosts by name rather than IP address, you will also need a nameserver and possibly the address of a gateway (if you are using PPP, it is your provider’s IP address) to use in talkingto it. If you want to install by FTP via a HTTP proxy (see below), you will also need the proxy’s address. If you donot know the answers to all or most of these questions, then you should really probably talk to your systemadministrator or ISP before trying this type of installation.
2.2.1.6.1 Before Installing via NFS
The NFS installation is fairly straight-forward. Simply copy the FreeBSD distribution files you want onto a serversomewhere and then point the NFS media selection at it.
If this server supports only “privileged port” (as is generally the default for Sun workstations), you will need to setthis option in the Options menu before installation can proceed.
If you have a poor quality ethernet card which suffers from very slow transfer rates, you may also wish to toggle theappropriate Options flag.
In order for NFS installation to work, the server must support subdir mounts, e.g., if your FreeBSD 3.4 distributiondirectory lives on:ziggy:/usr/archive/stuff/FreeBSD, then ziggy will have to allow the direct mounting of/usr/archive/stuff/FreeBSD, not just /usr or /usr/archive/stuff.
In FreeBSD’s /etc/exports file, this is controlled by the -alldirs. Other NFS servers may have differentconventions. If you are getting “permission denied” messages from the server, then it is likely that you do not havethis enabled properly.
2.2.1.6.2 Before Installing via FTP
FTP installation may be done from any FreeBSD mirror site containing a reasonably up-to-date version of FreeBSD.A full list of FTP mirrors located all over the world is provided during the install process.
If you are installing from an FTP site not listed in this menu, or are having trouble getting your name serverconfigured properly, you can also specify a URL to use by selecting the choice labeled “Other” in that menu. You can
7

Chapter 2 Installing FreeBSD
also use the IP address of a machine you wish to install from, so the following would work in the absence of a nameserver:
ftp://209.55.82.20/pub/FreeBSD/4.3-RELEASE
There are three FTP installation modes you can choose from: active or passive FTP or via a HTTP proxy.
FTP Active
This option will make all FTP transfers use “Active” mode. This will not work through firewalls, but will oftenwork with older FTP servers that do not support passive mode. If your connection hangs with passive mode (thedefault), try active!
FTP Passive
This option instructs FreeBSD to use “Passive” mode for all FTP operations. This allows the user to passthrough firewalls that do not allow incoming connections on random port addresses.
FTP via a HTTP proxy
This option instructs FreeBSD to use the HTTP protocol (like a web browser) to connect to a proxy for all FTPoperations. The proxy will translate the requests and send them to the FTP server. This allows the user to passthrough firewalls that do not allow FTP at all, but offer a HTTP proxy. In this case, you have to specify theproxy in addition to the FTP server.
Note: There is another type of FTP proxy other tha HTTP proxies. This type is very uncommon, though. If youare not absolutely certain, you can assume that you have a HTTP proxy as described above.
For a proxy FTP server, you should usually give the name of the server you really want as a part of the username,after an “@” sign. The proxy server then “fakes” the real server. For example, assuming you want to install fromftp.FreeBSD.org, using the proxy FTP server foo.bar.com, listening on port 1024.
In this case, you go to the options menu, set the FTP username to [email protected], and the password to youremail address. As your installation media, you specify FTP (or passive FTP, if the proxy supports it), and the URLftp://foo.bar.com:1234/pub/FreeBSD.
Since /pub/FreeBSD from ftp.FreeBSD.org is proxied under foo.bar.com, you are able to install from thatmachine (which will fetch the files from ftp.FreeBSD.org as your installation requests them.
8

Chapter 2 Installing FreeBSD
2.2.1.7 Check your BIOS drive numbering
If you have used features in your BIOS to renumber your disk drives without re-cabling them then you should readSection 11.2 first to avoid confusion.
2.2.2 Installing FreeBSDOnce you have completed the pre-installation step relevant to your situation, you are ready to install FreeBSD!
Although you should not experience any difficulty, there is always the chance that you may, no matter how slight itis. If this is the case in your situation, then you may wish to go back and re-read the relevant preparation section orsections. Perhaps you will come across something you missed the first time. If you are having hardware problems, orFreeBSD refuses to boot at all, read the Hardware Guide (../FAQ/hardware.html) for a list of possible solutions.
The FreeBSD boot floppies contain all of the online documentation you should need to be able to navigate throughan installation. If it does not, please let us know what you found to be the most confusing or most lacking. Send yourcomments to the FreeBSD documentation project mailing list <[email protected]>. It is the objective ofthe installation program (sysinstall) to be self-documenting enough that painful “step-by-step” guides are no longernecessary. It may take us a little while to reach that objective, but nonetheless, it is still our objective :-)
Meanwhile, you may also find the following “typical installation sequence” to be helpful:
1. Boot the kern.flp floppy and when asked, remove it and insert the mfsroot.flp and hit return. After a bootsequence which can take anywhere from 30 seconds to 3 minutes, depending on your hardware, you should bepresented with a menu of initial choices. If the kern.flp floppy does not boot at all or the boot hangs at somestage, read the Q&A section of the Hardware Guide (../FAQ/hardware.html) for possible causes.
2. Press F1. You should see some basic usage instructions on the menu screen and general navigation. If you havenot used this menu system before then please read this thoroughly.
3. Select the Options item and set any special preferences you may have.
4. Select a Standard, Express, or Custom install, depending on whether or not you would like the installation tohelp you through a typical installation, give you a high degree of control over each step, or simply whiz throughit (using reasonable defaults when possible) as fast as possible. If you have never used FreeBSD before, theStandard installation method is most recommended.
5. The final configuration menu choice allows you to further configure your FreeBSD installation by giving youmenu-driven access to various system defaults. Some items, like networking, may be especially important if youdid a CDROM, tape, or floppy install and have not yet configured your network interfaces (assuming you haveany). Properly configuring such interfaces here will allow FreeBSD to come up on the network when you firstreboot from the hard disk.
9

Chapter 2 Installing FreeBSD
2.3 Supported HardwareFreeBSD currently runs on a wide variety of ISA, VLB, EISA, and PCI bus based PCs, ranging from the 386SX toPentium class machines (though the 386SX is not recommended). Support for generic IDE or ESDI driveconfigurations, various SCSI controllers, and network and serial cards is also provided. FreeBSD also supportsIBM’s microchannel (MCA) bus.
In order to run FreeBSD, a recommended minimum of eight megabytes of RAM is suggested. Sixteen megabytes isthe preferred amount of RAM as you may have some trouble with anything less than sixteen depending on yourhardware.
What follows is a list of hardware currently known to work with FreeBSD. There may be other hardware that worksas well, but we have simply not received any confirmation of it.
2.3.1 Disk Controllers
• WD1003 (any generic MFM/RLL)
• WD1007 (any generic IDE/ESDI)
• IDE
• ATA
• Adaptec 1535 ISA SCSI controllers
• Adaptec 154X series ISA SCSI controllers
• Adaptec 174X series EISA SCSI controllers in standard and enhanced mode
• Adaptec 274X/284X/2920C/294X/2950/3940/3950 (Narrow/Wide/Twin) series EISA/VLB/PCI SCSI controllers
• Adaptec AIC-7850, AIC-7860, AIC-7880, AIC-789X on-board SCSI controllers
• Adaptec 1510 series ISA SCSI controllers (not for bootable devices)
• Adaptec 152X series ISA SCSI controllers
• Adaptec AIC-6260 and AIC-6360 based boards, which include the AHA-152X and SoundBlaster SCSI cards
• AdvanSys SCSI controllers (all models)
• BusLogic MultiMaster “W” Series Host Adapters including BT-948, BT-958, BT-9580
• BusLogic MultiMaster “C” Series Host Adapters including BT-946C, BT-956C, BT-956CD, BT-445C, BT-747C,BT-757C, BT-757CD, BT-545C, BT-540CF
• BusLogic MultiMaster “S” Series Host Adapters including BT-445S, BT-747S, BT-747D, BT-757S, BT-757D,BT-545S, BT-542D, BT-742A, BT-542B
10

Chapter 2 Installing FreeBSD
• BusLogic MultiMaster “A” Series Host Adapters including BT-742A, BT-542B
• AMI FastDisk controllers that are true BusLogic MultiMaster clones are also supported.
Note: BusLogic/Mylex “Flashpoint” adapters are NOT yet supported.
• DPT SmartCACHE Plus, SmartCACHE III, SmartRAID III, SmartCACHE IV, and SmartRAID IV SCSI/RAIDare supported. The DPT SmartRAID/CACHE V is not yet supported. The DPT PM3754U2-16M SCSI RAIDController is also supported.
• Compaq Intelligent Disk Array Controllers: IDA, IDA-2, IAES, SMART, SMART-2/E, Smart-2/P, SMART-2SL,Integrated Array, and Smart Arrays 3200, 3100ES, 221, 4200, 4200, 4250ES.
• SymBios (formerly NCR) 53C810, 53C810a, 53C815, 53C820, 53C825a, 53C860, 53C875, 53C875j, 53C885,and 53C896 PCI SCSI controllers including ASUS SC-200, Data Technology DTC3130 (all variants), DiamondFirePort (all), NCR cards (all), SymBios cards (all), Tekram DC390W, 390U, and 390F, and Tyan S1365
• QLogic 1020, 1040, 1040B, and 2100 SCSI and Fibre Channel Adapters
• DTC 3290 EISA SCSI controller in 1542 evaluation mode
With all supported SCSI controllers, full support is provided for SCSI-I and SCSI-II peripherals, including harddisks, optical disks, tape drives (including DAT and 8mm Exabyte), medium changers, processor target devices, andCDROM drives. WORM devices that support CDROM commands are supported for read-only access by theCDROM driver. WORM/CD-R/CD-RW writing support is provided by cdrecord, which is in the ports tree.
The following CDROM type systems are supported at this time:
• cd - SCSI interface (includes ProAudio Spectrum and SoundBlaster SCSI)
• matcd - Matsushita/Panasonic (Creative SoundBlaster) proprietary interface (562/563 models)
• scd - Sony proprietary interface (all models)
• acd - ATAPI IDE interface
The following drivers were supported under the old SCSI subsystem, but are NOT YET supported under the newCAM SCSI subsystem:
• NCR5380/NCR53400 (“ProAudio Spectrum”) SCSI controller
• UltraStor 14F, 24F, and 34F SCSI controllers
• Seagate ST01/02 SCSI controllers
• Future Domain 8XX/950 series SCSI controllers
11

Chapter 2 Installing FreeBSD
• WD7000 SCSI controller
Note: There is work-in-progress to port the UltraStor driver to the new CAM framework, but no estimates onwhen or if it will be completed.
Unmaintained drivers, which might or might not work for your hardware:
• Floppy tape interface (Colorado/Mountain/Insight)
• mcd - Mitsumi proprietary CDROM interface (all models)
2.3.2 Network Cards
•
Adaptec Duralink PCI fast ethernet adapters based on the Adaptec AIC-6195 fast ethernet controller chip,including the following:
• ANA-62011 64-bit single port 10/100baseTX adapter
• ANA-62022 64-bit dual port 10/100baseTX adapter
• ANA-62044 64-bit quad port 10/100baseTX adapter
• ANA-69011 32-bit single port 10/100baseTX adapter
• ANA-62020 64-bit single port 100baseFX adapter
• Allied-Telesyn AT1700 and RE2000 cards
• Alteon Networks PCI gigabit ethernet NICs based on the Tigon 1 and Tigon 2 chipsets including the AlteonAceNIC (Tigon 1 and 2), 3Com 3c985-SX (Tigon 1 and 2), Netgear GA620 (Tigon 2), Silicon Graphics GigabitEthernet, DEC/Compaq EtherWORKS 1000, NEC Gigabit Ethernet
• AMD PCnet/PCI (79c970 and 53c974 or 79c974)
• RealTek 8129/8139 fast ethernet NICs including the following:
• Allied-Telesyn AT2550
• Allied-Telesyn AT2500TX
12

Chapter 2 Installing FreeBSD
• Genius GF100TXR (RTL8139)
• NDC Communications NE100TX-E
• OvisLink LEF-8129TX
• OvisLink LEF-8139TX
• Netronix Inc. EA-1210 NetEther 10/100
• KTX-9130TX 10/100 Fast Ethernet
• Accton “Cheetah” EN1207D (MPX 5030/5038; RealTek 8139 clone)
• SMC EZ Card 10/100 PCI 1211-TX
• Lite-On 98713, 98713A, 98715, and 98725 fast ethernet NICs, including the LinkSys EtherFast LNE100TX,NetGear FA310-TX Rev. D1, Matrox FastNIC 10/100, Kingston KNE110TX
• Macronix 98713, 98713A, 98715, 98715A, and 98725 fast ethernet NICs including the NDC CommunicationsSFA100A (98713A), CNet Pro120A (98713 or 98713A), CNet Pro120B (98715), SVEC PN102TX (98713)
• Macronix/Lite-On PNIC II LC82C115 fast ethernet NICs including the LinkSys EtherFast LNE100TX version 2
• Winbond W89C840F fast ethernet NICs including the Trendware TE100-PCIE
• VIA Technologies VT3043 “Rhine I” and VT86C100A “Rhine II” fast ethernet NICs including the HawkingTechnologies PN102TX and D-Link DFE-530TX
• Silicon Integrated Systems SiS 900 and SiS 7016 PCI fast ethernet NICs
• Sundance Technologies ST201 PCI fast ethernet NICs including the D-Link DFE-550TX
• SysKonnect SK-984x PCI gigabit ethernet cards including the SK-9841 1000baseLX (single mode fiber, singleport), the SK-9842 1000baseSX (multimode fiber, single port), the SK-9843 1000baseLX (single mode fiber, dualport), and the SK-9844 1000baseSX (multimode fiber, dual port).
• Texas Instruments ThunderLAN PCI NICs, including the Compaq Netelligent 10, 10/100, 10/100 Proliant, 10/100Dual-Port, 10/100 TX Embedded UTP, 10 T PCI UTP/Coax, and 10/100 TX UTP, the Compaq NetFlex 3P, 3PIntegrated, and 3P w/BNC, the Olicom OC-2135/2138, OC-2325, OC-2326 10/100 TX UTP, and the Racore 816510/100baseTX and 8148 10baseT/100baseTX/100baseFX multi-personality cards
• ADMtek AL981-based and AN985-based PCI fast ethernet NICs
• ASIX Electronics AX88140A PCI NICs including the Alfa Inc. GFC2204 and CNet Pro110B
• DEC EtherWORKS III NICs (DE203, DE204, and DE205)
• DEC EtherWORKS II NICs (DE200, DE201, DE202, and DE422)
• DEC DC21040, DC21041, or DC21140 based NICs (SMC Etherpower 8432T, DE245, etc.)
• DEC FDDI (DEFPA/DEFEA) NICs
13

Chapter 2 Installing FreeBSD
• Efficient ENI-155p ATM PCI
• FORE PCA-200E ATM PCI
• Fujitsu MB86960A/MB86965A
• HP PC Lan+ cards (model numbers: 27247B and 27252A)
• Intel EtherExpress ISA (not recommended due to driver instability)
• Intel EtherExpress Pro/10
• Intel EtherExpress Pro/100B PCI Fast Ethernet
• Isolan AT 4141-0 (16 bit)
• Isolink 4110 (8 bit)
• Novell NE1000, NE2000, and NE2100 Ethernet interfaces
• PCI network cards emulating the NE2000, including the RealTek 8029, NetVin 5000, Winbond W89C940,Surecom NE-34, VIA VT86C926
• 3Com 3C501, 3C503 Etherlink II, 3C505 Etherlink/+, 3C507 Etherlink 16/TP, 3C509, 3C579, 3C589 (PCMCIA),3C590/592/595/900/905/905B/905C PCI and EISA (Fast) Etherlink III / (Fast) Etherlink XL, 3C980/3C980B FastEtherlink XL server adapter, 3CSOHO100-TX OfficeConnect adapter
• Toshiba ethernet cards
• PCMCIA ethernet cards from IBM and National Semiconductor are also supported
2.3.3 USB PeripheralsA wide range of USB peripherals are supported. Owing to the generic nature of most USB devices, with someexceptions any device of a given class will be supported even if not explicitly listed here.
• USB keyboards
• USB mice
• USB printers and USB to parallel printer conversion cables
• USB hubs
Motherboard chipsets:
• ALi Aladdin-V
• Intel 82371SB (PIIX3) and 82371AB and EB (PIIX4) chipsets
• NEC uPD 9210 Host Controller
14

Chapter 2 Installing FreeBSD
• VIA 83C572 USB Host Controller
and any other UHCI or OHCI compliant motherboard chipset (no exceptions known).
PCI plug-in USB host controllers
• ADS Electronics PCI plug-in card (2 ports)
• Entrega PCI plug-in card (4 ports)
Specific USB devices reported to be working:
• Agiler Mouse 29UO
• Andromeda hub
• Apple iMac mouse and keyboard
• ATen parallel printer adapter
• Belkin F4U002 parallel printer adapter and Belkin mouse
• BTC BTC7935 keyboard with mouse port
• Cherry G81-3504
• Chic mouse
• Cypress mouse
• Entrega USB-to-parallel printer adapter
• Genius Niche mouse
• Iomega USB Zip 100 MB
• Kensington Mouse-in-a-Box
• Logitech M2452 keyboard
• Logitech wheel mouse (3 buttons)
• Logitech PS/2 / USB mouse (3 buttons)
• MacAlly mouse (3 buttons)
• MacAlly self-powered hub (4 ports)
• Microsoft Intellimouse (3 buttons)
• Microsoft keyboard
• NEC hub
15

Chapter 2 Installing FreeBSD
• Trust Ami Mouse (3 buttons)
2.3.4 ISDN (European DSS1 [Q.921/Q.931] protocol)
• Asuscom I-IN100-ST-DV (experimental, may work)
• Asuscom ISDNlink 128K
• AVM A1
• AVM Fritz!Card classic
• AVM Fritz!Card PCI
• AVM Fritz!Card PCMCIA (currently FreeBSD 3.X only)
• AVM Fritz!Card PnP (currently FreeBSD 3.X only)
• Creatix ISDN-S0/8
• Creatix ISDN-S0/16
• Creatix ISDN-S0 PnP
• Dr.Neuhaus Niccy 1008
• Dr.Neuhaus Niccy 1016
• Dr.Neuhaus Niccy GO@ (ISA PnP)
• Dynalink IS64PH (no longer maintained)
• ELSA 1000pro ISA
• ELSA 1000pro PCI
• ELSA PCC-16
• ITK ix1 micro (currently FreeBSD 3.X only)
• ITK ix1 micro V.3 (currently FreeBSD 3.X only)
• Sagem Cybermod (ISA PnP, may work)
• Sedlbauer Win Speed
• Siemens I-Surf 2.0
• Stollman Tina-pp (under development)
• Teles S0/8
• Teles S0/16
16

Chapter 2 Installing FreeBSD
• Teles S0/16.3 (the “c” Versions - like 16.3c - are unsupported!)
• Teles S0 PnP (experimental, may work)
• 3Com/USRobotics Sportster ISDN TA intern (non-PnP version)
2.3.5 Sound DevicesThe following soundcards or codecs are supported (devices marked ’experimental’ are only supported inFreeBSD-CURRENT and might work only unstably):
• 16550 UART (Midi) (experimental, needs a trick in the hints file)
• Advance Asound 100, 110 and Logic ALS120
• Aureal Vortex1/Vortex2 and Vortex Advantage based soundcards by a third party driver(http://www.cis.ohio-state.edu/~matey/au88x0/)
• Creative Labs SB16, SB32, SB AWE64 (including Gold), Vibra16, SB PCI (experimental), SB Live!(experimental) and most SoundBlaster compatible cards
• Creative Labs SB Midi Port (experimental), SB OPL3 Synthesizer (experimental)
• Crystal Semiconductor CS461x/462x Audio Accelerator, the support for the CS461x Midi port is experimental
• Crystal Semiconductor CS428x Audio Controller
• CS4237, CS4236, CS4232, CS4231 (ISA)
• ENSONIQ AudioPCI ES1370/1371
• ESS ES1868, ES1869, ES1879, ES1888
• Gravis UltraSound PnP, MAX
• NeoMagic 256AV/ZX (PCI)
• OPTi931 (ISA)
• OSS-compatible sequencer (Midi) (experimental)
• Trident 4DWave DX/NX (PCI)
• Yahama OPL-SAx (ISA)
2.3.6 Miscellaneous Devices
• AST 4 port serial card using shared IRQ
17

Chapter 2 Installing FreeBSD
• ARNET 8 port serial card using shared IRQ
• ARNET (now Digiboard) Sync 570/i high-speed serial
• Boca BB1004 4-Port serial card (Modems NOT supported)
• Boca IOAT66 6-Port serial card (Modems supported)
• Boca BB1008 8-Port serial card (Modems NOT supported)
• Boca BB2016 16-Port serial card (Modems supported)
• Cyclades Cyclom-y Serial Board
• Moxa SmartIO CI-104J 4-Port serial card
• STB 4 port card using shared IRQ
• SDL Communications RISCom/8 Serial Board
• SDL Communications RISCom/N2 and N2pci high-speed sync serial boards
• Specialix SI/XIO/SX multiport serial cards, with both the older SIHOST2.x and the new “enhanced” (transputerbased, aka JET) host cards; ISA, EISA and PCI are supported
• Stallion multiport serial boards: EasyIO, EasyConnection 8/32 & 8/64, ONboard 4/16 and Brumby
• Adlib, SoundBlaster, SoundBlaster Pro, ProAudioSpectrum, Gravis UltraSound, and Roland MPU-401 soundcards
• Connectix QuickCam
• Matrox Meteor Video frame grabber
• Creative Labs Video Spigot frame grabber
• Cortex1 frame grabber
• Various frame grabbers based on the Brooktree Bt848 and Bt878 chip
• HP4020, HP6020, Philips CDD2000/CDD2660 and Plasmon CD-R drives
• Bus mice
• PS/2 mice
• Standard PC Joystick
• X-10 power controllers
• GPIB and Transputer drives
• Genius and Mustek hand scanners
• Floppy tape drives (some rather old models only, driver is rather stale)
18

Chapter 2 Installing FreeBSD
• Lucent Technologies WaveLAN/IEEE 802.11 PCMCIA and ISA standard speed (2Mbps) and turbo speed(6Mbps) wireless network adapters and workalikes (NCR WaveLAN/IEEE 802.11, Cabletron RoamAbout 802.11DS)
Note: The ISA versions of these adapters are actually PCMCIA cards combined with an ISA to PCMCIAbridge card, so both kinds of devices work with the same driver.
2.4 TroubleshootingThe following section covers basic installation troubleshooting, such as common problems people have reported.There are also a few questions and answers for people wishing to dual-boot FreeBSD with MS-DOS.
2.4.1 What to do if something goes wrong...Due to various limitations of the PC architecture, it is impossible for probing to be 100% reliable, however, there area few things you can do if it fails.
Check the supported hardware list to make sure your hardware is supported.
If your hardware is supported and you still experience lock-ups or other problems, reset your computer, and when thevisual kernel configuration option is given, choose it. This will allow you to go through your hardware and supplyinformation to the system about it. The kernel on the boot disks is configured assuming that most hardware devicesare in their factory default configuration in terms of IRQs, IO addresses, and DMA channels. If your hardware hasbeen reconfigured, you will most likely need to use the configuration editor to tell FreeBSD where to find things.
It is also possible that a probe for a device not present will cause a later probe for another device that is present tofail. In that case, the probes for the conflicting driver(s) should be disabled.
Warning: Do not disable any drivers you will need during the installation, such as your screen (sc0). If theinstallation wedges or fails mysteriously after leaving the configuration editor, you have probably removed orchanged something you should not have. Reboot and try again.
In configuration mode, you can:
• List the device drivers installed in the kernel.
19

Chapter 2 Installing FreeBSD
• Change device drivers for hardware that is not present in your system.
• Change IRQs, DRQs, and IO port addresses used by a device driver.
After adjusting the kernel to match your hardware configuration, type Q to boot with the new settings. Once theinstallation has completed, any changes you made in the configuration mode will be permanent so you do not have toreconfigure every time you boot. It is still highly likely that you will eventually want to build a custom kernel.
2.4.2 MS-DOS User’s Questions and AnswersMany users wish to install FreeBSD on PCs inhabited by MS-DOS. Here are some commonly asked questions aboutinstalling FreeBSD on such systems.
1. Help, I have no space! Do I need to delete everything first?
If your machine is already running MS-DOS and has little or no free space available for the FreeBSD installation, allhope is not lost! You may find the FIPS utility, provided in the tools directory on the FreeBSD CDROM or variousFreeBSD FTP sites to be quite useful.
FIPS allows you to split an existing MS-DOS partition into two pieces, preserving the original partition and allowingyou to install onto the second free piece. You first defragment your MS-DOS partition using the Windows DEFRAGutility (go into Explorer, right-click on the hard drive, and choose to defrag your hard drive), or Norton Disk Tools.You then must run FIPS. It will prompt you for the rest of the information it needs. Afterwards, you can reboot andinstall FreeBSD on the new free slice. See the Distributions menu for an estimate of how much free space you willneed for the kind of installation you want.
There is also a very useful product from PowerQuest (http://www.powerquest.com/) called Partition Magic. Thisapplication has far more functionality than FIPS, and is highly recommended if you plan to often add/removeoperating systems (like me). However, it does cost money, and if you plan to install FreeBSD once and then leave itthere, FIPS will probably be fine for you.
2. Can I use compressed MS-DOS filesystems from FreeBSD?
No. If you are using a utility such as Stacker(tm) or DoubleSpace(tm), FreeBSD will only be able to use whateverportion of the filesystem you leave uncompressed. The rest of the filesystem will show up as one large file (thestacked/double spaced file!). Do not remove that file or you will probably regret it greatly!
It is probably better to create another uncompressed primary MS-DOS partition and use this for communicationsbetween MS-DOS and FreeBSD.
20

Chapter 2 Installing FreeBSD
3. Can I mount my extended MS-DOS partition?
Yes. DOS extended partitions are mapped in at the end of the other “slices” in FreeBSD, e.g., your D: drive might be/dev/da0s5, your E: drive, /dev/da0s6, and so on. This example assumes, of course, that your extended partitionis on SCSI drive 0. For IDE drives, substitute ad for da appropriately if installing 4.0-RELEASE or later, andsubstitute wd for da if you are installing a version of FreeBSD prior to 4.0. You otherwise mount extended partitionsexactly like you would any other DOS drive, for example:
# mount -t msdos /dev/ad0s5 /dos_d
2.5 Advanced Installation GuideWritten by Valentino Vaschetto <[email protected]>, May 2001.
This section describes how to install FreeBSD in exceptional cases.
2.5.1 Installing FreeBSD on a system without a monitor or keyboardThis type of installation is called a "headless install", because the machine that you are trying to install FreeBSD oneither doesnt have a monitor attached to it, or doesnt even have a VGA output. How is this possible you ask? Using aserial console. A serial console is basically using another machine to act as the main display and keyboard for asystem. To do this, just follow these steps:
1. Fetch the right boot floppy images
First you will need to get the right disk images so that you can boot into the install program. The secret withusing a serial console is that you tell the boot loader to send I/O through a serial port instead of displayingconsole output to the VGA device and trying to read input from a local keyboard. Enough of that now, let’s getback to getting these disk images.
You will need to get kern.flp (ftp://ftp.freebsd.org/pub/FreeBSD/releases/i386/4.3-RELEASE/floppies/kern.flp)and mfsroot.flp (ftp://ftp.freebsd.org/pub/FreeBSD/releases/i386/4.3-RELEASE/floppies/mfsroot.flp) from thefloppies directory (ftp://ftp.FreeBSD.org/pub/FreeBSD/releases/i386/4.3-RELEASE/floppies/).
2. Write the image files to the floppy disks.
The image files, such as kern.flp, are not regular files that you copy to the disk. Instead, they are images of thecomplete contents of the disk.
21

Chapter 2 Installing FreeBSD
This means that you can not use commands like DOS’ copy to write the files. Instead, you must use specifictools to write the images directly to the disk.
If you are creating the floppies on a computer running DOS then we provide a tool to do this called fdimage.
If you are using the floppies from the CDROM, and your CDROM is the E: drive then you would run this:
E:\� tools\fdimage floppies\kern.flp A:
Repeat this command for each .flp file, replacing the floppy disk each time. Adjust the command line asnecessary, depending on where you have placed the .flp files. If you do not have the CDROM then fdimage
can be downloaded from the tools directory (ftp://ftp.FreeBSD.org/pub/FreeBSD/tools/) on the FreeBSD FTPsite.
If you are writing the floppies on a Unix system (such as another FreeBSD system) you can use the dd(1)command to write the image files directly to disk. On FreeBSD you would run:
# dd if=kern.flp of=/dev/fd0
On FreeBSD /dev/fd0 refers to the first floppy disk (the A: drive). /dev/rfd1 would be the B: drive, and soon. Other Unix variants might have different names for the floppy disk devices, and you will need to check thedocumentation for the system as necessary.
3. Enabling the boot floppies to boot into a serial console
Warning: Do not try to mount the floppy if it is write-protected
If you were to boot into the floppies that you just made, FreeBSD would boot into its normal install mode. Wewant FreeBSD to boot into a serial console for our install. To do this, you have to mount the kern.flp floppyonto your FreeBSD system using the mount(8) command.
# mount /dev/fd0 /mnt
Now that you have the floppy mounted, you must change into the floppy directory
# cd /mnt
Here is where you must set the floppy to boot into a serial console. You have to make a file called boot.config
containing "/boot/loader -h". All this does is pass a flag to the bootloader to boot into a serial console.
# echo "/boot/loader -h" > boot.config
Now that you have your floppy configured correctly, you must unmount the floppy using the umount(8)command
# cd /# umount /mnt
Now you can remove the floppy from the floppy drive
22

Chapter 2 Installing FreeBSD
4. Connecting your null modem cable
You now need to connect a null modem cable between the two machines. Just connect the cable to the serialports of the 2 machines. A normal serial cable will not work here, you need a null modem cable because it hassome of the wires inside crossed over.
5. Booting up for the install
It’s now time to go ahead and start the install. Put the kern.flp floppy in the floppy drive of the machine you’redoing the headless install on, and power on the machine.
6. Connecting to your headless machine
Now you have to connect to that machine with cu(1):
# cu -l /dev/cuaa0
That’s it! You should be able to control the headless machine through your cu session now. It will ask you to put inthe mfsroot.flp, and then it will come up with a selection of what kind of terminal to use. Just select the FreeBSDcolor console and proceed with your install!
23

Chapter 3 Unix Basics
3.1 SynopsisRewritten by Christopher Shumway <[email protected]>, 10 Mar 2000.
The following chapter will cover the basic commands and functionality of the FreeBSD operating system. If you arenew to FreeBSD, you will definitely want to read through this chapter before asking for help.
3.2 PermissionsFreeBSD, having its history rooted in BSD UNIX, has its fundamentals based on several key UNIX concepts. Thefirst, and most pronounced, is that FreeBSD is a multi-user operating system. The system can handle several users allworking simultaneously on completely unrelated tasks. The system is responsible for properly sharing and managingrequests for hardware devices, peripherals, memory, and CPU time evenly to each user.
Because the system is capable of supporting multiple users, everything the system manages has a set of permissionsgoverning who can read, write, and execute the resource. These permissions are stored as two octets broken intothree pieces, one for the owner of the file, one for the group that the file belongs to, and one for everyone else. Thisnumerical representation works like this:
Value Permission Directory Listing
0 No read, no write, no execute ---
1 No read, no write, execute --x
2 No read, write, no execute -w-
3 No read, write, execute -wx
4 Read, no write, no execute r--
5 Read, no write, execute r-x
6 Read, write, no execute rw-
7 Read, write, execute rwx
For the long directory listing by ls -l, a column will show a file’s permissions for the owner, group, and everyoneelse. Here’s how it is broken up:
-rw-r--r--
The first character, from left to right, is a special character that tells if this is a regular file, a directory, a special
24

Chapter 3 Unix Basics
character or block device, a socket, or any other special pseudo-file device. The next three characters, designated asrw- gives the permissions for the owner of the file. The next three characters, r-- gives the permissions for thegroup that the file belongs to. The final three characters, r--, gives the permissions for the rest of the world. A dashmeans that the permission is turned off. In the case of this file, the permissions are set so the owner can read andwrite to the file, the group can read the file, and the rest of the world can only read the file. According to the tableabove, the permissions for this file would be 644, where each digit represents the three parts of the file’s permission.
This is all well and good, but how does the system control permissions on devices? FreeBSD actually treats mosthardware devices as a file that programs can open, read, and write data to just like any other file. These special devicefiles are stored on the /dev directory.
Directories are also treated as files. They have read, write, and execute permissions. The executable bit for adirectory has a slightly different meaning than that of files. When a directory is marked executable, it means it can besearched into, for example, a directory listing can be done in that directory.
There are more to permissions, but they are primarily used in special circumstances such as setuid binaries and stickydirectories. If you want more information on file permissions and how to set them, be sure to look at the chmod(1)man page.
3.3 Directory StructuresSince FreeBSD uses its file systems to determine many fundamental system operations, the hierarchy of the filesystem is extremely important. Due to the fact that the hier(7) man page provides a complete description of thedirectory structure, it will not be duplicated here. Please read hier(7) for more information.
Of significant importance is the root of all directories, the / directory. This directory is the first directory mounted atboot time and it contains the base system necessary at boot time. The root directory also contains mount points forevery other file system that you want to mount.
A mount point is a directory where additional file systems can be grafted onto the root file system. Standard mountpoints include /usr, /var, /mnt, and /cdrom. These directories are usually referenced to entries in the file/etc/fstab. /etc/fstab is a table of various file systems and mount points for reference by the system. Most ofthe file systems in /etc/fstab are mounted automatically at boot time from the script rc(8) unless they contain thenoauto option. Consult the fstab(5) manual page for more information on the format of the /etc/fstab file andthe options it contains.
3.4 ShellsIn FreeBSD, a lot of everyday work is done in a command line interface called a shell. A shell’s main job is to takecommands from the input channel and execute them. A lot of shells also have built in functions to help everyday
25

Chapter 3 Unix Basics
tasks such a file management, file globing, command line editing, command macros, and environment variables.FreeBSD comes with a set of shells, such as sh, the Bourne Shell, and csh, the C-shell. Many other shells areavailable from the FreeBSD Ports Collection that have much more power, such as tcsh and bash.
Which shell do you use? It is really a matter of taste. If you are a C programmer you might feel more comfortablewith a C-like shell such as tcsh. If you’ve come from Linux or are new to a UNIX command line interface you mighttry bash. The point is that each shell has unique properties that may or may not work with your preferred workingenvironment, and that you have a choice of what shell to use.
One common feature in a shell is file-name completion. Given the typing of the first few letters of a command orfilename, you can usually have the shell automatically complete the rest of the command or filename by hitting theTAB key on the keyboard. Here is an example. Suppose you have two files called foobar and foo.bar. You want todelete foo.bar. So what you would type on the keyboard is: rm fo[TAB].[TAB].
The shell would print out rm foo[BEEP].bar.
The [BEEP] is the console bell, which is the shell telling me it was unable to totally complete the filename becausethere is more than one match. Both foobar and foo.bar start with fo, but it was able to complete to foo. If youtype in ., then hit TAB again, the shell would be able to fill in the rest of the filename for you.
Another function of the shell is environment variables. Environment variables are a variable key pair stored in theshell’s environment space. This space can be read by any program invoked by the shell, and thus contains a lot ofprogram configuration. Here is a list of common environment variables and what they mean:
Variable Description
USER Current logged in user’s name.
PATH Colon separated list of directories to search for binaries.
DISPLAY Network name of the X11 display to connect to, ifavailable.
SHELL The current shell.
TERM The name of the user’s terminal. Used to determine thecapabilities of the terminal.
TERMCAP Database entry of the terminal escape codes to performvarious terminal functions.
OSTYPE Type of operating system. E.g., FreeBSD.
MACHTYPE The CPU architecture that the system is running on.
EDITOR The user’s preferred text editor.
PAGER The user’s preferred text pager.
MANPATH Colon separated list of directories to search for manualpages.
To view or set an environment variable differs somewhat from shell to shell. For example, in the C-Style shells such
26

Chapter 3 Unix Basics
as tcsh and csh, you would use setenv to set and view environment variables. Under Bourne shells such as sh andbash, you would use set and export to view and set your current environment variables. For example, to set ormodify the EDITOR environment variable, under csh or tcsh a command like this would set EDITOR to/usr/local/bin/emacs:
% setenv EDITOR /usr/local/bin/emacs
Under Bourne shells:
% export EDITOR="/usr/local/bin/emacs"
You can also make most shells expand the environment variable by placing a $ character in front of it on thecommand line. For example, echo $TERM would print out whatever $TERM is set to, because the shell expands$TERM and passes it on to echo.
Shells treat a lot of special characters, called meta-characters as special representations of data. The most commonone is the * character, which represents any number of characters in a filename. These special meta-characters can beused to do file name globing. For example, typing in echo * is almost the same as typing in ls because the shelltakes all the files that match * and puts them on the command line for echo to see.
To prevent the shell from interpreting these special characters, they can be escaped from the shell by putting abackslash (\) character in front of them. echo $TERM prints whatever your terminal is set to. echo \$TERM prints$TERM as is.
3.4.1 Changing your shellThe easiest way to change your shell is to use the chsh command. Running chsh will place you into the editor that isin your EDITOR environment variable; if it is not set, you will be placed in vi. Change the “Shell:” line accordingly.
You can also give chsh the -s option; this will set your shell for you, without requiring you to enter an editor. Forexample, if you wanted to change your shell to bash, the following should do the trick:
% chsh -s /usr/local/bin/bash
Running chsh with no parameters and editing the shell from there would work also.
Note: The shell that you wish to use must be present in the /etc/shells file. If you have installed a shell fromthe ports collection, then this should have been done for you already. If you installed the shell by hand, you mustdo this.
For example, if you installed bash by hand and placed it into /usr/local/bin, you would want to:
# echo "/usr/local/bin/bash"� �
/etc/shells
Then rerun chsh.
27

Chapter 3 Unix Basics
3.5 Text EditorsA lot of configuration in FreeBSD is done by editing a text file. Because of this, it would be a good idea to becomefamiliar with a text editor. FreeBSD comes with a few as part of the base system, and many more are available in theports collection.
The easiest and simplest editor to learn is an editor called ee, which stands for easy editor. To start ee, one wouldtype at the command line ee filename where filename is the name of the file to be edited. For example, to edit/etc/rc.conf, type in ee /etc/rc.conf. Once inside of ee, all of the commands for manipulating the editor’sfunctions are listed at the top of the display. The caret ^ character means the control key on the keyboard, so ^eexpands to pressing the control key plus the letter e. To leave ee, hit the escape key, then choose leave editor. Theeditor will prompt you to save any changes if the file has been modified.
FreeBSD also comes with more powerful text editors such as vi as part of the base system, and emacs and vim aspart of the FreeBSD ports collection. These editors offer much more functionality and power at the expense of beinga little more complicated to learn. However if you plan on doing a lot of text editing, learning a more powerful editorsuch as vim or emacs will save you much more time in the long run.
3.6 For More Information...
3.6.1 Manual pagesThe most comprehensive documentation on FreeBSD is in the form of man pages. Nearly every program on thesystem comes with a short reference manual explaining the basic operation and various arguments. These manualscan be viewed with the man command. Use of the man command is simple:
% man command
command is the name of the command you wish to learn about. For example, to learn more about ls command type:
% man ls
The online manual is divided up into numbered sections:
1. User commands.
28

Chapter 3 Unix Basics
2. System calls and error numbers.
3. Functions in the C libraries.
4. Device drivers.
5. File formats.
6. Games and other diversions.
7. Miscellaneous information.
8. System maintenance and operation commands.
9. Kernel developers.
In some cases, the same topic may appear in more than one section of the online manual. For example, there is achmod user command and a chmod() system call. In this case, you can tell the man command which one you wantby specifying the section:
% man 1 chmod
This will display the manual page for the user command chmod. References to a particular section of the onlinemanual are traditionally placed in parenthesis in written documentation, so chmod(1) refers to the chmod usercommand and chmod(2) refers to the system call.
This is fine if you know the name of the command and simply wish to know how to use it, but what if you cannotrecall the command name? You can use man to search for keywords in the command descriptions by using the -kswitch:
% man -k mail
With this command you will be presented with a list of commands that have the keyword “mail” in their descriptions.This is actually functionally equivalent to using the apropos command.
So, you are looking at all those fancy commands in /usr/bin but do not have the faintest idea what most of themactually do? Simply do:
% cd /usr/bin% man -f *
or
% cd /usr/bin% whatis *
which does the same thing.
29

Chapter 3 Unix Basics
3.6.2 GNU Info FilesFreeBSD includes many applications and utilities produced by the Free Software Foundation (FSF). In addition toman pages, these programs come with more extensive hypertext documents called info files which can be viewedwith the info command or, if you installed emacs, the info mode of emacs.
To use the info(1) command, simply type:
% info
For a brief introduction, type h. For a quick command reference, type ?.
30

Chapter 4 Installing Applications: Packagesand Ports
4.1 SynopsisThere is only so much you can do with FreeBSD. If you are an operating systems developer then the base systemlikely contains everything you need. If that is not what you are planning to do with FreeBSD then you will probablywant to install additional software—perhaps a web server, or a mail reader, or a graphical environment such as KDEor GNOME.
If you have used a Unix system before you will know that the typical procedure for installing third party softwaregoes something like this:
1. Download the software, which might be distributed in source code format, or as a binary.
2. Unpack the software from its distribution format (typically a tarball compressed with either compress(1) orgzip(1)).
3. Locate the documentation (perhaps a README file, or some files in a doc/ subdirectory) and read up on how toinstall the software.
4. If the software was distributed in source format, compile it. This may involve editing a Makefile, or running aconfigure script, and other work.
5. Test and install the software.
And that is only if everything goes well. If you are installing a software package that was not deliberately ported toFreeBSD you may even have to go in and edit the code to make it work properly.
Should you want to, you can continue to install software the “traditional” way with FreeBSD. However, FreeBSDprovides two technologies which can save you a lot of effort; packages and ports. At the time of writing, over 5,400third party applications have been made available in this way.
For any given application, the FreeBSD package for that application is a single file which you must download. Thepackage contains pre-compiled copies of all the commands for the application, as well as any configuration files ordocumentation. A downloaded package file can be manipulated with FreeBSD pkg_* commands, such aspkg_add(1) pkg_delete(1), pkg_info(1), and so on.
Installing a new application can be carried out with a single command.
A FreeBSD port for an application is a collection of files designed to automate the process of compiling anapplication from source code.
31

Chapter 4 Installing Applications: Packages and Ports
Remember that there are a number of steps you would normally carry out if you compiled a program yourself(unpacking, patching, compiling, installing). The files that make up a port contain all the necessary information toalllow the system to do this for you. You run a handful of simple commands and the source code for the applicationis automatically downloaded, extracted, patched, compiled, and installed for you.
In fact, the ports system can also be used to generate packages which can later be manipulated with the pkg_*commands.
Both packages and ports understand dependencies. Suppose you want to install an application that depends on aspecific library being installed. Both the application and the library have been made available as FreeBSD ports andpackages. If you use the pkg_add command or the ports system to add the application, both will notice that thelibrary has not been installed, and the commands will install the library first.
Given that the two technologies are quite similar, you might be wondering why FreeBSD bothers with both.Packages and ports both have their own strengths, and which one you use will depend on your own preference.
Package benefits
• A compressed package tarball is typically smaller than the compressed tarball containing the source code for theapplication.
• Packages do not require any additional compilation. For large applications, such as Mozilla, KDE, or GNOMEthis can be important, particularly if you are on a slow system.
• Packages do not require you to understand any of the process involved in compiling software on FreeBSD.
Ports benefits
• Packages are normally compiled with conservative options, because they have to run on the maximum number ofsystems. By installing from the port, you can tweak the compilation options to (for example) generate code that isspecific to a 686 processor.
• Some packages have compile time options relating to what they can and can’t do. For example, Apache can beconfigured with a wide variety of different builtin options. By building from the port you do not have to accept thedefault options, and can set them yourself.
In some cases, multiple packages will exist for the same application to specify certain settings. For example,Ghostscript is available as a ghostscript package and a ghostscript-nox11 package, depending onwhether or not you have installed an X11 server. This sort of rough tweaking is possible with packages, but rapidlybecomes impossible if an application has more than one or two different compile time options.
• The licensing conditions of some software distributions forbid binary distribution. They must be distributed assource code.
• Some people do not trust binary distributions. At least with source code, you can (in theory) read through it andlook for potential problems yourself.
32

Chapter 4 Installing Applications: Packages and Ports
• If you have local patches, you will need the source in order to apply them.
• Some people like having code around, so they can read it if they get bored, hack it, borrow from it (licensepermitting, of course), and so on.
To keep track of updated ports, subscribe to freebsd-ports.
The remainder of this chapter will explain how to use packages and ports to install and manage third party softwareon FreeBSD.
4.2 Finding your applicationBefore you can install any applications you need to know what you want, and what the application is called.
FreeBSD’s list of available applications is growing all the time. Currently there are over 5,400 applications availableas packages or ports. There are a number of ways to find what you want.
• The FreeBSD web site maintains an up-to-date searchable list of all the available applications, athttp://www.FreeBSD.org/ports/. The name space is divided in to categories, and you may either search for anapplication by name (if you know it), or you can list all the applications available in a category.
• Dan Langille maintains FreshPorts, at http://www.freshports.org/. FreshPorts tracks changes to the applications inthe ports tree as they happen, and allows you to “watch” one or more ports, and will send you an e-mail when theyare updated.
• If you do not know the name of the application you want, try using a site like FreshMeat(http://www.freshmeat.net/) or AppWatch (http://www.appwatch.com/) to find an application, then check back atthe FreeBSD site to see if the application has been ported yet.
4.3 Using the Packages SystemContributed by Chern Lee <[email protected]>, April 30, 2001.
4.3.1 Installing a PackageYou can use the pkg_add(1) utility to install a FreeBSD software package from a local file or from a server on thenetwork.
33

Chapter 4 Installing Applications: Packages and Ports
Example 4-1. Downloading a package and then installing it locally
# ftp ftp2.freebsd.orgConnected to ftp2.freebsd.org.220 ftp2.freebsd.org FTP server (Version 6.00LS) ready.331 Guest login ok, send your email address as password.230-230- This machine is in Vienna, VA, USA, hosted by Verio.230- Questions? E-mail [email protected] Guest login ok, access restrictions apply.Remote system type is UNIX.Using binary mode to transfer files.ftp> cd /pub/FreeBSD/ports/packages/irc250 CWD command successful.ftp> get xchat-1.7.1.tgzlocal: xchat-1.7.1.tgz remote: xchat-1.7.1.tgz150 Opening BINARY mode data connection for ’xchat-1.7.1.tgz’ (471488 bytes).100% |**************************************************| 460 KB 00:00 ETA226 Transfer complete.471488 bytes received in 5.37 seconds (85.70 KB/s)ftp> exit# pkg_add xchat-1.7.1.tgz#
If you don’t have a source of local packages (such as a FreeBSD CDROM set) then it will probably be easier to usethe -r option to pkg_add(1). This will cause the utility to automatically determine the correct object format andrelease and then to fetch and install the package from an FTP site.
# pkg_add -r xchat-1.7.1
This would download the correct package and add it without any further user intervention.
Package files are distributed in .tgz format. You can find them at ftp://ftp.freebsd.org/pub/FreeBSD/ports/packages/(ftp://ftp.freebsd.org/pub/FreeBSD/ports/packages/), or on the FreeBSD CDROM distribution. Every CD on theFreeBSD 4-CD set (and PowerPak, etc) contains packages in the /packages directory. The layout of the packages issimilar to that of the /usr/ports tree. Each category has its own directory, and every package can be found withinthe All directory.
The directory structure of the package system is homologous to that of the ports; they work with each other to formthe entire package/port system.
34

Chapter 4 Installing Applications: Packages and Ports
4.3.2 Deleting a Package
# pkg_delete xchat-1.7.1#
pkg_delete(1) is the utility for removing previously installed software package distributions.
4.3.3 Managing packagespkg_info(1) a utility that lists and describes the various packages installed.
# pkg_infocvsup-bin-16.1 A general network file distribution system optimized for CVdocbook-1.2 Meta-port for the different versions of the DocBook DTD...
pkg_version(1) a utility that summarizes the versions of all installed packages. It compares the package version tothe current version found in the ports tree.
# pkg_versioncvsup-bin =docbook =...
The symbols in the second column indicate the relative age of the installed version and the version available in thelocal ports tree.
Symbol Meaning
= The version of the installed package matches that of theone found in the local ports tree.
� The installed version is older then the one available in theports tree.
� The installed version is newer than the one found in thelocal ports tree. (local ports tree is probably out of date)
? The installed package cannot be found in the ports index.
* There are multiple versions of the package.
35

Chapter 4 Installing Applications: Packages and Ports
4.3.4 Miscellaneouspkg_add(1) pkg_delete(1) pkg_info(1) pkg_version(1) pkg_create(1)
All package information is stored within the /var/db/pkg directory. The listing of contents and descriptions ofeach package can be found within files in this directory.
4.4 Using the Ports CollectionThe following sections provide basic instructions on using the ports collection to install or remove programs fromyour system.
4.4.1 Installing PortsThe first thing that should be explained when it comes to the Ports collection is what is actually meant by a“skeleton”. In a nutshell, a port skeleton is a minimal set of files that are needed for a program to compile and installcleanly on FreeBSD. Each port skeleton includes:
• A Makefile. The Makefile contains various statements that specify how the application should be compiled andwhere it should be installed on your system
• A distinfo file. This file contains information about the files that must be downloaded to build the port, andchecksums, to ensure that those files have not been corrupted during the download.
• A files directory. This directory contains patches to make the program compile and install on your FreeBSDsystem. Patches are basically small files that specify changes to particular files. They are in plain text format, andbasically say “Remove line 10” or “Change line 26 to this ...”. Patches are also known as “diffs” because they aregenerated by the diff program.
This directory may also contain other files used in building the port.
• A pkg-comment file. This is a one-line description of the program.
• A pkg-descr file. This is a more detailed, often multiple-line, description of the program.
• A pkg-plist file. This is a list of all the files that will be installed by the port. It also tells the ports system whatfiles to remove upon deinstallation.
Now that you have enough background information to know what the Ports collection is used for, you are ready toinstall your first port. There are two ways this can be done, and each is explained below.
36

Chapter 4 Installing Applications: Packages and Ports
Before we get into that however, you will need to choose a port to install. There are a few ways to do this, with theeasiest method being the ports listing on the FreeBSD web site (http://www.freebsd.org/ports/). You can browsethrough the ports listed there or use the search function on the site. Each port also includes a description so you canread a bit about each port before deciding to install it.
Another method is to use the whereis command. To use whereis, simply type “whereis � program you want
to install � ” at the prompt, and if it is found on your system, you will be told where it is, like so:
# whereis xchatxchat: /usr/ports/irc/xchat#
This tells us that xchat (an irc client) can be found in the /usr/ports/irc/xchat directory.
Yet another way of finding a particular port is by using the Ports collection’s built-in search mechanism. To use thesearch feature, you will need to be in the /usr/ports directory. Once in that directory, run make search
key=program-name where “program-name” is the name of the program you want to find. For example, if you werelooking for xchat:
# cd /usr/ports# make search key=xchatPort: xchat-1.3.8Path: /usr/ports/irc/xchatInfo: An X11 IRC client using the GTK+ toolkit, and optionally, GNOMEMaint: [email protected]: ircB-deps: XFree86-3.3.5 bzip2-0.9.5d gettext-0.10.35 giflib-4.1.0 glib-1.2.6 gmake-3.77 gtk-
1.2.6imlib-1.9.8 jpeg-6b png-1.0.3 tiff-3.5.1
R-deps: XFree86-3.3.5 gettext-0.10.35 giflib-4.1.0 glib-1.2.6 gtk-1.2.6 imlib-1.9.8 jpeg-6b
png-1.0.3 tiff-3.5.1
The part of the output you want to pay particular attention to is the “Path:” line, since that tells you where to find it.The other information provided is not needed in order to install the port directly, so it will not be covered here.
Note: You must be the root user to install ports.
Now that you have found a port you would like to install, you are ready to do the actual installation.
37

Chapter 4 Installing Applications: Packages and Ports
4.4.1.1 Installing ports from a CDROM
As you may have guessed from the title, everything described in this section assumes you have a FreeBSD CDROMset. If you do not, you can order one from the FreeBSD Mall (http://www.freebsdmall.com/).
Assuming that your FreeBSD CDROM is in the drive and is mounted on /cdrom (and the mount point must be/cdrom), you are ready to install the port. To begin, change directories to the directory where the port you want toinstall lives:
# cd /usr/ports/irc/xchat
Once inside the xchat directory, you will see the port skeleton. The next step is to compile (also called build) the port.This is done by simply typing make at the prompt. Once you have done so, you should see something like this:
# make� � xchat-1.3.8.tar.bz2 doesn’t seem to exist on this system.� � Attempting to fetch from file:/cdrom/ports/distfiles/.=== � Extracting for xchat-1.3.8
� � Checksum OK for xchat-1.3.8.tar.bz2.=== � xchat-1.3.8 depends on executable: bzip2 - found=== � xchat-1.3.8 depends on executable: gmake - found=== � xchat-1.3.8 depends on shared library: gtk12.2 - found=== � xchat-1.3.8 depends on shared library: Imlib.5 - found=== � xchat-1.3.8 depends on shared library: X11.6 - found=== � Patching for xchat-1.3.8=== � Applying FreeBSD patches for xchat-1.3.8=== � Configuring for xchat-1.3.8...[configure output snipped]...=== � Building for xchat-1.3.8...[compilation snipped]...#
Take notice that once the compile is complete you are returned to your prompt. The next step is to install the port. Inorder to install it, you simply need to tack one word onto the make command, and that word is install:
# make install=== � Installing for xchat-1.3.8=== � xchat-1.3.8 depends on shared library: gtk12.2 - found=== � xchat-1.3.8 depends on shared library: Imlib.5 - found=== � xchat-1.3.8 depends on shared library: X11.6 - found...[install routines snipped]
38

Chapter 4 Installing Applications: Packages and Ports
...=== � Generating temporary packing list=== � Installing xchat docs in /usr/X11R6/share/doc/xchat=== � Registering installation for xchat-1.3.8#
Once you are returned to your prompt, you should be able to run the application you just installed.
Note: You can save an extra step by just running make install instead of make and make install as twoseparate steps.
Note: Please be aware that the licenses of a few ports do not allow for inclusion on the CDROM. This could befor various reasons, including things such as registration form needs to be filled out before downloading, ifredistribution is not allowed, and so on. If you wish to install a port not included on the CDROM, you will need tobe online in order to do so (see the next section).
4.4.1.2 Installing ports from the Internet
As with the last section, this section makes an assumption that you have a working Internet connection. If you do not,you will need to do the CDROM installation.
Installing a port from the Internet is done exactly the same way as it would be if you were installing from a CDROM.The only difference between the two is that the program’s source code is downloaded from the Internet instead ofpulled from the CDROM.
The steps involved are identical:
# make install� � xchat-1.3.8.tar.bz2 doesn’t seem to exist on this system.� � Attempting to fetch from http://xchat.org/files/v1.3/.Receiving xchat-1.3.8.tar.bz2 (305543 bytes): 100%305543 bytes transferred in 2.9 seconds (102.81 Kbytes/s)=== � Extracting for xchat-1.3.8
� � Checksum OK for xchat-1.3.8.tar.bz2.=== � xchat-1.3.8 depends on executable: bzip2 - found=== � xchat-1.3.8 depends on executable: gmake - found=== � xchat-1.3.8 depends on shared library: gtk12.2 - found=== � xchat-1.3.8 depends on shared library: Imlib.5 - found=== � xchat-1.3.8 depends on shared library: X11.6 - found=== � Patching for xchat-1.3.8
39

Chapter 4 Installing Applications: Packages and Ports
=== � Applying FreeBSD patches for xchat-1.3.8=== � Configuring for xchat-1.3.8...[configure output snipped]...=== � Building for xchat-1.3.8...[compilation snipped]...=== � Installing for xchat-1.3.8=== � xchat-1.3.8 depends on shared library: gtk12.2 - found=== � xchat-1.3.8 depends on shared library: Imlib.5 - found=== � xchat-1.3.8 depends on shared library: X11.6 - found...[install routines snipped]...=== � Generating temporary packing list=== � Installing xchat docs in /usr/X11R6/share/doc/xchat=== � Registering installation for xchat-1.3.8#
As you can see, the only difference is the line that tells you where the system is fetching the port from.
That about does it for installing ports onto your system. In the section you will learn how to remove a port from yoursystem.
4.4.2 Removing Installed PortsNow that you know how to install ports, you are probably wondering how to remove them, just in case you installone and later on you decide that you installed the wrong port. The next few paragraphs will cover just that.
Now we will remove our previous example (which was xchat for those of you not paying attention). As withinstalling ports, the first thing you must do is change to the port directory, which if you remember was/usr/ports/irc/xchat. After you change directories, you are ready to uninstall xchat. This is done with themake deinstall command (makes sense right?):
# cd /usr/ports/irc/xchat# make deinstall=== � Deinstalling for xchat-1.3.8#
That was easy enough. You have now managed to remove xchat from your system. If you would like to reinstall it,you can do so by running make reinstall from the /usr/ports/irc/xchat directory.
40

Chapter 4 Installing Applications: Packages and Ports
4.5 TroubleshootingThe following sections cover some of the more frequently asked questions about the Ports collection and some basictroubleshooting techniques, and what do to if a port is broken.
4.5.1 Some Questions and Answers
1. I thought this was going to be a discussion about modems??!
Ah, you must be thinking of the serial ports on the back of your computer. We are using “port” here to mean theresult of “porting” a program from one version of UNIX to another.
2. What is a patch?
A patch is a small file that specifies how to go from one version of a file to another. It contains plain text, andbasically says things like “delete line 23”, “add these two lines after line 468”, or “change line 197 to this”. They arealso known as diffs because they are generated by the diff program.
3. What is all this about tarballs?
It is a file ending in .tar, or with variations such as .tar.gz, .tar.Z, .tar.bz2, and even .tgz.
Basically, it is a directory tree that has been archived into a single file (.tar) and optionally compressed (.gz). Thistechnique was originally used for Tape ARchives (hence the name tar), but it is a widely used way of distributingprogram source code around the Internet.
You can see what files are in them, or even extract them yourself by using the standard UNIX tar program, whichcomes with the base FreeBSD system, like this:
% tar tvzf foobar.tar.gz% tar xzvf foobar.tar.gz% tar tvf foobar.tar% tar xvf foobar.tar
4. And a checksum?
It is a number generated by adding up all the data in the file you want to check. If any of the characters change, thechecksum will no longer be equal to the total, so a simple comparison will allow you to spot the difference.
5. I did what you said for compiling ports from a CDROM and it worked great until I tried to install the kermit port.
41

Chapter 4 Installing Applications: Packages and Ports
# make install� � cku190.tar.gz doesn’t seem to exist on this system.� � Attempting to fetch from ftp://kermit.columbia.edu/kermit/archives/.
Why can it not be found? Have I got a dud CDROM?
As was explained in the compiling ports from CDROM section, some ports cannot be put on the CDROM set due tolicensing restrictions. Kermit is an example of that. The licensing terms for kermit do not allow us to put the tarballfor it on the CDROM, so you will have to fetch it by hand—sorry!
The reason why you got all those error messages was because you were not connected to the Internet at the time.Once you have downloaded it from any of the MASTER_SITES (listed in the Makefile), you can restart the installprocess.
6. I did that, but when I tried to put it into /usr/ports/distfiles I got some error about not having permission.
The ports mechanism looks for the tarball in /usr/ports/distfiles, but you will not be able to copy anythingthere because it is symlinked to the CDROM, which is read-only. You can tell it to look somewhere else by doing:
# make DISTDIR=/where/you/put/it install
7. Does the ports scheme only work if you have everything in /usr/ports? My system administrator says I mustput everything under /u/people/guests/wurzburger, but it does not seem to work.
You can use the PORTSDIR and PREFIX variables to tell the ports mechanism to use different directories. Forinstance,
# make PORTSDIR=/u/people/guests/wurzburger/ports install
will compile the port in /u/people/guests/wurzburger/ports and install everything under /usr/local.
# make PREFIX=/u/people/guests/wurzburger/local install
will compile it in /usr/ports and install it in /u/people/guests/wurzburger/local.
And of course,
# make PORTSDIR=../ports PREFIX=../local install
will combine the two (it is too long to write fully on the page, but it should give you the general idea).
42

Chapter 4 Installing Applications: Packages and Ports
Some ports that use imake(1) (a part of the X Windows System) don’t work well with PREFIX, and will insist oninstalling under /usr/X11R6. Similarly, some Perl ports ignore PREFIX and install in the Perl tree. Making theseports respect PREFIX is a difficult or impossible job.
If you do not fancy typing all that in every time you install a port, it is a good idea to put these variables into yourenvironment. Read the man page for your shell for instructions on doing so.
8. I do not have a FreeBSD CDROM, but I would like to have all the tarballs handy on my system so I do not have towait for a download every time I install a port. Is there any way to get them all at once?
To get every single tarball for the Ports collection, do:
# cd /usr/ports# make fetch
For all the tarballs for a single ports directory, do:
# cd /usr/ports/directory# make fetch
and for just one port—well, you have probably guessed already.
9. I know it is probably faster to fetch the tarballs from one of the FreeBSD mirror sites close by. Is there any way totell the port to fetch them from servers other than the ones listed in the MASTER_SITES?
Yes. If you know, for example, that ftp.FreeBSD.org is much closer to you than the sites listed inMASTER_SITES, do as follows:
# cd /usr/ports/directory# make MASTER_SITE_OVERRIDE= \
ftp://ftp.FreeBSD.org/pub/FreeBSD/ports/distfiles/ fetch
10. I want to know what files make is going to need before it tries to pull them down.
make fetch-list will display a list of the files needed for a port.
11. Is there any way to stop the port from compiling? I want to do some hacking on the source before I install it, butit is a bit tiresome to watch it and hit control-C every time.
Doing make extract will stop it after it has fetched and extracted the source code.
43

Chapter 4 Installing Applications: Packages and Ports
12. I am trying to make my own port and I want to be able to stop it compiling until I have had a chance to see if mypatches worked properly. Is there something like make extract, but for patches?
Yep, make patch is what you want. You will probably find the PATCH_DEBUG option useful as well. And by theway, thank you for your efforts!
13. I have heard that some compiler options can cause bugs. Is this true? How can I make sure that I compile portswith the right settings?
Yes, with version 2.6.3 of gcc (the version shipped with FreeBSD 2.1.0 and 2.1.5), the -O2 option could result inbuggy code unless you used the -fno-strength-reduce option as well. (Most of the ports do not use -O2). Youshould be able to specify the compiler options used by something like:
# make CFLAGS=’-O2 -fno-strength-reduce’ install
or by editing /etc/make.conf, but unfortunately not all ports respect this. The surest way is to do make
configure, then go into the source directory and inspect the Makefiles by hand, but this can get tedious if thesource has lots of sub-directories, each with their own Makefiles.
The default FreeBSD compiler options are quite conservative, so if you have not changed them you should not haveany problems.
14. There are so many ports it is hard to find the one I want. Is there a list anywhere of what ports are available?
Look in the INDEX file in /usr/ports. If you would like to search the ports collection for a keyword, you can dothat too. For example, you can find ports relevant to the LISP programming language using:
% cd /usr/ports% make search key=lisp
15. I went to install the foo port but the system suddenly stopped compiling it and starting compiling the bar port.What is going on?
The foo port needs something that is supplied with bar — for instance, if foo uses graphics, bar might have alibrary with useful graphics processing routines. Or bar might be a tool that is needed to compile the foo port.
16. I installed the grizzle program from the ports and frankly it is a complete waste of disk space. I want to deleteit but I do not know where it put all the files. Any clues?
No problem, just do:
# pkg_delete grizzle-6.5
44

Chapter 4 Installing Applications: Packages and Ports
Alternatively, you can do:
# cd /usr/ports/somewhere/grizzle# make deinstall
17. Hang on a minute, you have to know the version number to use that command. You do not seriously expect me toremember that, do you??
Not at all, you can find it out by doing:
# pkg_info -I ’grizzle*’Information for grizzle-6.5:grizzle-6.5 - the combined piano tutorial, LOGO interpreter and shoot ’em uparcade game.
18. Talking of disk space, the ports directory seems to be taking up an awful lot of room. Is it safe to go in there anddelete things?
Yes, if you have installed the program and are fairly certain you will not need the source again, there is no point inkeeping it hanging around. The best way to do this is:
# cd /usr/ports# make clean
which will go through all the ports subdirectories and delete everything except the skeletons for each port.
19. I tried that and it still left all those tarballs or whatever you called them in the distfiles directory. Can I deletethose as well?
Yes, if you are sure you have finished with them, those can go as well. They can be removed manually, or by usingmake distclean.
20. I like having lots and lots of programs to play with. Is there any way of installing all the ports in one go?
Just do:
# cd /usr/ports# make install
Be careful, as some ports may install files with the same name. If you install two graphics ports and they both install/usr/local/bin/plot then you will obviously have problems.
45

Chapter 4 Installing Applications: Packages and Ports
21. OK, I tried that, but I thought it would take a very long time so I went to bed and left it to get on with it. When Ilooked at the computer this morning, it had only done three and a half ports. Did something go wrong?
No, the problem is that some of the ports need to ask you questions that we cannot answer for you (e.g., “Do youwant to print on A4 or US letter sized paper?”) and they need to have someone on hand to answer them.
22. I really do not want to spend all day staring at the monitor. Any better ideas?
OK, do this before you go to bed/work/the local park:
# cd /usr/ports# make -DBATCH install
This will install every port that does not require user input. Then, when you come back, do:
# cd /usr/ports# make -DINTERACTIVE install
to finish the job.
23. At work, we are using frobble, which is in your Ports collection, but we have altered it quite a bit to get it to dowhat we need. Is there any way of making our own packages, so we can distribute it more easily around our sites?
No problem, assuming you know how to make patches for your changes:
# cd /usr/ports/somewhere/frobble# make extract# cd work/frobble-2.8[Apply your patches]# cd ../..# make package
24. This ports stuff is really clever. I am desperate to find out how you did it. What is the secret?
Nothing secret about it at all, just look at the bsd.port.mk and bsd.port.subdir.mk files in your makefilesdirectory. (file://localhost/usr/ports/Mk/)
(Readers with an aversion to intricate shell-scripts are advised not to follow this link...)
46

Chapter 4 Installing Applications: Packages and Ports
4.5.2 Help! This port is broken!If you come across a port that doesn’t work for you, there are a few things you can do, including:
1. Fix it! The “how to make a port” section should help you do this.
2. Gripe—by email only! Send email to the maintainer of the port first. Type make maintainer or read theMakefile to find the maintainer’s email address. Remember to include the name and version of the port (sendthe $FreeBSD: line from the Makefile) and the output leading up to the error when you email the maintainer.If you do not get a response from the maintainer, you can use send-pr to submit a bug report.
3. Forget about it. This is the easiest route—very few ports can be classified as “essential”. There’s also a goodchance any problems will be fixed in the next version when the port is updated.
4. Grab the package from an ftp site near you. The “master” package collection is on ftp.FreeBSD.org in thepackages directory (ftp://ftp.FreeBSD.org/pub/FreeBSD/ports/packages/), but be sure to check your local mirrorfirst! These are more likely to work than trying to compile from source and are a lot faster as well. Use thepkg_add(1) program to install the package on your system.
4.6 Advanced TopicsThe documentation that was here has been moved to its own Porter’s Handbook (../porters-handbook/index.html) forease of reference. Please go there if you wish to create and submit your own ports.
47

II. System Administration

Chapter 5 Configuration and TuningThis chapter was written by Chern Lee <[email protected]> and Murray Stokely <[email protected]>using information originally written by Michael Smith <[email protected]> and Matthew Dillon<[email protected]>
5.1 SynopsisConfiguring a system correctly can substantially reduce the amount of work and hassle involved in maintaining andupgrading it in the future. This chapter describes some of the aspects of administrative configuration of FreeBSDsystems.
This chapter will also describe some of the parameters that can be set to tune a FreeBSD system for optimumperformance.
5.2 Initial Configuration
5.2.1 Partition layout
5.2.1.1 Base Partitions
When laying out your filesystem with disklabel(8) or sysinstall(8), it is important to remember that hard drives cantransfer data at a faster rate from the outer tracks than the inner. Knowing this, you should place your smaller,heavily-accessed filesystems, such as root and swap, closer to the outside of the drive, while placing larger partitions,such as /usr, towards the inner. To do so, it is a good idea to create partitions in a similar order: root, swap, /var,/usr.
The size of your /var partition reflects the intended use of your machine. /var is primarily used to hold: mailboxes,print spool and log files. Mail boxes and log files, in particular, can grow to unexpected sizes based upon how manyusers are on your system and how long your log files are kept. If you intend to run a mailserver, a /var partition ofover a gig can be suitable. Additionally, /var/tmp must be large enough to contain any packages you may wish toadd.
The /usr partition holds the bulk of the files required to support the system and a subdirectory within it called/usr/local holds the bulk of the files installed from the ports(7) hierarchy. If you do not use ports all that muchand do not intend to keep system source (/usr/src) on the machine, you can get away with a 1 gigabyte /usr partition.However, if you install a lot of ports (especially window managers and Linux-emulated binaries), we recommend at
49

Chapter 5 Configuration and Tuning
least a two gigabyte /usr and if you also intend to keep system source on the machine, we recommend a threegigabyte /usr. Do not underestimate the amount of space you will need in this partition, it can creep up and surpriseyou!
When sizing your partitions, keep in mind the space requirements for your system to grow. Running out of space inone partition while having plenty in another can lead to much frustration.
Note: Some users who have used sysinstall(8)’s Auto-defaults partition sizer have found either their root or/var partitions too small later on. Partition wisely and generously.
5.2.1.2 Swap Partition
As a rule of thumb, your swap space should typically be double the amount of main memory. For example, if themachine has 128 megabytes of memory, the swap file should be 256 megabytes. Systems with lesser memory mayperform better with a lot more swap. It is not recommended that you configure any less than 256 megabytes of swapon a system and you should keep in mind future memory expansion when sizing the swap partition. The kernel’s VMpaging algorithms are tuned to perform best when the swap partition is at least two times the size of main memory.Configuring too little swap can lead to inefficiencies in the VM page scanning code as well as create issues later on ifyou add more memory to your machine.
Finally, on larger systems with multiple SCSI disks (or multiple IDE disks operating on different controllers), it isstrongly recommend that you configure swap on each drive (up to four drives). The swap partitions on the drivesshould be approximately the same size. The kernel can handle arbitrary sizes but internal data structures scale to 4times the largest swap partition. Keeping the swap partitions near the same size will allow the kernel to optimallystripe swap space across the disks. Do not worry about overdoing it a little, swap space is the saving grace of UNIX.Even if you don’t normally use much swap, it can give you more time to recover from a runaway program beforebeing forced to reboot.
5.2.1.3 Why Partition?
Why partition at all? Why not create one big root partition and be done with it? Then I don’t have to worry aboutundersizing things!
There are several reasons this is not a good idea. First, each partition has different operational characteristics andseparating them allows the filesystem to tune itself to those characteristics. For example, the root and /usr partitionsare read-mostly, with very little writing, while a lot of reading and writing could occur in /var and /var/tmp.
By properly partitioning your system, fragmentation introduced in the smaller more heavily write-loaded partitionswill not bleed over into the mostly-read partitions. Additionally, keeping the write-loaded partitions closer to theedge of the disk, for example before the really big partition instead of after in the partition table, will increase I/O
50

Chapter 5 Configuration and Tuning
performance in the partitions where you need it the most. Now it is true that you might also need I/O performance inthe larger partitions, but they are so large that shifting them more towards the edge of the disk will not lead to asignificant performance improvement whereas moving /var to the edge can have a huge impact. Finally, there aresafety concerns. Having a small neat root partition that is essentially read-only gives it a greater chance of survivinga bad crash intact.
5.3 Core ConfigurationThe principal location for system configuration information is within /etc/rc.conf. This file contains a widerange of configuration information, principally used at system startup to configure the system. Its name directlyimplies this; it is configuration information for the rc* files.
An administrator should make entries in the rc.conf file to override the default settings from/etc/defaults/rc.conf. The defaults file should not be copied verbatim to /etc - it contains default values, notexamples. All system-specific changes should be made in the rc.conf file itself.
A number of strategies may be applied in clustered applications to separate site-wide configuration fromsystem-specific configuration in order to keep administration overheads down. The recommended approach is toplace site-wide configuration into another file, eg. /etc/rc.conf.site, and then include this file into/etc/rc.conf, which will contain only system-specific information.
As rc.conf is read by sh(1) it is trivial to achieve this. For example:
• rc.conf:
. rc.conf.sitehostname="node15.webcompany.com"network_interfaces="fxp0 lo0"ifconfig_fxp0="inet 10.1.1.1"
• rc.conf.site:
defaultrouter="10.1.1.254"saver="daemon"blanktime="100"
The rc.conf.site file can then be distributed to every system using eg. rsync, whilst the rc.conf file remainsunique.
51

Chapter 5 Configuration and Tuning
Upgrading the system eg. via sysinstall(8) or ’make world’ will not overwrite the rc.conf file, so systemconfiguration information will not be lost.
5.4 Application ConfigurationTypically, installed applications have their own configuration files, with their own syntax, etc. It is important thatthese files be kept separate from the base system, so that they may be easily located and managed by the packagemanagement tools.
Typically, these files are installed in /usr/local/etc. In the case where an application has a large number ofconfiguration files, a subdirectory will be created to hold them.
Normally, when a port or package is installed, sample configuration files are also installed. These are usuallyidentified with a ".default" suffix. If there are no existing configuration files for the application, they will be createdby copying the .default files.
For example, here is /usr/local/etc/apache:
-rw-r--r-- 1 root wheel 2184 May 20 1998 access.conf-rw-r--r-- 1 root wheel 2184 May 20 1998 access.conf.default-rw-r--r-- 1 root wheel 9555 May 20 1998 httpd.conf-rw-r--r-- 1 root wheel 9555 May 20 1998 httpd.conf.default-rw-r--r-- 1 root wheel 12205 May 20 1998 magic-rw-r--r-- 1 root wheel 12205 May 20 1998 magic.default-rw-r--r-- 1 root wheel 2700 May 20 1998 mime.types-rw-r--r-- 1 root wheel 2700 May 20 1998 mime.types.default-rw-r--r-- 1 root wheel 7980 May 20 1998 srm.conf-rw-r--r-- 1 root wheel 7933 May 20 1998 srm.conf.default
It can be quickly seen that only the srm.conf file has been changed. A later update of the apache port would notoverwrite this changed file.
5.5 Starting ServicesIt is common for a system to host a number of services. These may be started in several different fashions, eachhaving different advantages.
Software installed from a port or the packages collection will often place a script in /usr/local/etc/rc.d whichis invoked at system startup with a ’start’ argument, and at system shutdown with a ’stop’ argument. This is therecommended way for starting systemwide services that are to be run as root, or that expect to be started as root.
52

Chapter 5 Configuration and Tuning
These scripts are registered as part of the installation of the package, and will be removed when the package isremoved.
A generic startup script in /usr/local/etc/rc.d looks like:
#!/bin/shecho -n ’ FooBar’
case "$1" instart)
/usr/local/bin/foobar;;
stop)kill -9 ‘cat /var/run/foobar.pid‘;;
*)echo "Usage: ‘basename $0‘ {start|stop}" >&2exit 64;;
esac
exit 0
This script is called with start at startup, and the stop at shutdown to allow it to carry out its purpose.
Some services expect to be invoked by inetd(8) when a connection is received on a suitable port. This is common formail reader servers (POP and IMAP, etc.). These services are enabled by editing the file /etc/inetd.conf. Seeinetd(8) for details on editing this file.
Some additional system services may not be covered by the toggles in /etc/rc.conf. These are traditionallyenabled by placing the command(s) to invoke them in /etc/rc.local. As of FreeBSD 3.1 there is no default/etc/rc.local; if it is created by the administrator it will however be honored in the normal fashion. Note thatrc.local is generally regarded as the location of last resort; if there is a better place to start a service, do it there.
Note: Do not place any commands in /etc/rc.conf. To start daemons, or run any commands at boot time,place a script in /usr/local/etc/rc.d instead.
It is also possible to use the cron(8) daemon to start system services. This approach has a number of advantages, notleast being that because cron runs these processes as the owner of the crontab, services may be started andmaintained by non-root users.
This takes advantage of an undocumented feature of cron; the time specification may be replaced by ’@reboot’,which will cause the job to be run when cron is started shortly after system boot.
53

Chapter 5 Configuration and Tuning
5.6 Virtual HostsA very common use of FreeBSD is virtual site hosting, where one server appears to the network as many servers.This is achieved by assigning multiple network addresses to a single interface.
A given network interface has one "real" address, and may have any number of "alias" addresses. These aliases arenormally added by placing alias entries in /etc/rc.conf.
An alias entry for the interface ’fxp0’ looks like:
ifconfig_fxp0_alias0="inet xxx.xxx.xxx.xxx netmask xxx.xxx.xxx.xxx"
Note that alias entries must start with alias0 and proceed upwards in order, eg. _alias1, _alias2, etc. The configurationprocess will stop at the first missing number.
The calculation of alias netmasks is important, but fortunately quite simple. For a given interface, there must be oneaddress which correctly represents the network’s netmask. Any other addresses which fall within this network musthave a netmask of all 1’s.
For example, consider the case where the fxp0 interface is connected to two networks, the 10.1.1.0 network with anetmask of 255.255.255.0 and the 202.0.75.16 network with a netmask of 255.255.255.240. We want the system toappear at 10.1.1.1 through 10.1.1.5 and at 202.0.75.17 through 202.0.75.20.
The following entries configure the adapter correctly for this arrangement:
ifconfig_fxp0="inet 10.1.1.1 netmask 255.255.255.0"ifconfig_fxp0_alias0="inet 10.1.1.2 netmask 255.255.255.255"ifconfig_fxp0_alias1="inet 10.1.1.3 netmask 255.255.255.255"ifconfig_fxp0_alias2="inet 10.1.1.4 netmask 255.255.255.255"ifconfig_fxp0_alias3="inet 10.1.1.5 netmask 255.255.255.255"ifconfig_fxp0_alias4="inet 202.0.75.17 netmask 255.255.255.240"ifconfig_fxp0_alias5="inet 202.0.75.18 netmask 255.255.255.255"ifconfig_fxp0_alias6="inet 202.0.75.19 netmask 255.255.255.255"ifconfig_fxp0_alias7="inet 202.0.75.20 netmask 255.255.255.255"
5.7 Configuration Files
5.7.1 /etc LayoutThere are a number of directories in which configuration information is kept. These include:
54

Chapter 5 Configuration and Tuning
/etc Generic system configuration information; data here issystem-specific.
/etc/defaults Default versions of system configuration files.
/etc/mail Extra sendmail configuration, other MTA configurationfiles.
/etc/ppp Configuration for both user- and kernel-ppp programs.
/etc/namedb Default location for bind(8) data. Normally the boot file islocated here, and contains a directive to refer to other datain /var/db.
/usr/local/etc Configuration files for installed applications. May containper-application subdirectories.
/usr/local/etc/rc.d Start/stop scripts for installed applications.
/var/db Persistent system-specific data files, eg. bind(8) zone files,database files, and so on.
5.7.2 Hostnames
5.7.2.1 /etc/resolv.conf
/etc/resolv.conf dictates how FreeBSD’s resolver accesses the Internet Domain Name System (DNS).
The most common entries to resolv.conf are:
nameserver The IP address of a nameserver the resolver should query.The servers are queried in the order listed with amaximum of three.
search Search list hostname lookup. This is normally determinedby the domain of the local hostname.
domain The local domain name.
A typical resolv.conf:
search foobar.comnameserver 147.11.1.11nameserver 147.11.100.30
dhclient(8) usually rewrites resolv.conf with information received from the DHCP server.
55

Chapter 5 Configuration and Tuning
5.7.2.2 /etc/hosts
/etc/hosts is a simple text database reminescent of the old Internet. It works in conjunction with DNS and NISproviding name to IP address mappings. Local computers connected via a LAN can be placed in here for simplisticnaming purposes instead of setting up a named(8) server. Additionally, /etc/hosts can be used to provide a localrecord of Internet names, reducing the need to query externally for commonly accessed names.
# $FreeBSD$## Host Database# This file should contain the addresses and aliases# for local hosts that share this file.# In the presence of the domain name service or NIS, this file may# not be consulted at all; see /etc/nsswitch.conf for the resolution order.##::1 localhost localhost.my.domain myname.my.domain127.0.0.1 localhost localhost.my.domain myname.my.domain
## Imaginary network.#10.0.0.2 myname.my.domain myname#10.0.0.3 myfriend.my.domain myfriend## According to RFC 1918, you can use the following IP networks for# private nets which will never be connected to the Internet:## 10.0.0.0 - 10.255.255.255# 172.16.0.0 - 172.31.255.255# 192.168.0.0 - 192.168.255.255## In case you want to be able to connect to the Internet, you need# real official assigned numbers. PLEASE PLEASE PLEASE do not try# to invent your own network numbers but instead get one from your# network provider (if any) or from the Internet Registry (ftp to# rs.internic.net, directory ‘/templates’).#
/etc/hosts takes on the simple format of:
[Internet address] [offical hostname] [alias1] [alias2] ...
For example:
10.0.0.1 myRealHostname.foobar.com myRealHostname foobar1 foobar2
56

Chapter 5 Configuration and Tuning
Consult hosts(5) for more information.
5.7.3 Log File Configuration
5.7.3.1 syslog.conf
syslog.conf is the configuration file for the syslogd(8) program. It indicates which types of syslog messages arelogged to particular log files.
# $FreeBSD$## Spaces ARE valid field separators in this file. However,# other *nix-like systems still insist on using tabs as field# separators. If you are sharing this file between systems, you# may want to use only tabs as field separators here.# Consult the syslog.conf(5) manpage.*.err;kern.debug;auth.notice;mail.crit /dev/console*.notice;kern.debug;lpr.info;mail.crit;news.err /var/log/messagessecurity.* /var/log/securitymail.info /var/log/mailloglpr.info /var/log/lpd-errscron.* /var/log/cron*.err root*.notice;news.err root*.alert root*.emerg *# uncomment this to log all writes to /dev/console to /var/log/console.log#console.info /var/log/console.log# uncomment this to enable logging of all log messages to /var/log/all.log#*.* /var/log/all.log# uncomment this to enable logging to a remote loghost named loghost#*.* @loghost# uncomment these if you’re running inn# news.crit /var/log/news/news.crit# news.err /var/log/news/news.err# news.notice /var/log/news/news.notice!startslip*.* /var/log/slip.log!ppp*.* /var/log/ppp.log
Consult the syslog.conf(5) manpage for more information.
57

Chapter 5 Configuration and Tuning
5.7.3.2 newsyslog.conf
newsyslog.conf is the configuration file for newsyslog(8), a program that is scheduled to run normally by cron(8)newsyslog(8) determines when log files require archiving or rearranging. logfile is moved to logfile.1,logfile.1 is moved to logfile.2, and so on. Additionally, the log files may be archived in gzip format causingthem to be named: logfile.0.gz, logfile.1.gz, and so on.
newsyslog.conf indicates which log files are to be managed, how many are to be kept, and when they are to betouched. Log files can be rearranged and/or archived when they have either reached a certain size, or at a certainperiodic time/date.
# configuration file for newsyslog# $FreeBSD$## logfilename [owner:group] mode count size when [ZB] [/pid_file] [sig_num]/var/log/cron 600 3 100 * Z/var/log/amd.log 644 7 100 * Z/var/log/kerberos.log 644 7 100 * Z/var/log/lpd-errs 644 7 100 * Z/var/log/maillog 644 7 * @T00 Z/var/log/sendmail.st 644 10 * 168 B/var/log/messages 644 5 100 * Z/var/log/all.log 600 7 * @T00 Z/var/log/slip.log 600 3 100 * Z/var/log/ppp.log 600 3 100 * Z/var/log/security 600 10 100 * Z/var/log/wtmp 644 3 * @01T05 B/var/log/daily.log 640 7 * @T00 Z/var/log/weekly.log 640 5 1 $W6D0 Z/var/log/monthly.log 640 12 * $M1D0 Z/var/log/console.log 640 5 100 * Z
Consult the newsyslog(8) manpage for more information.
5.7.4 sysctl.conf
sysctl.conf looks much like rc.conf. Values are set in a variable=value form. The specified values are set afterthe system goes into multi-user mode. Not all variables are settable in this mode.
A sample sysctl.conf turning off logging of fatal signal exits and letting Linux programs know they are reallyrunning under FreeBSD.
kern.logsigexit=0 # Do not log fatal signal exits (e.g. sig 11)
58

Chapter 5 Configuration and Tuning
compat.linux.osname=FreeBSDcompat.linux.osrelease=4.3-STABLE
5.8 Tuning with sysctlsysctl(8) is an interface that allows you to make changes to a running FreeBSD system. This includes many advancedoptions of the TCP/IP stack and virtual memory system that can dramatically improve performance for anexperienced system administrator. Over five hundred system variables can be read and set using sysctl(8)
At its core, sysctl(8) serves to do two functions: read and modify system settings.
To view all readable variables:
% sysctl -a
To read a particular variable, for example, kern.maxproc:
% sysctl kern.maxprockern.maxproc: 1044
To set a particular variable, use the = option:
# sysctl kern.maxfiles=5000kern.maxfiles: 2088 -> 5000
Settings of sysctl variables are usually either strings, numbers, or booleans. A boolean being 1 for yes or a 0 for no.
5.9 Tuning disks
5.9.1 Sysctl Variables
5.9.1.1 vfs.vmiodirenable
The vfs.vmiodirenable sysctl variable defaults to 0 (off) (though soon it will default to 1) and may be set to 0(off) or 1 (on). This parameter controls how directories are cached by the system. Most directories are small and usebut a single fragment (typically 1K) in the filesystem and even less (typically 512 bytes) in the buffer cache.However, when operating in the default mode the buffer cache will only cache a fixed number of directories even ifyou have a huge amount of memory. Turning on this sysctl allows the buffer cache to use the VM Page Cache to
59

Chapter 5 Configuration and Tuning
cache the directories. The advantage is that all of memory is now available for caching directories. The disadvantageis that the minimum in-core memory used to cache a directory is the physical page size (typically 4K) rather than 512bytes. We recommend turning this option on if you are running any services which manipulate large numbers of files.Such services can include web caches, large mail systems, and news systems. Turning on this option will generallynot reduce performance even with the wasted memory but you should experiment to find out.
5.9.1.2 hw.ata.wc
FreeBSD 4.3 flirted with turning off IDE write caching. This reduced write bandwidth to IDE disks but wasconsidered necessary due to serious data consistency issues introduced by hard drive vendors. Basically the problemis that IDE drives lie about when a write completes. With IDE write caching turned on, IDE hard drives will not onlywrite data to disk out of order, they will sometimes delay some of the blocks indefinitely when under heavy diskloads. A crash or power failure can result in serious filesystem corruption. So our default was changed to be safe.Unfortunately, the result was such a huge loss in performance that we caved in and changed the default back to onafter the release. You should check the default on your system by observing the hw.ata.wc sysctl variable. If IDEwrite caching is turned off, you can turn it back on by setting the kernel variable back to 1. This must be done fromthe boot loader at boot time. Attempting to do it after the kernel boots will have no effect.
Please see ata(4).
5.9.2 SoftUpdatesThe tunefs(8) can be used to fine-tune a filesystem. In this situation, we are only concerned with its ability to togglesoftupdates on and off, which is done so by:
# tunefs -n enable /filesystem# tunefs -n disable /filesystem
A filesystem cannot be modified with tunefs(8) while it is mounted. A good time to enable SoftUpdates is before anypartitions have been mounted, in single-user mode.
SoftUpdates drastically improves meta-data performance, mainly file creation and deletion, through the use of amemory cache. We recommend turning SoftUpdates on on all of your filesystems. There are two downsides toSoftUpdates that you should be aware of: First, softupdates guarantees filesystem consistency in the case of a crashbut could very easily be several seconds (even a minute!) behind updating the physical disk. If you crash you maylose more work than otherwise. Secondly, softupdates delays the freeing of filesystem blocks. If you have afilesystem (such as the root filesystem) which is close to full, doing a major update of it, e.g. make installworld, canrun it out of space and cause the update to fail.
60

Chapter 5 Configuration and Tuning
5.10 Tuning kernel limits
5.10.1 File/process limits
5.10.1.1 kern.maxfiles
kern.maxfiles can be raised or lowered based upon your system requirements. This variable indicates themaximum number of file descriptors on your system. When the file descriptor table is full, file: table is full
will show up repeatedly in dmesg.
Each open file, socket, or fifo uses one file descriptor. A large-scale production server may easily require manythousands of file descriptors, depending on the kind and number of services running concurrently.
kern.maxfile’s default value is dictated by the maxusers option in your kernel config. kern.maxfiles growsproportionally to the value of maxusers.
61

Chapter 6 The FreeBSD Booting Process
6.1 SynopsisFreeBSD uses a three-stage bootstrap by default, which basically entails three programs which call each other inorder (two boot blocks, and the loader). Each of these three build on the previous program’s understanding andprovide increasing amounts of sophistication.
The kernel is then started, which will then probe for devices and initialize them for use. Once the kernel boot processis finished, the kernel passes control to the user process init(8), which then makes sure the disks are in a usable state.init(8) then starts the user-level resource configuration which then mounts filesystems, sets up network cards to acton the network, and generally starts all the processes that usually are run on a FreeBSD system at startup.
6.2 The Boot Blocks: Bootstrap Stages 1 and 2Bootstrapping is the process whereby a computer probes and initializes its devices, and works out what programs itis supposed to run.
This involves the use of special Read Only Memory chips, which determine what further operations to do, and theseusually pass control to other chips that do consistency and memory tests, configure devices, and provide amechanism for programs to determine what configuration details were determined.
In standard personal computers, this involves the BIOS (which oversees the bootstrap), and CMOS (which storesconfiguration). BIOS and CMOS understand disks, and also understand where on the disk to find a program that willknow how to load up an operating system.
This chapter will not deal with this first part of the bootstrap process. Instead it will focus on what happens aftercontrol is passed to the program on the disk.
The boot blocks are responsible for finding (usually) the loader, and running it, and thus need to understand how tofind that program on the filesystem, how to run the program, and also allow minor configuration of how they work.
6.2.1 boot0There is actually a preceding bootblock, named boot0, which lives on the Master Boot Record, the special part of thedisk that the system bootstrap looks for and runs, and it simply shows a list of possible slices to boot from.
boot0 is very simple, since the program in the MBR can only be 512 bytes in size.
It displays something like this:
62

Chapter 6 The FreeBSD Booting Process
Example 6-1. boot0 screenshot
F1 DOSF2 FreeBSDF3 LinuxF4 ??F5 Drive 1
Default: F2
6.2.2 boot1boot1 is found on the boot sector of the boot slice, which is where boot0, or any other program on the MBR expectsto find the program to run to continue the boot process.
boot1 is very simple, since it too can only be 512 bytes in size, and knows just enough about the FreeBSD disklabel,which stores information about the slice, to find and execute boot2.
6.2.3 boot2boot2 is slightly more sophisticated, and understands the FreeBSD filesystem enough to find files on it, and canprovide a simple interface to choose the kernel or loader to run.
Since the loader is much more sophisticated, and provides a nice easy-to-use boot configuration, boot2 usually runsit, but previously it was tasked to run the kernel directly.
Example 6-2. boot2 screenshot
� � FreeBSD/i386 BOOTDefault: 0:wd(0,a)/kernelboot:
6.3 Loader: Bootstrap Stage ThreeThe loader is the final stage of the three-stage bootstrap, and is located on the filesystem, usually as /boot/loader.
Note: While /boot/boot0, /boot/boot1, and /boot/boot2 are files there, they are not the actual copies in theMBR, the boot sector, or the disklabel respectively.
63

Chapter 6 The FreeBSD Booting Process
The loader is intended as a user-friendly method for configuration, using an easy-to-use built-in command set,backed up by a more powerful interpreter, with a more complex command set.
6.3.1 Loader Program FlowDuring initialization, the loader will probe for a console and for disks, and figure out what disk it is booting from. Itwill set variables accordingly, and then the interpreter is started, and the easy-to-use commands are explained to it.
loader will then read /boot/loader.rc, which by default reads in /boot/defaults/loader.conf which setsreasonable defaults for variables and reads /boot/loader.conf for local changes to those variables. loader.rcthen acts on these variables, loading whichever modules and kernel are selected.
Finally, by default, the loader issues a 10 second wait for key presses, and boots the kernel if it is not interrupted. Ifinterrupted, the user is presented with a prompt which understands the easy-to-use command set, where the user mayadjust variables, unload all modules, load modules, and then finally boot or reboot.
A more technical discussion of the process is available in loader(8)
6.3.2 Loader Built-In CommandsThe easy-to-use command set comprises of:
autoboot seconds
Proceeds to boot the kernel if not interrupted within the time span given, in seconds. It displays a countdown,and the default timespan is 10 seconds.
boot [-options] [kernelname]
Immediately proceeds to boot the kernel, with the given options, if any, and with the kernel name given, if it is.
boot-conf
Goes through the same automatic configuration of modules based on variables as what happens at boot. Thisonly makes sense if you use unload first, and change some variables, most commonly kernel.
help [topic]
Shows help messages read from /boot/loader.help. If the topic given is index, then the list of availabletopics is given.
64

Chapter 6 The FreeBSD Booting Process
include filename . . .
Processes the file with the given filename. The file is read in, and interpreted line by line. An error immediatelystops the include command.
load [-t type] filename
Loads the kernel, kernel module, or file of the type given, with the filename given. Any arguments after filenameare passed to the file.
ls [-l] [path]
Displays a listing of files in the given path, or the root directory, if the path is not specified. If -l is specified,file sizes will be shown too.
lsdev [-v]
Lists all of the devices from which it may be possible to load modules. If -v is specified, more details areprinted.
lsmod [-v]
Displays loaded modules. If -v is specified, more details are shown.
more filename
Display the files specified, with a pause at each LINES displayed.
reboot
Immediately reboots the system.
set variableset variable=value
Set loader’s environment variables.
unload
Removes all loaded modules.
6.3.3 Loader ExamplesHere are some practical examples of loader usage.
•
65

Chapter 6 The FreeBSD Booting Process
To simply boot your usual kernel, but in single-user mode:
boot -s
• To unload your usual kernel and modules, and then load just your old (or another) kernel:
unloadload kernel.old
You can use kernel.GENERIC to refer to the generic kernel that comes on the install disk, or kernel.old torefer to your previously installed kernel (when you’ve upgraded or configured your own kernel, for example).
Note: Use the following to load your usual modules with another kernel:
unloadset kernel="kernel.old"boot-conf
• To load a kernel configuration script (an automated script which does the things you’d normally do in the kernelboot-time configurator):
load -t userconfig_script/boot/kernel.conf
6.4 Kernel Interaction During BootOnce the kernel is loaded by either loader (as usual) or boot2 (bypassing the loader), it examines its boot flags, if any,and adjusts its behavior as necessary.
6.4.1 Kernel Boot FlagsHere are the more common boot flags:
-a
during kernel initialization, ask for the device to mount as the root file system.
66

Chapter 6 The FreeBSD Booting Process
-C
boot from CDROM.
-c
run UserConfig, the boot-time kernel configurator
-s
boot into single-user mode
-v
be more verbose during kernel startup
Note: There are other boot flags, read boot(8) for more information on them.
6.5 Init: Process Control InitializationOnce the kernel has finished booting, it passes control to the user process init, which is located at /sbin/init, orthe program path specified in the init_path variable in loader.
6.5.1 Automatic Reboot SequenceThe automatic reboot sequence makes sure that the filesystems available on the system are consistent. If they are not,and fsck can not fix the inconsistencies, init drops the system into single-user mode for the system administratorto take care of the problems directly.
6.5.2 Single-User ModeThis mode can be reached through the automatic reboot sequence, or by the user booting with the -s or setting theboot_single variable in loader.
It can also be reached by calling shutdown without the reboot (-r) or halt (-h) options, from multi-user mode.
If the system console console is set to insecure in /etc/ttys, then the system prompts for the root passwordbefore initiating single-user mode.
67

Chapter 6 The FreeBSD Booting Process
Example 6-3. An insecure console in /etc/ttys
# name getty type status comments## This entry needed for asking password when init goes to single-user mode# If you want to be asked for password, change "secure" to "insecure" hereconsole none unknown off insecure
Note: An insecure console means that you consider your physical security to the console to be insecure, andwant to make sure only someone who knows the root password may use single-user mode, and it does not meanthat you want to run your console insecurely. Thus, if you want security, choose insecure, not secure.
6.5.3 Multi-User ModeIf init finds your filesystems to be in order, or once the user has finished in single-user mode, the system entersmulti-user mode, in which it starts the resource configuration of the system.
6.5.3.1 Resource Configuration (rc)
The resource configuration system reads in configuration defaults from /etc/defaults/rc.conf, andsystem-specific details from /etc/rc.conf, and then proceeds to mount the system filesystems mentioned in/etc/fstab, start up networking services, starts up miscellaneous system daemons, and finally runs the startupscripts of locally installed packages.
rc(8) is a good reference to the resource configuration system, as is examining the scripts themselves.
6.6 Shutdown SequenceUpon controlled shutdown, via shutdown, init will attempt to run the script /etc/rc.shutdown, and thenproceed to send all processes the terminate signal, and subsequently the kill signal to any that don’t terminate timely.
68

Chapter 7 Users and Basic AccountManagement
7.1 SynopsisContributed by Neil Blakey-Milner <[email protected]> February 2000.
All access to the system is achieved via accounts, and all processes are run by users, so user and accountmanagement are of integral importance on FreeBSD systems.
There are three main types of accounts; the Superuser, system users, and user accounts. The Superuser account,usually called root, is used to manage the system with no limitations on privileges. System users run services.Finally, user accounts are used by real people, who log on, read mail, and so forth.
7.2 The Superuser AccountThe superuser account, usually called root, comes preconfigured, and facilitates system administration, and shouldnot be used for day-to-day tasks like sending and receiving mail, general exploration of the system, or programming.
This is because the superuser, unlike normal user accounts, can operate without limits, and misuse of the superuseraccount may result in spectacular disasters. User accounts are unable to destroy the system by mistake, so it isgenerally best to use normal user accounts whenever possible, unless you especially need the extra privilege.
In addition, always double and triple-check commands you issue as the superuser, since an extra space or missingcharacter can mean irreparable data loss. Those extra privileges you needed when you decided to change to thesuperuser mean that the safeguards of your normal user account no longer apply.
So, the first thing you should do after reading this chapter, is to create an unprivileged user account for yourself forgeneral usage, if you haven’t already. This applies equally whether you’re running a multi-user or single-usermachine. Later in this chapter, we discuss how to create additional accounts, and how to change between the normaluser and superuser.
7.3 System AccountsSystem users are those used to run services such as DNS, mail, web servers, and so forth. The reason for this issecurity; if all services ran as the superuser, they could act without restriction.
69

Chapter 7 Users and Basic Account Management
Examples of system users are daemon, operator, bind (for the Domain Name Service), and news. Oftensysadmins create httpd to run web servers they install.
nobody is the generic unprivileged system user, but the more services that use nobody, the more privileged itbecomes.
7.4 User AccountsUser accounts are the primary means of access for real people to the system, and these accounts insulate the user andthe environment, preventing the users from damaging the system or other users, and allowing users to customize theirenvironment without affecting others.
Every person accessing your system should have their own unique user account. This allows you to find out who isdoing what, and prevent people from clobbering each others’ settings, and reading mail meant for the other, and soforth.
Each user can set up their own environment to accommodate their use of the system, by using alternate shells,editors, key bindings, and language.
7.5 Modifying Accountspw is a powerful and flexible means to modify accounts, but adduser is recommended for creating new accounts,and rmuser for deleting accounts.
chpass allows both the system administrator and normal users to adjust passwords, shells, and personal information.passwd is the more common means to change passwords specifically, however.
7.5.1 adduseradduser is a simple program for adding new users. It creates passwd and group entries for the user, as well ascreating their home directory, copy in some default dotfiles from /usr/share/skel, and can optionally mail theuser a welcome message.
To create the initial configuration file, use adduser -s -config_create. 1Next, we configure adduser defaults,and create our first user account, since using root for normal usage is evil and nasty.
Example 7-1. Changing the configuration for adduser
# adduser -vUse option “-silent” if you don’t want to see all warnings and questions.
70

Chapter 7 Users and Basic Account Management
Check /etc/shellsCheck /etc/master.passwdCheck /etc/groupEnter your default shell: csh date no sh tcsh [sh]: tcshYour default shell is: tcsh -> /usr/local/bin/tcshEnter your default HOME partition: [/home]:Copy dotfiles from: /usr/share/skel no [/usr/share/skel]:Send message from file: /etc/adduser.message no[/etc/adduser.message]: noDo not send messageUse passwords (y/n) [y]: y
Write your changes to /etc/adduser.conf? (y/n) [n]: y
Ok, let’s go.Don’t worry about mistakes. I will give you the chance later to correct any input.Enter username [a-z0-9_-]: jruEnter full name []: J. Random UserEnter shell csh date no sh tcsh [tcsh]:Enter home directory (full path) [/home/jru]:Uid [1001]:Enter login class: default []:Login group jru [jru]:Login group is “jru”. Invite jru into other groups: guest no[no]: wheelEnter password []:Enter password again []:
Name: jruPassword: ****Fullname: J. Random UserUid: 1007Gid: 1007 (jru)Class:Groups: jru wheelHOME: /home/jruShell: /usr/local/bin/tcshOK? (y/n) [y]: yAdded user “jru”Copy files from /usr/share/skel to /home/jruAdd another user? (y/n) [y]: nGoodbye!#
71

Chapter 7 Users and Basic Account Management
In summary, we changed the default shell to tcsh (an additional shell found in packages), and turned off the sendingof a welcome mail to added users. We then saved the configuration, and then created an account for jru, and wemade sure jru is in wheel group (which we’ll see is important later).
Note: The password you type in isn’t echoed, nor are asterisks displayed. Make sure you don’t mistype thepassword twice :-)
Note: Just use adduser without arguments from now on, and you won’t have to go through changing thedefaults. If the program asks you to change the defaults, exit the program, and try the -s option.
7.5.2 rmuserrmuser removes users from the system, including any traces beyond the user database.
rmuser performs the following steps:
1. Removes the user’s crontab(1) entry (if any).
2. Removes any at(1) jobs belonging to the user.
3. Kills all processes owned by the user
4. Removes the user from the system’s local password file.
5. Removes the user’s home directory (if it is owned by the user)
6. Removes the incoming mail files belonging to the user from /var/mail.
7. Removes all files owned by the user from temporary file storage areas such as /tmp.
8. Finally, removes the username from all groups to which it belongs in /etc/group.
Note: If a group becomes empty and the group name is the same as the username, the group is removed; thiscomplements the per-user unique groups created by adduser(8).
rmuser can’t be used to remove superuser accounts, since that is almost always an indication of massive destruction.
By default, an interactive mode is used, which attempts to make sure you know what you’re doing.
72

Chapter 7 Users and Basic Account Management
Example 7-2. rmuser interactive account removal
# rmuser jruMatching password entry:jru:*:1000:1000::0:0:J. Random User:/home/jru:/usr/local/bin/tcshIs this the entry you wish to remove? yRemove user’s home directory (/home/jru)? yUpdating password file, updating databases, done.Updating group file: trusted (removing group jru -- personal group is empty) done.Removing user’s incoming mail file /var/mail/jru: done.Removing files belonging to jru from /tmp: done.Removing files belonging to jru from /var/tmp: done.Removing files belonging to jru from /var/tmp/vi.recover: done.#
7.5.3 pwpw is a command line utility to create, remove, modify, and display users and groups, and functions as an editor ofthe system user and group files. This section describes its use for users; the Groups section below describes its usefor groups.
It is designed to be useful both as a directly executed command and for use from shell scripts.
pw(8) has all the information.
7.5.4 chpasschpass changes user database information such as passwords, shells, and personal information.
Only system administrators, as the superuser, may change other users’ information and passwords with chpass.
Passed no options, besides the optional username, chpass displays an editor containing user information, and uponexit from the editor, attempts to change the information in the user database.
Example 7-3. Interactive chpass by Superuser
#Changing user database information for jru.Login: jruPassword: *Uid [#]: 1000Gid [# or name]: 1000Change [month day year]:Expire [month day year]:
73

Chapter 7 Users and Basic Account Management
Class:Home directory: /home/jruShell: /usr/local/bin/tcshFull Name: J. Random UserOffice Location:Office Phone:Home Phone:Other information:
The normal user can change only a small subsection of this information, and only for themselves.
Example 7-4. Interactive chpass by Normal User
#Changing user database information for jru.Shell: /usr/local/bin/tcshFull Name: J. Random UserOffice Location:Office Phone:Home Phone:Other information:
Note: chfn and chsh are just links to chpass, as are ypchpass, ypchfn, and ypchsh. NIS support is automatic,so specifying the yp before the command is not necessary.
7.5.5 passwdpasswd is the usual way to change your own password as a user, or another user’s password as the superuser.
Note: Users must type in their original password before changing their password, to prevent an unauthorizedperson from changing their password when the user is away from their console.
Example 7-5. Changing your password
% passwdChanging local password for jru.Old password:New password:Retype new password:
74

Chapter 7 Users and Basic Account Management
passwd: updating the database...passwd: done
Example 7-6. Changing another user’s password as the superuser
# passwd jruChanging local password for jru.New password:Retype new password:passwd: updating the database...passwd: done
Note: yppasswd is just a link to passwd. NIS support is automatic, so specifying the yp before the command isnot necessary.
7.6 Limiting UsersIf you run a multi-user system, chances are that you do not trust all of your users not to damage your system.FreeBSD provides a number of ways a system administrator can limit the amount of system resources an individualuser can use. These limits are generally divided into two sections: disk quotas, and other resources limits.
Disk quotas are a way for the system administrator to tell the filesystem the amount of disk space a user may use;moreover, they provide a way to quickly check on the disk usage of a user without having to calculate it every time.Quotas are discussed in Section 11.7.
The other resource limits include ways to limit the amount of CPU, memory, and other resources a user mayconsume. These are defined using login classes and are discussed here.
Login classes are defined in /etc/login.conf. The precise semantics are beyond the scope of this section, but aredescribed in detail in the login.conf(5) manual page. It is sufficient to say that each user is assigned to a login class(default by default), and that each login class has a set of login capabilities associated with it. A login capability isa name=value pair, where name is a well-known identifier and value is an arbitrary string processed accordinglydepending on the name. Setting up login classes and capabilities is rather straight-forward, and is also described inlogin.conf(5).
Resource limits are different from plain vanilla login capabilities in two ways. First, for every limit, there is a soft(current) and hard limit. A soft limit may be adjusted by the user or application, but may be no higher than the hardlimit. The latter may be lowered by the user, but never raised. Second, most resource limits apply per process to aspecific user, not the user as a whole. Note, however, that these differences are mandated by the specific handling of
75

Chapter 7 Users and Basic Account Management
the limits, not by the implementation of the login capability framework (i.e., they are not really a special case oflogin capabilities).
And so, without further ado, below are the most commonly used resource limits (the rest, along with all the otherlogin capabilities, may be found in login.conf(5)).
coredumpsize
The limit on the size of a core file generated by a program is, for obvious reasons, subordinate to other limits ondisk usage (e.g., filesize, or disk quotas). Nevertheless, it is often used as a less-severe method of controllingdisk space consumption: since users do not generate core files themselves, and often do not delete them, settingthis may save them from running out of disk space should a large program (e.g., Emacs) crash.
cputime
This is the maximum amount of CPU time a user’s process may consume. Offending processes will be killed bythe kernel.
Note: This is a limit on CPU time consumed, not percentage of the CPU as displayed in some fields by top(1)and ps(1). A limit on the latter is, at the time of this writing, not possible, and would be rather useless: acompiler—probably a legitimate task—can easily use almost 100% of a CPU for some time.
filesize
This is the maximum size of a file the user may possess. Unlike disk quotas, this limit is enforced on individualfiles, not the set of all files a user owns.
maxproc
This is the maximum number of processes a user may be running. This includes foreground and backgroundprocesses alike. For obvious reasons, this may not be larger than the system limit specified by thekern.maxproc sysctl. Also note that setting this too small may hinder a user’s productivity: it is often useful tobe logged in multiple times or execute pipelines. Some tasks, such as compiling a large program, also spawnmultiple processes (e.g., make(1), cc(1), and other intermediate preprocessors).
memorylocked
This is the maximum amount a memory a process may have requested to be locked into main memory (e.g., seemlock(2)). Some system-critical programs, such as amd(8), do this so that their getting swapped out does notcontribute to a system’s thrashing in time of trouble.
76

Chapter 7 Users and Basic Account Management
memoryuse
This is the maximum amount of memory a process may consume at any given time. It includes both corememory and swap usage. This is not a catch-all limit for restricting memory consumption, but it is a good start.
openfiles
This is the maximum amount of files a process may have open. In FreeBSD, files are also used to representsockets and IPC channels; thus, be careful not to set this too low. The system-wide limit for this is defined bythe kern.maxfiles sysctl.
sbsize
This is the limit on the amount of network memory, and thus mbufs, a user may consume. This originated as aresponse to an old DoS attack by creating a lot of sockets, but can be generally used to limit networkcommunications.
stacksize
This is the maximum size a process’ stack may grow to. This alone is not sufficient to limit the amount ofmemory a program may use; consequently, it should be used in conjunction with other limits.
There are a few other things to remember when setting resource limits. Following are some general tips, suggestions,and miscellaneous comments.
• Processes started at system startup by /etc/rc are assigned to the daemon login class.
• Although the /etc/login.conf that comes with the system is a good source of reasonable values for mostlimits, only you, the administrator, can know what is appropriate for your system. Setting a limit too high mayopen your system up to abuse, while setting it too low may put a strain on productivity.
• Users of the X Window System (X11) should probably be granted more resources than other users. X11 by itselftakes a lot of resources, but it also encourages users to run more programs simultaneously.
• Remember that many limits apply to individual processes, not the user as a whole. For example, setting openfilesto 50 means that each process the user runs may open up to 50 files. Thus, the gross amount of files a user mayopen is the value of openfiles multiplied by the value of maxproc. This also applies to memory consumption.
For further information on resource limits and login classes and capabilities in general, please consult the relevantmanual pages: cap_mkdb(1), getrlimit(2), login.conf(5).
7.7 Personalizing UsersLocalization is an environment set up by the system administrator or user to accommodate different languages,character sets, date and time standards, and so on. This is discussed in the localization chapter.
77

Chapter 7 Users and Basic Account Management
7.8 GroupsA group is simply a list of users. Groups are identified by their group name and gid (group ID). In FreeBSD (andmost other Unix systems), the two factors the kernel uses to decide whether a process is allowed to do something isits user ID and list of groups it belongs to. Unlike a user ID, a process has a list of groups associated with it. You mayhear some things refer to the "group ID" of a user or process; most of the time, this just means the first group in thelist.
The group name to group ID map is in /etc/group. This is a plain text file with four colon-delimited fields. Thefirst fields is the group name, the second is the encrypted password, the third the group ID, and the fourth thecomma-delimited list of members. It can safely be edited by hand (assuming, of course, that you don’t make anysyntax errors!). For a more complete description of the syntax, see the group(5) manual page.
If you don’t want to edit /etc/group manually, you can use the pw(8) command to add and edit groups. Forexample, to add a group called teamtwo and then confirm that it exists you can use:
Example 7-7. Adding a group using pw(8)
# pw groupadd teamtwo
# pw groupshow teamtwo
teamtwo:*:1100:
The number 1100 above is the group ID of the group teamtwo. Right now, teamtwo has no members, and is thusrather useless. Let’s change that by inviting jru to the teamtwo group.
Example 7-8. Adding somebody to a group using pw(8)
# pw groupmod teamtwo -M jru
# pw groupshow teamtwo
teamtwo:*:1100:jru
The argument to the -M option is a comma-delimited list of users who are members of the group. If you’ve read thepreceeding sections, you’ll know that the password file also contains a group for each user; the group in the passwordfile is automatically added to the group list by the system and will not (should not) appear in the list of memberswhen using pw(8) to query group membership. If you wish to find out what groups a user is part of, you can use theid(1) program as so:
Example 7-9. Using id(1) to determine group membership
% id jru
uid=1001(jru) gid=1001(jru) groups=1001(jru), 1100(teamtwo)
As you can see, jru is a member of the groups jru and teamtwo.
78

Chapter 7 Users and Basic Account Management
For more information about pw(8), see its manual page, and for more information on the format of /etc/group,consult the group(5) manual page.
Notes1. The -s makes adduser default to quiet. We use -v later when we want to change defaults.
79

Chapter 8 Configuring the FreeBSD Kernel
8.1 SynopsisUpdated and restructured by Jim Mock <[email protected]>, March 2000. Originally contributed by Jake Hamby<[email protected]>, 6 October 1995.
The following chapter of the handbook covers everything you will need to know in order to build a custom kernel. Ifyou are wondering what the benefits of a custom kernel are, or would like to know how to configure, compile, andinstall a custom kernel, this chapter is for you.
8.2 Why Build a Custom Kernel?Building a custom kernel is one of the most important rites of passage nearly every UNIX user must endure. Thisprocess, while time consuming, will provide many benefits to your FreeBSD system. Unlike the GENERIC kernel,which must support a wide range of hardware, a custom kernel only contains support for your PC’s hardware. Thishas a number of benefits, such as:
• Faster boot time. Since the kernel will only probe the hardware you have on your system, the time it takes yoursystem to boot will decrease dramatically.
• Less memory use. A custom kernel often uses less memory than the GENERIC kernel, which is important becausethe kernel is one process that must always be present in memory. For this reason, a custom kernel is especiallyuseful on a system with a small amount of RAM.
• Additional hardware support. A custom kernel allows you to add in support for devices such as sound cards, whichare not present in the GENERIC kernel.
8.3 Building and Installing a Custom KernelFirst, let us take a quick tour of the kernel build directory. All directories mentioned will be relative to the main/usr/src/sys directory, which is also accessible through /sys. There are a number of subdirectories hererepresenting different parts of the kernel, but the most important, for our purposes, are arch/conf, where you willedit your custom kernel configuration, and compile, which is the staging area where your kernel will be built. archrepresents either i386, alpha, or pc98 (an alternative development branch of PC hardware, popular in Japan).Everything inside a particular architecture’s directory deals with that architecture only; the rest of the code is
80

Chapter 8 Configuring the FreeBSD Kernel
common to all platforms to which FreeBSD could potentially be ported. Notice the logical organization of thedirectory structure, with each supported device, filesystem, and option in its own subdirectory.
Note: If there is not a /usr/src/sys directory on your system, then the kernel source has not been installed.The easiest way to do this is by running /stand/sysinstall as root, choosing Configure, thenDistributions, then src, then sys.
Next, move to the arch/conf directory and copy the GENERIC configuration file to the name you want to give yourkernel. For example:
# cd /usr/src/sys/i386/conf# cp GENERIC MYKERNEL
Traditionally, this name is in all capital letters and, if you are maintaining multiple FreeBSD machines with differenthardware, it is a good idea to name it after your machine’s hostname. We will call it MYKERNEL for the purpose ofthis example.
Tip: Storing your kernel config file directly under /usr/src can be a bad idea. If you are experiencing problems itcan be tempting to just delete /usr/src and start again. Five seconds after you do that you realise that you havedeleted your custom kernel config file.
You might want to keep your kernel config file elsewhere, and then create a symbolic link to the file in the i386
directory.
For example:
# cd /usr/src/sys/i386/conf# mkdir /root/kernels# cp GENERIC /root/kernels/MYKERNEL# ln -s /root/kernels/MYKERNEL
Note: You must execute these and all of the following commands under the root account or you will getpermission denied errors.
Now, edit MYKERNEL with your favorite text editor. If you are just starting out, the only editor available will probablybe vi, which is too complex to explain here, but is covered well in many books in the bibliography. However,FreeBSD does offer an easier editor called “ee” which, if you are a beginner, should be your editor of choice. Feelfree to change the comment lines at the top to reflect your configuration or the changes you have made todifferentiate it from GENERIC.
81

Chapter 8 Configuring the FreeBSD Kernel
If you have built a kernel under SunOS or some other BSD operating system, much of this file will be very familiarto you. If you are coming from some other operating system such as DOS, on the other hand, the GENERICconfiguration file might seem overwhelming to you, so follow the descriptions in the Configuration File sectionslowly and carefully.
Note: Be sure to always check the file /usr/src/UPDATING, before you perform any update steps, in the caseyou sync your source-tree with the latest sources of the FreeBSD project. In this file all important issues withupdating FreeBSD are written down. /usr/src/UPDATING always fits to your version of the FreeBSD source, andis therefore more accurate for those information than the handbook.
You must now compile the source code for the kernel. There are two procedures you can use to do this, and the oneyou will use depends on why you are rebuilding the kernel, and the version of FreeBSD you are running.
• If you have installed only the kernel source code, use procedure 1.
• If you are running a FreeBSD version prior to 4.0, and you are not upgrading to FreeBSD 4.0 or higher using the“make world” procedure, use procedure 1.
• If you are building a new kernel without updating the source code (perhaps just to add a new option, such asIPFIREWALL) you can use either procedure.
• If you are rebuilding the kernel as part of a “make world” process, use procedure 2.
Procedure 1. Building a kernel the “traditional” way
1. Run config(8) to generate the kernel source code.
# /usr/sbin/config MYKERNEL
2. Change in to the build directory.
# cd ../../compile/MYKERNEL
3. Compile the kernel.
# make depend# make
4. Install the new kernel.
# make install
Procedure 2. Building a kernel the “new” way
1. Change to the /usr/src directory
82

Chapter 8 Configuring the FreeBSD Kernel
# cd /usr/src
2. Compile the kernel.
# make buildkernel KERNCONF=MYKERNEL
3. Install the new kernel.
# make installkernel KERNCONF=MYKERNEL
Note: In FreeBSD 4.2 and older you must replace KERNCONF= with KERNEL=. 4.2-STABLE that was fetched afterFeb 2nd, 2001 does recognize KERNCONF=
If you have not upgraded your source tree in any way (you have not run CVSup, CTM, or used anoncvs), then youshould use the config, make depend, make, make install sequence.
The new kernel will be copied to the root directory as /kernel and the old kernel will be moved to /kernel.old.Now, shutdown the system and reboot to use your kernel. In case something goes wrong, there are sometroubleshooting instructions at the end of this document. Be sure to read the section which explains how to recover incase your new kernel does not boot.
Note: If you have added any new devices (such as sound cards) you may have to add some device nodes toyour /dev directory before you can use them.
8.4 The Configuration FileThe general format of a configuration file is quite simple. Each line contains a keyword and one or more arguments.For simplicity, most lines only contain one argument. Anything following a # is considered a comment and ignored.The following sections describe each keyword, generally in the order they are listed in GENERIC, although somerelated keywords have been grouped together in a single section (such as Networking) even though they are actuallyscattered throughout the GENERIC file. An exhaustive list of options and more detailed explanations of the devicelines is present in the LINT configuration file, located in the same directory as GENERIC. If you are in doubt as to thepurpose or necessity of a line, check first in LINT.
Quoting numbers: In all versions of FreeBSD up to and including 3.X, config(8) required that any strings in theconfiguration file that contained numbers used as text had to be enclosed in double quotes.
This requirement was removed in the 4.X branch, which this book covers, so if you are on a pre-4.X system, seethe /usr/src/sys/i386/conf/LINT and /usr/src/sys/i386/conf/GENERIC files on your system for examples.
83

Chapter 8 Configuring the FreeBSD Kernel
The following is an example GENERIC kernel configuration file with various additional comments where needed forclarity. This example should match your copy in /usr/src/sys/i386/conf/GENERIC fairly closely. For detailsof all the possible kernel options, see /usr/src/sys/i386/conf/LINT.
## GENERIC -- Generic kernel configuration file for FreeBSD/i386## For more information on this file, please read the handbook section on# Kernel Configuration Files:## http://www.freebsd.org/handbook/kernelconfig-config.html## The handbook is also available locally in /usr/share/doc/handbook# if you’ve installed the doc distribution, otherwise always see the# FreeBSD World Wide Web server (http://www.FreeBSD.ORG/) for the# latest information.## An exhaustive list of options and more detailed explanations of the# device lines is also present in the ./LINT configuration file. If you are# in doubt as to the purpose or necessity of a line, check first in LINT.## $FreeBSD: src/sys/i386/conf/GENERIC,v 1.246 2000/03/09 16:32:55 jlemon Exp $
The following are the mandatory keywords required in every kernel you build:
machine i386
This is the machine architecture. It must be either i386, alpha, or pc98.
cpu I386_CPUcpu I486_CPUcpu I586_CPUcpu I686_CPU
The above specifies the type of CPU you have in your system. You may have multiple instances of the CPU line (i.e.,you are not sure whether you should use I586_CPU or I686_CPU), however, for a custom kernel, it is best to specifyonly the CPU you have. If you are unsure which type your CPU use, you can use the dmesg command to view yourboot up messages.
The Alpha architecture has different values for cpu_type. They include:
cpu EV4cpu EV5
84

Chapter 8 Configuring the FreeBSD Kernel
If you are using an Alpha machine, you should be using one of the above CPU types.
ident GENERIC
This is the identification of the kernel. You should change this to whatever you named your kernel, in our previousexample, MYKERNEL. The value you put in the ident string will print when you boot up the kernel, so it is useful togive a kernel a different name if you want to keep it separate from your usual kernel (i.e., you want to build anexperimental kernel).
maxusers 32
The maxusers option sets the size of a number of important system tables. This number is supposed to be roughlyequal to the number of simultaneous users you expect to have on your machine. However, under normalcircumstances, you will want to set maxusers to at least 4, especially if you are using the X Window System orcompiling software. The reason is that the most important table set by maxusers is the maximum number ofprocesses, which is set to 20 + 16 * maxusers, so if you set maxusers to 1, then you can only have 36simultaneous processes, including the 18 or so that the system starts up at boot time, and the 15 or so you willprobably create when you start the X Window System. Even a simple task like reading a man page will start up nineprocesses to filter, decompress, and view it. Setting maxusers to 64 will allow you to have up to 1044 simultaneousprocesses, which should be enough for nearly all uses. If, however, you see the dreaded proc table full error whentrying to start another program, or are running a server with a large number of simultaneous users (likeftp.FreeBSD.org), you can always increase the number and rebuild.
Note: maxusers does not limit the number of users which can log into your machine. It simply sets various tablesizes to reasonable values considering the maximum number of users you will likely have on your system andhow many processes each of them will be running. One keyword which does limit the number of simultaneousremote logins is pseudo-device pty 16.
Everything that follows is more or less optional. See the notes underneath or next to each option for moreinformation.
#makeoptions DEBUG=-g #Build kernel with gdb(1) debug symbolsoptions MATH_EMULATE #Support for x87 emulation
This line allows the kernel to simulate a math co-processor if your computer does not have one (386 or 486SX). Ifyou have a 486DX, or a 386 or 486SX (with a separate 387 or 487 chip), or higher (Pentium, Pentium II, etc.), youcan comment this line out.
Note: The normal math co-processor emulation routines that come with FreeBSD are not very accurate. If youdo not have a math co-processor, and you need the best accuracy, it is recommended that you change this optionto GPL_MATH_EMULATION to use the GNU math support, which is not included by default for licensing reasons.
85

Chapter 8 Configuring the FreeBSD Kernel
options INET #InterNETworking
Networking support. Leave this in, even if you do not plan to be connected to a network. Most programs require atleast loopback networking (i.e., making network connections within your PC), so this is essentially mandatory.
options INET6 #IPv6 communications protocols
This enables the IPv6 communication protocols.
options FFS #Berkeley Fast Filesystemoptions FFS_ROOT #FFS usable as root device [keep this!]
This is the basic hard drive filesystem. Leave it in if you boot from the hard disk.
options MFS #Memory Filesystemoptions MD_ROOT #MD is a potential root device
This is the memory-mapped filesystem. This is basically a RAM disk for fast storage of temporary files, useful if youhave a lot of swap space that you want to take advantage of. A perfect place to mount an MFS partition is on the/tmp directory, since many programs store temporary data here. To mount an MFS RAM disk on /tmp, add thefollowing line to /etc/fstab:
/dev/ad1s2b /tmp mfs rw 0 0
Now you simply need to either reboot, or run the command mount /tmp.
options NFS #Network Filesystemoptions NFS_ROOT #NFS usable as root device, NFS required
The network filesystem. Unless you plan to mount partitions from a UNIX file server over TCP/IP, you can commentthese out.
options MSDOSFS #MSDOS Filesystem
The MS-DOS filesystem. Unless you plan to mount a DOS formatted hard drive partition at boot time, you can safelycomment this out. It will be automatically loaded the first time you mount a DOS partition, as described above. Also,the excellent mtools software (in the ports collection) allows you to access DOS floppies without having to mountand unmount them (and does not require MSDOSFS at all).
options CD9660 #ISO 9660 Filesystemoptions CD9660_ROOT #CD-ROM usable as root, CD9660 required
86

Chapter 8 Configuring the FreeBSD Kernel
The ISO 9660 filesystem for CDROMs. Comment it out if you do not have a CDROM drive or only mount data CDsoccasionally (since it will be dynamically loaded the first time you mount a data CD). Audio CDs do not need thisfilesystem.
options PROCFS #Process filesystem
The process filesystem. This is a “pretend” filesystem mounted on /proc which allows programs like ps(1) to giveyou more information on what processes are running.
options COMPAT_43 #Compatible with BSD 4.3 [KEEP THIS!]
Compatibility with 4.3BSD. Leave this in; some programs will act strangely if you comment this out.
options SCSI_DELAY=15000 #Delay (in ms) before probing SCSI
This causes the kernel to pause for 15 seconds before probing each SCSI device in your system. If you only haveIDE hard drives, you can ignore this, otherwise you will probably want to lower this number, perhaps to 5 seconds, tospeed up booting. Of course, if you do this, and FreeBSD has trouble recognizing your SCSI devices, you will haveto raise it back up.
options UCONSOLE #Allow users to grab the console
Allow users to grab the console, which is useful for X users. For example, you can create a console xterm by typingxterm -C, which will display any write, talk, and any other messages you receive, as well as any consolemessages sent by the kernel.
options USERCONFIG #boot -c editor
This option allows you to boot the configuration editor from the boot menu.
options VISUAL_USERCONFIG #visual boot -c editor
This option allows you to boot the visual configuration editor from the boot menu.
options KTRACE #ktrace(1) support
This enables kernel process tracing, which is useful in debugging.
options SYSVSHM #SYSV-style shared memory
This option provides for System V shared memory. The most common use of this is the XSHM extension in X,which many graphics-intensive programs will automatically take advantage of for extra speed. If you use X, you’lldefinitely want to include this.
options SYSVSEM #SYSV-style semaphores
87

Chapter 8 Configuring the FreeBSD Kernel
Support for System V semaphores. Less commonly used but only adds a few hundred bytes to the kernel.
options SYSVMSG #SYSV-style message queues
Support for System V messages. Again, only adds a few hundred bytes to the kernel.
Note: The ipcs(1) command will list any processes using each of these System V facilities.
options P1003_1B #Posix P1003_1B real-time extensionsoptions _KPOSIX_PRIORITY_SCHEDULING
Real-time extensions added in the 1993 POSIX. Certain applications in the ports collection use these (such as StarOffice).
options ICMP_BANDLIM #Rate limit bad replies
This option enables ICMP error response bandwidth limiting. You typically want this option as it will help protectthe machine from denial of service packet attacks.
# To make an SMP kernel, the next two are needed#options SMP # Symmetric MultiProcessor Kernel#options APIC_IO # Symmetric (APIC) I/O
The above are both required for SMP support.
device isa
All PCs supported by FreeBSD have one of these. If you have an IBM PS/2 (Micro Channel Architecture), youcannot run FreeBSD at this time (support is being worked on).
device eisa
Include this if you have an EISA motherboard. This enables auto-detection and configuration support for all deviceson the EISA bus.
device pci
Include this if you have a PCI motherboard. This enables auto-detection of PCI cards and gatewaying from the PCIto ISA bus.
# Floppy drivesdevice fdc0 at isa? port IO_FD1 irq 6 drq 2device fd0 at fdc0 drive 0device fd1 at fdc0 drive 1
88

Chapter 8 Configuring the FreeBSD Kernel
This is the floppy drive controller. fd0 is the A: floppy drive, and fd1 is the B: drive.
device ata
This driver supports all ATA and ATAPI devices. You only need one device ata line for the kernel to detect all PCIATA/ATAPI devices on modern machines.
device atadisk # ATA disk drives
This is needed along with device ata for ATAPI disk drives.
device atapicd # ATAPI CDROM drives
This is needed along with device ata for ATAPI CDROM drives.
device atapifd # ATAPI floppy drives
This is needed along with device ata for ATAPI floppy drives.
device atapist # ATAPI tape drives
This is needed along with device ata for ATAPI tape drives.
options ATA_STATIC_ID #Static device numbering
This makes the controller number static (like the old driver) or else the device numbers are dynamically allocated.
# ATA and ATAPI devicesdevice ata0 at isa? port IO_WD1 irq 14device ata1 at isa? port IO_WD2 irq 15
Use the above for older, non-PCI systems.
# SCSI Controllersdevice ahb # EISA AHA1742 familydevice ahc # AHA2940 and onboard AIC7xxx devicesdevice amd # AMD 53C974 (Teckram DC-390(T))device dpt # DPT Smartcache - See LINT for options!device isp # Qlogic familydevice ncr # NCR/Symbios Logicdevice sym # NCR/Symbios Logic (newer chipsets)
device adv0 at isa?device adwdevice bt0 at isa?
89

Chapter 8 Configuring the FreeBSD Kernel
device aha0 at isa?device aic0 at isa?
SCSI controllers. Comment out any you do not have in your system. If you have an IDE only system, you canremove these altogether.
# SCSI peripheralsdevice scbus # SCSI bus (required)device da # Direct Access (disks)device sa # Sequential Access (tape etc)device cd # CDdevice pass # Passthrough device (direct SCSIaccess)
SCSI peripherals. Again, comment out any you do not have, or if you have only IDE hardware, you can remove themcompletely.
# RAID controllersdevice ida # Compaq Smart RAIDdevice amr # AMI MegaRAIDdevice mlx # Mylex DAC960 family
Supported RAID controllers. If you do not have any of these, you can comment them out or remove them.
# atkbdc0 controls both the keyboard and the PS/2 mousedevice atkbdc0 at isa? port IO_KBD
The keyboard controller (atkbdc) provides I/O services for the AT keyboard and PS/2 style pointing devices. Thiscontroller is required by the keyboard driver (atkbd) and the PS/2 pointing device driver (psm).
device atkbd0 at atkbdc? irq 1
The atkbd driver, together with atkbdc controller, provides access to the AT 84 keyboard or the AT enhancedkeyboard which is connected to the AT keyboard controller.
device psm0 at atkbdc? irq 12
Use this device if your mouse plugs into the PS/2 mouse port.
device vga0 at isa?
The video card driver.
# splash screen/screen saverpseudo-device splash
90

Chapter 8 Configuring the FreeBSD Kernel
Splash screen at start up! Screen savers require this too.
# syscons is the default console driver, resembling an SCO consoledevice sc0 at isa?
sc0 is the default console driver, which resembles a SCO console. Since most full-screen programs access theconsole through a terminal database library like termcap, it should not matter whether you use this or vt0, theVT220 compatible console driver. When you log in, set your TERM variable to scoansi if full-screen programshave trouble running under this console.
# Enable this and PCVT_FREEBSD for pcvt vt220 compatible console driver#device vt0 at isa?#options XSERVER # support for X server on a vt console#options FAT_CURSOR # start with block cursor# If you have a ThinkPAD, uncomment this along with the rest of the PCVT lines#options PCVT_SCANSET=2 # IBM keyboards are non-std
This is a VT220-compatible console driver, backward compatible to VT100/102. It works well on some laptopswhich have hardware incompatibilities with sc0. Also set your TERM variable to vt100 or vt220 when you log in.This driver might also prove useful when connecting to a large number of different machines over the network,where termcap or terminfo entries for the sc0 device are often not available — vt100 should be available onvirtually any platform.
# Floating point support - do not disable.device npx0 at nexus? port IO_NPX irq 13
npx0 is the interface to the floating point math unit in FreeBSD, which is either the hardware co-processor or thesoftware math emulator. This is not optional.
# Power management support (see LINT for more options)device apm0 at nexus? disable flags 0x20 # Advanced Power Management
Advanced Power Management support. Useful for laptops.
# PCCARD (PCMCIA) supportdevice carddevice pcic0 at isa? irq 10 port 0x3e0 iomem 0xd0000device pcic1 at isa? irq 11 port 0x3e2 iomem 0xd4000 disable
PCMCIA support. You need this if you are installing on a laptop.
# Serial (COM) portsdevice sio0 at isa? port IO_COM1 flags 0x10 irq 4device sio1 at isa? port IO_COM2 irq 3device sio2 at isa? disable port IO_COM3 irq 5
91

Chapter 8 Configuring the FreeBSD Kernel
device sio3 at isa? disable port IO_COM4 irq 9
These are the four serial ports referred to as COM1 through COM4 in the MS-DOS/Windows world.
Note: If you have an internal modem on COM4 and a serial port at COM2, you will have to change the IRQ of themodem to 2 (for obscure technical reasons, IRQ2 = IRQ 9) in order to access it from FreeBSD. If you have amultiport serial card, check the manual page for sio(4) for more information on the proper values for these lines.Some video cards (notably those based on S3 chips) use IO addresses in the form of 0x*2e8, and since manycheap serial cards do not fully decode the 16-bit IO address space, they clash with these cards making theCOM4 port practically unavailable.
Each serial port is required to have a unique IRQ (unless you are using one of the multiport cards where sharedinterrupts are supported), so the default IRQs for COM3 and COM4 cannot be used.
# Parallel portdevice ppc0 at isa? irq 7
This is the ISA-bus parallel port interface.
device ppbus # Parallel port bus (required)
Provides support for the parallel port bus.
device lpt # Printer
Support for parallel port printers.
Note: All three of the above are required to enable parallel printer support.
device plip # TCP/IP over parallel
This is the driver for the parallel network interface.
device ppi # Parallel port interface device
The general-purpose I/O (“geek port”) + IEEE1284 I/O.
#device vpo # Requires scbus and da
This is for an Iomega Zip drive. It requires scbus and da support. Best performance is achieved with ports in EPP1.9 mode.
# PCI Ethernet NICs.
92

Chapter 8 Configuring the FreeBSD Kernel
device de # DEC/Intel DC21x4x (“Tulip”)device fxp # Intel EtherExpress PRO/100B (82557, 82558)device tx # SMC 9432TX (83c170 “EPIC”)device vx # 3Com 3c590, 3c595 (“Vortex”)device wx # Intel Gigabit Ethernet Card (“Wiseman”)
Various PCI network card drivers. Comment out or remove any of these not present in your system.
# PCI Ethernet NICs that use the common MII bus controller code.device miibus # MII bus support
MII bus support is required for some PCI 10/100 ethernet NICs, namely those which use MII-compliant transceiversor implement transceiver control interfaces that operate like an MII. Adding device miibus to the kernel configpulls in support for the generic miibus API and all of the PHY drivers, including a generic one for PHYs that are notspecifically handled by an individual driver
device dc # DEC/Intel 21143 and various workalikesdevice rl # RealTek 8129/8139device sf # Adaptec AIC-6915 (“Starfire”)device sis # Silicon Integrated Systems SiS 900/SiS 7016device ste # Sundance ST201 (D-Link DFE-550TX)device tl # Texas Instruments ThunderLANdevice vr # VIA Rhine, Rhine IIdevice wb # Winbond W89C840Fdevice xl # 3Com 3c90x (“Boomerang”, “Cyclone”)
Drivers that use the MII bus controller code.
# ISA Ethernet NICs.device ed0 at isa? port 0x280 irq 10 iomem 0xd8000device exdevice ep# WaveLAN/IEEE 802.11 wireless NICs. Note: the WaveLAN/IEEE really# exists only as a PCMCIA device, so there is no ISA attachment needed# and resources will always be dynamically assigned by the pccard code.device wi# Aironet 4500/4800 802.11 wireless NICs. Note: the declaration below will# work for PCMCIA and PCI cards, as well as ISA cards set to ISA PnP# mode (the factory default). If you set the switches on your ISA# card for a manually chosen I/O address and IRQ, you must specify# those parameters here.device an# The probe order of these is presently determined by i386/isa/isa_compat.c.device ie0 at isa? port 0x300 irq 10 iomem 0xd0000device fe0 at isa? port 0x300
93

Chapter 8 Configuring the FreeBSD Kernel
device le0 at isa? port 0x300 irq 5 iomem 0xd0000device lnc0 at isa? port 0x280 irq 10 drq 0device cs0 at isa? port 0x300device sn0 at isa? port 0x300 irq 10# requires PCCARD (PCMCIA) support to be activated#device xe0 at isa?
ISA ethernet drivers. See /usr/src/sys/i386/conf/LINT for which cards are supported by which driver.
# Pseudo devices - the number indicates how many units to allocate.pseudo-device loop # Network loopback
This is the generic loopback device for TCP/IP. If you telnet or FTP to localhost (a.k.a., 127.0.0.1) it will comeback at you through this pseudo-device. This is mandatory.
pseudo-device ether # Ethernet support
ether is only needed if you have an Ethernet card. It includes generic Ethernet protocol code.
pseudo-device sl 1 # Kernel SLIP
sl is for SLIP support. This has been almost entirely supplanted by PPP, which is easier to set up, better suited formodem-to-modem connection, and more powerful. The number after sl specifies how many simultaneous SLIPsessions to support.
pseudo-device ppp 1 # Kernel PPP
This is for kernel PPP support for dial-up connections. There is also a version of PPP implemented as a userlandapplication that uses tun and offers more flexibility and features such as demand dialing. The number after pppspecifies how many simultaneous PPP connections to support.
pseudo-device tun # Packet tunnel.
This is used by the userland PPP software. The number after tun specifies the number of simultaneous PPPsessions to support. See the PPP section of this book for more information.
pseudo-device pty # Pseudo-ttys (telnet etc)
This is a “pseudo-terminal” or simulated login port. It is used by incoming telnet and rlogin sessions, xterm,and some other applications such as emacs. The number indicates the number of ptys to create. If you need morethan the default of 16 simultaneous xterm windows and/or remote logins, be sure to increase this numberaccordingly, up to a maximum of 256.
pseudo-device md # Memory “disks”
94

Chapter 8 Configuring the FreeBSD Kernel
Memory disk pseudo-devices.
pseudo-device gif 4 # IPv6 and IPv4 tunneling
This implements IPv6 over IPv4 tunneling, IPv4 over IPv6 tunneling, IPv4 over IPv4 tunneling, and IPv6 over IPv6tunneling.
pseudo-device faith 1 # IPv6-to-IPv4 relaying (translation)
This pseudo-device captures packets that are sent to it and diverts them to the IPv4/IPv6 translation daemon.
# The ‘bpf’ pseudo-device enables the Berkeley Packet Filter.# Be aware of the administrative consequences of enabling this!pseudo-device bpf # Berkeley packet filter
This is the Berkeley Packet Filter. This pseudo-device allows network interfaces to be placed in promiscuous mode,capturing every packet on a broadcast network (e.g., an ethernet). These packets can be captured to disk and orexamined with the tcpdump(1) program.
# USB support#device uhci # UHCI PCI- � USB interface#device ohci # OHCI PCI- � USB interface#device usb # USB Bus (required)#device ugen # Generic#device uhid # “Human Interface Devices”#device ukbd # Keyboard#device ulpt # Printer#device umass # Disks/Mass storage - Requires scbus and da#device ums # Mouse# USB Ethernet, requires mii#device aue # ADMtek USB ethernet#device cue # CATC USB ethernet#device kue # Kawasaki LSI USB ethernet
Support for various USB devices.
For more information and additional devices supported by FreeBSD, see /usr/src/sys/i386/conf/LINT.
8.5 Making Device NodesAlmost every device in the kernel has a corresponding “node” entry in the /dev directory. These nodes look likeregular files, but are actually special entries into the kernel which programs use to access the device. The shell script/dev/MAKEDEV, which is executed when you first install the operating system, creates nearly all of the device nodes
95

Chapter 8 Configuring the FreeBSD Kernel
supported. However, it does not create all of them, so when you add support for a new device, it pays to make surethat the appropriate entries are in this directory, and if not, add them. Here is a simple example:
Suppose you add the IDE CD-ROM support to the kernel. The line to add is:
device acd0
This means that you should look for some entries that start with acd0 in the /dev directory, possibly followed by aletter, such as c, or preceded by the letter r, which means a “raw” device. It turns out that those files are not there, soyou must change to the /dev directory and type:
# sh MAKEDEV acd0
When this script finishes, you will find that there are now acd0c and racd0c entries in /dev so you know that itexecuted correctly.
For sound cards, the following command creates the appropriate entries:
# sh MAKEDEV snd0
Note: When creating device nodes for devices such as sound cards, if other people have access to yourmachine, it may be desirable to protect the devices from outside access by adding them to the /etc/fbtab file.See fbtab(5) for more information.
Follow this simple procedure for any other non-GENERIC devices which do not have entries.
Note: All SCSI controllers use the same set of /dev entries, so you do not need to create these. Also, networkcards and SLIP/PPP pseudo-devices do not have entries in /dev at all, so you do not have to worry about theseeither.
8.6 If Something Goes WrongThere are four categories of trouble that can occur when building a custom kernel. They are:
config fails
If the config command fails when you give it your kernel description, you have probably made a simple errorsomewhere. Fortunately, config will print the line number that it had trouble with, so you can quickly skip to itwith vi. For example, if you see:
96

Chapter 8 Configuring the FreeBSD Kernel
config: line 17: syntax error
You can skip to the problem in vi by typing 17G in command mode. Make sure the keyword is typed correctly,by comparing it to the GENERIC kernel or another reference.
make fails
If the make command fails, it usually signals an error in your kernel description, but not severe enough forconfig to catch it. Again, look over your configuration, and if you still cannot resolve the problem, send mailto the FreeBSD general questions mailing list <[email protected]> with your kernelconfiguration, and it should be diagnosed very quickly.
The kernel will not boot
If your new kernel does not boot, or fails to recognize your devices, do not panic! Fortunately, BSD has anexcellent mechanism for recovering from incompatible kernels. Simply choose the kernel you want to boot fromat the FreeBSD boot loader (i.e., boot kernel.old). When reconfiguring a kernel, it is always a good idea tokeep a kernel that is known to work on hand.
After booting with a good kernel you can check over your configuration file and try to build it again. Onehelpful resource is the /var/log/messages file which records, among other things, all of the kernel messagesfrom every successful boot. Also, the dmesg(8) command will print the kernel messages from the current boot.
Note: If you are having trouble building a kernel, make sure to keep a GENERIC, or some other kernel that isknown to work on hand as a different name that will not get erased on the next build. You cannot rely onkernel.old because when installing a new kernel, kernel.old is overwritten with the last installed kernelwhich may be non-functional. Also, as soon as possible, move the working kernel to the proper kernellocation or commands such as ps(1) will not work properly. The proper command to “unlock” the kernel filethat make installs (in order to move another kernel back permanently) is:
# chflags noschg /kernel
And, if you want to “lock” your new kernel into place, or any file for that matter, so that it cannot be moved ortampered with:
# chflags schg /kernel
The kernel works, but ps does not work any more!
If you have installed a different version of the kernel from the one that the system utilities have been built with,for example, a 4.X kernel on a 3.X system, many system-status commands like ps(1) and vmstat(8) will not
97

Chapter 8 Configuring the FreeBSD Kernel
work any more. You must recompile the libkvm library as well as these utilities. This is one reason it is notnormally a good idea to use a different version of the kernel from the rest of the operating system.
98

Chapter 9 SecurityMuch of this chapter has been taken from the security(7) man page, originally written by Matthew Dillon<[email protected]>.
9.1 SynopsisThe following chapter will provide a basic introduction to system security concepts, some general good rules ofthumb, and some advanced topics such as S/Key, OpenSSL, Kerberos, and others.
9.2 IntroductionSecurity is a function that begins and ends with the system administrator. While all BSD UNIX multi-user systemshave some inherent security, the job of building and maintaining additional security mechanisms to keep those users“honest” is probably one of the single largest undertakings of the sysadmin. Machines are only as secure as youmake them, and security concerns are ever competing with the human necessity for convenience. UNIX systems, ingeneral, are capable of running a huge number of simultaneous processes and many of these processes operate asservers – meaning that external entities can connect and talk to them. As yesterday’s mini-computers and mainframesbecome today’s desktops, and as computers become networked and internetworked, security becomes an ever biggerissue.
Security is best implemented through a layered “onion” approach. In a nutshell, what you want to do is to create asmany layers of security as are convenient and then carefully monitor the system for intrusions. You do not want tooverbuild your security or you will interfere with the detection side, and detection is one of the single most importantaspects of any security mechanism. For example, it makes little sense to set the schg flags (see chflags(1)) on everysystem binary because while this may temporarily protect the binaries, it prevents an attacker who has broken in frommaking an easily detectable change that may result in your security mechanisms not detecting the attacker at all.
System security also pertains to dealing with various forms of attack, including attacks that attempt to crash orotherwise make a system unusable but do not attempt to break root. Security concerns can be split up into severalcategories:
1. Denial of service attacks.
2. User account compromises.
3. Root compromise through accessible servers.
4. Root compromise via user accounts.
99

Chapter 9 Security
5. Backdoor creation.
A denial of service attack is an action that deprives the machine of needed resources. Typically, D.O.S. attacks arebrute-force mechanisms that attempt to crash or otherwise make a machine unusable by overwhelming its servers ornetwork stack. Some D.O.S. attacks try to take advantages of bugs in the networking stack to crash a machine with asingle packet. The latter can only be fixed by applying a bug fix to the kernel. Attacks on servers can often be fixedby properly specifying options to limit the load the servers incur on the system under adverse conditions. Brute-forcenetwork attacks are harder to deal with. A spoofed-packet attack, for example, is nearly impossible to stop short ofcutting your system off from the Internet. It may not be able to take your machine down, but it can saturate yourInternet connection.
A user account compromise is even more common than a D.O.S. attack. Many sysadmins still run standard telnetd,rlogind, rshd, and ftpd servers on their machines. These servers, by default, do not operate over encryptedconnections. The result is that if you have any moderate-sized user base, one or more of your users logging into yoursystem from a remote location (which is the most common and convenient way to login to a system) will have his orher password sniffed. The attentive system admin will analyze his remote access logs looking for suspicious sourceaddresses even for successful logins.
One must always assume that once an attacker has access to a user account, the attacker can break root. However, thereality is that in a well secured and maintained system, access to a user account does not necessarily give the attackeraccess to root. The distinction is important because without access to root the attacker cannot generally hide histracks and may, at best, be able to do nothing more than mess with the user’s files or crash the machine. User accountcompromises are very common because users tend not to take the precautions that sysadmins take.
System administrators must keep in mind that there are potentially many ways to break root on a machine. Theattacker may know the root password, the attacker may find a bug in a root-run server and be able to break root over anetwork connection to that server, or the attacker may know of a bug in an suid-root program that allows the attackerto break root once he has broken into a user’s account. If an attacker has found a way to break root on a machine, theattacker may not have a need to install a backdoor. Many of the root holes found and closed to date involve aconsiderable amount of work by the attacker to cleanup after himself, so most attackers install backdoors. Backdoorsprovide the attacker with a way to easily regain root access to the system, but it also gives the smart systemadministrator a convenient way to detect the intrusion. Making it impossible for an attacker to install a backdoor mayactually be detrimental to your security because it will not close off the hole the attacker found to break in the firstplace.
Security remedies should always be implemented with a multi-layered “onion peel” approach and can be categorizedas follows:
1. Securing root and staff accounts.
2. Securing root – root-run servers and suid/sgid binaries.
3. Securing user accounts.
4. Securing the password file.
100

Chapter 9 Security
5. Securing the kernel core, raw devices, and filesystems.
6. Quick detection of inappropriate changes made to the system.
7. Paranoia.
The next section of this chapter will cover the above bullet items in greater depth.
9.3 Securing FreeBSDThe sections that follow will cover the methods of securing your FreeBSD system that were mentioned in the lastsection of this chapter.
9.3.1 Securing the root account and staff accountsFirst off, do not bother securing staff accounts if you have not secured the root account. Most systems have apassword assigned to the root account. The first thing you do is assume that the password is always compromised.This does not mean that you should remove the password. The password is almost always necessary for consoleaccess to the machine. What it does mean is that you should not make it possible to use the password outside of theconsole or possibly even with the su(1) command. For example, make sure that your pty’s are specified as beingunsecure in the /etc/ttys file so that direct root logins via telnet or rlogin are disallowed. If using other loginservices such as sshd, make sure that direct root logins are disabled there as well. Consider every access method –services such as FTP often fall through the cracks. Direct root logins should only be allowed via the system console.
Of course, as a sysadmin you have to be able to get to root, so we open up a few holes. But we make sure these holesrequire additional password verification to operate. One way to make root accessible is to add appropriate staffaccounts to the wheel group (in /etc/group). The staff members placed in the wheel group are allowed to su toroot. You should never give staff members native wheel access by putting them in the wheel group in their passwordentry. Staff accounts should be placed in a staff group, and then added to the wheel group via the /etc/groupfile. Only those staff members who actually need to have root access should be placed in the wheel group. It is alsopossible, when using an authentication method such as kerberos, to use kerberos’ .k5login file in the root accountto allow a ksu(1) to root without having to place anyone at all in the wheel group. This may be the better solutionsince the wheel mechanism still allows an intruder to break root if the intruder has gotten hold of your password fileand can break into a staff account. While having the wheel mechanism is better than having nothing at all, it is notnecessarily the safest option.
An indirect way to secure staff accounts, and ultimately root access is to use an alternative login access method anddo what is known as *’ing out the crypted password for the staff accounts. Using the vipw(8) command, one canreplace each instance of a crypted password with a single * character. This command will update the/etc/master.passwd file and user/password database to disable password-authenticated logins.
A staff account entry such as:
101

Chapter 9 Security
foobar:R9DT/Fa1/LV9U:1000:1000::0:0:Foo Bar:/home/foobar:/usr/local/bin/tcsh
Should be changed to this :
foobar:*:1000:1000::0:0:Foo Bar:/home/foobar:/usr/local/bin/tcsh
This change will prevent normal logins from occurring, since the encrypted password will never match *. With thisdone, staff members must use another mechanism to authenticate themselves such as kerberos(1) or ssh(1) using apublic/private key pair. When using something like kerberos, one generally must secure the machines which run thekerberos servers and your desktop workstation. When using a public/private key pair with ssh, one must generallysecure the machine used to login from (typically one’s workstation). An additional layer of protection can be addedto the key pair by password protecting the key pair when creating it with ssh-keygen(1). Being able to * out thepasswords for staff accounts also guarantees that staff members can only login through secure access methods thatyou have setup. This forces all staff members to use secure, encrypted connections for all of their sessions whichcloses an important hole used by many intruders: That of sniffing the network from an unrelated, less secure machine.
The more indirect security mechanisms also assume that you are logging in from a more restrictive server to a lessrestrictive server. For example, if your main box is running all sorts of servers, your workstation should not berunning any. In order for your workstation to be reasonably secure you should run as few servers as possible, up toand including no servers at all, and you should run a password-protected screen blanker. Of course, given physicalaccess to a workstation an attacker can break any sort of security you put on it. This is definitely a problem that youshould consider but you should also consider the fact that the vast majority of break-ins occur remotely, over anetwork, from people who do not have physical access to your workstation or servers.
Using something like kerberos also gives you the ability to disable or change the password for a staff account in oneplace and have it immediately effect all the machine the staff member may have an account on. If a staff member’saccount gets compromised, the ability to instantly change his password on all machines should not be underrated.With discrete passwords, changing a password on N machines can be a mess. You can also impose re-passwordingrestrictions with kerberos: not only can a kerberos ticket be made to timeout after a while, but the kerberos systemcan require that the user choose a new password after a certain period of time (say, once a month).
9.3.2 Securing Root-run Servers and SUID/SGID BinariesThe prudent sysadmin only runs the servers he needs to, no more, no less. Be aware that third party servers are oftenthe most bug-prone. For example, running an old version of imapd or popper is like giving a universal root ticket outto the entire world. Never run a server that you have not checked out carefully. Many servers do not need to be run asroot. For example, the ntalk, comsat, and finger daemons can be run in special user sandboxes. A sandbox isn’tperfect unless you go to a large amount of trouble, but the onion approach to security still stands: If someone is ableto break in through a server running in a sandbox, they still have to break out of the sandbox. The more layers theattacker must break through, the lower the likelihood of his success. Root holes have historically been found in
102

Chapter 9 Security
virtually every server ever run as root, including basic system servers. If you are running a machine through whichpeople only login via sshd and never login via telnetd or rshd or rlogind, then turn off those services!
FreeBSD now defaults to running ntalkd, comsat, and finger in a sandbox. Another program which may be acandidate for running in a sandbox is named(8). /etc/defaults/rc.conf includes the arguments necessary torun named in a sandbox in a commented-out form. Depending on whether you are installing a new system orupgrading an existing system, the special user accounts used by these sandboxes may not be installed. The prudentsysadmin would research and implement sandboxes for servers whenever possible.
There are a number of other servers that typically do not run in sandboxes: sendmail, popper, imapd, ftpd, andothers. There are alternatives to some of these, but installing them may require more work than you are willing toperform (the convenience factor strikes again). You may have to run these servers as root and rely on othermechanisms to detect break-ins that might occur through them.
The other big potential root hole in a system are the suid-root and sgid binaries installed on the system. Most of thesebinaries, such as rlogin, reside in /bin, /sbin, /usr/bin, or /usr/sbin. While nothing is 100% safe, thesystem-default suid and sgid binaries can be considered reasonably safe. Still, root holes are occasionally found inthese binaries. A root hole was found in Xlib in 1998 that made xterm (which is typically suid) vulnerable. It isbetter to be safe than sorry and the prudent sysadmin will restrict suid binaries that only staff should run to a specialgroup that only staff can access, and get rid of (chmod 000) any suid binaries that nobody uses. A server with nodisplay generally does not need an xterm binary. Sgid binaries can be almost as dangerous. If an intruder can breakan sgid-kmem binary the intruder might be able to read /dev/kmem and thus read the crypted password file,potentially compromising any passworded account. Alternatively an intruder who breaks group kmem can monitorkeystrokes sent through pty’s, including pty’s used by users who login through secure methods. An intruder thatbreaks the tty group can write to almost any user’s tty. If a user is running a terminal program or emulator with akeyboard-simulation feature, the intruder can potentially generate a data stream that causes the user’s terminal toecho a command, which is then run as that user.
9.3.3 Securing User AccountsUser accounts are usually the most difficult to secure. While you can impose Draconian access restrictions on yourstaff and * out their passwords, you may not be able to do so with any general user accounts you might have. If youdo have sufficient control then you may win out and be able to secure the user accounts properly. If not, you simplyhave to be more vigilant in your monitoring of those accounts. Use of ssh and kerberos for user accounts is moreproblematic due to the extra administration and technical support required, but still a very good solution compared toa crypted password file.
9.3.4 Securing the Password FileThe only sure fire way is to * out as many passwords as you can and use ssh or kerberos for access to those accounts.
103

Chapter 9 Security
Even though the crypted password file (/etc/spwd.db) can only be read by root, it may be possible for an intruderto obtain read access to that file even if the attacker cannot obtain root-write access.
Your security scripts should always check for and report changes to the password file (see Checking file integritybelow).
9.3.5 Securing the Kernel Core, Raw Devices, and FilesystemsIf an attacker breaks root he can do just about anything, but there are certain conveniences. For example, mostmodern kernels have a packet sniffing device driver built in. Under FreeBSD it is called the bpf device. An intruderwill commonly attempt to run a packet sniffer on a compromised machine. You do not need to give the intruder thecapability and most systems should not have the bpf device compiled in.
But even if you turn off the bpf device, you still have /dev/mem and /dev/kmem to worry about. For that matter, theintruder can still write to raw disk devices. Also, there is another kernel feature called the module loader, kldload(8).An enterprising intruder can use a KLD module to install his own bpf device or other sniffing device on a runningkernel. To avoid these problems you have to run the kernel at a higher secure level, at least securelevel 1. Thesecurelevel can be set with a sysctl on the kern.securelevel variable. Once you have set the securelevel to 1,write access to raw devices will be denied and special chflags flags, such as schg, will be enforced. You must alsoensure that the schg flag is set on critical startup binaries, directories, and script files – everything that gets run up tothe point where the securelevel is set. This might be overdoing it, and upgrading the system is much more difficultwhen you operate at a higher secure level. You may compromise and run the system at a higher secure level but notset the schg flag for every system file and directory under the sun. Another possibility is to simply mount / and/usr read-only. It should be noted that being too draconian in what you attempt to protect may prevent theall-important detection of an intrusion.
9.3.6 Checking File Integrity: Binaries, Configuration Files, Etc.When it comes right down to it, you can only protect your core system configuration and control files so much beforethe convenience factor rears its ugly head. For example, using chflags to set the schg bit on most of the files in /
and /usr is probably counterproductive because while it may protect the files, it also closes a detection window. Thelast layer of your security onion is perhaps the most important – detection. The rest of your security is pretty muchuseless (or, worse, presents you with a false sense of safety) if you cannot detect potential incursions. Half the job ofthe onion is to slow down the attacker rather than stop him in order to give the detection side of the equation a chanceto catch him in the act.
The best way to detect an incursion is to look for modified, missing, or unexpected files. The best way to look formodified files is from another (often centralized) limited-access system. Writing your security scripts on theextra-secure limited-access system makes them mostly invisible to potential attackers, and this is important. In orderto take maximum advantage you generally have to give the limited-access box significant access to the other
104

Chapter 9 Security
machines in the business, usually either by doing a read-only NFS export of the other machines to the limited-accessbox, or by setting up ssh key-pairs to allow the limit-access box to ssh to the other machines. Except for its networktraffic, NFS is the least visible method – allowing you to monitor the filesystems on each client box virtuallyundetected. If your limited-access server is connected to the client boxes through a switch, the NFS method is oftenthe better choice. If your limited-access server is connected to the client boxes through a hub or through severallayers of routing, the NFS method may be too insecure (network-wise) and using ssh may be the better choice evenwith the audit-trail tracks that ssh lays.
Once you give a limit-access box at least read access to the client systems it is supposed to monitor, you must writescripts to do the actual monitoring. Given an NFS mount, you can write scripts out of simple system utilities such asfind(1) and md5(1). It is best to physically md5 the client-box files boxes at least once a day, and to test control filessuch as those found in /etc and /usr/local/etc even more often. When mismatches are found relative to thebase md5 information the limited-access machine knows is valid, it should scream at a sysadmin to go check it out. Agood security script will also check for inappropriate suid binaries and for new or deleted files on system partitionssuch as / and /usr.
When using ssh rather than NFS, writing the security script is much more difficult. You essentially have to scp thescripts to the client box in order to run them, making them visible, and for safety you also need to scp the binaries(such as find) that those scripts use. The ssh daemon on the client box may already be compromised. All in all, usingssh may be necessary when running over unsecure links, but it’s also a lot harder to deal with.
A good security script will also check for changes to user and staff members access configuration files: .rhosts,.shosts, .ssh/authorized_keys and so forth. . . files that might fall outside the purview of the MD5 check.
If you have a huge amount of user disk space it may take too long to run through every file on those partitions. In thiscase, setting mount flags to disallow suid binaries and devices on those partitions is a good idea. The nodev andnosuid options (see mount(8)) are what you want to look into. You should probably scan them anyway at least oncea week, since the object of this layer is to detect a break-in whether or not the break-in is effective.
Process accounting (see accton(8)) is a relatively low-overhead feature of the operating system which might help as apost-break-in evaluation mechanism. It is especially useful in tracking down how an intruder has actually broken intoa system, assuming the file is still intact after the break-in occurs.
Finally, security scripts should process the log files and the logs themselves should be generated in as secure amanner as possible – remote syslog can be very useful. An intruder tries to cover his tracks, and log files are criticalto the sysadmin trying to track down the time and method of the initial break-in. One way to keep a permanent recordof the log files is to run the system console to a serial port and collect the information on a continuing basis through asecure machine monitoring the consoles.
9.3.7 ParanoiaA little paranoia never hurts. As a rule, a sysadmin can add any number of security features as long as they do noteffect convenience, and can add security features that do effect convenience with some added thought. Even more
105

Chapter 9 Security
importantly, a security administrator should mix it up a bit – if you use recommendations such as those given by thisdocument verbatim, you give away your methodologies to the prospective attacker who also has access to thisdocument.
9.3.8 Denial of Service AttacksThis section covers Denial of Service attacks. A DOS attack is typically a packet attack. While there is not much youcan do about modern spoofed packet attacks that saturate your network, you can generally limit the damage byensuring that the attacks cannot take down your servers.
1. Limiting server forks.
2. Limiting springboard attacks (ICMP response attacks, ping broadcast, etc.).
3. Kernel Route Cache.
A common DOS attack is against a forking server that attempts to cause the server to eat processes, file descriptors,and memory until the machine dies. Inetd (see inetd(8)) has several options to limit this sort of attack. It should benoted that while it is possible to prevent a machine from going down it is not generally possible to prevent a servicefrom being disrupted by the attack. Read the inetd manual page carefully and pay specific attention to the -c, -C, and-R options. Note that spoofed-IP attacks will circumvent the -C option to inetd, so typically a combination of optionsmust be used. Some standalone servers have self-fork-limitation parameters.
Sendmail has its -OMaxDaemonChildren option which tends to work much better than trying to use sendmail’sload limiting options due to the load lag. You should specify a MaxDaemonChildren parameter when you startsendmail high enough to handle your expected load but no so high that the computer cannot handle that number ofsendmails without falling on its face. It is also prudent to run sendmail in queued mode(-ODeliveryMode=queued) and to run the daemon (sendmail -bd) separate from the queue-runs (sendmail-q15m). If you still want real-time delivery you can run the queue at a much lower interval, such as -q1m, but be sureto specify a reasonable MaxDaemonChildren option for that sendmail to prevent cascade failures.
Syslogd can be attacked directly and it is strongly recommended that you use the -s option whenever possible, andthe -a option otherwise.
You should also be fairly careful with connect-back services such as tcpwrapper’s reverse-identd, which can beattacked directly. You generally do not want to use the reverse-ident feature of tcpwrappers for this reason.
It is a very good idea to protect internal services from external access by firewalling them off at your border routers.The idea here is to prevent saturation attacks from outside your LAN, not so much to protect internal services fromnetwork-based root compromise. Always configure an exclusive firewall, i.e., “firewall everything except ports A, B,C, D, and M-Z”. This way you can firewall off all of your low ports except for certain specific services such asnamed (if you are primary for a zone), ntalkd, sendmail, and other Internet-accessible services. If you try toconfigure the firewall the other way – as an inclusive or permissive firewall, there is a good chance that you willforget to “close” a couple of services or that you will add a new internal service and forget to update the firewall. You
106

Chapter 9 Security
can still open up the high-numbered port range on the firewall to allow permissive-like operation withoutcompromising your low ports. Also take note that FreeBSD allows you to control the range of port numbers used fordynamic binding via the various net.inet.ip.portrange sysctl’s (sysctl -a | fgrep portrange),which can also ease the complexity of your firewall’s configuration. For example, you might use a normal first/lastrange of 4000 to 5000, and a hiport range of 49152 to 65535, then block everything under 4000 off in your firewall(except for certain specific Internet-accessible ports, of course).
Another common DOS attack is called a springboard attack – to attack a server in a manner that causes the server togenerate responses which then overload the server, the local network, or some other machine. The most commonattack of this nature is the ICMP ping broadcast attack. The attacker spoofs ping packets sent to your LAN’sbroadcast address with the source IP address set to the actual machine they wish to attack. If your border routers arenot configured to stomp on ping’s to broadcast addresses, your LAN winds up generating sufficient responses to thespoofed source address to saturate the victim, especially when the attacker uses the same trick on several dozenbroadcast addresses over several dozen different networks at once. Broadcast attacks of over a hundred and twentymegabits have been measured. A second common springboard attack is against the ICMP error reporting system. Byconstructing packets that generate ICMP error responses, an attacker can saturate a server’s incoming network andcause the server to saturate its outgoing network with ICMP responses. This type of attack can also crash the serverby running it out of mbuf’s, especially if the server cannot drain the ICMP responses it generates fast enough. TheFreeBSD kernel has a new kernel compile option called ICMP_BANDLIM which limits the effectiveness of thesesorts of attacks. The last major class of springboard attacks is related to certain internal inetd services such as the udpecho service. An attacker simply spoofs a UDP packet with the source address being server A’s echo port, and thedestination address being server B’s echo port, where server A and B are both on your LAN. The two servers thenbounce this one packet back and forth between each other. The attacker can overload both servers and their LANssimply by injecting a few packets in this manner. Similar problems exist with the internal chargen port. A competentsysadmin will turn off all of these inetd-internal test services.
Spoofed packet attacks may also be used to overload the kernel route cache. Refer to the net.inet.ip.rtexpire,rtminexpire, and rtmaxcache sysctl parameters. A spoofed packet attack that uses a random source IP willcause the kernel to generate a temporary cached route in the route table, viewable with netstat -rna | fgrep
W3. These routes typically timeout in 1600 seconds or so. If the kernel detects that the cached route table has gottentoo big it will dynamically reduce the rtexpire but will never decrease it to less than rtminexpire. There are twoproblems:
1. The kernel does not react quickly enough when a lightly loaded server is suddenly attacked.
2. The rtminexpire is not low enough for the kernel to survive a sustained attack.
If your servers are connected to the Internet via a T3 or better it may be prudent to manually override both rtexpireand rtminexpire via sysctl(8). Never set either parameter to zero (unless you want to crash the machine :-). Settingboth parameters to 2 seconds should be sufficient to protect the route table from attack.
107

Chapter 9 Security
9.3.9 Access Issues with Kerberos and SSHThere are a few issues with both kerberos and ssh that need to be addressed if you intend to use them. Kerberos V isan excellent authentication protocol but there are bugs in the kerberized telnet and rlogin applications that makethem unsuitable for dealing with binary streams. Also, by default kerberos does not encrypt a session unless you usethe -x option. ssh encrypts everything by default.
ssh works quite well in every respect except that it forwards encryption keys by default. What this means is that ifyou have a secure workstation holding keys that give you access to the rest of the system, and you ssh to an unsecuremachine, your keys becomes exposed. The actual keys themselves are not exposed, but ssh installs a forwarding portfor the duration of your login and if a attacker has broken root on the unsecure machine he can utilize that port to useyour keys to gain access to any other machine that your keys unlock.
We recommend that you use ssh in combination with kerberos whenever possible for staff logins. ssh can becompiled with kerberos support. This reduces your reliance on potentially exposable ssh keys while at the same timeprotecting passwords via kerberos. ssh keys should only be used for automated tasks from secure machines(something that kerberos is unsuited to). We also recommend that you either turn off key-forwarding in the sshconfiguration, or that you make use of the from=IP/DOMAIN option that ssh allows in its authorized_keys file tomake the key only usable to entities logging in from specific machines.
9.4 DES, MD5, and CryptParts rewritten and updated by Bill Swingle <[email protected]>, 21 March 2000.
Every user on a UNIX system has a password associated with their account. It seems obvious that these passwordsneed to be known only to the user and the actual operating system. In order to keep these passwords secret, they areencrypted with what is known as a “one-way hash”, that is, they can only be easily encrypted but not decrypted. Inother words, what we told you a moment ago was obvious is not even true: the operating system itself does not reallyknow the password. It only knows the encrypted form of the password. The only way to get the “plain-text”password is by a brute force search of the space of possible passwords.
Unfortunately the only secure way to encrypt passwords when UNIX came into being was based on DES, the DataEncryption Standard. This is not such a problem for users that live in the US, but since the source code for DEScould not be exported outside the US, FreeBSD had to find a way to both comply with US law and retaincompatibility with all the other UNIX variants that still use DES.
The solution was to divide up the encryption libraries so that US users could install the DES libraries and use DESbut international users still had an encryption method that could be exported abroad. This is how FreeBSD came touse MD5 as its default encryption method. MD5 is believed to be more secure than DES, so installing DES is offeredprimarily for compatibility reasons.
108

Chapter 9 Security
9.4.1 Recognizing your crypt mechanismIt is pretty easy to identify which encryption method FreeBSD is set up to use. Examining the encrypted passwordsin the /etc/master.passwd file is one way. Passwords encrypted with the MD5 hash are longer than those withencrypted with the DES hash and also begin with the characters $1$. DES password strings do not have anyparticular identifying characteristics, but they are shorter than MD5 passwords, and are coded in a 64-characteralphabet which does not include the $ character, so a relatively short string which does not begin with a dollar sign isvery likely a DES password.
The libraries can identify the passwords this way as well. As a result, the DES libraries are able to identify MD5passwords, and use MD5 to check passwords that were encrypted that way, and DES for the rest. They are able to dothis because the DES libraries also contain MD5. Unfortunately, the reverse is not true, so the MD5 libraries cannotauthenticate passwords that were encrypted with DES.
Identifying which library is being used by the programs on your system is easy as well. Any program that uses cryptis linked against libcrypt which for each type of library is a symbolic link to the appropriate implementation. Forexample, on a system using the DES versions:
% ls -l /usr/lib/libcrypt*lrwxr-xr-x 1 root wheel 13 Mar 19 06:56 libcrypt.a - � libdescrypt.alrwxr-xr-x 1 root wheel 18 Mar 19 06:56 libcrypt.so.2.0 - � libdescrypt.so.2.0lrwxr-xr-x 1 root wheel 15 Mar 19 06:56 libcrypt_p.a - � libdescrypt_p.a
On a system using the MD5-based libraries, the same links will be present, but the target will be libscrypt ratherthan libdescrypt.
If you have installed the DES-capable crypt library libdescrypt (e.g. by installing the "crypto" distribution), thenwhich password format will be used for new passwords is controlled by the “passwd_format” login capability in/etc/login.conf, which takes values of either “des” or “md5”. See the login.conf(5) manpage for moreinformation about login capabilities.
9.5 S/KeyS/Key is a one-time password scheme based on a one-way hash function. FreeBSD uses the MD4 hash forcompatibility but other systems have used MD5 and DES-MAC. S/Key has been part of the FreeBSD base systemsince version 1.1.5 and is also used on a growing number of other operating systems. S/Key is a registered trademarkof Bell Communications Research, Inc.
There are three different sorts of passwords which we will talk about in the discussion below. The first is your usualUNIX-style or Kerberos password; we will call this a “UNIX password”. The second sort is the one-time passwordwhich is generated by the S/Key key program and accepted by the keyinit program and the login prompt; we willcall this a “one-time password”. The final sort of password is the secret password which you give to the key program
109

Chapter 9 Security
(and sometimes the keyinit program) which it uses to generate one-time passwords; we will call it a “secretpassword” or just unqualified “password”.
The secret password does not have anything to do with your UNIX password; they can be the same but this is notrecommended. S/Key secret passwords are not limited to 8 characters like UNIX passwords, they can be as long asyou like. Passwords of six or seven word long phrases are fairly common. For the most part, the S/Key systemoperates completely independently of the UNIX password system.
Besides the password, there are two other pieces of data that are important to S/Key. One is what is known as the“seed” or “key” and consists of two letters and five digits. The other is what is called the “iteration count” and is anumber between 1 and 100. S/Key creates the one-time password by concatenating the seed and the secret password,then applying the MD4 hash as many times as specified by the iteration count and turning the result into six shortEnglish words. These six English words are your one-time password. The login and su programs keep track of thelast one-time password used, and the user is authenticated if the hash of the user-provided password is equal to theprevious password. Because a one-way hash is used it is impossible to generate future one-time passwords if asuccessfully used password is captured; the iteration count is decremented after each successful login to keep theuser and the login program in sync. When the iteration count gets down to 1 S/Key must be reinitialized.
There are four programs involved in the S/Key system which we will discuss below. The key program accepts aniteration count, a seed, and a secret password, and generates a one-time password. The keyinit program is used toinitialized S/Key, and to change passwords, iteration counts, or seeds; it takes either a secret password, or an iterationcount, seed, and one-time password. The keyinfo program examines the /etc/skeykeys file and prints out theinvoking user’s current iteration count and seed. Finally, the login and su programs contain the necessary logic toaccept S/Key one-time passwords for authentication. The login program is also capable of disallowing the use ofUNIX passwords on connections coming from specified addresses.
There are four different sorts of operations we will cover. The first is using the keyinit program over a secureconnection to set up S/Key for the first time, or to change your password or seed. The second operation is using thekeyinit program over an insecure connection, in conjunction with the key program over a secure connection, to dothe same. The third is using the key program to log in over an insecure connection. The fourth is using the keyprogram to generate a number of keys which can be written down or printed out to carry with you when going tosome location without secure connections to anywhere.
9.5.1 Secure connection initializationTo initialize S/Key for the first time, change your password, or change your seed while logged in over a secureconnection (e.g., on the console of a machine or via ssh), use the keyinit command without any parameters whilelogged in as yourself:
% keyinitAdding unfurl:Reminder - Only use this method if you are directly connected.If you are using telnet or rlogin exit with no password and use keyinit -s.
110

Chapter 9 Security
Enter secret password:Again secret password:
ID unfurl s/key is 99 to17757DEFY CLUB PRO NASH LACE SOFT
At the Enter secret password: prompt you should enter a password or phrase. Remember, this is not thepassword that you will use to login with, this is used to generate your one-time login keys. The “ID” line gives theparameters of your particular S/Key instance; your login name, the iteration count, and seed. When logging in withS/Key, the system will remember these parameters and present them back to you so you do not have to rememberthem. The last line gives the particular one-time password which corresponds to those parameters and your secretpassword; if you were to re-login immediately, this one-time password is the one you would use.
9.5.2 Insecure connection initializationTo initialize S/Key or change your secret password over an insecure connection, you will need to already have asecure connection to some place where you can run the key program; this might be in the form of a desk accessoryon a Macintosh, or a shell prompt on a machine you trust. You will also need to make up an iteration count (100 isprobably a good value), and you may make up your own seed or use a randomly-generated one. Over on the insecureconnection (to the machine you are initializing), use the keyinit -s command:
% keyinit -sUpdating unfurl:Old key: to17758Reminder you need the 6 English words from the key command.Enter sequence count from 1 to 9999: 100Enter new key [default to17759]:s/key 100 to 17759s/key access password:
To accept the default seed (which the keyinit program confusingly calls a key), press return. Then before enteringan access password, move over to your secure connection or S/Key desk accessory, and give it the same parameters:
% key 100 to17759Reminder - Do not use this program while logged in via telnet or rlogin.Enter secret password: � secret password �CURE MIKE BANE HIM RACY GORE
Now switch back over to the insecure connection, and copy the one-time password generated by key over to thekeyinit program:
s/key access password:CURE MIKE BANE HIM RACY GOREID unfurl s/key is 100 to17759
111

Chapter 9 Security
CURE MIKE BANE HIM RACY GORE
The rest of the description from the previous section applies here as well.
9.5.3 Generating a single one-time passwordOnce you’ve initialized S/Key, when you login you will be presented with a prompt like this:
% telnet example.comTrying 10.0.0.1...Connected to example.comEscape character is ’^]’.
FreeBSD/i386 (example.com) (ttypa)
login: � username �s/key 97 fw13894Password:
As a side note, the S/Key prompt has a useful feature (not shown here): if you press return at the password prompt,the login program will turn echo on, so you can see what you are typing. This can be extremely useful if you areattempting to type in an S/Key by hand, such as from a printout. Also, if this machine were configured to disallowUNIX passwords over a connection from the source machine, the prompt would have also included the annotation(s/key required), indicating that only S/Key one-time passwords will be accepted.
At this point you need to generate your one-time password to answer this login prompt. This must be done on atrusted system that you can run the key command on. (There are versions of the key program for MS-DOS,Windows and MacOS as well.) The key program needs both the iteration count and the seed as command lineoptions. You can cut-and-paste these right from the login prompt on the machine that you are logging in to.
On the trusted system:
% key 97 fw13894Reminder - Do not use this program while logged in via telnet or rlogin.Enter secret password:WELD LIP ACTS ENDS ME HAAG
Now that you have your one-time password you can continue logging in:
login: � username �s/key 97 fw13894Password: � return to enable echo �s/key 97 fw13894Password [echo on]: WELD LIP ACTS ENDS ME HAAG
112

Chapter 9 Security
Last login: Tue Mar 21 11:56:41 from 10.0.0.2 ...
This is the easiest mechanism if you have a trusted machine. There is a Java S/Key key applet, The Java OTPCalculator (http://www.cs.umd.edu/~harry/jotp/src.html), that you can download and run locally on any Javasupporting browser.
9.5.4 Generating multiple one-time passwordsSometimes you have to go places where you do not have access to a trusted machine or secure connection. In thiscase, it is possible to use the key command to generate a number of one-time passwords before hand to be printedout and taken with you. For example:
% key -n 5 30 zz99999Reminder - Do not use this program while logged in via telnet or rlogin.Enter secret password: � secret password �26: SODA RUDE LEA LIND BUDD SILT27: JILT SPY DUTY GLOW COWL ROT28: THEM OW COLA RUNT BONG SCOT29: COT MASH BARR BRIM NAN FLAG30: CAN KNEE CAST NAME FOLK BILK
The -n 5 requests five keys in sequence, the 30 specifies what the last iteration number should be. Note that theseare printed out in reverse order of eventual use. If you are really paranoid, you might want to write the results downby hand; otherwise you can cut-and-paste into lpr. Note that each line shows both the iteration count and theone-time password; you may still find it handy to scratch off passwords as you use them.
9.5.5 Restricting use of UNIX passwordsRestrictions can be placed on the use of UNIX passwords based on the host name, user name, terminal port, or IPaddress of a login session. These restrictions can be found in the configuration file /etc/skey.access. Theskey.access(5) manual page has more info on the complete format of the file and also details some security cautionsto be aware of before depending on this file for security.
If there is no /etc/skey.access file (this is the FreeBSD default), then all users will be allowed to use UNIXpasswords. If the file exists, however, then all users will be required to use S/Key unless explicitly permitted to dootherwise by configuration statements in the skey.access file. In all cases, UNIX passwords are permitted on theconsole.
Here is a sample configuration file which illustrates the three most common sorts of configuration statements:
permit internet 192.168.0.0 255.255.0.0permit user fnord
113

Chapter 9 Security
permit port ttyd0
The first line (permit internet) allows users whose IP source address (which is vulnerable to spoofing) matchesthe specified value and mask, to use UNIX passwords. This should not be considered a security mechanism, butrather, a means to remind authorized users that they are using an insecure network and need to use S/Key forauthentication.
The second line (permit user) allows the specified username, in this case fnord, to use UNIX passwords at anytime. Generally speaking, this should only be used for people who are either unable to use the key program, likethose with dumb terminals, or those who are uneducable.
The third line (permit port) allows all users logging in on the specified terminal line to use UNIX passwords; thiswould be used for dial-ups.
9.6 KerberosContributed by Mark Murray <[email protected]> (based on contribution by Mark Dapoz <[email protected]>).
Kerberos is a network add-on system/protocol that allows users to authenticate themselves through the services of asecure server. Services such as remote login, remote copy, secure inter-system file copying and other high-risk tasksare made considerably safer and more controllable.
The following instructions can be used as a guide on how to set up Kerberos as distributed for FreeBSD. However,you should refer to the relevant manual pages for a complete description.
In FreeBSD, the Kerberos is not that from the original 4.4BSD-Lite, distribution, but eBones, which had beenpreviously ported to FreeBSD 1.1.5.1, and was sourced from outside the USA/Canada, and was thus available tosystem owners outside those countries during the era of restrictive export controls on cryptographic code from theUSA.
9.6.1 Creating the initial databaseThis is done on the Kerberos server only. First make sure that you do not have any old Kerberos databases around.You should change to the directory /etc/kerberosIV and check that only the following files are present:
# cd /etc/kerberosIV# lsREADME krb.conf krb.realms
If any additional files (such as principal.* or master_key) exist, then use the kdb_destroy command todestroy the old Kerberos database, of if Kerberos is not running, simply delete the extra files.
114

Chapter 9 Security
You should now edit the krb.conf and krb.realms files to define your Kerberos realm. In this case the realm willbe GRONDAR.ZA and the server is grunt.grondar.za. We edit or create the krb.conf file:
# cat krb.confGRONDAR.ZAGRONDAR.ZA grunt.grondar.za admin serverCS.BERKELEY.EDU okeeffe.berkeley.eduATHENA.MIT.EDU kerberos.mit.eduATHENA.MIT.EDU kerberos-1.mit.eduATHENA.MIT.EDU kerberos-2.mit.eduATHENA.MIT.EDU kerberos-3.mit.eduLCS.MIT.EDU kerberos.lcs.mit.eduTELECOM.MIT.EDU bitsy.mit.eduARC.NASA.GOV trident.arc.nasa.gov
In this case, the other realms do not need to be there. They are here as an example of how a machine may be madeaware of multiple realms. You may wish to not include them for simplicity.
The first line names the realm in which this system works. The other lines contain realm/host entries. The first itemon a line is a realm, and the second is a host in that realm that is acting as a “key distribution center”. The wordsadmin server following a hosts name means that host also provides an administrative database server. For furtherexplanation of these terms, please consult the Kerberos man pages.
Now we have to add grunt.grondar.za to the GRONDAR.ZA realm and also add an entry to put all hosts in the.grondar.za domain in the GRONDAR.ZA realm. The krb.realms file would be updated as follows:
# cat krb.realmsgrunt.grondar.za GRONDAR.ZA.grondar.za GRONDAR.ZA.berkeley.edu CS.BERKELEY.EDU.MIT.EDU ATHENA.MIT.EDU.mit.edu ATHENA.MIT.EDU
Again, the other realms do not need to be there. They are here as an example of how a machine may be made awareof multiple realms. You may wish to remove them to simplify things.
The first line puts the specific system into the named realm. The rest of the lines show how to default systems of aparticular subdomain to a named realm.
Now we are ready to create the database. This only needs to run on the Kerberos server (or Key Distribution Center).Issue the kdb_init command to do this:
# kdb_initRealm name [default ATHENA.MIT.EDU ]: GRONDAR.ZAYou will be prompted for the database Master Password.It is important that you NOT FORGET this password.
115

Chapter 9 Security
Enter Kerberos master key:
Now we have to save the key so that servers on the local machine can pick it up. Use the kstash command to do this.
# kstash
Enter Kerberos master key:
Current Kerberos master key version is 1.
Master key entered. BEWARE!
This saves the encrypted master password in /etc/kerberosIV/master_key.
9.6.2 Making it all runTwo principals need to be added to the database for each system that will be secured with Kerberos. Their names arekpasswd and rcmd These two principals are made for each system, with the instance being the name of theindividual system.
These daemons, kpasswd and rcmd allow other systems to change Kerberos passwords and run commands like rcp,rlogin and rsh.
Now let’s add these entries:
# kdb_editOpening database...
Enter Kerberos master key:
Current Kerberos master key version is 1.
Master key entered. BEWARE!Previous or default values are in [brackets] ,enter return to leave the same, or new value.
Principal name: passwdInstance: grunt
� Not found � , Create [y] ? y
Principal: passwd, Instance: grunt, kdc_key_ver: 1New Password: � ---- enter RANDOM here
116

Chapter 9 Security
Verifying password
New Password: � ---- enter RANDOM here
Random password [y] ? y
Principal’s new key version = 1Expiration date (enter yyyy-mm-dd) [ 2000-01-01 ] ?
Max ticket lifetime (*5 minutes) [ 255 ] ?
Attributes [ 0 ] ?
Edit O.K.Principal name: rcmdInstance: grunt
� Not found � , Create [y] ?
Principal: rcmd, Instance: grunt, kdc_key_ver: 1New Password: � ---- enter RANDOM hereVerifying password
New Password: � ---- enter RANDOM here
Random password [y] ?
Principal’s new key version = 1Expiration date (enter yyyy-mm-dd) [ 2000-01-01 ] ?
Max ticket lifetime (*5 minutes) [ 255 ] ?
Attributes [ 0 ] ?
Edit O.K.Principal name: � ---- null entry here will cause an exit
9.6.3 Creating the server fileWe now have to extract all the instances which define the services on each machine. For this we use the ext_srvtabcommand. This will create a file which must be copied or moved by secure means to each Kerberos client’s/etc/kerberosIV directory. This file must be present on each server and client, and is crucial to the operation ofKerberos.
# ext_srvtab gruntEnter Kerberos master key:
Current Kerberos master key version is 1.
117

Chapter 9 Security
Master key entered. BEWARE!Generating ’grunt-new-srvtab’....
Now, this command only generates a temporary file which must be renamed to srvtab so that all the server can pickit up. Use the mv command to move it into place on the original system:
# mv grunt-new-srvtab srvtab
If the file is for a client system, and the network is not deemed safe, then copy the client-new-srvtab toremovable media and transport it by secure physical means. Be sure to rename it to srvtab in the client’s/etc/kerberosIV directory, and make sure it is mode 600:
# mv grumble-new-srvtab srvtab# chmod 600 srvtab
9.6.4 Populating the databaseWe now have to add some user entries into the database. First let’s create an entry for the user jane. Use thekdb_edit command to do this:
# kdb_editOpening database...
Enter Kerberos master key:
Current Kerberos master key version is 1.
Master key entered. BEWARE!Previous or default values are in [brackets] ,enter return to leave the same, or new value.
Principal name: janeInstance:
� Not found � , Create [y] ? y
Principal: jane, Instance: , kdc_key_ver: 1New Password: � ---- enter a secure password hereVerifying password
New Password: � ---- re-enter the password herePrincipal’s new key version = 1Expiration date (enter yyyy-mm-dd) [ 2000-01-01 ] ?
118

Chapter 9 Security
Max ticket lifetime (*5 minutes) [ 255 ] ?
Attributes [ 0 ] ?
Edit O.K.Principal name: � ---- null entry here will cause an exit
9.6.5 Testing it all outFirst we have to start the Kerberos daemons. NOTE that if you have correctly edited your /etc/rc.conf then thiswill happen automatically when you reboot. This is only necessary on the Kerberos server. Kerberos clients willautomagically get what they need from the /etc/kerberosIV directory.
# kerberos &Kerberos server startingSleep forever on errorLog file is /var/log/kerberos.logCurrent Kerberos master key version is 1.
Master key entered. BEWARE!
Current Kerberos master key version is 1Local realm: GRONDAR.ZA# kadmind -n &KADM Server KADM0.0A initializingPlease do not use ’kill -9’ to kill this job, use aregular kill instead
Current Kerberos master key version is 1.
Master key entered. BEWARE!
Now we can try using the kinit command to get a ticket for the id jane that we created above:
% kinit janeMIT Project Athena (grunt.grondar.za)Kerberos Initialization for "jane"Password:
Try listing the tokens using klist to see if we really have them:
% klistTicket file: /tmp/tkt245Principal: [email protected]
119

Chapter 9 Security
Issued Expires PrincipalApr 30 11:23:22 Apr 30 19:23:22 [email protected]
Now try changing the password using passwd to check if the kpasswd daemon can get authorization to the Kerberosdatabase:
% passwdrealm GRONDAR.ZAOld password for jane:
New Password for jane:
Verifying passwordNew Password for jane:
Password changed.
9.6.6 Adding su privilegesKerberos allows us to give each user who needs root privileges their own separate supassword. We could now addan id which is authorized to su to root. This is controlled by having an instance of root associated with a principal.Using kdb_edit we can create the entry jane.root in the Kerberos database:
# kdb_editOpening database...
Enter Kerberos master key:
Current Kerberos master key version is 1.
Master key entered. BEWARE!Previous or default values are in [brackets] ,enter return to leave the same, or new value.
Principal name: janeInstance: root
� Not found � , Create [y] ? y
Principal: jane, Instance: root, kdc_key_ver: 1New Password: � ---- enter a SECURE password hereVerifying password
New Password: � ---- re-enter the password here
Principal’s new key version = 1
120

Chapter 9 Security
Expiration date (enter yyyy-mm-dd) [ 2000-01-01 ] ?
Max ticket lifetime (*5 minutes) [ 255 ] ? 12 � --- Keep this short!Attributes [ 0 ] ?
Edit O.K.Principal name: � ---- null entry here will cause an exit
Now try getting tokens for it to make sure it works:
# kinit jane.rootMIT Project Athena (grunt.grondar.za)Kerberos Initialization for "jane.root"Password:
Now we need to add the user to root’s .klogin file:
# cat /root/[email protected]
Now try doing the su:
% su
Password:
and take a look at what tokens we have:
# klistTicket file: /tmp/tkt_root_245Principal: [email protected]
Issued Expires PrincipalMay 2 20:43:12 May 3 04:43:12 [email protected]
9.6.7 Using other commandsIn an earlier example, we created a principal called jane with an instance root. This was based on a user with thesame name as the principal, and this is a Kerberos default; that a � principal � . � instance � of the form
� username � .root will allow that � username � to su to root if the necessary entries are in the .klogin file inroot’s home directory:
# cat /root/[email protected]
Likewise, if a user has in their own home directory lines of the form:
121

Chapter 9 Security
% cat ~/[email protected]@GRONDAR.ZA
This allows anyone in the GRONDAR.ZA realm who has authenticated themselves to jane or jack (via kinit, seeabove) access to rlogin to jane’s account or files on this system (grunt) via rlogin, rsh or rcp.
For example, Jane now logs into another system, using Kerberos:
% kinitMIT Project Athena (grunt.grondar.za)Password:
% rlogin gruntLast login: Mon May 1 21:14:47 from grumbleCopyright (c) 1980, 1983, 1986, 1988, 1990, 1991, 1993, 1994
The Regents of the University of California. All rights reserved.
FreeBSD BUILT-19950429 (GR386) #0: Sat Apr 29 17:50:09 SAT 1995
Or Jack logs into Jane’s account on the same machine (Jane having set up the .klogin file as above, and the personin charge of Kerberos having set up principal jack with a null instance:
% kinit% rlogin grunt -l janeMIT Project Athena (grunt.grondar.za)Password:
Last login: Mon May 1 21:16:55 from grumbleCopyright (c) 1980, 1983, 1986, 1988, 1990, 1991, 1993, 1994
The Regents of the University of California. All rights reserved.FreeBSD BUILT-19950429 (GR386) #0: Sat Apr 29 17:50:09 SAT 1995
9.7 FirewallsContributed by Gary Palmer <[email protected]> and Alex Nash.
Firewalls are an area of increasing interest for people who are connected to the Internet, and are even findingapplications on private networks to provide enhanced security. This section will hopefully explain what firewalls are,how to use them, and how to use the facilities provided in the FreeBSD kernel to implement them.
Note: People often think that having a firewall between your internal network and the “Big Bad Internet” will solveall your security problems. It may help, but a poorly setup firewall system is more of a security risk than nothaving one at all. A firewall can add another layer of security to your systems, but it cannot stop a really
122

Chapter 9 Security
determined cracker from penetrating your internal network. If you let internal security lapse because you believeyour firewall to be impenetrable, you have just made the crackers job that much easier.
9.7.1 What is a firewall?There are currently two distinct types of firewalls in common use on the Internet today. The first type is moreproperly called a packet filtering router, where the kernel on a multi-homed machine chooses whether to forward orblock packets based on a set of rules. The second type, known as a proxy server, relies on daemons to provideauthentication and to forward packets, possibly on a multi-homed machine which has kernel packet forwardingdisabled.
Sometimes sites combine the two types of firewalls, so that only a certain machine (known as a bastion host) isallowed to send packets through a packet filtering router onto an internal network. Proxy services are run on thebastion host, which are generally more secure than normal authentication mechanisms.
FreeBSD comes with a kernel packet filter (known as IPFW), which is what the rest of this section will concentrateon. Proxy servers can be built on FreeBSD from third party software, but there is such a variety of proxy serversavailable that it would be impossible to cover them in this document.
9.7.1.1 Packet filtering routers
A router is a machine which forwards packets between two or more networks. A packet filtering router has an extrapiece of code in its kernel which compares each packet to a list of rules before deciding if it should be forwarded ornot. Most modern IP routing software has packet filtering code within it that defaults to forwarding all packets. Toenable the filters, you need to define a set of rules for the filtering code so it can decide if the packet should beallowed to pass or not.
To decide whether a packet should be passed on, the code looks through its set of rules for a rule which matches thecontents of this packets headers. Once a match is found, the rule action is obeyed. The rule action could be to dropthe packet, to forward the packet, or even to send an ICMP message back to the originator. Only the first matchcounts, as the rules are searched in order. Hence, the list of rules can be referred to as a “rule chain”.
The packet matching criteria varies depending on the software used, but typically you can specify rules whichdepend on the source IP address of the packet, the destination IP address, the source port number, the destination portnumber (for protocols which support ports), or even the packet type (UDP, TCP, ICMP, etc).
9.7.1.2 Proxy servers
Proxy servers are machines which have had the normal system daemons (telnetd, ftpd, etc) replaced with specialservers. These servers are called proxy servers as they normally only allow onward connections to be made. This
123

Chapter 9 Security
enables you to run (for example) a proxy telnet server on your firewall host, and people can telnet in to your firewallfrom the outside, go through some authentication mechanism, and then gain access to the internal network(alternatively, proxy servers can be used for signals coming from the internal network and heading out).
Proxy servers are normally more secure than normal servers, and often have a wider variety of authenticationmechanisms available, including “one-shot” password systems so that even if someone manages to discover whatpassword you used, they will not be able to use it to gain access to your systems as the password instantly expires. Asthey do not actually give users access to the host machine, it becomes a lot more difficult for someone to installbackdoors around your security system.
Proxy servers often have ways of restricting access further, so that only certain hosts can gain access to the servers,and often they can be set up so that you can limit which users can talk to which destination machine. Again, whatfacilities are available depends largely on what proxy software you choose.
9.7.2 What does IPFW allow me to do?IPFW, the software supplied with FreeBSD, is a packet filtering and accounting system which resides in the kernel,and has a user-land control utility, ipfw(8). Together, they allow you to define and query the rules currently used bythe kernel in its routing decisions.
There are two related parts to IPFW. The firewall section allows you to perform packet filtering. There is also an IPaccounting section which allows you to track usage of your router, based on similar rules to the firewall section. Thisallows you to see (for example) how much traffic your router is getting from a certain machine, or how much WWW(World Wide Web) traffic it is forwarding.
As a result of the way that IPFW is designed, you can use IPFW on non-router machines to perform packet filteringon incoming and outgoing connections. This is a special case of the more general use of IPFW, and the samecommands and techniques should be used in this situation.
9.7.3 Enabling IPFW on FreeBSDAs the main part of the IPFW system lives in the kernel, you will need to add one or more options to your kernelconfiguration file, depending on what facilities you want, and recompile your kernel. See reconfiguring the kernel formore details on how to recompile your kernel.
There are currently three kernel configuration options relevant to IPFW:
options IPFIREWALL
Compiles into the kernel the code for packet filtering.
124

Chapter 9 Security
options IPFIREWALL_VERBOSE
Enables code to allow logging of packets through syslogd(8). Without this option, even if you specify thatpackets should be logged in the filter rules, nothing will happen.
options IPFIREWALL_VERBOSE_LIMIT=10
Limits the number of packets logged through syslogd(8) on a per entry basis. You may wish to use this option inhostile environments in which you want to log firewall activity, but do not want to be open to a denial of serviceattack via syslog flooding.
When a chain entry reaches the packet limit specified, logging is turned off for that particular entry. To resumelogging, you will need to reset the associated counter using the ipfw(8) utility:
# ipfw zero 4500
Where 4500 is the chain entry you wish to continue logging.
Previous versions of FreeBSD contained an IPFIREWALL_ACCT option. This is now obsolete as the firewall codeautomatically includes accounting facilities.
9.7.4 Configuring IPFWThe configuration of the IPFW software is done through the ipfw(8) utility. The syntax for this command looks quitecomplicated, but it is relatively simple once you understand its structure.
There are currently four different command categories used by the utility: addition/deletion, listing, flushing, andclearing. Addition/deletion is used to build the rules that control how packets are accepted, rejected, and logged.Listing is used to examine the contents of your rule set (otherwise known as the chain) and packet counters(accounting). Flushing is used to remove all entries from the chain. Clearing is used to zero out one or moreaccounting entries.
9.7.4.1 Altering the IPFW rules
The syntax for this form of the command is:
ipfw [-N] command [index] action [log] protocol addresses [options]
There is one valid flag when using this form of the command:
125

Chapter 9 Security
-N
Resolve addresses and service names in output.
The command given can be shortened to the shortest unique form. The valid commands are:
add
Add an entry to the firewall/accounting rule list
delete
Delete an entry from the firewall/accounting rule list
Previous versions of IPFW used separate firewall and accounting entries. The present version provides packetaccounting with each firewall entry.
If an index value is supplied, it used to place the entry at a specific point in the chain. Otherwise, the entry is placedat the end of the chain at an index 100 greater than the last chain entry (this does not include the default policy, rule65535, deny).
The log option causes matching rules to be output to the system console if the kernel was compiled withIPFIREWALL_VERBOSE.
Valid actions are:
reject
Drop the packet, and send an ICMP host or port unreachable (as appropriate) packet to the source.
allow
Pass the packet on as normal. (aliases: pass and accept)
deny
Drop the packet. The source is not notified via an ICMP message (thus it appears that the packet never arrived atthe destination).
count
Update packet counters but do not allow/deny the packet based on this rule. The search continues with the nextchain entry.
Each action will be recognized by the shortest unambiguous prefix.
The protocols which can be specified are:
126

Chapter 9 Security
all
Matches any IP packet
icmp
Matches ICMP packets
tcp
Matches TCP packets
udp
Matches UDP packets
The address specification is:
from address/mask [port] to address/mask [port] [via interface]
You can only specify port in conjunction with protocols which support ports (UDP and TCP).
The via is optional and may specify the IP address or domain name of a local IP interface, or an interface name (e.g.ed0) to match only packets coming through this interface. Interface unit numbers can be specified with an optionalwildcard. For example, ppp* would match all kernel PPP interfaces.
The syntax used to specify an address/mask is:
address
or
address/mask-bits
or
address:mask-pattern
A valid hostname may be specified in place of the IP address. mask-bits is a decimal number representing howmany bits in the address mask should be set. e.g. specifying 192.216.222.1/24 will create a mask which willallow any address in a class C subnet (in this case, 192.216.222) to be matched. mask-pattern is an IP addresswhich will be logically AND’ed with the address given. The keyword any may be used to specify “any IP address”.
The port numbers to be blocked are specified as:
port [,port [,port [. . . ]]]
127

Chapter 9 Security
to specify either a single port or a list of ports, or
port-port
to specify a range of ports. You may also combine a single range with a list, but the range must always be specifiedfirst.
The options available are:
frag
Matches if the packet is not the first fragment of the datagram.
in
Matches if the packet is on the way in.
out
Matches if the packet is on the way out.
ipoptions spec
Matches if the IP header contains the comma separated list of options specified in spec. The supported list ofIP options are: ssrr (strict source route), lsrr (loose source route), rr (record packet route), and ts (timestamp). The absence of a particular option may be denoted with a leading !.
established
Matches if the packet is part of an already established TCP connection (i.e. it has the RST or ACK bits set). Youcan optimize the performance of the firewall by placing established rules early in the chain.
setup
Matches if the packet is an attempt to establish a TCP connection (the SYN bit set is set but the ACK bit is not).
tcpflags flags
Matches if the TCP header contains the comma separated list of flags. The supported flags are fin, syn,rst, psh, ack, and urg. The absence of a particular flag may be indicated by a leading !.
icmptypes types
Matches if the ICMP type is present in the list types. The list may be specified as any combination of rangesand/or individual types separated by commas. Commonly used ICMP types are: 0 echo reply (ping reply), 3destination unreachable, 5 redirect, 8 echo request (ping request), and 11 time exceeded (used to indicate TTLexpiration as with traceroute(8)).
128

Chapter 9 Security
9.7.4.2 Listing the IPFW rules
The syntax for this form of the command is:
ipfw [-a] [-t] [-N] l
There are three valid flags when using this form of the command:
-a
While listing, show counter values. This option is the only way to see accounting counters.
-t
Display the last match times for each chain entry. The time listing is incompatible with the input syntax used bythe ipfw(8) utility.
-N
Attempt to resolve given addresses and service names.
9.7.4.3 Flushing the IPFW rules
The syntax for flushing the chain is:
ipfw flush
This causes all entries in the firewall chain to be removed except the fixed default policy enforced by the kernel(index 65535). Use caution when flushing rules, the default deny policy will leave your system cut off from thenetwork until allow entries are added to the chain.
9.7.4.4 Clearing the IPFW packet counters
The syntax for clearing one or more packet counters is:
ipfw zero [index]
129

Chapter 9 Security
When used without an index argument, all packet counters are cleared. If an index is supplied, the clearingoperation only affects a specific chain entry.
9.7.5 Example commands for ipfwThis command will deny all packets from the host evil.crackers.org to the telnet port of the hostnice.people.org:
# ipfw add deny tcp from evil.crackers.org to nice.people.org 23
The next example denies and logs any TCP traffic from the entire crackers.org network (a class C) to thenice.people.org machine (any port).
# ipfw add deny log tcp from evil.crackers.org/24 to nice.people.org
If you do not want people sending X sessions to your internal network (a subnet of a class C), the followingcommand will do the necessary filtering:
# ipfw add deny tcp from any to my.org/28 6000 setup
To see the accounting records:
# ipfw -a list
or in the short form
# ipfw -a l
You can also see the last time a chain entry was matched with:
# ipfw -at l
9.7.6 Building a packet filtering firewall
Note: The following suggestions are just that: suggestions. The requirements of each firewall are different andwe cannot tell you how to build a firewall to meet your particular requirements.
130

Chapter 9 Security
When initially setting up your firewall, unless you have a test bench setup where you can configure your firewall hostin a controlled environment, it is strongly recommend you use the logging version of the commands and enablelogging in the kernel. This will allow you to quickly identify problem areas and cure them without too muchdisruption. Even after the initial setup phase is complete, I recommend using the logging for ‘deny’ as it allowstracing of possible attacks and also modification of the firewall rules if your requirements alter.
Note: If you use the logging versions of the accept command, it can generate large amounts of log data as onelog line will be generated for every packet that passes through the firewall, so large ftp/http transfers, etc, willreally slow the system down. It also increases the latencies on those packets as it requires more work to be doneby the kernel before the packet can be passed on. syslogd with also start using up a lot more processor time as itlogs all the extra data to disk, and it could quite easily fill the partition /var/log is located on.
You should enable your firewall from /etc/rc.conf.local or /etc/rc.conf. The associated man page explainswhich knobs to fiddle and lists some preset firewall configurations. If you do not use a preset configuration, ipfwlist will output the current ruleset into a file that you can pass to rc.conf. If you do not use/etc/rc.conf.local or /etc/rc.conf to enable your firewall, it is important to make sure your firewall isenabled before any IP interfaces are configured.
The next problem is what your firewall should actually do! This is largely dependent on what access to your networkyou want to allow from the outside, and how much access to the outside world you want to allow from the inside.Some general rules are:
• Block all incoming access to ports below 1024 for TCP. This is where most of the security sensitive services are,like finger, SMTP (mail) and telnet.
• Block all incoming UDP traffic. There are very few useful services that travel over UDP, and what useful trafficthere is normally a security threat (e.g. Suns RPC and NFS protocols). This has its disadvantages also, since UDPis a connectionless protocol, denying incoming UDP traffic also blocks the replies to outgoing UDP traffic. Thiscan cause a problem for people (on the inside) using external archie (prospero) servers. If you want to allow accessto archie, you’ll have to allow packets coming from ports 191 and 1525 to any internal UDP port through thefirewall. ntp is another service you may consider allowing through, which comes from port 123.
• Block traffic to port 6000 from the outside. Port 6000 is the port used for access to X11 servers, and can be asecurity threat (especially if people are in the habit of doing xhost + on their workstations). X11 can actually usea range of ports starting at 6000, the upper limit being how many X displays you can run on the machine. Theupper limit as defined by RFC 1700 (Assigned Numbers) is 6063.
• Check what ports any internal servers use (e.g. SQL servers, etc). It is probably a good idea to block those as well,as they normally fall outside the 1-1024 range specified above.
Another checklist for firewall configuration is available from CERT athttp://www.cert.org/tech_tips/packet_filtering.html
131

Chapter 9 Security
As stated above, these are only guidelines. You will have to decide what filter rules you want to use on your firewallyourself. We cannot accept ANY responsibility if someone breaks into your network, even if you follow the advicegiven above.
9.8 OpenSSLAs of FreeBSD 4.0, the OpenSSL toolkit is a part of the base system. OpenSSL (http://www.openssl.org/) provides ageneral-purpose cryptography library, as well as the Secure Sockets Layer v2/v3 (SSLv2/SSLv3) and TransportLayer Security v1 (TLSv1) network security protocols.
However, one of the algorithms (specifically IDEA) included in OpenSSL is protected by patents in the USA andelsewhere, and is not available for unrestricted use. IDEA is included in the OpenSSL sources in FreeBSD, but it isnot built by default. If you wish to use it, and you comply with the license terms, enable the MAKE_IDEA switch in/etc/make.conf and rebuild your sources using ’make world’.
Today, the RSA algorithm is free for use in USA and other countries. In the past it was protected by a patent.
9.8.1 Source Code InstallationsOpenSSL is part of the src-crypto and src-secure cvsup collections. See the Obtaining FreeBSD section formore information about obtaining and updating FreeBSD source code.
9.9 IPsecContributed by Yoshinobu Inoue <[email protected]>, 5 March 2000.
The IPsec mechanism provides secure communication either for IP layer and socket layer communication. Thissection should explain how to use them. For implementation details, please refer to The Developers’ Handbook(http://www.freebsd.org/doc/en_US.ISO8859-1/books/developers-handbook/ipv6.html).
The current IPsec implementation supports both transport mode and tunnel mode. However, tunnel mode comes withsome restrictions. http://www.kame.net/newsletter/ (http://www.kame.net/newsletter/) has more comprehensiveexamples.
Please be aware that in order to use this functionality, you must have the following options compiled into your kernel:
options IPSEC #IP securityoptions IPSEC_ESP #IP security (crypto; define w/IPSEC)
132

Chapter 9 Security
9.9.1 Transport mode example with IPv4Let’s setup security association to deploy a secure channel between HOST A (10.2.3.4) and HOST B (10.6.7.8).Here we show a little complicated example. From HOST A to HOST B, only old AH is used. From HOST B toHOST A, new AH and new ESP are combined.
Now we should choose algorithm to be used corresponding to "AH"/"new AH"/"ESP"/"new ESP". Please refer to thesetkey(8) man page to know algorithm names. Our choice is MD5 for AH, new-HMAC-SHA1 for new AH, andnew-DES-expIV with 8 byte IV for new ESP.
Key length highly depends on each algorithm. For example, key length must be equal to 16 bytes for MD5, 20 fornew-HMAC-SHA1, and 8 for new-DES-expIV. Now we choose "MYSECRETMYSECRET","KAMEKAMEKAMEKAMEKAME", "PASSWORD", respectively.
OK, let’s assign SPI (Security Parameter Index) for each protocol. Please note that we need 3 SPIs for this securechannel since three security headers are produced (one for from HOST A to HOST B, two for from HOST B toHOST A). Please also note that SPI MUST be greater than or equal to 256. We choose, 1000, 2000, and 3000,respectively.
(1)HOST A ------> HOST B
(1)PROTO=AHALG=MD5(RFC1826)KEY=MYSECRETMYSECRETSPI=1000
(2.1)HOST A <------ HOST B
<------(2.2)
(2.1)PROTO=AHALG=new-HMAC-SHA1(new AH)KEY=KAMEKAMEKAMEKAMEKAMESPI=2000
(2.2)PROTO=ESPALG=new-DES-expIV(new ESP)IV length = 8KEY=PASSWORDSPI=3000
Now, let’s setup security association. Execute setkey(8) on both HOST A and B:
133

Chapter 9 Security
# setkey -c
add 10.2.3.4 10.6.7.8 ah-old 1000 -m transport -A keyed-md5 "MYSECRETMYSECRET" ;add 10.6.7.8 10.2.3.4 ah 2000 -m transport -A hmac-sha1 "KAMEKAMEKAMEKAMEKAME" ;add 10.6.7.8 10.2.3.4 esp 3000 -m transport -E des-cbc "PASSWORD" ;^D
Actually, IPsec communication doesn’t process until security policy entries will be defined. In this case, you mustsetup each host.
At A:
# setkey -c
spdadd 10.2.3.4 10.6.7.8 any -P out ipsecah/transport/10.2.3.4-10.6.7.8/require ;
^D
At B:
# setkey -c
spdadd 10.6.7.8 10.2.3.4 any -P out ipsecesp/transport/10.6.7.8-10.2.3.4/require ;
spdadd 10.6.7.8 10.2.3.4 any -P out ipsecah/transport/10.6.7.8-10.2.3.4/require ;
^D
HOST A --------------------------------------> HOST E10.2.3.4 10.6.7.8
| |========== old AH keyed-md5 ==========>
<========= new AH hmac-sha1 ===========<========= new ESP des-cbc ============
9.9.2 Transport mode example with IPv6Another example using IPv6.
ESP transport mode is recommended for TCP port number 110 between Host-A and Host-B.
============ ESP ============| |
Host-A Host-B
134

Chapter 9 Security
fec0::10 -------------------- fec0::11
Encryption algorithm is blowfish-cbc whose key is "kamekame", and authentication algorithm is hmac-sha1 whosekey is "this is the test key". Configuration at Host-A:
# setkey -c � � EOF
spdadd fec0::10[any] fec0::11[110] tcp -P out ipsecesp/transport/fec0::10-fec0::11/use ;
spdadd fec0::11[110] fec0::10[any] tcp -P in ipsecesp/transport/fec0::11-fec0::10/use ;
add fec0::10 fec0::11 esp 0x10001-m transport-E blowfish-cbc "kamekame"-A hmac-sha1 "this is the test key" ;
add fec0::11 fec0::10 esp 0x10002-m transport-E blowfish-cbc "kamekame"-A hmac-sha1 "this is the test key" ;
EOF
and at Host-B:
# setkey -c � � EOF
spdadd fec0::11[110] fec0::10[any] tcp -P out ipsecesp/transport/fec0::11-fec0::10/use ;
spdadd fec0::10[any] fec0::11[110] tcp -P in ipsecesp/transport/fec0::10-fec0::11/use ;
add fec0::10 fec0::11 esp 0x10001 -m transport-E blowfish-cbc "kamekame"-A hmac-sha1 "this is the test key" ;
add fec0::11 fec0::10 esp 0x10002 -m transport-E blowfish-cbc "kamekame"-A hmac-sha1 "this is the test key" ;
EOF
Note the direction of SP.
9.9.3 Tunnel mode example with IPv4Tunnel mode between two security gateways
Security protocol is old AH tunnel mode, i.e. specified by RFC1826, with keyed-md5 whose key is "this is the test"as authentication algorithm.
135

Chapter 9 Security
======= AH =======| |
Network-A Gateway-A Gateway-B Network-B10.0.1.0/24 ---- 172.16.0.1 ----- 172.16.0.2 ---- 10.0.2.0/24
Configuration at Gateway-A:
# setkey -c � � EOF
spdadd 10.0.1.0/24 10.0.2.0/24 any -P out ipsecah/tunnel/172.16.0.1-172.16.0.2/require ;
spdadd 10.0.2.0/24 10.0.1.0/24 any -P in ipsecah/tunnel/172.16.0.2-172.16.0.1/require ;
add 172.16.0.1 172.16.0.2 ah-old 0x10003 -m any-A keyed-md5 "this is the test" ;
add 172.16.0.2 172.16.0.1 ah-old 0x10004 -m any-A keyed-md5 "this is the test" ;
EOF
If port number field is omitted such above then "[any]" is employed. ‘-m’ specifies the mode of SA to be used. "-many" means wild-card of mode of security protocol. You can use this SA for both tunnel and transport mode.
and at Gateway-B:
# setkey -c � � EOF
spdadd 10.0.2.0/24 10.0.1.0/24 any -P out ipsecah/tunnel/172.16.0.2-172.16.0.1/require ;
spdadd 10.0.1.0/24 10.0.2.0/24 any -P in ipsecah/tunnel/172.16.0.1-172.16.0.2/require ;
add 172.16.0.1 172.16.0.2 ah-old 0x10003 -m any-A keyed-md5 "this is the test" ;
add 172.16.0.2 172.16.0.1 ah-old 0x10004 -m any-A keyed-md5 "this is the test" ;
EOF
Making SA bundle between two security gateways
AH transport mode and ESP tunnel mode is required between Gateway-A and Gateway-B. In this case, ESP tunnelmode is applied first, and AH transport mode is next.
========== AH =========| ======= ESP ===== || | | |
Network-A Gateway-A Gateway-B Network-Bfec0:0:0:1::/64 --- fec0:0:0:1::1 ---- fec0:0:0:2::1 --- fec0:0:0:2::/64
136

Chapter 9 Security
9.9.4 Tunnel mode example with IPv6Encryption algorithm is 3des-cbc, and authentication algorithm for ESP is hmac-sha1. Authentication algorithm forAH is hmac-md5. Configuration at Gateway-A:
# setkey -c � � EOF
spdadd fec0:0:0:1::/64 fec0:0:0:2::/64 any -P out ipsecesp/tunnel/fec0:0:0:1::1-fec0:0:0:2::1/requireah/transport/fec0:0:0:1::1-fec0:0:0:2::1/require ;
spdadd fec0:0:0:2::/64 fec0:0:0:1::/64 any -P in ipsecesp/tunnel/fec0:0:0:2::1-fec0:0:0:1::1/requireah/transport/fec0:0:0:2::1-fec0:0:0:1::1/require ;
add fec0:0:0:1::1 fec0:0:0:2::1 esp 0x10001 -m tunnel-E 3des-cbc "kamekame12341234kame1234"-A hmac-sha1 "this is the test key" ;
add fec0:0:0:1::1 fec0:0:0:2::1 ah 0x10001 -m transport-A hmac-md5 "this is the test" ;
add fec0:0:0:2::1 fec0:0:0:1::1 esp 0x10001 -m tunnel-E 3des-cbc "kamekame12341234kame1234"-A hmac-sha1 "this is the test key" ;
add fec0:0:0:2::1 fec0:0:0:1::1 ah 0x10001 -m transport-A hmac-md5 "this is the test" ;
EOF
Making SAs with the different end
ESP tunnel mode is required between Host-A and Gateway-A. Encryption algorithm is cast128-cbc, andauthentication algorithm for ESP is hmac-sha1. ESP transport mode is recommended between Host-A and Host-B.Encryption algorithm is rc5-cbc, and authentication algorithm for ESP is hmac-md5.
================== ESP =================| ======= ESP ======= || | | |
Host-A Gateway-A Host-Bfec0:0:0:1::1 ---- fec0:0:0:2::1 ---- fec0:0:0:2::2
Configuration at Host-A:
# setkey -c � � EOF
spdadd fec0:0:0:1::1[any] fec0:0:0:2::2[80] tcp -P out ipsecesp/transport/fec0:0:0:1::1-fec0:0:0:2::2/useesp/tunnel/fec0:0:0:1::1-fec0:0:0:2::1/require ;
spdadd fec0:0:0:2::1[80] fec0:0:0:1::1[any] tcp -P in ipsecesp/transport/fec0:0:0:2::2-fec0:0:0:l::1/useesp/tunnel/fec0:0:0:2::1-fec0:0:0:1::1/require ;
137

Chapter 9 Security
add fec0:0:0:1::1 fec0:0:0:2::2 esp 0x10001-m transport-E cast128-cbc "12341234"-A hmac-sha1 "this is the test key" ;
add fec0:0:0:1::1 fec0:0:0:2::1 esp 0x10002-E rc5-cbc "kamekame"-A hmac-md5 "this is the test" ;
add fec0:0:0:2::2 fec0:0:0:1::1 esp 0x10003-m transport-E cast128-cbc "12341234"-A hmac-sha1 "this is the test key" ;
add fec0:0:0:2::1 fec0:0:0:1::1 esp 0x10004-E rc5-cbc "kamekame"-A hmac-md5 "this is the test" ;
EOF
9.10 OpenSSHContributed by Chern Lee <[email protected]>, April 21, 2001.
Secure shell is a set of network connectivity tools used to access remote machines securely. It can be used as a directreplacement for rlogin, rsh, rcp, and telnet. Additionally, any other TCP/IP connections can betunneled/forwarded securely through ssh. ssh encrypts all traffic to effectively eliminate eavesdropping, connectionhijacking, and other network-level attacks.
OpenSSH is maintained by the OpenBSD project, and is based upon SSH v1.2.12 with all the recent bug fixes andupdates. It is compatible with both SSH protocols 1 and 2. OpenSSH has been in the base system since FreeBSD 4.0.
9.10.1 Advantages of using OpenSSHNormally, when using telnet(1) or rlogin(1), data is sent over the network in an clear, un-encrypted form. Networksniffers anywhere in between the client and server can steal your user/password information or data transferred inyour session. OpenSSH offers a variety of authentication and encryption methods to prevent this from happening.
9.10.2 Enabling sshdBe sure to make the following additions to your rc.conf file:
138

Chapter 9 Security
sshd_enable="YES"
This will load the ssh daemon the next time your system initializes. Alternatively, you can simply run the sshddaemon.
9.10.3 SSH clientThe ssh(1) utility works similarly to rlogin(1).
# ssh [email protected] key not found from the list of known hosts.Are you sure you want to continue connecting (yes/no)? yesHost ’foobardomain.com’ added to the list of known [email protected]’s password: *******
The login will continue just as it would have if a session was created using rlogin or telnet. SSH utilizes a keyfingerprint system for verifying the authenticity of the server when the client connects. The user is prompted to enter’yes’ only during the first time connecting. Future attempts to login are all verified against the saved fingerprint key.The SSH client will alert you if the saved fingerprint differs from the received fingerprint on future login attempts.The fingerprints are saved in ~/.ssh/known_hosts
9.10.4 Secure copyThe scp command works similarly to rcp; it copies a file to or from a remote machine, except in a secure fashion.
# scp [email protected]:/COPYRIGHT [email protected]’s password:COPYRIGHT 100% |*****************************| 473500:00#
Since the fingerprint was already saved for this host in the previous example, it is verified when using scp here.
9.10.5 ConfigurationThe system-wide configuration files for both the OpenSSH daemon and client reside within the /etc/ssh directory.
ssh_config configures the client settings, while sshd_config configures the daemon.
139

Chapter 9 Security
9.10.6 ssh-keygenInstead of using passwords, ssh-keygen(1) can be used to generate RSA keys to authenticate a user.
% ssh-keygenInitializing random number generator...Generating p: .++ (distance 66)Generating q: ..............................++ (distance 498)Computing the keys...Key generation complete.Enter file in which to save the key (/home/user/.ssh/identity):Enter passphrase:Enter the same passphrase again:Your identification has been saved in /home/user/.ssh/identity....
ssh-keygen(1) will create a public and private key pair for use in authentication. The private key is stored in~/.ssh/identity, whereas the public key is stored in ~/.ssh/identity.pub. The public key must be placed in~/.ssh/authorized_keys of the remote machine in order for the setup to work.
This will allow connection to the remote machine based upon RSA authentication instead of passwords.
If a passphrase is used in ssh-keygen(1), the user will be prompted for a password each time in order to use theprivate key.
ssh-agent(1) and ssh-add(1) are utilities used in managing multiple passworded private keys.
9.10.7 SSH TunnelingOpenSSH has the ability to create a tunnel to encapsulate another protocol in an encrypted session.
The following command tells ssh(1) to create a tunnel for telnet.
% ssh -2 -N -f -L 5023:localhost:23 [email protected]%
• -2 this forces ssh(1) to use version 2 of the protocol. (Do not use if you are working with older ssh servers)
• -N indicates no command, or tunnel only. If omitted, ssh(1) would initiate a normal session.
• -f forces ssh(1) to run in the background.
• -L indicates a local tunnel in localport:localhost:remoteport fashion.
• foo.bar.com is the remote/target SSH server.
140

Chapter 9 Security
An SSH tunnel works by creating a listen socket on the specified local host and port. It then forwards any connectionto the local host/port via the SSH connection to the remote machine on the specified remote port.
In the example, port 5023 on localhost is being forwarded to port 23 on the remote machine. Since 23 is telnet, thiswould create a secure telnet session through an SSH tunnel.
This can be used to wrap any number of insecure TCP protocols such as smtp, pop3, ftp, etc.
A typical SSH Tunnel
% ssh -2 -N -f -L 5025:localhost:25 [email protected]@mailserver.foobar.com’s password: *****% telnet localhost 5025Trying 127.0.0.1...Connected to localhost.Escape character is ’^]’.220 mailserver.foobar.com ESMTP
This can be used in conjunction with an ssh-keygen(1) and additional user accounts to create a moreseamless/hassle-free SSH tunneling environment. Keys can be used in place of typing a password, and the tunnelscan be run as a separate user.
9.10.8 Further ReadingOpenSSH (http://www.openssh.com)
ssh(1) scp(1) ssh-keygen(1) ssh-agent(1) ssh-add(1)
sshd(8) sftp-server(8)
141

Chapter 10 PrintingContributed by Sean Kelly <[email protected]>, 30 September 1995. Restructured and updated by Jim Mock<[email protected]>, March 2000.
10.1 SynopsisIn order to use printers with FreeBSD, you will need to set them up to work with the Berkeley line printer spoolingsystem, also known as the LPD spooling system. It is the standard printer control system in FreeBSD. This chapterintroduces the LPD spooling system, often simply called LPD, and will guide you through its configuration.
If you are already familiar with LPD or another printer spooling system, you may wish to skip to section Setting upthe spooling system.
10.2 IntroductionLPD controls everything about a host’s printers. It is responsible for a number of things:
• It controls access to attached printers and printers attached to other hosts on the network.
• It enables users to submit files to be printed; these submissions are known as jobs.
• It prevents multiple users from accessing a printer at the same time by maintaining a queue for each printer.
• It can print header pages (also known as banner or burst pages) so users can easily find jobs they have printed in astack of printouts.
• It takes care of communications parameters for printers connected on serial ports.
• It can send jobs over the network to a LPD spooler on another host.
• It can run special filters to format jobs to be printed for various printer languages or printer capabilities.
• It can account for printer usage.
Through a configuration file (/etc/printcap), and by providing the special filter programs, you can enable theLPD system to do all or some subset of the above for a great variety of printer hardware.
142

Chapter 10 Printing
10.2.1 Why You Should Use the SpoolerIf you are the sole user of your system, you may be wondering why you should bother with the spooler when you donot need access control, header pages, or printer accounting. While it is possible to enable direct access to a printer,you should use the spooler anyway since:
• LPD prints jobs in the background; you do not have to wait for data to be copied to the printer.
• LPD can conveniently run a job to be printed through filters to add date/time headers or convert a special fileformat (such as a TeX DVI file) into a format the printer will understand. You will not have to do these stepsmanually.
• Many free and commercial programs that provide a print feature usually expect to talk to the spooler on yoursystem. By setting up the spooling system, you will more easily support other software you may later add oralready have.
10.3 Basic SetupTo use printers with the LPD spooling system, you will need to set up both your printer hardware and the LPDsoftware. This document describes two levels of setup:
• See section Simple Printer Setup to learn how to connect a printer, tell LPD how to communicate with it, and printplain text files to the printer.
• See section Advanced Printer Setup to find out how to print a variety of special file formats, to print header pages,to print across a network, to control access to printers, and to do printer accounting.
10.3.1 Simple Printer SetupThis section tells how to configure printer hardware and the LPD software to use the printer. It teaches the basics:
• Section Hardware Setup gives some hints on connecting the printer to a port on your computer.
• Section Software Setup shows how to setup the LPD spooler configuration file (/etc/printcap).
If you are setting up a printer that uses a network protocol to accept data to print instead of a serial or parallelinterface, see Printers With Networked Data Stream Interfaces.
Although this section is called “Simple Printer Setup”, it is actually fairly complex. Getting the printer to work withyour computer and the LPD spooler is the hardest part. The advanced options like header pages and accounting arefairly easy once you get the printer working.
143

Chapter 10 Printing
10.3.1.1 Hardware Setup
This section tells about the various ways you can connect a printer to your PC. It talks about the kinds of ports andcables, and also the kernel configuration you may need to enable FreeBSD to speak to the printer.
If you have already connected your printer and have successfully printed with it under another operating system, youcan probably skip to section Software Setup.
10.3.1.1.1 Ports and Cables
Nearly all printers you can get for a PC today support one or both of the following interfaces:
• Serial interfaces use a serial port on your computer to send data to the printer. Serial interfaces are common in thecomputer industry and cables are readily available and also easy to construct. Serial interfaces sometimes needspecial cables and might require you to configure somewhat complex communications options.
• Parallel interfaces use a parallel port on your computer to send data to the printer. Parallel interfaces are commonin the PC market. Cables are readily available but more difficult to construct by hand. There are usually nocommunications options with parallel interfaces, making their configuration exceedingly simple.
Parallel interfaces are sometimes known as “Centronics” interfaces, named after the connector type on the printer.
In general, serial interfaces are slower than parallel interfaces. Parallel interfaces usually offer just one-waycommunication (computer to printer) while serial gives you two-way. Many newer parallel ports and printers cancommunicate in both directions under FreeBSD when a IEEE1284 compliant cable is used.
Usually, the only time you need two-way communication with the printer is if the printer speaks PostScript.PostScript printers can be very verbose. In fact, PostScript jobs are actually programs sent to the printer; they neednot produce paper at all and may return results directly to the computer. PostScript also uses two-waycommunication to tell the computer about problems, such as errors in the PostScript program or paper jams. Yourusers may be appreciative of such information. Furthermore, the best way to do effective accounting with aPostScript printer requires two-way communication: you ask the printer for its page count (how many pages it hasprinted in its lifetime), then send the user’s job, then ask again for its page count. Subtract the two values and youknow how much paper to charge the user.
10.3.1.1.2 Parallel Ports
To hook up a printer using a parallel interface, connect the Centronics cable between the printer and the computer.The instructions that came with the printer, the computer, or both should give you complete guidance.
Remember which parallel port you used on the computer. The first parallel port is /dev/lpt0 to FreeBSD; thesecond is /dev/lpt1, and so on.
144

Chapter 10 Printing
10.3.1.1.3 Serial Ports
To hook up a printer using a serial interface, connect the proper serial cable between the printer and the computer.The instructions that came with the printer, the computer, or both should give you complete guidance.
If you are unsure what the “proper serial cable” is, you may wish to try one of the following alternatives:
• A modem cable connects each pin of the connector on one end of the cable straight through to its correspondingpin of the connector on the other end. This type of cable is also known as a “DTE-to-DCE” cable.
• A null-modem cable connects some pins straight through, swaps others (send data to receive data, for example),and shorts some internally in each connector hood. This type of cable is also known as a “DTE-to-DTE” cable.
• A serial printer cable, required for some unusual printers, is like the null-modem cable, but sends some signals totheir counterparts instead of being internally shorted.
You should also set up the communications parameters for the printer, usually through front-panel controls or DIPswitches on the printer. Choose the highest bps (bits per second, sometimes baud rate) rate that both your computerand the printer can support. Choose 7 or 8 data bits; none, even, or odd parity; and 1 or 2 stop bits. Also choose aflow control protocol: either none, or XON/XOFF (also known as “in-band” or “software”) flow control. Rememberthese settings for the software configuration that follows.
10.3.1.2 Software Setup
This section describes the software setup necessary to print with the LPD spooling system in FreeBSD.
Here is an outline of the steps involved:
1. Configure your kernel, if necessary, for the port you are using for the printer; section Kernel Configuration tellsyou what you need to do.
2. Set the communications mode for the parallel port, if you are using a parallel port; section Setting theCommunication Mode for the Parallel Port gives details.
3. Test if the operating system can send data to the printer. Section Checking Printer Communications gives somesuggestions on how to do this.
4. Set up LPD for the printer by modifying the file /etc/printcap. You will find out how to do this later in thischapter.
145

Chapter 10 Printing
10.3.1.2.1 Kernel Configuration
The operating system kernel is compiled to work with a specific set of devices. The serial or parallel interface foryour printer is a part of that set. Therefore, it might be necessary to add support for an additional serial or parallelport if your kernel is not already configured for one.
To find out if the kernel you are currently using supports a serial interface, type:
# dmesg | grep sioN
Where N is the number of the serial port, starting from zero. If you see output similar to the following:
sio2 at 0x3e8-0x3ef irq 5 on isasio2: type 16550A
then the kernel supports the port.
To find out if the kernel supports a parallel interface, type:
# dmesg | grep lptN
Where N is the number of the parallel port, starting from zero. If you see output similar to the following
lpt0 at 0x378-0x37f on isa
then the kernel supports the port.
You might have to reconfigure your kernel in order for the operating system to recognize and use the parallel or serialport you are using for the printer.
To add support for a serial port, see the section on kernel configuration. To add support for a parallel port, see thatsection and the section that follows.
10.3.1.3 Adding /dev Entries for the Ports
Even though the kernel may support communication along a serial or parallel port, you will still need a softwareinterface through which programs running on the system can send and receive data. That is what entries in the /devdirectory are for.
To add a /dev entry for a port:
1. Become root with the su(1) command. Enter the root password when prompted.
2. Change to the /dev directory:
# cd /dev
146

Chapter 10 Printing
3. Type:
# ./MAKEDEV port
Where port is the device entry for the port you want to make. Use lpt0 for the first parallel port, lpt1 for thesecond, and so on; use ttyd0 for the first serial port, ttyd1 for the second, and so on.
4. Type:
# ls -l port
to make sure the device entry got created.
10.3.1.3.1 Setting the Communication Mode for the Parallel Port
When you are using the parallel interface, you can choose whether FreeBSD should use interrupt-driven or polledcommunication with the printer.
• The interrupt-driven method is the default with the GENERIC kernel. With this method, the operating system usesan IRQ line to determine when the printer is ready for data.
• The polled method directs the operating system to repeatedly ask the printer if it is ready for more data. When itresponds ready, the kernel sends more data.
The interrupt-driven method is somewhat faster but uses up a precious IRQ line. You should use whichever oneworks.
You can set the communications mode in two ways: by configuring the kernel or by using the lptcontrol(8) program.
To set the communications mode by configuring the kernel:
1. Edit your kernel configuration file. Look for or add an lpt0 entry. If you are setting up the second parallel port,use lpt1 instead. Use lpt2 for the third port, and so on.
• If you want interrupt-driven mode, add the irq specifier:
device lpt0 at isa? port? tty irq N vector lptintr
Where N is the IRQ number for your computer’s parallel port.
• If you want polled mode, do not add the irq specifier:
device lpt0 at isa? port? tty vector lptintr
2. Save the file. Then configure, build, and install the kernel, then reboot. See kernel configuration for more details.
To set the communications mode with lptcontrol(8):
147

Chapter 10 Printing
1. Type:
# lptcontrol -i -u N
to set interrupt-driven mode for lptN .
2. Type:
# lptcontrol -p -u N
to set polled-mode for lptN .
You could put these commands in your /etc/rc.local file to set the mode each time your system boots. Seelptcontrol(8) for more information.
10.3.1.3.2 Checking Printer Communications
Before proceeding to configure the spooling system, you should make sure the operating system can successfullysend data to your printer. It is a lot easier to debug printer communication and the spooling system separately.
To test the printer, we will send some text to it. For printers that can immediately print characters sent to them, theprogram lptest(1) is perfect: it generates all 96 printable ASCII characters in 96 lines.
For a PostScript (or other language-based) printer, we will need a more sophisticated test. A small PostScriptprogram, such as the following, will suffice:
%!PS100 100 moveto 300 300 lineto stroke310 310 moveto /Helvetica findfont 12 scalefont setfont(Is this thing working?) showshowpage
The above PostScript code can be placed into a file and used as shown in the examples appearing in the followingsections.
Note: When this document refers to a printer language, it is assuming a language like PostScript, and notHewlett Packard’s PCL. Although PCL has great functionality, you can intermingle plain text with its escapesequences. PostScript cannot directly print plain text, and that is the kind of printer language for which we mustmake special accommodations.
10.3.1.3.2.1 Checking a Parallel Printer
This section tells you how to check if FreeBSD can communicate with a printer connected to a parallel port.
To test a printer on a parallel port:
148

Chapter 10 Printing
1. Become root with su(1).
2. Send data to the printer.
• If the printer can print plain text, then use lptest(1). Type:
# lptest � /dev/lptN
Where N is the number of the parallel port, starting from zero.
• If the printer understands PostScript or other printer language, then send a small program to the printer. Type:
# cat � /dev/lptN
Then, line by line, type the program carefully as you cannot edit a line once you have pressed RETURN orENTER. When you have finished entering the program, press CONTROL+D, or whatever your end of file key is.
Alternatively, you can put the program in a file and type:
# cat file � /dev/lptN
Where file is the name of the file containing the program you want to send to the printer.
You should see something print. Do not worry if the text does not look right; we will fix such things later.
10.3.1.3.2.2 Checking a Serial Printer
This section tells you how to check if FreeBSD can communicate with a printer on a serial port.
To test a printer on a serial port:
1. Become root with su(1).
2. Edit the file /etc/remote. Add the following entry:
printer:dv=/dev/port:br#bps-rate:pa=parity
Where port is the device entry for the serial port (ttyd0, ttyd1, etc.), bps-rate is the bits-per-second rateat which the printer communicates, and parity is the parity required by the printer (either even, odd, none,or zero).
Here is a sample entry for a printer connected via a serial line to the third serial port at 19200 bps with no parity:
printer:dv=/dev/ttyd2:br#19200:pa=none
3. Connect to the printer with tip(1). Type:
# tip printer
149

Chapter 10 Printing
If this step does not work, edit the file /etc/remote again and try using /dev/cuaaN instead of /dev/ttydN .
4. Send data to the printer.
• If the printer can print plain text, then use lptest(1). Type:
~$lptest
• If the printer understands PostScript or other printer language, then send a small program to the printer. Typethe program, line by line, very carefully as backspacing or other editing keys may be significant to the printer.You may also need to type a special end-of-file key for the printer so it knows it received the whole program.For PostScript printers, press CONTROL+D.
Alternatively, you can put the program in a file and type:
~ � file
Where file is the name of the file containing the program. After tip(1) sends the file, press any requiredend-of-file key.
You should see something print. Do not worry if the text does not look right; we will fix that later.
10.3.1.4 Enabling the Spooler: The /etc/printcap File
At this point, your printer should be hooked up, your kernel configured to communicate with it (if necessary), andyou have been able to send some simple data to the printer. Now, we are ready to configure LPD to control access toyour printer.
You configure LPD by editing the file /etc/printcap. The LPD spooling system reads this file each time thespooler is used, so updates to the file take immediate effect.
The format of the printcap(5) file is straightforward. Use your favorite text editor to make changes to/etc/printcap. The format is identical to other capability files like /usr/share/misc/termcap and/etc/remote. For complete information about the format, see the cgetent(3).
The simple spooler configuration consists of the following steps:
1. Pick a name (and a few convenient aliases) for the printer, and put them in the /etc/printcap file; see theNaming the Printer section for more information on naming.
2. Turn off header pages (which are on by default) by inserting the sh capability; see the Suppressing HeaderPages section for more information.
150

Chapter 10 Printing
3. Make a spooling directory, and specify its location with the sd capability; see the Making the SpoolingDirectory section for more information.
4. Set the /dev entry to use for the printer, and note it in /etc/printcap with the lp capability; see theIdentifying the Printer Device for more information. Also, if the printer is on a serial port, set up thecommunication parameters with the fs, fc, xs, and xc capabilities; which is discussed in the ConfiguringSpooler Communications Parameters section.
5. Install a plain text input filter; see the Installing the Text Filter section for details.
6. Test the setup by printing something with the lpr(1) command. More details are available in the Trying It Outand Troubleshooting sections.
Note: Language-based printers, such as PostScript printers, cannot directly print plain text. The simple setupoutlined above and described in the following sections assumes that if you are installing such a printer you willprint only files that the printer can understand.
Users often expect that they can print plain text to any of the printers installed on your system. Programs thatinterface to LPD to do their printing usually make the same assumption. If you are installing such a printer and wantto be able to print jobs in the printer language and print plain text jobs, you are strongly urged to add an additionalstep to the simple setup outlined above: install an automatic plain-text-to-PostScript (or other printer language)conversion program. The section entitled Accommodating Plain Text Jobs on PostScript Printers tells how to do this.
10.3.1.4.1 Naming the Printer
The first (easy) step is to pick a name for your printer It really does not matter whether you choose functional orwhimsical names since you can also provide a number of aliases for the printer.
At least one of the printers specified in the /etc/printcap should have the alias lp. This is the default printer’sname. If users do not have the PRINTER environment variable nor specify a printer name on the command line ofany of the LPD commands, then lp will be the default printer they get to use.
Also, it is common practice to make the last alias for a printer be a full description of the printer, including make andmodel.
Once you have picked a name and some common aliases, put them in the /etc/printcap file. The name of theprinter should start in the leftmost column. Separate each alias with a vertical bar and put a colon after the last alias.
In the following example, we start with a skeletal /etc/printcap that defines two printers (a Diablo 630 lineprinter and a Panasonic KX-P4455 PostScript laser printer):
## /etc/printcap for host rose#
151

Chapter 10 Printing
rattan|line|diablo|lp|Diablo 630 Line Printer:
bamboo|ps|PS|S|panasonic|Panasonic KX-P4455 PostScript v51.4:
In this example, the first printer is named rattan and has as aliases line, diablo, lp, and Diablo 630 Line
Printer. Since it has the alias lp, it is also the default printer. The second is named bamboo, and has as aliases ps,PS, S, panasonic, and Panasonic KX-P4455 PostScript v51.4.
10.3.1.4.2 Suppressing Header Pages
The LPD spooling system will by default print a header page for each job. The header page contains the user namewho requested the job, the host from which the job came, and the name of the job, in nice large letters. Unfortunately,all this extra text gets in the way of debugging the simple printer setup, so we will suppress header pages.
To suppress header pages, add the sh capability to the entry for the printer in /etc/printcap. Here is an example/etc/printcap with sh added:
## /etc/printcap for host rose - no header pages anywhere#rattan|line|diablo|lp|Diablo 630 Line Printer:\
:sh:
bamboo|ps|PS|S|panasonic|Panasonic KX-P4455 PostScript v51.4:\:sh:
Note how we used the correct format: the first line starts in the leftmost column, and subsequent lines are indentedwith a single TAB. Every line in an entry except the last ends in a backslash character.
10.3.1.4.3 Making the Spooling Directory
The next step in the simple spooler setup is to make a spooling directory, a directory where print jobs reside untilthey are printed, and where a number of other spooler support files live.
Because of the variable nature of spooling directories, it is customary to put these directories under /var/spool. Itis not necessary to backup the contents of spooling directories, either. Recreating them is as simple as runningmkdir(1).
It is also customary to make the directory with a name that is identical to the name of the printer, as shown below:
# mkdir /var/spool/printer-name
152

Chapter 10 Printing
However, if you have a lot of printers on your network, you might want to put the spooling directories under a singledirectory that you reserve just for printing with LPD. We will do this for our two example printers rattan andbamboo:
# mkdir /var/spool/lpd# mkdir /var/spool/lpd/rattan# mkdir /var/spool/lpd/bamboo
Note: If you are concerned about the privacy of jobs that users print, you might want to protect the spoolingdirectory so it is not publicly accessible. Spooling directories should be owned and be readable, writable, andsearchable by user daemon and group daemon, and no one else. We will do this for our example printers:
# chown daemon:daemon /var/spool/lpd/rattan# chown daemon:daemon /var/spool/lpd/bamboo# chmod 770 /var/spool/lpd/rattan# chmod 770 /var/spool/lpd/bamboo
Finally, you need to tell LPD about these directories using the /etc/printcap file. You specify the pathname of thespooling directory with the sd capability:
## /etc/printcap for host rose - added spooling directories#rattan|line|diablo|lp|Diablo 630 Line Printer:\
:sh:sd=/var/spool/lpd/rattan:
bamboo|ps|PS|S|panasonic|Panasonic KX-P4455 PostScript v51.4:\:sh:sd=/var/spool/lpd/bamboo:
Note that the name of the printer starts in the first column but all other entries describing the printer should beindented with a tab and each line escaped with a backslash.
If you do not specify a spooling directory with sd, the spooling system will use /var/spool/lpd as a default.
10.3.1.4.4 Identifying the Printer Device
In the Adding /dev Entries for the Ports section, we identified which entry in the /dev directory FreeBSD will useto communicate with the printer. Now, we tell LPD that information. When the spooling system has a job to print, itwill open the specified device on behalf of the filter program (which is responsible for passing data to the printer).
List the /dev entry pathname in the /etc/printcap file using the lp capability.
153

Chapter 10 Printing
In our running example, let us assume that rattan is on the first parallel port, and bamboo is on a sixth serial port;here are the additions to /etc/printcap:
## /etc/printcap for host rose - identified what devices to use#rattan|line|diablo|lp|Diablo 630 Line Printer:\
:sh:sd=/var/spool/lpd/rattan:\:lp=/dev/lpt0:
bamboo|ps|PS|S|panasonic|Panasonic KX-P4455 PostScript v51.4:\:sh:sd=/var/spool/lpd/bamboo:\:lp=/dev/ttyd5:
If you do not specify the lp capability for a printer in your /etc/printcap file, LPD uses /dev/lp as a default./dev/lp currently does not exist in FreeBSD.
If the printer you are installing is connected to a parallel port, skip to the section entitled, Installing the Text Filter.Otherwise, be sure to follow the instructions in the next section.
10.3.1.4.5 Configuring Spooler Communication Parameters
For printers on serial ports, LPD can set up the bps rate, parity, and other serial communication parameters on behalfof the filter program that sends data to the printer. This is advantageous since:
• It lets you try different communication parameters by simply editing the /etc/printcap file; you do not have torecompile the filter program.
• It enables the spooling system to use the same filter program for multiple printers which may have different serialcommunication settings.
The following /etc/printcap capabilities control serial communication parameters of the device listed in the lpcapability:
br#bps-rate
Sets the communications speed of the device to bps-rate, where bps-rate can be 50, 75, 110, 134, 150,200, 300, 600, 1200, 1800, 2400, 4800, 9600, 19200, or 38400 bits-per-second.
fc#clear-bits
Clears the flag bits clear-bits in the sgttyb structure after opening the device.
154

Chapter 10 Printing
fs#set-bits
Sets the flag bits set-bits in the sgttyb structure.
xc#clear-bits
Clears local mode bits clear-bits after opening the device.
xs#set-bits
Sets local mode bits set-bits.
For more information on the bits for the fc, fs, xc, and xs capabilities, see the file/usr/include/sys/ioctl_compat.h.
When LPD opens the device specified by the lp capability, it reads the flag bits in the sgttyb structure; it clears anybits in the fc capability, then sets bits in the fs capability, then applies the resultant setting. It does the same for thelocal mode bits as well.
Let us add to our example printer on the sixth serial port. We will set the bps rate to 38400. For the flag bits, we willset the TANDEM, ANYP, LITOUT, FLUSHO, and PASS8 flags. For the local mode bits, we will set the LITOUT andPASS8 flags:
bamboo|ps|PS|S|panasonic|Panasonic KX-P4455 PostScript v51.4:\:sh:sd=/var/spool/lpd/bamboo:\:lp=/dev/ttyd5:fs#0x82000c1:xs#0x820:
10.3.1.4.6 Installing the Text Filter
We are now ready to tell LPD what text filter to use to send jobs to the printer. A text filter, also known as an inputfilter, is a program that LPD runs when it has a job to print. When LPD runs the text filter for a printer, it sets thefilter’s standard input to the job to print, and its standard output to the printer device specified with the lp capability.The filter is expected to read the job from standard input, perform any necessary translation for the printer, and writethe results to standard output, which will get printed. For more information on the text filter, see the Filters section.
For our simple printer setup, the text filter can be a small shell script that just executes /bin/cat to send the job tothe printer. FreeBSD comes with another filter called lpf that handles backspacing and underlining for printers thatmight not deal with such character streams well. And, of course, you can use any other filter program you want. Thefilter lpf is described in detail in section entitled lpf: a Text Filter.
First, let us make the shell script /usr/local/libexec/if-simple be a simple text filter. Put the following textinto that file with your favorite text editor:
#!/bin/sh## if-simple - Simple text input filter for lpd
155

Chapter 10 Printing
# Installed in /usr/local/libexec/if-simple## Simply copies stdin to stdout. Ignores all filter arguments.
/bin/cat && exit 0exit 2
Make the file executable:
# chmod 555 /usr/local/libexec/if-simple
And then tell LPD to use it by specifying it with the if capability in /etc/printcap. We will add it to the twoprinters we have so far in the example /etc/printcap:
## /etc/printcap for host rose - added text filter#rattan|line|diablo|lp|Diablo 630 Line Printer:\
:sh:sd=/var/spool/lpd/rattan:\ :lp=/dev/lpt0:\:if=/usr/local/libexec/if-simple:
bamboo|ps|PS|S|panasonic|Panasonic KX-P4455 PostScript v51.4:\:sh:sd=/var/spool/lpd/bamboo:\:lp=/dev/ttyd5:fs#0x82000e1:xs#0x820:\:if=/usr/local/libexec/if-simple:
10.3.1.4.7 Turn on LPD
lpd(8) is run from /etc/rc, controlled by the lpd_enable variable. This variable defaults to NO. If you have notdone so already, add the line:
lpd_enable="YES"
to /etc/rc.conf, and then either restart your machine, or just run lpd(8).
# lpd
10.3.1.4.8 Trying It Out
You have reached the end of the simple LPD setup. Unfortunately, congratulations are not quite yet in order, since westill have to test the setup and correct any problems. To test the setup, try printing something. To print with the LPDsystem, you use the command lpr(1), which submits a job for printing.
156

Chapter 10 Printing
You can combine lpr(1) with the lptest(1) program, introduced in section Checking Printer Communications togenerate some test text.
To test the simple LPD setup:
Type:
# lptest 20 5 | lpr -Pprinter-name
Where printer-name is a the name of a printer (or an alias) specified in /etc/printcap. To test the defaultprinter, type lpr(1) without any -P argument. Again, if you are testing a printer that expects PostScript, send aPostScript program in that language instead of using lptest(1). You can do so by putting the program in a file andtyping lpr file.
For a PostScript printer, you should get the results of the program. If you are using lptest(1), then your results shouldlook like the following:
!"#$%&’()*+,-./01234"#$%&’()*+,-./012345#$%&’()*+,-./0123456$%&’()*+,-./01234567%&’()*+,-./012345678
To further test the printer, try downloading larger programs (for language-based printers) or running lptest(1) withdifferent arguments. For example, lptest 80 60 will produce 60 lines of 80 characters each.
If the printer did not work, see the Troubleshooting section.
10.4 Advanced Printer SetupThis section describes filters for printing specially formatted files, header pages, printing across networks, andrestricting and accounting for printer usage.
10.4.1 FiltersAlthough LPD handles network protocols, queuing, access control, and other aspects of printing, most of the realwork happens in the filters. Filters are programs that communicate with the printer and handle its devicedependencies and special requirements. In the simple printer setup, we installed a plain text filter—an extremelysimple one that should work with most printers (section Installing the Text Filter).
157

Chapter 10 Printing
However, in order to take advantage of format conversion, printer accounting, specific printer quirks, and so on, youshould understand how filters work. It will ultimately be the filter’s responsibility to handle these aspects. And thebad news is that most of the time you have to provide filters yourself. The good news is that many are generallyavailable; when they are not, they are usually easy to write.
Also, FreeBSD comes with one, /usr/libexec/lpr/lpf, that works with many printers that can print plain text.(It handles backspacing and tabs in the file, and does accounting, but that is about all it does.) There are also severalfilters and filter components in the FreeBSD ports collection.
Here is what you will find in this section:
• Section How Filters Work, tries to give an overview of a filter’s role in the printing process. You should read thissection to get an understanding of what is happening “under the hood” when LPD uses filters. This knowledgecould help you anticipate and debug problems you might encounter as you install more and more filters on each ofyour printers.
• LPD expects every printer to be able to print plain text by default. This presents a problem for PostScript (or otherlanguage-based printers) which cannot directly print plain text. Section Accommodating Plain Text Jobs onPostScript Printers tells you what you should do to overcome this problem. You should read this section if youhave a PostScript printer.
• PostScript is a popular output format for many programs. Even some people (myself included) write PostScriptcode directly. But PostScript printers are expensive. Section Simulating PostScript on Non-PostScript Printers tellshow you can further modify a printer’s text filter to accept and print PostScript data on a non-PostScript printer.You should read this section if you do not have a PostScript printer.
• Section Conversion Filters tells about a way you can automate the conversion of specific file formats, such asgraphic or typesetting data, into formats your printer can understand. After reading this section, you should be ableto set up your printers such that users can type lpr -t to print troff data, or lpr -d to print TeX DVI data, orlpr -v to print raster image data, and so forth. I recommend reading this section.
• Section Output Filters tells all about a not often used feature of LPD: output filters. Unless you are printing headerpages (see Header Pages), you can probably skip that section altogether.
• Section lpf: a Text Filter describes lpf, a fairly complete if simple text filter for line printers (and laser printersthat act like line printers) that comes with FreeBSD. If you need a quick way to get printer accounting working forplain text, or if you have a printer which emits smoke when it sees backspace characters, you should definitelyconsider lpf.
10.4.1.1 How Filters Work
As mentioned before, a filter is an executable program started by LPD to handle the device-dependent part ofcommunicating with the printer.
158

Chapter 10 Printing
When LPD wants to print a file in a job, it starts a filter program. It sets the filter’s standard input to the file to print,its standard output to the printer, and its standard error to the error logging file (specified in the lf capability in/etc/printcap, or /dev/console by default).
Which filter LPD starts and the filter’s arguments depend on what is listed in the /etc/printcap file and whatarguments the user specified for the job on the lpr(1) command line. For example, if the user typed lpr -t, LPDwould start the troff filter, listed in the tf capability for the destination printer. If the user wanted to print plain text, itwould start the if filter (this is mostly true: see Output Filters for details).
There are three kinds of filters you can specify in /etc/printcap:
• The text filter, confusingly called the input filter in LPD documentation, handles regular text printing. Think of itas the default filter. LPD expects every printer to be able to print plain text by default, and it is the text filter’s jobto make sure backspaces, tabs, or other special characters do not confuse the printer. If you are in an environmentwhere you have to account for printer usage, the text filter must also account for pages printed, usually by countingthe number of lines printed and comparing that to the number of lines per page the printer supports. The text filteris started with the following argument list:
filter-name [-c] -wwidth -llength -iindent -n login -h host acct-file
where
-c
appears if the job’s submitted with lpr -l
width
is the value from the pw (page width) capability specified in /etc/printcap, default 132
length
is the value from the pl (page length) capability, default 66
indent
is the amount of the indentation from lpr -i, default 0
login
is the account name of the user printing the file
host
is the host name from which the job was submitted
159

Chapter 10 Printing
acct-file
is the name of the accounting file from the af capability.
• A conversion filter converts a specific file format into one the printer can render onto paper. For example, ditrofftypesetting data cannot be directly printed, but you can install a conversion filter for ditroff files to convert theditroff data into a form the printer can digest and print. Section Conversion Filters tells all about them. Conversionfilters also need to do accounting, if you need printer accounting. Conversion filters are started with the followingarguments:
filter-name -xpixel-width -ypixel-height -n login -h host acct-file
where pixel-width is the value from the px capability (default 0) and pixel-height is the value from thepy capability (default 0).
• The output filter is used only if there is no text filter, or if header pages are enabled. In my experience, outputfilters are rarely used. Section Output Filters describe them. There are only two arguments to an output filter:
filter-name -wwidth -llength
which are identical to the text filters -w and -l arguments.
Filters should also exit with the following exit status:
exit 0
If the filter printed the file successfully.
exit 1
If the filter failed to print the file but wants LPD to try to print the file again. LPD will restart a filter if it exitswith this status.
exit 2
If the filter failed to print the file and does not want LPD to try again. LPD will throw out the file.
The text filter that comes with the FreeBSD release, /usr/libexec/lpr/lpf, takes advantage of the page widthand length arguments to determine when to send a form feed and how to account for printer usage. It uses the login,host, and accounting file arguments to make the accounting entries.
If you are shopping for filters, see if they are LPD-compatible. If they are, they must support the argument listsdescribed above. If you plan on writing filters for general use, then have them support the same argument lists andexit codes.
160

Chapter 10 Printing
10.4.1.2 Accommodating Plain Text Jobs on PostScript Printers
If you are the only user of your computer and PostScript (or other language-based) printer, and you promise to neversend plain text to your printer and to never use features of various programs that will want to send plain text to yourprinter, then you do not need to worry about this section at all.
But, if you would like to send both PostScript and plain text jobs to the printer, then you are urged to augment yourprinter setup. To do so, we have the text filter detect if the arriving job is plain text or PostScript. All PostScript jobsmust start with %! (for other printer languages, see your printer documentation). If those are the first two charactersin the job, we have PostScript, and can pass the rest of the job directly. If those are not the first two characters in thefile, then the filter will convert the text into PostScript and print the result.
How do we do this?
If you have got a serial printer, a great way to do it is to install lprps. lprps is a PostScript printer filter whichperforms two-way communication with the printer. It updates the printer’s status file with verbose information fromthe printer, so users and administrators can see exactly what the state of the printer is (such as toner low or paperjam). But more importantly, it includes a program called psif which detects whether the incoming job is plain textand calls textps (another program that comes with lprps) to convert it to PostScript. It then uses lprps to sendthe job to the printer.
lprps is part of the FreeBSD ports collection (see The Ports Collection). You can fetch, build and install it yourself,of course. After installing lprps, just specify the pathname to the psif program that is part of lprps. If youinstalled lprps from the ports collection, use the following in the serial PostScript printer’s entry in/etc/printcap:
:if=/usr/local/libexec/psif:
You should also specify the rw capability; that tells LPD to open the printer in read-write mode.
If you have a parallel PostScript printer (and therefore cannot use two-way communication with the printer, whichlprps needs), you can use the following shell script as the text filter:
#!/bin/sh## psif - Print PostScript or plain text on a PostScript printer# Script version; NOT the version that comes with lprps# Installed in /usr/local/libexec/psif#
read first_linefirst_two_chars=‘expr "$first_line" : ’\(..\)’‘
if [ "$first_two_chars" = "%!" ]; then## PostScript job, print it.
161

Chapter 10 Printing
#echo "$first_line" && cat && printf "\004" && exit 0exit 2
else## Plain text, convert it, then print it.#( echo "$first_line"; cat ) | /usr/local/bin/textps && printf "\004" && exit 0exit 2
fi
In the above script, textps is a program we installed separately to convert plain text to PostScript. You can use anytext-to-PostScript program you wish. The FreeBSD ports collection (see The Ports Collection) includes a fullfeatured text-to-PostScript program called a2ps that you might want to investigate.
10.4.1.3 Simulating PostScript on Non-PostScript Printers
PostScript is the de facto standard for high quality typesetting and printing. PostScript is, however, an expensivestandard. Thankfully, Alladin Enterprises has a free PostScript work-alike called Ghostscript that runs withFreeBSD. Ghostscript can read most PostScript files and can render their pages onto a variety of devices, includingmany brands of non-PostScript printers. By installing Ghostscript and using a special text filter for your printer, youcan make your non-PostScript printer act like a real PostScript printer.
Ghostscript is in the FreeBSD ports collection, if you would like to install it from there. You can fetch, build, andinstall it quite easily yourself, as well.
To simulate PostScript, we have the text filter detect if it is printing a PostScript file. If it is not, then the filter willpass the file directly to the printer; otherwise, it will use Ghostscript to first convert the file into a format the printerwill understand.
Here is an example: the following script is a text filter for Hewlett Packard DeskJet 500 printers. For other printers,substitute the -sDEVICE argument to the gs (Ghostscript) command. (Type gs -h to get a list of devices the currentinstallation of Ghostscript supports.)
#!/bin/sh## ifhp - Print Ghostscript-simulated PostScript on a DeskJet 500# Installed in /usr/local/libexec/hpif
## Treat LF as CR+LF:#printf "\033&k2G" || exit 2
162

Chapter 10 Printing
## Read first two characters of the file#read first_linefirst_two_chars=‘expr "$first_line" : ’\(..\)’‘
if [ "$first_two_chars" = "%!" ]; then## It is PostScript; use Ghostscript to scan-convert and print it.## Note that PostScript files are actually interpreted programs,# and those programs are allowed to write to stdout, which will# mess up the printed output. So, we redirect stdout to stderr# and then make descriptor 3 go to stdout, and have Ghostscript# write its output there. Exercise for the clever reader:# capture the stderr output from Ghostscript and mail it back to# the user originating the print job.#exec 3 � &1 1 � &2/usr/local/bin/gs -dSAFER -dNOPAUSE -q -sDEVICE=djet500 \
-sOutputFile=/dev/fd/3 - && exit 0
#/usr/local/bin/gs -dSAFER -dNOPAUSE -q -sDEVICE=djet500 -sOutputFile=- - \
&& exit 0else
## Plain text or HP/PCL, so just print it directly; print a form# at the end to eject the last page.#echo $first_line && cat && printf "\033&l0H" &&
exit 0fi
exit 2
Finally, you need to notify LPD of the filter via the if capability:
:if=/usr/local/libexec/hpif:
That is it. You can type lpr plain.text and lpr whatever.ps and both should print successfully.
163

Chapter 10 Printing
10.4.1.4 Conversion Filters
After completing the simple setup described in Simple Printer Setup, the first thing you will probably want to do isinstall conversion filters for your favorite file formats (besides plain ASCII text).
10.4.1.4.1 Why Install Conversion Filters?
Conversion filters make printing various kinds of files easy. As an example, suppose we do a lot of work with theTeX typesetting system, and we have a PostScript printer. Every time we generate a DVI file from TeX, we cannotprint it directly until we convert the DVI file into PostScript. The command sequence goes like this:
% dvips seaweed-analysis.dvi% lpr seaweed-analysis.ps
By installing a conversion filter for DVI files, we can skip the hand conversion step each time by having LPD do itfor us. Now, each time we get a DVI file, we are just one step away from printing it:
% lpr -d seaweed-analysis.dvi
We got LPD to do the DVI file conversion for us by specifying the -d option. Section Formatting and ConversionOptions lists the conversion options.
For each of the conversion options you want a printer to support, install a conversion filter and specify its pathname in/etc/printcap. A conversion filter is like the text filter for the simple printer setup (see section Installing the TextFilter) except that instead of printing plain text, the filter converts the file into a format the printer can understand.
10.4.1.4.2 Which Conversions Filters Should I Install?
You should install the conversion filters you expect to use. If you print a lot of DVI data, then a DVI conversion filteris in order. If you have got plenty of troff to print out, then you probably want a troff filter.
The following table summarizes the filters that LPD works with, their capability entries for the /etc/printcap file,and how to invoke them with the lpr command:
File type /etc/printcap capability lpr option
cifplot cf -c
DVI df -d
plot gf -g
ditroff nf -n
FORTRAN text rf -f
troff rf -f
raster vf -v
164

Chapter 10 Printing
File type /etc/printcap capability lpr option
plain text if none, -p, or -l
In our example, using lpr -d means the printer needs a df capability in its entry in /etc/printcap.
Despite what others might contend, formats like FORTRAN text and plot are probably obsolete. At your site, youcan give new meanings to these or any of the formatting options just by installing custom filters. For example,suppose you would like to directly print Printerleaf files (files from the Interleaf desktop publishing program), butwill never print plot files. You could install a Printerleaf conversion filter under the gf capability and then educateyour users that lpr -g mean “print Printerleaf files.”
10.4.1.4.3 Installing Conversion Filters
Since conversion filters are programs you install outside of the base FreeBSD installation, they should probably gounder /usr/local. The directory /usr/local/libexec is a popular location, since they are specialized programsthat only LPD will run; regular users should not ever need to run them.
To enable a conversion filter, specify its pathname under the appropriate capability for the destination printer in/etc/printcap.
In our example, we will add the DVI conversion filter to the entry for the printer named bamboo. Here is the example/etc/printcap file again, with the new df capability for the printer bamboo.
## /etc/printcap for host rose - added df filter for bamboo#rattan|line|diablo|lp|Diablo 630 Line Printer:\
:sh:sd=/var/spool/lpd/rattan:\:lp=/dev/lpt0:\:if=/usr/local/libexec/if-simple:
bamboo|ps|PS|S|panasonic|Panasonic KX-P4455 PostScript v51.4:\:sh:sd=/var/spool/lpd/bamboo:\:lp=/dev/ttyd5:fs#0x82000e1:xs#0x820:rw:\:if=/usr/local/libexec/psif:\:df=/usr/local/libexec/psdf:
The DVI filter is a shell script named /usr/local/libexec/psdf. Here is that script:
#!bin/sh## psdf - DVI to PostScript printer filter# Installed in /usr/local/libexec/psdf#
165

Chapter 10 Printing
# Invoked by lpd when user runs lpr -d#exec /usr/local/bin/dvips -f | /usr/local/libexec/lprps "$@"
This script runs dvips in filter mode (the -f argument) on standard input, which is the job to print. It then starts thePostScript printer filter lprps (see section Accommodating Plain Text Jobs on PostScript Printers) with thearguments LPD passed to this script. lprps will use those arguments to account for the pages printed.
10.4.1.4.4 More Conversion Filter Examples
Since there is no fixed set of steps to install conversion filters, let me instead provide more examples. Use these asguidance to making your own filters. Use them directly, if appropriate.
This example script is a raster (well, GIF file, actually) conversion filter for a Hewlett Packard LaserJet III-Si printer:
#!/bin/sh## hpvf - Convert GIF files into HP/PCL, then print# Installed in /usr/local/libexec/hpvf
PATH=/usr/X11R6/bin:$PATH; export PATHgiftopnm | ppmtopgm | pgmtopbm | pbmtolj -resolution 300 \
&& exit 0 \|| exit 2
It works by converting the GIF file into a portable anymap, converting that into a portable graymap, converting thatinto a portable bitmap, and converting that into LaserJet/PCL-compatible data.
Here is the /etc/printcap file with an entry for a printer using the above filter:
## /etc/printcap for host orchid#teak|hp|laserjet|Hewlett Packard LaserJet 3Si:\
:lp=/dev/lpt0:sh:sd=/var/spool/lpd/teak:mx#0:\:if=/usr/local/libexec/hpif:\:vf=/usr/local/libexec/hpvf:
The following script is a conversion filter for troff data from the groff typesetting system for the PostScript printernamed bamboo:
#!/bin/sh## pstf - Convert groff’s troff data into PS, then print.# Installed in /usr/local/libexec/pstf
166

Chapter 10 Printing
#exec grops | /usr/local/libexec/lprps "$@"
The above script makes use of lprps again to handle the communication with the printer. If the printer were on aparallel port, we would use this script instead:
#!/bin/sh## pstf - Convert groff’s troff data into PS, then print.# Installed in /usr/local/libexec/pstf#exec grops
That is it. Here is the entry we need to add to /etc/printcap to enable the filter:
:tf=/usr/local/libexec/pstf:
Here is an example that might make old hands at FORTRAN blush. It is a FORTRAN-text filter for any printer thatcan directly print plain text. We will install it for the printer teak:
#!/bin/sh## hprf - FORTRAN text filter for LaserJet 3si:# Installed in /usr/local/libexec/hprf#
printf "\033&k2G" && fpr && printf "\033&l0H" &&exit 0
exit 2
And we will add this line to the /etc/printcap for the printer teak to enable this filter:
:rf=/usr/local/libexec/hprf:
Here is one final, somewhat complex example. We will add a DVI filter to the LaserJet printer teak introducedearlier. First, the easy part: updating /etc/printcap with the location of the DVI filter:
:df=/usr/local/libexec/hpdf:
Now, for the hard part: making the filter. For that, we need a DVI-to-LaserJet/PCL conversion program. TheFreeBSD ports collection (see The Ports Collection) has one: dvi2xx is the name of the package. Installing thispackage gives us the program we need, dvilj2p, which converts DVI into LaserJet IIp, LaserJet III, and LaserJet2000 compatible codes.
167

Chapter 10 Printing
dvilj2p makes the filter hpdf quite complex since dvilj2p cannot read from standard input. It wants to work witha filename. What is worse, the filename has to end in .dvi so using /dev/fd/0 for standard input is problematic.We can get around that problem by linking (symbolically) a temporary file name (one that ends in .dvi) to/dev/fd/0, thereby forcing dvilj2p to read from standard input.
The only other fly in the ointment is the fact that we cannot use /tmp for the temporary link. Symbolic links areowned by user and group bin. The filter runs as user daemon. And the /tmp directory has the sticky bit set. Thefilter can create the link, but it will not be able clean up when done and remove it since the link will belong to adifferent user.
Instead, the filter will make the symbolic link in the current working directory, which is the spooling directory(specified by the sd capability in /etc/printcap). This is a perfect place for filters to do their work, especiallysince there is (sometimes) more free disk space in the spooling directory than under /tmp.
Here, finally, is the filter:
#!/bin/sh## hpdf - Print DVI data on HP/PCL printer# Installed in /usr/local/libexec/hpdf
PATH=/usr/local/bin:$PATH; export PATH
## Define a function to clean up our temporary files. These exist# in the current directory, which will be the spooling directory# for the printer.#cleanup() {
rm -f hpdf$$.dvi}
## Define a function to handle fatal errors: print the given message# and exit 2. Exiting with 2 tells LPD to do not try to reprint the# job.#fatal() {
echo "$@" 1 � &2cleanupexit 2
}
## If user removes the job, LPD will send SIGINT, so trap SIGINT
168

Chapter 10 Printing
# (and a few other signals) to clean up after ourselves.#trap cleanup 1 2 15
## Make sure we are not colliding with any existing files.#cleanup
## Link the DVI input file to standard input (the file to print).#ln -s /dev/fd/0 hpdf$$.dvi || fatal "Cannot symlink /dev/fd/0"
## Make LF = CR+LF#printf "\033&k2G" || fatal "Cannot initialize printer"
## Convert and print. Return value from dvilj2p does not seem to be# reliable, so we ignore it.#dvilj2p -M1 -q -e- dfhp$$.dvi
## Clean up and exit#cleanupexit 0
10.4.1.4.5 Automated Conversion: An Alternative To Conversion Filters
All these conversion filters accomplish a lot for your printing environment, but at the cost forcing the user to specify(on the lpr(1) command line) which one to use. If your users are not particularly computer literate, having to specifya filter option will become annoying. What is worse, though, is that an incorrectly specified filter option may run afilter on the wrong type of file and cause your printer to spew out hundreds of sheets of paper.
Rather than install conversion filters at all, you might want to try having the text filter (since it is the default filter)detect the type of file it has been asked to print and then automatically run the right conversion filter. Tools such asfile can be of help here. Of course, it will be hard to determine the differences between some file types—and, ofcourse, you can still provide conversion filters just for them.
169

Chapter 10 Printing
The FreeBSD ports collection has a text filter that performs automatic conversion called apsfilter. It can detectplain text, PostScript, and DVI files, run the proper conversions, and print.
10.4.1.5 Output Filters
The LPD spooling system supports one other type of filter that we have not yet explored: an output filter. An outputfilter is intended for printing plain text only, like the text filter, but with many simplifications. If you are using anoutput filter but no text filter, then:
• LPD starts an output filter once for the entire job instead of once for each file in the job.
• LPD does not make any provision to identify the start or the end of files within the job for the output filter.
• LPD does not pass the user’s login or host to the filter, so it is not intended to do accounting. In fact, it gets onlytwo arguments:
filter-name -wwidth -llength
Where width is from the pw capability and length is from the pl capability for the printer in question.
Do not be seduced by an output filter’s simplicity. If you would like each file in a job to start on a different page anoutput filter will not work. Use a text filter (also known as an input filter); see section Installing the Text Filter.Furthermore, an output filter is actually more complex in that it has to examine the byte stream being sent to it forspecial flag characters and must send signals to itself on behalf of LPD.
However, an output filter is necessary if you want header pages and need to send escape sequences or otherinitialization strings to be able to print the header page. (But it is also futile if you want to charge header pages to therequesting user’s account, since LPD does not give any user or host information to the output filter.)
On a single printer, LPD allows both an output filter and text or other filters. In such cases, LPD will start the outputfilter to print the header page (see section Header Pages) only. LPD then expects the output filter to stop itself bysending two bytes to the filter: ASCII 031 followed by ASCII 001. When an output filter sees these two bytes (031,001), it should stop by sending SIGSTOP to itself. When LPD’s done running other filters, it will restart the outputfilter by sending SIGCONT to it.
If there is an output filter but no text filter and LPD is working on a plain text job, LPD uses the output filter to do thejob. As stated before, the output filter will print each file of the job in sequence with no intervening form feeds orother paper advancement, and this is probably not what you want. In almost all cases, you need a text filter.
The program lpf, which we introduced earlier as a text filter, can also run as an output filter. If you need aquick-and-dirty output filter but do not want to write the byte detection and signal sending code, try lpf. You canalso wrap lpf in a shell script to handle any initialization codes the printer might require.
170

Chapter 10 Printing
10.4.1.6 lpf: a Text Filter
The program /usr/libexec/lpr/lpf that comes with FreeBSD binary distribution is a text filter (input filter) thatcan indent output (job submitted with lpr -i), allow literal characters to pass (job submitted with lpr -l), adjustthe printing position for backspaces and tabs in the job, and account for pages printed. It can also act like an outputfilter.
lpf is suitable for many printing environments. And although it has no capability to send initialization sequences toa printer, it is easy to write a shell script to do the needed initialization and then execute lpf.
In order for lpf to do page accounting correctly, it needs correct values filled in for the pw and pl capabilities in the/etc/printcap file. It uses these values to determine how much text can fit on a page and how many pages were ina user’s job. For more information on printer accounting, see Accounting for Printer Usage.
10.4.2 Header PagesIf you have lots of users, all of them using various printers, then you probably want to consider header pages as anecessary evil.
Header pages, also known as banner or burst pages identify to whom jobs belong after they are printed. They areusually printed in large, bold letters, perhaps with decorative borders, so that in a stack of printouts they stand outfrom the real documents that comprise users’ jobs. They enable users to locate their jobs quickly. The obviousdrawback to a header page is that it is yet one more sheet that has to be printed for every job, their ephemeralusefulness lasting not more than a few minutes, ultimately finding themselves in a recycling bin or rubbish heap.(Note that header pages go with each job, not each file in a job, so the paper waste might not be that bad.)
The LPD system can provide header pages automatically for your printouts if your printer can directly print plaintext. If you have a PostScript printer, you will need an external program to generate the header page; see HeaderPages on PostScript Printers.
10.4.2.1 Enabling Header Pages
In the Simple Printer Setup, we turned off header pages by specifying sh (meaning “suppress header”) in the/etc/printcap file. To enable header pages for a printer, just remove the sh capability.
Sounds too easy, right?
You are right. You might have to provide an output filter to send initialization strings to the printer. Here is anexample output filter for Hewlett Packard PCL-compatible printers:
#!/bin/sh## hpof - Output filter for Hewlett Packard PCL-compatible printers
171

Chapter 10 Printing
# Installed in /usr/local/libexec/hpof
printf "\033&k2G" || exit 2exec /usr/libexec/lpr/lpf
Specify the path to the output filter in the of capability. See Output Filters for more information.
Here is an example /etc/printcap file for the printer teak that we introduced earlier; we enabled header pagesand added the above output filter:
## /etc/printcap for host orchid#teak|hp|laserjet|Hewlett Packard LaserJet 3Si:\
:lp=/dev/lpt0:sd=/var/spool/lpd/teak:mx#0:\:if=/usr/local/libexec/hpif:\:vf=/usr/local/libexec/hpvf:\:of=/usr/local/libexec/hpof:
Now, when users print jobs to teak, they get a header page with each job. If users want to spend time searching fortheir printouts, they can suppress header pages by submitting the job with lpr -h; see Header Page Options formore lpr(1) options.
Note: LPD prints a form feed character after the header page. If your printer uses a different character orsequence of characters to eject a page, specify them with the ff capability in /etc/printcap.
10.4.2.2 Controlling Header Pages
By enabling header pages, LPD will produce a long header, a full page of large letters identifying the user, host, andjob. Here is an example (kelly printed the job named outline from host rose):
k ll llk l lk l lk k eeee l l y yk k e e l l y yk k eeeeee l l y ykk k e l l y yk k e e l l y yyk k eeee lll lll yyy y
yy y
172

Chapter 10 Printing
yyyy
llt l it l
oooo u u ttttt l ii n nnn eeeeo o u u t l i nn n e eo o u u t l i n n eeeeeeo o u u t l i n n eo o u uu t t l i n n e eoooo uuu u tt lll iii n n eeee
r rrr oooo ssss eeeerr r o o s s e er o o ss eeeeeer o o ss er o o s s e er oooo ssss eeee
Job: outlineDate: Sun Sep 17 11:04:58 1995
LPD appends a form feed after this text so the job starts on a new page (unless you have sf (suppress form feeds) inthe destination printer’s entry in /etc/printcap).
If you prefer, LPD can make a short header; specify sb (short banner) in the /etc/printcap file. The header pagewill look like this:
rose:kelly Job: outline Date: Sun Sep 17 11:07:51 1995
173

Chapter 10 Printing
Also by default, LPD prints the header page first, then the job. To reverse that, specify hl (header last) in/etc/printcap.
10.4.2.3 Accounting for Header Pages
Using LPD’s built-in header pages enforces a particular paradigm when it comes to printer accounting: header pagesmust be free of charge.
Why?
Because the output filter is the only external program that will have control when the header page is printed thatcould do accounting, and it is not provided with any user or host information or an accounting file, so it has no ideawhom to charge for printer use. It is also not enough to just “add one page” to the text filter or any of the conversionfilters (which do have user and host information) since users can suppress header pages with lpr -h. They couldstill be charged for header pages they did not print. Basically, lpr -h will be the preferred option ofenvironmentally-minded users, but you cannot offer any incentive to use it.
It is still not enough to have each of the filters generate their own header pages (thereby being able to charge forthem). If users wanted the option of suppressing the header pages with lpr -h, they will still get them and becharged for them since LPD does not pass any knowledge of the -h option to any of the filters.
So, what are your options?
You can:
• Accept LPD’s paradigm and make header pages free.
• Install an alternative to LPD, such as LPRng. Section Alternatives to the Standard Spooler tells more about otherspooling software you can substitute for LPD.
• Write a smart output filter. Normally, an output filter is not meant to do anything more than initialize a printer ordo some simple character conversion. It is suited for header pages and plain text jobs (when there is no text (input)filter). But, if there is a text filter for the plain text jobs, then LPD will start the output filter only for the headerpages. And the output filter can parse the header page text that LPD generates to determine what user and host tocharge for the header page. The only other problem with this method is that the output filter still does not knowwhat accounting file to use (it is not passed the name of the file from the af capability), but if you have awell-known accounting file, you can hard-code that into the output filter. To facilitate the parsing step, use the sh(short header) capability in /etc/printcap. Then again, all that might be too much trouble, and users willcertainly appreciate the more generous system administrator who makes header pages free.
174

Chapter 10 Printing
10.4.2.4 Header Pages on PostScript Printers
As described above, LPD can generate a plain text header page suitable for many printers. Of course, PostScriptcannot directly print plain text, so the header page feature of LPD is useless—or mostly so.
One obvious way to get header pages is to have every conversion filter and the text filter generate the header page.The filters should use the user and host arguments to generate a suitable header page. The drawback of this method isthat users will always get a header page, even if they submit jobs with lpr -h.
Let us explore this method. The following script takes three arguments (user login name, host name, and job name)and makes a simple PostScript header page:
#!/bin/sh## make-ps-header - make a PostScript header page on stdout# Installed in /usr/local/libexec/make-ps-header#
## These are PostScript units (72 to the inch). Modify for A4 or# whatever size paper you are using:#page_width=612page_height=792border=72
## Check arguments#if [ $# -ne 3 ]; then
echo "Usage: ‘basename $0‘ � user � � host � � job � " 1 � &2exit 1
fi
## Save these, mostly for readability in the PostScript, below.#user=$1host=$2job=$3date=‘date‘
## Send the PostScript code to stdout.#exec cat � � EOF
175

Chapter 10 Printing
%!PS
%% Make sure we do not interfere with user’s job that will follow%save
%% Make a thick, unpleasant border around the edge of the paper.%$border $border moveto$page_width $border 2 mul sub 0 rlineto0 $page_height $border 2 mul sub rlinetocurrentscreen 3 -1 roll pop 100 3 1 roll setscreen$border 2 mul $page_width sub 0 rlineto closepath0.8 setgray 10 setlinewidth stroke 0 setgray
%% Display user’s login name, nice and large and prominent%/Helvetica-Bold findfont 64 scalefont setfont$page_width ($user) stringwidth pop sub 2 div $page_height 200 sub moveto($user) show
%% Now show the boring particulars%/Helvetica findfont 14 scalefont setfont/y 200 def[ (Job:) (Host:) (Date:) ] {200 y moveto show /y y 18 sub def }forall
/Helvetica-Bold findfont 14 scalefont setfont/y 200 def[ ($job) ($host) ($date) ] {
270 y moveto show /y y 18 sub def} forall
%% That is it%restoreshowpageEOF
176

Chapter 10 Printing
Now, each of the conversion filters and the text filter can call this script to first generate the header page, and thenprint the user’s job. Here is the DVI conversion filter from earlier in this document, modified to make a header page:
#!/bin/sh## psdf - DVI to PostScript printer filter# Installed in /usr/local/libexec/psdf## Invoked by lpd when user runs lpr -d#
orig_args="$@"
fail() {echo "$@" 1 � &2exit 2
}
while getopts "x:y:n:h:" option; docase $option in
x|y) ;; # Ignoren) login=$OPTARG ;;h) host=$OPTARG ;;*) echo "LPD started ‘basename $0‘ wrong." 1 � &2
exit 2;;
esacdone
[ "$login" ] || fail "No login name"[ "$host" ] || fail "No host name"
( /usr/local/libexec/make-ps-header $login $host "DVI File"/usr/local/bin/dvips -f ) | eval /usr/local/libexec/lprps $orig_args
Notice how the filter has to parse the argument list in order to determine the user and host name. The parsing for theother conversion filters is identical. The text filter takes a slightly different set of arguments, though (see section HowFilters Work).
As we have mentioned before, the above scheme, though fairly simple, disables the “suppress header page” option(the -h option) to lpr. If users wanted to save a tree (or a few pennies, if you charge for header pages), they wouldnot be able to do so, since every filter’s going to print a header page with every job.
To allow users to shut off header pages on a per-job basis, you will need to use the trick introduced in sectionAccounting for Header Pages: write an output filter that parses the LPD-generated header page and produces a
177

Chapter 10 Printing
PostScript version. If the user submits the job with lpr -h, then LPD will not generate a header page, and neitherwill your output filter. Otherwise, your output filter will read the text from LPD and send the appropriate header pagePostScript code to the printer.
If you have a PostScript printer on a serial line, you can make use of lprps, which comes with an output filter,psof, which does the above. Note that psof does not charge for header pages.
10.4.3 Networked PrintingFreeBSD supports networked printing: sending jobs to remote printers. Networked printing generally refers to twodifferent things:
• Accessing a printer attached to a remote host. You install a printer that has a conventional serial or parallelinterface on one host. Then, you set up LPD to enable access to the printer from other hosts on the network.Section Printers Installed on Remote Hosts tells how to do this.
• Accessing a printer attached directly to a network. The printer has a network interface in addition (or in place of) amore conventional serial or parallel interface. Such a printer might work as follows:
• It might understand the LPD protocol and can even queue jobs from remote hosts. In this case, it acts just like aregular host running LPD. Follow the same procedure in section Printers Installed on Remote Hosts to set upsuch a printer.
• It might support a data stream network connection. In this case, you “attach” the printer to one host on thenetwork by making that host responsible for spooling jobs and sending them to the printer. Section Printers withNetworked Data Stream Interfaces gives some suggestions on installing such printers.
10.4.3.1 Printers Installed on Remote Hosts
The LPD spooling system has built-in support for sending jobs to other hosts also running LPD (or are compatiblewith LPD). This feature enables you to install a printer on one host and make it accessible from other hosts. It alsoworks with printers that have network interfaces that understand the LPD protocol.
To enable this kind of remote printing, first install a printer on one host, the printer host, using the simple printersetup described in Simple Printer Setup. Do any advanced setup in Advanced Printer Setup that you need. Make sureto test the printer and see if it works with the features of LPD you have enabled. Also ensure that the local host hasauthorization to use the LPD service in the remote host (see Restricting Jobs from Remote Printers).
If you are using a printer with a network interface that is compatible with LPD, then the printer host in the discussionbelow is the printer itself, and the printer name is the name you configured for the printer. See the documentationthat accompanied your printer and/or printer-network interface.
178

Chapter 10 Printing
Tip: If you are using a Hewlett Packard Laserjet then the printer name text will automatically perform the LF toCRLF conversion for you, so you will not require the hpif script.
Then, on the other hosts you want to have access to the printer, make an entry in their /etc/printcap files with thefollowing:
1. Name the entry anything you want. For simplicity, though, you probably want to use the same name and aliasesas on the printer host.
2. Leave the lp capability blank, explicitly (:lp=:).
3. Make a spooling directory and specify its location in the sd capability. LPD will store jobs here before they getsent to the printer host.
4. Place the name of the printer host in the rm capability.
5. Place the printer name on the printer host in the rp capability.
That is it. You do not need to list conversion filters, page dimensions, or anything else in the /etc/printcap file.
Here is an example. The host rose has two printers, bamboo and rattan. We will enable users on the host orchid toprint to those printers. Here is the /etc/printcap file for orchid (back from section Enabling Header Pages). Italready had the entry for the printer teak; we have added entries for the two printers on the host rose:
## /etc/printcap for host orchid - added (remote) printers on rose#
## teak is local; it is connected directly to orchid:#teak|hp|laserjet|Hewlett Packard LaserJet 3Si:\
:lp=/dev/lpt0:sd=/var/spool/lpd/teak:mx#0:\:if=/usr/local/libexec/ifhp:\:vf=/usr/local/libexec/vfhp:\:of=/usr/local/libexec/ofhp:
## rattan is connected to rose; send jobs for rattan to rose:#rattan|line|diablo|lp|Diablo 630 Line Printer:\
:lp=:rm=rose:rp=rattan:sd=/var/spool/lpd/rattan:
## bamboo is connected to rose as well:
179

Chapter 10 Printing
#bamboo|ps|PS|S|panasonic|Panasonic KX-P4455 PostScript v51.4:\
:lp=:rm=rose:rp=bamboo:sd=/var/spool/lpd/bamboo:
Then, we just need to make spooling directories on orchid:
# mkdir -p /var/spool/lpd/rattan /var/spool/lpd/bamboo# chmod 770 /var/spool/lpd/rattan /var/spool/lpd/bamboo# chown daemon:daemon /var/spool/lpd/rattan /var/spool/lpd/bamboo
Now, users on orchid can print to rattan and bamboo. If, for example, a user on orchid typed
% lpr -P bamboo -d sushi-review.dvi
the LPD system on orchid would copy the job to the spooling directory /var/spool/lpd/bamboo and note that itwas a DVI job. As soon as the host rose has room in its bamboo spooling directory, the two LPDs would transfer thefile to rose. The file would wait in rose’s queue until it was finally printed. It would be converted from DVI toPostScript (since bamboo is a PostScript printer) on rose.
10.4.3.2 Printers with Networked Data Stream Interfaces
Often, when you buy a network interface card for a printer, you can get two versions: one which emulates a spooler(the more expensive version), or one which just lets you send data to it as if you were using a serial or parallel port(the cheaper version). This section tells how to use the cheaper version. For the more expensive one, see the previoussection Printers Installed on Remote Hosts.
The format of the /etc/printcap file lets you specify what serial or parallel interface to use, and (if you are usinga serial interface), what baud rate, whether to use flow control, delays for tabs, conversion of newlines, and more. Butthere is no way to specify a connection to a printer that is listening on a TCP/IP or other network port.
To send data to a networked printer, you need to develop a communications program that can be called by the textand conversion filters. Here is one such example: the script netprint takes all data on standard input and sends it toa network-attached printer. We specify the hostname of the printer as the first argument and the port number to whichto connect as the second argument to netprint. Note that this supports one-way communication only (FreeBSD toprinter); many network printers support two-way communication, and you might want to take advantage of that (toget printer status, perform accounting, etc.).
#!/usr/bin/perl## netprint - Text filter for printer attached to network# Installed in /usr/local/libexec/netprint#$#ARGV eq 1 || die "Usage: $0 � printer-hostname � � port-number � ";
180

Chapter 10 Printing
$printer_host = $ARGV[0];$printer_port = $ARGV[1];
require ’sys/socket.ph’;
($ignore, $ignore, $protocol) = getprotobyname(’tcp’);($ignore, $ignore, $ignore, $ignore, $address)
= gethostbyname($printer_host);
$sockaddr = pack(’S n a4 x8’, &AF_INET, $printer_port, $address);
socket(PRINTER, &PF_INET, &SOCK_STREAM, $protocol)|| die "Can’t create TCP/IP stream socket: $!";
connect(PRINTER, $sockaddr) || die "Can’t contact $printer_host: $!";while ( � STDIN � ) { print PRINTER; }exit 0;
We can then use this script in various filters. Suppose we had a Diablo 750-N line printer connected to the network.The printer accepts data to print on port number 5100. The host name of the printer is scrivener. Here is the text filterfor the printer:
#!/bin/sh## diablo-if-net - Text filter for Diablo printer ‘scrivener’ listening# on port 5100. Installed in /usr/local/libexec/diablo-if-net#exec /usr/libexec/lpr/lpf "$@" | /usr/local/libexec/netprint scrivener 5100
10.4.4 Restricting Printer UsageThis section gives information on restricting printer usage. The LPD system lets you control who can access aprinter, both locally or remotely, whether they can print multiple copies, how large their jobs can be, and how largethe printer queues can get.
10.4.4.1 Restricting Multiple Copies
The LPD system makes it easy for users to print multiple copies of a file. Users can print jobs with lpr -#5 (forexample) and get five copies of each file in the job. Whether this is a good thing is up to you.
If you feel multiple copies cause unnecessary wear and tear on your printers, you can disable the -# option to lpr(1)by adding the sc capability to the /etc/printcap file. When users submit jobs with the -# option, they will see:
181

Chapter 10 Printing
lpr: multiple copies are not allowed
Note that if you have set up access to a printer remotely (see section Printers Installed on Remote Hosts), you needthe sc capability on the remote /etc/printcap files as well, or else users will still be able to submit multiple-copyjobs by using another host.
Here is an example. This is the /etc/printcap file for the host rose. The printer rattan is quite hearty, so wewill allow multiple copies, but the laser printer bamboo’s a bit more delicate, so we will disable multiple copies byadding the sc capability:
## /etc/printcap for host rose - restrict multiple copies on bamboo#rattan|line|diablo|lp|Diablo 630 Line Printer:\
:sh:sd=/var/spool/lpd/rattan:\:lp=/dev/lpt0:\:if=/usr/local/libexec/if-simple:
bamboo|ps|PS|S|panasonic|Panasonic KX-P4455 PostScript v51.4:\:sh:sd=/var/spool/lpd/bamboo:sc:\:lp=/dev/ttyd5:fs#0x82000e1:xs#0x820:rw:\:if=/usr/local/libexec/psif:\:df=/usr/local/libexec/psdf:
Now, we also need to add the sc capability on the host orchid’s /etc/printcap (and while we are at it, let usdisable multiple copies for the printer teak):
## /etc/printcap for host orchid - no multiple copies for local# printer teak or remote printer bambooteak|hp|laserjet|Hewlett Packard LaserJet 3Si:\
:lp=/dev/lpt0:sd=/var/spool/lpd/teak:mx#0:sc:\:if=/usr/local/libexec/ifhp:\:vf=/usr/local/libexec/vfhp:\:of=/usr/local/libexec/ofhp:
rattan|line|diablo|lp|Diablo 630 Line Printer:\:lp=:rm=rose:rp=rattan:sd=/var/spool/lpd/rattan:
bamboo|ps|PS|S|panasonic|Panasonic KX-P4455 PostScript v51.4:\:lp=:rm=rose:rp=bamboo:sd=/var/spool/lpd/bamboo:sc:
By using the sc capability, we prevent the use of lpr -#, but that still does not prevent users from running lpr(1)multiple times, or from submitting the same file multiple times in one job like this:
182

Chapter 10 Printing
% lpr forsale.sign forsale.sign forsale.sign forsale.sign forsale.sign
There are many ways to prevent this abuse (including ignoring it) which you are free to explore.
10.4.4.2 Restricting Access To Printers
You can control who can print to what printers by using the UNIX group mechanism and the rg capability in/etc/printcap. Just place the users you want to have access to a printer in a certain group, and then name thatgroup in the rg capability.
Users outside the group (including root) will be greeted with lpr: Not a member of the restricted group
if they try to print to the controlled printer.
As with the sc (suppress multiple copies) capability, you need to specify rg on remote hosts that also have access toyour printers, if you feel it is appropriate (see section Printers Installed on Remote Hosts).
For example, we will let anyone access the printer rattan, but only those in group artists can use bamboo. Hereis the familiar /etc/printcap for host rose:
## /etc/printcap for host rose - restricted group for bamboo#rattan|line|diablo|lp|Diablo 630 Line Printer:\
:sh:sd=/var/spool/lpd/rattan:\:lp=/dev/lpt0:\:if=/usr/local/libexec/if-simple:
bamboo|ps|PS|S|panasonic|Panasonic KX-P4455 PostScript v51.4:\:sh:sd=/var/spool/lpd/bamboo:sc:rg=artists:\:lp=/dev/ttyd5:fs#0x82000e1:xs#0x820:rw:\:if=/usr/local/libexec/psif:\:df=/usr/local/libexec/psdf:
Let us leave the other example /etc/printcap file (for the host orchid) alone. Of course, anyone on orchid canprint to bamboo. It might be the case that we only allow certain logins on orchid anyway, and want them to haveaccess to the printer. Or not.
Note: There can be only one restricted group per printer.
183

Chapter 10 Printing
10.4.4.3 Controlling Sizes of Jobs Submitted
If you have many users accessing the printers, you probably need to put an upper limit on the sizes of the files userscan submit to print. After all, there is only so much free space on the filesystem that houses the spooling directories,and you also need to make sure there is room for the jobs of other users.
LPD enables you to limit the maximum byte size a file in a job can be with the mx capability. The units are inBUFSIZ blocks, which are 1024 bytes. If you put a zero for this capability, there will be no limit on file size;however, if no mx capability is specified, then a default limit of 1000 blocks will be used.
Note: The limit applies to files in a job, and not the total job size.
LPD will not refuse a file that is larger than the limit you place on a printer. Instead, it will queue as much of the fileup to the limit, which will then get printed. The rest will be discarded. Whether this is correct behavior is up fordebate.
Let us add limits to our example printers rattan and bamboo. Since those artists’ PostScript files tend to be large,we will limit them to five megabytes. We will put no limit on the plain text line printer:
## /etc/printcap for host rose#
## No limit on job size:#rattan|line|diablo|lp|Diablo 630 Line Printer:\
:sh:mx#0:sd=/var/spool/lpd/rattan:\:lp=/dev/lpt0:\:if=/usr/local/libexec/if-simple:
## Limit of five megabytes:#bamboo|ps|PS|S|panasonic|Panasonic KX-P4455 PostScript v51.4:\
:sh:sd=/var/spool/lpd/bamboo:sc:rg=artists:mx#5000:\:lp=/dev/ttyd5:fs#0x82000e1:xs#0x820:rw:\:if=/usr/local/libexec/psif:\:df=/usr/local/libexec/psdf:
Again, the limits apply to the local users only. If you have set up access to your printers remotely, remote users willnot get those limits. You will need to specify the mx capability in the remote /etc/printcap files as well. Seesection Printers Installed on Remote Hosts for more information on remote printing.
184

Chapter 10 Printing
There is another specialized way to limit job sizes from remote printers; see section Restricting Jobs from RemotePrinters.
10.4.4.4 Restricting Jobs from Remote Printers
The LPD spooling system provides several ways to restrict print jobs submitted from remote hosts:
Host restrictions
You can control from which remote hosts a local LPD accepts requests with the files /etc/hosts.equiv and/etc/hosts.lpd. LPD checks to see if an incoming request is from a host listed in either one of these files. Ifnot, LPD refuses the request.
The format of these files is simple: one host name per line. Note that the file /etc/hosts.equiv is also usedby the ruserok(3) protocol, and affects programs like rsh(1) and rcp(1), so be careful.
For example, here is the /etc/hosts.lpd file on the host rose:
orchidvioletmadrigal.fishbaum.de
This means rose will accept requests from the hosts orchid, violet, and madrigal.fishbaum.de. If anyother host tries to access rose’s LPD, the job will be refused.
Size restrictions
You can control how much free space there needs to remain on the filesystem where a spooling directoryresides. Make a file called minfree in the spooling directory for the local printer. Insert in that file a numberrepresenting how many disk blocks (512 bytes) of free space there has to be for a remote job to be accepted.
This lets you insure that remote users will not fill your filesystem. You can also use it to give a certain priority tolocal users: they will be able to queue jobs long after the free disk space has fallen below the amount specifiedin the minfree file.
For example, let us add a minfree file for the printer bamboo. We examine /etc/printcap to find thespooling directory for this printer; here is bamboo’s entry:
bamboo|ps|PS|S|panasonic|Panasonic KX-P4455 PostScript v51.4:\:sh:sd=/var/spool/lpd/bamboo:sc:rg=artists:mx#5000:\:lp=/dev/ttyd5:fs#0x82000e1:xs#0x820:rw:mx#5000:\:if=/usr/local/libexec/psif:\:df=/usr/local/libexec/psdf:
185

Chapter 10 Printing
The spooling directory is the given in the sd capability. We will make three megabytes (which is 6144 diskblocks) the amount of free disk space that must exist on the filesystem for LPD to accept remote jobs:
# echo 6144 � /var/spool/lpd/bamboo/minfree
User restrictions
You can control which remote users can print to local printers by specifying the rs capability in/etc/printcap. When rs appears in the entry for a locally-attached printer, LPD will accept jobs fromremote hosts if the user submitting the job also has an account of the same login name on the local host.Otherwise, LPD refuses the job.
This capability is particularly useful in an environment where there are (for example) different departmentssharing a network, and some users transcend departmental boundaries. By giving them accounts on yoursystems, they can use your printers from their own departmental systems. If you would rather allow them to useonly your printers and not your compute resources, you can give them “token” accounts, with no home directoryand a useless shell like /usr/bin/false.
10.4.5 Accounting for Printer UsageSo, you need to charge for printouts. And why not? Paper and ink cost money. And then there are maintenancecosts—printers are loaded with moving parts and tend to break down. You have examined your printers, usagepatterns, and maintenance fees and have come up with a per-page (or per-foot, per-meter, or per-whatever) cost.Now, how do you actually start accounting for printouts?
Well, the bad news is the LPD spooling system does not provide much help in this department. Accounting is highlydependent on the kind of printer in use, the formats being printed, and your requirements in charging for printerusage.
To implement accounting, you have to modify a printer’s text filter (to charge for plain text jobs) and the conversionfilters (to charge for other file formats), to count pages or query the printer for pages printed. You cannot get awaywith using the simple output filter, since it cannot do accounting. See section Filters.
Generally, there are two ways to do accounting:
• Periodic accounting is the more common way, possibly because it is easier. Whenever someone prints a job, thefilter logs the user, host, and number of pages to an accounting file. Every month, semester, year, or whatever timeperiod you prefer, you collect the accounting files for the various printers, tally up the pages printed by users, andcharge for usage. Then you truncate all the logging files, starting with a clean slate for the next period.
186

Chapter 10 Printing
• Timely accounting is less common, probably because it is more difficult. This method has the filters charge usersfor printouts as soon as they use the printers. Like disk quotas, the accounting is immediate. You can prevent usersfrom printing when their account goes in the red, and might provide a way for users to check and adjust their“print quotas.” But this method requires some database code to track users and their quotas.
The LPD spooling system supports both methods easily: since you have to provide the filters (well, most of the time),you also have to provide the accounting code. But there is a bright side: you have enormous flexibility in youraccounting methods. For example, you choose whether to use periodic or timely accounting. You choose whatinformation to log: user names, host names, job types, pages printed, square footage of paper used, how long the jobtook to print, and so forth. And you do so by modifying the filters to save this information.
10.4.5.1 Quick and Dirty Printer Accounting
FreeBSD comes with two programs that can get you set up with simple periodic accounting right away. They are thetext filter lpf, described in section lpf: a Text Filter, and pac(8), a program to gather and total entries from printeraccounting files.
As mentioned in the section on filters (Filters), LPD starts the text and the conversion filters with the name of theaccounting file to use on the filter command line. The filters can use this argument to know where to write anaccounting file entry. The name of this file comes from the af capability in /etc/printcap, and if not specified asan absolute path, is relative to the spooling directory.
LPD starts lpf with page width and length arguments (from the pw and pl capabilities). lpf uses these arguments todetermine how much paper will be used. After sending the file to the printer, it then writes an accounting entry in theaccounting file. The entries look like this:
2.00 rose:andy3.00 rose:kelly3.00 orchid:mary5.00 orchid:mary2.00 orchid:zhang
You should use a separate accounting file for each printer, as lpf has no file locking logic built into it, and two lpfsmight corrupt each other’s entries if they were to write to the same file at the same time. A easy way to insure aseparate accounting file for each printer is to use af=acct in /etc/printcap. Then, each accounting file will be inthe spooling directory for a printer, in a file named acct.
When you are ready to charge users for printouts, run the pac(8) program. Just change to the spooling directory forthe printer you want to collect on and type pac. You will get a dollar-centric summary like the following:
Login pages/feet runs priceorchid:kelly 5.00 1 $ 0.10orchid:mary 31.00 3 $ 0.62orchid:zhang 9.00 1 $ 0.18
187

Chapter 10 Printing
rose:andy 2.00 1 $ 0.04rose:kelly 177.00 104 $ 3.54rose:mary 87.00 32 $ 1.74rose:root 26.00 12 $ 0.52
total 337.00 154 $ 6.74
These are the arguments pac(8) expects:
-Pprinter
Which printer to summarize. This option works only if there is an absolute path in the af capability in/etc/printcap.
-c
Sort the output by cost instead of alphabetically by user name.
-m
Ignore host name in the accounting files. With this option, user smith on host alpha is the same user smith onhost gamma. Without, they are different users.
-pprice
Compute charges with price dollars per page or per foot instead of the price from the pc capability in/etc/printcap, or two cents (the default). You can specify price as a floating point number.
-r
Reverse the sort order.
-s
Make an accounting summary file and truncate the accounting file.
name ...
Print accounting information for the given user names only.
In the default summary that pac(8) produces, you see the number of pages printed by each user from various hosts. If,at your site, host does not matter (because users can use any host), run pac -m, to produce the following summary:
Login pages/feet runs priceandy 2.00 1 $ 0.04kelly 182.00 105 $ 3.64mary 118.00 35 $ 2.36root 26.00 12 $ 0.52
188

Chapter 10 Printing
zhang 9.00 1 $ 0.18
total 337.00 154 $ 6.74
To compute the dollar amount due, pac(8) uses the pc capability in the /etc/printcap file (default of 200, or 2cents per page). Specify, in hundredths of cents, the price per page or per foot you want to charge for printouts in thiscapability. You can override this value when you run pac(8) with the -p option. The units for the -p option are indollars, though, not hundredths of cents. For example,
# pac -p1.50
makes each page cost one dollar and fifty cents. You can really rake in the profits by using this option.
Finally, running pac -s will save the summary information in a summary accounting file, which is named the sameas the printer’s accounting file, but with _sum appended to the name. It then truncates the accounting file. When yourun pac(8) again, it rereads the summary file to get starting totals, then adds information from the regular accountingfile.
10.4.5.2 How Can You Count Pages Printed?
In order to perform even remotely accurate accounting, you need to be able to determine how much paper a job uses.This is the essential problem of printer accounting.
For plain text jobs, the problem is not that hard to solve: you count how many lines are in a job and compare it tohow many lines per page your printer supports. Do not forget to take into account backspaces in the file whichoverprint lines, or long logical lines that wrap onto one or more additional physical lines.
The text filter lpf (introduced in lpf: a Text Filter) takes into account these things when it does accounting. If youare writing a text filter which needs to do accounting, you might want to examine lpf’s source code.
How do you handle other file formats, though?
Well, for DVI-to-LaserJet or DVI-to-PostScript conversion, you can have your filter parse the diagnostic output ofdvilj or dvips and look to see how many pages were converted. You might be able to do similar things with otherfile formats and conversion programs.
But these methods suffer from the fact that the printer may not actually print all those pages. For example, it couldjam, run out of toner, or explode—and the user would still get charged.
So, what can you do?
There is only one sure way to do accurate accounting. Get a printer that can tell you how much paper it uses, andattach it via a serial line or a network connection. Nearly all PostScript printers support this notion. Other makes andmodels do as well (networked Imagen laser printers, for example). Modify the filters for these printers to get the pageusage after they print each job and have them log accounting information based on that value only. There is no linecounting nor error-prone file examination required.
189

Chapter 10 Printing
Of course, you can always be generous and make all printouts free.
10.5 Using PrintersThis section tells you how to use printers you have setup with FreeBSD. Here is an overview of the user-levelcommands:
lpr(1)
Print jobs
lpq(1)
Check printer queues
lprm(1)
Remove jobs from a printer’s queue
There is also an administrative command, lpc(8), described in the section Administrating the LPD Spooler, used tocontrol printers and their queues.
All three of the commands lpr(1), lprm(1), and lpq(1) accept an option -P printer-name to specify on whichprinter/queue to operate, as listed in the /etc/printcap file. This enables you to submit, remove, and check onjobs for various printers. If you do not use the -P option, then these commands use the printer specified in thePRINTER environment variable. Finally, if you do not have a PRINTER environment variable, these commandsdefault to the printer named lp.
Hereafter, the terminology default printer means the printer named in the PRINTER environment variable, or theprinter named lp when there is no PRINTER environment variable.
10.5.1 Printing JobsTo print files, type:
% lpr filename ...
This prints each of the listed files to the default printer. If you list no files, lpr(1) reads data to print from standardinput. For example, this command prints some important system files:
% lpr /etc/host.conf /etc/hosts.equiv
190

Chapter 10 Printing
To select a specific printer, type:
% lpr -P printer-name filename ...
This example prints a long listing of the current directory to the printer named rattan:
% ls -l | lpr -P rattan
Because no files were listed for the lpr(1) command, lpr read the data to print from standard input, which was theoutput of the ls -l command.
The lpr(1) command can also accept a wide variety of options to control formatting, apply file conversions, generatemultiple copies, and so forth. For more information, see the section Printing Options.
10.5.2 Checking JobsWhen you print with lpr(1), the data you wish to print is put together in a package called a “print job”, which is sentto the LPD spooling system. Each printer has a queue of jobs, and your job waits in that queue along with other jobsfrom yourself and from other users. The printer prints those jobs in a first-come, first-served order.
To display the queue for the default printer, type lpq(1). For a specific printer, use the -P option. For example, thecommand
% lpq -P bamboo
shows the queue for the printer named bamboo. Here is an example of the output of the lpq command:
bamboo is ready and printingRank Owner Job Files Total Sizeactive kelly 9 /etc/host.conf, /etc/hosts.equiv 88 bytes2nd kelly 10 (standard input) 1635 bytes3rd mary 11 ... 78519 bytes
This shows three jobs in the queue for bamboo. The first job, submitted by user kelly, got assigned “job number” 9.Every job for a printer gets a unique job number. Most of the time you can ignore the job number, but you will needit if you want to cancel the job; see section Removing Jobs for details.
Job number nine consists of two files; multiple files given on the lpr(1) command line are treated as part of a singlejob. It is the currently active job (note the word active under the “Rank” column), which means the printer shouldbe currently printing that job. The second job consists of data passed as the standard input to the lpr(1) command.The third job came from user mary; it is a much larger job. The pathname of the files she’s trying to print is too longto fit, so the lpq(1) command just shows three dots.
191

Chapter 10 Printing
The very first line of the output from lpq(1) is also useful: it tells what the printer is currently doing (or at least whatLPD thinks the printer is doing).
The lpq(1) command also support a -l option to generate a detailed long listing. Here is an example of lpq -l:
waiting for bamboo to become ready (offline ?)kelly: 1st [job 009rose]
/etc/host.conf 73 bytes/etc/hosts.equiv 15 bytes
kelly: 2nd [job 010rose](standard input) 1635 bytes
mary: 3rd [job 011rose]/home/orchid/mary/research/venus/alpha-regio/mapping 78519 bytes
10.5.3 Removing JobsIf you change your mind about printing a job, you can remove the job from the queue with the lprm(1) command.Often, you can even use lprm(1) to remove an active job, but some or all of the job might still get printed.
To remove a job from the default printer, first use lpq(1) to find the job number. Then type:
% lprm job-number
To remove the job from a specific printer, add the -P option. The following command removes job number 10 fromthe queue for the printer bamboo:
% lprm -P bamboo 10
The lprm(1) command has a few shortcuts:
lprm -
Removes all jobs (for the default printer) belonging to you.
lprm user
Removes all jobs (for the default printer) belonging to user. The superuser can remove other users’ jobs; youcan remove only your own jobs.
lprm
With no job number, user name, or - appearing on the command line, lprm(1) removes the currently active jobon the default printer, if it belongs to you. The superuser can remove any active job.
192

Chapter 10 Printing
Just use the -P option with the above shortcuts to operate on a specific printer instead of the default. For example, thefollowing command removes all jobs for the current user in the queue for the printer named rattan:
% lprm -P rattan -
Note: If you are working in a networked environment, lprm(1) will let you remove jobs only from the host fromwhich the jobs were submitted, even if the same printer is available from other hosts. The following commandsequence demonstrates this:
% lpr -P rattan myfile% rlogin orchid% lpq -P rattanRank Owner Job Files Total Sizeactive seeyan 12 ... 49123 bytes2nd kelly 13 myfile 12 bytes% lprm -P rattan 13rose: Permission denied% logout% lprm -P rattan 13dfA013rose dequeuedcfA013rose dequeued
10.5.4 Beyond Plain Text: Printing OptionsThe lpr(1) command supports a number of options that control formatting text, converting graphic and other fileformats, producing multiple copies, handling of the job, and more. This section describes the options.
10.5.4.1 Formatting and Conversion Options
The following lpr(1) options control formatting of the files in the job. Use these options if the job does not containplain text or if you want plain text formatted through the pr(1) utility.
For example, the following command prints a DVI file (from the TeX typesetting system) namedfish-report.dvi to the printer named bamboo:
% lpr -P bamboo -d fish-report.dvi
These options apply to every file in the job, so you cannot mix (say) DVI and ditroff files together in a job. Instead,submit the files as separate jobs, using a different conversion option for each job.
193

Chapter 10 Printing
Note: All of these options except -p and -T require conversion filters installed for the destination printer. Forexample, the -d option requires the DVI conversion filter. Section Conversion Filters gives details.
-c
Print cifplot files.
-d
Print DVI files.
-f
Print FORTRAN text files.
-g
Print plot data.
-i number
Indent the output by number columns; if you omit number, indent by 8 columns. This option works only withcertain conversion filters.
Note: Do not put any space between the -i and the number.
-l
Print literal text data, including control characters.
-n
Print ditroff (device independent troff) data.
-p
Format plain text with pr(1) before printing. See pr(1) for more information.
-T title
Use title on the pr(1) header instead of the file name. This option has effect only when used with the -poption.
194

Chapter 10 Printing
-t
Print troff data.
-v
Print raster data.
Here is an example: this command prints a nicely formatted version of the ls(1) manual page on the default printer:
% zcat /usr/share/man/man1/ls.1.gz | troff -t -man | lpr -t
The zcat(1) command uncompresses the source of the ls(1) manual page and passes it to the troff(1) command,which formats that source and makes GNU troff output and passes it to lpr(1), which submits the job to the LPDspooler. Because we used the -t option to lpr(1), the spooler will convert the GNU troff output into a format thedefault printer can understand when it prints the job.
10.5.4.2 Job Handling Options
The following options to lpr(1) tell LPD to handle the job specially:
-# copies
Produce a number of copies of each file in the job instead of just one copy. An administrator may disable thisoption to reduce printer wear-and-tear and encourage photocopier usage. See section Restricting MultipleCopies.
This example prints three copies of parser.c followed by three copies of parser.h to the default printer:
% lpr -#3 parser.c parser.h
-m
Send mail after completing the print job. With this option, the LPD system will send mail to your account whenit finishes handling your job. In its message, it will tell you if the job completed successfully or if there was anerror, and (often) what the error was.
-s
Do not copy the files to the spooling directory, but make symbolic links to them instead.
If you are printing a large job, you probably want to use this option. It saves space in the spooling directory(your job might overflow the free space on the filesystem where the spooling directory resides). It saves time aswell since LPD will not have to copy each and every byte of your job to the spooling directory.
195

Chapter 10 Printing
There is a drawback, though: since LPD will refer to the original files directly, you cannot modify or removethem until they have been printed.
Note: If you are printing to a remote printer, LPD will eventually have to copy files from the local host to theremote host, so the -s option will save space only on the local spooling directory, not the remote. It is stilluseful, though.
-r
Remove the files in the job after copying them to the spooling directory, or after printing them with the -soption. Be careful with this option!
10.5.4.3 Header Page Options
These options to lpr(1) adjust the text that normally appears on a job’s header page. If header pages are suppressedfor the destination printer, these options have no effect. See section Header Pages for information about setting upheader pages.
-C text
Replace the hostname on the header page with text. The hostname is normally the name of the host fromwhich the job was submitted.
-J text
Replace the job name on the header page with text. The job name is normally the name of the first file of thejob, or stdin if you are printing standard input.
-h
Do not print any header page.
Note: At some sites, this option may have no effect due to the way header pages are generated. SeeHeader Pages for details.
196

Chapter 10 Printing
10.5.5 Administrating PrintersAs an administrator for your printers, you have had to install, set up, and test them. Using the lpc(8) command, youcan interact with your printers in yet more ways. With lpc(8), you can
• Start and stop the printers
• Enable and disable their queues
• Rearrange the order of the jobs in each queue.
First, a note about terminology: if a printer is stopped, it will not print anything in its queue. Users can still submitjobs, which will wait in the queue until the printer is started or the queue is cleared.
If a queue is disabled, no user (except root) can submit jobs for the printer. An enabled queue allows jobs to besubmitted. A printer can be started for a disabled queue, in which case it will continue to print jobs in the queue untilthe queue is empty.
In general, you have to have root privileges to use the lpc(8) command. Ordinary users can use the lpc(8) commandto get printer status and to restart a hung printer only.
Here is a summary of the lpc(8) commands. Most of the commands takes a printer-name argument to tell onwhich printer to operate. You can use all for the printer-name to mean all printers listed in /etc/printcap.
abort printer-name
Cancel the current job and stop the printer. Users can still submit jobs if the queue’s enabled.
clean printer-name
Remove old files from the printer’s spooling directory. Occasionally, the files that make up a job are notproperly removed by LPD, particularly if there have been errors during printing or a lot of administrativeactivity. This command finds files that do not belong in the spooling directory and removes them.
disable printer-name
Disable queuing of new jobs. If the printer’s started, it will continue to print any jobs remaining in the queue.The superuser (root) can always submit jobs, even to a disabled queue.
This command is useful while you are testing a new printer or filter installation: disable the queue and submitjobs as root. Other users will not be able to submit jobs until you complete your testing and re-enable the queuewith the enable command.
down printer-name message
Take a printer down. Equivalent to disable followed by stop. The message appears as the printer’s statuswhenever a user checks the printer’s queue with lpq(1) or status with lpc status.
197

Chapter 10 Printing
enable printer-name
Enable the queue for a printer. Users can submit jobs but the printer will not print anything until it is started.
help command-name
Print help on the command command-name. With no command-name, print a summary of the commandsavailable.
restart printer-name
Start the printer. Ordinary users can use this command if some extraordinary circumstance hangs LPD, but theycannot start a printer stopped with either the stop or down commands. The restart command is equivalent toabort followed by start.
start printer-name
Start the printer. The printer will print jobs in its queue.
stop printer-name
Stop the printer. The printer will finish the current job and will not print anything else in its queue. Even thoughthe printer is stopped, users can still submit jobs to an enabled queue.
topq printer-name job-or-username
Rearrange the queue for printer-name by placing the jobs with the listed job numbers or the jobsbelonging to username at the top of the queue. For this command, you cannot use all as theprinter-name.
up printer-name
Bring a printer up; the opposite of the down command. Equivalent to start followed by enable.
lpc(8) accepts the above commands on the command line. If you do not enter any commands, lpc(8) enters aninteractive mode, where you can enter commands until you type exit, quit, or end-of-file.
10.6 Alternatives to the Standard SpoolerIf you have been reading straight through this manual, by now you have learned just about everything there is to knowabout the LPD spooling system that comes with FreeBSD. You can probably appreciate many of its shortcomings,which naturally leads to the question: “What other spooling systems are out there (and work with FreeBSD)?”
198

Chapter 10 Printing
LPRng
LPRng, which purportedly means “LPR: the Next Generation” is a complete rewrite of PLP. Patrick Powell andJustin Mason (the principal maintainer of PLP) collaborated to make LPRng. The main site for LPRng ishttp://www.astart.com/lprng/LPRng.html.
10.7 TroubleshootingAfter performing the simple test with lptest(1), you might have gotten one of the following results instead of thecorrect printout:
It worked, after awhile; or, it did not eject a full sheet.
The printer printed the above, but it sat for awhile and did nothing. In fact, you might have needed to press aPRINT REMAINING or FORM FEED button on the printer to get any results to appear.
If this is the case, the printer was probably waiting to see if there was any more data for your job before itprinted anything. To fix this problem, you can have the text filter send a FORM FEED character (or whatever isnecessary) to the printer. This is usually sufficient to have the printer immediately print any text remaining in itsinternal buffer. It is also useful to make sure each print job ends on a full sheet, so the next job does not startsomewhere on the middle of the last page of the previous job.
The following replacement for the shell script /usr/local/libexec/if-simple prints a form feed after itsends the job to the printer:
#!/bin/sh## if-simple - Simple text input filter for lpd# Installed in /usr/local/libexec/if-simple## Simply copies stdin to stdout. Ignores all filter arguments.# Writes a form feed character (\f) after printing job.
/bin/cat && printf "\f" && exit 0exit 2
It produced the “staircase effect.”
You got the following on paper:
!"#$%&’()*+,-./01234"#$%&’()*+,-./012345
#$%&’()*+,-./0123456
199

Chapter 10 Printing
You have become another victim of the staircase effect, caused by conflicting interpretations of what charactersshould indicate a new line. UNIX-style operating systems use a single character: ASCII code 10, the line feed(LF). MS-DOS, OS/2, and others uses a pair of characters, ASCII code 10 and ASCII code 13 (the carriagereturn or CR). Many printers use the MS-DOS convention for representing new-lines.
When you print with FreeBSD, your text used just the line feed character. The printer, upon seeing a line feedcharacter, advanced the paper one line, but maintained the same horizontal position on the page for the nextcharacter to print. That is what the carriage return is for: to move the location of the next character to print to theleft edge of the paper.
Here is what FreeBSD wants your printer to do:
Printer received CR Printer prints CR
Printer received LF Printer prints CR + LF
Here are some ways to achieve this:
• Use the printer’s configuration switches or control panel to alter its interpretation of these characters. Checkyour printer’s manual to find out how to do this.
Note: If you boot your system into other operating systems besides FreeBSD, you may have toreconfigure the printer to use a an interpretation for CR and LF characters that those other operatingsystems use. You might prefer one of the other solutions, below.
• Have FreeBSD’s serial line driver automatically convert LF to CR+LF. Of course, this works with printers onserial ports only. To enable this feature, set the CRMOD bit in fs capability in the /etc/printcap file forthe printer.
• Send an escape code to the printer to have it temporarily treat LF characters differently. Consult yourprinter’s manual for escape codes that your printer might support. When you find the proper escape code,modify the text filter to send the code first, then send the print job.
Here is an example text filter for printers that understand the Hewlett-Packard PCL escape codes. This filtermakes the printer treat LF characters as a LF and CR; then it sends the job; then it sends a form feed to ejectthe last page of the job. It should work with nearly all Hewlett Packard printers.
#!/bin/sh## hpif - Simple text input filter for lpd for HP-PCL based printers# Installed in /usr/local/libexec/hpif#
200

Chapter 10 Printing
# Simply copies stdin to stdout. Ignores all filter arguments.# Tells printer to treat LF as CR+LF. Ejects the page when done.
printf "\033&k2G" && cat && printf "\033&l0H" && exit 0exit 2
Here is an example /etc/printcap from a host called orchid. It has a single printer attached to its firstparallel port, a Hewlett Packard LaserJet 3Si named teak. It is using the above script as its text filter:
## /etc/printcap for host orchid#teak|hp|laserjet|Hewlett Packard LaserJet 3Si:\
:lp=/dev/lpt0:sh:sd=/var/spool/lpd/teak:mx#0:\:if=/usr/local/libexec/hpif:
It overprinted each line.
The printer never advanced a line. All of the lines of text were printed on top of each other on one line.
This problem is the “opposite” of the staircase effect, described above, and is much rarer. Somewhere, the LFcharacters that FreeBSD uses to end a line are being treated as CR characters to return the print location to theleft edge of the paper, but not also down a line.
Use the printer’s configuration switches or control panel to enforce the following interpretation of LF and CRcharacters:
Printer receives Printer prints
CR CR
LF CR + LF
The printer lost characters.
While printing, the printer did not print a few characters in each line. The problem might have gotten worse asthe printer ran, losing more and more characters.
The problem is that the printer cannot keep up with the speed at which the computer sends data over a serial line(this problem should not occur with printers on parallel ports). There are two ways to overcome the problem:
• If the printer supports XON/XOFF flow control, have FreeBSD use it by specifying the TANDEM bit in thefs capability.
201

Chapter 10 Printing
• If the printer supports carrier flow control, specify the MDMBUF bit in the fs capability. Make sure the cableconnecting the printer to the computer is correctly wired for carrier flow control.
• If the printer does not support any flow control, use some combination of the NLDELAY, TBDELAY,CRDELAY, VTDELAY, and BSDELAY bits in the fs capability to add appropriate delays to the stream ofdata sent to the printer.
It printed garbage.
The printer printed what appeared to be random garbage, but not the desired text.
This is usually another symptom of incorrect communications parameters with a serial printer. Double-checkthe bps rate in the br capability, and the parity bits in the fs and fc capabilities; make sure the printer is usingthe same settings as specified in the /etc/printcap file.
Nothing happened.
If nothing happened, the problem is probably within FreeBSD and not the hardware. Add the log file (lf)capability to the entry for the printer you are debugging in the /etc/printcap file. For example, here is theentry for rattan, with the lf capability:
rattan|line|diablo|lp|Diablo 630 Line Printer:\:sh:sd=/var/spool/lpd/rattan:\:lp=/dev/lpt0:\:if=/usr/local/libexec/if-simple:\:lf=/var/log/rattan.log
Then, try printing again. Check the log file (in our example, /var/log/rattan.log) to see any errormessages that might appear. Based on the messages you see, try to correct the problem.
If you do not specify a lf capability, LPD uses /dev/console as a default.
202

Chapter 11 Disks
11.1 SynopsisThis chapter covers how to use disks, whether physical, memory, or networked, on FreeBSD.
11.2 BIOS Drive NumberingBefore you install and configure FreeBSD on your system, there is an important subject that you should be aware ofif, especially if you have multiple hard drives.
In a PC running DOS or any of the BIOS-dependent operating systems (WINxxx), the BIOS is able to abstract thenormal disk drive order, and the operating system goes along with the change. This allows the user to boot from adisk drive other than the so-called “primary master”. This is especially convenient for some users who have foundthat the simplest and cheapest way to keep a system backup is to buy an identical second hard drive, and performroutine copies of the first drive to the second drive using Ghost or XCOPY. Then, if the first drive fails, or is attackedby a virus, or is scribbled upon by an operating system defect, he can easily recover by instructing the BIOS tologically swap the drives. It’s like switching the cables on the drives, but without having to open the case.
More expensive systems with SCSI controllers often include BIOS extensions which allow the SCSI drives to bere-ordered in a similar fashion for up to seven drives.
A user who is accustomed to taking advantage of these features may become surprised when the results withFreeBSD are not as expected. FreeBSD does not use the BIOS, and does not know the “logical BIOS drivemapping”. This can lead to very perplexing situations, especially when drives are physically identical in geometry,and have also been made as data clones of one another.
When using FreeBSD, always restore the BIOS to natural drive numbering before installing FreeBSD, and then leaveit that way. If you need to switch drives around, then do so, but do it the hard way, and open the case and move thejumpers and cables.
203

Chapter 11 Disks
An illustration from the files of Bill and Fred’s Exceptional Adventures:
Bill breaks-down an older Wintel box to make another FreeBSD box for Fred. Bill installs a single SCSI drive asSCSI unit zero, and installs FreeBSD on it.
Fred begins using the system, but after several days notices that the older SCSI drive is reporting numerous softerrors, and reports this fact to Bill.
After several more days, Bill decides it’s time to address the situation, so he grabs an identical SCSI drive from thedisk drive "archive" in the back room. An initial surface scan indicates that this drive is functioning well, so Billinstalls this drive as SCSI unit four, and makes an image copy from drive zero to drive four. Now that the new driveis installed and functioning nicely, Bill decides that it’s a good idea to start using it, so he uses features in the SCSIBIOS to re-order the disk drives so that the system boots from SCSI unit four. FreeBSD boots and runs just fine.
Fred continues his work for several days, and soon Bill and Fred decide that it’s time for a new adventure -- time toupgrade to a newer version of FreeBSD. Bill removes SCSI unit zero because it was a bit flaky, and replaces it withanother identical disk drive from the "archive." Bill then installs the new version of FreeBSD onto the new SCSIunit zero using Fred’s magic Internet FTP floppies. The installation goes well.
Fred uses the new version of FreeBSD for a few days, and certifies that it is good enough for use in the engineeringdepartment...it’s time to copy all of his work from the old version. So Fred mounts SCSI unit four (the latest copy ofthe older FreeBSD version). Fred is dismayed to find that none of his precious work is present on SCSI unit four.
Where did the data go?
When Bill made an image copy of the original SCSI unit zero onto SCSI unit four, unit four became the "newclone," When Bill re-ordered the SCSI BIOS so that he could boot from SCSI unit four, he was only foolinghimself. FreeBSD was still running on SCSI unit zero. Making this kind of BIOS change will cause some or all ofthe Boot and Loader code to be fetched from the selected BIOS drive, but when the FreeBSD kernel driverstake-over, the BIOS drive numbering will be ignored, and FreeBSD will transition back to normal drive numbering.In the illustration at hand, the system continued to operate on the original SCSI unit zero, and all of Fred’s data wasthere, not on SCSI unit four. The fact that the system appeared to be running on SCSI unit four was simply anartifact of human expectations.
We are delighted to mention that no data bytes were killed or harmed in any way by our discovery of thisphenomenon. The older SCSI unit zero was retrieved from the bone pile, and all of Fred’s work was returned tohim, (and now Bill knows that he can count as high as zero).
Although SCSI drives were used in this illustration, the concepts apply equally to IDE drives.
11.3 Disk NamingPhysical drives come in two main flavors, IDE, or SCSI; but there are also drives backed by RAID controllers, flash
204

Chapter 11 Disks
memory, and so forth. Since these behave quite differently, they have their own drivers and devices.
Table 11-1. Physical Disk Naming Conventions
Drive type Drive device name
IDE hard drives ad in 4.0-RELEASE, wd before 4.0-RELEASE.
IDE CDROM drives acd from 4.1-RELEASE, wcd before 4.0-RELEASE.
SCSI hard drives da from 3.0-RELEASE, sd before 3.0-RELEASE.
SCSI CDROM drives cd
Assorted non-standard CDROM drives mcd for Mitsumi CD-ROM, scd for Sony CD-ROM,matcd for Matsushita/Panasonic CD-ROM
Floppy drives fd
SCSI tape drives sa from 3.0-RELEASE, st before 3.0-RELEASE.
IDE tape drives ast from 4.0-RELEASE, wst before 4.0-RELEASE.
Flash drives fla for DiskOnChip Flash device from 3.3-RELEASE.
RAID drives myxd for Mylex, and amrd for AMI MegaRAID, idad forCompaq Smart RAID. from 4.0-RELEASE. id between3.2-RELEASE and 4.0-RELEASE.
11.3.1 Slices and PartitionsPhysical disks usually contain slices, unless they are “dangerously dedicated”. Slice numbers follow the devicename, prefixed with an s: “da0s1”.
Slices, “dangerously dedicated” physical drives, and other drives contain partitions, which represented as lettersfrom a to h. b is reserved for swap partitions, and c is an unused partition the size of the entire slice or drive. This isexplained in Section 11.5.
11.4 Mounting and Unmounting FilesystemsThe filesystem is best visualized as a tree, rooted, as it were, at /. /dev, /usr, and the other directories in the rootdirectory are branches, which may have their own branches, such as /usr/local, and so on.
There are various reasons to house some of these directories on separate filesystems. /var contains log/, spool/,and various types of temporary files, and as such, may get filled up. Filling up the root filesystem isn’t a good idea, sosplitting /var from / is often a good idea.
205

Chapter 11 Disks
Another common reason to contain certain directory trees on other filesystems is if they are to be housed on separatephysical disks, or are separate virtual disks, such as Network File System mounts, or CDROM drives.
11.4.1 The fstab FileDuring the boot process, filesystems listed in /etc/fstab are automatically mounted (unless they are listed withnoauto).
The /etc/fstab file contains a list of lines of the following format:
device /mount-point fstype options dumpfreq passno
device is a device name (which should exist), as explained in the Disk naming conventions above.
mount-point is a directory (which should exist), on which to mount the filesystem.
fstype is the filesystem type to pass to mount(8). The default FreeBSD filesystem is ufs.
options is either rw for read-write filesystems, or ro for read-only filesystems, followed by any other options thatmay be needed. A common option is noauto for filesystems not normally mounted during the boot sequence. Otheroptions in the mount(8) manual page.
dumpfreq is the number of days the filesystem should be dumped, and passno is the pass number during which thefilesystem is checked during the boot sequence.
11.4.2 The mount CommandThe mount(8) command is what is ultimately used to mount filesystems.
In its most basic form, you use:
# mount device mountpoint
There are plenty of options, as mentioned in the mount(8) manual page, but the most common are:
mount options
-a
Mount all filesystems in /etc/fstab, as modified by -t, if given.
-d
Do everything but actually mount the filesystem.
206

Chapter 11 Disks
-f
Force the mounting the filesystem.
-r
Mount the filesystem read-only.
-t fstype
Mount the given filesystem as the given filesystem type, or mount only filesystems of the given type, if given the-a option.
“ufs” is the default filesystem type.
-u
Update mount options on the filesystem.
-v
Be verbose.
-w
Mount the filesystem read-write.
The -o takes a comma-separated list of the options, including the following:
nodev
Do not interpret special devices on the filesystem. Useful security option.
noexec
Do not allow execution of binaries on this filesystem. Useful security option.
nosuid
Do not interpret setuid or setgid flags on the filesystem. Useful security option.
11.4.3 The umount CommandThe umount command takes, as a parameter, one of a mountpoint, a device name, or the -a or -A option.
All forms take -f to force unmounting, and -v for verbosity.
207

Chapter 11 Disks
-a and -A are used to unmount all mounted filesystems, possibly modified by the filesystem types listed after -t. -A,however, doesn’t attempt to unmount the root filesystem.
11.5 Adding DisksOriginally contributed by David O’Brien <[email protected]> 26 April 1998
Lets say we want to add a new SCSI disk to a machine that currently only has a single drive. First turn off thecomputer and install the drive in the computer following the instructions of the computer, controller, and drivemanufacturer. Due the wide variations of procedures to do this, the details are beyond the scope of this document.
Login as user root. After you’ve installed the drive, inspect /var/run/dmesg.boot to ensure the new disk wasfound. Continuing with our example, the newly added drive will be da1 and we want to mount it on /1 (if you areadding an IDE drive, it will be wd1 in pre-4.0 systems, or ad1 in most 4.X systems).
Because FreeBSD runs on IBM-PC compatible computers, it must take into account the PC BIOS partitions. Theseare different from the traditional BSD partitions. A PC disk has up to four BIOS partition entries. If the disk is goingto be truly dedicated to FreeBSD, you can use the dedicated mode. Otherwise, FreeBSD will have to live with in oneof the PC BIOS partitions. FreeBSD calls the PC BIOS partitions slices so as not to confuse them with traditionalBSD partitions. You may also use slices on a disk that is dedicated to FreeBSD, but used in a computer that also hasanother operating system installed. This is to not confuse the fdisk utility of the other operating system.
In the slice case the drive will be added as /dev/da1s1e. This is read as: SCSI disk, unit number 1 (second SCSIdisk), slice 1 (PC BIOS partition 1), and e BSD partition. In the dedicated case, the drive will be added simply as/dev/da1e.
11.5.1 Using sysinstall(8)You may use /stand/sysinstall to partition and label a new disk using its easy to use menus. Either login asuser root or use the su command. Run /stand/sysinstall and enter the Configure menu. With in theFreeBSD Configuration Menu, scroll down and select the Partition item. Next you should be presented witha list of hard drives installed in your system. If you do not see da1 listed, you need to recheck your physicalinstallation and dmesg output in the file /var/run/dmesg.boot.
Select da1 to enter the FDISK Partition Editor. Choose A to use the entire disk for FreeBSD. When asked ifyou want to “remain cooperative with any future possible operating systems”, answer YES. Write the changes to thedisk using W. Now exit the FDISK editor using q. Next you will be asked about the Master Boot Record. Since youare adding a disk to an already running system, choose None.
Next enter the Disk Label Editor. This is where you will create the traditional BSD partitions. A disk can haveup to eight partitions, labeled a-h. A few of the partition labels have special uses. The a partition is used for the root
208

Chapter 11 Disks
partition (/). Thus only your system disk (e.g, the disk you boot from) should have an a partition. The b partition isused for swap partitions, and you may have many disks with swap partitions. The c partition addresses the entire diskin dedicated mode, or the entire FreeBSD slice in slice mode. The other partitions are for general use.
Sysinstall’s Label editor favors the e partition for non-root, non-swap partitions. With in the Label editor, create asingle file system using C. When prompted if this will be a FS (file system) or swap, choose FS and give a mountpoint (e.g, /mnt). When adding a disk in post-install mode, Sysinstall will not create entries in /etc/fstab for you,so the mount point you specify isn’t important.
You are now ready to write the new label to the disk and create a file system on it. Do this by hitting W. Ignore anyerrors from Sysinstall that it could not mount the new partition. Exit the Label Editor and Sysinstall completely.
The last step is to edit /etc/fstab to add an entry for your new disk.
11.5.2 Using Command Line Utilities
11.5.2.1 Using Slices
This setup will allow your disk to work correctly with other operating systems that might be installed on yourcomputer and will not confuse other operating systems’ fdisk utilities. It is recommended to use this method fornew disk installs. Only use dedicated mode if you have a good reason to do so!
# dd if=/dev/zero of=/dev/rda1 bs=1k count=1# fdisk -BI da1 #Initialize your new disk# disklabel -B -w -r da1s1 auto #Label it.# disklabel -e da1s1 # Now edit the disklabel you just created and add any partitions.# mkdir -p /1# newfs /dev/da1s1e # Repeat this for every partition you created.# mount -t ufs /dev/da1s1e /1 # Mount the partition(s)# vi /etc/fstab # When satisfied, add the appropriate entry/entries to your /etc/fstab.
If you have an IDE disk, substitute ad for da. On pre-4.X systems use wd.
11.5.2.2 Dedicated
If you will not be sharing the new drive with another operating system, you may use the dedicated mode.Remember this mode can confuse Microsoft operating systems; however, no damage will be done by them. IBM’sOS/2 however, will “appropriate” any partition it finds which it doesn’t understand.
# dd if=/dev/zero of=/dev/rda1 bs=1k count=1# disklabel -Brw da1 auto# disklabel -e da1 # create the ‘e’ partition
209

Chapter 11 Disks
# newfs -d0 /dev/rda1e# mkdir -p /1# vi /etc/fstab # add an entry for /dev/da1e# mount /1
An alternate method is:
# dd if=/dev/zero of=/dev/rda1 count=2# disklabel /dev/rda1 | disklabel -BrR da1 /dev/stdin# newfs /dev/rda1e# mkdir -p /1# vi /etc/fstab # add an entry for /dev/da1e# mount /1
11.6 Virtual Disks: Network, Memory, and File-BasedFilesystemsAside from the disks you physically insert into your computer: floppies, CDs, hard drives, and so forth; other formsof disks are understood by FreeBSD - the virtual disks.
These include network filesystems such as the Network Filesystem and Coda, memory-based filesystems such as mdand file-backed filesystems created by vnconfig.
11.6.1 vnconfig: file-backed filesystemvnconfig(8) configures and enables vnode pseudo disk devices. A vnode is a representation of a file, and is the focusof file activity. This means that vnconfig(8) uses files to create and operate a filesystem. One possible use is themounting of floppy or CD images kept in files.
To mount an existing filesystem image:
Example 11-1. Using vnconfig to mount an existing filesystem image
# vnconfig vn0 diskimage# mount /dev/vn0c /mnt
To create a new filesystem image with vnconfig:
210

Chapter 11 Disks
Example 11-2. Creating a New File-Backed Disk with vnconfig
# dd if=/dev/zero of=newimage bs=1k count=5k5120+0 records in5120+0 records out# vnconfig -s labels -c vn0 newimage# disklabel -r -w vn0 auto# newfs vn0cWarning: 2048 sector(s) in last cylinder unallocated/dev/rvn0c: 10240 sectors in 3 cylinders of 1 tracks, 4096 sectors
5.0MB in 1 cyl groups (16 c/g, 32.00MB/g, 1280 i/g)super-block backups (for fsck -b #) at:32
# mount /dev/vn0c /mnt# df /mntFilesystem 1K-blocks Used Avail Capacity Mounted on/dev/vn0c 4927 1 4532 0% /mnt
11.6.2 md: Memory Filesystemmd is a simple, efficient means to do memory filesystems.
Simply take a filesystem you’ve prepared with, for example, vnconfig(8), and:
Example 11-3. md memory disk
# dd if=newimage of=/dev/md05120+0 records in5120+0 records out# mount /dev/md0c /mnt# df /mntFilesystem 1K-blocks Used Avail Capacity Mounted on/dev/md0c 4927 1 4532 0% /mnt
11.7 Disk QuotasQuotas are an optional feature of the operating system that allow you to limit the amount of disk space and/or thenumber of files a user, or members of a group, may allocate on a per-file system basis. This is used most often on
211

Chapter 11 Disks
timesharing systems where it is desirable to limit the amount of resources any one user or group of users mayallocate. This will prevent one user from consuming all of the available disk space.
11.7.1 Configuring Your System to Enable Disk QuotasBefore attempting to use disk quotas it is necessary to make sure that quotas are configured in your kernel. This isdone by adding the following line to your kernel configuration file:
options QUOTA
The stock GENERIC kernel does not have this enabled by default, so you will have to configure, build and install acustom kernel in order to use disk quotas. Please refer to the Configuring the FreeBSD Kernel section for moreinformation on kernel configuration.
Next you will need to enable disk quotas in /etc/rc.conf. This is done by adding the line:
enable_quotas=“YES”
For finer control over your quota startup, there is an additional configuration variable available. Normally on bootup,the quota integrity of each file system is checked by the quotacheck program. The quotacheck facility insuresthat the data in the quota database properly reflects the data on the file system. This is a very time consuming processthat will significantly affect the time your system takes to boot. If you would like to skip this step, a variable is madeavailable for the purpose:
check_quotas=“NO”
If you are running FreeBSD prior to 3.2-RELEASE, the configuration is simpler, and consists of only one variable.Set the following in your /etc/rc.conf:
check_quotas=“YES”
Finally you will need to edit /etc/fstab to enable disk quotas on a per-file system basis. This is where you caneither enable user or group quotas or both for all of your file systems.
To enable per-user quotas on a file system, add the userquota option to the options field in the /etc/fstab entryfor the file system you want to enable quotas on. For example:
/dev/da1s2g /home ufs rw,userquota 1 2
Similarly, to enable group quotas, use the groupquota option instead of the userquota keyword. To enable bothuser and group quotas, change the entry as follows:
/dev/da1s2g /home ufs rw,userquota,groupquota 1 2
212

Chapter 11 Disks
By default the quota files are stored in the root directory of the file system with the names quota.user andquota.group for user and group quotas respectively. See man fstab for more information. Even though that manpage says that you can specify an alternate location for the quota files, this is not recommended because the variousquota utilities do not seem to handle this properly.
At this point you should reboot your system with your new kernel. /etc/rc will automatically run the appropriatecommands to create the initial quota files for all of the quotas you enabled in /etc/fstab, so there is no need tomanually create any zero length quota files.
In the normal course of operations you should not be required to run the quotacheck, quotaon, or quotaoffcommands manually. However, you may want to read their man pages just to be familiar with their operation.
11.7.2 Setting Quota LimitsOnce you have configured your system to enable quotas, verify that they really are enabled. An easy way to do this isto run:
# quota -v
You should see a one line summary of disk usage and current quota limits for each file system that quotas are enabledon.
You are now ready to start assigning quota limits with the edquota command.
You have several options on how to enforce limits on the amount of disk space a user or group may allocate, and howmany files they may create. You may limit allocations based on disk space (block quotas) or number of files (inodequotas) or a combination of both. Each of these limits are further broken down into two categories; hard and softlimits.
A hard limit may not be exceeded. Once a user reaches his hard limit he may not make any further allocations on thefile system in question. For example, if the user has a hard limit of 500 blocks on a file system and is currently using490 blocks, the user can only allocate an additional 10 blocks. Attempting to allocate an additional 11 blocks willfail.
Soft limits, on the other hand, can be exceeded for a limited amount of time. This period of time is known as thegrace period, which is one week by default. If a user stays over his or her soft limit longer than the grace period, thesoft limit will turn into a hard limit and no further allocations will be allowed. When the user drops back below thesoft limit, the grace period will be reset.
The following is an example of what you might see when you run the edquota command. When the edquotacommand is invoked, you are placed into the editor specified by the EDITOR environment variable, or in the vieditor if the EDITOR variable is not set, to allow you to edit the quota limits.
# edquota -u test
213

Chapter 11 Disks
Quotas for user test:/usr: blocks in use: 65, limits (soft = 50, hard = 75)
inodes in use: 7, limits (soft = 50, hard = 60)/usr/var: blocks in use: 0, limits (soft = 50, hard = 75)
inodes in use: 0, limits (soft = 50, hard = 60)
You will normally see two lines for each file system that has quotas enabled. One line for the block limits, and oneline for inode limits. Simply change the value you want updated to modify the quota limit. For example, to raise thisusers block limit from a soft limit of 50 and a hard limit of 75 to a soft limit of 500 and a hard limit of 600, change:
/usr: blocks in use: 65, limits (soft = 50, hard = 75)
to:
/usr: blocks in use: 65, limits (soft = 500, hard = 600)
The new quota limits will be in place when you exit the editor.
Sometimes it is desirable to set quota limits on a range of uids. This can be done by use of the -p option on theedquota command. First, assign the desired quota limit to a user, and then run edquota -p protouser
startuid-enduid. For example, if user test has the desired quota limits, the following command can be used toduplicate those quota limits for uids 10,000 through 19,999:
# edquota -p test 10000-19999
See man edquota for more detailed information.
11.7.3 Checking Quota Limits and Disk UsageYou can use either the quota or the repquota commands to check quota limits and disk usage. The quotacommand can be used to check individual user and group quotas and disk usage. Only the super-user may examinequotas and usage for other users, or for groups that they are not a member of. The repquota command can be usedto get a summary of all quotas and disk usage for file systems with quotas enabled.
The following is some sample output from the quota -v command for a user that has quota limits on two filesystems.
Disk quotas for user test (uid 1002):Filesystem blocks quota limit grace files quota limit grace
/usr 65* 50 75 5days 7 50 60/usr/var 0 50 75 0 50 60
On the /usr file system in the above example this user is currently 15 blocks over the soft limit of 50 blocks and has5 days of the grace period left. Note the asterisk * which indicates that the user is currently over his quota limit.
214

Chapter 11 Disks
Normally file systems that the user is not using any disk space on will not show up in the output from the quotacommand, even if he has a quota limit assigned for that file system. The -v option will display those file systems,such as the /usr/var file system in the above example.
11.7.4 Quotas over NFSQuotas are enforced by the quota subsystem on the NFS server. The rpc.rquotad(8) daemon makes quota informationavailable to the quota(1) command on NFS clients, allowing users on those machines to see their quota statistics.
Enable rpc.rquotad in /etc/inetd.conf like so:
rquotad/1 dgram rpc/udp wait root /usr/libexec/rpc.rquotad rpc.rquotad
Now restart inetd:
# kill -HUP ‘cat /var/run/inetd.pid‘
11.8 Creating CDsContributed by Mike Meyer <[email protected]>, April 2001.
11.8.1 IntroductionCDs have a number of features that differentiate them from conventional disks. Initially, they weren’t writable by theuser. They are designed so that they can be read continuously without delays to move the head between tracks. Theyare also much easier to transport between systems than similarly sized media were at the time.
CDs do have tracks, but this refers to a section of data to be read continuously and not a physical property of the disk.To produce a CD on FreeBSD, you prepare the data files that are going to make up the tracks on the CD, then writethe tracks to the CD.
The ISO 9660 file system was designed to deal with these differences. It unfortunately codifies file system limits thatwere common then. Fortunately, it provides an extension mechanism that allows properly written CDs to exceedthose limits while still working with systems that do not support those extensions.
The mkisofs program is used to produce a data file containing an ISO 9660 file system. It has options that supportvarious extensions, and is described below. You can install it with the /usr/ports/sysutils/mkisofs port.
215

Chapter 11 Disks
Which tool to use to burn the CD depends on whether your CD burner is ATAPI or something else. ATAPI CDburners use the burncd program that is part of the base system. SCSI and USB CD burners should use thecdrecord from the /usr/ports/sysutils/cdrecord port.
11.8.2 mkisofsmkisofs produces an ISO 9660 file system that is an image of a directory tree in the Unix file system name space.The simplest usage is:
# mkisofs -o imagefile.iso /path/to/tree
This command will create an imagefile containing an ISO 9660 file system that is a copy of the tree at/path/to/tree. In the process, it will map the file names to names that fit the limitations of the standard ISO9660 file system, and will exclude files that have names uncharacteristic of ISO file systems. Read mkisofs(8) fordetails of this process, and options that can be used to control it.
A number of options are available to overcome those restrictions. In particular, -R enables the Rock Ridge extensionscommon to Unix systems, -J enables Joliet extensions used by Microsoft systems, and -hfs can be used to createHFS file systems used by Macs. Read mkisofs(8) for more information on the last two.
For CDs that are going to be used only on FreeBSD systems, -U can be used to disable all filename restrictions.When used with -R, it produces a file system image that is identical to the FreeBSD tree you started from, though itmay violate the ISO 9660 standard in a number of ways.
The last option of general use is -b. This is used to specify the location of the boot image for use in producing an “ElTorito” bootable CD. This option takes an argument which is the path to a boot image from the top of the tree beingwritten to the CD. So, given that /tmp/myboot holds a bootable FreeBSD system with the boot image in/tmp/myboot/boot/cdboot, you could produce the image of an ISO 9660 file system in /tmp/bootable.iso
like so:
# mkisofs -U -R -b boot/cdboot -o /tmp/bootable.iso /tmp/myboot
Having done that, if you have vn configured in your kernel, you can mount the file system with:
# vnconfig -e vn0c /tmp/bootable.iso
# mount -t cd9660 /dev/vn0c /mnt
At which point you can verify that /mnt and /tmp/myboot are identical.
There are many other options you can use with mkisofs to fine-tune its behavior. See mkisofs(8) for details.
216

Chapter 11 Disks
11.8.3 burncdIf you have an ATAPI CD burner, you can use the burncd command to burn an ISO image onto a CD. burncd ispart of the base system, installed as /usr/sbin/burncd. Usage is very simple, as it has few options:
# burncd -f cddevice data imagefile.iso fixate
Will burn a copy of imagefile.iso on cddevice. The default device is /dev/acd0. See burncd(8) for optionsto set the write speed, eject the CD after burning, and write audio data.
11.8.4 cdrecordIf you do not have an ATAPI CD burner, you will have to use cdrecord to burn your CDs. cdrecord is not part ofthe base system; you must install it from either the port at /usr/ports/sysutils/cdrecord or the appropriatepackage. Changes to the base system can cause binary versions of this program to fail, possibly resulting in a“coaster”. You should therefore either upgrade the port when you upgrade your system, or if you are tracking -stable,upgrade the port when a new version becomes available.
While cdrecord has many options, basic usage is even simpler than burncd. Burning an ISO 9660 image is donewith:
# cdrecord dev=device imagefile.iso
The tricky part of using cdrecord is finding the dev to use. To find the proper setting, use the -scanbus flag ofcdrecord, which might produce results like this:
# cdrecord -scanbus
Cdrecord 1.9 (i386-unknown-freebsd4.2) Copyright (C) 1995-2000 Jörg SchillingUsing libscg version ’schily-0.1’scsibus0:
0,0,0 0) ’SEAGATE ’ ’ST39236LW ’ ’0004’ Disk0,1,0 1) ’SEAGATE ’ ’ST39173W ’ ’5958’ Disk0,2,0 2) *0,3,0 3) ’iomega ’ ’jaz 1GB ’ ’J.86’ Removable Disk0,4,0 4) ’NEC ’ ’CD-ROM DRIVE:466’ ’1.26’ Removable CD-ROM0,5,0 5) *0,6,0 6) *0,7,0 7) *
scsibus1:1,0,0 100) *1,1,0 101) *1,2,0 102) *1,3,0 103) *1,4,0 104) *
217

Chapter 11 Disks
1,5,0 105) ’YAMAHA ’ ’CRW4260 ’ ’1.0q’ Removable CD-ROM1,6,0 106) ’ARTEC ’ ’AM12S ’ ’1.06’ Scanner1,7,0 107) *
This lists the appropriate dev value for the devices on the list. Locate your CD burner, and use the three numbersseparated by commas as the value for dev. In this case, the CRW device is 1,5,0, so the appropriate input would bedev=1,5,0. There are easier ways to specify this value; see cdrecord(1) for details. That is also the place to lookfor information on writing audio tracks, controlling the speed, and other things.
218

Chapter 12 Backups
12.1 SynopsisThe following chapter will cover methods of backing up data, and the programs used to create those backups. If youwould like to contribute something to this section, send it to the FreeBSD documentation project mailing list<[email protected]>.
12.2 Tape MediaThe major tape media are the 4mm, 8mm, QIC, mini-cartridge and DLT.
12.2.1 4mm (DDS: Digital Data Storage)4mm tapes are replacing QIC as the workstation backup media of choice. This trend accelerated greatly whenConner purchased Archive, a leading manufacturer of QIC drives, and then stopped production of QIC drives. 4mmdrives are small and quiet but do not have the reputation for reliability that is enjoyed by 8mm drives. The cartridgesare less expensive and smaller (3 x 2 x 0.5 inches, 76 x 51 x 12 mm) than 8mm cartridges. 4mm, like 8mm, hascomparatively short head life for the same reason, both use helical scan.
Data throughput on these drives starts ~150kB/s, peaking at ~500kB/s. Data capacity starts at 1.3 GB and ends at 2.0GB. Hardware compression, available with most of these drives, approximately doubles the capacity. Multi-drive tapelibrary units can have 6 drives in a single cabinet with automatic tape changing. Library capacities reach 240 GB.
The DDS-3 standard now supports tape capacities up to 12GB (or 24GB compressed).
4mm drives, like 8mm drives, use helical-scan. All the benefits and drawbacks of helical-scan apply to both 4mm and8mm drives.
Tapes should be retired from use after 2,000 passes or 100 full backups.
12.2.2 8mm (Exabyte)8mm tapes are the most common SCSI tape drives; they are the best choice of exchanging tapes. Nearly every sitehas an exabyte 2 GB 8mm tape drive. 8mm drives are reliable, convenient and quiet. Cartridges are inexpensive andsmall (4.8 x 3.3 x 0.6 inches; 122 x 84 x 15 mm). One downside of 8mm tape is relatively short head and tape lifedue to the high rate of relative motion of the tape across the heads.
219

Chapter 12 Backups
Data throughput ranges from ~250kB/s to ~500kB/s. Data sizes start at 300 MB and go up to 7 GB. Hardwarecompression, available with most of these drives, approximately doubles the capacity. These drives are available assingle units or multi-drive tape libraries with 6 drives and 120 tapes in a single cabinet. Tapes are changedautomatically by the unit. Library capacities reach 840+ GB.
The Exabyte “Mammoth” model supports 12GB on one tape (24GB with compression) and costs approximatelytwice as much as conventional tape drives.
Data is recorded onto the tape using helical-scan, the heads are positioned at an angle to the media (approximately 6degrees). The tape wraps around 270 degrees of the spool that holds the heads. The spool spins while the tape slidesover the spool. The result is a high density of data and closely packed tracks that angle across the tape from one edgeto the other.
12.2.3 QICQIC-150 tapes and drives are, perhaps, the most common tape drive and media around. QIC tape drives are the leastexpensive "serious" backup drives. The downside is the cost of media. QIC tapes are expensive compared to 8mm or4mm tapes, up to 5 times the price per GB data storage. But, if your needs can be satisfied with a half-dozen tapes,QIC may be the correct choice. QIC is the most common tape drive. Every site has a QIC drive of some density oranother. Therein lies the rub, QIC has a large number of densities on physically similar (sometimes identical) tapes.QIC drives are not quiet. These drives audibly seek before they begin to record data and are clearly audible wheneverreading, writing or seeking. QIC tapes measure (6 x 4 x 0.7 inches; 15.2 x 10.2 x 1.7 mm). Mini-cartridges, whichalso use 1/4" wide tape are discussed separately. Tape libraries and changers are not available.
Data throughput ranges from ~150kB/s to ~500kB/s. Data capacity ranges from 40 MB to 15 GB. Hardwarecompression is available on many of the newer QIC drives. QIC drives are less frequently installed; they are beingsupplanted by DAT drives.
Data is recorded onto the tape in tracks. The tracks run along the long axis of the tape media from one end to theother. The number of tracks, and therefore the width of a track, varies with the tape’s capacity. Most if not all newerdrives provide backward-compatibility at least for reading (but often also for writing). QIC has a good reputationregarding the safety of the data (the mechanics are simpler and more robust than for helical scan drives).
Tapes should be retired from use after 5,000 backups.
12.2.4 * Mini-Cartridge
220

Chapter 12 Backups
12.2.5 DLTDLT has the fastest data transfer rate of all the drive types listed here. The 1/2" (12.5mm) tape is contained in asingle spool cartridge (4 x 4 x 1 inches; 100 x 100 x 25 mm). The cartridge has a swinging gate along one entire sideof the cartridge. The drive mechanism opens this gate to extract the tape leader. The tape leader has an oval hole in itwhich the drive uses to "hook" the tape. The take-up spool is located inside the tape drive. All the other tapecartridges listed here (9 track tapes are the only exception) have both the supply and take-up spools located inside thetape cartridge itself.
Data throughput is approximately 1.5MB/s, three times the throughput of 4mm, 8mm, or QIC tape drives. Datacapacities range from 10GB to 20GB for a single drive. Drives are available in both multi-tape changers andmulti-tape, multi-drive tape libraries containing from 5 to 900 tapes over 1 to 20 drives, providing from 50GB to 9TBof storage.
With compression, DLT Type IV format supports up to 70GB capacity.
Data is recorded onto the tape in tracks parallel to the direction of travel (just like QIC tapes). Two tracks are writtenat once. Read/write head lifetimes are relatively long; once the tape stops moving, there is no relative motionbetween the heads and the tape.
12.2.6 AITAIT is a new format from Sony, and can hold up to 50GB (with compression) per tape. The tapes contain memorychips which retain an index of the tape’s contents. This index can be rapidly read by the tape drive to determine theposition of files on the tape, instead of the several minutes that would be required for other tapes. Software such asSAMS:Alexandria can operate forty or more AIT tape libraries, communicating directly with the tape’s memory chipto display the contents on screen, determine what files where backed up to which tape, locate the correct tape, load it,and restore the data from the tape.
Libraries like this cost in the region of $20,000, pricing them a little out of the hobbyist market.
12.2.7 Using a New Tape for the First TimeThe first time that you try to read or write a new, completely blank tape, the operation will fail. The console messagesshould be similar to:
sa0(ncr1:4:0): NOT READY asc:4,1sa0(ncr1:4:0): Logical unit is in process of becoming ready
The tape does not contain an Identifier Block (block number 0). All QIC tape drives since the adoption of QIC-525standard write an Identifier Block to the tape. There are two solutions:
mt fsf 1 causes the tape drive to write an Identifier Block to the tape.
221

Chapter 12 Backups
Use the front panel button to eject the tape.
Re-insert the tape and dump(8) data to the tape.
dump(8) will report DUMP: End of tape detected and the console will show: HARDWARE FAILURE info:280
asc:80,96
rewind the tape using: mt rewind
Subsequent tape operations are successful.
12.3 Backup ProgramsThe three major programs are dump(8), tar(1), and cpio(1).
12.3.1 Dump and Restoredump(8) and restore(8) are the traditional Unix backup programs. They operate on the drive as a collection of diskblocks, below the abstractions of files, links and directories that are created by the filesystems. dump(8) backs updevices, entire filesystems, not parts of a filesystem and not directory trees that span more than one filesystem, usingeither soft links ln(1) or mounting one filesystem onto another. dump(8) does not write files and directories to tape,but rather writes the data blocks that are the building blocks of files and directories. dump(8) has quirks that remainfrom its early days in Version 6 of ATT Unix (circa 1975). The default parameters are suitable for 9-track tapes (6250bpi), not the high-density media available today (up to 62,182 ftpi). These defaults must be overridden on thecommand line to utilize the capacity of current tape drives.
rdump(8) and rrestore(8) backup data across the network to a tape drive attached to another computer. Both programsrely upon rcmd(3) and ruserok(3) to access the remote tape drive. Therefore, the user performing the backup musthave rhosts access to the remote computer. The arguments to rdump(8) and rrestore(8) must suitable to use on theremote computer. (e.g. When rdumping from a FreeBSD computer to an Exabyte tape drive connected to a Suncalled komodo, use: /sbin/rdump 0dsbfu 54000 13000 126 komodo:/dev/nrsa8 /dev/rda0a 2>&1)Beware: there are security implications to allowing rhosts commands. Evaluate your situation carefully.
12.3.2 Tartar(1) also dates back to Version 6 of ATT Unix (circa 1975). tar(1) operates in cooperation with the filesystem; tar(1)writes files and directories to tape. tar(1) does not support the full range of options that are available from cpio(1),but tar(1) does not require the unusual command pipeline that cpio(1) uses.
222

Chapter 12 Backups
Most versions of tar(1) do not support backups across the network. The GNU version of tar(1), which FreeBSDutilizes, supports remote devices using the same syntax as rdump(8). To tar(1) to an Exabyte tape drive connected toa Sun called komodo, use: /usr/bin/tar cf komodo:/dev/nrsa8 . 2>&1. For versions without remotedevice support, you can use a pipeline and rsh(1) to send the data to a remote tape drive.
# tar cf - . | rsh hostname dd of=tape-device obs=20b
If you’re worried about the security of backing over a network you should use the ssh(1) command instead of rsh(1).
12.3.3 Cpiocpio(1) is the original Unix file interchange tape program for magnetic media. cpio(1) has options (among manyothers) to perform byte-swapping, write a number of different archives format, and pipe the data to other programs.This last feature makes cpio(1) and excellent choice for installation media. cpio(1) does not know how to walk thedirectory tree and a list of files must be provided through stdin.
cpio(1) does not support backups across the network. You can use a pipeline and rsh(1) to send the data to a remotetape drive.
# for f in directory_list; dofind $f >> backup.listdone# cpio -v -o --format=newc < backup.list | ssh user@host "cat > backup_device
Where directory_list is the list of directories you want to back up, user@host is the user/hostnamecombination that will be performing the backups, and backup_device is where the backups should be written to(e.g., /dev/nrsa0).
12.3.4 Paxpax(1) is IEEE/POSIX’s answer to tar(1) and cpio(1). Over the years the various versions of tar(1) and cpio(1) havegotten slightly incompatible. So rather than fight it out to fully standardize them, POSIX created a new archiveutility. pax(1) attempts to read and write many of the various cpio(1) and tar(1) formats, plus new formats of its own.Its command set more resembles cpio(1) than tar(1).
12.3.5 AmandaAmanda (/ports/misc.html#amanda-2.4.0) (Advanced Maryland Network Disk Archiver) is a client/server backupsystem, rather than a single program. An Amanda server will backup to a single tape drive any number of computers
223

Chapter 12 Backups
that have Amanda clients and network communications with the Amanda server. A common problem at locationswith a number of large disks is the length of time required to backup to data directly to tape exceeds the amount oftime available for the task. Amanda solves this problem. Amanda can use a "holding disk" to backup severalfilesystems at the same time. Amanda creates "archive sets": a group of tapes used over a period of time to create fullbackups of all the filesystems listed in Amanda’s configuration file. The "archive set" also contains nightlyincremental (or differential) backups of all the filesystems. Restoring a damaged filesystem requires the most recentfull backup and the incremental backups.
The configuration file provides fine control backups and the network traffic that Amanda generates. Amanda will useany of the above backup programs to write the data to tape. Amanda is available as either a port or a package, it is notinstalled by default.
12.3.6 Do Nothing“Do nothing” is not a computer program, but it is the most widely used backup strategy. There are no initial costs.There is no backup schedule to follow. Just say no. If something happens to your data, grin and bear it!
If your time and your data is worth little to nothing, then “Do nothing” is the most suitable backup program for yourcomputer. But beware, Unix is a useful tool, you may find that within six months you have a collection of files thatare valuable to you.
“Do nothing” is the correct backup method for /usr/obj and other directory trees that can be exactly recreated byyour computer. An example is the files that comprise these handbook pages-they have been generated from SGMLinput files. Creating backups of these HTML files is not necessary. The SGML source files are backed up regularly.
12.3.7 Which Backup Program is Best?dump(8) Period. Elizabeth D. Zwicky torture tested all the backup programs discussed here. The clear choice forpreserving all your data and all the peculiarities of Unix filesystems is dump(8). Elizabeth created filesystemscontaining a large variety of unusual conditions (and some not so unusual ones) and tested each program by doing abackup and restore of that filesystems. The peculiarities included: files with holes, files with holes and a block ofnulls, files with funny characters in their names, unreadable and unwritable files, devices, files that change sizeduring the backup, files that are created/deleted during the backup and more. She presented the results at LISA V inOct. 1991. See torture-testing Backup and Archive Programs (http://reality.sgi.com/zwicky_neu/testdump.doc.html).
224

Chapter 12 Backups
12.3.8 Emergency Restore Procedure
12.3.8.1 Before the Disaster
There are only four steps that you need to perform in preparation for any disaster that may occur.
First, print the disklabel from each of your disks (e.g. disklabel da0 | lpr), your filesystem table(/etc/fstab) and all boot messages, two copies of each.
Second, determine that the boot and fix-it floppies (boot.flp and fixit.flp) have all your devices. The easiestway to check is to reboot your machine with the boot floppy in the floppy drive and check the boot messages. If allyour devices are listed and functional, skip on to step three.
Otherwise, you have to create two custom bootable floppies which has a kernel that can mount your all of your disksand access your tape drive. These floppies must contain: fdisk(8), disklabel(8), newfs(8), mount(8), and whicheverbackup program you use. These programs must be statically linked. If you use dump(8), the floppy must containrestore(8).
Third, create backup tapes regularly. Any changes that you make after your last backup may be irretrievably lost.Write-protect the backup tapes.
Fourth, test the floppies (either boot.flp and fixit.flp or the two custom bootable floppies you made in steptwo.) and backup tapes. Make notes of the procedure. Store these notes with the bootable floppy, the printouts andthe backup tapes. You will be so distraught when restoring that the notes may prevent you from destroying yourbackup tapes (How? In place of tar xvf /dev/rsa0, you might accidently type tar cvf /dev/rsa0 andover-write your backup tape).
For an added measure of security, make bootable floppies and two backup tapes each time. Store one of each at aremote location. A remote location is NOT the basement of the same office building. A number of firms in the WorldTrade Center learned this lesson the hard way. A remote location should be physically separated from yourcomputers and disk drives by a significant distance.
An example script for creating a bootable floppy:
#!/bin/sh## create a restore floppy## format the floppy#PATH=/bin:/sbin:/usr/sbin:/usr/bin
fdformat -q fd0if [ $? -ne 0 ]then
echo "Bad floppy, please use a new one"
225

Chapter 12 Backups
exit 1fi
# place boot blocks on the floppy#disklabel -w -B /dev/fd0c fd1440
## newfs the one and only partition#newfs -t 2 -u 18 -l 1 -c 40 -i 5120 -m 5 -o space /dev/fd0a
## mount the new floppy#mount /dev/fd0a /mnt
## create required directories#mkdir /mnt/devmkdir /mnt/binmkdir /mnt/sbinmkdir /mnt/etcmkdir /mnt/rootmkdir /mnt/mnt # for the root partitionmkdir /mnt/tmpmkdir /mnt/var
## populate the directories#if [ ! -x /sys/compile/MINI/kernel ]then
cat << EOMThe MINI kernel does not exist, please create one.Here is an example config file:## MINI -- A kernel to get FreeBSD on onto a disk.#machine "i386"cpu "I486_CPU"ident MINImaxusers 5
226

Chapter 12 Backups
options INET # needed for _tcp _icmpstat _ipstat# _udpstat _tcpstat _udb
options FFS #Berkeley Fast File Systemoptions FAT_CURSOR #block cursor in syscons or pcconsoptions SCSI_DELAY=15 #Be pessimistic about Joe SCSI deviceoptions NCONS=2 #1 virtual consolesoptions USERCONFIG #Allow user configuration with -c XXX
config kernel root on da0 swap on da0 and da1 dumps on da0
controller isa0controller pci0
controller fdc0 at isa? port "IO_FD1" bio irq 6 drq 2 vector fdintrdisk fd0 at fdc0 drive 0
controller ncr0
controller scbus0
device sc0 at isa? port "IO_KBD" tty irq 1 vector scintrdevice npx0 at isa? port "IO_NPX" irq 13 vector npxintr
device da0device da1device da2
device sa0
pseudo-device loop # required by INETpseudo-device gzip # Exec gzipped a.out’sEOM
exit 1fi
cp -f /sys/compile/MINI/kernel /mnt
gzip -c -best /sbin/init > /mnt/sbin/initgzip -c -best /sbin/fsck > /mnt/sbin/fsckgzip -c -best /sbin/mount > /mnt/sbin/mountgzip -c -best /sbin/halt > /mnt/sbin/haltgzip -c -best /sbin/restore > /mnt/sbin/restore
gzip -c -best /bin/sh > /mnt/bin/shgzip -c -best /bin/sync > /mnt/bin/sync
227

Chapter 12 Backups
cp /root/.profile /mnt/root
cp -f /dev/MAKEDEV /mnt/devchmod 755 /mnt/dev/MAKEDEV
chmod 500 /mnt/sbin/initchmod 555 /mnt/sbin/fsck /mnt/sbin/mount /mnt/sbin/haltchmod 555 /mnt/bin/sh /mnt/bin/syncchmod 6555 /mnt/sbin/restore
## create the devices nodes#cd /mnt/dev./MAKEDEV std./MAKEDEV da0./MAKEDEV da1./MAKEDEV da2./MAKEDEV sa0./MAKEDEV pty0cd /
## create minimum filesystem table#cat > /mnt/etc/fstab <<EOM/dev/fd0a / ufs rw 1 1EOM
## create minimum passwd file#cat > /mnt/etc/passwd <<EOMroot:*:0:0:Charlie &:/root:/bin/shEOM
cat > /mnt/etc/master.passwd <<EOMroot::0:0::0:0:Charlie &:/root:/bin/shEOM
chmod 600 /mnt/etc/master.passwdchmod 644 /mnt/etc/passwd/usr/sbin/pwd_mkdb -d/mnt/etc /mnt/etc/master.passwd
228

Chapter 12 Backups
## umount the floppy and inform the user#/sbin/umount /mntecho "The floppy has been unmounted and is now ready."
12.3.8.2 After the Disaster
The key question is: did your hardware survive? You have been doing regular backups so there is no need to worryabout the software.
If the hardware has been damaged. First, replace those parts that have been damaged.
If your hardware is okay, check your floppies. If you are using a custom boot floppy, boot single-user (type -s at theboot: prompt). Skip the following paragraph.
If you are using the boot.flp and fixit.flp floppies, keep reading. Insert the boot.flp floppy in the first floppydrive and boot the computer. The original install menu will be displayed on the screen. Select the Fixit--Repairmode with CDROM or floppy. option. Insert the fixit.flp when prompted. restore and the other programsthat you need are located in /mnt2/stand.
Recover each filesystem separately.
Try to mount(8) (e.g. mount /dev/da0a /mnt) the root partition of your first disk. If the disklabel was damaged,use disklabel(8) to re-partition and label the disk to match the label that your printed and saved. Use newfs(8) tore-create the filesystems. Re-mount the root partition of the floppy read-write (mount -u -o rw /mnt). Use yourbackup program and backup tapes to recover the data for this filesystem (e.g. restore vrf /dev/sa0). Unmountthe filesystem (e.g. umount /mnt) Repeat for each filesystem that was damaged.
Once your system is running, backup your data onto new tapes. Whatever caused the crash or data loss may strikeagain. An another hour spent now, may save you from further distress later.
12.3.8.3 * I did not prepare for the Disaster, What Now?
229

Chapter 12 Backups
12.4 What about Backups to Floppies?
12.4.1 Can I use floppies for backing up my data?Floppy disks are not really a suitable media for making backups as:
• The media is unreliable, especially over long periods of time
• Backing up and restoring is very slow
• They have a very limited capacity (the days of backing up an entire hard disk onto a dozen or so floppies has longsince passed).
However, if you have no other method of backing up your data then floppy disks are better than no backup at all.
If you do have to use floppy disks then ensure that you use good quality ones. Floppies that have been lying aroundthe office for a couple of years are a bad choice. Ideally use new ones from a reputable manufacturer.
12.4.2 So how do I backup my data to floppies?The best way to backup to floppy disk is to use tar(1) with the -M (multi volume) option, which allows backups tospan multiple floppies.
To backup all the files in the current directory and sub-directory use this (as root):
# tar Mcvf /dev/fd0 *
When the first floppy is full tar(1) will prompt you to insert the next volume (because tar(1) is media independent itrefers to volumes. In this context it means floppy disk)
Prepare volume #2 for /dev/fd0 and hit return:
This is repeated (with the volume number incrementing) until all the specified files have been archived.
12.4.3 Can I compress my backups?Unfortunately, tar(1) will not allow the -z option to be used for multi-volume archives. You could, of course, gzip(1)all the files, tar(1) them to the floppies, then gunzip(1) the files again!
230

Chapter 12 Backups
12.4.4 How do I restore my backups?To restore the entire archive use:
# tar Mxvf /dev/fd0
To restore only specific files you can either start with the first floppy and use:
# tar Mxvf /dev/fd0 filename
tar(1) will prompt you to insert subsequent floppies until it finds the required file.
Alternatively, if you know which floppy the file is on then you can simply insert that floppy and use the samecommand as above. Note that if the first file on the floppy is a continuation from the previous one then tar(1) willwarn you that it cannot restore it, even if you have not asked it to!
231

Chapter 13 The X Window SystemThis chapter has been graciously donated by Greg Lehey <[email protected]> from his book, The CompleteFreeBSD (http://www.wccdrom.com/titles/freebsd/bsdcomp_bkx.phtml), and remains copyright of him. Modificationsfor the handbook made by Jim Mock <[email protected]>. The section on fonts in XFree86 was contributed byMurray Stokely <[email protected]> and the section on XDM was contributed by Seth Kingsley<[email protected]>.
13.1 SynopsisThe following chapter will cover installing and configuring X11 on your system. For more information on X11 andto see whether your video card is supported, check the XFree86 (http://www.xfree86.org/) web site.
13.2 OverviewFreeBSD comes with XFree86, a port of X11R6 that supports several versions of Intel-based UNIX. This chapterdescribes how to set up your XFree86 server. It is based on material supplied with the FreeBSD release, specificallythe files README.FreeBSD and README.Config in the directory /usr/X11R6/lib/X11/doc. If you find anydiscrepancy, the material in those files will be more up-to-date than this description. In addition, the file/usr/X11R6/lib/X11/doc/RELNOTES contains OS-independent information about the current release.
X uses a lot of memory. In order to run X, your system should have an absolute minimum of 8 MB of memory, butperformance will be painful with so little memory. A more practical minimum is 16 MB, and you can improveperformance by adding more memory. If you use X intensively, you will continue seeing performance improvementby increasing to as much as 128 MB of RAM.
There is lots of useful information in the rest of this chapter, but maybe you are not interested in information rightnow. You just want to get your X server up and running. However, be warned:
Warning: An incorrect installation can burn out your monitor or your video board.
However, if you know you are in spec, and you have a standard Super VGA board and a good multi-frequencymonitor, then you can probably get things up and running without reading this chapter.
232

Chapter 13 The X Window System
13.3 Installing XFree86The easiest way to install XFree86 is with the sysinstall program, either when you are installing the system, or laterby starting the program /stand/sysinstall. In the rest of this chapter, we will look at what makes up thedistribution, and we will also take a look at manually installing X11.
13.3.1 The XFree86 DistributionXFree86 is distributed as a bewildering number of archives. In the following section, we will take a look at what youshould install. Do not worry too much, though; if you cannot decide what to pick and you have 200MB of disk spacefree, it’s safe to unpack everything.
At a minimum you need to unpack the archives in the following table and at least one server that matches your VGAboard. You will need 10Mb for the minimum required run-time binaries only, and between 1.7 and 3 MB for theserver.
Below is a table of the required components.
Archive Description
Xbin.tgz All the executable X client applications and sharedlibraries.
Xfnts.tgz The misc and 75 dpi fonts.
Xlib.tgz Data files and libraries needed at runtime.
13.3.2 The X ServerIn addition to the archives above, you need at least one server, which will take up about 3 MB of disk. The choicedepends primarily on what kind of display board you have. The default server name is /usr/X11R6/bin/X, and it isa link to a specific server binary /usr/X11R6/bin/XF86_xxxx. You will find the server archives for the standardPC architecture in /cdrom/XF86336/Servers, and the servers for the Japanese PC98 architecture in/cdrom/XF86336/PC98-Servers if you have the CD set. Alternatively, they are available on our FTP site atftp://ftp.FreeBSD.org/pub/FreeBSD/releases/i386/4.3-RELEASE/XF86336/Servers/ orftp://ftp.FreeBSD.org/pub/FreeBSD/releases/i386/4.3-RELEASE/XF86336/PC98-Servers/
Available X servers for the standard PC architecture:
Archive Description
X8514.tgz 8-bit color for IBM 8514 and true compatibles.
XAGX.tgz 8 and 16-bit color for AGX and XGA boards.
233

Chapter 13 The X Window System
Archive Description
XI128.tgz 8 and 16-bit color for I128 boards.
XMa32.tgz 8 and 16-bit color for ATI Mach32 boards.
XMa64.tgz 8, 16, and 32-bit color fot ATI Mach64 boards.
XMa8.tgz 8-bit color for ATI Mach8 boards.
XMono.tgz 1-bit monochrome for VGA, Super-VGA, Hercules, andothers.
XP9K.tgz 8, 16, and 32-bit color for Weitek P9000 boards (DiamondViper).
XS3.tgz 8, 16, and 32-bit color for S3 boards.
XS3V.tgz 8 and 16-bit color for S3 ViRGE boards.
XSVGA.tgz� =8-bit color for Super-VGA cards.
XVG16.tgz 4-bit color for VGA and Super-VGA cards.
XW32.tgz 8-bit color for ET4000/W32, /W32i, /W32p, and ET6000cards.
Available X servers for the Japanese PC98 architecture:
Archive Description
X9GAN.tgz 8-bit color for PC98 GA-98NB/WAP boards.
X9GA9.tgz 8, 16, and 32-bit color for PC98 S3 GA-968 boards.
X9480.tgz 8-bit color for PC98 PEGC
X9NKV.tgz 8-bit color for PC98 NEC-CIRRUS/EPSON NKV/NKV2boards.
X9WBS.tgz 8-bit color for PC98 WAB-S boards.
X9WEP.tgz 8-bit color for PC98 WAB-EP boards.
X9WSN.tgz 8-bit color for PC98 WSN-A2F boards.
X9EGC.tgz 4-bit color for PC98 EGC.
X9TGU.tgz 8 and 16-bit color for PC98 Trident Cyber9320/9680boards.
X9NS3.tgz 8 and 16-bit color for PC98 NEC S3 boards.
X9SPW.tgz 8 and 16-bit color for PC98 S3 PW/PCSKB boards.
X9LPW.tgz 8 and 16-bit color for PC98 S3 PW/LB boards.
Each of these servers includes a manual page which contains details of supported chipsets and server-specificconfiguration options.
234

Chapter 13 The X Window System
There are also a number of archives are provided for X programmers:
Archive Description
Xprog.tgz Config, lib*.a, and *.h files needed for compilingclients.
Xctrb.tgz Contributed sources.
Xlk98.tgz The “link kit” for building servers, Japanese PC98version.
Xlkit.tgz The “link kit” for building servers, normal PCarchitecture.
Xsrc-1.tgz Part 1 of the complete sources.
Xsrc-2.tgz Part 2 of the complete sources.
Xsrc-3.tgz Part 3 of the complete sources.
Note: You will need Xprog.tgz if you intend to install ports of X software.
XFree86 also includes a number of optional parts, such as documentation, and setup programs.
Archive Description
Xdoc.tgz READMEs
Xjdoc.tgz READMEs in Japanese.
Xps.tgz READMEs in PostScript.
Xhtml.tgz READMEs in HTML.
Xman.tgz Manual pages.
Xcfg.tgz Customizable xinit and xdm runtime configuration files.
Xset.tgz The X86Setup utility; a graphical version of thexf86config utility.
Xjset.tgz The XF86Setup utility, Japanese version, for the normalPC architecture.
XF86Setup is a graphical mode setup program for XFree86, and you may prefer it to the standard setup programxf86config. You do not need any special archives for xf86config; it is included in Xbin.tgz.
The first time you install, you will need Xcfg.tgz to create your initial configuration files. Do not use it whenupgrading; it overwrites your configuration files.
There are also additional fonts that are available with XFree86:
235

Chapter 13 The X Window System
Archive Description
Xf100.tgz 100 dpi fonts.
Xfscl.tgz Speedo and Type1 fonts.
Xfnon.tgz Japanese, Chinese, and other non-english fonts.
Xfcyr.tgz Cyrillic fonts.
Unlike the X servers described above, the archives for the following servers are all in the main directory.
Archive Description
Xfsrv.tgz The font server.
Xnest.tgz A nested server running as a client window on anotherdisplay.
Xprt.tgz The print server.
Xvfb.tgz The Virtual Framebuffer X server, which renders intomemory or an mmapped file.
13.3.3 Installing XFree86 ManuallyIf you do not use sysinstall to install X, you need to perform a number of steps:
1. Create the directories and unpack the required archives.
2. Choose and install an X server.
3. Set up the environment to be able to access X.
4. Find a virtual terminal in which to run X.
5. Configure X for your hardware.
This sounds like a lot of work, but if you approach it methodically, it is not too bad. In the rest of this section, we willlook at each step in turn.
13.3.3.1 Unpacking the Archives
You must unpack the archives as root, since a number of the executables are set-user-id (they run as root even whenstarted by other users). If you unpack the server as an ordinary user, it may abort when you try to run it. You mustalso use a umask value of 022 (permissions rwxr-xr-x), because the X server requires special permissions.
% su
236

Chapter 13 The X Window System
Password:# umask 022
If you do not have enough space in the /usr file system, create a directory on another partition and symlink it to /usr.For example, if you have a file system /home with adequate space, you could do:
# cd /home# mkdir X11R6# ln -s /home/X11R6 /usr/X11R6
Next, decide which archives you want to install. For a minimal installation, choose Xbin.tgz, Xfnts.tgz,Xlib.tgz, and Xcfg.tgz. If you have already configured X for your hardware, you can omit Xcfg.tgz.
If you are using sh, unpack like this:
# mkdir -p /usr/X11R6# cd /usr/X11R6# for i in bin fnts lib cfg; do# tar xzf X$i.tgz# done
If you are using csh, enter:
# mkdir -p /usr/X11R6# cd /usr/X11R6# foreach i (bin fnts lib cfg)? tar xzf X$i.tgz? end
13.3.3.2 Installing the Server
Choose a server archive corresponding to your VGA board. If the table in the section above does not give youenough information, check the server man pages, /usr/X11R6/man/man1/XF86_*, which list the VGA chipsetssupported by each server. For example, if you have an ET4000 based board you will use the XF86_SVGA server. Inthis case you would enter:
# cd /usr/X11R6# tar xzf XSVGA.tgz [substitute your server name here]
237

Chapter 13 The X Window System
13.3.3.3 Setting up the environment
Next, you may wish to create a symbolic link /usr/X11/bin/X that points to the server that matches your videoboard. In this example, it is the XF86_SVGA server:
# cd /usr/X11R6/bin# rm X# ln -s XF86_SVGA X
X needs this symbolic link in order to be able to work correctly, but you have the option of setting it when you runxf86config – see below.
Next, check that the directory /usr/X11R6/bin is in the default path for sh in /etc/profile and for csh in/etc/csh.login, and add it if it is not. It is best to do this with an editor, but if you want to take a shortcut, you canenter:
# echo ’PATH=$PATH:/usr/X11R6/bin’ � � /etc/profile
or:
# echo ’set path = ($path /usr/X11R6/bin)’ � � /etc/csh.login
Alternatively, make sure everybody who uses X puts /usr/X11R6/bin in their shell’s PATH variable.
Next, invoke ldconfig to put the shared libraries in ld.so’s cache:
# ldconfig -m /usr/X11R6/lib
You can omit invoking ldconfig if you plan to reboot before using X.
You do not need to uncompress the font files, but if you do, you must run mkfontdir in the corresponding fontdirectory, otherwise your server will abort with the message “could not open default font ‘fixed’”.
13.3.3.4 Assigning a virtual terminal to X
Next, make sure you have a spare virtual console which is running a getty. First check how many virtual consolesyou have:
# dmesg | grep virtualsc0: VGA color � 16 virtual consoles, flags=0x0 �
Then check /etc/ttys to make sure there is at least one virtual terminal (ttyvxx device) which does not have agetty enabled. Look for the keyword off:
# grep ttyv /etc/ttysttyv0 "/usr/libexec/getty Pc" cons25 on secure
238

Chapter 13 The X Window System
ttyv1 "/usr/libexec/getty Pc" cons25 on securettyv2 "/usr/libexec/getty Pc" cons25 on securettyv3 "/usr/libexec/getty Pc" cons25 off secure
In this case, /dev/ttyv3 is available, if your kernel has least 4 VTs. If not, either disable a getty in /etc/ttys bychanging on to off, or build another kernel with more virtual terminals.
13.3.3.5 Configuring X for Your Hardware
After installing the X software, you will need to customize the file XF86Config, which tells the X server about yourhardware and how you want to run it.
In order to set up XF86Config, you will need the following hardware information:
• Your mouse type, the bit rate if it is a serial mouse, and the name of the device to which it is connected. This willtypically be /dev/ttyd0 or /dev/ttyd1 for a serial mouse, /dev/psm0 for a PS/2 mouse, or /dev/mse0 for abus mouse.
• The type of the video board and the amount of display memory. If it is a no-name board, establish what VGA chipset it uses.
• The parameters of your monitor; vertical and horizontal frequency.
13.3.3.6 Identifying the hardware
How do you decide what your hardware is? The manufacturer should tell you, but very often the information you getabout your display board and monitor is pitiful; “Super VGA board with 76 Hz refresh rate and 16,777,216 colors”.This tells you the maximum pixel depth (24 bits – - the number of colors is 2(pixel depth)), but it doesn’t tell youanything else about the display board.
As we will see later, the real parameters you need to know are the maximum horizontal frequency, the dot clockrange, the chipset and the amount of display memory.
You could be unlucky trying to get some of this information, but you can get some with the SuperProbe program. Itshould always be able to tell you the chipset and the amount of memory on board.
Occasionally SuperProbe can crash your system. Make sure you are not doing anything important when you run it.Running SuperProbe looks like this:
# SuperProbe(warnings and acknowledgments omitted)First video: Super-VGA
Chipset: Tseng ET4000 (Port Probed)Memory: 1024 Kbytes
239

Chapter 13 The X Window System
RAMDAC: Generic 8-bit pseudo-color DAC(with 6-bit wide lookup tables (or in 6-bit mode))
SuperProbe is very finicky about running at all, and you will often get messages like:
SuperProbe: Cannot be run while an X server is runningSuperProbe: If an X server is not running, unset $DISPLAY and try againSuperProbe: Cannot open video
In other words, even if no X server is running, SuperProbe will not work if you have the environment variableDISPLAY set. How do you unset it? With Bourne-style shells, you enter:
# unset DISPLAY
In the C shell, you enter:
# unsetenv DISPLAY
13.3.3.7 Running xf86config
The easy way to create your configuration file is with one of the utilities xf86config (note the lower case name) orXF86Setup. Both lead you through the configuration step by step. xf86config runs in character mode, whileXF86Setup runs in a graphical mode. XF86Setup can have problems with unusual hardware, so I personally preferxf86config.
You can also use sysinstall, but this does not change much; sysinstall just starts xf86config for you, and it is easierto start it directly. In this section, we will use an example to illustrate configuration via xf86config. We areinstalling X for an ancient Diamond SpeedStar with 1 MB of display memory, a Logitech MouseMan mouse, and anADI MicroScan 5AP monitor. The mouse is connected to the system via the first serial port, /dev/ttyd0.
To run xf86config, type in the name. If /usr/X11R6/bin is included in your PATH environment variable, youjust need to type xf86config. If it is not, you need to type out the full path to xf86config, like so:
# /usr/X11R6/bin/xf86config
This program will create a basic XF86Configfile, based on menu selections you make.
The XF86Config file usually resides in /usr/X11R6/lib/X11 or /etc. A sample XF86Config file is suppliedwith XFree86; it is configured for a standard VGA card and monitor with 640x480 resolution. This program will askfor a pathname when it is ready to write the file.
You can either take the sample XF86Config as a base and edit it for your configuration, or let this program producea base XF86Config file for your configuration and fine-tune it. Refer to/usr/X11R6/lib/X11/doc/README.Config for a detailed overview of the configuration process.
240

Chapter 13 The X Window System
For accelerated servers (including accelerated drivers in the SVGA server), there are many chipset and card-specificoptions and settings. This program does not know about these. On some configurations some of these settings mustbe specified. Refer to the server man pages and chipset-specific READMEs.
Before continuing with this program, make sure you know the chipset and amount of video memory on your videocard. SuperProbe can help with this. It is also helpful if you know what server you want to run.
Press enter to continue, or ctrl-c to abort. ENTER
First specify a mouse protocol type. Choose one from the following list:
1. Microsoft compatible (2-button protocol)2. Mouse Systems (3-button protocol)3. Bus Mouse4. PS/2 Mouse5. Logitech Mouse (serial, old type, Logitech protocol)6. Logitech MouseMan (Microsoft compatible)7. MM Series8. MM HitTablet9. Microsoft IntelliMouse
If you have a two-button mouse, it is most likely of type 1, and if you have a three-button mouse, it can probablysupport both protocol 1 and 2. There are two main varieties of the latter type; mice with a switch to select theprotocol, and mice that default to 1 and require a button to be held at boot-time to select protocol 2. Some mice canbe convinced to do 2 by sending a special sequence to the serial port (see the ClearDTR/ClearRTS options).
Enter a protocol number: 6 Logitech MouseMan
You have selected a Logitech MouseMan type mouse. You might want to enableChordMiddle which could cause the third button to work.
Please answer the following question with either ’y’ or ’n’.Do you want to enable ChordMiddle? n
You definitely want to enable the third button on your mouse, since many X clients use it. With a genuine Logitechmouse, however, you don’t need to enable ChordMiddle in order to use the button. If you find that the third buttondoes not work when you start X, you can enable ChordMiddle by editing the configuration file – it is much easierand less error-prone than re-running XF86Setup.
Continuing through the setup:
If your mouse has only two buttons, it is recommended that you enable Emulate3Buttons.
Please answer the following question with either ’y’ or ’n’.Do you want to enable Emulate3Buttons? n
241

Chapter 13 The X Window System
Now give the full device name that the mouse is connected to, for example/dev/tty00. Just pressing enter will use the default, /dev/mouse.
Mouse device: /dev/ttyd1
Be very careful about this entry. You must specify the correct name for the device to which the mouse is connected.xf86config is not specific to FreeBSD, and the suggested example is just plain wrong for FreeBSD. Use the names/dev/ttyd0 through /dev/ttyd3 for serial mice, /dev/psm0 for PS/2 mice or /dev/mse0 for a bus mouse.
Continuing, we see:
Beginning with XFree86 3.1.2D, you can use the new X11R6.1XKEYBOARD extension to manage the keyboard layout. If you answer ’n’ to thefollowing question, the server will use the old method, and you have toadjust your keyboard layout with xmodmap.
Please answer the following question with either ’y’ or ’n’.Do you want to use XKB? y
The following dialogue will allow you to select from a list of alreadypreconfigured keymaps. If you don’t find a suitable keymap in the list,the program will try to combine a keymap from additional information youare asked then. Such a keymap is by default untested and may requiremanual tuning. Please report success or required changes for such akeymap to [email protected] for addition to the list of preconfiguredkeymaps in the future.
Press enter to continue, or ctrl-c to abort.
List of preconfigured keymaps:
1 Standard 101-key, US encoding2 Microsoft Natural, US encoding3 KeyTronic FlexPro, US encoding4 Standard 101-key, US encoding with ISO9995-3 extensions5 Standard 101-key, German encoding6 Standard 101-key, French encoding7 Standard 101-key, Thai encoding8 Standard 101-key, Swiss/German encoding9 Standard 101-key, Swiss/French encoding
10 None of the above
Enter a number to choose the keymap.
242

Chapter 13 The X Window System
1 Choose the standard US keyboard
Now we want to set the specifications of the monitor. The two critical parameters are the vertical refresh rate, whichis the rate at which the whole screen is refreshed, and most importantly the horizontal sync rate, which is the rate atwhich scanlines are displayed.
The valid range for horizontal sync and vertical sync should be documented in the manual of your monitor. If indoubt, check the monitor database /usr/X11R6/lib/X11/doc/Monitors to see if your monitor is there.
Press enter to continue, or ctrl-c to abort. ENTER
You must indicate the horizontal sync range of your monitor. You can eitherselect one of the predefined ranges below that correspond to industry-standard monitor types, or give a specific range.
It is VERY IMPORTANT that you do not specify a monitor type with a horizontalsync range that is beyond the capabilities of your monitor. If in doubt,choose a conservative setting.
hsync in kHz; monitor type with characteristic modes1 31.5; Standard VGA, 640x480 @@ 60 Hz2 31.5 - 35.1; Super VGA, 800x600 @@ 56 Hz3 31.5, 35.5; 8514 Compatible, 1024x768 @@ 87 Hz interlaced (no 800x600)4 31.5, 35.15, 35.5; Super VGA, 1024x768 @@ 87 Hz interlaced, 800x600 @@ 56 Hz5 31.5 - 37.9; Extended Super VGA, 800x600 @@ 60 Hz, 640x480 @@ 72 Hz6 31.5 - 48.5; Non-Interlaced SVGA, 1024x768 @@ 60 Hz, 800x600 @@ 72 Hz7 31.5 - 57.0; High Frequency SVGA, 1024x768 @@ 70 Hz8 31.5 - 64.3; Monitor that can do 1280x1024 @@ 60 Hz9 31.5 - 79.0; Monitor that can do 1280x1024 @@ 74 Hz
10 31.5 - 82.0; Monitor that can do 1280x1024 @@ 76 Hz11 Enter your own horizontal sync range
Enter your choice (1-11):
Unfortunately, our monitor is not mentioned in the file /usr/X11R6/lib/X11/doc/Monitors, but by chance themanual does specify the frequency range in the Technical Data section. The horizontal frequency range is from 30 to64 kHz, and the vertical frequency range is from 50 to 100 Hz. The horizontal frequency range is almost exactlycovered by choice 8, but that setting threatens to go 0.3 kHz higher in frequency than the technical data state. Do youwant to risk it? Doing so will most likely not be a problem, since it is unlikely that the monitor will die at such a smalldeviation from the specs, and it is also unlikely that your XF86Config will actually generate a horizontal frequencybetween 64.0 and 64.3 kHz. However, there is no need to take even this slight risk. Just specify the real values:
Enter your choice (1-11): 11
Please enter the horizontal sync range of your monitor, in the format used
243

Chapter 13 The X Window System
in the table of monitor types above. You can either specify one or morecontinuous ranges (e.g. 15-25, 30-50), or one or more fixed syncfrequencies.
Horizontal sync range: 30-64
Next, we select the vertical frequency range:
You must indicate the vertical sync range of your monitor.You can either select one of the predefined ranges below that correspondto industry-standard monitor types, or give a specific range. Forinterlaced modes, the number that counts is the high one (e.g., 87 Hzrather than 43 Hz).
1 50-702 50-903 50-1004 40-1505 Enter your own vertical sync range
Enter your choice: 3 exactly the range of the monitor
The next step is to specify identification strings. You can think out names if you want, but unless you are juggling alot of different hardware, you can let xf86config do it for you:
You must now enter a few identification/description strings,namely an identifier, a vendor name, and a model name. Just pressing enterwill fill in default names.
The strings are free-form, spaces are allowed.Enter an identifier for your monitor definition: ENTEREnter the vendor name of your monitor: ENTEREnter the model name of your monitor: ENTER
Next comes the choice of the video board. We have an elderly Diamond SpeedStar Plus with an ET4000 chip, andunknown Ramdac and Clock Chip. Let’s see how we fare:
Now we must configure video card specific settings. Atthis point you can choose to make a selection out of a database of videocard definitions. Because there can be variation in Ramdacs and clockgenerators even between cards of the same model, it is not sensible toblindly copy the settings (e.g., a Device section). For this reason,after you make a selection, you will still be asked about the componentsof the card, with the settings from the chosen database entry presented asa strong hint.
244

Chapter 13 The X Window System
The database entries include information about the chipset, what server torun, the Ramdac and ClockChip, and comments that will be included in theDevice section. However, a lot of definitions only hint about what serverto run (based on the chipset the card uses) and are untested.
If you can’t find your card in the database, there’s nothing to worry about.You should only choose a database entry that is exactly the same model asyour card; choosing one that looks similar is just a bad idea (e.g. aGemStone Snail 64 may be as different from a GemStone Snail 64+ in terms ofhardware as can be).
Do you want to look at the card database? y0 2 the Max MAXColor S3 Trio64V+ S3 Trio64V+1 928Movie S3 9282 AGX (generic) AGX-014/15/163 ALG-5434(E) CL-GD54344 ASUS 3Dexplorer RIVA1285 ASUS PCI-AV264CT ATI-Mach646 ASUS PCI-V264CT ATI-Mach647 ASUS Video Magic PCI V864 S3 8648 ASUS Video Magic PCI VT64 S3 Trio649 AT25 Alliance AT3D
10 AT3D Alliance AT3D11 ATI 3D Pro Turbo ATI-Mach6412 ATI 3D Xpression ATI-Mach6413 ATI 3D Xpression+ PC2TV ATI-Mach6414 ATI 8514 Ultra (no VGA) ATI-Mach815 ATI All-in-Wonder ATI-Mach6416 ATI Graphics Pro Turbo ATI-Mach6417 ATI Graphics Pro Turbo 1600 ATI-Mach64
Enter a number to choose the corresponding card definition.Press enter for the next page, q to continue configuration.ENTER
Dozens of board definitions come in alphabetic order. Finally we see:
108 DSV3325 S3 ViRGE109 DSV3326 S3 Trio64V+110 DataExpert DSV3325 S3 ViRGE111 DataExpert DSV3365 S3 Trio64V+112 Dell S3 805 S3 801/805113 Dell onboard ET4000 ET4000114 Diamond Edge 3D nv1
245

Chapter 13 The X Window System
115 Diamond Multimedia Stealth 3D 2000 S3 ViRGE116 Diamond Multimedia Stealth 3D 2000 PRO S3 ViRGE/DX117 Diamond SpeedStar (Plus) ET4000118 Diamond SpeedStar 24 ET4000119 Diamond SpeedStar 24X (not fully supported) WD90C31120 Diamond SpeedStar 64 CL-GD5434121 Diamond SpeedStar HiColor ET4000122 Diamond SpeedStar Pro (not SE) CL-GD5426/28123 Diamond SpeedStar Pro 1100 CL-GD5420/2/4/6/8/9124 Diamond SpeedStar Pro SE (CL-GD5430/5434) CL-GD5430/5434125 Diamond SpeedStar64 Graphics 2000/2200 CL-GD5434
Enter a number to choose the corresponding card definition.Press enter for the next page, q to continue configuration.
117
Your selected card definition:
Identifier: Diamond SpeedStar (Plus)Chipset: ET4000Server: XF86_SVGA
Press enter to continue, or ctrl-c to abort.ENTER
Now you must determine which server to run. Refer to the man pages andother documentation. The following servers are available (they may notall be installed on your system):
1 The XF86_Mono server. This a monochrome server that should work on anyVGA-compatible card, in 640x480 (more on some SVGA chipsets).
2 The XF86_VGA16 server. This is a 16-color VGA server that should work onany VGA-compatible card.
3 The XF86_SVGA server. This is a 256 color SVGA server that supportsa number of SVGA chipsets. On some chipsets it is accelerated orsupports higher color depths.
4 The accelerated servers. These include XF86_S3, XF86_Mach32, XF86_Mach8,XF86_8514, XF86_P9000, XF86_AGX, XF86_W32, XF86_Mach64, XF86_I128 andXF86_S3V.
These four server types correspond to the four different "Screen" sections inXF86Config (vga2, vga16, svga, accel).
5 Choose the server from the card definition, XF86_SVGA.
246

Chapter 13 The X Window System
Which one of these screen types do you intend to run by default (1-5)?
The system already chose XF86_SVGA for us. Do we want to change? We would need a good reason. In this case,we do not have a reason, so we will keep the server from the card definition:
Which one of these screen types do you intend to run by default (1-5)? 5
The server to run is selected by changing the symbolic link ’X’. For example,the SVGA server.
Please answer the following question with either ’y’ or ’n’.Do you want me to set the symbolic link? y
All the programs that start X (xinit, startx, and xdm) start a program /usr/X11R6/bin/X. This symbolic link makes/usr/X11R6/bin/X point to your X server. If you don’t have a link, you will not be able to start X.
Now you must give information about your video card. Thiswill be used for the "Device" section of your video card in XF86Config.
You must indicate how much video memory you have. It is probably a goodidea to use the same approximate amount as that detected by the server youintend to use. If you encounter problems that are due to the used servernot supporting the amount memory you have (e.g. ATI Mach64 is limited to1024K with the SVGA server), specify the maximum amount supported by theserver.
How much video memory do you have on your video card:
1 256K2 512K3 1024K4 2048K5 4096K6 Other
Enter your choice: 3
You must now enter a few identification/description strings, namely anidentifier, a vendor name, and a model name. Just pressing enter will fillin default names (possibly from a card definition).
Your card definition is Diamond SpeedStar (Plus).
The strings are free-form, spaces are allowed.Enter an identifier for your video card definition: ENTER
247

Chapter 13 The X Window System
You can simply press enter here if you have a generic card, or want todescribe your card with one string.Enter the vendor name of your video card: ENTEREnter the model (board) name of your video card: ENTER
Especially for accelerated servers, Ramdac, Dacspeed and ClockChip settingsor special options may be required in the Device section.
The RAMDAC setting only applies to the S3, AGX, W32 servers, and somedrivers in the SVGA servers. Some RAMDAC’s are auto-detected by the server.The detection of a RAMDAC is forced by using a Ramdac "identifier" line inthe Device section. The identifiers are shown at the right of the followingtable of RAMDAC types:
1 AT&T 20C490 (S3 and AGX servers, ARK driver) att20c4902 AT&T 20C498/21C498/22C498 (S3, autodetected) att20c4983 AT&T 20C409/20C499 (S3, autodetected) att20c4094 AT&T 20C505 (S3) att20c5055 BrookTree BT481 (AGX) bt4816 BrookTree BT482 (AGX) bt4827 BrookTree BT485/9485 (S3) bt4858 Sierra SC15025 (S3, AGX) sc150259 S3 GenDAC (86C708) (autodetected) s3gendac
10 S3 SDAC (86C716) (autodetected) s3_sdac11 STG-1700 (S3, autodetected) stg170012 STG-1703 (S3, autodetected) stg1703
Enter a number to choose the corresponding RAMDAC.Press enter for the next page, q to quit without selection of a RAMDAC.
q We don’t need this
A Clockchip line in the Device section forces the detection of aprogrammable clock device. With a clockchip enabled, any requiredclock can be programmed without requiring probing of clocks or aClocks line. Most cards don’t have a programmable clock chip.Choose from the following list:
1 Chrontel 8391 ch83912 ICD2061A and compatibles (ICS9161A, DCS2824) icd2061a3 ICS2595 ics25954 ICS5342 (similar to SDAC, but not completely compatible) ics5342
248

Chapter 13 The X Window System
5 ICS5341 ics53416 S3 GenDAC (86C708) and ICS5300 (autodetected) s3gendac7 S3 SDAC (86C716) s3_sdac8 STG 1703 (autodetected) stg17039 Sierra SC11412 sc11412
10 TI 3025 (autodetected) ti302511 TI 3026 (autodetected) ti302612 IBM RGB 51x/52x (autodetected) ibm_rgb5xx
Just press enter if you don’t want a Clockchip setting.What Clockchip setting do you want (1-12)? ENTER
For most configurations, a Clocks line is useful since it prevents the slowand nasty sounding clock probing at server start-up. Probed clocks aredisplayed at server startup, along with other server and hardwareconfiguration info. You can save this information in a file by runningimprecise; some clocks may be slightly too high (varies per run).
At this point I can run X -probeonly, and try to extract the clock informationfrom the output. It is recommended that you do this yourself and add a clocksline (note that the list of clocks may be split over multiple Clocks lines) toyour Device section afterwards. Be aware that a clocks line is notappropriate for drivers that have a fixed set of clocks and don’t probe bydefault (e.g. Cirrus). Also, for the P9000 server you must simply specifyclocks line that matches the modes you want to use. For the S3 server witha programmable clock chip you need a ’ClockChip’ line and no Clocks line.
You must be root to be able to run X -probeonly now.
Do you want me to run ’X -probeonly’ now?
This last question is worth thinking about. You should run X -probeonly at some point, but it requires some extrawork. We’ll take the recommendation and try it later.
Do you want me to run ’X -probeonly’ now? n
For each depth, a list of modes (resolutions) is defined. The defaultresolution that the server will start-up with will be the first listedmode that can be supported by the monitor and card.Currently it is set to:
"640x480" "800x600" "1024x768" for 8bpp"640x480" "800x600" for 16bpp"640x480" for 24bpp"640x400" for 32bpp
249

Chapter 13 The X Window System
Note that 16, 24 and 32bpp are only supported on a few configurations.Modes that cannot be supported due to monitor or clock constraints willbe automatically skipped by the server.
1 Change the modes for 8pp (256 colors)2 Change the modes for 16bpp (32K/64K colors)3 Change the modes for 24bpp (24-bit color, packed pixel)4 Change the modes for 32bpp (24-bit color)5 The modes are OK, continue.
Enter your choice: 5 accept the defaults
You can have a virtual screen (desktop), which is screen area that is largerthan the physical screen and which is panned by moving the mouse to the edgeof the screen. If you don’t want virtual desktop at a certain resolution,you cannot have modes listed that are larger. Each color depth can have adifferently-sized virtual screen
Please answer the following question with either ’y’ or ’n’.Do you want a virtual screen that is larger than the physical screen? n
It is difficult to decide whether you want a virtual screen larger than the physical screen. I find it extremelydisturbing, so I suggest you answer n. You might find it useful, especially if your highest resolution is small.
Now the configuration is complete, and sysinstall just need to write the configuration file:
I am going to write the XF86Config file now. Make sureyou don’t accidently overwrite a previously configured one.
Shall I write it to /etc/XF86Config? y
File has been written. Take a look at it before running ’startx’. Note thatthe XF86Config file must be in one of the directories searched by the server(e.g. /usr/X11R6/lib/X11) in order to be used. Within the server pressctrl, alt and ’+’ simultaneously to cycle video resolutions. Pressing ctrl,alt and backspace simultaneously immediately exits the server (use ifthe monitor doesn’t sync for a particular mode).
For further configuration, refer to /usr/X11R6/lib/X11/doc/README.Config.
Once you have completed this configuration, you are ready to start X.
250

Chapter 13 The X Window System
13.4 XFree86 4.X Configuration
13.4.1 IntroductionThis chapter will introduce the steps necessary to install and configure the XFree86 X Windows System underFreeBSD. Once the server is installed and configured properly. The user can read Section 13.7 to setup their desktopenvironment.
13.4.2 Before You StartBefore the user is to start configuration of XFree86-4, the the following information will need to be known about thetarget system:
• Monitor specifications
• Video Adapter chipset
• Video Adapter memory
The specifications for the target system’s monitor are used by XFree86 to determine the resolution and refresh rate torun at. These specifications can usually be obtained from the documentation that came with the target system’smonitor or from the manufacturer’s website. There are two ranges of numbers that are needed, the horizontal scanrate and the vertical synchronization rate.
The video adapter’s chipset defines what driver module XFree86 uses to talk to the graphics hardware. With mostchipsets, this can be automatically determined, but it is still useful to know in case the automatic detection doesn’twork correctly.
Video memory on the graphic adapter determines the resolution and color depth the target system can run at. This isimportant to know so the user knows the limitations of the target system.
13.4.3 Installing XFree86 4.X softwareContributed by Christopher Shumway <[email protected]>, July 2001.
XFree86 4 can be installed using the FreeBSD ports system or using pkg_add(1). If the user is building XFree86-4from source and has USA_RESIDENT set in /etc/make.conf, the user may first have to fetch Wraphelp.c ifXDM-AUTHORIZATION-1 support is desired. This file is to be placed in the port’s files/ sub-directory beforethe port is built.
251

Chapter 13 The X Window System
13.4.4 Configuring XFree86 4.XConfiguration of XFree86 4.1 is a several step process. The first step is to build an initial configuration file with theconfigure option to XFree86. As the super user, simply run:
# XFree86 -configure
This will generate a skeleton XFree86 configuration file in the current working directory called XF86Config.new.The XFree86 program will attempt to probe the graphics hardware on the system and will write a configuration fileto load the proper drivers for the detected hardware on the target system.
The next step is to test the currently existing configuration to verify that XFree86 can work with the graphicshardware on the target system. To preform this task, the user needs to run:
# XFree86 -xf86config XF86Config.new
If the user is presented with a black and grey grid and an X mouse cursor, then the configuration was successful. Toexit the test, just press ctrl, alt and backspace simultaneously.
Next, the user needs to tune the XF86Config.new configuration file to their personal taste. Open up the file in a texteditor such as emacs(1) or ee(1). The first thing the user will want to do is add the frequencies for the target system’smonitor. These are usually expressed as a horizontal and vertical synchronization rate. These values are added to theXF86Config.new file under the "Monitor" section as such:
Section "Monitor"Identifier "Monitor0"VendorName "Monitor Vendor"ModelName "Monitor Model"Horizsync 30-107VertRefresh 48-120
EndSection
The Horizsync and VertRefresh keywords may not exist in the user’s configuration file. If they do not, they needto be added, with the correct horizontal synchronization rate placed after the Horizsync keyword and the verticalsynchronization rate after the VertRefresh keyword. In the example above the target monitor’s rates where entered.
While the XF86Config.new configuration file is still open in an editor, next the user needs to select what the defaultresolution and color depth is desired. This is defined in the Screen section.
Section "Screen"Identifier "Screen0"Device "Card0"Monitor "Monitor0"DefaultColorDepth 24SubSection "Display"
Depth 24
252

Chapter 13 The X Window System
Modes "1024x768"EndSubSection
EndSection
The DefaultColorDepth keyword describes the color depth the user wishes to run at by default. This can beoverridden with the -bpp command line switch to XFree86(1). The Modes keyword describes the resolution the userwishes to run at for the given color depth. In the example above, the default color depth is twenty four bits per pixel.At this color depth, the accepted resolution is one thousand twenty four pixels by seven hundred and sixty eightpixels.
If a user wants to run at a resolution of one thousand twenty four pixels by seven hundred sixty eight pixels at twentyfour bits per pixel, then the user needs to add the DefaultColorDepth keyword with the value of twenty four, andadd to the "Display" subsection with the desired Depth the Modes keyword with the resolution the user wishes torun at. Note that only VESA standard modes are supported as defined by the target system’s graphics hardware.
Finally, the user can write out the configuration file and test it using the test mode given above. If all is well, then theconfiguration file needs to be installed in a common location where XFree86(1) can source it in the future. This istypically /etc/X11/XF86Config or /usr/X11R6/etc/X11/XF86Config.
# cp XF86Config.new /etc/X11/XF86Config
Once the configuration file has been placed in a common location, XFree86 can then be used through xdm(1). Inorder to use startx(1) the user will have to install the X11/wrapper port.
13.4.5 Advanced Configuration Topics
13.4.5.1 Configuration with Intel i810 graphics chipsets
Configuration with Intel i810 integrated chipsets requires the agpgart AGP programming interface for XFree86 to beable to drive the card. To enable the agpgart programming interface, the agp.ko kernel loadable module needs to beloaded into the kernel with kldload(8). This can be done automatically with the loader(8). Simply add this line to/boot/loader.conf to have the loader load agp.ko at boot time:
agp_load="YES"
Next, a device node needs to be created for the programming interface. To create the agp device node, runMAKEDEV(8) in the /dev directory as such:
# cd /dev# sh MAKEDEV agpgart
This will allow the user to configure the graphics hardware as any other graphics board.
253

Chapter 13 The X Window System
13.5 Using Fonts in XFree86
13.5.1 Type1 FontsThe default fonts that ship with XFree86 are less than ideal for typical desktop publishing applications. Largepresentation fonts show up jagged and unprofessional looking and small fonts in Netscape are almost completelyunintelligible. However, there are several free, high quality Type1 (PostScript) fonts available which can be readilyused with XFree86, either version 3.X or version 4.X. For instance, the URW font collection(/usr/ports/x11-fonts/urwfonts) includes high quality versions of standard type1 fonts (Times Roman,Helvetica, Palatino and others). The Freefont collection (/usr/ports/x11-fonts/freefont) includes manymore fonts, but most of them are intended for use in graphics software such as the Gimp, and are not completeenough to serve as screen fonts. In addition, XFree86 can be configured to use TrueType fonts with a minimum ofeffort: see the section on TrueType fonts later.
To install the above Type1 font collections from the ports collection you can run the following commands.
# cd /usr/ports/x11-fonts/urwfonts# make install clean
And likewise with the freefont or other collections. To tell the X server that these fonts exist, you can add anappropriate line to your XF86Config file (in /etc/ for XFree86 version 3, or in /etc/X11/ for version 4), whichreads:
FontPath "/usr/X11R6/lib/X11/fonts/URW/"
Alternatively, at the command line in your X session you can write:
% xset fp+ /usr/X11R6/lib/X11/fonts/URW% xset fp rehash
This will work but will be lost when you log out from this session, unless you add it to your startup file(~/.xinitrc for a normal startx session, or ~/.xsession when logging in through a graphical login manager likeXDM). A third way is to use the new XftConfig file: see the section on anti-aliasing, later.
13.5.2 TrueType FontsXFree86 4.0 has built in support for rendering TrueType fonts. There are two different modules that can enable thisfunctionality. The "freetype" module is used in this example because it is more consistent with the other fontrendering backends. To enable the freetype module just add the following line to the module section of your/etc/X11/XF86Config file.
254

Chapter 13 The X Window System
Load "freetype"
For XFree86 3.3.X you will need to run a separate TrueType font server. Xfstt is commonly used for this purpose.To install Xfstt on your FreeBSD system simply install the port from /usr/ports/x11-servers/Xfstt
You should now make a directory for your TrueType fonts (e.g. /usr/X11R6/lib/X11/fonts/TrueType) andcopy all of your TrueType fonts into this directory. Keep in mind that you can not take TrueType fonts directly from aMacintosh; they must be in Unix/DOS/Windows format for use by XFree86. Once you have copied the files into thisdirectory you need to use ttmkfdir to create a fonts.dir file so that the X font renderer knows that you’ve installedthese new files. There is a FreeBSD port for ttmkfdir in /usr/ports/x11-fonts/ttmkfdir.
# cd /usr/X11R6/lib/X11/fonts/TrueType# ttmkfdir > fonts.dir
Now you need to add your TrueType directory to your fonts path. This is just the same as described above for Type1fonts, that is, use
% xset fp+ /usr/X11R6/lib/X11/fonts/TrueType% xset fp rehash
or add a FontPath line to the XF86Config file.
That’s it. Now Netscape, Gimp, StarOffice, and all of your other X applications should now recognize your installedTrueType fonts. Extremely small fonts (as with text in a high resolution display on a web page) and extremely largefonts (within StarOffice) will look much better now.
13.5.3 Anti-Aliasing your fontsStarting with version 4.0.2, XFree86 supports anti-aliased fonts. Currently, most software has not been updated totake advantage of this new functionality. However, Qt (the toolkit for the KDE desktop) does; so if you are runningXFree86 4.0.2 (or higher), Qt 2.3 (or higher) and KDE, all your KDE/Qt applications can be made to use anti-aliasedfonts.
To configure anti-aliasing, you need to create (or edit, if it already exists) the file/usr/X11R6/lib/X11/XftConfig. Several advanced things can be done with this file; this section describes onlythe simplest possibilities.
First, you need to tell the X server about the fonts which you want anti-aliased. To do that, for each font directoryyou have a line, which looks like this:
dir "/usr/X11R6/lib/X11/Type1"
255

Chapter 13 The X Window System
And likewise for the other font directories (URW, truetype, etc) containing fonts you’d like anti-aliased. Anti-aliasingmakes sense only for scalable fonts (basically, Type1 and TrueType) so don’t include bitmap font directories here.The directories which you included here can now be commented out of your XF86Config file.
Next, you may not want to anti-alias normal-sized text. (Antialiasing makes borders slightly fuzzy, which makes verysmall text more readable and removes "staircases" from large text, but can cause eyestrain if applied to normal text.)To exclude point sizes between 9 and 13 from anti-aliasing, include these lines:
matchany size > 8any size < 14
editantialias = false;
You may also find that the spacing for some monospaced fonts gets messed up when you turn on anti-aliasing. Thisseems to be an issue with KDE, in particular. One possible fix for this is to force the spacing for such fonts to be 100:add the following lines:
match any family == "fixed" edit family =+ "mono";match any family == "console" edit family =+ "mono";
(this aliases the other common names for fixed fonts as "mono"), and then add:
match any family == "mono" edit spacing = 100;
Supposing you want to use the Lucidux fonts whenever monospaced fonts are required (these look nice, and don’tseem to suffer from the spacing problem), you could replace that last line with these:
match any family == "mono" edit family += "LuciduxMono";match any family == "Lucidux Mono" edit family += "LuciduxMono";match any family == "LuciduxMono" edit family =+ "Lucidux Mono";
(the last lines alias different equivalent family names).
Finally, you want to allow users to add commands to this file, via their personal .xftconfig files. To do this, add alast line:
includeif "~/.xftconfig"
That’s all; anti-aliasing should be enabled the next time you start the X server. However, note that your programsmust know how to take advantage of it. At the present time, the toolkit Qt does, so the entire KDE environment canuse anti-aliased fonts (see Section 13.7.3.2 on KDE for details); there are patches for gtk+ to do the same, so ifcompiled against such a patched gtk+, the GNOME environment and Mozilla can also use anti-aliased fonts.
Anti-aliasing is still new to FreeBSD and XFree86; configuring it should get easier with time, and it will soon besupported by many more applications.
256

Chapter 13 The X Window System
13.6 The X Display Manager
13.6.1 OverviewThe X Display Manager (XDM) is an optional part of the X Window System that is used for login sessionmanagement. This is useful for several types of situations, including minimal “X Terminals” (see Section 16.3.1.3),desktops, and large network display servers. Since the X Window System is network and protocol independent, thereare a wide variety of possible configurations for running X clients and servers on different machines connected by anetwork. XDM provides a graphical interface for choosing which display server to connect to, and enteringauthorization information such as a login and password combination.
You may think of XDM as providing the same functionality to the user as the getty(8) utility (see Section 16.3.3.2 fordetails). That is, it performs system logins to the display being connected to and then runs a session manager onbehalf of the user (usually an X window manager). XDM then waits for this program to exit, signaling that the user isdone and should be logged out of the display. At this point, XDM can display the login and display chooser screensfor the next user to login.
13.6.2 Using XDMThe XDM daemon program is located in /usr/X11R6/bin/xdm. You can run this program at any time as root andit will start managing the X display on the local machine. If you want XDM to run in the background every time themachine boots up, a convenient way to do this is by adding an entry to /etc/ttys. For more information about theformat and usage of this file, see Section 16.3.3.1. There is a line in the default /etc/ttys file for running the xdmdaemon on a virtual terminal:
ttyv8 "/usr/X11R6/bin/xdm -nodaemon" xterm off secure
By default this entry is disabled, and in order to enable it you will need to change field 5 from off to on and thenrestart init(8) using the directions in Section 16.3.3.6. The first field, the name of the terminal this program willmanage, is ttyv8. This means that XDM will start running on the 9th virtual terminal.
13.6.3 Configuring XDMThe XDM configuration directory is located in /usr/X11R6/lib/X11/xdm. In this directory you will see severalfiles used to change the behavior and appearance of XDM. Typically you will find these files:
File Description
Xaccess Client authorization ruleset.
257

Chapter 13 The X Window System
File Description
Xresources Default X resource values.
Xservers List of remote and local displays to manage.
Xsession Default session script for logins.
Xsetup_*
xdm-config Global configuration for all displays running on thismachine.
xdm-errors Errors generated by the server program.
xdm-pid The process ID of the currently running XDM.
Also in this directory are a few scripts and programs used to setup the desktop when XDM is running. In the next fewsections I will briefly describe the purpose of each of these files. The exact syntax and usage of all of these files isdescribed in xdm(1)
The default configuration is a simple rectangular login window with the hostname of the machine displayed at thetop in a large font and “Login:” and “Password:” prompts below. This is a good starting point if you are planning todesign your own look and feel for the XDM screens.
13.6.3.1 Xaccess
The protocol for connecting to XDM controlled displays is called the X Display Manager Connection Protocol(XDMCP). This file is basically just a ruleset for controlling XDMCP connections from remote machines. Bydefault, it allows any client to connect, but you will see this will not matter because the default xdm-config file doesnot listen for remote connections.
13.6.3.2 Xresources
This is an application-defaults file for the display chooser and the login screens. This is where you can customize theappearance of the login program. The format is identical to the app-defaults file described in the XFree86documentation.
13.6.3.3 Xservers
This is a list of the remote displays the chooser should provide as choices.
258

Chapter 13 The X Window System
13.6.3.4 Xsession
This is the default session script for XDM to run after a user has logged in. Normally each user will have acustomized session script in ~/.xsessionrc that overrides this script.
13.6.3.5 Xsetup_*
These files contain scripts that will be run automatically before displaying the chooser or login interfaces. There is ascript for each display being used, named Xsetup_followed by the local display number (for instance Xsetup_0).Typically these scripts will run one or two programs in the background such as xconsole.
13.6.3.6 xdm-config
This file contains settings in the form of app-defaults that are applicable to every display that this installationmanages.
13.6.3.7 xdm-errors
This file contains the output of the X servers that XDM is trying to run. If a display that XDM is trying to start hangsfor some reason, this is a good place to look for error messages. These messages are also written to the user’s~/.xsession-errors file on a per-session basis
13.6.4 Running A Network Display ServerIn order for other clients to connect to your display server, you will need to edit the access control rules, and enablethe connection listener. By default these are set to conservative values, which is a good decision security-wise. To getXDM to listen for connections first comment out a line in the xdm-config file:
! SECURITY: do not listen for XDMCP or Chooser requests! Comment out this line if you want to manage X terminals with xdmDisplayManager.requestPort: 0
and then restart XDM. Remember that comments in app-defaults files begin with a “!” character, not a “#”. Afterthis, you may need to put more strict access controls in place. Look at the example entries in Xaccess file, and referto the xdm(1) manual page.
259

Chapter 13 The X Window System
13.6.5 Replacements for XDMSeveral replacements for the default XDM program exist. One of them, KDM (bundled with KDE) is described in alater section. Apart from various visual improvements and cosmetic frills, it can be easily configured to let userschoose their window manager of choice at the time they log in.
13.7 Desktop EnvironmentsWritten by Valentino Vaschetto <[email protected]>, June 2001
This section describes the different desktop environments available for X-Windows on FreeBSD. For our purposes a"desktop environment" will mean anything ranging from a simple window manager, to a complete suite of desktopapplications such as KDE or GNOME.
13.7.1 GNOME
13.7.1.1 About GNOME
GNOME is a user-friendly desktop environment that enables users to easily use and configure their computers.GNOME includes a panel (for starting applications and displaying status), a desktop (where data and applicationscan be placed), a set of standard desktop tools and applications, and a set of conventions that make it easy forapplications to cooperate and be consistent with each other. Users of other operating systems or environments shouldfeel right at home using the powerful graphics-driven environment that GNOME provides.
13.7.1.2 Installing GNOME
To install GNOME from the network, simply type:
# pkg_add -r gnome
If you would rather build GNOME from source, then use the ports tree:
# cd /usr/ports/x11/gnome# make install clean
Once GNOME is installed, we must have the X server start GNOME instead of a default window mananger. If youhave already customized your .xinitrc file then you should simply replace the line that starts your current windowmanager with one that starts /usr/X11R6/bin/gnome-wm instead. If you haven’t added anything special to yourconfiguration file, then it is enough to simply type:
260

Chapter 13 The X Window System
# echo "/usr/X11R6/bin/gnome-wm" > ~/.xinitrc
That’s it. Type ’startx’ and you will be in the GNOME desktop environment.
Note: if you’re running a display manager like xdm, this will not work. Instead, you should create an executable.xsession file with the same command in it. To do this, edit your file (if you already have one) and replace theexisting wm command with /usr/X11R6/bin/gnome-wm; or else,
# echo "#!/bin/sh" > ~/.xsession# echo "/usr/X11R6/bin/gnome-wm" >> ~/.xsession# chmod +x ~/.xsession
Another option is to configure your display manager to allow choosing the window manager at login time; thesection on KDE2 details explains how to do this for kdm, the display manager of KDE.
13.7.2 KDE2
13.7.2.1 About KDE2
KDE is an easy to use contemporary desktop environment. Some of the things that KDE brings to the user are:
• A beautiful contemporary desktop
• A desktop exhibiting complete network transparency
• An integrated help system allowing for convenient, consistent access to help on the use of the KDE desktop and itsapplications
• Consistent look and feel of all KDE applications
• Standardized menu and toolbars, keybindings, color-schemes, etc.
• Internationalization: KDE is available in more than 40 languages
• Centralized consisted dialog driven desktop configuration
• A great number of useful KDE applications
KDE has an office application suite based on KDE’s KParts technology consisting of a spread-sheet, a presentationapplication, an organizer, a news client and more. KDE is also comes with a web browser called Konqeuror, whichrepresents already a solid competitor to other existing web browsers on Unix systems. More information on KDE canbe found on the KDE website (http://www.kde.org)
261

Chapter 13 The X Window System
13.7.2.2 Installing KDE2
At the time of writing, a package for kde2 doesn’t exist yet. No problem! The ports tree hides all the complexity ofbuilding a package from source. To install KDE2, do this :
# cd /usr/ports/x11/kde2# make install clean
This command will fetch all the necessary files from the Internet, configure and compile KDE2, install theapplications, and then clean up after itself.
Now you’re going to have to tell the X server to launch KDE2 instead of a default window manager. Do this bytyping this:
# echo "/usr/X11R6/bin/startkde" > ~/.xinitrc
Now, whenever you go into X-Windows, KDE2 will be your desktop. (Note: this will not work if you’re logging invia a display manager like xdm. In that case you have two options: create an .xsession file as described in thesection on GNOME, but with the /usr/X11R6/bin/startkde command instead of the gnome-wm command; or,configure your display manager to allow choosing a desktop at login time. Below it is explained how to do this forkdm, KDE’s display manager.)
13.7.3 More details on KDE2Now that KDE2 is installed on your system, you’ll find that you can learn a lot from its help pages, or just bypointing and clicking at various menus. Windows or Mac users will feel quite at home.
The best reference for KDE is the on-line documentation. KDE comes with its own web browser, Konqueror, dozensof useful applications, and extensive documentation. This section only discusses somewhat technical things whichare difficult to learn just by random exploration.
13.7.3.1 The KDE display manager
If you’re an administrator on a multi-user system, you may like to have a graphical login screen to welcome users.You can use xdm, as described earlier. However, KDE includes an alternative, kdm, which is designed to look moreattractive and include more login-time options. In particular, users can easily choose (via a menu) which desktopenvironment (KDE2, GNOME, or something else) to run after logging on. If you’re slightly adventurous and youwant this added flexibility and visual appeal, read on.
To begin with, run the KDE2 control panel, kcontrol, as root. Note: it is generally considered unsafe to run yourentire X environment as root. Instead, run your window manager as a normal user, open a terminal window (such as
262

Chapter 13 The X Window System
xterm or KDE’s konsole, become root with su (you need to be in the "wheel" group in /etc/group for this), andthen type kcontrol.
Click on the icon on the left marked "System", then on "Login manager". On the right you’ll see various configurableoptions, which the KDE manual will explain in greater detail. Click on "sessions" on the right. Depending on whatwindow managers or desktop environments you have currently installed, you can type their names in "New type" andadd them. (These are just labels so far, not commands, so you can write "KDE" and "GNOME" rather than "startkde"or "gnome-wm".) Include a label "failsafe".
Play with the other menus as you like (those are mainly cosmetic and self-explanatory). When you’re done, click on"Apply" at the bottom, and quit the control center.
To make sure kdm understands what your above labels (KDE, GNOME etc) mean, you need to edit some more files:the same ones used by xdm. In your terminal window, as root, edit the file /usr/X11R6/lib/X11/xdm/Xsession.You will come across a section in the middle looking like this (by default):
case $# in1)
case $1 infailsafe)
exec xterm -geometry 80x24-0-0;;
esacesac
You will need to add a few lines to this section. Assuming the labels you gave earlier were KDE2 and GNOME, thefollowing will do:
case $# in1)
case $1 inKDE2)
exec /usr/X11R6/bin/startkde;;
GNOME)exec /usr/X11R6/bin/gnome-wm;;
failsafe)exec xterm -geometry 80x24-0-0;;
esacesac
To make sure your KDE choice of a login-time desktop background is also honored, you will need to add thefollowing line to /usr/X11R6/lib/X11/xdm/Xsetup_0:
263

Chapter 13 The X Window System
/usr/X11R6/bin/kdmdesktop
Now, you need only to make sure kdm is started at the next bootup. To learn how to do this, read the section on xdm,and do the same thing replacing references to the xdm program by kdm.
That’s it. Your next login screen should have a pretty face and lots of menus.
13.7.3.2 Anti-aliased fonts
Tired of blocky staircase edges to your fonts under X11? Tired of unreadable text in web browsers? Well, no more.
Starting with version 4.0.2, XFree86 supports anti-aliasing via its "RENDER" extension, and starting with version2.3, Qt (the toolkit used by KDE) supports this extension. Configuring this is described in Section 13.5.3 onantialiasing X11 fonts. So if you’re running up-to-date software, anti-aliasing is possible on your KDE2 desktop. Justgo to your KDE2 menu, go to Preferences -> Look and Feel -> Style, and click on the checkbox "Use Anti-Aliasingfor Fonts and Icons". That’s all. If you’re running a Qt application which is not part of KDE, you may need to set theenvironment variable QT_XFT to true before starting your program.
13.7.4 XFCE
13.7.4.1 About XFCE
XFCE is based on the gtk+ toolkit used by GNOME, but is much more lightweight and meant for those who want asimple, efficient desktop which is nevertheless easy to use and configure. Visually, it looks very much like CDE,found on commercial Unix systems. Some of XFCE’s features are:
• A simple, easy-to-handle desktop
• Fully configurable via mouse, with drag and drop, etc
• Main panel similar to CDE, with menus, applets and app launchers
• Integrated window manager, file manager, sound manager, GNOME compliance module, and other things
• Themable (since it uses gtk+)
• Fast, light and efficient: ideal for older/slower machines or machiens with memory limitations
More information on XFCE can be found on the XFCE website (http://www.xfce.org).
264

Chapter 13 The X Window System
13.7.4.2 Installing XFCE
A binary package for xfce exists (at the time of writing). To install, simply do this:
# pkg_add -r xfce
Alternatively, you may prefer to build from source. The ports tree comes to the rescue again:
# cd /usr/ports/x11-wm/xfce# make install clean
All necessary source packages (including dependencies) will be automagically fetched, built and installed, and thebuild areas cleaned up afterwards.
Now you want to tell the X server to launch XFCE the next time you start X. Simply type this:
# echo "/usr/X11R6/bin/startxfce" > ~/.xinitrc
The next time you start X, XFCE will be your desktop. (Note, as before: if you’re logging in via a display managerlike xdm, you should either create an .xsession, as described in the section on GNOME, but with the/usr/X11R6/bin/startxfce command; or, configure your display manager to allow choosing a desktop at logintime, as explained in the section on kdm.)
265

Chapter 14 Localization - I18N/L10N Usage andSetupContributed by Andrey A. Chernov <[email protected]>
Rewritten by Michael C. Wu <[email protected]>, 30 Nov 2000.
14.1 SynopsisThis section of the handbook discusses the internationalization and localization of FreeBSD to different countriesand different settings. If the users wish to use languages other than the system default English, he/she will have tosetup the system accordingly. Please note that language support for each language varies in level. Hence, the usershould contact the respective FreeBSD local group that is responsible for each language.
The author realizes that he may have been incomplete in the description of the I18N process in FreeBSD. Due to thevarious levels of I18N implementation in both the system and application levels, we advise you to refer to individualdocumentation, man pages, READMEs, and so forth.
Should you have any questions or suggestions regarding this chapter, please email the author.
14.2 The Basics
14.2.1 What is I18N/L10N?Developers shortened internationalization into the term I18N, counting the number of letters between the first and thelast letters of internationalization. L10N uses the same naming scheme, coming from "localization". Combinedtogether, I18N/L10N methods, protocols, and applications allow users to use languages of their choice.
I18N applications are programmed using I18N kits under libraries. It allows for developers to write a simple file andtranslate displayed menus and texts to each language. We strongly encourage programmers to follow this convention.
14.2.2 Why should I use I18N/L10N?I18N/L10N is used whenever you wish to either view, input, or process data in non-English languages.
266

Chapter 14 Localization - I18N/L10N Usage and Setup
14.2.3 What languages are supported in the I18N effort?I18N and L10N are not FreeBSD specific. Currently, one can choose from most of the major languages of the World,including but not limited to: Chinese, German, Japanese, Korean, French, Russian, Vietnamese and others.
14.3 Using LocalizationIn all its splendor, I18N is not FreeBSD-specific and is a convention. We encourage you to help FreeBSD infollowing this convention.
Localization settings are based on three main terms: Language Code, Country Code, and Encoding. Locale namesare constructed from these parts as follows:
LanguageCode_CountryCode.Encoding
14.3.1 Language and Country CodesIn order to localize a FreeBSD system to a specific language (or any other I18N-supporting UNIX’s), the user needsto find out the codes for the specify country and language (country codes tell applications what variation of givenlanguage to use). In addition, web browsers, SMTP/POP servers, web servers, etc. make decisions based on them.The following are examples of language/country codes:
Language/Country Code Description
en_US English - United States
ru_RU Russian for Russia
zh_TW Traditional Chinese for Taiwan
14.3.2 EncodingsSome languages use non-ASCII encodings that are 8-bit, wide or multibyte characters, see multibyte(3) for moredetails. Older applications do not recognize them and mistake them for control characters. Newer applicationsusually do recognize 8-bit characters. Depending on the implementation, users may be required to compile anapplication with wide or multibyte characters support, or configure it correctly. To be able to input and process wideor multibyte characters, the FreeBSD Ports collection (/ports/) has provided each language with different programs.Refer to the I18N documentation in the respective FreeBSD Port.
Specifically, the user needs to look at the application documentation to decide on how to configure it correctly or to
267

Chapter 14 Localization - I18N/L10N Usage and Setup
pass correct values into the configure/Makefile/compiler.
Some things to keep in mind are:
• Language specific single C chars character sets (see multibyte(3)), i.e., ISO-8859-1, ISO-8859-15, KOI8-R,CP437.
• Wide or multibyte encodings, f.e. EUC, Big5.
You can check the active list of character sets at the IANA Registry(ftp://ftp.isi.edu/in-notes/iana/assignments/character-sets).
14.3.3 I18N applicationsIn the FreeBSD Ports and Package system, I18N applications have been named with I18N in their names for easyidentification. However, they do not always support the language needed.
14.3.4 Setting LocaleTheoretically, one only needs to export the value of his/her locale name as LANG in the login shell and is usuallydone through the user’s ~/.login_conf or the user login shell configuration (~/.profile, ~/.bashrc,~/.cshrc). This should set all of the locale subsets (such as LC_CTYPE, LC_CTIME, etc.). Please refer tolanguage-specific FreeBSD documentation for more information.
You should set the following two values in your configuration files:
• LANG for POSIX setlocale(3) family functions
• MM_CHARSET for applications’ MIME character set
This includes the user shell config, the specific application config, and the X11 config.
14.3.4.1 Setting Locale Methods
There are two methods for setting locale, and both are described below. The first (recommended one) is by assigningthe environment variables in login class, and the second is by adding the environment variable assignments to thesystem’s shell startup file.
268

Chapter 14 Localization - I18N/L10N Usage and Setup
14.3.4.1.1 Login Classes Method
This method allows environment variables needed for locale name and MIME character sets to be assigned once forevery possible shell instead of adding specific shell assignments to each shell’s startup file. User Level Setup can bedone by an user himself and Administrator Level Setup require superuser privileges.
14.3.4.1.1.1 User Level Setup
Here is a minimal example of a .login_conf file in user’s home directory which has both variables set for Latin-1encoding:
german:German User:\:charset=ISO-8859-1:\:lang=de_DE.ISO_8859-1:
Here is an example of a .login_conf that sets the variables for Traditional Chinese in BIG-5 encoding. Notice themany more variables set because some software does not respect locale variables correctly for Chinese, Japanese,and Korean.
#Users who do not wish to use monetary units or time formats#of Taiwan can manually change each variabletaiwan:Taiwanese User:\lang=zh_TW.Big5:\lc_all=zh_TW.Big:\lc_collate=zh_TW.Big5:\lc_ctype=zh_TW.Big5:\lc_messages=zh_TW.Big5:\lc_monetary=zh_TW.Big5:\lc_numeric=zh_TW.Big5:\lc_time=zh_TW.Big5:\charset=big5:\xmodifiers="@im=xcin": #Setting the XIM Input Server
See Administrator Level Setup and login.conf(5) for more details.
14.3.4.1.1.2 Administrator Level Setup
Check that /etc/login.conf have the correct language user’s class. Make sure these settings appear in/etc/login.conf:
language_name:accounts_title:\:charset=MIME_charset:\:lang=locale_name:\:tc=default:
269

Chapter 14 Localization - I18N/L10N Usage and Setup
So sticking with our previous example using Latin-1, it would look like this:
german:German Users Accounts:\:charset=ISO-8859-1:\:lang=de_DE.ISO_8859-1:\:tc=default:
Changing Login Classes with vipw(8)
Use vipw to add new users, and make the entry look like this:
user:password:1111:11:language:0:0:User Name:/home/user:/bin/sh
Changing Login Classes with adduser(8)
Use adduser to add new users, and do the following:
• Set defaultclass = language in /etc/adduser.conf. Keep in mind you must enter a default class forall users of other languages in this case.
• An alternative variant is answering the specified language each time that
Enter login class: default []:
appears from adduser(8)
• Another alternative is to use the following for each user of a different language that you wish to add:
# adduser -class language
Changing Login Classes with pw(8)
If you use pw(8) for adding new users, call it in this form:
# pw useradd user_name -L language
14.3.4.1.2 Shell Startup File Method
Note: This method is not recommended because it requires a different setup for each possible login programchosen. Use the Login Class Method instead.
To add the locale name and MIME character set, just set the two environment variables shown below in the/etc/profile and/or /etc/csh.login shell startup files. We will use the German language as an example below:
270

Chapter 14 Localization - I18N/L10N Usage and Setup
In /etc/profile:
LANG=de_DE.ISO_8859-1; export LANGMM_CHARSET=ISO-8859-1; export MM_CHARSET
Or in /etc/csh.login:
setenv LANG de_DE.ISO_8859-1setenv MM_CHARSET ISO-8859-1
Alternatively, you can add the above instructions to /usr/share/skel/dot.profile (similar to what was used in/etc/profile above), or /usr/share/skel/dot.login (similar to what was used in /etc/csh.login above).
For X11:
In $HOME/.xinitrc:
LANG=de_DE.ISO_8859-1; export LANG
Or:
setenv LANG de_DE.ISO_8859-1
Depending on your shell (see above).
14.3.5 Console SetupFor all single C chars character sets, set the correct console fonts in /etc/rc.conf for the language in questionwith:
font8x16=font_namefont8x14=font_namefont8x8=font_name
The font_name here is taken from the /usr/share/syscons/fonts directory, without the .fnt suffix.
Also be sure to set the correct keymap and screenmap for your single C chars character set through/stand/sysinstall. Once inside sysinstall, choose Configure, then Console. Alternatively, you can add thefollowing to /etc/rc.conf:
scrnmap=screenmap_namekeymap=keymap_namekeychange="fkey_number sequence"
271

Chapter 14 Localization - I18N/L10N Usage and Setup
The screenmap_name here is taken from the /usr/share/syscons/scrnmaps directory, without the .scmsuffix. A screenmap with a corresponding mapped font is usually needed as a workaround for expanding bit 8 to bit 9on a VGA adapter’s font character matrix in pseudographics area, i.e., to move letters out of that area if screen fontuses a bit 8 column.
If you have the moused daemon enabled by setting the following in your /etc/rc.conf:
moused_enable="YES"
then examine the mouse cursor information in the next paragraph.
By default the mouse cursor of the syscons driver occupies the 0xd0-0xd3 range in the character set. If your languageuses this range, you need to move the cursor’s range outside of it. To enable the workaround for FreeBSD versionsbefore 5.0, insert the following line into your kernel config:
options SC_MOUSE_CHAR=0x03
For the FreeBSD versions 5.0 and up insert the following line into /etc/rc.conf:
mousechar_start=3
The keymap_name here is taken from the /usr/share/syscons/keymaps directory, without the .kbd suffix.
The keychange is usually needed to program function keys to match the selected terminal type because functionkey sequences cannot be defined in the key map.
Also be sure to set the correct console terminal type in /etc/ttys for all ttyv* entries. Current pre-definedcorrespondences are:
Character Set Terminal Type
ISO-8859-1 or ISO-8859-15 cons25l1
ISO-8859-2 cons25l2
KOI8-R cons25r
KOI8-U cons25u
CP437 (hardware default) cons25
For wide or multibyte characters languages, use the correct FreeBSD port in your /usr/ports/languagedirectory. Some ports appear as console while the system sees it as serial vtty’s, hence you must reserve enough vtty’sfor both X11 and the pseudo-serial console. Here is a partial list of applications for using other languages in console:
Language Location
Traditional Chinese (BIG-5) /usr/ports/chinese/big5con
272

Chapter 14 Localization - I18N/L10N Usage and Setup
Language Location
Japanese /usr/ports/japanese/ja-kon2-* or/usr/ports/japanese/Mule_Wnn
Korean /usr/ports/korean/ko-han
14.3.6 X11 SetupAlthough X11 is not part of the FreeBSD Project, we have included some information here for FreeBSD users. Formore details, refer to the XFree86 web site (http://www.xfree86.org/) or whichever X11 Server you use.
In ~/.Xresources, you can additionally tune application specific I18N settings (e.g., fonts, menus, etc.).
14.3.6.1 Displaying Fonts
Install the X11 True Type-Common server (XTT-common) and install the language truetype fonts. Setting the correctlocale should allow you to view your selected language in menus and such.
14.3.6.2 Inputting Non-English Characters
The X11 Input Method (XIM) Protocol is a new standard for all X11 clients. All X11 applications should be writtenas XIM clients that take input from XIM Input servers. There are several XIM servers available for differentlanguages.
14.3.7 Printer SetupSome single C chars character sets are usually hardware coded into printers. Wide or multibyte character sets requirespecial setup and we recommend using apsfilter. You may also convert the document to PostScript or PDF formatsusing language specific converters.
14.3.8 Kernel and File SystemsThe FreeBSD FFS filesystem is 8-bit clean, so it can be used with any single C chars character set (see multibyte(3)),but there is no character set name stored in the filesystem; i.e., it is raw 8-bit and does not know anything aboutencoding order. Officially, FFS does not support any form of wide or multibyte character sets yet. However, somewide or multibyte character sets have independent patches for FFS enabling such support. They are only temporary
273

Chapter 14 Localization - I18N/L10N Usage and Setup
unportable solutions or hacks and we have decided to not include them in the source tree. Refer to respectivelanguages’ web sites for more informations and the patch files.
The FreeBSD MS-DOS filesystem has the configurable ability to convert between MS-DOS, Unicode character setsand chosen FreeBSD filesystem character sets. See mount_msdos(8) for details.
14.4 Advanced TopicsIf you wish to compile I18N applications or program I18N compliant applications, please read this section.
14.4.1 Compiling I18N ProgramsMany FreeBSD Ports have been ported with I18N support. Some of them are marked with -I18N in the port name.These and many other programs have built in support for I18N and need no special consideration.
However, some applications such as MySQL need to be have the Makefile configured with the specific charset.This is usually done in the Makefile or done by passing a value to configure in the source.
14.4.2 Programming I18N Compliant ApplicationsTo make your application more useful for speakers of other languages, we hope that you will program I18Ncompliant. The GNU gcc compiler, GUI Libraries like QT and GTK support I18N through special handling ofstrings. Making a program I18N compliant is very easy. It allows contributors to port your application to otherlanguages quickly. Refer to library specific I18N documentation for more details.
To the contrary of common perception, I18N compliant code is easy to write. Usually, it only involves wrapping yourstrings with library specific functions. In addition, please be sure to allow for wide or multibyte characters support.
14.4.2.1 A Call to Unify the I18N effort
It has come to our attention that the individual I18N/L10N efforts for each country has been repeating each others’efforts. Many of us have been reinventing the wheel repeatedly and inefficiently. We hope that the various majorgroups in I18N could congregate into a group effort similar to the Core Team’s responsibility.
Currently, we hope that, when you write or port I18N programs, you would send it out to each country’s relatedFreeBSD mailing lists for testing. In the future, we hope to create applications that work in all the languagesout-of-the-box without dirty hacks.
274

Chapter 14 Localization - I18N/L10N Usage and Setup
The mailing list <[email protected]> has been established. If you are an I18N/L10N developer, pleasesend your comments, ideas, questions, and anything you deem related to it.
Michael C. Wu will be maintaining an I18N works in progress homepage athttp://www.FreeBSD.org/~keichii/i18n/index.html Please also read the BSDCon2000 I18N paper and presentationsby Clive Lin, Chia-Liang Kao, and Michael C. Wu at http://www.FreeBSD.org/~keichii/papers/
14.4.2.2 Perl and Python
Perl and Python have I18N and wide characters handling libraries. Please use them for I18N compliance.
In older FreeBSD versions, Perl may gives warning about not having a wide characters locale that is already installedin your system. You can set the environmental variable LD_PRELOAD to /usr/lib/libxpg4.so in your shell.
In sh-based shells:
LD_PRELOAD=/usr/lib/libxpg4.so
In C-based shells:
setenv LD_PRELOAD /usr/lib/libxpg4.so
14.5 Localizing FreeBSD to Specific Languages
14.5.1 Russian Language (KOI8-R encoding)Originally contributed by Andrey A. Chernov <[email protected]>.
For more information about KOI8-R encoding, see the KOI8-R References (Russian Net Character Set)(http://koi8.pp.ru/).
14.5.1.1 Locale Setup
Put the following lines into your ~/.login_conf file:
me:My Account:\:charset=KOI8-R:\:lang=ru_RU.KOI8-R:
275

Chapter 14 Localization - I18N/L10N Usage and Setup
See earlier in this chapter for examples of setting up the locale.
14.5.1.2 Console Setup
• For the FreeBSD versions before 5.0 add the following line to your kernel configuration file:
options SC_MOUSE_CHAR=0x03
For the FreeBSD versions 5.0 and up insert the following line into /etc/rc.conf:
mousechar_start=3
• Use following settings in /etc/rc.conf:
keymap="ru.koi8-r"scrnmap="koi8-r2cp866"font8x16="cp866b-8x16"font8x14="cp866-8x14"font8x8="cp866-8x8"
• For each ttyv* entry in /etc/ttys, use cons25r as the terminal type.
See earlier in this chapter for examples of setting up the console.
14.5.1.3 Printer Setup
Since most printers with Russian characters come with hardware code page CP866, a special output filter is neededfor KOI8-R - � CP866 conversion. Such a filter is installed by default as /usr/libexec/lpr/ru/koi2alt. ARussian printer /etc/printcap entry should look like:
lp|Russian local line printer:\:sh:of=/usr/libexec/lpr/ru/koi2alt:\:lp=/dev/lpt0:sd=/var/spool/output/lpd:lf=/var/log/lpd-errs:
See printcap(5) for a detailed description.
14.5.1.4 MS-DOS FS and Russian Filenames
The following example fstab(5) entry enables support for Russian filenames in mounted MS-DOS filesystems:
/dev/ad0s2 /dos/c msdos rw,-Wkoi2dos,-L=ru_RU.KOI8-R 0 0
276

Chapter 14 Localization - I18N/L10N Usage and Setup
See mount_msdos(8) for a detailed description of the -W and -L options.
14.5.1.5 X11 Setup
1. Do non-X locale setup first as described.
Note: The Russian KOI8-R locale may not work with old XFree86 releases (lower than 3.3). The XFree86port from /usr/ports/x11/XFree86 already is the most recent XFree86 version, so it will work if you installXFree86 from the port. This should not be an issue unless you are using an old version of FreeBSD.
2. Go to the /usr/ports/russian/X.language directory and issue the following command:
# make install
The above port installs the latest version of the KOI8-R fonts. XFree86 3.3 already has some KOI8-R fonts, butthese are scaled better.
Check the "Files" section in your /etc/XF86Config file. The following lines must be added before anyother FontPath entries:
FontPath "/usr/X11R6/lib/X11/fonts/cyrillic/misc"FontPath "/usr/X11R6/lib/X11/fonts/cyrillic/75dpi"FontPath "/usr/X11R6/lib/X11/fonts/cyrillic/100dpi"
If you use a high resolution video mode, swap the 75 dpi and 100 dpi lines.
3. To activate a Russian keyboard, add the following to the "Keyboard" section of your XF86Config file.
For XFree86 v3.*:
XkbLayout "ru"XkbOptions "grp:caps_toggle"
For XFree86 v4.*:
Option "XkbLayout" "ru"Option "XkbOptions" "grp:caps_toggle"
Also make sure that XkbDisable is turned off (commented out) there.
The RUS/LAT switch will be CapsLock. The old CapsLock function is still available via Shift+CapsLock (inLAT mode only).
277

Chapter 14 Localization - I18N/L10N Usage and Setup
If you have “Windows” keys on your keyboard, and notice that some non-alphabetical keys are mappedincorrectly in RUS mode, add the following line in your XF86Config file.
For XFree86 v3.*:
XkbVariant "winkeys"
For XFree86 v4.*:
Option "XkbVariant" "winkeys"
Note: The Russian XKB keyboard may not work with old XFree86 versions, see the above note for moreinformation. The Russian XKB keyboard may also not work with non-localized applications as well. Minimallylocalized applications should call a XtSetLanguageProc (NULL, NULL, NULL); function early in theprogram. See KOI8-R for X-Window (http://koi8.pp.ru/xwin.html) for more instructions on localizing X11applications.
14.5.2 Traditional Chinese Localization for TaiwanThe FreeBSD-Taiwan Project has an I18N/L10N tutorial for FreeBSD athttp://freebsd.sinica.edu.tw/~ncvs/zh-l10n-tut/index.html using many /usr/ports/chinese/* applications. Theeditor for the zh-L10N-tut is Clive Lin <[email protected]>. You can also cvsup the following collections atfreebsd.sinica.edu.tw:
Collection Description
outta-port tag=. Beta-quality Ports Collection for Chinese
zh-L10N-tut tag=. Localizing FreeBSD Tutorial in BIG-5 TraditionalChinese
zh-doc tag=. FreeBSD Documentation Translation to BIG-5 TraditionalChinese
Chuan-Hsing Shen <[email protected]> has created the Chinese FreeBSD Collection (CFC)(http://cnpa.yzu.edu.tw/~cfc/) using FreeBSD-Taiwan’s zh-L10N-tut. The packages and the script files areavailable at ftp://ftp.csie.ncu.edu.tw/OS/FreeBSD/taiwan/CFC/.
14.5.3 German Language Localization (For All ISO 8859-1
278

Chapter 14 Localization - I18N/L10N Usage and Setup
Languages)Slaven Rezic <[email protected]> wrote a tutorial how to use umlauts on a FreeBSD machine. Thetutorial is written in German and available at http://www.de.FreeBSD.org/de/umlaute/.
14.5.4 Japanese and Korean Language LocalizationFor Japanese, refer to http://www.jp.FreeBSD.org/, and for Korean, refer to http://www.kr.FreeBSD.org/.
14.5.5 Non-English FreeBSD DocumentationSome FreeBSD contributors have translated parts of FreeBSD to other languages. They are available through linkson the main site (../) or in /usr/share/doc.
279

Chapter 15 SoundContributed by Moses Moore <[email protected]>, 20 November 2000.
15.1 SynopsisThis chapter of the handbook deals with setting up sound on a FreeBSD system.
15.2 Locating the Correct DeviceBefore you begin, you should know the model of the card you have, the chip it uses, and whether it is a PCI or ISAcard. FreeBSD supports a wide variety of both PCI and ISA cards. If you do not see your card in the following list,check the pcm(4) manual page. This is not a complete list; however, it does list some of the most common cards.
• Crystal 4237, 4236, 4232, 4231
• Yamaha OPL-SAx
• OPTi931
• Ensoniq AudioPCI 1370/1371
• ESS Solo-1/1E
• NeoMagic 256AV/ZX
• Sound Blaster Pro, 16, 32, AWE64, AWE128, Live
• Creative ViBRA16
• Advanced Asound 100, 110, and Logic ALS120
• ES 1868, 1869, 1879, 1888
• Gravis UltraSound
• Aureal Vortex 1 or 2
The driver you use in your kernel depends on the kind of card you have. The sections below provide moreinformation and what you will need to add to your kernel configuration.
15.2.1 Creative, Advance, and ESS Sound CardsIf you have one of the above cards, you will need to add
280

Chapter 15 Sound
device pcm
to your kernel. If you have a PnP ISA card, you will also need to add
device sbc
to your kernel. For a non-PnP ISA card, add
device pcm
and
device sbc0 at isa? port0x220 irq 5 drq 1 flags 0x15
to your kernel. Those are the default settings. You may need to change the IRQ, etc. See the sbc(4) man page formore information.
Note: The Sound Blaster Live is not supported under FreeBSD 4.0 without a patch, which this document will notcover. It is recommended that you update to the latest -STABLE before trying to use this card.
15.2.2 Gravis UltraSound CardsFor a PnP ISA card, you will need to add
device pcm
and
device gusc
to your kernel. If you have a non-PnP ISA card, you will need to add
device pcm
and
device gus0 at isa? port 0x220 irq 5 drq 1 flags 0x13
to your kernel. You may need to change the IRQ, etc. See the gusc(4) man page for more information.
281

Chapter 15 Sound
15.2.3 Crystal Sound CardsFor Crystal cards, you will need both
device pcm
and
device csa
in your kernel.
15.2.4 Generic SupportFor PnP ISA or PCI cards, you will need to add
device pcm
to your kernel configuration. If you have a non-PnP ISA sound card that does not have a bridge driver, you will needto add
device pcm0 at isa? irq 10 drq 1 flags 0x0
to your kernel configuration. You may need to change the IRQ, etc., to match your hardware configuration.
15.3 Recompiling the KernelAfter adding the driver(s) you need to your kernel configuration, you will need to recompile your kernel. Please seeSection 8.3 of the handbook for more information.
15.4 Creating and Testing the Device NodesAfter you reboot, log in and run cat /dev/sndstat. You should see output similar to the following:
FreeBSD Audio Driver (newpcm) Sep 21 2000 18:29:53Installed devices:pcm0: � Aureal Vortex 8830 � at memory 0xfeb40000 irq 5 (4p/1r +channels duplex)
282

Chapter 15 Sound
If you see an error message, something went wrong earlier. If that happens, go through your kernel configuration fileagain and make sure you chose the correct device.
If it reported no errors and returned pcm0, su to root and do the following:
# cd /dev# sh MAKEDEV snd0
If it reported no errors and returned pcm1, su to root and do the following:
# cd /dev# sh MAKEDEV snd1
Please note that either of the above commands will not create a /dev/snd device! Instead it creates a group ofdevice nodes including:
Device Description
/dev/audio SPARC-compatible audio device
/dev/dsp Digitized voice device
/dev/dspW Like /dev/dsp, but 16 bits per sample
/dev/midi Raw midi access device
/dev/mixer Control port mixer device
/dev/music Level 2 sequencer interface
/dev/sequencer Sequencer device
/dev/pss Programmable device interface
If all goes well, you should now have a functioning sound card. If you do not, see the next section.
15.5 Common Problems
1. I get an unsupported subdevice XX error!
One or more of the device nodes wasn’t created correctly. Repeat the steps above.
2. I get a sb_dspwr(XX) timed out error!
The I/O port is not set correctly.
3. I get a bad irq XX error!
The IRQ is set incorrectly. Make sure that the set IRQ and the sound IRQ are the same.
283

Chapter 15 Sound
4. I get a "xxx: gus pcm not attached, out of memory" error. What causes that?
If this happens, it is because there is not enough available memory to use the device.
284

III. Network Communications

Chapter 16 Serial Communications
16.1 SynopsisUNIX has always had support for serial communications. In fact, the very first UNIX machines relied on serial linesfor user input and output. Things have changed a lot from the days when the average “terminal” consisted of a10-character-per-second serial printer and a keyboard. This chapter will cover some of the ways in which FreeBSDuses serial communications.
16.2 Serial BasicsAssembled from FAQ.
This section should give you some general information about serial ports. If you do not find what you want here,check into the Terminal and Dial-up sections of the handbook.
The ttydX (or cuaaX) device is the regular device you will want to open for your applications. When a processopens the device, it will have a default set of terminal I/O settings. You can see these settings with the command
# stty -a -f /dev/ttyd1
When you change the settings to this device, the settings are in effect until the device is closed. When it is reopened,it goes back to the default set. To make changes to the default set, you can open and adjust the settings of the “initialstate” device. For example, to turn on CLOCAL mode, 8 bits, and XON/XOFF flow control by default for ttyd5, do:
# stty -f /dev/ttyid5 clocal cs8 ixon ixoff
A good place to do this is in /etc/rc.serial. Now, an application will have these settings by default when itopens ttyd5. It can still change these settings to its liking, though.
You can also prevent certain settings from being changed by an application by making adjustments to the “lock state”device. For example, to lock the speed of ttyd5 to 57600 bps, do
# stty -f /dev/ttyld5 57600
Now, an application that opens ttyd5 and tries to change the speed of the port will be stuck with 57600 bps.
Naturally, you should make the initial state and lock state devices writable only by root. The MAKEDEV script doesnot do this when it creates the device entries.
286

Chapter 16 Serial Communications
16.3 TerminalsContributed by Sean Kelly <[email protected]> 28 July 1996
Terminals provide a convenient and low-cost way to access the power of your FreeBSD system when you are not atthe computer’s console or on a connected network. This section describes how to use terminals with FreeBSD.
16.3.1 Uses and Types of TerminalsThe original Unix systems did not have consoles. Instead, people logged in and ran programs through terminals thatwere connected to the computer’s serial ports. It is quite similar to using a modem and some terminal software to dialinto a remote system to do text-only work.
Today’s PCs have consoles capable of high quality graphics, but the ability to establish a login session on a serialport still exists in nearly every Unix-style operating system today; FreeBSD is no exception. By using a terminalattached to a unused serial port, you can log in and run any text program that you would normally run on the consoleor in an xterm window in the X Window System.
For the business user, you can attach many terminals to a FreeBSD system and place them on your employees’desktops. For a home user, a spare computer such as an older IBM PC or a Macintosh can be a terminal wired into amore powerful computer running FreeBSD. You can turn what might otherwise be a single-user computer into apowerful multiple user system.
For FreeBSD, there are three kinds of terminals:
• Dumb terminals
• PCs acting as terminals
• X terminals
The remaining subsections describe each kind.
16.3.1.1 Dumb Terminals
Dumb terminals are specialized pieces of hardware that let you connect to computers over serial lines. They arecalled “dumb” because they have only enough computational power to display, send, and receive text. You cannotrun any programs on them. It is the computer to which you connect them that has all the power to run text editors,compilers, email, games, and so forth.
There are hundreds of kinds of dumb terminals made by many manufacturers, including Digital EquipmentCorporation’s VT-100 and Wyse’s WY-75. Just about any kind will work with FreeBSD. Some high-end terminalscan even display graphics, but only certain software packages can take advantage of these advanced features.
287

Chapter 16 Serial Communications
Dumb terminals are popular in work environments where workers do not need access to graphic applications such asthose provided by the X Window System.
16.3.1.2 PCs Acting As Terminals
If a dumb terminal has just enough ability to display, send, and receive text, then certainly any spare personalcomputer can be a dumb terminal. All you need is the proper cable and some terminal emulation software to run onthe computer.
Such a configuration is popular in homes. For example, if your spouse is busy working on your FreeBSD system’sconsole, you can do some text-only work at the same time from a less powerful personal computer hooked up as aterminal to the FreeBSD system.
16.3.1.3 X Terminals
X terminals are the most sophisticated kind of terminal available. Instead of connecting to a serial port, they usuallyconnect to a network like Ethernet. Instead of being relegated to text-only applications, they can display any Xapplication.
We introduce X terminals just for the sake of completeness. However, this chapter does not cover setup,configuration, or use of X terminals.
16.3.2 Cables and PortsTo connect a terminal to your FreeBSD system, you need the right kind of cable and a serial port to which to connectit. This section tells you what to do. If you are already familiar with your terminal and the cable it requires, skip toConfiguration.
16.3.2.1 Cables
Because terminals use serial ports, you need to use serial—also known as RS-232C—cables to connect the terminalto the FreeBSD system.
There are a couple of kinds of serial cables. Which one you’ll use depends on the terminal you want to connect:
•
If you are connecting a personal computer to act as a terminal, use a null-modem cable. A null-modem cableconnects two computers or terminals together.
288

Chapter 16 Serial Communications
• If you have an actual terminal, your best source of information on what cable to use is the documentation thataccompanied the terminal. If you do not have the documentation, then try a null-modem cable. If that does notwork, then try a standard cable.
Also, the serial port on both the terminal and your FreeBSD system must have connectors that will fit the cable youare using.
16.3.2.1.1 Null-modem cables
A null-modem cable passes some signals straight through, like “signal ground,” but switches other signals. Forexample, the “send data” pin on one end goes to the “receive data” pin on the other end.
If you like making your own cables, here is a table showing a recommended way to construct a null-modem cable foruse with terminals. This table shows the RS-232C signal names and the pin numbers on a DB-25 connector.
Signal Pin # Pin # Signal
TxD 2 connects to 3 RxD
RxD 3 connects to 2 TxD
DTR 20 connects to 6 DSR
DSR 6 connects to 20 DTR
SG 7 connects to 7 SG
DCD 8 connects to 4 RTS
RTS 4 5 CTS
CTS 5 connects to 8 DCD
Note: For DCD to RTS, connect pins 4 to 5 internally in the connector hood, and then to pin 8 in the remote hood.
16.3.2.1.2 Standard RS-232C Cables
A standard serial cable passes all the RS-232C signals straight-through. That is, the “send data” pin on one end of thecable goes to the “send data” pin on the other end. This is the type of cable to connect a modem to your FreeBSDsystem, and the type of cable needed for some terminals.
289

Chapter 16 Serial Communications
16.3.2.2 Ports
Serial ports are the devices through which data is transferred between the FreeBSD host computer and the terminal.This section describes the kinds of ports that exist and how they are addressed in FreeBSD.
16.3.2.2.1 Kinds of Ports
Several kinds of serial ports exist. Before you purchase or construct a cable, you need to make sure it will fit the portson your terminal and on the FreeBSD system.
Most terminals will have DB25 ports. Personal computers, including PCs running FreeBSD, will have DB25 or DB9ports. If you have a multiport serial card for your PC, you may have RJ-12 or RJ-45 ports.
See the documentation that accompanied the hardware for specifications on the kind of port in use. A visualinspection of the port often works, too.
16.3.2.2.2 Port Names
In FreeBSD, you access each serial port through an entry in the /dev directory. There are two different kinds ofentries:
• Call-in ports are named /dev/ttydX where X is the port number, starting from zero. Generally, you use the call-inport for terminals. Call-in ports require that the serial line assert the data carrier detect (DCD) signal to work.
• Call-out ports are named /dev/cuaaX. You usually do not use the call-out port for terminals, just for modems.You may use the call-out port if the serial cable or the terminal does not support the carrier detect signal.
See the sio(4) manual page for more information.
If you have connected a terminal to the first serial port (COM1 in DOS parlance), then you want to use /dev/ttyd0to refer to the terminal. If it is on the second serial port (also known as COM2), it is /dev/ttyd1, and so forth.
Note that you may have to configure your kernel to support each serial port, especially if you have a multiport serialcard. See Configuring the FreeBSD Kernel for more information.
16.3.3 ConfigurationThis section describes what you need to configure on your FreeBSD system to enable a login session on a terminal. Itassumes you have already configured your kernel to support the serial port to which the terminal is connected—andthat you have connected it.
290

Chapter 16 Serial Communications
In a nutshell, you need to tell the init process, which is responsible for process control and initialization, to start agetty process, which is responsible for reading a login name and starting the login program.
To do so, you have to edit the /etc/ttys file. First, use the su command to become root. Then, make the followingchanges to /etc/ttys:
1. Add an line to /etc/ttys for the entry in the /dev directory for the serial port if it is not already there.
2. Specify that /usr/libexec/getty be run on the port, and specify the appropriate getty type from the/etc/gettytab file.
3. Specify the default terminal type.
4. Set the port to “on.”
5. Specify whether the port should be “secure.”
6. Force init to reread the /etc/ttys file.
As an optional step, you may wish to create a custom getty type for use in step 2 by making an entry in/etc/gettytab. This document does not explain how to do so; you are encouraged to see the gettytab(5) and thegetty(8) manual pages for more information.
The remaining sections detail how to do these steps. We will use a running example throughout these sections toillustrate what we need to do. In our example, we will connect two terminals to the system: a Wyse-50 and a old 286IBM PC running Procomm terminal software emulating a VT-100 terminal. We connect the Wyse to the secondserial port and the 286 to the sixth serial port (a port on a multiport serial card).
For more information on the /etc/ttys file, see the ttys(5) manual page.
16.3.3.1 Adding an Entry to /etc/ttys
First, you need to add an entry to the /etc/ttys file, unless one is already there.
The /etc/ttys file lists all of the ports on your FreeBSD system where you want to allow logins. For example, thefirst virtual console ttyv0 has an entry in this file. You can log in on the console using this entry. This file containsentries for the other virtual consoles, serial ports, and pseudo-ttys. For a hardwired terminal, just list the serial port’s/dev entry without the /dev part.
When you installed your FreeBSD system, the /etc/ttys file included entries for the first four serial ports: ttyd0through ttyd3. If you are attaching a terminal on one of those ports, you do not need to add an entry.
In our example, we attached a Wyse-50 to the second serial port, ttyd1, which is already in the file. We need to addan entry for the 286 PC connected to the sixth serial port. Here is an excerpt of the /etc/ttys file after we add thenew entry:
ttyd1 "/usr/libexec/getty std.9600" unknown off securettyd5
291

Chapter 16 Serial Communications
16.3.3.2 Specifying the getty Type
Next, we need to specify what program will be run to handle the logins on a terminal. For FreeBSD, the standardprogram to do that is /usr/libexec/getty. It is what provides the login: prompt.
The program getty takes one (optional) parameter on its command line, the getty type. A getty type tells aboutcharacteristics on the terminal line, like bps rate and parity. The getty program reads these characteristics from thefile /etc/gettytab.
The file /etc/gettytab contains lots of entries for terminal lines both old and new. In almost all cases, the entriesthat start with the text std will work for hardwired terminals. These entries ignore parity. There is a std entry foreach bps rate from 110 to 115200. Of course, you can add your own entries to this file. The manual page gettytab(5)provides more information.
When setting the getty type in the /etc/ttys file, make sure that the communications settings on the terminalmatch.
For our example, the Wyse-50 uses no parity and connects at 38400 bps. The 286 PC uses no parity and connects at19200 bps. Here is the /etc/ttys file so far (showing just the two terminals in which we are interested):
ttyd1 "/usr/libexec/getty std.38400" unknown off securettyd5 "/usr/libexec/getty std.19200"
Note that the second field—where we specify what program to run—appears in quotes. This is important, otherwisethe type argument to getty might be interpreted as the next field.
16.3.3.3 Specifying the Default Terminal Type
The third field in the /etc/ttys file lists the default terminal type for the port. For dial-up ports, you typically putunknown or dialup in this field because users may dial up with practically any kind of terminal or software. Forhardwired terminals, the terminal type does not change, so you can put a real terminal type in this field.
Users will usually use the tset program in their .login or .profile files to check the terminal type and promptfor one if necessary. By setting a terminal type in the /etc/ttys file, users can forego such prompting.
To find out what terminal types FreeBSD supports, see the file /usr/share/misc/termcap. It lists about 600terminal types. You can add more if you wish. See the termcap(5) manual page for information.
In our example, the Wyse-50 is a Wyse-50 type of terminal (although it can emulate others, we will leave it inWyse-50 mode). The 286 PC is running Procomm which will be set to emulate a VT-100. Here are the pertinent yetunfinished entries from the /etc/ttys file:
ttyd1 "/usr/libexec/getty std.38400" wy50 off securettyd5 "/usr/libexec/getty std.19200" vt100
292

Chapter 16 Serial Communications
16.3.3.4 Enabling the Port
The next field in /etc/ttys, the fourth field, tells whether to enable the port. Putting on here will have the initprocess start the program in the second field, getty, which will prompt for a login. If you put off in the fourth field,there will be no getty, and hence no logins on the port.
So, naturally, you want an on in this field. Here again is the /etc/ttys file. We have turned each port on.
ttyd1 "/usr/libexec/getty std.38400" wy50 on securettyd5 "/usr/libexec/getty std.19200" vt100 on
16.3.3.5 Specifying Secure Ports
We have arrived at the last field (well, almost: there is an optional window specifier, but we will ignore that). The lastfield tells whether the port is secure.
What does “secure” mean?
It means that the root account (or any account with a user ID of 0) may login on the port. Insecure ports do not allowroot to login.
How do you use secure and insecure ports?
By marking a port as insecure, the terminal to which it is connected will not allow root to login. People who knowthe root password to your FreeBSD system will first have to login using a regular user account. To gain superuserprivileges, they will then have to use the su command.
Because of this, you will have two records to help track down possible compromises of root privileges: both thelogin and the su command make records in the system log (and logins are also recorded in the wtmp file).
By marking a port as secure, the terminal will allow root in. People who know the root password will just login asroot. You will not have the potentially useful login and su command records.
Which should you use?
Just use “insecure.” Use “insecure” even for terminals not in public user areas or behind locked doors. It is quite easyto login and use su if you need superuser privileges.
Here finally are the completed entries in the /etc/ttys file, with comments added to describe where the terminalsare:
ttyd1 "/usr/libexec/getty std.38400" wy50 on insecure # Kitchenttyd5 "/usr/libexec/getty std.19200" vt100 on insecure # Guest bathroom
293

Chapter 16 Serial Communications
16.3.3.6 Force init to Reread /etc/ttys
When you boot FreeBSD, the first process, init, will read the /etc/ttys file and start the programs listed for eachenabled port to prompt for logins.
After you edit /etc/ttys, you do not want to have to reboot your system to get init to see the changes. So, initwill reread /etc/ttys if it receives a SIGHUP (hangup) signal.
So, after you have saved your changes to /etc/ttys, send SIGHUP to init by typing:
# kill -HUP 1
(The init process always has process ID 1.)
If everything is set up correctly, all cables are in place, and the terminals are powered up, you should see loginprompts. Your terminals are ready for their first logins!
16.3.4 Debugging your connectionEven with the most meticulous attention to detail, something could still go wrong while setting up a terminal. Here isa list of symptoms and some suggested fixes.
No login prompt appears
Make sure the terminal is plugged in and powered up. If it is a personal computer acting as a terminal, makesure it is running terminal emulation software on the correct serial port.
Make sure the cable is connected firmly to both the terminal and the FreeBSD computer. Make sure it is theright kind of cable.
Make sure the terminal and FreeBSD agree on the bps rate and parity settings. If you have a video displayterminal, make sure the contrast and brightness controls are turned up. If it is a printing terminal, make surepaper and ink are in good supply.
Make sure that a getty process is running and serving the terminal. Type
# ps -axww|grep getty
to get a list of running getty processes. You should see an entry for the terminal. For example, the display
22189 d1 Is+ 0:00.03 /usr/libexec/getty std.38400 ttyd1
shows that a getty is running on the second serial port ttyd1 and is using the std.38400 entry in/etc/gettytab.
If no getty process is running, make sure you have enabled the port in /etc/ttys. Make sure you have runkill -HUP 1.
294

Chapter 16 Serial Communications
Garbage appears instead of a login prompt
Make sure the terminal and FreeBSD agree on the bps rate and parity settings. Check the getty processes tomake sure the correct getty type is in use. If not, edit /etc/ttys and run kill -HUP 1.
Characters appear doubled; the password appears when typed
Switch the terminal (or the terminal emulation software) from “half duplex” or “local echo” to “full duplex.”
16.4 Dial-in ServiceContributed by Guy Helmer <[email protected]>.
This document provides suggestions for configuring a FreeBSD system to handle dial-up modems. This document iswritten based on the author’s experience with FreeBSD versions 1.0, 1.1, and 1.1.5.1 (and experience with dial-upmodems on other UNIX-like operating systems); however, this document may not answer all of your questions orprovide examples specific enough to your environment. The author cannot be responsible if you damage your systemor lose data due to attempting to follow the suggestions here.
16.4.1 PrerequisitesTo begin with, the author assumes you have some basic knowledge of FreeBSD. You need to have FreeBSD installed,know how to edit files in a UNIX-like environment, and how to look up manual pages on the system. As discussedbelow, you will need certain versions of FreeBSD, and knowledge of some terminology & modem and cabling.
16.4.1.1 FreeBSD Version
First, it is assumed that you are using FreeBSD version 1.1 or higher (including versions 2.X). FreeBSD version 1.0included two different serial drivers, which complicates the situation. Also, the serial device driver (sio) hasimproved in every release of FreeBSD, so more recent versions of FreeBSD are assumed to have better and moreefficient drivers than earlier versions.
16.4.1.2 Terminology
A quick rundown of terminology:
295

Chapter 16 Serial Communications
bps
Bits per Second — the rate at which data is transmitted
DTE
Data Terminal Equipment — for example, your computer
DCE
Data Communications Equipment — your modem
RS-232
EIA standard for serial communications via hardware
If you need more information about these terms and data communications in general, the author remembers readingthat The RS-232 Bible (anybody have an ISBN?) is a good reference.
When talking about communications data rates, the author does not use the term “baud”. Baud refers to the numberof electrical state transitions that may be made in a period of time, while “bps” (bits per second) is the “correct” termto use (at least it does not seem to bother the curmudgeons quite a much).
16.4.1.3 External v.s. Internal Modems
External modems seem to be more convenient for dial-up, because external modems often can be semi-permanentlyconfigured via parameters stored in non-volatile RAM and they usually provide lighted indicators that display thestate of important RS-232 signals. Blinking lights impress visitors, but lights are also very useful to see whether amodem is operating properly.
Internal modems usually lack non-volatile RAM, so their configuration may be limited only to setting DIP switches.If your internal modem has any signal indicator lights, it is probably difficult to view the lights when the system’scover is in place.
296

Chapter 16 Serial Communications
16.4.1.4 Modems and Cables
A background knowledge of these items is assumed
• You know how to connect your modem to your computer so that the two can communicate (unless you have aninternal modem, which does not need such a cable)
• You are familiar with your modem’s command set, or know where to look up needed commands
• You know how to configure your modem (probably via a terminal communications program) so you can set thenon-volatile RAM parameters
The first, connecting your modem, is usually simple — most straight-through serial cables work without anyproblems. You need to have a cable with appropriate connectors (DB-25 or DB-9, male or female) on each end, andthe cable must be a DCE-to-DTE cable with these signals wired:
• Transmitted Data (SD)
• Received Data (RD)
• Request to Send (RTS)
• Clear to Send (CTS)
• Data Set Ready (DSR)
• Data Terminal Ready (DTR)
• Carrier Detect (CD)
• Signal Ground (SG)
FreeBSD needs the RTS and CTS signals for flow-control at speeds above 2400bps, the CD signal to detect when acall has been answered or the line has been hung up, and the DTR signal to reset the modem after a session iscomplete. Some cables are wired without all of the needed signals, so if you have problems, such as a login sessionnot going away when the line hangs up, you may have a problem with your cable.
The second prerequisite depends on the modem(s) you use. If you do not know your modem’s command set by heart,you will need to have the modem’s reference book or user’s guide handy. Sample commands for USR Sportster14,400 external modems will be given, which you may be able to use as a reference for your own modem’scommands.
Lastly, you will need to know how to setup your modem so that it will work well with FreeBSD. Like otherUNIX-like operating systems, FreeBSD uses the hardware signals to find out when a call has been answered or a linehas been hung up and to hangup and reset the modem after a call. FreeBSD avoids sending commands to the modemor watching for status reports from the modem. If you are familiar with connecting modems to PC-based bulletinboard systems, this may seem awkward.
297

Chapter 16 Serial Communications
16.4.1.5 Serial Interface Considerations
FreeBSD supports NS8250-, NS16450-, NS16550-, and NS16550A-based EIA RS-232C (CCITT V.24)communications interfaces. The 8250 and 16450 devices have single-character buffers. The 16550 device provides a16-character buffer, which allows for better system performance. (Bugs in plain 16550’s prevent the use of the16-character buffer, so use 16550A’s if possible). Because single-character-buffer devices require more work by theoperating system than the 16-character-buffer devices, 16550A-based serial interface cards are much preferred. If thesystem has many active serial ports or will have a heavy load, 16550A-based cards are better for low-error-ratecommunications.
16.4.2 Quick OverviewHere is the process that FreeBSD follows to accept dial-up logins. A getty process, spawned by init, patientlywaits to open the assigned serial port (/dev/ttyd0, for our example). The command ps ax might show this:
4850 ?? I 0:00.09 /usr/libexec/getty V19200 ttyd0
When a user dials the modem’s line and the modems connect, the CD line is asserted by the modem. The kernelnotices that carrier has been detected and completes getty’s open of the port. getty sends a login: prompt at thespecified initial line speed. getty watches to see if legitimate characters are received, and, in a typical configuration,if it finds junk (probably due to the modem’s connection speed being different than getty’s speed), getty triesadjusting the line speeds until it receives reasonable characters.
We hope getty finds the correct speed and the user sees a login: prompt. After the user enters his/her login name,getty executes /usr/bin/login, which completes the login by asking for the user’s password and then startingthe user’s shell.
Let’s dive into the configuration...
16.4.3 Kernel ConfigurationFreeBSD kernels typically come prepared to search for four serial ports, known in the MS-DOS world as COM1:,COM2:, COM3:, and COM4:. FreeBSD can presently also handle “dumb” multiport serial interface cards, such as theBoca Board 1008 and 2016 (please see the manual page sio(4) for kernel configuration information if you have amultiport serial card). The default kernel only looks for the standard COM ports, though.
To see if your kernel recognizes any of your serial ports, watch for messages while the kernel is booting, or use the/sbin/dmesg command to replay the kernel’s boot messages. In particular, look for messages that start with thecharacters sio. Hint: to view just the messages that have the word sio, use the command:
# /sbin/dmesg | grep ’sio’
298

Chapter 16 Serial Communications
For example, on a system with four serial ports, these are the serial-port specific kernel boot messages:
sio0 at 0x3f8-0x3ff irq 4 on isasio0: type 16550Asio1 at 0x2f8-0x2ff irq 3 on isasio1: type 16550Asio2 at 0x3e8-0x3ef irq 5 on isasio2: type 16550Asio3 at 0x2e8-0x2ef irq 9 on isasio3: type 16550A
If your kernel does not recognize all of your serial ports, you will probably need to configure a custom FreeBSDkernel for your system.
Please see the BSD System Manager’s Manual chapter on “Building Berkeley Kernels with Config” [the source forwhich is in /usr/src/share/doc/smm] and “FreeBSD Configuration Options” [in /sys/conf/options and in/sys/arch/conf/options.arch, with arch for example being i386] for more information on configuring andbuilding kernels. You may have to unpack the kernel source distribution if have not installed the system sourcesalready (srcdist/srcsys.?? in FreeBSD 1.1, srcdist/sys.?? in FreeBSD 1.1.5.1, or the entire sourcedistribution in FreeBSD 2.0) to be able to configure and build kernels.
Create a kernel configuration file for your system (if you have not already) by cding to /sys/i386/conf. Then, ifyou are creating a new custom configuration file, copy the file GENERICAH (or GENERICBT, if you have a BusTekSCSI controller on FreeBSD 1.x) to YOURSYS, where YOURSYS is the name of your system, but in upper-case letters.Edit the file, and change the device lines:
device sio0 at isa? port "IO_COM1" tty irq 4 vector siointrdevice sio1 at isa? port "IO_COM2" tty irq 3 vector siointrdevice sio2 at isa? port "IO_COM3" tty irq 5 vector siointrdevice sio3 at isa? port "IO_COM4" tty irq 9 vector siointr
You can comment-out or completely remove lines for devices you do not have. If you have a multiport serial board,such as the Boca Board BB2016, please see the sio(4) man page for complete information on how to writeconfiguration lines for multiport boards. Be careful if you are using a configuration file that was previously used for adifferent version of FreeBSD because the device flags have changed between versions.
Note: port "IO_COM1" is a substitution for port 0x3f8, IO_COM2 is 0x2f8, IO_COM3 is 0x3e8, and IO_COM4 is0x2e8, which are fairly common port addresses for their respective serial ports; interrupts 4, 3, 5, and 9 are fairlycommon interrupt request lines. Also note that regular serial ports cannot share interrupts on ISA-bus PCs(multiport boards have on-board electronics that allow all the 16550A’s on the board to share one or two interruptrequest lines).
299

Chapter 16 Serial Communications
When you are finished adjusting the kernel configuration file, use the program config as documented in “BuildingBerkeley Kernels with Config” and the config(8) manual page to prepare a kernel building directory, then build,install, and test the new kernel.
16.4.4 Device Special FilesMost devices in the kernel are accessed through “device special files”, which are located in the /dev directory. Thesio devices are accessed through the /dev/ttyd? (dial-in) and /dev/cuaa? (call-out) devices. On FreeBSDversion 1.1.5 and higher, there are also initialization devices (/dev/ttyid? and /dev/cuai0?) and locking devices(/dev/ttyld? and /dev/cual0?). The initialization devices are used to initialize communications port parameterseach time a port is opened, such as crtscts for modems which use CTS/RTS signaling for flow control. Thelocking devices are used to lock flags on ports to prevent users or programs changing certain parameters; see themanual pages termios(4), sio(4), and stty(1) for information on the terminal settings, locking & initializing devices,and setting terminal options, respectively.
16.4.4.1 Making Device Special Files
A shell script called MAKEDEV in the /dev directory manages the device special files. (The manual page forMAKEDEV(8) on FreeBSD 1.1.5 is fairly bogus in its discussion of COM ports, so ignore it.) To use MAKEDEV tomake dial-up device special files for COM1: (port 0), cd to /dev and issue the command MAKEDEV ttyd0. Likewise,to make dial-up device special files for COM2: (port 1), use MAKEDEV ttyd1.
MAKEDEV not only creates the /dev/ttyd? device special files, but also creates the /dev/cuaa? (and all of theinitializing and locking special files under FreeBSD 1.1.5 and up) and removes the hardwired terminal special file/dev/tty0?, if it exists.
After making new device special files, be sure to check the permissions on the files (especially the /dev/cua* files)to make sure that only users who should have access to those device special files can read & write on them — youprobably do not want to allow your average user to use your modems to dial-out. The default permissions on the/dev/cua* files should be sufficient:
crw-rw---- 1 uucp dialer 28, 129 Feb 15 14:38 /dev/cuaa1crw-rw---- 1 uucp dialer 28, 161 Feb 15 14:38 /dev/cuaia1crw-rw---- 1 uucp dialer 28, 193 Feb 15 14:38 /dev/cuala1
These permissions allow the user uucp and users in the group dialer to use the call-out devices.
300

Chapter 16 Serial Communications
16.4.5 Configuration FilesThere are three system configuration files in the /etc directory that you will probably need to edit to allow dial-upaccess to your FreeBSD system. The first, /etc/gettytab, contains configuration information for the/usr/libexec/getty daemon. Second, /etc/ttys holds information that tells /sbin/init what tty devicesshould have getty processes running on them. Lastly, you can place port initialization commands in the/etc/rc.serial script if you have FreeBSD 1.1.5.1 or higher; otherwise, you can initialize ports in the/etc/rc.local script.
There are two schools of thought regarding dial-up modems on UNIX. One group likes to configure their modemsand system so that no matter at what speed a remote user dials in, the local computer-to-modem RS-232 interfaceruns at a locked speed. The benefit of this configuration is that the remote user always sees a system login promptimmediately. The downside is that the system does not know what a user’s true data rate is, so full-screen programslike Emacs will not adjust their screen-painting methods to make their response better for slower connections.
The other school configures their modems’ RS-232 interface to vary its speed based on the remote user’s connectionspeed. For example, V.32bis (14.4 Kbps) connections to the modem might make the modem run its RS-232 interfaceat 19.2 Kbps, while 2400 bps connections make the modem’s RS-232 interface run at 2400 bps. Because getty doesnot understand any particular modem’s connection speed reporting, getty gives a login: message at an initialspeed and watches the characters that come back in response. If the user sees junk, it is assumed that they know theyshould press the � Enter � key until they see a recognizable prompt. If the data rates do not match, getty seesanything the user types as “junk”, tries going to the next speed and gives the login: prompt again. This procedurecan continue ad nauseam, but normally only takes a keystroke or two before the user sees a good prompt. Obviously,this login sequence does not look as clean as the former “locked-speed” method, but a user on a low-speedconnection should receive better interactive response from full-screen programs.
The author will try to give balanced configuration information, but is biased towards having the modem’s data ratefollow the connection rate.
16.4.5.1 /etc/gettytab
/etc/gettytab is a termcap(5)-style file of configuration information for getty(8). Please see the gettytab(5)manual page for complete information on the format of the file and the list of capabilities.
16.4.5.1.1 Locked-Speed Config
If you are locking your modem’s data communications rate at a particular speed, you probably will not need to makeany changes to /etc/gettytab.
16.4.5.1.2 Matching-Speed Config
You will need to setup an entry in /etc/gettytab to give getty information about the speeds you wish to use for
301

Chapter 16 Serial Communications
your modem. If you have a 2400 bps modem, you can probably use the existing D2400 entry. This entry alreadyexists in the FreeBSD 1.1.5.1 gettytab file, so you do not need to add it unless it is missing under your version ofFreeBSD:
## Fast dialup terminals, 2400/1200/300 rotary (can start either way)#D2400|d2400|Fast-Dial-2400:\
:nx=D1200:tc=2400-baud:3|D1200|Fast-Dial-1200:\
:nx=D300:tc=1200-baud:5|D300|Fast-Dial-300:\
:nx=D2400:tc=300-baud:
If you have a higher speed modem, you will probably need to add an entry in /etc/gettytab; here is an entry youcould use for a 14.4 Kbps modem with a top interface speed of 19.2 Kbps:
## Additions for a V.32bis Modem#um|V300|High Speed Modem at 300,8-bit:\
:nx=V19200:tc=std.300:un|V1200|High Speed Modem at 1200,8-bit:\
:nx=V300:tc=std.1200:uo|V2400|High Speed Modem at 2400,8-bit:\
:nx=V1200:tc=std.2400:up|V9600|High Speed Modem at 9600,8-bit:\
:nx=V2400:tc=std.9600:uq|V19200|High Speed Modem at 19200,8-bit:\
:nx=V9600:tc=std.19200:
On FreeBSD 1.1.5 and later, this will result in 8-bit, no parity connections. Under FreeBSD 1.1, add :np: parametersto the std.xxx entries at the top of the file for 8 bits, no parity; otherwise, the default is 7 bits, even parity.
The example above starts the communications rate at 19.2 Kbps (for a V.32bis connection), then cycles through 9600bps (for V.32), 2400 bps, 1200 bps, 300 bps, and back to 19.2 Kbps. Communications rate cycling is implementedwith the nx= (“next table”) capability. Each of the lines uses a tc= (“table continuation”) entry to pick up the rest ofthe “standard” settings for a particular data rate.
If you have a 28.8 Kbps modem and/or you want to take advantage of compression on a 14.4 Kbps modem, you needto use a higher communications rate than 19.2 Kbps. Here is an example of a gettytab entry starting a 57.6 Kbps:
## Additions for a V.32bis or V.34 Modem# Starting at 57.6 Kbps
302

Chapter 16 Serial Communications
#vm|VH300|Very High Speed Modem at 300,8-bit:\
:nx=VH57600:tc=std.300:vn|VH1200|Very High Speed Modem at 1200,8-bit:\
:nx=VH300:tc=std.1200:vo|VH2400|Very High Speed Modem at 2400,8-bit:\
:nx=VH1200:tc=std.2400:vp|VH9600|Very High Speed Modem at 9600,8-bit:\
:nx=VH2400:tc=std.9600:vq|VH57600|Very High Speed Modem at 57600,8-bit:\
:nx=VH9600:tc=std.57600:
If you have a slow CPU or a heavily loaded system and you do not have 16550A-based serial ports, you may receivesio “silo” errors at 57.6 Kbps.
16.4.5.2 /etc/ttys
/etc/ttys is the list of ttys for init to monitor. /etc/ttys also provides security information to login (userroot may only login on ttys marked secure). See the manual page for ttys(5) for more information.
You will need to either modify existing lines in /etc/ttys or add new lines to make init run getty processesautomatically on your new dial-up ports. The general format of the line will be the same, whether you are using alocked-speed or matching-speed configuration:
ttyd0 "/usr/libexec/getty xxx" dialup on
The first item in the above line is the device special file for this entry — ttyd0 means /dev/ttyd0 is the file thatthis getty will be watching. The second item, "/usr/libexec/getty xxx" (xxx will be replaced by the initialgettytab capability) is the process init will run on the device. The third item, dialup, is the default terminaltype. The fourth parameter, on, indicates to init that the line is operational. There can be a fifth parameter, secure,but it should only be used for terminals which are physically secure (such as the system console).
The default terminal type (dialup in the example above) may depend on local preferences. dialup is the traditionaldefault terminal type on dial-up lines so that users may customize their login scripts to notice when the terminal isdialup and automatically adjust their terminal type. However, the author finds it easier at his site to specify vt102
as the default terminal type, since the users just use VT102 emulation on their remote systems.
After you have made changes to /etc/ttys, you may send the init process a HUP signal to re-read the file. Youcan use the command
# kill -HUP 1
303

Chapter 16 Serial Communications
to send the signal. If this is your first time setting up the system, though, you may want to wait until your modem(s)are properly configured and connected before signaling init.
16.4.5.2.1 Locked-Speed Config
For a locked-speed configuration, your ttys entry needs to have a fixed-speed entry provided to getty. For amodem whose port speed is locked at 19.2 Kbps, the ttys entry might look like this:
ttyd0 "/usr/libexec/getty std.19200" dialup on
If your modem is locked at a different data rate, substitute the appropriate name for the std.speed entry forstd.19200 from /etc/gettytab for your modem’s data rate.
16.4.5.2.2 Matching-Speed Config
In a matching-speed configuration, your ttys entry needs to reference the appropriate beginning “auto-baud” (sic)entry in /etc/gettytab. For example, if you added the above suggested entry for a matching-speed modem thatstarts at 19.2 Kbps (the gettytab entry containing the V19200 starting point), your ttys entry might look like this:
ttyd0 "/usr/libexec/getty V19200" dialup on
16.4.5.3 /etc/rc.serial or /etc/rc.local
High-speed modems, like V.32, V.32bis, and V.34 modems, need to use hardware (RTS/CTS) flow control. You canadd stty commands to /etc/rc.serial on FreeBSD 1.1.5.1 and up, or /etc/rc.local on FreeBSD 1.1, to setthe hardware flow control flag in the FreeBSD kernel for the modem ports.
For example, on a sample FreeBSD 1.1.5.1 system, /etc/rc.serial reads:
#!/bin/sh## Serial port initial configuration
stty -f /dev/ttyid1 crtsctsstty -f /dev/cuai01 crtscts
This sets the termios flag crtscts on serial port #1’s (COM2:) dial-in and dial-out initialization devices.
On an old FreeBSD 1.1 system, these entries were added to /etc/rc.local to set the crtscts flag on the devices:
# Set serial ports to use RTS/CTS flow controlstty -f /dev/ttyd0 crtscts
304

Chapter 16 Serial Communications
stty -f /dev/ttyd1 crtsctsstty -f /dev/ttyd2 crtsctsstty -f /dev/ttyd3 crtscts
Since there is no initialization device special file on FreeBSD 1.1, one has to just set the flags on the sole devicespecial file and hope the flags are not cleared by a miscreant.
16.4.6 Modem SettingsIf you have a modem whose parameters may be permanently set in non-volatile RAM, you will need to use aterminal program (such as Telix under MS-DOS or tip under FreeBSD) to set the parameters. Connect to themodem using the same communications speed as the initial speed getty will use and configure the modem’snon-volatile RAM to match these requirements:
• CD asserted when connected
• DTR asserted for operation; dropping DTR hangs up line & resets modem
• CTS transmitted data flow control
• Disable XON/XOFF flow control
• RTS received data flow control
• Quiet mode (no result codes)
• No command echo
Please read the documentation for your modem to find out what commands and/or DIP switch settings you need togive it.
For example, to set the above parameters on a USRobotics Sportster 14,400 external modem, one could give thesecommands to the modem:
ATZAT&C1&D2&H1&I0&R2&W
You might also want to take this opportunity to adjust other settings in the modem, such as whether it will useV.42bis and/or MNP5 compression.
The USR Sportster 14,400 external modem also has some DIP switches that need to be set; for other modems,perhaps you can use these settings as an example:
• Switch 1: UP — DTR Normal
• Switch 2: Do not care (Verbal Result Codes/Numeric Result Codes)
305

Chapter 16 Serial Communications
• Switch 3: UP — Suppress Result Codes
• Switch 4: DOWN — No echo, offline commands
• Switch 5: UP — Auto Answer
• Switch 6: UP — Carrier Detect Normal
• Switch 7: UP — Load NVRAM Defaults
• Switch 8: Do not care (Smart Mode/Dumb Mode)
Result codes should be disabled/suppressed for dial-up modems to avoid problems that can occur if gettymistakenly gives a login: prompt to a modem that is in command mode and the modem echoes the command orreturns a result code. I have heard this sequence can result in a extended, silly conversation between getty and themodem.
16.4.6.1 Locked-speed Config
For a locked-speed configuration, you will need to configure the modem to maintain a constant modem-to-computerdata rate independent of the communications rate. On a USR Sportster 14,400 external modem, these commands willlock the modem-to-computer data rate at the speed used to issue the commands:
ATZAT&B1&W
16.4.6.2 Matching-speed Config
For a variable-speed configuration, you will need to configure your modem to adjust its serial port data rate to matchthe incoming call rate. On a USR Sportster 14,400 external modem, these commands will lock the modem’serror-corrected data rate to the speed used to issue the commands, but allow the serial port rate to vary fornon-error-corrected connections:
ATZAT&B2&W
16.4.6.3 Checking the Modem’s Configuration
Most high-speed modems provide commands to view the modem’s current operating parameters in a somewhathuman-readable fashion. On the USR Sportster 14,400 external modems, the command ATI5 displays the settingsthat are stored in the non-volatile RAM. To see the true operating parameters of the modem (as influenced by theUSR’s DIP switch settings), use the commands ATZ and then ATI4.
306

Chapter 16 Serial Communications
If you have a different brand of modem, check your modem’s manual to see how to double-check your modem’sconfiguration parameters.
16.4.7 TroubleshootingHere are a few steps you can follow to check out the dial-up modem on your system.
16.4.7.1 Checking out the FreeBSD system
Hook up your modem to your FreeBSD system, boot the system, and, if your modem has status indication lights,watch to see whether the modem’s DTR indicator lights when the login: prompt appears on the system’s console— if it lights up, that should mean that FreeBSD has started a getty process on the appropriate communicationsport and is waiting for the modem to accept a call.
If the DTR indicator doesn’t light, login to the FreeBSD system through the console and issue a ps ax to see ifFreeBSD is trying to run a getty process on the correct port. You should see a lines like this among the processesdisplayed:
114 ?? I 0:00.10 /usr/libexec/getty V19200 ttyd0115 ?? I 0:00.10 /usr/libexec/getty V19200 ttyd1
If you see something different, like this:
114 d0 I 0:00.10 /usr/libexec/getty V19200 ttyd0
and the modem has not accepted a call yet, this means that getty has completed its open on the communicationsport. This could indicate a problem with the cabling or a mis-configured modem, because getty should not be ableto open the communications port until CD (carrier detect) has been asserted by the modem.
If you do not see any getty processes waiting to open the desired ttyd? port, double-check your entries in/etc/ttys to see if there are any mistakes there. Also, check the log file /var/log/messages to see if there areany log messages from init or getty regarding any problems. If there are any messages, triple-check theconfiguration files /etc/ttys and /etc/gettytab, as well as the appropriate device special files /dev/ttyd?,for any mistakes, missing entries, or missing device special files.
16.4.7.2 Try Dialing In
Try dialing into the system; be sure to use 8 bits, no parity, 1 stop bit on the remote system. If you do not get aprompt right away, or get garbage, try pressing � Enter � about once per second. If you still do not see a login:
307

Chapter 16 Serial Communications
prompt after a while, try sending a BREAK. If you are using a high-speed modem to do the dialing, try dialing againafter locking the dialing modem’s interface speed (via AT&B1 on a USR Sportster, for example).
If you still cannot get a login: prompt, check /etc/gettytab again and double-check that
• The initial capability name specified in /etc/ttys for the line matches a name of a capability in/etc/gettytab
• Each nx= entry matches another gettytab capability name
• Each tc= entry matches another gettytab capability name
If you dial but the modem on the FreeBSD system will not answer, make sure that the modem is configured toanswer the phone when DTR is asserted. If the modem seems to be configured correctly, verify that the DTR line isasserted by checking the modem’s indicator lights (if it has any).
If you have gone over everything several times and it still does not work, take a break and come back to it later. If itstill does not work, perhaps you can send an electronic mail message to the FreeBSD general questions mailing list<[email protected]>describing your modem and your problem, and the good folks on the listwill try to help.
16.4.8 AcknowledgmentsThanks to these people for comments and advice:
Sean Kelly <[email protected]>
for a number of good suggestions
16.5 Dial-out ServiceInformation integrated from FAQ.
The following are tips to getting your host to be able to connect over the modem to another computer. This isappropriate for establishing a terminal session with a remote host.
This is useful to log onto a BBS.
This kind of connection can be extremely helpful to get a file on the Internet if you have problems with PPP. If youneed to FTP something and PPP is broken, use the terminal session to FTP it. Then use zmodem to transfer it to yourmachine.
308

Chapter 16 Serial Communications
16.5.1 Why cannot I run tip or cu?On your system, the programs tip and cu are probably executable only by uucp and group dialer. You can usethe group dialer to control who has access to your modem or remote systems. Just add yourself to group dialer.
Alternatively, you can let everyone on your system run tip and cu by typing:
# chmod 4511 /usr/bin/tip
You do not have to run this command for cu, since cu is just a hard link to tip.
16.5.2 My stock Hayes modem is not supported, what can I do?Actually, the man page for tip is out of date. There is a generic Hayes dialer already built in. Just use at=hayes inyour /etc/remote file.
The Hayes driver is not smart enough to recognize some of the advanced features of newer modems—messages likeBUSY, NO DIALTONE, or CONNECT 115200 will just confuse it. You should turn those messages off when you usetip (using ATX0&W).
Also, the dial timeout for tip is 60 seconds. Your modem should use something less, or else tip will think there is acommunication problem. Try ATS7=45&W.
Actually, as shipped tip does not yet support it fully. The solution is to edit the file tipconf.h in the directory/usr/src/usr.bin/tip/tipObviously you need the source distribution to do this.
Edit the line #define HAYES 0 to #define HAYES 1. Then make and make install. Everything works nicelyafter that.
16.5.3 How am I expected to enter these AT commands?Make what is called a “direct” entry in your /etc/remote file. For example, if your modem is hooked up to the firstserial port, /dev/cuaa0, then put in the following line:
cuaa0:dv=/dev/cuaa0:br#19200:pa=none
Use the highest bps rate your modem supports in the br capability. Then, type tip cuaa0 and you will be connectedto your modem.
If there is no /dev/cuaa0 on your system, do this:
# cd /dev# MAKEDEV cuaa0
309

Chapter 16 Serial Communications
Or use cu as root with the following command:
# cu -lline -sspeed
line is the serial port (e.g./dev/cuaa0) and speed is the speed (e.g.57600). When you are done entering the ATcommands hit ~. to exit.
16.5.4 The @ sign for the pn capability does not work!The @ sign in the phone number capability tells tip to look in /etc/phones for a phone number. But the @ sign isalso a special character in capability files like /etc/remote. Escape it with a backslash:
pn=\@
16.5.5 How can I dial a phone number on the command line?Put what is called a “generic” entry in your /etc/remote file. For example:
tip115200|Dial any phone number at 115200 bps:\:dv=/dev/cuaa0:br#115200:at=hayes:pa=none:du:
tip57600|Dial any phone number at 57600 bps:\:dv=/dev/cuaa0:br#57600:at=hayes:pa=none:du:
Then you can things like:
# tip -115200 5551234
If you prefer cu over tip, use a generic cu entry:
cu115200|Use cu to dial any number at 115200bps:\:dv=/dev/cuaa1:br#57600:at=hayes:pa=none:du:
and type:
# cu 5551234 -s 115200
310

Chapter 16 Serial Communications
16.5.6 Do I have to type in the bps rate every time I do that?Put in an entry for tip1200 or cu1200, but go ahead and use whatever bps rate is appropriate with the br capability.tip thinks a good default is 1200 bps which is why it looks for a tip1200 entry. You do not have to use 1200 bps,though.
16.5.7 I access a number of hosts through a terminal server.Rather than waiting until you are connected and typing CONNECT � host � each time, use tip’s cm capability. Forexample, these entries in /etc/remote:
pain|pain.deep13.com|Forrester’s machine:\:cm=CONNECT pain\n:tc=deep13:
muffin|muffin.deep13.com|Frank’s machine:\:cm=CONNECT muffin\n:tc=deep13:
deep13:Gizmonics Institute terminal server:\:dv=/dev/cuaa2:br#38400:at=hayes:du:pa=none:pn=5551234:
will let you type tip pain or tip muffin to connect to the hosts pain or muffin; and tip deep13 to get to theterminal server.
16.5.8 Can tip try more than one line for each site?This is often a problem where a university has several modem lines and several thousand students trying to usethem...
Make an entry for your university in /etc/remote and use @ for the pn capability:
big-university:\:pn=\@:tc=dialout
dialout:\:dv=/dev/cuaa3:br#9600:at=courier:du:pa=none:
Then, list the phone numbers for the university in /etc/phones:
big-university 5551111big-university 5551112big-university 5551113big-university 5551114
tip will try each one in the listed order, then give up. If you want to keep retrying, run tip in a while loop.
311

Chapter 16 Serial Communications
16.5.9 Why do I have to hit CTRL+P twice to send CTRL+P once?CTRL+P is the default “force” character, used to tell tip that the next character is literal data. You can set the forcecharacter to any other character with the ~s escape, which means “set a variable.”
Type ~sforce=single-char followed by a newline. single-char is any single character. If you leave outsingle-char, then the force character is the nul character, which you can get by typing CTRL+2 orCTRL+SPACE. A pretty good value for single-char is SHIFT+CTRL+6, which is only used on some terminalservers.
You can have the force character be whatever you want by specifying the following in your $HOME/.tiprc file:
force= � single-char �
16.5.10 Suddenly everything I type is in UPPER CASE??You must have pressed CTRL+A, tip’s “raise character,” specially designed for people with broken caps-lock keys.Use ~s as above and set the variable raisechar to something reasonable. In fact, you can set it to the same as theforce character, if you never expect to use either of these features.
Here is a sample .tiprc file perfect for Emacs users who need to type CTRL+2 and CTRL+A a lot:
force=^^raisechar=^^
The ^^ is SHIFT+CTRL+6.
16.5.11 How can I do file transfers with tip?If you are talking to another UNIX system, you can send and receive files with ~p (put) and ~t (take). Thesecommands run cat and echo on the remote system to accept and send files. The syntax is:
~p local-file [remote-file]
~t remote-file [local-file]
There is no error checking, so you probably should use another protocol, like zmodem.
312

Chapter 16 Serial Communications
16.5.12 How can I run zmodem with tip?To receive files, start the sending program on the remote end. Then, type ~C rz to begin receiving them locally.
To send files, start the receiving program on the remote end. Then, type ~C sz files to send them to the remotesystem.
16.6 Setting Up the Serial ConsoleKazutaka YOKOTA <[email protected]> and Bill Paul <[email protected]>:
The text is heavily based on /sys/i386/boot/biosboot/README.serialwritten by Bill Paul<[email protected]>.
16.6.1 IntroductionThe FreeBSD/i386 operating system can boot on a system with only a dumb terminal on a serial port as a console.Such a configuration should be useful for two classes of people: system administrators who wish to install FreeBSDon machines that have no keyboard or monitor attached, and developers who want to debug the kernel or devicedrivers.
Starting from version 3.1, FreeBSD/i386 employs a three stage bootstrap. The first two stages are in the boot blockcode which is stored at the beginning of the FreeBSD slice on the boot disk. The boot block will then load and runthe boot loader (/boot/loader) as the third stage code. (See boot(8) and loader(8) for more details on the bootprocess.)
In order to set up the serial console you must configure the boot block code, the boot loader code and the kernel.
In FreeBSD version 3.0, the boot loader does not exist and there are only two stages in the bootstrap; the boot blocksdirectly load the kernel into memory. If you are using FreeBSD 3.0, then you should disregard any reference to theboot loader in this section. You can still use the serial port as a console.
FreeBSD versions 2.X are quite different from 3.X, in that the serial port driver, sio(4), must be configured in adifferent way. This chapter will not describe the settings for version 2.X systems. If you are using these olderversions of FreeBSD, please consult /sys/i386/boot/biosboot/README.serial instead.
16.6.2 6 Steps to Set up the Serial Console
1. Prepare a serial cable.
313

Chapter 16 Serial Communications
You will need either a null-modem cable or a standard serial cable and a null-modem adapter. See Section 16.3for a discussion on serial cables.
2. Unplug your keyboard.
Most PC systems probe for the keyboard during the Power-On Self-Test (POST) and will generate an error if thekeyboard is not detected. Some machines complain loudly about the lack of a keyboard and will not continue toboot until it is plugged in.
If your computer complains about the error, but boots anyway, then you do not have to do anything special.(Some machines with Phoenix BIOS installed merely say Keyboard failed and continue to boot normally.)
If your computer refuses to boot without a keyboard attached then you will have to configure the BIOS so that itignores this error (if it can). Consult your motherboard’s manual for details on how to do this.
Tip: Setting the keyboard to “Not installed” in the BIOS setup does not mean that you will not be able to useyour keyboard. All this does is tell the BIOS not to probe for a keyboard at power-on so that it will notcomplain if the keyboard is not plugged in. You can leave the keyboard plugged in even with this flag set to“Not installed” and the keyboard will still work.
Note: If your system has a PS/2 mouse, chances are very good that you may have to unplug your mouse aswell as your keyboard. This is because PS/2 mice share some hardware with the keyboard, and leaving themouse plugged in can fool the keyboard probe into thinking the keyboard is still there. It is said that aGateway 2000 Pentium 90MHz system with an AMI BIOS that behaves this way. In general this is not aproblem since the mouse is not much good without the keyboard anyway.
3. Plug a dumb terminal into COM1: (sio0).
If you do not have a dumb terminal, you can use an old PC/XT with a modem program, or the serial port onanother UNIX box. If you do not have a COM1: (sio0), get one. At this time, there is no way to select a portother than COM1: for the boot blocks without recompiling the boot blocks. If you are already using COM1: foranother device, you will have to temporarily remove that device and install a new boot block and kernel onceyou get FreeBSD up and running. (It is assumed that COM1: will be available on a file/compute/terminal serveranyway; if you really need COM1: for something else (and you cannot switch that something else to COM2:
(sio1)), then you probably should not even be bothering with all this in the first place.)
4. Make sure the configuration file of your kernel has appropriate flags set for COM1: (sio0).
Relevant flags are:
314

Chapter 16 Serial Communications
0x10
Enables console support for this unit. The other console flags are ignored unless this is set. Currently, atmost one unit can have console support; the first one (in config file order) with this flag set is preferred.This option alone will not make the serial port the console. Set the following flag or use the -h optiondescribed below, together with this flag.
0x20
Forces this unit to be the console (unless there is another higher priority console), regardless of the -hoption discussed below. This flag replaces the COMCONSOLE option in FreeBSD versions 2.X. The flag0x20 must be used together with the 0x10 flag.
0x40
Reserves this unit (in conjunction with 0x10) and makes the unit unavailable for normal access. You shouldnot set this flag to the serial port unit which you want to use as the serial console. The only use of this flagis to designate the unit for kernel remote debugging. See Chapter 23 for more information on remotedebugging.
Note: In FreeBSD 4.0-CURRENT or later the semantics of the flag 0x40 are slightly different and thereis another flag to specify a serial port for remote debugging.
Example:
device sio0 at isa? port "IO_COM1" tty flags 0x10 irq 4
See sio(4) for more details.
If the flags were not set, you need to run UserConfig (on a different console) or recompile the kernel.
5. Create boot.config in the root directory of the a partition on the boot drive.
This file will instruct the boot block code how you would like to boot the system. In order to activate the serialconsole, you need one or more of the following options—if you want multiple options, include them all on thesame line:
-h
Toggles internal and serial consoles. You can use this to switch console devices. For instance, if you bootfrom the internal (video) console, you can use -h to direct the boot loader and the kernel to use the serialport as its console device. Alternatively, if you boot from the serial port, you can use the -h to tell the bootloader and the kernel to use the video display as the console instead.
315

Chapter 16 Serial Communications
-D
Toggles single and dual console configurations. In the single configuration the console will be either theinternal console (video display) or the serial port, depending on the state of the -h option above. In the dualconsole configuration, both the video display and the serial port will become the console at the same time,regardless of the state of the -h option. However, that the dual console configuration takes effect onlyduring the boot block is running. Once the boot loader gets control, the console specified by the -h optionbecomes the only console.
-P
Makes the boot block probe the keyboard. If no keyboard is found, the -D and -h options are automaticallyset.
Note: Due to space constraints in the current version of the boot blocks, the -P option is capable ofdetecting extended keyboards only. Keyboards with less than 101 keys (and without F11 and F12 keys)may not be detected. Keyboards on some laptop computers may not be properly found because of thislimitation. If this is to be the case with your system, you have to abandon using the -P option.Unfortunately there is no workaround for this problem.
Use either the -P option to select the console automatically, or the -h option to activate the serial console.
You may include other options described in boot(8) as well.
The options, except for -P, will be passed to the boot loader (/boot/loader). The boot loader will determinewhich of the internal video or the serial port should become the console by examining the state of the -h optionalone. This means that if you specify the -D option but not the -h option in /boot.config, you can use theserial port as the console only during the boot block; the boot loader will use the internal video display as theconsole.
6. Boot the machine.
When you start your FreeBSD box, the boot blocks will echo the contents of /boot.config to the console. Forexample;
/boot.config: -PKeyboard: no
The second line appears only if you put -P in /boot.config and indicates presence/absence of the keyboard.These messages go to either serial or internal console, or both, depending on the option in /boot.config.
Options Message goes to
none internal console
316

Chapter 16 Serial Communications
Options Message goes to
-h serial console
-D serial and internal consoles
-Dh serial and internal consoles
-P, keyboard present internal console
-P, keyboard absent serial console
After the above messages, there will be a small pause before the boot blocks continue loading the boot loaderand before any further messages printed to the console. Under normal circumstances, you do not need tointerrupt the boot blocks, but you may want to do so in order to make sure things are set up correctly.
Hit any key, other than Enter/Return, at the console to interrupt the boot process. The boot blocks will thenprompt you for further action. You should now see something like:
>> FreeBSD/i386 BOOTDefault: 0:wd(0,a)/boot/loaderboot:
Verify the above message appears on either the serial or internal console or both, according to the options you putin /boot.config. If the message appears in the correct console, hit Enter/Return to continue the boot process.
If you want the serial console but you do not see the prompt on the serial terminal, something is wrong with yoursettings. In the meantime, you enter -h and hit Enter/Return (if possible) to tell the boot block (and then the bootloader and the kernel) to choose the serial port for the console. Once the system is up, go back and check whatwent wrong.
After the boot loader is loaded and you are in the third stage of the boot process you can still switch between theinternal console and the serial console by setting appropriate environment variables in the boot loader. See Section16.6.5.
16.6.3 SummaryHere is the summary of various settings discussed in this section and the console eventually selected.
16.6.3.1 Case 1: You set the flags to 0x10 for sio0
device sio0 at isa? port "IO_COM1" tty flags 0x10 irq 4
Options in /boot.config Console during bootblocks
Console during bootloader
Console in kernel
317

Chapter 16 Serial Communications
Options in /boot.config Console during bootblocks
Console during bootloader
Console in kernel
nothing internal internal internal
-h serial serial serial
-D serial and internal internal internal
-Dh serial and internal serial serial
-P, keyboard present internal internal internal
-P, keyboard absent serial and internal serial serial
16.6.3.2 Case 2: You set the flags to 0x30 for sio0
device sio0 at isa? port "IO_COM1" tty flags 0x30 irq 4
Options in /boot.config Console during bootblocks
Console during bootloader
Console in kernel
nothing internal internal serial
-h serial serial serial
-D serial and internal internal serial
-Dh serial and internal serial serial
-P, keyboard present internal internal serial
-P, keyboard absent serial and internal serial serial
16.6.4 Tips for the Serial Console
16.6.4.1 Setting A Faster Serial Port Speed
By default the serial port settings are set to 9600 baud, 8 bits, no parity, 1 stop bit. If you wish to change the speed,you need to recompile at least the boot blocks. Add the following line to /etc/make.conf and compile new bootblocks:
BOOT_COMCONSOLE_SPEED=19200
If the serial console is configured in some other way than by booting with -h, or if the serial console used by thekernel is different from the one used by the boot blocks, then you must also add the following option to the kernelconfiguration file and compile a new kernel:
318

Chapter 16 Serial Communications
options CONSPEED=19200
16.6.4.2 Using Serial Port Other Than sio0 For The Console
Using a port other than sio0 as the console requires some recompiling. If you want to use another serial port forwhatever reasons, recompile the boot blocks, the boot loader and the kernel as follows.
1. Get the kernel source.
2. Edit /etc/make.conf and set BOOT_COMCONSOLE_PORT to the address of the port you want to use (0x3F8,0x2F8, 0x3E8 or 0x2E8). Only sio0 through sio3 (COM1: through COM4:) can be used; multiport serial cardswill not work. No interrupt setting is needed.
3. Create a custom kernel configuration file and add appropriate flags for the serial port you want to use. Forexample, if you want to make sio1 (COM2:) the console:
device sio1 at isa? port "IO_COM2" tty flags 0x10 irq 3
or
device sio1 at isa? port "IO_COM2" tty flags 0x30 irq 3
The console flags for the other serial ports should not be set.
4. Recompile and install the boot blocks:
# cd /sys/boot/i386/boot2# make# make install
5. Recompile and install the boot loader:
# cd /sys/boot/i386/loader# make# make install
6. Rebuild and install the kernel.
7. Write the boot blocks to the boot disk with disklabel(8) and boot from the new kernel.
16.6.4.3 Entering the DDB Debugger from the Serial Line
If you wish to drop into the kernel debugger from the serial console (useful for remote diagnostics, but alsodangerous if you generate a spurious BREAK on the serial port!) then you should compile your kernel with thefollowing options:
options BREAK_TO_DEBUGGER
319

Chapter 16 Serial Communications
options DDB
16.6.4.4 Getting a Login Prompt on the Serial Console
While this is not required, you may wish to get a login prompt over the serial line, now that you can see bootmessages and can enter the kernel debugging session through the serial console. Here is how to do it.
Open the file /etc/ttys with an editor and locate the lines:
ttyd0 "/usr/libexec/getty std.9600" unknown off securettyd1 "/usr/libexec/getty std.9600" unknown off securettyd2 "/usr/libexec/getty std.9600" unknown off securettyd3 "/usr/libexec/getty std.9600" unknown off secure
ttyd0 through ttyd3 corresponds to COM1 through COM4. Change off to on for the desired port. If you havechanged the speed of the serial port, you need to change std.9600 to match the current setting, e.g. std.19200.
You may also want to change the terminal type from unknown to the actual type of your serial terminal.
After editing the file, you must kill -HUP 1 to make this change take effect.
16.6.5 Changing Console from the Boot LoaderPrevious sections described how to set up the serial console by tweaking the boot block. This section shows that youcan specify the console by entering some commands and environment variables in the boot loader. As the boot loaderis invoked as the third stage of the boot process, after the boot block, the settings in the boot loader will override thesettings in the boot block.
16.6.5.1 Setting Up the Serial Console
You can easily specify the boot loader and the kernel to use the serial console by writing just one line in/boot/loader.rc:
set console=comconsole
This will take effect regardless of the settings in the boot block discussed in the previous section.
You had better put the above line as the first line of /boot/loader.rc so as to see boot messages on the serialconsole as early as possible.
Likewise, you can specify the internal console as:
320

Chapter 16 Serial Communications
set console=vidconsole
If you do not set the boot loader environment variable console, the boot loader, and subsequently the kernel, will usewhichever console indicated by the -h option in the boot block.
In versions 3.2 or later, you may specify the console in /boot/loader.conf.local or /boot/loader.conf,rather than in /boot/loader.rc. In this method your /boot/loader.rc should look like:
include /boot/loader.4thstart
Then, create /boot/loader.conf.local and put the following line there.
console=comconsole
or
console=vidconsole
See loader.conf(5) for more information.
Note: At the moment, the boot loader has no option equivalent to the -P option in the boot block, and there is noprovision to automatically select the internal console and the serial console based on the presence of thekeyboard.
16.6.5.2 Using Serial Port Other than sio0 for the Console
You need to recompile the boot loader to use a serial port other than sio0 for the serial console. Follow theprocedure described in Section 16.6.4.2.
16.6.6 CaveatsThe idea here is to allow people to set up dedicated servers that require no graphics hardware or attached keyboards.Unfortunately, while (most?) every system will let you boot without a keyboard, there are quite a few that will not letyou boot without a graphics adapter. Machines with AMI BIOSes can be configured to boot with no graphics adapterinstalled simply by changing the ‘graphics adapter’ setting in the CMOS configuration to ‘Not installed.’
However, many machines do not support this option and will refuse to boot if you have no display hardware in thesystem. With these machines, you’ll have to leave some kind of graphics card plugged in, (even if it’s just a junkymono board) although you will not have to attach a monitor into it. You might also try installing an AMI BIOS.
321

Chapter 17 PPP and SLIPRestructured, reorganized, and updated by Jim Mock <[email protected]>, 1 March 2000.
17.1 SynopsisIf you are connecting to the Internet via modem, or wish to provide dial-up connections to the Internet for othersusing FreeBSD, you have the option of using PPP or SLIP.
This chapter covers three varieties of PPP; user, kernel, and PPPoE (PPP over Ethernet). It also covers setting up aSLIP client and server.
The first variety of PPP that will be covered is User PPP. User PPP was introduced into FreeBSD in 2.0.5-RELEASEas an addition to the already existing kernel implementation of PPP.
You may be wondering what the main difference is between User PPP and kernel PPP. The answer is simple; userPPP does not run as a daemon, and can run as and when desired. No PPP interface needs to be compiled into theirkernel; it runs as a user process, and uses the tunnel device driver (tun) to get data into and out of the kernel.
From here on out in this chapter, user ppp will simply be referred to as ppp unless a distinction needs to be madebetween it and any other PPP software such as pppd. Unless otherwise stated, all of the commands explained in thissection should be executed as root.
17.2 Using User PPPOriginally contributed by Brian Somers <[email protected]>, with input from Nik Clayton<[email protected]>, Dirk-Willem van Gulik <[email protected]>, and Peter Childs<[email protected]>.
17.2.1 User PPP
17.2.1.1 Assumptions
This document assumes you have the following:
• An account with an Internet Service Provider (ISP) which you connect to using PPP. Further, you have a modemor other device connected to your system and configured correctly, which allows you to connect to your ISP.
• The dial-up number(s) of your ISP.
322

Chapter 17 PPP and SLIP
• Your login name and password. This can be either a regular UNIX-style login and password pair, or a PAP orCHAP login and password pair.
• The IP address(es) of one or more name servers. Normally, you will be given two IP addresses by your ISP to usefor this. If they have not given you at least one, then you can use the enable dns command in your ppp.conffile to tell ppp to set the name servers for you.
The following information may be supplied by your ISP, but is not completely necessary:
• The IP address of your ISP’s gateway. The gateway is the machine to which you will connect and will be set up asyour default route. If you do not have this information, we can make one up and your ISP’s PPP server will tell usthe correct value when we connect.
This IP number is referred to as HISADDR by ppp.
• The netmask you should use. If your ISP has not provided you with one, you can safely use 255.255.255.0.
• If your ISP provides you with a static IP address and hostname, you can enter it. Otherwise, we simply let the peerassign whatever IP address it sees fit.
If you do not have any of the required information, contact your ISP and make sure they provide it to you.
17.2.1.2 Preparing the Kernel
As previously mentioned, ppp uses the tun device, and whichever kernel you are using must have tun configured.The tun device is preconfigured for the default GENERIC kernel that ships with FreeBSD. However, if you haveinstalled a custom kernel, you must make sure your kernel is configured for ppp.
To check, go to your kernel compile directory (/sys/i386/conf or /sys/pc98/conf) and examine yourconfiguration file. It should have the following line somewhere in it:
pseudo-device tun 1
If this line is not present, you will need to add it to the configuration file and recompile your kernel. The stockGENERIC kernel has this included, so if you have not installed a custom kernel or do not have a /sys directory, youdo not have to change anything. If you do need to recompile your kernel, please refer to the kernel configurationsection for more information.
You can check how many tunnel devices your current kernel has by typing the following:
# ifconfig -atun0: flags=8051 � UP,POINTOPOINT,RUNNING,MULTICAST � mtu 1500
inet 200.10.100.1 -- � 203.10.100.24 netmask 0xfffffffftun1: flags=8050 � POINTOPOINT,RUNNING,MULTICAST � mtu 576
323

Chapter 17 PPP and SLIP
tun2: flags=8051 � UP,POINTOPOINT,RUNNING,MULTICAST � mtu 1500inet 203.10.100.1 -- � 203.10.100.20 netmask 0xffffffff
tun3: flags=8010 � POINTOPOINT,MULTICAST � mtu 1500
Note: In FreeBSD 4.0 and later releases, you will only see any tun devices which have already been used. Thismeans you might not see any tun devices. If this is the case, do not worry; the device should be createddynamically when ppp attempts to use it.
This case shows four tunnel devices, two of which are currently configured and being used. It should be noted thatthe RUNNING flag above indicates that the interface has been used at some point—it is not an error if your interfacedoes not show up as RUNNING.
If for some reason you have a kernel that does not have the tun device in it and cannot recompile the kernel, all isnot lost. You should be able to dynamically load the code. Please refer to the appropriate modload(8) and lkm(4) manpages for further details.
17.2.1.3 Check the tun device
Under normal circumstances, most users will only require one tun device (/dev/tun0). If you have specified morethan one on the pseudo-device line for tun in your kernel configuration file, then alter all references to tun0
below to reflect whichever device number you are using (e.g., tun2).
The easiest way to make sure that the tun0 device is configured correctly, is to remake the device. This process isquite easy. To remake the device, do the following:
# cd /dev# ./MAKEDEV tun0
If you need 16 tunnel devices in your kernel, you will need to create them. This can be done by executing thefollowing commands:
# cd /dev# ./MAKEDEV tun15
To confirm that the kernel is configured correctly, issue the follow command and compare the results:
# ifconfig tun0tun0: flags=8050 � POINTOPOINT,RUNNING,MULTICAST � mut 1500
The RUNNING flag may not yet be set, in which case you will see:
# ifconfig tun0
324

Chapter 17 PPP and SLIP
tun0: flags=8010 � POINTOPOINT,MULTICAST � mtu 1500
Remember from earlier that you might not see the device if it has not been used yet, as tun devices are created ondemand in FreeBSD 4.0 and later releases.
17.2.1.4 Name Resolution Configuration
The resolver is the part of the system that turns IP addresses into hostnames and vice versa. It can be configured tolook for maps that describe IP to hostname mappings in one of two places. The first is a file called /etc/hosts.Read hosts(5) for more information. The second is the Internet Domain Name Service (DNS), a distributed data base,the discussion of which is beyond the scope of this document.
The resolver is a set of system calls that do the name mappings, but you have to tell them where to find theirinformation. You do this by first editing the file /etc/host.conf. Do not call this file /etc/hosts.conf (notethe extra s) as the results can be confusing.
17.2.1.4.1 Edit /etc/host.conf
This file should contain the following two lines (in this order):
hostsbind
These instruct the resolver to first look in the file /etc/hosts, and then to consult the DNS if the name was notfound.
17.2.1.4.2 Edit /etc/hosts
This file should contain the IP addresses and names of machines on your network. At a bare minimum it shouldcontain entries for the machine which will be running ppp. Assuming that your machine is called foo.bar.com
with the IP address 10.0.0.1, /etc/hosts should contain:
127.0.0.1 localhost.bar.com localhost127.0.0.1 localhost.bar.com.10.0.0.1 foo.bar.com foo10.0.0.1 foo.bar.com.
The first two lines define the alias localhost as a synonym for the current machine. Regardless of your own IPaddress, the IP address for this line should always be 127.0.0.1. The second two lines map the namefoo.bar.com (and the shorthand foo) to the IP address 10.0.0.1.
If your provider allocates you a static IP address and name, use them in place of the 10.0.0.1 entry.
325

Chapter 17 PPP and SLIP
17.2.1.4.3 Edit /etc/resolv.conf
The /etc/resolv.conf file tells the resolver how to behave. If you are running your own DNS, you may leave thisfile empty. Normally, you will need to enter the following line(s):
domain bar.comnameserver x.x.x.xnameserver y.y.y.y
The x.x.x.x and y.y.y.y addresses are those given to you by your ISP. Add as many nameserver lines as yourISP provides. The domain line defaults to your hostname’s domain, and is probably unnecessary. Refer to theresolv.conf(5) manual page for details of other possible entries in this file.
If you are running PPP version 2 or greater, the enable dns command will tell PPP to request that your ISPconfirms the nameserver values. If your ISP supplies different addresses (or if there are no nameserver lines in/etc/resolv.conf), PPP will rewrite the file with the ISP-supplied values.
17.2.1.5 PPP Configuration
Both ppp and pppd (the kernel level implementation of PPP) use the configuration files located in the/usr/share/examples/ppp directory. The sample configuration files provided are a good reference, so do notdelete them.
Configuring ppp requires that you edit a number of files, depending on your requirements. What you put in themdepends to some extent on whether your ISP allocates IP addresses statically (i.e., you get given one IP address, andalways use that one) or dynamically (i.e., your IP address changes each time you connect to your ISP).
17.2.1.5.1 PPP and Static IP Addresses
You will need to create a configuration file called /etc/ppp/ppp.conf. It should look similar to the example below.
Note: Lines that end in a : start in the first column, all other lines should be indented as shown using spaces ortabs.
1 default:2 set device /dev/cuaa03 set speed 1152004 set dial "ABORT BUSY ABORT NO\\sCARRIER TIMEOUT 5 \"\" ATE1Q0 OK-AT-OK \\dATDT\\TTIMEOUT 40 CONNECT"5 provider:6 set phone "(123) 456 7890"7 set login "TIMEOUT 10 \"\" \"\" gin:--gin: foo word: bar col: ppp"8 set timeout 300
326

Chapter 17 PPP and SLIP
9 set ifaddr x.x.x.x y.y.y.y 255.255.255.0 0.0.0.010 add default HISADDR11 enable dns
Do not include the line numbers, they are just for reference in this discussion.
Line 1:
Identifies the default entry. Commands in this entry are executed automatically when ppp is run.
Line 2:
Identifies the device to which the modem is connected. COM1 is /dev/cuaa0 and COM2 is /dev/cuaa1.
Line 3:
Sets the speed you want to connect at. If 115200 does not work (it should with any reasonably new modem), try38400 instead.
Line 4:
The dial string. User PPP uses an expect-send syntax similar to the chat(8) program. Refer to the manual pagefor information on the features of this language.
Line 5:
Identifies an entry for a provider called “provider”.
Line 6:
Sets the phone number for this provider. Multiple phone numbers may be specified using the colon (:) or pipecharacter (|)as a separator. The difference between the two separators is described in ppp(8). To summarize, ifyou want to rotate through the numbers, use a colon. If you want to always attempt to dial the first number firstand only use the other numbers if the first number fails, use the pipe character. Always quote the entire set ofphone numbers as shown.
Line 7:
The login string is of the same chat-like syntax as the dial string. In this example, the string works for a servicewhose login session looks like this:
J. Random Providerlogin: foopassword: barprotocol: ppp
You will need to alter this script to suit your own needs. When you write this script for the first time, you shouldenable “chat” logging to ensure that the conversation is going as expected.
327

Chapter 17 PPP and SLIP
If you are using PAP or CHAP, there will be no login at this point, so your login string can be left blank. SeePAP and CHAP authentication for further details.
Line 8:
Sets the default timeout (in seconds) for the connection. Here, the connection will be closed automatically after300 seconds of inactivity. If you never want to timeout, set this value to zero.
Line 9:
Sets the interface addresses. The string x.x.x.x should be replaced by the IP address that your provider hasallocated to you. The string y.y.y.y should be replaced by the IP address that your ISP indicated for theirgateway (the machine to which you connect). If your ISP hasn’t given you a gateway address, use 10.0.0.2/0.If you need to use a “guessed” address, make sure that you create an entry in /etc/ppp/ppp.linkup as perthe instructions for PPP and Dynamic IP addresses. If this line is omitted, ppp cannot run in -auto or-dynamic mode.
Line 10:
Adds a default route to your ISP’s gateway. The special word HISADDR is replaced with the gateway addressspecified on line 9. It is important that this line appears after line 9, otherwise HISADDR will not yet beinitialized.
Line 11:
This line tells PPP to ask your ISP to confirm that your nameserver addresses are correct. If your ISP supportsthis facility, PPP can then update /etc/resolv.conf with the correct nameserver entries.
It is not necessary to add an entry to ppp.linkup when you have a static IP address as your routing table entries arealready correct before you connect. You may however wish to create an entry to invoke programs after connection.This is explained later with the sendmail example.
Example configuration files can be found in the /usr/share/examples/ppp directory.
17.2.1.5.2 PPP and Dynamic IP Addresses
If your service provider does not assign static IP addresses, ppp can be configured to negotiate the local and remoteaddresses. This is done by “guessing” an IP address and allowing ppp to set it up correctly using the IPConfiguration Protocol (IPCP) after connecting. The ppp.conf configuration is the same as PPP and Static IPAddresses, with the following change:
9 set ifaddr 10.0.0.1/0 10.0.0.2/0 255.255.255.0
Again, do not include the line numbers, they are just for reference. Indentation of at least one space is required.
328

Chapter 17 PPP and SLIP
Line 9:
The number after the / character is the number of bits of the address that ppp will insist on. You may wish touse IP numbers more appropriate to your circumstances, but the above example will always work.
The last argument (0.0.0.0) tells PPP to negotiate using address 0.0.0.0 rather than 10.0.0.1. Do not use0.0.0.0 as the first argument to set ifaddr as it prevents PPP from setting up an initial route in -auto
mode.
If you are running version 1.x of PPP, you will also need to create an entry in /etc/ppp/ppp.linkup.ppp.linkup is used after a connection has been established. At this point, ppp will know what IP addresses shouldreally be used. The following entry will delete the existing bogus routes, and create correct ones:
1 provider:2 delete ALL3 add 0 0 HISADDR
Line 1:
On establishing a connection, ppp will look for an entry in ppp.linkup according to the following rules: First,try to match the same label as we used in ppp.conf. If that fails, look for an entry for the IP address of ourgateway. This entry is a four-octet IP style label. If we still have not found an entry, look for the MYADDR entry.
Line 2:
This line tells ppp to delete all of the existing routes for the acquired tun interface (except the direct routeentry).
Line 3:
This line tells ppp to add a default route that points to HISADDR. HISADDR will be replaced with the IP numberof the gateway as negotiated in the IPCP.
See the pmdemand entry in the files /usr/share/examples/ppp/ppp.conf.sample and/usr/share/examples/ppp/ppp.linkup.sample for a detailed example.
Version 2 of PPP introduces “sticky routes”. Any add or delete lines that contain MYADDR or HISADDR will beremembered, and any time the actual values of MYADDR or HISADDR change, the routes will be reapplied. Thisremoves the necessity of repeating these lines in ppp.linkup.
17.2.1.5.3 Receiving Incoming Calls
When you configure ppp to receive incoming calls on a machine connected to a LAN, you must decide if you wishto forward packets to the LAN. If you do, you should allocate the peer an IP number from your LAN’s subnet, and
329

Chapter 17 PPP and SLIP
use the command enable proxy in your /etc/ppp/ppp.conf file. You should also confirm that the/etc/rc.conf file contains the following:
gateway="YES"
17.2.1.5.3.1 Which getty?
Configuring FreeBSD for Dial-up Services provides a good description on enabling dial-up services using getty.
An alternative to getty is mgetty (http://www.leo.org/~doering/mgetty/index.html), a smarter version of gettydesigned with dial-up lines in mind.
The advantages of using mgetty is that it actively talks to modems, meaning if port is turned off in /etc/ttys thenyour modem will not answer the phone.
Later versions of mgetty (from 0.99beta onwards) also support the automatic detection of PPP streams, allowingyour clients script-less access to your server.
Refer to Mgetty and AutoPPP for more information on mgetty.
17.2.1.5.3.2 PPP Permissions
The ppp command must normally be run as user id 0. If however, you wish to allow ppp to run in server mode as anormal user by executing ppp as described below, that user must be given permission to run ppp by adding them tothe network group in /etc/group.
You will also need to give them access to one or more sections of the configuration file using the allow command:
allow users fred mary
If this command is used in the default section, it gives the specified users access to everything.
17.2.1.5.3.3 PPP Shells for Dynamic-IP Users
Create a file called /etc/ppp/ppp-shell containing the following:
#!/bin/shIDENT=‘echo $0 | sed -e ’s/^.*-\(.*\)$/\1/’‘CALLEDAS="$IDENT"TTY=‘tty‘
if [ x$IDENT = xdialup ]; thenIDENT=‘basename $TTY‘
fi
330

Chapter 17 PPP and SLIP
echo "PPP for $CALLEDAS on $TTY"echo "Starting PPP for $IDENT"
exec /usr/sbin/ppp -direct $IDENT
This script should be executable. Now make a symbolic link called ppp-dialup to this script using the followingcommands:
# ln -s ppp-shell /etc/ppp/ppp-dialup
You should use this script as the shell for all of your dialup users. This is an example from /etc/password for adialup PPP user with username pchilds (remember don’t directly edit the password file, use vipw).
pchilds:*:1011:300:Peter Childs PPP:/home/ppp:/etc/ppp/ppp-dialup
Create a /home/ppp directory that is world readable containing the following 0 byte files:
-r--r--r-- 1 root wheel 0 May 27 02:23 .hushlogin-r--r--r-- 1 root wheel 0 May 27 02:22 .rhosts
which prevents /etc/motd from being displayed.
17.2.1.5.3.4 PPP shells for Static-IP Users
Create the ppp-shell file as above and for each account with statically assigned IPs create a symbolic link toppp-shell.
For example, if you have three dialup customers fred, sam, and mary, that you route class C networks for, youwould type the following:
# ln -s /etc/ppp/ppp-shell /etc/ppp/ppp-fred# ln -s /etc/ppp/ppp-shell /etc/ppp/ppp-sam# ln -s /etc/ppp/ppp-shell /etc/ppp/ppp-mary
Each of these users dialup accounts should have their shell set to the symbolic link created above (i.e., mary’s shellshould be /etc/ppp/ppp-mary).
17.2.1.5.3.5 Setting up ppp.conf for dynamic-IP users
The /etc/ppp/ppp.conf file should contain something along the lines of:
default:set debug phase lcp chatset timeout 0
331

Chapter 17 PPP and SLIP
ttyd0:set ifaddr 203.14.100.1 203.14.100.20 255.255.255.255enable proxy
ttyd1:set ifaddr 203.14.100.1 203.14.100.21 255.255.255.255enable proxy
Note: The indenting is important.
The default: section is loaded for each session. For each dialup line enabled in /etc/ttys create an entry similarto the one for ttyd0: above. Each line should get a unique IP address from your pool of IP addresses for dynamicusers.
17.2.1.5.3.6 Setting up ppp.conf for static-IP users
Along with the contents of the sample /usr/share/examples/ppp/ppp.conf above you should add a section foreach of the statically assigned dialup users. We will continue with our fred, sam, and mary example.
fred:set ifaddr 203.14.100.1 203.14.101.1 255.255.255.255
sam:set ifaddr 203.14.100.1 203.14.102.1 255.255.255.255
mary:set ifaddr 203.14.100.1 203.14.103.1 255.255.255.255
The file /etc/ppp/ppp.linkup should also contain routing information for each static IP user if required. The linebelow would add a route for the 203.14.101.0 class C via the client’s ppp link.
fred:add 203.14.101.0 netmask 255.255.255.0 HISADDR
sam:add 203.14.102.0 netmask 255.255.255.0 HISADDR
mary:add 203.14.103.0 netmask 255.255.255.0 HISADDR
332

Chapter 17 PPP and SLIP
17.2.1.5.4 More on mgetty, AutoPPP, and MS extensions
17.2.1.5.4.1 mgetty and AutoPPP
Configuring and compiling mgetty with the AUTO_PPP option enabled allows mgetty to detect the LCP phase ofPPP connections and automatically spawn off a ppp shell. However, since the default login/password sequence doesnot occur it is necessary to authenticate users using either PAP or CHAP.
This section assumes the user has successfully configured, compiled, and installed a version of mgetty with theAUTO_PPP option (v0.99beta or later).
Make sure your /usr/local/etc/mgetty+sendfax/login.config file has the following in it:
/AutoPPP/ - - /etc/ppp/ppp-pap-dialup
This will tell mgetty to run the ppp-pap-dialup script for detected PPP connections.
Create a file called /etc/ppp/ppp-pap-dialup containing the following (the file should be executable):
#!/bin/shexec /usr/sbin/ppp -direct pap$IDENT
For each dialup line enabled in /etc/ttys, create a corresponding entry in /etc/ppp/ppp.conf. This willhappily co-exist with the definitions we created above.
pap:enable papset ifaddr 203.14.100.1 203.14.100.20-203.14.100.40enable proxy
Each user logging in with this method will need to have a username/password in /etc/ppp/ppp.secret file, oralternatively add the following option to authenticate users via PAP from /etc/password file.
enable passwdauth
If you wish to assign some users a static IP number, you can specify the number as the third argument in/etc/ppp/ppp.secret. See /usr/share/examples/ppp/ppp.secret.sample for examples.
17.2.1.5.4.2 MS extensions
It is possible to configure PPP to supply DNS and NetBIOS nameserver addresses on demand.
To enable these extensions with PPP version 1.x, the following lines might be added to the relevant section of/etc/ppp/ppp.conf.
enable msext
333

Chapter 17 PPP and SLIP
set ns 203.14.100.1 203.14.100.2set nbns 203.14.100.5
And for PPP version 2 and above:
accept dnsset dns 203.14.100.1 203.14.100.2set nbns 203.14.100.5
This will tell the clients the primary and secondary name server addresses, and a netbios nameserver host.
In version 2 and above, if the set dns line is omitted, PPP will use the values found in /etc/resolv.conf.
17.2.1.5.5 PAP and CHAP authentication
Some ISPs set their system up so that the authentication part of your connection is done using either of the PAP orCHAP authentication mechanisms. If this is the case, your ISP will not give a login: prompt when you connect, butwill start talking PPP immediately.
PAP is less secure than CHAP, but security is not normally an issue here as passwords, although being sent as plaintext with PAP, are being transmitted down a serial line only. There’s not much room for crackers to “eavesdrop”.
Referring back to the PPP and Static IP addresses or PPP and Dynamic IP addresses sections, the followingalterations must be made:
7 set login...12 set authname MyUserName13 set authkey MyPassword
As always, do not include the line numbers, they are just for reference in this discussion. Indentation of at least onespace is required.
Line 7:
Your ISP will not normally require that you log into the server if you’re using PAP or CHAP. You musttherefore disable your “set login” string.
Line 12:
This line specifies your PAP/CHAP user name. You will need to insert the correct value for MyUserName.
334

Chapter 17 PPP and SLIP
Line 13:
This line specifies your PAP/CHAP password. You will need to insert the correct value for MyPassword. Youmay want to add an additional line, such as:
15 accept PAP
or
15 accept CHAP
to make it obvious that this is the intention, but PAP and CHAP are both accepted by default.
17.2.1.5.6 Changing your ppp configuration on the fly
It is possible to talk to the ppp program while it is running in the background, but only if a suitable diagnostic porthas been set up. To do this, add the following line to your configuration:
set server /var/run/ppp-tun%d DiagnosticPassword 0177
This will tell PPP to listen to the specified unix-domain socket, asking clients for the specified password beforeallowing access. The %d in the name is replaced with the tun device number that is in use.
Once a socket has been set up, the pppctl(8) program may be used in scripts that wish to manipulate the runningprogram.
17.2.1.6 Final system configuration
You now have ppp configured, but there are a few more things to do before it is ready to work. They all involveediting the /etc/rc.conf file.
Working from the top down in this file, make sure the hostname= line is set, e.g.:
hostname="foo.bar.com"
If your ISP has supplied you with a static IP address and name, it’s probably best that you use this name as your hostname.
Look for the network_interfaces variable. If you want to configure your system to dial your ISP on demand,make sure the tun0 device is added to the list, otherwise remove it.
network_interfaces="lo0 tun0" ifconfig_tun0=
335

Chapter 17 PPP and SLIP
Note: The ifconfig_tun0 variable should be empty, and a file called /etc/start_if.tun0 should be created.This file should contain the line:
ppp -auto mysystem
This script is executed at network configuration time, starting your ppp daemon in automatic mode. If you have aLAN for which this machine is a gateway, you may also wish to use the -alias switch. Refer to the manual pagefor further details.
Set the router program to NO with following line in your /etc/rc.conf:
router_enable="NO"
It is important that the routed daemon is not started (it is started by default), as it routed tends to delete the defaultrouting table entries created by ppp.
It is probably worth your while ensuring that the sendmail_flags line does not include the -q option, otherwisesendmail will attempt to do a network lookup every now and then, possibly causing your machine to dial out. Youmay try:
sendmail_flags="-bd"
The downside of this is that you must force sendmail to re-examine the mail queue whenever the ppp link is up bytyping:
# /usr/sbin/sendmail -q
You may wish to use the !bg command in ppp.linkup to do this automatically:
1 provider:2 delete ALL3 add 0 0 HISADDR4 !bg sendmail -bd -q30m
If you don’t like this, it is possible to set up a “dfilter” to block SMTP traffic. Refer to the sample files for furtherdetails.
Now the only thing left to do is reboot the machine.
All that is left is to reboot the machine. After rebooting, you can now either type:
# ppp
and then dial provider to start the PPP session, or, if you want ppp to establish sessions automatically whenthere is outbound traffic (and you have not created the start_if.tun0 script), type:
336

Chapter 17 PPP and SLIP
# ppp -auto provider
17.2.1.7 Summary
To recap, the following steps are necessary when setting up ppp for the first time:
Client side:
1. Ensure that the tun device is built into your kernel.
2. Ensure that the tunX device file is available in the /dev directory.
3. Create an entry in /etc/ppp/ppp.conf. The pmdemand example should suffice for most ISPs.
4. If you have a dynamic IP address, create an entry in /etc/ppp/ppp.linkup.
5. Update your /etc/rc.conf file.
6. Create a start_if.tun0 script if you require demand dialing.
Server side:
1. Ensure that the tun device is built into your kernel.
2. Ensure that the tunX device file is available in the /dev directory.
3. Create an entry in /etc/passwd (using the vipw(8) program).
4. Create a profile in this users home directory that runs ppp -direct direct-server or similar.
5. Create an entry in /etc/ppp/ppp.conf. The direct-server example should suffice.
6. Create an entry in /etc/ppp/ppp.linkup.
7. Update your /etc/rc.conf file.
17.3 Using Kernel PPPParts originally contributed by Gennady B. Sorokopud <[email protected]> and Robert Huff<[email protected]>.
337

Chapter 17 PPP and SLIP
17.3.1 Setting up Kernel PPPBefore you start setting up PPP on your machine make sure that pppd is located in /usr/sbin and the directory/etc/ppp exists.
pppd can work in two modes:
1. As a “client”, i.e., you want to connect your machine to the outside world via a PPP serial connection or modemline.
2. as a “server”, i.e. your machine is located on the network and used to connect other computers using PPP.
In both cases you will need to set up an options file (/etc/ppp/options or ~/.ppprc if you have more than oneuser on your machine that uses PPP).
You also will need some modem/serial software (preferably kermit) so you can dial and establish a connection withthe remote host.
17.3.2 Using pppd as a clientThe following /etc/ppp/options might be used to connect to a CISCO terminal server PPP line.
crtscts # enable hardware flow controlmodem # modem control linenoipdefault # remote PPP server must supply your IP address.
# if the remote host doesn’t send your IP during IPCP# negotiation , remove this option
passive # wait for LCP packetsdomain ppp.foo.com # put your domain name here
: � remote_ip � # put the IP of remote PPP host here# it will be used to route packets via PPP link# if you didn’t specified the noipdefault option# change this line to � local_ip � : � remote_ip �
defaultroute # put this if you want that PPP server will be your# default router
To connect:
1. Dial to the remote host using kermit (or some other modem program), and enter your user name and password(or whatever is needed to enable PPP on the remote host).
2. Exit kermit (without hanging up the line).
338

Chapter 17 PPP and SLIP
3. Enter the following:
# /usr/src/usr.sbin/pppd.new/pppd /dev/tty01 19200
Be sure to use the appropriate speed and device name.
Now your computer is connected with PPP. If the connection fails, you can add the debug option to the/etc/ppp/options file and check messages on the console to track the problem.
Following /etc/ppp/pppup script will make all 3 stages automatically:
#!/bin/shps ax |grep pppd |grep -v greppid=‘ps ax |grep pppd |grep -v grep|awk ’{print $1;}’‘if [ "X${pid}" != "X" ] ; then
echo ’killing pppd, PID=’ ${pid}kill ${pid}
fips ax |grep kermit |grep -v greppid=‘ps ax |grep kermit |grep -v grep|awk ’{print $1;}’‘if [ "X${pid}" != "X" ] ; then
echo ’killing kermit, PID=’ ${pid}kill -9 ${pid}
fi
ifconfig ppp0 downifconfig ppp0 delete
kermit -y /etc/ppp/kermit.dialpppd /dev/tty01 19200
/etc/ppp/kermit.dial is a kermit script that dials and makes all necessary authorization on the remote host (anexample of such a script is attached to the end of this document).
Use the following /etc/ppp/pppdown script to disconnect the PPP line:
#!/bin/shpid=‘ps ax |grep pppd |grep -v grep|awk ’{print $1;}’‘if [ X${pid} != "X" ] ; then
echo ’killing pppd, PID=’ ${pid}kill -TERM ${pid}
fi
ps ax |grep kermit |grep -v greppid=‘ps ax |grep kermit |grep -v grep|awk ’{print $1;}’‘if [ "X${pid}" != "X" ] ; then
339

Chapter 17 PPP and SLIP
echo ’killing kermit, PID=’ ${pid}kill -9 ${pid}
fi
/sbin/ifconfig ppp0 down/sbin/ifconfig ppp0 deletekermit -y /etc/ppp/kermit.hup/etc/ppp/ppptest
Check to see if PPP is still running by executing /usr/etc/ppp/ppptest, which should look like this:
#!/bin/shpid=‘ps ax| grep pppd |grep -v grep|awk ’{print $1;}’‘if [ X${pid} != "X" ] ; then
echo ’pppd running: PID=’ ${pid-NONE}else
echo ’No pppd running.’fiset -xnetstat -n -I ppp0ifconfig ppp0
To hang up the modem, execute /etc/ppp/kermit.hup, which should contain:
set line /dev/tty01 ; put your modem device hereset speed 19200set file type binaryset file names literalset win 8set rec pack 1024set send pack 1024set block 3set term bytesize 8set command bytesize 8set flow none
pau 1out +++inp 5 OKout ATH0\13echo \13exit
Here is an alternate method using chat instead of kermit.
The following two files are sufficient to accomplish a pppd connection.
340

Chapter 17 PPP and SLIP
/etc/ppp/options:
/dev/cuaa1 115200
crtscts # enable hardware flow controlmodem # modem control lineconnect "/usr/bin/chat -f /etc/ppp/login.chat.script"noipdefault # remote PPP serve must supply your IP address.
# if the remote host doesn’t send your IP during# IPCP negotiation, remove this option
passive # wait for LCP packetsdomain � your.domain � # put your domain name here
: # put the IP of remote PPP host here# it will be used to route packets via PPP link
# if you didn’t specified the noipdefault option# change this line to � local_ip � : � remote_ip �
defaultroute # put this if you want that PPP server will be# your default router
/etc/ppp/login.chat.script:
Note: The following should go on a single line.
ABORT BUSY ABORT ’NO CARRIER’ "" AT OK ATDT � phone.number �CONNECT "" TIMEOUT 10 ogin:-\\r-ogin: � login-id �TIMEOUT 5 sword: � password �
Once these are installed and modified correctly, all you need to do is run pppd, like so:
# pppd
This sample is based primarily on information provided by: Trev Roydhouse� [email protected] � and used with permission.
17.3.3 Using pppd as a server/etc/ppp/options should contain something similar to the following:
crtscts # Hardware flow controlnetmask 255.255.255.0 # netmask ( not required )
341

Chapter 17 PPP and SLIP
192.114.208.20:192.114.208.165 # ip’s of local and remote hosts# local ip must be different from one# you assigned to the ethernet ( or other )# interface on your machine.# remote IP is ip address that will be# assigned to the remote machine
domain ppp.foo.com # your domainpassive # wait for LCPmodem # modem line
The following /etc/ppp/pppserv script will enable tell pppd to behave as a server:
#!/bin/shps ax |grep pppd |grep -v greppid=‘ps ax |grep pppd |grep -v grep|awk ’{print $1;}’‘if [ "X${pid}" != "X" ] ; then
echo ’killing pppd, PID=’ ${pid}kill ${pid}
fips ax |grep kermit |grep -v greppid=‘ps ax |grep kermit |grep -v grep|awk ’{print $1;}’‘if [ "X${pid}" != "X" ] ; then
echo ’killing kermit, PID=’ ${pid}kill -9 ${pid}
fi
# reset ppp interfaceifconfig ppp0 downifconfig ppp0 delete
# enable autoanswer modekermit -y /etc/ppp/kermit.ans
# run ppppppd /dev/tty01 19200
Use this /etc/ppp/pppservdown script to stop the server:
#!/bin/shps ax |grep pppd |grep -v greppid=‘ps ax |grep pppd |grep -v grep|awk ’{print $1;}’‘if [ "X${pid}" != "X" ] ; then
echo ’killing pppd, PID=’ ${pid}kill ${pid}
fi
342

Chapter 17 PPP and SLIP
ps ax |grep kermit |grep -v greppid=‘ps ax |grep kermit |grep -v grep|awk ’{print $1;}’‘if [ "X${pid}" != "X" ] ; then
echo ’killing kermit, PID=’ ${pid}kill -9 ${pid}
fiifconfig ppp0 downifconfig ppp0 delete
kermit -y /etc/ppp/kermit.noans
The following kermit script (/etc/ppp/kermit.ans) will enable/disable autoanswer mode on your modem. Itshould look like this:
set line /dev/tty01set speed 19200set file type binaryset file names literalset win 8set rec pack 1024set send pack 1024set block 3set term bytesize 8set command bytesize 8set flow none
pau 1out +++inp 5 OKout ATH0\13inp 5 OKecho \13out ATS0=1\13 ; change this to out ATS0=0\13 if you want to disable
; autoanswer modinp 5 OKecho \13exit
A script named /etc/ppp/kermit.dial is used for dialing and authenticating on the remote host. You will need tocustomize it for your needs. Put your login and password in this script; you will also need to change the inputstatement depending on responses from your modem and remote host.
;; put the com line attached to the modem here:;
343

Chapter 17 PPP and SLIP
set line /dev/tty01;; put the modem speed here:;set speed 19200set file type binary ; full 8 bit file xferset file names literalset win 8set rec pack 1024set send pack 1024set block 3set term bytesize 8set command bytesize 8set flow noneset modem hayesset dial hangup offset carrier auto ; Then SET CARRIER if necessary,set dial display on ; Then SET DIAL if necessary,set input echo onset input timeout proceedset input case ignoredef \%x 0 ; login prompt countergoto slhup
:slcmd ; put the modem in command modeecho Put the modem in command mode.clear ; Clear unread characters from input bufferpause 1output +++ ; hayes escape sequenceinput 1 OK\13\10 ; wait for OKif success goto slhupoutput \13pause 1output at\13input 1 OK\13\10if fail goto slcmd ; if modem doesn’t answer OK, try again
:slhup ; hang up the phoneclear ; Clear unread characters from input bufferpause 1echo Hanging up the phone.output ath0\13 ; hayes command for on hookinput 2 OK\13\10if fail goto slcmd ; if no OK answer, put modem in command mode
344

Chapter 17 PPP and SLIP
:sldial ; dial the numberpause 1echo Dialing.output atdt9,550311\13\10 ; put phone number hereassign \%x 0 ; zero the time counter
:lookclear ; Clear unread characters from input bufferincrement \%x ; Count the secondsinput 1 {CONNECT }if success goto slloginreinput 1 {NO CARRIER\13\10}if success goto sldialreinput 1 {NO DIALTONE\13\10}if success goto slnodialreinput 1 {\255}if success goto slhupreinput 1 {\127}if success goto slhupif < \%x 60 goto lookelse goto slhup
:sllogin ; loginassign \%x 0 ; zero the time counterpause 1echo Looking for login prompt.
:slloopincrement \%x ; Count the secondsclear ; Clear unread characters from input bufferoutput \13;; put your expected login prompt here:;input 1 {Username: }if success goto sluidreinput 1 {\255}if success goto slhupreinput 1 {\127}if success goto slhupif < \%x 10 goto slloop ; try 10 times to get a login promptelse goto slhup ; hang up and start again if 10 failures
:sluid;
345
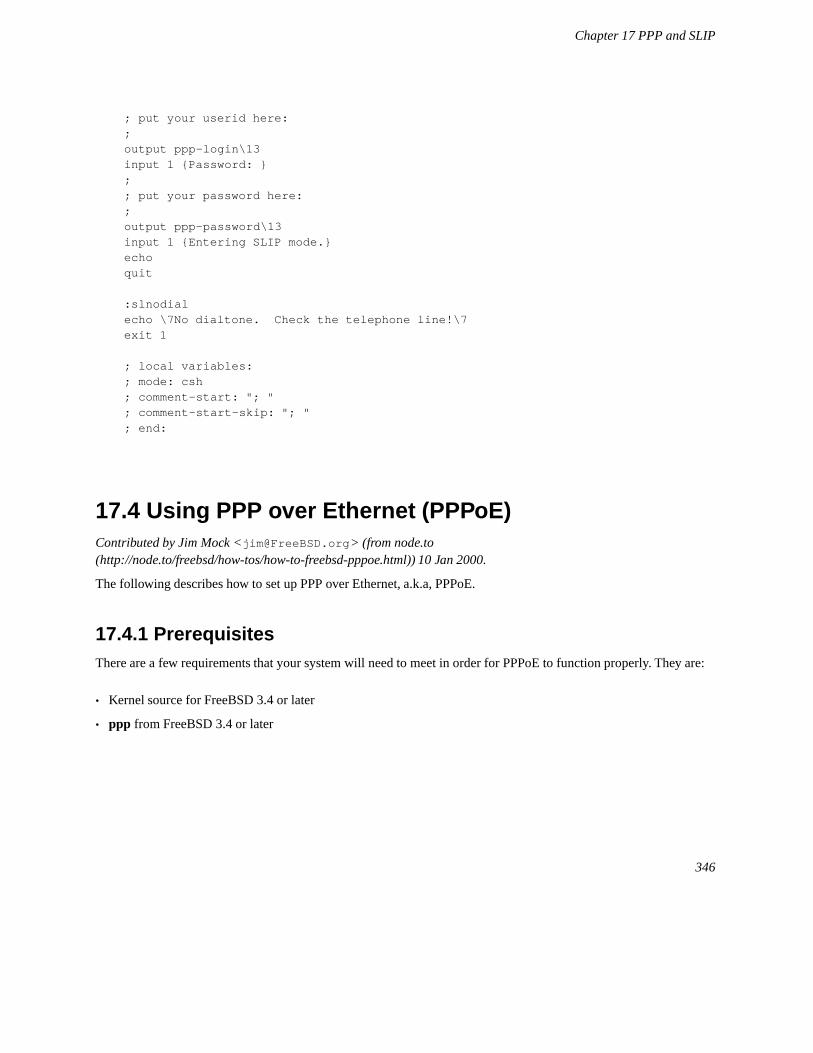
Chapter 17 PPP and SLIP
; put your userid here:;output ppp-login\13input 1 {Password: };; put your password here:;output ppp-password\13input 1 {Entering SLIP mode.}echoquit
:slnodialecho \7No dialtone. Check the telephone line!\7exit 1
; local variables:; mode: csh; comment-start: "; "; comment-start-skip: "; "; end:
17.4 Using PPP over Ethernet (PPPoE)Contributed by Jim Mock <[email protected]> (from node.to(http://node.to/freebsd/how-tos/how-to-freebsd-pppoe.html)) 10 Jan 2000.
The following describes how to set up PPP over Ethernet, a.k.a, PPPoE.
17.4.1 PrerequisitesThere are a few requirements that your system will need to meet in order for PPPoE to function properly. They are:
• Kernel source for FreeBSD 3.4 or later
• ppp from FreeBSD 3.4 or later
346

Chapter 17 PPP and SLIP
17.4.2 Kernel ConfigurationYou will need to set the following options in your kernel configuration file and then compile a new kernel.
• options NETGRAPH
Optionally, you can add
• options NETGRAPH_PPPOE
• options NETGRAPH_SOCKET
although if this functionality is not available at runtime, ppp will load the relevant modules on demand
17.4.3 Setting up ppp.conf
Here is an example of a working ppp.conf:
default: # or name_of_service_providerset device PPPoE:xl1 # replace xl1 with your ethernet deviceset mru 1492set mtu 1492set authname YOURLOGINNAMEset authkey YOURPASSWORDset log Phase tun command # you can add more detailed logging if you wishset dialset loginset ifaddr 10.0.0.1/0 10.0.0.2/0add default HISADDRnat enable yes # if you want to enable nat for your local net
papchap:set authname YOURLOGINNAMEset authkey YOURPASSWORD
Care should be taken when running PPPoE with the -nat option (../FAQ/ppp.html#PPPoEwithNAT).
17.4.4 Running PPPAs root, you can run:
# ppp -ddial name_of_service_provider
347

Chapter 17 PPP and SLIP
17.4.5 Starting PPP at BootAdd the following to your /etc/rc.conf file:
ppp_enable="YES"ppp_mode="ddial"ppp_nat="YES"ppp_profile="default" # or your provider
17.4.6 PPPoE with a 3Com HomeConnect ADSL Modem Dual LinkContributed by Mário Sérgio Fujikawa Ferreira<[email protected]>, 07 Apr 2001.
In short, it does not work. It should, but unfortunately, that is not the case. For whatever reason, this modem does notfollow RFC 2516 (http://www.faqs.org/rfcs/rfc2516.html) (A Method for transmitting PPP over Ethernet (PPPoE),written by L. Mamakos, K. Lidl, J. Evarts, D. Carrel, D. Simone, and R. Wheeler).
Since it does not follow the specification, FreeBSD’s PPPoE implementation will not talk to it. It is very likely that itwill not work under other unixes for that same reason. Complain to 3Com (http://www.3com.com/) if you think itshould comply with the PPPoE specification.
If you absolutely want to use your ADSL connection with FreeBSD and are stuck with this modem, you can either:
• Try replacing the modem with a different brand or model if your DSL provider permits you to do so. If you are notsure which brand(s) will work, the FreeBSD general questions mailing list<[email protected]> is a good place to ask.
• Try to get it working. Keep in mind that there is no guarantee it will work, your mileage may vary.
If you want to try to make it work, you can do the following, but please keep in mind that you do this at your ownrisk! Just because it worked for me does not mean it will work for you.
There are three steps to the process. They are:
1. Make sure you already have ppp.conf set up. See the beginning of this chapter for more details on doing so.
2. Since the modem does not speak the correct protocol, we need to learn how to speak its variant of the protocol.This information was obtained from a DSLreports forum message(http://www.dslreports.com/forum/remark,367540;root=equip,16;mode=flat).
The modem speaks 0x3c12 for DISCOVERY, and 0x3c13 for PAYLOAD identifiers instead of 0x8863 and0x8864 respectively, as mandated by the PPPoE specification.
Code RFC’s Code Dual Link Modem’s Code
348

Chapter 17 PPP and SLIP
Code RFC’s Code Dual Link Modem’s Code
PAYLOAD 0x8863 0x3c12
PAYLOAD 0x8864 0x3c13
So, now what? You need to recompile the NETGRAPH_PPPOE code with the modem’s codes. For this, you shouldhave installed the full kernel sources.
Find the /usr/src/sys/netgraph/ng_pppoe.h file. Be careful while editing this file. You have to modifyboth the little and the big endian entries.
• For big endian, find the line with 0x8863 in it, and replace the number with 0x3c12. Do the same with0x8864, replacing it with 0x3c13.
• For little endian, find the line with 0x6388in it, and replace the number with 0x123c. Do the same with0x6488, replacing it with 0x133c.
Here is a diff of how the new file should look:
% diff -u ng_pppoe.h.orig ng_pppoe.h
--- ng_pppoe.h.orig Thu Apr 12 13:42:46 2001+++ ng_pppoe.h Thu Apr 12 13:44:47 2001@@ -148,8 +148,8 @@#define PTT_SYS_ERR (0x0202)#define PTT_GEN_ERR (0x0203)
-#define ETHERTYPE_PPPOE_DISC 0x8863 /* pppoe discovery packets */-#define ETHERTYPE_PPPOE_SESS 0x8864 /* pppoe session packets */+#define ETHERTYPE_PPPOE_DISC 0x3c12 /* pppoe discovery packets */+#define ETHERTYPE_PPPOE_SESS 0x3c13 /* pppoe session packets */#else#define PTT_EOL (0x0000)#define PTT_SRV_NAME (0x0101)@@ -162,8 +162,8 @@#define PTT_SYS_ERR (0x0202)#define PTT_GEN_ERR (0x0302)
-#define ETHERTYPE_PPPOE_DISC 0x6388 /* pppoe discovery packets */-#define ETHERTYPE_PPPOE_SESS 0x6488 /* pppoe session packets */+#define ETHERTYPE_PPPOE_DISC 0x123c /* pppoe discovery packets */+#define ETHERTYPE_PPPOE_SESS 0x133c /* pppoe session packets */#endif
struct pppoe_tag {
Then do the following as root:
349

Chapter 17 PPP and SLIP
# cd /usr/src/sys/modules/netgraph/pppoe# make clean depend all install# make clean
Now you can speak the modem’s variant of the PPPoE specification.
The third step is to figure out the name of the profile your ISP assigned to the modem. The information for thisstep was obtained from the Roaring Penguin PPPoE (http://www.roaringpenguin.com/pppoe/) program whichcan be found in the ports collection. If you still are not able to find it, ask your ISP’s tech support.
If they do not know it either, and you are feeling bold (this may de-program your modem and render it useless,so think twice about doing it).
Install the program shipped with the modem by your provider. Then, access the System menu from theprogram. The name of your profile should be listed there. It is usually ISP.
The profile name will be used in the PPPoE configuration inside ppp.conf as the provider parameter. See theppp(8) manual page for more information.
The PPPoE line in your ppp.conf should look like this:
set device PPPoE:xl1:ISP
Do not forget to change xl1 to the proper device for your ethernet card.
Do not forget to change ISP to the profile you have just found above.
For additional information, you can try:
• Cheaper Broadband with FreeBSD on DSL (http://www.daemonnews.org/200101/pppoe.html) by RenaudWaldura (http://www.daemonnews.org/200101/pppoe.html#author) in Daemon News(http://www.daemonnews.org/).
• Another PPPoE tutorial by Sympatico Users Group (http://www.sympaticousers.org/faq/freebsd_howto.htm).
17.5 Using SLIPOriginally contributed by Satoshi Asami <[email protected]> and Guy Helmer<[email protected]>, with input from Wilko Bulte <[email protected]> and Piero Serini<[email protected]>.
350

Chapter 17 PPP and SLIP
17.5.1 Setting up a SLIP ClientThe following is one way to set up a FreeBSD machine for SLIP on a static host network. For dynamic hostnameassignments (i.e., your address changes each time you dial up), you probably need to do something much fancier.
First, determine which serial port your modem is connected to. I have a symbolic link to /dev/modem from/dev/cuaa1, and only use the modem name in my configuration files. It can become quite cumbersome when youneed to fix a bunch of files in /etc and .kermrc’s all over the system!
Note: /dev/cuaa0 is COM1, cuaa1 is COM2, etc.
Make sure you have the following in your kernel configuration file:
pseudo-device sl 1
It is included in the GENERIC kernel, so this should not be a problem unless you have deleted it.
17.5.1.1 Things you have to do only once
1. Add your home machine, the gateway and nameservers to your /etc/hosts file. Mine looks like this:
127.0.0.1 localhost loghost136.152.64.181 silvia.HIP.Berkeley.EDU silvia.HIP silvia136.152.64.1 inr-3.Berkeley.EDU inr-3 slip-gateway128.32.136.9 ns1.Berkeley.edu ns1128.32.136.12 ns2.Berkeley.edu ns2
2. Make sure you have hosts before bind in your /etc/host.conf. Otherwise, funny things may happen.
3. Edit the /etc/rc.conf file.
1. Set your hostname by editing the line that says:
hostname=“myname.my.domain”
You should give it your full Internet hostname.
2. Add sl0 to the list of network interfaces by changing the line that says:
network_interfaces="lo0"
to:
network_interfaces=“lo0 sl0”
351

Chapter 17 PPP and SLIP
3. Set the startup flags of sl0 by adding a line:
ifconfig_sl0="inet ${hostname} slip-gateway netmask 0xffffff00 up"
4. Designate the default router by changing the line:
defaultrouter=“NO”
to:
defaultrouter=“slip-gateway”
4. Make a file /etc/resolv.conf which contains:
domain HIP.Berkeley.EDUnameserver 128.32.136.9nameserver 128.32.136.12
As you can see, these set up the nameserver hosts. Of course, the actual domain names and addresses depend onyour environment.
5. Set the password for root and toor (and any other accounts that do not have a password). Use passwd or vipw(8),do not edit the /etc/passwd or /etc/master.passwd files!
6. Reboot your machine and make sure it comes up with the correct hostname.
17.5.1.2 Making a SLIP connection
1. Dial up, type slip at the prompt, enter your machine name and password. The things you need to enter dependson your environment. If you use kermit, you can try a script like this:
# kermit setupset modem hayesset line /dev/modemset speed 115200set parity noneset flow rts/ctsset terminal bytesize 8set file type binary# The next macro will dial up and logindefine slip dial 643-9600, input 10 = � , if failure stop, -output slip\x0d, input 10 Username:, if failure stop, -output silvia\x0d, input 10 Password:, if failure stop, -output ***\x0d, echo \x0aCONNECTED\x0a
352

Chapter 17 PPP and SLIP
Of course, you have to change the hostname and password to fit yours. After doing so, you can just type slipfrom the kermit prompt to get connected.
Note: Leaving your password in plain text anywhere in the filesystem is generally a BAD idea. Do it at yourown risk.
2. Leave the kermit there (you can suspend it by z) and as root, type:
# slattach -h -c -s 115200 /dev/modem
If you are able to ping hosts on the other side of the router, you are connected! If it does not work, you mightwant to try -a instead of -c as an argument to slattach.
17.5.1.3 How to shutdown the connection
Do the following:
# kill -INT ‘cat /var/run/slattach.modem.pid‘
to kill slattach. Keep in mind you must be root to do the above. Then go back to kermit (fg if you suspended it) andexit from it (q).
The slattach man page says you have to use ifconfig sl0 down to mark the interface down, but this does notseem to make any difference for me. (ifconfig sl0 reports the same thing.)
Some times, your modem might refuse to drop the carrier (mine often does). In that case, simply start kermit and quitit again. It usually goes out on the second try.
17.5.1.4 Troubleshooting
If it does not work, feel free to ask me. The things that people tripped over so far:
• Not using -c or -a in slattach (I have no idea why this can be fatal, but adding this flag solved the problem for atleast one person).
• Using s10 instead of sl0 (might be hard to see the difference on some fonts).
• Try ifconfig sl0 to see your interface status. For example, you might get:
# ifconfig sl0sl0: flags=10 � POINTOPOINT �
inet 136.152.64.181 -- � 136.152.64.1 netmask ffffff00
353

Chapter 17 PPP and SLIP
• Also, netstat -r will give the routing table, in case you get the “no route to host” messages from ping. Minelooks like:
# netstat -rRouting tablesDestination Gateway Flags Refs Use IfaceMTU Rtt Netmasks:
(root node)(root node)
Route Tree for Protocol Family inet:(root node) = �default inr-3.Berkeley.EDU UG 8 224515 sl0 - -localhost.Berkel localhost.Berkeley UH 5 42127 lo0 - 0.438inr-3.Berkeley.E silvia.HIP.Berkele UH 1 0 sl0 - -silvia.HIP.Berke localhost.Berkeley UGH 34 47641234 lo0 - 0.438(root node)
This is after transferring a bunch of files, your numbers should be smaller).
17.5.2 Setting up a SLIP ServerThis document provides suggestions for setting up SLIP Server services on a FreeBSD system, which typicallymeans configuring your system to automatically startup connections upon login for remote SLIP clients. The authorhas written this document based on his experience; however, as your system and needs may be different, thisdocument may not answer all of your questions, and the author cannot be responsible if you damage your system orlose data due to attempting to follow the suggestions here.
17.5.2.1 Prerequisites
This document is very technical in nature, so background knowledge is required. It is assumed that you are familiarwith the TCP/IP network protocol, and in particular, network and node addressing, network address masks,subnetting, routing, and routing protocols, such as RIP. Configuring SLIP services on a dial-up server requires aknowledge of these concepts, and if you are not familiar with them, please read a copy of either Craig Hunt’s TCP/IPNetwork Administration published by O’Reilly & Associates, Inc. (ISBN Number 0-937175-82-X), or DouglasComer’s books on the TCP/IP protocol.
It is further assumed that you have already setup your modem(s) and configured the appropriate system files to allowlogins through your modems. If you have not prepared your system for this yet, please see the tutorial for configuring
354

Chapter 17 PPP and SLIP
dialup services; if you have a World-Wide Web browser available, browse the list of tutorials athttp://www.FreeBSD.org/. You may also want to check the manual pages for sio(4) for information on the serial portdevice driver and ttys(5), gettytab(5), getty(8), & init(8) for information relevant to configuring the system to acceptlogins on modems, and perhaps stty(1) for information on setting serial port parameters (such as clocal fordirectly-connected serial interfaces).
17.5.2.2 Quick Overview
In its typical configuration, using FreeBSD as a SLIP server works as follows: a SLIP user dials up your FreeBSDSLIP Server system and logs in with a special SLIP login ID that uses /usr/sbin/sliplogin as the special user’sshell. The sliplogin program browses the file /etc/sliphome/slip.hosts to find a matching line for thespecial user, and if it finds a match, connects the serial line to an available SLIP interface and then runs the shellscript /etc/sliphome/slip.login to configure the SLIP interface.
17.5.2.2.1 An Example of a SLIP Server Login
For example, if a SLIP user ID were Shelmerg, Shelmerg’s entry in /etc/master.passwd would looksomething like this (except it would be all on one line):
Shelmerg:password:1964:89::0:0:Guy Helmer - SLIP:/usr/users/Shelmerg:/usr/sbin/sliplogin
When Shelmerg logs in, sliplogin will search /etc/sliphome/slip.hosts for a line that had a matchinguser ID; for example, there may be a line in /etc/sliphome/slip.hosts that reads:
Shelmerg dc-slip sl-helmer 0xfffffc00 autocomp
sliplogin will find that matching line, hook the serial line into the next available SLIP interface, and then execute/etc/sliphome/slip.login like this:
/etc/sliphome/slip.login 0 19200 Shelmerg dc-slip sl-helmer 0xfffffc00 autocomp
If all goes well, /etc/sliphome/slip.login will issue an ifconfig for the SLIP interface to whichsliplogin attached itself (slip interface 0,in the above example, which was the first parameter in the list given toslip.login) to set the local IP address (dc-slip), remote IP address (sl-helmer), network mask for the SLIPinterface (0xfffffc00), and any additional flags (autocomp). If something goes wrong, sliplogin usually logsgood informational messages via the daemon syslog facility, which usually goes into /var/log/messages (see themanual pages for syslogd(8) and syslog.conf(5) and perhaps check /etc/syslog.conf to see to which filessyslogd is logging).
OK, enough of the examples — let us dive into setting up the system.
355

Chapter 17 PPP and SLIP
17.5.2.3 Kernel Configuration
FreeBSD’s default kernels usually come with two SLIP interfaces defined (sl0 and sl1); you can use netstat -i
to see whether these interfaces are defined in your kernel.
Sample output from netstat -i:
Name Mtu Network Address Ipkts Ierrs Opkts Oerrs Colled0 1500 � Link � 0.0.c0.2c.5f.4a 291311 0 174209 0 133ed0 1500 138.247.224 ivory 291311 0 174209 0 133lo0 65535 � Link � 79 0 79 0 0lo0 65535 loop localhost 79 0 79 0 0sl0* 296 � Link � 0 0 0 0 0sl1* 296 � Link � 0 0 0 0 0
The sl0 and sl1 interfaces shown in netstat -i’s output indicate that there are two SLIP interfaces built into thekernel. (The asterisks after the sl0 and sl1 indicate that the interfaces are “down”.)
However, FreeBSD’s default kernels do not come configured to forward packets (ie, your FreeBSD machine will notact as a router) due to Internet RFC requirements for Internet hosts (see RFCs 1009 [Requirements for InternetGateways], 1122 [Requirements for Internet Hosts — Communication Layers], and perhaps 1127 [A Perspective onthe Host Requirements RFCs]), so if you want your FreeBSD SLIP Server to act as a router, you will have to edit the/etc/rc.conf file and change the setting of the gateway_enable variable to YES.
You will then need to reboot for the new settings to take effect.
You will notice that near the end of the default kernel configuration file (/sys/i386/conf/GENERIC) is a line thatreads:
pseudo-device sl 2
This is the line that defines the number of SLIP devices available in the kernel; the number at the end of the line isthe maximum number of SLIP connections that may be operating simultaneously.
Please refer to Configuring the FreeBSD Kernel for help in reconfiguring your kernel.
17.5.2.4 Sliplogin Configuration
As mentioned earlier, there are three files in the /etc/sliphome directory that are part of the configuration for/usr/sbin/sliplogin (see sliplogin(8) for the actual manual page for sliplogin): slip.hosts, which definesthe SLIP users & their associated IP addresses; slip.login, which usually just configures the SLIP interface; and(optionally) slip.logout, which undoes slip.login’s effects when the serial connection is terminated.
356

Chapter 17 PPP and SLIP
17.5.2.4.1 slip.hosts Configuration
/etc/sliphome/slip.hosts contains lines which have at least four items, separated by whitespace:
• SLIP user’s login ID
• Local address (local to the SLIP server) of the SLIP link
• Remote address of the SLIP link
• Network mask
The local and remote addresses may be host names (resolved to IP addresses by /etc/hosts or by the domain nameservice, depending on your specifications in /etc/host.conf), and the network mask may be a name that can beresolved by a lookup into /etc/networks. On a sample system, /etc/sliphome/slip.hosts looks like this:
## login local-addr remote-addr mask opt1 opt2# (normal,compress,noicmp)#Shelmerg dc-slip sl-helmerg 0xfffffc00 autocomp
At the end of the line is one or more of the options.
• normal — no header compression
• compress — compress headers
• autocomp — compress headers if the remote end allows it
• noicmp — disable ICMP packets (so any “ping” packets will be dropped instead of using up your bandwidth)
Note that sliplogin under early releases of FreeBSD 2 ignored the options that FreeBSD 1.x recognized, so theoptions normal, compress, autocomp, and noicmp had no effect until support was added in FreeBSD 2.2 (unlessyour slip.login script included code to make use of the flags).
Your choice of local and remote addresses for your SLIP links depends on whether you are going to dedicate aTCP/IP subnet or if you are going to use “proxy ARP” on your SLIP server (it is not “true” proxy ARP, but that is theterminology used in this document to describe it). If you are not sure which method to select or how to assign IPaddresses, please refer to the TCP/IP books referenced in the slips-prereqs section and/or consult your IP networkmanager.
If you are going to use a separate subnet for your SLIP clients, you will need to allocate the subnet number out ofyour assigned IP network number and assign each of your SLIP client’s IP numbers out of that subnet. Then, youwill probably either need to configure a static route to the SLIP subnet via your SLIP server on your nearest IProuter, or install gated on your FreeBSD SLIP server and configure it to talk the appropriate routing protocols toyour other routers to inform them about your SLIP server’s route to the SLIP subnet.
357

Chapter 17 PPP and SLIP
Otherwise, if you will use the “proxy ARP” method, you will need to assign your SLIP client’s IP addresses out ofyour SLIP server’s Ethernet subnet, and you will also need to adjust your /etc/sliphome/slip.login and/etc/sliphome/slip.logout scripts to use arp(8) to manage the proxy-ARP entries in the SLIP server’s ARPtable.
17.5.2.4.2 slip.login Configuration
The typical /etc/sliphome/slip.login file looks like this:
#!/bin/sh -## @(#)slip.login 5.1 (Berkeley) 7/1/90
## generic login file for a slip line. sliplogin invokes this with# the parameters:# 1 2 3 4 5 6 7-n# slipunit ttyspeed loginname local-addr remote-addr mask opt-args#/sbin/ifconfig sl$1 inet $4 $5 netmask $6
This slip.login file merely ifconfig’s the appropriate SLIP interface with the local and remote addresses andnetwork mask of the SLIP interface.
If you have decided to use the “proxy ARP” method (instead of using a separate subnet for your SLIP clients), your/etc/sliphome/slip.login file will need to look something like this:
#!/bin/sh -## @(#)slip.login 5.1 (Berkeley) 7/1/90
## generic login file for a slip line. sliplogin invokes this with# the parameters:# 1 2 3 4 5 6 7-n# slipunit ttyspeed loginname local-addr remote-addr mask opt-args#/sbin/ifconfig sl$1 inet $4 $5 netmask $6# Answer ARP requests for the SLIP client with our Ethernet addr/usr/sbin/arp -s $5 00:11:22:33:44:55 pub
The additional line in this slip.login, arp -s $5 00:11:22:33:44:55 pub, creates an ARP entry in theSLIP server’s ARP table. This ARP entry causes the SLIP server to respond with the SLIP server’s Ethernet MACaddress whenever a another IP node on the Ethernet asks to speak to the SLIP client’s IP address.
358

Chapter 17 PPP and SLIP
When using the example above, be sure to replace the Ethernet MAC address (00:11:22:33:44:55) with the MACaddress of your system’s Ethernet card, or your “proxy ARP” will definitely not work! You can discover your SLIPserver’s Ethernet MAC address by looking at the results of running netstat -i; the second line of the outputshould look something like:
ed0 1500 � Link � 0.2.c1.28.5f.4a 191923 0 129457 0 116
This indicates that this particular system’s Ethernet MAC address is 00:02:c1:28:5f:4a — the periods in theEthernet MAC address given by netstat -i must be changed to colons and leading zeros should be added to eachsingle-digit hexadecimal number to convert the address into the form that arp(8) desires; see the manual page onarp(8) for complete information on usage.
Note: When you create /etc/sliphome/slip.login and /etc/sliphome/slip.logout, the “execute” bit (ie,chmod 755 /etc/sliphome/slip.login /etc/sliphome/slip.logout) must be set, or sliplogin will beunable to execute it.
17.5.2.4.3 slip.logout Configuration
/etc/sliphome/slip.logout is not strictly needed (unless you are implementing “proxy ARP”), but if youdecide to create it, this is an example of a basic slip.logout script:
#!/bin/sh -## slip.logout
## logout file for a slip line. sliplogin invokes this with# the parameters:# 1 2 3 4 5 6 7-n# slipunit ttyspeed loginname local-addr remote-addr mask opt-args#/sbin/ifconfig sl$1 down
If you are using “proxy ARP”, you will want to have /etc/sliphome/slip.logout remove the ARP entry for theSLIP client:
#!/bin/sh -## @(#)slip.logout
#
359

Chapter 17 PPP and SLIP
# logout file for a slip line. sliplogin invokes this with# the parameters:# 1 2 3 4 5 6 7-n# slipunit ttyspeed loginname local-addr remote-addr mask opt-args#/sbin/ifconfig sl$1 down# Quit answering ARP requests for the SLIP client/usr/sbin/arp -d $5
The arp -d $5 removes the ARP entry that the “proxy ARP” slip.login added when the SLIP client logged in.
It bears repeating: make sure /etc/sliphome/slip.logout has the execute bit set for after you create it (ie,chmod 755 /etc/sliphome/slip.logout).
17.5.2.5 Routing Considerations
If you are not using the “proxy ARP” method for routing packets between your SLIP clients and the rest of yournetwork (and perhaps the Internet), you will probably either have to add static routes to your closest default router(s)to route your SLIP client subnet via your SLIP server, or you will probably need to install and configure gated onyour FreeBSD SLIP server so that it will tell your routers via appropriate routing protocols about your SLIP subnet.
17.5.2.5.1 Static Routes
Adding static routes to your nearest default routers can be troublesome (or impossible, if you do not have authority todo so...). If you have a multiple-router network in your organization, some routers, such as Cisco and Proteon, maynot only need to be configured with the static route to the SLIP subnet, but also need to be told which static routes totell other routers about, so some expertise and troubleshooting/tweaking may be necessary to get static-route-basedrouting to work.
17.5.2.5.2 Running gated
An alternative to the headaches of static routes is to install gated on your FreeBSD SLIP server and configure it touse the appropriate routing protocols (RIP/OSPF/BGP/EGP) to tell other routers about your SLIP subnet. You canuse gated from the ports collection or retrieve and build it yourself from the GateD anonymous ftp site(ftp://ftp.gated.merit.edu/research.and.development/gated/); the current version as of this writing isgated-R3_5Alpha_8.tar.Z, which includes support for FreeBSD “out-of-the-box”. Complete information anddocumentation on gated is available on the Web starting at the Merit GateD Consortium(http://www.gated.merit.edu/). Compile and install it, and then write a /etc/gated.conf file to configure yourgated; here is a sample, similar to what the author used on a FreeBSD SLIP server:
#
360

Chapter 17 PPP and SLIP
# gated configuration file for dc.dsu.edu; for gated version 3.5alpha5# Only broadcast RIP information for xxx.xxx.yy out the ed Ethernet interface### tracing options#traceoptions "/var/tmp/gated.output" replace size 100k files 2 general ;
rip yes {interface sl noripout noripin ;interface ed ripin ripout version 1 ;traceoptions route ;
} ;
## Turn on a bunch of tracing info for the interface to the kernel:kernel {
traceoptions remnants request routes info interface ;} ;
## Propagate the route to xxx.xxx.yy out the Ethernet interface via RIP#
export proto rip interface ed {proto direct {
xxx.xxx.yy mask 255.255.252.0 metric 1; # SLIP connections} ;
} ;
## Accept routes from RIP via ed Ethernet interfaces
import proto rip interface ed {all ;
} ;
The above sample gated.conf file broadcasts routing information regarding the SLIP subnet xxx.xxx.yy viaRIP onto the Ethernet; if you are using a different Ethernet driver than the ed driver, you will need to change thereferences to the ed interface appropriately. This sample file also sets up tracing to /var/tmp/gated.output fordebugging gated’s activity; you can certainly turn off the tracing options if gated works OK for you. You will needto change the xxx.xxx.yy’s into the network address of your own SLIP subnet (be sure to change the net mask inthe proto direct clause as well).
361

Chapter 17 PPP and SLIP
When you get gated built and installed and create a configuration file for it, you will need to run gated in place ofrouted on your FreeBSD system; change the routed/gated startup parameters in /etc/netstart as appropriatefor your system. Please see the manual page for gated for information on gated’s command-line parameters.
362

Chapter 18 Advanced Networking
18.1 SynopsisThe following chapter will cover some of the more frequently used network services on UNIX systems. This, ofcourse, will pertain to configuring said services on your FreeBSD system.
18.2 Gateways and RoutesContributed by Coranth Gryphon <[email protected]>. 6 October 1995.
For one machine to be able to find another, there must be a mechanism in place to describe how to get from one tothe other. This is called Routing. A “route” is a defined pair of addresses: a “destination” and a “gateway”. The pairindicates that if you are trying to get to this destination, send along through this gateway. There are three types ofdestinations: individual hosts, subnets, and “default”. The “default route” is used if none of the other routes apply.We will talk a little bit more about default routes later on. There are also three types of gateways: individual hosts,interfaces (also called “links”), and ethernet hardware addresses.
18.2.1 An exampleTo illustrate different aspects of routing, we will use the following example which is the output of the commandnetstat -r:
Destination Gateway Flags Refs Use Netif Expire
default outside-gw UGSc 37 418 ppp0localhost localhost UH 0 181 lo0test0 0:e0:b5:36:cf:4f UHLW 5 63288 ed0 7710.20.30.255 link#1 UHLW 1 2421foobar.com link#1 UC 0 0host1 0:e0:a8:37:8:1e UHLW 3 4601 lo0host2 0:e0:a8:37:8:1e UHLW 0 5 lo0 =>host2.foobar.com link#1 UC 0 0224 link#1 UC 0 0
The first two lines specify the default route (which we will cover in the next section) and the localhost route.
363

Chapter 18 Advanced Networking
The interface (Netif column) that it specifies to use for localhost is lo0, also known as the loopback device. Thissays to keep all traffic for this destination internal, rather than sending it out over the LAN, since it will only end upback where it started anyway.
The next thing that stands out are the 0:e0:... addresses. These are ethernet hardware addresses. FreeBSD willautomatically identify any hosts (test0 in the example) on the local ethernet and add a route for that host, directly toit over the ethernet interface, ed0. There is also a timeout (Expire column) associated with this type of route, whichis used if we fail to hear from the host in a specific amount of time. In this case the route will be automaticallydeleted. These hosts are identified using a mechanism known as RIP (Routing Information Protocol), which figuresout routes to local hosts based upon a shortest path determination.
FreeBSD will also add subnet routes for the local subnet (10.20.30.255 is the broadcast address for the subnet10.20.30, and foobar.com is the domain name associated with that subnet). The designation link#1 refers to thefirst ethernet card in the machine. You will notice no additional interface is specified for those.
Both of these groups (local network hosts and local subnets) have their routes automatically configured by a daemoncalled routed. If this is not run, then only routes which are statically defined (ie. entered explicitly) will exist.
The host1 line refers to our host, which it knows by ethernet address. Since we are the sending host, FreeBSDknows to use the loopback interface (lo0) rather than sending it out over the ethernet interface.
The two host2 lines are an example of what happens when we use an ifconfig alias (see the section of ethernet forreasons why we would do this). The = � symbol after the lo0 interface says that not only are we using the loopback(since this is address also refers to the local host), but specifically it is an alias. Such routes only show up on the hostthat supports the alias; all other hosts on the local network will simply have a link#1 line for such.
The final line (destination subnet 224) deals with MultiCasting, which will be covered in a another section.
The other column that we should talk about are the Flags. Each route has different attributes that are described inthe column. Below is a short table of some of these flags and their meanings:
U Up: The route is active.
H Host: The route destination is a single host.
G Gateway: Send anything for this destination on to thisremote system, which will figure out from there where tosend it.
S Static: This route was configured manually, notautomatically generated by the system.
C Clone: Generates a new route based upon this route formachines we connect to. This type of route is normallyused for local networks.
W WasCloned: Indicated a route that was auto-configuredbased upon a local area network (Clone) route.
364

Chapter 18 Advanced Networking
L Link: Route involves references to ethernet hardware.
18.2.2 Default routesWhen the local system needs to make a connection to remote host, it checks the routing table to determine if a knownpath exists. If the remote host falls into a subnet that we know how to reach (Cloned routes), then the system checksto see if it can connect along that interface.
If all known paths fail, the system has one last option: the “default” route. This route is a special type of gatewayroute (usually the only one present in the system), and is always marked with a c in the flags field. For hosts on alocal area network, this gateway is set to whatever machine has a direct connection to the outside world (whether viaPPP link, or your hardware device attached to a dedicated data line).
If you are configuring the default route for a machine which itself is functioning as the gateway to the outside world,then the default route will be the gateway machine at your Internet Service Provider’s (ISP) site.
Let us look at an example of default routes. This is a common configuration:
[Local2] � --ether-- � [Local1] � --PPP-- � [ISP-Serv] � --ether-- � [T1-GW]
The hosts Local1 and Local2 are at your site, with the formed being your PPP connection to your ISP’s TerminalServer. Your ISP has a local network at their site, which has, among other things, the server where you connect and ahardware device (T1-GW) attached to the ISP’s Internet feed.
The default routes for each of your machines will be:
host default gateway interface
Local2 Local1 ethernet
Local1 T1-GW PPP
A common question is “Why (or how) would we set the T1-GW to be the default gateway for Local1, rather than theISP server it is connected to?”.
Remember, since the PPP interface is using an address on the ISP’s local network for your side of the connection,routes for any other machines on the ISP’s local network will be automatically generated. Hence, you will alreadyknow how to reach the T1-GW machine, so there is no need for the intermediate step of sending traffic to the ISPserver.
As a final note, it is common to use the address ...1 as the gateway address for your local network. So (using thesame example), if your local class-C address space was 10.20.30 and your ISP was using 10.9.9 then the defaultroutes would be:
365

Chapter 18 Advanced Networking
Local2 (10.20.30.2) -- � Local1 (10.20.30.1)Local1 (10.20.30.1, 10.9.9.30) -- � T1-GW (10.9.9.1)
18.2.3 Dual homed hostsThere is one other type of configuration that we should cover, and that is a host that sits on two different networks.Technically, any machine functioning as a gateway (in the example above, using a PPP connection) counts as adual-homed host. But the term is really only used to refer to a machine that sits on two local-area networks.
In one case, the machine as two ethernet cards, each having an address on the separate subnets. Alternately, themachine may only have one ethernet card, and be using ifconfig aliasing. The former is used if two physicallyseparate ethernet networks are in use, the latter if there is one physical network segment, but two logically separatesubnets.
Either way, routing tables are set up so that each subnet knows that this machine is the defined gateway (inboundroute) to the other subnet. This configuration, with the machine acting as a Bridge between the two subnets, is oftenused when we need to implement packet filtering or firewall security in either or both directions.
18.2.4 Routing propagationWe have already talked about how we define our routes to the outside world, but not about how the outside worldfinds us.
We already know that routing tables can be set up so that all traffic for a particular address space (in our examples, aclass-C subnet) can be sent to a particular host on that network, which will forward the packets inbound.
When you get an address space assigned to your site, your service provider will set up their routing tables so that alltraffic for your subnet will be sent down your PPP link to your site. But how do sites across the country know to sendto your ISP?
There is a system (much like the distributed DNS information) that keeps track of all assigned address-spaces, anddefines their point of connection to the Internet Backbone. The “Backbone” are the main trunk lines that carryInternet traffic across the country, and around the world. Each backbone machine has a copy of a master set of tables,which direct traffic for a particular network to a specific backbone carrier, and from there down the chain of serviceproviders until it reaches your network.
It is the task of your service provider to advertise to the backbone sites that they are the point of connection (and thusthe path inward) for your site. This is known as route propagation.
366

Chapter 18 Advanced Networking
18.2.5 TroubleshootingSometimes, there is a problem with routing propagation, and some sites are unable to connect to you. Perhaps themost useful command for trying to figure out where a routing is breaking down is the traceroute(8) command. It isequally useful if you cannot seem to make a connection to a remote machine (i.e. ping(8) fails).
The traceroute(8) command is run with the name of the remote host you are trying to connect to. It will show thegateway hosts along the path of the attempt, eventually either reaching the target host, or terminating because of alack of connection.
For more information, see the manual page for traceroute(8).
18.3 BridgingWritten by Steve Peterson <[email protected]>.
18.3.1 IntroductionIt is sometimes useful to divide one physical network (i.e., an Ethernet segment) into two separate network segments,without having to create IP subnets and use a router to connect the segments together. A device that connects twonetworks together in this fashion is called a bridge. and a FreeBSD system with two network interface cards can actas a bridge.
The bridge works by learning the MAC layer addresses (i.e., Ethernet addresses) of the devices on each of its networkinterfaces. It forwards traffic between two networks only when its source and destination are on different networks.
In many respects, a bridge is like an Ethernet switch with very few ports.
18.3.2 Situations where bridging is appropriateThere are two common situations in which a bridge is used today.
18.3.2.1 High traffic on a segment
Situation one is where your physical network segment is overloaded with traffic, but you don’t want for whateverreason to subnet the network and interconnect the subnets with a router.
Let’s consider an example of a newspaper where the Editorial and Production departments are on the samesubnetwork. The Editorial users all use server A for file service, and the Production users are on server B. AnEthernet is used to connect all users together, and high loads on the network are slowing things down.
367

Chapter 18 Advanced Networking
If the Editorial users could be segregated on one network segment and the Production users on another, the twonetwork segments could be connected with a bridge. Only the network traffic destined for interfaces on the "other"side of the bridge would be sent to the other network, reducing congestion on each network segment.
18.3.2.2 Filtering/traffic shaping firewall
The second common situation is where firewall functionality is needed without IP Masquerading (NAT).
An example is a small company that is connected via DSL or ISDN to their ISP. They have a 13 address global IPallocation for their ISP and have 10 PCs on their network. In this situation, using a router-based firewall is difficultbecause of subnetting issues.
A bridge-based firewall can be configured and dropped into the path just downstream of their DSL/ISDN routerwithout any IP numbering issues.
18.3.3 Configuring a bridge
18.3.3.1 Network interface card selection
A bridge requires at least two network cards to function. Unfortunately, not all network interface cards as ofFreeBSD 4.0 support bridging. Read bridge(4) for details on the cards that are supported.
Install and test the two network cards before continuing.
18.3.3.2 Kernel configuration changes
To enable kernel support for bridging, add the
options BRIDGE
statement to your kernel configuration file, and rebuild your kernel.
18.3.3.3 Firewall support
If you are planning to use the bridge as a firewall, you will need to add the IPFIREWALL option as well. ReadSection 9.7 for general information on configuring the bridge as a firewall.
If you need to allow non-IP packets (such as ARP) to flow through the bridge, there is an undocumented firewalloption that must be set. This option is IPFIREWALL_DEFAULT_TO_ACCEPT. Note that this changes the default rule
368

Chapter 18 Advanced Networking
for the firewall to accept any packet. Make sure you know how this changes the meaning of your ruleset before youset it.
18.3.3.4 Traffic shaping support
If you want to use the bridge as a traffic shaper, you will need to add the DUMMYNET option to your kernelconfiguration. Read dummynet(4) for further information.
18.3.4 Enabling the bridgeAdd the line
net.link.ether.bridge=1
to /etc/sysctl.conf to enable the bridge at runtime. If you want the bridged packets to be filtered by ipfw, youshould also add
net.link.ether.bridge_ipfw=1
as well.
18.3.5 PerformanceMy bridge/firewall is a Pentium 90 with one 3Com 3C900B and one 3C905B. The protected side of the network runsat 10mbps half duplex and the connection between the bridge and my router (a Cisco 675) runs at 100mbps fullduplex. With no filtering enabled, I’ve found that the bridge adds about 0.4 milliseconds of latency to pings from theprotected 10mbps network to the Cisco 675.
18.3.6 Other informationIf you want to be able to telnet into the bridge from the network, it is OK to assign one of the network cards an IPaddress. The consensus is that assigning both cards an address is a bad idea.
If you have multiple bridges on your network, there cannot be more than one path between any two workstations.Technically, this means that there is no support for spanning tree link management.
369

Chapter 18 Advanced Networking
18.4 NFSWritten by Bill Swingle <[email protected]>, 4 March 2000.
Among the many different file systems that FreeBSD supports is a very unique type, the Network File System orNFS. NFS allows you to share directories and files on one machine with one or more other machines via the networkthey are attached to. Using NFS, users and programs can access files on remote systems as if they were local files.
NFS has several benefits:
• Local workstations don’t need as much disk space because commonly used data can be stored on a single machineand still remain accessible to everyone on the network.
• There is no need for users to have unique home directories on every machine on your network. Once they have anestablished directory that is available via NFS it can be accessed from anywhere.
• Storage devices such as floppies and CDROM drives can be used by other machines on the network eliminatingthe need for extra hardware.
18.4.1 How It WorksNFS is composed of two sides – a client side and a server side. Think of it as a want/have relationship. The clientwants the data that the server side has. The server shares its data with the client. In order for this system to functionproperly a few processes have to be configured and running properly.
The server has to be running the following daemons:
• nfsd - The NFS Daemon which services requests from NFS clients.
• mountd - The NFS Mount Daemon which actually carries out requests that nfsd passes on to it.
• portmap - The portmapper daemon which allows NFS clients to find out which port the NFS server is using.
The client side only needs to run a single daemon:
• nfsiod - The NFS async I/O Daemon which services requests from its NFS server.
18.4.2 Configuring NFSLuckily for us, on a FreeBSD system this setup is a snap. The processes that need to be running can all be run at boottime with a few modifications to your /etc/rc.conf file.
On the NFS server make sure you have:
370

Chapter 18 Advanced Networking
portmap_enable="YES"nfs_server_enable="YES"nfs_server_flags="-u -t -n 4"mountd_flags="-r"
mountd is automatically run whenever the NFS server is enabled. The -u and -t flags to nfsd tell it to serve UDPand TCP clients. The -n 4 flag tells nfsd to start 4 copies of itself.
On the client, make sure you have:
nfs_client_enable="YES"nfs_client_flags="-n 4"
Like nfsd, the -n 4 tells nfsiod to start 4 copies of itself.
The last configuration step requires that you create a file called /etc/exports. The exports file specifies which filesystems on your server will be shared (a.k.a., “exported”) and with what clients they will be shared. Each line in thefile specifies a file system to be shared. There are a handful of options that can be used in this file but only a few willbe mentioned here. You can find out about the rest in the exports(5) man page.
Here are a few example /etc/exports entries:
The following line exports /cdrom to three silly machines that have the same domain name as the server (hence thelack of a domain name for each) or have entries in your /etc/hosts file. The -ro flag makes the shared file systemread-only. With this flag, the remote system will not be able to make any changes to the shared file system.
/cdrom -ro moe larry curly
The following line exports /home to three hosts by IP address. This is a useful setup if you have a private networkbut do not have DNS running. The -alldirs flag allows all the directories below the specified file system to beexported as well.
/home -alldirs 10.0.0.2 10.0.0.3 10.0.0.4
The following line exports /a to two machines that have different domain names than the server. The -maproot=0flag allows the root user on the remote system to write to the shared file system as root. Without the -maproot=0 flageven if someone has root access on the remote system they won’t be able to modify files on the shared file system.
/a -maproot=0 host.domain.com box.example.com
In order for a client to share an exported file system it must have permission to do so. Make sure your client is listedin your /etc/exports file.
It’s important to remember that you must restart mountd whenever you modify /etc/exports so that your changestake effect. This can be accomplished by sending the hangup signal to the mountd process :
# kill -HUP ‘cat /var/run/mountd.pid‘
371

Chapter 18 Advanced Networking
Now that you have made all these changes you can just reboot and let FreeBSD start everything for you at boot timeor you can run the following commands as root:
On the NFS server:
# portmap# nfsd -u -t -n 4# mountd -r
On the NFS client:
# nfsiod -n 4
Now you should be ready to actually mount a remote file system. This can be done one of two ways. In theseexamples the server’s name will be server and the client’s name will be client. If you just want to temporarilymount a remote file system or just want to test out your config you can run a command like this as root on the client:
# mount server:/home /mnt
This will mount /home on the server on /mnt on the client. If everything is setup correctly you should be able to gointo /mnt on the client and see all the files that are on the server.
If you want to permanently (each time you reboot) mount a remote file system you need to add it to your/etc/fstab file. Here is an example line:
server:/home /mnt nfs rw 0 0
Read the fstab(5) man page for more options.
18.4.3 Practical UsesThere are many very cool uses for NFS. Some of the more common ones are listed below.
• Have several machines on a network and share a CDROM or floppy drive among them. This is cheaper and oftenmore convenient.
• With so many machines on a network, it gets old having your personal files strewn all over the place. You can havea central NFS server that houses all user home directories and shares them with the rest of the machines on theLAN, so no matter where you log in you will have the same home directory.
• When you get to reinstalling FreeBSD on one of your machines, NFS is the way to go! Just pop your distributionCDROM into your file server and away you go!
372

Chapter 18 Advanced Networking
• Have a common /usr/ports/distfiles directory that all your machines share. That way, when you go toinstall a port that you’ve already installed on a different machine, you do not have to download the source all overagain!
18.4.4 Problems integrating with other systemsContributed by John Lind <[email protected]>.
Certain Ethernet adapters for ISA PC systems have limitations which can lead to serious network problems,particularly with NFS. This difficulty is not specific to FreeBSD, but FreeBSD systems are affected by it.
The problem nearly always occurs when (FreeBSD) PC systems are networked with high-performance workstations,such as those made by Silicon Graphics, Inc., and Sun Microsystems, Inc. The NFS mount will work fine, and someoperations may succeed, but suddenly the server will seem to become unresponsive to the client, even thoughrequests to and from other systems continue to be processed. This happens to the client system, whether the client isthe FreeBSD system or the workstation. On many systems, there is no way to shut down the client gracefully oncethis problem has manifested itself. The only solution is often to reset the client, because the NFS situation cannot beresolved.
Though the “correct” solution is to get a higher performance and capacity Ethernet adapter for the FreeBSD system,there is a simple workaround that will allow satisfactory operation. If the FreeBSD system is the server, include theoption -w=1024 on the mount from the client. If the FreeBSD system is the client, then mount the NFS file systemwith the option -r=1024. These options may be specified using the fourth field of the fstab entry on the client forautomatic mounts, or by using the -o parameter of the mount command for manual mounts.
It should be noted that there is a different problem, sometimes mistaken for this one, when the NFS servers andclients are on different networks. If that is the case, make certain that your routers are routing the necessary UDPinformation, or you will not get anywhere, no matter what else you are doing.
In the following examples, fastws is the host (interface) name of a high-performance workstation, and freebox isthe host (interface) name of a FreeBSD system with a lower-performance Ethernet adapter. Also, /sharedfs will bethe exported NFS filesystem (see man exports), and /project will be the mount point on the client for theexported file system. In all cases, note that additional options, such as hard or soft and bg may be desirable in yourapplication.
Examples for the FreeBSD system (freebox) as the client: in /etc/fstab on freebox:
fastws:/sharedfs /project nfs rw,-r=1024 0 0
As a manual mount command on freebox:
# mount -t nfs -o -r=1024 fastws:/sharedfs /project
Examples for the FreeBSD system as the server: in /etc/fstab on fastws:
373

Chapter 18 Advanced Networking
freebox:/sharedfs /project nfs rw,-w=1024 0 0
As a manual mount command on fastws:
# mount -t nfs -o -w=1024 freebox:/sharedfs /project
Nearly any 16-bit Ethernet adapter will allow operation without the above restrictions on the read or write size.
For anyone who cares, here is what happens when the failure occurs, which also explains why it is unrecoverable.NFS typically works with a “block” size of 8k (though it may do fragments of smaller sizes). Since the maximumEthernet packet is around 1500 bytes, the NFS “block” gets split into multiple Ethernet packets, even though it is stilla single unit to the upper-level code, and must be received, assembled, and acknowledged as a unit. Thehigh-performance workstations can pump out the packets which comprise the NFS unit one right after the other, justas close together as the standard allows. On the smaller, lower capacity cards, the later packets overrun the earlierpackets of the same unit before they can be transferred to the host and the unit as a whole cannot be reconstructed oracknowledged. As a result, the workstation will time out and try again, but it will try again with the entire 8K unit,and the process will be repeated, ad infinitum.
By keeping the unit size below the Ethernet packet size limitation, we ensure that any complete Ethernet packetreceived can be acknowledged individually, avoiding the deadlock situation.
Overruns may still occur when a high-performance workstations is slamming data out to a PC system, but with thebetter cards, such overruns are not guaranteed on NFS “units”. When an overrun occurs, the units affected will beretransmitted, and there will be a fair chance that they will be received, assembled, and acknowledged.
18.5 Diskless OperationContributed by Martin Renters <[email protected]>.
netboot.com/netboot.rom allow you to boot your FreeBSD machine over the network and run FreeBSD withouthaving a disk on your client. Under 2.0 it is now possible to have local swap. Swapping over NFS is also stillsupported.
Supported Ethernet cards include: Western Digital/SMC 8003, 8013, 8216 and compatibles; NE1000/NE2000 andcompatibles (requires recompile)
18.5.1 Setup Instructions
1. Find a machine that will be your server. This machine will require enough disk space to hold the FreeBSD 2.0binaries and have bootp, tftp and NFS services available. Tested machines:
374

Chapter 18 Advanced Networking
• HP9000/8xx running HP-UX 9.04 or later (pre 9.04 doesn’t work)
• Sun/Solaris 2.3. (you may need to get bootp)
2. Set up a bootp server to provide the client with IP, gateway, netmask.
diskless:\:ht=ether:\:ha=0000c01f848a:\:sm=255.255.255.0:\:hn:\:ds=192.1.2.3:\:ip=192.1.2.4:\:gw=192.1.2.5:\:vm=rfc1048:
3.
Set up a TFTP server (on same machine as bootp server) to provide booting information to client. The name ofthis file is cfg.X.X.X.X (or /tftpboot/cfg.X.X.X.X, it will try both) where X.X.X.X is the IP address ofthe client. The contents of this file can be any valid netboot commands. Under 2.0, netboot has the followingcommands:
help print help list
ip X.X.X.X print/set client’s IP address
server X.X.X.X print/set bootp/tftp server address
netmask X.X.X.X print/set netmask
hostname name print/set hostname
kernel name print/set kernel name
rootfs ip:/fs print/set root filesystem
swapfs ip:/fs print/set swap filesystem
swapsize size set diskless swapsize in KBytes
diskboot boot from disk
autoboot continue boot process
trans on|off turn transceiver on|off
flags bcdhsv set boot flags
A typical completely diskless cfg file might contain:
rootfs 192.1.2.3:/rootfs/myclientswapfs 192.1.2.3:/swapfsswapsize 20000hostname myclient.mydomain
375

Chapter 18 Advanced Networking
A cfg file for a machine with local swap might contain:
rootfs 192.1.2.3:/rootfs/myclienthostname myclient.mydomain
4. Ensure that your NFS server has exported the root (and swap if applicable) filesystems to your client, and thatthe client has root access to these filesystems A typical /etc/exports file on FreeBSD might look like:
/rootfs/myclient -maproot=0:0 myclient.mydomain/swapfs -maproot=0:0 myclient.mydomain
And on HP-UX:
/rootfs/myclient -root=myclient.mydomain/swapfs -root=myclient.mydomain
5.
If you are swapping over NFS (completely diskless configuration) create a swap file for your client using dd. Ifyour swapfs command has the arguments /swapfs and the size 20000 as in the example above, the swapfilefor myclient will be called /swapfs/swap.X.X.X.X where X.X.X.X is the client’s IP addr, e.g.:
# dd if=/dev/zero of=/swapfs/swap.192.1.2.4 bs=1k count=20000
Also, the client’s swap space might contain sensitive information once swapping starts, so make sure to restrictread and write access to this file to prevent unauthorized access:
# chmod 0600 /swapfs/swap.192.1.2.4
6. Unpack the root filesystem in the directory the client will use for its root filesystem (/rootfs/myclient in theexample above).
• On HP-UX systems: The server should be running HP-UX 9.04 or later for HP9000/800 series machines.Prior versions do not allow the creation of device files over NFS.
• When extracting /dev in /rootfs/myclient, beware that some systems (HPUX) will not create devicefiles that FreeBSD is happy with. You may have to go to single user mode on the first bootup (press control-cduring the bootup phase), cd /dev and do a sh ./MAKEDEV all from the client to fix this.
7. Run netboot.com on the client or make an EPROM from the netboot.rom file
18.5.2 Using Shared / and /usr filesystemsAlthough this is not an officially sanctioned or supported way of doing this, some people report that it works quitewell. If anyone has any suggestions on how to do this cleanly, please tell FreeBSD documentation project mailing list<[email protected]>.
376

Chapter 18 Advanced Networking
18.5.3 Compiling netboot for specific setupsNetboot can be compiled to support NE1000/2000 cards by changing the configuration in/sys/i386/boot/netboot/Makefile. See the comments at the top of this file.
18.6 ISDNA good resource for information on ISDN technology and hardware is Dan Kegel’s ISDN Page(http://alumni.caltech.edu/~dank/isdn/).
A quick simple road map to ISDN follows:
• If you live in Europe you might want to investigate the ISDN card section.
• If you are planning to use ISDN primarily to connect to the Internet with an Internet Provider on a dial-upnon-dedicated basis, you might look into Terminal Adapters. This will give you the most flexibility, with thefewest problems, if you change providers.
• If you are connecting two LANs together, or connecting to the Internet with a dedicated ISDN connection, youmight consider the stand alone router/bridge option.
Cost is a significant factor in determining what solution you will choose. The following options are listed from leastexpensive to most expensive.
18.6.1 ISDN CardsContributed by Hellmuth Michaelis <[email protected]>.
This section is really only relevant to ISDN users in countries where the DSS1/Q.931 ISDN standard is supported.
Some growing number of PC ISDN cards are supported under FreeBSD 2.2.X and up by the isdn4bsd driverpackage. It is still under development but the reports show that it is successfully used all over Europe.
The latest isdn4bsd version is available from ftp://[email protected]/pub/, the main isdn4bsd ftp site (you haveto log in as user isdn4bsd , give your mail address as the password and change to the pub directory. Anonymous ftpas user ftp or anonymous will not give the desired result).
Isdn4bsd allows you to connect to other ISDN routers using either IP over raw HDLC or by using synchronous PPP.A telephone answering machine application is also available.
Many ISDN PC cards are supported, mostly the ones with a Siemens ISDN chipset (ISAC/HSCX), support for otherchipsets (from Motorola, Cologne Chip Designs) is currently under development. For an up-to-date list of supportedcards, please have a look at the README (ftp://[email protected]/pub/README) file.
377

Chapter 18 Advanced Networking
In case you are interested in adding support for a different ISDN protocol, a currently unsupported ISDN PC card orotherwise enhancing isdn4bsd, please get in touch with <[email protected]>.
A majordomo maintained mailing list is available. To join the list, send mail to <[email protected]> andspecify:
subscribe freebsd-isdn
in the body of your message.
18.6.2 ISDN Terminal AdaptersTerminal adapters(TA), are to ISDN what modems are to regular phone lines.
Most TA’s use the standard hayes modem AT command set, and can be used as a drop in replacement for a modem.
A TA will operate basically the same as a modem except connection and throughput speeds will be much faster thanyour old modem. You will need to configure PPP exactly the same as for a modem setup. Make sure you set yourserial speed as high as possible.
The main advantage of using a TA to connect to an Internet Provider is that you can do Dynamic PPP. As IP addressspace becomes more and more scarce, most providers are not willing to provide you with a static IP anymore. Moststand-alone routers are not able to accommodate dynamic IP allocation.
TA’s completely rely on the PPP daemon that you are running for their features and stability of connection. Thisallows you to upgrade easily from using a modem to ISDN on a FreeBSD machine, if you already have PPP setup.However, at the same time any problems you experienced with the PPP program and are going to persist.
If you want maximum stability, use the kernel PPP option, not the user-land iijPPP.
The following TA’s are know to work with FreeBSD.
• Motorola BitSurfer and Bitsurfer Pro
• Adtran
Most other TA’s will probably work as well, TA vendors try to make sure their product can accept most of thestandard modem AT command set.
The real problem with external TA’s is like modems you need a good serial card in your computer.
You should read the FreeBSD Serial Hardware (http://www.freebsd.org/tutorials) tutorial for a detailedunderstanding of serial devices, and the differences between asynchronous and synchronous serial ports.
A TA running off a standard PC serial port (asynchronous) limits you to 115.2Kbs, even though you have a 128Kbsconnection. To fully utilize the 128Kbs that ISDN is capable of, you must move the TA to a synchronous serial card.
378

Chapter 18 Advanced Networking
Do not be fooled into buying an internal TA and thinking you have avoided the synchronous/asynchronous issue.Internal TA’s simply have a standard PC serial port chip built into them. All this will do, is save you having to buyanother serial cable, and find another empty electrical socket.
A synchronous card with a TA is at least as fast as a stand-alone router, and with a simple 386 FreeBSD box drivingit, probably more flexible.
The choice of sync/TA v.s. stand-alone router is largely a religious issue. There has been some discussion of this inthe mailing lists. I suggest you search the archives (http://www.FreeBSD.org/search.html) for the completediscussion.
18.6.3 Stand-alone ISDN Bridges/RoutersISDN bridges or routers are not at all specific to FreeBSD or any other operating system. For a more completedescription of routing and bridging technology, please refer to a Networking reference book.
In the context of this page, the terms router and bridge will be used interchangeably.
As the cost of low end ISDN routers/bridges comes down, it will likely become a more and more popular choice. AnISDN router is a small box that plugs directly into your local Ethernet network(or card), and manages its ownconnection to the other bridge/router. It has all the software to do PPP and other protocols built in.
A router will allow you much faster throughput that a standard TA, since it will be using a full synchronous ISDNconnection.
The main problem with ISDN routers and bridges is that interoperability between manufacturers can still be aproblem. If you are planning to connect to an Internet provider, you should discuss your needs with them.
If you are planning to connect two LAN segments together, ie: home LAN to the office LAN, this is the simplestlowest maintenance solution. Since you are buying the equipment for both sides of the connection you can be assuredthat the link will work.
For example to connect a home computer or branch office network to a head office network the following setup couldbe used.
Example 18-1. Branch office or Home network
Network uses a bus based topology with 10 base 2 Ethernet ("thinnet"). Connect router to network cable withAUI/10BT transceiver, if necessary.
379

Chapter 18 Advanced Networking
Router
Windows 95
Sun Workstation
FreeBSD Box
ISDN BRI Line TheInternet
TheInternet
If your home/branch office is only one computer you can use a twisted pair crossover cable to connect to thestand-alone router directly.
Example 18-2. Head office or other LAN
Network uses a star topology with 10 base T Ethernet ("Twisted Pair").
Hub Router
Novell Server Windows 95 Sun Workstation
FreeBSD Box
ISDN BRI Line TheInternet
TheInternet
380

Chapter 18 Advanced Networking
One large advantage of most routers/bridges is that they allow you to have 2 separate independent PPP connectionsto 2 separate sites at the same time. This is not supported on most TA’s, except for specific(expensive) models thathave two serial ports. Do not confuse this with channel bonding, MPP etc.
This can be very useful feature, for example if you have an dedicated ISDN connection at your office and would liketo tap into it, but don’t want to get another ISDN line at work. A router at the office location can manage a dedicatedB channel connection (64Kbs) to the Internet, as well as a use the other B channel for a separate data connection. Thesecond B channel can be used for dial-in, dial-out or dynamically bond(MPP etc.) with the first B channel for morebandwidth.
An Ethernet bridge will also allow you to transmit more than just IP traffic, you can also send IPX/SPX or whateverother protocols you use.
18.7 NIS/YPWritten by Bill Swingle <[email protected]>, 21 January 2000, enhanced with parts and comments from EricOgren <[email protected]> and Udo Erdelhoff <[email protected]> in June 2000.
18.7.1 What is it?NIS, which stands for Network Information Services, was developed by Sun Microsystems to centralizeadministration of Unix (originally SunOS) systems. It has now essentially become an industry standard; all majorUnices (Solaris, HP-UX, AIX, Linux, NetBSD, OpenBSD, FreeBSD, etc) support NIS.
NIS was formerly known as Yellow Pages (or yp), but due to copyright violations, Sun was forced to change thename.
It is a RPC-based client/server system that allows a group of machines within an NIS domain to share a common setof configuration files. This permits a system administrator to set up NIS client systems with only minimalconfiguration data and add, remove or modify configuration data from a single location.
It is similar to Windows NT’s domain system; although the internal implementation of the two aren’t at all similar,the basic functionality can be compared.
18.7.2 Terms/processes you should knowThere are several terms and several important user processes that you will come across when attempting toimplement NIS on FreeBSD, whether you are trying to create an NIS server or act an NIS client:
381

Chapter 18 Advanced Networking
• The NIS domainname. An NIS master server and all of its clients (including its slave servers) have a NISdomainname. Similar to an NT domain name, the NIS domainname does not have anything to do with DNS.
• portmap. portmap must be running in order to enable RPC (Remote Procedure Call, a network protocol used byNIS). If portmap is not running, it will be impossible to run an NIS server, or to act as an NIS client.
• ypbind. ypbind “binds” an NIS client to its NIS server. It will take the NIS domainname from the system, andusing RPC, connect to the server. ypbind is the core of client-server communication in an NIS environment; ifypbind dies on a client machine, it will not be able to access the NIS server.
• ypserv. ypserv, which should only be running on NIS servers, is the NIS server process itself. If ypserv dies, thenthe server will no longer be able to respond to NIS requests (hopefully, there is a slave server to take over for it).
Note: There are some implementations of NIS (but not the FreeBSD one), that don’t try to reconnect toanother server if the server it used before dies. Often, the only thing that helps in this case is to restart theserver process (or even the whole server) or the ypbind process on the client.
• rpc.yppasswdd. rpc.yppasswdd, another process that should only be running on NIS master servers, is a daemonthat will allow NIS clients to change their NIS passwords. If this daemon is not running, users will have to login tothe NIS master server and change their passwords there.
18.7.3 How does it work?There are three types of hosts in an NIS environment; master servers, slave servers, and clients. Servers act as acentral repository for host configuration information. Master servers hold the authoritative copy of this information,while slave servers mirror this information for redundancy. Clients rely on the servers to provide this information tothem.
Information in many files can be shared in this manner. The master.passwd, group, and hosts files arecommonly shared via NIS. Whenever a process on a client needs information that would normally be found in thesefiles locally, it makes a query to the server it is bound to, to get this information.
18.7.3.1 Machine types
• A NIS master server. This server, analogous to a Windows NT primary domain controller, maintains the files usedby all of the NIS clients. The passwd, group, and other various files used by the NIS clients live on the masterserver.
382

Chapter 18 Advanced Networking
Note: It is possible for one machine to be an NIS master server for more than one NIS domain. However, thiswill not be covered in this introduction, which assumes a relatively small-scale NIS environment.
• NIS slave servers. Similar to NT’s backup domain controllers, NIS slave servers maintain copies of the NISmaster’s data files. NIS slave servers provide the redundancy, which is needed in important environments. Theyalso help to balance the load of the master server: NIS Clients always attach to the NIS server whose response theyget first, and this includes slave-server-replies.
• NIS clients. NIS clients, like most NT workstations, authenticate against the NIS server (or the NT domaincontroller in the NT Workstation case) to log on.
18.7.4 Using NIS/YPThis section will deal with setting up a sample NIS environment.
Note: This section assumes that you are running FreeBSD 3.3 or later. The instructions given here will probablywork for any version of FreeBSD greater than 3.0, but there are no guarantees that this is true.
18.7.4.1 Planning
Let’s assume that you are the administrator of a small university lab. This lab, which consists of 15 FreeBSDmachines, currently has no centralized point of administration; each machine has its own /etc/passwd and/etc/master.passwd. These files are kept in sync with each other only through manual intervention; currently,when you add a user to the lab, you must run adduser on all 15 machines. Clearly, this has to change, so you havedecided to convert the lab to use NIS, using two of the machines as servers.
Therefore, the configuration of the lab now looks something like:
Machine name IP address Machine role
ellington 10.0.0.2 NIS master
coltrane 10.0.0.3 NIS slave
basie 10.0.0.4 Faculty workstation
bird 10.0.0.5 Client machine
cli[1-11] 10.0.0.[6-17] Other client machines
383

Chapter 18 Advanced Networking
If you are setting up a NIS scheme for the first time, it is a good idea to think through how you want to go about it.No matter what the size of your network, there are a few decisions that need to be made.
18.7.4.1.1 Choosing a NIS Domain Name
This might not be the “domainname” that you are used to. It is more accurately called the “NIS domainname”. Whena client broadcasts its requests for info, it includes the name of the NIS domain that it is part of. This is how multipleservers on one network can tell which server should answer which request. Think of the NIS domainname as thename for a group of hosts that are related in some way.
Some organizations choose to use their Internet domainname for their NIS domainname. This is not recommended asit can cause confusion when trying to debug network problems. The NIS domainname should be unique within yournetwork and it is helpful if it describes the group of machines it represents. For example, the Art department at AcmeInc. might be in the "acme-art" NIS domain. For this example, assume you have chosen the name test-domain.
However, some operating systems (notably SunOS) use their NIS domain name as their Internet domain name. If oneor more machines on your network have this restriction, you must use the Internet domain name as your NIS domainname.
18.7.4.1.2 Physical Server Requirements
There are several things to keep in mind when choosing a machine to use as a NIS server. One of the unfortunatethings about NIS is the level of dependency the clients have on the server. If a client cannot contact the server for itsNIS domain, very often the machine becomes unusable. The lack of user and group information causes most systemsto temporarily freeze up. With this in mind you should make sure to choose a machine that won’t be prone to beingrebooted regularly, or one that might be used for development. The NIS server should ideally be a stand alonemachine whose sole purpose in life is to be an NIS server. If you have a network that is not very heavily used, it isacceptable to put the NIS server on a machine running other services, just keep in mind that if the NIS serverbecomes unavailable, it will affect all of your NIS clients adversely.
18.7.4.2 NIS Servers
The canonical copies of all NIS information are stored on a single machine called the NIS master server. Thedatabases used to store the information are called NIS maps. In FreeBSD, these maps are stored in/var/yp/[domainname] where [domainname] is the name of the NIS domain being served. A single NIS servercan support several domains at once, therefore it is possible to have several such directories, one for each supporteddomain. Each domain will have its own independent set of maps.
NIS master and slave servers handle all NIS requests with the ypserv daemon. Ypserv is responsible for receivingincoming requests from NIS clients, translating the requested domain and map name to a path to the correspondingdatabase file and transmitting data from the database back to the client.
384

Chapter 18 Advanced Networking
18.7.4.2.1 Setting up a NIS master server
Setting up a master NIS server can be relatively straight forward, depending on your needs. FreeBSD comes withsupport for NIS out-of-the-box. All you need is to add the following lines to /etc/rc.conf, and FreeBSD will dothe rest for you.
•
nisdomainname="test-domain"
This line will set the NIS domainname to test-domain upon network setup (e.g. after reboot).
•
nis_server_enable="YES"
This will tell FreeBSD to start up the NIS server processes when the networking is next brought up.
•
nis_yppasswdd_enable="YES"
This will enable the rpc.yppasswdd daemon, which, as mentioned above, will allow users to change their NISpassword from a client machine.
Now, all you have to do is to run the command /etc/netstart as superuser. It will setup everything for you, usingthe values you defined in /etc/rc.conf.
18.7.4.2.2 Initializing the NIS maps
The NIS maps are database files, that are kept in the /var/yp directory. They are generated from configuration filesin the /etc directory of the NIS master, with one exception: the /etc/master.passwd file. This is for a goodreason; you don’t want to propagate passwords to your root and other administrative accounts to all the servers in theNIS domain. Therefore, before we initialize the NIS maps, you should:
# cp /etc/master.passwd /var/yp/master.passwd# cd /var/yp# vi master.passwd
You should remove all entries regarding system accounts (bin, tty, kmem, games, etc), as well as any accounts thatyou don’t want to be propagated to the NIS clients (for example root and any other UID 0 (superuser) accounts).
Note: Make sure the /var/yp/master.passwd is neither group nor world readable (mode 600)! Use the chmod
command, if appropriate.
385

Chapter 18 Advanced Networking
When you have finished, it’s time to initialize the NIS maps! FreeBSD includes a script named ypinit to do this foryou (see its man page for more information). Note that this script is available on most UNIX OSs, but not on all. OnDigital Unix/Compaq Tru64 Unix it is called ypsetup. Because we are generating maps for an NIS master, we aregoing to pass the -m option to ypinit. To generate the NIS maps, assuming you already performed the steps above,run:
ellington# ypinit -m test-domainServer Type: MASTER Domain: test-domainCreating an YP server will require that you answer a few questions.Questions will all be asked at the beginning of the procedure.Do you want this procedure to quit on non-fatal errors? [y/n: n] nOk, please remember to go back and redo manually whatever fails.If you don’t, something might not work.At this point, we have to construct a list of this domains YP servers.rod.darktech.org is already known as master server.Please continue to add any slave servers, one per line. When you aredone with the list, type a � control D � .master server : ellingtonnext host to add: coltranenext host to add: ^DThe current list of NIS servers looks like this:ellingtoncoltraneIs this correct? [y/n: y] y
[..output from map generation..]
NIS Map update completed.ellington has been setup as an YP master server without any errors.
ypinit should have created /var/yp/Makefile from /var/yp/Makefile.dist. When created, this fileassumes that you are operating in a single server NIS environment with only FreeBSD machines. Since test-domainhas a slave server as well, you must edit /var/yp/Makefile:
ellington# vi /var/yp/Makefile
You should comment out the line that says ‘NOPUSH = "True"’ (if it is not commented out already).
18.7.4.2.3 Setting up a NIS slave server
Setting up an NIS slave server is even more simple than setting up the master. Log on to the slave server and edit thefile /etc/rc.conf as you did before. The only difference is that we now must use the -s option when runningypinit. The -s option requires the name of the NIS master be passed to it as well, so our command line looks like:
386

Chapter 18 Advanced Networking
coltrane# ypinit -s ellington test-domain
Server Type: SLAVE Domain: test-domain Master: ellington
Creating an YP server will require that you answer a few questions.Questions will all be asked at the beginning of the procedure.
Do you want this procedure to quit on non-fatal errors? [y/n: n] n
Ok, please remember to go back and redo manually whatever fails.If you don’t, something might not work.There will be no further questions. The remainder of the procedureshould take a few minutes, to copy the databases from ellington.Transferring netgroup...ypxfr: Exiting: Map successfully transferredTransferring netgroup.byuser...ypxfr: Exiting: Map successfully transferredTransferring netgroup.byhost...ypxfr: Exiting: Map successfully transferredTransferring master.passwd.byuid...ypxfr: Exiting: Map successfully transferredTransferring passwd.byuid...ypxfr: Exiting: Map successfully transferredTransferring passwd.byname...ypxfr: Exiting: Map successfully transferredTransferring group.bygid...ypxfr: Exiting: Map successfully transferredTransferring group.byname...ypxfr: Exiting: Map successfully transferredTransferring services.byname...ypxfr: Exiting: Map successfully transferredTransferring rpc.bynumber...ypxfr: Exiting: Map successfully transferredTransferring rpc.byname...ypxfr: Exiting: Map successfully transferredTransferring protocols.byname...ypxfr: Exiting: Map successfully transferredTransferring master.passwd.byname...ypxfr: Exiting: Map successfully transferredTransferring networks.byname...ypxfr: Exiting: Map successfully transferredTransferring networks.byaddr...ypxfr: Exiting: Map successfully transferredTransferring netid.byname...ypxfr: Exiting: Map successfully transferred
387

Chapter 18 Advanced Networking
Transferring hosts.byaddr...ypxfr: Exiting: Map successfully transferredTransferring protocols.bynumber...ypxfr: Exiting: Map successfully transferredTransferring ypservers...ypxfr: Exiting: Map successfully transferredTransferring hosts.byname...ypxfr: Exiting: Map successfully transferred
coltrane has been setup as an YP slave server without any errors.Don’t forget to update map ypservers on ellington.
You should now have a directory called /var/yp/test-domain. Copies of the NIS master server’s maps should bein this directory. You will need to make sure that these stay updated. The following /etc/crontab entries on yourslave servers should do the job:
20 * * * * root /usr/libexec/ypxfr passwd.byname21 * * * * root /usr/libexec/ypxfr passwd.byuid
These two lines force the slave to sync its maps with the maps on the master server. Although this is not mandatory,because the master server tries to make sure any changes to its NIS maps are communicated to its slaves, thepassword information is so vital to systems that depend on the server, that it is a good idea to force the updates. Thisis more important on busy networks where map updates might not always complete.
Now, run the command /etc/netstart on the slave server as well, which again starts the NIS server.
18.7.4.3 NIS Clients
An NIS client establishes what is called a binding to a particular NIS server using the ypbind daemon. ypbindchecks the system’s default domain (as set by the domainname command), and begins broadcasting RPC requests onthe local network. These requests specify the name of the domain for which ypbind is attempting to establish abinding. If a server that has been configured to serve the requested domain receives one of the broadcasts, it willrespond to ypbind, which will record the server’s address. If there are several servers available (a master and severalslaves, for example), ypbind will use the address of the first one to respond. From that point on, the client systemwill direct all of its NIS requests to that server. Ypbind will occasionally “ping” the server to make sure it is still upand running. If it fails to receive a reply to one of its pings within a reasonable amount of time, ypbind will mark thedomain as unbound and begin broadcasting again in the hopes of locating another server.
18.7.4.3.1 Setting up an NIS client
Setting up a FreeBSD machine to be a NIS client is fairly straightforward.
388

Chapter 18 Advanced Networking
• Edit the file /etc/rc.conf and add the following lines in order to set the NIS domainname and start ypbindupon network startup:
nisdomainname="test-domain"nis_client_enable="YES"
• To import all possible password entries from the NIS server, add this line to your /etc/master.passwd file,using vipw:
+:::::::::
Note: This line will afford anyone with a valid account in the NIS server’s password maps an account. Thereare many ways to configure your NIS client by changing this line. See the netgroups part below for moreinformation. For more detailed reading see O’Reilly’s book on Managing NFS and NIS.
• To import all possible group entries from the NIS server, add this line to your /etc/group file:
+:*::
After completing these steps, you should be able to run ypcat passwd and see the NIS server’s passwd map.
18.7.5 NIS SecurityIn general, any remote user can issue an RPC to ypserv and retrieve the contents of your NIS maps, provided theremote user knows your domainname. To prevent such unauthorized transactions, ypserv supports a feature calledsecurenets which can be used to restrict access to a given set of hosts. At startup, ypserv will attempt to load thesecurenets information from a file called /var/yp/securenets.
Note: This path varies depending on the path specified with the -p option. This file contains entries that consistof a network specification and a network mask separated by white space. Lines starting with “#” are consideredto be comments. A sample securenets file might look like this:
# allow connections from local host -- mandatory127.0.0.1 255.255.255.255# allow connections from any host# on the 192.168.128.0 network
389

Chapter 18 Advanced Networking
192.168.128.0 255.255.255.0# allow connections from any host# between 10.0.0.0 to 10.0.15.255# this includes the machines in the testlab10.0.0.0 255.255.240.0
If ypserv receives a request from an address that matches one of these rules, it will process the request normally. Ifthe address fails to match a rule, the request will be ignored and a warning message will be logged. If the/var/yp/securenets file does not exist, ypserv will allow connections from any host.
The ypserv program also has support for Wietse Venema’s tcpwrapper package. This allows the administrator to usethe tcpwrapper configuration files for access control instead of /var/yp/securenets.
Note: While both of these access control mechanisms provide some security, they, like the privileged port test,are vulnerable to “IP spoofing” attacks. All NIS-related traffic should be blocked at your firewall.
Servers using /var/yp/securenets may fail to serve legitimate NIS clients with archaic TCP/IPimplementations. Some of these implementations set all host bits to zero when doing broadcasts and/or fail toobserve the subnet mask when calculating the broadcast address. While some of these problems can be fixed bychanging the client configuration, other problems may force the retirement of the client systems in question or theabandonment of /var/yp/securenets.
Using /var/yp/securenets on a server with such an archaic implementation of TCP/IP is a really bad idea andwill lead to loss of NIS functionality for large parts of your network.
The use of the tcpwrapper package increases the latency of your NIS server. The additional delay may be longenough to cause timeouts in client programs, especially in busy networks or with slow NIS servers. If one ormore of your client systems suffers from these symptoms, you should convert the client systems in question intoNIS slave servers and force them to bind to themselves.
18.7.6 Barring some users from logging onIn our lab, there is a machine basie that is supposed to be a faculty only workstation. We don’t want to take thismachine out of the NIS domain, yet the passwd file on the master NIS server contains accounts for both faculty andstudents. What can we do?
There is a way to bar specific users from logging on to a machine, even if they are present in the NIS database. To dothis, all you must do is add -username to the end of the /etc/master.passwd file on the client machine, whereusername is the username of the user you wish to bar from logging in. This should preferably be done using vipw,since vipw will sanity check your changes to /etc/master.passwd, as well as automatically rebuild the passworddatabase when you finish editing. For example, if we wanted to bar user bill from logging on to basie we would:
basie# vipw
390

Chapter 18 Advanced Networking
[add -bill to the end, exit]vipw: rebuilding the database...vipw: done
basie# cat /etc/master.passwd
root:[password]:0:0::0:0:The super-user:/root:/bin/cshtoor:[password]:0:0::0:0:The other super-user:/root:/bin/shdaemon:*:1:1::0:0:Owner of many system processes:/root:/sbin/nologinoperator:*:2:5::0:0:System &:/:/sbin/nologinbin:*:3:7::0:0:Binaries Commands and Source„,:/:/sbin/nologintty:*:4:65533::0:0:Tty Sandbox:/:/sbin/nologinkmem:*:5:65533::0:0:KMem Sandbox:/:/sbin/nologingames:*:7:13::0:0:Games pseudo-user:/usr/games:/sbin/nologinnews:*:8:8::0:0:News Subsystem:/:/sbin/nologinman:*:9:9::0:0:Mister Man Pages:/usr/share/man:/sbin/nologinbind:*:53:53::0:0:Bind Sandbox:/:/sbin/nologinuucp:*:66:66::0:0:UUCP pseudo-user:/var/spool/uucppublic:/usr/libexec/uucp/uucicoxten:*:67:67::0:0:X-10 daemon:/usr/local/xten:/sbin/nologinpop:*:68:6::0:0:Post Office Owner:/nonexistent:/sbin/nologinnobody:*:65534:65534::0:0:Unprivileged user:/nonexistent:/sbin/nologin+:::::::::-bill
basie#
18.7.7 Using netgroupsThe netgroups part was contributed by Udo Erdelhoff <[email protected]> in July 2000.
The method shown in the previous chapter works reasonably well if you need special rules for a very small numberof users and/or machines. On larger networks, you will forget to bar some users from logging onto sensitivemachines, or you may even have to modify each machine separately, thus losing the main benefit of NIS, centralizedadministration.
The NIS developers’ solution for this problem is called netgroups. Their purpose and semantics can be compared tothe normal groups used by Unix file systems. The main differences are the lack of a numeric id and the ability todefine a netgroup by including both user accounts and other netgroups.
Netgroups were developed to handle large, complex networks with hundreds of users and machines. On one hand,this is a Good Thing if you are forced to deal with such a situation. On the other hand, this complexity makes italmost impossible to explain netgroups with really simple examples. The example used in the remainder of thischapter demonstrates this problem.
391

Chapter 18 Advanced Networking
Let us assume that your successful introduction of NIS in your laboratory caught your superiors’ interest. Your nextjob is to extend your NIS domain to cover some of the other machines on campus. The two tables contain the namesof the new users and new machines as well as brief descriptions of them.
User Name(s) Description
alpha, beta Normal employees of the IT department
charlie, delta The new apprentices of the IT department
echo, foxtrott, golf, ... Ordinary employees
able, baker, ... The current interns
Machine Name(s) Description
war, death, famine, pollution Your most important servers. Only the IT employees areallowed to log onto these machines.
pride, greed, envy, wrath, lust, sloth Less important servers. All members of the IT departmentare allowed to login onto these machines.
one, two, three, four, ... Ordinary workstations. Only the real employees areallowed to use these machines.
trashcan A very old machine without any critical data. Even theintern is allowed to use this box.
If you tried to implement these restrictions by separately blocking each user, you would have to add one -user lineto each system’s passwd for each user who is not allowed to login onto that system. If you forget just one entry, youcould be in trouble. It may be feasible to do this correctly during the initial setup, however you will eventually forgetto add the lines for new users during day-to-day operations. After all, Murphy was an optimist.
Handling this situation with netgroups offers several advantages. Each user need not be handled separately; youassign a user to one or more netgroups and allow or forbid logins for all members of the netgroup. If you add a newmachine, you will only have to define login restrictions for netgroups. If a new user is added, you will only have toadd the user to one or more netgroups. Those changes are independent of each other; no more “for each combinationof user and machine do...” If your NIS setup is planned carefully, you will only have to modify exactly one centralconfiguration file to grant or deny access to machines.
The first step is the initialization of the NIS map netgroup. FreeBSD’s ypinit does not create this map by default, butits NIS implementation will support it once it has been created. To create an empty map, simply type
ellington# vi /var/yp/netgroup
and start adding content. For our example, we need at least four netgroups: IT employees, IT apprentices, normalemployees and interns.
392

Chapter 18 Advanced Networking
IT_EMP (,alpha,test-domain) (,beta,test-domain)IT_APP (,charlie,test-domain) (,delta,test-domain)USERS (,echo,test-domain) (,foxtrott,test-domain) \
(,golf,test-domain)INTERNS (,able,test-domain) (,baker,test-domain)
IT_EMP, IT_APP etc. are the names of the netgroups. Each bracketed group adds one or more user accounts to it.The three fields inside a group are:
1. The name of the host(s) where the following items are valid. If you do not specify a hostname, the entry is validon all hosts. If you do specify a hostname, you will enter a realm of darkness, horror and utter confusion.
2. The name of the account that belongs to this netgroup.
3. The NIS domain for the account. You can import accounts from other NIS domains into your netgroup if you areone of unlucky fellows with more than one NIS domain.
Each of these fields can contain wildcards. See netgroup(5) for details.
Note: Netgroup names longer than 8 characters should not be used, especially if you have machines runningother operating systems within your NIS domain. The names are case sensitive; using capital letters for yournetgroup names is an easy way to distinguish between user, machine and netgroup names.
Some NIS clients (other than FreeBSD) cannot handle netgroups with a large number of entries. For example,some older versions of SunOS start to cause trouble if a netgroup contains more than 15 entries. You cancircumvent this limit by creating several sub-netgroups with 15 users or less and a real netgroup that consists ofthe sub-netgroups:
BIGGRP1 (,joe1,domain) (,joe2,domain) (,joe3,domain) [...]BIGGRP2 (,joe16,domain) (,joe17,domain) [...]BIGGRP3 (,joe31,domain) (,joe32,domain)BIGGROUP BIGGRP1 BIGGRP2 BIGGRP3
You can repeat this process if you need more than 225 users within a single netgroup.
Activating and distributing your new NIS map is easy:
ellington# cd /var/ypellington# make
This will generate the three NIS maps netgroup, netgroup.byhost and netgroup.byuser. Use ypcat(1) tocheck if your new NIS maps are available:
ellington% ypcat -k netgroupellington% ypcat -k netgroup.byhost
393

Chapter 18 Advanced Networking
ellington% ypcat -k netgroup.byuser
The output of the first command should resemble the contents of /var/yp/netgroup. The second command willnot produce output if you have not specified host-specific netgroups. The third command can be used to get the list ofnetgroups for a user.
The client setup is quite simple. To configure the server war, you only have to start vipw(8) and replace the line
+:::::::::
with
+@IT_EMP:::::::::
Now, only the data for the users defined in the netgroup IT_EMP is imported into war’s password database and onlythese users are allowed to login.
Unfortunately, this limitation also applies to the ~ function of the shell and all routines converting between usernames and numerical user ids. In other words, cd ~user will not work, ls -l will show the numerical id instead ofthe username and find . -user joe -print will fail with “No such user”. To fix this, you will have to importall user entries without allowing them to login onto your servers.
This can be achieved by adding another line to /etc/master.passwd. This line should contain+:::::::::/sbin/nologin, meaning “Import all entries but replace the shell with /sbin/nologin in theimported entries”. You can replace any field in the passwd entry by placing a default value in your/etc/master.passwd.
Warning: Make sure that the line +:::::::::/sbin/nologin is placed after +@IT_EMP:::::::::. Otherwise,all user accounts imported from NIS will have /sbin/nologin as their login shell.
After this change, you will only have to change one NIS map if a new employee joins the IT department. You coulduse a similar approach for the less important servers by replacing the old +::::::::: in their local version of/etc/master.passwd with something like this:
+@IT_EMP:::::::::+@IT_APP:::::::::+:::::::::/sbin/nologin
The corresponding lines for the normal workstations could be:
+@IT_EMP:::::::::+@USERS:::::::::+:::::::::/sbin/nologin
394

Chapter 18 Advanced Networking
And everything would be fine until there is a policy change a few weeks later: The IT department starts hiringinterns. The IT interns are allowed to use the normal workstations and the less important servers; and the ITapprentices are allowed to login onto the main servers. You add a new netgroup IT_INTERN, add the new IT internsto this netgroup and start to change the config on each and every machine... As the old saying goes: “Errors incentralized planning lead to global mess”.
NIS’ ability to create netgroups from other netgroups can be used to prevent situations like these. One possibility isthe creation of role-based netgroups. For example, you could create a netgroup called BIGSRV to define the loginrestrictions for the important servers, another netgroup called SMALLSRV for the less important servers and a thirdnetgroup called USERBOX for the normal workstations. Each of these netgroups contains the netgroups that areallowed to login onto these machines. The new entries for your NIS map netgroup should look like this:
BIGSRV IT_EMP IT_APPSMALLSRV IT_EMP IT_APP ITINTERNUSERBOX IT_EMP ITINTERN USERS
This method of defining login restrictions works reasonably well if you can define groups of machines with identicalrestrictions. Unfortunately, this is the exception and not the rule. Most of the time, you will need the ability to definelogin restrictions on a per-machine basis.
Machine-specific netgroup definitions are the other possibility to deal with the policy change outlined above. In thisscenario, the /etc/master.passwd of each box contains two lines starting with “+”. The first of them adds anetgroup with the accounts allowed to login onto this machine, the second one adds all other accounts with/sbin/nologin as shell. It is a good idea to use the ALL-CAPS version of the machine name as the name of thenetgroup. In other words, the lines should look like this:
+@BOXNAME:::::::::+:::::::::/sbin/nologin
Once you have completed this task for all your machines, you will not have to modify the local versions of/etc/master.passwd ever again. All further changes can be handled by modifying the NIS map. Here is anexample of a possible netgroup map for this scenario with some additional goodies.
# Define groups of users firstIT_EMP (,alpha,test-domain) (,beta,test-domain)IT_APP (,charlie,test-domain) (,delta,test-domain)DEPT1 (,echo,test-domain) (,foxtrott,test-domain)DEPT2 (,golf,test-domain) (,hotel,test-domain)DEPT3 (,india,test-domain) (,juliet,test-domain)ITINTERN (,kilo,test-domain) (,lima,test-domain)D_INTERNS (,able,test-domain) (,baker,test-domain)## Now, define some groups based on rolesUSERS DEPT1 DEPT2 DEPT3
395

Chapter 18 Advanced Networking
BIGSRV IT_EMP IT_APPSMALLSRV IT_EMP IT_APP ITINTERNUSERBOX IT_EMP ITINTERN USERS## And a groups for a special tasks# Allow echo and golf to access our anti-virus-machineSECURITY IT_EMP (,echo,test-domain) (,golf,test-domain)## machine-based netgroups# Our main serversWAR BIGSRVFAMINE BIGSRV# User india needs access to this serverPOLLUTION BIGSRV (,india,test-domain)## This one is really important and needs more access restrictionsDEATH IT_EMP## The anti-virus-machine mentioned aboveONE SECURITY## Restrict a machine to a single userTWO (,hotel,test-domain)# [...more groups to follow]
If you are using some kind of database to manage your user accounts, you should be able to create the first part of themap with your database’s report tools. This way, new users will automatically have access to the boxes.
One last word of caution: It may not always be advisable to use machine-based netgroups. If you are deploying acouple dozen or even hundreds of identical machines for student labs, you should use role-based netgroups instead ofmachine-based netgroups to keep the size of the NIS map within reasonable limits.
18.7.8 Important things to rememberThere are still a couple of things that you will need to do differently now that you are in an NIS environment.
• Every time you wish to add a user to the lab, you must add it to the master NIS server only, and you mustremember to rebuild the NIS maps. If you forget to do this, the new user will not be able to login anywhere excepton the NIS master. For example, if we needed to add a new user “jsmith” to the lab, we would:
# pw useradd jsmith# cd /var/yp# make test-domain
396

Chapter 18 Advanced Networking
You could also run adduser jsmith instead of pw useradd jsmith.
• Keep the administration accounts out of the NIS maps. You don’t want to be propagating administrative accountsand passwords to machines that will have users that shouldn’t have access to those accounts.
• Keep the NIS master and slave secure, and minimize their downtime. If somebody either hacks or simply turns offthese machines, they have effectively rendered many people without the ability to login to the lab.
This is the chief weakness of any centralized administration system, and it is probably the most importantweakness. If you do not protect your NIS servers, you will have a lot of angry users!
18.7.9 NIS v1 compatibilityFreeBSD’s ypserv has some support for serving NIS v1 clients. FreeBSD’s NIS implementation only uses the NIS v2protocol, however other implementations include support for the v1 protocol for backwards compatibility with oldersystems. The ypbind daemons supplied with these systems will try to establish a binding to an NIS v1 server eventhough they may never actually need it (and they may persist in broadcasting in search of one even after they receivea response from a v2 server). Note that while support for normal client calls is provided, this version of ypserv doesnot handle v1 map transfer requests; consequently, it cannot be used as a master or slave in conjunction with olderNIS servers that only support the v1 protocol. Fortunately, there probably are not any such servers still in use today.
18.7.10 NIS servers that are also NIS clientsCare must be taken when running ypserv in a multi-server domain where the server machines are also NIS clients. Itis generally a good idea to force the servers to bind to themselves rather than allowing them to broadcast bindrequests and possibly become bound to each other. Strange failure modes can result if one server goes down andothers are dependent upon on it. Eventually all the clients will time out and attempt to bind to other servers, but thedelay involved can be considerable and the failure mode is still present since the servers might bind to each other allover again.
You can force a host to bind to a particular server by running ypbind with the -S flag.
18.7.11 libscrypt v.s. libdescryptOne of the most common issues that people run into when trying to implement NIS is crypt library compatibility. Ifyour NIS server is using the DES crypt libraries, it will only support clients that are using DES as well. To check
397

Chapter 18 Advanced Networking
which one your server and clients are using look at the symlinks in /usr/lib. If the machine is configured to usethe DES libraries, it will look something like this:
% ls -l /usr/lib/*crypt*lrwxrwxrwx 1 root wheel 13 Jul 15 08:55 /usr/lib/libcrypt.a@ -> libdescrypt.alrwxrwxrwx 1 root wheel 14 Jul 15 08:55 /usr/lib/libcrypt.so@ -> libdescrypt.solrwxrwxrwx 1 root wheel 16 Jul 15 08:55 /usr/lib/libcrypt.so.2@ -> libdescrypt.so.2lrwxrwxrwx 1 root wheel 15 Jul 15 08:55 /usr/lib/libcrypt_p.a@ -> libdescrypt_p.a-r--r--r-- 1 root wheel 13018 Nov 8 14:27 /usr/lib/libdescrypt.alrwxr-xr-x 1 root wheel 16 Nov 8 14:27 /usr/lib/libdescrypt.so@ -> libdescrypt.so.2-r--r--r-- 1 root wheel 12965 Nov 8 14:27 /usr/lib/libdescrypt.so.2-r--r--r-- 1 root wheel 14750 Nov 8 14:27 /usr/lib/libdescrypt_p.a
If the machine is configured to use the standard FreeBSD MD5 crypt libraries they will look something like this:
% ls -l /usr/lib/*crypt*lrwxrwxrwx 1 root wheel 13 Jul 15 08:55 /usr/lib/libcrypt.a@ -> libscrypt.alrwxrwxrwx 1 root wheel 14 Jul 15 08:55 /usr/lib/libcrypt.so@ -> libscrypt.solrwxrwxrwx 1 root wheel 16 Jul 15 08:55 /usr/lib/libcrypt.so.2@ -> libscrypt.so.2lrwxrwxrwx 1 root wheel 15 Jul 15 08:55 /usr/lib/libcrypt_p.a@ -> libscrypt_p.a-r--r--r-- 1 root wheel 6194 Nov 8 14:27 /usr/lib/libscrypt.alrwxr-xr-x 1 root wheel 14 Nov 8 14:27 /usr/lib/libscrypt.so@ -> libscrypt.so.2-r--r--r-- 1 root wheel 7579 Nov 8 14:27 /usr/lib/libscrypt.so.2-r--r--r-- 1 root wheel 6684 Nov 8 14:27 /usr/lib/libscrypt_p.a
If you have trouble authenticating on an NIS client, this is a pretty good place to start looking for possible problems.If you want to deploy an NIS server for a heterogenous network, you will probably have to use DES on all systemsbecause it is the lowest common standard.
18.8 DHCPWritten by Gregory Sutter <[email protected]>, March 2000.
18.8.1 What is DHCP?DHCP, the Dynamic Host Configuration Protocol, describes the means by which a system can connect to a networkand obtain the necessary information for communication upon that network. FreeBSD uses the ISC (InternetSoftware Consortium) DHCP implementation, so all implementation-specific information here is for use with theISC distribution.
398

Chapter 18 Advanced Networking
18.8.2 What This Section CoversThis handbook section attempts to describe only the parts of the DHCP system that are integrated with FreeBSD;consequently, the server portions are not described. The DHCP manual pages, in addition to the references below, areuseful resources.
18.8.3 How it WorksWhen dhclient, the DHCP client, is executed on the client machine, it begins broadcasting requests for configurationinformation. By default, these requests are on UDP port 68. The server replies on UDP 67, giving the client an IPaddress and other relevant network information such as netmask, router, and DNS servers. All of this informationcomes in the form of a DHCP "lease" and is only valid for a certain time (configured by the DHCP servermaintainer). In this manner, stale IP addresses for clients no longer connected to the network can be automaticallyreclaimed.
DHCP clients can obtain a great deal of information from the server. An exhaustive list may be found indhcp-options(5).
18.8.4 FreeBSD IntegrationFreeBSD fully integrates the ISC DHCP client, dhclient. DHCP client support is provided within both the installerand the base system, obviating the need for detailed knowledge of network configurations on any network that runs aDHCP server. dhclient has been included in all FreeBSD distributions since 3.2.
DHCP is supported by sysinstall. When configuring a network interface within sysinstall, the first question asked is,"Do you want to try dhcp configuration of this interface?" Answering affirmatively will execute dhclient, and ifsuccessful, will fill in the network configuration information automatically.
There are two things you must do to have your system use DHCP upon startup:
• Make sure that the bpf device is compiled into your kernel. To do this, add pseudo-device bpf to your kernelconfiguration file, and rebuild the kernel. For more information about building kernels, see Chapter 8.
The bpf device is already part of the GENERIC kernel that is supplied with FreeBSD, so if you don’t have acustom kernel, you shouldn’t need to create one in order to get DHCP working.
Note: For those who are particularly security conscious, you should be warned that bpf is also the device thatallows packet sniffers to work correctly (although they still have to be run as root). bpf is required to useDHCP, but if you are very sensitive about security, you probably shouldn’t add bpf to your kernel in theexpectation that at some point in the future you will be using DHCP.
399

Chapter 18 Advanced Networking
• Edit your /etc/rc.conf to include the following:
ifconfig_fxp0="DHCP"
Note: Be sure to replace fxp0 with the designation for the interface that you wish to dynamically configure.
If you are using a different location for dhclient, or if you wish to pass additional flags to dhclient, alsoinclude the following (editing as necessary):
dhcp_program="/sbin/dhclient"dhcp_flags=""
The DHCP server, dhcpd, is included as part of the isc-dhcp2 port in the ports collection. This port contains thefull ISC DHCP distribution, consisting of client, server, relay agent and documentation.
18.8.5 Files
• /etc/dhclient.conf
dhclient requires a configuration file, /etc/dhclient.conf. Typically the file contains only comments, thedefaults being reasonably sane. This configuration file is described by the dhclient.conf(5) man page.
• /sbin/dhclient
dhclient is statically linked and resides in /sbin. The dhclient(8) manual page gives more information aboutdhclient.
• /sbin/dhclient-script
dhclient-script is the FreeBSD-specific DHCP client configuration script. It is described in dhclient-script(8),but should not need any user modification to function properly.
• /var/db/dhclient.leases
The DHCP client keeps a database of valid leases in this file, which is written as a log. dhclient.leases(5) gives aslightly longer description.
400

Chapter 18 Advanced Networking
18.8.6 Further ReadingThe DHCP protocol is fully described in RFC 2131 (http://www.freesoft.org/CIE/RFC/2131/). An informationalresource has also been set up at dhcp.org (http://www.dhcp.org/).
18.9 DNSContributed by Chern Lee <[email protected]>, April 12, 2001.
18.9.1 OverviewFreeBSD utilizes, by default, a version of BIND (Berkeley Internet Name Domain), which is the most commonimplementation of the DNS protocol. DNS is the protocol through which names are mapped to IPs, and vice versa.For example, a query for www.freebsd.org will send back a reply for the IP address of The FreeBSD Project’swebpage, whereas, a query for ftp.freebsd.org will return the IP of the corresponding ftp machine. Likewise, theopposite can happen. A query for an IP address can resolve its hostname.
DNS is coordinated across the Internet through a somewhat complex system of authoritative root name servers, andother smaller-scale nameservers who host and relay individual domain information.
This document refers to BIND 8.x, as it is the most current, stable version used in FreeBSD.
RFC1034 and RFC1035 dictates the DNS protocol.
Currently, BIND is maintained by the Internet Software Consortium (www.isc.org) (http://www.isc.org)
18.9.2 Terminologyzone - Each individual domain, subdomain, or ’area’ dictated by DNS is considered a zone.
Examples of zones:
• . is the root zone
• org. is a zone under the root zone
• foobardomain.org is a zone under the org. zone
401

Chapter 18 Advanced Networking
• foo.foobardomain.org. is a subdomain, a zone under the foobardomain.org. zone
• 1.2.3.in-addr.arpa is a zone referencing all ips which fall under the 3.2.1.* ip space.
named, bind, name server - these are all common names for the BIND name server package within FreeBSD.
resolver - a network process by which a system queries a nameserver for answers
root zone - literally, a ’.’, refers to the root, or beginning zone. All zones fall under this, as do all files in fall under theroot directory. It is the beginning of the Internet zone hierarchy
origin - refers to the point of start for the particular zone
forward dns - mapping of hostnames to ip addresses
reverse dns - the opposite, mapping of ip addresses to hostnames
18.9.3 Reasons to run a name server
• You need your machine to host DNS information to the world
• An authoritative nameserver replies exclusively to requests.
• For example, you register foobardomain.org and wish to assign hostnames to the proper IP addresses.
• A slave nameserver, which replies to queries for a domain when the primary is down or inaccessible.
• The above two can also be done with in-addr.arpa, IP to hostname entries
• You wish your machine to act as a local relay of DNS information
• DNS traffic has been measured to be about 5% or more of the total Internet traffic.
• A local DNS server may have some added benefit by providing a local cache of DNS information.
• For example, when one queries for www.freebsd.org, their resolver goes out to (usually) your ISP’s nameserver, and retrieves the query.
• With a local, caching DNS server, the query only has to be made once to the outside world. Every additionalquery will not have to go outside of the local network, since the information is cached.
18.9.4 How it worksA DNS server in FreeBSD relies on the BIND daemon. This daemon is called ’named’ for obvious reasons.
402

Chapter 18 Advanced Networking
named - the bind daemon
ndc - name daemon control program
/etc/namedb - directory where all the bind information resides
/etc/namedb/named.conf - daemon configuration file
zone files are usually contained within the /etc/namedb directory, and contain the information (query answers fromyour site) served by your name server.
18.9.5 Starting BINDSince bind is installed by default, configuring it all is relatively simple.
To ensure the named daemon is started at boot, put the following modifications in your /etc/rc.conf
named_enable="YES"
To start the daemon manually (after configuring it)
# ndc start
18.9.6 Configuration files
18.9.6.1 make-localhost
Be sure to
# cd /etc/namedb# sh make-localhost
to properly create your local reverse dns zone file in /etc/namedb/localhost.rev.
18.9.6.2 /etc/namedb/named.conf
// $FreeBSD: doc/en_US.ISO8859-1/books/handbook/advanced-networking/chapter.sgml,v 1.56 2001/07/14 23:40:27 mur-ray Exp $
//// Refer to the named(8) man page for details. If you are ever going// to setup a primary server, make sure you’ve understood the hairy// details of how DNS is working. Even with simple mistakes, you can
403

Chapter 18 Advanced Networking
// break connectivity for affected parties, or cause huge amount of// useless Internet traffic.
options {directory "/etc/namedb";
// In addition to the "forwarders" clause, you can force your name// server to never initiate queries of its own, but always ask its// forwarders only, by enabling the following line://// forward only;
// If you’ve got a DNS server around at your upstream provider, enter// its IP address here, and enable the line below. This will make you// benefit from its cache, thus reduce overall DNS traffic in theInternet./*
forwarders {127.0.0.1;
};*/
Just as the comment says, if you want to benefit from your uplink’s cache, you can enable this section of the configfile. Normally, your nameserver will recursively query different nameservers until it finds the answer it is looking for.Having this enabled will have it automatically see if your uplink’s (or whatever provided) ns has the requested query.If your uplink has a heavily trafficked, fast nameserver, enabling this properly could work to your advantage.127.0.0.1 will *NOT* work here; change this to the IP of a nameserver at your uplink.
/** If there is a firewall between you and nameservers you want* to talk to, you might need to uncomment the query-source* directive below. Previous versions of BIND always asked* questions using port 53, but BIND 8.1 uses an unprivileged* port by default.*/
// query-source address * port 53;
/** If running in a sandbox, you may have to specify a different* location for the dumpfile.*/
// dump-file "s/named_dump.db";};
// Note: the following will be supported in a future release.
404

Chapter 18 Advanced Networking
/*host { any; } {
topology {127.0.0.0/8;
};};*/
// Setting up secondaries is way easier and the rough picture for this// is explained below.//// If you enable a local name server, don’t forget to enter 127.0.0.1// into your /etc/resolv.conf so this server will be queried first.// Also, make sure to enable it in /etc/rc.conf.
zone "." {type hint;file "named.root";
};
zone "0.0.127.IN-ADDR.ARPA" {type master;file "localhost.rev";
};
zone"0.0.0.0.0.0.0.0.0.0.0.0.0.0.0.0.0.0.0.0.0.0.0.0.0.0.0.0.0.0.0.IP6.INT" {
type master;file "localhost.rev";
};
// NB: Do not use the IP addresses below, they are faked, and only// serve demonstration/documentation purposes!//// Example secondary config entries. It can be convenient to become// a secondary at least for the zone where your own domain is in. Ask// your network administrator for the IP address of the responsible// primary.//// Never forget to include the reverse lookup (IN-ADDR.ARPA) zone!// (This is the first bytes of the respective IP address, in reverse// order, with ".IN-ADDR.ARPA" appended.)//// Before starting to setup a primary zone, better make sure you fully// understand how DNS and BIND works, however. There are sometimes
405

Chapter 18 Advanced Networking
// unobvious pitfalls. Setting up a secondary is comparably simpler.//// NB: Don’t blindly enable the examples below. :-) Use actual names// and addresses instead.//// NOTE!!! FreeBSD runs bind in a sandbox (see named_flags in rc.conf).// The directory containing the secondary zones must be write accessible// to bind. The following sequence is suggested://// mkdir /etc/namedb/s// chown bind:bind /etc/namedb/s// chmod 750 /etc/namedb/s
/*zone "domain.com" {
type slave;file "s/domain.com.bak";masters {
192.168.1.1;};
};
zone "0.168.192.in-addr.arpa" {type slave;file "s/0.168.192.in-addr.arpa.bak";masters {
192.168.1.1;};
};*/
These are example slave entries, read below to see more.
For each new domain added to your nameserver, you must add one of these entries to your named.conf
The simplest zone entry, can look like
zone "foobardomain.org" {type master;file "foorbardomain.org";
};
For a master entry with the zone information within foobardomain.org, or
zone "foobardomain.org" {type slave;
406

Chapter 18 Advanced Networking
file "foobardomain.org";};
for a slave. Note that slave zones automatically query the listed master (authoritative) name servers for the zone file.
18.9.6.3 Zone files
An example master ’foobardomain.org’ (existing within /etc/namedb/foobardomain.org) is as follows:
$TTL 3600
foobardomain.org. IN SOA ns1.foobardomain.org. admin.foobardomain.org. (5 ; Serial10800 ; Refresh3600 ; Retry604800 ; Expire86400 ) ; Minimum TTL
; DNS Servers@ IN NS ns1.foobardomain.org.@ IN NS ns2.foobardomain.org.
; Machine Nameslocalhost IN A 127.0.0.1ns1 IN A 3.2.1.2ns2 IN A 3.2.1.3mail IN A 3.2.1.10@ IN A 3.2.1.30
; Aliaseswww IN CNAME @
; MX Record@ IN MX 10 mail.foobardomain.org.
Note that every hostname ending in a ’.’ is an exact hostname, whereas everything without a trailing ’.’ is referencedto the origin. For example, www is translated into www + origin. In our fictitious zone file, our origin isfoobardomain.org, so www would be www.foobardomain.org.
The format of this file follows:
recordname IN recordtype value
The most commonly used DNS records:
407

Chapter 18 Advanced Networking
SOA - start of zone authority
NS - an authoritative nameserver
A - A host address
CNAME - the canonical name for an alias
MX - mail exchange
PTR - a domain name pointer (used in reverse dns)
foobardomain.org. IN SOA ns1.foobardomain.org. admin.foobardomain.org. (5 ; Serial10800 ; Refresh after 3 hours3600 ; Retry after 1 hour604800 ; Expire after 1 week86400 ) ; Minimum TTL of 1 day
foobardomain.org. - the domain name, also the origin for this zone file.
ns1.foobardomain.org. - the primary/authoritative nameserver for this zone
admin.foobardomain.org. - the responsible person for this zone, e-mail address with @ replaced.([email protected] becomes admin.foobardomain.org)
5 - the serial number of the file. this must be incremented each time the zone file is modified. Nowadays, manyadmins prefer a yyyymmddrr format for the serial number. 2001041002 would mean last modified 04/10/2001, thelatter 02 being the second time the zone file has been modified this day. The serial number is important as it alertsslave nameservers for a zone when it is updated.
@ IN NS ns1.foobardomain.org.
This is an NS entry. Every nameserver that is going to reply authoritatively for the zone must have one of theseentries. The @ as seen here could have been ’foobardomain.org.’ The @ translates to the origin.
localhost IN A 127.0.0.1ns1 IN A 3.2.1.2ns2 IN A 3.2.1.3mail IN A 3.2.1.10@ IN A 3.2.1.30
The A record indicates machine names. As seen above, ns1.foobardomain.org would resolve to 3.2.1.2. Again, theorigin symbol, @, is used here, thus meaning foobardomain.org would resolve to 3.2.1.30.
408

Chapter 18 Advanced Networking
www IN CNAME @
The canonical name record is usually used for giving aliases to a machine. In the example, www is aliased to themachine addressed to the origin, or foobardomain.org (3.2.1.30). CNAMEs can be used to provide alias hostnames,or round robin one hostname among multiple machines.
@ IN MX 10 mail.foobardomain.org.
The MX record indicates which mail servers are responsible for handling incoming mail for the zone.mail.foobardomain.org is the hostname of the mail server, and 10 being the priority of that mailserver.
One can have several mailservers, with priorities of 3, 2, 1. A mail server attempting to deliver to foobardomain.orgwould first try the highest priority MX, then the second highest, etc, until the mail can be properly delivered.
For in-addr.arpa zone files (reverse dns), the same format is used, except with PTR entries instead of A or CNAME.
$TTL 3600
1.2.3.in-addr.arpa. IN SOA ns1.foobardomain.org. admin.foobardomain.org. (5 ; Serial10800 ; Refresh3600 ; Retry604800 ; Expire3600 ) ; Minimum
@ IN NS ns1.foobardomain.org.@ IN NS ns2.foobardomain.org.
2 IN PTR ns1.foobardomain.org.3 IN PTR ns2.foobardomain.org.10 IN PTR mail.foobardomain.org.30 IN PTR foobardomain.org.
This file gives the proper IP to hostname mappings of our above fictitious domain.
18.9.7 Caching Name ServerA caching nameserver is simply a nameserver that is not authoritative for any zones. It simply asks queries of itsown, and remembers them for later use. To set one up, just configure the name server as usual, omitting anyinclusions of zones.
409

Chapter 18 Advanced Networking
18.9.8 Running named in a SandboxContributed by Mike Makonnen <[email protected]>, May 1, 2001
For added security you may want to run named(8) in a sandbox. This will reduce the potential damage should it becompromised. If you include a sandbox directory in its command line, named will chroot(8) into that directoryimmediately upon finishing processing its command line. It is also a good idea to have named run as a non-privilegeduser in the sandbox. The default FreeBSD install contains a user bind with group bind. If we wanted the sandbox inthe /etc/namedb/sandbox directory the command line for named would look like this:
# /usr/sbin/named -u bind -g bind -t /etc/namedb/sandbox � path_to_named.conf>
The following steps should be taken in order to successfully run named in a sandbox. Throughout the followingdiscussion we will assume the path to your sandbox is /etc/namedb/sandbox
• Create the sandbox directory: /etc/namedb/sandbox
• Create other necessary directories off of the sandbox directory: etc and var/run
• copy /etc/localtime to sandbox/etc
• make bind:bind the owner of all files and directories in the sandbox:
# chown -R bind:bind /etc/namedb/sandbox
# chmod -R 750 /etc/namedb/sandbox
There are some issues you need to be aware of when running named in a sandbox.
• Your named.conf(5) file and all your zone files must be in the sandbox
• sandbox/etc/localtime is needed in order to have the correct time for your time zone in log messages.
• named(8) will write its process id to a file in sandbox/var/run
• The Unix socket used for communication by the ndc(8) utility will be created in sandbox/var/run
• When using the ndc utility you need to specify the location of the Unix socket created in the sandbox, bynamed(8), by using the -c switch: # ndc -c /etc/namedb/sandbox/var/run/ndc
• If you enable logging to file, the log files must be in the sandbox
named(8) can be started in a sandbox properly, if the following is in /etc/rc.conf
named_flags="-u bind -g bind -t /etc/namedb/sandbox"
410

Chapter 18 Advanced Networking
18.9.9 How to use the nameserverIf setup properly, the nameserver should be accessible through the network and locally. /etc/resolv.conf mustcontain a nameserver entry with the local ip so it will query the local name server first.
To access it over the network, the machine must have the nameserver’s IP address set properly in its own nameserverconfiguration options.
18.9.10 SecurityAlthough BIND is the most common implementation of DNS, there is always the issue of security. Possible andexploitable security holes are sometimes found.
It is a good idea to subscribe to CERT (http://www.cert.org) and freebsd-announce(http://www.freebsd.org/handbook/eresources.html#ERESOURCES-MAIL) to stay up to date with the currentInternet and FreeBSD security issues.
If a problem arises, keeping your sources up to date and having a fresh build of named can’t hurt.
18.9.11 Further Readingndc(8) named(8) named.conf(5)
Official ISC BIND Page http://www.isc.org/products/BIND/
BIND FAQ http://www.nominum.com/resources/faqs/bind-faqs.html(http://www.nominum.com/resources/faqs/bind-faqs.html)
O’Reilly DNS and BIND 4th Edition (http://www.oreilly.com/catalog/dns4/)
RFC1034 - Domain Names - Concepts and Facilities (http://info.internet.isi.edu:80/in-notes/rfc/files/rfc1034.txt)
RFC1035 - Domain Names - Implementation and Specification(http://info.internet.isi.edu:80/in-notes/rfc/files/rfc1035.txt)
18.10 Network Address Translation daemon (natd)Contributed by Chern Lee <[email protected]>, June 2001.
411

Chapter 18 Advanced Networking
18.10.1 OverviewFreeBSD’s Network Address Translation daemon, commonly known as natd(8) is a daemon that accepts incomingraw IP packets, changes the source to the local machine and re-injects these packets back into the outgoing IP packetstream. natd does this by changing the source ip and port such that when data is received back, it is able to determinethe original location of the data and forward it back to its original requestor.
The most common use of NAT is to perform what is commonly known as Internet Connection Sharing.
18.10.2 SetupDue to the diminishing ip space in ipv4, and the increased number of users on high-speed consumer lines such ascable or DSL, people are in more and more need of an Internet Connection Sharing solution. The ability to connectseveral computers online through one connection and ip makes natd(8) a reasonable choice.
Most commonly, a user has a machine connected to a cable or DSL line with one ip and wishes to use this oneconnected computer to provide Internet access to several more over a LAN.
To do this, the FreeBSD machine on the Internet must act as a gateway. This gateway machine must have twoNICs--one for connecting to the Internet router, the other connecting to a LAN. All the machines on the LAN areconnected through a hub or switch.
Hub Router
Client A Client B(FreeBSD Gateway)
TheInternet
TheInternet
With this setup, the machine without Internet access can use the machine with access as a gateway to access theoutside world.
18.10.3 ConfigurationThe following options must be in the kernel configuration file:
options IPFIREWALLoptions IPDIVERT
412

Chapter 18 Advanced Networking
Additionally, at choice, the following may also be suitable:
options IPFIREWALL_DEFAULT_TO_ACCEPToptions IPFIREWALL_VERBOSE
The following must be in /etc/rc.conf:
gateway_enable="YES"firewall_enable="YES"firewall_type="OPEN"natd_enable="YES"natd_interface="fxp0"natd_flags=""
gateway_enable="YES" Sets up the machine to act as a gateway. Running sysctl-w net.inet.ip.forwarding=1 would have the sameeffect.
firewall_enable="YES" Enables the firewall rules in /etc/rc.firewall at boot.
firewall_type="OPEN" This specifies a predefined firewall ruleset that allowsanything in. See /etc/rc.firewall for additionaltypes.
natd_interface="fxp0" Indicates which interface to forward packets through. (theinterface connected to the Internet)
natd_flags="" Any additional configuration options passed to natd(8) onboot.
Having the previous options defined in /etc/rc.conf would run natd -interface fxp0 at boot. This can alsobe run manually.
Each machine and interface behind the LAN should be assigned ip numbers in the private network space as definedby RFC 1918 (http://info.internet.isi.edu:80/in-notes/rfc/files/rfc1918.txt) and have a default gateway of the natdmachine’s internal ip.
For example, client a and b behind the LAN have ips of 192.168.0.2 and 192.168.0.3, while the natd machine’s LANinterface has an ip of 192.168.0.1. Client a and b’s default gateway must be set to that of the natd machine,192.168.0.1. The natd machine’s external, or Internet interface does not require any special modification for natd towork.
18.10.4 Port RedirectionThe drawback with natd is that the LAN clients are not accessible from the Internet. Clients on the LAN can make
413

Chapter 18 Advanced Networking
outgoing connections to the world but cannot receive incoming ones. This presents a problem if trying to run Internetservices on one of the LAN client machines. A simple way around this is to redirect selected Internet ports on thenatd machine to a LAN client.
For example, an IRC server runs on Client A, and a web server runs on Client B. For this to work properly,connections received on ports 6667 (irc) and 80 (web) must be redirected to the respective machines.
The -redirect_port must be passed to natd(8) with the proper options. The syntax is as follows:
-redirect_port proto targetIP:targetPORT[-targetPORT][aliasIP:]aliasPORT[-aliasPORT][remoteIP[:remotePORT[-remotePORT]]]
In the above example, the argument should be:
-redirect_port tcp 192.168.0.2:6667 6667-redirect_port tcp 192.168.0.3:80 80
This will redirect the proper tcp ports to the LAN client machines.
The -redirect_port argument can be used to indicate port ranges over individual ports. For example, tcp192.168.0.2:2000-3000 2000-3000 would redirect all connections received on ports 2000 to 3000 to ports2000 to 3000 on Client A.
These options can be used when directly running natd(8) or placed within the
natd_flags=""
option in /etc/rc.conf.
For further configuration options, consult natd(8)
18.10.5 Address RedirectionAddress redirection is useful if several ips are available, yet they must be on one machine. With this, natd(8) canassign each LAN client its own external ip. natd(8) then rewrites outgoing packets from the LAN clients with theproper external ip and redirects all traffic incoming on that particular ip back to the specific LAN client. This is alsoknown as static NAT. For example, the ips 128.1.1.1, 128.1.1.2, and 128.1.1.3 belong to the natd gateway machine.128.1.1.1 can be used as the natd gateway machine’s external ip address, while 128.1.1.2 and 128.1.1.3 areforwarded back to LAN clients A and B.
The -redirect_address syntax is as follows:
414

Chapter 18 Advanced Networking
-redirect_address localIP publicIP
localIP The internal ip of the LAN client.
publicIP The external ip corresponding to the LAN client.
In the example, this argument would read:
-redirect_address 192.168.0.2 128.1.1.2-redirect_address 192.168.0.3 128.1.1.3
Like -redirect_port, these arguments are also placed within natd_flags of /etc/rc.conf. With address redirection,there is no need for port redirection since all data received on a particular ip address is redirected.
The external ips on the natd machine must be active and aliased to the external interface. Look at rc.conf(5) to do so.
415

Chapter 19 Electronic MailRewritten by Jim Mock <[email protected]>, 02 December 1999. Original work done by Bill Lloyd<[email protected]>.
19.1 SynopsisElectronic Mail, better known as email, is one of the most widely used forms of communication today. Millions ofpeople use email every day, and chances are if you are reading this online, you fall into that category and probablyeven have more than one email address.
Electronic Mail configuration is the subject of many System Administration books. If you plan on doing anythingbeyond setting up one mailhost for your network, you need industrial strength help.
Some parts of email configuration are controlled in the Domain Name System (DNS). If you are going to run yourown DNS server, be sure to read through the files in /etc/namedb and man -k named.
19.2 Using Electronic MailThere are five major parts involved in an email exchange. They are: the user program, the server daemon, DNS, a popor IMAP daemon, and of course, the mailhost itself.
19.2.1 The User ProgramThis includes command line programs such as mutt, pine, elm, and mail, and GUI programs such as balsa, xfmailto name a few, and something more “sophisticated” like a WWW browser. These programs simply pass off the emailtransactions to the local “mailhost”, either by calling one of the server daemons available or delivering it over TCP.
19.2.2 Mailhost Server DaemonThis is usually sendmail (by default with FreeBSD) or one of the other mail server daemons such as qmail, postfix,or exim. There are others, but those are the most widely used.
The server daemon usually has two functions—it looks after receiving incoming mail and delivers outgoing mail. Itdoes not allow you to connect to it via POP or IMAP to read your mail. You need an additional daemon for that.
416

Chapter 19 Electronic Mail
Be aware that some older versions of sendmail have some serious security problems, however as long as you run acurrent version of it you should not have any problems. As always, it is a good idea to stay up-to-date with anysoftware you run.
19.2.3 Email and DNSThe Domain Name System (DNS) and its daemon named play a large role in the delivery of email. In order to delivermail from your site to another, the server daemon will look up the site in the DNS to determine the host that willreceive mail for the destination.
It works the same way when you have mail sent to you. The DNS contains the database mapping hostname to an IPaddress, and a hostname to mailhost. The IP address is specified in an A record. The MX (Mail eXchanger) recordspecifies the mailhost that will receive mail for you. If you do not have an MX record for your hostname, the mailwill be delivered directly to your host.
19.2.4 Receiving MailReceiving mail for your domain is done by the mail host. It will collect mail sent to you and store it for reading orpickup. In order to pick the stored mail up, you will need to connect to the mail host. This is done by either usingPOP or IMAP. If you want to read mail directly on the mail host, then a POP or IMAP server is not needed.
If you want to run a POP or IMAP server, there are two things you need to do:
1. Get a POP or IMAP daemon from the Ports Collection (/ports/mail.html) and install it on your system.
2. Modify /etc/inetd.conf to load the POP or IMAP server.
19.2.5 The Mail HostThe mail host is the name given to a server that is responsible for delivering and receiving mail for your host, andpossibly your network.
19.3 TroubleshootingHere are some frequently asked questions and answers. These have been migrated from the FAQ (../FAQ/).
417

Chapter 19 Electronic Mail
1. Why do I have to use the FQDN for hosts on my site?
You will probably find that the host is actually in a different domain; for example, if you are in foo.bar.edu andyou wish to reach a host called mumble in the bar.edu domain, you will have to refer to it by the fully-qualifieddomain name, mumble.bar.edu, instead of just mumble.
Traditionally, this was allowed by BSD BIND resolvers. However the current version of BIND that ships withFreeBSD no longer provides default abbreviations for non-fully qualified domain names other than the domain youare in. So an unqualified host mumble must either be found as mumble.foo.bar.edu, or it will be searched for inthe root domain.
This is different from the previous behavior, where the search continued across mumble.bar.edu, andmumble.edu. Have a look at RFC 1535 for why this was considered bad practice, or even a security hole.
As a good workaround, you can place the line:
search foo.bar.edu bar.edu
instead of the previous:
domain foo.bar.edu
into your /etc/resolv.conf. However, make sure that the search order does not go beyond the “boundarybetween local and public administration”, as RFC 1535 calls it.
2. Sendmail says mail loops back to myself
This is answered in the sendmail FAQ as follows:
* I am getting “Local configuration error” messages, such as:
553 relay.domain.net config error: mail loops back to myself554 � [email protected] � ... Local configuration error
How can I solve this problem?
You have asked mail to the domain (e.g., domain.net) to beforwarded to a specific host (in this case, relay.domain.net)by using an MX record, but the relay machine does not recognizeitself as domain.net. Add domain.net to /etc/sendmail.cw(if you are using FEATURE(use_cw_file)) or add “Cw domain.net”to /etc/sendmail.cf.
The sendmail FAQ is in /usr/src/usr.sbin/sendmail and is recommended reading if you want to do any“tweaking” of your mail setup.
418

Chapter 19 Electronic Mail
3. How can I do email with a dial-up PPP host?
You want to connect a FreeBSD box on a lan, to the Internet. The FreeBSD box will be a mail gateway for the lan.The PPP connection is non-dedicated.
There are at least two ways to do this.
The other is to use UUCP.
The key is to get a Internet site to provide secondary MX service for your domain. For example:
bigco.com. MX 10 bigco.com.MX 20 smalliap.com.
Only one host should be specified as the final recipient (add Cw bigco.com in /etc/sendmail.cf on bigco.com).
When the senders’ sendmail is trying to deliver the mail it will try to connect to you over the modem link. It willmost likely time out because you are not online. sendmail will automatically deliver it to the secondary MX site,i.e., your Internet provider. The secondary MX site will try every (sendmail_flags = -bd -q15m in/etc/rc.conf) 15 minutes to connect to your host to deliver the mail to the primary MX site.
You might want to use something like this as a login script.
#!/bin/sh# Put me in /usr/local/bin/pppbigco( sleep 60 ; /usr/sbin/sendmail -q ) &/usr/sbin/ppp -direct pppbigco
If you are going to create a separate login script for a user you could use sendmail -qRbigco.com instead in thescript above. This will force all mail in your queue for bigco.com to be processed immediately.
A further refinement of the situation is as follows.
Message stolen from the FreeBSD Internet service provider’s mailing list <[email protected]>.
� we provide the secondary MX for a customer. The customer connects to� our services several times a day automatically to get the mails to� his primary MX (We do not call his site when a mail for his domains� arrived). Our sendmail sends the mailqueue every 30 minutes. At the� moment he has to stay 30 minutes online to be sure that all mail is� gone to the primary MX.�� Is there a command that would initiate sendmail to send all the mails� now? The user has not root-privileges on our machine of course.
In the “privacy flags” section of sendmail.cf, there is a
419

Chapter 19 Electronic Mail
definition Opgoaway,restrictqrun
Remove restrictqrun to allow non-root users to start the queue processing.You might also like to rearrange the MXs. We are the 1st MX for ourcustomers like this, and we have defined:
# If we are the best MX for a host, try directly instead of generating# local config error.OwTrue
That way a remote site will deliver straight to you, without tryingthe customer connection. You then send to your customer. Only works for“hosts”, so you need to get your customer to name their mailmachine “customer.com” as well as“hostname.customer.com” in the DNS. Just put an A record inthe DNS for “customer.com”.
19.4 Advanced TopicsThe following section covers more involved topics such as mail configuration and setting up mail for your entiredomain.
19.4.1 Basic ConfigurationOut of the box, you should be able to send email to external hosts as long as you have set up /etc/resolv.conf orare running your own name server. If you would like to have mail for your host delivered to that specific host, thereare two methods:
• Run your own name server and have your own domain. For example, FreeBSD.org
• Get mail delivered directly to your host. This is done by delivering mail directly to the current DNS name for yourmachine. For example, example.FreeBSD.org.
Regardless of which of the above you choose, in order to have mail delivered directly to your host, you must have apermanent (static) IP address (no dynamic PPP dial-up). If you are behind a firewall, it must pass SMTP traffic on toyou. If you want to receive mail at your host itself, you need to be sure of one of two things:
• Make sure that the MX record in your DNS points to your host’s IP address.
420

Chapter 19 Electronic Mail
• Make sure there is no MX entry in your DNS for your host.
Either of the above will allow you to receive mail directly at your host.
Try this:
# hostnameexample.FreeBSD.org# host example.FreeBSD.orgexample.FreeBSD.org has address 204.216.27.XX
If that is what you see, mail directly to <[email protected]> should work without problems.
If instead you see something like this:
# host example.FreeBSD.orgexample.FreeBSD.org has address 204.216.27.XXexample.FreeBSD.org mail is handled (pri=10) by hub.FreeBSD.org
All mail sent to your host (example.FreeBSD.org) will end up being collected on hub under the same usernameinstead of being sent directly to your host.
The above information is handled by your DNS server. The DNS record that carries mail routing information is theMail eXchange entry. If no MX record exists, mail will be delivered directly to the host by way of its IP address.
The MX entry for freefall.FreeBSD.org at one time looked like this:
freefall MX 30 mail.crl.netfreefall MX 40 agora.rdrop.comfreefall MX 10 freefall.FreeBSD.orgfreefall MX 20 who.cdrom.com
As you can see, freefall had many MX entries. The lowest MX number is the host that ends up receiving the mailin the end while the others will queue mail temporarily if freefall is busy or down.
Alternate MX sites should have separate Internet connections from your own in order to be the most useful. Your ISPor other friendly site should have no problem providing this service for you.
19.4.2 Mail for your DomainIn order to set up a “mailhost” (a.k.a., mail server) you need to have any mail sent to various workstations directed toit. Basically, you want to “hijack” any mail for your domain (in this case *.FreeBSD.org) and divert it to your mailserver so your users can check their mail via POP or directly on the server.
To make life easiest, a user account with the same username should exist on both machines. Use adduser to do this.
421

Chapter 19 Electronic Mail
The mailhost you will be using must be the designated mail exchange for each workstation on the network. This isdone in your DNS configuration like so:
example.FreeBSD.org A 204.216.27.XX ; WorkstationMX 10 hub.FreeBSD.org ; Mailhost
This will redirect mail for the workstation to the mailhost no matter where the A record points. The mail is sent to theMX host.
You cannot do this yourself unless you are running a DNS server. If you are not, or cannot, run your own DNSserver, talk to your ISP or whoever does your DNS for you.
If you’re doing virtual email hosting, the following information will come in handy. For the sake of an example, wewill assume you have a customer with their own domain, in this case customer1.org and you want all the mail forcustomer1.org sent to your mailhost, which is named mail.myhost.com. The entry in your DNS should looklike this:
customer1.org MX 10 mail.myhost.com
You do not need an A record if you only want to handle email for the domain.
Note: Be aware that this means pinging customer1.org will not work unless an A record exists for it.
The last thing that you must do is tell sendmail on your mailhost what domains and/or hostnames it should beaccepting mail for. There are a few different ways this can be done. Either of the following will work:
• Add the hosts to your /etc/sendmail.cw file if you are using the FEATURE(use_cw_file). If you are usingsendmail 8.10 or higher, the file is /etc/mail/local-host-names.
• Add a Cwyour.host.com line to your /etc/sendmail.cf or /etc/mail/sendmail.cf if you are usingsendmail 8.10 or higher.
422

IV. Advanced topics

Chapter 20 The Cutting EdgeRestructured, reorganized, and parts updated by Jim Mock <[email protected]> March 2000. Original work byJordan K. Hubbard <[email protected]>, Poul-Henning Kamp <[email protected]>, John Polstra<[email protected]>, and Nik Clayton <[email protected]> with feedback from various others.
20.1 SynopsisFreeBSD is under constant development between releases. For people who want to be on the cutting edge, there areseveral easy mechanisms for keeping your system in sync with the latest developments. Be warned—the cutting edgeis not for everyone! This chapter will help you decide if you want to track the development system, or stick with oneof the released versions.
20.2 FreeBSD-CURRENT vs. FreeBSD-STABLEThere are two development branches to FreeBSD; FreeBSD-CURRENT and FreeBSD-STABLE. This section willexplain a bit about each and describe how to keep your system up-to-date with each respective tree.FreeBSD-CURRENT will be discussed first, then FreeBSD-STABLE.
20.2.1 Staying Current with FreeBSDAs you are reading this, keep in mind that FreeBSD-CURRENT is the “bleeding edge” of FreeBSD development andthat if you are new to FreeBSD, you are most likely going to want to think twice about running it.
20.2.1.1 What is FreeBSD-CURRENT?
FreeBSD-CURRENT is, quite literally, nothing more than a daily snapshot of the working sources for FreeBSD.These include work in progress, experimental changes and transitional mechanisms that may or may not be presentin the next official release of the software. While many of us compile almost daily from FreeBSD-CURRENTsources, there are periods of time when the sources are literally un-compilable. These problems are generallyresolved as expeditiously as possible, but whether or not FreeBSD-CURRENT sources bring disaster or greatlydesired functionality can literally be a matter of which part of any given 24 hour period you grabbed them in!
20.2.1.2 Who needs FreeBSD-CURRENT?
FreeBSD-CURRENT is made generally available for 3 primary interest groups:
424

Chapter 20 The Cutting Edge
1. Members of the FreeBSD group who are actively working on some part of the source tree and for whom keeping“current” is an absolute requirement.
2. Members of the FreeBSD group who are active testers, willing to spend time working through problems in orderto ensure that FreeBSD-CURRENT remains as sane as possible. These are also people who wish to make topicalsuggestions on changes and the general direction of FreeBSD.
3. Peripheral members of the FreeBSD (or some other) group who merely wish to keep an eye on things and usethe current sources for reference purposes (e.g. for reading, not running). These people also make the occasionalcomment or contribute code.
20.2.1.3 What is FreeBSD-CURRENT not?
1. A fast-track to getting pre-release bits because you heard there is some cool new feature in there and you want tobe the first on your block to have it.
2. A quick way of getting bug fixes.
3. In any way “officially supported” by us. We do our best to help people genuinely in one of the 3 “legitimate”FreeBSD-CURRENT categories, but we simply do not have the time to provide tech support for it. This is notbecause we are mean and nasty people who do not like helping people out (we would not even be doingFreeBSD if we were), it is literally because we cannot answer 400 messages a day and actually work onFreeBSD! Given the choice between improving FreeBSD and answering lots of questions, most developers, andusers, would probably opt for the former.
20.2.1.4 Using FreeBSD-CURRENT
1. Join the FreeBSD-current mailing list <[email protected]> and the FreeBSD CVS commitmessage mailing list <[email protected]> . This is not just a good idea, it is essential. If you are not onthe FreeBSD-current mailing list <[email protected]>, you will not see the comments thatpeople are making about the current state of the system and thus will probably end up stumbling over a lot ofproblems that others have already found and solved. Even more importantly, you will miss out on importantbulletins which may be critical to your system’s continued health.
The FreeBSD CVS commit message mailing list <[email protected]> mailing list will allow you to seethe commit log entry for each change as it is made along with any pertinent information on possible side-effects.
To join these lists, send mail to <[email protected]> and specify the following in the body of yourmessage:
subscribe freebsd-currentsubscribe cvs-all
425

Chapter 20 The Cutting Edge
Optionally, you can also say help and Majordomo will send you full help on how to subscribe and unsubscribeto the various other mailing lists we support.
2. Grab the sources from ftp.FreeBSD.org. You can do this in one of three ways:
a. Use the cvsup program with this supfile(ftp://ftp.FreeBSD.org/pub/FreeBSD/FreeBSD-current/src/share/examples/cvsup/standard-supfile). This isthe second most recommended method, since it allows you to grab the entire collection once and then onlywhat has changed from then on. Many people run cvsup from cron and keep their sources up-to-dateautomatically. For a fairly easy interface to this, simply type:
# pkg_add -f ftp://ftp.FreeBSD.org/pub/FreeBSD/development/CVSup/cvsupit.tgz
b. Use ftp. The source tree for FreeBSD-CURRENT is always “exported” on:ftp://ftp.FreeBSD.org/pub/FreeBSD/FreeBSD-current/. We also use wu-ftpd which allowscompressed/tarred grabbing of whole trees. e.g. you see:
usr.bin/lex
You can do the following to get the whole directory as a tar file:
ftp� cd usr.bin
ftp� get lex.tar
c. Use the CTM facility. If you have very bad connectivity (high price connections or only e-mail access)CTM is an option. However, it is a lot of hassle and can give you broken files. This leads to it being rarelyused, which again increases the chance of it not working for fairly long periods of time. We recommendusing CVSup for anybody with a 9600bps modem or faster connection.
3. If you are grabbing the sources to run, and not just look at, then grab all of FreeBSD-CURRENT, not justselected portions. The reason for this is that various parts of the source depend on updates elsewhere, and tryingto compile just a subset is almost guaranteed to get you into trouble.
Before compiling FreeBSD-CURRENT, read the Makefilein /usr/src carefully. You should at least run amake world the first time through as part of the upgrading process. Reading the FreeBSD-current mailing list<[email protected]> will keep you up-to-date on other bootstrapping procedures thatsometimes become necessary as we move towards the next release.
426

Chapter 20 The Cutting Edge
4. Be active! If you are running FreeBSD-CURRENT, we want to know what you have to say about it, especially ifyou have suggestions for enhancements or bug fixes. Suggestions with accompanying code are received mostenthusiastically!
20.2.2 Staying Stable with FreeBSD
20.2.2.1 What is FreeBSD-STABLE?
FreeBSD-STABLE is our development branch for a more low-key and conservative set of changes intended for ournext mainstream release. Any changes to this branch will have debuted in FreeBSD-CURRENT first, helping toreduce (but not eliminate) the chance that the changes will cause problems.
20.2.2.2 Who needs FreeBSD-STABLE?
If you are interested in tracking the FreeBSD development process, and you want early access to the features thatwill appear in the next “point” release of FreeBSD then you should consider following FreeBSD-STABLE.
Tracking FreeBSD-STABLE also gives you easy access to security fixes for FreeBSD as they are released. However,you do not need to track FreeBSD-STABLE to do this, as every security advisory for FreeBSD explains how to fixthe problem for the releases it affects.
Although we endeavour to ensure that the FreeBSD-STABLE branch compiles and runs at all times, this cannot beguaranteed. In addition, while code is developed in FreeBSD-CURRENT before including it in FreeBSD-STABLE,more people run FreeBSD-STABLE than FreeBSD-CURRENT, so it is inevitable that bugs and corner cases willsometimes be found in FreeBSD-STABLE that were not apparent in FreeBSD-CURRENT.
For these reasons, we do not recommend that you blindly track FreeBSD-STABLE, and it is particularly importantthat you do not update any production servers to FreeBSD-STABLE without first thoroughly testing the code in yourdevelopment environment.
If you do not have the resources to do this then we recommend that you run the most recent release of FreeBSD, anduse the binary update mechanism to move from release to release.
20.2.2.3 Using FreeBSD-STABLE
1. Join the FreeBSD-stable mailing list <[email protected]>. This will keep you informed ofbuild-dependencies that may appear in FreeBSD-STABLE or any other issues requiring special attention.Developers will also make announcements in this mailing list when they are contemplating some controversial
427

Chapter 20 The Cutting Edge
fix or update, giving the users a chance to respond if they have any issues to raise concerning the proposedchange.
The FreeBSD CVS commit message mailing list <[email protected]> mailing list will allow you to seethe commit log entry for each change as it is made along with any pertinent information on possible side-effects.
To join these lists, send mail to <[email protected]> and specify the following in the body of yourmessage:
subscribe freebsd-stablesubscribe cvs-all
Optionally, you can also say help and Majordomo will send you full help on how to subscribe and unsubscribeto the various other mailing lists we support.
2. If you are installing a new system and want it to be as stable as possible, you can simply grab the latest datedbranch snapshot from ftp://releng4.FreeBSD.org/pub/FreeBSD/ and install it like any other release.
If you are already running a previous release of FreeBSD and wish to upgrade via sources then you can easily doso from ftp.FreeBSD.org. This can be done in one of three ways:
a. Use the CTM facility. Unless you have a good TCP/IP connection at a flat rate, this is the way to do it.
b. Use the cvsup program with this supfile(ftp://ftp.FreeBSD.org/pub/FreeBSD/FreeBSD-current/src/share/examples/cvsup/stable-supfile). This is thesecond most recommended method, since it allows you to grab the entire collection once and then only whathas changed from then on. Many people run cvsup from cron to keep their sources up-to-date automatically.For a fairly easy interface to this, simply type:
# pkg_add -f ftp://ftp.FreeBSD.org/pub/FreeBSD/development/CVSup/cvsupit.tgz
c. Use ftp. The source tree for FreeBSD-STABLE is always “exported” on:ftp://ftp.FreeBSD.org/pub/FreeBSD/FreeBSD-stable/
We also use wu-ftpd which allows compressed/tarred grabbing of whole trees. e.g. you see:
usr.bin/lex
You can do the following to get the whole directory for you as a tar file:
ftp� cd usr.bin
ftp� get lex.tar
428

Chapter 20 The Cutting Edge
3. Essentially, if you need rapid on-demand access to the source and communications bandwidth is not aconsideration, use cvsup or ftp. Otherwise, use CTM.
4. Before compiling FreeBSD-STABLE, read the Makefile in /usr/src carefully. You should at least run amake world the first time through as part of the upgrading process. Reading the FreeBSD-stable mailing list<[email protected]> will keep you up-to-date on other bootstrapping procedures thatsometimes become necessary as we move towards the next release.
20.3 Synchronizing Your SourceThere are various ways of using an Internet (or email) connection to stay up-to-date with any given area of theFreeBSD project sources, or all areas, depending on what interests you. The primary services we offer areAnonymous CVS, CVSup, and CTM.
Warning: While it is possible to update only parts of your source tree, the only supported update procedure is toupdate the entire tree and recompile both userland (i.e., all the programs that run in user space, such as those in/bin and /sbin) and kernel sources. Updating only part of your source tree, only the kernel, or only userland willoften result in problems. These problems may range from compile errors to kernel panics or data corruption.
Anonymous CVS and CVSup use the pull model of updating sources. In the case of CVSup the user (or a cronscript) invokes the cvsup program, and it interacts with a cvsupd server somewhere to bring your files up-to-date.The updates you receive are up-to-the-minute and you get them when, and only when, you want them. You can easilyrestrict your updates to the specific files or directories that are of interest to you. Updates are generated on the fly bythe server, according to what you have and what you want to have. Anonymous CVS is quite a bit more simplisticthan CVSup in that it’s just an extension to CVS which allows it to pull changes directly from a remote CVSrepository. CVSup can do this far more efficiently, but Anonymous CVS is easier to use.
CTM, on the other hand, does not interactively compare the sources you have with those on the master archive orotherwise pull them across.. Instead, a script which identifies changes in files since its previous run is executedseveral times a day on the master CTM machine, any detected changes being compressed, stamped with asequence-number and encoded for transmission over email (in printable ASCII only). Once received, these “CTMdeltas” can then be handed to the ctm.rmail(1) utility which will automatically decode, verify and apply the changesto the user’s copy of the sources. This process is far more efficient than CVSup, and places less strain on our serverresources since it is a push rather than a pull model.
There are other trade-offs, of course. If you inadvertently wipe out portions of your archive, CVSup will detect andrebuild the damaged portions for you. CTM won’t do this, and if you wipe some portion of your source tree out (and
429

Chapter 20 The Cutting Edge
don’t have it backed up) then you will have to start from scratch (from the most recent CVS “base delta”) and rebuildit all with CTM or, with anoncvs, simply delete the bad bits and resync.
More information about Anonymous CVS, CTM, and CVSup is available further down in this section.
20.4 Using make world
Once you have synchronized your local source tree against a particular version of FreeBSD (FreeBSD-STABLE,FreeBSD-CURRENT, and so on) you can then use the source tree to rebuild the system.
Take a backup: It cannot be stressed enough how important it is to take a backup of your system before you dothis. While rebuilding the world is (as long as you follow these instructions) an easy task to do, there willinevitably be times when you make mistakes, or when mistakes made by others in the source tree render yoursystem unbootable.
Make sure you have taken a backup. And have a fix-it floppy to hand. You will probably never have to use it, but itis better to be safe than sorry!
Subscribe to the right mailing list: The FreeBSD-STABLE and FreeBSD-CURRENT branches are, by theirnature, in development . People that contribute to FreeBSD are human, and mistakes occasionally happen.
Sometimes these mistakes can be quite harmless, just causing your system to print a new diagnostic warning.Or the change may be catastrophic, and render your system unbootable or destroy your filesystems (or worse).
If problems like these occur, a “heads up” is posted to the appropriate mailing list, explaining the nature of theproblem and which systems it affects. And an “all clear” announcement is posted when the problem has beensolved.
If you try and track FreeBSD-STABLE or FreeBSD-CURRENT and do not read the <[email protected]> or<[email protected]> mailing lists then you are asking for trouble.
20.4.1 Read /usr/src/UPDATING
Before you do anything else, read /usr/src/UPDATING (or the equivalent file wherever you have a copy of thesource code). This file should contain important information about problems you might encounter, or specify theorder in which you might have to run certain commands. If UPDATING contradicts something you read here,UPDATING takes precedence.
430

Chapter 20 The Cutting Edge
Important: Reading UPDATING is not an acceptable substitute for subscribing to the correct mailing list, asdescribed previously. The two requirements are complementary, not exclusive.
20.4.2 Check /etc/make.conf
Examine the files /etc/defaults/make.conf and /etc/make.conf. The first contains some default defines –most of which are commented out. To make use of them when you rebuild your system from source, add them to/etc/make.conf. Keep in mind that anything you add to /etc/make.conf is also used every time you run make,so it is a good idea to set them to something sensible for your system.
A typical user will probably want to copy the CFLAGS and NOPROFILE lines found in /etc/defaults/make.conf
to /etc/make.conf and uncomment them.
Examine the other definitions (COPTFLAGS, NOPORTDOCS and so on) and decide if they are relevant to you.
20.4.3 Update /etc/group
The /etc directory contains a large part of your system’s configuration information, as well as scripts that are run atsystem startup. Some of these scripts change from version to version of FreeBSD.
Some of the configuration files are also used in the day to day running of the system. In particular, /etc/group.
There have been occasions when the installation part of “make world” has expected certain usernames or groups toexist. When performing an upgrade it is likely that these groups did not exist. This caused problems when upgrading.
The most recent example of this is when the “ppp” group (later renamed “network”) was added. Users had theinstallation process fail for them when parts of the ppp subsystem were installed using a non-existent (for them)group name.
The solution is to examine /usr/src/etc/group and compare its list of groups with your own. If there are anygroups in the new file that are not in your file then copy them over. Similarly, you should rename any groups in/etc/group which have the same GID but a different name to those in /usr/src/etc/group.
Tip: If you are feeling particularly paranoid, you can check your system to see which files are owned by the groupyou are renaming or deleting.
# find / -group GID -print
will show all files owned by group GID (which can be either a group name or a numeric group ID).
431

Chapter 20 The Cutting Edge
20.4.4 Drop to single user modeYou may want to compile the system in single user mode. Apart from the obvious benefit of making things goslightly faster, reinstalling the system will touch a lot of important system files, all the standard system binaries,libraries, include files and so on. Changing these on a running system (particularly if you have active users on thesystem at the time) is asking for trouble.
Another method is to compile the system in multi-user mode, and then drop into single user mode for the installation.If you would like to do it this way, simply hold off on the following steps until the build has completed.
As the superuser, you can execute
# shutdown now
from a running system, which will drop it to single user mode.
Alternatively, reboot the system, and at the boot prompt, enter the -s flag. The system will then boot single user. Atthe shell prompt you should then run:
# fsck -p# mount -u /# mount -a -t ufs# swapon -a
This checks the filesystems, remounts / read/write, mounts all the other UFS filesystems referenced in /etc/fstab
and then turns swapping on.
20.4.5 Remove /usr/obj
As parts of the system are rebuilt they are placed in directories which (by default) go under /usr/obj. Thedirectories shadow those under /usr/src.
You can speed up the “make world” process, and possibly save yourself some dependency headaches by removingthis directory as well.
Some files below /usr/obj may have the immutable flag set (see chflags(1) for more information) which must beremoved first.
# cd /usr/obj# chflags -R noschg *# rm -rf *
432

Chapter 20 The Cutting Edge
20.4.6 Recompile the source
20.4.6.1 Saving the output
It is a good idea to save the output you get from running make(1) to another file. If something goes wrong you willhave a copy of the error message. While this might not help you in diagnosing what has gone wrong, it can helpothers if you post your problem to one of the FreeBSD mailing lists.
The easiest way to do this is to use the script(1) command, with a parameter that specifies the name of the file to saveall output to. You would do this immediately before rebuilding the world, and then type exit when the process hasfinished.
# script /var/tmp/mw.outScript started, output file is /var/tmp/mw.out# make TARGET... compile, compile, compile ...# exitScript done, ...
If you do this, do not save the output in /tmp. This directory may be cleared next time you reboot. A better place tostore it is in /var/tmp (as in the previous example) or in root’s home directory.
20.4.6.2 Compile and install the base system
You must be in the /usr/src directory...
# cd /usr/src
(unless, of course, your source code is elsewhere, in which case change to that directory instead).
To rebuild the world you use the make(1) command. This command reads instructions from the Makefile, whichdescribes how the programs that comprise FreeBSD should be rebuilt, the order in which they should be built, and soon.
The general format of the command line you will type is as follows:
# make -x -DVARIABLE target
In this example, -x is an option that you would pass to make(1). See the make(1) manual page for an example of theoptions you can pass.
-DVARIABLE passes a variable to the Makefile. The behavior of the Makefile is controlled by these variables.These are the same variables as are set in /etc/make.conf, and this provides another way of setting them.
# make -DNOPROFILE=true target
433

Chapter 20 The Cutting Edge
is another way of specifying that profiled libraries should not be built, and corresponds with the
NOPROFILE= true# Avoid compiling profiled libraries
lines in /etc/make.conf.
target tells make(1) what you want to do. Each Makefile defines a number of different “targets”, and yourchoice of target determines what happens.
Some targets are listed in the Makefile, but are not meant for you to run. Instead, they are used by the build processto break out the steps necessary to rebuild the system into a number of sub-steps.
Most of the time you won’t need to pass any parameters to make(1), and so your command like will look like this:
# make target
Beginning with version 2.2.5 of FreeBSD (actually, it was first created on the FreeBSD-CURRENT branch, and thenretrofitted to FreeBSD-STABLE midway between 2.2.2 and 2.2.5) the world target has been split in two.buildworld and installworld.
As the names imply, buildworld builds a complete new tree under /usr/obj, and installworld installs thistree on the current machine.
This is very useful for 2 reasons. First, it allows you to do the build safe in the knowledge that no components ofyour running system will be affected. The build is “self hosted”. Because of this, you can safely run buildworld ona machine running in multi-user mode with no fear of ill-effects. It is still recommended that you run theinstallworld part in single user mode, though.
Secondly, it allows you to use NFS mounts to upgrade multiple machines on your network. If you have threemachines, A, B and C that you want to upgrade, run make buildworld and make installworld on A. B and Cshould then NFS mount /usr/src and /usr/obj from A, and you can then run make installworld to installthe results of the build on B and C.
Although the world target still exists, you are strongly encouraged not to use it.
Run
# make buildworld
It is now possible to specify a -j option to make which will cause it to spawn several simultaneous processes. This ismost useful on multi-CPU machines. However, since much of the compiling process is IO bound rather than CPUbound it is also useful on single CPU machines.
On a typical single-CPU machine you would run:
# make -j4 buildworld
434

Chapter 20 The Cutting Edge
make(1) will then have up to 4 processes running at any one time. Empirical evidence posted to the mailing listsshows this generally gives the best performance benefit.
If you have a multi-CPU machine and you are using an SMP configured kernel try values between 6 and 10 and seehow they speed things up.
Be aware that this is still somewhat experimental, and commits to the source tree may occasionally break this feature.If the world fails to compile using this parameter try again without it before you report any problems.
20.4.6.3 Timings
Many factors influence the build time, but currently a 500MHz Pentium 3 with 128MB of RAM takes about 3 and ahalf hours to build the FreeBSD-CURRENT tree, with no tricks or shortcuts used during the process. AFreeBSD-STABLE tree will build somewhat faster.
20.4.7 Compile and install a new kernelTo take full advantage of your new system you should recompile the kernel. This is practically a necessity, as certainmemory structures may have changed, and programs like ps(1) and top(1) will fail to work until the kernel andsource code versions are the same.
The simplest, safest way to do this is to build and install a kernel based on GENERIC. While GENERIC may not haveall the necessary devices for your system, it should contain everything necessary to boot your system back to singleuser mode. This is a good test that the new system works properly. After booting from GENERIC and verifying thatyour system works you can then build a new kernel based on your normal kernel config file.
If you are upgrading to FreeBSD 4.0 or above then the standard kernel build procedure (as described in Chapter 8) isdeprecated. Instead, you should run these commands.
# cd /usr/src# make buildkernel# make installkernel
If you are upgrading to a version of FreeBSD below 4.0 you should use the standard kernel build procedure.However, it is recommended that you use the new version of config(8), using a command line like this.
# /usr/obj/usr/src/usr.sbin/config/config KERNELNAME
435

Chapter 20 The Cutting Edge
20.4.8 Reboot in to single user modeYou should reboot in to single user mode to test the new kernel works. Do this by following the instructions inSection 20.4.4.
20.4.9 Install the new system binariesIf you were building a version of FreeBSD recent enough to have used make buildworld then you should now usethe installworld to install the new system binaries.
Run
# make installworld
Note: If you specified variables on the make buildworld command line, you must specify the same variables inthe make installworld command line. This does not necessarily hold true for other options; for example, -jmust never be used with installworld.
For example, if you ran:
# make -DNOPROFILE=true buildworld
you must install the results with:
# make -DNOPROFILE=true installworld
otherwise it would try and install profiled libraries that had not been built during the make buildworld phase.
20.4.10 Update files not updated by make world
Remaking the world will not update certain directories (in particular, /etc, /var and /usr) with new or changedconfiguration files.
The simplest way to update these files is to use mergemaster(8), though it is possible to do it manually if you wouldprefer to do that. We strongly recommend you use mergemaster(8), however, and if you do then you can skip forwardto the next section, since mergemaster(8) is very simple to use. You should read the manual page first, and make abackup of /etc in case anything goes wrong.
If you wish to do the update manually, you cannot just copy over the files from /usr/src/etc to /etc and have itwork. Some of these files must be “installed” first. This is because the /usr/src/etc directory is not a copy of
436

Chapter 20 The Cutting Edge
what your /etc directory should look like. In addition, there are files that should be in /etc that are not in/usr/src/etc.
The simplest way to do this by hand is to install the files into a new directory, and then work through them lookingfor differences.
Backup your existing /etc: Although, in theory, nothing is going to touch this directory automatically, it isalways better to be sure. So copy your existing /etc directory somewhere safe. Something like:
# cp -Rp /etc /etc.old
-R does a recursive copy, -p preserves times, ownerships on files and suchlike.
You need to build a dummy set of directories to install the new /etc and other files into. /var/tmp/root is areasonable choice, and there are a number of subdirectories required under this as well.
# mkdir /var/tmp/root# cd /usr/src/etc# make DESTDIR=/var/tmp/root distrib-dirs distribution
This will build the necessary directory structure and install the files. A lot of the subdirectories that have been createdunder /var/tmp/root are empty and should be deleted. The simplest way to do this is to:
# cd /var/tmp/root# find -d . -type d | xargs rmdir 2 � /dev/null
This will remove all empty directories. (Standard error is redirected to /dev/null to prevent the warnings about thedirectories that are not empty.)
/var/tmp/root now contains all the files that should be placed in appropriate locations below /. You now have togo through each of these files, determining how they differ with your existing files.
Note that some of the files that will have been installed in /var/tmp/root have a leading “.”. At the time of writingthe only files like this are shell startup files in /var/tmp/root/ and /var/tmp/root/root/, although there maybe others (depending on when you are reading this. Make sure you use ls -a to catch them.
The simplest way to do this is to use diff(1) to compare the two files.
# diff /etc/shells /var/tmp/root/etc/shells
This will show you the differences between your /etc/shells file and the new /etc/shells file. Use these todecide whether to merge in changes that you have made or whether to copy over your old file.
437

Chapter 20 The Cutting Edge
Name the new root directory (/var/tmp/root) with a time stamp, so you can easily compare differencesbetween versions: Frequently rebuilding the world means that you have to update /etc frequently as well,which can be a bit of a chore.
You can speed this process up by keeping a copy of the last set of changed files that you merged into /etc. Thefollowing procedure gives one idea of how to do this.
1. Make the world as normal. When you want to update /etc and the other directories, give the target directorya name based on the current date. If you were doing this on the 14th of February 1998 you could do thefollowing.
# mkdir /var/tmp/root-19980214# cd /usr/src/etc# make DESTDIR=/var/tmp/root-19980214 \distrib-dirs distribution
2. Merge in the changes from this directory as outlined above.
Do not remove the /var/tmp/root-19980214 directory when you have finished.
3. When you have downloaded the latest version of the source and remade it, follow step 1. This will give you anew directory, which might be called /var/tmp/root-19980221 (if you wait a week between doing updates).
4. You can now see the differences that have been made in the intervening week using diff(1) to create arecursive diff between the two directories.
# cd /var/tmp# diff -r root-19980214 root-19980221
Typically, this will be a much smaller set of differences than those between /var/tmp/root-19980221/etc
and /etc. Because the set of differences is smaller, it is easier to migrate those changes across into your/etc directory.
5. You can now remove the older of the two /var/tmp/root-* directories.
# rm -rf /var/tmp/root-19980214
6. Repeat this process every time you need to merge in changes to /etc.
You can use date(1) to automate the generation of the directory names.
# mkdir /var/tmp/root-‘date "+%Y%m%d"‘
20.4.11 Update /dev
DEVFS: If you are using DEVFS this is unnecessary.
438

Chapter 20 The Cutting Edge
In most cases, the mergemaster(8) tool will realize when it is necessary to update the devices, and offer to complete itautomatically. These instructions tell how to update the devices manually.
For safety’s sake, this is a multi-step process.
1. Copy /var/tmp/root/dev/MAKEDEV to /dev.
# cp /var/tmp/root/dev/MAKEDEV /dev
If you used mergemaster(8) to update /etc, then your MAKEDEV script should have been updated already,though it can’t hurt to check (with diff(1)) and copy it manually if necessary.
2. Now, take a snapshot of your current /dev. This snapshot needs to contain the permissions, ownerships, majorand minor numbers of each filename, but it should not contain the time stamps. The easiest way to do this is touse awk(1) to strip out some of the information.
# cd /dev# ls -l | awk ’{print $1, $2, $3, $4, $5, $6, $NF}’ > /var/tmp/dev.out
3. Remake all the devices.
# sh MAKEDEV all
4. Write another snapshot of the directory, this time to /var/tmp/dev2.out. Now look through these two filesfor any devices that you missed creating. There should not be any, but it is better to be safe than sorry.
# diff /var/tmp/dev.out /var/tmp/dev2.out
You are most likely to notice disk slice discrepancies which will involve commands such as
# sh MAKEDEV sd0s1
to recreate the slice entries. Your precise circumstances may vary.
20.4.12 Update /stand
Note: This step is included only for completeness. It can safely be omitted.
For the sake of completeness, you may want to update the files in /stand as well. These files consist of hard links tothe /stand/sysinstall binary. This binary should be statically linked, so that it can work when no otherfilesystems (and in particular /usr) have been mounted.
# cd /usr/src/release/sysinstall# make all install
439

Chapter 20 The Cutting Edge
20.4.13 RebootingYou are now done. After you have verified that everything appears to be in the right place you can reboot the system.A simple fastboot(8) should do it.
# fastboot
20.4.14 FinishedYou should now have successfully upgraded your FreeBSD system. Congratulations.
If things went slightly wrong, it is easy to rebuild a particular piece of the system. For example, if you accidentlydeleted /etc/magic as part of the upgrade or merge of /etc, the file(1) command will stop working. In this case,the fix would be to run:
# cd /usr/src/usr.bin/file# make all install
20.4.15 Questions?
1. Do I need to re-make the world for every change?
There is no easy answer to this one, as it depends on the nature of the change. For example, if you just ran CVSup,and it has shown the following files as being updated,
src/games/cribbage/instr.c
src/games/sail/pl_main.c
src/release/sysinstall/config.c
src/release/sysinstall/media.c
src/share/mk/bsd.port.mk
it probably is not worth rebuilding the entire world. You could just go to the appropriate sub-directories and makeall install, and that’s about it. But if something major changed, for example src/lib/libc/stdlib then youshould either re-make the world, or at least those parts of it that are statically linked (as well as anything else youmight have added that is statically linked).
At the end of the day, it is your call. You might be happy re-making the world every fortnight say, and let changesaccumulate over that fortnight. Or you might want to re-make just those things that have changed, and are confidentyou can spot all the dependencies.
And, of course, this all depends on how often you want to upgrade, and whether you are tracking FreeBSD-STABLEor FreeBSD-CURRENT.
440

Chapter 20 The Cutting Edge
2. My compile failed with lots of signal 11 (or other signal number) errors. What has happened?
This is normally indicative of hardware problems. (Re)making the world is an effective way to stress test yourhardware, and will frequently throw up memory problems. These normally manifest themselves as the compilermysteriously dying on receipt of strange signals.
A sure indicator of this is if you can restart the make and it dies at a different point in the process.
In this instance there is little you can do except start swapping around the components in your machine to determinewhich one is failing.
3. Can I remove /usr/obj when I have finished?
The short answer is yes.
/usr/obj contains all the object files that were produced during the compilation phase. Normally, one of the firststeps in the “make world” process is to remove this directory and start afresh. In this case, keeping /usr/obj aroundafter you have finished makes little sense, and will free up a large chunk of disk space (currently about 340MB).
However, if you know what you are doing you can have “make world” skip this step. This will make subsequentbuilds run much faster, since most of sources will not need to be recompiled. The flip side of this is that subtledependency problems can creep in, causing your build to fail in odd ways. This frequently generates noise on theFreeBSD mailing lists, when one person complains that their build has failed, not realising that it is because theyhave tried to cut corners.
If you want to live dangerously then make the world, passing the NOCLEAN definition to make, like this:
# make -DNOCLEAN world
4. Can interrupted builds be resumed?
This depends on how far through the process you got before you found a problem.
In general (and this is not a hard and fast rule) the “make world” process builds new copies of essential tools (such asgcc(1), and make(1)) and the system libraries. These tools and libraries are then installed. The new tools and librariesare then used to rebuild themselves, and are installed again. The entire system (now including regular user programs,such as ls(1) or grep(1)) is then rebuilt with the new system files.
If you are at the last stage, and you know it (because you have looked through the output that you were storing) thenyou can (fairly safely) do
... fix the problem ...
441

Chapter 20 The Cutting Edge
# cd /usr/src# make -DNOCLEAN all
This will not undo the work of the previous “make world”.
If you see the message
--------------------------------------------------------------Building everything..--------------------------------------------------------------
in the “make world” output then it is probably fairly safe to do so.
If you do not see that message, or you are not sure, then it is always better to be safe than sorry, and restart the buildfrom scratch.
5.
Can I use one machine as a master to upgrade lots of machines (NFS)?
This is a fairly easy task, and can save hours of compile time for many machines. Simply run the buildworld on acentral machine, and then NFS mount /usr/src and /usr/obj on the remote machine and installworld there.
6. How can I speed up making the world?
• Run in single user mode.
• Put the /usr/src and /usr/obj directories on separate filesystems held on separate disks. If possible, put thesedisks on separate disk controllers.
• Better still, put these filesystems across multiple disks using the “ccd” (concatenated disk driver) device.
• Turn off profiling (set “NOPROFILE=true” in /etc/make.conf). You almost certainly do not need it.
• Also in /etc/make.conf, set “CFLAGS” to something like “-O -pipe”. The optimization “-O2” is much slower,and the optimization difference between “-O” and “-O2” is normally negligible. “-pipe” lets the compiler usepipes rather than temporary files for communication, which saves disk access (at the expense of memory).
• Pass the -j � n � option to make to run multiple processes in parallel. This usually helps regardless of whether youhave a single or a multi processor machine.
• The filesystem holding /usr/src can be mounted (or remounted) with the “noatime” option. This prevents thefilesystem from recording the file access time. You probably do not need this information anyway.
# mount -u -o noatime /usr/src
442

Chapter 20 The Cutting Edge
Warning: The example assumes /usr/src is on its own filesystem. If it is not (if it is a part of /usr for example)then you will need to use that filesystem mount point, and not /usr/src.
• The filesystem holding /usr/obj can be mounted (or remounted) with the “async” option. This causes diskwrites to happen asynchronously. In other words, the write completes immediately, and the data is written to thedisk a few seconds later. This allows writes to be clustered together, and can be a dramatic performance boost.
Warning: Keep in mind that this option makes your filesystem more fragile. With this option there is anincreased chance that, should power fail, the filesystem will be in an unrecoverable state when the machinerestarts.
If /usr/obj is the only thing on this filesystem then it is not a problem. If you have other, valuable data on thesame filesystem then ensure your backups are fresh before you enable this option.
# mount -u -o async /usr/obj
Warning: As above, if /usr/obj is not on its own filesystem, replace it in the example with the name of theappropriate mount point.
443

Chapter 21 Contributing to FreeBSDContributed by Jordan K. Hubbard <[email protected]>.
So you want to contribute something to FreeBSD? That is great! We can always use the help, and FreeBSD is one ofthose systems that relies on the contributions of its user base in order to survive. Your contributions are not onlyappreciated, they are vital to FreeBSD’s continued growth!
Contrary to what some people might also have you believe, you do not need to be a hot-shot programmer or a closepersonal friend of the FreeBSD core team in order to have your contributions accepted. The FreeBSD Project’sdevelopment is done by a large and growing number of international contributors whose ages and areas of technicalexpertise vary greatly, and there is always more work to be done than there are people available to do it.
Since the FreeBSD project is responsible for an entire operating system environment (and its installation) rather thanjust a kernel or a few scattered utilities, our TODO list also spans a very wide range of tasks, from documentation, betatesting and presentation to highly specialized types of kernel development. No matter what your skill level, there isalmost certainly something you can do to help the project!
Commercial entities engaged in FreeBSD-related enterprises are also encouraged to contact us. Need a specialextension to make your product work? You will find us receptive to your requests, given that they are not toooutlandish. Working on a value-added product? Please let us know! We may be able to work cooperatively on someaspect of it. The free software world is challenging a lot of existing assumptions about how software is developed,sold, and maintained throughout its life cycle, and we urge you to at least give it a second look.
21.1 What is NeededThe following list of tasks and sub-projects represents something of an amalgam of the various core team TODO listsand user requests we have collected over the last couple of months. Where possible, tasks have been ranked bydegree of urgency. If you are interested in working on one of the tasks you see here, send mail to the coordinatorlisted by clicking on their names. If no coordinator has been appointed, maybe you would like to volunteer?
21.1.1 High priority tasksThe following tasks are considered to be urgent, usually because they represent something that is badly broken orsorely needed:
1. 3-stage boot issues. Overall coordination: FreeBSD technical discussions mailing list<[email protected]>
• Do WinNT compatible drive tagging so that the 3rd stage can provide an accurate mapping of BIOSgeometries for disks.
444

Chapter 21 Contributing to FreeBSD
2. Filesystem problems. Overall coordination: FreeBSD filesystem project mailing list<[email protected]>
• Clean up and document the nullfs filesystem code. Coordinator: Eivind Eklund <[email protected]>
• Fix the union file system. Coordinator: David Greenman <[email protected]>
3. Implement Int13 vm86 disk driver. Coordinator: FreeBSD technical discussions mailing list<[email protected]>
4. New bus architecture. Coordinator: New Bus Architecture mailing list <[email protected]>
• Port existing ISA drivers to new architecture.
• Move all interrupt-management code to appropriate parts of the bus drivers.
• Port PCI subsystem to new architecture. Coordinator: Doug Rabson <[email protected]>
• Figure out the right way to handle removable devices and then use that as a substrate on which PC-Card andCardBus support can be implemented.
• Resolve the probe/attach priority issue once and for all.
• Move any remaining buses over to the new architecture.
5. Kernel issues. Overall coordination: FreeBSD technical discussions mailing list<[email protected]>
6. Add more pro-active security infrastructure. Overall coordination: FreeBSD security mailing list<[email protected]>
• Build something like Tripwire(TM) into the kernel, with a remote and local part. There are a number ofcryptographic issues to getting this right; contact the coordinator for details. Coordinator: Eivind Eklund<[email protected]>
• Make the entire kernel use suser() instead of comparing to 0. It is presently using about half of each.Coordinator: Eivind Eklund <[email protected]>
• Split securelevels into different parts, to allow an administrator to throw away those privileges he can throwaway. Setting the overall securelevel needs to have the same effect as now, obviously. Coordinator: EivindEklund <[email protected]>
• Make it possible to upload a list of “allowed programs” to BPF, and then block BPF from accepting otherprograms. This would allow BPF to be used e.g. for DHCP, without allowing an attacker to start snooping thelocal network.
445

Chapter 21 Contributing to FreeBSD
• Update the security checker script. We should at least grab all the checks from the other BSD derivatives, andadd checks that a system with securelevel increased also have reasonable flags on the relevant parts.Coordinator: Eivind Eklund <[email protected]>
• Add authorization infrastructure to the kernel, to allow different authorization policies. Part of this could bedone by modifying suser(). Coordinator: Eivind Eklund <[email protected]>
• Add code to the NFS layer so that you cannot chdir("..") out of an NFS partition. E.g., /usr is a UFSpartition with /usr/src NFS exported. Now it is possible to use the NFS filehandle for /usr/src to getaccess to /usr.
21.1.2 Medium priority tasksThe following tasks need to be done, but not with any particular urgency:
1. Full KLD based driver support/Configuration Manager.
• Write a configuration manager (in the 3rd stage boot?) that probes your hardware in a sane manner, keepsonly the KLDs required for your hardware, etc.
2. PCMCIA/PCCARD. Coordinators: Michael Smith <[email protected]> and Warner Losh<[email protected]>
• Documentation!
• Reliable operation of the pcic driver (needs testing).
• Recognizer and handler for sio.c (mostly done).
• Recognizer and handler for ed.c (mostly done).
• Recognizer and handler for ep.c (mostly done).
• User-mode recognizer and handler (partially done).
3. Advanced Power Management. Coordinators: Michael Smith <[email protected]> and Poul-HenningKamp <[email protected]>
• APM sub-driver (mostly done).
• IDE/ATA disk sub-driver (partially done).
• syscons/pcvt sub-driver.
446

Chapter 21 Contributing to FreeBSD
• Integration with the PCMCIA/PCCARD drivers (suspend/resume).
21.1.3 Low priority tasksThe following tasks are purely cosmetic or represent such an investment of work that it is not likely that anyone willget them done anytime soon:
The first N items are from Terry Lambert <[email protected]>
1. NetWare Server (protected mode ODI driver) loader and sub-services to allow the use of ODI card driverssupplied with network cards. The same thing for NDIS drivers and NetWare SCSI drivers.
2. An "upgrade system" option that works on Linux boxes instead of just previous rev FreeBSD boxes.
3. Symmetric Multiprocessing with kernel preemption (requires kernel preemption).
4. A concerted effort at support for portable computers. This is somewhat handled by changing PCMCIA bridgingrules and power management event handling. But there are things like detecting internal v.s.. external display andpicking a different screen resolution based on that fact, not spinning down the disk if the machine is in dock, andallowing dock-based cards to disappear without affecting the machines ability to boot (same issue for PCMCIA).
21.1.4 Smaller tasksMost of the tasks listed in the previous sections require either a considerable investment of time or an in-depthknowledge of the FreeBSD kernel (or both). However, there are also many useful tasks which are suitable for"weekend hackers", or people without programming skills.
1. If you run FreeBSD-current and have a good Internet connection, there is a machine current.FreeBSD.orgwhich builds a full release once a day — every now and again, try and install the latest release from it and reportany failures in the process.
2. Read the freebsd-bugs mailing list. There might be a problem you can comment constructively on or withpatches you can test. Or you could even try to fix one of the problems yourself.
3. Read through the FAQ and Handbook periodically. If anything is badly explained, out of date or even justcompletely wrong, let us know. Even better, send us a fix (SGML is not difficult to learn, but there is noobjection to ASCII submissions).
4. Help translate FreeBSD documentation into your native language (if not already available) — just send an emailto FreeBSD documentation project mailing list <[email protected]> asking if anyone is working
447

Chapter 21 Contributing to FreeBSD
on it. Note that you are not committing yourself to translating every single FreeBSD document by doing this —in fact, the documentation most in need of translation is the installation instructions.
5. Read the freebsd-questions mailing list and the comp.unix.bsd.freebsd.misc (news:comp.unix.bsd.freebsd.misc)newsgroup occasionally (or even regularly). It can be very satisfying to share your expertise and help peoplesolve their problems; sometimes you may even learn something new yourself! These forums can also be a sourceof ideas for things to work on.
6. If you know of any bug fixes which have been successfully applied to -current but have not been merged into-stable after a decent interval (normally a couple of weeks), send the committer a polite reminder.
7. Move contributed software to src/contrib in the source tree.
8. Make sure code in src/contrib is up to date.
9. Build the source tree (or just part of it) with extra warnings enabled and clean up the warnings.
10. Fix warnings for ports which do deprecated things like using gets() or including malloc.h.
11. If you have contributed any ports, send your patches back to the original author (this will make your life easierwhen they bring out the next version)
12. Suggest further tasks for this list!
21.1.5 Work through the PR databaseThe FreeBSD PR list (http://www.FreeBSD.org/cgi/query-pr-summary.cgi) shows all the current active problemreports and requests for enhancement that have been submitted by FreeBSD users. Look through the open PRs, andsee if anything there takes your interest. Some of these might be very simple tasks, that just need an extra pair of eyesto look over them and confirm that the fix in the PR is a good one. Others might be much more complex.
Start with the PRs that have not been assigned to anyone else, but if one them is assigned to someone else, but itlooks like something you can handle, e-mail the person it is assigned to and ask if you can work on it—they mightalready have a patch ready to be tested, or further ideas that you can discuss with them.
21.2 How to ContributeContributions to the system generally fall into one or more of the following 6 categories:
448

Chapter 21 Contributing to FreeBSD
21.2.1 Bug reports and general commentaryAn idea or suggestion of general technical interest should be mailed to the FreeBSD technical discussions mailinglist <[email protected]>. Likewise, people with an interest in such things (and a tolerance for ahigh volume of mail!) may subscribe to the hackers mailing list by sending mail to <[email protected]>.See mailing lists for more information about this and other mailing lists.
If you find a bug or are submitting a specific change, please report it using the send-pr(1) program or its WEB-basedequivalent (http://www.FreeBSD.org/send-pr.html). Try to fill-in each field of the bug report. Unless they exceed65KB, include any patches directly in the report. When including patches, do not use cut-and-paste becausecut-and-paste turns tabs into spaces and makes them unusable. Consider compressing patches and using uuencode(1)if they exceed 20KB. Upload very large submissions to ftp.FreeBSD.org:/pub/FreeBSD/incoming/(ftp://ftp.FreeBSD.org/pub/FreeBSD/incoming/).
After filing a report, you should receive confirmation along with a tracking number. Keep this tracking number sothat you can update us with details about the problem by sending mail to <[email protected]>. Use thenumber as the message subject, e.g. "Re: kern/3377". Additional information for any bug report should besubmitted this way.
If you do not receive confirmation in a timely fashion (3 days to a week, depending on your email connection) or are,for some reason, unable to use the send-pr(1) command, then you may ask someone to file it for you by sending mailto the FreeBSD problem reports mailing list <[email protected]>.
21.2.2 Changes to the documentationChanges to the documentation are overseen by the FreeBSD documentation project mailing list<[email protected]>. Send submissions and changes (even small ones are welcome!) using send-pr asdescribed in Bug Reports and General Commentary.
21.2.3 Changes to existing source codeAn addition or change to the existing source code is a somewhat trickier affair and depends a lot on how far out ofdate you are with the current state of the core FreeBSD development. There is a special on-going release of FreeBSDknown as “FreeBSD-current” which is made available in a variety of ways for the convenience of developersworking actively on the system. See Staying current with FreeBSD for more information about getting and usingFreeBSD-current.
Working from older sources unfortunately means that your changes may sometimes be too obsolete or too divergentfor easy re-integration into FreeBSD. Chances of this can be minimized somewhat by subscribing to the FreeBSDannouncements mailing list <[email protected]> and the FreeBSD-current mailing list<[email protected]> lists, where discussions on the current state of the system take place.
449

Chapter 21 Contributing to FreeBSD
Assuming that you can manage to secure fairly up-to-date sources to base your changes on, the next step is toproduce a set of diffs to send to the FreeBSD maintainers. This is done with the diff(1) command, with the “contextdiff” form being preferred. For example:
% diff -c oldfile newfile
or
% diff -c -r olddir newdir
would generate such a set of context diffs for the given source file or directory hierarchy. See the man page for diff(1)for more details.
Once you have a set of diffs (which you may test with the patch(1) command), you should submit them for inclusionwith FreeBSD. Use the send-pr(1) program as described in Bug Reports and General Commentary. Do not just sendthe diffs to the FreeBSD technical discussions mailing list <[email protected]> or they will getlost! We greatly appreciate your submission (this is a volunteer project!); because we are busy, we may not be able toaddress it immediately, but it will remain in the pr database until we do.
If you feel it appropriate (e.g. you have added, deleted, or renamed files), bundle your changes into a tar file and runthe uuencode(1) program on it. Shar archives are also welcome.
If your change is of a potentially sensitive nature, e.g. you are unsure of copyright issues governing its furtherdistribution or you are simply not ready to release it without a tighter review first, then you should send it toFreeBSD core team <[email protected]> directly rather than submitting it with send-pr(1). The coremailing list reaches a much smaller group of people who do much of the day-to-day work on FreeBSD. Note that thisgroup is also very busy and so you should only send mail to them where it is truly necessary.
Please refer to intro(9) and style(9) style for some information on coding style. We would appreciate it if you were atleast aware of this information before submitting code.
21.2.4 New code or major value-added packagesIn the case of a significant contribution of a large body work, or the addition of an important new feature toFreeBSD, it becomes almost always necessary to either send changes as uuencoded tar files or upload them to a webor FTP site for other people to access. If you do not have access to a web or FTP site, ask on an appropriate FreeBSDmailing list for someone to host the changes for you.
When working with large amounts of code, the touchy subject of copyrights also invariably comes up. Acceptablecopyrights for code included in FreeBSD are:
1. The BSD copyright. This copyright is most preferred due to its “no strings attached” nature and generalattractiveness to commercial enterprises. Far from discouraging such commercial use, the FreeBSD Project
450

Chapter 21 Contributing to FreeBSD
actively encourages such participation by commercial interests who might eventually be inclined to investsomething of their own into FreeBSD.
2. The GNU Public License, or “GPL”. This license is not quite as popular with us due to the amount of extraeffort demanded of anyone using the code for commercial purposes, but given the sheer quantity of GPL’d codewe currently require (compiler, assembler, text formatter, etc) it would be silly to refuse additional contributionsunder this license. Code under the GPL also goes into a different part of the tree, that being /sys/gnu or/usr/src/gnu, and is therefore easily identifiable to anyone for whom the GPL presents a problem.
Contributions coming under any other type of copyright must be carefully reviewed before their inclusion intoFreeBSD will be considered. Contributions for which particularly restrictive commercial copyrights apply aregenerally rejected, though the authors are always encouraged to make such changes available through their ownchannels.
To place a “BSD-style” copyright on your work, include the following text at the very beginning of every sourcecode file you wish to protect, replacing the text between the %% with the appropriate information.
Copyright (c) %%proper_years_here%%%%your_name_here%%, %%your_state%% %%your_zip%%.
All rights reserved.
Redistribution and use in source and binary forms, with or withoutmodification, are permitted provided that the following conditionsare met:1. Redistributions of source code must retain the above copyright
notice, this list of conditions and the following disclaimer asthe first lines of this file unmodified.
2. Redistributions in binary form must reproduce the above copyrightnotice, this list of conditions and the following disclaimer in thedocumentation and/or other materials provided with the distribution.
THIS SOFTWARE IS PROVIDED BY %%your_name_here%% “AS IS” AND ANY EXPRESS ORIMPLIED WARRANTIES, INCLUDING, BUT NOT LIMITED TO, THE IMPLIED WARRANTIESOF MERCHANTABILITY AND FITNESS FOR A PARTICULAR PURPOSE ARE DISCLAIMED.IN NO EVENT SHALL %%your_name_here%% BE LIABLE FOR ANY DIRECT, INDIRECT,INCIDENTAL, SPECIAL, EXEMPLARY, OR CONSEQUENTIAL DAMAGES (INCLUDING, BUTNOT LIMITED TO, PROCUREMENT OF SUBSTITUTE GOODS OR SERVICES; LOSS OF USE,DATA, OR PROFITS; OR BUSINESS INTERRUPTION) HOWEVER CAUSED AND ON ANYTHEORY OF LIABILITY, WHETHER IN CONTRACT, STRICT LIABILITY, OR TORT(INCLUDING NEGLIGENCE OR OTHERWISE) ARISING IN ANY WAY OUT OF THE USE OFTHIS SOFTWARE, EVEN IF ADVISED OF THE POSSIBILITY OF SUCH DAMAGE.
$Id$
For your convenience, a copy of this text can be found in /usr/share/examples/etc/bsd-style-copyright.
451

Chapter 21 Contributing to FreeBSD
21.2.5 Money, Hardware or Internet accessWe are always very happy to accept donations to further the cause of the FreeBSD Project and, in a volunteer effortlike ours, a little can go a long way! Donations of hardware are also very important to expanding our list of supportedperipherals since we generally lack the funds to buy such items ourselves.
21.2.5.1 Donating funds
Empty, pending information from the FreeBSD Foundation.
21.2.5.2 Donating hardware
Donations of hardware in any of the 3 following categories are also gladly accepted by the FreeBSD Project:
• General purpose hardware such as disk drives, memory or complete systems should be sent to the FreeBSD, Inc.address listed in the donating funds section.
• Hardware for which ongoing compliance testing is desired. We are currently trying to put together a testing lab ofall components that FreeBSD supports so that proper regression testing can be done with each new release. We arestill lacking many important pieces (network cards, motherboards, etc) and if you would like to make such adonation, please contact David Greenman <[email protected]> for information on which items are still required.
• Hardware currently unsupported by FreeBSD for which you would like to see such support added. Please contactthe FreeBSD core team <[email protected]> before sending such items as we will need to find adeveloper willing to take on the task before we can accept delivery of new hardware.
21.2.5.3 Donating Internet access
We can always use new mirror sites for FTP, WWW or cvsup. If you would like to be such a mirror, please contactthe FreeBSD project administrators <[email protected]> for more information.
21.3 Donors GalleryThe FreeBSD Project is indebted to the following donors and would like to publicly thank them here!
• Contributors to the central server project:
452

Chapter 21 Contributing to FreeBSD
The following individuals and businesses made it possible for the FreeBSD Project to build a new central servermachine to eventually replace freefall.FreeBSD.org by donating the following items:
• Ade Barkah <[email protected]> and his employer, Hemisphere Online (http://www.hemi.com/),donated a Pentium Pro (P6) 200MHz CPU
• ASA Computers (http://www.asacomputers.com/) donated a Tyan 1662 motherboard.
• Joe McGuckin <[email protected]> of ViaNet Communications (http://www.via.net/) donated a Kingston ethernetcontroller.
• Jack O’Neill <[email protected]> donated an NCR 53C875 SCSI controller card.
• Ulf Zimmermann <[email protected]> of Alameda Networks (http://www.Alameda.net/) donated 128MB ofmemory, a 4 Gb disk drive and the case.
• Direct funding:
The following individuals and businesses have generously contributed direct funding to the project:
• Annelise Anderson <[email protected]>
• Matthew Dillon <[email protected]>
• Blue Mountain Arts (http://www.bluemountain.com/)
• Epilogue Technology Corporation (http://www.epilogue.com/)
• Sean Eric Fagan <[email protected]>
• Global Technology Associates, Inc (http://www.gta.com/)
• Don Scott Wilde
• Gianmarco Giovannelli <[email protected]>
• Josef C. Grosch <[email protected]>
• Robert T. Morris
• Chuck Robey <[email protected]>
• Kenneth P. Stox <[email protected]> of Imaginary Landscape, LLC.(http://www.imagescape.com/)
• Dmitry S. Kohmanyuk <[email protected]>
• Laser5 (http://www.cdrom.co.jp/) of Japan (a portion of the profits from sales of their various FreeBSDCDROMs).
453

Chapter 21 Contributing to FreeBSD
• Fuki Shuppan Publishing Co. (http://www.mmjp.or.jp/fuki/) donated a portion of their profits from Hajimete noFreeBSD (FreeBSD, Getting started) to the FreeBSD and XFree86 projects.
• ASCII Corp. (http://www.ascii.co.jp/) donated a portion of their profits from several FreeBSD-related books tothe FreeBSD project.
• Yokogawa Electric Corp (http://www.yokogawa.co.jp/) has generously donated significant funding to theFreeBSD project.
• BuffNET (http://www.buffnet.net/)
• Pacific Solutions (http://www.pacificsolutions.com/)
• Siemens AG (http://www.siemens.de/) via Andre Albsmeier <[email protected]>
• Chris Silva <[email protected]>
• Hardware contributors:
The following individuals and businesses have generously contributed hardware for testing and device driverdevelopment/support:
• BSDi for providing the Pentium P5-90 and 486/DX2-66 EISA/VL systems that are being used for ourdevelopment work, to say nothing of the network access and other donations of hardware resources.
• TRW Financial Systems, Inc. provided 130 PCs, three 68 GB file servers, twelve Ethernets, two routers and anATM switch for debugging the diskless code.
• Dermot McDonnell donated the Toshiba XM3401B CDROM drive currently used in freefall.
• Chuck Robey <[email protected]> contributed his floppy tape streamer for experimental work.
• Larry Altneu <[email protected]>, and Wilko Bulte <[email protected]>, provided Wangtek and ArchiveQIC-02 tape drives in order to improve the wt driver.
• Ernst Winter <[email protected]> contributed a 2.88 MB floppy drive to the project. This will hopefullyincrease the pressure for rewriting the floppy disk driver. ;-)
• Tekram Technologies (http://www.tekram.com/) sent one each of their DC-390, DC-390U and DC-390F FASTand ULTRA SCSI host adapter cards for regression testing of the NCR and AMD drivers with their cards. Theyare also to be applauded for making driver sources for free operating systems available from their FTP serverftp://ftp.tekram.com/scsi/FreeBSD/.
• Larry M. Augustin contributed not only a Symbios Sym8751S SCSI card, but also a set of data books, includingone about the forthcoming Sym53c895 chip with Ultra-2 and LVD support, and the latest programming manualwith information on how to safely use the advanced features of the latest Symbios SCSI chips. Thanks a lot!
• Christoph Kukulies <[email protected]> donated an FX120 12 speed Mitsumi CDROM drive for IDECDROM driver development.
454

Chapter 21 Contributing to FreeBSD
• Special contributors:
• BSDi (http://www.osd.bsdi.com/) (formerly Walnut Creek CDROM) has donated almost more than we can say(see the history document for more details). In particular, we would like to thank them for the original hardwareused for freefall.FreeBSD.org, our primary development machine, and for thud.FreeBSD.org, a testingand build box. We are also indebted to them for funding various contributors over the years and providing uswith unrestricted use of their T1 connection to the Internet.
• The interface business GmbH, Dresden (http://www.interface-business.de/) has been patiently supporting JörgWunsch <[email protected]> who has often preferred FreeBSD work over paid work, and used to fall backto their (quite expensive) EUnet Internet connection whenever his private connection became too slow or flakyto work with it...
• Berkeley Software Design, Inc. (http://www.bsdi.com/) has contributed their DOS emulator code to theremaining BSD world, which is used in the doscmd command.
21.4 Core Team AlumniThe following people were members of the FreeBSD core team during the periods indicated. We thank them for theirpast efforts in the service of the FreeBSD project.
In rough chronological order:
• Andrey A. Chernov <[email protected]> (1993 - 2000)
• Jonathan M. Bresler <[email protected]> (1993 - 2000)
• Bruce Evans <[email protected]> (1992 - 2000)
• Justin T. Gibbs <[email protected]> (1993 - 2000)
• Rich Murphey <[email protected]> (1994 - 2000)
• Poul-Henning Kamp <[email protected]> (1992 - 2000)
• Gary Palmer <[email protected]> (1993 - 2000)
• Søren Schmidt <[email protected]> (1993 - 2000)
• Garrett Wollman <[email protected]> (1993 - 2000)
• Jörg Wunsch <[email protected]> (1995 - 2000)
• John Polstra <[email protected]> (1997 - 2000)
455

Chapter 21 Contributing to FreeBSD
• Guido van Rooij <[email protected]> (1995 - 1999)
• John Dyson <[email protected]> (1993 - 1998)
• Nate Williams <[email protected]> (1992 - 1996)
• Rodney Grimes <[email protected]> (1992 - 1995)
• Andreas Schulz (1992 - 1995)
• Geoff Rehmet <[email protected]> (1993 - 1995)
• Paul Richards <[email protected]> (1992 - 1995)
• Scott Mace <[email protected]> (1993 - 1994)
• Andrew Moore (1993 - 1994)
• Christoph Robitschko (1993 - 1994)
• J. T. Conklin (1992 - 1993)
21.5 Development Team AlumniThe following people were members of the FreeBSD development team during the periods indicated. We thank themfor their past efforts in the service of the FreeBSD project.
In rough chronological order:
• Ted Mittelstaedt <[email protected]> (???? - 2000)
• Karl Strickland <[email protected]> (???? - 2000)
• Gary Clark II <[email protected]> (1993 - 2000)
• James Raynard <[email protected]> (???? - 2000)
• Joe Greco <[email protected]> (???? - 1999)
• Andreas Schulz <[email protected]> (???? - 1999)
• Jamil Weatherby (1997 - 1999)
• meganm (???? - 1998)
• John Dyson <[email protected]> (???? - 1998)
• Amancio Hasty (1997 - 1998)
• Drew Derbyshire (1997 - 1998)
456

Chapter 21 Contributing to FreeBSD
21.6 Derived Software ContributorsThis software was originally derived from William F. Jolitz’s 386BSD release 0.1, though almost none of the original386BSD specific code remains. This software has been essentially re-implemented from the 4.4BSD-Lite releaseprovided by the Computer Science Research Group (CSRG) at the University of California, Berkeley and associatedacademic contributors.
There are also portions of NetBSD and OpenBSD that have been integrated into FreeBSD as well, and we wouldtherefore like to thank all the contributors to NetBSD and OpenBSD for their work.
21.7 Additional FreeBSD Contributors(in alphabetical order by first name):
• ABURAYA Ryushirou <[email protected]>
• AMAGAI Yoshiji <[email protected]>
• Aaron Bornstein <[email protected]>
• Aaron Smith <[email protected]>
• Achim Patzner <[email protected]>
• Ada T Lim <[email protected]>
• Adam Baran <[email protected]>
• Adam Glass <[email protected]>
• Adam Herzog <[email protected]>
• Adam McDougall <[email protected]>
• Adam Strohl <[email protected]>
• Adoal Xu <[email protected]>
• Adrian Colley <[email protected]>
• Adrian Hall <[email protected]>
• Adrian Mariano <[email protected]>
• Adrian Steinmann <[email protected]>
• Adrian T. Filipi-Martin <[email protected]>
• Ajit Thyagarajan <unknown>
457

Chapter 21 Contributing to FreeBSD
• Akio Morita <[email protected]>
• Akira SAWADA <unknown>
• Akira Watanabe <[email protected]>
• Akito Fujita <[email protected]>
• Alain Kalker <[email protected]>
• Alan Bawden <[email protected]>
• Alec Wolman <[email protected]>
• Aled Morris <[email protected]>
• Aleksandr A Babaylov <[email protected]>
• Alex G. Bulushev <[email protected]>
• Alex D. Chen <[email protected]>
• Alex Le Heux <[email protected]>
• Alex Kapranoff <[email protected]>
• Alex Perel <[email protected]>
• Alex Semenyaka <[email protected]>
• Alex Varju <[email protected]>
• Alex Zepeda <[email protected]>
• Alexander B. Povolotsky <[email protected]>
• Alexander Gelfenbain <[email protected]>
• Alexander Leidinger <[email protected]>
• Alexandre Peixoto <[email protected]>
• Alexandre Snarskii <[email protected]>
• Alistair G. Crooks <[email protected]>
• Allan Bowhill <[email protected]>
• Allan Saddi <[email protected]>
• Allen Campbell <[email protected]>
• Amakawa Shuhei <[email protected]>
• Amancio Hasty <[email protected]>
• Amir Farah <[email protected]>
458

Chapter 21 Contributing to FreeBSD
• Amir Shalem <[email protected]>
• Amy Baron <[email protected]>
• The Anarcat <[email protected]>
• Anatoly A. Orehovsky <[email protected]>
• Anatoly Vorobey <[email protected]>
• Anders Andersson <[email protected]>
• Anders Nordby <[email protected]>
• Anders Thulin <[email protected]>
• Andras Olah <[email protected]>
• Andre Albsmeier <[email protected]>
• Andre Goeree <[email protected]>
• Andre Oppermann <[email protected]>
• Andreas Haakh <[email protected]>
• Andreas Kohout <[email protected]>
• Andreas Lohr <[email protected]>
• Andreas Schulz <unknown>
• Andreas Wetzel <[email protected]>
• Andreas Wrede <[email protected]>
• Andres Vega Garcia <unknown>
• Andrew Atrens <[email protected]>
• Andrew Boothman <[email protected]>
• Andrew Gillham <[email protected]>
• Andrew Gordon <[email protected]>
• Andrew Herbert <[email protected]>
• Andrew J. Korty <[email protected]>
• Andrew L. Moore <[email protected]>
• Andrew L. Neporada <[email protected]>
• Andrew McRae <[email protected]>
• Andrew Stevenson <[email protected]>
459

Chapter 21 Contributing to FreeBSD
• Andrew Timonin <[email protected]>
• Andrew V. Stesin <[email protected]>
• Andrew Webster <[email protected]>
• Andrey Novikov <[email protected]>
• Andrey Simonenko <[email protected]>
• Andrey Tchoritch <[email protected]>
• Andy Farkas <[email protected]>
• Andy Valencia <[email protected]>
• Andy Whitcroft <[email protected]>
• Angelo Turetta <[email protected]>
• Anthony C. Chavez <[email protected]>
• Anthony Yee-Hang Chan <[email protected]>
• Anton N. Bruesov <[email protected]>
• Anton Voronin <[email protected]>
• Antti Kaipila <[email protected]>
• arci <[email protected]>
• Are Bryne <[email protected]>
• Ari Suutari <[email protected]>
• Arindum Mukerji <[email protected]>
• Arjan de Vet <[email protected]>
• Arne Henrik Juul <[email protected]>
• Arun Sharma <[email protected]>
• Arnaud S. Launay <[email protected]>
• Ask Bjoern Hansen <[email protected]>
• Atsushi Furuta <[email protected]>
• Atsushi Murai <[email protected]>
• Atushi Sakauchi <[email protected]>
• Bakul Shah <[email protected]>
• Barry Bierbauch <[email protected]>
460

Chapter 21 Contributing to FreeBSD
• Barry Lustig <[email protected]>
• Ben Hutchinson <[email protected]>
• Ben Jackson <unknown>
• Ben Walter <[email protected]>
• Benjamin Lewis <[email protected]>
• Berend de Boer <[email protected]>
• Bernd Rosauer <[email protected]>
• Bill Kish <[email protected]>
• Bill Trost <[email protected]>
• Blaz Zupan <[email protected]>
• Bob Van Valzah <[email protected]>
• Bob Wilcox <[email protected]>
• Bob Willcox <[email protected]>
• Boris Staeblow <[email protected]>
• Boyd Faulkner <[email protected]>
• Boyd R. Faulkner <[email protected]>
• Brad Chapman <[email protected]>
• Brad Hendrickse <[email protected]>
• Brad Karp <[email protected]>
• Bradley Dunn <[email protected]>
• Brad Jones <[email protected]>
• Brandon Fosdick <[email protected]>
• Brandon Gillespie <[email protected]>
• Bill Lloyd <[email protected]>
• Brent J. Nordquist <[email protected]>
• Brett Lymn <[email protected]>
• Brett Taylor <[email protected]>
• Brian Campbell <[email protected]>
• Brian Clapper <[email protected]>
461

Chapter 21 Contributing to FreeBSD
• Brian Cully <[email protected]>
• Brian Handy <[email protected]>
• Brian Litzinger <[email protected]>
• Brian McGovern <[email protected]>
• Brian Moore <[email protected]>
• Brian R. Haug <[email protected]>
• Brian Tao <[email protected]>
• Brion Moss <[email protected]>
• Bruce Albrecht <[email protected]>
• Bruce Gingery <[email protected]>
• Bruce J. Keeler <[email protected]>
• Bruce Murphy <[email protected]>
• Bruce Walter <[email protected]>
• Carey Jones <[email protected]>
• Carl Fongheiser <[email protected]>
• Carl Mascott <[email protected]>
• Casper <[email protected]>
• Castor Fu <[email protected]>
• Chad David <[email protected]>
• Chain Lee <[email protected]>
• Charles Hannum <[email protected]>
• Charles Henrich <[email protected]>
• Charles Mott <[email protected]>
• Charles Owens <[email protected]>
• Chet Ramey <[email protected]>
• Chia-liang Kao <[email protected]>
• Chiharu Shibata <[email protected]>
• Chip Norkus <unknown>
• Chris Csanady <[email protected]>
462

Chapter 21 Contributing to FreeBSD
• Chris Dabrowski <[email protected]>
• Chris Dillon <[email protected]>
• Chris Shenton <[email protected]>
• Christopher Shumway <[email protected]>
• Chris Stenton <[email protected]>
• Chris Timmons <[email protected]>
• Chris Torek <[email protected]>
• Christian Gusenbauer <[email protected]>
• Christian Haury <[email protected]>
• Christian Weisgerber <[email protected]>
• Christoph P. Kukulies <[email protected]>
• Christoph Robitschko <[email protected]>
• Christoph Weber-Fahr <[email protected]>
• Christopher G. Demetriou <[email protected]>
• Christopher N. Harrell <[email protected]>
• Christopher Preston <[email protected]>
• Christopher T. Johnson <[email protected]>
• Chrisy Luke <[email protected]>
• Chuck Hein <[email protected]>
• Cliff Rowley <[email protected]>
• Colman Reilly <[email protected]>
• Conrad Sabatier <[email protected]>
• Coranth Gryphon <[email protected]>
• Cornelis van der Laan <[email protected]>
• Cove Schneider <[email protected]>
• Craig Leres <[email protected]>
• Craig Loomis <unknown>
• Craig Metz <[email protected]>
• Craig Spannring <[email protected]>
463

Chapter 21 Contributing to FreeBSD
• Craig Struble <[email protected]>
• Cristian Ferretti <[email protected]>
• Curt Mayer <[email protected]>
• Cy Schubert <[email protected]>
• Cyrille Lefevre <[email protected]>
• Cyrus Rahman <[email protected]>
• Dai Ishijima <[email protected]>
• Daisuke Watanabe <[email protected]>
• Damian Hamill <[email protected]>
• Dan Cross <[email protected]>
• Dan Langille <[email protected]>
• Dan Lukes <[email protected]>
• Dan Nelson <[email protected]>
• Dan Papasian <[email protected]>
• Dan Piponi <[email protected]>
• Dan Walters <[email protected]>
• Daniel Hagan <[email protected]>
• Daniel O’Connor <[email protected]>
• Daniel Poirot <[email protected]>
• Daniel Rock <[email protected]>
• Daniel W. McRobb <[email protected]>
• Danny Egen <unknown>
• Danny J. Zerkel <[email protected]>
• Dave Adkins <[email protected]>
• Dave Andersen <[email protected]>
• Dave Blizzard <[email protected]>
• Dave Bodenstab <[email protected]>
• Dave Burgess <[email protected]>
• Dave Chapeskie <[email protected]>
464

Chapter 21 Contributing to FreeBSD
• Dave Cornejo <[email protected]>
• Dave Edmondson <[email protected]>
• Dave Glowacki <[email protected]>
• Dave Marquardt <[email protected]>
• Dave Tweten <[email protected]>
• David A. Adkins <[email protected]>
• David A. Bader <[email protected]>
• David Borman <[email protected]>
• David Dawes <[email protected]>
• David Filo <unknown>
• David Holland <[email protected]>
• David Holloway <[email protected]>
• David Horwitt <[email protected]>
• David Hovemeyer <[email protected]>
• David Jones <[email protected]>
• David Kelly <[email protected]>
• David Kulp <[email protected]>
• David L. Nugent <[email protected]>
• David Leonard <[email protected]>
• David Muir Sharnoff <[email protected]>
• David S. Miller <[email protected]>
• David Sugar <[email protected]>
• David Wolfskill <[email protected]>
• Dean Gaudet <[email protected]>
• Dean Huxley <[email protected]>
• Denis Fortin <unknown>
• Denis Shaposhnikov <[email protected]>
• Dennis Glatting <[email protected]>
• Denton Gentry <[email protected]>
465

Chapter 21 Contributing to FreeBSD
• der Mouse <[email protected]>
• Derek Inksetter <[email protected]>
• DI. Christian Gusenbauer <[email protected]>
• Dirk Keunecke <[email protected]>
• Dirk Nehrling <[email protected]>
• Dishanker Rajakulendren <[email protected]>
• Dmitry Khrustalev <[email protected]>
• Dmitry Kohmanyuk <[email protected]>
• Dom Mitchell <[email protected]>
• Domas Mituzas <[email protected]>
• Dominik Brettnacher <[email protected]>
• Dominik Rothert <[email protected]>
• Don Croyle <[email protected]>
• Donn Miller <[email protected]>
• Dan Pelleg <[email protected]>
• Don Whiteside <[email protected]>
• Don Morrison <[email protected]>
• Don Yuniskis <[email protected]>
• Donald Maddox <[email protected]>
• Douglas Ambrisko <[email protected]>
• Douglas Carmichael <[email protected]>
• Douglas Crosher <[email protected]>
• Drew Derbyshire <[email protected]>
• Dustin Sallings <[email protected]>
• Eckart "Isegrim" Hofmann <[email protected]>
• Ed Gold <[email protected]>
• Ed Hudson <[email protected]>
• Edward Chuang <[email protected]>
• Edward Wang <[email protected]>
466

Chapter 21 Contributing to FreeBSD
• Edwin Groothus <[email protected]>
• Edwin Mons <[email protected]>
• Ege Rekk <[email protected]>
• Eiji-usagi-MATSUmoto <[email protected]>
• Eike Bernhardt <[email protected]>
• ELISA Font Project
• Elmar Bartel <[email protected]>
• Eoin Lawless <[email protected]>
• Eric A. Griff <[email protected]>
• Eric Blood <[email protected]>
• Eric D. Futch <[email protected]>
• Eric J. Haug <[email protected]>
• Eric J. Schwertfeger <[email protected]>
• Eric L. Hernes <[email protected]>
• Eric P. Scott <[email protected]>
• Eric Sprinkle <[email protected]>
• Erich Stefan Boleyn <[email protected]>
• Erich Zigler <[email protected]>
• Erik H. Bakke <[email protected]>
• Erik E. Rantapaa <[email protected]>
• Erik H. Moe <[email protected]>
• Ernst de Haan <[email protected]>
• Ernst Winter <[email protected]>
• Espen Skoglund <[email protected]>
• Eugene M. Kim <[email protected]>
• Eugene Radchenko <[email protected]>
• Eugeny Kuzakov <[email protected]>
• Evan Champion <[email protected]>
• Faried Nawaz <[email protected]>
467

Chapter 21 Contributing to FreeBSD
• Flemming Jacobsen <[email protected]>
• Fong-Ching Liaw <[email protected]>
• Francis M J Hsieh <[email protected]>
• Francisco Reyes <[email protected]>
• Frank Bartels <[email protected]>
• Frank Chen Hsiung Chan <[email protected]>
• Frank Durda IV <[email protected]>
• Frank MacLachlan <[email protected]>
• Frank Nobis <[email protected]>
• Frank ten Wolde <[email protected]>
• Frank van der Linden <[email protected]>
• Frank Volf <[email protected]>
• Fred Cawthorne <[email protected]>
• Fred Gilham <[email protected]>
• Fred Templin <[email protected]>
• Frederick Earl Gray <[email protected]>
• FUJIMOTO Kensaku <[email protected]>
• FURUSAWA Kazuhisa <[email protected]>
• G. Adam Stanislav. <[email protected]>
• Gabor Kincses <[email protected]>
• Gabor Zahemszky <[email protected]>
• Gareth McCaughan <[email protected]>
• Gary A. Browning <[email protected]>
• Gary Howland <[email protected]>
• Gary J. <[email protected]>
• Gary Kline <[email protected]>
• Gaspar Chilingarov <[email protected]>
• Gea-Suan Lin <[email protected]>
• Gene Raytsin <[email protected]>
468

Chapter 21 Contributing to FreeBSD
• Geoff Rehmet <[email protected]>
• Georg Wagner <[email protected]>
• Gianlorenzo Masini <[email protected]>
• Gianmarco Giovannelli <[email protected]>
• Gil Kloepfer Jr. <[email protected]>
• Gilad Rom <[email protected]>
• Giles Lean <[email protected]>
• Ginga Kawaguti <[email protected]>
• Giorgos Keramidas <[email protected]>
• Glen Foster <[email protected]>
• Glenn Johnson <[email protected]>
• Godmar Back <[email protected]>
• Goran Hammarback <[email protected]>
• Gord Matzigkeit <[email protected]>
• Gordon Greeff <[email protected]>
• Graham Wheeler <[email protected]>
• Greg A. Woods <[email protected]>
• Greg Ansley <[email protected]>
• Greg Robinson <[email protected]>
• Greg Troxel <[email protected]>
• Greg Ungerer <[email protected]>
• Gregory Bond <[email protected]>
• Gregory D. Moncreaff <[email protected]>
• Guy Harris <[email protected]>
• Guy Helmer <[email protected]>
• HAMADA Naoki <[email protected]>
• Hannu Savolainen <[email protected]>
• Hans Huebner <[email protected]>
• Hans Petter Bieker <[email protected]>
469

Chapter 21 Contributing to FreeBSD
• Hans Zuidam <[email protected]>
• Harlan Stenn <[email protected]>
• Harold Barker <[email protected]>
• Harry Newton <[email protected]>
• Havard Eidnes <[email protected]>
• Heikki Suonsivu <[email protected]>
• Heiko W. Rupp <unknown>
• Helmut F. Wirth <[email protected]>
• Henrik Vestergaard Draboel <[email protected]>
• Herb Peyerl <[email protected]>
• Hideaki Ohmon <[email protected]>
• Hidekazu Kuroki <[email protected]>
• Hideki Yamamoto <[email protected]>
• Hideyuki Suzuki <[email protected]>
• Hirayama Issei <[email protected]>
• Hiroaki Sakai <[email protected]>
• Hiroharu Tamaru <[email protected]>
• Hironori Ikura <[email protected]>
• Hiroshi Nishikawa <[email protected]>
• Hiroya Tsubakimoto <unknown>
• Holger Lamm <[email protected]>
• Holger Veit <[email protected]>
• Holm Tiffe <[email protected]>
• HONDA Yasuhiro <[email protected]>
• Horance Chou <[email protected]>
• Horihiro Kumagai <[email protected]>
• HOSOBUCHI Noriyuki <[email protected]>
• HOTARU-YA <[email protected]>
• Hr.Ladavac <[email protected]>
470

Chapter 21 Contributing to FreeBSD
• Hubert Feyrer <[email protected]>
• Hugh F. Mahon <[email protected]>
• Hugh Mahon <[email protected]>
• Hung-Chi Chu <[email protected]>
• Ian Holland <[email protected]>
• Ian Struble <[email protected]>
• Ian Vaudrey <[email protected]>
• Igor Khasilev <[email protected]>
• Igor Roshchin <[email protected]>
• Igor Serikov <[email protected]>
• Igor Sviridov <[email protected]>
• Igor Vinokurov <[email protected]>
• Ikuo Nakagawa <[email protected]>
• Ilia Chipitsine <[email protected]>
• Ilya V. Komarov <[email protected]>
• IMAI Takeshi <[email protected]>
• IMAMURA Tomoaki <[email protected]>
• Itsuro Saito <[email protected]>
• IWASHITA Yoji <[email protected]>
• J. Bryant <[email protected]>
• J. David Lowe <[email protected]>
• J. Han <[email protected]>
• J. Hawk <[email protected]>
• J.T. Conklin <[email protected]>
• Jack <[email protected]>
• Jacob Bohn Lorensen <[email protected]>
• Jagane D Sundar <[email protected]>
• Jake Hamby <[email protected]>
• James Clark <[email protected]>
471

Chapter 21 Contributing to FreeBSD
• James D. Stewart <[email protected]>
• James da Silva <[email protected]>
• James Jegers <[email protected]>
• James Raynard <[email protected]>
• James T. Liu <[email protected]>
• Jamie Heckford <[email protected]>
• Jan Conard <[email protected]>
• Jan Jungnickel <[email protected]>
• Jan Koum <[email protected]>
• Janick Taillandier <[email protected]>
• Janusz Kokot <[email protected]>
• Jarle Greipsland <[email protected]>
• Jason Garman <[email protected]>
• Jason R. Mastaler <[email protected]>
• Jason Thorpe <[email protected]>
• Jason Wright <[email protected]>
• Jason Young <[email protected]>
• Javier Martin Rueda <[email protected]>
• Jay Fenlason <[email protected]>
• Jay Krell <[email protected]>
• Jaye Mathisen <[email protected]>
• Jeff Bartig <[email protected]>
• Jeff Brown <[email protected]>
• Jeff Forys <[email protected]>
• Jeff Kletsky <[email protected]>
• Jeff Palmer <[email protected]>
• Jeffrey Evans <[email protected]>
• Jeffrey Wheat <[email protected]>
• Jeremy Allison <[email protected]>
472

Chapter 21 Contributing to FreeBSD
• Jeremy Chadwick <[email protected]>
• Jeremy Chatfield <[email protected]>
• Jeremy Karlson <[email protected]>
• Jeremy Prior <unknown>
• Jeremy Shaffner <[email protected]>
• Jesse McConnell <[email protected]>
• Jesse Rosenstock <[email protected]>
• Jian-Da Li <[email protected]>
• Jim Babb <[email protected]>
• Jim Binkley <[email protected]>
• Jim Bloom <[email protected]>
• Jim Carroll <[email protected]>
• Jim Flowers <[email protected]>
• Jim Leppek <[email protected]>
• Jim Lowe <[email protected]>
• Jim Mattson <[email protected]>
• Jim Mercer <[email protected]>
• Jim Sloan <[email protected]>
• Jim Wilson <[email protected]>
• Jimbo Bahooli <[email protected]>
• Jin Guojun <[email protected]>
• Joachim Kuebart <[email protected]>
• Joao Carlos Mendes Luis <[email protected]>
• Jochen Pohl <[email protected]>
• Joe "Marcus" Clarke <[email protected]>
• Joe Abley <[email protected]>
• Joe Jih-Shian Lu <[email protected]>
• Joe Orthoefer <[email protected]>
• Joe Traister <[email protected]>
473

Chapter 21 Contributing to FreeBSD
• Joel Faedi <[email protected]>
• Joel Ray Holveck <[email protected]>
• Joel Sutton <[email protected]>
• Jordan DeLong <[email protected]>
• Joseph Scott <[email protected]>
• Johan Granlund <[email protected]>
• Johan Karlsson <[email protected]>
• Johan Larsson <[email protected]>
• Johann Tonsing <[email protected]>
• Johannes Helander <unknown>
• Johannes Stille <unknown>
• John Beckett <[email protected]>
• John Beukema <[email protected]>
• John Brezak <unknown>
• John Capo <[email protected]>
• John F. Woods <[email protected]>
• John Goerzen <[email protected]>
• John Heidemann <[email protected]>
• John Hood <[email protected]>
• John Kohl <unknown>
• John Lind <[email protected]>
• John Mackin <[email protected]>
• John Merryweather Cooper <[email protected]>
• John P <[email protected]>
• John Perry <[email protected]>
• John Preisler <[email protected]>
• John Reynolds <[email protected]>
• John Rochester <[email protected]>
• John Sadler <[email protected]>
474

Chapter 21 Contributing to FreeBSD
• John Saunders <[email protected]>
• John Wehle <[email protected]>
• John Woods <[email protected]>
• Johny Mattsson <[email protected]>
• Jon Morgan <[email protected]>
• Jonathan Belson <[email protected]>
• Jonathan H N Chin <[email protected]>
• Jonathan Hanna <[email protected]>
• Jonathan Pennington <[email protected]>
• Jorge Goncalves <[email protected]>
• Jorge M. Goncalves <[email protected]>
• Jos Backus <[email protected]>
• Jose Marques <[email protected]>
• Josef Grosch <[email protected]>
• Joseph Stein <[email protected]>
• Josh Gilliam <[email protected]>
• Josh Tiefenbach <[email protected]>
• Juergen Lock <[email protected]>
• Juha Inkari <[email protected]>
• Jukka A. Ukkonen <[email protected]>
• Julian Assange <[email protected]>
• Julian Coleman <[email protected]>
• Julian Stacey <[email protected]>
• Julian Jenkins <[email protected]>
• Junichi Satoh <[email protected]>
• Junji SAKAI <[email protected]>
• Junya WATANABE <[email protected]>
• Justas <[email protected]>
• Justin Stanford <[email protected]>
475

Chapter 21 Contributing to FreeBSD
• K.Higashino <[email protected]>
• Kai Vorma <[email protected]>
• Kaleb S. Keithley <[email protected]>
• Kaneda Hiloshi <[email protected]>
• Kang-ming Liu <[email protected]>
• Kapil Chowksey <[email protected]>
• Karl Denninger <[email protected]>
• Karl Dietz <[email protected]>
• Karl Lehenbauer <[email protected]>
• KATO Tsuguru <[email protected]>
• Kawanobe Koh <[email protected]>
• Kees Jan Koster <[email protected]>
• Keith Bostic <[email protected]>
• Keith E. Walker <[email protected]>
• Keith Moore <unknown>
• Keith Sklower <unknown>
• Ken Hornstein <unknown>
• Ken Key <[email protected]>
• Ken Mayer <[email protected]>
• Kenji Saito <[email protected]>
• Kenji Tomita <[email protected]>
• Kenneth Furge <[email protected]>
• Kenneth Monville <[email protected]>
• Kenneth R. Westerback <[email protected]>
• Kenneth Stailey <[email protected]>
• Kent Talarico <[email protected]>
• Kent Vander Velden <[email protected]>
• Kentaro Inagaki <[email protected]>
• Kevin Bracey <[email protected]>
476

Chapter 21 Contributing to FreeBSD
• Kevin Day <[email protected]>
• Kevin Lahey <[email protected]>
• Kevin Meltzer <[email protected]>
• Kevin Street <[email protected]>
• Kevin Van Maren <[email protected]>
• Killer <[email protected]>
• Kim Scarborough <[email protected]>
• Kiril Mitev <[email protected]>
• Kiroh HARADA <[email protected]>
• Klaus Herrmann <[email protected]>
• Klaus Klein <[email protected]>
• Klaus-J. Wolf <[email protected]>
• Koichi Sato <[email protected]>
• Konrad Heuer <[email protected]>
• Konstantin Chuguev <[email protected]>
• Kostya Lukin <[email protected]>
• Kouichi Hirabayashi <[email protected]>
• Kris Dow <[email protected]>
• KUNISHIMA Takeo <[email protected]>
• Kurt D. Zeilenga <[email protected]>
• Kurt Olsen <[email protected]>
• L. Jonas Olsson <[email protected]>
• Larry Altneu <[email protected]>
• Lars Bernhardsson <[email protected]>
• Lars Köller <[email protected]>
• Laurence Lopez <[email protected]>
• Lee Cremeans <[email protected]>
• Leo Kim <[email protected]>
• Leo Serebryakov <[email protected]>
477

Chapter 21 Contributing to FreeBSD
• Liang Tai-hwa <[email protected]>
• Lon Willett <lon%[email protected]>
• Louis A. Mamakos <[email protected]>
• Louis Mamakos <[email protected]>
• Lowell Gilbert <[email protected]>
• Lucas James <[email protected]>
• Lyndon Nerenberg <[email protected]>
• M. L. Dodson <[email protected]>
• M.C. Wong <unknown>
• Magnus Enbom <[email protected]>
• Mahesh Neelakanta <[email protected]>
• Makoto MATSUSHITA <[email protected]>
• Makoto WATANABE <[email protected]>
• Makoto YAMAKURA <[email protected]>
• Malte Lance <[email protected]>
• MANTANI Nobutaka <[email protected]>
• Manu Iyengar <[email protected]>
• Marc Frajola <[email protected]>
• Marc Ramirez <[email protected]>
• Marc Slemko <[email protected]>
• Marc van Kempen <[email protected]>
• Marc van Woerkom <[email protected]>
• Marcin Cieslak <[email protected]>
• Mark Andrews <unknown>
• Mark Cammidge <[email protected]>
• Mark Diekhans <[email protected]>
• Mark Huizer <[email protected]>
• Mark J. Taylor <[email protected]>
• Mark Knight <[email protected]>
478

Chapter 21 Contributing to FreeBSD
• Mark Krentel <[email protected]>
• Mark Mayo <[email protected]>
• Mark Thompson <[email protected]>
• Mark Tinguely <[email protected]>
• Mark Treacy <unknown>
• Mark Valentine <[email protected]>
• Markus Holmberg <[email protected]>
• Martin Birgmeier <unknown>
• Martin Blapp <[email protected]>
• Martin Hinner <[email protected]>
• Martin Ibert <[email protected]>
• Martin Kammerhofer <[email protected]>
• Martin Minkus <[email protected]>
• Martin Renters <[email protected]>
• Martti Kuparinen <[email protected]>
• Masachika ISHIZUKA <[email protected]>
• Masahiro Sekiguchi <[email protected]>
• Masahiro TAKEMURA <[email protected]>
• Masanobu Saitoh <[email protected]>
• Masanori Kanaoka <[email protected]>
• Masanori Kiriake <[email protected]>
• Masatoshi TAMURA <[email protected]>
• Mats Lofkvist <[email protected]>
• Matt Bartley <[email protected]>
• Matt Heckaman <[email protected]>
• Matt Thomas <[email protected]>
• Matt White <[email protected]>
• Matthew C. Mead <[email protected]>
• Matthew Cashdollar <[email protected]>
479

Chapter 21 Contributing to FreeBSD
• Matthew Emmerton <[email protected]>
• Matthew Flatt <[email protected]>
• Matthew Fuller <[email protected]>
• Matthew Stein <[email protected]>
• Matthew West <[email protected]>
• Matthias Pfaller <[email protected]>
• Matthias Scheler <[email protected]>
• Mattias Gronlund <[email protected]>
• Mattias Pantzare <[email protected]>
• Maurice Castro <[email protected]>
• Max Euston <[email protected]>
• Max Khon <[email protected]>
• Maxim Bolotin <[email protected]>
• Maxim Konovalov <[email protected]>
• Maxime Henrion <[email protected]>
• Micha Class <[email protected]>
• Michael Alyn Miller <[email protected]>
• Michael Lucas <[email protected]>
• Michael Lyngbøl <[email protected]>
• Michael Butler <[email protected]>
• Michael Butschky <[email protected]>
• Michael Clay <[email protected]>
• Michael Galassi <[email protected]>
• Michael Hancock <[email protected]>
• Michael Hohmuth <[email protected]>
• Michael Perlman <[email protected]>
• Michael Petry <[email protected]>
• Michael Reifenberger <[email protected]>
• Michael Sardo <[email protected]>
480

Chapter 21 Contributing to FreeBSD
• Michael Searle <[email protected]>
• Michael Urban <[email protected]>
• Michael Vasilenko <[email protected]>
• Michal Listos <[email protected]>
• Michio Karl Jinbo <[email protected]>
• Miguel Angel Sagreras <[email protected]>
• Mihoko Tanaka <[email protected]>
• Mika Nystrom <[email protected]>
• Mikael Hybsch <[email protected]>
• Mikael Karpberg <[email protected]>
• Mike Barcroft <[email protected]>
• Mike Bristow <[email protected]>
• Mike Del <[email protected]>
• Mike Durian <[email protected]>
• Mike Durkin <[email protected]>
• Mike E. Matsnev <[email protected]>
• Mike Evans <[email protected]>
• Mike Futerko <[email protected]>
• Mike Grupenhoff <[email protected]>
• Mike Harding <[email protected]>
• Mike Hibler <[email protected]>
• Mike Karels <unknown>
• Mike McGaughey <[email protected]>
• Mike Meyer <[email protected]>
• Mike Mitchell <[email protected]>
• Mike Murphy <[email protected]>
• Mike Peck <[email protected]>
• Mike Sherwood <[email protected]>
• Mike Spengler <[email protected]>
481

Chapter 21 Contributing to FreeBSD
• Mikhail A. Sokolov <[email protected]>
• Ming-I Hseh <[email protected]>
• Mitsuru Yoshida <[email protected]>
• Monte Mitzelfelt <[email protected]>
• Morgan Davis <[email protected]>
• MOROHOSHI Akihiko <[email protected]>
• Mostyn Lewis <[email protected]>
• Motomichi Matsuzaki <[email protected]>
• Motoyuki Kasahara <[email protected]>
• N.G.Smith <[email protected]>
• Nadav Eiron <[email protected]>
• NAGAO Tadaaki <[email protected]>
• NAKAJI Hiroyuki <[email protected]>
• NAKAMURA Kazushi <[email protected]>
• NAKAMURA Motonori <[email protected]>
• NAKATA, Maho <[email protected]>
• Nanbor Wang <[email protected]>
• Naofumi Honda <[email protected]>
• Naoki Hamada <[email protected]>
• Narvi <[email protected]>
• Nathan Dorfman <[email protected]>
• Neal Fachan <[email protected]>
• Niall Smart <[email protected]>
• Nicholas Esborn <[email protected]>
• Nick Barnes <[email protected]>
• Nick Handel <[email protected]>
• Nick Hilliard <[email protected]>
• Nick Johnson <[email protected]>
• Nick Williams <[email protected]>
482

Chapter 21 Contributing to FreeBSD
• Nickolay N. Dudorov <[email protected]>
• NIIMI Satoshi <[email protected]>
• Niklas Hallqvist <[email protected]>
• Nils M. Holm <[email protected]>
• Nisha Talagala <[email protected]>
• No Name <[email protected]>
• No Name <[email protected]>
• No Name <[email protected]>
• No Name <[email protected]>
• No Name <[email protected]>
• No Name <[email protected]>
• No Name <[email protected]>
• No Name <[email protected]>
• No Name <[email protected]>
• No Name <[email protected]>
• No Name <[email protected]>
• No Name <[email protected]>
• No Name <[email protected]>
• No Name <[email protected]>
• No Name <[email protected]>
• No Name <[email protected]>
• No Name <[email protected]>
• No Name <[email protected]>
• No Name <[email protected]>
• No Name <[email protected]>
• No Name <[email protected]>
• No Name <[email protected]>
• No Name <[email protected]>
• No Name <[email protected]>
483

Chapter 21 Contributing to FreeBSD
• No Name <[email protected]>
• No Name <[email protected]>
• No Name <[email protected]>
• No Name <[email protected]>
• No Name <[email protected]>
• No Name <[email protected]>
• No Name <[email protected]>
• No Name <[email protected]>
• No Name <[email protected]>
• No Name <[email protected]>
• No Name <[email protected]>
• No Name <[email protected]>
• No Name <[email protected]>
• No Name <[email protected]>
• No Name <[email protected]>
• No Name <[email protected]>
• No Name <[email protected]>
• No Name <[email protected]>
• No Name <[email protected]>
• No Name <[email protected]>
• No Name <[email protected]>
• No Name <[email protected]>
• No Name <[email protected]>
• No Name <[email protected]>
• No Name <[email protected]>
• No Name <[email protected]>
• No Name <[email protected]>
• No Name <[email protected]>
• No Name <[email protected]>
484

Chapter 21 Contributing to FreeBSD
• No Name <[email protected]>
• No Name <[email protected]>
• No Name <[email protected] [email protected]>
• No Name <[email protected]>
• No Name <[email protected]>
• No Name <[email protected]>
• No Name <[email protected]>
• No Name <[email protected]>
• No Name <[email protected]>
• No Name <[email protected]>
• No Name <[email protected]>
• No Name <[email protected]>
• No Name <[email protected]>
• Nobuhiro Yasutomi <[email protected]>
• Nobuyuki Koganemaru <[email protected]>
• NOKUBI Hirotaka <[email protected]>
• Norio Suzuki <[email protected]>
• Noritaka Ishizumi <[email protected]>
• Noriyuki Soda <[email protected]>
• Oddbjorn Steffenson <[email protected]>
• Oh Junseon <[email protected]>
• Olaf Wagner <[email protected]>
• Oleg Semyonov <[email protected]>
• Oleg Sharoiko <[email protected]>
• Oleg V. Volkov <[email protected]>
• Olexander Kunytsa <[email protected]>
• Oliver Breuninger <[email protected]>
• Oliver Friedrichs <[email protected]>
• Oliver Fromme <[email protected]>
485

Chapter 21 Contributing to FreeBSD
• Oliver Helmling <[email protected]>
• Oliver Laumann <[email protected]>
• Oliver Lehmann <[email protected]>
• Oliver Oberdorf <[email protected]>
• Olof Johansson <[email protected]>
• Osokin Sergey aka oZZ <[email protected]>
• Pace Willisson <[email protected]>
• Paco Rosich <[email protected]>
• Palle Girgensohn <[email protected]>
• Parag Patel <[email protected]>
• Pascal Pederiva <[email protected]>
• Pasvorn Boonmark <[email protected]>
• Patrick Alken <[email protected]>
• Patrick Bihan-Faou <[email protected]>
• Patrick Hausen <unknown>
• Patrick Li <[email protected]>
• Patrick Seal <[email protected]>
• Paul Antonov <[email protected]>
• Paul F. Werkowski <unknown>
• Paul Fox <[email protected]>
• Paul Koch <[email protected]>
• Paul Kranenburg <[email protected]>
• Paul M. Lambert <[email protected]>
• Paul Mackerras <[email protected]>
• Paul Popelka <[email protected]>
• Paul S. LaFollette, Jr. <unknown>
• Paul Sandys <[email protected]>
• Paul T. Root <[email protected]>
• Paul Vixie <[email protected]>
486

Chapter 21 Contributing to FreeBSD
• Paulo Menezes <[email protected]>
• Paulo Menezes <[email protected]>
• Pedro A M Vazquez <[email protected]>
• Pedro Giffuni <[email protected]>
• Per Wigren <[email protected]>
• Pete Bentley <[email protected]>
• Pete Fritchman <[email protected]>
• Peter Childs <[email protected]>
• Peter Cornelius <[email protected]>
• Peter Haight <[email protected]>
• Peter Jeremy <[email protected]>
• Peter M. Chen <[email protected]>
• Peter Much <[email protected]>
• Peter Olsson <unknown>
• Peter Philipp <[email protected]>
• Peter Stubbs <[email protected]>
• Peter van Heusden <[email protected]>
• Phil Maker <[email protected]>
• Phil Sutherland <[email protected]>
• Phil Taylor <[email protected]>
• Philip Musumeci <[email protected]>
• Philippe Lefebvre <[email protected]>
• Pierre Y. Dampure <[email protected]>
• Pius Fischer <[email protected]>
• Pomegranate <[email protected]>
• Powerdog Industries <[email protected]>
• Priit Järv <[email protected]>
• R Joseph Wright <[email protected]>
• R. Kym Horsell
487

Chapter 21 Contributing to FreeBSD
• Ralf Friedl <[email protected]>
• Randal S. Masutani <[email protected]>
• Randall Hopper <[email protected]>
• Randall W. Dean <[email protected]>
• Randy Bush <[email protected]>
• Rasmus Kaj <[email protected]>
• Reinier Bezuidenhout <[email protected]>
• Remy Card <[email protected]>
• Ricardas Cepas <[email protected]>
• Riccardo Veraldi <[email protected]>
• Rich Wood <[email protected]>
• Richard Henderson <[email protected]>
• Richard Hwang <[email protected]>
• Richard Kiss <[email protected]>
• Richard J Kuhns <[email protected]>
• Richard M. Neswold <[email protected]>
• Richard Seaman, Jr. <[email protected]>
• Richard Stallman <[email protected]>
• Richard Straka <[email protected]>
• Richard Tobin <[email protected]>
• Richard Wackerbarth <[email protected]>
• Richard Winkel <[email protected]>
• Richard Wiwatowski <[email protected]>
• Rick Macklem <[email protected]>
• Rick Macklin <unknown>
• Rob Austein <[email protected]>
• Rob Mallory <[email protected]>
• Rob Snow <[email protected]>
• Robert Crowe <[email protected]>
488

Chapter 21 Contributing to FreeBSD
• Robert D. Thrush <[email protected]>
• Robert Eckardt <[email protected]>
• Robert P Ricci <[email protected]>
• Robert Sanders <[email protected]>
• Robert Sexton <[email protected]>
• Robert Shady <[email protected]>
• Robert Swindells <[email protected]>
• Robert Withrow <[email protected]>
• Robert Yoder <unknown>
• Robin Carey <[email protected]>
• Rod Taylor <[email protected]>
• Roger Hardiman <[email protected]>
• Roland Jesse <[email protected]>
• Roman Shterenzon <[email protected]>
• Ron Bickers <[email protected]>
• Ron Lenk <[email protected]>
• Ronald Kuehn <[email protected]>
• Rudolf Cejka <[email protected]>
• Ruslan Belkin <[email protected]>
• Ruslan Shevchenko <[email protected]>
• Russell L. Carter <[email protected]>
• Russell Vincent <[email protected]>
• Ryan Younce <[email protected]>
• Ryuichiro IMURA <[email protected]>
• Sakai Hiroaki <[email protected]>
• Sakari Jalovaara <[email protected]>
• Sam Hartman <[email protected]>
• Samuel Lam <[email protected]>
• Samuel Tardieu <[email protected]>
489

Chapter 21 Contributing to FreeBSD
• Samuele Zannoli <[email protected]>
• Sander Janssen <[email protected]>
• Sander Vesik <[email protected]>
• Sandro Sigala <[email protected]>
• SANETO Takanori <[email protected]>
• SASAKI Shunsuke <[email protected]>
• Sascha Blank <[email protected]>
• Sascha Wildner <[email protected]>
• Satoh Junichi <[email protected]>
• SAWADA Mizuki <[email protected]>
• Scot Elliott <[email protected]>
• Scot W. Hetzel <[email protected]>
• Scott A. Kenney <[email protected]>
• Scott A. Moberly <[email protected]>
• Scott Blachowicz <[email protected]>
• Scott Burris <[email protected]>
• Scott Hazen Mueller <[email protected]>
• Scott Michel <[email protected]>
• Scott Mitchel <[email protected]>
• Scott Reynolds <[email protected]>
• Sebastian Strollo <[email protected]>
• Serge V. Vakulenko <[email protected]>
• Sergei Chechetkin <[email protected]>
• Sergei S. Laskavy <[email protected]>
• Sergey Gershtein <[email protected]>
• Sergey Kosyakov <[email protected]>
• Sergey N. Vorokov <[email protected]>
• Sergey Potapov <[email protected]>
• Sergey Samoyloff <[email protected]>
490

Chapter 21 Contributing to FreeBSD
• Sergey Shkonda <[email protected]>
• Sergey Skvortsov <[email protected]>
• Sergey V.Dorokhov <[email protected]>
• Sergio Lenzi <[email protected]>
• Shaun Courtney <[email protected]>
• Shawn M. Carey <[email protected]>
• Shigio Yamaguchi <[email protected]>
• Shinya Esu <[email protected]>
• Shinya FUJIE <[email protected]>
• Shuichi Tanaka <[email protected]>
• Simon <[email protected]>
• Simon Burge <[email protected]>
• Simon Dick <[email protected]>
• Simon J Gerraty <[email protected]>
• Simon Marlow <[email protected]>
• Simon Shapiro <[email protected]>
• Sin’ichiro MIYATANI <[email protected]>
• Slaven Rezic <[email protected]>
• Soochon Radee <[email protected]>
• Soren Dayton <[email protected]>
• Soren Dossing <[email protected]>
• Soren S. Jorvang <[email protected]>
• Stefan Bethke <[email protected]>
• Stefan Eggers <[email protected]>
• Stefan Moeding <[email protected]>
• Stefan Petri <unknown>
• Stefan ‘Sec‘ Zehl <[email protected]>
• Steinar Haug <[email protected]>
• Stephane E. Potvin <[email protected]>
491

Chapter 21 Contributing to FreeBSD
• Stephane Legrand <[email protected]>
• Stephen Clawson <[email protected]>
• Stephen F. Combs <[email protected]>
• Stephen Farrell <[email protected]>
• Stephen Hocking <[email protected]>
• Stephen J. Roznowski <[email protected]>
• Stephen McKay <[email protected]>
• Stephen Melvin <[email protected]>
• Steve Bauer <[email protected]>
• Steve Coltrin <[email protected]>
• Steve Deering <unknown>
• Steve Gerakines <[email protected]>
• Steve Gericke <[email protected]>
• Steve Piette <[email protected]>
• Steve Schwarz <[email protected]>
• Steven Enderle <[email protected]>
• Steven G. Kargl <[email protected]>
• Steven H. Samorodin <[email protected]>
• Steven McCanne <[email protected]>
• Steven Plite <[email protected]>
• Steven Wallace <unknown>
• Stijn Hoop <[email protected]>
• Stuart Henderson <[email protected]>
• Sue Blake <[email protected]>
• Sugimoto Sadahiro <[email protected]>
• SUGIMURA Takashi <[email protected]>
• Sugiura Shiro <[email protected]>
• Sujal Patel <[email protected]>
• Sungman Cho <[email protected]>
492

Chapter 21 Contributing to FreeBSD
• Sune Stjerneby <[email protected]>
• SURANYI Peter <[email protected]>
• Suzuki Yoshiaki <[email protected]>
• Svein Skogen <[email protected]>
• Sybolt de Boer <[email protected]>
• Tadashi Kumano <[email protected]>
• Taguchi Takeshi <[email protected]>
• TAKAHASHI Kaoru <[email protected]>
• Takahiro Yugawa <[email protected]>
• Takashi Mega <[email protected]>
• Takashi Uozu <[email protected]>
• Takayuki Ariga <[email protected]>
• Takeru NAIKI <[email protected]>
• Takeshi Amaike <[email protected]>
• Takeshi MUTOH <[email protected]>
• Takeshi Ohashi <[email protected]>
• Takeshi WATANABE <[email protected]>
• Takuya SHIOZAKI <[email protected]>
• Tatoku Ogaito <[email protected]>
• Tatsuya Kudoh <[email protected]>
• Ted Buswell <[email protected]>
• Ted Faber <[email protected]>
• Ted Lemon <[email protected]>
• Terry Lambert <[email protected]>
• Terry Lee <[email protected]>
• Tetsuya Furukawa <[email protected]>
• Theo de Raadt <[email protected]>
• Thomas <[email protected]>
• Thomas D. Dean <[email protected]>
493

Chapter 21 Contributing to FreeBSD
• Thomas David Rivers <[email protected]>
• Thomas G. McWilliams <[email protected]>
• Thomas Graichen <[email protected]>
• Thomas König <[email protected]>
• Thomas Ptacek <unknown>
• Thomas Quinot <[email protected]>
• Thomas A. Stephens <[email protected]>
• Thomas Stromberg <[email protected]>
• Thomas Valentino Crimi <[email protected]>
• Thomas Wintergerst <[email protected]>
• Þórður Ívarsson <[email protected]>
• Thierry Thomas <[email protected]>
• Timothy Jensen <[email protected]>
• Tim Kientzle <[email protected]>
• Tim Singletary <[email protected]>
• Tim Wilkinson <[email protected]>
• Timo J. Rinne <[email protected]>
• Tobias Reifenberger <[email protected]>
• Todd Miller <[email protected]>
• Tom <[email protected]>
• Tom <[email protected]>
• Tom Gray - DCA <[email protected]>
• Tom Jobbins <[email protected]>
• Tom Pusateri <[email protected]>
• Tom Rush <[email protected]>
• Tom Samplonius <[email protected]>
• Tomohiko Kurahashi <[email protected]>
• Tony Kimball <[email protected]>
• Tony Li <[email protected]>
494

Chapter 21 Contributing to FreeBSD
• Tony Lynn <[email protected]>
• Tony Maher <[email protected]>
• Torbjorn Granlund <[email protected]>
• Toshihiko SHIMOKAWA <[email protected]>
• Toshihiro Kanda <[email protected]>
• Toshiomi Moriki <[email protected]>
• Trefor S. <[email protected]>
• Trenton Schulz <[email protected]>
• Trevor Blackwell <[email protected]>
• Udo Schweigert <[email protected]>
• Ugo Paternostro <[email protected]>
• Ulf Kieber <[email protected]>
• Ulli Linzen <[email protected]>
• URATA Shuichiro <[email protected]>
• Uwe Arndt <[email protected]>
• Vadim Belman <[email protected]>
• Vadim Chekan <[email protected]>
• Vadim Kolontsov <[email protected]>
• Vadim Mikhailov <[email protected]>
• Valentin Nechayev <[email protected]>
• Valentino Vaschetto <[email protected]>
• Van Jacobson <[email protected]>
• Vasily V. Grechishnikov <[email protected]>
• Vasim Valejev <[email protected]>
• Vernon J. Schryver <[email protected]>
• Veselin Slavov <[email protected]>
• Vic Abell <[email protected]>
• Ville Eerola <[email protected]>
• Vince Valenti <[email protected]>
495

Chapter 21 Contributing to FreeBSD
• Vincent Poy <[email protected]>
• Vincenzo Capuano <[email protected]>
• Virgil Champlin <[email protected]>
• Vladimir A. Jakovenko <[email protected]>
• Vladimir Kushnir <[email protected]>
• Vsevolod Lobko <[email protected]>
• W. Gerald Hicks <[email protected]>
• W. Richard Stevens <[email protected]>
• Walt Howard <[email protected]>
• Walt M. Shandruk <[email protected]>
• Warren Toomey <[email protected]>
• Wayne Scott <[email protected]>
• Werner Griessl <[email protected]>
• Wes Santee <[email protected]>
• Wietse Venema <[email protected]>
• Wiljo Heinen <[email protected]>
• Willem Jan Withagen <[email protected]>
• William Jolitz <withheld>
• William Liao <[email protected]>
• Wojtek Pilorz <[email protected]>
• Wolfgang Helbig <[email protected]>
• Wolfgang Solfrank <[email protected]>
• Wolfgang Stanglmeier <[email protected]>
• Wu Ching-hong <[email protected]>
• Yarema <[email protected]>
• Yaroslav Terletsky <[email protected]>
• Yasuhiro Fukama <[email protected]>
• Yasuhito FUTATSUKI <[email protected]>
• Yen-Ming Lee <[email protected]>
496

Chapter 21 Contributing to FreeBSD
• Yen-Shuo Su <[email protected]>
• Yin-Jieh Chen <[email protected]>
• Yixin Jin <[email protected]>
• Yoichi Asai <[email protected]>
• Yoichi Nakayama <[email protected]>
• Yoshiaki Uchikawa <[email protected]>
• Yoshihiko SARUMRU <[email protected]>
• Yoshihisa NAKAGAWA <[email protected]>
• Yoshikazu Goto <[email protected]>
• Yoshimasa Ohnishi <[email protected]>
• Yoshishige Arai <[email protected]>
• Yuichi MATSUTAKA <[email protected]>
• Yujiro MIYATA <[email protected]>
• Yu-Shun Wang <[email protected]>
• Yusuke Nawano <[email protected]>
• Yuu Yashiki <[email protected]>
• Yuuki SAWADA <[email protected]>
• Yuuichi Narahara <[email protected]>
• Yuval Yarom <[email protected]>
• Yves Fonk <[email protected]>
• Yves Fonk <[email protected]>
• Zach Heilig <[email protected]>
• Zach Zurflu <[email protected]>
• Zahemszhky Gabor <[email protected]>
• Zhong Ming-Xun <[email protected]>
21.8 386BSD Patch Kit Patch Contributors(in alphabetical order by first name):
497

Chapter 21 Contributing to FreeBSD
• Adam Glass <[email protected]>
• Adrian Hall <[email protected]>
• Andrey A. Chernov <[email protected]>
• Andrew Herbert <[email protected]>
• Andrew Moore <[email protected]>
• Andy Valencia <[email protected]> <[email protected]>
• Arne Henrik Juul <[email protected]>
• Bakul Shah <[email protected]>
• Barry Lustig <[email protected]>
• Bob Wilcox <[email protected]>
• Branko Lankester
• Brett Lymn <[email protected]>
• Charles Hannum <[email protected]>
• Chris G. Demetriou <[email protected]>
• Chris Torek <[email protected]>
• Christoph Robitschko <[email protected]>
• Daniel Poirot <[email protected]>
• Dave Burgess <[email protected]>
• Dave Rivers <[email protected]>
• David Dawes <[email protected]>
• David Greenman <[email protected]>
• Eric J. Haug <[email protected]>
• Felix Gaehtgens <[email protected]>
• Frank Maclachlan <[email protected]>
• Gary A. Browning <[email protected]>
• Gary Howland <[email protected]>
• Geoff Rehmet <[email protected]>
• Goran Hammarback <[email protected]>
• Guido van Rooij <[email protected]>
498

Chapter 21 Contributing to FreeBSD
• Guy Antony Halse <[email protected]>
• Guy Harris <[email protected]>
• Havard Eidnes <[email protected]>
• Herb Peyerl <[email protected]>
• Holger Veit <[email protected]>
• Ishii Masahiro, R. Kym Horsell
• J.T. Conklin <[email protected]>
• Jagane D Sundar <[email protected]>
• James Clark <[email protected]>
• James Jegers <[email protected]>
• James W. Dolter
• James da Silva <[email protected]> et al
• Jay Fenlason <[email protected]>
• Jim Wilson <[email protected]>
• Jörg Lohse <[email protected]>
• Jörg Wunsch <[email protected]>
• John Dyson
• John Woods <[email protected]>
• Jordan K. Hubbard <[email protected]>
• Julian Elischer <[email protected]>
• Julian Stacey <[email protected]>
• Karl Dietz <[email protected]>
• Karl Lehenbauer <[email protected]> <[email protected]>
• Keith Bostic <[email protected]>
• Ken Hughes
• Kent Talarico <[email protected]>
• Kevin Lahey <kml%[email protected]> <[email protected]>
• Konstantinos Konstantinidis <[email protected]>
• Marc Frajola <[email protected]>
499

Chapter 21 Contributing to FreeBSD
• Mark Tinguely <[email protected]> <[email protected]>
• Martin Renters <[email protected]>
• Michael Clay <[email protected]>
• Michael Galassi <[email protected]>
• Mike Durkin <[email protected]>
• Naoki Hamada <[email protected]>
• Nate Williams <[email protected]>
• Nick Handel <[email protected]> <[email protected]>
• Pace Willisson <[email protected]>
• Paul Kranenburg <[email protected]>
• Paul Mackerras <[email protected]>
• Paul Popelka <[email protected]>
• Peter da Silva <[email protected]>
• Phil Sutherland <[email protected]>
• Poul-Henning Kamp <[email protected]>
• Ralf Friedl <[email protected]>
• Rick Macklem <[email protected]>
• Robert D. Thrush <[email protected]>
• Rodney W. Grimes <[email protected]>
• Sascha Wildner <[email protected]>
• Scott Burris <[email protected]>
• Scott Reynolds <[email protected]>
• Sean Eric Fagan <[email protected]>
• Simon J Gerraty <[email protected]> <[email protected]>
• Stephen McKay <[email protected]>
• Terry Lambert <[email protected]>
• Terry Lee <[email protected]>
• Tor Egge <[email protected]>
• Warren Toomey <[email protected]>
500

Chapter 21 Contributing to FreeBSD
• Wiljo Heinen <[email protected]>
• William Jolitz <withheld>
• Wolfgang Solfrank <[email protected]>
• Wolfgang Stanglmeier <[email protected]>
• Yuval Yarom <[email protected]>
501

Chapter 22 Source Tree Guidelines and PoliciesContributed by Poul-Henning Kamp <[email protected]>.
This chapter documents various guidelines and policies in force for the FreeBSD source tree.
22.1 MAINTAINER on MakefilesJune 1996.
If a particular portion of the FreeBSD distribution is being maintained by a person or group of persons, they cancommunicate this fact to the world by adding a
MAINTAINER= email-addresses
line to the Makefiles covering this portion of the source tree.
The semantics of this are as follows:
The maintainer owns and is responsible for that code. This means that he is responsible for fixing bugs and answerproblem reports pertaining to that piece of the code, and in the case of contributed software, for tracking newversions, as appropriate.
Changes to directories which have a maintainer defined shall be sent to the maintainer for review before beingcommitted. Only if the maintainer does not respond for an unacceptable period of time, to several emails, will it beacceptable to commit changes without review by the maintainer. However, it is suggested that you try and have thechanges reviewed by someone else if at all possible.
It is of course not acceptable to add a person or group as maintainer unless they agree to assume this duty. On theother hand it doesn’t have to be a committer and it can easily be a group of people.
22.2 Contributed SoftwareContributed by Poul-Henning Kamp <[email protected]> and David O’Brien <[email protected]>.
June 1996.
Some parts of the FreeBSD distribution consist of software that is actively being maintained outside the FreeBSDproject. For historical reasons, we call this contributed software. Some examples are perl, gcc and patch.
Over the last couple of years, various methods have been used in dealing with this type of software and all have somenumber of advantages and drawbacks. No clear winner has emerged.
502

Chapter 22 Source Tree Guidelines and Policies
Since this is the case, after some debate one of these methods has been selected as the “official” method and will berequired for future imports of software of this kind. Furthermore, it is strongly suggested that existing contributedsoftware converge on this model over time, as it has significant advantages over the old method, including the abilityto easily obtain diffs relative to the “official” versions of the source by everyone (even without cvs access). This willmake it significantly easier to return changes to the primary developers of the contributed software.
Ultimately, however, it comes down to the people actually doing the work. If using this model is particularly unsuitedto the package being dealt with, exceptions to these rules may be granted only with the approval of the core team andwith the general consensus of the other developers. The ability to maintain the package in the future will be a keyissue in the decisions.
Note: Because of some unfortunate design limitations with the RCS file format and CVS’s use of vendorbranches, minor, trivial and/or cosmetic changes are strongly discouraged on files that are still tracking thevendor branch. “Spelling fixes” are explicitly included here under the “cosmetic” category and are to be avoidedfor files with revision 1.1.x.x. The repository bloat impact from a single character change can be rather dramatic.
The TCL embedded programming language will be used as example of how this model works:
src/contrib/tcl contains the source as distributed by the maintainers of this package. Parts that are entirely notapplicable for FreeBSD can be removed. In the case of Tcl, the mac, win and compat subdirectories were eliminatedbefore the import
src/lib/libtcl contains only a "bmake style" Makefile that uses the standard bsd.lib.mk makefile rules toproduce the library and install the documentation.
src/usr.bin/tclsh contains only a bmake style Makefile which will produce and install the tclsh programand its associated man-pages using the standard bsd.prog.mk rules.
src/tools/tools/tcl_bmake contains a couple of shell-scripts that can be of help when the tcl software needsupdating. These are not part of the built or installed software.
The important thing here is that the src/contrib/tcl directory is created according to the rules: It is supposed tocontain the sources as distributed (on a proper CVS vendor-branch and without RCS keyword expansion) with as fewFreeBSD-specific changes as possible. The ’easy-import’ tool on freefall will assist in doing the import, but if thereare any doubts on how to go about it, it is imperative that you ask first and not blunder ahead and hope it “worksout”. CVS is not forgiving of import accidents and a fair amount of effort is required to back out major mistakes.
Because of the previously mentioned design limitations with CVS’s vendor branches, it is required that “official”patches from the vendor be applied to the original distributed sources and the result re-imported onto the vendorbranch again. Official patches should never be patched into the FreeBSD checked out version and "committed", asthis destroys the vendor branch coherency and makes importing future versions rather difficult as there will beconflicts.
503

Chapter 22 Source Tree Guidelines and Policies
Since many packages contain files that are meant for compatibility with other architectures and environments thatFreeBSD, it is permissible to remove parts of the distribution tree that are of no interest to FreeBSD in order to savespace. Files containing copyright notices and release-note kind of information applicable to the remaining files shallnot be removed.
If it seems easier, the bmake Makefiles can be produced from the dist tree automatically by some utility, somethingwhich would hopefully make it even easier to upgrade to a new version. If this is done, be sure to check in suchutilities (as necessary) in the src/tools directory along with the port itself so that it is available to futuremaintainers.
In the src/contrib/tcl level directory, a file called FREEBSD-upgrade should be added and it should statesthings like:
• Which files have been left out
• Where the original distribution was obtained from and/or the official master site.
• Where to send patches back to the original authors
• Perhaps an overview of the FreeBSD-specific changes that have been made.
However, please do not import FREEBSD-upgrade with the contributed source. Rather you should cvs add
FREEBSD-upgrade ; cvs ci after the initial import. Example wording from src/contrib/cpio is below:
This directory contains virgin sources of the original distribution fileson a "vendor" branch. Do not, under any circumstances, attempt to upgradethe files in this directory via patches and a cvs commit. New versions orofficial-patch versions must be imported. Please remember to import with"-ko" to prevent CVS from corrupting any vendor RCS Ids.
For the import of GNU cpio 2.4.2, the following files were removed:
INSTALL cpio.info mkdir.cMakefile.in cpio.texi mkinstalldirs
To upgrade to a newer version of cpio, when it is available:1. Unpack the new version into an empty directory.
[Do not make ANY changes to the files.]
2. Remove the files listed above and any others that don’t apply toFreeBSD.
3. Use the command:cvs import -ko -m ’Virgin import of GNU cpio v � version � ’ \
src/contrib/cpio GNU cpio_ � version �
504

Chapter 22 Source Tree Guidelines and Policies
For example, to do the import of version 2.4.2, I typed:cvs import -ko -m ’Virgin import of GNU v2.4.2’ \
src/contrib/cpio GNU cpio_2_4_2
4. Follow the instructions printed out in step 3 to resolve anyconflicts between local FreeBSD changes and the newer version.
Do not, under any circumstances, deviate from this procedure.
To make local changes to cpio, simply patch and commit to the mainbranch (aka HEAD). Never make local changes on the GNU branch.
All local changes should be submitted to "[email protected]" forinclusion in the next vendor release.
[email protected] - 30 March 1997
22.3 Encumbered FilesIt might occasionally be necessary to include an encumbered file in the FreeBSD source tree. For example, if adevice requires a small piece of binary code to be loaded to it before the device will operate, and we do not have thesource to that code, then the binary file is said to be encumbered. The following policies apply to includingencumbered files in the FreeBSD source tree.
1. Any file which is interpreted or executed by the system CPU(s) and not in source format is encumbered.
2. Any file with a license more restrictive than BSD or GNU is encumbered.
3. A file which contains downloadable binary data for use by the hardware is not encumbered, unless (1) or (2)apply to it. It must be stored in an architecture neutral ASCII format (file2c or uuencoding is recommended).
4. Any encumbered file requires specific approval from the Core team before it is added to the CVS repository.
5. Encumbered files go in src/contrib or src/sys/contrib.
6. The entire module should be kept together. There is no point in splitting it, unless there is code-sharing withnon-encumbered code.
7. Object files are named arch/filename.o.uu>.
8. Kernel files;
a. Should always be referenced in conf/files.* (for build simplicity).
505

Chapter 22 Source Tree Guidelines and Policies
b. Should always be in LINT, but the Core team decides per case if it should be commented out or not. TheCore team can, of course, change their minds later on.
c. The Release Engineer decides whether or not it goes in to the release.
9. User-land files;
a.
The Core team decides if the code should be part of make world.
b.
The Release Engineer decides if it goes in to the release.
22.4 Shared LibrariesContributed by Satoshi Asami <[email protected]>, Peter Wemm <[email protected]>, and DavidO’Brien <[email protected]> 9 December 1996.
If you are adding shared library support to a port or other piece of software that doesn’t have one, the versionnumbers should follow these rules. Generally, the resulting numbers will have nothing to do with the release versionof the software.
The three principles of shared library building are:
• Start from 1.0
• If there is a change that is backwards compatible, bump minor number (note that ELF systems ignore the minornumber)
• If there is an incompatible change, bump major number
For instance, added functions and bugfixes result in the minor version number being bumped, while deletedfunctions, changed function call syntax etc. will force the major version number to change.
Stick to version numbers of the form major.minor (x.y). Our a.out dynamic linker does not handle version numbersof the form x.y .z well. Any version number after the y (ie. the third digit) is totally ignored when comparing sharedlib version numbers to decide which library to link with. Given two shared libraries that differ only in the “micro”revision, ld.so will link with the higher one. Ie: if you link with libfoo.so.3.3.3, the linker only records 3.3 in
506

Chapter 22 Source Tree Guidelines and Policies
the headers, and will link with anything starting with libfoo.so.3.(anything �= 3).(highest
available).
Note: ld.so will always use the highest “minor” revision. Ie: it will use libc.so.2.2 in preference tolibc.so.2.0, even if the program was initially linked with libc.so.2.0.
In addition, our ELF dynamic linker does not handle minor version numbers at all. However, one should still specifya major and minor version number as our Makefiles "do the right thing" based on the type of system.
For non-port libraries, it is also our policy to change the shared library version number only once between releases.In addition, it is our policy to change the major shared library version number only once between major OS releases.Ie: X.0 to (X+1).0. When you make a change to a system library that requires the version number to be bumped,check the Makefile’s commit logs. It is the responsibility of the committer to ensure that the first such change sincethe release will result in the shared library version number in the Makefile to be updated, and any subsequentchanges will not.
507

Chapter 23 Kernel DebuggingContributed by Paul Richards <[email protected]> and Jörg Wunsch <[email protected]>
23.1 Debugging a Kernel Crash Dump with gdb
Here are some instructions for getting kernel debugging working on a crash dump. They assume that you haveenough swap space for a crash dump. If you have multiple swap partitions and the first one is too small to hold thedump, you can configure your kernel to use an alternate dump device (in the config kernel line), or you canspecify an alternate using the dumpon(8) command. The best way to use dumpon(8) is to set the dumpdev variable in/etc/rc.conf. Typically you want to specify one of the swap devices specified in /etc/fstab. Dumps tonon-swap devices, tapes for example, are currently not supported. Config your kernel using config -g. See KernelConfiguration for details on configuring the FreeBSD kernel.
Use the dumpon(8) command to tell the kernel where to dump to (note that this will have to be done after configuringthe partition in question as swap space via swapon(8)). This is normally arranged via /etc/rc.conf and /etc/rc.Alternatively, you can hard-code the dump device via the dump clause in the config line of your kernel config file.This is deprecated and should be used only if you want a crash dump from a kernel that crashes during booting.
Note: In the following, the term gdb refers to the debugger gdb run in “kernel debug mode”. This can beaccomplished by starting the gdb with the option -k. In kernel debug mode, gdb changes its prompt to (kgdb).
Tip: If you are using FreeBSD 3 or earlier, you should make a stripped copy of the debug kernel, rather thaninstalling the large debug kernel itself:
# cp kernel kernel.debug# strip -g kernel
This stage isn’t necessary, but it is recommended. (In FreeBSD 4 and later releases this step is performedautomatically at the end of the kernel make process.) When the kernel has been stripped, either automatically orby using the commands above, you may install it as usual by typing make install.
Note that older releases of FreeBSD (up to but not including 3.1) used a.out kernels by default, which must havetheir symbol tables permanently resident in physical memory. With the larger symbol table in an unstrippeddebug kernel, this is wasteful. Recent FreeBSD releases use ELF kernels where this is no longer a problem.
508

Chapter 23 Kernel Debugging
If you are testing a new kernel, for example by typing the new kernel’s name at the boot prompt, but need to boot adifferent one in order to get your system up and running again, boot it only into single user state using the -s flag atthe boot prompt, and then perform the following steps:
# fsck -p# mount -a -t ufs # so your file system for /var/crash is writable# savecore -N /kernel.panicked /var/crash# exit # ...to multi-user
This instructs savecore(8) to use another kernel for symbol name extraction. It would otherwise default to thecurrently running kernel and most likely not do anything at all since the crash dump and the kernel symbols differ.
Now, after a crash dump, go to /sys/compile/WHATEVER and run gdb -k. From gdb do:
symbol-file kernel.debugexec-file /var/crash/kernel.0core-file /var/crash/vmcore.0
and voila, you can debug the crash dump using the kernel sources just like you can for any other program.
Here is a script log of a gdb session illustrating the procedure. Long lines have been folded to improve readability,and the lines are numbered for reference. Despite this, it is a real-world error trace taken during the development ofthe pcvt console driver.
1:Script started on Fri Dec 30 23:15:22 19942:# cd /sys/compile/URIAH3:# gdb -k kernel /var/crash/vmcore.14:Reading symbol data from /usr/src/sys/compile/URIAH/kernel
...done.5:IdlePTD 1f30006:panic: because you said to!7:current pcb at 1e3f708:Reading in symbols for ../../i386/i386/machdep.c...done.9:(kgdb) where
10:#0 boot (arghowto=256) (../../i386/i386/machdep.c line 767)11:#1 0xf0115159 in panic ()12:#2 0xf01955bd in diediedie () (../../i386/i386/machdep.c line 698)13:#3 0xf010185e in db_fncall ()14:#4 0xf0101586 in db_command (-266509132, -266509516, -267381073)15:#5 0xf0101711 in db_command_loop ()16:#6 0xf01040a0 in db_trap ()17:#7 0xf0192976 in kdb_trap (12, 0, -272630436, -266743723)18:#8 0xf019d2eb in trap_fatal (...)19:#9 0xf019ce60 in trap_pfault (...)20:#10 0xf019cb2f in trap (...)21:#11 0xf01932a1 in exception:calltrap ()
509

Chapter 23 Kernel Debugging
22:#12 0xf0191503 in cnopen (...)23:#13 0xf0132c34 in spec_open ()24:#14 0xf012d014 in vn_open ()25:#15 0xf012a183 in open ()26:#16 0xf019d4eb in syscall (...)27:(kgdb) up 1028:Reading in symbols for ../../i386/i386/trap.c...done.29:#10 0xf019cb2f in trap (frame={tf_es = -260440048, tf_ds = 16, tf_\30:edi = 3072, tf_esi = -266445372, tf_ebp = -272630356, tf_isp = -27\31:2630396, tf_ebx = -266427884, tf_edx = 12, tf_ecx = -266427884, tf\32:_eax = 64772224, tf_trapno = 12, tf_err = -272695296, tf_eip = -26\33:6672343, tf_cs = -266469368, tf_eflags = 66066, tf_esp = 3072, tf_\34:ss = -266427884}) (../../i386/i386/trap.c line 283)35:283 (void) trap_pfault(&frame, FALSE);36:(kgdb) frame frame- � tf_ebp frame- � tf_eip37:Reading in symbols for ../../i386/isa/pcvt/pcvt_drv.c...done.38:#0 0xf01ae729 in pcopen (dev=3072, flag=3, mode=8192, p=(struct p\39:roc *) 0xf07c0c00) (../../i386/isa/pcvt/pcvt_drv.c line 403)40:403 return ((*linesw[tp- � t_line].l_open)(dev, tp));41:(kgdb) list42:39843:399 tp- � t_state |= TS_CARR_ON;44:400 tp- � t_cflag |= CLOCAL; /* cannot be a modem (:-) */45:40146:402 #if PCVT_NETBSD || (PCVT_FREEBSD >= 200)47:403 return ((*linesw[tp- � t_line].l_open)(dev, tp));48:404 #else49:405 return ((*linesw[tp- � t_line].l_open)(dev, tp, flag));50:406 #endif /* PCVT_NETBSD || (PCVT_FREEBSD >= 200) */51:407 }52:(kgdb) print tp53:Reading in symbols for ../../i386/i386/cons.c...done.54:$1 = (struct tty *) 0x1bae55:(kgdb) print tp- � t_line56:$2 = 176799081657:(kgdb) up58:#1 0xf0191503 in cnopen (dev=0x00000000, flag=3, mode=8192, p=(st\59:ruct proc *) 0xf07c0c00) (../../i386/i386/cons.c line 126)60: return ((*cdevsw[major(dev)].d_open)(dev, flag, mode, p));61:(kgdb) up62:#2 0xf0132c34 in spec_open ()63:(kgdb) up64:#3 0xf012d014 in vn_open ()65:(kgdb) up66:#4 0xf012a183 in open ()
510

Chapter 23 Kernel Debugging
67:(kgdb) up68:#5 0xf019d4eb in syscall (frame={tf_es = 39, tf_ds = 39, tf_edi =\69: 2158592, tf_esi = 0, tf_ebp = -272638436, tf_isp = -272629788, tf\70:_ebx = 7086, tf_edx = 1, tf_ecx = 0, tf_eax = 5, tf_trapno = 582, \71:tf_err = 582, tf_eip = 75749, tf_cs = 31, tf_eflags = 582, tf_esp \72:= -272638456, tf_ss = 39}) (../../i386/i386/trap.c line 673)73:673 error = (*callp- � sy_call)(p, args, rval);74:(kgdb) up75:Initial frame selected; you cannot go up.76:(kgdb) quit77:# exit78:exit79:80:Script done on Fri Dec 30 23:18:04 1994
Comments to the above script:
line 6:
This is a dump taken from within DDB (see below), hence the panic comment “because you said to!”, and arather long stack trace; the initial reason for going into DDB has been a page fault trap though.
line 20:
This is the location of function trap() in the stack trace.
line 36:
Force usage of a new stack frame; this is no longer necessary now. The stack frames are supposed to point to theright locations now, even in case of a trap. From looking at the code in source line 403, there is a highprobability that either the pointer access for “tp” was messed up, or the array access was out of bounds.
line 52:
The pointer looks suspicious, but happens to be a valid address.
line 56:
However, it obviously points to garbage, so we have found our error! (For those unfamiliar with that particularpiece of code: tp- � t_line refers to the line discipline of the console device here, which must be a rathersmall integer number.)
511

Chapter 23 Kernel Debugging
23.2 Debugging a Crash Dump with DDDExamining a kernel crash dump with a graphical debugger like ddd is also possible. Add the -k option to the dddcommand line you would use normally. For example;
# ddd -k /var/crash/kernel.0 /var/crash/vmcore.0
You should then be able to go about looking at the crash dump using ddd’s graphical interface.
23.3 Post-Mortem Analysis of a DumpWhat do you do if a kernel dumped core but you did not expect it, and it is therefore not compiled using config
-g? Not everything is lost here. Do not panic!
Of course, you still need to enable crash dumps. See above on the options you have to specify in order to do this.
Go to your kernel config directory (/usr/src/sys/arch/conf) and edit your configuration file. Uncomment (oradd, if it does not exist) the following line
makeoptions DEBUG=-g #Build kernel with gdb(1) debug symbols
Rebuild the kernel. Due to the time stamp change on the Makefile, there will be some other object files rebuild, forexample trap.o. With a bit of luck, the added -g option will not change anything for the generated code, so youwill finally get a new kernel with similar code to the faulting one but some debugging symbols. You should at leastverify the old and new sizes with the size(1) command. If there is a mismatch, you probably need to give up here.
Go and examine the dump as described above. The debugging symbols might be incomplete for some places, as canbe seen in the stack trace in the example above where some functions are displayed without line numbers andargument lists. If you need more debugging symbols, remove the appropriate object files and repeat the gdb -k
session until you know enough.
All this is not guaranteed to work, but it will do it fine in most cases.
23.4 On-Line Kernel Debugging Using DDBWhile gdb -k as an off-line debugger provides a very high level of user interface, there are some things it cannot do.The most important ones being breakpointing and single-stepping kernel code.
If you need to do low-level debugging on your kernel, there is an on-line debugger available called DDB. It allows tosetting breakpoints, single-stepping kernel functions, examining and changing kernel variables, etc. However, itcannot access kernel source files, and only has access to the global and static symbols, not to the full debuginformation like gdb.
512

Chapter 23 Kernel Debugging
To configure your kernel to include DDB, add the option line
options DDB
to your config file, and rebuild. (See Kernel Configuration for details on configuring the FreeBSD kernel.
Note: If you have an older version of the boot blocks, your debugger symbols might not be loaded at all. Updatethe boot blocks; the recent ones load the DDB symbols automagically.)
Once your DDB kernel is running, there are several ways to enter DDB. The first, and earliest way is to type the bootflag -d right at the boot prompt. The kernel will start up in debug mode and enter DDB prior to any device probing.Hence you can even debug the device probe/attach functions.
The second scenario is a hot-key on the keyboard, usually Ctrl-Alt-ESC. For syscons, this can be remapped; some ofthe distributed maps do this, so watch out. There is an option available for serial consoles that allows the use of aserial line BREAK on the console line to enter DDB (options BREAK_TO_DEBUGGER in the kernel config file). It isnot the default since there are a lot of crappy serial adapters around that gratuitously generate a BREAK condition,for example when pulling the cable.
The third way is that any panic condition will branch to DDB if the kernel is configured to use it. For this reason, it isnot wise to configure a kernel with DDB for a machine running unattended.
The DDB commands roughly resemble some gdb commands. The first thing you probably need to do is to set abreakpoint:
b function-nameb address
Numbers are taken hexadecimal by default, but to make them distinct from symbol names; hexadecimal numbersstarting with the letters a-f need to be preceded with 0x (this is optional for other numbers). Simple expressions areallowed, for example: function-name + 0x103.
To continue the operation of an interrupted kernel, simply type:
c
To get a stack trace, use:
trace
Note: Note that when entering DDB via a hot-key, the kernel is currently servicing an interrupt, so the stack tracemight be not of much use for you.
513

Chapter 23 Kernel Debugging
If you want to remove a breakpoint, use
deldel address-expression
The first form will be accepted immediately after a breakpoint hit, and deletes the current breakpoint. The secondform can remove any breakpoint, but you need to specify the exact address; this can be obtained from:
show b
To single-step the kernel, try:
s
This will step into functions, but you can make DDB trace them until the matching return statement is reached by:
n
Note: This is different from gdb’s next statement; it is like gdb’s finish.
To examine data from memory, use (for example):
x/wx 0xf0133fe0,40x/hd db_symtab_spacex/bc termbuf,10x/s stringbuf
for word/halfword/byte access, and hexadecimal/decimal/character/ string display. The number after the comma isthe object count. To display the next 0x10 items, simply use:
x ,10
Similarly, use
x/ia foofunc,10
to disassemble the first 0x10 instructions of foofunc, and display them along with their offset from the beginning offoofunc.
To modify memory, use the write command:
w/b termbuf 0xa 0xb 0w/w 0xf0010030 0 0
514

Chapter 23 Kernel Debugging
The command modifier (b/h/w) specifies the size of the data to be written, the first following expression is theaddress to write to and the remainder is interpreted as data to write to successive memory locations.
If you need to know the current registers, use:
show reg
Alternatively, you can display a single register value by e.g.
p $eax
and modify it by:
set $eax new-value
Should you need to call some kernel functions from DDB, simply say:
call func(arg1, arg2, ...)
The return value will be printed.
For a ps(1) style summary of all running processes, use:
ps
Now you have examined why your kernel failed, and you wish to reboot. Remember that, depending on the severityof previous malfunctioning, not all parts of the kernel might still be working as expected. Perform one of thefollowing actions to shut down and reboot your system:
panic
This will cause your kernel to dump core and reboot, so you can later analyze the core on a higher level with gdb.This command usually must be followed by another continue statement.
call boot(0)
Which might be a good way to cleanly shut down the running system, sync() all disks, and finally reboot. As longas the disk and file system interfaces of the kernel are not damaged, this might be a good way for an almost cleanshutdown.
call cpu_reset()
is the final way out of disaster and almost the same as hitting the Big Red Button.
If you need a short command summary, simply type:
help
515

Chapter 23 Kernel Debugging
However, it is highly recommended to have a printed copy of the ddb(4) manual page ready for a debugging session.Remember that it is hard to read the on-line manual while single-stepping the kernel.
23.5 On-Line Kernel Debugging Using Remote GDBThis feature has been supported since FreeBSD 2.2, and it is actually a very neat one.
GDB has already supported remote debugging for a long time. This is done using a very simple protocol along aserial line. Unlike the other methods described above, you will need two machines for doing this. One is the hostproviding the debugging environment, including all the sources, and a copy of the kernel binary with all the symbolsin it, and the other one is the target machine that simply runs a similar copy of the very same kernel (but stripped ofthe debugging information).
You should configure the kernel in question with config -g, include DDB into the configuration, and compile it asusual. This gives a large blurb of a binary, due to the debugging information. Copy this kernel to the target machine,strip the debugging symbols off with strip -x, and boot it using the -d boot option. Connect the serial line of thetarget machine that has "flags 080" set on its sio device to any serial line of the debugging host. Now, on thedebugging machine, go to the compile directory of the target kernel, and start gdb:
% gdb -k kernelGDB is free software and you are welcome to distribute copies of itunder certain conditions; type "show copying" to see the conditions.
There is absolutely no warranty for GDB; type "show warranty" for details.GDB 4.16 (i386-unknown-freebsd),Copyright 1996 Free Software Foundation, Inc...(kgdb)
Initialize the remote debugging session (assuming the first serial port is being used) by:
(kgdb) target remote /dev/cuaa0
Now, on the target host (the one that entered DDB right before even starting the device probe), type:
Debugger("Boot flags requested debugger")Stopped at Debugger+0x35: movb $0, edata+0x51bcdb
� gdb
DDB will respond with:
Next trap will enter GDB remote protocol mode
Every time you type gdb, the mode will be toggled between remote GDB and local DDB. In order to force a nexttrap immediately, simply type s (step). Your hosting GDB will now gain control over the target kernel:
516

Chapter 23 Kernel Debugging
Remote debugging using /dev/cuaa0Debugger (msg=0xf01b0383 "Boot flags requested debugger")
at ../../i386/i386/db_interface.c:257(kgdb)
You can use this session almost as any other GDB session, including full access to the source, running it in gud-modeinside an Emacs window (which gives you an automatic source code display in another Emacs window) etc.
23.6 Debugging Loadable Modules Using GDBWhen debugging a panic that occurred within a module, or using remote GDB against a machine that uses dynamicmodules, you need to tell GDB how to obtain symbol information for those modules.
First, you need to build the module(s) with debugging information:
# cd /sys/modules/linux# make clean; make COPTS=-g
If you are using remote GDB, you can run kldstat on the target machine to find out where the module was loaded:
# kldstatId Refs Address Size Name1 4 0xc0100000 1c1678 kernel2 1 0xc0a9e000 6000 linprocfs.ko3 1 0xc0ad7000 2000 warp_saver.ko4 1 0xc0adc000 11000 linux.ko
If you are debugging a crash dump, you’ll need to walk the linker_files list, starting atlinker_files->tqh_first and following the link.tqe_next pointers until you find the entry with thefilename you are looking for. The address member of that entry is the load address of the module.
Next, you need to find out the offset of the text section within the module:
# objdump --section-headers /sys/modules/linux/linux.ko | grep text3 .rel.text 000016e0 000038e0 000038e0 000038e0 2**2
10 .text 00007f34 000062d0 000062d0 000062d0 2**2
The one you want is the .text section, section 10 in the above example. The fourth hexadecimal field (sixth fieldoverall) is the offset of the text section within the file. Add this offset to the load address of the module to obtain therelocation address for the module’s code. In our example, we get 0xc0adc000 + 0x62d0 = 0xc0ae22d0. Use theadd-symbol-file command in GDB to tell the debugger about the module:
(kgdb) add-symbol-file /sys/modules/linux/linux.ko 0xc0ae22d0
517

Chapter 23 Kernel Debugging
add symbol table from file "/sys/modules/linux/linux.ko" at text_addr = 0xc0ae22d0?(y or n) yReading symbols from /sys/modules/linux/linux.ko...done.(kgdb)
You should now have access to all the symbols in the module.
23.7 Debugging a Console DriverSince you need a console driver to run DDB on, things are more complicated if the console driver itself is failing.You might remember the use of a serial console (either with modified boot blocks, or by specifying -h at the Boot:prompt), and hook up a standard terminal onto your first serial port. DDB works on any configured console driver, ofcourse also on a serial console.
518

Chapter 24 Linux Binary CompatibilityRestructured and parts updated by Jim Mock <[email protected]>, 22 March 2000. Originally contributed byBrian N. Handy <[email protected]> and Rich Murphey <[email protected]>
24.1 SynopsisThe following chapter will cover FreeBSD’s Linux binary compatibility features, how to install it, and how it works.
At this point, you may be asking yourself why exactly, does FreeBSD need to be able to run Linux binaries? Theanswer to that question is quite simple. Many companies and developers develop only for Linux, since it is the latest“hot thing” in the computing world. That leaves the rest of us FreeBSD users bugging these same companies anddevelopers to put out native FreeBSD versions of their applications. The problem is, that most of these companies donot really realize how many people would use their product if there were FreeBSD versions too, and most continue toonly develop for Linux. So what is a FreeBSD user to do? This is where the Linux binary compatibility of FreeBSDcomes into play.
In a nutshell, the compatibility allows FreeBSD users to run about 90% of all Linux applications withoutmodification. This includes applications such as Star Office, the Linux version of Netscape, Adobe Acrobat,RealPlayer 5 and 7, VMWare, Oracle, WordPerfect, Doom, Quake, and more. It is also reported that in somesituations, Linux binaries perform better on FreeBSD than they do under Linux.
There are, however, some Linux-specific operating system features that are not supported under FreeBSD. Linuxbinaries will not work on FreeBSD if they overly use the Linux /proc filesystem (which is different fromFreeBSD’s /proc filesystem), or i386-specific calls, such as enabling virtual 8086 mode.
For information on installing the Linux binary compatibility mode, see the next section.
24.2 InstallationWith the advent of 3.0-RELEASE, it is no longer necessary to specify options LINUX or optionsCOMPAT_LINUX in your kernel configuration.
The Linux binary compatibility is now done via a KLD object (“Kernel LoaDable object”), so it can be installed“on-the-fly” without having to reboot. You will, however, need to have the following in /etc/rc.conf:
linux_enable=“YES”
This, in turn, triggers the following action in /etc/rc.i386:
# Start the Linux binary compatibility if requested.
519

Chapter 24 Linux Binary Compatibility
#case ${linux_enable} in[Yy][Ee][Ss])echo -n ’ linux’; linux � /dev/null 2 � &1;;
esac
If you wish to verify that the KLD is loaded, kldstat will do that:
% kldstatId Refs Address Size Name1 2 0xc0100000 16bdb8 kernel7 1 0xc24db000 d000 linux.ko
If for some reason you do not want to or cannot load the KLD, then you may statically link the binary compatibilityin the kernel by adding options LINUX to your kernel configuration file. Then install your new kernel as describedin the kernel configuration section of this handbook.
24.2.1 Installing Linux Runtime LibrariesThis can be done one of two ways, either by using the linux_base port, or by installing them manually.
24.2.1.1 Installing using the linux_base port
This is by far the easiest method to use when installing the runtime libraries. It is just like installing any other portfrom the ports collection (/ports/). Simply do the following:
# cd /usr/ports/emulators/linux_base# make install distclean
You should now have working Linux binary compatibility. Some programs may complain about incorrect minorversions of the system libraries. In general, however, this does not seem to be a problem.
24.2.1.2 Installing libraries manually
If you do not have the “ports” collection installed, you can install the libraries by hand instead. You will need theLinux shared libraries that the program depends on and the runtime linker. Also, you will need to create a “shadowroot” directory, /compat/linux, for Linux libraries on your FreeBSD system. Any shared libraries opened byLinux programs run under FreeBSD will look in this tree first. So, if a Linux program loads, for example,/lib/libc.so, FreeBSD will first try to open /compat/linux/lib/libc.so, and if that does not exist, it will
520

Chapter 24 Linux Binary Compatibility
then try /lib/libc.so. Shared libraries should be installed in the shadow tree /compat/linux/lib rather thanthe paths that the Linux ld.so reports.
Generally, you will need to look for the shared libraries that Linux binaries depend on only the first few times thatyou install a Linux program on your FreeBSD system. After a while, you will have a sufficient set of Linux sharedlibraries on your system to be able to run newly imported Linux binaries without any extra work.
24.2.1.3 How to install additional shared libraries
What if you install the linux_base port and your application still complains about missing shared libraries? Howdo you know which shared libraries Linux binaries need, and where to get them? Basically, there are 2 possibilities(when following these instructions you will need to be root on your FreeBSD system).
If you have access to a Linux system, see what shared libraries the application needs, and copy them to yourFreeBSD system. Look at the following example:
Let us assume you used FTP to get the Linux binary of Doom, and put it on a Linux system you have access to. Youthen can check which shared libraries it needs by running ldd linuxdoom, like so:
% ldd linuxdoomlibXt.so.3 (DLL Jump 3.1) = � /usr/X11/lib/libXt.so.3.1.0libX11.so.3 (DLL Jump 3.1) = � /usr/X11/lib/libX11.so.3.1.0libc.so.4 (DLL Jump 4.5pl26) = � /lib/libc.so.4.6.29
You would need to get all the files from the last column, and put them under /compat/linux, with the names in thefirst column as symbolic links pointing to them. This means you eventually have these files on your FreeBSD system:
/compat/linux/usr/X11/lib/libXt.so.3.1.0/compat/linux/usr/X11/lib/libXt.so.3 - � libXt.so.3.1.0/compat/linux/usr/X11/lib/libX11.so.3.1.0/compat/linux/usr/X11/lib/libX11.so.3 - � libX11.so.3.1.0/compat/linux/lib/libc.so.4.6.29 /compat/linux/lib/libc.so.4 - � libc.so.4.6.29
Note: Note that if you already have a Linux shared library with a matching major revision number to the firstcolumn of the ldd output, you will not need to copy the file named in the last column to your system, the oneyou already have should work. It is advisable to copy the shared library anyway if it is a newer version,though. You can remove the old one, as long as you make the symbolic link point to the new one. So, if youhave these libraries on your system:
/compat/linux/lib/libc.so.4.6.27/compat/linux/lib/libc.so.4 -
�libc.so.4.6.27
and you find a new binary that claims to require a later version according to the output of ldd:
libc.so.4 (DLL Jump 4.5pl26) -�
libc.so.4.6.29
521

Chapter 24 Linux Binary Compatibility
If it is only one or two versions out of date in the in the trailing digit then do not worry about copying/lib/libc.so.4.6.29 too, because the program should work fine with the slightly older version. However,if you like, you can decide to replace the libc.so anyway, and that should leave you with:
/compat/linux/lib/libc.so.4.6.29/compat/linux/lib/libc.so.4 -
�libc.so.4.6.29
Note: The symbolic link mechanism is only needed for Linux binaries. The FreeBSD runtime linker takescare of looking for matching major revision numbers itself and you do not need to worry about it.
24.2.2 Installing Linux ELF binariesELF binaries sometimes require an extra step of “branding”. If you attempt to run an unbranded ELF binary, you willget an error message like the following;
% ./my-linux-elf-binaryELF binary type not knownAbort
To help the FreeBSD kernel distinguish between a FreeBSD ELF binary from a Linux binary, use the brandelf(1)utility.
% brandelf -t Linux my-linux-elf-binary
The GNU toolchain now places the appropriate branding information into ELF binaries automatically, so you thisstep should become increasingly more rare in the future.
24.2.3 Configuring the host name resolverIf DNS does not work or you get this message:
resolv+: "bind" is an invalid keyword resolv+:"hosts" is an invalid keyword
You will need to configure a /compat/linux/etc/host.conf file containing:
522

Chapter 24 Linux Binary Compatibility
order hosts, bindmulti on
The order here specifies that /etc/hosts is searched first and DNS is searched second. When/compat/linux/etc/host.conf is not installed, linux applications find FreeBSD’s /etc/host.conf andcomplain about the incompatible FreeBSD syntax. You should remove bind if you have not configured a nameserver using the /etc/resolv.conf file.
24.3 Installing MathematicaUpdated for Mathematica version 4.X by Murray Stokely <[email protected]> and merged with work byBojan Bistrovic <[email protected]>.
This document describes the process of installing the Linux version of Mathematica 4.X onto a FreeBSD system.
The Linux version of Mathematica runs perfectly under FreeBSD however the binaries shipped by Wolfram need tobe branded so that FreeBSD knows to use the Linux ABI to execute them.
The Linux version of Mathematica or Mathematica for Students can be ordered directly from Wolfram athttp://www.wolfram.com/.
24.3.1 Branding the Linux binariesThe Linux binaries are located in the Unix directory of the Mathematica CDROM distributed by Wolfram. You needto copy this directory tree to your local hard drive so that you can brand the Linux binaries with brandelf(1) beforerunning the installer:
# mount /cdrom# cp -rp /cdrom/Unix/ /localdir/# brandelf -t Linux /localdir/Files/SystemFiles/Kernel/Binaries/Linux/*# brandelf -t Linux /localdir/Files/SystemFiles/FrontEnd/Binaries/Linux/*# brandelf -t Linux /localdir/Files/SystemFiles/Installation/Binaries/Linux/*# brandelf -t Linux /localdir/Files/SystemFiles/Graphics/Binaries/Linux/*# brandelf -t Linux /localdir/Files/SystemFiles/Converters/Binaries/Linux/*# brandelf -t Linux /localdir/Files/SystemFiles/LicenseManager/Binaries/Linux/mathlm# cd /localdir/Installers/Linux/# ./MathInstaller
Alternatively, you can simply set the default ELF brand to Linux for all unbranded binaries with the command:
# sysctl -w kern.fallback_elf_brand=3
523

Chapter 24 Linux Binary Compatibility
This will make FreeBSD assume that unbranded ELF binaries use the Linux ABI and so you should be able to runthe installer straight from the CDROM.
24.3.2 Obtaining your Mathematica PasswordBefore you can run Mathematica you will have to obtain a password from Wolfram that corresponds to your“machine ID”.
Once you have installed the Linux compatibility runtime libraries and unpacked Mathematica you can obtain the“machine ID” by running the program mathinfo in the Install directory. This machine ID is based solely on theMAC address of your first ethernet card.
# cd /localdir/Files/SystemFiles/Installation/Binaries/Linux# mathinfodisco.example.com 7115-70839-20412
When you register with Wolfram, either by email, phone or fax, you will give them the “machine ID” and they willrespond with a corresponding password consisting of groups of numbers. You can then enter this information whenyou attempt to run Mathematica for the first time exactly as you would for any other Mathematica platform.
24.3.3 Running the Mathematica front end over a networkMathematica uses some special fonts to display characters not present in any of the standard font sets (integrals,sums, greek letters, etc.). The X protocol requires these fonts to be install locally. This means you will have to copythese fonts from the CDROM or from a host with Mathematica installed to your local machine. These fonts arenormally stored in /cdrom/Unix/Files/SystemFiles/Fonts on the CDROM, or/usr/local/mathematica/SystemFiles/Fonts on your hard drive. The actual fonts are in the subdirectoriesType1 and X. There are several ways to use them, as described below.
The first way is to copy them into one of the existing font directories in /usr/X11R6/lib/X11/fonts. This willrequire editing the fonts.dir file, adding the font names to it, and changing the number of fonts on the first line.Alternatively, you should also just be able to run mkfontdir in the directory you have copied them to.
The second way to do this is to copy the directories to /usr/X11R6/lib/X11/fonts:
# cd /usr/X11R6/lib/X11/fonts# mkdir X# mkdir MathType1# cd /cdrom/Unix/Files/SystemFiles/Fonts# cp X/* /usr/X11R6/lib/X11/fonts/X# cp Type1/* /usr/X11R6/lib/X11/fonts/MathType1# cd /usr/X11R6/lib/X11/fonts/X
524

Chapter 24 Linux Binary Compatibility
# mkfontdir# cd ../MathType1# mkfontdir
Now add the new font directories to your font path:
# xset fp+ /usr/X11R6/lib/X11/fonts/X# xset fp+ /usr/X11R6/lib/X11/fonts/MathType1# xset fp rehash
If you are using the XFree86 server, you can have these font directories loaded automatically by adding them to yourXF86Config file.
If you do not already have a directory called /usr/X11R6/lib/X11/fonts/Type1, you can change the name ofthe MathType1 directory in the example above to Type1.
24.4 Installing OracleContributed by Marcel Moolenaar <[email protected]>
24.4.1 PrefaceThis document describes the process of installing Oracle 8.0.5 and Oracle 8.0.5.1 Enterprise Edition for Linux onto aFreeBSD machine
24.4.2 Installing the Linux environmentMake sure you have both linux_base and linux_devtools from the ports collection installed. These ports areadded to the collection after the release of FreeBSD 3.2. If you are using FreeBSD 3.2 or an older version for thatmatter, update your ports collection. You may want to consider updating your FreeBSD version too. If you run intodifficulties with linux_base-6.1 or linux_devtools-6.1 you may have to use version 5.2 of these packages.
If you want to run the intelligent agent, you’ll also need to install the Red Hat TCL package:tcl-8.0.3-20.i386.rpm. The general command for installing packages with the official RPM port is :
# rpm -i --ignoreos --root /compat/linux --dbpath /var/lib/rpm package
Installation of the package should not generate any errors.
525

Chapter 24 Linux Binary Compatibility
24.4.3 Creating the Oracle environmentBefore you can install Oracle, you need to set up a proper environment. This document only describes what to dospecially to run Oracle for Linux on FreeBSD, not what has been described in the Oracle installation guide.
24.4.3.1 Kernel Tuning
As described in the Oracle installation guide, you need to set the maximum size of shared memory. Don’t useSHMMAX under FreeBSD. SHMMAX is merely calculated out of SHMMAXPGS and PGSIZE. Therefore defineSHMMAXPGS. All other options can be used as described in the guide. For example:
options SHMMAXPGS=10000options SHMMNI=100options SHMSEG=10options SEMMNS=200options SEMMNI=70options SEMMSL=61
Set these options to suit your intended use of Oracle.
Also, make sure you have the following options in your kernel config-file:
options SYSVSHM #SysV shared memoryoptions SYSVSEM #SysV semaphoresoptions SYSVMSG #SysV interprocess communication
24.4.3.2 Oracle account
Create an Oracle account just as you would create any other account. The Oracle account is special only that youneed to give it a Linux shell. Add /compat/linux/bin/bash to /etc/shells and set the shell for the Oracleaccount to /compat/linux/bin/bash.
24.4.3.3 Environment
Besides the normal Oracle variables, such as ORACLE_HOME and ORACLE_SID you must set the followingenvironment variables:
Variable Value
LD_LIBRARY_PATH $ORACLE_HOME/lib
CLASSPATH $ORACLE_HOME/jdbc/lib/classes111.zip
526

Chapter 24 Linux Binary Compatibility
Variable Value
PATH /compat/linux/bin /compat/linux/sbin
/compat/linux/usr/bin
/compat/linux/usr/sbin /bin /sbin /usr/bin
/usr/sbin /usr/local/bin $ORACLE_HOME/bin
It is advised to set all the environment variables in .profile. A complete example is:
ORACLE_BASE=/oracle; export ORACLE_BASEORACLE_HOME=/oracle; export ORACLE_HOMELD_LIBRARY_PATH=$ORACLE_HOME/libexport LD_LIBRARY_PATHORACLE_SID=ORCL; export ORACLE_SIDORACLE_TERM=386x; export ORACLE_TERMCLASSPATH=$ORACLE_HOME/jdbc/lib/classes111.zipexport CLASSPATHPATH=/compat/linux/bin:/compat/linux/sbin:/compat/linux/usr/bin:/compat/linux/usr/sbin:/bin:/sbin:/usr/bin:/usr/sbin:/usr/local/bin:$ORACLE_HOME/binexport PATH
24.4.4 Installing OracleDue to a slight inconsistency in the Linux emulator, you need to create a directory named .oracle in /var/tmp
before you start the installer. Either make it world writable or let it be owner by the oracle user. You should be able toinstall Oracle without any problems. If you have problems, check your Oracle distribution and/or configuration first!After you have installed Oracle, apply the patches described in the next two subsections.
A frequent problem is that the TCP protocol adapter is not installed right. As a consequence, you cannot start anyTCP listeners. The following actions help solve this problem:
# cd $ORACLE_HOME/network/lib# make -f ins_network.mk ntcontab.o# cd $ORACLE_HOME/lib# ar r libnetwork.a ntcontab.o# cd $ORACLE_HOME/network/lib# make -f ins_network.mk install
Don’t forget to run root.sh again!
527

Chapter 24 Linux Binary Compatibility
24.4.4.1 Patching root.sh
When installing Oracle, some actions, which need to be performed as root, are recorded in a shell script calledroot.sh. root.sh is written in the orainst directory. Apply the following patch to root.sh, to have it use toproper location of chown or alternatively run the script under a Linux native shell.
*** orainst/root.sh.orig Tue Oct 6 21:57:33 1998--- orainst/root.sh Mon Dec 28 15:58:53 1998****************** 31,37 ****# This is the default value for CHOWN# It will redefined later in this script for those ports# which have it conditionally defined in ss_install.h! CHOWN=/bin/chown## Define variables to be used in this script--- 31,37 ----# This is the default value for CHOWN# It will redefined later in this script for those ports# which have it conditionally defined in ss_install.h! CHOWN=/usr/sbin/chown## Define variables to be used in this script
When you don’t install Oracle from CD, you can patch the source for root.sh. It is called rthd.sh and is locatedin the orainst directory in the source tree.
24.4.4.2 Patching genclntsh
The script genclntsh is used to create a single shared client library. It is used when building the demos. Apply thefollowing patch to comment out the definition of PATH:
*** bin/genclntsh.orig Wed Sep 30 07:37:19 1998--- bin/genclntsh Tue Dec 22 15:36:49 1998****************** 32,38 ****## Explicit path to ensure that we’re using the correct commands#PATH=/usr/bin:/usr/ccs/bin export PATH! PATH=/usr/local/bin:/bin:/usr/bin:/usr/X11R6/bin export PATH## each product MUST provide a $PRODUCT/admin/shrept.lst--- 32,38 ----#
528

Chapter 24 Linux Binary Compatibility
# Explicit path to ensure that we’re using the correct commands#PATH=/usr/bin:/usr/ccs/bin export PATH! #PATH=/usr/local/bin:/bin:/usr/bin:/usr/X11R6/bin export PATH## each product MUST provide a $PRODUCT/admin/shrept.lst
24.4.5 Running OracleWhen you have followed the instructions, you should be able to run Oracle as if it was run on Linux itself.
24.5 Installing SAP R/3 (4.6B - IDES)Contributed by Holger Kipp <[email protected]>
Converted to SGML by Valentino Vaschetto <[email protected]>
24.5.1 PrefaceThis document describes a possible way of installing a SAP R/3 4.6B IDES-System with Oracle 8.0.5 for Linux ontoa FreeBSD 4.3 machine, including the installation of FreeBSD 4.3 stable and Oracle 8.0.5.
Even though this document tries to describe all important steps in a greater detail, it is not intended as a replacementfor the Oracle and SAP R/3 installation guides.
Please see the documentation that comes with the SAP R/3 Linux edition for SAP- and Oracle-specific questions, aswell as resources from Oracle and SAP OSS.
24.5.2 SoftwareThe following CDROMs have been used for SAP-installation:
Name Number Description
KERNEL 51009113 SAP Kernel Oracle / Installation /AIX, Linux, Solaris
RDBMS 51007558 Oracle / RDBMS 8.0.5.X / Linux
529

Chapter 24 Linux Binary Compatibility
Name Number Description
EXPORT1 51010208 IDES / DB-Export / Disc 1 of 6
EXPORT2 51010209 IDES / DB-Export / Disc 2 of 6
EXPORT3 51010210 IDES / DB-Export / Disc3 of 6
EXPORT4 51010211 IDES / DB-Export / Disc4 of 6
EXPORT5 51010212 IDES / DB-Export / Disc5 of 6
EXPORT6 51010213 IDES / DB-Export / Disc6 of 6
Additionally, I used the Oracle 8 Server (Pre-production version 8.0.5 for Linux, Kernel Version 2.0.33) CD whichis not really necessary, and of course FreeBSD 4.3 stable (it was only a few days past 4.3 RELEASE).
24.5.3 SAP-NotesThe following notes should be read before installing SAP R/3 or proved to be useful during installation:
Number Title
0171356 SAP Software auf Linux: grundlegenden Anmerkungen
0201147 INST: 4.6C R/3 Inst. on UNIX - Oracle
0373203 Update / Migration Oracle 8.0.5 --> 8.0.6/8.1.6 LINUX
0072984 Release of Digital UNIX 4.0B for Oracle
0130581 R3SETUP step DIPGNTAB terminates
0144978 Your system has not been installed correctly
0162266 Questions and tips for R3SETUP on Windows NT / W2K
24.5.4 Hardware-RequirementsThe following equipment is sufficient for a SAP R/3 System (4.6B):
Component 4.6B 4.6C
Processor 2 x 800MHz Pentium III 2 x 800MHz Pentium III
Memory 1GB ECC 2GB ECC
Hard Disc Space 50-60GB (IDES) 50-60GB (IDES)
For use in production, Xeon-Processors with large cache, high-speed disc access (SCSI, RAID hardware controller),USV and ECC-RAM is recommended. The large amount of Hard disc space is due to the preconfigured IDES
530

Chapter 24 Linux Binary Compatibility
System, which creates 27 GB of database files during installation. Usually after installation it is then necessary toextend some tablespaces.
I used a dual processor board with 2 800MHz Pentium III processors, Adaptec 29160 Ultra160 SCSI adapter (foraccessing a 40/80 GB DLT tape drive and CDROM), Mylex AcelleRAID (2 channels, firmware 6.00-1-00 with32MB RAM). To the Mylex Raid-controller are attached two 17GB hard discs (mirrored) and four 36GB hard discs(RAID level 5).
24.5.5 Installation of FreeBSD 4.3 stableFirst I installed FreeBSD 4.3 stable. I did the default-installation via ftp.
24.5.5.1 Installation via FTP
Get the diskimages kern.flp and mfsroot.flp and put them on floppy disks (I got mine from ftp7.de.freebsd.org. Pleasechoose the appropriate mirror).
# dd if=kern.flp of=/dev/fd0# dd if=mfsroot.flp of=/dev/fd0
Don’t forget to use different disks for the two images :-), then boot from the floppy with the kern.flp-image on it andfollow instructions. I used the following disk layout:
Filesystem Size (1k-blocks) Size (GB) Mounted on
/dev/da0s1a 1.016.303 1 /
/dev/da0s1b 6 � swap �
/dev/da0s1e 2.032.623 2 /var
/dev/da0s1f 8.205.339 8 /usr
/dev/da1s1e 45.734.361 45 /compat/linux/oracle
/dev/da1s1f 2.032.623 2 /compat/linux/sapmnt
/dev/da1s1g 2.032.623 2 /compat/linux/usr/sap
I had to configure and initialise the two logical drives with the Mylex software beforehand. It is located on the boarditself and can be started during the boot phase of the pc.
Please note that this disk layout differs slightly from the SAP recommendations, as SAP suggests mounting theoracle-subdirectories (and some others) separately - I decided to just create them as real subdirectories for simplicity.
531

Chapter 24 Linux Binary Compatibility
24.5.5.2 Get the latest stable-sources
For FreeBSD 4.3 stable onwards, it is quite easy to get the latest stable sources. With the older versions of FreeBSD,I had my own script located in /etc/cvsup. Setting up cvsup for FreeBSD 4.3 is quite easy. As user root do thefollowing:
# cp /etc/defaults/make.conf /etc/make.conf# vi /etc/make.conf
The file /etc/make.conf requires the following entries to be active:
SUP_UPDATE= yesSUP= /usr/local/bin/cvsupSUPFLAGS= -g -L 2SUPHOST= cvsup8.FreeBSD.orgSUPFILE= /usr/share/examples/cvsup/stable-supfilePORTSSUPFILE= /usr/share/examples/cvsup/ports-supfileDOCSUPFILE= /usr/share/examples/cvsup/doc-supfile
Change the SUPHOST-value appropriately. The supfiles in /usr/share/examples/cvsup should be fine. If youdon’t want to load all the docfiles, leave the corresponding DOCSUPFILE-entry inactive. Starting cvsup to get thelatest stable-sources is then very easy:
# cd /usr/src# make update
24.5.5.3 Make world and a new kernel
The first thing to do is to install the sources. As user root, do the following:
# cd /usr/src# make world
If this goes through, one can then continue creating and configuring the new kernel. Usually this is where tocustomize the kernel configuration file. As the computer is named troubadix, the natural name for the config file alsois troubadix:
# cd /usr/src/sys/i386/conf# cp GENERIC TROUBADIX# vi TROUBADIX
At this stage one can define the drivers to use and not to use, etc. See the appropriate documentation or have a look atfile LINT for some additional explanations.
532

Chapter 24 Linux Binary Compatibility
One can then also include the parameters as described below Creating the new kernel then requires:
# cd /usr/src/sys/i386/conf# config TROUBADIX# cd /usr/src/sys/compile/TROUBADIX# make depend# make# make install
After make install finished successfully, one should reboot the computer to have the new kernel available.
24.5.6 Installing the Linux environmentI had some trouble downloading the required RPM-files (for 4.3 stable, 2nd May 2001), so you might try one of thefollowing locations (if all the others fail and the following aren’t out of date):
• ftp7.de.freebsd.org/pub/FreeBSD/distfiles/rpm
• ftp.redhat.com/pub/redhat/linux/6.1/en/os/i386/RedHat/RPMS
24.5.6.1 Installing Linux base-system
First the linux base-system needs to be installed (as root):
# cd /usr/ports/emulators/linux_base# make package
24.5.6.2 Installing Linux development
Next, the linux development is needed:
# cd /usr/ports/devel/linux_devtools# make package
24.5.6.3 Installing necessary RPMs
To start the R3SETUP-Program, pam support is needed. As this also requires some other packages, I ended upinstalling several packages. After that, pam still complained about a missing package, so I forced the installation and
533

Chapter 24 Linux Binary Compatibility
it worked. I wonder if the other packages are really needed or if it would have been sufficient to install thepam-package.
Anyway, here is the list of packages I installed:
• cracklib-2.7-5.i386.rpm
• cracklib-dicts-2.7-5.i386.rpm
• pwdb-0.60-1.i386.rpm
• pam-0.68-7.i386.rpm
I installed these packages with the following command:
# rpm -i --ignoreos --root /compat/linux --dbpath /var/lib/rpm � package_name �
except for the pam package, which I forced with
# rpm -i --ignoreos --nodeps --root /compat/linux --dbpath /var/lib/rpm pam-0.68-7.i386.rpm
For Oracle to run the intelligent agent, I also had to install the following RedHat TCL package (as is stated in theFreeBSD Handbook): tcl-8.0.5-30.i386.rpm (otherwise the relinking during Oracle install won’t work). Thereare some other issues regarding relinking of Oracle, but that is a Oracle-Linux issue, not FreeBSD specific as far as Iunderstand it.
24.5.7 Creating the SAP/R3 environment
24.5.7.1 Creating the necessary filesystems and mountpoints
For a simple installation, it is sufficient to create the following filesystems:
mountpoint size in GB
/compat/linux/oracle 45 GB
/compat/linux/sapmnt 2 GB
/compat/linux/usr/sap 2 GB
I also created some links, so FreeBSD will also find the correct path:
# ln -s /compat/linux/oracle /oracle# ln -s /compat/linux/sapmnt /sapmnt# ln -s /compat/linux/usr/sap /usr/sap
534

Chapter 24 Linux Binary Compatibility
24.5.7.2 Creating users and directories
SAP R/3 needs two users and three groups. The usernames depend on the SAP system id (SID) which consists ofthree letters. Some of these SIDs are reserved by SAP (for example SAP and NIX. For a complete list please see theSAP documentation). For the IDES installation I used IDS. We have therefore the following groups (group ids mightdiffer, these are just the values I used with my installation):
group id group name description
100 dba Data Base Administrator
101 sapsys SAP System
102 oper Data Base Operator
For a default Oracle-Installation, only group dba is used. As oper-group, one also uses group dba (see Oracle- andSAP-documentation for further information).
We also need the following users:
user id username generic name group additionalgroups
description
1000 idsadm � sid � adm sapsys oper SAP Administrator
1002 oraids ora � sid � dba oper DB Administrator
Adding the users with adduser requires the following (please note shell and home directory) entries forSAP-Administrator:
Name: idsadm � sid � admPassword: ******Fullname: SAP IDES AdministratorUid: 1000Gid: 101 (sapsys)Class:Groups: sapsys dbaHOME: /home/idsadm /home/ � sid � admShell: /bin/sh
and for Database-Administrator:
Name: oraids ora � sid �Password: ******Fullname: Oracle IDES AdministratorUid: 1002Gid: 100 (dba)
535

Chapter 24 Linux Binary Compatibility
Class:Groups: dbaHOME: /oracle/IDS /oracle/ � sid �Shell: /bin/sh
This should also include group oper in case you are using both groups dba and oper.
24.5.7.3 Creating directories
These directories are usually created as separate filesystems. This depends entirely on your requirements. I choose tocreate them as simple directories, as they are all located on the same RAID 5 anyway:
First we’ll set owners and right of some directories (as user root):
# chmod 775 /oracle# chmod 777 /sapmnt# chown root:dba /oracle# chown idsadm:sapsys /compat/linux/usr/sap# chmow 775 /compat/linux/usr/sap
Second we’ll create directories as user ora � sid � . These will all be subdirectories of /oracle/IDS:
# su - oraids# mkdir mirrlogA mirrlogB origlogA origlogB# mkdir sapdata1 sapdata2 sapdata3 sapdata4 sapdata5 sapdata6# mkdir saparch sapreorg# exit
In the third step we create directories as user idsadm ( � sid � adm):
# su - idsadm# cd /usr/sap# mkdir IDS# mkdir trans# exit
24.5.7.4 Entries in /etc/services
SAP R/3 requires some entries in file /etc/services , which will not be set correctly during installation underFreeBSD. Please add the following entries (you need at least those entries corresponding to the instance number - inthis case, 00. It’ll do no harm adding all entries from 00 to 99 for dp, gw, sp and ms);
sapdp00 3200/tcp # SAP Dispatcher. 3200 + Instance-Number
536

Chapter 24 Linux Binary Compatibility
sapgw00 3300/tcp # SAP Gateway. 3300 + Instance-Numbersapsp00 3400/tcp # 3400 + Instance-Numbersapms00 3500/tcp # 3500 + Instance-NumbersapmsIDS 3600/tcp # SAP Message Server. 3600 + Instance-Number
24.5.7.5 Necessary locales
SAP requires at least two locales that aren’t part of the default RedHat installation. SAP offers the required RPMs asdownload from their ftp-server (which is only accessible if you are a customer with OSS-access). See note 0171356for a list of RPMs you need.
It is also possible to just create appropriate links (for example from de_DE and en_US ), but I wouldn’t recommendthis for a production system (so far it worked with the IDES system without any problems, though). The followinglocales are needed:
de_DE.ISO-8859-1en_US.ISO-8859-1
If they are not present, there will be some problems during the installation. If these are then subsequently ignored (egby setting the status of the offending steps to OK in file CENTRDB.R3S), it will be impossible to log onto theSAP-system without some additional effort.
24.5.7.6 Kernel Tuning
SAP R/3 Systems need a lot of resources. I therefore added the following parameters to my kernel config-file:
# Set these for memory pigs (SAP and Oracle):options MAXDSIZ="(1024*1024*1024)"options DFLDSIZ="(1024*1024*1024)" # System V options needed.options SYSVSHM #SYSV-style shared memoryoptions SHMMAXPGS=262144 #max amount of shared mem. pagesoptions SHMMNI=256 #max number of shared memory ident if.options SHMSEG=100 #max shared mem.segs per processoptions SYSVMSG #SYSV-style message queuesoptions MSGSEG=32767 #max num. of mes.segments in systemoptions MSGSSZ=32 #size of msg-seg. MUST be power of 2options MSGMNB=65535 #max char. per message queueoptions MSGTQL=2046 #max amount of msgs in systemoptions SYSVSEM #SYSV-style semaphoresoptions SEMMNU=256 #number of semaphore UNDO structuresoptions SEMMNS=1024 #number of semaphores in systemoptions SEMMNI=520 #number of semaphore indentifiers
537

Chapter 24 Linux Binary Compatibility
options SEMUME=100 #number of UNDO keys
The minimum values are specified in the documentation that comes from SAP. As there is no description for Linux,see the HP-UX-section (32-bit) for further information.
24.5.8 Installing SAP R/3
24.5.8.1 Preparing SAP CDROMs
There are lots of CDROMs to mount and unmount during installation. Assuming you have enough CDROM-drives,you can just mount them all. I decided to copy the CDROM contents to corresponding directories:
/oracle/IDS/sapreorg/ � cd-name �
where � cd-name � was one of KERNEL, RDBMS, EXPORT1, EXPORT2, EXPORT3, EXPORT4, EXPORT5 andEXPORT6. All the filenames should be in capital letters, otherwise use the -g option for mounting. So use thefollowing commands:
# mount_cd9660 -g /dev/cd0a /mnt# cp -R /mnt/* /oracle/IDS/sapreorg/ � cd-name �# umount /mnt
24.5.8.2 Running the install-script
First we need to prepare an install-directory:
# cd /oracle/IDS/sapreorg# mkdir install# cd install
Then the install-script is started, which will copy nearly all the relevant files into the install-directory:
/oracle/IDS/sapreorg/KERNEL/UNIX/INSTTOOL.SH
As this is an IDES-Installation with a fully customized SAP R/3 Demo-System, we have six instead of just threeEXPORT-CDs. At this point the installation template CENTRDB.R3S is for installing a standard central instance(R/3 and Database), not an IDES central instance, so copy the corresponding CENTRDB.R3S from the EXPORT1directory, otherwise R3SETUP will only ask for three EXPORT-CDs.
538

Chapter 24 Linux Binary Compatibility
24.5.8.3 Start R3SETUP
Make sure LD_LIBRARY_PATH is set correctly:
# export LD_LIBRARY_PATH=/oracle/IDS/lib:/sapmnt/IDS/exe:/oracle/805_32/lib
Start R3SETUP as user root from installation directory:
# cd /oracle/IDS/sapreorg/install# ./R3SETUP -f CENTRDB.R3S
The script then asks some questions (defaults in brackets, followed by actual input):
Question Default Input
Enter SAP System ID [C11] IDS � ret �
Enter SAP Instance Number [00] � ret �
Enter SAPMOUNT Directory [/sapmnt] � ret �
Enter name of SAP central host [troubadix.domain.de] � ret �
Enter name of SAP db host [troubadix] � ret �
Select character set [1] (WE8DEC) � ret �
Enter Oracle server version (1) Oracle8.0.5, (2) Oracle 8.0.6, (3) Oracle8.1.5, (4) Oracle 8.1.6
1 � ret �
Extract Oracle Client archive [1] (Yes, extract) � ret �
Enter path to KERNEL CD [/sapcd] /oracle/IDS/sapreorg/KERNEL
Enter path to RDBMS CD [/sapcd] /oracle/IDS/sapreorg/RDBMS
Enter path to EXPORT1 CD [/sapcd] /oracle/IDS/sapreorg/EXPORT1
Directory to copy EXPORT1 CD [/oracle/IDS/sapreorg/CD4_DIR] � ret �
Enter path to EXPORT2 CD [/sapcd] /oracle/IDS/sapreorg/EXPORT2
Directory to copy EXPORT2 CD [/oracle/IDS/sapreorg/CD5_DIR] � ret �
Enter path to EXPORT3 CD [/sapcd] /oracle/IDS/sapreorg/EXPORT3
Directory to copy EXPORT3 CD [/oracle/IDS/sapreorg/CD6_DIR] � ret �
Enter path to EXPORT4 CD [/sapcd] /oracle/IDS/sapreorg/EXPORT4
Directory to copy EXPORT4 CD [/oracle/IDS/sapreorg/CD7_DIR] � ret �
Enter path to EXPORT5 CD [/sapcd] /oracle/IDS/sapreorg/EXPORT5
Directory to copy EXPORT5 CD [/oracle/IDS/sapreorg/CD8_DIR] � ret �
Enter path to EXPORT6 CD [/sapcd] /oracle/IDS/sapreorg/EXPORT6
Directory to copy EXPORT6 CD [/oracle/IDS/sapreorg/CD9_DIR] � ret �
539

Chapter 24 Linux Binary Compatibility
Question Default Input
Enter amount of RAM for SAP + DB 850 � ret � (in Megabytes)
Service Entry Message Server [3600] � ret �
Enter Group-ID of sapsys [101] � ret �
Enter Group-ID of oper [102] � ret �
Enter Group-ID of dba [100] � ret �
Enter User-ID of � sid � adm [1000] � ret �
Enter User-ID of ora � sid � [1002] � ret �
Number of parallel procs [2] � ret �
If I had not copied the CDs to the different locations, then the SAP-Installer can’t find the CD needed (identified bythe LABEL.ASC-File on CD) and would then ask you to insert / mount the CD and confirm or enter the mountpath.
The CENTRDB.R3S might not be error-free. In my case, it requested EXPORT4 again (but indicated the correct key(6_LOCATI ON, then 7_LOCATION etc.), so one can just continue with entering the correct values. Don’t getirritated.
Apart from some problems mentioned below, everything should go straight throught up to the point where the Oracledatabase software needs to be installed.
24.5.9 Installing Oracle 8.0.5Please see the corresponding SAP-Notes and Oracle Readmes regarding Linux and Oracle DB for possible problems.Most if not all problems stem from incompatible libraries
For more information on installing Oracle, refer to the Installing Oracle chapter. (linuxemu-oracle.html)
24.5.9.1 Installing the Oracle 8.0.5 with orainst
If Oracle 8.0.5 is to be used, some additional libraries are needed for successfully relinking, as Oracle 8.0.5 waslinked with an old glibc (RedHat 6.0), but RedHat 6.1 already uses a new glibc. So you have to install the followingadditional packages to ensure that linking will work:
compat-libs-5.2-2.i386.rpm
compat-glibc-5.2-2.0.7.2.i386.rpm
compat-egcs-5.2-1.0.3a.1.i386.rpm
compat-egcs-c++-5.2-1.0.3a.1.i386.rpm
compat-binutils-5.2-2.9.1.0.23.1.i386.rpm
540

Chapter 24 Linux Binary Compatibility
See the corresponding SAP-Notes or Oracle Readmes for further information. If this is no option (at the time ofinstallation I didn’t have enough time to check this), one could use the original binaries, or use the relinked binariesfrom an original RedHat System.
For compiling the intelligent agent, the RedHat TCL package must be installed. If you can’t gettcl-8.0.3-20.i386.rpm, a newer one like tcl-8.0.5-30.i386.rpm for RedHat 6.1 should also do.
Apart from relinking, the installation is straightforward:
# su - oraids# export TERM=xterm# export ORACLE_TERM=xterm# export ORACLE_HOME=/oracle/IDS# cd /ORACLE_HOME/orainst_sap# ./orainst
Confirm all Screens with Enter until the software is installed, except that one has to deselect the Oracle On-Line TextViewer , as this is not currently available for Linux. Oracle then wants to relink with i386-glibc20-linux-gcc
instead of the available gcc, egcs or i386-redhat-linux-gcc .
Due to time constrains I decided to use the binaries from an Oracle 8.0.5 PreProduction release, after the first attemptat getting the version from the RDBMS-CD working, failed, and finding / accessing the correct RPMs was anightmare at that time.
24.5.9.2 Installing the Oracle 8.0.5 Pre-Production release for Linux (Kernel 2.0.33)
This installation is quite easy. Mount the CD, start the installer. It will then ask for the location of the Oracle homedirectory, and copy all binaries there. I did not delete the remains of my previous RDBMS-installation tries, though.
Afterwards, Oracle Database could be started with no problems.
24.5.10 Continue with SAP R/3 installationFirst check the environment settings of users idsamd ( � sid � adm) and oraids (ora � sid � ). They should now bothhave the files .profile , .login and .cshrc which are all using hostname. In case the system’s hostname is thefully qualified name, you need to change hostname to hostname -s within all three files.
24.5.10.1 Database load
Afterwards, R3SETUP can either be restarted or continued (depending on whether exit was chosen or not).R3SETUP then creates the tablespaces and loads the data from EXPORT1 to EXPORT6 (remember, it is an IDES
541

Chapter 24 Linux Binary Compatibility
system, otherwise it would only be EXPORT1 to EXPORT3) with R3load into the database.
When the database load is finished (might take a few hours), some passwords are requested. For test installations,one can use the well known default passwords (use different ones if security is an issue!):
Question Input
Enter Password for sapr3 sap � ret �
Confirum Password for sapr3 sap � ret �
Enter Password for sys change_on_install � ret �
Confirm Password for sys change_on_install � ret �
Enter Password for system manager � ret �
Confirm Password for system manager � ret �
At this point I had a few problems with dipgntab.
24.5.10.2 Listener
Start the Oracle-Listener as user oraids (ora � sid � ) as follows:
umask 0; lsnrctl start
Otherwise you might get ORA-12546 as the sockets won’t have the correct permissions. See SAP note 072984.
24.5.11 Post-installation steps
24.5.11.1 Request SAP R/3 license key
This is needed, as the temporary license is only valid for four weeks. Don’t forget to enter the correct OperatingSystem: (X) Other: FreeBSD 4.3 Stable. First get the hardware key. Log on as user idsadm and call saplicense:
# /sapmnt/IDS/exe/saplicense -get
Calling saplicense without options gives a list of options. Upon receiving the license key, it can be installed using
# /sapmnt/IDS/exe/saplicense -install
You are then required to enter the following values:
SAP SYSTEM ID = � SID, 3 chars �
542

Chapter 24 Linux Binary Compatibility
CUSTOMER KEY = � hardware key, 11 chars �INSTALLATION NO = � installation, 10 digits �EXPIRATION DATE = � yyyymmdd, usually "99991231" �LICENSE KEY = � license key, 24 chars �
24.5.11.2 Creating Users
Create a user within client 000 (for some tasks required to be done within client 000, but with a user different fromusers sap* and ddic). As a username, I usually choose wartung (or service in English). Profiles required aresap_new and sap_all. For additional safety the passwords of default users within all clients should be changed (thisincludes users sap* and ddic).
24.5.11.3 Configure Transport System, Profile, Operation Modes, etc.
Within client 000, user different from ddic and sap*, do at least the following:
Task Transaction
Configure Transport System, eg as Stand-Alone TransportDomain Entity
STMS
Create / Edit Profile for System RZ10
Maintain Operation Modes and Instances RZ04
These and all the other post-installation steps are thoroughly described in SAP installation guides.
24.5.11.4 Edit init � sid � .sap (initIDS.sap)
The file /oracle/IDS/dbs/initIDS.sap contains the SAP backup profile. Here the size of the tape to be used,type of compression and so on need to be defined. To get this running with sapdba / brbackup, I changed thefollowing values:
compress = hardwarearchive_function = copy_delete_savecpio_flags = "-ov --format=newc --block-size=128 --quiet"cpio_in_flags = "-iuv --block-size=128 --quiet"tape_size = 38000Mtape_address = /dev/nsa0tape_address_rew = /dev/sa0
Explanations:
543

Chapter 24 Linux Binary Compatibility
compress The tape I use is a HP DLT1 which does hardware compression.
archive_function This defines the default behaviour for saving Oracle archive logs: New logfiles are saved to tape,already saved logfiles are saved again and are then deleted. This prevents lots of trouble if one needs to recover thedatabase, and one of the archive-tapes has gone bad.
cpio_flags Default is to use -B which sets blocksize to 5120 Bytes. For DLT-Tapes, HP recommends at least 32Kblocksize, so I used --block-size=128 for 64K. --format=newc is needed I have inode numbers greater than 65535.The last option --quiet is needed as otherwise brbackup complains as soon as cpio outputs the numbers of blockssaved.
cpio_in_flags Flags needed for loading data back from tape. Format is reckognized automagically.
tape_size This usually gives the raw storage capability of the tape. For security reason (we use hardwarecompression), the
value is slightly lower than the actual value.
tape_address The non-rewindable device to be used with cpio.
tape_address_rew The rewindable device to be used with cpio.
24.5.12 Problems during installation
24.5.12.1 OSUSERSIDADM_IND_ORA during R3SETUP
If R3SETUP complains at this stage, edit file CENTRDB.R3S. Locate [OSUSERSIDADM_IND_ORA] and edit thefollowing values:
HOME=/home/idsadm (was empty)STATUS=OK (had status ERROR)
Then you can restart R3SETUP with:
# ./R3SETUP -f CENTRDB.R3S
24.5.12.2 OSUSERDBSID_IND_ORA during R3SETUP
Possibly R3SETUP also complains at this stage. Just edit CENTRDB.R3S. Locate [OSUSERDBSID_IND_ORA]and edit the following value in that section:
STATUS=OK
544

Chapter 24 Linux Binary Compatibility
Then just restart R3SETUP again:
# ./R3SETUP -f CENTRDB.R3S
24.5.12.3 oraview.vrf FILE NOT FOUND during Oracle installation
You haven’t deselected Oracle On-Line Text Viewer before starting the installation. This is marked for installationeven though this option is currently not available for Linux. Deselect this product inside the Oracle installation menuand restart installation.
24.5.12.4 TEXTENV_INVALID during R3SETUP, RFC or SAPGUI start
If this error is encountered, the correct locale is missing. SAP note 0171356 lists the necessary RPMs that need beinstalled (eg saplocales-1.0-3, saposcheck-1.0-1 for RedHat 6.1). In case you ignored all the related errors and set thecorresponding status from ERROR to OK (in CENTRDB.R3S) every time R3SETUP complained and just restartedR3SETUP, the SAP-System will not be properly configured and you will then not be able to connect to the systemwith a sapgui, even though the system can be started. Trying to connect with the old Linux sapgui gave the followingmessages:
Sat May 5 14:23:14 2001*** ERROR => no valid userarea given [trgmsgo. 0401]Sat May 5 14:23:22 2001*** ERROR => ERROR NR 24 occured [trgmsgi. 0410]*** ERROR => Error when generating text environment. [trgmsgi. 0435]*** ERROR => function failed [trgmsgi. 0447]*** ERROR => no socket operation allowed [trxio.c 3363]Speicherzugriffsfehler
This behaviour is due to SAP R/3 being unable to correctly assign a locale and also not being properly configureditself (missing entries in some database tables). To be able to connect to SAP, add the following entries to fileDEFAULT.PFL (see note 0043288):
abap/set_etct_env_at_new_mode =0install/collate/active =0rscp/TCP0B =TCP0B
Restart the SAP system. Now one can connect to the system, even though country-specific language settings mightnot work as expected. After correcting country-settings (and providing the correct locales), these entries can beremoved from DEFAULT.PFL and the SAP system can be restarted.
545

Chapter 24 Linux Binary Compatibility
24.5.12.5 ORA-12546. Start Listener with correct permissions
Start the Oracle Listener as user oraids with the following commands:
# umask 0; lsnrctl start
Otherwise one might get ORA-12546 as the sockets won’t have the correct permissions. See SAP note 0072984.
24.5.12.6 [DIPGNTAB_IND_IND] during R3SETUP
In general, see SAP note 0130581 (R3SETUP step DIPGNTAB terminates). During this specific installation, forsome reasons the installation process was not using the proper SAP system name "IDS", but the empty string ""instead. This lead to some minor problems with accessing directories, as the paths are generated dynamically using
� sid � (in this case IDS). So instead of accessing:
/usr/sap/IDS/SYS/.../usr/sap/IDS/DVMGS00
the following path were used:
/usr/sap//SYS/.../usr/sap/D00i
To continue with the installation, I created a link and an additional directory:
# pwd/compat/linux/usr/sap# ls -ltotal 4drwxr-xr-x 3 idsadm sapsys 512 May 5 11:20 D00drwxr-x--x 5 idsadm sapsys 512 May 5 11:35 IDSlrwxr-xr-x 1 root sapsys 7 May 5 11:35 SYS -> IDS/SYSdrwxrwxr-x 2 idsadm sapsys 512 May 5 13:00 tmpdrwxrwxr-x 11 idsadm sapsys 512 May 4 14:20 trans
I also found SAP notes (0029227 and 0008401) describing this behaviour.
24.5.12.7 [RFCRSWBOINI_IND_IND] during R3SETUP
Set STATUS of the offending step from ERROR to OK (file CENTRDB.R3S) and restart R3SETUP. After installation,you have to execute the report RSWBOINS from transaction SE38. See SAP note 0162266 for additionalinformation about phase RFCRSWBOINI and RFCRADDBDIF.
546

Chapter 24 Linux Binary Compatibility
24.5.12.8 [RFCRADDBDIF_IND_IND] during R3SETUP
Set STATUS of the offending step from ERROR to OK (file CENTRDB.R3S) and restart R3SETUP. After installation,you have to execute the report RADDBDIF from transaction SE38. See SAP note 0162266 for further information.
24.6 Advanced TopicsIf you are curious as to how the Linux binary compatibility works, this is the section you want to read. Most of whatfollows is based heavily on an email written to FreeBSD chat mailing list <[email protected]> byTerry Lambert <[email protected]> (Message ID:
� [email protected] � ).
24.6.1 How Does It Work?FreeBSD has an abstraction called an “execution class loader”. This is a wedge into the execve(2) system call.
What happens is that FreeBSD has a list of loaders, instead of a single loader with a fallback to the #! loader forrunning any shell interpreters or shell scripts.
Historically, the only loader on the UNIX platform examined the magic number (generally the first 4 or 8 bytes of thefile) to see if it was a binary known to the system, and if so, invoked the binary loader.
If it was not the binary type for the system, the execve(2) call returned a failure, and the shell attempted to startexecuting it as shell commands.
The assumption was a default of “whatever the current shell is”.
Later, a hack was made for sh(1) to examine the first two characters, and if they were :\n, then it invoked the csh(1)shell instead (we believe SCO first made this hack).
What FreeBSD does now is go through a list of loaders, with a generic #! loader that knows about interpreters as thecharacters which follow to the next whitespace next to last, followed by a fallback to /bin/sh.
For the Linux ABI support, FreeBSD sees the magic number as an ELF binary (it makes no distinction betweenFreeBSD, Solaris, Linux, or any other OS which has an ELF image type, at this point).
The ELF loader looks for a specialized brand, which is a comment section in the ELF image, and which is notpresent on SVR4/Solaris ELF binaries.
For Linux binaries to function, they must be branded as type Linux; from brandelf(1):
# brandelf -t Linux file
547

Chapter 24 Linux Binary Compatibility
When this is done, the ELF loader will see the Linux brand on the file.
When the ELF loader sees the Linux brand, the loader replaces a pointer in the proc structure. All system calls areindexed through this pointer (in a traditional UNIX system, this would be the sysent[] structure array, containingthe system calls). In addition, the process flagged for special handling of the trap vector for the signal trampolinecode, and sever other (minor) fix-ups that are handled by the Linux kernel module.
The Linux system call vector contains, among other things, a list of sysent[] entries whose addresses reside in thekernel module.
When a system call is called by the Linux binary, the trap code dereferences the system call function pointer off theproc structure, and gets the Linux, not the FreeBSD, system call entry points.
In addition, the Linux mode dynamically reroots lookups; this is, in effect, what the union option to FS mounts (notthe unionfs!) does. First, an attempt is made to lookup the file in the /compat/linux/original-path directory,then only if that fails, the lookup is done in the /original-path directory. This makes sure that binaries thatrequire other binaries can run (e.g., the Linux toolchain can all run under Linux ABI support). It also means that theLinux binaries can load and exec FreeBSD binaries, if there are no corresponding Linux binaries present, and thatyou could place a uname(1) command in the /compat/linux directory tree to ensure that the Linux binaries couldnot tell they were not running on Linux.
In effect, there is a Linux kernel in the FreeBSD kernel; the various underlying functions that implement all of theservices provided by the kernel are identical to both the FreeBSD system call table entries, and the Linux system calltable entries: file system operations, virtual memory operations, signal delivery, System V IPC, etc. . . The onlydifference is that FreeBSD binaries get the FreeBSD glue functions, and Linux binaries get the Linux glue functions(most older OS’s only had their own glue functions: addresses of functions in a static global sysent[] structurearray, instead of addresses of functions dereferenced off a dynamically initialized pointer in the proc structure of theprocess making the call).
Which one is the native FreeBSD ABI? It does not matter. Basically the only difference is that (currently; this couldeasily be changed in a future release, and probably will be after this) the FreeBSD glue functions are statically linkedinto the kernel, and the Linux glue functions can be statically linked, or they can be accessed via a kernel module.
Yeah, but is this really emulation? No. It is an ABI implementation, not an emulation. There is no emulator (orsimulator, to cut off the next question) involved.
So why is it sometimes called “Linux emulation”? To make it hard to sell FreeBSD! 8-). Really, it is because thehistorical implementation was done at a time when there was really no word other than that to describe what wasgoing on; saying that FreeBSD ran Linux binaries was not true, if you did not compile the code in or load a module,and there needed to be a word to describe what was being loaded—hence “the Linux emulator”.
548

V. Appendices

Appendix A. Obtaining FreeBSD
A.1 CDROM PublishersFreeBSD is available on CDROM from several retailers:
• Daemon News2680 Bayshore Parkway, Suite 307Mountain View, CA 94043USAPhone: +1 650 694-4949Email: <[email protected]>WWW: http://www.bsdmall.com/
• Wind River Systems4041 Pike Lane, Suite FConcord, CA 94520USAPhone: +1 925 691-2800Fax: +1 925 674-0821Email: <[email protected]>WWW: http://www.freebsdmall.com/
If you are a reseller and want to carry FreeBSD CDROM products, please contact the relevant department at WindRiver Systems (http://www.wccdrom.com/info/contact.phtml) or:
Cylogistics2680 Bayshore Parkway, Suite 307Mountain View, CA 94043USAPhone: +1 650 694-4949Fax: +1 650 694-4953Email: <[email protected]>WWW: http://www.cylogistics.com/
550

Appendix A. Obtaining FreeBSD
A.2 DVD PublishersFreeBSD is available on DVD from:
FreeBSD Services Ltd11 Lapwing CloseBicesterOX26 6XRUnited KingdomWWW: http://www.freebsd-services.com/
A.3 FTP SitesThe official sources for FreeBSD are available via anonymous FTP from:
ftp://ftp.FreeBSD.org/pub/FreeBSD/.
The FreeBSD mirror sites database (http://www.freebsdmirrors.org/) is more accurate than the mirror listing in thehandbook, as it gets its information from the DNS rather than relying on static lists of hosts.
Additionally, FreeBSD is available via anonymous FTP from the following mirror sites. If you choose to obtainFreeBSD via anonymous FTP, please try to use a site near you.
Argentina, Australia, Brazil, Canada, China, Czech Republic, Denmark, Estonia, Finland, France, Germany, HongKong, Hungary, Ireland, Israel, Japan, Korea, Lithuania, Netherlands, New Zealand, Poland, Portugal, Russia, SaudiArabia, South Africa, Spain, Slovak Republic, Slovenia, Sweden, Taiwan, Thailand, UK, Ukraine, USA.
Argentina
In case of problems, please contact the hostmaster <[email protected]> for this domain.
• ftp://ftp.ar.FreeBSD.org/pub/FreeBSD/
Australia
In case of problems, please contact the hostmaster <[email protected]> for this domain.
• ftp://ftp.au.FreeBSD.org/pub/FreeBSD/
• ftp://ftp2.au.FreeBSD.org/pub/FreeBSD/
551

Appendix A. Obtaining FreeBSD
• ftp://ftp3.au.FreeBSD.org/pub/FreeBSD/
• ftp://ftp4.au.FreeBSD.org/pub/FreeBSD/
Brazil
In case of problems, please contact the hostmaster <[email protected]> for this domain.
• ftp://ftp.br.FreeBSD.org/pub/FreeBSD/
• ftp://ftp2.br.FreeBSD.org/pub/FreeBSD/
• ftp://ftp3.br.FreeBSD.org/pub/FreeBSD/
• ftp://ftp4.br.FreeBSD.org/pub/FreeBSD/
• ftp://ftp5.br.FreeBSD.org/pub/FreeBSD/
• ftp://ftp6.br.FreeBSD.org/pub/FreeBSD/
• ftp://ftp7.br.FreeBSD.org/pub/FreeBSD/
Canada
In case of problems, please contact the hostmaster <[email protected]> for this domain.
• ftp://ftp.ca.FreeBSD.org/pub/FreeBSD/
China
In case of problems, please contact the hostmaster <[email protected]> for this domain.
• ftp://ftp.cn.FreeBSD.org/pub/FreeBSD/
Czech Republic
In case of problems, please contact the hostmaster <[email protected]> for this domain.
• ftp://ftp.cz.FreeBSD.org/pub/FreeBSD/ Contact: <[email protected]>
Denmark
In case of problems, please contact the hostmaster <[email protected]> for this domain.
• ftp://ftp.dk.FreeBSD.org/pub/FreeBSD/
552

Appendix A. Obtaining FreeBSD
Estonia
In case of problems, please contact the hostmaster <[email protected]> for this domain.
• ftp://ftp.ee.FreeBSD.org/pub/FreeBSD/
Finland
In case of problems, please contact the hostmaster <[email protected]> for this domain.
• ftp://ftp.fi.FreeBSD.org/pub/FreeBSD/
France
In case of problems, please contact the hostmaster <[email protected]> for this domain.
• ftp://ftp.fr.FreeBSD.org/pub/FreeBSD/
• ftp://ftp2.fr.FreeBSD.org/pub/FreeBSD/
• ftp://ftp3.fr.FreeBSD.org/pub/FreeBSD/
• ftp://ftp4.fr.FreeBSD.org/pub/FreeBSD/
• ftp://ftp5.fr.FreeBSD.org/pub/FreeBSD/
• ftp://ftp6.fr.FreeBSD.org/pub/FreeBSD/
Germany
In case of problems, please contact the mirror admins <[email protected] > for this domain.
• ftp://ftp.de.FreeBSD.org/pub/FreeBSD/
• ftp://ftp2.de.FreeBSD.org/pub/FreeBSD/
• ftp://ftp3.de.FreeBSD.org/pub/FreeBSD/
• ftp://ftp4.de.FreeBSD.org/pub/FreeBSD/
• ftp://ftp5.de.FreeBSD.org/pub/FreeBSD/
• ftp://ftp6.de.FreeBSD.org/pub/FreeBSD/
• ftp://ftp7.de.FreeBSD.org/pub/FreeBSD/
553

Appendix A. Obtaining FreeBSD
Hong Kong
• ftp://ftp.hk.super.net/pub/FreeBSD/ Contact: <[email protected]>.
Hungary
In case of problems, please contact the hostmaster <[email protected]> for this domain.
• ftp://ftp.hu.FreeBSD.org/pub/FreeBSD/
Ireland
In case of problems, please contact the hostmaster <[email protected]> for this domain.
• ftp://ftp.ie.FreeBSD.org/pub/FreeBSD/
Israel
In case of problems, please contact the hostmaster <[email protected]> for this domain.
• ftp://ftp.il.FreeBSD.org/pub/FreeBSD/
• ftp://ftp2.il.FreeBSD.org/pub/FreeBSD/
Japan
In case of problems, please contact the hostmaster <[email protected]> for this domain.
• ftp://ftp.jp.FreeBSD.org/pub/FreeBSD/
• ftp://ftp2.jp.FreeBSD.org/pub/FreeBSD/
• ftp://ftp3.jp.FreeBSD.org/pub/FreeBSD/
• ftp://ftp4.jp.FreeBSD.org/pub/FreeBSD/
• ftp://ftp5.jp.FreeBSD.org/pub/FreeBSD/
• ftp://ftp6.jp.FreeBSD.org/pub/FreeBSD/
554

Appendix A. Obtaining FreeBSD
Korea
In case of problems, please contact the hostmaster <[email protected]> for this domain.
• ftp://ftp.kr.FreeBSD.org/pub/FreeBSD/
• ftp://ftp2.kr.FreeBSD.org/pub/FreeBSD/
• ftp://ftp3.kr.FreeBSD.org/pub/FreeBSD/
• ftp://ftp4.kr.FreeBSD.org/pub/FreeBSD/
• ftp://ftp5.kr.FreeBSD.org/pub/FreeBSD/
• ftp://ftp6.kr.FreeBSD.org/pub/FreeBSD/
Lithuania
In case of problems, please contact the hostmaster <[email protected]> for this domain.
• ftp://ftp.lt.FreeBSD.org/pub/FreeBSD/
Netherlands
In case of problems, please contact the hostmaster <[email protected]> for this domain.
• ftp://ftp.nl.FreeBSD.org/pub/FreeBSD/
New Zealand
In case of problems, please contact the hostmaster <[email protected]> for this domain.
• ftp://ftp.nz.FreeBSD.org/pub/FreeBSD/
Poland
In case of problems, please contact the hostmaster <[email protected]> for this domain.
• ftp://ftp.pl.FreeBSD.org/pub/FreeBSD/
Portugal
In case of problems, please contact the hostmaster <[email protected]> for this domain.
• ftp://ftp.pt.FreeBSD.org/pub/FreeBSD/
555

Appendix A. Obtaining FreeBSD
• ftp://ftp2.pt.FreeBSD.org/pub/FreeBSD/
Romania
In case of problems, please contact the hostmaster <[email protected]> for this domain.
• ftp://ftp.ro.FreeBSD.org/pub/FreeBSD/
Russia
In case of problems, please contact the hostmaster <[email protected]> for this domain.
• ftp://ftp.ru.FreeBSD.org/pub/FreeBSD/
• ftp://ftp2.ru.FreeBSD.org/pub/FreeBSD/
• ftp://ftp3.ru.FreeBSD.org/pub/FreeBSD/
• ftp://ftp4.ru.FreeBSD.org/pub/FreeBSD/
Saudi Arabia
In case of problems, please contact <[email protected]>
• ftp://ftp.isu.net.sa/pub/mirrors/ftp.freebsd.org/
South Africa
In case of problems, please contact the hostmaster <[email protected]> for this domain.
• ftp://ftp.za.FreeBSD.org/pub/FreeBSD/
• ftp://ftp2.za.FreeBSD.org/pub/FreeBSD/
• ftp://ftp3.za.FreeBSD.org/FreeBSD/
Slovak Republic
In case of problems, please contact the hostmaster <[email protected]> for this domain.
• ftp://ftp.sk.FreeBSD.org/pub/FreeBSD/
556

Appendix A. Obtaining FreeBSD
Slovenia
In case of problems, please contact the hostmaster <[email protected]> for this domain.
• ftp://ftp.si.FreeBSD.org/pub/FreeBSD/
Spain
In case of problems, please contact the hostmaster <[email protected]> for this domain.
• ftp://ftp.es.FreeBSD.org/pub/FreeBSD/
Sweden
In case of problems, please contact the hostmaster <[email protected]> for this domain.
• ftp://ftp.se.FreeBSD.org/pub/FreeBSD/
• ftp://ftp2.se.FreeBSD.org/pub/FreeBSD/
• ftp://ftp3.se.FreeBSD.org/pub/FreeBSD/
Taiwan
In case of problems, please contact the hostmaster <[email protected]> for this domain.
• ftp://ftp.tw.FreeBSD.org/pub/FreeBSD/
• ftp://ftp2.tw.FreeBSD.org/pub/FreeBSD/
• ftp://ftp3.tw.FreeBSD.org/pub/FreeBSD/
• ftp://ftp4.tw.FreeBSD.org/pub/FreeBSD/
Thailand
• ftp://ftp.nectec.or.th/pub/FreeBSD/ Contact: <[email protected]>.
Ukraine
• ftp://ftp.ua.FreeBSD.org/pub/FreeBSD/ Contact: <[email protected]>.
557

Appendix A. Obtaining FreeBSD
UK
In case of problems, please contact the hostmaster <[email protected]> for this domain.
• ftp://ftp.uk.FreeBSD.org/pub/FreeBSD/
• ftp://ftp2.uk.FreeBSD.org/pub/FreeBSD/
• ftp://ftp3.uk.FreeBSD.org/pub/FreeBSD/
• ftp://ftp4.uk.FreeBSD.org/pub/FreeBSD/
• ftp://ftp5.uk.FreeBSD.org/pub/FreeBSD/
USA
In case of problems, please contact the hostmaster <[email protected]> for this domain.
• ftp://ftp.FreeBSD.org/pub/FreeBSD/
• ftp://ftp2.FreeBSD.org/pub/FreeBSD/
• ftp://ftp3.FreeBSD.org/pub/FreeBSD/
• ftp://ftp4.FreeBSD.org/pub/FreeBSD/
• ftp://ftp5.FreeBSD.org/pub/FreeBSD/
• ftp://ftp6.FreeBSD.org/pub/FreeBSD/
• ftp://ftp7.FreeBSD.org/pub/FreeBSD/
• ftp://ftp8.FreeBSD.org/pub/FreeBSD/
• ftp://ftp9.FreeBSD.org/pub/os/FreeBSD/
• ftp://ftp10.FreeBSD.org/pub/FreeBSD/
A.4 Anonymous CVS
A.4.1 IntroductionAnonymous CVS (or, as it is otherwise known, anoncvs) is a feature provided by the CVS utilities bundled withFreeBSD for synchronizing with a remote CVS repository. Among other things, it allows users of FreeBSD to
558

Appendix A. Obtaining FreeBSD
perform, with no special privileges, read-only CVS operations against one of the FreeBSD project’s official anoncvsservers. To use it, one simply sets the CVSROOT environment variable to point at the appropriate anoncvs server,provides the well-known password “anoncvs” with the cvs login command, and then uses the cvs(1) command toaccess it like any local repository.
While it can also be said that the CVSup and anoncvs services both perform essentially the same function, there arevarious trade-offs which can influence the user’s choice of synchronization methods. In a nutshell, CVSup is muchmore efficient in its usage of network resources and is by far the most technically sophisticated of the two, but at aprice. To use CVSup, a special client must first be installed and configured before any bits can be grabbed, and thenonly in the fairly large chunks which CVSup calls collections.
Anoncvs, by contrast, can be used to examine anything from an individual file to a specific program (like ls orgrep) by referencing the CVS module name. Of course, anoncvs is also only good for read-only operations on theCVS repository, so if it’s your intention to support local development in one repository shared with the FreeBSDproject bits then CVSup is really your only option.
A.4.2 Using Anonymous CVSConfiguring cvs(1) to use an Anonymous CVS repository is a simple matter of setting the CVSROOT environmentvariable to point to one of the FreeBSD project’s anoncvs servers. At the time of this writing, the following serversare available:
• USA: :pserver:[email protected]:/home/ncvs (Use cvs login and enter the password “anoncvs”when prompted.)
Since CVS allows one to “check out” virtually any version of the FreeBSD sources that ever existed (or, in somecases, will exist :-), you need to be familiar with the revision (-r) flag to cvs(1) and what some of the permissiblevalues for it in the FreeBSD Project repository are.
There are two kinds of tags, revision tags and branch tags. A revision tag refers to a specific revision. Its meaningstays the same from day to day. A branch tag, on the other hand, refers to the latest revision on a given line ofdevelopment, at any given time. Because a branch tag does not refer to a specific revision, it may mean somethingdifferent tomorrow than it means today.
Here are the branch tags that users might be interested in (keep in mind that the only tags valid for the portscollection is HEAD).
HEAD
Symbolic name for the main line, or FreeBSD-CURRENT. Also the default when no revision is specified.
RELENG_4
The line of development for FreeBSD-4.X, also known as FreeBSD-STABLE.
559

Appendix A. Obtaining FreeBSD
RELENG_4_3
The release branch for FreeBSD-4.3, used only for security advisories and other seriously critical fixes.
RELENG_3
The line of development for FreeBSD-3.X, also known as 3.X-STABLE.
RELENG_2_2
The line of development for FreeBSD-2.2.X, also known as 2.2-STABLE. This branch is mostly obsolete.
Here are the revision tags that users might be interested in. Again, none of these are valid for the ports collectionsince the ports collection does not have multiple revisions.
RELENG_4_3_0_RELEASE
FreeBSD 4.3.
RELENG_4_2_0_RELEASE
FreeBSD 4.2.
RELENG_4_1_1_RELEASE
FreeBSD 4.1.1.
RELENG_4_1_0_RELEASE
FreeBSD 4.1.
RELENG_4_0_0_RELEASE
FreeBSD 4.0.
RELENG_3_5_0_RELEASE
FreeBSD-3.5.
RELENG_3_4_0_RELEASE
FreeBSD-3.4.
RELENG_3_3_0_RELEASE
FreeBSD-3.3.
RELENG_3_2_0_RELEASE
FreeBSD-3.2.
560

Appendix A. Obtaining FreeBSD
RELENG_3_1_0_RELEASE
FreeBSD-3.1.
RELENG_3_0_0_RELEASE
FreeBSD-3.0.
RELENG_2_2_8_RELEASE
FreeBSD-2.2.8.
RELENG_2_2_7_RELEASE
FreeBSD-2.2.7.
RELENG_2_2_6_RELEASE
FreeBSD-2.2.6.
RELENG_2_2_5_RELEASE
FreeBSD-2.2.5.
RELENG_2_2_2_RELEASE
FreeBSD-2.2.2.
RELENG_2_2_1_RELEASE
FreeBSD-2.2.1.
RELENG_2_2_0_RELEASE
FreeBSD-2.2.0.
When you specify a branch tag, you normally receive the latest versions of the files on that line of development. Ifyou wish to receive some past version, you can do so by specifying a date with the -D date flag. See the cvs(1) manpage for more details.
A.4.3 ExamplesWhile it really is recommended that you read the manual page for cvs(1) thoroughly before doing anything, here aresome quick examples which essentially show how to use Anonymous CVS:
561

Appendix A. Obtaining FreeBSD
Example A-1. Checking out something from -CURRENT (ls(1)) and deleting it again:
% setenv CVSROOT :pserver:[email protected]:/home/ncvs% cvs loginAt the prompt, enter the password “anoncvs”.% cvs co ls% cvs release -d ls% cvs logout
Example A-2. Checking out the version of ls(1) in the 3.X-STABLE branch:
% setenv CVSROOT :pserver:[email protected]:/home/ncvs% cvs loginAt the prompt, enter the password “anoncvs”.% cvs co -rRELENG_3 ls% cvs release -d ls% cvs logout
Example A-3. Creating a list of changes (as unified diffs) to ls(1)
% setenv CVSROOT :pserver:[email protected]:/home/ncvs% cvs loginAt the prompt, enter the password “anoncvs”.% cvs rdiff -u -rRELENG_3_0_0_RELEASE -rRELENG_3_4_0_RELEASE ls% cvs logout
Example A-4. Finding out what other module names can be used:
% setenv CVSROOT :pserver:[email protected]:/home/ncvs% cvs loginAt the prompt, enter the password “anoncvs”.% cvs co modules% more modules/modules% cvs release -d modules% cvs logout
562

Appendix A. Obtaining FreeBSD
A.4.4 Other ResourcesThe following additional resources may be helpful in learning CVS:
• CVS Tutorial (http://www.csc.calpoly.edu/~dbutler/tutorials/winter96/cvs/) from Cal Poly.
• Cyclic Software (http://www.cyclic.com/), commercial maintainers of CVS.
• CVSWeb (http://www.FreeBSD.org/cgi/cvsweb.cgi) is the FreeBSD Project web interface for CVS.
A.5 Using CTMCTM is a method for keeping a remote directory tree in sync with a central one. It has been developed for usage withFreeBSD’s source trees, though other people may find it useful for other purposes as time goes by. Little, if any,documentation currently exists at this time on the process of creating deltas, so talk to Poul-Henning Kamp<[email protected]> for more information should you wish to use CTM for other things.
A.5.1 Why should I use CTM?CTM will give you a local copy of the FreeBSD source trees. There are a number of “flavors” of the tree available.Whether you wish to track the entire CVS tree or just one of the branches, CTM can provide you the information. Ifyou are an active developer on FreeBSD, but have lousy or non-existent TCP/IP connectivity, or simply wish to havethe changes automatically sent to you, CTM was made for you. You will need to obtain up to three deltas per day forthe most active branches. However, you should consider having them sent by automatic email. The sizes of theupdates are always kept as small as possible. This is typically less than 5K, with an occasional (one in ten) being10-50K and every now and then a biggie of 100K+ or more coming around.
You will also need to make yourself aware of the various caveats related to working directly from the developmentsources rather than a pre-packaged release. This is particularly true if you choose the “current” sources. It isrecommended that you read Staying current with FreeBSD.
A.5.2 What do I need to use CTM?You will need two things: The CTM program, and the initial deltas to feed it (to get up to “current” levels).
The CTM program has been part of FreeBSD ever since version 2.0 was released, and lives in/usr/src/usr.sbin/CTM if you have a copy of the source available.
If you are running a pre-2.0 version of FreeBSD, you can fetch the current CTM sources directly from:
563

Appendix A. Obtaining FreeBSD
ftp://ftp.FreeBSD.org/pub/FreeBSD/FreeBSD-current/src/usr.sbin/ctm/
The “deltas” you feed CTM can be had two ways, FTP or email. If you have general FTP access to the Internet thenthe following FTP sites support access to CTM:
ftp://ftp.FreeBSD.org/pub/FreeBSD/CTM/
or see section mirrors.
FTP the relevant directory and fetch the README file, starting from there.
If you wish to get your deltas via email:
Send email to <[email protected]> to subscribe to one of the CTM distribution lists. “ctm-cvs-cur”supports the entire cvs tree. “ctm-src-cur” supports the head of the development branch. “ctm-src-2_2” supports the2.2 release branch, etc.. (If you do not know how to subscribe yourself using majordomo, send a message firstcontaining the word help — it will send you back usage instructions.)
When you begin receiving your CTM updates in the mail, you may use the ctm_rmail program to unpack andapply them. You can actually use the ctm_rmail program directly from a entry in /etc/aliases if you want tohave the process run in a fully automated fashion. Check the ctm_rmail man page for more details.
Note: No matter what method you use to get the CTM deltas, you should subscribe to the<[email protected]> mailing list. In the future, this will be the only place where announcementsconcerning the operations of the CTM system will be posted. Send an email to <[email protected]> witha single line of subscribe ctm-announce to get added to the list.
A.5.3 Using CTM for the first timeBefore you can start using CTM deltas, you will need to get to a starting point for the deltas produced subsequentlyto it.
First you should determine what you already have. Everyone can start from an “empty” directory. You must use aninitial “Empty” delta to start off your CTM supported tree. At some point it is intended that one of these “started”deltas be distributed on the CD for your convenience, however, this does not currently happen.
Since the trees are many tens of megabytes, you should prefer to start from something already at hand. If you have a-RELEASE CD, you can copy or extract an initial source from it. This will save a significant transfer of data.
You can recognize these “starter” deltas by the X appended to the number (src-cur.3210XEmpty.gz for instance).The designation following the X corresponds to the origin of your initial “seed”. Empty is an empty directory. As arule a base transition from Empty is produced every 100 deltas. By the way, they are large! 25 to 30 Megabytes ofgzip’d data is common for the XEmpty deltas.
Once you’ve picked a base delta to start from, you will also need all deltas with higher numbers following it.
564

Appendix A. Obtaining FreeBSD
A.5.4 Using CTM in your daily lifeTo apply the deltas, simply say:
# cd /where/ever/you/want/the/stuff# ctm -v -v /where/you/store/your/deltas/src-xxx.*
CTM understands deltas which have been put through gzip, so you do not need to gunzip them first, this saves diskspace.
Unless it feels very secure about the entire process, CTM will not touch your tree. To verify a delta you can also usethe -c flag and CTM will not actually touch your tree; it will merely verify the integrity of the delta and see if itwould apply cleanly to your current tree.
There are other options to CTM as well, see the manual pages or look in the sources for more information.
That is really all there is to it. Every time you get a new delta, just run it through CTM to keep your sources up todate.
Do not remove the deltas if they are hard to download again. You just might want to keep them around in casesomething bad happens. Even if you only have floppy disks, consider using fdwrite to make a copy.
A.5.5 Keeping your local changesAs a developer one would like to experiment with and change files in the source tree. CTM supports localmodifications in a limited way: before checking for the presence of a file foo, it first looks for foo.ctm. If this fileexists, CTM will operate on it instead of foo.
This behavior gives us a simple way to maintain local changes: simply copy the files you plan to modify to thecorresponding file names with a .ctm suffix. Then you can freely hack the code, while CTM keeps the .ctm fileup-to-date.
A.5.6 Other interesting CTM options
A.5.6.1 Finding out exactly what would be touched by an update
You can determine the list of changes that CTM will make on your source repository using the -l option to CTM.
This is useful if you would like to keep logs of the changes, pre- or post- process the modified files in any manner, orjust are feeling a tad paranoid :-).
565

Appendix A. Obtaining FreeBSD
A.5.6.2 Making backups before updating
Sometimes you may want to backup all the files that would be changed by a CTM update.
Specifying the -B backup-file option causes CTM to backup all files that would be touched by a given CTMdelta to backup-file.
A.5.6.3 Restricting the files touched by an update
Sometimes you would be interested in restricting the scope of a given CTM update, or may be interested inextracting just a few files from a sequence of deltas.
You can control the list of files that CTM would operate on by specifying filtering regular expressions using the -eand -x options.
For example, to extract an up-to-date copy of lib/libc/Makefile from your collection of saved CTM deltas, runthe commands:
# cd /where/ever/you/want/to/extract/it/# ctm -e ’^lib/libc/Makefile’ ~ctm/src-xxx.*
For every file specified in a CTM delta, the -e and -x options are applied in the order given on the command line.The file is processed by CTM only if it is marked as eligible after all the -e and -x options are applied to it.
A.5.7 Future plans for CTMTons of them:
• Use some kind of authentication into the CTM system, so as to allow detection of spoofed CTM updates.
• Clean up the options to CTM, they became confusing and counter intuitive.
A.5.8 Miscellaneous stuffThere is a sequence of deltas for the ports collection too, but interest has not been all that high yet. Tell me if youwant an email list for that too and we will consider setting it up.
A.5.9 CTM mirrors
566

Appendix A. Obtaining FreeBSD
CTM/FreeBSD is available via anonymous FTP from the following mirror sites. If you choose to obtain CTM viaanonymous FTP, please try to use a site near you.
In case of problems, please contact Poul-Henning Kamp <[email protected]>.
California, Bay Area, official source
• ftp://ftp.FreeBSD.org/pub/FreeBSD/development/CTM/
Germany, Trier
• ftp://ftp.uni-trier.de/pub/unix/systems/BSD/FreeBSD/CTM/
South Africa, backup server for old deltas
• ftp://ftp.za.FreeBSD.org/pub/FreeBSD/CTM/
Taiwan/R.O.C, Chiayi
• ftp://ctm.tw.FreeBSD.org/pub/FreeBSD/CTM/
• ftp://ctm2.tw.FreeBSD.org/pub/FreeBSD/CTM/
• ftp://ctm3.tw.FreeBSD.org/pub/freebsd/CTM/ (ftp://ctm3.tw.FreeBSD.org/pub/FreeBSD/CTM/)
If you did not find a mirror near to you or the mirror is incomplete, try FTP search (http://ftpsearch.ntnu.no/) athttp://ftpsearch.ntnu.no/ftpsearch (http://ftpsearch.ntnu.no/ftpsearch/). FTP search is a great free archie server inTrondheim, Norway.
567

Appendix A. Obtaining FreeBSD
A.6 Using CVSup
A.6.1 IntroductionCVSup is a software package for distributing and updating source trees from a master CVS repository on a remoteserver host. The FreeBSD sources are maintained in a CVS repository on a central development machine inCalifornia. With CVSup, FreeBSD users can easily keep their own source trees up to date.
CVSup uses the so-called pull model of updating. Under the pull model, each client asks the server for updates, ifand when they are wanted. The server waits passively for update requests from its clients. Thus all updates areinstigated by the client. The server never sends unsolicited updates. Users must either run the CVSup clientmanually to get an update, or they must set up a cron job to run it automatically on a regular basis.
The term CVSup, capitalized just so, refers to the entire software package. Its main components are the client cvsupwhich runs on each user’s machine, and the server cvsupd which runs at each of the FreeBSD mirror sites.
As you read the FreeBSD documentation and mailing lists, you may see references to sup. Sup was the predecessorof CVSup, and it served a similar purpose.CVSup is in used in much the same way as sup and, in fact, usesconfiguration files which are backward-compatible with sup’s. Sup is no longer used in the FreeBSD project,because CVSup is both faster and more flexible.
A.6.2 InstallationThe easiest way to install CVSup is to use the net/cvsup-bin port from the FreeBSD ports collection. If youprefer to build CVSup from source, you can use the net/cvsup port instead. But be forewarned: the net/cvsupport depends on the Modula-3 system, which takes a substantial amount of time, memory, and disk space to build.
If you do not know anything about cvsup at all and want a single package which will install it, set up theconfiguration file and start the transfer via a pointy-clicky type of interface, then get the cvsupit(ftp://ftp.FreeBSD.org/pub/FreeBSD/development/CVSup/cvsupit.tgz) package. Just hand it to pkg_add(1) and itwill lead you through the configuration process in a menu-oriented fashion.
A.6.3 CVSup ConfigurationCVSup’s operation is controlled by a configuration file called the supfile. There are some sample supfiles inthe directory /usr/share/examples/cvsup/ (file:/usr/share/examples/cvsup/).
The information in a supfile answers the following questions for cvsup:
• Which files do you want to receive?
568

Appendix A. Obtaining FreeBSD
• Which versions of them do you want?
• Where do you want to get them from?
• Where do you want to put them on your own machine?
• Where do you want to put your status files?
In the following sections, we will construct a typical supfile by answering each of these questions in turn. First, wedescribe the overall structure of a supfile.
A supfile is a text file. Comments begin with # and extend to the end of the line. Lines that are blank and lines thatcontain only comments are ignored.
Each remaining line describes a set of files that the user wishes to receive. The line begins with the name of a“collection”, a logical grouping of files defined by the server. The name of the collection tells the server which filesyou want. After the collection name come zero or more fields, separated by white space. These fields answer thequestions listed above. There are two types of fields: flag fields and value fields. A flag field consists of a keywordstanding alone, e.g., delete or compress. A value field also begins with a keyword, but the keyword is followedwithout intervening white space by = and a second word. For example, release=cvs is a value field.
A supfile typically specifies more than one collection to receive. One way to structure a supfile is to specify allof the relevant fields explicitly for each collection. However, that tends to make the supfile lines quite long, and itis inconvenient because most fields are the same for all of the collections in a supfile. CVSup provides adefaulting mechanism to avoid these problems. Lines beginning with the special pseudo-collection name *defaultcan be used to set flags and values which will be used as defaults for the subsequent collections in the supfile. Adefault value can be overridden for an individual collection, by specifying a different value with the collection itself.Defaults can also be changed or augmented in mid-supfile by additional *default lines.
With this background, we will now proceed to construct a supfile for receiving and updating the main source treeof FreeBSD-CURRENT.
• Which files do you want to receive?
The files available via CVSup are organized into named groups called “collections”. The collections that areavailable are described here. In this example, we wish to receive the entire main source tree for the FreeBSDsystem. There is a single large collection src-all which will give us all of that. As a first step towardconstructing our supfile, we simply list the collections, one per line (in this case, only one line):
src-all
• Which version(s) of them do you want?
With CVSup, you can receive virtually any version of the sources that ever existed. That is possible because thecvsupd server works directly from the CVS repository, which contains all of the versions. You specify which oneof them you want using the tag= and date= value fields.
569

Appendix A. Obtaining FreeBSD
Warning: Be very careful to specify any tag= fields correctly. Some tags are valid only for certain collectionsof files. If you specify an incorrect or misspelled tag, CVSup will delete files which you probably do not wantdeleted. In particular, use only tag=. for the ports-* collections.
The tag= field names a symbolic tag in the repository. There are two kinds of tags, revision tags and branch tags.A revision tag refers to a specific revision. Its meaning stays the same from day to day. A branch tag, on the otherhand, refers to the latest revision on a given line of development, at any given time. Because a branch tag does notrefer to a specific revision, it may mean something different tomorrow than it means today.
Here are the branch tags that users might be interested in. Keep in mind that only the tag=. is relevant for theports collection.
tag=.
The main line of development, also known as FreeBSD-CURRENT.
Note: The . is not punctuation; it is the name of the tag. Valid for all collections.
tag=RELENG_4
The line of development for FreeBSD-4.X, also known as FreeBSD-STABLE.
tag=RELENG_3
The line of development for FreeBSD-3.X
tag=RELENG_2_2
The line of development for FreeBSD-2.2.X, also known as 2.2-STABLE.
Here are the revision tags that users might be interested in. Again, these are not valid for the ports collection.
tag=RELENG_4_2_0_RELEASE
FreeBSD-4.2.
tag=RELENG_4_1_1_RELEASE
FreeBSD-4.1.1.
tag=RELENG_4_1_0_RELEASE
FreeBSD-4.1.
570

Appendix A. Obtaining FreeBSD
tag=RELENG_4_0_0_RELEASE
FreeBSD-4.0.
tag=RELENG_3_5_0_RELEASE
FreeBSD-3.5.
tag=RELENG_3_4_0_RELEASE
FreeBSD-3.4.
tag=RELENG_3_3_0_RELEASE
FreeBSD-3.3.
tag=RELENG_3_2_0_RELEASE
FreeBSD-3.2.
tag=RELENG_3_1_0_RELEASE
FreeBSD-3.1.
tag=RELENG_3_0_0_RELEASE
FreeBSD-3.0.
tag=RELENG_2_2_8_RELEASE
FreeBSD-2.2.8.
tag=RELENG_2_2_7_RELEASE
FreeBSD-2.2.7.
tag=RELENG_2_2_6_RELEASE
FreeBSD-2.2.6.
tag=RELENG_2_2_5_RELEASE
FreeBSD-2.2.5.
tag=RELENG_2_2_2_RELEASE
FreeBSD-2.2.2.
tag=RELENG_2_2_1_RELEASE
FreeBSD-2.2.1.
571

Appendix A. Obtaining FreeBSD
tag=RELENG_2_2_0_RELEASE
FreeBSD-2.2.0.
Warning: Be very careful to type the tag name exactly as shown. CVSup cannot distinguish between validand invalid tags. If you misspell the tag, CVSup will behave as though you had specified a valid tag whichhappens to refer to no files at all. It will delete your existing sources in that case.
When you specify a branch tag, you normally receive the latest versions of the files on that line of development. Ifyou wish to receive some past version, you can do so by specifying a date with the date= value field. Thecvsup(1) manual page explains how to do that.
For our example, we wish to receive FreeBSD-CURRENT. We add this line at the beginning of our supfile:
*default tag=.
There is an important special case that comes into play if you specify neither a tag= field nor a date= field. Inthat case, you receive the actual RCS files directly from the server’s CVS repository, rather than receiving aparticular version. Developers generally prefer this mode of operation. By maintaining a copy of the repositoryitself on their systems, they gain the ability to browse the revision histories and examine past versions of files. Thisgain is achieved at a large cost in terms of disk space, however.
• Where do you want to get them from?
We use the host= field to tell cvsup where to obtain its updates. Any of the CVSup mirror sites will do, thoughyou should try to select one that is close to you in cyberspace. In this example we will use a fictional FreeBSDdistribution site, cvsup666.FreeBSD.org:
*default host=cvsup666.FreeBSD.org
You will need to change the host to one that actually exists before running CVSup. On any particular run ofcvsup, you can override the host setting on the command line, with -h hostname.
• Where do you want to put them on your own machine?
The prefix= field tells cvsup where to put the files it receives. In this example, we will put the source filesdirectly into our main source tree, /usr/src. The src directory is already implicit in the collections we havechosen to receive, so this is the correct specification:
*default prefix=/usr
• Where should cvsup maintain its status files?
572

Appendix A. Obtaining FreeBSD
The cvsup client maintains certain status files in what is called the “base” directory. These files help CVSup towork more efficiently, by keeping track of which updates you have already received. We will use the standard basedirectory, /usr/local/etc/cvsup:
*default base=/usr/local/etc/cvsup
This setting is used by default if it is not specified in the supfile, so we actually do not need the above line.
If your base directory does not already exist, now would be a good time to create it. The cvsup client will refuseto run if the base directory does not exist.
• Miscellaneous supfile settings:
There is one more line of boiler plate that normally needs to be present in the supfile:
*default release=cvs delete use-rel-suffix compress
release=cvs indicates that the server should get its information out of the main FreeBSD CVS repository. Thisis virtually always the case, but there are other possibilities which are beyond the scope of this discussion.
delete gives CVSup permission to delete files. You should always specify this, so that CVSup can keep yoursource tree fully up-to-date. CVSup is careful to delete only those files for which it is responsible. Any extra filesyou happen to have will be left strictly alone.
use-rel-suffix is ... arcane. If you really want to know about it, see the cvsup(1) manual page. Otherwise, justspecify it and do not worry about it.
compress enables the use of gzip-style compression on the communication channel. If your network link is T1speed or faster, you probably should not use compression. Otherwise, it helps substantially.
• Putting it all together:
Here is the entire supfile for our example:
*default tag=.*default host=cvsup666.FreeBSD.org*default prefix=/usr*default base=/usr/local/etc/cvsup*default release=cvs delete use-rel-suffix compress
src-all
573

Appendix A. Obtaining FreeBSD
A.6.3.1 The refuse file
As mentioned above, CVSup uses a pull method. Basically, this means that you connect to the CVSup server, and itsays, “Here’s what you can download from me...”, and your client responds “OK, I’ll take this, this, this, and this.” Inthe default configuration, the CVSup client will take every file associated with the collection and tag you chose inthe configuration file. However, this is not always what you want, especially if you are synching the doc, ports, orwww trees — most people can’t read four or five languages, and therefore they don’t need to download thelanguage-specific files. If you are CVSuping the ports collection, you can get around this by specifying eachcollection individually (e.g., ports-astrology, ports-biology, etc instead of simply saying ports-all). However, sincethe doc and www trees do not have language-specific collections, you must use one of CVSup’s many nifty features;the refuse file.
The refuse file essentially tells CVSup that it should not take every single file from a collection; in other words, ittells the client to refuse certain files from the server. The refuse file can be found (or, if you do not yet have one,should be placed) in base/sup/refuse. base is defined in your supfile; by default, base is/usr/local/etc/cvsup, which means that by default the refuse file is in/usr/local/etc/cvsup/sup/refuse.
The refuse file has a very simple format; it simply contains the names of files or directories that you do not wish todownload. For example, if you cannot speak any languages other than English and some German, and you do not feelthe need to use the German applications, you can put the following in your refuse file:
ports/chineseports/germanports/japaneseports/koreanports/russianports/vietnamesedoc/es_ES.ISO8859-1doc/ja_JP.eucJP
and so forth for the other languages. Note that the name of the repository is the first “directory” in the refuse file.
With this very useful feature, those users who are on slow links or pay by the minute for their Internet connectionwill be able to save valuable time as they will no longer need to download files that they will never use. For moreinformation on refuse files and other neat features of CVSup, please view its man page.
A.6.4 Running CVSupYou are now ready to try an update. The command line for doing this is quite simple:
# cvsup supfile
574

Appendix A. Obtaining FreeBSD
where supfile is of course the name of the supfile you have just created. Assuming you are running under X11,cvsup will display a GUI window with some buttons to do the usual things. Press the “go” button, and watch it run.
Since you are updating your actual /usr/src tree in this example, you will need to run the program as root so thatcvsup has the permissions it needs to update your files. Having just created your configuration file, and having neverused this program before, that might understandably make you nervous. There is an easy way to do a trial runwithout touching your precious files. Just create an empty directory somewhere convenient, and name it as an extraargument on the command line:
# mkdir /var/tmp/dest# cvsup supfile /var/tmp/dest
The directory you specify will be used as the destination directory for all file updates. CVSup will examine yourusual files in /usr/src, but it will not modify or delete any of them. Any file updates will instead land in/var/tmp/dest/usr/src. CVSup will also leave its base directory status files untouched when run this way. Thenew versions of those files will be written into the specified directory. As long as you have read access to /usr/src,you do not even need to be root to perform this kind of trial run.
If you are not running X11 or if you just do not like GUIs, you should add a couple of options to the command linewhen you run cvsup:
# cvsup -g -L 2 supfile
The -g tells cvsup not to use its GUI. This is automatic if you are not running X11, but otherwise you have to specifyit.
The -L 2 tells cvsup to print out the details of all the file updates it is doing. There are three levels of verbosity, from-L 0 to -L 2. The default is 0, which means total silence except for error messages.
There are plenty of other options available. For a brief list of them, type cvsup -H. For more detailed descriptions,see the manual page.
Once you are satisfied with the way updates are working, you can arrange for regular runs of cvsup using cron(8).Obviously, you should not let cvsup use its GUI when running it from cron.
A.6.5 CVSup File CollectionsThe file collections available via CVSup are organized hierarchically. There are a few large collections, and they aredivided into smaller sub-collections. Receiving a large collection is equivalent to receiving each of its sub-collections.The hierarchical relationships among collections are reflected by the use of indentation in the list below.
The most commonly used collections are src-all, and ports-all. The other collections are used only by smallgroups of people for specialized purposes, and some mirror sites may not carry all of them.
575

Appendix A. Obtaining FreeBSD
cvs-all release=cvs
The main FreeBSD CVS repository, including the cryptography code.
distrib release=cvs
Files related to the distribution and mirroring of FreeBSD.
doc-all release=cvs
Sources for the FreeBSD handbook and other documentation.
ports-all release=cvs
The FreeBSD ports collection.
ports-archivers release=cvs
Archiving tools.
ports-astro release=cvs
Astronomical ports.
ports-audio release=cvs
Sound support.
ports-base release=cvs
Miscellaneous files at the top of /usr/ports.
ports-benchmarks release=cvs
Benchmarks.
ports-biology release=cvs
Biology.
ports-cad release=cvs
Computer aided design tools.
ports-chinese release=cvs
Chinese language support.
576

Appendix A. Obtaining FreeBSD
ports-comms release=cvs
Communication software.
ports-converters release=cvs
character code converters.
ports-databases release=cvs
Databases.
ports-deskutils release=cvs
Things that used to be on the desktop before computers were invented.
ports-devel release=cvs
Development utilities.
ports-editors release=cvs
Editors.
ports-emulators release=cvs
Emulators for other operating systems.
ports-ftp release=cvs
FTP client and server utilities.
ports-games release=cvs
Games.
ports-german release=cvs
German language support.
ports-graphics release=cvs
Graphics utilities.
ports-irc release=cvs
Internet Relay Chat utilities.
ports-japanese release=cvs
Japanese language support.
577

Appendix A. Obtaining FreeBSD
ports-java release=cvs
Java utilities.
ports-korean release=cvs
Korean language support.
ports-lang release=cvs
Programming languages.
ports-mail release=cvs
Mail software.
ports-math release=cvs
Numerical computation software.
ports-mbone release=cvs
MBone applications.
ports-misc release=cvs
Miscellaneous utilities.
ports-net release=cvs
Networking software.
ports-news release=cvs
USENET news software.
ports-palm release=cvs
Software support for 3Com Palm(tm) series.
ports-print release=cvs
Printing software.
ports-russian release=cvs
Russian language support.
ports-security release=cvs
Security utilities.
578

Appendix A. Obtaining FreeBSD
ports-shells release=cvs
Command line shells.
ports-sysutils release=cvs
System utilities.
ports-textproc release=cvs
text processing utilities (does not include desktop publishing).
ports-vietnamese release=cvs
Vietnamese language support.
ports-www release=cvs
Software related to the World Wide Web.
ports-x11 release=cvs
Ports to support the X window system.
ports-x11-clocks release=cvs
X11 clocks.
ports-x11-fm release=cvs
X11 file managers.
ports-x11-fonts release=cvs
X11 fonts and font utilities.
ports-x11-toolkits release=cvs
X11 toolkits.
ports-x11-servers
X11 servers.
ports-x11-wm
X11 window managers.
579

Appendix A. Obtaining FreeBSD
src-all release=cvs
The main FreeBSD sources, including the cryptography code.
src-base release=cvs
Miscellaneous files at the top of /usr/src.
src-bin release=cvs
User utilities that may be needed in single-user mode (/usr/src/bin).
src-contrib release=cvs
Utilities and libraries from outside the FreeBSD project, used relatively unmodified(/usr/src/contrib).
src-crypto release=cvs
Cryptography utilities and libraries from outside the FreeBSD project, used relatively unmodified(/usr/src/crypto).
src-eBones release=cvs
Kerberos and DES (/usr/src/eBones). Not used in current releases of FreeBSD.
src-etc release=cvs
System configuration files (/usr/src/etc).
src-games release=cvs
Games (/usr/src/games).
src-gnu release=cvs
Utilities covered by the GNU Public License (/usr/src/gnu).
src-include release=cvs
Header files (/usr/src/include).
src-kerberos5 release=cvs
Kerberos5 security package (/usr/src/kerberos5).
src-kerberosIV release=cvs
KerberosIV security package (/usr/src/kerberosIV).
580

Appendix A. Obtaining FreeBSD
src-lib release=cvs
Libraries (/usr/src/lib).
src-libexec release=cvs
System programs normally executed by other programs (/usr/src/libexec).
src-release release=cvs
Files required to produce a FreeBSD release (/usr/src/release).
src-secure release=cvs
DES (/usr/src/secure).
src-sbin release=cvs
System utilities for single-user mode (/usr/src/sbin).
src-share release=cvs
Files that can be shared across multiple systems (/usr/src/share).
src-sys release=cvs
The kernel (/usr/src/sys).
src-sys-crypto release=cvs
Kernel cryptography code (/usr/src/sys/crypto).
src-tools release=cvs
Various tools for the maintenance of FreeBSD (/usr/src/tools).
src-usrbin release=cvs
User utilities (/usr/src/usr.bin).
src-usrsbin release=cvs
System utilities (/usr/src/usr.sbin).
www release=cvs
The sources for the World Wide Web data.
581

Appendix A. Obtaining FreeBSD
distrib release=self
The CVSup server’s own configuration files. Used by CVSup mirror sites.
gnats release=current
The GNATS bug-tracking database.
mail-archive release=current
FreeBSD mailing list archive.
www release=current
The installed World Wide Web data. Used by WWW mirror sites.
A.6.6 For more informationFor the CVSup FAQ and other information about CVSup, see The CVSup Home Page(http://www.polstra.com/projects/freeware/CVSup/).
Most FreeBSD-related discussion of CVSup takes place on the FreeBSD technical discussions mailing list<[email protected]>. New versions of the software are announced there, as well as on theFreeBSD announcements mailing list <[email protected]>.
Questions and bug reports should be addressed to the author of the program at <[email protected]>.
A.6.7 CVSup SitesCVSup servers for FreeBSD are running at the following sites:
Argentina
• cvsup.ar.FreeBSD.org (maintainer <[email protected]>)
Australia
• cvsup.au.FreeBSD.org (maintainer <[email protected]>)
• cvsup3.au.FreeBSD.org (maintainer <[email protected]>)
582

Appendix A. Obtaining FreeBSD
Austria
• cvsup.at.FreeBSD.org (maintainer <[email protected]>)
Brazil
• cvsup.br.FreeBSD.org (maintainer <[email protected]>)
• cvsup2.br.FreeBSD.org (maintainer <[email protected]>)
• cvsup3.br.FreeBSD.org (maintainer <[email protected]>)
Canada
• cvsup.ca.FreeBSD.org (maintainer <[email protected]>)
• cvsup2.ca.FreeBSD.org (maintainer <[email protected]>)
China
• cvsup.cn.FreeBSD.org (maintainer <[email protected]>)
Czech Republic
• cvsup.cz.FreeBSD.org (maintainer <[email protected]>)
Denmark
• cvsup.dk.FreeBSD.org (maintainer <[email protected]>)
583

Appendix A. Obtaining FreeBSD
Estonia
• cvsup.ee.FreeBSD.org (maintainer <[email protected]>)
Finland
• cvsup.fi.FreeBSD.org (maintainer <[email protected]>)
• cvsup2.fi.FreeBSD.org (maintainer <[email protected]>)
France
• cvsup.fr.FreeBSD.org (maintainer <[email protected]>)
• cvsup2.fr.FreeBSD.org (maintainer <[email protected]>)
Germany
• cvsup.de.FreeBSD.org (maintainer <[email protected]>)
• cvsup1.de.FreeBSD.org (maintainer <[email protected]>)
• cvsup2.de.FreeBSD.org (maintainer <[email protected]>)
• cvsup3.de.FreeBSD.org (maintainer <[email protected]>)
• cvsup4.de.FreeBSD.org (maintainer <[email protected]>)
• cvsup5.de.FreeBSD.org (maintainer <[email protected]>)
Greece
• cvsup.gr.FreeBSD.org (maintainer <[email protected]>)
• cvsup2.gr.FreeBSD.org (maintainer <[email protected]>)
584

Appendix A. Obtaining FreeBSD
Iceland
• cvsup.is.FreeBSD.org (maintainer <[email protected]>)
Ireland
• cvsup.ie.FreeBSD.org (maintainer <[email protected]>), Trinity College, Dublin.
Japan
• cvsup.jp.FreeBSD.org (maintainer <[email protected]>)
• cvsup2.jp.FreeBSD.org (maintainer <[email protected]>)
• cvsup3.jp.FreeBSD.org (maintainer <[email protected]>)
• cvsup4.jp.FreeBSD.org (maintainer <[email protected]>)
• cvsup5.jp.FreeBSD.org (maintainer <[email protected]>)
• cvsup6.jp.FreeBSD.org (maintainer <[email protected]>)
Korea
• cvsup.kr.FreeBSD.org (maintainer <[email protected]>)
• cvsup2.kr.FreeBSD.org (maintainer <[email protected]>)
Lithuania
• cvsup.lt.FreeBSD.org (maintainer <[email protected]>)
585

Appendix A. Obtaining FreeBSD
Netherlands
• cvsup.nl.FreeBSD.org (maintainer <[email protected]>)
• cvsup2.nl.FreeBSD.org (maintainer <[email protected]>)
Norway
• cvsup.no.FreeBSD.org (maintainer <[email protected]>)
Poland
• cvsup.pl.FreeBSD.org (maintainer <[email protected]>)
Portugal
• cvsup.pt.FreeBSD.org (maintainer <[email protected]>)
Russia
• cvsup.ru.FreeBSD.org (maintainer <[email protected]>)
• cvsup2.ru.FreeBSD.org (maintainer <[email protected]>)
• cvsup3.ru.FreeBSD.org (maintainer <[email protected]>)
• cvsup4.ru.FreeBSD.org (maintainer <[email protected]>)
• cvsup5.ru.FreeBSD.org (maintainer <[email protected]>)
• cvsup6.ru.FreeBSD.org (maintainer <[email protected]>)
586

Appendix A. Obtaining FreeBSD
Slovak Republic
• cvsup.sk.FreeBSD.org (maintainer <[email protected]>)
• cvsup2.sk.FreeBSD.org (maintainer <[email protected]>)
Slovenia
• cvsup.si.FreeBSD.org (maintainer <[email protected]>)
South Africa
• cvsup.za.FreeBSD.org (maintainer <[email protected]>)
• cvsup2.za.FreeBSD.org (maintainer <[email protected]>)
Spain
• cvsup.es.FreeBSD.org (maintainer <[email protected]>)
• cvsup2.es.FreeBSD.org (maintainer <[email protected]>)
• cvsup3.es.FreeBSD.org (maintainer <[email protected]>)
Sweden
• cvsup.se.FreeBSD.org (maintainer <[email protected]>)
• cvsup2.se.FreeBSD.org (maintainer <[email protected]>)
Taiwan
• cvsup.tw.FreeBSD.org (maintainer <[email protected]>)
587

Appendix A. Obtaining FreeBSD
• cvsup2.tw.FreeBSD.org (maintainer <[email protected]>)
• cvsup3.tw.FreeBSD.org (maintainer <[email protected]>)
Ukraine
• cvsup2.ua.FreeBSD.org (maintainer <[email protected]>)
• cvsup3.ua.FreeBSD.org (maintainer <[email protected]>), Kiev
• cvsup4.ua.FreeBSD.org (maintainer <[email protected]>)
United Kingdom
• cvsup.uk.FreeBSD.org (maintainer <[email protected]>)
• cvsup2.uk.FreeBSD.org (maintainer <[email protected]>)
• cvsup3.uk.FreeBSD.org (maintainer <[email protected]>)
USA
• cvsup1.FreeBSD.org (maintainer <[email protected]>), Washington state
• cvsup2.FreeBSD.org (maintainer <[email protected]>), California
• cvsup3.FreeBSD.org (maintainer <[email protected]>), Massachusetts
• cvsup4.FreeBSD.org (maintainer <[email protected]>), Oregon
• cvsup5.FreeBSD.org (maintainer <[email protected]>), Arizona
• cvsup6.FreeBSD.org (maintainer <[email protected]>), Florida
• cvsup7.FreeBSD.org (maintainer <[email protected]>), Washington state
• cvsup8.FreeBSD.org (maintainer <[email protected]>), Washington state
• cvsup9.FreeBSD.org (maintainer <[email protected]>), Minnesota
• cvsup10.FreeBSD.org (maintainer <[email protected]>), California
• cvsup11.FreeBSD.org (maintainer <[email protected]>), Virginia
588

Appendix A. Obtaining FreeBSD
• cvsup12.FreeBSD.org (maintainer <[email protected]>), Indiana
• cvsup13.FreeBSD.org (maintainer <[email protected]>), California
• cvsup14.FreeBSD.org (maintainer <[email protected]>), California
• cvsup15.FreeBSD.org (maintainer <[email protected]>), Illinois
• cvsup16.FreeBSD.org (maintainer <[email protected]>), Virginia
• cvsup17.FreeBSD.org (maintainer <[email protected]>), Washington state
A.7 AFS SitesAFS servers for FreeBSD are running at the following sites;
Sweden
The path to the files are: /afs/stacken.kth.se/ftp/pub/FreeBSD/
stacken.kth.se # Stacken Computer Club, KTH, Sweden130.237.234.43 #hot.stacken.kth.se130.237.237.230 #fishburger.stacken.kth.se130.237.234.3 #milko.stacken.kth.se
Maintainer <[email protected]>
589

Appendix B. BibliographyWhile the manual pages provide the definitive reference for individual pieces of the FreeBSD operating system, theyare notorious for not illustrating how to put the pieces together to make the whole operating system run smoothly.For this, there is no substitute for a good book on UNIX system administration and a good users’ manual.
B.1 Books & Magazines Specific to FreeBSDInternational books & Magazines:
• Using FreeBSD (http://jdli.tw.freebsd.org/publication/book/freebsd2/index.htm) (in Chinese).
• FreeBSD for PC 98’ers (in Japanese), published by SHUWA System Co, LTD. ISBN 4-87966-468-5 C3055P2900E.
• FreeBSD (in Japanese), published by CUTT. ISBN 4-906391-22-2 C3055 P2400E.
• Complete Introduction to FreeBSD (http://www.shoeisha.co.jp/pc/index/shinkan/97_05_06.htm) (in Japanese),published by Shoeisha Co., Ltd (http://www.shoeisha.co.jp/). ISBN 4-88135-473-6 P3600E.
• Personal UNIX Starter Kit FreeBSD (http://www.ascii.co.jp/pb/book1/shinkan/detail/1322785.html) (inJapanese), published by ASCII (http://www.ascii.co.jp/). ISBN 4-7561-1733-3 P3000E.
• FreeBSD Handbook (Japanese translation), published by ASCII (http://www.ascii.co.jp/). ISBN 4-7561-1580-2P3800E.
• FreeBSD mit Methode (in German), published by Computer und Literatur Verlag/Vertrieb Hanser, 1998. ISBN3-932311-31-0.
• FreeBSD Install and Utilization Manual (http://www.pc.mycom.co.jp/FreeBSD/install-manual.html) (inJapanese), published by Mainichi Communications Inc. (http://www.pc.mycom.co.jp/).
• Onno W Purbo, Dodi Maryanto, Syahrial Hubbany, Widjil Widodo Building Internet Server with FreeBSD(http://maxwell.itb.ac.id/) (in Indonesia Language), published by Elex Media Komputindo(http://www.elexmedia.co.id/).
English language books & Magazines:
• The Complete FreeBSD (http://www.wccdrom.com/titles/freebsd/bsdcomp_bkx.phtml), published by BSDi(http://www.bsdi.com/).
• The FreeBSD Corporate Networker’s Guide (http://www.freebsd-corp-net-guide.com), published byAddison-Wesley (http://www.awl.com/aw/).
590

Appendix B. Bibliography
B.2 Users’ Guides
• Computer Systems Research Group, UC Berkeley. 4.4BSD User’s Reference Manual. O’Reilly & Associates, Inc.,1994. ISBN 1-56592-075-9
• Computer Systems Research Group, UC Berkeley. 4.4BSD User’s Supplementary Documents. O’Reilly &Associates, Inc., 1994. ISBN 1-56592-076-7
• UNIX in a Nutshell. O’Reilly & Associates, Inc., 1990. ISBN 093717520X
• Mui, Linda. What You Need To Know When You Can’t Find Your UNIX System Administrator. O’Reilly &Associates, Inc., 1995. ISBN 1-56592-104-6
• Ohio State University (http://www-wks.acs.ohio-state.edu/) has written a UNIX Introductory Course(http://www-wks.acs.ohio-state.edu/unix_course/unix.html) which is available online in HTML and PostScriptformat.
• Jpman Project, Japan FreeBSD Users Group (http://www.jp.FreeBSD.org/). FreeBSD User’s Reference Manual(http://www.pc.mycom.co.jp/FreeBSD/urm.html) (Japanese translation). Mainichi Communications Inc.(http://www.pc.mycom.co.jp/), 1998. ISBN4-8399-0088-4 P3800E.
• Edinburgh University (http://www.ed.ac.uk/) has written an Online Guide (http://unixhelp.ed.ac.uk/) fornewcomers to the UNIX environment.
B.3 Administrators’ Guides
• Albitz, Paul and Liu, Cricket. DNS and BIND, 3rd Ed. O’Reilly & Associates, Inc., 1998. ISBN 1-56592-512-2
• Computer Systems Research Group, UC Berkeley. 4.4BSD System Manager’s Manual. O’Reilly & Associates,Inc., 1994. ISBN 1-56592-080-5
• Costales, Brian, et al. Sendmail, 2nd Ed. O’Reilly & Associates, Inc., 1997. ISBN 1-56592-222-0
• Frisch, Æleen. Essential System Administration, 2nd Ed. O’Reilly & Associates, Inc., 1995. ISBN 1-56592-127-5
• Hunt, Craig. TCP/IP Network Administration, 2nd Ed. O’Reilly & Associates, Inc., 1997. ISBN 1-56592-322-7
• Nemeth, Evi. UNIX System Administration Handbook. 3rd Ed. Prentice Hall, 2000. ISBN 0-13-020601-6
• Stern, Hal Managing NFS and NIS O’Reilly & Associates, Inc., 1991. ISBN 0-937175-75-7
• Jpman Project, Japan FreeBSD Users Group (http://www.jp.FreeBSD.org/). FreeBSD System Administrator’sManual (http://www.pc.mycom.co.jp/FreeBSD/sam.html) (Japanese translation). Mainichi Communications Inc.(http://www.pc.mycom.co.jp/), 1998. ISBN4-8399-0109-0 P3300E.
591

Appendix B. Bibliography
B.4 Programmers’ Guides
• Asente, Paul. X Window System Toolkit. Digital Press. ISBN 1-55558-051-3
• Computer Systems Research Group, UC Berkeley. 4.4BSD Programmer’s Reference Manual. O’Reilly &Associates, Inc., 1994. ISBN 1-56592-078-3
• Computer Systems Research Group, UC Berkeley. 4.4BSD Programmer’s Supplementary Documents. O’Reilly &Associates, Inc., 1994. ISBN 1-56592-079-1
• Harbison, Samuel P. and Steele, Guy L. Jr. C: A Reference Manual. 4rd ed. Prentice Hall, 1995. ISBN0-13-326224-3
• Kernighan, Brian and Dennis M. Ritchie. The C Programming Language.. PTR Prentice Hall, 1988. ISBN0-13-110362-9
• Lehey, Greg. Porting UNIX Software. O’Reilly & Associates, Inc., 1995. ISBN 1-56592-126-7
• Plauger, P. J. The Standard C Library. Prentice Hall, 1992. ISBN 0-13-131509-9
• Stevens, W. Richard. Advanced Programming in the UNIX Environment. Reading, Mass. : Addison-Wesley, 1992ISBN 0-201-56317-7
• Stevens, W. Richard. UNIX Network Programming. 2nd Ed, PTR Prentice Hall, 1998. ISBN 0-13-490012-X
• Wells, Bill. “Writing Serial Drivers for UNIX”. Dr. Dobb’s Journal. 19(15), December 1994. pp68-71, 97-99.
B.5 Operating System Internals
• Andleigh, Prabhat K. UNIX System Architecture. Prentice-Hall, Inc., 1990. ISBN 0-13-949843-5
• Jolitz, William. “Porting UNIX to the 386”. Dr. Dobb’s Journal. January 1991-July 1992.
• Leffler, Samuel J., Marshall Kirk McKusick, Michael J Karels and John Quarterman The Design andImplementation of the 4.3BSD UNIX Operating System. Reading, Mass. : Addison-Wesley, 1989. ISBN0-201-06196-1
• Leffler, Samuel J., Marshall Kirk McKusick, The Design and Implementation of the 4.3BSD UNIX OperatingSystem: Answer Book. Reading, Mass. : Addison-Wesley, 1991. ISBN 0-201-54629-9
• McKusick, Marshall Kirk, Keith Bostic, Michael J Karels, and John Quarterman. The Design and Implementationof the 4.4BSD Operating System. Reading, Mass. : Addison-Wesley, 1996. ISBN 0-201-54979-4
• Stevens, W. Richard. TCP/IP Illustrated, Volume 1: The Protocols. Reading, Mass. : Addison-Wesley, 1996. ISBN0-201-63346-9
592

Appendix B. Bibliography
• Schimmel, Curt. Unix Systems for Modern Architectures. Reading, Mass. : Addison-Wesley, 1994. ISBN0-201-63338-8
• Stevens, W. Richard. TCP/IP Illustrated, Volume 3: TCP for Transactions, HTTP, NNTP and the UNIX DomainProtocols. Reading, Mass. : Addison-Wesley, 1996. ISBN 0-201-63495-3
• Vahalia, Uresh. UNIX Internals -- The New Frontiers. Prentice Hall, 1996. ISBN 0-13-101908-2
• Wright, Gary R. and W. Richard Stevens. TCP/IP Illustrated, Volume 2: The Implementation. Reading, Mass. :Addison-Wesley, 1995. ISBN 0-201-63354-X
B.6 Security Reference
• Cheswick, William R. and Steven M. Bellovin. Firewalls and Internet Security: Repelling the Wily Hacker.Reading, Mass. : Addison-Wesley, 1995. ISBN 0-201-63357-4
• Garfinkel, Simson and Gene Spafford. Practical UNIX Security. 2nd Ed. O’Reilly & Associates, Inc., 1996. ISBN1-56592-148-8
• Garfinkel, Simson. PGP Pretty Good Privacy O’Reilly & Associates, Inc., 1995. ISBN 1-56592-098-8
B.7 Hardware Reference
• Anderson, Don and Tom Shanley. Pentium Processor System Architecture. 2nd Ed. Reading, Mass. :Addison-Wesley, 1995. ISBN 0-201-40992-5
• Ferraro, Richard F. Programmer’s Guide to the EGA, VGA, and Super VGA Cards. 3rd ed. Reading, Mass. :Addison-Wesley, 1995. ISBN 0-201-62490-7
• Intel Corporation publishes documentation on their CPUs, chipsets and standards on their developer web site(http://developer.intel.com/), usually as PDF files.
• Shanley, Tom. 80486 System Architecture. 3rd ed. Reading, Mass. : Addison-Wesley, 1995. ISBN 0-201-40994-1
• Shanley, Tom. ISA System Architecture. 3rd ed. Reading, Mass. : Addison-Wesley, 1995. ISBN 0-201-40996-8
• Shanley, Tom. PCI System Architecture. 3rd ed. Reading, Mass. : Addison-Wesley, 1995. ISBN 0-201-40993-3
• Van Gilluwe, Frank. The Undocumented PC. Reading, Mass: Addison-Wesley Pub. Co., 1994. ISBN0-201-62277-7
593

Appendix B. Bibliography
B.8 UNIX History
• Lion, John Lion’s Commentary on UNIX, 6th Ed. With Source Code. ITP Media Group, 1996. ISBN 1573980137
• Raymond, Eric S. The New Hacker’s Dictionary, 3rd edition. MIT Press, 1996. ISBN 0-262-68092-0. Also knownas the Jargon File (http://www.ccil.org/jargon/jargon.html)
• Salus, Peter H. A quarter century of UNIX. Addison-Wesley Publishing Company, Inc., 1994. ISBN0-201-54777-5
• Simon Garfinkel, Daniel Weise, Steven Strassmann. The UNIX-HATERS Handbook. IDG Books Worldwide, Inc.,1994. ISBN 1-56884-203-1
• Don Libes, Sandy Ressler Life with UNIX — special edition. Prentice-Hall, Inc., 1989. ISBN 0-13-536657-7
• The BSD family tree. 1997. ftp://ftp.FreeBSD.org/pub/FreeBSD/FreeBSD-current/src/share/misc/bsd-family-treeor local (file:/usr/share/misc/bsd-family-tree) on a FreeBSD-current machine.
• The BSD Release Announcements collection. 1997. http://www.de.FreeBSD.org/de/ftp/releases/
• Networked Computer Science Technical Reports Library. http://www.ncstrl.org/
• Old BSD releases from the Computer Systems Research group (CSRG). http://www.mckusick.com/csrg/: The 4CDset covers all BSD versions from 1BSD to 4.4BSD and 4.4BSD-Lite2 (but not 2.11BSD, unfortunately). As well,the last disk holds the final sources plus the SCCS files.
B.9 Magazines and Journals
• The C/C++ Users Journal. R&D Publications Inc. ISSN 1075-2838
• Sys Admin — The Journal for UNIX System Administrators Miller Freeman, Inc., ISSN 1061-2688
594

Appendix C. Resources on the InternetThe rapid pace of FreeBSD progress makes print media impractical as a means of following the latest developments.Electronic resources are the best, if not often the only, way stay informed of the latest advances. Since FreeBSD is avolunteer effort, the user community itself also generally serves as a “technical support department” of sorts, withelectronic mail and USENET news being the most effective way of reaching that community.
The most important points of contact with the FreeBSD user community are outlined below. If you are aware of otherresources not mentioned here, please send them to the FreeBSD documentation project mailing list<[email protected]>so that they may also be included.
C.1 Mailing ListsThough many of the FreeBSD development members read USENET, we cannot always guarantee that we will get toyour questions in a timely fashion (or at all) if you post them only to one of the comp.unix.bsd.freebsd.*groups. By addressing your questions to the appropriate mailing list you will reach both us and a concentratedFreeBSD audience, invariably assuring a better (or at least faster) response.
The charters for the various lists are given at the bottom of this document. Please read the charter before joining orsending mail to any list. Most of our list subscribers now receive many hundreds of FreeBSD related messages everyday, and by setting down charters and rules for proper use we are striving to keep the signal-to-noise ratio of the listshigh. To do less would see the mailing lists ultimately fail as an effective communications medium for the project.
Archives are kept for all of the mailing lists and can be searched using the FreeBSD World Wide Web server(http://www.FreeBSD.org/search.html). The keyword searchable archive offers an excellent way of finding answersto frequently asked questions and should be consulted before posting a question.
C.1.1 List SummaryGeneral lists: The following are general lists which anyone is free (and encouraged) to join:
List Purpose
freebsd-advocacy FreeBSD Evangelism
freebsd-announce Important events and project milestones
freebsd-arch Architecture and design discussions
freebsd-bugs Bug reports
freebsd-chat Non-technical items related to the FreeBSD community
freebsd-commit Changes made to the FreeBSD source tree
595

Appendix C. Resources on the Internet
List Purpose
freebsd-config Development of FreeBSD installation and configurationtools
freebsd-current Discussion concerning the use of FreeBSD-current
freebsd-isp Issues for Internet Service Providers using FreeBSD
freebsd-jobs FreeBSD employment and consulting opportunities
freebsd-newbies New FreeBSD users activities and discussions
freebsd-policy FreeBSD Core team policy decisions. Low volume, andread-only
freebsd-questions User questions and technical support
freebsd-stable Discussion concerning the use of FreeBSD-stable
freebsd-test Where to send your test messages instead of one of theactual lists
Technical lists: The following lists are for technical discussion. You should read the charter for each list carefullybefore joining or sending mail to one as there are firm guidelines for their use and content.
List Purpose
freebsd-afs Porting AFS to FreeBSD
freebsd-alpha Porting FreeBSD to the Alpha
freebsd-atm Using ATM networking with FreeBSD
freebsd-audit Source code audit project
freebsd-database Discussing database use and development under FreeBSD
freebsd-doc Creating FreeBSD related documents
freebsd-emulation Emulation of other systems such as Linux/DOS/Windows
freebsd-fs Filesystems
freebsd-hackers General technical discussion
freebsd-hardware General discussion of hardware for running FreeBSD
freebsd-i18n FreeBSD Internationalization
freebsd-ia64 Porting FreeBSD to Intel’s upcoming IA64 systems
freebsd-ipfw Technical discussion concerning the redesign of the IPfirewall code
freebsd-isdn ISDN developers
freebsd-java Java developers and people porting JDKs to FreeBSD
freebsd-libh The second generation installation and package system
freebsd-mobile Discussions about mobile computing
596

Appendix C. Resources on the Internet
List Purpose
freebsd-mozilla Porting mozilla to FreeBSD
freebsd-multimedia Multimedia applications
freebsd-new-bus Technical discussions about bus architecture
freebsd-net Networking discussion and TCP/IP source code
freebsd-platforms Concerning ports to non-Intel architecture platforms
freebsd-ports Discussion of the ports collection
freebsd-ppc Porting FreeBSD to the PowerPC
freebsd-realtime Development of realtime extensions to FreeBSD
freebsd-scsi The SCSI subsystem
freebsd-security Security issues
freebsd-security-notifications Security notifications
freebsd-small Using FreeBSD in embedded applications
freebsd-smp Design discussions for [A]Symmetric MultiProcessing
freebsd-sparc Porting FreeBSD to Sparc systems
freebsd-tokenring Support Token Ring in FreeBSD
Limited lists: The following lists are for more specialized (and demanding) audiences and are probably not of interestto the general public. It is also a good idea to establish a presence in the technical lists before joining one of theselimited lists so that you’ll understand the communications etiquette involved.
List Purpose
freebsd-core FreeBSD core team
freebsd-hubs People running mirror sites (infrastructural support)
freebsd-install Installation development
freebsd-user-groups User group coordination
freebsd-www Maintainers of www.freebsd.org(http://www.FreeBSD.org)
Digest lists: Many of the above lists are also available as digests. New messages posted to the list are collected andsent out as a single e-mail when the sizes goes over 100KB. The lists available in digest form are:
List
freebsd-afs-digest
freebsd-alpha-digest
freebsd-chat-digest
597

Appendix C. Resources on the Internet
List
freebsd-current-digest
freebsd-cvs-all-digest
freebsd-database-digest
freebsd-hackers-digest
freebsd-ia64-digest
freebsd-isdn-digest
freebsd-java-digest
freebsd-questions-digest
freebsd-security-digest
freebsd-sparc-digest
freebsd-stable-digest
freebsd-test-digest
CVS lists: The following lists are for people interested in seeing the log messages for changes to various areas of thesource tree. They are Read-Only lists and should not have mail sent to them.
List Source area Area Description (source for)
cvs-all /usr/src All changes to the tree (superset)
C.1.2 How to SubscribeAll mailing lists live on FreeBSD.org, so to post to a given list you simply mail to �
[email protected] � .It will then be redistributed to mailing list members world-wide.
To subscribe to a list, send mail to <[email protected]> and include
subscribe � listname � [ � optional address � ]
in the body of your message. For example, to subscribe yourself to freebsd-announce, you’d do:
% mail [email protected] freebsd-announce^D
If you want to subscribe yourself under a different name, or submit a subscription request for a local mailing list (thisis more efficient if you have several interested parties at one site, and highly appreciated by us!), you would dosomething like:
598

Appendix C. Resources on the Internet
% mail [email protected] freebsd-announce [email protected]^D
Finally, it is also possible to unsubscribe yourself from a list, get a list of other list members or see the list of mailinglists again by sending other types of control messages to majordomo. For a complete list of available commands, dothis:
% mail [email protected]^D
Again, we would like to request that you keep discussion in the technical mailing lists on a technical track. If you areonly interested in important announcements then it is suggested that you join freebsd-announce, which is intendedonly for infrequent traffic.
C.1.3 List ChartersAll FreeBSD mailing lists have certain basic rules which must be adhered to by anyone using them. Failure tocomply with these guidelines will result in two (2) written warnings from the FreeBSD Postmaster<[email protected]>, after which, on a third offense, the poster will removed from all FreeBSD mailinglists and filtered from further posting to them. We regret that such rules and measures are necessary at all, but today’sInternet is a pretty harsh environment, it would seem, and many fail to appreciate just how fragile some of itsmechanisms are.
Rules of the road:
• The topic of any posting should adhere to the basic charter of the list it is posted to, e.g. if the list is abouttechnical issues then your posting should contain technical discussion. Ongoing irrelevant chatter or flaming onlydetracts from the value of the mailing list for everyone on it and will not be tolerated. For free-form discussion onno particular topic, the freebsd-chat <[email protected]> mailing list is freely available and shouldbe used instead.
• No posting should be made to more than 2 mailing lists, and only to 2 when a clear and obvious need to post toboth lists exists. For most lists, there is already a great deal of subscriber overlap and except for the most esotericmixes (say "-stable & -scsi"), there really is no reason to post to more than one list at a time. If a message is sent toyou in such a way that multiple mailing lists appear on the Cc line then the Cc line should also be trimmed beforesending it out again. You are still responsible for your own cross-postings, no matter who the originator mighthave been.
• Personal attacks and profanity (in the context of an argument) are not allowed, and that includes users anddevelopers alike. Gross breaches of netiquette, like excerpting or reposting private mail when permission to do so
599

Appendix C. Resources on the Internet
was not and would not be forthcoming, are frowned upon but not specifically enforced. However, there are alsovery few cases where such content would fit within the charter of a list and it would therefore probably rate awarning (or ban) on that basis alone.
• Advertising of non-FreeBSD related products or services is strictly prohibited and will result in an immediate banif it is clear that the offender is advertising by spam.
Individual list charters:
FREEBSD-AFS
Andrew File System
This list is for discussion on porting and using AFS from CMU/Transarc
FREEBSD-ANNOUNCE
Important events / milestones
This is the mailing list for people interested only in occasional announcements of significant FreeBSD events.This includes announcements about snapshots and other releases. It contains announcements of new FreeBSDcapabilities. It may contain calls for volunteers etc. This is a low volume, strictly moderated mailing list.
FREEBSD-ARCH
Architecture and design discussions
This list is for discussion of the FreeBSD architecture. Messages will mostly be kept strictly technical in nature.Examples of suitable topics are:
• How to re-vamp the build system to have several customized builds running at the same time.
• What needs to be fixed with VFS to make Heidemann layers work.
• How do we change the device driver interface to be able to use the same drivers cleanly on many buses andarchitectures.
• How to write a network driver.
FREEBSD-AUDIT
Source code audit project
This is the mailing list for the FreeBSD source code audit project. Although this was originally intended forsecurity-related changes, its charter has been expanded to review any code changes.
600

Appendix C. Resources on the Internet
This list is very heavy on patches, and is probably of no intrest to the average FreeBSD user. Securitydiscussions not related to a particular code change are held on freebsd-security. Conversely, all developers areencouraged to send their patches here for review, especially if they touch a part of the system where a bug mayadversely affect the integrity of the system.
FREEBSD-BUGS
Bug reports
This is the mailing list for reporting bugs in FreeBSD Whenever possible, bugs should be submitted using thesend-pr(1) command or the WEB interface (http://www.FreeBSD.org/send-pr.html) to it.
FREEBSD-CHAT
Non technical items related to the FreeBSD community
This list contains the overflow from the other lists about non-technical, social information. It includesdiscussion about whether Jordan looks like a toon ferret or not, whether or not to type in capitals, who isdrinking too much coffee, where the best beer is brewed, who is brewing beer in their basement, and so on.Occasional announcements of important events (such as upcoming parties, weddings, births, new jobs, etc) canbe made to the technical lists, but the follow ups should be directed to this -chat list.
FREEBSD-CORE
FreeBSD core team
This is an internal mailing list for use by the core members. Messages can be sent to it when a seriousFreeBSD-related matter requires arbitration or high-level scrutiny.
FREEBSD-CURRENT
Discussions about the use of FreeBSD-current
This is the mailing list for users of freebsd-current. It includes warnings about new features coming out in-current that will affect the users, and instructions on steps that must be taken to remain -current. Anyonerunning “current” must subscribe to this list. This is a technical mailing list for which strictly technical contentis expected.
601

Appendix C. Resources on the Internet
FREEBSD-CURRENT-DIGEST
Discussions about the use of FreeBSD-current
This is the digest version of the freebsd-current mailing list. The digest consists of all messages sent tofreebsd-current bundled together and mailed out as a single message. This list is Read-Only and should not beposted to.
FREEBSD-DOC
Documentation project
This mailing list is for the discussion of issues and projects related to the creation of documentation forFreeBSD. The members of this mailing list are collectively referred to as “The FreeBSD DocumentationProject”. It is an open list; feel free to join and contribute!
FREEBSD-FS
Filesystems
Discussions concerning FreeBSD filesystems. This is a technical mailing list for which strictly technical contentis expected.
FREEBSD-IPFW
IP Firewall
This is the forum for technical discussions concerning the redesign of the IP firewall code in FreeBSD. This is atechnical mailing list for which strictly technical content is expected.
FREEBSD-IA64
Porting FreeBSD to IA64
This is a technical mailing list for individuals actively working on porting FreeBSD to the IA-64 platform fromIntel, to bring up problems or discuss alternative solutions. Individuals interested in following the technicaldiscussion are also welcome.
FREEBSD-ISDN
ISDN Communications
602

Appendix C. Resources on the Internet
This is the mailing list for people discussing the development of ISDN support for FreeBSD.
FREEBSD-JAVA
Java Development
This is the mailing list for people discussing the development of significant Java applications for FreeBSD andthe porting and maintenance of JDKs.
FREEBSD-HACKERS
Technical discussions
This is a forum for technical discussions related to FreeBSD. This is the primary technical mailing list. It is forindividuals actively working on FreeBSD, to bring up problems or discuss alternative solutions. Individualsinterested in following the technical discussion are also welcome. This is a technical mailing list for whichstrictly technical content is expected.
FREEBSD-HACKERS-DIGEST
Technical discussions
This is the digest version of the freebsd-hackers mailing list. The digest consists of all messages sent tofreebsd-hackers bundled together and mailed out as a single message. This list is Read-Only and should not beposted to.
FREEBSD-HARDWARE
General discussion of FreeBSD hardware
General discussion about the types of hardware that FreeBSD runs on, various problems and suggestionsconcerning what to buy or avoid.
FREEBSD-HUBS
Mirror sites
Announcements and discussion for people who run FreeBSD mirror sites.
603

Appendix C. Resources on the Internet
FREEBSD-INSTALL
Installation discussion
This mailing list is for discussing FreeBSD installation development for the future releases.
FREEBSD-ISP
Issues for Internet Service Providers
This mailing list is for discussing topics relevant to Internet Service Providers (ISPs) using FreeBSD. This is atechnical mailing list for which strictly technical content is expected.
FREEBSD-NEWBIES
Newbies activities discussion
We cover any of the activities of newbies that are not already dealt with elsewhere, including: independentlearning and problem solving techniques, finding and using resources and asking for help elsewhere, how to usemailing lists and which lists to use, general chat, making mistakes, boasting, sharing ideas, stories, moral (butnot technical) support, and taking an active part in the FreeBSD community. We take our problems and supportquestions to freebsd-questions, and use freebsd-newbies to meet others who are doing the same things that wedo as newbies.
FREEBSD-PLATFORMS
Porting to Non-Intel platforms
Cross-platform FreeBSD issues, general discussion and proposals for non-Intel FreeBSD ports. This is atechnical mailing list for which strictly technical content is expected.
FREEBSD-POLICY
Core team policy decisions
This is a low volume, read-only mailing list for FreeBSD Core Team Policy decisions.
FREEBSD-PORTS
Discussion of “ports”
604

Appendix C. Resources on the Internet
Discussions concerning FreeBSD’s “ports collection” (/usr/ports), proposed ports, modifications to portscollection infrastructure and general coordination efforts. This is a technical mailing list for which strictlytechnical content is expected.
FREEBSD-QUESTIONS
User questions
This is the mailing list for questions about FreeBSD. You should not send “how to” questions to the technicallists unless you consider the question to be pretty technical.
FREEBSD-QUESTIONS-DIGEST
User questions
This is the digest version of the freebsd-questions mailing list. The digest consists of all messages sent tofreebsd-questions bundled together and mailed out as a single message.
FREEBSD-SCSI
SCSI subsystem
This is the mailing list for people working on the scsi subsystem for FreeBSD. This is a technical mailing listfor which strictly technical content is expected.
FREEBSD-SECURITY
Security issues
FreeBSD computer security issues (DES, Kerberos, known security holes and fixes, etc). This is a technicalmailing list for which strictly technical content is expected.
FREEBSD-SECURITY-NOTIFICATIONS
Security Notifications
Notifications of FreeBSD security problems and fixes. This is not a discussion list. The discussion list isFreeBSD-security.
605

Appendix C. Resources on the Internet
FREEBSD-SMALL
Using FreeBSD in embedded applications
This list discusses topics related to unusually small and embedded FreeBSD installations. This is a technicalmailing list for which strictly technical content is expected.
FREEBSD-STABLE
Discussions about the use of FreeBSD-stable
This is the mailing list for users of freebsd-stable. It includes warnings about new features coming out in -stablethat will affect the users, and instructions on steps that must be taken to remain -stable. Anyone running “stable”should subscribe to this list. This is a technical mailing list for which strictly technical content is expected.
FREEBSD-USER-GROUPS
User Group Coordination List
This is the mailing list for the coordinators from each of the local area Users Groups to discuss matters witheach other and a designated individual from the Core Team. This mail list should be limited to meeting synopsisand coordination of projects that span User Groups.
C.2 Usenet NewsgroupsIn addition to two FreeBSD specific newsgroups, there are many others in which FreeBSD is discussed or areotherwise relevant to FreeBSD users. Keyword searchable archives(http://minnie.cs.adfa.edu.au/BSD-info/bsdnews_search.html) are available for some of these newsgroups fromcourtesy of Warren Toomey <[email protected]>.
C.2.1 BSD Specific Newsgroups
• comp.unix.bsd.freebsd.announce (news:comp.unix.bsd.freebsd.announce)
• comp.unix.bsd.freebsd.misc (news:comp.unix.bsd.freebsd.misc)
606

Appendix C. Resources on the Internet
C.2.2 Other Unix Newsgroups of Interest
• comp.unix (news:comp.unix)
• comp.unix.questions (news:comp.unix.questions)
• comp.unix.admin (news:comp.unix.admin)
• comp.unix.programmer (news:comp.unix.programmer)
• comp.unix.shell (news:comp.unix.shell)
• comp.unix.user-friendly (news:comp.unix.user-friendly)
• comp.security.unix (news:comp.security.unix)
• comp.sources.unix (news:comp.sources.unix)
• comp.unix.advocacy (news:comp.unix.advocacy)
• comp.unix.misc (news:comp.unix.misc)
• comp.bugs.4bsd (news:comp.bugs.4bsd)
• comp.bugs.4bsd.ucb-fixes (news:comp.bugs.4bsd.ucb-fixes)
• comp.unix.bsd (news:comp.unix.bsd)
C.2.3 X Window System
• comp.windows.x.i386unix (news:comp.windows.x.i386unix)
• comp.windows.x (news:comp.windows.x)
• comp.windows.x.apps (news:comp.windows.x.apps)
• comp.windows.x.announce (news:comp.windows.x.announce)
• comp.windows.x.intrinsics (news:comp.windows.x.intrinsics)
• comp.windows.x.motif (news:comp.windows.x.motif)
• comp.windows.x.pex (news:comp.windows.x.pex)
• comp.emulators.ms-windows.wine (news:comp.emulators.ms-windows.wine)
607

Appendix C. Resources on the Internet
C.3 World Wide Web Servers
• http://www.FreeBSD.org/ — Central Server.
• http://www.au.FreeBSD.org/ — Australia/1.
• http://www2.au.FreeBSD.org/ — Australia/2.
• http://www3.au.FreeBSD.org/ — Australia/3.
• http://freebsd.itworks.com.au/ — Australia/4.
• http://www.br.FreeBSD.org/www.freebsd.org/ — Brazil/1.
• http://www2.br.FreeBSD.org/www.freebsd.org/ — Brazil/2.
• http://www3.br.FreeBSD.org/ — Brazil/3.
• http://www.bg.FreeBSD.org/ — Bulgaria.
• http://www.ca.FreeBSD.org/ — Canada/1.
• http://www2.ca.FreeBSD.org/ — Canada/2.
• http://www3.ca.FreeBSD.org/ — Canada/3.
• http://www.cn.FreeBSD.org/ — China.
• http://www.cz.FreeBSD.org/ — Czech Republic.
• http://www.dk.FreeBSD.org/ — Denmark.
• http://www.ee.FreeBSD.org/ — Estonia.
• http://www.fi.FreeBSD.org/ — Finland.
• http://www.fr.FreeBSD.org/ — France.
• http://www.de.FreeBSD.org/ — Germany/1.
• http://www1.de.FreeBSD.org/ — Germany/2.
• http://www2.de.FreeBSD.org/ — Germany/3.
• http://www.gr.FreeBSD.org/ — Greece.
• http://www.hu.FreeBSD.org/ — Hungary.
• http://www.is.FreeBSD.org/ — Iceland.
• http://www.ie.FreeBSD.org/ — Ireland.
• http://www.jp.FreeBSD.org/www.FreeBSD.org/ — Japan.
• http://www.kr.FreeBSD.org/ — Korea/1.
608

Appendix C. Resources on the Internet
• http://www2.kr.FreeBSD.org/ — Korea/2.
• http://www.lv.FreeBSD.org/ — Latvia.
• http://rama.asiapac.net/freebsd/ — Malaysia.
• http://www.nl.FreeBSD.org/ — Netherlands/1.
• http://www2.nl.FreeBSD.org/ — Netherlands/2.
• http://www.no.FreeBSD.org/ — Norway.
• http://www.nz.FreeBSD.org/ — New Zealand.
• http://www.pl.FreeBSD.org/ — Poland/1.
• http://www2.pl.FreeBSD.org/ — Poland/2.
• http://www.pt.FreeBSD.org/ — Portugal/1.
• http://www2.pt.FreeBSD.org/ — Portugal/2.
• http://www3.pt.FreeBSD.org/ — Portugal/3.
• http://www.ro.FreeBSD.org/ — Romania.
• http://www.ru.FreeBSD.org/ — Russia/1.
• http://www2.ru.FreeBSD.org/ — Russia/2.
• http://www3.ru.FreeBSD.org/ — Russia/3.
• http://www4.ru.FreeBSD.org/ — Russia/4.
• http://freebsd.s1web.com/ — Singapore.
• http://www.sk.FreeBSD.org/ — Slovak Republic.
• http://www.si.FreeBSD.org/ — Slovenia.
• http://www.es.FreeBSD.org/ — Spain.
• http://www.za.FreeBSD.org/ — South Africa/1.
• http://www2.za.FreeBSD.org/ — South Africa/2.
• http://www.se.FreeBSD.org/ — Sweden.
• http://www.ch.FreeBSD.org/ — Switzerland.
• http://www.tw.FreeBSD.org/www.freebsd.org/data/ — Taiwan.
• http://www.tr.FreeBSD.org/ — Turkey.
• http://www.ua.FreeBSD.org/www.freebsd.org/ — Ukraine/1.
• http://www2.ua.FreeBSD.org/ — Ukraine/2.
609

Appendix C. Resources on the Internet
• http://www4.ua.FreeBSD.org/ — Ukraine/Crimea.
• http://www.uk.FreeBSD.org/ — United Kingdom/1.
• http://www2.uk.FreeBSD.org/ — United Kingdom/2.
• http://www3.uk.FreeBSD.org/ — United Kingdom/3.
• http://www6.FreeBSD.org/ — USA/Oregon.
• http://www2.FreeBSD.org/ — USA/Texas.
C.4 Email AddressesThe following user groups provide FreeBSD related email addresses for their members. The listed administratorreserves the right to revoke the address if it is abused in any way.
Domain Facilities User Group Administrator
ukug.uk.FreeBSD.org Forwarding only <[email protected]>
Lee Johnston <[email protected]>
C.5 Shell AccountsThe following user groups provide shell accounts for people who are actively supporting the FreeBSD project. Thelisted administrator reserves the right to cancel the account if it is abused in any way.
Host Access Facilities Administrator
storm.uk.FreeBSD.org SSH only Read-only cvs, personal webspace, email
Brian Somers<[email protected]>
dogma.freebsd-uk.eu.org Telnet/FTP/SSH E-Mail, Web space,Anonymous FTP
Lee Johnston<[email protected]>
610

Appendix D. FreeBSD Project StaffThe FreeBSD Project is managed and operated by the following groups of people:
D.1 The FreeBSD Core TeamThe FreeBSD core team constitutes the project’s “Board of Directors”, responsible for deciding the project’s overallgoals and direction as well as managing specific areas of the FreeBSD project landscape.
(in alphabetical order by last name):
• Satoshi Asami <[email protected]>
• David Greenman <[email protected]>
• Jordan K. Hubbard <[email protected]>
• Greg Lehey <[email protected]>
• Warner Losh <[email protected]>
• Doug Rabson <[email protected]>
• Michael Smith <[email protected]>
• Robert Watson <[email protected]>
• Peter Wemm <[email protected]>
D.2 The FreeBSD DevelopersThese are the people who have commit privileges and do the engineering work on the FreeBSD source tree. All coreteam members are also developers.
• Shunsuke Akiyama <[email protected]>
• Jose M. Alcaide <[email protected]>
• Will Andrews <[email protected]>
• Ugen J.S.Antsilevich <[email protected]>
• Toshihiko Arai <[email protected]>
• Sergey Babkin <[email protected]>
611

Appendix D. FreeBSD Project Staff
• Daniel Baker <[email protected]>
• John Baldwin <[email protected]>
• Duncan Barclay <[email protected]>
• Ade Barkah <[email protected]>
• Robert V. Baron <[email protected]>
• Doug Barton <[email protected]>
• Anton Berezin <[email protected]>
• Stefan Bethke <[email protected]>
• Pierre Beyssac <[email protected]>
• Andrzej Bialecki <[email protected]>
• John Birrell <[email protected]>
• Neil Blakey-Milner <[email protected]>
• Maxim Bolotin <[email protected]>
• Jonathan M. Bresler <[email protected]>
• Torsten Blum <[email protected]>
• Wilko Bulte <[email protected]>
• Jake Burkholder <[email protected]>
• Donald Burr <[email protected]>
• Adrian Chadd <[email protected]>
• David W. Chapman Jr. <[email protected]>
• Philippe Charnier <[email protected]>
• Jonathan Chen <[email protected]>
• Luoqi Chen <[email protected]>
• Andrey A. Chernov <[email protected]>
• Eric J. Chet <[email protected]>
• Kenjiro Cho <[email protected]>
• Junho CHOI <[email protected]>
• Crist J. Clark <[email protected]>
• Nik Clayton <[email protected]>
612

Appendix D. FreeBSD Project Staff
• Archie Cobbs <[email protected]>
• Chris Costello <[email protected]>
• Alan L. Cox <[email protected]>
• Martin Cracauer <[email protected]>
• David E. Cross <[email protected]>
• Peter da Silva <[email protected]>
• Adam David <[email protected]>
• Brooks Davis <[email protected]>
• Brian S. Dean <[email protected]>
• John W. DeBoskey <[email protected]>
• Matthew Dillon <[email protected]>
• Matthew N. Dodd <[email protected]>
• Dima Dorfman <[email protected]>
• Ian Dowse <[email protected]>
• Garance A Drosehn <[email protected]>
• Peter Dufault <[email protected]>
• Frank Durda IV <[email protected]>
• Tor Egge <[email protected]>
• Daniel Eischen <[email protected]>
• Eivind Eklund <[email protected]>
• Julian Elischer <[email protected]>
• Ralf S. Engelschall <[email protected]>
• Udo Erdelhoff <[email protected]>
• Ruslan Ermilov <[email protected]>
• Stefan Esser <[email protected]>
• Bruce Evans <[email protected]>
• Jason Evans <[email protected]>
• Sean Eric Fagan <[email protected]>
• Chris D. Faulhaber <[email protected]>
613

Appendix D. FreeBSD Project Staff
• Brian F. Feldman <[email protected]>
• Bill Fenner <[email protected]>
• Mário Sérgio Fujikawa Ferreira<[email protected]>
• John Fieber <[email protected]>
• James FitzGibbon <[email protected]>
• Marc G. Fournier <[email protected]>
• Lars Fredriksen <[email protected]>
• Dirk Frömberg <[email protected]>
• FUJISHIMA Satsuki <[email protected]>
• Shigeyuki Fukushima <[email protected]>
• Bill Fumerola <[email protected]>
• Atsushi Furuta <[email protected]>
• Andrew Gallatin <[email protected]>
• Patrick S. Gardella <[email protected]>
• Thomas Gellekum <[email protected]>
• Justin T. Gibbs <[email protected]>
• Brandon Gillespie <[email protected]>
• Sebastien Gioria <[email protected]>
• Thomas Graichen <[email protected]>
• Cameron Grant <[email protected]>
• Rodney Grimes <[email protected]>
• John-Mark Gurney <[email protected]>
• Hiroyuki HANAI <[email protected]>
• Roger Hardiman <[email protected]>
• Michael Haro <[email protected]>
• Daniel Harris <[email protected]>
• Peter Hawkins <[email protected]>
• John Hay <[email protected]>
• Sheldon Hearn <[email protected]>
614

Appendix D. FreeBSD Project Staff
• Mike Heffner <[email protected]>
• Wolfgang Helbig <[email protected]>
• Guy Helmer <[email protected]>
• Eric L. Hernes <[email protected]>
• Christoph Herrmann <[email protected]>
• Nick Hibma <[email protected]>
• Seiichirou Hiraoka <[email protected]>
• Orion Hodson <[email protected]>
• Peter Holm <[email protected]>
• Kazuo Horikawa <[email protected]>
• Tatsumi Hosokawa <[email protected]>
• James Housley <[email protected]>
• Jeffrey Hsu <[email protected]>
• Howard F. Hu <[email protected]>
• Tom Hukins <[email protected]>
• Matthew Hunt <[email protected]>
• R. Imura <[email protected]>
• Yoshinobu Inoue <[email protected]>
• Jun-ichiro Itoh <[email protected]>
• Mitsuru IWASAKI <[email protected]>
• Matthew Jacob <[email protected]>
• Jing-Tang Keith Jang <[email protected]>
• Gary Jennejohn <[email protected]>
• Trevor Johnson <[email protected]>
• Poul-Henning Kamp <[email protected]>
• Thomas-Henning von Kamptz <[email protected]>
• Josef Karthauser <[email protected]>
• Coleman Kane <[email protected]>
• Takenori KATO <[email protected]>
615

Appendix D. FreeBSD Project Staff
• Kris Kennaway <[email protected]>
• Kazuhiko Kiriyama <[email protected]>
• Andreas Klemm <[email protected]>
• Lars Koeller <[email protected]>
• Motoyuki Konno <[email protected]>
• Joseph Koshy <[email protected]>
• Jun Kuriyama <[email protected]>
• Alexander Langer <[email protected]>
• Chern Lee <[email protected]>
• Jeremy Lea <[email protected]>
• Jonathan Lemon <[email protected]>
• Don “Truck” Lewis <[email protected]>
• Ying-Chieh Liao <[email protected]>
• Larry Lile <[email protected]>
• Clive Lin <[email protected]>
• Kevin Lo <[email protected]>
• Scott Long <[email protected]>
• Ade Lovett <[email protected]>
• Joshua Peck Macdonald <[email protected]>
• Scott Mace <[email protected]>
• Bruce A. Mah <[email protected]>
• David Malone <[email protected]>
• Stephen McKay <[email protected]>
• Kirk McKusick <[email protected]>
• Eric Melville <[email protected]>
• Kenneth D. Merry <[email protected]>
• Dirk Meyer <[email protected]>
• Hellmuth Michaelis <[email protected]>
• Yoshiro Sanpei MIHIRA <[email protected]>
616

Appendix D. FreeBSD Project Staff
• Bosko Milekic <[email protected]>
• Yoshio MITA <[email protected]>
• Noriaki Mitsunaga <[email protected]>
• Jim Mock <[email protected]>
• Marcel Moolenaar <[email protected]>
• Dan Moschuk <[email protected]>
• Thomas Möstl <[email protected]>
• Atsushi Murai <[email protected]>
• Mark Murray <[email protected]>
• Rich Murphey <[email protected]>
• Akinori MUSHA <[email protected]>
• Yukihiro Nakai <[email protected]>
• Masafumi NAKANE <[email protected]>
• Mark Newton <[email protected]>
• Robert Nordier <[email protected]>
• David Nugent <[email protected]>
• David O’Brien <[email protected]>
• Daniel O’Callaghan <[email protected]>
• OKAZAKI Tetsurou <[email protected]>
• Jimmy Olgeni <[email protected]>
• L Jonas Olsson <[email protected]>
• Atsushi Onoe <[email protected]>
• Mark Ovens <[email protected]>
• Gary Palmer <[email protected]>
• Steve Passe <[email protected]>
• Sujal Patel <[email protected]>
• Chuck Paterson <[email protected]>
• Bill Paul <[email protected]>
• Alfred Perlstein <[email protected]>
617

Appendix D. FreeBSD Project Staff
• Peter Pentchev <[email protected]>
• Wes Peters <[email protected]>
• Chris Piazza <[email protected]>
• Jim Pirzyk <[email protected]>
• John Polstra <[email protected]>
• Boris Popov <[email protected]>
• Steve Price <[email protected]>
• Mike Pritchard <[email protected]>
• Mark Pulford <[email protected]>
• Darren Reed <[email protected]>
• Geoff Rehmet <[email protected]>
• George C. A. Reid <[email protected]>
• Martin Renters <[email protected]>
• Benno Rice <[email protected]>
• Luigi Rizzo <[email protected]>
• Paul Richards <[email protected]>
• Ollivier Robert <[email protected]>
• Chuck Robey <[email protected]>
• Jesus Rodriguez <[email protected]>
• Guido van Rooij <[email protected]>
• Gerard Roudier <[email protected]>
• Dima Ruban <[email protected]>
• Jeroen Ruigrok/Asmodai <[email protected]>
• Paul Saab <[email protected]>
• SADA Kenji <[email protected]>
• Hiroki Sato <[email protected]>
• Wilfredo Sánchez <[email protected]>
• Nick Sayer <[email protected]>
• Søren Schmidt <[email protected]>
618

Appendix D. FreeBSD Project Staff
• Wolfram Schneider <[email protected]>
• Jens Schweikhardt <[email protected]>
• Richard Seaman Jr. <[email protected]>
• Justin Seger <[email protected]>
• Ustimenko Semen <[email protected]>
• Gregory Neil Shapiro <[email protected]>
• Takeshi Shibagaki <[email protected]>
• Takuya SHIOZAKI <[email protected]>
• Hidetoshi Shimokawa <[email protected]>
• Vanilla I. Shu <[email protected]>
• Mike Silbersack <[email protected]>
• Shafeeq Sinnamohideen <[email protected]>
• Dmitry Sivachenko <[email protected]>
• Jesper Skriver <[email protected]>
• Michael Smith <[email protected]>
• Ben Smithurst <[email protected]>
• Nicolas Souchu <[email protected]>
• Issei Suzuki <[email protected]>
• Dag-Erling C. Smørgrav <[email protected]>
• Maxim Sobolev <[email protected]>
• Daniel C. Sobral <[email protected]>
• Brian Somers <[email protected]>
• Mike Spengler <[email protected]>
• Gene Stark <[email protected]>
• Murray Stokely <[email protected]>
• Munechika Sumikawa <[email protected]>
• Gregory Sutter <[email protected]>
• Bill Swingle <[email protected]>
• Yoshihiro Takahashi <[email protected]>
619

Appendix D. FreeBSD Project Staff
• Seigo Tanimura <[email protected]>
• Satoshi Taoka <[email protected]>
• Mark J. Taylor <[email protected]>
• Dmitrij Tejblum <[email protected]>
• Mikhail Teterin <[email protected]>
• Yar Tikhiy <[email protected]>
• Chris Timmons <[email protected]>
• Paul Traina <[email protected]>
• Hajimu UMEMOTO <[email protected]>
• Rajesh Vaidheeswarran <[email protected]>
• Tim Vanderhoek <[email protected]>
• Jacques Vidrine <[email protected]>
• Jayanth Vijayaraghavan <[email protected]>
• Johann Visagie <[email protected]>
• Rebecca Visger <[email protected]>
• Steven Wallace <[email protected]>
• Takanori Watanabe <[email protected]>
• Assar Westerlund <[email protected]>
• Doug White <[email protected]>
• Nate Williams <[email protected]>
• Garrett Wollman <[email protected]>
• Michael C. Wu <[email protected]>
• Jörg Wunsch <[email protected]>
• Kelly Yancey <[email protected]>
• UCHIYAMA Yasushi <[email protected]>
• Kazutaka YOKOTA <[email protected]>
• Andrey Zakhvatov <[email protected]>
• Alexey Zelkin <[email protected]>
• Jean-Marc Zucconi <[email protected]>
620

Appendix D. FreeBSD Project Staff
D.3 The FreeBSD Documentation ProjectThe FreeBSD Documentation Project (http://www.FreeBSD.org/docproj/docproj.html) is responsible for a numberof different services, each service being run by an individual and his deputies (if any):
Documentation Project Architect
Nik Clayton <[email protected]>
Handbook Editor
Jim Mock <[email protected]>
FAQ Editor
FAQ Maintainer <[email protected]>
News Editor
Jim Mock <[email protected]>
In the Press Editor
Joseph Koshy <[email protected]>
FreeBSD Really-Quick NewsLetter Editor
Chris Coleman <[email protected]>
Gallery Editor
Alexey Zelkin <[email protected]>
Commercial Editor
Alexey Zelkin <[email protected]>
Web Changes Editor
FreeBSD Webmaster mailing list <[email protected]>
User Groups Editor
Greg Lehey <[email protected]>
FreeBSD Projects and Tasklist Editor
Jeroen Ruigrok/Asmodai <[email protected]>
621

Appendix D. FreeBSD Project Staff
FreeBSD Java Project
Patrick S. Gardella <[email protected]>
LinuxDoc to DocBook conversion
Nik Clayton <[email protected]>
D.4 Who is Responsible for What
Documentation Project Manager (http://www.FreeBSD.org/docproj/docproj.html)
Nik Clayton <[email protected]>
Boot blocks
Robert Nordier <[email protected]>, John Baldwin <[email protected]>
Boot loader
Daniel C. Sobral <[email protected]>
John Baldwin <[email protected]>
Internationalization
Andrey A. Chernov <[email protected]>
Postmaster
Jonathan M. Bresler <[email protected]>
Release Coordinator
Jordan K. Hubbard <[email protected]>
Public Relations & Corporate Liaison
Jordan K. Hubbard <[email protected]>
Security Officer (http://www.FreeBSD.org/security/)
Kris Kennaway <[email protected]>
622

Appendix D. FreeBSD Project Staff
Source Repository Managers (http://www.FreeBSD.org/support.html#cvs)
Principal: Peter Wemm <[email protected]>
Assistant: John Polstra <[email protected]>
Ports Manager (http://www.FreeBSD.org/ports/)
Satoshi Asami <[email protected]>
Standards
Garrett Wollman <[email protected]>
XFree86 Project, Inc. Liaison
Rich Murphey <[email protected]>
GNATS Administrator (http://www.FreeBSD.org/support.html#gnats)
Steve Price <[email protected]>
623

Appendix E. PGP KeysIn case you need to verify a signature or send encrypted email to one of the officers or developers a number of keysare provided here for your convenience. Garrett Wollman <[email protected]> maintains a complete keyringof FreeBSD.org users (http://people.FreeBSD.org/~wollman/freebsd.keyring) for easy download.
E.1 Officers
E.1.1 FreeBSD Security Officer <[email protected]>
FreeBSD Security Officer � [email protected] �Fingerprint = 41 08 4E BB DB 41 60 71 F9 E5 0E 98 73 AF 3F 11
E.2 Core Team Members
E.2.1 Satoshi Asami <[email protected]>
Satoshi Asami � [email protected] �aka � [email protected] �
Fingerprint = EB 3C 68 9E FB 6C EB 3F DB 2E 0F 10 8F CE 79 CA
E.2.2 Jordan K. Hubbard <[email protected]>
Jordan K. Hubbard � [email protected] �Fingerprint = 3C F2 27 7E 4A 6C 09 0A 4B C9 47 CD 4F 4D 0B 20
E.2.3 Warner Losh <[email protected]>
Warner Losh � [email protected] �aka � [email protected] �
Fingerprint = D4 31 FD B9 F7 90 17 E8 37 C5 E7 7F CF A6 C1 B9
624

Appendix E. PGP Keys
E.2.4 Peter Wemm <[email protected]>
Peter Wemm � [email protected] �aka � [email protected] �aka � [email protected] �aka � [email protected] �
Key fingerprint = 47 05 04 CA 4C EE F8 93 F6 DB 02 92 6D F5 58 8A
E.2.5 Doug Rabson <[email protected]>
Doug Rabson � [email protected] �Key fingerprint = 20 BB E4 38 5D 89 D2 D4 68 A6 2F DC 0A DE 10 3C
E.3 Developers
E.3.1 Will Andrews <[email protected]>
pub 1024D/F81672C5 2000-05-22 Will Andrews (Key for official matters) � [email protected] �Key fingerprint = 661F BBF7 9F5D 3D02 C862 5F6C 178E E274 F816 72C5
uid Will Andrews � [email protected] �uid Will Andrews � [email protected] �uid Will Andrews � [email protected] �uid Will Andrews � [email protected] �uid Will Andrews � [email protected] �uid Will Andrews � [email protected] �sub 1024g/55472804 2000-05-22
E.3.2 Anton Berezin <[email protected]>
pub 1024D/7A7BA3C0 2000-05-25 Anton Berezin � [email protected]>Key fingerprint = CDD8 560C 174B D8E5 0323 83CE 22CA 584C 7A7B A3C0
uid Anton Berezin � [email protected]>uid Anton Berezin � [email protected]>sub 1024g/ADC71E87 2000-05-25
625

Appendix E. PGP Keys
E.3.3 Jonathan M. Bresler <[email protected]>
Jonathan M. Bresler � [email protected] �f16 Fingerprint16 = 31 57 41 56 06 C1 40 13 C5 1C E3 E5 DC 62 0E FB
E.3.4 Andrey A. Chernov <[email protected]>
Andrey A. Chernov � [email protected] �aka � [email protected] �
Key fingerprint = 33 03 9F 48 33 7B 4A 15 63 48 88 0A C4 97 FD 49
E.3.5 Nik Clayton <[email protected]>
pub 1024D/2C37E375 2000-11-09 Nik Clayton � [email protected]>Key fingerprint = 15B8 3FFC DDB4 34B0 AA5F 94B7 93A8 0764 2C37 E375
uid Nik Clayton � [email protected]>uid Nik Clayton � [email protected]>uid Nik Clayton � [email protected]>uid Nik Clayton � [email protected]>sub 1024g/769E298A 2000-11-09 [expires: 2000-11-10]
E.3.6 Dima Dorfman <[email protected]>
pub 1024D/9F6669F6 2001-02-04 Dima Dorfman � [email protected] �Key fingerprint = 0F07 CC6F 305A 698A CEAD 8ED9 1D98 247E 9F66 69F6
uid Dima Dorfman � [email protected] �sub 2048g/1CA759CB 2001-02-04 [expires: 2006-02-03]
E.3.7 Udo Erdelhoff <[email protected]>
pub 1024R/E74FA871 1994-07-19 Udo Erdelhoff � [email protected] �Key fingerprint = 8C B1 80 CA 2C 52 73 81 FB A7 B4 03 C5 32 C8 67
uid Udo Erdelhoff � [email protected] �uid Udo Erdelhoff � [email protected] �uid Udo Erdelhoff � [email protected] �uid Udo Erdelhoff � [email protected] �
626

Appendix E. PGP Keys
E.3.8 Brian F. Feldman <[email protected]>
pub 1024D/773905D6 2000-09-02 Brian Fundakowski Feldman � [email protected] �sig 773905D6 2000-09-02 Brian Fundakowski Feldman � [email protected] �sub 2048g/D2009B98 2000-09-02sig 773905D6 2000-09-02 Brian Fundakowski Feldman � [email protected] �
E.3.9 John-Mark Gurney <[email protected]>
Type bits/keyID Date User IDpub 1024/3F9951F5 1997/02/11 John-Mark Gurney � [email protected] �
Key fingerprint = B7 EC EF F8 AE ED A7 31 96 7A 22 B3 D8 56 36 F4John-Mark Gurney � [email protected] �John-Mark Gurney � [email protected] �John-Mark Gurney � [email protected] �
E.3.10 Trevor Johnson <[email protected]>
pub 1024D/3A3EA137 2000-04-20 Trevor Johnson � [email protected] �Key fingerprint = 7ED1 5A92 76C1 FFCB E5E3 A998 F037 5A0B 3A3E A137
sub 1024g/46C24F1E 2000-04-20
E.3.11 Poul-Henning Kamp <[email protected]>
Poul-Henning Kamp � [email protected] �Fingerprint = A3 F3 88 28 2F 9B 99 A2 49 F4 E2 FA 5A 78 8B 3ERSA 1024 0x0358FCBD 1995/08/01 Poul-Henning Kamp � [email protected] �
E.3.12 Josef Karthauser <[email protected]>
pub 1024D/E6B15016 2000-10-19 Josef Karthauser � [email protected] �uid Josef Karthauser � [email protected] �uid Josef Karthauser � [email protected] �uid Josef Karthauser � [email protected] �sub 2048g/1178B692 2000-10-19
627

Appendix E. PGP Keys
E.3.13 Andreas Klemm <[email protected]>
pub 1024D/6C6F6CBA 2001-01-06 Andreas Klemm � [email protected] �Key fingerprint = F028 D51A 0D42 DD67 4109 19A3 777A 3E94 6C6F 6CBA
uid Andreas Klemm � [email protected] �uid Andreas Klemm � [email protected] �uid Andreas Klemm � [email protected] �sub 2048g/FE23F866 2001-01-06
E.3.14 Bruce A. Mah <[email protected]>
Type Bits/KeyID Date User IDpub 1024/23EC263D 1997/03/12 Bruce A. Mah � [email protected] �
Bruce A. Mah � [email protected] �Bruce A. Mah � [email protected] �Bruce A. Mah � [email protected] �Bruce A. Mah � [email protected] �Bruce A. Mah � [email protected] �
E.3.15 Thomas Möstl <[email protected]>
pub 1024D/419C776C 2000-11-28 Thomas Moestl � [email protected] �Key fingerprint = 1C97 A604 2BD0 E492 51D0 9C0F 1FE6 4F1D 419C 776C
uid Thomas Moestl � [email protected] �uid Thomas Moestl � [email protected] �sub 2048g/ECE63CE6 2000-11-28
E.3.16 Rich Murphey <[email protected]>
Rich Murphey � [email protected] �fingerprint = AF A0 60 C4 84 D6 0C 73 D1 EF C0 E9 9D 21 DB E4
E.3.17 David O’Brien <[email protected]>
Type Bits KeyID Created Expires Algorithm Usesec+ 1024 0x34F9F9D5 1995-04-23 ---------- RSA Sign & Encryptf16 Fingerprint16 = B7 4D 3E E9 11 39 5F A3 90 76 5D 69 58 D9 98 7A
628

Appendix E. PGP Keys
David E. O’Brien � [email protected] �David E. O’Brien � [email protected] �David E. O’Brien � [email protected] �David E. O’Brien � [email protected] �David E. O’Brien � [email protected] �David E. O’Brien � whois Do38 �
sec+ 1024 0x7F9A9BA2 1998-06-10 ---------- DSS Sign & Encryptf20 Fingerprint20 = 02FD 495F D03C 9AF2 5DB7 F496 6FC8 DABD 7F9A 9BA2sub 3072 0xBA32C20D 1998-06-10 ---------- Diffie-Hellmanf20 Fingerprint20 = 0700 6058 CE6C 1C51 D0A3 45E6 26E1 A405 BA32 C20D
"David E. O’Brien" � [email protected] �"David E. O’Brien" � [email protected] �
E.3.18 Jim Pirzyk <[email protected]>
Jim Pirzyk � [email protected] �pub 1024D/4E23DACA 2001-03-02 Jim Pirzyk � [email protected] �
Key fingerprint = 07EE A1BD 32E5 C402 59B6 22D5 D846 31D1 4E23 DACAuid Jim Pirzyk � [email protected] �sub 1024g/F38895F7 2001-03-02
E.3.19 John Polstra <[email protected]>
John D. Polstra � [email protected] �Fingerprint = 54 3A 90 59 6B A4 9D 61 BF 1D 03 09 35 8D F6 0D
E.3.20 Mark Pulford <[email protected]>
Mark Pulford � [email protected] �Fingerprint = 58C9 C9BF C758 D8D4 7022 8EF5 559F 7F7B 182C 368F
E.3.21 Benno Rice <[email protected]>
pub 1024D/15BE120E 2001-01-15 Benno Rice � [email protected] �Key fingerprint = E786 5BF6 A296 5F77 E3DA 7493 6D0C 7BC6 15BE 120E
629

Appendix E. PGP Keys
sub 1024g/313F3AF2 2001-01-15 [expires: 2002-01-15]
E.3.22 Guido van Rooij <[email protected]>
Guido van Rooij � [email protected] �Fingerprint = 16 79 09 F3 C0 E4 28 A7 32 62 FA F6 60 31 C0 ED
E.3.23 Wolfram Schneider <[email protected]>
Type Bits/KeyID Date User IDpub 1024/2B7181AD 1997/08/09 Wolfram Schneider � [email protected] �
Key fingerprint = CA 16 91 D9 75 33 F1 07 1B F0 B4 9F 3E 95 B6 09
E.3.24 Gregory Neil Shapiro <[email protected]>
Type Bits KeyID Created Expires Algorithm Usesec+ 1024 0x4FBE2ADD 2000-10-13 ---------- RSA Sign & Encryptf16 Fingerprint16 = 56 D5 FF A7 A6 54 A6 B5 59 10 00 B9 5F 5F 20 09uid Gregory Neil Shapiro � [email protected] �uid Gregory Neil Shapiro � [email protected] �
E.3.25 Gregory Neil Shapiro <[email protected]>
Type Bits KeyID Created Expires Algorithm Usesec+ 1024 0xFCE56561 2000-10-14 2001-10-14 DSS Sign & Encryptf20 Fingerprint20 = 42C4 A87A FD85 C34F E77F 5EA1 88E1 7B1D FCE5 6561sub 1024 0x285DC8A0 2000-10-14 2001-10-14 Diffie-Hellmanf20 Fingerprint20 = 69AB 26D1 A244 51E3 2B6C 7091 BD19 FA76 285D C8A0uid Gregory Neil Shapiro � [email protected] �uid Gregory Neil Shapiro � [email protected] �
E.3.26 Christopher Shumway <[email protected]>
pub 1024D/3219F982 2001-05-17 Christopher Shumway � [email protected] �
630

Appendix E. PGP Keys
Fingerprint: 45F5 931B 0646 BF84 E78E E274 6C29 340E 3219 F982
E.3.27 Jesper Skriver <[email protected]>
pub 1024D/F9561C31 2001-03-09 Jesper Skriver � [email protected] �Key fingerprint = 6B88 9CE8 66E9 E631 C9C5 5EB4 22AB F0EC F956 1C31
uid Jesper Skriver � [email protected] �uid Jesper Skriver � [email protected] �sub 1024g/777C378C 2001-03-09
E.3.28 Ben Smithurst <[email protected]>
Type Bits KeyID Created Expires Algorithm Usesec+ 1024 0x99392F7D 1998-08-23 ---------- RSA Sign & Encryptf16 Fingerprint16 = 3D 89 87 42 CE CA 93 4C 68 32 0E D5 36 05 3D 16uid Ben Smithurst � [email protected] �
E.3.29 Daniel C. Sobral <[email protected]>
Type Bits/KeyID Date User IDpub 1024/488A2DD5 2000/06/07 Daniel C. Sobral � [email protected] �
Key fingerprint = AF 90 A6 A2 B5 8D 6C 28 37 F3 F4 47 8B 31 47 DFDaniel C. Sobral � [email protected] �
E.3.30 Brian Somers <[email protected]>
pub 1024R/666A7421 1997-04-30 Brian Somers � [email protected] �Key fingerprint = 2D 91 BD C2 94 2C 46 8F 8F 09 C4 FC AD 12 3B 21
uid Brian Somers � [email protected] �uid Brian Somers � [email protected] �uid Brian Somers � [email protected] �uid Brian Somers � [email protected] �
631

Appendix E. PGP Keys
E.3.31 Murray Stokely <[email protected]>
pub 1024/0E451F7D 2001/02/12 Murray Stokely � [email protected] �Key fingerprint = E2CA 411D DD44 53FD BB4B 3CB5 B4D7 10A2 0E45 1F7D
E.3.32 Gregory Sutter <[email protected]>
pub 1024D/845DFEDD 2000-10-10 Gregory S. Sutter � [email protected] �Key fingerprint = D161 E4EA 4BFA 2427 F3F9 5B1F 2015 31D5 845D FEDD
uid Gregory S. Sutter � [email protected] �uid Gregory S. Sutter � [email protected] �uid Gregory S. Sutter � [email protected] �sub 2048g/0A37BBCE 2000-10-10
E.3.33 Garrett Wollman <[email protected]>
pub 1024D/0B92FAEA 2000-01-20 Garrett Wollman � [email protected] �Key fingerprint = 4627 19AF 4649 31BF DE2E 3C66 3ECF 741B 0B92 FAEA
sub 1024g/90D5EBC2 2000-01-20
E.3.34 Jörg Wunsch <[email protected]>
Type Bits/KeyID Date User IDpub 1024/76A3F7B1 1996/04/27 Joerg Wunsch � [email protected] �
Key fingerprint = DC 47 E6 E4 FF A6 E9 8F 93 21 E0 7D F9 12 D6 4EJoerg Wunsch � [email protected] �Joerg Wunsch � [email protected] �Joerg Wunsch � [email protected] �
632