Free-Beginners-Guide-2016-with-6-day.pdf - BodyWeight ...
34
-
Upload
khangminh22 -
Category
Documents
-
view
2 -
download
0
Transcript of Free-Beginners-Guide-2016-with-6-day.pdf - BodyWeight ...

2 | P a g e C o p y r i g h t © 2 0 1 6 b y A n t h o n y A r v a n i t a k i s

3 | P a g e C o p y r i g h t © 2 0 1 6 b y A n t h o n y A r v a n i t a k i s
Contents It's simple but not easy... ......................................................................................................... 4
1. Either doing too little or doing too much ......................................................................... 5
2. Not doing the right exercises. ........................................................................................... 5
3. Too many reps! ................................................................................................................. 6
Quick Summary ...................................................................................................................... 7
Dynamic Stretching ................................................................................................................. 8
#1 Pull-ups - The king of upper body exercises (Lats, Arms & forearms) ............................ 20
Proper technique - The perfect pull up .................................................................................. 20
Chin ups - The best bodyweight exercise for big guns! ........................................................ 24
Progressions for beginners: ................................................................................................... 25
#2 Push ups (Chest, Triceps , serratus anterior) .................................................................... 25
#3 Weighted Lunges (whole legs) ........................................................................................ 26
#4 Dips (Chest, Shoulders, Triceps) ..................................................................................... 28
#5 Leg raises (Lower and Side Abs) ..................................................................................... 29
#6 Prone Cobra (Lower Back) .............................................................................................. 30

4 | P a g e C o p y r i g h t © 2 0 1 6 b y A n t h o n y A r v a n i t a k i s
Intro I have wasted a lot of my youth training too much and not having a lot to show for it. Of course
my goal then as an athlete was different but I wish I had the knowledge I now have to have
saved myself from extremes and use my training hours more efficiently. If you are someone who
just started training, not knowing where to start from and the only solution you've got is a home
bodyweight program I empathize with you and that is why I created this eBook. Its purpose is to
save you meaningless time and effort from all of the misinformation out there and help you focus
on the important stuff. Stick with me I promise to give you the best quality training a coach could
give his trainee.
It's simple but not easy...
Getting strong and lean is quite
simple. So simple that people miss it.
Of course the fitness industry is also
to blame for this since making
something seem a lot more
complicated than it is, can serve a lot
of guys into making them seem as
specialists. This way they can sell
themselves as a figure of authority.
As you read above, i mentioned it is going to be simple but
watch out, I didn't say it's going to be easy. There is a
difference between simple and easy. How many people do
you know who get their lazy ass of the couch and actually
pursue the stuff they are talking about? People just go on
YouTube, watch at a couple of transformation videos and
then go back to their couch, order a pizza or put a bowl of
cereal and play video games.
When you want results in life, there are no secret shortcuts. You are going to have to sweat, you
are going to have to accept the fact that there are going to be days (especially in the beginning)
when you will be waking up with muscle soreness. You will have to be patient, disciplined and
dedicated to your training schedule. Once you accept this and begin training the rest will follow.
5 | P a g e C o p y r i g h t © 2 0 1 6 b y A n t h o n y A r v a n i t a k i s
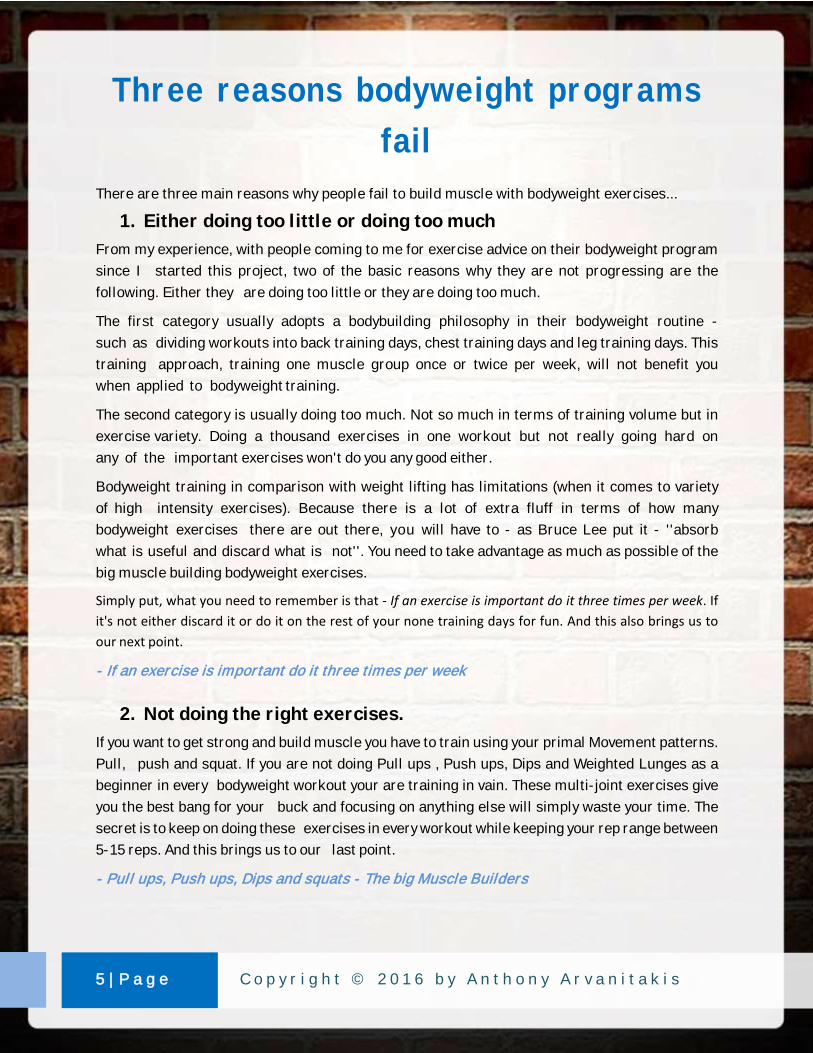
Three reasons bodyweight programs
fail
There are three main reasons why people fail to build muscle with bodyweight exercises...
1. Either doing too little or doing too much
From my experience, with people coming to me for exercise advice on their bodyweight program
since I started this project, two of the basic reasons why they are not progressing are the
following. Either they are doing too little or they are doing too much.
The first category usually adopts a bodybuilding philosophy in their bodyweight routine -
such as dividing workouts into back training days, chest training days and leg training days. This
training approach, training one muscle group once or twice per week, will not benefit you
when applied to bodyweight training.
The second category is usually doing too much. Not so much in terms of training volume but in
exercise variety. Doing a thousand exercises in one workout but not really going hard on
any of the important exercises won't do you any good either.
Bodyweight training in comparison with weight lifting has limitations (when it comes to variety
of high intensity exercises). Because there is a lot of extra fluff in terms of how many
bodyweight exercises there are out there, you will have to - as Bruce Lee put it - ''absorb
what is useful and discard what is not''. You need to take advantage as much as possible of the
big muscle building bodyweight exercises.
Simply put, what you need to remember is that - If an exercise is important do it three times per week. If
it's not either discard it or do it on the rest of your none training days for fun. And this also brings us to
our next point.
- If an exercise is important do it three times per week
2. Not doing the right exercises.
If you want to get strong and build muscle you have to train using your primal Movement patterns.
Pull, push and squat. If you are not doing Pull ups , Push ups, Dips and Weighted Lunges as a
beginner in every bodyweight workout your are training in vain. These multi-joint exercises give
you the best bang for your buck and focusing on anything else will simply waste your time. The
secret is to keep on doing these exercises in every workout while keeping your rep range between
5-15 reps. And this brings us to our last point.
- Pull ups, Push ups, Dips and squats - The big Muscle Builders

6 | P a g e C o p y r i g h t © 2 0 1 6 b y A n t h o n y A r v a n i t a k i s
3. Too many reps!
If you want to build muscle, science has proven that an intensity between 70% and 90% is the ideal
intensity to do it with. This means that you have to use a rep range between 5-15 repetitions - no
more than that. Applying this rep range to all the big muscle builders will activate muscle fiber
and trigger anabolic hormones in the most effective way in order to build muscle and burn fat.
Unfortunately, most people who train with bodyweight unfortunately turn their strength workouts
to cardio workouts by doing push up sets of 30 repetitions and more. If you have reached a point
in an exercise where you can do 15 clean push ups its time to move a harder progression of the
exercise not add more reps. If you are wondering how to increase the intensity of an exercise I
have included in the last chapter of this book progressions for every exercise. Stick around long
enough and you will be doing one arm push-ups and all kinds of cool progressions in the near
future ;)
- Keep it clean and stick between 5 and 15 repetitions
You might have noticed by now that I'm a fan
of Bruce Lee. What I loved most about Bruce
was how much ahead he was of his time when
it came to exercise knowledge. Even though
he was a master in everything he did, his basic
conclusion always was to perfect the basics.
And that is the problem with most people -
they forget to focus on the basics until they
are close to perfect. Even nowadays when my
progress hits a plateau I know I have been
neglecting something of the basics. This is
one of the most simplistic but also greatest
insights I have gained from studying Bruce
and I am eternally grateful to him for this
conclusion.
7 | P a g e C o p y r i g h t © 2 0 1 6 b y A n t h o n y A r v a n i t a k i s
Quick Summary
1. If you want to build muscle and burn fat you have to:
Set aside all the extra junk and focus on the big muscle builders
Do the important exercises three times per week
Keep your reps between 5-15
2. The big muscle builders for a beginner are:
Pull ups
Push ups
Single leg Squats (lunges)
Dips

8 | P a g e C o p y r i g h t © 2 0 1 6 b y A n t h o n y A r v a n i t a k i s
Warming Up
''If you don't have enough time to warm up you don't have enough time to workout''
- Old Saying
I always take my warm up serious, since a proper warm up has been proven to increase performance
and reduces injuries which can end up destroying results you have been working on for months.
Dynamic Stretching
A short definition of dynamic stretching would be as you are To be
more specific dynamic stretching is an active movement of your body that brings forth a
stretch but is not held statically in the end position.
When it comes to strength training, I generally prefer dynamic stretching in combination with
warm-up sets instead of doing type warm up routines like cardio, Cardio doesn't
really prepare you for the intensity of your workout and all the specific movement patterns you
are about to perform. Think about it, what happens during strength training is stress being
applied to specific muscles, tendons, ligaments and joints. So how would static cycling or
jogging prepare your upper body? For example, how would your shoulder area be prepared for
doing a simple push up? The only positive effect cycling or jogging would have is raising your
temperature and warming up your legs. This is not bad of course, but it is also not enough.
Dynamic stretching on the other hand can prepare your connective tissues and muscles
with targeted movements, which are more related to the movement patterns you will perform. The
areas of your body that are about to be trained become warmer and more blood is pumped into
them. This will also increase your range of motion and flexibility. Once again, I am not saying
that some jogging or cycling will hurt, but for me, doing too much cardio before strength training
takes my edge off and I end up training with less appetite and energy. If you want to combine some
traditional low cardio exercise before dynamic stretching, 5 minutes to raise your
temperature are enough.
9 | P a g e C o p y r i g h t © 2 0 1 6 b y A n t h o n y A r v a n i t a k i s
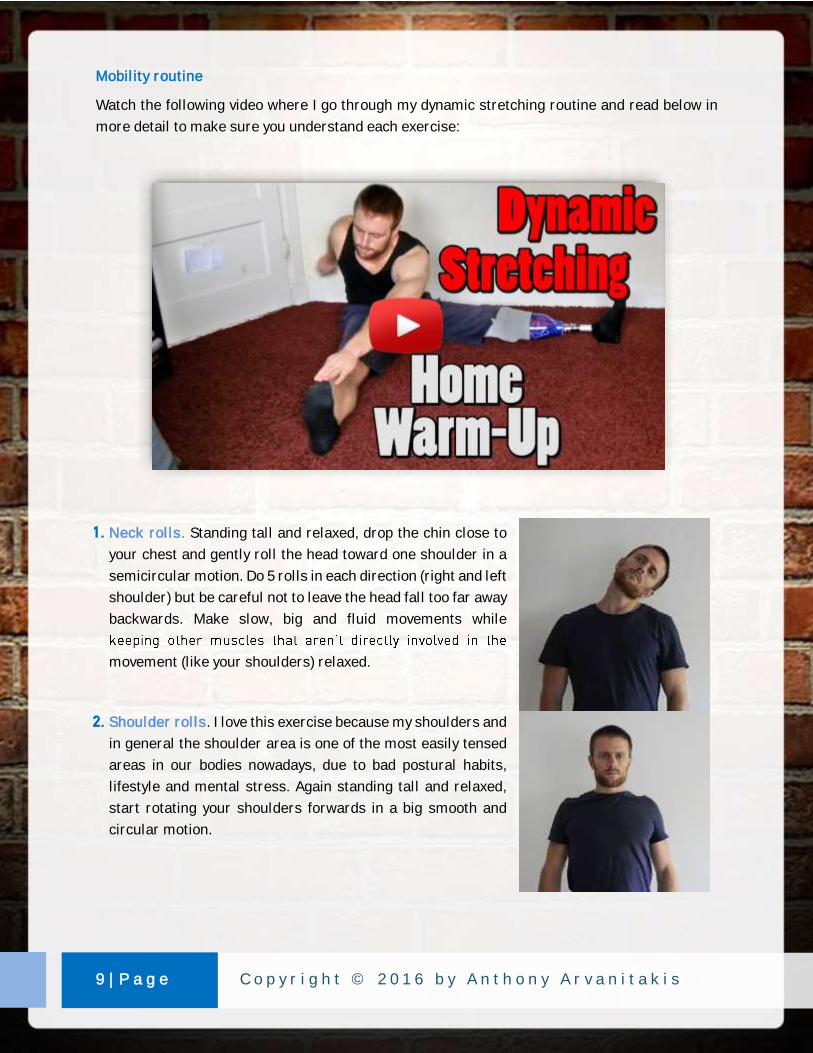
Mobility routine
Watch the following video where I go through my dynamic stretching routine and read below in
more detail to make sure you understand each exercise:
1. Neck rolls. Standing tall and relaxed, drop the chin close to
your chest and gently roll the head toward one shoulder in a
semicircular motion. Do 5 rolls in each direction (right and left
shoulder) but be careful not to leave the head fall too far away
backwards. Make slow, big and fluid movements while
movement (like your shoulders) relaxed.
2. Shoulder rolls. I love this exercise because my shoulders and
in general the shoulder area is one of the most easily tensed
areas in our bodies nowadays, due to bad postural habits,
lifestyle and mental stress. Again standing tall and relaxed,
start rotating your shoulders forwards in a big smooth and
circular motion.
10 | P a g e C o p y r i g h t © 2 0 1 6 b y A n t h o n y A r v a n i t a k i s
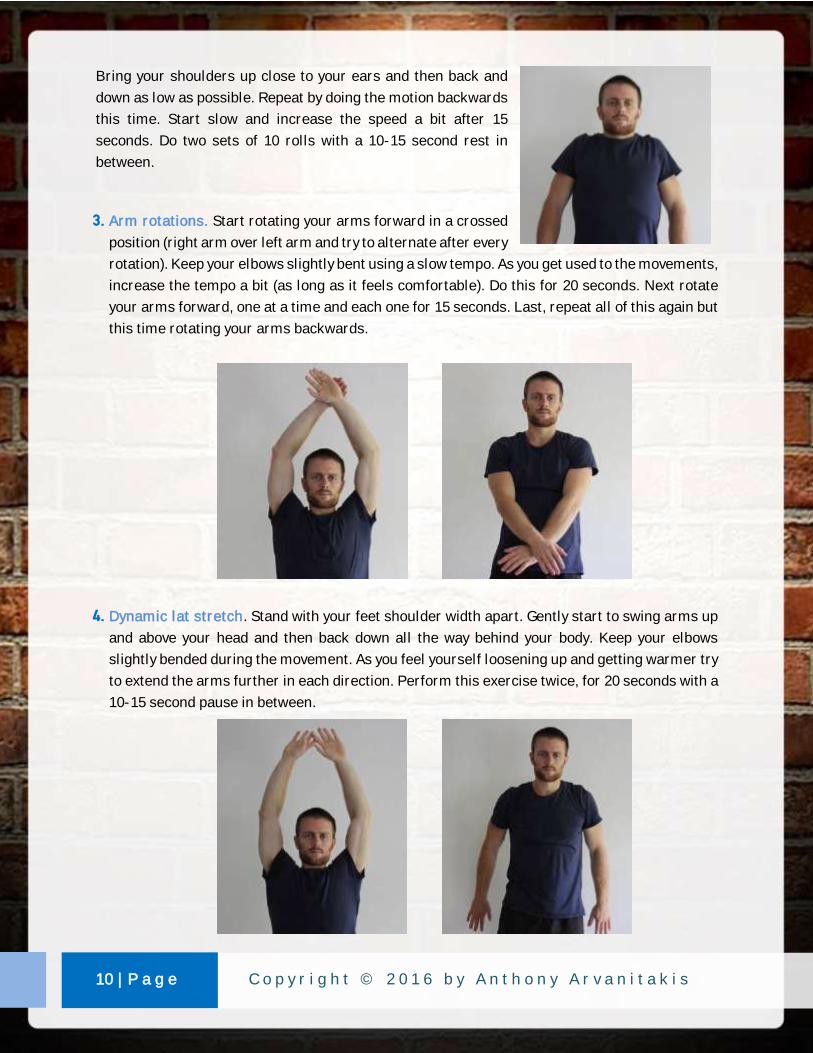
Bring your shoulders up close to your ears and then back and
down as low as possible. Repeat by doing the motion backwards
this time. Start slow and increase the speed a bit after 15
seconds. Do two sets of 10 rolls with a 10-15 second rest in
between.
3. Arm rotations. Start rotating your arms forward in a crossed
position (right arm over left arm and try to alternate after every
rotation). Keep your elbows slightly bent using a slow tempo. As you get used to the movements,
increase the tempo a bit (as long as it feels comfortable). Do this for 20 seconds. Next rotate
your arms forward, one at a time and each one for 15 seconds. Last, repeat all of this again but
this time rotating your arms backwards.
4. Dynamic lat stretch. Stand with your feet shoulder width apart. Gently start to swing arms up
and above your head and then back down all the way behind your body. Keep your elbows
slightly bended during the movement. As you feel yourself loosening up and getting warmer try
to extend the arms further in each direction. Perform this exercise twice, for 20 seconds with a
10-15 second pause in between.
11 | P a g e C o p y r i g h t © 2 0 1 6 b y A n t h o n y A r v a n i t a k i s
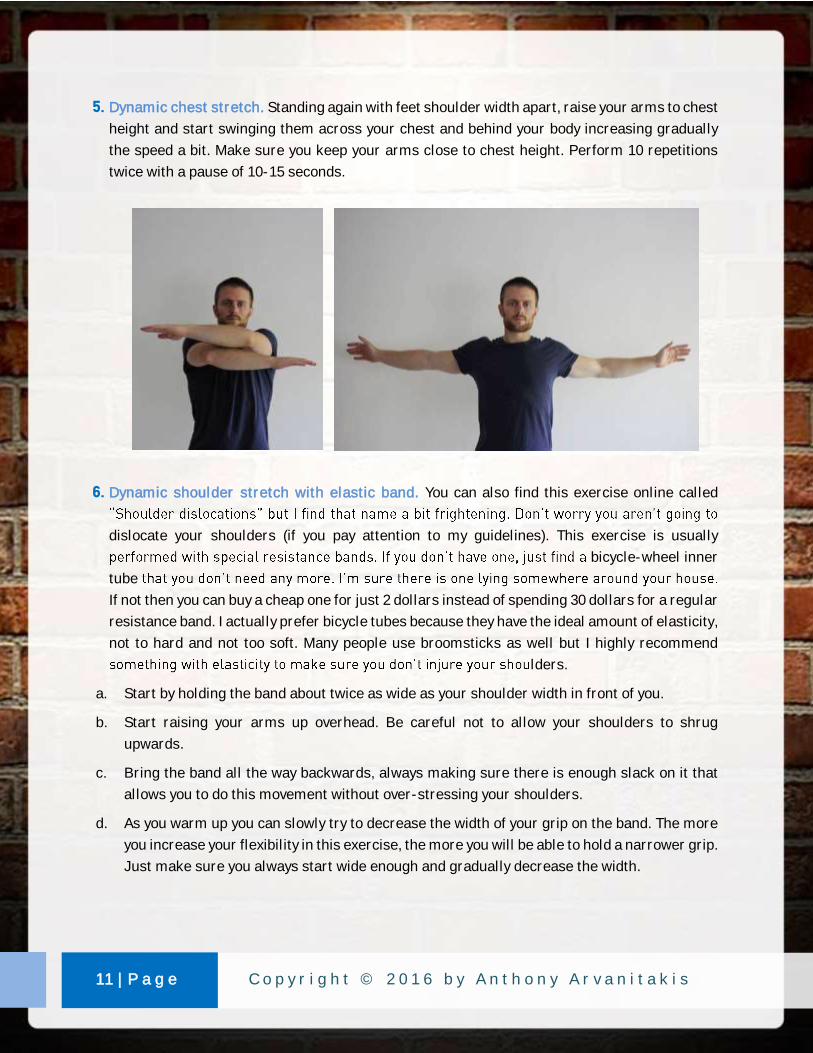
5. Dynamic chest stretch. Standing again with feet shoulder width apart, raise your arms to chest
height and start swinging them across your chest and behind your body increasing gradually
the speed a bit. Make sure you keep your arms close to chest height. Perform 10 repetitions
twice with a pause of 10-15 seconds.
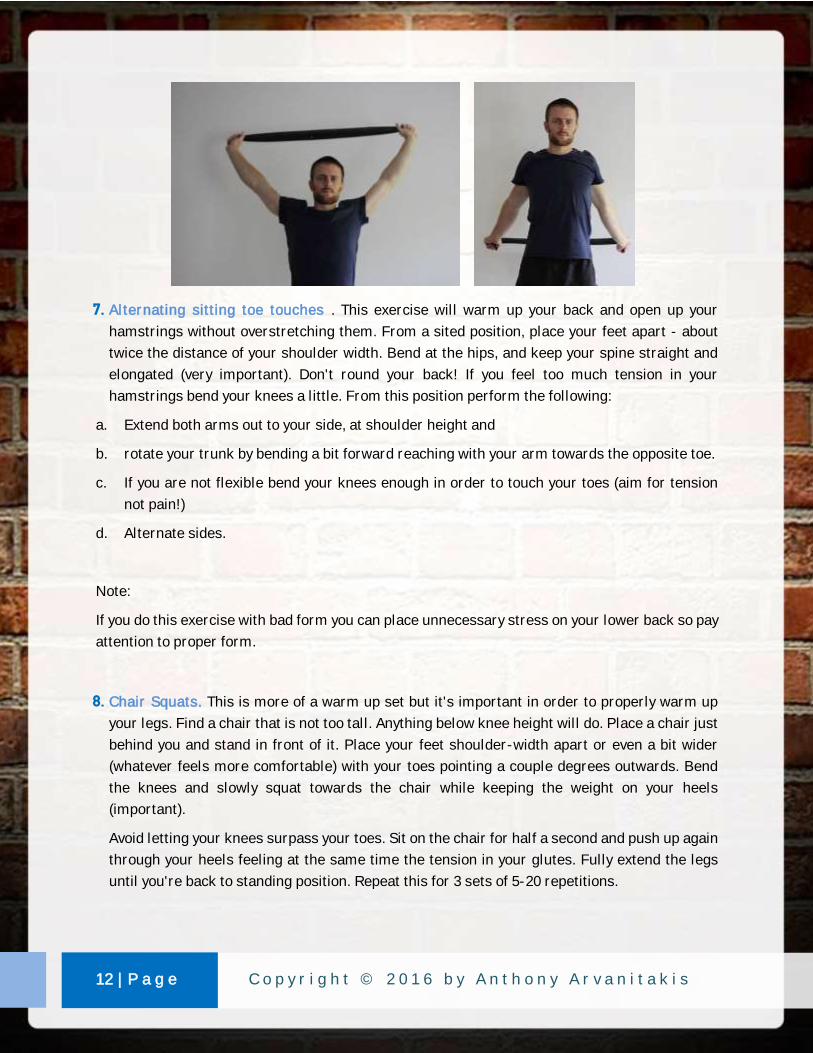
6. Dynamic shoulder stretch with elastic band. You can also find this exercise online called
dislocate your shoulders (if you pay attention to my guidelines). This exercise is usually
bicycle-wheel inner
tube
If not then you can buy a cheap one for just 2 dollars instead of spending 30 dollars for a regular
resistance band. I actually prefer bicycle tubes because they have the ideal amount of elasticity,
not to hard and not too soft. Many people use broomsticks as well but I highly recommend
lders.
a. Start by holding the band about twice as wide as your shoulder width in front of you.
b. Start raising your arms up overhead. Be careful not to allow your shoulders to shrug
upwards.
c. Bring the band all the way backwards, always making sure there is enough slack on it that
allows you to do this movement without over-stressing your shoulders.
d. As you warm up you can slowly try to decrease the width of your grip on the band. The more
you increase your flexibility in this exercise, the more you will be able to hold a narrower grip.
Just make sure you always start wide enough and gradually decrease the width.
12 | P a g e C o p y r i g h t © 2 0 1 6 b y A n t h o n y A r v a n i t a k i s
7. Alternating sitting toe touches . This exercise will warm up your back and open up your
hamstrings without overstretching them. From a sited position, place your feet apart - about
twice the distance of your shoulder width. Bend at the hips, and keep your spine straight and
elongated (very important). Don't round your back! If you feel too much tension in your
hamstrings bend your knees a little. From this position perform the following:
a. Extend both arms out to your side, at shoulder height and
b. rotate your trunk by bending a bit forward reaching with your arm towards the opposite toe.
c. If you are not flexible bend your knees enough in order to touch your toes (aim for tension
not pain!)
d. Alternate sides.
Note:
If you do this exercise with bad form you can place unnecessary stress on your lower back so pay
attention to proper form.
8. Chair Squats. This is more of a warm up set but it's important in order to properly warm up
your legs. Find a chair that is not too tall. Anything below knee height will do. Place a chair just
behind you and stand in front of it. Place your feet shoulder-width apart or even a bit wider
(whatever feels more comfortable) with your toes pointing a couple degrees outwards. Bend
the knees and slowly squat towards the chair while keeping the weight on your heels
(important).
Avoid letting your knees surpass your toes. Sit on the chair for half a second and push up again
through your heels feeling at the same time the tension in your glutes. Fully extend the legs
until you're back to standing position. Repeat this for 3 sets of 5-20 repetitions.
13 | P a g e C o p y r i g h t © 2 0 1 6 b y A n t h o n y A r v a n i t a k i s
The Program
This beginner program is divided in two phases. Phase A which is the introductory program
and its purpose is to gradually introduce you to bodyweight. While keeping you from overloading
your body at the same time. For this reason, this phase will contain only 4 basic exercises, each
one strengthening a primal movement pattern. The basic primal movement patterns are Pull,
Push and Squat. To cover these, you will do
1)Pull ups and Chin ups as pulling pattern movements
2) Push ups as a pushing pattern and
3) Lunges as a squatting pattern movement. Last you will add two supplementary exercises for
your core. I say supplementary because no matter what exercise you do in bodyweight training
your core is activated to stabilize the body. This is one of the most important benefits of
bodyweight exercise.
- Your primal movement patterns are Pull, Push and squat
Phase A (3 Weeks)
Phase A lasts three weeks. Because everybody differs in weight, height and strength - you should
find in the right progression in every exercise (in case you cannot perform the basic form
of the exercise described). You can find all the progressions/variations you need in the end of
the book. For example, if you cannot do regular push-ups then start with incline push-ups
(place hands on a higher level) and keep the reps between 5-15 reps. Dips will not be included
in phase A, but will be added in phase B so that your shoulders can toughen up first.
The workout frequency in both phases is 6 times per week and one day of rest minimum is
required once a week. You can train for example from Monday-Saturday and take Sunday
off. The program always starts with a pull and a push exercise . They are your foundational
muscle-building exercises. essential that you practice these a lot, if you want to build a powerful
muscular upper body.
14 | P a g e C o p y r i g h t © 2 0 1 6 b y A n t h o n y A r v a n i t a k i s
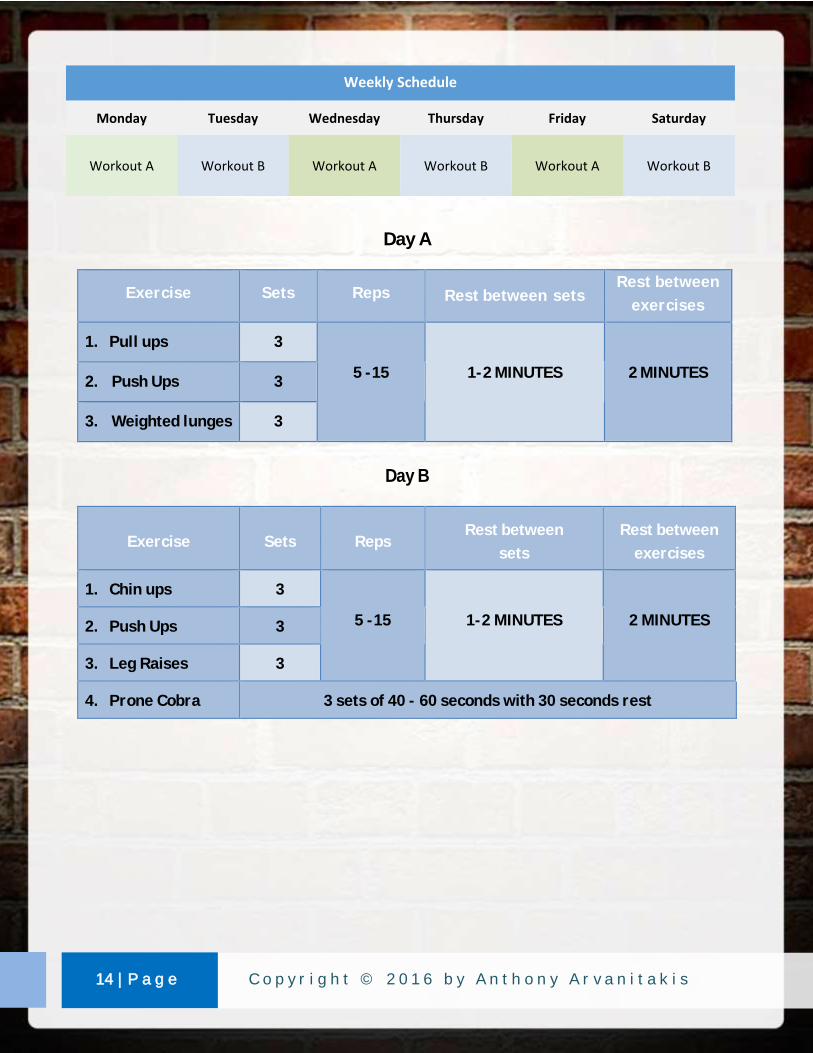
Weekly Schedule
Monday Tuesday Wednesday Thursday Friday Saturday
Workout A Workout B Workout A Workout B Workout A Workout B
Day A
Exercise Sets Reps Rest between sets Rest between
exercises
1. Pull ups 3
5 -15
1-2 MINUTES
2 MINUTES 2. Push Ups 3
3. Weighted lunges 3
Day B
Exercise Sets Reps Rest between
sets
Rest between
exercises
1. Chin ups 3
5 -15
1-2 MINUTES
2 MINUTES 2. Push Ups 3
3. Leg Raises 3
4. Prone Cobra 3 sets of 40 - 60 seconds with 30 seconds rest
15 | P a g e C o p y r i g h t © 2 0 1 6 b y A n t h o n y A r v a n i t a k i s
Phase B - 8 Weeks In phase B, now that your shoulders have toughened up a bit, we will add a new exercise - Dips.
Again there will be Workout A and workout B, which will be performed 3 times per week (6
workouts in total). But the exercise order will also change in each of these. This is done because
you are more rested in the beginning of the workout, and this way you can focus more on the
exercise that is first. Workout A1 for example starts with pull-ups and workout A2 starts with
Dips. The reason you never start with weighted lunges is because they are the only leg exercise
(which means that your legs are anyway rested) and it doesn't matter if they are in the middle of
your workout. Plus, this way they give your upper body has a bit more time to recover before
continuing with the other half of the workout.
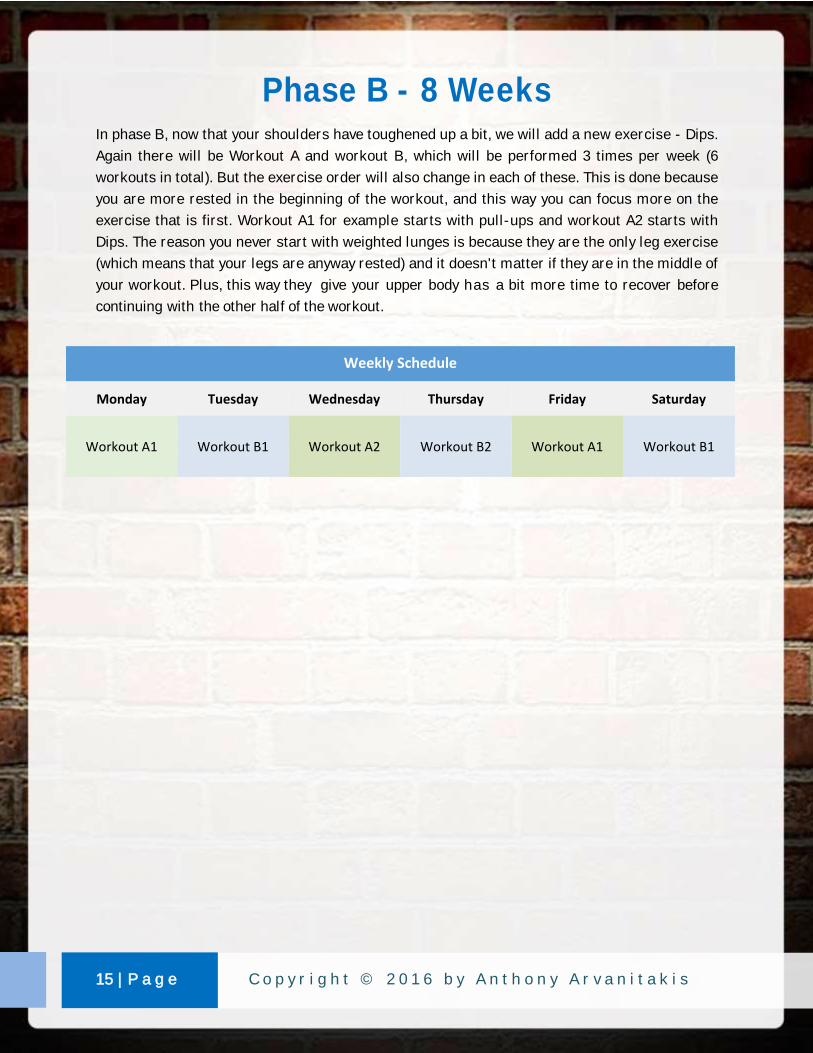
Weekly Schedule
Monday Tuesday Wednesday Thursday Friday Saturday
Workout A1 Workout B1 Workout A2 Workout B2 Workout A1 Workout B1
16 | P a g e C o p y r i g h t © 2 0 1 6 b y A n t h o n y A r v a n i t a k i s
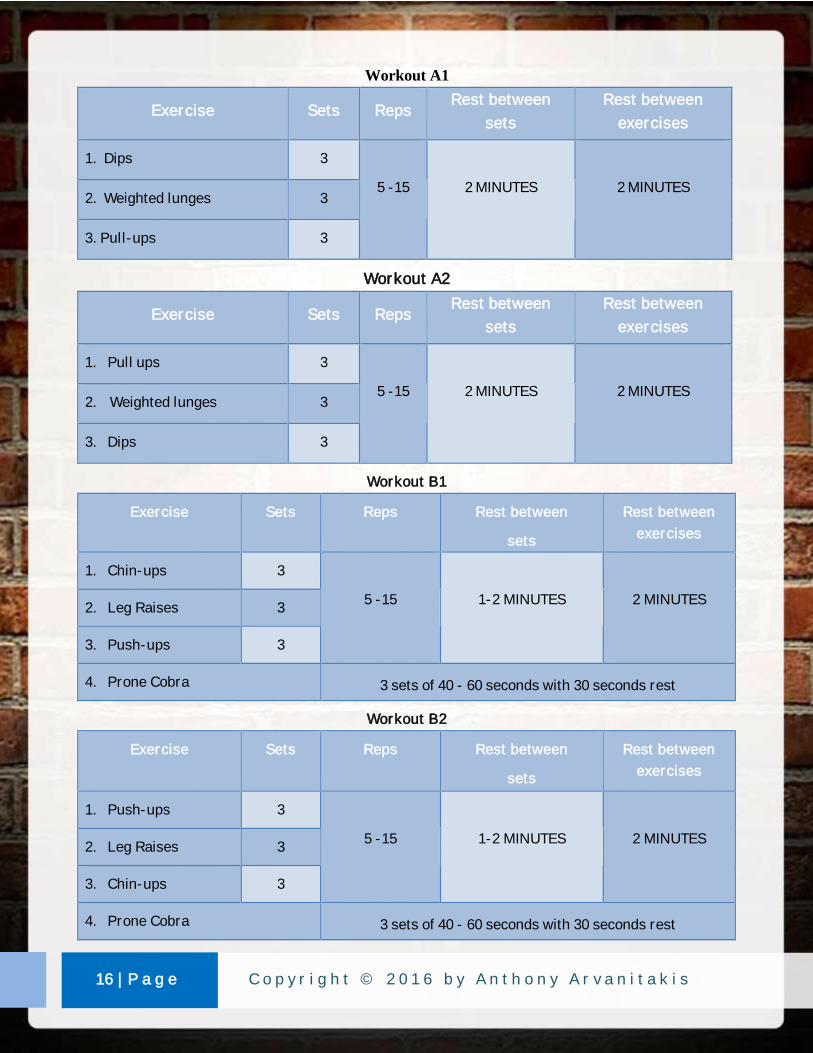
Workout A1
Exercise Sets Reps Rest between
sets
Rest between
exercises
1. Dips 3
5 -15
2 MINUTES
2 MINUTES 2. Weighted lunges 3
3. Pull-ups 3
Workout A2
Exercise Sets Reps Rest between
sets
Rest between
exercises
1. Pull ups 3
5 -15
2 MINUTES
2 MINUTES 2. Weighted lunges 3
3. Dips 3
Workout B1
Exercise Sets Reps Rest between
sets
Rest between
exercises
1. Chin-ups 3
5 -15
1-2 MINUTES
2 MINUTES 2. Leg Raises 3
3. Push-ups 3
4. Prone Cobra 3 sets of 40 - 60 seconds with 30 seconds rest
Workout B2
Exercise Sets Reps Rest between
sets
Rest between
exercises
1. Push-ups 3
5 -15
1-2 MINUTES
2 MINUTES 2. Leg Raises 3
3. Chin-ups 3
4. Prone Cobra 3 sets of 40 - 60 seconds with 30 seconds rest

Enjoying the book so far? Need any help?
Click here to share on Facebook! If you have any further questions, feel free to contact me through
the contact form on my website or by sending me a personal message on my Facebook group
(after liking it.)
Until then, keep on training!
Anthony Arvanitakis
Creator of HomeMadeMuscle.com
All You Need is a Pull-up Bar

18 | P a g e C o p y r i g h t © 2 0 1 6 b y A n t h o n y A r v a n i t a k i s
My story on how I got strong and lean after 5 years in bed, 13 operations and one leg amputation…
Learn how to use your Mind to Muscle connection to build more muscle with bodyweight exercises
Click here to learn more about the rest of my books
19 | P a g e C o p y r i g h t © 2 0 1 6 b y A n t h o n y A r v a n i t a k i s
Scroll down for all the exercise
tutorials!
20 | P a g e C o p y r i g h t © 2 0 1 6 b y A n t h o n y A r v a n i t a k i s
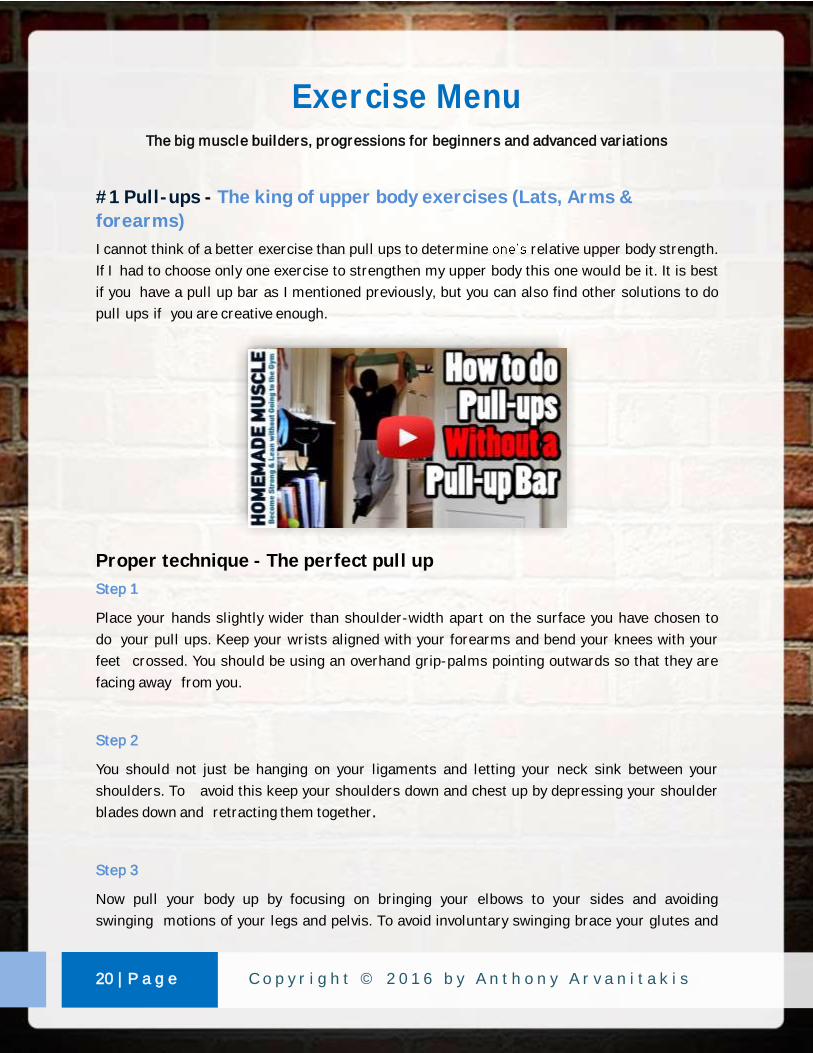
Exercise Menu The big muscle builders, progressions for beginners and advanced variations
#1 Pull-ups - The king of upper body exercises (Lats, Arms &
forearms)
I cannot think of a better exercise than pull ups to determine relative upper body strength.
If I had to choose only one exercise to strengthen my upper body this one would be it. It is best
if you have a pull up bar as I mentioned previously, but you can also find other solutions to do
pull ups if you are creative enough.
Proper technique - The perfect pull up
Step 1
Place your hands slightly wider than shoulder-width apart on the surface you have chosen to
do your pull ups. Keep your wrists aligned with your forearms and bend your knees with your
feet crossed. You should be using an overhand grip-palms pointing outwards so that they are
facing away from you.
Step 2
You should not just be hanging on your ligaments and letting your neck sink between your
shoulders. To avoid this keep your shoulders down and chest up by depressing your shoulder
blades down and retracting them together.
Step 3
Now pull your body up by focusing on bringing your elbows to your sides and avoiding
swinging motions of your legs and pelvis. To avoid involuntary swinging brace your glutes and
21 | P a g e C o p y r i g h t © 2 0 1 6 b y A n t h o n y A r v a n i t a k i s
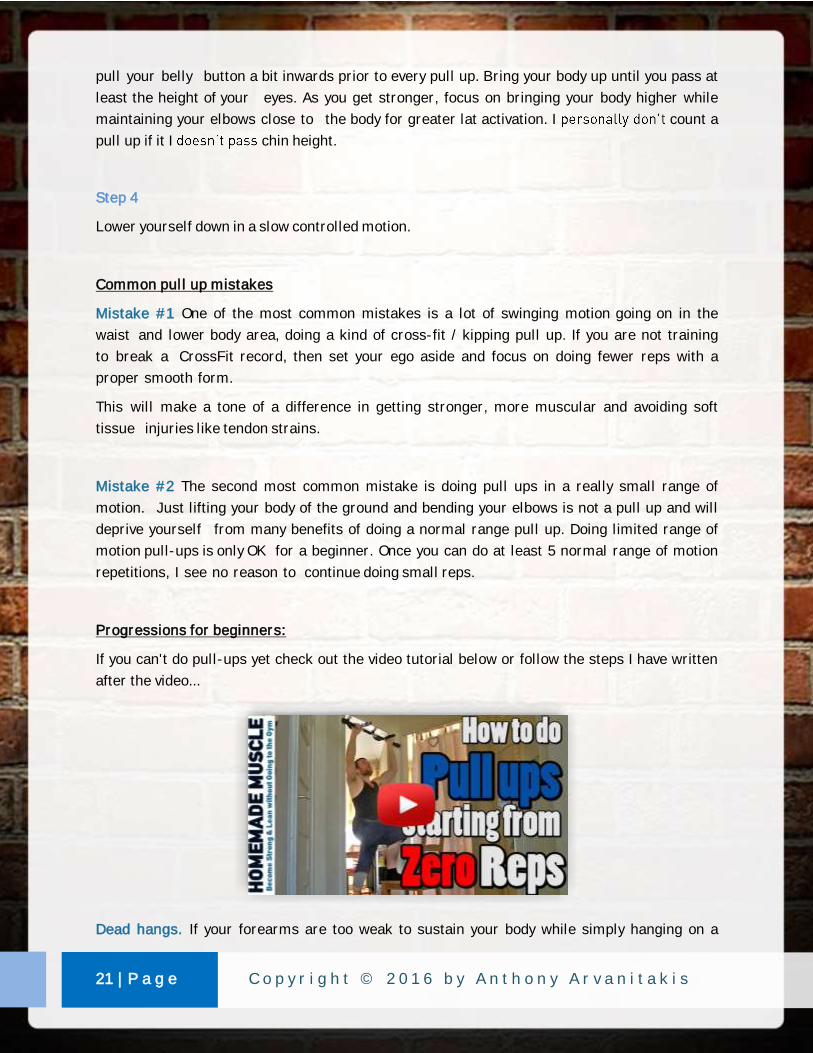
pull your belly button a bit inwards prior to every pull up. Bring your body up until you pass at
least the height of your eyes. As you get stronger, focus on bringing your body higher while
maintaining your elbows close to the body for greater lat activation. I count a
pull up if it I chin height.
Step 4
Lower yourself down in a slow controlled motion.
Common pull up mistakes
Mistake #1 One of the most common mistakes is a lot of swinging motion going on in the
waist and lower body area, doing a kind of cross-fit / kipping pull up. If you are not training
to break a CrossFit record, then set your ego aside and focus on doing fewer reps with a
proper smooth form.
This will make a tone of a difference in getting stronger, more muscular and avoiding soft
tissue injuries like tendon strains.
Mistake #2 The second most common mistake is doing pull ups in a really small range of
motion. Just lifting your body of the ground and bending your elbows is not a pull up and will
deprive yourself from many benefits of doing a normal range pull up. Doing limited range of
motion pull-ups is only OK for a beginner. Once you can do at least 5 normal range of motion
repetitions, I see no reason to continue doing small reps.
Progressions for beginners:
If you can't do pull-ups yet check out the video tutorial below or follow the steps I have written
after the video...
Dead hangs. If your forearms are too weak to sustain your body while simply hanging on a
22 | P a g e C o p y r i g h t © 2 0 1 6 b y A n t h o n y A r v a n i t a k i s
bar or wherever you do your pull ups, then you must strengthen your forearms and your hand
grip by per- forming dead hangs (meaning just hanging on the bar). Start with 4 sets of 3-10
seconds or more depending on your strength and as you get stronger progress to 30 seconds.
Once again, just hang on your ligaments letting your head sink do the dead hangs with
scapula activation and keeping your chest up. This will also strengthen your upper back muscles
as they will be contracting (isometrically).
Negative / assisted pull up system. One of the best ways to master most bodyweight
exercises is doing negative repetitions. In case you know what a negative repetition is
read the following paragraph otherwise move on to the Negative repetition progressions.
What is a negative repetition? Every repetition has 2 basic phases. A concentric and an
eccentric phase. The eccentric phase is known as a negative phase. The concentric repetition
in bodyweight exercises refers to the pushing or pulling phase and the negative phase is the other
half of the repetition where you are lowering your body against gravity. So in a pull up the
concentric phase is the pulling up of your body and the negative phase is the lowering down of
your body. In the case of push-ups the negative phase of the repetition is the lowering down
of the body and the concentric phase is the pushing up.
Negative repetition progressions:
1. Place a steady chair that can support your weight under the pull up bar. Get on the chair
and grip the bar. Keeping the bar at chin height try to lower your body slowly (counting around
2-3 seconds) without depending on the chair. Once you lower yourself down, use the chair again
to grab the bar at chin height and repeat. Depending on how easy the exercise is for you
perform 5-12 negative repetitions, two times, with one minute rest between each set. Once you
can perform 12 repetitions move on the next progression
2. Place the chair a bit behind the pull up bar, put one leg on the chair and pull yourself up
using as less as possible strength from your leg. Once you reach the top remove your leg
from the chair cautiously and lower your body down slowly (counting 2-3 seconds). Start again
with 5-12 reps and once you can perform two sets of twelve repetitions with one minute rest
move on the next phase.
At this point, you should be able to do at least 2-3 normal pull ups. Begin the set by doing as many
normal pull ups as you can and continue with assisted pulls until you complete a total of at least
5 reps. As you grow stronger you will eventually be able to do 3 sets of 5 normal reps. Once you
achieve this just start adding more reps until you are able to do 3-4 sets of 12-15 reps. After that
start trying advanced variations. Keep in mind that performing 15 reps is a goal that takes a huge
amount of time if you focus on keeping perfect form.

23 | P a g e C o p y r i g h t © 2 0 1 6 b y A n t h o n y A r v a n i t a k i s
Quick summary:
Start with negatives reps
Do as many normal pull ups as you can, combined with assisted pull ups
Build it up to at least 3 sets of 12 good form pull ups before you move on to a more advanced
variation.
Note: Another exercise that will contribute in doing normal pull ups are the table rows. As you
grow stronger in table rows you will also get better in pull ups.
Advanced variations:
Chest height pull ups. These are my favorite pull ups and they are just like normal pull
ups but instead of raising your body until eye level with the bar, this time you will raise your
body until the bar touches height of your upper chest - just below your collar bone. This way
you will also focus more on you lats because the lats are fully contracted when your shoulder
blades are drawn down and back. Once you can perform 12-15 reps move on the next variation.
Nowadays, I am going even lower touching the bar on my sternum which has given me great
results in pulling strength.
Pull ups with legs raised. Start with bended knees (90 degrees) in front of you. As this
becomes easier extend your legs until they are parallel to the floor. Once you can perform 15
reps move on the next variation.
This progression will also give your abs a great work out!
Weighted pull ups. Wear a weighted backpack (you can fill up your backpack with books,
sandbags, dumbbells etc). You can also buy special weighted backpacks for bodyweight exercises
online.
A variation you should avoid:
A common theory is that the wider your grip is when doing pull ups, the your lats
become. In my experience, this only means a smaller range of motion and less lat activation
which can lead to injuries - like in my case, where I strained my teres major using a wide grip -
a common injury in bad form or too wide-grip pull ups.

24 | P a g e C o p y r i g h t © 2 0 1 6 b y A n t h o n y A r v a n i t a k i s
Chin ups - The best bodyweight exercise for big guns!
I consider chin ups more as a variation of the pull up, than a different exercise. That is one of
the reasons why I categorize pull ups and chin ups as one exercise since the basic difference
is the way you grip the bar. The other two basic reasons I combine pull ups and chin ups as one
exercise, are 1) because including them as different exercises and doing too many sets of
them combined in a program can get your arms to tired for the rest of the exercises and 2)
when they are combined as one exercise they give incredible results in upper body strength
and muscle development.
Chin ups use an underhand grip where your palms face inwards so that they are facing
towards yourself. The basic thing you want to keep in mind is that pull ups/chin ups both focus
on the lats & arms and combined together they will activate your upper musculature
in the best way possible. Combining pull ups and chin ups, in my personal experience, is the
best way to get killer gains in the arm and back department!
Proper technique and common mistakes
Besides using an opposite - underhand grip the rest of the technique and common mistakes in
chin ups are basically the same as in pull-ups. I would advise you not to straighten your
elbow joints completely in the lowering phase while doing chin ups; keep them a bit bent.
Locking-out (straightening) the elbows with an underhand grip puts too much stress on the
elbows of many people, including me. More on this topic in the video below.
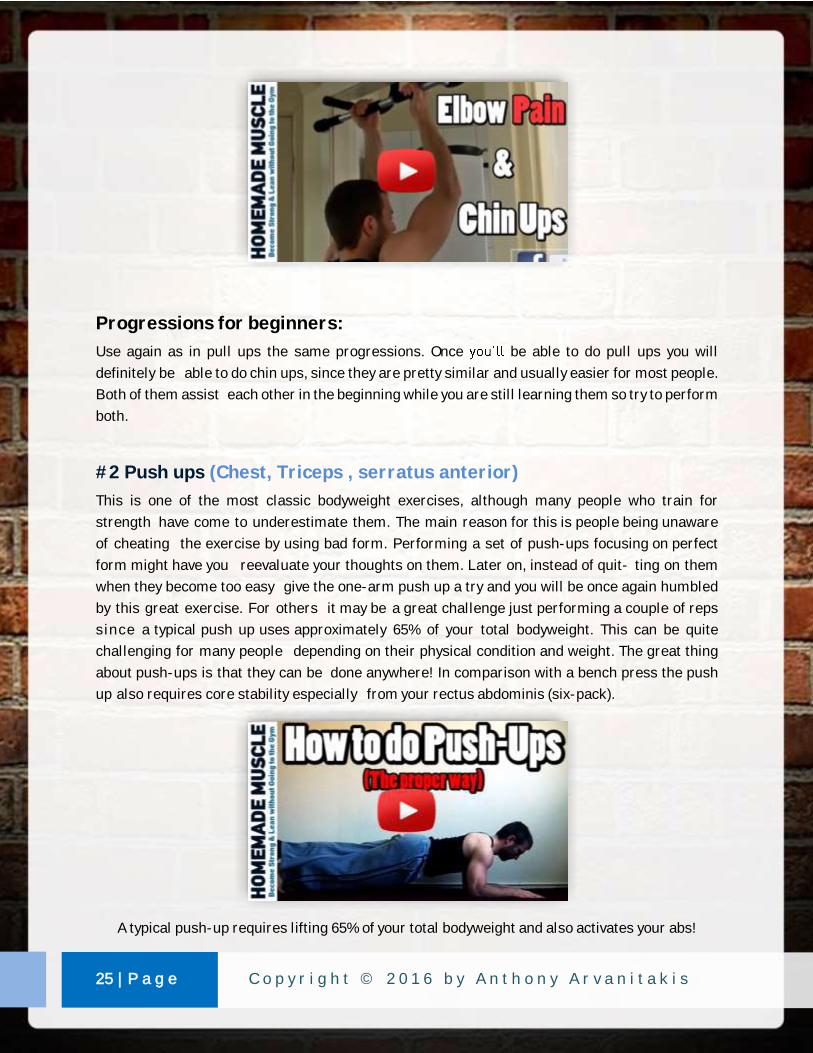
25 | P a g e C o p y r i g h t © 2 0 1 6 b y A n t h o n y A r v a n i t a k i s
Progressions for beginners:
Use again as in pull ups the same progressions. Once be able to do pull ups you will
definitely be able to do chin ups, since they are pretty similar and usually easier for most people.
Both of them assist each other in the beginning while you are still learning them so try to perform
both.
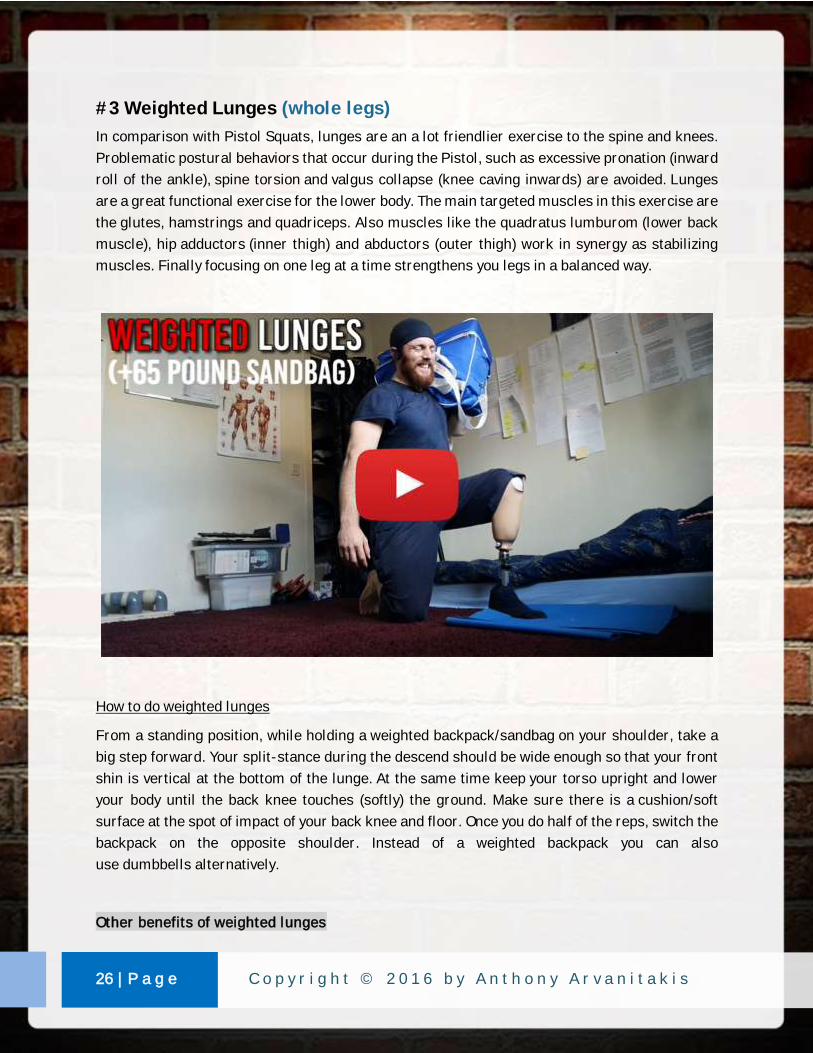
#2 Push ups (Chest, Triceps , serratus anterior) This is one of the most classic bodyweight exercises, although many people who train for
strength have come to underestimate them. The main reason for this is people being unaware
of cheating the exercise by using bad form. Performing a set of push-ups focusing on perfect
form might have you reevaluate your thoughts on them. Later on, instead of quit- ting on them
when they become too easy give the one-arm push up a try and you will be once again humbled
by this great exercise. For others it may be a great challenge just performing a couple of reps
since a typical push up uses approximately 65% of your total bodyweight. This can be quite
challenging for many people depending on their physical condition and weight. The great thing
about push-ups is that they can be done anywhere! In comparison with a bench press the push
up also requires core stability especially from your rectus abdominis (six-pack).
A typical push-up requires lifting 65% of your total bodyweight and also activates your abs!
26 | P a g e C o p y r i g h t © 2 0 1 6 b y A n t h o n y A r v a n i t a k i s
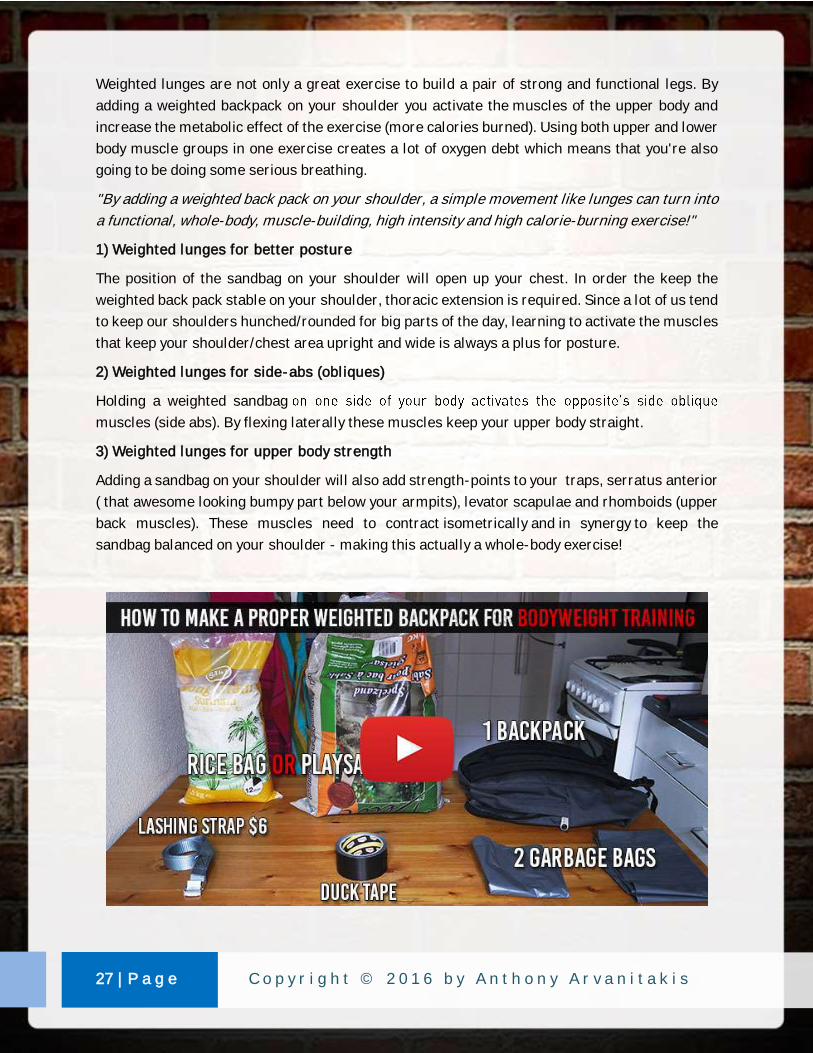
#3 Weighted Lunges (whole legs)
In comparison with Pistol Squats, lunges are an a lot friendlier exercise to the spine and knees.
Problematic postural behaviors that occur during the Pistol, such as excessive pronation (inward
roll of the ankle), spine torsion and valgus collapse (knee caving inwards) are avoided. Lunges
are a great functional exercise for the lower body. The main targeted muscles in this exercise are
the glutes, hamstrings and quadriceps. Also muscles like the quadratus lumburom (lower back
muscle), hip adductors (inner thigh) and abductors (outer thigh) work in synergy as stabilizing
muscles. Finally focusing on one leg at a time strengthens you legs in a balanced way.
How to do weighted lunges
From a standing position, while holding a weighted backpack/sandbag on your shoulder, take a
big step forward. Your split-stance during the descend should be wide enough so that your front
shin is vertical at the bottom of the lunge. At the same time keep your torso upright and lower
your body until the back knee touches (softly) the ground. Make sure there is a cushion/soft
surface at the spot of impact of your back knee and floor. Once you do half of the reps, switch the
backpack on the opposite shoulder. Instead of a weighted backpack you can also
use dumbbells alternatively.
Other benefits of weighted lunges
27 | P a g e C o p y r i g h t © 2 0 1 6 b y A n t h o n y A r v a n i t a k i s
Weighted lunges are not only a great exercise to build a pair of strong and functional legs. By
adding a weighted backpack on your shoulder you activate the muscles of the upper body and
increase the metabolic effect of the exercise (more calories burned). Using both upper and lower
body muscle groups in one exercise creates a lot of oxygen debt which means that you're also
going to be doing some serious breathing.
"By adding a weighted back pack on your shoulder, a simple movement like lunges can turn into
a functional, whole-body, muscle-building, high intensity and high calorie-burning exercise!"
1) Weighted lunges for better posture
The position of the sandbag on your shoulder will open up your chest. In order the keep the
weighted back pack stable on your shoulder, thoracic extension is required. Since a lot of us tend
to keep our shoulders hunched/rounded for big parts of the day, learning to activate the muscles
that keep your shoulder/chest area upright and wide is always a plus for posture.
2) Weighted lunges for side-abs (obliques)
Holding a weighted sandbag
muscles (side abs). By flexing laterally these muscles keep your upper body straight.
3) Weighted lunges for upper body strength
Adding a sandbag on your shoulder will also add strength-points to your traps, serratus anterior
( that awesome looking bumpy part below your armpits), levator scapulae and rhomboids (upper
back muscles). These muscles need to contract isometrically and in synergy to keep the
sandbag balanced on your shoulder - making this actually a whole-body exercise!
28 | P a g e C o p y r i g h t © 2 0 1 6 b y A n t h o n y A r v a n i t a k i s
Variation for sensitive knees Reverse weighted lunges
For those of you with sensitive knees, this exercise can become even friendlier by doing it in
reverse. This helps in two ways: 1) It decreases the impact on your knee by eliminating
the collision of your foot landing on the ground as you're initiating the lunge. 2) By
eliminating the forward step, your knee doesn't also act as a the
movement. Instead, as you initiate the movement in reverse, more tension is added to the
stabilizing muscles.
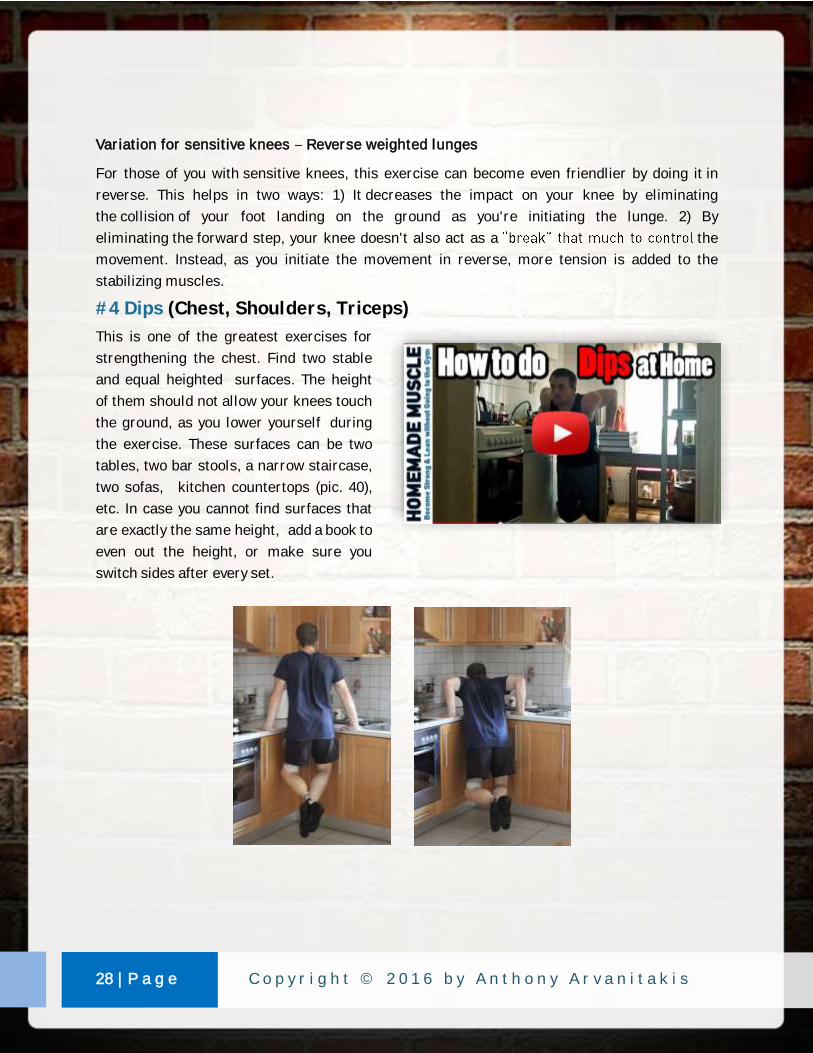
#4 Dips (Chest, Shoulders, Triceps)
This is one of the greatest exercises for
strengthening the chest. Find two stable
and equal heighted surfaces. The height
of them should not allow your knees touch
the ground, as you lower yourself during
the exercise. These surfaces can be two
tables, two bar stools, a narrow staircase,
two sofas, kitchen countertops (pic. 40),
etc. In case you cannot find surfaces that
are exactly the same height, add a book to
even out the height, or make sure you
switch sides after every set.
29 | P a g e C o p y r i g h t © 2 0 1 6 b y A n t h o n y A r v a n i t a k i s
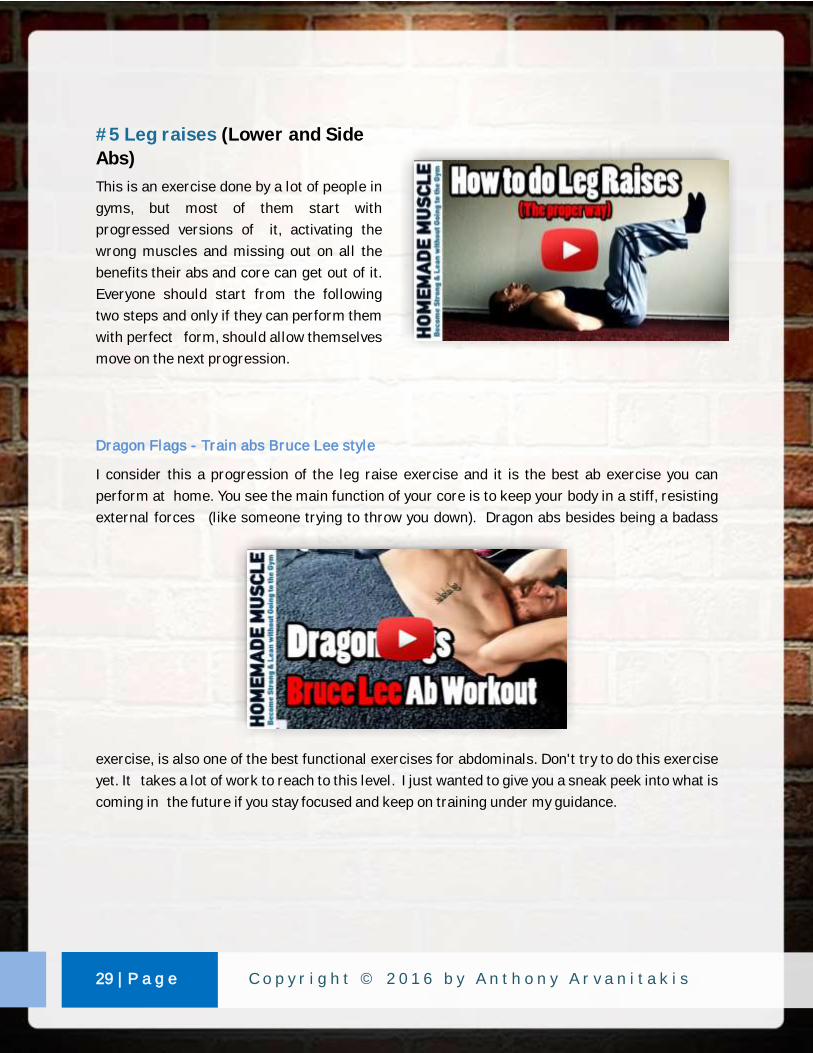
#5 Leg raises (Lower and Side
Abs)
This is an exercise done by a lot of people in
gyms, but most of them start with
progressed versions of it, activating the
wrong muscles and missing out on all the
benefits their abs and core can get out of it.
Everyone should start from the following
two steps and only if they can perform them
with perfect form, should allow themselves
move on the next progression.
Dragon Flags - Train abs Bruce Lee style
I consider this a progression of the leg raise exercise and it is the best ab exercise you can
perform at home. You see the main function of your core is to keep your body in a stiff, resisting
external forces (like someone trying to throw you down). Dragon abs besides being a badass
exercise, is also one of the best functional exercises for abdominals. Don't try to do this exercise
yet. It takes a lot of work to reach to this level. I just wanted to give you a sneak peek into what is
coming in the future if you stay focused and keep on training under my guidance.

30 | P a g e C o p y r i g h t © 2 0 1 6 b y A n t h o n y A r v a n i t a k i s
#6 Prone Cobra (Lower Back)
This is a great exercise, especially for people who sit at desks all day, gamers, and generally
those with a sedentary lifestyle, with that type of rounded posture. If you tend to have a
hyperlordotic posture, squeeze your glutes during this exercise, this will reduce over-
recruitment your low back muscles which, in this case, are probably already too stressed. Use
prolonged sets of twenty to sixty seconds, with fifteen second rest periods.
Start with 1-3 sets and progress until you can perform 3 sets of 60 seconds.
This is a great exercise, especially for people who sit at desks all day, gamers, and generally
those with a sedentary lifestyle, with that type of rounded posture. If you tend to have a
hyperlordotic posture, squeeze your glutes during this exercise, this will reduce over-recruitment
your low back muscles which, in this case, are probably already too stressed. Use prolonged sets
of twenty to sixty seconds, with fifteen second rest periods. Start with 1-3 sets and progress until
you can perform 3 sets of 60 seconds.
Proper technique
1. Lie face down on a soft surface and rest your arms at your side.
2. Lift your torso while simultaneously squeezing your shoulder blades together and externally
rotating your arms by pointing your thumbs up.
3. When you have reached the proper end position, your palms should face way from your body,
and your head and neck should be in neutral alignment.
End notes:
Doing an exercise with good form, contrary to doing an exercise with bad form, can play a huge
31 | P a g e C o p y r i g h t © 2 0 1 6 b y A n t h o n y A r v a n i t a k i s
role on the difficulty of it, and injury prevention. Just the feeling that you are per- forming an
exercise correctly, always mean you actually are. important to observe your form
once in a while. You can use mirrors, or ask someone experienced to spot you while exercising.
Almost every cell- phone has a camera today, so you can also use your phone or any other
de- vice available for you, and film your trainings to see how your form looks like. If you notice
mistakes, write them down and focus on them next time.
Having the perfect technique in every single rep and every single moment is not always
possible, not even by professionals. But that mean you should not try. As one of the
quotes I like says, is not attainable, but if we chase perfection, we can catch
"Perfection is not attainable, but if we chase perfection we can catch excellence"
~ Vince Lombardi

32 | P a g e C o p y r i g h t © 2 0 1 6 b y A n t h o n y A r v a n i t a k i s
Looking for something to get you more motivated?
Something more organized with nutritional plans & more advanced workouts?
Then Check out my bestselling book eed is a Pull-
Scroll below to read all the reviews on amazon
33 | P a g e C o p y r i g h t © 2 0 1 6 b y A n t h o n y A r v a n i t a k i s
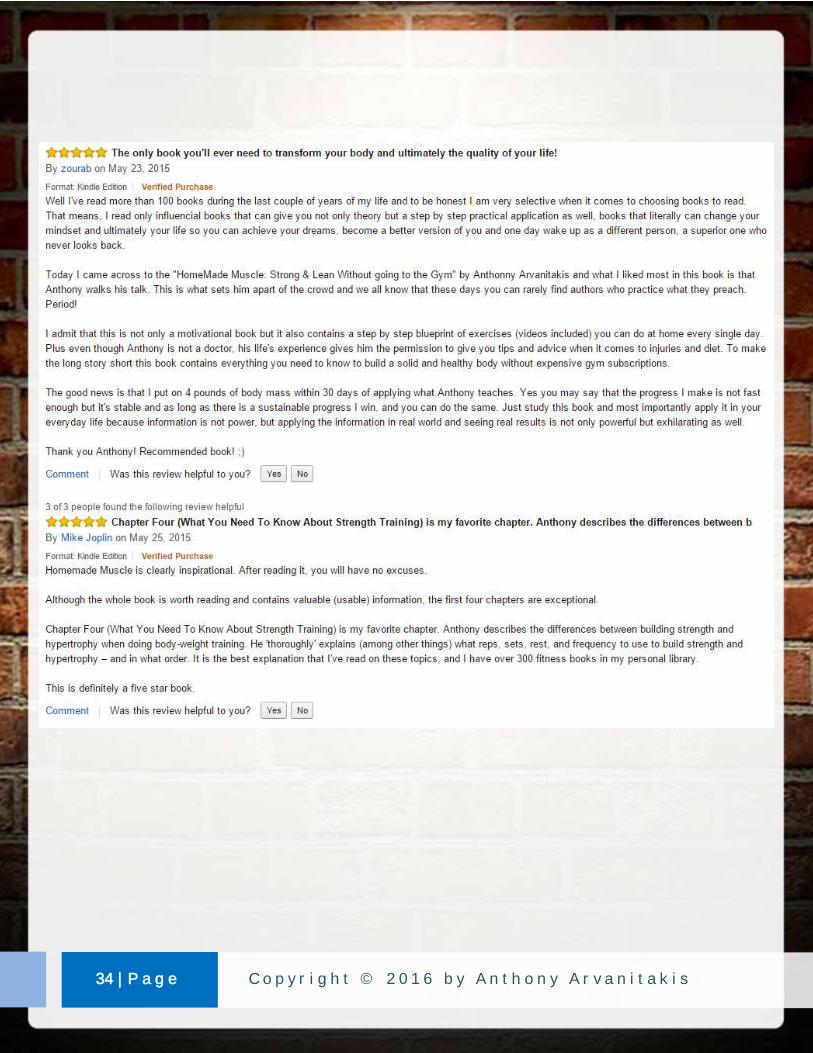
34 | P a g e C o p y r i g h t © 2 0 1 6 b y A n t h o n y A r v a n i t a k i s