Enviralab Sterility Module Unidirectional Flow Clean Bench ...
12
Enviralab Sterility Module Unidirectional Flow Clean Bench INSTALLATION, OPERATION, AND MAINTENANCE MANUAL ENVIRCO Technical Support: 800-884-0002
-
Upload
khangminh22 -
Category
Documents
-
view
7 -
download
0
Transcript of Enviralab Sterility Module Unidirectional Flow Clean Bench ...

Enviralab Sterility ModuleUnidirectional Flow Clean Bench
INSTALLATION, OPERATION, AND MAINTENANCE MANUAL
ENVIRCO Technical Support: 800-884-0002

2
I n s t a l l a t i o n , O p e r a t i o n , & M a i n t e n a n c e M a n u a l
Innovators in Clean Air Technology | www.envirco.com
Enviralab Sterility Module Unidirectional Flow Clean Bench
Table of Contents
Uncrating .......................................................................................................................... 3
Introduction ....................................................................................................................... 3
Installation ........................................................................................................................ 3
Operation .......................................................................................................................... 4
Maintenance and Service ................................................................................................. 6
Troubleshooting ................................................................................................................ 7
Electrical Schematic ......................................................................................................... 8
Engineering Data .............................................................................................................. 9
ESM-3 Parts List.............................................................................................................. 10
ESM-4 Parts List...............................................................................................................10
ESM-6 Parts List...............................................................................................................11
Warranty ...........................................................................................................................11

3
I n s t a l l a t i o n , O p e r a t i o n , & M a i n t e n a n c e M a n u a l
Innovators in Clean Air Technology | www.envirco.com
Enviralab Sterility ModuleUnidirectional Flow Clean Bench
■ Uncrating
The ENVIRCO equipment should be uncrated and inspected for shipping damage immediately upon arrival. If any damage is observed, a claims report should be filled out and promptly send to the responsible carrier. Otherwise, uncrate and examine for internal damage.
If shipping damage is discovered inside the crating, file claim with the responsible carrier immediately. Shipping components list and actual material received should be compared and any shortages reported to ENVIRCO immediately.
Note: Remove shipping blocks inside blower housing from motor/blower assembly(s).
■ Introduction
The Enviralab® Sterility Module is completely self-contained clean air product that provides a bio-clean, Class 100 environment (current Federal Standard 209) within its work area. The unit is designed for product protection only so that surrounding particle contamination cannot reach the work area within the Module. At the same time, airborne contamination generated within the work area is swept away by the unique laminar airflow pattern.
Air enters the Module through a prefilter in the top of the cabinet. A blower then supplies air to the work area through a High Efficiency Particulate Air (HEPA) filter. The HEPA filter removes all particles 0.3 microns and larger in size with an efficiency of 99.99%. Air moves uniformly through the work area at a velocity of 90 feet per minute (±20%) and exits at the front of the Module.
■ Installation
The Module is ready for operation as received and should be set up as follows.
Step 1. Locate Module on a sturdy laboratory bench or table (on a solid floor for Modules equipped with a Support Stand).
Step 2. Level Module, or Module and Support Stand, by adjusting the four leveling feet located at the corners.
Note: Enviralab Sterility Module is shipped separately from Support Stand. When Support Stand is used, the leveling feet must be removed from the Module and installed on the Support Stand. Support Stand should be located and leveled. The Module may then be placed on the top of the Support Stand.
Step 3. Remove packaged materials from the work enclosure. Connect special electrical plug located on upper side of air diffuser screen to matching outlet in roof of work area. Secure air diffuser screen in place with nuts and bolts provided and then install fluorescent and ultraviolet lights.
Note: Do not work in Module while ultraviolet light is on. See cautions listed in Operation section.
Step 4. Wipe interior surfaces of the work area with a mild disinfectant solution.
Step 5. Plug Module into 120 volt, 60 cycle, 20 amp, grounded 5-15 R power receptacle.
Step 6. Turn unit on by operating fan switch located on control panel. Unit will provide a clean atmosphere within five minutes.
Step 7. Check air velocity by observing velocity gauge on control panel. Velocity reading should be in the black zone of the airflow gauge and may be adjusted via the control knob.
Step 8. The light control switch is a center “off” type. The “up” position controls fluorescent lights; the “down” position controls the ultraviolet light.

4
I n s t a l l a t i o n , O p e r a t i o n , & M a i n t e n a n c e M a n u a l
Innovators in Clean Air Technology | www.envirco.com
Enviralab Sterility Module Unidirectional Flow Clean Bench
■ Operation
Adherence to the following procedures will assure maximum unit effectiveness and operator safety.
The Enviralab Sterility ModuleThe Enviralab Sterility Module is equipped with an Ultraviolet Short Wavelength Germicidal Lamp for surface decontamination. The Lamp is intended for use in sterilizing work area surfaces and equipment before using the Module or for decontaminating surfaces after use.
CAUTION: THE LAMP IS NOT TO BE USED WHILE AN OPERATOR IS USING THE BENCH, AS CERTAIN HEALTH HAZARDS MAY RESULT.
Ultraviolet Lamp DataThe 25 and 30 watts nominal ultraviolet output, 253.7 Angstroms peak output, average intensity at lamp 6500 μ w. per cm2, average intensity at work surface 180 μ w. per cm2. (Average at 100 hours, initial rating 20% higher, approximate life, 7200 hours.)
Ultraviolet sterilization is a surface effect. Therefore, there must be no objects within the field which cast a shadow if complete sterilization is to be achieved.
Ultraviolet Lethal Doses
Lethal Dose for 180 μ w. per cm2 Radiation Intensity at Work Surface
Micro-Organism 90% Kill 99% Kill 99.99% Kill
Yeast (Average) 22.2 Seconds 44.4 Seconds 1.48 Minutes
Brewer’s Yeast 55.6 Seconds 1.6 Minutes 3.7 Minutes
Fungi (Molds) 2.8-27.8 Minutes 5.6-55.6 Minutes 0.2-1.9 Hours
Protozoa 5.6-9.3 Minutes 11.2-18.6 Minutes 22.4-37.2 Minutes
Algae, Blue-Green 27.8-55.6 Minutes 0.9-1.9 Hours 1.9-3.7 Hours
Molds 90% Kill 99% Kill 99.99% Kill
Aspergillus Nigea (Bread) 9.3 Minutes 18.6 Minutes 37.2 Minutes
Aspergillus Amstelodami (Meat) 6.5 Minutes 13 Minutes 26 Minutes
Cladosporium Herbarum (Cold Spores) 2.8-6.5 Minutes 5.6-9.3 Minutes 11.2-26 Minutes
Penicillum Chrysogenum (Fruit) 2.8-4.6 Minutes 5.6-9.3 Minutes 11.2-18.5 Minutes
Mucor Mucedo (Meat, Bread, Fat) 4.6-6.5 Minutes 9.3-13 Minutes 18.5-26 Minutes
Scopulariopsis brevicaulis (Cheese) 4.6-7.4 Minutes 9.3-14.8 Minutes 18.5-29.6 Minutes
Rhizopus nigricans (Cheese) 27.8 Minutes 55.6 Minutes 1.9 Hours
Adapted from Summer, Dr. W., Ultraviolet and Infrared Engineering, Pitman
High intensity ultraviolet radiation causes some ozone generation, which may cause personnel discomfort in a small, poorly ventilated laboratory. Lamp should be left on only as needed, as determined by the lethal dose estimations given in the chart above.
Caution: The ultraviolet lamp should never be directly viewed with the eyes. Damage to the skin can also occur if exposed arms and hands are introduced into bench when the lamp is on. The injurious effects are similar to those of sunburn from overexposure to the sun. Recommended safe exposure limit to the intensities present in the Enviralab Sterility Module is 30 seconds to one minute.
The permissible concentration for exposure during an 8-hour day is 0.1 ppm by the OSHA Regulations. At twice this concentration and above, an odor irritation, dry cough, drying of nasal passages, smarting of the eyes, and headache symptoms occur. If any of these above mentioned signs are noticed, ultraviolet illumination should be discontinued unless adequate ventilation can be introduced into the laboratory.
5
I n s t a l l a t i o n , O p e r a t i o n , & M a i n t e n a n c e M a n u a l
Innovators in Clean Air Technology | www.envirco.com
Enviralab Sterility ModuleUnidirectional Flow Clean Bench
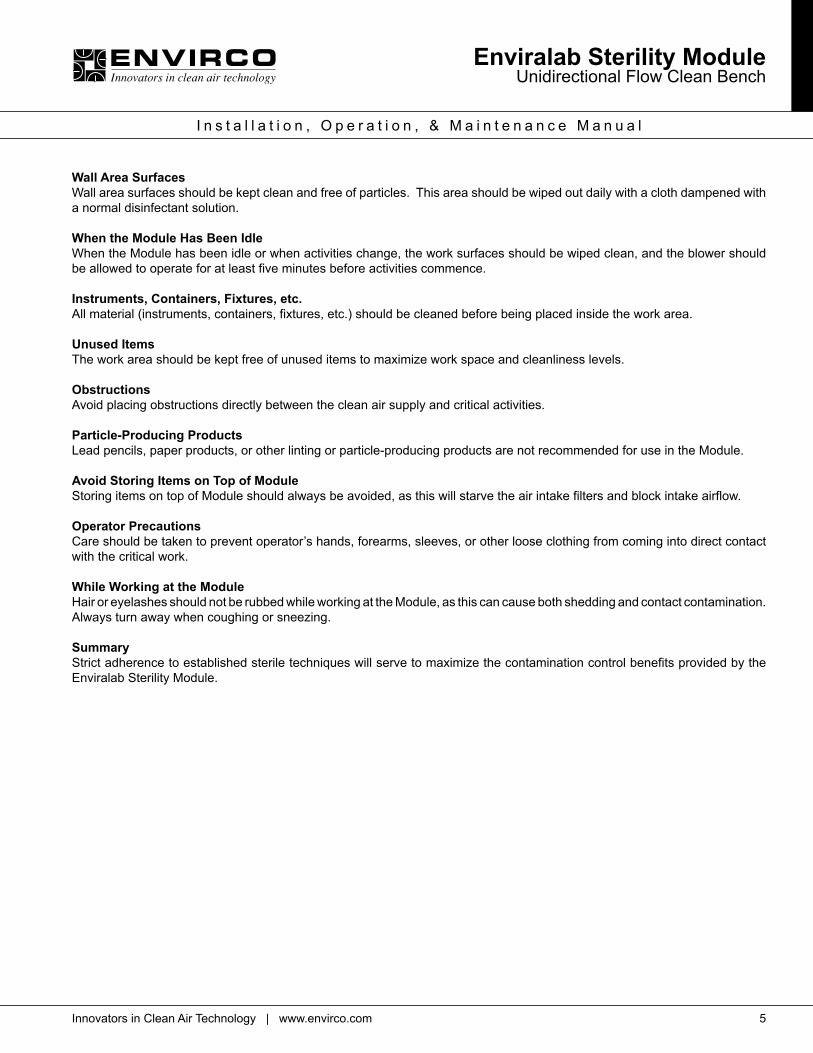
Wall Area SurfacesWall area surfaces should be kept clean and free of particles. This area should be wiped out daily with a cloth dampened with a normal disinfectant solution.
When the Module Has Been IdleWhen the Module has been idle or when activities change, the work surfaces should be wiped clean, and the blower should be allowed to operate for at least five minutes before activities commence.
Instruments, Containers, Fixtures, etc.All material (instruments, containers, fixtures, etc.) should be cleaned before being placed inside the work area.
Unused ItemsThe work area should be kept free of unused items to maximize work space and cleanliness levels.
ObstructionsAvoid placing obstructions directly between the clean air supply and critical activities.
Particle-Producing ProductsLead pencils, paper products, or other linting or particle-producing products are not recommended for use in the Module.
Avoid Storing Items on Top of ModuleStoring items on top of Module should always be avoided, as this will starve the air intake filters and block intake airflow.
Operator PrecautionsCare should be taken to prevent operator’s hands, forearms, sleeves, or other loose clothing from coming into direct contact with the critical work.
While Working at the ModuleHair or eyelashes should not be rubbed while working at the Module, as this can cause both shedding and contact contamination. Always turn away when coughing or sneezing.
SummaryStrict adherence to established sterile techniques will serve to maximize the contamination control benefits provided by the Enviralab Sterility Module.

Enviralab Sterility Module Unidirectional Flow Clean Bench
6 Innovators in Clean Air Technology | www.envirco.com
I n s t a l l a t i o n , O p e r a t i o n , & M a i n t e n a n c e M a n u a l
■ Maintenance and Service
Prefilters on Top of the ModulePrefilters on top of the Module should be replaced every 30 to 60 days, depending upon the amount of dust and lint in the surrounding room.
When to Replace the HEPA FilterFinal (HEPA) filter must be replaced only when the airflow drops below an acceptable level with new prefilters. HEPA filters will normally require replacing every 2 to 3 years.
HEPA Removal and Replacement (Figures 1 and 2)
Motor/BlowerMotor/blower should require no servicing. In case of motor failure, a new motor/blower unit may be ordered directly from ENVIRCO. Access to motor/blower is through prefilter opening on top of unit.
Lamp MaintenanceLamp maintenance requires only occasional replacement of the lamp tubes. This is easily done from within the work area. Ultraviolet lamp requires a lamp starter, which is located on the diffuser screen. Starter may be replaced by removing lamp, then twisting starter until it is free. In case of ballast failure, ballast can be replaced by removing prefilters for access to blower compartment.
CAUTION: DO NOT LOOK DIRECTLY UP INTO WORK AREA WHEN ULTRAVIOLET LIGHT IS ON.
Figure 1
1. Unplug module from power source and remove lamp tubes (1,2).
2. Disconnect all apparatus from duplex electrical outlet connection (3).
3. Remove prefilters from top of unit (4).4. Remove screws holding air intake screen and remove
screen (5).5. Unplug control panel connector and air gauge tubes.
Remove screws from front panel and remove panel (6).
Figure 2
1. Rotate lower front panel from top (pull towards you) (7).2. Lift toggle clamp handles, located at sides of blower
plenum, 180° to raise plenum off HEPA filter (8).3. Carefully pull out the HEPA filter to the front of the unit (9).4. Clean surface of filter sealing frame (10).

Enviralab Sterility ModuleUnidirectional Flow Clean Bench
7Innovators in Clean Air Technology
I n s t a l l a t i o n , O p e r a t i o n , & M a i n t e n a n c e M a n u a l
Velocity Gauge CalibrationVelocity gauge calibration may be checked as follows.
• Measure air velocity in the unit with an air velometer (Alnor Model #3002, or equivalent). Measure air velocity on a 6” grid at 6” below diffuser screen.
• Average all readings to determine average air velocity. (Must be corrected for altitude.)• Air gauge on control panel is set to read between 70 and 110 fpm with the center line at 90 fpm (corrected to STP). Gauge
calibration can be adjusted by the screw at the top of the gauge.
Note: Blockage of sensing tubes from gauge to blower can cause incorrect gauge calibration.
Note: Complete service for the Enviralab Sterility Module is available nationwide by factory-trained, qualified specialists. Services available include filter replacement, repairs, unit testing, and certification to current Federal Standard 209.
For additional information, contact:
■ Troubleshooting
If malfunctions occur, proceed in numbered order.Symptom Causes Action
Air supply inoperative
a. Power failureb. Switch or internal
c. Faulty speed controld. Motor failure
a. Check building power plug.b. Check unit wiring and switch wiring failure by enclosed electrical schematic. Replace defective components.c. Check speed control and replace if required.d. Replace motor/blower unit.
Inoperative lights
a. Incorrectly installedb. Tube failurec. Wiring, switch, or UV-starter failure
d. Ballast failure
a. Check for proper installation.b. Replace tubes.c. Check wiring and switch by enclosed electrical schematic. Check UV-starter. Replace defective component.d. Replace ballast.
Low air velocity
a. Speed control set too lowb. Dirty prefilterc. Dirty HEPA filterd. Velocity gauge out of calibratione. Blocked or damaged sensing tubes
a. Check speed control knob on front control panel.b. Replace prefilter. (Recommended replacement every 30-60 days.)c. Replace HEPA filter.d. Recalibrate gauge.e. Check tubes for obstructions or damage.
Excessive noise or vibration Blower bearing damage, loose mounting, or loose blower wheel
a. Check motor/blower, tighten bolts.b. Replace motor/blower.
Work area contamination Damaged HEPA filter Find leak by leak test procedure and repair with silicon sealants or replace filter.
ENVIRCO USA101 McNeill Road
Sanford, NC 27330Tel: (919) 775-2201Tel: (800) 884-0002Fax: (800) 458-2379
Email: [email protected]
ASIAN SALESBuilding #1
200 Middle Suhong RoadSuzhou, Jiangsu
PRC 215021Tel: (86) 512 6258 0031Fax: (86) 512 6258 7180
EUROPE, MIDDLE EAST, AND AFRICA (EMEA)
TRION, A Division of Ruskin Air Management Ltd
European OperationsThe Cavendish Center, Winnall Close
Winchester, HampshireS023 OLB, UK
www.envirco-emea.comTel: +44 (0) 1962 840465Fax: +44 (0) 1962 828619
Email: [email protected]

Enviralab Sterility Module Unidirectional Flow Clean Bench
8 Innovators in Clean Air Technology | www.envirco.com
I n s t a l l a t i o n , O p e r a t i o n , & M a i n t e n a n c e M a n u a l
■ Electrical Schematic

Enviralab Sterility ModuleUnidirectional Flow Clean Bench
9Innovators in Clean Air Technology
I n s t a l l a t i o n , O p e r a t i o n , & M a i n t e n a n c e M a n u a l
■ Engineering Data
Model No.
Product No.
Dimensions in Inches (cm)
A B C D E
Average CFM @ 90 FPM
BTU/Hour
Power Req. Amps @ 115V
No. of Blowers
Ship Weight Lbs. (Kg.)
ESM-3 10758 35.00 (88.90)
32.25 (81.92)
24.50(62.23)
26.125(66.36)
33.50(85.09) 540 3100 6.0 1 265 (120.0)
ESM-4 10166 47.00(119.38)
32.25(81.92)
28.00(71.12)
26.125(66.36)
44.50(113.03) 720 3300 8.0 1 370 (168.2)
ESM-6 10315 70.00(177.80)
32.25(81.92)
28.00(71.12)
26.125(66.36)
67.50(171.45) 1080 4100 10.0 1 510 (231.8)
Specifications are subject to change without notice and without incurring liability for modifications to equipment previously sold.

Enviralab Sterility Module Unidirectional Flow Clean Bench
10 Innovators in Clean Air Technology | www.envirco.com
I n s t a l l a t i o n , O p e r a t i o n , & M a i n t e n a n c e M a n u a l
■ ESM-3 Parts List
36” Enviralab Sterility ModuleItem Part Number
HEPA filter (one required), 32” x 24” x 5-7/8” 69357
Blower/motor assembly 23567
Blower only 60466
Motor only, 1/4 HP, 115V, 60 Hz, single phase 62857
Fluorescent ballast assembly (with wire connector) 23558
Fluorescent ballast only, not assembled 60069
UV ballast assembly (with wire connector) 23557
UV ballast only, not assembled 62859
Lamp starter 60268
UV lamp (one required) 60860
Fluorescent lamp (two required) 90821
Prefilters (one required), 22” x 32-1/8” x 1” 62862
Speed control 60446
Velocity gauge 61056
Potentiometer 30299
■ ESM-4 Parts List
48” Enviralab Sterility ModuleItem Part Number
HEPA filter (one required), 44-1/8” x 24” x 5-7/8” 60080
Blower/motor assembly 20299
Blower only 60466
Motor only, 1/3 HP, 115V, 60 Hz, single phase 62260
Fluorescent ballast assembly (with wire connector) 20077
Fluorescent ballast only, not assembled 65060
UV ballast assembly (with wire connector) 20296
UV ballast only, not assembled 60202
Lamp starter 60268
UV lamp (one required) 60265
Fluorescent lamp (two required) 64650
Prefilters (one required), 22” x 23-1/8” x 1” 60370
Speed control 60446
Velocity gauge 61056
Potentiometer 30299

Enviralab Sterility ModuleUnidirectional Flow Clean Bench
11Innovators in Clean Air Technology
I n s t a l l a t i o n , O p e r a t i o n , & M a i n t e n a n c e M a n u a l
■ ESM-6 Parts List
70” Enviralab Sterility ModuleItem Part Number
HEPA filter (one required), 67” x 24” x 5-7/8” 61659
Blower/motor assembly 32512
Blower only 61642
Motor only, 1/2 HP, 115V, 60 Hz, single phase 61657
Fluorescent ballast assembly (with wire connector) 32151
Fluorescent ballast only, not assembled 61656
UV ballast assembly (with wire connector) 20296
UV ballast only, not assembled 60202
Lamp starter 60268
UV lamp (one required) 60265
Fluorescent lamp (two required) 61660
Prefilters (one required), 22” x 22-1/8” x 1” 60370
Speed control 60446
Velocity gauge 61056
Potentiometer 30299
■ Limited Warranty
ENVIRCO warrants that all equipment manufactured by it and bearing its name will be free from defects in material and workmanship under normal use. The obligation of ENVIRCO under this warranty is limited to the repair or replacement of any parts which are defective for a period of one year after invoice date, provided that ENVIRCO receives written notice of such defect. For a period of 90 days after invoice date, ENVIRCO may effect such repairs or replacement, via qualified service personnel, at the equipment installation site provided that the equipment is located in the continental United States and that ENVIRCO receives written notice of such defect. Excluded from this warranty are certain expendable items such as light tubes, filters, etc., as well as damage due to abuse or accident. Expect for this warranty, ENVIRCO makes no warranty, expressed or implied, including but those not limited to, those of description, quality merchantability, sample, fitness for a particular purpose, or productiveness.

Clean air solutions built for you. M O R E I N F O R M A T I O N A V A I L A B L E A T W W W . E N V I R C O . C O M
Copyright © 2017 ENVIRCO. All Rights Reserved.Form P/N#: 61363 Rev. 02/17
Industrial Cleanroom Products
» MAC 10® Original
» MAC 10® IQ™
» MAC 10® IQ™ LAF
» MAC 10® LEAC™
» MAC 10® LEAC2™
» MAC 10® LEDC™
» Ducted Ceiling Module: DCM & RSR
» AC or DC Control Systems
» MAC-T Ceiling Grid System
Hospital & HealthcareHospital & Healthcare
» IsoClean® and IsoClean with Ultraviolet Light
» AirCeil®
» Hospi-Gard® Room Pressure Monitor
Enviramedic Products » HOR Horizontal Flow
Enclosure
» HCF Horizontal Flow Surgery Room
» VOR Vertical Flow Surgery Isolator
PharmaceuticalPharmaceutical & Medical Device
» Unimodule M2 Vertical Laminar Flow Workstation
» METD 100% Exhausted Vertical Flow Workstation
» Laminar Downflow Module
Laboratory & ResearchLaboratory & Research
» 100-Plus Horizontal or Vertical Flow Clean Bench
» Unidirectional Flow Horizontal Flow Bench (LF)
» TT Table Top Horizontal Flow Clean Bench
» EnviraLab Sterility Module: ESM
ENVIRCO MAC 10 is a registered trademark of ENVIRCO, USA. Specifications subject to modifications or changes without notice. US patents 4,560,395 and 5,470,363. Other patents issued and pending in foreign countries.
ENVIRCO®
101 McNeill Road | Sanford, NC 27330, USA
tel: 919.775.2201 | toll free: 800.884.0002 | fax: 800.458.2379
www.envirco.com | email: [email protected]