
ENPowerToolkit-EN.pdf - European Commission
168
-
Upload
khangminh22 -
Category
Documents
-
view
1 -
download
0
Transcript of ENPowerToolkit-EN.pdf - European Commission

2
The Toolkit A manual for young trainers working with media & communication, entrepreneurship, volunteering and career counseling
Authors Abdurrahim Gunaydin, Cordelia Bădescu,Paula Beudean, Urszula Puchalska, Vedat Sevincer
Some of the energizers and evaluation methods were contributed by Agnieszka Duda-Jastrzębska and Career counseling unit is based on contribution by Mariusz Boguszewski, Elżbieta Dydak and Małgorzata Dąbrowska
Project expert: Andriy Hnyda
Cover design: Yaroslav Sosnovskyy
Project Partners
REHIONALNYJ BLAHODIJNYJ FOND REZONANS, Ukraine Fundatia Danis, Romania Fundacia Aktywnych Inciatyw rozwoju, Polan Norsensus Mediaforum, Norway
Copyright 2018
"The European Commission support for the production of this publication does not constitute an endorsement of the contents which reflects the views only of the authors, and the Commission cannot be held responsible for any use which may be made of the information contained therein."
Project Title
Bridges to ENpower. Cross-sectorial initiative to support the young people in their quest for ENtrepreneurship
Funded by

3
ACKNOWLEDGMENTS
We would like to express our gratitude to all of the partners and experts who have contributed to the creation of this toolkit.
Much of the knowledge that you can find in this toolkit is based on the trainings organized in each of the partners' respective countries and valuable experiences from Your Kite project which was carried out between 2015 and 2017. Experts from various fields were invited to provide us with their knowledge which, in return, were used and included in the creation of the toolkit you have in front of you.
Lastly, we would like to thank the participants of the ENpower Workshop that took place in Lviv, Ukraine, June 2018. Those experts from various fields who work with youth in the Ukrainien labour market, provided us with the needed insights to better understand the Ukrainian context, allowing us therefore to better adapt this toolkit and other resources to meet some of the needs mentioned during the workshop.

4
Table of Contents
PART A INTRODUCTION TO Bridges to ENpower
CHAPTER 1 About Bridges to ENpower project
1.1 About Bridges to ENpower
CHAPTER 2 ABOUT Bridges to ENpower TOOLKIT
2.1 About The Toolkit 2.2 How To Use The Toolkit 2.3 Implementing The Scenarios 2.4 The Online Resources
CHAPTER 3 TRAINER SKILLS
3.1 What Is A Workshop? 3.2 How To Create A Workshop 3.3 Training Program 3.4 Training Methods 3.5 About Facilitation, The Facilitator’s Role and Facilitation Techniques 3.6 Motivation for Learning and How We Learn 3.7 What To Keep In Mind When Working With Youth 3.8 Handling Difficult Behaviour 3.9 How To Gain Experience

5
PART B
DISCOVERING THE THEORY BEHIND THE SCENARIOS
CHAPTER 4 MEDIA & COMMUNICATION
4.1 Background Information on: Storytelling And Communication 4.2 Visual Storytelling: New Language In The Age of Information 4.3 Telling your story. Personal branding
CHAPTER 5 ENTREPRENEURSHIP
5.1 Get Ready To Become An Entrepreneur! 5.2 Are You An Entrepreneur? Entrepreneurship Quotient 5.3 Improve Your Creativity And Think Innovatively 5.4 Always Think Twice 5.5 Know Your Clients, Sell Your Product 5.6 How Can You Be Sure That You Can Make Profit With Your Business? 5.7 Imagine And Develop Your Business - Business Model Canvas 5.8 Leading Your Organization With Style 5.9 Building An Ethical And Responsible Business
CHAPTER 6 VOLUNTEERING
6.1 Background Information 6.2 Who and How Many People Volunteer? 6.3 Why Volunteer? 6.4 Volunteering Roles 6.5 Trendy Volunteering Activities 6.6 Volunteering Roles for Youth

6
CHAPTER 7 CAREER COUNSELING
7.1 Background Information 7.2 Let’s Get Started! 7.3 Being a Role Model 7.4 Career Guidance – What Is It All About? 7.5 Key Issues To Recognize Before Choosing a Profession 7.6 About Future Professions 7.7 What Color Is Your Parachute?
PART C
DISCOVERING THE SCENARIOS
CHAPTER 8 BASIC SCENARIOS
8.1 Balloon of Expectations 8.2 Tell Me About The Others 8.3 Map of Participants 8.4 Map of Expectations 8.5 Paper Me 8.6 Flower 8.7 Amnesia 8.8 Who Also Likes…? 8.9 Triangle 8.10 Circle Talks 8.11 Question Cube 8.12 Question Poster 8.13 Evaluation, Other Methods

7
CHAPTER 9 MEDIA & COMMUNICATION
9.1 Visualize Your Story 9.2 Can I Have Your Attention 9.3 Visualize Your Future With a Vision Board 9.4 Retell the Story with Pictures 9.5 Motion Your Story 9.6 Tell your story
CHAPTER 10 ENTREPRENEURSHIP
10.1 Entrepreneurship - a career path 10.2 Start Your Business With A Paperclip 10.3 Launch Your Boats! 10.4 How much money do you need? 10.5 Get Ready To Make A Profit! 10.6 The Business Model Canvas - Plan Your Business On One Page! 10.7 Leading Your Organization With Style 10.8 Is it really your choice? 10.9 Building an Ethical and Responsible Business
CHAPTER 11 VOLUNTEERING
11.1 Picturing a Volunteer 11.2 Defining Volunteering 11.3 Who can be a volunteer? 11.4 What Is Out There For Me?
CHAPTER 12 CAREER COUNSELING
12.1 Who am I? What should I dream about? 12.2 I Love To - I’m Good At - It Pays Well To 12.3 Discovering Your Interests 12.4 What Is Success? 12.5 Quiz On The Labor Market 12.6 Preparing Your CV and Letter of Motivation 12.7 Get Ready For The Job Interview!

8
PART D
ADDITIONAL RESOURCES
Additional resources on training scenarios, media & communication, entrepreneurship, volunteering and career counseling

9
INTRODUCTION TO Bridges to ENpower
CHAPTER 1 About Bridges to ENpower Project
1.1 About Bridges to ENpower
This toolkit is the result of the cooperation of organizations working with young people from four countries: Rehionalnyj Blahodijnyj Fond "Rezonans" (Regional Charity Foundation “Resonance”, the lead organization) from Ukraine; Norsensus Mediaforum from Norway; Fundația Danis pentru Dezvoltare Managerială (Danis Foundation for Management Development) from Romania; and Fundacja Aktywnych Inicjatyw Rozwoju (Foundation for Active Development Initiatives) from Poland.
The ENpower Training Toolkit was developed mainly for Ukrainian youth organizations and non-governmental organizations working with young people, but it can be used by other organizations interested in developing such programs for young people, once they adapt it to their local context. The toolkit is designed and written from the youth worker/facilitator’s perspective. All the recommendations, the steps, the methods and the tools are designed and presented here to be used by organizers of workshops for young people.
The ENpower Training Toolkit was developed based mainly on the experience gained through one project run by Norwegian, Polish and Romanian partners – YourKITE project, co-funded by European Commission, through the Erasmus+ Programme, in 2015-2017. The YourKITE toolkit, developed in the mentioned project, was adapted to the Ukrainian context, with the support of Rehionalnyj Blahodijnyj Fond "Rezonans" (Resonance Foundation, Ukraine).
The main thing we learned about the Ukrainian context, with the support of Resonance Foundation and the other Ukrainian stakeholders involved in the development of the ENpower open educational resources, aspects which are relevant for this internship program are:
● When they are looking for a job, young people from Ukraine face challenges, suchas: personal challenges related to their low levels of work-related knowledge and softskills, such as communication skills, presentation/personal branding skills; personalchallenges related to self-awareness, self-confidence, and autonomy (most of the timethey underestimate themselves or cannot identify and promote the competences theyhave; they do not know where and how to search for better jobs, they are “lost” on thelabour market, do not know their rights as future employees or trainees); personalchallenges related to the work attitudes - they feel helpless in the Ukrainian political and

10
economic context, they are demotivated, they fear to take risks and to get out of the comfort zone; labour market challenges, such as poor payments, or much less high skilled jobs available than the number of university graduates.
● When hiring young people, Ukrainian employers face challenges, such as: economic challenges, such as high taxes they need to pay for employees’ salaries, so high that they prefer sometimes to use the black labour market; challenges given by the education system which does not educate the young people for the needs of the labour market, the job market misses workforce on specific professions, or even when the young people are prepare in a specific sector, they lack the appropriate qualification in terms of knowledge and skills required by the employers; challenges given by the “characteristics” of the young generation - young people lack soft skills, such as working in teams, taking the initiative or the responsibility, communication skills, etc.; and, finally challenges related to the image the other workers or managers have about the young generation - they think that young people have too high expectations in regards to compensations and benefits, while they miss a lot of knowledge and skills, that young people are not ready to change or to compromise on the job, that young people search for quick success and accomplishments, while they are very indifferent and they have no genuine interest towards the job or the work.
The ENpower Training Toolkit does not aim to solve and address all the challenges identified in the Ukrainian context. Most of the challenges are structural, culturally, politically or economically determined. The training toolkit program aims at addressing challenge related to the young people’s knowledge, skills, and attitudes, but also some of the challenges related to the lack of proper career counselling programs. The theory and the scenarios developed in the toolkit aims to support youth workers in providing workshops for young people, in order to enhance their entrepreneurship and employability skills.
The ENpower Toolkit is part of the Bridges to ENpower project - Bridges to ENpower. Cross-sectorial initiative to support the young people in their quest for Entrepreneurship, which is co-funded by European Commission, through Erasmus+ Programme (KA2 – Cooperation for innovation and the exchange of good practices -Capacity Building in the field of Youth), and implemented by Rehionalnyj Blahodijnyj Fond "Rezonans" (Resonance Foundation, Ukraine, lead organization), Fundația Danis pentru Dezvoltare Manageriala (Fundația Danis, Romania), Norsensus Mediaforum (Norsensus, Norway) and Fundacja Aktywnych Inicjatyw Rozwoju (FAIR, Poland).
Bridges to ENpower aims to improve the quality of youth work in Ukraine, in the field of entrepreneurship education for young people, and to foster cooperation and exchanges between youth organizations from Ukraine, Poland, Romania and Norway.
The aim of the project is reached through the following specific objectives:

11
● Professionalize youth workers from Ukraine in delivering workshops onentrepreneurship education;
● Enhance the capacity of youth organizations from Ukraine to provide mentorshipprograms for young people, in order to increase their interest, knowledge, andcompetencies related to entrepreneurship, and to foster their employability;
● Professionalize youth workers from Ukraine in establishing sustainable and efficientcross-sectorial partnerships on the labour market (with companies, SMEs, universities andstudents associations);
● Foster cooperation between the partner organizations from Ukraine, Poland,Romania and Norway, through common work on developing open educational resources,and through the internationalization of partners’ expertise.
More information about the project, the partners of the project and about the educational resources developed within the project can be found at: https://enpower.yourkite.org/. Please feel free to provide us with your feedback and suggestions.
The ENpower Training Toolkit is an open education resource, delivered under Creative Common Licence - any organization or any individual can access this free resource and use it for supporting young people, as long as credentials are given to the ENpower partners, and European Commission, Erasmus+ Programme.

12
CHAPTER 2 ABOUT Bridges to ENpower TOOLKIT
2.1 About The Toolkit
This toolkit has been designed to help promote volunteering and the development of entrepreneurship and media and communication skills of young people with a special focus on employability.
It serves as an integrative and comprehensive trainer guide for youth workers and educators working to address these issues, both inside and outside the formal education system.
The toolkit was designed for those who are working with young people. However, scenarios may be adapted to other age groups and situations. It can be used by youth workers, youth organizations, entrepreneurship centers, volunteering organizations, high schools, universities and other stakeholders. It can guide anybody that is interested in volunteering providing practical professional orientation or information on the labor market and entrepreneurship, and supporting the employability of youth by improving their media and digital skills, as well.
The growing unemployment rate amongst youth demonstrates the need for this initiative. This is a pressing issue in the labor market in both the project target country Ukraine and the rest of Europe. It is partially due to the fact that young people competing in the labor market lack experience and updated skills. Entrepreneurship or self-employment are ways out of unemployment. However, skills required to start a business are not enough to compete in the labor market today, which values social and communication skills. One must also have volunteering, IT/media and communication skills. From this perspective, employability and social integration is becoming more and more complex, and it is not fully recognized or understood. The ‘novelty’ of these life skills requires new ways to address the issue. Many existing attempts to foster these skills tend to focus only on financial, business and professional skills, and fail to develop an integral approach.
The approach we take in this toolkit allows us to view employability as a set of skills that combine various experiences and expertise with regards to entrepreneurship, media and communication, volunteering, and career counseling. This toolkit has been designed to address both how to acquire and how to teach these skills. The activities described in the toolkit are intended to help young people to develop the knowledge, skills and attitudes they will need as future employees or entrepreneurs.
The manual is based on the belief that the role of stakeholders and young people in promoting these essential skills is vital. They should take action and be self-learners. This toolkit explores, using scenarios and theory, how young people can improve themselves for better employability.

13
The toolkit includes media & communication training as well as practical information on how to train others, handle the group process and other necessary information for trainers. Moreover, the toolkit has entrepreneurial insights on how to set up and run your own business. The focus is not to provide the users of the toolkit with formal regulations on how to set up a business, but more on the practical issues for improving life skills. The toolkit also encourages young people to volunteer and plan their professional careers by acquiring valuable knowledge and resources, and by learning through creative scenarios, exercises, and games.
This toolkit was created in the frame of Erasmus+ Programme: Capacity Building in the field of youth by bringing together four project partners and a number of diverse stakeholders who have different perspectives on the challenges and opportunities that need to be considered in the youth work and field of entrepreneurship, volunteerism and digital media skills. The partners are REHIONALNYJ BLAHODIJNYJ FOND REZONANS: Norsensus Mediaforum, Fundația Danis pentru Dezvoltare Managerială (Danis Foundation for Management Development); and Foundation for Active Development Initiatives (FAIR). The various stakeholders include youth workers, teachers, school leaders, educational experts, employers, parents and students. Their role is to identify important emerging trends that are likely to have an impact on employment skills.
14
2.2 How To Use The Toolkit
This toolkit is structured in four main parts: introduction, theory on media and communication, entrepreneurship, volunteering and career counseling, scenarios for workshops on these topics, and useful resources.
Read the Introduction (Part A) to discover more about ENpower project and this toolkit, but mainly to learn how to organize and facilitate workshops, how to motivate and help others to learn, and how to work with young people.
Read Discover The Theory Behind The Scenarios (Part B) in order to gain basic knowledge on media and communication, entrepreneurship education, volunteering, and career counseling. This part will help you to prepare workshops on these topics, providing you with all the background information you will need for the scenarios prepared in Part C of the toolkit. The theory sections (Part A and B) follow the same sequence and structure of the scenarios section (Part C), so that you can easily relate the theory to a specific scenario. Thus, when you prepare a scenario for a workshop, just follow the reading instructions from the scenario and return to this part to gain the knowledge you need.
Read Discover The Scenarios (Part C), which includes ready-designed exercises for workshops on media and communication, entrepreneurship, volunteering and career counseling. Moreover, this part includes scenarios you can use in the introductory part of any workshop, energizer, and evaluation exercise.
Consult Additional Resources (Part D) when you want to read more about a specific topic or when you need the tools, photos, handouts, etc. that were mentioned in the scenarios you want to practice. You can also use the Glossary of Terms and Concepts included in this section when you want to navigate the toolkit more efficiently, based on a specific topic or interest you might have. Download from http://enpower.yourkite.org/ and consult the ENpower Toolkit Appendixes for the tools, photos, handouts etc. mentioned in the scenarios you want to practice.

15
2.3 Implementing The Scenarios
All the scenarios from the toolkit are gathered in Part C - Discover The Scenarios. However, when you want to practice one specific scenario, you will have to follow the instructions and go to Part B of the toolkit (Discover The Theory Behind Scenarios) in order to gain the basic knowledge needed for the scenario, or to Part D, from where you might want to read more on the topic or to the Bridges to ENpower Toolkit Appendixes, to print out specific materials you need for your exercise/game of choice. The activities use the term ‘trainer’ or ‘facilitator’ to refer to the person running the train- ing. A trainer/facilitator is someone who ‘makes something happen’ and who supports and encourages others to learn and develop their own potential. Effective facilitation is the key to giving life to these activities. Do not feel like you need to be an ‘expert’ in order to work on these issues. Good facilitation does not require any particular knowledge or expertise, with the exception of perhaps an ‘expertise’ in understanding and relating to young people. The activities in this toolkit will be most successful in an environment where your group is encouraged to explore and find their own approach to raised issues.
The direct participation of learners in the education processes increases the impact and quality of training. The facilitator, therefore, does not have to be the expert in all matters but should be able to help learners find information and form their own answers and opinions.
All the scenarios are designed and presented in the toolkit so that they can be implemented right away by the young trainers. Thus, each scenario is structured in the following way:
Preparation & Duration Time - This is quick information on how much time you need to deliver the workshop; for some scenarios, where preparation time is relevant, you can also check here how much time you will need to prepare the exercise/game. Size of The Group - This helps you to quickly learn about how many participants can be involved in the exercise (the minimum or the maximum). Age of The Group - This provides you with information about the age of participants for which the scenario is designed. Tags - These will help you to quickly identify the topic of the scenario, and the knowledge and skills in which the scenario intends to enhance. When To Use It - This part summarizes the learning objectives of the exercise or game. It

16
could also suggest the best moment to use the exercise during the workshop structure. Materials - This part summarizes the materials (such as office supplies, video-projector, computer, handouts, etc.) you will need in preparing and delivering the scenario. How (Preparation & Presentation) - This is the most important section of the scenario. It reveals exactly what you need to do in order to prepare the scenario (if necessary), and how to conduct the exercise, game, icebreaker, energizer, etc. This part provides as much detailed information as possible in order to help you to deliver the scenario with no obstacles. Follow-up Questions - This section helps you to conclude the scenario by pointing out, through meaningful questions, the most important knowledge or skills the participants should develop during the specific exercise. Possible Variations - This part was developed for the scenarios that could be delivered in alternative ways in order to be flexible with regards to variations, such as physical conditions for the workshop, the number or demographic of participants, but also in regards to the topic of the scenario and the time you have at your disposal. The Factbox / the infobox - You will find this for some scenarios. It is intended to help you better understand concepts, terms and theories or to better deliver the exercise to the participants in a more efficient way. Each scenario has basic and mandatory theory behind it that you need to read about in Discover the Theory Behind the Scenarios (Part B). You should read the corresponding theory part for the scenarios to acquire the basic knowledge before preparing and delivering the exercise.

17
2.4 The Online Resources
The online version of toolkit is available on the project website:http://enpower.yourkite.org/ Here you will find the scenarios presented in the toolkit pdf and printed version, as well as interactive scenarios and an online training for people to use in preparing and delivering workshops on the aforementioned themes.
The online scenarios, which are provided in English, are organized based on topics and tags related to the main topics, which are Media and Communication, Entrepreneurship, Volunteering and Career Counselling, but also Training Methodology. The structure of the scenario is similar. However, the scenarios might include additional information. Moreover, an online training is provided in the Ukrainian language. This training touches upon the same topics and scenarios as provided in the training toolkit, however also provides the possibility to test the gained knowledge after each part. The online training can be accessed under the following link:https://enpower.yourkite.org/online-training/

18
CHAPTER 3 TRAINER SKILLS
The role of the Trainer is to help people to learn. You will learn later in this part of the toolkit that people, especially children and youth, learn best when they have the chance to learn through experience. The following sections are about providing you with the basics on how to become a facilitative trainer. Throughout this part the term training and workshop will be used interchangeably. However, it needs to be stated that we will focus on one specific teaching style - on how to conduct a training - the workshop style. Allowing for a more interactive form of training.
What Does Facilitative Trainer Mean?
A facilitative trainer is a trainer that creates an environment that allows people to learn what they need to learn by designing a workshop that enables people to actively participate In their learning process.
3.1 What Is A Workshop?
A workshop is a teaching method which allows:
• The role of the ‘teacher’ to be reduced to a minimum. The trainer is acting more as a facilitator than a teacher.
• The participants to learn by interacting with each other. The more active participants, are the more they will be able to learn.
• The learning process to be organized in such a way that is more active and allows for a variety of techniques to be used in a near real-life situation.
19
3.2 How To Create A Workshop
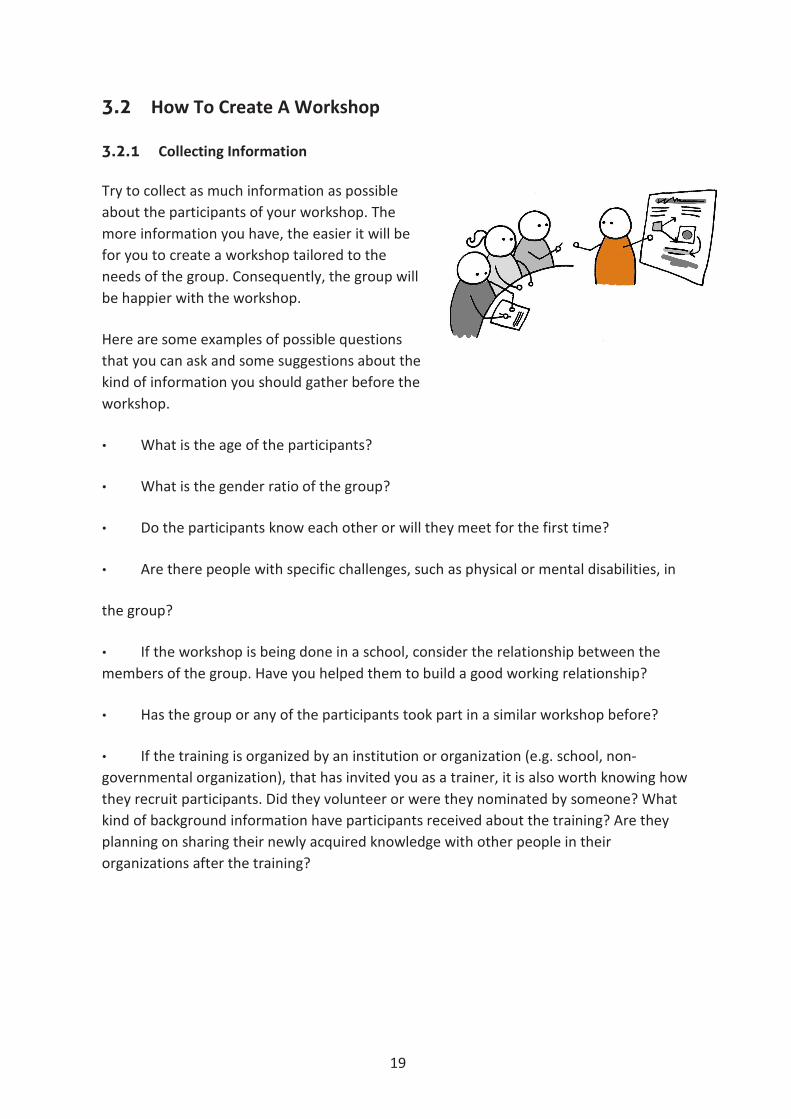
3.2.1 Collecting Information Try to collect as much information as possible about the participants of your workshop. The more information you have, the easier it will be for you to create a workshop tailored to the needs of the group. Consequently, the group will be happier with the workshop.
Here are some examples of possible questions that you can ask and some suggestions about the kind of information you should gather before the workshop.
• What is the age of the participants?
• What is the gender ratio of the group?
• Do the participants know each other or will they meet for the first time?
• Are there people with specific challenges, such as physical or mental disabilities, in
the group?
• If the workshop is being done in a school, consider the relationship between the members of the group. Have you helped them to build a good working relationship?
• Has the group or any of the participants took part in a similar workshop before?
• If the training is organized by an institution or organization (e.g. school, non-governmental organization), that has invited you as a trainer, it is also worth knowing how they recruit participants. Did they volunteer or were they nominated by someone? What kind of background information have participants received about the training? Are they planning on sharing their newly acquired knowledge with other people in their organizations after the training?

20
3.2.2 Designing The Workshop
Defining The Topic of The Workshop
Whether you define the topic of the workshop yourself or if someone told you to do a workshop on a given topic, keep the following in mind:
Do the workshop only about a topic that you find interesting and know something about. Be confident about the topic you want to present. Here's why.
• Your level of confidence will influence your non-verbal communication skills. We are able to control what we say. However, it is very difficult to control our body language, especially for inexperienced public speakers.
• Difficult situations may arise. The participants may have doubts or questions. In these kinds of situations, it is important that your attitude supports what you have said during the workshop.
Do workshops on topics for which you are prepared. Your audience should feel as though you are well-prepared and know what you are talking about. Make sure to do research on the topic before holding the workshop. Read some publications or books or simply search the Internet. Make sure you know exactly what you want to do and say. If you are unsure about what you are trying to teach or if you are constantly using notes, you will lose your credibility.
Defining The Goal
In order to narrow down the topic, decide on a title, and develop the content of the workshop, we must first define the goal of the workshop. Goals are a description of the results we want to achieve by doing the workshop and what the participants should know and be able to do after completing the workshop.
There are 3 main questions that you should ask yourself before starting to prepare for the workshop:
• Why? – Why is this training necessary? What is it meant to achieve? What’s the purpose? Who is it for?
• What? – What content is necessary to achieve the goals of the training? • How? - How will the content be delivered during the training? In order to answer all three questions you will need to: Learn more about the participants and their specific needs. Besides trying to find answers to the questions stated above to help you figure out who they are, you can also ask the

21
following questions prior to the workshop:
• Why do they need/want to participate in the training? • What do they expect to get out of the workshop?
• What do they already know about the topic? • What do they want to do with the knowledge and skills that they have gained after completing the course?
Define how you want them to feel at the end of the workshop and what sort of impressions you want them to leave with. This is important because people need to have the right attitude in order to learn something. They need to be open to it and see the benefit of it. They must also want to apply their newfound knowledge, otherwise nothing will change.
Write out the learning objectives and desired outcomes of the workshop based on the information you have gathered. The learning objectives of a workshop cover what you want people to be able to do once it is completed.
Defining the learning objectives will help you to define the content. The objectives relate back to the training needs of the participants. Why do they need the training and what is the training meant to achieve? The objectives should be detailed, precise and measurable. E.g.. Workshop on
Volunteering
Broad objective: The participants will learn what volunteering is and in which volunteering activities they can engage,
Narrow down the objective: Create one definition on what volunteering means
Identify 6 types of volunteering actives
Identify the one volunteering activity that fits them best
The learning outcomes are the ‘thinking and feeling’ part of designing the workshop.
As previously mentioned, without the right attitude, learning will not take place at all. If it does, it will not be applied in the way you would like.

22
But how can one plan the way that others will feel during and after the workshop?
Think about how the people in front of you will likely feel at the beginning. How interested, energized and enthusiastic will they be?
Now think about how you want them to feel. Do you want them to be motivated to learn and to apply new knowledge? Do you want them to feel confident about their abilities, energized, and supportive of each other?
Choose the content for the workshop based on the way you want the participants to feel. For example, if the participants are expected to work on tasks together during the workshop, then you want them to bond and feel supportive of each other. Appropriate content to achieve those kinds of feelings could be teamwork activities where the participants succeed together and get to know each other better.
Once you have worked out the detailed learning objectives and the desired outcomes of the workshop, you should then move on to designing the content and methodology of the workshop.
3.2.3 Seven Tips To Designing a Workshop
1. Collect information about participants. How many people will attend the workshop? What are their expectations and needs? What do they already know about the workshop and its topic?
2. Include exercises, games and other stimulating activities. Remember, a workshop is not a lecture!
3. Think carefully about how much time you have to spend on each activity. Don’t be too ambitious because you’ll most likely run out of time!
4. Provide enough time for discussions after each exercise or activity. Remember, people like to reflect and express their emotions during workshops, so leave enough space for them to do so.
5. Ask the participants to provide feedback. It will be especially appreciated by young people. Make sure to allow participants to provide positive feedback to each other.
6. Plan activities in the right order. Move from easier task onto the more difficult or risky ones.
7. Stay flexible! Think about what content can be excluded if you run out of time. Additionally, plan 1-2 extra activities in case the group works faster than expected.

23
3.2.4 Practical Preparations
In order to make the workshop more enjoyable for the participants, please keep in mind the following practicalities:
The workshop space should be comfortable. There should be plenty of natural light, air circulation and a comfortable temperature. The space should be set up in a way that encourages participation. By putting tables aside and putting chairs in a circle, you allow everyone to see each other. There is no automatic hierarchy in a circle.
Check any equipment & materials that you or the participants will be using. Equipment that is not working properly can be very annoying and therefore influence the productivity of the workshop. Make sure that you have materials for everyone and that no one has to wait in line to use certain materials or equipment.
If the workshop is long, make sure to have enough food and drinks for the group. An alternative would be to inform them in advance that they need to bring food and drinks for themselves. When deciding what food to provide, please consider ethical concerns,
food allergies and religious or cultural needs. Coffee breaks can slow down a workshop. If you want the workshop to be short and focused, provide cups, water, coffee, etc for the participants to enjoy during the workshop instead of having designated coffee breaks.
If the workshop is long, plan breaks accordingly. People don’t learn effectively when they are tired, thirsty and hungry and tend to leave the room regularly during the workshop to go to the bathroom.
Consider how much time the workshop will take. Make sure to finish on time and don't let people leave in a hurry. Plan for all important activities to take place at the beginning of the workshop.
3.2.5 Preparing Yourself
It is natural to be nervous before and during a workshop. A bit of adrenalin can be useful to keep you focused. However, if you don't feel confident about the workshop, it might influence your body language and the way that you are perceived by the participants.
Be prepared and anticipate. The first and most important step is to be well-prepared so that you are happy with what you have planned. Moreover, make sure you are prepared for things that might go wrong. Prepare extra activities to add in case you have too much time left, and know what to cut out in case you are running out of time. Rehearsing the workshop with some friends can help a lot. Run through what you are going to say in the main sections (e.g. introduction, complicated activities, presentation) by yourself.

24
Relax. If you feel you are getting nervous, take a couple of slow and deep breaths or do something else to help you to relax, like listening to music.
Accept that you will make mistakes. Making mistakes and reflecting on them is an important part of becoming a better trainer. Be aware that participants will not notice most of the mistakes you make. Being confident does not mean that you have to be perfect!

25
3.3 Training Program
A typical training session can be divided into three stages: (1) start, (2) develop and (3) completion. Below you will find a brief description of these three stages.
3.3.1 Start of The Training The purpose of this step is to get to know the participants and the trainer, to explain the purpose of training and to determine the rules. This will help build mutual confidence and motivation to learn. At this stage, you should ensure that: A. Participants get to know each other. This is especially important if participants have not met before. You can propose some form of presentation and use it as an example to introduce yourselves first. It can include the person's first name, school or organization which the participant represents, past experiences with the training topics, your favourite computer game, etc. B. Introduce yourself to the participants. In addition to sharing basic information, as a trainer you should introduce yourself a bit more thoroughly. For example, you should explain what skills and experiences you have related to the subject in focus and what kind of experience you have as a trainer. You need to convince the participants that you are “right person for the job.”
C. Ask participants what they would like to learn during the training. This can be done in many ways. The simplest way is to let the participants finish the following sentence: "During this training, I would like to learn ...". Another alternative, which is a bit more complicated, would be to do the following: (1) give the participants small post-its and ask them to write down one thing they would like to learn on each post-it, (2) ask each participant to read what he / she wrote on the post-it and then pin them on a cork board. Organize the post-its so that the ones that contain similar content are next to each other. This creates a "map of expectations.” By seeing which answers are most repeated, you will figure out what participants are most interested in learning. D. Refer to the "map the expectations" and tell the participants which of these expectations will be fulfilled during the training and which will not and why. It is apparent that during a training, it is impossible to meet all the expectations of all of the participants. Say it directly and honestly so as to not give false hope. If possible, suggest an additional source of knowledge on topics that will not be discussed during the training. E. Tell the participants what the training program is about, the topics of each session, and their duration. Hand out the printed program or hang it on the wall written on the flip chart sheet. Tell them what time you have planned a break and how long it will last. F. Establish a set of rules with the participants that will apply during the training.

26
Knowledge of the rules reinforces the sense of security, and thus supports learning. Additionally, jointly established rules allow the trainer to refer to them ( "together we agreed that ..."), and thus avoid taking all the responsibility for its application. The easiest way to determine the list of rules, is to propose a few of them, explain what they are and include some proposals from participants ("What would you have added to this list?"). A more sophisticated way may be as follows: (1) ask participants to recall other trainings in which they have participated (lessons at school, extracurricular activities, etc.), and reflect on what helped them learn, made them feel safe and encouraged them to get involved, (2 ) ask them to formulate a proposal for rules that is feeling-based and describes why that rule is necessary during this training, such as: “when I appear in front of a group, it is difficult for me to collect my thoughts, I would suggest that we do not interrupt each other when we want to say something", (3) ask each participant in turn to suggest one of the rules, and finally create the list - preferably no longer than 5-7 rules that most people seemed to agree on, (4) Inform them that they can add to the list if they find out during the training that an important rule has been omitted.
3.3.2 Developing Participants are expected to perform various tasks (individually, in pairs or in groups), during which they will acquire knowledge and skills and shape their attitudes. As a trainer, you should: G. Give participants the instructions associated with a given task. Tell them what the purpose of the task is, suggest a way in which they can achieve this purpose, and specify how much time they should spend completing the task. For more complex tasks, print and distribute instructions on how to complete the task. The purpose is not only to inform the participants on what to do and in what time, but also to encourage them to take responsibility for the tasks and to make decisions independently. Tell them that if there is something that they don't understand, they should discuss it with the other participants instead of coming to you for answers. If you find that the participants are competent and quick learners, encourage them to use their own methods to complete the task, rather than your suggested methods. During a typical training, participants will perform most of the tasks in groups. This will teach them social skills. It is important that everyone is involved in the work. During some of the tasks, selected participants will fulfil additional roles, e.g. a leader or person responsible for presenting results of their group's work. In such cases, prepare relevant instructions, explaining is expected of them. H. Provide a working space and materials needed to execute the tasks. Select a space for the participants that is appropriate for the given task, e.g. tables prepared to work in groups. Provide them with the necessary materials and equipment. Allow them to decide how and when they want to do it.
27
I. Monitor their progress. Observe how the participants perform tasks. Pay attention to how they communicate, whether they are all involved in the group work, and how they fulfil their roles. If necessary, help participants by providing additional explanations. Try not to interfere excessively. It is better if they can act on their own, even if they make mistakes ("sometimes you win, and sometimes you learn"). Remember, the more autonomy you give the participants, the more time you have to monitor their work, and thus provide them with better feedback on their progress. J. If necessary, make changes to the training plan. Monitoring
their work may lead you to modify the training plan. Make changes if you notice that some of the needs of the participants proved to be more important than you thought, or if the method you planned does not fully allow for the achievement of the training objectives. To avoid missing such a situation, you can: • Ask the participants in the middle of the training (if it lasts longer than one day, at the end of the first day) for short statements about what they have learned and whether it is knowledge that is relevant to the reason why they came to the workshop (e.g. trying to get a job, realizing a project at school or NGO, etc.). • Hang a flipchart sheet on the wall where participants can, at any time, to write down some suggestions e.g. "I'd like to get to learn additional ways of film processing, rather than those taught previously." • Provide an online survey with a question like "Have you learned skills you really need?" where participants can select an answer from 1 to 10. K. Allow participants to present the results of the tasks. The way in which they present will depend on whether the participants worked individually or in groups, as well as how much time you have (the shorter the training, the less time you have for the presentations). Remember, however, that it doesn't make sense to propose tasks, if there isn't time to present the results. If participants work in groups, they can select one person to present their results. His / Her statements may be supplemented by other members of the group. Another option is to have all of the members of the group present the results. Each group member can have a role and present a specific part of the presentation. Here
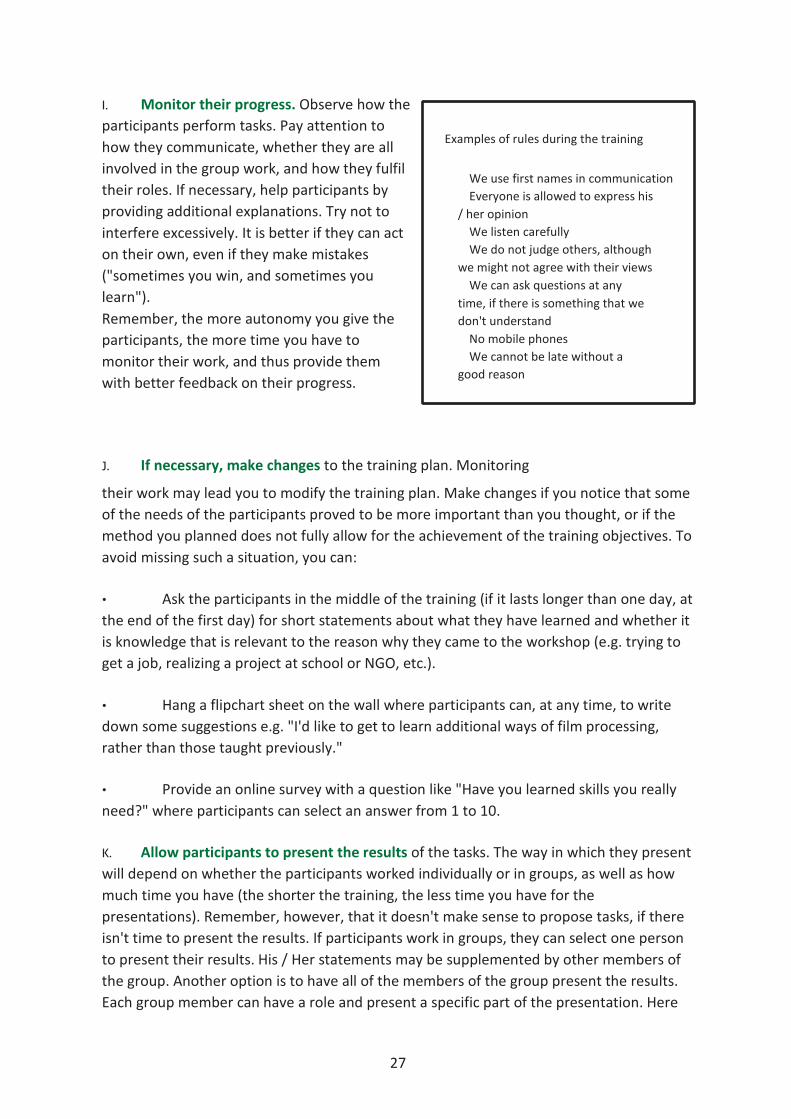
Examples of rules during the training
We use first names in communication Everyone is allowed to express his
/ her opinion We listen carefully We do not judge others, although
we might not agree with their views We can ask questions at any
time, if there is something that we don't understand
No mobile phones We cannot be late without a
good reason

28
are a few methods of presentation that you can use: • Writing the results on a flipchart sheet. Text can be enhanced with diagrams, graphics, etc. • If the result of the group's work is digital, participants can use the projector to present their work (e.g. a powerpoint presentation, the profile they created on a social networking site, photographs, videos, etc.). • Asking participants to play out scenes in order to illustrate a certain situation e.g. an interview with a potential employer.
L. Summarize the course and the results of the tasks (reflection). Give some sort of conclusion and summary of the course and the results of the completed tasks. The course of the task is the way in which the participants tried to achieve the expected results. To help participants reflect on the course of the task you can ask the following questions: “What are the methods you used in completing the task?”, “What worked well and what would you have done differently?”, “Were there any difficulties?”, “If so, how did you deal with them?”, “How was the communication in the group?”, “Was it easy to get along?”, “How did you make decisions?”. The results of the tasks are what have been achieved. To help participants reflect on the results of the task, you can ask the following questions: “What did you achieve?”, “To what extent did you accomplish the task?”, “Are you satisfied with the results?”, “How could you improve the quality of carrying out a similar task next time?” 3.3.3 Concluding
Make sure to leave enough time to conclude the workshop. The ending is just as important as all of the other parts of the workshop. In case people already start to pack up, ask them to focus for a few more moments. The ending of the workshop should involve the following elements: • Tell the group that the workshop is about to end; • Summarize what has been done by stating again the topic and reminding them of the main parts of the workshop; • Evaluate the workshop with the participants. This can be done orally by making a round. Ask each participant to share with the group what he/she has learned from the workshop and what he/she wants to put into practice after the workshop. A written evaluation can also take place, where you ask the participants to fill in a questionnaire where they can give anonymous feedback; • Tell the group what your impressions and feelings are about the workshop; • Remember that you will learn something from each group and workshop you lead. Therefore, you should always show your respect and thank the group for the workshop;

29
• Say goodbye and leave your contact information if you want the group to be able toget in touch with you if they have questions regarding the topic of the workshop.
3.4 Training Methods Training methods are ways of achieving the objectives of training with regards to select- ed content. There are many guides available that describe a wide variety of methods, so we will only mention a few of them here.
Methods For Acquiring Knowledge
These include, for example:
• Presentations using tools such as PowerPoint or Prezi, which combine speech,photo- graphs, diagrams, etc.• Lectures. Short speeches (generally not exceeding 20 minutes) that allow you toteach in a systematic way.• Videos or animations that show things step by step, e.g. how to use an applicationon their smartphones.• Infographics. Presentations of the issues in the form of key figures, concepts, charts,graphics, etc.• Visualization. A graphic form to present some issues, e.g. in the form of a drawing,collages, etc.
Methods To Analyze Problems, Make Decisions, etc.
These include, for example:
• Case studies, which are descriptions of some problematic situations (real orimagined) that the trainees analyze and propose solutions to. They should ask questionslike: "What is the problem?" "What solutions were adopted?" "What were theconsequences?"• "Decision trees". This is a structure to help make decisions step by step, bydetermining what the problem is, other alternative decisions to solving the problem, whatvalues must be taken into account, and so on.• Discussions. There are different ways of structuring a discussion, such as setting atime limit for each speaker. Another option is to use the "for - against" structure. Divideparticipants into two groups, one of which argues "for" a solution, and the other "against".After their presentation, all participants choose the solution they feel is best.
Methods To Develop Social Skills
These include, for example:

30
• Role play. Participants take on the roles of different characters and play a scenedescribed in the instruction. For example, one person plays the role of an employer, who islooking to hire a new employee with specific skills. The other person plays the role of thejob seeker, who has to prove that he / she has those skills.• The simulations usually rely on the fact that the participants take part in the "mockreality" described in the manual. This "mock reality" is meant to reflect situations thatoccur in reality. For example, participants could have a "mock" municipal council meetingto decide on the distribution of the budget. The instruction could include the budget thatthe council has at its disposal, its decision-making procedure, etc. Although theparticipants take part in a "mock reality", their behaviour, and emotions are true. In thisway, they learn social skills: to communicate with others, cooperation, conflict resolutionand decision-making.• Games are a kind of simulation with a clear element of competition. Participants -acting under specific rules – have to complete an assignment for obtaining a reward, forexample the highest number of points. Games may involve individual participants orteams. It may take place in the training room, in the city (urban games) or online (gamesusing computers, tablets or smartphones).
When choosing training methods you should take into account the following factors:
• The objectives of the training. If in the course of the training, participants haveto learn new skills, you cannot conduct training using only presentations.
• The number of participants. Remember that the larger the group, the moretime things will take.
• Training time. The shorter the training, the harder it will be to use methodsfocused on developing skills.
• Level of experience of the participants. If they are not accustomed to workingwith the methods you propose, it may take more time.
• Available equipment or Internet access. If you want to use certain technologyduring the training, you need to make sure that the organizer can provide it or thatparticipants can bring their own devices.
• The stage of the group’s development. You have to consider whether or not theparticipants know each other and trust each other when proposing activities during whichthey must work together (simulation) or reveal their beliefs and values (discussion, roleplay).
• Different learning styles of the participants. There are many classifications oflearning styles. One of them divides people into three groups: "listeners" (people who

31
learn by listening to others, talk, discuss etc.), "visuals" (learns through visuals, drawing, etc.) and "kinesthetics" (people who learn "in action" through group work, etc.). It is important that you include different training methods when planning the training in order to address the needs of each participant.

32
3.5 About Facilitation, The Facilitator’s Role and Facilitation Techniques You’ve already gotten to know how people learn, what is helpful and what is disturbing in this process, and how to develop and conduct a training on a given subject. Now it is time to look at the tasks of a person who conducts a meeting - tasks of a facilitator and techniques, which he / she uses in this process.
3.5.1 Facilitation - What Does It Mean? To facilitate means to mutually stimulate the behavior of the people participating in a meeting or training. The facilitator is a person who observes and stimulates behavior and supports the group in reaching their goals. He /she is therefore responsible for the course of the meeting. He /she leads the group and follows it at the same time. The facilitator remains impartial to the people in the group.
3.5.2 Features of a Good Facilitator • neutrality and impartiality (regarding people and content); • ability to listen to others; • ability to ask the right questions at the right time; • balance between the objectives, process and people; • acceptance of all participants; • creates a favorable and open atmosphere; • ability to exploit the potential of all participants; • takes care of the relationship between people; • is open to problems. 3.5.3 How To Get Started?
If facilitation seems like something difficult and complicated after reading this brief introduction - we have good news for you! You can probably already do many of the facilitator’s tasks, even if you are not aware of it. Sometimes it is enough to be curious, friendly and mindful about what people say and need. These characteristics have very significant potential and will help you develop the necessary skills to become a facilitator. Now we’ll show you what else is important and worth your attention, along with some tips and tricks regarding facilitation techniques.
3.5.4 Triangle of Facilitation When you facilitate a training or meeting, be sure to pay attention to three aspects: the purpose of the meeting, the process and the individual participants. 1. Purpose of Your Meeting / Training

33
Your task is to achieve the goal of a meeting.
First of all, be sure that all participants are aware of the goal of the meeting or training. Talk to them about it before the meeting starts (you can include information about the goal of the meeting in the invitation). Mention the goal again when the meeting starts. But that’s not all. Sometimes, even though the goal was clearly defined at the beginning, the participants might diverge from the topic and start discussing different subjects. In such situations, bring the meeting back on track - remember the purpose, organize a discussion, focus the participants' energy and ideas on topics that will lead you all to achieve the goal. If necessary - suggest postponing additional (even essential) topics or issues and addressing them at another meeting or training. You should show them how much has already been accomplished. As a result, people will feel a mutual sense of accomplishment and at the end of the meeting they will be pleased that they were able to complete the task.
2. Process
Process means everything that happens between the people during your meeting and training.
Imagine for a moment an effective meeting or training, where the goal has been achieved accordingly as planned. But... the whole time there was a tense atmosphere, some people spoke out frequently, others hardly expressed their opinions, two participants were malicious and quarreled with each other, one was constantly disturbing and criticizing other people. And although it worked out (barely), and the goal was achieved, the participants probably won’t have positive memories of this training and will probably avoid your trainings or meetings in the future. So, what should be done to avoid such situations?
A good facilitator not only pays close attention to achieving the goal, but carefully observes and reacts to what goes on between the participants. First of all, a facilitator cares about the participants’ sense of security and builds a sense of trust - both to himself (as a facilitator), as well as to other people taking part in a meeting. At the beginning, he / she allows participants to get to know each other, clearly shows the purpose and subject of training, inquiries about expectations, and sets the rules of group work. Then, a facilitator uses the techniques of a group work to enhance mutual trust and positive relationships between participants. He / she invites people to talk in pairs or work in subgroups. When he / she notices the readiness of participants, he /she invites them to speak in front of the group. The facilitator skillfully mobilizes (not forces!) each person to speak. He /she makes use of integration exercises and icebreakers (to learn more look at the page... ). He / she constantly observes the participants and their interactions carefully, and - if necessary - intervenes. If too many people speak at the same time - the facilitator should give the floor to a specific participant. If there is one person who has very strong opinions and tries to impose them on others - the facilitator should encourage all participants to express their opinions. When a participant cannot clearly express his/her thoughts or

34
opinions - a facilitator paraphrases his / her statement. And, of course, the facilitator asks as many open questions as possible (open questions allow for more free answers).
3. Individuals
While leading the training, you need to look at the participants not only as a group, but also as individuals.
Consider an anthill. Usually we look at an anthill from a distance and see a mass of small points that are constantly moving. We do not notice individual ants, even though it would only take a moment of concentration and mindfulness to realize that each one is going in its own direction. A similar situation can happen during a training. We can spend so much time and effort focusing on the group as a whole, that we don't even notice the individuals. One may be tired, another impatient, freezing or dissatisfied. The list goes on.
The good news is that after a certain period of time, the individual's needs or behaviors will influence the rest of the group and it will be easier to notice a certain issue. Someone who feels cold will eventually say so; A dissatisfied person may eventually criticize your statement or another participant. The trick, however, is to notice it before it happens and to react accordingly. (E.g. it’s better to ask if the air condition should be turned off, or if you need to explain something more precisely, rather than to wait for a reaction). Carefully observing individuals and paying attention not only to what they say - but also to their body language, will be extremely helpful here. The way we sit on a chair, the expression of our faces and our gestures tell a lot about us. And it usually tells the truth. Body language is extremely difficult to control. So keep in mind - body language can be your ally!
Remember, each of the aspects mentioned above are equally important. If you, the facilitator, pay close (and preferably equal) attention to all of them, the meeting or training will be successful.
Your positive attitude, energy, commitment and flexibility can be helpful. Think about the group work as if it were an interesting trip or excursion. You, the facilitator, know the destination and are aware of what can happen along the way. While the participants are seeing new and sometimes surprising things during this trip. They may even leave the path that you put them on and as long as it doesn't move you away from the goal, you can follow them with curiosity!

35
3.5.5 Facilitation Techniques You already know the tasks of a facilitator. Now you will learn about facilitation techniques that will help you conduct a meeting or training. Each of these techniques will be useful, however you’ll use them with different frequencies. Remember, your choice of techniques will depend primarily on the needs of the group. 1. Asking Questions
Questions are the most important tool in the hands of the facilitator. They allow you to collect information, search for solutions and create a mutual understanding. When do we ask questions? At each stage of the work group. For what purpose? • To get information • To clarify doubts and misunderstandings • To encourage participants to seek solutions • To analyze possible explanations or suggested solutions How? Ask questions with a purpose. Use primarily open-ended questions, starting with words like: 'what?', 'who?', 'for what?', 'when?', 'why?' and 'how?' Asking open-ended questions can be compared to fishing with nets and trying to catch as many different fish as possible. The way that you catch fish is similar to the way that you collect information. In this way, you can collect a lot of information. You also encourage participants think, dig dipper and collaborate. Use closed-ended questions in a situation where you need precise information. A closed-ended question is one that begins with the word “if” and leads to an answer like “yes”, “no” or “I don't know.” In this case, we can also use the metaphor of fishing. This time you fish using a rod and try to catch just one fish. You get a very precise answer to your specific question. 2. Paraphrase
To paraphrase is to repeat what we understood of what another person has said, but in a different way. It should not summarize the problem or include the interpretation. It should contain only what was said. When paraphrasing, do not judge and do not value statements you’ve already heard. When to paraphrase?

36
• To show you are listening and concentrating on what the participant is saying. • To check how well you understand his /her intentions (if you misunderstood, the participant has the opportunity to clarify). • To keep the conversation organized and to keep the participants focused on the issue at hand. • To highlight the participant's interest and understanding and to encourage him/her to continue the speech. • To make his/her speech more understandable for the group. How? Repeat in your own words what you have understood from the participant. Say for example: If I understand correctly ..., Having said that… you mean…, I understand that you’re asking about the…
Paraphrase when you do not fully understand the participant’s statement and are not sure about his intentions. Use it also when you are not certain if everyone in the group has heard or understood the participant.
3. Confirmation Give a participant confirmation that you are listening intently and want him/her to continue speaking. When to give confirmation? • At the beginning of the meeting. • After a participant who is a bit reserved has spoken. For what purpose? • To encourage less active participants to participate more. • To show your interest. How? Express your interest by using non-verbal signals such as nodding your head, facing the direction of the speaker, eye contact, smiling. Remember to also use verbal confirmation - both short (e.g. "oh," "yes," "yes, I understand") and more complex (e.g. "Do you want to say something more?").
4. Balancing To balance is to encourage people who haven’t said anything yet or have spoken very little, to speak and express their opinions and ideas. By using this technique, you are giving a clear signal that all views in the group are important and that everyone has the right to express their opinion. When to use the balancing technique?

37
• At the beginning, when not all participants feel comfortable talking. • Whenever the discussion is dominated by a small group of people. How? Say: We’ve already heard the opinions of two people. Who can propose a different way of looking at this problem? What do the rest of you think about what Peter has just said? Now we have heard the arguments of both Anna and Dominic, does anybody else have a different point of view?
5. Giving voice Giving voice is a procedure that helps to organize the discussion. When to give voice? When the group becomes chaotic and everyone speaks at the same time. How? Step 1: Say "Please raise your hand if you want to speak." Step 2: Say " I see that four people want to speak: Anna, Lucy, George and Adam. You will each get a turn to speak in this order." . Step 3: When Anna finishes, say "Lucy, it's your turn to speak." Step 4: When the last person finishes, ask if anyone else has anything they would like to add. 6. Summarizing
To summarize is to repeat the most important issues, thoughts, ideas or emotions that were brought up during a particular stage of the group work. When to summarize? • At the end of a particular stage of the group work. • At the end of the group work. For what purpose? • To collect the most important facts and to make sure that everybody understands. • To show the progress that has been made and to encourage further efforts. • To make sure that all matters in that part of the meeting have been discussed so that we can move on to the next task. How? Introduce the most essential issues that have been raised. Verify that you have discussed every important matter. For example, you can say something like: "It seems to me that the basic thoughts that have been expressed are " or "I think that the most important issues that have been raised until now are" and simply, "Have I forgotten about anything?"

38
3.6 Motivation For Learning and How We Learn
3.6.1 How To Make People Learn
Your job as a trainer is not only to prepare the training plan and its implementation, but also to motivate the participants and to encourage them to get involved during all of the sessions. There are several methods and activities that you can do in order to make the participants more motivated and eager to learn.
Participants’ Influence on The Objectives and Topic of The Training
Participants will feel motivated if they have an influence on the objectives and the topic of the training, as well as opportunity to choose which learning methods work best for them.
This can be achieved by: • Asking the participants what they are most interested in learning about, and howthey want to use their newly acquired knowledge and skills after the training. Take intoaccount their needs when planning the training.• Responding to the current needs of the participants when they express them duringthe training. For example, requests for additional breaks if they feel tired.
Interesting and Engaging Tasks
Participants will be more engaged if the tasks you propose differ from the routine and require effort. Keep in mind that the tasks shouldn't be so complicated that the participants aren't able to complete them.
This can be achieved by: • Assessing, prior to the training, the participants' level of competence.• If the level of competence of participants varies, prepare tasks that vary in difficulty.
A Safe Atmosphere
Participants are more likely to get involved if they feel safe during the training. They will have a greater desire to experiment with innovative ideas. They will also be more willing to express their opinions.

39
This can be achieved by: • Enabling participants to get to know each other. The better they know each other,the more they will trust each other.• Limiting competition. Proposing methods that require cooperation.• Establishing rules together with the participants so that they know what is expectedof them and how they are expected to behave.• Supporting participants when they meet difficulties that they aren't able toovercome without your guidance. Encouraging participants to help each other.
Your Positive Attitude
You can also influence the participants’ motivation through your attitude during training. Participants will be more motivated if you show them that you are also motivated.
This can be achieved by: • Expressing your satisfaction of what has been achieved during the training.• Showing participants that you are interested in the topics of the training, that youhave competence in this field and that you enjoy what you’re doing.• Showing respect for the participants and helping them when they encounterdifficulties, making sure they feel comfortable in the training room, and supplying themwith high quality materials and equipment.
An approach to adult learning will also be extremely helpful. You should take it into the account when developing and conducting the training.
As previously mentioned, people learn more effectively when they are motivated. At the same time, we also have to remember that people learn effectively in different ways - some people prefer to learn with others, while some prefer to learn individually. Some prefer to learn in practice when they have an opportunity to try something themselves. Others need more theory, facts or figures. People also differ in terms of the sensory system. This sensory system determines how we perceive the world around us and what kind of information we notice and memorize best. It also determines our personal strategy of learning. There are three representational systems:
• The Visual System - We remember best when we can see something (e.g. charts,infographics, tables, pictures, movies);

40
• The Auditory System - We remember best when we can hear something (e.g. when we listen to others or ourselves, when we talk with others, when there’s no disturbing sounds around us, when we read or think aloud); • The Kinesthetic System - We remember best when we can move / touch / feel / taste (e.g. Emotions that we feel when we are in touch with others). Based on these and other conclusions about adult learning methodology, David Kolb, an American educational theorist, described the most efficient model of learning called Kolb’s Cycle, which consists of four phases. The first phase is experience. In this phase, participants of the training have an opportunity to experience something. For example, they participate in an exercise, discussion, role play, case study - any activity that enables them to (A) try something new, and (B) use their own personal experiences (e.g. their knowledge, skills, attitude). This phase is especially important for people who learn in practice and for those who prefer Th Kinaesthetic System of learning. The second phase is reflective observation. This phase enables participants to reflect
on an activity they’ve already completed. The idea is to focus on discussing conclusions, emotions or any other thoughts that may appear. As a result, people not only have an opportunity to express their opinions, but they also understand the purpose of the activity (and their effort!). It also builds mutual trust, among both the participants and the trainer. The third phase is abstract conceptualization. This phase comes after the reflective observation and leads the group to come up with general conclusions. For instance, if participants have already discussed how they have behaved, they should now discuss how people behave in general. The role of the trainer is to help participants figure this out by themselves by stimulating discussion and asking questions. When the most crucial findings are mentioned, it's the trainer's turn to present additional facts and figures. However, it should be very brief and accompanied by charts, drawings or a powerpoint presentation. This phase is especially valuable to those who require more theory. The fourth phase is active experimentation. It enables participants to try out what they’ve learned and to apply their newly acquired knowledge or skills to their own needs. It usually consists of an individual activity, which becomes an opportunity for another experience at the same time. This phase is the first step in applying new knowledge and skills, which should be continued after the training. It’s also particularly useful for people who prefer practicing and concrete actions. All of the phases are necessary and are recommended to be used in the order described

41
above. By developing the entire training and each of the training sessions accordingly to this methodology, we can ensure that our participants will learn effectively. Two types of learning are active and passive learning. Passive learning involves activities like listening to a speech or reading a book. Active learning allows people to engage in what we are supposed to learn, for example through role plays, discussions and presentations by participants. While people are more likely to remember things when they involve ‘real’ experiences, experience on its own won’t get us very far. We also need to reflect on our experiences and make ‘generalizations’ about them.

42
3.7 What To Keep In Mind When Working With Youth The aim of this toolkit is to give you a basic understanding of what you should keep in mind when working with youth. A great deal has been written on psychological and pedagogical aspects related to dealing with youngsters. There is no way that we will be able to go through all of the material. However, we see the need to bring attention to the following aspects as they may help you in preparing yourself and designing the workshop.
3.7.1 Special Needs and Problems of Youths As you might remember from your teenage years, growing up means to be in constant search of one’s own identity. It is also the time when we start to create our own value system that will influence our whole life. This is usually a very difficult time and often connected to the feeling of loneliness and dissent. Young people very often feel alone with their inner conflicts and have doubts about themselves. Youths desperately long for approval from others, but at the same time also long to be independent. Part of this process is testing ones boundaries as well as trying to fight everything and everyone who wants to limit their freedom. Receiving approval from peers is often more important than respect for oneself. Therefore, the biggest challenge for young people is the confrontation between their ideal and real self. Young people want to be ideal as they imagine themselves to be, in order to receive the needed approval from others. Many of them have idols. Young girls dream of being artists, actors or singers, young boys of being a famous athlete or musician. In dealing with youth, you have to recognize this way of thinking and that it is not easy for them to accept the difference between their ideal and real self.

43
In order to help you remember and accept how youths act and think, you can always do the following exercise: Imagine that the clock turned backwards and you are making a journey in time. You are now 14 years old. Imagine what was most important for you back then. Now write down three things that were most important to you and rank them from one to three. Think about it, do your answers seem similar to those of today's 14 year olds? I bet they do. Just ask a group of 14-year-olds what is most important to them in their lives. Now, think about what is most important for you in your life today. Write down the three things that are most important to you by ranking them from one to three. Do you see a difference? I bet that even if some of the things are the same, they are not equally as important to you now as they were when you were 14. Why?
“When working with youth, do not make the mistake of presenting your values as being superior to their values. You cannot communicate with youth at the values level.”
Zdzisław Hofman, Teacher & Trainer, Volunteering Development Foundation
Our values are changing, and the older we are, the more they evolve. It is very difficult to connect with someone based on values. The biggest conflicts that arise are due to differences in values. The biggest conflict between generations is usually between generations closed to each other in terms of age. Usually the older ones do not understand the younger ones. This was true a long time ago and remains true today. The conflict between generations amplifies when a given civilization is living in a stable and prosperous economy. Conflict between generations is only non-existent when there are many dangers that can influence a given civilization.

44
3.7.2 How To Connect With Youth? By ... ... building relations. Even if you do not agree with the other person's values, never give up on finding a way to build a relationship between the two of you. Try to find something that you have in common, such as an interest or a task that can allow you to connect. Try to do things together that create a common experience (e.g singing, dancing, playing). Choose an activity that the person/group is able to do easily. ... accepting the other person for who they are. This does not mean that we have to accept a certain behavior. Accepting a person should not be mixed up with accepting a certain behavior.
Try not to assess the person in front of you. Be aware that the first impression might not always be true. You cannot create the whole picture of a given person based on a certain behavior. ... not stating your expectations of that person, as he/she might feel overwhelmed by it. Be authentic, do not play a role. Show the person who you really are, as especially young children have a very good instinct of judging if someone is fake or not. ... showing empathy and trying to see a situation from the perspective of the other person.
... focusing on the here and now, the person in front of you. Be positive and give all your attention to the person or the group. This will help you to avoid making presumptions about the person in front of you ... try to focus especially, without making it too obvious, on the person in the group that might be the most vulnerable, or the leader of the group.

45
3.7.3 When Working With a Large Group It is more difficult to connect with large groups. Therefore, you need to use certain techniques that will help you. The relation that you are building with the group is not going to be very deep, especially if the workshop you are going to conduct will be just a few hours long. Nonetheless, try to build a good atmosphere. Examples of such techniques can be found under the scenario section of this toolkit. Select the ones that you think will be the most fun and thus create a good atmosphere and energy. More links to documents with energizers and team building scenarios can also be found on the Bridges to EMpower webpage: https://enpower.yourkite.org
3.7.4
3.7.5 What Helps Young People Learn? Keep It Short
Keep in mind that humans have a limited capacity of concentration and this capacity is proportional to age. The younger the participants, the harder it is for him/her to stay focused. Therefore, think about achieving the goal of your workshop in the shortest possible time and plan enough breaks and energizers too keep the participants involved. Make It Interactive
As previously mentioned, the best way for young people to learn is through experience. Therefore, the workshop you are preparing should keep the participants as involved as possible. If you have to give an presentation, then try to keep it short, not more than 10 minutes at a time. When your teenage participants start to lose interests in what you are saying, it is time to change activities and get the participants involved. Play a quick game to get the participants moving. The same is true when doing activities that take longer to complete, like for instance drawing a poster. Allow the participants to have a break from it and get them moving. Let Them Be In Charge
This does not mean that you should let the participants do the workshop on their own.
This means that you should take on the role of a facilitator, at least for some parts of the workshop, and guide the participants without interfering too much. Recognize the participants opinions and ideas by asking the whole group or individuals what they think or feel, if they have other ideas or if they would do something different.

46
Let Them Feel Safe
We learn best when we feel safe – it allows us to take risks, try out new things and explore new ideas. It is especially important for young people to feel safe in a group because it will directly impact the level of activity during the workshop. It is important to keep in mind that what makes a person feel safe, varies from person to person. However, there are a few guidelines that can help to construct a ‘safe environment’. 1. Help participants to get to know each other. Build a positive and trusting atmosphere by playing name games with the participants. ( see scenarios on introduction). Also, give them small group tasks and try to mix up the group as often as possible. 2. Make groups of various sizes. Many young people find it easier to express themselves in a pair or a small group. However, some people prefer impersonal bigger groups. Observe how the participants react in various group sizes and make adjustments accordingly. 3. Build trust in your role. Participants might project onto you the image of a school teacher. Help them realize what a workshop is and that it is empowering, that participants need to be active themselves and that the more active they are, the more they will learn. Show them what kind of person you are. Tell them something about yourself, what you do and what your hobbies are. Try to create a good atmosphere, by smiling and making jokes. 4. Develop a contract with the group. Discuss with the group how they want to work together. Please keep in mind that creating the rules might take longer with youth as you also need to discuss why certain rules are important (refer to the contract page). Be consequent and do not allow for exemptions to the rules or else you might risk losing the groups respect.
5. Make sure they understand the objective of the workshop and of certain activities. It is important that youths, and adults for that matter, know the benefits that learning something gives them. It will help if you give real life examples on where and how they can apply their new knowledge and abilities. Unlike young children, who often learn for the pleasure of learning, youths, similarly to adults, need a reason to learn. Be Flexible
You need to be well prepared for the workshop and have a clear vision of the structure in order to make it attractive. However, you should be also flexible enough to adapt the program of the workshop to unexpected situations. Avoid sticking to the planned program at all costs. Make sure to have extra activities in mind and know which parts to leave out if you are to run out of time.

47
Creating Affinity
Try to be likeable. If the group doesn't like you, they will not work with you. Therefore, be friendly from the start, be humorous and smile. Make sure to talk to the youths during the breaks and address their concerns if they bring it up. This is a good time to get to know their names and maybe mention something that you have in common with them. This doesn't mean that you should take their side should they be in conflict with another participant. Listen and let them make their point. Then, make them aware of the others side point of view. Provide Positive Feedback
Youths want to receive praise and approval. Positive feedback is very important to them. If they like and respect you, your approval will be of very high value to them. Therefore, give your feedback to the group after each activity and at the end of the workshop.

48
3.8 Handling Difficult Behaviour Each person holding a workshop might sooner or later run into a situation where he/she has to deal with difficult behavior. Saying especially “behavior” and not people as usually people do not want to do you any harm. However, they come with a certain baggage from the external world, outside the training room, which might affect their behavior. You may have someone who just had a fight with a girlfriend, problems at home, aso. The same is true for adults as for youth.
Moreover, It is also possible that the trainer him/herself causes “ difficult behavior” in the group by having said or done something not appropriate. You might for instance exclude somebody from a discussion, by saying, e.g “ … you have said already enough”. This kind of statement might make the whole group upset. Further, not having given enough integration time, can cause people to not feel comfortable enough to share information with each other. By having chosen the wrong energizer, which e.g. demands physical contact, someone might not want to participate but the others try to persuade that person, aso. Besides, it is also important to choose for the right training methods. When doing a role play the possibilities to “ problem behaviour” to occur are much higher than in a facilitated discussion, as we have much more control over the process of the exercise, and therefore the participants.
Generally, there are many reasons on why difficult behaviour can occur. In order to prevent is you need to prepare your workshop very well, make the needed research in order to better anticipate the participants needs and hindrances. However, no matter how well you prepare, there is always room for something unexpected. Therefore, it is advisable to learn on what techniques there are to deal with difficult behaviour.
3.8.1 Intervention non-specific versus specific
Based on the “difficult behaviour” shown by the participant you have to choose on the actions that you as a trainer want to take. During a workshop, this general actions can be taken by a trainer:
Monitoring is an activity that is ongoing and which does not demand from the trainer more than observing the process of the workshop. Observing the group and individuals, their reactions towards each other, the expercises and the trainer. When certain behavior is registered which could influence the process negatively the trainer should implement non-specific intervention
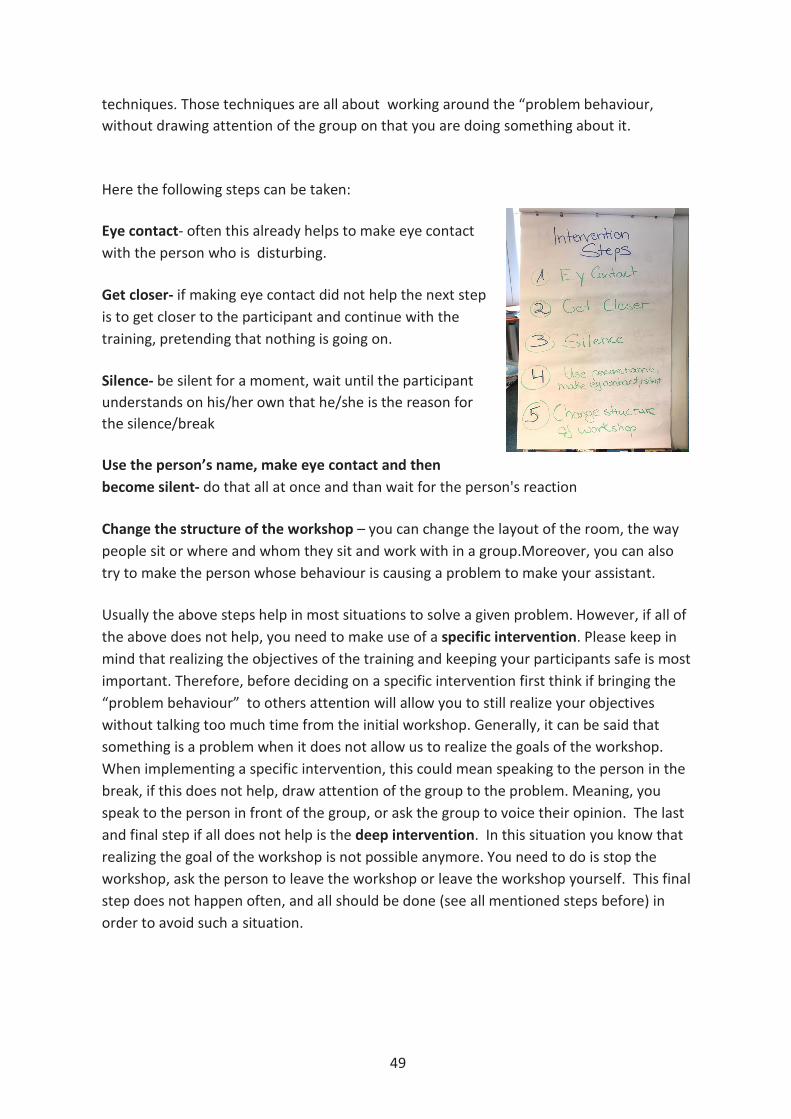
49
techniques. Those techniques are all about working around the “problem behaviour, without drawing attention of the group on that you are doing something about it.
Here the following steps can be taken:
Eye contact- often this already helps to make eye contact with the person who is disturbing.
Get closer- if making eye contact did not help the next step is to get closer to the participant and continue with the training, pretending that nothing is going on.
Silence- be silent for a moment, wait until the participant understands on his/her own that he/she is the reason for the silence/break
Use the person’s name, make eye contact and then become silent- do that all at once and than wait for the person's reaction
Change the structure of the workshop – you can change the layout of the room, the way people sit or where and whom they sit and work with in a group.Moreover, you can also try to make the person whose behaviour is causing a problem to make your assistant.
Usually the above steps help in most situations to solve a given problem. However, if all of the above does not help, you need to make use of a specific intervention. Please keep in mind that realizing the objectives of the training and keeping your participants safe is most important. Therefore, before deciding on a specific intervention first think if bringing the “problem behaviour” to others attention will allow you to still realize your objectives without talking too much time from the initial workshop. Generally, it can be said that something is a problem when it does not allow us to realize the goals of the workshop. When implementing a specific intervention, this could mean speaking to the person in the break, if this does not help, draw attention of the group to the problem. Meaning, you speak to the person in front of the group, or ask the group to voice their opinion. The last and final step if all does not help is the deep intervention. In this situation you know that realizing the goal of the workshop is not possible anymore. You need to do is stop the workshop, ask the person to leave the workshop or leave the workshop yourself. This final step does not happen often, and all should be done (see all mentioned steps before) in order to avoid such a situation.

50
3.9 How To Gain Experience
If you want to create and conduct great workshops, you need to practice. The more workshops you do, the more confident you will feel in your role as a trainer and the easier it will be for you to develop the right workshop for the right type of group.
At the beginning, you might not be able to make money from doing the workshops, but it is all about gaining experience. When people recognize that you are doing a good job, money and recognition might eventually come along.
But how to find to find opportunities to practice?
Spread The Word!
Make sure to tell others about the workshops you are doing or are interested in doing. Tell not only your friends and your family, but also strangers you meet. You never know, maybe you will encounter a person who might just need what you are offering, or who has some ideas on how to make your plans a reality. Your friends and family might also be a valuable source of support and information. The more people you talk to about your goals, the more information you will receive on how to realize them. Use also your social media pages to spread the word.
Search The Internet!
Check the internet for volunteering possibilities. There are many NGOs who are in need of people who want to get involved and share their knowledge with others. Use a search engine or check various pages in your country but also abroad where NGOs or other institutions search for help.
Ask Around!
You can visit the local school, or even your old school where they might still know you, and ask if you could do workshops for the youths there. Other good places to ask are libraries and youth and cultural centers. You could also ask in childcare homes. Keep in mind that those places have rules and regulations that might require you to provide references and information about yourself if you were to organize a workshop there.
Build Credibility!
In order to build credibility a good idea is to create your LinkedIN profile, where you can mention the workshops you can provide, maybe even add a document with your workshop portofolio. Do not forget to make some pictures at your workshop that you can add to your profile. Moreover, you can join various already available groups on LinkedIN related to

51
providing trainings where you can gain further knowledge and show yourself as an aspiring trainers. Also other social media pages, like e.g Facebook, allows to join training related groups on a national and international level. Make sure to mention your trainings and/or your openness to hold workshop also on your own social media pages. Maybe somebody will see your post and offer his/her help and interest to allow you to gain the needed experience.
If you need to make sure that the information about your person and the workshops you can provide is also available in your country specific language, you can set up your own wordpress webpage or blog. Or even easier, make use of platforms that allow you to create your blog for free.
Make sure to add the online link of your LinkedIN profile or/and your blog to your CV.

52
DISCOVERING THE THEORY BEHIND THE SCENARIOS
PART B

53
CHAPTER 4 MEDIA & COMMUNICATION
4.1 Background Information 4.1.1 Storytelling and Communication
People have been telling stories long before writing was invented. The first stories were being documented on cave walls so that the great achievements and magical tales could be remembered and passed on. Stories can be told in many different ways - through oral narrative, music, dance and even tattoos. With the new era came with the possibility to record stories on paper, stones, pottery, and later, digital platforms.
4.1.2 What Is Storytelling and Why Is It So Important?
Storytelling is the art of telling stories. While stories are the sequence of events that involve characters and obey a certain structure. Like traditional tales that start with “Once upon a time...” and end with “They lived happily ever after”.
So what does this have to do with business and entrepreneurship? - One might ask. A lot.
Our lives are stories. And when we die, all that is left is stories- the only thing that re- mains, the only thing that will be remembered.
Still, no clear connection to business. Why should we tell fairytales when we want to be serious about what we do?
Again, because people remember stories. And that is exactly what you need today - to be remembered in the overwhelming flow of information. Stories are often based on expe- rience, but as you have noticed, learning from experience does not come automatically. Usually, turning the experience into a story and telling it to others helps us to remember better. Only then does the author himself realizes the value of this particular experience. That is why storytelling is also an extremely effective educational tool.
4.1.3 The Role of Storytelling In Entrepreneurship When you start your own business or organization, the first thing you should think about is your audience. Who are they and why do they need what you are offering them? It is crucial that you engage your audience, learn about their needs and make them remember you and your message.

54
This is where storytelling becomes especially useful. Listening to a person tell a story can create intense personal connections between the audience and the message. It can promote innovative problem solving and foster a shared understanding regarding future ambitions.
World-leading scholar in entrepreneurship, Professor Bill Gartner claims his students learn more from the entrepreneurs talking in class rather than from the traditional lecturers. Personal stories of successes and failures teach students more about the real life challenges than any theory could.
As an entrepreneur, you will need to pitch your ideas, products and services to your customers every day. But not only customers, also vendors, partners, investors and your team members. Only a good story can attach them to your product. Many entrepreneurs, especially in the technical sphere, attract attention of their audience with impressive facts. But you won’t always have impressive facts at hand. Besides, people don't always make rational decisions. But they love good stories.
4.1.4 Job Seeking
Good storytelling skills is an asset no matter what your occupation is. Thus, when apply- ing for a job, it is crucial that you stand out from hundreds of applicants with identical CVs and boring applications. Here is where the art if storytelling comes in. The ability to tell a story about your own life is one of the most preferable skills on the modern labor market.
Here is how to land a job with a good story during the interview, according to a storytell- ing guru David Crabb. When the interviewer asks you to tell shortly about yourself, you follow this pattern:
1. The Introduction Set the scene and prove to the interviewer that it is worth listening. Give a brief summary of your previous position and passion for the new job. 2. The Inciting Incident Share something personal and maybe even touching. It could be useful to show a bit of vulnerability. You can express how you actually felt in your previous position. 3. Strong Arguments This is the part when you become specific about the details and make them memorable for the interviewer. Get the audience intrigued by the ending of your story. 4. The Main Event Also known as the climax of the story. A change should occur. The story should shift to why you decided to apply for this job.

55
5. The Resolution Highlight what makes your story unique. Talk about your competency and about what you’ve learned from the experience. 4.1.5 Communication Skills for Business/organizational Storytelling
How often are we inspired by a great story of success or moved while reading about the courage of people with disabilities? Stories can be very powerful when they influence our minds, make us feel unusual feelings and act in a different way. Stories can capture our imagination, illustrate our ideas and inspire us. You will never get inspired by cold data and facts.
Many successful business leaders know how to use the art of storytelling to engage their teams and customers.
With the help of stories, it is possible to share and interpret experiences. Stories, al- though very personal, are actually universal and can be applied to anybody. A story is successful when people can recognize themselves in it or can somehow relate to the characters. A thrilling climax and satisfying conclusion of the story are key factors in engaging the audience.
When you should use stories in business:
1. When you want to build with your colleagues and within your team. The more people know about you, the more willing they will be to trust you.
2. When you want to prove your company’s value and effectiveness.
3. When you want to prove something is worth doing by using examples from the past.
Annette Simmons, the author of the book “Whoever Tells the Best Story Wins” defines 6 types of possible business stories:
1. “Who-I-Am” Story You as a person: your dreams, goals, accomplishments, failures. Such stories are essential to build trust. 2. “Why-I-Am-Here”Story The aim is to replace suspicion with trust. You should show why you're passionate about doing this for people.

56
3. Teaching Story Such stories show how a change in behavior, perspective, or skills can lead to meaningful results. It also works for best- or worst-case scenario stories. 4. Vision Story These are meant to inspire people and to encourage them to feel hope and happiness. You can use it to motivate people to change their behavior and to overcome frustration, obstacles and challenges in order to achieve their goals. 5. Values-In-Action Story This kind of story aims to reinforce the values you want to present to your audience. It can be both in a positive and a negative way. For example, you can highlight the attitudes you don’t want to see in others. 6. “I-Know-What-You-Are-Thinking” Story When telling this kind of story, you discuss possible questions, concerns and objections be- fore they are expressed by the audience. You validate the audience’s thoughts and worries, which allows people to feel that you’re on their side and that you are concerned about their emotions. This type of story suits sales, negotiations and pitches to key stakeholders. (Source: https://www.mindtools.com/pages/article/BusinessStoryTelling.htm) The story should touch, move or inspire the audience. Emotions are so important that people often make decisions based on how they feel in the moment. Peter Guber, a leader on this subject and long-time business executive, in his book “Tell to Win: Connect, Persuade, and Triumph with the Hidden Power of Story” argues that people today are all part of the “emotional transportation business” and that creating a captivating story is the best way to secure promotion to your business. All in all, it’s important to be authentic when you tell a story. Stories should be used to tell more about who you are, and why you’re here. You should not be afraid of appearing vulnerable while telling a story. People like to hear honest stories about failures, poor judgments and mistakes. It makes you human in their eyes. When you’re prepared to appear vulnerable in front of others, you can quickly establish trust and affinity.

57
4.1.6 How To Master The Art of Storytelling In the modern world where we constantly experience information overload, it can be hard to attract attention to your message. The only thing people make exceptions for is a good story. Everyone likes to hear other people’s stories or fantasies. Nothing will help to promote your business better than building a thrilling and significant story around it. But the art of storytelling is not that easy to master. With good and long practice it is possible. You will have to constantly test your story with the audience and make correc- tions. You need to focus on your customer and getting to know him as much as possible and trying to figure out what his needs might be. And if you succeed, you will see your customers engaging greatly with your product. Here are some useful recommendations: 1. Know your audience and tell a suitable story 2. Choose the best time and place for your presentation (you need to get the audience’ full attention without them being distracted or you interrupted) 3. Constantly collect material for the story in forms of anecdotes, metaphors, etc. 4. Make sure the audience understands the message you are trying to convey 5. Get in the right state for your story, prepare your body and mind 6. Be energetic and enthusiastic about your own story because it is contagious 7. Don’t be afraid to share your fears and concerns 8. Add interactivity. Address your audience to make them feel like they're a part of your story 9. Engage the senses of your audience, use nonverbal communication 10. Try to listen to your audience, their interest, engagement, attention, and trust All great entrepreneurs have tried to tell their consumers a good story. Famous for his storytelling art, the founder of Starbucks, Howard Schultz gives these 5 pieces of advice for beginners in storytelling: 1. Use details to bring color to your story To stand out from your competitors, it is important to add lively details that will attract attention to your message. 2. Be Straightforward Say only the necessary, try to be concise so as to not bore your audience and lose their attention. 3. Present metaphors and examples to illustrate your message Any message becomes visual and clear when it is supplemented with good examples. 4. No “Me, myself and I”

58
Don’t focus too much on yourself and your product, instead, focus on the audience. 5. Be explicit Make sure your audience understands the message. Storytelling is important in various spheres of life. And business and communication fields are far from being excluded. Any good business creates a community around its product or service by telling its customers a thrilling story. Today there are lots of possibilities for producing creative and visual storytelling in media. Understanding the importance of storytelling is a secure way to success.

59
4.2 Visual Storytelling:
New Language In The Age of Information
«We now live in a world where information is potentially unlimited. Information is cheap, but meaning is expensive. Where is the meaning? Only human beings can tell you where it is. We’re extracting meaning from our minds and our own lives.»
George Dyson As futurist George Dyson expresses in a perfect way, there is a growing disconnect be- tween information and meaning in the age of data-overload. Over the past several years, our quest to extract meaning from information has taken us more and more towards the realm of visual storytelling. Technically, visual storytelling is the art of conveying a message with the visual images of a story. From hand-drawn diagrams to sophisticated data visualization, by way of graphic design, illustration, photography, and information architecture, visual storytelling allows us to convey information with equal parts clarity and creativity, speaking with remarkable aesthetic eloquence about the things that matter in the world today. Because people are uniquely wired to receive stories, it’s important to understand this art, which is necessary for every individual, from students to entrepreneurs. This is important because visual storytelling offers meaningful opportunities to tackle traditional communication channels that derive from language, attention and instinc- tive factors. But what is at the core of developing and implementing successful visual storytelling? Here are seven tips from the book, The Power of Visual Storytelling, to help jump-start your strategy: 1) Embrace Visual Imagery Don’t be afraid to experiment with different types of visuals! The human brain processes visuals 60,000 times faster than text, offering a powerful advantage to companies that can curate social media-friendly visuals that drive an immediate response. From images, to videos, infographics and presentations, the magic lies truly within the mix, with more visual mediums than ever before that can be used to bring your story to life
2) Personalize, Don’t Spray Gone are the days where it’s okay to spray the same piece of content across multiple platforms. Instead, today’s social media leaders are embracing the special features, capabilities, and audience demographics of each platform to foster different types of engagement and storytelling. 2) Make Yourself Useful

60
Want to make your visual content more engaging to your audience? Focus on being useful. Shape your visual storytelling strategy by listening to your audience, from their frequently asked questions, to popular conversation topics, timely events, and issues they care about. Then, strategically leverage visuals to draw more attention and engagement around these popular content topics. In 2016, the BBC News launched an Instagram video news service called Insta- fax. The program displays 15-second news clips via Instagram video as a way to deliver timely content to its busy community that doesn’t always have time to watch the news. Although positioned as a short-term experiment, the BBC is still producing daily Instafax video content on Instagram, proving the usefulness of this content to its community. 3) Be Human Visual stories perform better when the content has a human element. From tapping into user generated images, to showing behind the scenes content on how a product is made, consumers like to see the human side of your story or organization. As seen with Crest, being human can also mean using visuals to shape your story around the issues or interests that are important to your community or audience. 4) Tell A Story As seen with the visuals thus far, your content’s storytelling element is just as important as the visuals you use. Start with a strong story concept that aligns to your overall social media strategy and goals and the end result will be that much more impactful. A unique example of using visuals to tell an important company story came when the Calgary Zoo published its 2012 annual report on Instagram. Fifty-five photos and captions served as “pages” in the report, all of which came together to form a powerful story of the good work the zoo did over the course of the year.
4.3 Telling your story: Personal branding
Like storytelling, personal branding is a buzzword we hear very often nowadays. Like many other popular concepts, it is one of the overused but at the same time little known terms. So what is it actually. It can be simply described as what you do when the product you are promoting is you. For example, as an expert in teaching, I market my service and expertise by presenting a clear and consistent message to reach target group to tell what I can offer.
Very important point here is that your personal brand isn’t a fake version of yourself created just for marketing. It is more presenting yourself in a strategic and coherent way.

61
Like a corporate brand that represents a particular business entity, a personal brand is a manifestation of “you” on an individual level. Today this branding mainly happens on social media. So the following steps will guide you to build your personal brand via social media:
Define Your Goals and priorities
Before starting posting, it is very important to define what you want to achieve with your personal brand. You have to set a goal. Do you want to promote your skills, engagement, start a new business?
For example, if you want people to recognize your professional skills for better employability in your field of work, you can focus on building your strategy to promote these skills on relevant social media channels.
In this frame defining your specialties and values is also key. Whether it is your skills or values, you need to communicate what you stand for, what you can achieve and how people should recognize you.
A good start for this is to include your interests and skills in all of your social media profile descriptions and all the sharing you are making. They will serve as keywords that will help your brand to be recognized.
Keep Your Brand Tone Consistent: Do not be a social media junk
If you come up with content or images that don’t match up with your brand’s voice or you suddenly and radically switch values and ideas you stand for, no doubt you would lose credibility. For this, you must remain consistent with your ideas and the ways you present them.
You will be able to build a better and more impactful personal brand once you are consistent in your voice and brand messaging across all social media channels.

62
CHAPTER 5 ENTREPRENEURSHIP
4.1 Get Ready To Become An Entrepreneur! An entrepreneur is a person who has set up a business or organization and is taking on the financial risks in order to gain a profit for himself / herself and/or for the community as a whole. The definition hides behind a lot of other characteristics an entrepreneur should have, in terms of attitudes, knowledge, and skills. An entrepreneur is seen first as a risk-taker and as an innovator, a person able to spot the needs and the opportunities in the community, and respond to these in a profitable and sustainable way. How does one become an entrepreneur? Some are natural risk-takers and innovators, others learn to be entrepreneurs and to develop specific attitudes, knowledge and skills. Education, Audiovisual and Culture Executive Agency, from European Commission, prepared a specific framework for entrepreneurship education, in Entrepreneurship Education at School in Europe. National Strategies, Curricula and Learning Outcomes (2012, available here, p. 19). This framework includes the main attitudes, knowledge and skills needed to become an entrepreneur. An entrepreneur needs: ● Entrepreneurial attitudes: self-awareness and self-confidence. These two attitudes are seen as the basis for all the other attitudes, knowledge, and skills needed by a would-be entrepreneur. ● Other entrepreneurial attitudes: taking initiative, risk taking, creativity and problem solving. ● Entrepreneurial knowledge: economic and financial literacy, knowledge of business organization and process, and knowledge of career opportunities and the world of work. ● Entrepreneurial skills: practical exploration of entrepreneurial opportunities (ex.: designing and implementing a business plan), as well as skills such as communication, presenting, planning and working in a team. The current toolkit as well as the other online resources created for the project provide scenarios that are focused on developing most of these essential attitudes, knowledge and skills, such as self-awareness, critical thinking, creativity, problem solving, basic economic and financial knowledge, entrepreneurship as a career path, knowledge on aspects related to running a business (business model, decision making, negotiations, production, leadership style, etc.), and skills such as communication, presenting, planning and working in a team.

63
The following section will provide you with basic information on the attitudes, knowledge and skills developed through the entrepreneurship scenarios available in the toolkit. While the information is mandatory when preparing the workshops, it can also be used as basic knowledge for you to learn about entrepreneurship. Let’s get started!
4.2 Are You An Entrepreneur? Entrepreneurship Quotient Entrepreneurship Quotient is a coefficient that can be measured to diverse tests. These tests will never predict your success in business! The tests will just tell you if you have, at the moment of taking the test, some of the qualities / abilities needed to become an entrepreneur. The test used in this toolkit is adapted from the quiz from Start Your Own Business, Sixth Edition: The Only Startup Book You'll Ever Need, written by Inc The Staff of Entrepreneur Media; the test was initially developed by Northwestern Mutual Life insurance. The assumptions of the test are the following: ● Most of the time, successful entrepreneurs tend not to be top achievers in school. ● Entrepreneurs are not especially enthusiastic about working in teams, and in their younger days, they preferred to work alone. ● Entrepreneurs are determined and stubborn. They are ready to take risks, and act less cautiously. ● Entrepreneurs care less about others’ opinions, and dislike daily routines; ● Entrepreneurs get bored quickly. They move from one project to another nonstop and are ready to put their savings in the next project. ● Still, most entrepreneurs handle their finances properly and are in the habit of writing down their goals. ● Usually, entrepreneurs are optimistic - a characteristic that makes it easier for them to take risks. Once again: having a high Entrepreneurship Quotient does not automatically mean that one will succeed in his/her own business. However, one can have characteristics and skills that could lead them to success if they are willing to work hard to develop their business. Take the test from the Appendixes and see what your Entrepreneurship Quotient is.
4.3 Improve Your Creativity And Think Innovatively Spotting the needs or opportunities in the community is a very important step in generating a business idea. The way in which an entrepreneur responds to these depends a lot on the entrepreneur’s sense of creativity. Exercise your creativity everyday, by using

64
creativity tests or exercises, such as alternative uses tests, incomplete figure exercises, or by solving riddles or logical problems. Creativity is very useful in business, but even more important is innovation. While creativity means to create something original or unusual, innovation means to create something that is both new and valuable to others. Thus, innovation means to put your creativity in practice in order to solve problems, respond to specific needs, address opportunities, etc.
4.4 Always Think Twice Critical thinking means making reasoned, well thought out judgments based on logic, evidence and analysis of alternative possibilities. Critical thinking involves curiosity, the willingness to seek out information, openness to new ideas. It also requires skepticism- a healthy questioning attitude. And finally, it implicitly includes humility - the ability to accept that you are wrong when there is evidence contradicting your ideas. Critical thinking is essential in business. Curiosity and skepticism help entrepreneurs to e the status quo, find new solutions to problems, investigate the market, adapt to new environments, and spot new opportunities. Additionally, a person in constant search of facts rather than opinions is a person well equipped to manage the ambiguity and complexity of the market, supply chains, customers’ demands, stakeholders’ interests, etc. A critical thinker can easily analyze the market, the competitors, and the customers. Such a person can realistically assess potential, seize opportunities, and make prompt decisions. At the same time, a critical thinker can quickly admit when he/she is wrong or has failed, and start over again.
4.5 Know Your Clients, Sell Your Product Now, you will be introduced to a classic entrepreneurship manual that will introduce you to the business plan and show you how to organize your business. By contrast, we recommend you first get to know your clients/customers and design your product according to their needs or to the opportunities you've spotted. You learn things about your clients through what, in technical language, is called “market research”. Simply put, this is the process of analyzing through which you build a profile of your customers. It includes analyzing characteristics such as age, gender, marital status, financial status, level of education and employment. It is important to find the characteristics that are most relevant to your product or idea; the characteristics that make the customers buy or develop an interest in your product.

65
One might say that it is difficult to know what makes a person buy something, and that thoroughly investigate it would require a lot of resources. So, another option you have would be to create your “prototype” product and see how people react to it. Do they like it? Do they say they need it? Have they already asked for the price? To receive initial feedback, you could organize a focus group with people you think could become your potential buyers. Present them the product, let them test it, and see what they think about it. Or, try to sell or give away your first samples and ask for people’s suggestions on different aspects from the product name to product’s usefulness. Before starting to sell your products, you have to price them. You can figure out a reasonable price by adding the profit you want to make to the cost of production. Mainly in the service business, the price can also be set by analyzing how much customers will pay for your product/service. Moreover, prices are highly determined by what happens on the market with regards to supply and demand. When the demand on the market is high, people will buy more of your products or similar products from your competitors. People will believe that there is a shortage of these products. Thus, prices will increase. However, when there is an excessive amount of your products or similar products on the market, the demand is low and the supply is high. Consequently, prices will decrease. In conditions of high supply and low demand, your competitors will start reducing prices in order to make people buy their products. You might need to do the same if you want to sell your products. Or, you should rethink your product or service that you are offering. For instance, you might want to think about making your product more distinct by adding some buying incentives, such as an increase in quality, additional services or special warranties. Keep in mind that people evaluate products and services that they are interested in buying based on quality and price. Thus, you might want to portray yourself as an enterprise that can provide better quality than the competitors, while having the same price, or that you can provide the same quality products, but at a lower price. Or in the best case scenario, that you can provide better quality at a lower price. Moreover, when you think about prices of your products or services, pay close attention to the opportunity costs that your clients might have. Such costs might include the time spent buying the product, cost of transportation, costs of rejecting other products or services, or emotional costs such as embarrassment of buying your product if the customers have to admit they have a shameful problem. Thus, only your customer will know the final price of your product.

66
4.6 How Can You Be Sure That You Can Make a Profit With Your Business? Profit is essential in business. This is the first goal of any entrepreneur. Making profit should be your first priority in your business idea. This does not mean that you will be- come a fierceful capitalist! Not at all. It means rather that you want to develop a sustainable business or organization. Profit proves your business is running smoothly and that you have the resources for future investments and projects. However, before making a profit, you want to make sure that what you sell covers your production costs. Now, let’s take a closer look at your costs. Business costs can be categorized into two types: variable costs and fixed costs. The variable costs are those that vary with the quantity of the products you produce. For instance, if you open a bakery, some of your variable costs will be represented by the price of the ingredients you use to bake the cakes. If you cook more cakes, your direct costs related to the ingredients will increase proportionally. The fixed costs are those that stay the same no matter how many cakes you make. For instance, you have to pay the rent of the bakery shop no matter how many cakes you make in a month. A fixed cost could also include a cost that can't be easily determined based on how many cakes you make. For instance, the cost of electricity. You know that it is somehow correlated with the number of cakes you make, but it would be challenging and time consuming to calculate. It is therefore better to include electricity as a fixed cost, using the monthly average. Now that you know your costs, your total production costs will look like this: Total costs = Fixed costs + X number of products*Variable costs/product Whatever you sell in a month or a year represents your total revenues. It could be described like this: Total revenues= X number of products sold * the price/product Now, you need to calculate your break-even point, which represents the number of products you need to produce and sell in order to cover your production costs; that means that you need to see how many “cakes” you need to make per month/per year so that your total revenues will equal your total costs. Here is how you calculate the break-even point: Total revenues = Total costs X number of products sold * the price / product = fixed costs + X number of products*-

67
variable costs/product X number of products sold * the price / product - X number of products*variable costs/ product = fixed costs X number of products sold (the price / product-variable costs/product)=fixed costs X number of products sold=fixed costs : (the price / product-variable costs/product)
Example: Total revenues = Total costs X * 5 euro = 2000 euro + 3 euro*X X*5 euro - X*3 euro = 2000 euro X* (5euros-3euros)=2000 euro X=2000 euro : 2 euro X=1000
In this case, the entrepreneur should produce 1000 products to cover the fixed costs (of 2000 euro/month) and the variable costs of 3 euro/product.
The break-even point is essential in making decisions regarding prices and also the optimization of the production. It brings a pragmatic view over the costs you can afford, the price of your products, and over the work you and your employees need to put in order to make a profit.
Let’s say now that you want to make a profit - about 500 euro per month. Here is how you calculate how many products you need to sell in order to get this profit:
Total revenues - Total costs = 500 euro (X*5 euro) - (2000 euro+X*3 euro) = 500 euro X*5 euro - 2000 euro - X*3 euro = 500 euro X*2 euro = 500 euro + 2000 euro X=2500 euro/2 euro X=1250
The entrepreneur needs to make and sell 1250 products in order to get a 500 euro profit. These estimations, for break-even point and for certain profit, are the basic financial tools any entrepreneur should be able to use. These equations will help you to make a budget and to estimate the funds you have available for your business. It will also prove helpful in developing a sales strategy and anticipating factors such as costs, production and number of employees needed.

68
4.7 Imagine and Develop Your Business - The Business Model Canvas The business model canvas is a management and entrepreneurial tool, developed by Strategyzer.com. In comparison with the traditional business plan, this tool allows an entrepreneur to express a business idea on just one page - the canvas:
The business model canvas should be used as following: • The entrepreneur should think about the customers that he/she wants to serve (customer segments). Try to identify all the groups/segments that your business could reach through the products you want to sell. Consider also the key resources and partnerships you might need and the key activities you want to develop. • Now, start with the first group (segment) of clients. • Think about what you can provide these clients with (services, products, relations, etc.). Then think about how valuable the proposition is to them; what value can you bring to their life? • Decide how you will provide value; through what channels. How will your products/ services get to your customers? • The types of channels and the types of values you proposed will lead to a decision on what kind of relationship (customer relationships) you want to establish with your customers (direct, indirect, online, face to face etc.). • Next, you need to decide the price of your products and how your customers are going to pay you (revenue streams), what and how this specific segment of customers will pay for the products/services they receive, and what kind of discounts/offers you might

69
provide, etc. • Now you should think about the resources you will need to create and deliver value for your clients and for your business (key resources). These could be financial resources, human resources, infrastructure for production and sales, amongst other things. • Then, you need to figure out what you need to do in order to create and deliver the value (products, services, relations, etc.) you promised to your segment of customers (key activities). • In order to get to the key resources, and perform the key activities, you will definitely need some partners (suppliers, public authorities, business partners, etc.). These partners could represent one of your company's next customer segments. • Finally, define your costs (fixed and variable) for running the business, and try to identify the specific costs of delivering value to the specific customer segment you are focused on. • When you are finished with one customer segment, you should get started on planning the following segment of customers, starting with the value you want to provide them. You might notice how roles change from one segment of customers to another. One type of customer could become a partner in delivering value for another type of customer. The business model canvas can also be used in planning projects, activities and events. It is a planning tool for both management and entrepreneurship goals.
4.8 Organization With Style Your organization and your people need a leader. And as an entrepreneur, it is your responsibility to take on leadership. There are different styles of leadership that can be applied based on the leader’s personality, the followers’ experiences, commitment, and competence. It is also based on the business objectives, time frame, and some external pressures. Psychologist Kurt Lewin identified three leadership styles: autocratic, democratic, and laissez-faire style. The autocratic leaders do not take into consideration the followers’ points of view, wishes or needs when making decisions, even though these perspectives could be useful. This style might be appropriate when a leader has to make quick decisions. However, if it is a regular habit, the autocratic style demoralizes the followers/the teams, creates tension, and ends up making people leave the organization. The autocratic leaders are preferred in organizations where decisions need to be made quickly, but also in organizations where the team members are still in the beginning of their career and need a leader to take charge. Once the followers developed knowledge, skills and commitment to the organization, the leader should take on a more democratic approach. Democratic leaders always include their followers in the decision-making process. They

70
make sure that each and every one of them can express their opinions, needs and wishes. The leader is the one that makes the final decision, but does so with the consensus of the followers. This style of leadership boosts people’s engagement, motivation and commitment to the organization. However, this style is not always efficient, especially when quick decisions need to be made. The majority of the organizations prefer the democratic style because of its obvious benefits. However, in order to be efficient and to produce results, the followers need to be somewhat competent, experienced, committed and interested in being involved in the decision-making process.
Laissez-faire leaders do not get too involved in the decision-making process; they provide a lot of freedom to their followers with regards to how they conduct their work, and how the goals of the organization are reached. The autonomy gained by the followers can lead to job satisfaction and increased creativity. However, when the followers/teams are not competent or committed to the organization and its goals, this style could be damaging to the organization or the more responsible team members. In other words, this style works perfectly when it involves a leader that can delegate and people of high competence, extensive experience and commitment. This style will certainly not work in situations where the followers are at the beginning of their career or are new to the organization, or when they cannot keep themselves responsible and accountable for their work. No matter the type of team or followers, there are still important decisions that need to be made and assumed by the leader.
4.9 Building An Ethical And Responsible Business
As you can see in the Business Model Canvas, your business, thus your profit, constantly depends on your stakeholders: shareholders (if you share your business with other partners), customers, employees, suppliers, and other key partners from the community. In order to get their constant support, you need to treat them right, in a socially responsible way. To do so, you should develop your own code of conduct. Decide what basic values you and your company have. Create a set of principles that your business will run on.
Your code of conduct should include the basic aspects of corporate social responsibility, as defined by Wayne Visser (2011): • Value creation - a business should create added value, contributing to a community’sgrowth and development;• Good governance - a business should be transparent in everything it does, reportingabout its annual activities;• Environmental integrity - a business should aim at reducing waste and pollution tozero, and use renewable energy;• Societal contribution - a business should support the local community by providing
71
resources (financial and in-kind) for achieving development goals; it could invest in education, social, or environmental programs developed by local action groups or by nongovernmental organizations. Moreover, a company should respect some general principles recommended by structures such as the United Nations, or the European Commission. The companies should respect and assume the ten principles developed by the United Nations Global Compact, which focus on aspects such as human rights, labor rights and principles, and environment and anti-corruption measures. A company should respect, promote, and protect human rights, and make sure that its suppliers and partners also respect human rights (principles 1-2). Additionally, a company should eliminate, if applicable, all forms of forced labor and child labor, and also any type of discrimination (this applies also to its suppliers or business partners). The company should support the freedom of associations of its employees for collective bargaining or unions (principles 3-6). Moreover, a company should strive to be environmentally responsible, use environmentally friendly technologies and be aware and cautious about environmental challenges (principles 7-9). Finally, any business should eliminate and work against any form of corruption (principle 10). Developing and adopting a code of conduct helps your business to prosper while building and maintaining positive and sustainable relations with your stakeholders. This type of ethical and responsible behavior helps your business in the long term to gather the support of the community, increase the number of clients, raise profit for your shareholders, and add value to the society in which you operate.

72
CHAPTER 6 Volunteering
6.1 Background Information Volunteering comes from the Latin word ‘voluntas’ and means free will or a decision made individually. Thus, volunteering means the willingness to devote one's time, energy, skills and good will to perform various tasks. There are also other terms for volunteering used by different countries and regions. To name a few: civic participation, civic engagement, voluntary participation and honorary position. In Europe, the European council decided that the term "voluntary activities" refers to all types of voluntary activity, whether formal or non-formal, that is done a person’s own accord, and is without concern of financial gain. Volunteering is broadly used to include both formal and informal forms of volunteering. Formal volunteering involves activities that involve organized structures. For example, working as an unpaid board member of a non-profit organization or an unpaid coach of a local football team. In other words, volunteers involved in formal volunteering activities donate their time or work without pay to organizations or social groups. Non-formal volunteering involves unorganized forms of volunteering activities. For example, helping neighbors with groceries or organizing a neighborhood picnic. Volunteers involved in non-formal volunteering activities donate their time without compensation to people (outside the family and circle of friends), or to their environment (community, neighborhood) and do so without the help of intermediary organizations or groups.
To keep it simple for the purpose of this toolkit, we decided to use the following definition of volunteering, which involves both formal and non-formal activities: Volunteering is the unpaid help provided to others The term volunteering should be not mixed up with philanthropy. Philanthropy involves the transfer of money or gifts to or through organizations or social groups. Volunteering is more than providing money and goods. It involves being proactive. An example of volun-teering would be the unpaid job of collecting money and goods for a social group in need.
73
6.2 Who And How Many People Volunteer? This is a difficult question to answer because it varies greatly from country to country. The countries with the highest percentage of volunteers can be found in Europe- northern countries such as Sweden, and Anglo-Saxon countries like Great Britain where more than 50 % of the population is involved in volunteering activities. Countries in Eastern and Central Europe have lower volunteering rates. Based on a Eurobarometer study from 2007, the average volunteering rate in Europe ( EU25) was over 34%. Demographic and social indicators, such as gender, also differ greatly from country to country. A country's historical and political past can influence how many people in the country are involved in volunteering. To learn about comparative differences in volunteering activity in different countries and the reasoning behind it, look into country reports on volunteering and to other national sources.
6.3 Why Volunteer? There are many reasons why people volunteer. Usually the decision is based in the desire to help others . However, it is also okay to want some benefits for yourself for volunteering. Volunteering has traditionally been viewed as self-sacrificing or as a form of charity. It
is therefore also usually regarded as something difficult and tiring, especially mentally. Most people see volunteering as more of a pleasurable activity rather than a chore. Volunteering involves the desire to serve others, however it does not exclude other motivations as well. Volunteering should be about creating a win-win situation for all parties involved. Others should gain something from your help, but you should also enjoy what you are doing, whether it's because you are learning a new skill or just having a chance to meet new and interesting people. Volunteering is also associated with an increased likelihood of employment for those out of work or looking for their first job. Based on research findings from the Corporation for National Community Service in the United States, volunteering is associated with 27% higher odds of employment. This is due to the competitive advantage that a job-seeker gets when they have volunteering experience on their resume. It proves to an employer that one has improved or learned new skills and knowledge, and is motivated and productive. Volunteering can also expand one's network. It is therefore a win-win situation. The volunteer makes a positive contribution to the community, which in turn

74
makes them more likely to get hired. There are many more reasons why people volunteer. Here are just a few identified. The reasons why you would want to volunteer are as unique as you are. But no matter what your reason, you can get a lot out of volunteering. Think about it, why do you want to volunteer? • to feel needed • to share a skill • to get to know a community • to figure out what you like • to demonstrate commitment to a cause/belief • to gain leadership skills • to learn a new language • to act out a fantasy • to do your civic duty • because of pressure from a friend or relative • to keep busy
• for recognition • to repay a debt • to donate your professional skills • because nobody else would do it • to have an impact • to learn something new • to help a friend or relative • to become an "insider" • guilt • to take on a new challenge • to feel proud • to make new friends • to explore a career • to help someone • as therapy • to do something different from your job • for fun! • for religious reasons • to earn academic credit • to keep skills alive • to have an excuse to do what you love • to assure progress • to feel good • to be part of a team • because you were asked
75
• to test yourself • to build your resume • to be an agent of change • because of personal experience with the specific problem or cause of the organization
6.4 Volunteering Roles
Volunteers perform numerous functions in many areas of the community. A volunteer's role can be in any one or more of the following categories:
• Action or Hands- on: This type of volunteering activities demand minimal training to get started and almost anyone can do it. It involves activities such as planting trees, cleaning up parks or memorials, walking dogs, painting the walls of an orphanage, collecting money for a cause, setting up a community picnic, etc. • Skilled or Knowledge: Activities depend on a particular skill, or knowledge and experience that you have to offer on a certain topic. It can involve setting up or maintaining a webpage of a non-profit organization, providing language lessons to seniors or children, doing workshops on a certain topic, or providing legal advice. • Direct Service: These types of activities allow you to be at the front line, having direct contact with the beneficiaries. It can involve giving out food to homeless people, doing activities in senior or youth centers, or doing gardening or grocery services. • Advisory: This is when a volunteer serves behind the scenes of an organization, usu- ally by serving as a board member or by advising and providing feedback on things such as strategic or fundraising plans or online communication tools. • Online: This type of volunteer work can be done from anywhere in the world, as long as you have Internet access. It can involve translating materials, blogging, managing fan pages or developing webpages. Many volunteering roles involve all of the above. Think for instance about the work that goes in to organizing a charity event for a certain organization. It requires you to get your hands dirty by setting up the place, but it will also require some prior knowledge about how to organize such an event. You need to be in direct contact with the beneficiaries of the organization in order to agree upon what the goal of the charity event is. You may also have to update the organization's webpage about the event and advise the organization on which communication tools they should use to get the word out about the charity event.

76
When defining the role of the volunteer, you should also consider the time commitment related to the activity. The activity may only be one-time thing, like for instance helping at a community festival, or organizing a fundraiser before Christmas break. The activity may demand occasional volunteers, who for instance give out food at a homeless shelter, or help out in case someone gets sick at a school or youth center. The volunteering activity may also be ongoing, based on a mutually agreed upon period of time. This may involve helping out in the office of a non-profit organization for a certain period of time, or organizing play days in youth centers for a semester. It may also involve traveling abroad to volunteer for a period of time.
6.5 Trendy Volunteering Activities
6.5.1 Employee Volunteering
Companies are becoming more and more aware that doing good for the community can be also good for the company. Employee volunteering can lead employees to feel more connected to the company and people they work for and with. Moreover, the company benefits from employee volunteering by creating more positive brand awareness in the eyes of investors, their customers and local communities. Therefore, companies ask their employees to tackle social issues by donating their time and skills after or during working hours. Employee Volunteering can involve various tasks, from hands on activities like painting walls of orphanages, to teaching and advisory activities where employees provide training and advice to NGO staff, or lead workshops for school children.
6.5.2 International Volunteering
Volunteering while on vacation, break, or a gap year in another country is an increasingly popular way to give back. There are various international volunteering opportunities available. For example, one can engage in humanitarian or disaster relief volunteering as UN Volunteers, or in other national humanitarian non-profit organizations. Another opportunity is to get involved in the European Voluntary Service (EVS). Both of the aforementioned options demand a time commitment of a couple of months to one year. How- ever, there are also international volunteering opportunities that require a commitment of only a few days or weeks. For instance, one could volunteer at a summer camp, organic farm, or a program for youth and children. You can find links to international volunteering opportunities in the Part D of this toolkit - Additional Resources.

77
6.6 Volunteering Roles For Youth
Generally, everyone can volunteer regardless of age, race or gender. Nevertheless, the volunteering activity should be in line with the abilities and preferences of a certain age group. Children can volunteering by planting flowers, picking up trash or taking care of animals in a shelter. Those activities are usually one-time, hands on activities. Youth can get involved in more time consuming activities that are occasional or even ongoing, Activities for young people should involve some sort of action. They will be motivated to do more if they can see imminent results and feel the satisfaction of having accomplished the task. For children, support from a volunteering coordinator is essential. The coordinator should provide recognition and celebrate the involvement of the youth.

78
CHAPTER 7 Career Counseling 7.1 Background Information The objective of this chapter is to provide you with basic information on the labor market, which you can later pass on to the young people that you will be meeting with in order to inspire them to start thinking about their professional careers. You will gain knowledge on key steps in planning one's career, key terms concerning the labor market and some tools to help assess professional predispositions. In the practical part of this toolkit, we suggest a set of exercises that you can use when meeting the youth. You don’t have to use all of the scenarios - choose the most suitable for you and your audience. Feel free to modify them if necessary. Take the time to properly perform all of the exercises and tasks proposed below. This includes doing your own research and finding appropriate resources in your language, reading recommended texts and testing the tools before you propose them to the youth. Good luck!
7.2 Let’s Get Started! “What profession would I like to have in the future?” Do you remember when you asked yourself this question seriously for the first time? Who did you want to be? Why did you choose this profession? Think for a while and write down answers: • I was……… years old when I seriously considered for the first time what profession I was most interested in. • I wanted to be…………………………………………………............................................ • I chose this profession because ………………………………………………..…............ If your studies, volunteer activity, hobby or job is similar to the profession you had considered in the past, and they give you satisfaction, you are lucky. Most young people have no idea who they would like to be in the future, or their choice is random, based only what professions they know of. Usually they know only standard professions like teachers, shop assistants, policemen, doctors, actors, etc. Thus, it is important to “broaden their horizons” and introduce them to new perspective professions they could have (more on this subject: About future professions). Sometimes, they aren’t ready to even think about their professional future, or even their future in general. In this case, it is better to start with asking them to imagine what their life would look like at age 30, where they would live, what their home would look like, what people they would be surrounded with, how

79
they would spend their days, etc. Let’s go back to recalling your own experiences. Have you received any help in choosing your profession? How did you know that this profession would be appropriate for you? How did you define your education path? Think for a while and write down answers: • I received the following help in choosing my profession from the following people/ organizations/institutions: ………………………………………………………………………………………..… • I didn’t receive help in choosing my profession. I figured it out on my own. Now I think that …….………………………………………………………………………………………… • I knew that I would be a good ………..(name of the profession you have chosen), because …………………………………………………………………………….……………. • After having chosen to become a……….(name of the profession you have chosen), I planned my education as follows:………………………………………………………………………….. • Other decisions I took, were: …………………………………………………………………………………… Again, if you were able to answer all of the questions above, you are lucky. Most young people don’t plan their career path and don’t receive professional help in defining their strengths and weaknesses (more about what kind of help they could receive: Career Guidance – What Is It All About?)
7.3 Being A Role Model Assuming that you will be meeting many people much younger than you, you must accept that you will be a role model for them. A role model is a person whose example, success, behavior, experience, etc. can be followed by others. You don’t have to be an expert in career counseling. Your role is to inspire them, empower them (“Yes, you can!”) and to provide them with some basic information. Your potential impact on future decisions to be taken by your audience will be bigger, if you: • use examples or stories from your own life • clearly point out key messages you would like to pass on • use simple language • ask questions in order to keep the youth interested in your messages • mention what you would have done differently if you could return to the age of your audience • leave enough time for questions and let the youth talk to you about their concerns and worries Remember that is better to say less, and to say it strongly, than to say more cursorily. Try to focus on what really matters. Before the meeting, write down a maximum of 3 key messages. For example, if you study IT or you are a programmer, your list of key messages

80
might look something like this: • learning is fun if you decide on your own what you are interested in learning • knowledge of English is an entry pass to a whole word • science fiction books stimulate imagination People love real-life examples and stories. It would be great if you could share some stories from your own life that illustrate the key messages that you would like to pass on. Your stories will make it easier for your audience to understand and remember your messages. For example, do not just tell them that learning a foreign language is important nowadays. Instead, tell a story like this one: “When I was a teenager, a group of American tourists came to my village. They asked me to give them directions on how to get to the local library. Despite having studied English in school, I wasn’t able to describe it to them. I was ready to die of embarrassment! That was the day I decided to start memorizing new vocabulary, doing all of my homework and even learn English by myself in my free time with the help of the Internet. Now, since I speak English well, I was able to land a job at an international company.” Prepare to be “tested” by your young audience. They might question you about your mistakes (e.g. why you didn't do your homework just because it was boring). Just act naturally!
7.4 Career Guidance – What Is It All About? When we asked you to recall whether you had received any help in choosing your profession and what kind of help it was, we were trying to figure out whether you received any career guidance. Career guidance is about assisting people (not necessarily young people) in making choices about education (e.g. what kind of school to choose), training (e.g. what new language they should take up) or which profession to choose. It is also about providing assistance to those who have a job but want to up-skill, re-skill, change professions or make any other kind of change with regards to their career. Career guidance consists of: Career Information – Information on for example: what professions are in demand on the labor market, what professions are likely to lead to unemployment, what are the precise tasks to be performed at a given job position, what kind of schooling or qualifications are needed for different professions, what skills are the most valued by employers, or simply how to apply for a job. Career Counseling – Providing counseling focused on individuals' specific issues (e.g.
81
personal strengths and weaknesses, professions most suitable for a given person). Career counseling - as it is personal - is conducted on a one-to-one basis or in small groups. Career planning workshops can also be helpful (one of the most popular career planning methodologies is called “Parachute”; more about the methodology on which the course is based: What Color Is Your Parachute?)
7.5 Key Issues to Recognize Before Choosing a Profession We recommend that you make your young audience aware of some of the key issues related to choosing a profession. ● It’s up to them to decide what profession to choose - because their life depends on this decision! Perhaps their family or friends would like them to become a doctor, a lawyer, a farmer, a manager of the family business, etc. However, this is their decision to make. ● Choosing a profession isn't a lifelong commitment. With age, their interests and values will change and external factors will change. Thus, they should stay flexible and be open to something new, even if it is hard to imagine or currently inexistent. When considering their professional future, they should take into account: ● their predispositions, so inherited features as temperament or abilities that may make a given profession easier or more difficult (such as reasoning, strength, physical coordination, hearing sensitivity, etc.), ● their values and what is important to them: independence, acceptance, respect, harmony, beauty, helping others, family, money, etc. Some professions correlate with precise values, for example a person who wants to help others might want to work as an elderly caretaker. ● their interests, so what activities make them happy. Encourage them to try out new activities and to get experience in different fields – perhaps some fields are waiting to be discovered? Recommend them volunteer. Use your own volunteering experience (if you have any) to show them how volunteering can contribute to personal development. ● labor market trends, so real possibilities to work in a given profession. They should look for trends concerning professions they are interested in. They should also consider which professions are dying out, making it difficult to find a job. Other things to consider are deficit professions, which are professions with great opportunities for employment, and future professions, which are professions that are expected to be in high demand in the future. (More about this last category of professions: About future professions). ● mobility, so their readiness to move to another village or city. Would they like to stay where they were born or were studying, or do they not mind changing locations?

82
7.6 About Future Professions As the world evolves, so do labor market trends. Try to explain to your young audience that the best bet would be to work towards getting a job that is showing significant growth potential. The key is to plan a career where their professions will be in demand in several years, not eliminated. It is important to search for information on long-term labor market trends – through various trusted sources, both online and offline. Always verify the information you receive because choosing a profession is too important of a decision to make based on just one source. Here are examples of the most common trends: ● an aging population will put healthcare workers such as doctors, nurses, physical therapists, home health aides, and pharmacists in higher demand. ● as more technology is developed, IT professionals such as programmers, security specialists, and administrators will continue to be in high demand. ● alternative energy sources such as wind power, solar power and biofuels, which are becoming more and more important, will create new career opportunities for various kinds of specialists from mechanics and plant managers to scientists and engineers. ● as global business is still developing, there will be a need for specialists in international law, tax codes, work and environmental regulations around the world.

83
7.7 What Color Is Your Parachute?
What Color is Your Parachute? is an excellent manual for job-seekers and people considering a career change. It was published by Richard Bolles and translated into 21 languages. It is regularly updated. The author encourages readers to look for a job that gives new meaning to one’s life. He asks about the skills we have that we find enjoyable and in what fields we would like to use them. He then gives practical advice on how to look for a job. We highly recommend you read this book in your language. It may change the way in which you think about your future career.
The goal in career planning workshops based on this methodology is to find one's most loved “talents." Abilities can be discovered while looking at one's own achievements. Everybody has achievements – it means things that we have accomplished that we are particularly proud of. They don’t have to be major successes such as winning a competition. In the case of young students, it could be for example having organized an amazing birthday party, taken very good care of the dog or helped a classmate with a physics test. The next step is to identify professions in which those abilities could be put to use. Identifying career opportunities requires knowledge on professions. Thus, this step should be done with the help of a vocational counselor or via an online tool.
There are at least two online tools based on this methodology: ● eParachute – created by the Richard Bolles and his team, available in English for asmall annual fee at http://eparachute.com/;● Your Potential – created by the Foundation for Social and Economic Initiatives,available in Polish for free at www.praca-enter.pl. If you know Polish, we stronglyrecommend you make use of this source and devote at least 2-3 hours to identifying yourachievements. Select your abilities which were behind those achievements and describeyour dreaming working place. As the tool is linked to a catalogue of more than 130professions in the end you will come up with a list of 10 most suitable professions for you.
To find more about the methodology itself please look at the Richard Bolles website: http://www.jobhuntersbible.com/.

84
DISCOVER THE SCENARIOS
PART C

85
CHAPTER 8 BASIC SCENARIOS
Introduction Scenarios
In this section, we will present a variety of training scenarios that you can use at the beginning of a training. These scenarios should help you to get to know the participants and their names as well as their expectations and feelings towards the training.
8.1 Balloon of Expectations 8.2 Tell Me About The Others 8.3 Map of Participants 8.4 Map of Expectations 8.5 Paper Me 8.6 Flower
Energizer Scenarios
In this section, we will introduce you to a variety of scenarios that should help you to boost the energy level of the group. You should use them at the beginning of the training, after breaks or whenever you feel that the energy and attention level of the group is declining. Energizers are also very helpful as teambuilding activities and help the group get to know each other.
8.7 Amnesia 8.8 Who Also Likes…? 8.9 Triangle 8.10 Circle Talks
Evaluation Scenarios
In this section, we will introduce a variety of scenarios that you can use to evaluate the workshop with the participants.
8.11 Question Cube 8.12 Question Poster 8.13 Evaluation, Other Methods

86
8.1 BALLOON OF EXPECTATIONS
Preparation: 5 mins Duration: 15 mins Size: unlimited Age: 13+ Tags: expectations, beginning, introduction, evaluation
When to use it?
At the beginning of the workshop. Use it to find out what the participants are expecting, what they are afraid of, and how they want to contribute to the workshop.
At the end of the workshop, the “Take” part can be used to evaluate the workshop together with the participants to see if all of the expectations were met.
Materials:
Sticky notes (3 different colors), pens
How:
Preparation:
• Draw the picture as shown above on a flipchart paper.
Presentation:
1. Explain to the participants that you want to find out what kind of expectations theyhave with regards to the workshop. The balloon represents the collection of expectations.The balloon consist of three different parts. You want the participants to write down oneor two words on three different colored post-its, each post-it contain- ing an answer to oneof the following questions:
• What do you want to give to the group? (yellow post-it - the balloon section)
• What do you want to take away/ learn from the workshop? (pink post-it - thebasket section)

87
• What are you afraid will be difficult for you today? (green post-it - the weightsection)
2. After writing down one or two words on each post-it, the participants are asked tostand up and stick their note on the appropriate section.
3. The trainer now needs to read the post-its to the group. Start from the ‘Give’ part ,then go to the ‘Problem’ part and finish with the ‘Take’ part. The trainer then groupsanswers that are similar and gives feedback tothe group on their answers. You also propose ideas on how the participants can overcomedifficulties.
4. You can tell the participants that you will come back to the ‘Take’ post-its at the endof workshop to see if all expectations were met and to clarify or add something ifnecessary.

88
8.2 TELL ME ABOUT THE OTHERS
Preparation: 2 mins Duration: 10 mins Size: 6-20 Age: 13+ Tags: introduction, name game
When to use it?
When you want to get to know the participants who already know each other, regardless of how well they know each other.
Materials: none.
How: 1. The participants sit down in a circle and are asked to state the name of the personnext to them and say one sentence about that person.2. The trainer, if unfamiliar with the group, tells one sentence about himself or herselfand repeats all of the names.
name

89
8.3 MAP OF PARTICIPANTS
Preparation: 2 mins Duration: 15 mins Size: unlimited Age: 7+ Tags: introduction, presentation
When to use it?
• At the beginning of the workshop.• When working with a group consisting ofpeople from different regions/ countries.• When you want to illustrate the groups diversity.• When the group needs help getting to know each other.
Materials:
• Map• Stickers or anything else to pin the places on the map• Possible variations: paper, glue, scissors and old magazines and/or newspapers
How:
1. Ask the group to take paper figures/ stickers and put them/stick them on the map ofa continent, country, region etc., showing where each person lives.
2. Sit down in a circle. Each person then shows on the map where they come from andtalks a little bit about that place.
Possible variations:
Ask the participants to create a poster using old magazines and newspapers that reflects what they like to do. Each participant then presents their poster. Make sure to account for the time it takes to create and present the collages.

90
8.4 MAP OF EXPECTATIONS
Preparation: 2 mins Duration: >5 mins Size: 6-20 Age: 13+ Tags: expectations, introduction, evaluation, voting
When to use it?
• At the beginning of the workshop.• When you want to get to know the expectations of the group.• When evaluating the workshop.• When voting.
Materials:
Big paper cards, markers or small round stickers
How:
1. On posters, write down possible expectations the participants might have2. Create one poster per expectation3. Ask the participants to put a dot next to at least one expectation they have of theworkshop
4. When finished, present the outcomes to the group.
Possible variations:
• This method can be used as the end of the workshop as an evaluation tool.• Participants put dots next to the workshop topics they found most interesting.• Alternatively, you could write agree/ disagree statements on sheets of paper.• This method can also be used for voting. This occur over the course of several daysby hanging up the posters in a place where everyone will see them.

91
8.5 PAPER ME
Preparation: 2 mins Duration: 20 mins Size: unlimited Age: 7+ Tags: introduction, presentation, name game
When to use it?
• At the beginning of the workshop.• When you want to help the group get to know eachother and learn each other's names.• When the participants are in need of awakening their creativity.
Materials:
Paper (preferably also colored paper), glue, markers
How:
1. Ask participants to create a paper person by tearing off papers and sticking them ona paper sheet and then2. writing or drawing on it. They shouldwrite:• Their name – somewhere in the center… • On the arm – What they like to do…• Leg – Where they like to go…• Belly – What they love to eat…• Head – what they sometimesthink of…
3. The next step is to have the participants introduce the figures to the group or inpairs.4. Hang up the paper figures.
Possible variations:
You can adapt the questions to be answered on the paper figure to pertain to the topic of your workshop. If the participants are small children, you can ask them to draw instead of writing on the figure.

92
8.6 FLOWER
Preparation: 2 mins Duration: 15 mins Size: 8-30 Age: 12+ Tags: introduction, presentation, name game
When to use it?
• At the beginning of the workshop.• When you want to know each other.
Materials:
big sheets of paper, crayons or markers
How:
1. Divide the group into smaller groups of 4-5 people.2. Every group should draw a large flower on a big sheet of paper. The flowersymbolizes the group and should consist of:• petals to show the individuals' characteristics.• a center to show what the members of the group have in common.
3. Allow each group to present their flower to the whole group.
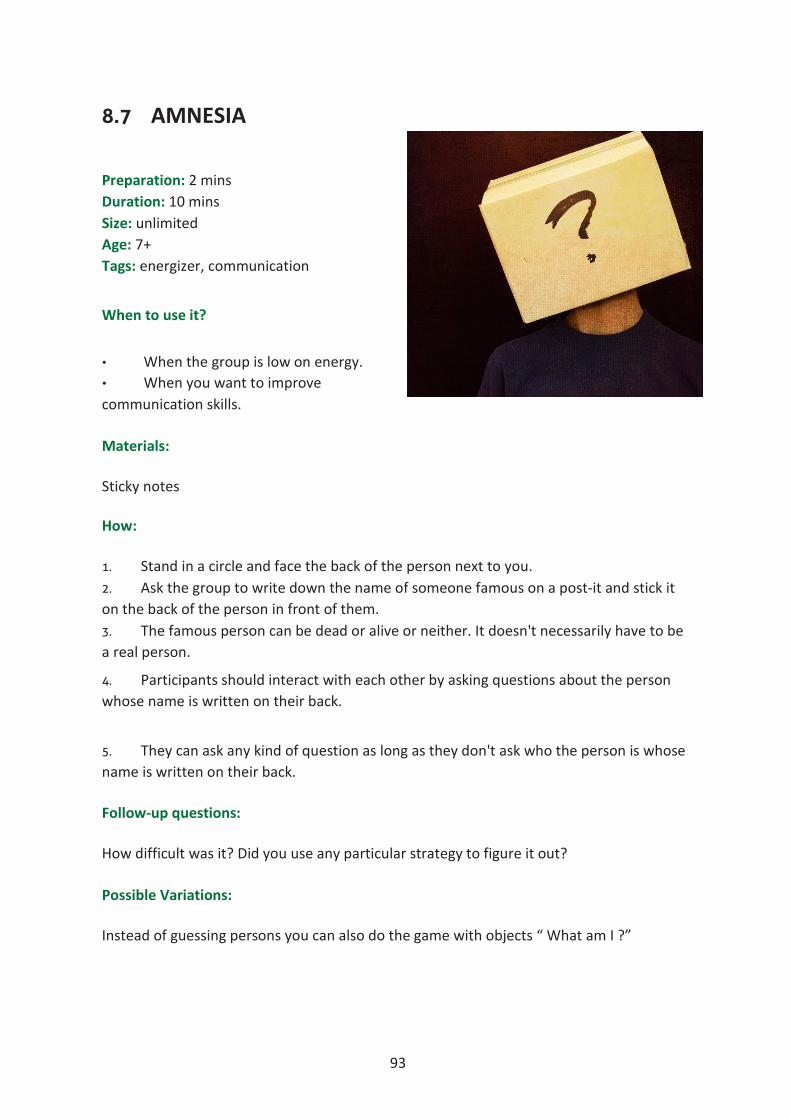
93
8.7 AMNESIA
Preparation: 2 mins Duration: 10 mins Size: unlimited Age: 7+ Tags: energizer, communication
When to use it?
• When the group is low on energy.• When you want to improvecommunication skills.
Materials:
Sticky notes
How:
1. Stand in a circle and face the back of the person next to you.2. Ask the group to write down the name of someone famous on a post-it and stick iton the back of the person in front of them.3. The famous person can be dead or alive or neither. It doesn't necessarily have to bea real person.
4. Participants should interact with each other by asking questions about the personwhose name is written on their back.
5. They can ask any kind of question as long as they don't ask who the person is whosename is written on their back.
Follow-up questions:
How difficult was it? Did you use any particular strategy to figure it out?
Possible Variations:
Instead of guessing persons you can also do the game with objects “ What am I ?”
94
8.8 WHO ALSO LIKES …?
Preparation: 2 mins Duration: 15 mins Size: 10-40 Age: 6+ Tags: energizer, get to know
When to use it? • At the beginning in order to get toknow each other.• When the group needs energy.• When you want to mix up the people who usually sit together.
Materials: none
How:
1. Prepare a circle of chairs with one less chair than the number of participant.2. One person stands inside the circle without a chair.3. The person in the middle of the circle starts game the by asking "Who also…" forexample: "...likes chocolate?".4. The participants that also like chocolate stand up and switch chairs. The person whois asking also needs to find a place to sit.5. There is always someone left without a chair – this person starts the new round byasking a new question.
Possible variations:
Instead of asking “ Who also likes…?” you can ask “Who as I, did….?”

95
8.9 TRIANGLE
Preparation: 2 mins Duration: 10 mins Size: unlimited Age: 9+ Tags: energizer, system thinking
When to use it?
• When the group needs energy.• When you want to introduce the idea of asystem, the dynamics and relations.
Materials: none
How:
1. The group spread out around the whole room.2. Nobody is allowed to talk during the exercise.3. Everybody secretly picks two people without saying/showing them to anyone else.4. Each person positions themselves to create a triangle with those two people andthemselves as the points of the triangle.5. Let them work for a while. Usually after some time people will stop moving. Thensome big change will probably occur and the whole group will be moving again.6. Talk to the participants about their feelings and experience with this exercise.
96
8.10 CIRCLE TALKS
Preparation: 2 mins Duration: 15 mins Size: 10-40 Age: 6+ Tags: energizer, diagnosis
When to use it?
• When the group needs energy.• To help the group to get to know eachother.
Materials: stopwatch, list of questions
How:
1. Prepare a list of subjects to talk about or questions to ask, starting with most neutraland then moving on to the most personal topics. Questions may also be connected withthe subject of the workshops.
2. Split the group into two even groups, each creating a circle.
3. One of the circles should be inside of the other one so that each person has apartner.
4. Ask participants to talk to their partner for one minute and answer the question ortalk about the subject stated by the trainer, starting with the person on the inside of thecircle.
5. After one minute change pairs. The external circle moves to the right.

97
8.11 QUESTION CUBE
Preparation: 2 mins Duration: 15 mins Size: 10-40 Age: 6+ Tags: evaluation, get to know
When to use it?
When evaluating (appropriate for all ages and all types of groups).
Materials: a large size cube made of material or paper, prepared questions
How: 1. Give the participants a big cube to throw. The numbers on the cube representcertain evaluation questions.2. Prepare the questions in advance and write them on a poster so that everyone cansee them.3. Each participant throws the cube once answers the question pertaining to thenumber that the cube landed on .
Possible variations: This is a good evaluation method for kids. The cube represents a scale from 1-6, where 1 means that you did not like the workshop at all and 6 means that the workshop was great. Ask the participants to put a sticker on the number that best represents their feeling towards the workshop.

98
8.12 QUESTION POSTERS
Preparation: 2 mins Duration: 15 mins Size: 10-40 Age: 12+ Tags: evaluation, diagnosis
When to use it?
• When evaluating.• When time is scarce and the group is too big to dothe evaluation individually.
Materials:
Post-its and markers, posters with questions you prepared prior to the workshop
How:
● Prepare posters with questions written on them about the participants' experienceswith the workshop
● Choose maximum 4 questions. One question per poster.● Participants write a short answer on a post-it and stick it to the poster.● Participants can answer the questions when they have time.● Make sure to hang the posters up in an accessible place and make sure to state if orwhen you want to discuss the answers provided.
99
8.13 EVALUATIONS, OTHER METHODS
Active Methods Suitable to Introduce at Beginning
• Fun Box The box is used to make participants to be on time, after the break or thenext day. At the beginning of the workshop ask the participants to think of things to do as“ punishment” in case somebody is late, and write those ideas down on a post- it which,they are asked to throw into the box. Possibles examples: sing a song, jump for 10s on oneleg, aso. The latecomer is supposed to draw one piece of paper and do what is said on it, infront of the whole group. Mention to the participants that it might be them to draw theiridea for the task, so they should choose wisely on what to write. to prepare a box, you canuse a shoe box. Make an opening on the top, the rest of the box make as colorful aspossible.
• House of Sorrow & Happiness The box is especially useful for trainings that lastlonger than one day. I provides participants with the possibility to give feedback to thetrainers about positive and negative issues related to the training, also outside of thetraining room. The box , as well as paper and a pen, can be placed in a spot whereparticipants can anonymously thow in their written remarks. This method allows thetrainer to learn about negative and positive aspects before the training ends. Moreover, itis a good “feedback” tool for participants which are not that outspoken.
Active Methods Suitable for Kids
• Trash, bin or suitcase? Ask kids to write or draw on sheets of paper things that theyliked the most and the least about the workshop. Afterwards, participants put the drawingthat represents what they didn’t like in the trash bin, and what they liked or want to takehome with them - in the suitcase.
• Distance. Put a book or any other object in the center of the room. Ask participantsto stand where they feel appropriately in order to symbolize how much they enjoyed theworkshop (closer to the object means they liked it more). This can also be used for otherevaluation questions.
Other Methods
• Questionnaire or survey: online, on paper, face-to-face• Observation• Tailor-made workshop session (e.g. Volunteer portrait, comic book).
Remember! Evaluations can be useful because they can help you to improve your workshops and provide you with new ideas. They are not just a rating!

100
CHAPTER 9 MEDIA & COMMUNICATION
9.1 Visualize Your Story
9.2 Can I Have Your Attention
9.3 Visualize Your Future With a Vision Board
9.4 Retell the Story with Pictures
9.5 Motion Your Story
9.6 Tell your story

101
9.1 VISUALIZE YOUR STORY
Preparation: 15 mins Duration: 45 mins Size:15-25 Age: 13+ Tags: communication, storytelling, visualization
When to use it?
• For helping participants to understand the importance of visualization incommunication.
• For letting the participants to know each other better.
Materials:
Storyboard printouts (see the appendix for this scenario) or A4 sheets, pens/pencils.
How?
Preparation:
• For each participant, make one copy of the storyboard, which you can find in theappendix for this scenario. Alternatively, use A4 sheets, one for each participant.
• Make sure all participants have a pen or a pencil to draw with. You should have extrapens and pencils with you.
• Read the info boxes about visualization and storyboarding.
Presentation:
1. Ask participants how much they know about the other people in the room. Follow upwith further questions about how they learned personal information. Ask them to sharethe most memorable thing they learned about another person in the room.

102
2. Tell them about how visual elements in an information flow are more persistent thanverbal and textual information. Refer to the visualization theory part from this toolkit(chapter 4).3. Then show them the storyboard and explain how it is used in storytelling anddifferent sectors.4. Hand out one storyboard to each participant and tell them to draw picturesdescribing their life, hobbies and anything else they would like to share about themselvesin each of the frames.The participants can use one to three keywords for each frame tosupport the information in the frames.Let them work on this for up to 20 minutes.5. Then, ask the participants to write their name on the storyboard and exchange itwith the person next to them.6. Give them another 5 minutes to study the frames and try to understand the story.7. Then, ask each participant to introduce/present the life of the person based on thestoryboard they received. The presentation is done to the whole group.8. After each presentation, ask the creator of the storyboard whether theinterpretation was accurate.9. When all the presentations were done, invite the participants to express their ideasthey have now on the usefulness of getting to know a person with visual clues, as opposedto a verbal/textual introduction.
Follow-up questions:
• What was the most enjoyable part about Storyboard?
• How much easier or more difficult is it to get to know a person using this method asopposed to reading about them or listening to them?
Possible variations:
You can do this activity using only drawings (no key words under frames) to make it more challenging.
FACT BOX:
Visualization
Visualization or visualisation (see spelling differences) is any technique for creating images, diagrams, or animations to communicate a message. Visualization through visual imagery has been an effective way to communicate both abstract and concrete ideas since the dawn of mankind. Examples from history include cave paintings, Egyptian hieroglyphs, Greek geometry, and Leonardo da Vinci’s revolutionary methods of technical drawing for engineering and scientific purposes.

103
Storyboarding
A storyboard is a sketch of how to organize a story and a list of its contents. A storyboard helps you define the parameters of a story within available resources and time, organize and focus a story, and to figure out what medium to tell each part of the story with. A multimedia story is some combination of video, text, still photos, audio, or graphics, which are interactivity presented in a nonlinear format in which the information in each medium is complementary, not redundant. Your storyboard should be put together with all of those elements in mind.

104
9.2 CAN I HAVE YOUR ATTENTION
Preparation: 15 mins Duration: 45 mins Size: 16-20 Age: 13+ Tags: website, online communication, presentation, visualization, organizational communication
When to use it?
• To learn how to make an effectivepresentation about online data.• To increase awareness about users'attention span in online communication.• To talk about effective methods of presentation, online communication andorganizational communication on the Internet
Materials: A computer or tablet and preferably a projector to screen the About Us pages of different organizations and businesses; alternatively printed versions of these pages; pens, pencils, flip-chart papers.
How? Preparation: • Print out the About Us pages from four chosen websites or check them for screeningwith the projector.• Read the info box about attention span and online presentation.
Presentation:
1. Open About Us pages of four different websites. Alternatively, hand out the printedversions of the pages to the participants.2. Ask them to look at each page/showed website for ten seconds.3. Discuss with the participants what they remember about the organizationspresented in the pages, what they were about, what attracted their attention, what wouldmake the pages more appealing, what was the most memorable component and whetherthey were interesting enough to keep reading.4. Divide the participants in groups of two-three and assign them one of the About Uspages to redesign.5. Let each group present their new design and explain why they made those changes.
organizational
visualizat
online
presenta

105
Follow-up questions: How do you usually learn about new people and organizations online? What attracts your attention visually on the Internet and on social media? What new visual “tricks” did you observed on social media channels to attract your attention?
Possible variations: Instead of presenting the redesigned pages, the groups can prepare 10 second videos about the new About Us pages they propose, videos made using with their smartphones.
FACT BOX:
ATTENTION SPAN AND ONLINE PRESENTATION
A recent Microsoft consumer survey reveals that the human attention span for web browsing today is 8 seconds. This highlights the effects of an increasingly digitized life-style on the brain.
What does this mean for you as a communicator? If you are designing your presentation on online platforms, you must communicate a compelling message in the first 8 seconds of your presentation, or risk losing your audience. The 8 second rule can also be valuable for presentations that take place in the real world.
To hook viewers within the first 8 seconds, carefully craft a title that will resonate with your target audience. If you can use visible and striking titles and keywords to point to the problem that you want to communicate with your audience, your odds of gaining and keeping attention will increase dramatically.
If your audience is still paying attention after the first 8 seconds, you have approximately 4 minutes and 52 seconds until their attention spans are exhausted. The average adult attention span has plummeted from 12 minutes a decade ago to just 5 minutes now, according to a Fortune.com article.
Craft your material so that your message directly speaks to the audience members. Give solutions, insights, inspiration, or even entertainment. Just don’t make your presentation all about you and your ideas.

106
9.3 VISUALIZE YOUR FUTURE WITH A VISION BOARD
Preparation: 30 mins Duration: 45 mins Size: 10-15 Age: 13+ Tags: design, planning, visual board, storytelling, visualization When to use it? • To prepare visual and comprehensiveplans.
• To familiarize the participants with long term planning.
• To teach about organization and career planning
Materials: Posters or A3 sheets, color pencils, a bunch of inspirational stock printed pictures.
How? Preparation: • Read the info box on Vision Board.• Find three examples of visual boards, online.• Find images, quotes or pictures that represent success or capture the emotions theparticipants might feel when they have reached their goals. You can use magazines orwebsites such as Pinterest, stock image sites or online image galleries. The images youselect should inspire them or evoke positive emotions.
Presentation: 1. Ask participants to list their dreams and goals and to imagine their ideal life. Remindthem that there are different components of their life, such as wealth, health, career,relationships and school. It doesn’t matter if they haven’t figured out exactly how they willachieve their goals. It helps to have prompts or questions to get them started. Ask themquestions like:• Where have you always wanted to live?• What would your dream house look like?• What is your dream vacation?• What do you want to achieve at work or in your career?• What does your ideal work space look like?• If you had all the time in the world, how would you spend it?• What is an organization or cause you have always wanted to support?• Who are people you would like to meet or see?• Think of places you want to see and things you want to do before you die.Also tell them that they really can’t mess this up, so they should not overthink it.2. Then ask them how they plan on achieving their goals. Show them examples of visual

107
boards and explain to them what a vision board is (see info box) and how, for instance, athletes and business people use it to plan their life and achieve goals. 3. Hand out paper or posters, color pens and pictures so that they can start makingtheir visual boards representing the list of goals they made.4. At the end, ask each participant to present their visual boards to the others.
Follow-up questions: How do you think the visual board helps you in comparison with a simple list of written objectives or goals? Where would you keep the visual board, to inspire you better?
Possible variations: If you feel like the participants need a little positive reinforcement to get started,you could make them work in groups or pairs. Working on their vision board with a group may drive them to complete the project faster. It also serves as a built in accountability group for their vision.
FACT BOX:
Vision board A vision board is a tool used to help clarify, concentrate and maintain focus on a specific life goal. Literally, a vision board is any sort of board on which you display images that represent whatever you want to be, do or have in your life. What’s the point of making a vision board, you ask? Simply put, we tend to be very busy and are constantly bombarded with distractions. Creating and using vision boards serves several purposes, some of which include helping you to identify your vision and give it clarity, reinforce your daily affirmations and keep your attention on your intentions.

108
9.4 RETELL THE STORY WITH PICTURES
Preparation: 15 mins Duration: 45 mins Size: 15-21 Age: 13+ Tags: reporting, presentation, online tools, visualization, infographics
When to use it?
• To understand the importance of visuals in presentations.• To learn about online visualization tools.• To learn about storytelling structure and visual storytelling.• To learn how to prepare infographics for lengthy texts.
Materials: Flipchart papers, color pencils, news articles or reports, projector.
How? Preparation: • Read the visual storytelling part (in chapter 4) and the info box about Infographics.
• Find relevant reports/articles from magazines or newspapers for each group.Alternatively, ask them to find their own on the Internet, after you explain the exercise.• Use the examples of infographics from this scenario's appendix.
Presentation:
1. Ask the participants about what news sources they read and in which format.2. Ask them what they know about infographics, then explain what infographics are,which components they consist of, why/how they are used to tell complex stories andshow examples.3. Divide the participants into pairs or groups of three. Then hand out one flipchartpaper to each group, along with color pens and one article to read first.4. Ask each group to draw an infographic version of the story from the article bydrawing figures and using only one sentence for each figure.5. In the end, each group make a 3 to 5 minute presentation about their infographic.6. Invite the audience to give feedback on each infographic. Focus not on the aestheticof the infographics, but on how clearly the information was converted into an infographic.

109
Follow-up questions: Which format of information would you prefer while reading? Infographic or traditional reporting? What are the advantages and disadvantages of the two ways of presenting information?
Possible variations: Alternative 1: Instead of news reports, you can also use CVs or business proposals to be transformed in infographics.
Alternative 2: You can ask participants to bring their laptops/tablets and design their infographics by using one of the online infographics tools (online visual storytelling tools) available in the appendix of this scenario.
FACT BOX:
Infographics Information graphics or infographics are graphic visual representations of information, data or knowledge intended to present information quickly and clearly. They can improve cognition by utilizing graphics to enhance the human visual system’s ability to see patterns and trends. Similar pursuits are information visualization, data visualization, statistical graphics, information design, or information architecture. Infographics have evolved in recent years to be for mass communication, and thus are designed with fewer assumptions about the readers knowledge base than other types of visualizations.

110
9.5 MOTION YOUR STORY
Preparation: 60 mins Duration: 3-4 hours Size: 15-20 Age: 13+ Tags: stop-motion, presentation, online tools, visualization, animation
When to use it?
• To use a stop motion technique to create a simple two-dimensional and/or three-dimensional animation that communicates an idea/tells a story.• To learn an alternative method of visualization and visual storytelling.• To learn how to plan a multimedia production.• To teach about visual storytelling and effective communication methods.
Materials: Flipchart papers, color pencils/markers, colored papers, scissors, modelling clay, laptop, projector, smartphones & Stop Motion Studio App.
How? Preparation:
• Read the info box about stop-motion animation.
• Find interesting examples of stop-motion movies. You can find links to someexamples in the appendix for this scenario.
• Download Stop Motion Studio App on your smartphone and try out the app usingtutorials, maybe even make your own short movie.
Presentation:
1. Explain what stop motion animation is and what materials are required. Rememberto also discuss 2D and 3D techniques.2. Show different examples of stop-motion animation. Showing videos from “MakingOf” documentaries is a great way to begin discussing the techniques and strategies used instop motion.3. Have participants create a 15 second promotional video/video story on any topicthey want. Have them discuss, brainstorm, and write everything down and develop ascript.4. Explain them what is a script. A script is the written description of the actions thatwill take place in their short story. Ask students questions to help them plan their scripts

111
such as:
• What is the theme or idea? • What sort of character would you like to create? • How long do you expect it to be? How many frames and fps is that? (Make them do the math!) • Who in your group will do which production jobs? • What materials or objects will you need? • What kind of background will you need? • Will 2D or 3D technique work better for this particular story? Why? • What different shots do you need? What close-ups? • What else do you want to say about your idea?
5. Challenge participants to suggest new ideas and to further develop existing ideas in their group, about the story. Even weak ideas can be developed into something good! Remind participants that great ideas can come from simple, everyday experiences. Have students take notes and write down their thoughts on the plot, the scenes, the characters, and any extra details that come to mind. Keep it simple! The shortest and simplest concepts are the easiest to animate. Limit them to one or two characters so that they can concentrate on the details. The approach participants take (2-D, 3-D or combined) should support their overall idea. 6. The story is then ready to be visually depicted as a storyboard (explain shortly how to use storyboarding - see scenario 9.1), outlining the plot, characters and backgrounds. Remind participants that storyboarding and planning on paper saves time and energy because this way they will have figured out all the details before committing to the animation. Storyboarding will also ensure that each group selects the approach that is best suited to their story. 7. Once the groups have created their storyboards, they need to begin gathering their props, characters, and backdrops in order to get ready to film their animation. 8. Tell them to download on their smartphones the Stop Motion Studio app and show them how to use it. 9. Participants can then start filming according to their plan. 10. When done, they can save the final product and upload it to Youtube to share with other participants. 11. Give feedback on their videos on the story structure and on the way they use the technique. Follow-up questions: How did group members work together and split their tasks? What was the biggest challenge? What was the easiest part of the project? Possible variations: The workshop can be divided into two to three sessions, so that participants can also take

112
some breaks and do not feel the pressure of time.
FACT BOX:
Stop motionStop motion animation (also called stop frame animation) is an animation that is captured one frame at a time, with physical objects that are moved between frames. When you play back the sequence of images rapidly, it creates the illusion of movement. The basic process of animation involves taking a photograph of your objects or characters, moving them slightly, and taking another photograph. When you play back the images consecutively, the objects or characters appear to move on their own. You see stop motion animation all the time—in commercials, music videos, television shows and feature films—even if you don't realize it. While it is common for people to think of stop motion as just one specific style, such as clay animation, the reality is that stop motion techniques can be used to create a wide range of film styles.

113
9.6 TELL YOUR STORY
Preparation: 30 mins Duration: 45 mins Size: 16-20 Age: 13+ Tags: personal branding, personal storytelling, social media
When to use it? ● To learn about personal brandingand the use of social media.● To make young people aware of the power of social media over their personalbrand.● To help young people to think strategically about building their personal brandthrough social media they already use.
Materials: ● post-its, pens, pencils, markers
How? Preparation: • Read from chapter 4 the short introduction on telling your story and personalbranding. Also, find other online resources on personal branding and the use of socialmedia.
Presentation:
1. Ask the participants to share in forum what they usually post on social mediachannels, what social media channels they use, and what kind of profiles/portraits theybuild and present about themselves on those channels. Explain to the participants that theprofiles they build and what they regularly post on Facebook, Instagram, Linkedin, etc.constitutes their public personal brand.2. Then, ask participants to take, each of them, 5 sticky notes (post-its) and take thetime and identify write down on each of them a role they have in their lives, from personalto professional. Use may use your personal example for these five roles you have in life, toconnect better with the participants. For instance: volunteer, brother/sister, facilitator,public speaker, dog owner.3. Then, the participants should prioritize the roles, by choosing the first role theywould want to promote and talk about it to others, and which could help themprofessionally as well. Invite them to prioritize the roles with the help of another personfrom the group, and explain to that person why that role is important to be shared with
listen
repor
press

114
others. For instance, why and how the role “I am a student in biology” would be relevant to share with others for enhancing one’s personal brand. 4. Each participant should then get a square piece of paper and some pens, pencils ormarkers. On this piece of paper, each participant should “design” a post for Instagram, thatwill show something related to the main role they chose in the previous step. They shouldthink about what they would share from that personal or professional role - think whatpicture, what moment will they share, what comment they will add, and even whathashtags they will use. Afterwards, they have to draw/prototype the post, and share withthe person that helped them to choose that role, and get and receive feedback.5. Ask each pair to share their conclusions on the game, what they learned andreflected on the post they would like to share about their professional/personal role.6. Using the short introduction on personal branding (see chapter 4), but also otherresources on personal branding you might find, make the participants aware of theprofile/the brand that they build about themselves with each post, comment and share,and insist on how they should think more strategically, for their future jobs, for instance, todevelop their personal brand in such a way that will enhance their employability and the“future employee” profile.
Follow-up questions: How did you choose what to post about the specific role you considered relevant for building your online personal brand? What reaction would you expect from your friends to your post? Who else would have access to this post, what would you want them to think/conclude about you after they see the Instagram post?
Possible variations:Combine this scenario, with scenario 12. 1 Who I am? What Should I Dream About?, more precisely continue and connect that scenario on the 10 life roles with this exercise on personal branding.

115
CHAPTER 10 ENTREPRENEURSHIP
10.1 Entrepreneurship - a career path
10.2 Start Your Business With A Paperclip
10.3 Launch Your Boats!
10.4 How much money do you need?
10.5 Get Ready To Make A Profit!
10.6 The Business Model Canvas - Plan Your Business On One Page!
10.7 Leading Your Organization With Style
10.8 Is it really your choice?
10.9 Building an Ethical and Responsible Business

116
10.1 ENTREPRENEURSHIP - A CAREER PATH
Preparation: 30 mins Duration: 60 mins Size: 5-15 Age: 14+ Tags: career path, career counseling, entrepreneurs, financial education When to use it? ● When supporting young people todiscover entrepreneurship as a careeroption.● When supporting young people tolearn the differences between being an employee, self-employed, a business owner, andan investor.
Materials: ● flipchart papers, markers
How? Preparation: ● Watch the video on Kiyosaki cashflow quadrant here:https://www.youtube.com/watch?v=yywKO_xqXIY;● Prepare the story to use, and possible solutions for step 3., so that the participantscan understand the difference between S and B sections of the quadrant.
Presentation: 1. On a flipchart paper, brainstorm with the participants the potential sources ofrevenues / incomes they might have once they get out of school.2. Using the answers given by the participants, draw on a new flipchart paper, andexplain the following cashflow quadrant (developed by Robert Kiyosaki):
E (Employee works for others)
B (Business owner – others work for him/her)
S (Self-employed works for him/herself)
I (Investor – money works for him/her)

117
3. Split the participants in groups of five people, and tell them the next story, adaptedfrom Robert Kiyosaki:“Once upon a time there was a little village, a great place to live, except for one problem.The village had no access to water, unless it rained. However, close to the village there wasa river that could be used as source for clean water. To solve this problem, the village eldersasked different contractors to submit ideas to deliver water to the village on a daily basis”.4. Each group of five people represents a contractor contacted by the village elders.At this moment the contractors are working people from the village who village eldersthought they might be more entrepreneurial and help the village to find a solution todeliver water everyday, and come with their business idea.5. Ask the participants to work in groups and come with solutions to the villageproblem. After 20 minutes, ask each group to present their idea.6. From the discussions, or from the feedback you provide, two stories shouldemerge:● one is the story of a self-employed / small business: for instance, the participantscould say that they will work everyday in a business bringing fresh water from the river inbuckets or other recipients; they will be working hard to deliver water to the city;● the second story is one of a business owner, who decides, for instance, to spendsome time to find some investors who will pay for building a pipeline system, and then tohire people to set up the system and to keep it running; and who is also interested indeveloping the business to other villages and provide through the pipeline water to morevillages.Though this game, the participants should understand the main difference in visionbetween self-employed and business owner. At the same time, they also see what could bethe role of an investor.7. Recap with the participants the quadrant, and insist in the presentation on thefollowing characteristics, adapted from Robert Kiyosaki’s book: Rich Dad’s CashflowQuadrant. Guide to Financial Freedom (2012):
An Employee might say: “I am looking for a safe, secure job with good pay and excellent benefits.” A Self-employed might say: “My rate is $75 per hour.” Or “I can’t seem to find people who want to work and do the job right.” They are people who want to be their own boss, and they only believe in the quality of their work. While employees respond to fear of not
having money by seeking for security (a secure job), the self-employed persons respond to this fear by taking control of the situation and doing what they know best.

118
A Business owner might say: “I’m looking for a new president to run my company.” Usually they surround themselves with smart people from the other categories. To be a successful B, one should own or control a system, and to have the ability to lead people.
An Investor might say: “Is my cash flow based on an internal rate of return or net rate of return?”. The investor makes money with money, the money is working for them. Kiyosaki says that this quadrant is the “playground” of the rich.
Follow-up questions: ● What will be the quadrant section that you see yourself in, based on your values /interests?● What do you think is the most important thing that you need to keep in mind to gofrom the E section of the quadrant to the B section?Here you can guide the discussion by explaining Kiyosaki’s point of view, who says thatthere are a lot of entrepreneurs providing superior products or services than those ofmultinational companies, however in order to compete or compare with a multinationalcorporation is important not to create better products, but better business systems.
Possible variations: For the step 3., you could use a different story, adapting it to the audience of the workshop.

119
10.2 START YOUR BUSINESS WITH A PAPERCLIP
Preparation: 30 mins Duration: 45 mins Size: 5-20 Age: 13+ Tags: entrepreneurship, creativity, alternative use, thinking outside the box
When to use it? ● When evaluating creative potential.● When encouraging out of the boxthinking and attitudes.● When trying to get participants to understand how creativity and innovation helps inbusiness development.
Materials: ● pens, sticky notes, flipchart paper, markers, paper clips
How? Preparation: ● Read the short presentation of the Alternative Uses Test from the appendix for thisscenario.
Presentation: 1. Initiate the discussion by asking the participants to define “creativity” and writedown their answers on a flipchart paper.2. Then, ask them what the main aspects are that one should have in order to beconsidered creative. Write down their answers on the flipchart paper.3. Give each participant a paper clip and a stack of sticky notes and give them threeminutes to think up as many ways as possible that a paper clip could be used. They shoulduse a different sticky note for each idea.4. The participants then stick their ideas on a flipchart while presenting them. For eachnew participant, ask them to stick only ideas on the flipchart that aren't already there.5. After all the ideas are on the flipchart, with the help of the participants, split thesticky notes into three categories:● The paper clip is used as it is;● The paper clip has been changed in some way;● A new object has been added to the clip paper, creating a new product.6. Moreover, analyze together with the participants their ideas from the followingperspectives:

120
● Fluency (how many uses each person found in comparison with the total numberof uses found by the group);● Originality (how unusual an idea is);● Flexibility (how many areas the idea covers; for instance, if a person mentionedthe idea of using paper clips as earrings, and also as part of a necklace, then the personcovered just one area of activity);● Elaboration (how detailed the ideas were).7. Ask the participants how they reached these ideas, and then introduce the idea thatcreativity can be trained, through daily exercises like this one.8. Now, ask the participants why creativity could be important in business. Based ontheir answers, explain that it is not enough to be creative and to think outside the box, butit is equally important to be able to put creativity into practice in order to solve problemsin the community or respond to needs or business opportunities.
Follow-up questions: Ask the participants to share what happened once they saw the others’ ideas on how to use a paperclip. Did they get more ideas as well?
By looking at the different ways to use a paper clip that the participants suggested, ask them how many alternative uses they found before they actually started to get more creative in using a paper clip. What does this tell them? Help them come to the conclusion that it is very important to keep challenging themselves and that the best ideas usually come later, rather than at the beginning of the process.
Possible variations: The chosen object for thinking alternative uses can vary (a jar, a spoon, a balloon, a chair, etc.). The scenario can be extended with an additional activity in which you split the participants in groups of five, and ask the groups to prepare a poster as an advertisement to sell an idea resulted from the previous activity on how to use a paperclip. Each group then pitches their idea for one minute.
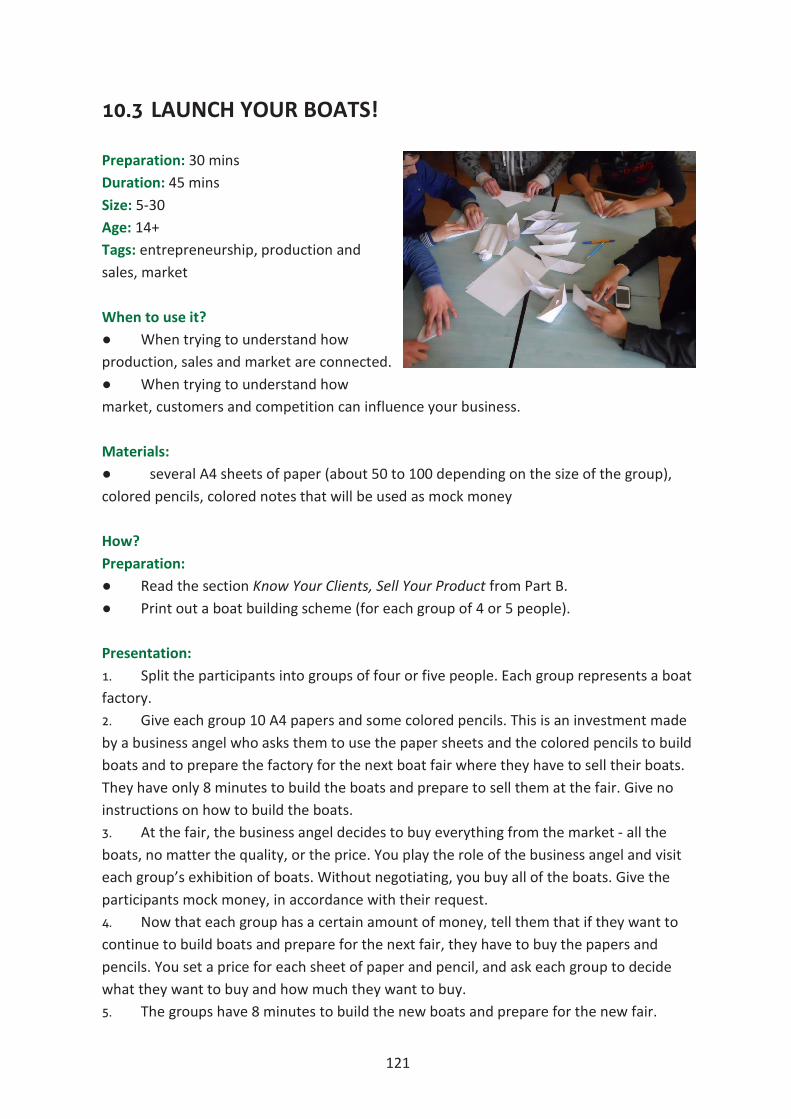
121
10.3 LAUNCH YOUR BOATS!
Preparation: 30 mins Duration: 45 mins Size: 5-30 Age: 14+ Tags: entrepreneurship, production and sales, market
When to use it? ● When trying to understand howproduction, sales and market are connected.● When trying to understand howmarket, customers and competition can influence your business.
Materials: ● several A4 sheets of paper (about 50 to 100 depending on the size of the group),colored pencils, colored notes that will be used as mock money
How? Preparation: ● Read the section Know Your Clients, Sell Your Product from Part B.● Print out a boat building scheme (for each group of 4 or 5 people).
Presentation: 1. Split the participants into groups of four or five people. Each group represents a boatfactory.2. Give each group 10 A4 papers and some colored pencils. This is an investment madeby a business angel who asks them to use the paper sheets and the colored pencils to buildboats and to prepare the factory for the next boat fair where they have to sell their boats.They have only 8 minutes to build the boats and prepare to sell them at the fair. Give noinstructions on how to build the boats.3. At the fair, the business angel decides to buy everything from the market - all theboats, no matter the quality, or the price. You play the role of the business angel and visiteach group’s exhibition of boats. Without negotiating, you buy all of the boats. Give theparticipants mock money, in accordance with their request.4. Now that each group has a certain amount of money, tell them that if they want tocontinue to build boats and prepare for the next fair, they have to buy the papers andpencils. You set a price for each sheet of paper and pencil, and ask each group to decidewhat they want to buy and how much they want to buy.5. The groups have 8 minutes to build the new boats and prepare for the new fair.

122
6. At the second fair, you play the role of the business investor and talk with eachfactory and explain that you have poor finances and that you cannot afford to spend a lotof money today. You buy the cheapest one of the three boats (don't buy from eachfactory!).7. If they still have money, the factories can decide to buy more paper or more pens.8. You give them good news; a new investor is coming that is interested in boats but isonly interested in boats made using a precise technique. Tell the groups how the investorwants the boats made for the fair.9. Each group has 10 minutes to prepare the new boats or re-model the old ones.10. It's now time for the third fair. You play the role of the investor and buy only theboats from each factory that really satisfy in terms of quality.11. End the game by explaining the concept of supply and demand. Explain howproduction and sales can be influenced by competition, market requirements and marketfluctuations. Using the three fairs as examples, explain how you can adjust the market inyour favor when you know how to optimize costs, production, marketing and sales.
Follow-up questions: ● Now that you know how your clients might react to your products, what will you dodifferently next time? (For instance at the first phase, when the demand on the market ishigh - maybe raising prices and producing more would be a good idea).● What are the main things you will keep in mind for your future business?
Possible variations: You can choose another object that can be built from paper as long as it's not too easy or too complicated to make.

123
10.4 HOW MUCH MONEY DO YOU NEED?
Preparation: 30 mins Duration: 90 mins Size: 5-15 Age: 14+ Tags: budgeting, entrepreneurship, financial education, financial plan
When to use it: ● When explaining concepts ofcosts / expenses and revenues / incomes.● When promoting personal financially responsible behaviour.
Materials: ● flipchart papers, A4 papers, pens, markers, a box of chocolate / a similar prize.
How? Preparation: ● Print out the monthly expenses-revenues handouts from the appendixes.● Check information about the minimum and average wage in your country, and howmany people make the minimum and the average wage.
Presentation: 1. Brainstorm with the participants on what they usually spend their money or onwhat their families spend their money. Introduce them the concepts of expenses –everyday living costs.2. Give each participant the monthly expenses-revenues handout from theappendixes, and ask them to spend 10 minutes and make a list with their monthly costs,specifying the amount of money spent and trying to put the costs under a category, suchas: food, clothes, leisure activities, etc. At the same time, ask them to make a total withtheir monthly expenses.3. Ask each participant to calculate on what category of expenses they spend most oftheir money.4. Start then a group discussion, and ask the participants if all the expenses are reallyneeded. Ask them how they will call those expenses that are not really needed for living.The discussion should end by defining needs versus wishes.5. Shortly, ask them, as a group, to identify from the following lists the needs and thewishes:● to get to school / work

124
● to drive to work or school● to eat lunch● to eat at [choose a well restaurant in your area]● to buy shoes● to buy [a well known brand] shoes● to read books● to buy presents for my friends● to buy a car6. While some costs are easily identified as needs or wishes, some others can startsome debates. For instance, to read books, maybe the participants will identify it as a wish,while you might explain that it is a need, as one needs to have access to the righteducation, so that he/she can have the professional career he/she wants.7. Continue the discussion, by challenging participants about their sources ofincomes/revenues. From where do they get the money? At this age, most of them mightsay they get the money from their parents / grandparents. Guide the discussion further, sothat they can identify different categories of incomes/revenues: salaries, profit made asbusiness, investments, loans, etc. At the same time, provide them with the information ofsalaries in your country (the minimum wage, the average wage, and how many peoplereceive the minimum and the average wage).8. Ask them to go back to their monthly expenses-revenues handout, and to calculatetheir monthly revenues. Then ask them to subtract the expenses from the revenues. Asmost of the people at this age, their revenues will be much lower than the expenses. Askthem what happens in this case, how they would cover their monthly expenses. They willget to one of the next two ideas: savings or increase their revenues. Explain to them thatincreasing revenues is hard at their age, or with the first job – as most of the time, in a firstjob, they will make the minimum or somewhere above the minimum wage.9. Split the participants in groups of five people, and ask them to share their monthlyexpenses and find together solutions for savings and reducing costs. After 10 minutes, eachgroup presents its ideas of saving. The group with the most ideas of saving will win a smallpresent (such as a box of chocolate).10. Ask each participant to identify a thing that they want to have or an experience thatthey want to live, and for which they need a certain amount of money. Ask them to make aplan for the next six months or one year to raise the money for what they want to buy.How much they need to save each month? What they should give up from their monthlyexpenses in order to be able to make the savings? How they can increase their revenues?11. After 10 minutes, group participants in pairs, and ask them to share their savingplans.12. Mention to the participants the possibility of using a mobile app for their personalbudget and finance (see ideas in the Part D of the toolkit).
Follow-up questions:

125
● What are the main things you learned about money today?● What will be your first thought next time you buy something?
Possible variations: For step 3., if you want to make it more visual, you can use an excel (the graphic function; a pie), and build one of the participant’s monthly budget (expenses); the participants can better understand and visualize how much money they spent on each cost category.

126
10.5 GET READY TO MAKE A PROFIT!
Preparation: 30 mins Duration: > 60 mins Size: 6-15 Age: 14+ Tags: entrepreneurship, financial education, break-even point, profit
When to use it? ● When learning about types of costs and pricing.● When learning about how to calculate a break-even point.● When learning how production, sales and profit are related.
Materials: ● A4 papers, pens, three flipchart papers, markers
How? Preparation: ● Read the section How Can You Be Sure You Can Make a Profit With Your Business?from Part B.● Practice the formulas and the calculations from the exercise described in thepresentation phase.
Presentation: 1. Split the participants into groups of three.2. Tell the participants the following story: “You discovered you are a talented baker.Your are especially great at making carrot cake. You sold your first carrot cake last week toyour aunt and she started to promoting your skills. Now everyone calls asking for carrotcake - family, friends, neighbors. After two months of intensively making carrot cakes, youdecide to open a small business, rent a place and make and sell carrot cakes professionally.You meet your wise friends for a coffee and ask them to help you decide costs and prices.”3. Ask each group to make a list with the costs they can think a small business like thatwill have. Ask them to come up with a price for the carrot cake.4. Each group will then present the costs they identified. As they present, take notes ona flipchart. Draw a line down the middle of the flipchart and on one side write a list of fixedcosts and on the other side write a list of variable costs. Explain to the participants thedifferences between the two types of costs.

127
5. Ask each group how they decided on the price. Explain to the participants that thereare three ways of pricing products- based on costs, based on what clients are willing topay, or a combination of these two strategies.6. After they've discussed their strategy of pricing, explain the concept of profit. Keep itsimple and explain that profit represents the difference between revenues/sales and costs.Write the following formula on a flipchart: Revenues-Costs=Profit.7. Now ask the groups if they know how many carrot cakes per month their friendshould make in order to reach the break-even point. Explain the break-even point as thepoint where revenues equalize costs, the point when the small business starts to make aprofit.8. Demonstrate how the break-even point is calculated using the costs and prices theyprovided previously, or using the following example:If for one carrot cake, the variable costs are 2 euro, and the monthly fixed costs for thebusiness are 2000 euro; and the price set for one carrot cake is 10 euro, here is how tocalculate the break-even point:Revenues/Sales=Costs,and x=the number of carrot cakes needed to be produced and soldx*10= x*2+2000 10x-2x=20008x=2000 x=2000/8 x=250
In conclusion, the friend has to make 250 carrot cakes/month; which means more than 11 carrot cakes per working day. Explain the participants that this is just an example, but any beginner in entrepreneurship should calculate the break-even point, make a rational decision about pricing and find solutions to optimize costs and production, and/ or increase prices.
9. Now ask the participants to exercise this formula, but this time they should calculatehow many carrot cakes must be produced and sold if their friend needs a profit of 4000euro/month. Provide the starting formula on a flipchart paper:Revenues-Costs=4000 euro.Give them 10 minutes to do the math.10. Ask participants about their calculations and quickly demonstrate on the flipchartthe correct calculation:10x-(2x+2000)=400010x-2x-2000=40008x=6000 x=75011. Recap the main concepts with the help of the participants: costs (variable and fixed),break-even point, profit. Insist on the idea that an entrepreneur can optimize his/her profitby applying different strategies on costs, production, pricing and sales.
Follow-up questions:

128
● What would you do if you were the talented baker from the story?● What would decide with regards to opening the business and what factors wouldinfluence your decision?
Possible variations: You can adapt the type of business/product you use in your example if you have an idea that you think would be more interesting to the group.

129
10.6 BUSINESS MODEL CANVAS - PLAN YOUR BUSINESS ON ONE PAGE!
Preparation: 60 mins Duration: 90 mins Size: 5-30 Age: 14+ Tags: entrepreneurship, planning, business plan
When to use it? ● When developing a business ideainto a real business plan.● When planning projects that involve different clients and stakeholders.
Materials: ● flipchart paper, sticky notes - 2 to 5 different colors, markers, projector and laptop
How? Preparation: ● Read Imagine Your Business. The Business Model Canvas section from Part B andwatch the short video presentation of the Business Model Canvas here:https://www.youtube.com/watch?v=QoAOzMTLP5s;● Prepare a flipchart by using the Business Model Canvas available at this link:http://www.businessmodelgener- ation.com/downloads/business_mod- el_canvas_poster.pdf or on Bridges to ENpower. org/toolkit/business-model-canvas.● Using sticky notes, prepare a presentation of a project/business idea (choose asimple one that people from your group might be familiar with!). Follow the nine areas ofthe canvas. Use at least two types of clients so that your audience can understand howclients can become key partners or provide key resources.
Presentation: 1. Brainstorm with the participants the main components of any project (goals,objectives, problem, target group, activities, methodology, predicted results, budget, etc.)or of any business idea (products, clients, channels of distribution, prices, costs, promotionetc.).2. Present the business model canvas as a tool for having every component of aproject/business idea on one page.

130
3. Apply the Business Model Canvas to the project/business idea you prepared before the workshop as an example. Present how the model works for at least two different clients’ segments. Show how the nine elements are related and explain each component: clients/customer segments, value propositions, customer relationships, channels, revenue streams, key activities, key resources, key partners, and cost structure. 4. Split the participants into groups of five and give each group a flipchart. Ask each group to prepare the flipchart paper with a Business Model Canvas. Also, ask each group to come up with an idea of a project they would like to start in their community, school or neighborhood and to prepare a presentation of the project using the Business Model Canvas. Each group has to make a 5 to 7 minute presentation of their project. 5. You should give feedback on each project. Focus not on the idea of the project, but on how the project was planned using the Business Model Canvas. Follow-up questions: ● How did your project idea develop during the exercise? ● What new ideas or new questions did you come up with about your project when using the Business Model Canvas? ● What can you say about the sustainability of your project based on the business model you developed? Possible variations: To make step 6 easier for the participants or to shorten the exercise, you can prepare one or more short descriptions of different projects and ask them to portray those projects using the Business Model Canvas.

131
10.7 LEADING YOUR ORGANIZATION WITH STYLE!
Preparation: 25 mins Duration: 45 mins Size: 15 Age: 14+ Tags: entrepreneurship, leadership, leadership styles
When to use it? ● When developing a business ideainto a real business plan.● When planning projects that involve different clients and stakeholders.
Materials: ● flipchart paper, markers
How? Preparation: ● Print out the three scenarios that describe three types of leaders (democratic leader,laissez-faire leader, and autocratic leader) from the appendix of this scenario.● Read the Leading Your Organization With Style section, from Part B.
Presentation: 1. Split the participants into three groups and select one person from each group whowill be the leader of the group.2. Provide each leader (but NOT to the groups) with one of the three scenarios fromthe appendix of this scenario.3. While the three leaders read the scenarios, provide each group with flipchart paperand markers. Tell them that they will receive instructions from their respective leaders.4. Now, leave the groups to be led by their leaders for about 15 minutes.5. Each group then presents their decisions and results.
Follow-up questions: ● What did you notice about your leader's behavior? What did you notice about yourfollowers' behavior?● How did you feel as a leader or as a follower during the role play?● How efficient was the meeting?● What were the advantages and disadvantages of each meeting based on the

132
leadership style?
Possible variations: For step 2, you can provide another situation where both leadership and organization are needed in accordance with your audience’s age and cultural background.

133
10.8 IS IT REALLY YOUR CHOICE?
Preparation: 30 mins Duration: 15 mins Size: 10-20 Age: 14+ Tags: behavioural economics, decision making, entrepreneurship, irrational decisions
When to use it: ● When you want to support young people to understand how their decisions areinfluenced by “irrational” contexts.● When you want to teach young people about “Ikea effect” and “decoy effect”.
Materials: ● printed handouts with the two offers (see step 1.) from the appendixes, pens,flipchart paper, markers.
How? Preparation: ● Read the about irrational decisions and “decoy effect”(http://simplicable.com/new/decoy-effect) and “Ikea effect”(https://www.behavioraleconomics.com/mini-encyclopedia-of-be/ikea-effect/).● Print out the two offers you will use in step 1 from the appendixes.● Prepare the flipchart papers with the two offers, for the statistics.● Prepare a flipchart paper with the statistics from the original experiment (see step4.)
Presentation:

134
1. Split the participants in two, and give to each group (to each member!) an offer tosubscribe to The Economist for one year. Use the following or the handouts from theappendixes.
Offers The first offer to be given to the first group says the following:
Subscribe to the best business magazine in the world – The Economist! “The Economist offers authoritative insight and opinion on international news, politics, business, finance, science, technology and the connections between them.” (www.economist.com)
Subscribe for: a) The Economist online version – 59$/yearorb) The Economist printed and online versions – 125$/yearWaiting for your email!
The second offer to be given to the second group says the following:
Subscribe to the best business magazine in the world – The Economist! “The Economist offers authoritative insight and opinion on international news, politics, business, finance, science, technology and the connections between them.” (www.economist.com)
Subscribe for: a) The Economist online version – 59$/yearorb) The Economist printed version – 125$/yearorc) The Economist printed and online versions – 125$/yearWaiting for your email!
2. Do not let participants to talk among themselves, and ask them to choose, quietly,the subscription they would want and then to give you the paper with their choice.3. Once you collect all the “subscriptions”, using two flipchart papers prepared beforewith the choices from the two offers, count the types of the subscriptions chosen by theparticipants.4. Make the statistics for each offer, and then compare these statistics with thestatistics from the original experiment, which are the following:
Statistics 1st offer:

135
a) The Economist online version – 59$/year – 68%b) The Economist printed and online versions – 125$/year – 32%
2nd offer: a) The Economist online version – 59$/year – 16%b) The Economist printed version – 125$/year – 0%c) The Economist printed and online versions – 125$/year – 84%
5. Debrief the results by explaining the participants how we are all under the risk tomake “irrational” decisions, just because of a different context in which the alternativesare presented or are developed. Explain the “decoy effect” (illustrated with this exercise)and “Ikea effect”.
Follow-up questions: ● How do you feel now when you know that your choice can be so easily influencedby such marketing “tricks”?● How would you use the “decoy effect” or “Ikea effect” in your own business /professional career?● What do you think / feel about the ethics in using the knowledge related to“irrational” decisions?
Possible variations: You could illustrate the Ikea effect with a different exercise, instead of this with The Economist subscriptions. For the Ikea effect, you could do the following exercise: 1. Prepare, before the training, one boat paper and ask the participants to put a priceon it (individually, and each should write down what he/she will pay for the boat).2. Give each participant a scheme on how to build a paper boat, and a paper, and askthem to build a boat.3. Ask each participant to put a price on the boat they built.4. Finally ask the participants to compare the price they put on your boat with the onethey put on the boat they built.5. If the Ikea effect worked, their prices should be bigger than the prices they put onyour boat.6. Debrief explaining the “Ikea effect”, insisting on the fact that the boats are thesame (same paper, same construction)… still the prices are different, because of our“irrational” decision on pricing.

136
10.9 BUILDING AN ETHICAL AND RESPONSIBLE BUSINESS
Preparation: 40 mins Duration: 90 mins Size: 5-15 Age: 14+ Tags: entrepreneurship, business ethics
When to use it? ● When learning about entrepreneurs/companies’ responsibilities towardsdifferent stakeholders such as customers, employees, suppliers and the community as awhole.● When learning about the basic ethical principles that a company/entrepreneurshould have.
Materials: ● A4 pieces of paper, pens, flipchart papers, markers
How? Preparation: ● Read the Building an Ethical and Responsible Business section, from part B. Read alsothe Ten Principles of the UN Global Compact from the appendix for this scenario or fromthe following link: https://www.unglobalcompact. org/what-is-gc/mission/principles.● Print out, on separate papers, the profiles of the companies from the appendix forthis scenario.● Print out or write on a flipchart paper the Ten Principles of the UN Global Compactfrom the appendix of this scenario.
Presentation: 1. Ask the participants to stand up. Place sheets of paper on the floor with thecompanies’ profiles you prepared. Tell them to imagine that these companies are allavailable in their community and make them choose a company to work for.2. Read each profile aloud and ask the participants to make a circle around the piece ofpaper with the name of the company that they will work for. Make a tally on a flipchartshowing how many people wanted to work for which companies.3. Discuss with the participants why they would like to work for the company that theychose, but not for the other companies.4. Split the participants into groups of five. Tell them to imagine that they are startingtheir own companies and that they have to decide together on their policies, which should

137
be similar to the ones from the profiles used before. They need to also decide on what is not acceptable in their company with regards to their employees, customers, suppliers and the community in which they work. Additionally, they need to decide what they will do in order to benefit their customers, employees, suppliers and community. Explain to them that these are the decisions that go into developing a code of conduct for their company. 5. Give them 20 to 30 minutes to develop a code of conduct and then ask them topresent it on a flipchart.6. When the groups are done presenting, find commonalities and differences betweenthe codes of conduct. Use this feedback to introduce The Ten Principles UN GlobalCompact for companies.7. Present the ten principles (using the print outs or the flipchart paper you prepared)and note the commonalities and differences between this code of conduct and the onescreated by the participants.
Follow-up questions: ● As an entrepreneur, for whom should you feel responsible while running yourbusiness?● What do you think will be the advantages and the disadvantages of beingresponsible for your community (customers, employees, community as a whole) whilerunning your business?
Possible variations: Instead of The Ten Principles UN Global Compact, you could use the OECD Guidelines for Multinational Enterprises (pp. 19-20) (see the link in the resources section) or another good example of a code of conduct of a company.
138
CHAPTER 11 VOLUNTEERING
11.1 Picturing a Volunteer
11.2 Defining Volunteering
11.3 Who can be a volunteer?
11.4 What Is Out There For Me?
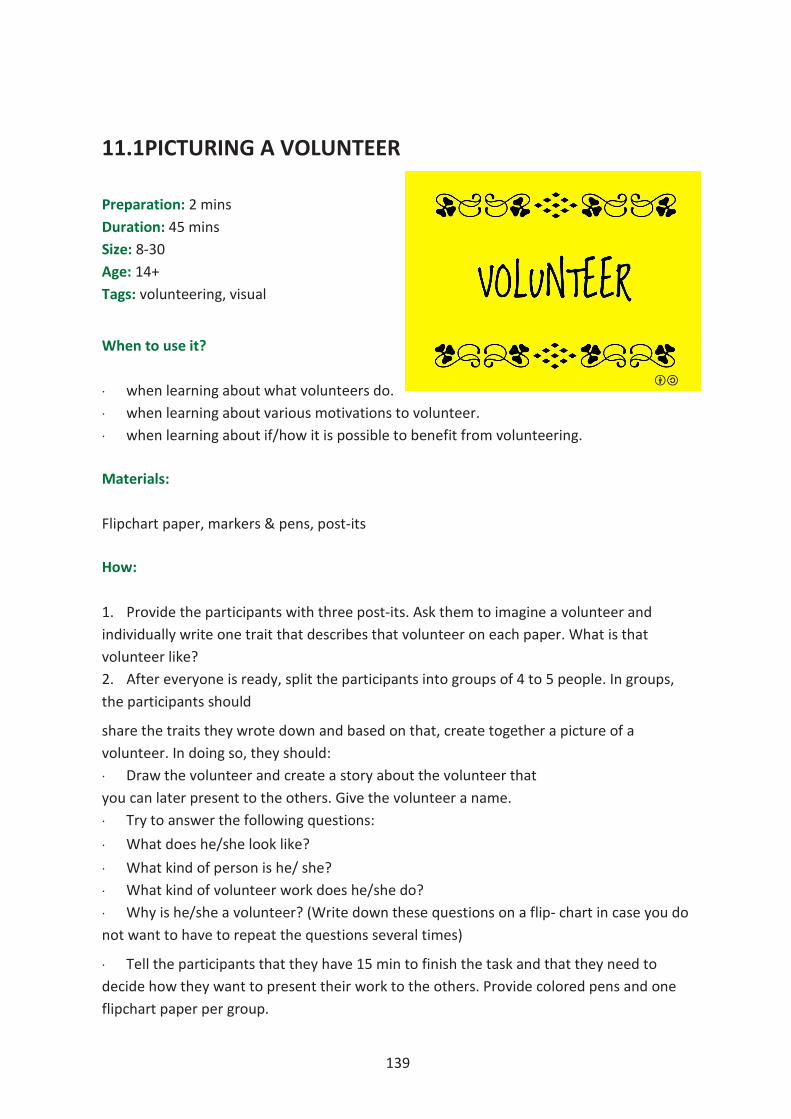
139
11.1PICTURING A VOLUNTEER
Preparation: 2 mins Duration: 45 mins Size: 8-30 Age: 14+ Tags: volunteering, visual
When to use it?
· when learning about what volunteers do.· when learning about various motivations to volunteer.· when learning about if/how it is possible to benefit from volunteering.
Materials:
Flipchart paper, markers & pens, post-its
How:
1. Provide the participants with three post-its. Ask them to imagine a volunteer andindividually write one trait that describes that volunteer on each paper. What is thatvolunteer like?2. After everyone is ready, split the participants into groups of 4 to 5 people. In groups,the participants should
share the traits they wrote down and based on that, create together a picture of a volunteer. In doing so, they should: · Draw the volunteer and create a story about the volunteer thatyou can later present to the others. Give the volunteer a name.· Try to answer the following questions:· What does he/she look like?· What kind of person is he/ she?· What kind of volunteer work does he/she do?· Why is he/she a volunteer? (Write down these questions on a flip- chart in case you donot want to have to repeat the questions several times)
· Tell the participants that they have 15 min to finish the task and that they need todecide how they want to present their work to the others. Provide colored pens and oneflipchart paper per group.

140
3. While the groups are working, prepare a flipchart where you will summarize thefindings of the groups. Divide the paper into 3 sections, one for each of the followingquestions.· How is he/she?· What is he/she doing?· Why is he/she a volunteer?4. Ask each group to present. While they are presenting, write down key words fromeach group that answer the questions above.
5. Make sure to hang up each picture of a volunteer so that everyone can see them.6. Summarize the findings of all of the groups. Ask the participants if they want toadd something. Do all groups picture a volunteer in the same way?7. Pick some of the pictured volunteers. Ask the participants what else mightmotivate the volunteer to volunteer. Talk to the participants about why people volunteerand explain to them that it can be a win- win situation. If you are a volunteer, tell themabout your reasons for volunteering. If not, tell them about somebody you know or haveheard of that is a volunteer and why they do it.

141
11.2 DEFINING VOLUNTEERING
Preparation: 2 mins Duration: 25 mins Size: 8-30 Age: 14+ Tags: volunteering, visual
When to use it?
when defining what volunteering means and what a volunteer does.
Materials:
Flipchart paper, markers & pens, post-its (if you haven't already done exercise 1, show video or print out stories about volunteering).
How:
1. Base this exercise on exercise 1 or provide the participants with stories of variousvolunteers.2. If you have not done exercise 1 with the group before: Analyze with the group thevarious volunteering roles based on the questions stated in exercise 1, point 3.3. Based on the findings, ask the participants to create individually a definition ofvolunteering.
4. Ask the participants to read their definitions aloud and agree upon one definitionof the term. If the group is large, spit the group into two sub- groups. Keep the twodefinitions or try to come up with one definition with the whole group based on the twodifferent definitions.
Follow-up questions:
Ask if everyone agrees with the definition and hang up the written definition.

142
11.3 WHO CAN BE A VOLUNTEER?
Preparation: 10 mins Duration: 45 mins Size: 8-30 Age: 14+ Tags: volunteering, visual
When to use it?
When wanting to work with stereotypes regarding on who is a volunteer. to allow participants to know that everyone can a volunteer.
Materials:
Find and print out pictures of known movie or music stars who are also active as volunteers, You can find examples of famous people and what they do as volunteers under this link https://www.looktothestars.org/celebrity
How:
1. Based on the way the participants see volunteers, e.g. as Looser, Mother Teresashow them pictures of 2 or 3 stars and ask what those persons have in common.2. Show examples of those persons volunteering activities either on printed outpapers that you give out, or by showing through a projector.3. Ask the participants if they still think that volunteers are losers.Ask them also ifeveryone can be a volunteer?
Follow up: You can follow up this exercise by showing various volunteering possibilities, please scenario 11.4.

143
11.4 WHAT IS OUT THERE FOR ME?
Preparation: 2 mins Duration: 25 mins Size: 8-20 Age: 14+ Tags: volunteering, visual
When to use it:
When defining what volunteering means and what a volunteer does.
Materials:
Printed out pictures of volunteering roles (see the appendix for this scenario) Printed out volunteering test (see the appendix for this scenario) Pens
How: 1. Lay out pictures on the floor that represent volunteers in their various roles. Ask theparticipants to take one picture each.(If the group is large, you can also ask the participants to discuss and present a picture inpairs. You can find example pictures in the appendix sectionof this toolkit or you can search the
Internet on your own for pictures rep- resenting different volunteering roles) 2. The participants sit or stand in a circle and present the volunteering role on thepicture by answering the following questions:· What is the volunteer doing?· Who are the beneficiaries?· Who organized the volunteering activity? Was it organized through an organization orindividually?· How long or often will the person volunteer?Write down the questions on a flip- chart if you want to avoid repeating the questionsseveral times.3. Add information when needed about each volunteering activity presented. Makeuse of the information provided in the theory section on volunteering. See fact box.
4. After all roles have been discussed, ask the participants if they would like to engage

144
in a volunteering activity, what they would like to do and why. If the group is not too large, give each participant a chance to talk. 5. Tell the participants that you have a self-assessment quiz to help them discoverwhat kinds of volunteering opportunities they might enjoy. You can find the test in theappendix section of this toolkit.
Follow-up questions:
Ask the participants if they agree with the test results. Did they find out something surprising? Is the result similar to the idea they had earlier?

145
CHAPTER 12 CAREER COUNSELING
12.1 Who am I? What should I dream about?
12.2 I Love To - I’m Good At - It Pays Well To
12.3 Discovering Your Interests
12.4 What Is Success?
12.5 Quiz On The Labor Market
12.6 Preparing Your CV and Letter of Motivation
12.7 Get Ready For The Job Interview!

146
12.1 WHO AM I? WHAT SHOULD I DREAM ABOUT?
Preparation: 30 mins Duration: >50 mins Size: 10-20 Age: 14+ Tags: dream job, job hunting, self inventory, life roles
When to use it? ● When you want to support young people to reflect on themselves, on what makesthem happy/excited.● When you want to support young people to identify careers/jobs they would like totake in their life.
Materials: ● Big sticky notes or A5/A5 colored papers, pens, markers.
How? Preparation: ● Read about Richard Bolles and his career guide What Color is Your Parachute?, toget inspired and learn about his powerful tools:https://www.nytimes.com/2017/04/01/business/richard-bolles-dead-what-color-is-your-parachute.html
Presentation: 1. Introduce the exercise by presenting the participants the view of Richard Bolles on“job-hunting”, the author of the top-seller, for the past decades, career guide What Coloris Your Parachute?: “Most job-hunters who fail to find their dream job fail not because theylack information about the job market, but because they lack information aboutthemselves”. The idea is to convince the participants that most of the time it is not about

147
the jobs that are out there for them, but about learning more who they are, what they can do, what is their added value and what they would like for themselves in this life. 2. Tell the participants that you introduce them to a powerful and fast tool developed by Richard Bolles, called “Who am I?”. Ask each participant to take 10 big sticky notes or 10 blank sheets of paper. At the top of each paper they have to write down the question: “Who am I?” 3. Give them 5-10 minutes to write the answers to that question for each of the 10 sheets of paper. Ask them to think about roles they have in their lives, from personal to professional. For instance: student, son/daughter, speaker, writer, engineer, etc. 4. Afterwards, ask the participants to write under each of the ten roles 1) why they chose that role/why is important to them and 2) what excites them / makes them happy / brings them joy about that role. For instance, for “speaker”, one person could enjoy the attention, recognition, preparation of powerful messages, networking; while, for “writer”, one person could enjoy the self-expression, the creativity involved, the recognition received, etc. Give them 10-15 minutes for this step. 5. Ask the participants to prioritize the roles, thus deciding which roles are more important to them. The most important roles should stay on top, once the less important roles will go at the bottom of the stack of sheets/sticky notes. Then, ask them to go over the ten roles and the things they appreciate in those roles, and to find the common denominator in the ten responses. For instance, using the examples above with the “writer” and “speaker”, the common denominator would be the “recognition”. The participants should write down the common denominators on a separate sheet. 6. Ask participants to share their results, the “aha” moments they had in the exercise. Reflect with the participants on the results they obtained, and explain to them that these common denominators are the things they should start from when searching for a dream job or career, because these make them to feel excitement, joy, satisfaction, etc. Follow-up questions: ● What kind of jobs do you think you could search for yourselves now that you know what makes you feel happy/excited? ● How would you promote yourself, how would you build your personal brand (in your resumes or social media accounts) now that you know your most important professional roles and professional expectations? Possible variations: Step 5. can also be done in pairs, so participants could support each other in the reflection part, in identifying the denominators.

148
12.2 I LOVE TO - I’M GOOD AT - IT PAYS WELL TO
Preparation: 5 mins Duration: 20 mins Size: 5-30 Age: 15-19 Tags: self-assessment, future, career planning
When to use it? ● To realize the main factors behind professional success and interrelations betweenthem.● To warm-up at the beginning of a workshop on career guidance.
Materials: ● Computer, projector, flipchart paper, markers, post-its, pencils
How? This exercise is to be practiced individually. Here are the instructions: ● Complete the sentences:
I love [to do]...................................
I am good at………………………………….
It pays well to………………………………..
● Write down each response on the separate post-it● Do not share your answers with the group● Put anonymous post-its on the board. You have 3 MINUTES – let’s get started!
Please present the below infographic to participants. The conclusion of this exercise is: “the success is when you do what you love, what you’re good at and what pays well”.

149
Source: http://eskimon.wordpress.com
Follow-up questions: ● Think about people you know. Can you identify the groups mentioned above? Possible variations: As a warm-up exercise, provide a list of examples of future professions and ask the participants to choose one that is conducive to their personality traits. You can also use the exercise “What Is Success?” from scenario 12.4. FACT BOX: If you do what you love and what you’re good at, but you’re not paid well, you will be happy but poor and if you are poor it’s likely that you will become unhappy in the future, unless you have somebody like your spouse or parents who provide you with financial support. If you do what you’re good at and what pays well, but you don’t like your job, you will have money, but you will probably be unhappy. It's rare to find somebody that loves their job and is paid well, but isn't good at it. You can achieve long term success and satisfaction in your professional life when you are able to combine all of these factors: when you do what you love, what you’re good at and it pays well.

150
12.3 DISCOVERING YOUR INTERESTS
Preparation: 5 mins Duration: 60 mins Size: 5-25 Age: 17-19 Tags: professional interests, personality types, career planning
When to use it? ● To find out more about professional interests.● To learn about personality types.
Materials: ● Pens, markers, flipchart, A4 sheets of paper
How? 1. Ask the participants to draw what they like to do on a piece of paper. When they'refinished, ask them to present themselves by saying “My name is ...and I like to…”.2. After the presentations are done, initiate the discussion on interests by asking theparticipants about how they discovered what they like to do. For instance, they might say“I like to… because I am good at it” or “I like to… because I have been doing it since I was achild” or “I like to… because it is easy” or “I like to… because I feel happy when I do it”,etc.).3. Based on their answers, explain what interests are (what you like to do) and whythese are important in choosing a career. Explain to them that interests come from varioussources: heredity, learning experiences, preferences, specific abilities, previous successes,etc. These can be based on factors such as how much time one spends doing a certainactivity, how often one does that activity, how involved one is in an activity, how often onespeaks about a specific activity, how happy that activity makes them, how long one hasbeen doing that activity, etc.4. Tell them about personality tests. An example can be the Holland test (see info boxabout RIASEC). The participants can find out more about the test at home on the following

151
website: http://personality-testing.info/tests/RIASEC/. The test license allows you to use it only for educational purposes, and not for giving psychological advice. 5. Most people have one of the six personality types. 6. Lastly, explain the differences between traits (what you're like), values (what is important to you), skills (what you are able to do) and interests (what you like to do). This could help young participants redefine their resumes. Follow-up questions: ● What do you think about the interests you presented at the beginning of the meeting? ● What type of job do you think would suit you? Possible variations: For step 1, you could ask the participant to talk about the job they want to have in the future, instead of their interest or hobbies. Then based on the jobs they mention, you can start discussing interests FACT BOX: About RIASEC The RIASEC test was developed by John Holland in the ‘60s, and according to Holland, the majority of the people have one of the six personality types: Realistic, Investigative, Artistic, Social, Enterprising, and Conventional. These types develop on two axes, respectively: objects-people, and data-ideas. See the graphic below. Realistic - people who are realistic like to work with tools, machines or plants and animals. They have manual and technical abilities and are usually stable, pragmatic, honest, persistent, and conformist. The most common jobs for the realistic type of personality are: engineer, ITist, mechanic, driver, etc. Investigative - this type of personality describes an inclination for research, investigation in any form, and in various sectors of activity (biology, physics, social, cultural). The investigative persons possess mathematical and scientific skills, and they prefer to work by themselves in solving problems. They are usually analytical, cautious, critic, curious, independent, introverted, rational, and accurate. The most common jobs are: physician, chemist, mathematician, biologist, etc. Artistic - people with this type of personality like activities that are less structured, which call for more creative solutions and which require more use of the imagination. They are usually more expressive, and more sensitive, idealistic, creative, disorganized, complex, independent, non-conformist. The most common jobs for this type of personality are those from art sectors - fine arts, music, writing, etc.

152
Social - the people who possess this type of personality need more interpersonal interactions. They like to teach people and to help them solve their problems. They are cooperative, friendly, generous, problem solvers, responsible, sociable. The most common jobs for these kinds of people are: teacher, social worker, human resources manager, adviser, etc. Enterprising - these types of people prefer to work in teams, but only when they can lead the team. They avoid scientific or analytical work and prefer managerial roles. They are usually ambitious, dominant, energetic, impulsive, optimistic, talkative and sociable. The most common jobs for this type of personality are: sales manager, manager, politician, entrepreneur, etc. Conventional - people with this type of personality are well organized. They like activities where they can work with data. These people are usually accurate, conformist, organized, persistent, efficient, scrupulous, and conservative. The most common jobs that these people take are: accountant, clerk, secretary, manager assistant, librarian, etc. Most people will possess a dominant characteristic from the six types, however, the first three types (with the higher scores) will define a person's personality more precisely. Defining one's personality can help them to make more rational career choices.

153
12.4 WHAT IS SUCCESS?
Preparation: 10 mins Duration: 20 mins Size: 5-30 Age: 15-19 Tags: personality tests, labor market, career planning, future professions, role models When to use it? ● To realize the various aspects of success. ● To present dependency between successes, personality traits and professions in which these personality traits are important. Materials: ● Computer, projector, Internet access, flipchart paper, markers, post-its, pencils How? 1. What can be considered a success for somebody your age? [Group exercise] Try to name as many examples as possible of what could be considered a success for a middle school/high school student. Hint: Remember that even small successes count; try to think of different kinds of success.2. What personal achievements are you most proud of? [Individual exercise] Write down at least 3 personal achievements. Keep it to yourself. Don't show anyone. Hint: Remember that these don’t have to be any spectacular achievements. It could be something small, that you’re proud of. 3. Personality traits that contributed to your achievements [Individual exercise] Mark your personality traits that contributed to your achievements.

154
Personality traits to be considered: Honest Responsible Adaptable Compassionate Patient Courageous Loyal Adventurous Affable Conscientious Cultured Dependable Discreet
Fair Fearless Observant Impartial Independent Optimistic Intelligent Keen Gregarious Persistent Capable Charming Precise
Confident Dutiful Encouraging Reliable Exuberant Helpful Humble Suave Imaginative Meticulous Obedient Trusting Valiant
4. Professions that are conducive to your personality traits that you just named[Individual exercise] Please look at the list of deficit professions and future professions andtry to select 10 professions in which the personality traits you marked are important. Theseare professions worth considering.
Possible variations: If you speak Polish you can skip step 3 and 4 and go to Your Potential (Twój Potencjał) online tool to analyze your achievements: http://praca-enter.pl/potencjal (available only in Polish).
FACT BOX: There is a dependency between successes, personality traits and professions optimal for each person. This exercise is designed to identify strengths in a more neutral way than people usually tend to think about them because the analysis is based on evidence and real achievements. On the other hand, it helps to realize that certain personality traits are important in certain professions, broadening the perspective in planning a professional future.

155
12.5 QUIZ ON THE LABOR MARKET
Preparation: 120 min Duration: 30 mins Size: 15-25 Age: 15-19 Tags: imagination, future, career planning When to use it? ● To find out more about your strengths and how they are related to the types of professions optimal for you. ● To realize the various aspects of the success. ● To become familiar with the current situation and trends on the labour market, including future professions. Materials: ● projector, computer How? Preparation: ● Look at the sample quiz in the appendix for this scenario. ● Modify the questions using relevant information about the labor market in your country. ● Copy questions and paste them into the presentation using your preferred layout. ● Prepare diplomas or small prizes for the winners in order to boost the competition. Presentation: 1. Ask participants to form groups of 3-5 people. 2. Set a time limit for answering the questions (1 minute is suggested).

156
3. Present the quiz on the projector.4. Read the questions aloud and ask them to discuss the answer with their group.5. Write each group's answer on the board or flipchart.6. You can comment on the answers or ask participants to comment on them.7. When you've finished the quiz, sum up the results and announce the winners.
Follow-up questions: ● What are some sources on the current situation and trends in the labor market?
Possible variations: Update the sample quiz before the exercise. Make sure that it applies to the context of your labor market.
FACT BOX: The knowledge on the current situation and trends in the labor market can be provided in the form of quiz. Participants of the workshop are competing in groups of 3-5 persons trying to guess the correct answer. This kind of gamification technique makes providing the knowledge more attractive and easier to remember by participants. Sample questions based mainly on the situation and trends on the Polish labor market are presented in the appendix. You should modify the questions and answers according to the current situation and trends on the labor market in your country. The correct answers are in bold.

157
12.6 PREPARING YOUR CV AND LETTER OF MOTIVATION
Preparation: 20 mins Duration: 90 mins Size: 5-25 Age: 17-19 Tags: CV, letter of intent, career planning, personal SWOT, personal marketing
When to use it? ● To learn about how to prepare a CV and a letter of motivation.● To learn about personal strengths, weaknesses, and about the opportunities andthreats for an ideal job.
Materials: ● A4 sheets of paper, flipchart paper, pens, markers, printed CV templates - one foreach participant
How? Preparation: ● Download the Europass CV format in your language here:https://europass.cedefop.europa.eu/ en/documents/curriculum-vitae/templates-in- structions.● Read about the letter of motivation format from the FACT BOX.● Print out CV templates for all participants.
Presentation: 1. Give each participant an A4 sheet of paper and a pen and ask them to write theirideal job position as the title of the page.2. Ask the participants to then draw a cross, diving the paper into four sections. Do thesame on the flipchart:This is a personal SWOT analysis. SWOT is an acronym for Strengths, Weaknesses,Opportunities, Threats.
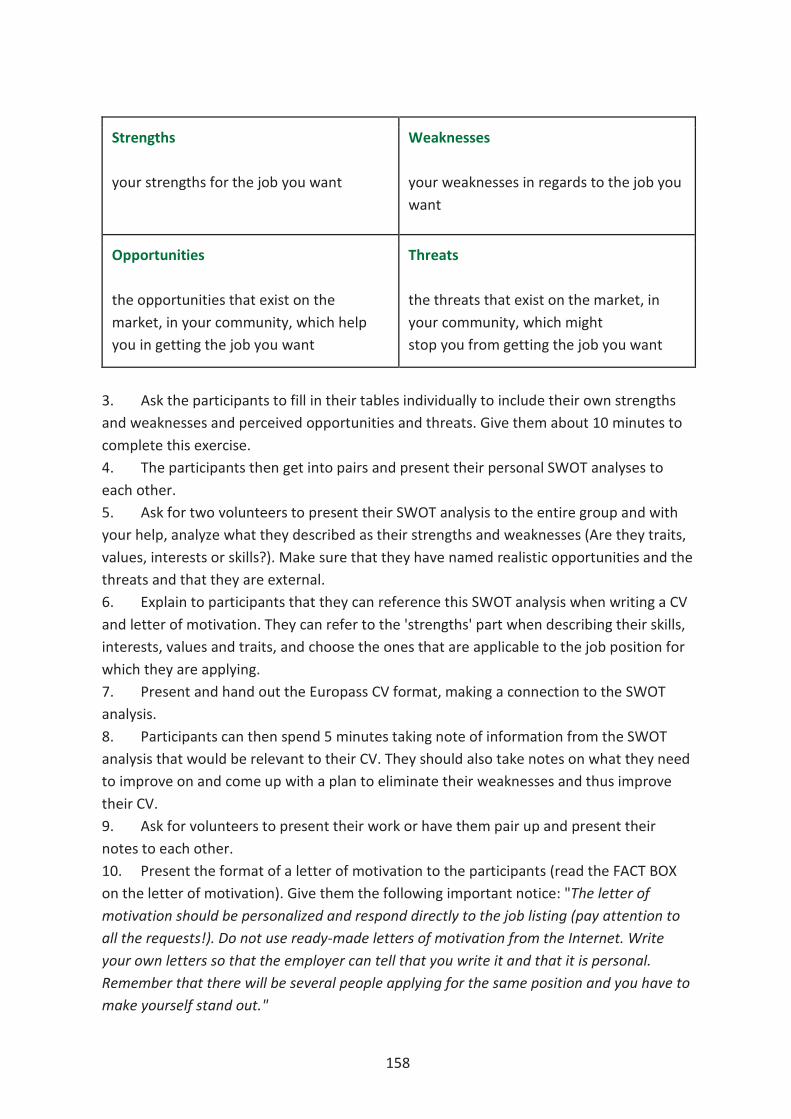
158
Strengths your strengths for the job you want
Weaknesses your weaknesses in regards to the job you want
Opportunities the opportunities that exist on the market, in your community, which help you in getting the job you want
Threats the threats that exist on the market, in your community, which might stop you from getting the job you want
3. Ask the participants to fill in their tables individually to include their own strengths and weaknesses and perceived opportunities and threats. Give them about 10 minutes to complete this exercise. 4. The participants then get into pairs and present their personal SWOT analyses to each other. 5. Ask for two volunteers to present their SWOT analysis to the entire group and with your help, analyze what they described as their strengths and weaknesses (Are they traits, values, interests or skills?). Make sure that they have named realistic opportunities and the threats and that they are external. 6. Explain to participants that they can reference this SWOT analysis when writing a CV and letter of motivation. They can refer to the 'strengths' part when describing their skills, interests, values and traits, and choose the ones that are applicable to the job position for which they are applying. 7. Present and hand out the Europass CV format, making a connection to the SWOT analysis. 8. Participants can then spend 5 minutes taking note of information from the SWOT analysis that would be relevant to their CV. They should also take notes on what they need to improve on and come up with a plan to eliminate their weaknesses and thus improve their CV. 9. Ask for volunteers to present their work or have them pair up and present their notes to each other. 10. Present the format of a letter of motivation to the participants (read the FACT BOX on the letter of motivation). Give them the following important notice: "The letter of motivation should be personalized and respond directly to the job listing (pay attention to all the requests!). Do not use ready-made letters of motivation from the Internet. Write your own letters so that the employer can tell that you write it and that it is personal. Remember that there will be several people applying for the same position and you have to make yourself stand out."

159
11. Put the participants in groups based on their ideal job (the one that they identified at the beginning of the workshop). Try to find the same jobs, similar jobs, or ones from the same field. Then, ask them to write a letter of motivation and to present it in their small groups. 12. Conclude by asking each participant to set a goal for improving their CV that they can achieve within the next six months. Their goal should aim at reducing their threats and weakness- es that they identified in their SWOT analysis, or at finding new opportunities. The participants should share their goal with the entire groups and write it down in a letter to themselves. Follow-up questions: ● What new things did you discover about yourself or the environment in which you live by creating the SWOT analysis? ● What will you do in the next six months in order to make sure that you reach your goal? ● Where and when you could use your CV? Possible variations: If the activity is taking to much time and the participants are getting restless you can split it up into two parts after step 6. Do an energizer and then come back to step 7. FACT BOX Letter of motivation - template Date, locality Your contact details Company contact details Dear Mrs…… / Dear Mr……., Introduction phrase, where you express your interest for a specific job / internship in the company, and where or how you found out about the job. Two or three phrases about your relevant competencies, skills, abilities for the job / internship you apply for, and mention how you acquired those skills. Two or three phrases about your motivation, and why the job / internship and the company suit you. A polite request for a response, and showing your availability for a job interview. Mention the CV as an annex to the letter / email you send. Sincerely yours, Name / signature

160
12.7 GET READY FOR THE JOB INTERVIEW!
Preparation: 15 mins Duration: 60 mins Size: 5-25 Age: 17-19 Tags: job interview, career planning
When to use it? ● To learn how to prepare for a job interview.● To learn about what employers expect from candidates in a job interview.
Materials: ● A4 sheets of paper, pens, chairs, a table to set up an “office” for the interview,printed job announcements for all the participants.
How? Preparation: ● Print out a couple of job listings that you find on a job search platform.
Presentation: 1. Select four participants or ask for four volunteers. Each one will play a different role.One will be the director of a company, another will the human resources manager, anothersupervisor and another candidate for the job.2. Give the participants copies of one of the job listings you printed out.3. Ask participants playing the roles, while sitting separately from the group, to preparea set of questions to ask the candidate for the job position based on the job listing yougave them. Explain to them the role of each position they are acting out.4. Ask the participant playing the role of the candidate to consider what questionsmight be asked in the interview and prepare some answers.5. While the four of them are preparing their questions/answers, prepare the room,

161
arranging some chairs and a table to simulate the environment of an office. Have the rest of the group help you. 6. Ask the other participants to pay attention to the role play and take notes.7. Everybody then reunites in the “office” and the interview begins.8. Do not interrupt the role playing and do not let other participants interrupt it either.Let them stop when they feel like they are done.9. At the end of the interview, discuss with the participants what went well and thatthey could have done differently. Explain to the participants that the questions asked in ajob interview are usually focused on the knowledge, experience and motivation of thecandidate; make sure to correct the discriminatory questions, or the closed-endedquestions, or one s that are too personal. You should also discuss the candidate's answers,attitude and nonverbal communication as well as the questions (if any) that the candidateasked.10. Ask the audience what they would have done differently if they were the company’srepresentatives or the candidate.11. End the session by presenting basic guidelines to preparing for a job interview fromthe perspective of the candidate. Guidelines can include researching the organization,learning about the company and the job, revising your CV, imagining what questions youmight get asked and how you would respond to them, experiences and motivation,preparing your own questions for the company’s representatives, etc.).
Follow-up questions: ● What are the most important things you have learned about job interviews fromthe role play?● What should you improve on before your next job interview?
Possible variations: Before step 11 you can add another role play with a different group of volunteers. Choose a different job position from a different job listing.

162
ADDITIONAL RESOURCES
PART D

163
Additional Resources Training Methodology
Various scenarios: https://www.trainingforchange.org/tools http://www.businessballs.com/index.htm
Media & Communication
Online Visual Storytelling Tools Piktochart (https://piktochart.com/) Piktochart is an infographic and presentation tool enabling you to turn boring data into engaging infographics with just a few clicks. It has both free and premium versions.
Visme (https://www.visme.co/) http://blog.visme.co/visual-storytelling-classroom/ Visme helps create infographics and images that will help you to make your content more enegaging for your audience. Also, it has a very dynamic blog providing very useful tips about visual design and storytelling.
Canva Infographic Maker (https://www.canva.com/)
Canva’s a powerful and easy-to-use online tool that’s suitable for all manner of design tasks, from brochures to presentations and much more. Besides, it has a vast library of images, icons, fonts and features to choose from.
Vizualize (http://vizualize.me/)
Vizualize.me is the #1 infographics maker for resumes. It is simple and very easy to use. It imports data from your LinkedIn profile and uses that data to build a visual treat.
Entrepreneurship
Entrepreneurship competencies, skills, and abilities
Start Your Own Business, Sixth Edition: The Only Startup Book You'll Ever Need, written by Inc The Staff of Entrepreneur Media. http://www.amazon.com/Start-Your-Own-Business-Sixth-ebook/dp/B00R3L71WE/ref=t- mm_kin_swatch_0?_encoding=UTF8&qid=&sr= Louis C.K. stand-up on self-awareness: https://www.youtube.com/watch?v=M0YYJv7Zu9c

164
“Every day, we make decisions that have good or bad consequences for our future selves. (Can I skip flossing just this one time?) Daniel Goldstein makes tools that help us imagine ourselves over time, so that we make smart choices for Future Us.” https://www.ted.com/talks/daniel_goldstein_the_battle_between_your_present_and_fu- ture_self?language=en Checklist: Questions That Can Help Teens Build Self-Awareness https://www.understood.org/en/friends-feelings/empowering-your-child/self-awareness/checklist-questions-that-can-help-teens-build-self-awareness Short version of the test on alternative uses of the paperclip and other 4 creative tests http://99u.com/articles/7160/test-your-creativity-5-classic-creative-challenges 100 Uses ideas for Paper clips https://leoniehallatinnovationiq.wordpress.com/2012/11/21/100-uses-for-paperclips/ The Unlock Social Enterprise game, the module 1 dedicated on critical thinking: http://iseeyou-network.eu/resources-2/business-simulation-game/ How to Improve Your Critical Thinking Skills and Make Better Business Decisions http://www.entrepreneur.com/article/226484 Article on Making Rational Decisions: https://new.edu/resources/making-rational-decisions Module 1 and 3 of the Unlock Social Enterprise game, on critical thinking and ability to prioritize. The games are available at this link: http://iseeyou-network.eu/resources-2/business-simulation-game/ Dan Ariely: Are we in control of our own decisions?, TED Talks https://www.ted.com/talks/dan_ariely_asks_are_we_in_control_of_our_own_deci- sions?language=en Science of persuasion (R. Cialdini, S. Martin) - short summary, video made by Influence at work https://www.youtube.com/watch?v=cFdCzN7RYbw
Entrepreneurship as a career path
Read how to attract business investors, when you want to become a business owner, here: http://www.iseeyou-network.eu/files/8514/5579/7112/Business_Angel_Attraction_Plan. pdf Robert Kiyosaki, Rich Dad’s Cashflow Quadrant. Guide to Financial Freedom (2012). Trump and Kiyosaki on Building Business Wealth http://www.entrepreneur.com/article/169174
Running a business
Business Model Canvas http://www.businessmodelgeneration.com/ http://nonprofitcanvaskit.com/ How to attract business angels: http://www.iseeyou-network.eu/files/8614/5579/7162/ Personalised_Business_Angels_Concept_and_Strategy_Final.pdf How to sell a product: http://www.entrepreneur.com/article/227134 Know your target

165
market: http://www.entrepreneur.com/article/202334 12 Steps for How to Make a Budget – Personal Budgeting Tips for First Timers http://www.moneycrashers.com/how-to-make-a-budget/ 10 Best Budgeting and Personal Finance Apps http://www.tomsguide.com/us/pictures-story/548-best-budget-expense-apps.html How to do a break-even analysis http://entrepreneurs.about.com/od/businessplan/a/breakeven.htm The 7 habits of highly effective people, by Stephen Covey: https://www.stephencovey.com/7habits/7habits-habit1.php 7 Reasons '7 Habits of Highly Effective People' Lives on 25 Years Later http://www.entrepreneur.com/article/236544
Leadership
Leadership Styles and Types: Authoritarian, Laissez-Faire & Democratic http://study.com/academy/lesson/leadership-styles-and-types-authoritarian-lais- sez-faire-democratic.html Situational Leadership: https://situational.com/the-cls-difference/situational-leader- ship-what-we-do/ Leadership styles:
https://www.mindtools.com/pages/article/newLDR_84.htm
Business ethics and CSR
The Ten Principles UN Global Compact: https://www.unglobalcompact.org/what-is-gc/ mission/principles; The OECD Guidelines for Multinational Enterprises: http://www.oecd.org/daf/inv/ mne/48004323.pdf How to build an ethical business culture http://www.entrepreneur.com/article/224453 The 4 Pillars of Ethical Enterprises http://www.entrepreneur.com/article/240035 News and stories on Sustainable Development Goals https://www.theguardian.com/global-development/sustainable-development-goals
Social entrepreneurship
Changing the world: a young’s person guide to social entrepreneurship, by UnLtd for Social Entrepreneurs https://unltd.org.uk/wp-content/uploads/2014/04/Beginners-Guide-First-Edition.pdf 14 TED talks on how the power of social entrepreneurship is helping solve the world’s biggest problems http://social.yourstory.com/2014/03/14-ted-talks-power-social-entrepreneurship-hel- ping-solve-worlds-biggest-problems-part-2/

166
Volunteering
Find Volunteering opportunities: https://europa.eu/youth/volunteering/project_en http://www.workingabroad.com/database/
Personal Volunteer stories:
http://www.movit.si/fileadmin/movit/0ZAVOD/Publikacije/Raziskave/Success_stories_ How_EVS_has_changed_my_life_2014.pdf https://www.volunteermatch.org/volunteers/stories/index.jsp http://www.workingabroad.com/volunteering-abroad/volunteer-stories
Career Counseling
Online Self-Assessment Tools
http://icould.com/buzz/ - Buzz Quiz "What animal are you?". It’s a great, quick (5 minutes) personal test that analyses your personality. It’s provides a lot of fun (names of the categories are rabbit, falcon etc.) and empowering messages (what famous people have the same type of personality as you) as well as a feedback on your strengths and weaknesses and the professions popular amongst people with your personality type. http://www.skillage.eu - Skillage is a friendly tool for youth for quick self-assessment of ICT skills typically required in job situations grouped in five categories: employability, productivity, communications, social media, content management and safety. It provides a report in PDF format that can be shared with friends on Facebook, Twitter and LinkedIn. The tool is available in most of the European languages. The owner of this tool, All Digital (formerly Telecentre-Europe) is open for new language versions. Do not hesitate to contact them If you’re able to volunteer and provide a translation for languages that are not supported yet (like Norwegian). http://personality-testing.info/tests/RIASEC/ - RIASEC test was developed by John Holland in the ‘60s. According to Holland, the most people have one of six personality types: Realistic, Investigative, Artistic, Social, Enterprising, and Conventional. Accessible online only for educational purposes. Dick Bolles, The Importance of Self-Inventory in Finding Your Ideal Job https://www.youtube.com/watch?v=RtpCubh3JB0 The Flower Test explained: Stephen Williams - What Color Is Your Parachute - Flower Exercise https://www.linkedin.com/pulse/what-color-your-parachute-flower-exercise-stephen-williams-mba

167
Career Counseling Online
http://icould.com/ - icould is a British service providing career inspiration and information for young people. It suggests different work options and offers different ways to think about careers through free access to over 1000 personal video stories and detailed job information as well as practical tips, insight and advice.
Descriptions of Professions, Deficit and Future Professions
http://icould.com/watch-career-videos/ - over 1000 personal video stories and detailed job information as well as practical tips, insight and advice (British labor market) BBC News Business, “Global migrants: Which are the most wanted professions?”, 26 March 2013, http://www.bbc.com/news/business-21938085 UK Commission for Employment and Skills, Careers of the future, December 2015, https://www.gov.uk/government/uploads/system/uploads/attachment_data/ file/452078/15.01.05._UKCES_Career_Brochure_V13_reduced.pdf
Professional Networks
https://www.linkedin.com/ - LinkedIn is the largest worldwide business-oriented social network of professionals http://yourock.jobs - an online source designed for youth to help them build a dynamic job profile and benefit from networking
Online and Offline Educational Games
https://vimeo.com/36491415 - video presenting the MeTycoon game. This games presents the idea that work-life balance is based on two main performance indicators: money and happiness. It also presents real-life situations like how taking care of your dog is developing your professional skills (social skills in this case). Moreover, it gives a wide overview of the labor market, available professions, requirements and typical salaries as well as interviews with representatives of these professions, supported by gamification. https://www.facebook.com/MaxCareer/ - Max-Career is a Facebook game on career coun- seling that allows one to easily share their achievements with friends on Facebook http://ocias.com/loved.php - Loved by Alexander Ocias, a game which might be good for overcoming the barrier between following the instructions and being decisive http://www.capitalismlab.com/ - Capitalism, a game simulating a real business https://www.mobygames.com/game-group/railroad-tycoon-series - Railroad Tycoon, a series of business simulation games with powerful economic features
Current Situation, Statistics and Trends In The Labor Market https://ec.europa.eu/eurostat/web/labour-market/overview - EUROSTAT, Labor Market, the official source of knowledge on labor market statistics in European countries http://www.manpowergroup.com/wps/wcm/connect/manpowergroup-en/home/
168
thought-leadership/research-insights/talent-shortage-2015 - Manpower is a global HR company providing an annual report “Talent Shortage Survey” informing about the current situation of and trends in the labor markets of various countries
Digital Skills for Employability http://ipts.jrc.ec.europa.eu/publications/pub.cfm?id=6359 - DIGCOMP: A Framework for Developing and Understanding Digital Competence in Europe, map of digital competence that are required in labor markets https://code.org/ - online source for learning how to code http://apki.org/ - online courses for learning various programming languages (Polish only)
Other Inspiration Sources For Entrepreneurship
https://eusic.challenges.org/ , https://ec.europa.eu/growth/industry/innovation/policy/social/competition_en - European Social Innovation Competition
http://www.ideaswatch.com/browse - IdeasWatch, startup inspirations from the crowd http://www.forbes.com/startups/#62ef9f8d3f25 - Forbes, Entrepreneurs / Startups, stories about startups