Employee Directory with Office 365 or SharePoint - HubSpot
69
Office Phone Reports To Mobile Phone Postal Code Skype ID State Country Company Location Office Location Home Phone Number City Department Manager Organization The Definitive Guide to building your own Employee Directory with Office 365 or SharePoint V1.13 Feb 2018
-
Upload
khangminh22 -
Category
Documents
-
view
0 -
download
0
Transcript of Employee Directory with Office 365 or SharePoint - HubSpot

O�ce Phone
Reports To
Mobile Phone
Postal Code
Skype IDState
Country
Company
Location
O�ce Location
Home Phone
Number
City
Department
Manager
Organization
The Definitive Guide to building your own
Employee Directory with Office 365 or SharePoint
V1.13 Feb 2018

1
Introduction . . . . . . . . . . . . . . . . . . . . . . . . . . . . . . . . . . . . . . . . . . . . . . 4
Why Do We Need An Employee Directory? . . . . . . . . . . . . . . . 6
Finding by name . . . . . . . . . . . . . . . . . . . . . . . . . . . . . . . . . . . . . . . . . . 7
Locating someone in a department . . . . . . . . . . . . . . . . . . . . . . . 7
Locating someone with a similar role . . . . . . . . . . . . . . . . . . . . . 7
Locating the office location of an employee . . . . . . . . . . . . . . 7
Locating someone by navigating the org chart . . . . . . . . . . . 8
Who is the contact for < insert responsibility > . . . . . . . . . . 8
Skills searches . . . . . . . . . . . . . . . . . . . . . . . . . . . . . . . . . . . . . . . . . . . . 8
Out Of The Box People Search Experience . . . . . . . . . . . . . . . 9
Outlook address book . . . . . . . . . . . . . . . . . . . . . . . . . . . . . . . . . . .10
Outlook People view in Windows desktop . . . . . . . . . . . . . . 11
Outlook People view in browser . . . . . . . . . . . . . . . . . . . . . . . .12
Skype for Business . . . . . . . . . . . . . . . . . . . . . . . . . . . . . . . . . . . . . . .13
Delve . . . . . . . . . . . . . . . . . . . . . . . . . . . . . . . . . . . . . . . . . . . . . . . . . . . .16
Microsoft Teams . . . . . . . . . . . . . . . . . . . . . . . . . . . . . . . . . . . . . . . . .17
SharePoint Enterprise Search Center . . . . . . . . . . . . . . . . . . .18
Architecture Of SharePoint People Search . . . . . . . . . . . . . . 19
Synchronization pipeline . . . . . . . . . . . . . . . . . . . . . . . . . . . . . . . . .20
User defined profile properties . . . . . . . . . . . . . . . . . . . . . . . . . .22
Crawling . . . . . . . . . . . . . . . . . . . . . . . . . . . . . . . . . . . . . . . . . . . . . . . . .24
Enhancing SharePoint People Search . . . . . . . . . . . . . . . . . . . . 26
Employee Directory search page set up . . . . . . . . . . . . . . . . .28
Default results setup . . . . . . . . . . . . . . . . . . . . . . . . . . . . . . . . . . . .32
Upload Display template customizations . . . . . . . . . . . . . . . .35
Change to custom display template . . . . . . . . . . . . . . . . . . . . . 41
Enhancing SharePoint People Search . . . . . . . . . . . . . . . . . . . . 42
Adding refiners to people search . . . . . . . . . . . . . . . . . . . . . . . .43
Excluding service accounts . . . . . . . . . . . . . . . . . . . . . . . . . . . . . .47
Displaying additional attributes in search results . . . . . . .48
Make your People search "fuzzy" . . . . . . . . . . . . . . . . . . . . . . .52
Hit-highlighted properties (JSON) section . . . . . . . . . . . . . .55
Additional Display Templates . . . . . . . . . . . . . . . . . . . . . . . . . . . .56
Advanced search filtering . . . . . . . . . . . . . . . . . . . . . . . . . . . . . . . .57
Developing A Future Proof Solution . . . . . . . . . . . . . . . . . . . . . 62
References . . . . . . . . . . . . . . . . . . . . . . . . . . . . . . . . . . . . . . . . . . . . . . .64
Contents

2
About this guide
At Hyperfish we are passionate about employee
profiles and the business benefits realized when
profiles are complete and up-to-date.
We have received many requests from our
customers, wanting to extend the out of box
people search functionality in Microsoft
products.
It’s for reason we’ve collaborated with industry
experts in Microsoft SharePoint and Office
365 to bring you this comprehensive guide to
Build your own Office 365 Employee Directory,
helping your organization to find people and
expertise quickly and easily.
The guide provides:
• Detailed analysis on the out of the box people
search functionality available in Outlook, Skype
for Business, SharePoint, Delve, and Microsoft
Teams;
• Outlines the architecture of People search in
both SharePoint Online and SharePoint on-
premises;
• Provides you step by step instructions to
build an employee directory in Office 365 and
SharePoint with a A-Z index navigation.

3
Contributors
Matthew McDermott
AbleBlue
@MatthewMcD
Jeremy Thake
Hyperfish
@jthake
Stacy Deere-Strole
Focal Point Solutions
@sldeere
Julie Turner
Sympraxis Consulting
@jfj1997
Agnes Molnar
SearchExplained.com
@molnaragnes
Marc Anderson
Sympraxis Consulting
@sympmarc
Thomas Daly
SPSNYMetro LLC
@_tomdaly_
Mikael Svenson
Puzzlepart
@mikaelsvenson

4
Introduction

5
Every organization has a method for employees to look up other employees contact information. Over the decades, these
methods have changed for most organizations. From printed paper references to an integral part of the digital workplace.
For those of you reading this, you likely have users that:
• Live in Outlook that use the Outlook address book via email address;
• Are in Skype for Business doing name lookups;
• Have Office 365 and jump into Delve through the app launcher;
• Chat in Microsoft Teams and navigate via the organizational chart; or
• Are using SharePoint Enterprise search center to search for people.
6
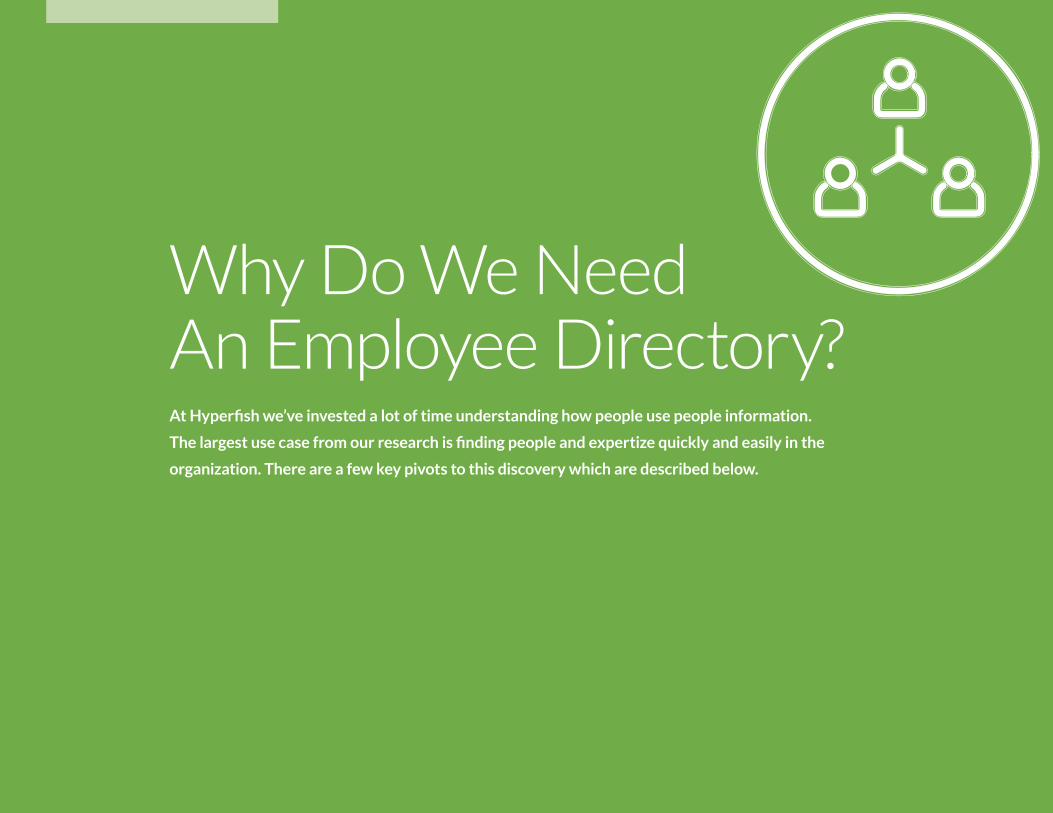
Why Do We Need An Employee Directory? At Hyperfish we’ve invested a lot of time understanding how people use people information.
The largest use case from our research is finding people and expertize quickly and easily in the
organization. There are a few key pivots to this discovery which are described below.

7
Finding by name
The most common is when users know either the first name
or last name of the person they are trying to find.
TIP: Office 365 handles phonetic suggestions so "Jacob" would
show results for "Jakob".
Locating someone in a department
Users frequently want to find someone in a department,
like Human Resources, because they are trying to solve a
problem that they think they’ll know the answer to.
TIP: Often people will type "HR", you can train SharePoint search
to handle responding with correct results for this.
Locating someone with a similar role
When users are new to a role in the organization, often they
want to find people with similar job titles to them. That way
they can ask them questions about their own role or get
feedback from people who are likely to be able to help.
TIP: Unfortunately, none of the search experiences store historic
values for job titles. So you can’t use previous work experience to
find people that may have been able to help.
Locating the office location of an employee
When users are trying to organize in-person meetings,
they’ll often want to add the office of one of the people they
are meeting. To do that they’ll look up the person by name, or
even click on their contact card in the email thread and copy
and pasted the office location.

8
Locating someone by navigating the org chart
There are situations where users know someone in the
organization and are looking for someone in a specific role
either above them or below them in the hierarchy. Being able
to search for that individual they know, and then view the
organizational hierarchy of that person and navigate up and
down is a critical way to discover individuals.
Who is the contact for < insert responsibility >
As an employee, there are often scenarios where they need
to find the person that is responsible for payroll enquiries,
expense enquiries or legal counsel. Many organizations will
track these responsibilities against profiles of individuals to
streamline reaching out to them.
TIP: You can create an additional SharePoint User Profile
property to track these responsibilities.
Skills searches
When users are working on projects, often they want to
get feedback and have things reviewed by subject matter
experts. Being able to search for people with specific skills
allows users to locate experts across the entire company.
TIP: Storing skills is a great way to work around the fact you can’t
search historic job titles.

9
Out Of The Box People Search ExperienceEach of these approaches to discovering people in the organization has its pros and cons.
There are some common missing features:
10
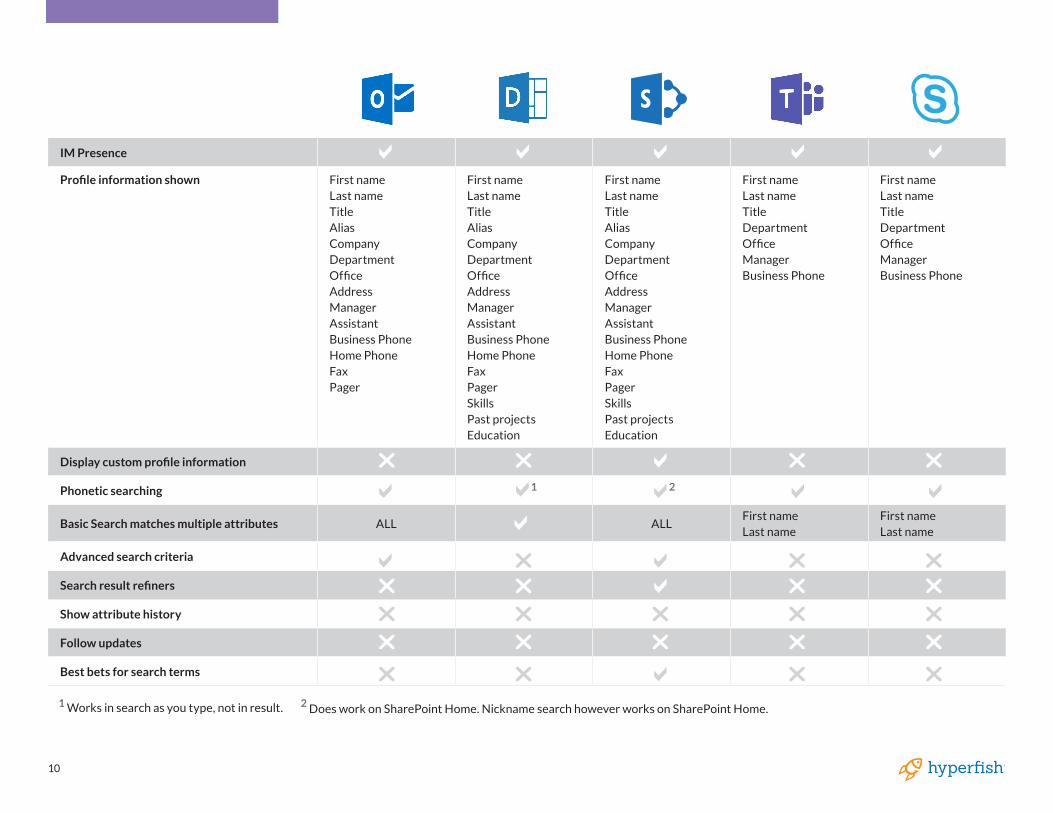
IM Presence
Profile information shown First name Last name Title Alias Company Department Office Address Manager Assistant Business Phone Home Phone Fax Pager
First name Last name Title Alias Company Department Office Address Manager Assistant Business Phone Home Phone Fax Pager Skills Past projects Education
First name Last name Title Alias Company Department Office Address Manager Assistant Business Phone Home Phone Fax Pager Skills Past projects Education
First name Last name Title Department Office Manager Business Phone
First name Last name Title Department Office Manager Business Phone
Display custom profile information
Phonetic searching
Basic Search matches multiple attributes ALL ALLFirst name Last name
First name Last name
Advanced search criteria
Search result refiners
Show attribute history
Follow updates
Best bets for search terms
1
1 2
2
Works in search as you type, not in result. Does work on SharePoint Home. Nickname search however works on SharePoint Home.

11
Outlook address book
The most popular way to discover people has been around
since Outlook came out in 1997. It has not evolved much
over the years, primarily because the Global Address Book
is sourced by Active Directory and that hasn’t evolved
much either. It does provide the ability to search not only
the corporate directory (global address book) but also your
own contacts that are stored personally in your exchange
mailbox…and likely sync’d from your iOS/Android contacts.
Unfortunately, the contact cards that show when viewing
results are very dated from a user interface perspective.
TIP: One risk here is that users "Add to contacts". What that means is if Jakob, in this
example, updates his office location/phone number, it does not sync the changes to
the locally stored contact record. It is common practice to educate users on this issue.

12
The organization tab view is very limiting and flat. You can double click on the
manager and it’ll pop open another contact window and you can keep doing this, it
is not as easy to navigate as more visual org charts can be.

13
Outlook People view in Windows desktop
The people view in Outlook is underused
based on our research over the Address
book. It has similar functionality and
provides information not shown in the
contact window in the address book.

14
This has some advanced filters such as "Has Address" and "Has Phone number". You can also see recent
searches and build advanced search refiners across more properties than the address book.

15
Outlook People view in browser
This view has been recently updated
to leverage the Microsoft Graph to
suggest contacts based on people
you frequently collaborate with. You
can even add favorites to make it easy
to start conversations with them.
Unfortunately, there is no advanced
search here and the free text search
in the top left will only search inside
the names of contacts so searching for
"sales" will not return all people with
the department name of "sales".

16
Skype for Business
Skype for Business has a very simple
search experience that allows only to
search by name. But hovering over
the results does show contact cards
similar to Outlook. From our research,
this is the second most popular way to
discover people.
Delve
Delve was the first interface in Office
365 to focus on the power of the
Microsoft Graph. It has not evolved
much since launching in 2015 but has
got people search capabilities via one
search text box. This works for many
indexable attributes in peoples profiles.
The Delve profile page is also where
most of the other experiences listed
above actually link to if you click "see
more" on people.
17
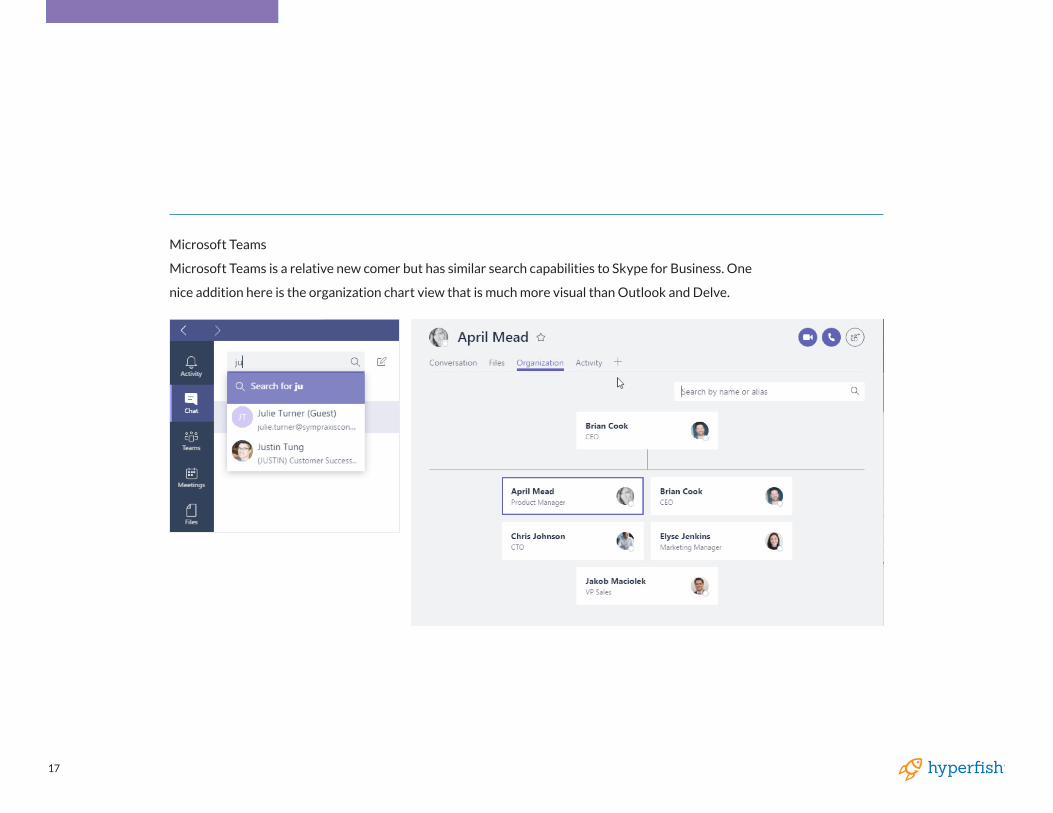
Microsoft Teams
Microsoft Teams is a relative new comer but has similar search capabilities to Skype for Business. One
nice addition here is the organization chart view that is much more visual than Outlook and Delve.

18
SharePoint Enterprise Search Center
Most people are using SharePoint
already and don’t even realize that
there is a hidden gem inside the
Enterprise Search Portal that gives
the ultimate in employee directory
experiences. This site collection is
created by default in Office 365. It can
be accessed by https://<<TENANT>>.
sharepoint.com/search.
The SharePoint extensibility models
allow you to fully tailor the search
experience. Many intranet-in-a-box
vendors are already taking advantage
of these features such as Bonzai,
Powell365, Unily and Valo.

19
People search in SharePoint and Delve relies at a basic level on information from Active
Directory being synchronized to SharePoint, and then indexed into the search engine.
Architecture of SharePoint People Search

20
SYNC PROCESS DESCRIPTION
AZURE AD CONNECTAzure AD Connect syncs data from your on-premises Active Directory to
Azure Active Directory. For more information.
AAD TO SPO SYNCAzure Active Directory syncs data from Azure Active Directory to the SPO
Directory Store.
AD IMPORTActive Directory Import syncs data from the SPO Directory Store to the
User Profile Application.
WSS SYNCWSS Sync syncs data from the User Profile Application to the SharePoint
Online site collection.
Synchronization pipeline
At granular level data flow via four processes:

21
The main difference for people search in SharePoint Online
and on-premises is that the attributes synchronized per
profile from AAD to SharePoint Online is set. For any extra
attribute you wish to include in the Delve profile or in people
search outside those in Table 1 you must employ a custom
synchronize mechanism. The same goes if you synchronized
custom data from line of business systems using BCS to the
User Profile Application on-premises. This capability is not
present in SharePoint Online.

22
Azure Active Directory attribute SPO User Profile property Notes
UserPrincipalNameDisplayName: User Name
Name: UserName
The value in this property is used to create the path of a user’s OneDrive for Business site collection.
For example: [email protected] and /gherrera_contoso_com/
This property is replicated to the site collection by WSS Sync.
UserPrincipalNameDisplayName: Account name
Name: AccountName
This property stores the claims-encoded User Principal Name for the user.
For example: i:0#.f|membership|[email protected]
This property is used to look up the user profile.
UserPrincipalNameDisplayName: Claim User Identifier
Name: SPS-ClaimID
This property stores the user’s claims identifier. The identifier is the User Principal Name.
For example: [email protected]
UserPrincipalNameDisplayName: User Principal Name
Name: SPS-UserPrincipalName
This property stores the User Principal Name of the user.
For example: [email protected]
GivenNameDisplayName: First name
Name: FirstName
This property is replicated to the site collection by WSS Sync.
For example: Gabriela
snDisplayName: Last name
Name: LastName
This property is replicated to the site collection by WSS Sync.
For example: Herrara
ManagerDisplayName: Manager
Name: Manager
The manager property is used to determine colleagues and will be used in the user profile and OneDrive for Business deletion process.
For more information see: 3042522 How user profiles are deleted in SharePoint Online and OneDrive for Business.
DisplayNameDisplayName: Name
Name: PreferredName
This property is replicated to the site collection by WSS Sync.
For example: Gabriela Herrara
telephoneNumberDisplayName: Work phone
Name: WorkPhone
This property is replicated to the site collection by WSS Sync.
For example: (123) 456-7890
proxyAddressesDisplayName: Work email
Name: WorkEmail
Processed in this order when it’s added to the profile:
WorkEmail if the value in proxy address is prefixed with SMTP: (Must be in CAPS)
WorkEmail if the value in proxy address is prefixed with smtp: (Must be lowercase)
This property is replicated to the site collection by WSS Sync.
For example: [email protected]
For SharePoint Online, the list of attributes being synchronized is:

23
ProxyAddressesDisplayName: SIP Address
Name: SPS-SIPAddress
SPS-SIPAddress if the value in proxy address is prefixed with sip:.
This property is replicated to the site collection by WSS Sync.
PhysicalDeliveryOfficeNameDisplayName: Office
Name: OfficeThis property is replicated to the site collection by WSS Sync.
TitleDisplayName: Title
Name: TitleThis property is replicated to the site collection by WSS Sync
TitleDisplayName: Job Title
Name: SPS-JobTitle
SPS-JobTitle contains the same value as Title. SPS-JobTitle is connected to a Term Set.
This property isn’t replicated to the site collection.
DepartmentDisplayName: Department
Name: DepartmentThis property is replicated to the site collection by WSS Sync.
DepartmentDisplayName: Department
Name: SPS-Department
SPS-Department contains the same value as Department. SPS-Department is connected to a Term Set.
This property isn’t replicated to the site collections.
WWWHomePageDisplayName: Public site redirect
Name: PublicSiteRedirect
PreferredLanguageDisplayName: Language Preferences
Name: SPS-MUILanguagesSPS-MUILangauges is used by SPO to determine which language a site is displayed in for the user when MUI is enabled.
msExchHideFromAddressListDisplayName: SPS-HideFromAddressLists
Name: SPS-HideFromAddressLists
msExchRecipientTypeDetailsDisplayName: SPS-RecipientTypeDetails
Name: SPS-RecipientTypeDetails
ObjectGuidDisplayName: Active Directory Id
Name: ADGuidInternal
DistinguishedNameDisplayName: Distinguished Name
Name: SPS-DistinguishedNameInternal
ObjectIdDisplayName: msonline-ObjectId
Name: msOnline-ObjectIdInternal
UserTypeDisplayName: SPS-UserType
Name: SPS-UserTypeInternal
Reference: https://support.microsoft.com/en-us/help/3168272/information-about-user-profile-synchronization-in-sharepoint-online

2424
User defined profile properties
In addition to the properties making its way from Active
Directory the user can have any number of fields in the
Delve profile which they themselves can fill in. Examples
of these are the Ask me about and Skills properties, this
information is stored in the SharePoint Online User Profile
store (sometimes called SharePoint Online Directory).
Crawling
Once data makes its way up the chain to the SharePoint
Online User Profile store it will be indexed and made
searchable. Typically, a change in a user’s profile can take up
to 6 hours before being reflected in the search results.
A common scenario for people search is that you after a
while discover the need to make more properties searchable
in the user profiles. Once you have made the necessary
changes you need to re-index the user profiles for these
properties to be available.
In an on-premises environment you could start a full crawl
of the user profiles, but this is not possible in SharePoint
Online. The solution is to "update" each and every single
user profile so that the last modified date changes, which the
crawler picks up on and re-index the data.
TIP: MVP Mikael Svenson has a PowerShell script available at
https://github.com/wobba/SPO-Trigger-Reindex which helps with
this, or if you are a UI person take a look at SharePoint Online
Search Toolbox by Puzzlepart, a SharePoint Add-in available
from the Office Store.

2525
In the land of people search, content is king. To make your
people search as good as possible you should strive to get
your employees to take a few minutes and update their
profile information. The screenshots below illustrate the
difference between a two people search results. If Jane
Moneypenny spent a couple of minutes and updated her
profile picture, title, office, ask me about and about me fields,
her result would be very similar to Mads Nissen’s.
Moreover, the icing on the cake is of course the hover panels.
If your employees enrich their profile information, this will
be displayed in the hover panels for the people results as
presented below.

26
Enhancing SharePoint People Search

2727
This step by step guide will help you to enhance your
employee directory in SharePoint. It works for SharePoint
Server 2013/2016 and SharePoint Online.
This is based on a series of blog posts with permission by
Marc Anderson (http://sympmarc.com/series/create-a-
simple-sharepoint-2013-employee-directory-on-office365/).
This creates a table like employee directory with a A-Z index
navigation.
There are basically four mandatroy steps with a bunch of
optional steps:
1. Employee Directory search page set up
2. Default results setup
3. Upload Display template customizations
4. Change to custom display template

2828
The first step is, of course, to create a page where the
Employee Directory will live. The approach we’re taking here
is to use a page in the Search Site Collection in Office 365.
By default the Search Site Collection lives at https://[tenant
name].sharepoint.com/search.
When you go to the Search Site Collection directly, you’ll
land on a very bland search page:
You may also have created your own Enterprise Search
Center, which may look a little different. It doesn’t really
matter, though. All we want to do is to create a new page
in the Search Site Collection you are using to house the
Employee Directory .
Click on the cog in the top right and then Site Contents
option. This should show you all the lists and libraries
available in the Site Collection root. If you can’t get this far,
then you may not have the appropriate permissions.
Go directly to Jail, do not pass Go, and do not collect
$200. You’ll need to talk to your Tenant or Site Collection
Administrator to get the right permissions.
If permissions aren’t a problem, then click on the Pages
Library icon.
Employee Directory search page set up
ST
EP
1

2929
Once in the Pages library, go to the
ribbon and create a new page.
When you select Page, you’ll end up on the page where you can create the page.
What you’re looking for here is the "(Welcome Page) Search People" page layout.
I’m calling mine "Employee Directory" with the URL set to Employee-Directory.
aspx. Be sure to choose the "(Welcome Page) Search People" page layout.

3030
In the image below, the page layout is not available. If it is,
choose it and keep rolling. If not, first take this little detour.
Click on the cog, go into Site Settings, and choose "Page
layouts and site templates" under the "Look and Feel"
section at the top of the right column.
In the Page Layouts section, add the "(Welcome Page)
Search People" page layout. The section should then look
like this below:
Now go back to the Pages library and create the new page.
Detour: Missing page layout

3131
When you click Create, you’ll end up back in the Pages library.
Click on the Employee Directory page. It’ll look something like
this, though if you see my photo it’ll be a little weird.
Believe it or not, you now have a fully functional page that
will do much of what you want. For instance, if you type
"Lastname:A*" in the search box, you’ll get all of the people
whose last name starts with the letter A.
3232
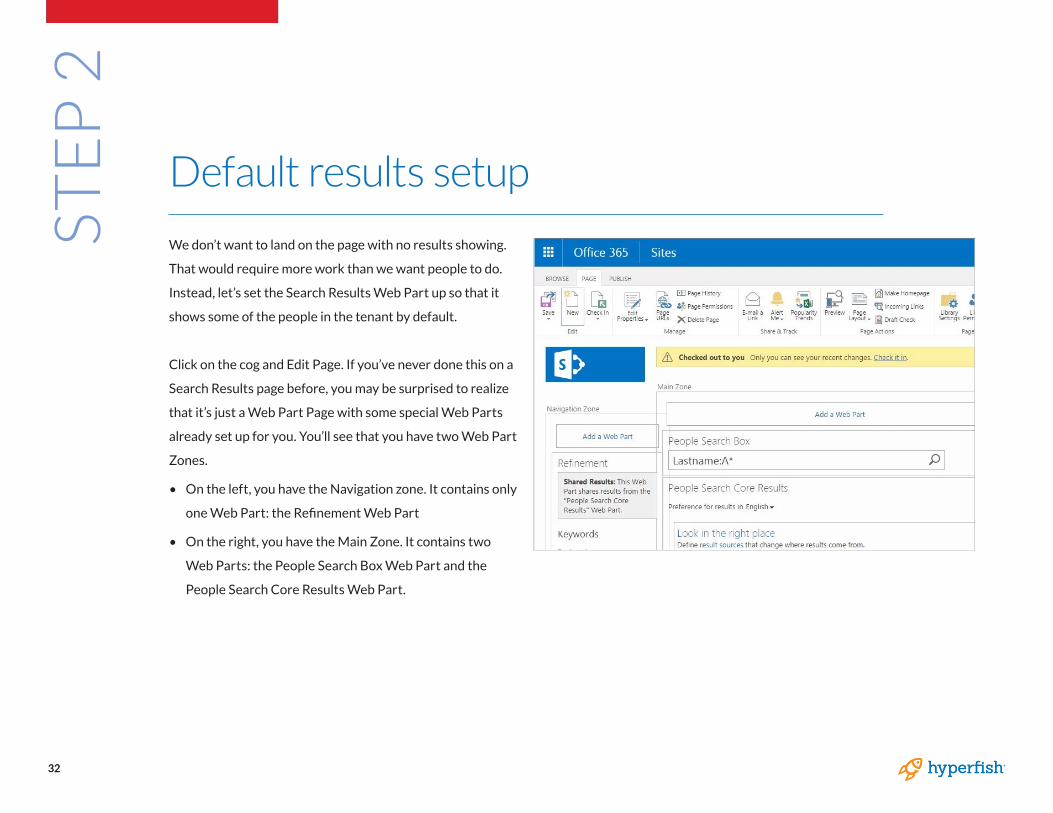
We don’t want to land on the page with no results showing.
That would require more work than we want people to do.
Instead, let’s set the Search Results Web Part up so that it
shows some of the people in the tenant by default.
Click on the cog and Edit Page. If you’ve never done this on a
Search Results page before, you may be surprised to realize
that it’s just a Web Part Page with some special Web Parts
already set up for you. You’ll see that you have two Web Part
Zones.
• On the left, you have the Navigation zone. It contains only
one Web Part: the Refinement Web Part
• On the right, you have the Main Zone. It contains two
Web Parts: the People Search Box Web Part and the
People Search Core Results Web Part.
Default results setup
ST
EP
2

3333
Click on the dropdown at the top right
of the People Search Core Results Web
Part and choose Edit Web Part. This will
open the Tool Pane for the Web Part.
There’s a great deal we can do with these settings, but for now we are going to
just do one simple thing. Click on the Change Query button. In the Query Text
box, simply add " contentclass=spspeople". This sets the default search to return
all people, filtered by whatever is in the search box. If you click the Test query
button, you should see at least a few people show up on the right in the Search
Result Preview box.

3434
Click OK to save the query. Then OK to save the Web Part
settings. Then Save on the ribbon to save the page.
Now you should have a very rough first pass at an Employee
Directory. You should see up to 10 people in the results,
perhaps along with a photo (if they have one in their profile)
and a little information about each person (if certain profile
properties are populated).
You may also see some strange "people-like" entities.
These will usually be some crawler accounts, for example
_spocrwl_19284, etc. We’ll take care of those later.

3535
What you’ll want to do here will vary based on the
characteristics of your organization. What’s useful for an
organization with 10 people will be quite different than
what’s useful for one with 100k+ people.
The client I needed this directory for has about 100
employees. As with many organizations, the Employee
Directory is effectively replacing something that has been
maintained in Excel and emailed out regularly. Everyone
prints it out and hangs up a copy in their cube. So we really
want this directory to look a lot like that old-fashioned phone
list. It will have a little more info and if the data maintenance
side of things holds up, the data will always be current. At the
same time, since we are using Display Templates, we’re well-
positioned to expand the information we display over time.
In small- to medium-sized organizations like this, it’s helpful
to have an alphabetic filter. I’ve created a Control Display
Template which shows the alphabetical filtering links and an
Item Display Template that shows each person’s details.
Here’s what the alphabetic filtering looks like:
Note that several of the letters are not "lit up". That’s because no
one in the organization has a last name starting with I, Q, X, or Y.
Few things are more annoying than clicking on a link like this only
to be told that "Nothing here matches your search".
If nothing matches, then why did you show me the link?!?!?!
So there’s a little magic in the Control Display Template to
figure out which letters should not be lit up. That logic will
ensure that we only can click on letters where there are
actual results, even as people come and go.
Upload display template customizations
ST
EP
3

3636
There are two Display Templates here.
Think of the Control template as the outer one and the
Item template as the inner one which we iterate for every
individual item in the result set coming back from search.
This can be a little tricky and also a little confusing. Where
should we draw that dotted line? Well, you’ll see a lot of
inconsistency on this. In my two Display Templates for
the Employee Directory, I’m using the Control template to
display the alphabetic filter links and to create the table
which will contain the items, but I’m rendering the table
header in the Item template.
That just seems to make more sense to me because that way
the column headers sit with the rendering of the actual data,
not is a separate place (the Control template). Another thing
to consider here is that ideally, we want the two types of
Display Templates to work atomically: we should be able to
mix and match different Control and Item templates based
on our needs. For instance, in a really large organization,
we may not need to check for which letter to light up, so we
could just use a Control Template that doesn’t do that piece.
For the next step, you’ll need the zip file, which is on the
download page where you got this PDF from:
www.hyperfish.com/employee-directory

3737
With the zip package extracted on your computer.
1. Go to Site Settings in the cog menu.
2. Then click "Master pages and page layouts" under "Web
Designer Galleries".
3. Then in the ribbon click "Files" tab and then "New Folder".
Create the folder named "_EmployeeDirectory".
4. Create two sub folders called "css" and "Display
Templates". Create a sub folder of "Display Templates"
called "search
TIP: In the real installation, that folder is named for the client,
but here I’ve called it "_EmployeeDirectory". Note the leading
underscore: that ensures that the folder will always show up at the
top of the listing under masterpage; otherwise I have to scroll a lot.
Using the Files tab upload the files into the directories from
the zip package. Keep the default settings when prompted for
metadata for all files uploaded.
You will notice when you upload the html files into the Search
folder, there will be a javascript file created automatically.

3838
It is recommended that you get organized about how I store things in the folder. Having subfolders
for different functions helps new people understand your customizations. This approach mimics how
SharePoint uses files out of the box.
• css—Any CSS files that are a part of this solution.
• Display Templates—Mirroring the subfolder names, like Search, makes it clear what type of Display
Templates are in there. Because each of the Display Templates has a Content Type in it, SharePoint
knows how to find the files in these custom folders.
If I had any custom JavaScript in the solution, I’d have a js folder, images files would go into an images
folder, etc.

3939
Control Display Template explanation
Here are the custom parts of the Control Display Template.
The basic logic is this:
• Line 3—Include some custom CSS. In a full installation, this
would probably occur in the master page, but I’ve chunked
it out to share the important bits here.
• Line 4—Include jQuery. I’m using jQuery to handle a bunch
of things since it makes life easier.
• Line 7—This div is just the outer container for the template.
• Lines 10-15—Declare some variables we’ll need later
• Lines 19-36—Emits the markup for the alphabetic filters.
• Lines 22-28—Loop through all of the letters in the
alphabet and make the calls to search to find out if that
letter should be "lit up".
• Line 31—Emit the hard-wired "All" link.
• Lines 38-53—This block is where I figure out which letters
to unlight change the CSS for each. Yes, After fiddling
around with this for a while, I decided to load the page with
*all* the letter lit up, and turn off the ones that don’t have
data behind them. This makes for a good regression if we
have one: all the links will be lit up even if the script fails.
• Lines 55-76—This function called
getSearchResultsUsingREST makes a call to the Search
Service using REST and passes back a promise. Each call
requests just the first result (rowlimit=1) and only the
WorkId property (selectproperties=’WorkId’). This makes
the call extremely "light". We don’t need to know how
many people fall into the letters bucket; we just want to
know if *any* do.

4040
Lite Item Display Template explanation
Next up is the Item Display Template. In this one, I’ve gone as simple as possible. I’ve gotten rid of a lot
of the encoding, null value tests, etc. that most of the out-of-the-box Display Templates have just to
keep it simple. Below I’m showing *everything* in the body of the template. It’s really stripped down.
• Line 9-21—If this is the first item in the result set, emit the table header.
• Line 23-33—Emit the details for each person in the result set. Here I’m showing:
- Name (full name)
- Work Phone
- Department
- Office
Your organization will undoubtedly have a few other fields you want to add, you may one to remove one
or two of these.

4141
Now that you have uploaded your custom display template files. In the employee
directory page, you need to configure the web part to use these instead of the
defaults.
1. Go to your Employee-Directory.aspx page.
2. Click the cog in the top right then Edit Page.
3. Hover over the "People Search Core Results" Web Part and click Edit Web Part.
4. Expand the "Display Templates" option in the web part properties. And select
"People Search Table Control" option rather than "Default result".
5. Then click "Use a single template to display items". And select "People Search
Table Item".
Change to custom display template
ST
EP
4

42
Further Enhancements For Employee Directory

4343
The next step is to add some of the slicing and dicing
capabilities. We couldn’t do that before we set up the
RefinableString00 aka LastnameSortable property. If we had
tried to use the Lastname property, we’d just get errors in the
page I know this from experience). Errors that tell us precious
little about what the actual problem is. Correlation ID!
In a company with 100 employees, clicking on once of the
letters are the top of the page will probably narrow things
down well enough that you’ll see everyone with that letter
at the start of their last name on one page. If you have many
more employees, you may end up with too many people to see
very easily. And since we’re limited to 50 results in the Search
Results Web Part, you may need to page and/or scroll a lot,
depending on what properties you’ve decided to show for
each person (one line vs. two lines or more, for example).
There are a couple of out of the box capabilities we can use
to sort or filter our results a bit more. Because we’re using
search to drive the directory, we have all of the native search
capabilities that SharePoint gives us. Let’s take a look at
adding some sorting and improving the refiners.
Sorting and refiners

4444
Sorting
In the Web Part Properties for the Search Results Web Part, there is a checkbox labelled
"Show sort dropdown". It’s in the Settings section (which is full of other options as well).
By checking the box and adding some of our own JSON into the field below it, we can
control what sort options are available. The JSON should be an array of sort options
taking this form:
1 {
2 "name": "Last name (A-Z)",
3 "sorts": [{
4 "p": "LastName",
5 "d": 0
6 }]
7 }
The values break down like this:
• name—The text value you’ll see in the dropdown
• sorts—The parameters for the sort that apply when the option is selected
- p—The managed property to sort on
- d—[0 | 1] If 0, the assort is ascending, if 1 it is descending.

4545
Here’s a pretty basic set of sorting options that should at least get you started. I’m
giving you four pretty basic sort options:
• First name (A-Z)
• First name (Z-A)
• Last name (A-Z)
• Last name (Z-A)
[{"name":"First name (A-Z)","sorts":[{"p":"FirstName","d":0}]},{"name":"First
name (Z-A)","sorts":[{"p":"FirstName","d":1}]},{"name":"Last name
(A-Z)","sorts":[{"p":"LastName","d":0}]},{"name":"Last name (Z-A)","sorts":[{"p":"LastName","d":1}]}]
You should be able to take this and enhance it for your own needs.

4646
Refiners
Next, we probably want to adjust the refiners a bit. Out of
the box, the Refiners Web Part will display properties that
look to a machine like useful ones, but they may not be the
most useful in your organization. You may want to show
refiners that are part of the search results already or you
may want to show refiners that aren’t visible in the results.
Changing which refiners you see and in what order works
like this:
• Edit the page
• Put the Refinement Web Part into Edit Mode
• Click on Choose refiners
• Change the settings
• Save it
The key action here is to add or subtract from the Selected
refiners in the Choose refiners dialog. For each refiner, you
can change the settings on the bottom of the page. Note that
refiners use Display Templates as well. I’m not going to go
into building Refinement Display Templates, but you can see
them in _catalog/_masterpage/Display Templates/Filters.
In my case, I’ve got refiners for Department, JobTitle,
PeopleKeywords, and BaseOfficeLocation. You will probably
want some others which work for you.
You should see the impact of these changes immediately
upon saving the page. Assuming that the properties you have
selected have been indexed, that is.

4747
The user profile store in SharePoint has several service
accounts added to it from different Microsoft services
running in SharePoint Online. These shouldn’t show for the
employee directory results.
In order to remove these accounts you can add the following
to your Query Text that you modified in previous steps:
-accountname:spo* -PreferredName:"Foreign Principal"
This will remove all accounts with an accountname starting
with spo. If you think this will also remove some of your
regular accounts you can do a more granular one:
-accountname:spofrm -accountname:spoapp
-accountname:spocrawler -accountname:spocrwl
-PreferredName:"Foreign Principal"
And we just have to hope that Microsoft don’t add more
outside of this naming schema.
One thing to note is that you cannot edit the default "Local
People Results" result source to make this a global exclusion.
You can however create a query rule to append this to every
query – but that might break other query rules so I would
not recommend this.
This means you might not be able to fix SharePoint Home,
but it works anywhere you have a search web part or can
control the query being sent over.
Excluding service accounts

4848
It will be common to display additional properties in the
display template from the user profiles. Many companies
create additional user profile properties, such as "Cost
Center" that they will want to show and search by.
1. Create the User Profile property in the SharePoint admin
center. Ensure that this property is editable by users so
they can provide the value from the Delve profile edit
form .
2. Create a New Managed Property into the Search |
Manage Search Schema section of the SharePoint Admin
center. Call the managed property the same as the user
profile property itself.
3. Ensure that you check that it is Searchable, Queryable
and Retrievable. You can verify this in the main Managed
Properties screen as below. On premises, If you want to
refine on Cost Center choose Refinable and follow the
steps above in the section on Sorting and Refiners. For
SharePoint Online you would perform these same steps
but edit a RefinableString## field instead.
Including additional User Profile Properties

49
4. You will need to map it in the Mappings to crawled
properties, by clicking the Add a Mapping button. The
UI is unstable and its recommended to do a search
first for the user profile property, and selecting it and
clicking OK for it to actually save the setting.
5. You will need to modify your Display Template too.
Obviously you’ll need to add a line where you want to
render it on the item display template.
<th><td class="ms-vb2">_#= ctx.CurrentItem.
CostCenter =#_</td></th>
49
6. You will also need to add the property to the
mso:ManagedPropertyMapping element of the item
display template file too.
,'CostCenter':'CostCenter'
7. You’ll have to upload this change to the item display
template to the library you uploaded it before.
8. For this to take effect. You will need to reindex the
user profiles. The easiest way to do this is use Mikael
Svenson’s powershell script. https://github.com/wobba/
SPO-Trigger-Reindex This requires a Windows machine
with PowerShell on it, with the SharePoint CSOM SDK
installed.

5050
One of the default query rules in SharePoint 2013
and SharePoint Online (SPO) is called People Name in
SharePoint Search. What the query rules does, is that it adds
people results when a user’s query matches the full name of
a person. So, if you do a search for "Mikael Svenson" on the
"Everything" search tab, you might get a people result that
looks like this:
However, if you search for "Mikael" or "Svenson" by
themselves the query rule will not trigger, and no people
results will be displayed. It will only show people based on
exact name matches and in large companies memorizing the
full name of every employee can be difficult.
Using the full name makes this query rule a hidden gem that
never reaches the surface. What most employees do is click
on the People search vertical and make a follow-up search
from there. Then they usually find the information they were
looking for related to a colleague/person.
It is a known fact that many people are lazy and get irritated
when they have to spend a lot of time finding the information
they need. So why not give them a technological shortcut
to their final destination by extending the people search
logic for the Everything search vertical to allow partial name
matches as follows:
1. Go to your Enterprise Search Center (as an administrator)
– Site Settings – Search Query Rules
2. Select Local SharePoint Results (System) and click on New
Query Rule
3. Give your new query rule a name, e.g. "People Search on
Everything tab"
4. Under Query Conditions click Remove Condition.
Improving the people name query rule

51
6. Deactivate the default query rule People Name In SharePoint Search in order to avoid duplicates:
If you now go to the Everything search tab and search for "Trond", you will get a people match like in
the screenshot below. Voila!
51
5. Click on Add Result Block and edit the following fields:
Expand Settings and add a "More" link and your custom display template (based on Item_Person.html).
You can use something like “./employee-directory.aspx?k={subjectTerms}”

5252
Mikael Svenson has a great tip about adding fuzzy logic to
People Search. If your users primary language setting in
SharePoint is a minority language, this post is for you. If your
primary language is one of the languages in the list further
down, keep on reading as well to broaden your horizon.
Finding people is one of the most used search features in
SharePoint, and spelling names is inherently hard as people
choose just about all possible ways to spell their name.
As an example; my name is Mikael Svenson, where it’s more
common to spell Mikael with ch instead of a k (Michael) and
Svenson is most commonly spelled with two s’ in the middle
(Svensson). This means a search for "Michael Svensson"
should also match "Mikael Svenson". This is where fuzzy
name matching comes in.
Search in Norwegian – yields zero results - ql=1044
Search in English – returns a match - ql=1033
Make your people search more "fuzzy"
5353
Looking at the linguistic feature table over at TechNet you
see the languages supporting fuzzy name matching are:
• Dutch 1043/2067
• English 1033
• French 1036
• German 1031
• Italian 1040
• Japanese 1041
• Polish 1045
• Portuguese 1046 / 2070
• Russian 1049 (not working) / 2073
• Spanish 1034 (not working) 3082 / 9226
Seems most of the above languages work on my test case,
but I’m not sure how the logic differs on each one. What I
do know is that the English one is pretty good and works,
while the Norwegian one is non-existent. This means if I use
Norwegian versions of SharePoint and my operating system,
my queries are most likely to be executed in a Norwegian
context which disables fuzzy name matches.
The question you might ask yourself is: "How does
SharePoint decide the language to use when executing a
query on a search center result page?". After some digging
around I found the logic to be as follows in sorted order:
1. Use a fallback language if present
2. Use query language URL parameter if present (more on
this later)
3. Use the users preferred language if present
(https://<tenant>-my.sharepoint.com/_layouts/15/
editprofile.aspx?UserSettingsProvider=dfb95e82-8132-
404b-b693-25418fdac9b6)
4. Use the browser language
The solution for me was setting the fallback language to
English or 1033 in the result web part on the people search
page. By default this property is not set.

5454
What is the fallback language?
The fallback language name is a misnomer as it is in fact
a language override parameter, and it’s a property of the
DataProviderScriptWebPart. If you export the People
Search Core Result web part from the peopleresults.aspx
page you find the property well hidden in a JSON object in
the web part’s DataProviderJSON property.
The property is by default –1, which means it’s not set. By
changing the value to 1033, all queries will now be executed
in an English context.
In order to get activate the change you can upload your
changed .webpart file to the web part gallery and replace the
web part on the people result page.

5555
Configure the Search Results web part, expand Display
Templates, and add the following fields to the Hit-highlighted
properties (JSON) section:
"AboutMe", "AcountName","BaseOfficeLocation",
"Department","Interests","JobTitle","Memberships", "PastProjects",
"PreferredName", "Responsibilities", "Schools", "Skills", "WorkEmail",
"YomiDisplayName"
The effect of adding the new hit-highlighted properties are
visualized in the figure below. The screenshot on the right
shows the people search results after a user has performed a
search for SharePoint competency in the Oslo office.
Hit-highlighted properties (JSON) section

5656
There are other Display Templates you could use for each
people item result. Using the one including in the zip which is
a simple table is one approach.
The out of the box Item_Person.html display template is
more sophisticated as it has Skype for Business presence
and the profile photo built into it.
It also has a hover pop up that shows more information
which can be changed with in the Item_Person_HoverPanel.
html file.
Copying these files and mofifying them to show the
properties you wish to will give you greater control to
customize your directory. Then all you need to do is change
the people search results web part to use the new copied
display template.
Additional Display Templates

5757
With a little extra work, you can have more than one search
box. This allows you to do advanced search filters. You will
need to add this to the seach page using standard HTML
form elements.
On submitting the search form, the page redirect would
have to build a query string that SharePoint supports. As an
example
?k=(OfficeNumber:"Seattle*")
The SharePoint People Search Result Web Part would
automatically read the query with that specific filter.
Advanced Search Filters

5858
For some unfathomable reason, SharePoint Server out of
the box the LastName property is not "Sortable", nor is it
"Refinable". The FirstName is "sortable", but to me it’s a lot
less likely that you’d want to sort or filter on FirstName than
LastName.
If you go to the Search Schema settings (Admin / SharePoint
/ search / Manage Search Schema), you’ll see that this is the
case.
In SharePoint Server, you can actually go into the LastName
property and make it sortable directly.
Trevor Seward (@NaupliusTrevor) pointed out that it is bad
practice to change the search settings in the Shared Service
Application on SharePoint Server. As it is incompatible with
the Office 365 search settings.
Unfortunately you cannot edit the LastName property
within the site level search settings, where the employee
directory page lives.
There is a very big set of dummy properties named
RefinableString00, RefinableString01, etc. There are 100
of these String properties. There are also sets for Date (20),
Decimal (10), Double (10), and Int (50). If you need any more
of any of these, you’re stuck, so use them wisely.
Fixing the Lastname Sortable issues

59
Because the Lastname is a a string-valued property, we’re
going to use one of the RefinableString dummy properties.
What we do is map the RefinableString property to a crawled
property. Here I’ve chosen RefinableString00 because I
haven’t used it yet. Here are the steps to set up the mapping:
- Click on the RefinableString00 property in the search
schema listing
- Scroll down to the section for Mappings to crawled
properties
- Click on the Add a Mapping link
- Find People:LastName by typing "Lastname" in the search
box and clicking "Find"
Select the People:LastName property and click OK
You can only map to one Crawled Property, even though
the UI will allow you to select several. As much as I wanted
to include People:SPS-PhoneticLastName to match the
LastName Managed Property, I couldn’t. I had to settle for
just People:LastName, (which should be fine).
Scroll to the Alias setting and give the property a name you’ll
recognize. I’ve used LastnameSortable.
Save the RefineablerString00 property by clicking OK

6060
Now you still have a property named RefinableString00, but
it has an alias of LastnameSortable (if you used the same
name as I did) and it is mapped to the People:LastName
property, meaning that RefinableString00 will get the same
values as People:LastName.
Perfect, right? Now we can just use that LastnameSortable
property in our slicing and dicing tools and we’ll be all set!
On Office365, we have no control over search crawling. We
can’t just fire off a crawl to update the index like we can on
premises. (In either case, we have to be admins, but that’s not
the difference here.)
A User Profile will only be re-indexed if a value in that profile
changes. For example, if I change my MobilePhone or a new
value syncs over from Active Directory, then the next crawl
will pick up that change and the value will be available in the
search index. We’ve mapped the People:LastName property
to the RefinableString00 property, but since no User Profiles
were changed in the process, it makes no difference. We
can’t just push the re-index button on Office365.
The only way to change every User Profile so that it will
be indexed is to run the Powershell script that "touches"
every profile. This is down and dirty stuff, folks, and not for
the squeamish. You might want to enlist your local Admin
Superhero to help you with this part.
TIP: MVP Mikael Svenson has a PowerShell script available at
https://github.com/wobba/SPO-Trigger-Reindex which helps with
this, or if you are a UI person take a look at SharePoint Online
Search Toolbox by Puzzlepart, a SharePoint Add-in available
from the Office Store.

61
Future Proof Solutions

62
A common method to modify the visualization of search
results, which additionally is the easiest way to get security
trimmed information across site collections, is to implement
a Display Template. In the steps above we recommend
copying existing Display Template’s HTML files and then
those files would be uploaded into the Master Page gallery
and a server based process would convert them into
JavaScript.
If you’re a developer type, and comfortable working with
JavaScript, it’s preferable to create these JavaScript based
display template files yourself which gives you fine grained
control over the outcome. That said, it is just JavaScript so
no matter what technique you use to render the content
the goal should be to separate your concerns as much as
possible, this allows you to somewhat future-proof your
solutions. What I mean specifically is that the "brains" that
make the display template render and retrieve its metadata
can be isolated from how that metadata is then rendered.
If you look at the minimal display template that was shared
by Elio Struyf, you can see that Control_Minimal.js and
Item_Minimal.js have one thing in common and that’s that
the HTML and binding of the results metadata is done using
a string replace. Incredibly low tech and simple.
https://www.eliostruyf.com/starter-javascript-display-
templates-for-your-projects/
With that said it would be straight forward to create that
html markup within these JavaScript files, that we could
externalize them by utilizing a simple JavaScript templating
engine. Ideally, we would want this engine to be compatible
across a wide range of browsers and versions so that our
solution will migrate with us and when the display template
container is no longer viable, we can reuse our templates by
changing the data binding (e.g. SPFx). For this we propose
using handlebars.js
Julie Turner
Sympraxis Consulting
@jfj1997

References
64
• http://sympmarc.com/series/create-a-simple-sharepoint-2013-employee-directory-on-office365/
• https://www.puzzlepart.com/three-things-that-will-make-your-people-search-rock/
• http://www.techmikael.com/2013/10/make-sure-your-people-search-is.html
• https://en.share-gate.com/blog/corporate-directory-sharepoint-search
• https://www.premierpointsolutions.com/training/help-and-how-to-articles/how-to-show-the-fax-number-in-people-
search-results-in-sharepoint-2010/
• https://thomasdaly.net/2016/01/16/hiding-people-from-people-search/
• http://www.techmikael.com/2014/12/how-to-trigger-re-indexing-of-user.html
• https://www.cardinalsolutions.com/blog/2016/11/creating-a-robust-employee-directory-using-sharepoint-search
• https://www.eliostruyf.com/starter-javascript-display-templates-for-your-projects/
6565
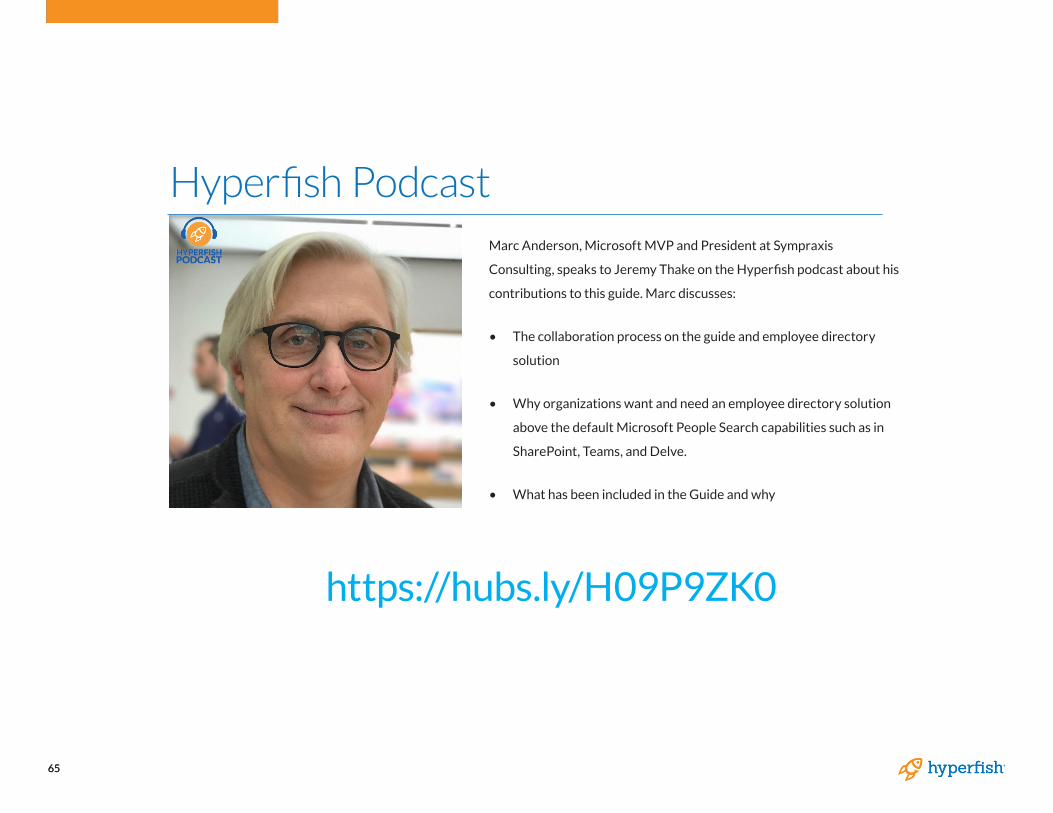
Marc Anderson, Microsoft MVP and President at Sympraxis
Consulting, speaks to Jeremy Thake on the Hyperfish podcast about his
contributions to this guide. Marc discusses:
• The collaboration process on the guide and employee directory
solution
• Why organizations want and need an employee directory solution
above the default Microsoft People Search capabilities such as in
SharePoint, Teams, and Delve.
• What has been included in the Guide and why
Hyperfish Podcast
https://hubs.ly/H09P9ZK0

6666
The MIT License (MIT)
Copyright ©2018 Hyperfish
Permission is hereby granted, free of charge, to any person obtaining a copy of this software
and associated documentation files (the "Software"), to deal in the Software without restriction,
including without limitation the rights to use, copy, modify, merge, publish, distribute, sublicense,
and/or sell copies of the Software, and to permit persons to whom the Software is furnished to do
so, subject to the following conditions:
The above copyright notice and this permission notice shall be included in all copies or substantial
portions of the Software.
THE SOFTWARE IS PROVIDED "AS IS", WITHOUT WARRANTY OF ANY KIND, EXPRESS OR
IMPLIED, INCLUDING BUT NOT LIMITED TO THE WARRANTIES OF MERCHANTABILITY,
FITNESS FOR A PARTICULAR PURPOSE AND NONINFRINGEMENT. IN NO EVENT SHALL THE
AUTHORS OR COPYRIGHT HOLDERS BE LIABLE FOR ANY CLAIM, DAMAGES OR OTHER
LIABILITY, WHETHER IN AN ACTION OF CONTRACT, TORT OR OTHERWISE, ARISING FROM,
OUT OF OR IN CONNECTION WITH THE SOFTWARE OR THE USE OR OTHER DEALINGS IN
THE SOFTWARE.

67
Hyperfish helps bring your company and employee directory
to life by ensuring directory and profile information is always
complete and up-to-date. Hyperfish improves IT Service
Delivery, increases employee engagement, and helps unlock
the value of your technology investments.
Hyperfish uses AI and Bot technology to automate the
collection of profile information. The secure service supports
on-premises, hybrid, and online environments.
You can experience Hyperfish for free with Hyperfish Lite to
automatically collect and manage profile photos in Office 365.
www.hyperfish.com
www.hyperfish.com/try
About Hyperfish
@hyperfish

68
Copyright ©2018 Hyperfish