DESIGN FABRICATION 1202 TEACHER RESOURCE GUIDE
242
DESIGN AND FABRICATION 1202 TEACHER RESOURCE GUIDE FOR Department of Education Newfoundland and Labrador August, 2006
-
Upload
khangminh22 -
Category
Documents
-
view
0 -
download
0
Transcript of DESIGN FABRICATION 1202 TEACHER RESOURCE GUIDE

DESIGN AND
FABRICATION 1202
TEACHER RESOURCE GUIDE
FOR
Department of Education Newfoundland and Labrador August, 2006

Table of Contents
Page
Foreward i Acknowledgements ii Overview and Rationale 1 General Curriculum Outcomes 2 Key Stage Curriculum Outcomes 3 Specific Curriculum Outcomes 4 Student Assessment and Course Evaluation 6 Lesson Plans 6
Unit 1: Introduction to Design (10 hours) Topic 1-1: History of Design (1 hour) Topic 1-2: The Design Process (4 hours) Topic 1-3: Social/Environmental Considerations (2 hours) Topic 1-4: Design in Fabrication (2 hours) Topic 1-5: Careers in Design (1 hour)
Unit 2: Fabrication Techniques (11 hours)
Topic 2-1: Shop Safety (2 hours) Topic 2-2: Metrology (2 hours) Topic 2-3: Machine Operation (4 hours) Topic 2-4: Environmental Protection (2 hours) Topic 2-5: Shop Related Careers (1 hour)
Unit 3: Introduction to Shop Practices (17 hours)
Topic 3-1: Material Types and Properties (4 hours) Topic 3-2: The Production Environment (4 hours) Topic 3-3: Processing of Materials (8 hours) Topic 3-4: Careers in Production (1 hour)
Unit 4: Graphical Communications (10 hours)
Topic 4-1: Lettering and Sketching (2 hours) Topic 4-2: 2D Orthographic Views (4 hours) Topic 4-3: 3D Pictorial Drawings (1 hours) Topic 4-4: Working Drawings (2 hours) Topic 4-5: Drafting Related Careers (1 hour)

Unit 5: Introduction to CAD/CAM (16 hours) Topic 5-1: Creating Entities (4 hours) Topic 5-2: Display Manipulation (2 hours) Topic 5-3: Modifying Entities (2 hours) Topic 5-4: Dimensioning (3 hours) Topic 5-5: Plotting (1 hour) Topic 5-6: 2D Computer Aided Manufacture (CAM) (4 hours)
Unit 6: The Design Project (46 hours)
Topic 6-1: The Design Portfolio and Report (2 hours) Topic 6-2: Defining the Problem (2 hours) Topic 6- 3: Generating Options (2 hours) Topic 6- 4: Selecting the Best Option (2 hours) Topic 6- 5: Developing the Solution (16 hours) Topic 6- 6: Prototyping and Testing (20 hours) Topic 6- 7: Evaluation and Redesign (2 hours)

i
Foreward
Design and Fabrication 1212 is a new two term course for the 2006-2007 academic year that replaces the one-term technology education courses, Design Technology 1109 and Woodworking 1107. This new course was developed in accordance with the guidelines presented in the Atlantic Canada Foundation document on Technology Education (2001) and is designed to address the general curriculum outcomes (GCOs) specified in the Foundation document for Level I technology education. The course incorporates a problem-based learning approach that allows students to take ownership of their own learning. Students are given the opportunity to “learn by doing” through the completion of individual and group projects that require them to progress from a design concept to a built prototype. This helps students to develop an appreciation for the interrelation of design and fabrication in practice and to recognize that they are interdependent activities requiring a team approach. The Teacher Resource Guide is a supplement to the Curriculum Guide for Design and Fabrication 1212. This guide is a practical and comprehensive instructional resource for teachers and contains detailed lesson plans for each topic in Units 1-6 of the Curriculum Guide. The lesson plans are presented in an “easy-to-read” format that includes:
Unit Number and Name Topic Number and Name Specific Curriculum Outcomes Teacher Required Resources Student Required Resources Teacher Preparation Introduction Presentation Suggested Student Activities Suggested Assessment and Evaluation Wrap-up and Closing Learning Resources Student Material Pack
The print materials that must be copied for the class are included in the “Student Materials Pack” at the end of each lesson for quick and easy reproduction by the teacher. Each lesson also features a “Learning Resources” section that presents a listing of website, textbook, and other resources that the teacher or students can refer to for further study. The Teacher Resource Guide for Design and Fabrication 1212 will help minimize teacher preparation time, pace course delivery and offer enhanced student-learning opportunities that help ensure that students acquire the knowledge and skills identified in the Atlantic Canada Foundation document on Technology Education for Level I. As with any new course, the content for Design and Fabrication 1212 will need to evolve over time to keep abreast of the changes in design and fabrication in industry. It is recommended that Units 1-4 be covered during term 1 with Unit 5 extending into term 2 as a prelude to Unit 6, the Design Project. The scope of the Design Project in Unit 6 can be adjusted if additional time is deemed necessary for the first five Units. With over 50 years combined teaching experience in technology education, we know the challenges associated with this field of study and are confident that this comprehensive resource will facilitate course delivery and help ensure quality learning opportunities for your students. We look forward to receiving your feedback and suggestions for improvement. Good luck! Sincerely, Bruce Barbour P.Eng. John O’Leary M.Eng.

ii
Acknowledgements
The development of this Teacher Resource Guide for Design and Fabrication 1212 was an iterative process that involved the support and contribution of a variety of professionals working in both the educational sector in Newfoundland and Labrador. First, we would like thank Mr. Eldrid Barnes, Director, Division of Program Development, Dept. of Education, for his support throughout this process and wish him future success in managing the continued development of a new technology education program for Levels I, II, and III. Secondly, we would like to thank Mr. John Barron, Program Development Specialist for Technology Education/Career Education, for his valuable guidance throughout the development of this guide and, in particular, for providing an opportunity to obtain feedback from the Industrial Technology teachers from the 30 schools throughout the Province that will be piloting this course during the 2006-2007 academic year. Finally, we would like to extend a special thanks to the teachers from the pilot sites whose insight and constructive feedback helped ensure that Design and Fabrication 1212 will provide students with the foundation knowledge and skills needed for future related study at the secondary and post-secondary level.

Overview and Rationale
Design and Fabrication 1212 - 1 - Teacher Resource Guide
Overview
Design and Fabrication 1212 is based conceptually, philosophically and practically on the Atlantic Canada Foundation document for Technology Education (2001). The teacher is directed to the Foundation document for specific information that forms the basis for this and other technology education curricula in the province of Newfoundland and Labrador. This two-term course replaces the one-term technology education courses, Design Technology 1109 and Woodworking 1107. While content from these courses that addresses the General Curriculum Outcomes (GCOs) is retained, Design and Fabrication 1212 features additional topics and a delivery model that reflects the interrelation of design and fabrication in practice. This course should be of interest to students with varied academic abilities and hands-on skills. The acquisition of practical skills and knowledge is emphasized with the full continuum from design concept to finished product being addressed. This approach allows students to explore the various career options available in design and fabrication from skilled trades to engineering.
Rationale
In the production sector, design and fabrication are mutually dependent and interrelated activities. Designers must consider the capabilities of the fabricators and equipment that will be employed to produce a physical prototype of their design. Similarly, fabricators must rely on the designer’s engineering drawings to determine the shape, size, form, and fit of the part that they produce. Collaboration between the designer and the fabricator is, therefore, essential to effective design and fabrication. While there are a variety of industry models that govern design and fabrication, the concurrent engineering approach arguably best reflects the interrelation between these two activities. In concurrent engineering, the design, manufacture, service, and ultimate disposal of a product are considered from the beginning of the design process. This is in contrast to the more traditional sequential approach in which design is completed before these other areas are considered. Concurrent engineering requires that representatives from engineering, purchasing, manufacturing, marketing, sales and other departments affected work as a team from the initial design concept to the finished product. This collaborative approach can help to reduce costs, minimize lead-times, and improve overall product quality. Design and Fabrication 1212 immerses students in a problem based learning environment in which this collaboration between designer and fabricator is simulated. Students acquire knowledge of the design process and develop hands-on fabrication skills through a combination of classroom instruction and shop laboratories. During completion of the major Design Project, they are also introduced to the economical, legal, and environmental issues that must be considered during the design and fabrication stages of a product’s life cycle. Students are expected to take ownership of their own learning in this course with the teacher’s role becoming that of facilitator who manages the learning process to help ensure that students achieve the general curriculum outcomes (GCOs) identified in the Atlantic Canada Foundation document on Technology Education for Level I.

General Curriculum Outcomes
Design and Fabrication 1212 - 2 - Teacher Resource Guide
General Curriculum Outcomes
The General Curriculum Outcomes (GCOs) for technology education as defined in the Atlantic Foundation document on Technology Education include: GCO 1: Technological Problem Solving Students will be expected to design, develop, evaluate, and articulate technological solutions. GCO 2: Technological Systems Students will be expected to evaluate and manage technological systems. GCO 3: History and Evolution of Technology Students will be expected to demonstrate an understanding of the history and evolution of technology, and of its social and cultural implications. GCO 4: Technology and Careers Students will be expected to demonstrate an understanding of current and evolving careers and of the influence of technology on the nature of work. GCO 5: Technological Responsibility Students will be expected to demonstrate an understanding of the consequences of their technological choices. The Key Stage Curriculum Outcomes (KSCOs) for Design and Fabrication 1212 elaborate on these five GCO’s and indicate what is expected of students at the end of Level III as follows:
Key Stage Curriculum Outcomes
By the end of Level III, students will be expected to:
GCO 1: Technological Problem Solving [1.401] articulate problems that may be solved through technological means
assess diverse needs and opportunities
construct detailed design briefs that include design criteria & work schedule [1.402] conduct design studies to identify a technological solution to a problem
investigate related solutions
document a range of options to solve this problem
determine and justify the best option
determine resource requirements and availability
develop detailed action plans, including technical drawings and sequences

Key Stage Curriculum Outcomes
Design and Fabrication 1212 - 3 - Teacher Resource Guide
GCO 1: Technological Problem Solving (Continued)
[1.403] develop (prototype, fabricate, make) technological solutions to problems
match resources and technical processes for specific tasks
construct and test models and prototypes as needed
construct the solution with adherence to the design criteria
document activities, decisions, and milestones [1.404] critically evaluate technological solutions and report their findings
develop detailed evaluations of both their own and others’ technological solutions, with reference to independently developed criteria
employ a continuous assessment methodology with the purpose of continuous improvement of the design
document and report their changes, the rationale for change, and conclusions [1.405] communicate ideas and information about technological solutions through appropriate technical means
accurately present technical information by using a representative sample of analog and digital tools, including, for example, two- and three-dimensional, computer-assisted drafting and modeling tools
create accurately scaled models and prototypes
GCO 2: Technological Systems
[2.401] operate, monitor, and adjust technological systems of increasing complexity [2.402] manage technological systems of increasing complexity [2.403] modify programming logic and control systems to optimize the behaviour of systems [2.404] deconstruct complex technological systems into their simpler systems and components [2.405] troubleshoot and maintain systems GCO 3: History and Evolution of Technology
[3.401] evaluate technological systems in the context of convergence where one system has multiple functions, or divergence where multiple systems have the same function [3.402] evaluate the symbiotic roles of technology and science in modern society [3.403] analyse the symbiotic relationship between technology and education, including factors that influence standards for technological literacy and capability, and ways that the community responds [3.404] critically evaluate the effects of accelerating rates of technological change on self and society [3.405] account for effects of cultural diversity on technological solutions
critically examine the effects of cultural diversity on market forces and technological products, and vice versa
incorporate knowledge of cultural diversity into technological solutions

Key Stage Curriculum Outcomes
Design and Fabrication 1212 - 4 - Teacher Resource Guide
GCO 4: Technology and Careers
[4.401] assess and evaluate employability profiles for a variety of workplaces and careers and determine the level of technological literacy and capability they would need to achieve for job entry [4.402] employ design and invention as tools to create entrepreneurial activity [4.403] envision their short- and longer-term future and develop a plan for acquiring the technological literacy/capability required to achieve their vision
GCO 5: Technological Responsibility
[5.401] demonstrate responsible leadership in employing legal and ethical rules and principles [5.402] demonstrate responsible leadership in employing health and safety rules and standards [5.403] demonstrate responsible leadership in taking proper measures to manage current and future technological risk
These KSCOs form the basis of the Specific Curriculum Outcomes (SCOs) for Design and Fabrication 1212. The SCOs indicate what is expected of at the end of a lesson or series of lessons on a particular topic.
Specific Curriculum Outcomes
The SCOs for Design and Fabrication 1212 are addressed over two terms of study that include six major units of study. Units 1-5 provides students with the knowledge of design principles and basic “hands-on” skills in fabrication considered pre-requisite to completing the Design Project in Unit 6. It is, therefore, recommended that Units 1 through 5 be completed prior to Unit 6. The requirement for a major Design Project supports a problem-based learning environment that provides students with an experiential learning opportunity that mirrors industry practice and requires them to take ownership of their own learning. During Unit 6, students must work in groups of 2 or 4 on a major project assigned by the teacher that requires them to develop engineering drawings, fabricate a physical prototype, and evaluate its performance through prototype testing. Throughout the process, students are required to keep a record of all related activities in a Design Portfolio. In the Design Portfolio, students document the project schedule, support resources, group meetings, problem-solving strategies, and other key activities completed as they progress through the design process from initial design concept to finished product. This student-centered approach helps ensure that the General Curriculum Outcomes (GCOs) detailed in the Atlantic Canada Foundation document for Technology Education (2001) for Level III are addressed. Each of the six major units is comprised of several key topics as follows:

Specific Curriculum Outcomes
Design and Fabrication 1212 - 5 - Teacher Resource Guide
Unit 1: Introduction to Design (10 hours) Topic 1-1: History of Design (1 hour) Topic 1-2: The Design Process (4 hours) Topic 1-3: Social/Environmental Considerations (2 hours) Topic 1-4: Design for Fabrication (2 hours) Topic 1-5: Careers in Design (1 hour)
Unit 2: Fabrication Techniques (11 hours)
Topic 2-1: Shop Safety (2 hours) Topic 2-2: Metrology (2 hours) Topic 2-3: Machine Operation (4 hours) Topic 2-4: Environmental Protection (2 hours) Topic 2- 5: Shop Related Careers (1 hour)
Unit 3: Introduction to Shop Practices (17 hours) Topic 3-1: Material Types and Properties (4 hours) Topic 3-2: The Production Environment (4 hours) Topic 3-3: Processing of Materials (8 hours) Topic 3-4: Careers in Production (1 hour)
Unit 4: Graphical Communications (10 hours) Topic 4-1: Lettering and Sketching (2 hours) Topic 4-2: 2D Orthographic Views (4 hours) Topic 4-3: 3D Pictorial Drawings (1 hour) Topic 4-4: Working Drawings (2 hours) Topic 4-5: Drafting Related Careers (1 hour)
Unit 5: Introduction to CAD/CAM (16 hours) Topic 5-1: Creating Entities (4 hours) Topic 5-2: Display Manipulation (2 hours) Topic 5-3: Modifying Entities (2 hours) Topic 5-4: Dimensioning (3 hours) Topic 5-5: Plotting (1 hour) Topic 5-6: Computer Aided Manufacture (CAM) (4 hours)
Unit 6: The Design Project (46 hours)
Topic 6-1: The Design Portfolio and Report (2 hours) Topic 6-2: Defining the Problem (2 hours) Topic 6-3: Generating Options (2 hours) Topic 6-4: Selecting the Best Option (2 hours) Topic 6-5: Developing the Solution (16 hours) Topic 6-6: Prototyping and Testing (20 hours)
Topic 6-7: Evaluation and Redesign (2 hours)

Student Assessment and Course Evaluation
Design and Fabrication 1212 - 6 - Teacher Resource Guide
Student Assessment and Course Evaluation
The recommended student assessment for Design and Fabrication 1212 reflects the problem-based learning approach and emphasizes the importance of the design portfolio and prototype. Given that Unit 6 accounts for approximately 42% of the course, it is recommended that the Design Project account for a significant portion of a student’s assessment with both the design portfolio documentation and the performance of the physical prototype being considered. Student participation throughout the course should also be considered given the frequency of group work and related discussions in this course. Finally, the use of the more conventional class/lab assignments and unit quizzes should also be considered in the assessment of the students. Overall, it is recommended that students be assessed in accordance with the following guideline: Participation 20% Design Portfolio 30% Prototype Performance 20% Class/Lab Assignments 10% Quizzes 20%
Lesson Plans
The lesson plans included in this guide address all topics in Units 1 to 6 and are intended as a practical resource for teachers that will both facilitate course delivery and help ensure student learning. A standard format is used for each lesson with the following main sections:
Suggested Duration and Delivery Format
Specific Curriculum Outcomes
Teacher Required Resources
Student Required Resources
Teacher Preparation
Introduction
Presentation
Suggested Student Activities
Suggested Assessment and Evaluation
Wrap-up and Closing
Learning Resources
Student Material Pack The Student Material Pack presented at the end of each lesson plan includes lesson support materials that must be copied for the class including Learning Resource Sheets and assignments. The Learning Resource Sheets include reference information that directly supports lesson delivery. An alphanumeric system is used to identify Learning Resource Sheets and assignments by unit number, topic, and sheet number. LRS-U1-T1-1, for example, represents Learning Resource Sheet (LRS) #1 for Unit 1 (U1), Topic 1 (T1). Similarly, ASG-U1-T1-1 represents assignment #1 for Unit 1, Topic 1.

Lesson Plans UNIT 1 Introduction to Design

Lesson Plans Unit 1: Introduction to Design
Design and Fabrication 1212 - 1 - Teacher Resource Guide
Unit 1 Introduction to Design
Unit Overview
This unit introduces students to the engineering design process and provides the basis for the remaining units in Design and Fabrication 1212, particularly the Design Project in Unit 6. Students learn the steps in the design process and demonstrate an appreciation for the concurrent engineering design philosophy through application of the process. In particular, students review the history of the design process and examine how it has evolved over time from a single person activity to the current approaches, such as concurrent engineering, that emphasize a team approach involving all stakeholders from the initial design concept stage. They also examine various fabrication techniques and discover how design and fabrication are interrelated mutually dependent activities in practice. Finally, students develop an appreciation for the socio-environmental impacts of design and explore the various career opportunities available in the design field.

Lesson Plans Unit 1: Introduction to Design
Design and Fabrication 1212 - 2 - Teacher Resource Guide
Specific Curriculum Outcomes and Suggested Timelines
Unit 1 addresses 8 specific curriculum outcomes (SCOs) distributed over five topics as shown below. Note that the durations specified for each topic are estimates and the teacher is encouraged to adjust these, if necessary. The GCOs that are being addressed in a particular topic are specified inside square brackets at the end of the corresponding SCO listing. Following completion of Unit 1, students will be able to:
Topic 1-1: History of Design (1 hour)
1.1.1 Explain the historical development and philosophy of design [3.404, 3.405]
Topic 1-2: The Design Process (4 hours)
1.2.1 Identify the steps in the design process [1.401] 1.2.2 Apply the design process in the development of a design of a simple project [1.402,
1.403] Topic 1-3: Social/Environmental Considerations (2 hours)
1.3.1 Explain the relationship between design and related social/environmental impacts [5.403] 1.3.2 Describe the ethical and legal responsibilities of designers [5.401, 5.402, 5.403]
Topic 1-4: Design for Fabrication (2 hours)
1.4.1 Explain the relationship between product design and fabrication [1.403] 1.4.2 Demonstrate recognition of the importance of a team approach in design and fabrication [4.401]
Topic 1-5: Careers in Design and Fabrication (1 hour)
1.5.1 Identify the various job roles required to support both design and fabrication in industry [4.401]

Lesson Plans Unit 1: Introduction to Design
Design and Fabrication 1212 - 3 - Teacher Resource Guide
Unit 1 Lesson Plans
Unit 1 includes eight lesson plans as follows:
Unit Topic Lesson Plan Number(s)
Recommended Duration
Topic 1-1: History of Design
Lesson #1 1 hour
Topic 1-2: The Design Process
Lesson #1 2 hours
Lesson #2 2 hours
Topic 1-3: Social/Environmental Considerations
Lesson #1 1 hour
Lesson #2 1 hour
Topic 1-4: Design for Fabrication
Lesson #1 1 hour
Lesson #2 1 hour
Topic 1-5: Careers in Design and Fabrication
Lesson #1 1 hour
Recommended Total Duration for Unit 1 10 hours

Lesson Plan #1 of 1 for Topic 1-1: History of Design Unit 1: Introduction to Design
Design and Fabrication 1212 - 1 - Teacher Resource Guide
Lesson Plan #1 of 1 Topic 1-1: History of Design
Suggested Duration: 1 hour Suggested Format: Classroom Lecture/Discussion
Following completion of this lesson, students will be able to:
1.1.1 Explain the historical development and philosophy of design [3.404, 3.405]
Teacher Required Resources
Design and Fabrication 1212 Teacher’s Resource Guide
Student Required Resources
Design and Fabrication 1212 Student Reference Textbooks Student Materials Pack
Teacher Preparation (1) Review the historical development of design and how it has evolved from an informal approach to a formal one with defined steps and procedures. Refer to http://deed.ryerson.ca/~fil/t/history0.html for “An Extremely Abbreviated History of Engineering Design”. (2) Review how the design process has expanded into a multidiscipline approach that relies on people with varied disciplines and backgrounds. Refer to http://www.creatingtechnology.org/history.htm#1 for an overview of the History of Engineering. (3) Review a chronology of historically noteworthy designs.
Refer to http://www.greatachievements.org for a list of the top 20 achievements and how engineering shaped the 20th century and changed the world.
(4) Prepare overhead transparencies or PowerPoint slides for learning resource
sheets #LRS-U1-T1-1, “Chronology of Design” and #LRS-U1-T2-1, “The Design Process”.

Lesson Plan #1 of 1 for Topic 1-1: History of Design Unit 1: Introduction to Design
Design and Fabrication 1212 - 2 - Teacher Resource Guide
Introduction
Overview Design and Fabrication 1212 with focus on the design project
State the purpose of this lesson and the expected learning outcomes
State how this lesson relates to other topics in Design and Fabrication 1212
Summarize what will be covered in this lesson and the related student activity
Presentation (1) Review the historical development of design and how it has evolved from an informal approach to a formal one with defined steps and procedures.
A copy of the chronology of design shown in the lesson resource sheet #LRS-U1-T1-1, “Chronology of Design”, should be displayed (via the website or overhead reproduction) and students referred to their copy included with the Student Material Pack.
(2) Overview how the design process has expanded into a multidiscipline approach that relies on people with varied disciplines and backgrounds.
A description of a common product and a related discussion on the various stakeholders from engineering, manufacturing, purchasing, marketing, and sales could facilitate this.
(3) Develop a chronology of other historically noteworthy designs.
Solicit the class for their own suggestions of other historically significant designs. Why have these designs stood the test of time? Which of today’s designs do you think will remain significant in the future?
Suggested Student Activities
The students will participate in a teacher-directed class discussion on the chronology of design aimed at comparing historical design approaches to current practice.
The students will participate in a teacher-directed class discussion aimed at identifying the various personnel involved in design and fabrication and the team approach required.

Lesson Plan #1 of 1 for Topic 1-1: History of Design Unit 1: Introduction to Design
Design and Fabrication 1212 - 3 - Teacher Resource Guide
Assessment and Evaluation The teacher should informally assess quality of student participation in class discussion; this will be considered in the calculation of the overall participation mark for the course.
Wrap-up and Closing
Review the key points related to the historical evolution of design and the team approach now required.
Preview the next lesson on the design process using the lesson resource sheet #LRS-U1-T2-1, “The Design Process”. Refer students to their copy in the Student Materials Pack.
Learning Resources (1) http://deed.ryerson.ca/~fil/t/history0.html
This site provides a brief one- page overview of engineering design form Brunelleschi in the 14thcentury through to the 21st century. It reviews the one-person approach to engineering design by Brunelleschi and traces the evolution of engineering design to the modern team multi disciplined approach used today.
(2) http://www.greatachievements.org/
This site lists the top engineering achievements and how engineering shaped a century and changed the world in 20 different categories from electrification to high performance materials. The site features an historical timeline of developments in each of the 20 categories and forecasts future developments in each area.
(3) http://www.asme.org/Communities/History/Resources/20th_Century_Achievements.cfm This site presents an alphabetical listing of the mechanical engineering achievements of the 20th century from agricultural mechanization to xerography. A brief summary of each achievement is provided and, in several cases, links to additional websites that further explore the topic in question are provided. (4) http://www.memagazine.org/supparch/medesign/index.html
This site is sponsored by the American Society of Mechanical Engineers and provides an overview of the design process, its evolution and the multidiscipline approach required in today’s design environment. The site is an excellent reference for the teacher or the student interested in further study on engineering design.
(5) http://www.creatingtechnology.org/history.htm#1 This site considers the history of engineering design in four distinct stages including Pre- scientific Revolution, the Industrial Revolution, the Second Industrial Revolution and Information Revolution.
Lesson Plan #1 of 1 for Topic 1-1: History of Design Unit 1: Introduction to Design
Design and Fabrication 1212 - 4 - Teacher Resource Guide
Student Material Pack The Student Material Pack for lesson #1 of 1 for topic 1-1 includes the following attached documents: (1) Learning Resource Sheet #LRS-U1-T1-1, “Chronology of Design”

Lesson Plan #1 of 1 for Topic 1-1: History of Design Unit 1: Introduction to Design
Design and Fabrication 1212 LRS-U1-T1-1-Page 1 Teacher Resource Guide
Chronology of Design Learning Resource Sheet #LRS-U1-T1-1
The history of engineering design can be considered in four distinct stages1: Pre-scientific revolution The prehistory of modern engineering that featured ancient master builders and Renaissance engineers such as Leonardo da Vinci. These forerunners of engineers, practical artists and craftsmen, proceeded mainly by trial and error. Industrial revolution From the eighteenth through early nineteenth century, civil and mechanical engineers changed from practical artists to scientific professionals. The first phase of modern engineering emerged in the Scientific Revolution. Galileo’s Two New Sciences, which seeks systematic explanations and adopts a scientific approach to practical problems, is a landmark regarded by many engineering historians as the beginning of structural analysis, the mathematical representation and design of building structures. This phase of engineering lasted through the First Industrial Revolution, when machines, increasingly powered by steam engines, started to replace muscles in most production. Second industrial revolution In the century before World War II, chemical, electrical, and other science-based engineering branches developed electricity, telecommunications, cars, airplanes, and mass production. The second industrial revolution, symbolized by the advent of electricity and mass production, was driven by many branches of engineering. Information revolution As engineering science matured after the war, microelectronics, computers, and telecommunications jointly produced information technology. Research and development boomed in all fields of science and technology after World War II, partly because of the Cold War and the Sputnik effect. The explosion of engineering research, which used to lag behind natural science, was especially impressive, as can be seen from the relative expansion of graduate education. Engineering was also stimulated by new technologies, notably aerospace, microelectronics, computers, and novel means of telecommunications from the Internet to cell phones. 1. Source: http://www.creatingtechnology.org/history.htm#1

Lesson Plan #1 of 2 for Topic 1-2: The Design Process Unit 1: Introduction to Design
Design and Fabrication 1212 LRS-U1-T2-1 Page 1 Teacher Resource Guide
Lesson Plan #1 of 2 Topic 1-2: The Design Process
Suggested Duration: 2 hours Suggested Format: Classroom Lecture/Discussion
Following completion of this lesson, students will be able to:
1.2.1 Identify the steps in the design process [1.401]
Teacher Required Resources
Design and Fabrication 1212 Teacher’s Resource Guide
Student Required Resources
Design and Fabrication 1212 Student Reference Textbooks Student Materials Pack
Teacher Preparation (1) Review the concept that a design for a product or service comes as a response to some
perceived need for that product or service. A good example would be the design of a powered wheel chair overviewed in learning resource sheet #LRS-U1-T2-2, “Powered Wheelchair Design Case Study”.
(2) Review learning resource sheet #LRS-U1-T2-1, “The Design Process” which illustrates the
steps in the design process.
Refer to http://iisme.org/etp/HS%20Engineering-%20Engineering.pdf. for a detailed explanation of each of the steps in the design process from the Industry Initiatives for Science and Math Education (IISME) founded in 1985 by a consortium of San Francisco Bay Area companies in partnership with the Lawrence Hall of Science at the University of California at Berkeley.
(3) Review the powered wheel-chair design case study presented in learning resource sheet
#LRS-U1-T2-2, “Powered Wheelchair Design Case Study”.
Prepare overhead transparencies or PowerPoint slides for learning resource sheets #LRS-U1-T2-1, “The Design Process” and #LRS-U1-T2-2, “Powered Wheelchair Design Case Study”.
(4) Review the student assignment #ASG-U1-T2-1, “Computer Workstation Design”.

Lesson Plan #1 of 2 for Topic 1-2: The Design Process Unit 1: Introduction to Design
Design and Fabrication 1212 LRS-U1-T2-1 Page 2 Teacher Resource Guide
Introduction
Introduce the concept that the need for a product or service stimulates the design process; solicit examples from the class and display learning resource sheet #LRS-U1-T2-1, “The Design Process” to briefly overview the steps in the design process
State the purpose of this lesson and the expected learning outcomes
State how this lesson relates to other topics in Design and Fabrication 1212
Summarize what will be covered in this lesson and the related student activity
Presentation (1) Explain the steps in the design process, as presented in learning resource sheet
#LRS-U1-T2-1, “The Design Process”, using the powered wheel-chair case study example contained in learning resource sheet #LRS-U1-T2-2, “Powered Wheelchair Design Case Study”.
Each step in the design process should be discussed in sequence for the powered wheel-chair design. At each stage in the process, class feedback should be solicited before the related section of learning resource sheet #LRS-U1-T2-1, “The Design Process” is displayed to the class.
Suggested Student Activities
The students will participate in a teacher-directed class discussion on the design process using the powered wheel-chair case study example.
Assessment and Evaluation The teacher should informally assess quality of student participation in class discussion; this will be considered in the calculation of the overall participation mark for the course.

Lesson Plan #1 of 2 for Topic 1-2: The Design Process Unit 1: Introduction to Design
Design and Fabrication 1212 LRS-U1-T2-1 Page 3 Teacher Resource Guide
Wrap-up and Closing
Review the key points related to the design process for the powered wheel-chair case study example.
Preview the next lesson on the design process by introducing Assignment #ASG-U1-T2-1, “Design of a Student Computer Workstation”. Refer students to their copy included in the Student Materials Pack.
Learning Resources (1) http://iisme.org/etp/HS%20Engineering-%20Engineering.pdf.
This document was developed by Industry Initiatives for Science and Math Education (IISME), a consortium of San Francisco Bay Area companies in partnership with the Lawrence Hall of Science at the University of California at Berkeley. It includes a detailed overview of each of the steps in the engineering design process.
(2) http://www.ap.buffalo.edu/idea/Anthro/index.asp This site developed by the Center for Inclusive Design & Environmental Access of the University at Buffalo South Campus is a comprehensive resource on the anthropometry, or the study of the dimensions and abilities of the human body, of wheeled mobility. It includes a detailed report that includes measurement of reaching abilities, maneuvering and other aspects of space and equipment use of a wheeled mobility device.
Student Material Pack The Student Material Pack for lesson #1 of 2 for topic 1-2 includes the following attached documents: (1) Learning Resource Sheet # LRS-U1-T2-1, “The Design Process” (2) Learning Resource Sheet #LRS-U1-T2-2, “Powered Wheelchair Design Case Study””.

Lesson Plan #1 of 2 for Topic 1-2: The Design Process Unit 1: Introduction to Design
Design and Fabrication 1212 LRS-U1-T2-1 Page 4 Teacher Resource Guide
The Design Process Learning Resource Sheet #LRS-U1-T2-1
The Design Process, as defined in the Atlantic Canada Foundation document on technology Education (2001), is essentially a methodology that can facilitate technological problem-solving. It is an iterative process that begins with an identified need or opportunity and progresses through a series of pre-defined steps to a final implemented solution. As shown in figure 2, “The Design Process”, there are six distinct steps in the process including Design Brief, Investigative Research, Generate Options, Select Best Option, Develop Solution, and Evaluate Redesign2. While there are numerous variations of this process contained in the literature, all include these essential steps.
Figure 2: The Design Process
2. Source: Atlantic Canada Foundation document on Technology Education (2001)

Lesson Plan #1 of 2 for Topic 1-2: The Design Process Unit 1: Introduction to Design
Design and Fabrication 1212 LRS-U1-T2-2 Page 1 Teacher Resource Guide
Powered Wheel-Chair Design Learning Resource Sheet #LRS-U1-T2-2
Needs Identification (Opportunities) As lead engineer at your company, you have been requested to design a powered wheel-chair for persons with full upper body function (paraplegic).
Defining the Problem (The Design Brief and Investigative Research) A critical first step in design is to define the problem by identifying the design objectives or goals. For each objective, criteria that quantify or qualify the design objective must be assigned. For example, “must be able to provide variable speed” is quantified as “0 to 5 km/hr”. Constraints or the physical, time, and cost limitations on the design must also be considered. For example, “the retail price should not exceed $5000.00”. The powered wheel-chair design must satisfy the following objectives within the criteria and constraints noted.
Must be able to fit through standard sized doorways
Vertical distance from the floor to the bottom of the chair seat, or knee height, should accommodate 95% of the male/female populations according to anthropometric standards;
Must be capable of transport in a minivan or compact pick-up
Must be able to structurally accommodate user payload for 95% of the male and female populations according to anthropometric standards;
Must be able to provide variable speed from 0 to 5 km/hr; speed adjustment should be possible using hand-operated controls
Must be reliable and capable of 12 hours continuous operation
Must be equipped with brakes capable of bringing the chair to a stop from the maximum speed of 5 km/hr in a distance of 2 meters; brakes should be capable of actuation using hand-operated control; emergency manual braking to stop should be possible in a distance of 4 meters in the event of power failure
Overall weight of unit without passenger should not exceed 80 kg.
Retail price of unit should not exceed $5000.00
Final design must be completed in one month Investigative research reveals the following:
The most common standard doorway width is 813 mm
The available cargo space in a minivan is 1200 mm wide x 1100 mm high x 1500 mm long
Anthropometric standards recommend a knee height of 675 mm
Generate Options Three alternative solutions are considered:

Lesson Plan #1 of 2 for Topic 1-2: The Design Process Unit 1: Introduction to Design
Design and Fabrication 1212 LRS-U1-T2-2 Page 2 Teacher Resource Guide
A commercially available powered scooter
A commercially available powered wheel-chair
A custom designed and built powered wheel-chair
Select Best Option The best option is selected by comparing how well each meets the design objectives within the identified constraints. This decision is often made after developing a decision matrix. The decision matrix is essentially a comparison table which quantifies the degree to which each alternative solution meets the various objectives. For example, on a scale of 0 to 10, the expected cost of alternative #1 may be rated at 10/10 ($3500.00), that for alternative #2 at 8/10 ($4500.00), and alternative #3 at 7/10 ($5000.00). Students will have the opportunity to develop a decision matrix in Unit 6, the Design Project. The time, cost and physical constraints imposed on the design are particularly significant in selecting the best option. In this case, the best solution appears to be a commercially available powered wheel-chair custom fit to the end-user.
Develop Solution The best solution option is developed in detail at this stage. This often involves various engineering calculations and the development of detail and assembly drawings. Following this, a physical or virtual prototype is usually produced and tested to ensure functional compliance. Since in this case a commercially available wheel-chair appears to be the best solution, the solution is “developed” through extensive research and consultation with prospective suppliers, existing users of similar systems, and experts in the related health field. Based on this research, the C300 CS from Permobil (http://www.permobil.com/templates/ProductPage.aspx?id=1558) appears to meet all design objectives within the defined constraints.
Prototype and Testing Since the vehicle already exists, there is no need to construct a physical prototype and then test its performance. The vehicle could be purchased and the user then monitored to determine further areas for improvement.
Evaluate and Redesign Prototype testing will often reveal the need for improvement in a number of areas. The need to minimize weight and reduce production costs, for example, are sometimes identified at this stage. The design process essentially repeats at this stage in an effort to optimize the design – hence, design becomes a cyclic process. In this case, preliminary use of the vehicle by the end user will likely reveal needed improvements such as leg height and other size adjustments. Other improvements may be identified that require custom modification of the vehicle. Product manufacturers often survey end-users in this manner to identify needed improvements that later appear as enhancements in future releases of their product.

Lesson Plan #2 of 2 for Topic 1-2: The Design Process Unit 1: Introduction to Design
Design and Fabrication 1212 - 1 - Teacher Resource Guide
Lesson Plan #2 of 2 Topic 1-2: The Design Process
Suggested Duration: 2 hours Suggested Format: Classroom Lecture/Discussion
Following completion of this lesson, students will be able to:
1.2.2 Apply the design process in the design of a simple project [1.402, 1.403]
Teacher Required Resources
Design and Fabrication 1212 Teacher’s Resource Guide
Student Required Resources
Design and Fabrication 1212 Student Reference Textbooks Student Materials Pack
Teacher Preparation (1) Review learning resource sheet #LRS- U1-T2-1, The Design Process” which illustrates the
steps in the design process.
Refer to http://iisme.org/etp/HS%20Engineering-%20Engineering.pdf. for a detailed explanation of each of the steps in the design process. This document was developed by Industry Initiatives for Science and Math Education (IISME), a consortium of San Francisco Bay Area companies in partnership with the Lawrence Hall of Science at the University of California at Berkeley. It includes a detailed overview of each of the steps in the engineering design process.
(2) Review assignment #ASG-U1-T2-1, “Computer Workstation Design”.
(3) Prepare overhead transparencies or PowerPoint slides for learning resource sheets #LRS-
U1-T2-1, “The Design Process” and #ASG-U1-T2-1, “Computer Workstation Design”.

Lesson Plan #2 of 2 for Topic 1-2: The Design Process Unit 1: Introduction to Design
Design and Fabrication 1212 - 2 - Teacher Resource Guide
Introduction
Briefly review the design process; use learning resource sheets #LRS-U1-T2-1, “The Design Process” to facilitate and solicit class feedback during delivery
State the purpose of this lesson and the expected learning outcomes
State how this lesson relates to other topics in Design and Fabrication 1212
Summarize what will be covered in this lesson and the related student activity
Presentation (1) Briefly review the steps in the design process as they were applied in the powered
wheel-chair design case study presented in learning resource sheet #LRS-U1-T2-2, “Powered Wheelchair Design Case Study”.
At each stage in the process, class feedback should be solicited.
Suggested Student Activities
The class is divided into groups of 2 or 4 and assignment #ASG-U1-T2-1 , “Computer Workstation Design” is overviewed by the teacher with particular emphasis on defining the problem. Each group should assign a recorder and presenter. Students then work in their individual groups to complete the assignment. At the end of the group work session, each student group presents their results.
Assessment and Evaluation While the assignment solution presented should be considered, the teacher should primarily base assessment of each group on adherence to the steps in the design process. An evaluation rubric is recommended to facilitate this task.

Lesson Plan #2 of 2 for Topic 1-2: The Design Process Unit 1: Introduction to Design
Design and Fabrication 1212 - 3 - Teacher Resource Guide
Wrap-up and Closing
Identify how the various group solutions are similar and are different. Select a group to review the design process using their solution to assignment #ASG-U1-T2-1, “Computer Workstation Design” as an example.
Preview the next lesson on the social/environmental considerations that impact design.
Learning Resources (1) http://iisme.org/etp/HS%20Engineering-%20Engineering.pdf.
This document was developed by Industry Initiatives for Science and Math Education (IISME), a consortium of San Francisco Bay Area companies in partnership with the Lawrence Hall of Science at the University of California at Berkeley. It includes a detailed overview of each of the steps in the engineering design process.
Student Material Pack The Student Material Pack for lesson #2 of 2 for topic 1-2 includes the following attached document: (1) Assignment #ASG-U1-T2-1, “Computer Workstation Design”.

Lesson Plan #2 of 2 for Topic 1-2: The Design Process Unit 1: Introduction to Design
Design and Fabrication 1212 ASG-U1-T2-1 Page 1 Teacher Resource Guide
Computer Workstation Design Assignment #ASG-U1-T2-1
Needs Identification Your group, an engineering consulting firm, has been hired to design a computer workstation for use by high school students that is functional, affordable, portable, attractive and easily manufactured.
Defining the Problem The computer workstation design must meet the following objectives within the criteria and constraints noted:
Must provide a sufficient main work surface area to accommodate a 17” monitor, 8.5” x 11” sheet size capable printer, mouse, 2 speakers, keyboard, and 8.5” x 14” sheet size capable scanner.
Must provide sufficient space for CPU storage
Must provide sufficient storage space to accommodate all textbooks and/or binders required for Level I studies
Must provide sufficient space for storage of 20 CDs
Must provide storage space for pens, pencils, erasers, paper clips and other peripherals
Must have sufficient structural strength to support 200 lbs static load
Must be capable of being manufactured by students in Design and Fabrication 1212 using conventional hand tools including a circular saw, powered drill, jig-saw, palm sander, and router
Must allow for easy manual assembly/disassembly using only a Robertson screwdriver and/or ¼” Allen key
Production cost should not exceed $100.00; this will permit a retail price of $125.00 with a 25% mark-up. Consider only materials and direct labour costs and assume labour costs are based on an operator being paid at a rate of $15.00 per hour
Must be producible from two 4 ft. x 8 ft. sheets of ½” plywood (good one-side), 1” No 10 Robertson flathead wood screws, 1 240 ml bottle of Carpenter’s glue
Must be aesthetically pleasing – in other words it’s got to look good!
Assignment Tasks Complete the exercises presented on the following pages. Note that physical prototyping, testing, evaluation, and re-design need not be considered at this stage.

Lesson Plan #2 of 2 for Topic 1-2: The Design Process Unit 1: Introduction to Design
Design and Fabrication 1212 ASG-U1-T2-1 Page 2 Teacher Resource Guide
Computer Workstation Design Assignment #ASG-U1-T2-1
(1) Defining the Problem Criteria that quantify or qualify each design objective must be assigned in order to adequately define the problem. Table 1, “Assigning Criteria to Objectives”, lists several design objectives from the previous page that are not completely defined by quantifying or qualifying the objective. In the space provided, complete each objective by writing the corresponding criteria. Note that some preliminary research and/or field measurements will be necessary.
Table 1: Assigning Criteria to Objectives
Objective Criteria
Must provide a sufficient main work surface area to accommodate a 17” monitor, 8.5” x 11” sheet size capable printer, mouse, 2 speakers, keyboard, and 8.5” x 14” sheet size capable scanner.
Must provide sufficient space for CPU storage
Must provide sufficient storage space to accommodate all textbooks and/or binders required for Level I studies
Must provide storage space for pens, pencils, erasers, paper clips and other peripherals
(2) Generate Options, Select the Best Option, and Develop Solution Using table 2, “Solution Options”, sketch 3 alternative design concepts for the computer workstation design. Using table 3, “Decision Matrix”, indicate whether or not each of your alternative solutions meets the solution objectives by writing (Y)es or (N)o in the space provided. Use the completed table to help determine which alternative is the preferred solution for detailed design development. Using table 4, “Final Solution”, sketch the final solution. Label your sketch to identify the key components in the workstation design.

Lesson Plan #2 of 2 for Topic 1-2: The Design Process Unit 1: Introduction to Design
Design and Fabrication 1212 ASG-U1-T2-1 Page 3 Teacher Resource Guide
Table 2: Solution Options
Alternative Solution #1
Alternative Solution #2
Alternative Solution #3

Lesson Plan #2 of 2 for Topic 1-2: The Design Process Unit 1: Introduction to Design
Design and Fabrication 1212 ASG-U1-T2-1 Page 4 Teacher Resource Guide
Table 3: Decision Matrix
Objective Alternative #1 Alternative #2 Alternative #3 Must provide a sufficient main work surface area to accommodate a 17” monitor, 8.5” x 11” sheet size capable printer, mouse, 2 speakers, keyboard, and 8.5” x 14” sheet size capable scanner.
Must provide sufficient space for CPU storage
Must provide sufficient storage space to accommodate all textbooks and/or binders required for Level I studies
Must provide sufficient space for storage of 20 CDs
Must provide storage space for pens, pencils, erasers, paper clips and other peripherals
Must have sufficient structural strength to support 200 lbs static load
Must be capable of being manufactured by students in Design and Fabrication 1212 using conventional hand tools including a circular saw, powered drill, jig-saw, palm sander, and router
Must allow for easy manual assembly/disassembly using only a Robertson screwdriver and/or ¼” Allen key
Production cost should not exceed $100.00; this will permit a retail price of $125.00 with a 25% mark-up. Consider only materials and direct labour costs and assume labour costs are based on an operator being paid at a rate of $15.00 per hour
Must be producible from two 4 ft. x 8 ft. sheets of ½” plywood (good one-side), 1” No 10 Robertson flathead wood screws, 1 240 ml bottle of Carpenter’s glue
Must be aesthetically pleasing – in other words it’s got to look good!
Based on this decision matrix, the preferred solution appears to be alternative # .

Lesson Plan #2 of 2 for Topic 1-2: The Design Process Unit 1: Introduction to Design
Design and Fabrication 1212 ASG-U1-T2-1 Page 5 Teacher Resource Guide
Table 4: Final Solution

Lesson Plan #1 of 2 for Topic 1-3: Social/Environmental Considerations Unit 1: Introduction to Design
Design and Fabrication 1212 - 1 - Teacher Resource Guide
Lesson Plan #1 of 2 Topic 1-3: Social/Environmental Considerations
Suggested Duration: 1 hour Suggested Format: Classroom Lecture/Discussion
Following completion of this lesson, students will be able to:
1.3.1 Explain the relationship between design and related social/environmental impacts [5.403]
Teacher Required Resources
Design and Fabrication 1212 Teacher’s Resource Guide
Student Required Resources
Design and Fabrication 1212 Student Reference Textbooks Student Materials Pack
Teacher Preparation (1) Determine the impact that production of a common consumer product has on the
environment and how design can minimize such impacts. An example would be the production of a computer monitor. The harvesting of the raw material, processing into a finished product and eventual disposal of these units can each have negative impacts on the environment. Refer to http://www.epa.gov/dfe/pubs/projects/computer/. This site, by the U.S. Environmental Protection Agency, is dedicated to The Design for the Environment (DfE) Program. The DfE is a voluntary partnership program that works directly with industry to integrate health and environmental considerations into business decisions. The Computer Display Partnership of DfE, along with the electronics industry, evaluated the life-cycle environmental impacts, performance, and cost of technologies that are used in desktop computer monitors.
(2) The teacher should prepare a list of common products from which students can select or be assigned their take-home assignment #ASG-U1-T3-1, “Product Life Cycle and Environmental Impacts”. Refer to http://www.computerhope.com/disposal.htm - 51, a collection of free services that allows any user to access its database of extensive free computer related information.

Lesson Plan #1 of 2 for Topic 1-3: Social/Environmental Considerations Unit 1: Introduction to Design
Design and Fabrication 1212 - 2 - Teacher Resource Guide
Introduction
Ask the class what happens to a common product such as a beverage container, used tire or cell phone, after it is worn out? Briefly discuss a product, such as PCBs or furnace oil, that have had negative environmental impacts locally and query the class on who should be held responsible. Ask the class what role design could play in reducing such negative environmental impacts.
State the purpose of this lesson and the expected learning outcomes
State how this lesson relates to other topics in Design and Fabrication 1212
Summarize what will be covered in this lesson and the related student activity
Presentation (1) Discuss with the class the environmental impact of the materials used in the
production of a common product such as a computer monitor.
Trace the possible impact of the production and use of the product on the environment and the health of people. The plastic used in a computer monitor case, for example, contains chemical plasticizers to make the plastic flexible so that the shape can be made but the plasticizers leach out of the monitor over time and are a known health hazard.
(2) Discuss what happens with the product at the end of its life cycle.
A monitor is usually discarded at the same time as the CPU unit and the rest of the computer system. These products often end up in landfills where the plastic can take many years to break down. There are recycling and re-use alternatives for these products such as those identified at ComputerHope.com (http://www.computerhope.com/disposal.htm - 51), a collection of free services that allows any user to access its database of extensive free computer related information.
(3) Discuss how the design of the product contributes to its negative environmental
impacts and solicit the class on how an improved design could minimize these.
The newer flat screen monitor designs, for example, consist of fewer smaller components.

Lesson Plan #1 of 2 for Topic 1-3: Social/Environmental Considerations Unit 1: Introduction to Design
Design and Fabrication 1212 - 3 - Teacher Resource Guide
Suggested Student Activities
Individually or in groups of 2 or 4, students should develop a 11” x 17” poster depicting the life cycle for a simple common product. The poster should include graphical illustrations and supporting text labels that help describe the life cycle from raw material to usable product to wasted, re-used or recycled product. The group poster should also include suggestions on how the product could be re-designed to minimize any negative environmental impacts. This assignment will need to be a take-home assignment since students will have to complete related research. The group topics should be either selected or assigned before the end of this lesson from a teacher prepared list.
Assessment and Evaluation Groups should be assessed based on the poster presentation. An evaluation rubric that considers the quality of presentation, the information content with supporting references, and the suggestion for re-design is recommended.
Wrap-up and Closing
Review the life cycle of the product discussed with emphasis on the environmental impacts and the importance of design in minimizing these impacts
Preview the next lesson on the social/environmental considerations that impact design.
Learning Resources (1) http://www.epa.gov/dfe/pubs/projects/computer/ . This site, by the U.S. Environmental
Protection Agency, is dedicated to The Design for the Environment (DfE) Program. The DfE is a voluntary partnership program that works directly with industry to integrate health and environmental considerations into business decisions. The Computer Display Partnership of DfE, along with the electronics industry, evaluated the life-cycle environmental impacts, performance, and cost of technologies that are used in desktop computer monitors.
(2) http://www.env.gov.nl.ca/env/ActsReg/default.asp, the provincial Department of
Environment and Conservation website, with links to the various acts and regulations governing the disposal of products and the environmental impact assessment requirements for industrial projects.
(3) http://www.computerhope.com/disposal.htm - 51, a collection of free services that allows
any user to access its database of extensive free computer related information

Lesson Plan #1 of 2 for Topic 1-3: Social/Environmental Considerations Unit 1: Introduction to Design
Design and Fabrication 1212 - 4 - Teacher Resource Guide
Student Material Pack The Student Material Pack for lesson #1 of 2 for topic 1-3 includes the following attached document: (1) Assignment ASG-U1-T3-1, “Product Life Cycle and Environmental Impacts”.

Lesson Plan #1 of 2 for Topic 1-3: Social/Environmental Considerations Unit 1: Introduction to Design
Design and Fabrication 1212 ASG-U1-T3-1 Page 1 Teacher Resource Guide
Product Life Cycle and Environmental Impacts Assignment #ASG-U1-T2-1
Select a common consumer product such as a beverage container, an automobile tire, or a cardboard box and develop a 11” x 17” poster depicting the life cycle for that product. Your poster should include graphical illustrations and supporting text labels that help describe the life cycle from raw material to usable product to wasted, re-used or recycled product. Your poster should also include suggestions on how the product could be re-designed to minimize any negative environmental impacts.

Lesson Plan #2 of 2 for Topic 1-3: Social/Environmental Considerations Unit 1: Introduction to Design
Design and Fabrication 1212 - 1 - Teacher Resource Guide
Lesson Plan #2 of 2 Topic 1-3: Social/Environmental Considerations
Suggested Duration: 1 hour Suggested Format: Classroom Lecture/Discussion
Following completion of this lesson, students will be able to:
1.3.2 Describe the ethical and legal responsibilities of designers [5.401, 5.402, 5.403]
Teacher Required Resources
Design and Fabrication 1212 Teacher’s Resource Guide
Student Required Resources
Design and Fabrication 1212 Student Reference Textbooks Student Materials Pack
Teacher Preparation (1) Review the legal and ethical responsibilities of engineers, in particular as relates to the
environment. Refer to http://www.pegnl.ca/publications/index.html. This site, which is produced by the association for Professional Engineers and Geoscientists in Newfoundland and Labrador, includes a description of the various codes of conduct governing engineering practice in relation to the environment.
(2) Review an engineering case study for discussion with the class. The NASA Challenger Case Study instructor guide at http://ethics.tamu.edu/ethics/shuttle/shuttle1.htm from Texas A & M University includes a complete description of the shuttle disaster and related questions for classroom discussion.
For other case studies, refer to http://onlineethics.org/cases/nspe/index.html, the Online Ethics Center for Engineering and Science at Case Western Reserve University. This site contains links to a variety of discussion cases that highlight professional ethics in engineering practice.

Lesson Plan #2 of 2 for Topic 1-3: Social/Environmental Considerations Unit 1: Introduction to Design
Design and Fabrication 1212 - 2 - Teacher Resource Guide
Introduction
Briefly describe a recent case of where a product or system has had a negative environmental impact that can be directly attributed to engineering design and discuss the related social impacts.
State the purpose of this lesson and the expected learning outcomes
State how this lesson relates to other topics in Design and Fabrication 1212
Summarize what will be covered in this lesson and the related student activity
Presentation (1) Briefly review the Code of Conduct for Professional Engineers or Engineering
Technologists as it relates specifically to the environment. The PEGNL website at http://www.pegnl.ca/publications/index.html documents the
guidelines governing engineering design as it relates to the environment. (2) Overview an engineering case study for the class in which an ethical dilemma
relating to the environment exists.
The online Engineering Case Study library at Texas A & M University (http://onlineethics.org/cases/nspe/index.html) includes several good examples such as the NASA Challenger disaster.
Suggested Student Activities
In groups of 2 or 4, students should complete a more detailed review of the engineering case study overviewed by the teacher; each group should assign a recorder and presenter and complete assignment # ASG-U1-T3-1, “Engineering Case Study”.
Assessment and Evaluation Groups should be assessed based on response to the assignment questions, which should be solicited by the teacher and discussed with the class. The completed assignment sheets should also be collected.

Lesson Plan #2 of 2 for Topic 1-3: Social/Environmental Considerations Unit 1: Introduction to Design
Design and Fabrication 1212 - 3 - Teacher Resource Guide
Wrap-up and Closing
Review the legal/ethical responsibilities of engineers or technologists and the possible negative environmental and other impacts that may arise if professional codes of conduct are not adhered to.
Preview the next lesson on Design for Fabrication.
Learning Resources (1) http://www.pegnl.ca/publications/index.html. This site, which is produced by the
association for Professional Engineers and Geoscientists in Newfoundland and Labrador, includes a description of the various codes of conduct governing engineering practice in relation to the environment.
(2) http://ethics.tamu.edu/ethics/shuttle/shuttle1.htm. This site from Texas A & M University includes a complete description of the Challenger shuttle disaster and a lesson plan with related classroom activities.
(3) http://onlineethics.org/cases/nspe/index.html, the Online Ethics Center for Engineering and
Science at Case Western Reserve University. This site contains links to a variety of discussion cases that highlight professional ethics in engineering practice.
Student Material Pack The Student Material Pack for lesson #2 of 2 or topic 1-3 includes the following attached document: (1) Assignment #ASG-U1-T3-1, “Engineering Case Study”.

Lesson Plan #2 of 2 for Topic 1-3: Social/Environmental Considerations Unit 1: Introduction to Design
Design and Fabrication 1212 ASG-U1-T2-1 Page 1 Teacher Resource Guide
Engineering Case Study Assignment #ASG-U1-T3-1
(1) What could management have done differently? (2) What, if anything, could their subordinates have done differently? (3) What should the engineer have done differently (if anything)? (4) What do you (the students) see as your future engineering professional responsibilities in
relation to both being loyal to management and protecting the public welfare?

Lesson Plan #1 of 2 for Topic 1-4: Design for Fabrication Unit 1: Introduction to Design
Design and Fabrication 1212 - 1 - Teacher Resource Guide
Lesson Plan #1 of 2 Topic 1-4: Design for Fabrication
Suggested Duration: 1 hour Suggested Format: Classroom Lecture/Discussion
Following completion of this lesson, students will be able to:
1.4.1 Explain the relationship between product design and fabrication [1.403]
Teacher Required Resources
Design and Fabrication 1212 Teacher’s Resource Guide
Student Required Resources
Design and Fabrication 1212 Student Reference Textbooks Student Materials Pack
Teacher Preparation (1) Review the design for manufacturing principles that engineers rely on to help ensure that
specified product and component designs are capable of being manufactured cost effectively using available resources. These are presented as Learning Resource Sheet #LRS-U1-T4-1, “Principles of Design for Manufacture and Assembly”.
Refer to
http://www.me.berkeley.edu/ME110/presentations/DesignForManufacturingAndAssembly.pdf for an excellent overview of the design for manufacturing and design for assembly principles from Berkeley University.
(2) Review the capability of the shop equipment for material handling and fabrication. This will
indicate the type/scope of projects that can be done in the shop considering manufacturing resource constraints.
(3) Review a set of working drawings for a simple project, such as the bird house example
included in the Student Activity Pack as Learning Resource Sheet #LRS-U1-T4-2. This design is based on the free birdhouse blueprints available at http://www.choosefreedom.com/birdhouse.html, a website produced by L&R Designs, a U.S. based company specializing in woodworking blueprints.
(4) Prepare an overhead transparency or PowerPoint slide of the Design for Manufacturing
and Assembly principles presented as Learning Resource Sheets #LRS-U1-T4-1, “Principles of Design for Manufacture and Assembly” and #LRS-U1-T4-2, “Birdhouse Design Project”.

Lesson Plan #1 of 2 for Topic 1-4: Design for Fabrication Unit 1: Introduction to Design
Design and Fabrication 1212 - 2 - Teacher Resource Guide
Introduction
Explain how design impacts the manufacturing methods required and the associated differences in production cost. Introduce the principles of design for manufacturing and assembly (DFM/DFA) as a means to minimizing these.
State the purpose of this lesson and the expected learning outcomes.
State how this lesson relates to other topics in Design and Fabrication 1212.
Summarize what will be covered in this lesson and the related student activity.
Presentation (1) Review the design for manufacturing principles that engineers rely on to help
ensure that specified product and component designs are capable of being manufactured cost effectively using available resources.
Refer to Learning Resource Sheet # LRS-U1-T4-1, “Principles of Design for Manufacture
and Assembly” which is based on the Berkeley University document at http://www.me.berkeley.edu/ME110/presentations/DesignForManufacturingAndAssembly.pdf.
(2) Emphasize the need for designers to consider the physical and human resources
available to fabricate a design as well as the associated cost.
The tool and equipment resource limitations of the shop should be discussed with the students and the need for the related required skills, particularly in relation to power tools, should be emphasized.
(3) Introduce the concept of working drawings to the students using the free birdhouse
blueprints available at http://www.choosefreedom.com/birdhouse.html, a website produced by L&R Designs, a U.S. based company specializing in woodworking blueprints. The general plan is reproduced as Learning Resource Sheet #LRS-U1-T4-2, “Birdhouse Design Project”.
The difference between detail and assembly drawings should be briefly explained with reference to the birdhouse blueprints.

Lesson Plan #1 of 2 for Topic 1-4: Design for Fabrication Unit 1: Introduction to Design
Design and Fabrication 1212 - 3 - Teacher Resource Guide
Suggested Student Activities
In groups of 2 or 4, students should review the set of working drawings for the birdhouse.
Assessment and Evaluation The teacher should informally assess quality of student participation in class discussion; this will be considered in the calculation of the overall participation mark for the course.
Wrap-up and Closing
Review the Design for Manufacturing and Assembly principles presented in Learning Resource Sheet #LRS-U1-T4-1, “Principles of Design for Manufacture and Assembly”.
Preview the next class on Design for Fabrication during which the birdhouse will be fabricated.
Learning Resources (1) http://www.me.berkeley.edu/ME110/presentations/DesignForManufacturingAndAssembly.pdf .
This online document by Berkley University provides an excellent overview of the design for manufacturing and design for assembly principles.
(2) http://www.choosefreedom.com/birdhouse.html, a website produced by L&R Designs, a
U.S. based company specializing in woodworking blueprints, includes the detailed plans for the birdhouse project. The general plan is reproduced as Learning Resource Sheet #LRS-U1-T4-2, “Birdhouse Design Project”.
Student Material Pack The Student Material Pack for lesson #1 of 2 for topic 1-4 includes the following attached documents: (1) Learning Resource Sheet #LRS-U1-T4-1, “Principles of Design for Manufacture and
Assembly”. (2) Learning Resource Sheet #LRS-U1-T4-2, “Birdhouse Design”.

Lesson Plan #1 of 2 for Topic 1-4: Design for Fabrication Unit 1: Introduction to Design
Design and Fabrication 1212 LRS-U1-T4-1 Page 1 Teacher Resource Guide
Principles of Design for Manufacture and Assembly Learning Resource Sheet #LRS-U1-T4-1
The primary aim of Design for Manufacturing (DFM) is to minimize the cost of production and/or time to market for a product, while maintaining an appropriate level of quality. This typically involves minimizing the number of parts in a product. Similarly, Design For Assembly (DFA) involves making attachment directions and methods simpler1. There are several fundamental principles governing DFM and DFA including:
Minimize part count by incorporating multiple functions into single parts. Several parts could be fabricated by using different manufacturing processes (sheet metal forming, injection molding). Ask yourself if a part function can be performed by a neighboring part.
Modularize multiple parts into single sub-assemblies.
Design to allow assembly in open spaces, not confined spaces. Do not bury important components.
Parts should easily indicate orientation for insertion. Parts should have self-locking features so that the precise alignment during assembly is not required. Or, provide marks (indentation) to make orientation easier.
Standardize parts to reduce variety.
Design parts so they do not tangle or stick to each other.
Distinguish different parts that are shaped similarly by non-geometric means, such as color coding.
Design parts to prevent nesting. Nesting is when parts are stacked on top of one another clamp to one another, for example, cups and coffee lids.
Design parts with orienting features to make alignment easier.
Provide alignment features on the assembly so parts are easily oriented.
Design the mating parts for easy insertion. Provide allowance on each part to compensate for variation in part dimensions.
Design the first part large and wide to be stable and then assemble the smaller parts on top of it sequentially.
If you cannot assemble parts from the top down exclusively, then minimize the number of insertion direction. Never require the assembly to be turned over.
Joining parts can be done with fasteners (screws, nuts and bolts, rivets), snap fits, welds or adhesives.
1 Source: Course Notes for Introduction to New Product Development (ME110), Berkley, University of California http://www.me.berkeley.edu/ME110/presentations/DesignForManufacturingAndAssembly.pdf

Lesson Plan #1 of 2 for Topic 1-4: Design for Fabrication Unit 1: Introduction to Design
Design and Fabrication 1212 LRS-U1-T4-2 Page 1 Teacher Resource Guide
Birdhouse Design Project Learning Resource Sheet #LRS-U1-T4-2
The birdhouse plan presented below is based on a design by L&R Designs, a U.S. based company specializing in design plans for a variety of woodworking projects. With the exception of a 3/8” dowel which must be purchased, all parts are to be made from 1"x 6" (3/4" thick by 5-1/2" wide) cedar fence board or a more cost effective substitute such as pine. All dimensions of 5-1/2" will,
therefore, not require cutting. The use of overlapping roof pieces in the design also eliminates the need for more complex taper cuts. Since this project requires only basic skills in the use of hand and power word-working tools, it is an excellent introductory shop project for students.

Lesson Plan #2 of 2 for Topic 1-4: Design for Fabrication Unit 1: Introduction to Design
Design and Fabrication 1212 - 1 - Teacher Resource Guide
Lesson Plan #2 of 2 Topic 1-4: Design for Fabrication
Suggested Duration: 2 hours Suggested Format: Shop
Following completion of this lesson, students will be able to:
1.4.2 Demonstrate recognition of the importance of a team approach in design and fabrication [4.401]
Teacher Required Resources
Design and Fabrication 1212 Teacher’s Resource Guide
Student Required Resources
Design and Fabrication 1212 Student Reference Textbooks Student Materials Pack
Teacher Preparation (1) Review the design for manufacturing principles that engineers rely on to help ensure that
specified product and component designs are capable of being manufactured cost effectively using available resources. These are presented as Learning Resource Sheet #LRS-U1-T4-1, “Principles of Design for Manufacture and Assembly”.
Refer to
http://www.me.berkeley.edu/ME110/presentations/DesignForManufacturingAndAssembly.pdf for an excellent overview of the design for manufacturing and design for assembly principles from Berkeley University.
(2) Review the capability of the shop equipment for material handling and fabrication. During
this lab, you will be introducing the students to the shop through building of the birdhouse as presented in Learning Resource Sheet #LRS-U1-T4-2, “Birdhouse Design Project”.
(3) Review the birdhouse design included in the Student Activity Pack as Learning Resource
Sheet #LRS-U1-T4-2, “Birdhouse Design Project”. This design is based on the free birdhouse blueprints available at http://www.choosefreedom.com/birdhouse.html, a website produced by L&R Designs, a U.S. based company specializing in woodworking blueprints. Note the particular skills, materials, and shop resources that students will need to build the prototype.

Lesson Plan #2 of 2 for Topic 1-4: Design for Fabrication Unit 1: Introduction to Design
Design and Fabrication 1212 - 2 - Teacher Resource Guide
Introduction
Explain the manufacturing requirements for the birdhouse through a brief interactive class discussion
State the purpose of this lesson and the expected learning outcomes
State how this lesson relates to other topics in Design and Fabrication 1212
Summarize what will be covered in this lesson and the related student activity
Presentation (1) Demonstrate the safe operation of the tools required to build the birdhouse through
fabrication of a demo unit, which will be retained on display in the shop. Safe shop practice, personnel protection, and shop safety rules should be emphasized and
potential hazards should be identified.
Suggested Student Activities
In groups of 2 or 4, students under the direct supervision of the teacher should manufacture one of the components required for a single birdhouse per group. Each student in the group should be given an opportunity to actively participate in use of the shop tools.
Groups then complete Assignment #ASG-U1-T4-1, “Birdhouse Production Cost”, as a take-home assignment to determine the estimated labour hours required, the estimated direct labour cost, and the production cost per unit considering only material and direct labour cost.
Assessment and Evaluation Student groups should be assessed based on how well their prototype birdhouse meets the blueprint specifications as well as on safe practice in the shop.

Lesson Plan #2 of 2 for Topic 1-4: Design for Fabrication Unit 1: Introduction to Design
Design and Fabrication 1212 - 3 - Teacher Resource Guide
Wrap-up and Closing
Solicit the class for suggested design changes that could facilitate manufacture of the birdhouse.
Preview the next lesson on Careers in Design.
Learning Resources (1) http://www.me.berkeley.edu/ME110/presentations/DesignForManufacturingAndAssembly.pdf .
This online document by Berkley University provides an excellent overview of the design for manufacturing and design for assembly principles.
(2) http://www.choosefreedom.com/birdhouse.html, a website produced by L&R Designs, a
U.S. based company specializing in woodworking blueprints. Note the particular skills, materials, and shop resources that students will need to build the prototype.
Student Material Pack The Student Material Pack for lesson #2 of 2 for topic 1-4 includes the following attached document: (1) Assignment #ASG-U1-T4-1, “Birdhouse Production Cost”.

Lesson Plan #2 of 2 for Topic 1-4: Design for Fabrication Unit 1: Introduction to Design
Design and Fabrication 1212 ASG-U1-T4- 1 Page 1 Teacher Resource Guide
Birdhouse Production Cost Assignment #ASG-U1-T4-1
(1) For each component of the birdhouse shown in Learning Resource Sheet #LRS-U1-T4-2,
“Birdhouse Design Project”, complete the following table:
Component Material Required
Estimated Material Cost ($)
Shop Tools/Resources
Required
Estimated Labour Time
(Hr.)
Estimated Labour Cost
($)
Front
Back
Bottom
Sides
Top Left
Top Right
Note: The dowel, 1-1/2" finishing nails, and outdoor carpenter’s glue must be purchased. (2) Determine the estimated total time to produce one unit. How many units could be
produced in an 8 hour shift? (3) Determine the estimated total cost to produce. What retail price would you suggest for this
birdhouse?
NOTE: Assume a labour cost of $10/hr. and an equipment rental cost of $15/hr..

Lesson Plan #1 of 1 for Topic 1-5: Careers in Design Unit 1: Introduction to Design
Design and Fabrication 1212 - 1 - Teacher Resource Guide
Lesson Plan #1 of 1 Topic 1-5: Careers in Design
Suggested Duration: 1 hour Suggested Format: Lecture/Discussion
Following completion of this lesson, students will be able to:
1.5.1 Identify the various job roles required to support both design and fabrication in industry [4.401]
Teacher Required Resources
Design and Fabrication 1212 Teacher’s Resource Guide
Student Required Resources
Design and Fabrication 1212 Student Reference Textbooks Student Materials Pack
Teacher Preparation (1) Review the various design careers required in support of fabrication. Refer to http://www.jobfutures.ca/noc/browse-occupations-interest-Things.shtml, the
JobFutures website produced by Services Canada that provides an extensive listing of careers including those in support of design and fabrication. For each career listed, a wealth of information regarding job role, employment prospects, and required training is provided.
(2) Review the set of working drawings for the bird house example included in the Student
Activity Pack as Learning Resource Sheet #LRS-U1-T4-2, “Birdhouse Design Project”. This design is based on the free birdhouse blueprints available at http://www.choosefreedom.com/birdhouse.html, a website produced by L&R Designs, a U.S. based company specializing in woodworking blueprints. Note the various job roles that would be required in a production setting where a high volume of this product is produced.

Lesson Plan #1 of 1 for Topic 1-5: Careers in Design Unit 1: Introduction to Design
Design and Fabrication 1212 - 2 - Teacher Resource Guide
Introduction
Introduce the notion that there are various job roles required to support production of in industry both on the shop floor and in the office
State the purpose of this lesson and the expected learning outcomes
State how this lesson relates to other topics in Design and Fabrication 1212
Summarize what will be covered in this lesson and the related student activity
Presentation (1) Trace the various job roles in industry that would be required to support high
volume production of the birdhouse from initial design to finished product. The importance of the designer’s role should be emphasized and it’s impact on the various
other job roles should be explored. (2) Using the JobFutures website (http://www.jobfutures.ca/noc/browse-occupations-
interest-Things.shtml), explore some of the job roles identified for the birdhouse production and provide a general overview of the website features.
Suggested Student Activities
For one of the various job roles identified for the birdhouse production, students should write a job advertisement that they would post in the classified section of a newspaper if they were hiring to fill this role. Since students will need to use the JobFutures website or similar source to determine key information, this should be a take-home assignment.
Assessment and Evaluation The teacher should informally assess quality of student participation in class discussion; this will be considered in the calculation of the overall participation mark for the course.

Lesson Plan #1 of 1 for Topic 1-5: Careers in Design Unit 1: Introduction to Design
Design and Fabrication 1212 - 3 - Teacher Resource Guide
Wrap-up and Closing
Summarize the group results and identify the common findings by developing a final listing of the job roles required to support production
Preview Unit 2: Fabrication Techniques.
Learning Resources (1) http://www.jobfutures.ca/noc/browse-occupations-interest-Things.shtml, the JobFutures
website produced by Services Canada that provides an extensive listing of careers including those in support of design and fabrication. For each career listed, a wealth of information regarding job role, employment prospects, and required training is provided.
(2) http://www.choosefreedom.com/birdhouse.html, a website produced by L&R Designs, a
U.S. based company specializing in woodworking blueprints.
Student Material Pack A Student Material Pack is not required for this lesson.

Lesson Plans UNIT 2 Fabrication Techniques

Lesson Plans Unit 2: Fabrication Techniques
Design and Fabrication 1212 - 1 - Teacher Resource Guide
Unit 2 Fabrication Techniques
Unit Overview
The purpose of this unit is to provide students with an introduction to the operation and environment of an industrial shop. Students will learn how to operate power and hand tools through the fabrication of simple projects in the shop accompanied by supporting activities in the classroom. This unit will give students the hands on experience that is required to relate their design to fabrication. In particular, students first learn the shop safety rules and how to use common metrology tools. They then learn the safe operating practices for hand/power tools found in an industrial production shop, and develop an awareness of the related environmental impacts that should be considered. Finally, students are given the opportunity to explore shop related careers.

Lesson Plans Unit 2: Fabrication Techniques
Design and Fabrication 1212 - 2 - Teacher Resource Guide
Specific Curriculum Outcomes and Suggested Timelines
Unit 2 addresses 11 Specific Curriculum Outcomes (SCOs) distributed among five topics as shown below. Note that the durations specified for each topic are estimates and the teacher is encouraged to adjust these, if necessary. The General Curriculum Outcomes (GCOs) that are being addressed in a particular topic are specified inside square brackets at the end of the corresponding SCO listing. Following completion of Unit 2, students will be able to: Topic 2-1: Shop Safety (2 hours)
2.1.1 Identify potential hazards in the shop environment [5.402] 2.1.2 Recognize the need to consult Material Data Safety Sheets (MSDS) when handling chemicals [5.402] 2.1.3 Demonstrate proper procedure for handling shop emergencies [5.402, 5.403] Topic 2-2: Metrology (2 hours)
2.2.1 Identify common metrology tools [1.403] 2.2.2 Explain the relationship between tolerancing and production cost [1.403] Topic 2-3: Machine Operation (4 hours)
2.3.1 Demonstrate safe use of hand tools in the fabrication of a simple project [1.403, 2.401] 2.3.2 Demonstrate safe operating procedure for operation of power tools for cutting, turning and milling [2.401] Topic 2-4: Environmental Protection (2 hours)
2.4.1 Explain the proper disposal methods for waste material [5.402, 5.403] 2.4.2 Identify recycling and re-use opportunities for production waste [5.401,5.402, 5.403] Topic 2-5: Shop Related Careers (1 hour)
2.5.1 Identify the various job roles required to support shop operations in industry [4.401] 2.5.2 List the educational requirements for shop personnel [4.403]

Lesson Plans Unit 2: Fabrication Techniques
Design and Fabrication 1212 - 3 - Teacher Resource Guide
Unit 2 Lesson Plans
Unit 2 includes eight lesson plans as follows: .
Unit Topic Lesson Plan Number(s)
Recommended Duration
Topic 2-1: Shop Safety
Lesson #1 1 hour
Lesson #2 1 hour
Topic 2-2: Metrology
Lesson #1 2 hours
Topic 2-3: Machine Operation
Lesson #1 2 hours
Lesson #2 2 hours
Topic 2-4: Environmental Protection
Lesson #1 1 hour
Lesson #2 1 hour
Topic 2-5: Shop Related Careers
Lesson #1 1 hour
Recommended Total Duration for Unit 2 11 hours

Lesson Plan #1 of 2 for Topic 2-1: Shop Safety Unit 2: Fabrication Techniques
Design and Fabrication 1212 - 1 - Teacher Resource Guide
Lesson Plan #1 of 2 Topic 2-1: Shop Safety
Suggested Duration: 1 hour Suggested Format: Shop Demonstration
Following completion of this lesson, students will be able to:
2.1.1 Identify potential hazards in the shop environment [5.402] 2.1.2 Recognize the need to consult Material Data Safety Sheets ( MSDS) when handling chemicals [5.402] 2.1.3 Demonstrate proper procedure for handling shop emergencies. [5.402, 5.403]
Teacher Required Resources
Design and Fabrication 1212 Teacher’s Resource Guide Safety footwear Safety glasses Full face shield Leather gloves Coveralls Ear plugs Ear muffs
Equipment Manuals Student Required Resources
Design and Fabrication 1212 Student Text Student Materials Pack Safety footwear
Safety glasses
Teacher Preparation (1) Collect safety footwear, safety glasses, full face shield, leather gloves, coveralls, ear plugs,
and ear muffs. Place these on the demonstration table in the shop in preparation for class. (2) Develop the General Shop Safety rules and post in a common area of the shop.
Refer to http://mielsvr1.ecs.umass.edu/mie213/Generalshopsafetyrules.pdf, an on-line document from the University of Massachusetts that includes both general safety rules and equipment specific safety rules samples.

Lesson Plan #1 of 2 for Topic 2-1: Shop Safety Unit 2: Fabrication Techniques
Design and Fabrication 1212 - 2 - Teacher Resource Guide
(3) Review the safe operating procedure for hand tools and the operations manuals for each piece of equipment in the shop. For stationary power tools, operations manuals should be located adjacent to the machine for easy access by students. For hand tools and portable power tools, the guidelines for safe operation should be posted in clear view on a wall in the tool storage center area.
(4) Tour the shop and record the potential electrical, mechanical, trip and other hazards noted.
Inspect the shop for general housekeeping and clean where necessary. Ensure all safety guards and lockouts are in-place.
(5) Develop the procedure for handling shop emergencies and the emergency evacuation
plan. At minimum, emergency procedures should address emergency contacts, emergency planning, First Aid, fire, and hazardous spills. Ensure that first aid kits and eyewash stations are fully functional and in clear view. The emergency evacuation plan should be posted in a common area of the shop. Ensure that emergency exits are identified and that there is clear access. A sample shop emergency plan is presented as Learning Resource Sheet #LRS-U2-T1-1, “Shop Emergency Plan”.
(6) Prepare an overhead transparency or PowerPoint slide of the Learning Resource Sheet
#LRS-U2-T2-2, “Hazardous Condition Report Form”.
Introduction
Explain to students that safety should be a part of the shop culture. Everyone working in or visiting a shop environment has a responsibility to be constantly on guard, to identify actual and potential hazards, and to use personal protective equipment in the shop
State the purpose of this lesson and the expected learning outcomes
State how this lesson relates to other topics in Design and Fabrication 1212
Summarize what will be covered in this lesson and the related student activity

Lesson Plan #1 of 2 for Topic 2-1: Shop Safety Unit 2: Fabrication Techniques
Design and Fabrication 1212 - 3 - Teacher Resource Guide
Presentation (1) Overview the general shop safety rules with the students and discuss the use of the
“Hazardous Condition Report Form” presented as Learning Resource Sheet #LRS-U2-T1-2 by students in the shop.
Have the students suggest appropriate rules and interactively develop a draft list before presenting the class with the previously prepared official listing. There are a number of references that can be sourced to help develop the general shop safety rules.
Refer to http://mielsvr1.ecs.umass.edu/mie213/Generalshopsafetyrules.pdf, this on-line document by the University of Massachusetts includes both general safety rules and equipment specific safety rules samples.
(2) Ask students about any adverse reactions or allergies that they may have to
sawdust, wood, metals or plastics or any medical condition that could cause a problem when handling machinery.
Some students may be reluctant to disclose this but it is essential for their protection as well as others that these be dealt with at this stage. Consult with administration regarding further action for any cases noted.
(3) Identify the minimum required personnel protection equipment and demonstrate
proper fit and use.
The acceptable footwear, safety glasses, gloves, coveralls, face shields and ear protection should be displayed and proper fit demonstrated.
(4) Review the proper procedure for handling shop emergencies and shop evacuation.
Discuss the shop emergency plan included as Learning Resource Sheet #LRS-U2-T1-1, “Shop Emergency Plan”, or a suitable alternative plan, with the students. The location of First Aid kits, eyewash stations, and emergency exits should be clearly identified to students during a general tour of the shop. A shop floor plan showing each of these locations should also be posted in a common area of the shop. The location of the Materials Safety Data Sheets (MSDS) should be noted as well and a quick overview of their purpose provided.
Suggested Student Activities
The students will participate in a teacher-directed class discussion on shop safety, MSDS, and shop emergencies.

Lesson Plan #1 of 2 for Topic 2-1: Shop Safety Unit 2: Fabrication Techniques
Design and Fabrication 1212 - 4 - Teacher Resource Guide
Assessment and Evaluation The teacher should informally assess quality of student participation in class discussion; this will be considered in the calculation of the overall participation mark for the course.
Wrap-up and Closing
Review the key points related to shop safety.
Preview the next lesson on Shop Safety.
Learning Resources (1) http://mielsvr1.ecs.umass.edu/mie213/Generalshopsafetyrules.pdf, this on-line document
by the University of Massachusetts includes both general safety rules and equipment specific safety rules samples.
Student Material Pack The Student Material Pack for lesson #1 of 2 for topic 2-1 includes the following attached documents: (1) Learning Resource Sheet #LRS-U2-T1-1, “Shop Emergency Plan” (2) Learning Resource Sheet #LRS-U2-T1-2, “Hazardous Condition Report Form”

Lesson Plan #1 of 2 for Topic 2-1: Shop Safety Unit 2: Fabrication Techniques
Design and Fabrication 1212 LRS-U2-T1-1 Page 1 Teacher Resource Guide
Shop Emergency Plan Learning Resource Sheet #LRS-U2-T1-1
Medical Emergencies or Injuries in the Shop
Immediately contact the course instructor or nearest other teacher. If the first aid or medical problem is beyond the scope of the teacher’s training and qualifications he or she will : 1. Dial 911 or the number for the nearest medical response facility 2. State his/her name 3. Give the location of the school and the shop 4. Describe the extent of the injury or emergency 5. Request an ambulance 6. Stay on the line unless and until you are directed to hang up 7. Contact the school’s administrative office and record the incident
Shop Evacuation
1. Upon hearing the school’s alarm system or the teacher’s directions, all students
will immediately proceed to the nearest exit. 2. Once outside students will proceed to a spot previously identified by the teacher. 3. The teacher will ensure that all students have left the shop before he or she
evacuates. 4. The teacher will proceed to the previously designated location occupied by the
students and complete a roll call to ensure that everyone is out. 5. The appropriate outside agency or 911 will be contacted. 6. No students or teachers will be allowed back into the shop until the situation is
declared safe by the responding team.

Lesson Plan #1 of 2 for Topic 2-1: Shop Safety Unit 2: Fabrication Techniques
Design and Fabrication 1212 LRS-U2-T1-2-Page 1 Teacher Resource Guide
Hazardous Condition Report Form Learning Resource Sheet #LRS-U2-T1-2
(1) Date of hazard identification: (2) Name of Person reporting the hazard: (3) Description of the hazard:
1. Operating procedure
2. Equipment
3. Environment
(4) Description of corrective action taken and by whom: (5) General Comments:

Lesson Plan #2 of 2 for Topic 2-1: Shop Safety Unit 2: Fabrication Techniques
Design and Fabrication 1212 - 1 - Teacher Resource Guide
Lesson Plan #2 of 2 Topic 2-1: Shop Safety
Suggested Duration: 1 hour Suggested Format: Shop Activity
Following completion of this lesson, students will be able to:
2.1.1 Identify potential hazards (chemical) in the shop environment [5.402] 2.1.2 Recognize the need to consult Material Data Safety Sheets ( MSDS) when handling chemicals [5.402]
Teacher Required Resources
Design and Fabrication 1212 Teacher’s Resource Guide Material Safety Data Sheets binder for the Shop Safety footwear
Safety glasses Coveralls
Student Required Resources
Design and Fabrication 1212 Student Text Student Materials Pack Safety footwear
Safety glasses Coveralls
Teacher Preparation (1) Tour the shop and prepare a list of chemicals and trade name substances used. (2) Review the fundamentals of the Workplace Hazardous Materials Information System
(WHMIS). Obtain the MSDS for each of the substances identified during the shop tour and compile a copy of these in a binder that will require regular updates as new substances are introduced to the shop.
Refer to http://www.ilpi.com/MSDS/ref/whmis.html, a website by Health Canada, for an overview of WHMIS.
Refer to http://msds.ehs.cornell.edu/msdssrch.asp, an on-line MSDS database maintained by Cornell University, Ottawa, Canada.
(3) Prepare an overhead transparency or PowerPoint slide of a sample Material Safety Data
Sheet (MSDS).

Lesson Plan #2 of 2 for Topic 2-1: Shop Safety Unit 2: Fabrication Techniques
Design and Fabrication 1212 - 2 - Teacher Resource Guide
Introduction
Discuss how chemicals and other substances used in processing and fabrication can be dangerous. Discuss how Material Safety Data Sheets (MSDS) highlight these dangers and provide guidelines regarding toxicity, proper disposal, and so on. Using a substance commonly used in a shop such as machine oil, overview WHMIS and discuss the purpose and use of Material Safety Data Sheets (MSDS). Emphasis should be placed on the value of these sheets in helping develop emergency response plans for the shop.
State the purpose of this lesson and the expected learning outcomes
State how this lesson relates to other topics in Design and Fabrication 1212
Summarize what will be covered in this lesson and the related student activity
Presentation (1) Using a sample MSDS for a substance such as machine oil that is commonly used in
the shop, discuss the purpose of MSDS and the various sections included.
The hazardous ingredients and exposure limits, required personal protective equipment (PPE), health hazards, exposure symptoms: chemical routes of entry, fire, explosion and reactivity hazards, precautions for safe handling, storage and use, disposal methods, spill or leak procedures and First Aid procedures should be emphasized. Refer to http://msds.ehs.cornell.edu/msdssrch.asp, an on-line MSDS database maintained by Cornell University, Ottawa, Canada.
(2) Tour the shop with the students to identify chemicals and other substances used in
the shop.
In groups of 2 or 4, have students compile a list of these chemicals and substances during the tour.
(3) Discuss the MSDS for one of the substances on the list that is frequently used in the
shop and discuss the related hazards and related emergency procedures. The MSDS selected should be distributed to the students prior to this discussion. (4) Inform the students of the location of the MSDS binder in the shop.
Students should be aware of the location for easy access. They should also be aware of the policy on updating the binder and use of contents.

Lesson Plan #2 of 2 for Topic 2-1: Shop Safety Unit 2: Fabrication Techniques
Design and Fabrication 1212 - 3 - Teacher Resource Guide
Suggested Student Activities
The students will participate in a teacher-directed class discussion on MSDS for substances used in the shop
Assessment and Evaluation The teacher should informally assess quality of student participation in class discussion; this will be considered in the calculation of the overall participation mark for the course.
Wrap-up and Closing
Review the key points related to MSDS.
Preview the next lesson on Metrology.
Learning Resources (1) http://msds.ehs.cornell.edu/msdssrch.asp, an on-line searchable MSDS database
maintained by Cornell University, Ottawa, Canada. (2) http://www.ilpi.com/MSDS/ref/whmis.html, a website by Health Canada, for an overview of
WHMIS.
Student Material Pack The Student Material Pack for lesson #2 of 2 for topic 2-1 should include a copy of the MSDS selected by the teacher for discussion with the class.

Lesson Plan #1 of 1 for Topic 2-2: Metrology Unit 2: Fabrication Techniques
Design and Fabrication 1212 - 1 - Teacher Resource Guide
Lesson Plan #1 of 1 Topic 2-2: Metrology
Suggested Duration: 2 hours Suggested Format: Shop Activity
Following completion of this lesson, students will be able to:
2.2.1 Identify common metrology tools [1.403] 2.2.2 State the relationship between tolerancing and production cost. [1.403]
Teacher Required Resources
Design and Fabrication 1212 Teacher’s Resource Guide Micrometer
Caliper Steel rule Steel tape Scriber Center punch Feeler gage Rafter square Combination square
Safety footwear Safety glasses Coveralls
Part samples Student Required Resources
Design and Fabrication 1212 Student Text Student Materials Pack Micrometer
Caliper Steel rule Steel tape Scriber Center punch Feeler gage Rafter square Combination square Safety footwear Safety glasses Coveralls Part samples

Lesson Plan #1 of 1 for Topic 2-2: Metrology Unit 2: Fabrication Techniques
Design and Fabrication 1212 - 2 - Teacher Resource Guide
Teacher Preparation (1) Collect and review the operation of a steel rule, a steel tape, a micrometer, calipers, a
scriber, a center punch, a feeler gauge and a rafter square. (2) Review the fundamentals of tolerancing, the related importance of metrology tools, and the
relationship to product quality and cost.
Refer to http://www.draftingzone.com/studyzone/generaltol.html, the Drafting Zone website by Genium Group that contains a comprehensive overview of geometric dimensioning and tolerancing.
Introduction
Discuss with students how variations in part size and shape are unavoidable in practice and that the allowable variation or tolerance must be controlled to ensure a quality part. Explain how the use of metrology or measuring tools during part production is critical to ensuring proper part size and shape.
State the purpose of this lesson and the expected learning outcomes
State how this lesson relates to other topics in Design and Fabrication 1212
Summarize what will be covered in this lesson and the related student activity
Presentation (1) Briefly define tolerances and explain how they are used to control the allowable
variation in part shape and dimensions. Emphasize the importance of tolerancing to ensuring part assemblies fit together properly.
Refer to http://www.draftingzone.com/studyzone/generaltol.html, the Drafting Zone website by Genium Group that contains a comprehensive overview of geometric dimensioning and tolerancing.
(2) Explain the importance of metrology tools to ensuring that tolerances are met during part production. Identify the various basic metrology tools that will be used in the shop and for what type of measure they would be used.
Clearly display each tool as it is described and then distribute to the class for closer examination.
(3) Explain how the designer in specifying dimension tolerances directly impacts the
production methods required and subsequent production cost. Explain that the decision on tolerances for a part is a function of its end use.

Lesson Plan #1 of 1 for Topic 2-2: Metrology Unit 2: Fabrication Techniques
Design and Fabrication 1212 - 3 - Teacher Resource Guide
(4) Demonstrate the use of the most commonly used metrology tools by measuring key
dimensions of a sample part. Have the students, in groups of 2 or 4, repeat each measurement using their own sample and tools. Discuss the variation in size that occurs for the same feature.
Suggested Student Activities
Using the sample parts and metrology tools provided, students will measure key dimensions following demonstration by the teacher.
Assessment and Evaluation The teacher should informally assess quality of student participation in the shop activity; this will be considered in the calculation of the overall participation mark for the course.
Wrap-up and Closing
Review the key points related to metrology tools and tolerancing.
Preview the next lesson on Machine Operations.
Learning Resources (1) http://www.draftingzone.com/studyzone/generaltol.html, the Drafting Zone website by
Genium Group that contains a comprehensive overview of geometric dimensioning and tolerancing.
Student Material Pack A Student Material Pack is not required for this lesson.

Lesson Plan #1 of 2 for Topic 2-3: Machine Operations Unit 2: Fabrication Techniques
Design and Fabrication 1212 - 1 - Teacher Resource Guide
Lesson Plan #1 of 2 Topic 2-3: Machine Operations
Suggested Duration: 2 hours Suggested Format: Shop Activity
Following completion of this lesson, students will be able to:
3.3.1 Demonstrate safe use of hand tools in the fabrication of a simple project. [1.403, 2.401]
Teacher Required Resources
Design and Fabrication 1212 Teacher’s Resource Guide Coping saw
Hand saw Electric drill Sandpaper Hammer Nails Try or combination square Pencil Flexible steel tape Waterproof indoor glue (non toxic) Safety shoes Safety glasses Protective clothing 1 - 6mm x 300 mm x 300 mm sheet of aluminum and polyethylene 1 – 6” x 8’ x ¾” pine
Student Required Resources
Design and Fabrication 1212 Student Text Student Materials Pack
Safety shoes Safety glasses Protective clothing

Lesson Plan #1 of 2 for Topic 2-3: Machine Operations Unit 2: Fabrication Techniques
Design and Fabrication 1212 - 2 - Teacher Resource Guide
Teacher Preparation (1) Select and review a plan for a simple project that can be completed using only hand tools
and that requires the use of wood, plastic and metal.
Refer to http://www.sawdustmaking.com/#Projects, a website entitled Sawdust Making 101 that is aimed at the beginning woodworker. It contains a wealth of information on the application, selection and safe operation of various hand and power tools. The site is an excellent resource for both students and teachers. The teacher will find the reference material comprehensive and the shop equipment description valuable teaching resources. The student will find it a valuable reference source especially when they do their design project in Unit 6. Refer to http://www.woodworkersworkshop.com/resources/index.php?cat=102, this woodworking resource site by Jim Barry offers a wide variety of free woodworking plans and patterns with step-by-step fabrication instructions.
(2) Acquire the necessary raw material for completion of the project by each student group of 2 or 4.
(3) Cut the raw material for the project to the rough sizes needed to fabricate each part. (4) Ensure that shop liability forms have been sent to parents and/or guardians and that they
have been signed and returned to the school. NO STUDENTS ARE TO BE ADMITTED TO THE SHOP WITHOUT THE SIGNED FORM!
Introduction
Discuss with students how the design of a part is often constrained by both the physical resources and the skill of the operators available to produce the part.
State the purpose of this lesson and the expected learning outcomes
State how this lesson relates to other topics in Design and Fabrication 1212
Summarize what will be covered in this lesson and the related student activity

Lesson Plan #1 of 2 for Topic 2-3: Machine Operations Unit 2: Fabrication Techniques
Design and Fabrication 1212 - 3 - Teacher Resource Guide
Presentation (1) Discuss the relationship between the design of a part, the equipment available, the
skill of the operator and the allowable production cost. (2) Demonstrate the relationship between the production methods required and the
material used by making a similar cut in aluminum, polyethylene and pine using the scroll saw with a standard blade.
This demonstration will show the students the reduced production speed when using the saw in aluminum versus pine. The use of the plastic will illustrate that unless the feedrate is extremely slow the heat buildup due the friction of the blade will cause the kerf to close behind the blade as it cuts through the material.
(3) Discuss with the students the effect of proper tool, and feed rate on the production time, accuracy and cost of fabrication.
(4) Review the plans for a simple project that requires only the use of hand tools and
discuss the processing and assembly requirements.
The Birdhouse Design Project previously presented in Unit 1 as Learning Resource Sheet #LRS-U1-T4-2 could be modified to require the use of wood, plastic and metal. Alternatively, a suitable project can be selected from http://www.sawdustmaking.com/#Projects or from http://www.woodworkersworkshop.com/resources/index.php?cat=102.
Suggested Student Activities
In groups of 2 or 4, students will complete fabrication of the simple project assigned by the teacher.
Assessment and Evaluation Students adherence to safety rules and participation in the fabrication project should be informally evaluated. An evaluation rubric is recommended.
Wrap-up and Closing
Review the relationship between design, equipment, operator skill and finished part quality
Preview the next lesson on Machine Operations.

Lesson Plan #1 of 2 for Topic 2-3: Machine Operations Unit 2: Fabrication Techniques
Design and Fabrication 1212 - 4 - Teacher Resource Guide
Learning Resources (1) http://www.sawdustmaking.com/#Projects, a website entitled Sawdust Making 101 that is
aimed at the beginning woodworker. It contains a wealth of information on the application, selection and safe operation of various hand and power tools
(2) http://www.woodworkersworkshop.com/resources/index.php?cat=102, this woodworking
resource site by Jim Barry offers a wide variety of free woodworking plans and patterns with step-by-step fabrication instructions.
Student Material Pack The Student Material Pack for lesson #1 of 2 for topic 2-3 should include a copy of the student project selected by the teacher for fabrication in the shop.

Lesson Plan #2 of 2 for Topic 2-3: Machine Operations Unit 2: Fabrication Techniques
Design and Fabrication 1212 - 1 - Teacher Resource Guide
Lesson Plan #2 of 2 Topic 2-3: Machine Operations
Suggested Duration: 2 hours Suggested Format: Shop Activity
Following completion of this lesson, students will be able to:
2.3.2 Demonstrate the safe operating procedure for power tools used for cutting, turning and milling [2.401]
Teacher Required Resources
Design and Fabrication 1212 Teacher’s Resource Guide Scroll saw
Miter saw Table saw Drill press Sandpaper Hammer Nail Try or combination square Pencil Flexible steel tape Waterproof indoor glue (non toxic) Electric drill Safety shoes Safety glass Protective clothing Safety Video
Student Required Resources
Design and Fabrication 1212 Student Text Student Materials Pack
Safety shoes Safety glasses Protective clothing

Lesson Plan #2 of 2 for Topic 2-3: Machine Operations Unit 2: Fabrication Techniques
Design and Fabrication 1212 - 2 - Teacher Resource Guide
Teacher Preparation (1) Select several projects that contain components made from wood, metal and plastic and
that require the use of power tools.
Refer to http://www.sawdustmaking.com/#Projects, a website entitled Sawdust Making 101 that is aimed at the beginning woodworker. It contains a wealth of information on the application, selection and safe operation of various hand and power tools. The site is an excellent resource for both students and teachers. The teacher will find the reference material comprehensive and the shop equipment description valuable teaching resources. The student will find it a valuable reference source especially when they do their design project in Unit 6. Refer to http://www.woodworkersworkshop.com/resources/index.php?cat=102, this woodworking resource site by Jim Barry offers a wide variety of free woodworking plans and patterns with step-by-step fabrication instructions.
(2) Practice operations on the power tools until mastery of the required fabrication techniques is acquired. This can be done by building a prototype of each project to become familiar with the fabrication and identify potential problem areas. The prototypes will also aid students in selecting a project and serve as a motivator.
(3) Ensure that shop liability forms have been sent to parents and/or guardians and that they
have been signed and returned to the school. NO STUDENTS ARE TO BE ADMITTED TO THE SHOP WITHOUT THE SIGNED FORM!
(4) Acquire a safety video on the use of power tools and other shop equipment in industry.
Refer to http://www.whscc.nf.ca/pubs/pdf/brochures/Video%20Catalogue.pdf, the online video resource guide from the Workplace Health, Safety and Compensation Commission of Newfoundland and Labrador. This is an excellent resource from which teachers can order free videos on a wide variety of workplace safety related subjects.
Introduction
Discuss with students that while all tools can be dangerous, power tools have a special propensity for hazards due to their power and speed of operation. A power tool can quickly become uncontrollable if used incorrectly or for the wrong application. Provide some real-life examples of incorrect power tool usage or selection and emphasize the potential for catastrophic personal injuries
State the purpose of this lesson and the expected learning outcomes
State how this lesson relates to other topics in Design and Fabrication 1212
Summarize what will be covered in this lesson and the related student activity

Lesson Plan #2 of 2 for Topic 2-3: Machine Operations Unit 2: Fabrication Techniques
Design and Fabrication 1212 - 3 - Teacher Resource Guide
Presentation
(1) Review the general shop safety rules and emergency procedures (2) Present a safety video that focuses on the use of power tools and the potential for
catastrophic injury if improperly used.
Refer to http://www.whscc.nf.ca/pubs/pdf/brochures/Video%20Catalogue.pdf, the online video resource guide from the Workplace Health, Safety and Compensation Commission of Newfoundland and Labrador. This is an excellent resource from which teachers can order free videos on a wide variety of workplace safety related subjects.
(3) Review the plans for the selected project(s) with the class and discuss the required power tools.
(4) Demonstrate the correct use of each power tool with particular emphasis on
potential hazards. (5) Divide the students into groups of 2 or 4, and have each group select which
members will produce which specific part(s).
This will mirror industry practice and illustrate to the students that although different operators may make different parts of an assembly in industry, these parts must still fit together in the final assembly.
(6) Monitor each group until their project is finished
Students should be informed of the evaluation scheme that will be used to assess their project such as the rubric presented as Learning Resource Sheet #LRS-U2-T3-1, “Project Evaluation Rubric”.
Suggested Student Activities
In groups of 2 or 4, students will complete fabrication of the project assigned by the teacher.
Assessment and Evaluation Students adherence to safety rules and participation in the fabrication project should be informally evaluated. The quality of the finished project should be evaluated using a rubric such as the one presented as Learning Resource Sheet #LRS-U2-T3-1, “Project Evaluation Rubric”.

Lesson Plan #2 of 2 for Topic 2-3: Machine Operations Unit 2: Fabrication Techniques
Design and Fabrication 1212 - 4 - Teacher Resource Guide
Wrap-up and Closing
Review the relationship between design, equipment, operator skill and finished part quality
Preview the next lesson on Machine Operations.
Learning Resources (1) http://www.sawdustmaking.com/#Projects, a website entitled Sawdust Making 101 that is
aimed at the beginning woodworker. It contains a wealth of information on the application, selection and safe operation of various hand and power tools
(2) http://www.woodworkersworkshop.com/resources/index.php?cat=102, this woodworking
resource site by Jim Barry offers a wide variety of free woodworking plans and patterns with step-by-step fabrication instructions.
(3) http://www.whscc.nf.ca/pubs/pdf/brochures/Video%20Catalogue.pdf, the online video
resource guide from the Workplace Health, Safety and Compensation Commission of Newfoundland and Labrador. This is an excellent resource from which teachers can order free videos on a wide variety of workplace safety related subjects.
Student Material Pack The Student Material Pack for lesson #2 of 2 for topic 2-3 should include: (1) A copy of the student project selected by the teacher for fabrication in the shop. (2) Learning Resource Sheet #LRS-U2-T3-1, “Project Evaluation Rubric”

Lesson Plan #2 of 2 for Topic 2-3: Machine Operations Unit 2: Fabrication Techniques
Design and Fabrication 1212 LRS-U2-T3-1 Page 1 Teacher Resource Guide
Project Evaluation Rubric Learning Resource Sheet #LRS-U2-T3-1
Name of Project: Group members:
Component Number
Accuracy X/10
Fit X/10
Finish X/10
Stability X/10
Aesthetics X/10
Component Total
1
2
3
4
5
Assembly Total
Final Project Mark: %
General Comments on Project: Evaluated by: Date:

Lesson Plan #1 of 2 for Topic 2-4: Environmental Protection Unit 2: Fabrication Techniques
Design and Fabrication 1212 - 1 - Teacher Resource Guide
Lesson Plan #1 of 2 Topic 2-4: Environmental Protection
Suggested Duration: 1 hour Suggested Format: Classroom Lecture/Discussion
Following completion of this lesson, students will be able to:
2.4.1 Explain the proper disposal methods for waste material [5.402, 5.403]
Teacher Required Resources
Design and Fabrication 1212 Teacher’s Resource Guide Student Required Resources
Design and Fabrication 1212 Student Text Student Materials Pack
Teacher Preparation (1) Review the environmental regulations pertaining to waste disposal in the Province.
Refer to http://www.env.gov.nl.ca/env/ActsReg/default.asp, the Department of Environment and Conservation, NL, website for on-line documentation of the related acts and regulations.

Lesson Plan #1 of 2 for Topic 2-4: Environmental Protection Unit 2: Fabrication Techniques
Design and Fabrication 1212 - 2 - Teacher Resource Guide
Introduction
Discuss with students how waste disposal is becoming a pressing environmental problem provincially, nationally, and internationally. The remaining capacity of many of the domestic landfill sites in Newfoundland and Labrador, for example, is not adequate to handle expected future volumes of waste. In addition, the traditional use of incinerators is no longer a viable option given the toxic fumes generated during burning of waste products. This has resulted in an increased emphasis on the recycling of paper, cardboard, beverage containers and other products such as tires.
State the purpose of this lesson and the expected learning outcomes
State how this lesson relates to other topics in Design and Fabrication 1212
Summarize what will be covered in this lesson and the related student activity
Presentation
(1) Discuss the general concern with the waste that results when processing material and with the pollution that is generated by the processing machinery. The negative environmental impacts of waste and pollution should be examined. As an example, identify the waste\pollution generated during shop operations and solicit the class on the potential negative environmental impacts.
(2) Discuss how the growing societal support for protection of the environment and the
depletion of natural resources has heightened focus on the reduction, reuse and recycling of products and waste production material
Provide a local example such as the production of minced fish products, the use of sawdust to fire boilers, or the recycling of office paper for newsprint production to describe reduction, re-use, or recycling of waste respectively.
(3) Discuss the moral and legal obligations to future generations regarding our disposal of waste. Overview provincial laws and regulations governing the disposal of waste.
The provincial acts and regulations governing waste disposal should be overviewed. Refer to http://www.env.gov.nl.ca/env/ActsReg/default.asp, the Department of Environment and Conservation, NL, website for on-line documentation of the related acts and regulations.

Lesson Plan #1 of 2 for Topic 2-4: Environmental Protection Unit 2: Fabrication Techniques
Design and Fabrication 1212 - 3 - Teacher Resource Guide
Suggested Student Activities
In groups of 2 or 4, students should develop a list of all the waste products and pollution generated in the shop and suggest reduction, re-use, and recycling opportunities. A recorder and presenter should be assigned in each group. Each group will be required to summarize their findings to the class.
Assessment and Evaluation Each student should be informally evaluated based on participation in the group activity and groups assessed based on the inclusiveness of the list and quality of suggested remedies.
Wrap-up and Closing
Review the sources of waste/pollution, the possible reduction, re-use, and recycling opportunities, and the moral/legal obligations to proper waste management.
Preview the next lesson on Environmental Protection.
Learning Resources (1) http://www.env.gov.nl.ca/env/ActsReg/default.asp, the Department of Environment and
Conservation, NL, website for on-line documentation of the related acts and regulations.
Student Material Pack A Student Material Pack is not required for this lesson.

Lesson Plan #2 of 2 for Topic 2-4: Environmental Protection Unit 2: Fabrication Techniques
Design and Fabrication 1212 - 1 - Teacher Resource Guide
Lesson Plan #2 of 2 Topic 2-4: Environmental Protection
Suggested Duration: 1 hour Suggested Format: Classroom Lecture/Discussion
Following completion of this lesson, students will be able to:
2.4.2 Identify recycling and re–use opportunities for production waste. [5.401, 5.402, 5.403]
Teacher Required Resources
Design and Fabrication 1212 Teacher’s Resource Guide Student Required Resources
Design and Fabrication 1212 Student Text Student Materials Pack
Teacher Preparation (1) Review the existing waste management practices in Newfoundland and Labrador
regarding the recycling and reuse of common products such as beverage containers, newspaper, plastic, tires and office equipment.
For other examples of recycling nationally and internationally visit http://www.obviously.com/recycle/, a website by Evergreen Industries & Obviously Enterprises that includes a comprehensive but brief recycling guide. The guide identifies recycling opportunities for a wide variety of commonly used materials and products.
(2) Review the provincial regulations directly pertaining to recycling. Refer to http://www.env.gov.nl.ca/env/ActsReg/default.asp, the Department of
Environment and Conservation, NL, website for on-line documentation of the related acts and regulations.
(3) Review the role of the Multi-Material Stewardship Board (MMSB) in developing,
implementing, and managing waste diversion programs in Newfoundland and Labrador. Refer to http://www.mmsb.nf.ca/, the official MMSB website.

Lesson Plan #2 of 2 for Topic 2-4: Environmental Protection Unit 2: Fabrication Techniques
Design and Fabrication 1212 - 2 - Teacher Resource Guide
Introduction
Discuss with the students how the disposal costs and negative environmental impacts of waste products can be minimized through reduction, recycling and re–use programs.
State the purpose of this lesson and the expected learning outcomes
State how this lesson relates to other topics in Design and Fabrication 1212
Summarize what will be covered in this lesson and the related student activity
Presentation
(1) Discuss with students the type and amount of waste that is generated every day and what happens to it. Review government requirements for recycling.
Refer to http://www.mmsb.nf.ca/programs-publiced.htm, the public education section of the
official MMSB website that includes related on-line documentation. (2) List some of the common waste products that we generate and the related
entrepreneurial opportunities in recycling and/or re-use.
(3) Identify the MMSB and its role in developing, implementing, and managing waste diversion programs in Newfoundland and Labrador
Refer to http://www.mmsb.nf.ca/, the official MMSB website.
(4) Identify some of the companies and organizations in the province involved in
recycling/reuse and describe the related markets to which they ship their products. The school recycling program, if any, could also be discussed.

Lesson Plan #2 of 2 for Topic 2-4: Environmental Protection Unit 2: Fabrication Techniques
Design and Fabrication 1212 - 3 - Teacher Resource Guide
Suggested Student Activities
In groups of 2 or 4, students should develop a list of all the waste products and pollution generated in the cafeteria and suggest reduction, re-use, and recycling opportunities. A recorder and presenter should be assigned in each group. Each group will be required to summarize their findings to the class.
Assessment and Evaluation Each student should be informally evaluated based on participation in the group activity and groups assessed based on the inclusiveness of the list and quality of suggested remedies.
Wrap-up and Closing
Review the role of the MMSB, and the reduction, re-use, and recycling of waste products.
Preview the next lesson on Shop Related Careers.
Learning Resources (1) http://www.env.gov.nl.ca/env/ActsReg/default.asp, the Department of Environment and
Conservation, NL, website for on-line documentation of the related acts and regulations. (2) http://www.obviously.com/recycle/, a website by Evergreen Industries & Obviously
Enterprises that includes a comprehensive but brief recycling guide. The guide identifies recycling opportunities for a wide variety of commonly used materials and products.
(3) http://www.mmsb.nf.ca/programs-publiced.htm, the public education section of the official
MMSB website that includes related on-line documentation.
Student Material Pack A Student Material Pack is not required for this lesson.

Lesson Plan #1 of 1 for Topic 2-5: Shop Related Careers Unit 2: Fabrication Techniques
Design and Fabrication 1212 - 1 - Teacher Resource Guide
Lesson Plan #1 of 1 Topic 2-5: Shop Related Careers
Suggested Duration: 1 hour Suggested Format: Classroom Lecture/Discussion
Following completion of this lesson, students will be able to:
2.5.1 Identify the various job roles required to support shop operations in industry [4.401]
Teacher Required Resources
Design and Fabrication 1212 Teacher’s Resource Guide Guest Lecturer Student Required Resources
Design and Fabrication 1212 Student Text Student Materials Pack
Teacher Preparation (1) Review the various career roles directly related to fabrication. Refer to http://www.ed.gov.nl.ca/app/index.htm, the provincial Department of Education
website for information on trades apprenticeship programs. Refer to http://caf-fca.org/english/documents.asp, the Canadian Apprenticeship Forum
website for additional information on trades apprenticeship programs. Refer to http://www.khake.com/page40.html, a website from the Vocational Information
Center that offers an extensive listing of manufacturing related careers with links to related job descriptions.
(2) Arrange for a guest speaker from industry who is currently practicing in the trades,
technology or engineering area in a production setting. OR
Arrange for a guest speaker from the educational sector who is currently teaching in the trades, technology or engineering post-secondary area. OR Research a trades, technology or engineering career for presentation to the class.

Lesson Plan #1 of 1 for Topic 2-5: Shop Related Careers Unit 2: Fabrication Techniques
Design and Fabrication 1212 - 2 - Teacher Resource Guide
Introduction
Discuss how in any processing facility there are people who are directly involved in the processing operation and those that support those operations. In a typical industrial plant this could include millwrights, plumbers, electricians, carpenters, production technicians, technologists and engineers. The student should have some insight into the duties, responsibilities and job requirements for the people who do this work.
State the purpose of this lesson and the expected learning outcomes
State how this lesson relates to other topics in Design and Fabrication 1212
Summarize what will be covered in this lesson and the related student activity
Presentation
(1) Briefly overview the various employees that may be required to support production in an industrial plant both on the shop floor and in the office.
A local example, such as a fish processing plant, could be used to allow students to actively participate.
(2) Introduce the guest speaker and state the purpose of the presentation .
(3) The guest speaker will overview his/her organization, describe the product
produced, overview the production process and identify the various production, administrative and management employees required.
The general educational requirements to work in each of the jobs identified should also be discussed with the students.
(4) Follow-up the guest speaker presentation with a brief overview of the related career
guidance resources available to students. Refer to http://www.ed.gov.nl.ca/app/index.htm, the provincial Department of Education
website for information on trades apprenticeship programs. Refer to http://caf-fca.org/english/documents.asp, the Canadian Apprenticeship Forum
website for additional information on trades apprenticeship programs. Refer to http://www.khake.com/page40.html, a website from the Vocational Information
Center that offers an extensive listing of manufacturing related careers with links to related job descriptions.

Lesson Plan #1 of 1 for Topic 2-5: Shop Related Careers Unit 2: Fabrication Techniques
Design and Fabrication 1212 - 3 - Teacher Resource Guide
Suggested Student Activities
Students will interact with the speaker during the discussion and complete the take-home assignment #ASG-U2-T5-1, “Shop Related Careers”.
Assessment and Evaluation Each student should be informally evaluated based on participation in class discussion and interaction with the guest speaker. Assignments should be evaluated by comparison to a standard solution.
Wrap-up and Closing
Review the various shop related careers discussed
Preview Unit 3: Shop Practices.
Learning Resources (1) http://www.ed.gov.nl.ca/app/index.htm, the provincial Department of Education website for
information on trades apprenticeship programs. (2) http://caf-fca.org/english/documents.asp, the Canadian Apprenticeship Forum website for
additional information on trades apprenticeship programs. (3) http://www.khake.com/page40.html, a website from the Vocational Information Center that
offers an extensive listing of manufacturing related careers with links to related job descriptions.
Student Material Pack The Student Material Pack for lesson #1 of 1 for topic 2-5 includes the following attached document: (1) Assignment #ASG-U2-T5-1, “Shop Related Careers”. .

Lesson Plan #1 of 1 for Topic 2-5: Shop Related Careers Unit 2: Fabrication Techniques
Design and Fabrication 1202 ASG-U2-T5-1 Page 1 Teacher Resource Guide
Shop Related Careers Assignment #ASG-U2-T5-1
Research a shop related career and complete the career profile table below. Information can be obtained from the Internet, the library, the employment office, a direct employee interview or from a combination of these sources. All sources should be referenced appropriately.
Career Profile Career Title
Industry Sector
General Work Duties
Educational Requirements
Educational Institutions Offering
Educational Institution Entrance Requirements
Average Annual Salary
Future Employment Outlook
Special Skills Required
Special Knowledge Required
Related High School Courses

Lesson Plans UNIT 3 Introduction to Shop Practices

Lesson Plans Unit 3: Introduction to Shop Practices
Design and Fabrication 1212 - 1 - Teacher Resource Guide
Unit 3 Introduction to Shop Practices
Unit Overview
This unit introduces students to shop practices and their interrelation to design. Generally, the purpose of doing a product design is to eventually fabricate a physical product for the end user. The transition from design blueprint to the final product requires that various materials be selected, processed and then fabricated. The student has to be aware of selection criteria, processing methods and fabrication techniques in choosing materials for product manufacture. In this unit the student will be introduced to the physical/mechanical properties of wood, common metals and plastic and explore how these properties affect the cost, function and the required manufacturing processes. They will also develop and appreciation for the effect of proper material selection and processing on quality assurance and costing of the final product. Finally, production planning and production related careers are overviewed.

Lesson Plans Unit 3: Introduction to Shop Practices
Design and Fabrication 1212 - 2 - Teacher Resource Guide
Specific Curriculum Outcomes and Suggested Timelines
Unit 3 addresses 14 Specific Curriculum Outcomes (SCOs) distributed among four topics as shown below. Note that the durations specified for each topic are estimates and the teacher is encouraged to adjust these, if necessary. The General Curriculum Outcomes (GCOs) that are being addressed in a particular topic are specified inside square brackets at the end of the corresponding SCO listing. Following completion of Unit 3, students will be able to:
Topic 1: Material Types and Properties (4 hours)
3.1.1 Identify the common materials available for fabrication [1.403] 3.1.2 Define the key physical/mechanical properties of common materials [1.403] 3.1.3 Explain the relationship between material properties and product application [1.403] 3.1.4 Explain the relationship of material type and properties to environmental impact [5.402, 5.403] Topic 2: The Production Environment (4 hours)
3.2.1 Discuss the production process observed during a field trip to a local industry [1.404, 3.405,4.401, 4.403] 3.2.2 State the principles governing methods measurement, time standards, production costing and production planning [2.402, 2.404] Topic 3: Processing of Materials (8 hours)
3.3.1 Demonstrate knowledge of shop safety rules [5.402] 3.3.2 Operate shop equipment to demonstrate how differences in material properties affect fabrication [2.401] 3.3.3 Perform basic machine operations for the processing of wood [1.403, 2.401] 3.3.4 Perform basic machine operations for the processing of metal [1.403, 2.401] 3.3.5 Perform basic machine operations for the processing of plastic [1.403, 2.401] 3.3.6 Explain the relationship of material processing method to environmental impact [5.402, 5.403] Topic 4: Careers in Production (1 hour)
3.4.1 Identify the various job roles required to support production in industry [4.401] 3.4.2 List the educational requirements for production managers [4.403]

Lesson Plans Unit 3: Introduction to Shop Practices
Design and Fabrication 1212 - 3 - Teacher Resource Guide
Unit 3 Lesson Plans
Unit 3 includes ten lesson plans as follows: .
Unit Topic Lesson Plan Number(s)
Recommended Duration
Topic 3-1: Material Types and Properties
Lesson #1 1 hour
Lesson #2 1 hour
Lesson #3 1 hour
Lesson #4 1 hour
Topic 3-2: The Production Environment
Lesson #1 3 hours
Lesson #2 1 hour
Topic 3-3: Processing of Materials
Lesson #1 2 hours
Lesson #2 2 hours
Lesson #3 4 hours
Topic 3-4: Careers in Production
Lesson #1 1 hour
Recommended Total Duration for Unit 3 17 hours

Lesson Plan #1 of 4 for Topic 3-1: Material Types and Properties Unit 3: Introduction to Shop Practices
Design and Fabrication 1212 - 1 - Teacher Resource Guide
Lesson Plan #1 of 4 Topic 3-1: Material Types and Properties
Suggested Duration: 1 hour Suggested Format: Classroom Lecture/Shop
Following completion of this lesson, students will be able to:
3.1.1 Identify the common materials available for fabrication [1.403] 3.1.2 Define the key physical/mechanical properties of materials [1.403] 3.1.3 Explain the relationship between material properties and product application [1.403]
Teacher Required Resources
Safety Footwear Safety Glasses Protective Clothing Hand saw, wood chisel, scroll or band saw Club Hammer 4 – 50mm x100mmx300mm blocks of local wood species including balsam fir, black spruce, birch, larch and pine 4-50mm x100mmx300mm blocks of mainland Canadian wood species including B.C. fir, maple and oak 4- 50mm x100mmx300mm blocks of exotic wood species including lacewood, teak and purple heart
Student Required Resources
Design and Fabrication 1212 Student Text Student Materials Pack Safety footwear Safety glasses Coveralls

Lesson Plan #1 of 4 for Topic 3-1: Material Types and Properties Unit 3: Introduction to Shop Practices
Design and Fabrication 1212 - 2 - Teacher Resource Guide
Teacher Preparation (1) Review the various types of hardwood and softwood species available for fabrication. Refer to http://www.wood-furniture-manufacturers.com/type-of-wood.html, a website by the
Wood Furniture Manufacturers that provides an excellent overview of the various types of wood available and for what fabrication application they are best suited.
Refer also to http://www.woodbin.com/calcs/wdpick.htm, an excellent resource for
teachers called the Wood Picker, a searchable database that helps the user to identify candidate woods for a woodworking project.
(2) Review the types of wood that can be harvested here in the province.
Refer to http://www.nr.gov.nl.ca/forestry/ourforest/forest_types.stm, the provincial Forest Resources website for a complete list of tree species found in Newfoundland and Labrador.
(3) Identify the key physical and mechanical properties of wood that influence its selection for
a particular manufacturing application.
Refer to http://www.cwc.ca/education/professor_resources/presentations/properties/index.htm, a comprehensive on-line presentation on wood by the Canadian Wood Council that includes an introduction to physical and mechanical properties of wood. A fabulous resource for teachers and students alike.
(4) Prepare samples of local and exotic woods for display and distribution to student groups.
Introduction
Discuss the wide variety of materials available for the manufacture of products and note the predominant use of woods, metals, and plastics. Explain how the decision on what material to use is based on availability, cost, available production methods, product application, and disposal. Emphasize the importance of being familiar with the physical and mechanical properties of these materials when selecting materials for a particular design application.
State the purpose of this lesson and the expected learning outcomes
State how this lesson relates to other topics in Design and Fabrication 1212
Summarize what will be covered in this lesson and the related student activity

Lesson Plan #1 of 4 for Topic 3-1: Material Types and Properties Unit 3: Introduction to Shop Practices
Design and Fabrication 1212 - 3 - Teacher Resource Guide
Presentation (1) Identify the various types of hardwoods and softwoods available for fabrication
projects.
Note the wood types that can be harvested locally and provide examples of exotic woods that need to be imported.
Refer to http://www.wood-furniture-manufacturers.com/type-of-wood.html, a website by the Wood Furniture Manufacturers that provides an excellent overview of the various types of wood available and for what fabrication application they are best suited. Learning Resource Sheet #LRS-U3-T1-1, “Type of Wood”, is an extract from this site that identifies hardwood and softwood species. Refer to http://www.nr.gov.nl.ca/forestry/ourforest/forest_types.stm, the provincial Forest Resources website for a complete list of tree species found in Newfoundland and Labrador.
Distribute samples of these woods to the class for closer examination throughout the discussion.
(2) Identify and define the key physical and mechanical properties of wood
Directly relate each property to fabrication, where possible.
Refer to http://www.cwc.ca/education/professor_resources/presentations/properties/index.htm, a comprehensive on-line presentation on wood by the Canadian Wood Council that includes an introduction to physical and mechanical properties of wood. A fabulous resource for teachers and students alike.
(3) Conduct a series of simple lab exercises that demonstrate some of the key physical and mechanical properties of wood.
For mechanical properties, a simple bending test can be performed to visually illustrate strength and specimens can be cut with a saw and struck with a hammer to visually demonstrate difference in hardness. Physical properties such as grain structure and size can be visually examined.
(4) Discuss the particular difficulties associated with working with wood in the shop.
The presence of knots, warping, splitting, rotting and sawdust pollution should be discussed. Explain that since wood is not a man-made material, it is impossible to have the uniformity and consistency of metals or plastics. Discuss the fabrication challenges that this presents.

Lesson Plan #1 of 4 for Topic 3-1: Material Types and Properties Unit 3: Introduction to Shop Practices
Design and Fabrication 1212 - 4 - Teacher Resource Guide
Suggested Student Activities
The students will participate in a teacher-directed class discussion and assist the teacher in the completion of shop demonstrations.
Assessment and Evaluation The teacher should informally assess quality of student participation in class discussion; this will be considered in the calculation of the overall participation mark for the course.
Wrap-up and Closing
Review the key points related to wood types and their physical/mechanical properties.
Preview the next lesson on Material Types and Processes.
Learning Resources (1) http://www.wood-furniture-manufacturers.com/type-of-wood.html, a website by the Wood
Furniture Manufacturers that provides an excellent overview of the various types of wood available and for what fabrication application they are best suited.
(2) http://www.woodbin.com/calcs/wdpick.htm, an excellent resource for teachers called the
Wood Picker, searchable database that helps the user to identify candidate woods for a woodworking project.
(3) http://www.nr.gov.nl.ca/forestry/ourforest/forest_types.stm, the provincial Forest Resources
website for a complete list of tree species found in Newfoundland and Labrador. (4) http://www.cwc.ca/education/professor_resources/presentations/properties/index.htm, a
comprehensive on-line presentation on wood by the Canadian Wood Council that includes an introduction to physical and mechanical properties of wood.
Student Material Pack The Student Material Pack for lesson #1 of 4 for topic 3-1 includes the following attached documents: (1) Learning Resource Sheet #LRS-U3-T1-1, “Types of Wood”

Lesson Plan #1 of 4 for Topic 3-1: Material Types and Properties Unit 3: Introduction to Shop Practices
Design and Fabrication 1212 LRS-U3-T1-1 Page 1 Teacher Resource Guide
Types of Wood Learning Resource Sheet #LRS-U3-T1-1
Woods may be generally classified as either hardwood or softwood as indicated in the following listing extracted from http://www.wood-furniture-manufacturers.com/type-of-wood.html:
Hardwood Hardwood is taken from deciduous trees. The deciduous trees have broad leaves, produce a fruit or nut and generally go dormant in the winter. They grow well in temperate climates include oak, ash, cherry, maple and much more. Certain hardwood species are not hard enough to withstand heavy wear and tear and thus, are not recommended for flooring. There are a variety of different types: Mahogany This variety of hardwood is finely grained and has a reddish brown color. Being highly durable, mahogany resists swelling, shrinking and warping. It is extensively used for quality furniture such as cabinets, boat construction, wood facings and veneers. Walnut Walnut is a very strong and finely textured hardwood. The lumber resists shrinking and warping and is very easy to work with. It is used for making gunstocks, solid and veneered furniture, novelties, cabinetry and wall paneling. Oak An exclusive variety of hardwood, Oak possesses good bending qualities in addition to its durability. It finishes well and resists moisture absorption. The hardwood is good for furniture, trimming, boat framing, desks and flooring. Maple Maple is a finely textured wood variety with immense strength and hardness. With moderate shrinkage, this lumber machines well and is best used in flooring, fine furniture and woodenware such as bowling alleys. Cherry Being close-grained, this type of hardwood resists warping and shrinking. The wood has a distinct feature of reddening, when exposed to sunlight. It ages well and is extensively used in cabinet making, boat trim, novelties and solid furniture handles. Rosewood Rosewood is very hard wood variety with a dark reddish brown color. The wood type possesses exclusive fragrance and is close grained. It is hard to work and takes high polish. It is good for use in making musical instruments, piano cases, tool handles, art projects, veneers and furniture. Teak Teak is a hard and moisture- resistant wood variety. It resists warping, cracking and decay and is best used in fine furniture, paneling, shipbuilding, doors, window framing, flooring and general construction. Shesham Shesham is a rich medium brown wood with deep grains. It is a part of the rosewood family. The wood variety is highly is durable, easily carved and is exclusively used for making furniture, almirahs and cabinets.

Lesson Plan #1 of 4 for Topic 3-1: Material Types and Properties Unit 3: Introduction to Shop Practices
Design and Fabrication 1212 LRS-U3-T1-1 Page 2 Teacher Resource Guide
Softwood Softwood is a general term used for needle-leaved coniferous tree species and for the wood produced from such trees. Coniferous trees are evergreen cone-bearing trees. They include cedar, fir, hemlock, pine, redwood and spruce. They are often used as structural lumber with limited decorative applications. There are a variety of different types: Pine Pine possesses a uniform texture and is very easy to work with. It finishes well and resists shrinkage, swelling and warping. The wood variety is widely used in house construction, paneling, furniture, molding and for making boxes. Hemlock This wood variety is lightweight and machines well. Being nonresinous, it is uniformly textured and has low resistance to decay. It is used for construction lumber, planks, doors, boards, paneling, sub flooring and crates. Fir Fir is a wood variety with uniform texture and low resistance to decay. It is nonresinous, works easy and finishes well. Fir is food for use in furniture, doors, frames, windows, plywood, veneer, general millwork and interior trim. Redwood Being light in weight, Redwood is durable and easy to work with. It has a natural resistance to decay and is good for making outdoor furniture, fencing, house siding, interior finishing, veneering and paneling. Spruce Spruce is a strong wood variety that finishes well and has low resistance to decay. It possesses moderate shrinkage and is light in weight. Thus, good for use in making for masts and spars for ships, aircraft, crates, boxes, general millwork and ladders. Cedar Cedar has a sweet odor and is reddish in color. It is very easy to work with, uniform in texture and is resistant to decay. Cedar is extensively used in chest making, closet lining, shingles, posts, dock planks, novelties and Venetian blinds.

Lesson Plan #2 of 4 for Topic 3-1: Material Types and Properties Unit 3: Introduction to Shop Practices
Design and Fabrication 1212 - 1 - Teacher Resource Guide
Lesson Plan #2 of 4 Topic 3-1: Material Types and Properties
Suggested Duration: 1 hour Suggested Format: Classroom Lecture/Shop
Following completion of this lesson, students will be able to:
3.1.1 Identify the common materials available for fabrication [1.403] 3.1.2 Define the key physical/mechanical properties of materials [1.403] 3.1.3 Explain the relationship between material properties and product application [1.403]
Teacher Required Resources
Safety Footwear Safety Glasses Protective Clothing Club Hammer Chop Saw 1 – 150 mm x 150 mm x 3 mm piece of mild carbon steel 1 - 150 mm x 150 mm x3 mm piece of stainless steel 1 - 150 mm x 150 mm x3 mm piece of aluminum 1 - 150 mm x 150 mm x3 mm piece of copper 1- piece of 2 “diameter steel pipe x 30 inches long 1- piece of 2 “diameter cast iron pipe x 30 inches long
Student Required Resources
Design and Fabrication 1212 Student Text Student Materials Pack Safety footwear
Safety glasses Coveralls

Lesson Plan #2 of 4 for Topic 3-1: Material Types and Properties Unit 3: Introduction to Shop Practices
Design and Fabrication 1212 - 2 - Teacher Resource Guide
Teacher Preparation (1) Review the various common types of ferrous and non-ferrous metals available for
fabrication. Refer to http://www.nrcan.gc.ca/mms/scho-ecol/main_e.htm, a site from Natural Resources
Canada that overviews the main metals and minerals in Canada. (2) Identify the key physical and mechanical properties of metals that influence their selection
for a particular manufacturing application.
Refer to http://metalwebnews.com/machine-tools/ch2.pdf, a U.S. army online training document that provides a quick overview of the various types of metal available and their associated physical/mechanical properties. Refer also to http://www.matweb.com/search/SearchSubcat.asp, the Matweb an on-line searchable database of material data sheets for metals and plastics.
(3) Prepare samples of aluminum, mild steel, stainless steel, copper and pipe for display and distribution to student groups.
Introduction
Discuss the wide variety of metals available for the manufacture of products. Explain how the decision on what metal to use is based on availability, cost, available production methods, product application, and disposal. Emphasize the importance of being familiar with the physical and mechanical properties of metals when selecting for a particular design application.
State the purpose of this lesson and the expected learning outcomes
State how this lesson relates to other topics in Design and Fabrication 1212
Summarize what will be covered in this lesson and the related student activity

Lesson Plan #2 of 4 for Topic 3-1: Material Types and Properties Unit 3: Introduction to Shop Practices
Design and Fabrication 1212 - 3 - Teacher Resource Guide
Presentation (1) Identify the various types of metals available for fabrication projects. Refer to http://www.nrcan.gc.ca/mms/scho-ecol/main_e.htm, a site from Natural Resources
Canada that overviews the main metals and minerals in Canada.
Distribute samples of ferrous and non-ferrous metals to the class for closer examination throughout the discussion.
(2) Identify and define the key physical and mechanical properties of metals.
Directly relate each property to fabrication, where possible.
Refer to http://metalwebnews.com/machine-tools/ch2.pdf, a U.S. army online training document that provides a quick overview of the various types of metal available and their associated physical/mechanical properties. Refer also to http://www.matweb.com/search/SearchSubcat.asp, the Matweb an on-line searchable database of material data sheets for metals and plastics.
(3) Conduct a series of simple lab exercises that demonstrate some of the key physical and mechanical properties of ferrous and non-ferrous metals.
For mechanical properties, a simple bending test can be performed to visually illustrate strength and specimens can be cut with a saw and struck with a hammer to visually demonstrate difference in hardness.
(4) Discuss the particular difficulties associated with working with metal in the shop.
The inherent danger in working with the necessary high-powered equipment should be emphasized.

Lesson Plan #2 of 4 for Topic 3-1: Material Types and Properties Unit 3: Introduction to Shop Practices
Design and Fabrication 1212 - 4 - Teacher Resource Guide
Suggested Student Activities
The students will participate in a teacher-directed class discussion and assist the teacher in the completion of shop demonstrations.
In groups of 2 or 4, students should complete research on one type of metal used in fabrication, as assigned by the teacher, and complete the take-home assignment #ASG-U3-T1-1, “Metal Types and Properties”.
Assessment and Evaluation The teacher should informally assess quality of student participation in class discussion; this will be considered in the calculation of the overall participation mark for the course. Assignments should be evaluated based on comparison to a standard solution.
Wrap-up and Closing
Review the key points related to metals and their physical/mechanical properties.
Preview the next lesson on Material Types and Processes.
Learning Resources (1) http://www.nrcan.gc.ca/mms/scho-ecol/main_e.htm, a site from Natural Resources Canada
that overviews the main metals and minerals in Canada. (2) http://metalwebnews.com/machine-tools/ch2.pdf, a U.S. army online training document
that provides a quick overview of the various types of metal available and their associated physical/mechanical properties.
(3) http://www.matweb.com/search/SearchSubcat.asp, the Matweb an on-line searchable
database of material data sheets for metals and plastics.
Student Material Pack The Student Material Pack for lesson #2 of 4 for topic 3-1 includes the following attached documents: (1) Assignment #ASG-U3-T1-1, “Metal Types and Properties”

Lesson Plan #2 of 4 for Topic 3-1: Material Types and Properties Unit 3: Introduction to Shop Practices
Design and Fabrication 1212 ASG-U3-T1-1 Page 1 Teacher Resource Guide
Metal Types and Properties Assignment #ASG-U3-T1-1
Student: Date:
Directions: Select a consumer product, such as a soft drink tin or automobile rim, and identify the metal used and key physical/mechanical properties by completing the material data sheet below. Be sure to specify appropriate units in each case.
Material Data Sheet Product Name/Description: Main Material Used for Fabrication:
Physical Properties
Color
Density
Melting Point
Heat Conductance
Electrical Conductance
Magnetic Properties
Mechanical Properties
Tensile Strength
Modulus of Elasticity
Elongation
Hardness

Lesson Plan #3 of 4 for Topic 3-1: Material Types and Properties Unit 3: Introduction to Shop Practices
Design and Fabrication 1212 - 2 - Teacher Resource Guide
Lesson Plan #3 of 4 Topic 3-1: Material Types and Properties
Suggested Duration: 1 hour Suggested Format: Classroom Lecture/Shop
Following completion of this lesson, students will be able to:
3.1.1 Identify the common materials available for fabrication [1.403] 3.1.2 Define the key physical/mechanical properties of materials [1.403] 3.1.3 Explain the relationship between material properties and product application [1.403]
Teacher Required Resources
Safety Footwear Safety Glasses Protective Clothing Club Hammer Chop Saw Samples of thermoplastic material and products including garbage bags and eating utensils, PVC and ABS piping Samples of thermosetting material and products including: fiberglass resin, melamine (work top surfaces), bakelite (power insulators)
Student Required Resources
Design and Fabrication 1212 Student Text Student Materials Pack Safety footwear
Safety glasses Coveralls

Lesson Plan #3 of 4 for Topic 3-1: Material Types and Properties Unit 3: Introduction to Shop Practices
Design and Fabrication 1212 - 3 - Teacher Resource Guide
Teacher Preparation (1) Review the various common types of plastics
Refer to http://www.cpia.ca/teachers/news/details.php?ID=833&lang=EN, he EPIC Teacher’s website that includes a wealth of plastics related information including fully developed lesson plans.
Refer also to http://www.teachingplastics.com/9_12/index.html, the virtual plastics
classroom by the American Plastics Council. A superb reference resource for the student and teacher alike.
(2) Identify the key physical and mechanical properties of plastics that influence their selection
for a particular manufacturing application.
Refer to http://www.manufacturingcenter.com/dfx/archives/1100/1100plst.asp, a website by DesignFax that provides a quick overview of the various types of plastics available and their associated physical/mechanical properties. Refer also to http://www.matweb.com/search/SearchSubcat.asp, the Matweb an on-line searchable database of material data sheets for metals and plastics.
(3) Prepare samples of thermoplastics and thermosetting plastics for display and distribution to student groups.
Introduction
Discuss the wide variety of plastics available for the manufacture of products. Explain how the decision on what plastic to use is based on availability, cost, available production methods, product application, and disposal. Emphasize the importance of being familiar with the physical and mechanical properties of plastics when selecting for a particular design application.
State the purpose of this lesson and the expected learning outcomes
State how this lesson relates to other topics in Design and Fabrication 1212
Summarize what will be covered in this lesson and the related student activity

Lesson Plan #3 of 4 for Topic 3-1: Material Types and Properties Unit 3: Introduction to Shop Practices
Design and Fabrication 1212 - 4 - Teacher Resource Guide
Presentation (1) Identify the various types of plastics available for fabrication projects.
Refer to http://www.cpia.ca/teachers/news/details.php?ID=833&lang=EN, he EPIC Teacher’s website that includes a wealth of plastics related information including fully developed lesson plans.
Refer also to http://www.teachingplastics.com/9_12/index.html, the virtual plastics
classroom by the American Plastics Council. A superb reference resource on all aspects of plastics for the student and teacher alike.
Distribute samples of thermoplastics and thermosetting plastics to the class for closer examination throughout the discussion.
(2) Identify and define the key physical and mechanical properties of plastics.
Directly relate each property to fabrication, where possible.
Refer to http://www.manufacturingcenter.com/dfx/archives/1100/1100plst.asp, a website by DesignFax that provides a quick overview of the various types of plastics available and their associated physical/mechanical properties. Refer also to http://www.matweb.com/search/SearchSubcat.asp, the Matweb an on-line searchable database of material data sheets for metals and plastics.
(3) Conduct a series of simple lab exercises that demonstrate some of the key physical and mechanical properties of plastics.
For mechanical properties, a simple bending test can be performed to visually illustrate strength and specimens can be cut with a saw and struck with a hammer to visually demonstrate difference in hardness.
(4) Discuss the particular difficulties associated with working with plastic in the shop.
The tendency for plastic to melt when cut and related corrective measures should be emphasized.

Lesson Plan #3 of 4 for Topic 3-1: Material Types and Properties Unit 3: Introduction to Shop Practices
Design and Fabrication 1212 - 5 - Teacher Resource Guide
Suggested Student Activities
The students will participate in a teacher-directed class discussion and assist the teacher in the completion of shop demonstrations.
Assessment and Evaluation The teacher should informally assess quality of student participation in class discussion; this will be considered in the calculation of the overall participation mark for the course.
Wrap-up and Closing
Review the key points related to plastics and their physical/mechanical properties.
Preview the next lesson on Material Types and Processes.
Learning Resources (1) http://www.nrcan.gc.ca/mms/scho-ecol/main_e.htm, a site from Natural Resources Canada
that overviews the main metals and minerals in Canada. (2) http://metalwebnews.com/machine-tools/ch2.pdf, a U.S. army online training document
that provides a quick overview of the various types of metal available and their associated physical/mechanical properties.
(3) http://www.matweb.com/search/SearchSubcat.asp, the Matweb an on-line searchable
database of material data sheets for metals and plastics.
Student Material Pack A Student Material Pack is not required for this lesson.

Lesson Plan #4 of 4 for Topic 3-1: Material Types and Properties Unit 3: Introduction to Shop Practices
Design and Fabrication 1212 - 1 - Teacher Resource Guide
Lesson Plan #4 of 4 Topic 3-1: Material Types and Properties
Suggested Duration: 1 hour Suggested Format: Classroom Lecture/Shop
Following completion of this lesson, students will be able to:
3.1.4 Explain the relationship of material type and properties to environmental impact [5.402, 5.403]
Teacher Required Resources
Design and Fabrication 1212 Teacher’s Resource Guide Student Required Resources
Design and Fabrication 1212 Student Text Student Materials Pack Safety footwear
Safety glasses Coveralls

Lesson Plan #4 of 4 for Topic 3-1: Material Types and Properties Unit 3: Introduction to Shop Practices
Design and Fabrication 1212 - 2 - Teacher Resource Guide
Teacher Preparation (1) Review the various common types of wood, metal and plastics.
Refer to http://www.wood-furniture-manufacturers.com/type-of-wood.html, a website by the Wood Furniture Manufacturers that provides an excellent overview of the various types of wood available and for what fabrication application they are best suited. Learning Resource Sheet #LRS-U3-T1-1, “Type of Wood”, is an extract from this site that identifies hardwood and softwood species. Refer to http://www.nrcan.gc.ca/mms/scho-ecol/main_e.htm, a site from Natural Resources Canada that overviews the main metals and minerals in Canada.
Refer also to http://www.teachingplastics.com/9_12/index.html, the virtual plastics
classroom by the American Plastics Council. A superb reference resource for the student and teacher alike.
(2) Review the environmental impact of wood, plastics and metal.
Refer http://www.ene.gov.on.ca/envision/land/woodwaste/woodwastefs.htm, a website by the Ontario Ministry of Environment that overviews the potential environmental impacts related to wood harvesting and wood processing. Refer also http://www.nrcan.gc.ca/mms/canmet-mtb/mmsl-lmsm/enviro/metals/metals-e.htm, a website by the National Research Council of Canada that overviews the potential environmental impacts of mining and metal processing. Refer also to http://www.enviroliteracy.org/article.php/1188.html, a website by the Environmental Literacy Council, U.S., that overviews the potential environmental impacts of plastics manufacturing, processing and disposal. The site features a number of classroom resource lessons such as “The Life Cycle of a CD”.
Introduction
Discuss the wide variety of wood, metals and plastics available for the manufacture of products and, using a common example such as a CD, explain the life cycle of the product with particular focus on the environmental impacts that can occur during harvesting, processing and disposal.
State the purpose of this lesson and the expected learning outcomes
State how this lesson relates to other topics in Design and Fabrication 1212
Summarize what will be covered in this lesson and the related student activity

Lesson Plan #4 of 4 for Topic 3-1: Material Types and Properties Unit 3: Introduction to Shop Practices
Design and Fabrication 1212 - 3 - Teacher Resource Guide
Presentation (1) Discuss the reduction, re-use and recycling of wood, metals and plastics.
Refer to http://www.ene.gov.on.ca/envision/land/woodwaste/woodwastefs.htm, a website by the Ontario Ministry of Environment that overviews the potential environmental impacts related to wood harvesting and wood processing. Refer also http://www.nrcan.gc.ca/mms/canmet-mtb/mmsl-lmsm/enviro/metals/metals-e.htm, a website by the National Research Council of Canada that overviews the potential environmental impacts of mining and metal processing. Refer also to http://www.enviroliteracy.org/article.php/1188.html, a website by the Environmental Literacy Council, U.S., that overviews the potential environmental impacts of plastics manufacturing, processing and disposal. The site features a number of classroom resource lessons such as “The Life Cycle of a CD”.
(2) Discuss the potential economic benefits and entrepreneurial opportunities related to
the re-use and recycling of wood, plastics, and metals.
Use local examples, such the Green Depot recycling centers, to facilitate the discussion.
(3) Discuss the opportunities for reduction, re-use, and recycling in the shop.
Suggested Student Activities
In groups of 2 or 4, the students will develop a list of all the materials to be used in the shop and identify opportunities for reduction, re-use and recycling. Each group should assign a recorder and presenter with findings to be presented to the class at the end of the activity.
Assessment and Evaluation The teacher should informally assess quality of student participation in class discussion and the group activity; this will be considered in the calculation of the overall participation mark for the course.
Wrap-up and Closing
Review the key points related to materials and their physical/mechanical properties.
Preview the next lesson on Processing of Materials.

Lesson Plan #4 of 4 for Topic 3-1: Material Types and Properties Unit 3: Introduction to Shop Practices
Design and Fabrication 1212 - 4 - Teacher Resource Guide
Learning Resources (1) http://www.wood-furniture-manufacturers.com/type-of-wood.html, a website by the Wood
Furniture Manufacturers that provides an excellent overview of the various types of wood available and for what fabrication application they are best suited. Learning Resource Sheet #LRS-U3-T1-1, “Type of Wood”, is an extract from this site that identifies hardwood and softwood species.
(2) http://www.nrcan.gc.ca/mms/scho-ecol/main_e.htm, a site from Natural Resources Canada that overviews the main metals and minerals in Canada.
(3) http://www.teachingplastics.com/9_12/index.html, the virtual plastics classroom by the
American Plastics Council. A superb reference resource for the student and teacher alike. (4) http://www.ene.gov.on.ca/envision/land/woodwaste/woodwastefs.htm, a website by the
Ontario Ministry of Environment that overviews the potential environmental impacts related to wood harvesting and wood processing.
(5) http://www.nrcan.gc.ca/mms/canmet-mtb/mmsl-lmsm/enviro/metals/metals-e.htm, a website by the National Research Council of Canada that overviews the potential environmental impacts of mining and metal processing.
(6) http://www.enviroliteracy.org/article.php/1188.html, a website by the Environmental Literacy Council, U.S., that overviews the potential environmental impacts of plastics manufacturing, processing and disposal. The site features a number of classroom resource lessons such as “The Life Cycle of a CD”.
Student Material Pack A Student Material Pack is not required for this lesson.

Lesson Plan #1 of 2 for Topic 3-2: The Production Environment Unit 3: Introduction to Shop Practices
Design and Fabrication 1212 - 1 - Teacher Resource Guide
Lesson Plan #1 of 2 Topic 3-2: The Production Environment
Suggested Duration: 3 hours Suggested Format: Classroom Lecture/Shop
Following completion of this lesson, students will be able to:
3.2.1 Discuss the production process observed during a field trip to a local industry. [1.404, 3.405, 4.401, 4.403]
Teacher Required Resources
Design and Fabrication 1212 Teacher’s Resource Guide Personal safety equipment for industrial visit Form for parents regarding the industrial visit and liability issues Transportation for students Video recorder
Student Required Resources
Design and Fabrication 1212 Student Text Student Materials Pack
Personal safety equipment for industrial visit
Teacher Preparation (1) Arrange for a field trip to a local production facility. This could be a fish plant, sawmill or
fabrication facility. (2) Any special class re-scheduling that will be necessary to accommodate the visit duration
should be made before the trip schedule is confirmed. Additional chaperones, if required, should also be arranged at this time.
(3) In advance of the trip with the students the teacher if possible should meet with the plant
supervisor and get a one on one tour of the plant so that the teacher can familiarize themselves with the operation. Request permission from the plant manager to video tape the visit and or take pictures.
(4) Prepare a check list for students of what they should observe during their plant visit. (5) Send home to parents a release of liability form and information on the trip and its value to
the student. Signed forms must be returned before a student will be permitted to participate.

Lesson Plan #1 of 2 for Topic 3-2: The Production Environment Unit 3: Introduction to Shop Practices
Design and Fabrication 1212 - 2 - Teacher Resource Guide
(6) Send a thank you letter to the plant manager following the tour and acknowledge any employees who were of special assistance.
Introduction
It is important for students to see the application of the knowledge and skills they are learning in the classroom to real life situations. An industry field trip can be an effective means of achieving this and may also help motivate further related student learning. Discuss with students that the field trip is intended as a fun learning experience during which they will observe the various operations, transportations, and inspections that are required to produce a particular product. Students should be encouraged to observe the operations performed with a view to identifying the particular skills and knowledge that the operator requires. Students should also note the various management and administrative roles required in support of production.
State the purpose of this lesson and the expected learning outcomes
State how this lesson relates to other topics in Design and Fabrication 1212
Summarize what will be covered in this lesson and the related student activity
Presentation (1) Review with the students the rules of conduct expected during the field trip.
(2) Check to make sure that all liability forms are completed
(3) Distribute and review the plant tour information sheet that identifies what students
are expected to observe during the visit.
(4) Ensure that all students have required personal protection equipment on before starting the tour.
(5) Videotape appropriate sections of the plant showing the various operations hat make up the overall production process.
(6) Distribute the take-home assignment upon returning to the school.

Lesson Plan #1 of 2 for Topic 3-2: The Production Environment Unit 3: Introduction to Shop Practices
Design and Fabrication 1212 - 3 - Teacher Resource Guide
Suggested Student Activities
Prior to the plant visit discuss with the teacher what should be observed during the plant visit.
Complete the take-home assignment #ASG-U3-T2-1, “Field Trip Log”.
Assessment and Evaluation The teacher should evaluate the submitted assignments by comparison to a standard solution.
Wrap-up and Closing
Review the process observed after returning from the field trip.
Preview the next lesson on The Production Environment.
Learning Resources None referenced.
Student Material Pack The Student Material Pack for lesson #1 of 2 for topic 3-2 includes the following attached document: (1) Assignment #ASG-U3-T2-1, “Field Trip Log”.

Lesson Plan #1 of 2 for Topic 3-2: The Production Environment Unit 3: Introduction to Shop Practices
Design and Fabrication 1212 ASG-U3-T2-1 Page 1 Teacher Resource Guide
Field Trip Log Assignment #ASG-U3-T2-1
Student Name: Date: Name of Site: Location: (1) Describe the product(s) produced at the facility. (2) What is the approximate number of employees? (3) List any personal protection equipment used by the employees. (4) What are some of the potential hazards that you observed. (5) Comment on the noise level, visible air and water pollution that you observed.

Lesson Plan #1 of 2 for Topic 3-2: The Production Environment Unit 3: Introduction to Shop Practices
Design and Fabrication 1212 ASG-U3-T2-1 Page 2 Teacher Resource Guide
(6) Describe the production system by using a block diagram to indicate product flow and the operation at each processing station (Use back of sheet, if necessary).
(7) Describe any process quality control that you observed at the facility. (8) What did the facility do with any waste products produced? (9) List three processing related careers that you observed. (10) List the education and skills required of a worker in one of the categories that you listed in
#9 above.

Lesson Plan #2 of 2 for Topic 3-2: The Production Environment Unit 3: Introduction to Shop Practices
Design and Fabrication 1212 - 1 - Teacher Resource Guide
Lesson Plan #2 of 2 Topic 3-2: The Production Environment
Suggested Duration: 1 hour Suggested Format: Classroom Lecture/Shop
Following completion of this lesson, students will be able to:
2.3.2 State the principles governing methods measurement, time standards, production costing and production planning [2.402, 2.404]
Teacher Required Resources
Design and Fabrication 1212 Teacher’s Resource Guide Video recording of plant visit Flow diagram of process observed
Student Required Resources
Design and Fabrication 1212 Student Text Student Materials Pack
Teacher Preparation (1) Review the video tape from the plant visit and identify the various production operations. (2) Obtain a process flow diagram and process chart for the industrial process from the plant
manager, if possible. (3) Review the fundamentals of production planning including standardization of work
methods, time standards, and manufacturing resource planning. Refer to http://www.columbia.edu/~gjv1/Pfanote2.PDF, an on-line document from
Columbia University that provides an introduction to production process types and key performance measures.
Refer to http://rtreport.ksc.nasa.gov/techreports/95report/ief/ie11.html, this on-line report
by the University of Florida provides a brief overview of work methods standardization. Refer to http://www.twi.co.uk/j32k/protected/band_3/ksngs001.html, this site by TWI Ltd,
the operating arm of The Welding Institute, U.K., provides a brief overview of production planning and scheduling.

Lesson Plan #2 of 2 for Topic 3-2: The Production Environment Unit 3: Introduction to Shop Practices
Design and Fabrication 1212 - 2 - Teacher Resource Guide
Introduction
Discuss with the students that in addition to the selection of materials and processing methods, the production of a product involves the scheduling of labour, equipment, raw material procurement, inventory shipping and other administrative support functions that will impact on product cost. It is vital that students be aware of the importance of production planning to ensuring the on-time, safe, and quality production of a product within budget constraints.
State the purpose of this lesson and the expected learning outcomes
State how this lesson relates to other topics in Design and Fabrication 1212
Summarize what will be covered in this lesson and the related student activity
Presentation (1) Review the plant trip with the students highlighting the various operations, material
handling, and equipment required at each stage of the process.
(2) With the aid of a process flow diagram, Identify each of the operations, transports, inspections and delays in the process.
(3) Discuss some of the direct and indirect costs associated with running a production
facility. (4) Discuss controlled and uncontrolled costs and their effect on production.
Uncontrolled costs would include for example oil embargoes, political unrest, disruption of material supplies and currency exchange rates.
(5) Introduce the concept of establishing a standard method and standard cycle time
for each operation in the production process. (6) Discuss the use of standards in budgeting, cost control, scheduling and in other
aspects of production planning.

Lesson Plan #2 of 2 for Topic 3-2: The Production Environment Unit 3: Introduction to Shop Practices
Design and Fabrication 1212 - 3 - Teacher Resource Guide
Suggested Student Activities
Students will participate in interactive discussion with the teacher
Complete the take-home assignment #ASG-U3-T2-2, “Production Planning”.
Assessment and Evaluation The teacher should evaluate the submitted assignments by comparison to a standard solution.
Wrap-up and Closing
Review the key considerations in production planning with particular focus on the use of standard methods and standard times in controlling product quality, operator safety, and product cost.
Preview the next lesson on Processing of Materials.
Learning Resources (1) http://www.columbia.edu/~gjv1/Pfanote2.PDF, an on-line document from Columbia
University that provides an introduction to production process types and key performance measures.
(2) http://rtreport.ksc.nasa.gov/techreports/95report/ief/ie11.html, this on-line report by the
University of Florida provides a brief overview of work methods standardization. (3) http://www.twi.co.uk/j32k/protected/band_3/ksngs001.html, this site by TWI Ltd, the
operating arm of The Welding Institute, U.K., provides brief overview of production planning and scheduling.
Student Material Pack The Student Material Pack for lesson #2 of 2 for topic 3-2 includes the following attached document: (1) Assignment #ASG-U3-T2-2, “Production Planning”.

Lesson Plan #2 of 2 for Topic 3-2: The Production Environment Unit 3: Introduction to Shop Practices
Design and Fabrication 1212 ASG-U3-T2-2 Page 1 Teacher Resource Guide
Production Planning Assignment #ASG-U3-T2-2
Student Name: __________________________ Date: __________________________________ Directions: Your group is competing for a contract by the school to prepare and serve 100 submarine sandwiches in the school cafeteria. If you win the contract you will be paid $5 per sandwich. All of the kitchen facilities will be provided to you free of charge but you are responsible for the supply of the ingredients, packaging and the associated labor costs. A requirement is that the sandwiches have to be prepared no earlier than two hours before serving. Complete the following production sheet to develop a cost estimate and your estimated profit. 1. List the equipment and facilities that you will need to produce the sandwiches. 2. Illustrate the production process using a block diagram. Show each of the operations, transports and inspections necessary. For each operation indicate the required tools/equipment, the number of operators, and the estimated time per operation.

Lesson Plan #2 of 2 for Topic 3-2: The Production Environment Unit 3: Introduction to Shop Practices
Design and Fabrication 1212 ASG-U3-T2-2 Page 2 Teacher Resource Guide
3. Identify any potential bottlenecks in the process and suggest how they can be reduced or eliminated. 4. Identify operations/tools/equipment that may be required occasionally to meet any special customer requirements. 5. Calculate the average cost per sandwich. This should consider the direct labour cost and the cost of raw materials. Assume a labor cost of $6.50 per hour plus 20% for benefits. At what price should the sandwiches be sold?

Lesson Plan #1 of 3 for Topic 3-3: Processing of Materials Unit 3: Introduction to Shop Practices
Design and Fabrication 1212 - 1 - Teacher Resource Guide
Lesson Plan #1 of 3 Topic 3-3: Processing of Materials
Suggested Duration: 2 hours Suggested Format: Shop
Following completion of this lesson, students will be able to:
3.3.1 Demonstrate knowledge of shop safety rules [5.402] 3.3.2 Operate shop equipment to demonstrate how differences in material properties affect fabrication [2.401]
Teacher Required Resources
Design and Fabrication 1212 Teacher’s Resource Guide Safety Posters Safety information Pamphlets Safety Glasses Safety Boots Protective Clothing First Aid Kit Fire Extinguisher Ear Plugs Shop Safety and Operation List Manufacturer’s operation manual for each piece of power equipment in the shop 1” x 6” x 24” piece of pine and larch 3 mm x 6” x 24” piece of polyethylene, aluminum, low carbon steel, tool steel and cast iron Chop Saw Scroll Saw Band Saw Grinder Medium grinding wheel Drill Press with ½ drill bit Cutting Oil
Materials and equipment required for selected project. Student Required Resources
Design and Fabrication 1212 Student Text Student Materials Pack
Safety glasses Safety footwear
Protective Clothing Ear plugs

Lesson Plan #1 of 3 for Topic 3-3: Processing of Materials Unit 3: Introduction to Shop Practices
Design and Fabrication 1212 - 2 - Teacher Resource Guide
Teacher Preparation (1) Develop and post in a prominent location the safety rules for working in the shop.
Refer to the draft list developed in conjunction with the students in lesson #1, topic 1-2, Unit 2. A sample list of shop safety rules is also presented as Learning Resource Sheet #LRS-U3-T3-1, “General Shop Safety Rules”. A sample shop safety checklist is presented as Learning Resource Sheet #LRS-U3-T3-2, “Shop Safety Checklist”.
(2) Know how to safely operate each piece of shop or laboratory equipment and reach the
competency required for the operations described in this unit. The operation level will be at a beginner’s level and the teacher will be demonstrating very basic operations.
(3) Purchase and maintain a first aid kit that is suitable for a school shop environment.
Refer to St. John’s Ambulance and the Department of Education for requirements.
(4) Obtain a St. John’s Ambulance First Aid certificate.
The teacher should check with the School Board and/or Department of Education regarding course offerings and level of certification required.
(5) Know the accident or emergency response plan for the school.
(6) Know how to use all of the personal safety equipment
(7) Identify and fix any potential shop hazards
(8) Identify any potential operator safety issues in the shop and resolve them.
(9) Prepare two wood samples each 6”x9” x3/4” of larch and spruce.
Prepare two metal samples one 6” x 9”x ¼” steel plate and one aluminum. These samples will be used to demonstrate drill press operation. Cut a piece of 1” x 6” pine, one piece of 3 mm x 150 mm x 200 mm aluminum and a piece of polyethylene 3 mm x150 mm x 200 mm. These will be used to demonstrate the band saw and/or scroll saw operation.
(10) Determine the raw material and equipment requirements for the selected project and
procure as required.

Lesson Plan #1 of 3 for Topic 3-3: Processing of Materials Unit 3: Introduction to Shop Practices
Design and Fabrication 1212 - 3 - Teacher Resource Guide
Introduction
Discuss with students how shop safety involves instilling culture not just following a set of safety rules. Students must be constantly aware of their surroundings and be prepared to identify and eliminate existing or potential hazards. A mistake in the shop can negatively impact the quality of future life for the student. Inform students that violation of any safety rules will result in their immediate removal from the shop – NO EXCEPTIONS!
State the purpose of this lesson and the expected learning outcomes
State how this lesson relates to other topics in Design and Fabrication 1212
Summarize what will be covered in this lesson and the related student activity
Presentation (1) Review the shop safety rules and emergency response plan. (2) Check that each student has their personal protection equipment on and fitted
properly. (3) Complete some of the following demonstrations to demonstrate proper equipment
operation and to illustrate the fabrication differences that occur when working with wood, metals, and plastic:
Operate the chop saw to cut wood, plastic, and metal stock to a specified length. Take a sample of pine and larch and drill a 25 mm diameter hole in each one to demonstrate the changes required in feed rate and effort required to do the same operation in both materials. Drill the same size hole in the sample piece of mild steel and aluminum to illustrate the additional requirements for a cutting fluid to dissipate the heat generated due to friction. Cut a piece of pine, aluminum and polyethylene 3mm x 6’’ using the scroll saw and band saw. This will demonstrate feed rates and effort in cutting operations and the effect of heat on thermoplastic fabrications. If the feed rate is too fast in the plastic the cut will reseal itself as the blade passes through the material. Demonstrate using a medium grinding stone the effect of a finishing operation on low carbon steel, tool steel (high carbon), cast iron and plastic. The grinding operation for the steel and iron will produce unique shower spark displays depending on the carbon content of the steel or iron. This is a common identification method used in the machine shop for identification of unknown steels or irons.

Lesson Plan #1 of 3 for Topic 3-3: Processing of Materials Unit 3: Introduction to Shop Practices
Design and Fabrication 1212 - 4 - Teacher Resource Guide
Suggested Student Activities
In groups of 2 or 4, students will complete a shop exercise that requires use of the chop saw and drill press. A sample exercise is presented as Assignment #ASG-U3-3-1, “Storage Box”. Each group member should be required to operate the equipment under teacher supervision.
Assessment and Evaluation The teacher should informally assess the students based on quality of participation in class discussion and the shop assignment.
Wrap-up and Closing
Review the importance of shop safety and the how differences in material properties affect fabrication.
Preview the next lesson on Processing of Materials.
Learning Resources None referenced.
Student Material Pack The Student Material Pack for lesson #1 of 3 for topic 3-3 includes the following attached document: (1) Assignment #ASG-U3-T3-1, “Storage Box”.

Lesson Plan #1 of 3 for Topic 3-3: Processing of Materials Unit 3: Introduction to Shop Practices
Design and Fabrication 1212 ASG-U3-T3-1 Page 1 Teacher Resource Guide
1” x 6” Pine 2 pieces
1” x 6” Pine 2 pieces
1” x 8” Polyethylene 1 piece
Storage Box Assignment #ASG-U3-T3-1
Using 1” x 6” pine, ¼ ” x 8” polyethylene, a chop saw, and a drill press, complete the fabrication of the storage box shown below. NOTE: Do not operate equipment without teacher supervision. The pine pieces can be nailed and glued together –
choose the appropriate size finishing nails and glue. The polyethylene can then be attached to the pine using ¼ “ flat head wood screws.

Lesson Plan #2 of 3 for Topic 3-3: Processing of Materials Unit 3: Introduction to Shop Practices
Design and Fabrication 1212 - 1 - Teacher Resource Guide
Lesson Plan #2 of 3 Topic 3-3: Processing of Materials
Suggested Duration: 2 hours Suggested Format: Shop
Following completion of this lesson, students will be able to:
3.3.3 Perform basic machine operations for the processing of wood [1.403, 2.401]
Teacher Required Resources
Design and Fabrication 1212 Teacher’s Resource Guide Safety Posters Safety information Pamphlets Safety Glasses Safety Boots Protective Clothing First Aid Kit Fire Extinguisher Ear Plugs Shop Safety and Operation List Manufacturer’s operation manual for each piece of power equipment in the shop
Material and equipment required to complete the selected project. Student Required Resources
Design and Fabrication 1212 Student Text Student Materials Pack
Safety glasses Safety footwear
Protective Clothing Ear plugs Teacher Preparation (1) Review basic operations of the table saw, band saw, scroll saw, jointer, miter saw and
hand held power tools until they reach the intermediate skill level. The work in this unit by the students will be at a beginner’s level.
(2) Review basic operation of the power sander, cordless drill and jig saw until they reach an
intermediate skill level. The work in this unit by the students will be at a beginner’s level.
(3) Select a simple project and make a copy of the patterns for the student groups.

Lesson Plan #2 of 3 for Topic 3-3: Processing of Materials Unit 3: Introduction to Shop Practices
Design and Fabrication 1212 - 2 - Teacher Resource Guide
Refer to http://www.raymondsdesigns.com/free_scrollsaw_patterns.htm, a website by Raymond’s Designs that includes free woodworking patterns such as the Winter Treat Feeder for Birds. Refer to http://www.buildeazy.com/kidsdiy_diyprojects_scooter_metric_page01.html, the Buildeazy website for kids that has a simple yet excellent wooden scooter project plan.
(4) Determine the raw material and equipment resource requirements for the selected project
and procure as required.
(5) Probably the “safest” and most flexible of power tools is the scroll saw. It is advised to use this saw in place of the band saw where possible.
Introduction
Explain to students that it is only intended that they become familiar with the capability of the equipment and be able to relate that capability to the design process. Overview the simple woodworking project that will be completed and distribute copies of the plans to the student groups.
State the purpose of this lesson and the expected learning outcomes
State how this lesson relates to other topics in Design and Fabrication 1212
Summarize what will be covered in this lesson and the related student activity
Presentation (1) Review the shop safety rules with the students before entering the shop. (2) Check that each student has on their personal protection equipment. (3) Check each piece of equipment before using for any safety hazards. (4) Overview the operation and demonstrate the proper use of each piece of equipment
required before permitting students to operate. (5) Monitor student groups of 2 or 4 in the fabrication of a simple wood-working project
and ensure each student is given the opportunity to operate equipment.

Lesson Plan #2 of 3 for Topic 3-3: Processing of Materials Unit 3: Introduction to Shop Practices
Design and Fabrication 1212 - 3 - Teacher Resource Guide
Suggested Student Activities
In groups of 2 or 4, students will complete the assigned woodworking project under the direct supervision of the teacher. Each student should be given the opportunity to operate equipment.
Assessment and Evaluation The teacher should informally assess the students based on quality of participation in class discussion and shop.
Wrap-up and Closing
Review the importance of shop safety and the how material properties affect fabrication. Discuss the environmental impacts of the processing activities. Preview the next lesson on Processing of Materials.
Learning Resources (1) http://www.raymondsdesigns.com/free_scrollsaw_patterns.htm, a website by Raymond’s
Designs that includes free woodworking patterns such as the Winter Treat Feeder for Birds.
(2) http://www.buildeazy.com/kidsdiy_diyprojects_scooter_metric_page01.html, the Buildeazy
website for kids that has a simple yet excellent wooden scooter project plan.
Student Material Pack A Student Material Pack should include a copy of the woodworking project plan.

Lesson Plan #3 of 3 for Topic 3-3: Processing of Materials Unit 3: Introduction to Shop Practices
Design and Fabrication 1212 - 1 - Teacher Resource Guide
Lesson Plan #3 of 3 Topic 3-3: Processing of Materials
Suggested Duration: 4 hours Suggested Format: Shop
Following completion of this lesson, students will be able to:
3.3.4 Perform basic machine operations for the processing of metal [1.403, 2.401] 3.3.5 Perform basic machine operations for the processing of plastic [1.403, 2.401 3.3.6 Explain the relationship of material processing method to environmental impact [5.402, 5.403]
Teacher Required Resources
Design and Fabrication 1212 Teacher’s Resource Guide Safety Posters Safety information Pamphlets Safety Glasses Safety Boots Protective Clothing First Aid Kit Fire Extinguisher Ear Plugs Shop Safety and Operation List Manufacturer’s operation manual for each piece of power equipment in the shop
Material and equipment required to complete the selected project. Student Required Resources
Design and Fabrication 1212 Student Text Student Materials Pack
Safety glasses Safety footwear
Protective Clothing Ear plugs

Lesson Plan #3 of 3 for Topic 3-3: Processing of Materials Unit 3: Introduction to Shop Practices
Design and Fabrication 1212 - 2 - Teacher Resource Guide
Teacher Preparation (1) Review basic operations for the band saw and drill press, lathe and sheet metal brake until
reaching the intermediate skill level. The work in this unit by the students will be at a beginner’s level.
(2) Select a simple project and make a copy of the patterns for the student groups. The project
should require the use of metal and plastic materials. Refer to http://absolutelyfreeplans.com/, a website by plan3D with an extensive listing of
free plans for both indoor and outdoor projects. (3) Determine the raw material and equipment resource requirements for the selected project
and procure as required. (4) Review the spark test for carbon content of steel.
Introduction
Explain to students that it is only intended that they become familiar with the capability of the equipment and be able to relate that capability to the design process. Overview the simple project that will be completed and distribute copies of the plans to the student groups.
State the purpose of this lesson and the expected learning outcomes
State how this lesson relates to other topics in Design and Fabrication 1212
Summarize what will be covered in this lesson and the related student activity
Presentation (1) Review the shop safety rules with the students before entering the shop. (2) Check that each student has on their personal protection equipment. (3) Check each piece of equipment before using for any safety hazards. (4) Overview the operation and demonstrate the proper use of each piece of equipment
required for the project before permitting students to operate.
(5) Demonstrate operation of the lathe, sheet metal and portable grinder to the students. Indicate the difference in the spark pattern when the grinder is used on iron, low carbon steel and high carbon steel.

Lesson Plan #3 of 3 for Topic 3-3: Processing of Materials Unit 3: Introduction to Shop Practices
Design and Fabrication 1212 - 3 - Teacher Resource Guide
(6) Monitor student groups of 2 or 4 in the fabrication of a simple project and ensure each student is given the opportunity to operate equipment.
Suggested Student Activities
In groups of 2 or 4, students will complete the assigned project under the direct supervision of the teacher. Each student should be given the opportunity to operate equipment.
Assessment and Evaluation The teacher should informally assess the students based on quality of participation in class discussion and the shop participation.
Wrap-up and Closing
Review the importance of shop safety and the how differences in material properties affect fabrication. Discuss the environmental impacts of the processing activities.
Preview the next lesson on Processing of Materials.
Learning Resources (1) http://absolutelyfreeplans.com/, a website by plan3D with an extensive listing of free plans
for both indoor and outdoor projects.
Student Material Pack The Student Material Pack for lesson #3 of 3 for topic 3-3 should include a copy of the project plan.

Lesson Plan #1 of 1 for Topic 3-4: Careers in Production Unit 3: Introduction to Shop Practices
Design and Fabrication 1212 - 1 - Teacher Resource Guide
Lesson Plan #1 of 1 Topic 3-4: Careers in Production
Suggested Duration: 1 hour Suggested Format: Classroom Lecture/Discussion
Following completion of this lesson, students will be able to:
3.4.1 Identify the various job roles required to support production in industry [4.401] 3.4.2 List the educational requirements for production managers [4.403]
Teacher Required Resources
Design and Fabrication 1212 Teacher’s Resource Guide Guest Lecturer Student Required Resources
Design and Fabrication 1212 Student Text Student Materials Pack Teacher Preparation (1) Review the various career roles directly related to production. Refer to http://jobsearch.monster.ca/jobsearch.asp?cy=CA&q=&fn=47&lid=&x=25&y=13,
the Monster.com or similar on-line recruiter website which profiles careers in support of manufacturing and production.
Refer to http://www.jobfutures.ca/en/home.shtml, the JobFutures website by Services
Canada with a wealth of information on a wide variety of careers related to manufacturing and production.
(2) Arrange for a guest speaker from industry who is currently practicing in the trades,
technology or engineering area in a production planning related position. OR
Arrange for a guest speaker from the educational sector who is currently teaching in the trades, technology or engineering post-secondary area with specialization in production planning. OR Research a trades, technology or engineering career for presentation to the class.

Lesson Plan #1 of 1 for Topic 3-4: Careers in Production Unit 3: Introduction to Shop Practices
Design and Fabrication 1212 - 2 - Teacher Resource Guide
Introduction
Discuss how in any processing facility there are people who are directly involved in the processing operation and those that support those operations. This session will focus on those involved in production planning and management. The student should have some insight into the duties, responsibilities and job requirements for the people who do this type of work such as comptrollers, plant managers, front-line supervisors, planners, schedulers, and so on.
State the purpose of this lesson and the expected learning outcomes
State how this lesson relates to other topics in Design and Fabrication 1212
Summarize what will be covered in this lesson and the related student activity
Presentation
(1) Review the basics of production planning and control. (2) Introduce the guest speaker and state the purpose of the presentation .
(3) The guest speaker will overview his/her organization, describe the product
produced, overview the production process and identify the various production planning and management roles required.
The general educational requirements to work in each of the jobs identified should also be discussed with the students.
(4) Follow-up the guest speaker presentation with a brief overview of the related career
guidance resources available to students.
Refer to http://jobsearch.monster.ca/jobsearch.asp?cy=CA&q=&fn=47&lid=&x=25&y=13,
the Monster.com website (or similar on-line recruiter website) which profiles careers in support of manufacturing and production.
Refer to http://www.jobfutures.ca/en/home.shtml, the JobFutures website by Services
Canada with a wealth of information on a wide variety of careers related to manufacturing and production.

Lesson Plan #1 of 1 for Topic 3-4: Careers in Production Unit 3: Introduction to Shop Practices
Design and Fabrication 1212 - 3 - Teacher Resource Guide
Suggested Student Activities
Students will interact with the speaker during the discussion and complete the take-home assignment #ASG-U3-T4-1, “Production Related Careers”..
Assessment and Evaluation Each student should be informally evaluated based on participation in class discussion and interaction with the guest speaker.
Wrap-up and Closing
Review the various shop related careers discussed
Preview Unit 4: Graphical Communications.
Learning Resources (1) http://jobsearch.monster.ca/jobsearch.asp?cy=CA&q=&fn=47&lid=&x=25&y=13, the
Monster.com website which profiles careers in support of manufacturing and production. (2) http://www.jobfutures.ca/en/home.shtml, the JobFutures website by Services Canada with
a wealth of information on a wide variety of careers related to manufacturing and production.
Student Material Pack The Student Material Pack for lesson #1 of 1 for topic 3-4 should include: (1) Assignment #ASG-U3-T4-1, “Production Related Careers”. .

Lesson Plan #1 of 1 for Topic 3-4: Careers in Production Unit 3: Introduction to Shop Practices
Design and Fabrication 1212 ASG-U3-T4-1 Page 1 Teacher Resource Guide
Production Careers Assignment #ASG-U3-T4-1
Research a production planning related career and complete the career profile table below. Information can be obtained from the Internet, the library, the employment office, a direct employee interview or from a combination of these sources. All sources should be referenced appropriately.
Career Profile Career Title
Industry Sector
General Work Duties
Educational Requirements
Educational Institutions Offering
Educational Institution Entrance Requirements
Average Annual Salary
Future Employment Outlook
Special Skills Required
Special Knowledge Required
Related High School Courses

Lesson Plans UNIT 4 Graphical Communications

Lesson Plans Unit 4: Graphical Communications
Design and Fabrication 1212 - 1 - Teacher Resource Guide
Unit 4 Graphical Communications
Unit Overview
Graphical communications is the interdisciplinary communications method for design and fabrication in industry. This unit is intended to provide students with a basic introduction to technical drawing and the related drafting conventions and standards. Students will learn how to sketch simple engineering drawings and review industrial blueprints required to produce a simple product. The focus will be on hands on work with supporting theory that will provide students with an appreciation for the relationship between working drawings and production. In particular, students will learn the rules governing lettering, acquire basic proficiency in free-hand sketching, and apply the rules of orthographic projection in the generation of simple 2D drawings. Students will also explore the application of 3D pictorial drawings in engineering and learn the fundamentals of working drawings as the primary communication tool that links design to fabrication. Finally, students will explore the wide array of career opportunities related to graphical communications.

Lesson Plans Unit 4: Graphical Communications
Design and Fabrication 1212 - 2 - Teacher Resource Guide
Specific Curriculum Outcomes and Suggested Timelines
Unit 4 addresses 14 Specific Curriculum Outcomes (SCOs) distributed among five topics as shown below. Note that the durations specified for each topic are estimates and the teacher is encouraged to adjust these, if necessary. The General Curriculum Outcomes (GCOs) that are being addressed in a particular topic are specified inside square brackets at the end of the corresponding SCO listing. Following completion of Unit 4, students will be able to:
Topic 1: Lettering and Sketching (2 hours)
4.1.1 Print gothic lettering in accordance with drafting standards [1.403, 1.405] 4.1.2 Produce simple single view sketches [1.403, 1.405] Topic 2: 2D Orthographic Views (4 hours)
4.2.1 Sketch 2D orthographic views from pictorial drawings [1.403, 1.405] 4.2.2 Dimension simple 2D orthographic views [1.405] 4.2.3 Differentiate between 1st angle and 3rd angle projection [1.403, 1.405] 4.2.4 Determine the required orthographic views for part production [1.403, 1.405] Topic 3: 3D Pictorial Drawings (1 hour)
4.3.1 Explain the engineering applications of oblique and isometric 3D views [1.403, 1.405, 2.404] 4.3.2 Sketch a simple oblique and isometric drawing [1.403, 1.405] Topic 4: Working Drawings (2 hours)
4.4.1 Explain the relationship between working drawings and part production [1.403, 1.405, 2.404] 4.4.2 Differentiate between detail and assembly drawings [1.403, 1.405] 4.4.3 Find technical information on detail and assembly drawings [1.403, 1.405] 4.4.4 Derive technical information from detail and assembly drawings [1.403, 1.405] Topic 5: Drafting Related Careers (1 hour)
4.5.1 Identify the various job roles required to support engineering drawing production [4.401] 4.5.2 List the educational requirements for draftspersons [4.403]

Lesson Plans Unit 4: Graphical Communications
Design and Fabrication 1212 - 3 - Teacher Resource Guide
Unit 4 Lesson Plans
Unit 4 includes nine lesson plans as follows: .
Unit Topic Lesson Plan Number(s)
Recommended Duration
Topic 4-1: Lettering and Sketching
Lesson #1 1 hour
Lesson #2 1 hour
Topic 4-2: 2D Orthographic Projection
Lesson #1 1 hour
Lesson #2 1 hour
Lesson #3
1 hour
Lesson #4
1 hour
Topic 4-3: 3D Pictorial Drawings
Lesson #1 1 hour
Topic 4-4: Working Drawings
Lesson #1 2 hours
Topic 4-5: Drafting related Careers
Lesson #1 1 hour
Recommended Total Duration for Unit 4 10 hours

Lesson Plan #1 of 2 for Topic 4-1: Lettering and Sketching Unit 4: Graphical Communications
Design and Fabrication 1212 - 1 - Teacher Resource Guide
Lesson Plan #1 of 2 Topic 4-1: Lettering and Sketching
Suggested Duration: 1 hour Suggested Format: Classroom Lecture/Lab
Following completion of this lesson, students will be able to:
4.1.1 Print gothic lettering in accordance with drafting standards [1.403, 1.405]
Teacher Required Resources
Design and Fabrication 1212 Teachers Resource Guide 2H Pencil Student Required Resources
Design and Fabrication 1212 Student Text Student Materials Pack
2H Pencil Teacher Preparation (1) Review and practice the single stroke commercial gothic style of lettering that is used on
engineering drawings and printed communications. Refer to http://www.mcgill.ca/files/cden/GraphicsCommunications_Lecture-1.pdf, an on-line document from McGill University that offers an excellent yet concise overview of graphical communications including a discussion on gothic lettering. Refer also to http://www.tpub.com/content/engineering/14069/, a website by Integrated Publishing that provides a comprehensive resource for engineers including graphical communications.
(2) Acquire the ruled paper that will be need to be distributed to students for their lettering assignment.

Lesson Plan #1 of 2 for Topic 4-1: Lettering and Sketching Unit 4: Graphical Communications
Design and Fabrication 1212 - 2 - Teacher Resource Guide
Introduction
Discuss the requirements for engineering lettering to be legible, easy to produce and clear to the reader. Lettering styles are meant to convey information but also aesthetic values and that is why there is such a variety of fonts. For example Old English text is traditionally used on diplomas, degrees and some legal documents. It is difficult to read but is a very formal style and in our culture it is instantly recognized as conveying very important dignified messages. Advertisers for instance use aesthetic value for marketing their products by using a variety of lettering styles that intimate the use or appeal of the product. Explain that the style of lettering used in the majority of technical communications is the vertical single stroke gothic lettering style.
State the purpose of this lesson and the expected learning outcomes
State how this lesson relates to other topics in Design and Fabrication 1212
Summarize what will be covered in this lesson and the related student activity
Presentation (1) Discuss with the students how the style of lettering affects the ease of interpretation
and the aesthetics of the communications.
Using displayed examples, ask the students to comment on the readability, ease of printing and aesthetic applications for Old English Text style of lettering compared to the Arial style used in Word or WordPerfect software.
(2) Review the purpose of using text for technical communications and the potential
problems that could arise during fabrication if the information is misinterpreted. (3) Indicate that the vertical gothic upper case lettering is the standard for technical
communications and review its features of ease of production, readability and aesthetics. Refer to http://www.mcgill.ca/files/cden/GraphicsCommunications_Lecture-1.pdf, an on-line document from McGill University that offers an excellent yet concise overview of graphical communications including a discussion on gothic lettering.
Refer also to http://www.tpub.com/content/engineering/14069/, a website by Integrated Publishing provides a comprehensive resource for engineers including graphical communications.

Lesson Plan #1 of 2 for Topic 4-1: Lettering and Sketching Unit 4: Graphical Communications
Design and Fabrication 1212 - 3 - Teacher Resource Guide
(4) Inform students that the vertical single stroke lettering style will be used for all assignments and other written communications in Design and Fabrication 1212.
(5) Demonstrate gothic lettering to the class. (6) Overview the use of drafting pencils and their different lead hardness. Note the requirement for students to use a 2H pencil for lettering and sketching exercises. (7) Refer students to the lettering assignment.
Suggested Student Activities
The students will complete a single page lettering assignment presented as assignment #ASG-U4-T1-1, “Gothic Lettering”.
Assessment and Evaluation The teacher should informally assess quality of student participation in class discussion; this will be considered in the calculation of the overall participation mark for the course. Lettering assignments should be assessed by comparison to a standard solution.
Wrap-up and Closing
Review the key points related to lettering with a focus on the need to communicate effectively.
Preview the next lesson on Sketching.
Learning Resources (1) http://www.mcgill.ca/files/cden/GraphicsCommunications_Lecture-1.pdf, an on-line
document from McGill University that offers a concise overview of graphical communications including a discussion on Gothic lettering.
(2) http://www.tpub.com/content/engineering/14069/, a website by Integrated Publishing
provides a comprehensive resource for engineers including graphical communications.

Lesson Plan #1 of 2 for Topic 4-1: Lettering and Sketching Unit 4: Graphical Communications
Design and Fabrication 1212 - 4 - Teacher Resource Guide
Student Material Pack The Student Material Pack for lesson #1 of 2 for topic 4-1 includes the following attached document: (1) Assignment #ASG-U4-T1-1, “Gothic Lettering”

Lesson Plan #1 of 2 for Topic 4-1: Lettering and Sketching Unit 4: Graphical Communications
Design and Fabrication 1212 ASG-U4-T1-1 Page 1 Teacher Resource Guide
Gothic Lettering Assignment #ASG-U4-T1-1
(1) Using the ruled paper provided by the teacher, reproduce the alphabet and the numbers 0
to 9 using single stroke commercial gothic lettering style. (2) Using 2H pencil and Gothic lettering style, complete the blank title block shown below
using the following specific information:
Drawn By: Your initials Check By: Teacher’s Initials Approved By: Teacher’s Signature Approval Date: The date the teacher grants approval in month-day-year format Date: The date the drawing is completed – use today’s date in month-
day-year format Scale: 1:2 Drawing Name: GOTHIC LETTERING EXERCISE Company Name: The name of your school Drawing Number: DR-U4-T1-1 Sheet #: 1 of 1
Sample Title Block Showing General Layout of Text
Drawn by:
XXX Checked by:
XXX Approved By:
XXX Approval Date:
XX-XX-XX Date:
XX-XX-XX Scale:
X:X
COMPANY NAME DRAWING NAME
DRAWING NUMBER Sheet #:
X of X
Title Block to be Completed by Student
Drawn by:
Checked by:
Approved By:
Approval Date:
Date:
Scale:
Sheet #:

Lesson Plan #2 of 2 for Topic 4-1: Lettering and Sketching Unit 4: Graphical Communications
Design and Fabrication 1212 - 1 - Teacher Resource Guide
Lesson Plan #2 of 2 Topic 4-1: Lettering and Sketching
Suggested Duration: 1 hour Suggested Format: Classroom Lecture/Lab
Following completion of this lesson, students will be able to:
4.1.2 Produce simple single view sketches. [1.403, 1.405]
Teacher Required Resources
Design and Fabrication 1212 Teachers Resource Guide 2H Pencil
Eraser Quad paper (1/2” grid)
Student Required Resources
Design and Fabrication 1212 Student Text Student Materials Pack
2H Pencil Eraser Quad paper (1/2” grid)
Teacher Preparation (1) Review the rules of freehand sketching and practice your technique by completing the
student assignment and similar exercises.
Refer to http://www.mace.manchester.ac.uk/project/intranet/teaching_learning/teaching_materials/ug/swailes/computation_and_cad/SWAILES_CC1016_sketching.pdf, an online document from the University of Manchester, U.K., that includes a comprehensive overview of sketching techniques with examples. A superb reference for students and teacher.
(2) Download the sketching sheets that students can use for the sketching assignment #ASG-
U4-T1-2, “Freehand Sketching”.
Refer to http://www.incompetech.com/beta/plainGraphPaper/, a non commercial site by Incompetech.com, U.K., that provides free graph paper in a variety of styles. It is an excellent resource for students and teacher.

Lesson Plan #2 of 2 for Topic 4-1: Lettering and Sketching Unit 4: Graphical Communications
Design and Fabrication 1212 - 2 - Teacher Resource Guide
Introduction
Discuss with students that most technical personnel will have to produce or interpret simple sketches as part of their job requirements despite the prevalence today of CAD systems. Measurements and related sketches, for example, are commonly made in the field by engineers and technologists as a first step in a design modification. These sketches are used to communicate with others in a variety of functions including maintenance, installation, fabrication, and design. In many cases, these sketches are eventually refined using computer aided drafting (CAD) software as finished detail and assembly drawings. It is, therefore, essential that students have the skill to produce simple sketches that are accurate and complete.
State the purpose of this lesson and the expected learning outcomes
State how this lesson relates to other topics in Design and Fabrication 1212
Summarize what will be covered in this lesson and the related student activity
Presentation (1) Discuss how freehand sketching relates to the design process, the production of
engineering drawings, and fabrication of a prototype. Note the connection between the sketching of a part and the need to develop good visualization skills.
(2) Review the general rules for freehand sketching of lines, arcs, circles and other
basic shapes commonly used in engineering drawings.
Refer to http://www.mace.manchester.ac.uk/project/intranet/teaching_learning/teaching_materials/ug/swailes/computation_and_cad/SWAILES_CC1016_sketching.pdf, an online document from the University of Manchester, U.K., that includes a comprehensive overview of sketching techniques with examples.
(3) Using an overhead display and a transparency of the sketching grid paper,
demonstrate how to sketch a simple 2D drawing with features similar to those on the student assignment #ASG-U4-T1-1, “Freehand Sketching”.
(4) Review the requirements for the student assignment #ASG-U4-T1-1, “Freehand
Sketching”.

Lesson Plan #2 of 2 for Topic 4-1: Lettering and Sketching Unit 4: Graphical Communications
Design and Fabrication 1212 - 3 - Teacher Resource Guide
Suggested Student Activities
The students will complete assignment #ASG-U4-T1-2, “Freehand Sketching”.
Assessment and Evaluation The teacher should informally assess quality of student participation in class discussion; this will be considered in the calculation of the overall participation mark for the course. Sketching assignments should be assessed based on adherence to sketching rules. An evaluation rubric is recommended.
Wrap-up and Closing
Review the key points on sketching with a focus on the need to communicate effectively.
Preview the next lesson on Orthographic Views.
Learning Resources (1)
http://www.mace.manchester.ac.uk/project/intranet/teaching_learning/teaching_materials/ug/swailes/computation_and_cad/SWAILES_CC1016_sketching.pdf, an online document from the University of Manchester, U.K., that includes a comprehensive overview of sketching techniques with examples.
(2) http://www.incompetech.com/beta/plainGraphPaper/, a non commercial site
Incompetech.com, U.K., that provides free graph paper in a variety of styles. It is an excellent resource for students and teacher.
Student Material Pack The Student Material Pack for lesson #2 of 2 for topic 4-1 includes the following attached document: (1) Assignment #ASG-U4-T1-2, “Freehand Sketching”.

Lesson Plan #2 of 2 for Topic 4-1: Lettering and Sketching Unit 4: Graphical Communications
Design and Fabrication 1212 ASG-U4-T1-2 Page 1 Teacher Resource Guide
Freehand Sketching Assignment #ASG-U4-T1-2
Using the quad paper provided, sketch the single view of the bracket shown below.
Bracket – All Dimensions in Millimeters

Lesson Plan #1 of 4 for Topic 4-2: 2D Orthographic Views Unit 4: Graphical Communications
Design and Fabrication 1212 - 1 - Teacher Resource Guide
Lesson Plan #1 of 4 Topic 4-2: 2D Orthographic Views
Suggested Duration: 1 hour Suggested Format: Classroom Lecture/Lab
Following completion of this lesson, students will be able to:
4.2.1 Sketch 2D orthographic views from pictorial drawings [1.403, 1.405]
Teacher Required Resources
Design and Fabrication 1212 Teachers Resource Guide 2 H Pencil Eraser Quad paper Styrofoam Objects
Student Required Resources
Design and Fabrication 1212 Student Text Student Materials Pack
2H Pencil Eraser Quad paper (1/2” grid)
Teacher Preparation (1) Review the fundamentals of orthographic projection (1st and 3rd angle), projection between
views, and the use of a miter line.
Refer to http://www.me.utexas.edu/~rbarr/sketching/manual.html, a site sponsored by the University of Texas and is an excellent resource for students and teachers that covers orthographic, axonometric, isometric, oblique and perspective sketching in an easy to follow format. Refer also to http://pergatory.mit.edu/2.007/Resources/drawings/index.html This is a non commercial site that provides you with the basics of engineering sketching and drawing. It is an excellent reference site for both students and teacher.
(2) Prepare models of simple 3D shapes such as those shown in assignment #ASG-U2-T2-1,
“Orthographic Projection” from high density Styrofoam or other suitable material. These will be used to visually illustrate how orthographic views are derived from a 3D object.
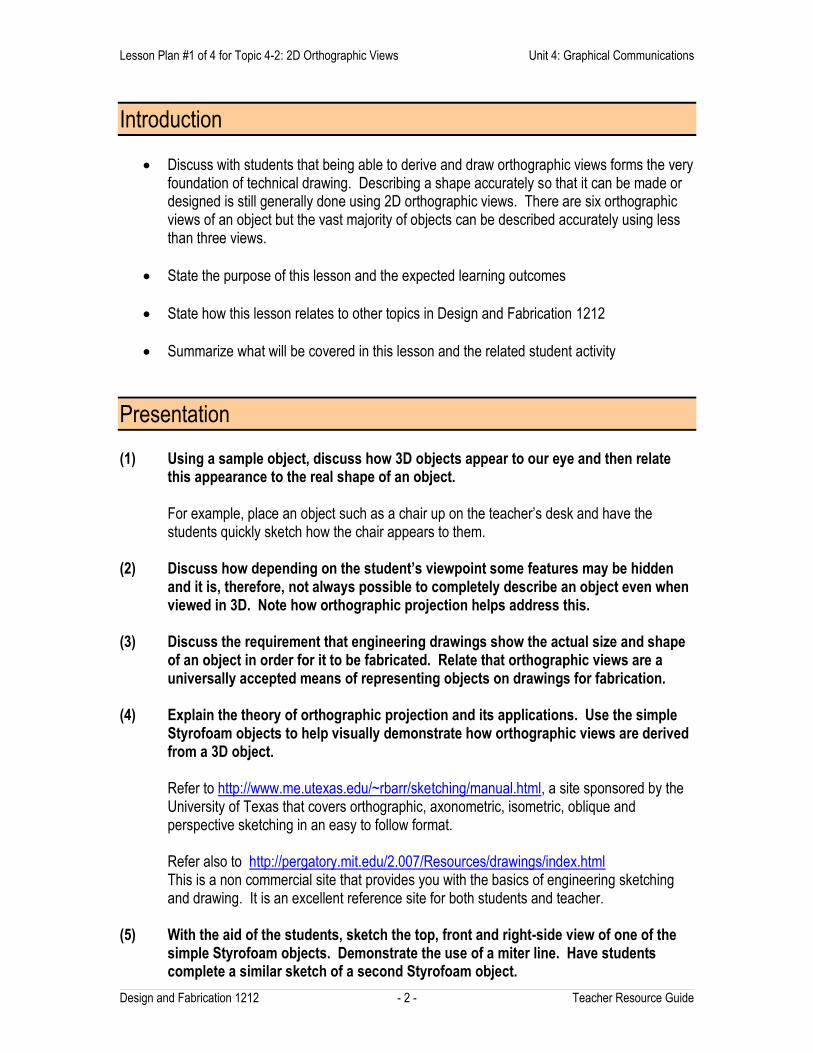
Lesson Plan #1 of 4 for Topic 4-2: 2D Orthographic Views Unit 4: Graphical Communications
Design and Fabrication 1212 - 2 - Teacher Resource Guide
Introduction
Discuss with students that being able to derive and draw orthographic views forms the very foundation of technical drawing. Describing a shape accurately so that it can be made or designed is still generally done using 2D orthographic views. There are six orthographic views of an object but the vast majority of objects can be described accurately using less than three views.
State the purpose of this lesson and the expected learning outcomes
State how this lesson relates to other topics in Design and Fabrication 1212
Summarize what will be covered in this lesson and the related student activity
Presentation (1) Using a sample object, discuss how 3D objects appear to our eye and then relate
this appearance to the real shape of an object.
For example, place an object such as a chair up on the teacher’s desk and have the students quickly sketch how the chair appears to them.
(2) Discuss how depending on the student’s viewpoint some features may be hidden
and it is, therefore, not always possible to completely describe an object even when viewed in 3D. Note how orthographic projection helps address this.
(3) Discuss the requirement that engineering drawings show the actual size and shape
of an object in order for it to be fabricated. Relate that orthographic views are a universally accepted means of representing objects on drawings for fabrication.
(4) Explain the theory of orthographic projection and its applications. Use the simple
Styrofoam objects to help visually demonstrate how orthographic views are derived from a 3D object. Refer to http://www.me.utexas.edu/~rbarr/sketching/manual.html, a site sponsored by the University of Texas that covers orthographic, axonometric, isometric, oblique and perspective sketching in an easy to follow format. Refer also to http://pergatory.mit.edu/2.007/Resources/drawings/index.html This is a non commercial site that provides you with the basics of engineering sketching and drawing. It is an excellent reference site for both students and teacher.
(5) With the aid of the students, sketch the top, front and right-side view of one of the
simple Styrofoam objects. Demonstrate the use of a miter line. Have students complete a similar sketch of a second Styrofoam object.

Lesson Plan #1 of 4 for Topic 4-2: 2D Orthographic Views Unit 4: Graphical Communications
Design and Fabrication 1212 - 3 - Teacher Resource Guide
Suggested Student Activities
The students will complete take-home assignment #ASG-U4-T2-1, “Sketching Orthographic Views”.
Assessment and Evaluation The teacher should informally assess quality of student participation in class discussion; this will be considered in the calculation of the overall participation mark for the course. Sketching assignments should be assessed based on adherence to the rules of orthographic projection. An evaluation rubric is recommended.
Wrap-up and Closing
Review the key points on orthographic projection with a focus on the need to adequately describe the shape and size of the 3D object being represented.
Preview the next lesson on Orthographic Views.
Learning Resources (1) http://www.me.utexas.edu/~rbarr/sketching/manual.html, a site sponsored by the
University of Texas and is an excellent resource for students and teachers that covers orthographic, axonometric, isometric, oblique and perspective sketching in an easy to follow format.
(2) http://pergatory.mit.edu/2.007/Resources/drawings/index.html This is a non commercial site that provides you with the basics of engineering sketching and drawing. It is an excellent reference site for both students and teacher.
Student Material Pack The Student Material Pack for lesson #1 of 4 for topic 4-2 includes the following attached document: (1) Assignment #ASG-U4-T2-1, “Sketching Orthographic Views”.

Lesson Plan #1 of 4 for Topic 4-2: 2D Orthographic Views Unit 4: Graphical Communications
Design and Fabrication 1212 ASG-U4-T2-1 Page 1 Teacher Resource Guide
Sketching Orthographic Views Assignment #ASG-U4-T2-1
Using the quad paper provided, sketch the top, front and right side views for the objects shown below. The overall dimensions for each object are 100 mm x 100 mm x 100 mm. Feature dimensions can be visually estimated.

Lesson Plan #2 of 4 for Topic 4-2: 2D Orthographic Views Unit 4: Graphical Communications
Design and Fabrication 1212 - 1 - Teacher Resource Guide
Lesson Plan #2 of 4 Topic 4-2: 2D Orthographic Views
Suggested Duration: 1 hour Suggested Format: Classroom Lecture/Lab
Following completion of this lesson, students will be able to:
4.2.2 Dimension simple 2D orthographic views [1.405]
Teacher Required Resources
Design and Fabrication 1212 Teachers Resource Guide 2 H Pencil Eraser Quad paper Styrofoam Objects
Student Required Resources
Design and Fabrication 1212 Student Text Student Materials Pack
2H Pencil Eraser Quad paper (1/2” grid)
Teacher Preparation (1) Review the fundamentals of dimensioning of orthographic views.
Refer to http://www.me.utexas.edu/~rbarr/sketching/manual.html, a site sponsored by the University of Texas and is an excellent resource for students and teachers that covers orthographic, axonometric, isometric, oblique and perspective sketching in an easy to follow format. Refer also to http://pergatory.mit.edu/2.007/Resources/drawings/index.html This is a non commercial site that provides you with the basics of engineering sketching and drawing. It is an excellent reference site for both students and teacher.

Lesson Plan #2 of 4 for Topic 4-2: 2D Orthographic Views Unit 4: Graphical Communications
Design and Fabrication 1212 - 2 - Teacher Resource Guide
Introduction
Discuss with students the two essentials required to fabricate an object are the necessary orthographic views of the object and the related dimensions. Once the orthographic views are drawn the dimensions have to be applied. Two classes of dimensions, location and size, are used on a technical drawing. There are general rules for the technique and placement of dimensions. As with orthographic projection, you can encounter some very difficult dimensioning problems on complicated drawings. At this introductory level the drawings are relatively simple and so is the dimensioning.
State the purpose of this lesson and the expected learning outcomes
State how this lesson relates to other topics in Design and Fabrication 1212
Summarize what will be covered in this lesson and the related student activity
Presentation (1) Display the orthographic sketch of the Styrofoam block used in the previous lesson.
Solicit from the students what additional information would be needed on the sketch to enable fabrication of the block in the shop. Introduce the concept of dimensioning.
(2) Discuss the standard practice for dimensioning engineering drawings and how it
relates to fabrication. Introduce the aligned and uni-directional methods of dimensioning and display examples of both methods.
(3) Discuss the difference between location and size dimensions. Display examples of
each. (4) Discuss how the specified accuracy of dimensions on a drawing affects the
function, cost and manufacturability of an object. (5) Explain the relationship of dimensions to the precision of metrology instruments
and the capability of the operator and fabrication equipment used to make a part. (6) Using an overhead projector display, demonstrate placement of dimensions by
adding the necessary location and size dimensions to the orthographic views of the Styrofoam block. Overview the general rules for dimension placement.

Lesson Plan #2 of 4 for Topic 4-2: 2D Orthographic Views Unit 4: Graphical Communications
Design and Fabrication 1212 - 3 - Teacher Resource Guide
Suggested Student Activities
The students will complete take-home assignment #ASG-U4-T2-2, “Dimensioning Orthographic Views”.
Assessment and Evaluation The teacher should informally assess quality of student participation in class discussion; this will be considered in the calculation of the overall participation mark for the course. Dimensioning assignments should be assessed based on adherence to the rules governing dimensioning. An evaluation rubric is recommended.
Wrap-up and Closing
Review the key points on dimensioning with a focus on the need to adequately describe the location and size of part features to enable fabrication of the part.
Preview the next lesson on Orthographic Views.
Learning Resources (1) http://www.me.utexas.edu/~rbarr/sketching/manual.html, a site sponsored by the
University of Texas and is an excellent resource for students and teachers that covers orthographic, axonometric, isometric, oblique and perspective sketching in an easy to follow format.
(2) http://pergatory.mit.edu/2.007/Resources/drawings/index.html This is a non commercial site that provides you with the basics of engineering sketching and drawing. It is an excellent reference site for both students and teacher.
Student Material Pack The Student Material Pack for lesson #2 of 4 for topic 4-2 includes the following attached document: (1) Assignment #ASG-U4-T2-2, “Dimensioning Orthographic Views”.

Lesson Plan #2 of 4 for Topic 4-2: 2D Orthographic Views Unit 4: Graphical Communications
Design and Fabrication 1212 ASG-U4-T2-2 Page 1 Teacher Resource Guide
Dimensioning Orthographic Views
Assignment #ASG-U4-T2-2 Sketch the necessary dimensions on the orthographic views for the Guide Block shown below. The overall dimensions of the block are 100 mm x 100 mm x 100 mm. Feature dimensions can be visually estimated.

Lesson Plan #3 of 4 for Topic 4-2: 2D Orthographic Views Unit 4: Graphical Communications
Design and Fabrication 1212 - 1 - Teacher Resource Guide
Lesson Plan #3 of 4 Topic 4-2: 2D Orthographic Views
Suggested Duration: 1 hour Suggested Format: Classroom Lecture/Lab
Following completion of this lesson, students will be able to:
4.2.3 Differentiate between 1st angle and 3rd angle projection. [1.403 1.405]
Teacher Required Resources
Design and Fabrication 1212 Teachers Resource Guide 2 H Pencil Eraser Blueprint Reading Exercises
Student Required Resources
Design and Fabrication 1212 Student Text Student Materials Pack
2H Pencil Eraser
Teacher Preparation (1) Review the difference between 1st and 3rd angle orthographic projection.
Refer to http://www.colorado.edu/MCEN/MCEN1025/lecture PDF/2-WWW.pdf, an on-line document by the University of Colorado that provides an excellent introduction to 1st and 3rd angle projection. Refer also to http://pergatory.mit.edu/2.007/Resources/drawings/index.html This is a non commercial site that provides you with the basics of engineering sketching and drawing. It is an excellent reference site for both students and teacher.
(2) Prepare blueprint reading exercise(s) based on 1st angle orthographic projection and 3rd angle orthographic projection.

Lesson Plan #3 of 4 for Topic 4-2: 2D Orthographic Views Unit 4: Graphical Communications
Design and Fabrication 1212 - 2 - Teacher Resource Guide
Introduction
Discuss with students that there are two basic systems of orthographic projection used in the world: 1st angle and 3rd angle. Once a person understands one system the other one is easily understood. The analogy is that in Canada we drive on the right hand side of the road while in England they drive on the left hand side. The remainder of the driving rules and required skills are the same. The 3rd angle system is used in most of the world with the exception of England and some Commonwealth countries. The vast majority of drawings that we produce and use in the western hemisphere are 3rd angle.
State the purpose of this lesson and the expected learning outcomes
State how this lesson relates to other topics in Design and Fabrication 1212
Summarize what will be covered in this lesson and the related student activity
Presentation (1) Display a sketch of the Styrofoam block used in the previous lessons based on 3rd
angle orthographic projection alongside a sketch based on 1st angle projection. Solicit from the students what the difference is between both methods. Introduce the concepts of 1st and 3rd angle projection.
(2) Compare the theory of 1st angle with 3rd angle orthographic projection and note how
the method used is indicated in the title block of a drawing. (3) List the countries that use 3rd angle versus 1st angle projection (4) Overview the requirements of the in-class blueprint reading exercise(s).
Suggested Student Activities
The students will complete blueprint reading exercise(s) related to 1st and 3rd angle projection.
Assessment and Evaluation The teacher should informally assess quality of student participation in class discussion; this will be considered in the calculation of the overall participation mark for the course. Blueprints assignments should be assessed based on comparison to a standard solution.

Lesson Plan #3 of 4 for Topic 4-2: 2D Orthographic Views Unit 4: Graphical Communications
Design and Fabrication 1212 - 3 - Teacher Resource Guide
Wrap-up and Closing
Review the key points on 1st and 3rd angle projection and the importance of recognizing which method is being used when interpreting drawings .
Preview the next lesson on Orthographic Views.
Learning Resources (1) http://www.colorado.edu/MCEN/MCEN1025/lecture%20PDF/2-WWW.pdf, an on-line
document by the University of Colorado that provides an excellent introduction to 1st and 3rd angle projection.
(2) http://pergatory.mit.edu/2.007/Resources/drawings/index.html
This is a non commercial site that provides you with the basics of engineering sketching and drawing. It is an excellent reference site for both students and teacher.
Student Material Pack The Student Material Pack for lesson #3 of 4 for topic 4-2 should include the blueprint reading exercise(s) on 1st and 3rd angle projection.

Lesson Plan #4 of 4 for Topic 4-2: 2D Orthographic Views Unit 4: Graphical Communications
Design and Fabrication 1212 - 1 - Teacher Resource Guide
Lesson Plan #4 of 4 Topic 4-2: 2D Orthographic Views
Suggested Duration: 1 hour Suggested Format: Classroom Lecture/Lab
Following completion of this lesson, students will be able to:
4.2.4 Determine the required orthographic views for part production. [1.403 1.405]
Teacher Required Resources
Design and Fabrication 1212 Teachers Resource Guide 2 H Pencil Eraser Calipers Steel Rule Dividers Micrometer Sample Product Assemblies
Student Required Resources
Design and Fabrication 1212 Student Text Student Materials Pack
2H Pencil Eraser Calipers Steel Rule Dividers Micrometer

Lesson Plan #4 of 4 for Topic 4-2: 2D Orthographic Views Unit 4: Graphical Communications
Design and Fabrication 1212 - 2 - Teacher Resource Guide
Teacher Preparation (1) Review 3rd angle orthographic projection and the dimensioning of views
Refer to http://www.colorado.edu/MCEN/MCEN1025/lecture%20PDF/2-WWW.pdf, an on-line document by the University of Colorado that provides an excellent introduction to 1st and 3rd angle projection. Refer also to http://pergatory.mit.edu/2.007/Resources/drawings/index.html This is a non commercial site that provides you with the basics of engineering sketching and drawing. It is an excellent reference site for both students and teacher.
(2) Prepare sample product assemblies for reverse engineering assignment #ASG-U4-T2-3, “Reverse Engineering” by student groups. These should be selected to enable measurement of critical dimensions using basic metrology hand-tools including calipers, micrometers, and steel rules.
Introduction
Discuss with students how the number of orthographic views required to describe a product so that it can be made depends on the complexity and shape of the product. The vast majority of products can be described in three or fewer views. When drawing the object the first thing that the drafter has to determine is the correct number and orientation of views.
State the purpose of this lesson and the expected learning outcomes
State how this lesson relates to other topics in Design and Fabrication 1212
Summarize what will be covered in this lesson and the related student activity

Lesson Plan #4 of 4 for Topic 4-2: 2D Orthographic Views Unit 4: Graphical Communications
Design and Fabrication 1212 - 3 - Teacher Resource Guide
Presentation (1) Review the theory of 3rd angle orthographic projection. Use the Styrofoam models to facilitate.
Refer to http://www.colorado.edu/MCEN/MCEN1025/lecture%20PDF/2-WWW.pdf, an on-line document by the University of Colorado that provides an excellent introduction to 1st and 3rd angle projection. Refer also to http://pergatory.mit.edu/2.007/Resources/drawings/index.html This is a non commercial site that provides you with the basics of engineering sketching and drawing.
(2) List the criteria for selection of the front view of an object.
(3) Discuss how to select the correct number of views to describe an object
Use the Styrofoam models to facilitate. (4) Distribute sample products and discuss the requirements of the student assignment
#ASG-U4-T2-3, “Reverse Engineering”.
Suggested Student Activities
The students will complete the in-class assignment #ASG-U4-T2-3, “Reverse Engineering”.
Assessment and Evaluation The teacher should informally assess quality of student participation in class discussion; this will be considered in the calculation of the overall participation mark for the course. Reverse engineering assignments should be assessed based on the rules of orthographic projection and dimensioning. An evaluation rubric is recommended.
Wrap-up and Closing
Review the key points on 3rd angle orthographic projection and the necessary views for fabrication of a part.
Preview the next lesson on Pictorial Drawings.

Lesson Plan #4 of 4 for Topic 4-2: 2D Orthographic Views Unit 4: Graphical Communications
Design and Fabrication 1212 - 4 - Teacher Resource Guide
Learning Resources (1) http://www.colorado.edu/MCEN/MCEN1025/lecture%20PDF/2-WWW.pdf, an on-line
document by the University of Colorado that provides an excellent introduction to 1st and 3rd angle projection.
(2) http://pergatory.mit.edu/2.007/Resources/drawings/index.html
This is a non commercial site that provides you with the basics of engineering sketching and drawing. It is an excellent reference site for both students and teacher.
Student Material Pack The Student Material Pack for lesson #4 of 4 for topic 4-2 should include the assignment #ASG-U4-T2-3, “Reverse Engineering”.
Lesson Plan #4 of 4 for Topic 4-2: 2D Orthographic Views Unit 4: Graphical Communications
Design and Fabrication 1212 ASG-U4-T2-3 Page 1 Teacher Resource Guide
Reverse Engineering Assignment #ASG-U4-T2-3
In industry, replacement parts for equipment may have to be custom made. In some of these cases, there are no engineering drawings available and, therefore, must be developed before the part can be fabricated in the shop. This requires reverse engineering. Reverse engineering involves measuring the key features of the existing part so that the dimensions necessary to produce engineering drawings for the part can be developed. In groups of 2 or 4, disassemble the sample product supplied by the teacher and measure the critical dimensions of each of the key components. Based on these measured dimensions, sketch the orthographic views required for fabrication of each component. A separate sketch should be produced for each component and the necessary dimensions for component production should be applied to the orthographic views.

Lesson Plan #1 of 1 for Topic 4-3: 3D Pictorial Drawings Unit 4: Graphical Communications
Design and Fabrication 1212 - 1 - Teacher Resource Guide
Lesson Plan #1 of 1 Topic 4-3: 3D Pictorial Drawings
Suggested Duration: 1 hour Suggested Format: Classroom Lecture/Lab
Following completion of this lesson, students will be able to:
4.3.1 Explain the engineering applications of oblique and isometric 3D views. [1.403 1.405, 2.404] 4.3.2 Sketch a simple oblique and isometric drawing. [1.403 1.405]
Teacher Required Resources
Design and Fabrication 1212 Teachers Resource Guide Parts catalog drawing of a machine assembly
Student Required Resources
Design and Fabrication 1212 Student Text Student Materials Pack
2H Pencil Eraser
Teacher Preparation (1) Review the application and development of 3D pictorial drawings.
Refer to http://www.me.utexas.edu/~rbarr/sketching/manual.html, a site sponsored by the University of Texas and is an excellent resource for students and teachers that covers orthographic, axonometric, isometric, oblique and perspective sketching in an easy to follow format. Refer also to http://pergatory.mit.edu/2.007/Resources/drawings/index.html This is a non commercial site that provides you with the basics of engineering sketching and drawing. It is an excellent reference site for both students and teacher.
(2) Prepare an overhead transparency or PowerPoint slide of an exploded assembly from a parts catalog or instruction manual.
(3) Prepare a blueprint reading exercise for students on 3D Pictorial Drawings. (4) Prepare isometric grid paper for student take-home assignment #ASG-U4-T3-1, “Isometric
Sketching.

Lesson Plan #1 of 1 for Topic 4-3: 3D Pictorial Drawings Unit 4: Graphical Communications
Design and Fabrication 1212 - 2 - Teacher Resource Guide
Introduction
Discuss with students how while pictorial drawings are generally not used for the production of parts or products, they are effective for relaying product information to non-technical personnel. 3D exploded assemblies are often used to display products in parts catalogs and instruction manuals. A barbeque assembly manual, for example, will usually contain pictorial drawings that show the relationship of the various parts and the sequence of assembly.
State the purpose of this lesson and the expected learning outcomes
State how this lesson relates to other topics in Design and Fabrication 1212
Summarize what will be covered in this lesson and the related student activity
Presentation (1) Discuss the limitations of using pictorial drawings for technical applications
including fabrication and production. Note the problems of hidden features and distortion of true size. (2) Demonstrate an application of a pictorial drawing by using a parts or installation
drawing of a common product such as a barbeque. (3) Differentiate between isometric and oblique drawings and explain their application. Display examples of each type to facilitate.
Refer to http://www.me.utexas.edu/~rbarr/sketching/manual.html, a site sponsored by the University of Texas and is an excellent resource for students and teachers that covers orthographic, axonometric, isometric, oblique and perspective sketching in an easy to follow format.
(4) Draw an isometric and a oblique cube to illustrate the difference in the two types of pictorials.
Suggested Student Activities
The students will complete an in-class blueprint reading assignment on 3D pictorial drawings.
The students will also complete the take-home sketching assignment #ASG-U4-T3-1, “Isometric Sketching”.

Lesson Plan #1 of 1 for Topic 4-3: 3D Pictorial Drawings Unit 4: Graphical Communications
Design and Fabrication 1212 - 3 - Teacher Resource Guide
Assessment and Evaluation The teacher should informally assess quality of student participation in class discussion; this will be considered in the calculation of the overall participation mark for the course. Blueprints assignments should be assessed based on comparison to a standard solution.
Wrap-up and Closing
Review the key types of 3D pictorial drawings and emphasize the limitations of this form of drafting for fabrication purposes.
Preview the next lesson on Working Drawings.
Learning Resources (1) http://www.me.utexas.edu/~rbarr/sketching/manual.html, a site sponsored by the
University of Texas and is an excellent resource for students and teachers that covers orthographic, axonometric, isometric, oblique and perspective sketching in an easy to follow format.
(2) http://pergatory.mit.edu/2.007/Resources/drawings/index.html
This is a non commercial site that provides you with the basics of engineering sketching and drawing. It is an excellent reference site for both students and teacher.
Student Material Pack The Student Material Pack for lesson #1 of 1 for topic 4-3 should include the blueprint reading assignment on 3D pictorial drawings and the attached document: (1) Assignment #ASG-U4-T3-1, “Isometric Sketching”.

Lesson Plan #1 of 1 for Topic 4-3: 3D Pictorial Drawings Unit 4: Graphical Communications
Design and Fabrication 1212 ASG-U4-T3-1 Page 1 Teacher Resource Guide
Isometric Sketching Assignment #ASG-U4-T3-1
Using the isometric grid paper provided, develop an isometric sketch for a common product found in your home such as a cabinet, table, bookcase, or television set.

Lesson Plan #1 of 1 for Topic 4-4: Working Drawings Unit 4: Graphical Communications
Design and Fabrication 1212 - 1 - Teacher Resource Guide
Lesson Plan #1 of 1 Topic 4-4: Working Drawings
Suggested Duration: 2 hours Suggested Format: Classroom Lecture/Lab
Following completion of this lesson, students will be able to:
4.4.1 Explain the relationship between working drawings and part production. [1.403, 1.405, 2.404] 4.4.2 Differentiate between detail and assembly drawings. [1.403, 1.405] 4.4.3 Find and select technical information from detail and assembly drawings. [1.403, 1.405]
Teacher Required Resources
Design and Fabrication 1212 Teachers Resource Guide Sample working drawing set
Student Required Resources
Design and Fabrication 1212 Student Text Student Materials Pack
2H Pencil Eraser
Teacher Preparation (1) Review the application and development of working drawings.
Refer to http://64.78.42.182/sweethaven/BldgConst/Carpentry01/lessonMain.asp?iNum=010102, an on-line document by Sweethaven Publications, U.S., that overviews the working drawings requirements for construction. Refer also to http://pergatory.mit.edu/2.007/Resources/drawings/index.html This is a non commercial site that provides you with the basics of engineering sketching and drawing. It is an excellent reference site for both students and teacher.
(2) Review a set of working drawings such as the blueprints for the school, a local industrial plant, or home and note key information that the students will have to identify when they examine the drawings in the classroom.
(3) Prepare copies of a set of working drawings for distribution to student groups such as the
blueprints for the school, a local industrial plant, or house.

Lesson Plan #1 of 1 for Topic 4-4: Working Drawings Unit 4: Graphical Communications
Design and Fabrication 1212 - 2 - Teacher Resource Guide
Introduction
Discuss with students how before an engineered part can be made, the necessary shape, form and dimension information must be known. In the case of assemblies that consist of multiple parts, information regarding part identity and how the various parts fit together is also required. Working drawings provide this information. A “set” of working drawings includes detail drawings, which provide the shape, form and dimension information for each part, and the assembly drawing, which identifies each part and illustrates how parts should fit together.
State the purpose of this lesson and the expected learning outcomes
State how this lesson relates to other topics in Design and Fabrication 1212
Summarize what will be covered in this lesson and the related student activity
Presentation (1) Discuss the application of detail and assembly drawings. (2) Review the sample set of working drawings with the students. Use an overhead display to facilitate. (3) Identify and discuss the production specifications shown on the drawings.
Solicit the students during this discussion. (4) Discuss the precautions that the design team should take during production of the
detail and assembly drawings to ensure elimination of errors.
Note how the drawing produced by the drafter is checked and approved by the project leader before a blueprint or copy of the original drawing is produced and sent to the fabrication personnel. The original drawing never leaves the drafting office. Errors in the blueprint may have drastic implications for cost, production and function. It is essential that all blueprints be carefully reviewed and checked before production begins.
(5) Discuss the role of different fabricators who produce the various parts and their
relationship to the assembly of the parts.
To illustrate this, the teacher can take the example of the school building. Different contractors completed the construction in stages. The teacher can point out, for instance, that if the bases for the columns were not located correctly then the prefabricated columns, beams and trusses would not have aligned properly.

Lesson Plan #1 of 1 for Topic 4-4: Working Drawings Unit 4: Graphical Communications
Design and Fabrication 1212 - 3 - Teacher Resource Guide
Suggested Student Activities
In groups of 2 or 4, the students will review a set of sample working drawings from industry and identify the fabrication processes required.
Assessment and Evaluation The teacher should informally assess quality of student participation in class discussion and group activity; this will be considered in the calculation of the overall participation mark for the course.
Wrap-up and Closing
Review the difference between detail and assembly drawings and emphasize the importance of error-free working drawings in terms of the potential negative impact that mistakes can have on production time, quality, and cost.
Preview the next lesson on Drafting Related Careers.
Learning Resources (1) http://64.78.42.182/sweethaven/BldgConst/Carpentry01/lessonMain.asp?iNum=010102,
an on-line document by Sweethaven Publications, U.S., that overviews the working drawings requirements for construction.
(2) http://pergatory.mit.edu/2.007/Resources/drawings/index.html This is a non commercial site that provides you with the basics of engineering sketching and drawing. It is an excellent reference site for both students and teacher.
Student Material Pack The Student Material Pack for lesson #1 of 1 for topic 4-4 should include a copy of the sample set of working drawings.

Lesson Plan #1 of 1 for Topic 4-5: Drafting Related Careers Unit 4: Graphical Communications
Design and Fabrication 1212 - 1 - Teacher Resource Guide
Lesson Plan #1 of 1 Topic 4-5: Drafting Related Careers
Suggested Duration: 1 hour Suggested Format: Classroom Lecture/Discussion
Following completion of this lesson, students will be able to:
4.5.1 Identify the various job roles required to support engineering drawing production. [4.401] 4.5.2 List the educational requirements for draftspersons. [4.403]
Teacher Required Resources
Design and Fabrication 1212 Teacher’s Resource Guide Guest Lecturer Student Required Resources
Design and Fabrication 1212 Student Text Student Materials Pack
Teacher Preparation (1) Review the various career roles that directly support engineering drawing production. Refer to http://jobsearch.monster.ca/jobsearch.asp?cy=CA&q=&fn=47&lid=&x=25&y=13,
the Monster.com or similar on-line recruiter website which profiles careers in support of manufacturing and production.
Refer to http://www.jobfutures.ca/en/home.shtml, the JobFutures website by Services
Canada with a wealth of information on a wide variety of careers related to manufacturing and production.
(2) Arrange for a guest speaker from industry who is currently practicing in the trades,
technology or engineering area in an engineering drawing related position. OR
Arrange for a guest speaker from the educational sector who is currently teaching in the trades, technology or engineering post-secondary area with specialization in engineering drawing production. OR Research a related trades, technology or engineering career for presentation to the class.

Lesson Plan #1 of 1 for Topic 4-5: Drafting Related Careers Unit 4: Graphical Communications
Design and Fabrication 1212 - 2 - Teacher Resource Guide
Introduction
Discuss how the job roles for technical people involved in engineering drawing can range from a junior drafter to senior engineer. At the entry level the junior drafter is responsible for doing basic level engineering work that is of a repetitive nature and with limited responsibility for decision-making. This individual will copy drawings and make simple detail drawings. The next level would be an intermediate drafter who would be a technologist or junior engineer. This person would be involved in some minor design elements and incorporate these into detail and assembly drawings. The third level would be the senior engineer level where major design and production methods are decided and decisions made on modifications. This level would require that the individual be a professional engineer with associated work experience
State the purpose of this lesson and the expected learning outcomes
State how this lesson relates to other topics in Design and Fabrication 1212
Summarize what will be covered in this lesson and the related student activity
Presentation (1) Review the basics of engineering drawing production. (2) Introduce the guest speaker and state the purpose of the presentation .
(3) The guest speaker will overview his/her organization and identify the various
employee roles required to support engineering drawing production.
The general educational requirements to work in each of the jobs identified should also be discussed with the students.
(4) Follow-up the guest speaker presentation with a brief overview of the related career
guidance resources available to students.
Refer to http://jobsearch.monster.ca/jobsearch.asp?cy=CA&q=&fn=47&lid=&x=25&y=13,
the Monster.com website (or similar on-line recruiter website) which profiles careers in support of manufacturing and production.
Refer to http://www.jobfutures.ca/en/home.shtml, the JobFutures website by Services
Canada with a wealth of information on a wide variety of careers related to manufacturing and production.

Lesson Plan #1 of 1 for Topic 4-5: Drafting Related Careers Unit 4: Graphical Communications
Design and Fabrication 1212 - 3 - Teacher Resource Guide
Suggested Student Activities
Students will interact with the speaker during the discussion and complete the take-home assignment #ASG-U4-T5-1, “Drafting Related Careers”.
Assessment and Evaluation Each student should be informally evaluated based on participation in class discussion and interaction with the guest speaker.
Wrap-up and Closing
Review the various drafting related careers discussed
Preview Unit 5: Introduction to CAD/CAM.
Learning Resources (1) http://jobsearch.monster.ca/jobsearch.asp?cy=CA&q=&fn=47&lid=&x=25&y=13, the
Monster.com website which profiles careers in support of manufacturing and production. (2) http://www.jobfutures.ca/en/home.shtml, the JobFutures website by Services Canada with
a wealth of information on a wide variety of careers related to manufacturing and production.
Student Material Pack The Student Material Pack for lesson #1 of 1 for topic 4-5 should include: (1) Assignment #ASG-U4-T5-1, “Drafting Related Careers”. .

Lesson Plan #1 of 1 for Topic 4-5: Drafting Related Careers Unit 4: Graphical Communications
Design and Fabrication 1212 ASG-U4-T5-2 Page 1 Teacher Resource Guide
Drafting Related Careers Assignment #ASG-U4-T5-1
Research a drafting related career and complete the career profile table below. Information can be obtained from the Internet, the library, the employment office, a direct employee interview or from a combination of these sources. All sources should be referenced appropriately.
Career Profile Career Title
Industry Sector
General Work Duties
Educational Requirements
Educational Institutions Offering
Educational Institution Entrance Requirements
Average Annual Salary
Future Employment Outlook
Special Skills Required
Special Knowledge Required
Related High School Courses

Lesson Plans UNIT 5 Introduction to CAD/CAM
Lesson Plans Unit 5: Introduction to CAD/CAM
Design and Fabrication 1212 - 1 - Teacher Resource Guide
Unit 5 Introduction to CAD/CAM
Unit Overview
CAD or Computer Aided Drawing extends on the traditional manual technical drawing method by taking advantage of the advanced capabilities of the computer environment. It allows the drafter to be more productive and accurate in producing and modifying technical drawings. While the performance of the available software packages is very impressive, CAD is still only a tool. The quality of the work done using a CAD system still depends on the knowledge of the drafter in the use of graphics communication. In industry the CAD system is sometimes linked to a CAM or Computer Aided Manufacturing system that usually includes a CAM software package and a Computer Numerically Controlled (CNC) machine. This combination makes for a complete system from design drawings to actual manufacture of the product. This increases efficiency and gives industry the ability to respond quickly to product changes. It also allows industry to perform low volume and custom production that would otherwise not be cost effective or even possible by a human operator. The operators of CAD/CAM systems have to be proficient in both engineering drawing production and manufacturing methods. This Unit provides students with the opportunity to develop an appreciation for the CAD/CAM process from concept sketch to manufactured part and to identify the key skills and knowledge needed to work in this field. In particular, students learn how to create, modify, and control the display of the basic shapes or entities that are used in CAD software to develop an engineering drawing. They also learn the basics of dimensioning CAD drawings and how to generate a hardcopy or plot of a CAD drawing. Finally, students are given a brief introduction to Computer Aided Manufacturing through an interactive teacher directed demonstration of the process

Lesson Plans Unit 5: Introduction to CAD/CAM
Design and Fabrication 1212 - 2 - Teacher Resource Guide
Specific Curriculum Outcomes and Suggested Timelines
Unit 5 has 13 Specific Curriculum Outcomes distributed among six topics: Topic 1: Creating Entities (4 hours)
5.1.1 Identify the key areas of the CAD interface [1.403, 1.405] 5.1.2 Create basic 2D entities [1.403, 1.405] 5.1.3 Use file management tools for CAD drawings [1.403, 1.405] Topic 2: Display Manipulation (2 hours)
5.2.1 Use display tools to manipulate viewpoint of a drawing [1.403, 1.405] Topic 3: Modifying Entities (2 hours)
5.3.1 Edit existing entities using available modify tools [1.403, 1.405] Topic 4: Dimensioning (3 hours)
5.4.1 Place dimensions on 2D CAD drawings [1.403, 1.405] 5.4.2 Create basic dimension styles [1.403, 1.405] Topic 5: Plotting (1 hour)
5.5.1 Develop basic page setups for plotting [1.405] 5.5.2 Plot a 2D CAD drawing [1.405] Topic 6: Computer Aided Manufacture (4 hours)
5.6.1 Export 2D CAD files for transfer to CAM software [1.403, 1.405, 2.402] 5.6.2 Develop programs for part production using CAM software [1.403, 1.405, 2.402, 2.403] 5.6.3 Set-up a computer numerically controlled (CNC) machine [1.403, 1.405, 2.402, 2.403] 5.6.4 Produce a part prototype using CNC [1.403, 1.405]

Lesson Plans Unit 5: Introduction to CAD/CAM
Design and Fabrication 1212 - 3 - Teacher Resource Guide
Unit 5 Lesson Plans
Unit 5 includes seven lesson plans as follows: .
Unit Topic Lesson Plan Number(s)
Recommended Duration
Topic 1: Creating Entities Lesson #1
4 hours
Topic 2: Display Manipulation
Lesson #1 2 hours
Topic 3: Modifying Entities Lesson #1
2 hours
Topic 4: Dimensioning Lesson #1
3 hours
Topic 5: Plotting
Lesson #1 1 hour
Topic 6: Computer Aided Manufacture
Lesson #1 2 hours
Lesson #2
2 hours
Recommended Total Duration for Unit 5 16 hours

Lesson Plan #1 of 1 for Topic 5-1: Creating Entities Unit 5: Introduction to CAD/CAM
Design and Fabrication 1212 - 1 - Teacher Resource Guide
Lesson Plan #1 of 1 Topic 5-1: Creating Entities
Suggested Duration: 4 hours Suggested Format: Lab
Following completion of this lesson, students will be able to:
5.1.1 Identify the key areas of the CAD interface [1.403, 1.405] 5.1.2 Create basic 2D entities [1.403, 1.405] 5.1.3 Use file management tools for CAD drawings. [1.403, 1.405]
Teacher Required Resources
Design and Fabrication 1212 Teachers Resource Guide Personal Computer with printer AutoCAD software
Lab Control Software that allows lockout of student PCs Student Required Resources
Design and Fabrication 1212 Student Text Student Materials Pack Teacher Preparation (1) Review the procedure for starting a new drawing in AutoCAD using the Metric acadiso.dwt
template file. (2) Review the AutoCAD user interface and be able to identify each of the key areas. (3) Review the fundamentals of absolute, relative, and polar co-ordinates and their
relationship to the AutoCAD user co-ordinate system. (4) Review the AutoCAD toggle POLAR TRACKING. (5) Review the AutoCAD ZOOM and UNDO commands. (6) Review the 2D AutoCAD drawing commands including LINE, CIRCLE, POLYGON and
RECTANGLE. (7) Review the AutoCAD SAVEAS command. (8) Review using Windows Explorer to create a subfolder.

Lesson Plan #1 of 1 for Topic 5-1: Creating Entities Unit 5: Introduction to CAD/CAM
Design and Fabrication 1212 - 2 - Teacher Resource Guide
(9) Review the student in-class assignment #ASG-U5-T1-1, “Creating Entities”. Refer to http://www.andrew.cmu.edu/course/48-568/2DVideosWEB_files/frame.htm, a set of on-line tutorials for AutoCAD in both Adobe and voiced video format. An excellent AutoCAD reference for the beginner. These tutorials are user friendly and enable the user to control the pace with a start/stop control.
Introduction
Discuss with the students the rapid evolution of Computer Aided Drafting or CAD and computer graphics capability, in general, during the last decade. Explain to students that AutoCAD, the most popular commercially available CAD software in industry, includes many of the same capabilities of software used to develop video game graphics or computer animation special effects in movies. Emphasize the fact that CAD is only a tool not a replacement for the draftsperson. Knowledge of the fundamental principles of drafting is still an essential pre-requisite to success with using a CAD system to develop engineering drawings. It should be noted, however, that CAD is much more than merely an electronic pencil and T-square. The ability to use CAD tools to facilitate drawing management, drawing revision, and information extraction represents one of its many advantages over traditional pen and pencil drafting methods.
State the purpose of this lesson and the expected learning outcomes
State how this lesson relates to other topics in Design and Fabrication 1212
Summarize what will be covered in this lesson and the related student activity
Presentation Note: It is recommended that classroom/lab control software be use in a networked lab
environment to help with classroom management during instruction. This software enables the instructor to monitor and control students’ workstations. For example, the students’ workstations can be locked as key concepts are first introduced and demonstrated.
Refer to http://www.celt.lsu.edu/CFD/E-proceedings04/Dunnington.pdf, this online
document from Louisiana State University, U.S., overviews the key features of lab control software.
(1) Start AutoCAD from the Windows desktop and start a new drawing using the metric
acadiso.dwt template file. At this stage, explain only that the template file pre-sets various controls in AutoCAD such as the size of the crosshairs and pickbox.

Lesson Plan #1 of 1 for Topic 5-1: Creating Entities Unit 5: Introduction to CAD/CAM
Design and Fabrication 1212 - 3 - Teacher Resource Guide
(2) Identify and explain the purpose of the key areas of the AutoCAD interface including the cross-hair, command line, status line, cursor tracking area, toggle bar, drawing window, pop-up menus, and icon menus.
(3) Identify the World Co-ordinate System icon and explain how AutoCAD is essentially
a geometry-based tool that represents drawing objects in terms of Cartesian co-ordinates.
(4) Briefly review the Cartesian co-ordinate system and differentiate between absolute
and relative co-ordinates in this system.
Knowledge of these co-ordinate systems is a necessary pre-requisite to making effective use of the capabilities of AutoCAD. Explain the concept of World Co-ordinate System origin and x-y-z co-ordinate entry as a means of defining basic geometric shapes such as straight lines. For example, the size of a rectangle which is essentially the combination of four lines can be defined by specifying the x-y co-ordinates of the lower left corner and the upper right corner. LOCKOUT STUDENT PCS DURING THIS DISCUSSION.
(6) Using the LINE command, demonstrate the use of absolute and relative co-ordinates in AutoCAD by creating a rectangle from four line segments that measures 250 units long x 170 units high with lower left corner at absolute co-ordinate location 25,25. Demonstrate the ZOOM-extents command to enlarge the rectangle display.
The rectangle should first be constructed using only absolute co-ordinates. The UNDO
command can be used to then clear the screen. Repeat the rectangle construction using relative co-ordinates. Monitor the students to see how they have progressed and provide assistance where necessary before proceeding.
Release student PCs during this demonstration so they can follow along. This rectangle will later be used to create an A4 size border.
(7) Explain the concept of polar co-ordinates as a form of relative co-ordinates and
demonstrate entry of polar co-ordinates using AutoCAD. Identify and explain the POLAR TRACKING tool and demonstrate its use as yet another means of creating the rectangle previously discussed.
UNDO the previously constructed rectangle and repeat its construction using the POLAR TRACKING tool. Explain to students that this is one of many drawing assist tools available in AutoCAD that simplify the creation of drawings. Emphasize the notion that AutoCAD offers a variety of techniques for creating a particular shape.
(8) Use the SAVEAS command to save the file as MyA4border.dwg. Demonstrate the
use of Windows Explorer utilities to create a subfolder named “Design and Fabrication 1212”, which students will use to store future work.
(9) Overview the in-class student assignment #ASG-U5-T1-1, “Creating Entities”.

Lesson Plan #1 of 1 for Topic 5-1: Creating Entities Unit 5: Introduction to CAD/CAM
Design and Fabrication 1212 - 4 - Teacher Resource Guide
Refer students to the AutoCAD HELP menu and AutoCAD’s Active Assistance tool for a description of the CIRCLE, POLYGON and RECTANGLE commands.
Suggested Student Activities
The students will complete the in-class assignment #ASG-U5-T1-1, “Creating Entities”.
Assessment and Evaluation The teacher should informally assess quality of student participation in class discussion; this will be considered in the calculation of the overall participation mark for the course.
Wrap-up and Closing
Review the key points related to the AutoCAD interface, co-ordinate entry, creating entities, and file management.
Preview the next lesson on Display Manipulation.
Learning Resources (1) http://www.andrew.cmu.edu/course/48-568/2DVideosWEB_files/frame.htm, a set of on-line
tutorials for AutoCAD in both Adobe and voiced video format. An excellent AutoCAD reference for the beginner.
(2) http://www.celt.lsu.edu/CFD/E-proceedings04/Dunnington.pdf, this online document from
Louisiana State University, U.S., overviews the key features of lab control software.
Student Material Pack The Student Material Pack for lesson #1 of 1 for topic 5-1 includes the following attached documents: (1) Assignment #ASG-U5-T1-1, “Creating Entities”

Lesson Plan #1 of 1 for Topic 5-1: Creating Entities Unit 5: Introduction to CAD/CAM
Design and Fabrication 1212 ASG-U5-T1-1 Page 1 Teacher Resource Guide
Creating Entities Assignment #ASG-U5-T1-1
Develop the AutoCAD drawing for the manual drafting template shown below based on the following:
Start a new drawing using the acadiso.dwt template file
Use the LINE command and the POLAR TRACKING tool to create the outside bounding rectangle with lower left corner at 25, 25
Use the RECTANGLE command to create the inner rectangle.
Use the CIRCLE command to create the circle.
Use the POLYGON command to create the inner hexagonal shapes and the triangle. Do not include dimensions on your drawing. Save your completed drawing as draftingtemplate.dwg.
Drafting Template

Lesson Plan #1 of 1 for Topic 5-2: Display Manipulation Unit 5: Introduction to CAD/CAM
Design and Fabrication 1212 - 1 - Teacher Resource Guide
Lesson Plan #1 of 1 Topic 5-2: Display Manipulation
Suggested Duration: 2 hours Suggested Format: Lab
Following completion of this lesson, students will be able to:
5.2.1 Use display tools to manipulate viewpoint of a drawing. [1.403, 1.405]
Teacher Required Resources
Design and Fabrication 1212 Teachers Resource Guide Personal Computer with printer AutoCAD software
Lab Control Software that allows lockout of student PCs Student Required Resources
Design and Fabrication 1212 Student Text Student Materials Pack Teacher Preparation (1) Review the AutoCAD ZOOM and PAN commands. (2) Review the 2D AutoCAD drawing command DTEXT. (3) Review the AutoCAD modify commands OFFSET and TRIM. (4) Review the AutoCAD format command LIMITS. (5) Review the student in-class assignment #ASG-U5-T2-1, “Display Manipulation”. Refer to http://www.andrew.cmu.edu/course/48-568/2DVideosWEB_files/frame.htm, a set of on-line tutorials for AutoCAD in both Adobe and voiced video format. An excellent AutoCAD reference for the beginner.

Lesson Plan #1 of 1 for Topic 5-2: Display Manipulation Unit 5: Introduction to CAD/CAM
Design and Fabrication 1212 - 2 - Teacher Resource Guide
Introduction
Discuss with the students how on a CAD system all drawings are produced at true size. Since the drawing window is physically not large enough to accommodate most drawings at true size, the display of the drawing on-screen is usually at reduced scale. For example, a drawing of a house floor plan would have to be displayed at reduced scale in order to show the whole plan in the drawing window. AutoCAD provides a number of tools that allow the user to change the size and position of the drawing displayed within the drawing window. Knowledge of these is essential for effective use of the software.
State the purpose of this lesson and the expected learning outcomes
State how this lesson relates to other topics in Design and Fabrication 1212
Summarize what will be covered in this lesson and the related student activity
Presentation Note: It is recommended that classroom/lab control software be use in a networked lab
environment to help with classroom management during instruction. This software enables the instructor to monitor and control students’ workstations. For example, the students’ workstations can be locked as key concepts are first introduced and demonstrated.
(1) Start AutoCAD from the Windows desktop and open the sample file “City Map.dwg”
included with the software. The students should follow along on their own workstations. (2) Demonstrate the use of the ZOOM and PAN commands.
ZOOM/ ALL, ZOOM/ EXTENTS, ZOOM/ WINDOW, ZOOM/ PREVIOUS and ZOOM/ REALTIME should be demonstrated at this stage. Use the PAN command in conjunction with ZOOM/ WINDOW to view areas on the map. Explain the concept of LIMITS and how they relate to the ZOOM/ ALL command.
(3) Close the sample file and open the MyA4border.dwg file created in the previous lesson.
(4) Demonstrate the use of the OFFSET and TRIM commands to create the border
shown in Learning Resource Sheet #LRS-U5-T1-1, “Custom A4border”. (5) Demonstrate the use of the DTEXT command with ZOOM to add the text to the title
block. Save the file as Mya4border.dwg.

Lesson Plan #1 of 1 for Topic 5-2: Display Manipulation Unit 5: Introduction to CAD/CAM
Design and Fabrication 1212 - 3 - Teacher Resource Guide
(6) Overview the in-class student assignment #ASG-U5-T2-1, “Display Manipulation”.
Suggested Student Activities
The students will complete the in-class assignment #ASG-U5-T2-1, “Display Manipulation”.
Assessment and Evaluation The teacher should informally assess quality of student participation in class discussion; this will be considered in the calculation of the overall participation mark for the course.
Wrap-up and Closing
Review the key points related to the AutoCAD display manipulation tools.
Preview the next lesson on Modifying Entities.
Learning Resources (1) http://www.andrew.cmu.edu/course/48-568/2DVideosWEB_files/frame.htm, a set of on-line
tutorials for AutoCAD in both Adobe and voiced video format. An excellent AutoCAD reference for the beginner.
(2) http://www.celt.lsu.edu/CFD/E-proceedings04/Dunnington.pdf, this online document from
Louisiana State University, U.S., overviews the key features of lab control software.
Student Material Pack The Student Material Pack for lesson #1 of 1 for topic 5-2 includes the following attached document: (1) Assignment #ASG-U5-T2-1, “Display Manipulation”

Lesson Plan #1 of 1 for Topic 5-3: Modifying Entities Unit 5: Introduction to CAD/CAM
Design and Fabrication 1212 ASG-U5-T3-1 Page 1 Teacher Resource Guide
Display Manipulation Assignment #ASG-U5-T2-1
Using the OFFSET, TRIM, DTEXT and ZOOM commands, modify your existing MyA4border.dwg file to create the final version shown below. This border will be used in later exercises. Do not include dimensions on your drawing.
Custom A4border Note: Text height is 7 mm for DRAWING NAME and 3 mm for the remaining entries.

Lesson Plan #1 of 1 for Topic 5-3: Modifying Entities Unit 5: Introduction to CAD/CAM
Design and Fabrication 1212 - 1 - Teacher Resource Guide
Lesson Plan #1 of 1 Topic 5-3: Modifying Entities
Suggested Duration: 2 hours Suggested Format: Lab
Following completion of this lesson, students will be able to:
5.3.1 Edit existing entities using available modify tools. [1.403, 1.405]
Teacher Required Resources
Design and Fabrication 1212 Teachers Resource Guide Personal Computer with printer AutoCAD software
Lab Control Software that allows lockout of student PCs Student Required Resources
Design and Fabrication 1212 Student Text Student Materials Pack Teacher Preparation (1) Review the AutoCAD modify commands ERASE, OFFSET, TRIM, COPY, MOVE,
ROTATE, MIRROR AND FILLET COMMANDS. (2) Review the OBJECT SNAP tools. (3) Review the student in-class assignment #ASG-U5-T3-1, “Modifying Entities”. Refer to http://www.andrew.cmu.edu/course/48-568/2DVideosWEB_files/frame.htm, a set of on-line tutorials for AutoCAD in both Adobe and voiced video format. An excellent AutoCAD reference for the beginner.

Lesson Plan #1 of 1 for Topic 5-3: Modifying Entities Unit 5: Introduction to CAD/CAM
Design and Fabrication 1212 - 2 - Teacher Resource Guide
Introduction
Discuss with the students that creating a drawing on a CAD system basically involves creating and modifying basic drawing objects or entities such as lines and circles. The drawing commands available in AutoCAD enable the user to create these basic objects while the modify commands allow the user to change or modify objects that are already on-screen. These modify commands allow the user to take advantage of some of the productivity features of CAD when compared to traditional pen and paper techniques. For example, when creating an electronic schematic the COPY command allows the user to quickly replicate a symbol, such as a resistor symbol, that appears frequently in the schematic. Even when using templates, manual drafting would still require individually drawing each occurrence of the symbol on the drawing.
State the purpose of this lesson and the expected learning outcomes
State how this lesson relates to other topics in Design and Fabrication 1212
Summarize what will be covered in this lesson and the related student activity
Presentation Note: It is recommended that classroom/lab control software be use in a networked lab
environment to help with classroom management during instruction. This software enables the instructor to monitor and control the students’ workstations. For example, the students’ workstations can be locked as key concepts are first introduced and demonstrated.
(1) Start AutoCAD from the Windows desktop and begin a new file using the
acadiso.dwt template. The students should follow along on their own workstations. (2) Review the use of the ZOOM, OFFSET and TRIM commands in creating
MyA4border.dwg.
Explain that OFFSET and TRIM are considered modify commands since they involve changing or replicating existing objects.
(3) Demonstrate the use of the ERASE, COPY, MOVE, ROTATE, MIRROR AND FILLET
commands. Lockout student PCs during this demonstration.

Lesson Plan #1 of 1 for Topic 5-3: Modifying Entities Unit 5: Introduction to CAD/CAM
Design and Fabrication 1212 - 3 - Teacher Resource Guide
(4) Explain the OBJECT SNAP tools and how they can be used to assist with the drawing and modifying of objects.
Focus on the key osnaps including END, INT, CEN, MID, and QUAD.
(5) Overview the in-class student assignment #ASG-U5-T3-1, “Modifying Entities”.
Suggested Student Activities
The students will complete the in-class assignment #ASG-U5-T3-1, “Modifying Entities”.
Assessment and Evaluation The teacher should informally assess quality of student participation in class discussion; this will be considered in the calculation of the overall participation mark for the course.
Wrap-up and Closing
Review the key points related to the AutoCAD modify tools.
Preview the next lesson on Dimensioning.
Learning Resources (1) http://www.andrew.cmu.edu/course/48-568/2DVideosWEB_files/frame.htm, a set of on-line
tutorials for AutoCAD in both Adobe and voiced video format. An excellent AutoCAD reference for the beginner.
(2) http://www.celt.lsu.edu/CFD/E-proceedings04/Dunnington.pdf, this online document from
Louisiana State University, U.S., overviews the key features of lab control software.
Student Material Pack The Student Material Pack for lesson #1 of 1 for topic 5-3 includes the following attached documents: (1) Assignment #ASG-U5-T3-1, “Modifying Entities”

Lesson Plan #1 of 1 for Topic 5-3: Modifying Entities Unit 5: Introduction to CAD/CAM
Design and Fabrication 1212 ASG-U5-T2-1 Page 1 Teacher Resource Guide
Modifying Entities Assignment #ASG-U5-T3-1
Develop the Gasket drawing shown below based on the following:
Create the perimeter shape first using the RECTANGLE command and then use the FILLET command to round the right corners.
Create one inner rectangular shape using the RECTANGLE command and then use a combination of COPY and ROTATE commands to generate the remaining three.
Create the first trapezoidal shape using the LINE, OFFSET and TRIM commands and then use the MIRROR command to generate the second.
Do not include dimensions on your drawing. Save your completed drawing as gasket.dwg.
Gasket

Lesson Plan #1 of 1 for Topic 5-4: Dimensioning Unit 5: Introduction to CAD/CAM
Design and Fabrication 1212 - 1 - Teacher Resource Guide
Lesson Plan #1 of 1 Topic 5-4: Dimensioning
Suggested Duration: 3 hours Suggested Format: Lab
Following completion of this lesson, students will be able to:
5.4.1 Place dimensions on 2D CAD drawings [1.403, 1.405] 5.4.2 Create basic dimension styles [1.403, 1.405]
Teacher Required Resources
Design and Fabrication 1212 Teachers Resource Guide Personal Computer with printer AutoCAD software
Lab Control Software that allows lockout of student PCs Student Required Resources
Design and Fabrication 1212 Student Text Student Materials Pack Teacher Preparation (1) Review the AutoCAD dimensioning commands for linear, diameter and radial dimensions. (2) Review the GRIPS tool in AutoCAD and how it can be used to access the PROPERTIES
dialogue box. (3) Review the concept of dimension style and the use of the PROPERTIES dialogue box to
edit dimension style parameters such as text height and arrow size. (4) Review the student in-class assignment #ASG-U5-T4-1, “Dimensioning”. Refer to http://www.andrew.cmu.edu/course/48-568/2DVideosWEB_files/frame.htm, a set of on-line tutorials for AutoCAD in both Adobe and voiced video format. An excellent AutoCAD reference for the beginner.

Lesson Plan #1 of 1 for Topic 5-4: Dimensioning Unit 5: Introduction to CAD/CAM
Design and Fabrication 1212 - 2 - Teacher Resource Guide
Introduction
Discuss with the students that after creating a drawing by creating and modifying basic objects, the drawing has to be dimensioned and other information necessary to enable fabrication, such as drawing notes, has to be added.
State the purpose of this lesson and the expected learning outcomes
State how this lesson relates to other topics in Design and Fabrication 1212
Summarize what will be covered in this lesson and the related student activity
Presentation Note: It is recommended that classroom/lab control software be use in a networked lab
environment to help with classroom management during instruction. This software enables the instructor to monitor and control students’ workstations. For example, the students’ workstations can be locked as key concepts are first introduced and demonstrated.
(1) Start AutoCAD from the Windows desktop and open the gasket.dwg file. The students should follow along on their own workstations. (2) Demonstrate the application of a linear dimension by placing the overall length and
height dimensions. Dimension the rounded corner to demonstrate a radial dimension.
End the dimension command and select one of the placed dimensions to reveal its GRIPS. Explain the basic concept of GRIPS and right-click to select the PROPERTIES dialogue box. Using the dialogue box, identify the key dimension parameters that control the appearance of dimensions and then modify several to visually demonstrate.
(3) Explain to students that the parameters that control the appearance of a dimension
can be pre-set by creating a dimension style. Open the dimension style dialogue box and overview the key parameters in each tab.
Repeat this demonstration by creating a new style based on the ISO-25 standard by
changing several parameters that will be visibly noticeable to students such as text height and arrow size.
(4) Overview the in-class student assignment #ASG-U5-T4-1, “Dimensioning”.

Lesson Plan #1 of 1 for Topic 5-4: Dimensioning Unit 5: Introduction to CAD/CAM
Design and Fabrication 1212 - 3 - Teacher Resource Guide
Suggested Student Activities
The students will complete the in-class assignment #ASG-U5-T4-1, “Dimensioning”.
Assessment and Evaluation The teacher should informally assess quality of student participation in class discussion; this will be considered in the calculation of the overall participation mark for the course.
Wrap-up and Closing
Review the key points related to dimensioning, GRIPS, properties, and dimension style.
Preview the next lesson on Plotting.
Learning Resources (1) http://www.andrew.cmu.edu/course/48-568/2DVideosWEB_files/frame.htm, a set of on-line
tutorials for AutoCAD in both Adobe and voiced video format. An excellent AutoCAD reference for the beginner.
(2) http://www.celt.lsu.edu/CFD/E-proceedings04/Dunnington.pdf, this online document from
Louisiana State University, U.S., overviews the key features of lab control software.
Student Material Pack The Student Material Pack for lesson #1 of 1 for topic 5-4 includes the following attached document: (1) Assignment #ASG-U5-T4-1, “Dimensioning”

Lesson Plan #1 of 1 for Topic 5-4: Dimensioning Unit 5: Introduction to CAD/CAM
Design and Fabrication 1212 ASG-U5-T2-1 Page 1 Teacher Resource Guide
Dimensioning Assignment #ASG-U5-T4-1
Dimension the Drafting Template and Gasket drawings previously developed in topic 5-1 and 5-3 respectively. For each drawing, create a new dimension style based on ISO-25 but with 3 mm text, 3 mm arrow size, and horizontally aligned text.

Lesson Plan #1 of 1 for Topic 5-5: Plotting Unit 5: Introduction to CAD/CAM
Design and Fabrication 1212 - 1 - Teacher Resource Guide
Lesson Plan #1 of 1 Topic 5-5: Plotting
Suggested Duration: 1 hour Suggested Format: Lab
Following completion of this lesson, students will be able to:
5.5.1 Develop basic page setups for plotting. [1.405] 5.5.2 Plot a 2D CAD drawing. [1.405]
Teacher Required Resources
Design and Fabrication 1212 Teachers Resource Guide Personal Computer with printer AutoCAD software
Lab Control Software that allows lockout of student PCs Student Required Resources
Design and Fabrication 1212 Student Text Student Materials Pack Teacher Preparation (1) Review the AutoCAD plot setup command PAGESETUP in model space. (2) Review the AutoCAD command for hardcopy output, PLOT in model space. (3) Review the concept of plot scale. (4) Review the INSERT and REFEDIT commands for BLOCKs. (5) Review the student in-class assignment #ASG-U5-T5-1, “Plotting”. Refer to http://www.andrew.cmu.edu/course/48-568/2DVideosWEB_files/frame.htm, a set of on-line tutorials for AutoCAD in both Adobe and voiced video format. An excellent AutoCAD reference for the beginner.
Lesson Plan #1 of 1 for Topic 5-5: Plotting Unit 5: Introduction to CAD/CAM
Design and Fabrication 1212 - 2 - Teacher Resource Guide
Introduction
Discuss with the students that once a drawing has been completed on a CAD system it is still typically printed in hardcopy or “blueprint” form for the fabrication shop. An exception to this general practice is made in computer aided manufacturing (CAM), which will be explored in the next lesson. Emphasize that although everything should be drawn at true size in CAD, there will still be a need to consider plot scale when generating a hardcopy output.
State the purpose of this lesson and the expected learning outcomes
State how this lesson relates to other topics in Design and Fabrication 1212
Summarize what will be covered in this lesson and the related student activity
Presentation Note: It is recommended that classroom/lab control software be use in a networked lab
environment to help with classroom management during instruction. This software enables the instructor to monitor and control students’ workstations. For example, the students’ workstations can be locked as key concepts are first introduced and demonstrated.
(1) Start AutoCAD from the Windows desktop and open the dimensioned Gasket
drawing. The students should follow along on their own workstations. (2) Use the PAGESETUP command to demonstrate and explain plot setup for an A4 size
sheet.
Configure the plot device for your lab, plot to extents, in landscape layout, and at a 1:1 scale.
(3) ZOOM all and then use the INSERT command to insert the MyA4border.dwg as a BLOCK in the Gasket drawing.
Use the MOVE command to visually center the drawing inside the border. ZOOM/
EXTENTS when positioning is complete. Use REFEDIT to change the text in the title strip to the appropriate values.
Lock student workstations at this point.
(4) PLOT the drawing to the printer and display the hardcopy result to the students.

Lesson Plan #1 of 1 for Topic 5-5: Plotting Unit 5: Introduction to CAD/CAM
Design and Fabrication 1212 - 3 - Teacher Resource Guide
(5) Monitor and guide students as they PLOT their own drawings.
Suggested Student Activities
The students will complete the in-class assignment #ASG-U5-T5-1, “Plotting”.
Assessment and Evaluation The teacher should informally assess quality of student participation in class discussion; this will be considered in the calculation of the overall participation mark for the course.
Wrap-up and Closing
Review the key points related to PAGESETUP and PLOT.
Preview the next lesson on Computer Aided Manufacturing (CAM).
Learning Resources (1) http://www.andrew.cmu.edu/course/48-568/2DVideosWEB_files/frame.htm, a set of on-line
tutorials for AutoCAD in both Adobe and voiced video format. An excellent AutoCAD reference for the beginner.
(2) http://www.celt.lsu.edu/CFD/E-proceedings04/Dunnington.pdf, this online document from
Louisiana State University, U.S., overviews the key features of lab control software.
Student Material Pack The Student Material Pack for lesson #1 of 1 for topic 5-5 includes the following attached document: (1) Assignment #ASG-U5-T5-1, “Plotting”

Lesson Plan #1 of 1 for Topic 5-5: Plotting Unit 5: Introduction to CAD/CAM
Design and Fabrication 1212 ASG-U5-T2-1 Page 1 Teacher Resource Guide
Plotting Assignment #ASG-U5-T5-1
Modify the Drafting Template drawing to include a properly titled A4 border and then PLOT a hardcopy of the completed drawing.

Lesson Plan #1 of 2 for Topic 5-6: Computer Aided Manufacture Unit 5: Introduction to CAD/CAM
Design and Fabrication 1212 - 1 - Teacher Resource Guide
Lesson Plan #1 of 2 Topic 5-6: Computer Aided Manufacture (CAM)
Suggested Duration: 2 hours Suggested Format: Lab
Following completion of this lesson, students will be able to:
5.6.1 Export 2D CAD files for transfer to CAM software [1.403, 1.405, 2.402] 5.6.2 Develop programs for part production using CAM software. [1.403, 1.405, 2.402, 2.403]
Teacher Required Resources
Design and Fabrication 1212 Teachers Resource Guide Personal Computer with printer AutoCAD software Art CAM software
Lab Control Software that allows lockout of student PCs Student Required Resources
Design and Fabrication 1212 Student Text Student Materials Pack Teacher Preparation (1) Review the AutoCAD EXPORT command that enables saving in SAT, IGES, DXF or other
file format that can be transferred from AutoCAD for use in a CAM software package such as ArtCAM.
(2) Review the ArtCAM IMPORT command that enables import of the SAT file previously
exported from AutoCAD. (3) Review the ArtCAM commands for zoom control, tool definition, toolpath specification, and
part file creation. (4) Review the student in-class assignment #ASG-U5-T6-1, “CAD/CAM”. Refer to http://www.artcam.com/artcam/signandwood/downloads/default.asp, the ArtCAM official website to download a set of video tutorials on ArtCAM. An excellent ArtCAM reference for the beginner.

Lesson Plan #1 of 2 for Topic 5-6: Computer Aided Manufacture Unit 5: Introduction to CAD/CAM
Design and Fabrication 1212 - 2 - Teacher Resource Guide
Introduction
Discuss with the students that once a drawing has been completed on a CAD system it is still typically printed in hardcopy or “blueprint” form for the fabrication shop. An exception to this general practice is made in computer aided manufacturing (CAM). CAD/CAM negates the need for blueprint production by allowing the transfer of the geometric information defining a part in CAD directly to the controller or “brain” of a Computer Numerically Controlled (CNC) machine which is used to produce the part.
State the purpose of this lesson and the expected learning outcomes
State how this lesson relates to other topics in Design and Fabrication 1212
Summarize what will be covered in this lesson and the related student activity
Presentation Note: It is recommended that classroom/lab control software be use in a networked lab
environment to help with classroom management during instruction. This software enables the instructor to monitor and control students’ workstations. For example, the students’ workstations can be locked key concepts are first introduced and demonstrated.
(1) Start AutoCAD from the Windows desktop and begin a new drawing using the
acadiso.dwt template file. The students should follow along on their own workstations. (2) Create the drawing shown in Learning Resource Sheet #LRS-U5-T6-1, “Office Sign”.
Use only the basic AutoCAD commands previously covered to create the drawing since this will allow review for the students. The students should follow along on their own workstations.
(3) Use the AutoCAD EXPORT command to save the file in SAT, IGES, or DXF format. (4) Briefly overview ArtCAM, its features, and purpose in the CAD/CAM process. (5) Start ArtCAM and import the SAT, IGES, or DXF file. Overview ArtCAM
(6) Define the tool that will eventually be used to machine the office sign. (7) Use ArtCAM’s contour toolpath generator to develop the universal coded PART
program, or program that will eventually be used to control a Computer Numerical Controlled (CNC) machine that will cut out the sign.

Lesson Plan #1 of 2 for Topic 5-6: Computer Aided Manufacture Unit 5: Introduction to CAD/CAM
Design and Fabrication 1212 - 3 - Teacher Resource Guide
(8) Run the ArtCAM toolpath simulator to verify that the PART program is OK. (9) POST the ArtCAM file to convert it into the coded format required by the specific
CNC machine used to produce the part..
Suggested Student Activities
The students will complete the in-class assignment #ASG-U5-T6-1, “CAD/CAM”.
Assessment and Evaluation The teacher should informally assess quality of student participation in class discussion; this will be considered in the calculation of the overall participation mark for the course.
Wrap-up and Closing
Review the key points related to CAD/CAM and the procedure for transferring files between CAD and CAM software packages and generating toolpaths.
Preview the next lesson on Computer Aided Manufacture.
Learning Resources (1) http://www.andrew.cmu.edu/course/48-568/2DVideosWEB_files/frame.htm, a set of on-line
tutorials for AutoCAD in both Adobe and voiced video format. An excellent AutoCAD reference for the beginner.
(2) http://www.artcam.com/artcam/signandwood/downloads/default.asp, the ArtCAM official
website to download a set of video tutorials on ArtCAM. An excellent ArtCAM reference for the beginner.
Student Material Pack The Student Material Pack for lesson #1 of 1 for topic 5-5 includes the following attached documents: (1) Learning Resource Sheet #LRS-U5-T6-1, “Office Sign” (2) Assignment #ASG-U5-T6-1, “CAD/CAM”

Lesson Plan #1 of 2 for Topic 5-6: Computer Aided Manufacture Unit 5: Introduction to CAD/CAM
Design and Fabrication 1212 LRS-U5-T6-1 Page 1 Teacher Resource Guide
Office Sign Learning Resource Sheet #LRS-U5-T6-1
Using AutoCAD, develop the office sign drawing shown below. Note the letters should be created using the LINE and ARC commands. The rounded corners should be created using the FILLET command. Export the file in a format that can be imported by ArtCAM. Do not include dimensions on this drawing.

Lesson Plan #1 of 2 for Topic 5-6: Computer Aided Manufacture Unit 5: Introduction to CAD/CAM
Design and Fabrication 1212 ASG-U5-T6-1 Page 1 Teacher Resource Guide
CAD/CAM Assignment #ASG-U5-T6-1
Modify the office sign AutoCAD drawing to include your own name in block form. Export the file and then use ArtCAM to import the file. Assuming a ¼” end mill with a 2 inch long shank will be used to cut the sign, define the tool and then generate the toolpath. Finally, verify the toolpath using the simulator and, if OK, post the file to create the PART program that will control the CNC router.

Lesson Plan #2 of 2 for Topic 5-6: Computer Aided Manufacture Unit 5: Introduction to CAD/CAM
Design and Fabrication 1212 - 1 - Teacher Resource Guide
Lesson Plan #2 of 2 Topic 5-6: Computer Aided Manufacture (CAM)
Suggested Duration: 2 hours Suggested Format: Lab
Following completion of this lesson, students will be able to:
5.6.3 Set up computer numerically controlled (CNC) machine [1.403, 1.405, 2.402, 2.403] 5.6.4 Produce part prototype [1.403, 1.405]
Teacher Required Resources
Design and Fabrication 1212 Teachers Resource Guide Personal Computer with printer AutoCAD software Art CAM software CNC Router with ¼” flat end mill with 2 inch length shank
Lab Control Software that allows lockout of student PCs 125 mm x 85mm x 10 mm machinable wax or high density machinable Styrofoam Student Required Resources
Design and Fabrication 1212 Student Text Student Materials Pack Teacher Preparation (1) Review the ArtCAM commands for PART file creation and posting for CNC use. (2) Review the CNC machine control software command for importing the PART file from
ArtCAM. (3) Review the CNC machine procedure for tool definition, stock size specification, and
establishing part origin. (4) Prepare enough stock pieces of wax or Styrofoam for all students. Refer to http://www.artcam.com/artcam/signandwood/downloads/default.asp, the ArtCAM official website to download a set of video tutorials on ArtCAM. An excellent ArtCAM reference for the beginner.

Lesson Plan #2 of 2 for Topic 5-6: Computer Aided Manufacture Unit 5: Introduction to CAD/CAM
Design and Fabrication 1212 - 2 - Teacher Resource Guide
Introduction
Discuss with the students that the PART file essentially includes a series of instructions that control router operation including feeds, speeds, spindle on/off, tool center point location and the toolpath. When a PART file is “posted” it is basically converted to a control language that the CNC controller or “brain” can understand and then interpret to send instructions to the machine during part production.
State the purpose of this lesson and the expected learning outcomes
State how this lesson relates to other topics in Design and Fabrication 1212
Summarize what will be covered in this lesson and the related student activity
Presentation Note: It is recommended that classroom/lab control software be use in a networked lab
environment to help with classroom management during instruction. This software enables the instructor to monitor and control students’ workstations. For example, the students’ workstations can be locked key concepts are first introduced and demonstrated.
(1) Open the office sign ArtCAM PART file and “post” it to produce a file that will
control the CNC machine. Make sure the file has first been verified using the simulation tool. (2) Engage the emergency stop on the CNC router, load the stock material, and clamp
in place. Check to ensure the material is clamped firmly in place. Load the end mill in the chuck and tighten firmly.
(3) Specify the tool and stock size in the CNC control software. (4) Release the emergency stop and jog the tool tip to establish the origin location. (5) HOME the machine. (6) Start the CNC control file and carefully monitor the machining process. If in doubt,
push the emergency stop!
(7) After the end of the CNC control program is visually confirmed in the CNC control software screen and the machine has stopped, push the emergency stop button .
(8) Release the clamp and remove the finished office sign. Check for machining flaws
and other defects.

Lesson Plan #2 of 2 for Topic 5-6: Computer Aided Manufacture Unit 5: Introduction to CAD/CAM
Design and Fabrication 1212 - 3 - Teacher Resource Guide
Suggested Student Activities
Under the direct supervision of the teacher, the students will produce their own parts based on their assignment #ASG-U5-T6-1, “CAD/CAM”.
Assessment and Evaluation The teacher should informally assess quality of student participation in class discussion; this will be considered in the calculation of the overall participation mark for the course.
Wrap-up and Closing
Review the key points related to CAD/CAM and CNC machine set-up.
Preview the next Unit on The Design Process.
Learning Resources (1) http://www.artcam.com/artcam/signandwood/downloads/default.asp, the ArtCAM official
website to download a set of video tutorials on ArtCAM. An excellent ArtCAM reference for the beginner.
Student Material Pack A Student Material Pack is not required for this lesson.

Lesson Plans UNIT 6 Graphical Communications

Lesson Plans Unit 6: The Design Process
Design and Fabrication 1212 - 1 - Teacher Resource Guide
Unit 6 The Design Process
Unit Overview
The purpose of this unit is to allow the students to apply the knowledge and skills that they have acquired in the first five units through the completion of a group design project. The students will simulate the process actually followed in the field from the initial design concept through to development of the physical prototype. This unit will also develop the students’ proficiency in the use of CAD through the completion of a set of working drawings and enhance their hands-on skills through the operation of shop equipment during the production and testing of the physical prototype. The product development cycle from the design concept to the physical prototype takes a variety of specialized skills and individuals working as a team. This unit will build on some of the previous group activities that students have done in the course but will give them more exposure to group dynamics as they work together to complete the project. Projects rarely go as smoothly as desired and students will have to learn how to deal with the stresses and frustrations brought on by group decision making and impending deadlines. The design project will allow the students to fully experience the design process and they will be required to apply both their academic skills through completion of a design portfolio and their shop skills through the building of a physical prototype. The interrelation between design and fabrication is reinforced through this project as students “learn by doing” that both activities are mutually dependent.
For this introductory design and fabrication course, the design projects should be selected by each group of students from one of several possible projects suggested by the teacher. This will help the teacher to ensure that projects are of reasonable scope and capable of being produced with the available shop resources and within the available timeframe. Due to the nature of design projects, the teacher will be expected to play the role of facilitator. The teacher will be expected to offer intermittent classroom instruction, formally and informally consult with student groups, and generally manage project activities to ensure that students work within time, budget and physical resource constraints. Students will be expected to supplement class/lab instruction with self-directed study, as each design project will present unique challenges.

Lesson Plans Unit 6: The Design Process
Design and Fabrication 1212 - 2 - Teacher Resource Guide
Specific Curriculum Outcomes and Suggested Timelines
Unit 6 has 15 Specific Curriculum Outcomes distributed among seven topics:
Topic 1: The Design Portfolio (2 hours)
6.1.1 List the requirements of the design portfolio [1.405] Topic 2: Defining the Problem (2 hours)
6.2.1 Develop a problem statement [1.401] 6.2.2 Develop design objectives and related criteria [1.401, 5.401, 5.402, 5.403] 6.2.3 Identify design constraints [1.401] Topic 3: Generating Options (2 hours)
6.3.1 Develop alternative solution concepts [1.402, 1.403] Topic 4: Selecting the Best Option (2 hours)
6.4.1 Evaluate alternative solutions in terms of design objectives [1.403, 1.404] 6.4.2 Select the best alternative [1.403, 1.404] Topic 5: Developing the Solution (16 hours)
6.5.1 Develop a production plan for prototype fabrication [1.402, 1.403, 2.401, 2.402, 2.404] 6.5.2 Develop detail and assembly drawings for the prototype [1.405] Topic 6: Prototyping and Testing (20 hours)
6.6.1 Fabricate the design prototype [1.403] 6.6.2 Test the design prototype [1.404] Topic 7: Evaluation and Redesign (2 hours)
6.7.1 Evaluate the prototype in terms of design objectives [1.404] 6.7.2 Evaluate the prototype performance based on testing [1.404] 6.7.3 Suggest any required design modifications [1.404, 2.403] 6.7.4 Identify the entrepreneurial opportunities for the project [4.402]

Lesson Plans Unit 6: The Design Process
Design and Fabrication 1212 - 3 - Teacher Resource Guide
Unit 6 Lesson Plans
Unit 6 includes seven lesson plans as follows:
Unit Topic Lesson Plan Number(s)
Recommended Duration
Topic 1: The Design Portfolio Lesson #1
2 hours
Topic 2: Defining the Problem
Lesson #1 2 hours
Topic 3: Generating Options Lesson #1
2 hours
Topic 4: Selecting the Best Option Lesson #1
2 hours
Topic 5: Developing the Solution
Lesson #1 16 hours
Topic 6: Prototyping and Testing
Lesson #1 20 hours
Topic 7: Evaluation and Redesign Lesson #1
2 hours
Recommended Total Duration for Unit 6 46 hours

Lesson #1 of 1 for Topic 6-1: The Design Portfolio Unit 6: The Design Process
Design and Fabrication 1212 - 1 - Teacher Resource Guide
Lesson Plan #1 of 1 Topic 6-1: The Design Portfolio
Suggested Duration: 2 hours Suggested Format: Classroom Lecture/Discussion
Following completion of this lesson, students will be able to:
6.1.1 List the requirements of the design portfolio [1.405]
Teacher Required Resources
Design and Fabrication 1212 Teachers Resource Guide Student Required Resources
Design and Fabrication 1212 Student Text Student Materials Pack Teacher Preparation (1) Review the design process and the requirements for a typical design portfolio that were
covered in Unit 1.
Refer to http://iisme.org/etp/HS Engineering- Engineering.pdf for a detailed explanation of each of the steps in the design process from the Industry Initiatives for Science and Math Education (IISME) founded in 1985 by a consortium of San Francisco Bay Area companies in partnership with the Lawrence Hall of Science at the University of California at Berkeley.
(2) Identify key completion dates for the activities involved in the design project. (3) Develop a list of design project topics that can be completed by the students for the Unit 6 design project. (4) Review the teacher guidelines presented as Learning Resource Sheet #LRS-U6-T1-1, “The Design Project – General Guidelines for the Teacher”.

Lesson #1 of 1 for Topic 6-1: The Design Portfolio Unit 6: The Design Process
Design and Fabrication 1212 - 2 - Teacher Resource Guide
Introduction
Discuss with students that, as stated in the Atlantic Canada Foundation document on Technology Education, the design portfolio is essentially a diary of the project progress and contains all relevant information, especially trial and error information. It is used to illustrate the thinking and planning processes that students engage in while developing a technological solution to a problem. Assessment of this process is often indirect, in that the evidence comes from a variety of sources. The value of the portfolio depends on how well it represents this process. As a first step in developing the design portfolio, the student groups will be required to write a design brief. As stated in the Atlantic Canada Foundation document on Technology Education, the design brief is negotiated between student and teacher and sets the conditions under which the student engages in a design activity. While design professionals are assessed mainly on the solution to the problem, students are assessed mainly on growth in their design capability.
State the purpose of this lesson and the expected learning outcomes
State how this lesson relates to other topics in Design and Fabrication 1212
Summarize what will be covered in this lesson and the related student activity
Presentation (1) Briefly review the design process as covered in Unit 1 – Introduction to Design. (2) Explain the purpose of a design portfolio and its role in the design process. (3) List the information that should be contained in the portfolio as the students progress through the project. (4) Discuss the format of the portfolio. (5) Organize the students into groups of four to prepare a design portfolio. (6) Work with each group to develop a record-keeping procedure for the design portfolio. (7) Have each group decide on a design project selected from the list provided by the teacher.

Lesson #1 of 1 for Topic 6-1: The Design Portfolio Unit 6: The Design Process
Design and Fabrication 1212 - 3 - Teacher Resource Guide
Suggested Student Activities
In groups of 2 or 4, students should prepare the outline for a design portfolio. This outline should contain the design brief, title of the project selected, client (teacher’s name), project location, and members of the design team (student group). As the students progress through the unit, their portfolios will be updated as directed by the teacher.
Assessment and Evaluation The teacher will evaluate the students’ design portfolio outline by comparing it to a standard.
Wrap-up and Closing
Review the structure and purpose of the design format emphasizing the importance of documentation of activities related to the project. Organization of records and information in the design portfolio is essential.
Preview the next lesson on Defining the Problem.
Learning Resources (1) http://iisme.org/etp/HS Engineering- Engineering.pdf for a detailed explanation of each of
the steps in the design process from the Industry Initiatives for Science and Math Education (IISME) founded in 1985 by a consortium of San Francisco Bay Area companies in partnership with the Lawrence Hall of Science at the University of California at Berkeley.
Student Material Pack The Student Material Pack for lesson #1 of 1 for topic 6-1 includes the following attached documents: (1) Learning Resource Sheet #LRS-U6-T1-1, “The Design Project – General Guidelines for the Teacher”

Lesson #1 of 1 for Topic 6-1: The Design Portfolio Unit 6: The Design Process
Design and Fabrication 1212 LRS-U6-T1-1 Page 1 Teacher Resource Guide
The Design Project – General Guidelines for the Teacher Learning Resource Sheet #LRS-U6-T1-1
Group Organization: The group members must be compatible and have skills that complement each other. The members of the group must also have commitment to each other and to the project. Personalities, work ethics and attitudes must also be considered in formation of the project groups. The teacher will have to draw on their professional and observational skills when forming the groups. Student input on team composition is vital. Design Portfolio:
A portfolio is a folder that contains papers or drawings. In the case of an engineering design, the portfolio contains all of the materials related to the design of a product or service. The portfolio is the record of the whole process and the work involved in the engineering process from the initial problem statement to the final project report. All of the work related to the project including phone calls, e-mail and other correspondence must be kept. These records are essential to the actual project and any related activities. Electronic and hard copies must be kept and organized. A filing system has to be developed and implemented. The first thing that the students will have to do is to present the teacher with a design brief or proposal. This brief will be the start of their design portfolio and the following is a suggested format:
1. Problem statement 2. Identification of the need for the project 3. Background and description of any existing system 4. Project constraints 5. Project goals and objectives 6. Criteria to determine the successful completion of the goals and objectives 7. A schedule and timeline for completion of project activities
8. Physical and financial resources required to complete the project
Record Keeping: There will be a lot of information involved with each project including research, meetings, progress reports, drawings and other documents. The efficiency of a project will depend to a large extent on the ability to store and retrieve data when needed. Therefore organization of information is vital. This is where the group has to decide on how they are going to store their data and who will maintain security and access. As an example how are they going to handle computer files? If everyone in the group has access to all files, what happens if someone makes a change to a file without consulting the other members? Who is going to be responsible for the research file? The drawing files? How about security of backup files?

Lesson #1 of 1 for Topic 6-1: The Design Portfolio Unit 6: The Design Process
Design and Fabrication 1212 LRS-U6-T1-1 Page 2 Teacher Resource Guide
The computer files cause the least physical problem but there are physical problems caused by hard copies of meetings, notes, drawings etc. Each design team will have to devise a filing system to handle this. A common mistake for beginners is to let the paper and other records pile up until they become frustrated by the inability to find material and then they panic. Taking the time to organize material at the beginning of the project and continually updating it will make the project easier. Project Log: One important piece of record keeping is the project log. This is a record of how things are progressing on the project and includes records of meetings, important milestones in the project, research activities etc. All designers use these log books and a suggested basic layout is shown below:

Lesson #1 of 1 for Topic 6-1: The Design Portfolio Unit 6: The Design Process
Design and Fabrication 1212 LRS-U6-T1-1 Page 3 Teacher Resource Guide
Design and Fabrication 1212
Project Log Book
(Project Name)
(Team Members)
(Teacher)

Lesson #1 of 1 for Topic 6-1: The Design Portfolio Unit 6: The Design Process
Design and Fabrication 1212 LRS-U6-T1-1 Page 4 Teacher Resource Guide
Date: Recorder:
Things to Do Today
(Action List)
Appointments And
Scheduled Events
Phone Calls E-mail Faxes Letters
Expenses
Time Place Subject
O800
0900
1000
1100
1200
1300
1400
1500
1600
Project Name Detail of Meetings, Summary of Activities Decisions
Time (Hours)

Lesson #1 of 1 for Topic 6-2: Defining the Problem Unit 6: The Design Process
Design and Fabrication 1212 - 1 - Teacher Resource Guide
Lesson Plan #1 of 1 Topic 6-2: Defining the Problem
Suggested Duration: 2 hours Suggested Format: Classroom Lecture/Discussion
Following completion of this lesson, students will be able to:
6.2.1 Develop a problem statement [1.401] 6.2.2 Develop design objectives and related criteria. [1.401, 5.401, 5.402, 5.403] 6.2.3 Identify design constraints [1.401]
Teacher Required Resources
Design and Fabrication 1212 Teachers Resource Guide Student Required Resources
Design and Fabrication 1212 Student Text Student Materials Pack Teacher Preparation (1) Review the design process and the requirements for a typical design portfolio that were
covered in Unit 1. (2) Identify key completion dates for the activities involved in the design project.
Lesson #1 of 1 for Topic 6-2: Defining the Problem Unit 6: The Design Process
Design and Fabrication 1212 - 2 - Teacher Resource Guide
Introduction
Discuss with students how the development of a problem definition is the initial and probably most important part of the design process. The problem definition focuses the design team and delineates the broad parameters of the design process. Any design project is the result of a perceived need for a product and the problem definition characterizes that need by identifying the design objectives and related criteria and constraints. That need may relate to the requirement to upgrade or improve an existing product or system, or to fulfill a consumer requirement for a new system or product. Emphasize to students that some preliminary research has to be done before the problem definition can be properly formulated.
State the purpose of this lesson and the expected learning outcomes
State how this lesson relates to other topics in Design and Fabrication 1212
Summarize what will be covered in this lesson and the related student activity
Presentation (1) Briefly review the design process as covered in Unit 1 – Introduction to Design. (2) Discuss how for each objective or design goal, corresponding criteria must be
assigned that quantify or qualify the degree to which the objective must be met. Use the mobile wheelchair example from Unit 1 to demonstrate.
For the mobile wheelchair covered in Unit 1, for example, the design objective “The paraplegic mobile wheelchair design must have sufficient payload capacity.” means nothing to the designer unless we can quantify “sufficient payload” or assign a criteria. The use of the verbs small, medium or large to describe the capacity in the criteria statement would also be too vague. What we should use is something like this to measure the criteria: The wheel chair must be able to carry a total payload of 350 pounds. In some cases, quantifying an objective in this manner is not possible and the criteria may be a qualifier. For example, the objective “The paraplegic mobile wheelchair design must be aesthetically pleasing” could have the associated criteria “Must be approved by a review panel comprised of marketing representatives”. The teacher should also point out to the students that objectives are not static and may change as the project progresses.
(3) Divide students in their groups and work with each group to guide them in the
development of the problem definition for their project topic.
Undoubtedly, student groups will need to do additional research outside this class before this task can be completed.

Lesson #1 of 1 for Topic 6-2: Defining the Problem Unit 6: The Design Process
Design and Fabrication 1212 - 3 - Teacher Resource Guide
Suggested Student Activities
In groups of 2 or 4, students should prepare the problem definition for their project. In many cases, this will involve identifying a need for additional research before this task can be completed.
Assessment and Evaluation The teacher will evaluate the students’ problem definitions through direct review since each project will have different objectives. Each objective should have an associated criteria and physical, time, and cost constraints should be identified.
Wrap-up and Closing
Review the problem definition requirements and the need to assign criteria to each objective and to consider constraints on the design.
Preview the next lesson on Generating Options.
Learning Resources None required.
Student Material Pack A Student Material Pack is not required for lesson #1 of 1 for topic 6-2.

Lesson #1 of 1 for Topic 6-3: Generating Options Unit 6: The Design Process
Design and Fabrication 1212 - 1 - Teacher Resource Guide
Lesson Plan #1 of 1 Topic 6-3: Generating Options
Suggested Duration: 2 hours Suggested Format: Classroom Lecture/Discussion
Following completion of this lesson, students will be able to:
6.3.1 Develop alternative solutions concepts [1.402, 1.403] 6.4.1 Evaluate alternative solutions in terms of design objectives. [1.403, 1.404]
Teacher Required Resources
Design and Fabrication 1212 Teachers Resource Guide Student Required Resources
Design and Fabrication 1212 Student Text Student Materials Pack Teacher Preparation (1) Review the design process and the requirements for a typical design portfolio that were
covered in Unit 1. (2) Review brainstorming as a technique for generating alternative solutions to a problem.
Refer to http://www.mindtools.com/brainstm.html, a website by Mindtools Inc. that provides an excellent concise overview of the brainstorming process and guidelines for an effective brainstorming session.

Lesson #1 of 1 for Topic 6-3: Generating Options Unit 6: The Design Process
Design and Fabrication 1212 - 2 - Teacher Resource Guide
Introduction
Discuss with students how when completing a design project, the design team must develop a solution that satisfies as many of the objectives as possible within identified constraints. As they generate possible solutions to the design project, the design team must be cognizant of the objectives, related criteria and constraints. A key consideration at this stage is the importance of meeting each objective in the final solution. Generally, not all objectives are of equal importance and it may even be necessary to omit or revise objectives/criteria as the project proceeds.
There are a number of methods such as brainstorming that can be used to help generate alternative solutions to a design problem. Research on existing related technologies is also an important pre-requisite to alternative solution generation
State the purpose of this lesson and the expected learning outcomes
State how this lesson relates to other topics in Design and Fabrication 1212
Summarize what will be covered in this lesson and the related student activity
Presentation (1) Review the role of solution generation in the design process (2) Describe how brainstorming is used to generate ideas in a group
Refer to http://www.mindtools.com/brainstm.html, a website by Mindtools Inc. that provides an excellent concise overview of the brainstorming process and guidelines for an effective brainstorming session.
Emphasize the need for an open forum where criticism of ideas is not acceptable. Also note that only concept designs need to be generated at this stage in the process.
(3) Use a simple project such as a bird house and use brainstorming with the students
to generate alternative design concepts. (4) Review how the results of brainstorming and research activities should be recorded
in the design portfolio. (5) Divide the students in their groups and interact with the groups to guide them in
their own brainstorming session for their chosen topic.

Lesson #1 of 1 for Topic 6-3: Generating Options Unit 6: The Design Process
Design and Fabrication 1212 - 3 - Teacher Resource Guide
Suggested Student Activities
In groups of 2 or 4, students should brainstorm alternative solution concepts for their project.
Assessment and Evaluation The teacher will evaluate the students based on direct observation of the list of brainstormed solutions and the presentation to the class.
Wrap-up and Closing
Review the brainstorming process.
Preview the next lesson on Selecting the Best Option.
Learning Resources (1) http://www.mindtools.com/brainstm.html, a website by Mindtools Inc. that provides an
excellent concise overview of the brainstorming process and guidelines for an effective brainstorming session.
Student Material Pack A Student Material Pack is not required for lesson #1 of 1 for topic 6-3.

Lesson #1 of 1 for Topic 6-4: Selecting the Best Option Unit 6: The Design Process
Design and Fabrication 1212 - 1 - Teacher Resource Guide
Lesson Plan #1 of 1 Topic 6-4: Selecting the Best Option
Suggested Duration: 2 hours Suggested Format: Classroom Lecture/Discussion
Following completion of this lesson, students will be able to:
6.4.2 Select the best alternative. [1.403, 1.404]
Teacher Required Resources
Design and Fabrication 1212 Teachers Resource Guide Student Required Resources
Design and Fabrication 1212 Student Text Student Materials Pack Teacher Preparation (1) Review the design process and the requirements for a typical design portfolio that were
covered in Unit 1. (2) Review decision matrices as a technique for selecting the best of the possible alternative
solutions to a problem. (3) Develop a decision matrix for a project previously covered in class. The mobile wheel
chair design problem would be an excellent choice.
Refer to http://web2.concordia.ca/Quality/tools/10decision.pdf, an on-line document from Concordia University that provides a brief overview of decision matrices. Refer also to http://www.asq.org/learn-about-quality/decision-making-tools/overview/decision-matrix.html, the American Quality Society website which provides guidelines for developing and using a decision matrix.

Lesson #1 of 1 for Topic 6-4: Selecting the Best Option Unit 6: The Design Process
Design and Fabrication 1212 - 2 - Teacher Resource Guide
Introduction
Discuss with students how after the design team generates several possible solutions to the problem, the next stage in the process is determining how well each of the solutions meets each of the objectives. Each objective has a degree of importance in the solution of the problem. For example, in the mobile wheelchair example from Unit 1, the weight restrictions would be of more importance than the aesthetics. When listing the objectives and the associated criteria, the design team should attach a weighting system that reflects the importance of each objective.
State the purpose of this lesson and the expected learning outcomes
State how this lesson relates to other topics in Design and Fabrication 1212
Summarize what will be covered in this lesson and the related student activity
Presentation (1) Review the role of decision making in the design process and the use of decision
matrices. Refer to http://web2.concordia.ca/Quality/tools/10decision.pdf, an on-line document from Concordia University that provides a brief overview of decision matrices. Refer also to http://www.asq.org/learn-about-quality/decision-making-tools/overview/decision-matrix.html, the American Quality Society website which provides guidelines for developing and using a decision matrix.
(2) Explain the relevant weight or importance of the various objectives in the design of the product or process. Using the wheelchair example, discuss the importance of an objective such as color versus one such as weight.
(3) Discuss with the students the fact that most potential solutions might not satisfy all
of the objectives. (4) Demonstrate how to develop a decision matrix as one method of evaluating the
objectives for the project and then rating the possible solutions. Use the mobile wheelchair as an example.
(5) Divide students into their groups and interact with the groups to guide them in the
development of the decision matrix for their project.

Lesson #1 of 1 for Topic 6-4: Selecting the Best Option Unit 6: The Design Process
Design and Fabrication 1212 - 3 - Teacher Resource Guide
Suggested Student Activities
In groups of 2 or 4, students should develop the decision matrix for their project and then select the best alternative for detailed design.
Assessment and Evaluation The teacher will evaluate the students based on direct observation of the decision matrix and the presentation to the class.
Wrap-up and Closing
Review decision matrices and their use in design.
Preview the next lesson on Developing the Solution.
Learning Resources (1) http://web2.concordia.ca/Quality/tools/10decision.pdf, an on-line document from Concordia
University that provides a brief overview of decision matrices.
(2) http://www.asq.org/learn-about-quality/decision-making-tools/overview/decision-matrix.html, the American Quality Society website which provides guidelines for developing and using a decision matrix.
Student Material Pack A Student Material Pack is not required for lesson #1 of 1 for topic 6-4.

Lesson #1 of 1 for Topic 6-5: Developing the Solution Unit 6: The Design Process
Design and Fabrication 1212 - 1 - Teacher Resource Guide
Lesson Plan #1 of 1 Topic 6-5: Developing the Solution
Suggested Duration: 16 hours Suggested Format: Classroom Lecture/Discussion/Lab/Shop
Following completion of this lesson, students will be able to:
6.5.1 Develop a production plan for prototype fabrication [1.402, 1.403, 2.401, 2.402, 2.404] 6.5.2 Develop detail and assembly drawings for the prototype [1.405]
Teacher Required Resources
Design and Fabrication 1212 Teachers Resource Guide Student Required Resources
Design and Fabrication 1212 Student Text Student Materials Pack Teacher Preparation This activity will be student driven with the teacher acting as guidance and resource person. (1) The teacher should review how to use a Gantt chart for scheduling of a project. A
reference to information on Gantt charts is contained in the resource section of this lesson plan.
Refer to http://www.smartdraw.com, a commercial site by Smart Draw with free downloads of demonstration software for producing all kinds of charts including Gantt charts, free tutorial on the software and background information on the charts and their application.
Refer to http://www.me.umn.edu/courses/me4054/assignments/gantt.html, a non-commercial site that provides an easy to follow tutorial in how to create Gantt charts using Excel or MicroSoft Project software.
(2) Prepare deadlines for the major activities including submission of design brief, progress
report, group presentation of project, submission of final report (3) Prepare a sample project plan including a Gantt chart for a simple project such as the bird
house or the wheel chair examples used in previous units. (4) Review the requirements of working drawings.

Lesson #1 of 1 for Topic 6-5: Developing the Solution Unit 6: The Design Process
Design and Fabrication 1212 - 2 - Teacher Resource Guide
Introduction
Discuss with students how developing a prototype design can be a complicated process involving many different disciplines including personnel from engineering, production, quality control, purchasing, and planning. Explain that the students working in groups of 2 or 4 will be responsible for both the design and fabrication of the project. This will require them to develop a set of working drawings with the detail and assembly drawings needed to produce the physical prototype.
State the purpose of this lesson and the expected learning outcomes
State how this lesson relates to other topics in Design and Fabrication 1212
Summarize what will be covered in this lesson and the related student activity
Presentation (1) Demonstrate the development of a Gantt chart for the completion of the sample
project. (2) Explain how each time activity is related to the probability of completion within the
allocated time. (3) Discuss some of the safety factors that have to be built into the time and use of
resources for individual activities
Explain how unexpected problems can arise with some activities and this will necessitate adjustment of other activities and resource use to keep the project on schedule.
(4) Discuss the importance of maintaining the project log for a record of activities, problems, solutions, resources, meetings, and so on related to project activities.
(5) Discuss the engineering calculations that may be required to detail designs. (6) Overview the requirements for working drawings. (7) Discuss with the students the required operator skill, time and resources for the
production of each part of the project and how they should determine the related costs.
Develop a system for scheduling of the CAD lab and fabrication equipment resources. Student groups should be responsible for their own scheduling of resources and the related cost considered. The number of groups in the shop at a given time should be limited by alternately rotating groups between the CAD lab and shop.

Lesson #1 of 1 for Topic 6-5: Developing the Solution Unit 6: The Design Process
Design and Fabrication 1212 - 3 - Teacher Resource Guide
Suggested Student Activities
In groups of 2 or 4, students should develop the Gant chart for their project.
In groups of 2 or 4, students should complete the engineering calculations for their project
In groups of 2 or 4, students should develop the working drawings for their project.
Assessment and Evaluation The teacher will evaluate the student projects based on the Design Portfolio, which will include the GANTT chart, calculations, and working drawings.
Wrap-up and Closing
Review the project scheduling, costing and working drawing requirements.
Preview the next lesson on Prototyping and Testing.
Learning Resources (1) http://www.smartdraw.com, a commercial site by Smart Draw with free downloads of
demonstration software for producing all kinds of charts including Gantt charts. They also provide free tutorial on the software and background information on the charts and their application.
(2) http://www.me.umn.edu/courses/me4054/assignments/gantt.html, a non-commercial site
that provides an easy to follow tutorial in how to create Gantt charts using Excel or Microsoft Project software.
Student Material Pack A Student Material Pack is not required for lesson #1 of 1 for topic 6-5.

Lesson #1 of 1 for Topic 6-6: Prototyping and Testing Unit 6: The Design Process
Design and Fabrication 1212 - 1 - Teacher Resource Guide
Lesson Plan #1 of 1 Topic 6-6: Prototyping and Testing
Suggested Duration: 20 hours Suggested Format: Classroom Lecture/Discussion/Lab/Shop
Following completion of this lesson, students will be able to:
6.6.1 Fabricate the design prototype [1.404] 6.6.2 Test the design prototype [1.404]
Teacher Required Resources
Design and Fabrication 1212 Teachers Resource Guide Student Required Resources
Design and Fabrication 1212 Student Text Student Materials Pack Teacher Preparation This activity will be student driven with the teacher acting as guidance and resource person. (1) Ensure that all of the fabrication equipment is in working order. (2) Check and eliminate all hazards in the shop. (3) Make copies of safety rules that were developed earlier in the course. (4) Develop a prototype test procedure and related evaluation method in consultation with
each student group.

Lesson #1 of 1 for Topic 6-6: Prototyping and Testing Unit 6: The Design Process
Design and Fabrication 1212 - 2 - Teacher Resource Guide
Introduction
Discuss with students how this is probably the most exciting stage of the product development process because the theory meets reality. Before production starts, the completed working drawings and related calculations should be re-checked for errors. The earlier that problems or errors are discovered and fixed in the design and production process the easier and less costly the process will be. For instance an error in a design drawing can easily be fixed by correcting the drawing. The same error discovered during production can mean scrapping of produced product or modification of it. At the extreme end, the same mistake discovered by the customer can result in recalls, issuance or replacement products, liability and loss of present and future customers. In some cases, it can mean the bankruptcy of the organization.
Emphasize to students that they will undoubtedly encounter problems in translating the design idea to a finished product, and, in some cases, re-design may be necessary. Students should also be advised that when they encounter problems during production, they will have to be clearly defined and then a solution found. This will help students to develop problem solving skills.
Explain that the degree of success of a design is based on how well it meets or exceeds the design objectives. In practice, this assessment involves actual testing of the physical prototype to determine if it functions as intended. This involves reviewing the list of design objectives, constraints and criteria to determine how successfully the prototype meets these. Sometimes the prototype will not only exceed the requirement but surpass them. All of this should be recorded in the design portfolio. There is always room for improvement in a design and any needed improvements should be discovered when the prototype is tested. This occurs even when a design exceeds its original criteria for success.
State the purpose of this lesson and the expected learning outcomes
State how this lesson relates to other topics in Design and Fabrication 1212
Summarize what will be covered in this lesson and the related student activity

Lesson #1 of 1 for Topic 6-6: Prototyping and Testing Unit 6: The Design Process
Design and Fabrication 1212 - 3 - Teacher Resource Guide
Presentation (1) Review the relationship between the detail drawing specifications and the method of
production and human resource requirement. (2) Review with each group their calculations and drawings for their project before they
start any fabrication (3) Ensure that the work completed in (2) is contained in the design portfolio for each
group. The rationale for decisions should be also included in the portfolio. (4) Ensure that all students have read and signed the list of shop safety rules. (5) Check each student proficiency record for each piece of power equipment before
allowing access. Rectify if necessary. (6) Discuss the relationship of the performance of the prototype to its design criteria (7) Discuss suggested changes to production methods, labor or material discovered
during the manufacture of the prototype. (8) Distribute a form for the testing and evaluation of the design project. (9) Discuss the importance of logging any changes made to the project and recording
the changes and observations in the design portfolio. (10) Assist each group as required in the fabrication and testing of their design
prototype.

Lesson #1 of 1 for Topic 6-6: Prototyping and Testing Unit 6: The Design Process
Design and Fabrication 1212 - 4 - Teacher Resource Guide
Suggested Student Activities
In groups of 2 or 4, students should fabricate their project prototype.
In groups of 2 or 4, students should test their project prototype.
Assessment and Evaluation The teacher will evaluate the student projects based on the Design Portfolio, which will include the Gantt chart, working drawings and prototype test results.
Wrap-up and Closing
Review the fabrication and prototype requirements.
Preview the next lesson on Evaluation and Redesign.
Learning Resources None required.
Student Material Pack A Student Material Pack is not required for lesson #1 of 1 for topic 6-6.

Lesson #1 of 1 for Topic 6-7: Evaluation and Redesign Unit 6: The Design Process
Design and Fabrication 1212 - 1 - Teacher Resource Guide
Lesson Plan #1 of 1 Topic 6-7: Evaluation and Redesign
Suggested Duration: 2 hours Suggested Format: Classroom Lecture/Discussion/Lab/Shop
Following completion of this lesson, students will be able to:
6.7.1 Evaluate the prototype in terms of design objectives [1.404] 6.7.2 Evaluate the prototype performance based on testing [1.404] 6.7.3 Suggest any required modifications [1.404, 2.403] 6.7.4 Identify the entrepreneurial opportunities for the project [4.402]
Teacher Required Resources
Design and Fabrication 1212 Teachers Resource Guide Student Required Resources
Design and Fabrication 1212 Student Text Student Materials Pack Teacher Preparation This activity will be student driven with the teacher acting as guidance and resource person. (1) Review the prototype test procedure and evaluation method for each group project.

Lesson #1 of 1 for Topic 6-7: Evaluation and Redesign Unit 6: The Design Process
Design and Fabrication 1212 - 2 - Teacher Resource Guide
Introduction
Discuss with students how after a prototype has been tested it must be evaluated based on how well it met or exceeded the design objectives and constraints. Depending on the outcome of the prototype test, redesign or modification may be required. This is a normal occurrence in most projects especially if the outcome is hard to predict such as complex or experimental projects.
Emphasize to students that since most initial designs do not initially meet all objectives and criteria, there are typically modifications required. Sometimes problems are not apparent until after the product is mass produced and feedback is received from consumers. The teacher should emphasize to students that design problems should be corrected at the earliest possible stage because the potential negative impact on product cost, user safety, and overall product quality increases in severity with each successive step in the design process. The student must also be reminded of the importance of getting objective opinions from 3rd parties, ideally potential end users, and being professional when critiques are offered.
Engineering is the application of science to the solution of practical problems and that is where design work originates. Individuals and groups design products and systems in response to some real or perceived need in society. Engineering consulting firms are generally involved in applying the design process to technical problems with a view to making a profit at the end of the day. There are numerous entrepreneurial opportunities related to design in such areas as selling design concepts, setting up production facilities, establishing distribution networks, product marketing, production system maintenance and material/equipment supply. Ground positioning satellites or GPS were originally designed to track satellites and other space objects but have been adapted into small hand held devices used to track the position of individual and vehicles.
State the purpose of this lesson and the expected learning outcomes
State how this lesson relates to other topics in Design and Fabrication 1212
Summarize what will be covered in this lesson and the related student activity
Lesson #1 of 1 for Topic 6-7: Evaluation and Redesign Unit 6: The Design Process
Design and Fabrication 1212 - 3 - Teacher Resource Guide
Presentation (1) Discuss the importance of evaluation and redesign as the last chance to correct any
problems with the design before control goes to the customer. (2) Ensure that modifications identified and corrective actions taken are entered into
the design logs for the appropriate groups. (3) Discuss the relationship of design activities to practical solutions of problems and
relate this to the student design projects. (4) Use an example such as the GPS or Cellular phone to discuss the modification of an
original design to meet a specific need. (5) Relate the innovation of design to the development of facilities or industries. A local
example would be the development of the wet processing of nickel to avoid environmental problems and the establishment of a new hydrometallurgical process being piloted at Argentia.
(6) Discuss the entrepreneurial opportunities for the various student group designs.

Lesson #1 of 1 for Topic 6-7: Evaluation and Redesign Unit 6: The Design Process
Design and Fabrication 1212 - 4 - Teacher Resource Guide
Suggested Student Activities
In groups of 2 or 4, students should evaluate and suggest design modifications for their projects.
Assessment and Evaluation The teacher will evaluate the student projects based on the Design Portfolio, which will include the Gantt chart, working drawings, prototype test results and suggestions for re-design.
Wrap-up and Closing
Summarize the course and the key concepts learned.
Learning Resources None required.
Student Material Pack A Student Material Pack is not required for lesson #1 of 1 for topic 6-7.