Deploying Windows Updates using WSUS and MBSA - HP
10
Technical white paper Deploying Windows Updates using WSUS and MBSA Windows-based HP Thin Clients Table of contents Overview .................................................................................................................................................................................2 Requirements for applying Windows security patches ....................................................................................................2 Additional precautions ..........................................................................................................................................................2 Windows Server Update Services........................................................................................................................................2 Enabling WSUS for Windows 10 IoT Enterprise ............................................................................................................3 Preparing the thin client ...............................................................................................................................................3 Applying updates through the servicing mode .........................................................................................................3 Creating a servicing task...............................................................................................................................................4 Enabling WSUS for Windows Embedded Standard 7 ...................................................................................................5 Preparing the thin client ...............................................................................................................................................5 Scheduling updates in Task Scheduler .......................................................................................................................6 Disabling Windows Update ..........................................................................................................................................7 Re-enabling the write filter ..........................................................................................................................................7 Microsoft Baseline Security Analyzer .................................................................................................................................7 Preparing the thin client ...................................................................................................................................................7 Applying Windows updates..............................................................................................................................................7 For more information ........................................................................................................................................................ 10
-
Upload
khangminh22 -
Category
Documents
-
view
6 -
download
0
Transcript of Deploying Windows Updates using WSUS and MBSA - HP

Technical white paper
Deploying Windows Updates using WSUS and MBSA Windows-based HP Thin Clients
Table of contents Overview ................................................................................................................................................................................. 2 Requirements for applying Windows security patches .................................................................................................... 2 Additional precautions .......................................................................................................................................................... 2 Windows Server Update Services ........................................................................................................................................ 2
Enabling WSUS for Windows 10 IoT Enterprise ............................................................................................................ 3 Preparing the thin client ............................................................................................................................................... 3 Applying updates through the servicing mode ......................................................................................................... 3 Creating a servicing task ............................................................................................................................................... 4
Enabling WSUS for Windows Embedded Standard 7 ................................................................................................... 5 Preparing the thin client ............................................................................................................................................... 5 Scheduling updates in Task Scheduler ....................................................................................................................... 6 Disabling Windows Update .......................................................................................................................................... 7 Re-enabling the write filter .......................................................................................................................................... 7
Microsoft Baseline Security Analyzer ................................................................................................................................. 7 Preparing the thin client ................................................................................................................................................... 7 Applying Windows updates.............................................................................................................................................. 7
For more information ........................................................................................................................................................ 10
2
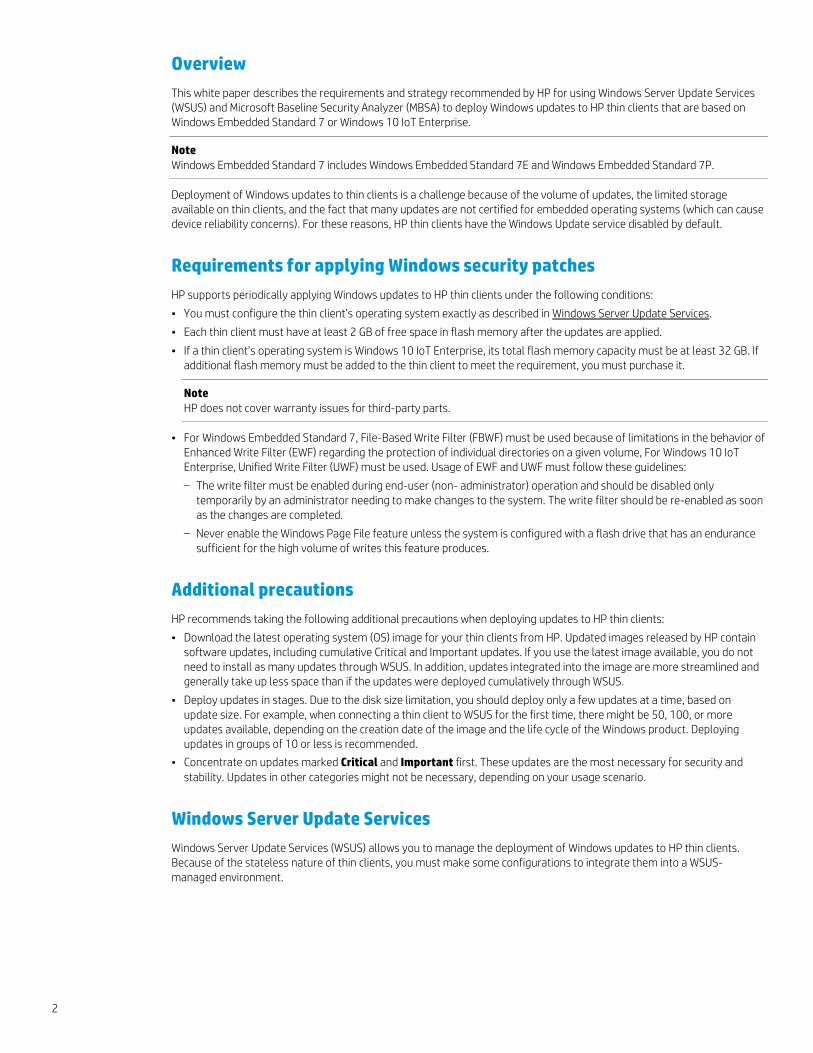
Overview
This white paper describes the requirements and strategy recommended by HP for using Windows Server Update Services (WSUS) and Microsoft Baseline Security Analyzer (MBSA) to deploy Windows updates to HP thin clients that are based on Windows Embedded Standard 7 or Windows 10 IoT Enterprise.
Note Windows Embedded Standard 7 includes Windows Embedded Standard 7E and Windows Embedded Standard 7P.
Deployment of Windows updates to thin clients is a challenge because of the volume of updates, the limited storage available on thin clients, and the fact that many updates are not certified for embedded operating systems (which can cause device reliability concerns). For these reasons, HP thin clients have the Windows Update service disabled by default.
Requirements for applying Windows security patches
HP supports periodically applying Windows updates to HP thin clients under the following conditions:
• You must configure the thin client’s operating system exactly as described in Windows Server Update Services.
• Each thin client must have at least 2 GB of free space in flash memory after the updates are applied.
• If a thin client’s operating system is Windows 10 IoT Enterprise, its total flash memory capacity must be at least 32 GB. If additional flash memory must be added to the thin client to meet the requirement, you must purchase it.
Note HP does not cover warranty issues for third-party parts.
• For Windows Embedded Standard 7, File-Based Write Filter (FBWF) must be used because of limitations in the behavior of Enhanced Write Filter (EWF) regarding the protection of individual directories on a given volume, For Windows 10 IoT Enterprise, Unified Write Filter (UWF) must be used. Usage of EWF and UWF must follow these guidelines:
– The write filter must be enabled during end-user (non- administrator) operation and should be disabled only temporarily by an administrator needing to make changes to the system. The write filter should be re-enabled as soon as the changes are completed.
– Never enable the Windows Page File feature unless the system is configured with a flash drive that has an endurance sufficient for the high volume of writes this feature produces.
Additional precautions
HP recommends taking the following additional precautions when deploying updates to HP thin clients:
• Download the latest operating system (OS) image for your thin clients from HP. Updated images released by HP contain software updates, including cumulative Critical and Important updates. If you use the latest image available, you do not need to install as many updates through WSUS. In addition, updates integrated into the image are more streamlined and generally take up less space than if the updates were deployed cumulatively through WSUS.
• Deploy updates in stages. Due to the disk size limitation, you should deploy only a few updates at a time, based on update size. For example, when connecting a thin client to WSUS for the first time, there might be 50, 100, or more updates available, depending on the creation date of the image and the life cycle of the Windows product. Deploying updates in groups of 10 or less is recommended.
• Concentrate on updates marked Critical and Important first. These updates are the most necessary for security and stability. Updates in other categories might not be necessary, depending on your usage scenario.
Windows Server Update Services
Windows Server Update Services (WSUS) allows you to manage the deployment of Windows updates to HP thin clients. Because of the stateless nature of thin clients, you must make some configurations to integrate them into a WSUS-managed environment.

3
Enabling WSUS for Windows 10 IoT Enterprise
Note WSUS version 4.0 or later is required for Windows 10 IoT Enterprise support.
Preparing the thin client 1. Log on to the thin client as Administrator.
2. Select Start > All Apps > Windows System.
3. Right-click Command Prompt and select Run as administrator.
4. Disable the UWF and restart the system by entering the following commands:
uwfmgr filter disable
shutdown -r -t 0
5. After the system restarts, log on as Administrator.
6. Select Start > All Apps > Windows System.
7. Right-click Command Prompt and select Run as administrator.
8. In Command Prompt, set the Windows Update service to automatically start by entering the following command:
sc config wuauserv start= auto
9. Execute the command to open the Local Group Policy Editor: gpedit.msc.
10. In the left pane of the Local Group Policy Editor, expand Computer Configuration > Policies > Administrative Templates > Windows Components, and then select Windows Update.
11. In the right pane, double-click Specify intranet Microsoft update service location.
12. Select Enabled to enable the policy.
13. Under Options, specify the local WSUS server in the Set the intranet update service for detecting updates box.
14. Specify the local statistics server in the Set the intranet statistics server box.
Note You can specify the same server using the format http://<server name>:<port> for both options. For example, enter http://myserver:8530 in both boxes (where myserver is the name of the WSUS server and 8530 is the default WSUS port for HTTP traffic). Make sure that the server name is resolvable by DNS.
15. Close the Local Group Policy Editor.
16. Enable updates for all Microsoft products by doing the following:
A. Select Start > Settings > Update & security.
B. Select Advanced options.
C. Select the Give me updates for other Microsoft products when I update Windows option.
D. Close the Settings window.
17. Register the thin client with the WSUS server by entering the following commands:
wuauclt /detectnow
wuauclt /reportnow
Note This can take several minutes.
18. Enable the UWF and start the system by entering the following commands:
uwfmgr filter enable
shutdown -r -t 0
Applying updates through the servicing mode 1. Log on to the thin client as Administrator.
2. Select Start > All Apps > Windows System.
3. Right-click Command Prompt and select Run as administrator.
4. Enter the following commands:
uwfmgr.exe servicing enable
shutdown -r -t 0

4
After you restart the thin client, it automatically logs on to the servicing account and servicing starts. After servicing starts, no user interaction is required. The system might restart, if it is required by the Windows updates that are being installed. If a restart is required, the system re-enters servicing mode after the restart and continues until all updates have been installed. During servicing, the UwfServicingScr.scr screensaver is displayed on the device.
If the Windows updates cannot be installed or return an error, servicing is disabled, the system restarts with UWF re-enabled, and all file and registry exclusions are restored to their original state.
Creating a servicing task Updates can be configured as an automated and scheduled task within your environment via the following procedure:
1. Log on to the thin client as Administrator.
2. Select Start > All Apps > Windows System.
3. Right-click Command Prompt and select Run as administrator.
4. Disable the UWF and reboot the system by entering the following commands:
uwfmgr filter disable
shutdown -r -t 0
5. After the system restarts, log on as Administrator.
6. Select Start > All Apps > Windows Administrative Tools > Task Scheduler.
7. In Task Scheduler, select Action > Create Task.
8. Under the General tab of the Create Task dialog box, do the following:
A. Enter a name for the task, such as Windows Servicing.
B. Enter a description of the task.
C. Select Change User or Group, select the UWF-Servicing account, and then select OK.
D. Select Run whether user is logged on or not.
E. Select Run with highest privileges.
9. Under the Triggers tab, specify the time and interval to use for Windows Servicing.
10. Under the Actions tab, add a new action to enable servicing as follows:
A. Select New.
B. Make sure that Start a program is selected as the action.
C. Enter the following command in the Program/script box:
uwfmgr.exe
D. Enter the following argument in the Add arguments (optional) box:
servicing enable
E. Select OK.
11. Under the Actions tab, add a new action to restart the thin client:
A. Select New.
B. Make sure that Start a program is selected as the Action.
C. Enter the following command in the Program/script box:
shutdown.exe
D. Enter the following argument in the Add arguments (optional) box:
-r -t 0
E. Select OK.
12. In the Create Task dialog box, select OK.
13. When prompted, provide the Administrator account credentials.

5
14. Enable UWF and restart the system by entering the following commands:
uwfmgr filter enable
shutdown -r -t 0
Enabling WSUS for Windows Embedded Standard 7 To enable automatic updates through WSUS on an HP thin client running Windows Embedded Standard 7, use the following procedure.
Note Due to the limitations in the behavior of the EWF related to the protection of individual directories on a given volume, these instructions assume that the FBWF is in use.
Preparing the thin client 1. Log on to the thin client as Administrator.
2. Select Start > All Programs > Accessories.
3. Right-click Command Prompt and select Run as administrator.
4. Disable the FBWF and restart the system by entering the following commands:
fbwfmgr /disable
shutdown -r -t 0
5. After the system restarts, log on as Administrator.
6. Select Start > All Programs > Accessories.
7. Right-click Command Prompt and select Run as administrator.
8. In Command Prompt, create a directory to store WSUS update packages to be installed; for example:
md C:\WSUS
9. Configure the security permissions on this directory so that only administrators can access the files in this directory.
Note HP recommends that you set administrator access to Allow for Full Control for the unprotected directory and files in this directory, and that you set all user (non-administrator) access to Deny for Full Control for the same directory and files.
10. Enable FBWF for the next system restart by entering the following command:
fbwfmgr /enable
11. Add the update directory to the FBWF exclusion list; for example:
fbwfmgr /addexclusion C: \WSUS
12. Download the Windows Update Servicing with Write Filter (WUS-WF) Solution from Microsoft at http://go.microsoft.com/fwlink/?LinkId=195328.
Note For more information about how the solution files control the servicing flow for Windows Update, go to https://msdn.microsoft.com/en-us/library/ff850921.aspx.
13. Extract the contents of WUS-WF.zip to the exclusion directory created in step 8 (C:\WSUS).
There are now three files within this directory:
• WUS-WF.vbs
• WindowsUpdateWithWriteFilter-Scheduled.xml
• WindowsUpdateWithWriteFilter-Startup.xml
14. Make sure that the built-in Administrator account is enabled and has a password set. You can do this by entering the following command:
net user administrator /active: yes
– or –
Configure the scripts to use a different user in the Administrators group, as follows:
A. Look for the string <UserId>Administrator</UserId> in WindowsUpdateWithWriteFilter-Startup.xml and WindowsUpdateWithWriteFilter-Scheduled.xml.

6
B. Replace this string in each file with the following, where Name is the name of any other user in the Administrators group:
<UserId>Name</UserId>
Scheduling updates in Task Scheduler Next, two tasks must be added to Task Scheduler. These tasks are defined in WindowsUpdateWithWriteFilter-Startup.xml and WindowsUpdateWithWriteFilter-Scheduled.xml.
WindowsUpdateWithWriteFilter-Scheduled.xml This task checks for available Windows updates at a scheduled time. The schedule can be changed to suit your environment. This task can run while any user is logged on to the system and runs even if no one is logged on to the system. If updates are found, the write filter is disabled and the system is restarted.
To add the WindowsUpdateWithWriteFilter-Scheduled task to Task Scheduler:
1. Select Start > All Programs > Accessories > System Tools > Task Scheduler.
2. In Task Scheduler, select Action > Import Tasks.
3. Navigate to the unprotected directory (C:\WSUS), select the WindowsUpdateWithWriteFilter-Startup.xml file, and then select Open.
4. In the Create Task dialog box, select the Actions tab.
5. Select the Start a program action from the list, and then select Edit.
6. Change the working directory to the unprotected directory that you created previously (C:\WSUS).
Note Do not change the other settings.
7. Select OK.
8. Select the Triggers tab, if you want to change the scheduled time for this task.
Note: By default, the task is scheduled to run at 3:00 AM daily.
To change the scheduled time:
A. Select the Daily trigger, and then select Edit.
B. Select the new scheduled time, and then select OK.
9. In the Create Task dialog box, select OK.
10. When prompted, provide the Administrator account credentials.
WindowsUpdateWithWriteFilter-Startup.xml This task applies the available updates if updates are found by the WindowsUpdateWithWriteFilter-Scheduled task. This task runs at startup. The updates are searched for and applied only if the WindowsUpdateWithWriteFilter-Scheduled task finds pending updates. This task can run while any user is logged on to the system, and runs even if no one is logged on to the system.
If updates are found, the updates applied by WindowsUpdateWithWriteFilter-Startup become persistent, because the write filter was disabled by the WindowsUpdateWithWriteFilter-Scheduled task. After the updates are applied, the write filter is enabled and the system is restarted.
Note If the updates have license terms associated with them, the license terms are automatically accepted; however, they are saved for later review in a folder named SavedEULAs in the unprotected directory.
Any logs or errors from this process are written to a log file that is named UpdateLog.log in the unprotected directory.
To add the WindowsUpdateWithWriteFilter-Startup task to Task Scheduler:
1. Select Start > All Programs > Accessories > System Tools > Task Scheduler.
2. In Task Scheduler, select Action > Import Task.
3. Navigate to the unprotected directory (C:\WSUS), select the WindowsUpdateWithWriteFilter-Startup.xml file, and then select Open.
4. In the Create Task dialog box, select the Actions tab.
5. Select the Start a program action from the list, and then select Edit.

7
6. Change the working directory to the unprotected directory that you created earlier (C:\WSUS).
Note Do not change the other settings.
7. Select OK.
Note Do not change the trigger settings.
8. In the Create Task dialog box, select OK.
9. If prompted, provide the Administrator account credentials.
Disabling Windows Update When you are using the WUS-WF solution for updates (instead of using the Windows Update program), you must configure Windows Update to never search for updates as follows:
1. Select Start > All Programs > Windows Update.
2. Select Change settings.
3. From the Important updates list, select Never check for updates (Not Recommended), and then select OK.
Re-enabling the write filter If you did not re-enable the write filter earlier, you must re-enable the write filter and restart the system for your changes to take effect.
1. In a command prompt, enter the following command:
fbwfmgr /enable
2. Restart the system by entering the following command:
shutdown -r -t 0
Microsoft Baseline Security Analyzer
Preparing the thin client
Important You must disable the write filter for your changes to take effect. Re-enable the write filter after completing the procedure.
1. Log on to the thin client as Administrator.
2. Set the thin client RAM drive size to up to 512 MB as follows:
A. Select Start > Control Panel > HP RAMDisk Manager.
B. In HP RAMDisk Manager, drag the slider to 512 MB, and then select OK.
3. Enable Windows Update as follows:
A. Run services.msc.
B. In the Services window, double-click Windows Update.
C. In the Windows Update Properties dialog box, select Manual for the startup type, and then select OK.
4. If a thin client’s OS is Windows Embedded Standard 7, verify that KB3102810 has been installed as follows:
A. Select Start > Control Panel > Programs and Features.
B. On the left side of the window, select View installed updates.
C. If KB3102810 is not installed, download it from https://support.microsoft.com/en-us/kb/3102810 and install it.
5. Go to https://www.microsoft.com/en-us/download/details.aspx?id=7558, and then download, install, and run MBSA version 2.3 or later on the thin client.
Applying Windows updates 1. In MBSA, select Scan a computer.

8
2. Select the Check for security updates option, and then start the scan.
3. After the scan is complete, select Result details under the Windows Security Updates issue category.

9
4. Notice the updates listed as Critical.
5. Verify that there is enough flash memory on the thin client by determining the total size of all critical updates.
6. Download all critical updates to a USB flash drive or network drive.
7. Access these updates from the thin client and follow the instructions to install them.
8. Repeat steps 3 through 7, but for the Developer Tools, Runtimes, and Redistributables issue category.
9. If the thin client OS is Windows Embedded Standard 7, verify that KB2852386 has been installed as follows:
A. Select Start > Control Panel > Programs and Features.
B. On the left side of the window, select View installed updates.
C. If KB2852386 is not installed, download it from https://support.microsoft.com/en-us/kb/2852386 and install it.
D. Run cleanmgr.exe.
E. In the Disk Cleanup window, select OK, and then select Windows Update Cleanup to free disk space.
Note For more information, go to https://blogs.technet.microsoft.com/askpfeplat/2013/10/08/breaking-news-reduce-the-size-of-the-winsxs-directory-and-free-up-disk-space-with-a-new-update-for-windows-7-sp1-clients/ and see the “How to Automate Windows Update Cleanup” section.
10. Disable the Windows Update service as follows:
A. Run services.msc.
B. In the Services window, double-click Windows Update.
C. In the Windows Update Properties dialog box, select Disabled for the startup type, and then select OK.
Note To apply the same updates across multiple thin clients, use HP ThinUpdate to copy the image to a USB flash drive and reimage the thin clients using that image.

Sign up for updates hp.com/go/getupdated
© Copyright 2010-2011, 2016-2017 HP Development Company, L.P.
Microsoft and Windows are either registered trademarks or trademarks of Microsoft Corporation in the United States and/or other countries.
The information contained herein is subject to change without notice. The only warranties for HP products and services are set forth in the express warranty statements accompanying such products and services. Nothing herein should be construed as constituting an additional warranty. HP shall not be liable for technical or editorial errors or omissions contained herein.
Fifth Edition: June 2017
First Edition: December 2010
Document Part Number: 643369-005
For more information
For information about how to deploy and configure a WSUS server within your environment, go to https://technet.microsoft.com/en-us/library/hh852340(v=ws.11).aspx.
For information about UWF servicing mode, including how to add third-party updates into your servicing process, go to https://msdn.microsoft.com/en-us/library/jj962927(v=winembedded.81).aspx.
For information about Windows Update Servicing on Windows Embedded Standard 7, including how to add third-party updates into your servicing process, go to https://msdn.microsoft.com/en-us/library/ff850921.aspx.
For more information about HP thin clients, go to the following websites:
• HP thin client software and operating system website: http://www.hp.com/go/thinclient
• HP support website: http://www.hp.com/support (search for the thin client model to find the support page for that particular model