
Connect Contact Center Administration Guide
211
Connect Contact Center Administration Guide October 23, 2017
-
Upload
khangminh22 -
Category
Documents
-
view
2 -
download
0
Transcript of Connect Contact Center Administration Guide

Connect Contact CenterAdministration Guide
October 23, 2017

Legal Notices
Trademarks© Copyright 2017, Mitel Networks Corporation. All Rights Reserved. The Mitel word and logo are trademarks of Mitel Networks Corporation.
Any reference to third-party trademarks is for reference only and Mitel makes no representation of ownership of these marks.
PatentsMitel products are covered by patents as listed at http://www.shoretel.com/about/patents.html.
Version Information Administration Guide Date: October 23, 2017
Company InformationMitel Networks Corporation
350 Legget Dr.
Kanata, Ontario K2K 2W7
Canada
+1.844.937.6483
2 Connect CLOUD Contact Center Administrator Guide

Preface
The following sections provide an overview of the book.
About This Book.......................................................................................................... 3
About This Book
ShoreTel is now part of Mitel. Together, we look forward to helping you power connections that are brilliantly simple.
The Connect Contact Center Administrator Guide describes how to use the Connect Contact Center administration applications, Connect Contact Center Director and Graphical Call Control Script Administration, to configure and route calls. This guide is intended for Connect Contact Center administrators.
Organization
The document is divided into the following chapters:
Chapter 1, Overview
Chapter 2, Configuring Connect Contact Center
Chapter 3, Identifying Agents and Supervisors
Chapter 4, Groups
Chapter 5, Routing Calls
Chapter 6, Defining How Email Reaches Agents
Chapter 7, Identifying IVR Applications for Reporting
Chapter 8, Specifying Call Handling by Dial List
Chapter 9, Setting System Parameters
Administrator Guide Connect CLOUD Contact Center 3

Preface Conventions
Chapter 10, Maintaining Connect Contact Center
Chapter 11, Using Call Control Scripts
Chapter A, Using Time Zone Data
Conventions
The following typographical marking conventions are used in this document.
Marking Meaning
Bold Names of interface objects, such as buttons and menus.
Courier Code examples.
Courier Italic Variables in code examples.
Blue Cross references with hyperlinks
Click the blue text to go to the indicated section. All chapters have a list of section links on the first page.
Note: Table of Contents entries are also links, but they are not shown in blue.
4 Connect CLOUD Contact Center Administrator Guide

Table of Contents
About This Book . . . . . . . . . . . . . . . . . . . . . . . . . . . . . . . . . . . . . . . . . . . . . . 3Organization . . . . . . . . . . . . . . . . . . . . . . . . . . . . . . . . . . . . . . . . . . . . . . 3Conventions . . . . . . . . . . . . . . . . . . . . . . . . . . . . . . . . . . . . . . . . . . . . . . 4
Chapter 1 Overview. . . . . . . . . . . . . . . . . . . . . . . . . . . . . . . . . . . . . . . . . . . . . . . . . . . 10Call Flow Processing in Connect Contact Center . . . . . . . . . . . . . . . . . . . . 10Call Profiles . . . . . . . . . . . . . . . . . . . . . . . . . . . . . . . . . . . . . . . . . . . . . . . . 11
Call Profile Fields . . . . . . . . . . . . . . . . . . . . . . . . . . . . . . . . . . . . . . . . . 11Connect Contact Center Interactions with Callers . . . . . . . . . . . . . . . . . . . 14
Basic Call Routing . . . . . . . . . . . . . . . . . . . . . . . . . . . . . . . . . . . . . . . . 14Mid-Level Call Routing . . . . . . . . . . . . . . . . . . . . . . . . . . . . . . . . . . . . . 14Advanced Call Routing . . . . . . . . . . . . . . . . . . . . . . . . . . . . . . . . . . . . . 15Monitoring . . . . . . . . . . . . . . . . . . . . . . . . . . . . . . . . . . . . . . . . . . . . . . 17Performance Measurement . . . . . . . . . . . . . . . . . . . . . . . . . . . . . . . . . 17Agent Tools . . . . . . . . . . . . . . . . . . . . . . . . . . . . . . . . . . . . . . . . . . . . . 18
About Entities . . . . . . . . . . . . . . . . . . . . . . . . . . . . . . . . . . . . . . . . . . . . . . . 19Agents . . . . . . . . . . . . . . . . . . . . . . . . . . . . . . . . . . . . . . . . . . . . . . . . . 20Groupings . . . . . . . . . . . . . . . . . . . . . . . . . . . . . . . . . . . . . . . . . . . . . . . 20Routing . . . . . . . . . . . . . . . . . . . . . . . . . . . . . . . . . . . . . . . . . . . . . . . . . 20Email . . . . . . . . . . . . . . . . . . . . . . . . . . . . . . . . . . . . . . . . . . . . . . . . . . 21Supervisors . . . . . . . . . . . . . . . . . . . . . . . . . . . . . . . . . . . . . . . . . . . . . 21Dial Lists . . . . . . . . . . . . . . . . . . . . . . . . . . . . . . . . . . . . . . . . . . . . . . . . 21IVR Configuration . . . . . . . . . . . . . . . . . . . . . . . . . . . . . . . . . . . . . . . . . 22System Parameters . . . . . . . . . . . . . . . . . . . . . . . . . . . . . . . . . . . . . . . 22Maintenance . . . . . . . . . . . . . . . . . . . . . . . . . . . . . . . . . . . . . . . . . . . . . 23
Chapter 2 Configuring Connect Contact Center . . . . . . . . . . . . . . . . . . . . . . . . . . . 24The Configuration Process . . . . . . . . . . . . . . . . . . . . . . . . . . . . . . . . . . . . . 24Connect Contact Center Director . . . . . . . . . . . . . . . . . . . . . . . . . . . . . . . . 25
Supported Browsers . . . . . . . . . . . . . . . . . . . . . . . . . . . . . . . . . . . . . . . 25Starting Connect Contact Center Director . . . . . . . . . . . . . . . . . . . . . . 26The Header Panel . . . . . . . . . . . . . . . . . . . . . . . . . . . . . . . . . . . . . . . . 27The Navigation Panel . . . . . . . . . . . . . . . . . . . . . . . . . . . . . . . . . . . . . . 27The List View Panel . . . . . . . . . . . . . . . . . . . . . . . . . . . . . . . . . . . . . . . 29The Details View Panel . . . . . . . . . . . . . . . . . . . . . . . . . . . . . . . . . . . . 29Finding and Displaying Information . . . . . . . . . . . . . . . . . . . . . . . . . . . 30Keyboard Shortcuts . . . . . . . . . . . . . . . . . . . . . . . . . . . . . . . . . . . . . . . 36Improved Access to Connect Contact Center Documentation . . . . . . 36
Graphical Call Control Scripts Administration . . . . . . . . . . . . . . . . . . . . . . . 36
Connect CLOUD Contact Center Administration Guide 5

Table of Contents
Starting GCCS Administration . . . . . . . . . . . . . . . . . . . . . . . . . . . . . . . 37The GCCS Administration Window . . . . . . . . . . . . . . . . . . . . . . . . . . . 37Getting Help . . . . . . . . . . . . . . . . . . . . . . . . . . . . . . . . . . . . . . . . . . . . . 38
Chapter 3 Identifying Agents and Supervisors . . . . . . . . . . . . . . . . . . . . . . . . . . . . 40Identifying Agents . . . . . . . . . . . . . . . . . . . . . . . . . . . . . . . . . . . . . . . . . . . . 40
Creating Agent Accounts . . . . . . . . . . . . . . . . . . . . . . . . . . . . . . . . . . . 41Defining a Class of Service . . . . . . . . . . . . . . . . . . . . . . . . . . . . . . . . . . . . 50
Creating an Agent Class of Service . . . . . . . . . . . . . . . . . . . . . . . . . . . 50Modifying a Class of Service . . . . . . . . . . . . . . . . . . . . . . . . . . . . . . . . 52Deleting a Class of Service . . . . . . . . . . . . . . . . . . . . . . . . . . . . . . . . . 52
Creating Supervisor Accounts . . . . . . . . . . . . . . . . . . . . . . . . . . . . . . . . . . 52Supervisor Capabilities . . . . . . . . . . . . . . . . . . . . . . . . . . . . . . . . . . . . 53Setting Prerequisite Supervisor Account Parameters . . . . . . . . . . . . . 54Adding a Supervisor Account . . . . . . . . . . . . . . . . . . . . . . . . . . . . . . . . 54Assigning Groups to a Supervisor . . . . . . . . . . . . . . . . . . . . . . . . . . . . 55Managing Supervisor Reports . . . . . . . . . . . . . . . . . . . . . . . . . . . . . . . 56Modifying a Supervisor Account . . . . . . . . . . . . . . . . . . . . . . . . . . . . . . 56Deleting a Supervisor Account . . . . . . . . . . . . . . . . . . . . . . . . . . . . . . . 57Setting Supervisor Preferences . . . . . . . . . . . . . . . . . . . . . . . . . . . . . . 57Creating a Supervisor Class of Service . . . . . . . . . . . . . . . . . . . . . . . . 58Modifying a Supervisor Class of Service . . . . . . . . . . . . . . . . . . . . . . . 59Deleting a Supervisor Class of Service . . . . . . . . . . . . . . . . . . . . . . . . 59Defining Supervisor Alerts . . . . . . . . . . . . . . . . . . . . . . . . . . . . . . . . . . 59
Configuring Additional Agent and Supervisor Settings . . . . . . . . . . . . . . . . 62Using Web Pop Up . . . . . . . . . . . . . . . . . . . . . . . . . . . . . . . . . . . . . . . . 62Using KPI Boards . . . . . . . . . . . . . . . . . . . . . . . . . . . . . . . . . . . . . . . . . 64Using Call Profile Lists . . . . . . . . . . . . . . . . . . . . . . . . . . . . . . . . . . . . . 65
Chapter 4 Groups . . . . . . . . . . . . . . . . . . . . . . . . . . . . . . . . . . . . . . . . . . . . . . . . . . . . 70Creating Agent Groups . . . . . . . . . . . . . . . . . . . . . . . . . . . . . . . . . . . . . . . . 70
Specifying Prerequisite Group Parameters . . . . . . . . . . . . . . . . . . . . . 71Adding an Agent Group . . . . . . . . . . . . . . . . . . . . . . . . . . . . . . . . . . . . 71Modifying an Agent Group . . . . . . . . . . . . . . . . . . . . . . . . . . . . . . . . . . 74Deleting an Agent Group . . . . . . . . . . . . . . . . . . . . . . . . . . . . . . . . . . . 75
Chapter 5 Routing Calls . . . . . . . . . . . . . . . . . . . . . . . . . . . . . . . . . . . . . . . . . . . . . . . 76Routing Entities . . . . . . . . . . . . . . . . . . . . . . . . . . . . . . . . . . . . . . . . . . . . . 76Specifying Services . . . . . . . . . . . . . . . . . . . . . . . . . . . . . . . . . . . . . . . . . . 77
Setting Prerequisite Service Parameters . . . . . . . . . . . . . . . . . . . . . . . 77Adding a New Service . . . . . . . . . . . . . . . . . . . . . . . . . . . . . . . . . . . . . 78Defining Service Announcements . . . . . . . . . . . . . . . . . . . . . . . . . . . . 81Changing a Service Destination . . . . . . . . . . . . . . . . . . . . . . . . . . . . . . 82Specifying a Service Overflow Destination . . . . . . . . . . . . . . . . . . . . . 83Determining a Service Interflow Destination . . . . . . . . . . . . . . . . . . . . 85Identifying a Destination for a Service with No Agents . . . . . . . . . . . . 87Selecting a Destination for Scheduled Callbacks . . . . . . . . . . . . . . . . . 88Choosing an Abandoned Callbacks Destination . . . . . . . . . . . . . . . . . 91Modifying Service Details and Properties . . . . . . . . . . . . . . . . . . . . . . 93Deleting a Service . . . . . . . . . . . . . . . . . . . . . . . . . . . . . . . . . . . . . . . . 93
Connect CLOUD Contact Center Administration Guide 6

Table of Contents
Identifying IRNs . . . . . . . . . . . . . . . . . . . . . . . . . . . . . . . . . . . . . . . . . . . . . 94Specifying Prerequisite IRN Parameters . . . . . . . . . . . . . . . . . . . . . . . 94Creating an IRN . . . . . . . . . . . . . . . . . . . . . . . . . . . . . . . . . . . . . . . . . . 95Setting Call Profile Field Values for an IRN . . . . . . . . . . . . . . . . . . . . . 96Configuring DNIS . . . . . . . . . . . . . . . . . . . . . . . . . . . . . . . . . . . . . . . . . 97Defining Agent Skills for an IRN . . . . . . . . . . . . . . . . . . . . . . . . . . . . . . 98Changing an IRN Destination . . . . . . . . . . . . . . . . . . . . . . . . . . . . . . . . 98Modifying an IRN . . . . . . . . . . . . . . . . . . . . . . . . . . . . . . . . . . . . . . . . 100Deleting an IRN . . . . . . . . . . . . . . . . . . . . . . . . . . . . . . . . . . . . . . . . . 100
Creating Agent Queue Profiles . . . . . . . . . . . . . . . . . . . . . . . . . . . . . . . . . 100Setting Prerequisite Agent Queue Profile Parameters . . . . . . . . . . . . 101Adding an Agent Queue Profile . . . . . . . . . . . . . . . . . . . . . . . . . . . . . 102Assigning Agents to a Profile . . . . . . . . . . . . . . . . . . . . . . . . . . . . . . . 103Changing a Profile’s Threshold Value . . . . . . . . . . . . . . . . . . . . . . . . 104Defining Profile Announcements . . . . . . . . . . . . . . . . . . . . . . . . . . . . 104Specifying a Profile Overflow Destination . . . . . . . . . . . . . . . . . . . . . 105Determining a Profile Interflow Destination . . . . . . . . . . . . . . . . . . . . 107Identifying a Destination for a Queue with No Agents . . . . . . . . . . . . 108Selecting a Destination for Callbacks . . . . . . . . . . . . . . . . . . . . . . . . . 109Choosing an Abandoned Calls Destination . . . . . . . . . . . . . . . . . . . . 111Modifying an Agent Queue Profile . . . . . . . . . . . . . . . . . . . . . . . . . . . 112Deleting an Agent Queue Profile . . . . . . . . . . . . . . . . . . . . . . . . . . . . 113
Chapter 6 Defining How Email Reaches Agents . . . . . . . . . . . . . . . . . . . . . . . . . . 114Setting Prerequisite Email Parameters . . . . . . . . . . . . . . . . . . . . . . . . . . . 114Adding a New Email Account . . . . . . . . . . . . . . . . . . . . . . . . . . . . . . . . . . 115Creating Email Groups . . . . . . . . . . . . . . . . . . . . . . . . . . . . . . . . . . . . . . . 118
Assigning Agents to Email Groups . . . . . . . . . . . . . . . . . . . . . . . . . . . 119Changing Email Group Threshold Values . . . . . . . . . . . . . . . . . . . . . 119Identifying Staffing Requirements for Email Groups . . . . . . . . . . . . . 120
Specifying an Email Service . . . . . . . . . . . . . . . . . . . . . . . . . . . . . . . . . . . 120Identifying Email IRNs . . . . . . . . . . . . . . . . . . . . . . . . . . . . . . . . . . . . . . . 125
Modifying Email Entities . . . . . . . . . . . . . . . . . . . . . . . . . . . . . . . . . . . 128Deleting an Email Entity . . . . . . . . . . . . . . . . . . . . . . . . . . . . . . . . . . . 128
Defining Email Agent Queue Profiles . . . . . . . . . . . . . . . . . . . . . . . . . . . . 129Adding an Email Agent Queue . . . . . . . . . . . . . . . . . . . . . . . . . . . . . . 129Assigning Agents to a Profile . . . . . . . . . . . . . . . . . . . . . . . . . . . . . . . 130Changing a Profile’s Threshold Value . . . . . . . . . . . . . . . . . . . . . . . . 130Specifying a Profile Overflow Destination . . . . . . . . . . . . . . . . . . . . . 131Determining a Profile Interflow Destination . . . . . . . . . . . . . . . . . . . . 133Identifying a Destination for a Queue with No Agents . . . . . . . . . . . . 134
Chapter 7 Identifying IVR Applications for Reporting . . . . . . . . . . . . . . . . . . . . . . 136
Chapter 8 Specifying Call Handling by Dial List . . . . . . . . . . . . . . . . . . . . . . . . . . 138Dial Lists . . . . . . . . . . . . . . . . . . . . . . . . . . . . . . . . . . . . . . . . . . . . . . . . . . 138
Setting Prerequisite Dial List Parameters . . . . . . . . . . . . . . . . . . . . . 139Adding a Dial List Account . . . . . . . . . . . . . . . . . . . . . . . . . . . . . . . . . 139Scheduling a Dial List . . . . . . . . . . . . . . . . . . . . . . . . . . . . . . . . . . . . 150Configuring DNC and Call Tables . . . . . . . . . . . . . . . . . . . . . . . . . . . 151
Connect CLOUD Contact Center Administration Guide 7

Table of Contents
Defining SQL Statements . . . . . . . . . . . . . . . . . . . . . . . . . . . . . . . . . . 152
Chapter 9 Setting System Parameters . . . . . . . . . . . . . . . . . . . . . . . . . . . . . . . . . . 154Scheduling Routing to Destinations . . . . . . . . . . . . . . . . . . . . . . . . . . . . . 155
Defining Day Types . . . . . . . . . . . . . . . . . . . . . . . . . . . . . . . . . . . . . . 155Defining a Calendar . . . . . . . . . . . . . . . . . . . . . . . . . . . . . . . . . . . . . . 155Defining Shifts . . . . . . . . . . . . . . . . . . . . . . . . . . . . . . . . . . . . . . . . . . 156
Specifying Reporting Preferences . . . . . . . . . . . . . . . . . . . . . . . . . . . . . . 157Determining the Reporting Settings . . . . . . . . . . . . . . . . . . . . . . . . . . 157Changing Real-Time Report Colors . . . . . . . . . . . . . . . . . . . . . . . . . . 158
Selecting the Routing Preferences . . . . . . . . . . . . . . . . . . . . . . . . . . . . . . 158Specifying Service Settings . . . . . . . . . . . . . . . . . . . . . . . . . . . . . . . . 159Determining the Incomplete Destination . . . . . . . . . . . . . . . . . . . . . . 160Identifying Agent Skills . . . . . . . . . . . . . . . . . . . . . . . . . . . . . . . . . . . . 162
Creating Call Profile User Fields . . . . . . . . . . . . . . . . . . . . . . . . . . . . . . . . 163Setting Client Preferences . . . . . . . . . . . . . . . . . . . . . . . . . . . . . . . . . . . . 164Defining Tagged Codes . . . . . . . . . . . . . . . . . . . . . . . . . . . . . . . . . . . . . . 165
Defining Wrap-Up Codes . . . . . . . . . . . . . . . . . . . . . . . . . . . . . . . . . . 165Defining Release Codes . . . . . . . . . . . . . . . . . . . . . . . . . . . . . . . . . . 165
Configuring System Outbound Parameters . . . . . . . . . . . . . . . . . . . . . . . 166Configuring General Parameters for Outbound Calls . . . . . . . . . . . . 166Configuring Time Settings for Outbound Calls . . . . . . . . . . . . . . . . . . 168
Configuring Parameters for Chat . . . . . . . . . . . . . . . . . . . . . . . . . . . . . . . 168Configuring Custom Chat Messages . . . . . . . . . . . . . . . . . . . . . . . . . . . . 170System Chat Messages . . . . . . . . . . . . . . . . . . . . . . . . . . . . . . . . . . . . . . 170System Email Messages . . . . . . . . . . . . . . . . . . . . . . . . . . . . . . . . . . . . . 171Configuring Parameters for Email . . . . . . . . . . . . . . . . . . . . . . . . . . . . . . . 171
Chapter 10 Maintaining Connect Contact Center. . . . . . . . . . . . . . . . . . . . . . . . . . . 174Uploading IVR Files . . . . . . . . . . . . . . . . . . . . . . . . . . . . . . . . . . . . . . 175
Configuring Music Streams . . . . . . . . . . . . . . . . . . . . . . . . . . . . . . . . . . . 175Enabling a Language . . . . . . . . . . . . . . . . . . . . . . . . . . . . . . . . . . . . . . . . 176Backing Up the Connect Contact Center . . . . . . . . . . . . . . . . . . . . . . . . . 176
Critical Components of the Connect Contact Center System . . . . . . 176Viewing Information on Connected Users . . . . . . . . . . . . . . . . . . . . . . . . 178
Chapter 11 Using Call Control Scripts . . . . . . . . . . . . . . . . . . . . . . . . . . . . . . . . . . . 180Overview of Call Control Scripts . . . . . . . . . . . . . . . . . . . . . . . . . . . . . . . . 180
Using Scripts to Affect Calls . . . . . . . . . . . . . . . . . . . . . . . . . . . . . . . . 181Call Control Scripts Provided by Mitel . . . . . . . . . . . . . . . . . . . . . . . . 181Audio Files Provided by Mitel . . . . . . . . . . . . . . . . . . . . . . . . . . . . . . . 182
Working with Call Control Scripts . . . . . . . . . . . . . . . . . . . . . . . . . . . . . . . 183Specifying Prerequisite Call Control Script Parameters . . . . . . . . . . . 183Creating Call Control Scripts . . . . . . . . . . . . . . . . . . . . . . . . . . . . . . . 184Editing a Call Control Script . . . . . . . . . . . . . . . . . . . . . . . . . . . . . . . . 184Importing and Exporting Call Control Scripts . . . . . . . . . . . . . . . . . . . 185Deleting a Call Control Script . . . . . . . . . . . . . . . . . . . . . . . . . . . . . . . 185
Testing and Database Query . . . . . . . . . . . . . . . . . . . . . . . . . . . . . . . . . . 185Call Control Script Actions Reference . . . . . . . . . . . . . . . . . . . . . . . . . . . 186
Announce . . . . . . . . . . . . . . . . . . . . . . . . . . . . . . . . . . . . . . . . . . . . . 186
Connect CLOUD Contact Center Administration Guide 8

Table of Contents
Announce Place in Queue . . . . . . . . . . . . . . . . . . . . . . . . . . . . . . . . 189Announce Wait Time . . . . . . . . . . . . . . . . . . . . . . . . . . . . . . . . . . . . . 189Branch to Script . . . . . . . . . . . . . . . . . . . . . . . . . . . . . . . . . . . . . . . . . 190Change Call Profile . . . . . . . . . . . . . . . . . . . . . . . . . . . . . . . . . . . . . . 190Collect Callback Info . . . . . . . . . . . . . . . . . . . . . . . . . . . . . . . . . . . . . 191Customer Query . . . . . . . . . . . . . . . . . . . . . . . . . . . . . . . . . . . . . . . . 193Decision . . . . . . . . . . . . . . . . . . . . . . . . . . . . . . . . . . . . . . . . . . . . . . 193Dial Digits . . . . . . . . . . . . . . . . . . . . . . . . . . . . . . . . . . . . . . . . . . . . . 194Get Digits . . . . . . . . . . . . . . . . . . . . . . . . . . . . . . . . . . . . . . . . . . . . . 194Get Next Record . . . . . . . . . . . . . . . . . . . . . . . . . . . . . . . . . . . . . . . . 195Give Menu . . . . . . . . . . . . . . . . . . . . . . . . . . . . . . . . . . . . . . . . . . . . . 195Hang-Up . . . . . . . . . . . . . . . . . . . . . . . . . . . . . . . . . . . . . . . . . . . . . . 196Increase/Decrease . . . . . . . . . . . . . . . . . . . . . . . . . . . . . . . . . . . . . . 196IVR Application End . . . . . . . . . . . . . . . . . . . . . . . . . . . . . . . . . . . . . 196IVR Application Start . . . . . . . . . . . . . . . . . . . . . . . . . . . . . . . . . . . . . 196Logic Switch . . . . . . . . . . . . . . . . . . . . . . . . . . . . . . . . . . . . . . . . . . . 197Login Primary Groups . . . . . . . . . . . . . . . . . . . . . . . . . . . . . . . . . . . . 198Login/Logout Primary Groups . . . . . . . . . . . . . . . . . . . . . . . . . . . . . . 198Logout Primary Groups . . . . . . . . . . . . . . . . . . . . . . . . . . . . . . . . . . . 199Overflow . . . . . . . . . . . . . . . . . . . . . . . . . . . . . . . . . . . . . . . . . . . . . . 199Play Callback File . . . . . . . . . . . . . . . . . . . . . . . . . . . . . . . . . . . . . . . 200Play File . . . . . . . . . . . . . . . . . . . . . . . . . . . . . . . . . . . . . . . . . . . . . . 200Play Music Stream . . . . . . . . . . . . . . . . . . . . . . . . . . . . . . . . . . . . . . 201Release . . . . . . . . . . . . . . . . . . . . . . . . . . . . . . . . . . . . . . . . . . . . . . . 201Release/Resume . . . . . . . . . . . . . . . . . . . . . . . . . . . . . . . . . . . . . . . . 202Resume . . . . . . . . . . . . . . . . . . . . . . . . . . . . . . . . . . . . . . . . . . . . . . . 202Send Message . . . . . . . . . . . . . . . . . . . . . . . . . . . . . . . . . . . . . . . . . 203Send Page . . . . . . . . . . . . . . . . . . . . . . . . . . . . . . . . . . . . . . . . . . . . 203Set Route Destination . . . . . . . . . . . . . . . . . . . . . . . . . . . . . . . . . . . . 203SQL Connect . . . . . . . . . . . . . . . . . . . . . . . . . . . . . . . . . . . . . . . . . . . 203SQL Disconnect . . . . . . . . . . . . . . . . . . . . . . . . . . . . . . . . . . . . . . . . 204SQL Execute . . . . . . . . . . . . . . . . . . . . . . . . . . . . . . . . . . . . . . . . . . . 204Transfer . . . . . . . . . . . . . . . . . . . . . . . . . . . . . . . . . . . . . . . . . . . . . . . 205Wait . . . . . . . . . . . . . . . . . . . . . . . . . . . . . . . . . . . . . . . . . . . . . . . . . . 205
Chapter 12 Troubleshooting Connect Contact Center Configuration . . . . . . . . . . 206Troubleshooting Tools . . . . . . . . . . . . . . . . . . . . . . . . . . . . . . . . . . . . . . . 206
Contact Center Log Monitor . . . . . . . . . . . . . . . . . . . . . . . . . . . . . . . . 207
Chapter A Using Time Zone Data . . . . . . . . . . . . . . . . . . . . . . . . . . . . . . . . . . . . . . 210Purchasing Time Zone Data . . . . . . . . . . . . . . . . . . . . . . . . . . . . . . . . . . . 210
Configuring Time Zone Data . . . . . . . . . . . . . . . . . . . . . . . . . . . . . . . 210Uploading Time Zone Data . . . . . . . . . . . . . . . . . . . . . . . . . . . . . . . . 211
Connect CLOUD Contact Center Administration Guide 9

CHAPTER
1. Overview
This chapter introduce some basic elements of the Connect Contact Center system. Understanding of these elements, and their functionality, can better help you to use the Connect Contact Center applications, deliver an improved customer experience, and increase agent productivity.
Call Flow Processing in Connect Contact Center ..................................................... 10
Call Profiles ............................................................................................................... 11
Connect Contact Center Interactions with Callers .................................................... 14
About Entities ............................................................................................................ 19
Call Flow Processing in Connect Contact Center
The following is a typical scenario for processing a call in Connect Contact Center:
1. The application receives a message from the Mitel Connect system about a new incoming call. The call may contain optional ANI information.
2. The application identifies the target service for the call.
3. The application uses the service parameters to:
Assign the initial values of the call profile, including call priority and ANI. Refer to Call Profiles on page 11 for information about how call profiles are used in the Connect Contact Center system.
Define the next destination for the call, such as a service or a call control script, based on specified work shifts and the default destination.
Administrator Guide Connect CLOUD Contact Center 10
Overview Call Profiles1
4. If the destination is a service, the call enters the service, where it may receive a mandatory announcement. Then the application starts the procedure of matching an agent with the call:
If there is an available agent in the group providing the required service, the call is immediately routed to that agent.
If there is more than one available agent in the group providing the required service, Connect Contact Center uses the service Agent Selection Criteria parameter to select the appropriate agent for the call.
If no agent in the group is available, the call is queued to wait for an agent to become available. In the queue, the call may be transferred to the service music source, to an announcement, or to a call control script. When an agent becomes available, the application uses the agent Call Selection parameter to decide which call to route to the agent. A call control script can modify the behavior of the routing and call flow, or provide callers with alternate service choices, such as callbacks or self-service.
While in the queue, a call can overflow to other groups, making a larger number of agents available to take the call.
While in the queue, a call can interflow to another extension for service.
Call Profiles
A call profile consists of dynamic information that is attached to each call in the system. This information is used to route the call and record its history. The call profile is updated as the call moves through the system and by caller interaction or by a CRM database that uses call control scripts.
Call Profile Fields
Each field in the call profile is either mandatory or optional. Mandatory fields are predefined and exist in any Contact Center Solution installation. Mandatory fields cannot be removed or changed by the user. Optional fields that meet your business needs—also called user fields—can be defined by using Connect Contact Center Director > System Parameters > Routing Preferences > Call Profiles. Refer to the Connect Contact Center Director Administration Guide for specifics.
Connect Contact Center uses Structured Query Language (SQL) for database interactions. Use the Call Profile Name, surrounded with a pair of percent signs (%), in a SQL statement. For example
SELECT * FROM table_1 WHERE phone_number = %ANI%
The following is a list of mandatory fields in the call profile. The field names in the call profile are case-sensitive.
11 Connect CLOUD Contact Center Administrator Guide

Call Profile Fields Overview 1
Table 1: Call Profile Mandatory Fields
Call Profile Name DDE Name Description
_STCC_ANI ANI Automatic Number Identification (ANI) transmits the customer’s telephone number and delivers it to your call center’s telephone system.
Note: The format of the ANI call profile field includes a plus sign (+) before the ANI number. This facilitates external incoming calls (i.e. from outside your site).
_STCC_Agent Queue agent_queue Indicates that the call is being handled by a personal agent queue.
_STCC_Group acd_group The internal group id related to the call
_STCC_Original Destination
called The original destination of the call
_STCC_Trunk trunk PBX and call-type depended
_STCC_Call ID callid The ID of the call
_STCC_DNIS DNIS The DNIS of the call
_STCC_calling calling The ANI (caller ID) of the caller
_STCC_Type calltyp Call type (Voice, Chat, Email, Callback, Abandoned, Web Callback, Dial List)
_STCC_Media Media Call media (WEB, VOICE, EMAIL)
_STCC_Priority Priority Priority of the call
_STCC_Service Service Service that handles the call
_STCC_Customer Number CUSTOMER_NUMBER Identifier number of the customer (if internal, the Customers Table is used)
_STCC_Customer Name CUSTOMER_NAME Customer name (if internal the Customers Table is used)
_STCC_ACD Enter Date ACD_ENTER_DATE Date the call entered Contact Center
_STCC_ACD Enter Time ACD_ENTER_TIME Time the call entered Contact Center
_STCC_Queue Position Q_POSITION Call position in the queue
_STCC_Average Queue Time
AVERAGE_Q_TIME Expected average wait time in the queue.
_STCC_Call Back Time CALLBACK_TIME Callback time set by caller (if empty, Abandoned Call)
_STCC_Call Back Destination
CALLBACK_DEST Callback destination
_STCC_Language LANGUAGE The language associated with the call (0=English, 1=Hebrew, 2=Russsian, 3=Arabic, 4=Mexican Spanish)
Administrator Guide Connect CLOUD Contact Center 12

Overview Call Profile Fields1
_STCC_Agent Extension AGENT_EXT The agent’s telephone extension number
_STCC_Agent Number AGENT_NUMBER Number used to identify the agent
_STCC_Dial List ID DIAL_LIST_ID The ID of the dial list
_STCC_Start Queue Time START_QUEUE_TIME The time when a call enters the queue
_STCC_Agent PSW AGENT_PSW Agent password
_STCC_Execute Req EXECUTE_REQ For any request to be executed
_STCC_Trunk Number TRUNK_NUMBER The number of the trunk
_STCC_Email To EMAIL_TO The text in the To field of the email
_STCC_Email CC EMAIL_CC The text in the CC field of the email
_STCC_Email Subject EMAIL_SUBJECT The text in the Subject field of the email
_STCC_Email From EMAIL_FROM The text in the From field of the email
_STCC_Email To EMAIL_REPLY_TO The text in the Reply To field of the email
_STCC_Email Sent Date EMAIL_SENT_DATE The text in the Date Sent field of the email
_STCC_Email Sent Time EMAIL_SENT_TIME The text in the Time Sent field of the email
_STCC_Email Enter OMS Date
EMAIL_ENTER_OMS_DATE The text in the OMS Date field of the email
_STCC_Email Enter OMS Time
EMAIL_ENTER_OMS_TIME The text in the OMS Time field of the email
_STCC_Primary Call Back Destination
PRIMARY_CB The primary destination for the callback
_STCC_Alternative Call Back Destination 1
ALTERNATIVE1_CB The first alternative destination for the callback
_STCC_Alternative Call Back Destination 2
ALTERNATIVE2_CB The second alternative destination for the callback.
_STCC_Last Time To Initiate Callback
LAST_TIME_TO_INITIATE_CB The time when the last callback can be made
_STCC_Alternative Call ID ALTERNATIVE_CALL_ID The PBX TAPI call ID
_STCC_Group GROUP_ID The ID of the group
_STCC_Outbound Caller ID
OUTBOUND_CALLER_ID The caller ID of the outbound call
_STCC_SW Call GUID SW_CALL_GUID The PBX call GUID
Table 1: Call Profile Mandatory Fields
Call Profile Name DDE Name Description
13 Connect CLOUD Contact Center Administrator Guide

Connect Contact Center Interactions with Callers Overview 1
Connect Contact Center Interactions with Callers
Connect Contact Center controls interactions with callers through a system of four inter-operating features:
Call routing determines how a customer’s call interacts with the call center. Call routing ranges from the most basic configuration—a single phone number that connects customers to the first available agent—to a complex system that distributes calls according to customer requirements and best-fit agent criteria.
Monitoring of call center operations provides supervisors with information required to manage daily operations.
Performance measurement through historical reports gives management a high-level view of operations from the perspective of business objectives, and captures information that can be used to make policy decisions.
Agent tools extend the ability of knowledge workers to provide effective service.
Basic Call Routing
Basic call routing features include queuing, menu interactions, music-on-hold, and schedules. It facilitates caller interaction through menus that callers can use to select a service. After the service is identified, the system can route the call to a group of agents who are best equipped to handle the caller’s needs.
If a call arrives when no agent is available, it goes into a queue of calls waiting for delivery to the next available agent. Music-on-hold and recorded announcements can let callers know they have not been forgotten. Recorded messages can be customized with additional information, including the caller’s place in line or estimated wait time.
A basic routing solution also helps a company adjust to fluctuations in the size of the contact center staff. The system administrator can set up automatic routing options that depend on the time of day, day of the week, or date. The capabilities include:
Recorded announcements and menus enable callers to select the type of service they want music-on-hold. The Connect Contact Center customer can customize these functions for each type of service that the call center provides.
Mandatory announcements to callers prior to entering the queue, notifying them of important information, such as a “your call may be monitored” announcement.
Mid-Level Call Routing
Mid-level call routing features include agent prioritization, overflow, interflow.
With agent prioritization, you can specify primary and secondary areas of expertise for agents and route calls on the basis of these skill sets. Agent prioritization also matches a caller with the agent who is best equipped to provide assistance. Agents receive calls related to their primary area of expertise
Administrator Guide Connect CLOUD Contact Center 14

Overview Advanced Call Routing1
until no more calls requiring that skill are in the queue. At that point, agents begin to receive calls related to their secondary skill set. Agent prioritization optimizes agent time and enables you to maximize the return on knowledge capital.
Overflow is another routing technique that can improve customer service and help you optimize valuable resources. Overflow enables you to reserve highly trained or cross-trained agents as backups for groups experiencing unusually heavy call traffic. When the caller wait time exceeds a specified ceiling, backup resources are automatically added to the pool and made available to handle customer calls.
The overflow features in Connect Contact Center include the following:
Single-level overflow — As calls reach the specified wait time limit, they are queued for a new, expanded group of potential agents. The overflow process can add one or more agent groups to the queue.
Multiple-step overflow — Adds flexibility to overflow by allowing you to specify one group of agents for overflow duty when the call reaches the first time-out, a second group after a longer interval, and additional agent groups after subsequent intervals.
Automate callbacks — Made to customers who abandoned the caller queue, by hanging up, after failing to reach an agent.
Caller choice — Callers can choose between requesting a call back or remaining on hold for an agent.
Interflow offers another service-level tool for managing calls. If the caller wait time is too long (or projected to be too long), Connect Contact Center can divert the call to a different destination offering other service groups or service options, or notify callers of the extended wait time and ask them to try again later. Interflow doubles as a resource management tool by routing calls out of your call center instead of stacking on-hold customers on expensive 800 lines.
Interflow features provided by the application include the following:
Wait time flow — When a caller reaches the configured time-out value, they are transferred to an alternative destination.
Predictive interflow — Extends the value of the service by offering transfer to an alternative destination when the estimated service time—based on the average service time and the number of callers already in the queue—exceeds the configured threshold.
With domain routing, the basis for call routing can be geographical location. When a call arrives, Connect Contact Center identifies the physical location of the customer and routes the call to a group with a skill set related to that geographical area or to a group within the same time zone.
Advanced Call Routing
The advanced call routing techniques in Connect Contact Center enable you to get maximum value from your knowledge resources and deliver the highest possible levels of customer satisfaction. The advanced call routing features in the application can be specified by service level, skills, identity, day/date, outbound calls, CRM database, and IVR scripting.
15 Connect CLOUD Contact Center Administrator Guide

Advanced Call Routing Overview 1
With service-level routing, you can set up dynamic routing based on service category and wait time. Agents with multiple expertise capabilities can receive calls routed from service groups that have failed to reach a percentage of calls answered within a predefined wait time interval.
Skills-based routing optimizes the caller experience by matching calls to the agent best equipped to address the customer’s needs. When multiple agents are available, Connect Contact Center routes the call to the agent with the highest skill ranking for the requested service. When multiple calls are waiting, available agents are selected on the basis of a best match.
With identity routing, you can extend premium services to your most valued customers. When a call arrives, Connect Contact Center identifies the customer by caller ID, DNIS, or data from a CRM database and assigns the caller a priority level. Callers designated as high priority immediately move to the front of the queue to await delivery to the first available agent. You can further optimize the customer experience by routing tagged customers to a “premium” group of top-level agents—or by sending customers with past-due accounts directly to the collections department.
Day/date routing provides an additional level of resource management by designating specific service offerings and/or groups for call handling on the basis of date or the day of the week. You can use day/date routing to define multiple shifts based on different date and time ranges, and then use the shifts to modify call routing options.
Outbound call routing makes your call center more proactive by allowing you to initiate customer interactions and offer your customers higher-value services. Outbound call routing can significantly improve the value of your service, making it possible for the call center to produce revenue. Outbound call routing frees agents from tedious dialing and eliminates cost leakage due to incorrectly dialed numbers. Outbound call routing features include the ability to perform the following functions:
Automate callbacks to customers who abandoned, by hanging up, the caller queue after failing to reach an agent.
Offer your callers a choice between requesting a call back or remaining on hold for an agent.
Conduct dialing campaigns—automated calling of groups of customers with new service offers, courtesy information, or other opportunities.
CRM database routing customizes call routing on the basis of intelligence resident in your relationship management system. By employing customer information or other business data in the call routing rules engine, you can optimize the customer experience with intelligent call routing and customized announcements.
IVR scripting provides a higher level of automated customer interaction by allowing the collection of more detailed caller information and employing CRM information to make more complex call routing decisions. Advanced scripting options make it possible for call center managers to modify call routing, collect caller information, query external databases, perform logic decisions, manage overflow or interflow, and provide callers with automated feedback and results. IVR scripting is used to build an automated interface between the caller and your corporate information systems. An IVR-based, self-service system delivers immediate, effective customer service without straining agent resources. Your scripts can prompt callers for actions, record dual-tone multi-frequency (DTMF) inputs, check and change the status of records in the corporate database, and provide customers with report results and status information.
Administrator Guide Connect CLOUD Contact Center 16
Overview Monitoring1
Connect Contact Center provides tools to build and implement scripts that augment call routing features. You can write scripts that provide deeper interaction with customers by querying customer data stores, diverting calls to different locations, modifying skills or properties, or delivering information to callers.
Monitoring
The Connect Contact Center Agent Manager application provides real-time agent monitoring, giving managers and supervisors a unique and comprehensive view of call center activity. Information can be displayed in tables or as graphics.
Agent Manager provides real-time data for specified intervals for the following Connect Contact Center statistics:
Agent and group status and performance
Queue status and results for calls
IVR status and the results for IVR calls
Staffing results based on targeted staffing levels
Agent Manager also provides supervisors with resource management tools they can use to adjust service levels. By adding or removing agents from selected groups, a supervisor can effectively manage the callers and service level in real-time.
Supervisors can use the Interaction Center Barge In, Whisper Coaching, and Monitor features to further enhance the customer experience. Whether done on an ad-hoc basis, or in response to an agent’s request for help, a supervisor can instantly (and privately) connect to an agent’s current call. Neither agent nor caller receives notification that monitoring has begun. If intervention is required, the supervisor can barge in on the call—with the choice of continuing with agent participation, or allowing the agent to return to the queue.
Performance Measurement
Connect Contact Center offers , a sophisticated historical reporting engine for capturing a wider spectrum of information to reach your business goals and improve customer service, which includes the following features:
Graphical layout for customizing templates
Assignable security levels for reports
Note
Connect Contact Center supports monitoring only one voice interaction at a time. Attempting to monitor more than one voice interaction may result in unexpected behavior such as the agent getting stuck in release mode.
You can monitor multiple chat interactions simultaneously. Also, you can monitor one voice interaction and one or more chat interaction simultaneously.
17 Connect CLOUD Contact Center Administrator Guide

Agent Tools Overview 1
Options for saving reports, including a save-to-file function for sharing templates
Scheduling report printing at specified intervals
provides predefined reports and the ability to create custom reports that meet your specific needs. An extensive collection of report templates is available for generating data views of call center performance that extends far beyond basic call handling and queue metrics.
Historical reports give you a detailed view of all facets of call center operations, including:
Agent and group performance and results
Total call activity and distribution results
Wrap-up code usage
Abandoned call analysis
Trunk and DNIS usage
Caller activity based on ANI domains
IVR application activity
Outbound calling activity
Mailbox activity
Agent Tools
Interaction Center provides an easy-to-use interface that enables agents to manage calls quickly and intuitively by displaying critical information, such as caller ID and caller name. With Interaction Center, agents are able to make better informed decisions.
Agents have access to information that tells them how many callers are waiting and the length of their wait times. A quick glance at the desktop lets the agent know how the team is doing and whether it is a good time to take a break—or even leave for the day.
Interaction Center extends agent capabilities with productivity features that include single-button controls for telephony and ACD operations, chat, queue management, and entering/leaving release mode.
Connect Contact Center provides pop up profiles to configure the Interaction Center to launch a third-party web page based on the combination of a Service, the state of an interaction, and optionally a call profile field such as Caller ID. Pop up profiles are defined in Agents > Pop Up Profiles.
PC-Less Agent Login
Agents can dial an IRN number from a non-anonymous, internal phone. The IRN number can invoke a login script that allows the agent to log in to the system by keying in agent ID through the phone keypad. Administrators can assign different IRN numbers for different PC-Less related scripts for various procedures:
Log in
Administrator Guide Connect CLOUD Contact Center 18

Overview About Entities1
Log out
Release
Resume
About Entities
An entity is a group of configuration parameters and business rules that determine how calls are routed, reported, and managed. In Connect Contact Center Director, configuration parameters and business rules are grouped according to the entity.
Some entities may have already been specified by your system administrator as part of the installation process. However, if this task has been left up to you, or you have changes in your organization, you will need to work with entities.
The categories of Connect Contact Center entities are as follows:
Agents
Groupings
Routing
Supervisors
Domains
Dial Lists
IVR Configuration
System Parameters
Maintenance
Note
PC-Less Agent login applies only to internal phones that are not anonymous.
19 Connect CLOUD Contact Center Administrator Guide

Agents Overview 1
Agents
Connect Contact Center uses the entities in the Agents category to identify agents in the Connect Contact Center system. Agents handle calls and contacts routed to them by the application. Each agent must be equipped with a telephone, and begins work by logging into the system. An agent can be a member of multiple groups, and may log in or out of all groups simultaneously or one group at a time
Agents — The information that comprises an agent account in the application.
Class of Service — A configurable set of Interaction Center settings and capabilities.
Call Profile Lists — Use this feature to define, by call profile, the information that is available to the agent during an interaction.
Pop Up Profiles — Use this feature to configure the Interaction Center to launch a third-party web page based on the combination of a Service, the state of an interaction, and optionally a call profile field such as Caller ID.
KPI Boards — Use this feature to configure key performance information (KPIs) to display on the Interaction Center
Groupings
Use the entities in the Groupings category to organize agents into groups. Typically, the agents in a group can provide the same services to callers.
Routing
The entities in the Routing category determine how the system routes calls and contacts. You can generate real-time reports by using Agent Manager and historical reports by using Connect Contact Center Reports on some of these routing entities.
Services — Entity that defines how Connect Contact Center processes an incoming call. Services are like to a waiting room, where the application manages a call until an agent can answer it or otherwise processes the call. Incoming calls are assigned to a specific service. The service includes customer-defined announcements, overflow and interflow settings, callback settings, and other business rules.
IRN (Intelligent Routing Node) — Dial numbers used as entry points to the routing system. Each IRN is defined with rules for routing the incoming call to various destinations, including agent queues, services, call control scripts, and devices. IRNs are reached from the Mitel Connect system by dialing the extension number assigned to the route point that corresponds to the IRN.
Agent Queue Profiles — An agent queue profile defines common attributes that can be used across multiple agents queues. Agent queues allow ACD calls to be queued for an individual agent. This feature is useful if your call center directs calls to specific agents, or if you allow agents to take a higher priority call while on an existing ACD call.
Administrator Guide Connect CLOUD Contact Center 20

Overview Email1
The following entities specify the routing that lets the email contacts reach an agent:
Email Accounts — The information that makes up an email account in Connect Contact Center. Agents can work with standard email programs such as Outlook or Outlook Express. Email accounts are configured for each type of inquiry. Emails received in these accounts are placed in a queue from which an agent can download emails. Mailboxes can be assigned to a specific computer or agent.
Email Groups — Agents can be organized into email groups, which are typically a collection of agents that can deliver the same service to incoming email contacts. Emails sent to the group are presented to the most appropriate agent according to the specified routing policy.
Email Services — The entity that defines how incoming emails are processed. Email services are analogous to a waiting room where emails are managed until they can be answered or otherwise handled. Every incoming email contact is assigned to a specific service, with destination, overflow, and interflow settings, and other business rules.
Email IRN (Intelligent Routing Node) — Used as email entry points to the routing system. Each email IRN is defined with rules for routing the incoming email contact.
Email Agent Queue Profiles — Used to define common attributes that can be used across multiple email agent queues. Select the email agent queue profile that you want to assign the agent to.
Supervisors
Use the entities in the Supervisors category to define supervisors in the system. Supervisors are responsible for the performance and operation of selected Connect Contact Center groups.
Accounts — The information that makes up a supervisor account in the application. Supervisors must be assigned the appropriate privileges and groups.
Class of Service — Supervisor class of service (COS) allows administrators to easily configure the capabilities supervisors have in the Interaction Center.
Preferences — Specifies the following:
Which messages are displayed to a supervisor
The pages in a supervisor’s Connect Contact Center Director Favorites list
Alerts — Alerts that a supervisor hears when a real-time group report reaches a threshold.
Dial Lists
Use the Dial List entities to identify rules for dial lists. A dial list is a set of telephone numbers in a database your company uses for outbound calls.
Dial Lists — The information that comprises a dial list account in Connect Contact Center.
21 Connect CLOUD Contact Center Administrator Guide

IVR Configuration Overview 1
Dial List Schedules — Specifies the run schedule for a dial list.
DNC/Call Tables — Defines Do Not Call (DNC) and Call tables.
Predefined SQL — Creates predefined SQL statements for use in dial lists.
Query — Use to query the database for the set of numbers to be dialed and to verify that numbers are still valid.
Procedure — Allows you to update the database with call results.
IVR Configuration
An Interactive Voice Response (IVR) application is used by the Contact Center to perform interactive tasks with the caller. Each application is composed of actions forming a script to execute a procedure.
System Parameters
These entities are used to configure various definitions and parameters that affect the behavior of the entire system. Many of the entities are organized under sub-categories.
Schedules — Used by the Connect Contact Center Server to route calls to different destinations according to the day and time.
Calendar — Specify working and non-working days. This information is used to calculate the daily average for Connect Contact Center historical reports for intervals that span more than one day.
Day Types — Identifies special days (like holidays) and working or non-working days. Each day type can be assigned a color so it can be easily viewed in the calendar.
Shifts — Defines service routing destinations used at different times of the day. Shifts are associated with a day type.
Reporting Preferences — Monitors different points of the system and are used to generate reports using Agent Manager (for real-time reports) and Connect Contact Center Reports (for historical reports).
Reporting Settings — Specifies report parameters.
Real-Time Report Colors — The display colors that highlight different agent states in real-time reports.
Reports — Lists available real-time reports, historical report templates, and historical report schedules.
Routing Preferences — Defines the handling of incoming calls.
Service Settings — Call priority and other settings for services.
Incomplete Destinations — The destination to which the system routes a call or contact that enters the system with no valid routing destination.
Administrator Guide Connect CLOUD Contact Center 22

Overview Maintenance1
Skills — Used by the system to determine the routing of calls to the most suitable agent. When more than one agent is available to receive a call, the system routes the call based on the best skill fit.
Call Profiles — A call profile user field can be used by IRNs, domains, and dial lists to gather and update information about a call.
Client Preferences — Specifies how the system interacts with the user or user’s system.
Tagged Codes — Agents use tagged codes when they have finished handling a call. In most cases, these codes provide information for evaluating calls based on statistical reporting.
Wrap-Up Codes — Identifies the wrap-up codes available to agents.
Release Codes — Defines the release codes available to agents.
Outbound — Specifies how outbound calls are handled.
General Preferences — Preferences for phone prefixes, callbacks and dial lists, timers, and outbound behavior.
Time Settings — Identifies the time in which outbound calls are made.
Chat and Email — Made up of the various parameters that define how chat and email contacts are to be handled by the Connect Contact Center system.
External Interfaces — Defines the interface between the application and external interfaces.
Database Connections — Configures the connection to an external database.
Maintenance
The Maintenance entities define areas of the system after the application starts operating. Many of the entities are organized under sub-categories.
Music Streams — Music streams are WAV files that are played when a call is waiting in queue. Music streams can be specified system-wide, per call, per caller, or to play a prompt.
Languages — The required languages for IVR announcements.
Connected Users — Provides information on users currently logged into the application.
Note
The WAV file must be in the following format: u-law, 8000Hz, 8 bit, and mono.
23 Connect CLOUD Contact Center Administrator Guide

CHAPTER
2. Configuring Connect ContactCenter
Call center administrators and supervisors might be responsible for configuring Connect Contact Center. We recommend that call center administrators and supervisors configure the application by using the process descriptions in this chapter.
Connect Contact Center Director is the graphical user interface for configure the application. The Graphical Call Control Script (GCCS) Administration application allows you to create call control scripts. An introduction to both these applications is provided in this chapter.
The Configuration Process........................................................................................ 24
Connect Contact Center Director .............................................................................. 25
Graphical Call Control Scripts Administration ........................................................... 36
The Configuration Process
Configuring the application is the process by which you specify the parameters and business rules that determine how your call center works.
It is assumed that the application has already been set up as part of the installation process. Setting up the application involves integrating with the Mitel Connect system and other tasks. If this preliminary step has not been completed, refer to the Connect Contact Center Installation Guide for details.
Mitel recommends the following sequence of tasks for configuring Connect Contact Center:
1. Identify agents and supervisors.
Administrator Guide Connect CLOUD Contact Center 24

Configuring Connect Contact Center Connect Contact Center Director2
2. Create groups.
3. Configure routing.
4. Define how email reaches agents.
5. Identify trunks and IVR applications for reporting.
6. Set system parameters.
7. Determine maintenance entities.
8. (Optional) Implement the redundant server system.
9. Create call control scripts.
10. If necessary, troubleshoot the configuration.
Connect Contact Center Director
Connect Contact Center Director provides a single, easy-to-use, browser-based interface for call center administration.
Connect Contact Center Director can only be used by supervisors who have either Supervisor Administrator or Entity Administrator privileges, as explained in Creating Supervisor Accounts on page 52. You do not need a supervisor license to use Connect Contact Center Director.
Supported Browsers
Connect Contact Center Director supports the following browsers:
Microsoft Internet Explorer (IE) 10 and 11
Mozilla Firefox 4.x
Apple Safari 5.x
Google Chrome
Make sure that JavaScript is enabled in the browser and that the Connect Contact Center Director URL is accessible. For IE, this means adding the Connect Contact Center Director URL to the trusted sites by using the Tools > Internet Options > Security tab in the browser. If JavaScript is disabled, Connect Contact Center Director displays a warning.
25 Connect CLOUD Contact Center Administrator Guide

Starting Connect Contact Center Director Configuring Connect Contact Center 2
Starting Connect Contact Center Director
Before starting Connect Contact Center Director, get the following information from your system administrator:
Connect Contact Center Director Uniform Resource Locator (URL)
Your user ID
Your password
Complete the following steps to start Connect Contact Center Director:
1. Enter the application URL in the browser’s address field. Typically, this address is in the following form:
2. Enter your user ID and password, and then click Submit.
Connect Contact Center Director opens.
Connect Contact Center Director is made up of four panels: the Header panel, the Navigation panel, the List View panel, and the Details View panel.
Navigation Panel
Header Panel List View Panel
Details View Panel
Administrator Guide Connect CLOUD Contact Center 26

Configuring Connect Contact Center The Header Panel2
The Header Panel
The Connect Contact Center Director Header panel contains the following items:
Version — If you are using a version other than the standard Connect Contact Center Director (i.e. a lab or demo version), the version type is indicated in the Header panel.
User Name — The user name of the person currently logged into this instance of Connect Contact Center Director.
Logout — Click to log out of Connect Contact Center Director.
Preferences — Click to access the Preferences page.
View Buttons — Click to view only list information, only detailed information, or both list and detailed information. The appropriate panels are displayed.
The default is to show both the List View and Details View panels. For pages that do not include a list of individual items, the View buttons are not available.
The Navigation Panel
The Navigation panel is made up of a Search field and links to your Favorites, the application entity pages, and the Help. The entities are organized by category; clicking on an entity displays links to the pages of those types of entities.
The Navigation panel also indicates where you are in Connect Contact Center Director by highlighting the current page. The build number of the Connect Contact Center Director instance you are running is shown at the bottom of the Navigation panel; this information is useful for troubleshooting purposes.
You can collapse the Navigation panel by clicking and expand it by clicking . Collapsing the Navigation panel allows you to see more information in the List View and/or Details View.
User Name
View Buttons
List and Details View
Details View
List View
27 Connect CLOUD Contact Center Administrator Guide

The Navigation Panel Configuring Connect Contact Center 2
The entities available in the Navigation panel are dependent on licensing. If you launch Connect Contact Center Director and do not see the full list of entities you are expecting, contact your system administrator. A Navigation panel with only the License pages displayed indicates that a node-locked system license is required.
Search Director
The Search Director field at the top of the Navigation panel allows you to find text (for example, abandoned callbacks) in Connect Contact Center Director. Refer to Finding and Displaying Information on page 30 for details on using Search Director.
Favorites
Favorites are links to the pages you use most frequently. Using Favorites makes it easy to access a page by simply clicking its name, instead of having to find it elsewhere in the Navigation panel.
Search
Help
Favorites
Click a category todisplay links to thosetypes of entities
Click to collapse he Navigation panel
Build Number
Administrator Guide Connect CLOUD Contact Center 28

Configuring Connect Contact Center The List View Panel2
By default, Favorites contains a list of pages most commonly used. Clicking on Favorites displays the links to those pages. You can change the pages in Favorites at any time, as explained in Setting Supervisor Preferences on page 57.
Help
The Help link at the bottom of the Navigation panel provides access to this and other Connect Contact Center documentation, and to a summary of the available Connect Contact Center Director keyboard shortcuts. Refer to Keyboard Shortcuts on page 36 and Improved Access to Connect Contact Center Documentation on page 36 for additional information.
The List View Panel
The List View panel shows a list of the individual records that make up an entity, with information on each record. Only the number of records that can be displayed on a page are shown; this number is affected by the size of your browser window. The total number of records in the list is indicated.
Connect Contact Center Director provides multiple ways to find and display records in a list. Refer to Finding and Displaying Information on page 30 for details.
The Details View Panel
The Details View panel displays the details of a record selected in the List View Panel. You also use the Details View panel to change a record’s details and to specify the details of a new record.
If applicable, separate categories of detailed information are accessed by clicking on the appropriate tab. Fields with a title in boldfaced font are required.
Connect Contact Center Director helps you enter the correct information in the fields of the Details View panel:
For fields that require a number value, the possible number range is displayed when you click in the field.
You can incrementally increase or decrease the number in a field, by a value of 1, by using the keyboard’s up and down keys. To increase or decrease the number in a field by a value of 10, use the Page Up and Page Down keys of your keyboard.
This is the current page
29 Connect CLOUD Contact Center Administrator Guide

Finding and Displaying Information Configuring Connect Contact Center 2
Some fields have a drop-down menu made up of options that have been previously defined. If the menu does not contain the option you want, or if you want to verify or change an option, clicking on the right arrow associated with the field takes you to the location in Connect Contact Center Director where the option is defined.
Information on some fields is available by clicking the Help button associated with the field.
Finding and Displaying Information
Connect Contact Center Director provides various methods to find and display information. You can search for specific text, search for an item in a list, select a different page of records, and view details on another item. The sort order of items in a list can also be changed. And the Navigation panel can be collapsed so that you see more of the information you need in the List View and/or Details View.
Searching for Text
The Search Director field at the top of the Navigation panel allows you to find text (for example, abandoned callbacks) in Connect Contact Center Director. The Search Director field is case insensitive.
Complete the following steps to search for text:
1. Make sure you have selected List and Details View.
2. In the Search Director field, enter the text you want to find.
As you type, the list of pages in the Navigation panel narrows to reflect your search criteria.
Click here to be taken to the location inConnect Contact Center Director where these menu options are defined.
Click here to displayHelp on the field.
Administrator Guide Connect CLOUD Contact Center 30

Configuring Connect Contact Center Finding and Displaying Information2
3. Click the page you want to view.
The text is highlighted in the page. If the text is hidden because it is on a tab other than the current one, the tab with the text is also highlighted.
4. To return to the full list of pages in the Navigation panel, click the Search close button.
Searching for an Item in a List
The List View panel shows a list of the individual records that make up an entity, with information on each record. Only the number of records that can be displayed on a page are shown; this number is affected by the size of your browser window. The total number of records in the list is indicated.
The Details View panel also includes lists of items.
Only 4 records are displayed in
There is a total of9 records in this list
this list.
31 Connect CLOUD Contact Center Administrator Guide

Finding and Displaying Information Configuring Connect Contact Center 2
In either panel, if a list is very long, or if there are additional items not shown in the list, you can search for a specific item. The search fields are case insensitive.
Complete the following steps to search for a record in the List View panel:
1. In the Search Records field, at the top of the List View panel, enter the record you want to find.
Records that match the search criteria are displayed in the list. If more than one page contains the records, the drop-down menu at the top of the List View panel shows only the pages with the record.
2. To return to the first page of records in the list, click the Search close button.
Complete the following steps to search for an item in the Details View panel:
1. In the Search field at the top of a list, enter the item you want to find. The item is displayed, and selected, in the list.
2. Press Enter to continue the search The next item in the list matching the search criteria is displayed and selected.
3. To return to the full list, click the Search close button.
Selecting a Different Page of Records
A page is made up of only the number of records in a list that can currently be displayed. If the list includes more records, they are organized in additional pages that you can select. There are two ways in the List View panel to select and display another page: by choosing a specific page or by choosing the next or previous page.
Complete the following steps to choose a specific page of items:
From the drop-down menu at the top of the List View panel, choose the page you want to view.
Only pages with a recordmatching the searchcriteria are listed here
Administrator Guide Connect CLOUD Contact Center 32

Configuring Connect Contact Center Finding and Displaying Information2
The choices on the menu indicate the page number, and the first and last records of the page.
Complete the following steps to choose the next or previous page of records:
1. To to display the next page of records, click .
2. To display the previous page of records, click .
Viewing Details of Another Item
In the Details View panel, you can see information on the next or previous item in the list, without having to first select it in the List View panel. This is useful if you are working only in the Details View panel, or want to sequentially move through a list of items.
Complete the following steps to view details of another item:
1. In the Details View panel, to view information on the next item, click .
2. To view information on the previous item, click .
Changing the Sort Order
Many columns in a list can be sorted by ascending or descending order. Columns that are sortable
have associated sort arrows .
Complete the following steps to change the sort order:
1. Point to the column you want to reorder. The tool tip describes the type of sort you can do.
33 Connect CLOUD Contact Center Administrator Guide

Finding and Displaying Information Configuring Connect Contact Center 2
2. Click on the column title.
The items in the column are sorted. An arrow indicates whether the column is sorted in ascending or descending order.
Collapsing the Navigation Panel
Collapse the Navigation panel by clicking .
Expand the Navigation panel by clicking .
Collapsing the Navigation panel allows you to see more information in the List View and/or Details View.
This column can be sorted
This column is sorted in ascending order.
Administrator Guide Connect CLOUD Contact Center 34

Configuring Connect Contact Center Finding and Displaying Information2
Getting Help
Information for a specific field is available by clicking the Help button associated with the field.
Click to collapse the Navigation panel.
Click here to displayHelp on the field.
35 Connect CLOUD Contact Center Administrator Guide

Keyboard Shortcuts Configuring Connect Contact Center 2
Error Messages
In Connect Contact Center Director, error messages are displayed within the browser window highlighted in red.
Specific error information is displayed next to the field with the error. Any additional information is also displayed in the red banner at the top of the panel.
Keyboard Shortcuts
Keyboard shortcuts are available for the most common actions. To use a keyboard shortcut, press Ctrl+Alt+key. A list of keyboard shortcuts is provided.
Complete the following steps to access the list of keyboard shortcuts:
1. Click Help in the Navigation panel.
2. Click Shortcut Keys.
To close, click anywhere in the list.
Improved Access to Connect Contact Center Documentation
Complete the following steps to access the application documentation from Connect Contact Center Director:
1. Click Help in the Navigation panel.
2. Click on the document you are interested in viewing.
3. If you need help on a specific area of the product, click Edit > Find.
Graphical Call Control Scripts Administration
Graphical Call Control Scripts (GCCS) Administration allows you to create, edit, and manage call control scripts.
Administrator Guide Connect CLOUD Contact Center 36

Configuring Connect Contact Center Starting GCCS Administration2
Starting GCCS Administration
1. From the Windows desktop, click Start > Programs > ShoreTel> ShoreTel Connect Contact Center Supervisor > GCCS.
If the GCCS Administration icon is on your desktop, or in the Windows Start menu, you can click this icon to start GCCS Administration.
The GCCS Administration Window
Scripts — Accessed by clicking the Scripts tab at the top of the pane on the left-side of the window. The Script List pane displays the list of available scripts. Clicking on a script in the Script pane displays the script actions and logical flow in graphical form in the Action area.
Palette — The Palette pane displays icons of all supported actions for the selected script. Clicking on an icon adds the action to the script, as shown by the icon being added to the Action area.
Action — The Action area, on the right side of the window, displays the script in graphical form.
Click on this tab Action Areato see the Palette
Properties areaComment area
37 Connect CLOUD Contact Center Administrator Guide

Getting Help Configuring Connect Contact Center 2
Comment — The Comment area, at the bottom-left of the window, allows you to include a description of the selected script or action.
The Comment area can be reduced or enlarged by dragging the borders that separate the area either up or down or left or right. Any changes to the area size are automatically saved.
Properties — When you select an action in the Action area, the configuration details for that action appear in the lower-right Properties area of the window. Until you select an action, the Properties area is blank. A script’s announcement parameters are presented in Properties area.
The Properties area can be reduced or enlarged by dragging the borders that separate the area either up or down or left or right. Any changes to the area size are automatically saved.
Toolbar — The GCCS Administration toolbar provides icon shortcuts to streamline access to GCCS Administration functionality:
New Script (1) — Adds a new script to the Script list.
Save Script (2) — Saves the script that has been loaded into the Action area.
Save All Scripts (3) — Saves all scripts.
Delete Script (4) — Deletes a selected script from the Script list.
Reload Current Script (5) — Reloads the current script from the database.
Cut (6) — Cuts the selected action(s) and properties.
Copy (7) — Copies the selected actions and properties in a script to the clipboard.
Paste (8) — Pastes the selected action(s) and properties into another script.
Database Test Query (9) — Sends a test query to a database.
Zoom Out (10) — Allows you to zoom back from a page by increments.
Zoom In (11) — Allows you to zoom into a page by increments.
Select Zoom (12) — Allows you to zoom in or zoom out by a specific percent.
Original Size (13) — Restores the screen to 100% of its original size.
Logout (14) — Starts the logout process.
Getting Help
Additional information about using GCCS Administration is available from Help > Help Contents.
Administrator Guide Connect CLOUD Contact Center 38

Configuring Connect Contact Center Getting Help2
39 Connect CLOUD Contact Center Administrator Guide
CHAPTER
3. Identifying Agents andSupervisors
Agents handle calls and contacts routed to them by Connect Contact Center. Each agent must be equipped with a telephone, and each agent begins work by logging into the system.
Identifying Agents...................................................................................................... 40
Defining a Class of Service ....................................................................................... 50
Creating Supervisor Accounts................................................................................... 52
Identifying Agents
Follow these steps to identify agents:
1. Creating an agent account.
2. Defining a class of service for the agent.
Note
An agent must not be configured to receive calls as a workgroup or hunt group member while logged in to ECC. An agent’s work group or hunt group activity must be limited to a backup role to be used only when ECC is unavailable.
Connect Contact Center agents must be configured to receive only calls from the application. Configuring an agent to receive calls from both the application and a work group or hunt group can cause major TAPI delays, which may result in a complete system outage.
Administator Guide Connect CLOUD Contact Center 40

Identifying Agents and Supervisors Creating Agent Accounts3
A supervisor can be responsible for the management of one or more agent groups. For each supervisor in the system, you can set preferences and audible alerts that sound when data in a real-time group report reaches or exceeds a threshold.
Supervisors are identified by the following:
1. Creating a supervisor account.
2. Setting the supervisor’s preferences.
3. Defining the supervisor’s alerts.
Creating Agent Accounts
The process of creating agent accounts in Connect Contact Center includes the following steps:
1. Specify prerequisite agent account parameters.
2. Add a new agent account.
3. Define queue handling.
4. Override agent queue profile parameters.
5. Override email agent queue profile parameters.
6. Assign primary groups to the agent.
7. Assign a set of skills to the agent.
8. Require the agent to use wrap-up code.
You can also modify an agent account, and delete an agent account from the system.
Specifying Prerequisite Agent Account Parameters
Before creating a new agent account, specify the following parameters:
The class of service, which is capabilities the agent has access to. Refer to Defining a Class of Service on page 50.
If you want agents to deliver the same service to incoming calls, agent groups. Refer to Creating Agent Groups on page 70.
The agents skills that further refine how calls are routed to the agent. Refer to Identifying Agent Skills on page 162.
WARNING!
Mitel strongly suggests that, for optimal system performance, you submit a service request to add or change user records.
41 Connect CLOUD Contact Center Administator Guide

Creating Agent Accounts Identifying Agents and Supervisors 3
If you want to override the default No Agent destination for the agent’s queue, provide the IRN, device, or script to be used for the new No Agent destination. Refer to Identifying IRNs on page 94, or Chapter 11, Using Call Control Scripts to create the script, or have the number of the device.
If you want to override the default No Agent destination for the email agent queue, provide the IRN, device, or script to be used for the new No Agent destination. Refer to Identifying IRNs on page 94, or Chapter 11, Using Call Control Scripts to create the script, or have the number of the device.
Once specified, these parameters automatically appear as options that you can choose, allowing you to quickly and easily create a new agent account.
Adding a New Agent Account
Adding a new agent account involves specifying general details for an agent. Agents records are automatically set to use a default class of service (COS), which is a configurable set of capabilities to which an agent can have access.
Complete the following steps to add a new agent account:
1. From Connect Contact Center Director, click Agents > Agents.
2. Click New.
If you have an existing agent account with parameters similar to what you want, you can quickly add a new account by selecting it and clicking Copy.
3. In the General tab, specify following information:
Agent Name
Agent Username — The Agent Username must match the Client username defined in the user profile in Connect Director.
Agent ID
WARNING!
Mitel strongly suggests that, for optimal system performance, you submit a service requests to add or change user records.
Note
If you configured email addresses for your agents in Enterprise Contact Center 9.0 or earlier, be aware that the upgrade to Connect Contact Center updates the Agent Username with this data and that this data may not match the user name defined for the agent in the Connect PBX.
If you need to make changes in Connect Contact Center to match what’s defined in the Connect Director, you must restart the Connect Contact Center service for the change to properly sync with the Connect database.
Administator Guide Connect CLOUD Contact Center 42

Identifying Agents and Supervisors Creating Agent Accounts3
Agent Extension — This is the extension assigned to the agent. Leaving this field blank allows the agent to work from any extension. The agent can specify the extension they are working from when they log into Interaction Center.
Class of Service — New agents are automatically assigned the first COS to appear in the list of COS. The COS records are ordered alphabetically.
The available items in the menu have been previously defined. Refer to Creating an Agent Class of Service on page 50 for more information.
Pop Up Profile — Pop up profiles allow you to configure the Interaction Center to launch a web page based on an agent’s log in status and/or the combination of a Service, the state of an interaction, and optionally a call profile field such as Caller ID. Refer to Using Web Pop Up on page 62 for more information.
Agent Queue Profile — Agent queue profiles define common attributes that can be used across multiple agent queues. Select the agent queue profile that you want to assign the agent to. Refer to Creating Agent Queue Profiles on page 100 for more information.
Email Agent Queue Profile — Email agent queue profiles define common attributes that can be used across multiple email agent queues. Select the email agent queue profile that you want to assign the agent to. Refer to Defining Email Agent Queue Profiles on page 129 for more information.
Email Address — Specify the Email Address used by the system to route email contacts to the agent's email address, which is typically the agent's corporate email address.
4. Select Auto Answer Incoming ACD Voice Calls to direct the system to answer calls to this agent if the agent does not answer after one ring.
5. Select Forced Wrap-Up to require the agent to enter a wrap-up code at the end of an interaction.
If multi-interaction is enabled in the COS the agent belongs to, an agent can answer additional interactions before entering a wrap-up code for a previous interaction. Refer to Creating an Agent Class of Service on page 50 for information about enabling multi-interaction.
There may be instances in which an agent needs to move onto the next call without entering a wrap-up code, such as when the caller hangs up immediately after the agent answers the call. In this instance, even if you have enabled forced wrap-up code, the agent can avoid entering a wrap-up code for a call by either exiting Interaction Center, or by logging out of their primary ACD group or the ACD group that routed the call.
6. Click Create.
Tip
Beginning with Connect Contact Center, agent COS is mandatory. If you have defined agent records that do not include a COS in previous versions of ECC, those agents will be assigned to the default COS upon upgrade. The default COS is the first COS record, and COS records are sorted alphabetically.
43 Connect CLOUD Contact Center Administator Guide

Creating Agent Accounts Identifying Agents and Supervisors 3
Defining Queue Handling
Once you have added an agent, you can define how the system routes a queued contact to the agent.
Complete the following steps to define queue handling:
1. From Connect Contact Center Director, click Agents > Agents.
2. In the List View panel, select the agent whose queue handling you want to define, and then click the Queue Handling tab.
3. In the Group Selection area, select options to determine the group from which a call is routed to the agent:
Group List Order — Calls are selected from groups in priority order, as defined in the Agents > Agents > Groups tab.
All Groups — Calls are selected from all groups without consideration of priority.
Target Service Factor (TSF) — Calls are selected from groups with the lowest TSF. The TSF measures how well a group provides a level of service based on the Target Average Speed of Answer (ASA). Use this criteria to balance the load between groups and enable the group with the lowest TSF to improve its score.
4. From the Call Selection area, select the Primary Rule option to define how calls in the group are routed to the agent:
Longest Wait Time — The call in the group with the longest wait time is sent to the agent.
Priority — The call in the group with the highest priority is sent to the agent.
Best Skill Fit — The call in the group with characteristics that best fit the agent’s skills is sent to the agent.
This option requires that you assign a skill to the agent. Refer to Assigning a Set of Skills to an Agent on page 48 for information.
5. If you want to further refine how calls in a group are routed to the agent, select Use Secondary Rule and then select the appropriate Secondary Rule option. These options act on calls that have already been selected based on the Primary Rule.
Longest Wait Time — The call in the group with the longest wait time is sent to the agent.
Priority — The call in the group with the highest priority is sent to the agent.
Best Skill Fit — The call in the group with characteristics that best fit the agent’s skills is sent to the agent.
This option requires that you assign a skill to the agent. Refer to Assigning a Set of Skills to an Agent on page 48 for information.
For example, if the Primary Rule option is Longest Wait Time, and the Secondary Rule option is Priority, the agent is routed the highest priority call that has been waiting the longest.
6. Click Save.
Administator Guide Connect CLOUD Contact Center 44

Identifying Agents and Supervisors Creating Agent Accounts3
Overriding Agent Queue Profile Parameters
Agent queues allow ACD calls to be queued to a specific agent. Agent queues profiles define common attributes that can be used across multiple agent queues and are configured in Routing > Agent Queue Profiles. The profile parameters defined in this entity are automatically applied to every agent assigned to the profile. However, you can override some of these parameters for a specific agent using the Agents > Agents > Agent Queue Overrides tab.
Complete the following steps to override agent queue profile parameters:
1. From Connect Contact Center Director, click Agents > Agents.
2. In the List View panel, select the agent whose profile parameters you want to override, and then click the Agent Queue Overrides tab.
3. If you want to override the IRN callback ID, select Change Caller ID and enter the new Caller ID for the agent.
4. To override the No Agent destination for the agent, select Change No Agent Destination. Next, from the Destination Type drop-down menu, choose the new No Agent destination for the agent.
5. Specify the details of the destination using the following options:
(System Default) — This is the default incomplete destination setting defined in System Parameters > Routing Preferences > Incomplete Destinations. Refer to Determining the Incomplete Destination on page 160 for more information.
IRN — If the No Agent destination is an IRN, choose the IRN from the drop-down menu. The IRNs in the menu have been previously defined. Refer to Identifying IRNs on page 94 for more information.
Device — If the No Agent destination is a device, enter the device number in this field.
Script — If the No Agent destination is a script, choose the script from the drop-down menu. The scripts in the menu have been previously defined, as explained in Chapter 11, Using Call Control Scripts.
Agent Queue — If the No Agent destination is another agent queue, choose the agent whose queue is to be used from the drop-down menu. The agents in the menu have been previously defined, as explained in Creating Agent Accounts on page 41.
6. Click Save.
Note
This tab is enabled only if the selected agent is associated with an agent queue profile.
45 Connect CLOUD Contact Center Administator Guide

Creating Agent Accounts Identifying Agents and Supervisors 3
Overriding Email Agent Queue Profile Parameters
Email agent queues allow email calls to be queued to a specific agent. Email agent queues profiles define common attributes that can be used across multiple agent queues and are configured in Email > Email Agent Queue Profiles. The parameters defined in this entity for a profile are automatically applied to every agent assigned to the profile. However, you can override some of these parameters for a specific agent using the Agents > Agents > Email Agent Queue Overrides tab.
Complete the following steps to override email agent queue profile parameters:
1. From Connect Contact Center Director, click Agents > Agents.
2. In the List View panel, select the agent whose profile parameters you want to override, and then click the Email Agent Queue Overrides tab.
3. To override the No Agent destination for the agent, select Change No Agent Destination.
4. If you have chosen to override the no agent destination and want emails to continue to queue in the email agent queue while the agent is not logged in, select Email queues up in Agent Queue.
5. In Destination Type, choose the new No Agent destination for the agent:
(System Default) — This is the default incomplete destination setting defined in System Parameters > Routing Preferences > Incomplete Destinations. Refer to Determining the Incomplete Destination on page 160 for more information.
IRN — If the No Agent destination is an IRN, choose the IRN from the drop-down menu. The IRNs in the menu have been previously defined. Refer to Identifying IRNs on page 94 for more information.
Device — If the No Agent destination is a device, enter the device number in this field.
Script — If the No Agent destination is a script, choose the script from the drop-down menu. The scripts in the menu have been previously defined, as explained in Chapter 11, Using Call Control Scripts.
Email Agent Queue — If the No Agent destination is another email agent queue, choose the agent whose email agent queue is to be used from the drop-down menu. The agents in the menu have been previously defined, as explained in Creating Agent Accounts on page 41.
6. Click Save.
Note
This tab is enabled only if the selected agent is associated with an email agent queue profile.
Administator Guide Connect CLOUD Contact Center 46

Identifying Agents and Supervisors Creating Agent Accounts3
Assigning Primary Groups to an Agent
After a new agent has been added to the system, you can assign existing groups to the agent as their primary groups. A maximum of 64 primary groups can be assign to each agent.
Using Interaction Center, agents can log into their primary groups. Agents can also log into other groups if the Agents > Class of Service > Initiate Specific Login/Logout option is selected, as described in Creating an Agent Class of Service on page 50.
Complete the following steps to assign groups to an agent:
1. From the Connect Contact Center Director, click Agents > Agents.
2. In the List View panel, select the agent you want to assign a group, and then click the Groups tab.
The Selected list displays all the groups currently assigned to the agent. In addition, if the agent is assigned to an agent queue profile, Agent Queue is listed here.
3. To add a group to the agent’s assignment, select the group in the Available list, and then click
. To add all groups to the agent’s assignment, click .
The groups in the Available list have been previously defined. Refer to Creating Agent Groups on page 70 for information about creating agent groups.
4. To remove a group from the agent’s assignment, select the group in the Selected list, and then
click . To remove all groups from the agent’s assignment, click .
5. Once the list of groups for the agent is correct in the Selected list, reorder the groups by using the
and to reflect the order that you want calls to be routed to the agent through the groups.
6. Click Save.
Note
Adding or removing a group from an agent record while the agent has an active call will prevent the agent from answering incoming ACD interactions (voice/chat/email). Queued ACD interactions will not be presented to the agent until the active call is disconnected from the system.
Note
You cannot unassign an agent queue or an email agent queue from the Selected list using this feature. To unassign an agent queue or an email agent queue, navigate to the Agents > Agents > General > Agent Queue Profile or Email Agent Queue Profile drop-down menu and choose Not Defined. If the agent queue is used as a routing destination by a service, IRN, or call control script, it cannot be unassigned from the agent until it is no longer used as a destination. If you attempt to unassign an agent queue that is used as a routing destination, the application displays a warning in red font that states where the agent queue is used and what action it is used for.
47 Connect CLOUD Contact Center Administator Guide

Creating Agent Accounts Identifying Agents and Supervisors 3
Assigning a Set of Skills to an Agent
You can assign a set of skills to an agent to further refine how calls are routed. The system determines call routing based first on call priority and then on agent skill. If more than one agent is available to receive a call, the system routes the call based on the best skill fit.
For example, if you have specified that the agent selects calls by Best Skill Fit, which is an option on the Agents > Agents > Queue Handling tab, the system tries to match the skill of this agent with the specific requirements of a queued call.
An agent skill is measured by two factors: ability and preference. Ability is an agent’s capacity to answer calls that require a particular skill. Preference is the priority to have an agent answer a call for a particular skill. The system uses both these numbers to create the agent’s skill score, which is calculated as ability * preference/100.
Call routing is determined by subtracting the skill value of the call from the agent’s skill score. If the outcome is negative, it is considered zero. The lower the number, the better the match.
For example, a call requires a skill with a score of 75. Agent A has a skill value of 50 for ability and 100 for preference. Agent B has a skill value of 75 for ability and 75 for preference. The system calculates skill based call routing as
Agent A = 75 – (50*100/100) = 25
Agent B = 75 – (75*75/100) = 18.75
and routes the call to Agent B.
Zero Skills Routing
If an incoming call has a required skill, and no agents in the queue have a Best Skill Fit score that matches the requirement, the call will be queued until an agent with an acceptable Best Skill Fit score is available, or the call will be routed to another specified destination.
Complete the following steps to assign agent skills:
1. From Connect Contact Center Director, click Agents > Agents.
2. In the List View panel select the agent to whom you want to assign a skill, and then click the Skills tab.
3. To assign a skill to the agent, select the skill in the Available list, and then click . To assign all
skills to the agent, click .
By default, the agent is automatically assigned an ability and preference value of 50 for the skill, with a score of 25.
Note
Changing an agent’s skills will not affect calls that are in queue. For example, if there is a call in queue that requires an agent with Spanish-speaking skills, and there is no agent available with those skills, adding Spanish to an active agent’s skills to accommodate the need will not route the call to that agent. The call will remain in queue.
Administator Guide Connect CLOUD Contact Center 48

Identifying Agents and Supervisors Creating Agent Accounts3
The skills in the Available list have been previously defined. Refer to Identifying Agent Skills on page 162 for information.
4. To change the skill level of the agent, select the skill in the Selected list. In the Ability and Preference fields, enter the correct value, with 100 being the highest value.
5. To unassign a skill from the agent, select the skill in the Selected list, and then click . To
unassign all skills from the agent, click .
6. Click Save.
Modifying an Agent Account
Complete the following steps to modify an agent account:
1. From Connect Contact Center Director, click Agents > Agents.
2. In the List View panel select the agent account you want to modify, and then click the General tab.
3. Modify the agent account as described in Creating Agent Accounts on page 41.
4. To update how the system routes a queued contact to the agent when they become available, click the Queue Handling tab and modify the options, as explained in Defining Queue Handling on page 44.
5. If you want to modify the parameters of the agent queue profile or email agent queue profile, click the Agent Queue Overrides tab or the Email Agent Queue Overrides tab and make the appropriate changes to the options. Refer to Overriding Agent Queue Profile Parameters on page 45 or Overriding Email Agent Queue Profile Parameters on page 46 for information.
6. To change the agent’s group assignments, click the Groups tab and specify the correct groups in the Available list. Refer to Assigning Primary Groups to an Agent on page 47 for details
7. To change the agent’s skill set, click the Skills tab. Edit or remove a skill, as explained in Assigning a Set of Skills to an Agent on page 48.
8. Click Save.
Deleting an Agent Account
You can delete an agent account from the system. However, if the agent’s personal agent queue or email agent queue is used as a routing destination by a service, IRN, or call control script, the agent cannot be deleted until removed from that agent queue profile or email agent queue profile or until the profile is no longer a destination. If you attempt to delete an agent account in this scenario, Connect Contact Center displays information about what destination the agent queue or email agent queue is used for.
Complete the following steps to delete an agent:
1. From Connect Contact Center Director, click Agents > Agents.
2. In the List View panel select the agent account you want to delete, and click Delete.
49 Connect CLOUD Contact Center Administator Guide

Defining a Class of Service Identifying Agents and Supervisors 3
Defining a Class of Service
A class of service (COS) is a configurable set of agent capabilities and configuration settings for Interaction Center.
Complete the following procedures to define a COS:
1. Create a class of service.
2. Assign agents to the class of service.
You can also modify a class of service and delete a class of service from the system.
Agents whose skills are frequently required can also be assigned to a group, such as a group of agents who are fluent in Spanish. Adding an Agent Group on page 71 provides details about developing skill-based groups.
Creating an Agent Class of Service
Complete the following steps to create a new agent class of service:
1. From Connect Contact Center Director, click Agents > Class of Service > New.
If you have an existing COS with parameters similar to what you want, you can quickly create a new COS by selecting it and clicking Copy. Then make the necessary changes to the COS details, as explained here.
2. In the General tab, specify a COS Name.
3. In Package Name, select the appropriate package to associate with the COS. Packages define features and functionality that the agent will have access to.
4. In the Functions in Web Client area, select the Interaction Center window features you want to include in the COS. These options define how the Interaction Center appears and functions for the agent:
ACD Call Pickup from Queues — Lets the agent choose a call to answer in the Interaction Center, rather than having calls be automatically routed. This function is available only for the Agent Advanced package.
Specific Login/Logout — Allows the agent, using the Interaction Center, to log in or out of a particular group. By default, when an agent logs into groups in the Interaction Center, the agent is automatically logged into all groups of which they are a member.
Automatic Login to Queue — Allows the agent to automatically log into his or her queues when logging into the Interaction Center.
Sound Notifications — Alerts the agent to interactions with sound.
Wrap-Up Code Selection — Allows the agent to select a wrap-up code for the interaction. This function is available only for the Agent Advanced and Agent Standard packages.
Allow Queue Monitor — Allows the agent to monitor the queue(s) s/he is assigned to.
Administator Guide Connect CLOUD Contact Center 50

Identifying Agents and Supervisors Creating an Agent Class of Service3
Help Request — Allows the agent to request a supervisor’s help with an interaction.
Key Performance Indicators (KPIs) — Allows the agent to view the KPIs associated with the KPI board you select. Refer to Using KPI Boards on page 64 for information about defining KPI boards.
Custom Queue Monitor — Allows the agent to define the queues s/he monitors.
Language — Displays the languages you can configure the COS to use.
5. Select the appropriate options in the Agent Queues area to add personal agent queue features to the COS:
Routing to Personal Agent Queue — Allows the agent to move a call from a group queue to their personal agent queue using Interaction Center. Agents can also transfer a call from their agent queue directly to their extension as well as transfer an active call back to their agent queue.
Automatic Log into Agent Queue — Allows the agent to automatically log in or out of their agent queue by clicking the Login Primary ACD Groups / Logout Primary ACD Groups buttons in Interaction Center.
Automatic Log into Email Agent Queue — Allows the agent, using Interaction Center, to automatically log in or out of their email agent queue by clicking the Login Primary ACD Groups / Logout Primary ACD Groups buttons.
6. Select the appropriate Multi Interactions settings:
Maximum number of total concurrent interactions allowed
Maximum number of concurrent email interactions allowed
Maximum number of concurrent chat interactions allowed
7. Click Create.
Tip
The Agent Queues settings are available only for the Agent Advanced and Agent Standard packages.
Note
Maximum number of total concurrent interactions allowed must be set to a value greater than the combined totals in Maximum number of concurrent email interactions allowed and Maximum number of concurrent chat interactions allowed.
Note
Changing the values in Multi Interactions does not immediately impact calls in queue. For example, if there are calls in queue, changing the Maximum number of total concurrent interactions allowed does not immediately route calls to affected agents. Routing is triggered by agent activities such as release/resume, logging in, and logging out.
51 Connect CLOUD Contact Center Administator Guide

Modifying a Class of Service Identifying Agents and Supervisors 3
Modifying a Class of Service
Complete the following steps to modify a COS:
1. From Connect Contact Center Director, click Agents > Class of Service.
2. In the List View panel, select the COS you want to modify.
3. Use the General tab to edit the COS name and set of Interaction Center features if necessary. Refer to Creating an Agent Class of Service on page 50 for information about the options on this tab.
4. Click Save.
Deleting a Class of Service
Complete the following steps to delete a COS:
1. From Connect Contact Center Director, click Agents > Class of Service.
2. In the List View panel, select the COS you want to delete.
3. Click Delete.
Creating Supervisor Accounts
A supervisor in the application can be responsible for the management of one or more agent groups. The supervisor accounts define the permissions for meeting these responsibilities.
The process of creating supervisor accounts in Connect Contact Center includes the following steps:
1. Set prerequisite supervisor account parameters.
2. Add a new supervisor account.
3. Assign groups to a supervisor.
4. Manage supervisor reports.
You can also modify a supervisor account, and delete a supervisor account from the system.
WARNING!
Mitel strongly suggests that, for optimal system performance, you submit a service request to add or change user records.
Administator Guide Connect CLOUD Contact Center 52

Identifying Agents and Supervisors Supervisor Capabilities3
Supervisor Capabilities
Supervisor permissions dictate what adds and changes supervisors can make in the contact center system.The following table shows read and write access to entities for the available levels of permission.
Supervisors can move, add, and change the following records in Connect CLOUD Contact Center with Supervisor Administrator and Entity Administrator permissions: Agent Records
COS Profile — Including Skill and Queue behavior KPI board Call Profile List Pop Up Profile
Group Records Setting Stats for reporting and Thresholds
Services Records IRN Records Email Records: Profile, IRN, Service Group Chat Records: IRN, Service, Group Agent Queue Profile Records Advanced Call Flow
Skills Priority Time of Day Routing/Schedules
Scripting of any kind — Announcements (mandatory, queue), Auto Attendant SQL scripting
Supervisor Records COS Profiles
Dial Lists IVR Files Schedules Tagged Codes, such as Wrap-Up and Release codes System Parameters
Table 1: Supervisor Permissions
Permission Level
Supervisor Administration
Contact Center Director
GCCSReal-Time Reports
Historical Reports
Supervisor Administrator
X X X X X
Entity Administrator
X X X X
Entity Monitor* X X
*The system administrator can specify groups for which entity monitors can view real-time reports.
WARNING!
Mitel strongly suggests that, for optimal system performance, you submit service requests to add or change user records and/or to perform IRN changes.
53 Connect CLOUD Contact Center Administator Guide

Setting Prerequisite Supervisor Account Parameters Identifying Agents and Supervisors 3
Setting Prerequisite Supervisor Account Parameters
Before creating supervisor accounts you can specify the following parameters:
The agent name used by a supervisor to start Interaction Center and bypass the Interaction Center logon procedure. Refer to Creating Agent Accounts on page 41 for more information.
Alerts a supervisor hears when a a real-time group report reaches or exceeds a threshold. Refer to Defining Supervisor Alerts on page 59 for information.
Agent groups to assign to the supervisor. Refer to Creating Agent Groups on page 70 for details.
Once specified, these parameters automatically appear as options that you can choose, allowing you to more quickly create supervisor accounts.
Adding a Supervisor Account
Complete the following steps to add a supervisor account:
1. From Connect Contact Center Director, click Supervisors > Accounts > New.
If you have an existing supervisor account with parameters similar to what you want, you can quickly create a new account by clicking Copy.
2. In the General tab, specify the following:
Name
Username — This is a username that matches the Client username defined in the user profile in Connect Director.
Sup COS — The Sup COS is a supervisor class of service that specifies supervisor capabilities. Refer to Creating a Supervisor Class of Service on page 58 for information about setting up this COS.
3. In Agent Name, choose an agent name for the supervisor.
Note
All IVR port configuration is handled by your Mitel representative.
Tip
Supervisors must log in to the Interaction Center before logging in to any other supervisor applications. Typical system configuration forces the supervisor to change their password upon initial login, and this procedure must be completed in the Interaction Center.
Note
In order for supervisors to use the Interaction Center to monitor agents, the supervisor record must be assigned an agent name.
Administator Guide Connect CLOUD Contact Center 54

Identifying Agents and Supervisors Assigning Groups to a Supervisor3
The agent names in the menu have been previously defined. Refer to Creating Agent Accounts on page 41 for details.
4. In Alert Type, choose the audio alert the supervisor hears when a a real-time group report reaches or exceeds a threshold.
The alerts in the menu have been previously defined. Refer to Defining Supervisor Alerts on page 59 for information.
5. In the Supervisor Permissions area, select the appropriate permissions for the supervisor:
Supervisor Administrator — Access and modify system entities.
Entity Administrator — Access and modify all system entities except supervisor accounts.
Entity Monitor — Access specified Connect Contact Center reports.
Refer to Supervisor Capabilities on page 53 for more information about these permission options.
6. Select View Real-Time Reports (Agent Manager) to allow the supervisor to view and update real-time reports using Agent Manager. This field is available only if you have selected Entity Monitor in the Supervisor Permissions area.
7. Click Create.
Assigning Groups to a Supervisor
After a supervisor has been added to the system, you can assign agent groups for the supervisor to manage. An agent group can be managed by several supervisors.
You also assign groups to a supervisor to enable the running of reports on these entities.
The Groups tab is available if the selected supervisor has the Entity Monitor permission.
Complete the following steps to assign groups to a supervisor:
1. From Connect Contact Center Director, click Supervisors > Accounts.
2. In the List View panel, select the supervisor to whom you want to assign groups, and then click the Groups tab.
3. To add a group to the supervisor’s assignment, select the item in the Available list, and then click
. To add all items to the supervisor’s assignment, click .
The groups in the Available list have been previously defined. Refer to Creating Agent Groups on page 74 for information.
4. To remove a group from the supervisor’s assignment, select the item in the Selected list, and then
click . To remove all items from the supervisor’s assignment, click .
5. To enable the supervisor to view reports for a group, select the group in the Selected list and then select Real-Time Reports and/or Historical Reports.
55 Connect CLOUD Contact Center Administator Guide

Managing Supervisor Reports Identifying Agents and Supervisors 3
6. Click Save.
Managing Supervisor Reports
You can view the list of real-time, historical, and scheduled reports that belong to a supervisor. This is useful if you need to manage the reports of a supervisor who is no longer part of your organization.
Complete the following steps to manage supervisor reports:
1. From Connect Contact Center Director, click Supervisors > Accounts.
2. In the List View panel select the supervisor whose list of reports you want to manage.
3. In the Details View panel, click either the Real-Time Reports, Historical Report Templates, or Historical Reports Schedules tab to display information about the selected supervisor’s reports.
4. To reassign a report to another supervisor, select the report, choose a supervisor from the User drop-down menu, and then click Save.
Modifying a Supervisor Account
Complete the following steps to modify a supervisor account:
1. From Connect Contact Center Director, click Supervisor > Accounts.
2. In the List View panel, select the supervisor whose account you want to modify.
3. Make the appropriate changes to the account details by clicking the General tab and using the options described in Adding a Supervisor Account on page 54.
Supervisors with Agent Accounts
When updating the username for a supervisor record that has an associated agent record, you must unassign the agent from the supervisor before making the change.
Complete the following steps to unassign the agent from the supervisor, change the agent username, and then change the supervisor name:
a. Unassign the agent from the supervisor record:
1. Navigate to Supervisors > Records.
2. Select the supervisor for which you want to change the username.
3. Select Not Defined in the Agent Name field.
b. Change the agent username:
1. Navigate to Agents > Records.
2. Select the agent for which you want to change the username, and enter the Agent username exactly as defined for the user in Connect Director.
Administator Guide Connect CLOUD Contact Center 56

Identifying Agents and Supervisors Deleting a Supervisor Account3
3. This information is defined for the user on in Connect Director in the Users > Users > General page.
4. Click Save.
c. Change the supervisor username:
1. Navigate to Supervisors > Records.
2. Select the supervisor associated with the agent record you modified in step b.
3. Change the Username to the same user name you specified for the agent record in step b.
4. Click Save.
4. To change the groups assigned to the supervisor, use the Groups tab. For details, refer to Assigning Groups to a Supervisor on page 55.
5. Click Save.
Deleting a Supervisor Account
Complete the following steps to delete a supervisor account:
1. From Connect Contact Center Director, click Supervisor > Accounts.
2. In the List View panel, select the supervisor account that you want to delete and click Delete.
Setting Supervisor Preferences
For each supervisor in the system, you can set Connect Contact Center Director preferences such as the display language, the specific messages shown, and the pages listed in Favorites on the Navigation panel.
Complete the following steps to set supervisor preferences:
1. From Connect Contact Center Director, click Supervisors > Preferences.
2. In the List View panel, select the supervisor whose preferences you want to set.
3. In the Details View panel, use the options in the Default Settings tab:
Language in Director — The display language of Connect Contact Center Director.
Always Warn About Unsupported Browser — Displays a warning when Connect Contact Center Director is started in an unsupported browser.
Always Confirm Deletion — Displays a message requiring a confirmation whenever an item is deleted from the system.
57 Connect CLOUD Contact Center Administator Guide

Creating a Supervisor Class of Service Identifying Agents and Supervisors 3
Available and Selected List of Pages — Displays the pages in Connect Contact Center Director. To add a page to the supervisor’s Favorites, select the page in the Available list, and
then click . To add all pages, click .
To remove a page from the supervisor’s Favorites, select the page in the Selected list, and
then click . To remove all entities, click .
To change the order in which a page is listed in Favorites, select the page in the Selected list
and then click either or to move the entity to the correct position in the list.
4. Click Save.
Creating a Supervisor Class of Service
Complete the following steps to create a supervisor class of service:
1. From Connect Contact Center Director, click Supervisors > Class of Service > New.
If you have an existing COS with parameters similar to what you want, you can quickly create a new COS by selecting it and clicking Copy. You can modify the COS details as explained here.
2. In the General tab, specify a COS Name.
3. Configure the appropriate web client functions for the supervisor:
Allow Queue Monitor — Gives the supervisor access to monitoring queues.
Allow Agent Monitor — Gives the supervisor access to monitoring agents.
Key Performance Indicators (KPIs) — Allows the agent to view the KPIs associated with the KPI board you select. Refer to Using KPI Boards on page 64 for information about defining KPI boards.
Custom Queue Monitor — Gives the supervisor access to summary statistics about active queues as specified by a call profile list. Refer to Creating a Call Profile List on page 67 for information about defining call profile lists.
Max Agent Manager Reports — Maximum number of Agent Manager reports the supervisor can have open simultaneously. The system max is defined by the administrator. The system max is 50.
Note
Monitoring requires configuration in Connect Director as well as in Connect Contact Center Director. The Connect user record related to the supervisor record in Connect Contact Center must be configured to initiate monitoring, and the Connect user records related to agent records in Connect Contact Center must be configured to accept monitoring. These settings are available on the Telephony Features Permissions page in Connect Director. Refer to the Connect Administration Guide for more information.
Administator Guide Connect CLOUD Contact Center 58

Identifying Agents and Supervisors Modifying a Supervisor Class of Service3
Agent Manager Refresh Rate — The rate at which the Agent Manager reports that are open will refresh. This value is read-only and is calculated by the system based on the number of simultaneous Agent Manager reports specified in Max Agent Manager Reports:
< 5 Agent Manager Reports — One second (1s).
=> 5 and <=12 Agent Manager Reports — Seven seconds (7s)
> 12 Agent Manager Reports — 10 seconds (10s)
4. Click Create.
Modifying a Supervisor Class of Service
Complete the following steps to modify a COS:
1. From Connect Contact Center Director, click Supervisors > Class of Service.
2. In the List View panel, select the COS you want to modify.
3. Use the General tab to edit the COS name supervisor functions if necessary. Refer to Creating a Supervisor Class of Service on page 58 for information about the options on this tab.
4. Click Save.
Deleting a Supervisor Class of Service
Complete the following steps to delete a COS:
1. From Connect Contact Center Director, click Supervisors > Class of Service.
2. In the List View panel, select the COS you want to delete.
3. Click Delete.
Defining Supervisor Alerts
When data in a supervisor’s real-time group report reaches or exceeds a threshold, an audible alert can sound.
Audible alert levels are indicated in a group report by the red or yellow threshold. The red threshold indicates the value is in a high warning range; the yellow threshold indicates that the value is in a low warning range. Thresholds are set in the Groupings > Groups > Thresholds tab.
Two default files are used as the audible alerts: warning.wav and alarm.wav. These files are located on the supervisor’s machine in ShoreTel\Contact Center\Supervisor\Bin. When the threshold level meets or exceeds the yellow level, the sound in the warning.wav file is used. The alarm.wav file sounds when the threshold level meets or exceeds the red level. Custom alerts can be used by recording or using an existing WAV file. These custom sounds must be saved in the ShoreTel\Contact Center\Supervisor\Bin directory, with the filenames custom_warning.wav and custom_alarm.wav, respectively.
59 Connect CLOUD Contact Center Administator Guide

Defining Supervisor Alerts Identifying Agents and Supervisors 3
Refer to Examples of Using the Supervisor Alerts Options on page 61 for examples of selecting the appropriate alert options.
Complete the following steps to define audible alerts:
1. From Connect Contact Center Director, click Supervisors > Alerts.
2. Click New.
If you have an existing alert with parameters similar to what you want, you can quickly create a new alert by selecting it and clicking Copy.
3. In the General tab, specify a Name for the alert.
4. In the Red Settings area, select the appropriate options for a red alert:
Alert on Change to Red State — Select to turn on the red alert feature.
Source — The alert can either be a system beep or sound from a WAV file.
Play — The number of times the sound will play. The sound can play once, loop continuously, play once during an interval, or loop continuously during an interval.
Maximum Duration — The maximum length of time, in seconds, an alert will sound. If the selected file is shorter than the maximum duration, and the Play option is Loop, the file will repeat up to the duration. If the file is longer, it will only play up to the duration.
You can use this option to limit the playing of a long alert WAV file within a specific time duration. For example, if you want only the first 3 seconds of a 5-second audio file to be heard, specify a 3-second maximum duration.
Interval — The length of time, in seconds, of the interval. This time must be equal to or greater than the Maximum Duration time.
If the selected file is shorter than the interval, and the Play option is Once with Interval, at the start of each interval the sound will play once. If the file is shorter than the interval, and the Play option is Loop with Interval, the sound will play up to the interval and then start over.
You can use the Once with Interval option to create a period of silence between the restart of the alert. If the interval is longer than the length of the audio file, the time difference will be the amount of silence before the next interval begins.
5. In the Yellow Settings area, select the appropriate options for a yellow alert:
Alert on Change to Yellow State — Select to turn on the yellow alert feature.
Source — The alert can either be a system beep or sound from a WAV file.
Play — The number of times the sound will play. The sound can play once, loop continuously, play once during an interval, or loop continuously during an interval.
Note
WAV files are in the following format: u-law, 8000Hz, 8 bit, and mono.
Administator Guide Connect CLOUD Contact Center 60

Identifying Agents and Supervisors Defining Supervisor Alerts3
Maximum Duration — The maximum length of time, in seconds, an alert will sound. If the selected file is shorter than the maximum duration, and the Play option is Loop, the file will repeat up to the duration. If the file is longer, it will only play up to the duration.
You can use this option to limit the playing of a long alert WAV file within a specific time duration. For example, if you want only the first 3 seconds of a 5-second audio file to be heard, specify a 3-second maximum duration.
Interval — The length of time, in seconds, of the interval. This time must be equal to or greater than the Maximum Duration time.
If the selected file is shorter than the interval, and the Play option is Once with Interval, at the start of each interval the sound will play once. If the file is shorter than the interval, and the Play option is Loop with Interval, the sound will play up to the interval and then start over.
You can use the Once with Interval option to create a period of silence between the restart of the alert. If the interval is longer than the length of the audio file, the time difference will be the amount of silence before the next interval begins.
6. Click Create.
Examples of Using the Supervisor Alerts Options
ScenarioWav File Size
Play OptionMaximum Duration Option
Interval Option
Play the entire audio file once. 2 seconds Once Greater than or equal to 2 seconds
n/a
Play just the 1st second of the audio file once.
2 seconds Once 1 second n/a
Play the entire audio file once for each interval, with 2 seconds of silence, before the start of the next interval.
2 seconds Once with Interval
0 seconds 4 seconds
Play just the 1st second of the audio file once, for each interval, with 1 second of silence before the start of the next interval.
2 seconds Once with Interval
1 second Greater than or equal to 2 seconds
Play the entire audio file once, for each interval, with 4 seconds of silence before the start of the next interval.
2 seconds Once with Interval
5 seconds 6 seconds
Repeatedly play the entire audio file (i.e. without stopping and without silence).
2 seconds Loop 0 seconds n/a
Repeatedly play just the 1st second of the audio file.
2 seconds Loop 1 second n/a
61 Connect CLOUD Contact Center Administator Guide

Configuring Additional Agent and Supervisor Settings Identifying Agents and Supervisors 3
Configuring Additional Agent and Supervisor Settings
After you configure agents and supervisors, you can configure the following additional settings to determine how system interactions work for the agent(s) and how supervisors can monitor agent activity:
Web Pop Up — Use this feature to configure web pages to display in relation to particular interactions and states.
KPI Boards — Use this feature to configure key performance information (KPIs) to display on the Interaction Center.
Using Web Pop Up
The web pop up feature allows you to configure the Interaction Center to launch a third-party web page based on the agents’ log-in state or based on the combination of a Service, the state of an interaction, and optionally a call profile field such as Caller ID.
You can launch a web page based on the agent’s log-in status. For example, you can configure a pop up profile to launch an intranet site to share product news when an agent logs in.
You also can use pop up profiles to provide a way for the agent to review/enter information pertaining to an interaction. For example, you can launch a Customer Relationship Management (CRM) web page specific to a customer based on the Caller ID. When an agent enters wrap-up, launching a CRM web page would allow the agent to enter pertinent information in the CRM application.
Repeatedly play the entire WAV file for the duration.
2 seconds Loop 5 seconds n/a
Repeatedly play the entire audio file (i.e. without stopping and without silence), before the start of the next interval.
2 seconds Loop with Interval
0 second 1 second
Repeatedly play just the 1st second of the audio file, for each interval, with 1 second of silence, before the start of the next interval.
2 seconds Loop with Interval
1 second 2 seconds
Repeatedly play the entire audio file for the duration, with 1 second of silence, before the start of the next interval.
2 seconds Loop with Interval
5 seconds 6 seconds
ScenarioWav File Size
Play OptionMaximum Duration Option
Interval Option
Administator Guide Connect CLOUD Contact Center 62

Identifying Agents and Supervisors Using Web Pop Up3
The web page launches according to the settings you have configured for your browser. For example, if you are using Internet Explorer and you have configured the browser to open new pages as tabs in the a browser window, the web page associated with the interaction trigger will open in a new tab.
Complete the following steps to configure a pop up profile:
1. From Connect Contact Center Director, click Agents > Pop Up Profiles.
2. Click New.
3. In the General tab, enter a Name for the pop-up profile.
4. Click the Agents tab, and in the Available list, select the agents to which the profile applies, and then click .
5. In the Interaction Triggers section, select one or more of the agent states that will trigger the pop up:
log-in
log out
release
6. In the URL(s) section, enter the URL(s) for the web sites you want to launch for each agent state that you selected.
7. Click the Services tab, and in the Available list, select the service to which the profile applies, and then click .
8. In the Interaction Triggers section, select one or more of the interactions that will trigger the pop up:
reserved
presented
accepted
wrap-up
ended
9. In the URL(s) section, enter the URL(s) for the web sites you want to launch for each interaction trigger state that you selected.
10. In the Call Profiles list, select applicable call profiles, and then click the Insert field name into target URL button to the right of the URL specification to add the selected call profile field.
For example, when you want to pass the customer name to a CRM application, select Mandatory Field/Customer Name in Call Profiles, and then click the Insert field name into target URL button to the right of the URL you specified for the CRM web page.
Refer to the Connect Contact Center Applications Interface Guide for information about mandatory call profiles and setting up custom call profiles.
You can specify up to four URLs for each interaction trigger. While the first URL is required, the other three are optional.
63 Connect CLOUD Contact Center Administator Guide

Using KPI Boards Identifying Agents and Supervisors 3
Specifying optional URLs and call profile fields helps ensure that a web page launches even if data for an included call profile field is null. For example, if you specify the Mandatory Field/Customer Name call profile field in the mandatory URL, and the data passed to the web page does not contain the customer name, the system will attempt to launch the next URL/call profile field combination that is specified in the second URL field.
Using KPI Boards
The KPI Boards feature allows you to configure the Interaction Center to include key performance information (KPI) about specific interactions. You can configure up to 12 different interaction metrics to include in the KPI Board.
You enable the KPI feature for agents by class of service (COS). If you have migrated to Connect Contact Center from a previous version of ECC, you must modify existing agents’ COS settings to enable the KPI board feature.
Complete the following steps to configure a KPI Board:
1. In Connect Contact Center Director, click Agents > KPI Board.
2. In the Board Config area, enter a Name for the board.
3. Complete the following steps to determine the label and data you want to display. You can display up to six different data points with unique labels:
a. In the KPI Config area, enter a KPI Name and select the Group you want to configure the KPI Board for.
The KPI Name is the label for the area in which the selected interaction metric displays on the KPI Board at the bottom of the Interaction Center page.
b. In the Available list, select the interaction metric you want to display on the KPI Board, and then click .
4. Repeat step 3 for each interaction metric you want to display on the KPI Board.
5. Click Create.
Tips
Only one web page is launched. The first URL/call profile combination that contains call profile information that is not null is the web page that will launch. The system will ignore any other URL/call profile combinations that you specify.
To simply display a web page without including call profile fields, specify the target URL in the first URL field.
Administator Guide Connect CLOUD Contact Center 64

Identifying Agents and Supervisors Using Call Profile Lists3
Using Call Profile Lists
Call profile lists allow you to configure the caller information that appears in the Interaction Center as well as the information that appears for supervisors when they want to monitor a queue in Interaction Center. You specify call profile information by service. For example, if you have a service set up for voice calls, you can configure a call profile list that displays information such as the caller name and the caller phone number for an incoming voice call.
The following is a list of mandatory fields in the call profile. The field names in the call profile are case-sensitive.
Table 2: Call Profile Mandatory Fields
Call Profile Name DDE Name Description
_STCC_ANI ANI Automatic Number Identification (ANI) transmits the customer’s telephone number and delivers it to your call center’s telephone system.
Note: The format of the ANI call profile field includes a plus sign (+) before the ANI number. This facilitates external incoming calls (i.e. from outside your site).
_STCC_Agent Queue agent_queue Indicates that the call is being handled by a personal agent queue.
_STCC_Group acd_group The internal group id related to the call
_STCC_Original Destination
called The original destination of the call
_STCC_Trunk trunk PBX and call-type depended
_STCC_Call ID callid The ID of the call
_STCC_DNIS DNIS The DNIS of the call
_STCC_calling calling The ANI (caller ID) of the caller
_STCC_Type calltyp Call type (Voice, Chat, Email, Callback, Abandoned, Web Callback, Dial List)
_STCC_Media Media Call media (WEB, VOICE, EMAIL)
_STCC_Priority Priority Priority of the call
_STCC_Service Service Service that handles the call
_STCC_Customer Number CUSTOMER_NUMBER Identifier number of the customer (if internal, the Customers Table is used)
_STCC_Customer Name CUSTOMER_NAME Customer name (if internal the Customers Table is used)
_STCC_ACD Enter Date ACD_ENTER_DATE Date the call entered Contact Center
_STCC_ACD Enter Time ACD_ENTER_TIME Time the call entered Contact Center
_STCC_Queue Position Q_POSITION Call position in the queue
65 Connect CLOUD Contact Center Administator Guide

Using Call Profile Lists Identifying Agents and Supervisors 3
_STCC_Average Queue Time
AVERAGE_Q_TIME Expected average wait time in the queue.
_STCC_Call Back Time CALLBACK_TIME Callback time set by caller (if empty, Abandoned Call)
_STCC_Call Back Destination
CALLBACK_DEST Callback destination
_STCC_Language LANGUAGE The language associated with the call (0=English, 1=Hebrew, 2=Russsian, 3=Arabic, 4=Mexican Spanish)
_STCC_Agent Extension AGENT_EXT The agent’s telephone extension number
_STCC_Agent Number AGENT_NUMBER Number used to identify the agent
_STCC_Dial List ID DIAL_LIST_ID The ID of the dial list
_STCC_Start Queue Time START_QUEUE_TIME The time when a call enters the queue
_STCC_Agent PSW AGENT_PSW Agent password
_STCC_Execute Req EXECUTE_REQ For any request to be executed
_STCC_Trunk Number TRUNK_NUMBER The number of the trunk
_STCC_Email To EMAIL_TO The text in the To field of the email
_STCC_Email CC EMAIL_CC The text in the CC field of the email
_STCC_Email Subject EMAIL_SUBJECT The text in the Subject field of the email
_STCC_Email From EMAIL_FROM The text in the From field of the email
_STCC_Email To EMAIL_REPLY_TO The text in the Reply To field of the email
_STCC_Email Sent Date EMAIL_SENT_DATE The text in the Date Sent field of the email
_STCC_Email Sent Time EMAIL_SENT_TIME The text in the Time Sent field of the email
_STCC_Email Enter OMS Date
EMAIL_ENTER_OMS_DATE The text in the OMS Date field of the email
_STCC_Email Enter OMS Time
EMAIL_ENTER_OMS_TIME The text in the OMS Time field of the email
_STCC_Primary Call Back Destination
PRIMARY_CB The primary destination for the callback
_STCC_Alternative Call Back Destination 1
ALTERNATIVE1_CB The first alternative destination for the callback
_STCC_Alternative Call Back Destination 2
ALTERNATIVE2_CB The second alternative destination for the callback.
_STCC_Last Time To Initiate Callback
LAST_TIME_TO_INITIATE_CB The time when the last callback can be made
_STCC_Alternative Call ID ALTERNATIVE_CALL_ID The PBX TAPI call ID
Table 2: Call Profile Mandatory Fields
Call Profile Name DDE Name Description
Administator Guide Connect CLOUD Contact Center 66

Identifying Agents and Supervisors Using Call Profile Lists3
Creating a Call Profile List
Complete the following steps to configure a call profile list:
1. In Connect Contact Center Director, click Agents > Call Profile Lists.
2. Click New.
3. Enter a Name for the call profile list.
4. In the Available list in the Mandatory Call Profiles area, select the call profile fields you want to include in the call profile list, and then click . Refer to Table 2 for a list of mandatory call profile fields.
5. In Available list in the Custom Call Profiles area, select the custom call profile fields you want to include in the call profile list, and then click . Refer to Creating Call Profile User Fields on page 163 for information about creating custom call profile fields.
6. In Available list in the Skills area, select the skills you want to include in the call profile list, and then click . Refer to Identifying Agent Skills on page 162 for information about defining agent skills.
7. Click Create.
Using Call Profile Lists to Configure Interaction Center
You can use call profile lists to configure customer information that is displayed in Interaction Center when agents are on interactions that fit the service parameters that the call profile list is associated with. You associate a call profile list with a Service when you add the service. Refer to Adding a New Service on page 78 for more information.
_STCC_Group GROUP_ID The ID of the group
_STCC_Outbound Caller ID
OUTBOUND_CALLER_ID The caller ID of the outbound call
_STCC_SW Call GUID SW_CALL_GUID The PBX call GUID
Table 2: Call Profile Mandatory Fields
Call Profile Name DDE Name Description
67 Connect CLOUD Contact Center Administator Guide

Using Call Profile Lists Identifying Agents and Supervisors 3
You also can use call profile lists to determine the information that is visible to supervisors in the Custom Queue Monitor. The Custom Queue Monitor appears when the supervisor clicks the Queues item in the left navigation panel of the Interaction Center.
For example, if a supervisor COS is set to use a call profile list that includes ACD Enter Date, ACD Enter Time, and Queue Position, this is the information that supervisors assigned to the COS will see when they view Queues in Interaction Center.
Refer to the Interaction Center User Guide for more information about using Interaction Center.
Table 3: Example Call Profile List Results in Interaction Center
Service Parameters Call Profile ListInformation Displayed in Interaction Center
Agent selection criteria - Longest Idle
Capabilities - chat enabled
Timers- forced release timeout is 20 seconds
Music source - Script
Customer Name
Customer Number
Call Type
When the following is true, the information listed in the Call Profile List column is displayed in the Interaction Center:
Agent meets the agent selection criteria specified in the service
Agent answers an interaction that matches the other criteria specified for the service
The service is associated with a call profile list that includes the call profile fields shown in the 2nd column
Administator Guide Connect CLOUD Contact Center 68

Identifying Agents and Supervisors Using Call Profile Lists3
69 Connect CLOUD Contact Center Administator Guide

CHAPTER
4. Groups
Connect Contact Center supports the organization of agents into groups. Typically, all group members can provide the same service to callers. Calls in a group are presented to the most appropriate agent according to the routing policy.
An agent can be a member of multiple groups and can log in or out of one group at a time or all groups simultaneously.
Creating Agent Groups ............................................................................................. 70
Creating Agent Groups
The process of creating agent groups in Connect Contact Center includes the following steps:
1. Specify prerequisite group parameters.
2. Add a new group.
3. Assign agents to the group as a primary group.
4. Change the group’s threshold value.
5. Identify the staffing requirements for the group.
You can also modify a group’s details and properties, and delete a group from the system.
Administrator Guide Connect CLOUD Contact Center 70

Groups Specifying Prerequisite Group Parameters4
Specifying Prerequisite Group Parameters
Before creating a new agent group, specify the agents who will be assigned to the group. Refer to Creating Agent Accounts on page 41 for details.
Once specified, this parameter automatically appears as options that you can choose, allowing you to more quickly and easily create a new agent group.
Adding an Agent Group
Creating a new agent group involves specifying the group’s name, media capabilities, and the statistics used to monitor the group’s calls.
Complete the following steps to add a new agent group:
1. From Connect Contact Center Director, click Groupings > Groups.
2. Click New.
If you have an existing group with parameters similar to what you want, you can quickly add a new group by clicking Copy.
3. In the General tab, specify the group name.
4. In the Capabilities area, identify the type of media the group can use:
Chat — The group is capable of handling chat calls. Each agent that logs in to this group may require a license for handling chat calls, depending on the package that applies to the agent.
Dial Lists — The group is capable of handling outbound dial list calls. Each agent that logs in to this group may require a license for handling outbound dial list calls, depending on the package that applies to the agent.
Outbound — The group is capable of handling outbound calls. Each agent that logs in to this group may require a license for handling outbound calls, depending on the package that applies to the agent.
5. In the Statistics area, change the time intervals that relate to the monitoring of calls in the Connect Contact Center system for the group:
Target Average Speed of Answer (ASA) — The amount of time, in seconds, that should elapse between the moment a call is received and answered. This parameter is used to calculate the Target Service Factor (TSF) for the group and is used in Connect Contact Center reports.
Tip
Group information is not presented on the phone display when an agent is receiving an incoming call. Group and queue information is displayed in the center pane of the Interaction Center when the agent answers the call.
Refer to the phone user guide for more information about the phone display. Refer to the Interaction Center Guide for more information about how group and queue information is displayed.
71 Connect CLOUD Contact Center Administrator Guide
Adding an Agent Group Groups 4
Max ACD Talk Time — The length of time, in seconds, that a call must exceed to be counted as a long call.
Short Calls Threshold — The length of time, in seconds, that a call must not exceed to be counted as a short call.
Interval Time — The length of time, in minutes, that the group is monitored for the purpose of reporting on real-time events.
For example, if this option is 10 minutes, the real-time report for the group shows statistics for the last 10 minutes.
6. In the Service Time Intervals (STI) area, specify the time intervals, in seconds, for which call statistics are monitored for the purpose of reporting.
For example, intervals can be 0 to 60 seconds, 61 to 122 seconds, 123 to 146 seconds, and so on. If the event is an abandoned call, then statistics are gathered for abandoned calls from 0 to 60 seconds, 61 to 122 seconds, 123 to 146 seconds, and so on.
7. Click Create.
Assigning Agents to a Group
Once a new group has been added to the system, you can assign agents to the group as a primary group.
Using Interaction Center, agents can log into their primary groups. Agents can also log into other groups if the Agents > Class of Service > Initiate Specific Login/Logout option is selected, as described in Creating an Agent Class of Service on page 50.
Complete the following steps to assign agents to a group:
1. From Connect Contact Center Director, click Groupings > Groups.
2. In the List View panel select the group to which you want to assign agents, and then click the Agents tab.
3. To add an agent to the group, select the agent in the Available list and then click . To add all
agents to the group, click .
The agents in the Available list have been previously defined, as explained in Creating Agent Accounts on page 41.
4. To remove an agent from the group, select the agent in the Selected list and then click . To
remove all agents from the group, click .
Note
Adding or removing an agent from a group record while the agent has an active call will prevent the agent from answering incoming ACD interactions (voice/chat/email). Queued ACD interactions will not be presented to the agent until the active call is disconnected from the system.
Administrator Guide Connect CLOUD Contact Center 72

Groups Adding an Agent Group4
5. Once the list of agents for the group is correct in the Selected list, reorder the agents by using the
and to reflect the order, such as by ability, in which you want calls to be routed from the group to the agent.
6. Click Save.
Defining Group Chat Parameters
Complete the following steps to define chat parameters for groups:
1. From Connect Contact Center Director, click Groupings > Groups > Chat.
2. Use the Inactivity Timer to specify the maximum amount of time that can elapse without any response from either chat participant. If the timer expires, the chat will be terminated. If the Inactivity Timer is set to 0, there is no time limit on the chat interaction.
3. Use the Response Threshold to specify the maximum amount of time that can elapse without any agent response before the indicator on the agent's chat tab changes from green to red. If the Response Threshold is set to 0, there is no time limit on the chat interaction.
4. Use Email Transcript Subject to specify the subject for chat transcripts associated with the group.
5. Use Append Call Profile to include a call profile field.
Changing Threshold Values for a Group
Threshold values are assigned to some of the fields that are shown in real-time reports to alert you to changing conditions of a group. The system assigns a default value to a low and high warning level for these fields, which you can change.
Alerts are indicated in a group report by being highlighted with default background colors. The Yellow threshold indicates that the value is in a low warning range (slightly too high or too low); by default, fields that exceed this threshold are highlighted in yellow. The Red threshold indicates the value is in a high warning range, meaning the value is unacceptably high or unacceptably low; by default, fields that exceed this threshold are highlighted in red. You can change the default background color for these fields. Refer to Specifying Reporting Preferences on page 157 for more information.
Complete the following steps to change a group’s threshold values:
1. From Connect Contact Center Director, click Groupings > Groups.
2. In the List View panel, select the group whose threshold values you want to change, and then click the Thresholds tab.
3. For a report field, select the threshold number you want to change (Yellow or Red), and enter a new value.
4. Click Save.
73 Connect CLOUD Contact Center Administrator Guide

Modifying an Agent Group Groups 4
Identifying the Staffing Requirements for a Group
You can identify the number of agents required by a group on a daily basis. Once these numbers are identified, they become the group’s default staffing setting. A calendar is then generated for the group displaying the number of staff members required for each day of the week.
These parameters are also used for the group’s staffing real-time and historical reports, which measure actual vs. required staffing.
Complete the following steps to identify staffing requirements for a group:
1. From Connect Contact Center Director, click Groupings > Groups.
2. In the List View panel, select the group whose staffing requirements you want to identify, and then click the Staffing tab.
3. Click Use Staffing to enable this feature.
4. In the Staffing area, specify the number of agents needed in the group for each day of the week.
5. You can change the staffing requirement for an individual day, such as a national holiday, by selecting the day on the calendar and then enter the number of agents in the Number of Required Agents field.
Changes to the number of required agents take effect at midnight on the date the change is made.
6. Click Save.
Modifying an Agent Group
Complete the following steps to modify an agent group:
1. From Connect Contact Center Director, click Groupings > Groups.
2. In the List View panel, select the group you want to modify, and then click the General tab and make the appropriate changes.
These options are described in Adding an Agent Group on page 71.
3. If you want to change the group’s agent assignments, click the Agents tab and organize the correct agents in the Selected list. Refer to Assigning Agents to a Group on page 72 for details.
4. To change the report thresholds for the group, click the Thresholds tab. Edit the threshold levels, as explained in Defining Group Chat Parameters on page 73.
5. If you want to change the group’s staffing requirements, click the Staffing tab and make the appropriate changes as described in Identifying the Staffing Requirements for a Group on page 74.
6. Click Save.
Administrator Guide Connect CLOUD Contact Center 74

Groups Deleting an Agent Group4
Deleting an Agent Group
Complete the following steps to delete an agent group:
1. From Connect Contact Center Director, click Groupings > Groups.
2. In the List View panel, select the group that you want to delete, and then click Delete.
75 Connect CLOUD Contact Center Administrator Guide

CHAPTER
5. Routing Calls
Routing entities determine how calls are routed. You can generate reports on routing activities using Connect Contact Center Agent Manager (for real-time reports) and Connect Contact Center Reports (for historical reports).
Routing Entities ......................................................................................................... 76
Specifying Services ................................................................................................... 77
Identifying IRNs......................................................................................................... 94
Modifying an IRN..................................................................................................... 100
Creating Agent Queue Profiles ............................................................................... 100
Routing Entities
Services — Defines how incoming calls are processed. Incoming calls are assigned to a specific service, with defined announcements, overflow and interflow settings, callback settings, and other business rules.
IRN (Intelligent Routing Node) — Dial numbers used as entry points to the routing system. Each IRN is defined with rules for routing the incoming call to various destinations, including agent queues, services, call control scripts, and devices. IRNs are reached from the Mitel Connect system by dialing the extension number assigned to the route point that corresponds to the IRN.
Agent Queue Profiles — Queues in which ACD calls are first sent to a specific agent before being routed to another destination.
Email Agent Queue Profiles — Queues in which email calls are first sent to a specific agent before being routed to another destination.
Administrator Guide Connect CLOUD Contact Center 76

Routing Calls Specifying Services5
Specifying Services
Services define how incoming calls to Connect Contact Center are processed. Services are analogous to a waiting room where calls are managed until they can be answered or otherwise handled. Every incoming call is assigned to a specific service, with defined announcements, overflow and interflow settings, callback settings, and other business rules.
The process of specifying a service in Connect Contact Center includes the following steps:
1. Set prerequisite service parameters.
2. Add a new service.
3. Define service announcements.
4. Change a service destination.
5. Specify an overflow destination.
6. Determine an interflow destination.
7. Identify a No Agent destination.
8. Select a destination for scheduled callbacks.
9. Choose an Abandoned Callbacks destination.
You can also modify a service’s details and properties, and delete a service from the system.
Setting Prerequisite Service Parameters
Before specifying a service, you can set the following parameters:
The music source that the system connects a call to while waiting in queue. The music source can be a call control script, a music stream, or silence. Refer to Chapter 11., Using Call Control Scripts and Configuring Music Streams on page 175 for more information.
Call control scripts for service and callback announcements. Refer to Chapter 11., Using Call Control Scripts for more information.
The call profile list you want to associate with services to determine what caller information appears in the Interaction Center during interactions categorized by the associated service. Refer to Using Call Profile Lists on page 65.
The agent groups and agent queues used for routing, overflow, scheduled callback, and abandoned callback destinations. Refer to the following sections for more information:
Creating Agent Groups on page 70
Adding an Agent Queue Profile on page 102
If you want to use shifts, the routing destinations to be used at different times of the day. Refer to Defining Shifts on page 156 for more information.
77 Connect CLOUD Contact Center Administrator Guide

Adding a New Service Routing Calls 5
Interflow destinations, which can be an IRN, another service, a device — be sure to have the device number available, a call control script, or an agent queue. Refer to the following sections for more information:
Identifying IRNs on page 94
Adding a New Service on page 78
Adding an Agent Queue Profile on page 102
No Agents destinations, which can be an IRN, another service, a device — be sure to have the device number available, a call control script, or an agent queue. Refer to the following sections for more information:
Identifying IRNs on page 94
Adding a New Service on page 78
Adding an Agent Queue Profile on page 102
Once specified, these parameters automatically appear as options that you can choose, allowing you to more quickly and easily specify services.
Adding a New Service
Adding a new service involves specifying the service’s name, agent selection strategy, and other properties.
Complete the following steps to add a new service:
1. From Connect Contact Center Director, click Routing > Services.
2. Click New.
If you have an existing service with parameters similar to what you want, you can quickly add a new service by selecting it and clicking Copy.
3. In the General tab, specify a name for the service.
4. In the Selection Criteria area, define the method by which an available agent is selected for a call that enters the service. This method is used whenever a call enters the service, and there is more than one available agent to handle the call in the group associated with the service. If only one agent is available at that time, that agent will get the call. These options are
Longest Idle — The call is assigned to the agent who has been idle the longest.
Terminal — The call is assigned to the first available agent, in the order the agent is listed in the Groupings > Groups > Agents tab.
Administrator Guide Connect CLOUD Contact Center 78

Routing Calls Adding a New Service5
Agents are assigned primary groups using the Agents > Agents > Groups tab or Groupings > Groups > Agents tab. Refer to Assigning Primary Groups to an Agent on page 47 and Assigning Agents to a Group on page 72 for details.
Circular — The system searches the group’s agent list, starting from the last agent to receive a call, for the next available agent. This method attempts to distribute calls equally between agents in the group.
Best Skill Fit — The service looks for the agent whose skills best fit the requirements of the call. In a case where two agents with the same skill fit are found, the service uses one of the following methods to decide which agent receives the call
Longest Idle — The call is assigned to the agent, among all the agents with the same skill fit, who has been idle the longest.
Terminal — The call is assigned to the first available agent, among all the agents with the same skill fit, in the order the agent is listed in the Groupings > Groups > Agents tab.
Agents are assigned primary groups using the Agents > Agents > Groups tab or Groupings > Groups > Agents tab. Refer to Assigning Primary Groups to an Agent on page 47 and Assigning Agents to a Group on page 72 for details.
Circular — The system searches the group’s agent list, among all the agents with the same skill fit, starting from the last agent to receive a call, for the next available agent. This method attempts to distribute calls equally between agents in the group.
5. Set Capabilities options:
Select Chat Enabled to turn on chat for the service; otherwise only voice is available.
Note
Agents must be logged into the group associated with this service, as a primary group, to be assigned the call in the order listed in the Groupings > Groups > Agents tab. Agents logged into this group, but not as a primary group, receive the call only if all other agents in the list are not available.
Note
When Best Skill Fit is combined with Circular, calls are routed to agents starting with the agent who has the best skill fit. For example, if you have 10 agents active, and agent number 3 has the best skill fit, calls will be routed to this agent before any other agent, and then calls will be routed from this agent forward. If agent number 3 is not available, the call will route to agent 4 and beyond. This scenario may mean that agent 3 has the highest number of calls, and agents 1 and 2 do not get calls routed to them.
79 Connect CLOUD Contact Center Administrator Guide

Adding a New Service Routing Calls 5
Select Chat Interrupts Voice Interaction to allow incoming chat interactions to be routed to an agent who is already engaged in a voice interaction. When this option is not selected, chat interactions are not routed to agents who are already engaged in a voice interaction. This option is disabled by default.
Select Voice Interrupts Chat Interaction to allow incoming voice interactions to be routed to an agent who is already engaged in a chat interaction. This option is selected by default. When this option is not selected, voice interactions are not routed to agents who are already engaged in a chat interaction.
6. From the Timers area, specify the amount of time, in seconds, an agent has in wrap-up mode and to answer a call before being forced into release mode.
Wrap-Up Time — The time that an agent has for post call activity after the completion of the call. Though the agent’s extension is idle, Connect Contact Center does not route another call to the agent until after this time period has expired.
Forced Release Timeout — The time that an unanswered call can ring at an agent extension before being rerouted to another destination, such as back to queue or to another available agent, and the agent is forced into released mode.
If this option is left undefined, the system uses the default time specified in System Parameters > Routing Preferences > Service Settings.
7. In the Music Source area, select how the system connects a call waiting in queue to a music source in Music Source. If no music source is specified, the system uses the default source specified in System Parameters > Routing Preferences > Service Settings.
If the music source is a script, the call is connected to an IVR port and performs the actions indicated in the specified script. Typically, the script has a play action pointing to the music WAV file. Choose the specific script from the Script field. The scripts available in the menu have been previously defined. Refer to Chapter 11., Using Call Control Scripts for information.
For a music source that is a music stream, the call is connected to streaming music. From the Music Stream field, choose the stream to be played from the drop-down menu. The available music streams in the menu have been previously defined. Refer to Configuring Music Streams on page 175 for details.
If the music source is silence, the caller hears nothing.
8. Click Create.
Agent Selection with Multi-Interaction
Beginning with ECC 9, when agents are configured to handle multiple interactions simultaneously, agent selection is determined by calculating utilization percentage (UP).
UP calculations compare the number of interactions an agent is on versus the maximum number of interactions the agent is configured to handle.
Tip
Mitel highly recommends that a music source always be selected.
Administrator Guide Connect CLOUD Contact Center 80

Routing Calls Defining Service Announcements5
Agent selection strategy for email
When Email interrupts Voice Interaction is not selected, Connect Contact Center selects among all agents who are logged in to a group and who are not on a voice interaction, and then calculates the least busy agent using UP (email) with tie breaker UP (total). If required, Connect Contact Center also applies the second tie breaker as defined in Routing > Services > General.
When Email interrupts Voice Interaction is selected, Connect Contact Center selects among all agents who are logged in to this group, and then calculates the least busy agent using UP (email) with tie breaker UP (total). If required, Connect Contact Center also applies the second tie breaker as defined in Routing > Services > General.
Agent selection strategy for chat
When Chat interrupts Voice Interaction is not selected, Connect Contact Center selects among all agents who are logged in to this group and who are not on a voice interaction, and then calculates the least busy agent using UP (chat) with tie breaker UP (total). If required, Connect Contact Center also applies the second tie breaker as defined in Routing > Services > General.
When Chat interrupts Voice Interaction is selected, Connect Contact Center selects among all agents who are logged in to this group, and then calculates the least busy agent using UP (chat) with tie breaker UP (total). If required, Connect Contact Center also applies the second tie breaker as defined in Routing > Services > General.
Defining Service Announcements
You can define the announcements the caller hears while waiting in the service queue.
Complete the following steps to define a service announcement:
1. From Connect Contact Center Director, click Routing > Services.
2. In the List View panel, select the service for which you want to define a service announcement.
3. In the Details View panel, click the Announcements tab.
4. Use the Mandatory Announcement area to define the mandatory announcement for the service.
Enabled — Select to turn on the mandatory announcement. All callers entering the service hear the mandatory announcement, regardless of the availability of agents. An example of a mandatory announcement is “This call may be recorded for quality and training purposes,” which is heard by every caller.
Script — The script to be played. The scripts available in the drop-down menu have been previously defined. Refer to Chapter 11., Using Call Control Scripts for information.
Time After Mandatory — The length of time, in seconds, that the caller hears music before the next announcement.
5. If you want an announcement that is heard only once when the caller first enters the service queue, use the options in the First Announcement area.
Enabled — Select to turn on the first announcement.
81 Connect CLOUD Contact Center Administrator Guide

Changing a Service Destination Routing Calls 5
Script — The script to be played. The scripts available in the drop-down menu have been previously defined. Refer to Chapter 11., Using Call Control Scripts for information.
Time After First — The length of time, in seconds, that the caller hears music before the next announcement.
6. Use the Secondary Announcement Settings area to specify which secondary announcements play and how often.
Cycle All — All secondary announcements are played repeatedly.
Cycle Last — The last secondary announcement is played repeatedly.
No Cycle — Each secondary announcement is played only once.
7. The Secondary Announcements area allows you to select the secondary announcements to be played.
Enabled — Select to turn on or off the selected secondary announcement in the list.
Script — Use to change the script to be played for the selected secondary announcement in the list. The scripts available in the drop-down menu have been previously defined. Refer to Chapter 11., Using Call Control Scripts for information.
Time — Enter a different length of time, in seconds, that the caller hears music before the next announcement, for the selected secondary announcement in the list.
List of Secondary Announcements — The secondary announcements that exist in the system. You can modify the properties of a secondary announcement by selecting it in the list and changing the Enabled, Script, and Time options.
To define a secondary announcement, click Add. You can define up to 20 secondary announcements.
To delete a secondary announcement, select it in the list and then click Remove.
Once the list of secondary announcements is correct, place the announcements in the order
that you want the them to be played, by selecting an announcement and using the and
to move it to the correct position in the list.
8. Click Save.
Changing a Service Destination
Agent groups and agent queues can be associated with a service as it’s routing destination. You can also specify shift destinations, which are routing destinations used at different times of the day.
Complete the following steps to change a service destination:
1. From Connect Contact Center Director, click Routing > Services.
2. In the List View panel select the service whose destination you want to change.
3. In the Details View panel, click the Destination tab.
Administrator Guide Connect CLOUD Contact Center 82

Routing Calls Specifying a Service Overflow Destination5
4. Use Type to choose whether the destination is an agent group or an agent queue. This is the default destination of the service if a shift destination is not defined.
Choose the Group. The groups in the list have been previously defined. Refer to Creating Agent Groups on page 70 for more information.
If the destination is an agent queue, select the agent whose queue is the destination in Agent Queue. The agents in the list have been previously associated with an agent queue. Refer to Adding an Agent Queue Profile on page 102 for information.
5. If you want to add a shift destination to the service, use the options in the Shift area.
Destination — Use to change the type of destination for the selected shift in the Selected list.
Group — Use to change the agent group destination for the selected shift. The groups in the list have been previously defined. Refer to Creating Agent Groups on page 70 for more information.
Agent Queue — Enter a different agent whose queue is the destination for the selected shift. The agents in the list have been previously associated with an agent queue. Refer to Adding an Agent Queue Profile on page 102 for information.
Available and Selected List of Shifts — Displays the shifts that exist in the system. To add a shift to the service, select the shift in the Available list, and then click . To add all shifts to
the service, click . The available shifts have been previously defined. Refer to Defining Shifts on page 156 for details.
To remove a shift from the service, select the shift in the Selected list, and then click . To
remove all shifts from the service, click .
You can modify the properties of a shift by selecting it in the Selected list and changing the Destination and Group or Agent Queue options.
6. Click Save.
Specifying a Service Overflow Destination
Overflow improves the way calls waiting in a service’s group are handled, by sending these calls to another group or to an agent queue. This expands the number of agents who can answer waiting calls. Overflow is activated after the overflow timeout interval has been reached.
In addition to incoming calls, overflow can also be applied to outbound calls. You can also define separate overflow destinations for different timeout intervals and work shifts.
Complete the following steps to specify a service overflow destination:
1. From Connect Contact Center Director, click Routing > Services.
2. In the List View panel select the service whose overflow destination you want to specify.
3. In the Details View panel, click the Overflow tab.
4. To also apply overflow to outbound calls, click Outbound Call Overflows.
83 Connect CLOUD Contact Center Administrator Guide

Specifying a Service Overflow Destination Routing Calls 5
5. If you want the service overflow destination to be an agent group, use the options in the Overflow Groups area.
Timeout — Use to change the timeout interval of the selected group in Selected list. The timeout interval is the number of seconds a call is in queue, after the mandatory announcement. Once reached, the call is overflowed into another group.
Available and Selected List of Overflow Groups — Displays the agent groups that exist in the system. To add an agent group to the service as an overflow destination, select the group in
the Available list, and then click . To add all groups as an overflow destination, click . The available groups have been previously defined. Refer to Creating Agent Groups on page 70 for details.
To remove a group as an overflow destination, select the group in the Selected list, and then
click . To remove all groups as an overflow destination, click .
You can modify the overflow timeout properties of a group by selecting it in the Selected list and changing the Timeout option.
6. Use the options in the Overflow Agent Queues area if you want to specify an agent queue as the service overflow destination.
Timeout — Use to change the timeout interval of the selected agent’s queue in the Selected list. The timeout interval is the number of seconds a call is in queue, after the mandatory announcement. Once reached, the call is overflowed into another agent queue.
Available and Selected List of Overflow Agent Queues — Displays the agents in the system with personal agent queues. Add and remove agents from the Selected list to specify the agent whose queue you want to be the service overflow destination. The available agents have been previously defined. Refer to Adding an Agent Queue Profile on page 102 for details.
You can modify the overflow timeout properties of an agent queue by selecting it in the Selected list and changing the Timeout option.
7. To add an agent group as an overflow destination for a shift, use the options in the Overflow Shift Groups area.
Shift — Use to select a shift. The shifts in the drop-down menu have been previously defined. Refer to Defining Shifts on page 156 for more information.
Group — Use to change the agent group for the selected shift. The groups in the drop-down have been previously defined. Refer to Creating Agent Groups on page 70 for more information.
Timeout — Enter a different timeout interval for the selected shift in Selected list. The timeout interval is the number of seconds a call is in queue, after the mandatory announcement. Once reached, the call is overflowed into another group.
List of Shifts — The shifts that exist in the system. To define an overflow group destination for a shift, click Add. To delete a shift, select it in the list and then click Remove.
You can modify the properties of a shift by selecting it in the list and changing the Shift, Group, and Timeout options.
Administrator Guide Connect CLOUD Contact Center 84

Routing Calls Determining a Service Interflow Destination5
8. To add an agent queue as an overflow destination for a shift, use the options in the Overflow Shift Agent Queues area.
Shift — Use to select a shift. The shifts in the drop-down menu have been previously defined. Refer to Defining Shifts on page 156 for information.
Agent — Use to change the agent whose personal agent queue is the overflow destination for the selected shift. The agents in the drop-down have been previously associated with an agent queue. Refer to Adding an Agent Queue Profile on page 102 for more information.
Timeout — Enter a different timeout interval for the selected shift in Selected list. The timeout interval is the number of seconds a call is in queue, after the mandatory announcement. Once reached, the call is overflowed into another agent queue.
List of Shifts — The shifts that exist in the system. Add and remove shifts to specify the shifts to which you want to add an agent queue as an overflow destination. The available shifts have been previously defined. Refer to Defining Shifts on page 156 for details.
You can modify the properties of a shift by selecting it in the list and changing the Shift, Agent, and Timeout options.
9. Click Save.
Determining a Service Interflow Destination
Interflow transfers calls that are waiting for a service and are not handled within a specific amount of time. Separate interflow destinations can also be defined for different shifts.
Once a call has been interflowed, it is no longer part of the ACD. If the interflow destination is an IRN or service, the call reenters the system as a new ACD call.
Complete the following steps to determine a service interflow destination:
1. From Connect Contact Center Director, click Routing > Services.
2. In the List View panel select the service whose interflow destination you want to determine.
3. In the Details View panel, click the Interflow tab.
4. If you want calls to be automatically sent to the interflow destination based on the estimated wait time, rather than waiting in the service until the timeout interval has been reached, select the Predictive Interflow option.
By default, the estimated wait time is 10 seconds. This default time can be changed using the Announce Wait Time action. Refer to Announce Wait Time on page 189 for more information.
5. Use the Default Destination area to choose the interflow destination for the service.
Default Destination — From the drop-down menu, choose the interflow destination.
IRN — If the default destination is an IRN, choose the IRN from the drop-down menu. The IRNs in the menu have been previously defined as explained in Complete the following steps to create an IRN: on page 95.
85 Connect CLOUD Contact Center Administrator Guide

Determining a Service Interflow Destination Routing Calls 5
Service — Use to specify the service destination from the drop-down menu. The services in the menu have been previously defined. Refer to Adding a New Service on page 78 for information.
Device — If the default destination is a device, enter the device number.
Script — Use to specify the script destination from the drop-down menu. The scripts in the menu have been previously defined; see Chapter 11., Using Call Control Scripts for details.
Agent Queue — If the default destination is an agent queue, choose the agent whose queue is the destination from the drop-down menu. The agents in the menu have been previously associated with an agent queue, as explained in Adding an Agent Queue Profile on page 102.
Timeout — The number of seconds that calls wait in a service before being interflowed. The maximum number of seconds that you can enter in this field is 9,999. If you require more time, contact your Mitel representative.
6. To add an interflow destination to a shift, use the options in the Shifts area.
Destination — Use to change the type of destination for the selected shift in the Selected list.
IRN — If the shift destination is an IRN, use the drop-down menu to choose the IRN. The IRNs in the menu have been previously defined. Refer to Complete the following steps to create an IRN: on page 95 for more information.
Service — Use to specify the service interflow destination for the shift from the drop-down menu. The services in the menu have been previously defined. Refer to Adding a New Service on page 78 for information.
Device — If the shift destination is a device, enter the device number.
Script — Use to specify the shift script destination from the drop-down menu. The scripts in the menu have been previously defined; see Chapter 11., Using Call Control Scripts for details.
Agent Queue — If the shift destination is an agent queue, choose the agent whose personal agent queue is the destination from the drop-down menu. The agents in the menu have been previously associated with an agent queue. Refer to Adding an Agent Queue Profile on page 102 for more information.
Available and Selected List of Shifts — Displays the shifts that exist in the system. To add a shift to the service, select the shift in the Available list, and then click . To add all shifts to
the service, click . The available shifts have been previously defined. Refer to Defining Shifts on page 156 for details.
To remove a shift from the service, select the shift in the Selected list, and then click . To
remove all shifts from the service, click .
You can change the destination of the shift by selecting it in the Selected list and changing the Type options.
7. For details on a shift, click Explain Shift. In the resulting calendar, select the day whose shifts you want information.
Administrator Guide Connect CLOUD Contact Center 86

Routing Calls Identifying a Destination for a Service with No Agents5
8. Click Save.
Identifying a Destination for a Service with No Agents
The No Agents destination routes calls in a service with no logged in agents to another destination. By default, this is the Incomplete destination. If the No Agents destination is an IRN, the system counts it as a new, incoming call.
You can also define separate No Agents destinations for different work shifts.
Complete the following steps to identify a No Agent destination:
1. From Connect Contact Center Director, click Routing > Services.
2. In the List View panel select the service for which you want to identify a No Agent destination.
3. In the Details View panel, click the No Agent Destination tab.
4. If you want the calls that enter the service when there are no agents logged in, to first be routed to an overflow destination, click Use Overflow Destination.
Call are routed to the first interval overflow destinations. If these destinations do not have any logged in agents, the calls are then sent to the service’s No Agent destination.
Note that this is a special handling scenario, and if agents are logged into the primary group while the call is queued into the overflow destination, the call is not presented to the primary group.
5. Use the options in the Default Destination area to change the No Agent destination for the service. By default, the No Agent destination is the Incomplete destination defined in System Parameters > Routing Preferences > Incomplete Destinations.
Default Destination — From the drop-down menu, choose the new No Agent destination.
IRN — If the default destination is an IRN, select the appropriate IRN. The IRNs in the menu have been previously defined as explained in Complete the following steps to create an IRN: on page 95.
Device — If the default destination is a device, enter the device number.
Script — Use to specify the script destination from the drop-down menu. The scripts in the menu have been previously defined. Refer to Chapter 11., Using Call Control Scripts for details.
Agent Queue — If the default destination is an agent queue, choose the agent whose personal agent queue is the destination from the drop-down menu. The agents in the menu have been previously associated with an agent queue, as explained in Adding an Agent Queue Profile on page 102.
6. To add a No Agent destination to a shift, use the options in the Shifts area.
Destination — Use to change the type of destination for the selected shift in the Selected list. The System Default is the Incomplete destination defined in System Parameters > Routing Preferences > Incomplete Destinations.
87 Connect CLOUD Contact Center Administrator Guide

Selecting a Destination for Scheduled Callbacks Routing Calls 5
IRN — If the shift destination is an IRN, use the drop-down menu to choose the IRN. The IRNs in the menu have been previously defined as explained in Complete the following steps to create an IRN: on page 95.
Device — If the shift destination is a device, enter the device number.
Script — Use to specify the shift script destination from the drop-down menu. The scripts in the menu have been previously defined; see Chapter 11., Using Call Control Scripts for details.
Agent Queue — If the shift destination is an agent queue, choose the agent whose personal agent queue is the destination from the drop-down menu. The agents in the menu have been previously associated with an agent queue. Refer to Adding an Agent Queue Profile on page 102 for more information.
Available and Selected List of Shifts — Displays the shifts that exist in the system. To add a shift to the service, select the shift in the Available list, and then click . To add all shifts to
the service, click . The available shifts have been previously defined. Refer to Defining Shifts on page 156 for details.
To remove a shift from the service, select the shift in the Selected list, and then click . To
remove all shifts from the service, click .
You can change the destination of the shift by selecting it in the Selected list and changing the Type options.
7. For details on a shift, click Explain Shift. In the resulting calendar, select the day whose shifts you want information.
8. Click Save.
Selecting a Destination for Scheduled Callbacks
Callback is used to enhance the customer experience during peak loads, by allowing callers to choose to be called back rather than continue to wait. The waiting call needs to be routed to a call control script that contains the Collect Callback Information action. This action asks the caller to specify the callback parameters (generally the callback phone number and the desired time for the callback). The service then makes the callback and routes the call to the callback destination.
You can also select separate callback destinations for different work shifts.
By default, the service generates callbacks at any time. You can instead define limited time ranges when you want the service to make callbacks (say only during business hours).
Note
If a callback is in queue when the time range you specified ends, the callback will not be attempted until the following day at the time the callback request was made. If the callback should be made at the earliest opportunity the following day, use shift routing instead of time ranges.
For off hours, configure the callback to point to a group that has no agents. For on hours, configure the callback to point to the appropriate callback group with available agents.
Administrator Guide Connect CLOUD Contact Center 88

Routing Calls Selecting a Destination for Scheduled Callbacks5
Complete the following steps to select a destination for scheduled callbacks:
1. From Connect Contact Center Director, click Routing > Services.
2. In the List View panel select the service for which you want to select a Scheduled Callbacks destination.
3. In the Details View panel, click the Scheduled Callbacks tab.
4. Choose how the system validates the customer’s callback number from the Numbering Plan menu.
None — No validity check is done. Any number is accepted.
North American — The system ensures that the number has the format NPX-NXX-XXXX, where
N — must be a digit between 2 and 9.
P — must be a digit between 0 and 8.
X — may be any digit.
If the number is not valid, the system asks the customer to enter it again.
5. In the Attempt Callback field, set the limit in hours between the time that the customer requested the callback and the time it is actually dialed.
6. If you want to play a script before transferring the callback to an agent, click Run Script before Transferring to Agent. In the associated Script field, choose the specific call control script to be used.
The scripts available in the menu have been previously defined. Refer to Chapter 11., Using Call Control Scripts for information.
7. Click Require Agent Confirmation if you want agents to be able to choose whether to accept or reject a callback. The agent sees a popup window displaying the call's parameters and providing the option to accept the callback. Only if the agent accepts the callback is the call transferred to the agent.
You can then change the amount of time, from the default 10 seconds, that the system waits for the agent to either accept or reject the callback, in the Wait for Agent Confirmation field. If no action is taken by the agent within this amount of time, the system considers the callback rejected and forces the agent into release mode.
8. Use the options in the Default Destination area to specify the Scheduled Callbacks destination for the service.
Tip
When you configure your system to transfer a callback call to an agent upon connection, Mitel suggests you configure any related scripts to include an announcement to let the caller know that the call has been placed as a result of a callback request and to announce that the caller is being connected to an agent.
89 Connect CLOUD Contact Center Administrator Guide

Selecting a Destination for Scheduled Callbacks Routing Calls 5
Destination — From the drop-down menu, choose the Scheduled Callbacks destination.
Group — If the default destination is an agent group, choose the group from the drop-down menu. The groups in the menu have been previously defined. Refer to Creating Agent Groups on page 70 for more information.
Agent Queue — If the default destination is an agent queue, choose the agent whose personal agent queue is the destination from the drop-down menu. The agents in the menu have been previously associated with a queue, as explained in Adding an Agent Queue Profile on page 102.
9. To add a Scheduled Callbacks destination to a shift, use the options in the Shifts area.
Destination — Use to change the type of destination for the selected shift in the Selected list.
Group — If the shift destination is an agent group, use the drop-down menu to choose the group. The groups in the menu have been previously defined, as explained in Creating Agent Groups on page 70.
Agent Queue — If the shift destination is an agent queue, choose the agent whose personal agent queue is the destination from the drop-down menu. The agents in the menu have been previously associated with a queue, as explained in Adding an Agent Queue Profile on page 102.
Available and Selected List of Shifts — Displays the shifts that exist in the system. To add a shift to the service, select the shift in the Available list, and then click . To add all shifts to
the service, click . The available shifts have been previously defined. Refer to Defining Shifts on page 156 for details.
To remove a shift from the service, select the shift in the Selected list, and then click . To
remove all shifts from the service, click .
You can change the destination of the shift by selecting it in the Selected list and changing the Type options.
10. If you want to specify a limited time range for scheduled callbacks, use the options in the Time Range area.
Time Range Enabled — Select to turn on the Time Range feature.
Start Time — Use to change the start time of the selected time range in the list.
Stop Time — Use to change the stop time of the selected time range in the list.
List of Time Ranges — Displays the previously defined time ranges. To add a time range to the service, click Add. Then adjust the start and stop times, using the appropriate fields, as necessary. You can add multiple time ranges.
To remove a time range from the service, select the time range in the list and click Remove.
11. Click Save.
Administrator Guide Connect CLOUD Contact Center 90

Routing Calls Choosing an Abandoned Callbacks Destination5
Choosing an Abandoned Callbacks Destination
An abandoned call is a call that was disconnected (i.e. the caller hung up) before being handled by an agent. The service can automatically generate a callback to the caller who abandoned the call, if the incoming DID number has been captured. The service then routes the call to the Abandoned Callbacks destination.
You can also select separate Abandoned Callbacks destinations for different work shifts.
By default, the service generates callbacks to abandoned calls at any time. You can instead define limited time ranges when you want the service to make callbacks (for example, only during business hours).
Complete the following steps to choose an abandoned callbacks destination:
1. From Connect Contact Center Director, click Routing > Services.
2. In the List View panel select the service for which you want to choose an abandoned callbacks destination.
3. In the Details View panel, click the Abandoned Callbacks tab.
4. Select Abandoned Callbacks Enabled.
5. In the Callback if Call Abandoned After field, set the time, in seconds, that a call must be in the IRN before being considered abandoned.
This parameter allows you to filter out calls that were abandoned after only a relatively short time. In many cases, a short time in the IRN indicates that the call was a wrong number and a callback is not required.
6. If you want to play a script before transferring the callback to an agent, click Run Script before Transferring to Agent. In the Script field, choose the specific call control script to be used.
The scripts available in the menu have been previously defined. Refer to Chapter 11., Using Call Control Scripts for information.
7. Click Require Agent Confirmation if you want agents to be able to choose whether to accept or reject a callback. The agent sees a popup window displaying the call's parameters and providing the option to accept the callback. The call is transferred to the agent only if the agent accepts the callback.
Use Wait for Agent Confirmation to change the amount of time that the system waits for the agent to either accept or reject the callback. The default is 10 seconds. If the agent does not accept or reject the callback within the amount of time specified here, the system considers the callback rejected and forces the agent into release mode.
Tip
When you configure your system to transfer a callback call to an agent upon connection, Mitel suggests you configure any related scripts to include an announcement to let the caller know that the call has been placed as a result of a callback request and to announce that the caller is being connected to an agent.
91 Connect CLOUD Contact Center Administrator Guide

Choosing an Abandoned Callbacks Destination Routing Calls 5
8. Use the options in the Default Destination area to specify the Abandoned Callbacks destination for the service. The options are
Destination. From the drop-down menu, choose the Abandoned Callbacks destination.
Group. If the default destination is an agent group, choose the group from the drop-down menu. The groups in the menu have been previously defined, as explained in Creating Agent Groups on page 70.
Agent Queue. If the default destination is an agent queue, choose the agent whose personal agent queue is the destination from the drop-down menu. The agents in the menu have been previously associated with a queue, as explained in Adding an Agent Queue Profile on page 102.
9. To add an Abandoned Callbacks destination to a shift, use the options in the Shifts area. These options are
Destination — Use to change the type of destination for the selected shift in the Selected list.
Group — If the shift destination is an agent group, use the drop-down menu to choose the group. The groups in the menu have been previously defined as explained in Creating Agent Groups on page 70.
Agent Queue — If the shift destination is an agent queue, choose the agent whose personal agent queue is the destination. The agents in the menu have been previously associated with a queue, as explained in Adding an Agent Queue Profile on page 102.
Available and Selected List of Shifts — Displays the shifts that exist in the system. To add a shift to the service, select the shift in the Available list, and then click . To add all shifts to
the service, click . The available shifts have been previously defined. Refer to Defining Shifts on page 156 for details.
To remove a shift from the service, select the shift in the Selected list, and then click . To
remove all shifts from the service, click .
You can change the destination of the shift by selecting it in the Selected list and changing the Type options.
10. If you want to specify a limited time range for abandoned callbacks, use the options in the Time Range area.
Time Range Enabled — Select to turn on the Time Range feature.
Start Time — Use to change the start time of the selected time range in the list.
Stop Time — Use to change the stop time of the selected time range in the list.
List of Time Ranges — Displays the previously defined time ranges. To add a time range to the service, click Add. Then adjust the start and stop time, using the appropriate fields, as necessary. You can add multiple time ranges.
To remove a time range from the service, select the time range in the list and click Remove.
11. Click Save.
Administrator Guide Connect CLOUD Contact Center 92

Routing Calls Modifying Service Details and Properties5
Modifying Service Details and Properties
You can modify an existing service’s details and properties.
Complete the following steps to modify a service:
1. From Connect Contact Center Director, click Routing > Services.
2. In the List View panel select the service you want to modify.
3. To edit the service’s details, click the General tab and make the appropriate changes. Refer to Adding a New Service on page 78 for details.
4. To change the service’s announcements, click the Announcements tab and define new announcements as detailed in Defining Service Announcements on page 81.
5. To select a different service routing destination, click the Destination tab and follow the directions detailed in Changing a Service Destination on page 82.
6. To change the service’s overflow destination, click the Overflow tab and select the appropriate options as explained in Specifying a Service Overflow Destination on page 83.
7. To modify the service’s interflow destination, click the Interflow tab and change the appropriate options.
These options are described in Determining a Service Interflow Destination on page 85.
8. To select a different No Agent destination for the service, click the No Agent Destination tab and follow the directions detailed in Identifying a Destination for a Service with No Agents on page 87.
9. To change the service’s scheduled callback destination, click the Scheduled Callbacks tab and define a new destination as detailed in Selecting a Destination for Scheduled Callbacks on page 88.
10. To select a different abandoned callback destination for the service, click the Abandoned Callbacks tab and make the appropriate changes. The tab options are explained in Choosing an Abandoned Callbacks Destination on page 91.
11. Click Save.
Deleting a Service
Complete the following steps to delete a service:
1. From Connect Contact Center Director, click Routing > Services.
2. In the List View panel select the service you want to delete, and then click Delete.
93 Connect CLOUD Contact Center Administrator Guide

Identifying IRNs Routing Calls 5
Identifying IRNs
Intelligent Routing Numbers (IRNs) are dial numbers used as entry points into the Connect Contact Center routing system. Each number can be used to define rules for routing incoming calls to various destinations, such as services, call control scripts, and devices. These rules can also update call profile fields, including the call’s priority and the skills required by the call.
Each entry to an IRN has a corresponding entry as a route point in the Mitel Connect system. Route points can reside either on the Mitel DVS server or on the main server. The IRN is reached from the Mitel Connect system by dialing the extension number assigned to the route point, which is then sent to the corresponding IRN.
For each different way a call can enter the system, there is typically a unique IRN. For example, you would configure an IRN for every toll free number used by your customers to call into the call center.
If you want to gather statistics on an IRN, the IRN must also be defined as a DNIS.
The process of identifying IRNs in Connect Contact Center includes the following steps:
1. Specify prerequisite IRN parameters.
2. Create an IRN.
3. Set the initial call profile field values for calls that enter an IRN.
4. Configure DNIS for statistics.
5. Define agent skills required for handling calls that enter an IRN.
6. Change the destination of an IRN.
You can also modify an IRN’s details and properties, and delete an IRN from the system.
Specifying Prerequisite IRN Parameters
Before creating IRNs, you can specify the following parameters:
Call control scripts that fill the Customer Number field in the call profile, allowing calls to be routed from the IRN by using the contents of the Customer Number field. Refer to Chapter 11., Using Call Control Scripts for more information.
The enabled languages that can be selected for an IRN’s call profile, as described in Enabling a Language on page 176.
(Optional) User call profile fields to collect information used to route calls from the IRN. Refer to Creating Call Profile User Fields on page 163 for more information.
WARNING!
Mitel strongly suggests that, for optimal system performance, you submit a service request to add or change IRN records.
Administrator Guide Connect CLOUD Contact Center 94

Routing Calls Creating an IRN5
Agent skills required for handling calls that enter the IRN. Refer to Identifying Agent Skills on page 162 for more information.
IRN destinations, which can be a service, device — have the device number available, a call control script, or an agent queue. Refer to the following sections for more information:
Adding a New Email Account on page 115
Chapter 11., Using Call Control Scripts
Adding an Agent Queue Profile on page 102
If you want to use shifts, the routing destinations to be used at different times of the day. Refer to Defining Shifts on page 156 for more information.
If you plan to implement the Connect Contact Center redundant server system, the IRNs used for backup on the secondary server. Refer to Complete the following steps to create an IRN: on page 95 for more information.
Once specified, these parameters automatically appear as options that you can choose, allowing you to more quickly and easily create new IRNs.
Creating an IRN
Complete the following steps to create an IRN:
1. From Connect Contact Center Director, click Routing > IRN.
2. Click New.
If you have an existing IRN with parameters similar to what you want, you can quickly add a new IRN by selecting it and clicking Copy.
3. In the General tab, in the IRN field specify the entry, such as a dial number, to the IRN used to route voice and chat contacts.
4. If you want to route calls directly to the default destination, which is specified in the Routing > IRN > Destination tab, select Route Directly to Default Destination.
5. Specify the customer routing rules you want to use for routing to the IRN destination:
Route by Caller ID — The system tries to match the call’s CID (Caller ID or ANI) to one of the customers defined in the system. If a match is found, the system applies the customer’s routing rules to the call if one of the following conditions is true
Route by ANI Domains — If this option is not selected, domain routing is disabled.
Route by ANI Domains — If only this option is selected, domain routing is enabled.
Note
The IRN must match a route point defined in Connect Director for all voice contacts.
95 Connect CLOUD Contact Center Administrator Guide

Setting Call Profile Field Values for an IRN Routing Calls 5
Domain Routing Precedes Customer Routing — If this option and the Route by ANI Domains option, are selected, domain routing is enabled but the system does not find a domain match.
Use Script to Collect Customer ID — Calls are routed from the selected IRN by using the contents of the Customer Number field in the call profile even if no ANI is available.
In the associated Script field, choose the specific call control script. This script should fill the Customer Number call profile field. If the script definition does not include the Customer Number, the system routes the call according to the normal IRN routing rules. Otherwise, the system searches the customer list by the customer number. If the customer is found, the system uses the customer information to route the call. If the customer is not found, the call is routed by the IRN routing rules.
The call control scripts in the menu have been previously created as explained in Chapter 11., Using Call Control Scripts.
6. If you want to specify a number that appears as the caller ID for callbacks that the system generates for this IRN, enter the number in Caller ID for Callback Calls.
The IRN for the callback call is the IRN through which the call that requested the callback was entered. There is no validity check on this number.
7. If you want to configure a backup IRN for the secondary server used in the Connect Contact Center redundant server system, use the options in the Redundancy area.
IRN on Secondary Server — Select to turn on the IRN backup feature.
Synchronize with Primary IRN — Select to synchronize the IRN with the main server.
Primary IRN — From the drop-down menu, select the backup IRN for the secondary server.
The IRNs in this menu have been previously defined, as explained in Complete the following steps to create an IRN: on page 95.
8. Click Create.
Setting Call Profile Field Values for an IRN
You can set the initial value of the call profile fields for calls that enter the IRN. A call profile is attached to each contact in the system and consists of dynamic information used to route the contact and provide relevant history. Information is updated as the contact moves through the system. For example, the automatic number identification (ANI) information is recorded when the call enters from the PSTN, and the caller can add more information through IVR menus.
Each field in the call profile is either mandatory, which means it is required by the Connect Contact Center system, or user-defined, which means it is an optional field used for further call processing. These fields can be different on each installation. You can define the initial values of the Language and Priority mandatory fields and all user fields.
Complete the following steps to set call profile field values for an IRN:
1. From Connect Contact Center Director, click Routing > IRN.
Administrator Guide Connect CLOUD Contact Center 96

Routing Calls Configuring DNIS5
2. In the List View panel select the IRN for which you want to set call profile field values.
3. In the Details View panel, click the Call Profile tab.
4. Select the initial language of the Language call profile field.
The languages in the menu have been previously enabled, as described in Enabling a Language on page 176.
5. Use the Priority field to specify the initial value of the Priority call profile field.
6. Use the Value field to change the initial value of the selected call profile field in the Selected list.
7. To add a call profile field to the IRN, select the field in the Available list and then click . To add
all fields to the IRN, click . The available call profile fields have been previously defined. Refer to Creating Call Profile User Fields on page 163 for details.
To remove a call profile field from the IRN, select the field in the Selected list, and then click .
To remove all fields from the IRN, click .
You can change the value of a call profile field by selecting it in the Selected list and changing the Value option.
8. Click Save.
Configuring DNIS
The DNIS is the same as the IRN Dial Number. For the purpose of gathering statistics on an IRN, the IRN should also be defined as a DNIS.
Complete the following steps to create a new DNIS:
1. From Connect Contact Center Director, click Routing > IRN > DNIS.
2. Click New.
If you have an existing DNIS with parameters similar to what you want, you can quickly add a new DNIS by selecting it and clicking Copy. Then make the necessary changes to the DNIS details, as explained here.
3. Specify a unique DNIS Name.
4. In the Target ASA field, set the target Average Speed of Answer (ASA).
This is the amount of time, in seconds, in which the call should be answered from the time it is received. This value is used to calculate the DNIS Target Service Factor (TSF).
5. To specify the amount of time, in seconds, in which a contact must end to be counted as too short in Connect Contact Center reports, use Short Calls Threshold.
Note
Setting the priority at the IRN level overwrites the default priority.
97 Connect CLOUD Contact Center Administrator Guide

Defining Agent Skills for an IRN Routing Calls 5
6. Use the Max ACD Talk Time field to set the amount of time, in seconds, that a contact must exceed to be counted as too long in the Connect Contact Center reports.
7. In the Interval Time field, specify the time period, in minutes, that will be monitored for real-time reports for the DNIS.
For example, if this field is set to ten minutes, the real-time report for the DNIS shows statistical information relevant to the last ten minutes.
8. In Service Time Intervals (STI), set the time intervals in which calls are monitored.
Statistics on the calls can be viewed in STI histogram reports that show the number of calls waiting for each given interval.
9. Click Save.
Defining Agent Skills for an IRN
For each IRN in the system, you can define the agent skills required for handling calls that enter the IRN. An agent skill is measured by two factors: capability and preference. The value assigned to a skill is a combination of these factors expressed as a percentage.
Complete the following steps to define agent skills for an IRN:
1. From Connect Contact Center Director, click Routing > IRN.
2. In the List View panel select the IRN for which you want to define agent skills.
3. In the Details View panel, click the Skills tab.
4. To add a skill to the IRN, select the skill in the Available list and then click . To add all skills to
the IRN, click . The available skills have been previously defined. Refer to Identifying Agent Skills on page 162 for details.
To remove a skill from the IRN, select the skill in the Selected list, and then click . To remove all
skills from the IRN, click .
5. You can change the value of the skill by selecting it in the Selected list and changing the Value option.
6. Click Save.
Changing an IRN Destination
As part of creating a Connect Contact Center IRN, you specified the IRN’s default destination. You can change this destination and specify shift destinations (routing destinations used at different times of the day).
Complete the following steps to change an IRN destination:
1. From Connect Contact Center Director, click Routing > IRN.
Administrator Guide Connect CLOUD Contact Center 98

Routing Calls Changing an IRN Destination5
2. In the List View panel select the IRN whose destination you want to change.
3. In the Details View panel, click the Destination tab.
4. Choose the new default destination for the IRN from the Type menu:
Service — Select the appropriate Service. The services in the menu have been previously defined as explained in Specifying Services on page 77.
Device — Specify the appropriate Device number.
Script — Select the appropriate Script. The scripts in the menu have been previously defined, as explained in Chapter 11., Using Call Control Scripts.
Agent Queue — Select the agent whose personal agent queue is the destination. The agents in the menu have been previously associated with a queue, as explained in Adding an Agent Queue Profile on page 102.
5. To specify a shift destination for the IRN, use the options in the Shifts area.
Type — Use to change the type of destination for the selected shift in the Selected list.
Service — If the shift destination is a service, use the drop-down menu to choose the service. The services in the menu have been previously defined as explained in Specifying Services on page 77.
Script — For a shift destination that is a script, choose the script from the drop-down menu. The scripts in the menu have been previously defined, as explained in Chapter 11., Using Call Control Scripts.
Device — If the shift destination is a device, enter the device number.
Agent Queue — If the shift destination is an agent queue, choose the agent whose personal agent queue is the destination. The agents in the menu have been previously associated with a queue, as explained in Adding an Agent Queue Profile on page 102.
Available and Selected List of Shifts — Displays the shifts that exist in the system. To add a shift to the IRN, select the shift in the Available list, and then click . To add all shifts to the
IRN, click . The available shifts have been previously defined. Refer to Defining Shifts on page 156 for details.
To remove a shift from the IRN, select the shift in the Selected list, and then click . To
remove all shifts from the IRN, click .
You can change the destination of the shift by selecting it in the Selected list and changing the Type options.
Note
Mitel highly recommends you do not select Script as the destination for an email IRN. If you select Script and the first action in the script you specify is not to set the service, the email will not be routed to any agents.
99 Connect CLOUD Contact Center Administrator Guide

Modifying an IRN Routing Calls 5
6. For details on a shift, click Explain Shift. In the resulting calendar, select the day whose shifts you want information.
7. Click Save.
Modifying an IRN
Complete the following steps to modify an IRN:
1. From Connect Contact Center Director, click Routing > IRN.
2. In the List View panel select the IRN you want to modify.
3. To edit the IRN’s details, click the General tab and make the appropriate changes.
These options are described in Complete the following steps to create an IRN: on page 95.
4. To change the properties of the call profile fields for calls that enter the IRN, click the Call Profile tab. Refer to Setting Call Profile Field Values for an IRN on page 96 for information.
5. To select a different set of agent skills required for handling calls that enter the IRN, click the Skills tab and follow the directions detailed in Configuring DNIS on page 97.
6. To change the IRN’s default destination, and specify shift destinations, click the Destination tab and select the appropriate options as explained in Changing an IRN Destination on page 98.
7. Click Save.
Deleting an IRN
Complete the following steps to delete an IRN:
1. From Connect Contact Center Director, click Routing > IRN.
2. In the List View panel select the IRN you want to delete, and then click Delete.
Creating Agent Queue Profiles
Agent queue profiles define common attributes that can be used across multiple agents queues. An agent queue allows ACD calls to be queued for a specific agent. If that agent is not available, the call can then be routed to another destination.
This feature is useful if you have a single agent responsible for a certain area of expertise or geographic location, or if your agents give customers their telephone number for direct calls. Agent queues can also be used as a routing destination by a service, IRN, or call control script.
The process of creating agent queue profiles in Connect Contact Center includes the following steps:
1. Set prerequisite agent queue profile parameters.
Administrator Guide Connect CLOUD Contact Center 100

Routing Calls Setting Prerequisite Agent Queue Profile Parameters5
2. Add an agent queue profile.
3. Assign agents to the profile.
4. Change profile thresholds.
5. Define profile announcements.
6. Specify an overflow destination.
7. Determine an interflow destination.
8. Identify a No Agent destination.
9. Select a destination for scheduled callbacks.
10. Choose an Abandoned Calls destination.
You can also modify an agent queue profile, and delete an agent queue profile from the system.
Setting Prerequisite Agent Queue Profile Parameters
Before creating an agent queue profile, you can set the following parameters:
The music source to which the system connects a call waiting in the agent queue. The music source can be a call control script, a music stream, or silence. Refer to the following sections for more information about setting up various music sources:
Chapter 11., Using Call Control Scripts
Configuring Music Streams on page 175
The agent(s) to assign to the queue profile, as explained in Creating Agent Accounts on page 41.
Announcement scripts, if you want callers waiting in the agent queue to hear announcements. Refer to Chapter 11., Using Call Control Scripts.
The agent group or the queue of another agent, if you plan to use overflow destinations. Refer to Creating Agent Groups on page 70 and Adding an Agent Queue Profile on page 102 for details.
The IRN, service, device, call control script, or the queue of another agent that you want to use as an interflow destination. If you plan to use a device as the destination, have the device number available. Refer to the following sections for more information:
Identifying IRNs on page 94
Adding a New Service on page 78
Chapter 11., Using Call Control Scripts
Adding an Agent Queue Profile on page 102
If you plan to specify a No Agent destination, the IRN, device, call control script, or the queue of another agent that you want to use. For a device, have the device number available.Refer to the following sections for more information:
101 Connect CLOUD Contact Center Administrator Guide

Adding an Agent Queue Profile Routing Calls 5
Identifying IRNs on page 94
Adding a New Service on page 78
Chapter 11., Using Call Control Scripts
Adding an Agent Queue Profile on page 102
Once specified, these parameters automatically appear as options that you can choose, allowing you to more quickly and easily create agent queue profiles.
Adding an Agent Queue Profile
Adding an agent queue profile involves specifying the name, settings, statistics, timers, and music source for the profile.
Complete the following steps to create an agent queue profile:
1. From Connect Contact Center Director, click Routing > Agent Queue Profiles.
2. Click New in the List View panel.
If you have an existing agent queue profile with parameters similar to what you want, you can quickly add a new profile by selecting it and clicking Copy.
3. In the General tab, enter a unique name for the profile.
4. Use the options in the Settings area to specify how calls are handled in the agent queue.
Interflow/Overflow on Requeued Calls — Select if you want calls that are placed back in the queue by the agent to be subject to interflow and overflow routing rules.
If this option is not selected, the call stays in the queue until the agent either retrieves it or logs out of the queue.
Incoming Priority — The priority of incoming calls in the agent queue.
If you choose Set Fixed Value, enter a Fixed Value. The value can be any number between 0 and 100 with 100 being the highest priority.
If you choose Set Relative Value, enter a Relative Value. The value can be any number between -100 and 100, with 100 being the highest priority.
Outgoing Priority. The priority of outgoing calls in the agent queue. If you want to change the priority, choose how from the drop-down list. The priority can be specified as either a fixed value or a relative value.
If you choose Set Fixed Value, in the Fixed Value field, enter a new fixed value. The value can be any number between 0 and 100, with 100 being the highest priority.
If you choose Set Relative Value, in the Relative Value field, enter a new relative value. The value can be any number between -100 and 100, with 100 being the highest priority.
Administrator Guide Connect CLOUD Contact Center 102

Routing Calls Assigning Agents to a Profile5
5. If you want the agent queue to be able to handle dial list calls, select Dial Lists. The agent that logs in with this agent queue assignment requires a license for handling outbound dial list calls.
6. You can define the amount of time to gather information for reports in the Statistics area.
Target Average Speed of Answer (ASA) — The amount of time, in seconds, that should elapse between the moment a call is received and answered. This parameter is used to calculate the queue’s Target Service Factor (TSF) and used in Connect Contact Center reports.
Interval Time — The length of time, in minutes, that the queue is monitored for the purpose of reporting on real-time events.
7. In the Timers area, determine the amount of time agents have in wrap-up and release mode.
Wrap-Up Time — The time that an agent has for post call activity after the completion of the call. Though the agent’s extension is idle, Connect Contact Center does not route another call to the agent until after this time period has expired.
Forced Release Timeout — The time that an unanswered call can ring at an agent extension before being routed to another destination, such as to another queue or available agent, and the agent is forced into released mode.
8. Select the Music Source. A music source can be a call control script, a music stream, or silence. If no music source is specified, the system default is used.
If you choose Script, the call is connected to an IVR port and performs the actions indicated in the selected script. Typically, the script has a play action pointing to the music WAV file. The scripts available in the menu have been previously defined, as explained in Chapter 11., Using Call Control Scripts.
If you choose Music Stream, the call is connected to streaming music from the file you select. The music stream files in the menu have been previously defined. Refer to Configuring Music Streams on page 175 for details.
9. Click Create.
Assigning Agents to a Profile
Complete the following steps to assign agents to an agent queue profile:
1. From Connect Contact Center Director, click Routing > Agent Queue Profiles.
2. In the List View panel select the profile to which you want to assign agents.
3. In the Details View panel, click the Agents tab.
4. To add an agent to the profile, select the agent in the Available list and then click . To add all
agents to the profile, click .
Each agent can only be assigned to one profile at a time. If an existing agent does not appear in the Available list, that agent has already been assigned to an agent queue profile.
103 Connect CLOUD Contact Center Administrator Guide

Changing a Profile’s Threshold Value Routing Calls 5
The agents in the Available list have been previously defined, as explained in Creating Agent Accounts on page 41.
5. To remove an agent from the profile, select the agent in the Selected list and then click . To
remove all agents from the profile, click .
6. Click Save.
Changing a Profile’s Threshold Value
Threshold values are assigned to some of the fields that are shown in real-time reports to alert you to changing conditions of an agent queue.
Alerts are indicated in a queue report by being highlighted with default background colors. The Yellow threshold indicates that the value is in a low warning range meaning it is slightly too high or too low; by default fields that exceed this threshold are highlighted in yellow. The Red threshold indicates the value is in a high warning range meaning it is unacceptably high or low; by default fields that exceed this threshold are highlighted in red. You can change the default background color for these fields, as explained in Specifying Reporting Preferences on page 157.
Complete the following steps to change a profile’s threshold value:
1. From Connect Contact Center Director, click Routing > Agent Queue Profiles.
2. In the List View panel, select the profile you want to change threshold values for.
3. In the Details View panel, click the Thresholds tab.
4. For the specific field, select the threshold number you want to change in the Yellow State or Red State area, and enter the new value.
5. Click Save.
Defining Profile Announcements
Complete the following steps to define a profile announcement:
1. From Connect Contact Center Director, click Routing > Agent Queue Profile.
2. In the List View panel select the profile for which you want to define an announcement.
3. In the Details View panel, click the Announcements tab.
4. Use the Mandatory Announcement area to define the mandatory announcement for the queue.
Enabled — Select to turn on the mandatory announcement. All callers entering the queue hear the mandatory announcement, regardless of the availability of agents. An example of a mandatory announcement is “This call may be recorded for quality and training purposes,” which is heard by every caller.
Script — The script to be played. The available scripts have been previously defined. Refer to Chapter 11., Using Call Control Scripts for information.
Administrator Guide Connect CLOUD Contact Center 104

Routing Calls Specifying a Profile Overflow Destination5
Time After Mandatory — The length of time, in seconds, that the caller hears music before the next announcement.
5. If you want an announcement that is heard only one time when the caller first enters the agent queue, use the options in the First Announcement area.
Enabled — Select to turn on the first announcement.
Script — The script to be played. The scripts available in the drop-down menu have been previously defined. Refer to Chapter 11., Using Call Control Scripts for information.
Time After First — The length of time, in seconds, that the caller hears music before the next announcement.
6. Cycle Secondary allows you to specify which secondary announcements play and how often.
Cycle All — All secondary announcements are played repeatedly.
Cycle Last — The last secondary announcement is played repeatedly.
No Cycle — Each secondary announcement is played only once.
7. The Secondary Announcements area allows you to identify the secondary announcements you want to use for this agent queue profile.
Enabled — Select to turn on or off the selected secondary announcement in the list.
Script — Use to change the script to be played for the selected secondary announcement in the list. The scripts available in the drop-down menu have been previously defined. Refer to Chapter 11., Using Call Control Scripts for information.
Time — Enter a different length of time, in seconds, that the caller hears music before the next announcement for the selected secondary announcement in the list.
To define a secondary announcement, click Add. Use the Enabled, Script, and Time options to change the default properties for the announcement. You can define up to 20 secondary announcements.
To delete a secondary announcement, select it in the list and then click Remove.
Once the list of secondary announcements is correct, place the announcements in the order
that you want the them to be played, by selecting an announcement and using the and
to move it to the correct position in the list.
8. Click Save.
Specifying a Profile Overflow Destination
Overflow improves the way calls waiting in a queue are handled, by offering these calls to another agent queue or to an agent group. This expands the number of agents who can answer waiting calls. Overflow is activated after the overflow timeout interval has been reached.
In addition to incoming calls, overflow can also be applied to outbound calls.
105 Connect CLOUD Contact Center Administrator Guide

Specifying a Profile Overflow Destination Routing Calls 5
Complete the following steps to specify an overflow destination for the agent queue profile:
1. From Connect Contact Center Director, click Routing > Agent Queue Profiles.
2. In the List View panel select the profile whose overflow destination you want to specify.
3. In the Details View panel, click the Overflow tab.
4. To also apply overflow to outbound calls, click Outbound Call Overflows.
5. In the Selection Criteria on Overflow area, define the method by which an available agent is selected for a call that enters the queue of an Overflow group. This method is used whenever a call enters the queue of an Overflow group, and there is more than one available agent to handle the call. If only one agent is available at that time, that agent will get the call.
Longest Idle Agent — The call is assigned to the agent who has been idle the longest.
Terminal — The call is assigned to the first available agent, in the order the agent is listed in the Groupings > Groups > Agents tab.
Circular — The system searches the Overflow group’s agent list, starting from the last agent to receive a call, for the next available agent. This method attempts to distribute calls equally between agents in the Overflow group.
Best Skill Fit — The system looks for the agent whose skills best fit the requirements of the call. In a case where two agents with the same skill fit are found, the system uses the selected following method to decide which agent receives the call.
Longest Idle — The call is assigned to the agent, among all the agents with the same skill fit, who has been idle the longest.
Terminal — The call is assigned to the first available agent, among all the agents with the same skill fit, in the order the agent is listed in the Groupings > Groups > Agents tab.
Circular — The system searches the queue’s agent list, among all the agents with the same skill fit, starting from the last agent to receive a call, for the next available agent. This method attempts to distribute calls equally between agents in the queue.
Note
Agents must be logged into the group associated with this service, as a primary group, to be assigned the call in the order listed in the Groupings > Groups > Agents tab. Agents logged into this group, but not as a primary group, receive the call only if all other agents in the list are not available.
Agents are assigned primary groups using the Agents > Agents > Groups tab or Groupings > Groups > Agents tab. Refer to Assigning Primary Groups to an Agent on page 47 and Assigning Agents to a Group on page 72 for details.
Administrator Guide Connect CLOUD Contact Center 106

Routing Calls Determining a Profile Interflow Destination5
6. If you want the overflow destination to be an agent group, use the options in the Overflow Group area.
Timeout — Use to change the timeout interval of the selected group in Selected list. The timeout interval is the number of seconds a call is in queue, after the mandatory announcement. Once reached, the call is overflowed into another group.
Available and Selected List of Overflow Groups — Displays the agent groups that exist in the system. To add an agent group to the queue as an overflow destination, select the group in the
Available list, and then click . To add all groups as an overflow destination, click . The available groups have been previously defined. Refer to Creating Agent Groups on page 70 for details.
To remove a group as an overflow destination, select the group in the Selected list, and then
click . To remove all groups as an overflow destination, click .
You can modify the overflow timeout properties of a group by selecting it in the Selected list and changing the Timeout option.
7. Use the options in the Overflow Queue of Other Agents area if you want to specify another agent queue as the overflow destination.
Timeout — Use to change the timeout interval of the selected agent’s queue in the Selected list. The timeout interval is the number of seconds a call is in queue, after the mandatory announcement. Once reached, the call is overflowed into another agent queue.
Available and Selected List of Overflow Agent Queues — Displays the agents in the system with queues. In the Selected list, add and remove agent queues to specify the queue to which you want to add another agent queue as an overflow destination. The available agent queues have been previously defined. Refer to Adding an Agent Queue Profile on page 102 for details.
You can modify the overflow timeout properties of an agent queue by selecting it in the Selected list and changing the Timeout option.
8. Click Save.
Determining a Profile Interflow Destination
Interflow transfers calls waiting in a queue to another destination. Interflow is activated after a specified period of time (timeout) has been reached.
Note
When Best Skill Fit is combined with Circular, calls are routed to agents starting with the agent who has the best skill fit. For example, if you have 10 agents active, and agent number 3 has the best skill fit, calls will be routed to this agent before any other agent, and then calls will be routed from this agent forward. If agent number 3 is not available, the call will route to agent 4 and beyond. This scenario may mean that agent 3 has the highest number of calls, and agents 1 and 2 do not get calls routed to them.
107 Connect CLOUD Contact Center Administrator Guide

Identifying a Destination for a Queue with No Agents Routing Calls 5
Once a call has been interflowed, it is no longer part of the ACD domain. If the interflow destination is an IRN or service, the call reenters the system as a new ACD call.
To determine a profile interflow destination:
1. From Connect Contact Center Director, click Routing > Agent Queue Profiles.
2. In the List View panel select the profile whose interflow destination you want to determine.
3. In the Details View panel, click the Interflow tab.
4. If you want calls to be automatically sent to the interflow destination based on the estimated wait time, rather than waiting in the queue until the timeout interval has been reached, select the Predictive Interflow option.
By default, the estimated wait time is 10 seconds. This default time can be changed using the Announce Wait Time action. Refer to Announce Wait Time on page 189 for more information.
5. In Default Destination, choose the interflow destination, and then use one of the following fields to specify the destination:
IRN — Select an IRN for the default destination. The IRNs in the menu have been previously defined, as explained in Complete the following steps to create an IRN: on page 95.
Service —Select a Service for the default destination. The services in the menu have been previously defined. Refer to Adding a New Service on page 78 for information.
Device —If the default destination is a device, enter the device number.
Script — Select a Script for the default destination. The scripts in the menu have been previously defined. Refer to Chapter 11., Using Call Control Scripts for details.
Agent Queue — If the default destination is another agent queue, choose the agent whose personal agent queue is the destination. The agents in the menu have been previously associated with an agent queue, as explained in Adding an Agent Queue Profile on page 102.
6. In Timeout, specify the number of seconds that calls wait in the queue before being interflowed. The maximum number of seconds that you can enter in this field is 9,999. If you require more time, contact your Mitel representative.
7. Click Save.
Identifying a Destination for a Queue with No Agents
The No Agents destination routes calls in an agent queue that has no agents logged into it to another destination. By default, this is the Incomplete destination. If the No Agents destination is an IRN, the system counts it as a new, incoming call.
Complete the following steps to identify a No Agent destination:
1. From Connect Contact Center Director, click Routing > Agent Queue Profiles.
2. In the List View panel, select the profile for which you want to identify a No Agent destination.
Administrator Guide Connect CLOUD Contact Center 108
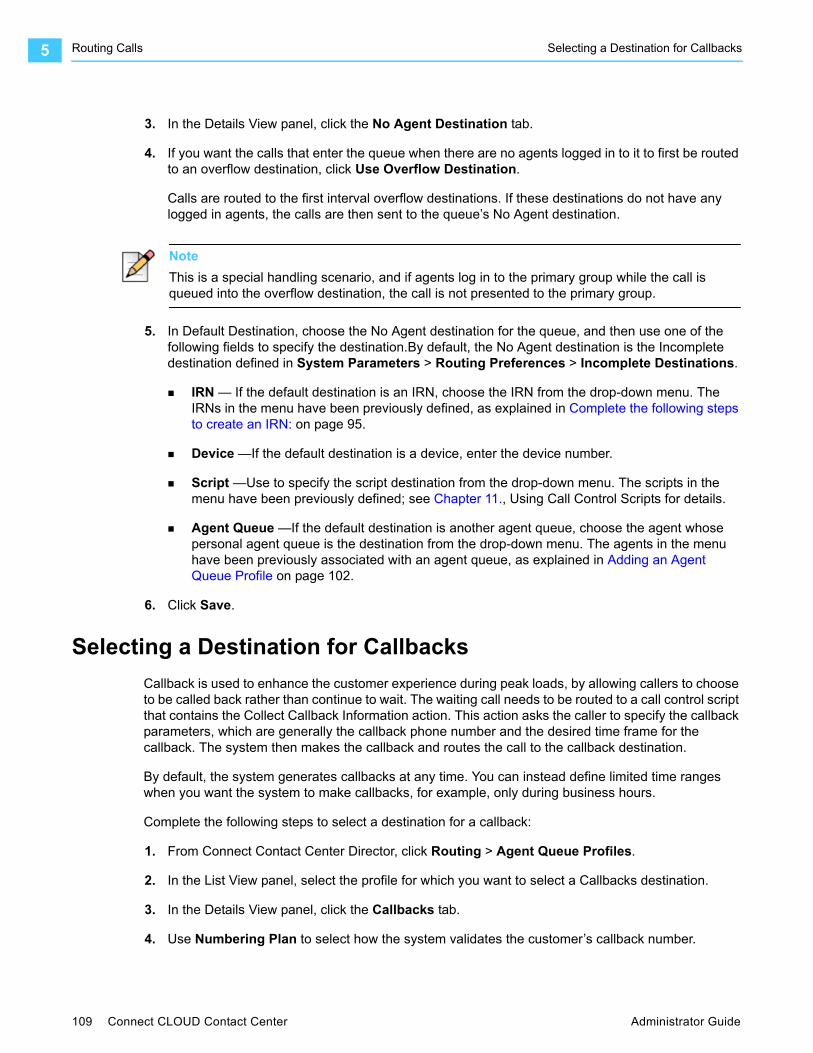
Routing Calls Selecting a Destination for Callbacks5
3. In the Details View panel, click the No Agent Destination tab.
4. If you want the calls that enter the queue when there are no agents logged in to it to first be routed to an overflow destination, click Use Overflow Destination.
Calls are routed to the first interval overflow destinations. If these destinations do not have any logged in agents, the calls are then sent to the queue’s No Agent destination.
5. In Default Destination, choose the No Agent destination for the queue, and then use one of the following fields to specify the destination.By default, the No Agent destination is the Incomplete destination defined in System Parameters > Routing Preferences > Incomplete Destinations.
IRN — If the default destination is an IRN, choose the IRN from the drop-down menu. The IRNs in the menu have been previously defined, as explained in Complete the following steps to create an IRN: on page 95.
Device —If the default destination is a device, enter the device number.
Script —Use to specify the script destination from the drop-down menu. The scripts in the menu have been previously defined; see Chapter 11., Using Call Control Scripts for details.
Agent Queue —If the default destination is another agent queue, choose the agent whose personal agent queue is the destination from the drop-down menu. The agents in the menu have been previously associated with an agent queue, as explained in Adding an Agent Queue Profile on page 102.
6. Click Save.
Selecting a Destination for Callbacks
Callback is used to enhance the customer experience during peak loads, by allowing callers to choose to be called back rather than continue to wait. The waiting call needs to be routed to a call control script that contains the Collect Callback Information action. This action asks the caller to specify the callback parameters, which are generally the callback phone number and the desired time frame for the callback. The system then makes the callback and routes the call to the callback destination.
By default, the system generates callbacks at any time. You can instead define limited time ranges when you want the system to make callbacks, for example, only during business hours.
Complete the following steps to select a destination for a callback:
1. From Connect Contact Center Director, click Routing > Agent Queue Profiles.
2. In the List View panel, select the profile for which you want to select a Callbacks destination.
3. In the Details View panel, click the Callbacks tab.
4. Use Numbering Plan to select how the system validates the customer’s callback number.
Note
This is a special handling scenario, and if agents log in to the primary group while the call is queued into the overflow destination, the call is not presented to the primary group.
109 Connect CLOUD Contact Center Administrator Guide

Selecting a Destination for Callbacks Routing Calls 5
None — No validity check is done. Any number is accepted.
North American — The system ensures that the number has the format NPX-NXX-XXXX, where:
N — must be a digit between 2 and 9.
P — must be a digit between 0 and 8.
X — may be any digit.
If the number is not valid, the system asks the customer to enter it again.
5. In the Attempt Callback field, set the limit, in hours, between the time that the customer requested the callback and the time it is actually dialed.
6. If you want to play a script before transferring the callback to an agent, click Run Script before Transferring to Agent. In the associated Script field, choose the specific call control script to be used.
The scripts available in the menu have been previously defined. Refer to Chapter 11., Using Call Control Scripts for information.
7. Click Require Agent Confirmation if you want agents to be able to choose whether to accept or reject a callback. The agent sees a popup window displaying the call's parameters and providing the option to accept the callback. The call is transferred to the agent only if the agent accepts the callback.
You can then change the amount of time, from the default 10 seconds, that the system waits for the agent to either accept or reject the callback, in the Wait for Agent Confirmation field. If no action is taken by the agent within this amount of time, the system considers the callback rejected and forces the agent into release mode.
8. If you want to specify a limited time range for callbacks, use the options in the Time Range area.
Time Range Enabled — Select to turn on the Time Range feature.
Start Time — Use to change the start time of the selected time range in the list.
Stop Time — Use to change the stop time of the selected time range in the list.
List of Time Ranges — Displays the previously defined time ranges. To add a time range to the queue, click Add, and then adjust the start and stop times using the appropriate fields as necessary. You can add multiple time ranges.
To remove a time range from the queue, select the time range in the list and click Remove.
9. Click Save.
Tip
When you configure your system to transfer a callback call to an agent upon connection, Mitel suggests you configure any related scripts to include an announcement to let the caller know that the call has been placed as a result of a callback request and to announce that the caller is being connected to an agent.
Administrator Guide Connect CLOUD Contact Center 110

Routing Calls Choosing an Abandoned Calls Destination5
Choosing an Abandoned Calls Destination
An abandoned call is a call that was disconnected (i.e. the caller hung up) before being handled by an agent. The system can automatically generate a callback to the caller who abandoned the call while in an agent queue, if the incoming DID number has been captured. The system then routes the call to the queue’s Abandoned Calls destination.
By default, the system generates callbacks to abandoned calls at any time. You can instead define limited time ranges when you want the system to make callbacks (for example, only during business hours).
Complete the following steps to choose an abandoned calls destination:
1. From Connect Contact Center Director, click Routing > Agent Queue Profiles.
2. In the List View panel select the profile for which you want to choose an Abandoned Calls destination.
3. In the Details View panel, click the Abandoned Calls tab.
4. Select Abandoned Callbacks Enabled.
5. In Callback if Call Abandoned After, set the time, in seconds, that a call must be in the IRN before being considered abandoned.
This parameter allows you to filter out calls that were abandoned after only a relatively short time. In many cases, a short time in the IRN indicates that the call was a wrong number, and a callback is not required.
6. If you want to play a script before transferring the callback to an agent, click Run Script before Transferring to Agent. In the Script field, choose the specific call control script to be used.
The scripts available in the menu have been previously defined. Refer to Chapter 11., Using Call Control Scripts for information.
7. Click Require Agent Confirmation if you want agents to be able to choose whether to accept or reject a callback. The agent sees a popup window displaying the call's parameters and providing the option to accept the callback. The call is transferred to an agent only if the agent accepts the callback.
You can then change the amount of time, from the default 10 seconds, that the system waits for the agent to either accept or reject the callback, in the Wait for Agent Confirmation field. If no action is taken by the agent within this amount of time, the system considers the callback rejected and forces the agent into release mode.
Tip
When you configure your system to transfer a callback call to an agent upon connection, Mitel suggests you configure any related scripts to include an announcement to let the caller know that the call has been placed as a result of a callback request and to announce that the caller is being connected to an agent.
111 Connect CLOUD Contact Center Administrator Guide

Modifying an Agent Queue Profile Routing Calls 5
8. If you want to specify a limited time range for abandoned calls, use the options in the Time Range area.
Time Range Enabled — Select to turn on the Time Range feature.
Start Time — Use to change the start time of the selected time range in the list.
Stop Time — Use to change the stop time of the selected time range in the list.
List of Time Ranges — Displays the previously defined time ranges. To add a time range to the queue, click Add, and then adjust the start and stop time, using the appropriate fields, as necessary. You can add multiple time ranges.
To remove a time range from the queue, select the time range in the list and click Remove.
9. Click Save.
Modifying an Agent Queue Profile
Complete the following steps to modify an agent queue:
1. From Connect Contact Center Director, click Routing > Agent Queue Profiles.
2. In the List View panel, select the queue you want to modify.
3. To edit the queue’s details, click the General tab and make the appropriate changes.
Refer to Adding an Agent Queue Profile on page 102 for information about the options on the General tab.
4. To change the agents assigned to the queue, use the options in the Agents tab, as described in Assigning Agents to a Profile on page 103.
5. To define different queue thresholds, click the Thresholds tab and follow the directions detailed in Changing a Profile’s Threshold Value on page 104.
6. To change the queue’s announcements, click the Announcements tab and define new announcements as detailed in Defining Profile Announcements on page 104.
7. To specify a different queue overflow destination, click the Overflow tab and select the appropriate options as explained in Specifying a Profile Overflow Destination on page 105.
8. To modify the queue’s interflow destination, click the Interflow tab and change the appropriate options as described in Determining a Profile Interflow Destination on page 107.
9. To select a different No Agent destination for the queue, click the No Agent Destination tab and follow the directions detailed Identifying a Destination for a Queue with No Agents on page 108.
10. To change the queue’s callback destination, click the Callbacks tab and define a new destination as detailed in Selecting a Destination for Callbacks on page 109.
11. To select a different abandoned calls destination for the queue, click the Abandoned Calls tab and make the appropriate changes as explained in Choosing an Abandoned Calls Destination on page 111.
Administrator Guide Connect CLOUD Contact Center 112

Routing Calls Deleting an Agent Queue Profile5
12. Click Save.
Deleting an Agent Queue Profile
You can delete an agent queue profile from the system. However, profiles defining agent queues used as a routing destination by a service, IRN, or call control script, cannot be deleted until you remove the agent queue as a destination. Connect Contact Center displays an alert when you click Delete, if this needs to be done for a specific profile.
Complete the following steps to delete an agent queue profile:
1. From Connect Contact Center Director, click Routing > Agent Queue Profiles.
2. In the List View panel, select the profile you want to delete.
3. Click Delete.
113 Connect CLOUD Contact Center Administrator Guide

CHAPTER
6. Defining How EmailReaches Agents
The email entities specify how email contacts reach agents. This chapter includes information about the following procedures for defining how email reaches agents:
Setting Prerequisite Email Parameters ................................................................... 114
Adding a New Email Account.................................................................................. 115
Creating Email Groups............................................................................................ 118
Specifying an Email Service.................................................................................... 120
Identifying Email IRNs............................................................................................. 125
Defining Email Agent Queue Profiles...................................................................... 129
Setting Prerequisite Email Parameters
Before working with email entities, you can set the following parameters:
The agents who will be assigned to the email group. Refer to Adding a new agent account involves specifying general details for an agent. Agents records are automatically set to use a default class of service (COS), which is a configurable set of capabilities to which an agent can have access. on page 42 for details.
Email groups to serve as a default, shift, or overflow destination of an email service. Refer to Creating Email Groups on page 118.
The routing destinations to be used at different times of the day if Connect Contact Center uses multiple work shifts. Refer to Defining Shifts on page 156.
Administrator Guide Connect CLOUD Contact Center 114

Defining How Email Reaches Agents Adding a New Email Account6
Interflow destinations, which can be an email IRN, another email service, an email address — have the address available, or a call control script. Refer to the following sections for more information:
Identifying Email IRNs on page 125
Specifying an Email Service on page 120
Chapter 11, Using Call Control Scripts
IRN email accounts to be used as email entry points to the routing system. Refer to Adding a New Email Account on page 115 for more information.
For an email IRN, the user-defined (optional) call profile fields used to route the email and provide relevant history. Refer to Creating Call Profile User Fields on page 163 for details.
The skills to be used if you want to assign agent skills to the email IRN. For details, see Identifying Agent Skills on page 162.
The service, call control script, or email address to use as the default or shift destination for an email IRN. Refer to the following sections for more information:
Identifying Email IRNs on page 125
Specifying an Email Service on page 120
Chapter 11, Using Call Control Scripts
Email accounts that represent an email DNIS. Refer to Adding a New Email Account on page 115 for more information.
Once specified, these parameters automatically appear as options that you can choose, allowing you to more quickly and easily work with email entities.
Adding a New Email Account
An email account is a destination for emails in the system. The email account is where emails are routed from when they are routed to available agents.
Note
To avoid unexpected results, configure the Connect Contact Center email account to not use server-based rules. For example, ensure that there are no rules configured to copy or move any incoming email messages to the Connect Contact Center email account or to any other destination.
Note
Avoid accessing Connect Contact Center email accounts through the email client.
115 Connect CLOUD Contact Center Administrator Guide

Adding a New Email Account Defining How Email Reaches Agents 6
Complete the following steps to add a new email account:
1. From Connect Contact Center Director, click Email > Email Accounts.
2. Click New.
If you have an existing email account with parameters similar to what you want, you can quickly add a new account by selecting it and clicking Copy.
3. In the General tab, specify the following parameters:
Account Name — The name of the account you are setting up email for. For example, if you are setting up email for the sales team, you might enter “sales” here.
Account Address — The email address for the account.
Agent-Inactivity Timeout Value — The amount of time an agent can be inactive before the interaction times out. When the interaction times out, the timeout is logged and reported, and the email is rerouted to another agent. When the email is rerouted to another agent, the original agent enters wrap-up mode and becomes idle.
Send Automatic Confirmation — Automatically sends a reply email to the contact.
Automated Response from Address — The email address that the contact sees when they receive an automatic reply.
Automated Response Text — Content included in the automatic reply.
4. Click the Incoming tab, and specify the following parameters:
Note
If you need to change an Account Address, add a new one and maintain the original Account Address until any queues for it are empty. If you delete an Account Address while there are emails queued for it, the emails will be inaccessible.
Note
To manage read receipts, do the following:
Configure the mail server to suppress read receipts. For example, for Microsoft Exchange Management Shell, you might specify set-ImapSettings -SuppressReadReceipt $true. Refer to the documentation for your mail server for detailed information about suppressing read receipts.
Select Send Automatic Confirmation and configure the settings as appropriate for your system. If Send Automatic Confirmation is not selected and the ECC email account receives a message that requires a read receipt, it is possible that the sender may receive a message indicating that their message was deleted without being read.
If you are using Exchange server, you can enter text or your personal email address in Automated Response from Address, otherwise, Exchange will not send the automatic reply. Refer to Microsoft documentation about sending email on behalf of others for more information.
If you are using a public email server, you only can use your personal email address for Automated Response from Address.
Administrator Guide Connect CLOUD Contact Center 116

Defining How Email Reaches Agents Adding a New Email Account6
Email Server — This is the IP address or fully qualified domain name of the email server.
Username — This is the user name for the email account.
Password — This is the password for the email account.
Protocol — This field defaults to IMAP and cannot be changed.
SSL Enabled — When selected, this field enables transport layer protocol (TLP) protection for the email account, which means that communication transmitted to and from the email account specified is encrypted and authenticated.
Port — If SSL Enabled is checked, the default port is 993. If SSL Enabled is not checked, the default port is 143.
Priority — A max of 100 emails may be queued for agents. Additional emails arriving in an incoming email account must wait for processing as backlog. When an agent becomes available and answers a queued email, the number of queued emails drops to 99, and the next highest priority email is selected from the backlog and submitted to Connect Contact Center for routing.
The higher the number specified here, the higher priority is for the email.To prevent email account starvation, where emails from one account are never processed because the system is processing emails from another higher priority email account, Connect Contact Center processes one email by earliest arrival time for every nine emails processed by priority.
5. Select the Outgoing tab and specify the following parameters:
Use Incoming Settings — When selected, the rest of the fields on this page default to the settings you set on the Incoming tab.
Email Server — This is the IP address or fully qualified name of the email server.
Username — This is the user name for the email account.
Password — This is the password for the email account.
Protocol — This field defaults to SMTP and cannot be changed.
Start TLS — TLS (Transport Layer Security) provides a way to change data, such as your username and password, into code as it travels across the Internet. This ensures that the data is secure and private. TLS begins with an unsecured connection to the mail servers, and then upgrades to a secure connection when information is sent.
Note
Connect Contact Center support for TLS 1.1 and 1.2 has been verified on Exchange Server 2013 and Exchange Server 2016.
Note
If you select Use Incoming Settings and you selected SSL Enabled on the Incoming tab, Start TLS is also enabled.
117 Connect CLOUD Contact Center Administrator Guide

Creating Email Groups Defining How Email Reaches Agents 6
Port — The default port is 25.
6. Select the Advanced tab and use Reporting Interval to specify how often you want information about this email account to be collected for reporting purposes.
7. Click Create.
Creating Email Groups
Agents can be organized into primary email groups, which are typically a collection of agents that can deliver the same service to incoming email contacts. Using Interaction Center, agents can then log into their primary email groups. Agents can also log into other email groups if the Agents > Class of Service > Initiate Specific Login/Logout option is selected. Refer to Creating an Agent Class of Service on page 50 for more information.
Emails sent to the group are presented to the most appropriate agent according to the specified routing policy.
Threshold values are assigned to some of the fields that are shown in real-time reports to alert you to changing conditions of the email group. The system assigns a default value to a low and high warning level for these fields, which you can change. Alerts are indicated in a group report by being highlighted with default background colors. The Yellow threshold indicates that the value is in a low warning range, meaning that it is slightly too high or too low. By default, fields that exceed this threshold are highlighted in yellow. The Red threshold indicates the value is in a high warning range, meaning it is unacceptably high or unacceptably low. By default, fields that exceed this threshold are highlighted in red. You can change the default background color for these fields. Refer to Specifying Reporting Preferences on page 157 for more information.
You can also identify the number of agents required by an email group on a daily basis. Once these numbers are identified, they become the group’s default staffing setting. A calendar is then generated for the group displaying the number of staff members required for each day of the week. These parameters are also used for the group’s staffing real-time and historical reports, which measure actual vs. required staffing.
Complete the following steps to create an email group:
1. From Connect Contact Center Director, click Email > Email Groups.
2. Click New.
If you have an existing email group with parameters similar to what you want, you can quickly add a new group by selecting it and clicking Copy.
3. In the General tab, specify a unique name for the group.
Note
Each agent assigned to an email group must have an email address configured in Agents > Agents > General. Connect Contact Center sends email that is routed to an agent to this email address.
Administrator Guide Connect CLOUD Contact Center 118

Defining How Email Reaches Agents Assigning Agents to Email Groups6
4. Use the options in the Statistics area to change the time intervals that are relevant to the monitoring of emails in the Connect Contact Center system for the group:
Target Average Speed of Answer (ASA) — The amount of time, in hours and minutes, that should elapse between the moment an email is received and answered. This parameter is used to calculate the group’s Target Service Factor (TSF) and used in Connect Contact Center reports.
Max ACD Talk Time — The length of time, in hours and minutes, that interaction with an email must exceed to be counted as a long contact.
Short Calls Threshold — The length of time, in seconds, that an email must be under to be counted as a short contact.
Interval Time — The length of time, in hours and minutes, that the email group is monitored for the purpose of reporting on real-time events.
For example, if this option is 10 minutes, the report for the group shows statistics for the last 10 minutes.
5. In the Service Time Intervals (STI) area, specify the time intervals, by hour and minutes, for which email statistics are monitored for the purpose of reporting.
For example, intervals can be 0 to 2 hours, 2 to 4 hours, 4 to 6 hours, and so on.
6. Click Create.
Assigning Agents to Email Groups
Complete the following steps to add agents to email groups:
1. From Connect Contact Center Director, click Email > Email Groups.
2. Click the Agents tab.
3. Select the agent in the Available list and then click . To add all agents to the group, click . The agents in the Available list have been previously defined, as explained in Creating Agent Accounts on page 41.
To remove an agent from the email group, select the agent in the Selected list and then click .
To remove all agents from the group, click .
Once the list of agents for the email group is correct in the Selected list, reorder the agents by
using the and to reflect the order, such as by ability, in which you want emails to be routed from the group to the agent.
Changing Email Group Threshold Values
Complete the following steps to change email group threshold values:
1. From Connect Contact Center Director, click Email > Email Groups.
119 Connect CLOUD Contact Center Administrator Guide

Identifying Staffing Requirements for Email Groups Defining How Email Reaches Agents 6
2. Click the Thresholds tab.
3. Select the threshold number you want to change, and enter the appropriate value in the Yellow State and Red State fields.
Identifying Staffing Requirements for Email Groups
Complete the following steps to identify staffing requirements for email groups:
1. From Connect Contact Center Director, click Email > Email Groups.
2. Click the Staffing tab.
3. Specify the number of agents needed in the group for each day of the week.
You can change the staffing requirement for an individual day, such as a national holiday, by selecting the day on the calendar and then entering the number of agents in the Number of Required Agents field.
Changes to the number of required agents take effect at midnight on the day the change is made.
Specifying an Email Service
The Email Services entity defines how incoming emails are processed. Email services are analogous to a waiting room where emails are managed until they can be answered or otherwise handled. Every incoming email contact is assigned to a specific service with destination, overflow, and interflow settings along with other business rules.
An email service is associated with an email group as its routing destination. You can also specify shift destinations, which are routing destinations used at different times of the day.
Overflow improves the way emails waiting in an email service are handled by offering these emails to another group. This expands the number of agents who can answer waiting email. Overflow is activated after a specified period of time — the overflow timeout interval — has been reached.
Interflow transfers emails waiting in a service to a destination other than a group. Interflow is activated after a specified period of time — timeout — has been reached. Separate interflow destinations can also be defined for different shifts.
Complete the following steps to specify an email service:
1. From Connect Contact Center Director, click Email > Email Services.
2. Click New.
If you have an existing email service with parameters similar to what you want, you can quickly add a new service by selecting it and clicking Copy.
3. In the General tab, specify a unique Name for the email service.
Administrator Guide Connect CLOUD Contact Center 120

Defining How Email Reaches Agents Specifying an Email Service6
4. In Agent Selection Criteria — The method by which an available agent is selected for an email that enters the service.
Longest Idle — The email is assigned to the agent who has been idle the longest.
Terminal — The email is assigned to the first available agent, in the order the agent is listed in the Email > Email Groups > Agents tab.
Circular — The system searches the service’s agent list, starting from the last agent to receive an email, for the next available agent. This method attempts to distribute email equally between agents in the service.
Best Skill Fit — The system looks for the agent whose skills best fit the requirements of the email. In a case where two agents with the same skill fit are found, the system uses the selected following method to decide which agent receives the email.
Longest Idle — The email is assigned to the agent, among all the agents with the same skill fit, who has been idle the longest.
Terminal — The email is assigned to the first available agent, among all the agents with the same skill fit, in the order the agent is listed in the Email > Email Groups > Agents tab.
Circular — The system searches the service’s agent list, among all the agents with the same skill fit, starting from the last agent to receive an email, for the next available agent. This method attempts to distribute emails equally between agents in the service.
5. Email interrupts Voice Interaction — When selected, the system will route email interactions to agents who are currently on voice interactions. When this option is not selected, agents are not interrupted by email while on voice interactions. This option is disabled by default.
6. From the Timers area, specify the amount of time, in seconds, an agent has in wrap-up and release mode:
Note
To be assigned the email in the order listed in the Email > Email Groups > Agents tab, Agents must be logged in to the group associated with this email service as a primary group. Agents logged into this group, but not as a primary group, receive the email only if all other agents in the list are not available.
Agents are assigned primary email groups using the Email > Email Groups > Agents tab. Refer to Creating Email Groups on page 118 for details.
Note
When Best Skill Fit is combined with Circular, emails are routed to agents starting with the agent who has the best skill fit. For example, if you have 10 agents active, and agent number 3 has the best skill fit, emails will be routed to this agent before any other agent, and then emails will be routed from this agent forward. If agent number 3 is not available, the email will route to agent 4 and beyond. This scenario may mean that agent 3 has the highest number of emails, and agents 1 and 2 do not get emails routed to them.
121 Connect CLOUD Contact Center Administrator Guide

Specifying an Email Service Defining How Email Reaches Agents 6
Wrap-Up Time — The time that an agent has for post contact activity after the completion of the email. Though the agent’s extension is idle, Connect Contact Center does not route another email to the agent until after this time period has expired.
Forced Release Timeout — The time that an unanswered email can sit in the agent’s inbox before being rerouted to another destination, such as back to a service or to another available agent, and the agent is forced into released mode.
If this option is left undefined, the system uses the default time specified in System Parameters > Routing Preferences > Service Settings.
7. Use the options on the Destination tab to change default destination for the email service and to specify shift destinations:
Default Destination — From the Type drop-down menu, choose an email group or an email agent queue profile as the default destination of the service, if a shift destination is not defined.
The groups in the list have been previously defined. Refer to Creating Email Groups on page 118.
Shifts area — Use the options in this area to add a shift destination to the service:
Destination — Use to select either Group or Agent Queue as the destination for the selected shift.
Group — Use to change the email group destination for the selected shift. The groups in the list have been previously defined. Refer to Creating Email Groups on page 118 for more information.
Agent Queue — Use to change the agent queue destination for the selected shift. The agent queues in the list have been previously defined. Refer to Creating Agent Queue Profiles on page 100 for more information.
Available and Selected List of Shifts — Displays the shifts that exist in the system. To add a shift to the email service, select the shift in the Available list, and then click . To add
all shifts to the service, click . The available shifts have been previously defined. Refer to Defining Shifts on page 156 for details.
To remove a shift from the email service, select the shift in the Selected list, and then click
. To remove all shifts from the service, click .
You can modify the properties of a shift by selecting it in the Selected list and changing the Group or Agent Queue option.
Explain Shift — Click for details on a shift. In the resulting calendar, select the day for which you want shift information.
8. Use the Overflow tab options to specify the overflow destination for the email service:
Overflow Group area — Specify the service overflow destination to be an email group.
Timeout — Use to change the timeout interval of the selected email group in Selected list. The timeout interval is the amount of time (in hours, minutes, and seconds) an email is in the group. Once reached, the email is overflowed into another group.
Administrator Guide Connect CLOUD Contact Center 122

Defining How Email Reaches Agents Specifying an Email Service6
Available and Selected List of Overflow Groups — Displays the email groups that exist in the system. Add and remove groups from the Selected list to identify the email groups you want to be the overflow destination. The available groups have been previously defined. Refer to Creating Email Groups on page 118 for details.
You can modify the overflow timeout properties of an email group by selecting it in the Selected list and changing the Timeout option.
Overflow Agent Queues area — Specify the service overflow destination to be an agent queue.
Timeout — Use to change the timeout interval of the selected agent queue in Selected list. The timeout interval is the amount of time, in hours, minutes, and seconds, an email is in the agent queue. Once the timeout limit is reached, the email is overflowed into another agent queue.
Available and Selected List of Agent Queues— Displays the agent queues that exist in the system. Add and remove agent queues from the Selected list to identify the agent queues you want to be the overflow destination. The available agent queues have been previously defined. Refer to Adding an Email Agent Queue on page 129 for details.
You can modify the overflow timeout properties of an email group by selecting it in the Selected list and changing the Timeout option.
Overflow Shift Groups area — Add an email group as an overflow destination for a shift.
Shift — Use to change the shift for the selected shift. The shifts in the drop-down menu have been previously defined. Refer to Defining Shifts on page 156 for information.
Group — Use to change the email group for the selected shift. The groups in the drop-down have been previously defined. Refer to Creating Email Groups on page 118 for more information.
Timeout — Enter a different timeout interval for the selected shift. The timeout interval is the amount of time, in hours, minutes, and seconds, an email is in the group. Once the timeout interval is reached, the email is overflowed into another group.
List of Shifts — The shifts that exist in the system. You can modify the properties of a shift by selecting it in the list and changing the Shift, Group, and Timeout options.
To define an overflow group destination for a shift, click Add. Use the Shift, Group, and Timeout options to change the default properties for the shift.
To delete a shift, select it in the list and click Remove.
Overflow Agent Queues area — Add an agent queue as an overflow destination for a shift.
Shift — Use to change the shift for the selected shift. The shifts in the drop-down menu have been previously defined. Refer to Defining Shifts on page 156 for information.
Group — Use to change the agent queue for the selected shift. The agent queues in the drop-down have been previously defined. Refer to Adding an Email Agent Queue on page 129 for details.
123 Connect CLOUD Contact Center Administrator Guide

Specifying an Email Service Defining How Email Reaches Agents 6
Timeout — Enter a different timeout interval for the selected shift. The timeout interval is the amount of time, in hours, minutes, and seconds, an email is in the agent queue. Once the timeout interval is reached, the email is overflowed into another agent queue.
List of Shifts — The shifts that exist in the system. You can modify the properties of a shift by selecting it in the list and changing the Shift, Group, and Timeout options.
To define an overflow agent queue destination for a shift, click Add. Use the Shift, Group, and Timeout options to change the default properties for the shift.
To delete a shift, select it in the list and click Remove.
9. Use the Interflow tab to identify the interflow destination for the email service:
Timeout — The amount of time, in hours, minutes, and seconds, that emails wait in the service before being interflowed.
Default Destination area — Choose the default interflow destination for the service.
Default Destination — From the drop-down menu, choose the interflow destination.
IRN — If the default destination is an email IRN, choose the IRN from the drop-down menu. The email IRNs in the menu have been previously defined as explained in Identifying Email IRNs on page 125.
Service — Use to specify the service destination from the drop-down menu. The email services in the menu have been previously defined. Refer to Specifying an Email Service on page 120 for information.
Email Address — If the default destination is an email address, enter the address.
Script — Use to specify the script destination from the drop-down menu. The scripts in the menu have been previously defined; see Chapter 11, Using Call Control Scripts for details.
Agent Queue — Use to specify the agent queue destination from the drop-down menu. The agent queues in the menu have been previously defined. Refer to Adding an Email Agent Queue on page 129 for details.
Shifts area — Add an interflow destination to a shift.
Destination — Use to change the type of destination for the selected shift in the Selected list.
IRN — If the shift destination is an email IRN, use the drop-down menu to choose the IRN. The email IRNs in the menu have been previously defined as explained in Identifying Email IRNs on page 125.
Service — Use to specify the service interflow destination for the shift from the drop-down menu. The email services in the menu have been previously defined. Refer to Specifying an Email Service on page 120 for information.
Email Address — If the shift destination is an email address, enter the address.
Administrator Guide Connect CLOUD Contact Center 124

Defining How Email Reaches Agents Identifying Email IRNs6
Script — Use to specify the shift script destination from the drop-down menu. The scripts in the menu have been previously defined. Refer to Chapter 11, Using Call Control Scripts for details.
Available and Selected List of Shifts — Shows the existing worker shifts. Add or remove shifts from the Selected list to identify the shifts to which you are adding an interflow destination. For details, see Defining Shifts on page 156.
You can change the destination of the shift by selecting it in the Selected list and changing the Type options.
Explain Shift — Click for details on a shift. In the resulting calendar, select the day you want shift information for.
Agent Queue — Use to specify the agent queue destination from the drop-down menu. The agent queues in the menu have been previously defined. Refer to Adding an Email Agent Queue on page 129 for details.
10. Click Create.
Identifying Email IRNs
Intelligent Routing Nodes (IRNs) are entry points to the routing system. Each email IRN is defined with rules for routing the incoming email contact.
You can set the initial value of the call profile fields for emails that enter the IRN. A call profile is attached to each contact in the system and consists of dynamic information used to route the contact and provide relevant history. Information is updated as the contact moves through the system. Each field in the call profile is either required by the Connect Contact Center system, or is an optional field used for further email processing. These fields can be different on each installation. You can define the priority and language mandatory fields and all user fields. Refer to Call Profiles on page 11 for more information.
A set of skills can be assigned to an email IRN to further refine how emails are routed to agents. If more than one agent is available to receive an email, the system routes the email based on the best skill fit.
Email IRNs can be associated with a service, call control script, or email address as its routing destination. You can also specify shift destinations, which are routing destinations used at different times of the day.
Complete the following steps to identify an email IRN:
1. From Connect Contact Center Director, click Email > Email IRN.
2. Click New.
WARNING!
Mitel strongly suggests that, for optimal system performance, you submit a service request to add or change IRN records.
125 Connect CLOUD Contact Center Administrator Guide
Identifying Email IRNs Defining How Email Reaches Agents 6
If you have an existing email IRN with parameters similar to what you want, you can quickly add a new IRN by selecting it and clicking Copy.
3. Use the following options of the General tab to specify the IRN details:
IRN — A unique number or string used as an entry point to the routing system.
Email Account — The email account associated with the email IRN. The email accounts in the menu have been previously defined, and are not associated with an existing IRN, as explained in Adding a New Email Account on page 115.
Route Directly to Default Destination — Select to route emails directly to the default destination, as defined in the Email > Email IRN > Destination tab.
4. To set initial call profile field values for the IRN, use the following options on the Call Profile tab:
Language —The initial language of the Language call profile field.
The languages in the menu have been previously enabled, as described in Enabling a Language on page 176.
Priority — The initial priority for emails associated with the call profile.
Value — Specify the value of the user defined call profile field selected in the Selected list.
Available and Selected List of Call Profile fields — Displays the user-defined (optional) call profile fields that exist in the system. To add a call profile field to the email IRN, select the field
in the Available list, and then click . To add all fields to the IRN, click . The available fields have been previously defined. Refer to Creating Call Profile User Fields on page 163 for details.
To remove a field from the IRN, select the field in the Selected list, and then click . To remove all call profile fields from the email IRN, click .
You can change the value of a field by selecting it in the Selected list and changing the Value option.
5. To set a dialed number identification service (DNIS), click the DNIS tab and set the following parameters:
Target ASA — Set the target Average Speed of Answer (ASA). This is the amount of time in which the email should be answered from the time it is received, and is used to calculate the DNIS Target Service Factor (TSF).
Short Calls Threshold — Specify the amount of time in which interaction with an email must end to be counted as too short.
Max Talk Time — Set the amount of time that interaction with an email must exceed to be counted as too long in the Connect Contact Center reports.
Interval Time — Specify the time period that will be monitored for real-time reports for the email DNIS.
For example, if this field is set to ten minutes, the real-time report for the DNIS shows statistical information relevant to the last ten minutes.
Administrator Guide Connect CLOUD Contact Center 126

Defining How Email Reaches Agents Identifying Email IRNs6
Service Time Interval — Set the time intervals in which emails are monitored.
Statistics on the emails can be viewed in STI histogram reports that show the number of emails waiting in each given interval.
6. Click the Skills tab and use the following options to assign agent skills to the email IRN:
Value — Change the value of the selected skill in the Selected list.
Available and Selected List of Skills — Displays the skills that exist in the system. Add and remove skills from the Selected list to identify the skills you want to be the IRN. The skills in the Available list have been previously defined. Refer to Identifying Agent Skills on page 162 for information.
You can change the value of a skill by selecting it in the Selected list and changing the Value option.
7. Use the options on the Destination tab to change destination for the email IRN:
Default Destination — From the drop-down menu, choose the destination.
Service — Use to specify the email service destination from the drop-down menu. The services in the menu have been previously defined. Refer to Specifying an Email Service on page 120 for information.
Email Address — If the default destination is an email address, enter the address.
Script — Use to specify the script destination from the drop-down menu. The scripts in the menu have been previously defined. Refer to Chapter 11, Using Call Control Scripts for details.
Agent Queue — Use to choose the agent whose personal agent queue is the destination.If the destination is an agent queue, use the Agent Queue drop-down menu to choose the agent whose personal agent queue is the destination. The agents in the list have been previously associated with an agent queue. Refer to Adding an Agent Queue Profile on page 102 for information.
Shifts
Type — Use to change the type of destination for the selected shift in the Selected list.
Service — If the shift destination is an email service, choose the service from the drop-down menu. The email services in the menu have been previously defined. Refer to Specifying an Email Service on page 120 for information.
Email Address — If the shift destination is an email address, enter the address.
Note
If the default destination is Email Address and you enter an external email address in this field, you may need to modify the SMTP security settings to enable the local SMTP service be able to send email out to your external address. Refer to Internet Information Services documentation for information about how to modify the SMTP security settings.
127 Connect CLOUD Contact Center Administrator Guide

Modifying Email Entities Defining How Email Reaches Agents 6
Script — Use to specify the shift script destination from the drop-down menu. The scripts in the menu have been previously defined. Refer to Chapter 11, Using Call Control Scripts for details.
Agent Queue — Use to choose the agent whose personal agent queue is the destination.
Available and Selected List of Shifts — Displays the shifts that exist in the system. Add and remove shifts from the Selected list to identify the shifts you want to be the destination for the IRN. The available shifts have been previously defined. Refer to Defining Shifts on page 156 for details.
You can change the destination of the shift by selecting it in the Selected list and changing the Type options.
For details on a shift, click Explain Shift. In the resulting calendar, and select the day for which you want shift information.
8. Click Create.
Modifying Email Entities
Complete the following steps to modify an email entity:
1. To edit an email account, from Connect Contact Center Director click Email > Email Accounts. Refer to Adding a New Email Account on page 115 for information.
2. To change an email group, from Connect Contact Center Director click Email > Email Groups and make the appropriate changes. Refer to Creating Email Groups on page 118 for more information.
3. If you want to modify the email service, from Connect Contact Center Director click Email > Email Services tabs. Refer to Specifying an Email Service on page 120 for information.
4. To change the IRNs used as email entry points to the routing system, from Connect Contact Center Director, click Email > Email IRN. Refer to Identifying Email IRNs on page 125 for details
5. To change the email DNIS from Connect Contact Center Director, click Email > Email IRN > DNIS. Refer to Adding a New Email Account on page 115 for more information.
6. Click Save.
Deleting an Email Entity
Complete the following steps to delete an email entity:
1. From Connect Contact Center Director, click Email.
2. Click the type of email entity you want to delete an item for. For example, if you want to delete an email group, click Email > Email Groups.
3. In the List View panel, select the specific entity that you want to delete.
4. Click Delete.
Administrator Guide Connect CLOUD Contact Center 128

Defining How Email Reaches Agents Defining Email Agent Queue Profiles6
Defining Email Agent Queue Profiles
Email agent queue profiles define common attributes that can be used across multiple email agent queues. An email agent queue allows ACD email calls to be queued for a specific agent. If that agent is not available, the email call can then be routed to another destination. This feature is useful if you have a single agent responsible for a certain area of expertise or geographic location, or if your agents give customers their email address for direct email calls. Email agent queues can also be used as a routing destination by a service, IRN, or call control script.
Up to 2,000 individual email agent queues can be created in Connect Contact Center.
Adding an Email Agent Queue
Complete the following steps to create an email agent queue profile:
1. From Connect Contact Center Director, click Email > Email Agent Queue Profiles.
2. Click New in the List View panel.
If you have an existing email agent queue profile with parameters similar to what you want, you can quickly add a new profile by selecting it and clicking Copy.
3. In the General tab, enter a unique name for the profile.
4. Use the options in the Settings area to specify how calls are handled in the agent queue.
Interflow/Overflow on Requeued Calls — Select if you want calls that are placed back in the queue by the agent to be subject to interflow and overflow routing rules.
If this option is not selected, the email call stays in the queue until the agent either retrieves it or logs out of the queue.
Incoming Priority — The priority of incoming calls in the agent queue.
If you choose Set Fixed Value, enter a Fixed Value. The value can be any number between 0 and 100 with 100 being the highest priority.
If you choose Set Relative Value, enter a Relative Value. The value can be any number between -100 and 100, with 100 being the highest priority.
5. Email interrupts Voice Interaction — When selected, the system will route email interactions to agents who are currently on voice interactions. When this option is not selected, agents are not interrupted by email while on voice interactions. This option is disabled by default.
6. You can define the amount of time to gather information for reports in the Statistics area.
Target Average Speed of Answer (ASA) — The amount of time, in seconds, that should elapse between the moment an email call is received and answered. This parameter is used to calculate the queue’s Target Service Factor (TSF) and used in Connect Contact Center reports.
Interval Time — The length of time, in minutes, that the queue is monitored for the purpose of reporting on real-time events.
129 Connect CLOUD Contact Center Administrator Guide

Assigning Agents to a Profile Defining How Email Reaches Agents 6
7. In the Timers area, determine the amount of time agents have in wrap-up and release mode.
Wrap-Up Time — The time that an agent has for post email call activity after the completion of the email call. Though the agent’s extension is idle, Connect Contact Center does not route another email call to the agent until after this time period has expired.
Forced Release Timeout — The time that an unanswered email call can alert for an agent before being routed to another destination, such as to another queue or available agent, and the agent is forced into released mode.
8. Click Create.
Assigning Agents to a Profile
Complete the following steps to assign agents to an email agent queue profile:
1. From Connect Contact Center Director, click Email > Email Agent Queue Profiles.
2. In the List View panel select the profile to which you want to assign agents.
3. In the Details View panel, click the Agents tab.
4. To add an agent to the profile, select the agent in the Available list and then click . To add all
agents to the profile, click .
Each agent can only be assigned to one profile at a time. If an existing agent does not appear in the Available list, that agent has already been assigned to an email agent queue profile.
The agents in the Available list have been previously defined, as explained in Creating Agent Accounts on page 41.
5. To remove an agent from the profile, select the agent in the Selected list and then click . To
remove all agents from the profile, click .
6. Click Save.
Changing a Profile’s Threshold Value
Threshold values are assigned to some of the fields that are shown in real-time reports to alert you to changing conditions of an email agent queue.
Alerts are indicated in a queue report by being highlighted with default background colors. The Yellow threshold indicates that the value is in a low warning range meaning it is slightly too high or too low; by default fields that exceed this threshold are highlighted in yellow. The Red threshold indicates the value is in a high warning range meaning it is unacceptably high or unacceptably low. By default, fields that exceed this threshold are highlighted in red. You can change the default background color for these fields, as explained in Specifying Reporting Preferences on page 157.
Complete the following steps to change a profile’s threshold value:
1. From Connect Contact Center Director, click Email > Email Agent Queue Profiles.
Administrator Guide Connect CLOUD Contact Center 130

Defining How Email Reaches Agents Specifying a Profile Overflow Destination6
2. In the List View panel, select the profile you want to change threshold values for.
3. In the Details View panel, click the Thresholds tab.
4. For the specific field, select the threshold number you want to change in the Yellow State or Red State area, and enter the new value.
5. Click Save.
Specifying a Profile Overflow Destination
Overflow improves the way email calls waiting in a queue are handled by offering these calls to another agent queue or to an agent group. This expands the number of agents who can answer waiting calls. Overflow is activated after the overflow timeout interval has been reached.
In addition to incoming email calls, overflow can also be applied to outbound email calls.
Complete the following steps to specify an overflow destination for the agent queue profile:
1. From Connect Contact Center Director, click Email > Email Agent Queue Profiles.
2. In the List View panel select the profile whose overflow destination you want to specify.
3. In the Details View panel, click the Overflow tab.
4. In the Selection Criteria on Overflow area, define the method by which an available agent is selected for a email call that enters the queue of an Overflow group. This method is used whenever an email call enters the queue of an Overflow group, and there is more than one available agent to handle the email call. If only one agent is available at that time, that agent will get the email call.
Longest Idle — The call is assigned to the agent who has been idle the longest.
Terminal — The call is assigned to the first available agent, in the order the agent is listed in the Groupings > Groups > Agents tab.
Circular — The system searches the Overflow group’s agent list for the next available agent, and the search starts from the last agent to receive an email call. This method attempts to distribute calls equally between agents in the Overflow group.
Note
To be assigned the email call in the order listed in the Groupings > Groups > Agents tab, agents must be logged into the group associated with this service as a primary group. Agents logged into this group, but not as a primary group, receive the call only if all other agents in the list are not available.
Agents are assigned primary groups using the Agents > Agents > Groups tab or Groupings > Groups > Agents tab. Refer to Assigning Primary Groups to an Agent on page 47 and Assigning Agents to a Group on page 72 for details.
131 Connect CLOUD Contact Center Administrator Guide
Specifying a Profile Overflow Destination Defining How Email Reaches Agents 6
Best Skill Fit — The system looks for the agent whose skills best fit the requirements of the call. In a case where two agents with the same skill fit are found, the system uses one of the following methods to decide which agent receives the email call.
Longest Idle — The call is assigned to the agent, among all the agents with the same skill fit, who has been idle the longest.
Terminal — The call is assigned to the first available agent, among all the agents with the same skill fit, in the order the agent is listed in the Groupings > Groups > Agents tab.
Circular — The system searches the queue’s agent list, among all the agents with the same skill fit, starting from the last agent to receive an email call, for the next available agent. This method attempts to distribute email calls equally between agents in the queue.
5. If you want the overflow destination to be an agent group, use the options in the Overflow Group area.
Timeout — Use to change the timeout interval of the selected group in Selected list. The timeout interval is the number of seconds an email call is in queue, after the mandatory announcement. Once reached, the email call is overflowed into another group.
Available and Selected List of Overflow Groups — Displays the agent groups that exist in the system. To add an agent group to the queue as an overflow destination, select the group in the
Available list, and then click . To add all groups as an overflow destination, click . The available groups have been previously defined. Refer to Creating Agent Groups on page 70 for details.
To remove a group as an overflow destination, select the group in the Selected list, and then
click . To remove all groups as an overflow destination, click .
You can modify the overflow timeout properties of a group by selecting it in the Selected list and changing the Timeout option.
6. Use the options in the Overflow Queue of Other Agents area if you want to specify another agent queue as the overflow destination.
Timeout — Use to change the timeout interval of the selected agent’s queue in the Selected list. The timeout interval is the number of seconds an email call is in queue, after the mandatory announcement. Once reached, the email call is overflowed into another agent queue.
Note
When Best Skill Fit is combined with Circular, email calls are routed to agents starting with the agent who has the best skill fit. For example, if you have 10 agents active, and agent number 3 has the best skill fit, email calls will be routed to this agent before any other agent, and then email calls will be routed from this agent forward. If agent number 3 is not available, the email call will route to agent 4 and beyond. This scenario may mean that agent 3 has the highest number of email calls, and agents 1 and 2 do not get email calls routed to them.
Administrator Guide Connect CLOUD Contact Center 132

Defining How Email Reaches Agents Determining a Profile Interflow Destination6
Available and Selected List of Overflow Agent Queues — Displays the agents in the system with queues. In the Selected list, add and remove agent queues to specify the queue to which you want to add another agent queue as an overflow destination. The available agent queues have been previously defined. Refer to Adding an Email Agent Queue on page 129 for details.
You can modify the overflow timeout properties of an agent queue by selecting it in the Selected list and changing the Timeout option.
7. Click Save.
Determining a Profile Interflow Destination
Interflow transfers calls waiting in a queue to another destination. Interflow is activated after a specified period of time (timeout) has been reached.
Once an email call has been interflowed, it is no longer part of the ACD domain. If the interflow destination is an IRN or service, the email call reenters the system as a new ACD call.
Complete the following steps to determine a profile interflow destination:
1. From Connect Contact Center Director, click Email > Email Agent Queue Profiles.
2. In the List View panel select the profile whose interflow destination you want to determine.
3. In the Details View panel, click the Interflow tab.
4. In Default Destination, choose the interflow destination, and then use one of the following fields to specify the destination:
IRN — Select an IRN for the default destination. The IRNs in the menu have been previously defined.
Service — Select a Service for the default destination. The services in the menu have been previously defined. Refer to Adding a New Service on page 78 for information.
Email Address — If the default destination is a device, enter the device number.
Script — Select a Script for the default destination. The scripts in the menu have been previously defined. Refer to Chapter 11., Using Call Control Scripts for details.
Agent Queue — If the default destination is another agent queue, choose the agent whose personal agent queue is the destination. The agents in the menu have been previously associated with an agent queue, as explained in Defining Email Agent Queue Profiles on page 129.
5. In Timeout, specify the number of seconds that email calls wait in the queue before being interflowed. The maximum number of seconds that you can enter in this field is 9,999. If you require more time, contact your Mitel representative.
6. Click Save.
133 Connect CLOUD Contact Center Administrator Guide

Identifying a Destination for a Queue with No Agents Defining How Email Reaches Agents 6
Identifying a Destination for a Queue with No Agents
The No Agents destination routes calls in an agent queue that has no agents logged into it to another destination. By default, this is the Incomplete destination. If the No Agents destination is an IRN, the system counts it as a new, incoming call.
Complete the following steps to identify a No Agent destination:
1. From Connect Contact Center Director, click Email > Email Agent Queue Profiles.
2. In the List View panel, select the profile for which you want to identify a No Agent destination.
3. In the Details View panel, click the No Agent Destination tab.
4. If you want the email calls that enter the queue when there are no agents logged in to it to first be routed to an overflow destination, click Use Overflow Destination. Use Overflow Destination overrides any other no agent destination settings defined for the email agent queue.
Email calls are routed to the first interval overflow destinations. If these destinations do not have any logged in agents, the email calls are then sent to the Email Incomplete Destination configured in System Parameters > Routing Preferences > Incomplete Destinations > Email. Refer to Determining the Incomplete Destination on page 160 for more information.
5. In Default Destination, choose the No Agent destination for the queue, and then use one of the following fields to specify the destination.By default, the No Agent destination is the Incomplete destination defined in System Parameters > Routing Preferences > Incomplete Destinations.
IRN — If the default destination is an IRN, choose the IRN from the drop-down menu. The IRNs in the menu have been previously defined, as explained in Complete the following steps to create an IRN: on page 95.
Device — If the default destination is a device, enter the device number.
Script — Use to specify the script destination from the drop-down menu. The scripts in the menu have been previously defined; see Using Call Control Scripts, starting on page 180, Using Call Control Scripts for details.
Agent Queue — If the default destination is another agent queue, choose the agent whose personal agent queue is the destination from the drop-down menu. The agents in the menu have been previously associated with an agent queue, as explained in Defining Email Agent Queue Profiles on page 129.
6. Click Save.
Administrator Guide Connect CLOUD Contact Center 134

Defining How Email Reaches Agents Identifying a Destination for a Queue with No Agents6
135 Connect CLOUD Contact Center Administrator Guide

CHAPTER
7. IdentifyingIVR Applications for Reporting
The IVR entity is used to monitor different points of the system and to generate reports using Connect Contact Center Agent Manager for real-time reports and for historical reports. Refer to the online help for each of these applications to view the templates available for IVR applications reports.
IVR (interactive voice response) applications are used by the Contact Center to perform interactive tasks with the caller. Each application is composed of actions forming a script to execute a procedure. IVR ports, which are configured as route points in the Mitel Connect system, are used by Connect Contact Center to perform an IVR action on a call. An IVR group is a number of IVR ports that are combined as a statistical entity for the purpose of measuring IVR port performance.
Administrator Guide Connect CLOUD Contact Center 136

Identifying IVR Applications for Reporting7
137 Connect CLOUD Contact Center Administrator Guide

CHAPTER
8. Specifying Call Handling by Dial List
Dial lists are sets of telephone numbers, in a database, used for outbound calls. The dial list entities define the rules for dial lists.
Refer to the following sections for more information about dial lists:
Dial Lists.................................................................................................................. 138
Dial Lists
Dial lists are sets of telephone numbers, in a database, used for outbound calls. The dial list entities define the rules for dial lists. These rules specify the input, which is the source for the set of telephone numbers, and the scheduling, which is the dates and times when the dial list is active. You can also have the system save output, which is every call result, to an external database.
The database connection of a dial list specifies the input required to query the database and retrieve the set of dial numbers to be dialed. It is recommended that your dial list database be case-insensitive, since the format of a dial list query is automatically converted to lower-case characters when run.
The input can also provide the system with information used by agents. For example, when agents are assigned an outbound call from a dial list, Interaction Center displays a notification, and the agent must click Yes to accept the call.
Administrator Guide Connect CLOUD Contact Center 138

Specifying Call Handling by Dial List Setting Prerequisite Dial List Parameters8
To make the information in the notification more useful to the agent, you can populate the Customer Number and Customer Name fields from the call profile. Use Connect Contact Center Director > Dial Lists > Input > Mandatory Call Profiles to assign these call profile fields to the account and fname columns, respectively.
The system retrieves the customer number and name from the call profile of each call in the dial list, and displays it in the notification.
Dial lists are in the form of a table in an SQL database. To activate a new dial list, you must define the scheduling parameters.
Setting Prerequisite Dial List Parameters
Setting prerequisite dial list parameters allows you to quickly and easily create new dial lists. Before creating dial lists, specify the following parameters:
The destination for dial list calls, which can be a service or an agent queue. Refer to Adding a New Service on page 78) and Adding an Agent Queue Profile on page 102 for more information.
The script that a customer hears before the call is transferred to an agent. Refer to Chapter 11 on page 180, for more information.
The connections to databases containing the sets of telephone numbers used in the dial list.
SQL statements to query the database containing the data for dial lists. Refer to Defining SQL Statements on page 152 for more information.
User-defined call profile fields to which you want to map database columns and to set initial values Refer to Creating Call Profile User Fields on page 163 for information.
Agent skills to assign to dial list calls. Refer to Identifying Agent Skills on page 162 for more information.
Do Not Call and Call tables to use in a dial list. Refer to Configuring DNC and Call Tables on page 151.
Time zone data used to define the hours in which calls are made. Refer to Configuring Time Settings for Outbound Calls on page 168 for more information.
The columns in the Input table in which the numbers to dial are located. Refer to Dial Lists on page 138 for more information.
Adding a Dial List Account
Complete the following steps to add a new dial list account:
1. From Connect Contact Center Director, click Dial Lists > Dial Lists.
2. Click New.
If you have an existing dial list with parameters similar to what you want, you can quickly add a new dial list by selecting it and clicking Copy.
139 Connect CLOUD Contact Center Administrator Guide

Adding a Dial List Account Specifying Call Handling by Dial List 8
3. Complete the procedures in the following sections as appropriate:
Configuring General Settings for a Dial List on page 140
Configuring Input Settings for a Dial List on page 142
Specifying Dial List Results on page 144
Defining Call Profile Field Values for a Dial List on page 146
Identifying Agent Skills for a Dial List on page 146
Configuring Advanced Parameters for a Dial List on page 147
Creating Dialing Rules on page 148
Importing New Dial List Records on page 149
Configuring General Settings for a Dial List
1. In Connect Contact Center Director, click Dial Lists > Dial Lists > General.
2. Use the options in the Details area to specify details about the dial list:
Name — A unique name for the dial list.
Destination Type — The destination of the dial list.
Service — If the destination is a service, choose the service from the drop-down menu. The services in the menu have been previously defined. Refer to Adding a New Service on page 78 for information.
Agent Queue — The agent whose personal agent queue is the destination. The agents in the menu have been previously associated with an agent queue, as explained in Adding an Agent Queue Profile on page 102.
Run Script Before Transferring to Agent — Configures Connect Contact Center to play a script before the call is transferred to an agent.
Script — The script that the customer hears. The scripts in the menu have been previously defined, as explained in Using Call Control Scripts, starting on page 180.
Require Agent Confirmation — The option to accept or reject the call.
If you select this option, agents reserved for a dial list call receive a notification displaying the call details and the ability to accept or reject the call.
Tip
When you configure your system to transfer a callback call to an agent upon connection, Mitel suggests you configure any related scripts to include an announcement to let the caller know that the call has been placed as a result of a callback request and to announce that the caller is being connected to an agent.
Administrator Guide Connect CLOUD Contact Center 140

Specifying Call Handling by Dial List Adding a Dial List Account8
If the call is accepted, it is transferred to the agent. If rejected, or if the amount of time specified in Wait for Agent Confirmation expires, the system releases the agent from reserved mode.
Wait for Agent Confirmation — The number of seconds the system waits for the agent to accept the call.
Maximum Number of Retries — The number of times that the system should retry the call, when the call is not answered or results in a busy signal.
The maximum number of times the system attempts to dial this customer is one more than this number.
Retry Calls — The percentage of retry calls from total initiated calls.
Retain Dial List — The number of days that the dial list should be retained in the database once the dial list activity is completed.
Campaign Caller ID — The number used by the system as the originating number of the call. This number is displayed to the customer as the Caller ID.
This option is especially useful for a dial list that is used for an outbound campaign.
3. Use the following options in the Active Dial List On area to specify how the system treats calls in an active dial list:
Transfer to Agent on — Select Connect to transfer the call to the agent when the customer picks up. Select Ring if the call should be transferred to the agent when the customer’s phone rings.
Customer Disconnect in IVR — If a customer hangs up before the call is transferred to the agent, and you want the system to call the next customer in the list, select Stop. To have the system repeat the call at a later time, select Continue.
Maximum Dial Numbers in Queue — Specify the maximum number of dial list calls that should be waiting in the queue simultaneously.
Conditional Call Placement — A call is activated whenever this option is selected and the associated statistical condition is true.
Tip
Connect Contact Center retries unanswered outbound calls every 45 seconds. When the retry is started, it applies to all calls that are due for a retry.
Note
Only specific types of trunks, such as PRI, allow you to customize the CLID. Ensure that you have the right trunk before implementing this feature.
Note
The Ring option for this setting is supported only with PRI trunk service.
141 Connect CLOUD Contact Center Administrator Guide

Adding a Dial List Account Specifying Call Handling by Dial List 8
Condition — Use the drop-down menu to select the statistical condition.
TSF Greater Than — If the statistical condition is TSF Greater Than, the percentage of the level of service (TSF) that is greater than this number.
Number Queued Calls Less Than — If the statistical condition is Queued Calls Less Than, the number of calls waiting in the queue that is less than this number.
Average Wait Time Less Than — If the statistical condition is Average Wait Time Less Than, the average wait time, in seconds, of a call in the queue that is less than this number.
4. The Status area shows the current status of the dial list. To refresh the information, click Refresh.
The status information indicates whether the dial list is Active, Not Active, Paused, Finished, or Terminated.
5. To stop an active dial list, click Terminate.
Configuring Input Settings for a Dial List
Configuring the input settings for a dial list allows you to specify the information you want to import from an ODBC database to define the dial list.The information you import may include the phone numbers, customer names, and skills associated with the type of call. You also can configure monitoring capabilities for the database. For example, you can configure the dial list to check the status of the associated phone numbers.
1. In Connect Contact Center Director, click Dial Lists > Dial Lists.
2. In the List View panel, select the dial list for which you want to configure input settings, and then click the Input tab.
3. From the Connection Name drop-down menu, select the connection to the database containing the dial list.
The connections in the menu have been previously defined.
4. Use the Response Timeout field to specify the amount of time, in seconds, in which the selected database is expected to respond to queries.
5. In the Table Key Column field, identify the name of the column that is the index of the table that describes the dial list.
6. Use the SQL Query – Import Dialing Information field to write the SQL query to retrieve the necessary information for the dial list from the database.
If you have already defined SQL statements, click Show Predefined SQL, select the appropriate statement in the Predefined SQL list, and click Use Predefined SQL. Click Test to validate the query.
Refer to Defining SQL Statements on page 152 for information about defining SQL statements.
Administrator Guide Connect CLOUD Contact Center 142

Specifying Call Handling by Dial List Adding a Dial List Account8
7. In the SQL Query - Check Status before Dialing Out field, define a SQL query to check the status of the phone numbers before dialing. This query is useful since, because the query to import dialing information is done before the dialing process starts, a telephone number may no longer be valid for the list. The query is performed before a specific number is dialed.
8. Use the Dial Number fields to specify which columns in the Input table the numbers to dial are located:
Dial Number - 1 — The name of the column from which the main phone number is retrieved.
Dial Number - 2 — The name of the column from which the first alternative phone number is retrieved. The dialing rules for this dial list define when this number is used.
Dial Number - 3 — The name of the column from which the second alternative phone number is retrieved. The dialing rules for this dial list define when this number is used.
9. To map a call profile field to a database column, use the options in the Mandatory Call Profiles and the User Call Profiles areas.
When dial list records are retrieved, the contents of the database columns are copied into the call profile fields of the dialed calls, as listed below:
Name — Use to change the database column associated with the call profile field selected in the Selected list.
Available and Selected list of call profile fields — Displays the call profile fields that exist in the system. To add a field, select the field in the Available list, and then click . To add all
fields, click . The available call profile user fields have been previously defined. Refer to Creating Call Profile User Fields on page 163 for details.
Note
Connect Contact Center modifies input and output queries to ensure optimal system performance. For example, an input dial list query is limited to 50 records. To customize a query to your specifications, create a SQL statement or a stored procedure.
Notes
Dial Number - 1, Dial Number - 2, and Dial Number - 3 are dialed in the sequence configured in this step and if Max Number of Retries is set to a value greater than zero, the sequence starts over as many times as configured. You configure the Max Number of Retries in the Dial Lists > Dial Lists > General tab.
If Dial Number - 1, Dial Number - 2, and/or Dial Number - 3 are included in a DNC/Call Table list, the number(s) will not be dialed. You configure a DNC/Call Table in Dial Lists > Dial Lists > Advanced tab.
The calling number displayed in Interaction Center will always be Dial Number - 1, even when an alternative number is dialed. Call Back Destination, if added, will show the actual number dialed.
143 Connect CLOUD Contact Center Administrator Guide

Adding a Dial List Account Specifying Call Handling by Dial List 8
To remove a field, select the field in the Selected list, and then click . To remove all fields,
click .
You can change the database column associated with a call profile field by selecting it in the Selected list, and changing the Name option.
10. If you want to add a skill to the dial list, use the options in the Skills area:
Name — Use to change the database column associated with the skill selected in the Selected list.
Available and Selected list of skills — Displays the skills that exist in the system. In the Selected list, add and remove skills to identify the skills that you want to use as a destination. The available skills have been previously defined, as explained in Identifying Agent Skills on page 162.
You can change the database column associated with a skill by selecting it in the Selected list, and changing the Name option.
11. Click Create.
To activate the new dial list, you must define the scheduling parameters.
Specifying Dial List Results
Use the Output tab to specify the information you want to store about the dial list activity. For example, you can store information about successful calls, calls that fail, calls that continue to fail, and calls made to numbers that are contained in a DNC (Do Not Call) table.
Specify how long the results of a dial list are stored in the Retain Dial List For field in Dial Lists > Dial Lists > General tab. These result are used to generate reports on dial lists.
You can also update your input table with a result and a timestamp when the connection was dialed.
Complete the following steps to specify the location for dial list results:
1. From Connect Contact Center Director, click Dial Lists > Dial Lists.
2. In the List View panel, select the dial list for which you want to specify an output location, and then click the Output tab.
3. In the Connection Name drop-down menu, select the connection to the database where you want to store the dial list results. This connection can be the same one used for dial list input.
The connections in the menu have been previously defined.
4. Specify the amount of time, in seconds, in which the selected database is expected to respond to queries in the Response Timeout field.
If the response time exceeds this number, an alarm is sent to the supervisor about a potential database problem.
5. Use the SQL Statement On fields to create a SQL statement used to update the database:
Administrator Guide Connect CLOUD Contact Center 144

Specifying Call Handling by Dial List Adding a Dial List Account8
SQL Statement on Success — Use to update the database when there is a successful call.
SQL Statement on Single Failure — Use to update the database upon failure (busy, no answer, and so on), while retries are still in effect.
SQL Statement on Final Failure — Use to update the database when there is a failure after the last retry.
SQL Statement on DNC — Use to update the database when the entry is contained in a DNC table.
6. To include a call profile field in the query, select the field in the Call Profiles list, and then click the appropriate associated Append Call Profile button to insert the field as either a string or a number. The call profile user fields in list have been previously defined. Refer to Creating Call Profile User Fields on page 163 for details.
7. If you have already defined SQL statements, click Show Predefined SQL, select the appropriate statement in the Predefined SQL list, and click Use Predefined SQL. Click Test to validate the query.
Refer to Defining SQL Statements on page 152 for information about defining SQL statements.
8. Click Save.
Example
Input
SELECT customer_id, customer_name, amount_owed, phone FROM collections WHERE dialer_status = ‘active’
Check It is not necessary to specify a WHERE clause because Connect Contact Center will automatically add a WHERE dialer_id = x to the query.
SELECT customer_id FROM collections
Output It is not necessary to specify a WHERE clause because Connect Contact Center will automatically add a WHERE dialer_id = x to the query.
Success UPDATE· collections SET status = ‘success’, change_time =GETDATE() The function here returns the current date in Microsoft SQL. In MySQL it is now()
Note
Connect Contact Center modifies input and output queries to ensure optimal system performance. For example, an input dial list query is limited to 50 records. To customize a query to your specifications, create a SQL statement or a stored procedure.
If you use a customer number with an output query on an external database, be aware that Connect Contact Center updates the status and record associated with that ID along with all the records that belong to that customer.
145 Connect CLOUD Contact Center Administrator Guide

Adding a Dial List Account Specifying Call Handling by Dial List 8
Pending retries UPDATE collections SET status = ‘retry’, change_time =GETDATE()
Failure UPDATE collections SET status = ‘failed’, change_time = GETDATE()
Defining Call Profile Field Values for a Dial List
You can define the values of the call profile fields for dial list calls. This includes defining both the Priority and user fields. User fields contain optional call profile information that is used for further call processing.
Complete the following steps to define a call profile value:
1. From Connect Contact Center Director, click Dial Lists > Dial Lists.
2. In the List View panel select, the dial list for which you want to define call profile field values, and then click the Call Profile tab.
3. Use the Priority field to specify the initial value of the Priority call profile field.
4. To add a user-defined call profile field to the dial list, select the field in the Available list and then
click . To add all fields to the dial list, click . The available user-defined call profile fields have been previously defined. Refer to Creating Call Profile User Fields on page 163 for details.
To remove a user-defined call profile field from the dial list, select the field in the Selected list, and
then click . To remove all fields from the dial list, click .
5. Use the Value field to change the initial value of the selected user-defined call profile field in the Selected list.
6. Click Save.
Identifying Agent Skills for a Dial List
For each dial list, you can identify the agent skills required for handling the placed calls. An agent skill is measured by value.
Complete the following steps to identify agent skills for a dial list:
1. From Connect Contact Center Director, click Dial Lists > Dial Lists.
Administrator Guide Connect CLOUD Contact Center 146

Specifying Call Handling by Dial List Adding a Dial List Account8
2. In the List View panel, select the dial list for which you want to identify agent skills, and then click the Skills tab.
3. To add a skill to the dial list, select the skill in the Available list and then click . To add all skills
to the dial list, click . The available skills have been previously determined, as explained in Identifying Agent Skills on page 162.
To remove a skill from the dial list, select the skill in the Selected list, and then click . To
remove all skills from the dial list, click .
4. Use the Value field to change the value of the selected skill in the Selected list.
5. Click Save.
Configuring Advanced Parameters for a Dial List
Advanced parameters for a dial list include specifying Do Not Call (DNC) and Call tables and setting calling hours.
Complete the following steps to configure advanced parameters for a dial list:
1. From Connect Contact Center Director, click Dial Lists > Dial Lists.
2. In the List View panel select, the dial list for which you want to configure advanced parameters, and then click the Advanced tab.
3. Use the options in the DNC/Call Table area to specify the tables for the dial list. Up to four DNC or Call tables can be used.
To add a table to the dial list, select the table in the Available list and then click . To add all
tables to the dial list, click . The available tables have been previously defined. Refer to Configuring DNC and Call Tables on page 151 for details.
To remove a table from the dial list, select the table in the Selected list, and then click . To
remove all tables from the dial list, click .
The order of the tables in the list determines which table is used first. To reorder the selected table
in the list, click or .
4. If you want to specify the hours in which calls are made, based on the destination local time, in the Calling Hours area create a time range by clicking Add. Use the Start Time and Stop Time options to define the time range parameters.
This feature uses the previously defined time zone data. Refer to Configuring Time Settings for Outbound Calls on page 168 for details.
To remove hours from the list, select the range and click Remove.
5. Click Save.
147 Connect CLOUD Contact Center Administrator Guide

Adding a Dial List Account Specifying Call Handling by Dial List 8
Creating Dialing Rules
Dialing rules specify the numbers to call, when to call them, and how long the system waits if it retries an unanswered call.
Complete the following steps to create a dialing rule:
1. In Connect Contact Center Director, click Dial Lists > Dial Lists.
2. In the List View panel, select the dial list for which you are creating dialing rules, and then click the Dialing Rules tab.
3. In the Default area, use the First Dial, Second Dial, and Third Dial drop-down menus to choose which number should be used for each try.
The numbers in drop-down menus have been previously defined in the Dial Numbers fields of the Dial Lists > Dial Lists > Input tab. Refer to Adding a Dial List Account on page 139 for information about defining dial numbers.
4. In the Retry on Busy for and Retry on No Answer for fields, enter the amount of time, in seconds, that the system spends retrying a call. For example, if you specify four minutes, Connect Contact Center will retry the call four minutes after a busy signal or after a call is not answered. Because Connect Contact Center queries the database for retries every 45 seconds, unanswered or busy calls subject to the four-minute retry time may be retried in 3 minutes and 15 seconds.
5. If you want to specify the hours in which calls are made, based on the destination local time, use the options in the Specific Times area.
From — Use to change the start time of the selected period in the Selected list.
To — Allows you to change the end time of the selected period in the Selected list.
First Dial — Use to modify number dialed first for the selected period in the Selected list.
Second Dial — Change the number dialed second for the selected period in the Selected list.
Third Dial — Use to change the number dialed third for the selected period in the Selected list.
Retry on Busy — Modify the amount of time for the selected period, in seconds, that the system waits after a busy signal, before retrying the call.
Retry on No Answer — Change the amount of time for the selected period, in seconds, that the system wait after a call is not answered, before retrying the call.
List of Time Periods — To add a time period to the dialing rule, click Add, and then make the appropriate changes in the From, To, First Dial, Second Dial, Third Dial, Retry on Busy and Retry on No Answer options.
To remove a time period from the dialing rule, select the period in the list, and then click Remove.
6. Click Save.
Administrator Guide Connect CLOUD Contact Center 148

Specifying Call Handling by Dial List Adding a Dial List Account8
Importing New Dial List Records
You can import new dial records, either automatically or manually. New dial list records are those records that would be retrieved by the Import query, but have not yet been retrieved.
Complete the following steps to import dial list records:
1. From Connect Contact Center Director, click Dial Lists > Dial Lists.
2. In the List View panel select the dial list for which you want to import new records, and then click the Import tab.
3. If you want to automatically import the records, define the following options in the Automatic area:
Automatic Import — Select to turn on this feature.
Import Mode — New records are imported periodically.
Interval — The import is executed at the interval, hh:mm, entered in the Interval field. For example, 1:30 equals 90 minutes.
Cyclic — The import of new records is started immediately after the previous import is complete. This option is recommended only for large tables.
4. To import the records, click Import Now.
5. Click Save.
Modifying a Dial List Account
You can modify an existing dial list account to change any properties.
Complete the following steps to modify a dial list account:
1. From Connect Contact Center Director, click Dial Lists > Dial Lists.
2. In the List View panel select the dial list account you want to modify.
3. Make the appropriate changes in the General tab. These options are described in Configuring General Settings for a Dial List on page 140.
4. Use the Output tab to change the location of dial list results.
The Output tab options are described in Specifying Dial List Results on page 144.
5. If you want to change the definition of the value of call profile fields for the dial list, use the Call Profile tab.
The Call Profile tab options are explained in Defining Call Profile Field Values for a Dial List on page 146.
6. To identify different agent skills for the dial list by modifying the options in the Skills tab. Refer to Identifying Agent Skills for a Dial List on page 146 for information.
149 Connect CLOUD Contact Center Administrator Guide

Scheduling a Dial List Specifying Call Handling by Dial List 8
7. If you want to change the advanced parameters for the dial list, click the Advanced tab. Then modify the options, as explained in Configuring Advanced Parameters for a Dial List on page 147.
8. Use the Dialing Rules tab to create different rules for retrying calls that were busy or not answered.
The Dialing Rules tab options are described in Creating Dialing Rules on page 148.
9. You can change when a new dial list records are imported by using the options on the Import tab. Refer to Importing New Dial List Records on page 149 for details.
10. Click Save.
Deleting a Dial List Account
Complete the following steps to delete a dial list account:
1. From Connect Contact Center Director, click Dial Lists > Dial Lists.
2. In the List View panel select the dial list account you want to delete.
3. Click Delete.
Scheduling a Dial List
Complete the following steps to schedule a dial list:
1. From Connect Contact Center Director, click Dial Lists > Dial List Schedules.
2. In the List View panel, select the dial list that you want to schedule.
3. In the Details View panel, click Add and then specify the Start Date, Stop Date, and Periodic Type. The Periodic Type defines if the dial list is run Daily, Weekly or Monthly between the Start Date and Stop Date.
To remove a date range, select it in the list and click Remove.
4. Click the Active Days tab.
5. Select Specified Time Range and define the time range for the dial list to run.
6. If you want to specify a time range other than the one you specified in Specified Time Range, select Specified Time Range for Days and specify a time range you want to run the dial list for each day.
7. Click Save.
Note
If you select Specified Time Range for Days and do not specify a time range, the dial list will run for 24 hours each day that does not have a specified time range.
Administrator Guide Connect CLOUD Contact Center 150
Specifying Call Handling by Dial List Configuring DNC and Call Tables8
Configuring DNC and Call Tables
You must define the Do Not Call (DNC) and Call tables used for outbound calling. You can also edit and delete DNC and Call tables.
Before configuring DNC and Call tables, you can specify the database connection. Doing so allows you to more quickly and easily configure tables. Refer to for information.
Complete the following steps to configure DNC and Call tables for outbound calls:
1. From Connect Contact Center Director, click Dial Lists > DNC/Calls Table.
2. Click New.
If you have an existing table with parameters similar to what you want, you can quickly add a table by selecting it and clicking Copy.
3. In the General tab, choose a Database Connection.The connections in the menu have been previously defined. Refer to on page 172 for information.
4. Identify the Database Table.
5. In Response Timeout, specify the number of seconds that must elapse before the response is considered timed out.
6. Choose whether numbers are blocked or allowed in the Block Allow Mode field.
7. In the Phone Number Column Name fields, specify the database column for the 1st, 2nd, and 3rd phone numbers, respectively.
8. In the Status Column Name and Status Value fields, identify the name and value for the database Status column.
9. Click Save.
Editing a DNC or Call Table
Complete the following steps to edit a DNC or Call table:
1. From Connect Contact Center Director, click Dial Lists > DNC/Call Tables.
2. In the List View panel select the table you want to edit.
3. Make the appropriate changes in the General tab.
4. Click Save.
Deleting a DNC or Call Table
Complete the following steps to delete a DNC or Call table:
1. From Connect Contact Center Director, click Dial Lists > DNC/Call Tables entity.
2. In the List View panel select the table you want to delete, and click Delete.
151 Connect CLOUD Contact Center Administrator Guide

Defining SQL Statements Specifying Call Handling by Dial List 8
Defining SQL Statements
You can define SQL statements to use in dial lists. Both SQL queries and stored procedures can be defined.
Before defining a SQL statement, you can create user call profile fields to use in the statement. Doing so allows you to more quickly and easily define SQL statements. Refer to Creating Call Profile User Fields on page 163 for details.
You can also edit and delete SQL statements.
Defining a SQL Query
SQL queries can be used to retrieve data from a database for a dial list, or to write data to a database.
Complete the following steps to define a SQL query:
1. From Connect Contact Center Director, click Dial Lists > Predefined SQL > Query.
2. Click New.
If you have an existing SQL query with parameters similar to what you want, you can quickly add a query by selecting it and clicking Copy.
3. In the General tab, specify a name for the query in the Predefined Query Name field.
4. In the Category field, enter the query’s category.
5. Type the query in the SQL Query field.
6. If you want to insert a call profile field into the query, select the field in the Available Call Profile Fields list. Then click either Append as String or Append as Number to insert the field as either a string or number, respectively.
The user-defined fields in the list have been previously specified. Refer to Creating Call Profile User Fields on page 163 for details.
7. Click Create.
Defining a SQL Procedure
SQL stored procedures are used to update the database with call results. You should only use SQL stored procedures if this feature is supported by your database.
Complete the following steps to define a SQL procedures:
1. From Connect Contact Center Director, click Dial Lists > Predefined SQL > Procedures.
2. Click New.
If you have any existing SQL procedures with parameters similar to what you want, you can quickly add a procedure by selecting it and clicking Copy.
Administrator Guide Connect CLOUD Contact Center 152

Specifying Call Handling by Dial List Defining SQL Statements8
3. In the General tab, specify a name for the procedure in the Predefined Stored Procedure Name field.
4. In the Category field, enter the procedure’s category.
5. Use the Name field to specify the name of the procedure in your database.
6. If you want to insert specific elements into the procedure, click Add. Then use the following options to define the element’s parameters.
In/Out — The input/output type of the stored procedure. The selected input/output type must match the type defined in the database.
Data Type — The format of the data returned from database. The selected data type does not have to match the data type defined in the database; Connect Contact Center can convert one data type into another.
Assigned To — The type of field from which the input and output values is to be taken from, or stored, respectively.
Constant — If the Assigned To value is Constant, enter the value of the field used to provide and store the input/output values.
Call Profile — If the Assigned To value is Call Profile, choose the call profile field used to provide and store the input/output values from the drop-down menu.
7. Click Create.
Editing a SQL Statement
Complete the following steps to edit a SQL query and stored procedure:
1. From Connect Contact Center Director, click Dial Lists > Predefined SQL > and either Query or Procedure, depending on the type of SQL statement you want to edit.
2. In the List View panel, select the statement you want to edit.
3. Make the appropriate changes to the SQL statement definition, as explained in Defining a SQL Query on page 152 and Defining a SQL Procedure on page 152.
4. Click Save.
Deleting a SQL Statement
Complete the following steps to delete a SQL statement:
1. From Connect Contact Center Director, click Dial Lists > Predefined SQL > and either Query or Procedure, depending on the type of SQL statement you want to delete.
2. In the List View panel, select the statement you want to delete, and then click Delete.
153 Connect CLOUD Contact Center Administrator Guide

CHAPTER
9. Setting System Parameters
The System entities are used to set the various parameters that affect the behavior of the entire system. Connect Contact Center includes the system entities listed below:
Schedules — Used by the Connect Contact Center server to route calls to different destinations according to the day and time.
Reporting Preferences — Monitors different points of the system and are used to generate reports using Agent Manager (for real-time reports) and Connect Contact Center Reports (for historical reports).
Routing Preferences — Defines the handling of incoming calls.
Client Preferences — Specifies how the system interacts with the user or user’s system.
Tagged Codes — Agents use tagged codes when they have finished handling a call. In most cases, these codes provide information for evaluating calls based on statistical reporting.
Outbound — Specifies how outbound calls are handled.
Chat and Email — Made up of the various parameters that define how chat and email contacts are to be handled by the Connect Contact Center system.
Refer to the following sections for information about system parameters:
Scheduling Routing to Destinations ........................................................................ 155
Specifying Reporting Preferences........................................................................... 157
Selecting the Routing Preferences.......................................................................... 158
Creating Call Profile User Fields ............................................................................. 163
Setting Client Preferences ...................................................................................... 164
Defining Tagged Codes........................................................................................... 165
Administrator Guide Connect CLOUD Contact Center 154

Setting System Parameters Scheduling Routing to Destinations9
Configuring System Outbound Parameters ............................................................ 166
Configuring Parameters for Chat ............................................................................ 168
Configuring Custom Chat Messages ...................................................................... 170
Configuring Custom Chat Messages ...................................................................... 170
Configuring Parameters for Email ........................................................................... 171
Scheduling Routing to Destinations
You can define day types, a calendar, and shifts for Connect Contact Center. The day type and shifts are used by the Connect Contact Center server to route calls to different destinations according to the day and time.
Defining Day Types
Day types are used to identify special days, such as national holidays, and working or non-working days. Each day type can be assigned a color so it can be easily viewed in the calendar.
Information on working and non-working days is used to calculate the daily average for Connect Contact Center historical reports in intervals that span more than one day. The average is calculated by dividing the totals by the number of working days in the report period. This information is also used by the Connect Contact Center Reports scheduler to determine whether to generate or print reports on a non-working day, if either of these options are selected. Refer to the Connect Contact Center Supervisor Guide for details.
Complete the following steps to define a day type:
1. From Connect Contact Center Director, click System Parameters > Schedules > Day Types.
2. Click New.
If you have an existing day type with parameters similar to what you want, you can quickly create a new day type by selecting it and clicking Copy. Then make the necessary changes to the day type details, as explained here.
3. In the General tab, specify a Name for the day type.
4. If the day type is a working day, select Working Day.
5. Use the color sliders to select a color for the day type. This color is used to highlight the day type in the calender.
6. Click Create.
Defining a Calendar
The calendar displays the day types and shifts as defined in your system. The current and following two months can be seen at a glance. You can scroll through the calendar to see other months. Days are color-coded according to their type.
155 Connect CLOUD Contact Center Administrator Guide

Defining Shifts Setting System Parameters 9
You can also use the calendar to change the day type associated with a specific date.
Complete the following steps to define a calendar:
1. From Connect Contact Center Director, click System Parameters > Schedules > Calendar.
2. For information on a specific date, in the General tab, select the date in the calendar.
3. To change the day type associated with the selected date, choose the appropriate option from the Day Type drop-down menu, and then click Save.
The available day types have been previously defined. Refer to Defining Day Types on page 155 for details.
4. To change the day type of a specific day of the week, use the following options in the Advanced Update area. For example, if your company will be working every Saturday for the next month, use the options in this area to specify that. When you are finished making changes, click Update and Save.
Day of Week — Choose the day for which you want to change the associated day type.
Which Period — Choose if you want the change to apply to the Current Month, Current Year, or Always.
Day Type — Choose the new day type for the day of the week.
Defining Shifts
Shifts are service routing destinations used at different times of the day. Shifts are associated with a day type. The system translates the current date to a day type, and then translates the current time to a shift that is associated with the day type.
Up to 40 shifts can be defined.
Complete the following steps to define a shift:
1. From Connect Contact Center Director, click System Parameters > Schedules > Shifts.
2. Click New.
If you have an existing shift with parameters similar to what you want, you can quickly create a new shift by selecting it and clicking Copy.
3. In the General tab, specify a Name for the shift.
Note
When you define a shift for a holiday, to indicate that the contact center is not available for the shift defined, you must also define a shift for the following day to ensure that the holiday shift ends. Otherwise, the holiday shift will continue.
For example, if your call center is not available for Christmas day, and you define a shift for December 25th with a Day Type that indicates a holiday, you must define a shift for December 26th with a Day Type of working day.
Administrator Guide Connect CLOUD Contact Center 156

Setting System Parameters Specifying Reporting Preferences9
4. Use Start Time to specify the time the shift starts.
5. In Day Type, choose the day type you want to associate with the shift.
The available day types have been previously defined. Refer to Defining Day Types on page 155 for details.
6. Click Create.
Specifying Reporting Preferences
The Reporting Preferences entities specify how the Reporting application computes and displays report data.
Determining the Reporting Settings
The Reporting settings determine the basic interval of historical reports, the Target Service Factor (TSF) formula, and other parameters.
The historical reports basic interval is the time period that is monitored for historical statistical data purposes. This interval determines the amount of detail provided in a historical report. A smaller interval results in historical reports with more detail. This interval also affects the amount of disk space needed by your database. Smaller intervals require more disk space to store the information; for larger intervals, less disk space is needed.
The TSF is the percentage of calls answered within the Target Average Speed of Answer (ASA), out of all the calls that are routed to a group. This factor indicates how well a group is providing the level of service defined for it, based on the Target ASA. The Target ASA is specified for each group, as explained in Adding an Agent Group on page 71.
Complete the following steps to determine reporting settings:
1. From Connect Contact Center Director, click System Parameters > Reporting Preferences > Reporting Settings.
2. In the Company Name field, enter the name you want to appear at the bottom of each historical report.
3. In Retain Historical Data, choose how long you want to keep historical data. The options are 12 or 24 months.
4. Select the appropriate TSF formula option to define how the TSF is calculated:
Answered — The percentage of calls answered within the Target ASA out of all calls answered by the group.
Abandoned after TASA — The percentage of calls answered within the Target ASA out of the sum of the Calls answered by the group plus the Calls abandoned after the Target ASA.
157 Connect CLOUD Contact Center Administrator Guide

Changing Real-Time Report Colors Setting System Parameters 9
Accepted — The percentage of calls answered within the Target ASA out of the sum of calls answered by the group, plus the calls abandoned after the Target ASA, plus the calls which interflowed out, plus the calls answered by another group (for example, overflowed in).
5. Enter the length of time to retain data on abandoned calls in the Days to Store Abandoned Calls field.
Information on abandoned calls can be retrieved by generating reports. This data is used by Connect Contact Center to initiate callbacks.
6. Click Save.
Changing Real-Time Report Colors
You can change the display colors used to highlight different states in real-time reports. You can use a different color for the state’s background, foreground, or text in the report.
Complete the following steps to specify real-time report colors:
1. From Connect Contact Center Director, click System Parameters > Reporting Preferences > Real-Time Report Colors.
2. In the General tab, select the report for which you want to set the color, and then use the color sliders to select a color for the background and foreground.
3. Click Save.
Selecting the Routing Preferences
To streamline the process of specifying routing preferences, you can specify the following parameters first:
The music script or music stream that the system connects to a call waiting in queue. Refer to Chapter 11, Using Call Control Scripts and Configuring Music Streams on page 175 for more information.
The Incomplete destination for voice calls and shift destinations, which can be an IRN, a device — have the device number available, or a call control script. Refer to Complete the following steps to create an IRN: on page 95 and Chapter 11, Using Call Control Scripts for more information.
The No IVR Port Available specification can route an unanswered call to a Dialed Number when no IVR ports are available. This capability addresses the challenge of a call not being answered initially because of no available IVR ports but also not being answered after an IVR port becoming available. If the incomplete destination involves a script, the call might never be answered, and this capability alleviates the problem of an incomplete destination that involves a script.
For the response, the call should not be routed to a script, which requires an IVR port, but should be routed to a Dialed Number (DN) to ensure that the call is answered. There is a 15-second timeout associated with this scenario, and this timeout should not be modified.
Administrator Guide Connect CLOUD Contact Center 158
Setting System Parameters Specifying Service Settings9
If a port becomes available for the call before the 15 seconds passes, Connect Contact Center routes the call by using that IVR port. If the IVR port becomes available after the 15 seconds passes, the call is routed to an incomplete destination. If the incomplete destination involves a script, this requires an IVR port as well and the call is effectively never answered.
To use shifts, which are the different periods of the day that can affect routing destinations, refer to the Defining Shifts on page 156.
Once specified, these parameters automatically appear as options that you can choose, allowing you to quickly and easily specify routing preferences.
Specifying Service Settings
Complete the following steps to specify service settings:
1. From Connect Contact Center Director, click System Parameters > Routing Preferences > Service Settings.
2. In the Call Priority Settings area, select the default priorities for calls:
Default Priority for IRNs — Choose the default priority for newly created IRNs.
This parameter can be overridden by setting a different initial value for the Priority field in an IRN’s call profile, as explained in Identifying IRNs on page 94.
Priority Increase Interval — Enter how often the priority is increased.
Priority Increase Step — The step by which the priority is increased. For example, if the interval is ten seconds and the step is five, the priority is increased by five every ten seconds.
3. In Forced Released Timeout, enter the amount of time, in seconds, an agent station can ring before being forced into the release state.
4. In Music Source, select a default method for the system to use when connecting a call in the queue to a music source.
If the music source is a script, the call is connected to an IVR port and performs the actions indicated in the specified script. Typically, the script has a play action pointing to the music WAV file. Choose the specific script from the Music Script field. The scripts available in the menu have been previously defined. Refer to Chapter 11, Using Call Control Scripts for information.
For a music source that is a music stream, the call is connected to streaming music. In Music Stream field, select the stream to be played. The available music streams in the menu have been previously defined. Refer to Configuring Music Streams on page 175 for details.
Note
For scripts used for Music-on-Hold, the Play File action must have the Play Continuously in a Loop option selected. Otherwise, secondary announcements do not play correctly if the music script is shorter than the time specified in Routing > Services > Announcements > Secondary Announcements Time in Connect Contact Center Director. Refer to Play File on page 200 for information about configuring the Play File action.
159 Connect CLOUD Contact Center Administrator Guide

Determining the Incomplete Destination Setting System Parameters 9
5. Click Save.
Determining the Incomplete Destination
When a call or email enters the system with no valid routing destination, the system routes it to the Incomplete call destination. For example, if a call enters an IRN with a call control script as a destination, but the script does not have a value for the service required mandatory call profile field, this leaves the IRN without a destination. In this case, the system uses the Incomplete destination for that call.
Separate Incomplete destinations can be defined for different work shifts.
Determining the Incomplete Destination for Voice Calls
The Incomplete destination for voice calls can be an IRN, device, or call control script.
If the destination of an incomplete call is a call control script, we advise also specifying an IVR port for the No IVR Port Available capability. Refer to Specifying an IVR Port when No IVR Port Available on page 162 for details.
Complete the following steps to specify the Incomplete destination for voice calls:
1. From Connect Contact Center Director, click System Parameters > Routing Preferences > Incomplete Destinations > Voice.
2. Use the following options in the Default area to specify the default Incomplete destination.
Type — From the drop-down menu, choose the type of default destination.
IRN — If the default destination is an IRN, choose the IRN from the drop-down menu. The IRNs in the menu have been previously defined, as explained in Identifying IRNs on page 94.
Device — If the default destination is a device, enter the device number.
Script — Select a script destination. The scripts in the menu have been previously defined. Refer to Chapter 11, Using Call Control Scripts for details.
3. To add an Incomplete destination to a shift, use the options in the Shifts area:
Type — Use Type to change the type of destination for the selected shift in the Selected list.
IRN — If the shift destination is an IRN, use the drop-down menu to choose the IRN. The IRNs in the menu have been previously defined, as explained in Complete the following steps to create an IRN: on page 95.
Device — If the shift destination is a device, enter the device number.
Script — Use to choose the shift script destination from the drop-down menu. The scripts in the menu have been previously defined; see Chapter 11, Using Call Control Scripts for details.
Administrator Guide Connect CLOUD Contact Center 160

Setting System Parameters Determining the Incomplete Destination9
Available and Selected List of Shifts — Displays the shifts that exist in the system. To add a shift to the service, select the shift in the Available list, and then click . To add all shifts to
the service, click . The available shifts have been previously defined. Refer to Defining Shifts on page 156 for details.
To remove a shift from the service, select the shift in the Selected list, and then click . To
remove all shifts from the service, click .
You can change the destination of the shift by selecting it in the Selected list and changing the Type options.
4. For details on a shift, click Explain Shift. In the resulting calendar, select the day for which you want shift information.
5. Click Save.
Determining the Incomplete Destination for Emails
Email contacts can interflow only to an email account. The system automatically identifies the media type and sends the contact to the correct Incomplete destination.
Complete the following steps to determine the Incomplete destination for emails:
1. From Connect Contact Center Director, click System Parameters > Routing Preferences > Incomplete Destinations > Email.
2. Use the following options in the Default area to specify the default Incomplete destination.
Type — From the drop-down menu, choose the type of default destination.
Email Address — If the default destination is an email address, enter the address in the field.
3. To add an Incomplete destination to a shift, use the options in the Shifts area:
Email Address — The destination for the selected shift in the Selected list.
Available and Selected List of Shifts — Displays the time periods for work that exist in the system. Refer to Defining Shifts on page 156 for information about defining these time periods. To add a shift to the service, select that shift in the Available list, and then click . To add all
shifts to the service, click .
To remove a shift from the service, select the shift in the Selected list, and then click . To
remove all shifts from the service, click .
Note
If the default destination is Email Address and you enter an external email address in this field, you may need to modify the SMTP security settings to enable the local SMTP service be able to send email out to your external address. Refer to Internet Information Services documentation for information about how to modify the SMTP security settings.
161 Connect CLOUD Contact Center Administrator Guide

Identifying Agent Skills Setting System Parameters 9
You can change the destination for an individual the shift by selecting it in the Selected list and changing the Type options.
4. For details on a shift, click Explain Shift. In the resulting calendar, select the day for which you want to view shift information.
5. Click Save.
Specifying an IVR Port when No IVR Port Available
If a call control script is running in the system, Mitel recommends the additional configuration step of specifying an IVR port as a reserve call destination when no IVR port is available. This option prevents a potential problem at moments when both of the following scenarios are true:
A call control script is running.
A call arrives when no IVR ports are available, but a port becomes available while the call is waiting.
Complete the following steps to specify an IVR port for the No IVR Port Available capability:
1. In Connect Contact Center Director, navigate to System Parameters > Routing Preferences > Incomplete Destinations > IVR.
2. In No IVR port destination, enter the number of the IVR port for calls.
Identifying Agent Skills
Agent skills are used by the system to determine the routing of calls to the most suitable agent. When more than one agent is available to receive a call, the system routes the call based on the best skill fit. However, if only one agent is available, a call does not wait in the queue but instead goes to that agent even if the agent’s skills do not fit the requirements of the call.
Once an agent skill is identified, multiple approaches are available for specifying the skill requirements for a call. You specify skill requirements by the following categories:
Agent
IRN
Domain
Customer
Dial List
Call control script actions that set a value in a call profile field
Complete the following steps to identify an agent skill:
1. From Connect Contact Center Director, click System Parameters > Routing Preferences > Skills.
2. Click New.
Administrator Guide Connect CLOUD Contact Center 162

Setting System Parameters Creating Call Profile User Fields9
3. In the General tab, specify a name for the skill.
The skill name must be unique. Reserved skill names are listed below.
ACD Enter Date
ACD Enter Time
ANI
Average Q Time
Callback Dest
Callback Time
Customer Name
Customer Number
Dial List ID
DNIS
Language
Media
Priority
Q Position
Service ID
Session ID
4. Click Create.
Creating Call Profile User Fields
A call profile is attached to each call. It consists of dynamic information that the system uses to route the call and provide relevant history. The call profile information is updated as the call moves through the system. Refer to Call Profiles on page 11 for more information.
Each field in the call profile is either required by the Connect Contact Center system or is a user-defined field used for further call processing. You can create a call profile user field, which can then be used by IRNs, domains, and dial lists to gather and update information about a call.
Complete the following steps to create a call profile user field:
1. From Connect Contact Center Director, click System Parameters > Routing Preferences > Call Profiles.
2. Click New.
3. In the General tab, specify a Name for the call profile field.
4. Click Create.
Note
The reserved skill names listed below cannot be reused for skills or for call profile fields.
163 Connect CLOUD Contact Center Administrator Guide

Setting Client Preferences Setting System Parameters 9
Setting Client Preferences
Complete the following steps to set client preferences:
1. Select Connect Contact Center Director, click System Parameters > Client Preferences.
2. In the Tenant Timezone area, select the Timezone that applies to the location of the tenant for whom you are configuring agent preferences.
3. In the Agent Settings area, select the appropriate options for how the system interacts with Interaction Center.
Enable Transfer to Agent List — Select this option to enable the broadcasting of information on agents currently logged in from the server to Interaction Center. Agents use this information to transfer a call to another agent based on agent ID (rather than agent extension, which can vary every time an agent logs in).
Logout from all Groups on Primary Logout — Select to cause the system to automatically log out an agent from all groups when the agent clicks the Log Out of my queues button in Interaction Center. If this option is not selected, the system logs the agent out of only the agent’s primary groups.
Reset Idle Time on Non-ACD Call — Select to have the system reset the idle time for an agent after a non-ACD call. The way that the system measures an agent’s idle time is significant, since it determines when a call is routed to an agent if the Longest Idle agent selection criteria is defined for a service.
Auto Answer on Pickup — Select to cause the system to automatically answer a call that is transferred to the agent according to a pick up request. If this box is not selected, the agent must manually answer the picked up call.
When Disconnected from the Server
Agents are Logged Off — Select if you want the system to not route calls to agents when Interaction Center is disconnected from the server due to networking problems. To continue receiving calls, agents must log on again either through a new instance of Interaction Center or through the telephone.
Agents Continue to Work PC-less — Select to have the system continue to route calls to agents when Interaction Center is disconnected from the server due to networking problems. When the networking problem is solved, Interaction Center is automatically reconnected to the server and updated.
Allow Late Email Replies — Select to allow the agent to hang-up an email interaction before replying. The agent can then reply later or not reply at all.
WARNING!
Do not use Agents Continue to Work PC-less if the agent is using a softphone. Assuming Interaction Center and the softphone are running on the same computer that has lost network connectivity, be aware that ACD calls will continue to route to an softswitch extension when the softphone is disconnected.
Administrator Guide Connect CLOUD Contact Center 164

Setting System Parameters Defining Tagged Codes9
Allow Reply for — Specify the maximum number of days that can elapse between the receipt of an email and when an agent responds before the email is considered abandoned. This option is available only if Allow Late Email Replies is selected.
4. Click Save.
Defining Tagged Codes
Agents enter wrap-up and release tagged codes when they have finished handling a call. In most cases, these codes provide information for evaluating calls based on statistical reporting.
Defining Wrap-Up Codes
Wrap-up codes are internal codes that are used to label a call. They can be used to indicate the service received by the caller and/or identify the customer who received the service.
Wrap-up codes also are useful for labeling and reporting situations where email communication is terminated before the agent replies to the contact. In this case, the agent should use a wrap-up code to indicate why the communication was terminated without a reply.
Complete the following steps to define a wrap-up code:
1. From Connect Contact Center Director, click System Parameters > Tagged Codes > Wrap-Up Codes.
2. Click New.
3. In the General tab, specify the code Name and Number.
The name is usually the subject of the code, and the number is the digits used to enter the code.
4. Click Create.
Defining Release Codes
Release codes are used by the system to classify the time and reason agents spend in the released state. In the system there are two predefined released codes that are always available: No Code and Forced Released.
Complete the following steps to define a release code:
1. From Connect Contact Center Director, click System Parameters > Tagged Codes > Release Codes.
2. Click New.
3. In the General tab, specify the following:
Short Name — Used in real-time reports.
165 Connect CLOUD Contact Center Administrator Guide

Configuring System Outbound Parameters Setting System Parameters 9
Full Name — Used in historical reports.
Code — Used to sort the entries in Agent Web Interface, streamlining the process of finding a specific release code.
4. Click Create.
Configuring System Outbound Parameters
The system’s outbound parameters specify how outbound calls are handled. Outbound calls are generated in the following sequence:
1. The system waits for an agent to handle the call, and then reserves that agent for the call.
2. The system then waits for an IVR port to become available. As soon as the IVR port is available, the IVR dials the outbound number.
3. According to the configuration for abandoned calls, callback calls, or dial lists, the system transfers the call from the IVR to the agent.
4. If, while reserved, the agent starts a telephony activity (i.e. places a call or receives a non-ACD or a consultation call), the system sends the outbound call to another other available agent or puts the call in the queue.
Defining how the system handles outbound calls involves configuring general preferences and time settings.
Before configuring outbound parameters you can specify the default callback service. Refer to Specifying Services on page 77 for details. Once specified, this service automatically appears as an option that you can choose, allowing you to more quickly and easily configure outbound parameters.
Configuring General Parameters for Outbound Calls
The general parameters for outbound calls includes options for phone prefixes, callbacks and dial lists, timers, and outbound behavior.
Complete the following steps to configure general parameters for outbound calls:
1. From Connect Contact Center Director, click System Parameters > Outbound > General Preferences.
2. In the General tab, specify the call prefix options:
Local Area Code — By specifying the local area code, the system knows to eliminate it from the CID of abandoned calls and from the numbers dialed from callback and dial lists.
Outbound Prefix — The number that must be dialed before a phone number when making a call to a number outside of the ST system. Connect Contact Center dials the outbound prefix + customer number when making an outbound call.
Administrator Guide Connect CLOUD Contact Center 166

Setting System Parameters Configuring General Parameters for Outbound Calls9
The prefix depends on the trunk that routes your calls. Consult your system administrator for information.
The outbound prefix directly affects the expected format of the callback extension. For example, if a 9 (the usual PSTN dial prefix) is specified as the outbound prefix, and the callback extension is an internal 301, the callback will fail.
3. In the Callback area, choose the appropriate options:
Default Callback Service — The service to be used for calls leaving callback information, or abandoned, during a point in the process in which no service is defined for the call.
The services in the menu have been previously defined. Refer to Defining How Email Reaches Agents on page 114 for details.
Number of Retries — The number of times the system attempts to make a callback call.
4. In the System Timers area, specify the amount of time, in seconds, for the following timers:
Reserved Agent Waits for IVR Port — The time the system keeps an agent on reserve for an outbound call, while waiting for an IVR port to become available. Once this time expires, the agent’s reserve status is removed, and the agent can engage in other activities. The outbound call is held for the next retry.
IVR Waits for Answer — The time an IVR waits for an answer to an outbound call.
Retry on Busy — The time the system waits after a busy signal before retrying the call.
Retry on No Answer — The time the system waits after a call is not answered, before retrying the call.
5. From the Auto Answer area, identify the type of outbound calls you want the system to automatically answer:
Auto Answer on Progressive Dial List Calls — The system automatically answers outbound progressive dial list calls.
Auto Answer Callbacks — The system automatically answers callbacks scheduled using the phone system.
Auto Answer Web Callbacks — The system automatically answers callbacks scheduled from the web.
Auto Answer Abandoned Callbacks — The system automatically answers callbacks to abandoned calls.
6. Choose the behavior of the IVR when a customer hangs up on an outbound call, or when an outbound call is transferred to an agent, in the Outbound Behavior area:
When Customer Disconnects in IVR
Stop — The number is no longer dialed or redialed, and is identified as failed in the database.
167 Connect CLOUD Contact Center Administrator Guide

Configuring Time Settings for Outbound Calls Setting System Parameters 9
Continue — The system dials or redials the call up to the number of total retries specified in Number of Retries.
Transfer to Agent On
Connect — Transfers the call to the reserved agent when the customer picks up.
Ring — Transfers the call to the reserved agent when the customer’s phone rings.
7. Click Save.
Configuring Time Settings for Outbound Calls
Complete the following steps to configure time settings for outbound calls:
1. From Connect Contact Center Director, click System Parameters > Outbound > Time Settings.
2. In the General tab, select the time difference in GMT Offset that indicates the correct time zone. For example, if you are configuring a system that is in the Pacific Standard Time zone, you select -7 or -8 depending on the time of year and whether daylight savings time is in effect.
3. Select Observe Daylight Saving if the location of your Connect Contact Center server observes daylight savings time.
4. In the Time Zone File Upload area, click Browse, locate and select the file containing the time zone data, and then click Upload File.
Connect Contact Center currently only works with a time zone data file which you must purchase. Refer to Appendix A, Using Time Zone Data for information.
5. In the Daylight Savings area, specify how you want daylight savings time to be defined:
Specific Days — Select to specify daylight savings time by a specific range of dates. Identify the date range in the Specific Dates area.
Week, Day and Month — Select to specify daylight savings time by a time period. Identify the time period in the Specify Week, Day, and Month area.
6. Click Save.
Configuring Parameters for Chat
You must configure various parameters for chat contacts to be handled correctly by the Connect Contact Center system.
Note
The Ring option for this setting is supported only with PRI trunk service.
Administrator Guide Connect CLOUD Contact Center 168

Setting System Parameters Configuring Parameters for Chat9
Before configuring chat parameters, you can specify the default email address that appears in an emailed transcript’s From field. Refer to Configuring Parameters for Email on page 171. Once specified, this address automatically appears, allowing you to more quickly and easily configure chat parameters.
Complete the following steps to configure parameters for chat:
1. From Connect Contact Center Director, click System Parameters > Chat and Email > Chat.
2. Use the options in the General tab to specify general parameters for chat:
Max Chat Calls — Enter the maximum number of concurrent chat calls.
Email Transcript to Chat Caller — Select to email a transcript of the chat session to the customer on completion.
Email Transcript to Archive — Select to email a transcript of the chat session to an archive.
Archive Email Address — If you selected the Email Transcript to Archive option, enter the address of the archive.
Email Subject Title — The text that appears in the Subject field of the email.
Append Call Profile — Click to include a call profile field.
Append Date/Time to Subject — Select if you want the date and time of the email added to the subject.
3. Click the Responses tab, and use the following options to provide standardized chat responses to chat customers:
Add Folder — Click to add a folder to the chat response tree, which is an Explorer type tree that organizes responses defined in the system. Use Name to specify the folder name.
Folders on the same level should have unique names.
Add Item — Click to add a response to the selected folder. Use the following options to specify the response:
Name — The response item name.
Type — Specify the type of chat response that appears in the agent’s response list. Select URL if you want to define a web link that will be pushed to the contact when used by the agent. Select Text if you want to define a message that will be displayed on the customer’s computer when selected by the agent.
Content — If the chat response type is URL, enter the web link, such as http://support.shoretel.com. If the chat response type is Text, enter the actual text of the response.
Tip
For information about how administrators and supervisors can monitor agents’ chat sessions, refer to the Monitoring Chat Sessions section of the Monitoring Activity chapter in the Contact Center Supervisor Guide.
169 Connect CLOUD Contact Center Administrator Guide

Configuring Custom Chat Messages Setting System Parameters 9
Remove — You can remove folders and items by selecting them in the Responses tab and clicking Remove.
4. Click Save.
Configuring Custom Chat Messages
Chat messages are used in actions, such as Send Message, that involve a chat contact. For example, such actions can operate in a script that announces chat contacts.
Complete the following steps to configure custom chat messages:
1. From Connect Contact Center Director, click System Parameters > Chat Messages.
2. Click New, and then specify a Name and Message.
3. Click Create.
To modify an existing chat message, select the message, modify the Name and/or Message field, and click Save.
To delete an existing chat message, select the message and click Delete.
System Chat Messages
System chat messages, which are located in System Parameters > Chat and Email > System Chat Messages, are predefined. Users with administrator privileges can modify the predefined system chat messages, but you cannot add or delete them. Refer to Configuring Custom Chat Messages on page 170 for information about creating custom chat messages.
Note
Updated chat messages are applied only after each script they appear in is opened and saved in the GCCS application.
Tip
Connect Contact Center Director supports German, Spanish, and French characters, so system chat messages can be localized in these three languages.
Administrator Guide Connect CLOUD Contact Center 170

Setting System Parameters System Email Messages9
System Email Messages
System email messages, which are located in System Parameters > Chat and Email > System Email Messages, are predefined. Users with administrator privileges can modify the predefined system email messages, but you cannot add or delete them.
Configuring Parameters for Email
You must configure various parameters for email to be handled correctly by the Connect Contact Center system.
Complete the following steps to configure parameters for email:
1. From Connect Contact Center Director, click System Parameters > Chat and Email > Email.
2. Use the options in the General tab to specify how email is assigned according to your site needs and the way email clients, such as Outlook, are configured.
Reply Email Account — Set the parameters of the email account you want to use for reply emails.
Email Address — Email address of the reply account.
Server Address — This is the IP address or fully qualified name of the email server.
Username — User name for the reply account.
Password — Password for the reply account.
Protocol — This value defaults to IMAP and is not available for updates.
SSL Enabled — When selected, this field enables SSL protection for the email account, which means that communication transmitted to and from the email account is encrypted and authenticated.
Port — If SSL Enabled is checked, the default port is 993. If SSL Enabled is not checked, the default port is 143.
Deadletter Email Account — The deadletter email account is an optional email account you can configure to handle email that could not be delivered for some reason, was answered by the wrong agent after transfer, if the email was replied to late, and so on.
Email Address — Email address to send deadletter emails to.
Tip
Connect Contact Center Director supports German, Spanish, and French characters, so system email messages can be localized in these three languages.
171 Connect CLOUD Contact Center Administrator Guide

Configuring Parameters for Email Setting System Parameters 9
General Outgoing Email Account — Set the parameters of the email account you want to use for outgoing emails.
From Email Address — Email address of the general outgoing account.
Server Address — This is the IP address or fully qualified name of the email server.
Username — User name for the general outgoing account.
Password — Password for the general outgoing account.
StartTLS — When selected, this field enables transport layer security for the email account, which means that communication transmitted to and from the email account is encrypted and authenticated.
Port — If StartTLS is checked, the default port is 587. If StartTLS is not checked, the default port is 25.
3. Click Save.
4.
Note
Connect Contact Center support for TLS 1.1 and 1.2 has been verified on Exchange Server 2013 and Exchange Server 2016.
Administrator Guide Connect CLOUD Contact Center 172

Setting System Parameters Configuring Parameters for Email9
173 Connect CLOUD Contact Center Administrator Guide

CHAPTER
10. Maintaining Connect ContactCenter
Use the Maintenance the following entities to maintain the Connect Contact Center system:
Music Streams — Music streams are WAV files that are played when a call is waiting in queue. Music streams can be specified for the entire system, by call, by caller, or to play a prompt.
Languages — The required languages for IVR announcements.
Connected Users — Provides information on users currently logged into the Connect Contact Center system.
Refer to the following sections for more information about maintaining Connect Contact Center:
Configuring Music Streams ..................................................................................... 175
Enabling a Language .............................................................................................. 176
Viewing Information on Connected Users............................................................... 178
Administrator Guide Connect CLOUD Contact Center 174

Maintaining Connect Contact Center Uploading IVR Files10
Uploading IVR Files
The Connect Contact Center system includes default announcement files with the IVR system. You also can upload additional announcement files for use with the IVR system. The default announcement files and any files you upload are located in the IVR directory in the installation location, as follows:
<installation location>\ShoreTel\Contact Center Server\IVR
Complete the following steps to add directories and/or upload additional announcement files:
1. If you want to add a directory, enter the directory Name in the Add Directory section, and then click Add. Otherwise, proceed to step 2.
2. To add an announcement file, click Browse in the Add File section, select the appropriate file, and then click Add.
Configuring Music Streams
Music streams are WAV files that are played when a call is waiting in queue. Music streams can be specified for the entire system, by call, by caller, or to play a prompt.
Complete the following steps to configure a music stream:
1. From Connect Contact Center Director, click Maintenance > Music Streams.
2. Click New.
If you have an existing music stream with parameters similar to what you want, you can quickly create a new music stream by selecting it and clicking Copy.
3. In the General tab, specify a Name for the music stream.
4. From the Stream Type drop-down menu, select the type of music stream:
System-Wide — The audio stream is continuous. When callers enter the queue, they hear the audio at that position in time.
Per Call — The audio stream starts from the beginning for each call in queue, and then plays continuously. A caller hears the audio from the beginning when they first enter the queue; if they reenter the queue they hear the audio at that position in time.
Per Caller — The audio stream starts from the beginning for each call in the queue, and then pauses when the call leaves the queue. A caller hears the audio from the beginning when they first enter the queue; if they reenter the queue they hear the audio at the point where they left off.
Play Prompt — The audio stream starts from the beginning for each call in the queue. A caller hears the audio from the beginning when they first enter the queue; if they reenter the queue they hear the audio from the beginning again.
175 Connect CLOUD Contact Center Administrator Guide

Enabling a Language Maintaining Connect Contact Center 10
5. In the WAVE File Path, enter the location and name of the file to be played. The file must be located on the Connect Contact Center Server in the IVR directory. If IVR servers are being used, the file must also be copied into the IVR directory on all IVR servers.
Click Browse, and use the resulting directory tree to locate and select a specific WAV file.
6. Click Create.
Enabling a Language
Complete the following steps to enable a language:
1. From Connect Contact Center Director, click Maintenance > Languages.
2. In the List View panel, select the language you want to enable, and then select Enabled for Use.
The languages in the list are those currently supported by Connect Contact Center.
3. If you want the language to be used when the IRN Language call profile field is not set to any supported language, select Default Language.
Only one language can be specified as the default language.
4. Click Save.
Backing Up the Connect Contact Center
Refer to the following sections for information about backing up your contact center system.
Critical Components of the Connect Contact Center System
The folders and files listed here are critical components of your Connect Contact Center system. Mitel strongly recommends you back up these components for disaster recovery, preparation for an upgrade, and to be used in the event you need to rollback.
By default, all of these components can be found on the server in ...\ShoreTel\Contact Center Server\. Your installation path may vary.
Backup — This directory contains backups of the contact center configuration database as well as all other contact center databases.
Bin — This directory contains all binaries along with the keystore.exe.config ini file.
Note
WAVE files must not contain an apostrophe (‘). For example, do not use, “Don't Know Why.wav”, instead change the file name to “Do Not Know Why.wav”.
Administrator Guide Connect CLOUD Contact Center 176

Maintaining Connect Contact Center Critical Components of the Connect Contact Center System10
CCD2 and Contact Center Director — These directories contain contact center-related files.
DBProvider — This directory contains database related files. The location of this directory is configurable during install.
Email — This directory contains email headers that will be used for all emails being routed by the contact center.
IVR — This directory contains IVR files.
Log — This directory contains all logs. The location of this directory is configurable during install.
Connect Contact Center CLOUD —services logs are located in /var/log and are named <application>.access/error.log
nginx — This directory contains nginx binaries and configuration files. ngnix is used by Connect Contact Center Director.
Connect Contact Center CLOUD Reverse Proxy
conf.d — All contact center configuration files are under set6. For example: service_urls_set6_ecc.conf. This file is populated by a configuration script provided by the Reverse Proxy team.
The services covered in this configuration file are Web Agent, Contact Center Director, Contact Center API, and Chat.
The URLs configured for these services are as follows:
https://cc.shoretel.com (Web Agent)
https://ccdirector.shoretel.com (Contact Center Director)
https://ccapi.shoretel.com (Contact Center API)
https://chat.shoretel.com (Chat)
Ruby — This directory contains Ruby binaries and configuration files. Ruby is used by Connect Contact Center Director.
Web Agent — This directory contains two sub directories, which contain files related to the Interaction Center for the server and the client.
Server
Certs — This directory contains HTTPS certs. This content does not need to be backed up as the source for it is on the HQ.
Lib — This directory contains various javascript libraries used by the NodeJS Server. NodeJS is used by Web Agent.
Log — This directory contains WebAgent and External API logs.
Node_module — This directory contains NodeJS related files.
Client
Bin — This directory contains fonts, assets, Angular framework related files.
177 Connect CLOUD Contact Center Administrator Guide

Viewing Information on Connected Users Maintaining Connect Contact Center 10
Viewing Information on Connected Users
Information on the users currently connected to the Connect Contact Center system can be viewed. This includes when the user logged in, the IP address of the client machine, and other information.
Complete the following steps to view information on connected users:
1. From Connect Contact Center Director, click Maintenance > Connected Users.
2. In the List View panel, select the user on which you want information, and then view information about the user in the General tab.
Administrator Guide Connect CLOUD Contact Center 178

Maintaining Connect Contact Center Viewing Information on Connected Users10
179 Connect CLOUD Contact Center Administrator Guide

CHAPTER
11. Using Call Control Scripts
This chapter explains how to use call control scripts to affect a call in the Contact Center system. Contact Center provides the Graphical Call Control Script (GCCS) Administration application for the purpose of creating and working with call control scripts. For information about launching and using GCCS Administration, refer to Configuring Connect Contact Center on page 24.
In this release, the system-wide script capacities that Contact Center supports are a maximum of 500 scripts and 100 actions per script. Contact Center also comes with additional protected scripts you cannot modify.
Refer to the following sections for more information about using call control scripts:
Overview of Call Control Scripts ............................................................................. 180
Working with Call Control Scripts ............................................................................ 183
Testing and Database Query................................................................................... 185
Call Control Script Actions Reference..................................................................... 186
Overview of Call Control Scripts
A call control script is a collection of actions that the system performs on automatic call distribution (ACD) calls. These actions are sequentially executed until either the script is exhausted or an action causes a branch to another script.
Mitel provides sample call control scripts that you can use as is, or as the basis for new scripts. Sample audio files, in the WAV format, are also provided that you can include in your call control scripts.
Administrator Guide Connect CLOUD Contact Center 180

Using Call Control Scripts Using Scripts to Affect Calls11
Using Scripts to Affect Calls
Scripts can be used to affect a call in many ways, such as the following:
Gather information from the caller.
Present information to the caller.
Make logical decisions that affect the routing of a call based on information gathered from the caller or from your company’s database.
You can activate scripts at various stages of call processing:
At the incoming call entry point — An intelligent routing number (IRN) defines the rules for routing an incoming call (or contact). The script can announce an option menu to the caller. The system then routes the call based on the caller’s menu choice.
The script can also dynamically change the parameters of an incoming call. Changed parameters can be used later in the processing of the call according to choices made by the caller and other call parameters.
In a call queue and a personal agent queue — The activation of one or more scripts can announce different options to the caller, such as more information or an offer to contact the caller at a later time (call back).
Upon interflow.
When no agents are logged into the system.
When a called party answers an outbound call.
In an incomplete call scenario. The call ends up having no valid destination.
The Change Call Profile action can be used to change the value of a call profile field, and the modified call profile can affect the call routing. For example, the script can change the service that the call requires by adding information about the caller from a database. Alternatively, the call profile can change how the script defines the actions that require a caller to provide input from a menu.
Call Control Scripts Provided by Mitel
Mitel provides sample call control scripts that you can use as is, or as the basis for new scripts.
Note
If you define your script to use both services and agent queues as routing destinations, be aware that Connect Contact Center uses the service as the routing destination and disregards the queue.
Note
WAV files are in the following format: u-law, 8000Hz, 8 bit, and mono.
181 Connect CLOUD Contact Center Administrator Guide

Audio Files Provided by Mitel Using Call Control Scripts 11
The sample call control scripts are displayed when you launch GCCS Administration:
Login — Logs in agents without a PC to the Contact Center system. This script can be used as is.
Login Fail Confirm — Informs an agent, without a PC, that their attempt to log into the system has failed. This script can be used as is.
Logout — Logs out a agent without a PC from the Contact Center system. This script can be used as is.
Release — Puts an agent without a PC into the Release state. This script can be used as is.
Resume — Puts an agent without a PC into the Resume state. This script can be used as is.
Sample First Ann — Identifies the first announcement a caller hears when entering the Contact Center system. This script is only an example; any script identifying the first announcement should play a customer-specific file.
Sample Incomplete — Specifies the announcement a caller hears when their call can’t be handled by the system. This script is only an example; any script specifying the incomplete announcement should play a customer-specific file.
Sample Mandatory Ann — Identifies the mandatory announcement a caller hears when entering the Contact Center system. This script is only an example; any script identifying the mandatory announcement should play a customer-specific file.
Sample Music — Specifies the music a caller hears while waiting. This script is only an example; any script specifying music should play a customer-specific file.
Sample Second Ann — Identifies the second announcement a caller hears when entering the Contact Center system.This script is only an example; any script identifying the second announcement should play a customer-specific file.
Audio Files Provided by Mitel
Sample audio files, in the WAV format, that you can include in your call control scripts, are provided by Mitel.
The sample audio files are located on your Contact Center server in the IVR directory and can be selected from options within GCCS Administration. These files are available in multiple languages on the Contact Center server IVR directory as follows:
Note
Do not make any changes to the sample call control scripts because your changes will be lost when you upgrade. If you want to make changes, use the sample script as a template for a new call control script, and save the template with a unique name.
Note
WAV files are in the following format: u-law, 8000Hz, 8 bit, and mono.
Administrator Guide Connect CLOUD Contact Center 182

Using Call Control Scripts Working with Call Control Scripts11
Arabic (U.A.E) in the ar_AE folder
German (Standard) in the de_DE folder
English (United Kingdom) in the en_GB folder
English (United States) in the en_US folder
Spanish (Spain) in the es_ES folder
Spanish (Mexico) in the es_MX folder
French (Standard) in the fr_FR folder
Italian (Standard) in the it_IT folder
Swedish in the sv_SE
Working with Call Control Scripts
You can create, edit, and delete call control scripts. You can also specify prerequisite script parameters, allowing you to more quickly and easily work with call control scripts.
For script actions that have exit points, the action can have only one exit point or several exit points. The call continues to the next action that is connected to the exit point. The specific exit point from an action depends on the result of the action. For example, the Give Menu action has an exit point for each digit that a caller might press in addition to an exit point for a timeout. In this scenario, the script proceeds to the action that is connected to the exit point when the caller presses the number 1.
To change a call profile field, you must use the Change Call Profile action.
Specifying Prerequisite Call Control Script Parameters
Before creating a new call control script, you can specify the following parameters:
For scripts using a music source, defined the music source. Refer to Configuring Music Streams on page 175 for information.
If a script includes a chat message, create the message. Refer to Configuring Custom Chat Messages on page 170 for information.
For scripts accessing the database through the use of SQL actions, if you want to test the script, define the database connection.
Once specified, these parameters automatically appear as options that you can choose, allowing you to more quickly and easily create new call control scripts.
183 Connect CLOUD Contact Center Administrator Guide

Creating Call Control Scripts Using Call Control Scripts 11
Creating Call Control Scripts
Complete the following steps to create a call control script:
1. From GCCS Administration, choose File > New Script.
2. The new script, with a default name, is added to the bottom of the Script list.
If you want the script to have a more descriptive name, double-click on the new script in the list, and then edit the script name.
3. Click the Palette tab. From the Palette, drag-and-drop the appropriate actions onto the Action area. You can also right-click in the Action area to display and select an action.
A script begins with the first action on the left and continues along the path that is mapped out by the script. For example, the course of script execution is affected by a yes or no response from the called party, or the decision at a multiple choice junction.
Refer to Call Control Script Actions Reference on page 186 for an explanation of each script actions.
4. Click the action in the Action area and use the Properties area to specify the appropriate properties for the action.
5. Connect the actions by selecting the exit point for an action and dragging it to the next action. When you complete this action, a blue arrow is displayed indicating the flow between actions.
When a script is saved, the system automatically removes all actions that are not connected.
6. Use the Comment area to explain the purpose of the script or selected action.
A maximum of 2,048 characters can be entered.
7. If the script accesses the database, test it by running a database query. Refer to Testing and Database Query on page 185 for details.
8. Click File > Save Script.
Editing a Call Control Script
Complete the following steps to edit a call control script:
1. To get the latest scripts created or modified by other users, click File > Reload and Sort. Choose whether to display the scripts in the Script List by name, or by date the script was created.
2. Click the Scripts tab. From the Scripts List, select the script you want to edit. You can also select a script from the Scripts menu.
3. Make the appropriate changes to the script name, script actions, action properties, action connections, and comments. Refer to Complete the following steps to create a call control script: on page 184 for details.
4. Click File > Save Script.
Administrator Guide Connect CLOUD Contact Center 184

Using Call Control Scripts Importing and Exporting Call Control Scripts11
5. To make your new script available to other users and to appear as an option in Contact Center Director, click Reload Current Script.
Importing and Exporting Call Control Scripts
To import or export a call control script, click File > Import/Export in GCCS Administration, and then select the appropriate option. Navigate to the script file you want to import or to the location you want to export the script file to, and then click Open or Save, depending on which action you have selected.
Checking Imported Scripts
Complete the following steps to check an imported script:
1. Click File > Import/Export > Import, navigate to the script you want to check, and click Open.
2. Click File > Import/Export > Check Imported Script.
If the entity referenced in the imported script is no longer present in the system, GGCS will detect the error and prompt the user to change it to another valid entity, such as a service.
For some entities the references will be removed automatically. For example, a reference to a call profile for which there is no match will be removed.
3. Based on the information that appears in the top Description field, use the drop-down menu for the bottom Description field to select a value to replace the one listed above.
4. Click Accept.
5. Click OK.
Deleting a Call Control Script
You can delete a call control script that is not used in Contact Center Director from the system. If you want to delete a script used in Contact Center Director, first delete it from anywhere it is used in that application.
Complete the following steps to delete a call control script:
1. Click File > Reload and Sort, and then choose whether to display the scripts in the Script List by name or by the date the script was created.
2. Click the Scripts tab, select the script you want to delete, and then click File > Delete Script.
Testing and Database Query
Complete the following steps to test a script:
1. From GCCS Administration, click Tools > Database Test Query.
185 Connect CLOUD Contact Center Administrator Guide

Call Control Script Actions Reference Using Call Control Scripts 11
2. Select a database connection in the drop-down menu.
The connections in the list have been previously defined.
3. In the text field, enter the query.
4. Click Execute to test the connection.
5. Click OK.
Call Control Script Actions Reference
A call control script is made up of a collection of actions that the system performs on automatic call distribution (ACD) calls. These actions are sequentially executed until either the script is exhausted or an action causes a branch to another script.
Some actions are telephony-related, such as transferring a call. Some actions obtain information from your organization’s database, for example performing a SQL query. Other actions might involve an interactive voice response (IVR). When the system executes IVR actions, such as announcing a menu, getting digits, or playing a file, the call is automatically transferred to an available IVR port.
In GCCS Administration, the Branch option is implemented by the matched exit point.
This section describes each action that GCCS Administration supports.
Announce
The Announce action announces numerical values to the caller (for example, “Your customer number is 2763”). Numerical values are defined in the call profile fields. The announcement can be played in the caller’s language.
The Announce action includes the following properties:
Announce Field — From the drop-down list, choose the call profile field from which you want to extract the numeric information to be announced.
User (optional) call profile fields are created using Contact Center Director. Refer to Creating Call Profile User Fields on page 163 for information.
File to Play — Locate and select the file to play before the announcement.
Format — Choose from the drop-down list the numerical format.
Note
Test queries must begin with the SELECT statement.
Administrator Guide Connect CLOUD Contact Center 186

Using Call Control Scripts Announce11
The remaining options in the Properties area change based on the format chosen. You can select from the following formats:
Number — The system announces the contents of the announced field as a number. If the Number format is chosen, the following additional properties must be specified:
Language — The list of currently enables languages.
Languages are enabled using Contact Center Director, as explained Enabling a Language on page 176.
Gender — From the drop-down menu that is displayed when you click on the gender field, choose the gender in which the numbers are announced for each enabled language.
Type — Choose whether the number is announced as an integer or decimal. If the number type is decimal, from the Decimal Places drop-down menu choose how many digits to the right of the decimal point are announced.
Negative Number Prompt — Locate and select the recording that indicates a negative number prompt. If you want the Negative Number Prompt file to play before the number, select Before Number.
Positive Number Prompt — Locate and select the recording that indicates a positive number prompt. If you want the Positive Number Prompt file to play before the number, select Before Number.
File to Play [end] — Locate and select the file that plays the concluding announcement.
Digit by Digit — The number is announced digit by digit. For example, this format could be used to announce a social security number. If the Digit by Digit format is chosen, the following additional properties must be specified:
Language — The list of currently enables languages.
Languages are enabled using Contact Center Director, as explained in Enabling a Language on page 176.
Gender — From the drop-down menu that is displayed when you click on the gender field, choose the gender in which the numbers are announced for each enabled language.
Negative Number Prompt — Locate and select the recording that indicates a negative number prompt. If you want the Negative Number Prompt file to play before the number, select Before Number.
Positive Number Prompt — Locate and select the recording that indicates a positive number prompt. If you want the Positive Number Prompt file to play before the number, select Before Number.
File to Play [end] — Locate and select the file that plays the concluding announcement.
Sequential — The number is announced as a sequential number (for example, to announce a caller’s place in queue). If the Sequential format is chosen, the following additional properties must be specified
Language — The list of currently enables languages.
187 Connect CLOUD Contact Center Administrator Guide

Announce Using Call Control Scripts 11
Languages are enabled using Contact Center Director, as explained in Enabling a Language on page 176.
Gender — From the drop-down menu that is displayed when you click on the gender field, choose the gender in which the numbers are announced for each enabled language.
File to Play [end] — Locate and select the file that plays the concluding announcement.
Date — The number is announced as a date. If the Date format is chosen, the following additional properties must be specified
Announce Format — From the drop-down menu, choose the format of the date announcement. If you want the day of the week to be announced before the date, select Week Day.
File to Play [end] — Locate and select the file that plays the concluding announcement.
Money — The number is announced as units and subunits. For currency, it can be dollars and cents; for weight, it can be kilos and grams. If the Money format is chosen, the following additional properties must be specified:
Language — The list of currently enables languages.
Languages are enabled using Contact Center Director, as explained in Enabling a Language on page 176.
Gender — From the drop-down menu, choose the gender in which the numbers are announced for each enabled language.
Type — Choose whether the number is announced as an integer or decimal. If the number type is decimal, choose how many digits to the right of the decimal point are announced in Decimal Places.
Currency Units Prompt — Locate and select the recording that denotes the type of currency units prompt, for example dollars.
Currency Subunits Prompt — Locate and select the recording that denotes the type of currency subunits prompt, for example cents.
Negative Number Prompt — Locate and select the recording that indicates a negative number prompt. If you want the Negative Number Prompt file to play before the number, select Before Number.
Positive Number Prompt — Locate and select the recording that indicates a positive number prompt. If you want the Positive Number Prompt file to play before the number, select After Number.
File to Play [end] — Locate and select the file that plays the concluding announcement.
Note
The dd/mm/yyyy date format is no longer supported. For scripts using this date format, the date is announced in mm/dd/yyyy date format instead.
Administrator Guide Connect CLOUD Contact Center 188

Using Call Control Scripts Announce Place in Queue11
Time — The number is announced as a time. If the Time format is chosen, the following additional properties must be specified:
Announce Format — From the drop-down menu, choose the format of the time announcement.
File to Play [end] — Locate and select the file that plays the concluding announcement.
Announce Place in Queue
The Announce Place in Queue action announces the caller’s position in the queue. For example, this action might announce “You are the fifth caller in line.”
The following list includes the properties of the Announce Place in Queue action:
File to play [start] — Locate and select the file that plays the starting announcement.
File to Play [end] — Locate and select the file that plays the concluding announcement.
Place in Queue Offset — Choose the number to be added to the true queue position to offset the caller’s position. This allows a high priority call to go before someone in line without the person in line querying the wait time.
Announce Wait Time
The Announce Wait Time action announces the expected wait time for a call in queue.
The estimated wait time is determined by the following formula:
Average queue time = Average treatment time * position in queue / number of non-release agents
Average treatment time = (total wait till answer time + total talk time + total wrap-up time) / calls answered
The following list includes properties of the Announce Wait Time action:
File to Play [start] — Locate and select the file that plays the starting announcement.
File to Play [end] — Locate and select the file that plays the concluding announcement.
Wait Time Offset (sec) — Choose the number of seconds to be added to the expected wait time to offset the caller’s wait time. This allows a high priority call to go before someone in line without the person in line querying the wait time.
Resolution — Choose the minimal resolution of the announced time. For example, if you set it to 10 seconds and a particular wait time currently is 15 seconds, the announced wait time is 20 seconds.
189 Connect CLOUD Contact Center Administrator Guide

Branch to Script Using Call Control Scripts 11
Branch to Script
The Branch To Script action stops processing a call’s current script and starts processing the script specified by this action.
The property of the Branch to Script action is Branch to Script, which is the script to which the action branches.
Change Call Profile
The Change Call Profile action allows you to add or change a call profile field for a call that is being processed by a script. Any new fields that are created using the Change Call Profile action are added to the call’s profile. If a field already exists, its value is updated according to the modifications defined by the script. All user-defined call profile fields, such as optional fields and skills, are defined in Contact Center Director. Refer to Creating Call Profile User Fields on page 163 for information.
The value of a field is maintained throughout the life of a call. For example, it can be viewed by an agent using Interaction Center.
As an example of call profile management, consider the following call sent to a script:
The default call profile field definitions are as follows:
Field: Value
Service Required: Sales Dept.
DNIS: 7100
A call enters the system and passes through an action that changes the Service Required field and adds a new Customer Type field:
Field: Value
Service Required: Complaints Dept.
Customer Type: Foreign
After processing the action, the call profile is modified as follows:
Field: Value
Service Required: Complaints Dept.
DNIS: 7100
Customer Type: Foreign
Call profile fields can also be modified by the following actions: Logic Switch, Give Menu, Get Digits, and Customer Query.
Administrator Guide Connect CLOUD Contact Center 190

Using Call Control Scripts Collect Callback Info11
Complete the following steps to add a new call profile field:
1. In the Change Call Profile action’s Properties area, right-click and choose Insert. In the resulting menu, choose the call profile field you want to add to the action.
The menu lists the default call profile fields and the user-defined call profile fields specified in Contact Center Director. Refer to Creating Call Profile User Fields on page 163 for more information about creating call profile fields.
2. Double-click Value for the newly added field and enter a value.
To modify the value for any user-defined call profile field, double-click Value for the appropriate user-defined field and enter a value.
To delete a call profile field, right-click the appropriate field and select Delete.
Collect Callback Info
The Collect Callback Info action defines the dialog box used to obtain information from a caller for callback purposes. Once the action completes, both the call and script are terminated. Any action that follows it is not performed.
The Collect Callback Info action includes the following steps:
1. Prompt the caller to enter the callback phone number, which is the destination for the call.
2. Prompt the caller to enter the callback time.
3. The IVR announces the callback confirmation.
4. The IVR disconnects the call.
The properties of the Collect Callback Information action include the following:
Get Destination tab
Prompt — The file that prompts the caller to enter the number to be called back.
Timeout Prompt — The file to play if the caller has not responded within a defined time.
# of Digits — The number of digits the system waits for the caller to enter.
Variable Number of Digits — Select if the number of digits can vary. Then specify the End Digit, which is the character that the caller presses to signal the end of the number. Choices are * or #.
Retry — The number of times the system tries to obtain the callback number after the time specified in the Timeout field has passed.
Timeout (sec) — The number of seconds that the system waits for the caller to enter the required information.
191 Connect CLOUD Contact Center Administrator Guide

Collect Callback Info Using Call Control Scripts 11
Announce Destination — The system repeats the destination information that the caller entered, for example “The number you entered is...). Specify the following:
Prompt file — Announces the destination
Customer Feedback Prompt file — Requests the caller to confirm the information. The customer feedback prompt announces prompt such as “To confirm this number, please press one.” or “To change the number, please press two.”
Confirmation Digit — Digit the caller presses for confirmation
Retry Digit — Digit the caller presses to signal an intention to re-enter the information
Get Time tab
Callback Time — The caller specifies a callback time by pressing five digits. The ending numbers of 2 and 7 denote am and pm, respectively. For example, to specify a 7:00 am callback time, the caller presses 07002; for a callback time of 4:55pm the caller presses 04557.
Callback Period — The customer specifies the length of time the system should wait before it calls the customer back. This time is entered in four digits. For example, to receive a callback in 2 hours and 10 minutes the caller presses 0210.
Prompt — The file that prompts the caller to enter the number to be called back.
Timeout Prompt — The file to play if the caller has not responded within a defined time.
Error Prompt — The file that tells the customer that an error has occurred.
Retry — The number of times the system tries to obtain the callback number after the time specified in the Timeout field has passed.
Timeout (sec) — The number of seconds that the system waits for the caller to enter the required information.
Announce Time — The system announces the entered information back to the caller. Then specify the Prompt file to announce the time (for example “The number you entered is … .”), the Customer Feedback Prompt file that requests the caller to confirm the information (for example “To confirm this number, please press one. To change the number, please press two.”), the Confirmation Digit the caller presses for confirmation, and the Retry Digit the caller presses to signal an intention to re-enter the information.
Ending tab
File to Play — Locate and select the file that plays the concluding announcement.
Hang Up tab — Indicates that once the action completes, both the call and script are terminated.
Tip
To configure an immediate callback, leave all items on this tab blank.
Administrator Guide Connect CLOUD Contact Center 192

Using Call Control Scripts Customer Query11
Customer Query
The Customer Query action verifies that a customer exists in the database, using a call profile field. If the customer is in the database, the system routes the call according to customer-specific routing rules.
Any call profile field can be used to find a matching customer in the database. The value used as the search key is either the Caller ID or a number that the Get Digits action receives from the caller and then stores in the call profile.
The Customer Query action has one of three exit points: if the customer is found in the database (OK), if the customer is not found in the database (N.F.), and a following action (CONTINUE). To change the call profile, you should add a Change Call Profile after each exit point.
The Customer Query action includes the Look up customer according to the value in the call profile field property, which is the call profile field you want to use as a search key for a customer in a database.
Decision
The Decision action compares a call profile field value to either another call profile field value or a constant (number).
The properties of the Decision action include the following:
If — The call profile field whose value you want to compare.
The call profile fields in the drop-down menu are default fields and user-defined fields and skills as defined in Contact Center Director. Refer to Creating Call Profile User Fields on page 163 for details.
For those call profile fields that can be described as either a String or Number, choose the appropriate option in the associated field.
Operator field — The operator used in the comparison.
The comparison operations are as follows:
= — Call parameter value is equal to compare value.
<> — Call parameter value is not equal to compare value.
< — Call parameter value is less than compare value.
> — Call parameter value is greater than compare value.
<= — Call parameter value is less than or equal to compare value.
>= — Call parameter value is greater than or equal to compare value.
193 Connect CLOUD Contact Center Administrator Guide

Dial Digits Using Call Control Scripts 11
CP Field or Constant — Determines if the call profile field value is compared to another call profile field value or to a constant. In the associated field, choose either the call profile field or enter the constant.
Dial Digits
The Dial Digits action allows the system to dial digits to the other call’s party. For example, this action can function in an outbound call to send DTMF digits to the other party if the other party is a machine that responds to DTMF. The dialed digits can be predefined or can be the contents of a call profile field.
The properties of the Dial Digits action includes the following:
Dial Predefined Digits — Dials a predefined sequence of digits. In the associated field, enter the digits to dial.
Dial Digits from CP Field — Dials a sequence of digits according to the contents of a user-defined call profile field. In the associated field, from the drop-down menu choose the call profile field.
The user-defined call profile fields are specified using Contact Center Director, as explained in Creating Call Profile User Fields on page 163.
Dialing Protocol — The dialing protocol is DTMF.
Get Digits
The Get Digits action prompts the caller to enter a sequence of digits which is stored in a call profile field. For example, the caller can be prompted to enter a customer ID.
The properties of the Get Digits action include the following:
Prompt — The file that contains the voice prompt instructing the caller to enter the numbers to be stored in the call profile field.
Timeout Prompt — The file that contains the voice prompt instructing the caller on what to do if they have has not responded within a defined time.
Insert into CP — The call profile field into which the digits entered by the caller should be placed.
Retry — The number of times the system tries to obtain the number after the time specified in the Retry Timeout field has passed.
Retry Timeout (sec) — The number of seconds that the system waits for the caller to enter the required information.
Number of Digits — The number of digits expected. If the caller enters fewer digits and a timeout occurs, the system will retry until the number of retries has been exceeded. If a variable number of digits is expected, this field defines the maximum number of digits to collect.
Administrator Guide Connect CLOUD Contact Center 194

Using Call Control Scripts Get Next Record11
Variable Number of Digits — If selected, the system collects the digits entered by the caller until the caller presses the end digit, or until the Number of Digits value is reached. Then specify the End Digit, which is the character that the caller presses to signal the end of the number. Choices are * or #.
Decimal Number — Select if the digits that the caller enters represent a decimal number. Then specify the Decimal-Point Digit that represents the decimal point. When the caller enters this digit, the system takes all the digits that have been collected and makes them the integer part of the decimal number. The digits that the caller continues to enter are counted as the fraction part of the decimal number. Choices are * or #.
Clear DTMF on Start — When selected, the system ignores all the previously entered digits and restarts digit collection. When this option is not selected, any previously entered digits are included in this action.
Stop Prompt on DTMF — The prompt file stops when the caller begins to enter a digit.
Get Next Record
The Get Next Record action is associated with a SQL Execute action. It loads the results of the next record from the associated SQL Execute action into a call profile field according to the SQL Execute assignment rules.
The property of the Get Next Record action is Refer to SQL Execute. Choose the name of the SQL Execute action to which this Get Next action refers.
Give Menu
The Give Menu action provides a menu to the caller. The caller receives a voice prompt and can choose an option by entering a digit.
Complete the following steps to set the Give Menu action:
1. Define the voice prompt and other parameters such as number of retries and the wait time for the caller input.
2. Define the behavior of the system as a consequence of the caller’s choice.
The following list includes the properties of the Give Menu action:
Voice File — Locate and select the file instructing the caller on the menu options (for example “For technical support please press one, for product information please press two”).
Invalid File — Locate and select the file that is played if the caller presses a meaningless digit and for which there is no specific behavior defined for such an error.
Retries — The number of times the system tries to obtain the number after the time specified in the Timeout field has passed.
195 Connect CLOUD Contact Center Administrator Guide

Hang-Up Using Call Control Scripts 11
Timeout — The number of seconds that the system waits for the caller to enter the required information.
Clear DTMF on Start — When selected, the system clears any previously received digits for this call. When unselected, the system uses any previously received digits.
Stop Prompt on DTMF — Any digit pressed by the caller immediately terminates the currently playing voice message.
Hang-Up
The Hang-Up action hangs up the call. It terminates both the call and the script. If the agent is receiving an email, this button is unavailable until the agent clicks the Answer button. If an agent clicks the Hang-Up button before replying to an email, a wrap-up code must be entered to document the reason for terminating contact before replying. Refer to Defining Wrap-Up Codes on page 165 for information about setting up wrap-up codes.
Increase/Decrease
The Increase/Decrease action allows numerical changes to a user-defined call profile field. This allows the you to perform numeric functions, such as managing a counter and increasing the current priority.
The property of the Increase/Decrease action is CP Field, which is the user-defined call profile field to be changed by this action. Choose whether you want the value to Increase or Decrease, and then choose the increment by which to increase or decrease the call profile field value.
The user-defined call profile fields are specified using Contact Center Director, as explained in Creating Call Profile User Fields on page 163.
IVR Application End
The IVR Application End action stops the data collection from the current IVR application. An IVR application is a statistical entity that can be used to collect data about how calls perform a script or a part of a script. IVR applications are defined in Contact Center Director.
IVR Application Start
The IVR Application Start action starts data collection for the specified IRV Application. An IVR application is a statistical entity that can be used to collect data about how calls perform a script or a part of a script. IVR applications are defined in Contact Center Director.
Administrator Guide Connect CLOUD Contact Center 196

Using Call Control Scripts Logic Switch11
The property of the IVR Application Start action is IVR Application, which is the IVR application from which data is to be collected. When this action is performed on a call, the action is counted as part of the statistics for this IVR application.
Logic Switch
The Logic Switch action enables you to logically define how a call is handled, based on call profile field values.
The Logic Switch action properties are referred to as logic branches. Each Logic Switch action relates to one call profile field, but can contain up to 10 logic branches. A logic branch consists of an operation, such as equals (=), and a compare value, such as Friday. The Logic Switch action matches a single call profile field with the correct logic branch so that the call is handled according to actions defined in the branch. When the first matching branch is found, it is used and no more matching is done.
The following list includes the properties of the Logic Switch action:
If — The call profile field whose value you want to use. If the call profile field is a field that can be compared as a number or string, from the associated field choose the comparison type.
The call profile fields in the drop-down menu are default fields and user-defined fields and skills as defined in Contact Center Director. Refer to Creating Call Profile User Fields on page 163 for details.
Operator field — The operator used in the comparison.
The comparison operations are
= —The logic branch is triggered if the value is equal to compare value.
<> — The logic branch is triggered if the value is not equal to compare value.
< — The logic branch is triggered if the value is less than compare value.
> — The logic branch is triggered if the value is greater than compare value.
<= — The logic branch is triggered if the value is less than or equal to compare value.
>= — The logic branch is triggered if the is greater than or equal to compare value.
else — The logic branch is triggered by all the relations. A branch using the else operator should be placed as the last logic branch in the list, otherwise the branches that follow will never be checked.
Compare To field —The call profile field parameter to be compared. For example, if the call profile field is Media, parameters are “voice”, “chat”, and “email.” If you enter a number in the field, specify integers only. Use of a decimal will result in unexpected results since the system does not recognize the decimal part of the value. For example, 1.5 would be treated as the number 1 by the system.
197 Connect CLOUD Contact Center Administrator Guide

Login Primary Groups Using Call Control Scripts 11
Login Primary Groups
The Login Primary Groups action performs a login to an agent’s primary groups. Before performing this action, the Agent Number call profile field must be filled with the required agent number. Use the Get Digits action to fill the Agent Number call profile field. The agent extension is assumed to be the call’s calling device. The system is shipped with a predefined script named login. An agent’s primary groups are defined in Contact Center Director as explained in Assigning Primary Groups to an Agent on page 47.
Login/Logout Primary Groups
The Login/Logout Primary Group action plays a file informing the agent caller of their current logged in primary group status, and allows the caller to change that status.
The Login/Logout Primary Group action is constructed from three steps, each represented by a different tab:
1. A file that informs the agent of their current status and asks the agent for an input to change this state.
2. When a login takes place, the action gets the agent number.
3. A file informs the agent of the action results, success or failure, of either a login or logout.
The following list includes properties of the Login/Logout Primary Groups action:
Details tab — Use to specify the file that informs the agent of their current status, and asks the agent for an input to change this state.
Logged-In Status — This section is used if the agent is an already logged onto the extension. By pressing 1 the status change is initiated. Otherwise the system hangs up the call.
Logged-In Status Prompt — The file that informs the agent that the extension being used is already logged on.
Logout Option Prompt — The file that tells the agent to change their current state and perform a logout.
Logged-Out Status — This section is used if the agent is not logged onto the extension. By pressing 1 the status change is initiated. Otherwise the system hangs up the call.
Logged-Out Status Prompt — The file that informs the agent that the extension being used is logged-out (not logged in yet).
Note
The Login Primary Groups action is obsolete and exists only for backward compatibility. Mitel recommends using the Login/Logout Primary Groups action instead.
Administrator Guide Connect CLOUD Contact Center 198

Using Call Control Scripts Logout Primary Groups11
Login Option Prompt — The file that informs the agent to change their current state and to perform a login.
Get Agent Number tab — When login is activated, the action retrieves the agent number.
Prompt — The file that prompts for the agent number.
Timeout Prompt — The file to play if the agent has not responded within a defined time.
# of Digits — The number of digits the system waits for the caller to enter.
Announce — The system repeats the information that the agent entered. Specify the Prompt file to announce the information, the Customer Feedback Prompt file that requests the agent to confirm the information, the Confirmation Digit the agent presses for confirmation, and the Retry Digit the agent presses to signal an intention to re-enter the information.
Action Results tab — The files that inform the agent of the action results (success or failure) of both login and logout.
Login
Success Prompt — The file that plays when login succeeds.
Failed Prompt — The file that plays when login activation.
Logout
Success Prompt — The file that plays when logout succeeds.
Failed Prompt — The file that plays when logout fails.
Logout Primary Groups
The Logout Primary Group action performs a logout from an agent’s primary groups. The agent extension is assumed to be the call’s calling device.
The system is shipped with a predefined script named logout. The agent’s primary groups list is defined in Contact Center Director as explained in Assigning Primary Groups to an Agent on page 47.
Overflow
The Overflow action causes the call to overflow to a group or personal agent queue.
Note
The Logout Primary Groups action is obsolete and exists only for backward compatibility. Mitel recommends using the Login/Logout Primary Groups action instead.
199 Connect CLOUD Contact Center Administrator Guide

Play Callback File Using Call Control Scripts 11
Note that the Overflow action presents the call to the overflow group, or personal agent queue, only once. If the call is not answered in the overflow group, the call is resubmitted to the original group. For example, if the call is presented to an agent in forced released, the call is resubmitted to the original group instead of the overflow group. If the call has already overflowed, the action is ignored.
Groups and personal agent queues are defined using Contact Center Director. Refer to Adding an Agent Group on page 71 and Creating Agent Queue Profiles on page 100 for more information.
The following list includes properties of the Overflow action:
Overflow Groups — The groups that the call will overflow to once the action is performed.
To add a group to the Overflow To list, select the group from the Available list and click Add.
To delete a group from the Overflow To list, select the group from the Overflow To list and click Remove.
Overflow Agent Queue Agents — The personal agent queue that the call will overflow to once the action is performed.
To add an agent’s queue to the Overflow To list, select the agent from the Available list and click Add.
To delete a agent’s queue from the Overflow To list, select the agent and click Remove.
Play Callback File
The Play Callback File action is obsolete. Mitel recommends using the Play File action instead.
Play File
The Play File action plays a pre-recorded voice file to the caller. The file can be either predefined in the action or dynamically defined by the content of a call profile field. The length of time the file is played is determined by the Timeout and Play Continuously in a Loop properties.
For scripts selected in System Parameters > Routing Preferences > Service Settings > Default Music on Hold > Music Script in Contact Center Director, the Play File action must have the Play Continuously in a Loop option selected. Otherwise, secondary announcements do not play correctly if the music script is shorter than the time specified in Routing > Services > Announcements > Secondary Announcements Time in Contact Center Director.
The following list includes properties of the Play File action:
Predefined File Name — The action plays the predefined file specified in the associated field.
Use Call Profile Field — The action plays the file defined by the content of the call profile field specified in the associated field.
Administrator Guide Connect CLOUD Contact Center 200

Using Call Control Scripts Play Music Stream11
Timeout — The time, in seconds, after which the script ends the file being played and continues to the next action.
Play Continuously in a Loop — The file is played repeatedly until the Timeout parameter expires. If this option is not selected, the voice file plays only once.
Clear DTMF on Start — Clears any digits received before the action started. If this option is not selected, previously received digits might be used in the action.
Stop Prompt on DTMF — Any digit entered terminates the message currently playing.
Play Music Stream
The Play Music Stream action plays a music stream to the caller. The music stream can be either defined in the action (predefined) or dynamically defined by the content of a call profile field. The length of time the music stream plays is determined by the Timeout property.
The properties of the Play Music Stream action are:
Music Stream — The music stream file to be played.
Music streams are defined in Maintenance > Music Streams in Contact Center Director.
Timeout — The time, in seconds, after which the script ends the file being played and continues to the next action.
Clear DTMF on Start — Any digits received before the action started are cleared. If this box is not selected, previously received digits might be used in the action.
Stop Prompt on DTMF — Any digits entered terminates the message currently playing.
Release
When an agent is in a Release state, the system does not route ACD calls to the agent’s phone. The agent can still receive calls through transfers from other agents or incoming private calls. The Release action is used to release an agent. For example, the Release action might be used to release agents without a PC from their groups.
The Release action assumes that the calling device is the agent device. It then looks for the agent who is logged into this extension. If such an agent is found, the action verifies that the agent is not already released, and then changes the agent state to released.
Note
The Release action is obsolete and exists only for backward compatibility. Mitel recommends using the Release/Resume action instead.
201 Connect CLOUD Contact Center Administrator Guide
Release/Resume Using Call Control Scripts 11
Release/Resume
The Release/Resume action assumes that the calling device is the agent device. It then looks for the agent who is logged into this extension. If such an agent is found, the action verifies the agent’s current status (released or resumed), and then plays a WAV file prompting the agent to press 1 to change the current status. After 1 is pressed, the action tries to change the status and then plays a WAV file telling the agent the action results (success or failure).
The following list includes properties of the Release/Resume action:
Details tab — Defines the announcements on current status.
Released Status Prompt — The file that informs the agent their status is currently Release.
Resume Option Prompt — The file that tells the agent to press 1 to enter the Resume state.
Resumed Status Prompt — The file that informs the agent their status is currently Resume.
Release Option Prompt — The file that tells the agent to press 1 to enter the Release state.
Action Results tab — Defines the announcements reports action results.
Release Success Prompt — The file that informs the agent their status is now Release.
Release Failed Prompt — The file that informs the agent their status change to the Release status has failed.
Resume Success Prompt — The file that informs the agent their status is now Resume.
Resume Failed Prompt — The file that informs the agent their status change to the Resume status has failed.
Resume
When an agent is in the Resume state, the system routes ACD calls to the agent’s phone. The Resume action is used to return an agent from the Release state to the state in which the system routes ACD calls to the agent’s phone. For example, Release state can be used to put agents without a PC into a normal ACD mode.
The Resume action assumes that the calling device is the agent device. It then looks for the agent who is logged into this extension. If such an agent is found, the action verifies that the agent is in the Release state, and then changes the agent state to Resume.
Note
The Resume action is obsolete and exists only for backward compatibility. Mitel recommends using the Release/Resume action instead.
Administrator Guide Connect CLOUD Contact Center 202

Using Call Control Scripts Send Message11
Send Message
The Send Message action is used for chat, defining the message to be sent to a chat contact.
The properties of the Send Message action are:
Message Name — The message to be sent to the chat contact.
Chat messages are predefined as explained in Configuring Custom Chat Messages on page 170.
Message Text — The selected message’s text.
If you want to change the text, refer to Configuring Custom Chat Messages on page 170 for information.
Send Page
The Send Page action is used for chat, defining the web page (URL) to be sent to a chat contact.
The property of the Send Page action is URL, which is the URL of the web page to be sent to the chat contact.
No validity check is performed on the address entered in the URL field.
Set Route Destination
The Set Route Destination action changes the call profile field of a call to indicate a new destination.
The following list includes the properties of the Set Route Destination action:
Not Defined — Disables the Set Rout Destination action.
Service — The call is routed to a service.
Agent Queue — The call is routed to an agent’s personal agent queue.
SQL Connect
The SQL Connect action connects to an external database to make a query. For example, this action can be used to establish a connection with the your organization’s database, after which it is possible to branch to another script containing database queries, assuming that this database connection has been established.
203 Connect CLOUD Contact Center Administrator Guide

SQL Disconnect Using Call Control Scripts 11
The property of the SQL Connection action is Connection Name, which is the database connection.
Database connections are predefined using System Parameters > External Interfaces > Database Connections in Contact Center Director.
SQL Disconnect
The SQL Disconnect action disconnects currently connected databases, which were connected through the SQL Connect action.
The property of the SQL Disconnect action is Connection Name, which is the database connection.
SQL Execute
The SQL Execute action sends a query to the database to obtain specific information, such as stored procedures you created in Connect Contact Center Director. For example, you might use SQL Execute to do one of the following:
Obtain output from a stored procedure to put information in a CP variable.
Use data returned by a stored procedure to attach specific columns to CP variables.
The query is a SQL statement. For example, the query can find and retrieve caller priority and then update the priority value in a call profile field. If the result of the query is more than one record, you can loop over the result set using the Get Next Record action, and then perform actions on every record fetched.
The SQL Execute action assumes that the connection to the database already exists.
The following list includes properties of the SQL Execute action:
Query Name — The name that is referred by the Get Next Record action to loop over all the records fetched by the SQL Execute action.
Connection Name — The name of the currently connected database.
Database connections are predefined using Contact Center Director > System Parameters > External Interfaces > Database Connections.
Execution Timeout — The period of time, in seconds, that the system tries to query the database before timing out.
Handle Single Record — The query fetches one record.
Handle Multiple Records — The query fetches more than one record. Use the Update number of records found in CP field drop-down menu to select the call profile field used by the system to set the number of fetched records.
Use the Get Next Record action to perform actions on every record fetched.
Administrator Guide Connect CLOUD Contact Center 204

Using Call Control Scripts Transfer11
Predefined Queries — Click to select a SQL statement. The contents of the statement are shown in the associated field. No automatic syntax checking is performed on this field.
SQL statements are created in Dial Lists > Predefined SQL in Contact Center Director.
Test — Click to test your query. If your query contains a stored procedure, you are unable to test the query and will see an error message instead to ensure the integrity of the database.
Assign column from DB to update CP field — The list of call profile fields to be updated by the action. To insert a new call profile field to the list, right-click in the area, choose Insert, and then the appropriate field from the drop-down menu. Next in the Column field, double-click to enter the name of the database column that should be used as a source for updating the call profile field.
The column names are not automatically checked against the database and should be entered carefully.
Transfer
The Transfer action defines the transfer destination of a call. The destination can be either defined in the action itself (predefined), or dynamically defined by the content of a call profile field.
The following list includes properties of the Transfer action:
Predefined Destination — The transfer destination is defined by the Transfer action. The transfer destination must be a valid dial number in the PBX. (It can be an external dial number to the PBX.)
Use CP Field as Destination — The transfer destination is dynamically defined by the content of a call profile field. The system transfers the call to the dial number contained in the specified call profile field.
Wait
The Wait Action causes a delay in the execution of a script. It can be used to allow a previous action to complete before the script execution continues.
The property of the Wait action is Seconds to Wait, which is the length of the delay in seconds. The maximum length of delay is 1000 seconds.
205 Connect CLOUD Contact Center Administrator Guide

CHAPTER
12. Troubleshooting ConnectContact Center Configuration
This chapter provides information on troubleshooting the Connect Contact Center system, and details on problems or errors you may encounter when configuring and using Connect Contact Center.
In addition to the information in this chapter, always consult the Connect Contact Center documentation and knowledge base to help you solve common system issues.
When you start troubleshooting, first try to determine if the problem is Mitel related or involves your network.
Refer to the following sections for more information about troubleshooting Connect Contact Center configuration:
Troubleshooting Tools ............................................................................................. 206
Troubleshooting Tools
Connect Contact Center provides the following troubleshooting tools you can use to diagnose and remedy basic system problems:
Log Monitor
Administrator Guide Connect CLOUD Contact Center 206

Troubleshooting Connect Contact Center Configuration Contact Center Log Monitor12
Contact Center Log Monitor
Contact Center Log Monitor tracks the activity of every entity and subsystem maintained by Enterprise Contact Center. The information displayed in Contact Center Log Monitor can be viewed, formatted, and filtered in real-time. Past data is archived in text format.
This tool is targeted for administrators and is intended to be used for troubleshooting purposes.
Starting Contact Center Log Monitor
Complete the following steps to start Contact Center Log Monitor:
1. From your Contact Center server Windows desktop, navigate to ...\ShoreTel\ShoreTel Contact Center Server\Bin.
2. Double-click BswLogMon.exe.
3. To display data on the currently selected facilities, click Action > Play. To stop the display of data, click Action > Stop.
Viewing Data
You can specify the channel and facilities for which you information.
1. Click Tools > Settings.
2. To display data in the Log Monitor window, choose Contact Center Log Monitor Channel in Channel Description. If you want the data written to log files, select ECC Log File.
3. Select the Level of information you want.
4. Specify the facilities on which you want information by moving the appropriate facilities from the Available list to the Active list.
Pointing to a facility displays a tool tip with a description of the facility.
Some facilities should not be used because they are for internal Mitel use only. Retrieving data on other facilities can slow down your system. Contact Center provides warnings for these facilities.
Use the following options to specify the facilities you want information for:
Show All Facilities — Select to display all facilities in the Available list.
Select All — Click to move all facilities in the Available list to the Active list.
Add — Click to move the selected facilities from the Available list to the Active list.
Remove — Click to move the selected facilities from the Active list to the Available list.
Save Set — Click to save the list of facilities in the Active list so that you can use this set at a later time. In the resulting dialog box, enter a unique name for the facility set, and then click OK. If the list of facilities has already been saved as a set, clicking the Save Set button allows you to save the facility set under a new name or save it with current name.
207 Connect CLOUD Contact Center Administrator Guide

Contact Center Log Monitor Troubleshooting Connect Contact Center Configuration 12
Clear All — Click to move all facilities from the Active list to the Available list.
5. To use an existing facility set, select it from Facility Sets, and then click Set.
Default facility sets are provided for the type of information you most often need.
6. Click OK.
Data on the selected channel and facilities is displayed in the window of the Contact Center Log Monitor.
Working with Data
Complete the following steps to view, format, filter, and save data:
1. To open a log file, click the Open icon, and then select the file you want to open.
2. To copy text in the log, select what you want to copy, and then click Edit > Copy. You can cut selected text by clicking the Cut icon.
3. If you need to find specific information in the log, click Edit > Find. Specify your search criteria, and then click Find Next.
4. If you want back up the log file, click Tools > Backup Log File. Enter a name for the new file, and then click Rename.
5. To format a log file that you want to save as text, click Tools > Format Log File. Specify your formatting, and then click Format to File. You can select from the following options to specify how the log file is formatted:
Ignore Log Wrap — Click to turn off the wrapping of data in the log.
Level — Choose the level of information you want.
Show All Facilities — Select to display all facilities in the Available list.
Select All — Click to move all facilities from the Available list to the Active list.
Clear All — Click to move all facilities from the Active list to the Available list.
Add — Click to move the selected facilities from the Available list to the Active list.
Remove — Click to move the selected facilities from the Active list to the Available list.
Source File — Identify the file that is to be formatted.
Target File — Identify the name and location of the text file to which the formatted data should be saved.
6. If you want to filter the information, click Tools > Filter. Click All to filter all the facilities. Click None to remove filtering from all the facilities. Select an individual facility to turn off filtering for that facility.
7. To save the log file, click File > Save. To save the log file under a new name, click the Save As icon.
Administrator Guide Connect CLOUD Contact Center 208

Troubleshooting Connect Contact Center Configuration Contact Center Log Monitor12
8. To clear the Contact Center Log Monitor window of data, click the Clear icon.
209 Connect CLOUD Contact Center Administrator Guide

APPENDIX
A. Using Time Zone Data
As part of the process of configuring time settings for outbound calls, you can upload time zone data. Once uploaded, Connect Contact Center checks the database, and based on the area code of the destination, calls at the correct destination local time.
Connect Contact Center works with a time zone data file which you must purchase. Prior to December 2011, a CSV file named areacodeworldpremium.csv could be purchased. This file still works with Connect Contact Center but can no longer be obtained.
Starting in December 2011, the file you need is area-code-database.asp, which you can purchase from www.area-codes.com. This appendix provides information on purchasing, configuring and uploading this time zone data.
If you have any questions, contact Mitel TAC.
Purchasing Time Zone Data
You need to purchase the time zone data from Area-Codes.com. Choose the Deluxe Area Code Database version in the Comma Separated Values (CSV) format of their product.
Configuring Time Zone Data
Once you have purchased the time zone data, complete the following steps to configure the data:
1. Copy the data file to <contact center install directory>\ruby\bin.
2. Open a console window and run the following command from the <contact center install directory>\ruby\bin directory:
Administrator Guide Connect CLOUD Contact Center 210

Using Time Zone Data Uploading Time Zone DataA
ruby convert_time_zone.rb [name of the csv file] > normalized_ac.csv
3. Once the script is done, open the normalized_ac.csv file.
Verify that the following columns exist:
NPA
NXX
TIMEZONE
OBSERVES_DST
Uploading Time Zone Data
Complete the following steps to upload the time zone data file to Connect Contact Center:
1. From Connect Contact Center Director, click System Parameters > Outbound > Time Settings.
2. In the General tab, locate and select the file for the Time Zone File Upload field by clicking Browse. Next click Upload File. Uploading may take a few minutes; the Time Zone Data Loaded checkbox is automatically selected once uploading is complete.
3. Click Save.
Refer to Configuring Time Settings for Outbound Calls on page 168 for information about the other time setting options.
211 Connect CLOUD Contact Center Administrator Guide