Computer Network Engg. Lab - Madin Polytechnic College
31
REVISION-2015 COMPUTER NETWORK ENGINEERING LAB – 5137 | 1 MA’DIN POLYTECHNIC COLLEGE, MALAPPUAM| Lab Manual For COMPUTER NETWORK ENGINEERING LAB – 5137 Diploma in Computer Engineering 5 th Semester MA'DIN POLYTECHNIC COLLEGE
-
Upload
khangminh22 -
Category
Documents
-
view
4 -
download
0
Transcript of Computer Network Engg. Lab - Madin Polytechnic College

REVISION-2015 COMPUTER NETWORK ENGINEERING LAB – 5137 |
1 MA’DIN POLYTECHNIC COLLEGE, MALAPPUAM|
Lab Manual
For
COMPUTER NETWORK
ENGINEERING LAB – 5137
Diploma in Computer Engineering
5th Semester
MA'DIN POLYTECHNIC COLLEGE

REVISION-2015 |
2 MA’DIN POLYTECHNIC COLLEGE, MALAPPUAM|
INDEX
NO LIST OF EXPERIMENTS PAGE NO
1 Study of different types of Network cables and
Practically implement the cross-wired cable and
straight through cable using clamping tool.
3
2 Install and Configure Wired and Wireless NIC and
transfer files between systems in LAN and Wireless
LAN.
7
3 Install and configure Network Devices: HUB, Switch
and Routers. 8
4 Connect the computers in Local Area Network. 10
5 Configure Host IP, Subnet Mask and Default
Gateway in a System in LAN (TCP/IP
Configuration).
12
6 Establish Peer to Peer network connection using two
systems using Switch and Router in a LAN. 13
7 Configure Internet connection and use IPCONFIG,
PING / Tracer and Net stat utilities to debug the
network issues.
15
8 Transfer files between systems in LAN using FTP
Configuration, install Print server in a LAN and
share
the printer in a network.
18
9 Study of basic network command and Network
configuration commands 20
10 Configure a Network topology using packet tracer
software 23
11 Configure a Network topology using packet tracer
software. 26 MA'DIN POLYTECHNIC COLLEGE

REVISION-2015 |
3 MA’DIN POLYTECHNIC COLLEGE, MALAPPUAM|
Experiment No: 1
Experiment: Do the following Cabling works in a network a) Cable Crimping b) Standard
Cabling and c) Cross Cabling d) IO connector crimping e) Testing the crimped cable using a
cable tester.
Aim:
To do the following
a) Cable Crimping
b) Standard Cabling
c) Cross Cabling
d) IO connector crimping
e) Testing the crimped cable using a cable tester
Apparatus/Tools/Equipments/Components:
RJ-45
connector, IO
Connector,
Crimping Tool,
Twisted pair
Cable, Cable
Tester.
Principle:
Standard Cabling:
1. 10BaseT and 100BaseT are most common mode of LAN. You can use UTP category-5 cable
for both modes.
2. A straight cable is used to connect a computer to a hub
MA'DIN POLYTECHNIC COLLEGE

REVISION-2015 |
4 MA’DIN POLYTECHNIC COLLEGE, MALAPPUAM|
Cross Cabling:
A cross cable is used to connect 2 computers directly (with ONLY the UTP cable). It is also used then you
connect 2 hubs with a normal port on both hubs
Procedure:
Cable Crimping steps:
1. Remove the outmost vinyl shield for 12mm at one end of the cable (we call this side A-side).
2. Arrange the metal wires in parallel
3. Insert the metal wires into RJ45 connector on keeping the metal wire arrangement.
4. Set the RJ45 connector (with the cable) on the pliers, and squeeze it tightly.
MA'DIN POLYTECHNIC COLLEGE

REVISION-2015 |
5 MA’DIN POLYTECHNIC COLLEGE, MALAPPUAM|
5. Make the other side of the cable (we call this side B-side) in the same way.
6. After you made it, you don't need to take care of the direction of the cable.
IO connector crimping: Run the full length of Ethernet cable in place, from endpoint to endpoint,
making sure to leave excess.
At one end, cut the wire to length leaving enough length to work, but not too much excess.
Strip off about 2 inches of the Ethernet cable sheath.
Align each of the colored wires according to the layout of the
jack. Use the punch down tool to insert each wire into the
jack.
Repeat the above steps for the second RJ45 jack.
Testing the crimped cable using a cable tester:
Step 1 : Skin off the cable jacket 3.0 cm long cable stripper up to cable
Step 2: Untwist each pair and straighten each wire 190 0 1.5 cm long.
Step 3 : Cut all the wires
Step 4 : Insert the wires into the RJ45 connector right white orange left brown the pins facing up
MA'DIN POLYTECHNIC COLLEGE

REVISION-2015 |
6 MA’DIN POLYTECHNIC COLLEGE, MALAPPUAM|
Step 5 : Place the connector into a crimping tool, and squeeze hard so that the handle reaches its
full swing.
Step 6: Use a cable tester to test for proper continuity
Result:
Cable Crimping, Standard Cabling and Cross Cabling, IO connector crimping and testing the
crimped cable using a cable tester are done successfully
MA'DIN POLYTECHNIC COLLEGE

REVISION-2015 |
7 MA’DIN POLYTECHNIC COLLEGE, MALAPPUAM|
EXPERIMENT-2
Ex.No:2. Install and Configure Wired and Wireless NIC and transfer files between systems in
LAN and Wireless LAN.
Aim:
To Install and Configure Wired and Wireless (remotely) NIC and transfer files between systems in
LAN and Wireless LAN between two system in a LAN.
Principle:
NICs (Network Interface Card):Network Interface Card, or NIC is a hardware card installed in a
computer so it can communicate on a network. The network adapter provides one or more ports for
the network cable to connect to, and it transmits and receives data onto the network cable.
Wireless LAN card:
Every networked computer must also have a network adapter driver, which controls the network
adapter. Each network adapter driver is configured to run with a certain type of network adapter.
Procedure:
(a) Install the network card:
Disconnect all cables connected to the computer and open the case. Locate an available PCI slot
(white slots) and insert the network card and secure the card with the screw that came with it. Once the
adapter has been installed and secured close the computer case, connect all the cables and turn it on.
After installing the adapter driver it should be working find, now let’s configure the card for use on a
network.
Click on the Start button and select Settings then Control Panel.
Double click on the System icon
Click on the Hardware tab.
Click on Device Manager.
You will see a list of devices installed in your computer.
If necessary, click on the + sign next to Network Adapters to expand the list.
Ensure that there is no yellow exclamation mark (!) next to the Network Adapter. This indicates a possible
problem with the card or configuration.
Double click on your network driver (e.g. NE2000
Compatible). In the Device Status box you should see the
message:
This Device is working correctly.
If you do not see this message or if there is no Network Adapter displayed, then your Ethernet card will
probably need configuring.
Result:
Installation and configuration of Wired and Wireless (remotely) NIC and transfer files between systems
in LAN and Wireless LAN between two systems in a LAN have been done successfully.
MA'DIN POLYTECHNIC COLLEGE

REVISION-2015 |
8 MA’DIN POLYTECHNIC COLLEGE, MALAPPUAM|
EXPERIMENT-3
Ex. No. 3.Install and configure Network Devices: HUB, Switch and Routers.
Aim:
To Install and configure Network Devices HUB, Switch and Routers PCs are interfaced using connectivity devices.
Principle:
1. Repeater:Functioning at Physical Layer.A repeater is an electronic device that receives a signal
and retransmits it at a higher level and/or higher power, or onto the other side of an obstruction, so that
the signal can cover longer distances. Repeater have two ports ,so cannot be use to connect for more
than two devices.
2. Hub: An Ethernet hub, active hub, network hub, repeater hub, hub or concentrator
is a device for connecting multiple twisted pair or fiber optic Ethernet devices together and making
them act as a single network segment. Hubs work at the physical layer (layer 1) of the OSI model. The
device is a form of multiport repeater. Repeater hubs also participate in collision detection,
forwarding a jam signal to all ports if it detects a collision.
3. Switch:A network switch or switching hub is a computer networking device that connects
network segments.The term commonly refers to a network bridge that processes and routes data at the
data link layer (layer 2) of the OSI model. Switches that additionally process data at the network layer
(layer 3 and above) are often referred to as Layer 3 switches or multilayer switches.
4. Bridge: A network bridge connects multiple network segments at the data link layer (Layer 2) of
the OSI model. In Ethernet networks, the term bridge formally means a device that behaves according
to the IEEE 802.1D standard. A bridge and switch are very much alike; a switch being a bridge with
numerous ports. Switch or Layer 2 switch is often used interchangeably with bridge.Bridges can
analyze incoming data packets to determine if the bridge is able to send the given packet to another
segment of the network.
5. Router: A router is an electronic device that interconnects two or more computer networks, and
lectively interchanges packets of data between them. Each data packet contains address information
that a router can use to determine if the source and destination are on the same network, or if the data
packet must be transferred from one network to another. Where multiple routers are used in a large
collection of interconnected networks, the routers exchange information about target system addresses,
so that each router can build up a table showing the preferred paths between any two systems on the
interconnected networks.
6. Gate Way: In a communications network, a network node equipped for interfacing with another
network that uses different protocols.
• A gateway may contain devices such as protocol translators, impedance matching devices, rate
converters, fault isolators, or signal translators as necessary to provide system interoperability. It also
requires the establishment of mutually acceptable administrative procedures between both networks.
MA'DIN POLYTECHNIC COLLEGE

REVISION-2015 |
9 MA’DIN POLYTECHNIC COLLEGE, MALAPPUAM|
• A protocol translation/mapping gateway interconnects networks with different network protocol
technologies by performing the required protocol conversions.
Procedure:
Result:
Thus install and configure Network Devices PCs are interfaced using connectivity devices – Hub,
router and switch have been done successfully.
MA'DIN POLYTECHNIC COLLEGE
REVISION-2015 |
10 MA’DIN POLYTECHNIC COLLEGE, MALAPPUAM|
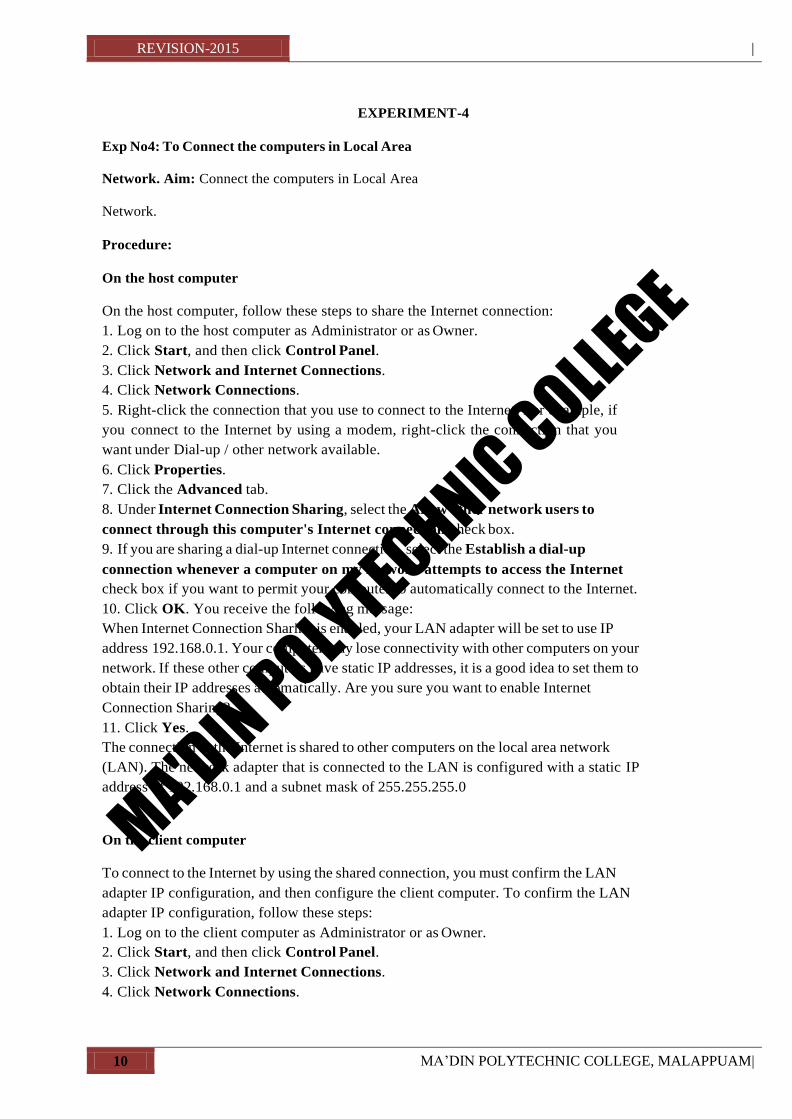
EXPERIMENT-4
Exp No4: To Connect the computers in Local Area
Network. Aim: Connect the computers in Local Area
Network.
Procedure:
On the host computer
On the host computer, follow these steps to share the Internet connection:
1. Log on to the host computer as Administrator or as Owner.
2. Click Start, and then click Control Panel.
3. Click Network and Internet Connections.
4. Click Network Connections.
5. Right-click the connection that you use to connect to the Internet. For example, if
you connect to the Internet by using a modem, right-click the connection that you
want under Dial-up / other network available.
6. Click Properties.
7. Click the Advanced tab.
8. Under Internet Connection Sharing, select the Allow other network users to
connect through this computer's Internet connection check box.
9. If you are sharing a dial-up Internet connection, select the Establish a dial-up
connection whenever a computer on my network attempts to access the Internet
check box if you want to permit your computer to automatically connect to the Internet.
10. Click OK. You receive the following message:
When Internet Connection Sharing is enabled, your LAN adapter will be set to use IP
address 192.168.0.1. Your computer may lose connectivity with other computers on your
network. If these other computers have static IP addresses, it is a good idea to set them to
obtain their IP addresses automatically. Are you sure you want to enable Internet
Connection Sharing?
11. Click Yes.
The connection to the Internet is shared to other computers on the local area network
(LAN). The network adapter that is connected to the LAN is configured with a static IP
address of 192.168.0.1 and a subnet mask of 255.255.255.0
On the client computer
To connect to the Internet by using the shared connection, you must confirm the LAN
adapter IP configuration, and then configure the client computer. To confirm the LAN
adapter IP configuration, follow these steps:
1. Log on to the client computer as Administrator or as Owner.
2. Click Start, and then click Control Panel.
3. Click Network and Internet Connections.
4. Click Network Connections.
MA'DIN POLYTECHNIC COLLEGE

REVISION-2015 |
11 MA’DIN POLYTECHNIC COLLEGE, MALAPPUAM|
5. Right-click Local Area Connection and then click Properties.
6. Click the General tab, click Internet Protocol (TCP/IP) in the connection uses
the following items list, and then click Properties.
7. In the Internet Protocol (TCP/IP) Properties dialog box, click Obtain an IP
address automatically (if it is not already selected), and then click OK.
Note: You can also assign a unique static IP address in the range of 192.168.0.2 to
192.168.0.254. For example, you can assign the following static IP address, subnet mask,
and default gateway:
8. IP Address 192.168.31.202
9. Subnet mask 255.255.255.0
10. Default gateway 192.168.31.1
11. In the Local Area Connection Properties dialog box, click OK.
12. Quit Control Panel.
Result:
The computers Connected in Local Area Network.
MA'DIN POLYTECHNIC COLLEGE

REVISION-2015 |
12 MA’DIN POLYTECHNIC COLLEGE, MALAPPUAM|
EXPERIMENT-5
Ex. No. 5. Configure Host IP, Subnet Mask and Default Gateway
in a System in LAN (TCP/IP Configuration).
Aim:
To Configure IP Address in a system in LAN (TCP/IP Configuration) and Configure DNS to establish
interconnection between systems
Principle: Following is required to be study under this practical.
• Classification of IP address
Class A 1.0.0.1 to 126.255.255.254 Supports 16 million hosts on each of 127 networks.
Class B 128.1.0.1 to 191.255.255.254 Supports 65,000 hosts on each of 16,000 networks.
Class C 192.0.1.1 to 223.255.254.254 Supports 254 hosts on each of 2 million networks.
Class D 224.0.0.0 to 239.255.255.255 Reserved for multicast groups.
Class E 240.0.0.0 to 254.255.255.254 Reserved.
• Sub netting
Why we Develop sub netting and How to calculate subnet mask and how to identify subnet
address.
• Super netting
Why we develop super netting and How to calculate supernet mask and how to
identify supernet address.
Procedure:
(a) Steps to configure IP address, Subnet mask and Default Gateway:
1. Click on the Start button and select Control Panel then Network and Internet Connections.
2. Click Network and Internet Connections.
3. Right click on the Local Area Connection icon and select Properties.
4. Select Internet Protocol (TCP/IP).
5. Click on the Properties button.
6. Uncheck that Obtain an IP address automatically and Obtain DNS server address automatically and
put IP, Subnet mask & Default Gateways.
7. Click on the Advanced button and select the DNS tab in the Advanced TCP/IP Settings window.
8. Ensure that Register this connection's addresses in DNS is not selected.
9. Click OK, OK, then Close to close all boxes.
Result :
Configuration of IP Address in a system in LAN (TCP/IP Configuration) and Configuration to establish
interconnection between systems have been done successfully
MA'DIN POLYTECHNIC COLLEGE

REVISION-2015 |
13 MA’DIN POLYTECHNIC COLLEGE, MALAPPUAM|
EXPERIMENT-6
Ex. No. 6. Establish Peer to Peer network connection using two systems using Switch and Router
in a LAN.
Aim:
To establish Peer to Peer network connection using two systems in a LAN and Switch and Router in a
LAN and share the Drives and folders.
Principle:
All PCs must have networking hardware already installed. Examine the back of the PC for an RJ45 port (it
looks like a port for a typical phone but is wider with eight contacts).
If you have more than two PCs, you will need at least one multi-port sharing device like a hub,
switch, or router with enough ports to support all your PCs.
If you are only networking two PCs, all you need is one crossover cable. You do not need a hub,
switch, or router.
Multi-port sharing devices that work for creating small networks:
Hubs are usually the least expensive of the devices. Hubs simply repeat the data flow out to the other
lines. These work good in small networks.
Switches are like hubs but filter IP addresses to increase data flow in larger networks.
Routers become necessary when networking over 254 computers. A router can also be used to share
one IP address with several other PCs
The network link between PCs can only be as fast as the slowest device in the link. Try to use all
networking devices with the same speed rating for optimal performance (this include cables).
Try to keep hubs, switches, and routers accessible.
Some hubs, switches, and routers, require the last port be used only when the cascade port is not already
in use. Do not connect a network cable for a PC into the cascade port.
Procedure:
Stepping into Peer-to-Peer:
1. Click Start, Control Panel, Network Connections.
2. Select Set up a home or small office network link under Network Tasks On the left-side.
3. The Welcome to the Network Setup Wizard screen on the Network Setup Wizard appears. Click Next.
4. The Before you continue screen appears, listing the steps that will be completed. Click the checklist
for creating a network link.
5. Close the Steps for creating a home or small office network screen.
6. Click Next on the Before you continue screen.
7. connect the network interfaces click Next.
MA'DIN POLYTECHNIC COLLEGE

REVISION-2015 |
14 MA’DIN POLYTECHNIC COLLEGE, MALAPPUAM|
8. The Select a connection method screen appears. Here you will select from three connection
options Make your selection and click Next.
9. On the Select your Internet connection screen, select the network connection that relates to the
Internet under Connections and click Next. You must make a selection or the Next button will remain
grayed out.
10. The next screen, Your computer has multiple connections, is very important for both Internet
connectivity and firewall issues. It's here you begin to assist the wizard by defining the "inside"
network adapter (local area network) and the "wild-side" network adapter (Internet connection).
Make the appropriate selection and click Next. In my case, I selected Let me choose the connections to
my network
11. Because of the selection I made in, the Select the connections to bridge appears. Make the
connection selection and click Next.
12. Complete the Computer description and Computer name fields on the Give this computer
13. Complete the Workgroup name field on the Name your network screen And click next.
14. Review your settings on the Ready to apply your network settings Screen and click next.
15. Click Finish after the configuration process is completed.
Result:
Peer to Peer network connection using two systems using Switch and Router in a LAN have been done
successfully.
MA'DIN POLYTECHNIC COLLEGE

REVISION-2015 |
15 MA’DIN POLYTECHNIC COLLEGE, MALAPPUAM|
EXPERIMENT-7
Exp 7.Configure Internet connection and use IPCONFIG, PING / Tracer and Net stat utilities to
debug the network issues.
Aim:
To Configure to Configure Internet connection and use IPCONFIG, PING / Tracer and Net stat utilities to
debug the network issues establish interconnection between systems
Procedure:
Configure Internet connection and use IPCONFIG, PING:
1. Open Command Prompt, and then type ipconfig. From the display of the ipconfig command, ensure
that the network adapter for the TCP/IP configuration you are testing is not in a Media disconnected
state.
2. At the command prompt, ping the loopback address by typing ping 127.0.0.1.
3. Ping the IP address of the computer.
4. Ping the IP address of the default gateway. If the ping command fails, verify that the default
gateway IP address is correct and that the gateway (router) is operational.
5. Ping the IP address of a remote host (a host that is on a different subnet).
If the ping command fails, verify that the remote host IP address is correct, that the remote host is
operational, and that all of the gateways (routers) between this computer and the remote host are
operational.
6. Ping the IP address of the DNS server.
If the ping command fails, verify that the DNS server IP address is correct that the DNS server is
operational, and that all of the gateways (routers) between this computer and the DNS server are
operational.
Tracer to debug the network issues.
Tracer network:
Open Command Prompt, and type the following:
tracert host_name
Or
tracert ip_address
where host_name or ip_address is the host name or IP address, respectively, of the remote computer.
If you do not want the tracert command to resolve and display the names of all routers in the path, use the
-d parameter. This expedites the display of the path. For example, to trace a path from this computer to
www.microsoft.com without displaying the router names, type the following at a command prompt:
MA'DIN POLYTECHNIC COLLEGE

REVISION-2015 |
16 MA’DIN POLYTECHNIC COLLEGE, MALAPPUAM|
Net stat utilities to debug the network issues:
Displays active TCP connections, ports on which the computer is listening, Ethernet statistics, the IP
routing table, IPv4 statistics (for the IP, ICMP, TCP, and UDP protocols), and IPv6 statistics (for the
IPv6, ICMPv6, TCP over IPv6, and UDP over IPv6 protocols). Used without parameters, netstat
displays active TCP connections
Syntax
netstat [-a] [-e] [-n] [-o] [-p Protocol] [-r] [-s] [Interval]
Parameters
-a
Displays all active TCP connections and the TCP and UDP ports on which the computer is listening.
-e
Displays Ethernet statistics, such as the number of bytes and packets sent and received. This
parameter can be combined with -s.
-n
Displays active TCP connections, however, addresses and port numbers are expressed numerically and no
attempt is made to determine names.
-o
Displays active TCP connections and includes the process ID (PID) for each connection. You can find
the application based on the PID on the Processes tab in Windows Task Manager. This parameter
can be combined with -a, -n, and -p.
-p Protocol
Shows connections for the protocol specified by Protocol. In this case, the Protocol can be tcp, udp,
tcpv6, or udpv6. If this parameter is used with -s to display statistics by protocol, Protocol can be tcp,
udp, icmp, ip, tcpv6, udpv6, icmpv6, or ipv6.
-s
Displays statistics by protocol. By default, statistics are shown for the TCP, UDP, ICMP, and IP
protocols. If the IPv6 protocol for Windows XP is installed, statistics are shown for the TCP over
IPv6, UDP over IPv6, ICMPv6, and IPv6 protocols. The -p parameter can be used to specify a set of
protocols.
-r
Displays the contents of the IP routing table. This is equivalent to the route print command.
Interval
Redisplays the selected information every Interval seconds. Press CTRL+C to stop the redisplay. If this
parameter is omitted, netstat prints the selected information only once.
/?
Displays help at the command prompt
Result:
Thus the Configure Internet connection and use IPCONFIG, PING / Tracer and Net stat utilities to
establish interconnection between systems have been done successful MA'DIN POLYTECHNIC COLLEGE

REVISION-2015 |
17 MA’DIN POLYTECHNIC COLLEGE, MALAPPUAM|
EXPERIMENT- 8
Ex.No.8.Transfer files between systems in LAN using FTP Configuration, install Print server in a
LAN and share the printer in a network.
Aim:
To transfer files between systems in LAN using FTP Configuration, install Print server in a LAN
and share the between two system in a LAN.
Procedure:
Local Printer installs:
To Install and configure printer:
Connect the printer to parallel port of the motherboard and power cable to AC.
Switch on the system and printer.
Insert the driver disk in the CD drive.
Click start >control panel>printers and fax respectively.
Then >double click> add a printer>add printer wizard
respectively. Printer sharing:
1. Open Printers and Faxes. Click Start, click Control Panel, click Printers and Other Hardware, and
then click Printers and Faxes.
2. Right-click the printer you want to share, and then click Sharing.
3. On the Sharing tab, click Share this printer and then type a share name for the shared printer.
4. If you share the printer with others using different hardware or different operating systems,
click Additional Drivers. Click the Environment and operating system for the other computers, and
then click OK to install the additional drivers
5. Click OK, or, if you have installed additional drivers, click
Close. To stop sharing your printer:
1. Open Printers and Faxes. Click Start, click Control Panel, click Printers and Other Hardware, and
then click Printers and Faxes.
2. Right-click the printer you want to stop sharing, and then click Sharing.
3. On the Sharing tab, click Do Not share this printer.
To connect to a printer on a network:
1. Open Printers and Faxes. Click Start, click Control Panel, click Printers and Other Hardware, and
then click Printers and Faxes.
2. Under Printer Tasks, click Add a printer to open the Add Printer Wizard, and then click Next.
3. Click A network printer, or a printer attached to another computer, and then click
Next. Three Ways to Connect to a Printer on a Network:
To search for a printer in Active Directory
1. Click Find a printer in the directory, and then click Next.
MA'DIN POLYTECHNIC COLLEGE

REVISION-2015 |
18 MA’DIN POLYTECHNIC COLLEGE, MALAPPUAM|
2. Click the Browse button to the right of Location, click the printer location, and then click OK.
3. Click Find Now.
4. Click the printer you want to connect to, and then click
OK. To locate a printer by typing the printer name or
browsing for it
1. Click Connect to this printer.
2. Do one of the following:
Type the printer name using the following format:
\\printserver_name\share_name
Browse for it on the network. Click Next, click the printer in Shared printers.
1. Click Next.
Result:
To transfer files between systems in LAN using FTP Configuration, install Print server in a LAN
and share the between two system in a LAN.
MA'DIN POLYTECHNIC COLLEGE

REVISION-2015 |
19 MA’DIN POLYTECHNIC COLLEGE, MALAPPUAM|
EXPERIMENT- 9
Network configuration
Aim: Study of basic network command and Network configuration commands.
Apparatus (Software): Command Prompt And Packet Tracer.
Principle:
All commands related to Network configuration which includes how to switch to privilege
mode and normal mode and how to configure router interface and how to save this
configuration to flash memory or permanent memory.
This commands includes
• Configuring the Router commands
• General Commands to configure network
• Privileged Mode commands of a router
• Router Processes & Statistics
• IP Commands
• Other IP Commands e.g. show ip route etc.
Procedure:
To do this EXPERIMENT- follows these steps:
ping:
ping(8) sends an ICMP ECHO_REQUEST packet to the specified host. If the host
responds, you get an ICMP packet back. Sound strange? Well, you can “ping” an IP
address to see if a machine is alive. If there is no response, you know something is
wrong.
Traceroute:
Tracert is a command which can show you the path a packet of information takes from your
computer to one you specify. It will list all the routers it passes through until it reaches its
destination, or fails to and is discarded. In addition to this, it will tell you how long each 'hop'
from router to router takes.
nslookup:
Displays information from Domain Name System (DNS) name servers.
NOTE :If you write the command as above it shows as default your pc's server name firstly.
pathping:
A better version of tracert that gives you statics about packet lost and latency
MA'DIN POLYTECHNIC COLLEGE

REVISION-2015 |
20 MA’DIN POLYTECHNIC COLLEGE, MALAPPUAM|
MA'DIN POLYTECHNIC COLLEGE

REVISION-2015 |
21 MA’DIN POLYTECHNIC COLLEGE, MALAPPUAM|
.
Getting Help
In any command mode, you can get a list of available commands by entering a question mark (?).
Router>?
To obtain a list of commands that begin with a particular character sequence, type in those haracters
followed immediately by the question mark (?).
Router#co?
configure connect copy
To list keywords or arguments, enter a question mark in place of a keyword or argument.
Include a space before the question mark.
Router#configure ?
memory Configure from NV memory
network Configure from a TFTP network
host terminal Configure from the terminal
You can also abbreviate commands and keywords by entering just enough characters to make
the command unique from other commands. For example, you can abbreviate the show
command to sh.
Configuration Files
Any time you make changes to the router configuration, you must save the changes to memory
because if you do not they will be lost if there is a system reload or power outage. There are two
types of configuration files: the running (current operating) configuration and the startup
configuration.
Use the following privileged mode commands to work with configuration files.
MA'DIN POLYTECHNIC COLLEGE

REVISION-2015 |
22 MA’DIN POLYTECHNIC COLLEGE, MALAPPUAM|
• configure terminal – modify the running configuration manually from the terminal.
• show running-config – display the running configuration.
• show startup-config – display the startup configuration.
• copy running-config startup-config – copy the running configuration to the
startup configuration.
• copy startup-config running-config – copy the startup configuration to the
running configuration.
• erase startup-config – erase the startup-configuration in NVRAM.
• copy tftp running-config – load a configuration file stored on a
Trivial File Transfer Protocol (TFTP) server into the running
configuration.
• copy running-config tftp – store the running configuration on a TFTP server.
IP Address Configuration
Take the following steps to configure the IP address of an interface.
Step 1: Enter privileged EXEC mode:
Router>enable password
Step 2: Enter the configure terminal command to enter global configuration mode.
Router#config terminal
Step 3: Enter the interface type slot/port (for Cisco 7000 series) or interface type port (for
Cisco 2500 series) to enter the interface configuration mode.
Example:
Router (config)#interface ethernet 0/1
Step 4: Enter the IP address and subnet mask of the interface using the ip address
ipaddress subnetmask command.
Example,
Router (config-if)#ip address 192.168.10.1 255.255.255.0
Step 5: Exit the configuration mode by pressing
Ctrl-Z Router(config-if)#[Ctrl-Z]
Result:
The network configuration done successfully. MA'DIN POLYTECHNIC COLLEGE

REVISION-2015 |
23 MA’DIN POLYTECHNIC COLLEGE, MALAPPUAM|
EXPERIMENT-10
Configure a Network
topology Aim: Configure a Network topology using packet tracer
software.
Apparatus (Software): Packet tracer Software
Principle: To implement this practical following network topology is required to be
configured using the commands learned in previous practical.
After configuring the given network a packet should be ping from any one machine
to another.
Procedure:
Router0 Configuration Command :......... Continue with configuration dialog? [yes/no]:
no Press RETURN to get started!
Router>
Router>Ena
ble
Router#conf
ig t
Enter configuration commands, one per line. End with CNTL/Z.
Router(config)#hostname router0
router0(config)#interface fastethernet
0/0
router0(config-if)#ip address 192.168.1.1
255.255.255.0 router0(config-if)#description
router0 fastethernet 0/0 router0(config-if)#no
shutdown
MA'DIN POLYTECHNIC COLLEGE

REVISION-2015 |
24 MA’DIN POLYTECHNIC COLLEGE, MALAPPUAM|
%LINK-5-CHANGED: Interface FastEthernet0/0, changed state
to up router0(config-if)#exit
router0(config)#interface fastethernet 0/1
router0(config-if)#description router0 fastethernet
0/1 router0(config-if)#no shutdown
%LINK-5-CHANGED: Interface FastEthernet0/1, changed state
to up router0(config-if)#exit
router0(config)#exit
%SYS-5-CONFIG_I: Configured from console by
console router0#show running-config
Building configuration...
Current configuration : 437 bytes
!
version 12.4
no service password-encryption
!
hostname router0
!
!
!
!
!
ip ssh version 1
!
!
interface FastEthernet0/0
description router0 fastethernet
0/0
ip address 192.168.1.1 255.255.255.0
duplex auto
speed auto
!
interface FastEthernet0/1
description router0 fastethernet
0/1 no ip address
duplex auto
speed auto
!
interface
Vlan1 no ip
address
shutdown
!
ip classless
!
!
!
!
MA'DIN POLYTECHNIC COLLEGE

REVISION-2015 |
25 MA’DIN POLYTECHNIC COLLEGE, MALAPPUAM|
!
line con 0
line vty 0 4
login
!
!
end
router0
#
router0
#
router0#copy running-config startup-
config Destination filename [startup-
config]?
Building
configuration... [OK]
router0#
Result:
The network configuration done successfully.
MA'DIN POLYTECHNIC COLLEGE

REVISION-2015 |
26 MA’DIN POLYTECHNIC COLLEGE, MALAPPUAM|
EXPERIMENT-11
Configure a Network
topology Aim: Configure a Network topology using packet tracer
software.
Apparatus (Software): Packet tracer Software
Principle: To implement this practical following network topology is required to be
configured using the commands learned in previous practical.
After configuring the given network a packet should be ping from any one machine
to another.
Procedure:
Router0 Configuration Command.........
Router>enable
Router#configure
terminal
Enter configuration commands, one per line. End with
CNTL/Z. Router(config)#interface FastEthernet0/0
Router(config-if)#ip address 192.168.0.254
255.255.255.0 Router(config-if)#no shutdown
%LINK-5-CHANGED: Interface FastEthernet0/0, changed state to up
%LINEPROTO-5-UPDOWN: Line protocol on Interface FastEthernet0/0, changed state
to up
Router(config-if)#exit
Router(config)#exit
%SYS-5-CONFIG_I: Configured from console by
console Router#
Router#configure terminal
MA'DIN POLYTECHNIC COLLEGE

REVISION-2015 |
27 MA’DIN POLYTECHNIC COLLEGE, MALAPPUAM|
Enter configuration commands, one per line. End with
CNTL/Z. Router(config)#interface FastEthernet0/0
Router(config-if)#
Router(config-
if)#exit
Router(config)#interface Serial2/0
Router(config-if)#ip address 192.168.1.1
255.255.255.0 Router(config-if)#no shutdown
%LINK-5-CHANGED: Interface Serial2/0, changed state to
down Router(config-if)#exit
Router(config)#exit
%SYS-5-CONFIG_I: Configured from console by
console Router#wr
Building
configuration... [OK]
Router#show running-config
Building configuration...
Current configuration : 542 bytes
!
version 12.2
no service password-encryption
!
hostname Router
!
!
!
!
!
ip ssh version 1
!
!
interface FastEthernet0/0
ip address 192.168.0.254 255.255.255.0
duplex auto
speed auto
!
interface
FastEthernet1/0 no ip
address
duplex auto
speed auto
shutdown
!
interface Serial2/0
ip address 192.168.1.1 255.255.255.0
!
interface
Serial3/0 no ip
address
MA'DIN POLYTECHNIC COLLEGE
REVISION-2015 |
28 MA’DIN POLYTECHNIC COLLEGE, MALAPPUAM|
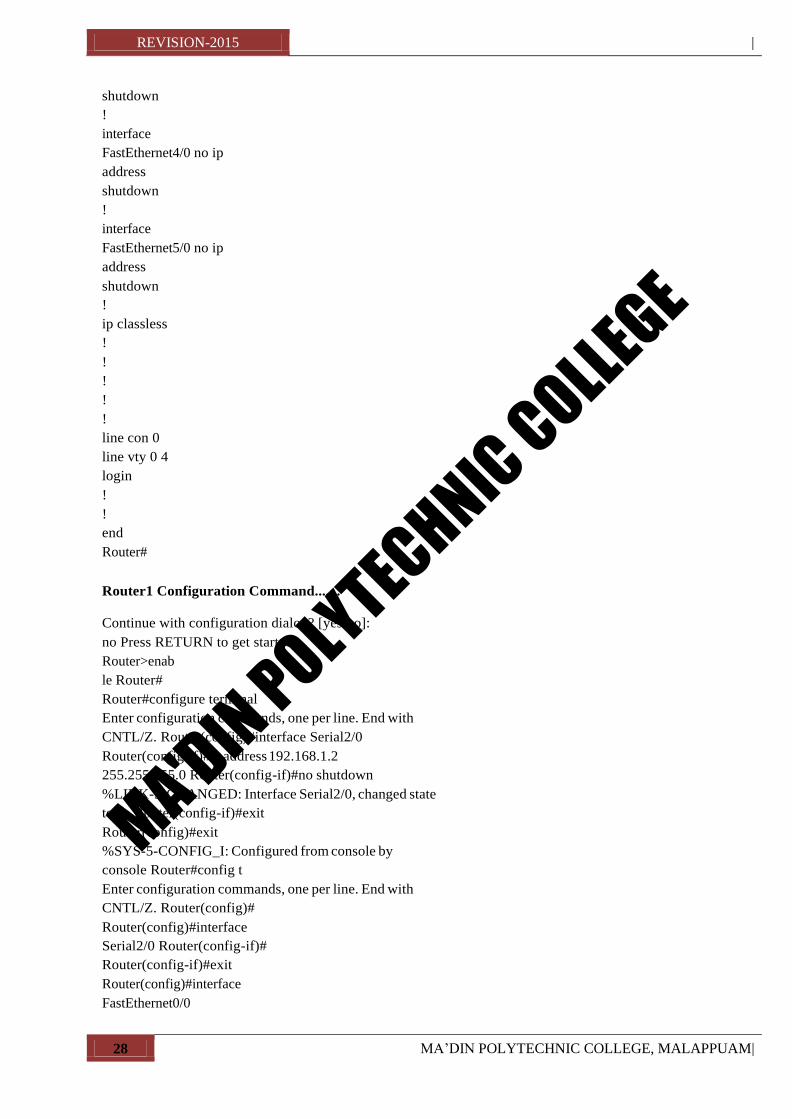
shutdown
!
interface
FastEthernet4/0 no ip
address
shutdown
!
interface
FastEthernet5/0 no ip
address
shutdown
!
ip classless
!
!
!
!
!
line con 0
line vty 0 4
login
!
!
end
Router#
Router1 Configuration Command.......
Continue with configuration dialog? [yes/no]:
no Press RETURN to get started!
Router>enab
le Router#
Router#configure terminal
Enter configuration commands, one per line. End with
CNTL/Z. Router(config)#interface Serial2/0
Router(config-if)#ip address 192.168.1.2
255.255.255.0 Router(config-if)#no shutdown
%LINK-5-CHANGED: Interface Serial2/0, changed state
to up Router(config-if)#exit
Router(config)#exit
%SYS-5-CONFIG_I: Configured from console by
console Router#config t
Enter configuration commands, one per line. End with
CNTL/Z. Router(config)#
Router(config)#interface
Serial2/0 Router(config-if)#
Router(config-if)#exit
Router(config)#interface
FastEthernet0/0
MA'DIN POLYTECHNIC COLLEGE

REVISION-2015 |
29 MA’DIN POLYTECHNIC COLLEGE, MALAPPUAM|
Router(config-if)#ip address 192.168.2.254
255.255.255.0 Router(config-if)#no shutdown
%LINK-5-CHANGED: Interface FastEthernet0/0, changed state to up
%LINEPROTO-5-UPDOWN: Line protocol on Interface FastEthernet0/0, changed state
to up
Router(config-if)#exit
Router(config)#exit
%SYS-5-CONFIG_I: Configured from console by
console Router#wr
Building
configuration... [OK]
Router#
Router#show running-config
Building configuration...
Current configuration : 542 bytes
!
version 12.2
no service password-encryption
!
hostname Router
!
!
!
!
!
ip ssh version 1
!
!
interface FastEthernet0/0
ip address 192.168.2.254 255.255.255.0
duplex auto
speed auto
!
interface
FastEthernet1/0 no ip
address
duplex auto
speed auto
shutdown
!
interface Serial2/0
ip address 192.168.1.2 255.255.255.0
!
interface
Serial3/0 no ip
address
shutdown
interface
FastEthernet4/0 no ip
MA'DIN POLYTECHNIC COLLEGE

REVISION-2015 |
30 MA’DIN POLYTECHNIC COLLEGE, MALAPPUAM|
address
shutdown
!
interface
FastEthernet5/0 no ip
address
shutdown
!
ip classless
!
!
!
!
!
line con 0
line vty 0 4
login
!
!
end
Router#
IP ROUTE Command.....
Router#config t
Enter configuration commands, one per line. End with
CNTL/Z. Router(config)#ip route 192.168.2.0
255.255.255.0 192.168.2.2 Router(config)#exit
Router#show ip route
Codes: C - connected, S - static, I - IGRP, R - RIP, M - mobile, B -
BGP D - EIGRP, EX - EIGRP external, O - OSPF, IA - OSPF inter
area
N1 - OSPF NSSA external type 1, N2 - OSPF NSSA external type
2 E1 - OSPF external type 1, E2 - OSPF external type 2, E - EGP
i - IS-IS, L1 - IS-IS level-1, L2 - IS-IS level-2, ia - IS-IS inter area
* - candidate default, U - per-user static route, o -
ODR P - periodic downloaded static route
Gateway of last resort is not set
C 192.168.2.0/24 is directly connected, FastEthernet0/0
C 192.168.1.2/24 is directly connected, Serial2/0
S 192.168.2.0/24 [1/0] via 192.168.1.2
Router#
IP ROUTE Command.....
Router>enable
Router#show ip route
MA'DIN POLYTECHNIC COLLEGE

REVISION-2015 |
31 MA’DIN POLYTECHNIC COLLEGE, MALAPPUAM|
Codes: C - connected, S - static, I - IGRP, R - RIP, M - mobile, B -
BGP D - EIGRP, EX - EIGRP external, O - OSPF, IA - OSPF inter
area
N1 - OSPF NSSA external type 1, N2 - OSPF NSSA external type
2 E1 - OSPF external type 1, E2 - OSPF external type 2, E - EGP
i - IS-IS, L1 - IS-IS level-1, L2 - IS-IS level-2, ia - IS-IS inter area
* - candidate default, U - per-user static route, o -
ODR P - periodic downloaded static route
Gateway of last resort is not set
S 192.168.0.0/24 [1/0] via 192.168.1.1
C 192.168.0.0/24 is directly connected,
FastEthernet0/0 C 192.168.1.1/24 is directly
connected, Serial2/0 Router#
Result:
The network configuration done successfully.
MA'DIN POLYTECHNIC COLLEGE