CEKit - Release 3.7.0
143
CEKit Release 3.7.0 Jul 29, 2020
-
Upload
khangminh22 -
Category
Documents
-
view
0 -
download
0
Transcript of CEKit - Release 3.7.0

CEKitRelease 3.7.0
Jul 29, 2020


Contents
1 About 3
2 Main features 5
3 I’m new, where to start? 7
4 Releases and changelog 9
5 Contact 11
6 Documentation 136.1 Getting started guide . . . . . . . . . . . . . . . . . . . . . . . . . . . . . . . . . . . . . . . . . . . 136.2 Handbook . . . . . . . . . . . . . . . . . . . . . . . . . . . . . . . . . . . . . . . . . . . . . . . . 196.3 Guidelines . . . . . . . . . . . . . . . . . . . . . . . . . . . . . . . . . . . . . . . . . . . . . . . . 596.4 Descriptor documentation . . . . . . . . . . . . . . . . . . . . . . . . . . . . . . . . . . . . . . . . 736.5 Contribution guide . . . . . . . . . . . . . . . . . . . . . . . . . . . . . . . . . . . . . . . . . . . . 131
7 Sponsor 137
8 License 139
i

ii

CEKit, Release 3.7.0
Contents 1
CEKit, Release 3.7.0
2 Contents

CHAPTER 1
About
Container image creation tool.
CEKit helps to build container images from image definition files with strong focus on modularity and code reuse.
3

CEKit, Release 3.7.0
4 Chapter 1. About

CHAPTER 2
Main features
• Building container images from YAML image definitions using many different builder engines
• Integration/unit testing of images
5

CEKit, Release 3.7.0
6 Chapter 2. Main features

CHAPTER 3
I’m new, where to start?
We suggest looking at the getting started guide. It’s probably the best place to start. Once get through this tutorial,look at handbook which describes how things work. Later you may be interested in the guidelines sections.
7

CEKit, Release 3.7.0
8 Chapter 3. I’m new, where to start?

CHAPTER 4
Releases and changelog
See the releases page for latest releases and changelogs.
9

CEKit, Release 3.7.0
10 Chapter 4. Releases and changelog

CHAPTER 5
Contact
• Please join the #cekit IRC channel on Freenode
• You can always mail us at: cekit at cekit dot io
11

CEKit, Release 3.7.0
12 Chapter 5. Contact

CHAPTER 6
Documentation
6.1 Getting started guide
Welcome!
It looks like you’re new to CEKit. This guide will walk you through the steps required to create your first containerimage from scratch.
If you need any help, just jump into the #cekit IRC channel on Freenode. We will assist you!
6.1.1 Before you start
Please ensure that you have followed the installation instructions that may be found here.
While several different build engines to construct container images are supported, this guide will use the podmanengine.
6.1.2 Preparing image descriptor
This section will guide you through a very simple example.
1. Using a standard text editor create an empty image.yml file. It is recommended to use the image.yamlnaming scheme.
2. As described in Image Descriptor several values are mandatory. Add the following to the file:
name: my-exampleversion: 1.0from: centos:7
• Next, while optional, it is recommended to add a suitable description tag e.g.
description: My Example Tomcat Image
13

CEKit, Release 3.7.0
While this configuration will build in CEKit it isn’t very interesting as it will simply create another image layered ontop of CentOS 7. The descriptor should now look like:
Listing 1: image.yaml
name: my-exampleversion: 1.0from: centos:7description: My Example Tomcat Image
It is possible to directly add further content to the image at this point through a variety of methods. Labels, ports,packages etc can be used - see here. In general modules are used as the ‘building blocks’ to assemble the image -they can be used as individual libraries or shared blocks across multiple images. So, move onto to modules to discovermore about these.
6.1.3 First modules
As described in the module reference modules are used as libraries or shared building blocks across images.
To add a module, the image.yaml file must be modified to add a modules section. This is responsible for definingmodule repositories and providing the list of modules to be installed in order. Modules may come from the local filesystem or from remote git based repositories e.g. on github.
Edit the file to add the highlighted section below.
name: my-exampleversion: 1.0from: centos:7description: My Example Image
modules:repositories:
- path: modules
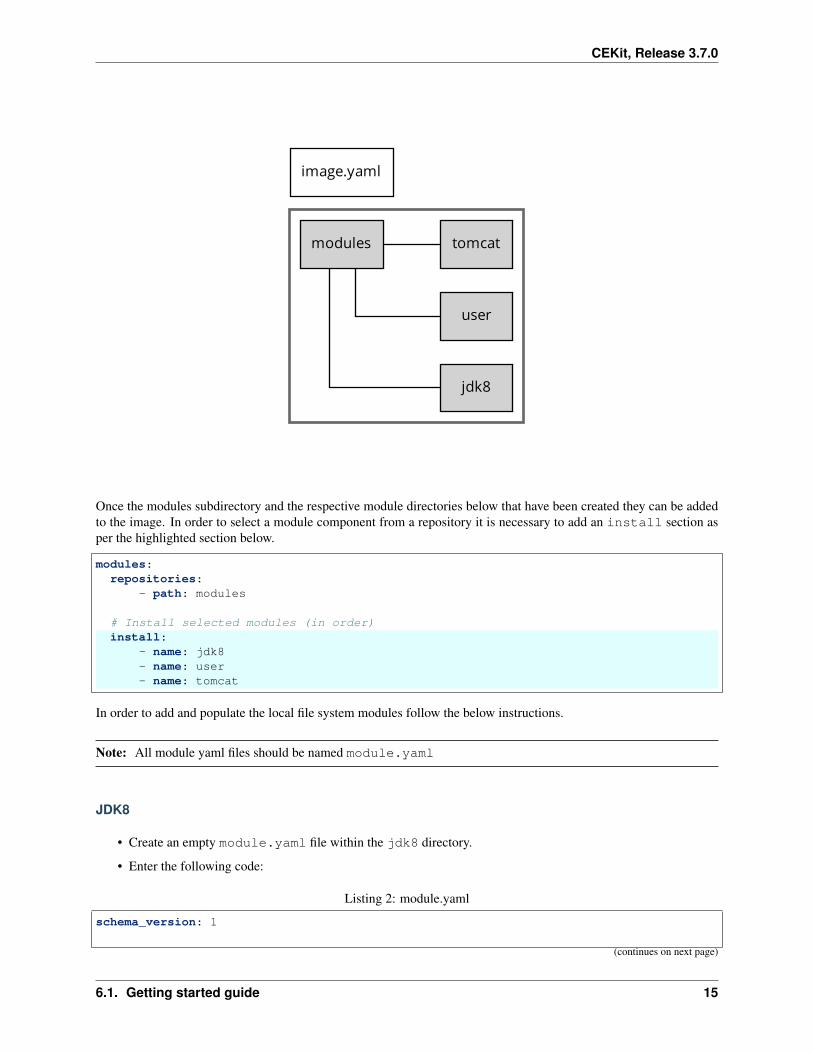
As per the below diagram a number of directories must be created next to image.yaml.
14 Chapter 6. Documentation
CEKit, Release 3.7.0
modules
jdk8
user
tomcat
image.yaml
Once the modules subdirectory and the respective module directories below that have been created they can be addedto the image. In order to select a module component from a repository it is necessary to add an install section asper the highlighted section below.
modules:repositories:
- path: modules
# Install selected modules (in order)install:
- name: jdk8- name: user- name: tomcat
In order to add and populate the local file system modules follow the below instructions.
Note: All module yaml files should be named module.yaml
JDK8
• Create an empty module.yaml file within the jdk8 directory.
• Enter the following code:
Listing 2: module.yaml
schema_version: 1
(continues on next page)
6.1. Getting started guide 15

CEKit, Release 3.7.0
(continued from previous page)
name: jdk8version: 1.0description: Module installing OpenJDK 8
envs:- name: "JAVA_HOME"
value: "/usr/lib/jvm/java-1.8.0-openjdk"
packages:install:
- java-1.8.0-openjdk-devel
• An environment variable has been defined that will be present in the container after running the image.
• packages have been used to add the JDK RPM.
User
• Create the module.yaml and create.sh files within the user directory.
• Enter the following code:
Listing 3: module.yaml
schema_version: 1
name: userversion: 1.0description: "Creates a regular user that could be used to run any service, gui/uid:→˓1000"
execute:- script: create.sh
run:user: 1000workdir: "/home/user"
Listing 4: create.sh
#!/bin/sh
set -e
groupadd -r user -g 1000 && useradd -u 1000 -r -g user -m -d /home/user -s /sbin/→˓nologin -c "Regular user" user
• An execute command is used to define what needs to be done to install this module in the image. It will be runat build time.
• A run command sets the working directory and user that is used to launch the main process.
Tomcat
• Finally, create the following two files inside the tomcat directory:
16 Chapter 6. Documentation

CEKit, Release 3.7.0
Listing 5: install.sh
#!/bin/shset -etar -C /home/user -xf /tmp/artifacts/tomcat.tar.gzchown user:user -R /home/user
Listing 6: module.yml
name: tomcatversion: 1.0description: "Module used to install Tomcat 8"# Defined artifacts that are used to build the imageartifacts:
- name: tomcat.tar.gzurl: https://archive.apache.org/dist/tomcat/tomcat-8/v8.5.24/bin/apache-tomcat-8.
→˓5.24.tar.gzmd5: 080075877a66adf52b7f6d0013fa9730
execute:- script: install.sh
run:cmd:
- "/home/user/apache-tomcat-8.5.24/bin/catalina.sh"- "run"
• The artifact command is used to retrieve external artifacts that need to be added to the image.
Move onto the build section to build this new image.
6.1.4 Building your image
Now that a fully assembled image definition file has been constructed it is time to try building it. As mentionedpreviously we will use podman to build this image; for other build engines see here
$ cekit build podman
This will output various logs (extra detail is possible via the verbose -v option).
cekit -v build podman2019-04-05 13:23:37,408 cekit INFO You are running on known platform:→˓Fedora 29 (Twenty Nine)2019-04-05 13:23:37,482 cekit INFO Generating files for podman engine2019-04-05 13:23:37,482 cekit INFO Initializing image descriptor...2019-04-05 13:23:37,498 cekit INFO Preparing resource 'modules'2019-04-05 13:23:37,510 cekit INFO Preparing resource 'example-common-→˓module.git'...STEP 41: FROM 850380a44a2b458cdadb0306fca831201c32d5c38ad1b8fb82968ab0637c40d0STEP 42: CMD ["/home/user/apache-tomcat-8.5.24/bin/catalina.sh", "run"]--> c55d3613c6a8d510c23fc56e2b56cf7a0eff58b97c262bef4f75675f1d0f9636STEP 43: COMMIT my-example:1.02019-04-05 13:27:48,975 cekit INFO Image built and available under→˓following tags: my-example:1.0, my-example:latest2019-04-05 13:27:48,977 cekit INFO Finished!
6.1. Getting started guide 17

CEKit, Release 3.7.0
It is possible to use podman to list the new image e.g.
$ podman imagesREPOSITORY TAG IMAGE ID CREATED SIZElocalhost/my-example latest c55d3613c6a8 48 seconds ago 709 MBlocalhost/my-example 1.0 c55d3613c6a8 48 seconds ago 709 MB
6.1.5 Is it running?
Now lets try running the image. As was shown in the preceeding example it is possible to obtain the image id throughthe podman images command. To ensure the local host machine can see the image the following command willmap port 8080 to 32597.
$ podman run -p 32597:8080 localhost/my-example:1.0
When the image is built it is automatically tagged using the name key in the image descriptor combined with theversion key. As the tomcat module that was specified earlier included a run command it will automatically start theTomcat webserver.
Using your browser go to http://localhost:32597 ; if successful then the image is running correctly.
Note: if you want to interactively explore the new image use the following command:
$ podman run -it --rm localhost/my-example:1.0 /bin/bash
Note: It is also possible to reference using the image id e.g. podman run -it --rm $(podman images -q| head -1) /bin/bash.
Once an interactive shell has been started on the image it is possible to verify the JDK has been installed e.g.
$ podman run -it --rm my-example:latest /bin/bash[user@ff7b60ea4d7c ~]$ rpm -qa | grep openjdk-develjava-1.8.0-openjdk-devel-1.8.0.201.b09-2.el7_6.x86_64
6.1.6 Let’s write some tests!
Todo: Write this!
6.1.7 Summary
Congratulations! You have now completed the getting started guide.
The examples used are available at github:
• https://github.com/cekit/example-image-tomcat/
• https://github.com/cekit/example-common-module/
The only difference is that the example-image-tomcat utilises a remote module repository reference to load thejdk8 and user modules which are within example-common-module e.g.
18 Chapter 6. Documentation
CEKit, Release 3.7.0
modules:repositories:
- path: modules- git:
url: https://github.com/cekit/example-common-module.gitref: master
6.2 Handbook
This chapter will guide you through the CEKit usage covering all important topics.
6.2.1 Installation
This chapter will guide you through all the steps needed to setup CEKit on your operating system.
Hint: We suggest to read carefully the dependencies section that covers the new dependencies mechanism in CEKit.
Installation instructions
Contents
• Installation instructions
– Fedora
– CentOS / RHEL
– Other systems
We provide RPM packages for Fedora, CentOS/RHEL distribution. CEKit installation on other platforms is stillpossible via pip.
RPM packages are distributed via regular repositories in case of Fedora and the EPEL repository for CentOS/RHEL.
Warning: Currently packaged version is a snapshot release of the upcoming CEKit 3.0.
Tip: You can see latest submitted package updates submitted in Bodhi.
Warning: Make sure you read the dependencies chapter which contains important information about how CEKitdependencies are handled!
6.2. Handbook 19

CEKit, Release 3.7.0
Fedora
Note: Supported versions: 29+.
CEKit is available from regular Fedora repositories.
dnf install cekit
CentOS / RHEL
Note: Supported versions: 7.x
CEKit is available from the EPEL repository.
yum install epel-releaseyum install cekit
Other systems
We strongly advise to use Virtualenv to install CEKit. Please consult your package manager for the correct packagename.
To create custom Python virtual environment please run following commands on your system:
# Prepare virtual environmentvirtualenv ~/cekitsource ~/cekit/bin/activate
# Install CEKit# Execute the same command to upgrade to latest versionpip install -U cekit
# Now you are able to run CEKitcekit --help
Note: Every time you want to use CEKit you must activate CEKit Python virtual environment by executing source~/cekit/bin/activate
If you don’t want to (or cannot) use Virtualenv, the best idea is to install CEKit in the user’s home with the --userprefix:
pip install -U cekit --user
Note: In this case you may need to add ~/.local/bin/ directory to your $PATH environment variable to be ableto run the cekit command.
20 Chapter 6. Documentation

CEKit, Release 3.7.0
Upgrading
Note: If you run on Fedora / CentOS / RHEL you should be using RPMs from regular repositories. Please seeinstallation instructions.
Upgrade from CEKit 2.x
Previous CEKit releases were provided via the COPR repository which is now deprecated. The COPR repositorywon’t be updated anymore with new releases.
Fedora packages are not compatible with packages that come from the deprecated COPR repository, you need touninstall any packages that came from it before upgrading.
Tip: You can use dnf repolist to get the repository id (should be group_cekit-cekit by default) whichcan be used for querying installed packages and removing them:
dnf list installed | grep @group_cekit-cekit | cut -f 1 -d ' ' | xargs sudo dnf→˓remove {}\;
Once all packages that came from the COPR repository you can follow the installation instructions.
Fedora
dnf update cekit
CentOS / RHEL
yum update cekit
Other systems
Use the pip -U switch to upgrade the installed module.
pip install -U cekit --user
Dependencies
By default when you install CEKit, only required core dependencies are installed. This means that in order to usesome generators or builders you may need to install additional software.
Building container images for various platforms requires many dependencies to be present. We don’t want to forceinstallation of unnecessary utilities thus we decided to limit dependencies to the bare minimum (core dependencies).
If a required dependency (for particular run) is not satisfied, user will be let know about the fact. In case of knownplatforms (like Fedora or RHEL) we even provide the package names to install (if available).
Below you can see a summary of CEKit dependencies and when these are required.
6.2. Handbook 21

CEKit, Release 3.7.0
Contents
• Dependencies
– Core dependencies
– Builder specific dependencies
* Docker builder dependencies
* Buildah builder dependencies
* Podman builder dependencies
* OSBS builder dependencies
– Test phase dependencies
Core dependencies
Following Python libraries are required to run CEKit:
• PyYAML
• Jinja2
• pykwalify
• colorlog
• click
Note: For more information about versions, please consult the Pipfile file available in the CEKit repository.
Additionally, we require Git to be present since we use it in many places.
Builder specific dependencies
This section describes builder-specific dependencies.
Docker builder dependencies
Docker Required to build the image.
Docker Python bindings We use Python library to communicate with the Docker daemon instead of using thedocker command directly. Both, old (docker-py) and new (docker) library is supported.
Docker squash tool After an image is built, all layers added by the image build process are squashed together withthis tool.
Note: We are aware that Docker now supports the --squash parameter, but it’s still an experimental featurewhich requires reconfiguring the Docker daemon to make it available. By default it’s disabled. Instead relyingon this, we use a proven tool that works in any case.
22 Chapter 6. Documentation

CEKit, Release 3.7.0
Important: If run within the Red Hat environment additional dependencies are required.
odcs command This is required when generate command and --build-engine buildah or--build-engine docker parameters are used. This package is available for Fedora and the Cen-tOS family in the EPEL repository. For RHEL/Fedora OS’es this is satisfied by installing the odcs-clientpackage.
brew command Used to identify and fetch artifacts from Brew.
Buildah builder dependencies
Buildah Required to build the image.
Important: If run within the Red Hat environment additional dependencies are required. See the note in the Dockersection above for more details.
Podman builder dependencies
• Podman Required to build the image.
Important: If run within the Red Hat environment additional dependencies are required. See the note in the Dockersection above for more details.
OSBS builder dependencies
koji command The koji command is used to interact with the Koji API to execute the build.
fedpkg command Used to clone and interact with dist-git repositories.
Important: If run within the Red Hat environment above dependencies are replaced with Red Hat specific tools:
• koji is replaced by brew command (or brew-stage if run with the --stage parameter)
• fedpkg is replaced by rhpkg command (or rhpkg-stage if run with the --stage parameter)
Test phase dependencies
For more information about testing, please take a look here.
Test dependencies can vary. CEKit uses a plugable way of defining Behave steps. The default test steps are lo-cated in https://github.com/cekit/behave-test-steps repository. You can find there more information about the currentdependencies.
6.2.2 Building images
This chapter explains the build process as well as describes available options.
6.2. Handbook 23

CEKit, Release 3.7.0
Build process explained
Contents
• Build process explained
– High-level overview
– Build process in details
* Reading image descriptor
* Applying overrides
* Preparing modules
* Handling artifacts
* Generating required files
* Build execution
In this section we will go through the build process. You will learn what stages there are and what is done in everystage.
High-level overview
Let’s start with a high-level diagram of CEKit.
CEKit
Image descriptor Generate ImageBuild
Main input to CEKit is the image descriptor. It defines the image. This should be the definitive description of theimage; what it is, what goes in and where and what should be run on boot.
Preparation of the image CEKit divides into two phases:
1. Generation phase Responsible for preparing everything required to build the image using selected builder.
2. Build phase Actual build execution with selected builder.
Result of these two phases is the image.
Let’s discuss it in details.
24 Chapter 6. Documentation

CEKit, Release 3.7.0
Build process in details
As mentioned above the CEKit build process is divided into two phases:
1. Generation phase
2. Build phase
In this section we will go through these phases in detail to see what’s happening in each. Below you can find diagramthat shows what is done from beginning to the end when you execute CEKit.
6.2. Handbook 25

CEKit, Release 3.7.0
START
Read descriptor
END
Apply overrides
Prepare modules Generate phase
Handle artifacts
Generate files
Execute build Build phase
26 Chapter 6. Documentation

CEKit, Release 3.7.0
The build process is all about preparation of required content so that the selected builder could create an image outof it. Depending on the builder, this could mean different things. Some builders may require generating Dockerfiles,some may require generating additional files that instruct the builder itself how to build the image or from where tofetch artifacts.
Reading image descriptor
In this phase the image descriptor is read and parsed. If the description is not in YAML format, it won’t be read.
Next step is to prepare an object representation of the descriptor. In CEKit internally we do not work on the dictionaryread from the descriptor, but we operate on objects. Each section is converted individually to object and validatedaccording to the schema for the section.
This is an important step, because it ensures that the image descriptor uses correct schema.
Applying overrides
Applying overrides is the next step. There can be many overrides specified. Some of them will be declared on CLIdirectly, some of them will be YAML files. We need to create an array of overrides because the order in whichoverrides are specified matters.
Each override is converted into an object too, and yes, you guessed it – it’s validated at the same time.
Last thing to do is to apply overrides on the image object we created before, in order.
Preparing modules
Next thing to do is to prepare modules. If there are any module repositories defined, we need to fetch them, and read.In most cases this will mean executing git clone command for each module repository, but sometimes it will bejust about copying directories available locally.
All module repositories are fetched into a temporary directory.
For each module repository we read every module descriptor we can find. Each one is converted into an object andvalidated as well.
Once everything is done, we have a module registry prepared, but this is not enough.
Next step is to apply module overrides to the image object we have. Modules are actually overrides with the differencethat modules encapsulate a defined functionality whereas overrides are just modifying things.
To do this we iterate over all modules that are defined to install and we try to find them in the module registry we builtbefore. If there is no such module or the module version is different from what we request, the build will fail. If therequirement is satisfied the module is applied to the image object.
The last step is to copy only required modules (module repository can contain many modules) from the temporarydirectory to the final target directory.
Handling artifacts
Each module and image descriptor itself can define artifacts.
In this step CEKit is going to handle all defined artifacts for the image. For each defined artifact CEKit is going tofetch it. If there will be a problem while fetching the artifact, CEKit will fail with information why it happened.
6.2. Handbook 27

CEKit, Release 3.7.0
Each successfully fetched artifact is automatically added to cache so that subsequent build will be executed fasterwithout the need to download the artifact again.
Generating required files
When we have all external content handled and the image object is final we can generate required files. Generation istightly coupled with the selected builder because different builders require different files to be generated.
For example Docker builder requires Dockerfile to be generated, but the OSBS builder requires additional files besidesthe Dockerfile.
For Dockerfiles we use a template which is populated which can access the image object properties.
Build execution
Final step is to execute the build using selected builder.
Resulting image sometimes will be available on your localhost, sometimes in some remote registry. It all depends onthe builder.
Supported builder engines
Contents
• Supported builder engines
– Docker builder
* Remote Docker daemon
* Docker environment variables
– OSBS builder
– Buildah builder
* Buildah environment variables
– Podman builder
* Podman environment variables
CEKit supports following builder engines:
• Docker builder – builds the container image using Docker
• OSBS builder – builds the container image using OSBS service
• Buildah builder – builds the container image using Buildah
• Podman builder – builds the container image using Podman
Docker builder
This builder uses Docker daemon as the build engine. Interaction with Docker daemon is done via Python binding.
28 Chapter 6. Documentation

CEKit, Release 3.7.0
By default every image is squashed at the end of the build. This means that all layers above the base image will besquashed into a single layer. You can disable it by using the --no-squash switch.
Input format Dockerfile
Parameters
--pull Ask a builder engine to check and fetch latest base image
--tag An image tag used to build image (can be specified multiple times)
--no-squash Do not squash the image after build is done.
Example Building Docker image
$ cekit build docker
Remote Docker daemon
It is possible to use environment variables to let CEKit know where is the Docker daemon located it should connectto.
Note: Read more about Docker daemon settings related to exposing it to clients.
By default, if you do not specify anything, CEKit will try to use a locally running Docker daemon.
If you need to customize this behavior (for example when you want to use Docker daemon running in a VM) you canset following environment variables: DOCKER_HOST, DOCKER_TLS_VERIFY and DOCKER_CERT_PATH. Seesection about Docker environment variables below for more information.
Docker environment variables
DOCKER_HOST The DOCKER_HOST environment variable is where you specify where the Daemon is running. Itsupports multiple protocols, but the most widely used ones are: unix:// (where you specify path to a localsocket) and tcp:// (where you can define host location and port).
Examples of DOCKER_HOST: unix:///var/run/docker.sock, tcp://192.168.22.33:1234.
Depending how your daemon is configured you may need to configure settings related to encryption.
# Connect to a remote Docker daemon$ DOCKER_HOST="tcp://192.168.22.33:1234" cekit build docker
DOCKER_TLS_VERIFY You can set DOCKER_TLS_VERIFY to a non-empty value to indicate that the TLS verifi-cation should take place. By default certificate verification is disabled.
DOCKER_CERT_PATH You can point DOCKER_CERT_PATH environment variable to a directory containing certifi-cates to use when connecting to the Docker daemon.
DOCKER_TMPDIR You can change the temporary directory used by Docker daemon by specifying theDOCKER_TMPDIR environment variable.
Note: Please note that this is environment variable should be set on the daemon and not on the client (CEKitcommand you execute). You need to modify your Docker daemon configuration and restart Docker to applynew value.
6.2. Handbook 29

CEKit, Release 3.7.0
By default it points to /var/lib/docker/tmp. If you are short on space there, you may want to usea different directory. This temporary directory is used to generate the TAR file with the image that is laterprocessed by the squash tool. If you have large images, make sure you have sufficient free space there.
TMPDIR This environment variable controls which directory should be used when a temporary directory is createdby the CEKit tool. In case the default temporary directory location is low on space it may be required to pointto a different location.
One example when such change could be required is when the squash post-processing of the image is takingplace and the default temporary directory location is low on space. Squashing requires to unpack the originalimage TAR file and apply transformation on it. This can be very storage-consuming process.
You can read more on how this variable is used in the Python docs.
$ TMPDIR="/mnt/external/tmp" cekit build docker
DOCKER_TIMEOUT By default it is set to 600 seconds.
This environment variable is responsible for setting how long we will wait for the Docker daemon to return data.Sometimes, when the Docker daemon is busy and you have large images, it may be required to set this variableto some even higher number. Setting proper value is especially important when the squashing post-processingtakes place because this is a very resource-consuming task and can take several minutes.
$ DOCKER_TIMEOUT="1000" cekit build docker
OSBS builder
This build engine is using rhpkg or fedpkg tool to build the image using OSBS service. By default it performsscratch build. If you need a proper build you need to specify --release parameter.
By default every image is squashed at the end of the build. This means that all layers above the base image will besquashed into a single layer.
Input format Dockerfile
Parameters
--release Perform an OSBS release build
--user Alternative user passed to build task
--nowait Do not wait for the task to finish
--stage Use stage environment
--commit-message Custom commit message for dist-git
--sync-only New in version 3.4.
Generate files and sync with dist-git, but do not execute build
--assume-yes New in version 3.4.
Run build in non-interactive mode answering all questions with ‘Yes’, useful for automation purposes
Example Performing scratch build
$ cekit build osbs
Performing release build
30 Chapter 6. Documentation

CEKit, Release 3.7.0
$ cekit build osbs --release
Buildah builder
This build engine is using Buildah.
By default every image is squashed at the end of the build. This means that all layers (including the base image) willbe squashed into a single layer. You can disable it by using the --no-squash switch.
Note: If you need to use any non default registry, please update /etc/containers/registry.conf file.
Input format Dockerfile
Parameters
--pull Ask a builder engine to check and fetch latest base image
--tag An image tag used to build image (can be specified multiple times)
--no-squash Do not squash the image after build is done.
Example Build image using Buildah
$ cekit build buildah
Build image using Buildah and tag it as example/image:1.0
$ cekit build buildah --tag example/image:1.0
Buildah environment variables
BUILDAH_LAYERS The BUILDAH_LAYERS environment variable allows you to control whether the builder enginewill cache intermediate layers during build.
By default it is set to false.
You can enable it by setting the environment variable to true. The initial build process will take longer becauseresult of every command will need to be stored on the disk (commited), but subsequent builds (without any codechange) should be faster because the layer cache will be reused.
$ BUILDAH_LAYERS="true" cekit build buildah
Warning: Caching layers conflicts with multi-stage builds. A ticket was opened: https://bugzilla.redhat.com/show_bug.cgi?id=1746022. If you use multi-stage builds, make sure the BUILDAH_LAYERS environ-ment variable is set to false.
Podman builder
This build engine is using Podman. Podman will perform non-privileged builds so no special configuration is required.
By default every image is squashed at the end of the build. This means that all layers (including the base image) willbe squashed into a single layer. You can disable it by using the --no-squash switch.
6.2. Handbook 31

CEKit, Release 3.7.0
Input format Dockerfile
Parameters
--pull Ask a builder engine to check and fetch latest base image
--tag An image tag used to build image (can be specified multiple times)
--no-squash Do not squash the image after build is done.
Example Build image using Podman
$ cekit build podman
Build image using Podman
$ cekit build podman --pull
Podman environment variables
BUILDAH_LAYERS
Note: Yes, the environment variable is called BUILDAH_LAYERS, there is no typo. Podman uses Buildahcode underneath.
The BUILDAH_LAYERS environment variable allows you to control whether the builder engine will cacheintermediate layers during build.
By default it is set to true.
You can disable it by setting the environment variable to false. This will make the build faster because therewill be no need to commit result of every command. The downside of this setting is that you will not be able toleverage layer cache in subsequent builds.
$ BUILDAH_LAYERS="false" cekit build podman
Warning: Caching layers conflicts with multi-stage builds. A ticket was opened: https://bugzilla.redhat.com/show_bug.cgi?id=1746022. If you use multi-stage builds, make sure the BUILDAH_LAYERS environ-ment variable is set to false.
Common build parameters
Below you can find description of the common parameters that can be added to every build command.
--validate Do not generate files nor execute the build but prepare image sources and check if these are valid.Useful when you just want to make sure that the content is buildable.
See --dry-run.
--dry-run Do not execute the build but let’s CEKit prepare all required files to be able to build the image forselected builder engine. This is very handy when you want manually check generated content.
See --validate.
--overrides Allows to specify overrides content as a JSON formatted string, directly on the command line.
32 Chapter 6. Documentation

CEKit, Release 3.7.0
Example
$ cekit build --overrides '{"from": "fedora:29"}' docker
Read more about overrides in the Overrides chapter.
This parameter can be specified multiple times.
--overrides-file In case you need to override more things or you just want to save the overrides in a file, youcan use the --overrides-file providing the path to a YAML-formatted file.
Example
$ cekit build --overrides-file development-overrides.yaml docker
Read more about overrides in the Overrides chapter.
This parameter can be specified multiple times.
6.2.3 Image testing
CEKit makes it possible to run tests against images. The goal is to make it possible to test images using differentframeworks.
Using different frameworks allows to define specialized tests. For example you can write tests that focus only parts ofthe image (you can think about unit tests) or the image (or even a set of images even!) as a whole which is similar tointegration testing.
Tip: We strongly recommend that a test is written for every feature that is added to the image.
Currently we support following test frameworks:
Behave
Behave test framework uses Gherkin language to describe tests.
Note: If you are not familiar with Behave, we suggest you read the Behave documentation and the Gherkin languagereference before reading this chapter. This will make it much easier to understand how to write tests.
Introduction
To jump start you into Behave tests, consider the example below.
Feature: OpenShift SSO tests
Scenario: Test if console is availableWhen container is readyThen check that page is served
| property | value || port | 8080 || path | /auth/admin/master/console/#/realms/master || expected_status_code | 200 |
6.2. Handbook 33

CEKit, Release 3.7.0
In this specific case, a container will be created from the image and after boot a http request will be made to the 8080on the /auth/admin/master/console/#/realms/master context. A successful reply is expected (returncode 200).
We think that this way of describing what to test is concise and very powerful at the same time.
Behave tests overview
Behave tests are defined in two parts: steps and features.
Features
Feature files define what should be tested. A feature file can contain multiple scenarios grouped in features.
You can find a great introduction to feature files in the Behave documentation. We do not want to repeat it here. If youthink something is missing or needs more explanation, please open a ticket.
Image vs. module features
In CEKit you write features to test images. But depending on the part of the image you write the test for, in manycases you will find that the test rather belongs to a module rather than the image itself. In our experience we see thatthis is the most common case.
Note: CEKit makes it possible to colocate tests with image source as well as module source. Please take a look at theTest file locations section for more information where these should be placed.
Placing feature files together with modules makes it easy to share the feature as well as tests. Such tests could be runby multiple different images which use this particular module.
Warning: There is a limitation in sharing module tests, please refer to the https://github.com/cekit/cekit/issues/421 issue fore more information.
Steps
Steps define what can be tested in scenarios. Steps are written in Python.
As with features, upstream documentation contains a section on steps. We suggest to read this, if it does not answerall your questions, let us know.
Note: For information how you can write your own steps, please take a look at the Writing custom steps paragraph.
Default steps
CEKit comes with a list of build-in steps that are available for use in features. These steps are available in the stepsrepository.
34 Chapter 6. Documentation

CEKit, Release 3.7.0
Hint: We encourage you to add or extend these steps instead of maintaining your own fork. We are happy to reviewyour contributions!
We will be extending the default steps documentation to cover all available steps with examples. In the meantime wesuggest to look at the source code itself.
Usage
Images can be tested by running:
$ cekit test behave
The most basic usage would be to run the test with just the --image parameter to specify which image should betested.
$ cekit test --image example/test:1.0 behave
Options
Todo: Try to generate available options.
Tip: For all available options, please use the --help switch.
• --wip – Only run tests tagged with the @wip tag.
• --steps-url – A git repository url containing steps for tests.
• --name – Scenario name to be executed
Examples
In this section you can find some examples of frequently used tasks.
Running selected tests
CEKit makes it possible to run specific Scenario(s) only. To do it you need to run CEKit with --name <name ofthe test> command line argument.
Note: --name switch can be specified multiple times and only the Scenarios matching all of the names are executed.
If you have following Scenario in your feature files:
Scenario: Check custom debug port is availableWhen container is started with env
| variable | value |(continues on next page)
6.2. Handbook 35

CEKit, Release 3.7.0
(continued from previous page)
| DEBUG | true || DEBUG_PORT | 8798 |
Then check that port 8798 is open
Then you can instruct CEKit to run this test in a following way:
$ cekit test behave --name 'Check custom debug port is available'
Skipping tests
Hint: See Special tags paragraph.
If there is a particular test which needs to be temporally disabled, you can use @ignore tag to disable it.
For example to disable following Scenario:
Scenario: Check custom debug port is availableWhen container is started with env
| variable | value || DEBUG | true || DEBUG_PORT | 8798 |
Then check that port 8798 is open
You need to tag it with @ignore tag in a following way:
@ignoreScenario: Check custom debug port is available
When container is started with env| variable | value || DEBUG | true || DEBUG_PORT | 8798 |
Then check that port 8798 is open
Test collection
It is important to understand how CEKit is collecting and preparing tests.
Todo: Explain how tests are collected
Feature tags
CEKit selects tests to run using the Behave built-in tags mechanism.
Tags are in format: @TAG_NAME, for example: @jboss-eap-7.
Below you can find several examples how tags could be used for managing tests across a set of images:
36 Chapter 6. Documentation

CEKit, Release 3.7.0
Image tags
CEKit derives two feature tag names from the name of the image being tested:
1. The image name itself (name key in image descriptor), and
2. Everything before the first / in the image name, also known as image family.
Example If you test the jboss-eap-7/eap7 image, tests will be invoked with tags @jboss-eap-7and @jboss-eap-7/eap7.
If --tag is specified, then the argument is used in place of the image name for the process above.
Example If you use --tag foo/bar parameter, then the tags used would be @foo and @foo/bar.
Special tags
@wip This is very special tag used while developing a test. Its purpose is to to limit the tests to be run to a subsetyou are working on. To achieve this you should mark your in-development test scenarios with the @wip tag andexecute tests with --wip parameter. All scenarios not tagged with @wip will be ignored.
@ci If CEKit is not running as a user called jenkins, the tag @ci is added to the list of ignored tags, meaning anytests tagged @ci are ignored and not executed.
The purpose of this behavior is to ease specifying tests that are only executed when run within CI.
@ignore If a Scenario or Feature is tagged with @ignore these tests will be skipped.
Writing Behave tests
Todo: Write introduction
Test file locations
There are a few places where your tests can be stored:
1. tests directory next to the image descriptor
2. tests directory next to the module descriptor
3. tests directory in root of the module repository
The tests directory is structured as follows:
tests/featurestests/features/*.featuretests/stepstests/steps/*.py
The tests/features directory is the place where you can drop your behave features.
The tests/steps directory is optional and contains custom steps for the specific image/module.
6.2. Handbook 37

CEKit, Release 3.7.0
Writing features
The most important
Todo: TBD
Writing custom steps
Todo: TBD
Running developed tests
To be able to run only the test you develop you can either use the --name parameter where you specify the scenarioname you develop or use the --wip switch.
In our practice we found that tagging the scenario with @wip tag and using the --wip switch is a common practice,but it’s up to you.
6.2.4 Modules
This chapter will guide you through modules. Understanding and making proper use of them is essential to succeedwith CEKit.
Module processing
Contents
• Module processing
– Order is important
– Module processing in template
* Packages
* Environment variables
* Labels
* Ports
* Executions
* Volumes
– Flattening nested modules
– Understanding the merge process
38 Chapter 6. Documentation

CEKit, Release 3.7.0
Note: This chapter applies to builder engines that use Dockerfile as the input.
Understanding how modules are merged together is important. This knowledge will let you introduce modules thatwork better together and make rebuilds faster which is an important aspect of the image and module development.
Order is important
Installation order of modules is extremely important. Consider this example:
1 modules:2 repositories:3 # Add local modules located next to the image descriptor4 # These modules are specific to the image we build and are not meant5 # to be shared6 - path: modules7
8 # Add a shared module repository located on GitHub. This repository9 # can contain several modules.
10 - git:11 url: https://github.com/cekit/example-common-module.git12 ref: master13
14 # Install selected modules (in order)15 install:16 - name: jdk817 - name: user18 - name: tomcat
On lines 16-18 we have defined a list of modules to be installed. These are installed in the order as they are defined(from top to bottom). This means that the first module installed will be jdk8 followed by user and the tomcatmodule will be installed last.
The same order is used later in the module merge process too.
Note: Defining module repositories in the repositories section does not require any particular order. Modulesare investigated after all modules repositories are fetched.
Module processing in template
Each module descriptor marked to be installed can define many different things. All this metadata needs to be mergedcorrectly into a single image, so that the resulting image is what we really expected.
This is where templates come into play. We use a template to generate the Dockerfile that is later fed into the builderengine.
This section will go through it and explain how we combine everything together in the template.
Note: Sections not defined in the module descriptor are simply skipped.
6.2. Handbook 39

CEKit, Release 3.7.0
Package installation
Environment variables
Labels
Ports
Executions
Volumes
Packages
The first thing done for each module is the package installation for all packages defined in the module. We do notclean the cache on each run, because this would slow subsequent package manager executions. You should also notworry about it taking too much space, because every image is squashed (depends on builder though).
Package installation is executed as root user.
Environment variables
Each defined environment variable is added to the Dockerfile.
40 Chapter 6. Documentation

CEKit, Release 3.7.0
Note: Please note that you can define an environment variable without value. In such case, the environment will notbe added to Dockerfile as it serves only an information purpose.
Labels
Similarly to environment variables, labels are added too.
Ports
All ports defined in the descriptor are exposed as well.
Executions
This is probably the most important section of each module. This is where the actual module installation is done. Eachscript defined in the execute section is converted to a RUN instruction.
The user that executes the script can be modified with the user key.
Volumes
Last thing is to add the volume definitions.
Flattening nested modules
Above example assumed that modules defined in the image descriptor do not have any child modules. This is notalways true. Each module can have dependency on other modules.
In this section we will answer the question: what is the order of modules in case where we have a hierarchy of modulesrequested to be installed?
Best idea to explain how module dependencies work is to look at some example. For simplicity, only the installsection will be shown:
# Module A
name: "A"modules:
# This module requires two additional modules: B and Cinstall:
- name: B- name: C
# Module B
name: "B"modules:
# This module requires one additional module: Dinstall:
- name: D
6.2. Handbook 41

CEKit, Release 3.7.0
# Module C
# No other modules requiredname: "C"
# Module D
# No other modules requiredname: "D"
# Module E
# No other modules requiredname: "E"
# Image descriptor
name: "example/modules"version: "1.0"modules:
repositories:- path: "modules"
install:- name: A- name: E
To make it easier to understand, below is the module dependency diagram. Please note that this diagram does not tellyou the order in which modules are installed, but only what modules are requested.
42 Chapter 6. Documentation

CEKit, Release 3.7.0
Image descriptor
A E
B C
D
The order in which modules will be installed is:
1. D
2. B
3. C
4. A
5. E
How it was determined?
modules = []
We start with the first module defined: A. We find that it has some dependencies: modules B and C. This means thatwe need to investigate these modules first, because these need to be installed before module A can be installed.
We investigate module B. This module has one dependency: D, so we investigate it and we find that this module hasno dependency. This means that we can install it first.
modules = ["D"]
Then we go one level back and we find that module B has no other requirements besides module D, so we can installit too.
modules = ["D", "B"]
6.2. Handbook 43

CEKit, Release 3.7.0
We go one level back and we’re now investigating module C (a requirement of module A). Module C has no require-ments, so we can install it.
modules = ["D", "B", "C"]
We go one level back. We find that module A dependencies are satisfied, so we can add module A too.
modules = ["D", "B", "C", "A"]
Last module is the module E, with no dependencies, we add it too.
modules = ["D", "B", "C", "A", "E"]
This is the final order in which modules will be installed.
Understanding the merge process
Now you know that we iterate over all modules defined to install and apply it one by one, but how it influencesthe build process? It all depends on the Dockerfile instructions that was used in the template. Some of them willoverwrite previous values (CMD), some of them will just add values (EXPOSE). Understanding how Dockerfiles workis important to make best usage of CEKit with builder engines that require Dockerfile as the input.
Environment variables and labels can be redefined. If you define a value in some module, another module later in thesequence can change its effective value. This is a feature that can be used to redefine the value in subsequent modules.
Volumes and ports are just adding next values to the list.
Note: Please note that there is no way to actually remove a volume or port in subsequent modules. This is why it’simportant to create modules that define only what is needed.
We suggest to not add any ports or volumes in the module descriptors leaving it to the image descriptor.
Package installation is not merged at all. Every module which has defined packages to install will be processedone-by-one and for each module a package manager will be executed to install requested packages.
Same approach applies to the execute section of each module. All defined will be executed in the requested order.
Module versioning
Contents
• Module versioning
– Requirements
– Parsing
– Handling modules with multiple versions
Module versioning is an important aspect of image development process. Proper handling of versions makes it easy tocontrol what exactly content should be part of the image.
This section describes how module versions are handled in CEKit.
See also:
44 Chapter 6. Documentation

CEKit, Release 3.7.0
If you want to learn best practices around module versioning, take a look at module guidelines.
Requirements
Every module must have a version defined. Version of the module is an important piece of information becausebased on the version we control what content goes into image.
You can look at module versioning similar to any library version. There are no libraries without version and there mustnot be modules without versions.
In module descriptor the version could be defined as string, float or integer. CEKit is converting this value internallyto string which is parsed later to become a version object finally.
Note: Although CEKit does not enforce any versioning scheme, se suggest to use Python versioning scheme. Readmore about suggested approach.
If your module version does not follow this scheme, CEKit will log a warning. In case you use your own versioningscheme you can ignore this warning.
Parsing
Every version of module is parsed internally. Before we can do this any version is converted to string. This meansthat
version: 1.0
and
version: "1.0"
are exactly the same versions for CEKit.
Handling modules with multiple versions
See also:
See module descriptor documentation and image descriptor modules section documentation for more information howto reference modules.
In case you do not specify version requirement in the module installation list in the image descriptor, CEKit will usenewest version to install.
Internally we use the packaging module to convert the module version string into a Version object. If you use a customversioning scheme your version may be represented by a LegacyVersion object.
Parsed versions are compared according to PEP 440 versioning scheme.
Custom versioning scheme in comparison with a PEP 440 version will be always older.
6.2.5 Multi-stage builds
6.2. Handbook 45

CEKit, Release 3.7.0
Contents
• Multi-stage builds
– Introduction
– CEKit implementation
This chapter discusses support for multi-stage builds in CEKit.
Introduction
Tip: Please read the Docker documentation on multi-stage builds.
Multi-stage builds define a process to build final image that uses intermediate images in the workflow. Such workflowis useful when we want to build some artifacts (applications, binaries, etc) as part of the build, but we are not interestedin all dependencies that are required to build them.
Multi-stage builds can help with it, because intermediate images used as part of the build are thrown away after thebuild is finished. The effective image can contain binaries built in previous stages without the need to install all thebuild time dependencies there. This makes it possible to decrease the size of the image significantly. Other positiveaspect is that having less packages installed in the image means that we are less exposed to CVE’s making the imagemore secure.
CEKit implementation
In CEKit we use image descriptor to define the image. Descriptor format was extended and allows now a list of imagedescriptors.
Listing 7: image.yaml
- name: builderversion: 1.0.0from: centos:7description: Some base image
modules:repositories:- path: modules
install:# Module providing environment required to build the application- name: python# Module required to build the application- name: build
- name: some/appversion: 12from: centos:7description: Our application
modules:repositories:
(continues on next page)
46 Chapter 6. Documentation

CEKit, Release 3.7.0
(continued from previous page)
- path: modules
# Install selected modules (in order)install:- name: setuptools# This module is responsible for fetching application built in previous stage- name: app
If a list of more than one image is found – multi-stage builds are assumed.
For multi-stage builds you have have multiple intermediate images and always just one final image. In CEKit thismeans that the last image defined in the descriptor is the final one, every other image is an intermediate image.
Let’s go back to our example above.
We have two images defined: builder and some/app. As the name suggest, the first one is the builder (intermedi-ate) image which will contain the build-time dependencies and where the actual artifact will be built.
Note: Although it is possible to use all keys available to use in an image descriptor when defining builder images,some of them does not have any effect. A few examples of such keys can be found below:
• ports
• volumes
• run
• help
• osbs
The second image is the final image where we will place the built artifact. But how to do it? Let’s take a look at theapp module which defines a special artifact.
Listing 8: module.yaml
name: appversion: 1.0
packages:install:
- python-requests
artifacts:- name: application
image: builderpath: /path/to/application/inside/the/builder/image.jar
- image: builderpath: /path/to/lib.jar
execute:- script: install.sh
This artifact is called image content resource and it does define artifact that is located in an image built in previousstage of the multi-stage build workflow. You do not need to define anything in the builder image. It’s responsibility isonly to build the artifacts which can be referenced in the final image.
In our case we define two artifacts, both from the builder image.
6.2. Handbook 47
CEKit, Release 3.7.0
The first one will become available as /tmp/artifacts/application and the second one as /tmp/artifacts/lib.jar in the final image.
Tip: You can change the destination as well as the target file name of artifacts. See how it can be done usingappropriate keys in the artifact.
Image source artifacts can be handled and installed to the correct place, as you would normally do with other types ofartifacts.
6.2.6 Base images
Contents
• Base images
– Introduction
– CEKit implementation
This chapter discusses support for creating images that extend the scratch image to build base images.
Introduction
Tip: Please read the Docker documentation on scratch base image.
The scratch image is a special type of image. It is an empty image and the FROM scratch instruction inDockerfile results in no-op when building the container image. There are a few use-cases for such an image:
Storing native binaries It is very popular in the cloud-native era to use languages that produce native binaries whichare packaged in a container image format and distributed this way. One of the most popular languages is Golang.
Tip: You may be interested in multi-stage builds as well.
Storing shared content (for example metadata) Sometimes there is a requirement to store metadata (for exampleYAML files) in a container image so that it can be versioned and used elsewhere.
CEKit implementation
Support for scratch base image is a special case in CEKit. This means that some of the features you are used tomay not work properly.
You need to ensure that modules you are including are written in a way so these can be installed and executed in anenvironment without operating system libraries.
In case of such container images it is important to understand how artifacts are put inside of them. By default CEKitcopies artifacts into a temporary directory which are later handled by modules (copied to correct places, permissionsare managed, etc). For scratch container images it won’t work, because we don’t have the operating system thatwould make it possible.
In this case, the dest keyword should be used to define the destination directory of the particular artifact.
48 Chapter 6. Documentation

CEKit, Release 3.7.0
Listing 9: image.yaml
name: "cekit-scratch"version: "1.0.0"from: "scratch"description: "Minimal scratch example"
labels:- name: "io.cekit.test"
value: "This is a CEKit test label"
envs:- name: "CEKIT_TEST"
value: "test"
artifacts:# Both files will be added to a /files directory in the container image# The /files directory itself will be created- name: "file1"
path: metadata/test-file.txtdest: /files/
- name: "file2"path: metadata/other.txtdest: /files/
# Whole 'metadata' directory (path relative to image descriptor) will be copied to# the container and placed in /target directory- name: "dir"
path: metadatadest: /target
In case of scratch container images it is safe to assume that following features are supported:
• Artifacts with dest property defined
• Environment variables
• Labels
• Entrypoint and command
Below you can find a multi-stage build which builds a Go binary in first stage and then it is copied to the resultingimage which is an empty container image. Additionally the binary is set as an entrypoint.
Listing 10: image.yaml
- name: builderversion: 1.0.0from: golang:1.7.3
modules:repositories:- path: modules
install:# Module required to build the application- name: build
- name: some/app
(continues on next page)
6.2. Handbook 49

CEKit, Release 3.7.0
(continued from previous page)
version: 12from: scratchdescription: Our application
artifacts:- name: application
# Name of the image from where the binary will be copiedimage: builder# Path where the binary can be found in the 'builder' imagepath: /tmp/scripts/build/hello-world# Target file name of the artifacttarget: entrypoint# Destination directory in the imagedest: /bin
run:entrypoint: ["/bin/entrypoint"]
Note: You can find above example in the CEKit source repository. It’s run as part of integration tests.
6.2.7 Artifact caching
Contents
• Artifact caching
– Technical design
– Automatic caching
– Managing cache
* Caching artifacts manually
* Listing cached artifacts
* Removing cached artifact
* Wiping cache
In this chapter we will go through the caching feature of CEKit.
CEKit has a built-in cache for artifacts. It’s purpose is to speed up the build process for subsequent builds.
Technical design
By default cached artifacts are located in the ~/.cekit/cache/ directory.
Note: Cache location can be changed when you specify the --work-dir parameter. In such case cache will belocated in a cache directory located inside the directory specified by the --work-dir parameter.
50 Chapter 6. Documentation

CEKit, Release 3.7.0
Every cached artifact is identified with a UUID (version 4). This identifier is also used as the file name (in the cachedirectory) for the artifact itself.
Each cached artifact contains metadata too. This includes information about computed checksums for this artifact aswell as names which were used to refer to the artifact. Metadata is stored in the cache directory too, the file name isthe UUID of the artifact with a .yaml extension.
Example If your artifact will have 1258069e-7194-426d-a6ab-ade0a27b8290UUID assigned with it, thenit will be found under the ~/.cekit/cache/1258069e-7194-426d-a6ab-ade0a27b8290 path andthe metadata can be found in the ~/.cekit/cache/1258069e-7194-426d-a6ab-ade0a27b8290.yaml file.
Artifacts in cache are discovered by the hash value.
While adding an artifact to the cache, CEKit is computing it’s checksums for all currently supported algorithms (md5,sha1, sha256, sha512). This makes it possible to refer the same artifact in descriptors using different algorithms.
This also means that CEKit is using cache only for artifacts which define at least one hash.
Automatic caching
CEKit is automatically caching all artifacts used to build the image. Consider following image descriptor snippet:
artifacts:- name: jolokia-1.3.6-bin.tar.gz
url: https://github.com/rhuss/jolokia/releases/download/v1.3.6/jolokia-1.3.6-→˓bin.tar.gz
md5: 75e5b5ba0b804cd9def9f20a70af649f
This artifact will be automatically added into the cache during image build. This is useful as the artifact will beautomatically copied from cache instead of downloading it again on any rebuild.
Managing cache
CEKit provides command line tool called cekit-cache which is used to manage cache.
It has a --work-dir (by default set to ~/.cekit) parameter which sets CEKit’s working directory. This is wherethe cache directory will be located.
Warning: If you customize --work-dir – make sure you use the same path for cekit and cekit-cachecommands. You can also set the path in the configuration file.
Caching artifacts manually
CEKit supports caching artifacts manually. This is very usefull if you need to introduce non-public artifact to a CEKit.To cache an artifact you need to specify path to the artifact on filesystem or its URL and at least one of the supportedhashes (md5, sha1, sha256, sha512).
Examples Caching local artifact
$ cekit-cache add path/to/file --md5 checksum
Caching remote artifact
6.2. Handbook 51

CEKit, Release 3.7.0
$ cekit-cache add https://foo.bar/baz --sha256 checksum
Listing cached artifacts
To list all artifact known to CEKit cache you need to run following command:
$ cekit-cache ls
After running the command you can see following output:
eba0b8ce-9562-439f-8a56-b9703063a9a3:sha512:
→˓5f4184e0fe7e5c8ae67f5e6bc5deee881051cc712e9ff8aeddf3529724c00e402c94bb75561dd9517a372f06c1fcb78dc7ae65dcbd4c156b3ba4d8e267ec2936sha256: c93c096c8d64062345b26b34c85127a6848cff95a4bb829333a06b83222a5cfasha1: 3c3231e51248cb76ec97214f6224563d074111c1md5: c1a230474c21335c983f45e84dcf8fb9names:- spark-2.4.0-bin-hadoop2.7.tgz
dba5a813-3972-4dcf-92a4-87049357f7e0:sha512:
→˓cf83e1357eefb8bdf1542850d66d8007d620e4050b5715dc83f4a921d36ce9ce47d0d13c5d85f2b0ff8318d2877eec2f63b931bd47417a81a538327af927da3esha256: e3b0c44298fc1c149afbf4c8996fb92427ae41e4649b934ca495991b7852b855sha1: da39a3ee5e6b4b0d3255bfef95601890afd80709md5: d41d8cd98f00b204e9800998ecf8427enames:- artifact
Removing cached artifact
If you are not interested in particular artifact from cache, you can delete it by executing following command:
$ cekit-cache rm uuid
Note: You can get uuid of any artifact by invoking cekit-cache ls command. Please consult Listing cachedartifacts.
Wiping cache
To wipe whole artifact cache you need to run the cekit-cache clear command. This will ask you for confirma-tion of the removal step.
$ cekit-cache clear
6.2.8 Overrides
52 Chapter 6. Documentation

CEKit, Release 3.7.0
Contents
• Overrides
– Overrides chaining
– How overrides works
* Scalar nodes
* Sequence nodes
* Mapping nodes
– Removing keys
During an image life cycle there can be a need to do a slightly tweaked builds – using different base images, injectingnewer libraries etc. We want to support such scenarios without a need of duplicating whole image sources.
To achieve this CEKit supports overrides mechanism for its descriptors. You can override anything from the descrip-tor. The overrides are based on overrides descriptor – a YAML object containing overrides for the image descriptor.
To use an override descriptor you need to pass --overrides-file argument to CEKit. You can also passJSON/YAML object representing changes directly via --overrides command line argument.
Example Use overrides.yaml file located in current working directory
$ cekit build --overrides-file overrides.yaml podman
Example Override a label via command line
$ cekit build --overrides '{"labels": [{"name": "foo", "value": "overridden"}]}'→˓podman
Overrides chaining
You can even specify multiple overrides. Overrides are resolved that last specified is the most important one. Thismeans that values from last override specified overrides all values from former ones.
Example If you run following command, label foo will be set to baz.
$ cekit build --overrides "{'labels': [{'name': 'foo', 'value': 'bar'}]} --→˓overrides "{'labels': [{'name': 'foo', 'value': 'baz'}]}" podman
How overrides works
CEKit is using YAML format for its descriptors. Overrides in CEKit works on YAML node level.
Scalar nodes
Scalar nodes are easy to override, if CEKit finds any scalar node in an overrides descriptor it updates its value in imagedescriptor with the overridden one.
Example Overriding scalar node
6.2. Handbook 53

CEKit, Release 3.7.0
# Image descriptor
schema_version: 1name: "dummy/example"version: "0.1"from: "busybox:latest"
# Override descriptor
schema_version: 1from: "fedora:latest"
# Resulting image descriptor
schema_version: 1name: "dummy/example"version: "0.1"from: "fedora:latest"
Sequence nodes
Sequence nodes are a little bit tricky, if they’re representing plain arrays, we cannot easily override any value so CEKitis just replacing the whole sequence.
Example Overriding plain array node.
# Image descriptor
schema_version: 1name: "dummy/example"version: "0.1"from: "busybox:latest"run:
cmd:- "echo"- "foo"
# Override descriptor
schema_version: 1run:
cmd:- "bar"
# Resulting image descriptor
schema_version: 1name: "dummy/example"version: "0.1"from: "busybox:latest"run:
cmd:- "bar"
54 Chapter 6. Documentation

CEKit, Release 3.7.0
Mapping nodes
Mappings are merged via name key. If CEKit is overriding a mapping or array of mappings it tries to find a name keyin mapping and use and identification of mapping. If two name keys matches, all keys of the mapping are updated.
Example Updating mapping node.
# Image descriptor
schema_version: 1name: "dummy/example"version: "0.1"from: "busybox:latest"envs:
- name: "FOO"value: "BAR"
# Override descriptor
schema_version: 1envs:
- name: "FOO"value: "new value"
# Resulting image descriptor
schema_version: 1name: "dummy/example"version: "0.1"from: "busybox:latest"envs:
- name: "FOO"value: "new value"
Removing keys
Overriding can result into need of removing a key from a descriptor. You can achieve this by overriding a key with aYAML null value.
You can use either the null word or the tilde character: ~ to remove particular key.
Example Remove value from a defined variable.
If you have a variable defined in a following way:
envs:- name: foovalue: bar
you can remove value key via following override:
envs:- name: foovalue: ~
It will result into following variable definition:
6.2. Handbook 55

CEKit, Release 3.7.0
envs:- name: foo
Warning: In some cases it will not be possible to remove the element and an error saying that schema cannot bevalidated will be shown. If you run it again with verbose output enabled (--verbose) you will see required.novalue messages.
Improvement to this behavior is tracked here: https://github.com/cekit/cekit/issues/460
6.2.9 Configuration file
CEKit can be configured using a configuration file. We use the ini file format.
CEKit will look for this file at the path ~/.cekit/config. Its location can be changed via command line--config option.
Example Running CEKit with different config file:
$ cekit --config ~/alternative_path build
Contents
• Configuration file
– Common section
* Working directory
* SSL verification
* Cache URL
* Red Hat environment
Below you can find description of available sections together with options described in detail.
Common section
The [common] section contains settings used across CEKit.
Example
[common]work_dir = /tmpssl_verify = Falsecache_url = http://cache.host.com/fetch?#algorithm#=#hash#redhat = True
Working directory
Key work_dir
56 Chapter 6. Documentation

CEKit, Release 3.7.0
Description Location of CEKit working directory, which is used to store some persistent data like dist-git repositoriesand artifact cache.
Default ~/.cekit
Example
[common]work_dir=/tmp
SSL verification
Key ssl_verify
Description Controls verification of SSL certificates, for example when downloading artifacts.
Default True
Example
[common]ssl_verify = False
Cache URL
Key cache_url
Description Specifies a different location that could be used to fetch artifacts. Usually this is a URL to some cacheservice.
You can use following substitutions:
• #filename#–the file name from the url of the artifact
• #algorithm#–has algorithm specified for the selected artifact
• #hash#–value of the digest.
Default Not set
Example Consider you have an image definition with artifacts section like this:
artifacts:- url: "http://some.host.com/7.0.0/jboss-eap-7.0.0.zip"md5: cd02482daa0398bf5500e1628d28179a
If we set the cache_url parameter in following way:
[common]cache_url = http://cache.host.com/fetch?#algorithm#=#hash#
The JBoss EAP artifact will be fetched from: http://cache.host.com/fetch?md5=cd02482daa0398bf5500e1628d28179a.
And if we do it like this:
[common]cache_url = http://cache.host.com/cache/#filename#
6.2. Handbook 57

CEKit, Release 3.7.0
The JBoss EAP artifact will be fetched from: http://cache.host.com/cache/jboss-eap-7.0.0.zip.
Red Hat environment
Key redhat
Description This option changes CEKit default options to comply with Red Hat internal infrastructure and policies.
Tip: Read more about Red Hat environment.
Default False
Example
[common]redhat = True
6.2.10 Red Hat environment
If you are running CEKit in Red Hat internal infrastructure it behaves differently. This behavior is triggered bychanging redhat configuration option in CEKit configuration file.
Tools
CEKit integration with following tools is changed in following ways:
• runs rhpkg instead of fedpkg
• runs odcs command with --redhat option set
Environment Variables
Following variables are added into the image:
• JBOSS_IMAGE_NAME – contains name of the image
• JBOSS_IMAGE_VERSION – contains version of the image
Labels
Following labels are added into the image:
• name – contains name of the image
• version - -contains version of the image
Repositories
In Red Hat we are using ODCS/OSBS integration to access repositories for building our container images. To make ourlife easier for local development CEKit is able to ask ODCS to create content_sets.yml based repositories evenfor local Docker builds. This means that if you set redhat configuration option to True, your content_sets repositorieswill be injected into the image you are building and you can successfully build an image on non-subscribed hosts.
58 Chapter 6. Documentation

CEKit, Release 3.7.0
Artifacts
In Red Hat environment we are using Brew to build our packages and artifacts. CEKit provides an integration layerwith Brew and enables to use artifact directly from Brew. To enable this set redhat configuration option to True (oruse --redhat switch) and define plain artifacts which have md5 checksum.
Warning: Using different checksum thn md5 will not work!
CEKit will fetch artifacts automatically from Brew, adding them to local cache.
Depending on the selected builders, different preparations will be performed to make it ready for the build process:
• for Docker/Buildah/Podman builder it will be available directly,
• for OSBS builder it uses the Brew/OSBS integration.
Example
artifacts:- name: jolokia-jvm-1.5.0.redhat-1-agent.jarmd5: d31c6b1525e6d2d24062ef26a9f639a8
This is everything required to fetch the artifact.
6.3 Guidelines
This chapter focuses on best practices and guides related to developing images.
6.3.1 Local development
Contents
• Local development
– Module development
* Referencing customized modules
* Notes
· Always define name for module repositories
· Install order of modules matters
– Injecting local artifacts
– Using Docker cache
Developing image locally is an important part of the workflow. It needs to provide a simple way to reference parts ofthe image we changed. Executing a local build with our changes should be easily done too.
Module development
6.3. Guidelines 59

CEKit, Release 3.7.0
Referencing customized modules
CEKit enables you to use a work in progress modules to build the image by using its overrides system. As an example,imagine we have very simple image which is using one module from a remote Git repository, like this:
schema_version: 1
name: cekit/example-jdk8version: 1.0from: centos:7description: "JDK 8 image"
modules:repositories:# Add a shared module repository located on GitHub. This repository# can contain several modules.- git:
name: commonurl: https://github.com/cekit/example-common-module.gitref: master
# Install selected modules (in order)install:
- name: jdk8- name: user
Now imagine, we have found a bug in its jdk8 module. We will clone the module repository locally by executing:
$ git clone https://github.com/cekit/example-common-module.git ~/repos/example-common-→˓module
Then we will create overrides.yaml file next to the image.yaml with following content:
modules:repositories:- name: common
path: /home/user/repo/cct_module
Now we can build the image with Docker using overridden module by executing:
$ cekit build --overrides-file overrides.yaml docker
Note: Instead using an overrides you can use inline overrides too!
$ cekit build --overrides '{"modules": {"repositories": [{"name": "common", "path": "/→˓home/user/repo/cct_module"}]}}' docker
When your work on the module is finished, commit and push your changes to a module repository so that other canbenefit from it. Afterwards you can remove your overrides file and use the upstream version of the module again.
Notes
Below you can see suggestions that should make developing modules easier.
60 Chapter 6. Documentation

CEKit, Release 3.7.0
Always define name for module repositories
We use the name key as the resource identifier in all places. If you do not define the name key yourself, we willgenerate one for you. This may be handy, but in cases where you plan to use overrides it may be much better idea todefine them.
Lack of the name key in repositories definition may be problematic because CEKit would not know which repositoryshould be overrides and instead overriding, a new module repository will be added. This will result in conflictingmodules (upstream and custom modules have same name and version) and thus the build will fail.
Install order of modules matters
It is very important to install modules in the proper order. Read more about it here.
Besides this, module install order matters at image development time too. If you are going to modify code of somemodule installed very early in the process, you should expect that the image build time will be much slower. Reasonfor this is that every step below this particular module installation is automatically invalidated, cache cannot be usedand needs a full rebuild.
This varies on the selected builder engine, but is especially true for Docker.
Injecting local artifacts
During module/image development there can be a need to use locally built artifact instead of a released one. Theeasiest way to inject such artifact is to use override mechanism.
Imagine that you have an artifact defined in following way:
artifacts:- name: jolokia
md5: d31c6b1525e6d2d24062ef26a9f639a8url: https://maven.repository.redhat.com/ga/org/jolokia/jolokia-jvm/1.5.0.
→˓redhat-1/jolokia-jvm-1.5.0.redhat-1-agent.jar
You want to inject a local build of new version of our artifact. To archive it you need to create following override:
artifacts:- name: jolokia
path: /tmp/build/jolokia.jar
Please note that the name key is used to identify which artifact we are going to override.
Whenever you override artifact, all previous checksums are removed too. If you want your new artifact to pass integritychecks you need to define checksum also in overrides in a following way:
artifacts:- name: jolokia
md5: d31c6b1525e6d2d24062ef26a9f639a8path: /tmp/build/joloika.jar
Using Docker cache
New in version 3.3.0.
6.3. Guidelines 61

CEKit, Release 3.7.0
Docker has support for caching layers. This is very convenient when you are developing images. It saves time by notrebuilding the whole image on any change, but instead it rebuilds layers that were changed only.
You can read more about it in Docker’s documentation.
In version 3.3.0 CEKit we optimized the way we generate Dockerfile making it much easier to fully leverage thecaching mechanism.
In order to make most of this feature we strongly suggest to execute Docker build with the the --no-squashparameter. This will make sure that the intermediate layers won’t be removed. In other case, the squashing post-processing will take place and any intermediate layers will be cleaned afterwards effectively losing cached layers.
$ cekit build docker --no-squash
Warning: You need to be aware that rebuilding a Docker image numerous times with the --no-squash optionwill leave many dangling layers that could fill your Docker storage. To prevent this you need to remove unusedimages from time to time. The docker system prune -a command may be useful.
Note: Please note that --no-squash switch may be only useful when developing the image. We strongly suggestto not use it to build the final image.
6.3.2 Module guidelines
Modules are the heart of CEKit. In modules we define what is going into the image and how it is configured. Modulescan be easily shared across images.
This chapter discusses guidelines around modules.
Module naming
Contents
• Module naming
– Suggested naming scheme
* Background
In this section we will be talking about about best practices related to module naming.
Suggested naming scheme
We suggest to use reverse domain convention:
name: "org.jboss.container.openjdk"version: "11"description: "OpenJDK 11 module"
# [SNIP]
62 Chapter 6. Documentation

CEKit, Release 3.7.0
We suggest to use lower-case letters.
Background
This approach is used in many languages (like Java, or C#) to define modules/packages. Besides this it is suggested tobe used in defining container image label names.
There are a few reasons why it is so popular and a great choice for module names too:
1. Simplicity.
2. Module maintainer is known immediately by looking just at the name.
3. Module name clashes are unlikely.
Module versioning
Contents
• Module versioning
– Suggested versioning scheme
* Versioning summary
– Custom versioning scheme
– Git references vs. module versions
* Referencing stable versions of modules
* Referencing development versions of modules
– Changelog
This section focuses on best practices around module versioning. For information about how module versions arehandled in CEKit take a look at descriptor documentation for modules.
Suggested versioning scheme
You are free to define your versioning scheme, but we strongly suggest to follow Python versioning scheme.
Although it was developed for Python - it’s easy to reuse it anywhere, including modules versioning.
Note: Its design is very similar to semantic versioning scheme. You can read about differences between these twohere.
Versioning summary
1. Use MAJOR.MINOR.MICRO versioning scheme.
2. Try to avoid release suffixes, but if you really need to add one of them, use PEP 440 style:
6.3. Guidelines 63

CEKit, Release 3.7.0
• Pre-releases like Alpha, Beta, Release Candidate
Note: There is no dot before the modifier.
• Post-releases
Note: Please note the dot before the post modifier.
• Development releases
Note: Please note the dot before the dev modifier.
Custom versioning scheme
Although it is possible to to use a custom versioning scheme for modules, we suggest to not use it. Custom versioningscheme can lead to issues that will be hard to debug, especially when your image uses multiple module repositoriesand many modules.
You should be fine when you will be strictly defining modules and versions in the image descriptor, but it’s veryproblematic to do so. It’s even close to impossible when you do not control the modules you are consuming.
As an example, an issue can arrive when you mix versioning schemes in modules. Version that follows the suggestedversioning scheme will always take precedence before a custom versioning scheme.
See also:
See information about parsing module versions.
Git references vs. module versions
It is very common use case to place modules inside a Git repository. This is a very efficient way to share modules withothers.
Git repositories are always using version of some sort, in Git we talk about ref’s. This can be a branch or a tag name.References can point to a stable release (tags) or to a work in progress (branches).
Defining module version is required in CEKit. This means that the module definition must have the version key.
If you reference modules stored in a Git repository we can talk about two layers of versioning:
1. Git references
2. Module versions itself
We will use a simple example to explain how we can reference modules. Here is the module descriptor.
Listing 11: module.yaml
name: "org.company.project.feature"version: "1.0"
execute:- script: "install.sh"
64 Chapter 6. Documentation

CEKit, Release 3.7.0
Below you can see the image descriptor snippet with only relevant content for this example.
Listing 12: image.yaml
modules:repositories:
- name: "org.company.project"git:url: "https://github.com/company/project-modules"ref: "release-3.1.0"
install:- name: "org.company.project.feature"
Note: As you can see above, the module repository does have a different reference than 1.0. This is not a mistake- module repositories can contain multiple modules with different versions. Module repositories group modulestogether under a single version.
Referencing stable versions of modules
Referencing stable versions of modules is very easy. The most important thing to remember is that in order to pin aversion of module, we need to be able to pin to a specific version of the module registry itself too.
Referencing tags is a great way to ensure that we use the same code always. This means that the git repositoryreferences need to be managed carefully and proper tag management need to be preserved (no force push on tags).
Once we have tags – we can reference them in the module registry ref just like in the example above.
We don’t need to specify versions in the install section of modules as long as we have a single version of particularmodule available in repositories. If this is not the case and in your workflow you maintain multiple versions of samemodule – specifying version to install may be required.
Note: An example could be a module that installs OpenJDK 8 and OpenJDK 11 – name of the module is the same,these live in the same module repository, but versions differ.
If multiple versions of a particular module are available and the version will not be specified in the module installationsection newest version will be installed.
Referencing development versions of modules
Module being currently in development should have set the version in module descriptor being the next (target) version.This will make sure the version is already set in the module and no code changes are required to actually release amodule.
Assuming that the current released version of the module is 1.0, we can develop the 2.0 version of this module, sowe just define it in the module descriptor:
Listing 13: module.yaml
name: "org.company.project.feature"version: "2.0"
(continues on next page)
6.3. Guidelines 65

CEKit, Release 3.7.0
(continued from previous page)
execute:- script: "install.sh"
If we develop module locally and reference the module repository using path attribute, no Git repository referencesare used at all. Modules are copied from the repository to the target directory and used there at build time.
We can use overrides feature to point to our development work. Using overrides makes it easy to not touch the imagedescriptor at development time.
Listing 14: overrides.yaml
modules:repositories:
# Override our module repository location to point to a local directory- name: "org.company.project"path: "project-modules"
Please note that we did not specify which version of the org.company.project.feature module should beinstalled. This is perfectly fine! Since we are overriding the module repository, the only module version of the org.company.project.feature available will be our locally developed – 2.0, so there is no need to define it, butof course we can do it.
If we want to share with someone our development work, we should push the module repository to a Git repositoryusing specific branch. This branch could be a feature branch, or a regular development branch (for example master),it depends on your workflow.
In our example, let’s use a feature branch: feature-dev. Once code is pushed to this branch, we can update ouroverrides.yaml file to use it:
Listing 15: overrides.yaml
modules:repositories:
- name: "org.company.project"git:url: "https://github.com/company/project-modules"ref: "feature-dev"
Changelog
Just as any other library, a module should carry a changelog. Every release should have published list of changes madein the code. This will make it much easier to consume particular module.
6.3.3 Artifact guidelines
Contents
• Artifact guidelines
– Artifact descriptor
* Proper name key usage
66 Chapter 6. Documentation

CEKit, Release 3.7.0
* Define checksums
* Add descriptions
Building container images without content doesn’t make sense. You can add packages shipped with the operatingsystem, you can add scripts with modules, but sooner or later you will need to add some bigger (potentially binary)files to your image. Using artifacts is how we handle it in CEKit.
This section helps you define artifacts in your descriptors.
Artifact descriptor
There are many artifact types available. Please refer to that page on what is the usage of these.
Below you can find best practices related to defining artifacts.
Proper name key usage
artifacts:- name: jolokia
url: https://github.com/rhuss/jolokia/releases/download/v1.3.6/jolokia-1.3.6-→˓bin.tar.gz
md5: 75e5b5ba0b804cd9def9f20a70af649fdescription: "Jolokia is remote JMX with JSON over HTTP"
It is very important to use the name key properly. In CEKit we use name keys as identifiers and this is what theartifact’s name key should be – it should define a unique key for the artifact across the whole image. This isespecially important when you define artifacts in modules that are reused in many images.
The name key should be generic enough and be descriptive at the same time.
Basing on the example above bad examples could be:
jolokia-1.3.6-bin.tar.gz: We should not use the artifact file name as the identifier.
1.3.6: There is no information about the artifact, just version is presented.
Better but not ideal is this:
jolokia-1.3.6: Defines what it is and adds full version. Adding exact version may be an overkill.Imagine that later we would like to override it with some different version, then the artifactjolokia-1.3.6 could point to a jolokia-1.6.0-bin.tar.gz which would be very mis-leading. We should avoid specifying versions.
But the best option would be to use something like this:
jolokia_tar: In this case we define what artifact we plan to add and the type of it. We do not specifyversion at all here.
jolokia: This is another possibility, where we use just the common name of the artifact. This makes itvery easy to override and is easy to memoize too.
Hint: When you define the name for the artifact, make sure you define the target key too. If you don’t do this, thetarget file name is defaulted to the value of the name key which may be misleading in some cases. See this sectionfor more information on this topic.
6.3. Guidelines 67

CEKit, Release 3.7.0
Define checksums
Note: Learn more about checksums.
artifacts:- name: jolokia
url: https://github.com/rhuss/jolokia/releases/download/v1.3.6/jolokia-1.3.6-→˓bin.tar.gz
md5: 75e5b5ba0b804cd9def9f20a70af649fdescription: "Jolokia is remote JMX with JSON over HTTP"
Every artifact should have defined checksums. This will ensure that the fetched artifact’s integrity is preserved. If youdo not define them artifacts will be always fetched again. This is good when the artifact changes very often at thedevelopment time, but once you settle on a version, specify the checksum too.
Add descriptions
artifacts:- name: jolokia
url: https://github.com/rhuss/jolokia/releases/download/v1.3.6/jolokia-1.3.6-→˓bin.tar.gz
md5: 75e5b5ba0b804cd9def9f20a70af649fdescription: "Jolokia is remote JMX with JSON over HTTP"
It’s a very good idea to add descriptions to the artifacts. This makes it much easier to understand what the artifactis about. Besides this, descriptions are used when automatic fetching of artifact is not possible and is a hint to thedeveloper where to fetch the artifact from manually.
Descriptions can be used also by tools that process image descriptors to produce documentation.
6.3.4 Repository guidelines
Contents
• Repository guidelines
– Background
* Repositories availability
* Image hierarchy challenges
* Source code
– Guidelines
* Repositories in community images
· RPM defined repositories
· Repository file defined repositories
· Manual repository management
68 Chapter 6. Documentation

CEKit, Release 3.7.0
* Repositories in product images
· Plain repositories
· Content sets
– Notes
* Always define name of the repository
* Do not define repositories in modules
* Use content sets for Red Hat images
One of the biggest challenges we faced with CEKit is how to manage and define package repositories correctly. Thissection focuses on best practices around using package repositories.
CEKit support different ways of defining and injecting repositories. Besides this, repositories can be manually man-aged by scripts in the modules itself.
Background
To give an overview on the available options, we need to understand the challenges too. Among other things, two arethe three visible ones:
1. Different requirements for repository access because of image types (community vs. product)
2. Image hierarchy
3. Source code requirement
Repositories availability
All public/community images have public repositories freely available. This applies to Fedora, CentOS images, but aswell to Ubuntu or Alpine. All images come with a set of repositories already configured in the image itself and thereis no need to do anything special to enable them.
On the other hand we have product images where repositories are guarded in some way, for example by requiringsubscriptions. Sometimes subscriptions are transparent (need to be enabled on the host, but nothing needs to be donein the container), sometimes we need to point to a specific location internally.
This makes it hard to have a single way to add or enable repositories.
Image hierarchy challenges
Besides issues in repository management described above we can have issues with how we structure images. Forexample the main image descriptor could be a community image, using publicly available repositories. We could havean overrides file saved next to it that would convert the image to be a product image, which obviously uses differentsources of packages.
Source code
This is a bit related to the image hierarchy challenges above. If we build community images, then we expect to havethe source code in public. With product images this may or may not be the same case.
6.3. Guidelines 69

CEKit, Release 3.7.0
In case where product images source is hosted internally only, we don’t need to hide internal package repositoties. Butit we develop in the true open source spirit, everything should be public. In such case, the product image descriptorcannot really refer to internal repositories and we need to use available, public information and correctly point thebuilder to an internal repository. This is very hard to do correctly.
Guidelines
This section describes best practices for managing repositories. We divided them into two sub-sections: for communityand product images.
Repositories in community images
In case of community images, in most cases you will be fine with whatever is already available in the image itself.
If you need to add some repository, we suggest to use one of three options:
1. Add a package with repository definition,
2. Add a repository file definition,
3. Manage it manually (advanced).
RPM defined repositories
First option is probably the cleanest one of all but it requires that a package with the repository definition exists in thealready enabled repositories. This is true for example for EPEL repository or Software Collections repository.
packages:repositories:
- name: sclrpm: centos-release-scl
Repository file defined repositories
Second option is to add prepared repository file.
packages:repositories:
- name: foourl:repository: https://web.example/foo.repo
Here is an example repo file:
[google-chrome]name=google-chromebaseurl=http://dl.google.com/linux/chrome/rpm/stable/x86_64enabled=1gpgcheck=1gpgkey=https://dl.google.com/linux/linux_signing_key.pub
It’s easy to create one if need. Please note that it should be self-contained meaning that other things must not berequired to configure to make it work. A good practice is to save this file on a host secured with SSL. The GPG key
70 Chapter 6. Documentation

CEKit, Release 3.7.0
should be always provided, but in case of development repositories it’s OK to turn off GPG checking (set gpgcheckto 0).
Manual repository management
Last option is all about manual repository management. This means that enabling and removing repositories can bedone as part of a module which directly creates repo files in the image while building it.
Enabling repositories this way needs to be well thought. Repositories will be available for package installation in thesubsequent module execution:
modules:install:
- name: repository.enable- name: repository.packages.install
The reason for this is that package installation is done before any commands are executed and since we enable therepository as part of some command we cannot also request packages to be installed from that repository at that time.
There is one way to overcome this limitation.
Additionally to enabling the repository, you can use the package manager to install packages you want. This gives yougreat flexibility.
Consider following module descriptor:
# SNIPexecute:
- script: packages.sh
and the packages.sh file content:
#!/bin/bash
curl -o /etc/yum.repos.d/foo.repo https://web.example/foo.repodnf -y install foo-package
This combination allows you to fully control what is done to packages as part of the build process.
Repositories in product images
Note: If your product image source code is not exposed to public as mentioned in the previous section, you may usethe same repository management methods as in community images.
Everything below covers the case where product image source code is public.
Managing repositories in product images is completely different from what we saw in community images. The reasonis that these require subscriptions to access them.
To enable repositories inside RHEL containers you need to subscribe the host. Read more about it here: https://access.redhat.com/solutions/1443553.
Besides this, we can have following situations:
1. Building RHEL based images on subscribed hosts
2. Building RHEL based images on unsubscribed hosts
6.3. Guidelines 71

CEKit, Release 3.7.0
Plain repositories
Plain repositories are an abstract way of defining package repositories. These are just markers that such and suchrepository is required to successfully build the image, but because these do not reveal the implementation of therepository, CEKit is unable to directly satisfy this requirement.
Why that would be a good thing? Because of two things:
1. If you specify plain repository with a defined name – it will be easy to override it! Additionally, the id key cansuggest what should be the implementation of this repository definition, and
2. For subscribed hosts, no repository preparation is required.
Let’s take a look at an example.
packages:repositories:
- name: sclid: rhel-server-rhscl-7-rpms
This could be later overridden with something like this:
$ cekit build --overrides '{"packages": {"repositories": [{"name": "scl", "url": {→˓"repository": "http://internal/scl.repo"}}]}}' podman
On a subscribed host, there would be no need to do above overrides, because automatically every repository attachedto a subscription is enabled in the container image running on that host.
Warning: It is not possible to limit repositories available to a container running on a subscribed host outside ofthe container. You need to manage it in the container. See https://access.redhat.com/solutions/1443553 for detailedinformation about this.
Content sets
Using content sets is the preferred way when building Red Hat container images. Content sets define all the sourcesfor packages for particular container image.
A sample content sets file may look like this:
x86_64:- server-rpms- server-extras-rpms
ppx64le:- server-for-power-le-rpms- server-extras-for-power-le-rpms
This defines architectures and appropriate repository ID’s. Defining content sets can be done in the content_setssection. For details please take a look at the image descriptor documentation.
Please note that the behavior of repositories when content sets are defined is different too; when content sets are used– any repositories defined are ignored. You will see a warning in the logs if that will be the case. This means thatif a repository is defined in any module (see note about this below) or in image descriptor or in overrides – it will beignored.
72 Chapter 6. Documentation

CEKit, Release 3.7.0
Note: If you want to enable content sets in OSBS, you need also set the pulp_repos key to true in the composesection of the OSBS configuration.
Notes
Here are a few notes from our experience. Hopefully this will make repository management easier for you too!
Always define name of the repository
When you define the repository, you should always specify the name key. It should be generic but self-explaining atthe same time. This will make it much easier to understand what repository it is and in case where it’s not available,finding a replacement source will be much easier task to do.
packages:repositories:
- name: sclrpm: centos-release-scl
In this example, the scl is short and it clearly suggests Software Collections. Here is how it could be redefined to usesome internal repository.
$ cekit build --overrides '{"packages": {"repositories": [{"name": "scl", "url": {→˓"repository": "http://internal/scl.repo"}}]}}' podman
Do not define repositories in modules
Although it is technically possible to define repositories in modules, it shouldn’t be done. This makes is much harderto manage and override it. In case you do not own the module that defines the repository, you have little control overhow it is defined and if it can be easily overridden.
Repositories should be a property of the image descriptor.
Use content sets for Red Hat images
If you are developing Red Hat container images, you should use content sets to define which repositories should beused.
6.4 Descriptor documentation
This chapter provides overview of available descriptors.
Note: Although descriptors look similar, these can differ in the availability of selected keys.
6.4. Descriptor documentation 73

CEKit, Release 3.7.0
6.4.1 Image descriptor
Image descriptor contains all information CEKit needs to build and test a container image.
Contents
• Image descriptor
– Name
– Version
– Description
– From
– Environment variables
– Labels
– Artifacts
* Artifact features
* Common artifact keys
* Artifact types
· Plain artifacts
· URL artifacts
· Path artifacts
· Image source artifacts
– Packages
* Packages to install
* Package manager
* Package repositories
· Plain repository
· RPM repository
· URL repository
· Content sets
· Embedded content sets
· Linked content sets
– Ports
– Volumes
– Modules
* Module repositories
* Module installation
– Run
74 Chapter 6. Documentation

CEKit, Release 3.7.0
* Cmd
* Entrypoint
* User
* Working directory
– Help
– OSBS
* OSBS extra directory
* OSBS repository
* OSBS Koji target
* OSBS configuration
Name
Key name
Required Yes
Image name without the registry part.
Example
name: "jboss-eap-7/eap70-openshift"
Version
Key version
Required Yes
Version of the image.
version: "1.4"
Description
Key description
Required No
Short summary of the image.
Value of the description key is added to the image as two labels:
1. description, and
2. summary.
Note: These labels are not added is these are already defined in the labels section.
6.4. Descriptor documentation 75

CEKit, Release 3.7.0
description: "Red Hat JBoss Enterprise Application 7.0 - An application platform for→˓hosting your apps that provides an innovative modular, cloud-ready architecture,→˓powerful management and automation, and world class developer productivity."
From
Key from
Required Yes
Base image of your image.
from: "jboss-eap-7/eap70:1.2"
Environment variables
Key envs
Required No
Similar to labels – we can specify environment variables that should be present in the container after running theimage. We provide envs section for this.
Environment variables can be divided into two types:
1. Information environment variables
These are set and available in the image. This type of environment variables provide information to the imageconsumer. In most cases such environment variables should not be modified.
2. Configuration environment variables
This type of variables are used to define environment variables used to configure services inside running con-tainer.
These environment variables are not set during image build time but can be set at run time.
Every configuration enviromnent variable should provide an example usage (example) and short description(description).
Please note that you could have an environment variable with both: a value and example set. This suggest that thisenvironment variable could be redefined.
Note: Configuration environment variables (without value) are not generated to the build source. These can beused instead as a source for generating documentation.
envs:# Configuration env variables below# These will be added to container- name: "STI_BUILDER"
value: "jee"- name: "JBOSS_MODULES_SYSTEM_PKGS"
value: "org.jboss.logmanager,jdk.nashorn.api"
# Information env variables below# These will NOT be defined (there is no value)
(continues on next page)
76 Chapter 6. Documentation

CEKit, Release 3.7.0
(continued from previous page)
- name: "OPENSHIFT_KUBE_PING_NAMESPACE"example: "myproject"description: "Clustering project namespace."
- name: "OPENSHIFT_KUBE_PING_LABELS"example: "application=eap-app"description: "Clustering labels selector."
Labels
Key labels
Required No
Note: Learn more about standard labels in container images.
Every image can include labels. CEKit makes it easy to do so with the labels section.
labels:- name: "io.k8s.description"
value: "Platform for building and running JavaEE applications on JBoss EAP 7.0"- name: "io.k8s.display-name"
value: "JBoss EAP 7.0"
Artifacts
It’s common for images to require external artifacts like jar files, installers, etc. In most cases you will want to addsome files into the image and use them during image build process.
Artifacts section is meant exactly for this. CEKit will try to automatically fetch any artifacts specified in this section.
If for some reason automatic fetching of artifacts is not an option for you, you should define artifacts as plain artifactsand use the cekit-cache command to add the artifact to local cache, making it available for the build processautomatically. See Artifact caching chapter.
Artifact features
Checksums Almost all artifacts will be checked for consistency by computing checksum of the fetched file andcomparing it with the desired value. Currently supported algorithms are: md5, sha1, sha256 and sha512.
You can define multiple checksums for a single artifact. All specified checksums will be validated.
If no algorithm is provided, artifacts will be fetched every time.
This can be useful when building images with snapshot content. In this case you are not concerned about theconsistency but rather focusing on rapid development. We advice that you define checksum when your contentbecomes stable.
Caching All artifacts are automatically cached during an image build. To learn more about caching please take a lookat Artifact caching chapter.
6.4. Descriptor documentation 77

CEKit, Release 3.7.0
Common artifact keys
name Used to define unique identifier of the artifact.
The name key is very important. It’s role is to provide a unique identifier for the artifact. If it’s not provided, itwill be computed from the resource definition, but we strongly suggest to provide the name keys always.
Value of this key does not need to be a filename, because it’s just an identifier used to refer the artifact. Usingmeaningful and unique identifiers is important in case when you want to use Overrides. It will make it mucheasier to refer the artifact and thus override it.
target The output name for fetched resources will match the target attribute. If it is not defined then base nameof the name attribute will be used. If it’s not provided either then base name of the path/URL will be used.
Below you can find a few examples.
artifacts:- name: jboss-eap-distributionpath: jboss-eap-6.4.0.ziptarget: jboss-eap.zip
Target file name: jboss-eap.zip.
artifacts:- name: jboss-eap-distributionpath: jboss-eap-6.4.0.zip
Target file name: jboss-eap-distribution.
artifacts:- path: jboss-eap-6.4.0.zip
Target file name: jboss-eap-6.4.0.zip.
dest The dest key defines the destination directory where the particular artifact will be placed within the containerimage. By default it is set to /tmp/artifacts/.
The dest key specifies the directory path, to control file name, use target key as explained above. In orderto get maximum control over the target artifact naming, you should use both dest and target together.
Examples:
artifacts:- name: jboss-eap-distribution
path: jboss-eap-6.4.0.ziptarget: jboss-eap.zip
Target file path is: /tmp/artifacts/jboss-eap.zip.
artifacts:- name: jboss-eap-distribution
path: jboss-eap-6.4.0.ziptarget: jboss-eap.zipdest: /opt
Target file path is: /opt/jboss-eap.zip.
Note: The default temporary directory (/tmp/artifacts/) will be cleaned up automatically after the buildprocess is done meaning that artifacts are available only at the build time.
78 Chapter 6. Documentation

CEKit, Release 3.7.0
Artifacts using custom dest values are not affected.
description Describes the artifact. This is an optional key that can be used to add more information about theartifact.
Adding description to artifacts makes it much easier to understand what artifact it is just by looking at theimage/module descriptor.
artifacts:- path: jboss-eap-6.4.0.zip
md5: 9a5d37631919a111ddf42ceda1a9f0b5description: "Red Hat JBoss EAP 6.4.0 distribution available on Customer
→˓Portal: https://access.redhat.com/jbossnetwork/restricted/softwareDetail.html?→˓softwareId=37393&product=appplatform&version=6.4&downloadType=distributions"
If CEKit is not able to download an artifact and this artifact has a description defined – the build will failbut a message with the description will be printed together with information on where to place the manuallydownloaded artifact so that the build could be resumed.
Artifact types
CEKit supports following artifact types:
• Plain artifacts
• URL artifacts
• Path artifacts
• Image source artifacts
Plain artifacts
This is an abstract way of defining artifacts. The only required keys are name and the md5 checksum. This type ofartifacts is used to define artifacts that are not available publicly and instead provided by some (internal) systems.
Listing 16: Schema
{"map": {
"description": {"desc": "Description of the resource","type": "str"
},"dest": {
"default": "/tmp/artifacts/","desc": "Destination directory inside of the container","type": "str"
},"md5": {
"desc": "The md5 checksum of the resource","required": true,"type": "str"
},"name": {
"desc": "Key used to identify the resource",
(continues on next page)
6.4. Descriptor documentation 79

CEKit, Release 3.7.0
(continued from previous page)
"required": true,"type": "str"
},"sha1": {
"desc": "The sha1 checksum of the resource","type": "str"
},"sha256": {
"desc": "The sha256 checksum of the resource","type": "str"
},"sha512": {
"desc": "The sha512 checksum of the resource","type": "str"
},"target": {
"desc": "Target file name for the resource","type": "str"
}}
}
Listing 17: Examples
artifacts:- name: jolokia
md5: 75e5b5ba0b804cd9def9f20a70af649ftarget: jolokia.tar.gz
As you can see, the definition does not define from where the artifact should be fetched. This approach relies onArtifact caching to provide the artifact.
Note: See Red Hat environment for description how plain artifacts are used in the Red Hat environment.
URL artifacts
This is the simplest way of defining artifacts. You need to provide the url key which is the URL from where theartifact should be fetched from.
Listing 18: Schema
{"map": {
"description": {"desc": "Description of the resource","type": "str"
},"dest": {
"default": "/tmp/artifacts/","desc": "Destination directory inside of the container","type": "str"
},"md5": {
(continues on next page)
80 Chapter 6. Documentation

CEKit, Release 3.7.0
(continued from previous page)
"desc": "The md5 checksum of the resource","type": "str"
},"name": {
"desc": "Key used to identify the resource","type": "str"
},"sha1": {
"desc": "The sha1 checksum of the resource","type": "str"
},"sha256": {
"desc": "The sha256 checksum of the resource","type": "str"
},"sha512": {
"desc": "The sha512 checksum of the resource","type": "str"
},"target": {
"desc": "Target file name for the resource","type": "str"
},"url": {
"desc": "URL where the resource can be found","required": true,"type": "str"
}}
}
Tip: You should always specify at least one checksum to make sure the downloaded artifact is correct.
6.4. Descriptor documentation 81

CEKit, Release 3.7.0
Listing 19: Examples
artifacts:- name: "jolokia"
url: "https://github.com/rhuss/jolokia/releases/download/v1.3.6/jolokia-1.3.6-→˓bin.tar.gz"
# The md5 checksum of the artifactmd5: "75e5b5ba0b804cd9def9f20a70af649f"
- name: "jolokia"url: "https://github.com/rhuss/jolokia/releases/download/v1.3.6/jolokia-1.3.6-
→˓bin.tar.gz"# Free text description of the artifactdescription: "Library required to access server data via JMX"md5: "75e5b5ba0b804cd9def9f20a70af649f"# Final name of the downloaded artifacttarget: "jolokia.tar.gz"
Path artifacts
This way of defining artifacts is mostly used in development overrides and enables you to inject artifacts from a localfilesystem.
Listing 20: Schema
{"map": {
"description": {"desc": "Description of the resource","type": "str"
},"dest": {
"default": "/tmp/artifacts/","desc": "Destination directory inside of the container","type": "str"
},"md5": {
"desc": "The md5 checksum of the resource","type": "str"
},"name": {
"desc": "Key used to identify the resource","type": "str"
},"path": {
"desc": "Relative (suggested) or absolute path to the resource","required": true,"type": "str"
},"sha1": {
"desc": "The sha1 checksum of the resource","type": "str"
},"sha256": {
"desc": "The sha256 checksum of the resource",
(continues on next page)
82 Chapter 6. Documentation

CEKit, Release 3.7.0
(continued from previous page)
"type": "str"},"sha512": {
"desc": "The sha512 checksum of the resource","type": "str"
},"target": {
"desc": "Target file name for the resource","type": "str"
}}
}
Tip: You should always specify at least one checksum to make sure the artifact is correct.
Listing 21: Examples
artifacts:- name: jolokia-1.3.6-bin.tar.gz
path: local-artifacts/jolokia-1.3.6-bin.tar.gzmd5: 75e5b5ba0b804cd9def9f20a70af649f
Note: If you are using relative path to define an artifact, path is considered relative to an image descriptor whichintroduced that artifact.
Example If an artifact is defined inside /foo/bar/image.yaml with a path: baz/1.zip the artifact will beresolved as /foo/bar/baz/1.zip
Image source artifacts
Image source artifacts are used in multi-stage builds. With image source artifacts you can define files built in previousstages of the multi-stage builds.
Listing 22: Schema
{"map": {
"description": {"desc": "Description of the resource","type": "str"
},"dest": {
"default": "/tmp/artifacts/","desc": "Destination directory inside of the container","type": "str"
},"image": {
"desc": "Name of the image which holds the resource","required": true,"type": "str"
},
(continues on next page)
6.4. Descriptor documentation 83

CEKit, Release 3.7.0
(continued from previous page)
"name": {"desc": "Key used to identify the resource","type": "str"
},"path": {
"desc": "Path in the image under which the resource can be found","required": true,"type": "str"
},"target": {
"desc": "Target file name for the resource","type": "str"
}}
}
Note: Please note that image source artifacts do not allow for defining checksums due to the nature of this type ofartifact.
Listing 23: Examples
artifacts:- name: application
# Name of the image (stage) from where we will fetch the artifactimage: builder# Path to the artifact within the imagepath: /path/to/application/inside/the/builder/image.jar
Packages
Key packages
Required No
To install additional packages you can use the packages section where you specify package names and repositoriesto be used, as well as the package manager that is used to manage packages in this image.
Listing 24: Example package section for RPM-based distro
packages:repositories:
- name: extrasid: rhel7-extras-rpm
manager: dnfinstall:
- mongodb24-mongo-java-driver- postgresql-jdbc- mysql-connector-java- maven- hostname
84 Chapter 6. Documentation

CEKit, Release 3.7.0
Listing 25: Example package section for Alpine Linux
packages:manager: apkinstall:
- python3
Packages to install
Key install
Required No
Packages listed in the install section are marked to be installed in the container image.
packages:install:
- mongodb24-mongo-java-driver- postgresql-jdbc
Package manager
Key manager
Required No
It is possible to define package manager used in the image used to install packages as part of the build process.
Currently available options are yum, dnf, microdnf and apk.
Note: If you do not specify this key the default value is yum. If your image requires different package manager youneed to specify it.
The default yum value will work fine on Fedora and RHEL images because OS maintains a symlink to the properpackage manager.
packages:manager: dnfinstall:
- git
Package repositories
Key repositories
Required No
Warning: Some package repositories are supported only on specific distributions and package manager combi-nations. Please refer to documentation below!
6.4. Descriptor documentation 85

CEKit, Release 3.7.0
CEKit uses all repositories configured inside the image. You can also specify additional repositories using repositoriessubsection. CEKit currently supports following ways of defining additional repositories:
• Plain repository
• RPM repository
• URL repository
• Content sets
Tip: See repository guidelines guide to learn about best practices for repository definitions.
packages:repositories:
- name: sclrpm: centos-release-scl
- name: extrasid: rhel7-extras-rpmdescription: "Repository containing extras RHEL7 extras packages"
Plain repository
Note: Available only on RPM-based distributions.
With this approach you specify repository id and CEKit will not perform any action and expect the repository def-inition exists inside the image. This is useful as a hint which repository must be present for particular image to bebuildable. The definition can be overridden by your preferred way of injecting repositories inside the image.
packages:repositories:
- name: extrasid: rhel7-extras-rpmdescription: "Repository containing extras RHEL7 extras packages"
RPM repository
Note: Available only on RPM-based distributions.
This ways is using repository configuration files and related keys packaged as an RPM.
Example: To enable CentOS SCL inside the image you should define repository in a following way:
packages:repositories:
- name: sclrpm: centos-release-scl
Tip: The rpm key can also specify a URL to a RPM file:
86 Chapter 6. Documentation

CEKit, Release 3.7.0
packages:repositories:
- name: epelrpm: https://dl.fedoraproject.org/pub/epel/epel-release-latest-7.noarch.rpm
URL repository
Note: Available only on RPM-based distributions.
This approach enables you to download a yum repository file and corresponding GPG key. To do it, define repositoriessection in a way of:
packages:repositories:
- name: foourl:repository: https://web.example/foo.repo
Content sets
Note: Available only on RPM-based distributions.
Content sets are tightly integrated to OSBS style of defining repositories in content_sets.yml file. If this kindof repository is present in the image descriptor it overrides all other repositories types. For local Docker based buildthese repositories are ignored similarly to Plain repository types and we expect repository definitions to be availableinside image. See upstream docs for more details about content sets.
Note: Behavior of Content sets repositories is changed when running in Red Hat Environment.
There are two possibilities how to define Content sets type of repository:
Embedded content sets
In this approach content sets are embedded inside image descriptor under the content_sets key.
packages:content_sets:
x86_64:- server-rpms- server-extras-rpms
Linked content sets
In this approach Contet sets file is linked from a separate yaml file next to image descriptor viacontent_sets_file key.
6.4. Descriptor documentation 87

CEKit, Release 3.7.0
Image descriptor:
packages:content_sets_file: content_sets.yml
content_sets.yml located next to image descriptor:
x86_64:- server-rpms- server-extras-rpms
Ports
Key ports
Required No
This section is used to mark which ports should be exposed in the container. If we want to highlight a port used in thecontainer, but not necessary expose it – we should set the expose flag to false (true by default).
You can provide additional documentation as to the usage of the port with the keys protocol, to specify which IPprotocol is used over the port number (e.g TCP, UDP. . . ) and service to describe what network service is runningon top of the port (e.g. “http”, “https”). You can provide a human-readable long form description of the port with thedescription key.
ports:- value: 8443
service: https- value: 8778
expose: falseprotocol: tcpdescription: internal port for communication.
Volumes
Key volumes
Required No
In case you want to define volumes for your image, just use the volumes section!
volumes:- name: "volume.eap"
path: "/opt/eap/standalone"
Note: The name key is optional. If not specified the value of path key will be used.
Modules
Key modules
Required No
The modules section is responsible for defining module repositories and providing the list of modules to be installedin order.
88 Chapter 6. Documentation
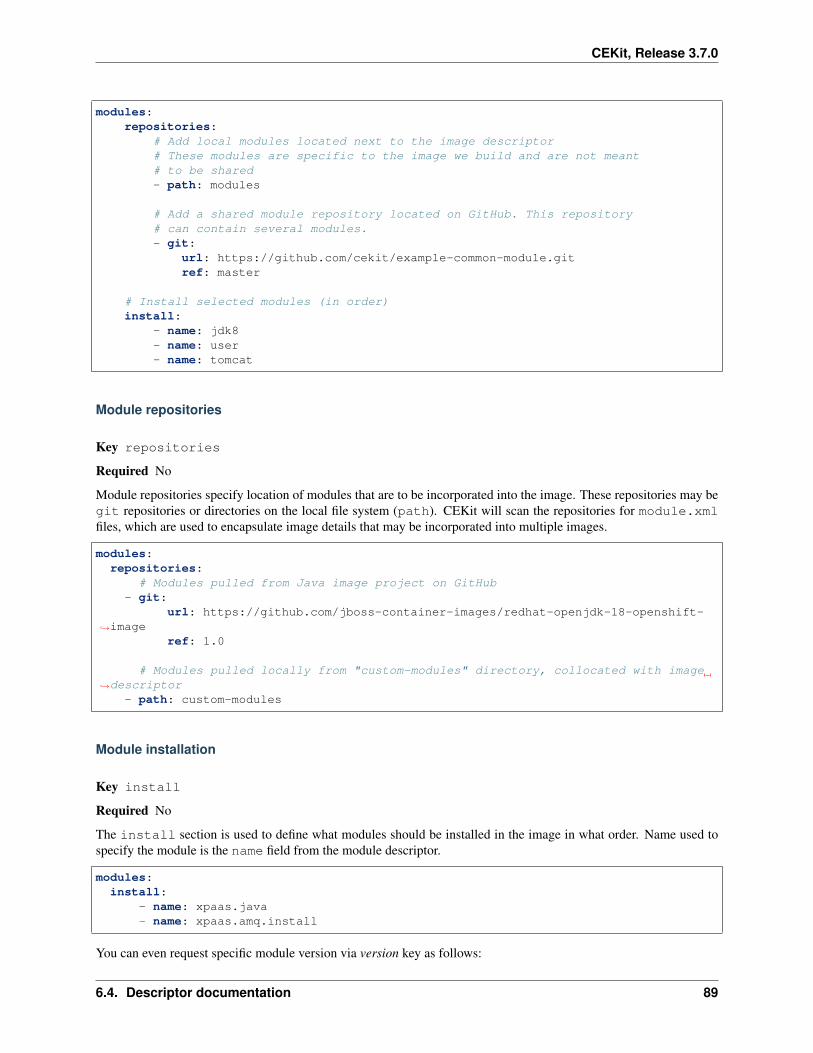
CEKit, Release 3.7.0
modules:repositories:
# Add local modules located next to the image descriptor# These modules are specific to the image we build and are not meant# to be shared- path: modules
# Add a shared module repository located on GitHub. This repository# can contain several modules.- git:
url: https://github.com/cekit/example-common-module.gitref: master
# Install selected modules (in order)install:
- name: jdk8- name: user- name: tomcat
Module repositories
Key repositories
Required No
Module repositories specify location of modules that are to be incorporated into the image. These repositories may begit repositories or directories on the local file system (path). CEKit will scan the repositories for module.xmlfiles, which are used to encapsulate image details that may be incorporated into multiple images.
modules:repositories:
# Modules pulled from Java image project on GitHub- git:
url: https://github.com/jboss-container-images/redhat-openjdk-18-openshift-→˓image
ref: 1.0
# Modules pulled locally from "custom-modules" directory, collocated with image→˓descriptor
- path: custom-modules
Module installation
Key install
Required No
The install section is used to define what modules should be installed in the image in what order. Name used tospecify the module is the name field from the module descriptor.
modules:install:
- name: xpaas.java- name: xpaas.amq.install
You can even request specific module version via version key as follows:
6.4. Descriptor documentation 89

CEKit, Release 3.7.0
modules:install:
- name: xpaas.javaversion: 1.2-dev
- name: xpaas.amq.install
Run
Key run
Required No
The run section encapsulates instructions related to launching main process in the container including: cmd,entrypoint, user and workdir. All subsections are described later in this paragraph.
Below you can find full example that uses every possible option.
run:cmd:
- "argument1"- "argument2"
entrypoint:- "/opt/eap/bin/wrapper.sh"
user: "alice"workdir: "/home/jboss"
Cmd
Key cmd
Required No
Command that should be executed by the container at run time.
run:cmd:
- "some cmd"- "argument"
Entrypoint
Key entrypoint
Required No
Entrypoint that should be executed by the container at run time.
run:entrypoint:
- "/opt/eap/bin/wrapper.sh"
90 Chapter 6. Documentation

CEKit, Release 3.7.0
User
Key user
Required No
Specifies the user (can be username or uid) that should be used to launch the main process.
run:user: "alice"
Working directory
Key workdir
Required No
Sets the current working directory of the entrypoint process in the container.
run:workdir: "/home/jboss"
Help
Key help
Required No
At image build-time CEKit can generate a documentation page about the image. This file is a human-readable conver-sion of the resulting image descriptor. That is, a descriptor with all overrides and modules combined together, whichwas used to build the image.
If an image help page is requested to be added to the image (by setting the add key), a help.md is generated andadded to the root of the image.
By default image help pages are not generated.
The default help template is supplied within CEKit. You can override it for every image via image definition. Theoptional help sub-section can define defines a single key template, which can be used to define a filename to usefor generating image documentation at build time.
The template is interpreted by the Jinja2 template engine. For a concrete example, see the default help.jinja suppliedin the CEKit source code.
help:add: truetemplate: my_help.md
OSBS
Key osbs
Required No
This section represents object we use to hint OSBS builder with a configuration which needs to be tweaked for suc-cessful and reproducible builds.
It contains two main keys:
6.4. Descriptor documentation 91

CEKit, Release 3.7.0
• repository
• configuration
osbs:repository:
name: containers/redhat-openjdk-18branch: jb-openjdk-1.8-openshift-rhel-7
configuration:container:
compose:pulp_repos: true
OSBS extra directory
Key extra_dir
Required No
If a directory name specified by extra_dir key will be found next to the image descriptor, the contents of thisdirectory will be copied into the target directory and later to the dist-git directory.
Symbolic links are preserved (not followed).
Copying files is done before generation, which means that files from the extra directory can be overridden in thegeneration phase .
Note: If you do not specify this key in image descriptor, the default value of osbs_extra will be used.
osbs:extra_dir: custom-files
OSBS repository
Key repository
Required No
This key serves as a hint which DistGit repository and its branch we use to push generated sources into.
osbs:repository:
name: containers/redhat-openjdk-18branch: jb-openjdk-1.8-openshift-rhel-7
OSBS Koji target
Key koji_target
Required No
To execute a build in OSBS the Koji target parameter needs to be provided. By default it is constructed based on thebranch name (see above), like this:
92 Chapter 6. Documentation

CEKit, Release 3.7.0
In most cases this is what is expected, but sometimes you want to change this. An example of such situation is whenyou use a custom, private branch to execute a scratch build. Target can be overridden by specifying the koji_targetkey.
osbs:koji_target: rhaos-middleware-rhel-7-containers-candidate
OSBS configuration
Key configuration
Required No
This key is holding OSBS container.yaml file. See OSBS docs for more information about this file.
CEKit supports two ways of defining content of the container.yaml file:
1. It can be embedded in container key, or
2. It can be injected from a file specified in container_file key.
Selecting preferred way of defining this configuration is up to the user. Maintaining external file may be handy in casewhere it is shared across multiple images in the same repository.
Embedding In this case whole container.yaml file is embedded in an image descriptor under the containerkey.
# Embeddingosbs:
configuration:# Configuration is embedded directly in the container key belowcontainer:
compose:pulp_repos: true
Linking In this case container.yaml file is read from a file located next to the image descriptor using thecontainer_file key to point to the file.
osbs:configuration:
# Configuration is available in the container.yaml filecontainer_file: container.yaml
and container.yaml file content:
compose:pulp_repos: true
6.4.2 Module descriptor
Module descriptor contains all information CEKit needs to introduce a feature to an image. Modules are used aslibraries or shared building blocks across images.
It is very important to make a module self-contained which means that executing scripts defined in the module’sdefinition file should always end up in a state where you could define the module as being installed.
Modules can be stacked – some modules will be run before, some after your module. Please keep that in mind at thetime you are developing your module – you don’t know how and when it’ll be executed.
6.4. Descriptor documentation 93

CEKit, Release 3.7.0
Contents
• Module descriptor
– Name
– Execute
– Version
– Description
– From
– Environment variables
– Labels
– Artifacts
* Artifact features
* Common artifact keys
* Artifact types
· Plain artifacts
· URL artifacts
· Path artifacts
· Image source artifacts
– Packages
* Packages to install
* Package manager
* Package repositories
· Plain repository
· RPM repository
· URL repository
· Content sets
· Embedded content sets
· Linked content sets
– Ports
– Volumes
– Modules
* Module repositories
* Module installation
– Run
* Cmd
* Entrypoint
94 Chapter 6. Documentation

CEKit, Release 3.7.0
* User
* Working directory
– Help
Name
Key name
Required Yes
Module identifier used to refer to the module, for example in list of modules to install or in overrides.
Warning: Please note that this key has a different purpose than the name key in image descriptor. When definedin a module it defines the module name and does not override the image name.
name: "python_flask_module"
Execute
Key execute
Required No
Execute section defines what needs to be done to install this module in the image. Every execution listed in this sectionwill be run at image build time in the order as defined.
Note: When no user is defined, root user will be used to execute the script.
execute:# The install.sh file will be executed first as root user- script: install.sh# Then the redefine.sh file will be executed as jboss user- script: redefine.sh
user: jboss
Version
Key version
Required Yes
Version of the image.
version: "1.4"
Description
Key description
6.4. Descriptor documentation 95

CEKit, Release 3.7.0
Required No
Short summary of the image.
Value of the description key is added to the image as two labels:
1. description, and
2. summary.
Note: These labels are not added is these are already defined in the labels section.
description: "Red Hat JBoss Enterprise Application 7.0 - An application platform for→˓hosting your apps that provides an innovative modular, cloud-ready architecture,→˓powerful management and automation, and world class developer productivity."
From
Key from
Required Yes
Base image of your image.
from: "jboss-eap-7/eap70:1.2"
Environment variables
Key envs
Required No
Similar to labels – we can specify environment variables that should be present in the container after running theimage. We provide envs section for this.
Environment variables can be divided into two types:
1. Information environment variables
These are set and available in the image. This type of environment variables provide information to the imageconsumer. In most cases such environment variables should not be modified.
2. Configuration environment variables
This type of variables are used to define environment variables used to configure services inside running con-tainer.
These environment variables are not set during image build time but can be set at run time.
Every configuration enviromnent variable should provide an example usage (example) and short description(description).
Please note that you could have an environment variable with both: a value and example set. This suggest that thisenvironment variable could be redefined.
Note: Configuration environment variables (without value) are not generated to the build source. These can beused instead as a source for generating documentation.
96 Chapter 6. Documentation

CEKit, Release 3.7.0
envs:# Configuration env variables below# These will be added to container- name: "STI_BUILDER"
value: "jee"- name: "JBOSS_MODULES_SYSTEM_PKGS"
value: "org.jboss.logmanager,jdk.nashorn.api"
# Information env variables below# These will NOT be defined (there is no value)- name: "OPENSHIFT_KUBE_PING_NAMESPACE"
example: "myproject"description: "Clustering project namespace."
- name: "OPENSHIFT_KUBE_PING_LABELS"example: "application=eap-app"description: "Clustering labels selector."
Labels
Key labels
Required No
Note: Learn more about standard labels in container images.
Every image can include labels. CEKit makes it easy to do so with the labels section.
labels:- name: "io.k8s.description"
value: "Platform for building and running JavaEE applications on JBoss EAP 7.0"- name: "io.k8s.display-name"
value: "JBoss EAP 7.0"
Artifacts
It’s common for images to require external artifacts like jar files, installers, etc. In most cases you will want to addsome files into the image and use them during image build process.
Artifacts section is meant exactly for this. CEKit will try to automatically fetch any artifacts specified in this section.
If for some reason automatic fetching of artifacts is not an option for you, you should define artifacts as plain artifactsand use the cekit-cache command to add the artifact to local cache, making it available for the build processautomatically. See Artifact caching chapter.
Artifact features
Checksums Almost all artifacts will be checked for consistency by computing checksum of the fetched file andcomparing it with the desired value. Currently supported algorithms are: md5, sha1, sha256 and sha512.
You can define multiple checksums for a single artifact. All specified checksums will be validated.
If no algorithm is provided, artifacts will be fetched every time.
6.4. Descriptor documentation 97

CEKit, Release 3.7.0
This can be useful when building images with snapshot content. In this case you are not concerned about theconsistency but rather focusing on rapid development. We advice that you define checksum when your contentbecomes stable.
Caching All artifacts are automatically cached during an image build. To learn more about caching please take a lookat Artifact caching chapter.
Common artifact keys
name Used to define unique identifier of the artifact.
The name key is very important. It’s role is to provide a unique identifier for the artifact. If it’s not provided, itwill be computed from the resource definition, but we strongly suggest to provide the name keys always.
Value of this key does not need to be a filename, because it’s just an identifier used to refer the artifact. Usingmeaningful and unique identifiers is important in case when you want to use Overrides. It will make it mucheasier to refer the artifact and thus override it.
target The output name for fetched resources will match the target attribute. If it is not defined then base nameof the name attribute will be used. If it’s not provided either then base name of the path/URL will be used.
Below you can find a few examples.
artifacts:- name: jboss-eap-distributionpath: jboss-eap-6.4.0.ziptarget: jboss-eap.zip
Target file name: jboss-eap.zip.
artifacts:- name: jboss-eap-distributionpath: jboss-eap-6.4.0.zip
Target file name: jboss-eap-distribution.
artifacts:- path: jboss-eap-6.4.0.zip
Target file name: jboss-eap-6.4.0.zip.
dest The dest key defines the destination directory where the particular artifact will be placed within the containerimage. By default it is set to /tmp/artifacts/.
The dest key specifies the directory path, to control file name, use target key as explained above. In orderto get maximum control over the target artifact naming, you should use both dest and target together.
Examples:
artifacts:- name: jboss-eap-distribution
path: jboss-eap-6.4.0.ziptarget: jboss-eap.zip
Target file path is: /tmp/artifacts/jboss-eap.zip.
artifacts:- name: jboss-eap-distribution
(continues on next page)
98 Chapter 6. Documentation

CEKit, Release 3.7.0
(continued from previous page)
path: jboss-eap-6.4.0.ziptarget: jboss-eap.zipdest: /opt
Target file path is: /opt/jboss-eap.zip.
Note: The default temporary directory (/tmp/artifacts/) will be cleaned up automatically after the buildprocess is done meaning that artifacts are available only at the build time.
Artifacts using custom dest values are not affected.
description Describes the artifact. This is an optional key that can be used to add more information about theartifact.
Adding description to artifacts makes it much easier to understand what artifact it is just by looking at theimage/module descriptor.
artifacts:- path: jboss-eap-6.4.0.zip
md5: 9a5d37631919a111ddf42ceda1a9f0b5description: "Red Hat JBoss EAP 6.4.0 distribution available on Customer
→˓Portal: https://access.redhat.com/jbossnetwork/restricted/softwareDetail.html?→˓softwareId=37393&product=appplatform&version=6.4&downloadType=distributions"
If CEKit is not able to download an artifact and this artifact has a description defined – the build will failbut a message with the description will be printed together with information on where to place the manuallydownloaded artifact so that the build could be resumed.
Artifact types
CEKit supports following artifact types:
• Plain artifacts
• URL artifacts
• Path artifacts
• Image source artifacts
Plain artifacts
This is an abstract way of defining artifacts. The only required keys are name and the md5 checksum. This type ofartifacts is used to define artifacts that are not available publicly and instead provided by some (internal) systems.
Listing 26: Schema
{"map": {
"description": {"desc": "Description of the resource","type": "str"
},"dest": {
(continues on next page)
6.4. Descriptor documentation 99

CEKit, Release 3.7.0
(continued from previous page)
"default": "/tmp/artifacts/","desc": "Destination directory inside of the container","type": "str"
},"md5": {
"desc": "The md5 checksum of the resource","required": true,"type": "str"
},"name": {
"desc": "Key used to identify the resource","required": true,"type": "str"
},"sha1": {
"desc": "The sha1 checksum of the resource","type": "str"
},"sha256": {
"desc": "The sha256 checksum of the resource","type": "str"
},"sha512": {
"desc": "The sha512 checksum of the resource","type": "str"
},"target": {
"desc": "Target file name for the resource","type": "str"
}}
}
Listing 27: Examples
artifacts:- name: jolokia
md5: 75e5b5ba0b804cd9def9f20a70af649ftarget: jolokia.tar.gz
As you can see, the definition does not define from where the artifact should be fetched. This approach relies onArtifact caching to provide the artifact.
Note: See Red Hat environment for description how plain artifacts are used in the Red Hat environment.
URL artifacts
This is the simplest way of defining artifacts. You need to provide the url key which is the URL from where theartifact should be fetched from.
100 Chapter 6. Documentation

CEKit, Release 3.7.0
Listing 28: Schema
{"map": {
"description": {"desc": "Description of the resource","type": "str"
},"dest": {
"default": "/tmp/artifacts/","desc": "Destination directory inside of the container","type": "str"
},"md5": {
"desc": "The md5 checksum of the resource","type": "str"
},"name": {
"desc": "Key used to identify the resource","type": "str"
},"sha1": {
"desc": "The sha1 checksum of the resource","type": "str"
},"sha256": {
"desc": "The sha256 checksum of the resource","type": "str"
},"sha512": {
"desc": "The sha512 checksum of the resource","type": "str"
},"target": {
"desc": "Target file name for the resource","type": "str"
},"url": {
"desc": "URL where the resource can be found","required": true,"type": "str"
}}
}
Tip: You should always specify at least one checksum to make sure the downloaded artifact is correct.
Listing 29: Examples
artifacts:- name: "jolokia"
url: "https://github.com/rhuss/jolokia/releases/download/v1.3.6/jolokia-1.3.6-→˓bin.tar.gz"
# The md5 checksum of the artifactmd5: "75e5b5ba0b804cd9def9f20a70af649f"
(continues on next page)
6.4. Descriptor documentation 101

CEKit, Release 3.7.0
(continued from previous page)
- name: "jolokia"url: "https://github.com/rhuss/jolokia/releases/download/v1.3.6/jolokia-1.3.6-
→˓bin.tar.gz"# Free text description of the artifactdescription: "Library required to access server data via JMX"md5: "75e5b5ba0b804cd9def9f20a70af649f"# Final name of the downloaded artifacttarget: "jolokia.tar.gz"
Path artifacts
This way of defining artifacts is mostly used in development overrides and enables you to inject artifacts from a localfilesystem.
Listing 30: Schema
{"map": {
"description": {"desc": "Description of the resource","type": "str"
},"dest": {
"default": "/tmp/artifacts/","desc": "Destination directory inside of the container","type": "str"
},"md5": {
"desc": "The md5 checksum of the resource","type": "str"
},"name": {
"desc": "Key used to identify the resource","type": "str"
},"path": {
"desc": "Relative (suggested) or absolute path to the resource","required": true,"type": "str"
},"sha1": {
"desc": "The sha1 checksum of the resource","type": "str"
},"sha256": {
"desc": "The sha256 checksum of the resource","type": "str"
},"sha512": {
"desc": "The sha512 checksum of the resource","type": "str"
},"target": {
"desc": "Target file name for the resource",(continues on next page)
102 Chapter 6. Documentation

CEKit, Release 3.7.0
(continued from previous page)
"type": "str"}
}}
Tip: You should always specify at least one checksum to make sure the artifact is correct.
Listing 31: Examples
artifacts:- name: jolokia-1.3.6-bin.tar.gz
path: local-artifacts/jolokia-1.3.6-bin.tar.gzmd5: 75e5b5ba0b804cd9def9f20a70af649f
Note: If you are using relative path to define an artifact, path is considered relative to an image descriptor whichintroduced that artifact.
Example If an artifact is defined inside /foo/bar/image.yaml with a path: baz/1.zip the artifact will beresolved as /foo/bar/baz/1.zip
Image source artifacts
Image source artifacts are used in multi-stage builds. With image source artifacts you can define files built in previousstages of the multi-stage builds.
Listing 32: Schema
{"map": {
"description": {"desc": "Description of the resource","type": "str"
},"dest": {
"default": "/tmp/artifacts/","desc": "Destination directory inside of the container","type": "str"
},"image": {
"desc": "Name of the image which holds the resource","required": true,"type": "str"
},"name": {
"desc": "Key used to identify the resource","type": "str"
},"path": {
"desc": "Path in the image under which the resource can be found","required": true,"type": "str"
(continues on next page)
6.4. Descriptor documentation 103

CEKit, Release 3.7.0
(continued from previous page)
},"target": {
"desc": "Target file name for the resource","type": "str"
}}
}
Note: Please note that image source artifacts do not allow for defining checksums due to the nature of this type ofartifact.
Listing 33: Examples
artifacts:- name: application
# Name of the image (stage) from where we will fetch the artifactimage: builder# Path to the artifact within the imagepath: /path/to/application/inside/the/builder/image.jar
Packages
Key packages
Required No
To install additional packages you can use the packages section where you specify package names and repositoriesto be used, as well as the package manager that is used to manage packages in this image.
Listing 34: Example package section for RPM-based distro
packages:repositories:
- name: extrasid: rhel7-extras-rpm
manager: dnfinstall:
- mongodb24-mongo-java-driver- postgresql-jdbc- mysql-connector-java- maven- hostname
104 Chapter 6. Documentation

CEKit, Release 3.7.0
Listing 35: Example package section for Alpine Linux
packages:manager: apkinstall:
- python3
Packages to install
Key install
Required No
Packages listed in the install section are marked to be installed in the container image.
packages:install:
- mongodb24-mongo-java-driver- postgresql-jdbc
Package manager
Key manager
Required No
It is possible to define package manager used in the image used to install packages as part of the build process.
Currently available options are yum, dnf, microdnf and apk.
Note: If you do not specify this key the default value is yum. If your image requires different package manager youneed to specify it.
The default yum value will work fine on Fedora and RHEL images because OS maintains a symlink to the properpackage manager.
packages:manager: dnfinstall:
- git
Package repositories
Key repositories
Required No
Warning: Some package repositories are supported only on specific distributions and package manager combi-nations. Please refer to documentation below!
6.4. Descriptor documentation 105

CEKit, Release 3.7.0
CEKit uses all repositories configured inside the image. You can also specify additional repositories using repositoriessubsection. CEKit currently supports following ways of defining additional repositories:
• Plain repository
• RPM repository
• URL repository
• Content sets
Tip: See repository guidelines guide to learn about best practices for repository definitions.
packages:repositories:
- name: sclrpm: centos-release-scl
- name: extrasid: rhel7-extras-rpmdescription: "Repository containing extras RHEL7 extras packages"
Plain repository
Note: Available only on RPM-based distributions.
With this approach you specify repository id and CEKit will not perform any action and expect the repository def-inition exists inside the image. This is useful as a hint which repository must be present for particular image to bebuildable. The definition can be overridden by your preferred way of injecting repositories inside the image.
packages:repositories:
- name: extrasid: rhel7-extras-rpmdescription: "Repository containing extras RHEL7 extras packages"
RPM repository
Note: Available only on RPM-based distributions.
This ways is using repository configuration files and related keys packaged as an RPM.
Example: To enable CentOS SCL inside the image you should define repository in a following way:
packages:repositories:
- name: sclrpm: centos-release-scl
Tip: The rpm key can also specify a URL to a RPM file:
106 Chapter 6. Documentation

CEKit, Release 3.7.0
packages:repositories:
- name: epelrpm: https://dl.fedoraproject.org/pub/epel/epel-release-latest-7.noarch.rpm
URL repository
Note: Available only on RPM-based distributions.
This approach enables you to download a yum repository file and corresponding GPG key. To do it, define repositoriessection in a way of:
packages:repositories:
- name: foourl:repository: https://web.example/foo.repo
Content sets
Note: Available only on RPM-based distributions.
Content sets are tightly integrated to OSBS style of defining repositories in content_sets.yml file. If this kindof repository is present in the image descriptor it overrides all other repositories types. For local Docker based buildthese repositories are ignored similarly to Plain repository types and we expect repository definitions to be availableinside image. See upstream docs for more details about content sets.
Note: Behavior of Content sets repositories is changed when running in Red Hat Environment.
There are two possibilities how to define Content sets type of repository:
Embedded content sets
In this approach content sets are embedded inside image descriptor under the content_sets key.
packages:content_sets:
x86_64:- server-rpms- server-extras-rpms
Linked content sets
In this approach Contet sets file is linked from a separate yaml file next to image descriptor viacontent_sets_file key.
6.4. Descriptor documentation 107
CEKit, Release 3.7.0
Image descriptor:
packages:content_sets_file: content_sets.yml
content_sets.yml located next to image descriptor:
x86_64:- server-rpms- server-extras-rpms
Ports
Key ports
Required No
This section is used to mark which ports should be exposed in the container. If we want to highlight a port used in thecontainer, but not necessary expose it – we should set the expose flag to false (true by default).
You can provide additional documentation as to the usage of the port with the keys protocol, to specify which IPprotocol is used over the port number (e.g TCP, UDP. . . ) and service to describe what network service is runningon top of the port (e.g. “http”, “https”). You can provide a human-readable long form description of the port with thedescription key.
ports:- value: 8443
service: https- value: 8778
expose: falseprotocol: tcpdescription: internal port for communication.
Volumes
Key volumes
Required No
In case you want to define volumes for your image, just use the volumes section!
volumes:- name: "volume.eap"
path: "/opt/eap/standalone"
Note: The name key is optional. If not specified the value of path key will be used.
Modules
Key modules
Required No
The modules section is responsible for defining module repositories and providing the list of modules to be installedin order.
108 Chapter 6. Documentation

CEKit, Release 3.7.0
modules:repositories:
# Add local modules located next to the image descriptor# These modules are specific to the image we build and are not meant# to be shared- path: modules
# Add a shared module repository located on GitHub. This repository# can contain several modules.- git:
url: https://github.com/cekit/example-common-module.gitref: master
# Install selected modules (in order)install:
- name: jdk8- name: user- name: tomcat
Module repositories
Key repositories
Required No
Module repositories specify location of modules that are to be incorporated into the image. These repositories may begit repositories or directories on the local file system (path). CEKit will scan the repositories for module.xmlfiles, which are used to encapsulate image details that may be incorporated into multiple images.
modules:repositories:
# Modules pulled from Java image project on GitHub- git:
url: https://github.com/jboss-container-images/redhat-openjdk-18-openshift-→˓image
ref: 1.0
# Modules pulled locally from "custom-modules" directory, collocated with image→˓descriptor
- path: custom-modules
Module installation
Key install
Required No
The install section is used to define what modules should be installed in the image in what order. Name used tospecify the module is the name field from the module descriptor.
modules:install:
- name: xpaas.java- name: xpaas.amq.install
You can even request specific module version via version key as follows:
6.4. Descriptor documentation 109

CEKit, Release 3.7.0
modules:install:
- name: xpaas.javaversion: 1.2-dev
- name: xpaas.amq.install
Run
Key run
Required No
The run section encapsulates instructions related to launching main process in the container including: cmd,entrypoint, user and workdir. All subsections are described later in this paragraph.
Below you can find full example that uses every possible option.
run:cmd:
- "argument1"- "argument2"
entrypoint:- "/opt/eap/bin/wrapper.sh"
user: "alice"workdir: "/home/jboss"
Cmd
Key cmd
Required No
Command that should be executed by the container at run time.
run:cmd:
- "some cmd"- "argument"
Entrypoint
Key entrypoint
Required No
Entrypoint that should be executed by the container at run time.
run:entrypoint:
- "/opt/eap/bin/wrapper.sh"
110 Chapter 6. Documentation

CEKit, Release 3.7.0
User
Key user
Required No
Specifies the user (can be username or uid) that should be used to launch the main process.
run:user: "alice"
Working directory
Key workdir
Required No
Sets the current working directory of the entrypoint process in the container.
run:workdir: "/home/jboss"
Help
Key help
Required No
At image build-time CEKit can generate a documentation page about the image. This file is a human-readable conver-sion of the resulting image descriptor. That is, a descriptor with all overrides and modules combined together, whichwas used to build the image.
If an image help page is requested to be added to the image (by setting the add key), a help.md is generated andadded to the root of the image.
By default image help pages are not generated.
The default help template is supplied within CEKit. You can override it for every image via image definition. Theoptional help sub-section can define defines a single key template, which can be used to define a filename to usefor generating image documentation at build time.
The template is interpreted by the Jinja2 template engine. For a concrete example, see the default help.jinja suppliedin the CEKit source code.
help:add: truetemplate: my_help.md
6.4.3 Overrides descriptor
Overrides descriptors are used to modify on the fly image descriptors.
Contents
6.4. Descriptor documentation 111

CEKit, Release 3.7.0
• Overrides descriptor
– Name
– Version
– Description
– From
– Environment variables
– Labels
– Artifacts
* Artifact features
* Common artifact keys
* Artifact types
· Plain artifacts
· URL artifacts
· Path artifacts
· Image source artifacts
– Packages
* Packages to install
* Package manager
* Package repositories
· Plain repository
· RPM repository
· URL repository
· Content sets
· Embedded content sets
· Linked content sets
– Ports
– Volumes
– Modules
* Module repositories
* Module installation
– Run
* Cmd
* Entrypoint
* User
* Working directory
112 Chapter 6. Documentation

CEKit, Release 3.7.0
– Help
– OSBS
* OSBS extra directory
* OSBS repository
* OSBS Koji target
* OSBS configuration
Name
Key name
Required Yes
Image name without the registry part.
Example
name: "jboss-eap-7/eap70-openshift"
Version
Key version
Required Yes
Version of the image.
version: "1.4"
Description
Key description
Required No
Short summary of the image.
Value of the description key is added to the image as two labels:
1. description, and
2. summary.
Note: These labels are not added is these are already defined in the labels section.
description: "Red Hat JBoss Enterprise Application 7.0 - An application platform for→˓hosting your apps that provides an innovative modular, cloud-ready architecture,→˓powerful management and automation, and world class developer productivity."
6.4. Descriptor documentation 113

CEKit, Release 3.7.0
From
Key from
Required Yes
Base image of your image.
from: "jboss-eap-7/eap70:1.2"
Environment variables
Key envs
Required No
Similar to labels – we can specify environment variables that should be present in the container after running theimage. We provide envs section for this.
Environment variables can be divided into two types:
1. Information environment variables
These are set and available in the image. This type of environment variables provide information to the imageconsumer. In most cases such environment variables should not be modified.
2. Configuration environment variables
This type of variables are used to define environment variables used to configure services inside running con-tainer.
These environment variables are not set during image build time but can be set at run time.
Every configuration enviromnent variable should provide an example usage (example) and short description(description).
Please note that you could have an environment variable with both: a value and example set. This suggest that thisenvironment variable could be redefined.
Note: Configuration environment variables (without value) are not generated to the build source. These can beused instead as a source for generating documentation.
envs:# Configuration env variables below# These will be added to container- name: "STI_BUILDER"
value: "jee"- name: "JBOSS_MODULES_SYSTEM_PKGS"
value: "org.jboss.logmanager,jdk.nashorn.api"
# Information env variables below# These will NOT be defined (there is no value)- name: "OPENSHIFT_KUBE_PING_NAMESPACE"
example: "myproject"description: "Clustering project namespace."
- name: "OPENSHIFT_KUBE_PING_LABELS"example: "application=eap-app"description: "Clustering labels selector."
114 Chapter 6. Documentation

CEKit, Release 3.7.0
Labels
Key labels
Required No
Note: Learn more about standard labels in container images.
Every image can include labels. CEKit makes it easy to do so with the labels section.
labels:- name: "io.k8s.description"
value: "Platform for building and running JavaEE applications on JBoss EAP 7.0"- name: "io.k8s.display-name"
value: "JBoss EAP 7.0"
Artifacts
It’s common for images to require external artifacts like jar files, installers, etc. In most cases you will want to addsome files into the image and use them during image build process.
Artifacts section is meant exactly for this. CEKit will try to automatically fetch any artifacts specified in this section.
If for some reason automatic fetching of artifacts is not an option for you, you should define artifacts as plain artifactsand use the cekit-cache command to add the artifact to local cache, making it available for the build processautomatically. See Artifact caching chapter.
Artifact features
Checksums Almost all artifacts will be checked for consistency by computing checksum of the fetched file andcomparing it with the desired value. Currently supported algorithms are: md5, sha1, sha256 and sha512.
You can define multiple checksums for a single artifact. All specified checksums will be validated.
If no algorithm is provided, artifacts will be fetched every time.
This can be useful when building images with snapshot content. In this case you are not concerned about theconsistency but rather focusing on rapid development. We advice that you define checksum when your contentbecomes stable.
Caching All artifacts are automatically cached during an image build. To learn more about caching please take a lookat Artifact caching chapter.
Common artifact keys
name Used to define unique identifier of the artifact.
The name key is very important. It’s role is to provide a unique identifier for the artifact. If it’s not provided, itwill be computed from the resource definition, but we strongly suggest to provide the name keys always.
Value of this key does not need to be a filename, because it’s just an identifier used to refer the artifact. Usingmeaningful and unique identifiers is important in case when you want to use Overrides. It will make it mucheasier to refer the artifact and thus override it.
6.4. Descriptor documentation 115

CEKit, Release 3.7.0
target The output name for fetched resources will match the target attribute. If it is not defined then base nameof the name attribute will be used. If it’s not provided either then base name of the path/URL will be used.
Below you can find a few examples.
artifacts:- name: jboss-eap-distributionpath: jboss-eap-6.4.0.ziptarget: jboss-eap.zip
Target file name: jboss-eap.zip.
artifacts:- name: jboss-eap-distributionpath: jboss-eap-6.4.0.zip
Target file name: jboss-eap-distribution.
artifacts:- path: jboss-eap-6.4.0.zip
Target file name: jboss-eap-6.4.0.zip.
dest The dest key defines the destination directory where the particular artifact will be placed within the containerimage. By default it is set to /tmp/artifacts/.
The dest key specifies the directory path, to control file name, use target key as explained above. In orderto get maximum control over the target artifact naming, you should use both dest and target together.
Examples:
artifacts:- name: jboss-eap-distribution
path: jboss-eap-6.4.0.ziptarget: jboss-eap.zip
Target file path is: /tmp/artifacts/jboss-eap.zip.
artifacts:- name: jboss-eap-distribution
path: jboss-eap-6.4.0.ziptarget: jboss-eap.zipdest: /opt
Target file path is: /opt/jboss-eap.zip.
Note: The default temporary directory (/tmp/artifacts/) will be cleaned up automatically after the buildprocess is done meaning that artifacts are available only at the build time.
Artifacts using custom dest values are not affected.
description Describes the artifact. This is an optional key that can be used to add more information about theartifact.
Adding description to artifacts makes it much easier to understand what artifact it is just by looking at theimage/module descriptor.
116 Chapter 6. Documentation

CEKit, Release 3.7.0
artifacts:- path: jboss-eap-6.4.0.zip
md5: 9a5d37631919a111ddf42ceda1a9f0b5description: "Red Hat JBoss EAP 6.4.0 distribution available on Customer
→˓Portal: https://access.redhat.com/jbossnetwork/restricted/softwareDetail.html?→˓softwareId=37393&product=appplatform&version=6.4&downloadType=distributions"
If CEKit is not able to download an artifact and this artifact has a description defined – the build will failbut a message with the description will be printed together with information on where to place the manuallydownloaded artifact so that the build could be resumed.
Artifact types
CEKit supports following artifact types:
• Plain artifacts
• URL artifacts
• Path artifacts
• Image source artifacts
Plain artifacts
This is an abstract way of defining artifacts. The only required keys are name and the md5 checksum. This type ofartifacts is used to define artifacts that are not available publicly and instead provided by some (internal) systems.
Listing 36: Schema
{"map": {
"description": {"desc": "Description of the resource","type": "str"
},"dest": {
"default": "/tmp/artifacts/","desc": "Destination directory inside of the container","type": "str"
},"md5": {
"desc": "The md5 checksum of the resource","required": true,"type": "str"
},"name": {
"desc": "Key used to identify the resource","required": true,"type": "str"
},"sha1": {
"desc": "The sha1 checksum of the resource","type": "str"
},"sha256": {
(continues on next page)
6.4. Descriptor documentation 117
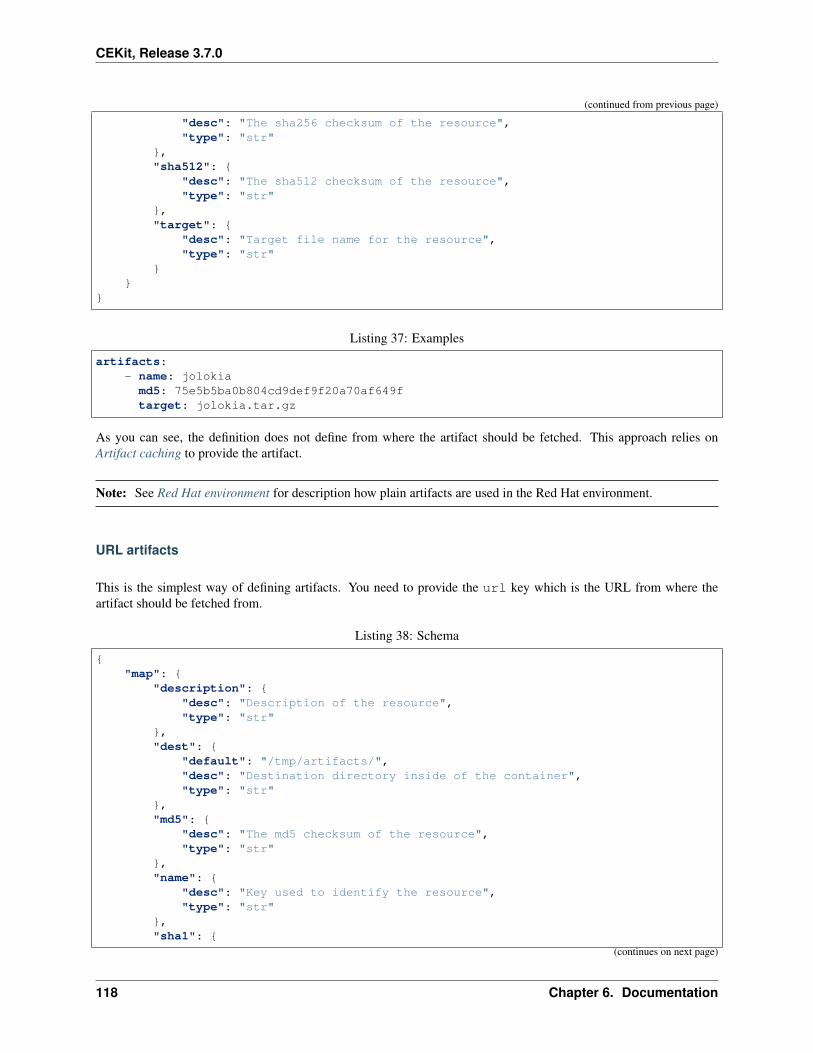
CEKit, Release 3.7.0
(continued from previous page)
"desc": "The sha256 checksum of the resource","type": "str"
},"sha512": {
"desc": "The sha512 checksum of the resource","type": "str"
},"target": {
"desc": "Target file name for the resource","type": "str"
}}
}
Listing 37: Examples
artifacts:- name: jolokia
md5: 75e5b5ba0b804cd9def9f20a70af649ftarget: jolokia.tar.gz
As you can see, the definition does not define from where the artifact should be fetched. This approach relies onArtifact caching to provide the artifact.
Note: See Red Hat environment for description how plain artifacts are used in the Red Hat environment.
URL artifacts
This is the simplest way of defining artifacts. You need to provide the url key which is the URL from where theartifact should be fetched from.
Listing 38: Schema
{"map": {
"description": {"desc": "Description of the resource","type": "str"
},"dest": {
"default": "/tmp/artifacts/","desc": "Destination directory inside of the container","type": "str"
},"md5": {
"desc": "The md5 checksum of the resource","type": "str"
},"name": {
"desc": "Key used to identify the resource","type": "str"
},"sha1": {
(continues on next page)
118 Chapter 6. Documentation

CEKit, Release 3.7.0
(continued from previous page)
"desc": "The sha1 checksum of the resource","type": "str"
},"sha256": {
"desc": "The sha256 checksum of the resource","type": "str"
},"sha512": {
"desc": "The sha512 checksum of the resource","type": "str"
},"target": {
"desc": "Target file name for the resource","type": "str"
},"url": {
"desc": "URL where the resource can be found","required": true,"type": "str"
}}
}
Tip: You should always specify at least one checksum to make sure the downloaded artifact is correct.
Listing 39: Examples
artifacts:- name: "jolokia"
url: "https://github.com/rhuss/jolokia/releases/download/v1.3.6/jolokia-1.3.6-→˓bin.tar.gz"
# The md5 checksum of the artifactmd5: "75e5b5ba0b804cd9def9f20a70af649f"
- name: "jolokia"url: "https://github.com/rhuss/jolokia/releases/download/v1.3.6/jolokia-1.3.6-
→˓bin.tar.gz"# Free text description of the artifactdescription: "Library required to access server data via JMX"md5: "75e5b5ba0b804cd9def9f20a70af649f"# Final name of the downloaded artifacttarget: "jolokia.tar.gz"
Path artifacts
This way of defining artifacts is mostly used in development overrides and enables you to inject artifacts from a localfilesystem.
Listing 40: Schema
{"map": {
(continues on next page)
6.4. Descriptor documentation 119

CEKit, Release 3.7.0
(continued from previous page)
"description": {"desc": "Description of the resource","type": "str"
},"dest": {
"default": "/tmp/artifacts/","desc": "Destination directory inside of the container","type": "str"
},"md5": {
"desc": "The md5 checksum of the resource","type": "str"
},"name": {
"desc": "Key used to identify the resource","type": "str"
},"path": {
"desc": "Relative (suggested) or absolute path to the resource","required": true,"type": "str"
},"sha1": {
"desc": "The sha1 checksum of the resource","type": "str"
},"sha256": {
"desc": "The sha256 checksum of the resource","type": "str"
},"sha512": {
"desc": "The sha512 checksum of the resource","type": "str"
},"target": {
"desc": "Target file name for the resource","type": "str"
}}
}
Tip: You should always specify at least one checksum to make sure the artifact is correct.
Listing 41: Examples
artifacts:- name: jolokia-1.3.6-bin.tar.gz
path: local-artifacts/jolokia-1.3.6-bin.tar.gzmd5: 75e5b5ba0b804cd9def9f20a70af649f
Note: If you are using relative path to define an artifact, path is considered relative to an image descriptor whichintroduced that artifact.
Example If an artifact is defined inside /foo/bar/image.yaml with a path: baz/1.zip the artifact will be
120 Chapter 6. Documentation

CEKit, Release 3.7.0
resolved as /foo/bar/baz/1.zip
Image source artifacts
Image source artifacts are used in multi-stage builds. With image source artifacts you can define files built in previousstages of the multi-stage builds.
Listing 42: Schema
{"map": {
"description": {"desc": "Description of the resource","type": "str"
},"dest": {
"default": "/tmp/artifacts/","desc": "Destination directory inside of the container","type": "str"
},"image": {
"desc": "Name of the image which holds the resource","required": true,"type": "str"
},"name": {
"desc": "Key used to identify the resource","type": "str"
},"path": {
"desc": "Path in the image under which the resource can be found","required": true,"type": "str"
},"target": {
"desc": "Target file name for the resource","type": "str"
}}
}
Note: Please note that image source artifacts do not allow for defining checksums due to the nature of this type ofartifact.
Listing 43: Examples
artifacts:- name: application
# Name of the image (stage) from where we will fetch the artifactimage: builder# Path to the artifact within the imagepath: /path/to/application/inside/the/builder/image.jar
6.4. Descriptor documentation 121

CEKit, Release 3.7.0
Packages
Key packages
Required No
To install additional packages you can use the packages section where you specify package names and repositoriesto be used, as well as the package manager that is used to manage packages in this image.
Listing 44: Example package section for RPM-based distro
packages:repositories:
- name: extrasid: rhel7-extras-rpm
manager: dnfinstall:
- mongodb24-mongo-java-driver- postgresql-jdbc- mysql-connector-java- maven- hostname
Listing 45: Example package section for Alpine Linux
packages:manager: apkinstall:
- python3
Packages to install
Key install
Required No
Packages listed in the install section are marked to be installed in the container image.
packages:install:
- mongodb24-mongo-java-driver- postgresql-jdbc
Package manager
Key manager
Required No
It is possible to define package manager used in the image used to install packages as part of the build process.
Currently available options are yum, dnf, microdnf and apk.
Note: If you do not specify this key the default value is yum. If your image requires different package manager youneed to specify it.
122 Chapter 6. Documentation

CEKit, Release 3.7.0
The default yum value will work fine on Fedora and RHEL images because OS maintains a symlink to the properpackage manager.
packages:manager: dnfinstall:
- git
Package repositories
Key repositories
Required No
Warning: Some package repositories are supported only on specific distributions and package manager combi-nations. Please refer to documentation below!
CEKit uses all repositories configured inside the image. You can also specify additional repositories using repositoriessubsection. CEKit currently supports following ways of defining additional repositories:
• Plain repository
• RPM repository
• URL repository
• Content sets
Tip: See repository guidelines guide to learn about best practices for repository definitions.
packages:repositories:
- name: sclrpm: centos-release-scl
- name: extrasid: rhel7-extras-rpmdescription: "Repository containing extras RHEL7 extras packages"
Plain repository
Note: Available only on RPM-based distributions.
With this approach you specify repository id and CEKit will not perform any action and expect the repository def-inition exists inside the image. This is useful as a hint which repository must be present for particular image to bebuildable. The definition can be overridden by your preferred way of injecting repositories inside the image.
packages:repositories:
- name: extras
(continues on next page)
6.4. Descriptor documentation 123

CEKit, Release 3.7.0
(continued from previous page)
id: rhel7-extras-rpmdescription: "Repository containing extras RHEL7 extras packages"
RPM repository
Note: Available only on RPM-based distributions.
This ways is using repository configuration files and related keys packaged as an RPM.
Example: To enable CentOS SCL inside the image you should define repository in a following way:
packages:repositories:
- name: sclrpm: centos-release-scl
Tip: The rpm key can also specify a URL to a RPM file:
packages:repositories:
- name: epelrpm: https://dl.fedoraproject.org/pub/epel/epel-release-latest-7.noarch.rpm
URL repository
Note: Available only on RPM-based distributions.
This approach enables you to download a yum repository file and corresponding GPG key. To do it, define repositoriessection in a way of:
packages:repositories:
- name: foourl:repository: https://web.example/foo.repo
Content sets
Note: Available only on RPM-based distributions.
Content sets are tightly integrated to OSBS style of defining repositories in content_sets.yml file. If this kindof repository is present in the image descriptor it overrides all other repositories types. For local Docker based buildthese repositories are ignored similarly to Plain repository types and we expect repository definitions to be availableinside image. See upstream docs for more details about content sets.
124 Chapter 6. Documentation

CEKit, Release 3.7.0
Note: Behavior of Content sets repositories is changed when running in Red Hat Environment.
There are two possibilities how to define Content sets type of repository:
Embedded content sets
In this approach content sets are embedded inside image descriptor under the content_sets key.
packages:content_sets:
x86_64:- server-rpms- server-extras-rpms
Linked content sets
In this approach Contet sets file is linked from a separate yaml file next to image descriptor viacontent_sets_file key.
Image descriptor:
packages:content_sets_file: content_sets.yml
content_sets.yml located next to image descriptor:
x86_64:- server-rpms- server-extras-rpms
Ports
Key ports
Required No
This section is used to mark which ports should be exposed in the container. If we want to highlight a port used in thecontainer, but not necessary expose it – we should set the expose flag to false (true by default).
You can provide additional documentation as to the usage of the port with the keys protocol, to specify which IPprotocol is used over the port number (e.g TCP, UDP. . . ) and service to describe what network service is runningon top of the port (e.g. “http”, “https”). You can provide a human-readable long form description of the port with thedescription key.
ports:- value: 8443
service: https- value: 8778
expose: falseprotocol: tcpdescription: internal port for communication.
6.4. Descriptor documentation 125

CEKit, Release 3.7.0
Volumes
Key volumes
Required No
In case you want to define volumes for your image, just use the volumes section!
volumes:- name: "volume.eap"
path: "/opt/eap/standalone"
Note: The name key is optional. If not specified the value of path key will be used.
Modules
Key modules
Required No
The modules section is responsible for defining module repositories and providing the list of modules to be installedin order.
modules:repositories:
# Add local modules located next to the image descriptor# These modules are specific to the image we build and are not meant# to be shared- path: modules
# Add a shared module repository located on GitHub. This repository# can contain several modules.- git:
url: https://github.com/cekit/example-common-module.gitref: master
# Install selected modules (in order)install:
- name: jdk8- name: user- name: tomcat
Module repositories
Key repositories
Required No
Module repositories specify location of modules that are to be incorporated into the image. These repositories may begit repositories or directories on the local file system (path). CEKit will scan the repositories for module.xmlfiles, which are used to encapsulate image details that may be incorporated into multiple images.
modules:repositories:
(continues on next page)
126 Chapter 6. Documentation

CEKit, Release 3.7.0
(continued from previous page)
# Modules pulled from Java image project on GitHub- git:
url: https://github.com/jboss-container-images/redhat-openjdk-18-openshift-→˓image
ref: 1.0
# Modules pulled locally from "custom-modules" directory, collocated with image→˓descriptor
- path: custom-modules
Module installation
Key install
Required No
The install section is used to define what modules should be installed in the image in what order. Name used tospecify the module is the name field from the module descriptor.
modules:install:
- name: xpaas.java- name: xpaas.amq.install
You can even request specific module version via version key as follows:
modules:install:
- name: xpaas.javaversion: 1.2-dev
- name: xpaas.amq.install
Run
Key run
Required No
The run section encapsulates instructions related to launching main process in the container including: cmd,entrypoint, user and workdir. All subsections are described later in this paragraph.
Below you can find full example that uses every possible option.
run:cmd:
- "argument1"- "argument2"
entrypoint:- "/opt/eap/bin/wrapper.sh"
user: "alice"workdir: "/home/jboss"
6.4. Descriptor documentation 127

CEKit, Release 3.7.0
Cmd
Key cmd
Required No
Command that should be executed by the container at run time.
run:cmd:
- "some cmd"- "argument"
Entrypoint
Key entrypoint
Required No
Entrypoint that should be executed by the container at run time.
run:entrypoint:
- "/opt/eap/bin/wrapper.sh"
User
Key user
Required No
Specifies the user (can be username or uid) that should be used to launch the main process.
run:user: "alice"
Working directory
Key workdir
Required No
Sets the current working directory of the entrypoint process in the container.
run:workdir: "/home/jboss"
Help
Key help
Required No
128 Chapter 6. Documentation

CEKit, Release 3.7.0
At image build-time CEKit can generate a documentation page about the image. This file is a human-readable conver-sion of the resulting image descriptor. That is, a descriptor with all overrides and modules combined together, whichwas used to build the image.
If an image help page is requested to be added to the image (by setting the add key), a help.md is generated andadded to the root of the image.
By default image help pages are not generated.
The default help template is supplied within CEKit. You can override it for every image via image definition. Theoptional help sub-section can define defines a single key template, which can be used to define a filename to usefor generating image documentation at build time.
The template is interpreted by the Jinja2 template engine. For a concrete example, see the default help.jinja suppliedin the CEKit source code.
help:add: truetemplate: my_help.md
OSBS
Key osbs
Required No
This section represents object we use to hint OSBS builder with a configuration which needs to be tweaked for suc-cessful and reproducible builds.
It contains two main keys:
• repository
• configuration
osbs:repository:
name: containers/redhat-openjdk-18branch: jb-openjdk-1.8-openshift-rhel-7
configuration:container:
compose:pulp_repos: true
OSBS extra directory
Key extra_dir
Required No
If a directory name specified by extra_dir key will be found next to the image descriptor, the contents of thisdirectory will be copied into the target directory and later to the dist-git directory.
Symbolic links are preserved (not followed).
Copying files is done before generation, which means that files from the extra directory can be overridden in thegeneration phase .
6.4. Descriptor documentation 129

CEKit, Release 3.7.0
Note: If you do not specify this key in image descriptor, the default value of osbs_extra will be used.
osbs:extra_dir: custom-files
OSBS repository
Key repository
Required No
This key serves as a hint which DistGit repository and its branch we use to push generated sources into.
osbs:repository:
name: containers/redhat-openjdk-18branch: jb-openjdk-1.8-openshift-rhel-7
OSBS Koji target
Key koji_target
Required No
To execute a build in OSBS the Koji target parameter needs to be provided. By default it is constructed based on thebranch name (see above), like this:
In most cases this is what is expected, but sometimes you want to change this. An example of such situation is whenyou use a custom, private branch to execute a scratch build. Target can be overridden by specifying the koji_targetkey.
osbs:koji_target: rhaos-middleware-rhel-7-containers-candidate
OSBS configuration
Key configuration
Required No
This key is holding OSBS container.yaml file. See OSBS docs for more information about this file.
CEKit supports two ways of defining content of the container.yaml file:
1. It can be embedded in container key, or
2. It can be injected from a file specified in container_file key.
Selecting preferred way of defining this configuration is up to the user. Maintaining external file may be handy in casewhere it is shared across multiple images in the same repository.
Embedding In this case whole container.yaml file is embedded in an image descriptor under the containerkey.
130 Chapter 6. Documentation

CEKit, Release 3.7.0
# Embeddingosbs:
configuration:# Configuration is embedded directly in the container key belowcontainer:
compose:pulp_repos: true
Linking In this case container.yaml file is read from a file located next to the image descriptor using thecontainer_file key to point to the file.
osbs:configuration:
# Configuration is available in the container.yaml filecontainer_file: container.yaml
and container.yaml file content:
compose:pulp_repos: true
6.5 Contribution guide
We’re excited to see your contributions!
We welcome any kind of contributions to the project; documentation, code or simply issue reports. Everythingmatters!
This guide will help you understand basics of how we work on CEKit which will help you create high quality contri-butions.
Thank you for being part of the project!
6.5.1 Submitting issues
Our main issue tracker can be found here: https://github.com/cekit/cekit/issues. This is the best place to report anyissues with CEKit. Usually we divide tickets into two categories:
1. Bug reports
2. Enhancements
To make it much easier for you to submit a ticket we created templates for you: https://github.com/cekit/cekit/issues/new/choose. Of course if you have non-standard request, feel free to open a regular issue here: https://github.com/cekit/cekit/issues/new.
Note: We strongly suggest using our templates, because it tries to formalize a bit the reporting process which helpsus review new tickets.
Labels
We use labels to categorize issues.
6.5. Contribution guide 131

CEKit, Release 3.7.0
Each ticket has assigned three label categories:
• type/
• priority/
• complexity/
There can be other labels assigned of course too!
Labels are set by the template or by CEKit team members. Initial labels (after a ticket is created) are assigned aftertriage which is done ad-hoc by CEKit team members.
Milestones
We use milestones to group images that should go to a particular release. Assigning a milestone to a ticket does notmean that it will be fixed in that particular milestone. This is mostly a hint for developer (and the reported) what is theproposed milestone.
Tickets can be moved to different milestones at any time.
Boards
To have a better overview on the release we use boards (aka GitHub projects). Some of them are long-living, but someof them are targeting specific milestone. Usually we use Kanban-style boards.
6.5.2 Setting up environment
We strongly advise to use Virtualenv to develop CEKit. Please consult your package manager for the correct packagename. Currently within Fedora 29 all the required packages are available as RPMs. A sample set of Ansible scriptsthat provide all pre-requistites for development are available here.
• If you are running inside the Red Hat infrastructure then rhpkg must be installed as well.
To create custom Python virtual environment please run following commands on your system:
# Prepare virtual environmentvirtualenv ~/cekitsource ~/cekit/bin/activate
# Install as development versionpip install -e <cekit directory>
# Now you are able to run CEKitcekit --help
It is possible to ask virtualenv to inherit pre-installed system packages thereby reducing the virtualenv to a deltabetween what is installed and what is required. This is achived by using the flag --system-site-packages (Seehere for further information).
Note: Every time you want to use CEKit you must activate CEKit Python virtual environment by executing source~/cekit/bin/activate
For those using ZSH a useful addition is Zsh-Autoswitch-VirtualEnv the use of which avoids the labour of manuallycreating the virtualenv and activating it each time ; simply run mkvenv --system-site-packages initiallyand then it is handled automatically then on.
132 Chapter 6. Documentation

CEKit, Release 3.7.0
6.5.3 Code style
In case you contribute code, we generally ask for following the code style we are using already. This is a generalPython style, with 4 spaces as the delimiter, nothing groundbreaking here :)
Formatting
For code formatting we use Flake8. You can find a .flake8 configuration file in the root directory.
Linting
Additionally we check for code errors with Pylint. We provide a .pylintrc file in the root directory which definesdifferences from the default Pylint configuration. Your IDE may help with linting your code too!
Logging
Python supports a number of different logging patterns - for more information see Pyformat and Formatting pythonlog messages. We request that the new format style is followed e.g.
logger.info("Fetching common steps from '{}'.".format(url))
6.5.4 Submitting changes
First of all; thank you for taking the effort to modify the code yourself and submitting your work so others can benefitfrom it!
Target branch
All development is done in the develop branch. This branch is what will the next major or minor CEKit release looklike and this is the place you should submit your changes.
Note: Submitting a pull request against the master branch may result in a request to rebase it against develop.
In case a fix needs to target the currently released version (a bugfix), the commit will be manually cherry-picked bythe CEKit team.
Review process
Each submitted pull request is reviewed by at least one CEKit team member. We may ask you for some changes in thecode or
Tests
We expect that each pull request contains a test for the change. It’s unlikely that a PR will be merged without a test,sorry!
Of course, if the PR is not about code change, but for example a documentation update, you don’t need to write a testfor it :)
6.5. Contribution guide 133

CEKit, Release 3.7.0
GitHub automation
Please reference the issue in the PR to utilise GitHubs ability to automatically close issues. You can add e.g. Fixes#nnn somewhere in the initial comment.
6.5.5 Running tests
To run the tests it is recommended to use tox. To run a single function from a single test on a single version of pythonthe following command may be used:
$ tox -e py37 -- tests/test_validate.py::test_simple_image_build
Or, using pytest directly:
$ pytest tests/test_validate.py::test_image_test_with_multiple_overrides
6.5.6 Contributing to documentation
We use the reStructuredText format to write our documentation because this is the de-facto standard for Python docu-mentation. We use Sphinx tool to generate documentation from reStructuredText files.
Published documentation lives on Read the Docs: https://cekit.readthedocs.io/
reStructuredText
A good guide to this format is available in the Sphinx documentation.
Local development
Note: The documentation has its own requirements.txt. As above we would recommend using Virtualenv touse a clean development environment. The Ansible scripts above will install all documentation pre-requisites as well.
Support for auto generating documentation is avialable for local development. Run the command below.
make preview
Afterwards you can see generated documentation at http://127.0.0.1:8000. When you edit any file, documentation willbe regenerated and immediately available in your browser.
Guidelines
Below you can find a list of conventions used to write CEKit documentation. Reference information on reStructured-Text may be found here.
Headers
Because reStructredText does not enforce what characters are used to mark header to be a certain level, we use follow-ing guidelines:
134 Chapter 6. Documentation

CEKit, Release 3.7.0
h1 header=========
h2 header---------
h3 header^^^^^^^^^
h4 header*********
6.5. Contribution guide 135

CEKit, Release 3.7.0
136 Chapter 6. Documentation

CHAPTER 7
Sponsor
Fig. 1: This is a Red Hat sponsored project.
137
CEKit, Release 3.7.0
138 Chapter 7. Sponsor

CHAPTER 8
License
Distributed under the terms of the MIT license.
139