Building The Lunge Pattern - Amazon S3
26
Innovative Fitness Solutions ©2015 1 Building The Lunge Pattern
-
Upload
khangminh22 -
Category
Documents
-
view
3 -
download
0
Transcript of Building The Lunge Pattern - Amazon S3
Innovative Fitness Solutions ©2015 �1
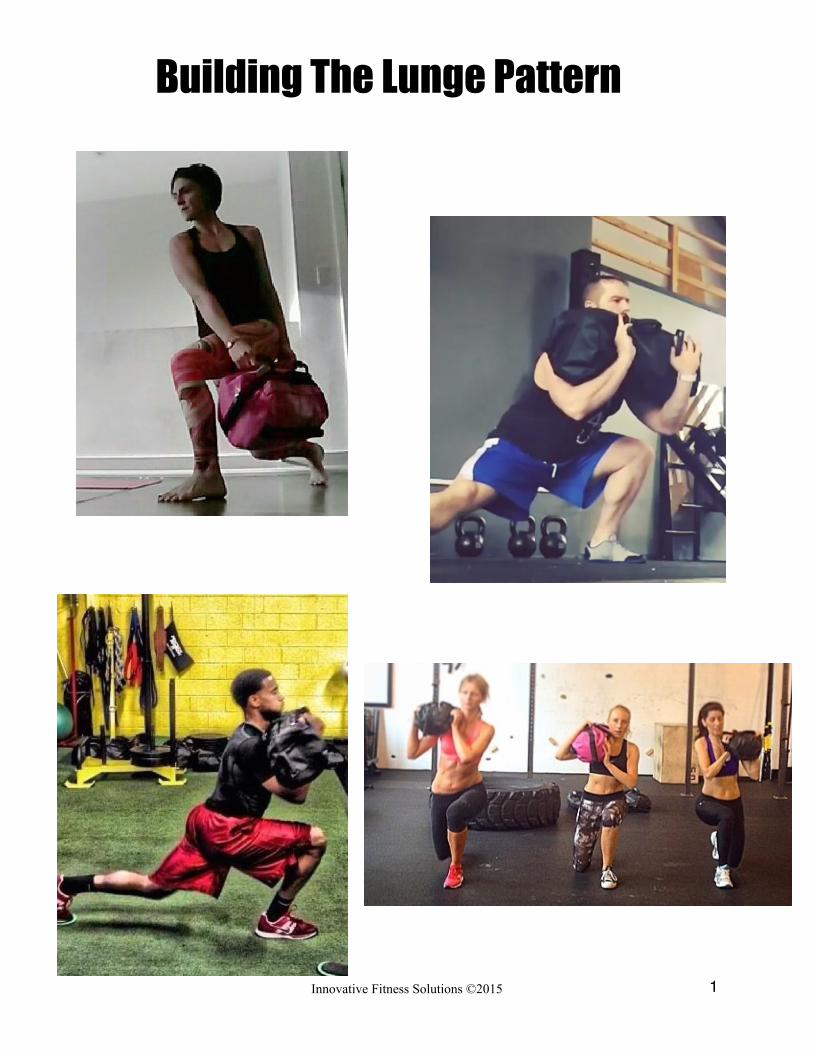
Building The Lunge Pattern
Isn’t the squat the “king” of all exercises? Why are we discussing the lunge first?! The truth is that the lunge may be the king of all lower body movements when we truly look at all the incredible benefits it provides.
The lunge is often not seen in such a light due to the lighter loads that are required, by now though we should understand that not everything is about the weight you use.
We Are Using More Muscles!
Because we typically are using lighter loads, people naturally assume we aren’t building as much strength as when we squat. However, that might be a complete fallacy! A 1999 study by scientists at the University of Wisconsin, La Crosse, set out to find different levels of muscle activation by some common lower body exercises. In this study, both squats and lunges were included. The results?
The researchers studied glute max, glute medius, and hamstrings. All three are important in hip stability and power production. According to the EMG activity of 12 trained individuals there were three interesting findings;
“Results for the gluteus medius showed that quadruped hip extensions, step- ups and lunges generated significantly more muscle activation than squats.”
“Finally, for the hamstrings quadruped hip extensions, step-ups, lunges and four-way hip extensions garnered significantly more EMG activity than squats…”
Hmm, isolated study? How about a study where researchers from the University of Arkansas and Eastern Kentucky University looked at muscle activity of squats compared to lunges. The study looked at female college athletes and found, “ that there was no greater muscle activation when performing any of the squat depths to that of the body weight lunge. It was revealed that the body weight lunge did indeed produce more activation in the majority of all muscles analyzed when compared to the three squat depths.”
Why mention the body weight lunge? The real shock here is that the lunge was compared to a weighted squat! That says a lot about the power lunges do possess. Understanding the importance of the lunge means we also have to once again appreciate strength isn’t just what we lift but what we can resist. Quantifying how much weight we can resist may be difficult, but it is proving time and time again to be a very important aspect of developing functional strength.
Don’t worry though, all this lunge talk doesn’t mean that I don’t believe in the squat. I just want to open your eyes to the often overlooked lunge and maybe have all of us re-evaluate how we implement this great drill.
Innovative Fitness Solutions ©2015 �2
More Than One Plane
The lunge represents a less stable body position, this level of instability actually causes a lot of often underutilized muscles to turn on. Turning on these smaller muscles (stabilizers) helps build strength in a more indirect route. By improving the whole body stability of the body we develop a stronger foundation in which to develop force and strength. As goes the old saying, “you are only as strong as your weakest link!”
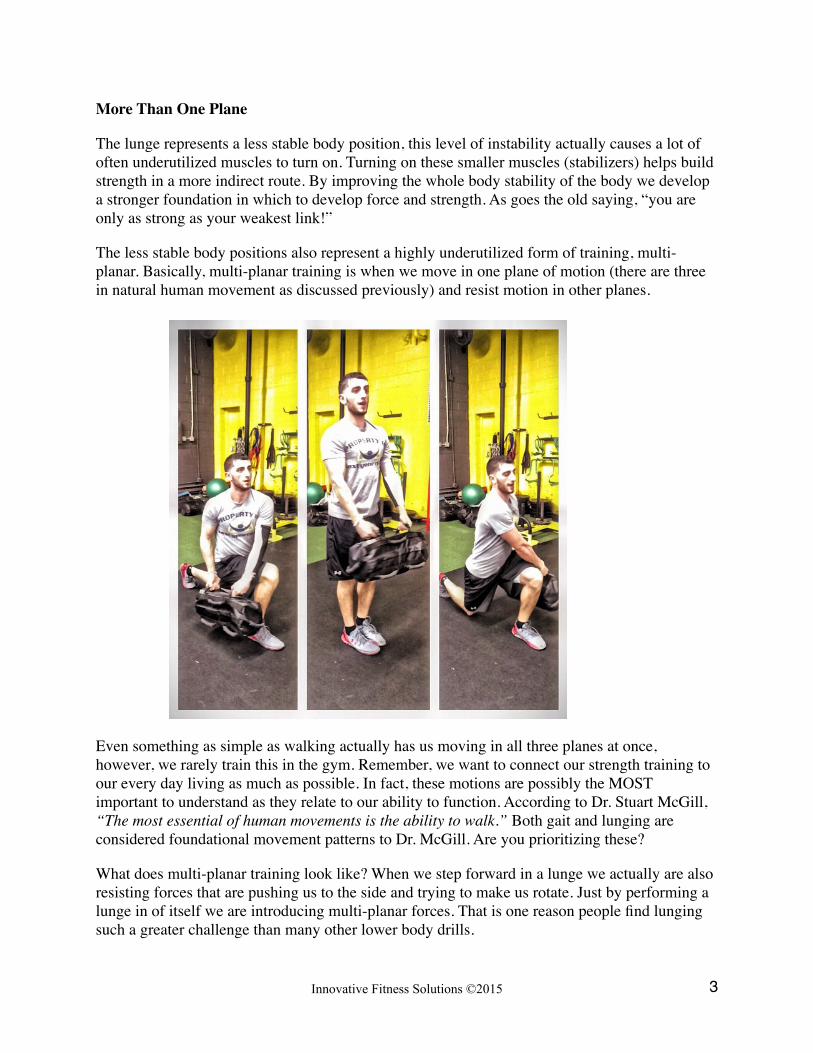
The less stable body positions also represent a highly underutilized form of training, multi-planar. Basically, multi-planar training is when we move in one plane of motion (there are three in natural human movement as discussed previously) and resist motion in other planes.
Even something as simple as walking actually has us moving in all three planes at once, however, we rarely train this in the gym. Remember, we want to connect our strength training to our every day living as much as possible. In fact, these motions are possibly the MOST important to understand as they relate to our ability to function. According to Dr. Stuart McGill, “The most essential of human movements is the ability to walk.” Both gait and lunging are considered foundational movement patterns to Dr. McGill. Are you prioritizing these?
What does multi-planar training look like? When we step forward in a lunge we actually are also resisting forces that are pushing us to the side and trying to make us rotate. Just by performing a lunge in of itself we are introducing multi-planar forces. That is one reason people find lunging such a greater challenge than many other lower body drills.
Innovative Fitness Solutions ©2015 �3
By adding in Ultimate Sandbags in a systematic manner we can actually enhance this effect. As we have already discussed in previous sections of this course, HOW we apply load to the body can either help or challenge movement. You will see this be the case in our lunge progressions and will aid in establishing then challenging the movement pattern.
Multi-planar training increases stability, makes our nervous system smarter, and yes, can be awesome for improving conditioning. This is something we don’t really get the opportunity to train in our more stable lifts such as squats and deadlifts.
More Than Up and Down
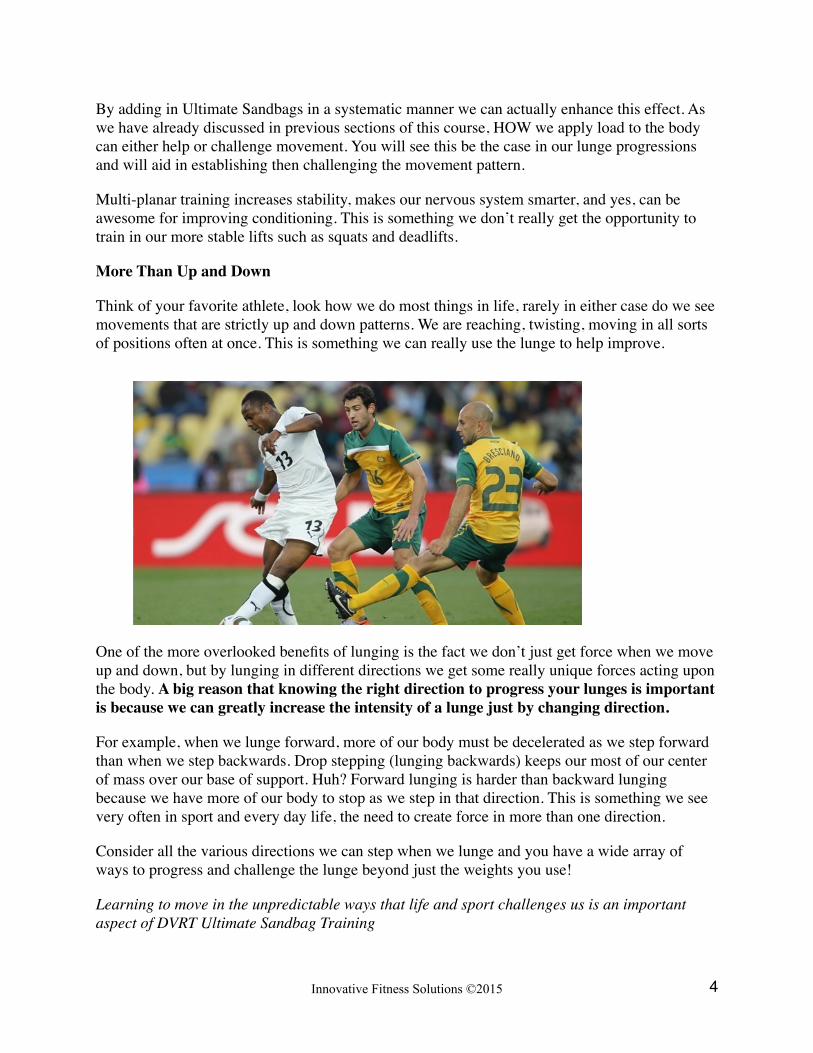
Think of your favorite athlete, look how we do most things in life, rarely in either case do we see movements that are strictly up and down patterns. We are reaching, twisting, moving in all sorts of positions often at once. This is something we can really use the lunge to help improve.
One of the more overlooked benefits of lunging is the fact we don’t just get force when we move up and down, but by lunging in different directions we get some really unique forces acting upon the body. A big reason that knowing the right direction to progress your lunges is important is because we can greatly increase the intensity of a lunge just by changing direction.
For example, when we lunge forward, more of our body must be decelerated as we step forward than when we step backwards. Drop stepping (lunging backwards) keeps our most of our center of mass over our base of support. Huh? Forward lunging is harder than backward lunging because we have more of our body to stop as we step in that direction. This is something we see very often in sport and every day life, the need to create force in more than one direction.
Consider all the various directions we can step when we lunge and you have a wide array of ways to progress and challenge the lunge beyond just the weights you use!
Learning to move in the unpredictable ways that life and sport challenges us is an important aspect of DVRT Ultimate Sandbag Training
Innovative Fitness Solutions ©2015 �4
Power Clean to Front Load: Watch HERE
In order to proceed to some of our DVRT lunge variations it is important to grasp how to place the load into the right position. We teach Clean to Fist prior to Clean to Front Load simply due to the fact that the Front Load position is the compensation to Clean to Fists. Therefore, gaining proficiency in Clean to Fists makes Clean to Front Load EXTREMELY easy to teach and implement.
The Power Clean to Front Load takes the Ultimate Sandbag to horizontal position in front of the body. This position appears much closer to the more familiar barbell Power Clean. However, the grip is a parallel grip instead of the pronated version found on the barbell. By taking the parallel handle position it is easier to lock in the upper body and create a more stable foundation for driving with the hips. The weight distribution is also significantly different making an Ultimate Sandbag extend the pull and feel heavier than an equivalent barbell.
The USB must start as close to the shins as possible, this reduces stress upon the low back. Because the weight of the USB will begin to drop away from the lifters as they begin to pull the weight off the floor it is important to watch for early pulling of the arms.
The movement should involve no arm tension while the lifter creates enough force that the arms can “sweep” under the weight to catch the USB in the crooks of the arms. Failure to create enough force the lifter will find the weight to stall and won’t be able to get the arms around the USB. Full extension of the body should occur from deliberately driving high forces into the ground. To reverse the movement the lifter must unwind the body by beginning with a slight chest bump to get the USB moving off the body. The “bump” must not drive the USB too far away from the body, it is just enough to begin the movement of unwinding the body, if the elbows come away from the rib cage the push was too hard.
The lifter must absorb the downward momentum by keeping the USB close to the body and quickly dropping the hips back into the original lifting position. Not cueing this rapid downward pull of the body makes the dropping force of the USB very large on the shoulders and lower back.
A common question that arises is should the lifter come to their toes? This can be seen sometimes in Olympic Weightlifting which is very similar in many regards to what we are using the Ultimate Sandbag for in this regards. Elevation to the toes is NEVER taught, but simply a byproduct of the amount of force the lifter produces. As the load of the USB gets heavier, they will be producing more force into the ground. Therefore, the ground will also be exerting force back into the body and one MAY come up to their toes as a reaction to these forces. Teaching coming to the toes, like a calf raise, will simply create unnecessary instability and throw the lifter off balance.
Innovative Fitness Solutions ©2015 �5
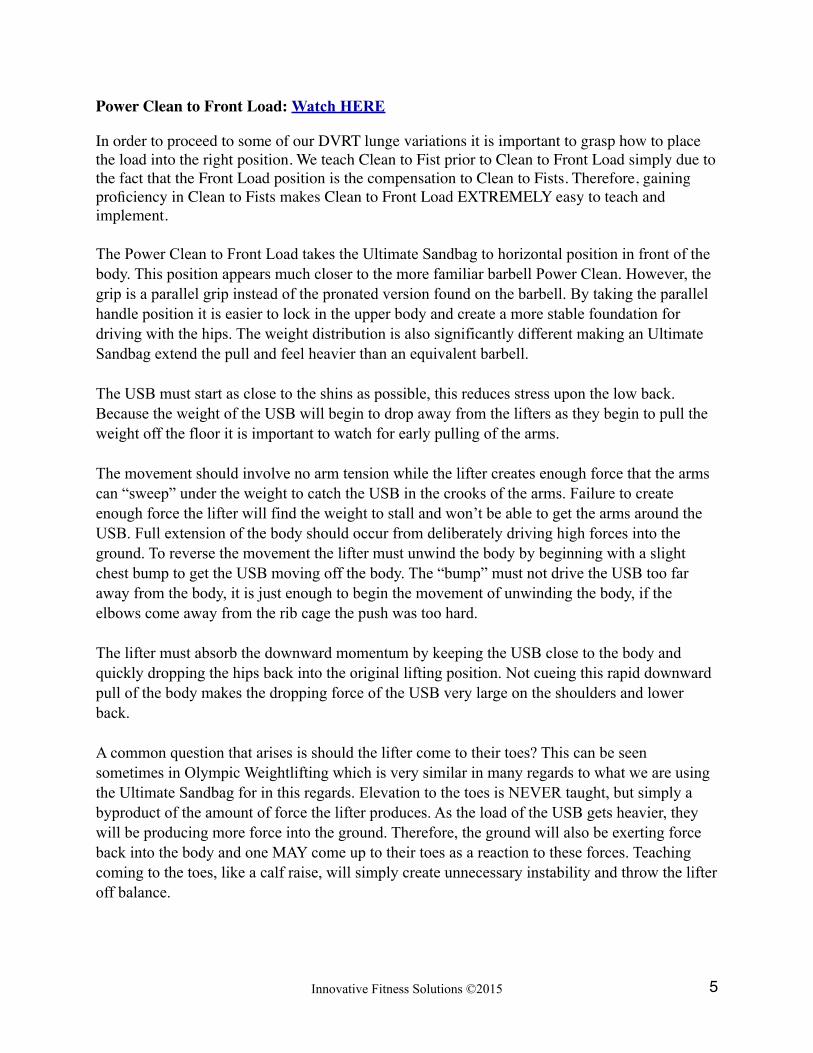
Keys to Performance of Power Clean to Front Load: • Start in your pull as the same of the deadlift and clean to fists. • Pull directly upwards so the elbows come up the body. • Quickly wrap the arms around the Ultimate Sandbag to receive the load softly in the crooks of the arms. • Reverse the movement by leading the hips back and unwrapping the arms and keeping them relatively close to the body. • If the load “smacks” the body examine the position and movement of the elbows.
Notes:________________________________________________________________________
______________________________________________________________________________
Innovative Fitness Solutions ©2015 �6
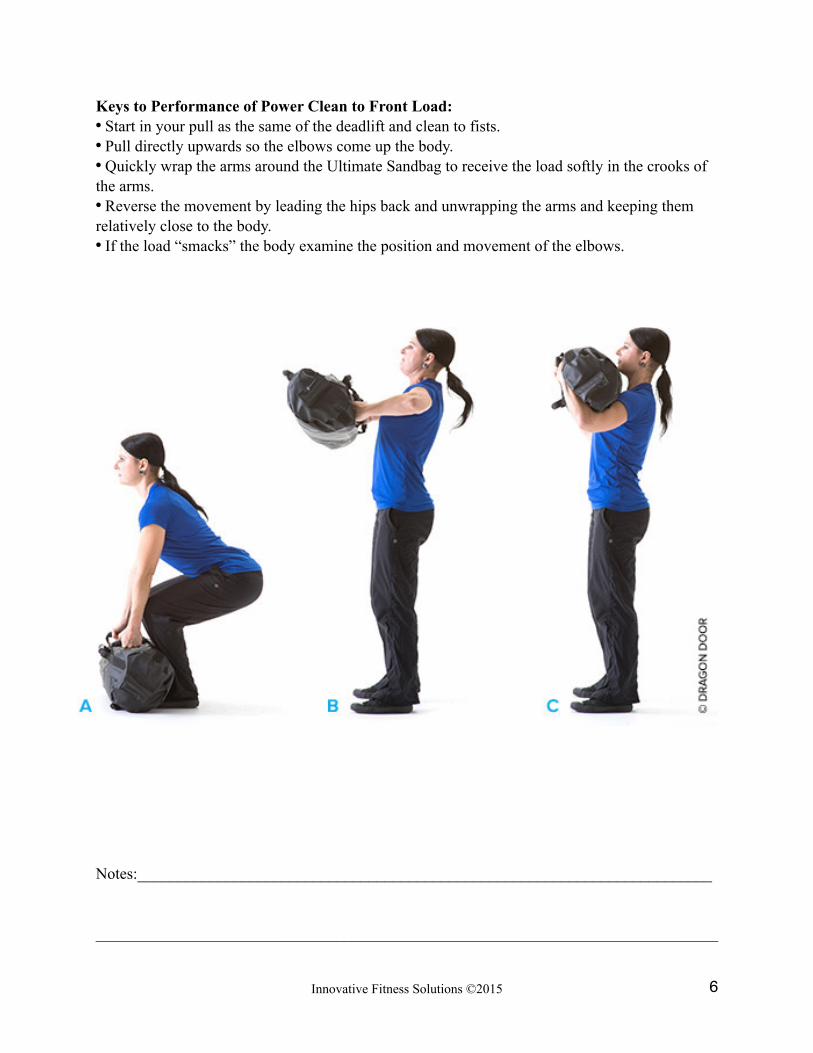
Drill #1 For the Lunge: Up Downs: Watch HERE
The Reverse Lunge allows for many different effective progressions to optimize results. One often overlooked strategy is manipulating speed and body position. The longer period of time that one spends on the ground the more momentum is dissipated and the greater amount of starting strength can be developed. For those that are focused on more of the corrective side of training this also forces individuals to fully engage their hamstrings and glutes with real no risk to the low back.
The DVRT Up Down is an exercise that can serve so many different purposes. From a teaching perspective, it helps clients identify a definitive end point and work on how they decelerate to the ground. The important thing to remember is that BOTH feet should be active. The ball of foot/toes of the rear leg and the middle of the foot (grabbing with the toes) of the front leg. If we only rely on the lead leg this will greatly destabilize and weaken the lifter.
Another use of the Up Down is to identify mobility and stability issues early on and improve both of these qualities. Due to the overall amount of work done during this DVRT drill people find it very challenging and fatiguing. The Up Down is a great example of a slower drill that can cause HUGE spikes in heart rate and overall energy expenditure. Perfect for those that work with tactical athletes that must endure long periods of gear or athletes dealing with the unpredictability of live opponents.
Up Downs play off the speed but also put increase demands upon mobility and hip flexibility that not only help with lunges, but squats, get-ups, and lower body pulls.
Innovative Fitness Solutions ©2015 �7

Keys to Performance of the Up Downs:
-Begin in the same Front Loaded position as seen in the Front Loaded Drop Lunge.
-Start to slowly lower the body in the same manner, however, know let the back knee GENTLY touch and rest upon the ground.
-To secure the body in the half kneeling position drive the ball of foot into the rear leg and activate the glutes and hamstring.
-Keep tension in the front heel to do the same in the front leg.
-While holding a perfect “tall” posture, slowly bring the front leg around to the back side in a half circle motion.
-The knee should come to gently rest beside the other knee and move the lifter into a tall kneeling posture without any change to alignment in the trunk.
-After a designated pause bring the same leg back around in the half circle.
-Plant through the front heal and rear ball of foot to push back up to the standing position.
-Do not lean forward during any aspect of the Up Down.
Notes:________________________________________________________________________
_____________________________________________________________________________
Innovative Fitness Solutions ©2015 �8
Drill #2 Lunge: Front Loaded Drop Lunge: Watch Video HERE
Lunging has always taken a backseat to squatting and deadlifting because most can not load to the same extent. However, the benefits from lunging can often be far greater than the more popular bilateral lifts.
As with the Single Leg Deadlift, the benefits begin with the training impact upon the lower leg. Even though lunging is STILL a bilateral exercise (the base of support has changed but both feet are active). The length of a step that is taken by the lifter can provide a lot of information in regards to stability, strength, and dynamic flexibility. The shorter stepping action that occurs can mean that the lifter feels unstable and is inhibited by tight muscles of the hip (primarily the hip flexors), or core instability. Therefore, proper guidance upon proper execution of the Reverse Lunge must occur prior to any additional loading.
Increasing the length of one’s step can be a progression used to add a greater loading challenge to the lifter. However, achieving the desired stride length should be a primary goal before too much external resistance is applied.
Utilizing the reverse lunge position can help offset some of the common mistakes performed during lunging. One of the most common errors during the performance of all lunging variations is the forward lean of the torso. This is often done by the lifter to help compensate for tight hips and/or for lack of strength in the posterior chain that allows the load to go through the more dominant quadriceps.
A deliberate lean can be implemented to teach a more deceleration during the forward lunge, yet, important to distinguish between the two variations one caused by compensation and the other being intentional. Our goal in the DVRT would be to work in the more upright positions first working towards changing the incline of the torso which is an advancement of movement.
Used in a progressive manner the reverse lunge and its variations can cause similar if not superior results to the deadlift. This is due to the fact that both can work on improve starting strength, yet, the reverse lunge is easier to see compensations in lateral hip stability, lower leg strength, and core stability where such issues can easily be masked in the deadlift. Using the following progressions helps to work towards rather advance movement skills in posterior chain development.
Innovative Fitness Solutions ©2015 �9
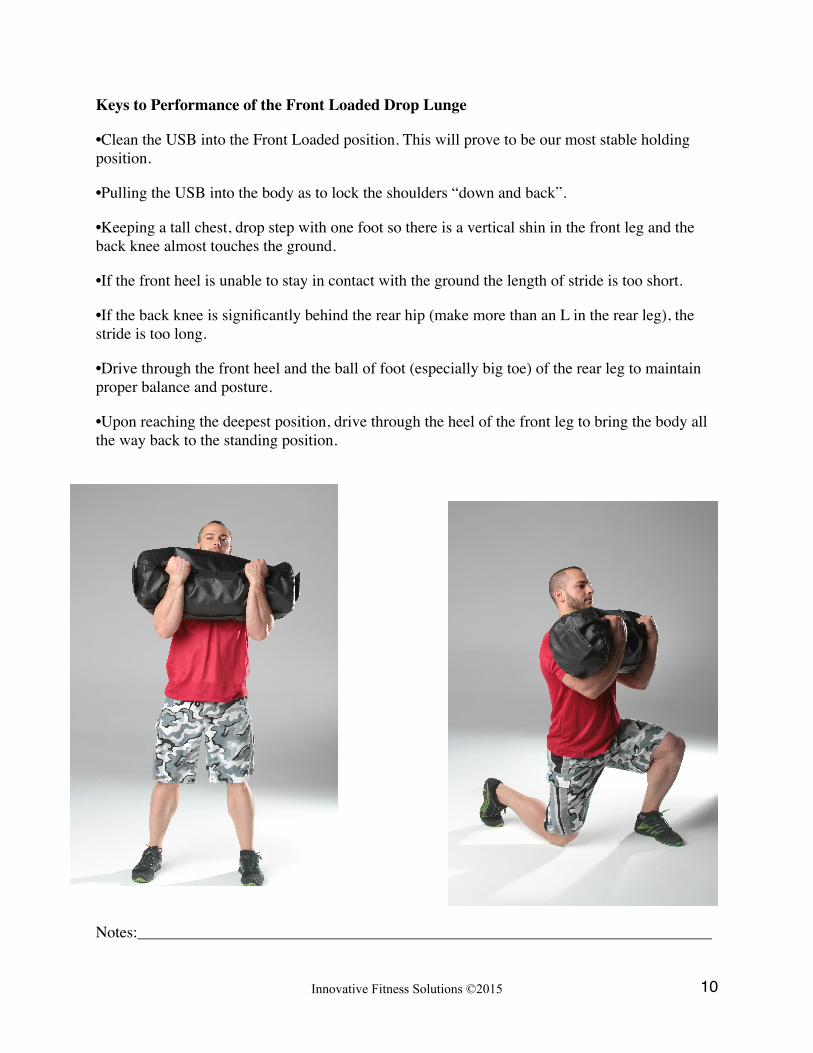
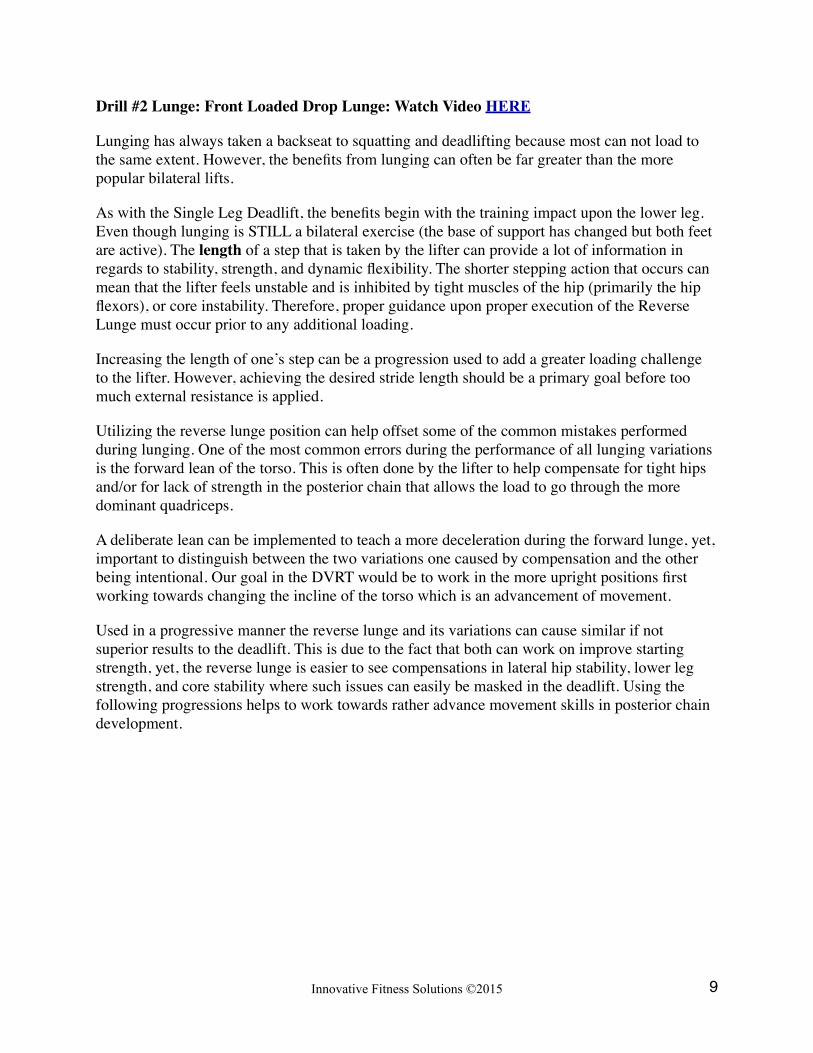
Keys to Performance of the Front Loaded Drop Lunge
•Clean the USB into the Front Loaded position. This will prove to be our most stable holding position.
•Pulling the USB into the body as to lock the shoulders “down and back”.
•Keeping a tall chest, drop step with one foot so there is a vertical shin in the front leg and the back knee almost touches the ground.
•If the front heel is unable to stay in contact with the ground the length of stride is too short.
•If the back knee is significantly behind the rear hip (make more than an L in the rear leg), the stride is too long.
•Drive through the front heel and the ball of foot (especially big toe) of the rear leg to maintain proper balance and posture.
•Upon reaching the deepest position, drive through the heel of the front leg to bring the body all the way back to the standing position.
Notes:________________________________________________________________________
Innovative Fitness Solutions ©2015 �10

Adding a Bit of Balance
If we are going to parallel the reverse lunge to our lower body pulls then it is equally important to understand the critical aspect of “finishing” the hips. Just like our Deadlifts, we need to make sure on our lunging motions that we completely finish the movement and not just “stand up”.
In order to solve this issue we can use what is called the Balance Step. This simple DVRT movement allows you to force the lifter to apply force into the ground and fully extend the hips. If the lifter does NOT lock out the stance leg, contract the hip, and apply proper force they will not be able to balance.
Due to the challenge of this movement you can vary the height in which the leg comes to balance and increase it (up to parallel) as a means of increasing intensity.
Front Load Balance Step is the precursor to Shoulder Balance Step that will be discussed later.
Innovative Fitness Solutions ©2015 �11

Drill #3 for the Lunge: Suitcase Watch Video HERE
In order to build incremental progression as well as build more quality of movement, we must specifically address asymmetrical loads and full hip extension. These are holding positions in the DVRT system where the body is loaded only on one side of the body. The asymmetrical loading of these holding positions will be closely related to the work that Side Planks allow. Except now we have a dynamic lower body and a less stable base in the lunge.
The asymmetrical patterns allow for four variations in of themselves. The first is the Suitcase position. The load being in the Suitcase position allows for an easier time in maintaining postural alignment because the load is not directly upon the body. In the Shoulder position, we can expose the body to higher loads, but the likelihood of rotation and lateral flexion is much higher.
In each of these positions we also have to consider the asymmetrical body position that the drop lunge creates. Since the body works in natural “x-patterns” (as we see in opposing leg and arm working in concert during walking), we will want to try to adhere to these concepts in applying progressive overload.
Suitcase Contralateral Load-1 Suitcase Ipsilateral Load-2
Innovative Fitness Solutions ©2015 �12

You will notice in the above examples that our lifter is going into the “balance” position. While this can be done with almost any of our holding positions for the lunge series, combining it with some of our asymmetrical patterns gives us some unique insight into the individual’s movement quality as well as strengths/weaknesses.
Why the balance step? Using the drop lunge is very similar in many ways as deadlifts, cleans, and any powerful hip extension exercise. As with deadlifts, our goal is to not simply lift the weight, but HOW we lift the weight. One of the very important aspects of hip extension drills is to “finish” the lift by highly activating the glutes, driving into the ground with the feet, and stabilizing the core.
In other words, it is possible to “stand up” with a weight without necessarily finishing the movement in the manner we just described. The issue is how do we teach these concepts to lifters? The balance step forces the individual to drive into the ground with the stance leg, lock the leg and hip, and resist lateral forces. If the lifter is not doing these things they simply will not be able to keep their posture and alignment. A very simple way to progress an exercise to learn more about high quality movement.
Keys to Performance of Suitcase Holding Lunge Positions: • Due to the instability of the asymmetrical patterns the form will not change, but compensations
will be more commonly observed. • The Suitcase is the first loading position of asymmetrical loading although the lunge in itself is
an asymmetrical body position. • The step back during the suitcase loading should see the rear leg stay in line with the hip. • As the back knee begins to bend there should be no collapse of the knee, otherwise cue more
drive through the ball of foot and big toe. • Watch the front knee and foot as well. The foot should remain neutral and not begin to “toe in”. • The knee should be coached to push gently outwards to avoid slight internal rotation of the hip. • Depending on the size of the Ultimate Sandbag the load may rest on the ground. That is not a
bad thing and correlates to our lower body pulls that often start off of the ground.
Notes:________________________________________________________________________
_____________________________________________________________________________
Innovative Fitness Solutions ©2015 �13
Shouldering: Watch HERE
There is definitely something primal about grabbing something from the ground and tossing it over your shoulder. We can easily envision cavemen grabbing their kill and tossing it over their shoulders to carry it back to their camp. While this action may be primal, a lot that has changed in our ability to safely reproduce these “primal” actions .
Squatting and pull-ups are quite primal, and yet we struggle in our modern society to perform them well. Shouldering has far more complexity because of the nature of the both the implement and the movement. Shouldering requires us to assume a very deep position if we choose to lift the USB off of the ground. We never want our client to be in a rounded back position when lifting the load from this extended position. Yes! Shouldering can be thought of in the same light as any extended pulling position. Therefore, the same precautions should also be taken to ensure that you – or your client – are able to maintain the proper lifting posture. Even if this means elevating the load.
I realize some people actually encourage a rounded back posture, which has been noted to help athletes in combat sports. In John Jesse’s 1974 landmark book, “The Encyclopedia of Wrestling Conditioning,” he writes, “The use of heavy sandbag and their large circumference forces the lifter to do this lifting with a round back instead of the traditional straight back lifting with a barbell...It develops the low back and side muscles in movements that are identical to the lifting and pulling movements of wrestling.” (Jesse, p. 204)
Ironically, Jesse points to a tragic end in the same book, emphasizing that the athletes he was seeing in his more modern era didn’t posses the same conditioning or work ethic he once observed in previous years. “...the English speaking countries, particularly America and Canada, were faced with cultural problems. With machines doing most of the work the majority of young men entering athletics were not drawn from a background of labor work in the mines, on the farms, in forests or on the docks.” (Jesse, p. 65)
While it is easy to want to implement very elite method that Jesse suggests in rounded back lifting, we have to be even more cautious and aware of the fact that most athletes shouldn’t be placing themselves at such risk. Over 40 years later, Western cultures have not become more progressive in their health and fitness training. Instead, the decline has continued. Take home message? Lift with the suggested postures in this book!
Shouldering is a asymmetrical power move due to the trajectory the weight takes during the movement. As discussed in previous sections, when we expose the body to asymmetrical loading we challenge more planes of movement and overall stability of the body.
Innovative Fitness Solutions ©2015 �14
During the set-up and initial pull of the weight it must remain balanced and evenly in front of our body. Shouldering places a great deal of emphasis and stress on resisting rotation and then finally fighting frontal plane stress.
The primary goal in all our asymmetrical loading patterns is to challenge the body’s ability to maintain its alignment and posture while producing force. The body experiences a great deal of complexity in movement, even though this seems like it would be a relatively simple activity. We see asymmetrical loading all the time in every day activities such as carrying groceries or holding a child. Yet people who regularly do these activities tend to be prone to experiencing low back issues because we rarely prepare our bodies for these unique stresses.
What is so different about asymmetrical loading? It requires a synergistic balance of production of force from one area of the body and resisting forces from another. Leading spinal expert, Dr. McGill, writes in his book “Ultimate Back Fitness and Performance”, about how unique this movement is to the body. In his study of elite competitive strongmen, the body actually uses stability to help create force and balance:
“Curiously they needed more hip abduction strength to succeed in events such as Super Yoke and the Suitcase carry than they could create in their hips. How could they perform a feat of strength that was beyond what a joint could produce? We quantified asymmetric carries such as the suitcase carry and found that quadratus and the abdominal wall were challenged to create this unique but essential athleticism.” (McGill, http://www.craigliebenson.com)
The “core” seems to be greatly elevated during such asymmetrical loading positions due to this need to create force and stability at the same time. However, this concept has largely been relegated to carrying weight, and ignored in many of our strength lifts. Coaches and athletes alike tend to skip asymmetrical loading during their strength training.
Most coaches and athletes are quite humbled by what asymmetrical loading does to their ability to use weights. Unfortunately, we get caught up in a numbers game rather than focusing on the value of these lifts. Asymmetrical drills take far more coordination, stability, and varying types of strength than their more stable relatives. Dr. McGill even points out such stable drills don’t address the full needs of athletes:
“World-class strongmen (who carry heavy loads) nor professional football and soccer players who run, plant the foot and cut are trained with the squat, as it does not emphasize the quadratus lumborum or the abdominal obliques (which these athletes use). Have clients spend less time doing squats, and redirect them to asymmetric carries, such as the farmer’s walk or bottoms-up kettlebell carry which build the needed athleticism in a much more “spine-friendly” way. In great athletes, power is generated in the hips and transmitted through the stiffened core.” (McGill, 281)
While Shouldering would at first glance seem like a simple movement (which it overall is) there are many nuances to appreciate the high value it offers in performance and fitness.
Innovative Fitness Solutions ©2015 �15
Understanding and optimizing these unique attributes allow us to both get more out of the exercise and raise the value of the overall movement.
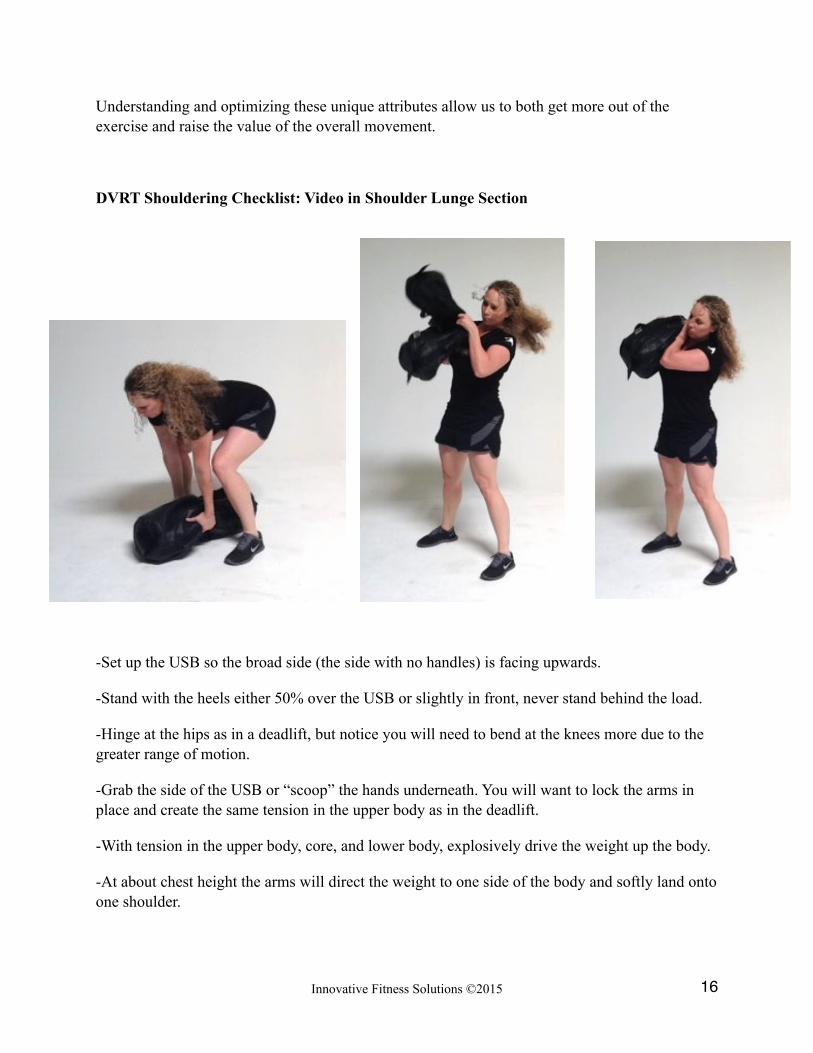
DVRT Shouldering Checklist: Video in Shoulder Lunge Section
-Set up the USB so the broad side (the side with no handles) is facing upwards.
-Stand with the heels either 50% over the USB or slightly in front, never stand behind the load.
-Hinge at the hips as in a deadlift, but notice you will need to bend at the knees more due to the greater range of motion.
-Grab the side of the USB or “scoop” the hands underneath. You will want to lock the arms in place and create the same tension in the upper body as in the deadlift.
-With tension in the upper body, core, and lower body, explosively drive the weight up the body.
-At about chest height the arms will direct the weight to one side of the body and softly land onto one shoulder.
Innovative Fitness Solutions ©2015 �16
-To lower the weight, clasp both hands on the USB, drive the hips back first and have the arms quickly help follow the weight back down to the ground.
Notes:________________________________________________________________
_____________________________________________________________________
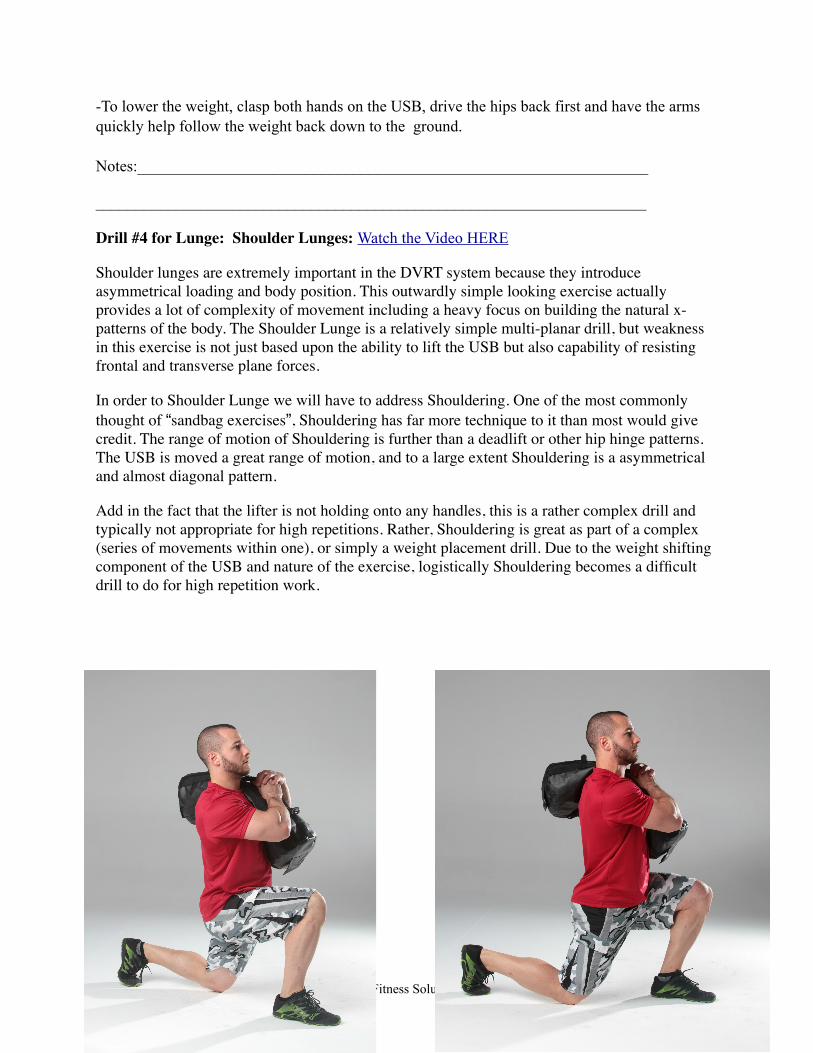
Drill #4 for Lunge: Shoulder Lunges: Watch the Video HERE
Shoulder lunges are extremely important in the DVRT system because they introduce asymmetrical loading and body position. This outwardly simple looking exercise actually provides a lot of complexity of movement including a heavy focus on building the natural x-patterns of the body. The Shoulder Lunge is a relatively simple multi-planar drill, but weakness in this exercise is not just based upon the ability to lift the USB but also capability of resisting frontal and transverse plane forces.
In order to Shoulder Lunge we will have to address Shouldering. One of the most commonly thought of “sandbag exercises”, Shouldering has far more technique to it than most would give credit. The range of motion of Shouldering is further than a deadlift or other hip hinge patterns. The USB is moved a great range of motion, and to a large extent Shouldering is a asymmetrical and almost diagonal pattern.
Add in the fact that the lifter is not holding onto any handles, this is a rather complex drill and typically not appropriate for high repetitions. Rather, Shouldering is great as part of a complex (series of movements within one), or simply a weight placement drill. Due to the weight shifting component of the USB and nature of the exercise, logistically Shouldering becomes a difficult drill to do for high repetition work.
Innovative Fitness Solutions ©2015 �17
Keys in Performance of Shoulder Lunge:
• Shoulder the USB upon one side. The leg on the same side as the shouldered weight will be the first one step back. Lunging with the opposite actually makes the exercises more difficult.
• Stand tall with the feet in line with the hips and posture should be maintained that makes the body appear symmetrically loaded.
• Lunge back and plant through the big toe of the rear leg and grab the ground with the front foot.
• Descend into the lunge so that both knees bend (if the back leg stays straight the stride was too long, if the front heel comes off the ground the stride was too short).
• Drive through booth feet to ascend back to the start position.
• Try the opposing leg to see how the shoulder the load is placed upon changes the outcome of the movement.
The changing of the corresponding shoulder to leg that is lunging will change the intensity of the exercise.
NOTES:_______________________________________________________________________
_____________________________________________________________________________
Innovative Fitness Solutions ©2015 �18
Lunge #5: Front Loaded MAX (Multiple Axis) Lunge: Watch HERE
The Front Loaded MAX lunge allows us to move back to a more stable holding position of the Front Load, while we add more movement to the lunge. Staying with the rear step, we add a slight bit of thoracic rotation to the movement to increase stability in the hips. This forces the body to not just create movement, but resist movement. The subtle rotation of the thoracic spine places more stress to resist the transverse forces in the lumbar area as well as the hips.
It is important to note that the movement comes from the thoracic spine and NOT the lumbar spine. Since the thoracic spine has quite a bit of movement and the lumbar spine does not, we aren’t trying to achieve maximal rotation, but a little disturbance to increase the demands of the body. Using this progression aids greatly in clients learning the concepts that are used in the popular MAX lunge series below.
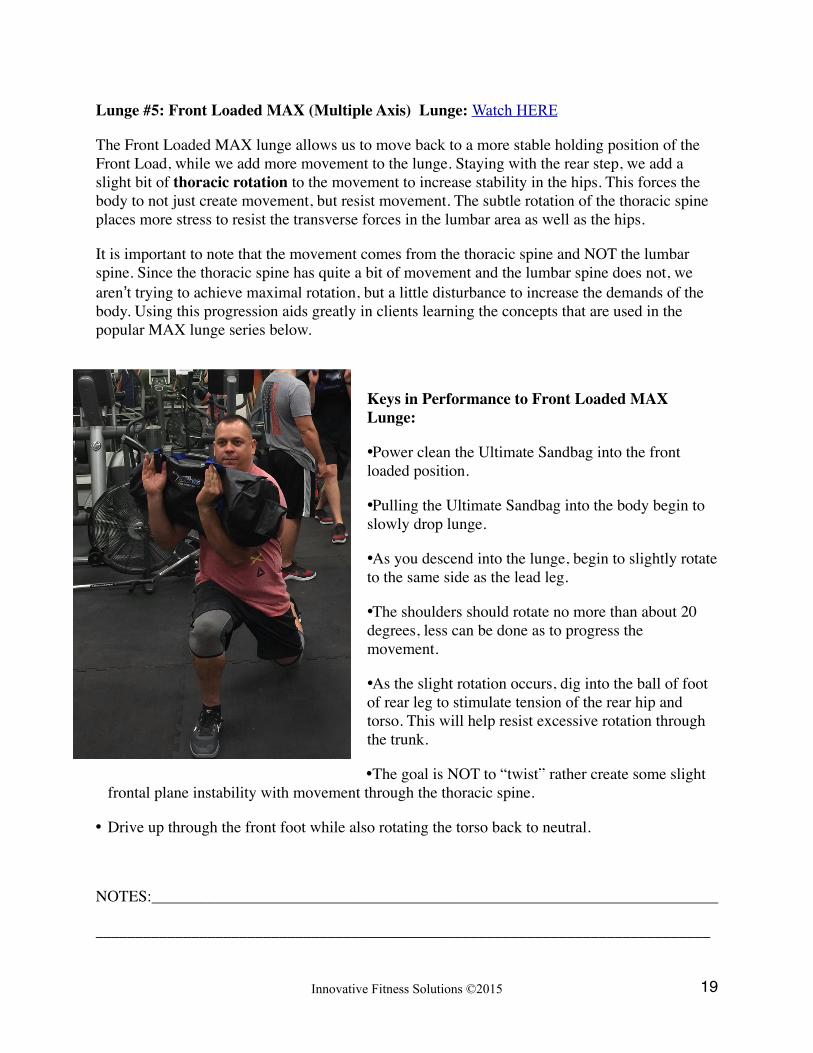
Keys in Performance to Front Loaded MAX Lunge:
•Power clean the Ultimate Sandbag into the front loaded position.
•Pulling the Ultimate Sandbag into the body begin to slowly drop lunge.
•As you descend into the lunge, begin to slightly rotate to the same side as the lead leg.
•The shoulders should rotate no more than about 20 degrees, less can be done as to progress the movement.
•As the slight rotation occurs, dig into the ball of foot of rear leg to stimulate tension of the rear hip and torso. This will help resist excessive rotation through the trunk.
•The goal is NOT to “twist” rather create some slight frontal plane instability with movement through the thoracic spine.
• Drive up through the front foot while also rotating the torso back to neutral.
NOTES:_______________________________________________________________________
_____________________________________________________________________________
Innovative Fitness Solutions ©2015 �19
Drill #6 for Lunge: MAX: Multiple Axis (Rotational)Lunge: Watch Video HERE
I'll admit it, some of you will probably struggle to see the value in some of our DVRT drills until they actually perform them. Squatting, hip hinging, even lunging can seem all too familiar. What I've written can't be significantly different, can it? Hopefully I've explained the "whys" well enough for you to dedicate time to these progressions, as they lay the foundation for the more truly unique DVRT drills.
For many, working through the foundational DVRT drills will be a wake-up call. We tend to want to rush through many of the foundational exercises to get to the “sexy” ones. It happens all the time that people forget about drills like Up Downs and immediately jump to ones like our MAX Lunge. You will find not only does it make performing MAX lunge more difficult, but you miss out on HUGE value that some of these seemingly “easier” exercises can provide.
If we do work through the proper progressions we get to some really great new concepts in functional fitness. I know, many coaches will have you believe that there is nothing new in fitness. How sad it must be to think that there are no new ideas. What would that mean for the future of fitness? The reality is that we have been burned by the novel exercises and programs so many times. Our "hope" for new ideas and programs has been lost. Part of the problem lies in same issues that I came across in my journey toward developing this system and the USB.
If we choose to see exercise and fitness the same way, we will of course begin to recycle ideas. However, if we can make the choice to take a look outside the proverbial box, a whole new world can open to us.
I'll give you an example that occurs all too often. If I bring up the term "functional" to most coaches, there is usually a big eye roll and sigh that follow. I understand, the typical buzzwords in the industry get overused, overhyped, and then suffer a severe backlash from the industry they were trying to help change. Functional training itself went from trying to get people off machine training to odd "circus" type of training, to a strong focus on Olympic lifting, powerlifting, and a bit of intense body weight training. Is that wrong, though? Isn't that what we should be focusing upon?
Functional training as a concept was very profound. Legendary sporting coaches like Vern Gambetta understood that there was huge difference between the needs of an athlete and what we saw in the average weight room. Coach Gambetta’s philosophy was based around “involving controlled instability” and working in all three planes of motion. Even the more progressive gyms that utilize Olympic style lifting and powerlifting were still leaving out these very important elements of athletic development.
My hope is that what we have covered in terms of manipulating these "new" training variables is changing the way you see all these movements, enabling you to see how they are adding new challenges to our training and physical development. Simply looking at how we are building progressions should change how you see even the most familiar of exercises and movements.
Functional training really was meant to teach the body how to move , how to produce strength in all types of postures and positions, and ultimately to deal with the unpredictability of both sport
Innovative Fitness Solutions ©2015 �20
and real life. This isn't necessarily a new U.S. idea either. The Olympic coaches of the former Soviet Union understood the value of creating a better bridge from the weight room to the sporting field. They coined the term “imperfection training.” The Soviet coaches employed different strategies, such as blind folding athletes as they lifted. They poked them slightly during a lift to force the lifter to react to an unpredictable force. The trouble again was this…how do you quantify these techniques, progress them, and have a far more developed system for their use rather than randomly trying to apply these stresses?
So far you have seen our approach for doing just that. DVRT, with its emphasis on changing holding positions, body position, direction of force, speed, and all the other training variables becomes a system unlike any other. Unfortunately, most people don't fully explore the depth of these concepts and only scratch the surface of where we can go with functional movement. A great example of this is the MAX Lunge.
If I had to point to my ONE exercise that most expressed the concepts of DVRT, it wouldn't be Shouldering -- as many would believe -- but rather, the MAX Lunge. All the dynamic components that allow one to actually perform the MAX Lunge are unlike anything else!
So, what is the MAX Lunge? We have changed this from what it was first known as, Rotational Lunge. The original name was drawn from the idea of the load moving around the body, moving in a rotational manner. The actual MOVEMENT is a strong anti-rotational drill. Unfortunately, due to the lack of understanding of the exercise people started calling this drill “lunge with rotation”, which as you can tell would pose some real issues!
What makes the MAX Lunge so challenging is that we are moving in one direction while the USB pulls us in all different directions. The fact we are doing this all from an unstable body position makes this an even more dramatic drill.
The MAX Lunge is performed by using our drop step lunge. We do so because we need to create the powerful hip extension that will give projection to the USB. As we drop step into the lunge, the USB begins to rotate to the side of our body. Moving from right in front of us to the side means the USB is moving through different planes of motion as we are moving and trying to resist lateral instability forces.
The body only rotates through the thoracic spine, which offers a great deal of rotation, especially compared to the lumbar spine. With our hips fixed forward, we don't want to try to rotate through the low back. The powerful hip extension upon rising from the drop step lunge is what gives the USB movement and challenge. In order to better understand what is happening during the MAX Lunge, let's reverse-engineer the movement.
Since the MAX Lunge appears so unique, most people miss the fact that we can trace it back to a more popular exercise, the kettlebell swing. Closer examination of the kettlebell swing will reveal a weight passing back through the body, causing the body to absorb the force and then create a powerful hip extension movement to re-transmit that force out in front of the body. Yes, basically the MAX Lunge is a much more complex kettlebell swing. Like the kettlebell swing, we can break down the movement to make it more accessible for more fitness levels.
Innovative Fitness Solutions ©2015 �21

What makes the MAX Lunge unique is also what can make it an incredible challenge to perform correctly. The trajectory can prove especially challenging. Unlike ALL DVRT drills we have already discussed, the USB is being projected out in front of the body and not "up" the body. Not only is this a different type of pattern we must learn to coordinate, but more importantly this pattern creates a long lever arm to the USB. As we project the USB out in front of the body, the weight of the USB changes. The USB can gain great momentum that many people have a difficult time learning to control. Many miss that this type of motion is really a more athletic and progressive lift and chop action.
In many cases you will see me emphasize speed with the MAX Lunge. That will be a progression we use, but not necessarily where we initially go with this drill. In order to get that powerful projection of weight like we see parallel in the kettlebell swing, we need to move quickly and explosively. However, that doesn't mean we have to do this all the time. One of the advantages the MAX Lunge has over the kettlebell swing is that it can be performed at varying speeds. The progression I have used to even get clients in their 60s to benefit from the MAX Lunge are as follows.
-Slow Same Side-Slow Alternating Sides -Slowly Increase Speed Alternating Sides
Why do we focus on one side at a time, and why go slow when the MAX Lunge is suppose to be so dynamic and explosive? The same-side phase of the MAX Lunge is surprisingly important. Using the same-side approach allows us to introduce the unique movement of the USB and groove a pattern. Even though no two repetitions of the MAX Lunge are the same, you will find the specificity principle kicking in, which will give you more confidence . There is also a different coordination pattern between staying on one side as opposed to alternating. Try this: simply try to slide your hands in through one another. You will notice that one hand is always on top and one is always on the bottom. Now try to reverse so that the other hand goes on top and the other on bottom. Odd feeling, isn't it? We tend to under appreciate how finely tuned our nervous system is to very specific activities.
The above example is a rather simple one, especially given that in a movement like the MAX Lunge we have far more complexity and components occurring. Moving slowly at first will obviously remove the projection of the USB, but that is okay at first. Our goal at this point is to teach how to deal with the USB moving in a different direction than our body moves. If we think about it, just about all our other exercises have the weight moving in line with our body's actions. Trying to resist the movement of the USB is what makes this our most pronounced multi-planar drill.
In the earlier sections of this course, I spoke at length about the different planes of movement and why they are so important to our functional fitness programs. Even though most movements in the gym occur in line with our body, there are many sporting actions and everyday activities that do not. Even a common task such as lifting a child requires multi-planar training. I remember first picking up my niece,and she was far from a rigid and stable weight. She would be
Innovative Fitness Solutions ©2015 �22
constantly moving, which meant I was not just lifting her up and down, but had to resist the forces she was creating in all types of different angles when she played with me.
In sport we see such actions all the time. I remember growing up in Chicago as a big Bears fan. It is hard to think of too many athletes that make you think of football and the Bears like Walter Payton. I was young at the height of his career, but can vividly remember his amazing runs -- he seemed invincible. Not being an especially large athlete, Walter Payton would run over defenders and put more punishment on the defense than it seemed he ever received. A running back almost never has the luxury of just running straight ahead. They are constantly changing direction, accelerating and decelerating, absorbing hits and all angles during pretty much any motion. They are constantly in the midst of multi-planar work. In either example, we see that real world movement is not about just moving up and down or side to side. It is a combination of all these patterns, and demonstrates our real need to integrate this concept wisely into our functional fitness programs.
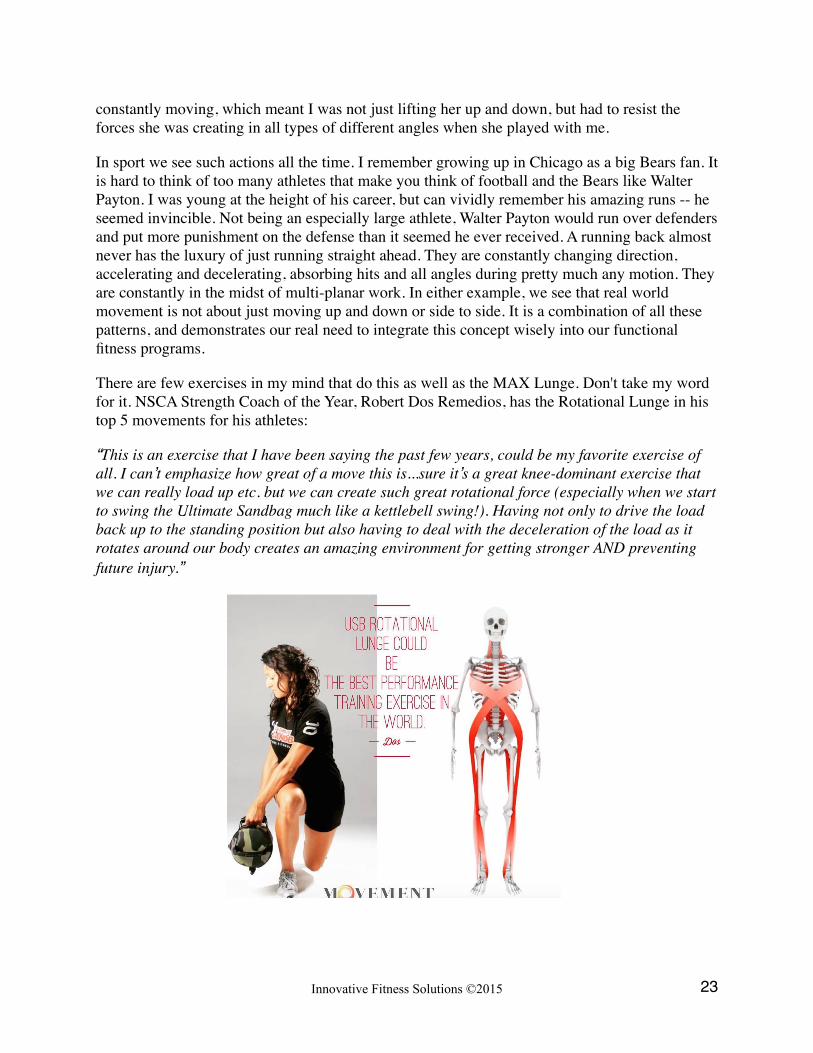
There are few exercises in my mind that do this as well as the MAX Lunge. Don't take my word for it. NSCA Strength Coach of the Year, Robert Dos Remedios, has the Rotational Lunge in his top 5 movements for his athletes:
“This is an exercise that I have been saying the past few years, could be my favorite exercise of all. I can’t emphasize how great of a move this is...sure it’s a great knee-dominant exercise that we can really load up etc. but we can create such great rotational force (especially when we start to swing the Ultimate Sandbag much like a kettlebell swing!). Having not only to drive the load back up to the standing position but also having to deal with the deceleration of the load as it rotates around our body creates an amazing environment for getting stronger AND preventing future injury.”
Innovative Fitness Solutions ©2015 �23
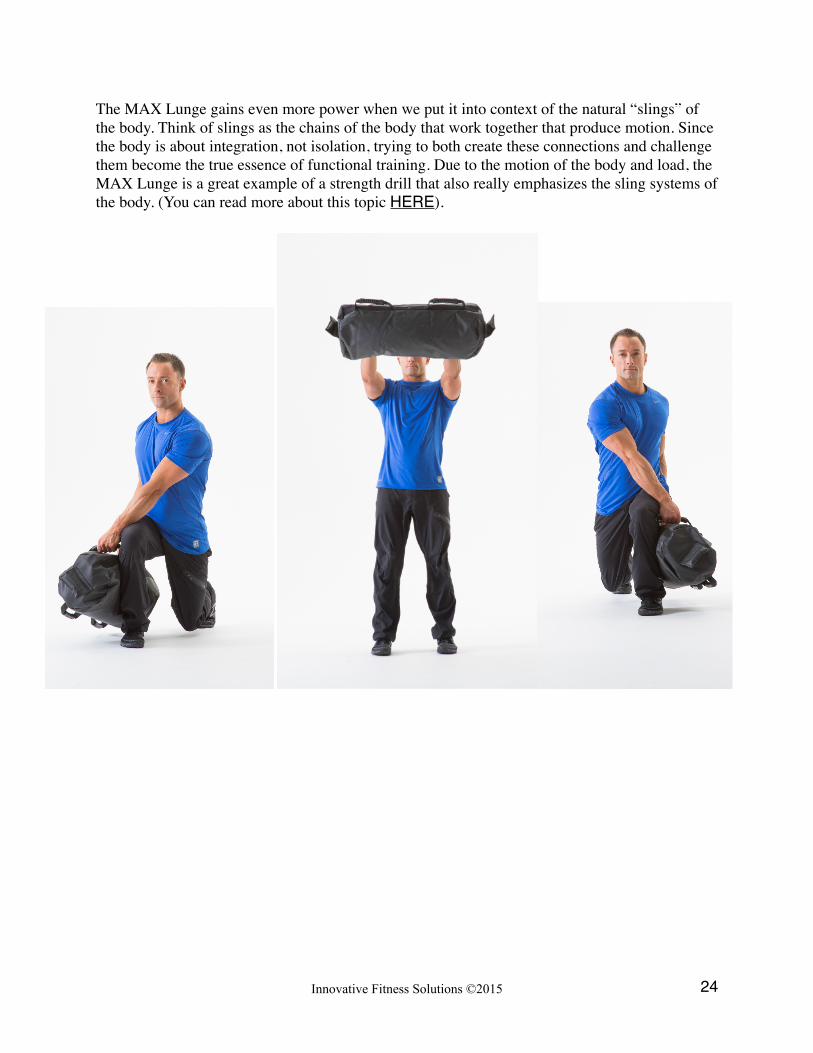
The MAX Lunge gains even more power when we put it into context of the natural “slings” of the body. Think of slings as the chains of the body that work together that produce motion. Since the body is about integration, not isolation, trying to both create these connections and challenge them become the true essence of functional training. Due to the motion of the body and load, the MAX Lunge is a great example of a strength drill that also really emphasizes the sling systems of the body. (You can read more about this topic HERE).
Innovative Fitness Solutions ©2015 �24
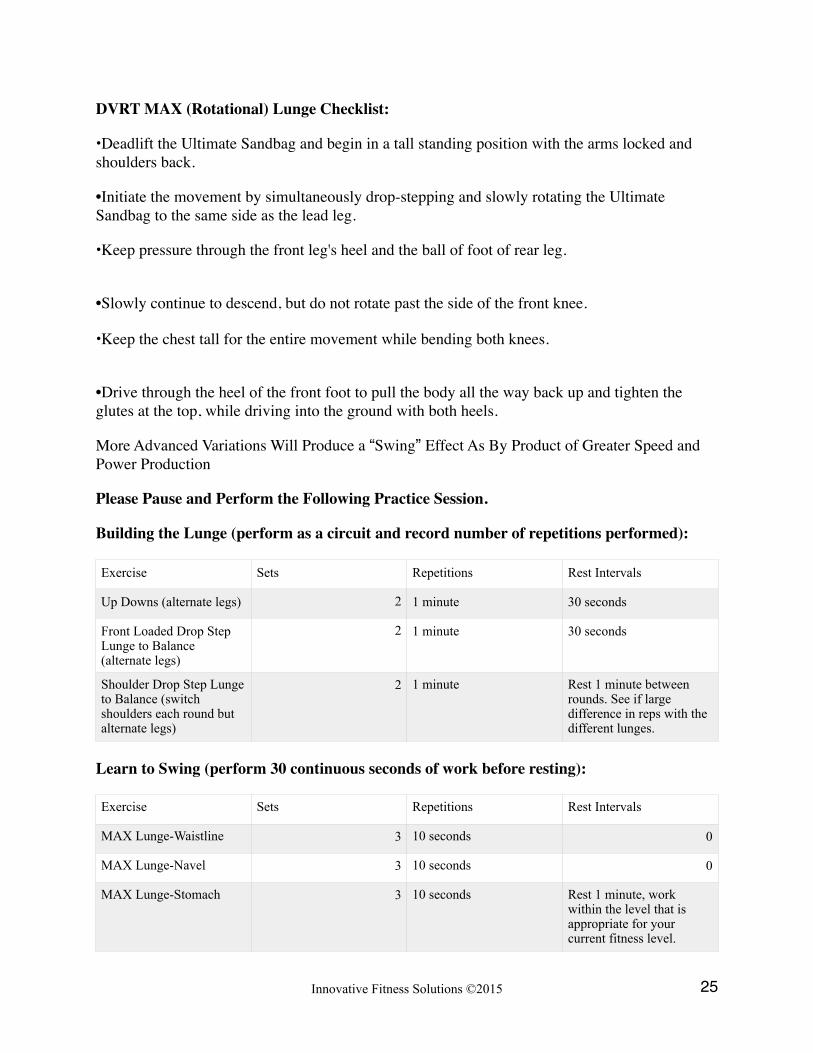
DVRT MAX (Rotational) Lunge Checklist:
•Deadlift the Ultimate Sandbag and begin in a tall standing position with the arms locked and shoulders back.
•Initiate the movement by simultaneously drop-stepping and slowly rotating the Ultimate Sandbag to the same side as the lead leg.
•Keep pressure through the front leg's heel and the ball of foot of rear leg.
•Slowly continue to descend, but do not rotate past the side of the front knee.
•Keep the chest tall for the entire movement while bending both knees.
•Drive through the heel of the front foot to pull the body all the way back up and tighten the glutes at the top, while driving into the ground with both heels.
More Advanced Variations Will Produce a “Swing” Effect As By Product of Greater Speed and Power Production
Please Pause and Perform the Following Practice Session.
Building the Lunge (perform as a circuit and record number of repetitions performed):
Learn to Swing (perform 30 continuous seconds of work before resting):
Exercise Sets Repetitions Rest Intervals
Up Downs (alternate legs) 2 1 minute 30 seconds
Front Loaded Drop Step Lunge to Balance (alternate legs)
2 1 minute 30 seconds
Shoulder Drop Step Lunge to Balance (switch shoulders each round but alternate legs)
2 1 minute Rest 1 minute between rounds. See if large difference in reps with the different lunges.
Exercise Sets Repetitions Rest Intervals
MAX Lunge-Waistline 3 10 seconds 0
MAX Lunge-Navel 3 10 seconds 0
MAX Lunge-Stomach 3 10 seconds Rest 1 minute, work within the level that is appropriate for your current fitness level.
Innovative Fitness Solutions ©2015 �25

Take time to review this section. Take notes, ask questions, really absorb the material. When you introduce new concepts to people, the initial reaction is sometimes to reject such ideas. However, this means going against science, not opinion. Making yourself comfortable and confident with this information arms you with far more than just more exercises.
Innovative Fitness Solutions ©2015 �26