
Automated smoke testing with Selenium - Theseus
50
Automated smoke testing with Selenium Emanuel Donalds Bachelor’s Thesis Information Technology Vaasa 2019
-
Upload
khangminh22 -
Category
Documents
-
view
1 -
download
0
Transcript of Automated smoke testing with Selenium - Theseus

Automated smoke testing with Selenium
Emanuel Donalds
Bachelor’s Thesis
Information Technology
Vaasa 2019

EXAMENSARBETE Författare: Emanuel Donalds
Utbildning och ort: Informationsteknik, Vasa
Inriktningsalternativ: Informationsteknik
Handledare: Kaj Wikman
Titel: Automatiserad Smoke Testning med Selenium _________________________________________________________________________
Datum 3.19.2021 Sidantal 45 _________________________________________________________________________
Detta arbete dokumenterar utformandet och implementationen av webbläsarbaserade
automatiserade tester. Arbetet utfärdades av Crosskey Banking Solutions med det
huvudsakliga målet att minska tidskrävande manuella tester och stärka förtroendet vid
leverans. När arbetet var utfört fanns tre skilda Java-applikationer som kör Selenium-
tester dagligen mot flera miljöer. Testernas subjekt är Crosskey’s Banking-plattform som
följer mikroservice-struktur och är molnbaserad med Amazon Web Services.
Tillgänglig webbläsarautomationsprogramvara evaluerades varav Selenium valdes.
Testerna skrevs som Java 8-applikationer med JUnit 5 och konfigurerades att köra i
molnet med AWS. Testkörningen initieras regelbundet av Jenkins, som även initierar
testkörning då ändringar i testapplikationens kod sker i Git. Testapplikationens design
inkluderade utformandet av ett framework som enkapsulerade och generaliserade
Seleniums funktionalitet för att underlätta testutformingen. Lösningar utformades för
att upprätthålla skilda tester vid utvecklings, tests och produktionsmiljö. Ytterligare
särskiljning gjordes för tester per sandlåde- och live-miljö.
Då testapplikationerna togs i bruk uppfylldes de huvudsakliga målen att minska
mängden manuella tester och öka förtroendet för plattformens hälsa vid leverans.
Problem som utmynnades med tiden var faktumet att testerna i live-miljön var beroende
på hälsan av backend-tjänster som tillhandahölls av andra aktörer, och att
kombinationen produktionsmiljö och live-miljö inte kunde automatiseras. Testerna
konstaterades värdefulla och adapterades som en del av teamets leveransprocess.
_________________________________________________________________________
Språk: engelska Nyckelord: Selenium, Java, Automation, Testning _________________________________________________________________________

BACHELOR’S THESIS Author: Emanuel Donalds
Degree Programme: Information Technology, Vaasa
Specialization: Information Technology
Supervisor: Kaj Wikman
Title: Automated Smoke Testing with Selenium _________________________________________________________________________
Date 3.19.2021 Number of pages 45 _________________________________________________________________________
The goal of this thesis was to design and implement a browser based automated test suite. The project was done for Crosskey Banking Solution, aiming to reduce time consuming manual testing and improve confidence when releasing. The project spawned three different Java applications executing tests towards development, test and production environments. The subject under test is Crosskey’s Open Banking platform which follows cloud based micro service structure with Amazon Web Services. Available browser automation software were evaluated, resulting in Selenium being selected as the most suitable. The tests were written in Java 8 with JUnit 5, and were configured to execute in the cloud using AWS. Jenkins was set up to trigger test execution both daily, and whenever a change is detected by Git in the test application source code. Building the test suite included the design of a test framework, wrapping and tailoring the functionality of Selenium to the project requirements. Solutions were derived for executing tests separately on the development, test and production environments. Further separation of execution was made for sandbox and live environments. When the test suite was launched it fulfilled the main goals of the project; the number of manual tests was reduced, and the confidence of the platform health at releases was increased. Issues that arose were that the live environment test result is dependent on the health of backend services maintained by other teams and companies, and the live/production environment combination could not be tested automatically. The tests were considered valuable and adapted into the delivery pipeline. _________________________________________________________________________
Language: English Key words: Selenium, Java, Automation, Testing _________________________________________________________________________

Contents
1 Introduction ....................................................................................................................................... 1
1.1 Employer ..................................................................................................................................... 1
1.2 Assignment ................................................................................................................................. 2
1.3 Purpose ........................................................................................................................................ 3
2 Software testing ................................................................................................................................ 3
2.1 Test automation ........................................................................................................................ 3
2.1.1 Flakiness.............................................................................................................................. 4
2.1.2 Test Suite Design .............................................................................................................. 4
2.2 Browser automation software ............................................................................................ 5
2.2.1 Cypress ................................................................................................................................ 6
2.2.2 Katalon Studio ................................................................................................................... 7
2.2.3 Selenium .............................................................................................................................. 7
2.3 JUnit 5 ........................................................................................................................................... 8
2.4 Creating a Selenium framework ...................................................................................... 10
2.4.1 Installing WebDriver ................................................................................................... 10
2.4.2 Locating elements......................................................................................................... 11
2.4.3 Waiting for elements ................................................................................................... 12
2.4.4 The page object design pattern ............................................................................... 13
3 The platform .................................................................................................................................... 16
3.1 Domain ...................................................................................................................................... 17
3.1.1 PSD2 and Open Banking ............................................................................................ 17
3.1.2 Third party providers ................................................................................................. 18
3.2 Applications ............................................................................................................................. 18
3.2.1 Developer portal ........................................................................................................... 18
3.2.2 Test tool ............................................................................................................................ 18
3.3 Infrastructure ......................................................................................................................... 19
3.3.1 Cloud computing ........................................................................................................... 19
3.3.2 Amazon Web Services ................................................................................................. 20
3.3.3 Micro services ................................................................................................................ 21
3.4 Development process .......................................................................................................... 21
3.4.1 Continuous integration ............................................................................................... 21
3.4.2 Release cycle ................................................................................................................... 22
4 Design and implementation ...................................................................................................... 22
4.1 Infrastructure ......................................................................................................................... 24
4.1.1 AMI ..................................................................................................................................... 24
4.1.2 Jenkins configuration .................................................................................................. 25
4.1.3 Pipeline ............................................................................................................................. 26
4.2 The test applications ............................................................................................................ 29
4.2.1 Client registration configuration ............................................................................ 31
4.2.2 Test code design ............................................................................................................ 32
4.2.3 Build tool .......................................................................................................................... 36
4.2.4 Shared logic ..................................................................................................................... 37
4.2.5 Targeting specific environments ............................................................................ 38
4.2.6 Uploading images on test failure ............................................................................ 39
5 Result and discussion .................................................................................................................. 41
References ................................................................................................................................................. 43

1
1 Introduction
It is human to err. Humans make wrong assumptions, forgets, and sometimes unintentionally
leave out information (Mette, 2008). It is therefore inevitable that code created by humans
will have errors, which is why software testing is so important.
Testing is not easy, Myers (2011) declares testing to be among the “dark arts” of software
development. Due to the inherent complexity of software systems, one can never ascertain
that a system is tested to the extent where it is completely error free. Even for primitive
applications, the number of input and output combinations can reach the hundreds or
thousands (Myers, 2011). Although not practically attainable, error free applications are an
important goal (Watkins, 2001). Testing does not assure completely error free systems, but
it is the most effective mean of reducing errors to a minimum.
Testing has always been important in software engineering. As the complexity of software
systems increases, the importance of testing multiply (Myers, 2011). Code is everywhere
around us today and faulty code can have serious impact on people’s lives and even cause
death.
A development team had been working on Crosskey’s C°Open platform for about two years
when it launched in 2019. The project was a success, but all integration tests were mostly
manual work and quite time consuming. The team concluded that they needed an automated
test suite functioning as a smoke test. A test suite that is run regularly would notify the team
of critical bugs in the early stages of development and improve the quality of the platform.
This thesis is about the development of this test suite.
1.1 Employer
Crosskey Banking Solutions is an IT company that began in 2004 when Ålandsbanken Plc
decided to develop their IT-department into a new subsidiary company. Crosskey operates
in the financial services domain, with about 280 full time employees and a turnover of 28,394
million euros 2020. (Crosskey Banking Solutions, 2020)
Crosskey offers a wide variety of banking solutions including card, mobile and e-banking
services. An open banking solution is also provided, helping banks comply with PSD2
regulations. (Crosskey Banking Solutions, 2020)
2
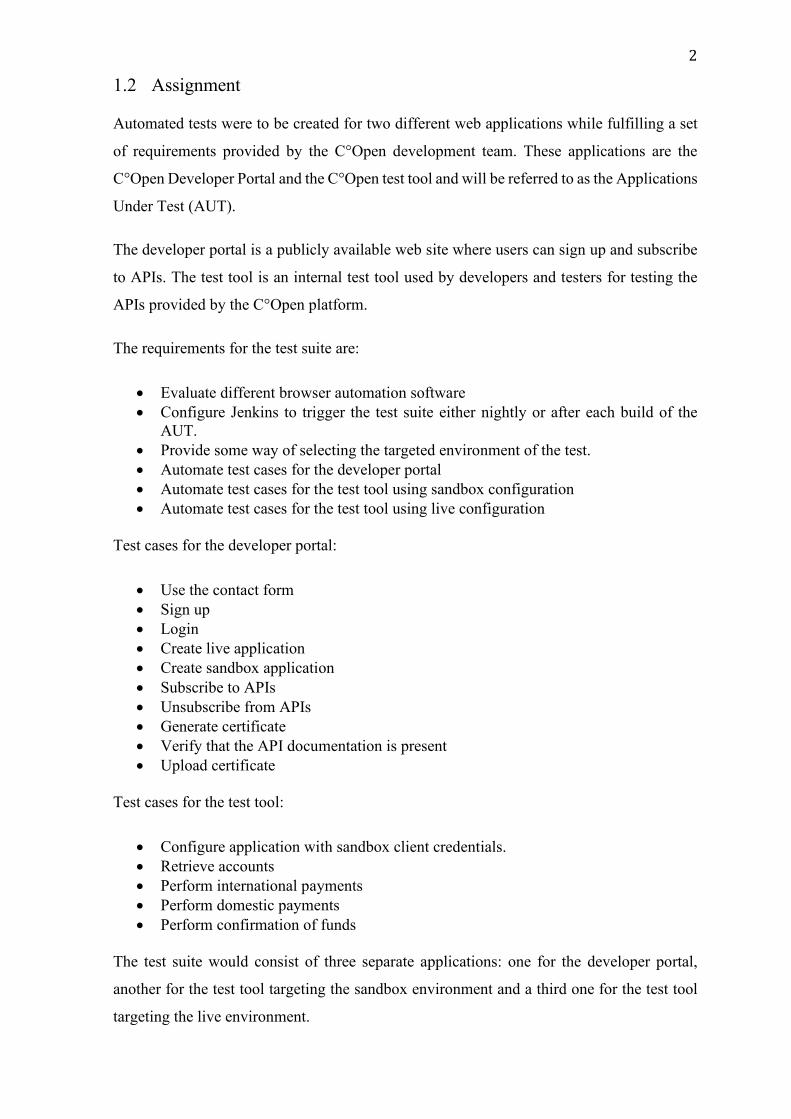
1.2 Assignment
Automated tests were to be created for two different web applications while fulfilling a set
of requirements provided by the C°Open development team. These applications are the
C°Open Developer Portal and the C°Open test tool and will be referred to as the Applications
Under Test (AUT).
The developer portal is a publicly available web site where users can sign up and subscribe
to APIs. The test tool is an internal test tool used by developers and testers for testing the
APIs provided by the C°Open platform.
The requirements for the test suite are:
• Evaluate different browser automation software • Configure Jenkins to trigger the test suite either nightly or after each build of the
AUT. • Provide some way of selecting the targeted environment of the test. • Automate test cases for the developer portal • Automate test cases for the test tool using sandbox configuration • Automate test cases for the test tool using live configuration
Test cases for the developer portal:
• Use the contact form • Sign up • Login • Create live application • Create sandbox application • Subscribe to APIs • Unsubscribe from APIs • Generate certificate • Verify that the API documentation is present • Upload certificate
Test cases for the test tool:
• Configure application with sandbox client credentials. • Retrieve accounts • Perform international payments • Perform domestic payments • Perform confirmation of funds
The test suite would consist of three separate applications: one for the developer portal,
another for the test tool targeting the sandbox environment and a third one for the test tool
targeting the live environment.

3
1.3 Purpose
When platform updates are released, the team should be confident in the overall health of
the updated platform and that the most vital functionality works both before and after the
update. Achieving this confidence is the purpose of this thesis, which is about creating a test
suite for the platform.
2 Software testing
This chapter summarizes the practice of testing software and the challenges associated with
it. It also introduces the test framework and browser automation software used in the test
suite and demonstrates how they can be implemented.
Testing is about comparing expected outcomes to actual outcomes. Homès (2012) defines
testing as:
“Testing is a set of activities with the objective of identifying failures in a software or system and to evaluate its level of quality, to obtain user
satisfaction. It is a set of tasks with clearly defined goals.”
The main goal of software testing is to identify and mitigate failures in code before it is
shipped. Another definition is found in the IEEE Standard 610.12-1990, “IEEE Standard
Glossary of Software Engineering Terminology”:
“The process of operating a system or component under specified conditions, observing or recording the results, and making an
evaluation of some aspect of the system or component”
Testing is a process that involves running a piece of software under specified conditions and
comparing expected and actual outcomes.
A set of tests for a system or component is a Test Suite and a specific test is called a Test
Case. The application which is the subject of the test is called the Application Under Test
(AUT). (IEEE, 1990)
2.1 Test automation
Testing can and should be performed manually by developers or designated testers, although
having too many manual tests is undesirable. Myers (2011) states that even simple programs
may have thousands of input and output combinations. Therefore, the complexity of software

4
systems introduces a very large number of test cases and the manual test process quickly
becomes unsustainably time consuming.
In Agile development where release cycles are short, the time span of a release cycle may
not be long enough for testers to perform every single test. Therefore, automated tests are
essential. Automated tests are fast and can in most cases be run multiple times a day.
A quick-to-run and thorough automated test suite reduces fear associated with programming.
When a new feature is implemented, the developer may run the tests and receive immediate
feedback on whether the feature works, and that it did not unintentionally break anything
else, which is a great confidence boost. (Beck, 2002)
2.1.1 Flakiness
A flaky test is unintentionally indeterministic, it will succeed one time and fail another
without any changes to configuration or code. Frequent test flakiness will likely lead to
developers systematically discarding failing tests as flaky, which significantly reduces the
value of the test suite.
The causes of flakiness are many, including infrastructure problems, undefined behaviour
and concurrency problems (Stričević, 2015). Test flakiness can be dealt with in many ways.
Preferably, a flaky test should be fixed immediately when it is discovered, but new flaky
tests might be unknowingly inserted at any time. Micco (2016) presents a few flakiness
mitigation strategies applied at Google, where the flaky test fix rate has settled on the same
as the insertion rate. These strategies include:
• Fixing flaky tests as soon as possible • Rerunning failed tests automatically • Flagging tests as flaky when found • Reporting flagged tests as failed only if they fail three times in a row
Google created a separate team dedicated to analysing and reducing test flakiness (Micco,
2016). Test flakiness is an important issue that require continuous attention. Fixing flaky
tests quickly should be of high priority for development teams.
2.1.2 Test Suite Design
Many variables are considered when designing a test suite. A test suite must have a well-
defined purpose scope. Is it testing single components or the interplay between multiple

5
systems? Generally, the smaller and more fine-grained the test is, the faster and more stable
it is (Beck, 2002).
If a test is dependent on the success of one or more other tests, the test report will be of little
value. Beck (2002) advocate that tests should be designed in such a way that running of one
test does not affect the any other test.: “If I had two tests broken, I wanted two problems”.
Tests are either non-functional or functional. Non-functional tests are test performance,
scaling, reliability and other non-functional aspects of the system. Functional tests are based
on specifications of the functionality of the system. Examples of functional tests include unit
tests, integration tests and smoke tests. (Homès, 2012)
Unit testing, or component testing is the process of testing small components in isolation.
Unit tests are usually created in parallel with the functional code. (Homès, 2012)
Integration testing is the process of testing of multiple components together as a subsystem,
but not the complete system (Ruggeri, et al., 2018).
Smoke testing is the process of testing the overall system health. A smoke test is defined by
Homès (2012) as:
"A subset of all defined/planned test cases that cover the main functionality of a component of system, to ascertain that the most crucial functions of a program work, but not bothering with finer
details. A daily build and smoke test is among industry best practises."
Smoke tests give the developer an indication on if the most crucial parts of the system are
working, and their success may be a precondition for running more fine-grained tests.
There are many other types of tests under both the non-functional and functional categories
and many books are written on the subject. Testing is essential in all stages of development
(Homès, 2012).
2.2 Browser automation software
This chapter focuses on available browser automation software and some of their strengths
and weaknesses. The reason for choosing Selenium as the automation software for this
project is presented, followed by summaries of each of the considered options.

6
Many browser automation software solutions are based on JavaScript execution. As
executing JavaScript can be potentially harmful, browsers have implemented a security
mechanism called “Same-origin policy”. Whenever a web page loads a script that does not
originate from the same domain as the web page, the same-origin policy rejects the script
(Ruderman, 2020). Automated browser software relying on executing scripts on other
domains are therefore required to circumvent this security mechanism somehow. The
comparisons in this chapter will present how the same-origin policy affect the respective
software.
Selenium is the industry standard when it comes to browser automation and there are few
serious competitors. Selenium is well established and have been the go-to browser
automation software for many years. A few competitors have gained some popularity in
recent years. For example, Cypress is a new promising tool which is worth considering if
the AUT is a JavaScript application.
There are many solutions available that base their inner workings on Selenium, Katalon
Studio is one such solution. The main benefit of these software is that they usually include a
powerful GUI which enables test-writing for non-programmers.
The choice of software for this project settled on Selenium for the following reasons:
• It is the industry standard. • The applications under test are not JavaScript applications. • The test suite will be maintained by developers, not by non-technical people.
The following sections compare and summarize the three different automation software that
were considered as options.
2.2.1 Cypress
Cypress is a new front-end JavaScript browser automation tool which runs on a Node server.
The software is executed in the same run loop as the AUT, which gives the test suite access
to the AUT source code. This architecture enables features like stubbing application
functions and mocking back end responses. (Cypress.io, Inc, 2020)
Although “Cypress can test anything in the browser” (Cypress.io, Inc, 2020), Cypress is
primarily used within applications using modern JavaScript frameworks, and it comes with
some draw-backs; Cypress currently only fully support Chromium based browsers, and since

7
Cypress runs JavaScript from within the browser, it is limited by the same-origin policy
issue, an issue that Selenium has mitigated with its WebDriver.
Cypress is payware with a free license option with limited features. The license can be
upgraded to different pricing levels as the test requirements increase.
2.2.2 Katalon Studio
Katalon Studio is a test automation solution developed by Katalon LCC. Supported testing
platforms are web, mobile, API and desktop. The solution is built on top of Selenium and
Appium (an automation framework for mobile), aiming to remove some of their
complexities. Katalon Studio comes with an interactive GUI, with integrations to Git (a
version control system), as well as Jira, Slack and more. (Katalon LCC, 2020)
This software is payware with a free license option providing a limited set of features. Upon
registration, a trial license is generated with access to the full set of features for 30 days.
2.2.3 Selenium
Selenium is a free library used to automate browsers, which can be used to automate manual
tasks such as entering text and clicking buttons. This makes it a suitable tool for test
automation.
Selenium started as “JavaScriptTestRunner” by Jason Huggins in 2004 while he was
working for ThoughtWorks in Chicago. Employees at ThoughtWorks saw potential in the
test tool and its reusability and it was open sourced soon after. Jason Huggins joined Google
in 2007, working in a dedicated Selenium support team. (Selenium, u.d.)
As the project was made open source, contributors continuously added new components.
Dan Fabulich and Nelson Sproul developed Selenium RC (Selenium Remote Control), now
called Selenium 1, which enabled tests written in any language to execute selenium
commands over http through a remote-control server. The benefits of this design are that it
circumvents the same-origin policy that browsers impose on generic JavaScript execution,
and allows for tests written in almost any language to execute commands on the server
through the common command language called Selenese (Avasarala, 2014).
A separate web test tool called WebDriver was eventually merged with the Selenium project.
This became Selenium 2, which is the foundation of the Selenium architecture of today.
8
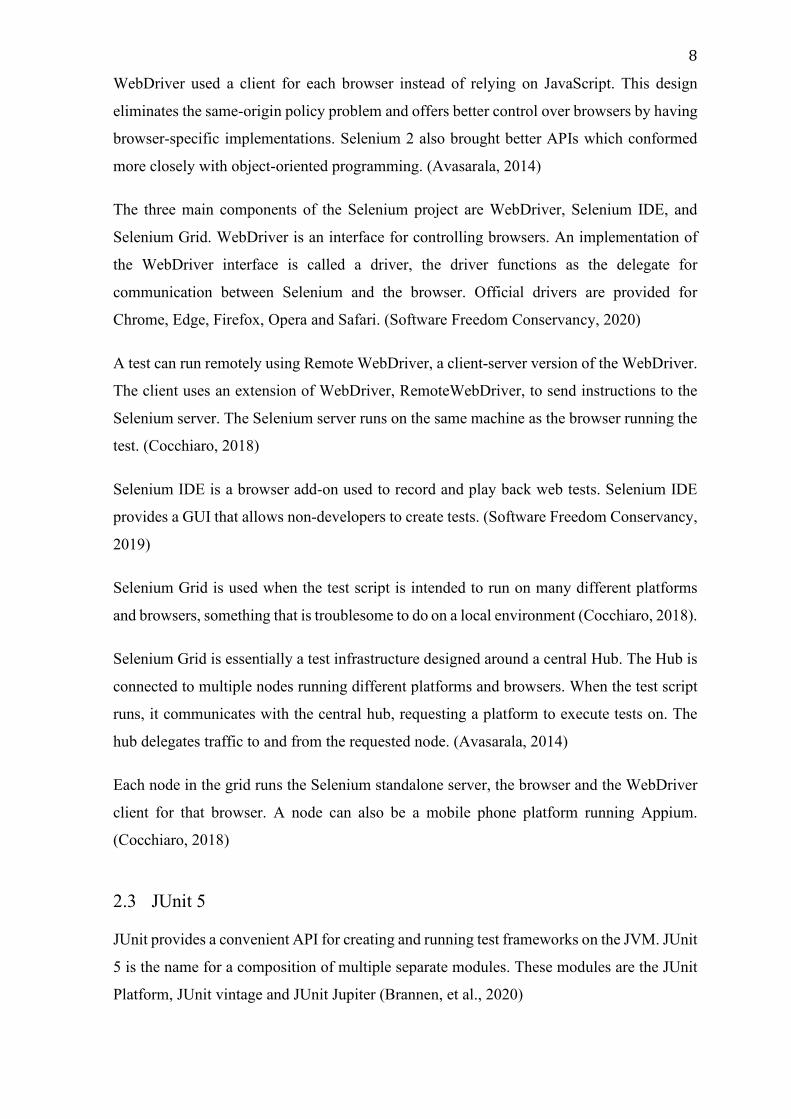
WebDriver used a client for each browser instead of relying on JavaScript. This design
eliminates the same-origin policy problem and offers better control over browsers by having
browser-specific implementations. Selenium 2 also brought better APIs which conformed
more closely with object-oriented programming. (Avasarala, 2014)
The three main components of the Selenium project are WebDriver, Selenium IDE, and
Selenium Grid. WebDriver is an interface for controlling browsers. An implementation of
the WebDriver interface is called a driver, the driver functions as the delegate for
communication between Selenium and the browser. Official drivers are provided for
Chrome, Edge, Firefox, Opera and Safari. (Software Freedom Conservancy, 2020)
A test can run remotely using Remote WebDriver, a client-server version of the WebDriver.
The client uses an extension of WebDriver, RemoteWebDriver, to send instructions to the
Selenium server. The Selenium server runs on the same machine as the browser running the
test. (Cocchiaro, 2018)
Selenium IDE is a browser add-on used to record and play back web tests. Selenium IDE
provides a GUI that allows non-developers to create tests. (Software Freedom Conservancy,
2019)
Selenium Grid is used when the test script is intended to run on many different platforms
and browsers, something that is troublesome to do on a local environment (Cocchiaro, 2018).
Selenium Grid is essentially a test infrastructure designed around a central Hub. The Hub is
connected to multiple nodes running different platforms and browsers. When the test script
runs, it communicates with the central hub, requesting a platform to execute tests on. The
hub delegates traffic to and from the requested node. (Avasarala, 2014)
Each node in the grid runs the Selenium standalone server, the browser and the WebDriver
client for that browser. A node can also be a mobile phone platform running Appium.
(Cocchiaro, 2018)
2.3 JUnit 5
JUnit provides a convenient API for creating and running test frameworks on the JVM. JUnit
5 is the name for a composition of multiple separate modules. These modules are the JUnit
Platform, JUnit vintage and JUnit Jupiter (Brannen, et al., 2020)

9
The JUnit platform provides a base on which different test frameworks can run. Included in
this platform is the Platform Launcher API, an interfaced used by build tools and IDEs to
discover, filter and execute test frameworks. Multiple test frameworks are supported due to
the abstraction of the TestEngine. (Brannen, et al., 2020)
A TestEngine handle the discovery and execution of tests written in a certain framework's
programming model. Both JUnit Vintage and JUnit Jupiter provide their own Test Engines.
(Brannen, et al., 2020)
JUnit Vintage provides a Test Engine that enables backwards compatibility with JUnit 3 and
JUnit 4 based tests (Brannen, et al., 2020).
JUnit Jupiter implements the JUnit 5 programming and extension model and provides the
JUnit 5 TestEngine (Brannen, et al., 2020).
A simple JUnit test can be created by importing org.junit.jupiter.api.Test and annotating a
method with @Test as shown in code sample 1. The Jupiter TestEngine will discover and
execute this test.
Code sample 1: Creating a test with JUnit Jupiter.
public class MyTestClass { @Test void myTest() { Assertions.assertTrue(2 == 2); } }
When a test suite grows, duplicated code quickly becomes an issue which can be tackled
with the Jupiter extension model. This model enables reusability with the concept of
extension classes. An extension is registered declaratively with the @ExtendWith
annotation, or programmatically with the @RegisterExtension annotation. Extension classes
implement different interfaces which provide behaviour to the extended class, for example,
the BeforeEachCallback interface is implemented when a certain snippet of code needs to
be run once before each test of the extended test class.

10
Code sample 2: Extension implementing the BeforeEachCallback interface.
class MyExtension implements BeforeEachCallback { @Override public void beforeEach(ExtensionContext context) { System.out.println("I will execute before each test"); } }
Code sample 3: A test class configured with an extension.
@ExtendWith(MyExtension.class) public class MyTestClass { @Test void myFirstTest() { System.out.println("I'm a test"); } @Test void mySecondTest() { System.out.println("I'm another test"); } }
Code samples 2 and 3 demonstrates the usage of an extension. Running this test will produce
the following output:
• I will execute before each test • I’m another test • I will execute before each test • I’m a test
Note that the second test was executed before the first test, the order of test execution
indeterministic by design. A test should not depend on the success of another test (Beck,
2002).
2.4 Creating a Selenium framework
This chapter focuses on the practical techniques used when building a Selenium framework
in Java, starting with the installation of the WebDriver and techniques for locating elements,
then moving on to design patterns and how they can aid in code design.
2.4.1 Installing WebDriver
WebDrivers are available for Firefox, Internet Explorer, Safari, Opera, Chrome and Edge
(Software Freedom Conservancy, 2020). These drivers are maintained by the creators of

11
each browser. The Google Chrome driver is available at
https://chromedriver.storage.googleapis.com/index.html. The driver must be downloaded to
the file system and the Java test application must set the system property
webdriver.chrome.driver to the location of the Chrome driver. (Avasarala, 2014)
There are some subtle differences between the different web drivers that are not covered in
this thesis, as the test suite will be written solely for the Chrome driver.
2.4.2 Locating elements
In order to perform assertions and operations on elements on a web page, the elements must
first be located. HTML DOM elements are represented by the WebElement class,
functioning as the handle for performing operations on them. (Avasarala, 2014)
Two methods are available in WebDriver for locating elements: findElement() and
findElements(). Usage of these methods is demonstrated in code sample 4. Both methods
specify one parameter of type By in their method definitions. The findElement() method
returns a single object of type WebElement and will throw an exception if the element is not
found. The findElements() method returns a list of WebElemet objects matching the given
search criteria. (Gundecha, 2012)
Code sample 4: Different methods for finding elements in Selenium.
WebElement inputField = driver.findElement(By.id("search")); WebElement menuLink = driver.findElement(By.linkText("Menu")); List<WebElement> buttons = driver.findElements(By.className("wsb-button")); List<WebElement> images = driver.findElements(By.tagName("img"));
The By class establishes the mechanism for locating elements, providing eight different
locator methods, as described in table 1. When selecting a locator method to use, the By.id(),
By.name() or By.class() should primarily be considered (Gundecha, 2012).
The By.id() method is the fastest and most reliable method for locating elements since IDs
are what browsers use natively (Gundecha, 2012). However, the developer should keep in
mind HTML element IDs are sometimes left to be generated by the web server and in that
case may change in an unpredictive manner (Avasarala, 2014).

12
Table 1. Locator methods of the By class
Locator method Description
By.id() Locates elements by their ID.
By.name() Locates elements by their name attribute.
By.className() Locates elements by their class attribute.
By.tagName() Locates elements by their tag attribute.
By.linkText() Locates a link element by its text.
By.partialLinkText() Locates a link element where its text partially matches the given matcher.
By.cssSelector() Locates a link element with a CSS selector.
By.xpath() Locates a link element with an X-Path expression.
2.4.3 Waiting for elements
Web elements are loaded differently with different timings each time web page is loaded;
this can cause synchronization issues. Selenium uses two types of waiting mechanisms to
tackle this problem: explicit waits and implicit waits. (Gundecha, 2012)
An explicit wait will wait until a given condition is true. Conditions are defined using the
ExpectedCondition, providing a wide selection of methods for creating expectations such as
the presence of specific elements, or that the web page title name matches a given value. An
example of using explicit waits is presented in code sample 5, where the test waits for the
menuLink element to be in a clickable state before clicking it.
Implicit waits are different from explicit waits in that they are set as a property of the web
driver and applied for every locator call. Implicit waits do not wait for defined conditions,
they simply retry the locator call repeatedly until the web element is found or the timeout is
reached. This strategy may lead to slower performance than explicit waits. Developers
should prefer the more reliable explicit waits over implicit waits. (Gundecha, 2012)

13
Code sample 5: Using waits.
@Test void testWithExplicitWait() { int timeOutInSeconds = 30; WebElement menuLink = driver.findElement(By.linkText("Menu"));
// Configures a wait instance to wait for expected conditions for a maximum of 30 seconds before // failing.
WebDriverWait wait = new WebDriverWait(driver, timeOutInSeconds); // Halts execution and waits for the element to reach a state that is considered clickable. WebElement clickableMenuLink = wait.until(ExpectedConditions.elementToBeClickable(menuLink)); // The element is now safe to click clickableMenuLink.click(); } @Test void testWithImplicitWait() { // Configures the driver to continuously retry finding elements for // a maximum of 5 seconds before failing. driver.manage().timeouts().implicitlyWait(5, TimeUnit.SECONDS); WebElement menuLink = driver.findElement(By.linkText("Menu")); menuLink.click(); }
2.4.4 The page object design pattern
Different tests may often need to access the same web pages. To avoid duplication of code,
the page object design pattern may be used. The page object design pattern defines a page
object model that encapsulates browser automation code related to a specific web page to its
own class. Usage of page object models introduces separation of browser automation code
and actual test code, making tests highly maintainable (Gundecha, 2012).
The page object is a class containing the locators and methods used for interacting with a
page. Public methods of a page object should not represent individual user actions like
fillUserName(), fillPassword() and clickSendButton(), but rather provide the services of the
web page; If a web page has a login form with input fields for username and password and
a login button, the page object model should provide a single login() method. (Avasarala,
2014)
Code sample 6 shows a sample page object implementation modelling the Novia front page,
including a method representing its search-on-site service. The return type for the public

14
method in this case is the page that the user ends up on after using the service. This design
creates an expressive page model.
Code sample 6: Implementing the page object model.
public class NoviaFrontPage { private final WebDriver driver; // Each page object keeps track of its own elements. private By searchButtonIdentifier = By.className("search-bar"); private By searchBarIdentifier = By.id("Form_SearchForm_Search"); public NoviaFrontPage(WebDriver driver) { this.driver = driver; } // The public methods of the page object reflect actions that can be taken // by a user on this particular page. public SearchResultsPage searchFor(String value) { // Use the identifiers to locate the WebElements. WebElement searchButton = driver.findElement(searchButtonIdentifier); WebElement searchBar = driver.findElement(searchBarIdentifier); // Interact with the WebElements searchButton.click(); searchBar.sendKeys(value); searchBar.sendKeys(Keys.ENTER); // Return the page that the user lands on after performing a search. return new SearchResultsPage(driver); } }
In the page object model implementation presented in code sample 6, the page object stores
the element locators as private By objects which are passed to the WebDriver whenever an
element needs to be located. This works fine, although Selenium provides a more convenient
way of locating elements with its page factory feature. The Page factory takes care of
locating and instantiating WebElements, leaving that part out of concern to the test
developer.

15
Code sample 7: Page object using the PageFactory.
public class NoviaFrontPage { private final WebDriver driver; @FindBy(className = "search-bar") // The page factory takes care of locating the element for us. private WebElement searchButton; @FindBy(id = "Form_SearchForm_Search") private WebElement searchBar; public NoviaFrontPage(WebDriver driver) { this.driver = driver; // The page factory initializes all web elements of this page object. PageFactory.initElements(driver, this); } public SearchResultsPage searchFor(String value) { searchButton.click(); searchBar.sendKeys(value); searchBar.sendKeys(Keys.ENTER); return new SearchResultsPage(driver); } }
Code sample 8: Using page objects in a test.
@Test void searchForStudent_returnsResults() { NoviaFrontPage noviaFrontPage = new NoviaFrontPage(driver); SearchResultsPage searchResultsPage = noviaFrontPage.searchFor("Student"); Assertions.assertTrue(searchResultsPage.hasSearchResults()); }
In order to utilize the page factory, the page object will define each WebElement as a private
field rather than the By object used to locate them. Each WebElement field is annotated with
the FindBy() annotation which takes the locating mechanism as input. Before they can be
used, the WebElements must be initialized with the PageFactory.initElements() method as
shown in code sample 7.
When tests use the page object, they need not consider details such as how elements are
located. If the page object’s methods are well named, they allow for writing expressive tests
that are easy to understand, such as the one in code sample 8.

16
3 The platform
This chapter describes C°Open. C°Open is Crosskey’s Open Banking platform which
provides a set of payment service APIs that comply with the Revised Payment Services
Directive (PSD2) regulations.
Consumers of the platform are third party providers (TPP). These are organizations who
have purchased a special Qualified Certificate for Web Authentication (QWAC) and a
Qualified Electronic Seal Certificate (QSealC). TPPs may use the APIs to create financial
planning apps, account aggregation apps or any sort of service that provides banking services
to users.
Sophisticated security is fundamental to Open Banking APIs. C°Open security mechanisms
include mutual TLS, Oauth2 and OpenID Connect. Access to the APIs is acquired through
the C°Open developer portal, where TPPs create and manage client registrations and API
subscriptions. After acquiring QWAC and QSealC certificates from a Qualified Trust
Service Provider, the TPP can upload them to the C°Open developer portal and subscribe to
any of the C°Open Open Banking APIs.
Figure 1: The function of C°Open.

17
When the TPP is subscribed to APIs of several different banks, they are all available through
a consistent interface. As a result, bank aggregation is easy. Figure 1 illustrates this concept,
where if the TPP user is a customer of bank A, C and E, accounts in all three banks could be
available in a single TPP application.
The C°Open platform is built with a micro service structure in the cloud. Most of the micro
services are Java applications. The rest of this chapter focuses on the details of the platform,
starting an overview of the Open Banking initiative and the publicly visible parts of C°Open,
followed by a more in-depth view of the underlying applications and infrastructure.
3.1 Domain
While Crosskey offer a variety of products in the financial domain, such as a core bank,
mobile app and internet bank, the C°Open platform specifically deals with the regulations
surrounding the revised Payment Service Directive (PSD2) and Open Banking. (Crosskey
Banking Solutions, 2020).
C°Open simplify compliance with the PSD2 regulations for banks as it exposes a PSD2
compliant API layer on top of the bank’s core system. The APIs are publicly marketed to
TPPs on Crosskey’s developer portal. (Crosskey Banking Solutions, 2020)
3.1.1 PSD2 and Open Banking
The revised Payment Service Directive aims to increase competition among small and big
payment service providers by making it easier for smaller actors such as FinTech start-ups
to provide payment services, all while being regulated by EU rules (European Commission,
2019).
Open banking is the British adaptation of the PSD2 regulations, essentially adding a standard
format to use in achieving compliance with PSD2 (Manthorpe, 2018).
Security and fraud mitigation are of highest importance. Therefore, all payment initiation
and processing are strictly required to be validated by the concept of Strong Customer
Authentication (SCA). The European Commission (2019) states that the authentication
process requires at least two of the following criteria to be fulfilled:
• Knowledge: something only known to the user (like a password) • Possession: something only possessed by the user (like a phone) • Inherence: something the user is (like a fingerprint)

18
3.1.2 Third party providers
All players who are providers of payment services must meet the strict requirements of
PSD2. These players are called third party providers (TPP) and include both traditional
banks and innovative FinTech start-ups. (European Commission, 2019)
TPPs may offer their customers access to their accounts from many different banks in a
single application. To achieve this kind of account aggregation in C°Open, the TPP
subscribes their application registration to the APIs of different banks in the developer portal
and integrate them into their application.
3.2 Applications
The platform consists of a set of micro services, most of which are Java Spring Boot
applications. An authorization server handles the issuing of tokens with which a TPP may
be granted access to a resource server. The resource servers are an account resource server
and a payment resource server. These servers communicate with multiple core bank systems.
Every API include a live and a sandbox version. Live APIs communicate with real core bank
back end systems, and a mocked back end is used for sandbox APIs. The mocked sandbox
back end include test customers with accounts and transactions. Integration of the sandbox
APIs is almost identical to that of live APIs, simplifying the initial development process for
TPPs.
3.2.1 Developer portal
A developer portal is available at https//crosskey.io and functions as the main entry point to
the platform. This is where TPP developers upload certificates and manage their API
subscriptions. The developer portal hosts the Open Banking Marketplace where all available
APIs are marketed. Every API come with extensive API documentation. Developers can
subscribe to live APIs only if they have uploaded valid QWAC and QSealC certificates. The
developer portal can also generate unqualified certificates for use with sandbox APIs.
3.2.2 Test tool
Testing of complete payment flows require coordinating many API calls. For this purpose,
the team have developed a dedicated test tool, also referred to as the third-party provider

19
sample application. This tool a third-party provider by implementing the APIs of the
platform.
The test tool can test all types of PSD2 related payment services offered by the platform and
is therefore used extensively for testing in both non-production environments and the
production environment.
At the test tool index page, the tester is required to provide the certificates and credentials of
a client registration created in the Developer portal, which has the effect of configuring the
test tool to function as a TPP.
After entering certificates and client credentials, the test tool provides functionality for
fetching accounts and performing payments through the C°Open APIs.
3.3 Infrastructure
As the IT industry has moved more towards cloud computing, Crosskey decided to do the
same with the C°Open platform.
The infrastructure was built using Amazon Web Services, allowing the team to be very
flexible in their design. This chapter covers cloud computing with AWS and how it enables
C°Open to scale on demand as it grows.
3.3.1 Cloud computing
Traditional data centres require the business to manage their own hardware, in contrast,
cloud computing adds an abstraction layer on top of the actual hardware, allowing users to
treat hardware as a pool of resources which can be increased or decreased on demand (Bloor,
et al., 2009)
This concept of managing hardware as resource pools is called elasticity. Elasticity brings a
big advantage over traditional infrastructure. Elasticity is possible largely due to
virtualization; Virtualization abstracts away storage, processing power, memory and
network from one or more virtual machines and allocates the resources available to each
virtual machine. (Chopra, 2017)
The efficiency of elasticity is a major driving force for businesses moving their systems to
the cloud. Another contributor is the billing system as it is usually based on service usage,

20
which has the potential to be more cost effective than traditional server expenses. (Bloor, et
al., 2009)
3.3.2 Amazon Web Services
When Amazon Web Services was launched in 2006, it became the pioneer of cloud
computing (Golden, 2013). Within a year, more than 200 000 users had registered to the
service, today it is the go-to provider of cloud computing offering a wide arrange of services
covering almost every aspect of cloud computing (Kuppusamy & Vyas, 2014).
A user may choose between a few different methods for interacting with the AWS services.
The most popular method is with the AWS Management console website. Another method
is with the AWS SDK with which developers can perform operations through code. AWS
also provides APIs for this purpose. These APIs are used by the SDK in the background.
The function of the SDK is essentially to provide a more robust method of using the
functionality of the APIs rather than performing individual requests. (Kuppusamy & Vyas,
2014)
Cloud Formation is service providing a way of achieving Infrastructure as Code (IaC),
allowing a large portion of the cloud environment to be modelled as Cloud Formation
templates. Deployment of the cloud resources occurs when the template is uploaded to AWS.
These templates can be treated as code and be version controlled, enabling less error prone
management than manual processes. (Amazon Web Services, Inc, 2020)
Elastic beanstalk is a convenient service for deploying web applications with easy
configuration of auto scaling and load balancing features (Amazon Web Services, Inc, 2020).
Virtual machines used by AWS are described by Amazon Machine Images (AMI). An AMI
includes the operating system and pre-installed software for a virtual machine instance. AWS
provides many AMIs to choose from. Custom AMIs can also be created and uploaded to
AWS. (Amazon Web Services, Inc, 2020)
The C°Open platform is built using AWS. Most of the applications are elastic beanstalk
applications provisioned by cloud formation scripts. The AWS services provide powerful
scaling functionality, allowing the infrastructure to be easily scaled as the platform usage
grows.

21
3.3.3 Micro services
Micro services is an architecture that divides an application up into separate small services
which can be deployed separately. This architecture is the opposite of monolithic
applications which run all their features as a single service.
Advantages to micro services over monolithic applications include improved resilience and
higher efficiency with flexible scaling. Each micro service can be scaled and operated
separately. (Amazon Web Services, Inc, 2020)
The C°Open platform takes advantage of micro service architecture and deploy each micro
service as a separate elastic beanstalk application.
3.4 Development process
C°Open applications are generally built with Java. All code is version controlled with Git
and Bitbucket. Bitbucket is a management and code collaboration system for Git
repositories. Jenkins is used to implement continuous integration and automated builds.
Three environments are maintained: a development environment, a test environment and a
production environment. This section describes the C°Open continuously integrated
development process.
3.4.1 Continuous integration
Code defects that are discovered early rather than late in the development cycle can be 100
to 1000 times as cheap to fix. The concept of Continuous Integration (CI) aids in finding
defects as early as possible. This is achieved by continuously integrating every new code
change to a common development environment where the code is built and tested
thoroughly. (Berg, 2012)
Jenkins is a popular open-source CI server able to build, test and deploy code, and can be
heavily customized with plug-ins (Berg, 2012). C°Open uses Jenkins along with AWS to
implement CI.
In C°Open, Jenkins is set up to build code as soon as a change is detected in version control.
The code is built on dedicated build servers. Jenkins also deploys applications to elastic
beanstalk. This kind of automation is achieved with pipelines; a set of Jenkins plug-ins
allowing the process of building, testing and deploying software to be automated and

22
expressed using a domain specific language (Jenkins, 2020). The pipeline code is included
in every repository in a Jenkinsfile.
3.4.2 Release cycle
Development follows an Agile process with two weeks long sprints, including one release
per sprint. The development cycle begins in a local environment where the developer
implements new features that run on his own device. When a developer has finished a
feature, a pull request is made to the development environment. The pull request is reviewed
by another developer before being merged to the development environment. A week before
release, the test environment is updated where the new features are tested before they are
merged to the production environment on release day.
4 Design and implementation
This chapter assembles the previously discussed technologies and methodologies into the
final product of this thesis. The final product is a test suite including three separate java
applications with supporting server infrastructure capable of executing browser-based tests
in a continuously integrated environment.
The first part of this chapter discusses the decisions made at the early stages of
implementation, followed by separate sections providing technical details about different
aspects of the test suite. Important decisions made in the design phase include the choice of
browser automation software, the programming language and the type of server to run the
applications on.
A key decision was the selection of browser automation software since some are tied to
specific programming languages, and some ship with supporting applications for dashboards
and management which could dictate subsequent design choices. Based on the evaluation in
section 2.2, the decision fell on Selenium.
Selenium is available for many programming languages. Java was selected for this project
as it is the go-to language of the team.
The choice of test framework became JUnit, as it was widely used already in the platform.
The latest available version of JUnit was selected.

23
A common requirement for browser based automated tests is to run each test on multiple
browsers. This can be achieved with selenium grid as mentioned in section 2.2.3. In this
project, the benefits of such an architecture were deemed to be low, as the main objective of
the test suite was to verify the underlying APIs rather than the user’s GUI experience.
The C°Open platform was running a micro service infrastructure with AWS and Jenkins, the
tests would therefore run on their own customized virtual machine, provisioned and managed
by the existing CI infrastructure of the platform. The virtual machine would be created as an
AMI. The AMI details are discussed in section 4.1.1.
When provisioning a virtual machine in AWS, an instance type is selected. The instance type
defines the virtual hardware that the AMI is run on. The instance type must be powerful
enough to run both the java application and a web browser. Browsers are known to be
demanding on resources and Arulanthu (2019) suggests a minimum of 4GB of RAM. The
t3a.medium instance with two virtual CPU cores and 4GB of RAM was selected for this
project.
More powerful instances are more expensive. The billing system for instances is based on
an hourly cost, meaning that the cost of operation of an instance will be significantly cheaper
if it is elastically provisioned rather than always alive.
A way of minimizing the cost of running the test suite is to provision and de-provision the
VM every time a test is run. Achieving this kind of behaviour was easy with the Jenkins
server already in use by the team, as it was neatly integrated with AWS allowing for flexible
provisioning of short-lived build servers.
The Jenkins setup is based on a master-slave system where a master node starts up and
distributes slave nodes as required by Jenkins jobs. A Jenkins job is a configuration
describing an automated process or pipeline. The slaves are virtual machines running
different AMIs for different purposes. With this setup, the automated tests could be created
as Jenkins jobs and configured to run on slaves with a pre-defined AMIs. Jenkins would also
be responsible for the run trigger, as it is able to trigger jobs automatically on schedule.
Developers can also trigger jobs manually in Jenkins.
To fulfil the requirement of having separate test runs for every environment, the solution
was to create them as separate Jenkins jobs, this is discussed further in section 4.1.2.
24
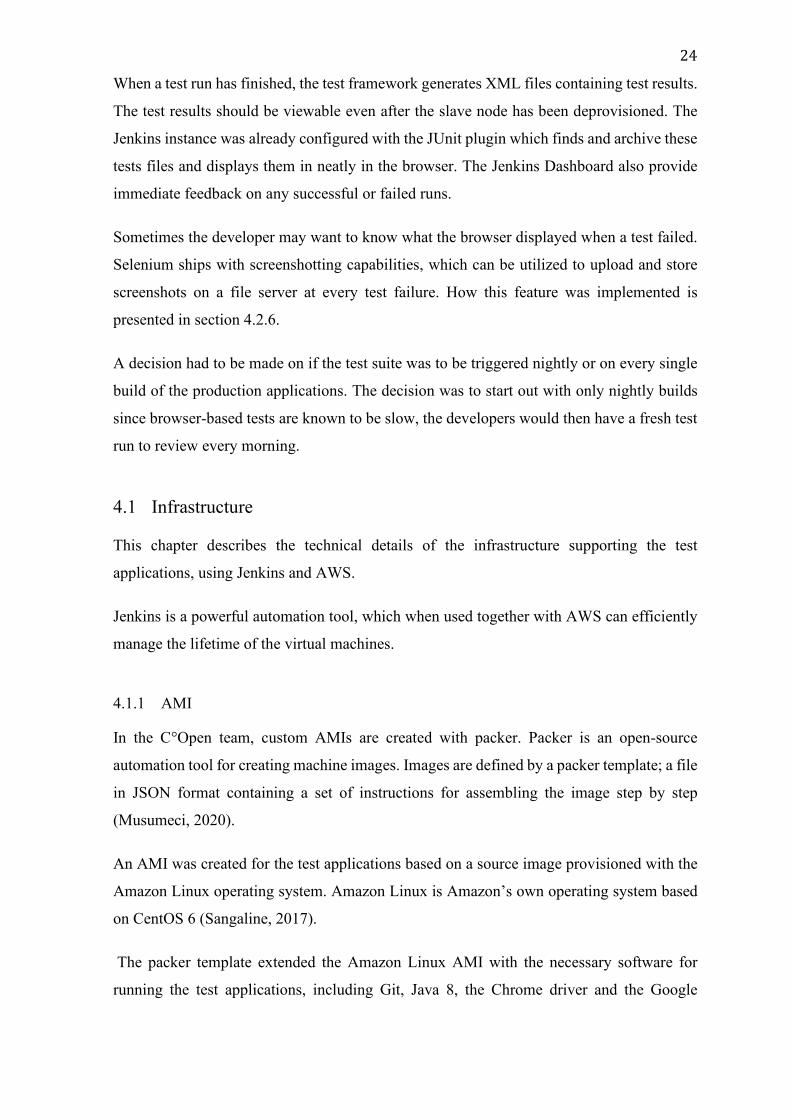
When a test run has finished, the test framework generates XML files containing test results.
The test results should be viewable even after the slave node has been deprovisioned. The
Jenkins instance was already configured with the JUnit plugin which finds and archive these
tests files and displays them in neatly in the browser. The Jenkins Dashboard also provide
immediate feedback on any successful or failed runs.
Sometimes the developer may want to know what the browser displayed when a test failed.
Selenium ships with screenshotting capabilities, which can be utilized to upload and store
screenshots on a file server at every test failure. How this feature was implemented is
presented in section 4.2.6.
A decision had to be made on if the test suite was to be triggered nightly or on every single
build of the production applications. The decision was to start out with only nightly builds
since browser-based tests are known to be slow, the developers would then have a fresh test
run to review every morning.
4.1 Infrastructure
This chapter describes the technical details of the infrastructure supporting the test
applications, using Jenkins and AWS.
Jenkins is a powerful automation tool, which when used together with AWS can efficiently
manage the lifetime of the virtual machines.
4.1.1 AMI
In the C°Open team, custom AMIs are created with packer. Packer is an open-source
automation tool for creating machine images. Images are defined by a packer template; a file
in JSON format containing a set of instructions for assembling the image step by step
(Musumeci, 2020).
An AMI was created for the test applications based on a source image provisioned with the
Amazon Linux operating system. Amazon Linux is Amazon’s own operating system based
on CentOS 6 (Sangaline, 2017).
The packer template extended the Amazon Linux AMI with the necessary software for
running the test applications, including Git, Java 8, the Chrome driver and the Google

25
Chrome browser. Both Git and Java 8 was installed with the Yum packet manager, while
installing Google Chrome was more complicated.
In his blog post, Evan Sangaline (2017) describes the difficulties of installing Google
Chrome on the CentOS 6 based Amazon Linux; Amazon Linux is a lightweight operating
system optimized for server use, which significantly reduces packet availability. A Google
Chrome repository is available for the RPM packet manager, but only for RHEL/CentOS
version 7 and newer. Evan distributes an installation script for free which installs all needed
dependencies as well as Google Chrome.
To install Google Chrome on the AMI, Evan’s installation script was provided alongside the
packer template and the template was configured to provision and run the installation script
on the AMI.
The packer pipeline was run by creating a new Job in Jenkins and linking it with a repository
in Bitbucket containing the pipeline and packer template. The pipeline would publish the
AMI and make it available to the C°Open AWS account.
4.1.2 Jenkins configuration
The Jenkins EC2 plugin allows for configuration of different kinds of slaves, also called
nodes, for different purposes. Jenkins jobs can be configured to request a certain type of
node depending on its needs.
A node was configured and provisioned with the previously created AMI for use with
Jenkins jobs running the test suite. This node was given a “selenium”-tag. This tag is used
by Jenkins jobs to refer to specific node types.
Jenkins jobs were created for each test application. Each Jenkins job was linked to a
Bitbucket repository where the test application source exists. When the job runs, the source
code is pulled from bitbucket onto the node and the code is compiled and run. The job was
set to run on a schedule. The details of how these Jenkins jobs were configured are described
in section 4.1.3.

26
Figure 2: Jenkins job overview of a test application.
To run test towards different environments, the Jenkins job was set up as a multibranch
project, using separate branches per environment. This configuration makes it easy to see
the status of each environment in the Jenkins Job view, as demonstrated by figure 3.
4.1.3 Pipeline
Each repository is provided with its own Jenkinsfile containing the pipeline code written in
the Jenkins Domain Specific Language (DSL); a programming language similar to the
Groovy programming language which provides functionality for configuring a Jenkins job
programmatically.
A developer may choose from two different styles of syntax when writing Jenkins DSL,
declarative and scripted syntax; Scripted syntax is older more similar to Groovy standards,
promoting imperative programming, while declarative syntax promotes declarative
programming and is more restricted by design (Lateef, 2020). For this project, scripted
syntax was used for its flexibility.
The pipeline was shared among test applications, and therefore stored in a separate library
and named “seleniumPipeline.groovy”. Each test application has their own Jenkins file
which imports the shared selenium pipeline. Code sample 9 shows the Jenkins file of one of
the test applications, where the last two lines imports and calls the seleniumPipeline. The
details of the seleniumPipeline are discussed further down.

27
Code sample 9: Jenkinsfile of selenium-tpp-sandbox.
properties([ pipelineTriggers([cron('H 6 * * *')]), // Every day at 06:00 parameters([ choice(choices: ['branch', 'prd', 'tst', 'dev'], description: 'Target environment', name: 'ENVIRONMENT') ]) ]) library 'openbanking-jenkins-pipeline@master' seleniumPipeline(jenkinsParameter: params.ENVIRONMENT)
The first lines of code in code sample 9 calls Jenkins DSL functions for setting properties on
the Jenkins job. The pipelineTriggers() function is able to trigger the Jenkins job
automatically. When pipelineTriggers() is used together with the cron() function, the
pipeline can be triggered on a schedule.
The cron() function is a cron-like feature for the Jenkins DSL which is able to represent
scheduled timestamps (Jenkins, 2020). The cron expression in code sample 9 represents
every morning at 06:00 UTC.
The parameters() function is used to set up selectable choices for parameterized Jenkins jobs.
These choices can then be selected when manually running the Jenkins job in Jenkins. As
the project was set up to run automatically, some default value had to be provided. This was
solved by adding the ‘branch’ choice as the first in the list, since the automated runs will
always select the first available parameter choice. The ‘branch’ choice represents the
environment of the git repository branch of the source code. For example, selecting the
“branch” option on the Jenkins job for development-tests would have the effect of running
the tests towards the development environment. If instead the “tst” was selected, the tests
intended for the development environment would be run towards the test environment.
Section 4.2.3 shows how this environment variable is provided to the application by Gradle.

28
Code sample 10: Main function of the seleniumPipeline.
def call(Map pipelineParams) { env.jenkinsParameter = pipelineParams.jenkinsParameter try { node('selenium') { checkout() build() if (isTestableBranch()) { test() } } } catch (org.jenkinsci.plugins.workflow.steps.FlowInterruptedException err) { println(err.toString()); println(err.getMessage()); println(err.getStackTrace()); } finally { cleanMasterWorkspace(); } }
Code sample 11: The test stage of the seleniumPipeline.
def test() { stage 'Test' def targetEnvironment = getTargetEnvironment() try { sh "./gradlew test -Denv=" + targetEnvironment } catch (e) { upload() currentBuild.result = 'FAILURE' } finally { junit 'build/test-results/**/*.xml' } }
The seleniumPipeline() consists of a checkout stage, a build stage and a test stage. The
entrypoint of the pipeline is shown in code sample 10. The node() function requests an
instance of the node that was configured in previous chapter based on its tag name. All code
inside the node() code block is then executed on the node VM.
The checkout(), build() and test() functions are called in order, representing different stages
of the pipeline. The checkout() function pulls the source code from version control, the
build() function builds the project from source and the test() function, presented in code

29
sample 11, runs the gradle test command while providing the java application with the test’s
target environment.
4.2 The test applications
As previously mentioned, three different test applications were created. One application for
targeting the developer portal and two applications targeting the C°Open test tool, separating
the live and sandbox environments.
Figure 3: The three test applications.
Figure 4 shows the three applications and their separation of concerns. It also illustrates how
the test tool provides access to the APIs through a web interface.

30
Figure 4: The components of the test applications.
The main components of each test application are the test framework, the browser
automation framework and the test cases.
The test framework is able to execute tests, make assertions, manage test data and more.
The test framework is also responsible for generating test results files, containing
information about the success or failure of tests. JUnit 5 was chosen as the base for the test
framework. An introduction to JUnit 5 is found in section 2.3, and section 4.2.2 presents the
implementation details of how JUnit 5 was used in the test suite.
The browser automation framework handles interactions with a browser. In section 2.2,
different browser automation software alternatives were evaluated, resulting in Selenium
being picked. Selenium is not shipped as a complete framework but provides the building
blocks for tailoring a framework which fulfils the needs of the test cases of the application.

31
How such a framework can be designed is presented in section 2.4, and section 4.2.2 presents
its implementation in the test suite.
Development of the test cases were done in parallel with the browser automation framework,
as the purpose of browser automation framework is to provide useful methods to the tests
while abstracting away details of the underlying browser automation software.
Java applications are usually accompanied by a build tool. Build tools are automation
software responsible of managing dependencies, compiling code and executing related tasks.
The C°Open team specifically requested that Gradle would be used as the build tool for these
applications, as it was already in use by all other java applications of the platform and a
proven concept. The details of the Gradle implementation are discussed later in this chapter.
These components all use different technologies and can be viewed as separate parts of the
application, as figure 5 illustrates. A benefit of thinking of these components separately is
that it helps in keeping the code neatly organized.
Since the test tool expects the tester to input different client credentials and certificates
depending on which API is tested, the tests needed a way to store them as configuration. The
client credentials come from a client registration created manually in the developer portal,
created separately for each environment. The handling of these credentials is presented in
the following section.
4.2.1 Client registration configuration
The test tool expects the tester to enter client credentials and certificates before accessing
the APIs. Client registrations were created beforehand, and its credentials had to be provided
to the test application at runtime. These client registrations were separated by environment
and the test application had to be able to choose from different client details depending on
which environment it was targeting.
Implementation of this functionality used separate configuration files for each environment,
provided with the source code. Each configuration file was suffixed with the environment it
targeted and formatted as YAML, a human readable serialization format.
A configurator class was created for reading the configuration file and populating a POJO-
object holding the application properties. The configurator class was added to a library
repository to make it reusable among all test applications.

32
Mapping text files to java classes is common programming problem and many libraries are
available for this purpose. The configurator uses an ObjectMapper class from a library called
FasterXML/jackson.
Code sample 12: Reading configuration from files.
public static <T> T getConfiguration(Class<T> configurationType) { final ObjectMapper mapper = new ObjectMapper(new YAMLFactory()); mapper.findAndRegisterModules(); final String fileName = getFileName(); try { return mapper.readValue(new File("src/test/resources/" + fileName), configurationType); } catch (IOException e) { throw new IllegalStateException("Unable to open file '" + fileName + "'", e); } }
The properties required for the developer portal configuration were different from those
required for the API test configuration. To be able to re-use the same configurator class in
all test applications, the configurator class takes a generic configuration class as a parameter,
as demonstrated in code sample 12. This way the configuration class defining the properties
is decoupled from the configurator class. The configurator class is placed in the shared
library, and the configuration classes with its associated YAML-file are defined in consumer
of the library.
4.2.2 Test code design
For every test case, certain tasks will always be performed before and after the actual test.
These tasks include reading the configuration file, opening a browser, and navigating to a
web page. Writing this code separately for every test would lead to a lot of duplicated code.
A custom test framework is created for this purpose. The test framework was implemented
as abstract classes inherited by every test class.

33
Figure 5: The test framework.
The resulting inheritance hierarchy, illustrated in figure 6, starts with a SeleniumTest
ancestor class responsible of initializing and closing the driver before and after tests. Code
sample 13 presents the implementation of the SeleniumTest class, using the @BeforeAll and
@AfterAll annotations from JUnit.
Code sample 13: The test framework ancestor class.
public abstract class SeleniumTest { protected static WebDriver driver; @BeforeAll public static void initializeDriver() { driver = WebDriverFactory.getDriver(); } @AfterAll static void closeDriver() { driver.quit(); } }
The first children of the SeleniumTest ancestor represent the separation of the Developer
portal tests (DeveloperPortalTest) and the API tests (TPPTest). These classes are responsible

34
for setting up configuration, navigating to the front page of the AUT, logging in and similar
preparations.
Implementation of the browser automation framework was also achieved with an inheritance
hierarchy, using the Page Object model pattern as described in section 2.4.4. All page objects
inherit from the Page ancestor, wrapping the functionality of the WebDriver into a domain
specific language for use by the children classes. Code sample 14 shows one of the many
methods from the Page class, demonstrating how the process of filling a text box was
implemented, and code sample 15 shows an example of a child page object, using the
framework methods of the Page ancestor.
Code sample 14: An early version of the Page class.
public abstract class Page { protected WebDriver driver; protected WebDriverWait wait; protected Page(final WebDriver driver) { this.driver = driver; this.wait = new WebDriverWait(driver, 30); } protected void click(final By identifier) { final WebElement element = driver.findElement(identifier); element.click(); } protected void fillTextBox(final By identifier, final String text) { final WebElement element = wait.until(ExpectedConditions.elementToBeClickable(identifier)); if (text == null) { element.sendKeys(""); } else { element.sendKeys(text); } } }

35
Code sample 15: A page object model of the sandbox authentication page.
class SandboxAuthPage extends Page { private final By usernameTextBox = By.id("username"); private final By passwordTextBox = By.id("password"); private final By loginButton = By.id("kc-login"); SandboxAuthPage(final WebDriver driver) { super(driver); } ConsentPage login(final UserAuthenticationData user) { fillTextBox(usernameTextBox, user.getUserName()); fillTextBox(passwordTextBox, user.getPassword()); click(loginButton); return new ConsentPage(driver); } }
The test framework and the browser automation framework could now be used together to
create tests. Each test case was created as a separate test class, where each method is a test
for a tenant that should run that specific test case. Code sample 16 shows a test which checks
that balances can be retrieved for an account. It uses the test framework by extending the
TPPTest class and annotating each method with the @Test annotation from JUnit. The
browser automation framework consists of the page objects used within the test.

36
Code sample 16: A test for fetching account balance information.
class GetBalancesTests extends TPPTest { @Test void sPankki() { getBalances(Tenant.SPANKKI); } @Test void alandsbankenFinland() { getBalances(Tenant.ALANDSBANKEN_FINLAND); } @Test void alandsbankenSweden() { getBalances(Tenant.ALANDSBANKEN_SWEDEN); } private void getBalances(final Tenant tenant) { final HomePage homePage = new HomePage(driver); homePage.connectAccounts(tenant, getUser(tenant), new SandboxAuthFlow(driver)); final BalancesPage balancesPage = homePage.clickBalancesOfTopMostAccount(); assertTrue(balancesPage.hasOneOrMoreEntries()); } }
All test cases described in section 1.2 were created in this style and new test cases are easily
added by creating new test classes extending either TPPTest or DeveloperPortalTest.
4.2.3 Build tool
The test applications were configured with Gradle. Gradle is responsible for managing
dependencies and automating build-related tasks.
Gradle configuration is written as code in the Gradle Build Language, a DSL providing a
convenient API for creating build scripts. The Gradle configuration code is written in a
special file named “build.gradle”.
Code sample 17: The test configuration block in build.gradle.
test { systemProperty 'env', System.getProperty('env') useJUnitPlatform() }

37
Code sample 17 shows the Gradle test task. To execute JUnit tests, the useJUnitPlatform()
function from the Gradle DSL is called, and an “env” system property from the command
line is propagated to the application by the systemProperty function. Using this
configuration, the test applications can be run with Gradle with the command: gradlew run
-D env=dev.
4.2.4 Shared logic
All three test applications are very similar and share a majority of the framework code. A
class library was created and populated with the abstract classes of the brower automation
framework and the test framework, as well as the Configurator class. Each test application
imports the class library as a dependency.
The two API test applications are very similar in structure, the biggest difference being the
authentication process. Each bank provides their own authentication system, each of which
had to be modelled with separate page objects by the test applications. An “AuthFlow”
interface was created to represent the authentication process, and each authentication system
was modelled in separate classes implementing the interface as demonstrated by code sample
18.

38
Code sample 18: The AuthFlow interface and two example implementations.
public interface AuthFlow { ConsentPage authenticate(UserAuthenticationData user); } public class AlandsbankenFinlandAuthFlow implements AuthFlow { //...Constructor etc. @Override public ConsentPage authenticate( final UserAuthenticationData user) { return new AlandsbankenFinlandAuthPage(driver) .login(user) .verifySMS(); } } public class KomplettBankAuthFlow implements AuthFlow { //...Constructor etc. @Override public ConsentPage authenticate(final UserAuthenticationData user) { return new KomplettBankCountrySelectionPage(driver) .selectCountry() .selectBankID() .enterSSN(user) .performBankIDLogin(user); } }
The abstraction of the authentication flow allowed for compact readable code segments in
consuming page objects. For example, the createPayment() method from the page object for
international payments, shown in code sample 19, takes an authentication flow object as a
parameter. This decouples the details of authentication from the process of creating a
payment.
Code sample 19: Usage of the AuthFlow abstraction in page objects.
public CheckFundsPage createPayment(final UserAuthenticationData userAuthenticationData, final InternationalPaymentForm form, final AuthFlow authFlow) { sendForm(form); return authFlow.authenticate(userAuthenticationData).confirmWithFirstAccount(); }
4.2.5 Targeting specific environments
Each C°Open environment is represented by a branch in the version control system of the
test applications: a “development”, “test”, and “production” branch. When the Jenkins job

39
runs the scheduled Jenkins job with the “branch”-parameter, the environment is resolved
from the Git branch name. The resolved environment is provided to the test application as
an environment variable in the Gradle test command.
Figure 6: Syncing tests with multiple environments.
Separating the targeted environment by Git branches is a good way to keep the tests in sync
with the production code base. As illustrated by figure 7, whenever new features are added
to the development environment, the development branch of the test suite is updated with
new tests. When the test and production environments are updated with the new features, the
tests suite branches can be merged accordingly to add the new tests to respective
environment.
4.2.6 Uploading images on test failure
Capturing screenshots as soon as a test fails is very helpful when trying to figure out the
cause of a failing test. Selenium is capable of capturing screenshots out of the box, which
allowed for a test failure screenshotting feature to be integrated into the test framework.

40
Code sample 20: The JUnit extension for taking screenshots.
public class ScreenshottingWatcherExtension implements TestWatcher { private TakesScreenshot driver; public ScreenshottingWatcherExtension() { } public void setDriver(final TakesScreenshot driver) { this.driver = driver; } @Override public void testFailed(ExtensionContext context, Throwable cause) { context.getTestClass().ifPresent(testClass -> context.getTestMethod().ifPresent(testMethod -> takeScreenshot(testClass.getSimpleName(), testMethod.getName()))); } private void takeScreenshot(final String className, final String methodName) { //…Code which takes a screenshot and stores it on disk } }
To take screenshots as soon as a test fails, a TestWatcher extension was created for the test
framework, implementing the testFailed() method with the screenshotting code in code
sample 20. The watcher was registered on the ancestor class of the test framework. The
takeScreenshot() method was implemented to store all screenshots in an “artifacts”-folder
on disk. Each screenshot is given a name based on the failing test’s class name, method name
and the current timestamp.
Although screenshots were now taken on every test failure, the tester had to be able to
conveniently view the images. Since the test suite was run on a short-lived VM, viewing the
images required the tester to connect to the VM and download the artifacts folder manually.
If the test suite can persist the images in a file server, they are much more accessible. AWS
provides convenient file servers with its S3 service. The S3 service can host “buckets”,
which are file servers for static content. An S3 bucket was created for the test suite images
and the test suite pipeline was configured to call an upload() method on test failure.

41
Code sample 21: Uploading screenshots to S3.
def upload() { s3Upload(file:'artifacts/screenshots', bucket:'cbs-openbanking-aws-ops-selenium-test', path:'') echo "Test failure screenshots will be available at:" echo_urls_to_screenshots(findFiles(glob: 'artifacts/screenshots/*')) }
The upload() method, presented in code sample 21, performs the screenshot upload and
prints out a link leading to the uploaded file which is visible in the Jenkins job console output.
The tester is now able to view the state of the browser at a specific test failure by clicking
this link.
5 Result and discussion
At this time of writing, the test suite has now tested the C°Open platform continuously for
over a year, and the project is considered a success. While the test suite has seen some
infrastructural changes, such as running tests in parallel, the underlying design have proved
to be extensible enough to make such changes easy to implement. The test suite has become
a crucial part of the C°Open delivery process.
The three test applications are run automatically every morning and the C°Open developer
workspace has been furnished with a TV-screen displaying a dashboard of the test results.
This dashboard provides great visibility of the test status for every environment, and major
bugs are found much earlier than before.
Although the test suite is successful, there are some inherent drawbacks to the design which
are important to understand; The test suite tests APIs though a browser-based test tool and
is therefore limited by the sluggishness of a web browser. While this is a logical approach
for the Developer portal tests, the API tests would greatly benefit from being able to bypass
the test tool and perform requests to the APIs directly. Any moving part separating the test
and the APIs may be prone to flakiness, browsers especially so. An API test with direct API
integration would perform much faster than browser-based tests and could be more flexibly
configured to run as a part of a CI pipeline.
Designing a test suite which directly calls the APIs comes with its own challenges. In the
case of C°Open, the biggest challenge would be the problem of authentication. Because the
APIs are secured with the OIDC Hybrid Flow authentication mechanism, authentication
requires human interaction by design. The APIs would therefore have to be provided with a

42
mocked authentication system, allowing the test suite to acquire access tokens purely by
calling APIs. A drawback of this method is that the authentication flow is left untested.
Development of browser-based tests with selenium can be frustrating at times, especially
when dealing with dynamic single page applications. This is largely due to the difficulties
associated with waiting for elements to reach a desired state before interacting with them.
Selenium provides a powerful mechanism for dealing with waiting, but implementing the
mechanism is often a long process of trial and error. Selenium is also less capable of dealing
with some newer HTML elements, such as shadow DOM elements.
All in all, the design choices made in this project have produced test suite solid enough to
reveal major bugs in the early stages of development. In conclusion, this project can be
summarized as a great learning experience, exploring many aspects of a modern micro
service-oriented cloud computing platform.

43
References
Amazon Web Services, Inc, 2020. AWS. [Online] Available at: https://aws.amazon.com [Accessed 27 10 2020].
Arulanthu, Y., 2019. What is the hardware and software requirements of Selenium?. [Online] Available at: https://yosuva.com/2019/08/03/how-to-start-with-selenium/ [Accessed 3 11 2020].
Avasarala, S., 2014. Selenium Testing Tools Definitive Guide. Birmingham: Publishing, Limited.
AWS, 2020. Amazon Linux AMI FAQs. [Online] Available at: https://aws.amazon.com/amazon-linux-ami/faqs/ [Accessed 1 12 2020].
Beck, K., 2002. Test-Driven Development: By Example. Boston: Addison Wesley.
Berg, A., 2012. Jenkins Continuous Integration Cookbook. Olton: Packt Publishing, Limited.
Bloor, R. et al., 2009. Cloud Computing for Dummies. Hoboken: John Wiley & Sons, Incorporated.
Brannen, S. et al., 2020. JUnit 5 User Guide. [Online] Available at: https://junit.org/junit5/docs/current/user-guide/ [Accessed 07 06 2020].
Chopra, R., 2017. Cloud Computing : An Introduction. Bloomfield: Mercury Learning & Information.
Cocchiaro, C., 2018. Selenium Framework Design in Data-Driven Testing : Build Data-Driven Test Frameworks Using Selenium WebDriver, AppiumDriver, Java, and TestNG. Birmingham: Packt Publishing, Limited.
Crosskey Banking Solutions, 2020. Crosskey. [Online] Available at: https//crosskey.fi [Accessed 22 09 2020].
Cypress.io, Inc, 2020. Cypress.io. [Online] Available at: https://docs.cypress.io [Accessed 13 9 2020].
European Commission, 2019. Frequently Asked Questions: Making electronic payments and online bankingsafer and easier for consumers. [Online] Available at: https://ec.europa.eu/commission/presscorner/detail/en/QANDA_19_5555 [Accessed 21 10 2020].

44 Financial Conduct Authority, 2017. FCA. [Online] Available at: https://www.fca.org.uk [Accessed 20 10 2020].
Golden, B., 2013. Amazon Web Services for Dummies. Somerset: John Wiley & Sons, Incorporated.
Gundecha, U., 2012. Selenium testing tools cookbook: Over 90 recipes to build, maintain, and improve test automation with Selenium WebDriver. Birminghan, UK: Packt Publishing Limited.
Hackernoon, 2017. Hackernoon. [Online] Available at: https://hackernoon.com/flaky-tests-a-war-that-never-ends-9aa32fdef359 [Accessed 06 08 2020].
Homès, B., 2012. Fundamentals of Software Testing. 1 ed. s.l.:John Wiley & Sons, Incorporated.
IEEE, 1990. Standard Glossary of Software Engineering Terminology. New York: s.n.
Jenkins, 2020. Jenkins Pipeline. [Online] Available at: https://www.jenkins.io/doc/book/pipeline/ [Accessed 30 10 2020].
Katalon LCC, 2020. https://docs.katalon.com/katalon-studio/docs/index.html#products. [Online] Available at: https://docs.katalon.com/ [Accessed 09 09 2020].
Kuppusamy, P. & Vyas, U., 2014. AWS Development Essentials. Olton Birmingham: Packt Publishing, Limited.
Lateef, Z., 2020. Jenkins Pipeline Tutorial: A Beginner’s Guide To Continuous Delivery. [Online] Available at: https://www.edureka.co/blog/jenkins-pipeline-tutorial-continuous-delivery [Accessed 3 12 2020].
Manthorpe, R., 2018. Wired - What is Open Banking and PSD2? WIRED explains. [Online] Available at: https://www.wired.co.uk/article/open-banking-cma-psd2-explained [Accessed 21 10 2020].
Mette, J., 2008. Guide to Advanced Software Testing. Norwood: Artech House.
Micco, J., 2016. Google Testing Blog. [Online] Available at: https://testing.googleblog.com/2016/05/flaky-tests-at-google-and-how-we.html [Accessed 11 08 2020].
Musumeci, G., 2020. How to use Packer to build a Windows Server Image for Azure. [Online] Available at: https://gmusumeci.medium.com/how-to-use-packer-to-build-a-

45 windows-server-image-for-azure-52b1e14be2f2 [Accessed 2 12 2020].
Myers, G. S. C. &. B. T., 2011. The Art of Software Testing. Hoboken: John Wiley & Sons, Incorporated.
Open Banking Limited, 2020. Open Banking. [Online] Available at: https://www.openbanking.org.uk [Accessed 23 10 2020].
Ruderman, J., 2020. Same-origin policy. [Online] Available at: https://developer.mozilla.org/en-US/docs/Web/Security/Same-origin_policy [Accessed 10 2 2021].
Ruggeri, F., Faltin, F. W. & Kenett, R. S., 2018. Analytic Methods in Systems and Software Testing. s.l.:John Wiley & Sons, Incorporated.
Sangaline, E., 2017. Installing Google Chrome On CentOS, Amazon Linux, or RHEL. [Online] Available at: https://intoli.com/blog/installing-google-chrome-on-centos/ [Accessed 5 12 2020].
Selenium, n.d. SeleniumHQ. [Online] Available at: https://www.selenium.dev [Accessed 14 08 2020].
Software Freedom Conservancy, 2019. Selenium IDE. [Online] Available at: https://www.selenium.dev/selenium-ide/ [Accessed 18 08 2020].
Software Freedom Conservancy, 2020. Selenium Documentation. [Online] Available at: https://www.selenium.dev/documentation [Accessed 18 08 2020].
Stričević, N., 2015. Semaphore. [Online] Available at: https://semaphoreci.com/community/tutorials/how-to-deal-with-and-eliminate-flaky-tests [Accessed 06 08 2020].
Watkins, J., 2001. Testing IT : An Off-the-Shelf Software Testing Process. Cambridge: Cambridge University Press.
Zapata, B. C. & Niñirola, A. H., 2014. Testing and Securing Android Studio Applications. Olton: Pack Publishing, Limited.