Audi A4 B7 front window regulator – replacement guide
44
How to change: Audi A4 B7 front window regulator – replacement guide VIDEO TUTORIAL This replacement procedure can be used for: AUDI A4 (8EC, B7) 2.0 TFSI, AUDI A4 (8EC, B7) 2.0 TFSI quattro, AUDI A4 Avant (8ED, B7) 2.0 TFSI, AUDI A4 Avant (8ED, B7) 2.0 TFSI quattro The steps may slightly vary depending on the car design. WWW.AUTODOC.CO.UK 1–44 Important!
-
Upload
khangminh22 -
Category
Documents
-
view
0 -
download
0
Transcript of Audi A4 B7 front window regulator – replacement guide

How to change: Audi A4 B7 frontwindow regulator – replacementguide
VIDEO TUTORIAL
This replacement procedure can be used for:AUDI A4 (8EC, B7) 2.0 TFSI, AUDI A4 (8EC, B7) 2.0 TFSI quattro, AUDI A4 Avant(8ED, B7) 2.0 TFSI, AUDI A4 Avant (8ED, B7) 2.0 TFSI quattro
The steps may slightly vary depending on the car design.
WWW.AUTODOC.CO.UK 1–44
Important!

REPLACEMENT: WINDOW REGULATOR – AUDI A4 B7.TOOLS YOU MIGHT NEED:
WWW.AUTODOC.CO.UK 2–44
Torque wrench
Drive socket # 10
Torx bit T20
Torx bit T25
Torx bit T27
Torx bit T30
Torx bit T45
Ratchet wrench
Phillips screwdriver
Round-nose pliers
Clip removal tool
Plastic trim tool
Fender cover
Replacement: window regulator – Audi A4 B7. AUTODOCrecommends:
REPLACEMENT: WINDOW REGULATOR – AUDI A4 B7. USE THEFOLLOWING PROCEDURE:
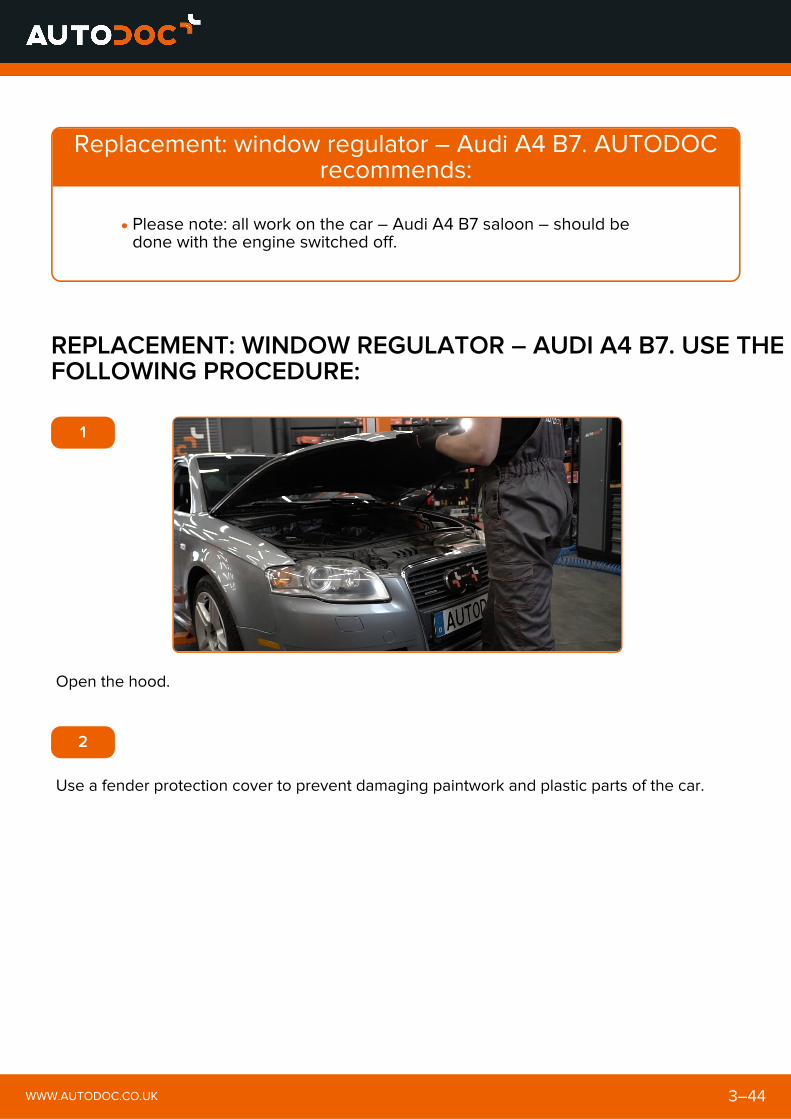
1
Open the hood.
2
Use a fender protection cover to prevent damaging paintwork and plastic parts of the car.
WWW.AUTODOC.CO.UK 3–44
Please note: all work on the car – Audi A4 B7 saloon – should bedone with the engine switched off.

3
Unscrew the fasteners of the car battery terminals. Use a drive socket #10. Use a ratchet
wrench.
4
Remove the battery terminals.
5
Open the car door.
WWW.AUTODOC.CO.UK 4–44
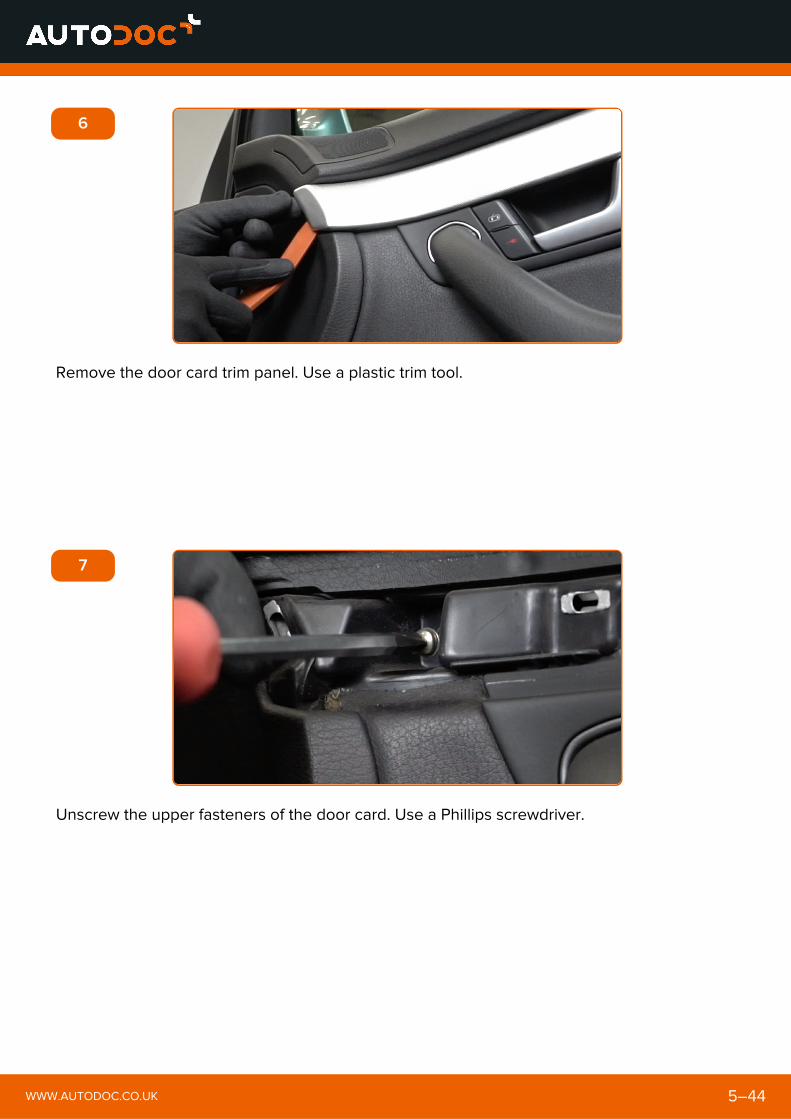
6
Remove the door card trim panel. Use a plastic trim tool.
7
Unscrew the upper fasteners of the door card. Use a Phillips screwdriver.
WWW.AUTODOC.CO.UK 5–44
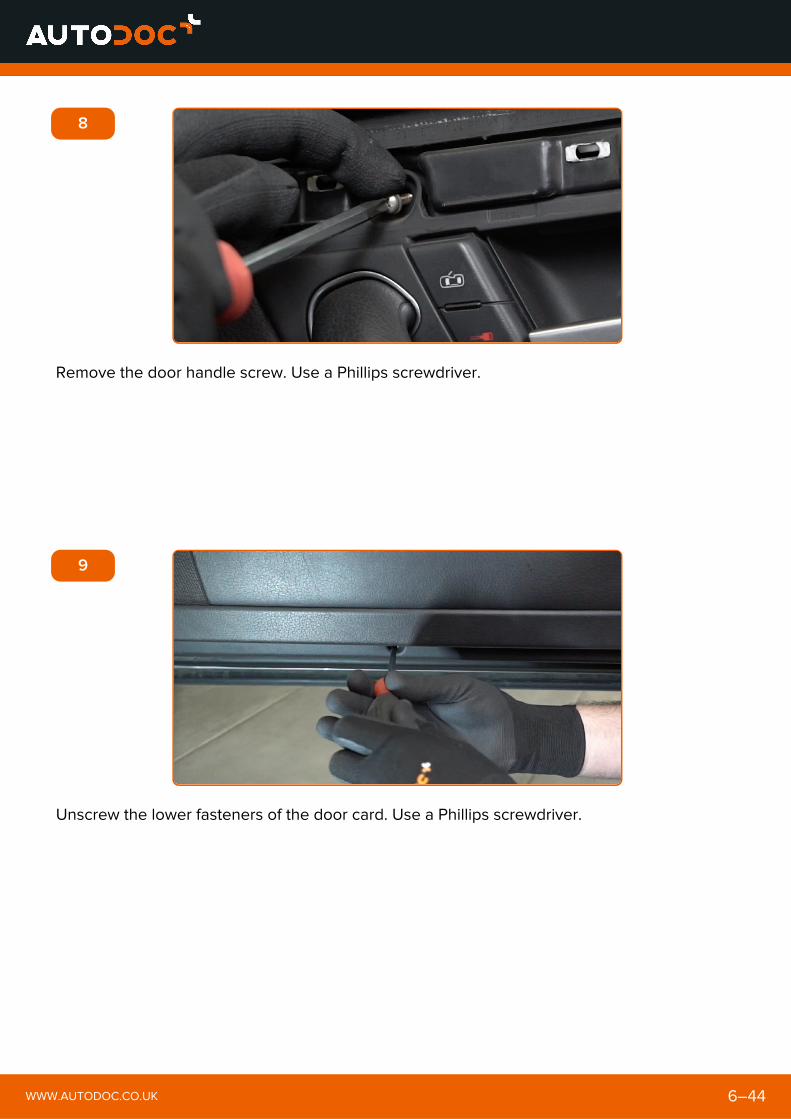
8
Remove the door handle screw. Use a Phillips screwdriver.
9
Unscrew the lower fasteners of the door card. Use a Phillips screwdriver.
WWW.AUTODOC.CO.UK 6–44
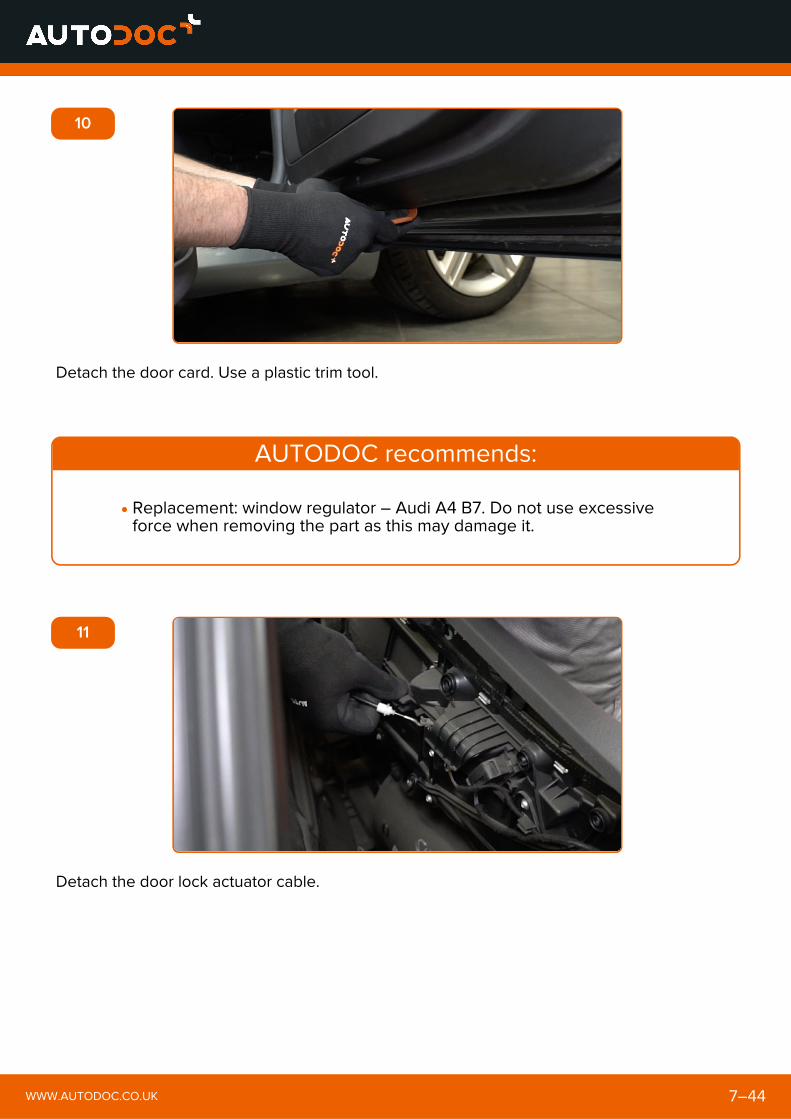
10
Detach the door card. Use a plastic trim tool.
AUTODOC recommends:
11
Detach the door lock actuator cable.
WWW.AUTODOC.CO.UK 7–44
Replacement: window regulator – Audi A4 B7. Do not use excessiveforce when removing the part as this may damage it.

12
Detach the speaker connector.
13
Detach the power window connectors from the control unit. Use a plastic trim tool.
WWW.AUTODOC.CO.UK 8–44
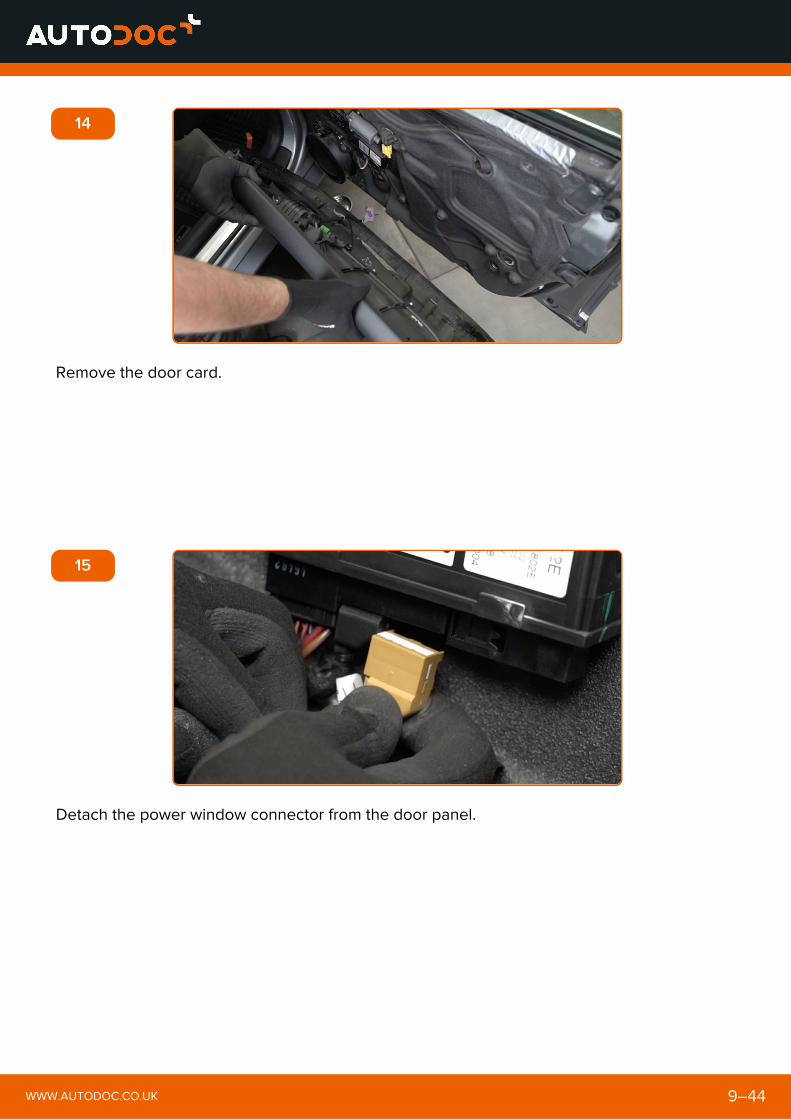
14
Remove the door card.
15
Detach the power window connector from the door panel.
WWW.AUTODOC.CO.UK 9–44
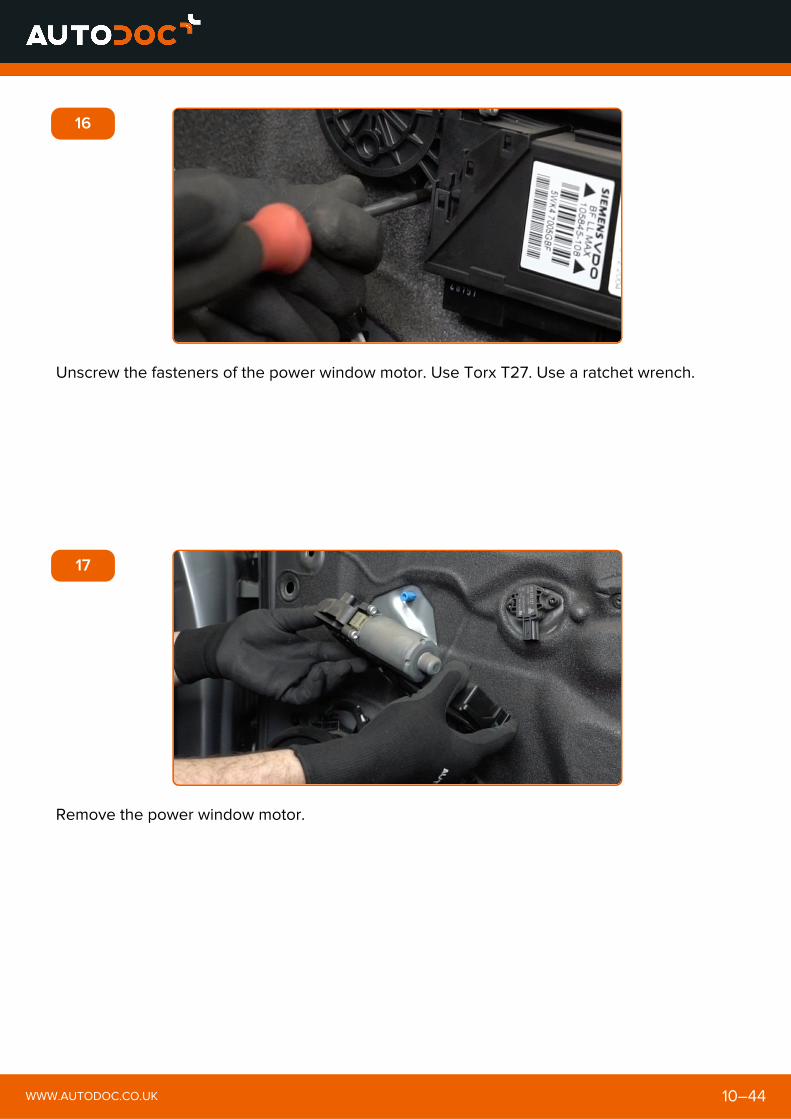
16
Unscrew the fasteners of the power window motor. Use Torx T27. Use a ratchet wrench.
17
Remove the power window motor.
WWW.AUTODOC.CO.UK 10–44

18
Detach the door panel sound insulation.
19
Detach the speaker connector.
WWW.AUTODOC.CO.UK 11–44
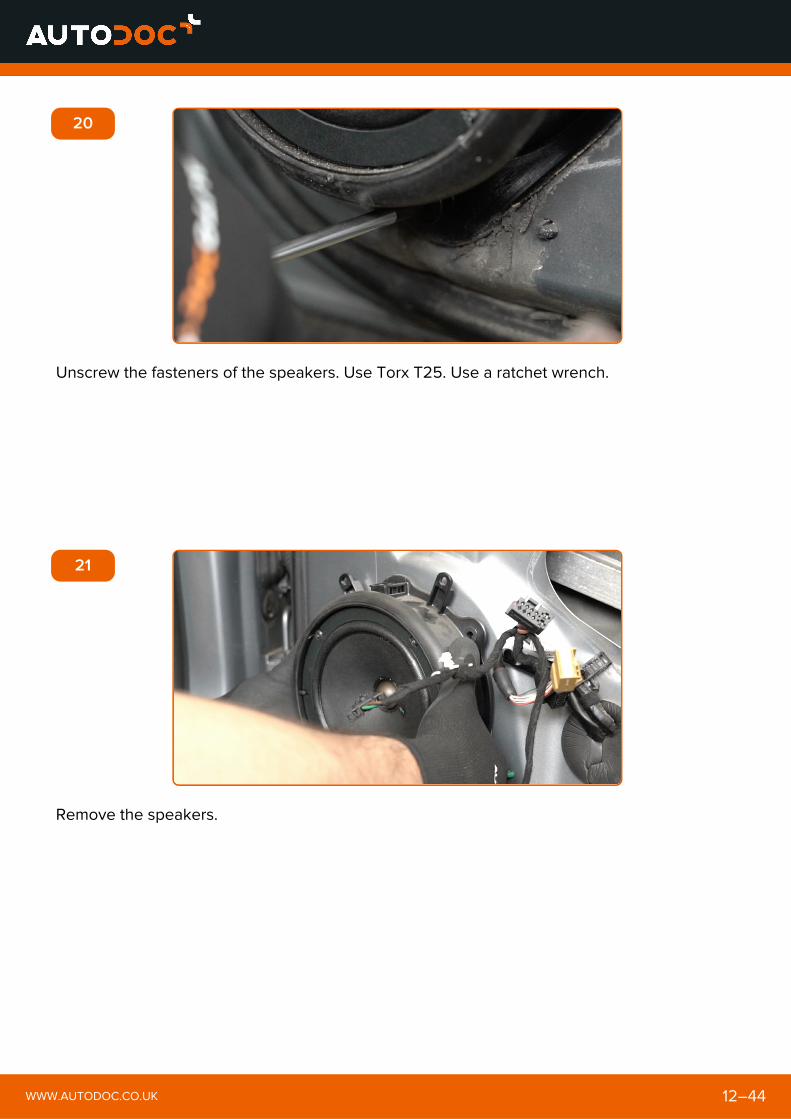
20
Unscrew the fasteners of the speakers. Use Torx T25. Use a ratchet wrench.
21
Remove the speakers.
WWW.AUTODOC.CO.UK 12–44
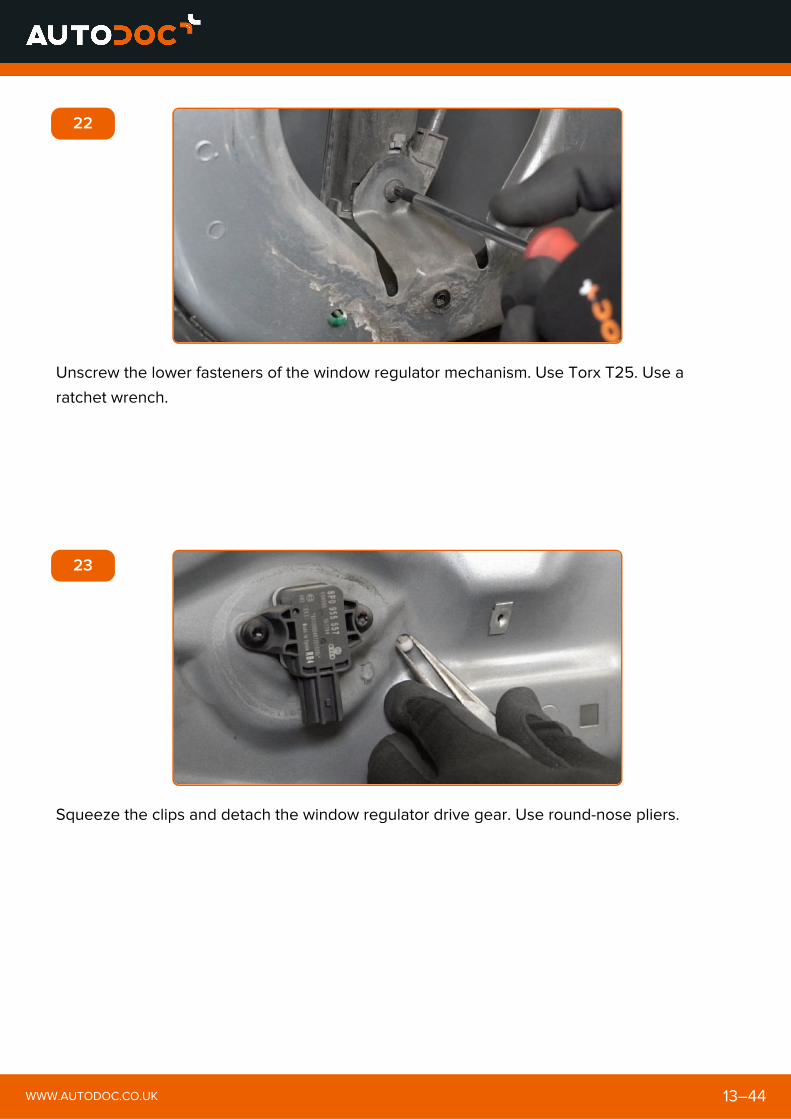
22
Unscrew the lower fasteners of the window regulator mechanism. Use Torx T25. Use a
ratchet wrench.
23
Squeeze the clips and detach the window regulator drive gear. Use round-nose pliers.
WWW.AUTODOC.CO.UK 13–44
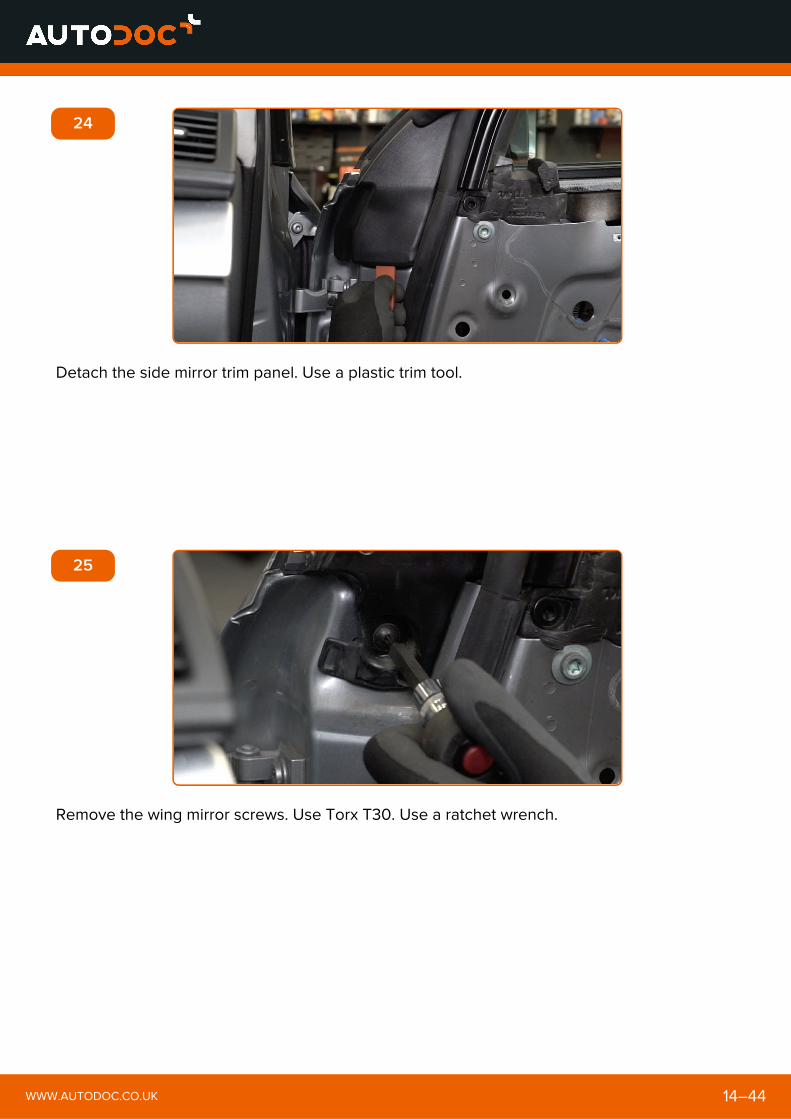
24
Detach the side mirror trim panel. Use a plastic trim tool.
25
Remove the wing mirror screws. Use Torx T30. Use a ratchet wrench.
WWW.AUTODOC.CO.UK 14–44
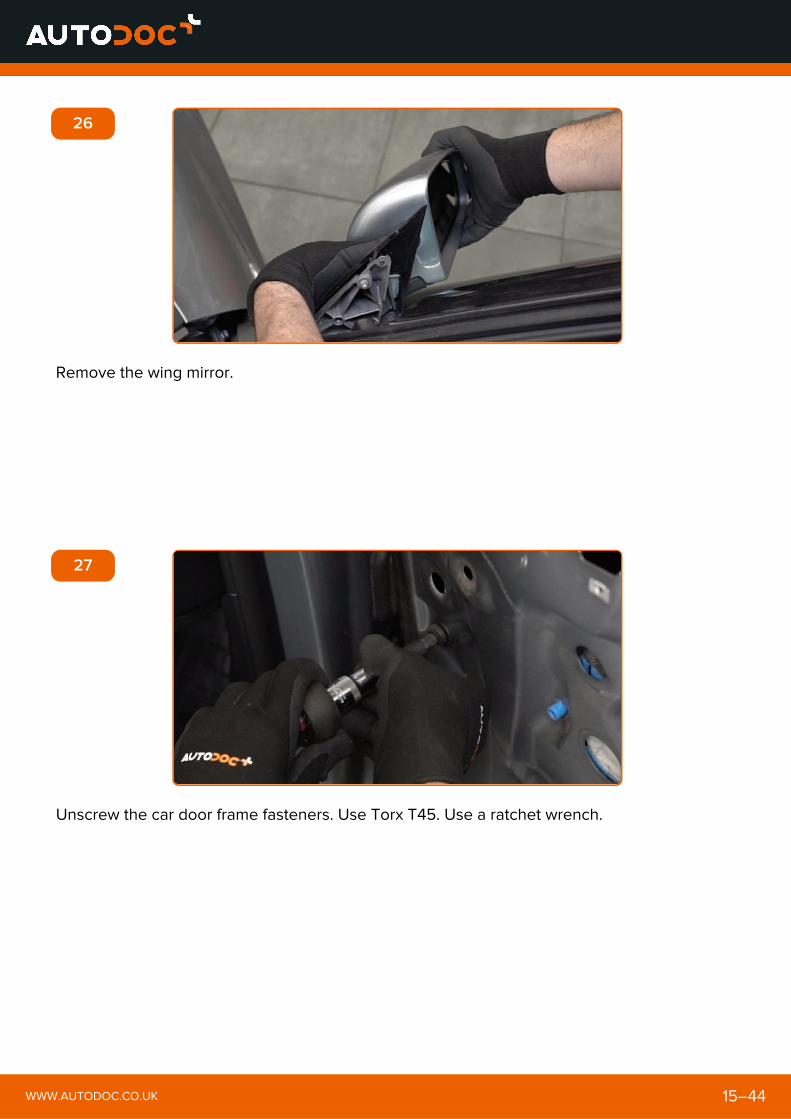
26
Remove the wing mirror.
27
Unscrew the car door frame fasteners. Use Torx T45. Use a ratchet wrench.
WWW.AUTODOC.CO.UK 15–44

28
Remove the door frame fastener cap. Use a plastic trim tool.
29
Unscrew the car door frame fasteners. Use Torx T45. Use a ratchet wrench.
WWW.AUTODOC.CO.UK 16–44

30
Detach the door weather strip. Use a plastic trim tool.
31
Remove the glass together with the door trim frame.
Replacement: window regulator – Audi A4 B7. Tip fromAUTODOC:
WWW.AUTODOC.CO.UK 17–44
Do not apply excessive force when removing the part. Otherwiseyou may damage it.
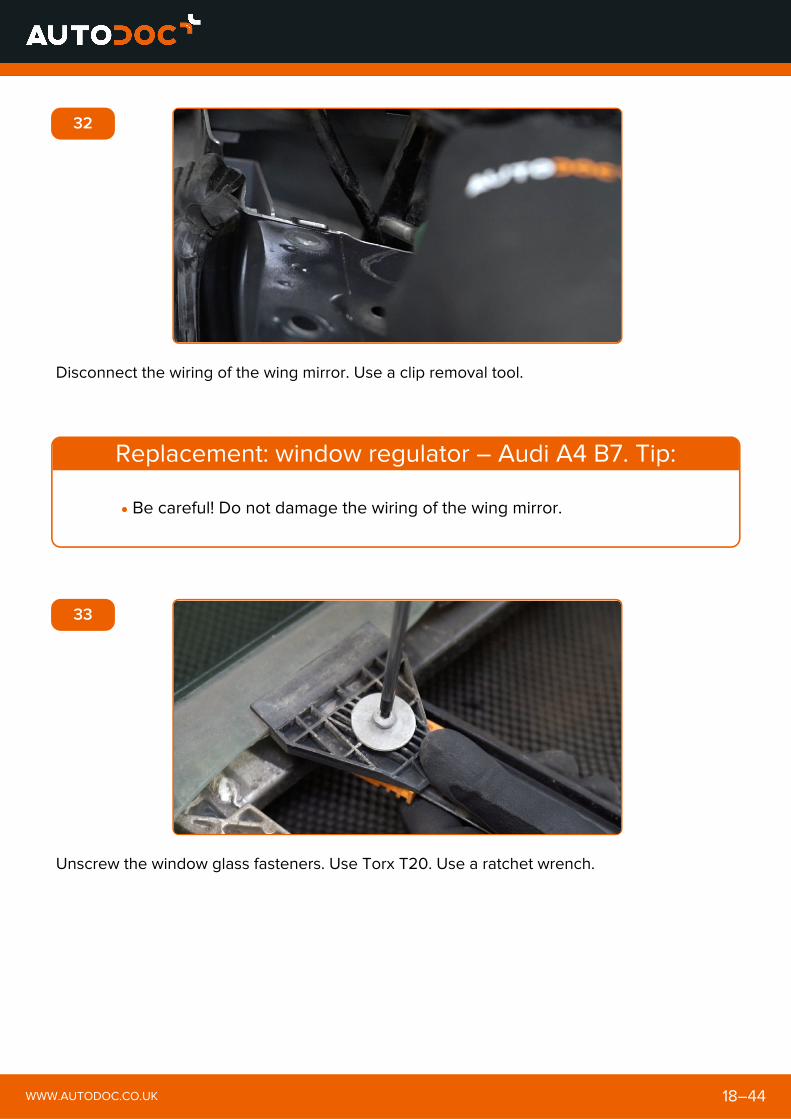
32
Disconnect the wiring of the wing mirror. Use a clip removal tool.
Replacement: window regulator – Audi A4 B7. Tip:
33
Unscrew the window glass fasteners. Use Torx T20. Use a ratchet wrench.
WWW.AUTODOC.CO.UK 18–44
Be careful! Do not damage the wiring of the wing mirror.

34
Turn the window regulator drive gear. This is how you release the glass from the window
regulator drive. Use round-nose pliers.
35
Unscrew the fasteners of the window regulator drive gear. Use Torx T25. Use a ratchet
wrench.
WWW.AUTODOC.CO.UK 19–44

36
Remove the window regulator mechanism.
37
Install the new window regulator mechanism.
WWW.AUTODOC.CO.UK 20–44

38
Screw in the fasteners of the window regulator drive gear. Use Torx T25. Use a ratchet
wrench.
39
Reinstall the glass into the window regulator drive.
AUTODOC recommends:
WWW.AUTODOC.CO.UK 21–44
Replacement: window regulator – Audi A4 B7. To avoid damagingthe part during installation, do not use excessive force.

40
Screw in the window glass fasteners. Use Torx T20. Use a ratchet wrench.
41
Turn the window regulator drive gear. This way you will return the glass to its standard
position. Use round-nose pliers.
WWW.AUTODOC.CO.UK 22–44

42
Tighten the window glass fasteners. Use Torx T20. Use a torque wrench. Tighten it to 11 Nm
torque.
43
Install the glass together with the door trim frame.
44
Сonnect the wiring of the wing mirror.
WWW.AUTODOC.CO.UK 23–44
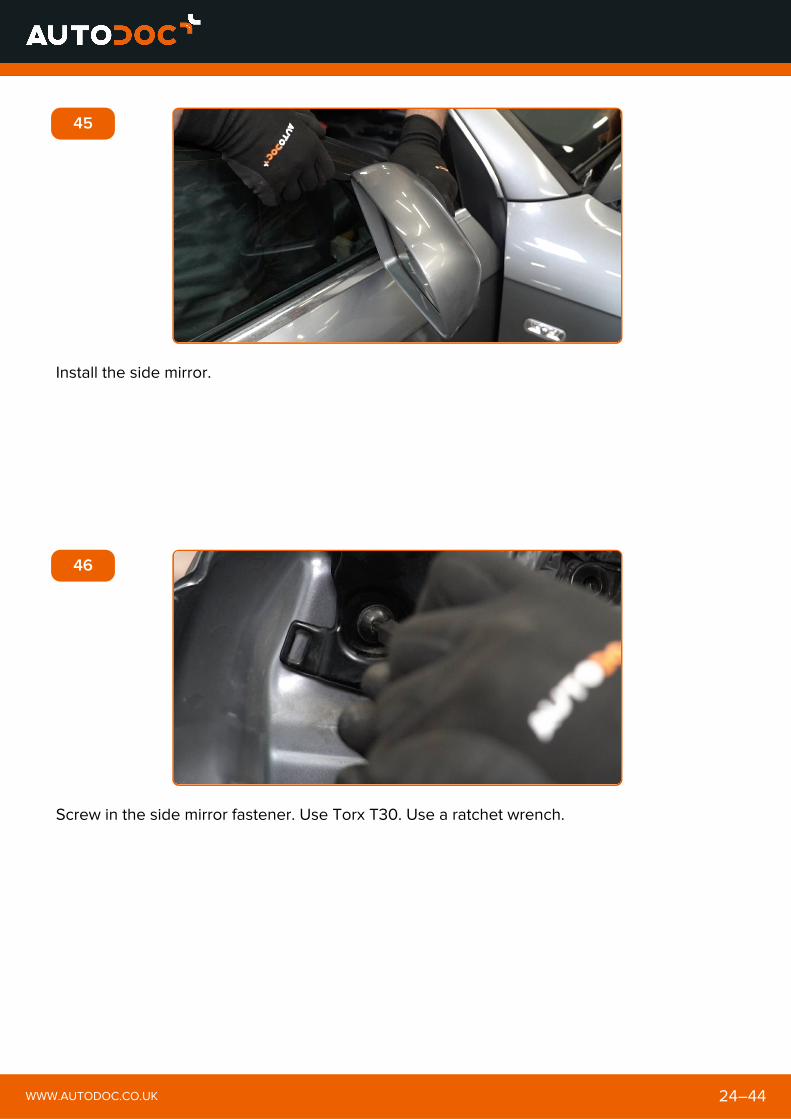
45
Install the side mirror.
46
Screw in the side mirror fastener. Use Torx T30. Use a ratchet wrench.
WWW.AUTODOC.CO.UK 24–44

47
Screw in the door frame fasteners. Use Torx T45. Use a ratchet wrench.
48
Tighten the screws of the wing mirror. Use Torx T30. Use a torque wrench. Tighten it to 30
Nm torque.
WWW.AUTODOC.CO.UK 25–44
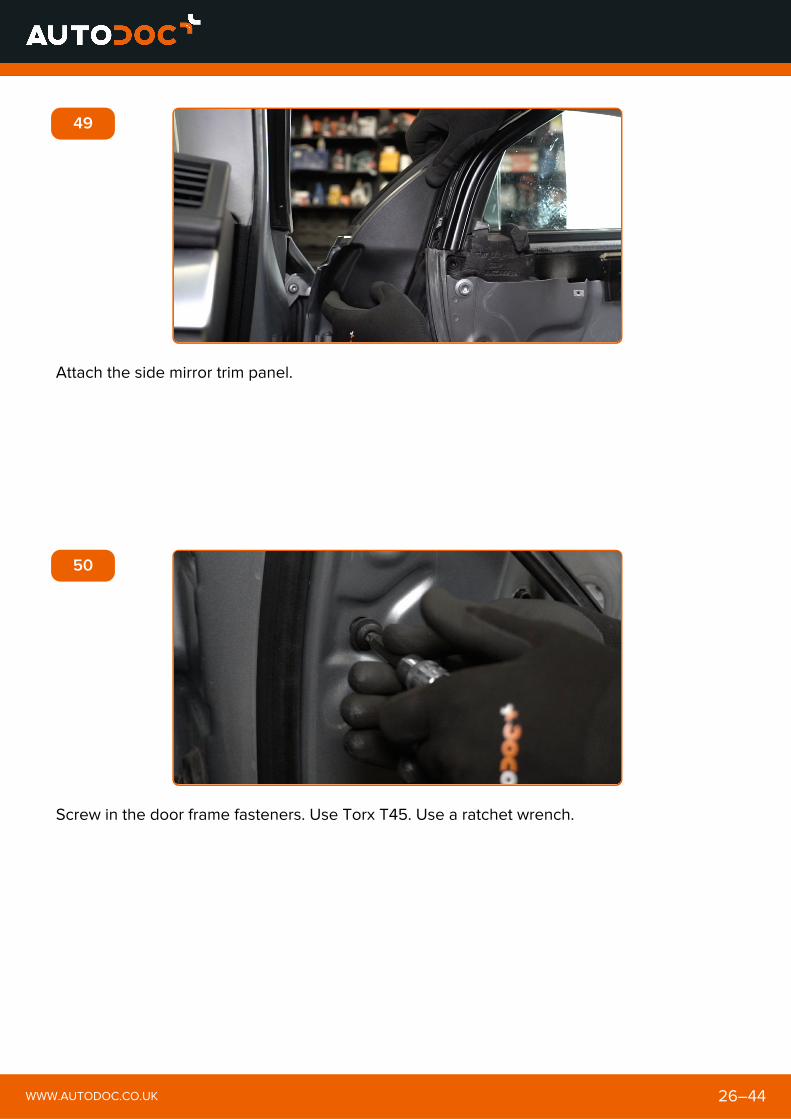
49
Attach the side mirror trim panel.
50
Screw in the door frame fasteners. Use Torx T45. Use a ratchet wrench.
WWW.AUTODOC.CO.UK 26–44
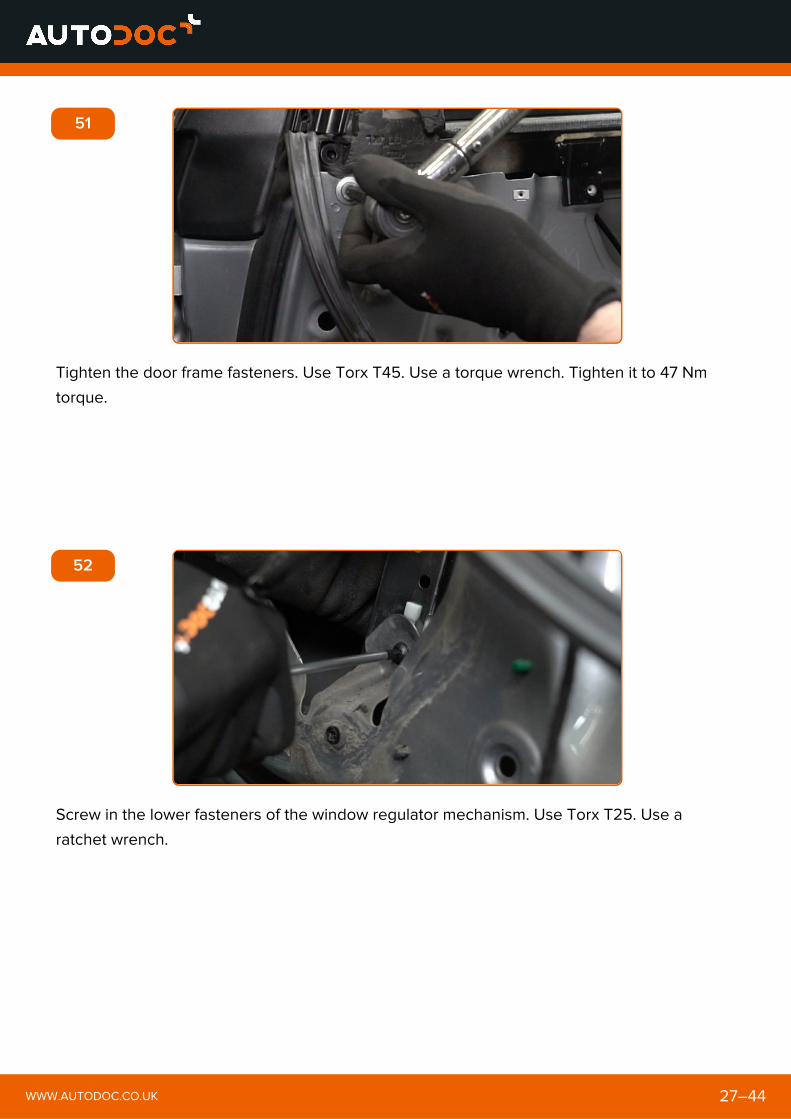
51
Tighten the door frame fasteners. Use Torx T45. Use a torque wrench. Tighten it to 47 Nm
torque.
52
Screw in the lower fasteners of the window regulator mechanism. Use Torx T25. Use a
ratchet wrench.
WWW.AUTODOC.CO.UK 27–44

53
Attach the window regulator drive gear.
54
Attach the door weather strip.
WWW.AUTODOC.CO.UK 28–44

55
Install the door frame fastener cap.
56
Reinstall the speakers.
WWW.AUTODOC.CO.UK 29–44

57
Screw in the fasteners of the speakers. Use Torx T25. Use a ratchet wrench.
58
Attach the speaker connector.
WWW.AUTODOC.CO.UK 30–44

59
Attach the door panel sound insulation.
60
Attach the power window connectors to the control unit.
WWW.AUTODOC.CO.UK 31–44
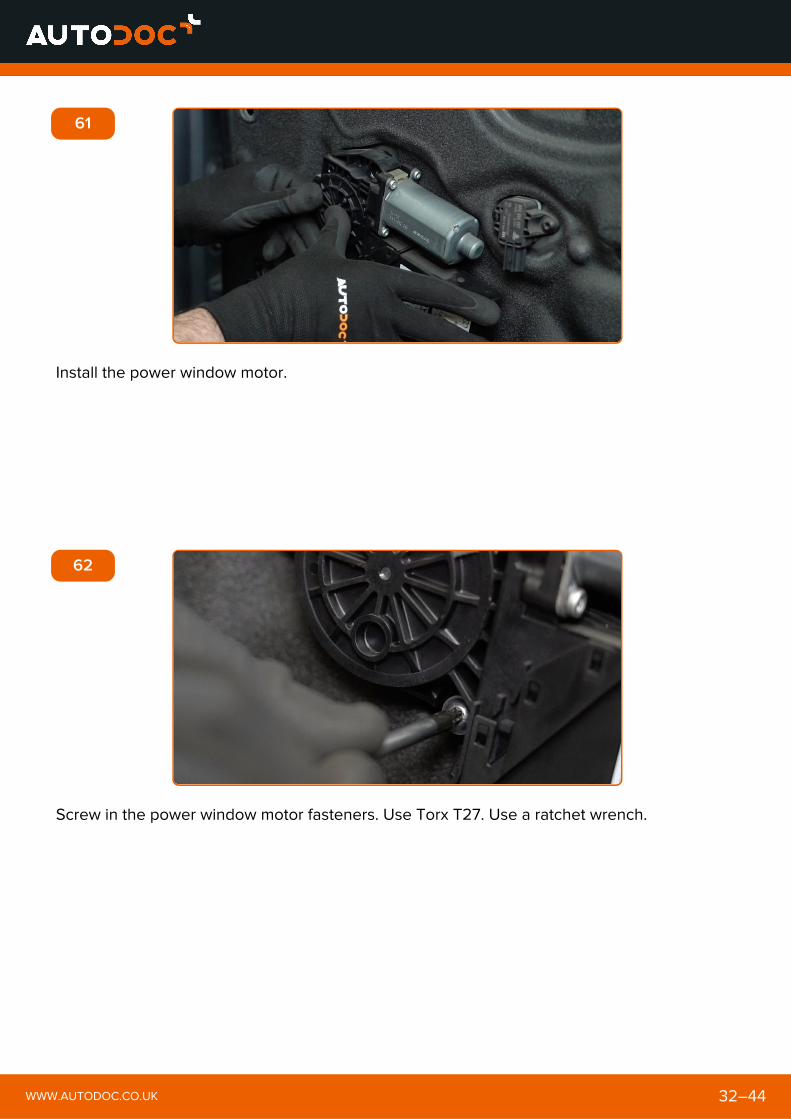
61
Install the power window motor.
62
Screw in the power window motor fasteners. Use Torx T27. Use a ratchet wrench.
WWW.AUTODOC.CO.UK 32–44

63
Attach the power window connector to the door panel.
64
Attach the speaker connector.
WWW.AUTODOC.CO.UK 33–44

65
Attach the door lock actuator cable.
66
Reinstall the door card. Make sure you hear a click indicating that it is locked in place.
WWW.AUTODOC.CO.UK 34–44
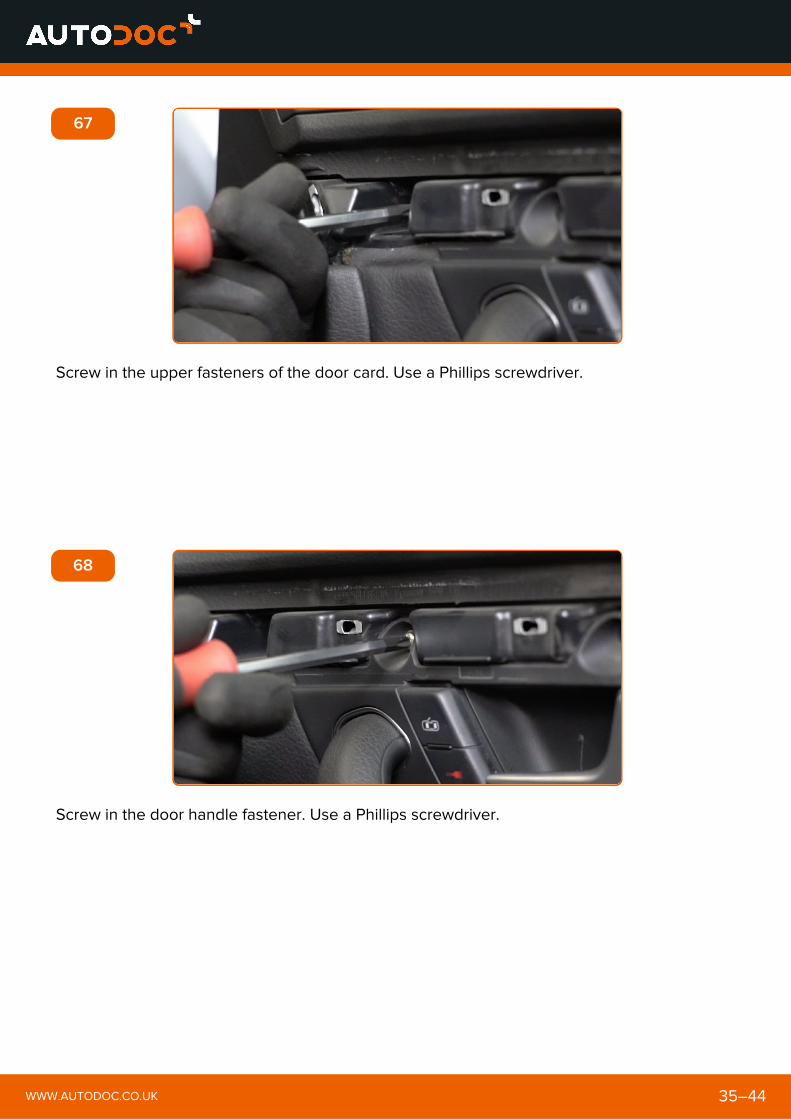
67
Screw in the upper fasteners of the door card. Use a Phillips screwdriver.
68
Screw in the door handle fastener. Use a Phillips screwdriver.
WWW.AUTODOC.CO.UK 35–44

69
Screw in the lower fasteners of the door card. Use a Phillips screwdriver.
70
Install the door card trim panel.
WWW.AUTODOC.CO.UK 36–44

71
Attach the terminals to the battery.
Replacement: window regulator – Audi A4 B7. AUTODOCexperts recommend:
72
Screw in the fasteners of the battery terminals. Use a drive socket #10. Use a ratchet wrench.
WWW.AUTODOC.CO.UK 37–44
Be careful! Do not mix up the positive and the negative terminals ofthe car battery.

73
Switch on the ignition. This is necessary in order to make sure that the component operates
properly.
74
Switch off the ignition.
75
Close the car door.
WWW.AUTODOC.CO.UK 38–44
76
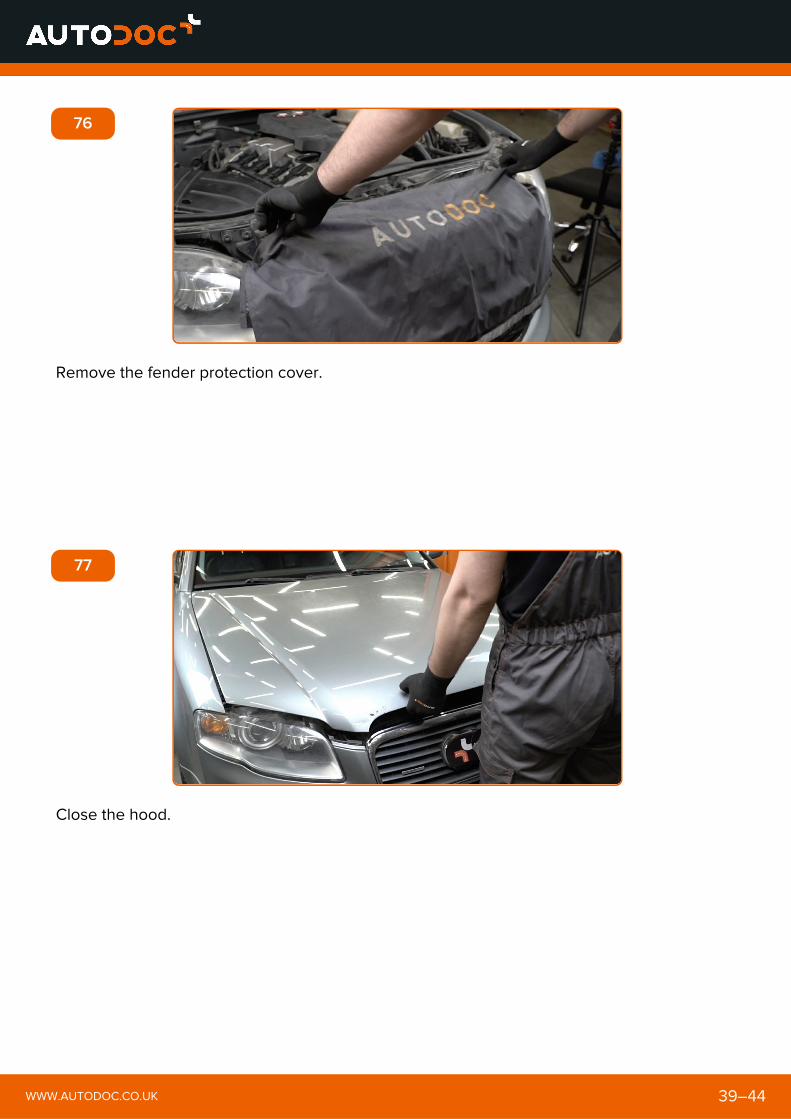
Remove the fender protection cover.
77
Close the hood.
WWW.AUTODOC.CO.UK 39–44

DID YOU FIND THESE INSTRUCTIONSHELPFUL?
YES NO
BECOME A MEMBER OF AUTODOC CLUB!
WWW.AUTODOC.CO.UK 40–44

AUTODOC — TOP QUALITY AND AFFORDABLE CARPARTS ONLINE
AUTODOC MOBILE APP: GREAT DEALS AND CONVENIENTSHOPPING
A GREAT SELECTION OF SPARE PARTS FOR YOUR CAR
WWW.AUTODOC.CO.UK 41–44

BUY SPARE PARTS FOR AUDI
WINDOW REGULATOR: A WIDE SELECTION
WWW.AUTODOC.CO.UK 42–44

CHOOSE CAR PARTS FOR AUDI A4 B7
WINDOW REGULATOR FOR AUDI: BUY NOW
WWW.AUTODOC.CO.UK 43–44

WINDOW REGULATOR FOR AUDI A4 B7: THE BEST DEALS &OFFERS
The document contains only general recommendations that may be useful for you when you perform repair or replacement work. AutoDoc shallnot be liable for any loss, injury, damage of property occurring in the repair or replacement process due to incorrect use or misinterpretation ofthe provided information.
AutoDoc shall not be liable for any possible mistakes and uncertainties in this guide. The information provided is for information purposes onlyand cannot replace advice from specialists.
AutoDoc shall not be liable for incorrect or hazardous usage of equipment, tools and car parts. AutoDoc strongly recommends to be carefuland observe the safety rules when performing repair or replacement works. Remember: usage of low quality auto parts does not guaranteeyou the appropriate level of road safety.
© Copyright 2018 – All the contents of this website, in particular texts, photographs and graphics, are protected by copyright. All rights,including reproduction, publication, editing and translation rights, are reserved by Autodoc GmbH.
WWW.AUTODOC.CO.UK 44–44
Disclaimer: