Junior Competition in association with Kenwood Kids Club Head ...
Upload
khangminh22Category
view
3download
0
Adobe Digital Kids Club Lesson submission-Sara Martin Digital Picture Art
• Overview Students learn how to take digital pictures and apply filters and styles to create their own digital art.
• Instructions 1. Hand students a digital camera and let them loose to take pictures. 2. Download and save the pictures in a form that the students can access
them. 3. Open Photoshop Elements and set up a canvas as below:
Set up the canvas any size that you wish. Remember that in order to print on standard size paper you need to set your width and height to about 7.5 inches by 10 inches for portrait orientations and 10 by 7.5 for landscape.
4. Open your picture in Photoshop Elements by clicking on File>Open and browse to that picture:

5. Close your file browser (it will be in your way) and drag and drop your picture onto the blank canvas.
To move the flower picture onto the blank canvas click your mouse on the background layer, hold the mouse button down and drag and drop it onto the blank canvas

6. Use the Move Tool to move the pictures into position and make any necessary changes in size.
Notice that Elements makes a new layer automatically when ever you move another picture onto your canvas. If you wish to rename the layer, right click and select “Rename Layer”.

7. Copy Layer 1 several times. This will give you plenty of copies to try different filters and effects on. To copy a layer, right click on the layer you wish to copy and select “duplicate layer”. If you wish you can rename the layer.

8. Let’s try out some filters. Click on Filter>Artistic>Dry Brush. Make adjustments is you wish.
Make sure you turn off the “eyeballs” on the layers ABOVE the one you are working on. The layer on top of the layer pallet is always the one that is visible on the canvas
9. Try some different effects. Here are some examples:


10. Now let’s experiment with the color adjustments and enhancements. Click on Enhance>Adjust Color>Color Variations
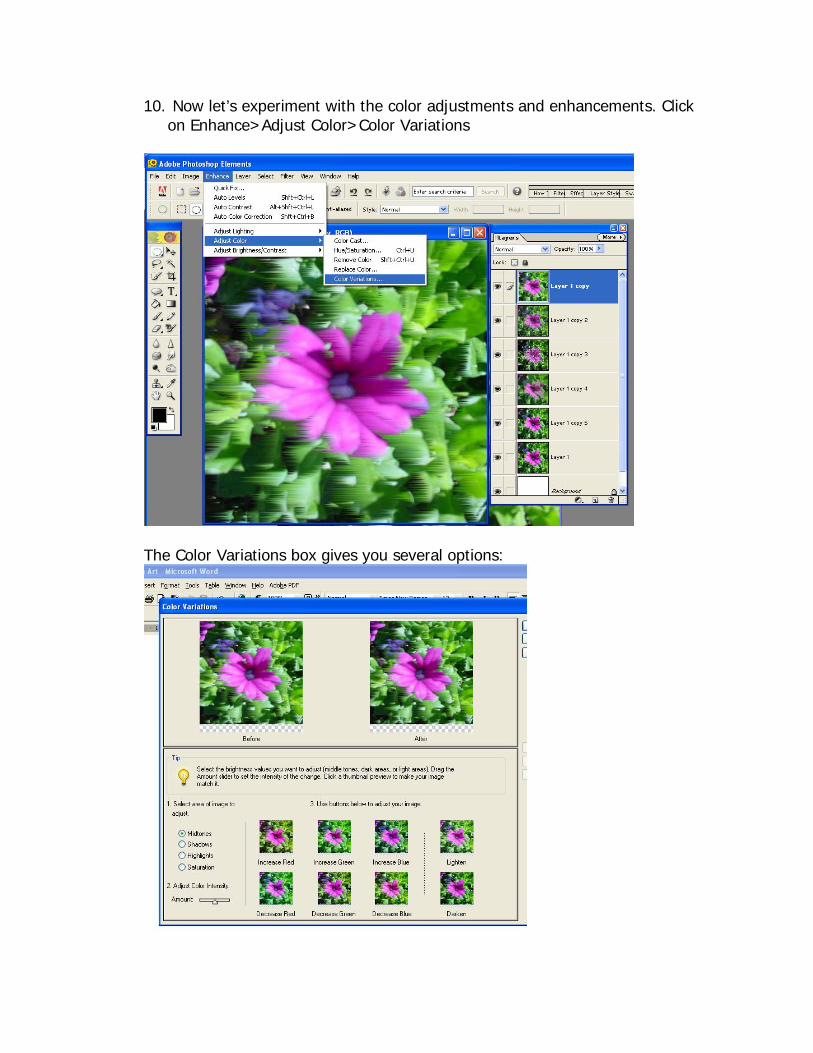
The Color Variations box gives you several options:

If you want more control, click on Enhance>Adjust Color>Hue Saturation
The Hue/Saturation Box give you control over all colors and allows you to preview your changes:
Take some time and experiment with all the controls in both the Enhance and Filter Menus. Students love to experiment and create their own art from their own digital pictures!

11. Student Examples:
Cody’s original tomato
Cody’s tomato magically “grows”!

Woody’s original water fountain
Woody’s “enhanced” water fountain
Copyright © 2022 FDOKUMEN